
ACPG2 - Gas cooktop ARC - Free user manual and instructions
Find the device manual for free ACPG2 ARC in PDF.


| Product Type | 60cm built-in gas cooktop |
| Brand | ARC |
| Model | ACPG2 |
| Dimensions (W x D x H) | 590 mm x 500 mm x 95 mm |
| Cutout Dimensions | 553 mm x 473 mm (approx.) |
| Weight | Approximately 10 kg |
| Burner Configuration | 1 Rapid (10.8 MJ/h), 2 Semi-rapid (6.3 MJ/h each), 1 Auxiliary (3.6 MJ/h) |
| Total Gas Consumption | 27.0 MJ/h |
| Gas Types Supported | Natural Gas (1.0 kPa) and ULPG (2.75 kPa, conversion kit supplied) |
| Gas Connection | G1/2 thread; flexible hose (AS/NZS 1869, 10 mm ID) |
| Electrical Supply | 220-240 V AC, 50/60 Hz, 0.6 W (for ignition) |
| Ignition Type | Continuous electric ignition with flame failure safety device |
| Safety Features | Flame failure device on each burner; automatic gas shut-off if flame extinguishes |
| Surface Material | Stainless steel top plate; enamel trivets |
| Control Knobs | 4 knobs with flame indicator symbols |
| Accessories Included | ULPG injectors (4), pressure test point, screws (4), auxiliary pan support, instruction manual |
| Installation Requirements | Minimum 600 mm clearance to rangehood; 60 mm from side walls; heat shield required above drawer |
| Ventilation | Use in well-ventilated area; mechanical extractor hood recommended |
| Cleaning | Use mild detergent and soft cloth; avoid abrasive cleaners; burner parts removable for soaking |
| Warranty | Parts and Labour Warranty; conditions apply; contact 1800 444 357 |
Frequently Asked Questions - ACPG2 ARC
User questions about ACPG2 ARC
0 question about this device. Answer the ones you know or ask your own.
Ask a new question about this device
Download the instructions for your Gas cooktop in PDF format for free! Find your manual ACPG2 - ARC and take your electronic device back in hand. On this page are published all the documents necessary for the use of your device. ACPG2 by ARC.
USER MANUAL ACPG2 ARC
natural_image
Black-and-white photo of a pie with chocolate chips in a decorative bowl, placed on a patterned cloth (no text or symbols visible)www.arcappliances.com.au
Preface
Dear Customer,
Congratulations on purchasing your new product from Home Appliances.
To register your Parts and Labour Warranty, some conditions apply, please refer to your warranty card for more details and contact our Aftersales Support team on:
1800 444 357 and Select 1
Our Customer Care Centre is there to ensure you get the most out of your appliance. Should you want to learn more about your product and how to use it to its best potential or tips on cleaning, please feel free to call us on the above number.
It is important that you read through the following instruction manual thoroughly to become familiar with the installation and operation of this appliance and ensure optimum performance.
We also carry a complete range of spare parts for all Home Appliance products. For all your spare parts enquiries please contact our Aftersales Support team on
1800 444 357 and Select 2
Again, thank you for choosing an appliance brought to you by Home Appliances and we look forward to being of service to you.
IMPORTANT: To assist in handling any equiries in the future about your appliance we urge you to complete the information on the following page
Kind regards,
The Management
Home Appliances
Product - Installation Details
For future reference we suggest that you staple a copy of your purchase receipt here and complete the below so the information is always
| Model Number ACG4 | |
| Description | 60cm knob controlled gas cooktop |
| Serial Number (Should be noted before installation) Located on base of cooktop | |
| Date of Purchase (DD-MM-YYYY) | |
| Place of Purchase | Store Name:Address:Telephone No: |
| Invoice and/or receipt number | |
| Date of Installation (DD-MM-YYYY) | |
| Installers details (Add for both gas and electrical* installers) | Company Name:Licence No.Installers Name:Address:Telephone No: |
| *CooTop is filled with a 10 Amp plug and lead therefore can plug straight into power point if one already filled |
contents
Preface 1
Product - Installation Details 2
Contents 3
Safety Warning
4 Safety Instructions
5 Installation
6 Child and People Safety
7 During Use
9 Cleaning and Service
9 Environmental Information
Instructions for use and maintenance
10 Description of the appliance
11 How to Use the appliance
13 Safety and Energy saving advice
14 Cleaning and Maintenance
Technical instructions
16 Instructions of USE
17 Positioning
18 Installing the appliance
20 Gas Connection
22 Gas Specifition
23 Electrical Connection
24 Gas Conversion
25 Troubleshooting
safety instructions
■ Please take the time to read this Instruction Manual before installing or using the appliance.
■ Instruction Manual must be kept with the appliance for future reference. If the appliance is sold or transferred to another person, ensure the manual is passed onto the new user.
■ The manufacturer declines any liability should these safety measures not be observed.
■ The following marks are made to be easily understood so that you can prevent any accident caused by misuse in advance, and use the appliance more conveniently.
- Read the following contents thoroughly and ensure you understand them.
 Danger/Warning Danger/Warning | Neglect of this mark may result in severe personal injury or death. |
 Caution Caution | Neglect of this mark may result in minor personal injury or property damage. |
The following marks are used in the instruction manual as follows:


Caution No Access
No Fire Tool

Danger
If gas seems to leak, take the following actions:
- DO NOT turn on lights
- DO NOT switch on or off any electrical appliance and do not touch any electric plug.
- DO NOT use a telephone
- Stop using the product and close gas valve to the appliance
- Open windows to improve ventilation
- Contact our After Sales Service Department from a phone outside the building

* Gas fuel contains mercaptan, it gives of a foul smell, reminiscent of rotten eggs or sulfur, even when a small amount of 1/1000 parts of gas are in the air.
Warning
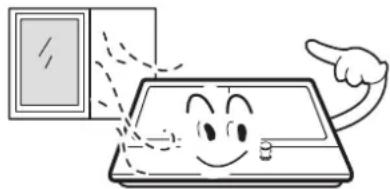
■ This appliance shall be installed in accordance with regulations in force and only used in a well ventilated space.
natural_image
Cartoon illustration of a smiling refrigerator with a hand pointing at it (no text or symbols)■ Prior to installation, ensure that the gas and electrical supply complies with the type stated on the rating plate.

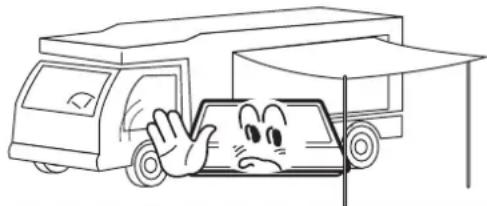
■ Where the appliance is installed in a marine craft or in caravans, it should not be used as space heater
natural_image
Cartoon illustration of a smiling car with a hand in front, partially covered by a truck (no text or symbols)■ The gas pipe and electrical cable must be installed in such a way that they do not any parts of the appliance.

natural_image
Cartoon illustration of a sad face with surprised expression and waving hand (no text or symbols)Caution
■ This appliance should be installed by a qualified technician or installer.
■ The adjustment conditions for this appliance are stated on the label or data plate.
■ Remove all packaging before using the appliance.
■ After unpacking the appliance, make sure the product is not damaged and that the connection cord is in perfect condition. Otherwise, contact the dealer before installing the appliance.
The adjacent furniture and all materials used in the installation must be able to withstand a minimum temperature of 85^ above the ambient temperature of the room it is located in, whilst in use.
In the event of burner flames being accidentally extinguished, turn off the burner control and do not attempt to re-ignite the burner for at least one minute.
■ The use of a gas cooking appliance results in the production of heat and moisture in the room in which it is installed. Ensure that the kitchen is well ventilated: keep natural ventilation holes open or install a mechanical ventilation device (mechanical extractor hood).
■ Prolonged intensive use of the appliance may call for additional ventilation, for example opening of a window, or more effective ventilation, for example increasing the level of mechanical ventilation where present.
child and people safety

Warning
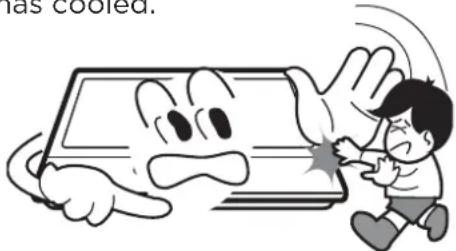
■ Do not allow children to play near or with the appliance.
The appliance gets hot when it is in use.
Children should be kept away until it has cooled.

Caution
■ This appliance is designed to be operated by adults.
■ Children can also injure themselves by pulling pans or pots off the appliance.
This appliance is not intended for use by children or other persons whose physical, sensory or mental capabilities or lack of experience and knowledge prevents them from using the appliance safety without supervision or instruction by a responsible person to ensure that they can use the appliance safety.
during use
Warning

food.

gniraperp Dof rechnailpify this applylice. Burner panel is not designed to operate from an external timer or separate remote control system.

natural_image
Cartoon illustration of a hand holding a tablet with a sad face and a pointing gesture (no text or symbols)■ The use of a gas cooking appliance results in the production of heat and moisture in the room in which it is installed. Ensure that the kitchen is well ventilated: keep natural ventilation holes open or install a mechanical ventilation device
(mechanical extractor hood).
natural_image
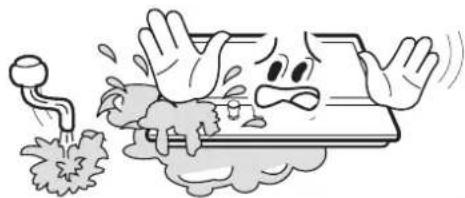
Cartoon illustration of a smiling computer monitor with a hand pointing to it (no text or symbols)■ Do not use this appliance if it comes in contact with water. Do not operate this appliance with wet hands.
natural_image
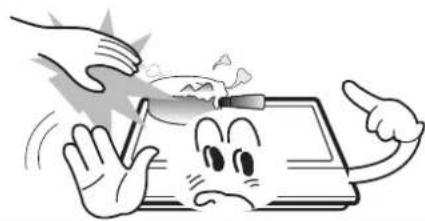
Cartoon illustration of a sad hand crushing a smartphone with smoke and steam (no text or symbols)■ The heating and cooking surfaces of the appliance become hot when they are in use, take all due precautions.
natural_image
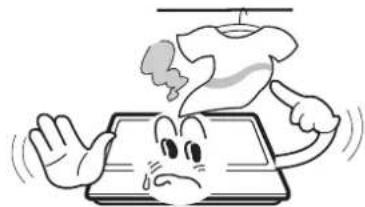
Cartoon illustration of a hand holding a pen and a bottle, with a sad face on a tablet screen (no text or symbols)■ Do not use large cloths, tea towels or similar as the ends could touch the flames and catch fire.
natural_image
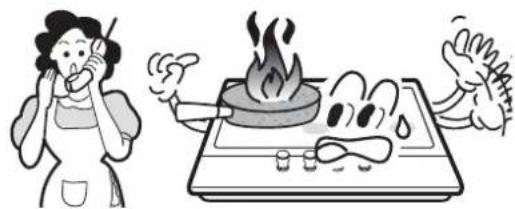
Cartoon illustration of a sad face on a phone with steam rising (no text or symbols)■ Never leave the appliance unattended when cooking.
natural_image
Illustration of a woman using a griddle to smoke while a person fires on a stovetop with steam rising (no text or symbols)■ Unstable or misshapen pans should not be used on the appliance as they can cause an accident by tipping or spillage.

natural_image
Cartoon illustration of a person reacting to a frying pan while holding their index finger, with no text or symbols present.during use

elbammafl
materials in the storage drawer near this appliance.
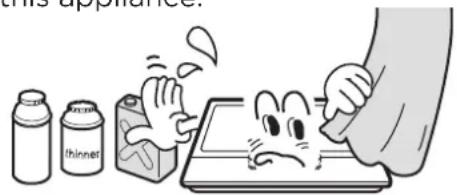
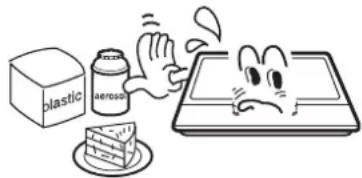
Is Perishable food, plastic items and aerosols may be affected by heat and should not stored above or below the appliance.
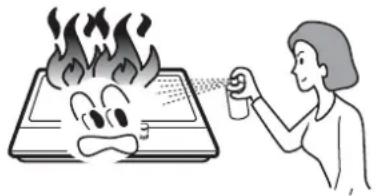
■ Do not spray aerosols in the vicinity of this appliance while it is in operation.
natural_image
Illustration of a person spraying water from a burning book with flames (no text or symbols)■ Ensure the control knobs are in the ‘●’ position when not in use.

natural_image
Cartoon illustration of a smiling face on a keyboard with five control buttons (no text or symbols)
Caution
This appliance is intended for domestic cooking only. It is not designed for commercial or industrial purposes.
■ Prolonged intensive use of the appliance may call for additional ventilation, for example, opening of a window, or increasing the level of mechanical ventilation where present.
■ Use heat-resistant pot holders or gloves when handling hot pots and pans.
- Do not let pot holders come near open flames when lifting cookware.
Take care not to let pot holders or gloves get damp or wet, as this causes heat to transfer though the material quicker with the risk of burning yourself.
■ Only ever use the burners after placing pots and pans on them. Do not heat up any empty pots or pans.
■ Never use plastic or aluminium foil dishes on the appliance.
When using other electrical appliances, ensure the cable does not come into contact with the surfaces of the cooking appliance.
Do not use a tea towel or similar materials in place of a pot holder. Such cloths can catch fire on a hot burner.
When using glass cookware, make sure it is designed for top plate cooking. If the surface is made of is made of glass-cracked, switch off the appliance to avoid electrocution.
To minimise the possibility of burns, ignition of flammable materials and spillage, turn cookware handles toward the side or center of the top plate without extending over adjacent burners.
■ Always turn burner controls off before removing cookware.
■ Carefully watch foods being fried at a high flame setting.
■ Always heat fat slowly and watch as it heats.
- Foods for frying should be as dry as possible. Frost on frozen foods or moisture on fresh foods can cause hot fat to bubble up and over the sides of the pan.
■ Never try to move a pan of hot fat, especially a deep fat fryer. Wait until the fat is completely cool.
cleaning and service

Warning
■ Never use abrasive or caustic cleaning agents. We recommend using Steel Power and Steel Kleen by Hillmark for Cleaning stainless steel surfaces.

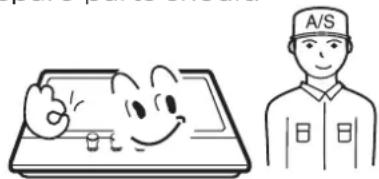
This appliance should only be repaired or serviced by an authorised Service Engineer and only genuine approved spare parts should be used.
natural_image
Illustration of a smiling cartoon character next to a tray with a person wearing a cap (no text or symbols)
Caution
■ Before attempting to clean the appliance, it should be disconnected from the mains and cooled.
■ You MUST NOT use a steam jet or any other high pressure cleaning equipment to clean the appliance.
environmental information
with due regard to safety and the environment.
■ When disposing of an old appliance, make it unusable, by cutting off the cable.
gnigakcap eht fo esopsid esaelp ,noitallatsnietf

natural_image
Cartoon illustration of a smiling face on a laptop screen (no text or symbols)
Correct Disposal of This Product (Waste Electrical & Electronic Equipment)
This marking shown on the product or its literature, indicates that it should not be disposed with other household wastes at the end of its working life. To prevent possible harm to the environment or human health from uncontrolled waste disposal, please separate this from other types of wastes and recycle it responsibly to promote the sustainable reuse of material resources.
■ Household users should contact either the retailer where they purchased this product, or their local government office, for details of where and how they can take this item for environmentally safe recycling.
■ Business users should contact their supplier and check the terms and conditions of the purchase contract. This product should not be mixed with other commercial wastes for disposal.
description of the appliance
 | |
| Model | ACG4 |
| Trivets | Enamel |
| Wok pan Support | N/A |
| Work Top | Stainless Steel |
| Dimension (W*D*H) | 590mm*500mm*95mm |
| Ignition device | Continuous Electric Ignition Type |
| Gas Connection | G1/2 thread - Natural Gas (LPG kit supplied) |
| Electric supply | 220-240 V ac, 50/60Hz , 0.6watt |
| Burners | Rapid - 10.8 MJ/h (1), Semi-rapid - 6.3 MJ/h (2), Auxiliary - 3.6MJ/h (1) |
| Total Gas Consumption | 27.0 MJ/h |
description of the appliance
Accessories


ULPG
Injector (4)

Pressure test point (1)
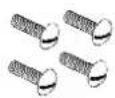
Screw (4)

Auxiliary pan support (1)

Instruction Manual (1)
how to use the appliance
The following symbols will appear on the control panel, next to each control knob:
- Black circle: gas off
Large flame: maximum setting
Small flame: minimum setting

natural_image
Simple diagram with a circle, star, and curved arrows (no text or symbols)■ The minimum ↑ setting is at the end of the anti-clockwise rotation of the control knob.
■ All operation positions must be between maximum and minimum positions.
The symbol on the control panel, next to each of the control knobs indicate which burner it operates.
Automatic ignition with flame failure safety device
The appliance is fitted with a flame failure safety device on each burner, which is designed to stop the flow of gas to the burner head in the event of the flame going out.
how to use the appliance

To ignite a burner:
o Press in the control knob of the burner that you wish to light and turn it anti-clockwise to the maximum position.
o If you keep the control knob depressed, the automatic ignition for the burner will operate.
o You should hold down the control knob for 15 seconds after the flame on the burner has lit. If after 15 seconds the burner has not lit, stop operating the device and open the compartment door and/or wait at least 1 min before attempting a further ignition of the burner.
o After this 15-second interval, to regulate the flame you should continue turning the control knob anti-clockwise until the flame is at a suitable level. The operating position MUST be at a position between the maximum and minimum position.
o To switch the burner off, turn the control knob fully clockwise to the gas off position.
o In case of power failure, the burners can be lit by carefully using a match.
safety and energy saving advice
- The diameter of the bottom of the pan should correspond to that of the burner.
| BURNERS | PANS | |
| min. | max. | |
| WOK 200mm 240mm | ||
| Rapid 200mm 240mm | ||
| Semi-Rapi 160mm | 180mm | |
| Auxiliary 120mm 160mm | ||

thaterawkooc esu
overlaps the edge of the burner.
| NOYES | |||
 | Do not use small diameter cookware on large burners.The flame should never come up the sides of the cookware. | Always use cookware that is suitable for each burner, to avoid wasting gas and discolouring the cookware. |  |
 | Avoid cooking without a lid or with the lid half off- as this wastes energy | Place a lid on the cookware. | 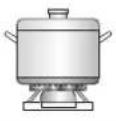 |
 | Do not use a pan with a convex or concave bottom. | Only use pots, saucepans and frying pans with a thick, flat bottom. |  |
 | Do not place cookware on one side of a burner, as it could tip over. | Always place the cookware right over the burners, not to one side. |  |
| Do not use cookware with a large diameter on the burners near the controls, which when placed on the middle of the burner may touch the controls or be so close to them that they increase the temperature in this area and may cause damage. | |||
 | Never place cookware directly on top of the burner. | Place the cookware on top of the trivet. | |
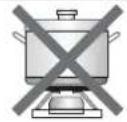 | Do not place anything, eg. flame tamer, asbestos mat, between pan and pan support as serious damage to the appliance may result. | ||
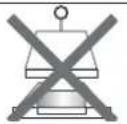 | Do not use excessive weight and do not hit the cooktop with heavy objects. | Handle cookware carefully when they are on the burner. | |

It is not recommended to used roasting pans, frying pans or grill stones heated simultaneously on several burners because the resulting heat build-up may damage the appliance.
■ Do not touch the top plate and trivets whilst in use for a certain period after use.

As soon as a liquid starts boiling, turn down the flame so that it will barely keep the liquid simmering.
cleaning and maintenance

■ Cleaning operations must only be carried out when the appliance is completely cool.
■ The appliance should be disconnected from your mains supply before commencing any cleaning process.
■ Clean the appliance regularly, preferably after each use.
■ Abrasive cleaners or sharp objects will damage the appliance surface; you should clean it using water and a little washing up liquid.
| Usable | Unusable |
 Soft cloth Soft cloth Neutral Detergent Neutral Detergent |  Nylon Brush Nylon Brush  Metal Brush Metal Brush Edible Oil [SDCX] Acidic/Alkali Detergent[8AXK] Abrasive [4KCE] Thinner/Benzene Edible Oil [SDCX] Acidic/Alkali Detergent[8AXK] Abrasive [4KCE] Thinner/Benzene |
Trivets and Control knobs
■ .troppus naP eht ffo eKa
■ Clean these and the control handles with a damp cloth, washing up liquid and warm water. For stubborn soiling, soak beforehand.
■ Dry everything with a clean soft cloth.
Top plate
■ Regularly wipe over the top plate using a soft cloth well wrung-out in warm water to which a little washing up liquid has been added.
■ Dry the top plate thoroughly after cleaning.
■ Thoroughly remove salty foods or liquids from the hob as soon as possible to avoid the risk of corrosion.
■ Stainless steel parts of the appliance may become discoloured over time. This is normal because of the high temperatures. Each time the appliance is used these parts should be cleaned with a product that is suitable for stainless steel.
cleaning and maintenance
BURNERS
■ Remove the burner lids and Flame Spreaders by pulling them upwards and away from the top plate.
■ Soak them in hot water and a little detergent or washing up liquid
■ After cleaning and washing them, wipe and dry them carefully. Make sure that the flame holes are clean and completely dry.
■ Wipe the fixed parts of the burner cup with a damp cloth and dry afterwards.
■ Gently wipe the ignition device and flame supervision device with a well wrung-out cloth and wipe dry with a clean cloth.
■ Before placing the burners back on the top plate, make sure that the injector is not blocked.
■ Re-assemble of the Rapid, Semi-rapid and Auxiliary burners as follows:
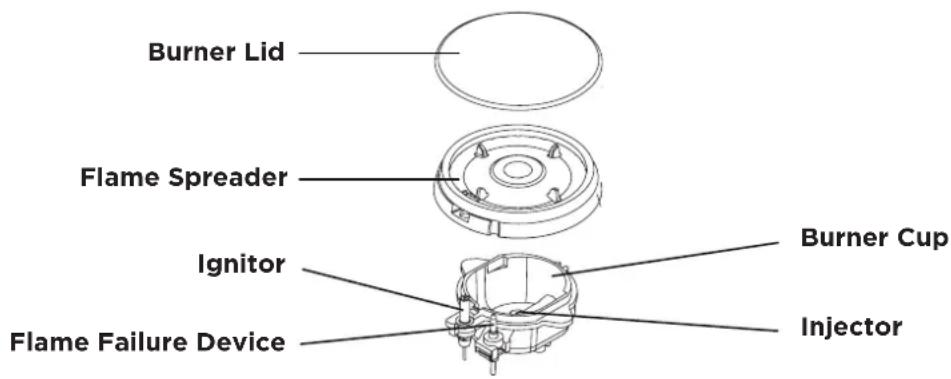
- Place the flame spreader on the burner cup so that the Ignitor and flame failure device extend through their respective holes in the flame spreader.
NOTE: The flame spreader must seated into position correctly.
- Position the burner lid onto the flame spreader so that the retaining pins fit into their respective recesses.

Replace parts in the correct order after cleaning.
- Do not mix up the top and bottom.
- The locating pins must fit exactly into the notches.
using instructions
Warnings
■ .ecnailppa siht yfidomoDo
■ This appliance must be installed by an authorised technician or installer.
■ Prior to installation, ensure that the local distribution conditions (nature of the gas and gas pressure) and the adjustment of the appliance are compatible.
■ The adjustment conditions for this appliance are stated on the label (or data plate).
This appliance is not to be connected to a combustion product evacuation device. It should be installed and connected in accordance with current installation regulations. Particular attention should be given the relevant requirements regarding ventilation.
■ Before installing, turn off the gas and electricity supply to the appliance.
■ All appliances containing any electrical components must be earthed.
■ Ensure that the gas pipe and electrical cable are inst a hous nidda way that they do not touch any parts of the appliance may become hot.
Gas pipe or connector shouldn't be bent or blocked by any other appliances.
- Check the dimensions of the appliance as well as the dimensions of the gap to be cut in the kitchen unit.
The panels located above the work surface, directly next to the appliance, must be made of non-flammable material. Both the stratified surface and the glue used to secure it should be heat resistant, to prevent deterioration. to prevent deterioration.
■ Turn on appliance tap and light each burners.
Check for a clear blue flame without yellow tipping.
If burners show any abnormal ties check the following :
- Burner lid on correctly
- Flame spreader positioned correctly
- Burner vertically aligned with injector nipple
A full operational test and a test for possible leakages must be carried out by the fitter after installation.
■ The flexible hose shall be fitted in such a way that it cannot come into contact with a moveable part of the housing unit and does not pass through any space susceptible of becoming congested.
■ Grease cranes produced at the factory to meet the requirement of all life hob.
positioning
*This 600mm measurement is based from the highest point of the cooktop in line with AS 5601-2004 to the bottom of a rangehood

■ This appliance is to be built into a kitchen unit or 600mm worktop, providing the following minimum distances are allowed for:
The edges of the hob must be a minimum distance of 60mm from a side or rear wall. NOTE: Refer to the next page a written in the gas code AS5601-2001, for detailed clearance requirements pertaining to Built-In and Freestanding gas appliances, especially when it relates to combustible surfaces.
- 600 mm between the highest point of the hob surface (including the burners) and the underside of a rangehood. In case of an overhead fan, this distance cannot be less than 750mm.
- 400 mm between the hob surfaces, providing that the underside of the horizontal surface is in line with the outer edge of the hob. If the underside of the horizontal surface is lower than 400 mm, then it must be at least 50mm away from the outer edges of the hob.
When instalale above a drawer or accessible cupboard a heat shield must be fitted at least 25mm from the underside of the appliance. This is to ensure that no hot surface are accidentally touch if accessing anything in the drawer or cupboard directly under the cooktop.

- An oven must be fitted with a cooling fan to install a hob above it.
- Check the dimensions of the oven in the installation manual.
- The cut out size must be followed the indication.
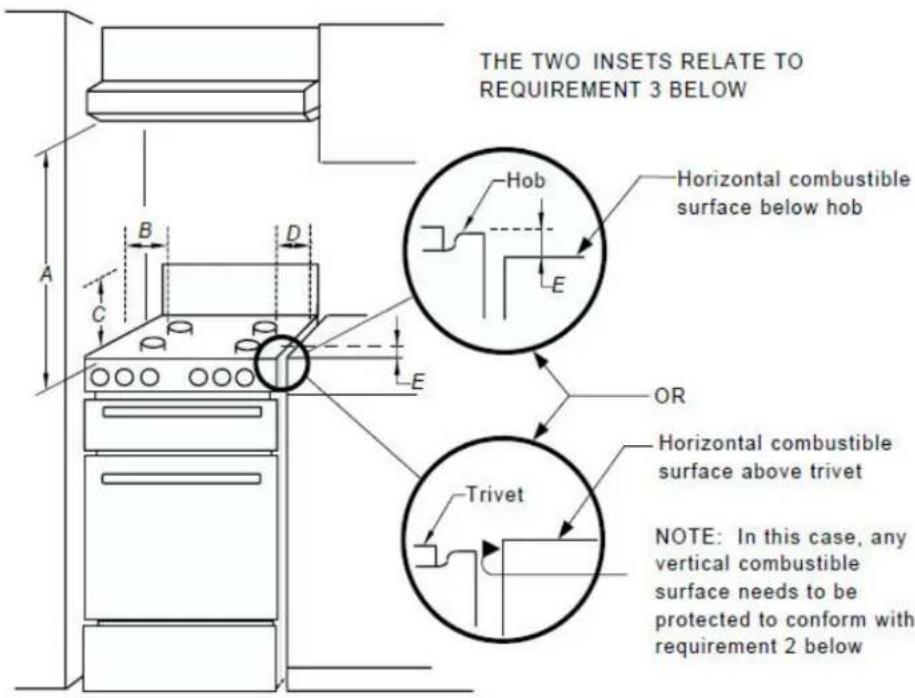
REQUIREMENTS
1 Overhead clearances—(Measurement A)
Range hoods and exhaust fans shall be installed in accordance with the manufacturer's instructions. However, in no case shall the clearance between the highest part of the hob of the cooking appliance and a range hood be less than 600 mm or, for an overhead exhaust fan, 750 mm.
Any other downward facing combustible surface less than 600 mm above the highest part of the hob shall be protected for the full width and depth of the cooking surface area in accordance with Clause 5.12.1.2. However, in no case shall this clearance to any surface be less than 450 mm.
2 Side clearances—(Measurements B and C)
Where B, measured from the periphery of the nearest burner to any vertical combustible surface, or vertical combustible surface covered with toughened glass or sheet metal, is less than 200 mm, the surface shall be protected in accordance with Clause 5.12.1.2 to a height C of not less than 150 mm above the hob for the full dimension (width or depth) of the cooking surface area. Where the cooking appliance is fitted with a 'splashback', protection of the rear wall is not required.
3 Additional requirements for Freestanding and Elevated Cooking Appliances—(Measurements D and E)
Where D, the distance from the periphery of the nearest burner to a horizontal combustible surface is less than 200 mm, then E shall be 10 mm or more, or the horizontal surface shall be above the trivet. See insets above.
NOTES:
1 Requirement 3 does not apply to a freestanding or elevated cooking appliance, which is designed to prevent flames or the cooking vessels from extending beyond the periphery of the appliance.
2 The 'cooking surface area' is defined as that part of the appliance where cooking normally takes place and does not include those parts of the appliance containing control knobs.
3 For definition of hob, see Clause 1.4.61.
4 For definition of trivet, see Clause 1.4.112.
5 Consideration is to be given to window treatments when located near cooking appliances. See Clause 5.3.4.
FIGURE 5.1 REQUIRED CLEARANCES AROUND DOMESTIC COOKING APPLIANCES
installing the appliance

natural_image
Line drawing of a four-pin electric stove with four circular vented lights (no text or symbols)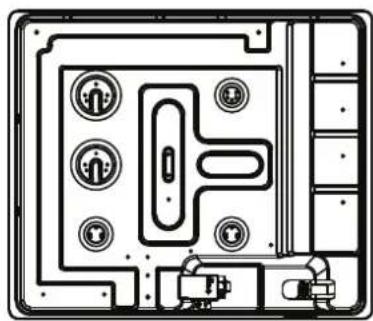
natural_image
Top-down schematic of a device layout with buttons and connectors (no text or labels)Bottom view
- Remove the pan supports, the burner lid and flame spreader and carefully turn the appliance upside down and place it on a cushioned mat.
Take care that the Ignition devices and flame supervision devices are not damaged in this operation.
-
Apply the sponge provided around the edge of the appliance.
-
Do not leave a gap in the sealing agent or overlap the thickness.
Sealing strip (A)

The thickness of the sponge is 3 mm. The width of the sponge is 10 mm.

natural_image
Simple line drawing of a hand holding a pen and a cross mark on a flat surface (no text or symbols)

Do not use a silicon sealant to seal the appliance against the aperture.
This will make it difficult to remove the appliance from the aperture in future, particularly if it needs to be serviced.
ezis eht hcta
of the screws.There are one set of screw holes in each corner of the hob(H).
Slightly tighten a screw(C) through the bracket(B) so that the bracket is attached to the hob, but so that you can still adjust the position.
-
Carefully turn the hob back over and then gently lower it into the aperture hole that you have cut out.
-
On the underneath of the hob, adjust the brackets into a position that is suitable for your worktop.
Then fully tighten the screws(C) to secure the hob into position.
gas connection

■ This appliance must be installed and connected in accordance with installation regulations in force in the country in which the appliance is to be used.
■ This appliance is supplied to run on natural gas only and cannot be used on any other type of gas without modification. Conversion for use on LPG and other gases must only be undertaken by a qualified person.
Statutory requirements
This installation must conform with the following:
■ Manufacturer's Installation instructions
■ Local Gas Fitting Regulations
■ Municipal Building Codes
■ Refer to AS/NZS 5601.1 for Gas Installations
■ S.A.A. Wiring Code
■ Local Electrical Regulations
■ Any other statutory regulations
Preparing to install
Refer to AS/NZS 5601.1 for piping size details. These built-in cooktops are intended to be inserted in a benchtop cutout. Only an officially authorised technician should connect the appliance. Before you begin, turn off the gas and electricity supply.

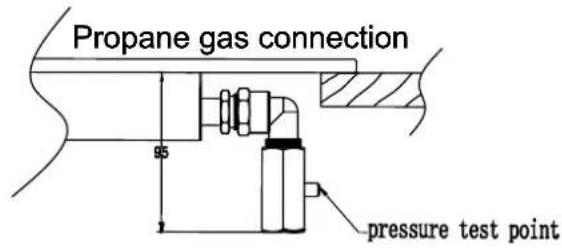

■ A full operational test and a test for possible leakages must be carried out by the fitter after installation.
■ Access to the whole length of the connection hose must be possible and the gas hose must be replaced before its use before the end of service life (indicated on the hose).
■ BeforeLeaving-Check all connections for gas leaks with soap and water.
■ DO NOT use a naked flame for detecting leaks. Ignite all burners both individually and concurrently to ensure correct operation of gas valves, burners and ignition.
Turn gas taps to low flame position and observe stability of the flame for each bur ner individually and all together. Adhere the duplicate data plate to an accessible location near the hotplate. When satisfied with the hotplate, please instruct the user on the correct method of operation. In case the appliance fails to operate correctly after all checks have been carried out, refer to the auth orised service provider in your area.
gas connection
■ Flexible Hose: If installing with a hose assembly, it must comply with AS/NZS 1869, 10 mm ID, class B or D, no more than 1 mm long and ins talled in accordance with AS/NZS 5601.1.
■ Ensure that the hose does not contact the hot surfaces of the hotplate, oven, dishwasher or any other appliance that may be installed underneath or next to the hotplate. The hose should not be subjected to abrasion, kinking or permanent deformation and should be able to be inspected along its entire length with the cooktop in the installed position. Unions compatible with the hose fittings must be used and all connections tested for gas leaks. The supply connection point shall be accessible with the appliance installed.
■ WARNING: Ensure that the hose assembly is restrained from accidental contact with the flue outlet of an underbench oven.
gas specification
| Model No. | Gas Type & Pressure | Electrical Power | Megajoule ratings and orifice injector sizes marked (mm) | Total Gas consumption | |||
| WOK Burner R | Rapid Burner Semi-Rapid Auxiliary | ||||||
| ACG4 | 220 - 240V50/60Hz | / | 10.8 Mj/h 6.3 | Mj/h 3.6 Mj/h 27 | Mj/h | ||
| Universal LPG2.75kPa | / | 0.88 0.68 | 0.53 | N/A | |||
| Natural Gas1.0kPa | / | 1.50 0.831.12 | |||||
NOTE
Natural Gas maximum supply pressure is 5.0 kPa and minimum is 1.13 kPa
Universal LPG maximum supply pressure is 2.75 kPa and minimum is 2.75 kPa
electrical connection
■ This appliance must be earthed.
■Thisapplianceisdesignedtobeconnectedtoa 220\~240V,50/60HzACelectricitysupply.
■ The wires in the mains lead are coloured in accordance with the following code ;
- Green/yellow = Earth
- Blue = Neutral
- Brown = Live

■ The wire which is coloured green and yellow must be connected to the terminal which is marked with the letter E or by the earth symbol.

■ Take precautions on the operations and adjustments to be carried out when converting from one gas to another.
■ All work must be carried out by a qualified technician.
■ Before you begin, turn off the gas and electricity supply to the appliance.
1
Change the injector of the burners.
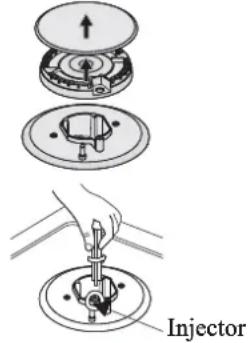
Remove the pan support, Burner lid and Flame spreader.
Unscrew the injector using a 7 mm box spanner and replace it with the stipulated injector for new gas supply.
Carefully reassemble the all components.
After injectors are replaced, it is advisable to strongly tighten the injector in place.
2
Adjustment of minimum level of the flame
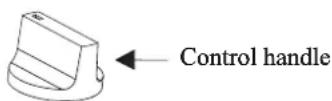
① Turn the taps down to minimum
② RRemove the knob from the tap and place a small bladed screwdriver in the centre of the tap shaft.
③ The correct adjustment is obtained when the flame has a length of about 3 - 4 mm.
- For butane/propane gas, the adjusting screw must be tightly screwed in.
- Refit the control knob.
- Make sure that the flame does not go out by quickly turning from maximum flow to minimum flow. If it does then remove the control knob and make further adjustments to the gas flow, testing it again once the adjustment has been made.
④ Repeat this process for each one of the gas taps.


!
■ Do not dismantle the tap shaft : in the event of a malfunction, change the whole tap.
■ Before placing the burners back on the top place, make sure that the injector is not blocked.
■ A full operational test and a test for possible leakages must be carried out after gas conversion. (such as soap water or gas detector)
■ After completing conversion, a qualified technician or installer has to mark "V" on the right gas category to match with the setting in rating plate. Remove the previous setting "V" mark.
trouble shooting
■ Repairs should be performed by a licensed technician only. Improper repair may result in considerable danger to you and others.
■ However, some minor problems can be resolved as follows :
| Problem Probable cause Solution | ||
| Not ignited | No Spark. Check the electricity supply | . |
| The burner lid is badly assembled. | Assemble the lid correctly. | |
| The gas supply is closed. Open the gas supply completely. | ||
| Badly ignited | The gas supply is not completely open. | Open the gas supply completely. |
| The burner lid is badly assembled. | Assemble the lid correctly. | |
| The ignition plug is contaminated with alien substance. | Wipe alien substance with a dry cloth . | |
| The burners are wet. Dry the burners lids carefully. | ||
| The holes in the flame spreader are clogged. | Clean the flame spreader. | |
| Noise made when combusted and ignited | The burner lid is badly assembled. | Assemble the burner lid correctly. |
| Flame goes out when in use. | The flame supervision device is contaminated with alien substance. | Clean the flame supervision device. |
| Product being cooked has boiled over and extinguished the flame. | Turn off burner knob. Waitone minute and reignite zone. | |
| A strong draught may have blown the flame out . | Please turn off zone and check cooking area for draught such as open windows. Wait one minute and reignite zone | |
| Yellow Flame | The holes in the flame spreader are clogged. | Clean the flame spreader. |
| Different gas is used. Check the gas used. | ||
| Unstable Flame | The burner lid is badly assembled. | Assemble the burner lid correctly. |
| Gas Smell | Gas leakage | Stop using the product and close the middle valve.Open the window to ventilate.Contact our service centre by using a phone outside. |

■ If problem is not solved, please contact customer care center.
This page has been left BLANK intentionally
ARC
- Preface
- 444 357 and Select 1
- 444 357 and Select 2
- Product - Installation Details
- contents
- Preface 1
- Product - Installation Details 2
- Contents 3
- Safety Warning
- Instructions for use and maintenance
- Technical instructions
- safety instructions
- The following marks are used in the instruction manual as follows:
- Danger
- If gas seems to leak, take the following actions:
- Warning
- Caution
- child and people safety
- during use
- cleaning and service
- environmental information
- Correct Disposal of This Product (Waste Electrical & Electronic Equipment)
- description of the appliance
- Accessories
- how to use the appliance
- To ignite a burner:
- safety and energy saving advice
- cleaning and maintenance
- Trivets and Control knobs
- Top plate
- BURNERS
- ■ Re-assemble of the Rapid, Semi-rapid and Auxiliary burners as follows:
- using instructions
- Warnings
- positioning
- ■ This appliance is to be built into a kitchen unit or 600mm worktop, providing the following minimum distances are allowed for:
- REQUIREMENTS
- Overhead clearances—(Measurement A)
- Side clearances—(Measurements B and C)
- Additional requirements for Freestanding and Elevated Cooking Appliances—(Measurements D and E)
- NOTES:
- installing the appliance
- gas connection
- Statutory requirements
- Preparing to install
- gas specification
- NOTE
- electrical connection
- Change the injector of the burners.
- Adjustment of minimum level of the flame
- trouble shooting
- ARC
Brand : ARC
Model : ACPG2
Category : Gas cooktop