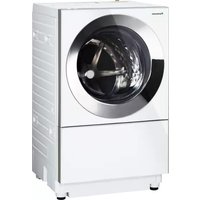
USER MANUAL NA-D106X1 PANASONIC
Operating & Installation Instructions
Specifications
| Rated voltage | 220 - 240 V |
| Rated frequency | 50 Hz |
| Maximum power consumption | Washing: 1660 - 2000 W |
| Dimensions | 600 (W) × 665 (D) × 998 (H) (mm) |
| Product weight | 74 kg |
| Maximum wash capacity | 10.0 kg |
| Maximum spin capacity | 10.0 kg |
| Maximum dry capacity | 6.0 kg |
| Water pressure | 0.03 - 1 MPa |
| Water consumption | Washing: 78 L ("ECONAVI" program) |
Panasonic Corporation
http://www.panasonic.com
© Panasonic Corporation 2017-2019
AWW9901A3YA0

AWW9901A3YA0-0A5
Printed in Japan
07-2019
S0719-0
D106X1WM3

Washer Dryer
(Domestic Use)
Model No.
NA-D106X1 WS3
NA-D106X1 WM3

It is essential to read these
instructions.
Contents
Read before Use
Safety Precautions 4
Part Names 6
Door Lock/Accessories 7
- Opening the door during operation
- Setting Child Lock
Touch Panel 8
- Operating buttons/Screen panel (Touch panel)
• To change the operation contents
Laundry Procedure 10
Laundry Check and
Preparations
12
- Items that cannot be washed or dried • Pre-treatment for tough stains • To prevent darkening of colour and colour transfer • To prevent creases and shrinkage caused by drying • To prevent damage of clothes, drainage failure and malfunctions • Use washing nets for delicate underwear and small items ● Preparations for each program ..... 14 • Bedding • Hand Wash 16
- Warm wash • Laundry capacity guideline
Selecting the Program 18
• ECONAVI
- Water temperature
How to Put in Detergent and Softener 20
- Timing to put in detergent, etc. • Guideline of amount used

How to Use
Everyday Washing 22
• Cotton/ECONAVI
Washing Options 24
- Hand Wash • Bedding • Intensive • Cotton (30 °C/40 °C)/ECONAVI (40 °C/60 °C)/ Soak 26 • Manual Setting (Wash/Rinse/Spin)
Drying 28
Maintenance
Maintenance 30
- Drain filter/Dry filter
- Drum/Detergent case/Main unit/Window seal..... 32
When Necessary
Changing the Settings 34
Any problem?
For Better Results 36
• Darkening of colour, colour transfer, creases and roughness of clothes
FAQ 38
• Operation sound • Large vibration or rattling sound • Blinking (Water temperature display/Remaining time) - Remaining "Dry" time does not decrease or suddenly decrease • Clothes are not well dried - Spin only or Drain only setting
Troubleshooting 40
Error Messages 45
Program Details 46 Installation 48 Specifications Back cover
Safety Precautions Observe fully.
To prevent the risk of danger to humans or property damage, make sure to follow the precautions described below. ■The descriptions are classified according to the degree of harm or damage caused by misuse.
WARNING May cause serious injury or death.
CAUTION May cause minor or moderate injury or property damage.

! WARNING
Drum/Main Unit
Do not allow children to get inside the drum.
(Children may get locked inside the drum, which will cause suffocation, burns, electric shock, injury, or drowning.)
- To prevent children from easily climbing on the appliance, do not put a table, etc. near the appliance.
- This appliance is not intended for use by persons (including children) with reduced physical, sensory or mental capabilities, or lack of experience and knowledge, unless they have been given supervision or instruction concerning use of the appliance by a person responsible for their safety.
- Children should be supervised to ensure that they do not play with the appliance.
Do not hang on the door.
(The appliance may fall over, resulting in injury.)
Never disassemble, repair or remodel. (Fire or abnormal operation may occur, resulting in injury.)
When taking out the laundry...
Do not touch the laundry inside
the drum until it completely stops.
(Your fingers may be entangled in the laundry even
during slow rotation, resulting in injury.)
Do not put flame or flammable materials in or close to the drum/main unit.
(Fire may occur.)
●Pyrethrum coil, cigarette, candle, etc.
Do not splash water over the appliance. Do not install at a damp place or place which may be exposed to rain, water, etc. (Electric shock or fire from a short circuit may occur.)
Maintenance
Balcony (Exposed to wind and rain)
• Bathroom (Lots of moisture)
During Use
Never dry the following items.
(even after washing)
(Spontaneous ignition or inflammation may occur due to heat of combustion of oil.)
- Items that have been soiled with substances such as cooking oil, acetone, alcohol, petrol, kerosene, spot removers, turpentine, waxes, wax removers and cosmetic oils must not be dried in the appliance even after having been washed.
Matters to be observed
- The lint filters have to be cleaned frequently.
- The lint must not be allowed to accumulate around the appliance.
● Make sure that no objects are left in any of the pockets. Pay particular attention to cigarette lighters and matches. They may cause fire.
● Fabric softeners, or similar products, should be used as specified by the fabric softener instructions.
Prohibited matters
- The appliance is not to be used if industrial chemicals have been used for cleaning.
- Do not dry unwashed items in the appliance.
- Do not dry items made of polypropylene fibre.
Ground the appliance.
(Electric shock may occur in electric leakage.)
- Be sure to have your dealer perform grounding work. (The grounding cost is not included in the product price.)
! WARNING
Power Plug and Cord
Prohibited matters
(Fire or electric shock may occur.) - Do not damage, modify, immoderately bend, twist, pull, or bundle them. Do not put them close to heating appliances. Do not put anything heavy on them. - Do not connect/disconnect them with wet hand.
- Do not hold the cord when pulling out of the socket.
Matters to be observed
(Fire or electric shock may occur.)
- Use the socket solely. (Using in combination with other appliances could cause fire.)
- Insert the plug all the way seated.
- Wipe the plug periodically with dry cloth. (Accumulated dust collects moisture, which may cause insulation failure, resulting in fire.)
- Be sure to pull out the cord before cleaning or when it is not used for a long period of time.
- If the power cord is damaged, it must be replaced by the manufacturer, its service agent or similarly qualified persons in order to avoid a hazard.

(Fume, fire or electric shock may occur.) Emergency and malfunction examples: ● The appliance does not operate at times when the power is turned on. - Dust or moisture has accumulated on the plug.
- An abnormal sound is heard during operation. ● Burnt odour smell comes from the appliance. (Consult your dealer for inspection and repair immediately.)
! CAUTION

To prevent water leak, etc.
Check before operation. (Water leak may occur.)
- Turn on the water faucet and check the connection.
Be sure to turn off the water faucet after operation has finished.
- Do not allow the laundry to be caught when closing the door. (This may cause water leak, malfunction of the appliance or breakage of clothing) * Do not close the door with the laundry on the window seal.
■Drain Filter (P.30) (A large amount of water (hot water) may spill out.)
- Do not remove during operation.
- Be sure to perform the "Spin" operation before removal. (P.26)
Observe the following when drying.
● Never stop the appliance before the end of the drying cycle unless all items are quickly removed and spread out so that the heat is dissipated.
Do not "Wash", "Rinse" or "Spin" waterproof sheets and clothes.
(Intense vibration during spin or falling of the appliance may result in injury, damage to the main unit, wall, floor, etc., damage to the laundry, water leakage, etc.)
● Raincoat, sauna suit, wet suit, diaper cover, sleeping bag, ski wear, car cover, waterproof sheet, etc.
Prohibited matters
● New hose-sets supplied with the appliance are to be used and old hose-sets should not be reused. - Do not obstruct the openings of the bottom face with carpet, etc. - Items such as foam rubber (latex foam), shower caps, waterproof textiles, airtight fabrics, rubber backed articles and clothes or pillows fitted with foam rubber pads should not be dried in the appliance. Such materials may be destroyed and thereby damage the appliance. - Do not insert your hand or foot under the main unit. (Your limb may be cut.) - Do not climb up or put fragile things on the appliance. (Deformation or damage may be caused, resulting in injury.) - Do not connect to a water heater (50 °C or more). (Plastic parts of water supply pathway may be deformed or damaged, resulting in electric shock or electric leakage.)
Part Names Door Lock/Accessories


How to open the Drain filter cover How to close the Drain filter cover - If the cover is difficult to open
Open the door of the drum, and hold the concave at the upper part of the cover as shown above to open it.
Push the positions indicated with arrows (near the claws), and close it firmly.
- If the drain filter cover comes off, attach the cover as follows. (For safety reasons, this structure allows the cover to be easily released.)

Opening the door during operation

is displayed during operation. The door does not open.

- Pressing the Start/Pause button during operation stops the drum rotation and cancels the lock with a clicking sound. The door does not open while the drum is rotating.
■ The door is locked if water temperature is high
When paused during operation, "hot" is displayed and the door does not open.
To open the door immediately: Turn the power off. → Turn the power on. → Start "Spin". (P.26) (Water supply may start to lower the water temperature inside the drum.)

Note
- If the door is opened while washing, bubbles may spill out. Catch them with a towel, etc. (Water droplets may also fall from the inside of the door.)
With the Child Lock set, the door does not open even if the appliance is not operating.
- The door does not open while the preset timer is being set. Turn the power off, and make the setting again.
- Do not disconnect the power plug. The lock cannot be cancelled even if the power is turned off.
Setting Child Lock
To prevent accidents involving children, this function disables door opening even if the power is turned off or after the operation has finished.
How to set

Close the door and
turn the power
on

Press and hold
for at least 5
seconds.
The setting is complete when
illuminates and CL is displayed
after a double beep is heard.
- To cancel, perform the same steps → disappears after a double beep (x 2) is heard.
Note
- When the power is turned on after Child Lock has been set, is displayed for approx. 5 seconds each time.
Accessories

Elbow (1)


Water supply hose (1: Approx. 1.2 m)

Cover (2)
Bottom cover (1)
(See "Installation" P.48)
Screw (2)

Spanner (1)
(The spanner is necessary when transferring, etc.)
(transferring, etc.)
To prevent malfunction, damage and operation error
- If detergent or softener is attached to the main unit (especially door, operation panel and touch panel), immediately wipe it off with a wrung-out towel, etc. (Peeling of print, damage to resin, metal corrosion or malfunction may occur.) In particular, if liquid concentrated detergent is attached to the resin part, it may crack.
Note that if detergent, etc. is attached to the door hinge part (metal part), metal corrosion may occur.
- Do not put objects on top of main unit during operation. (Vibration may cause the objects to fall.)
Even while operation is being paused, carefully put a basket, etc. so that it may not hit the water supply hose. (The water supply hose may be deformed.)
- Do not put home electric appliances such as TV, radio, etc. close to the main unit. (Images may be interrupted, or noise may occur.)
Touch Panel
All indicators are lit to facilitate explanation.

To change the operation contents (Wash/Wash&Dry/Dry)
Press the button to change the operation contents (
Wash/Wash&Dry/Dry)
![graph TD A["Wash"] --> B["Wash&Dry"] B --> C["Dry"] D[""Cotton 80%V Hand Wash"] --> E[""Cold Interactive Building Seal Tub Chorn"] E --> F["Hybrid Dry"] G[""Auto"] --> H[""Auto" Switched each time the button is pressed"] I[""Auto"] --> J[""Auto" Switched each…](/content/2026/05/938237/images/7f6ad5e6691c834f17af51dca84a5376c48cb192be07e9b3370857df23943dac.jpg)
How to use the touch panel
Touch (press) the buttons softly to operate.
Attention
- If water, detergent or softener is attached to the touch panel, turn the power off, and wipe it off with a wrung-out towel, etc. immediately.
(Operation error may occur.)
- Do not touch the panel with the sharp point such as a nail, pin, ballpoint pen, etc.
Note
- You cannot operate with rubber gloves on.
Laundry Procedure
![graph LR A["Prepare your laundry"] --> B["Turn the power on"] B --> C["Select the operation"] C --> D["Start"] D --> E["Select the program"] E --> F["Take out the laundry"] F --> G["Maintenance"] subgraph Start H["To select your preferred settings, such as 'Dry' mode (P 22)"] I["How to put in deterg…](/content/2026/05/938237/images/2a16fd04d2273b63783b6ec6173d7f7f82a09fa0c20017941de67a517d872c2a.jpg)
Anti-crease
After drying, the drum rotates for 40 seconds every 5 minutes to reduce creases in clothes left unattended until they are taken out. (approx. 2 hours)
Note
- When the preset timer has been set, the "Anti-crease" operation is performed until approx. 2 hours after the set time. ● The "Bedding" program does not perform the "Anti-crease" operation.
- You can take out the clothes at any time during the "Anti-crease" operation. (The operation ends when the door is opened) ■ To disable "Anti-crease" (P.35)
Auto Tub Clean
By utilizing the momentum of water during high-speed rotation of the rinse cycle, this automatically washes away detergent scum and body soil stains attached to the drum, and inhibits black mould forming.
Auto Tub Clean
→
● "Auto Tub Clean" is disabled at the time of purchase. (To set, see P.22) ● The Auto Tub Clean works in "Cotton" or "ECONAVI" program with 2 or more "Rinse" cycles.
Laundry Check and Preparations
Cannot Wash or Dry


Leather and fur products (Deformation may occur.)

Silk, rayon and cupro products (Blended fabric) (Discolouration or deformation may occur.)

Cushion, pillow, etc. with cotton, sponge or beads used (Damage or malfunction may occur.)

Waterproof sheets and clothes (Damage or malfunction may occur.)

Large or thick mats or carpet covers with urethane or rubber processed back surface (Damage or malfunction may occur.)

Commercially sold washing aids, washing nets with hard core material, etc. (Deformation or damage may occur due to heat. Also, damage to clothes or malfunction may occur.)

Caps with hard core materials.
(Damage or malfunction may occur.)


Starched shirts (The dry filter may be clogged.)

Clothes decorated with embroidery or lace and new chemical fibre (micro fibre) (Deformation may occur.)

Mats and other items with pet hair attached (Lint may block the drying pathway, or damage or malfunction may occur.)

Curtains
(Damage or malfunction may occur.)
• Follow care labels of curtains before washing.

Tights, pantyhose (Damage or deformation may occur.)

Wool clothes
(Shrinkage or loss of hair
may occur.)

Items with any of the symbols on the left (Damage may occur.)
Pre-treatment for tough stains
Collar and cuff stains
· Apply detergent for collar and cuffs
Dirt containing mud
- Apply detergent for partial stains or bathing soap, and wash by rubbing.
Stains
Apply detergent for stains or oxygen liquid bleach. (For blood, tea, juice stains, etc., pre-wash with water.)
To prevent darkening of colour and colour transfer
Due to less water used for drum type washing machines, stain or dye concentration may become high, resulting in noticeable darkening or colour transfer of clothes.
Note the following
- Separately wash new coloured clothes or clothes that easily lose colour or are heavily soiled. (If the lost colours transfer to white clothes, darkening of clothes may occur.)
● Warm wash program in particular tend to cause colour transfer. Check care labels of clothes carefully. (P.17)
- Use the correct amount of detergent. (P.21) (Using too small amount of detergent may cause once-removed soil to stick to the clothes again, resulting in darkening of clothes.)
- Do not put in excessive amount of softener. (Softener residue on clothes may cause darkening of clothes.) When using in combination with liquid detergent in particular, darkening of clothes may be noticeable. If it worries you, use powder detergent.
■ How to check loss of colour
Dip white cloth in undiluted mild liquid detergent and rub a hidden part of clothes.
→ If the lost colour transfers, wash separately.
■ If darkening or colour transfer of clothes occurs (P.36)


To prevent creases and shrinkage caused by drying
Note the following
- Select the dry mode that best suits your clothes. (P.29)
- Decrease the amount of clothes for drying at a time.

Recommended guideline: Approx. 3 kg
- Open the door in the middle of drying operation, take out the half-dry clothes. Then, hang the clothes to dry.

● Smooth out creases formed during spin, and then dry.

● After drying operation is complete, take out clothes made of chemical fibre, etc. as quickly as possible that easily dry.

- Clothes that shrink by drying
- Some clothes may shrink just by soaking in water, washing or drying.
(Because tension generated in fabric processing is restored to the original level by washing)
- Some may shrink more by mechanical force in drying.
- Knit products made of cotton, linen, etc.
- Underwear shirt • T-shirt.
- Polo shirt • Sweat shirt, etc.
■ If shrinkage worries you (P.36)
To prevent damage of clothes, drainage failure and malfunctions

Reverse fluffy clothes.

Using a brush, remove hairs of pet and person, sands, etc.

Remove metallic fragments and coins.

Fasten buttons. Close zippers.

Tie strings, etc.
Use washing nets for delicate underwear and small items
- Be sure to put only delicate underwear and small items in the net for washing. (Do not put in items in the net other than these.)
- Pantyhose and brassiere (Put wired brassieres in a commercially sold "brassiere-dedicated net".)
- Clothes and lingerie decorated with lace
- Socks, handkerchief, etc.

(Put the claw of the zipper into the cover.)
■When drying
- Do not dry items remaining in the net. (To prevent uneven dry and wrinkle)
Laundry Check and Preparations (continued)
Bedding program (Blanket)
Washable/Dryable

Blanket (Mayer, Tuft and woven) with any of the indications on the label
- Do not wash items without care labels, waterproof sheets or cover.
Wash only Wash&Dry
Chemical fibre 100% or cotton 100%
Blanket with 3 kg or less

Chemical fibre 100%
Blanket with 3 kg or less

Even blankets labelled as "Tumble dry prohibited" can be dried.
Cotton blankets cannot be dried. (Shrink may occur.)
Cannot Wash or Dry ✗ Blanket
Wool 100%
■ Pile length of 10 mm or more
(The texture will be damaged.)
■ Electric blanket (including the cover)

How to put in the blanket
1 Fold the blanket.
- Blanket (Fold into 4 layers.)
![graph LR A["Start"] --> B{Step 1} B --> C["Output"]](/content/2026/05/938237/images/612ea6fd61ccffdec0b40c303238ab97323863f3a7c0f55c2bca4703c00d8278.jpg)
2 Put in the blanket.
Fold it in zig zag shape (6 layers) inside the drum.

Attention
- Be sure to wash only one piece of blanket.
Be sure to observe the following. (The blanket may be torn due to contact with the main unit, or the main unit may vibrate.) - Do not twist or roll the blanket when putting in. (Spin may not work properly.) - Do not perform the "Spin"-only operation. - Never use a "blanket net". (Spin cannot be performed.)
Laundry Check and Preparations (continued)
Hand Wash program
By softly shaking the drum, this program gently washes delicate clothes, etc. that could not have been washed by
washing machine
(This is different from dry-cleaning that uses solvent.)
Washable

Delicate clothes with any of the indications on the label
e.g.) Slacks, blouse, cashmere sweater, etc.
● Some clothes cannot be washed even with the above indications. (P.12)
How to put in the laundry
Put laundry on top of each other flatly.
(Weight guideline)
Sweater (blended fabric): Approx. 300 g
Blouse (blended fabric): Approx. 200g

Attention
- Do not wash clothes without care labels, made of uncertain materials and clothes that lose colours.
● Pre-treat the clothes as shown below.

Wrap dark-colored buttons with plastic wrap.
- For body soil stains on collars and cuffs, and for dust and mud stains, apply detergent without fluorescent agent and pat with a soft hair brush to remove the stains.
- When washing only one item, such as a sweater, add one or two bath towels. (To balance during spin)
How to dry
- For shirts, slacks, etc. that tend to crease, dry on hangers.
(Do not hang knit products on hangers.)

- For roughly knit sweaters, dry flat.

Use a net for flat drying.
- For knit products, hang them to dry.

To give a nicer finish...
● Pale or white colored clothes, wool and nylon → Dry in the shade.
- Knit, new synthetic fiber, etc.
- Pat with your palm, smooth out creases, reshape and dry.
If clothes have shrunk (P.36)
Warm wash program
Cotton (30 °C)
Save washing water.
Washable
Daily clothes: Capacity 10 kg or less (wash only)
Capacity 6 kg or less (wash & dry)
Cotton (40 °C)/ECONAVI (40 °C)
Removes body soil stains, and prevents odour.
Washable
Daily clothes: Capacity 4.5 kg or less
Soak
Removes the yellowed stains by soaking with the warm water of approx. 40 °C for approx. 6 hours with approx. 2 times the detergent amount.
Washable
Daily clothes: Capacity 2 kg or less

Yellowed clothes
ECONAVI (60 °C)
Eradicates germs in white clothes such as underwear.
Washable
White clothes such as underwear: Capacity 2 kg or less

■ Note when checking the laundry
- Check symbols on care labels to prevent damage of clothes or colour transfer.
- Do not wash clothes that require hand wash or cannot be washed with water.
- Do not wash clothes that tend to crease.
- If upper limits of water temperature are indicated for some clothes, do not use water of higher temperature than the upper limits.
e.g.) This symbol indicates the upper limit of water temperature is 40 °C.
"Cotton (40 °C)", "ECONAVI (40 °C)" and "Soak" programs
- Wash separately the clothes that lose colour.

"Soak" program
- When using bleach or detergent containing bleach, observe the following.
Do not wash clothes with metallic objects (e.g. zipper, button, hook, etc.) attached. (Discolouration may occur.)
- Wash coloured clothes and white clothes separately.
"ECONAVI (60 °C)" program
- Clothes shown below cannot be washed, either.
• Coloured clothes
• Clothes with core materials such as dress shirts
- Stretchable clothes with rubber materials used
• Clothes with print

Laundry capacity guideline (Weight guideline per one item)

• Weight varies depending on the material.
Selecting the Program
| According to the type of laundry and stain | Operation | Program | Water temperature *1 | Maximum capacity | Additional functions | Auto Tub Clean | Dry mode |
| Check the care labels or material labels before washing and drying. (To prevent damage or a hole) | Wash | Wash&Dry | Dry Wash | | Wash&Dry Dry | Preset Timer |
| Daily clothes | Everyday washing | ● | ● | ● | Cotton | Cold 10 k | g | 6 kg | ● | ● | Auto Timer |
| — | ECONAVI |
| Save washing water | ● | ● | — | Cotton | 30 °C 10 k | g | 6 kg | ● | ●*1 | Auto Timer |
| Wash decomposing body soil stains to prevent odour | ● | ● | — | Cotton | 40 °C 4.5 k | g | 4.5 kg | ● | ● | Auto Timer |
| — | ECONAVI |
| Eradicate germs on underwear, sheets, etc. (White clothes only) | ● | ● | — | ECONAVI | 60 °C 2 k | g | 2 kg | ● | ● | Auto Timer |
| Wash thoroughly for dirt containing mud | ● | ● | — | Intensive | Cold 4.5 k | g | 4.5 kg | ● | — | Auto Timer |
| For yellowing of clothes | ● | ● | — | Soak | 40 °C 2 k | g | 2 kg | ● | — | Auto Timer |
| Wash delicates gently | ● | — | — | Hand Wash | Cold 1.5 k | g | — | — | — | — |
| Wash blanket, etc. | ● | ● | ● | Bedding | Cold 3 k | g | 3 kg | ● | — | Auto *2 Timer *3 |
| Maintenance | Prevent and eradicate black mould in the drum | ● | — | — | Tub Clean | Cold 30 °C | — | — | — | | — |

ECONAVI program
This program detects the laundry amount and types (cotton, chemical fibre, etc.) and determines the best suited wash time and water amount to save energy and water. The wash time and water amount can be saved more with smaller amount of laundry, larger amount of clothes that easily dry, such as chemical fibre, or with higher temperature.
| ECONAVI | ECONAVI indicator changes as below. |
| Blinking | ECONAVI detecting |
| Lighting | ECONAVI ON |
| OFF | Normal operation |
| Lighting for 10 minutes after the operation is complete | ECONAVI operation has been performed. |
■ To disable the ECONAVI operation (P.34)
ECONAVI Q&A
Q. In what cases does ECONAVI not detect the status correctly?
A. When operation is paused
- When operation is performed by filling water in the drum
Depending on the changes of operation condition, installation environment, water pressure, etc., the ECONAVI detection may not be correct. (Operation is not affected.)
Note
- For normally soiled laundry with the rated capacity, the "Cotton (30 °C)" program is recommended.
Drying method of this appliance
This appliance dries clothes with warm air that is slightly higher than room temperature.
The clothes after drying may not become warm. This is not a malfunction.
The moist air is exhausted while drying.
Attention
- Provide adequate ventilation while drying and after the operation, such as by turning on the exhaust fan or opening the window.
(To prevent condensation on the window/wall/ill cor)
- Do not block the exhaust outlet with clothes, etc. while drying.
(Drying time may become longer.)
Note
- Air from the exhaust outlet may feel cold.
- The drying time may become longer or clothes may not be dried well at low room temperature, or at high humidity.
Dry mode
• Auto
• Timer (30/60/90/120/180/240 minutes)
How to select the dry mode that best suits your clothes. (P.29)
*1 Water temperature is displayed above the \ Water button.
*2 "Wash&Dry" for the "Bedding" program
*3 "Dry" for the "Bedding" program (Timer can be set for 60/100/150/200 minutes)
*4 The Auto Tub Clean works with 2 or more "Rinse" cycles.
Water temperature
Warm water (approx. 30 °C/40 °C/60 °C) can also be used (P.26)
Water temperature can be selected based on the materials and how soiled the items are.
How to Put in Detergent and Softener
Always use low suds detergent or detergent designed for front loading washing machines.

- Powdered detergent
(Low suds or for front loading washing machines)
Liquid detergent
(Low suds or for front loading washing machines)
Powder (detergent/bleach)
To prevent the detergent from remaining
● Wipe the case if it is wet.
● Break block of detergent before putting in
Liquid (detergent/bleach)
- Do not use chlorine-based bleach when using the timer reservation. (Leaving the appliance for a long time may result in metal corrosion or malfunction.)
- Do not use chlorine-based bleach for coloured clothes. (Loss of colour may occur.)
Detergent case
Softener
● Dissolve in water if it is difficult to flow.
(Max.: approx. 100 ml)
- Do not put the softener exceeding the guideline 'MAX' position.
(The softener flows out quickly and no effect is given.)
- Do not leave the softener in the softener compartment for 12 hours or longer. (It easily becomes hard.)
- Do not use a separated or solidified softener (The softener or water may remain in the case.)
(The softener flows out quickly and no effect is given.)
- Do not leave the softener in the softener compartment
for 12 hours or longer. (It easily becomes hard.)
- Do not use a separated or solidified softener
(The softener or water may remain in the case.)
(The solution of water may remain in the case.) Small amount of softener may remain in the
- Small amount of softener may remain in the case due to its spherical structure.
case due to its siphonic structure. (This is not a malfunction)
(This is not a malfunction.)

Reduce the amount of excessive foaming detergent.
- If a large amount of bubble occurs, water is repeatedly supplied and drained to eliminate the bubble, resulting in longer operation time. Also, the bubble or water may overflow from the drain outlet or dry filter.
Attention
- If detergent or softener is attached to the main unit (especially door, operation panel and touch panel), immediately wipe it off with a wrung-out towel, etc. (Peeling of print, damage to resin, metal corrosion or malfunction may occur.)
In particular, if liquid concentrated detergent is attached to the resin part, it may crack. Note that if detergent, etc. is attached to the door hinge part (metal part), metal corrosion may occur
- If you have forgotten putting in the detergent or water is already in the drum, put the detergent in the detergent case and flow with a cup of water. (Because water to flow the detergent is not supplied)
Timing to put in detergent, etc.

Put in the laundry and close the door


Put in the detergent according to the indication.
(Washing starts.)
According to the amount of laundry, the detergent amount is displayed.

■ If water supply starts while putting in detergent
→ Press to pause. After putting in detergent, restart the operation.
Attention
- Put in detergent, bleach, and softener before supplying water. (They may remain if put in after supplying water.)
Guideline of amount used
● Depending on the type of detergent, the amount of detergent and the size (spoonful or capful) of spoon or cap differ. Refer to the table below. (Use the spoon or cap that comes with the detergent.)
(As of January, 2019)
| Laundry volume | Detergent indicator | Standard powder detergent | Liquid or concentrated powder detergent |
| 10 kg or less | 1.7 | 1.7 | 1.0 |
| 4.5 kg or less | 1.3 | 1.3 0.8 | |
| 2.5 kg or less | 1.0 | 1.0 | 0.6 |
| 0.5 kg or less | 0.6 | 0.6 | 0.4 |
■ For "Intensive" and "Soak" programs
| 4.5 kg or less | 2.6 | ▶ | 2.6 1.6 | |
| 2.5 kg or less | 2.0 | ▶ | 2.0 1.2 | |
| 0.5 kg or less | 1.2 | ▶ | 1.2 0.8 | |
● A drum type of washer uses small amount of water, so the necessary amount of detergent is displayed based on "Laundry amount" instead of "Water amount". ● The detergent amount is displayed based on the spoon (70 g in full). ● Detergent amount for "Hand Wash" and "Bedding" programs (P.25) - Reduce the amount of excessive foaming detergent.
Attention
- If the powdered detergent is poorly soluble
→ Dissolve it in warm water (approx. 30 °C) and directly put in the drum.

Put in the detergent little by little while stirring to prevent it from remaining in a powder state.
Everyday Washing
![graph TD A["Preparation\n(1) Prepare your laundry.\n(2) Turn on the water faucet.\n(3) Put the laundry in the drum and close the door."] --> B["1 Turn the power on."] B --> C["2 Select the operation."] C --> D["3 Select the program. "Cotton"/"ECONAVI""] D --> E["4 Start."] E -->…](/content/2026/05/938237/images/4a46bad67879b00c0bc019bcfeedb7819282a3a2c8e507111347d5c1ce0bade0.jpg)
Washing Options![graph TD A["Preparation\n(1) Prepare your laundry.\n(2) Turn on the water faucet.\n(3) Put the laundry in the drum and close the door."] --> B["1"] B --> C["Wash&Dry"] C --> D["Select 'Wash'. (P.8)"] D --> E["Program"] E --> F["• Liquid delicate detergent for stylish garments (for wool and silk)\n•…](/content/2026/05/938237/images/6597a12a2c9088fac5970ba05084b4374f9daecd71c8d475b0d4326589903fd4.jpg)
Washing Options (continued)
![graph TD A["1 Turn the power on."] --> B["Wash&Dry"] B --> C["Program"] C --> D["iC Water"] D --> E["Start Pause"] E --> F["After the operation has finished, wipe off the water droplets remaining on the dry filter and dry filter (inside). (P.31) (Remaining water droplets may cause mould growth.)"] F…](/content/2026/05/938237/images/cfd7da25b1c15c3153844df97eae0f1d9b3bb168a500161467387a64179853ea.jpg)
Drying
![graph TD A["1 Turn the power on."] --> B["2 Select the operation."] B --> C["3 Select the program."] C --> D["4 Select the dry mode."] D --> E["5 Start."] subgraph A A1["Prepare your Laundry.<br>Put the laundry in the drum and close the door."] B1["For clothes that cannot be dried (P.12)<br>To preve…](/content/2026/05/938237/images/f1c0809d23c6c0f7e1742f2af0e042c2366c8769ed46b0dca0ca80cde84526c2.jpg)
Maintenance
Drain Filter/Dry Filter
Drain Filter
Once a
week
Remove dust.
1 Perform the "Spin" operation. (P.26) (Drain water in the drum.)
2 Turn the power on, and prepare a container such as a cup to receive water discharged from the pump hose.
Open the drain filter cover.


- If the drain filter cover comes off (How to attach >P.6)
4 Pull out the pump hose and remove the cap to drain the water into the cup.

5 Turn the "Tip of knob" to the "•" position slowly.
If the buzzer beeps, do not remove. (Large amount of water spills over.)

6 Confirm no water is left, and pull it out.

7 Remove dust.
- If the 2 rubber seals are misaligned,
(To prevent water leak)
(To prevent water leak)


Large amount of water will spill over
Do not remove during operation.
Before removing, be sure to run the "Spin" operation. (P.26)

■ After removing dust

(2) Tighten securely until *<* meets

(3) Replace the cap and pump hose to the original position.
Attention
- Do not use the drain filter in a loosened state. ("U18" is displayed and operation is not possible.)
Attention
- Do not use gritty cleanser, thinner, benzine, alcohol, kerosene, etc.
- If detergent or schener is attached to the main unit (especially door, operation panel and touch panel), immediately wipe it off with a wrung-out towel, etc. (Peeling of print, damage to resin, metal corrosion or malfunction may occur.) In particular, if liquid concentrated detergent is attached to the resin part, it may crack.
Note that if detergent, etc. is attached to the door hinge part (metal part), metal corrosion may occur.
Dry filter
After every "Dry" operation
After every "Wash" using warm water
Remove dust.
- When the "Wash" operation (P.26) is performed with warm water, wipe off water droplets.
The "Clean Filter" indication notifies that cotton-like dust has been accumulated in the dry filter. (A buzzer beeps when the door is opened after operation has finished.) The indicator may blink even after one-time operation. This is not a malfunction.
1 Remove the dry filter. Do not remove during operation.

● After removing the filter, do not wash the main unit side with water or put foreign objects into it.
2 Remove cotton-like dust, and wipe it clean with a wrung-out towel, etc.
- Do not scrub with force. (The filter may be broken.)


- If dust is stuck to the filter, wash with lukewarm water and dry well.
Warm water
3 Remove dust from the dry filter (inside).
Dry filter (inside)

- Remove cotton-like dust and wipe it clean with a wrung-out towel, etc.
■ If "U04" is displayed, remove the dry filter (inside) and wash with water.

(Do not scrub with brush, etc.)
Running water
- Wash while rubbing it with the pads of fingers, and dry completely.
Removing

Attaching


4 Attach the dry filter. (Securely set inside.)
Attention
- Do not operate the appliance with the dry filter removed. (Drying performance may deteriorate or dust may stir up)
Maintenance (continued)
Drum/Main unit, etc.
Drum
Preparation
Turn on the water faucet. - Do not put in clothes.
1 Turn the power on.
2 Select the operation.
3 Select "Tub Clean".
4 Start.
5 When water supply finishes, press the Pause button. Directly put in bleach in the drum.
6 Close the door and start.

To prevent black mould and odour
Wash with chlorine-based bleach.
(once a month)
![graph LR A["Start"] --> B["Wash Dry"] B --> C["Program"] C --> D["Start Frame"] D --> E["Start Pause"] E --> F["Start Pause"] F --> G["Soak, Rinse and Spin"] F --> H["Approx. 11 hours will be taken. (Approx. 6 hours for '30 °C')"] C --> I["When using warm water"] I --> J["Ic Water"] J --> K["Select…](/content/2026/05/938237/images/98bdcd330d2b881795ceba52ab9a61ab933ffa2523dbb46fc53c784f57409725.jpg)
Detergent case
When dirty
Wash with water.
- If the case is not cleaned, softener may not flow smoothly because of soil, or it will get mouldy.
1 Remove the case.
Hold the protrusion, and pull it up.

● Wipe off the soil on the main unit side.
2 Remove the cover. Clean the tube of the case, back side of the cover and tube. (P.40)

Main unit/Window seal
When dirty
Wipe with a soft cloth.
- If lint, water droplets or foreign objects have been attached on the back of the window seal, wipe them off thoroughly. (This may cause water leak or smell.)
- If dust such as lint is attached in the hole of the window seal, remove it.
For tough stains
- Use a detergent for kitchen and wipe off.

Changing the Settings

Change the settings for easier use.
- Changed settings are stored in memory even after the power is turned off.
■ Before setting


Turn the power on.


Select "Wash".
(P.8)


Press and hold at least 3 seconds. A double beep sounds, and * is displayed in the display window.


Select the item to set.
Adjusts the 1:03 "Level of spin noise"
noise
2:01 Disables ECONAVI operation
operation
Changes the rinse cycle of 'Cotton' program
of 'Cotton'
program
Prevents
4:00 clothes from sticking to the drum.
the drum.
Numbers such as ":03" may be different depending on the setting condition.
Adjusting the
level of spin noise
Disabling ECONAVI
operation
Changing the
rinse cycle for "Cotton"
program
Preventing clothes from sticking
to the drum after the washing operation has finished

Select inStop
Adjust the level of spin
noise with


102
10
103
(1)
184
√8.5
105

Select dStep
Select the

2:00
201
Disables ECONAVI operation.
Enables ECONAVI operation
Enables ECONA (Factory default)

Select InStep
Set the rim

3:01
3:02
2 times
s (Factory default)

Select InStep
Set the rim
3:01
Therefore m = 3/11
2 times
s (Factory default)

Select 4H360p
Make the
Time
sticking.
4:00
4:01
Disables sticking prevention.
(Factory default)
Enable
es sticking prevention.
• Adjust
condition for
vibration and
noise varies
according to the
type and amount
of clothes, and
also how the
clothes are

pressed.


The setting is
complete.
(The power turns
off)
- If the
to 1, "Auto Tub
Clean* does not
operate.

• To restore
the setting to
the original
condition,
use the same
procedure.
This
requires approx.
5 more minutes
of operation
time

Cancelling the end buzzer
Factory default: Buzzer ON
With the power turned off, while
pressing and holding


press and hold
at least 3 seconds.
(When a double beep sounds, the setting is complete.)
- To restore the setting to the original condition, use the same procedure.
(When a double beep (x 2) sounds, the setting is complete.)
With the power turned off, while
pressing and holding


at least 3 seconds.
(When a double beep sounds, the setting is complete.)
● To restore the setting to the original condition, use the same procedure.
(When a double beep (x 2) sounds, the setting is complete.)
For Better Results
Symptoms Tips for nice finish
| Darkening or yellowing of clothes, colour transfer or odour | Use correct amount of detergent. (P.21) (Using too small amount of detergent may cause once-removed stains to stick to the clothes again, resulting in darkening of clothes and odour.)Use correct amount of softener. (P.21) (If excessive softener is put in, the softener residue on clothes may cause darkening of clothes.) When using in combination with liquid detergent in particular, darkening of clothes may be noticeable. In this case, use powder detergent.For clothes that easily lose colour (new coloured clothes or heavily soiled clothes), wash separately. (P.13)If yellowing of clothes is noticeable, the "Soak" program is recommended. (P.17, 26)Yellowing of clothes may occur after drying, due to rust in water. detergent residue, colour transfer, etc. (It may look charred.)Discolouration caused by sunlight cannot be remedied.If darkening of clothes, colour transfer or odour is noticeable...→ Using the spoon that comes with the detergent, add 2 spoonfuls of detergent to warm water of approx. 40 °C, soak clothes overnight and wash.→ If the stains still remain, soak them in solution with bleach dissolved for 2 hours.Use chlorine-based bleach for white clothes, and oxygen-based bleach for coloured clothes.(Follow each bleach instructions.) |  |
| Damaged clothes | Put delicates such as lingerie in laundry nets before washing. (P.13)Chemical fi bres (jersey, fl eece, etc.) easily dry and they may be damaged due to rubbing. Shorten the spin time. |  Detergent solution Detergent solution |
| Shrunk clothes | Depending on the material, weaving method, thickness and type, some clothes are not suited for washing or drying.Check the care labels or material labels before washing and drying.Knit products or rough-woven materials may shrink by drying even if they are cotton or linen fi bres.Use sun drying in combination.Use Timer dry, take out the clothes in half-dry condition and dry on a laundry pole immediately.Dry on a laundry pole and perform the "Dry" operation for finish.Chemical fi bres may shrink due to heat generated in drying.If cotton products have shrunk by drying→Moisten clothes with water suffi cliently and stretch them. The shrunk clothes are recovered to some extent.If clothes washed with the "Hand Wash" program have shrunk→(1) Spread the clothes to the desired size with marking pins on an ironing board.(2) Hold the iron above the clothes and steam generously.(3) Leave the clothes until they dry. | |
Symptoms Tips for nice finish
| Excessive creases after drying, or change of texture | ● Depending on the material, weaving method, thickness and type, some clothes are not suited for washing or drying.→Check the care labels or material labels before washing and drying.(Thin and fl at-woven, or crape clothes tend to crease.)● Reduce the amount of laundry for better fl nish.● Take out the clothes immediately from the drum after drying.● Increasing the "Wash" time or the number of rinses tends to cause the clothes to tangle and crease more. To prevent this, take out the laundry once after spin, and detangle the clothes.For cotton pants, large sheets, etc.If they are not well-dried, after a 60-minute "Timer" dry, take out the laundry in half-dry condition and hang outside. |  |
| Lint on clothes | ● Towels, etc. tend to produce lint. Separate wash is recommended.● If lint worries you, increase the number of rinses.● After drying operation in particular, lint tends to accumulate. Clean the appliance.If lint is attached on clothes every time→Wash the drum according to the following procedure and remove the lint in the drum.(1) Turn on the water faucet. (4) Select Programian).(2) On the power on. (5) Start.(3) Write dry ash*.Approx. 11 hours will be taken. (If "Tub Clean" (30 °C) is used, approx. 6 hours will be taken.) Clean the "Drain filter" after this operation. (P.30) |
| Persistent stains | ● Pre-treat stain or dirt containing mud which is difficult to remove. (P.12)● Stains are difficult to remove when left unattended.● Iron rust, mould, black writing fl uid, ink, lipstick, or stain caused by chemical reaction such as permanent wave solution may not be removed.● According to how soiled the laundry is, use the "Cotton" program to make your preferred settings. (P.26) |
| Rough surfaces | Since drum type washers wash clothes while beating. fl bres of towels, etc.may become fl at and you may feel rough on the surfaces.● If clothes stick to the drum and become rough on the surfaces, enable the sticking prevention. (P.34)● Using softener will give nice fl nish.● If the results are still unsatisfactory, perform the "Dry" operation after washing, or perform the "Timer" dry for 60 minutes after spin and dry on a laundry pole. |
● Materials of clothes, sewing conditions or type of detergents may be the causes of problems. Check those descriptions.
Operation sound
The following sound is normal. (This is not a malfunction.)

■ If the drum is moved while stopped
Water sound is heard.
- This sound comes from the liquid inside the drum to balance during spin. (There is no water in the main unit.)
Large vibration or rattling sound
■ Vibration of drum type washer
- Unlike stand type washing machines, drum type washers cause vibration or rattling sound at the beginning of a "Spin" cycle to balance. This is not a malfunction.
- Depending on the floor condition or laundry (when jeans or thick towel sheets are included, or only one sweat shirt or fleece shirt is included), vibration may become large.
→Adjust "Level of spin noise" if it worries you. (P.34)
■ For smooth spin operation
- Do not put too many clothes in the net.
- Do not wash only clothes put in the net.
- Wash towel sheets or Judo uniform separately from other clothes.


■ Check the installation condition.
In the following cases, contact the sales dealer immediately where you have purchased the appliance.
● The appliance rattles. - Fixing bolts for transfer are still attached. (See "Installation" P.48)
- If the bolts are not removed, the main unit may move, which is dangerous.
Fixing bolt for transfer (2)
● The appliance is tilted.
→ Check the leveller of the main unit. (It is level if the bubble is inside the circle.)

Blinking (Water temperature display/Remaining time)
- When the water temperature display blinks...
→Water temperature is being increased to the set temperature.
Blinking
- When 'min' blinks...
→Water temperature is being detected.
Since required time is automatically adjusted according to the water temperature, the displayed time may differ from the actual time.

Remaining "Dry" time does not decrease or suddenly decrease
■ The displayed time is a guideline. (different from the actual time)
- Since remaining time is automatically adjusted according to the type of clothes and drying condition, the displayed time may differ from the actual time.
- If the remaining time does not decrease for 1 hour or more, the dry filter may be clogged or the spin time may be too short.
→Maintenance for the dry filter (P.31)
Blinks while controlling automatically.
Clothes are not well dried
■ Drying method of this appliance
This appliance dries clothes with the warm air which is slightly higher than the room temperature.
The clothes after drying may not become warm. This is not a malfunction. The moist air is exhausted while drying.
Attention
- Provide adequate ventilation while drying and after the operation, such as by turning the exhaust fan or opening the window.
(To prevent condensation on the window/wall/floor)
- Do not block the exhaust outlet with clothes, etc. while drying. (Drying time may become longer.)
Note
● Air from the exhaust outlet may feel cold. - The drying time may become longer or clothes may not be dried well at low room temperature, or at high humidity.
■ Check the dry filter as below.
- Cotton-like dust is attached on the dry filter. →Remove and clean the dry filter. (P.31)
- The dry filter is clogged. ("Clean Filter" blinks.) →Even if the cotton-like dust is removed, the filter may be still clogged.
Wash well with lukewarm water and dry. Remove cotton-like dust attached on the dry filter (inside) as well and wipe with a wrung-out towel.
The mesh is clogged.

Attention
- When excessive foaming detergent is used or excessive detergent causes excessive foam, the bubbles in the drum may reach the dry filter by spin rotation, causing the filter to be clogged or bubbles to spill over.
If the filter is clogged or the bubbles spill over, reduce the amount of detergent.
■ Amount of clothes and the condition
- Too many clothes.
-Put in clothes of the upper limit amount or less according to the capacity of each program. (P.18) ● There are many clothes (cotton) that need longer time to dry. →Use Timer to dry more. (P.29)
- There are many thick clothes (jeans, sweatshirt, Judo uniform, etc.).
→Use Timer to dry more. (P.29)
- The "Wash&Dry" operation is being performed with many towels in.
→Towels stick to the drum during the "Spin" cycle, which interrupts the drying process. Perform the "Wash&Dry" operation with other clothes (20 to 30%) in.
- Detangle the clothes after spin.
- Do not put clothes in a laundry net.
■ Installation condition
(For details, see "Installation". (P.48)) ● The rear side of the main unit is in contact with wall, etc. ● The appliance is installed in a closed narrow place.
■ Others
● The door is opened or closed many times in the middle of operation, or left open. →Open or close the door only when necessary. - When "Anti-crease" is blinking, the "Dry" operation has finished.
→Open the door and take out the clothes.
Spin only or Drain only setting
- Press

to perform
the spin operation and drain water (See "Manual Setting" (P.26).)
Troubleshooting
- Check the following items before requesting service.
In the case of abnormality, contact the sales dealer immediately where you have purchased the appliance.
| Symptoms Check the following. |
| Detergent | Detergent remains. | The powder detergent is directly put in the drum or liquid detergent compartment.→Be sure to put it in the powder detergent compartment of the detergent case.(P.20)Depending on the brand, the detergent may be difficult to dissolve when water temperature is low.-Dissolve the detergent completely and put in the detergent case.Water is already in the drum. Or detergent was put in after water supply has fi nished.→Flush a cup of water into the detergent case.Lumps of detergent were put in the case or the detergent was put in the wet detergent case.The water supply fil ter is clogged with dust, interrupting smooth water flow.→Using water containing many impurities such as well water causes dust to accumulate. Clean the fil ter. (P.44)Detergent, softener or water remain in the detergent case.-Clean the detergent case.Turn on the water faucet further, and increase the amount of water supply.Depending on the brand, some softeners may be difficult to flow. Dissolve the softener with the same amount of water completely and put in the compartment. (Softeners of some brands are solidified when mixed with a small amount of water and cannot be used.)In the “Soak” program, small amount of softener may remain. This is not a malfunction.Softener is stuck to the detergent case.Remove the cover and clean the tube of the case with a soft cloth or cotton-tipped stick. →Remove the cover and clean the back side and tube of the cover with a soft cloth or cotton-tipped stick. →Remove the cover and clean the back side and tube of the cover with a soft cloth or cotton-tipped stick. |
| No effect of softener | The softener was put in exceeding the “MAX” level. (P.20)→Do not put in the softener exceeding the “MAX” level.(The softener flows out immediately due to its siphonic structure.) |
| Symptoms Check | the following. |
| Bubble | Not many bubbles are formed. | ● The powder detergent was directly put in the drum.→Be sure to put it in the powder detergent compartment of the detergent case. (P.20)● Bubble may be less depending on the type of detergent (low suds type), detergent amount, water quality and water temperature.● Bubble may be less when the mount of laundry is large or the laundry is heavily soiled. |
| Excessive bubbles are formed.(Bubbles are attached inside the door, etc.) | ● Depending on the type of detergent (liquid delicate detergent, etc.), detergent amount, water quality, water temperature and how soiled the laundry is, many bubbles remain on the door. This is not a malfunction.→Reduce the amount of detergent, or increase the number of rinses. |
| Wash | Water is not supplied | ● The water faucet is not turned on.● Water or water supply hose is frozen.● The water supply is cut off .● The fl liter of the connection of the water supply hose is clogged with dust.→Clean the water supply fl liter. (P.44)● If there are excessive bubbles, water supply may temporarily stop.● When using little amount of water, water may not be seen even if it is supplied. |
| Water is supplied in the middle. | ● When the water level goes down, water is supplied automatically.● With large amount of laundry, water may be supplied several times. |
| Water is drained in the middle. | ● If there are excessive bubbles, “water discharge → water supply” is repeated and bubbles are removed.● The “Intensive” program drains water in the middle of the “Wash” cycle. This prevents stains from reattaching.● It the “Tub Clean” program is operated using a washer-tub cleaner containing surface acting agent, excessive bubbles may be formed, causing water to drain in the middle of operation.● Do not open the door and pour water or hot water. Water may not be saved and drained instead.● A small amount of water may be drained when the operation restarts. |
Troubleshooting (continued)
- Check the following items before requesting service.
In the case of abnormality, contact the sales dealer immediately where you have purchased the appliance.
| Symptoms Check the following. |
| Rinse/Spin | Rinsing water is not supplied. | ● If "Rinse" or "Rinse/Spin" is selected, the operation starts with water discharge if water remains in the drum, and starts with spin if there is no water in the drum, and then water is supplied. |
| During spin, the operation changes to "Rinse". | ● If clothes are unevenly distributed, this may be automatically corrected, returning to the "Rinse" cycle. |
| Spin is not performed during the "Spin" cycle. | ● The appliance detangles clothes for nice fi nish during the spin cycle.● When using the "Soak" or "ECONAVI (60 °C)" program for "Wash", the fan operation is performed in the middle of the spin cycle to remove moisture. This is not a malfunction. |
| Clothes are not wet after washing. | ● In the following operation, thin fi bres, etc. may be dried when they are taken out after washing.● When operating the "Soak" or "ECONAVI (60 °C)" program for "Wash" (Moisture is removed by fan operation) |
| Display | Washing time is longer than the displayed time. | ● If clothes are unevenly distributed, this is automatically corrected, leading to longer operation time. This tends to occur especially when the amount of clothes is too large or small.● Check the water drain hose and drain outlet. (P.45 "U11")● In the following cases, excessive bubbles may be formed, and the operation time may become longer to remove bubbles.● Using large amount of detergent● Using excessive foaming detergent● Light soil on clothes→Reduce the amount of detergent. |
| The total remaining time differs from the remaining time of each process. | ● The "Soak" and "ECONAVI (60 °C)" programs detangle clothes for a slightly longer time after the spin operation has fi nished. Because of this, the total remaining time display may differ from the remaining time for the spin cycle displayed in the display window when the "Spin" button is pressed. |
| Still operating although the remaining time shows "0". | ● After the drying operation has fi nished, the "Anti-crease" operation is performed (approx. 2 hours) to prevent creases. (P.11) |
| The detergent indication is incorrect. | ● If water is in the drum, the indication may not be correct.● If clothes in the laundry net or wet clothes are in the drum, the indication may not be correct due to balance of clothes.→Load the laundry again (after detangling the clothes), and perform operation again. |
| The detergent amount is not displayed. | ● For the "Bedding" and "Hand Wash" programs, the detergent amount is not displayed because it is fi xed. |
| Symptoms Check | the following. |
| Main unit / Dry filter | Button operation is ignored. | After start, pressing “Pause” can change the settings for “Wash”, “Rinse” and “Spin” until the end of the “Wash” cycle.To change the program after start or change the settings after “Rinse”, turn the power off and then back on.Button operation is not possible if the door is open. |
| The door cannot be opened. | Check the indicator in power “ON” state, and identify the cause illumination → The door is locked during operation.Indination + display ↓ Child Lock is set illumination + display → The door is locked if water temperature is high.Amination → The preset timer is being set.→ To cancel the door lock (P.7) |
| Disturbing odour | The appliance (rubber or resin) may smell after purchase for certain period. This smell will disappear as time passes using the appliance.Take out the clothes immediately after the operation has finished.Clean the back side of the window seal. (P.33)Wash the drum. (P.32) |
| The dry filter is wet. | It may be wet after operation due to moisture formed during the washing or drying operation. This is not a malfunction. Well dry. (Mould may form.) |
| The dry filter moves. | The dry filter may move when the door is closed swiftly or during operation. This is not a malfunction. |
| Water droplets are attached on the door, drum or window seal after the drying operation. | In the following cases, water droplets may be attached due to the structure of the door even if the clothes are dry. This is not a malfunction.The timer dry is used.Excessive clothes or many thick clothes are put in.The dry filter is clogged.The spin time is switched to shorter time.Wipe off water droplets. |
Troubleshooting (continued)
- Check the following items before requesting service.
In the case of abnormality, contact the sales dealer immediately where you have purchased the appliance.
| Symptoms Check the following. |
| Others | Power failureThe breaker has tripped.The floor or wall is wet. (due to condensation)Murky water | The operation is stopped. Turn the power "ON", and restart the operation.(Operation does not resume after the electricity is restored.)Provide adequate ventilation while drying. Moist wind from the exhaust outlet may cause condensation.After water supply is recovered from water cut-off, remove the water supply hose to release murky water from the faucet, and start washing.Warm the connection. water supply hose and drum.(1) Wrap the connection with a hot steamed towel. 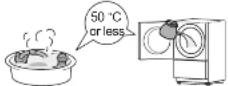 Remove the water supply hose and soak it in hot water. [3) Put 2 to 3 L of hot water into the drum. Remove the water supply hose and soak it in hot water. [3) Put 2 to 3 L of hot water into the drum. |
| The water supply hose is frozen. |
| Water pressure is low. | Clean the water supply filter.(4) Turn off the roof [5] Loosen the nut.[6] Remove the water supply filter.(7) Remove the lint on the water supply filter. [5] Loosen the nut.[6] Remove the water supply filter.(7) Remove the lint on the water supply filter. |
Error Messages
If the buzzer beeps and "U" and "number" are alternately displayed, check the following. By pressing "Start", the operation will resume (Except for U04, U17 and U18). ■ Depending on the displayed content of "U" and "Number", "Anti-crease" does not work. - If the problem persists, pull out the power plug and contact your dealer for service.

The dry filter is clogged.

- Turn the power "OFF" and clean the dry filter. (P.31, 39) If the clothes are not dry, perform the "Dry" operation.

Water cannot be drained.

- Check the water drain hose, drain filter and drain outlet.
- Do not allow the tip of the hose to face up.
- Do not raise a part of the hose higher than 1 m.
• The water drain base or drain outlet is clogged with lint
- It is frozen.
- It is crushed.
- Do not allow the tip to be soaked in water.
- Clean the drain filter if blocked. (P.30)
- Do not raise a part of the hose higher than 1 mm.
- The water drain hose or drain outlet is clogged with lint.
- It is frozen.
- It is crushed.
- Do not allow the tip to be soaked in water.
- Clean the drain filter if blocked. (P.30)

- If the door is not closed.
→Close the door.
→If the door is closed, close the door after once opening the door.
If the door does not open.
→Press the centre of the door firmly.

• Many large items (Towel shee
- Many clothes → Detangle the clothes.
• Not many clothes → Add one or two bath towels.

● The main unit is installed on an unstable location or inclined floor surface.
Check the water drain hose and drain outlet. (See the descriptions for "U11".)
You have adjusted the "Level of spin noise", and reduced the vibration and sound. (P.34)

- Check the water supply pathway.
• The water faucet is not turned on.
• The water supply filter is clogged with
• Water or water supply hose is frozen.

- You may have used much detergent, which formed excessive bubbles.
- Water is repeatedly supplied and drained to eliminate the bubble, resulting in longer operation time. (P.20)
• Bubble or water may overflow from the drain outlet or dry filter. (P.20)
- Next time, reduce the amount of detergent or try low suds detergent.
- Press the power button to turn off "U17" message.

- Set the drain filter correctly. (P.30)
The operation is restart when the drain filter is set correctly.
If "H" and "number" are alternately displayed, check the following.

Inspection is required.

- Check the displayed content (2-digit number after "H"), pull out the power plug, and contact your dealer.
Program Details
- Required operation time may become longer depending on the type of clothes and how the clothes are distributed.
| Program Operation | Capacity (or less) | Required time (approx.) | Auto setting Switching range | |
| Wash Rinse | Spin Dry | Wash Rinse | Spin Dry | | | | |
| Cotton | Wash 10 k | g | 34 min | 9 min 2 | | 5 min — | | 1 to 30 min | 1 to 4 | 1 to 15 min — | |
| Wash&Dry | 6 kg | 2 h 56 min to 6 h 40 min | 13 min | Auto — | 3 to 15 min | Auto Timer |
| Dry | 2 h to 5 h 40 min | — | — | — | — | — | |
| ECONAVI | Wash 10 k | g | 34 min | 8 to 9 min * | 2 | 5 min — | | 9 min(Not Changeable) | Not Changeable | Not Changeable | — |
| Wash&Dry | 6 kg | 2 h 55 min to 6 h 40 min | 13 min | Auto | Auto Timer |
| Cotton (30 °C) | Wash 10 k | g | 46 min | 13 min | 1 | 15 min | — | 1 to 30 min | 1 to 4 | 1 to 15 min — | |
| Wash&Dry | 6 kg | 2 h 59 min to 6 h 43 min | 15 min | Auto | 3 to 15 min | Auto Timer |
| Cotton (40 °C) | Wash | 4.5 kg | 1 h 13 min | 50 min | 2 | 5 min — | | Not Changeable | 1 to 4 | 1 to 15 min — | |
| Wash&Dry | 3 h 36 min to 5 h 54 min | 13 min | Auto | 3 to 15 min | Auto Timer |
| ECONAVI (40 °C) | Wash | 4.5 kg | 1 h 13 min | 30 to 50 min * | 2 | 5 min — | | 50 min(Not Changeable) | Not Changeable | Not Changeable | — |
| Wash&Dry | 3 h 21 min to 5 h 54 min | 13 min | Auto | Auto Timer |
| ECONAVI (60 °C) | Wash | 2 kg | 2 h 4 min | 60 to 80 min * | 2 | 5 min — | | 80 min(Not Changeable) | Not Changeable | Not Changeable | — |
| Wash&Dry | 4 h 3 min to 5 h 8 min | 13 min | Auto | Auto Timer |
| Hand Wash | Wash | 1.5 kg | 42 min | 13 min | 3 | 2 min | — | 1 to 20 min | 1 to 4 | 1 to 3 min | — |
| Intensive | Wash | 4.5 kg | 1 h 34 min | 63 min | 2 | 6 min — | | 63 min(Not Changeable) | 1 to 4 | 1 to 15 min — | |
| Wash&Dry | 3 h 53 min to 6 h 11 min | 13 min | Auto | 3 to 15 min | Auto Timer |
| Bedding | Wash | 3 kg | 1 h 27 min | 13 min | 3 | 3 min — | | 1 to 30 min | 1 to 4 | 1 to 15 min — | |
| Wash&Dry | 6 h | 11 min | Auto | 10 to 15 min | Auto |
| Dry | — | — | — | — | Timer | — | — | — | Timer |
| Soak | Wash | 2 kg | 7 h | 6 h | 3 | 5 min — | | 6 h(Not Changeable) | 1 to 4 | 1 to 15 min — | |
| Wash&Dry | 8 h 55 min to 9 h 50 min | 13 min | Auto | 3 to 15 min | Auto Timer |
| Tub Clean | Wash | — | 10 h 47 min | 10 h | 4 | 3 min | — | NoteFor "Wash&Dry", if the "Spin" time is set to 0 (light off) to 2 minutes. "Dry" cannot be selected. |
| Tub Clean (30 °C) | Wash | — | 5 h 47 min | 5 h | 4 | 3 min | — |
*1 The "Wash" time changes according to the laundry load or water temperature.
| “Preset Timer” setting range |
| Operation | Program | Setting range |
| Wash | Cotton/Cotton (30 °C)ECONAVI | After 1 to 24 h |
| Cotton (40 °C)ECONAVI (40 °C)Intensive Bedding | After 2 to 24 h |
| ECONAVI (60 °C) | After 3 to 24 h |
| Soak | After 8 to 24 h |
| Wash&Dry | ECONAVI (60 °C) | After 7 to 24 h |
| Cotton (40 °C)ECONAVI (40 °C)Intensive Bedding | After 8 to 24 h |
| Cotton/Cotton (30 °C)ECONAVI | After 9 to 24 h |
| Soak | After 12 to 24 h |
- You cannot make this setting for "Hand Wash", "Tub Clean", "Tub Clean (30 °C)".
Required time
- The required time for drying is for operation with the room temperature of 30 °C and humidity of 80%. Operation time may become longer depending on the room temperature and humidity. ● Displayed time for "Wash" and "Spin" in a program operation differs from the actual operation time.
- Required time includes time for water supply (standard water supply amount: 15 L per min.) and water discharge. It may become longer depending on the water pressure, water discharge condition, and amount and type of laundry.
- If program operation contents are changed, actual operation time will differ from the required time described.
Note
Installation
To servicing personnel
■ To achieve optimum performance of the appliance, read these installation instructions carefully and install the appliance properly and safely. ■ After installation, be sure to confirm normal operation based on Section 6 "Checking after installation". ■ The removed fixing bolts for transfer and the included spanner are necessary when transferring, etc. Give them to the customer. ■ Give these installation instructions to the customer after installation has finished. If the installation is not carried out following these installation instructions, Panasonic will not be liable for any accident or damage that may occur.
To customer
Please keep these installation instructions with "Operating Instructions" in a safe place in case of reinstallation due to drain cleaning or relocation even after the installation has finished.
■Be sure to have 2 people carry the appliance. ■Do not push the centre of the door with force (with knee, etc.) when tilting the appliance for installation.
(The door will deform.) Hold the proper part.
Product dimensions (unit: mm) Weight 74 kg * Be careful of the distance from the opened door to the wall.
1. Removing the fixing bolts for transfer and attach the cover

1. Remove the fixing bolts for transfer using the included spanner.
Remove the 2 fixing bolts for transfer that have fixed inside the appliance. If the appliance is used without removing the bolts, vibration may increase or the appliance may move, causing danger.
Fixing bolts for transfer (Main unit rear side)
2. Attach the included cover with the screw.
Insert the claw of the cover to the hole and fix with the screw. (2 locations)

! CAUTION
Be sure to attach the cover. (To avoid injury caused by the edge)
- When transporting the main unit, attach the bolts in the reverse procedure. Remaining water may spill from the inside the main unit. Carry the appliance with the drain hose propped up against the main unit.
Attention
- The removed fixing bolts for transfer and the included spanner are necessary when transferring, etc. Give them to the customer.
2. Attaching the bottom cover
1. Insert the bottom cover along the guides.
2. Fix with the screw. Remove the bottom cover screw fixed on the appliance, and use it.


Installation (continued)
3. Preparation before installation
4. Connect the hose
1. Check the installation location.
Avoid the following locations for installation:
- • Location where water may freeze in winter (washing cannot be done with frozen water).
• Location exposed to direct sunlight
- • Location where there is no window or ventilation fan
- • Uneven or unstable location (on blocks, timbers, bricks, table with wheels attached, etc.)
- • Slippery location such as tile
When installing in an enclosed area, keep the front open and secure gaps from walls and ceiling with the indicated dimensions or more.


WARNING


Do not splash water over the appliance. Do not install at a damp place or place which may be exposed to rain, water, etc. (To prevent electric shock or fire)

WARNING

The appliance must not be installed behind a lockable door, a sliding door or a door with a hinge on the opposite side to that of the appliance, in such a way that a full opening of the appliance door is restricted.
This will prevent children from being locked in the drum.
Attention
- Do not allow the opening of the bottom of the main unit to be blocked by carpet, etc.
- Do not allow lint, etc. to accumulate around the main unit. Do not allow the metal parts of the main unit to electrically make contact with metal board in the house, stainless steel board at the sink, etc.
2. Check the power supply.

WARNING

Use a dedicated socket rated at 10 A and AC 220 to 240 V.
(Using in combination with other appliances may cause fire due to heat generation.)
• This appliance incorporates a dryer, thus requires a socket rated 10 A or more.
Connect the hoses properly to prevent water leak. ■Maximum connection distance of hoses and power cord

Lengths shown are approximate.
Installation (continued)
Water tap adaptor and water supply hose
■ Mains water pressure and water flow
● Water pressure: 0.03-1.0 MPa
If the water pressure exceeds this value, attach a pressure reducing valve.
● Water flow from tap: 5 L/min. or more
■ Connecting the water supply hose
CAUTION
- Do NOT twist, squash, modify or cut the hose.
● Tighten the nut firmly.
1 Connect the water tap adaptor to the water faucet.
1 Turn part A to the left until approx. 4 mm of the thread becomes visible. 2 Loosen the 4 screws. 3 Connect to the faucet and tighten the screws. 4 Turn part A to the right and tighten securely. (To prevent water leakage)
2 Connect the water supply hose to the water tap adaptor.
Insert the hose into the adaptor while pushing down the lever, and hook the claw of the lever on the flange of the adaptor.

3 Connect the water supply hose to the water inlet.
Attach the end of the hose to the water inlet of the appliance and tighten the nut.

Drain hose
■Draining to a sink or wash basin
CAUTION
Secure the drain hose with an elbow so that it does not come off due to water pressure during drainage.

■Draining to a stand pipe

Draining to a drain outlet

Note
- Do not twist, pull out or bend the drain hose.
- Do not put the hose tip under water.
5. Levelling the appliance
Check the horizontal state.
Look at the leveller.

Horizontal
the tilt.
No adjustment needed.

Right side higher

Lower the right side or raise the left side.

Left side higher

Lower the left side or raise the right side.

Rear side higher

Raise the front side.

Front side higher

Lower the front side.
■How to check rattling
Push the diagonal corners alternately and confirm there is no rattling.
If the appliance rattles, adjust the height of the legs and check the leveller.

■How to adjust the tilt
(1) Turn to Loosen to loosen. (2) Raise or lower to adjust the tilt. (3) Turn to Tighten to fix.


Installation (continued)
6. Checking after installation
After installation, check the following items, and perform test run. Then, be sure to put your signature and explain to the customer that installation has completed.
Fixing bolts
Cause of vibration and abnormal sound
● 2 fixing bolts for transfer are removed, and covers are attached instead. (P.49)

Installer's signature
Power plug □
● The socket is singly connected to the power source.
(Rated at 10 A and AC 220 to 240 V)
Fixing bolts (2) Leveller
Do not remove the fastener of the drain hose. Doing so will prevent the drum from being filled with water, and washing is impossible.
Adjustable feet □
- The 2 adjustable feet are stable and securely tightened. (P.53)
- The 4 feet are properly attached and not deformed.
Installation place □
● The main unit is installed on the firm location and is not rattling. (P.53)
Water supply hose □
● The water supply hose is properly connected, and free from leaks. (P. 52)
Drain hose □
- The drain hose is properly connected, and water drains normally. (P. 52)
- The drain outlet is not clogged with foreign objects, etc.
Leveller □
● The bubble is inside the circle of the leveller, showing the appliance is horizontally installed. (P.53)
- With nothing inside the drum, check if "Water leak, abnormal sound and vibration are not present." and "Water is drained properly."
Test run method
Ensure that the fixing bolts for transfer have
been removed before test run!
(1) Fully open the water faucet, and close the door.
(2) While pressing and holding 📄, press
+ quickly. Then while 888
is being displayed, press
is lying
(3) While is being displayed, press
(4) Start operation. (Automatically finishes in approx. 3 minutes.)
(Note)
You cannot operate with rubber gloves on.
Check points
- No abnormal sound or vibration?
→Check if the appliance is installed horizontally.
- No water leak?
→Connect the hose correctly.
■ The following error messages appear when abnormality is detected.
U11 • The drain outlet is clogged.
U14 • The water supply hose is not connected or the water faucet is not turned on.
*1 After the error status is released, by pressing "Start", the test run will resume.
Attention
- Do not wipe the main unit with gritty cleanser, thinner, benzine, alcohol, kerosene, etc.
Note
- Before shipment, a water injection inspection is performed, which may cause the window to become foggy, or water droplets to remain inside the drum. This is not a malfunction.