TOR49 - Toaster Oven Emerson - Free user manual and instructions
Find the device manual for free TOR49 Emerson in PDF.


| Product Type | Toaster Oven |
| Brand | Emerson |
| Model | TOR49 |
| Dimensions (W x D x H) | Approx. 16 x 12 x 9 inches |
| Weight | Approx. 10 lbs |
| Power Supply | 120V, 60Hz, 1500W |
| Main Functions | Bake, Broil, Toast, Keep Warm |
| Temperature Range | 150°F to 450°F |
| Timer | 60-minute with auto shut-off |
| Interior Light | Yes |
| Rack Position | Multiple rack positions |
| Crumb Tray | Removable, dishwasher safe |
| Cleaning | Wipe exterior with damp cloth; interior with mild soap |
| Safety Features | Auto shut-off, cool-touch handle, overheat protection |
| Spare Parts | Replacement racks, crumb trays available via Emerson support |
| Warranty | 1-year limited warranty |
| Manual | Free PDF download available |
Frequently Asked Questions - TOR49 Emerson
User questions about TOR49 Emerson
0 question about this device. Answer the ones you know or ask your own.
Ask a new question about this device
Download the instructions for your Toaster Oven in PDF format for free! Find your manual TOR49 - Emerson and take your electronic device back in hand. On this page are published all the documents necessary for the use of your device. TOR49 by Emerson.
USER MANUAL TOR49 Emerson
Instructions For Use
Keep These Instructions
IMPORTANT SAFEGUARDS
When using electric appliances, basic safety precautions should always be observed, including the following:
- Read all instructions.
- Do not touch hot surfaces. Use handles or knobs.
- To protect against electrical shock do not immerse cord, plug or oven in water or other liquid.
- Close supervision is necessary when any appliance is used by or near children.
- Unplug from outlet when not in use and before cleaning. Allow to cool before cleaning appliance and putting on or taking off parts.
- Do not operate any appliance with a damaged cord or plug, or after the appliance malfunctions or is dropped or damaged in any manner. Call our toll-free customer service number for information on examination, repair or adjustment.
- The use of accessory attachments not recommended by the manufacturer may cause injuries.
- Do not use outdoors.
- Do not let cord hang over edge of table or counter, or touch hot surfaces, including the stove.
- Do not place on or near a hot gas or electric burner, or in a heated oven.
- When operating the oven, keep 2-4 inches of free space on all sides of the oven to allow for adequate air circulation.
-
Extreme caution must be used when moving an appliance containing hot oil or other hot liquids. Be sure to allow hot oil or liquids to cool before moving appliance.
-
To disconnect, turn any control to Off, then remove plug from wall outlet.
- Use extreme caution when removing baking pan or disposing of hot grease.
- Do not clean with metal scouring pads. Pieces can break off the pad and touch electrical parts, creating a risk of electrical shock.
- Oversize foods or metal utensils must not be inserted in a oven as they may create a fire or risk of electric shock.
- A fire may occur if the oven is covered by, touching or near flammable material, including curtains, draperies, walls, and the like, when in operation. Do not store any item on top of the appliance when in operation, or before the appliance cools down.
- Extreme caution should be exercised when using containers constructed of metal or glass.
- Do not store any materials, other than manufacturer-recommended accessories, in this oven.
- Do not place any of the following materials in the oven: paper, cardboard, plastic and the like.
- Do not cover crumb tray or any part of oven with metal foil. This will cause overheating of oven.
- To turn oven off, turn Timer to OFF position.
- Do not place eyes or face in close proximity with tempered safety glass door, in the event that the safety glass breaks.
- Do not use appliance for other than intended use.
- Please be sure this unit is plugged into a 15AMP Breaker.
SAVE THESE INSTRUCTIONS
HOUSEHOLD USE ONLY
IMPORTANT SAFEGUARDS
WARNING
Fire Hazard
- Do not use with oven cooking bags.
- Do not store any materials, other than recommended accessories, in this oven when not in use.
• Always allow at least one inch between food and heating element. - Do not cover or use near curtains, walls, cabinets, paper or plastic products, cloth towels, etc. Keep 2 to 4 inches away from wall or any objects on countertop.
- Close supervision is necessary when used by or near children.
• Always unplug toaster oven when not in use. - Regular cleaning reduces risk of fire hazard.
- If contents ignite, do not open oven door. Unplug oven and allow contents to stop burning and cool before opening door.
- Failure to follow these instructions can result in death or fire.
Shock Hazard
- Do not immerse this appliance in water or other liquid.
CONSUMER SAFETY INFORMATION:
This appliance is intended for household use only.
The length of the cord used on this appliance was selected to reduce the hazards of becoming tangled in, or tripping over a longer cord. If a longer cord is necessary an approved extension cord may be used. The electrical rating of the extension cord must be equal to or greater than the rating of the oven (AC120V, 60 Hz, 1000W). Care must be taken to arrange the extension cord so that it will not drape over the countertop or tabletop where it can be pulled on by children or accidentally tripped over. This appliance is equipped with a fully tempered safety glass door. The tempered glass is four times stronger than ordinary glass and more resistant to breakage. Tempered glass can break, however it breaks into pieces with no sharp edges. Care must be taken to avoid scratching door surface or nicking edges. If the door has a scratch or nick, call our toll-free customer service number. Always unplug your oven from the outlet when not in use.
LOCATION OF CONTROLS
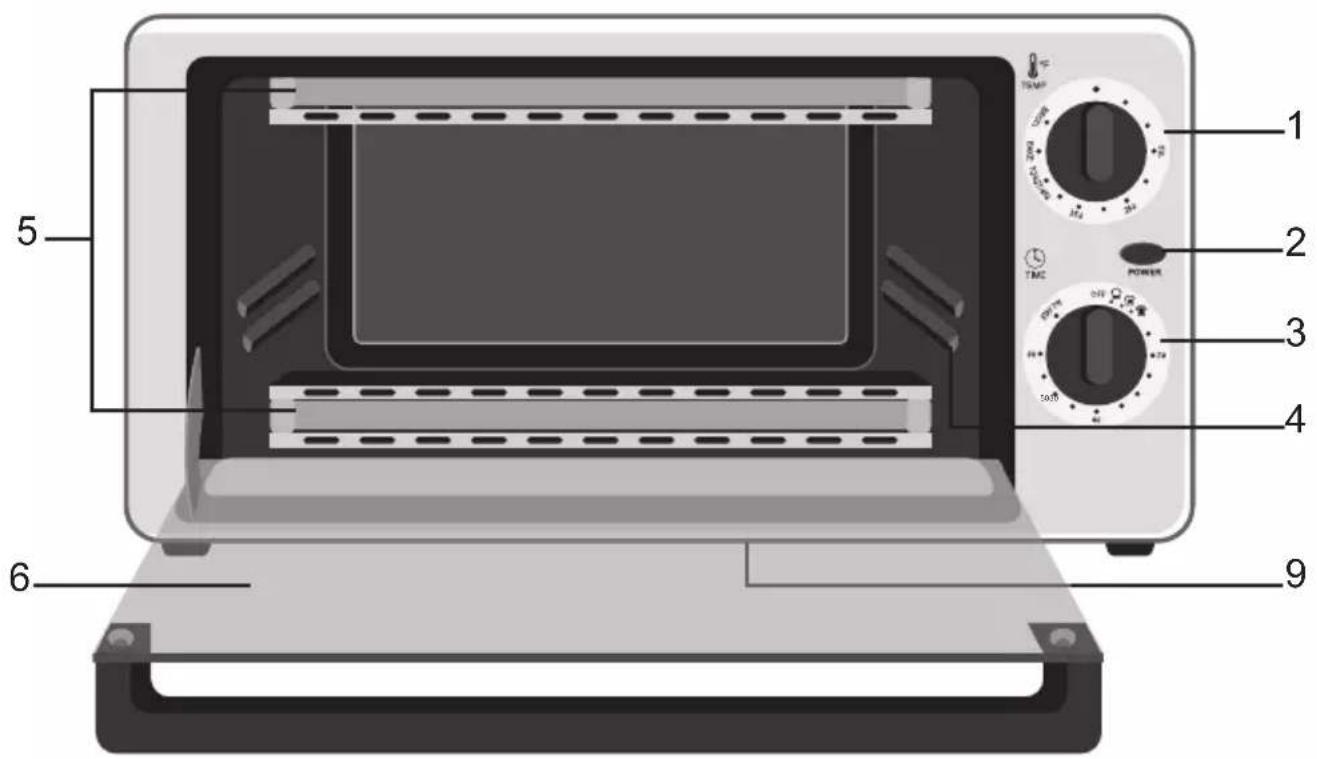
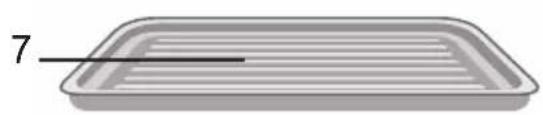
natural_image
Simple 3D illustration of a rectangular tray with slatted sides and a labeled number 7 (no text or symbols on the tray itself)
natural_image
Technical line drawing of a rectangular grid structure with internal divisions and a labeled section '8' (no text or symbols beyond the number)- Temperature Knob
- Indicator Light
- Timer Knob
- Rack Slot
-
Quartz Heating Elements
-
Glass Door
- Baking Pan
- Wire Rack
- Drop Down Crumb Tray
OPERATION
USING YOUR OVEN FOR THE FIRST TIME
Most heating appliances produce an odor and/or smoke when used for the first time.
Plug the oven into an outlet. Turn the Temperature Knob to 450^ F / TOAST. Heat at this temperature for 10 minutes. The odor should not be present after this initial preheating.
Wash all accessories before using.
AC CONNECTION
Unwind the AC cord and extend it to its full length.
Insert the AC plug into any convenient 120V 60Hz household outlet. Please note that this unit is equipped with a polarized AC plug which has one blade wider than the other. This is a safety feature to reduce the likelihood of electric shock. This polarized AC plug will only fit in a polarized AC outlet. If you find that you cannot insert this plug into your outlet, you may have an obsolete
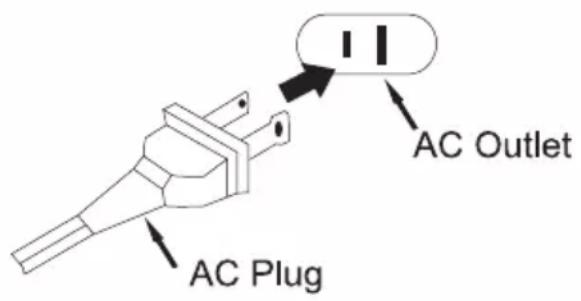
non-polarized outlet. Please do not try to defeat this safety feature by using a non-polarized adapter or by filing the wider blade to make it fit into your outlet. If this plug does not fit into your outlet, you should contact a qualified licensed electrician to replace your obsolete outlet.
NOTES:
- When in use, the oven will get hot. Always use oven mitt or pot holder when touching inner and other surface of the oven or removing the food from the oven.
- WHEN SETTING TIMER FOR 10 MINUTES OR LESS, TURN THE TIMER KNOB BEYOND THE 10 MINUTES MARK. THEN, TURN THE KNOB BACK TO THE DESIRED TIME.
OPERATION (CONTINUED)
TOASTING:
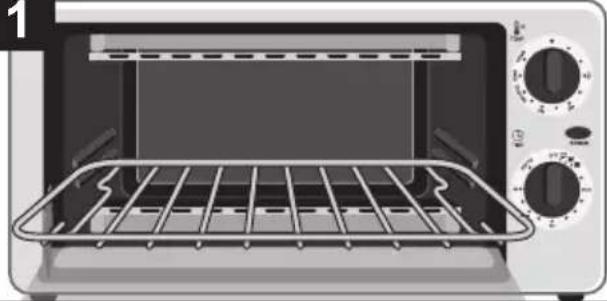
1
natural_image
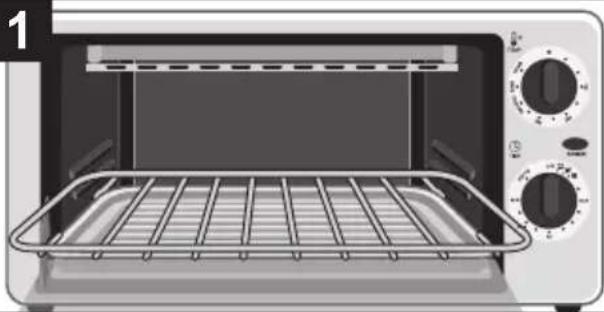
Illustration of a toaster oven with a rack and control knobs (no text or symbols)Open the oven door. Insert the Wire Rack into the slot. Place slices of bread or other food on the Wire Rack. Close the door.
2
natural_image
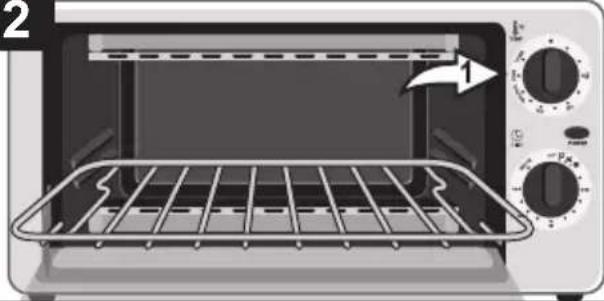
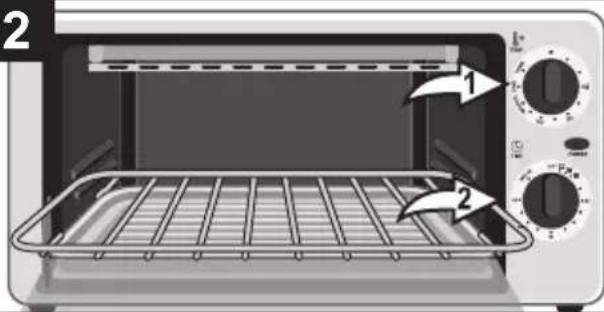
Interior view of a toaster oven with a rack and control knobs (no text or symbols visible)Rotate the TEMPERATURE knob ① to desired toasting temperature or the TOAST position which is set at 450°F.
natural_image
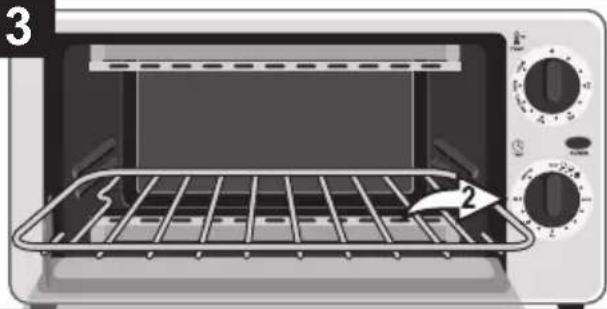
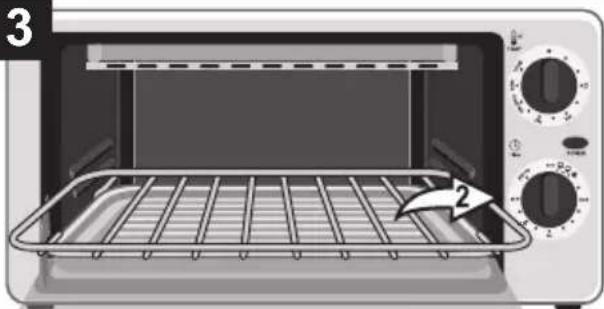
Interior view of a toaster oven with a grater rack and control knobs (no text or symbols visible)Set the TIMER knob ② to the desired toasting time. Please note that the toasting time is approximate (see below for suggested toasting times).
4
natural_image
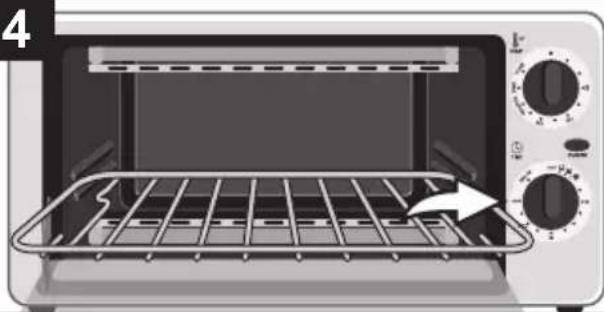
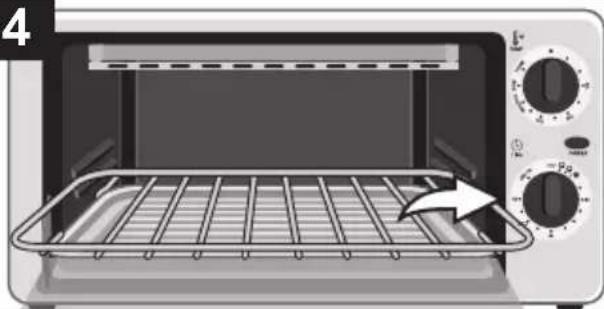
Interior view of a microwave oven with a rack and control knobs (no text or symbols visible)The oven is done toasting when the TIMER knob reaches OFF and a bell rings. You can also rotate the TIMER knob to OFF to stop toasting. Carefully remove the food using oven mitt or pot holder.
NOTES:
- It is not necessary to preheat the oven for toasting.
- The number of slices of bread, the bread freshness and the starting temperature of the oven will affect toast color. If the oven is already hot, select a lighter shade of toast than normal. Adjust the timer to achieve the desired color.
- In this cycle, both the upper and lower heating elements operate. The heating elements will cycle on and off to maintain even heat distribution.
- Do not place accessories or any other item on top of the oven as oven top will get hot.
- When toasting, do not leave food in for longer periods of time other than what is listed below. Toasting for longer than recommended times will burn food.
- WHEN SETTING TIMER FOR 10 MINUTES OR LESS, TURN THE TIMER KNOB BEYOND THE 10 MINUTES MARK. THEN, TURN THE KNOB BACK TO THE DESIRED TIME.
APPROXIMATE TOASTING TIMES (AT 450°F):
LIGHT: 3 - 4 Minutes
MEDIUM: 4 - 5.5 Minutes
DARK: 5.5 - 7 Minutes
OPERATION (CONTINUED)
BAKING:
natural_image
Interior view of a microwave oven with a rack and control knobs (no text or symbols visible)Open the oven door. There are two ways to cook you food.
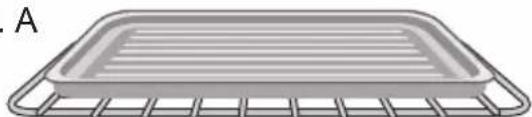
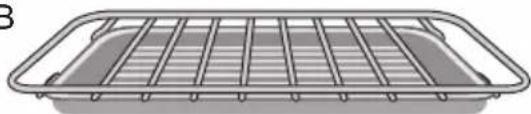
- Place the food in the Baking Pan and place the pan on top of the Wire Rack (below Fig. A).
- Place the food on the Wire Rack using the baking pan as a drip tray underneath the rack. Then insert the Wire Rack together with the Baking Pan into the slot (below Fig. B). Close the oven door.
2
Rotate the TEMPERATURE knob ① to desired baking temperature or the BAKE position which is set at 450°F.
natural_image
Interior view of a microwave oven with a rack and control knobs (no text or symbols visible)Rotate the TIMER knob 2 to the desired baking time or counter clockwise to the STAY ON position if you want to control cooking time or need to cook your food longer than 60 minutes.
4
natural_image
Interior view of a microwave oven with a rack and control knobs (no text or symbols visible)The oven is done cooking when the TIMER knob reaches OFF and a bell rings. You can also rotate the TIMER knob to OFF to stop cooking. If the STAY ON feature has been selected, the toaster oven must be shut off manually by turning the TIMER knob to the OFF position. Remove the Wire Rack and Baking Pan using oven mitt or pot holder.
NOTES:
- For the best result, always preheat the oven for 5 minutes at the desired temperature.
- In the BAKE position, only the lower heating element operates. When choosing a desired temperature, both the top and bottom heating elements operate.
- Do not place accessories or any other item on top of the oven as oven top will get hot.
- Use the BAKE setting when browning and crisping are not important.
• Position of Baking Pan:
Fig. A
natural_image
Illustration of a rectangular tray with slatted edges and a grid base, labeled 'A' in the top-left corner (no text or symbols on the tray itself)Fig. B
natural_image
Illustration of a rectangular container with internal grating and side supports (no text or symbols)OPERATION (CONTINUED)
BROILING
1
natural_image
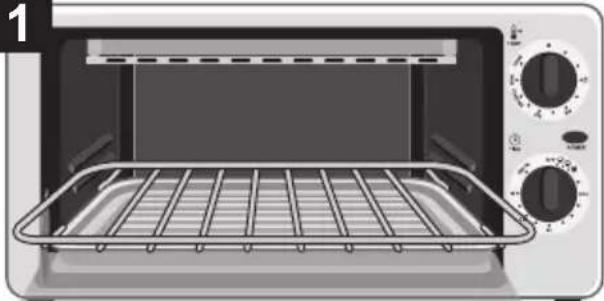
Interior view of a toaster oven with a rack and control knobs (no text or symbols visible)Open the oven door. Use the Baking Pan as a drip pan, insert it under the Wire Rack Place the Wire Rack together with Baking Pan into the slot.
2
natural_image
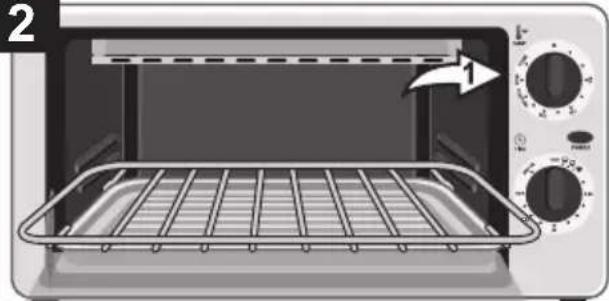
Interior view of a microwave oven with a tray and control knobs (no text or symbols visible)Rotate the TEMPERATURE knob ① to BROIL position. The oven does not need to be preheated for broiling.
natural_image
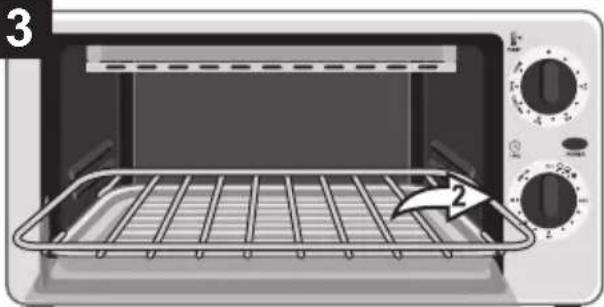
Interior view of a toaster oven with a rack and control knobs (no text or symbols visible)Place the food on the Wire Rack. Rotate the TIMER knob ② to the desired broiling time or counter clockwise to the STAY ON position if you want to control cooking time or need to cook your food longer than 60 minutes.
natural_image
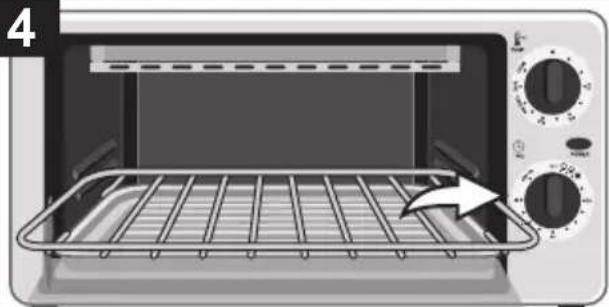
Interior view of a toaster oven with a rack and control knobs (no text or symbols visible)The oven is done broiling when the TIMER knob reaches OFF and a bell rings. You can also rotate the TIMER knob to OFF to stop broiling. If the STAY ON feature has been selected, the toaster oven must be shut off manually by turning the TIMER knob to the OFF position. Carefully remove the food using an oven mitt or pot holder.
NOTES:
• In this cycle, only the upper heating element operates.
- Do not place accessories or any other item on top of the oven as oven top will get hot.
- Use the BROIL setting when browning the top of food.
- Do not use Glass Pans when broiling, it is unsafe.
- For best results, do not preheat oven when broiling.
- Allow at least one inch between heating element and food.
TROUBLESHOOTING
The oven will not heat.
Check to make sure the AC cord is plugged in, the oven's TEMPERATURE knob is set to a temperature and the TIMER knob is set to desired time.
An odor and smoke comes from the oven.
Smoke and odor is normal during the first use and should not be present after the initial heating period.
Some foods burn and some are not done.
Use oven rack position to center food in the oven. Adjust oven temperature or cooking time for best results with your recipes.
CARE AND CLEANING
Always unplug the oven and allow it to cool before cleaning. This unit has been designed and engineered with your safety in mind. To assure maximum safe operation, keep unit clean, free of grease and free of build-up of food particles.
To clean the interior cavity of your oven use a damp cloth. Do not clean interior with metal scouring pads. Pieces can break off and touch electrical parts, creating risk of electrical shock.
To clean the glass door, use a glass cleaner or a damp cloth. Wipe dry with a clean cloth. To clean the exterior finish, use a damp, sudsy cloth. For stubborn stains, a non-abrasive liquid cleaner or spray glass cleaner may be used. Do not use metal scouring pads, as they might mar the finish. Always remove cleaning agents by polishing with a dry cloth.
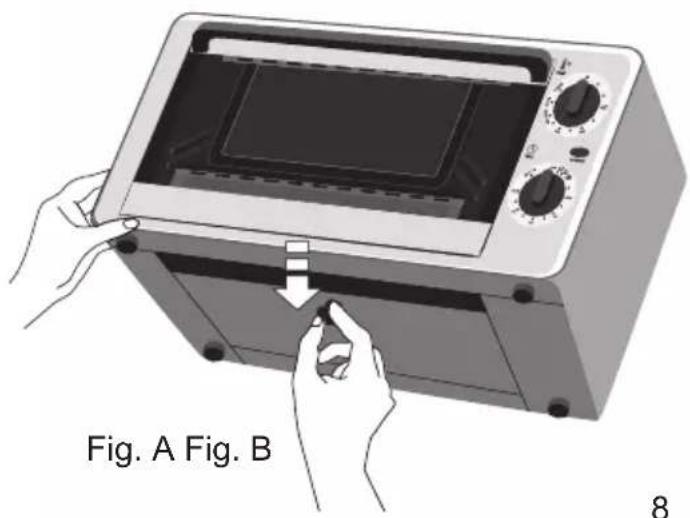
To clean the crumb tray, unplug the oven, tilt back the oven and push the knob located on the bottom of the oven toward the rear of the unit (Fig. A). The Crumb Tray will drop open and allow for cleaning. Brush off crumbs or wipe the crumb tray with a damp cloth (Fig. B). For stubborn stains, use a nylon or plastic sourcing pad or non-caustic cleaner. Dry thoroughly, close the crumb tray and check that it is locked securely into position.
natural_image
Illustration of hands operating a microwave oven with a handle, labeled Fig. A Fig. B (no text or symbols on the device itself)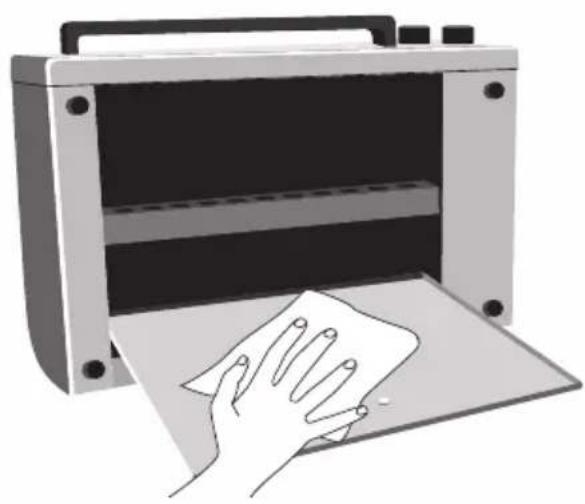
natural_image
Illustration of a hand cleaning a paper sheet inside a machine (no text or symbols)LIMITED WARRANTY
Emerson Radio Corp. warrants manufacturing defects in original material, including original parts and workmanship, under normal use and conditions, for a period of one year from the date of original purchase in the U.S. With your dated proof of purchase, we will provide repair service at no charge for labor and parts at an authorized Depot Repair Facility, or replace the product in our discretion. For repair or replacement, pack your unit in a padded box, enclose your check or money order payable to Emerson Radio Corp. in the amount of \$10.00 (not required by California residents) to cover shipping and handling costs, and enclose a copy of your proof of purchase. Send your unit to:
Emerson Returns Warehouse, 11500 Philadelphia Street, Mira Loma Ca. 91752
This warranty does not cover damage from negligence, misuse, abuse, accident, failure to follow operating instructions, commercial use, rental, repairs by an unauthorized facility, or products purchased, used, serviced or damaged outside of the United States.
THIS WARRANTY GIVES YOU SPECIFIC LEGAL RIGHTS, AND YOU MAY ALSO HAVE OTHER RIGHTS WHICH VARY FROM STATE TO STATE.
AU898N
The serial number can be found on the rear of the unit. We suggest that you record the serial number of your unit in the space below for future reference.
Model Number: TOR49
Serial Number:
Emerson™
SERVICE
FOR ADDITIONAL SET-UP OR OPERATING ASSISTANCE
PLEASE CALL:
1-800-898-9020 OR 1-800-695-0098
FOR CUSTOMER SERVICE, PLEASE E-MAIL TO:
internet@emersonradio.com
OR WRITE TO:
Emerson Radio Corp.,
Consumer Affairs Dept.,
9 Entin Road, P.O. Box 430,
Parsippany, New Jersey 07054-0430

- IMPORTANT SAFEGUARDS
- SAVE THESE INSTRUCTIONS
- HOUSEHOLD USE ONLY
- WARNING
- Fire Hazard
- Shock Hazard
- CONSUMER SAFETY INFORMATION:
- LOCATION OF CONTROLS
- OPERATION
- USING YOUR OVEN FOR THE FIRST TIME
- AC CONNECTION
- NOTES:
- OPERATION (CONTINUED)
- TOASTING:
- BAKING:
- BROILING
- TROUBLESHOOTING
- The oven will not heat.
- An odor and smoke comes from the oven.
- Some foods burn and some are not done.
- CARE AND CLEANING
- LIMITED WARRANTY
- Emerson™
- SERVICE
Brand : Emerson
Model : TOR49
Category : Toaster Oven