
Steamline Advance KI735 - Iron Kambrook - Free user manual and instructions
Find the device manual for free Steamline Advance KI735 Kambrook in PDF.


| Product Type | Steam Iron |
| Brand | Kambrook |
| Model | Steamline Advance KI735 (also compatible with KI785) |
| Power | 2400 W |
| Soleplate Material | FabriGlide |
| Water Tank Capacity | 360 ml |
| Cord Length | 3 m, with 360° cord outlet |
| Steam Control | Variable from MIN to MAX steam |
| Shot of Steam | Yes, for stubborn wrinkles |
| Vertical Steam Shot | Yes, for hanging garments and curtains |
| Fine Mist Spray | Yes |
| Anti-Drip System | Yes, prevents water leakage at low temperatures |
| Self-Clean Function | Yes, to remove scale impurities |
| Temperature Control | Variable from MIN (synthetic) to MAX (linen) |
| Safety Features | Thermal safety fuse; auto-off not available on KI735 (only on KI785) |
| Care and Cleaning | Self-clean function; clean soleplate with vinegar solution; wipe exterior with damp cloth |
| Spare Parts and Repairability | Contact Kambrook Customer Service or authorized service center |
| General Information | For household use only; do not use outdoors or in bathrooms |
Frequently Asked Questions - Steamline Advance KI735 Kambrook
User questions about Steamline Advance KI735 Kambrook
0 question about this device. Answer the ones you know or ask your own.
Ask a new question about this device
Download the instructions for your Iron in PDF format for free! Find your manual Steamline Advance KI735 - Kambrook and take your electronic device back in hand. On this page are published all the documents necessary for the use of your device. Steamline Advance KI735 by Kambrook.
USER MANUAL Steamline Advance KI735 Kambrook
Kambrook - Australia
Building 2, Port Air Industrial Estate
1A Hale Street
Botany NSW 2019 Australia
Customer Service Line
1300 139 798
Customer Service Fax
1800 621 337
www.kambrook.com.au
Kambrook - New Zealand
Private Bag 94411
Botany, Manukau Auckland
2163 New Zealand
Customer Service Line/Spare Parts
0800 273 845
Customer Service Fax
0800 288 513
www.kambrook.co.nz
KAMBROOK
THE SMARTER CHOICE
Due to continual improvement in design or otherwise, the product you purchase may differ slightly from the illustration in this book. Issue D14
KAMBROOK
THE SMARTER CHOICE
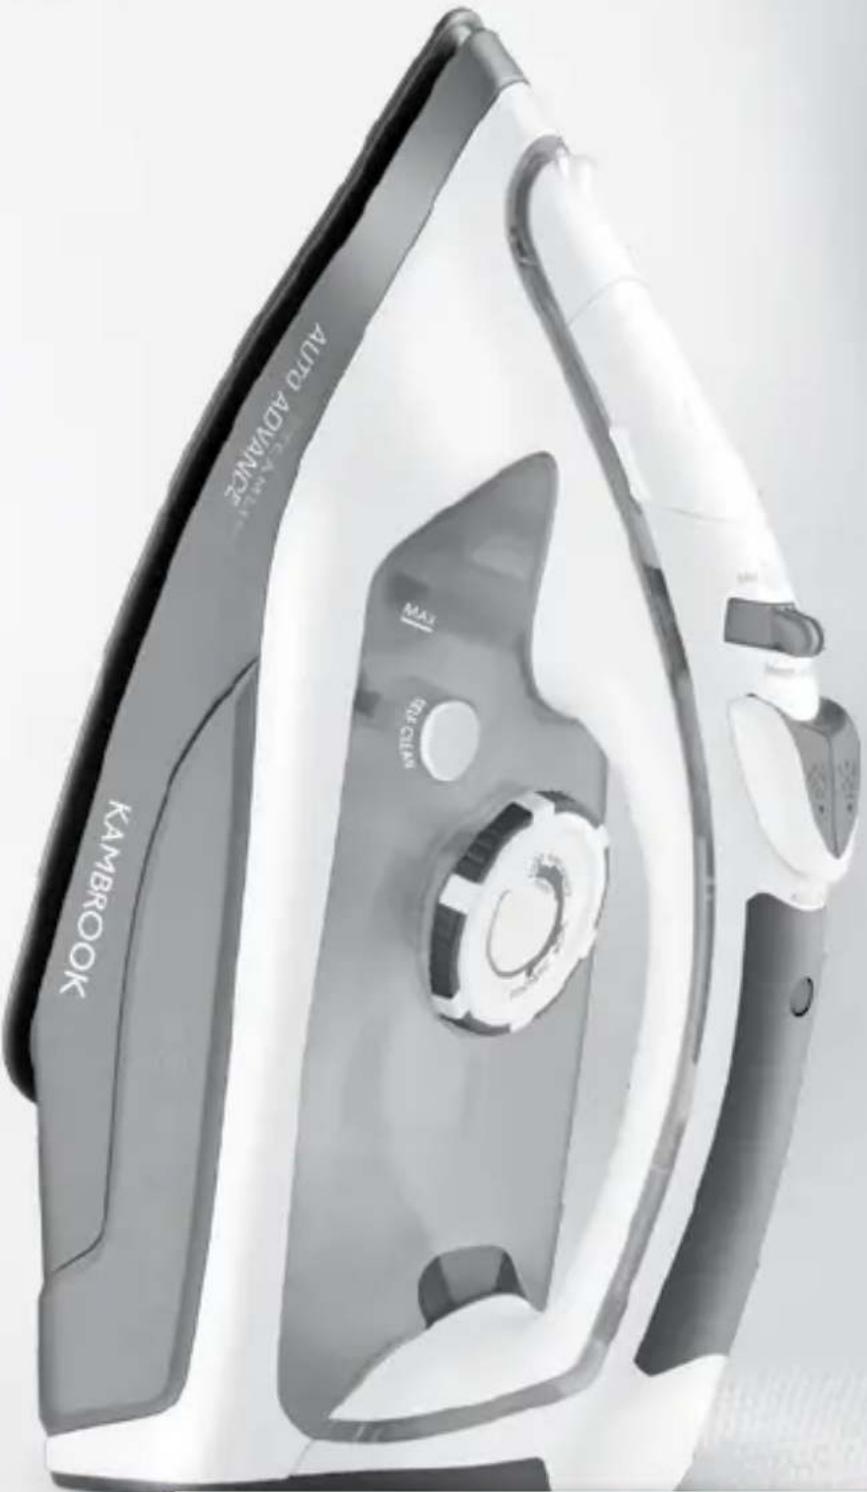
Steamline Advance Steam Iron
Suits KI735 and KI785 models
Instruction Booklet
As part of our commitment to the environment, and as members of the Australian Packaging Covenant, we have reduced the size of our instruction manuals on this product.
If you are finding it difficult to read this manual, you can download a PDF version from our website, www.kambrook.com.au
Important
Please retain your instruction book for future use.
In the event that you need some assistance with your Kambrook appliance, please contact our Customer Service Department on 1300 139 798 (Australia) or 0800 273845 (New Zealand). Alternatively, visit us on our website at www.kambrook.com.au or www.kambrook.co.nz
Contents
Kambrook Recommends p4
Safety First
Your Steamline Advance Steam Iron p7
Operating Instructions p8
Care and Cleaning p13
Kambrook Recommends Safety First
IMPORTANT: Please retain your instruction book for future use.
At Kambrook, we believe that safe performance is the first priority in any consumer product, so that you, our valued customer can confidently use and trust our products. We ask that any electrical appliance that you use be operated in a sensible fashion with due care and attention placed on the following important operating instructions.
Important Safeguards For Your Kambrook Steamline Advance Iron
- Carefully read all instructions before operating the iron for the first time and save for future reference.
- Remove and safely discard any packaging material and promotional labels before using the iron for the first time.
- To eliminate a choking hazard for young children, remove and safely discard the protective cover fitted to the power plug of this iron.
- When unpacking the iron, check to see you have received all the items listed in the parts list before discarding the packaging. • Always ensure the iron is properly assembled before use. Follow the instructions provided in this book.
- Do not touch hot surfaces. High temperatures are generated during use which could cause burns. Always use the handle and warn others (especially children) of the possible dangers of burns from steam, hot water or hot soleplate, especially when ironing vertically.
• Do not use outdoors or in bathrooms. - Always test the iron on a small, discreet part of the fabric to be ironed to ensure the temperature is not set too high. - Never use the vertical steam shot while clothes are on the body or direct the steam towards people. - Do not place the iron near the edge of a bench or table during operation. Ensure that the surface is level, clean and free of water and other substances. - Do not operate the iron on a sink drain board. - Safety auto-off is designed as a safety feature only. Irons should not be left switched on deliberately while unattended. If safety auto-off has activated and no further ironing is required, the iron should be switched off at the power outlet and unplugged. • Never iron with an empty water tank.
- Only push and hold the self-clean button when you want to activate the self-cleaning function. Do not push and hold whilst ironing. Boiling water and steam will drip from the holes on the soleplate during the cleaning process. Due caution and attention should be exercised.
- Do not allow the cord to touch hot surfaces.
- Do not leave the iron unattended when in use.
- If the iron is not used for an extended period, disconnect the iron from the power outlet.
- If the iron is set to a low temperature on the temperature control (i.e. synthetic or silk) and also on any of the steam control settings, there may be leakage from the soleplate. This is due to the iron temperature not being high enough to vaporise the water and create steam. Therefore, ensure that the steam control is always set to correspond with the setting on the temperature control as seen in Table A in section 'Setting the Temperature' on page 8.
- The iron must be used and rested on a stable surface.
- When placing the iron on its heel, ensure that the surface on which the heel is placed is stable.
- The iron is not to be used if it has been dropped, if there are visible signs of damage or if it is leaking.
• Always switch off at the power outlet then unplug the iron from the outlet:
- Before filling with water or emptying it.
- Before leaving it unattended.
- Before cleaning and maintenance, unless otherwise specified in this booklet.
- Immediately after use.
- The iron incorporates a thermal safety fuse to protect the iron from overheating. However, the iron should not be left unattended while it is connected to the power outlet. Special care should always be taken when there are children in the home or in the vicinity of the iron.
- Always turn the Variable Temperature Control to MIN, then switch off at the power outlet and then unplug the iron when not in use.
- Allow the iron to cool completely before storing in an upright position on its heel. Store the iron out of reach of children.
- Do not allow the iron to lay flat on the soleplate when stored, as water may seep through the steam holes if the tank is not empty.
- Always store the iron in the upright position on its heel. Do not leave the iron unattended while in use, connected, or on an ironing board.
- Do not store the iron with water in the water tank. Always empty the tank after use.
- Ensure the iron is cool before storing or wrapping the cord around the storage heel facility.
- To prevent damage to the iron, do not use alkaline cleaning agents when cleaning; use a soft cloth and mild detergent.
- Regularly inspect the cord, plug, and actual iron for any damage. If damage is found in any way, or the iron has been dropped, immediately cease use of the iron and return the entire iron to your nearest authorized Kambrook Service Centre for examination, replacement, or repair.
- Keep the iron clean. Follow the cleaning instructions provided in this book.
Important Safeguards For All Electrical Appliances
- Fully unwind the power cord before use.
- Connect only to a 230V or 240V power outlet.
- Do not let the power cord hang over the edge of a bench or table, touch hot surfaces, or become knotted.
- To protect against electric shock, do not immerse the power cord, power plug, or appliance in water or any other liquid, or allow moisture to come in contact with the part, unless it is recommended in the cleaning instructions.
- The appliance is not intended for use by persons (including children) with reduced physical, sensory, or mental capabilities, or lack of experience and knowledge, unless they have been given supervision or instruction concerning use of the appliance by a person responsible for their safety. Children should be supervised to ensure that they do not play with the appliance.
- It is recommended to regularly inspect the appliance. To avoid a hazard, do not use the appliance if the power cord, power plug, or appliance becomes damaged in any way. Return the entire appliance to the nearest authorized Kambrook Service Centre for examination and/or repair.
- Any maintenance other than cleaning should be performed at an authorized Kambrook Service Centre.
- This appliance is for household use only. Do not use this appliance for anything other than its intended use. Do not use in moving vehicles or boats. Do not use outdoors. Misuse may cause injury.
- The installation of a residual current device (safety switch) is recommended to provide additional safety protection when using electrical appliances. It is advisable that a safety switch with a rated residual operating current not exceeding 30mA be installed in the electrical circuit supplying the appliance. See your electrician for professional advice.
- Always turn the appliance to the OFF position, switch off at the power outlet, and unplug at the power outlet when the appliance is not in use.
- Before cleaning, always turn the appliance to the OFF position, switch off at the power outlet, unplug at the power outlet, and remove the power cord, if detachable, from the appliance and allow all parts to cool.
- Do not place this appliance on or near a heat source, such as a hot plate, oven, or heaters.
- Position the appliance at a minimum distance of 20cm away from walls, curtains, and other heat or steam sensitive materials, and provide adequate space above and on all sides for air circulation.
Your Kambrook Steamline Advance Iron
- Shot of steam button: For an extra burst of steam on thick fabric or tough creases.
- Fine mist spray button
- Steam control: Allows you to select how much or how little steam you require
- Water tank inlet: Large inlet for easy filling of water tank
- Fine Mist spray nozzle
- Self-clean function
- 360ml easy to fill water tank
- 2400W
- FabriGlide soleplate - For smooth gliding over all fabric types
- Temperature control: Selection of fabric temperatures from MIN (synthetic) to MAX (linen)
- 3 metre long cord with 360° cord outlet for better reach and more flexibility
- Collar tip: To easily reach in tricky areas i.e. pockets and buttons
- Power Indicator Light
- Auto-off Indicator Light
- Auto-Off protection (For KI785 model only): Automatically switches the iron off when it has been left unattended for a period of time. Vertical shot of steam: Removes creases and freshens hanging curtains and clothes. Ideal for delicate fabrics which require steam only. Anti-drip system: Stops water from dripping. Accessory: Water cup for filling the iron.

KI785 model shown
Operating Your Kambrook Iron
Before First Use
Remove any promotional material from the iron. Remove any sticker or protective cover from the soleplate.
When operating the iron for the first time, iron on an old piece of fabric to ensure that the soleplate and water tank are completely clean.
When the iron is used for the first time, some vapour may emit. After a short while however, this will cease. The vapour is due to the initial heating of the materials used in the iron. It is safe and will not harm the performance of the iron.

CAUTION: Never iron without water in the water tank. Water needs to be in the water tank even when ironing without steam.
NOTE: As an important part of our quality control process, your iron has been individually tested. As a result, you may notice a small amount of condensation or water droplets on the inside of the water tank. There is no need for concern.
Table A
NOTE  on label means: “This article cannot be ironed” (e.g. chlorofibre, acrylic, elastodiene) on label means: “This article cannot be ironed” (e.g. chlorofibre, acrylic, elastodiene) | |||
| Label Code Kind of Textile Temperature | Control | Variable Steam Control | |
| (see garment instruction) | (advised position) | ||
| [XTYS] | synthetic modacry polypropylene polyurethane acetate triacetate matalized cupro plyamide (nylon) polyester modal viscose (rayon) | MIN | MIN STEAM MAX STEAM |
 | silk | ||
| wool | |||
 | cotton | ||
| linen | |||
Setting the Temperature
Before commencing ironing, first sort the items to be ironed according to the International Textile Care Labelling Code or by the type of fabric. Iron fabrics that require the lowest temperatures first. Work through to the fabrics requiring higher temperatures. Both the Temperature Control and most items of laundry have markings corresponding with this code (see Table A).
Stand the iron on its heel and turn the Temperature Control to MIN.
Plug the power cord into a 230V or 240V power outlet and switch on. The Power Indicator light will illuminate.
Select the temperature setting required by rotating the Temperature Control so that the desired setting is aligned with the Temperature Indicator.
Wait for two to five minutes for the iron to reach the set temperature.
Note: For delicate materials such as synthetic or silk, rotate the Temperature Control between MIN and setting• and test temperature by ironing on a small discreet part of the fabric. Once the desired temperature is found between MIN and setting•, continue ironing on the rest of the delicate material.
Steam Ironing
When filling the iron with water, ensure that the iron is unplugged. Set the Steam Control to the MIN position and holding the iron at an angle use the water cup supplied to fill the water tank. Never exceed the maximum water level as indicated (MAX) on the side of the water tank.
Tap water can be used in your Kambrook iron unless it is particularly hard, in which case it is recommended that distilled or demineralised water be used.

Caution: Always test the iron on a small discreet part of the fabric to be ironed to ensure the temperature is not set too high.

Caution: The iron incorporates a thermal safety fuse to protect the iron from overheating. However the iron should not be left unattended while it is connected to the power outlet. Special care should always be taken when there are children in the home/vicinity of the iron.
To Operate the Steam Control
As per the indications on the Temperature Control and in Table A (See section 'Setting the Temperature' on page 8) steam ironing is only possible at higher ironing temperatures, indicated with Cotton/ Linen on the Temperature Control.
Stand the iron on its heel and turn the Temperature Control to MIN.
Plug the power into a 230V or 240V power outlet and switch the power on.
Set the Temperature Control to the required position within the steam range and wait for two to five minutes so that the iron reaches the set temperature.
Set the Steam Control (on top of the handle) to the required setting.
Your iron is now ready for use.
Operating Instructions continued...

CAUTION: If the iron is set to a low temperature on the temperature control (i.e. synthetic or silk) and also on any of the steam control settings, there may be leakage from the soleplate. This is due to the iron temperature not being high enough to vaporize the water and create steam. Therefore, ensure that the steam control is always set to correspond with the setting on the temperature control as seen in Table A (see section 'Setting the Temperature' page 8).
How To Use Shot Of Steam
The shot of steam provides an extra burst of steam which is ideal for the removal of stubborn creases or wrinkles. The shot of steam can be used when the steam selector is set to MIN or MAX.
Stand the iron on its heel and turn the Temperature Control to the hottest setting and wait for two to five minutes so that the iron reaches the set temperature and is ready for use. Ensure the Steam Control corresponds to the setting on the Temperature Control.
In the ironing position, lift the iron slightly above the surface of the fabric, press the Shot of Steam button down firmly and release it during ironing. An intense burst of steam penetrates deep into the fabric.
NOTE: For optimal steam quality, wait an interval of at least 4 seconds between presses of the Shot of Steam button.
Vertical Steam Shot
The Vertical Steam Shot allows you to use the iron for vertical applications. This is especially useful for getting wrinkles out of hanging garments, curtains, wall hangings etc.
Hold the iron vertically, in front, a slight distance from the item to be steamed and press the Shot of Steam button.

CAUTION: Never use the vertical steam shot while clothes are on the body or direct the steam towards people.
Ironing Without Steam
Ensure water is in the water tank.
Turn the steam selector to MIN position to shut off the steam flow.
Select the required setting on the Temperature Control dial for the fabric being ironed.
Stand the iron on its heel and wait for 2 to 5 minutes for the iron to reach the set temperature. The iron is now ready for use.

CAUTION: Never iron with an empty water tank. Water needs to be in the water tank, even when ironing without steam.
Using the Fine Mist Spray
The fine mist spray can be used to dampen difficult fabrics, dry areas, woollen items and accidental creases. Firmly press the spray button (located on the handle of the iron) to produce a fine spray of water ahead of the iron.
The spray can also be used with delicate fabrics (synthetic) which are ironed at low temperatures and therefore cannot be steam ironed.
Anti-Drip System
The iron is equipped with an Anti-Drip System. The iron will automatically close the steam valve when the soleplate temperature is too low to produce steam. It is safe and will not harm the performance of the iron.
This is the reason the fine mist spray should be used when ironing delicate fabrics at low temperatures.
The steam valve will open once the soleplate has reached the temperature required to create steam.
Safety Auto-Off (For KI785 model only)
The Safety Auto-Off feature is designed to automatically switch the iron off if left unattended.
When the iron is left in the upright position it will shut off in approximately 8 minutes, followed by six beeps (See Fig. 1).
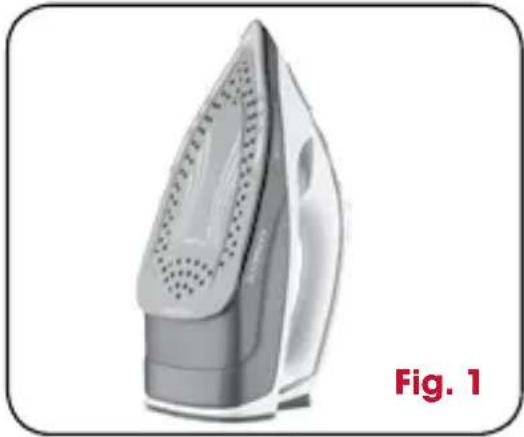
When left in the ironing position it will switch off in approximately 30 seconds, followed by six beeps (See Fig. 2).

When the iron has shut itself off, the Auto-Off light will blink to indicate that iron has switched off.
Simply move the iron to reactivate the iron. The Auto-Off light will no longer blink.
Operating Instructions continued...

CAUTION: Safety auto-off is designed as a safety feature only. Irons should not be left switched on deliberately while unattended. If safety auto-off has activated and no further ironing is required, the iron should be switched off at the power outlet and unplugged.
After Each Use
Set the steam selector to the MIN position and turn the Temperature Control to MIN.
Switch the power off at the power outlet and disconnect the power cord from the power outlet.
Stand the iron in an upright position and allow to cool.
Open the Water Tank Inlet and (over a sink or bucket) invert the iron to empty the remaining water from the tank.

CAUTION: Always turn the Temperature Control to MIN, switch off at the power outlet, and then unplug the appliance when not in use.
Care and Cleaning
To ensure your iron maintains optimum performance, it is recommended that it be cleaned using the Self-Clean function to remove scale or impurities.
- Set the Steam Control to the MIN position.
- Fill the water tank up to the maximum level (MAX) with the water cup supplied.
- Set the Temperature Control to MAX (Linen) setting.
- Place the iron in the upright position, insert the plug into the power outlet and switch the iron on.
- Allow the iron to heat for two to five minutes so that the iron reaches the set temperature.
- Switch the iron off at the power outlet and remove the plug.
- Hold the iron horizontally over the sink.
- Press and hold the Self-Clean button.
- Water will drip through the holes in the soleplate. Hold the iron until all water has dripped out of the water tank.
NOTE: Once you have used the Self-Clean function, it is normal for some water to remain in the water tank. This is due to the Anti-Drip System preventing the tank from being emptied completely. This will not affect the performance of the iron.
Repeat the Self-Clean process if the iron still contains a lot of impurities.

CAUTION: Do not store the iron with water in the water tank. Always empty the tank after use. Ensure the iron is cool before storing or wrapping the cord around the storage heel facility.

CAUTION: Safety auto-off is designed as a safety feature only. Irons should not be left switched on deliberately while unattended. If safety auto-off has activated and no further ironing is required, the iron should be switched off at the power outlet and unplugged.
Cleaning the Soleplate and Exterior
Ensure that the iron is disconnected from the power outlet.
To remove residue which may have built up from certain fabric finishes, clean the soleplate with a rough cloth that has been soaked in a vinegar and water solution. Dry thoroughly with a soft cloth.
To clean the steam holes, simply use a damp cloth to wipe away build-up of lint or starch from inside the steam holes.
Wipe the outer housing with a soft, damp clean cloth and polish with a dry cloth.
NOTE: Never use abrasives or scouring pads to clean the soleplate. Avoid hard contact with metal objects. Do not scratch or damage the surface of the soleplate. Do not use harsh or abrasive cleaners as they may damage the surface of the iron. Never immerse the iron in water or any other liquid.
Notes
Notes

- KAMBROOK
- STEAMLINE ADVANCE STEAM IRON
- IMPORTANT
- CONTENTS
- KAMBROOK RECOMMENDS SAFETY FIRST
- IMPORTANT: PLEASE RETAIN YOUR INSTRUCTION BOOK FOR FUTURE USE
- IMPORTANT SAFEGUARDS FOR YOUR KAMBROOK STEAMLINE ADVANCE IRON
- IMPORTANT SAFEGUARDS FOR ALL ELECTRICAL APPLIANCES
- YOUR KAMBROOK STEAMLINE ADVANCE IRON
- OPERATING YOUR KAMBROOK IRON
- BEFORE FIRST USE
- SETTING THE TEMPERATURE
- STEAM IRONING
- TO OPERATE THE STEAM CONTROL
- OPERATING INSTRUCTIONS CONTINUED
- HOW TO USE SHOT OF STEAM
- VERTICAL STEAM SHOT
- IRONING WITHOUT STEAM
- USING THE FINE MIST SPRAY
- ANTI-DRIP SYSTEM
- SAFETY AUTO-OFF (FOR KI785 MODEL ONLY)
- AFTER EACH USE
- CARE AND CLEANING
- CLEANING THE SOLEPLATE AND EXTERIOR
- NOTES
Brand : Kambrook
Model : Steamline Advance KI735
Category : Iron