
PRO-D6 - Dimmer Chauvet - Free user manual and instructions
Find the device manual for free PRO-D6 Chauvet in PDF.


| Product Type | Dimmer (gradateur) for lighting control |
| Brand | Chauvet |
| Model | PRO-D6 |
| Dimensions (L x W x H) | 19.3 x 5.5 x 3.9 in (491 x 140 x 98.5 mm) |
| Weight | 9.3 lb (4.2 kg) |
| Power Supply | Auto-ranging 100-240 VAC, 50/60 Hz |
| Maximum Load | 40 A total (20 A per line) |
| Max Output per Channel | 10 A |
| Circuit Breakers | Two 20 A resettable breakers (Line A & B) |
| Control Protocol | DMX-512 USITT |
| DMX Connectors | Locking 3-pin XLR (male in, female out) |
| DMX Addressing | Block (start address) or Single (per channel) |
| Control Functions | Preheat, Max Level, Curve (dimmer/relay), Manual output |
| Display | Red LED or blue LCD (depending on version) |
| Mounting | Any orientation, use safety cable, clamp sold separately |
| Ventilation Clearance | At least 20 in (50 cm) from adjacent surfaces |
| Max Ambient Temperature | 104°F (40°C) |
| Cleaning Frequency | External optics every 20 days, internal every 30-60 days |
| Cleaning Method | Mild glass cleaner or isopropyl alcohol with soft cloth |
| Spare Parts & Repairability | Contact authorized service center; RMA required for returns |
| Warranty | 2-year limited warranty |
| Included Accessories | 1 x Pro-D6, 1 x User Manual |
Frequently Asked Questions - PRO-D6 Chauvet
User questions about PRO-D6 Chauvet
0 question about this device. Answer the ones you know or ask your own.
Ask a new question about this device
Download the instructions for your Dimmer in PDF format for free! Find your manual PRO-D6 - Chauvet and take your electronic device back in hand. On this page are published all the documents necessary for the use of your device. PRO-D6 by Chauvet.
USER MANUAL PRO-D6 Chauvet
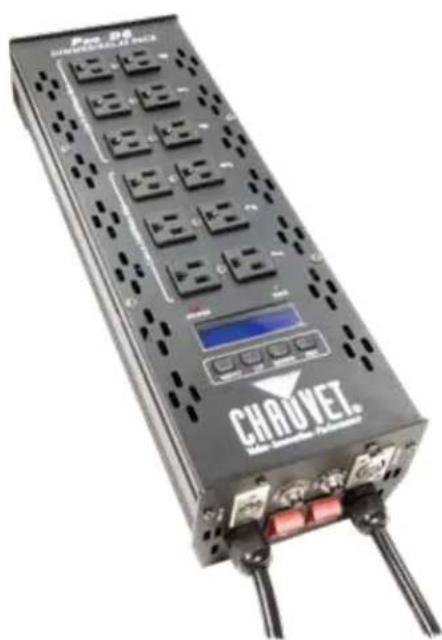
There are 2 different versions of this product. One version has a red LED display and the other has a blue LCD display.
CHAVET3
TABLE OF CONTENTS
1. BEFORE YOU BEGIN....3
WHAT IS INCLUDED....3
UNPACKING INSTRUCTIONS .... 3
CLAIMS 3
LIMITED WARRANTY 3
DISCLAIMER 3
TEXT CONVENTIONS....4
SYMBOLS 4
SAFETY INSTRUCTIONS 4
2. INTRODUCTION .... 5
PRODUCT OVERVIEW....5
3. SETUP .... 5
AC POWER....6
FIXTURE LINKING....6
Power connection 6
MOUNTING....7
Orientation 7
Rigging 7
4. OPERATING INSTRUCTIONS......8
CONTROL PANEL OPERATION....8
MENU FUNCTIONS....8
USER CONFIGURATIONS 8
To set the DMX address 8
5. APPENDIX 9
GENERAL MAINTENANCE....9
General Troubleshooting....9
RETURNS 10
TECHNICAL SPECIFICATIONS .... 11
CONTACT US 12
1. BEFORE YOU BEGIN
What is Included
• 1 x Pro-D6
- 1 x User Manual
Unpacking Instructions
Carefully unpack the product immediately and check the container to make sure all the parts are in the package and are in good condition.
Claims
If the box or the contents (the product and included accessories) appear damaged from shipping, or show signs of mishandling, notify the carrier immediately, not Chauvet. Failure to report damage to the carrier immediately may invalidate your claim. In addition, keep the box and contents for inspection.
For other issues, such as missing components or parts, damage not related to shipping, or concealed damage, file a claim with Chauvet within 7 days of delivery.
Limited Warranty
FOR WARRANTY REGISTRATION AND COMPLETE TERMS AND CONDITIONS PLEASE VISIT OUR WEBSITE.
For Customers in the United States and Mexico: www.chauvetlighting.com/warranty-registration
For Customers in the United Kingdom, Republic of Ireland, Belgium, the Netherlands, Luxembourg, France, and Germany: www.chauvetlighting.eu/warranty-registration/
Chauvet warrants that this product shall be free from defects in material and workmanship under normal use, for the period specified in and subject to the exclusions and limitations set forth in, the full limited warranty on our website. This warranty extends only to the original purchaser of the product and is not transferable. To exercise rights under this warranty, you must provide proof of purchase in the form of an original sales receipt from an authorized dealer that shows the product name and date of purchase. THERE ARE NO OTHER EXPRESS OR IMPLIED WARRANTIES. This warranty gives you specific legal rights. You may also have other rights that vary from state to state and country to country. This warranty is valid only in the United States, United Kingdom, Republic of Ireland, Belgium, the Netherlands, Luxembourg, France, Germany and Mexico. For warranty terms in other countries, please consult your local distributor.
Disclaimer
Chauvet believes that the information contained in this manual is accurate in all respects. However,
Chauvet assumes no responsibility and specifically disclaims any and all liability to any party for any loss, damage or disruption caused by any errors or omissions in this document, whether such errors or omissions result from negligence, accident or any other cause. Chauvet reserves the right to revise the content of this document without any obligation to notify any person or company of such revision, however, Chauvet has no obligation to make, and does not commit to make, any such revisions. Download the latest version from www.chauvetdj.com. The works of authorship contained in this manual, including, but not limited to, all design, text and images are owned by Chauvet.
© Copyright 2021 Chauvet & Sons, Inc. All rights reserved.
Electronically published by Chauvet in the United States of America. CHAUVET, the Chauvet logo, Intimidator Trio, and Intimidator Wash Zoom are registered trademarks or trademarks of Chauvet & Sons Inc. (d/b/a Chauvet and Chauvet Lighting) in the United States and other countries. Other company and product names and logos referred to herein may be trademarks of their respective companies.
Text Conventions
| Convention | Meaning |
| 1—512 | A range of values |
| 50/60 | A set of values of which only one can be chosen |
| Settings | A menu option not to be modified |
| Menu > Settings | A sequence of menu options to be followed |
| A key to be pressed on the product's control panel | |
| ON | A value to be entered or selected |
Symbols
| Symbol | Meaning |
 | Critical installation, configuration, or operation information. Not following these instructions may make the product not work, cause damage to the product, or cause harm to the operator. |
 | Important installation or configuration information. The product may not function correctly if this information is not used. |
 | Useful information. |
Safety Instructions
Please read the following Safety Notes carefully before working with the product. The Notes include important safety information about installation, usage, and maintenance.


• This product is intended for indoor use only!
• To prevent risk of fire or shock, do not expose fixture to rain or moisture. Make sure there are no flammable materials close to the unit while operating.
- The unit must be installed in a location with adequate ventilation, at least 20in (50cm) from adjacent surfaces. Be sure that no ventilation slots are blocked.
- Always disconnect from power source before servicing or replacing lamp or fuse and be sure to replace with same lamp source.
- Secure fixture to fastening device using a safety chain. Never carry the fixture solely by the cables. Use the carrying handles.
• Maximum ambient temperature (Ta) is 104° F ( 40° C). Do not operate fixture at temperatures higher than this.
- In the event of a serious operating problem, stop using the unit immediately. Never try to repair the unit by yourself. Repairs carried out by unskilled people can lead to damage or malfunction. Please contact the nearest authorized technical assistance center.
• Make sure the power cord is never crimped or damaged.
• Never disconnect the power cord by pulling or tugging on the cord.
- Please keep this User Guide for future consultation. If you sell the unit to another user, be sure that they also receive this instruction booklet.
- Never try to repair the product. Repairs carried out by unskilled people can lead to damage or malfunction. Please contact the nearest authorized technical assistance center.
2. INTRODUCTION
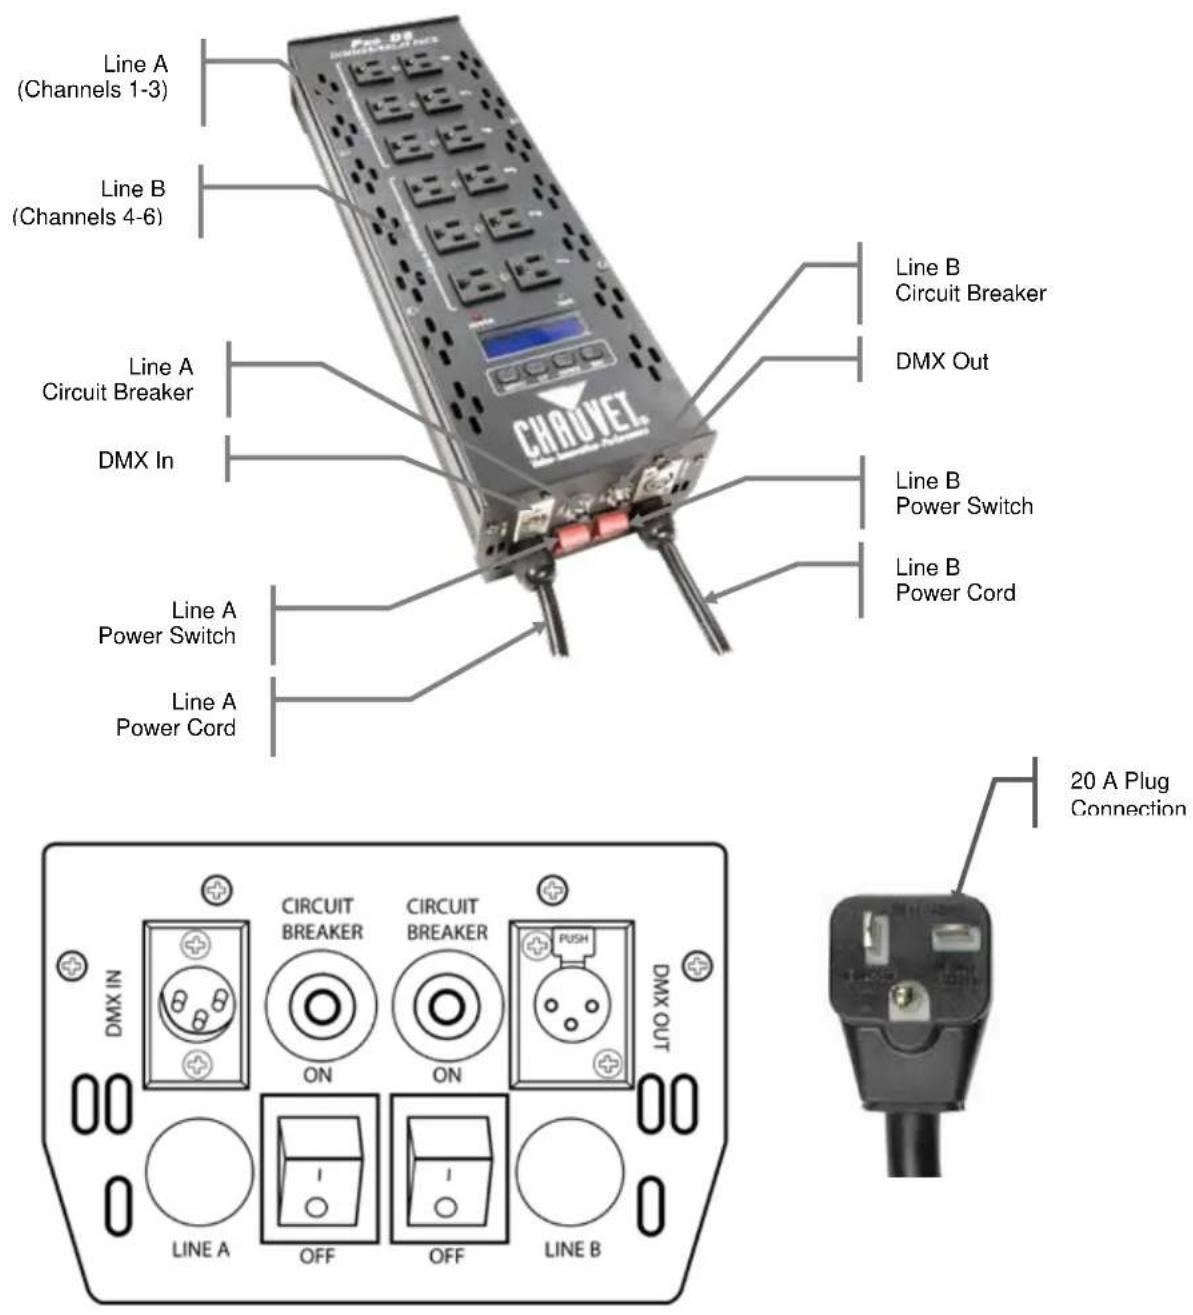
Product Overview
3. SETUP
AC Power
To determine the power requirements for a particular fixture, see the label affixed to the back plate of the fixture or refer to the fixture's specifications chart. A fixture's listed current rating is its average current draw under normal conditions. All fixtures must be powered directly off a switched circuit and cannot be run off a rheostat (variable resistor) or dimmer circuit, even if the rheostat or dimmer channel is used solely for a 0% to 100% switch. Before applying power to a fixture, check that the source voltage matches the fixture's requirement. Check the fixture or device carefully to make sure that if a voltage selection switch exists that it is set to the correct line voltage you will use.

All fixtures must be connected to circuits with a suitable Earth Ground. Input voltage equals output voltage. Line A must be used when only one line is needed in order for the unit to function properly.
Fixture Linking
You will need a serial data link to run light shows of one or more fixtures using a DMX-512 controller, or to run synchronized shows on two or more fixtures set to a master/slave operating mode. The combined number of channels required by all the fixtures on a serial data link determines the number of fixtures the data link can support.

Fixtures on a serial data link must be daisy chained in one single line. To comply with the EIA-485 standard no more than 32 devices should be connected on one data link. Connecting more than 32 fixtures on one serial data link without the use of a DMX optically isolated splitter may result in deterioration of the digital DMX signal.
Maximum recommended serial data link distance: 500 meters (1640 ft.)
Maximum recommended number of fixtures on a serial data link: 32
To link fixtures together you must obtain data cables. You can purchase CHAUVET certified DMX cables directly from a dealer/distributor or construct your own cable. If you choose to create your own cable please use data-grade cables that can carry a high quality signal and are less prone to electromagnetic interference.
Power connection
The Pro-D6 has been designed to work on multiple input voltages (100-240VAV 50/60Hz) simultaneously, and comes fitted with 20-amp connectors for this purpose. For example, Line A can be plugged into 120V and Line B can be plugged into 230V. Any voltage between 100-240 volts may be used.

The power for the Line A and the Line B circuits must share the same electrical phase. The unit will not operate properly if they are on different phases.
Mounting
Orientation
This fixture may be mounted in any position provided there is adequate room for ventilation.
Rigging
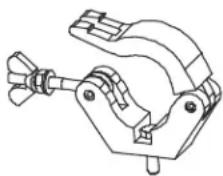
It is important never to obstruct the fan or vents pathway. Mount the fixture using, a suitable "C" or "O" type clamp. Adjust the angle of the fixture by loosening both knobs and tilting the fixture. After finding the desired position, retighten both knobs.
- When selecting installation location, take into consideration lamp replacement access and routine maintenance.
• Safety cables must always be used. - Never mount in places where the fixture will be exposed to rain, high humidity, extreme temperature changes or restricted ventilation.
Hanging Clamp
Note!
Clamp is sold separately.
4. OPERATING INSTRUCTIONS
Control Panel Operation
Access control panel functions using the four panel buttons located directly underneath the LCD Display.
| Button | Function |
| Press to find an operation mode or to back out of the current menu option | |
| Press to scroll up the list of options or to find a higher value | |
| Press to scroll down the list of options or to find a lower value | |
| Press to activate a menu option or a selected value |
The Control Panel LCD Display shows the menu items you select from the menu map. When a menu function is selected, the display will show immediately the first available option for the selected menu function. To select a menu item, press
- TABLE OF CONTENTS
- BEFORE YOU BEGIN....3
- INTRODUCTION .... 5
- SETUP .... 5
- OPERATING INSTRUCTIONS......8
- APPENDIX 9
- TECHNICAL SPECIFICATIONS .... 11
- BEFORE YOU BEGIN
- WHAT IS INCLUDED
- UNPACKING INSTRUCTIONS
- CLAIMS
- LIMITED WARRANTY
- DISCLAIMER
- SAFETY INSTRUCTIONS
- INTRODUCTION
- PRODUCT OVERVIEW
- SETUP
- AC POWER
- FIXTURE LINKING
- POWER CONNECTION
- MOUNTING
- ORIENTATION
- RIGGING
- OPERATING INSTRUCTIONS
- CONTROL PANEL OPERATION
- USER CONFIGURATIONS
- TO SET THE DMX ADDRESS
- APPENDIX
- GENERAL MAINTENANCE
- RETURNS
- TECHNICAL SPECIFICATIONS
- WEIGHT & DIMENSIONS
- POWER
- THERMAL
- CONTROL & PROGRAMMING
- ORDERING INFORMATION
- WARRANTY INFORMATION
Brand : Chauvet
Model : PRO-D6
Category : Dimmer