Brilliant Nexus Home Ultimate 21465 - Home Automation

Nexus Home Ultimate 21465 - Home Automation Brilliant - Free user manual and instructions

Find the device manual for free Nexus Home Ultimate 21465 Brilliant in PDF.

📄 157 pages English EN Download 💬 AI Question 10 questions ⚙️ Specs
Notice Brilliant Nexus Home Ultimate 21465 - page 8
Pick your language and provide your email: we'll send you a specifically translated version.
Product TypeHome Automation Hub
ModelNexus Home Ultimate 21465
BrandBrilliant
Dimensions140 x 140 x 20.5 mm
Input Voltage100-240V AC, 50/60Hz
Output5V DC, 1.2A
Wireless ProtocolsWi-Fi (2.4GHz), Bluetooth Low Energy (BLE), Zigbee, Infrared (IR)
IR RangeUp to 10 meters
Operating Temperature0°C to 40°C
Compatible DevicesOver 110+ devices including Yale Lock, Sengled Lights, Cree Bulb, Philips Light, LIFX, and IR devices
Voice Assistant IntegrationAmazon Alexa and Google Assistant
App ControlNexus Home App (iOS and Android)
Security ModesARM, DISARM, IN-HOUSE
Actions SupportedQuick actions, sequence actions, time/location/device triggers
Status LED IndicatorsSolid Red (ready to configure), Blinking Red (no access point), Blinking Blue (connecting), Solid Blue (fully functional)
Reset ButtonPress and hold for 8 seconds to factory reset
What's in the BoxHome Ultimate Hub, Power Adapter, USB Cable, Mounting Plate, Screws
WarrantyHardware Limited Warranty (see manual for details)

Frequently Asked Questions - Nexus Home Ultimate 21465 Brilliant

How do I set up the Nexus Home Ultimate?
Download the Nexus Home App from the App Store or Google Play. Create an account, power up the hub (LED should be solid red), and follow the in-app instructions to connect via Bluetooth or Wi-Fi. Ensure your phone and hub are within 5 meters of the router.
Which Wi-Fi networks are supported?
The hub supports 2.4GHz Wi-Fi networks with WPA/WPA2 security. 5GHz and WEP are not supported.
How can I control devices with voice?
Link your hub to the Brilliant Nexus skill in Amazon Alexa or Google Home app. Then use commands like 'Alexa, turn on the AC' or 'Hey Google, turn off the lights'.
What types of devices are compatible?
The hub supports Zigbee (e.g., Yale Lock, Sengled Lights), BLE (e.g., Microbot Push, Linkey Lock), Wi-Fi (e.g., Brilliant devices, Philips Light), and IR (most remote-controlled devices). It works with over 110+ brands.
How do I add devices to the hub?
In the Nexus Home App, go to Devices, tap '+ Add Device', and select the device type (e.g., Air Conditioner, Light, etc.). Follow the pairing instructions for that specific device, which may involve pressing buttons or scanning.
Can I use the hub as a universal remote?
Yes. The hub has built-in IR blasters to control IR devices like TVs and ACs. You can also create custom remotes by pairing keys from your existing remote controls.
How do I set up security modes?
Go to the Security tab in the app. You can enable ARM (all sensors active), DISARM (all sensors off), or IN-HOUSE (select sensors active). You can set time delays and choose which devices trigger alarms.
What do the LED colors mean?
Solid Red: Ready to configure. Blinking Red: Cannot connect to access point. Blinking Blue: Trying to connect to access point without internet. Solid Blue: Connected and fully functional.
How do I reset the hub?
To reset the hub, go to App Settings > Hub Settings > Reset Hub. You will need your account password and a temporary password sent to your email. Alternatively, press and hold the reset button on the hub for 8 seconds.
Can I share devices with family members?
Yes. In the app, go to Settings > Manage Users > Add User. Enter their email and assign privileges (view, control, or full access) for devices, actions, rooms, and security.

User questions about Nexus Home Ultimate 21465 Brilliant

0 question about this device. Answer the ones you know or ask your own.

Ask a new question about this device

The email remains private: it is only used to notify you if someone responds to your question.

No questions yet. Be the first to ask one.

Download the instructions for your Home Automation in PDF format for free! Find your manual Nexus Home Ultimate 21465 - Brilliant and take your electronic device back in hand. On this page are published all the documents necessary for the use of your device. Nexus Home Ultimate 21465 by Brilliant.

USER MANUAL Nexus Home Ultimate 21465 Brilliant

nexus

White rectangular electronic device labeled 'nexus' with no visible text or symbols on its body

Nexus Home Ultimate

Model: 21465

Table of Contents

  1. Important Safety Information...... 4
  2. What is Nexus Home Ultimate?...... 5
  3. Features of Nexus Home Ultimate.... 5
  4. Technical Specifications of Nexus Home Ultimate....6
  5. What's in the box? 7
  6. Know your Home Ultimate....7
  7. Hardware Installation Instructions....8
  8. Status Indicators on Nexus Home Ultimate....9
  9. Nexus Home Ultimate App.... 10
  10. Setting Up Nexus Home Ultimate....11

10.1 Sign Up.... 11
10.2 Nexus Home Ultimate setup.... 14

10.2.1 Home Ultimate setup using Bluetooth.... 14
10.2.2 Home Ultimate setup using Wi-Fi.... 19

  1. App Guide....24

11.1 Dashboard....24
11.2 Devices.... 26

11.2.1 Rooms.... 26
11.2.2 Addition of Brilliant Devices.... 34
11.2.3 Internal Screens of the Devices....38
11.2.4 Adding IR based Devices.... 43
11.2.5 Create My Own IR Remote 47
11.2.6 Adding Home Lite as an Extender using Bluetooth...... 57
11.2.7 Adding Home Lite as an Extender using Wi-Fi...... 62
11.2.8 Extender Settings 67
11.2.9 Addition of IR Devices to Extender 69
11.2.10 Deletion of Extender 72
11.2.11 Addition of BLE Devices 74
11.2.12 Addition of Zigbee Devices 79
11.2.13 Deletion of Device : Option 1 89
11.2.14 Deletion of Devices : Option 2 91

11.3 Security 93
11.4 Actions.... 98

11.4.1 Sequence Action 99
11.4.2 Quick Action 10
11.4.3 Time based Trigger Action 111

11.4.4 Location based Trigger Action.... 116
11.4.5 Device based Trigger Action 120

11.5 Managing Favourites 124

11.6 Settings in Home Ultimate 126

11.6.1 Hub Settings 127
11.6.2 Change Access Point 127
11.6.3 Change Location 130
11.6.4 Reset Zigbee Radio 131
11.6.5 Reset BLE Radio 133
11.6.6 Reset Actions 134
11.6.7 Update Hub Firmware 135
11.6.8 Check for Home Updates 137
11.6.9 Reset Hub 138
11.6.10 Account Settings 140
11.6.11 Manage Users 141

12 Voice Assistants 145

12.1 How to link Google Home to Home Ultimate 146
12.2 How to link Amazon Alexa to Home Ultimate 151

13 Compliance Certifications 156
14 Hardware Limited Warranty 157

1. Important Safety Information

Before using Nexus Home Ultimate, please read the following information to avoid any potential dangers:

i. Disconnect the device from the power supply before cleaning. Clean device with a damp cloth, do not use detergents under any circumstances.

ii. Do NOT place the device near heat sources such as ovens, microwaves, hot pans and geysers

iii. Keep out of reach of children.

iv. You should not open the device under any circumstances. This must only be carried out by a qualified engineer.

v. Do NOT touch the device with wet hands due to risk of electric shock.

2. What is Nexus Home Ultimate?

Nexus Home Ultimate is a revolutionary automation device that will make your home and life smarter than ever before. This device enables you to have complete control over your Zigbee supported devices (Yale Lock, Sengled Lights, Cree Bulb, Zigbee Motion & Door Sensors), Bluetooth supported devices(Microbot Push, Tracker, Linkey Lock), Wi-Fi supported devices (Brilliant Wi-Fi Devices, Philips Light, LIFX light) and IR enabled devices at home or business.

3. Features of Nexus Home Ultimate

- Nexus Home Ultimate allows you to combine and control all your Infrared remotes, Zigbee supported devices (Yale Lock, Sengled Lights, Cree Bulb, Zigbee Motion & Door Sensors), BLE supported devices (Microbot Push, Tracker, Linkey Lock) & Wi-Fi supported devices (Brilliant Wi-Fi Devices, Philips Light, LIFX light) into one Hub to use mobile application acting as a universal remote.

- Using Nexus Home Voice Act smart home skills for Google Home and Alexa, you can automate complex tasks with simple voice commands. For example, say 'Alexa, turn on the AC' to power ON your AC.

- Schedule your activities as per your convenience on a daily basis through the Nexus Home app, making your life simpler and smarter. For Example, 'Turn off AC at 11pm.'

- Control your "Nexus Home" supported devices from anywhere in the world using your smartphone.

- Works with over 110+ devices and is compatible with remotes of most brands

4. Technical Specifications of Home Ultimate

Input 100 ~ 240V, 50/60Hz, 0.25A Max
Output 5V DC, 1.2A
Protocols Supported WiFi (2.4 GHz), BLE, Zigbee and IR (Infrared)
Range Upto 10 metres
Operating Temperature 0° C to 40° C
Dimensions140 x 140 x 20.5 mm
Amazon Alexa IntegrationYes
Google Assistant IntegrationYes

5. What's in the box?

Line drawing of a rectangular electronic device with ports and an antenna (no text or symbols)

  1. Home Ultimate Hub

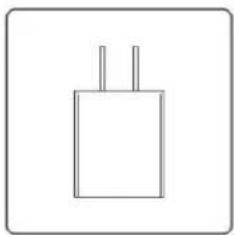
Simple line drawing of a rectangular object with two vertical lines on top (no text or symbols)

  1. Adapter

Line drawing of a USB cable with two connectors (no text or symbols)

  1. USB Cable

Simple line drawing of a symmetrical shape with two rectangular cutouts and small circular elements inside (no text or symbols)

  1. Mounting Plate

Three identical simple circular symbols with '×' marks, arranged horizontally within a rounded square frame (no text or labels)

  1. Screws

6. Know your Home Ultimate

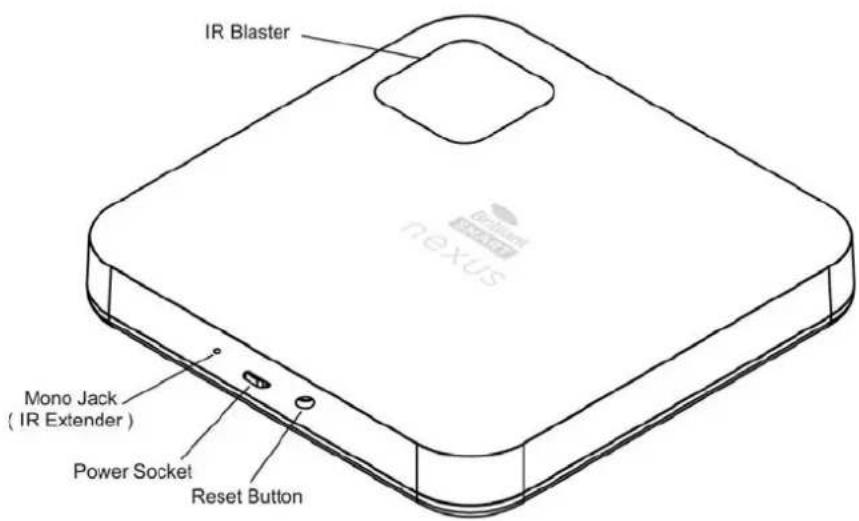
IR Blaster Mono Jack ( IR Extender ) Power Socket Reset Button

7. Hardware Installation Instructions

Line drawing of a device connected to a wall-mounted power outlet (no text or symbols)

Connect one end of the micro USB cable to the micro USB port on the Home Ultimate and the other end to the power adapter, and plug the power adapter into the electrical outlet.

8. Status Indicators on Nexus Home Ultimate

nexus

Solid Red Ready to connect/configure and not added to any account
Blinking Red Unable to connect to the Access point of Hub, i.e. Access point is not available
Blinking Blue Hub is trying to connect to it's Access Point and Hub Access Point is not having internet
Solid Blue Added to account and it's fully functional (Hub is connected to Access Point)

9. Nexus Home App

Nexus Home App lets you manage your home or business from anywhere, anytime. Manage your devices from anywhere in the world with one simple Nexus Home App.

You can download the Nexus Home App from the Play Store or App Store:

Play Store Url:

https://play.google.com/store/apps/details?id=com.brilliantlighting.nexus

Brilliant Nexus Home Ultimate 21465 - Nexus Home App - 1
App Store Url:

https://apps.apple.com/us/app/nexus-home/id1500221391

Brilliant Nexus Home Ultimate 21465 - Nexus Home App - 2

Nexus Home App allows you to do the following:

1.) Remote Control: Control Home appliances from anywhere.
2.) Simultaneously Control: Control multiple devices with one App.
3.) Timer: Set timer to perform multiple functions.
4.) Device Sharing: One tap to share devices among family members.
5.) Easy Connection: Easily and quickly connect App to devices.
6.) Universal IR Remote Control: Inbuilt universal remote control with its on board IR blasters and is capable to work with different devices at Home. Lets your IR legacy devices work with new smart devices.

10. Setting Up Nexus Home Ultimate

10.1 Sign Up
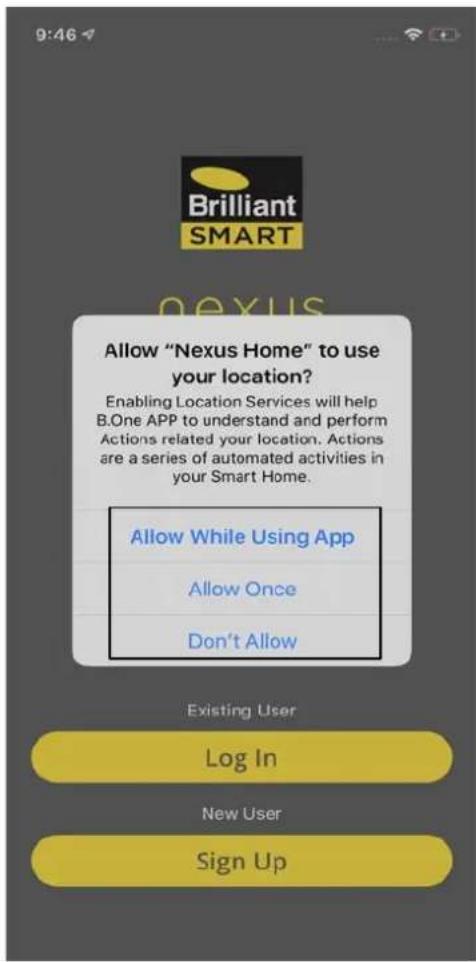
9:46 Brilliant SMART Allow "Nexus Home" to use your location? Enabling Location Services will help B.One APP to understand and perform Actions related your location. Actions are a series of automated activities in your Smart Home. Allow While Using App Allow Once Don't Allow Existing User Log In New…

After downloading the Nexus Home App, allow Nexus Home to use your Location to use some critical features.

"Nexus Home" Would Like to Send You Notifications Notifications may include alerts, sounds and icon badges. These can be configured in Settings. Don't Allow Allow Existing User Log In New User Sign Up

If you wish to receive notifications, click on Allow.

9:52 Brilliant SMART nexus UNIVERSAL GATEWAY Welcome to Nexus Home Existing User Log In New User Sign Up

Open Nexus Home App and proceed further by clicking on Sign Up.
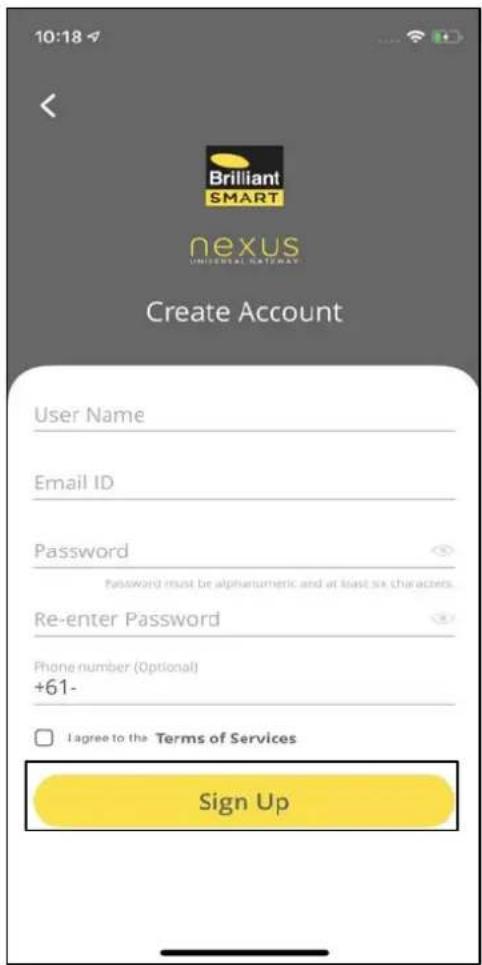
10:18 Brilliant SMART nexus UNIVERSAL NATeway Create Account User Name Email ID Password Password must be alphanumeric and at least six characters. Re-enter Password Phone number (Optional) +61- I agree to the Terms of Services Sign Up

Enter details in all the mandatory fields and then tap on Sign Up.
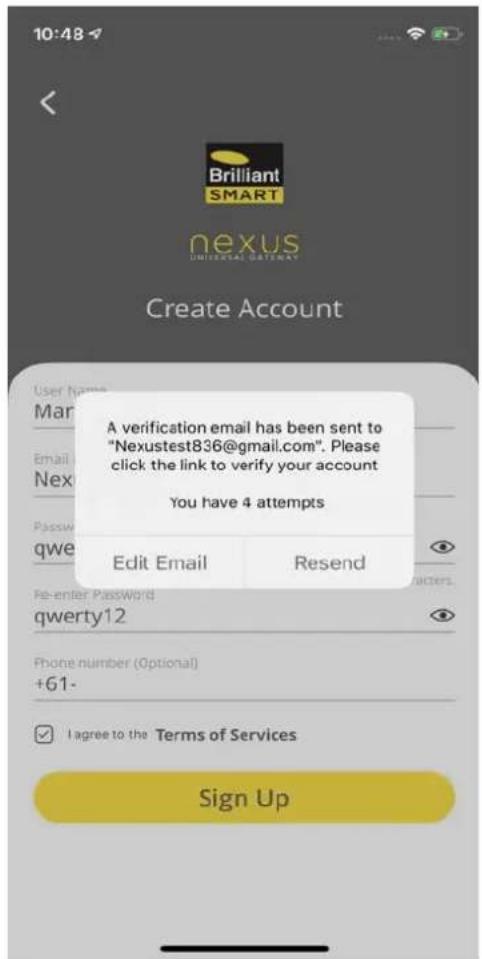
10:48 Brilliant SMART nexus UNIVERSAL GATEWAY Create Account A verification email has been sent to "Nexustest836@gmail.com". Please click the link to verify your account You have 4 attempts Edit Email Resend Re-enter Password qwerty12 Phone number (Optional) +61- I agree to the Terms of Services Sig…

Tapping on Sign Up will send a verification email to the provided email ID. Click on the link in the email to verify your account.

11:21 Congratulations!! Your Account has been created successfully. Next

After the verification of Email ID, Nexus Home app will automatically redirect to the screen displaying "Congratulations" as the account has been created successfully.

10.2 Nexus Home Ultimate Setup
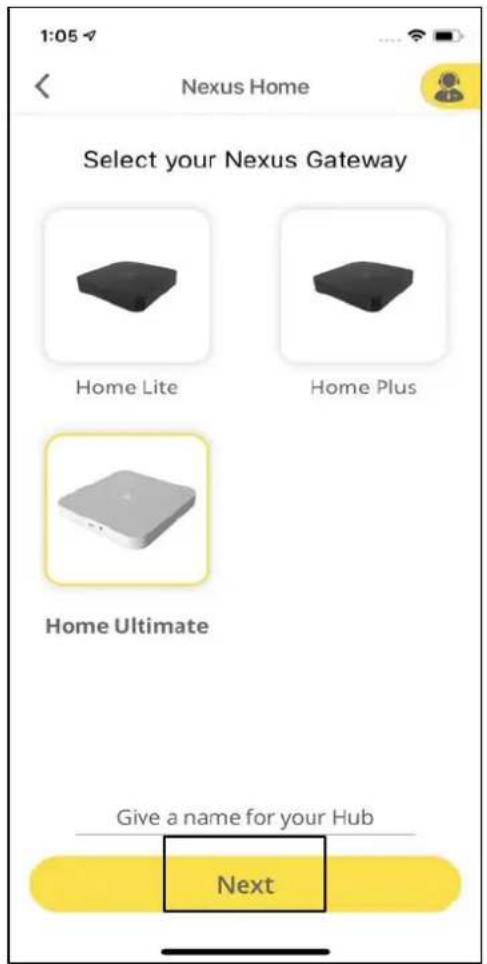
1:05 Nexus Home Select your Nexus Gateway Home Lite Home Plus Home Ultimate Give a name for your Hub Next

Brilliant Nexus Home Ultimate 21465 - Nexus Home Ultimate Setup - 2

nexus

Select Home Ultimate and enter a name of your choice for the Hub & tap Next.

10.2.1 Home Ultimate Setup using Bluetooth

10:19 Home Ultimate Setup Please ensure your mobile device can discover your preferred Wi-Fi network and Home Ultimate is within 5 meters of your Wi-Fi router. Home Ultimate can connect to a Wi-Fi router with the following specifications: • Band: 2.4GHz (5GHz is not supported) • Security WPA/WPA2 (W…

Please ensure your mobile device can discover your preferred Wi-Fi network and Home Ultimate is within 5 meters of your Wi-Fi router, Tap Next

10:20 Home Ultimate Setup Power up the device and ensure the LED indicator is solid RED colour. If it's solid blue, or blinking red press and hold the reset button for 8 seconds. Next

Now, Power up the device and make sure the LED light is glowing in solid Red color.

Once the pop-up appears, click on OK to allow Nexus Home to use Bluetooth.

10:20 Home Ultimate Setup Ensure that your mobile device and Home Ultimate is within 5 meters of your Wi-Fi router. Searching Rescan Unable to see your Hub?

Ensure that your mobile device and Home Ultimate are within 5 meters of your Wi-Fi Router.

1:05 Home Ultimate Setup Select your Hub Home-Ultimate(240AC4473048) Rescan Unable to see your Hub?

Select your Home Ultimate ID.

10:31 Home Ultimate Setup Enter your Wi-Fi password or tap Select WI-Fi to choose another network CS_Blaze Select Wi-Fi Password Re-enter Password • Ensure that your mobile device is close to your Home Ultimate. • Home Ultimate can connect to 2.4GHz (5GHz is not supported). Connect Wi-Fi

Enter the password for the Wi-Fi network that your mobile device is connected to and tap on Connect Wi-Fi.

10:32 Home Ultimate Setup Enter your Wi-Fi password or tap Select Wi-Fi to choose another network CS_Blaze Select Wi-Fi cs@blaze@1 cs@blaze@1 • Ensure that your mobile device is close to your • Home is no GHz Device connecting to Wi-Fi Connect Wi-Fi

Your device will start connecting to your Wi-Fi.

1:08 Finalizing your setup Wi-Fi Details shared with Home Ulti... Disconnected from Home Ultimate a... Connecting Home Ultimate to Cloud Connecting Home Ultimate to App

Home Ultimate connects to your Wi-Fi network, Cloud and mobile App.

1:09 Congratulations!! You have successfully setup Home Ultimate

Home Ultimate is added successfully.

10.2.2 Home Ultimate Setup using Wi-Fi

10:19 Home Ultimate Setup Please ensure your mobile device can discover your preferred Wi-Fi network and Home Ultimate is within 5 meters of your Wi-Fi router. Home Ultimate can connect to a Wi-Fi router with the following specifications: • Band: 2.4GHz (5GHz is not supported) • Security WPA/WPA2 (W…

Please ensure your mobile device can discover your preferred Wi-Fi network and Home Ultimate is within 5 meters of your Wi-Fi router, Tap Next
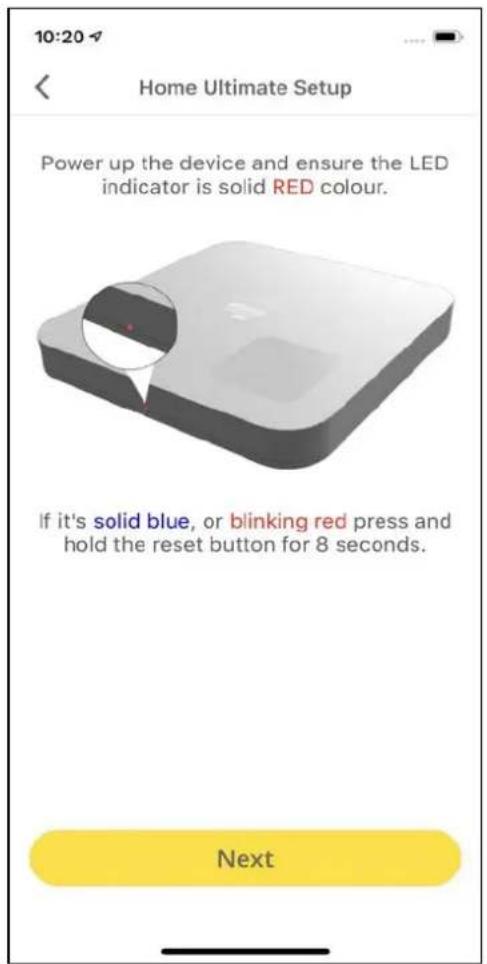
10:20 Home Ultimate Setup Power up the device and ensure the LED indicator is solid RED colour. If it's solid blue, or blinking red press and hold the reset button for 8 seconds. Next

Now, Power up the device and make sure the LED light is glowing in solid Red color.

Once the pop-up appears, click on OK to allow Nexus Home to use Bluetooth.

10:20 Home Ultimate Setup Ensure that your mobile device and Home Ultimate is within 5 meters of your Wi-Fi router. Searching Rescan Unable to see your Hub?

10:38 Home Ultimate Setup Connect to the Home Ultimate Wi-Fi Connect Home Ultimate to a power source and wait till the light turns Red. 1 Open iPhone Settings 2 Connect to Home- Ultimate Wi-Fi 3 Return to the Nexus Home app Unable to see Home-Ultimate Wi-Fi?

If you are unable to see your Hub here, please click on Rescan.

Even if after Rescanning, you are unable to see your Hub, please click on Unable to see your Hub?

Now, connect your phone to Home Ultimate Wi-Fi access point in your phone Wi-Fi settings & return to the Nexus Home App.

1:11 You have successfully connected to Home-Ultimate Wi-Fi

A screen appears stating "You have successfully connected to Home Ultimate Wi-Fi".

10:41 Home Ultimate Setup Select your preferred Wi-Fi network to connect Home Ultimate to the network. If you can't see your Wi-Fi network, enter SSID manually. Enter SSID Refresh JioPrivateNet WPA/WPA2 PSK BlazeServer WPA/WPA2 PSK Blaze-Server-28 WPA/WPA2 PSK Dlink_Guest WPA/WPA2 PSK JioNet No Secu…

Select your preferred Wi-Fi network to connect Home Ultimate to the network.

10:31 Home Ultimate Setup Enter your Wi-Fi password or tap Select WI-Fi to choose another network CS_Blaze Select Wi-Fi Password Re-enter Password • Ensure that your mobile device is close to your Home Ultimate. • Home Ultimate can connect to 2.4GHz (5GHz is not supported). Connect Wi-Fi

Enter the password for the selected Wi-Fi network and tap on Connect Wi-Fi.

4:31 Wi-Fi Setting Enter your WiFi password or 'Select Wi-Fi' to choose another network CS_Blaze Select Wi-Fi cs@blaze@1 CS@ Connect your mobile device to 'CS_Blaze' Select 'CS_Blaze' Wi-Fi network from the Wi-Fi settings screen on your mobile device and return to the Nexus Home App. OK

Click OK on the pop up screen. Now, open your Wi-Fi settings in your phone and connect your phone to the same Wi-Fi network to which Home Ultimate is connected and navigate back to Nexus Home App.
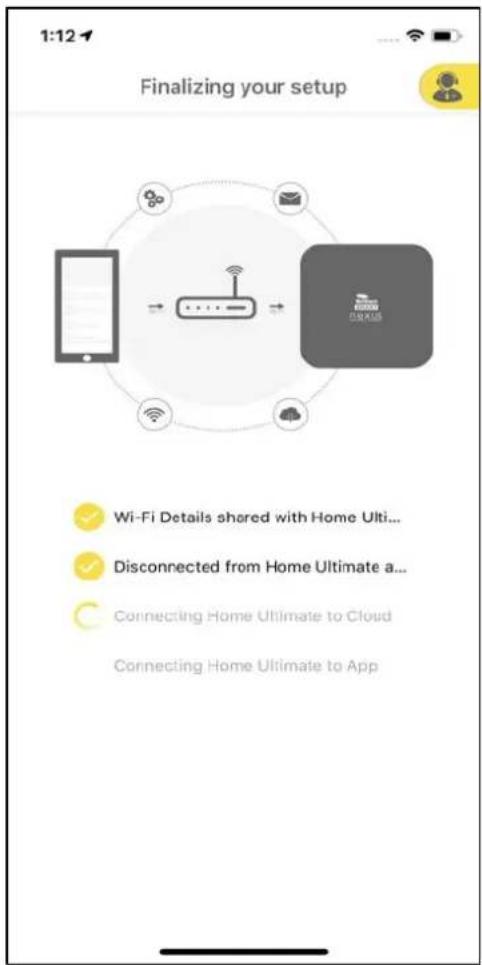
1:12 Finalizing your setup Wi-Fi Details shared with Home Ulti... Disconnected from Home Ultimate a... Connecting Home Ultimate to Cloud Connecting Home Ultimate to App

The Home Ultimate connects to your Wi-Fi network, Cloud and mobile App.

1:15 You have successfully connected to Home-Ultimate Wi-Fi

Home Ultimate is added successfully.

11. App Guide

11.1 Dashboard

Dashboard displays the Favourite devices/actions selected by the user, providing ease of control of those devices and notifications pertaining to the devices connected with Home Ultimate.

Favourites

1:16 Nexus Home Ultimate Favourites Edit Add Access Point Changed just now Access Point Changed 'BA-2G' to 'BA-2G' Nexus Home Ultimate Added 3 min ago New Nexus Home Ultimate 'Home Ultimate' has been added Reset Hub 5 min ago Reset Hub completed Dashboard Security Devices Actions Settings

It displays the devices/actions added as

Favourites by the user. Devices/Actions used more often can be added under this category.

Note: Only upto 6 devices/actions can be added as Favourites.

Notifications

1:16 Nexus Home Ultimate Favourites Edit + Add Access Point Changed just now Access Point Changed 'BA-2G' to 'BA-2G' Nexus Home Ultimate Added 3 min ago New Nexus Home Ultimate 'Home Ultimate' has been added Reset Hub 5 min ago Reset Hub completed Dashboard Security Devices Actions Settings

The notifications space on the Dashboard displays notifications for all the devices connected with Home Ultimate.

Eg: Devices Added & Deleted Notifications, Actions Enabled or Disabled Notifications, Action Started and Ended Notifications, Device Online and Offline Notifications.

The notifications can be turned ON/OFF from the Notify me toggle under Settings.

11.2.1 Rooms

12:37 Nexus Home Ultimate Edit Rooms Devices MyHome Add A Room Dashboard Security Devices Actions Settings

The Rooms tab displays all the Rooms available for your Home. The rooms can be added/deleted or the background image of the rooms can be changed here.

Addition of Rooms

6:02 Add A Room Done Room name

Click on Add a Room under Rooms tab.

Provide a name to the room in Room Name.

Now, click on + to change the background image of the room.

4:45 Add A Room Done Room name Bedroom Photo Camera Camera Roll Cancel

Click on Camera to click a picture or tap on Camera Roll to select a picture from your mobile device gallery.

11:42 Add A Room Done Room name Bedroom

Click on Done at the top right corner of the screen.

10:59 Office Devices + Add Device >

Go to Rooms under Devices tab. Select the room that needs to be edited.

Click on Edit at the top right corner of the screen.

10:59 Office Devices + Add Device >

The Add Device tab allows the user to add/delete devices compatible with Home Ultimate.

10:59 Edit Room Done Information Room name Office Devices Delete Room

Deletion of Rooms: Option 1

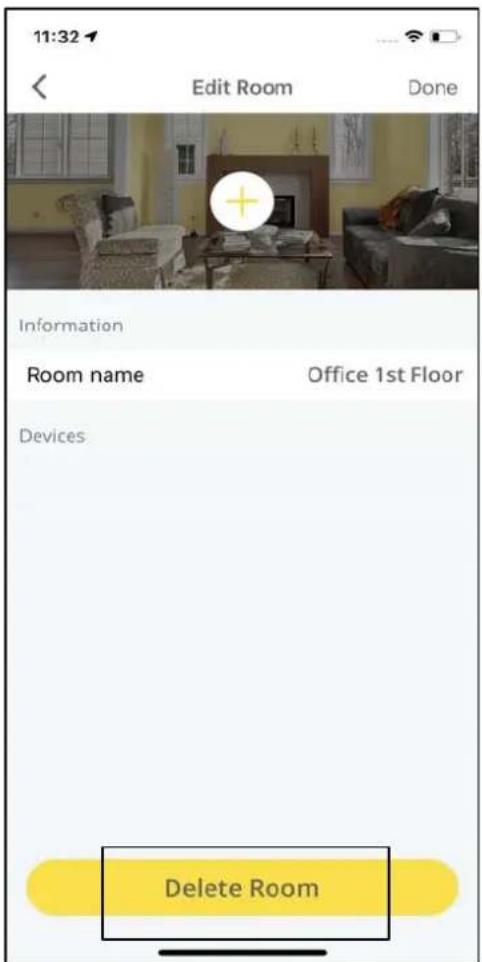
11:32 Edit Room Done Information Room name Office 1st Floor Devices Delete Room

Change the background image or the Room name and click on Done.

After clicking on Edit under the Rooms tab of Devices, click on Delete Room at the bottom of the screen.

11:04 Edit Room Done Information To delete Room, please enter your Passw ord. Password □ Show Password Cancel OK Delete Room

Enter your App password when the pop-up appears and click on OK.
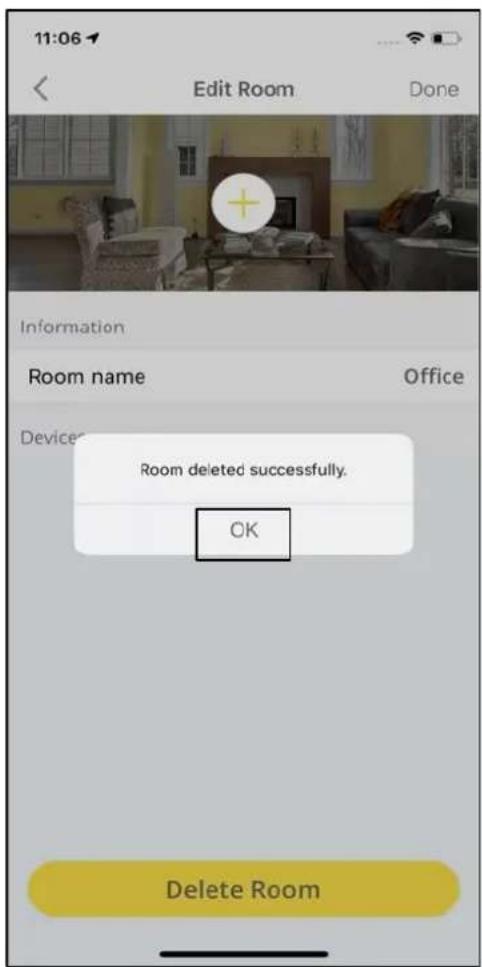
11:06 Edit Room Done Information Room name Office Device Room deleted successfully. OK Delete Room

A pop-up will appear mentioning "Room deleted successfully."

Deletion of Rooms: Method 2
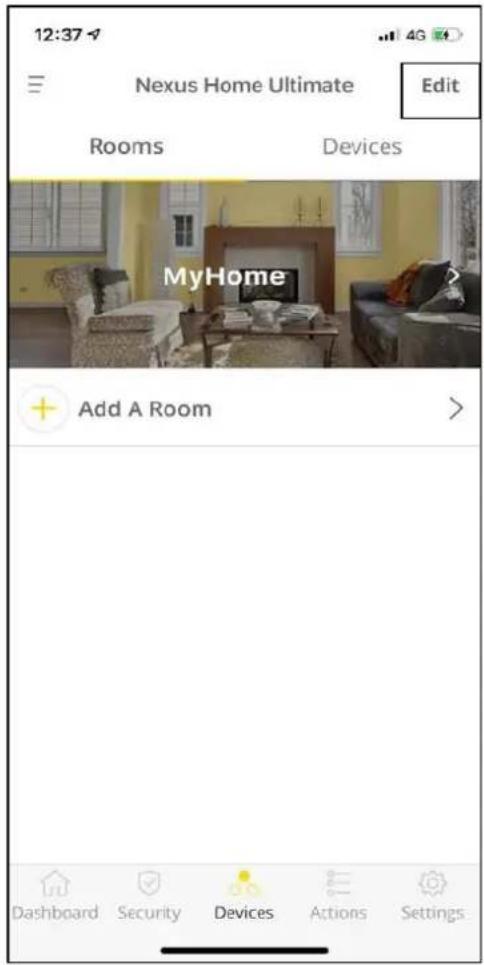
12:37 Nexus Home Ultimate Edit Rooms Devices MyHome Add A Room Dashboard Security Devices Actions Settings

11:46 Edit Rooms List MyHome Bedroom Office

Click on Edit at the top right of the screen on the Rooms tab under Devices.

Click on the Red "-" icon against the room that needs to be deleted.

11:43 Edit Rooms List MyHome Bedroom Please delete all devices connected to this Room before deleting the Room. OK

A pop-up appears asking the user to delete all the devices connected to the room before deleting the room.

11:44 Edit Rooms List MyHome Bedroom Do you want to Delete? Cancel Delete Office

Click on Delete when the pop-up appears.
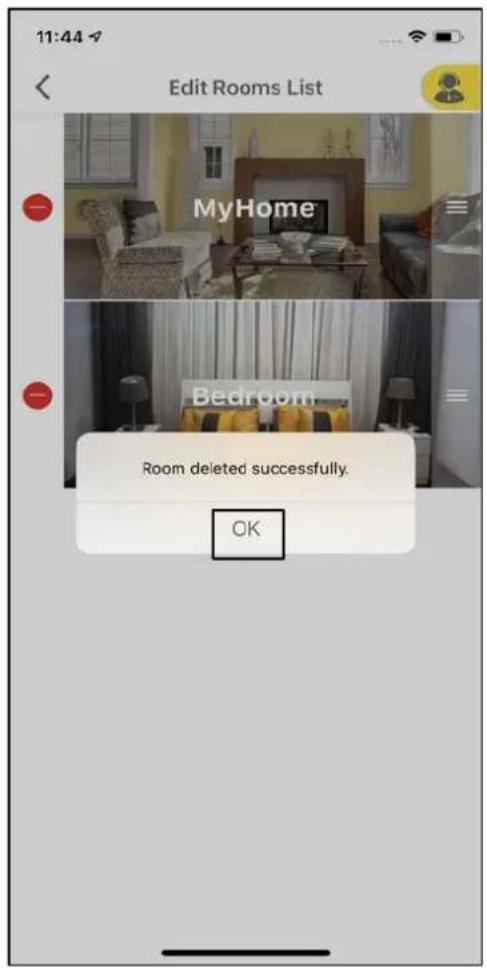
11:44 Edit Rooms List MyHome Bedroom Room deleted successfully. OK

A pop-up appears mentioning "Room deleted successfully".

1:20 Nexus Home Ultimate Edit Rooms Devices Zigbee Motion Sens > Home Ultimate > Add Device >

The Devices tab allows the user to add/delete IR devices, BLE supported devices, Brilliant Wi-Fi devices and Zigbee Devices linked with Home Ultimate.

11.2.1 Addition of Brilliant Devices
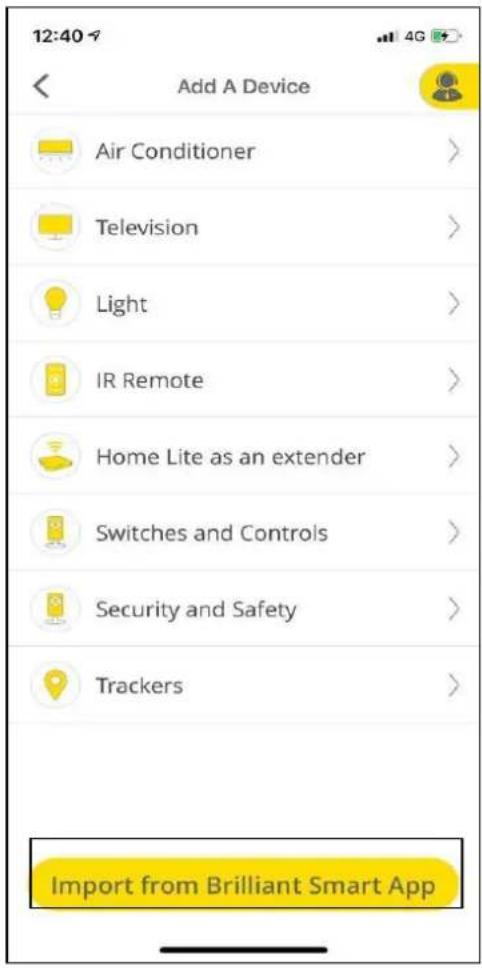
12:40 Add A Device Air Conditioner > Television > Light > IR Remote > Home Lite as an extender > Switches and Controls > Security and Safety > Trackers > Import from Brilliant Smart App

After selecting Add a Device under Devices tab, click on Import from Brilliant Smart App.
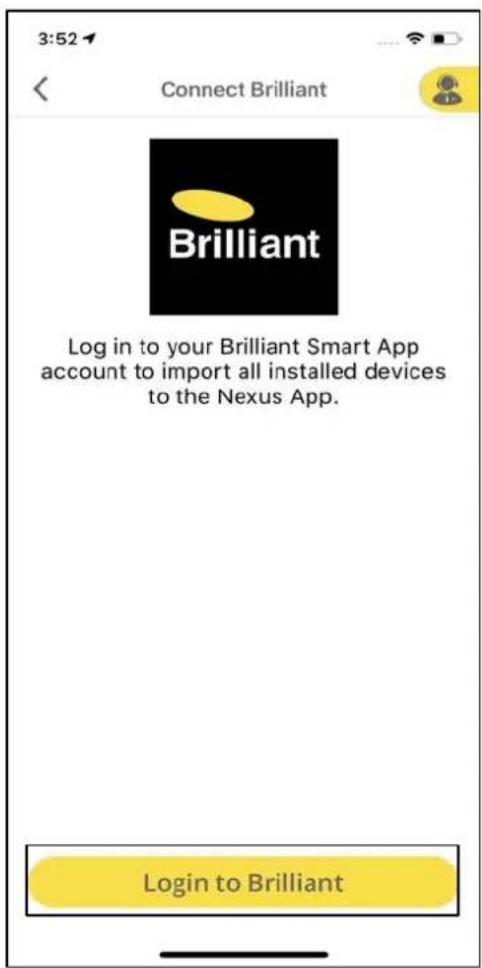
3:52 Connect Brilliant Brilliant Log in to your Brilliant Smart App account to import all installed devices to the Nexus App. Login to Brilliant

Follow the on-screen instructions and click on Login to Brilliant.

2:52 Connect Brilliant Cancel tuya + 61 Your mobile phone number or er password Scan login Forgot password log in Register English

Login to your Brilliant Smart App Account.

2:53 Connect Brilliant Cancel tuya Mukesh@blazeautomation.com tuya ⇌ After authorization, the developer will get the following permissions: • Access your account information • Access control of your device Confirm authorization

Tap on Confirm authorization to allow Nexus to access your account information and control of your device.

4:56 Connect Brilliant 38 Devices were found Please select the devices you want to add to Nexus Home WiFi double plug Double Plug D1 2 And GU10 CCT GU10 RGBW BRILLIANT SMART CCT+DIM CEI... Smart RGB Garden Light 4 Door Sensor WiFi Smart RGB Garden Light New BRILLIANT SMART ELECTRICAL... Add Devices

You will get a list of devices from your Brilliant App. Click on the Circle to select the devices that you would want to add to your Nexus Home App. Tap on Add devices.
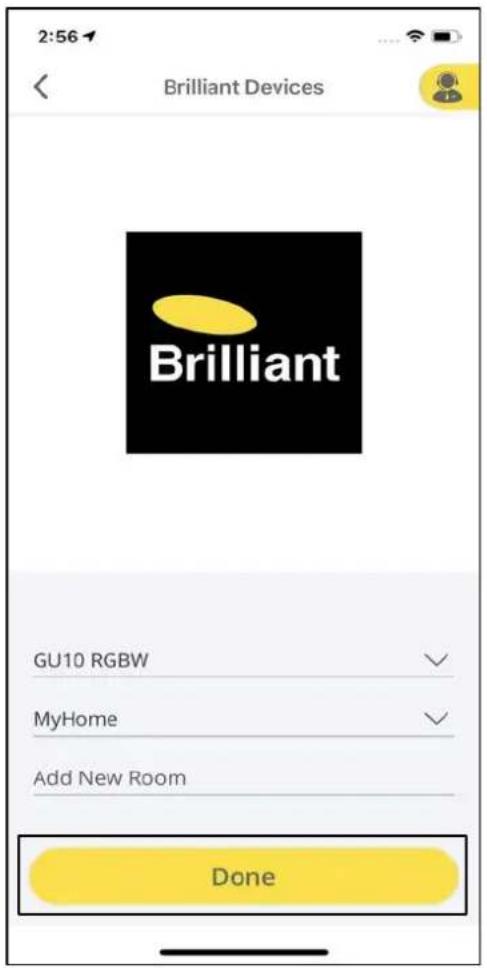
2:56 Brilliant Devices Brilliant GU10 RGBW MyHome Add New Room Done

After selecting the devices, provide the Device Information and click on Done.

2:56 Brilliant Devices Brilliant Nexus Home Saved Successfully. Select another device to Add or tap Cancel to exit. Cancel Continue Select A Device Assign Existing Room Add New Room Done

After successfully adding a device, click on Continue to add more devices or tap on Cancel to exit.

5:54 Nexus Home Plus Favourites Edit + Add Notification 2 min ago > Linkey Lock "LOCKED" in MyHome of Home Plus Notification 2 min ago > Linkey Lock "OUT OF REACH" in MyHome of Home Plus Notification 2 min ago > Linkey Lock "OUT OF REACH" in MyHome of Home Plus Notification 2 min ago > Linkey Lock "…

The notifications on the Dashboard will display the addition of all the devices.

11.2.3 Internal Screens of the Devices

GU10 RGBW

3:26 GU10 RGBW Device Status ON 56 % White Color

To check the status of your device, click on the device name under Devices tab.

Tap the circular button highlighted with ON/OFF to control the light.

To control brightness use the slider located under the ON/OFF button.
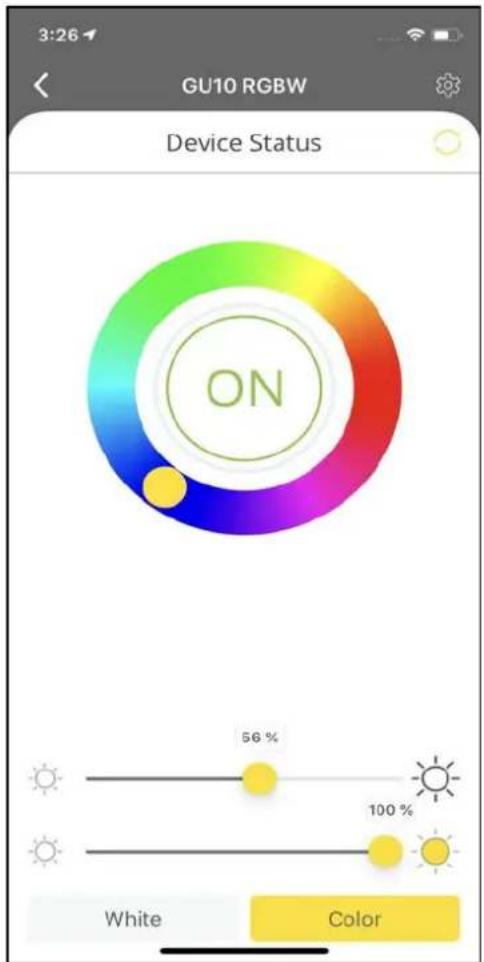
3:26 GU10 RGBW Device Status ON 56 % 100 % White Color

To change the color of light, tap on the White/Color tabs at the bottom of the screen.

In case of a colored light, choose the colors from the colored circle around the ON/OFF button.

3:26 GU10 RGBW Information Name GU10 RGBW Change room MyHome > Notification Notify Me History 05-14-2020 SWITCH TURNED OFF 15:26:25 status 05-14-2020 SWITCH TURNED ON 15:26:15 status

Click on Settings at the top right corner of the Device Status screen.

Settings include device details such as Device information, Notifications and Device history.

Glass Wall Switch 4
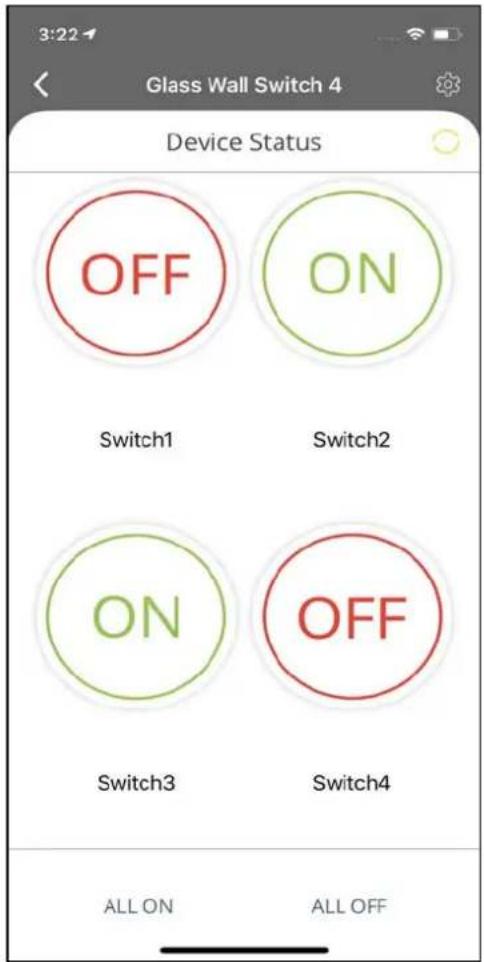
Glass Wall Switch 4 Device Status OFF ON Switch1 Switch2 ON OFF Switch3 Switch4 ALL ON ALL OFF

To check the status of your device, click on the device name under Devices tab.

Tap the circular buttons highlighted with ON/OFF to control the respective light.

Click on ALL ON or ALL OFF to control all the 4 lights with one click.

3:23
<Glass Wall Switch 4
Information
NameGlass Wall Switch 4
Change roomMyHome >
Notification
Notify Me
History
05-14-2020SWITCH2 OFF
15:23:17status
05-14-2020SWITCH1 ON
15:23:17status
05-14-2020SWITCH1 OFF
15:23:17status
05-14-2020SWITCH2 ON
15:23:17status
05-14-2020SWITCH4 OFF
15:23:16status
05-14-2020SWITCH2 OFF
15:23:16status

Motion Sensor
3:26 Motion Sensor-WiFi Device Status EVERYTHING IS OK

Click on Settings at the top right corner of the Device Status screen.

Settings include device details such as Device information, Notifications and Device history.

To check the status of your device, click on the device name under Devices tab.

This is the status of the screen when no motion is detected in the vicinity of the Motion Sensor.

3:27 Motion Sensor-WiFi Device Status MOTION DETECTED

This is the status screen whenever any motion is detected in the vicinity of the Motion Sensor.

3:28 Motion Sensor-WiFi Information Name Motion Sensor-WiFi Change room MyHome > Notification Notify Me History 05-14-2020 EVERYTHING IS OK 15:27:59 status 05-14-2020 MOTION DETECTED 15:26:58 status

Click on Settings at the top right corner of the Device Status screen.

Settings include device details such as Device information, Notifications and Device history.

Siren
3:41 Siren Device Status TURNED ON

To check the status of your device, click on the device name under Devices tab.

The status of the Siren (Turned ON/OFF) is displayed here.
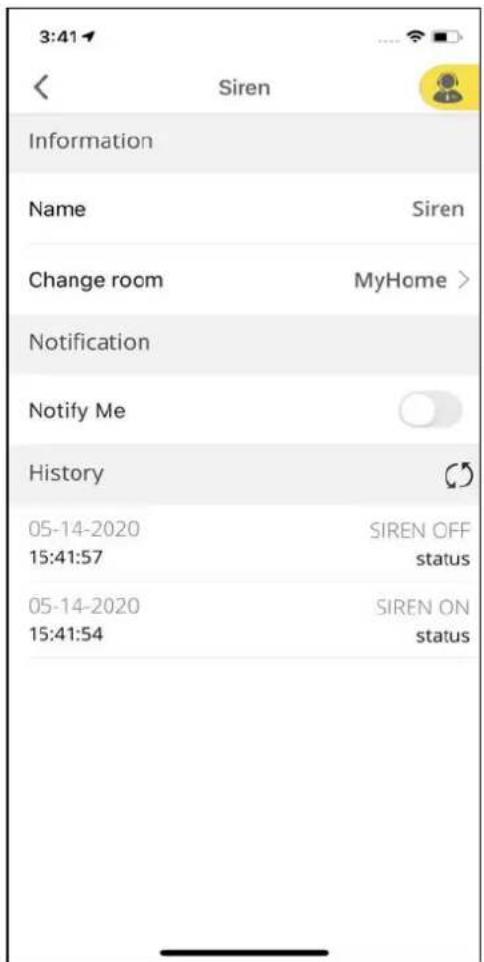
3:41 Siren Information Name Siren Change room MyHome > Notification Notify Me History 05-14-2020 SIREN OFF 15:41:57 status 05-14-2020 SIREN ON 15:41:54 status

Click on Settings at the top right corner of the Device Status screen.

Settings include device details such as Device information, Notifications and Device history.

11.2.4 Adding IR Based Device
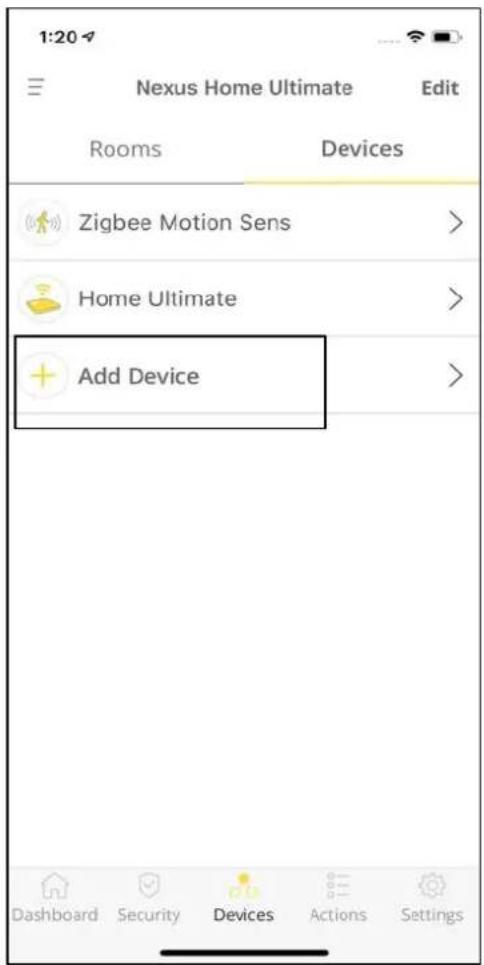
1:20 Nexus Home Ultimate Edit Rooms Devices Zigbee Motion Sens > Home Ultimate > Add Device >

Tap on Devices on the main screen and select + Add Device.

12:24 Add A Device Air Conditioner Television Light IR Remote Home Lite as an extender Switches and Controls Security and Safety Trackers Import from Brilliant Smart App

Select the category of your Device to be added. For Example, Air Conditioner.

12:30 < Remotes AIR CONDITIONER > AC CEILING > PORTABLE AIR CONDITIONER (with LCD STATUS ON REMOTE) AC SPLIT > TOWER AIR CONDITIONER (with LCD STATUS ON REMOTE) WINDOW AIR CONDITIONER (with LCD STATUS ON REMOTE) AIR CONDITIONER (NO LCD STATUS) PORTABLE AIR CONDITIONER (NO LCD STATUS ON REMOTE) TOWER…

Select the category of your Air Conditioner to proceed further.
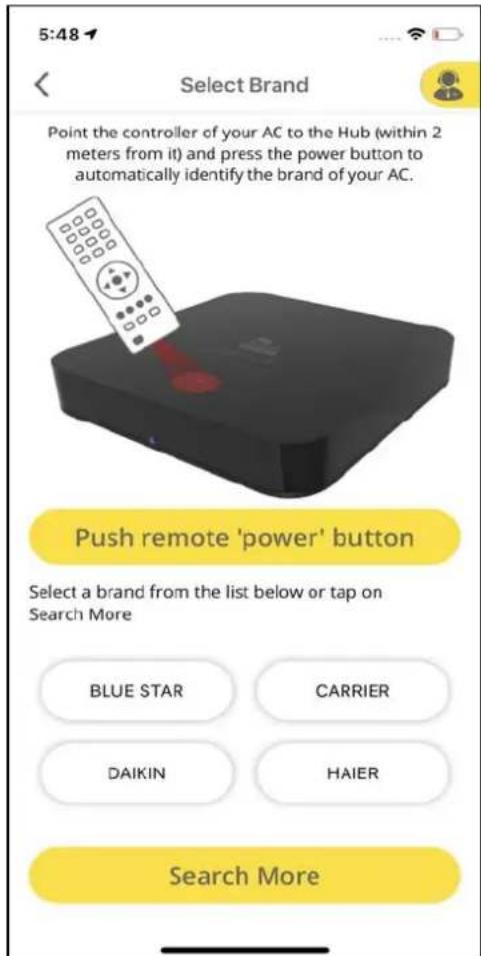
5:48 Select Brand Point the controller of your AC to the Hub (within 2 meters from it) and press the power button to automatically identify the brand of your AC. Push remote 'power' button Select a brand from the list below or tap on Search More BLUE STAR CARRIER DAIKIN HAIER Search More

Point the controller of your AC to the Hub within 2 meters and press the power button to automatically identify the brand of your AC.

You can also select the brand from the list on the screen or "Search for more" to choose your AC's brand.

12:32 AIR CONDITIONER Search Model Device Model : 2HW12HAX Remote Model : Remote code 1358 Device Model : 2HW12OC Remote Model : Remote code 429 Device Model : 2HW12OCU Remote Model : Remote code 429 Device Model : 2HW18HAX Remote Model : Remote code 1358 Device Model : 2HW18OC Remote Model : Remote…

Select the Device Model for your AC.

BLUE STAR 1/1 POWER Ensure the Hub is in line of sight of your Air Conditioner and then tap the POWER button.

Ensure that Hub is in line of sight of your Air Conditioner and then tap the POWER button. Click on Yes if the AC turned ON, else click on NO.

BLUE STAR 1/1 INCREASE TEMP Ensure the Hub is in line of sight of your Air Conditioner and then tap the INCREASE TEMP button. Did your AC change Temperature? YES NO

Check if the Temperature key on your app is working fine by clicking on + and - to increase and decrease the temperature respectively. If your AC responds, click Yes else No.
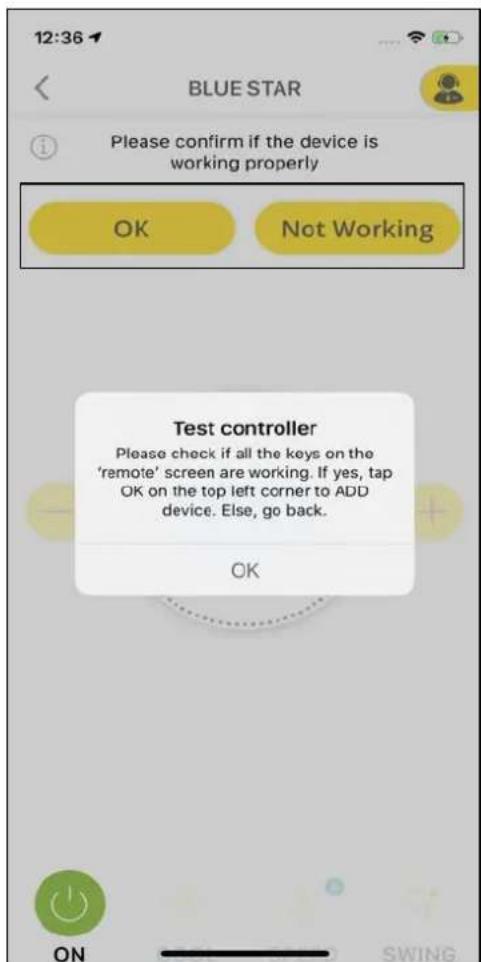
BLUE STAR Please confirm if the device is working properly OK Not Working Test controller Please check if all the keys on the 'remote' screen are working. If yes, tap OK on the top left corner to ADD device. Else, go back. OK ON SWING

Check if all the keys on the remote screen are working. If yes, tap OK else tap on Not Working to select other model or to create your own remote.

12:36 AIR CONDITIONER Device Information Enter A Device Name Done

Enter the Device Name and proceed further by clicking on Done.

A pop will appear saying, "Device added successfully."

11.2.5 Create my Own IR Remote

4:58 IR Remote Ceiling Fan with Light Disc Player DTH by Provider DVD BR FAN FAN HEATER Media Box Projector Satellite Receiver/DTH/Cable Sound Bar TV Box Create my Own IR Remote

After selecting IR Remote under Add Device, scroll down to select Create my Own IR Remote.

11:43 Create my Own IR Remote Air Conditioner Television Audio Amplifier Custom Remote Disc Player Media Box Projector Satellite Receiver/DTH/Cable Sound Bar

Select the category for your custom remote or choose Custom

Remote from the list.

4:58 Custom Remote Device Information Enter A Device Name Done

Enter a name for the device and click on Done.

4:58 Custom Remote Device added successfully OK Device Information Enter X Device Name Custom IR Remote Done

Click OK. The device is added successfully.

12:44 Nexus Home Ultimate Edit Rooms Devices Custom Remote > Home Ultimate > Add Device >

Tap on the recently added custom remote name under the Devices tab.

4:58 Custom IR Remote Edit i Custom Remotes You can create your own remote by pairing keys available in your handheld remote control Go to 'Edit' and tap on '+' to pair

Click on Edit at the top right corner of the screen and then tap on + to start pairing the keys.

4:58 Edit Custom IR Remote Done Name Custom IR Remote Tap on "+" to pair.Tap any button for more options + Pairing Add key from another Remote Cancel

Select Pairing to start pairing your keys by pairing the keys available in your handheld remote control or click on Add key from another

Remote to select any key from the remote of an already added device.

Option 1: Pairing
4:58 Edit Custom IR Remote Done Name Custom IR Remote Tap on "+" to pair.Tap any button for more options Key Pairing Instruction Tap 'Pair' below. A RED IR LED on the Home Lite will turn ON. Point your Remote towards the RED IR LED holding it an inch away and press the desired button on your Remote.…

A Red IR LED on the Home Ultimate will be turned on.

Point your Remote towards the Red IR LED holding it at a distance of not more than 2 meters and press the desired button on your remote.

4:58 Add a button Name Button name Icon Not selected > Done

Once the key is paired, enter a Name for the key.

4:59 Select Icon - + ↓ ↔ ← ♪ ○ Ⓧ → ↑ × ← ∥ 心 × 俯视 食 食 玩 玩 伤 × 伙 伙 × 伙 伙 × 伙 伙 × 伙 伙 × 伙 伙 × 伙 伙 × 伙 伙 × 伙 伙 × 伙 伙 × 伙 伙 × 伙 伙 × 伙 伙 × 伙 伙 × 伙 伙 × 伙 伙 × 伙 伙 × 伙 伙 × 休 休 × 休 休 × 休 休 × 休 休 × 休 休

Select the Icon for your key.

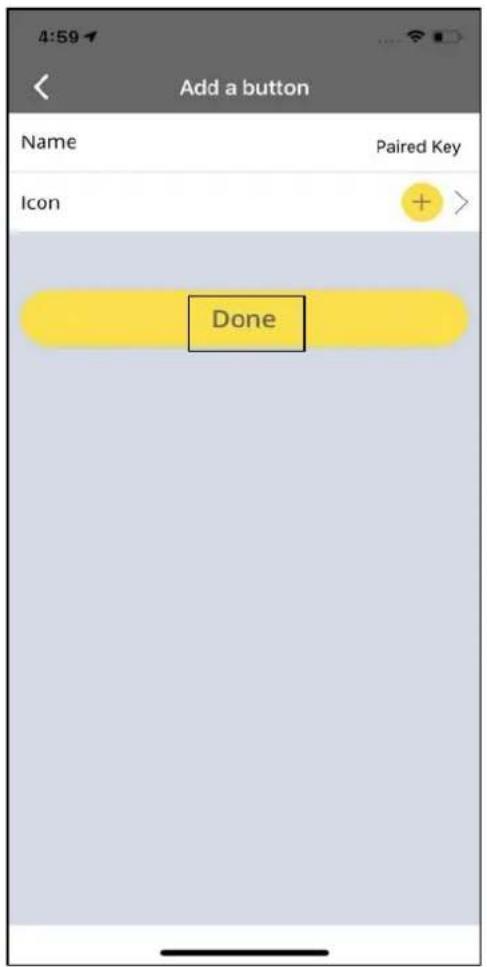
4:59 Add a button Name Paired Key Icon + > Done

Click on Done after selecting an Icon of your choice.

Option 2: Add key from another remote

4:59 Select device AC > Air Purifier > Audio Amplifier > AVR > CD > Ceiling fan with Light > Disc Player > Disc Player. DVD BR > FAN > Fan Heater >

After clicking on Add key from another

Remote, you need to select the remote for an already added device from the list of devices for which you need to add a key to your custom remote.

4:59 AVR MUTE INFO INPUT VOL TIMER VOICE CH - OK d Program Guide B C D A

After tapping on the device, the virtual remote will be displayed.

Select the key that you need to add to your Custom Remote.

4:58 Add a button Name Button name Icon Not selected > Done

Once the key is paired, enter a Name for the key.
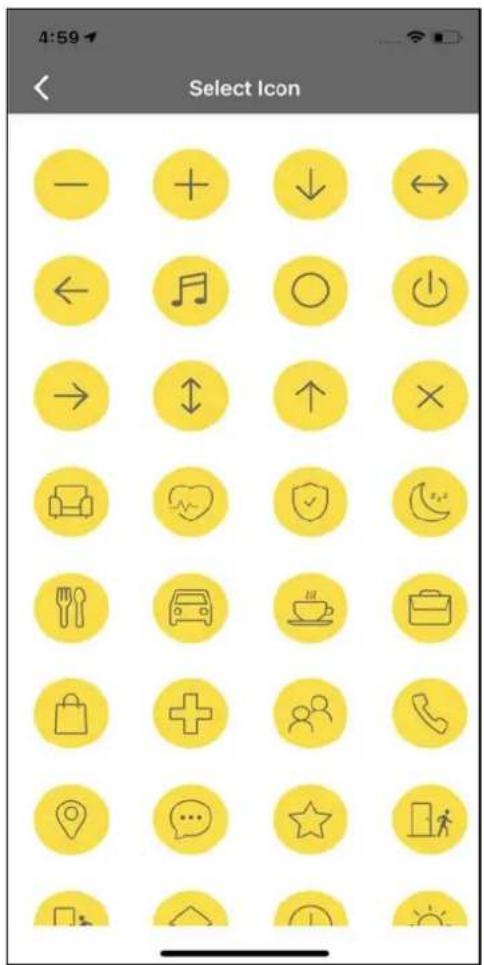
4:59 Select Icon — + ↓ ↔ ← ♪ ○ Ⓧ → ↑ × ​ ∥ ∏ ✓ ▼ ​ ∥ ∏ ∙ ​ ∥ ∏ ∙ ​ ∥ ∏ ∙ ​ ∥ ∏ ∙ ​ ∥ ∏ ∙ ​ ∥ ∏ ∙ ​ ∥ ∏ ∙

Select the Icon for your key.

4:59 Add a button Name Paired Key Icon + > Done

Click on Done after selecting an Icon of your choice.
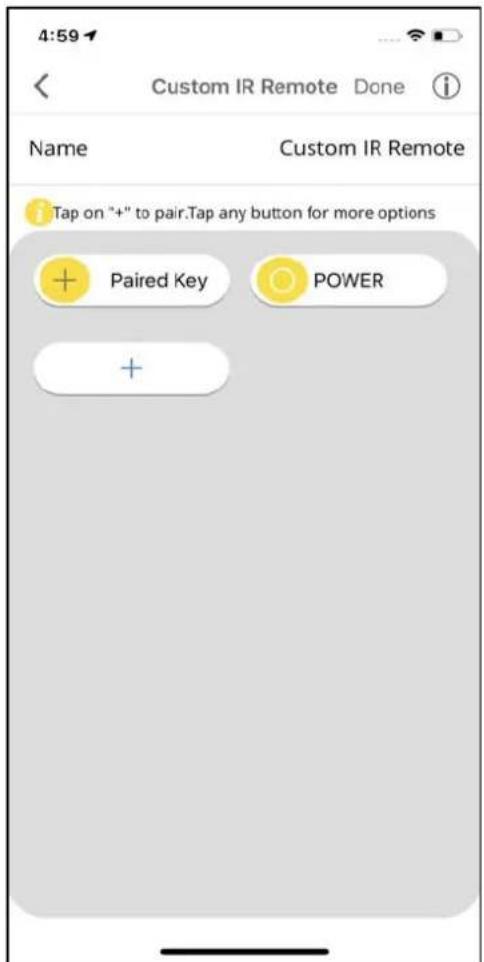
4:59 Custom IR Remote Done Name Custom IR Remote Tap on "+" to pair.Tap any button for more options + Paired Key POWER +

The keys are added to the Custom Remote.

Editing Custom Remote
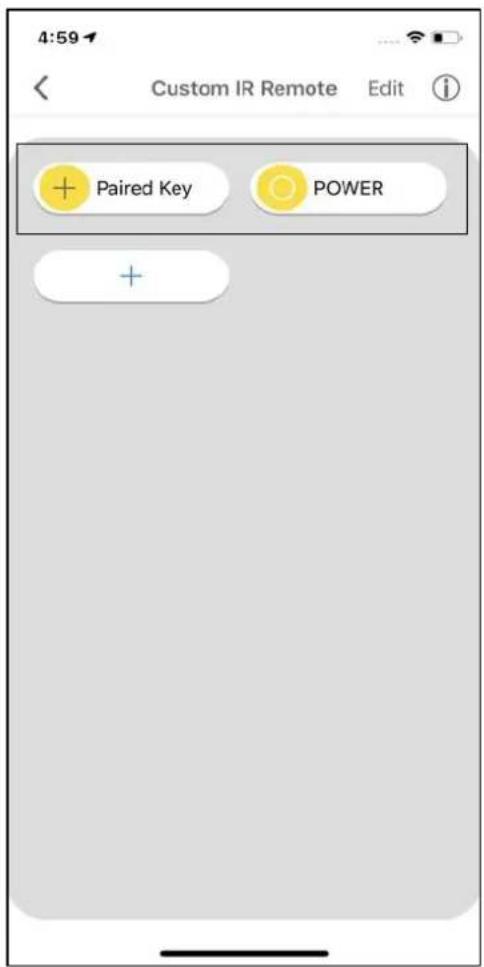
4:59 Custom IR Remote Edit + Paired Key POWER

Select the key that you want to edit.

Edit Custom IR Remote Done Name Custom IR Remote Tap on "+" to pair.Tap any button for more options + Paired Key POWER + Pairing Re-Order Edit Delete Cancel

Select the relevant tab to execute the action-Pairing, Re-Order, Edit or Delete the key.

11.2.6 Adding Home Lite as an Extender using Bluetooth

12:24 Add A Device Air Conditioner Television Light IR Remote Home Lite as an extender Switches and Controls Security and Safety Trackers Import from Brilliant Smart App

Home Lite can be added as an extender to expand the reach of the IR signals. IR cannot travel through walls. It is used to control the IR devices that are in different rooms.

Under the Devices tab, click on Add Devices and then tap on Home Lite as an extender.

Home Lite Setup Power up the device and ensure the LED indicator is solid RED colour. Turn On Bluetooth to Allow "Nexus Home" to Connect to Accessories Settings Close Next

Now, Power up the device and make sure the LED light is glowing in solid Red color.

Once the pop-up appears, allow the device to connect with the Bluetooth.
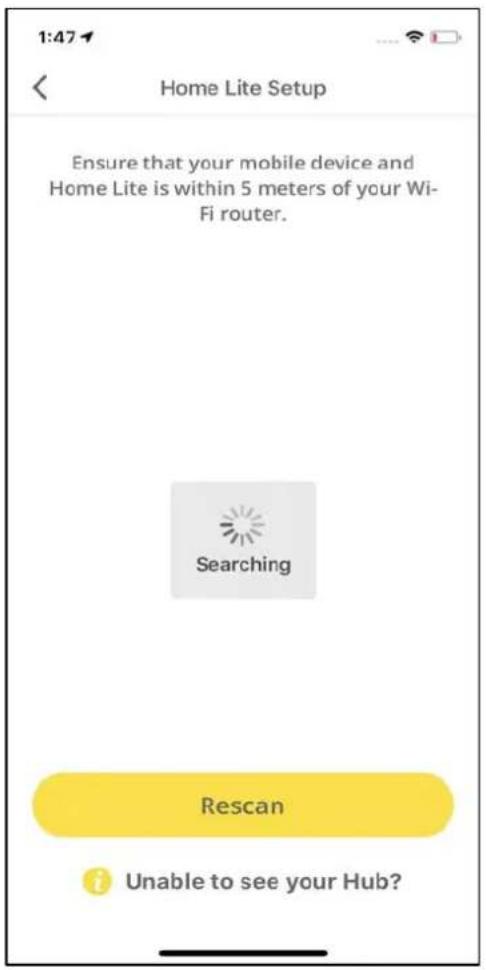
1:47 Home Lite Setup Ensure that your mobile device and Home Lite is within 5 meters of your Wi- Fi router. Searching Rescan Unable to see your Hub?

Ensure that your mobile device and Home Lite are within 5 meters of your Wi-Fi Router.

11:35 Home Lite Setup Select your Hub Home-Lite(240AC4C0916C) Rescan Unable to see your Hub?

Select your Home Lite ID.

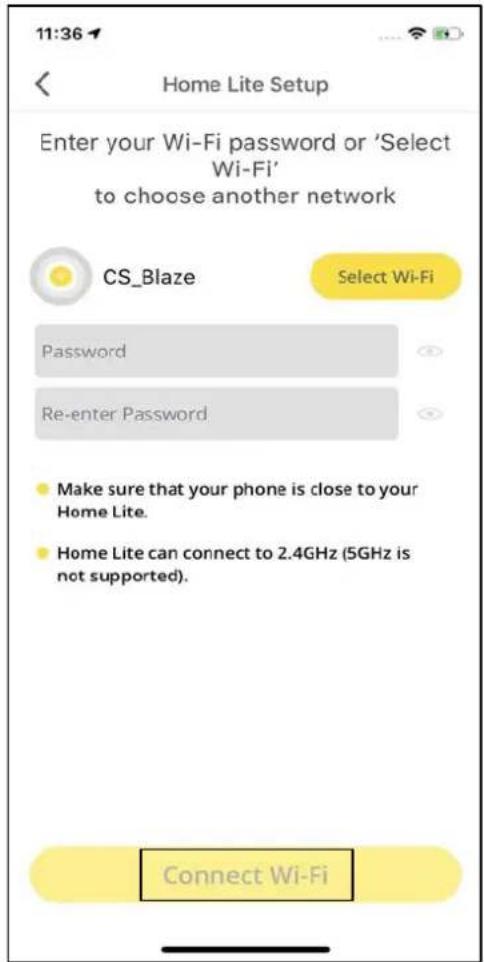
11:36 Home Lite Setup Enter your Wi-Fi password or 'Select Wi-Fi' to choose another network CS_Blaze Select Wi-Fi Password Re-enter Password Make sure that your phone is close to your Home Lite. Home Lite can connect to 2.4GHz (5GHz is not supported). Connect Wi-Fi

Enter the password for the Wi-Fi network that your mobile device is connected to and tap on Connect Wi-Fi.

11:45 Home Lite Setup Enter your Wi-Fi password or 'Select Wi-Fi' to choose another network CS_Blaze Select Wi-Fi cs@blaze@1 cs@blaze@1 • Mak Hom • Hom not: Device connecting to Wi-Fi Connect Wi-Fi

Your device will start connecting to your Wi-Fi.
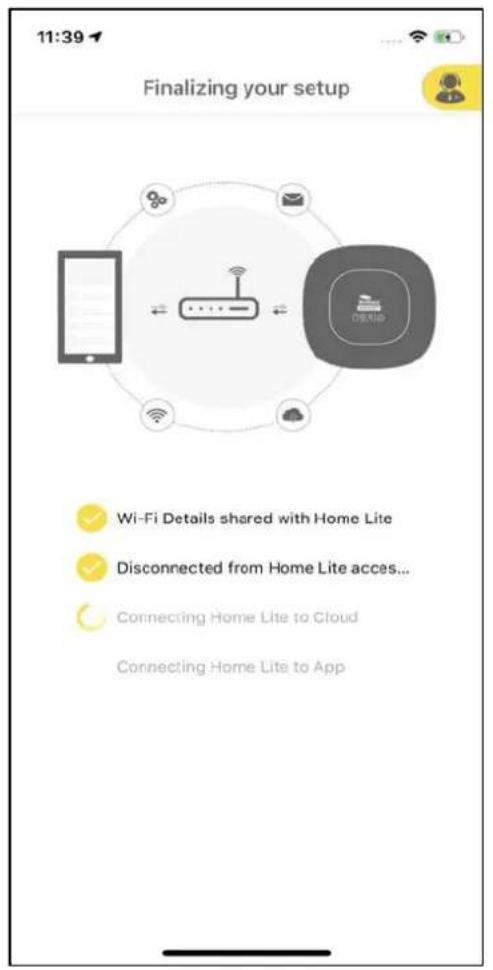
11:39 Finalizing your setup Wi-Fi Details shared with Home Lite Disconnected from Home Lite access... Connecting Home Lite to Cloud Connecting Home Lite to App

Home Lite connects to your Wi-Fi network, Cloud and mobile App.

3:07 Home Lite Device Information Enter A Device Name Extender Assign Existing Room Add New Room Basement Done

Enter the Device Information and then click on Done.

3:07 Home Lite Device added successfully OK Device Information Enter A Device Name Extender Assign Existing Room Add New Room Basement Done

A pop-up appears mentioning, "Device added successfully". Click on OK.

11.2.7 Adding Home Lite as an Extender using Wi-Fi

12:24 Add A Device Air Conditioner > Television > Light > IR Remote > Home Lite as an extender > Switches and Controls > Security and Safety > Trackers > Import from Brilliant Smart App

Under the Devices tab, click on Add Devices and then tap on Home Lite as an extender.

Home Lite Setup Power up the device and ensure the LED indicator is solid RED colour. Turn On Bluetooth to Allow "Nexus Home" to Connect to Accessories Settings Close Next

Now, Power up the device and make sure the LED light is glowing in solid Red color.

Once the pop-up appears, allow the device to connect with the Bluetooth.

10:13 Home Lite Setup Ensure that your mobile device and Home Lite is within 5 meters of your Wi- Fi router. Searching Rescan Unable to see your Hub?

If you are unable to see your Hub here, please click on Rescan.

Even if after Rescanning, you are unable to see your Hub, please click on Unable to see your Hub?

11:58 Home Lite Setup Connect to the Home Lite Wi-Fi Connect Home Lite to a power source and wait till the light turns Red. 1 2 Open iPhone Settings Connect to Home-Lite Wi-Fi 3 Return to the Nexus Home app Unable to see Home-Lite Wi-Fi?

Now, connect your phone to Home Lite Wi-Fi access point in your phone Wi-Fi settings & return to the Nexus Home App.

11:58 You have successfully connected to Home-Lite Wi-Fi

A screen appears stating "You have successfully connected to Home Lite Wi-Fi".

4:29 Home Lite Setup Select your preferred Wi-Fi network to connect Home Lite to the network. If you can't see your Wi-Fi network, enter SSID manually. Enter SSID Refresh JioNet No Security B.One_Socket(B4E62D57534D) No Security NETGEAR-28 WPA/WPA2 PSK NETGEAR_Guest WPA/WPA2 PSK JioPrivateNet WPA/WP…

Select your preferred Wi-Fi network to connect Home Lite to the network.

11:36 Home Lite Setup Enter your Wi-Fi password or 'Select Wi-Fi' to choose another network CS_Blaze Select Wi-Fi Password Re-enter Password Make sure that your phone is close to your Home Lite. Home Lite can connect to 2.4GHz (5GHz is not supported). Connect Wi-Fi

Enter the password for the selected Wi-Fi network and tap on Connect Wi-Fi.

4:31 Wi-Fi Setting Enter your WiFi password or 'Select Wi-Fi' to choose another network CS_Blaze Select Wi-Fi cs@blaze@1 CS@ Connect your mobile device to 'CS_Blaze' Select 'CS_Blaze' Wi-Fi network from the Wi-Fi settings screen on your mobile device and return to the Nexus Home App. OK

Click OK on the pop up screen. Now, open your Wi-Fi settings in your phone and connect your phone to the same Wi-Fi network to which extender is connected and navigate back to Nexus Home App.

12:00

Brilliant Nexus Home Ultimate 21465 - Adding Home Lite as an Extender using Wi-Fi - 9

Finalizing your setup

Brilliant Nexus Home Ultimate 21465 - Adding Home Lite as an Extender using Wi-Fi - 10

graph TD A["Smartphone"] --> B["Router"] C["Email"] --> B D["Cloud"] --> B E["Wireless"] --> B F["OCEAN"] --> B

Brilliant Nexus Home Ultimate 21465 - Adding Home Lite as an Extender using Wi-Fi - 12

Wi-Fi Details shared with Home Lite

Brilliant Nexus Home Ultimate 21465 - Adding Home Lite as an Extender using Wi-Fi - 13

Disconnected from Home Lite acces...

Brilliant Nexus Home Ultimate 21465 - Adding Home Lite as an Extender using Wi-Fi - 14

Connecting Home Lite to Cloud

Connecting Home Lite to App

The Home Lite connects to your Wi-Fi network and mobile App.

3:07-4

Brilliant Nexus Home Ultimate 21465 - Adding Home Lite as an Extender using Wi-Fi - 15

Home Lite

Brilliant Nexus Home Ultimate 21465 - Adding Home Lite as an Extender using Wi-Fi - 16

Device added successfully

Brilliant Nexus Home Ultimate 21465 - Adding Home Lite as an Extender using Wi-Fi - 17

Device Information

Enter A Device Name

Extender

Assign Existing Room

Add New Room

Basement

Done

Enter the Device Information and click on Done.

A pop-up appears confirming that the Device is added successfully.

11.2.8 Extender Settings

3:30 Extender Edit Basement DEVICE STATUS Please Calibrate Brightness. Cancel Calibration Temperature Brightness Not Calibrated Not Calibrated

Calibration of light intensity and temperature is a feature provided to the user to set temp and light intensity as per user convenience.

A pop-up appears suggesting the user to calibrate Brightness.

Click on Calibration and click on Edit at the top right of the screen.
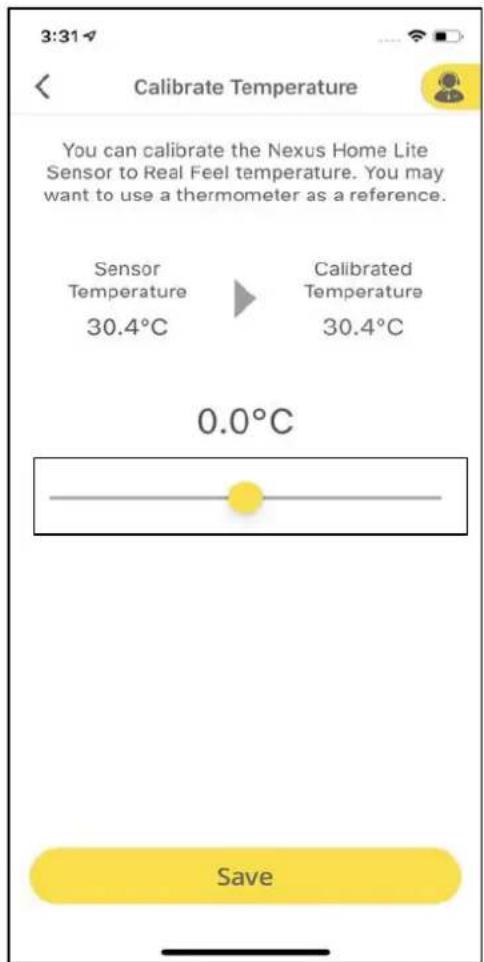
3:31 Calibrate Temperature You can calibrate the Nexus Home Lite Sensor to Real Feel temperature. You may want to use a thermometer as a reference. Sensor Temperature 30.4°C Calibrated Temperature 30.4°C 0.0°C Save

Select Calibrate Temperature.

Use the slider to set the Standard Temperature and click on Save.

3:32 Calibrate Brightness You can create a custom Brightness Scale by setting DARkest and BRIGHTEST values. Default values are DARkest = 500 & BRIGHTEST = 10,000 Set DARkest Value Tip: Turn off light, close curtains and tap on 'Check Value' 0% 500 Check Value Reset to Default Value Default DARkest =…

Similarly, select Calibrate Brightness and select the Darkest and the Brightest Values and then click on Next.
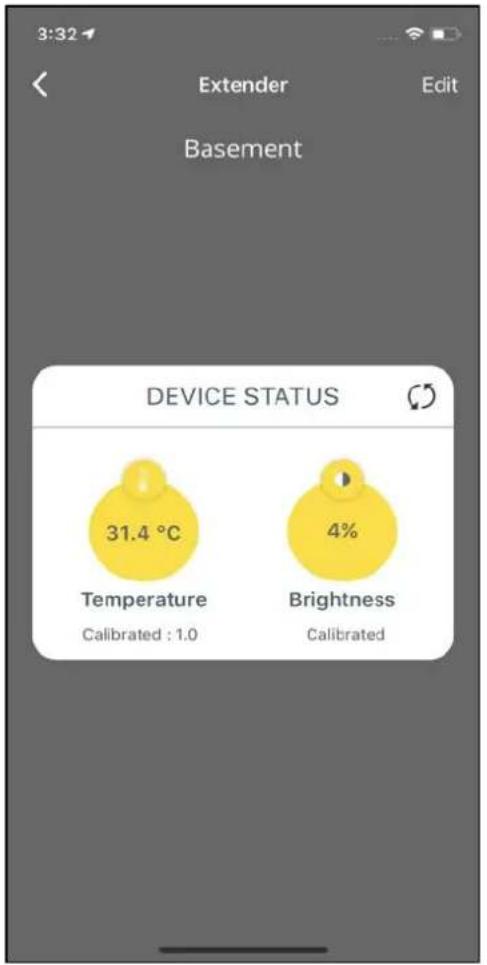
3:32 Extender Edit Basement DEVICE STATUS 31.4 °C Temperature Calibrated : 1.0 Brightness 4% Calibrated

The Device status will now display the Calibrated Values for both Temperature and Brightness.

11.2.9 Addition of IR Devices to Extender

12:24 Add A Device Air Conditioner Television Light IR Remote Home Lite as an extender Switches and Controls Security and Safety Trackers Import from Brilliant Smart App

To add IR devices to your Extender, click on Devices and select Add a Device.

Choose the Category of your IR Device. For example, IR Remote.

4:04 IR Remote Air Purifier Audio Amplifier AVR CD Ceiling Fan with Light Disc Player DTH by Provider DVD BR FAN FAN HEATER Media Box Projector

Select the IR remote that you would like to add to the Extender. For example, Air Purifier.
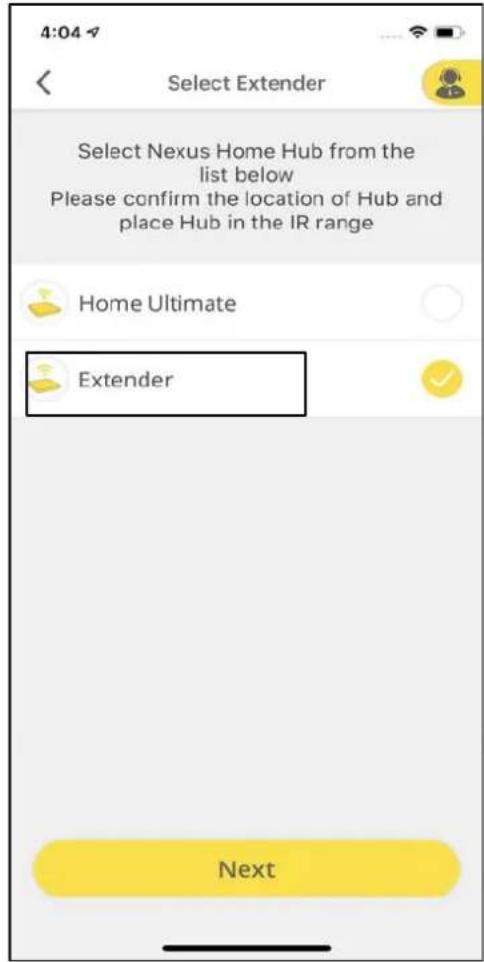
4:04 Select Extender Select Nexus Home Hub from the list below Please confirm the location of Hub and place Hub in the IR range Home Ultimate Extender Next

You will get an option to choose which Hub you would like to add the remote to. Select Extender.

4:04 Air Purifier Search Remote (i.e. Sony) AIRXED > ARKDAN > DAIKIN > DYSON > EQL > PANASONIC > PPP > SAMPO >

Select the make of your remote. For Example, Daikin.

4:04 Test your remote 1/4 Please confirm if your device is responding to all buttons on the remote. Working Not Working TIMER2 FAN SPD AUTO POWER FAN SPEED TIMER SPECIAL MODE

Please check if all the keys are working fine on your virtual remote. If yes, click on Working else Not Working.

4:05 Air Purifier Device Information Enter A Device Name Done

Enter the Device Information and click on Done.

4:05 Air Purifier Device added successfully OK Device Information Enter A Device Name Daikin Air Purifier Done

A pop-up appears mentioning, "Device added successfully".

11.2.10 Deletion of Extender

3:09 Nexus Home Ultimate Edit Rooms Devices Dyson Fan > Extender > Glass Wall Switch 1 > Glass Wall Switch 3 > Motion Sensor-WiFi > Nut Tracker > Projector > Relay Switch Smart Plug > Smart Power Strip-b9d8 >

To delete an Extender, click on Devices tab and tap on Edit at the top right of the screen.

4:12 Edit Devices List Daikin Air Purifier Dyson FAN Extender Glass Wall Switch 3 Motion Sensor-WiFi Projector Relay Switch Smart Plug Smart Power Strip-b9d8 TV WiFi double plug Home Lite

Click on the Red "-" icon against the Extender.
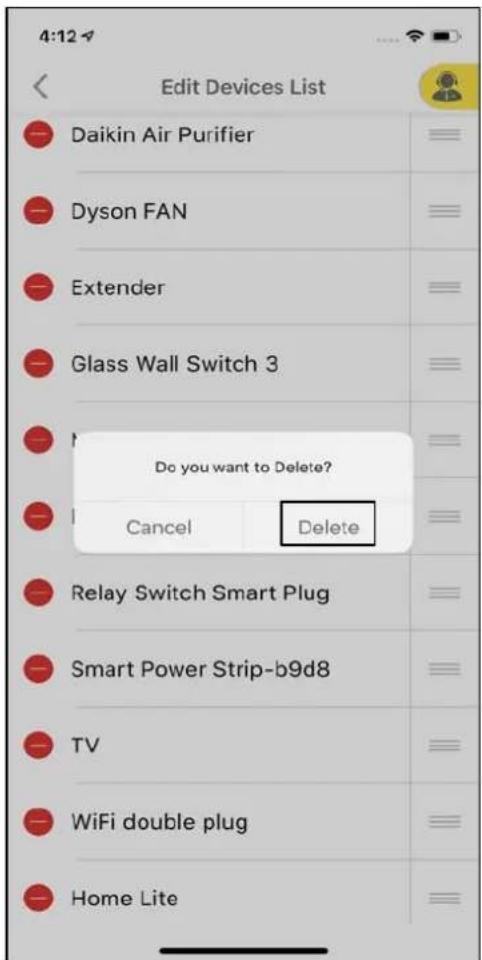
4:12 Edit Devices List Daikin Air Purifier Dyson FAN Extender Glass Wall Switch 3 Do you want to Delete? Cancel Delete Relay Switch Smart Plug Smart Power Strip-b9d8 TV WiFi double plug Home Lite

A pop-up will appear. Click on Delete.

11.2.11 Addition of BLE Devices

12:44 Nexus Home Ultimate Edit Rooms Devices Custom Remote > Home Ultimate > Add Device >

Click on Add Device under Devices tab.

12:24 Add A Device Air Conditioner > Television > Light > IR Remote > Home Lite as an extender > Switches and Controls > Security and Safety > Trackers > Import from Brilliant Smart App

Select the category of the device.

For example, Select Security and Safety to add a Smart Lock.

5:50 Security and Safety Door Lock

Select Door Lock.

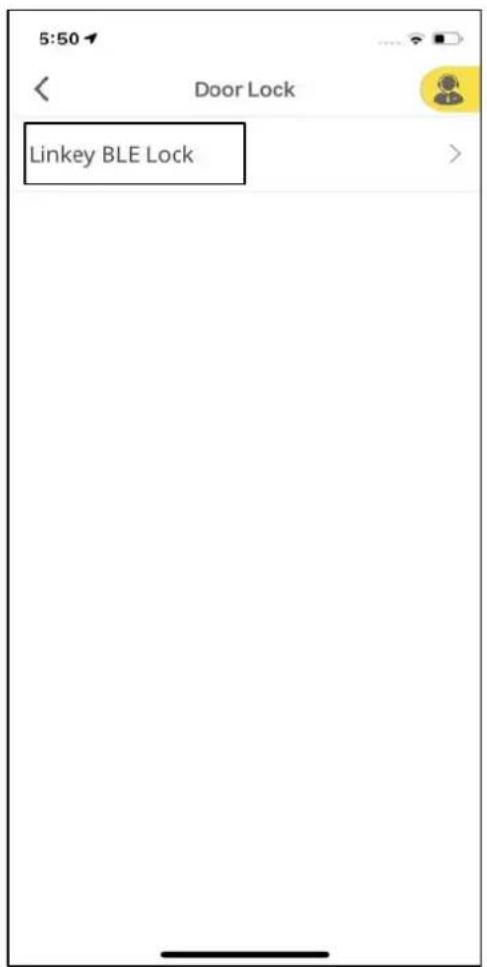
5:50 Door Lock Linkey BLE Lock

Click on Linkey BLE Lock.

5:50 Linkey BLE Lock Follow the Linkey BLE Door Lock documentation to install and setup your device. When this is complete, tap Next below. Next

Refer to the User Guide of Linkey BLE Lock to install the device. Once done, tap Next.

5:51 Linkey BLE Lock Pairing device... Follow your device for Lock documentation to install and setup your device. When this is complete, tap Next below. Next

The device will start to pair with Home Ultimate.

5:51 Linkey BLE Lock Device Information Enter A Device Name Assign Existing Room Add New Room Done

Enter the Device Information and then click on Done.

5:51 Linkey BLE Lock Device added successfully OK Device Information Enter A Device Name Linkey Lock MyHome Add New Room Done

A pop-up appears saying, "Device added successfully."

5:51 Linkey Lock Device Status UNLOCKED LOCK UNLOCK

Click on the device name under Devices tab to check the status of the Lock. Click on Lock/Unlock at the bottom of the screen to control the Lock.

5:51 Linkey Lock Information Name Linkey Lock Change room MyHome > Notification Notify Me History

Click on Settings at the top right corner of the Device Status screen.

Settings include device details such as Device information, Notifications and Device history.

11.2.12 Addition of Zigbee Devices

Tuya Motion Sensor
12:24 Add A Device Air Conditioner Television Light IR Remote Home Lite as an extender Switches and Controls Security and Safety Trackers Import from Brilliant Smart App

Click on Add Device under Devices tab and select a category to add your Zigbee Device.

For Example, To add Tuya Motion Sensor, select Security and Safety category.

1:19 Security and Safety Door Lock Motion Sensors Multi Sensors Door Sensors

Tap on Motion Sensors.

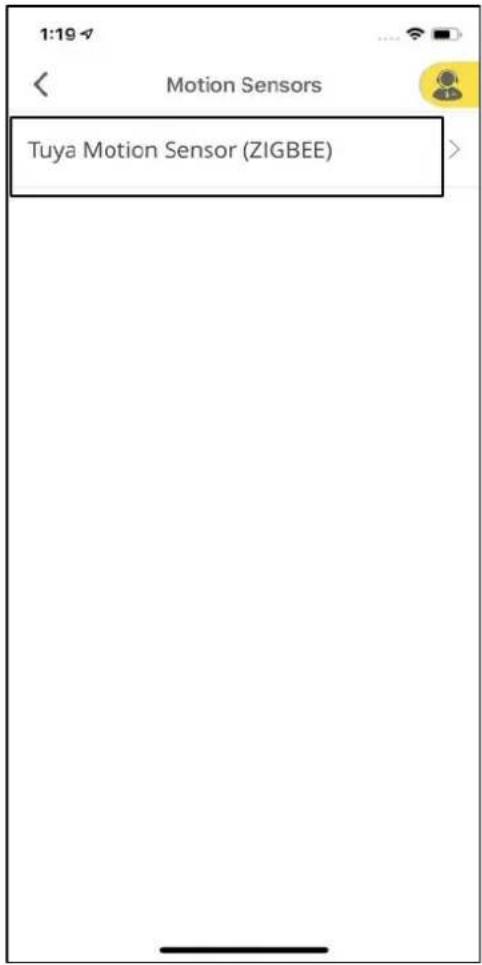
1:19 Motion Sensors Tuya Motion Sensor (ZIGBEE)

Click on Tuya Motion

Sensor (ZIGBEE) to

proceed further.
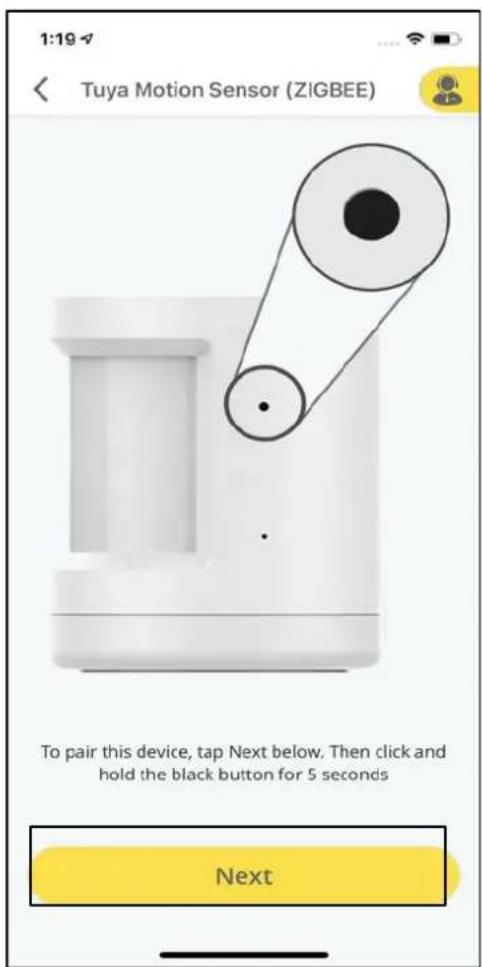
1:19 Tuya Motion Sensor (ZIGBEE) To pair this device, tap Next below. Then click and hold the black button for 5 seconds Next

To pair this device, click on Next below and then press and hold the black button for 5 seconds.

1:20 Tuya Motion Sensor (ZIGBEE) Pairing device... To pair this device, tap Next below. Then click and hold the black button for 5 seconds Next

The device will start pairing with Home Ultimate now.

1:20 Tuya Motion Sensor (ZIGBEE) Device Information Enter A Device Name Assign Existing Room Add New Room Done

Enter the Device information and tap on Done.

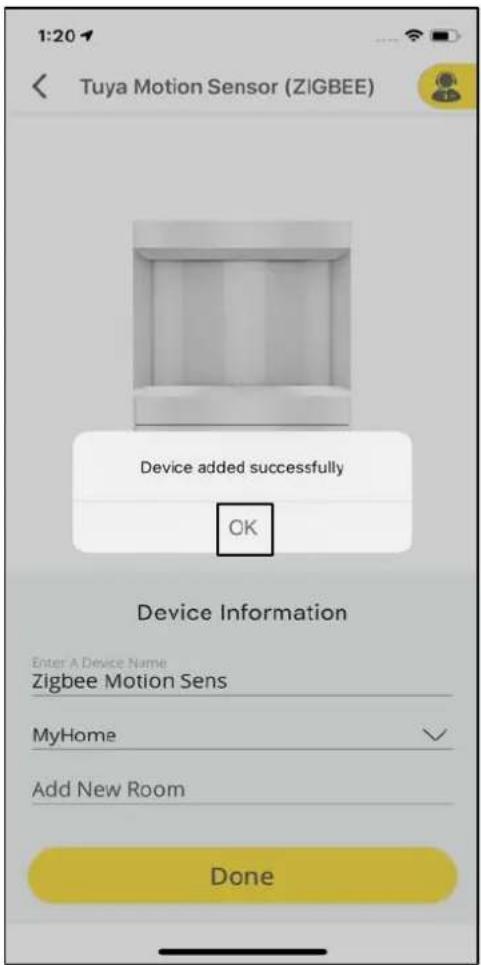
1:20 Tuya Motion Sensor (ZIGBEE) Device added successfully OK Device Information Enter A Device Name Zigbee Motion Sens MyHome Add New Room Done

A pop-up appears saying, "Device added successfully".

1:20 Nexus Home Ultimate Edit Rooms Devices Zigbee Motion Sens > Home Ultimate > Add Device >

Click on your Device name from the list of Devices to check the status.

3:31 Zigbee Motion Sens Device Status EVERYTHING IS OK 67 % BATTERY

User can view the motion sensor status such as (everything is OK, motion detected, & Device Battery Status).

This is the status screen when no motion is detected in the vicinity of the Motion Sensor.

3:30 Zigbee Motion Sens Device Status MOTION DETECTED 67 % BATTERY

This is the status screen whenever any motion is detected in the vicinity of the Motion Sensor.

3:27 Zigbee Motion Sens Information Name Zigbee Motion Sens Change room MyHome > Notification Notify Me History 05-15-2020 67% 15:27:34 battery_status 05-15-2020 MOTION DETECTED 15:27:33 status 05-15-2020 67% 15:25:28 battery_status 05-15-2020 EVERYTHING IS OK 15:25:27 status 05-15-2020 EVERYTHING I…

Click on Settings at the top right corner of the Device Status screen.

Settings include device details such as Device information, Notifications and Device history.

Sengled Element Classic LED Bulb
12:24 Add A Device Air Conditioner Television Light IR Remote Home Lite as an extender Switches and Controls Security and Safety Trackers Import from Brilliant Smart App

Click on Add Device under Devices tab and select a Category to add your Zigbee Device. For Example, To add Sengled Element Classic LED Bulb,, select Light category.

2:08 Light Cree Connected Bulb (ZIGB... Sengled Element Classic LE... Sengled Touch LED Bulb (ZI... Color Control

Tap on Sengled Element Classic LED Bulb.

2:08 Sengled Element Classic LE... To pair this Bulb make sure bulb is deleted then tap Next below and power ON the bulb. Next
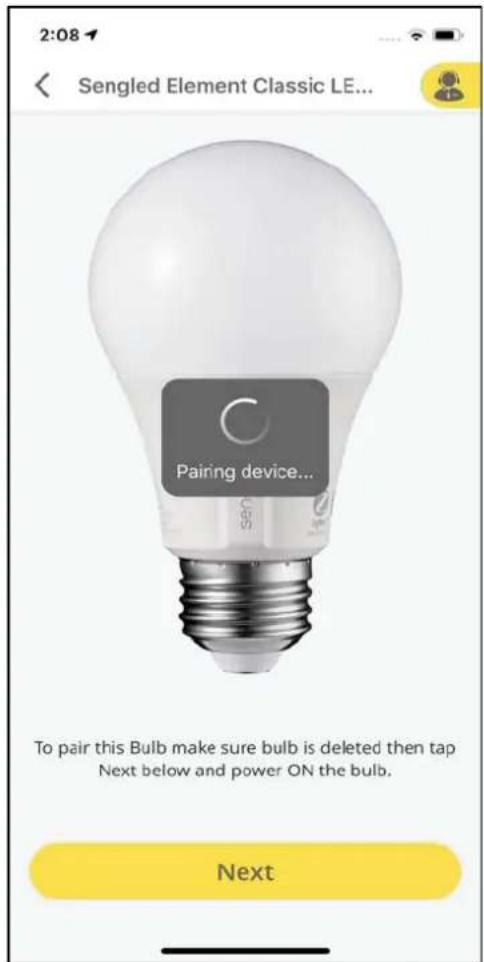
To pair this bulb, make sure bulb is deleted and then tap Next below and power ON the bulb.
2:08 Sengled Element Classic LE... Pairing device... To pair this Bulb make sure bulb is deleted then tap Next below and power ON the bulb. Next
The bulb will now start pairing.

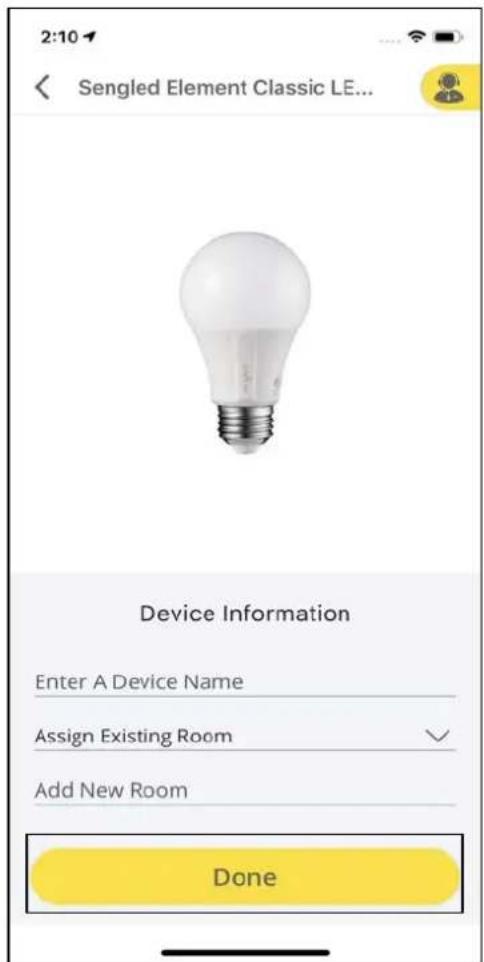
2:10 Sengled Element Classic LE... Device Information Enter A Device Name Assign Existing Room Add New Room Done

Enter the Device Information and click on Done.

2:10 Sengled Element Classic LE... Device added successfully OK Device Information Enter A Device Name Sengled Element Clasic MyHome Add New Room Done

A pop-up appears saying, "Device added successfully".

2:10 Sengled Element Clasic Device Status OFF TURNED OFF DIMMER CONTROL

To check the status of your device, click on the device name under Devices tab.

Tap the circular button highlighted with ON/OFF to control the light.

To control brightness use the slider located under the ON/OFF button.

2:11
Sengled Element Clasic
Information
NameSengled Element Clasic
Change roomMyHome >
Notification
Notify Me
History
05-15-2020BULB TURNED ON
14:11:18status
05-15-202055%
14:11:18dimming_level
05-15-2020NO
14:11:09Notify Me
05-15-2020YES
14:11:05Notify Me

Click on Settings at the top right corner of the Device Status screen.

Settings include device details such as Device information, Notifications and Device history.

11.2.13 Deletion of Devices: Option 1

8:44 Nexus Home Ultimate Edit Rooms Devices WiFi double plug > Home Ultimate > Add Device >

To delete a device, click on Devices tab and then tap on Edit at the top right corner of the screen.

8:44 Edit Devices List WiFi double plug Home Ultimate

Click on the Red "-" icon to delete the device.

9:37 Edit Devices List Ceiling Fan with Light Dyson FAN Extender Glass Wall Switch 1 Do you want to Delete? Cancel Delete Projector Relay Switch Smart Plug Smart Power Strip-b9d8 TV WiFi double plug

A pop-up appears, click on Delete.

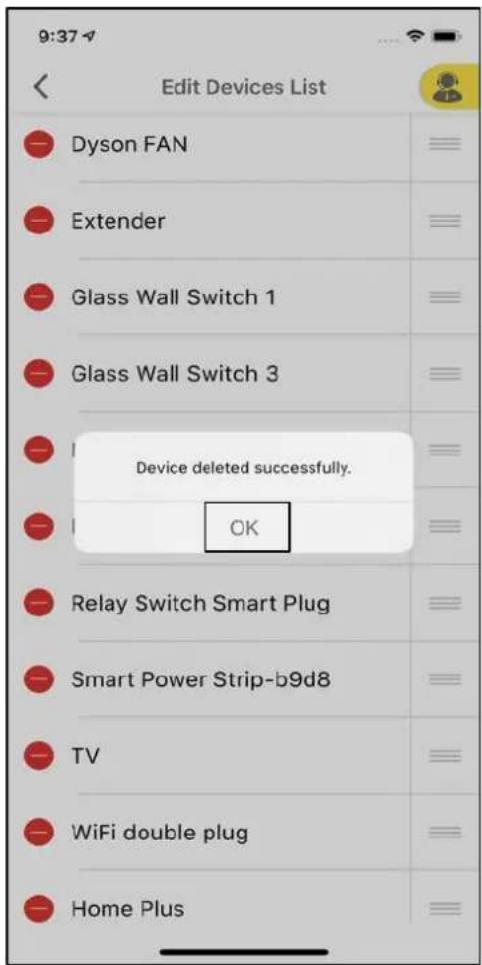
9:37 Edit Devices List Dyson FAN Extender Glass Wall Switch 1 Glass Wall Switch 3 Device deleted successfully. OK Relay Switch Smart Plug Smart Power Strip-b9d8 TV WiFi double plug Home Plus

A pop-up appears confirming that the Device has been deleted successfully.

11.2.14 Deletion of Devices: Option 2

9:37 MyHome Devices AC > Bose Sound Bar > Dyson FAN > Glass Wall Switch 1 > Glass Wall Switch 3 > Motion Sensor-WiFi > Projector > TV >

Select the Rooms that has your devices by clicking on it under the Rooms tab of Devices.

Click on the Edit at the top right corner of the screen.
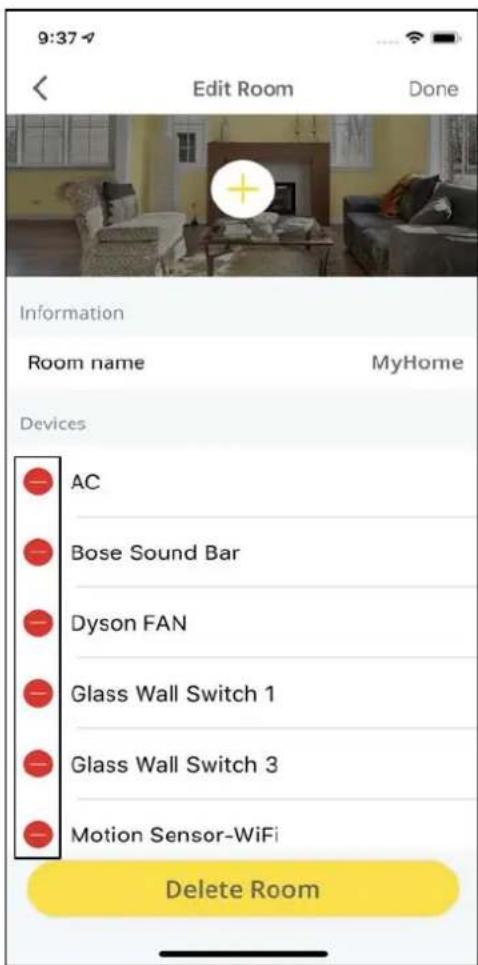
9:37 Edit Room Done Information Room name MyHome Devices AC Bose Sound Bar Dyson FAN Glass Wall Switch 1 Glass Wall Switch 3 Motion Sensor-WiFi Delete Room

Click on Red "-" icon against the device that you want to delete.

9:38 Edit Room Done Information Room name MyHome Devices Do you want to Delete? Cancel Delete Base Sound Bar Dyson FAN Glass Wall Switch 1 Glass Wall Switch 3 Motion Sensor-WiFi Delete Room

A pop-up appears, click on Delete.

Edit Devices List Dyson FAN Extender Glass Wall Switch 1 Glass Wall Switch 3 Device deleted successfully. OK Relay Switch Smart Plug Smart Power Strip-b9d8 TV WiFi double plug Home Plus

A pop-up appears confirming that the Device has been deleted successfully.

11.3 Security

Home Ultimate security feature has the following modes:

When this mode is enabled, all the security devices that are linked to Home Ultimate are activated.

Whenever an unauthorized event is triggered, the Siren is triggered.

Activate ARM mode

Tap on the ARM button and click on OK once the pop up appears.

Edit ARM Mode
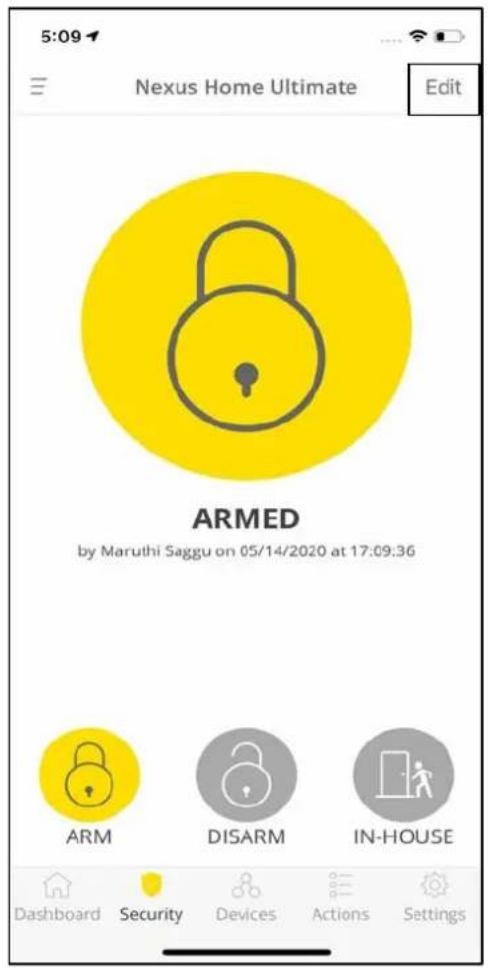
5:09 Nexus Home Ultimate Edit ARMED by Maruthi Saggu on 05/14/2020 at 17:09:36 ARM DISARM IN-HOUSE Dashboard Security Devices Actions Settings

Click on Edit on the Security tab.

5:19 Nexus Home Ultimate Edit DISARMED by Maruthi Saggu on 05/14/2020 at 17:14:38 Cancel Edit Security Done ARM DISARM IN-HOUSE Dashboard Security Devices Actions Settings

Tap on the ARM icon.

5:19 ARM Time Delay Settings 3 Minutes 2 Minutes 1 Minute 30 Seconds 15 Seconds 10 Seconds

Time Delay Setting is a countdown timer, in order to switch from one security mode to the other when selected. Default time delay is 10 seconds.

DISARM Mode
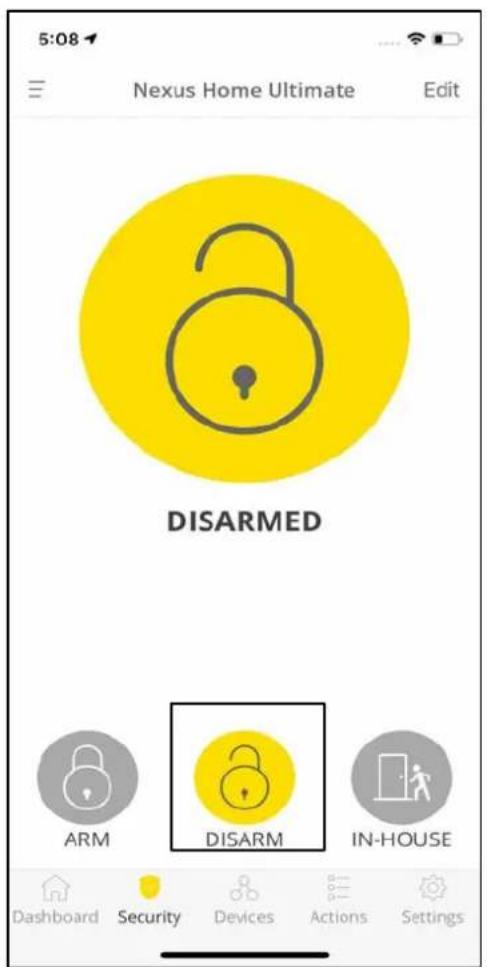
5:08 Nexus Home Ultimate Edit DISARMED ARM DISARM IN-HOUSE Dashboard Security Devices Actions Settings

When this mode is enabled, all the security devices connected to the Hub are disabled. Siren is disabled and notifications are turned "OFF" in case of any intrusion or threat.

Activate DISARM Mode

Tap on the DISARM tab and click on OK once the pop up appears.

IN-HOUSE Mode
5:11 Nexus Home Ultimate Edit IN-HOUSE by Maruthi Saggu on 05/14/2020 at 17:11:06 ARM DISARM IN-HOUSE Dashboard Security Devices Actions Settings

This is a custom security mode which allows the user to select the desired devices to be activated. The selected devices will trigger the alarm in case of an intrusion while you are at home.

Activate IN-HOUSE Mode:

Tap on the IN-HOUSE tab and click OK once the pop up appears.

Edit IN-HOUSE Mode
5:11 Nexus Home Ultimate Edit IN-HOUSE by Maruthi Saggu on 05/14/2020 at 17:11:06 ARM DISARM IN-HOUSE Dashboard Security Devices Actions Settings

Click on Edit on the top right corner of Security tab.

5:19 Nexus Home Ultimate Edit DISARMED by Maruthi Saggu on 05/14/2020 at 17:14:38 Cancel Edit Security Done ARM DISARM IN-HOUSE Dashboard Security Devices Actions Settings

Tap on the IN-HOUSE icon.

5:20 IN-HOUSE Alarms and Sirens Siren MyHome Door Sensors Door Sensor WiFi MyHome Motion Sensors Motion Sensor-WiFi MyHome

Select the devices that should be activated when the IN-HOUSE mode is enabled.

11.4 Actions

nexus

graph TD A["Actions"] --> B["Quick Trigger"] B --> C["Add a Sequence"] B --> D["Add Quick Action"] A --> E["Time"] A --> F["Location"] A --> G["Device"]

11.4.1 Sequence Action

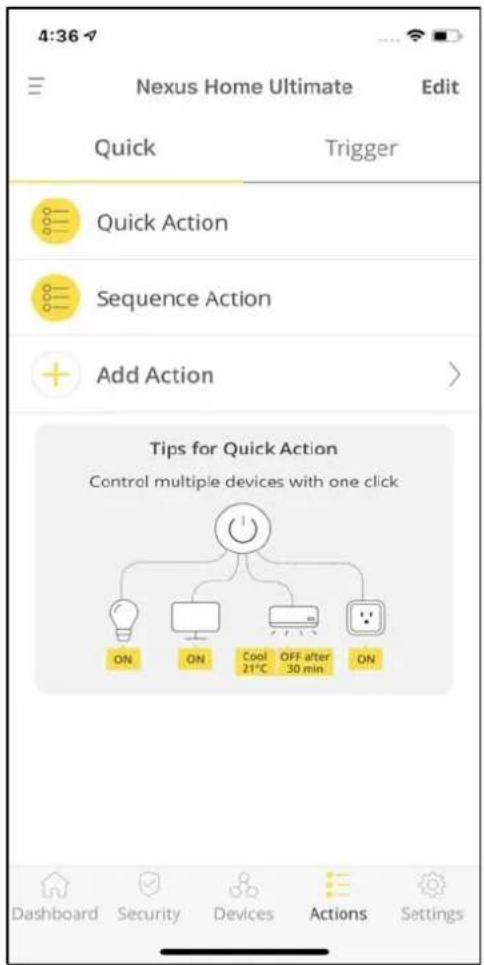
4:36 Nexus Home Ultimate Edit Quick Trigger Quick Action Sequence Action Add Action > Tips for Quick Action Control multiple devices with one click ON ON Cool 21°C OFF after 30 min ON Dashboard Security Devices Actions Settings

How to add a Sequence Action

4:36 Nexus Home Ultimate Edit Quick Trigger Quick Action Sequence Action Add Action Tips for Quick Action Control multiple devices with one click ON ON Cool 21°C OFF after 30 min ON Dashboard Security Devices Actions Settings

Sequence Action allows the user to run an activity using multiple devices performing an action one after the other with a desired time gap with just a single click.

To add a Sequence action, click on Actions on the Home Screen and then select Quick.

Next, click on Add Action.

graph TD A["Add Action"] --> B["Add a Sequence"] B --> C["ON"] C --> D["Play"] D --> E["Select HDMI"] E --> F["Wait for 1 sec"] F --> G["ON"] G --> H["Wait for 5 sec"] H --> I["Wait for 10 sec"] I --> J["Wait for 20 sec"] J --> K["Wait for 30 sec"] K --> L["Wait for 40 sec"] L --> M["Wait for 50 sec…

Tap on Add a Sequence.

9:26 Add Action Save Action Setting Action Name Enter Name Icon > Notification Select > Device Setting Devices >

Enter the Name for your Action.

9:27 Select Icon

Select an Icon of your choice for the Action.

9:27 Notification Save Show timeline Push Notification

Turn ON/OFF the toggle to receive the notifications for Actions.

9:27 Devices Save Select Device key and set interval. You can add up to 20 keys. Add Device >

Tap on Add Device to start adding devices for your Action.

Note: You can add up to 20 keys for an Action.
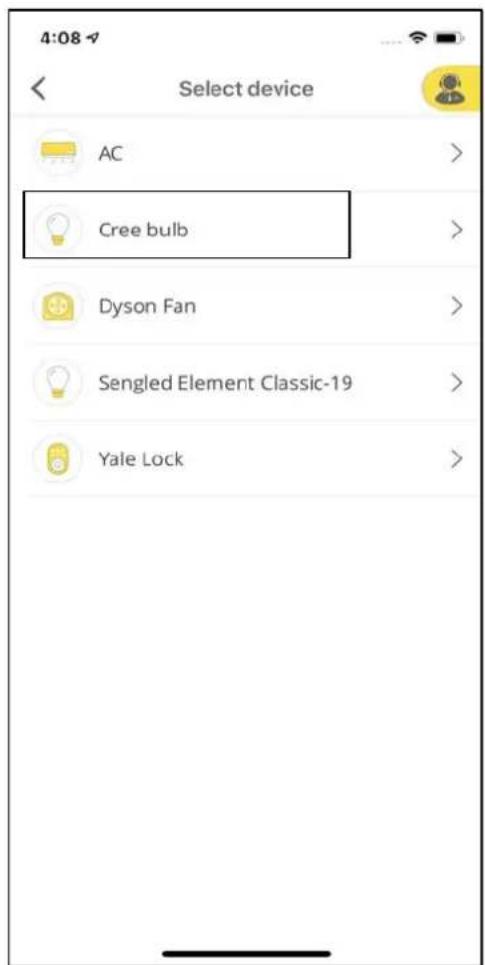
4:08 Select device AC Cree bulb Dyson Fan Sengled Element Classic-19 Yale Lock

Select the device that you want to add.

For example, Cree Connected Bulb.
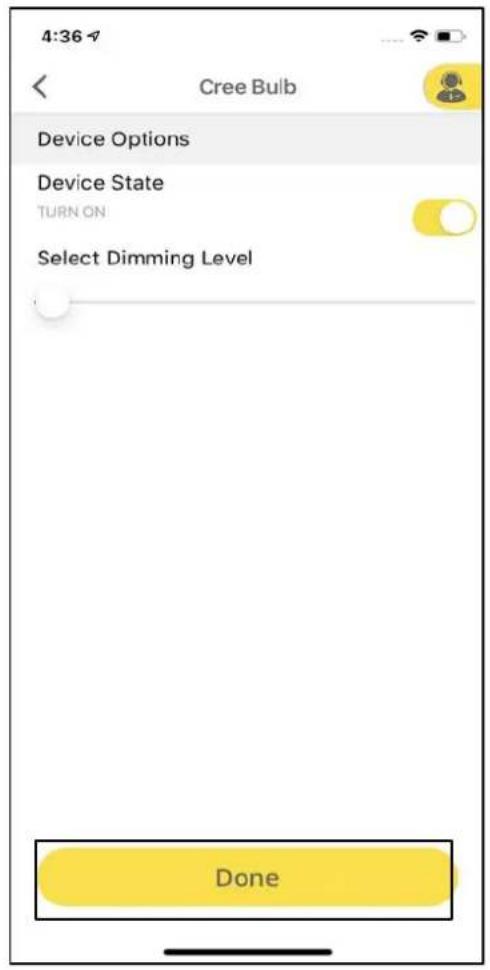
4:36 Cree Bulb Device Options Device State TURN ON Select Dimming Level Done

Select the Device State.

4:08 Devices Save Select Device key and set interval. You can add up to 20 keys. START Cree bulb Dimmer ON at 56% Add Device

Click on Add Device to add more devices to the Action.

4:08 Select device AC Dyson Fan Sengled Element Classic-19 Yale Lock

Select the next device that you want to add.

For example, Sengled Element Classic LED Bulb..

4:36 Sengled Element Clasic Device Options Device State TURN ON Select Dimming Level Done

Select the Device State.

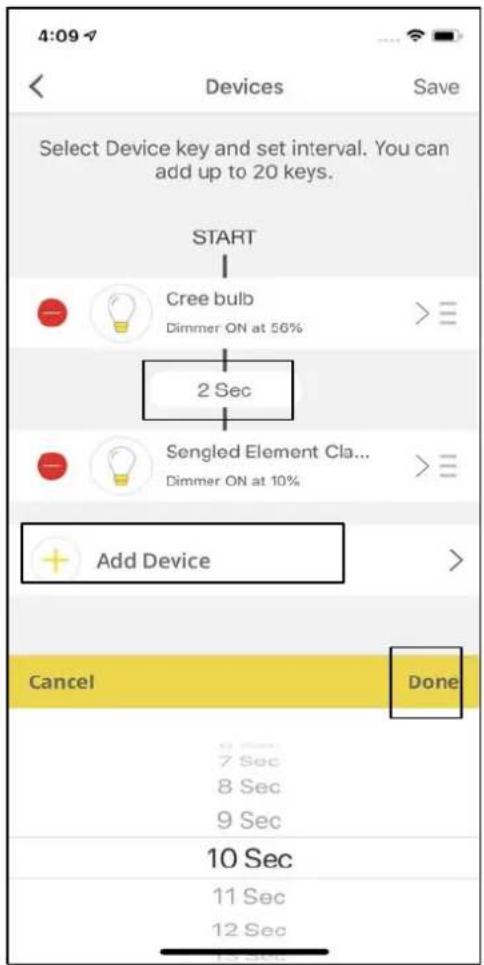
4:09 Devices Save Select Device key and set interval. You can add up to 20 keys. START Cree bulb Dimmer ON at 56% 2 Sec Sengled Element Cla... Dimmer ON at 10% Add Device Cancel Done 7 Sec 8 Sec 9 Sec 10 Sec 11 Sec 12 Sec

Click on the timer to change the time gap between the two devices to perform an action and click on Done.

Select Add Device to add more devices.

4:09 Select device AC Dyson Fan Yale Lock

Select the Device that you want to add.

For example, Yale Lock.

4:36 Yale Lock Device Options Device State UNLOCK Done

Select the Device State

1:56 Add Action Save Action Setting Action Name Sequence Action Icon > Notification Select > Device Setting Nexus Home Action created successfully > OK

Tap on Save at the top right of the screen.

A pop-up appears saying, "Action created successfully".

11.4.2 Quick Action
graph TD A["Start"] --> B["On"] B --> C["Play"] C --> D["Select HDMI"] D --> E["Start for 1 sec"] E --> F["Start for 3 sec"] F --> G["Start for 10 sec"] G --> H["Start for 10 sec"] H --> I["Start for 10 sec"] I --> J["Start for 10 sec"] J --> K["Start for 10 sec"] K --> L["Start for 10 sec"] L --> M…

How to add Quick Action
9:26 Add Action Save Action Setting Action Name Enter Name Icon Notification Select Device Setting Devices >

Quick action allows you to control multiple devices such as lights, television and air conditioner with one click.

To add Quick action, click on the Actions tab and then click on Quick.

Select Add Quick Action.

Provide the Action Name, Icon and Notifications for the Action.

10:01 Devices Save Select device status. You can add up to 10 devices Add Device >

Click on Add Device under Devices to add devices to your Action.

4:08 Select device AC Cree bulb Dyson Fan Sengled Element Classic-19 Yale Lock

Select the device that you want to add.

For example, Cree Bulb.

4:36 Cree Bulb Device Options Device State TURN ON Select Dimming Level Done

Select the Device State.

4:34 Devices Save Select device status. You can add up to 10 devices Cree Bulb Dimmer ON at 29% Yale Lock Door LOCK Sengled Element Clasic Dimmer ON at 20% Add Device

Click on Add Device to add more devices. After adding devices, click on Save at the top right corner of the screen.

12:38 Add Action Save Action Setting Action Name Bot in Quick Actions Icon > Notification Select > Device Setting Nexus Home Action created successfully > Devi OK

A pop-up appears saying, "Action created successfully."

Trigger Based Actions

11.4.3 Time Based Trigger Action

4:07 Nexus Home Ultimate Edit Quick Trigger Add Action > Tips for Trigger Control multiple devices when input triggered ON ON Cool 21°C OFF after 30 min ON Dashboard Security Devices Actions Settings

Time based Action helps user to create a set of Actions based on a specific time. It allows you to control multiple devices at the selected Time.

How to add Time based Action

10:16 Add Action Save Select Trigger Trigger Select > Action Setting Action Name Enter Name Icon > Notification Select > Select Device Devices >

To add a Trigger Action, click on Actions tab and then select Trigger.

10:16 Select Trigger Time Location Device

Select the Time based trigger out of the list.
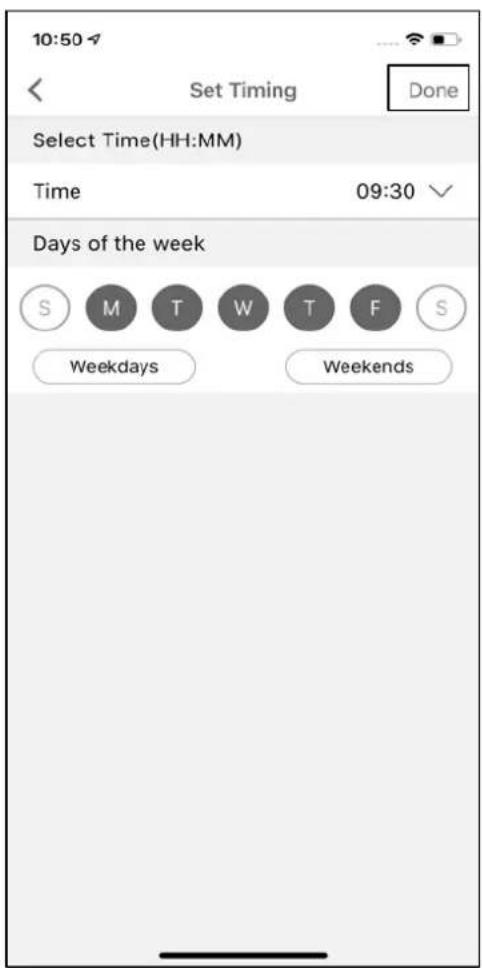
10:50 Set Timing Done Select Time(HH:MM) Time 09:30 Days of the week S M T W T F S Weekdays Weekends

Select the Time and Days for the Action to be executed and then click on Done.
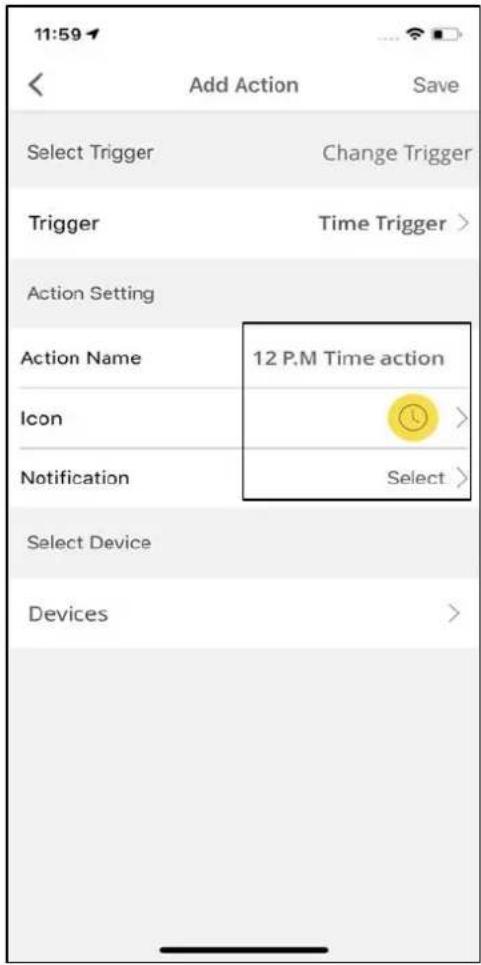
11:59 Add Action Save Select Trigger Change Trigger Trigger Time Trigger > Action Setting Action Name 12 P.M Time action Icon > Notification Select > Select Device Devices >

Provide the Action Name, select the Icon and Notifications.

10:17 Devices Save Select device status. You can add up to 10 devices Add Device >

Click on Add Device under Devices to add devices to your Action.

4:08 Select device AC Cree bulb Dyson Fan Sengled Element Classic-19 Yale Lock

Select the Device that you would want to add to your Action.

For example, Cree Bulb.

11:59 Ac Device Options Select key Done

Select the Device State.

11:14 Devices Save Select device status. You can add up to 10 devices Cree bulb Dimmer ON at 20% Add Device >

Click on Add Device to add more devices.

Note: Only 10 devices can be added to a Trigger based action.
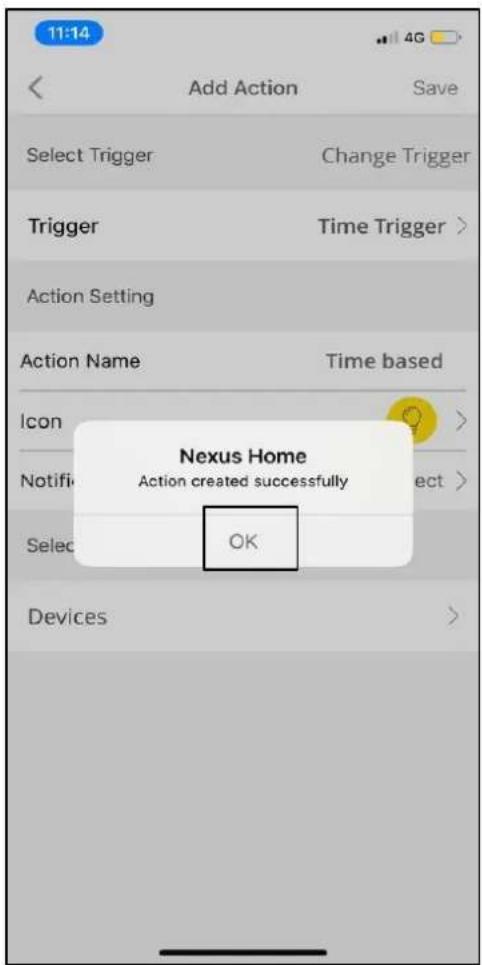
11:14 Add Action Save Select Trigger Change Trigger Trigger Time Trigger > Action Setting Action Name Time based Icon > Notify Action created successfully Select > Select OK Devices >

After adding all the devices, click on Save on the top right of the screen.

A pop-up appears mentioning, "Action added successfully."

11.4.4 Location Based Trigger Action

4:07 Nexus Home Ultimate Edit Quick Trigger Add Action Tips for Trigger Control multiple devices when input triggered ON ON Cool 21°C OFF after 30 min ON Dashboard Security Devices Actions Settings

Geofencing, a location-based service which allows Nexus Home App to use Wi-Fi to trigger a pre-programmed action when a mobile device enters or exits a virtual boundary set up around a geographical location, known as a geofence.

You can set actions before you enter or exit a particular area. For example, turn on all connected devices when you're 600 metres away from home.

10:16 Select Trigger Time Location Device

Select the Location based trigger out of the list after selecting Trigger Action by tapping on Actions tab.
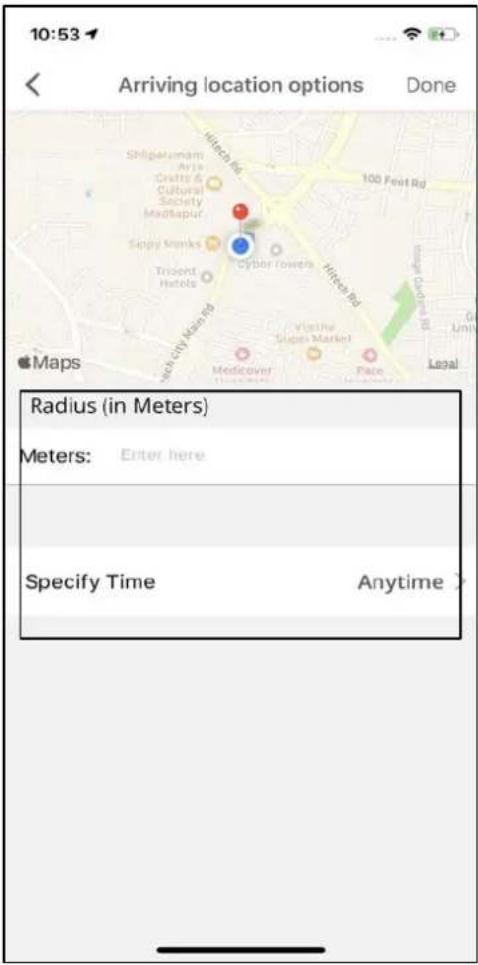
10:53 Arriving location options Done Shijiazhuangm Arja Crafts & Cultural Society Madhapur Sinyi Manks Trigent Hotels Glybor Rowers Witsea Rd Medicover (100 Feet Rd) Visthe Slope Market Legal Radius (in Meters) Meters: Enter here Specify Time Anytime

Enter the radius (in meters) and choose the specific day and time for the action to be executed.
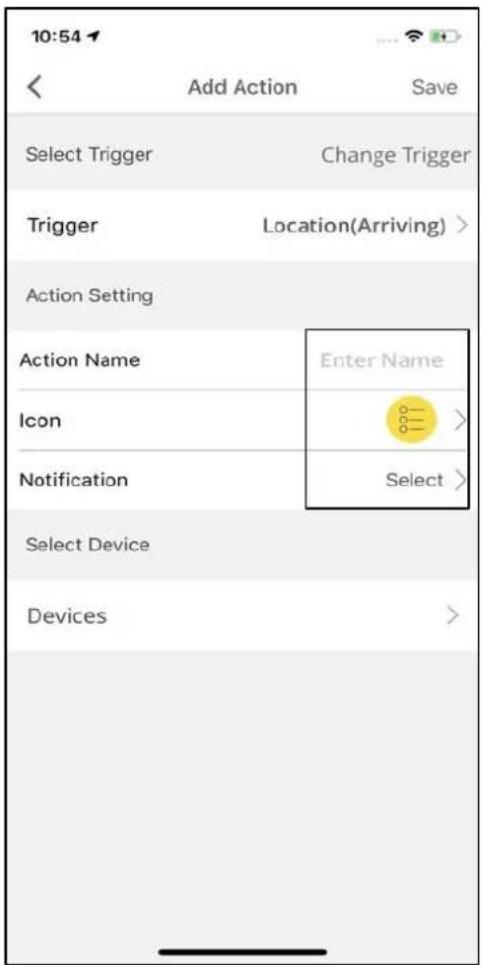
10:54 Add Action Save Select Trigger Change Trigger Trigger Location(Arriving) > Action Setting Action Name Enter Name Icon > Notification Select > Select Device Devices >

Enter the Action Name, select Icon and Notifications and click on Devices.
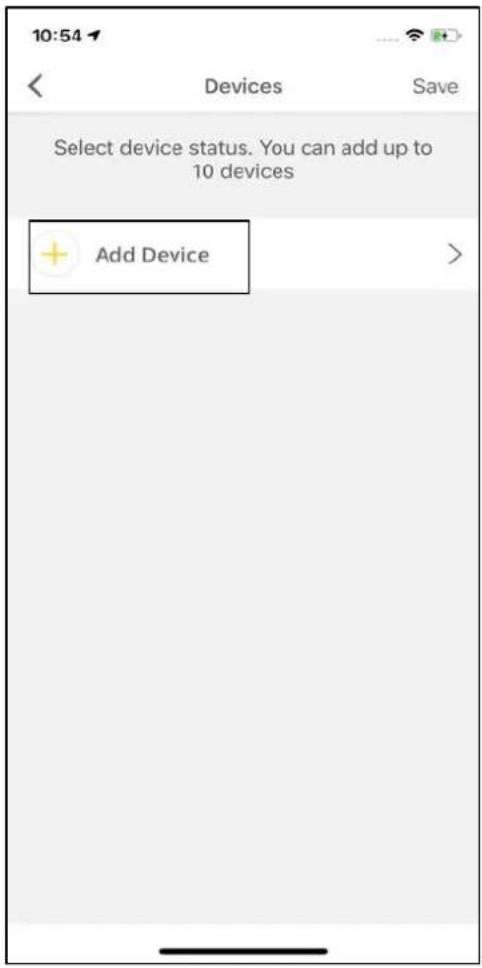
10:54 Devices Save Select device status. You can add up to 10 devices Add Device >

Click on Add Device to add devices to your Action.

Note: Only 10 devices can be added for a Location Based Trigger Action.

4:08 Select device AC Cree bulb Dyson Fan Sengled Element Classic-19 Yale Lock

Select the Device to be added.

For example, Sengled Element Classic Bulb.

4:09 Sengled Element Classic-19 Device Options Device State Turn ON Select Dimming Level Done

Select the Device State and click on Done.

11:18 Devices Save Select device status. You can add up to 10 devices Sengled Element Classic-19 Dimmer ON at 20% Add Device

Click on Add Device again to add more devices and follow the steps.

Tap on Save at the top right corner of the screen once all the devices are added.

10:54 Add Action Save Select Trigger Change Trigger Trigger Location(Arriving) > Action Setting Action Name Location Arriving Icon Nexus Home Action created successfully OK Notifi Select Devices

A pop-up appears mentioning, "Action created successfully".

11.4.5 Device Based Trigger Action
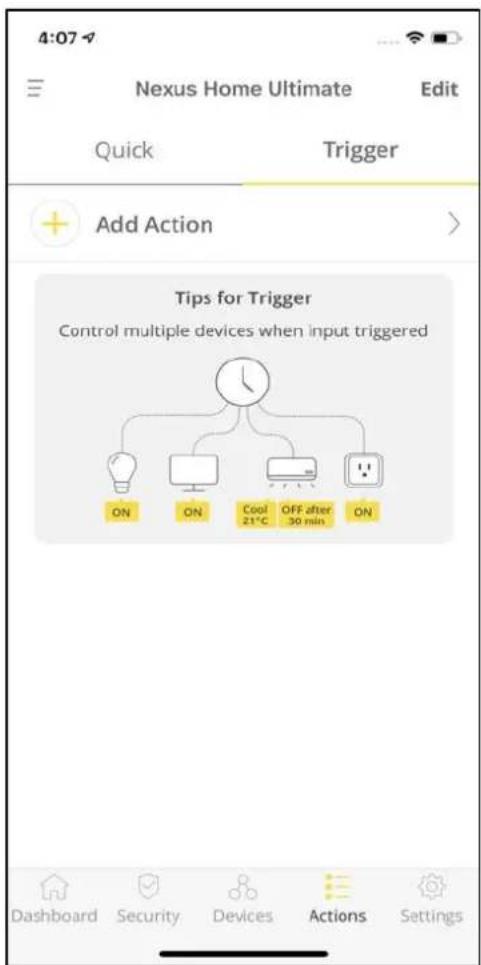
4:07 Nexus Home Ultimate Edit Quick Trigger Add Action > Tips for Trigger Control multiple devices when input triggered ON ON Cool 21°C OFF after 30 min ON Dashboard Security Devices Actions Settings

Device based actions can be triggered on the basis of a security & safety device or Light intensity and Temperature Sensor associated with the hub.
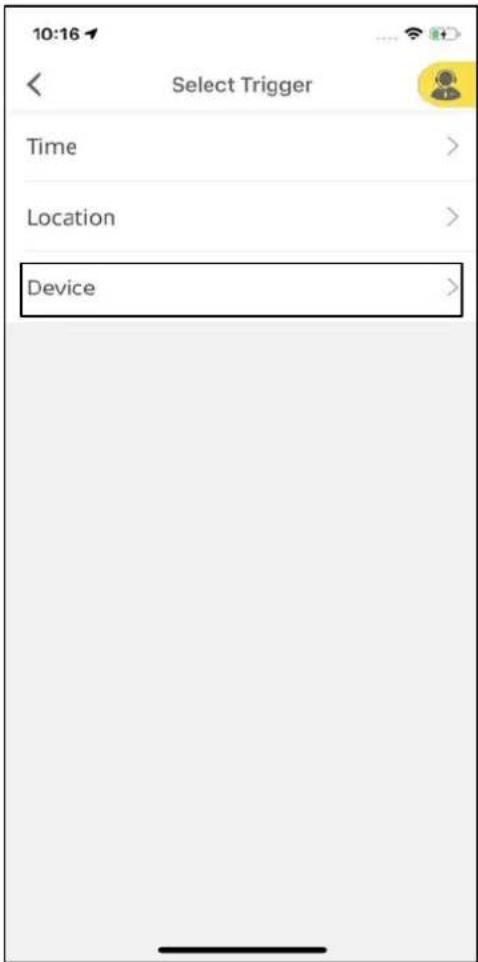
10:16 Select Trigger Time Location Device

Select the Device based trigger out of the list after selecting Trigger Action by tapping on Actions tab.

4:07 Select Trigger Home Ultimate Door Sensors Motion Sensor Multi Sensors Smoke Sensors BLE Tracker

Select the category forthe device that you wantto add to your Action.For example, DoorSensors.
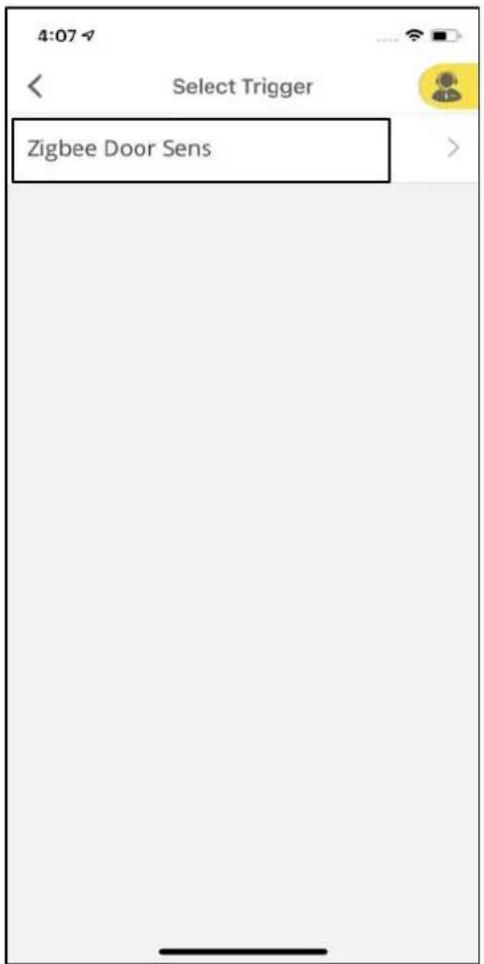
4:07 Select Trigger Zigbee Door Sens

Tap on Zigbee Door Sens.

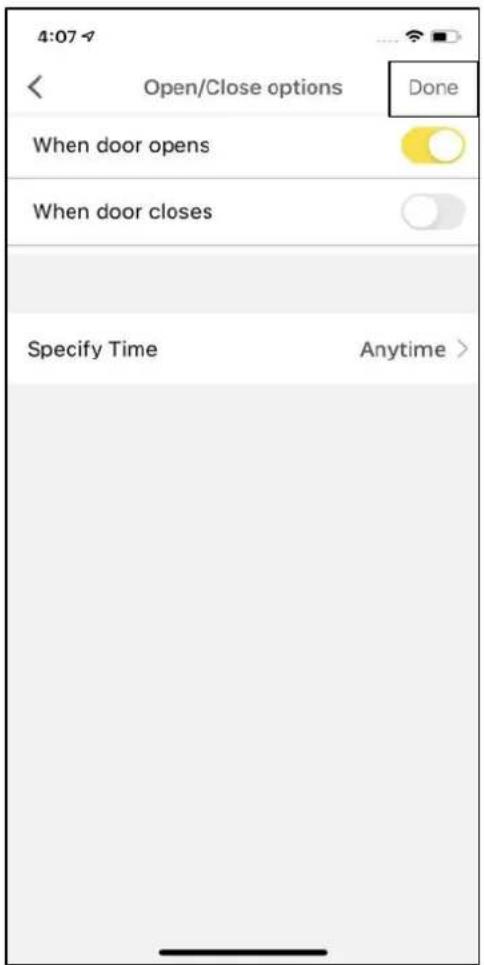
4:07 Open/Close options Done When door opens When door closes Specify Time Anytime >

Set the conditions for the trigger to be executed and specify the day and time.

Click on Done at the top right corner of the screen.

4:09 Add Action Save Select Trigger Change Trigger Trigger Device (Zigbee Door Sens) > Action Setting Action Name When Door Opens Icon > Notification Select > Select Device Devices >

Enter the Action Name, select an Icon for the Action and Notifications.

Click on Devices to proceed further.

11:18 Devices Save Select device status. You can add up to 10 devices Add Device >

Tap on Add Device to add devices to the Action and follow the steps and then click on Save on the top right of the screen. A pop-up will appear mentioning, "Action created successfully".

11.5 Managing Favourites
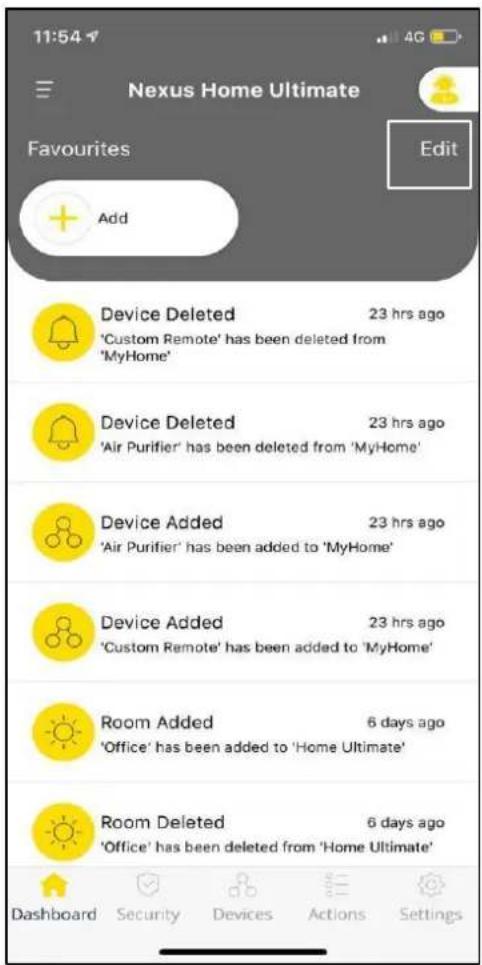
11:54 Nexus Home Ultimate Favourites Edit Add Device Deleted 23 hrs ago 'Custom Remote' has been deleted from 'MyHome' Device Deleted 23 hrs ago 'Air Purifier' has been deleted from 'MyHome' Device Added 23 hrs ago 'Air Purifier' has been added to 'MyHome' Device Added 23 hrs ago 'Custom Remote' has…

To add Devices/Actions to Favourites, click on Edit at the top right of the screen.

11:26 Manage Favourites Quick Actions Sequence Action Devices AC Cree bulb Dyson Fan Sengled Element Classic-19 Yale Lock Done

Select the Star Icon to add the Devices/Actions and tap on Done. Devices/Actions used frequently can be added to the Favourites for ease of control.

11:28 Nexus Home Ultimate Favourites Edit AC Control Cree bulb Control Sengled Element Classic-19 Control Sequence Action Execute Add Action Deleted 1 min ago 'Location Trigger' has been deleted from 'MyHome' Action Added 9 min ago 'Location Trigger' has been added to 'MyHome' Action Deleted 13 min…

The selected Devices/Actions will be displayed on the Dashboard.

11.6 Settings in Home Ultimate

1:15 Nexus Home Ultimate Information Profile > E-Mail nexustest345@gmail.com Password ******** > Settings Hub Settings > Account Settings > Notify Me Manage Users > Support Customer Support > Log out Dashboard Security Devices Actions Settings

The Settings screen shows the following categories:

Information: It displays the user's profile information, registered Email ID and Password.

Settings: This category provides information on Hub Settings, Account Settings, Notify me and Manage Users.

Support: It provides the Customer Support details.

Logout: Click on Logout to exit the App.

The top right icon allows the user to contact the Customer Support if needed.

11.6.1 Hub Settings

1:17 Hub Settings Hub Name: Home Ultimate Hub Type: Nexus Home Ultimate Hub ID: 240AC4473048 Hub Firmware: 1.0,Rev01 Hub Status: Online Hub Access Point: BA-2G Edit Settings Change Access Point > Change Location > Reset Zigbee Radio > Reset BLE Radio >

Under Hub Settings user can know Hub name, type, ID, Firmware, Status and access point to which Home Ultimate is connected.

11.6.2 Change Access Point
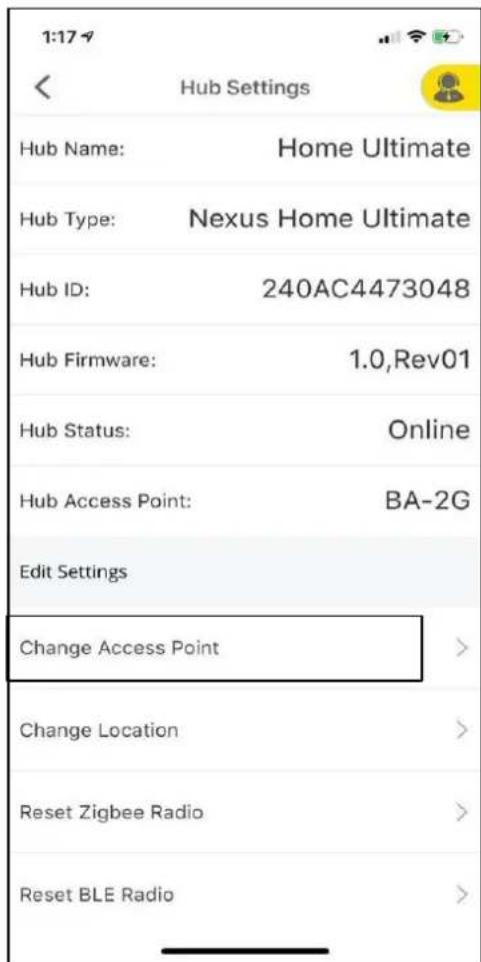
1:17 Hub Settings Hub Name: Home Ultimate Hub Type: Nexus Home Ultimate Hub ID: 240AC4473048 Hub Firmware: 1.0,Rev01 Hub Status: Online Hub Access Point: BA-2G Edit Settings Change Access Point > Change Location > Reset Zigbee Radio > Reset BLE Radio >

To Change Access Point, select Change Access Point under Hub Settings.

11:29 Hub Settings Hub Name: Home Ultimate Hub Hub Type: Nexus Home Ultimate Hub ID: 4C11AEB69420 Provide password to continue Password Show Password Edit S Cancel OK Change Access Point Change Location Reset Zigbee Radio Reset BLE Radio

Change Access Point is similar to changing the Wi-Fi network that it is on.

Enter your Nexus Home Password and tap OK.

10:41 Home Ultimate Setup Select your preferred Wi-Fi network to connect Home Ultimate to the network. If you can't see your Wi-Fi network, enter SSID manually. Enter SSID Refresh JioPrivateNet WPA/WPA2 PSK BlazeServer WPA/WPA2 PSK Blaze-Server-28 WPA/WPA2 PSK Dlink_Guest WPA/WPA2 PSK JioNet No Secu…

Select the desired Wi-Fi network from the list and enter the password of the network.

Note: If you do not see the Wi-Fi network in the list, tap Refresh at the top-right corner. If you still do not see the Wi-Fi network list, tap Enter SSID to manually enter the name of your Wi-Fi router.

4:31 Wi-Fi Setting Enter your WiFi password or 'Select Wi- Fi' to choose another network CS_Blaze Select Wi-Fi cs@blaze@1 CS@ Connect your mobile device to 'CS_Blaze' Select 'CS_Blaze' Wi-Fi network from the Wi-Fi settings screen on your mobile device and return to the Nexus Home App. OK

Tap Connect Wi-Fi. A pop-up appears to connect your phone to the Wi-Fi network to which the Home Ultimate is connected and return to the Nexus Home App.
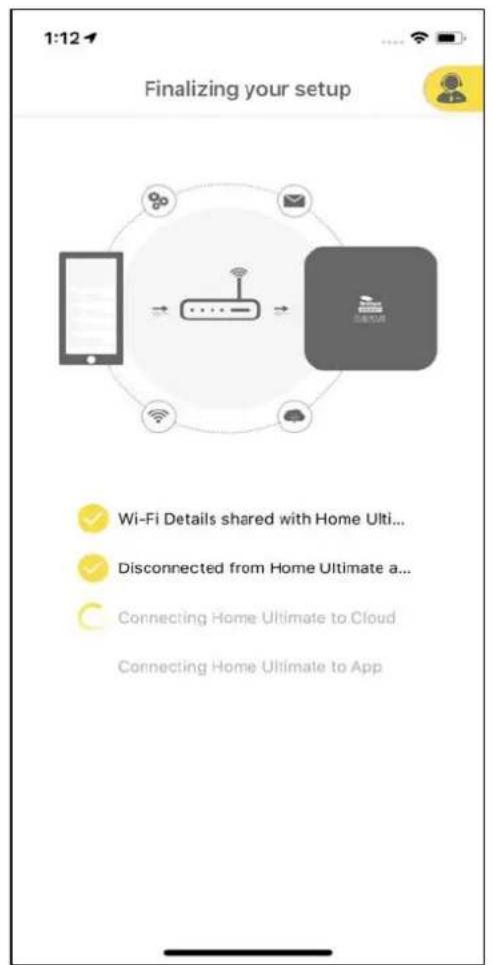
1:12 Finalizing your setup Wi-Fi Details shared with Home Ulti... Disconnected from Home Ultimate a... Connecting Home Ultimate to Cloud Connecting Home Ultimate to App

The Home Ultimate connects to your Wi-Fi network, Cloud and mobile App.
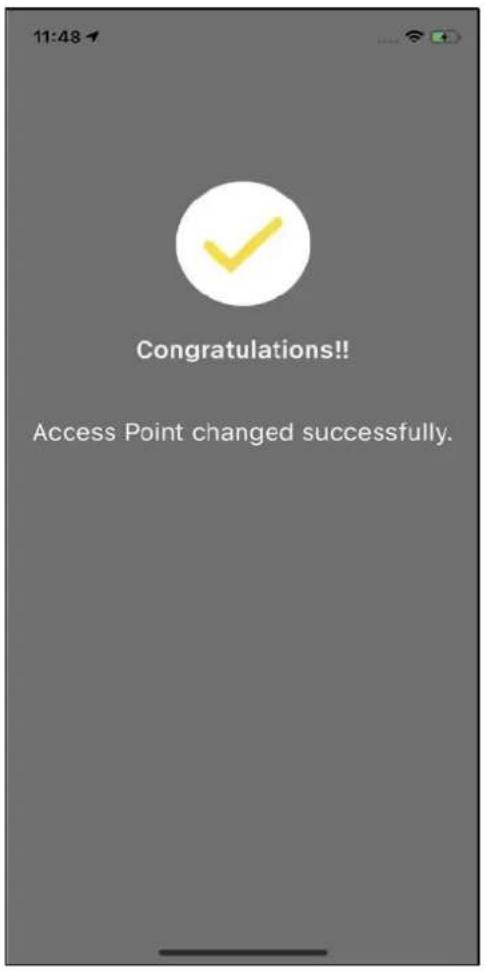
11:48 Congratulations!! Access Point changed successfully.

A message appears saying, "Access Point changed successfully."

11.6.3 Change Location

1:17 Hub Settings Hub Name: Home Ultimate Hub Type: Nexus Home Ultimate Hub ID: 240AC4473048 Hub Firmware: 1.0,Rev01 Hub Status: Online Hub Access Point: BA-2G Edit Settings Change Access Point > Change Location > Reset Zigbee Radio > Reset BLE Radio >

Change Location under Hub Settings allows the user to change the location on maps where Home Ultimate is installed.

Edit Location Madhapur Traff Control Room Paradise ais Gold Sippy Monks KFC 360 Realtiers Eip Kanak - Trident Hyderabad Amara - Trident Hotels Ninety Six Health Boosters Trident Hotels Manidit Online Hadoop Training Cyber Towers Mapsn The Wat Legal Zip Code State City Address Done

Enter the details of the location and tap on Done.

11.6.4 Reset Zigbee Radio
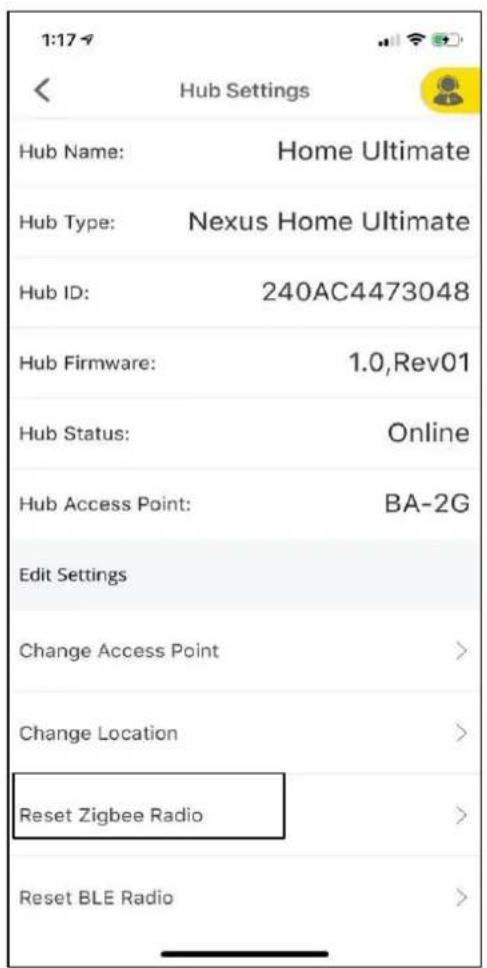
1:17 Hub Settings Hub Name: Home Ultimate Hub Type: Nexus Home Ultimate Hub ID: 240AC4473048 Hub Firmware: 1.0,Rev01 Hub Status: Online Hub Access Point: BA-2G Edit Settings Change Access Point > Change Location > Reset Zigbee Radio > Reset BLE Radio >

Tap Reset Zigbee Radio. This will delete all the Zigbee Devices added to your Home Ultimate.

5:46 Hub Settings Hub Access Point: BA-2G Edit Settings Change Access Point > Change Location > Nexus Home 'Reset ZigBee' will delete all your ZigBee devices from your Nexus Home Hub and App. Select OK to reset ZigBee radio. Reset Cancel OK Reset Actions > Update Hub Firmware > Check for Home update…

A pop-up appears confirming if you want to delete all the Zigbee Devices from your Nexus Home Hub. Click on OK.

1:01 Hub Settings Hub Status: Online Hub Access Point: BA-2G Edit Settings Change Access Point > Nexus Home ZigBee reset successful. Reset OK Reset BLE Radio > Reset Actions > Update Hub Firmware > Check for Home updates >

A pop-up appears mentioning, "Zigbee reset successful".

11.6.5 Reset BLE Radio
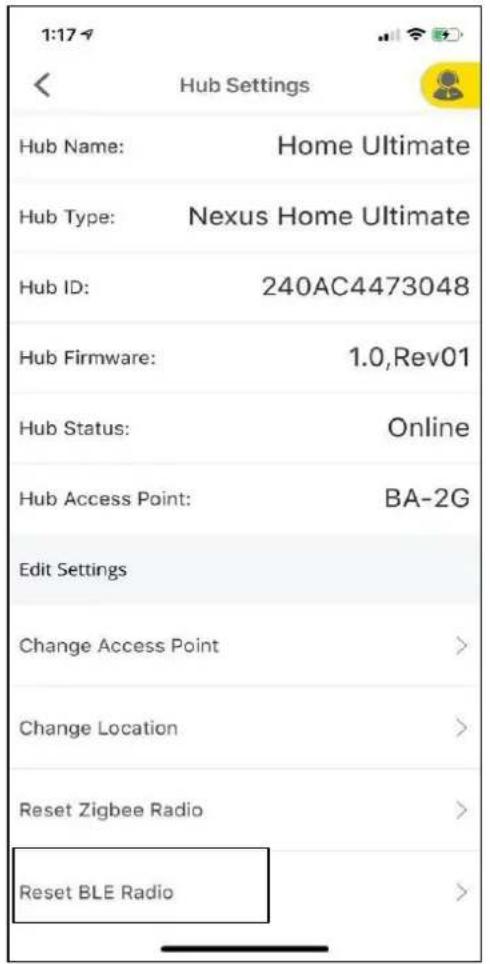
1:17 Hub Settings Hub Name: Home Ultimate Hub Type: Nexus Home Ultimate Hub ID: 240AC4473048 Hub Firmware: 1.0,Rev01 Hub Status: Online Hub Access Point: BA-2G Edit Settings Change Access Point > Change Location > Reset Zigbee Radio > Reset BLE Radio >

Tap Reset BLE Radio. This will delete all the BLE devices added to your Home Ultimate.

5:46 Hub Settings Hub Access Point: BA-2G Edit Settings Change Access Point + Change Location + Nexus Home 'Reset BLE' will delete all your BLE devices from your Nexus Home Hub and App. Select OK to reset BLE radio. + Reset Cancel OK Reset Actions + Update Hub Firmware + Check for Home updates + Res…

A pop-up will appear confirming if you would want to delete all the BLE Devices from your Nexus Home Hub. Click on OK.

1:00 Hub Settings Hub Firmware: 1.0,Rev01 Hub Status: Online Hub Access Point: BA-2G Edit Settings Nexus Home BLE reset successful. OK Reset Zigbee Radio Reset BLE Radio Reset Actions Update Hub Firmware Check for Home updates

A pop-up appears mentioning, "BLE reset successful."

11.6.6 Reset Actions

11:47 Hub Settings Hub Access Point: BA-2G Edit Settings Change Access Point > Change Location > Reset Zigbee Radio > Reset BLE Radio > Reset Actions > Update Hub Firmware > Check for Home updates > Reset Hub >

Tap Reset Actions. This will delete all the Actions added to your Home Ultimate.

11:29 Hub Settings Home Ultimate Hub Hub Type: Nexus Home Ultimate Hub ID: 4C11AEB69420 Provide password to continue Password Show Password Edit S Cancel OK Change Access Point Change Location Reset Zigbee Radio Reset BLE Radio

Enter your Nexus Home Password and tap OK.

11.6.7 Update Hub Firmware

6:04 Hub Settings Hub ID: 240AC4C0510C Hub Firmware: 1.0,Rev01 Hub Status: Online Hub Access Point: CS_Blaze Edit Settings Change Access Point > Change Location > Reset Actions > Update Hub Firmware > Check for Home updates > Reset Hub >

Tap Update Hub Firmware under Hub Settings.

A Firmware update is a software program that can be used to update the firmware of the Home Ultimate.

11:29 Hub Settings Home Ultimate Hub Hub Type: Nexus Home Ultimate Hub ID: 4C11AEB69420 Provide password to continue Password Show Password Edit S Cancel OK Change Access Point Change Location Reset Zigbee Radio Reset BLE Radio

Enter your Nexus Home Password and tap OK.

4:43 Hub Settings Hub Status: Online Hub Access Point: BA-2G Edit Settings Change Access Point > Change Firmware updated successfully > OK Reset BLC Radio > Reset Actions > Update Hub Firmware > Check for Home updates > Reset Hub >

A pop-up appears displaying, "Firmware updated successfully."

11.6.8 Check for Home Updates
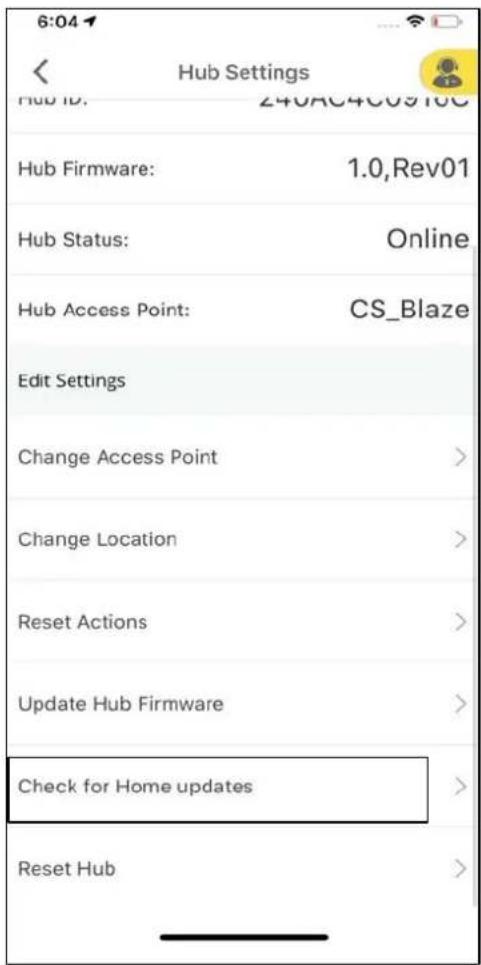
6:04 Hub Settings Hub ID: 240AC4C09100 Hub Firmware: 1.0,Rev01 Hub Status: Online Hub Access Point: CS_Blaze Edit Settings Change Access Point > Change Location > Reset Actions > Update Hub Firmware > Check for Home updates > Reset Hub >

Click on Check for Home Updates under Hub Settings.

11:29 Hub Settings Hub Name: Home Ultimate Hub Hub Type: Nexus Home Ultimate Hub ID: 4C11AEB69420 Provide password to continue Password Show Password Edit S Cancel OK Change Access Point > Change Location > Reset Zigbee Radio > Reset BLE Radio >

Enter your Nexus Home Password and tap OK.

6:06 Hub Settings Hub ID: 240AC4C09100 Hub Firmware: 1.0,Rev01 Hub Status: Online Hub Access Point: CS_Blaze Edit Settings Nexus Home Updated successfully. OK Chang Reset Actions Update Hub Firmware Check for Home updates Reset Hub

The Nexus Home is updated successfully.

11.6.9 Reset Hub

6:04 Hub Settings Hub ID: 240AC4C0910C Hub Firmware: 1.0,Rev01 Hub Status: Online Hub Access Point: CS_Blaze Edit Settings Change Access Point > Change Location > Reset Actions > Update Hub Firmware > Check for Home updates > Reset Hub >

Home Ultimate must be reset only from the Nexus Home App to erase complete hub data from both hub and the cloud properly.

Under Hub Settings select Reset Hub.

11:29 Hub Settings Hub Name: Home Ultimate Hub Hub Type: Nexus Home Ultimate Hub ID: 4C11AEB69420 Provide password to continue Password Show Password Edit S Cancel OK Change Access Point Change Location Reset Zigbee Radio Reset BLE Radio

Enter your Nexus Home Password and tap OK.

6:07 Enter Temporary Password If you reset your Hub, all your previous configurations like Rooms, Devices and their settings will be lost. Enter your temporary password below ENTER PASSWORD Resend Temporary Password You have 4 attempts Next Didn't receive a temporary password? Contact support@brilli…

Enter the temporary password, received to your registered email. Tap Next.
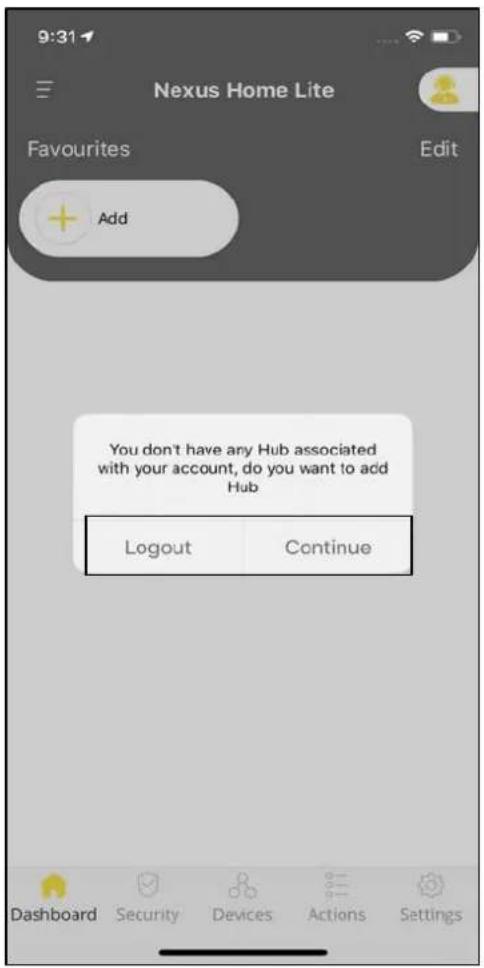
9:31 Nexus Home Lite Favourites Edit Add You don't have any Hub associated with your account, do you want to add Hub Logout Continue Dashboard Security Devices Actions Settings

A pop-up appears "You don't have any hub associated to your account". Tap Logout, else tap Continue to add the Hub again to the same account.

11.6.10 Account Settings
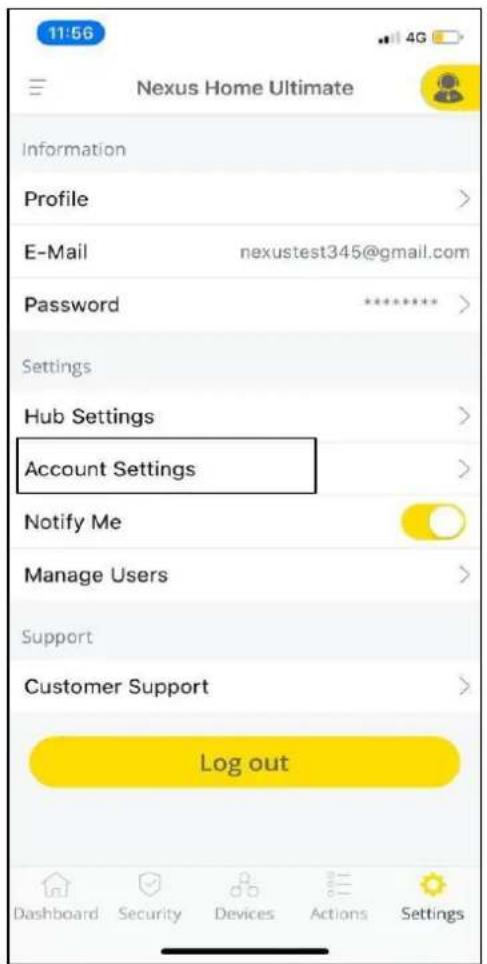
11:56 Nexus Home Ultimate Information Profile > E-Mail nexustest345@gmail.com Password ****** Settings Hub Settings > Account Settings > Notify Me Manage Users > Support Customer Support > Log out Dashboard Security Devices Actions Settings

Open Nexus Home App. Tap Settings and select Account Settings to view the details.
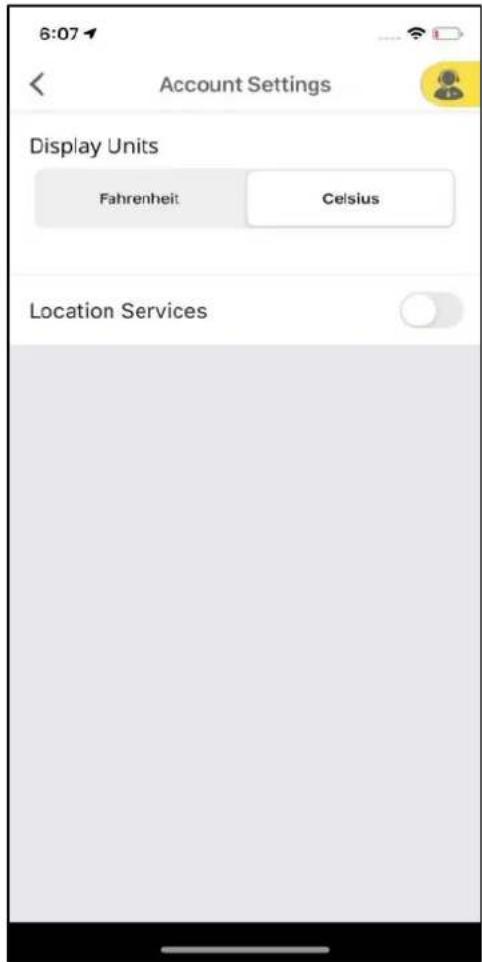
6:07 Account Settings Display Units Fahrenheit Celsius Location Services

Account Settings allows the user to choose the display units of temperature and Location Services toggle.

11.6.11 Manage Users

11:56 Nexus Home Ultimate Information Profile > E-Mail nexustest345@gmail.com Password ****** Settings Hub Settings > Account Settings > Notify Me Manage Users > Support Customer Support > Log out Dashboard Security Devices Actions Settings

Open Nexus Home App. Tap Settings and select Manage Users.

Manage Users allows you to add a Guest User who can control the devices added to the hub by assigning the desired privileges.

6:11 Manage Users Add User

Tap Add User.

6:11 Manage Users Add a new user account User Name Email ID Confirm Email Devices No access Actions No access Rooms No access Security No access Add a Guest user to assign privileges to monitor and control assigned Devices and Actions of your Nexus Home Lite. Guest user can be a friend or a family m…

Enter the user details and assign privileges to monitor and control assigned Devices, Actions, Rooms and Security to your Home Ultimate by tapping the drop down arrow to select any of the privileges.
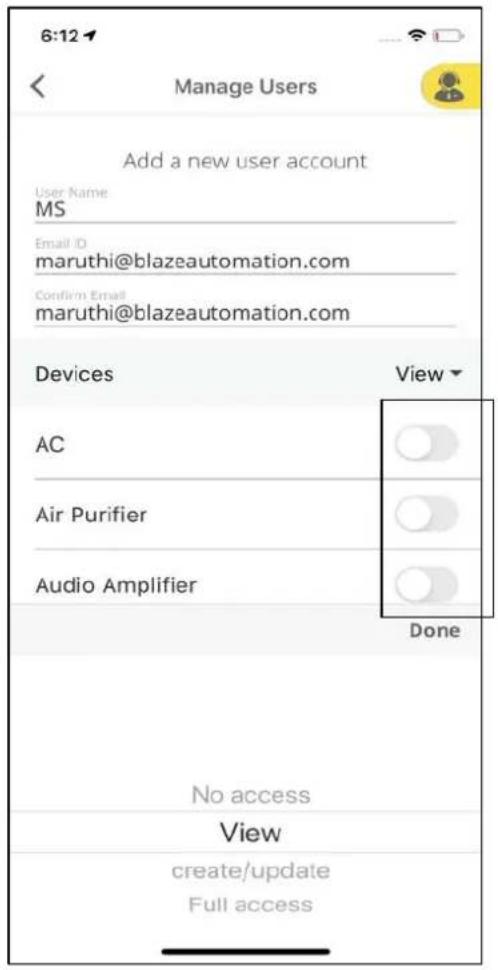
6:12 Manage Users Add a new user account User Name MS Email ID maruthi@blazeautomation.com Confirm Email maruthi@blazeautomation.com Devices View AC Air Purifier Audio Amplifier Done No access View create/update Full access

After selecting any one privilege from the drop down, turn ON any of the Toggle Switch from the Devices and Actions list.

6:12 Manage Users TV Box WiFi Dimmer Module WiFi double plug Glass Wall Switch 1 Activ Nexus Home Please assign at least one Device Roo OK Security No access Add a Guest user to assign privileges to monitor and control assigned Devices and Actions of your Nexus Home Lite. Guest user can be a friend…

After assigning the privileges, click on Add User.
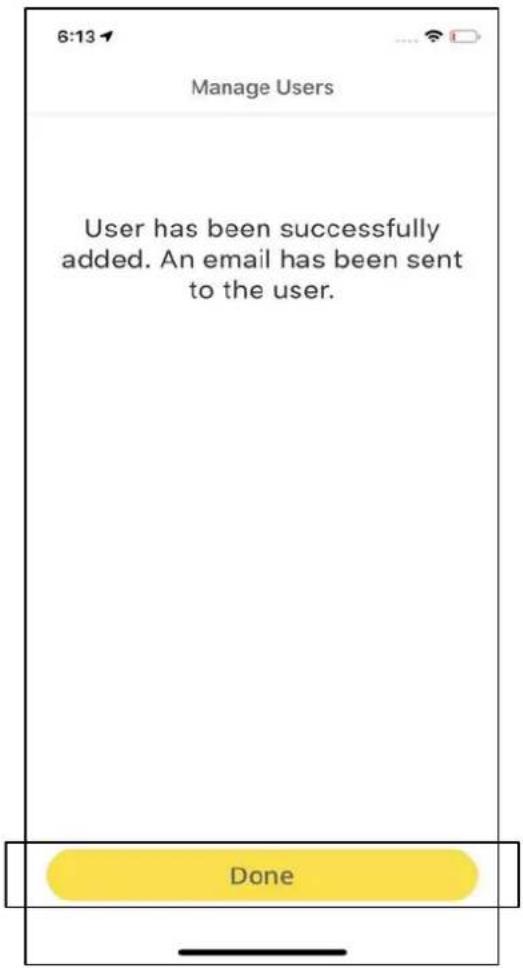
6:13 Manage Users User has been successfully added. An email has been sent to the user. Done

User has been successfully added. Tap Done.

12. Voice Assistants

Brilliant Smart Home lets you voice control your devices connected to your Hub through Alexa and Google Home. Link your Alexa or Google Home to our Brilliant Smart home skill to enable this feature.

Brilliant Nexus Home Ultimate 21465 - Voice Assistants - 1

Google HOME

Brilliant Nexus Home Ultimate 21465 - Voice Assistants - 2

amazon alexa

Google Home voice commands to control your Devices.

Just say: Okay Google, Turn ON device name or Okay Google, Turn OFF device name.

Alexa voice commands to control your Devices.

Just say: Alexa, turn ON Device Name ; Alexa, turn OFF Device Name

12:14 + b Techs Invite home member × Connect LIFX × Routines Settings You don't have any rooms yet. Add your devices to see everything in one place.

After setting up your Home Ultimate, open Google Home app & tap on + icon at the top left corner.
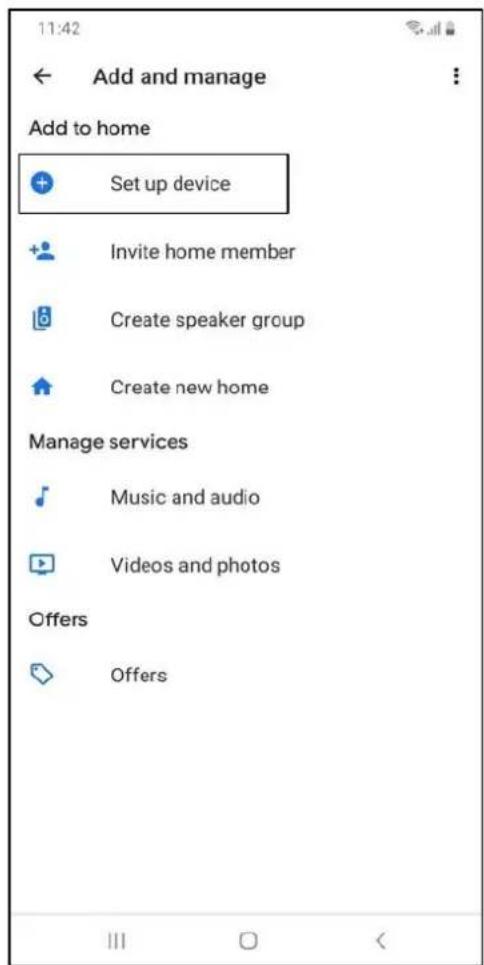
11:42 Add and manage Add to home + Set up device + Invite home member + Create speaker group + Create new home Manage services Music and audio Videos and photos Offers Offers

Tap on Set up device.

Set up Set up new devices or add existing devices and services to your home New devices Set up new devices in your home Google Home, Chromecast, Smart Displays, devices labelled 'Made for Google', like C by GE smart bulbs, and Philips Hue Bluetooth (without Hue Bridge) Works with Google Have somethi…

Under Set up, tap on "Have something already set up?

12:18 Manage accounts Add new #Age of Discovery IoT +HomeHome 1 H 1Home for KNX and Loxone 360 IoT @Foscam Camera @Nodus Smart [test] B.One Dev Testing [test] brilliant smart home [test] Focal Testing Abode Smart Home AC Freedom AC Freedom EU

Select the search bar.

[test] brilliant smart home Brilia LightSense brilli Brilliance Smart Brilliant Light Control Brilliant Smart Brilong

Search for Brilliant Smart Home Skill and select it.
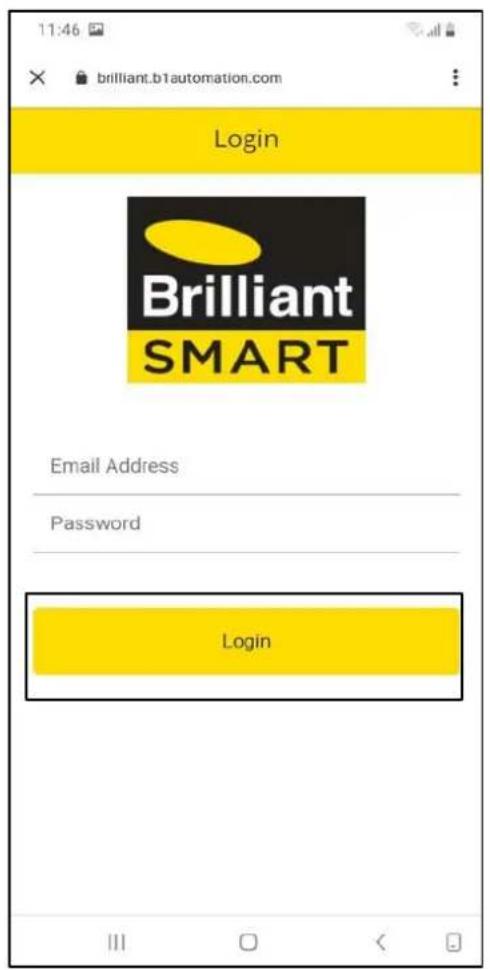
11:46 brilliant.b1automation.com Login Brilliant SMART Email Address Password Login

Enter your Nexus Home App Account credentials and tap on Login.

11:50 brilliant.b1automation.com Hub nexustest345@gmail.com Master Home Plus 2.0 Home Ultimate

[test] brilliant smart home Brilia LightSense brilli brilli Brilliance Smart Linking your [test] brilliant smart home account Brilong

Select a desired Hub from the list.

Note: You can only control the devices which are connected to the selected Hub.

A screen appears "Linking your Brilliant Smart Home Account". All Devices and Actioned in your account will be available in the HOME Page.
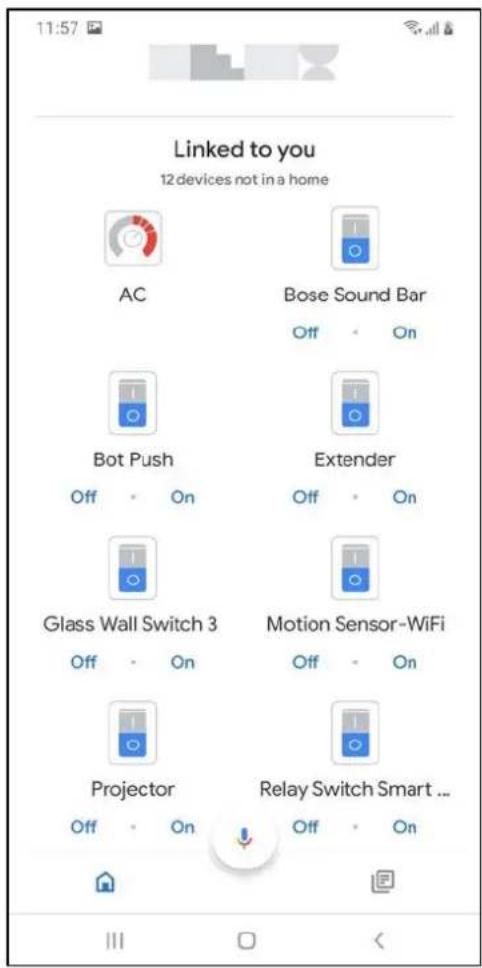
11:57 Linked to you 12 devices not in a home AC Bose Sound Bar Off On Bot Push Extender Off On Glass Wall Switch 3 Motion Sensor-WiFi Off On Projector Relay Switch Smart ... Off On Off On III

Now return to the home screen in your Google home app, tap the mic icon at the bottom & say "Ok Google, turn ON/OFF device_name".

17:11 HELP & FEEDBACK Search GENERAL HELP TOPICS Alexa Devices Alexa Features Alexa Settings Explore more topics on Amazon CONTACT US Speak to a representative Provide contact information so we can call you back immediately Email us Tell us a little about your issue and we'll email you back

After setting up your Hub, open ALEXA app & tap menu icon at the top left corner.
Add Device Lists Reminders & Alarms Contacts Routines Things to Try Skills & Games Activity Help & Feedback Settings

Tap Skills & Games.

17:11 SKILLS & GAMES Discover Categories Your Skills Listen live to NRL games and get the latest news and results "Alexa, launch NRL." Staff Picks See More NRL "Alexa, open NRL" News Huggies "Alexa, open Huggies" Music & Audio Official Harry Potter Quiz "Alexa, play Harry Potter quiz" Knowledge & Tr…

Tap the Search icon at top right corner of the screen and search for Brilliant Nexus.

17:12 BRILLIANT NEXUS Brilliant Nexus Brilliant Lighting Enable TO USE Account linking required You can use the APP to control Brilliant Smart lights, smart plug etc smart device in your house. Brilliant Nexus could control and scene your smart devices at home... See More Start By Saying English (US…

Tap on ENABLE TO USE.

17:12 Alexa Login Brilliant SMART nexustest345@gmail.com Login

Enter your Nexus Home App credentials & tap Login.

17:13 Hub nexustest345@gmail.com Master Home Plus 2.0 Home Ultimate

Select the desired Hub from the list.

17:13 amazon alexa Brilliant SMART Brilliant Nexus has been successfully linked. What to do next Close this window to discover smart home devices you can control with Alexa.

Brilliant Nexus is now successfully linked. Now, go back to Alexa Home Screen.

17:13 Discover Devices Smart Home devices must be discovered before they can be used with Alexa. CANCEL DISCOVER DEVICES

After successfully linking the skill a screen appears Discover Devices tap "Discover Devices".
Alexa is looking for devices to connect...

A screen appears "Alexa is looking for devices to connect..", wait until you see the next screen.

17:20 ALL DEVICES Alexa on this Phone Online AC Bose Sound Bar Bot in Quick Actions Bot Push dvd Dyson FAN Glass Wall Switch 3 Home Communicate Play Devices

Now goto the home screen in your Alexa app, tap Ask Alexa icon at the bottom of the screen & say "Alexa turn ON/OFF device_name".

13. Compliance Certifications

Warning symbol with a triangle and checkmark inside (no text)

ACMA (RCM) Certification

14. Hardware Limited Warranty

Table of contents Click a title to access it
Manual assistant
Powered by Anthropic
Waiting for your message
Product information

Brand : Brilliant

Model : Nexus Home Ultimate 21465

Category : Home Automation