
Dirtmaster Crossover SC51010N - Steam cleaner SWAN - Free user manual and instructions
Find the device manual for free Dirtmaster Crossover SC51010N SWAN in PDF.


| Product Type | Cordless Hard Floor Cleaner (Steam Cleaner) |
| Brand | Swan |
| Model | Dirtmaster Crossover SC51010N |
| Dimensions (Main Unit) | 290 x 250 x 1150 mm |
| Net Weight | 4.30 kg |
| Power Consumption | 150 W |
| Input Voltage | 30 V DC, 0.8 A (Adapter: 100-240 V AC) |
| Battery Type | Li-ion, 25.2 V, 5000 mAh |
| Working Time | 51-56 minutes (Eco Mode) |
| Charging Time | 4-4.5 hours (fully charged) |
| Clean Water Tank Capacity | 680 ml |
| Dirty Water Tank Capacity | 450 ml |
| Working Modes | Eco Mode, Max Mode |
| Floor Types | All hard floors (tile, hardwood, laminate, etc.) |
| Self-Cleaning Function | Yes, cleans roller brush and pipeline automatically on charging station |
| Digital Display | Shows working time, battery level, water tank status, and error codes |
| Voice Assistance | Yes, can be switched off |
| UV Light Indicator | Yes (indicates UV lamp is working) |
| Accessories Included | Handle, Li-ion battery pack, roller brush, adapter, cleaning tool, HEPA cleaning brush, charging station, drying tray |
| Safety Features | Overheat protection, short-circuit protection, battery protection, child lock not specified but safety instructions included |
| Operating Temperature | 0°C to 40°C |
| Warranty | 2 years (extendable by 1 year online) |
| Spare Parts Available | Yes (dirty water tank cover, brush guard, adapter, clean water tank, etc.) |
Frequently Asked Questions - Dirtmaster Crossover SC51010N SWAN
User questions about Dirtmaster Crossover SC51010N SWAN
0 question about this device. Answer the ones you know or ask your own.
Ask a new question about this device
Download the instructions for your Steam cleaner in PDF format for free! Find your manual Dirtmaster Crossover SC51010N - SWAN and take your electronic device back in hand. On this page are published all the documents necessary for the use of your device. Dirtmaster Crossover SC51010N by SWAN.
USER MANUAL Dirtmaster Crossover SC51010N SWAN
All-in-One Hard Floor Cleaner
Complete cordless cleaning across all hard floors.
Extend your warranty by 1 year at:
www.swan-brand.co.uk/product-manuals/
User Manual
Please read all instructions before using this product, and keep it stored safely for future reference.
Support: customerservice@swan-brand.co.uk


Contents
Safety Instructions 04
What's in the package? 06
Product View 07
Digital Display 09
Operation 10
Assembly 10
Filling up the Clean Water Tank 11
Charging the Cleaner 12
Cleaning Floor with the Cleaner 13
Self-Cleaning 14
Care and Maintenance 15
Specifications and spares 18
Recycling/Warranty 19
Trouble Shooting 20
Error Codes 22
Name and Content of Hazardous
Substances 23
Safety Instructions
• This product is for home use. Please do not use it outdoors.
- Do not disassemble, repair, or refit cleaner without authorisation.
- Do not modify or attempt to repair cleaner except as indicated in the manual for use and care.
- Do not use the product in an environment with a risk of fire or explosion.
- Do not use cleaner to pick up flammable materials, such as gasoline, lighter fluid.
- Do not use cleaner to pick up toxic material.
- Do not use cleaner to pick up foam liquids.
- Do not use cleaner to pick up the paint, pigments, and corrosive liquids.
- Do not use cleaner to pick up any hard or sharp objects, such as nails, screws, glass.
- Do not use cleaner to pick up things that are burning or smoking, such as hot ashes or cigarettes.
- Do not put any object into openings, keep openings free of dust, hair, and anything that may reduce airflow.
- Do not wash or soak the main body and electronic accessories in water.
- Do not allow metal and conductive materials to contact the battery.
- Do not allow the cleaner to be used as a toy. Close attention is necessary when used by or near children.
- Do not touch the charging plug and charging station with wet hands.
- The cleaner should always be protected from long term exposure to sunlight.
- Do not place cleaner near cigarette butts, lighters, or other open fires.
- Keep hair, fingers, and other parts of the body away from openings and moving parts of the appliance.
- Only the original power adapter can be used.
- When the metal part of the power plug is dusty, please wipe it with a dry cloth.
- The power adapter is applied to a 100-240V AC voltage. Please plug into the socket properly and keep away from children.
- The operating temperature of the product ranges from 0°C-40°C; please do not use it in a high-temperature environment.
- Plastic film can be dangerous, please keep away from babies and children.
- Please unplug the charger from the electrical socket when not in use.
- Please keep cleaner away from any metal objects, such as coins and paper clips when the battery pack is not in use.
- Do not use a battery pack that is damaged.
- Do not block the air inlet or air outlet in case of overheating.
- Do not shake cleaner hard in case the dirty water goes into the vacuum motor.
- Battery pack and charging station output terminals are not to be short-circuited.
- Please remove the battery from cleaner before the cleaner is scrapped.
- Please empty the cleaner when the dirty water box is full.
- Please ensure the cleaner is upright when moving the cleaner to prevent the dirty water from going into the vacuum motor.
What's in the Package?

Main Body
(Includes clean and dirty water tank with filter)
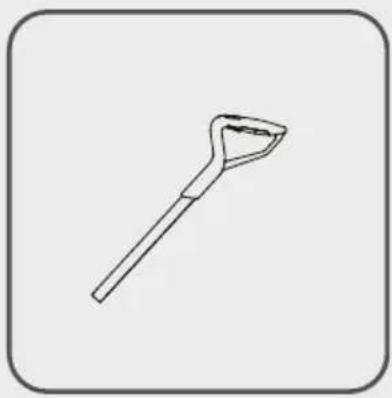
Handle

Li-ion Battery Pack
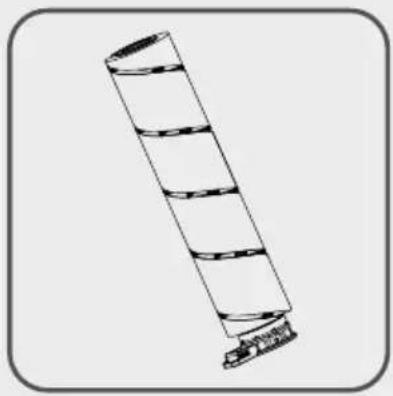
Roller Brush

Adapter

Cleaning Tool
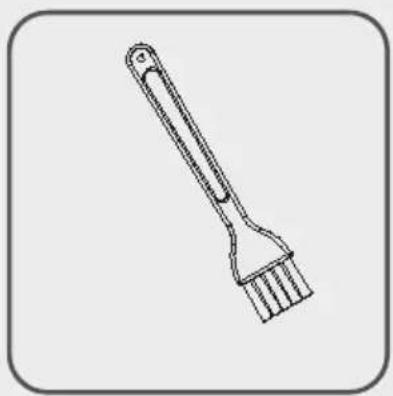
Hepa Cleaning Brush

Charging Station

Drying Tray
Accessories may be slightly different, the pictures are for reference, please subject to the received products or confirm with the seller.
Product View

Product View

Digital Display


The indicator will light up white when the cleaner is in Eco Mode.
The indicator will light up white when the cleaner is in Max Mode.
It shows the Working Time from "Switch on" to "now".

The indicator will light up white when UV lamp is working.

The indicator will flash RED slowly when Clean Water Tank is short of water, please fill up with clean water.

The indicator will flash RED slowly when Dirty Water Tank is full, please empty the Dirty Water Tank in time.

Press the Self-Cleaning Button, the indicator will flash white slowly, and the vacuum cleaner will enter the self-cleaning mode.

Battery Indicator, the indicator will flash white slowly when charging, it will stop flashing after fully charged.
The indicators and display may be slightly different on the final product.
Assembly
- Take out the Handle, Main Body, Li-ion Battery Pack, Clean Water Tank, Dirty Water Tank Set, Roller Brush, Charging Station, Drying Tray and Cleaning Tool from the package.
- Insert the handle into main body of cleaner until you hear a click. (Fig. 1)
- Turn over the clean water tank, insert it into the main body along with the clean water tank slot until you hear a click. (Fig. 2)
- Press the release button of Li-ion battery pack, then put the battery pack into the battery slot, and push it up slightly until you hear a click. (Fig. 3)
- Align the bottom of dirty water tank with the inlet, then push it inwards until you hear a click. (Fig. 4)
- Insert the roller brush into the base of the brush, rotate the roller brush so that the brush can align with the brush, meanwhile, make sure that the lock can align with the lock hole, then lock the roller brush. (Fig. 4, 5, 6)
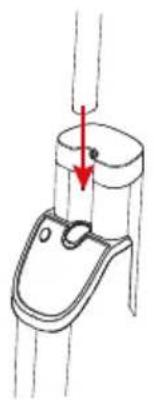
Fig. 1

Fig. 2
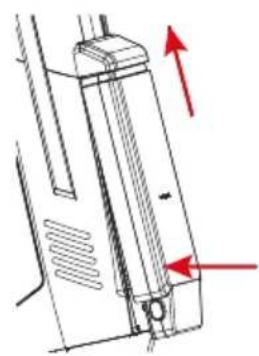
Fig. 3

Fig. 4

Fig. 5

Fig. 6

Fig. 7
Filling up the Clean Water Tank
-
The cleaning water tank is located on the back of the main body. Grasp the top of the water tank with your fingers and pull it upwards to remove it. (Fig. 1)
-
Unscrew the water cap counter-clockwise as below and add some water, then screw it and insert the clean water tank into the cleaner. (Fig. 2)
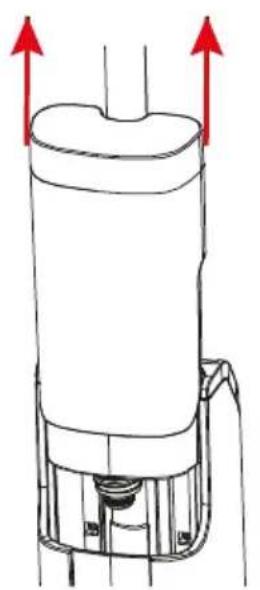
Fig. 1 Fig. 2

Important tips:
- Do not tighten the cover too tightly or too loosely, otherwise the cover may be damaged or the water tank may leak.
- The user can also add some non-corrosive or flammable liquid cleaning solutions to clean the floor, do not add dirty water to the cleaning water tank.
- It is normal if there is water in the water tank at the first use, tests and inspections are proceeded before products leave the factory.
Charging the Cleaner
-
Insert the drying tray into the charging station as shown in Fig. 1.
-
Place the charging station near the wall, plug the DC power socket of the adapter into the DC power socket of the charging station, and then plug the adapter into the power socket.
-
Charging:
A. Put the cleaner on the charging station and insert the adapter, then start charging. (Fig. 2)
B. Remove the Li-ion battery pack from the main body and charge it directly.

Fig. 1 Fig. 2
Please Note:
- Please charge the cleaner for 12 hours for the first time.
- Please ensure the 6 hours fully charged for max running time.
Cleaning Floor with the Cleaner
-
Check the Handle, the clean water tank, the dirty water tank, the Li-ion battery pack, the roller brush, make sure all of them are installed correctly and tightly.
-
Press the switch button on the handle to turn on the cleaner. Press the Eco/Max Mode button to switch the suction power.
Important tips:
- Please choose the hard roller brush for areas with a short rug.
- Please DO NOT use cleaner across LONG rug areas.
- Please DO NOT use cleaner across delicate rugs, silk, or similar floors.
-
Please DO NOT SPRAY on the rugs.
-
There will be Voice Assistance providing operation support. This function can be switched off by pressing the voice switch button.
-
Hold the spray button for 8 seconds to prime the cleaning water/solutions before each use. Spray the water according to your personal use during the cleaning.
-
Hold the handle and pull the cleaner forward and backward to clean your floors.
-
The angle range of handle tilt must be within 60.5 degree (up and down), please do not shake it in use.
-
Please clean the dirty water tank after each use of cleaning.
Important tips:
- Please DO NOT run over the edges of the rugs.
- The dirty Water Tank must be cleaned as soon as the cleaning work finished to prevent dirty scents.
- DO NOT turn the main body over before cleaning the dirty water tank, or the dirty water will flow into the vacuum motor and damage cleaner.
- Please clean and dry the HEPA and Filter after each use.
Self-Cleaning
The cleaner can clean the roller brush and pipeline automatically on the Self-Cleaning Base:
- Please make sure there is enough clean water in the clean water tank and empty dirty water tank before self-cleaning.
- Place cleaner on the charging station (Fig. 1) and plug in the power supply.
- Press the Self-Cleaning button (Fig. 2), the indicator will be white and flash slowly, and the cleaner will spray the clean water, clean the roller brush and pipeline automatically, meanwhile, it will vacuum the dirty water into the dirty water tank.
- Please unplug the power supply and clean the dirty water tank once the self-cleaning mode has finished to avoid dirty odours.

Fig. 1 Fig. 2

Please Note:
- The Self-Cleaning can only be used when charging on the charging station.
Care and Maintenance
Please unplug the power supply, turn off the switch, and remove the battery pack out before care and maintenance.
Daily care and maintenance
Use a soft dry mop to wipe the main body, the charging station; use a soft moist cloth to wipe the brush base, scraper, infrared sensor.
Roller Brush Cleaning
Release the lock button of the roller brush, rotate the brush counter-clockwise, then pull the brush out, clean the brush, and brush guard with a cleaning tool.

Dirty Water Cleaning
Press the release button of dirty water tank, and take the dirty water tank out. Take out the HEPA and the cap.
![graph LR A["Open hood with attached device"] --> B["Open hood with internal compartments"] B --> C["Dirty water tank cap"] C --> D["HEPA Filter"]](/content/2026/05/933637/images/2c09b22a0d12ec90d5ae60ed70fd99d5fdfdf74236f204220f69fa8a2fcc496a.jpg)
Care and Maintenance
Pour the debris into the dustbin, pour the dirty water into washbasin. Clean the dirty water tank, the cap, and the HEPA with clean water.

Charging Station & Drying Tray Cleaning
Unplug the power supply and take the main body out before cleaning.
Pour out the dirty water of Charging Station, use a soft dry mop to wipe the charging station and Drying Tray.


Removing the handle
The handle of the item can be removed.
This can be done by gently poking a small long object through the hole in the back of the item. This will push the release button, enabling you to slowly pull the handle out from the body of the item.
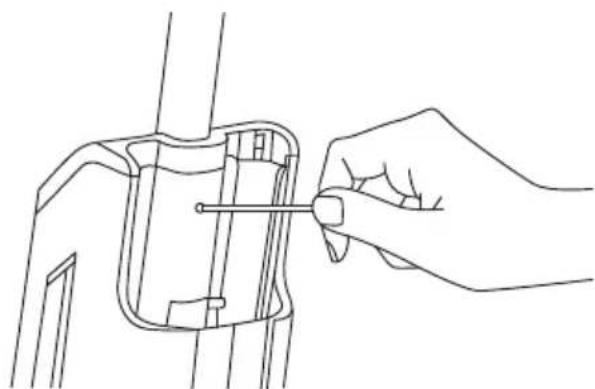
Care and Maintenance
Storage
Please dry the main body, clean water tank, dirty water tank, brush base, HEPA, Charging Station and drying tray. Then store them appropriately.
The roller brush can be stored in the drying tray.
Important tips:
- The Dirty Water Tank must be cleaned and dried after every single cleaning to avoid mildew or smell.
- The machine must be stored in a dry and ventilated place without heat sources.
- Please keep the machine away from direct sunlight.
- The battery pack should be fully charged every 3 months at least to avoid battery damage.
Recommended Cleaning / Replacement Frequency
| Part | Recommended Cleaning / Replacement Frequency |
| Clean Water Tank Clean after each use. | |
| Dirty Water Tank Clean after each use. | |
| HEPA Clean after each use; Replace every 3-6 months | |
| Brush Guard Clean after each use. | |
| Infrared Sensor Clean after each use. | |
| Roller Brushes | Clean after each use; Replace every 3-6 months. |
Please Note:
- Above frequency is only for your reference. The final cleaning/replacement frequency should depend on the usage.
Specifications
Product Model SC51010N
Size of Main Unit 290 x 250 x 1150mm
Net Weight 4.30KG
Input 30V 0.8A
Power Consumption 150W
Battery Type Li-ion Battery
Battery Capacity 5000 mAh
Battery Voltage 25.2V
Clean Water Tank Capacity 680 ml
Dirty Water Tank Capacity 450 ml
Working Time 51-56 mins
Charging Time 4-4.5 hours
Working Mode Eco Mode / Max Mode
Please Note:
- The data comes from the lab. It may be slightly different from the users' data due to different usage or working environment, the final product may appear different.
- For continuous product improvement, we reserve the right to any technical and design change without prior notice.
Spares
The following spare parts are available to purchase from www.swan-brand.co.uk
Crossover Dirty Water Tank Cover SC51010N01
Crossover Brush Guard SC51010N02
Crossover Adapter SC51010N03
Crossover Clean Water Tank SC51010N04
Recycling
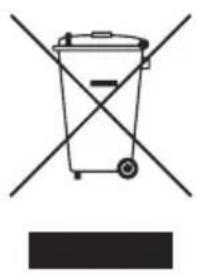


The symbol on the product or its packaging indicates that this product may not be treated as household waste. Instead, it should be taken to the appropriate collection point for the recycling of electrical and electronic equipment. By ensuring this product is disposed of correctly, you will help prevent potential negative consequences for the environment and human health, which could otherwise be caused by inappropriate waste handling of this product. For more detailed information about recycling of this product, please contact your local council, your household waste disposal service or the shop where you purchased the product.
The product meets all the requirements of the EU directives applicable to the specific product.
We reserve the right to changes in text, design, and technical specifications which are subject to change without prior notice.
Warranty
This product is guaranteed for 2 years from the date of original purchase. If any defect arises due to faulty materials of workmanship the faulty products must be returned to the place of purchase. Refunds or replacement is at the discretion of the store.
The following conditions apply:
- The product must be returned to the retailer with proof of purchase.
- The product must be installed and used in accordance with the instructions contained in this instruction guide.
- It must be used only for domestic purposes.
- It does not cover wear and tear, damage, misuse or consumable parts.
- Swan Products Ltd has limited liability for incidental or consequential loss or damage.
• This guarantee is valid in the UK and Eire Only.
For any enquiries, please call our helpline: 0333 220 6050
Troubleshooting
| Problems | Possible Reasons | Solutions |
| Cleaner cannot be charged. | The power supply does not connect well.Cleaner isn't connected well with charging station. | Please check the connection of power supply.Please replace cleaner on the charging station. |
| The handle control doesn't work. | The battery capacity is low.The handle doesn't connect well. | Please check the battery capacity and fully charge it.Please re-install the handle. |
| Cleaner doesn't work. | The dirty water tank is full.The dirty water tank is not installed.The roller brush is not installed. | Please empty the dirty water tank.Please check and install the dirty water tank.Please check and install the roller brush. |
| The indicator display of clean water tank is incorrect. | Uncalibrated Take off the Clean Watertank, then start to clean and spray, turn cleaner off until draining the pipe.Then press the "Switch Button" and "Eco/Max Button "for 5seconds until the digital display flash two times, then check again. | |
| The vacuum is getting weaker. | The Hepa is blocked.The Hepa is wet.The Scraper is not installed well. | Please check and clean the HEPA.Please dry the Hepa first.Please check and re-install the scraper. |
Troubleshooting
| Problems | Possible Reasons | Solutions |
| The clean water tank is leaking. | The clean water volume is higher than snuffle valve. The clean water tank is not installed well. The cap is not screwed well. | Pour out water until the volume is lower than snuffle valve. Please re-install the water tank. Please screw the cap well. |
| No water comes out when spraying. | The clean water tank is empty. The clean water tank is not installed well. | Please fill up the Clean Water Tank. Please re-install the water tank. |
| No voice assistance. | The voice function is switch off. The version exclude voice. | Turn on the voice switch. Please check and confirm with local seller. |
| Cleaner doesn't work in self-cleaning mode. | Cleaner isn't connected with power supply. The dirty water tank is full. Lack of water. | Please check and connect with the power supply well. Please empty the dirty water tank. Please fill up the clean water tank. |
| There are water drops at air outlet. | The Hepa isn't installed. Cleaner was tilted hard. Cleaner vacuums the foam liquid. | Please check and install the HEPA. Use the machine correctly. Empty the dirty water tank in time. |
| Cleaner moves hard. | The roller brushed isn't installed well. | Please check and re-install the Roller Brush as guide. |
Error Codes
| Error Code | Causes | Solutions |
| FF:01 | Charging over voltage Replace the adaptor | |
| FF:02 | Charging over current Replace the adaptor | |
| FF:03 | NTC open/short circuit Replace the battery pack | |
| FF:04 | Internal disconnection of the battery pack | Replace the battery pack |
| FF:05 | Rechargeable battery voltage is too low | Replace the battery pack |
| FF:06 | Rechargeable battery voltage difference is too large | Replace the battery pack |
| FF:07 | High discharging temperature | The battery pack temperature is high, please assure battery pack temperature returns to normal before reuse |
| FF:08 | High charging temperature | The battery pack temperature is high, please assure battery pack temperature returns to normal before charging |
| FF:09 | Low charging temperature | The battery pack temperature is low, please assure battery pack temperature returns to normal before charging |
| FF:10 | Roller brush over current | Check if there is any dirt (like pet hair) at the roller brush to be cleaned, then make it clean |
| FF:12 | No dirty water tank installed No dirty water tank installed Install dirty water tank | |
Name and Content of Hazardous Substances
Content of Hazardous Substances
| Component | Plastic Shell | PCB Cables Metal Parts Adapter | Electronic Components | Rubber Components | ||
| Cadmium(Cd) | ...... | |||||
| Lead(Pb) | ...... | |||||
| Mercury(Hg) | ...... | |||||
| Hexavalent Chromium (CrVI) | ...... | |||||
| Polybrominated Biphenyls(PBB) | ...... | |||||
| Polybrominated Diphenyl Ethers (PBDE) | ...... | |||||
| Bis(2-ethylhexyl) Phthalate(DEHP) | ...... | |||||
| Butyl Benzyl Phthalate (BBP) | ...... | |||||
| Dibutyl Phthalate (DBP) | ...... | |||||
| Diisobutyl Phthalate (DIBP) | ...... | |||||
The lifetime of the components for environmental protection concerns is 10 years. The time is valid under the use conditions of this manual.
O: It indicates that the content of the hazardous substances in all homogeneous materials of the components complies with the council RoHS 2 Directive (EU) 2015/863 and (EU) 2017/2102 amending Annex II to Directive 2011/65/EU.
X: It indicates that the content of the hazardous substances in all homogeneous materials of the components is the exempt item according to the council RoHS 2 Directive (EU) 2015/863 and (EU) 2017/2102 amending Annex II to Directive 2011/65/EU due to the existing level of technology.

www.swan-brand.co.uk
Helpline: 0333 220 6050

DIRT MASTER
CROSS XOVER

Scan this QR code to hear about our story

We love what we do

we're proud of our quality

Find us on Facebook


- ALL-IN-ONE HARD FLOOR CLEANER
- USER MANUAL
- CONTENTS
- SAFETY INSTRUCTIONS
- WHAT'S IN THE PACKAGE
- PRODUCT VIEW
- DIGITAL DISPLAY
- ASSEMBLY
- FILLING UP THE CLEAN WATER TANK
- IMPORTANT TIPS
- CHARGING THE CLEANER
- PLEASE NOTE
- CLEANING FLOOR WITH THE CLEANER
- SELF-CLEANING
- CARE AND MAINTENANCE
- DAILY CARE AND MAINTENANCE
- ROLLER BRUSH CLEANING
- DIRTY WATER CLEANING
- CHARGING STATION & DRYING TRAY CLEANING
- REMOVING THE HANDLE
- STORAGE
- RECOMMENDED CLEANING / REPLACEMENT FREQUENCY
- SPECIFICATIONS
- SPARES
- RECYCLING
- WARRANTY
- TROUBLESHOOTING
- ERROR CODES
- NAME AND CONTENT OF HAZARDOUS SUBSTANCES
Brand : SWAN
Model : Dirtmaster Crossover SC51010N
Category : Steam cleaner