
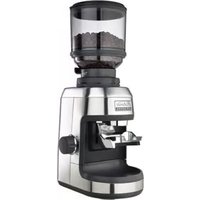
Café Series Conical Burr EMM0500BK - Coffee grinder SUNBEAM - Free user manual and instructions
Find the device manual for free Café Series Conical Burr EMM0500BK SUNBEAM in PDF.


| Product Type | Coffee Grinder with Conical Burrs |
| Brand | Sunbeam |
| Model | Café Series Conical Burr EMM0500BK |
| Bean Hopper Capacity | 250 g |
| Grind Settings | 24 settings (fine to coarse) |
| Burr Type | Italian conical burrs, tool hardened steel |
| Motor Type | Gear-driven slow-speed motor |
| Housing Material | Die-cast metal |
| Power Supply | 230-240 V AC |
| Operation Modes | Continuous (On) and On-Demand (Auto) |
| Grind On Demand Feature | Yes, with group handle cradle and activation button |
| Included Accessories | 2 group handle cradles (commercial & domestic), 2 dosing funnels, silicone spout, preparation mat, cleaning brush |
| Non-Slip Feet | Yes, rubber feet |
| Cord Wrap | Yes |
| Warranty | 12-month replacement or repair |
| Safety Features | Auto shut-off when not in use? Not specified; safety precautions in manual |
| Cleaning | Do not immerse burrs or motor base in water; brush clean burrs; wash hopper in soapy water |
| Burr Adjustment for Wear | Yes, adjustable to compensate for wear over time |
| Burr Replacement | Contact Sunbeam service center |
| Product Weight | Approximately 3.5 kg (estimated) |
| Product Dimensions (W x D x H) | Approximately 200 x 150 x 350 mm (estimated) |
Frequently Asked Questions - Café Series Conical Burr EMM0500BK SUNBEAM
User questions about Café Series Conical Burr EMM0500BK SUNBEAM
0 question about this device. Answer the ones you know or ask your own.
Ask a new question about this device
Download the instructions for your Coffee grinder in PDF format for free! Find your manual Café Series Conical Burr EMM0500BK - SUNBEAM and take your electronic device back in hand. On this page are published all the documents necessary for the use of your device. Café Series Conical Burr EMM0500BK by SUNBEAM.
USER MANUAL Café Series Conical Burr EMM0500BK SUNBEAM
natural_image
Exterior view of a black and silver coffee graser with visible coffee beans filled in liquid (no text or symbols)Contents
2 - 3 Sunbeam's Safety Precautions
4 - 5 Features of your Café Series Conical Burr Coffee Grinder
6 Functions of your Café Series Conical Burr Coffee Grinder
7 - 8 Operating your Café Series Conical Burr Coffee Grinder
9 Adjusting the grind setting
10-12 Care and cleaning
13 Warranty
Sunbeam's Safety Precautions
SAFETY PRECAUTIONS FOR YOUR CAFÉ SERIES CONICAL BURR COFFEE GRINDER
- Check the grinding bowl for the presence of foreign objects before using.
- Always operate the grinder with the ground coffee container properly inserted in the grinder.
- Do not place your hand in or near the burrs while the grinder is in operation.
• Always place the unit on a flat, level surface. - Switch off and unplug at power point before cleaning.
- Do not attempt to re-grind ground coffee.
Sunbeam's Safety Precautions
Sunbeam is very safety conscious when designing and manufacturing consumer products, but it is essential that the product user also exercise care when using an electrical appliance. Listed below are precautions which are essential for the safe use of an electrical appliance:
- Read carefully and save all the instructions provided with an appliance.
- Always turn the power off at the power outlet before you insert or remove a plug. Remove by grasping the plug - do not pull on the cord.
- Turn the power off and remove the plug when the appliance is not in use and before cleaning.
- Do not use your appliance with an extension cord unless this cord has been checked and tested by a qualified technician or service person.
- Always use your appliance from a power outlet of the voltage (A.C. only) marked on the appliance.
- This appliance is not intended for use by persons (including children) with reduced physical, sensory or mental capabilities, or lack of experience and knowledge, unless they have been given supervision or instruction concerning use of the appliance by a person responsible for their safety.
• Children should be supervised to ensure that they do not play with the appliance. - The temperature of accessible surfaces may be high when the appliance is operating.
- Never leave an appliance unattended while in use.
-
Do not place on top of any other appliance.
-
Do not use an appliance for any purpose other than its intended use.
- Do not place an appliance on or near a hot gas flame, electric element or on a heated oven.
- Do not let the power cord of an appliance hang over the edge of a table or benchtop or touch any hot surface.
- Do not operate any electrical appliance with a damaged cord or after the appliance has been damaged in any manner. If damage is suspected, return the appliance to the nearest Sunbeam Appointed Service Centre for examination, repair or adjustment.
- For additional protection, appliance should be supplied through a residual current device (RCD) having a rated residual operating current not exceeding 30 mA;
- Do not immerse the appliance in water or any other liquid unless recommended.
- Appliances are not intended to be operated by means of an external timer or separate remote control system.
- This appliance is intended to be used in household and similar applications such as: staff kitchen areas in shops, offices and other working environments; farm houses; by clients in hotels, motels and other residential type environments; bed and breakfast type environments.
If you have any concerns regarding the performance and use of your appliance, please visit the Sunbeam Website or contact Sunbeam Consumer Care - details are on the back page. Ensure the above safety precautions are understood.
Important Instructions - retain for future use
Features of your Café Series Conical Burr Coffee Grinder

Features of your Café Series Conical Burr Coffee Grinder
A. 250g bean hopper
The 250g capacity bean hopper has a shutter release mechanism for easy removal and preventing accidental spills. It allows the user to transfer any un-used beans to an ideal storage unit to preserve freshness.
B. Grind adjustment collar
Large and easy to use, the collar has a wide-range of 24 grind settings. The coffee maker can select a fine grind to suit commercial espresso or adjust the setting for other brewing styles – from Turkish to plunger. With such precise settings the user controls the particle size and ultimately the quality of the brew.
C. Group handle cradle
D. Preparationmat
Positioned under the grinding spout the preparation mat is ideal for catching loose coffee grinds while filling directly into the group handle. The mat can also be used on the bench as a tamping pad.
E. Rubberfeet
The non-slip rubber feet ensure the grinder remains stable and prevents slipping on the bench top during use.
F. Burrshield
G. Italian conical burrs
Italian designed and manufactured, the metal conical burr design achieves excellent grind consistency and minimises heat transfer to the coffee due to the slowly rotating burrs.
H. Die-cast metal housing
Built to last, the heavy duty die-cast metal body encases a powerful motor and provides a stable base for the grinder.
I. Grind on demand button
Position the group handle into the group handle cradle, push against the button and freshly ground coffee will flow directly into the filter basket.
Pull the group handle away and grinding will stop.
J. Operationswitch
Switch to 'On' to grind continuously into a container. 'Off' to stop or 'Auto' for grinding directly into the group handle.
K. Cord wrap
Cord wraps away to keep bench top clean.
L. Burr cleaning brush
Strong bristles help sweep out grinds from the burrs.
Accessories
M. Commercial size group handle cradle
N. Domestic size group handle cradle
- Silicone spout
P. Commercial size dosing funnel
Q. Domestic size dosing funnel

Functions of your Café Series Conical Burr Coffee Grinder
Slow speed grinding
The combination of a powerful gear-driven motor and conical burr design delivers a slow speed grinding process. This minimises the heat transferred to the coffee, protecting its aromatic profile.

natural_image
Technical line drawing of a mechanical component with no visible text or symbolsDual mode settings
For convenience, there are two modes of operation - the 'Auto' function for grinding coffee on demand or 'On' for grinding continuously into a container.

natural_image
Line drawing of a Sunbeam cafe series blender with a cup and lid (no text or symbols on the device itself)Grind on demand
As with commercial quality grinders, the 'Auto' function allows coffee beans to be freshly ground directly into the group handle, on demand as required. This provides complete dosing control and a fresh grind without loss of aroma and flavour.

natural_image
Line drawing of a Sunbeam coffee maker using a hand mixer (no text or symbols)Operating your Café Series Conical Burr Coffee Grinder
Before using the coffee grinder, wipe the base exterior with a damp cloth. Wash the bean hopper and hopper lid in soapy water. Rinse and dry before using.
Note: Do not immerse the burrs in water or any other liquid.
Note: Do not place any parts of the coffee grinder in the dishwasher.
- Place the coffee grinder on a dry, level surface.
- To attach the bean hopper, position bean hopper onto the top of the motor base, push down and turn clockwise. See Figure 1.

natural_image
Illustration of a hand pouring liquid into a jar with red arrows indicating rotation (no text or symbols)Figure 1
- Fill the bean hopper with coffee beans.
Note: This coffee grinder is intended to grind whole coffee beans only.
- Place the hopper lid onto the bean hopper.
- Plug the power cord into a 230-240V AC power outlet and switch the power on.
- Select the grind by turning the grind adjustment collar to the desired setting, see Figure 2.

Refer to the grind setting table on page 9 to assist you in selecting the correct grind level for the desired brewing method.
For grinding continuous quantities
- Insert a small container under the grinder, see Figure 3.

natural_image
Line drawing of a Simb reverse café blender with a cup and lid (no text or symbols)Figure 3
Operating your Café Series Conical Burr Coffee Grinder
- To grind coffee, flip the switch to the 'On' position, see Figure 4.

natural_image
Line drawing of a hand operating a portable blender with a cup, labeled Figure 4 (no text or symbols on the diagram itself)- When the desired amount of coffee has been ground, flip the switch to the 'Off' position. Remove the coffee container and scoop out the ground coffee.
For grinding into the group handle
- Add dosing funnel to group handle.
- Position the group handle into the group handle locator, see Figure 5.

natural_image
Line drawing of a Sunbeam cafe brush applying liquid into a blender (no text or symbols)Note: There are two group handles and two dosing funnels provided: a smaller size to fit domestic handles and a larger size for commercial handles.
- Flip the switch to the 'Auto' position, see Figure 6.

natural_image
Line drawing of a hand using a stand mixer device (no text or symbols present)- To grind coffee, press the group handle against the button located in the centre of the group handle cradle, see Figure 7.

- When the basket is full, pull the group handle off the button. Collapse the coffee in the basket by tapping it on the bench and repeat until the desired amount of coffee has been ground.
Note: Foreign objects like stones or twigs can sometimes be found in whole bean coffee and can cause the coffee grinder to jam. Should this occur, refer to the Care and cleaning section on page 11. These objects need to be removed immediately.
Adjusting the grind setting
Grind setting table
| SETTING | BREWING METHOD |
| 2 – 6 | Turkish |
| 12 – 16 | Espresso |
| 12 – 16 | Stove Top |
| 20 – 23 | Drip Filter |
| 20 – 23 | Plunger |
The wide-range of 24 grind settings allows for precision adjustment. The coffee maker has complete control of the particle size and ultimately the quality of the resulting brew.
Some things to remember when using the coffee grinder:
- The smaller the particle size the longer it will take to grind.
- When using the finer settings the coffee may become stuck, we recommend tapping on the lid of the bean hopper to dislodge any clumps of coffee blocking the flow.
- After long periods of using the finer settings, we recommend removing the upper burr and sweeping away any residual coffee to avoid clogging. See the Care and Cleaning section on page 11 for more details.
Tips
-
Select the correct grind for the brewing method you are using. 24 grind settings are available to ensure precision adjustment. Setting 1 produces the finest grind, 12 to 16 are medium grinds appropriate for espresso coffee makers, and 24 is the coarsest grind you can achieve. Experiment with the grind settings to achieve the ideal brew that best suits your tastes.
-
For drip filter coffee machines, a good starting point is to use 8 grams (1 scoop) of coffee for every 4 cups of brew water
as measured with the carafe. Finer grinds usually require less coffee, but using too fine a grind will result in a brew that is bitter in flavour.
- For those that prefer weaker coffee, continue to use the recommended amount of ground coffee and then dilute the resulting brew with fresh hot water. Doing this will maximise flavour and minimise bitterness.
- Coffee that is ground too fine for a particular brewing process will result in over-extraction and the coffee will taste bitter. On the other hand, coffee that is too coarse for a particular brewing method will result in under-extraction and the coffee will be thin and poor in flavour.
- Once coffee is ground it quickly loses its flavour and aroma. For the best results we recommend you grind beans immediately prior to brewing.
- Buy fresh whole coffee beans weekly.
- Coffee beans have the best flavour between 5 - 20 days after roasting.
- To retain freshness, store whole coffee beans in an airtight container in a cool, dark, dry place. It is not recommended that you store beans in the grinder's bean hopper for a prolonged period.
- To ensure the best results from the coffee grinder clean the bean hopper and conical burrs regularly.
Care and cleaning
Important Notes:
- Spots and marks on the surface of the burrs are part of the hardening process. These marks do not affect the performance of the grinder or the taste of the coffee.
- Ensure the coffee grinder is switched off and unplugged from the power outlet prior to cleaning.
- Do not immerse the motor base of the coffee grinder in water.
- Do not immerse any part of the burr assembly in water or any other liquid.
- Do not place any parts of the coffee grinder in the dishwasher.
- Do not use abrasive cleansers or scouring pads.
Cleaning the motor base, bean hopper and coffee container

natural_image
Illustration of a hand holding a blender with a red directional arrow indicating rotation (no text or symbols)Figure 8
-
Remove the bean hopper from the motor base and store unused beans in an airtight container to preserve their freshness, see Figure 8.
-
Wipe the motor base exterior with a damp cloth and dry.
- Wash the bean hopper in warm soapy water. Rinse and dry before using.
Cleaning the burrs
If the coffee grinder is used frequently (every day), the burrs need to be cleaned every three weeks to ensure best performance of the coffee grinder. Regular cleaning helps the burrs achieve consistent grinding results, which is especially important when grinding coffee for espresso.
- Ensure the coffee grinder is switched off and unplugged from the power outlet. Remove the bean hopper from the motor base, push down and turn anti-clockwise. See Figure 8.
- To remove the top burr turn the grind adjustment collar in an anti-clockwise direction until it stops, see Figure 9.

natural_image
Illustration of hands holding a cylindrical object with a red arrow indicating rotation (no text or symbols)Figure 9
Note: The top burr can only be removed when the graphic arrow on the grind adjustment collar is aligned with the arrow on the motor base.
Care and cleaning
- Press and hold down the 'UNLOCK' button at the rear of the motor base and with the other hand turn the grind adjustment collar anti-clockwise until the arrow on the collar is aligned with the arrow on the motor base, see Figure 10.

natural_image
Line drawing of two hands holding a small cylindrical object with a knob, labeled Figure 10 (no text or symbols on the object itself)- Lift out the top burr from the grind adjustment collar using the handle, see Figure 11. Clean using the burr cleaning brush.

natural_image
Line drawing of a hand pouring liquid into a container with a tool, labeled Figure 11 (no text or symbols on the diagram itself)- Lift the grind adjustment collar away from the motor base and clean with the brush, see Figure 12.

natural_image
Line drawing of a hand pressing down on a cylindrical device with a dial indicator (no text or symbols)- Clean the bottom burr using the burr cleaning brush, see Figure 13.

natural_image
Technical line drawing of a mechanical component with concentric rings and mounting brackets (no text or symbols)Figure 13
- Once both burrs are cleaned, return the grind adjustment collar to its position in the motor base.
- With the grind adjustment collar in hand align the arrow on the collar with the arrow on the rear of the motor base. Press down.
- Replace the top burr back into position in the grind adjustment collar and turn clockwise to the desired grind setting.
Care and cleaning
Adjusting the burrs for wear
The conical burrs are made of tool hardened steel for extra long life. However, after prolonged use the burrs will require adjustment to compensate for wear. A sign of this is when the grinds are not as fine as they used to be, check by rubbing some of the grinds between two fingers or for espresso the extraction will also show signs that the grind needs adjusting.
Replacing the burrs
To inquire about having the burrs replaced contact the Sunbeam Consumer Hotline.
Australia
1800 025 059
New Zealand
0800 786 232
Notes
Notes

This Sunbeam product is covered by a 12 month replacement or repair warranty, which is in addition to your rights under the Australian Consumer Law (if your product was purchased in Australia) or New Zealand Consumer Guarantees Act (if your product was purchased in New Zealand).
Upon receipt of your claim, Sunbeam will seek to resolve your difficulties or, if the product is defective, advise you on how to obtain a replacement or refund.
To assist us in managing warranty claims, we recommend you register your product as soon as practicable after purchase by creating a MySunbeam account on our website and uploading a copy of your original receipt.
In order to make a claim under our warranty, you must have the original proof of purchase documentation for the product and present it when requested (if not already uploaded to our website).
Should your product develop any defect within 12 months of purchase because of faulty materials or workmanship, we will replace or repair it, at our discretion, free of charge. A product presented for repair may be replaced by a refurbished product of the same type rather than being repaired. Refurbished parts may be used to repair the product.
Our replacement or repair warranty only applies where a defect arises as a result of faulty material or workmanship during the warranty period. Your warranty does not cover misuse or negligent handling (including damage caused by failing to use the product in accordance with this instruction booklet), accidental damage, or normal wear and tear.
Your warranty does not:
• cover freight or any other costs incurred in making a claim, consumable items, accessories that by their nature and limited lifespan require periodic renewal (such as filters and seals) or any consequential loss or damage; or
• cover damage caused by:
- power surges, power dips, voltage supply problems, or use of the product on incorrect voltage;
- servicing or modification of the product other than by Sunbeam or an authorised Sunbeam service centre;
- use of the product with other accessories, attachments, product supplies, parts or devices that do not conform to Sunbeam specifications; or
- exposure of the product to abnormally corrosive conditions; or
- extend beyond 3 months if the product is used in commercial, industrial, educational or rental applications.
The benefits given to you by our warranty are in addition to other rights and remedies under law in relation to the product.
In Australia our goods come with guarantees that cannot be excluded under the Australian Consumer Law. You are entitled to a replacement or refund for a major failure and for compensation for any other foreseeable loss or damage. You are also entitled to have the goods repaired or replaced if the goods fail to be of acceptable quality and the failure does not amount to a major failure.
Our goods also come with guarantees that cannot be excluded under the New Zealand Consumer Guarantees Act.
If your warranty claim is not accepted, we will inform you and if requested to do so by you, repair the product provided you pay the usual charges for such repair. You will also be responsible for all freight and other costs.
Should your product require repair or service after the warranty period, contact your nearest Sunbeam service centre. For a complete list of Sunbeam's service centres, visit our website or call our customer care line for advice on: 1300 881 861 in Australia, or 0800 786 232 in New Zealand.
Should you experience any difficulties with your product during the warranty period, please contact Sunbeam Customer Care:
Australia
www.sunbeam.com.au 1300 881 861
Suite 1, Level 1, 13 Lord Street, Botany NSW 2019
Australia
New Zealand
www.sunbeam.co.nz
0800 786 232
Level 6, Building 5, Central Park,
660–670 Great South Road Greenlane, Auckland New Zealand
Sunbeam
Need help with your appliance?
Contact our Customer Care Team or visit our website for information and tips on getting the most from your appliance.
AUSTRALIA
Visit: www.sunbeam.com.au
Phone: 1300 881 861
Mail: Suite 1, Level 1,
13 Lord Street,
Botany NSW 2019
Australia
NEW ZEALAND
Visit: www.sunbeam.co.nz
Phone: 0800 786 232
Mail: Level 6, Building 5, Central Park,
660-670 Great South Road,
Greenlane, Auckland


Newell Australia Pty Ltd | ABN 68 075 071 233
Sunbeam is a registered trade mark.
Due to continued product improvements, product illustrations and photographs in this User Guide may differ slightly from the actual product.
- Contents
- Sunbeam's Safety Precautions
- SAFETY PRECAUTIONS FOR YOUR CAFÉ SERIES CONICAL BURR COFFEE GRINDER
- Important Instructions - retain for future use
- Features of your Café Series Conical Burr Coffee Grinder
- 250g bean hopper
- Grind adjustment collar
- Group handle cradle
- Preparationmat
- Rubberfeet
- Burrshield
- Italian conical burrs
- Die-cast metal housing
- Grind on demand button
- Operationswitch
- Cord wrap
- Burr cleaning brush
- Accessories
- Functions of your Café Series Conical Burr Coffee Grinder
- Slow speed grinding
- Dual mode settings
- Grind on demand
- Operating your Café Series Conical Burr Coffee Grinder
- For grinding continuous quantities
- For grinding into the group handle
- Adjusting the grind setting
- Tips
- Care and cleaning
- Important Notes:
- Cleaning the burrs
- Adjusting the burrs for wear
- Replacing the burrs
- Australia
- New Zealand
- Notes
- Your warranty does not:
- • cover damage caused by:
- Sunbeam
- Need help with your appliance?
Brand : SUNBEAM
Model : Café Series Conical Burr EMM0500BK
Category : Coffee grinder