GGSHPD70 - Tumble dryer Sôlt - Free user manual and instructions
Find the device manual for free GGSHPD70 Sôlt in PDF.


| Product Type | Heat Pump Tumble Dryer |
| Brand | Sôlt |
| Model | GGSHPD70 |
| Rated Drying Capacity | 7.0 kg |
| Dimensions (H x W x D) | 845 x 595 x 622 mm |
| Net Weight | 51 kg |
| Power Supply | 220-240 V ~ 50 Hz |
| Rated Power | 650 W |
| Refrigerant | R134a |
| Ambient Temperature Range | +5 °C to +35 °C |
| Drying Programs | Cotton (Extra/Standard/Iron), Synthetics (Extra/Standard/Iron), Delicate, Wool, Jeans, Mix, Sports, Shirts, Time (Warm/Cool/Refresh), Your Cycle |
| Functions | Delay (0-24 h), Time, Intensity (4 levels), Your Cycle, Light, Signal, Anti-Crease, Child Lock |
| Lint Filter Cleaning | After each use |
| Base Filter Cleaning | Periodically via locking levers |
| Heat Exchanger Cleaning | Every 2 months |
| Water Container | Empty after each use |
| Safety Features | Child lock, overheat protection (cool-down cycle), door safety |
| Installation Type | Freestanding or under counter (30 mm clearance) |
| Warranty | 2 years parts and labour (Australia only) |
| Manufacturer | Residentia Group Pty Ltd |
Frequently Asked Questions - GGSHPD70 Sôlt
User questions about GGSHPD70 Sôlt
0 question about this device. Answer the ones you know or ask your own.
Ask a new question about this device
Download the instructions for your Tumble dryer in PDF format for free! Find your manual GGSHPD70 - Sôlt and take your electronic device back in hand. On this page are published all the documents necessary for the use of your device. GGSHPD70 by Sôlt.
USER MANUAL GGSHPD70 Sôlt
7.0kg Heat Pump Dryer
Welcome Congratulations on purchasing your new Heat Pump Dryer! The Sôlt brand is proudly distributed within Australia by Residentia Group Pty Ltd.
Residentia Group
Head Office.
165 Barkly Ave
Burnley
Victoria 3121
Australia
ACN.
600 546 656
Online.
residentia.group
Please refer to the warranty card at the rear of this manual for information regarding your product's parts and labour warranty, or visit us online at www.residentia.group
At Residentia Group, we are customer obsessed and our Support Team are there to ensure you get the most out of your appliance. Should you want to learn more about your rangehood features, and importantly taking care of your appliance when cleaning, our Support Team are here to help.
Sôlt
Online.
www.solt.house
Instagram.
/solt.house
Facebook.
/solt.appliances
You can use our online Support Centre at anytime by visiting http://support.residentiagroup.com.au, or you can contact us via calling us on 1300 11 HELP (4357).
It is important that you read through the following use and care manual thoroughly to familiarise yourself with the installation and operation requirements of your appliance to ensure optimum performance.
Again, thank you for choosing an Sôlt appliance and we look forward to being of service to you.
Kind Regards,
The Residentia Team
Contents 2 Welcome
4 Safety Instructions
8 Your Heat Pump Dryer
10 Operating Instructions
13 Cleaning & Maintenance
14 Troubleshooting
15 Technical Data
16 Attach Your Receipt
17 Purchase Details
18 Warranty Information
Customer Care
Sôlt recommends the use of original spare parts. When contacting our customer service team, please ensure that you have the following information at hand (which can be found on your appliances' rating plate).
-ModelNumber
— Serial Number
Safety Instructions
1. Conditions of use
This appliance is intended to be used in household and similar applications such as farm houses or by clients in serviced apartments, holiday apartments and other residential type environments.
2. Safety instructions
Before the installation and use of the appliance, carefully read the supplied instructions.
The manufacturer is not responsible if an incorrect installation and use causes injuries and damages. Always keep the instructions with your appliance for future reference.
Warning! To prevent any damages to your and others' life or property, you have to follow the safety notes.
Warning! Caution, risk of fire!
2.1 Children & vulnerable people safety
Warning! Risk of suffocation, injury or permanent disability.
— This appliance can be used by children aged from 8 years and above and persons with reduced physical, sensory or mental capabilities or lack of experience and knowledge if they have been given supervision or instruction for the operation of the appliance by a person who is responsible for their safety.
— Do not let children play with the appliance.
— Keep all packaging away from children.
— Keep all detergents away from children.
- Keep children and pets away from the appliance door when it is open.
— Cleaning and user maintenance shall not be made by children without supervision.
2.2 Installation
— Remove all the packaging.
— Do not install or use a damaged appliance.
— Obey the installation instruction supplied with the appliance.
— Make sure that the floor where you install the appliance is flat, stable, heat resistant and clean.
— Do not install or use the appliance where the temperature is less than 5^ C or higher than 35^ C, or a humid environment.
— Do not install the appliance behind a lockable door, a sliding door or a door with a hinge on the opposite side, where the appliance door can not be fully opened.
— Always be careful when you move the appliance because it is heavy. Always wear safety gloves.
— Always move the appliance vertically.
— The rear surface of the appliance must be put against the wall.
— Make sure that there is air circulation between the appliance and the floor.
— Make sure the carpet does not obstruct the ventilation openings in the base of the appliance (if applicable).
— Exhaust air must not be discharged into a flue which is used for exhausting fumes from appliances burning gas or other fuels.
— If the tumble dryer is put on top of a washing machine, use the stacking kit. The stacking kit, available from your authorised vendor, can be used only with the appliance specified in the instructions, supplied with the accessory. Read it carefully before installation.
— Ensure you have good ventilation in the installation room to avoid the back flow of gases into the room from appliances burning other fuels, including open fires.
— The appliance can be installed as freestanding or below the kitchen counter with a minimum clearance of 30mm between any adjacent walls and above the dryer.
— When the appliance is put in its permanent position, check if it is fully level with the aid of a spirit level. If it is not, adjust the feet until it is.
Electrical Connection
Warning! Risk of fire and electrical shock.
— The appliance must be earthed.
— Make sure that the electrical information on the rating plate agrees with the power supply. If not, contact an electrician.
— Always use a correctly installed shockproof socket.
— Do not use multi-plug adapters and extension cables.
— Make sure not to cause damage to the mains plug and to the mains cable. Should the appliance power supply cable need to be replaced, this must be carried out by our Service Centre.
- Connect the mains plug to the mains socket only at the end of the installation. Make sure that there is access to the mains plug after the installation. Do not connect the appliance plug with a power connection board.
— Do not pull the mains cable to disconnect the appliance. Always pull the mains plug.
— Do not touch the mains cable or the mains plug with wet hands.
— This appliance complies with the E.E.C. Directives.
2.3 Appliance use
Warning! Risk of fire, explosion, electric shock or damage to the appliance.
Warning! Before first use, leave the dryer to stand for 2 hours after transporting.
— Use this appliance in a household only.
— Do not change the specification of this appliance.
— The final part of the drying cycle occurs without heat (cool down cycle) to ensure that the items will not be damaged. If you stop the appliance before the end of the drying cycle, immediately remove and spread out all items, so that the heat can dissipate.
— If you use fabric softener or similar products, obey the instructions on the packaging.
— Do not run the appliance without a filter. Clean the lint filter before or after each use.
— Wipe away lint that has accumulated around the appliance.
— Do not dry the damaged items which contain padding or fillings.
— Do not dry items such as foam rubber (latex foam), shower caps, waterproof textiles, rubber backed articles and clothes or pillows fitted with foam rubber pads.
— Before drying items that have been in contact with substances such as cooking oil, acetone, alcohol, petrol, kerosene, spot removers, turpentine, waxes and wax removers, wash them in hot water with an extra amount of detergent.
— Do not dry items in the appliance if industrial chemicals have been used for cleaning.
— Make sure that no gas lighters or matches have been left in the pockets of the clothing.
— Only dry fabrics which are applicable to dry in the tumble dryer. Follow the instructions on the fabric label.
— Do not dry not washed items in the appliance.
— If you have washed your laundry with a stain remover start an extra rinse cycle before you start the dryer.
— Do not drink or prepare food with the condensed water. It can cause health problems to people and pets.
— Do not sit or stand on the open door.
— Obey the maximum load volume of 7 kg (refer to the "Program chart" chapter).
— Do not dry dripping wet clothes in the tumble dryer.
— Oil-affected items can ignite spontaneously, especially when exposed to heat sources such as in a tumble dryer. The items become warm, causing an oxidation reaction in the oil. Oxidation creates heat. If the heat cannot escape, the items can become hot enough to catch fire. Piling, stacking or storing oil-affected items can prevent heat from escaping and create a fire hazard.
— If it is unavoidable that fabrics that contain vegetable or cooking oil or have been contaminated by hair care products be placed in a tumble dryer they should first be washed in hot water with extra detergent- this will reduce, but not eliminate, the hazard.
— Ensure all objects are removed from clothing pockets such as lighters and matches.
— Before first use, clean the inside of the drum with a soft fabric cloth and run the "Refresh" program with some clean rags inside. After finishing the cycle, please clean the lint filter as per the instructions within this user manual.
Safety Instructions (Continued)
Dry care symbols
Please pay attention to use the drying machine if the materials of your clothes can not be dried by it or contain the symbols as follows:
 Dry Dry |  Normal Normal |  Not tumble dry normal Not tumble dry normal |  Do not dry Do not dry |
 Line dry / hang to dry Line dry / hang to dry |  Drip dry Drip dry |  Dry flat Dry flat |  In the shade In the shade |
 Dry clean Dry clean |  Do not dry clean Do not dry clean |  Dry clean normal cycle with any solvent Dry clean normal cycle with any solvent |  Dry clean normal cycle petroleum solvent only Dry clean normal cycle petroleum solvent only |
2.4 Care and Cleaning
Warning! Risk of injury or damage to the appliance.
— Before maintenance, deactivate the appliance and disconnect the mains plug from the mains socket.
— Do not use water spray and steam to clean the appliance.
— Clean the appliance with a moist soft cloth. Only use neutral detergents. Do not use abrasive products, abrasive cleaning pads, solvents or metal objects.
2.5 Product Disposal
Warning! Risk of injury or suffocation.
— Disconnect the appliance from the mains supply.
— Cut off the mains cable and discard it.
— Remove the door catch to prevent children and pets to get closed in the appliance.
2.6 Transport
Always move the appliance cautiously. Do not use the machine door or the handle of the water container, to lift the appliance.
2.7 Installation Positioning
— Ensure that your appliance is installed on solid and flat ground, in a level position.
— Please do not place the appliance on a slope, soft carpet or wooden floor.
- Your appliance should only be installed within an internal environment. Do not install the appliance outdoors.
Level Adjusting
- If the floor is obviously uneven, your appliance feet need to be adjusted. If your appliance isn't level, it will cause your appliance to vibrate, and potentially move from its position.
— Use a screwdriver to adjust the height of four machine legs to adjust the level of your dryer.
2.8 Installing the Optional Bypass Hose
- Remove the existing drain hose from the hose connector using pliers
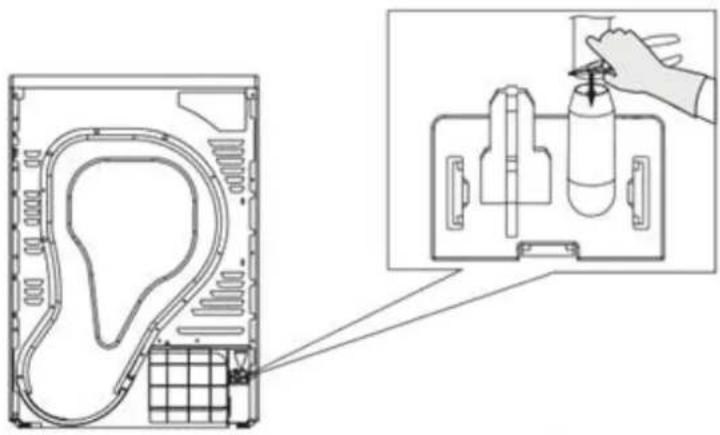
natural_image
Technical line drawing of a mechanical component with internal structure and assembly, showing a close-up view of the internal part (no text or symbols present)- Insert the optional bypass hose (using pliers if required), ensuring it is securely in place
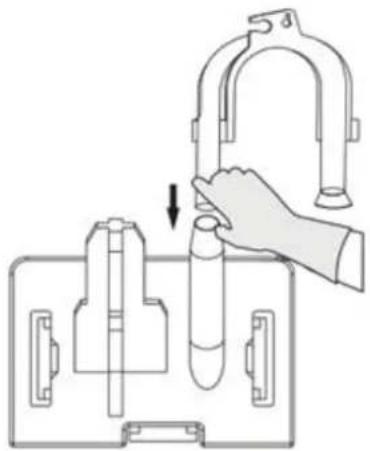
natural_image
Diagram showing a hand inserting a test tube into a device case (no text or symbols present)Your Heat Pump Dryer
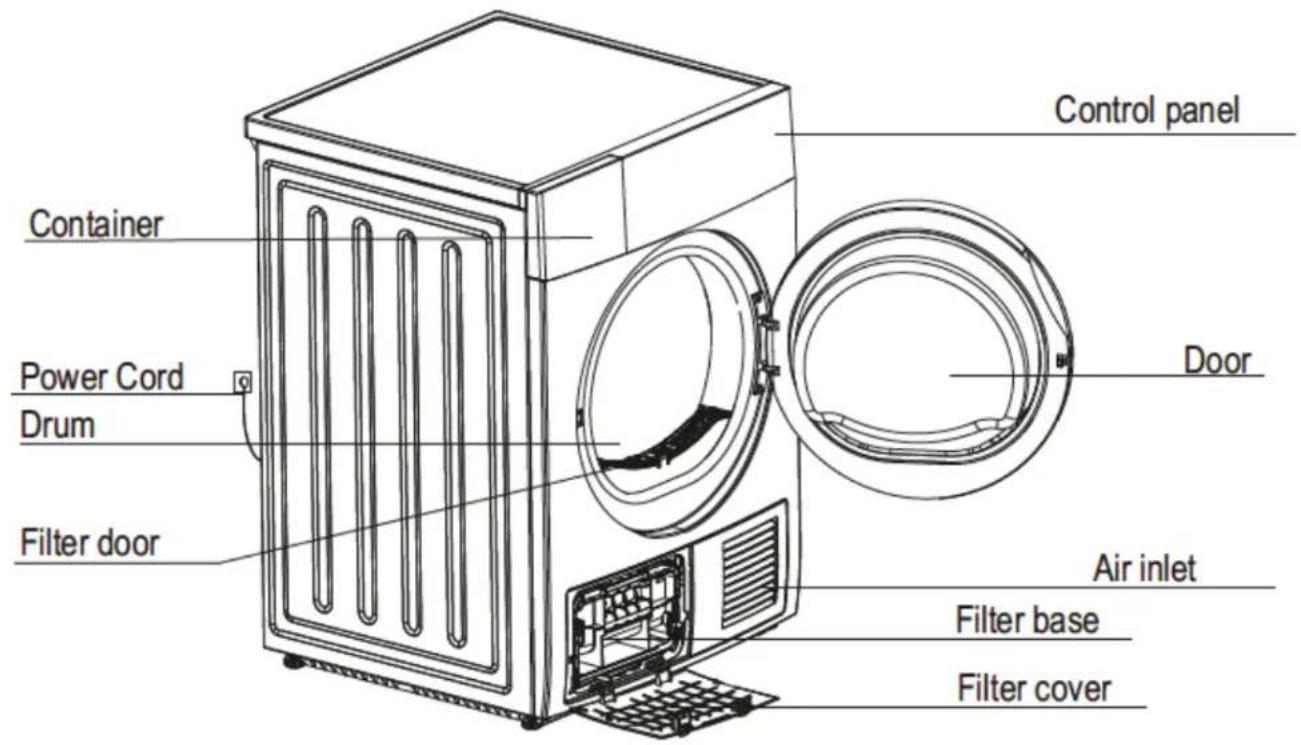
- Product Components
- Control Panel
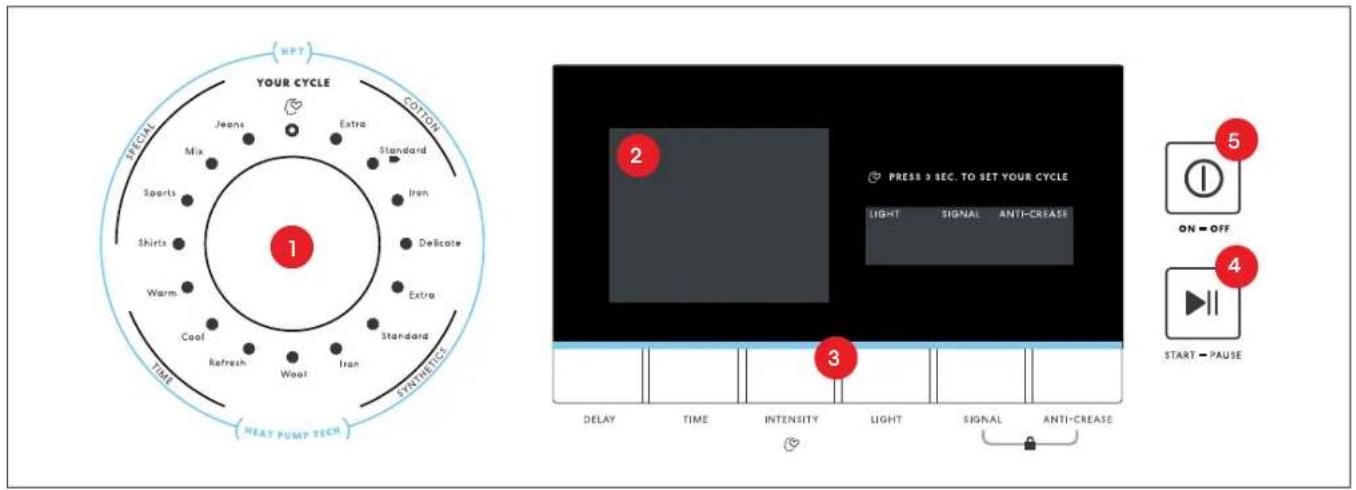
1 Program selection dial
2 Display
3 Specialty function buttons
4 Start/Pause button
5 On/Off button
Display Icons
| [XD7V] | Delay start |
 | Child lock |
 | Remaining Time indicator/Error message |
| Cycle phase status | |
| Filter | Clean filters (warning) |
| Full | Empty water container (warning) |
 | Dryness level (four grades) |
 | Drum lamp indicator |
| [0YAS] | Signal indicator |
 | Anti-crease mode |
Operating Instructions
5.1 Quick Start
Follow the procedure below to operate your dryer.
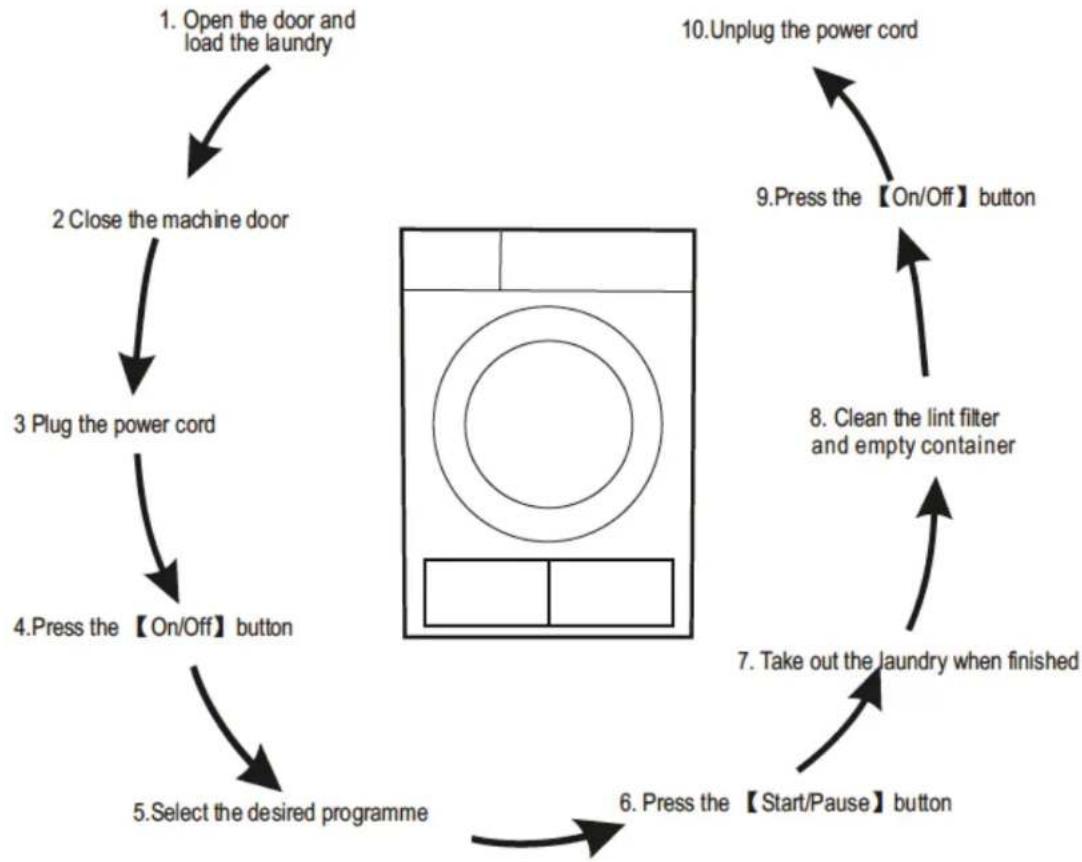
flowchart
graph TD
    A["1. Open the door and load the laundry"] --> B["2 Close the machine door"]
    B --> C["3 Plug the power cord"]
    C --> D["4. Press the 【On/Off】 button"]
    D --> E["5. Select the desired programme"]
    E --> F["6. Press the 【Start/Pause】 button"]
    F --> G["7. Take out the laundry when finished"]
    G --> H["8. Clean the lint filter and empty container"]
    H --> I["9. Press the 【On/Off】 button"]
    I --> J["10. Unplug the power cord"]
5.2 Clothing Weight Reference
The table below provides a weight reference for typical clothing items.
 | Blended Coats (about 800g) | 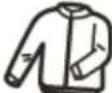 | Jackets (about 800g in cotton) | 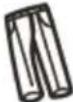 | Jeans Trousers (about 800g) | 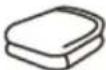 | Towel Quilts (about 900g in cotton) |
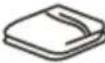 | Single Sheets (about 600g in cotton) |  | Work Clothes (upper and lower) (about 1120g in cotton) | 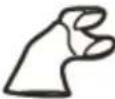 | Pajamas (about 200g) | 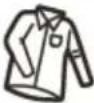 | Shirts (about 300g in cotton) |
 | Undershirts (about 180g in cotton) |  | Underpants (about 70g in cotton) |  | Socks (about 30g in blended material) | ||
6. Program Table
Programs Load Max Application Delay / Time
| Cotton These program options are designed for use with cotton or linen fabrics. | ||||
| Extra 7.0kg To dry cotton clothing. Drying level: Extra Dry Y / N | ||||
| Standard 7.0kg To dry cotton clothing. Drying level: Cupboard Dry Y / N | ||||
| Iron | 7.0kg | To dry cotton clothing. Drying level: Applicable for Ironing | Y / N | |
| Delicate | Delicate | 1.0kg | To dry delicate laundry that is suitable for drying, or clothing which is advised to be hand-washed at a lower temperature. | Y / N |
| Synthetics | These program options are designed for use with synthetic and blended fabrics. | |||
| Extra 3.5kg | To dry thick or multi-layered synthetic fabrics.Drying level: Extra Dry | Y / N | ||
| Standard 3.5kg | To dry thin synthetic fabrics which are not ironed (i.e. easy care shirts, table linen, baby clothes, socks, etc). | Y / N | ||
| Iron 3.5kg | To dry thin synthetic fabrics which are also to be ironed(i.e. knitwear, shirts, etc). | Y / N | ||
| Wool | Wool | 1.0kg | Use with fluffy and fresh wool clothing to start the drying process.Once the program is complete, remove the clothes and allow them to finish the drying process by air-drying. | Y / N |
| Special | Jeans | 5.0kg | To dry jeans or leisure clothes that are spun at high speeds within the washing machine. | Y / N |
| Mix | 3.5kg | Designed for use when you cannot determine your clothing material. | Y / N | |
| Sports | 3.0kg | To dry sportswear, thin fabrics and polyester items which are not to be ironed. | Y / N | |
| Shirts | 1.0kg | To dry easy care clothes such as shirts and blouses. Use with the anti-crease option for minimum ironing effort. Once dried, hang your items on a clothes hanger. | Y / N | |
| Your Cycle | Your Cycle | - | Define and save your favourite program settings. | Y / - |
| Time With these program options, you can use manual timing option and set your desired program duration. | ||||
| Warm | - | To warm clothes from a minimum of 10 minutes to a maximum of 120 minutes. (10 minute increments) | Y / Y | |
| Cool | - | To air clothes without blowing hot air from a minimum of 10 minutes to a maximum of 30 minutes.(10 minute increments) | Y / Y | |
| Refresh | 1.0kg | To refresh textiles that were in storage from a minimum of 20 minutes to a maximum of 150 minutes.(10 minute increments) | Y / Y | |
Note:
1 The Maximum Weights refer to dry items.
2 Energy labeling program: Cotton Extra is the program used for the AS/NZS 2442 MEPS energy rating.
3 The programs above are only recommendations and users can choose the appropriate program according to their personal requirements and habits. Thick fabrics (i.e. bed linen, jeans, jackets, etc) are not easy to dry and the Jeans drying program along with the strongest intensity is strongly recommended.
Operation Instructions (Continued)
7. Options
7.1 Delay Function
Use this delay function to delay the drying program from 0 to 24 hours. The delay time means the program will start after X hours. When the delay program starts, the time starts to decrease on the display and the "clock" icon blinks on your appliance display.
To activate the delay function:
— Load your clothing articles into your appliance and close the door.
— Press the On/Off button and use the program selector dial to select your desired drying program.
- You can select the "Anti-Crease" or "Signal" functions by pressing the corresponding buttons, according to your needs.
— Now press the "Delay" button.
— Continue to press the "Delay" button to set your desired delay time.
— Once your desired delay time is displayed, simply press the "Start/Pause" button and the dryer will automatically begin your selected drying program at the completion of your set delay period.
- If you press the "Start/Pause" button once again, the delay function will be paused. To cancel the delay function, press the "On/Off" button.
7.2 Time Function
When the Warm, Cool or Refresh drying programs are selected, the Time button can be used to adjust the drying time. Each press of the "Time" button will adjust the drying time in 10 minute increments.
7.3 Intensity Function
Your appliance features a drying intensity control, allowing you to adjust the dryness level of your laundry. The Intensity function has four levels, indicated by the icons below.

— The drying time increase by 3 minutes with each level.
— The Intensity function can only be activated before the drying program is started.
— Press the Intensity button repeatedly to select the desired intensity (and drying time).
— The Intensity function can be used for all programs except Cotton Iron, Quick, Synthetic Iron, Baby Care, Warm, Cool and Refresh.
7.4 Your Cycle Function
The Your Cycle function can be used to define and save your favourite drying program for easier selection in the future (i.e. Use this function to save your most frequently used drying settings).
To set your Your Cycle function:
— Use the program selector dial to select your required program and select any other drying functions.
— Press and hold the "Intensity" button for 3 seconds until the display flashes, indicating that your desired program has been saved.
— To use your preset Your Cycle, simply turn the program selector dial to the Your Cycle position and press the "Start/Pause" button to begin.
— If you wish to change your Your Cycle settings, simply repeat the steps above at any time.
7.5 Light Function
Your Heat Pump Dryer has an integrated light inside the drum to assist with viewing your clothing.
Press the "Light" button to activate the internal light for 3 minutes when the door is closed or the dryer is in operation, or 1 minute when the door is open.
7.6 Signal Function
This function allows you to turn the audible tone on or off, to indicate that your drying program is complete. By default the audible signal is set to On.
When the Signal function is on, your appliance will make an audible tone when:
— The extra function buttons are pressed (i.e. Speed Dry, Anti-Crease, etc).
— If the dryer is operating and the program selector knob is turned, the appliance will make an audible tone to alert the user that an invalid choice has been made.
— At the completion of a drying program, an audible tone will sound.
7.7 Anti-Crease Function
At the end of a drying program, the anti-crease operation time is 30 minutes (by default) or 120 minutes (if selected).
The “Anti-Crease” light shall illuminate when the function is selected. This function helps to prevent the laundry from creases. The laundry can be removed during the anti-crease phase. All programs have the ability to use this function, except for Cool, Refresh and Wool.
7.8 Child Lock
Your appliance features a child lock, preventing children from pressing keys or changing the dryers operation.
To activate the child lock:
- When the appliance is in operation, press and hold the "Anti-Crease" and "Signal" buttons simultaneously for 3 seconds. Once activated, the display will show the Child Lock icon.
— Whilst the Child Lock is activated, pressing of buttons won't effect the dryer.
— To deactivate the Child Lock, simply press and hold the "Anti-Crease" and "Signal" buttons simultaneously for 3 seconds. The Child Lock indicator icon will switch off the display.
Cleaning & Maintenance
8. Cleaning Procedures
8.1 Door Lint Filter
As with all clothes dryers, your lint filter should be cleaned after each use.
Note:
— Lint accumulates on the lint filter and will block the air circulation. This effects the performance of your clothes dryer and will extend the required drying time.
— Always disconnect the power cord before cleaning!
— Do not operate the dryer without the lint filter installed!
— Clean the lint filter after each use.
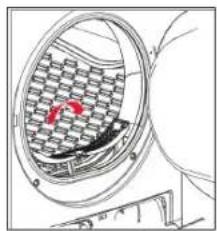
To clean the lint filter:
— Ensure the dryer has cooled down after any recent operation.
— Unplug the appliance.
— Open the appliance door.
— Take out the lint filter and wipe off any accumulated lint and fibres with your hand, or rinse the filter with water and dry thoroughly.
— Re-install the lint filter.
natural_image
Technical illustration of a mechanical component with a circular frame and internal grid structure (no text or symbols)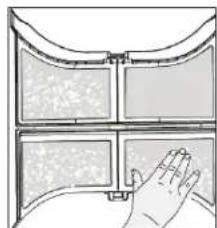
natural_image
Illustration of a hand touching a panel with a curved frame (no text or symbols)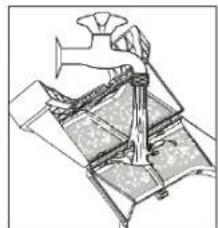
natural_image
Technical line drawing of a mechanical assembly or assembly (no visible text or symbols)8.2 Cleaning the Base Filter
— Ensure the dryer has cooled down after any recent operation.
— Unplug the appliance.
— Open the base filter cover, as illustrated below.
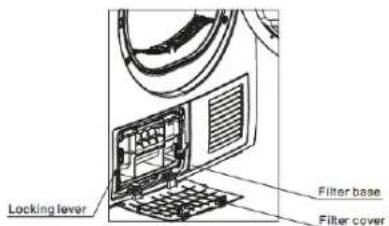
— Unscrew the two locking levers, rotating them towards each other.
— Completely clean the base filter using the same method as described in 8.1.
— Reinsert the base filter and re-screw the locking levers in place.
— Close the base filter flap, until it locks in position.
Warning! Never operate the dryer without the filters installed.
8.2 Cleaning the Heat Exchanger
If you frequently use your appliance, it is recommended to clean the heat exchanger approximately once every two months. Be careful not to damage the air heat exchanger and please use gloves.
Note:
The lint and fluff can easily be removed when first lightly dampened.
8.3 Empty the water container
Warning! After each use, the water container should be emptied.
— Hold and pull out the water container using two hands.
— Tilt the water container, pouring out the condensed water in to a sink.
— Re-insert the water container into the appliance.
Note:
If the container requires emptying during operation, the program will pause and the ☐on will flash on the display. Follow the process above to empty the container and restart the program by pressing the "Start/Pause" button.
Warning! — Do not drink the condenser water.
— Do not operate the dryer without the water container in place.
8.4 Error Alarms
| Display | Reason | Solutions |
| “E” is on | Container is full | Empty container |
| Water pump failure or water level sensor failure | Please contact your local service center if the problem persists | |
| “E32” | Humidity sensor failure | |
| “E33” | Temperature sensor failure |
Troubleshooting
9. Troubleshooting
Warning! Only authorised technicians can carry out repairs.
Before contacting our customer service team, please refer to the table below to see if your fault can be fixed by yourself. Should a service technician visit be arranged and its found there are no faults with the appliance, a call out charge will apply.
Problem Solution
| Display isn't turning on. — Check that the mains plug is inserted and switched on at the power point.— Check that a program is selected on the program selection dial.— Check that the relevant fuse hasn't blown. |

indicator is flashing
— Empty the water container as per the steps in 8.3 within this user manual.

indicator is flashing
— Clean lint filter.
Dryer doesn't start — Check the start button has selected.
— Check the appliance door has closed.
— Check that the program has been set.
Water is running out of the — Align dryer horizontally.
dryer
— Clear air condenser and door seals.
Door is opening by itself — Press the door door closed until it "clicks" into position.
— Ensure that the dryer hasn't been overloaded with clothes.
Degree of dryness was not — Clean the lint filter and wash the condenser.
reached or drying time too — Empty the water container.
long. — Clean the moisture sensors.
— Try using a higher drying program next time.
Note:
If the above steps don't resolve your issue or you cannot resolve the fault by yourself:
— Press the "On/Off" button,
— Switch off the appliance at the power outlet and remove the plug,
— Call our customer service team.
Technical Data
10. Technical Data
| Power supply 220-240V ~50Hz |
| Rated Power 650W |
| Refrigerant R134a |
| Ambient temperature +5°C - + 35°C |
| Dimensions 595 x 622 x 845 mm |
| Rated drying capacity 7.0kg |
| Net Weight 51kg |
Note:
— Contains fluorinated greenhouse gases covered by the Kyoto Protocol. Hermetically sealed.
— The rated capacity is the maximum capacity of dry clothes. Refer to the Program table for maximum loadings specific to each program.
— Do not install the dryer in a room where there is a risk of a frost occurring. At temperatures around freezing point, the dryer may not be able to operate properly.
— There is a risk of damage if the condensed water is allowed to freeze in the pump, or water container.
Attach your receipt to this page

Purchase Details
For future reference, please record the following information which can be found on the rating plate and the date of purchase which can be found on your sales invoice.
STORE DETAILS
STORE NAME
ADDRESS
TELEPHONE
PURCHASE DATE
PRODUCT DETAILS
MODEL NO.
SERIAL NO.*
Warranty Information
WARRANTY TERMS & CONDITIONS LAUNDRY
This document sets out the terms and conditions of the product warranties for Residentia Group Appliances. It is an important document. Please keep it with your proof of purchase documents in a safe place for future reference should you require service for your Appliance.
1. IN THIS WARRANTY
(a) ‘acceptable quality’ as referred to in clause 10 of this warranty has the same meaning referred to in the ACL;
(b) ‘ACL’ means Trade Practices Amendment (Australian Consumer Law) Act (No.2) 2010;
(c) 'Appliance' means any Residentia Group product purchased by you accompanied by this document;
(d) 'ASR' means Residentia Group authorised service representative;
(e) ‘Residentia Group’ means Residentia Group Pty Ltd of 165 Barkly Ave, Burnley VIC 3121, ACN 600 546 656 in respect of Appliances purchased in Australia;
(f) ‘major failure’ as referred to in clause 10 of this warranty has the same meaning referred to in the ACL and includes a situation when an Appliance cannot be repaired or it is uneconomic for Residentia Group, at its discretion, to repair an Appliance during the Warranty Period;
(g) 'Warranty Period' means:
(i) where the Appliance is used for personal, domestic or household use (i.e. normal single family use) as set out in the instruction manual, the Appliance is warranted against manufacturing defects for 24 months, following the date of original purchase of the Appliance;
(h) ‘you’ means the purchaser of the Appliance not having purchased the Appliance for re-sale, and ‘your’ has a corresponding meaning.
-
This warranty only applies to Appliances purchased and used in Australia and is in addition to (and does not exclude, restrict, or modify in any way) any non-excludable statutory warranties in Australia.
-
During the Warranty Period Residentia Group or its ASR will, at no extra charge if your Appliance is readily accessible for service, without special equipment and subject to these terms and conditions, repair or replace any parts which it considers to be defective. Residentia Group or its ASR may use remanufactured parts to repair your Appliance. You agree that any replaced Appliances or parts become the property of Residentia Group. This warranty does not apply to light globes, batteries, filters or similar perishable parts.
-
Parts and Appliances not supplied by Residentia Group are not covered by this warranty.
-
You will bear the cost of transportation, travel and delivery of the Appliance to and from Residentia Group or its ASR. If you reside outside of the service area, you will bear the cost of:
(a) travel of an authorised representative;
(b) transportation and delivery of the Appliance to and from Residentia Group or its ASR, in all instances, unless the Appliance is transported by Residentia Group or its ASR, the Appliance is transported at the owner's cost and risk while in transit to and from Residentia Group or its ASR.
6. Proof of purchase is required before you can make a claim under this warranty.
7. You may not make a claim under this warranty unless the defect claimed is due to faulty or defective parts or workmanship. Residentia Group is not liable in the following situations (which are not exhaustive):
(a) the Appliance is damaged by:
(i) accident
(ii) misuse or abuse, including failure to properly maintain or service
(iii) normal wear and tear
(iv) power surges, electrical storm damage or incorrect power supply
(v) incomplete or improper installation
(vi) incorrect, improper or inappropriate operation
(vii) insect or vermin infestation
(viii) failure to comply with any additional instructions supplied with the Appliance;
(b) the Appliance is modified without authority from Residentia Group in writing;
(c) the Appliance's serial number or warranty seal has been removed or defaced;
(d) the Appliance was serviced or repaired by anyone other than Residentia Group, an authorised repairer or ASR.
8. This warranty, the contract to which it relates and the relationship between you and Residentia Group are governed by the law applicable where the Appliance was purchased.
9. To the extent permitted by law, Residentia Group excludes all warranties and liabilities (other than as contained in this document) including liability for any loss or damage whether direct or indirect arising from your purchase, use or non use of the Appliance.
-
For Appliances and services provided by Residentia Group in Australia, the Appliances come with a guarantee by Residentia Group that cannot be excluded under the Australian Consumer Law. You are entitled to a replacement or refund for a major failure and for compensation for any other reasonably foreseeable loss or damage. You are also entitled to have the Appliance repaired or replaced if the Appliance fails to be of acceptable quality and the failure does not amount to a major failure. The benefits to you given by this warranty are in addition to your other rights and remedies under a law in relation to the Appliances or services to which the warranty relates.
-
At all times during the Warranty Period, Residentia Group shall, at its discretion, determine whether repair, replacement or refund will apply if an Appliance has a valid warranty claim applicable to it.
- Missing parts are not covered by warranty. Residentia Group reserves the right to assess each request for missing parts in a case by case basis. Any parts that are not reported missing in the first week after purchase will not provide free of charge.
- To enquire about claiming under this warranty, please follow these steps:
(a) carefully check the operating instructions, user manual and the terms of this warranty;
(b) have the model and serial number of the Appliance available;
(c) have the proof of purchase (e.g. an invoice) available;
(d) telephone the numbers shown below. - You accept that if you make a warranty claim, Residentia Group and its ASR may exchange information in relation to you to enable Residentia Group to meet its obligations under this warranty.
IMPORTANT
Before calling for service, please ensure that the steps in point 13 have been followed.
Telephone contacts
▶ Service: Please call 1300 11 HELP (4357)
▶ Spare Parts: Please call 1300 11 SPARE (7727)
T. 1300 11 4357
E. support@residentiagroup.com.au
www.solt.house
- Welcome Congratulations on purchasing your new Heat Pump Dryer! The Sôlt brand is proudly distributed within Australia by Residentia Group Pty Ltd.
- Residentia Group
- Sôlt
- Contents 2 Welcome
- Customer Care
- Safety Instructions
- Conditions of use
- Safety instructions
- Children & vulnerable people safety
- Installation
- Electrical Connection
- Appliance use
- Safety Instructions (Continued)
- Dry care symbols
- Care and Cleaning
- Product Disposal
- Transport
- Installation Positioning
- Level Adjusting
- Installing the Optional Bypass Hose
- Your Heat Pump Dryer
- Operating Instructions
- Quick Start
- Clothing Weight Reference
- Program Table
- Note:
- Operation Instructions (Continued)
- Options
- Delay Function
- Time Function
- Intensity Function
- Your Cycle Function
- Light Function
- Signal Function
- Anti-Crease Function
- Child Lock
- Cleaning & Maintenance
- Cleaning Procedures
- Door Lint Filter
- Cleaning the Base Filter
- Cleaning the Heat Exchanger
- Empty the water container
- Error Alarms
- Troubleshooting
- Troubleshooting
- Technical Data
- Technical Data
- Attach your receipt to this page
- Purchase Details
- STORE DETAILS
- PRODUCT DETAILS
- Warranty Information
- WARRANTY TERMS & CONDITIONS LAUNDRY
- IN THIS WARRANTY
- IMPORTANT
Brand : Sôlt
Model : GGSHPD70
Category : Tumble dryer