
WH24FX9019 - Monitor WESTINGHOUSE - Free user manual and instructions
Find the device manual for free WH24FX9019 WESTINGHOUSE in PDF.


| Product Type | Monitor |
| Brand | Westinghouse |
| Model | WH24FX9019 |
| Screen Size | 24 inches (diagonal) |
| Resolution | 1920 x 1080 (Full HD) |
| Refresh Rate | 60 Hz |
| Panel Type | TN or IPS (typical) |
| Aspect Ratio | 16:9 |
| Dimensions (with stand) | Approx. 21.3 x 16.1 x 7.2 inches (WxHxD) |
| Weight (with stand) | Approx. 8.8 lbs |
| Power Consumption | Typical 25W, standby <0.5W |
| Input Voltage | 100-240 VAC, 50/60 Hz |
| Connectivity | HDMI, VGA, DisplayPort (may vary) |
| Speakers | Built-in 2x2W (if applicable) |
| VESA Mount Compatible | 100x100 mm |
| Adjustability | Tilt only (typical) |
| Cleaning Instructions | Wipe with soft dry cloth; avoid chemicals |
| Safety Features | CE, FCC, RoHS compliant; Kensington lock slot |
| Spare Parts Availability | Power adapter, stand optional; contact support |
| Repairability Index | Not rated; standard design |
| Accessories Included | Power cable, HDMI cable, user manual |
| Warranty | 1 year limited (typical) |
Frequently Asked Questions - WH24FX9019 WESTINGHOUSE
User questions about WH24FX9019 WESTINGHOUSE
0 question about this device. Answer the ones you know or ask your own.
Ask a new question about this device
Download the instructions for your Monitor in PDF format for free! Find your manual WH24FX9019 - WESTINGHOUSE and take your electronic device back in hand. On this page are published all the documents necessary for the use of your device. WH24FX9019 by WESTINGHOUSE.
USER MANUAL WH24FX9019 WESTINGHOUSE
Important Safety Instructions
WARNING
- Read these instructions.
- Keep these instructions.
- Heed all warnings.
- Follow all instructions.
5.Do not use this apparatus near water. - Always turn the unit off and unplug the power cord when cleaning the unit. Clean only with a soft-drycloth.
- Do not block any ventilation openings.
- Do not install near any heat sources such as radiators, heaters, stoves, or other apparatus (including amplifiers) that produce heat.
- Protect the power cord from being walked on or pinched particularly at the point where they exit from the apparatus.
- Only use attachments/accessories specified within this manual.
- Unplug this apparatus during lightning storms or when unused for long periods of time.
- Do not attempt to repair this appliance yourself. Do not attempt to open or dismantle this product. Doing so may result in electric shock or physical injury.
- The External Power Supply is a Class I (EarthedDevice). Please ensure you connect the mains plug to an earth mains outlet. If unsure, please seek advice from your local qualified electrician.
- Please ensure the appliance, remote, accessories or batteries are not placed in a position where they are exposed to heat sources, direct sunlight or any other hazard.
15.PIs only use the external power adaptor provided by the manufacturer. - To prevent injury, this apparatus must be securely attached to the supporting surface in accordance with the installation instructions.
IMPORTANT INFORMATION
Please ensure that this appliance is positioned in a sufficiently stable location, Failure to take the appropriate safety measures may result in injuries, particularly to children, damage to property or to the appliance.
- Only use cabinets or stands that are suitable for the specifications of this appliance. A stand has been provided with this appliance however, if you choose to use alternative methods, this is at your own risk. The manufacturer or supplier only recommends to use the stand provided.
- Only using furniture that can safely support the television. Do not place the appliance on any unstable surface, stand or in a position that may create hazard for the appliance, the user or any surroundings.
- Do not place the television on tall furniture or wall brackets unless an appropriate anchoring or securing method has been used.
- Do not place the television on cloth or other unstable materials.
- Educate children about the dangers of climbing on furniture to reach the television or its controls. It is recommended to always supervise children at all times when they are around electrical or electronic appliances.
Seek advice from an appropriate expert when attempting to mount this appliance on a wall.
Important Safety Instructions
WARNINGS:
- This appliance is intended for household use only, and not for commercial or industrial use.
- Only connect the power plug to a suitable AC 100\~240V 50Hz/60Hz earthed mains socket.
- The apparatus shall not be exposed to dripping or splashing and no objects filled with liquids, such asvases, shall be placed on the apparatus.
- Install the unit at an adequate distance from the wall to allow sufficient ventilation. Any ventilation holes should not be impeded with items, such as newspaper, fabric, curtains etc. Do not place the unit in a poorly ventilated enclosure, such as an enclosed cabinet.
- To reduce the risk of fire or electric shock, do not expose the apparatus to rain or moisture.
- Do not place the unit on an unstable surface, such as a wobbly stand or sloped table, or on any surface whose area is smaller than the bottom area of the unit. Always place the unit on a flat stable surface.
- Do not place on top of any other appliance.
- Do not place a burning candle or similar on top of the unit.
- Do not place the unit near any heat source such as a fireplace or space heater.
- Keep the unit clean and never store it next to a heat source or in dirty, humid or wet places.
Keep it out of direct sunlight. - Do not insert any any objects or liquids, into the ventilation openings or terminals.
- Press the buttons gently. Pressing them too hard can damage the unit.
- When moving the unit, be sure to turn the unit off and unplug the power cord from the wall outlet.
- If you notice any unusual odors or smoke around the unit, immediately disconnect the unit from the outlet and contact the help line shown on the front of this manual.
Image Persistence
This product is not designed to have a fixed image patterns on the screen for extended periods of time.

This "bolt of lighting" indicates uninsulated material within your unit may cause an electrical shock. For the safety of everyone in your household, please do not remove product covering.
The “exclamation point” calls attention to features for which you should read the enclosed literature closely to prevent operating and maintenance problems.
WARNING: To reduce the risk of fire or electric shock, this apparatus should not be exposed to rain or moisture and objects filled with liquids, such as vases, should not be placed on this apparatus.
I. Safety Prevention Measures
 | 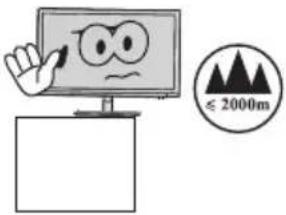 |  |  |
| Please always place this device on a stable surface; otherwise, it may fall and be damaged. | The altitude and the tropical environment the adapter fits depend on which adapter is used for the device. The rating plate on the back of the device with the above warning sign indicates that this product is applicable for the safe use of the region with altitude of 2,000m and below. | Do not hold the plug with wet hand; otherwise, electric shock may occur. Make sure the plug has a good to touch because poor touch may cause fire. | Do not use a broken power plug nor keep a power cord near heat source; otherwise, electric shock or fire may occur. |
| When cleaning the device, be sure to remove the power plug, use a piece of soft cloth rather than industrial chemical to clean the device, be sure not to let water enter the device. | Do not disassemble this device without permission. In case of failure, be sure to contact a professional servicing person to fix it. The unauthorized disassembly of this device may result in electric shock or fire. | In case of rare smell or noise out of this device, be sure to immediately cut off the power supply and ask a professional servicing person to fix the problem. | When this is device is idle for long time, be sure to power it off; otherwise, electric shock or fire may occur. |
Note:
The device with AC switch may use such AC switch as cut-off component. The device without AC switch may use power plug or coupler as cut-off component. In case of the normal use of the equipment, make sure the cut-off component can be accessed easily.

HIGH-DEFINITION MULTIMEDIA INTERFACE
This product incorporates HDMI technology. HDMI, the HDMI logo, and High-Definition Multimedia Interface are trademarks or registered trademarks of HDMI Licensing LLC.
II. Installation Instructions
1.Accessories

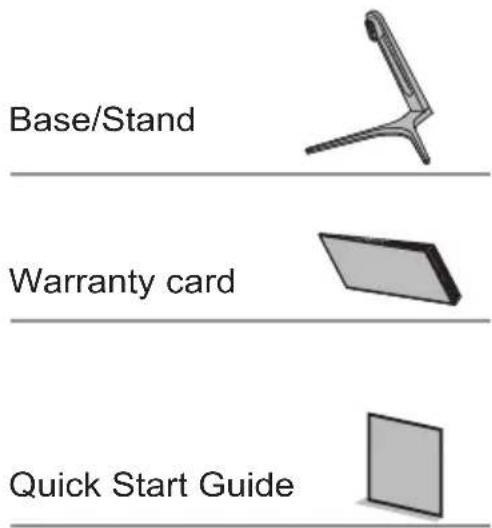
(The above pictures are for illustration only and the physical accessories shall govern.)
2. Angle Adjustment
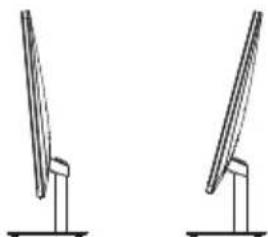
2.1 The screen can be adjusted by inc lining for rwa rd and backward; however, the specific adjustment depends on the specific model of the de vic e. Generally, it may be inclined 5±2° for war d and d 15±2° backward.
natural_image
Two identical line drawings of a flat-screen monitor with stand (no text or symbols)2.2 When adjusting the angle of the monitor, be sure not to touch or press the area of the screen.

natural_image
Line drawing of two hands holding a tablet with a prohibition symbol above (no text or labels)(The above pictures are for illustration only and the physical accessories shall govern.)
III. Connect the Monitor to PC

1

2

3
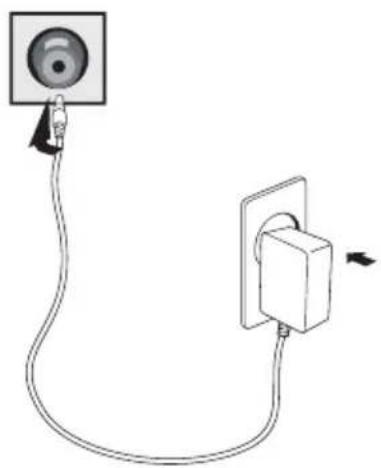
Before connecting the LCD monitor to the PC, please power down the PC and the monitor.
natural_image
Simple line drawing of a cable with a speaker and plug, no text or symbols presentPower adapter
* Warning: Always use the power cord of standard configuration.
1 Power Plug Connect the power cord of the monitor into the POWER port in the back of the monitor.
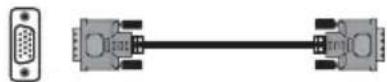
2 VGA Port Connect the VGA cable into the VGA IN port in the back of the monitor (this needs the support of the monitor).
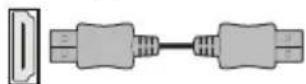
3 HDMI Port Connect the HDMI cable into the HDMI IN port into the back of the monitor (this needs the support of the monitor).
(The above pictures are for illustration only and the physical accessories shall govern.)
set the horizontal vertical position, always and focus (only for VGA signal)
IV. User Setup
- Schematic Diagram of Keys.
- Power switch: F

- Description of Keys' Functions
| ⏻ | ||
V. Operation Menu (OSD) Function Descriptions
| First level menu item | First level menu icon | Second level menu item | Second level menu icon | Third level menu item | Third level menu icon | Description |
| Brightness | [27W] | NONE | NONE | NONE | NONE | Adjust display brightness |
| Contrast | [68BC] | NONE | NONE | NONE | NONE | Adjust display contrast |
| DCR |  | On | ON | NONENONE | Activate dynamic contrast | |
| Off | OFF | NONENONE | Active dynamic contrast | |||
| Return | NONE | NONE | Return to the previous menu | |||
| Exit | NONE | NONE | Exit from the whole menu | |||
| Mode |  | Standard | NONE | NONE | Normal work mode | |
| Movie | MOVIE | NONE | NONE | Movie mode | ||
| FPS | NONE | NONE | FPS game mode | |||
| RTS | RS | NONE | NONE | RTS game mode | ||
| EyeSaver | NONE | NONE | Eye protection ray filter application mode | |||
| Return | NONE | NONE | Return to the previous menu | |||
| Exit | NONE | NONE | Exit from the whole menu | |||
| Color Temp. |  | Cool | NONE | NONE | Set as cold color temperature | |
| Warm | NONE | NONE | Set as warm color temperature | |||
| User | Red | Fine tuning of red color temperature | ||||
| Green | Fine tuning of green color temperature | |||||
| Blue | Fine tuning of blue color temperature | |||||
| Return | NONE | NONE | Return to the previous menu | |||
| Exit | NONE | NONE | Exit from the whole menu | |||
| Aspect |  | Auto | AUTO | NONE | NONE | Automatically adjust picture aspect ratio |
| 16:9 | NONE | NONE | Picture in 16:9 mode | |||
| 4:3 | NONE | NONE | Picture in 4:3 mode | |||
| Return | NONE | NONE | Return to the previous menu | |||
| Exit | NONE | NONE | Exit from the whole menu | |||
| Input | [04C] | VGA | NONE | NONE | VGA (analog) signal input | |
| HDMI | NONE | NONE | HDMI (digital) signal input | |||
| Return | NONE | NONE | Return to the previous menu | |||
| Exit | NONE | NONE | Exit from the whole menu | |||
| Adjust |  | Auto adjust | NONE | NONE | Automatically adjust the horizontal/vertical location, focusing and clock of pictures | |
| Auto color | NONE | NONE | Adjust the white balance of pictures | |||
| Gamma | Gamma1 | Adjust color tone brightness grey 1 | ||||
| Gamma2 | Adjust color tone brightness grey 2 | |||||
| Return | Return to the previous menu | |||||
| Exit | Exit from the whole menu | |||||
| Other | Language | English | English | English | ||
| Deutsch | Deutsch | Deutsch | ||||
| Español | Español | Español | ||||
| 한국어 | 한국어 | 한국어 | ||||
| 日本語 | 日本語 | 日本語 | ||||
| Русский | Русский | Русский | ||||
| Return | Return to the previous menu | |||||
| Exit | Exit from the whole menu | |||||
| Power Off | On | ON | Automatically turn off after saving power for 1 minute | |||
| Off | OFF | Inactivate the function of timed switch-off | ||||
| Return | Return to the previous menu | |||||
| Exit | Exit from the whole menu | |||||
| Reset | YES | YES | Reset to factory setup | |||
| NO | NO | Exit from this function | ||||
| Return | Return to the previous menu | |||||
| Exit | Exit from the whole menu | |||||
| Clock | 050 100 | Adjust the picture clock to reduce vertical line noise (only for vga signals) | ||||
| Phase | 050 100 | Adjust the picture phase to reduce horizontal noise (only for vga signals) | ||||
| Over driver | On | ON | Activate OD function | |||
| Off | OFF | Inactivate OD function | ||||
| Return | Return to the previous menu | |||||
| Exit | Exit from the whole menu | |||||
| Exit | NONENONE | NONENONE | Exit from the whole menu | |||
Note: The functions may be adjusted due to specific model or the upgrade of software version. The physical model shall govern.
VI. FAQ
| Faults occurring | Possible solutions |
| The power indicator light is not on | ◆ Check if the power is on.◆ Check if the power cord is connected. |
| Impossible plug-and-play | ◆ Check if the function of plug-and-play of the device is compatible with PC.◆ Check if the display card is compatible with the plug-and-play function. |
| Dimming picture | ◆ Adjust brightness and contrast. |
| Flickering picture or picture with ripples | ◆ There may be electrical appliances or equipment with electronic disturbance. |
| The power indicator light is on (flickering), but the monitor has no pictures. | ◆ Check if the PC power is on.◆ Check if the PC display card is inserted properly.◆ Check if the signal cable of the monitor is correctly connected with the PC.◆ Check the signal cable plug of the monitor and make sure every pin has no bending.◆ Observe the indicator light by pressing the Caps Lock key on the PC keyboard and check if the PC is working. |
| Color shortage(red, green and blue) | ◆ Check the signal cable of the monitor and make sure every pin has no bending. |
| The picture is not in the middle, or the size is not right | ◆ Hot key(AUTO) |
| Picture with color difference(white looks not white) | ◆ Adjust RGB color or reselect color temperature. |
| Screen font blur under VGA signal | ◆ Select the "E" to automatically adjust the image. |
| Screen color error under VGA signal | ◆ Select "Auto color" in OSD to correct under the white output screen. |
VII. Product Specifications
| Diagonal dimensions | Picture aspect ratio | Picture dimensions (mm) | Dot distance (mm) | Optimal resolution |
| 55cm(21.5"FHD) | 16:9 | 476.1*267.8 | 0.248 | 1920*1080@60Hz |
| 60cm(23.6") | 16:9 | 521.3*293.2 | 0.271 | 1920*1080@60Hz |
| 68.6cm(27"FHD) | 16:9 | 597.9*336.3 | 0.3114 | 1920*1080@60Hz |
| Ambient temperature | Storage temperature | -20°C to +50°C | ||
| Working temperature | 0°C to 40°C | |||
| Humidity | RH for operation | 20% 80% to | ||
Note: The actual application of the above parameters shall be subject to the specific model.
VIII. Table of Product Preset Modes
| Preset resolution/Refresh rate | |||||||||||
| Display dimensions | Aspect ratio | 720x400 (70Hz) | 640x480 (60/75/ 72.8Hz) | 800x600 (60/72 /75Hz) | 1024x768 (60/70 /75Hz) | 1280x1024 (60/75Hz) | 1360x768 (60Hz) | 1440x900 (60Hz) | 1600x900 (60Hz) | 1680x1050 (60Hz) | 1920x1080 (60Hz) |
| 21.5" | 16:9 | ○ | ○ | ○ | ○ | ○ | × | ○ | × | ○ | ○ |
| 23.6" | 16:9 | ○ | ○ | ○ | ○ | ○ | × | ○ | × | ○ | ○ |
| 27" | 16:9 | ○ | ○ | ○ | ○ | ○ | × | ○ | × | ○ | ○ |
Note: “O” indicates the corresponding resolution/refresh rate is supported. “X” indicates the corresponding resolution/refresh rate is not supported.
Note: The actual application of the above parameters shall be subject to the specific model.

www.westinghouseelectronics.com


Brand : WESTINGHOUSE
Model : WH24FX9019
Category : Monitor