14202004 - Barbecue Char-Broil - Free user manual and instructions
Find the device manual for free 14202004 Char-Broil in PDF.


| Product Type | Barbecue Grill |
| Brand | Char-Broil |
| Model | 14202004 |
| Fuel Type | Liquid Propane (LP) |
| Main Burners | 3 |
| Cooking Area | 450 sq. in |
| Dimensions (L x W x H) | 48 x 24 x 44 in |
| Weight | 75 lbs |
| Ignition | Electronic Push-Button |
| Temperature Gauge | Built-in lid thermometer |
| Side Burner | 1 (10,000 BTU) |
| Warming Rack | Yes |
| Cart Style | Open cart with wheels |
| Material | Porcelain-coated steel lid and body |
| Assembly Required | Yes |
| Warranty | 5 years on burners, 2 years on parts |
| Safety | Use outdoors only, keep away from flammable structures |
Frequently Asked Questions - 14202004 Char-Broil
User questions about 14202004 Char-Broil
0 question about this device. Answer the ones you know or ask your own.
Ask a new question about this device
Download the instructions for your Barbecue in PDF format for free! Find your manual 14202004 - Char-Broil and take your electronic device back in hand. On this page are published all the documents necessary for the use of your device. 14202004 by Char-Broil.
USER MANUAL 14202004 Char-Broil
natural_image
Color palette bar with grayscale shades and a small compass icon (no text or symbols)Congratulations and welcome to ownership of your Digital Electric Smoker. It is our sincere hope that by reading this guide, and with a little practice, you will come to fully enjoy the tender juiciness and delicious flavor of food you prepare with your new smoker.
We suggest you take a few moments to read the Product Guide and ensure your cooker is assembled correctly and completely and that you are familiar with both its construction and operation before using.
There are no hard and fast rules for cooking - just some basic facts about how the Digital Electric Smoker works. The Smart Smoking cooking system will help you prepare wonderful meals. Use this cooking guide as an introduction to cooking with the Digital Electric Smoker. It's filled with great tips, tricks and recipes.

The most important thing you can do first is register your cooker so that we can be more helpful when you need us. Please complete the warranty registration card found on the last page of your Product Guide or save a stamp and visit us at www.charbroil.com.
When you register, be sure to sign up for our free weekly E-mail newsletter. Each issue is packed with new tips, tricks, recipes, party ideas and exclusive subscriber offers. We never sell or distribute your contact information! We want
-
-
- . . . . . . . . . . . . .
-

Char-Broil
Table of Contents:
Overview of Controls 3-4
Getting started....5
How to use your smoker....6-13
Recipes....14-22
Pork 14-16
Beef 16-18
Poultry 19-20
Fish 21-22
Smoker Controls
The Digital Smoker has intuitive, easy-to-use controls. Take a moment to familiarize yourself with the buttons and their functions:
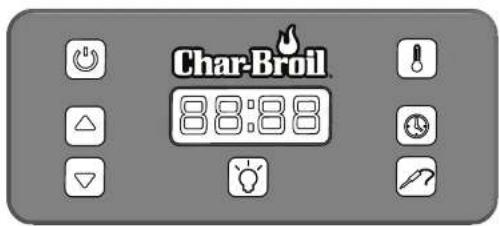

Power Button - turns smoker on and off

Up Button - add to time/temp value

Down Button - subtract from time/temp value

Temp Button - switches input to adjust Cooking time

Time Button - switches input to adjust Cooking time

Meat Probe Button - switches input to adjust target meat probe time
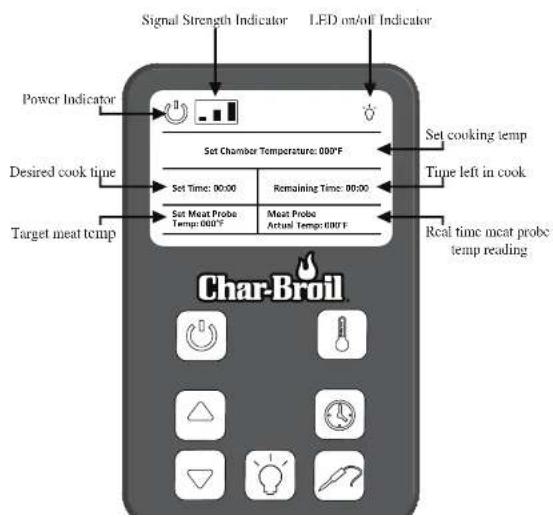
Remote Control (Optional)
The Digital Smoker comes equipped with a remote for monitoring and controlling your cook from a distance. It's buttons are identical to that of the control panel and it includes a status display that shows the following information:
A Few Notes First:
- The control panel temperature reading may fluctuate plus or minus 10-15°F (5-8°C) as the appliance cycles to maintain correct cooking temperature setting. This is normal operation of the smoker.
- Press the Power Button once, and the appliance is now ready to receive input settings from the Temp Button, Time Button and/or Meat Probe Button.
- If appliance is powered on and left unattended for 19 hours, the appliance will automatically turn off.
- The controller reads and displays internal cook temperature setting in °F, time in 00:00 (hours:minutes) and meat probe temperature in °F. Temperature readings can be changed from °F to °C by pressing the "UP" and "DOWN" buttons simultaneously for a period of 3 seconds. The temperature readings can be changed back to °F from °C using the same method.
• The heating element will not begin to heat up until you input 1) Cook time and cook temp or 2) Meat probe target temp and cook temp. NOTE: You must choose to cook by either time or meat probe target temp. These functions will not work simultaneously. - If the meat probe is not connected to the smoker the meat probe function is disabled.
Before your first cook...
You new smoker needs to be seasoned before use. Seasoning prepares your smoker for cooking by burning off any residues left

- Plug in the appliance. The display will immediately have power. A beep is sounded when the unit is plugged in.
- Press the Power Button once, the control unit is now ready.
- Press the Temp Button and set temperature to 275°F (135°C), max. setting, using the "UP" or "DOWN" buttons.
- Press the Time Button and set the time to 2 hours using the using the "UP" or "DOWN" buttons.
- Once 2 hours has elapsed, turn off smoker and allow to cool.
• After the seasoning process has completed, your smoker is now ready for use.
CAUTION: The smoker is HOT during use. Wear protective gloves when working inside the smoker.
Cooking with your Smoker
There are two methods of cooking with your new smoker:
- By Time - Cook your meat for a designated amount of time (see "cooking with the timer")
- By Meat Temperature - Cook your meat until its internal temperature hits a designated temperature. (see "cooking with meat probe")
Here, we will explain how to use these functions as well as explain a few basics of setting up your cook.
Preheating
Preheating warms up the chamber and gets your wood chips applying so that your most starts getting that delicious sprays
Setting the Preheat Cycle
- Press the Temp Button.
- Press and hold the "UP" or "DOWN" button to raise or lower until the letters "PH" is displayed. Release the button. "PH" is blinking.
- Press the Temp Button again. The display will no longer blink indicating that the "PH" is set.
- The display will show "PH", no temperature will be shown during the Preheat cycle.
• The appliance will automatically start the Preheating process.
• The Preheat cycle will run for 40 minutes.
• After the 40 minute preheat cycle ends: - The appliance will automatically reduce the interior temperature.
- The display will blink "00:00" (no temp will be displayed).
- An audible beep will sound - 3 beeps initially and then 3 beeps once every 30 seconds thereafter.
- You can then use the Temp Button, Meat Probe Button or Time Button to start using the smoker.
NOTE: The appliance will automatically turn off if 60 minutes has passed after the initial 40 minute Preheat cycle has been completed (40 minute Preheat + 1 hour = 100 total minutes) and a cook has not been started.
IMPORTANT:
Always cook with both the water pan and smoker box in place, whether or not they are filled.
Using the Temp Button
Display Range: 100^ F - 275^ F ( 38^ C - 135^ C)
- Press the Temp Button. The default temperature setting of 200^ (93°C) is shown.
- Press and hold the "UP" or "DOWN" button to adjust the desired cooking temperature.
- Press the Temp Button again after the desired temperature setting is entered. After the Temp Button is pressed the display should no longer blink, indicating that cook temperature is set.
Cooking With The Timer
When cooking with timer function, your smoker will run until the timer hits zero.
Here's how to set it up:
Display Range: 00:00 - 19:00 hours.
NOTE: The Meat Probe function will be disabled.
- Press the Time Button, and a blinking "00:00" is shown.
- Press the "UP" or "DOWN" button to adjust the hour in 1 hour increments. (The display should still be blinking.)
- Press the Time Button again after the desired hour portion of the cook time setting is entered. After the Time Button is pressed, the hour portion should no longer blink indicating that it is set.
pressed the minute portion should no longer blink indicating that it is set.
• After pressing the Time Button in the previous step the time should begin to count down.
- When using the Time function, the display should show the Set Cooking Temperature and the actual elapsed Time (countdown). They should alternate throughout the length of the cooking cycle.
- Once the desired set time has elapsed:
- The controller will automatically reduce the appliance temperature to 120^ F ( 49^ C).
- The display will alternate between 00:00 and 120°F (49°C) showing the set time has elapsed.
- An audible beep will sound 3 beeps and then 3 beeps once every 30 seconds thereafter until the Power Button is pressed, or has reached the maximum 19 hour automatic shut-off.
Cooking With The Meat Probe
When cooking with the meat probe function, your smoker will run until the meat hits a desired internal temperature.
Good Meat Probe Etiquette:
- Insert the probe into the thickest part of the food - not touching bone, fat or gristle before placing meat in the smoker. Once the meat is in place you can connect the meat probe jack to the smoker.
• After cooking check the temperature in several places to make

temperature and visit www.isitdoneyet.gov for more information on food safety.
- Use only the included meat probe.
Here's how to set it up:
Display Range: 50^ F to 225^ F ( 10^ C to 107^ C)
NOTE: The Set Time function will be disabled.
- Press the Meat Probe Button, and the default desired meat probe temperature setting of 145^ (63^) is displayed and will blink.
- Press the "UP" or "DOWN" button to adjust the desired meat probe target temperature setting.
- Press the Meat Probe Button again after the desired meat probe target temperature setting is entered.
• After the Meat Probe Button is pressed the display should no longer blink indicating that it is set. - When using the Meat Probe function, the display should show the Cooking Temperature and the actual Meat Probe Temperature. The display will alternate throughout the length of the cooking cycle.
-
Once the desired meat probe target temperature has been reached:
-
The controller will automatically reduce the set temp to 120^ F ( 49^ C).
- The display will alternate between the actual Meat Probe temperature and 120^ F ( 49^ C).
- An audible beep will sound 3 beeps and then 3 beeps once every 30 seconds thereafter until the Power Button is pressed, or has reached the maximum 19 hour automatic shut-off
How Much Wood Should I Use?
The smoker box can be filled to varied levels to accommodate short and long cooks. Use this chart to determine a rough estimate for what level you need to fill the smoke box. Please note: These numbers are just a guide. Many factors can influence your actual smoke time (flavor, size of chips, etc.), so please adjust your times based on your actual experiences.
| Smoke Box Fill Level | 1/4 | 1/2 | 3/4 | 1 |
| Smoke Time | 2-4 Hours | 3-5 Hours | 4-6 Hours | 6-8 Hours |
What Flavor Should I Use?
There are many wood chip types that result in different flavors. Choosing a particular flavor may take some trial and error but the chart below explains which woods will provide a more heavy, full flavor and which will provide a more mild, light flavor. This is a good starting point on your way to choosing your favorite flavors.
| Wood Flavor | |
| Heavier | Hickory |
| Oak | |
| Pecan | |
| Mesquite | |
| Lighter | Alder |
| Maple |


- The smoker box is designed for wood chips or pellets only, do not use wood chunks.
• Always operate smoker with smoker box in place regardless of whether or not you use wood chips. Never remove or refill the smoker box during cooking.
Using the Water Pan:
Your Digital Smoker comes equipped with a water pan. The water pan can be used to keep meat moist while cooking. To use, fill the water pan with warm water (cold water can bring down the temp of the cooker) to the Max Water mark and slide into place. Do not overfill the water pan.
NOTE:
• Using water is not required for smoking.
• Always operate (including preheating) smoker with water pan in place regardless of whether or not you use water. Never remove the water pan during cooking.
- If water pan needs to be refilled during cooking, always fill through the hole in the drip pan assembly. Care should be taken when refilling water pan to avoid having any liquid coming in contact with the heating element. Serious damage to the heating element could result, including flare ups and electrical failure.
Cooking Info
Lets get to the cooking! But first, here's a quick guide to estimate cooking times so you can better plan out your cooking:
| Meat Meat Cut | Cooking Temp | Estimated Cook Time | Target Temp | |
| Pork | Bull [Pulled] | 225 °F | 90-120 Mins Per Pound | 205 °F |
| Bull [Sliced] | 225 °F | 90-120 Mins Per Pound | 180 °F | |
| Splice Ribs | 225 °F | 5-7 Hours [Total] | 190 °F | |
| Baby Back Ribs | 225 °F | 4-6 Hours [Total] | 190 °F | |
| Beef | Brisket [Pulled] | 225 °F | 70-90 Mins Per Pound | 200 °F |
| Brisket [Sliced] | 225 °F | 70-90 Mins Per Pound | 190 °F | |
| Ribs | 225 °F | 3-4 Hours [Total] | 175 °F | |
| Poultry | Chicken [Whole] | 260 °F | 30-45 Mins Per Pound | 165 °F |
| Turkey [Whole] | 260 °F | 30-45 Mins Per Pound | 165 °F | |
| Fish | 225 °F | 40-60 Mins Per Pound | 150 °F | |
Remember, these are just estimates to help you plan by. Always make sure you cook to the internal temperature listed in this chart:
| Meat | UGDA RECOMMENDED GATE MINIMUM INTERNAL TEMPERATURES |
| Beef, Veal, Lamb Steaks & Roast (with a 3 minute rest) | 145°F |
| Fish | 145°F |
| Pork | 145°F |

Pork Recipes
Easy BBQ
Set cooking temp to 225°F
Ingredients:
• 3-7 lb pork roast or Boston Butt
- Dry Rub Seasoning
- BBQ Sauce
Directions:
Season the entire cut of meat using your favorite BBQ dry rub. Place on to smoking rack and cook until the internal temperature is 145°F for serving cubed or sliced.
To serve 'pulled pork', cook until the internal temperature reaches 190°-200°F. Once the internal temperature reaches 145°F, you may choose to remove the pork, cover with your favorite BBQ sauce, and wrap with two layers of heavy-duty aluminum foil, before returning it to the smoking rack for the additional cook time. This additional cook time from 145°F to 190°-200°F will require the same amount of time as the pork required to reach 145°F. When done, remove the basket from the cooking chamber and allow the BBQ to rest for 10-15 minutes while the aluminum foil cools. Place in a large tray, unwrap, and then shred with forks.
Pork Tenderloins
Set cooking temp to 225 °F
Ingredients:
• 2 Pork Tenderloins
• Kosher salt
- Fresh cracked pepper
Directions:
Baby Back Ribs
natural_image
Close-up of a cooked fish dish with glossy sauce and a white bowl of sauce (no text or symbols visible)Set cooking temp to 225°F
Ingredients:
• 1 Rack of Baby Back Ribs
• Dry Rub Seasoning
- BBQ Sauce
Directions:
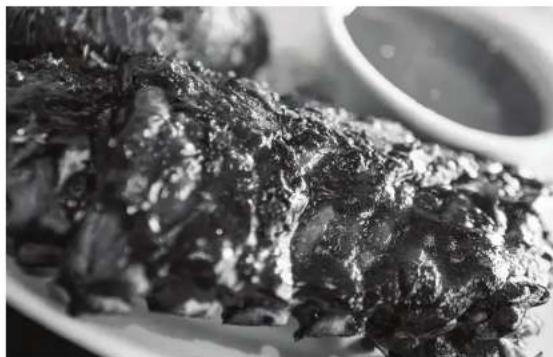
Season ribs using your favorite BBQ dry rub. Smoke and check for doneness using the digital food thermometer. If you like them extra tender and tasty, remove, cover with your favorite BBQ sauce, and wrap them with two layers of heavy-duty aluminum foil. Place the aluminum-foil-wrapped ribs back onto the smoking rack and allow them to cook for an additional 30 minutes. Remove the basket and allow the ribs to rest for 10-15 minutes while the aluminum foil cools.

St. Louis-Style Ribs
Set cooking temp to 225 °F
Ingredients:
• 2 racks of St. Louis style ribs
- Salt
- Your favorite rub
- Your favorite BBQ sauce (optional)
Directions:
Skin the membrane off the backs of the two slabs of St. Louis-style ribs.
Season the bone side with salt and the rub.
Flip over and season the meat side with the salt and the rub.
Place the ribs in the smoker preheated to 225 F.
At 90 minutes, sauce the bone side and then flip over and sauce the meat side (optional as you could serve the sauce on the side).
Re-sauce every 30 minutes until the rib meat pulls back from the bones 1/4 - 1/3 of an inch (about 2.5 - 2 hours).
Remove from the smoker, slice and serve.
Beef Recipes
Beef Roast
Set cooking temp to 225 °F
Ingredients:
• 3-5 lb beef roast
• Kosher salt
- Fresh cracked pepper
Directions:
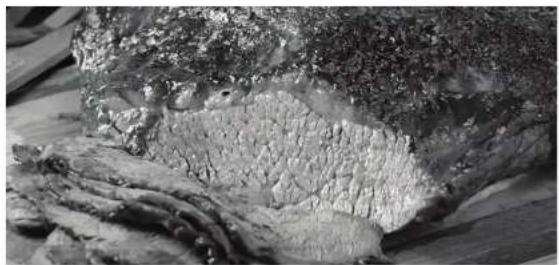
Prepare a 3-5 lb beef roast for cooking. Season outside with salt and pepper or a Croole rub for added spice. Place beef roast on bottom rock in the center of smoking chamber. Cook beef until the internal temperature reaches a minimum
Texas Style Beef Brisket
natural_image
Close-up of a textured, irregularly shaped rock or mineral sample with no visible text or symbolsSet cooking temp to 225°F
Ingredients:
- 1 lb (5 to 7 pound) beef brisket, trimmed
• ½ cup prepared barbecue seasoning rub
• 2 Tbsp ground chili powder
• 1 cup hot sauce of your choice
• 1 cup beer or non-alcoholic malt beverage
• 1 cup barbecue sauce
Directions:
- Ask your butcher to prepare the brisket by removing some of the fat cap, not all.
- Mix chile powder, hot sauce and beer to make marinade
- Place the meat in a shallow, non-reactive pan and add favorite beef marinade.
- Cover and place in refrigerator for 4 - 8 hours.
- Remove from fridge about an hour prior to placing in cooker
- Rinse and pat dry.
- Season with your favorite rub - that doesn't conflict with the flavors of the marinade.
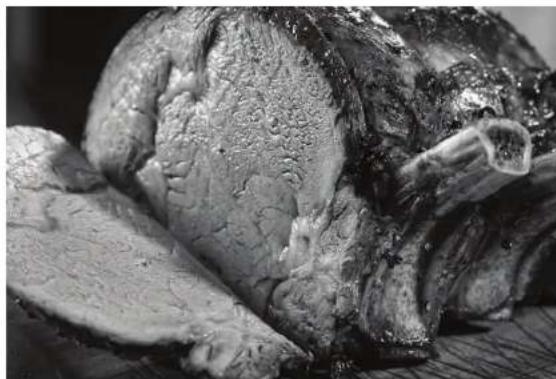
Char-Broil's Favorite Prime Rib Roast
natural_image
Close-up of a whole roasted chicken with visible meat and shell, showing cuts and bone (no text or symbols)Set cook temp to 225°F
Ingredients:
• 3-5 lb rib roast
• 1 Tbsp garlic powder
• 1 Tbsp sea salt
• 1 Tbsp onion powder
• 2 tsp cayenne pepper
• 2 tsp of each: dried rosemary, thyme
Directions:
Mix all dry ingredients together in large mixing bowl - using fork or whisk. Place rib roast in bowl and use hands to work rub into all areas of meat (Note: rubber gloves can come in handy). Large cuts of meat can typically be removed
Poultry Recipes
Cherry-Smoked Chicken Tacos
Set cook temp to 250°F
Ingredients
For chicken:
• 1 whole chicken (2-3 pounds)
• 2 Tbsp oil
• 1 Tbsp poultry seasoning
• 1 tsp ground cumin
• 1 tsp ground coriander
- Salt and pepper
• Cherry wood chips for smoking
For tacos
• 1 Taco Kit (taco shells)
- Shredded chicken
• 2 avocados, chopped
• 1 cucumber, de-seeded and chopped
• 1 red bell pepper, de-seeded and chopped
- 1 small head of red cabbage, thinly sliced
• 1-2 cups of Queso Fresco, crumbled
• Salsa
- Sour cream (optional)
• Hot sauce (optional)
Directions for chicken:
- Prep chicken for cooking. Remove neck, giblets and anything else inside bird. Wash and rinse inside and out and pat dry.
- Rub bird with oil, then season inside and out with poultry seasoning, cumin, coriander and salt and pepper.
- Place the chicken in the cooking basket, breast side up.
- Cook until the internal temperature has reached 165°F - about 1 hour and 90 minutes

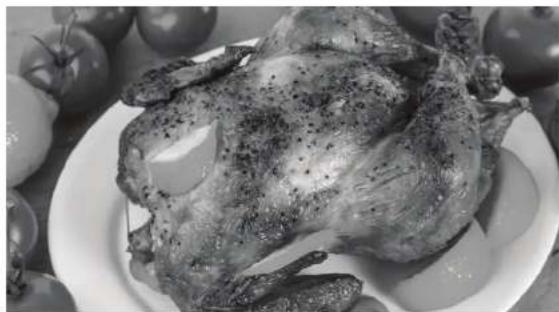
Hickory Smoked Garlic Chicken
natural_image
Black-and-white photo of a whole roasted chicken on a plate surrounded by tomatoes (no text or symbols visible)Set cook temp to 250 °F
Ingredients:
• 14 lb chicken
• 4 cloves of garlic
• 1/4 tsp of onion powder
• 1/3 cup softened butter
• 1/2 small yellow onion
• Coarse salt and cracked black pepper to taste
• Hickory wood chips (pecan, apple, cherry wood chips work well too)
Directions:
- Rinse the chicken and pat it dry with paper towels.
- Combine 2 minced cloves of garlic, 1/4 teaspoon onion powder and butter together.
- Loosen the skin on breast of chicken.
- Place 1/3 of the butter mixture under the skin on one side of breast. Press the top of the skin to evenly distribute the butter.
Fish Recipes
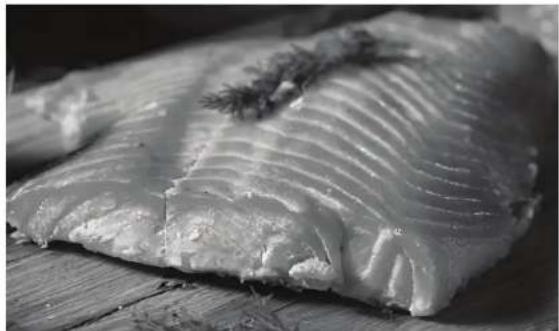
CB's EZ Smoked Salmon
natural_image
Close-up of raw fish fillets on a wooden surface, garnished with herbs (no text or symbols visible)Set cook temp to 250 °F
Ingredients:
• 1 (3-5 lb) Salmon Filet (1" thick)
• 2 cups brown sugar
• 12 cup pickling salt
• 13 oz Bag of commercially prepared "crab boil"
Directions:
- Have fish monger remove pin bones from salmon and trim the thin parts of the fillet (Cut off the last 3 inches of the tail and the belly area if you wish - use them in soup or scramble with eggs for breakfast).
- Rinse the salmon filet under cold running water and pat dry with paper towel.



-
2 hours before you are ready to smoke the fish, remove from refrigerator.
-
Scrape off the slurry mixture and place into wire sieve to drain... the desired outcome is to save all of the little pieces of crab boil.
-
Place salmon filet flesh side up on baking sheet and pat dry. (Do not rinse).
-
Spread the remaining bits and pieces of crab boil on the fish flesh.
-
With great restraint carefully crisis-cross a very thin line of black strap molasses on the salmon flesh over the top of the crab boil pieces.
-
At this point you have two choices:
A. Allow the toppings on the fish to dry naturally until 'tacky' to the touch - this takes quite a while and not recommended.
B. Use a hair dryer or a fan on low setting to speed up the drying process until the toppings on the fish are 'tacky to the touch.
-
Prepare your smoker to a temperature of approximately 250^ F degrees. For this dish I recommend alder, cherry, apple or other soft woods or a combination. This is a good dish to use the water pan in your smoker.
-
Use your hands placed in support under the fish file to lift and place flesh-side down on the grates so the grates cross the fish side-ways (not length-wise).
-
Smoke for between 1 - 2 hours depending upon the heat of your smoke, the number of fillets you are smoking and the thickness of the fish - a good target for the internal temperature of the fish is 130^ - 140^ degrees, this will ensure the meat is cooked and produce a soft (not gravloxl) yet firm texture.
-
Remove grate from smoker (use gloves to protect from heat!) with fish still on it and place a baking pan on the top of the fish then 'flip' the fish and grate so the baking sheet is on the bottom.
-
Remove the grates from fish the grates will have heated and 'split' the fish giving an appearance of having scored the flesh with a knife.
-
Place in refrigerator to hold until ready to serve with dark breads, sliced red onions, cream cheese, lemon wedges, capers, etc.


- Char-Broil
- Table of Contents:
- Smoker Controls
- Remote Control (Optional)
- A Few Notes First:
- Before your first cook...
- Cooking with your Smoker
- Preheating
- Setting the Preheat Cycle
- IMPORTANT:
- Using the Temp Button
- Cooking With The Timer
- Here's how to set it up:
- Cooking With The Meat Probe
- Good Meat Probe Etiquette:
- How Much Wood Should I Use?
- What Flavor Should I Use?
- Using the Water Pan:
- NOTE:
- Cooking Info
- Pork Recipes
- Easy BBQ
- Ingredients:
- Directions:
- Pork Tenderloins
- St. Louis-Style Ribs
- Beef Recipes
- Beef Roast
- Poultry Recipes
- Cherry-Smoked Chicken Tacos
- Ingredients
- For chicken:
- For tacos
- Directions for chicken:
- Fish Recipes
Brand : Char-Broil
Model : 14202004
Category : Barbecue