RSR-1050 - Laminator Royal Sovereign - Free user manual and instructions
Find the device manual for free RSR-1050 Royal Sovereign in PDF.


| Product Type | Roll Laminator |
| Brand | Royal Sovereign |
| Model | RSR-1050 |
| Dimensions (W x D x H) | 1070 x 650 x 1220 mm (42.1 x 25.6 x 48.0 in) |
| Weight | 100 kg (220.5 lbs) |
| Voltage / Frequency | AC 100-120 V / AC 220-240 V, 50/60 Hz |
| Power Consumption | 3300 W |
| Max Laminating Speed | 3.6 m/min (11.8 ft/min) |
| Laminating Width | 1050 mm |
| Film Core Diameter | 76 mm |
| Temperature Range | Up to 160 °C (320 °F) |
| Speed Levels | 9 |
| Memory Presets | 9 |
| Laminating Methods | Hot and Cold |
| Safety Features | Emergency stop switch, safety covers, automatic shutdown |
| Additional Features | Remote control, foot pedal operation, LCD display, tension control, rewinder, unwinder, cross cutter |
| Maintenance | Clean rollers after each use; adjust film tension; do not run with single film roll |
| Spare Parts | Core (76 mm), bolts (M8x65), washers (Φ8), fuse (50T, AC250V 6.3A) |
| Repair Service | Contact Royal Sovereign authorized service center; transportation costs may apply |
| General Information | Professional laminator designed for high-speed continuous lamination; for indoor use only; read manual before operation |
Frequently Asked Questions - RSR-1050 Royal Sovereign
User questions about RSR-1050 Royal Sovereign
0 question about this device. Answer the ones you know or ask your own.
Ask a new question about this device
Download the instructions for your Laminator in PDF format for free! Find your manual RSR-1050 - Royal Sovereign and take your electronic device back in hand. On this page are published all the documents necessary for the use of your device. RSR-1050 by Royal Sovereign.
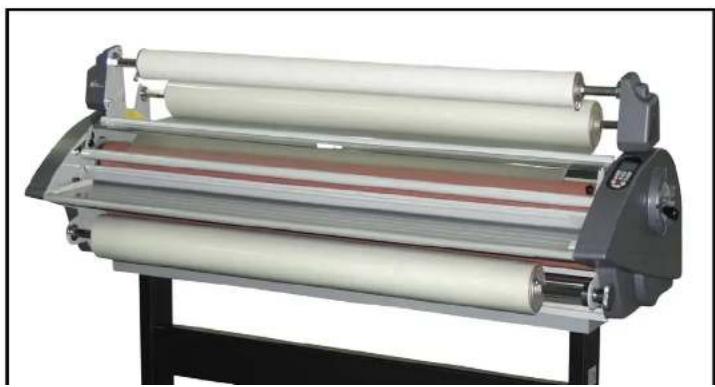
USER MANUAL RSR-1050 Royal Sovereign
Royal Sovereign LAMINATORS
OWNER'S MANUAL
RSH-1050/1650, RSR-685/1050
natural_image
Exterior view of a modern office building (no signage)TABLE OF CONTENTS
TOPICS PAGE
INSTRUCTION 3
SAFETY PRECAUTIONS 3
CHARACTERISTICS 4
SPECIFICATIONS 4
NAMES OF MAJOR PARTS OF MACHIN 5
HOW TO INSTALL THE REWINDER 6\~7
HOW TO INSTALL THE UNWINDER 8
SETTING UP FILM 9
HANGING FILM 10
1.HOT FILM 10
2.COLD FILM 11
CONTROL OF ROLLER PRESSURE 12
INSTRUCTIONS FOR CONTROL PANEL 13
1.LCD WINDOW 14
2.FUNCTIONS OF BUTTONS 15
a HOW TO USE BUTTONS 40-40
INSTRUCTION
Thank you for purchasing a Royal Sovereign Roll Laminator. It has been designed and manufactured to provide years of continuous service in the professional environment. To insure high quality lamination, please read this instruction manual thoroughly. This manual will provide you with complete operating and maintenance information. For additional product support or factory-direct ordering information. Call Royal Sovereign Customer Service at 1-800-397-1025.
SAFETY PRECAUTIONS
The safety recommendations outlined in this section are to be read, understood and followed before operating machine. Keep this information for future reference. Failure to comply any of the following safety procedures could result in serious personal injury.
- To prevent the possibility of electrical shock, do not immerse machine in water or permit liquids to spill inside.
- Do not allow articles of clothing (neckties, scarves, papers, etc.) near front or rear machine openings as they could get caught by rollers and be pulled inside, causing personal injury.
- Do not insert sharp objects into front or rear machine openings. Do not place anything in feed tray openings of machine other than appropriate laminating
CHARACTERISTIC
RS Roll Laminator Line is advanced laminators with time transcendental design, utilizing the latest in laminating technology.
It is designed for you to set temperature and speed as necessary and have the machine remember your settings. Also, you can laminate anything at high speed, regardless of thickness of material and type of film.
Remote control device allows for control of the machine from the front or rear. Foot-Pedal Switch allows for hands-free operation.
It is also designed for convenient use by anyone through the simple procedure of adjusting film tension in accordance with the thickness of film and materials to be laminated.
SPECIFICATIONS
| Description | RSH-1650 RSR-685 | RSR-1050 | RSH-1050 | |
| Dimensions(w x d x h) | 1960x650x1210mm(77.2x25.6x47.4in) (42.1x25.6x48.0in) | 1400x650x1220mm 1070x650x1220mm | ||
| Weight | 300Kg(660lbs) | 140Kg(308.6lbs) | 100Kg(220.5lbs) | |
| Voltage/Cycles | AC100~120V, 50/60HzAC220~ 240V, 50/60Hz | |||
| Power Consumption | 3000w | 2000w3300w | ||
| Max. Laminating Speed | 2m/min6.5ft/min | 4m/min 2m/min 4m/min13.1ft/min | 6.5ft/min | 13.1ft/min |
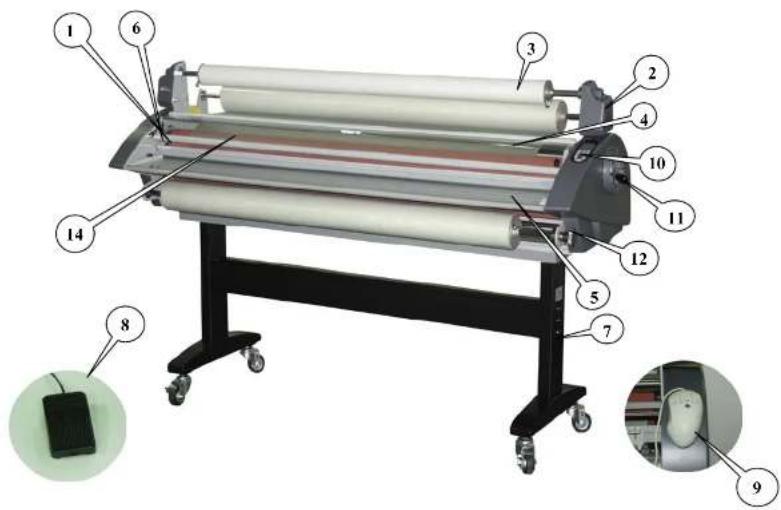
NAMES OF MAJOR PARTS OF MACHINE
How to install the rewinder
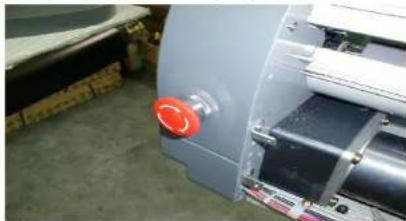
- Disassemble both the Right cover and the Left cover. (Note: Turn the fastening nut of the Emergency switch counterclockwise and disassemble the Emergency switch before disassembling the Right cover.)
natural_image
Industrial machine component with red valve and black cylindrical body, no visible text or symbols- Disassemble the Rear cover.
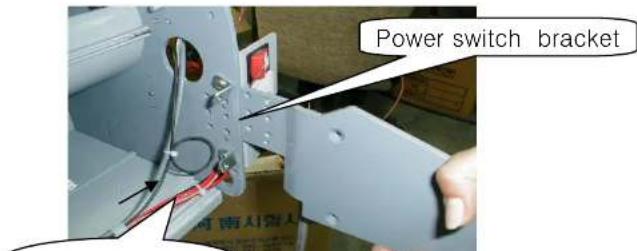
- Disassemble the power switch bracket which is located at the left side of the machine.
take -up motor.
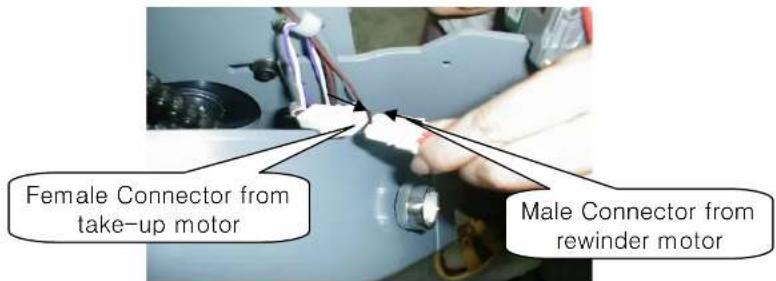
- Assemble the Right cover letting the wires go through the slot which is located at the rear side of the Right cover.
- Put the Power switch bracket on the Plate-Rewinder L and fasten it with two M4 screws.
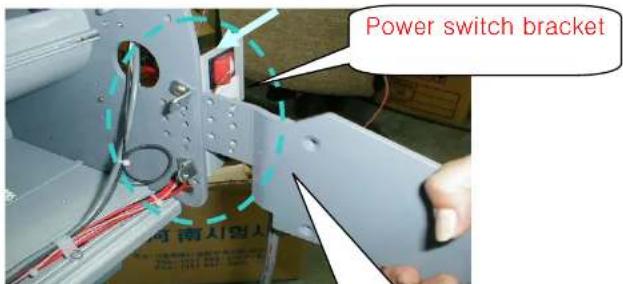
- Put the Plate-Unwinder R on the inner side of the frame as shown in the following figure and fasten it with four M6 hexagonal bolts.
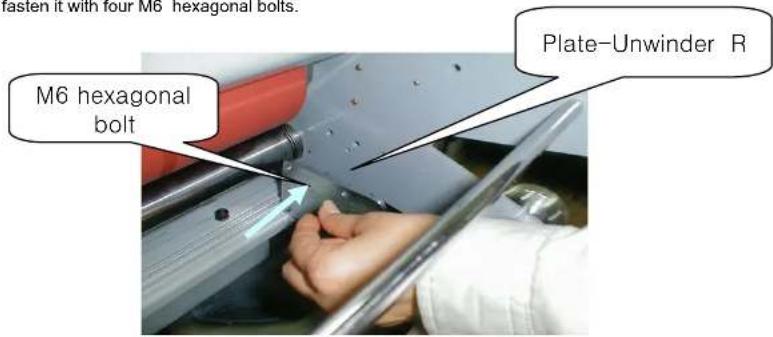
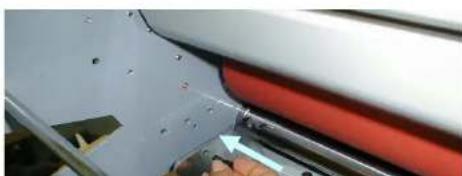
- Put the Plate-Unwinder L on the inner side of the frame as shown in the following figure and fasten it four M6 hexagonal bolts.
natural_image
Close-up of a car's side panel with red trim and white plastic components, no visible text or symbolsPicture 1
Picture 2
Picture 3
Picture 4
Picture 5
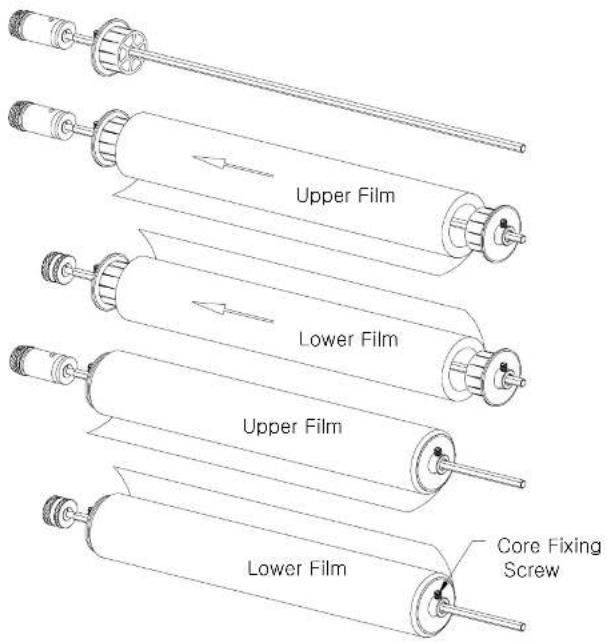
1. HOT FILM
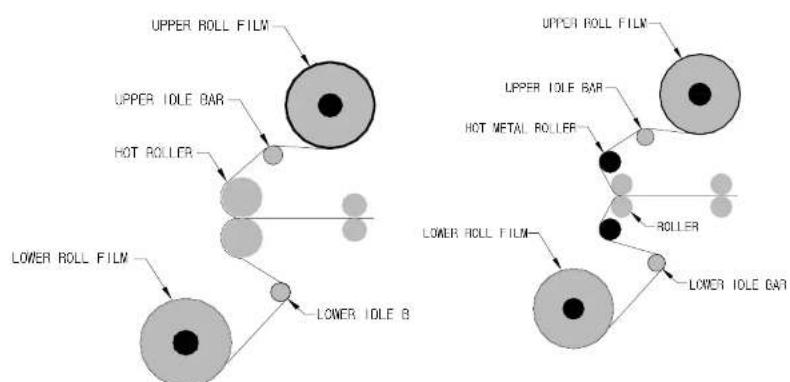
flowchart
graph TD
    A["UPPER ROLL FILM"] --> B["UPPER IDLE BAR"]
    B --> C["HOT ROLLER"]
    C --> D["LOWER ROLL FILM"]
    D --> E["Lower IDLE B"]

    F["UPPER ROLL FILM"] --> G["UPPER IDLE BAR"]
    G --> H["HOT METAL ROLLER"]
    H --> I["ROLLER"]
    I --> J["Lower IDLE BAR"]

    style A fill:#f9f,stroke:#333
    style F fill:#f9f,stroke:#333
    style G fill:#f9f,stroke:#333
    style H fill:#ccf,stroke:#333
    style I fill:#ccf,stroke:#333
    style J fill:#ccf,stroke:#333
RSH-1050/1650 RSR-685/1050
- Insert bar into the core of the roll film then place the bar on the machine.
- Place the Pressure Lever (on the right side of machine) to the open mode at 15mm.
- Insert a piece of wide cardboard (guiding paper/carrier) between the rollers.
- Pull the film from the upper roller passing over the upper idle bar to the upper roller and put it on the roller.
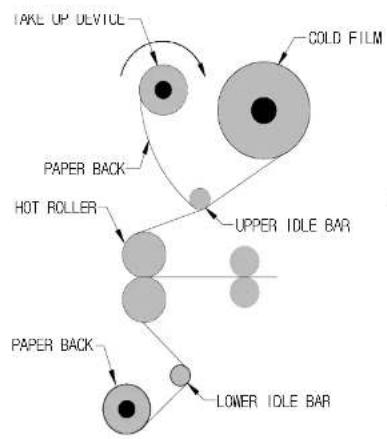
flowchart
graph TD
    A["Take UP DEVICE"] --> B["PAPER BACK"]
    B --> C["HOT ROLLER"]
    C --> D["UPPER IDLE BAR"]
    D --> E["Lower IDLE BAR"]
    E --> F["PAPER BACK"]
    F --> G["UPPER IDLE BAR"]
    G --> H["COLD FILM"]
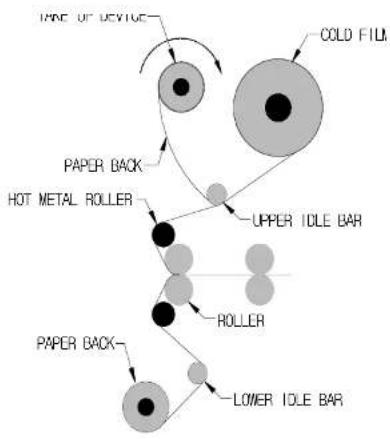
flowchart
graph TD
    A["Paper Back"] --> B["Hot Metal Roller"]
    B --> C["Roller"]
    C --> D["Lower Idle Bar"]
    D --> E["COLD FILM"]
    E --> F["Paper Back"]
    F --> G["Upper Idle Bar"]
    G --> H["Roller"]
    H --> I["Paper Back"]
    I --> J["Hot Metal Roller"]
RSH-1050/1650 RSR-685/1050
- Set up cold film below the upper bar of the machine
(Set the same as method of HOT film for protect paper of lower part) - Set the pressure Lever to the 15mm, open mode
- Insert a piece of wide cardboard (guiding paper/carrier) between the rollers
- Pull the film from the upper roller passing over the upper idle bar to the upper roller and put it on the upper roller.
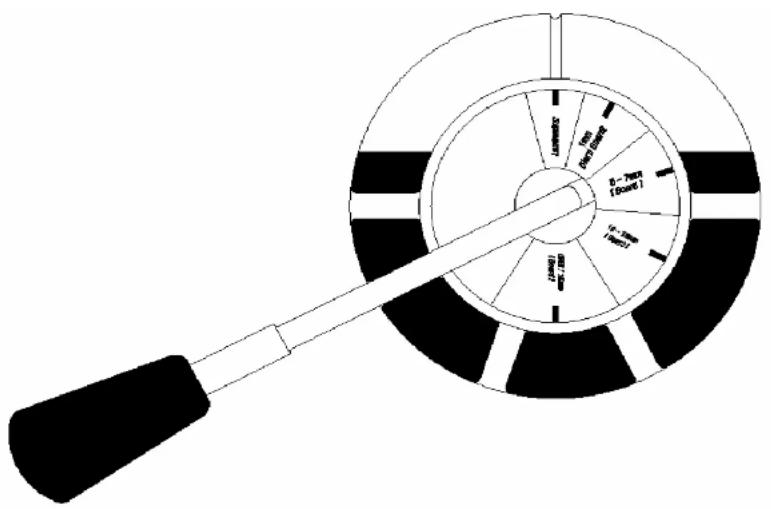
***Methods of controlling pressure of the roller**
- For setting, pull the pressure lever out and turn the lever to following the indication
- Open/15mm : for laminating 15mm(0.6") thick board (RSH-1050/1650)
speed and temperature of rollers each by each by the LCD controller.
And with memory function, you don't need to set machine every time you laminate.
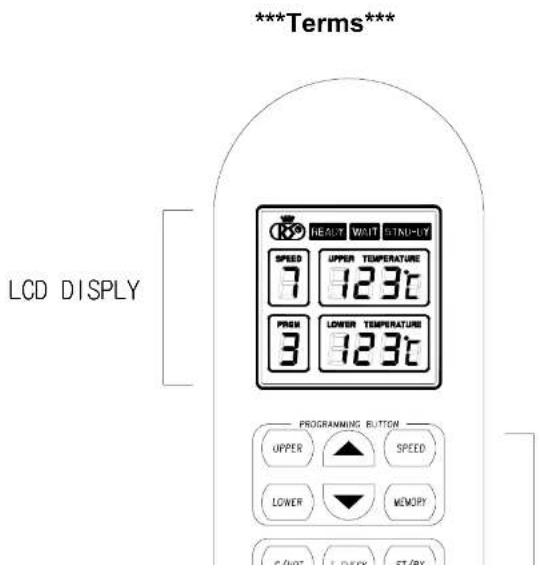
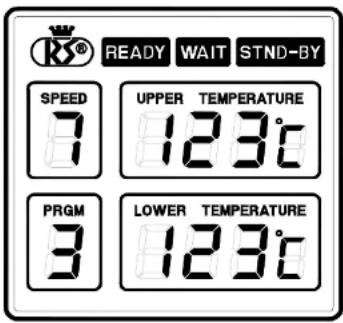
It displays you the last working condition when turned on.
2. READY
Is displayed when the preset temperature is reached.
3. WAIT Blinking
Indicates to wait till blinking stops.
Current temperature is higher or lower than the preset temperature.
4. STND-BY
Saving electricity status.
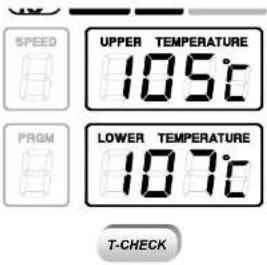
5. Temperature
1) Shows the preset temperature
2) You can check the current temperature on the heat shoe by pressing T-Check
6. Speed
*9 different speed option. "RSH" type---(SPEED1->0.4m(1.3ft)/min.
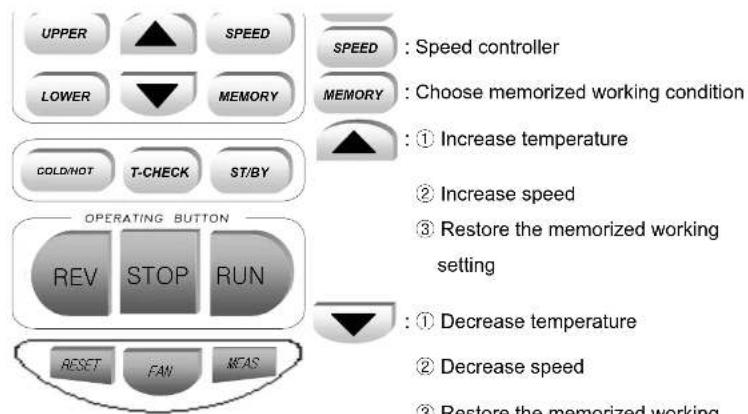
Button & Display

READY WAIT
STND-BY

一

1


to 160°C (320°F).
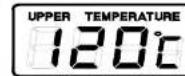
- Temperature setting of upper roller
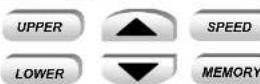
Press UPPER and you will see the LCD screen is
blinking 6 times. Before blinking is finished, press

or

to set the temperature
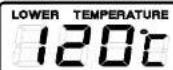
- Set temperature of lower roller
Press LOWER and choose the arrow button
the same way to set temperature of upper roller.
4
Each time you press the button,
it will change 1°C (2°F). If you press the button
more than 1 seconds, temperature will change
automatically until you press the button again.
- Buzzer is ringing each time you press the button.
\*\*\*Speed controls

READY
WAIT
STND-BY
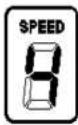
- The operator can use 9 different lamination speeds.



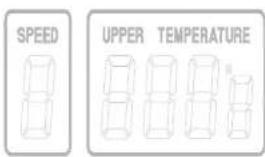
- Press SPEED button then speed display mode is blinking 6 times
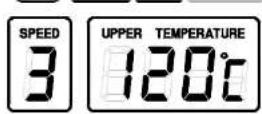
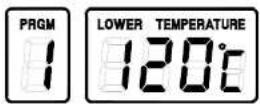
- Operator can memorize 9 working conditions.
- Choose working condition by pressing and button after pressing MEMORY button.
and speed, press MEMOR button.
- It is memorized if buzzer is ringing with blinking.
* If you change the temperature or speed when LCD screen is still blinking, you have to press button after changing.
- When you memorize another working condition, you can do above 2 and 3 operation over.

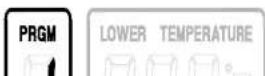
2) Use the memorized working condition.
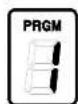
- Operator can choose one of 9 memorized working conditions.
blink five times.
- After this, it automatically returns to the previous state.

READY WAIT STND-BY

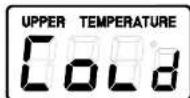
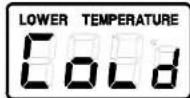
\*\*\*Cold mode\*\*\*
- You can do cold lamination with this function.
- Press the c/no button to show "Cold" on the display.
- Speed will always show 2.
- Speed can be varied 1 or 4 by selecting
▲ button.
- You release the machine from cold mode by pressing C/HOT button.
- Everytime you press the button, buzzer is ringing

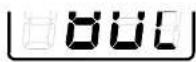
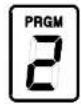
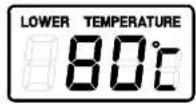
ST/BY
condition wouldn't work. Press the ST/BY button and it will revert to the previous working.
- When machine runs, you can't change it to the
STND-BY mode.
In this case, press the STOP button and turn the
machine to the STND-BY mode.
\*\*\*Check the laminating length & How many laminated papers\*\*\*
READY
WAIT
STND-BY
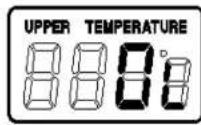
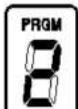
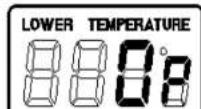
-
When press MEAS button the present numbers of length and papers laminated will be shown on the screen.
-
When you want to return to working mode Press MEAS button again.
-
Also, you can reset measure mode by pressing RESET button.(for 2 second)
-
Set the pressure lever to the "Laminating mode"
- Increase roller temperature. If you already memorized special working condition,
press MEMORY button and choose right condition by using button.

or

- When it's ready, you will see ready sign on the screen and the buzzer will ring.
- Press the RUN button. If rollers don't run, check the emergency switch whether it is located at "ON" position or not.
- To set film tension properly, use the Tension Control Knob. Lower tension would make better operation.
- Set document on the table. You should allow at least 5mm(1/4") space on each side for perfect laminations.
- Press the STOP button when your lamination is finished.
- For your convenience, it would be better to set table guide in proper position.

If it happens, the speed needs to be lowered by one speed level and started again after READY signal on the LCD window.
- In case of wrinkling or rolling of film due to wrong position of document,
REV
is needed to be keeping pushed in order that document could come out front with buzzer sound.
-
When document is much smaller than film, you should place it in the middle of film for preventing wrinkle
-
Use cooling fan when you laminate continuously without break and document is too hot.
***Laminating Speed at each level (mm(ft)/min) ***
| SPEED | RSR-685/1050 | RSH-1050/1650 |
| 1 | 800mm(2.6ft) | 400mm(1.3ft) |
| 2 | 1200mm(3.9ft) | 600mm(2ft) |
| 3 | 1600mm(5.2ft) | 800mm(2.6ft) |
| 4 | 2000mm(6.56ft) | 1000mm(3.3ft) |
| 5 | 2400mm(7.9ft) | 1200mm(3.9ft) |
| 6 | 2800mm(9.2ft) | 1400mm(4.6ft) |
| 7 | 3200mm(10.5ft) | 1600mm(5.2ft) |
| 3600mm(11.8ft)8 1800mm(5.9ft) | ||
- After pressing the the SPEED and

button choose and set proper speed by using button.
-
It is READY when ready is show on the screen and the buzzer rings three times. sound three times.
-
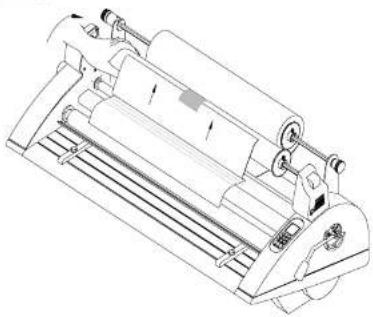
Turn on the take up device and set the proper film tension by pressing the RUN button. Lower tension would make better operation.
natural_image
Technical line drawing of a mechanical device with rollers and mounting brackets (no text or symbols)-
Set document on the table. You should allow at least 5mm(1/4") space on each side for perfect laminations
-
Turn the switch "Run" and "take up motor" at the same time. The liner and film will be rolled at the same time.
-
When lamination is finished, press the STOP button. For your convenience, it would be better to set table guide in proper position. And if needed, cut documents with cross cutter.
-
Set pressure lever at the Hard board/15mm mode.
-
Turn off the power switch.
-
Press Foot Switch one time for "RUN", press one more time for "STOP". (Don't keep pressing)
-
After use of Remote Control, attach it to the left side of rear of machine
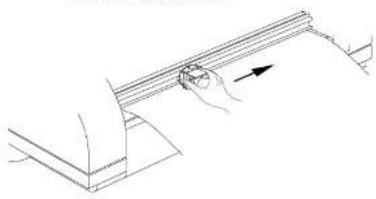
METHOD FOR USING CUTTER
**Cross Cutter**
natural_image
Line drawing of a hand holding a circular object on a metal beam, with an arrow indicating direction (no text or symbols)-
It is on the back side of the machine.
-
After lamination, move cutter to a point about 1/3 of the width of lamination
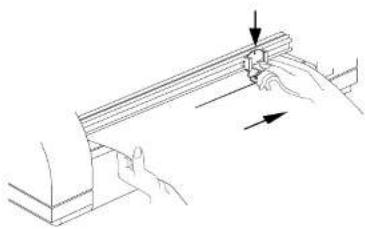
natural_image
Line drawing of hands holding a thin wooden beam with an arrow indicating force or direction (no text or symbols)- Grasp film with one hand and press the cutter cutter downward and slide it to the direction intending to cut with another hand.
Extreme Heat Will Cause Injury
- Place the machines on the plated place so that
- Make certain that the machine is connected to an adequate power source.
- Do not use any other purposes other than Lamination.
MAINTENANCE
- Do not allow the machine to run with only one roll of film installed. The melted resin will adhere to one roller and ruin future laminations.
- The width of film should be bigger than the material, and Width of upper side and lower side of film should be same in order not to allow melted resin to adhere to the rollers.
- Be sure to adjust the film tension while in operation. If the tension is too tight, it could cause the film to stretch.
- After work, you should clean the resin from the rollers before beginning the next operation.
| 4. It may stay at STAND-BY mode. press the STND-BY button | |
| *Hot roller is not heater 1. It is set at the cold mode 1. Change the function to hot up. 2. Memorized temp may be lower lamination. than atmosphere temp. 2. Set proper temperature for the work | |
| *Wrinkled lamination 1. Film tension is not proper, too 1. Adjust film tension result tight. | |
| *Result of lamination is 1. Temperature on the hot roller 1. Increase the temperature on the not clear is too low or lamination is too hot roller or decrease the speedy. speed. | |
SPARE PARTS
| PART NAME EA | MODEL | PART NAME | EA MODEL | ||
Core(76mm)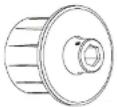 | 6 | RSH-1650RSH-1050RSR-1050RSR-685 | Bolt(M8X65) | 8 | RSH-1650RSH-1050RSR-1050RSR-685 |
Washer(Φ8) | 8 | ||||
| FUSE(50T)(AC250V 6.3A) | 1 | ||||
| Nut(M8) | |||||
a Sovereign authorized service representative, or damage caused by a natural calamity such as fire or earthquake and etc...
- Customers will bear the expense of Transportation fee and delivery fee of the damaged machine.
| 2 | 15 micron(3 mil) | 115 4 2 | ||||
| 3 | 80 micron(3.2 mil) | 120 5 | 3 | |||
| 4 | 100 micron(4 mil) | 120 4 4 | ||||
| 5 | 125 micron(5 mil) | 125 5 5 | ||||
| 6 | 150 micron(6 mil) | 125 3 6 | ||||
| 7 | 175 micron(7 mil) | 130 4 7 | ||||
| 8 | 200 micron(8 mil) | 135 3 | 8 | |||
| 9 | 250 micron(10 mil) | 140 3 9 | ||||
- Royal Sovereign LAMINATORS
- OWNER'S MANUAL
- TABLE OF CONTENTS
- TOPICS PAGE
- INSTRUCTION
- SAFETY PRECAUTIONS
- CHARACTERISTIC
- NAMES OF MAJOR PARTS OF MACHINE
- How to install the rewinder
- HOT FILM
- READY
- WAIT Blinking
- STND-BY
- Temperature
- Speed
- Button & Display
- \*\*\*Speed controls
- \*\*\*Cold mode\*\*\*
- \*\*\*Check the laminating length & How many laminated papers\*\*\*
- METHOD FOR USING CUTTER
- Extreme Heat Will Cause Injury
- MAINTENANCE
Brand : Royal Sovereign
Model : RSR-1050
Category : Laminator