
Clié PEG-N760C - PDA SONY - Free user manual and instructions
Find the device manual for free Clié PEG-N760C SONY in PDF.


| Type | Personal Digital Assistant (PDA) / Personal Entertainment Organizer |
| Operating System | Palm OS 4.1 |
| CPU | Dragonball VZ 33 MHz |
| Memory | 8 MB DRAM (approx. 7 MB user available), 4 MB Flash ROM |
| Display | 3.5-inch frontlight TFT color, 320 × 320 pixels, 65,536 colors |
| Input Methods | Stylus with Graffiti handwriting recognition, onscreen keyboard, Jog Dial navigator, computer keyboard via HotSync |
| Connectivity | IrDA 1.2 infrared port, Memory Stick slot, proprietary connector for cradle/sync |
| Audio | Stereo headphone jack (3.5 mm), supports ATRAC3 and MP3 playback |
| Battery | Built-in rechargeable lithium-ion, 15 days typical life (30 min/day usage) |
| Power Supply | AC adapter (DC 5.7 V, dedicated connector) |
| Dimensions | Approx. 71.0 × 118.5 × 16.8 mm (2 7/8 × 4 1/4 × 11/16 in) |
| Weight | Approx. 160 g (5.65 oz) including stylus |
| Built-in Applications | Date Book, Address Book, To Do List, Memo Pad, Expense, Calculator, Application Launcher |
| Data Synchronization | HotSync via cradle (USB), IR, modem, or network; compatible with Palm Desktop and MS Outlook |
| Memory Stick Support | MagicGate compatible; store/backup data, install apps, play audio (up to 128 MB recommended) |
| Reset Methods | Soft reset (reset button) and hard reset (POWER + reset button) – hard reset erases all data |
| Security | Password protection, private records (hide/mask/show), device locking |
| Warranty | 3 months parts and labor (extendable to 12 months with registration) |
Frequently Asked Questions - Clié PEG-N760C SONY
User questions about Clié PEG-N760C SONY
0 question about this device. Answer the ones you know or ask your own.
Ask a new question about this device
Download the instructions for your PDA in PDF format for free! Find your manual Clié PEG-N760C - SONY and take your electronic device back in hand. On this page are published all the documents necessary for the use of your device. Clié PEG-N760C by SONY.
USER MANUAL Clié PEG-N760C SONY
Operating Instructions
Personal Entertainment Organizer

Chapter 1
Basic operations of your Sony CLIÉ Handheld
Chapter 2
Using basic applications
Chapter 3
Exchanging and updating data using a HotSync® operation
Chapter 4
Communicating using your Sony CLIÉ Handheld
Chapter 5
Customizing your Sony CLIÉ Handheld (Preferences)
Table of contents
Chapter 1
Basic operations of your Sony CLIÉ Handheld
Turning your Sony CLIÉ Handheld on and off 7
Using the stylus....8
Using the Jog Dial™ navigator...... 10
Entering data into your Sony CLIÊ
Handheld 11
Using Graffiti® writing to enter data ..... 11
Using the onscreen keyboard 20
Using your computer keyboard 22
Changing the frontlight level 23
Resetting your Sony CLIÉ Handheld..... 24
Performing a soft reset 24
Performing a hard reset 25
Chapter 2
Using basic applications
Managing schedules and events (Date Book) 27
Scheduling an event 27
Checking schedules 34
Editing Date Book events 40
Using the Date Book menus 45
Managing addresses and phone numbers (Address Book) 47
Creating a new Address Book entry ..... 47
Viewing Address Book entries 49
Editing Address Book entries 53

Managing tasks and things to do
(To Do List) 61
Creating To Do List items 61
Viewing To Do List items 62
Checking off a To Do List item 63
Working with To Do List 64
Using the To Do List menus 68

Creating memos (Memo Pad) ..... 69
Creating a new memo 69
Reviewing memos 71
Editing memos 74
Using the Memo Pad menus.... 76

Managing expenses (Expense) ..... 77
Recording a new Expense item 77
Editing Expense items....79
Using the Expense menus 86

Using Calculator (Calc) 87
Calculating with Calculator 87
Using the Calculator buttons 88
Using the Calculator menus.... 88
Performing common tasks 89
Using the Application Launcher 89
Categorizing records 93
Finding records 96
Protecting your data (Security) ..... 100
Attaching notes 106
Purging records 107
Using the Edit menu 108
Choosing fonts 109
Table of contents
Chapter 3
Exchanging and updating data using a HotSync ^® operation
What is a HotSync® operation? ...... 111
Performing a local HotSync ^® operation with the cradle ..... 112
Using the Palm™ Desktop for CLIÉ software 114
Starting the Palm Desktop for CLIÉ software 114
Basic operations of the Palm Desktop for CLIÉ software .... 114 Locating the Palm Desktop for CLIÉ components .... 115
Advanced HotSync ^® operations ..... 116
Setting the HotSync ^® setup options .... 116
Customizing HotSync application settings (Conduit) 118
Conducting an IR HotSync operation ... 120
Conducting a HotSync operation via modem....123
Conducting a HotSync operation via a network....129
Importing data from a Windows application.... 134
Synchronizing with external data (File Link) 136
Chapter 4
Communicating using your Sony CLIÉ Handheld
Beaming between your Sony CLIÉ
Using Memory Stick ^® media ..... 141
What is Memory Stick® media? ...... 141
Inserting and removing Memory Stick media 142
Protecting the data in Memory
Stick media 144
Starting an application in Memory Stick media 145
Starting an application automatically when Memory Stick media is inserted 145
Viewing information of the inserted Memory Stick media (Card Info) ..... 146
Formatting Memory Stick media..... 147
Exchanging data via
Memory Stick ^10 media 149
Starting Memory Stick Gate
(MS Gate) 149
Creating the default folder in Memory Stick media 152
Copying your CLIÉ handheld data to Memory Stick media 153
Copying data in Memory Stick media to your CLIÉ handheld.... 155
Deleting data in Memory Stick media .. 158
Using the MS Gate menus 160
How to read the online manual ..... 161
Installing applications to/from Memory Stick ^® media without using MS Gate 162
Table of contents
Chapter 5
Customizing your Sony CLIÉ Handheld (Preferences)

What you can do with
Preferences 165
Changing the Buttons preferences .... 167
Assigning applications to buttons ..... 167
Changing the full-screen pen stroke
activities 168
Assigning applications to HotSync®
buttons 169
Changing the Jog Dial™ navigator
preferences 170
Setting the display format of the
time, date, and numbers (Formats) ... 171
Selecting a country default 171
Selecting the time, date, and
numbers formats 172
Setting the Date & Time preferences .. 173
Setting the date 173
Setting the time 174
Setting the time zone and daylight
saving time 175
Setting the General preferences..... 176
Setting the automatic shut-off time ..... 176
Setting sounds 177
Turning on or off the Beam Receive
feature 178
Entering owner information ..... 179
Creating Graffiti ^® ShortCuts .... 180
Changing the Network preferences ... 182
Selection variables 107
Creating additional service templates. 185
Adding detailed information to a
service template 187
Creating log in scripts 188
Using the Network preferences menus.. 191
etting the High Resolution Assist
nction 192
Chapter 6
Additional information
Backing up data of your Sony CLIÉ
Handheld 194
Backing up data to your computer
through HotSync operation.... 194
Backing up all CLIÉ data to a Memory
Stick media (using MS Backup) ..... 195
Backing up CLIÉ data to a Memory
Stick media using MS Gate 197
Using data of another
Sony CLIE Handheld 199
Using the Palm Desktop for CLIÉ
software to transfer data 199
Using Memory Stick media to
transfer data 201
Performing HotSync between your
old CLIÉ handheld and the new Palm
Desktop for CLIÉ software 203
Precautions 204
Notes on use 204
Battery considerations 205
Troubleshooting – Frequently Asked
0.0000 207
About this manual
Welcome to the Sony Personal Entertainment Organizer (referred to as the "CLIE handheld" in this manual).
Your CLIÉ handheld comes with three manuals:
Read This First
Read This First gives an overview of your CLIÉ handheld's features, hardware and software setup, installation instructions, and other important details. Before reading the rest of the manuals, read the Read This First manual.
Operating Instructions (this manual)
This manual describes all you need to know about how to use your CLIE handheld and the Personal Information Management applications that come with it.
The manual shows you how to:
■Turn your CLIÉ handheld on and off, reset your CLIÉ handheld, and enter data, explained in greater detail (Chapter 1)
■Use Personal Information Management applications: Date Book, Address Book, To Do List, Memo Pad, Expense, and Calculator (Chapter 2)
■Perform a HotSync ^® operation with your computer (Chapter 3)
■Exchange data with another handheld by beaming or via Memory Stick * media (Chapter 4)
■ Personalize your CLIÉ handheld with your own preferences settings (Chapter 5)
■Maintain your CLIÉ handheld and work with the Troubleshooting section and other technical information (Chapter6)
Add-on Application Guide
The Add-on Application Guide describes how to install and use the supplied add-on applications which include:
■Audio Player/OpenMG Jukebox/RealJukebox
Chapter 1
Basic operations of your Sony CLIÉ Handheld
This chapter explains how to turn on and off your CLIÉ handheld, enter data, and perform other basic operations.
Contents
Turning your Sony CLIÉ Handheld on and off 7
Using the stylus 8
Using the Jog Dial™ navigator 10
Entering data into your Sony CLIÉ Handheld 11
Using Graffiti ^® writing to enter data .... 11
Using the onscreen keyboard 20
Using your computer keyboard 22
Changing the frontlight level 23
Resetting your Sony CLIÉ Handheld 24
Performing a soft reset 24
Performing a hard reset 25
Turning your Sony CLIÉ Handheld on and off
Turning on your CLIÉ handheld
Press the POWER button.
Your CLIÉ handheld is turned on, and the last screen you viewed is displayed.
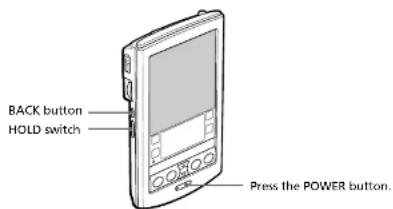
When you turn on your CLIÉ handheld for the first time, the Setup screen appears.
Note
If the power is not turned on, make sure that the HOLD switch is not in the protect position.
Tip
You can set to turn on/off the power with the BACK button. For details, see page 170.
Turning off your CLIÉ handheld
Press the POWER button again.
The power is turned off. You do not have to save data, quit an application or perform any of the other shutdown procedures that your computer requires.
Using the stylus
With your CLIÉ handheld, you can use the supplied stylus to enter characters or specify an application you want to run.
Taking out the stylus
The stylus is stored in the holder on the back panel of your CLIÉ handheld. Pull it out when using your CLIÉ handheld.
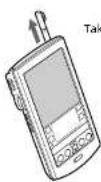
Take out the stylus.
To avoid losing the stylus, always put it back into its holder on your CLIÉ handheld after use.
Tapping
When you enter characters on the onscreen keyboard of your CLIÉ handheld, open an application, or select an item, press lightly on the desired button or icon with the stylus.
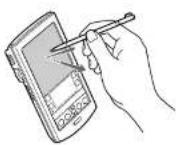
Press lightly (tap) on the screen
Using the stylus
Dragging
Just as you can drag the mouse to select (and drag) text or move objects on your computer, you can also use the stylus to drag an item on the screen of your CLIÉ handheld. Press the stylus lightly on the item and move it along the screen surface.
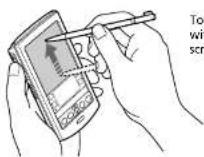
Touch the desired item on the screen with the stylus and move it along the screen surface (drag).
Examples of dragging:
To display data above or below the current viewing area on the screen, use the stylus to drag the slider of any scroll bar.
To select multiple characters or items together, use the stylus to drag along the desired characters or items.
On full-screen dragging
By default, full-screen dragging from the bottom of the writing area to the top of the screen displays the Graffiti® Help on the screen. You can assign the full-screen dragging to another activity. See page 168 for details.
Using the Jog Dial™ navigator
Your CLIÉ handheld is equipped with a Jog Dial™ navigator, which allows you to perform all major operations without the stylus. You can operate your CLIÉ handheld using the Jog Dial navigator with just one hand.
The icon of any application that supports Jog Dial navigator operations is marked with the ⒸJog Dial navigator mark.

(○ mark
For other applications, you can also use the JogAssist function to enable Jog Dial navigator operations. For details, see "Changing the Jog Dial ^TM navigator preferences" on page 170.
Rotating the Jog Dial navigator
Rotate the Jog Dial navigator to select various items in succession or to select an application to start. The operations you can perform by rotating the Jog Dial navigator differ depending on the application you are using. For details, refer to the instructions for each application.
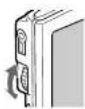
Pressing the Jog Dial navigator
Press the Jog Dial navigator to highlight the item selected by rotating the Jog Dial navigator, or to run the selected application.
The operations you can do by pressing the Jog Dial navigator differ depending on the application you are using. For details, refer to the instructions for each application.
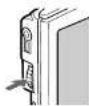
Rotating while holding down the Jog Dial navigator
Some applications support operations executed by rotating and pressing the log Dial navigator. For details, refer to the instructions for each application.
Entering data into your Sony CLIÉ Handheld
Using Graffiti® writing to enter data
This section explains the procedures for creating letters, numbers, punctuation, and symbols, as well as teaching you some Graffiti ^® tips and tricks.
What is Graffiti writing?
Most people find they can enter text quickly and accurately with only minutes of practice. Graffiti writing includes any character you can type on a standard keyboard. The Graffiti strokes closely resemble the upper case letters of the regular alphabet, which makes Graffiti writing easy to learn.
There are four basic concepts for success with Graffiti writing:
- If you draw the character shape exactly as shown in the tables later in this chapter (like the shapes shown in the following diagram), you can achieve 100% accuracy.



Graffiti writing examples: A, B, C, D, and E
- The heavy dot on each shape shows where to begin the stroke. Certain characters have similar shapes, but different beginning and end points. Always begin the stroke at the heavy dot (you should not create the heavy dot; it is only there to show you where to begin the stroke).
- Most characters require only a single stroke. When you lift the stylus from the Graffiti writing area, your CLIÉ handheld recognizes and displays the text character immediately.
To allow you to write an entire character with a single stroke, some Graffiti strokes are portions of the regular alphabet equivalents.
- The Graffiti writing area is divided into two parts: one for writing the letters of the alphabet and one for writing numbers. The small marks at the top and bottom of the Graffiti writing area separate the two areas.
Write letters here

Entering data into your Sony CLIÉ Handheld
Writing Graffiti letters
1 Tap where you want your text to go.
Note
You need to tap above the Graffiti writing area, and you must see a flashing cursor before you write the text.
2 Use the tables on the following pages to find the stroke shape for the letter you want to create. For example, the stroke shown below creates the letter "n".
Note
There are two different stroke shapes available for some letters. For these letters, choose the one that's easiest for you.
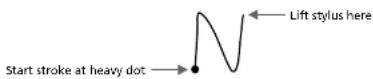
As you will see later, you use the same shape to create both the upper case and lower case version of a letter.
3 Position the stylus in the left-hand side of the Graffiti writing area.
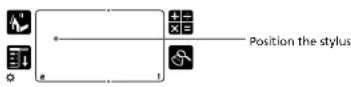
4 Start your stroke at the heavy dot and draw the stroke shape as it appears in the tables.
5 Lift the stylus from the screen at the end of the stroke shape. That is all there is to it. When you lift the stylus from the screen, your CLIE handheld recognizes your stroke immediately and prints the letter at the insertion point on the screen.
Entering data into your Sony CLIÉ Handheld
Note
You must begin the character strokes in the Graffiti writing area. If you do not make Graffiti strokes in the Graffiti writing area, your CI.II: handheld does not recognize them as text characters.
Tips
- Accuracy improves when you write large characters. You should draw strokes that nearly fill the Graffiti writing area.
- To delete characters, simply set the insertion point to the right of the character you want to delete and make the backspace stroke (a line from right to left) in the Graffiti writing area.
- Write at natural speed. Writing too slowly can generate recognition errors.
- Do not write on a slant. Vertical strokes should be parallel to the sides of the Graffiti writing area.
- Press firmly.
To display the Graffiti onscreen help
Drag the stylus from the bottom of the writing area to the top of the screen. Graffiti Help opens a series of screens that show the complete Graffiti character set.
Entering data into your Sony CLIÉ Handheld
Writing Graffiti alphabet
Draw Graffiti letters according to the following alphabet in the left-hand side of the Graffiti writing area.
| A | N | N | |
| B | BB | O | OO |
| C | C | P | PP |
| D | DP | Q | O |
| E | E | R | RR |
| F | S | S | |
| G | GG | T | 7 |
| H | h | U | U |
| I | I | V | V V |
| J | J | W | W |
| K | X | X | |
| L | L | Y | Y |
| M | mm | Z | Z |
| Space BackSpace — | — | ||
| Carriage Return Period Tap twice | |||
Entering data into your Sony CLIÉ Handheld
To write capital letters
Shift to caps and then you can make capital letters with the same stroke shapes as the basic alphabet characters.
• To draw the first letter of a word as a capital letter
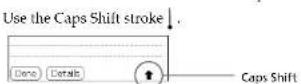
To return to the lower case, use the Backspace stroke —.
Note
When you create a new sentence or a new record (by tapping New or a blank line), the first letter is automatically capitalized.
• To enter only capital letters (Caps Lock)
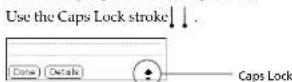
To return to the lower case, use the Caps Shift stroke ↓.
Writing numbers
Write the following numbers on the right-hand side (numbers side) of the Graffiti writing area.
| 0 | 0 0 | 5 | 5 5 |
| 1 | 1 | 6 | 6 |
| 2 | 2 | 7 | 7 |
| 3 | 3 | 8 | 8 8 |
Entering data into your Sony CLIÉ Handheld
Writing punctuation marks
Make a single tap on the Graffiti writing area to activate Punctuation Shift.
The next stroke you make anywhere in the Graffiti area (the letters or
numbers side) creates a punctuation mark.
| ( ) Period (—) Dash | Punctuation Shift |
| ( ) Comma ( ( ) Left Paren | — |
| (1) Apostrophe ( ( ) Right Paren | ( |
| (?) Question (/) Slash | ) |
| (!) Exclamation (5) Dollar | / |
| (@) At ( ) Back slash | S |
| (#) Number ( ( ) Left brace | \ |
| (%) Percent ( ) Right brage | ε |
| (^) Circumflex ( ) Left square bracket | 3 |
| (&) Ampersand ( ) Right square bracket | ε |
| (*) Asterisk (~) Swung flash | 3 |
| (<) Left angle bracket | N |
| (>) Right angle bracket | ( ) Grave accent |
| ( ); Semicolon |
Entering data into your Sony CLIÉ Handheld
Writing symbols and extended characters
Make a Symbol Shift stroke on the Graffiti writing area to activate Symbol Shift. The next stroke you make creates a symbol or extended character.

| (*) Bullet x | • | / | |
| (°TM) Trademark ÷ | m | 88 | |
| (@) Registered = | R | Z | |
| (@) Copyrighted (€) Cen | C | C | |
| (*) Left single quotation | Γ | (V) Yen | 8 |
| (*) Right single quotation | 7 | (£) Pound | L |
| (*) Left double quotation | N | (€) Euro | £ |
| (*) Right double quotation | V | i | L |
| (§) Section 1 | S | 1 | |
| (°) Degree B | O | B | |
| + | μ | M | |
| ± | ← | f | S |
| ø | Q |
Entering data into your Sony CLIÉ Handheld
Writing accented characters and non-English characters
To create accented characters, draw the stroke normally used to create the letter, followed by an accent stroke. Graffiti writing then adds the accent to the letter.
To enter "é," for example, draw E and then
| a eiouaeiou'y | |
| a eiouaon | |
| a iouyá |
To write non-English characters
You can write the following characters without any special punctuation or shifting:
| C |
Note
You must write these non-English characters on the left side of the Graffiti writing area.
Entering data into your Sony CLIÉ handheld
Using Navigation strokes
In addition to character symbols, Graffiti writing includes special strokes that you can use to navigate within text or fields in your applications.
| Move cursor right | |
| Move cursor left | |
| Go to the previous field (Address Book only) | |
| Go to the next field (Address Book only) | |
| Open Address Record (Address Book only) |
Using Graffiti ShortCuts
Graffiti ShortCuts, similar to the glossary or autotext features of some word processors, allow you to enter commonly used words or phrases quickly and easily. In addition to the following predefined ShortCuts, you can create your own ShortCuts for your name or the header of a memo (page 180). Each ShortCut can represent up to 45 characters.
To use a ShortCut, draw the ShortCut stroke followed by the ShortCut characters. When you draw the ShortCut stroke, the ShortCut symbol appears at the insertion point to show that you are in ShortCut mode.
When you enter and dts (D and ), you can enter date and time stamps.
Date stamp ds Breakfast br
Time stamp ts Lunch lu
Entering data into your Sony CLIÉ Handheld
Using the onscreen keyboard
You can open the onscreen keyboard any time you need to enter text or numbers into your CLIÉ handheld. Note that you cannot enter Graffiti characters while using the onscreen keyboard.
To use the onscreen keyboard:
1 Open any application (such as Memo Pad).
2 Tap any record, or tap New.
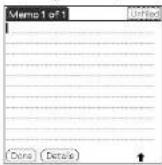
3 Tap "a" to open the alphabetic keyboard, or tap "1" to open the numeric keyboard.
The selected keyboard is displayed.
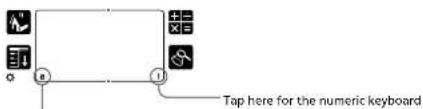
Tap here for the alphabetic keyboard

Entering data into your Sony CLIÉ Handheld
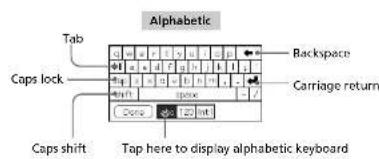
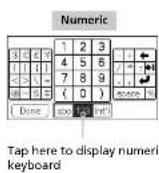
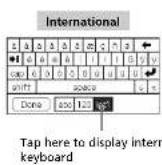
4 Select the desired keyboard and tap the characters to enter text and numbers.
You can use the onscreen keyboard in the same way as in the keyboard of your computer. To enter capital letter, tap cap and then tap the character button. To delete a character, tap ◆.
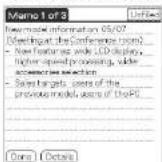
5 After you finish, tap Done to close the onscreen keyboard and place the text in the record.
Entering data into your Sony CLIÉ Handheld
Using your computer keyboard
If you have a lot of data to enter, or prefer to use the computer keyboard, you can use Palm™ Desktop for CLIÉ software or any other supported personal information manager (PIM), such as Microsoft Outlook®, to enter information. You can then perform a HotSync® operation to synchronize the information on your computer with the information on your CLIÉ handheld. All the main applications on your CLIÉ handheld are also available in Palm Desktop for CLIÉ software and in most PIMs, so you don't need to learn different applications.
Refer to the Palm Desktop for CLIÉ software online Help for more information on entering data on your computer.
To import data from your computer or another handheld
If you have data stored in computer applications such as spreadsheets, databases, or if you want to import data from another handheld, you can transfer the data to your CLIE handheld and use it without entering data manually. Save the data in a compatible file format (csv, txt, tab, tvv, dba, aba, tda, mpa), import it into your Palm Desktop for CLIE software, and then perform a HotSync operation to transfer the data to your CLIE handheld. For details, see "Chapter 3: Exchanging and updating data using a HotSync ^2 operation."
Changing the frontlight level
You can turn the frontlight on the screen off or on or adjust the frontlight level according to the lighting conditions or temperature of the environment where you use your CLIÉ handheld.
Turning the frontlight off and on
Press and hold down the POWER button for more than two seconds to turn the frontlight off or on.
Adjusting the frontlight level
Even with the frontlight on, you may need to further adjust the brightness on the screen.
You can use the onscreen brightness control to adjust the frontlight level.
1 Tap
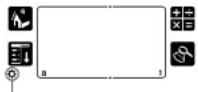
Tap this icon.
The adjustment control screen is displayed.
2 To change the level in small increments, tap to the left or right.
To change the brightness level in larger increments, drag the slider to the left or right.
Tip
You can also press the scroll button or rotate the Jog Dial navigator to move the slider incrementally.
3 Tap Done.
Note
If the divitizer is not connected exclusively, can may not be able to make the
Resetting your Sony CLIÉ Handheld
Under normal circumstances, you do not have to reset your CLIÉ handheld. On rare occasions, however, your CLIÉ handheld may no longer respond to buttons or the screen due to insufficient memory or other reasons. In this case, you need to perform a reset to get your CLIÉ handheld running again.
Performing a soft reset
A soft reset tells your CLIÉ handheld to stop what it's doing and start over again. All records and entries stored in your CLIÉ handheld are retained in a soft reset.
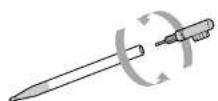
1 Take out the reset tip by unscrewing the metal barrel from the stylus quill.
2 Use the reset tip to gently press the reset button inside the hole on the back panel of your CLIÉ handheld.
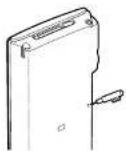
The system shuts down and then restarts.
After restarting, the system displays "palm powered," "CLIF," and
Resetting your Sony CLIÉ Handheld
Performing a hard reset
If the soft reset does not solve the problem, you need to perform a hard reset to restart your CLIÉ handheld.
Note
With a hard reset, all records and entries stored in your CLIÉ handheld are erased. Only perform a hard reset if a soft reset does not solve your problem. If you save a backup of your CLIÉ handheld data on your computer, you can restore any data previously synchronized with your computer during the next I lotSync ^4 operation.
1 Hold down the POWER button on your CLIÉ handheld.
2 While holding down the POWER button, use the reset tip to gently press and release the reset button.
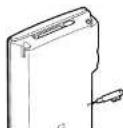
The Palm Powered logo screen is displayed.
3 Release the POWER button.
A message warning that you are about to erase all the data stored on your CLIÉ handheld is displayed.
4 Press the upper half of the scroll button on the front panel of your CLIÉ handheld.
Your CLIÉ handheld undergoes a hard reset.
Alter a hard reset, only the current date and time are retained. Formats, Preferences, and other settings are restored to their factory default settings.
Chapter 2
Using basic applications
This chapter describes how to do tasks that are specific or common to the basic applications of your CLIÉ handheld: Date Book, Address Book, To Do List, Memo Pad, Expense, and Calculator.
Contents
Managing schedules and events (Date Book).... 27
Managing addresses and phone numbers (Address Book) 47
Managing tasks and things to do (To Do List) 61
Creating memos (Memo Pad) 69
Managing expenses (Expense) 77
Using Calculator (Calc) 87
Performing common tasks....89
Using the Application Launcher 89
Categorizing records....93
Finding records.... 96
Protecting your data (Security) 100
Attaching notes 106
Purging records 107
Using the Edit menu 108
Choosing fonts 109
Managing schedules and events (Date Book)
Date Book lets you quickly and easily schedule appointments or any activity associated with a date, or a date and time. A record in Date Book is called an "event."
Note
If the HOLD switch is in the protect position, you cannot operate your CLIF handheld.
Scheduling an event
Scheduling an event for the current date
1 Press the Date Book ⏻ button on the front panel.
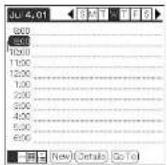
Date Book starts up. Today's schedule is displayed with a list of times for a standard business day.
Tip
Press the Date Book button repeatedly to cycle through the Day, Week, Month, and Agenda views. The Date Book views are displayed at the bottom left of the screen.
2 Tap the time line that corresponds to the beginning of the event.


Managing schedules and events (Date Book)
3 Enter a description of the event.
You can enter a description or a note of up to 255 characters in length.
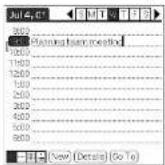
4 If the event is one hour long, skip to step 7. If the event is longer or shorter than one hour, tap the time of the event to open the Set Time dialog box.
5 Do one of the following to set the duration of the event:
- Tap the time columns on the right side of the Set Time dialog box to set the Start Time, and tap the End Time box. Then tap the time columns to set the End Time.
- Tap All Day to automatically insert the start and end time of the event as defined in your Date Book preferences.
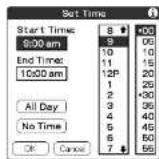
6 Tap OK.
7 Tap a blank area of the screen to deselect the event.
A vertical line appears next to the time, indicating the duration of the

Managing schedules and events (Date Book)
Tip
You can open the Set Time dialog box (to select a start time) by writing a number on the number side of the Graffiti writing area and making sure no event is selected.
To schedule an untimed event
In step 5, tap No Time. A new untimed event is displayed in the first line in Date Book with a ♦ mark.
Scheduling a timed event for another date
1 Press the Date Book Ⓞ button on the front panel. Date Book starts up.
2 Do one of the following to select the date you want for the event:
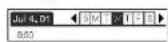
- Tap the day of the week on top of the Date Book screen. To move to another week, tap one of the scroll arrows of either side of the day of the week area.
- Tap Go To at the bottom of the screen. The Go To Date dialog box appears. Select a date by tapping a year, month, and day in the calendar.
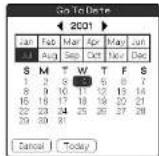
3 Follow the steps for "Scheduling an event for the current

Managing schedules and events (Date Book)
Tip
You can also use the scroll button on the front panel to move forward or backward one day or one month at a time.
To schedule an untimed event
In step 3, tap New and then tap No Time. Then follow the steps for "Scheduling an event for the current date."
Tip
You can create a new untimed event by making sure no event is selected and then writing letters in the Graffiti writing area. When you start writing, the untimed event appears at the top of the screen.
Scheduling repeating or continuous events
The Repeat function lets you schedule events that recur at regular intervals or extend over a period of consecutive days.
Examples of repeating or continuous events
• Birthday: an event that repeats annually
- Weekly guitar lesson: an event that falls on the same day of the week and the same time of day
• Business trip or vacation: a continuous event
1 Press the Date Book ⏻ button on the front panel.
Date Book starts up.
2 Tap the description of the event.
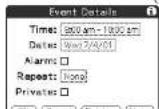
3 Tap Details.
The Event Details dialog box appears.

Managing schedules and events (Date Book)
4 Tap the Repeat box.
The Change Repeat dialog box appears.
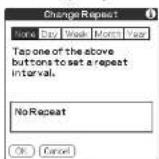
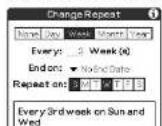
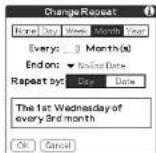
5 Tap Day, Week, Month, or Year to set how often the event repeats.
For a continuous event, tap Day.
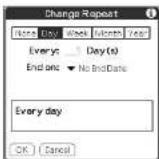
6 Enter a number that corresponds to how often you want the event to repeat on the Every line.
- When you tap Week: Tap a letter representing each day of the week on Repeat on line to specify the day you want the event to repeat.

Managing schedules and events (Date Book)
- When you tap Month: On the Repeat by line, tap Day to repeat the event on the specified day of the same week each month, or tap Date to repeat the event on the specified date each month.
7 To specify an end date for the repeating or continuous event, tap the arrow ▼ next to End on to display the drop-down list and then tap Choose Date. The Ending On screen appears.
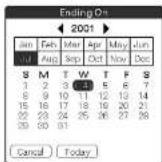
8 Tap the end date on the screen. The Change Repeat screen appears again.
9 Tap OK. The Event Details screen appears again.


Managing schedules and events (Date Book)
10 Tap OK.
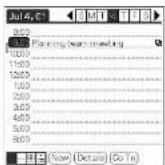
The Date Book screen is displayed again.
Make sure that the repeat on is displayed to the far right of the
event.
Notes
- If you change the start date of a repeating event, your CLIÉ handheld calculates the number of days you moved the event. Your CLIÉ handheld then automatically changes the end date to maintain the duration of the repeating event.
- If you change the repeat interval (e.g., daily to weekly) of a repeating event, past occurrences (prior to the day on which you change the setting) are not changed, and your CLIÉ handheld creates a new repeating event.
- If you change the date of an occurrence of a repeating event (e.g., from January 14 to January 15) and apply the change to all occurrences, the new date becomes the start date of the repeating event. Your CLIÉ handheld adjusts the end date to maintain the duration of the event.
- If you change other repeat settings (e.g., time, alarm, private) of a repeating event and apply the change to all occurrences, your CLIé handheld creates a new event. The start date of this new event is the day on which the setting is changed. Past occurrences (prior to the day of the change) are not changed.
- If you apply a change to a single occurrence of a repeating event (e.g., time), that occurrence no longer shows the repeat icon.

Managing schedules and events (Date Book)
Checking schedules
Displaying the Day view
You can display and check the events for a specific day.
1 Press the Date Book ⓣ button on the front panel.
Date Book starts. Today's schedule is displayed.
2 Rotate the Jog Dial™ navigator to display the events for yesterday or tomorrow.
You can display the schedule for a specific day and time.
To change the Date Book view
In addition to displaying the time list for a specific day, you can also display a whole week, a month, or an agenda.
To display the next view, press the Jog Dial navigator repeatedly.

You can also select the Date Book view by tapping an icon on the Date Book screen.
Tap one of the following icons to rotate to the corresponding calendar view:
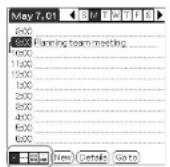
Tap the desired view icon.
- Day view
- Week view
• Month view - Month view
• agenda view

Managing schedules and events (Date Book)
Displaying the Week view
Week view displays a calendar of your events for an entire week. This view lets you quickly review your appointments and available time slots. In addition, the graphical display helps you spot overlaps and conflicts in your schedule.
1 Press the Date Book ⓣ button on the front panel.
Date Book starts up
2 Press the Jog Dial navigator repeatedly or tap the Week view icon.
The Week view appears. Untimed events are also displayed in the Week view.
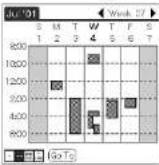
3 Rotate the Jog Dial navigator to select the week that you want to review.
To select the next week, rotate the Jog Dial navigator.
4 Press the Jog Dial navigator.
The details of the selected week are displayed.
Tips
- To reschedule an event while in the Week view, tap and drag the event to a different time or day.
- Tap a blank time on any day to move to that day and have the time selected for a new event.
- Tap any day or date that appears at the top of the Week view to move directly to that day without selecting an event.
- The Week view displays the time span defined by the Start Time and End Time in the

Managing schedules and events (Date Book)
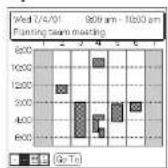
To view the detail of an event
Tap each time bar to view the detail of that event.
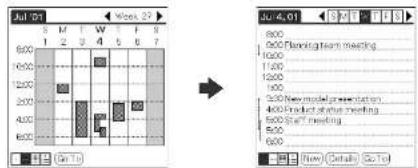
To spot event conflicts
An event conflict (time overlap) appears in the Week view as overlapping time bars and in the Day view as overlapping brackets to the left of the conflicting times.

Managing schedules and events (Date Book)
Displaying the Month view
The Month view screen shows which days have events scheduled. Dots and lines in the Month view indicate events, repeating events, and untimed events.
1 Press the Date Book @ button on the front panel.
Date Book starts up.
2 Press the Jog Dial navigator repeatedly or tap the Month view icon.
The Month view screen appears.
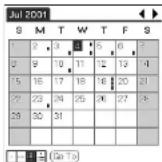
3 Rotate the Jog Dial navigator to select the day that you want to review.
To select the next day, rotate the Jog Dial navigator.
4 Press the Jog Dial navigator.
The details of the selected day are displayed.
Tips
- Tap a day in the Month view to display that day in the Day view.
- Tap the scroll arrows ◆ in the upper right corner to move forward or backward a month.
- Tap Go To to open the Go To Date dialog box to select a different month.
- Use the scroll buttons on the front panel of your CLIÉ handheld to move between months. Press the upper half of the scroll button to display the previous month, the lower half of the scroll button to display the next month.

Managing schedules and events (Date Book)
Displaying the Agenda view
The Agenda view shows you your appointments, untimed events, and To Do List items in a single screen. As well as checking the detailed information of an event, you can also use the Agenda view to check off completed To Do List items.
1 Press the Date Book @ button on the front panel.
Date Book starts up.
2 Press the Jog Dial navigator repeatedly or tap the Agenda view icon.
The Agenda view screen appears. Today's schedule and To Do List is displayed.
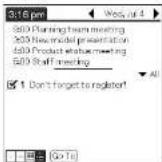
3 Rotate the Jog Dial navigator to select the day that you want to review.
To select the next day, rotate the Jog Dial navigator.
Tips
- Tap any appointment while in Agenda view to display the Day view of the appointment.
- Check off completed To Do List items in the Agenda view, or tap a description of an item to go directly into the To Do List application.

Managing schedules and events (Date Book)
Changing Date and Time view
Tap and hold the date in the title bar of Date Book.
The current time appears.

When you release the stylus, the menu bar appears. If you want to avoid displaying the menu when releasing the stylus, drag the stylus away from the date indication after the current time appears.

Managing schedules and events (Date Book)
Editing Date Book events
Changing a date or time for an event
1 On the Date Book screen, tap the event you want to edit.
2 Tap Details.
The Event Details dialog box appears.
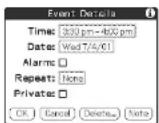
3 • To change the time, tap the Time box and select a new
time.
The Set Time dialog box appears. Tap the Start Time and the End Time.
• To change the date, tap the Date box and select a new
date.
The Set Date dialog box appears. Specify the year, month, and day in the calendar.
4 Tap OK.

Managing schedules and events (Date Book)
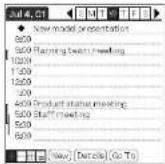
Changing a timed event to an untimed event
1 On the Date Book screen, tap the event you want to edit.
2 Tap Details.
3 Tap the Time box.
The Set Time screen appears.
4 Tap No Time and then tap OK.
The Event Details screen appears.
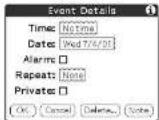
5 Tap OK.
The untimed event is displayed in the first line with the untimed ♦ mark.

Managing schedules and events (Date Book)
Setting an alarm for an event
The Alarm setting enables you to set an audible alarm for events in your Date Book. You can set an alarm to sound minutes, hours, or days before an event. The default Alarm setting is 5 minutes before the time of the event, but you can change this to any number of minutes, hours, or days.
When you set an alarm, an alarm icon appears to the far right of the event with the alarm.
1 On the Date Book screen, tap the event to which you want to assign an alarm.
2 Tap Details.
The Event Details dialog box appears.
3 Tap the Alarm check box to select it. The alarm is set.
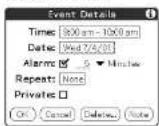
4 Tap the arrow ▼ to select the time unit from among Minutes, Hours, or Days.
5 Tap the "5" next to the Alarm check box and enter any number from 0 to 99 as the number of time units.
6 Tap OK.


Managing schedules and events (Date Book)
Setting an alarm for an untimed event
You can set a silent alarm for an untimed event. In this case, the alarm triggers at the specified period of minutes, hours, or days before midnight (beginning) of the day of the untimed event. No audible alarm sounds for an untimed event. The reminder message appears onscreen instead.
Example: When you set an alarm for an untimed event that occurs on February 4 and if the alarm is set for 5 minutes, the reminder message appears at 11:55 PM on the night of February 3. The reminder remains onscreen until you turn on your handheld and tap OK to erase it.
Making an event private
You can hide records that you mark as private. If you define a password for your CLIÉ handheld, you must enter it to display private records.
1 On the Date Book screen, tap the event you want to mark as private.
2 Tap Details.
The Event Details dialog box appears.
3 Tap the Private check box.
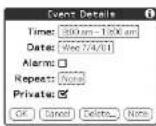
4 Tap OK.
The event is marked as private. For hiding or masking private events, see "Protecting your data (Security)" on page 100.

Managing schedules and events (Date Book)
Deleting events
You can delete existing events in Date Book.
Note
If you delete the contents of a repeating event, all the related events will be deleted.
When deleting an event in Delete Event dialog box, you can delete a single event as an exception or all the related events.
1 On the Date Book screen, tap the event you want to delete.
2 Tap Details.
3 Tap Delete.
The Delete Event dialog box appears.
4 Tap OK to delete the event.
The selected event is deleted. To cancel deletion, tap Cancel.
Tip
If you select the "Save archive copy on PC" check box, the deleted event will be saved onto the Palm™ Desktop for CLIÉ software on your computer during the next HotSync® operation.

Managing schedules and events (Date Book)
Using the Date Book menus
| This section explains the menu commands specific to Date Book. For the Edit menu, see "Using the Edit menu" on page 108. |
Record menus
| New Event Creates a new event. The Set Time dialog box for selecting the start and end times is displayed. | |
| Delete Event Deletes the currently selected event. The Delete Event dialog box appears. | |
| Attach Note Attaches notes to the current event. This menu opens up a dialog box for entering comments. | |
| Delete Note Deletes notes from the current event. The Delete Note dialog box is displayed. | |
| Purge You can specify a certain period based on the current date and discard any events that were formed before the specified date. Use this function to save memory space. NotesA repeating event will not be deleted.By default, the events that you purge will be saved in the Palm Desktop for CLIIE software on your computer at the next HotSync operation. To delete the events completely, deselect the check box (or "Save archive copy on PC" in the Purge dialog box. | |
| Beam Event | Sends the current event to another CLIIE handheld via the infrared communications port. |

Managing schedules and events (Date Book)
Options menus
| Font You can select a desired font in the Select Font dialog box. | |
| Preferences | Start/End Time: Defines the start and end times for Date Book screens. If the time slots you select do not fit on one screen, you can tap the scroll arrows to scroll up and down.Alarm Preset: Automatically sets an alarm for each new event. The silent alarm for unlimited events is defined by minutes, days, or hours before midnight of the date of the event.Alarm Sound: Sets the tone of the alarm.Remind Me: Defines how many times the alarm sounds. The choices are Once, Twice, 3 Times, 5 Times, and 10 Times.Play Every: Defines how often the alarm sounds. The choices are Minute, 5 minutes, 10 minutes, and 30 minutes. |
| Display Options | Changes the Date Book's appearance and which events display.Show Time Bars: Activates the time bars that appear in the Day view. The time bars show the duration of an event and illustrates event conflicts.Compress Day View: Controls how times appear in the Day view. When Compress Day view is off, all time slots are displayed. When it is on, start and end times display for each event, but blank time slots toward the bottom of the screen disappear to minimize scrolling.Month View settings: These check boxes apply to the Month view of Date Book. You can activate any or all of these settings to show that you have Timed, Untimed, or Daily Repeating events in the Month view only. |
| Phone Lookup The Phone Number Lookup screen appears. If there is an Address Book entry, you can look up the phone number of the selected item. | |
Security Hides the current item unless the password is entered.
Managing addresses and phone numbers (Address Book)
Address Book lets you keep names, addresses, telephone numbers, and other information about your personal or business contacts.
An item in Address Book is called an "entry."
Note
If the HOLD switch is in the protect position, you cannot operate your CI II handheld.
Creating a new Address Book entry
1 Press the Address Book Ⓞ button on the front panel.
The Address screen is displayed.
Note
Press the Address Book button repeatedly to cycle through the categories in which you have entries.
2 Tap New.
The Address Edit screen appears.
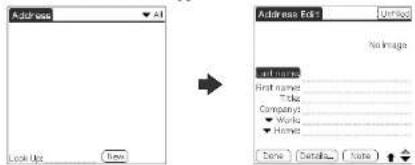
3 Enter the last name of the person you want to add to Address Book.
The first letter of each field (except numeric and e-mail fields) is automatically capitalized.
4 Tap First name.
The cursor shifts to the first name field.
Managing addresses and phone numbers (Address Book)
5 Enter the first name in the First name field.
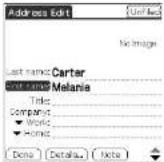
6 Repeat steps 4 and 5 to enter the other items of information that you want to include.
You can tap the scroll arrow ▼ next to each item to display the list of choices and then tap the desired item in the list.
7 To move to the next page of information, tap the scroll arrow ▼ on the bottom-right corner of the screen.
8 After you finish entering all the necessary information, tap Done.
The Address screen is displayed again.
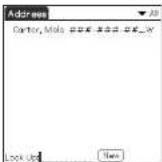
Tip
You can also use the Palm™ Desktop for CLIÉ software to create entries on your computer and then download them to your CLIÉ handheld with your next HotSync® operation. See "Performing a local HotSync® operation with the cradle" on page 112 fo
Managing addresses and phone numbers (Address Book)
Viewing Address Book entries
1 Press the Address Book button on the front panel. The Address screen is displayed, listing your current entries.
2 Rotate the Jog Dial™ navigator to select the address entry you want to view.
If the desired address entry is not displayed, rotate the Jog Dial navigator further to scroll up or down the entire list.
3 Press the Jog Dial navigator.
The Address View screen of the selected entry is displayed.
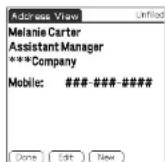
4 To return to the list of address entries, press the Jog Dial navigator again or press the BACK button. The Address screen is displayed again.
Tips
- If there are multiple pages of information, the scroll button moves up or down an address list or the Address View screen. If you hold down the scroll button, you accelerate the scrolling and display every third screen.
- You can also use the stylus to tap the onscreen scroll arrows ↕ to scroll to the entry.
To view an image pasted to an address entry
Tap an image on the Address View screen. The image is displayed across the whole screen. To return the Address View screen, tap the image again.
Managing addresses and phone numbers (Address Book)
Viewing addresses by category
Press the Jog Dial navigator when the address list is displayed but none of the listed entries are selected.
Each time you press the Jog Dial navigator, the display toggles through all the available categories.
To select category from the categories list
Tap the arrow ▼ at the upper right corner of the screen to display the category list. You can select the desired category from the list.
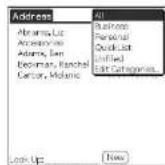
Managing addresses and phone numbers (Address Book)
Sorting the address entries in the list
You can sort the address entries in your desired order: listing by last and then first name, or listing by company and then last name. The address entries will be displayed in the selected order when you start Address Book. Any changes in the address order, however, do not affect the original address entries.
1 Press the Address Book button on the front panel. The Address screen is displayed, listing your current entries.
2 Tap the Menu ☐ on.
Address Book menu is displayed.
3 Tap Options, and then tap Preferences. The Address Book Preferences dialog box appears.
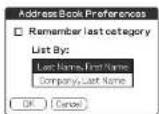
4 Tap the desired order of the address entries in the List By field.
Select the desired order that the address entries are to be listed when Address Book starts.
5 Tap OK.
The address entries are sorted in the selected order.
Notes
- When you tap Last Name, First Name, the address entries are sorted in alphabetical order of an individual's last name and then first name.
- When you tap Company, Last Name, the address entries are sorted in alphabetical order of the company name, and then an individual's last name.
Managing addresses and phone numbers (Address Book)
Looking up an address entry
The Look Up feature helps you to quickly scroll to any of your address entries.
1 On the Address Book list screen, enter the first letter of the entry you want to find.
The list scrolls to the first entry that begins with that letter. If you write another letter, the list scrolls to the first entry that starts with those two letters.
For example, writing an "s" scrolls to "Sands," and writing "sm" scrolls further to "Smith." If you sort the list by company name, the Look Up feature scrolls to the first letter of the company name.
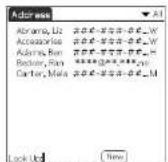
2 Tap the entry you want to view or press the Jog Dial navigator.
The entry you selected is shown.
Managing addresses and phone numbers (Address Book)
Editing Address Book entries
Pasting an image to an address entry
You can paste an image to the address entry. Paste a photograph of a person or restaurant, for example, as a reminder of an address entry.
To paste an image, install the PictureGear™ Pocket software onto your CLIé handheld. For installation, see "Installing add-on applications onto your Sony CLIÉ Handheld or Memory Stick media" in the Read This First manual.
1 Tap the address entry to which you want to paste an image in the address list.
The Address View screen of the selected address record appears.
2 Tap Edit.
The Address Edit screen appears.
3 Tap No Image in the upper right of the screen.
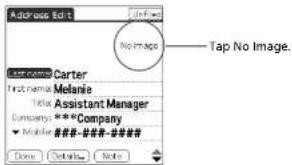
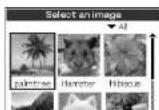
The PG Pocket screen appears.
Managing addresses and phone numbers (Address Book)
4 Tap the image you want to paste.
The image you selected is pasted to the address entry.
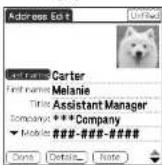
5 Tap Done.
The Address screen is displayed again.
A camera 📋 icon is attached to the entry that has the pasted image.
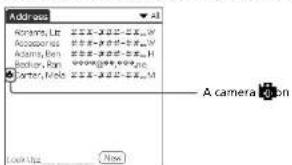
Note
If you use the Palm Desktop for CLI_E software to change the category of the address entry that has a pasted image, the image will no longer be associated with the address entry after the next HotSync operation. To edit an address entry with a pasted image, use the Address Book application in your CLI_E handheld.
To change the image
Tap the image and then select another image in the "Select an image" screen.
To remove the image

Managing addresses and phone numbers (Address Book)
Modifying an address entry
You can modify part of the address entry.
1 On the Address Book list screen, tap the entry you want to modify.
The Address View screen of the selected entry appears.
2 Tap Edit.
The Address Edit screen appears.
3 Tap the field that you want to edit. You can edit the tapped field.
4 Edit the entry.
5 When modification is complete, tap Done. The Address screen is displayed again.
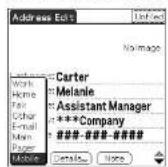
To select types of phone numbers
You can select the types of phone numbers or e-mail addresses that you associate with an Address Book entry. Any changes you make apply only to the current entry. To select other types of phone numbers in an entry, tap the arrow ▼ and select the desired label from the drop-down list.
Managing addresses and phone numbers (Address Book)
Duplicating an address entry
You can copy existing address entries you have created. This feature is useful when you use the address of one person or edit part of the address for another person.
1 On the Address Book list screen, tap the entry you want to copy.
The Address View screen of the selected record appears.
2 Tap the Menu ☐ on.
The Address Book menu is displayed.
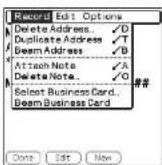
3 Tap Duplicate Address from the Record menu.
The entry you selected in step 2 is copied.
The word "Copy" is added to the end of the name field of the copied information.
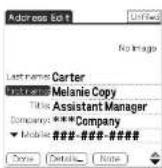
4 Tap Done.
Managing addresses and phone numbers (Address Book)
Deleting an address entry
1 On the Address Book list screen, tap the entry you want to delete.
The Address View screen of the selected record appears.
2 Tap Edit.
The Address Edit screen appears.
3 Tap Details.
The Address Entry Details dialog box appears.
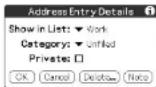
4 Tap Delete.
The Delete Address dialog box appears.
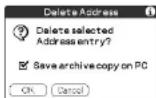
5 Tap OK to delete the entry.
The selected entry is deleted. To cancel deletion, tap Cancel.
Tip
If you select the "Save archive copy on PC" check box, the deleted data will be saved onto the Palm Desktop for Sony software on your computer during the next HotSync operation.
Managing addresses and phone numbers (Address Book)
Changing the address entry details
You can change the type of information that appears in the address list screen, categorize an entry, and hide an entry for security reasons. You can also delete entries.
1 On the Address Book list screen, tap the entry you want to change. The Address View appears.
2 Tap Edit.
The Address Edit screen appears.
3 Tap Details.
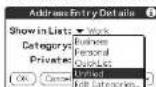
The Address Entry Details dialog box appears.
4 Change desired settings.
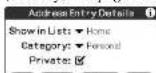
Show in List: Select which type of entries or other information appears in the Address list screen. Tap the arrow ▼ and select from Work, Home, Fax, Other, or E-mail.
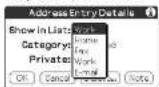
Category: Assign the entry to a category.
Private: Select the Private check box to hide the current entry when Security is turned on. For details on Security, see "Protecting your data (Security)" on page 100.
Managing addresses and phone numbers (Address Book)
Using the Address Book menus
This section explains the menu commands specific to Address Book. For the Edit menu, see "Using the Edit menu" on page 108. The Record and Options menus differ depending on whether you are displaying the Address List screen or the Address View screen.
Record menus
| Delete Address Deletes the current address entry. The Delete Address dialog box appears. | |
| NotesBy default, the entry that you delete will be saved onto the Palm Desktop for CLIÉ software on your computer during the next HotSync operation. To delete the entry completely, deselect the check box (☐ or "Save archive copy on PC" in the Delete Address dialog box.If the current entry has an image pasted, the image will not be deleted. | |
| Duplicate Address | Makes a copy of the current entry and displays the copy in Address Edit so you can make changes to the copied entry. The copy has the same category and attached notes as the original entry. |
| Beam Address Sends all the address entries in the currently selected category to another CLIÉ handheld via the infrared communications port. | |
| Beam Category Sends all the Address Book entries in the currently selected category to another CLIÉ handheld via the infrared communications port. | |
| Attach Note Adds comments to the current address entry. Choosing this menu opens up a screen for entering comments. | |
| Delete Note Deletes comments from the current address entry. Choosing this menu opens up the Delete Note dialog box. Tap Yes to delete comments and No to cancel the delete function. | |
| Select Business Card Defines the current address entry on a business card. A business card icon (☐) will be displayed when you set an entry as a business card. | |
| Beam Business Card | Sends the current business card to another CLIÉ handheld via |

Managing addresses and phone numbers (Address Book)
Options menus
| Font You can select a desired font in the Select Font dialog box. |
| Preferences Remember last category: Determines how Address Book appears when you return to it from another application. If you select this check box, Address Book shows the last category you selected. If you clear it, Address Book displays the All category |
| Rename Custom Fields These custom fields appear at the end of the Address Edit screen. Rename them to identify the kind of information you enter in them. The names you give the custom fields appear in all entries. |
| Security Hides the current record unless the password is entered.You can select the view option among Show Records, Mask Records, or Hide Records. |
| About Address Book Shows the version information for Address Book. |

Managing tasks and things to do (To Do List)
A To Do List is a reminder of some task you have to complete. A record in To Do List is called an "item."
Note
If the HOLD switch is in the protect position, you cannot operate your CLIÉ handheld.
Creating To Do List items
1 Press the To Do List button on the front panel.
To Do List opens and displays the category of items you last viewed.
Note
Press the To Do List application button repeatedly to cycle through the categories in which you have items.
2 Tap New.
A new To Do item is added to To Do List.
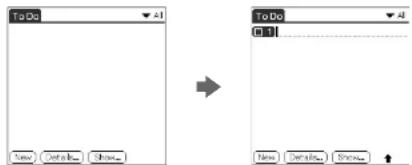
3 Enter the text of the To Do item.
You can enter multiple lines of text.
4 Tap anywhere onscreen to deselect the To Do List item.
The item is deselected and the new item is recorded to To Do List.
Tips
- If no To Do List item is currently selected, writing in the Graffiti writing area automatically creates a new item.

Managing tasks and things to do (To Do List)
Viewing To Do List items
You can check the items you recorded in To Do List.
1 Press the To Do List Ⓑ button on the front panel. The To Do screen appears.
2 Rotate the Jog Dial™ navigator to select the To Do List item that contains the note you want to view.
3 Press the Jog Dial navigator.
The notes of the selected item are displayed. If the item does not fit on the screen, rotate the Jog Dial navigator to scroll the screen.
4 Press the Jog Dial navigator.
The To Do List box reappears.
Viewing To Do List items by category
Press the Jog Dial navigator when To Do List is displayed but no To Do item is selected.
Each time you press the Jog Dial navigator, the display toggles through all the available categories.
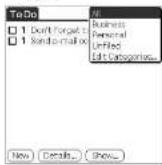
To select the desired category from the categories list
Tap the arrow ▼ at the upper right corner of the screen to display the category list. You can select the desired category from the list.

Managing tasks and things to do (To Do List)
Checking off a To Do List item
You can check off a To Do List item to remind you that you've completed it. You can set To Do List to record the date that you completed the To Do item, and you can choose to show or hide completed items. For details, see "Changing the appearance of To Do List" on page 67.
1 Press the To Do List Ⓑ button on the front panel. The To Do screen appears.
2 Tap to select the check box on the left side of the item. The check box changes to ☑
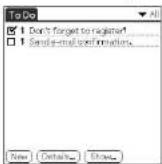

Managing tasks and things to do (To Do List)
Working with To Do List
Setting the priority of an item
The priority setting for items lets you arrange the tasks in your To Do List according to their importance or urgency. The default setting for To Do List is to arrange items by priority and due date, with priority 1 items at the top. If you have a number of items in your list, changing an item's priority setting may move its position in the list.
On the To Do List screen, tap the Priority number on the left side of the item and then tap the desired Priority number.
You can select the Priority numbers 1 through 5, with 1 being the most important.
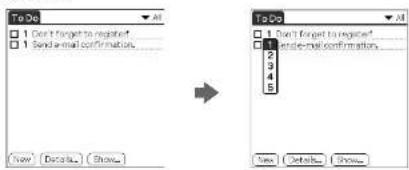

You can also set the priority from the To Do Item Details dialog box.
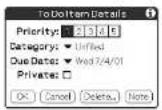

Managing tasks and things to do (To Do List)
Setting the due date for an item
You can associate a due date with any To Do List item. You can also sort the items that appear in the list based on their due date.
1 On the To Do List screen, tap the text of the item whose due date you want to set.
2 Tap Details.
3 Tap the arrow ▼ next to Due Date and then tap a desired due date from the drop-down list.
You can select one of the following options:
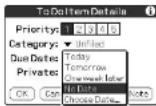
• Today: Assigns the current date.
- Tomorrow: Assigns the next day's date.
- One week later: Assigns the date exactly one week from the current date.
- No Date: Assigns no due date.
- Choose Date: Opens the Due Date screen, where you can choose any date from the calendar.
4 Tap OK.
Tip
If you turn on the Show Due Dates option in the To Do Preferences dialog box, you can tap directly on the due date in To Do List to select a desired due date.

Managing tasks and things to do (To Do List)
Deleting an item
You can delete items from To Do List.
1 On the To Do List screen, tap the item you want to delete.
2 Tap Details.
The To Do Item Details dialog box appears.
3 Tap Delete.
The Delete To Do dialog box appears.
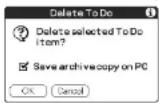
4 Tap OK to delete the item.
The selected event is deleted. To cancel deletion, tap Cancel.
Tip
If you check the "Save archive copy on PC" check box, the deleted item will be
saved onto the Palm Desktop for CLIE software on your computer during the next HotSync® operation.

Managing tasks and things to do (To Do List)
Changing the appearance of To Do List
The To Do Preferences dialog box enables you to control the appearance of To Do List.
1 On the To Do List screen, tap Show.
The To Do Preferences dialog box appears.
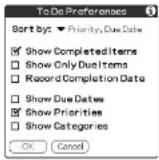
2 Change the To Do Preferences settings.
You can choose any of the following settings:
- Show Completed Items: Displays your completed items in To Do List. If you turn off this setting, your To Do items disappear from the list when you complete (check) them.
• Show Only Due Items: Shows only the items that are currently due, past due, or have no due date specified. When this setting is active, items that are not yet due do not appear in the list until their due date. - Record Completion Date: Replaces the due date with the actual date when you complete (check) the item. If you do not assign a due date to an item, the completion date still records when you complete the item.
- Show Due Dates: Displays the due dates associated with items in To Do List and displays an exclamation mark next to items that remain incomplete after the due date passes.
• Show Priorities: Shows the priority setting for each item.
• Show Categories: Shows the category for each item.
3 Tap OK.

Managing tasks and things to do (To Do List)
Using the To Do List menus
This section explains the menu commands specific to To Do List. For the Edit menu, see "Using the Edit menu" on page 108.
Record menus
| Delete Item Deletes the current To Do item. The Delete To Do dialog box appears. | |
| Attach Note Adds comments to the current To Do item. Choosing this menu item opens up a screen for entering comments. | |
| Delete Note | Deletes comments from the current To Do item. Choosing this menu item opens up the Delete Note dialog box. |
| Purge Allows you to delete any completed items from To Do List. Run this command to save memory if you find too many recorded To Do items in your CLIIE handheld.NoteBy default, the items that you purge will be saved onto the Palm Desktop for CLIIE software on your computer during the next HotSync operation. To delete the items completely, deselect the check box 1 or "Save archive copy on PC" in the Purge dialog box. | |
| Beam Item | Sends the current To Do item to another CLIIE handheld via the infrared communications port. |
| Beam Category Sends all the To Do items in the currently selected category to another CLIIE handheld via the infrared communications port. | |
Options menus
| Font | You can select a desired font in the Select Font dialog box. |
| Phone Lookup The Phone Number Lookup screen appears. If there is an Address Book entry, you can look up the phone number of the selected item. | |

Creating memos (Memo Pad)
You can use Memo Pad to make brief memos on your CLIÉ handheld. You can also display TXT or CSV (Comma Separated Value) document files created on your computer (page 134). A record in Memo Pad is called a "memo."
Note
If the HOLD switch is in the protect position, you cannot operate your CLIé handheld.
Creating a new memo
A memo can contain up to 4,000 characters. The number of memos you can store is limited only by the memory available on your CLI? handheld.
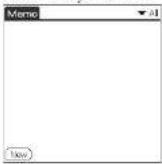
1 Press the Memo Pad button on the front panel.
Memo Pad starts up. Memo Pad opens to display the last Memo Pad screen that you viewed.
Tip
Press the Memo Pad button repeatedly to cycle through the categories in which you have memos.
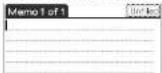
2 Tap New.
A new memo is created.
Creating memos (Memo Pad)
3 Enter the text you want to appear in the memo.
To move down to a new line, tap the Enter key when using the software keyboard or write / when using Graffiti writing.
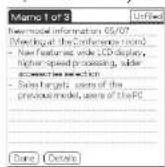
4 Tap Done or press the BACK button when you finish.
The first line of the memo is displayed.
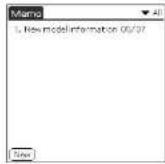
Tips
- You can also create a new memo by beginning your memo in the Graffiti writing area on the Memo screen. The first letter is automatically capitalized and begins your new memo.
- While entering text, the text may overlap the Done or Details buttons. After you finish entering the text, the overlap disappears.

Creating memos (Memo Pad)
Reviewing memos
The first line of a memo appears in the Memo List. This makes it easy to locate and review your memos.
1 Press the Memo Pad Ⓐ button on the front panel.
Memo Pad starts and the Memo List is displayed.
2 Rotate the Jog Dial™ navigator to select the memo you want to view.
If the desired memo is not displayed, rotate the Jog Dial navigator further to scroll up or down the memo list.
3 Press the Jog Dial navigator.
The content of the selected memo is displayed. If the memo text does not fit on the screen, rotate the Jog Dial navigator to scroll the screen.
4 Press the Jog Dial navigator.
The Memo list is displayed again.

Creating memos (Memo Pad)
Viewing memos by category
Press the Jog Dial navigator when the memo list is displayed but no memo is selected.
Each time you press the Jog Dial navigator, the display toggles through all the available categories.
Selecting the desired category from the categories list
Tap the arrow ▼ at the upper right corner of the screen to display the category list. You can select the desired category from the list.
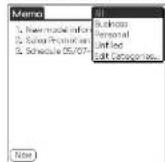
Sorting memos
You can change the order in which Memo Pad shows your memos.
1 Press the Memo Pad button on the front panel. Memo Pad starts and the Memo list is displayed.
2 Tap the Menu ☐ on.
A menu of commands appears.
3 Tap Options, and then tap Preferences. The Memo Preferences dialog box appears.


Creating memos (Memo Pad)
4 Tap the desired order of the memos in the Sort by field.
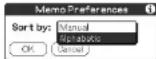
- Manual: Sorts the memos manually.
- Alphabetic: Sorts the memos in numerical and then alphabetical
order
5 Tap OK.
To sort the memos manually
In step 4, select Manual to activate manual sorting.
Tap the memo you want to move in the Memo screen and drag it into the desired location. The memo is placed where you released the stylus.
The memos are renumbered accordingly.

Creating memos (Memo Pad)
Editing memos
Deleting a memo
You can delete an unnecessary memo from Memo Pad.
1 On the Memo Pad screen, tap the memo you want to delete. The contents of the memo you tapped appears.
2 Tap Details.
The Memo Details dialog box appears.
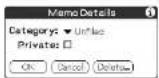
3 Tap Delete. The Delete Memo dialog box appears.
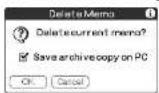
4 Tap OK to delete the memo. The selected record is deleted. To cancel deletion, tap Cancel.
Tip
If you select the "Save archive copy on PC" check box, the deleted memo will be saved unto the Palm Desktop for CLI ^2 software on your computer during the next HotSync ^28 operation.

Creating memos (Memo Pad)
Categorizing a memo
You can categorize your memo. In step 2 of "Deleting a memo," tap the arrow ▼ next to Category to display the list of available categories and then tap the desired category for the memo.
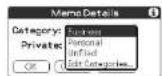
Making a memo private
You can hide a memo that you mark as private. If you define a password for your CLIÉ handheld, you must enter it to display private records.
1 On the Memo Pad screen, tap the memo you want to mark as private.
2 Tap Details.
The Memo Details dialog box appears.
3 Tap and select the Private check box.
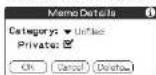
4 Tap OK.
The memo is marked as private. For details on hiding or masking private events, see "Protecting your data (Security)" on page 100.

Creating memos (Memo Pad)
Using the Memo Pad menus
This section explains the menu commands specific to Memo Pad. For the Edit menu, see "Using the Edit menu" on page 108. The Record and Options menus differ depending on the screen displayed.
Record menus
| Beam Category Sends all the memos in the currently selected category to another CLIIE handheld via the infrared communications port. |
| New Memo Creates a new memo. |
| Delete Memo Deletes the current memo. The Delete Memo dialog box appears.NoteBy default, the memos that you delete will be saved onto the Palm Desktop for CLIIE software on your computer during the next IotSync operation. To delete the memos completely, deselect the check box 1 or "Save archive copy on PC" in the Delete Memo dialog box. |
| Beam Memo Sends the current memo to another CLIIE handheld via the infrared communications port. |
The Options menus
| Font You can select a desired font in the Select Font dialog box. |
| Phone Lookup Phone Number Lookup screen appears. If there is an Address Book entry, you can look up the phone number of the selected memo. |
| Preferences Specifics how the mentors are displayed. The Memo Preferences screen appears. |
| Security Hides the current menu unless the password is entered.You can select the view option among Show Records,Mark Records, and Hide Records. |

Managing expenses (Expense)
You can use Expense for many disbursement purposes such as recording expenditures for business trips and personal expenses. A record in Expense is called an "item."
Note
If the HOLD switch is in the protect position, you cannot operate your CLIF handheld.
Recording a new Expense item
Expense allows you to record the date, Expense type, and the amount you spent. You can sort Expense items into categories or add other information to an item.
1 Rotate the Jog Dial™ navigator to select Expense and then press the Jog Dial navigator. Or tap the Expense icon on the Application Launcher screen. The Expense screen appears.
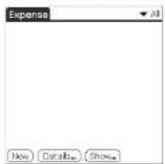
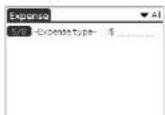
2 Tap New.
New Expense item is created.
Managing expenses (Expense)
3 Enter the amount of the expense.
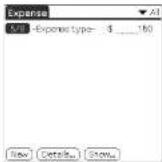
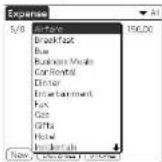
4 Tap -Expense Type- and select an Expense type from the drop-down list box.
The item you entered in Step 3 is saved when you select an Expense Type.
Note
If you do not select an Expense type, the entered data will not be saved.
Tip
You can also create a new Expense item on the Expense screen by writing on the number side of the Graffiti ^® writing area. The first number you write begins your new Expense item.

Managing expenses (Expense)
Editing Expense items
Changing the display option
You can change display options of Expense items.
1 On the Expense screen, tap Show.
The Show Options dialog box appears.
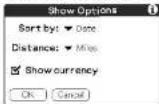
2 Select the desired display mode option.
- Sort by: Tap the arrow ▼ next to Sort by and then select Date or Type to sort Expense items.
- Distance: Tap the arrow ▼ and then select Miles or Kilometers so that you can display Mileage entries in miles or kilometers.
- Show currency: Shows or hides the currency symbol in the Expense list.
3 Tap OK.
The Expense items are sorted according the display mode option you selected.

Managing expenses (Expense)
Changing the date of an Expense item
The Expense item is initially displayed with the date when it is entered. If you want to record a past payment date for an Expense item, you can change the payment date of the item to the correct date.
1 On the Expense screen, tap the Expense item whose date you want to change.
The date is highlighted.
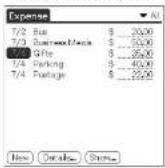
2 Tap the date area of the selected Expense item. The Date screen appears.
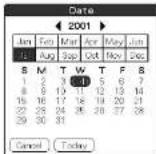
3 Tap the desired date. The date is changed.

Managing expenses (Expense)
Entering receipt details for an Expense item
You can add details to an Expense item in the Receipt Details screen.
1 On the Expense screen, tap the Expense item to which you want to assign details.
2 Tap Details. The Receipt Details dialog box appears.
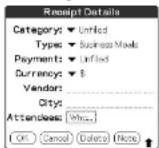
3 Change the Receipt Details settings.
You can choose any of the following options:
- Category: Specify the category of the Expense item. The Expense has two sample categories named "New York" and "Paris" which may be used to sort Expense items by the destination of the business trip. To rename an existing category or add a new category, tap the arrow ▼ and choose a category from the Edit Categories drop-down list box.
- Type: Tap the arrow ▼ and select an Expense type from the dropdown list box.
- Payment: Tap the arrow ▼ and select a payment method from the drop-down list box.
- Currency: Tap the arrow ▼ and select the currency in which you made the payment. Expense can show a maximum of four currencies. You can also change the currencies to be displayed.
- Vendor: Enter the name of the vendor associated with Expense.
- City: Enter the name of the payee (normally a company name) and the name of the city where the company is located. For example, you may specify "Rose Cafe" as the payee of a business lunch charge and
Managing expenses (Expense)
- Attendees: Expense opens the Attendees screen which looks like a memo screen of Memo Pad. In this screen, you can enter the names of attendees and purposes of expenditures. To display the address information in Address Book, tap Address Lookup.
4 Tap OK.
Creating/printing an Expense report
By performing a HotSync ^® operation to transfer your latest Expense data to your computer, the Palm ^™ Desktop for CLI.F. software makes it easy to view your Expense data in a Microsoft Excel spreadsheet. You can also print the Expense report from a printer connected to your computer.
1 Perform a HotSync operation to transfer the Expense data from your CLIÉ handheld to your computer.
2 Click Expense in the Palm Desktop for CLIÉ software. Microsoft Excel opens, and the Expense Report dialog box appears.
Note
If you launch Expense from the Start menu instead of the Palm Desktop for CLIÉ software, you must first choose your handheld user name.
3 Click the expense category that you want. If you want to define an end date for the expense report, enter the date in the End Date box.
Tips
- You can press Ctrl+click to select multiple categories. To print the expenses associated with all of your Expense categories, select All in the Categories group.
- If you do not specify an end date, all the expense entries for the selected categories (up to the date of the last HotSync operation) appear.
Managing expenses (Expense)
4 Click one of the following:
- Print: The expense report is displayed in the Print Preview window. Click Print in the Microsoft Excel window to print your expense report.
- Create: Your expense data is displayed in Microsoft Excel spreadsheet form. You can enter information, make formatting changes, and save and print the file in the normal manner.
Using expense report templates
Palm Desktop for CLIÉ software includes several expense report templates. When you use one of these templates, you can edit your expense data in Microsoft Excel.
To view your expense data using a Microsoft Excel template, click Options after creating an expense report. Click the templates menu, then select an expense template. Then, click OK.
Tip
The templates have the extension .xlt and are stored in the Template folder in the "C:\Program Files\Sony I landheld" directory on your computer. To see what a template looks like before you use it, open the template in Microsoft Excel.
Customizing the Currency list
You can change the currencies and symbols that appear for currencies to be used in Expense.
To change the currency list
1 On the Expense screen, tap the Expense item whose currency type you want to change.
2 Tap Details.
The Receipt Details dialog box appears.
Managing expenses (Expense)
3 Tap the arrow ▼ next to Currency and then tap Edit currencies from the drop-down list.
The Select Currencies dialog box appears.
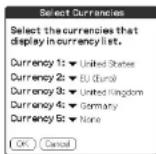
4 Tap the arrow ▼ for each Currency and then tap the country whose currency you want to display in the Currency list.
5 Tap OK to close the Select Currencies dialog box.
6 Tap OK.
To change your default currency
You can change the currency displayed as the default in the Currency list.
1 On the Expense screen, tap the Menu ☐ on.
The menu is displayed.
2 Tap Options and then Preferences.
The Preferences dialog box appears.
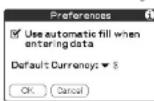
3 Tap the arrow ▼ next to Default Currency and then tap the
currency symbol you want to appear in Expense.
4 Tap OK.
Managing expenses (Expense)
To create a new currency symbol
If the currency you want to use is not included in the Currency list, you can create your own custom country and currency symbol.
1 On the Expense screen, tap the Menu ☐ on. The menu is displayed.
2 Tap Options and then Custom Currencies. The Custom Currencies dialog box appears.
3 Tap one of the four country boxes.
The Currency Properties dialog box appears.
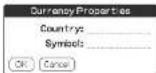
4 Enter the name of the country and a currency symbol, and then tap OK.
Tips
- To use a newly defined currency symbol as a standard currency symbol, it is necessary to select the target currency symbol in advance in the Preferences option.
- To use a currency symbol only for a specific Expense item, select the currency symbol in the Receipt Details dialog box of that Expense item.

Managing expenses (Expense)
Using the Expense menus
This section explains the menu commands specific to Expense. For the Edit menu, see "Using the Edit menu" on page 108.
Record menus
| Delete Item Deletes the current Expense item. The Delete Expense dialog box appears. |
| NoteBy default, the items that you delete will be saved in Palm Desktop for CLIE software on your computer at the next HotSync operation. To delete the items completely, deselect the check box (☐ for "Save archive copy on PC" in the Delete Expense dialog box. |
Purge Allows you to delete any category that is no longer used from the Expense category set. Run this command to save memory if you find too many expense items in your CLI ^E handheld.
Options menus
| Preferences | Use automatic fill: Lets you select an Expense type by writing the first letter of an Expense type in the Graffiti writing area. For example, if you write the letter "T," it enters the "Taxi" Expense type. Writing "T" and then "E" enters "Telephone" which is the first Expense type beginning with the letters "TE."Default Currency: Specifies the currency to be displayed as the default currency. |
| Custom Currencies You can create and add a new currency if you cannot find the currency you want to use in Expense. | |
| About Expense Shows the version information for Expense. | |

Using Calculator (Calc)
Calculating with Calculator
1 Do either of the following to start the Calculator:
- Tap the Calculator n.
- Rotate the Jog Dial™ navigator to select Calc and then press
the Jog Dial navigator. - Tap the Calc icon on the Application Launcher screen.
The Calculator screen appears.
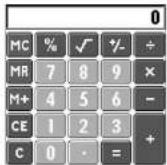
2 Perform calculations using Calculator.
To use Calculator, tap the numbers and symbol icons on the screen with the stylus.

Using Calculator (Calc)
Using the Calculator buttons
Calculator has several buttons to help you perform calculations.
| CE Clears the last number you entered. Use this button if you make a mistake while entering a number in the middle of a calculation. This button enables you to re- enter the number without starting the calculation over. | |
| C Clears the entire calculation and enables you to begin a new calculation. | |
| +/- Toggles the current number between a negative and positive value. If you want to enter a negative number, enter the number first and then press the +/- button. | |
| M+ Places the current number in memory. Each new number you enter with the M- button is added to the total stored in memory. The number that you add can be either a calculated value or any number you enter by pressing the number buttons. Pressing this button has no effect on the current calculation (or series of calculations); it merely places the value into memory until it is recalled. | |
| MR Recalls the stored value from memory and inserts it in the current calculation. | |
| MC Clears any value that is stored in the Calculator memory. | |
| √ | Calculates the square root of the entered number. Tap the button after entering the number. |
Using the Calculator menus
| Copy, Paste Copies a number from Calculator and pastes it intoanother application. Similarly, you can also pastenumeric values you copied from another applicationsuch as Expense into Calculator. |
Recent Calculations You can review the last series of calculations.
| Abreu Peralassee | 1 | 2 | 3 | 4 | 5 | 6 |
Performing common tasks
This section explains how to perform tasks that you can do in most or all of the basic applications.
Using the Application Launcher
This section explains how to switch between applications, how to change application settings so they are customized to your work methods, and how to categorize applications so you view them in related groups.
1 To open the Application Launcher screen, tap the Home icon.
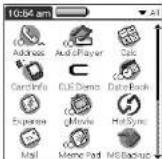
Tip
In addition to providing a way for you to open applications, the Application Launcher screen displays the current time, battery level, and application category.
Selecting applications
To open an application, choose from the following options:
- Tap the icon of the application you want to open. If you have many applications installed on your CLIÉ handheld, tap the scroll bar to see all the available applications.
- Rotate the Jog Dial™ navigator to select the application. Push the Jog Dial navigator to launch the selected application.
- Press an application button Ⓞ, ⚡ on the front panel to display the selected application immediately.
Performing common tasks
To open applications in the Memory Stick media
To open an application in the Memory Stick media from the Application
Launcher screen, tap the arrow ▼ in the upper-right corner of the
Application Launcher screen and select Card (or a category with the Card icon). Then, tap the icon of the application you want to open.
The Card 📄 icon is displayed only when a Memory Stick media is inserted in the CLIÉ handheld.
Note
There are some restrictions when opening an application copied (not installed using
MS Gate) onto the CLIÉ handheld from the Memory Stick media. For details, see page 163.
Categorizing applications
The category feature enables you to manage the number of application icons that appear in the Application Launcher screen. You can assign an application to a category and then display a single category or all your applications.
To categorize an application
1 Tap the Home 📂on.
2 Tap the Menu
3 Tap Category from the App menu.
The Category screen appears.
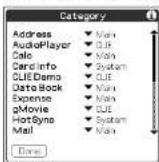

Performing common tasks
4 Tap the arrow ▼ next to each application to select a category from the drop-down list.
Tip
To create a new category for an application, tap Edit Categories from the drop-down list. Tap New, enter the category name, and then tap OK to add the category. Tap OK again.
5 Tap Done.
To display applications by category
1 Tap the Home 📂 on.
2 Do one of the following:
• Tap the Home ☐n repeatedly to cycle through all the categories.
- Tap the arrow ▼ in the upper right corner of the screen and then tap the desired
category from the drop-down categories list. - Push the Jog Dial navigator repeatedly while no applications are highlighted.
Changing the Application Launcher display
By default, the Application Launcher displays each application as an icon.
As an alternative, you can display applications in a list format.
You can also choose to view the same category of applications each time you open the Application Launcher screen.
To change the view of applications
1 Tap the Home Moon.
2 Tap the Menu ☐on.
The menu is displayed.
3 Tap Options, and then tap Preferences.
The Preferences screen is displayed.
Performing common tasks
4 Tap the arrow ▼ next to View By and then tap List.
5 Tap OK.
The applications are displayed in a list.
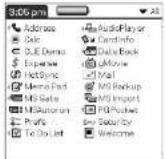
To open the Application Launcher screen to the last-opened category or the last-used application
1 Tap the Home 📂 on.
2 Tap the Menu
The menu is displayed.
3 Tap Options, and then tap Preferences.
The Preferences screen is displayed.
4 Tap the Remember Last Category check box to select it or the Remember Last Used App to select it.
5 Tap OK.
Note
Only application started from the Application Launcher screen will be remembered as the last-used application.
To display the Pop-up application menu with the Jog Dial navigator
In step 4, tap the arrow ▼ next to Jog Select and then tap PopUp.
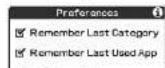
Performing common tasks
Categorizing records
You can categorize records in Address Book, To Do List, Memo Pad, and Expense applications for easy retrieval. (Date Book does not have categories.) When you create a record, it is automatically assigned to the currently displayed category. For example, if the All category is displayed, the record is assigned to the Unfiled category. A record can remain unfiled or it can be assigned to a category at any time.
System-defined and user-defined categories
By default, your CI.IE handheld includes system-defined categories, such as All and Unfiled, and user-defined categories, such as Business and Personal. You cannot modify the system-defined categories, but you can rename or delete the user-defined categories. In addition, you can create your own user-defined categories. You can have a maximum of 13 user-defined categories in each application.
Tips
- Address Book contains the QuickList user-defined category, in which you can store the names, addresses, and phone numbers of which you might need in emergencies (doctors, fire department, lawyers, etc.).
- Expense contains two user-defined categories, New York and Paris, to show how you might sort your expenses according to different business trips.
Performing common tasks
Moving a record into a category
1 Tap the record that you want to categorize.
2 Address Book only: Tap Edit.
The Address Edit screen appears.
3 Tap Details.
4 Tap the arrow ▼ next to Category to display the list of available categories.
5 Tap the desired category for the item.
6 Tap OK.
Displaying the category of records
1 Tap the arrow ▼ at the upper right corner of the screen. A list of available categories appears.
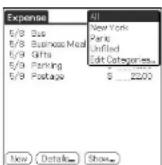
2 Tap the category you want to view.
The list screen now displays only the records assigned to that category.
Performing common tasks
Defining a new category
1 Tap the arrow ▼ at the upper right corner of the screen. A list of available categories appears.
2 Tap Edit Categories.
The Edit Categories screen is displayed.
3 Tap New.
The Edit Categories dialog box is displayed.
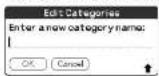
4 Enter a new category name and then tap OK. You can assign any of your entries to the new category.
Performing common tasks
Finding records
Your CLIÉ handheld lets you find information by entering text in the Find option dialog box or searching for a phone number using the Phone Lookup option. These two options are available for all the basic CLIÉ applications. Each application offers ways to find information:
- Date Book, To Do List, Memo Pad: Phone Lookup displays the Address List screen and lets you add the information that appears in this list to a record.
- Address Book: The Look Up line lets you enter the first letters of a name to scroll immediately to that name.
- Expense: Lookup displays the names in your Address Book that have data in the Company field. You can add these names to a list of attendees associated with an Expense record.
Using the Find option
The Find option lets you locate any text you specify in any application. For example, if the text appears in Address Book and Date Book, the Find option displays both occurrences in the Find dialog box.
1 Tap the Find ston. The Find dialog box ap
2 Enter the text you want to find. You can enter letters, symbols, or numbers.
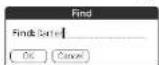

Performing common tasks
3 Tap OK.
Find searches for the text in records and notes and then displays the results.
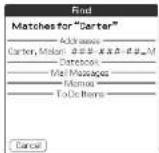
4 Tap the text in the find result list that you want to review.
The application associated with the data automatically starts to display the data.
To stop searching midway
Tap Stop. To resume the search, tap Find More.
Note
The Find option is not case sensitive; searching for "sony" also finds "Sony."
Tip
Select text in an application before tapping the Find icon to automatically place the text in the Find dialog box.
Performing common tasks
Using the Phone Lookup option
The Phone Lookup option lets you find a telephone number from the Address list screen and lets you add the information that appears in this list to a record. For example, you can add a telephone number from the Address list to an entry in Memo Pad.
1 Display the record in which you want to insert a phone number.
The record can be in Date Book, To Do List, or Memo Pad.
2 Tap the Menu ☐ on.
The menu of the application appears.
3 Tap Options and then Phone Lookup. The Phone Number Lookup screen appears.
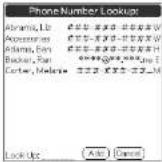
4 Tap the phone number you want to add.
Tip
To quickly find a phone number, enter the first few letters of the name you want to find in the Look Lp field in the lower screen.

Performing common tasks

Tap Add.
The Phone Lookup closes and the name and phone number are added to the record you displayed in step 1.
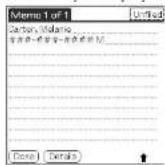
To activate Phone Lookup with Graffiti
Write the Graffiti® Command stroke /to activate Phone Lookup.
Phone Lookup using text
Drag and highlight text and then write the Graffiti Command stroke /
The selected text is replaced with the found name and phone number.
If multiple records are found, the Phone Number Lookup screen appears.
Performing common tasks
Protecting your data (Security)
Your CLIÉ handheld includes a Security application that allows you to protect your data from unauthorized users.
In Security, you can do the following:
- Lock and turn off your CLIÉ handheld so that it does not operate until you enter the correct password.
- Set the CLIÉ handheld to automatically lock at/after a preset time, or whenever you turn it off.
- Mask all records that you mark as private so the information appears greyed out.
- Hide all records that you mark as private so they do not appear on any screen.
You can mask or hide private records with or without a password. Without a password, private records are hidden or masked until you set the Security application to show them. With a password, you must enter the password to view the private records.
Assigning a password
You can assign a password to protect your private records and to lock your CLIÉ handheld.
1 Rotate the Jog Dial navigator to select Security and then press the Jog Dial navigator. Or tap the Security icon on the Application Launcher screen.
The Security screen appears.
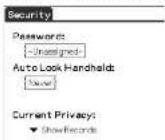
Performing common tasks
2 Tap Unassigned.
The Password dialog box appears.
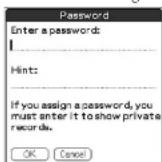
3 Enter a password and a hint to remember it, then tap OK.
The dialog box for verifying the password appears.
4 Enter the same password again to verify it and then tap OK.
Your password is assigned. In Password, "-Assigned-" is displayed.
To lock your CLIÉ handheld with this password, see page 103.
Changing or deleting a password
1 Rotate the Jog Dial navigator to select Security and press the Jog Dial navigator. Or tap the Security icon on the Application Launcher screen.
The Security screen appears.
2 Tap -Assigned-.
The Password dialog box appears.
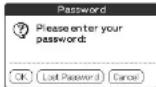
3 Enter the current password and then tap OK.
The dialog box used to enter a new password appears.
Performing common tasks
4 • To change the password, enter a new password and then tap OK.
• To delete the password, tap Unassign.
If you forget your password
If you forget your password, you can delete it. Note, however, that deleting a forgotten password also deletes all entries and records marked as Private. (If you synchronize with your computer before deleting a forgotten password, you can restore your private records at the next HotSync® operation.)
1 Tap Lost Password in step 3.
The Delete Password dialog box appears.
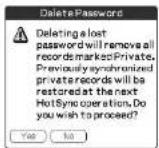
2 Tap Yes.
Your password and private records are deleted.
Performing common tasks
Locking your CLIÉ handheld with a password
You can lock your CLIÉ handheld so that you have to enter your password to operate it.
Note
If you lock your CLIÉ handheld, you must enter the exact password to restart your CLIÉ handheld. If you forget the password, you must perform a hard reset to resume using your CLIÉ handheld. Performing a hard reset deletes all the records in your CLIÉ handheld; however, you can restore all synchronized data at the next HotSync® operation.
1 Perform a HotSync operation to synchronize the data between your CLIÉ handheld and your computer.
See "Chapter 3: Exchanging and updating data using a HotSync® operation" for more information.
2 Assign a password and a hint to remember it. Follow the steps described in "Assigning a password."
3 Rotate the Jog Dial navigator to select Security and press the Jog Dial navigator. Or tap the Security icon on the Application Launcher screen.
The Security screen appears.
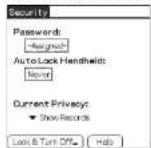
4 Tap Lock & Turn Off.
The System Lockout dialog box appears.
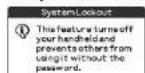
Performing common tasks
5 Tap Off & Lock.
Your CLIÉ handheld is turned off and locked.
To start your CLIÉ handheld, turn it on and enter the password.
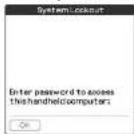
Setting your CLIÉ handheld to lock automatically
You can set your CLIÉ handheld to lock whenever you turn it off.
1 Back up your data and assign a password.
Follow the steps described in "Assigning a password."
2 Tap Never.
The Password screen appears.
3 Enter your password, and then tap OK.
The Lock Handheld screen appears.
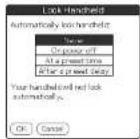
4 Tap your choice from the list.
- Never: Your CLIÉ handheld will not lock automatically. To lock it
manually, you must tap Lack & Turn Off in the Security screen.
- On power off: Your CLIÉ handheld will lock when it is turned off.
- At a preset time: The Set Time dialog box appears. Set a time so your
CLIE handheld will lock at that preset time.
Performing common tasks
Making records private
In all basic applications except Expense, you can make individual records private. Private records remain visible and accessible, until you select the Security setting to hide all private records.
To mask or hide private records
You can mask or hide your private records. To view the masked or hidden records, you need to enter the password.
1 Rotate the Jog Dial navigator to select Security or tap the Security 🔒 icon on the Application Launcher screen.
The Security screen appears.
2 Tap the arrow ▼ next to Current Privacy to select Mask Records or Hide Records from the drop-down list.
- Mask Records: Masked records appear as grey placeholders in their position with a lock mark.
- Hide Records: Hidden records disappear completely from the screen.
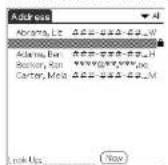
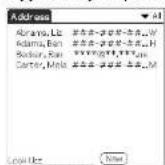
When you select Hide Records When you select Mask Re
3 Tap OK.
To display private records
In step 2, select Show Records.
If you have a password, the Show Records screen appears. Enter the password and then tap OK.
Performing common tasks
Attaching notes
In all basic applications except Memo Pad, you can attach a note to a record. A note can be up to several thousand characters long. For example, for an appointment in Date Book, you can attach a note with directions to a location.
1 Tap the record to which you want to add a note.
2 Address Book only: Tap Edit. The Address Edit screen appears.
3 Tap Details.
4 Tap Note.
5 Enter your note.

6 Tap Done.
A small note icon appears at the right side of any item that has a note.
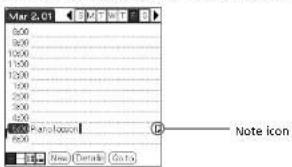
Performing common tasks
Purging records
If outdated records of Date Book, To Do List, or Expense take up memory on your CLIé handheld, it's a good idea to remove them by using Purge. If you think Date Book or To Do List records might prove useful later, you can save them in an archive file on your computer. Purging is not available in Address Book or Memo Pad, so delete outdated records from these applications.
1 Open the application.
2 Tap the Menu ☐ on.
3 Tap Purge from the Record menu.
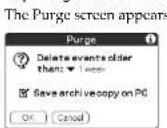
Date Book, To Do List
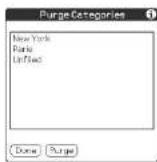
Expense
Date Book, To Do List: Tap the arrow ▼ and select how old a record must be to be purged. If you want to save a copy of the purged records on your computer, select the "Save archive copy on PC" check box. If you want to delete the records completely, clear it. Expense: Tap the category you want to delete.
4 Date Book, To Do List: Tap OK.
Expense: Tap Purge.
If you chose to save a copy of the purged records, your CLIé handheld transfers them to an archive file on your computer the next time you perform a HotSync operation.
Performing common tasks
Using the Edit menu
The Edit menu is available with any screen where you enter or edit text. In general, commands available in the Edit menu apply to the text that you select in an application.
Selecting text in an application
1 Tap the beginning of the text that you want to select.
2 Drag the stylus over the text to highlight it.
Notes
- You can also double tap to select a word, or triple tap to select a line of text.
- You can also drag across the text to select additional words, or drag down to select a group of lines.
Edit menu
To display the Edit menu, tap the Menu button and then select Edit.
| Undo Reverses the action of the last edit command. For example, if you used Cut to remove text, Undo restores the text you removed. Undo also reverses deletions done by using backspace. |
| Cut Removes the selected text and stores it temporarily in the memory of your CLIE handheld. You can paste the text you cut into another area of the current application or into a different application. |
| Copy Copies the selected text and stores it temporarily in the memory of your CI III handheld. You can paste the text that you copy into another area of the current application or into a different application. |
| Paste Inserts the text that you cut or copied at the selected point in a record. The text you paste replaces any selected text. If you did not previously cut or copy text, Paste does nothing. |
| Select All Selects all of the text in the current record or screen. This enables you to cut or copy all of the text and paste it elsewhere. |
Performing common tasks
Choosing fonts
In all basic applications except Expense, you can change the font style to make text easier to read. You can choose a different font style for each application.
1 Open an application.
2 Tap the Menu ☐ on.
The menu is displayed.
3 Tap Options, and then tap Font.
4 Tap the font style you want to use. You can select small, bold, or large font.
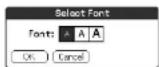
5 Tap OK. The text in the application is displayed in the selected font style.
Chapter 3
Exchanging and updating data using a HotSync® operation
This chapter describes how to select HotSync® operation options and how to perform a HotSync operation via cradle, infrared communications port, or network. Other advanced HotSync operations include how to use file link functions and how to import data from Windows applications.
Contents
What is a HotSync® operation? 111
Performing a local HotSync® operation with the cradle...... 112
Using the Palm™ Desktop for CLIÉ software.... 114
Starting the Palm Desktop for CLIÉ software 114
Basic operations of the Palm Desktop for CLIÉ software ..... 114
Locating the Palm Desktop for CLIÉ components ..... 115
Advanced HotSync® operations 116
Setting the HotSync® setup options 116
Customizing HotSync application settings (Conduit) 118
Conducting an IR HotSync operation 120
Conducting a HotSync operation via modem 123
Conducting a HotSync operation via a network 129
Importing data from a Windows application.... 134
Synchronizing with external data (File Link) 136
What is a HotSync® operation?
A HotSync ^ operation is a one-step operation that allows you to synchronize data between your CLIÉ handheld and your computer. With just one press on the HotSync button, you can synchronize your CLIÉ handheld application data with the Palm ^TM Desktop for CLIÉ software data on your computer, back up the data of your CLIÉ handheld on your computer, or install add-on applications.
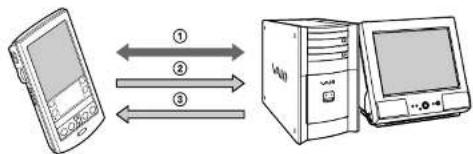
① Synchronize the Date Book, the Address Book, the To Do List, the Memo Pad, and the Expense data on your CLIÉ handheld and your computer. The Palm Desktop for CLIÉ software can manage the data of multiple CLIÉ handhelds independently.
② Back up the data stored on your CLIÉ handheld onto your computer. Synchronization ensures that your data is always safe and up-to-date. In case you need to perform a hard reset, a HotSync operation allows you to restore the data.
③Import the data on your computer or install add-on applications onto your CLIÉ handheld.
Performing a local HotSync® operation with the cradle
This section describes how to perform a HotSync® operation using the cradle (local HotSync), assuming that you have done all the necessary preparations and installations for your CLIe handheld and your computer. For the required preparations and software installation, and for information on performing a HotSync for the first HotSync operation, see the Read This First manual.
1 Place your CLIÉ handheld on the cradle.
2 Press the HotSync Button on the front panel of the cradle.
The HotSync operation starts.
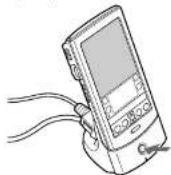
When the HotSync operation is complete, a message showing the HotSync completion is displayed on your CLIÉ handheld.
Note
Do not remove your CLIÉ handheld from the cradle until the HotSync operation is complete. Otherwise the Palm Desktop for CLIÉ software may not quit normally.
If the HotSync operation does not start
Make sure that the HotSync icon is displayed in the Windows task tray on your computer screen and Local Serial is not selected from the shortcut menu. If the HotSync icon is not shown in the task tray, click Start, point to Programs, Sony Handheld, and then click HotSync Manager. Press the HotSync Button on the cradle to start the HotSync operation.
Performing a local HotSync® operation with the cradle
If a message stating that the selected COM port is not available is displayed
Follow the procedures below. If the same message appears again, uninstall the Palm Desktop for CLIÉ software and then re-install it.
1 Click the HotSync Icon in the Windows ✉ task tray (bottom-right corner of the taskbar).
A shortcut menu is displayed.
2 Make sure that Local USB is selected.
If it is selected, click Local USB to clear it.
Notes
- Do not remove your CLIÉ handheld from the cradle during a HotSync operation.
- Do not press the HotSync button during a HotSync operation. It might cause errors and force the operation to quit.
- Do not enter power saving mode during a HotSync operation. If your computer enters power saving mode during a HotSync operation, the HotSync Manager will be forced to quit.
To change the user name
1 In the Palm™ Desktop for CLIÉ window, click Users from the Tools menu.
The Users dialog box is displayed.
2 Click the user name you want to change in the list box and then click Rename.
The Rename User dialog box is displayed.
3 Enter a new user name and then click OK.
Your CLIÉ handheld user name is changed at the next HotSync operation.
Using the Palm™ Desktop for CLIÉ software
The Palm ^15 Desktop for CLIÉ software duplicates Date Book, Address Book, To Do List, Expense, and Memo Pad applications on your CLIÉ handheld, so you can view, enter, and modify data stored on your CLIÉ handheld with your computer. You can also import data from Windows applications onto your CLIÉ handheld.
Starting the Palm Desktop for CLIÉ software
Double-click the Palm Desktop for CLIÉ software icon on the Windows desktop or click Start, select Programs, Sony Handheld, and then click Palm Desktop for CLIÉ. The Palm Desktop for CLIÉ software starts.
To quit the Palm Desktop for CLIÉ software
Click the close button in the upper right of the screen or click File, and then Exit.
Basic operations of the Palm Desktop for CLIÉ software
Click the icon of the application that you want to use. The screen switches to the selected application screen.
Basic operations for each application are the same as those of the corresponding CLIK application. For details, see the Palm Desktop online help. To display the online help, click Help and then Palm Desktop Help.
Using the Palm™ Desktop for CLIÉ software
Locating the Palm Desktop for CLIÉ components
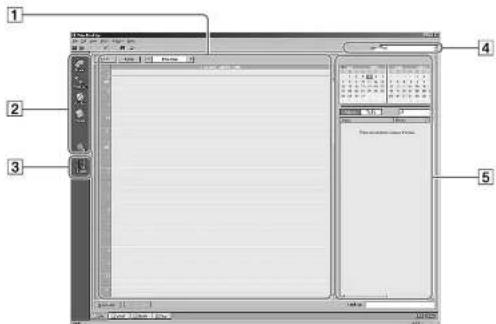
1 List pane
Displays the records in the current Desktop application.
2 Application Launch bar
Provides one-click access to each Desktop application. Click an icon to open its associated application.
3 Install Tool icon
Displays the Install Tool dialog box to select the application you want to install onto your CLIÉ handheld the next time you perform a HotSync operation.
4User name display
Displays the user name of the owner of the information being displayed.
Advanced HotSync® operations
Setting the HotSync® setup options
You can change how to start the HotSyncManager or make the local HotSync settings.
1 Click the HotSync icon in the Windows® task tray (bottom-right corner of the taskbar) and then select Setup from the shortcut menu.
The Setup dialog box appears.
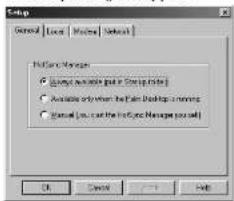
2 Click the General tab to select one of the following options.
If you are not sure which option to use, keep the default setting: (Always available)
- Always available: Adds the HotSync Manager to the Startup folder and starts the HotSync Manager to monitor the USB port as soon as Windows is started. This allows you to perform a HotSync operation even when the Palm Desktop for CLIÉ software is not running.
• Available only when the Palm Desktop is running: Starts the HotSync Manager when you start the Palm Desktop for CLIÉ software. - Manual: Starts the HotSync Manager only when you select HotSync Manager from the Windows Start menu.
Advanced HotSync® operations
3 Click the Modem tab to display the modem settings and then adjust the options as needed.
See "Conducting a HotSync operation via modem" on page 123 for more information.
4 If you are attached to a network, click the Network tab to display the network settings and then adjust the options as needed.
See "Conducting a HotSync operation via a network" on page 129 for more information.
5 Click OK.
Advanced HotSync® operations
Customizing HotSync application settings (Conduit)
What is a "Conduit"?
For each application, you can define a set of options that determines how records are handled during synchronization. These options are called a "conduit." By default, a HotSync operation synchronizes all files between your CLIÉ handheld and the Palm Desktop for CLIÉ software.
In general, you should leave the settings as they are to synchronize all files. The only reason you might want to change these settings is to overwrite data on either your CLIÉ handheld or the Palm Desktop for CLIÉ software, or to avoid synchronizing a particular type of file because you do not use it. In addition to the conduits for Date Book, Address Book, To Do List, Memo Pad, and Expense, the Palm Desktop for CLIÉ software offers System and Install conduits. The System conduit backs up the system information stored on your CLIÉ handheld. The Install conduit installs add-on applications to your CLIÉ handheld.
1 Click the HotSync (on in the Windows task tray (bottom-right corner of the taskbar) and then select Custom from the HotSync Manager menu. Or, select Custom from the HotSync menu of the Palm Desktop for CLI software. The Custom dialog box appears.
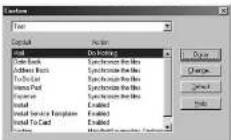
2 Select the appropriate user name you are using on your CLIÉ
Advanced HotSync® operations
4 Click Change.
The Change HotSync Action dialog box appears.
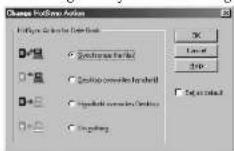
5 Click the direction in which you want to write data, or click Do nothing.
6 Click OK.
7 Repeat steps 2 through 6 to change conduit settings for other applications (or users).
8 Click Done.
Notes
- Any change in the HotSync setting from the default affects only the next HotSync operation. Thereafter, the HotSync Actions revert to their default settings. To use a new setting on an ongoing basis, check the Set as default box.
- To restore the default settings, click Default in the Custom dialog box.
Advanced HotSync® operations
Conducting an IR HotSync operation
You can use the IR (infrared) port of your CLIÉ handheld to perform an IR HotSync operation with a computer equipped with an IrDA (Infrared Data Association) IR port. An IR HotSync operation allows you to perform a HotSync operation without using the cradle.
Before you start performing an IR HotSync operation
Check the following:
- Your computer is equipped with an infrared port supporting the IrDA standards.
- The infrared port of your computer is enabled for Windows use.
To enable the IR port with Windows, see the manual of the computer you are using or the Windows online help. - Which port number is allocated to the infrared port.
Check the infrared port number in the Infrared Monitor in the Control Panel. For information on the Infrared Monitor, see the manual of the computer you are using or the Windows online help.
Preparing your computer
To perform an IR HotSync operation, you have to allocate a virtual port to an IR HotSync operation.
1 Click the HotSync Icon in the Windows task tray (bottom-right corner of the taskbar) and then select Local Serial from the shortcut menu.
2 Click the HotSync Ucon in the Windows task tray again and then select Setup from the shortcut menu. The setup dialog box is displayed.

Advanced HotSync® operations
3 Click the Local tab to change the setting for an IR HotSync operation as needed.
- Serial Port: Specifies a virtual port for an infrared port. If you are not sure of the connection port, see the Infrared Monitor in the Windows Control Panel.
- Speed: Determines the speed at which data is transferred. Try the "As Fast As Possible" rate first, and then adjust downward if you experience problems.
4 Tap OK. Your computer is ready to perform an IR HotSync operation.
Note
When performing a local HotSync operation with the cradle after you make the HotSync Setup settings for an IR HotSync operation, you should restore the local HotSync settings. For details, see "To restore the local HotSync settings" on page 122.
Performing an IR HotSync operation
After you prepare your computer and your CLIÉ handheld, and then select your Conduit Setup options, you are ready to perform an IR HotSync operation.
1 Rotate the Jog Dial™ navigator to select HotSync and then press the Jog Dial navigator. Or tap the HotSync icon on the Application Launcher screen.
The HotSync dialog box appears.
2 Tap Local.
3 Tap the arrow ▼ beneath the ☐ on and then select IR to a PC/Handheld from the drop-down list.
4 Point the IR port of your CLIÉ handheld directly at the IR port of the receiving computer.

Advanced HotSync® operations
Tip
For best results, your computer and your CLIH handheld should be 4 to 8 inches (approximately 10 to 20 centimeters) apart, and the path between your CLIH handheld and the computer must be clear of obstacles.
5 Tap the Icon.
The HotSync operation starts. Wait for the message showing that the HotSync operation is complete.
To restore the local HotSync settings
1 Connect the cradle to your computer.
2 Click the HotSync icon in the Windows task tray and clear the check mark of Local Serial from the shortcut menu.
3 Click the HotSync icon in the Windows task tray again and then select Setup from the shortcut menu.
The setup dialog box is displayed.
4 Click the Local tab to display the setting for a local HotSync operation as needed.
5 Click OK.
Your computer is now ready to perform a local HotSync operation.
Advanced HotSync® operations
Conducting a HotSync operation via modem
You can use a modem to synchronize your CLIÉ handheld when you are away from your computer. A HotSync operation via modem allows you to back up your CLIÉ data to your computer away from your computer.
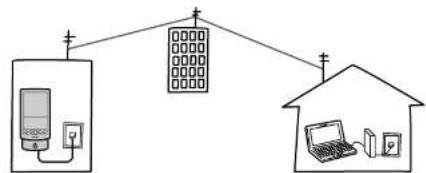
flowchart
graph TD
    A["Mobile Phone"] --> B["House"]
    C["Smart Home Device"] --> B
    D["Desktop Computer"] --> B
Your CLIÉ handheld away from your PC
A HotSync operation with the PC at home
Notes
- The first HotSync operation must be local, using the cradle. After that, you can perform a modem HotSync operation.
- It may take many minutes to complete a HotSync operation via modem. To minimize the time required to synchronize data with a modem, we suggest you define the files and/or applications you synchronize during a modem HotSync operation in advance. For details, see "To select the conduits for a modem HotSync operation" in page 127.
Before you start performing a HotSync operation via modem
Check the following:
- A modem or terminal adapter is connected to your computer.
- The CLIÉ Modem PEGA-MD700 (not supplied) must be connected to your CLIÉ handheld.
- The Palm Desktop for CLIÉ software must be properly configured for use with the modem.
Advanced HotSync® operations
Preparing your computer
There are a few steps you must perform to prepare your computer for a modem HotSync operation. Be sure to perform these steps before you leave your office or home so that your computer is ready to receive a call from your CLIÉ handheld.
1 Check the following to prepare your computer for a modem HotSync operation:
- The computer modem must be connected to your computer and both the modem and computer are turned on.
- No communication applications, such as fax or telephony software, are running on the COM port.
- The computer is disconnected from all online services. This helps to avoid conflicts with the COM port.
2 Click the HotSync (lon in the Windows task tray (bottom-right corner of the taskbar) and then select Modem from the shortcut menu.
3 Click the HotSync Icon in the Windows task tray again and then select Setup from the shortcut menu.
The Setup dialog box is displayed.
4 Click the Modem tab.
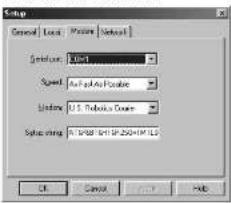

Advanced HotSync® operations
5 Adjust the following options as needed.
- Serial Port: Identifies the port for the modem. If you are unsure of the port assignment, look at the Modem Properties in the Windows Control Panel.
- Speed: Determines the speed at which data is transferred. Try the "As Fast As Possible" rate first, and then adjust downward if you experience problems. This setting allows the Palm Desktop for CLIÉ software and your CLIÉ handheld to find and use the fastest speed.
- Modem: Identifies the modem type or manufacturer. Refer to your modem manual or face plate for its type or settings. If you're not sure of your modem type or your modem doesn't match any that appear in the list, select Hayes Basic.
- Setup String: Identifies the setup string for your particular modem. Not all modems require a setup string. Refer to your modem manual and enter a setup string if recommended by the manufacturer.
6 Click OK.
Preparing your CLIÉ handheld
Follow the procedures below to prepare your CLIÉ handheld for a modem HotSync operation.
1 Rotate the Jog Dial navigator to select HotSync and then press the Jog Dial navigator. Or tap the HotSync Icon on the Application Launcher screen.
The HotSync dialog box appears.
2 Tap Modem.
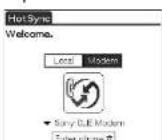
Advanced HotSync® operations
3 Tap the arrow ▼ beneath the ☐ on and then select the modem type from the drop-down list.
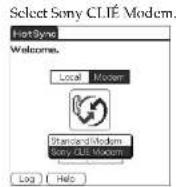
4 Tap the Enter Phone # field.
The Phone Setup dialog box is displayed.
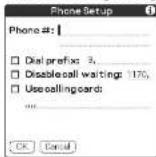
5 When using Sony CLIÉ Modem PEGA-MD700, skip to step 6.
When using another modem or adapter, change the settings as follows:
①Enter the telephone number used to access the modem connected to your computer.
If needed, enter a dial prefix (such as "9") to access an outside line, and then tap the Dial prefix check box. You can enter a comma in the field to introduce a "pause" in the dialing sequence. Each comma equals a two second pause.
② If the phone line you're using for your CI IE handheld has Call
Advanced HotSync® operations
③ If you want to use a calling card to place the call, select the "Use calling card" check box and enter the calling card number.
Note
If you plan to connect to your company's dial-in server (network modem) instead of connecting to a computer modem, see "Conducting a I lotSync operation via a network" on page 129.
6 Tap OK.
The HotSync screen is displayed again.
To select the conduits for a modem HotSync operation
The Conduit Setup dialog box on your CLIÉ handheld enables you to define which files and/or applications synchronize during a modem HotSync operation. You can use these settings to minimize the time required to synchronize your data when using a modem.
To change the Conduit Setup for a modem HotSync operation:
1 Rotate the Jog Dial navigator to select HotSync and then press the Jog Dial navigator. Or tap the HotSync ☐ on on the Application Launcher screen. The HotSync screen appears.
2 Tap the Menu ☐ on.
3 Tap Options, and then tap Conduit Setup. The Conduit Setup screen is displayed.
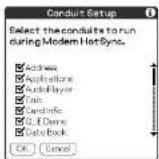
Advanced HotSync® operations
4 Tap the check boxes to clear the selection of the files and applications that you do not want to synchronize during a modem HotSync operation.
The default setting is to synchronize all files.
Note
Applications that do not have a database (such as games) do not synchronize, even if you select the item in the Conduit Setup dialog box.
5 Tap OK.
Performing a HotSync operation via modem
After you prepare your computer and your CLIÉ handheld, and then select your Conduit Setup options, you are ready to perform a modem HotSync operation.
1 Rotate the Jog Dial navigator to select HotSync and then press the Jog Dial navigator, or tap the HotSync Icon on the Application Launcher screen. The HotSync screen appears.
2 Tap the Ucon.
A HotSync operation starts. Wait for the message showing that the HotSync operation is complete.
Advanced HotSync® operations
Conducting a HotSync operation via a network
When you use the Network HotSync application, you can take advantage of the LAN and WAN connectivity available in many office environments. The Network HotSync application enables you to perform a HotSync operation by dialing in to a network (Network Modem Sync) or by using a cradle that is connected to any computer on your LAN or WAN (LAN Sync) (provided that the computer connected to the cradle also has the Network HotSync application installed, your computer is on, and the HotSync Manager is running).
To connect to your company's dial-in server
The Network HotSync application requires the following:
- Your computer has TCP/IP support installed.
- Both your company's network system and its remote access server support TCP/IP.
- You have a remote access account.
Everything you need to connect to your company's dial-in server (network modem) is included in the Palm Desktop for CLIÉ software and your CLIÉ handheld. You need to activate certain features, however, on both the Palm Desktop for CLIÉ software and your CLIÉ handheld.
Preparing your computer
1 Click the HotSync Icon in the Windows task tray and then select Network from the shortcut menu.
2 Click the HotSync Icon in the Windows task tray again and then select Setup from the shortcut menu.
The Setup screen is displayed.
3 Click the Network tab and make sure your user name has a check mark next to it. If the check mark is not there, click the check box next to your user name.
a ...
Advanced HotSync® operations
5 Place your CLIÉ handheld on the cradle and then press the HotSync Button on the front panel of the cradle.
The HotSync operation starts. This HotSync operation records the network information about your computer onto your CLIÉ handheld.
6 Check if your computer's network information (Primary PC name and Primary PC address) is entered in your CLIÉ handheld:
①Rotate the Jog Dial navigator to select HotSync and then press the Jog Dial navigator. Or tap the HotSync icon on the Application Launcher screen.
The HotSync screen appears.
②Tap the Menu icon.
③Tap Primary PC Setup from the Options menu. The Primary PC Setup screen is displayed.
④On your computer, click the HotSync icon in the Windows task tray and then select Setup from the shortcut menu.
⑤Click the Network tab, then click TCP/IP Settings to open the TCP/IP Settings screen.
⑥Confirm that the Primary PC name and Primary PC address on both screens displayed in step ③ and ⑤ match. If they do not, change the Primary PC name and Primary PC address entered in your CLIÉ handheld, then tap OK.
⑦On your computer, tap OK to close the TCP/IP Settings screen and the Setup screen.
Preparing your CLIÉ handheld and performing a network HotSync operation
When dialing into a network (Network Modem Sync)
1 Rotate the Jog Dial navigator to select HotSync and then press the Jog Dial navigator. Or tap the HotSync Ucon on the Application Launcher screen.
Advanced HotSync® operations
3 Tap Modem Sync Prefs from the Options menu. The Modem Sync Preferences screen is displayed.
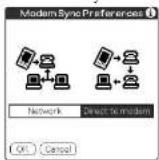
4 Tap Network.
5 Tap OK.
The HotSync screen appears again.
6 Tap Modem and then Select Service. The Preferences screen is displayed.
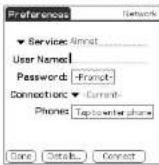
Note
See "Changing the Network preferences" on page 182 for information on creating a network connection.
7 Tap the arrow ▼ next to Service and then select a service from the drop-down list.

Advanced HotSync® operations
8 Tap Done.
9 Tap the Menu ☐ on.
10 Tap Conduit Setup from the Options menu.
Follow the instructions in "To select the conduits for a modem HotSync operation" on page 127.
11 Perform a HotSync operation via modem.
Follow the instructions in "Performing a HotSync operation via modem" on page 128.
When connecting via cable to the network computer (LAN Sync)
1 Rotate the Jog Dial navigator to select HotSync and then press the Jog Dial navigator. Or tap the HotSync icon on the Application Launcher screen.
The HotSync screen appears.
2 Tap the Menu
3 Tap LAN Sync Prefs from the Options menu.
The LANSync Preferences screen is displayed.
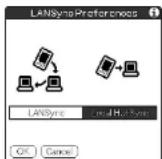

Advanced HotSync® operations
4 Tap LANSync.
5 Tap OK.
The HotSync screen appears again.
6 Tap the Menu ☐ on.
7 Tap Conduit Setup from the Options menu.
Follow the instructions in "To select the conduits for a modem HotSync operation" on page 127.
8 Perform a local HotSync operation.
Follow the instructions in "Performing a local HotSync operation with the cradle" on page 112.
Advanced HotSync® operations
Importing data from a Windows application
If you have data stored in Windows computer applications such as spreadsheets and databases, you can transfer that data to your CLIÉ handheld.
Importable file formats
Save data in one of the file formats listed below, import it into the Palm Desktop for CLIÉ software, and then perform a HotSync operation to transfer the data to your CLIÉ handheld.
The Palm Desktop for CLIÉ software can import data in the following file formats:
- Comma delimited (*.csv, *.txt): Address Book and Memo Pad only
- Tab separated values (*.tab, *.tsv, *.txt): Address Book and Memo Pad only
• vCard File (*.vcf): Address Book only - CSV (Lotus Organizer 2.x/97 Mapping): Address Book only
- Text (*.txt): Memo Pad only
- Date Book archive (*.dba)
• vCal File (*.vcs): Date Book only - Address Book archive (*.aba)
- To Do archive (*.tda)
- Memo Pad archive (*.mpa)
Archive formats can only be used with the Palm Desktop for CLIÉ software. Use the archive file formats to share information with other people who use a Palm OS® platform handheld or to create a copy of your Palm Desktop for CLIÉ software information.
Advanced HotSync® operations
Importing data
1 Start the Palm Desktop for CLIÉ software.
2 Click the application into which you want to import data.
3 If you are importing records that contain a field with category names, select All in the Category box.
Be sure that the same categories that appear in the imported file also exist in the application. If the categories do not exist, create them now; otherwise, the records will be imported into the Unfiled category.
4 Click Import from the File menu. The Import dialog box is displayed.
5 Select the file you want to import.
6 Click Open.
7 To import data into the correct Palm Desktop for CLIÉ fields, drag the fields in the left-hand column so that they become side-by-side to the corresponding imported fields on the right.
8 Clear the check box for the field that you do not want to import.
9 Click OK. The imported data is highlighted in the application.
10 To add the imported data to your CLIÉ handheld, perform a HotSync operation.
See the Palm Desktop for CLIÉ online Help for more information on importing and exporting data.
Advanced HotSync® operations
Synchronizing with external data (File Link)
The File Link feature allows you to import Address Book and Memo Pad information onto your CLIÉ handheld from a separate external file such as a company phone list. HotSync Manager stores the data in a separate category on your Palm Desktop for CLIÉ software and your CLIÉ handheld. You can set the File Link feature to check for changes to the external file when you perform a HotSync operation.
With File Link, you can import data stored in any of the following file formats:
- Comma-delimited (*.csv)
- Palm Desktop for CLIÉ software's Memo Pad archive (*.mpa)
- Palm Desktop for CLIÉ software's Address Book archive (*.aba)
- Text (*.txt)
For information on how to set up File Link, see the Desktop for CLIÉ online help.
Chapter 4
Communicating using your Sony CLIÉ Handheld
This chapter describes how to communicate with another Palm OS® PDA device via the infrared communications port or Memory Stick® media. It also explains how to handle Memory Stick media and how to use the MS Gate application software for managing the data in Memory Stick media.
Contents
Beaming between your Sony CLIÉ Handheld and another
| Palm OS® PDA | 138 |
| What you can do with beaming | 138 |
| Beaming information | 139 |
| Receiving beamed information | 140 |
| Tips on beaming information | 140 |
| Using Memory Stick®media | 141 |
| What is Memory Stick®media? | 141 |
| Inserting and removing Memory Stick media | 142 |
| Protecting the data in Memory Stick media | 144 |
| Starting an application in Memory Stick media | 145 |
| Starting an application automatically when Memory Stick media is inserted | 145 |
| Viewing information of the inserted Memory Stick media (Card Info) | 146 |
| Formatting Memory Stick media | 147 |
| Exchanging data via Memory Stick®media | 149 |
| Starting Memory Stick Gate (MS Gate) | 149 |
| Creating the default folder in Memory Stick media | 152 |
| Copying your CLIIE handheld data to Memory Stick media | 153 |
| Copying data in Memory Stick media to your CLIIE handheld | 155 |
| Deleting data in Memory Stick media | 158 |
| Using the MS Gate menus | 160 |
| How to read the online manual | 161 |
Beaming between your Sony CLIÉ Handheld and another Palm OS® PDA
What you can do with beaming
Your CLIÉ handheld is equipped with an IR (infrared) port that you can use to beam information to another Palm OS® PDA device that's close by and also has an IR port. The IR port is located at the top of your CLIÉ handheld, behind the small dark shield.
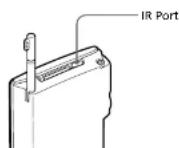
You can beam the following information between your CLIÉ handheld and another Palm OS PDA:
- The record currently displayed in Address Book, Date Book, To Do List, or Memo Pad.
- All records of the category currently displayed in Address Book, Date Book, To Do List, or Memo Pad.
- A special Address Book entry that you designate as your business card.
- An application installed in RAM memory.
Note
Some applications are protected and cannot be beamed, as indicated by a lock icon to the side of applications.
Beaming between your Sony CLIÉ Handheld and another Palm OS® PDA
Beaming information
You can beam a record, business card, or category of records between your CLIÉ handheld and another Palm OS PDA.
1 Locate the record, business card, or category you want to beam.
2 Tap the Menu ☐ on.
3 Tap one of the following from the Record menu:
• The Beam command for an individual record
• In Address Book only: Beam Business Card
- Beam Category
4 When the Beam dialog box appears, point the IR port directly at the IR port of the receiving handheld.
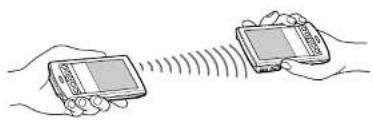
natural_image
Illustration of two hands exchanging a smartphone with a dotted line indicating signal transmission (no text or symbols)
For best results, your CLIFF handheld and another Palm OS PDA should be 4 to 8 inches (approximately 10 to 20 centimeters) apart, and the path between the two handhelds must be clear of obstacles and shielded from fluorescent lighting. Beaming distance to other Palm OS PDA handhelds may be different.
5 Wait for the Beam dialog box to indicate that the transfer is complete before you continue working on your CLIÉ handheld.
Beaming between your Sony CLIÉ Handheld and another Palm OS® PDA
Receiving beamed information
1 Turn on your CLIÉ handheld.
2 Point the IR port directly at the IR port of the other Palm OS PDA handheld transmitting the data.
The Beam dialog box is displayed. Beaming data starts.
You can select the category in which you save the data in a dialog box.
3 Tap Yes.
The data is saved to the unfiled category.
Note
If Beam Receive in the Preferences menu is set to Off, you cannot receive data using the beaming feature. Before beaming data, make sure to set Beam Receive to On.
Tips on beaming information
- Incoming data or application should be placed in the Unfiled category.
- You can press the Address Book Ⓐ button for about two seconds to beam your business card.
- You can use Graffiti to beam the current entry (✓ then ☐ or and then tap ☑).
Using Memory Stick® media
What is Memory Stick® media?
Memory Stick ^® media is a new compact, portable and versatile Integrated Circuit recording medium with a data capacity that exceeds a floppy disk. Memory Stick media is specially designed for exchanging and sharing digital data among Memory Stick media compatible products such as a digital video camera. Because it is removable, Memory Stick media can also be used for external data storage.
Memory Stick media allows you to exchange data between your CLIH handheld and your computer or a digital camera that supports Memory Stick media. To exchange data via Memory Stick media, your CLIH handheld uses the supplied Memory Stick Gate (MS Gate) software.
Types of Memory Stick media
There are two types of Memory Stick media:
- MagicGate Memory Stick media equipped with "MagicGate" copyright protection technology. MagicGate Memory Stick media is distinguished by the logo.
- Memory Stick media that is not equipped with "MagicGate" copyright protection technology.
You can use both types of Memory Stick media with this CLIÉ handheld (PEG-N760C). However, to play back OpenMG audio files, make sure to use MagicGate Memory Stick media (color: white).
To play back MP3 files, you can use the standard Memory Stick media (color: purple) as well as the MagicGate Memory Stick media.
Note on using MagicGate Memory Stick media
If you use MS Gate or Windows® Explorer to copy a protected file onto a MagicGate Memory Stick media or if you handle a folder containing a protected file, the file may be disabled. To handle the copyright-protected file, use a "MagicGate" compliant application such as OpenMG Jukebox.
Using Memory Stick® media
Inserting and removing Memory Stick media
Insert Memory Stick media into the Memory Stick slot as illustrated below. The contents of the Memory Stick media is displayed automatically.
The Memory Stick indicator lights in orange while your CLIÉ handheld is accessing Memory Stick media.
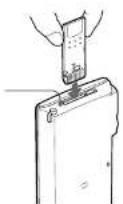
Note
Insert Memory Stick media in the right direction. If Memory Stick media is forced in the wrong way, it may be damaged.
To remove Memory Stick media
Make sure that your CLIÉ handheld is not writing to or reading data from Memory Stick media.
Push Memory Stick media gently into the slot and then release it so that Memory Stick media pops out. Then pull it out from your CLIÉ handheld.
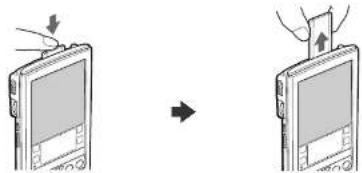
Using Memory Stick® media
Notes on using Memory Stick media
When you use Memory Stick media, follow these precautions:
- Avoid touching the terminal of Memory Stick media or contacting it with a metal object.
- Do not drop, bend, or submit Memory Stick media to external shock.
- Do not disassemble or modify Memory Stick media.
- Avoid getting liquids on Memory Stick media.
- Avoid using or storing Memory Stick media in a location subject to:
- extremely high temperature such as the hot inside of a car, the outdoors exposed to direct sunlight, or near a heater.
- direct sunlight – high humidity
- corrosive substances – excessive dust
- magnetic fields
- When storing and carrying Memory Stick media, keep it in its original case to ensure protection of important data.
- Save a backup for important data.
- Avoid removing Memory Stick media from the insertion slot while data is being written or read.
- To avoid damaging or crasing data, do not
- release Memory Stick media or unplug the AC power adapter while formatting, or reading or writing data.
- use Memory Stick media in a location subject to static electricity or electric noise.
- If the battery of your CLIÉ handheld is running out, an error message is displayed and you cannot exchange data with Memory Stick media. If this occurs, connect the AC power adapter or fully charge your CLIÉ handheld.
- Use the MS Gate software to format Memory Stick media you use in your CLIÉ handheld. If you format it using another application, further operation with your CLIÉ handheld is not guaranteed.
- If you insert Memory Stick media that has been formatted by another
Using Memory Stick® media
Protecting the data in Memory Stick media
To prevent accidental erasure of important data, you can use the write protect tab of Memory Stick media. Slide the tab to the left or right to enable or disable writing to Memory Stick media.
Write enable position
Slide the tab to the left to select the write enable position. You can read and write data in the Memory Stick media.
Write protect position (LOCK)
Slide the tab to the right. You can only read the data in the Memory Stick media. Select the write protect position when you do not want to overwrite or delete the data in the inserted Memory Stick media.
Back side
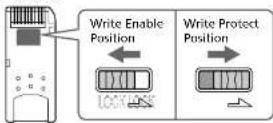
Using Memory Stick® media
Starting an application in Memory Stick media
To open an application in the Memory Stick media from the Application Launcher screen, tap the arrow ▼ in the upper-right corner of the
Application Launcher screen and select Card (or a category with the Card icon). Then, tap the icon of the application you want to open.
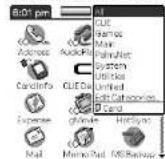
Note
If the application you are about to open had been installed to the Memory Stick media through a HotSync operation, some Sony application may not start. For details, see page 163.
Starting an application automatically when Memory Stick media is inserted
The Memory Stick Autorun (MS Autorun) allows you to start a specified application automatically when Memory Stick media is inserted into your CLIé handheld. You can select your favorite application as the auto-run application. For example, if you like watching still images, set PictureGear ^™ Pocket to start automatically.
See the supplied Add-On Application Guide for details.
Using Memory Stick® media
Viewing information of the inserted Memory Stick media (Card Info)
The Card Info gives you the outline (such as the remaining memory space) of the Memory Stick media inserted into your CLIÉ handheld. You can also give a name to each Memory Stick media, which comes in handy when you have more than one Memory Stick media.
1 Rotate the Jog Dial™ navigator to select Card Info and press the Jog Dial navigator. Or tap the Card Info 📄 on the Application Launcher screen.
The Card Info screen appears.
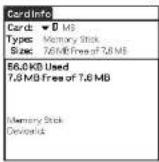
Attaching a name to a Memory Stick media
1 Rotate the Jog Dial™ navigator to select Card Info and press the Jog Dial navigator. Or tap the Card Info 📄 on the Application Launcher screen.
The Card Info screen appears.
2 Tap the Menu ☐ on.
3 Tap Rename Card. The Rename Card dialog box appears.
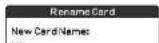
Using Memory Stick® media
4 Enter a new name for the inserted Memory Stick media.
5 Tap Rename.
Formatting Memory Stick media
Commercially available Memory Stick media is already formatted and you can use it as soon as you buy it. Follow the procedures below if you need to format your Memory Stick media again:
1 Rotate the Jog Dial™ navigator to select MS Gate and press the Jog Dial navigator. Or tap the 📂 on the Application Launcher screen. MS Gate starts up.
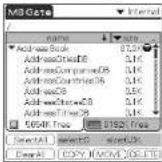
2 Tap the Menu ☐ on.
The Menu screen appears.
3 Tap Options, and then Format. The confirmation message appears.
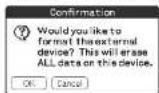
4 Tap OK.
Using Memory Stick ^® media
To cancel formatting
Tap Cancel in step 3.
To format a Memory Stick media in the Card Info screen
You can also format a Memory Stick media by tapping the Menu ☐ on the Card Info screen, and selecting Format Card from the Card menu.
What is formatting?
Formatting defines the recording format for your Memory Stick media so that you can access data with your CLIÉ handheld.
Notes
- If formatted, all the data previously recorded in Memory Stick media will be erased. Make sure to check the data before formatting so that you do not delete important data.
- To use Memory Stick media on your CLIÉ handheld, format it in your CLIÉ handheld. You may not be able to write or read properly on Memory Stick media formatted by the computer.
- If you remove or insert Memory Stick media during initialization, your Memory Stick media is not recognized by your computer. In this case, remove Memory Stick media, reinsert it, and then start formatting again.
Exchanging data via Memory Stick® media
Starting Memory Stick Gate (MS Gate)
MS Gate allows you to copy, move, or delete data in Memory Stick ^® media and in your CLIÈ handheld.
Rotate the Jog Dial™ navigator to select MS Gate and then press the Jog Dial navigator. Or tap the MS Gate screen on the Application Launcher screen.
MS Gate starts up and data lists appear on your CLIÉ handheld screen.
When displaying the contents of your CLIÉ handheld
Once you create the default
folder, the "PALM/PROGRAMS"
MSFILES" folder is displayed even
when In
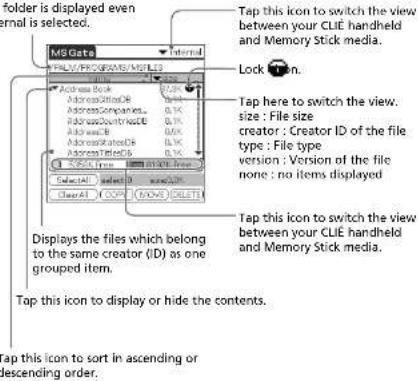
Tap this icon to sort in ascending or descending order.
Exchanging data via Memory Stick® media
When displaying the contents of Memory Stick media
The following icons with explanations are displayed only when you view the contents of Memory Stick media. For the other icons, see "When
displaying the contents of your CLIÉ handheld" (page 149).
: Tap this icon to display upper the folder.
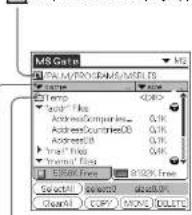
: Tap this icon to display the contents of the folder.
Tap here to display "file name" to show the file name with PC file extensions.
Exchanging data via Memory Stick® media
Notes on moving or copying data using MS Gate
In some cases when you move or copy a specific file using the MS Gate software, a CLIé application may not function properly. Sony is not liable for any trouble with applications or data that arises out of your deletion or moving of a file.
Do not move or delete the following files:
- Saved Preference: Saves the final operation status or settings for various applications.
- Unsaved Preference: Saves the settings of various applications or user information of your CLIé handheld. When this file is deleted, you may not be able to synchronize correct information.
- NetworkDB: Saves network settings. When this file is deleted, network connection is disabled.
- AddressDB: Saves the database for Address Book.*
- DatebookDB: Saves the database for Date Book.*
- MemoDB: Saves the database for Memo Pad.*
- ExpenceDB: Saves the database for Expense.*
- MailDB: Saves the database for Mail.*
- ToDoDB: Saves the database for To Do List.*
* These database files can be copied to Memory Stick media for backup. If you copy them back to your CLIé handheld, the identical files in your CLIé handheld will be overwritten with the information at the time of backup. Note that any added or edited data in your CLIé handheld after the backup will be erased.
Exchanging data via Memory Stick® media
Creating the default folder in Memory Stick media
When using either of the following Memory Stick media, you should create the default folder in the Memory Stick media.
- Memory Stick media to be used in MS Gate Ver.2.1 for the first time.
• Memory Stick media just formatted.
The "default folder" stands for the standard working folder where MS Gate Ver.2.1 reads and writes data. A folder named "PALM/PROGRAMS/MSFILES" is created in Memory Stick media.
1 Insert Memory Stick media into your CLIÉ handheld.
2 Tap the Home 📂 on.
3 Rotate the Jog Dial navigator to select MS Gate and then press the Jog Dial navigator. Or tap the MS Gate on the Application Launcher screen.
MS Gate starts. The data in your CLIÉ handheld is listed.
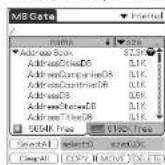
4 Tap the Menu ☐ on.
The Menu screen appears.
5 Tap Create Default Folder in the Tools menu.
The default folder ("/PALM/PROGRAMS/MSFILES") is created in the Memory Stick media.
Exchanging data via Memory Stick® media
Copying your CLIÉ handheld data to Memory Stick media
MS Gate allows you to save data inside your CLIÉ handheld onto Memory Stick media.
Notes
- Since data copying consumes a lot of power, you cannot use Memory Stick media when your CLIÉ handheld is short of battery power. Connect the AC adapter.
- If you receive infrared communication while copying data, the copying will be terminated. Do not allow infrared communication while copying data.
1 Insert Memory Stick media into your CLIÉ handheld. The contents of the Memory Stick media is displayed.
2 Tap the Home 📂 on.
3 Rotate the Jog Dial navigator to select MS Gate and then press the Jog Dial navigator. Or tap the MS Gate icon on the Application Launcher screen.
MS Gate starts. The data in your CLIÉ handheld is listed.
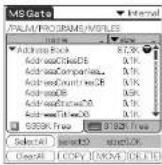
4 Tap to select the data you want to copy to Memory Stick media.
Tip
You can select multiple files.
Note
Exchanging data via Memory Stick® media
5 Tap COPY.
The Copy File dialog box is displayed.
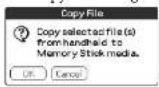
6 Tap OK.
The data selected in step 4 is copied to the default folder ("/PALM/PROGRAMS/MSFILES") in Memory Stick media.
To copy all the data at once
Tap Select All in step 4.
To cancel the selection
• To cancel all the selections, tap Clear All.
• To clear the selection of individual selected items only, tap them one at a time.
To change the destination folder
Tap the arrow ▼ in the upper right corner to select MS from the drop-down list. The contents of Memory Stick media are listed.
Tap ↗ or ↗ to select the destination folder, so that the folder display changes and you can specify the destination folder.
You can only select a folder under the "PALM/PROGRAMS" or "PALM/Launcher" folder. The other folders cannot be selected as destination.
Moving your CLIÉ handheld data to Memory Stick media
If your CLIÉ handheld is running out memory space, it is a good idea to move the data from your CLIÉ handheld to Memory Stick media.
In step 5, tap Move.
The data on your CLIE handheld is deleted after saved on Memory Stick media.
Note
When low battery error message is displayed while you are copying or moving data in
Exchanging data via Memory Stick® media
Copying data in Memory Stick media to your CLIÉ handheld
Note
Make sure your CLIÉ handheld has enough space before copying.
1 Insert Memory Stick media into your CLIÉ handheld. The contents of the Memory Stick media is displayed.
2 Tap the Home 📂 on.
3 Rotate the Jog Dial navigator to select MS Gate and then press the Jog Dial navigator. Or tap the MS Gate on the Application Launcher screen.
MS Gate starts. The data in your CLIÉ handheld is listed.
4 Press the Jog Dial navigator to select MS.
You can also tap the arrow ▼ in the upper right corner to select MS from the drop-down list.
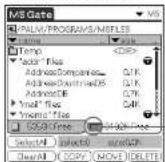
You can also select MS by tapping

The data in the default folder (/PALM/PROGRAMS/MSFILES") in Memory Stick media is listed.

Exchanging data via Memory Stick® media
5 Tap to select the data you want to copy to your CLIÉ handheld.
6 Tap COPY.
The Copy File dialog box is displayed.
7 Tap OK.
The data selected in step 5 is copied to your CLIÉ handheld.
To copy all the data at once
Tap Select All in step 5.
To cancel the selection
• To cancel all the selections, tap Clear All.
- To clear the selection of individual selected items only, tap them one at a time.
To change the folder to be copied
Tap or to select the folder that you want to copy, so that the folder display changes and you can specify a folder to be copied. You can only select a folder under the "PALM/PROGRAMS" or "PALM/Launcher" folder. The other folders cannot be selected.
To rename the file or folder name
Select the file or folder that you want to rename, and then tap the Menu icon. Tap Rename in the Tools menu. Rename the file or folder in the following dialog box.
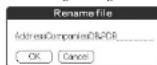
Note
You cannot rename a read-only file.
Exchanging data via Memory Stick® media
Moving data in Memory Stick media to your CLIÉ handheld
You can also move data from Memory Stick media to your CLIÉ handheld.
Tap MOVE in step 6.
The data in Memory Stick media is deleted after being saved in your CLIÉ handheld.
Notes
- Some data such as those copied from Memory Stick media to your CLIÉ handheld will not be backed up during the next HotSync operation.
- A read-only file cannot be deleted. If you attempt to move a read-only file, it will be copied onto your CLIÉ handheld instead.
Exchanging data via Memory Stick® media
Deleting data in Memory Stick media
MS Gate allows you to delete unnecessary data from Memory Stick media.
1 Insert Memory Stick media in your CLIÉ handheld. The contents of the Memory Stick media is displayed.
2 Tap the Home Mon.
3 Rotate the Jog Dial navigator to select MS Gate and then press the Jog Dial navigator. Or tap the MS Gate on the Application Launcher screen.
MS Gate starts. The data in your CLIÉ handheld is listed.
4 Press the Jog Dial navigator to select MS.
You can also tap the arrow ▼ in the upper right corner to select MS from the drop-down list.
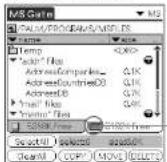
- You can also select MS by tapping

The data in the "/PALM/PROGRAMS/MSFILES" folder of Memory Stick media is listed.
5 Tap to select the data that you want to delete.
6 Tap DELETE.
The Delete File dialog box is displayed.
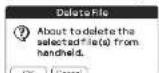
Exchanging data via Memory Stick® media
7 Tap OK.
The data selected in step 5 is deleted from Memory Stick media.
To delete all data at once
Tap Select All in step 5.
To cancel the selection
• To cancel all the selections, tap Clear All.
- To clear the selection of individual selected items only, tap them one at a time.
To change the folder to be deleted
Tap ☐ or ☐ to select the folder that you want to delete, so that the folder display changes and you can specify a folder to be deleted. You can only select a folder under the "PALM/PROGRAMS" or "PALM/Launcher" folder. The other folders cannot be selected.
Note
You cannot delete a read-only file.
Exchanging data via Memory Stick ^® media
Using the MS Gate menus
MS Gate menu commands allow you to exchange data between your CLIÉ handheld and Memory Stick media.
Tools menus
The menu items differ depending on the screen being displayed.
Select All Selects all the data displayed in the selected tab.
Clear All Cancels the selection of the data.
Move Moves the selected data to your CLIÉ handheld or Memory Stick media. The Move File screen appears.
Copy Copies the selected data to your CLIÉ handheld or Memory Stick media. The Copy File screen appears.
Delete Deletes the selected data from your CLIÉ handheld or Memory Stick media. The Delete File screen appears.
Rename Changes the name of the selected file or folder of Memory Stick media.
Create Folder Creates a folder in the current folder.
Create Default Folder Creates the default folder ("/PALM/PROGRAMS/MSFILES") in Memory Stick media.
Change to Default Folder Changes the current folder to default folder.
Options menus
Format Formats Memory Stick media inserted in your CLIÉ handheld.
Media Information Displays the memory information of Memory Stick media.
About MS Gate Shows the version information for MS Gate.
Exchanging data via Memory Stick® media
How to read the online manual
Detailed information on MS Gate software is provided in the online manual on the supplied CD-ROM.
To see the online manual, the Adobe Acrobat Reader ^® software must be installed on your computer.
1 Insert the Installation CD-ROM into your computer's CD-ROM drive.
The installation launcher window is displayed.
2 Click Manuals.
3 Double-click MSGate Manual.pdf.
The online manual appears.
If the Acrobat Reader software is not installed
1 Insert the Installation CD-ROM into your computer's CD-ROM drive.
The installation launcher window is displayed.
2 Click Exit to close the installation launcher window.
3 Double-click the My computer icon on the Windows desktop.
4 Right-click the CD-ROM drive icon, and then click Open from the shortcut menu.
5 Click the PC folder.
6 Double-click the Acrobat folder.
7 Double-click ar500enu.exe to install the Acrobat Reader onto your computer.
Follow the instructions onscreen to finish installation.
Exchanging data via Memory Stick® media
Installing applications to/from Memory Stick® media without using MS Gate
You can copy and install applications to/from a Memory Stick media from/to your CLIE handheld from the Application Launcher screen. However, observe the following as malfunction may occur depending on the application.
- You can only copy application files (files with extensions such as .prc, .pdb) with the following procedure. Related files will not be copied together at the same time.
- Data stored in the Memory Stick media (such as image files) will not be displayed.
1 Insert the Memory Stick media into the Memory Stick slot of your CLIÉ handheld. The contents of Memory Stick media are displayed.
2 Tap the Menu 📋 on on your CLIÉ handheld.
3 Tap Copy from the drop-down list. The Copy dialog box appears.
4 Tap arrow ▼ next to Copy to, and select Handheld or Card.
5 Tap the application you want to install.
6 Tap Copy. The selected application is installed onto your CLIÉ handheld.
Tip
You do not necessarily have to install add-on applications to the CLI If handheld in order to use it. If you want to save the CLI If handheld's memory space, you can simply tap to select the application in step 1. (Note, that such applications can only be used while the Memory Stick media containing the application is inscribed in the CLI If handheld).
Exchanging data via Memory Stick® media
Notes on starting applications installed from the Memory Stick media (without using MS Gate)
Observe the following when starting applications installed to a Memory Stick media without using MS Gate (i.e., when you installed them through a HotSync operation or by copying from the Application Launcher screen).
- You can only start application files (files with extensions such as .prc, .pdb). Image files and movie files that come with the application cannot be started (played).
If you cannot start the installed file data, move the file data to the CLIÉ handheld using MS Gate, or delete the files. If you do not use MS Gate when installing, applications and data files are stored in the "PALM/Launcher" folder.
Chapter 5
Customizing your Sony CLIÉ Handheld (Preferences)
This chapter describes how to customize your CLIÉ handheld by changing the Preferences settings.
Contents
What you can do with Preferences 165
Changing the Buttons preferences 167
Assigning applications to buttons 167
Changing the full-screen pen stroke activities.... 168
Assigning applications to HotSync ^16 buttons 169
Changing the Jog Dial™ navigator preferences.... 170
Setting the display format of the time, date, and
numbers (Formats) 171
Selecting a country default 171
Selecting the time, date, and numbers formats.... 172
Setting the Date & Time preferences 173
Setting the date 173
Setting the time.... 174
Setting the time zone and daylight saving time 175
Setting the General preferences 176
Setting the automatic shut-off time.... 176
Setting sounds 177
Turning on or off the Beam Receive feature.... 178
Entering owner information 179
Creating Graffiti® ShortCuts 180
Changing the Network preferences 182
Selecting a service 182
Entering a user name 183
Entering a password 183
Selecting a connection 184
Adding telephone settings 184

What you can do with Preferences
The Preferences screen enables you to customize the configuration options on your CLIJE handheld.
- Buttons
Assign different applications to the buttons on the front panel of your CLIÉ handheld and the HotSync® button on the cradle, and reassign the full-screen pen stroke command.
- Connection
Configure serial, modem, and infrared communication settings.
- Date & Time
Set the current date and time, the time zone of your present area, and turn on/off the daylight saving.
• Digitizer
Calibrate the screen on your CLIÉ handheld. The same digitizer calibration screen is displayed when you start your CLIÉ handheld for the first time. You can recalibrate your screen after a hard reset or if your find that "tapping" does not work as expected. For details, see "Step 2: Turning on your Sony CLIÉ Handheld for the first time" in the Read This First manual.
- Formats
Set the country default and the formats for dates, times, calendar, and numbers.
- General
Set the current date and time, the auto shut-off interval, the "Stay on in Cradle" feature, the Beam Receive feature, system, alarm, and game sounds.
• HiRes
Set the High Resolution Assist feature.
• Jog
Enable or disable the JogAssist feature.
- Network
Configure your CLIÉ handheld for use with a network.
- Owner
Assign your name, phone number, and other owner information.
- ShortCuts

What you can do with Preferences
Viewing Preference
1 Rotate the Jog Dial™ navigator to select Prefs and then press the Jog Dial navigator. Or tap the Prefs icon on the Application Launcher screen.
The Preferences screen appears.
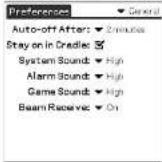
2 Tap the arrow ▼ in the upper right corner of the screen and then select the Preferences screen you want to view from the drop-down list.
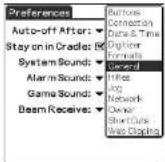
Changing the Buttons preferences
Assigning applications to buttons
The Buttons Preferences screen enables you to assign different applications to the buttons on the front panel of your CLIÉ handheld. For example, you can assign the To Do List button to start Expense.
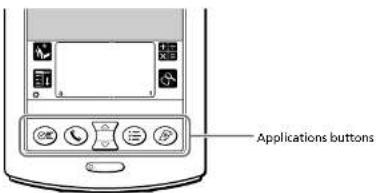
1 Tap Buttons from the drop-down list on the Preferences screen. The Buttons Preferences screen is displayed.
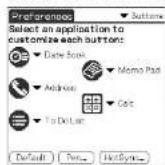
2 Tap the arrow ▼ next to a button and then tap the application that you want to assign to the button.
To launch the original applications
When you have assigned another application to the button, you can start the original application using the Application Launcher.
Changing the Buttons preferences
Changing the full-screen pen stroke activities
The Buttons Preferences screen enables you to change the assignment of the full-screen pen stroke. By default, the full-screen pen stroke activates the Graffiti ^20 Help.
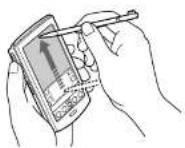
Drag the stylus from the bottom of the writing area to the top on the screen.
1 Tap Buttons from the drop-down list on the Preferences screen. The Buttons Preferences screen is displayed.
2 Tap Pen.
3 Tap the arrow ▼ and then select one of the following settings for the full-screen pen stroke.
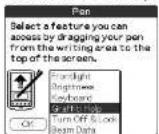
- Frontlight: Turns on the frontlight of your CLIÉ handheld without using the POWER button.
•Brightness: Opens the brightness adjustment screen. - Keyboard: Opens the onscreen keyboard for entering text.
- Graffiti Help: Opens a series of screens that show the complete Graffiti character set.
- Turn Off & Lock: Turns off and locks your CLIÉ handheld. To lock
Changing the Buttons preferences
Assigning applications to HotSync® buttons
The Buttons Preferences screen also enables you to assign different applications to the HotSync ^40 buttons on the cradle and the modem.
1 Tap Buttons from the drop-down list on the Preferences screen.
The Buttons Preferences screen is displayed.
2 Tap HotSync.
The HotSync Buttons dialog box appears.
3 Tap the arrow ▼ next to each button and then select the application you want to assign to the button.
The HotSync button assignment is changed.
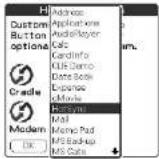
4 Tap OK. Any changes that you make in the HotSync Buttons screen become effective immediately. You can activate the selected application by pressing the HotSync button.
Changing the Jog Dial™ navigator preferences
The Jog Preferences screen enables you to change the default Jog Dial™ navigator and BACK button functions, which are:
- Scroll the screen with the Jog Dial navigator.
- Select an item from a pop-up list with the Jog Dial navigator.
- Move back and forth between screens with the BACK button.
You can set to use the Jog Dial navigator to operate a third-party application that is not designed to use Jog Dial navigator operations (Jog Assist feature).
You can also change the BACK button function so your CLIÉ handheld turns on or off when the BACK button is pressed /kept pressed.
Notes
- The functions activated by the jogAssist feature differ depending on the application you use.
- In some applications with the log Dial navigator mark, part of functions may change when the logAssist feature is activated.
1 Tap Jog from the drop-down list on the Preferences screen. The Jog Preferences screen is displayed.
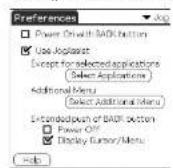
2 To enable the JogAssist function, select Use JogAssist. The Jog Dial navigator functions change.
3 In order to set to turn on the power by pressing the BACK button, select Power On with BACK button. You need to keep the BACK button pressed for a several seconds to turn on the power.
4 To set to turn off the power by keeping the BACK button pressed, select Power Off.
Setting the display format of the time, date, and numbers (Formats)
The Formats Preferences screen enables you to set the country default, and the display format of dates, times, and numbers on your CLIÉ handheld.
Selecting a country default
When you select the country where you use your CLIÉ handheld, the display format of the time, date, the week start day, and numbers is adjusted. For example, in England, time is expressed using a 24-hour clock; in the United States, time is expressed using a 12-hour clock with an AM or PM suffix.
All your CLIÉ applications use the Country default settings. However, you can customize your own settings for time, date, week start day, or numbers
1 Tap Formats from the drop-down list on the Preferences screen.
The Formats Preferences screen is displayed.
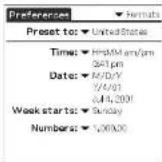
2 Tap the arrow ▼ next to "Preset to" and then select a country name.
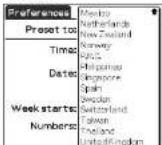
Setting the display format of the time, date, and numbers (Formats)
Selecting the time, date, and numbers formats
You can select the desired formats for the time, date, week start day, and numbers. The selected formats apply to all your CLIÉ applications.
1 On the Formats Preferences screen, tap the arrow ▼ next to Time and then select the desired format from the drop-down list.
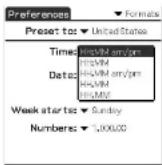
2 Tap the arrow ▼ next to Date and then select the desired format from the drop-down list.
3 Tap the arrow ▼ next to "Week starts" and then select whether you want the first day of the week to be Sunday or Monday.
This setting controls the Day, Week, Month, and Agenda views in Date Book and all other aspects of your CLIÉ handheld that display a calendar.
4 Tap the arrow ▼ next to Numbers and then select formats for the decimal point and thousands separator.
Setting the Date & Time preferences
The Date & Time Preferences screen enables you to set the date, time, time zone, and the on/off of daylight savings for your CLIé handheld. After you set the local date and time of your home base, you can change the displayed time (for example, during business trips) by simply switching the time zones.
Setting the date
1 Tap Date & Time from the drop-down list on the Preferences screen.
The Date & Time Preferences screen is displayed.
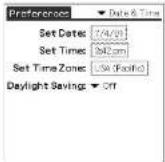
2 Tap Set Date.
The Set Date screen appears.
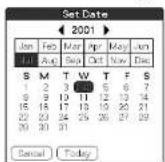
3 Tap the arrow ◀ or ▶ beside the year at the top of the screen to set the year.
Setting the Date & Time preferences
Setting the time
1 Tap Date & Time from the drop-down list on the Preferences screen.
The Date & Time Preferences screen is displayed.
2 Tap Set Time.
The Set Time screen appears.
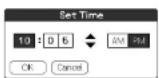
3 Tap the arrow ▼ or ▲ to set the hour.
4 Tap the minute box and then tap the arrow ▼ or ▲ to set the minute.
5 Tap AM or PM.
6 Tap OK.
Setting the Date & Time preferences
Setting the time zone and daylight saving time
Setting the time zone
1 Tap Date & Time from the drop-down list on the Preferences screen.
The Date & Time Preferences screen is displayed.
2 Tap the Set Time Zone field.
The Set Time Zone screen appears.
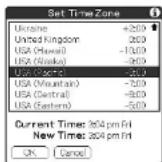
3 Select the time zone that corresponds to where you are.
4 Tap OK.
Setting the daylight saving time
1 Tap Date & Time from the drop-down list on the Preferences screen.
The Date & Time Preferences screen is displayed.
2 Tap the arrow ▼ next to Daylight saving.
3 Tap and select On or Off.
Setting the General preferences
The General Preferences screen enables you to set the auto shut-off interval and sounds for your CLIÉ handheld.
Setting the automatic shut-off time
Your CLIÉ handheld has an automatic shut-off feature that turns off the power after a period of inactivity. This feature helps conserve battery power in case you forget to turn off your CLIÉ handheld. If you find that your CLIÉ handheld shuts itself off too early or too late, you can increase or decrease the time setting for the automatic shut-off feature.
By default, your CLIÉ handheld will turn off after two minutes of inactivity and will be on as long as it is connected to the cradle.
1 Tap General from the drop-down list on the Preferences screen.
The General Preferences screen is displayed.
2 Tap the arrow ▼ next to Auto-off After and then select the desired time setting for the automatic shut-off feature.
You can select 30 seconds, 1 minute, 2 minutes, or 3 minutes.
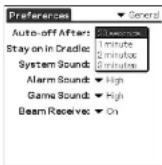
3 If you want to leave your CLIÉ handheld turned on while it is connected to the cradle, make sure that the check box next to "Stay on in Cradle" is selected. To turn it off automatically, clear the check box.
Setting the General preferences
Setting sounds
Your CLIÉ handheld uses a variety of sounds. The System, Alarm, and Game Sound settings enable you to turn the sounds on or off, and to adjust the volume level.
1 Tap General from the drop-down list on the Preferences screen.
The General Preferences screen is displayed.
2 Tap the arrow ▼ next to System Sound and then select the desired sound level or Off from the drop-down list.
When you turn the System Sound off, you also turn off the "chime" tones associated with the HotSync operation.
3 Tap the arrow ▼ next to Alarm Sound and then select the desired sound level from the drop-down list.
4 Tap the arrow ▼ next to Game Sound and then select the desired sound level or Off from the drop-down list. The Game Sound setting works only with the games that are programmed to respond to this setting.
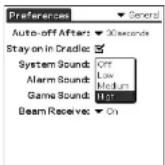
Setting the General preferences
Turning on or off the Beam Receive feature
You can choose to turn off the Beam Receive feature. This prohibits anyone from beaming information to your CLIÉ handheld. It also results in a slight saving of battery power. By default, the Beam Receive is set to On.
1 Tap General from the drop-down list on the Preferences screen.
The General Preferences screen is displayed.
2 Tap the arrow ▼ next to Beam Receive and then select On or Off from the drop-down list.
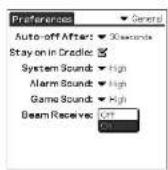
- On: Enables the Beam Receive feature.
- Off: Disables the Beam Receive feature.
Entering owner information
The Owner Preferences screen enables you to record a name, company name, or phone number, or any other information that you want to associate with your CLIÉ handheld.
If you use the Security application to lock your CLIÉ handheld with a password, the information that you enter in the Owner Preferences screen appears the next time you turn on your CLIÉ handheld.
1 Tap Owner from the drop-down list on the Preferences screen.
The Owner Preferences screen is displayed.
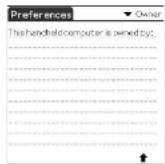
2 Enter your owner information.
If you enter more text than can fit on one screen, a scroll bar appears at the right side of the screen.
To unlock the Owner Preferences screen
If you assigned a password in the Security application, the information in the Owner Preferences screen cannot be changed. In this case, an Unlock button is displayed at the bottom of the screen.
1 Tap Unlock.
The Unlock Message dialog box appears.
Creating Graffiti® ShortCuts
The ShortCuts Preferences screen enables you to define abbreviations (ShortCuts) for entering text with Graffiti® strokes. You can create a ShortCut for any words, letters, or numbers. All ShortCuts you create appear on the list in the ShortCut Preferences screen. All the ShortCuts are available in any of your CLIe applications and are backed up on your computer when you perform a HotSync operation. See "Using Graffiti® writing to enter data" on page 11 for more information on the use of ShortCuts.
1 Tap ShortCut from the drop-down list on the Preferences screen.
The ShortCut Preferences screen is displayed.
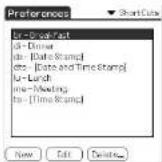
2 Tap New.
The ShortCut Entry screen is displayed.
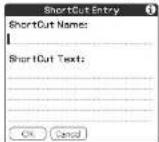
3 On the ShortCut name line, enter the letters you want to use to activate the ShortCut.
4 Tap the ShortCut Text area and then enter the text that you
Creating Graffiti® ShortCuts
To Edit a ShortCut
1 Tap the ShortCut you want to edit in the ShortCuts list and then tap Edit.
2 Make the changes you want and then tap OK.
To Delete a ShortCut
If you no longer need a ShortCut, you can delete it from the list of ShortCuts.
1 Tap the ShortCut you want to delete in the ShortCuts list and then tap Delete.
The confirmation dialog box is displayed.
2 Tap Yes.
Changing the Network preferences
In order to use your CLIÉ handheld with a network (such as using the Web Clipping application or performing a network HotSync operation), you must set the Network Preferences settings.
Note
The Network settings preferences provides the ability to connect to your ISP (Internet Service Provider) or dial-in (remote access) server with applications (e.g. Web Clipping) that allow you to view the transmitted data.
Selecting a service
Use the Service setting to select the service template for your Internet Service Provider or a dial-in server. Service templates are a set of ISP and dial-in server configuration settings that you can create, save, and reuse.
1 Tap Network from the drop-down list on the Preferences screen.
The Network Preferences screen is displayed.
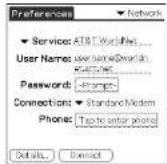
2 Tap the arrow ▼ next to Service and then select the predefined service template you want to use.
Changing the Network preferences
Entering a user name
The User Name setting identifies the name you use when you log into your Internet Service Provider or your dial-in server.
1 On the Network Preferences screen, tap User Name field.
2 Enter your user name.
Notes
- Although this field can contain multiple lines of text, only two lines appear onscreen.
- Most dial-in servers do not accept spaces in the user name.
Entering a password
The Password box identifies the password you use to log into your server or ISP. Your entry in this field determines whether your CLIÉ handheld prompts you to enter a password each time you log into your network:
- If you do not enter a password, your CLIÉ handheld displays the word "-Prompt-" in this field and asks you to enter a password during the login procedure.
- If you enter a password, your CLIÉ handheld displays the word "-Assigned-" in this field and does not prompt you to enter a password during the login procedure.
Note
If you are concerned about security, select the Prompt option and do not enter a password.
1 On the Network Preferences screen, tap the Password field.
2 Enter the password you use to log into your server.
3 Tap OK.
The Password field updates to display the word "-Assigned-."
Changing the Network preferences
Selecting a connection
Use the Connection setting to select the method you want to use to connect to your Internet Service Provider or a dial-in server.
1 On the Network Preferences screen, tap the arrow ▼ next to Connection and then select the connection you want to use.
- When using Sony CLIÉ Modem PEGA-MD700: select Sony CLIÉ Modem.
- When using another modem or adapter: select Standard Modem.
Adding telephone settings
When you select the Phone field, your CLIÉ handheld opens a dialog box in which you define the telephone number you use to connect with your ISP or dial-in server. In addition, you can also define a prefix, disable Call Waiting, and give special instructions for using a calling card.
Note
The Phone Setup dialog box works correctly for AT&T and Sprint long-distance services. However, because MCI works differently, MCI customers need to put the calling card number in the Phone # field and the phone number in the Use calling card field.
1 On the Network Preferences screen, tap the Phone field. The Phone Setup screen appears.
2 Enter the phone number for your ISP or dial-in server in the Phone# field.
3 When using Sony CLIÉ Modem PEGA-MD700, skip to step 4. When using another modem or adapter, change the settings as follows:
①Enter the telephone number used to access the modem.
If needed, enter a dial prefix (such as "9") to access an outside line.
Changing the Network preferences
② If the phone line you're using for your CLIÉ handheld has Call Waiting, select the "Disable call waiting" check box to avoid an interruption during a modem HotSync operation or accessing a Web Clipping site.
Note
Each telephone company assigns a code to disable Call Waiting. Contact your local telephone company for the code that is appropriate for you.
③ If you want to use a calling card to place the call, select the "Use calling card" check box and enter the calling card number.
Tip
There is usually a delay before you enter your calling card number. It's a good idea to add at least three commas before your calling card number to compensate for the cue delay.
4 Tap OK.
Creating additional service templates
You can create additional service templates from scratch or by duplicating existing templates and editing information. After you create a new or duplicate template, you can add and edit settings.
To add a new service template
1 On the Network Preferences screen, tap the Menu ☐ on.
2 Tap New from the Service menu.
An Untitled service template is added to the drop-down list for the Service field.

Changing the Network preferences
To duplicate an existing service template
1 On the Network Preferences screen, tap the arrow ▼ next to Service and then select the predefined service template you want to duplicate.
2 Tap the Menu ☐ on.
3 Tap Duplicate from the Service menu.
A copy of the service template is added to the drop-down list for the Service field.
To delete a service template
1 On the Network Preferences screen, tap the arrow ▼ next to Service and then select the predefined service template you want to delete.
2 Tap the Menu ☐ ton.
3 Tap Delete from the Service menu.
The Delete Service dialog box is displayed.
4 Tap OK.
The selected service template is deleted.
Changing the Network preferences
Adding detailed information to a service template
If you are using one of the predefined service templates, you probably only need to enter your user name and telephone number. If you are creating a new service template, you may need to provide additional information to your ISP or dial-in server. You use the Details dialog box to add additional information to a selected service template.
To select a connection type
1 On the Network Preferences screen, tap the service field.
2 Tap Details.
The Details screen is displayed.
3 Tap the arrow ▼ next to Connection type and select one of the following connection types.
- PPP: Point-to-Point protocol
• SLIP: Serial Line Internet Protocol
• CSLIP: Compressed Serial Line Internet Protocol
Tip
If you are not sure, try PPP; if that doesn't work, ask your Internet Service
Provider or your System Administrator for the correct connection type.
4 Tap the arrow ▼ next to Idle timeout and select one of the following options.
- 1 minute: Waits one minute for you to open another application before it drops the connection.
• 2 minutes: Waits two minutes.
• 3 minutes: Waits three minutes. - Never: Keeps your PPP or SLIP connection until you turn off your
CLIE handheld (or until it times out).
Note that this option will be more costly than others.
5 Tap the Query DNS check box to deselect it.
Changing the Network preferences
6 Enter the IP address for the Primary and Secondary DNS (Domain Naming System).
Ask your Internet Service Provider or System Administrator for the correct Primary or Secondary DNS IP numbers.
7 If you need to enter the CLIÉ handheld's IP Address, tap the IP Address check box to deselect it and display a permanent IP address field below the check box. Normally, you do not have to enter this. If you are not sure, select Automatic and go to step 9.
8 Enter the CLIÉ handheld's IP Address.
9 Tap OK.
Creating log in scripts
A log in script is a series of commands that automates logging in to a network server, for example, your corporate network or your Internet Service Provider (ISP). It is something that you are likely to receive from your IS System Administrator, if your company has a system in which you log in to the corporate servers from your CLIIS handheld using a modem or network connection.
Notes
- When using Sony CLIÉ Modem PEGA-MD700, you do not have to create a log in script.
- You can also use non-ASCII and literal characters in your log in script. For more information, see page 190.
1 On the Network Preferences screen, tap the service field.
2 Tap Details. The Details screen is displayed.
3 Tap Script. The Log in Script screen is displayed.
Changing the Network preferences
4 Tap the arrow ▼ next to End and select one of the following commands. If the command requires additional information, a field appears to the right of it for you to enter the information.
- Wait For: Tells your CLIÉ handheld to wait for specific characters from the TCP/IP server before executing the next command.
- Wait For Prompt: Detects a challenge-response prompt coming from the server and then displays the dynamically generated challenge value. You then enter the challenge value into your token card, which in turn generates a response value for you to enter on your CLIÉ handheld. This command takes two arguments, separated by a vertical bar (1) on the input line.
- Send: Transmits specific characters to the TCP/IP server to which you are connecting.
- Send CR: Transmits a carriage return or LF character to the TCP/IP server to which you are connecting.
- Send User ID: Transmits the User ID information entered in the User ID field of the Network Preferences screen.
- Send Password: Transmits the password entered in the Password field of the Network Preferences screen. If you did not enter a password, this command prompts you to enter one. The Password command is usually followed by a Send CR command.
- Delay: Tells your CLIÉ handheld to wait a specific number of seconds before executing the next command in the login script.
- Get IP: Reads an IP address and uses it as the IP address for your CLIÉ handheld. This command is used with SLIP connections.
- Prompt: Opens a dialog box and prompts you to enter text of some kind (for example, a password or a security code).
• End: Identifies the last line in the log in script.
5 Repeat step 4 until the log in script is complete.
6 Tap OK.
7 Tan OK
Changing the Network preferences
Non-ASCII Characters for Log in Scripts
The following information enables you to create custom log in scripts that require non-ASCII characters. It is provided for advanced users who understand the use and requirements of such characters in a custom log in script.
Use of ^char
You may use the caret (^) to transmit ASCII command characters. If you send ^char, and the ASCII value of char is between @ and _, then the character is automatically translated to a single-byte value between 0 and 31. For example, ^M is converted to a carriage return.
If char is a value between a and x , then the character sequence is translated to a single-byte value between 1 and 26. If char is any other value, then the character sequence is not subject to any special processing. For example, the string "Joe^M" transmits Joe, followed by a carriage return.
Carriage return and line feed
You may include carriage return and line feed commands as part of the login script, when entered in the following format.
•
•
For example, the string "waitfor Joc
Literal characters
The backslash () character defines that the next character is transmitted as a literal character, and is not subject to any special processing ordinarily associated with that character.
Examples:
- ^* : Includes a caret as part of the string
- < : Includes a < as part of the string
- : Includes a backslash as part of the string
Changing the Network preferences
Using the Network preferences menus
This section explains the menu commands specific to network preferences.
For the Edit menu, see "Using the Edit menu" on page 108.
Service menus
New Creates a new service template.
Delete Deletes the current service template.
The Delete Service dialog box appears.
Duplicate Duplicates the current service template.
Options menus
View Log Displays the Network Log. The Network Log lists all of
the communication that occurs between your modem and your dial-in server during the log in procedure. The information in the Network Log can help your ISP or your System Administrator pinpoint where the log in procedure communication fails and why.
Setting the High Resolution Assist function
The High Resolution Assist function enables the high resolution display of an application that does not support the high resolution mode.
1 Tap HiRes from the drop-down list on the Preferences screen. The HiRes Preferences screen is displayed.
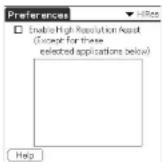
2 To enable the High Resolution Assist function, select Enable High Resolution Assist. The confirmation dialog box is displayed.
3 Tap OK. 4 Select the application(s) that you do not want to display in high resolution mode in the list box.
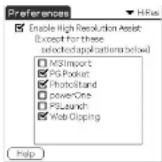
Note
In step 4, check an application when the following occurs in the high resolution mode: - Performances are largely deteriorated (e.g. game).
Chapter 6
Additional information
This chapter describes how to upgrade your CLIÉ handheld, as well as some precautions, troubleshooting information, and other technical information about your CLIÉ handheld.
Contents
Backing up data of your Sony CLIÉ Handheld 194
Backing up data to your computer
through HotSync operation 194
Backing up all CLIÉ data to a Memory Stick media
(using MS Backup) 195
Backing up CLIÉ data to a Memory Stick media
using MS Gate 197
Using data of another Sony CLIÉ Handheld 199
Using the Palm Desktop for CLIÉ software to transfer data. 199
Using Memory Stick media to transfer data 201
Performing HotSync between your old CLIÉ handheld
and the new Palm Desktop for CLIÉ software 203
Precautions 204
Notes on use 204
Battery considerations 205
Troubleshooting – Frequently Asked Questions .... 207
Getting Help 221
Specifications 222
Limited Warranty Statement 223
Index 227
Backing up data of your Sony CLIÉ Handheld
You can save a back-up copy of your CLIÉ handheld by performing either of the following three methods:
- Backing up data to your computer through HotSync ^db operation
- Backing up all data to a Memory Stick ^ media using the MS Backup application
- Backing up data to a Memory Stick® media using the MS Gate application
Backing up data to your computer through HotSync operation
By default, you can back-up the following data in your computer with a HotSync operation:
- Memo Pad data files
- Address Book data files
• To Do List data files - Date Book data files
- Expense data files
- Preferences data files
• Network Setup information - Applications files that have been installed using a HotSync operation
- User information files when you perform a HotSync operation
During the next HotSync operation, the back-up data is compared with the data in your computer, and the newer one becomes effective.
If you perform a hard reset, all records and entries stored in your CLIÉ handheld are erased and reset to the initial status. If you save a back-up of your CLIÉ handheld data, you can restore any data previously synchronized with your computer during the next HotSync operation.
Notes
- Some applications are not designed to be backed up. Therefore, you may not be able to restore some applications and data. It is recommended that you re-install those applications.
- If you change settings in the Change HotSync Action dialog box, you may not be able to save a back-up. You cannot back-up an application or restore its data if you
Backing up data of your Sony CLIÉ Handheld
Backing up all CLIÉ data to a Memory Stick media (using MS Backup)
With MS Backup, you can backup all the following CLIÉ handheld application and data to a Memory Stick media with a single tap. To separately backup applications and data to the Memory Stick media, use MS Gate (see page 197).
- Memo Pad data files
- Address Book data files
• To Do List data files - Date Book data files
- Expense data files
- Preferences data files
• Network Setup information - Applications files that have been installed using a HotSync operation
- User information files when you perform a HotSync operation
Backing up data with the MS Backup application
Note
When you back-up your CLIÉ data on a Memory Stick, the data size of the back-up may become larger than the total data size displayed in MS Gate. This is not a malfunction. Make sure you have more space free on the Memory Stick than the displayed CLIÉ data size before taking a back-up.
1 Insert a Memory Stick media into the Memory Stick slot.
2 Tap the Home 📂 on.
3 Rotate the Jog Dial navigator to select MS Backup and then press the Jog Dial navigator. Or tap the MS Backup icon on the Application Launcher screen.
Backing up data of your Sony CLIÉ Handheld
5 Tap OK.
The Backup Progress screen appears, and the back-up's general information (its date, size, and number of contents) appears in the list.
Note
Do not make any changes to the directory tree on the Memory Stick after taking a back-up. If you do, you will not be able to restore the back-up data to your CLIÉ handheld.
Tips
- In most cases, the back-up will be finished within approximately a minute.
- In step 4, you can also select an existing file from the back-up list, then tap Backup to overwrite it.
To delete back-up files from the Memory Stick
Tap to select the back-up in the Backup list, and tap Delete. The selected file is deleted from the Memory Stick.
Restoring back-up data and applications to your CLIÉ handheld
Notes
- When you restore back-up data and applications to your CLIÉ handheld, the data currently saved in your CLIÉ handheld will be overwritten with the back-up data.
Any data created or edited after you saved the back-up will be erased. - You can only restore data to the CLIÉ handheld from which you took that back-up.
1 Insert the Memory Stick media with the back-up files into the Memory Stick slot.
2 Tap the Home on.
3 In the MS Backup screen, tap to select the back-up data that you want to restore from the list.
4 Tap (Restore).
The Restore Confirm dialog box appears.
E T...OK
Backing up data of your Sony CLIÉ Handheld
Backing up CLIÉ data to a Memory Stick media using MS Gate
MS Gate allows you to save a backup of the following application and data of your CLIé handheld to Memory Stick media. (The file name after the colon is the name displayed in MS Gate.)
■ Applications
- Plugin files: CmPl...
• PictureGear Pocket: PictureGear Pocket
• gMovie: gMovie
• Network setup data: inetSetup
Data
- Address Book data files: AddressDB
• Date Book data files: DatebookDB
• Memo Pad data files: MemoDB
• Expense data files: ExpenseDB
• To Do List data files: ToDoDB
• Network setup information: NetworkDB - Other application setting data files: SavedPreferences
- User information and other preferences data files: UnsavedPreferences
For details on how to use MS Gate, see "Copying your CLIÉ handheld data to Memory Stick media" on page 153.
Notes
- Applications may not function properly if the necessary files are not backed up.
- Do not select Graffiti® ShortCuts, Net Prefs, and sonyres files, since they cannot be copied.
- You cannot copy data marked with a lock icon.
- You may not be able to back up full information since some data is locked or shared.
Backing up data of your Sony CLIÉ Handheld
Restoring backup data and applications to your CLIÉ handheld
Note
When you restore (copy) backup data and applications to your CLIé handheld, the data currently saved in your CLIé handheld will be overwritten with the backup data. Any data created or edited after you saved the backup will be erased.
Insert Memory Stick media storing the backup data into your CLIÉ handheld and use MS Gate to copy the data to your CLIÉ handheld. For details, see "Copying data in Memory Stick media to your CLIÉ handheld" on page 155.
If an overwrite confirm message is displayed, tap Yes to all.
Notes
- If a delete or access error message is displayed while copying files, tap OK to proceed to the next step in copying. Those files, however, will not be copied.
- Depending on the application configurations or file protection status, some necessary files may not be copied. In such a case, an application may not function properly.
- Some applications are not designed to be backed up. Therefore, you may not be able to restore some applications and data. It is recommended that you re-install those applications.
Using data of another Sony CLIÉ Handheld
If you already own a Sony CLIÉ Handheld, you can use data of your old CLIÉ handheld with your new CLIÉ handheld. You can transfer data from your old CLIÉ handheld to your new CLIÉ handheld with either of the following methods:
- Using Palm™ Desktop for CLIÉ to copy data: You can transfer data of the Palm OS basic applications easily.
- Using Memory Stick® media to copy data: You can transfer all the necessary data and settings information more securely than using the Palm Desktop for CLIÉ software.
Note on add-on applications that you have installed
Install add-on applications using the same procedures as the previous CLIÉ handheld. Some third-party applications may operate only on your old CLIÉ handheld.
Using the Palm Desktop for CLIÉ software to transfer data
For the Palm OS ^® basic applications data such as Address Book, Memo Pad, To Do List, Date Book, you can use the Palm Desktop for CLIÉ software to transfer data from your old CLIÉ handheld to your new CLIÉ handheld by exporting and importing data.
Before you start, perform a HotSync ^20 operation to the Palm Desktop for CLIÉ software using your new CLIÉ handheld with a different user name from that you have used with the old CLIÉ handheld.
1 Start the Palm Desktop for CLIÉ software.
2 Click the user name of your previous CLIÉ handheld from the User name list in the upper right of the screen.
3 Click the icon of the application whose data you want to copy in the left panel of the screen.
4 Click Export from the File menu.
5 Enter the file names and click Export
Using data of another Sony CLIÉ Handheld
6 Repeat steps 3 through 5 to export data of other applications.
7 Click the user name of your new CLIÉ handheld from the User name list in the upper right of the screen.
If you have never performed a HotSync operation with your new CLIÉ handheld, select Users from the Tools menu. Click New in the Users screen and enter a new user name. Then select that new user name.
8 Click Import from the File menu.
9 Select the files you have exported in steps 3 through 6 and then click Open.
10 Place your new CLIÉ handheld on the cradle and perform a HotSync operation.
The data exported from your old CLIÉ handheld is copied onto your new CLIÉ handheld.
Notes on a HotSync operation
- Do not attempt to transfer data from your old CLIÉ handheld to your new CLIÉ handheld by performing HotSync operations with the identical user name. Doing so may cause trouble.
- When you perform a HotSync operation with your new CLIé handheld and the New User dialog box is displayed, enter a different user name from that of your old CLIé handheld. If you enter the identical user name, the Palm Desktop for CLIé software may not be able to recognize the difference between your CLIé handhelds and the data of both handhelds may be mixed up or deleted.
- If you copy UnsavedPreference, the user name is also copied. This prevents you from managing the two CLIÉ handhelds with different user names.
Using data of another Sony CLIÉ Handheld
Using Memory Stick media to transfer data
You can use Memory Stick media to transfer your old CLIÉ handheld to your new CLIÉ handheld.
Notes
- Use Memory Stick media that has sufficient free memory space.
- Make sure that the write protect tab on the Memory Stick media not set to LOCK.
1 Insert Memory Stick media into your old CLIÉ handheld.
2 Rotate the Jog Dial™ navigator to select MS Gate and then press the Jog Dial navigator. Or tap the MS Gate 📄 on the Application Launcher screen.
MS Gate starts up. The data in your CLI.F handheld is listed.
3 Tap to select the data of the application whose settings and information you want to use with your new CLIÉ handheld.
You can select multiple files.
- Address Book: AddressDB
• Date Book: DatebookDB - Memo Pad: MemoDB
• Expense: ExpenseDB - Mail: MailDB
• To Do List: ToDoDB
• Network setup information: NetworkDB
Notes
- You cannot copy data marked with the lock 📞n.
- You cannot copy Graffiti ^10 ShortCuts, Net Prefs, and sonyrics (the database for
accessing the files in Memory Stick media). - Do not select UnSavedPreference. Your computer may not be able to distinguish your new CLIÉ handheld from your old CLIÉ handheld.
4 Tap COPY.
Using data of another Sony CLIÉ Handheld
5 Tap OK.
The data selected in step 3 is copied onto Memory Stick media.
6 Remove the Memory Stick media from your old CLIÉ handheld and then insert it into your new CLIÉ handheld.
7 Rotate the Jog Dial navigator to select MS Gate and then press the Jog Dial navigator. Or tap the MS Gate on the Application Launcher screen.
MS Gate starts. The data in your CLIÉ handheld is listed.
8 Press the Jog Dial navigator to select MS. You can also tap the arrow ▼ in the upper right corner to select MS from the drop-down list.
9 Tap to select the applications and data you have previously copied from the older device.
10 Tap COPY.
The File Overwrite confirmation message is displayed.
11 Tap OK.
12 If the file overwrite confirmation message is displayed, tap Yes to All.
The data of your old CLIÉ handheld is copied onto your new CLIÉ handheld.
Note
If a file-locked, access, or delete error message is displayed while copying files, tap OK to proceed to the next step in copying. Those files, however, will not be copied.
Using data of another Sony CLIÉ Handheld
Performing HotSync between your old CLIÉ handheld and the new Palm Desktop for CLIÉ software
You can use your other CLIÉ handhelds (PEG-S300, PEG-S320, PEG-N710C, PEG-N610C) with the Palm Desktop for CLIÉ software supplied to this newest CLIÉ handheld (PEG-N760C).
After setting up your CLIÉ handheld as indicated in the Read This First manual, perform the HotSync operation as indicated on page 112. If you have any trouble with the HotSync operation, check the following.
- Check the Windows task tray to make sure that Local Serial is selected.
- Check the Windows task tray to make sure that the USB Switcher is running.
Precautions
Notes on use
- Take care not to scratch or damage your CLIÉ handheld's screen or the Graffiti® writing area. Always use the supplied stylus or a plastic-tipped pointer to tap on the screen. Do not use a real pen, pencil, or other sharp object on the screen.
- Do not expose your CLIÉ handheld to rain or moisture. Should water enter the circuitry through the crevice around the front buttons, your CLIÉ handheld may be damaged.
- Your CLIÉ handheld screen is made of glass. Do not drop or submit your CLIÉ handheld to external shock. Do not carry your CLIÉ handheld in your back pocket. If you sit down with your CLIÉ handheld in the back pocket, it may break.
- Avoid using or storing your CLIÉ handheld in locations subject to: - extremely high temperature such as the hot inside of a car exposed to the sun, or near a heater.
- direct sunlight
– high humidity
- excessive dust
- The rubber feet of the cradle may lose their adhesion as they become dirty. If this occurs, wipe the feet with a moistened soft cloth to recover their adhesion.
On cleaning
Clean your CLIÉ handheld with a soft, dry cloth.
Precautions
Battery considerations
Follow these precautions when you charge your CLIÉ handheld.
On charging
- It takes about four hours to charge your CLIE handheld when the battery is empty.
- When you charge your CLIÉ handheld every day, it takes only a few minutes to charge the battery.
- You can view data or play audio files with your CLIÉ handheld while it is being charged.
On the battery life
- With a fully-charged battery, you can use your CLIÉ handheld for about fifteen days, 30 minutes each day if you do not use the audio playback function.
- If you set the HOLD switch to OFF and turn on the frontlight at the maximum level, you can play music continuously for about 3 hours.
- If you set the HOLD switch to ON, you can play music continuously for about 11 hours.
- Battery life varies depending on the conditions and environment where you use your CLIÉ handheld.
- If the battery in your CLIÉ handheld is fully discharged, all data stored on the DRAM (memory) is lost. Performing another HotSync operation once the battery is recharged can restore information saved from the last HotSync operation. For details, see "Backing up data to your computer through HotSync operation" on page 194.
Tips on conserving the battery
- Turn off the frontlight under good lighting conditions. For turning off the frontlight, see "Changing the frontlight level" on page 23.
- Change the automatic shut-off time setting so that your CLI, handheld will automatically turn off after a short period of inactivity. For details, see "Setting the automatic shut-off time" on page 176.
Precautions
When your battery runs out
- When the battery runs out, a caution message appears on the screen. If this occurs, perform a HotSync ^30 operation to back up all your CLIÉ handheld's data on your computer. Then charge your CLIÉ handheld using the cradle. This helps prevent accidental data loss.
- If your CLIÉ handheld does not turn on when you press the POWER button, charge your CLIÉ handheld immediately.
- The remaining battery indicator does not always reflect the actual battery amount. The battery is designed to provide years of service under normal use. To prolong the battery's life, charge it frequently even when it is not fully discharged.
- You do not have to replace batteries. When the remaining battery indicator reads zero, place your CLIÉ handheld on the cradle and start charging immediately. Never disassemble your CLIÉ handheld to take out the battery.
When the remaining battery indicator reads 0.
If your battery drains and you leave your CLIÉ handheld in an uncharged state for an extended period of time, all of the stored data will be erased. Sony suggests you charge your CLIÉ handheld frequently.
Troubleshooting – Frequently Asked Questions
This section describes how to solve common problems you may encounter when using your CLIé handheld. If a problem arises, we suggest you charge your CLIé handheld. If the problem persists, review the following list of frequently asked questions for possible solutions before you contact Sony Customer Information Service Center.
Note
Thousands of third-party add-on applications are available for the Palm OS® platform. Sony does not support third-party applications. If you have a problem with a third-party application, please contact the developer or publisher of that software.
Operating problems
I do not see anything on my CLIÉ handheld's screen.
→ Recharge your CLIÉ handheld. If your CLIÉ handheld still does not operate, try a soft reset. See "Resetting your Sony CLIÉ Handheld" (page 24).
→Make sure that the HOLD switch is not in the protect position.
I get a warning message telling me my CLIÉ handheld's memory is full.
→Purge records from Date Book and To Do List. This deletes To Do List items and past Date Book events from the memory of your CLIÉ handheld.
→Delete unused address entries, memos and records. If necessary, you can save a backup for these records. See explanations for each application.
If you have installed additional applications on your CLIÉ handheld, remove them to recover memory. See "Removing add-on applications" in the Read This First manual.
→Some applications may not operate properly if the memory is
Troubleshooting – Frequently Asked Questions
My CLIÉ handheld keeps turning itself off.
→ Your CLIÉ handheld is designed to turn itself off after a period of inactivity. This period can be set at one, two, or three minutes. See "Setting the automatic shut-off time" (page 176).
My CLIÉ handheld is not making any sounds.
→ Check the System Sound setting. See "Setting sounds" (page 177).
→You can only hear such sounds through the supplied headphones if you have them connected to the CLIÉ handheld.
My CLIÉ handheld has frozen.
→ Perform a soft reset. See "Resetting your Sony CLIÉ Handheld" (page 24).
→Make sure that the HOLD switch is not in the protect position.
I cannot use the Jog Dial navigator.
→ Check that the JogAssist feature is activated. See "Changing the Jog Dial™ navigator preferences" (page 170).
An error message is displayed repeatedly.
→Follow the instructions of the message.
Frontlight turns on when I am adjusting the frontlight level.
→When you are adjusting the frontlight level, the LCD frontlight turns on.
Troubleshooting – Frequently Asked Questions
Tapping and writing problems
When I tap the buttons or screen icons, my CLIÉ handheld activates the wrong feature.
→ Calibrate the screen. See "What you can do with Preferences" (page 165).
When I tap the Menu icon, nothing happens.
→Not all applications or screens have menus. Try changing to a different application.
I cannot get my CLIÉ handheld to recognize my handwriting.
For your CLIÉ handheld to recognize handwriting input with the stylus, you need to use Graffiti® writing. See "Using Graffiti® writing to enter data" (page 11).
→Make the Graffiti character strokes in the Graffiti writing area, not on the display part of the screen.
→Write Graffiti strokes for letters on the left-hand side, and the strokes for numbers on the right-hand side of the Graffiti writing area.
→Make sure that Graffiti has not shifted into extended or punctuation modes. See "Using Graffiti ^1 writing to enter data" (page 11).
→ For tips on successful Graffiti writing, see "Using Graffiti® writing to enter data" (page 11).
Troubleshooting – Frequently Asked Questions
Application problems
I tapped the Today button, but it does not show the correct date.
→ Your CLIÉ handheld is not set to the current date. Make sure the Set Date box in the Date & Time Preferences screen displays the current date. See "Setting the Date & Time preferences" (page 173).
→ Your CLIÉ handheld is not set to the correct time zone or the correct daylight saving setting. Make sure the Set Time Zone box and the Daylight Saving box in the Date & Time Preferences screen displays the correct setting. See "Setting the Date & Time preferences" (page 173).
I know I entered some records, but they do not appear in the application.
→Check the Categories drop-down list (upper-right corner). Choose All to display all of the records for the application.
→Check Security and confirm that Current Privacy is set to Show Records.
→ In To Do List, tap Show and see if "Show Only Due Items" is selected.
I am having problems listing memos the way I want to see them.
→If you cannot manually arrange the order of the memos in the list screen, check the Memo Preferences setting. Make sure that Sort by is set to Manual.
→If you choose to view your memos alphabetically on the Palm™ Desktop for CLIÉ software and then perform a HotSync® operation, the memos on your CLIÉ handheld still appear in the order defined in the Memo Preferences setting. In other words, the sort settings you use with the Palm Desktop for CLIÉ software are not transferred to
Troubleshooting – Frequently Asked Questions
I created an event in Date Book, but it does not appear in the Week view.
→In the Week view, you cannot select overlapping events that have the same start time. If you have two or more events with the same start time, choose the Day view to see overlapping events.
I cannot find an image pasted in an Address Book entry.
→ If you use the Palm Desktop for CLIÉ software to change the category of the Address Book entry, you may not be able to locate the pasted image on your CLIÉ handheld. Change the category on your CLIÉ handheld.
I changed Currencies in Expense, but they do not appear in the application.
→Retry setting Currencies in the Select Currencies dialog box.
I cannot start applications installed in the Memory Stick media.
→In order to open such applications from the Application Launcher screen, a memory space exceeding the application size must be kept free on your CLIÉ handheld.
→Check if the application files or data files (such as image files) essential to starting the applications are stored under the "/PALM/Launcher/" directory of the Memory Stick media. If so, the CLIÉ handheld may not be able to access the data files or application files. Copy or move the file data to the CLIÉ handheld using MS Gate (page 155, 157).
→Check if you installed application or data from your computer to the CLIÉ handheld by a HotSync operation, and selected Memory Stick as their destination. If so, copy or move the data to your CLIÉ handheld (page 155, 157).
Troubleshooting – Frequently Asked Questions
HotSync problems
I cannot perform a HotSync operation. What should I check to make sure I am doing it correctly?
^③ 98/
, Check that the operating system of your computer is Windows 98SE/Me/2000 Professional.
, Make sure that the cradle is connected securely to the computer.
I performed a HotSync operation, but one of my applications did not synchronize.
, Click the HotSync Manager and choose Custom. Check that the correct conduit is active.
I am using Outlook * as my PIM, but I cannot do a HotSync operation.
, Click the HotSync Manager and choose Custom. Check that the correct conduit is active.
, Check that the correct conduit is installed. Reinstall the HotSync Manager and make sure the correct conduit is selected.
, Make sure that Intellisync Lite is installed. See "Step 4: Installing the Palm Desktop for CLIÉ software onto your computer" in the Read This First manual for details.
I cannot launch the HotSync Manager.
, Make sure that you are not running another program, such as a network or facsimile applications, that use the serial port you selected in the Setup dialog box.
, Back up the Palm Desktop for CLIÉ software, uninstall it, and then reinstall it.
. Make sure that Local USB is selected.
Troubleshooting – Frequently Asked Questions
I tried to perform a local HotSync operation, but it did not complete successfully.
Try each of these in turn:
→Make sure that HotSync Manager is running. If HotSync Manager is running, exit, and then restart it.
→Make sure that Local USB is selected in the HotSync Manager menu or the Palm Desktop for CLIÉ software menu.
→Check that the cradle is properly connected to the USB connector of your computer.
→Read the HotSync Log for the user account for which you are performing a HotSync operation.
→ Make sure that your CLIÉ handheld is seated in the cradle correctly.
→Make sure that the gold-plated connectors on the cradle and your CLIÉ handheld are clean. Use a pencil craser to clean them.
I cannot perform a HotSync operation via modem.
Check the following on your computer:
→Make sure that your computer is turned on and that it does not shut down automatically as part of an energy-saving feature.
→Make sure that the modem connected to your computer is turned on and is connected to the outgoing phone line.
→Make sure that Modem is selected in the HotSync Manager menu.
→Make sure that the modem you are using with your CLIÉ handheld has an on-off switch. Your CLIÉ handheld cannot "wake up" a modem that has an auto-off feature.
→Make sure that the modem is connected properly to a serial port on your computer and it is connected to an incoming phone line.
→Confirm that the Setup String in the Setup dialog box configures
Troubleshooting – Frequently Asked Questions
→Confirm that the Speed setting in the Setup dialog box works for your modem. If you have problems using the "As Fast As Possible" option or a specific speed, try using a slower speed.
→Make sure that your modem resets before you try again. (Turn off your modem, wait a minute, then turn it on.)
→Confirm that the telephone cable is securely attached to your modem.
→Make sure that the dialing instruction dials the correct phone number.
→If you need to dial an outside line prefix, make sure you selected the Dial Prefix option on your CLIÉ handheld and have entered the correct code.
Check the following on your CLIÉ handheld:
If the telephone line you are using has Call Waiting, make sure you selected the Disable call waiting option under "Modem Sync Phone Setup" on your CLIé handheld and entered the correct code.
→Make sure that the telephone line you are using is not noisy. This can interrupt communications.
→Check the batteries in your modem and replace them if necessary.
I cannot perform an IR HotSync operation.
→Make sure that the HotSync Manager is running and the Serial Port for local operations is set to the simulated port for infrared communication.
→ On your CLIÉ handheld, make sure that the HotSync application is set to IR to a PC/Handheld.
→ Make sure that the IR port of your CLIÉ handheld is aligned directly opposite to, and within a few inches of, the infrared device of your computer.
Troubleshooting – Frequently Asked Questions
→IR HotSync operations do not work after you receive a low battery warning. Check the battery power of your CLIÉ handheld. Recharge the battery if necessary.
→If you have problems using a specific speed, select Prefs, Connection, IR to a PC/Handheld, Edit, and then Details. Then select a lower speed in the Details dialog box.
My CLIÉ handheld appears to freeze when I place it near my computer.
→ Move your CLIÉ handheld away from the computer's infrared port.
→Make sure that you turn the Beam Receive function off.
My CLIÉ handheld displays the message "Waiting for sender" when it is near my computer's infrared port.
→ Your computer's infrared port may be set to search automatically for the presence of other infrared devices. Do the following to turn off this option:
1 In the Windows task bar, select Start, point to Settings, and then select Control Panel.
2 Double-click Infrared.
3 Click the Options tab.
4 Clear the selection of the option "Search for and provide status for devices within range."
5 Click Apply and OK
→ Move your CLIÉ handheld away from the computer's infrared port.
→Make sure that you turn the Beam Receive function off.
I cannot cancel a HotSync operation midway.
→You may not be able to cancel a job a few seconds after you start a HotSync operation via a USB connection. Wait for a while and try
Troubleshooting – Frequently Asked Questions
I cannot backup some data at a HotSync operation.
→Some data is designed not to be backed up by a HotSync operation.
When I tap the HotSync button on the cradle, nothing happens on the Palm Desktop for CLIÉ software and my CLIÉ handheld times out.
→ Check the Palm Desktop for CLIÉ software HotSync Setup options to confirm that you have the correct settings for local HotSync operations.
→Make a copy of your Palm folder. Uninstall, and then reinstall the Palm Desktop for CLIÉ software.
→Turn on your CLIÉ handheld and then tap the Home icon. Tap the HotSync icon, then tap Local.
When I perform a HotSync operation, my information does not transfer to the Palm Desktop for CLIÉ software.
→If you have performed a HotSync operation successfully, but you cannot find the data from your CLIÉ handheld on the Palm Desktop for CLIÉ software, check to see that you have the correct user name selected for viewing data.
→Click the HotSync Manager and then choose Custom. Check that all conduits are set to synchronize files.
I want to synchronize my computer with more than one CLIÉ handheld.
→ When the computer running the Palm Desktop for CLIÉ software is to synchronize with more than one CLIÉ handheld, each CLIÉ handheld must have a unique user name. Assign a unique user name to your CLIÉ handheld the first time you perform a HotSync operation.
Dlason has seen that monochranding with more than one CT II.
Troubleshooting – Frequently Asked Questions
Connection problems
I have trouble establishing a network connection to my ISP or dial-in server.
→Check the Expanded Service Connection Progress messages to identify the point where the connection fails in the log in procedure. Press the lower half of the scroll button at any point during log in to display these messages.
→Check the information in the Network Log so your ISP or your System Administrator can pinpoint where the log in procedure communication fails and why.
To view the Network Log, open the Network Preferences screen and tap the Menu icon. Tap Options, then View Log, Tap the up and down arrows of the scroll bar to see the entire Network Log.
Beaming problems
I cannot beam data to another Palm OS PDA.
→ Confirm that your CLIÉ handheld and the other Palm OS PDA are between 4 inches (approximately 10 centimeters) and 8 inches (approximately 20 centimeters) apart, and that the path between the two handhelds is clear of obstacles. Beaming distance to other Palm OS PDA may be different.
→Move your CLIÉ handheld closer to the receiving handheld.
→Make sure that the Beam Receive function of the other Palm OS PDA is turned on.
Troubleshooting – Frequently Asked Questions
When someone beams data to my CLIÉ handheld, I get a message telling me it is out of memory.
→ Your CLIÉ handheld requires a memory space of at least approximately 1.1 times the data size that you are receiving.
→ Perform a soft reset. See "Resetting your Sony CLIÉ Handheld" (page 24) for more information.
I cannot beam Address Book data.
→ You cannot beam Address Book data to a CLIÉ handheld in which Address Book has never been started. Start Address Book and then try beaming Address Book data again.
→You cannot beam images to a Palm OS PDA other than a Sony CLIÉ handheld.
Recharging problems
When I place my CLIÉ handheld on the cradle, it does not recharge.
→ Confirm that your CLIÉ handheld is well seated in the cradle.
→Confirm that your cradle is plugged into an AC power adapter.
→Confirm that you are using the cradle and AC adapter that came with your CLIÉ handheld.
→ Confirm your CLIÉ handheld is turned off. Otherwise, it will not fully charge.
Troubleshooting – Frequently Asked Questions
Password problems
I forgot the password, and my CLIÉ handheld is not locked.
→You can use Security to delete the password, but your CLIÉ handheld deletes all records marked as private. To back up all data including private records, perform a HotSync operation before you delete the password. Then follow these steps to restore your private records onto your CLIÉ handheld:
1 Perform a HotSync operation to back up your data.
2 Tap Forgotten Password in Security to remove the password and delete all private records.
3 Perform a HotSync operation to synchronize your data and restore the private records by transferring them from your computer to your CLIÉ handheld.
I forgot the password and my CLIÉ handheld is locked.
→ If you assign a password and lock your CLIÉ handheld, you must perform a hard reset to continue using your CLIÉ handheld. See "Resetting your Sony CLIÉ Handheld" (page 24) for more information.
Memory Stick® media problems
I cannot copy/move data from Memory Stick® media to my CLIÉ handheld.
→ Your CLIÉ handheld requires a memory space of at least approximately 1.1 times the data size that you are copying/moving.
I inserted Memory Stick media, but the message "Please insert Memory Stick media" appears.
→ Your Memory Stick media is not recognized by your CLIÉ handheld.
Troubleshooting – Frequently Asked Questions
You cannot perform a HotSync operation before you install the Palm Desktop for CLIÉ software onto your computer
If you perform a HotSync operation before you install the CLIÉ drivers, other drivers may be installed. Make sure to install the Palm Desktop for CLIÉ software first and then perform a HotSync operation.
Do not use a USB hub
If you connect the cradle to your computer via a USB hub, you may not be able to perform a HotSync operation properly. Make sure to connect the cradle directly to a USB connector of your computer. Some computers have the hub function built into their internal circuitry. Contact your computer manufacturer if the USB connector of your computer is connected to an internal USB hub.
Check the USB driver being used
If you are using or have used a communication device that uses a virtual COM port, its driver may conflict with the driver for your CLIÉ handheld, preventing a HotSync operation. Remove the relevant driver or reinstall the driver for your CLIÉ handheld. Or reinstall all software on your computer.
Check that the USB port of your computer is enabled
If you are using Windows 95 pre-installed computer or another old type of computer equipped with a USB port, the USB port may be disabled by default. If another device such as a USB mouse cannot be used, check the BIOS setting of your computer. Also check the Device Manager. Right-click on My Computer and then select Properties. Click Device Manager tab and check that USB controller is listed in the Device Manager screen.
Getting Help
Sony offers several support options for your CLIÉ handheld. When you have questions or trouble, please refer to one of the following for a solution:
■Read This First (supplied), Operating Instructions (this guide), and Add-on Application Guide (supplied) explains how to use your CLIÉ handheld.
■ Your Sony CLIÉ Handheld support Web site
http://www.sony.com/peg/support/
Provides the latest information on your CLIÉ handheld. On this Web site, you will find:
• Frequently Asked Questions (FAQs)
• Online Operating Instructions
• Installation information
- Software updates
• Online knowledge base
■ The Sony e-mail support service answers your questions by e-mail.
Send your question, and a customer service representative will send you
a reply. You can use the e-mail form at
http://www.sony.com/peg/support/
■The Sony fax-back service provides you with answers to commonly asked questions. You can use this automated service to request a list of available topics and then select the topics that you want to receive. To contact the Sony fax-back service, call 1-877-760-SONY (7669).
■The Sony Customer Information Service Center offers information about your CLI.FE handheld and other Sony products that work with your computer. To contact the Sony Customer Information Service Center, call 1-877-760-SONY (7669).
Specifications
OS Palm OS ver. 4.1
CPU Dragonball VZ 33MHz
Memory
8 MB (DRAM)
4 MB (Flash memory)
User memory range:
approx. 7 MB
External input/output
Interface connector
IrDA (1.2)
Memory Stick slot
LCD display
Frontlight TFT color display
320 × 320 dots, 65536 colors
Power requirements
AC power adapter (supplied)
DC5.7V
(dedicated connector)
Battery
Lithium ion battery
(built-in)
Battery life
15 days* (based on an average of 30 minutes use per day)
• The battery life span varies depending on the temperature and conditions of use.
Audio frequency response
Audio recording time (when using a
128 MB Memory Stick media)
Approx. 120 min. (bit rate: 132kbps)
Approx. 160 min. (bit rate: 105kbps)
Approx. 240 min. (bit rate: 66kbps)
Audio Recording format
ATRAC3**
MP3
^** The ATRAC3 content-protected music is supported when used with MagicGate Memory Stick media (not supplied).
Sampling frequency
44.1 kHz
Output
Headphones: stereo mini-jack
Dimensions
Approx. 2^7/5 × 4^1/4 × ^11/_16 inches (71.0 x 118.5 x 16.8 mm) (w/h/d)
Mass
Approx. 5.65 oz (160g) (including the supplied stylus)
Operating temperature
41^ - 95^(5^ - 35^)
Limited Warranty Statement
CLIÉ Personal Entertainment Organizer - Hardware Warranty
The limited warranty on the hardware of your CLIÉ Personal Entertainment Organizer product (the "Product") covers parts and labor against defects in material or workmanship for a period of three (3) months from the original date of purchase for Products purchased in the United States (excluding territories) or Canada from SONY or a SONY authorized dealer. You can extend the warranty period for an additional nine (9) months by registering your Product within ninety (90) days of the purchase date. To register with Sony, register online at http://www.sony.com/pcg/support for United States sales (excluding territories) or http://www.sonystyle.ca for Canadian sales. You may also register by calling the respective phone numbers shown below. Once you register your Product, the limited warranty period is twelve (12) months from the original date of purchase.
For the purpose of this Limited Warranty "SONY" means SONY ELECTRONICS INC. for Products purchased in the United States (excluding territories) and SONY OF CANADA LTD. for Products purchased in Canada. SONY warrants the hardware of your Product against defects in material or workmanship as follows:
- Labor: For a period of ninety (90) calendar days from the original date of purchase in the United States (excluding territories) or Canada from SONY or a SONY authorized dealer, SONY will, in the country in which the Product was purchased, repair defects in material or workmanship in the hardware of the Product, at no charge, or pay the associated labor charges to a SONY authorized service facility. The ninety (90) day warranty period is extendible only to the original purchaser, for an additional period of nine (9) months, for a total of twelve (12) months from date of purchase when the Product is registered prior to the expiry of ninety (90) days from the original date of purchase. After the applicable labor warranty period, you must pay for all labor charges.
- Parts: If your Product in the United States (excluding territories) or Canada, from SONY or an authorized SONY dealer, for a period of ninety (90) calendar days from the original date of purchase, dealer, SONY will supply, at no charge, in the country in which the Product was purchased, new or rebuilt, at SONY's option, replacement parts in exchange for defective hardware parts. Any replacement hardware parts will be warranted for the remainder of the original warranty period or ninety (90) calendar days from installation by SONY's authorized service facility, whichever is longer. The ninety (90) day warranty period is extendible only to the original purchaser, for an additional period of nine (90) months, for a total of twelve (12) months from date of
Limited Warranty Statement
This Limited Warranty covers only the hardware components packaged with the Product. It does not cover the technical assistance or support for hardware or software usage and it does not cover any software products whether or not contained in the Product. SONY excludes all warranties and conditions, express or implied, in respect of any software provided with the Product and any such software is provided AS IS unless expressly provided for in any enclosed software limited warranty. Please refer to the End User License Agreement(s) included with the Product for your rights and obligations with respect to the software.
This Limited Warranty is non-transferable. Proof of purchase in the form of a bill of sale (which is evidence that the Product is within the warranty period) must be presented to obtain warranty service.
In addition, expedited delivery may be available for certain, limited replacement parts. Where expedited delivery service is available, you will be required to provide SONY with a credit card authorization to bill your credit card in the event you fail to return the original part(s) in the postage-paid envelope we provide. The credit card will be charged an amount equal to SONY's current list price for the part(s) only if the original part(s) has not been returned to Sony within thirty (30) days of the delivery of the replacement part(s). With respect to certain components, you may be entitled to express warranty service during the warranty period, subject to certain restrictions. Please contact SONY as indicated below for further information.
With respect of certain components you may be entitled to express warranty service during the warranty period, subject to certain restriction. Please contact SONY as indicated below for further information.
With respect to all service provided, it is solely your responsibility, prior to Product being serviced, to backup all data stored in its memory. It is likely that the contents of the memory will be lost or reformatted in the course of service and SONY will not be responsible for any damage to or loss of any programs, data or other information stored on any media or any part of any Product serviced hereunder or any incidental, indirect or consequential damages resulting therefrom.
IF DURING THE REPAIR OF THE PRODUCT THE CONTENTS OF THE
Limited Warranty Statement
Be sure to remove all third party hardware, software, features, parts, options, alterations, and attachments not warranted by SONY prior to sending the Product to SONY for service. SONY is not liable for any loss or damage to these items.
This Limited Warranty does not cover any consumable items supplied with the Product; cosmetic damages; damage or loss to any software programs, data, or media; or damage due to (1) acts of God, accident misuse, abuse, negligence, commercial use or modifications of this Product; (2) improper operation or maintenance of this Product; (3) connection to improper voltage supply; or (4) attempted repair by any party other than a SONY authorized service facility. This warranty does not cover physical damage to the surface of the Product, including cracks or scratches on the LCD touchscreen or outside casing. This Limited Warranty does not apply when the malfunction results from the use of the Product in conjunction with accessories, products or ancillary or peripheral equipment, or where it is determined by SONY that there is no fault with the Product itself. This Limited Warranty is valid only in the United States (excluding territories) and Canada. This Limited Warranty is invalid if the factory-applied serial number has been altered or removed from the product.
Repair or replacement of defective parts or hardware as provided under this limited Warranty is the exclusive remedy of the consumer. SONY SHALL NOT BE LIABLE FOR ANY INCIDENTAL, INDIRECT OR CONSEQUENTIAL DAMAGES OR OTHER DAMAGES INCLUDING BUT NOT LIMITED TO, LOSS OF PROFITS, LOSS OF REVENUE, LOSS OF DATA, LOSS OF USE OF THE PRODUCT OR ANY ASSOCIATED EQUIPMENT, DOWNTIME AND PURCHASER'S TIME OR FOR BREACH OF ANY EXPRESS OR IMPLIED WARRANTY OR CONDITION, BREACH OF CONTRACT, NEGLIGENCE, STRICT LIABILITY OR ANY OTHER LEGAL THEORY RELATED TO THIS PRODUCT. EXCEPT TO THE EXTENT PROHIBITED BY APPLICABLE LAW, ANY IMPLIED WARRANTY OR CONDITION OF MERCHANTABILITY QUALITY OR FITNESS FOR A PARTICULAR PURPOSE ON THIS PRODUCT IS LIMITED IN DURATION TO THE DURATION OF THIS WARRANTY.
Some jurisdictions do not allow the exclusion or limitation of incidental, indirect or consequential damages, or allow limitations on how long an implied warranty lasts, so the above limitations or exclusions may not apply to you. This Limited Warranty gives
Limited Warranty Statement
Technical Support: Although technical support is not provided free of charge under this Limited Warranty, SONY has established a telephone number for technical support. Charges may apply for technical support, unless and to the extent that free technical support for a limited period is provided in writing as a feature of your Product. Prior to placing your call, please have available the model and serial number for your Product, date of purchase, a list of all options installed in your Product and a detailed description of the problem.
For Product support, online knowledge base, frequently asked questions, and free updates via the Internet: http://www.sony.com/peg/support/. For Product information, service assistance, resolution of a service problem, or technical assistance, call: 1-877-760-SONY (7669) in the United States (excluding territories) or 1-866-557-SONY (7669) in Canada.
It Is Important That You Register Your
CLIE Personal Entertainment Organizer
By registering, you receive the following benefits:
-
Your ninety (90) day limited hardware warranty is automatically extended to a full one (1) year from the original date of purchase.
-
One (1)Year Hardware Telephone Support.
Save this statement for future reference.
©2001 Sony Electronics Inc. Reproduction in whole or in part without written permission is prohibited. All rights reserved. SONY is a registered trademark, and CLIÉ is a trademark, of Sony Corporation.
Index
A
Address Book
Editing 53
Entering a new entry 47
Pasting an image 53
Sorting entries 51
Using menus 59
Viewing entries 49
Adjusting the frontlight level 23
Application
Categorizing 90
Launcher (home) screen 89
Selecting/Starting 89
Setting applications to start
automatically 145
Starting an application in
Memory Stick media 90
Troubleshooting 210
Application buttons
Assigning applications to buttons ..... 167
Selecting applications 89
Attaching notes 106
Automatic shut-off time 176
B
BACK button 7,170
Backing up data
By a HotSync operation (to computer) ... 194
By MS Backup (to Memory Stick media) 195
By MS Gate (to Memory Stick media) .... 197
Battery considerations
Tips and notes....205
Beam Receive feature 178
Beaming
Between two handhelds ....138
Receiving data 140
Sending items or categories .....139
Tips on beaming.... 140
Troubleshooting 217
C
Calculator
Using buttons 88
Using calculator 87
Using menus 88
d Info 146
egories
Categorizing applications .....90
Categorizing items 75,93
New categories 95
Viewing items by categories50, 62, 72, 94
posing fonts 109
aning 204
Copying
From CLÉ handheld to
Memory Stick media 153
From Memory Stick media
to CUE handheld 155
Restoring backup
to your CLIÉ handheld .....198
Cradle 112
Index
D
Date Book
Agenda view 38
Day view 34
Editing 40
Month view 37
Repeating or continuous events ....30
Scheduling an event 27
Setting alarm 42
Using menus 45
Week view 35
Deleting
Data in the Memory Stick media .....158
Items 44, 57, 66, 74, 107
Digitizer 165
Dragging....9
E
Edit menu 108
Entering data
Computer keyboard 22
Graffiti writing ....11
Onscreen keyboard 20
Expense
Creating/printing an Expense report.....82
Currency list 83
Default currency 84
Editing items 79
New currency symbol 85
Recording a new item 77
Using menus 86
F
FAQ(Frequently Asked Questions) ..... 207
File Link 136
Finding items
Find option 96
Phone Lockup 98
Formats....171
Formatting the Memory Stick media.. 147
Frontlight
Adjusting the level 23
Turning on and off....23
Full-screen dragging 9, 13, 168
G
Getting Help 221
Graffiti writing
Accented characters 18
Alphabets 12, 14
Basic procedures 12
Letters/numbers writing area .....11
Non-English characters 18
Numbers 15
Onscreen help 13
Overview....11
Punctuation marks 16
ShortCuts 19, 180
Symbols and extended characters .....17
Index
H
Hard reset 25
HOLD switch 7
HotSync button 112, 169
HotSync operation
File Link 136
LANSync 129, 132
Network Modem Sync 129
Overview....111
Via cradle (Local HotSync)....112
Via IR port....120
Via modem ....123
Via network 129
I
Importing data from a Windows
application....134
IR port 120,138
J
Jog Dial navigator
Changing preferences....170
Compatible applications ....10
Displaying the Pop-up application menu .92
How to use (pressing/rotating)....10
logAssist function 170
JogAssist function.... 170
L
M
Making items private.. 43, 75, 100, 105
Memo Pad
Creating new memos 69
Editing memics ....74
Reviewing memos ....71
Using menus 76
Memory Stick media
Attaching a name 146
Default folder 152
Formatting 147
Inserting and removing.... 142
Installing applications without MS Gate 162
Notes on using 143
Overview....141
Protecting data 144
Starting an application .....145
Troubleshooting....219
Types 141
Viewing media information....146
MS Backup
Backing up all CLIÉ data to
Memory Stick media ....195
MS Gate
Copying CLIÉ data to
Memory Stick media ....153
Copying Memory Stick data to
CLIE handheld 155
Deleting data 158
Formatting the Memory Stick media..... 147
Notes on moving or copying data .....151
Starting 149
Index
N
Network preferences 182
Log in script 188
Password 183
Selecting a connection .....184
Selecting a service ....182
Service template 185
Telephone setting 184
User name 183
Using menus 191
Notes on use 204
0
Onscreen keyboard 20
Owner information 179
P
Palm Desktop for CLIÉ
Basic operations 114
Locating screen components .....115
Starting 114
Password
Deleting a password ....101
Entering a password ..... 100, 104, 183
Locking your CLIÉ handheld ....103
Troubleshooting 219
Phone Lookup....98
PIM (Personal Information Management)
Address Book 47
Calc (Calculator)....87
Common tasks 89
Date Book 27
Edit menu 108
Expense 77
Memo Pad 69
To Do List....61
POWER button....7
Precautions 204
Preferences
Beam Receive feature 178
Buttons 167
Date & Time preferences ....173
Digitizer 165
Formats 171
Full-screen pen stroke activities ..... 168
General preferences ....176
Graffiti ShortCuts 180
HotSync button 169
Network preferences ....182
Overview....165
Owner information 179
Password 183
Setting daylight saving time ....175
Setting the date 173
Setting the time 174
Setting the time zone 175
Time, date, and number formats .....172
User name 183
Protecting data 100
Purging records 107
Index
R
Reset
Hard reset 25
Reset button 25
Soft reset 24
s
Security 100
Selecting text in an application ..... 108
Setting
Automatic shut-off time 176
Date 173
Daylight saving time 175
Number formats 172
Priorities 64
Sound 177
Time 174
Time zone 175
Soft reset 24
Sorting items 51, 72
Specifications 222
Stylus
How to use 8
Taking out the reset tip....24
Synchronizing with external data ..... 136
T
Tapping....8
To Do List
Changing appearance 67
Checking off items 63
Creating Items 61
Setting priorities 64
nsferring data between two CLIE
ndhelds
Using Memory Stick media ....201
Using Palm Desktop for CLIÉ .....199
ubleshooting
Applications 210
Beaming 217
Connection 217
HotSync operations 212
Memory Stick media 219
Operations 207
Password 219
Recharging....218
Tapping and writing
Turning your CLIÉ handheld on and off...7
U
USB driver....220
User name 183
For the latest support information, check our official Sony CLIÉ Web site http://www.sony.com/clie/
- Operating Instructions
- Chapter 1
- Chapter 2
- Chapter 3
- Chapter 4
- Chapter 5
- Table of contents
- Chapter 6
- About this manual
- Read This First
- Operating Instructions (this manual)
- Add-on Application Guide
- Basic operations of your Sony CLIÉ Handheld
- Contents
- Turning your Sony CLIÉ Handheld on and off
- Turning on your CLIÉ handheld
- Note
- Tip
- Turning off your CLIÉ handheld
- Using the stylus
- Taking out the stylus
- Tapping
- Dragging
- Examples of dragging:
- On full-screen dragging
- Using the Jog Dial™ navigator
- Rotating the Jog Dial navigator
- Pressing the Jog Dial navigator
- Rotating while holding down the Jog Dial navigator
- Entering data into your Sony CLIÉ Handheld
- Using Graffiti® writing to enter data
- What is Graffiti writing?
- There are four basic concepts for success with Graffiti writing:
- Writing Graffiti letters
- Tips
- To display the Graffiti onscreen help
- Writing Graffiti alphabet
- To write capital letters
- Writing numbers
- Writing punctuation marks
- Writing symbols and extended characters
- Writing accented characters and non-English characters
- To write non-English characters
- Using Navigation strokes
- Using Graffiti ShortCuts
- Using the onscreen keyboard
- Using your computer keyboard
- To import data from your computer or another handheld
- Changing the frontlight level
- Turning the frontlight off and on
- Adjusting the frontlight level
- Resetting your Sony CLIÉ Handheld
- Performing a soft reset
- Performing a hard reset
- Using basic applications
- Managing schedules and events (Date Book)
- Scheduling an event
- Scheduling an event for the current date
- Enter a description of the event.
- If the event is one hour long, skip to step 7. If the event is longer or shorter than one hour, tap the time of the event to open the Set Time dialog box.
- Do one of the following to set the duration of the event:
- Tap OK.
- Tap a blank area of the screen to deselect the event.
- To schedule an untimed event
- Scheduling a timed event for another date
- Scheduling repeating or continuous events
- Examples of repeating or continuous events
- Tap the Repeat box.
- Tap Day, Week, Month, or Year to set how often the event repeats.
- Enter a number that corresponds to how often you want the event to repeat on the Every line.
- Tap OK.
- Notes
- Checking schedules
- Displaying the Day view
- To change the Date Book view
- Displaying the Week view
- To view the detail of an event
- To spot event conflicts
- Displaying the Month view
- Displaying the Agenda view
- Changing Date and Time view
- Editing Date Book events
- Changing a date or time for an event
- Changing a timed event to an untimed event
- Setting an alarm for an event
- Setting an alarm for an untimed event
- Making an event private
- Deleting events
- Managing addresses and phone numbers (Address Book)
- Creating a new Address Book entry
- Viewing Address Book entries
- To view an image pasted to an address entry
- Viewing addresses by category
- To select category from the categories list
- Sorting the address entries in the list
- Looking up an address entry
- Editing Address Book entries
- Pasting an image to an address entry
- Tap the image you want to paste.
- Tap Done.
- To change the image
- To remove the image
- Modifying an address entry
- To select types of phone numbers
- Duplicating an address entry
- Deleting an address entry
- Changing the address entry details
- Using the Address Book menus
- Managing tasks and things to do (To Do List)
- Creating To Do List items
- Viewing To Do List items
- Viewing To Do List items by category
- To select the desired category from the categories list
- Checking off a To Do List item
- Working with To Do List
- Setting the priority of an item
- Setting the due date for an item
- Tap OK.
- Deleting an item
- Changing the appearance of To Do List
- On the To Do List screen, tap Show.
- Change the To Do Preferences settings.
- Tap OK.
- Using the To Do List menus
- Creating memos (Memo Pad)
- Creating a new memo
- Press the Memo Pad button on the front panel.
- Tap New.
- Enter the text you want to appear in the memo.
- Tap Done or press the BACK button when you finish.
- Reviewing memos
- Viewing memos by category
- Sorting memos
- Editing memos
- Deleting a memo
- Categorizing a memo
- Making a memo private
- Using the Memo Pad menus
- Managing expenses (Expense)
- Recording a new Expense item
- Enter the amount of the expense.
- Tap -Expense Type- and select an Expense type from the drop-down list box.
- Editing Expense items
- Changing the display option
- On the Expense screen, tap Show.
- Select the desired display mode option.
- Changing the date of an Expense item
- Entering receipt details for an Expense item
- Creating/printing an Expense report
- Click one of the following:
- Using expense report templates
- Customizing the Currency list
- To change the currency list
- To change your default currency
- To create a new currency symbol
- Using the Expense menus
- Using Calculator (Calc)
- Calculating with Calculator
- Performing common tasks
- Using the Application Launcher
- Selecting applications
- To open applications in the Memory Stick media
- Categorizing applications
- To categorize an application
- To display applications by category
- Changing the Application Launcher display
- To change the view of applications
- Categorizing records
- System-defined and user-defined categories
- Moving a record into a category
- Displaying the category of records
- Defining a new category
- Finding records
- Using the Find option
- Tap the text in the find result list that you want to review.
- To stop searching midway
- Using the Phone Lookup option
- Protecting your data (Security)
- Assigning a password
- Changing or deleting a password
- If you forget your password
- Tap Lost Password in step 3.
- Tap Yes.
- Locking your CLIÉ handheld with a password
- Setting your CLIÉ handheld to lock automatically
- Making records private
- To mask or hide private records
- To display private records
- Attaching notes
- Purging records
- Using the Edit menu
- Selecting text in an application
- Edit menu
- Choosing fonts
- Exchanging and updating data using a HotSync® operation
- What is a HotSync® operation?
- Performing a local HotSync® operation with the cradle
- If the HotSync operation does not start
- If a message stating that the selected COM port is not available is displayed
- To change the user name
- Using the Palm™ Desktop for CLIÉ software
- Starting the Palm Desktop for CLIÉ software
- To quit the Palm Desktop for CLIÉ software
- Basic operations of the Palm Desktop for CLIÉ software
- Locating the Palm Desktop for CLIÉ components
- Advanced HotSync® operations
- Setting the HotSync® setup options
- Customizing HotSync application settings (Conduit)
- What is a "Conduit"?
- Conducting an IR HotSync operation
- Before you start performing an IR HotSync operation
- Preparing your computer
- Performing an IR HotSync operation
- Tap the Icon.
- To restore the local HotSync settings
- Conducting a HotSync operation via modem
- Before you start performing a HotSync operation via modem
- Adjust the following options as needed.
- Click OK.
- Preparing your CLIÉ handheld
- To select the conduits for a modem HotSync operation
- Tap the Menu ☐ on.
- Performing a HotSync operation via modem
- Conducting a HotSync operation via a network
- To connect to your company's dial-in server
- Preparing your CLIÉ handheld and performing a network HotSync operation
- Importing data from a Windows application
- Importable file formats
- Importing data
- Synchronizing with external data (File Link)
- Communicating using your Sony CLIÉ Handheld
- Beaming between your Sony CLIÉ Handheld and another Palm OS® PDA
- What you can do with beaming
- Beaming information
- Receiving beamed information
- Tips on beaming information
- Using Memory Stick® media
- What is Memory Stick® media?
- Types of Memory Stick media
- Inserting and removing Memory Stick media
- To remove Memory Stick media
- Notes on using Memory Stick media
- Protecting the data in Memory Stick media
- Write enable position
- Write protect position (LOCK)
- Starting an application in Memory Stick media
- Starting an application automatically when Memory Stick media is inserted
- Viewing information of the inserted Memory Stick media (Card Info)
- Attaching a name to a Memory Stick media
- Formatting Memory Stick media
- Using Memory Stick ® media
- To cancel formatting
- To format a Memory Stick media in the Card Info screen
- What is formatting?
- Exchanging data via Memory Stick® media
- Starting Memory Stick Gate (MS Gate)
- When displaying the contents of your CLIÉ handheld
- When displaying the contents of Memory Stick media
- Notes on moving or copying data using MS Gate
- Creating the default folder in Memory Stick media
- Copying your CLIÉ handheld data to Memory Stick media
- Tap COPY.
- To copy all the data at once
- To cancel the selection
- To change the destination folder
- Moving your CLIÉ handheld data to Memory Stick media
- Copying data in Memory Stick media to your CLIÉ handheld
- To change the folder to be copied
- To rename the file or folder name
- Moving data in Memory Stick media to your CLIÉ handheld
- Deleting data in Memory Stick media
- Tap OK.
- To delete all data at once
- To change the folder to be deleted
- Exchanging data via Memory Stick ® media
- Using the MS Gate menus
- Tools menus
- Options menus
- How to read the online manual
- If the Acrobat Reader software is not installed
- Installing applications to/from Memory Stick® media without using MS Gate
- Notes on starting applications installed from the Memory Stick media (without using MS Gate)
- Customizing your Sony CLIÉ Handheld (Preferences)
- What you can do with Preferences
- - Buttons
- - Connection
- - Date & Time
- • Digitizer
- - Formats
- - General
- • HiRes
- • Jog
- - Network
- - Owner
- - ShortCuts
- Viewing Preference
- Changing the Buttons preferences
- Assigning applications to buttons
- Changing the full-screen pen stroke activities
- Assigning applications to HotSync® buttons
- Changing the Jog Dial™ navigator preferences
- Setting the display format of the time, date, and numbers (Formats)
- Selecting a country default
- Selecting the time, date, and numbers formats
- Setting the Date & Time preferences
- Setting the date
- Setting the time
- Setting the time zone and daylight saving time
- Setting the time zone
- Setting the daylight saving time
- Setting the General preferences
- Setting the automatic shut-off time
- Setting sounds
- Turning on or off the Beam Receive feature
- Entering owner information
- To unlock the Owner Preferences screen
- Creating Graffiti® ShortCuts
- To Edit a ShortCut
- To Delete a ShortCut
- Changing the Network preferences
- Selecting a service
- Entering a user name
- Entering a password
- Selecting a connection
- Adding telephone settings
- Creating additional service templates
- To add a new service template
- To duplicate an existing service template
- To delete a service template
- Adding detailed information to a service template
- To select a connection type
- Creating log in scripts
- Non-ASCII Characters for Log in Scripts
- Use of ^char
- Carriage return and line feed
- Literal characters
- Using the Network preferences menus
- Service menus
- Setting the High Resolution Assist function
- Additional information
- Backing up data of your Sony CLIÉ Handheld
- Backing up data to your computer through HotSync operation
- Backing up all CLIÉ data to a Memory Stick media (using MS Backup)
- Backing up data with the MS Backup application
- Tap OK.
- To delete back-up files from the Memory Stick
- Restoring back-up data and applications to your CLIÉ handheld
- Backing up CLIÉ data to a Memory Stick media using MS Gate
- ■ Applications
- Data
- Restoring backup data and applications to your CLIÉ handheld
- Using data of another Sony CLIÉ Handheld
- Using the Palm Desktop for CLIÉ software to transfer data
- Notes on a HotSync operation
- Using Memory Stick media to transfer data
- Performing HotSync between your old CLIÉ handheld and the new Palm Desktop for CLIÉ software
- Precautions
- Notes on use
- On cleaning
- Battery considerations
- On charging
- On the battery life
- Tips on conserving the battery
- When your battery runs out
- When the remaining battery indicator reads 0.
- Troubleshooting – Frequently Asked Questions
- Operating problems
- I do not see anything on my CLIÉ handheld's screen.
- I get a warning message telling me my CLIÉ handheld's memory is full.
- My CLIÉ handheld keeps turning itself off.
- My CLIÉ handheld is not making any sounds.
- My CLIÉ handheld has frozen.
- I cannot use the Jog Dial navigator.
- An error message is displayed repeatedly.
- Frontlight turns on when I am adjusting the frontlight level.
- Tapping and writing problems
- Application problems
- I tried to perform a local HotSync operation, but it did not complete successfully.
- Try each of these in turn:
- I cannot perform a HotSync operation via modem.
- Check the following on your computer:
- Check the following on your CLIÉ handheld:
- I cannot perform an IR HotSync operation.
- My CLIÉ handheld appears to freeze when I place it near my computer.
- My CLIÉ handheld displays the message "Waiting for sender" when it is near my computer's infrared port.
- I cannot cancel a HotSync operation midway.
- Connection problems
- Beaming problems
- When someone beams data to my CLIÉ handheld, I get a message telling me it is out of memory.
- I cannot beam Address Book data.
- Recharging problems
- When I place my CLIÉ handheld on the cradle, it does not recharge.
- Password problems
- I forgot the password, and my CLIÉ handheld is not locked.
- I forgot the password and my CLIÉ handheld is locked.
- Memory Stick® media problems
- I cannot copy/move data from Memory Stick® media to my CLIÉ handheld.
- I inserted Memory Stick media, but the message "Please insert Memory Stick media" appears.
- You cannot perform a HotSync operation before you install the Palm Desktop for CLIÉ software onto your computer
- Do not use a USB hub
- Check the USB driver being used
- Check that the USB port of your computer is enabled
- Getting Help
- Specifications
- Memory
- External input/output
- LCD display
- Power requirements
- Battery life
- Audio recording time (when using a
- MB Memory Stick media)
- Audio Recording format
- Sampling frequency
- Output
- Dimensions
- Mass
- Operating temperature
- Limited Warranty Statement
- It Is Important That You Register Your
- CLIE Personal Entertainment Organizer
- Save this statement for future reference.
- Index
- A
- Address Book
- Adjusting the frontlight level 23
- Application
- Application buttons
- Attaching notes 106
- Automatic shut-off time 176
- B
- BACK button 7,170
- Backing up data
- Beam Receive feature 178
- Beaming
- C
- Calculator
- egories
- Copying
- Cradle 112
- D
- Date Book
- Deleting
- E
- Entering data
- Expense
- F
- Frontlight
- G
- Graffiti writing
- H
- I
- J
- L
- M
- N
- 0
- P
- Password
- Preferences
- R
- Reset
- s
- Setting
- Stylus
- T
- To Do List
- ndhelds
- ubleshooting
- U
Brand : SONY
Model : Clié PEG-N760C
Category : PDA