Perform 215 - Elliptical bike York Fitness - Free user manual and instructions
Find the device manual for free Perform 215 York Fitness in PDF.


| Product Type | Elliptical Cross Trainer |
| Brand | York Fitness |
| Model | Perform 215 |
| Maximum User Weight | 150 kg (330 lbs) |
| Dimensions (L x W x H) | Approx. 160 x 65 x 160 cm |
| Net Weight | Approx. 70 kg |
| Power Supply | DC adapter, input 100-240V ~ 50/60Hz |
| Resistance System | Magnetic, speed independent, computer controlled |
| Resistance Levels | 16 levels (adjustable via dial) |
| Display | LCD: Time, Speed, Distance, Calories, Pulse, RPM, Watt |
| Workout Programs | Manual, 12 Preset, User, HRC, Watt, Recovery, Body Fat |
| Heart Rate Monitoring | Hand pulse sensors + built-in wireless receiver (chest strap compatible) |
| Body Fat Measurement | Yes, via hand sensors (calculates BMI and FAT%) |
| Safety Standards | EN957 Class HA (home use) |
| Intended Use | Home, personal, family or household use |
| Maintenance | Regular inspection of bolts, moving parts; clean with damp cloth |
| Warranty | Contact York Fitness customer support for details |
Frequently Asked Questions - Perform 215 York Fitness
User questions about Perform 215 York Fitness
0 question about this device. Answer the ones you know or ask your own.
Ask a new question about this device
Download the instructions for your Elliptical bike in PDF format for free! Find your manual Perform 215 - York Fitness and take your electronic device back in hand. On this page are published all the documents necessary for the use of your device. Perform 215 by York Fitness.
USER MANUAL Perform 215 York Fitness
natural_image
Line drawing of a stationary exercise bike with adjustable arms and legs (no text or symbols)25APRIL2013
Table of contents
Congratulations on purchasing your exercise equipment from

You have chosen a high quality, safe and innovative piece of equipment as your training partner and we are certain it will keep you motivated on the way to achieving your personal fitness goals.
Please take the time to read this owner's manual as it will help you to get the most out of your new exercise equipment.
For more information visit www.yorkfitness.com
CONTENTS
Safety information 03
Customer support 04
Assembly instructions 05
Operational instructions 12
Care & Maintenance 16
Troubleshooting 17
Fitness guide 18
Exploded drawing 20
Part list 22
Protect the environment by not disposing of this product or batteries with household waste. Check your local authority for recycling advice and facilities.
Safety information
YORK FITNESS
Please read this instruction manual before you begin assembly. Great care has been taken to design these instructions and following them will help you with quicker assembly and minimize the risk of injury.
It is important that you keep these instructions for future reference.
This list is not exhaustive - You are responsible for your own safety!
- Always assemble and operate the equipment on a level surface.
- Ensure the equipment is stable before use.
• Always ensure that the equipment has adequate space on each side. - Try to ensure that your back is straight while exercising, especially for long periods.
- The safety level of this equipment can only be maintained if it is regularly examined for wear and tear.
- Replace defective components immediately and keep the equipment out of use until it is repaired.
- Use only the adjustment setting as described in the instructions. Always use the correct adjustment pin / fixing.
- Always check that any pins / fixings are tight and secure before use and after adjustment.
- Never leave any adjustment devices projecting from the equipment.
• Always consult your doctor before undertaking any exercise program.
• Always wear suitable clothing and footwear. (e.g. tracksuit / shorts / training shoes)
- Remove all personal jewelry before exercising.
- Ensure you warm-up well before using the equipment as this will help to prevent muscle strain.
• After eating, allow 1-2 hours before exercising as this will help to prevent muscle strain.
- Never overload the equipment. (See maximum user weight)
- Never use the equipment in any other manner other than the ways explained in these instructions and any wall-chart supplied.
- Injuries to health may result from incorrect or excessive training.
- Parents and others in charge of children should be aware of their responsibility, because the natural play instinct and the fondness of experimenting of children can lead to situations and behavior for which the training equipment is not intended.
- If children are allowed to use the equipment, their mental and physical development and above all their temperament should be taken into account. They should be controlled and instructed in the correct use of the equipment.
- The equipment is under no circumstances suitable as a children's toy.
• Children should not be allowed on or around the equipment, especially when it is not in use. - This appliance is not intended for use by persons (including children) with reduced physical, sensory or mental capabilities, or lack of experience and knowledge, unless they have been given supervision or instruction concerning use of the appliance by a person responsible for their safety.
- This product is not suitable for therapeutic purposes.
- This product has an integrated speed independent braking system without a constant power mode that is governed by magnetic resistance.
- This product has been tested for use in a home environment and is warranted for In Home, personal, family or household use.
- Due to our continuous policy of product development, York Fitness reserves the right to change specifications without notice.
CAUTION! The instructions must be followed carefully in the assembly, use and maintenance of your equipment. The warranty does not cover damage due to negligence of the assembly, adjustment and maintenance instructions described herein.
Maximum user weight: 150kg
Safety Standards
This equipment meets the requirements of the EU's EMC and Low Voltage directives (where applicable), EN957 1 & 9 - CLASS HA. Therefore the equipment carries the following marks:


Customer support
Customer Support
Should you require any assistance regarding this product please gather the following information and then contact us using the details below:
- Serial No. - This can be found on the sticker below, located as indicated.
• Original purchase date - Place of purchase
• Information about the place and conditions of use - Precise description of the issue / defect
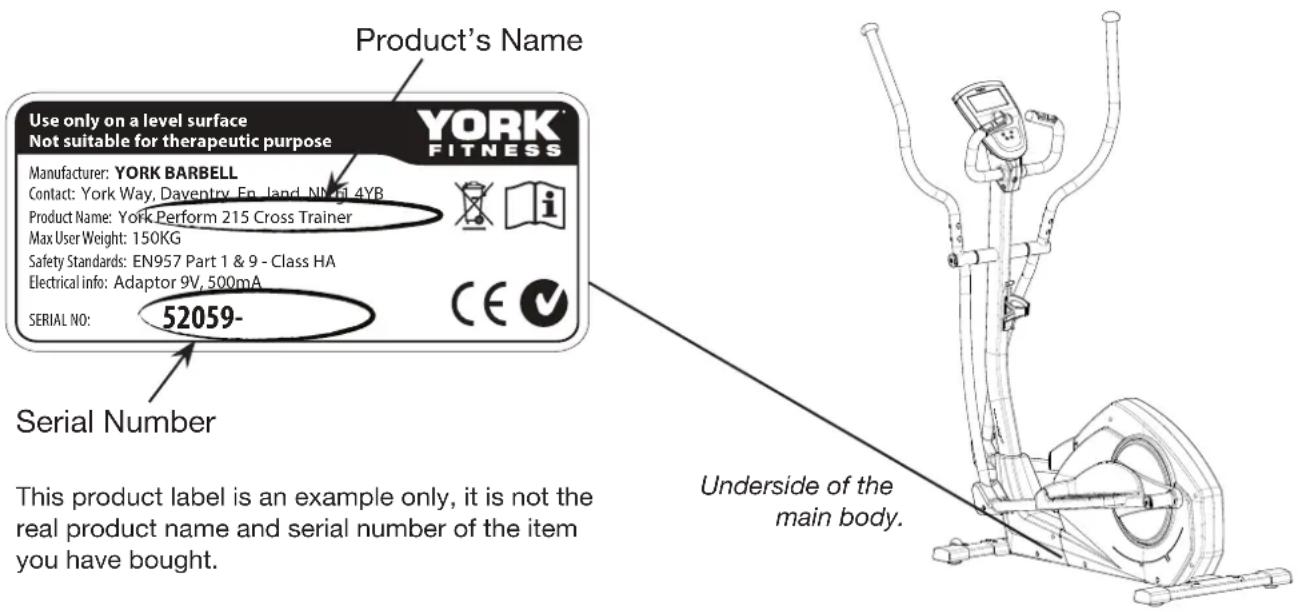
IMPORTANT!! - Please retain your sales receipt, York Fitness Customer Care may request proof of purchase to validate eligibility for warranty service. Warranty cover starts from the date shown on the proof of purchase.
ENGLAND
The best way to contact us is via the website: www.yorkfitness.com
York Barbell UK Ltd.
York Way, Daventry,
England, NN11 4YB
Tel: 0844 225 3112
AUSTRALIA
The best way to contact us is via the website: www.yorkfitness.com.au
York Fitness Australia
1/2 Swaffham Rd, Minto,
PO Box 5130, NSW 2566
Tel: 1800 730 149
Assembly instructions
Prepare your work area - It is important you assemble the product in a clean and uncluttered space.
Work with a friend - We recommend you have someone assist you with the assembly as some of the components are quite heavy.
Open the carton - Check any warnings on the carton and make sure you have it the right way up.
Unpack the carton - Remove all the parts and lay them out on the floor.
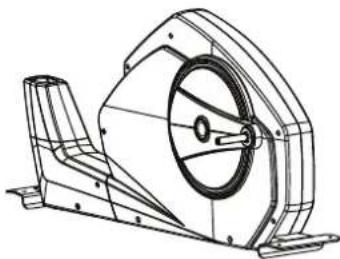
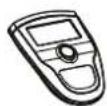
Make sure you have the following parts:
② x1
natural_image
Technical line drawing of a mechanical component with no visible text or symbolsA x 1
B x 1
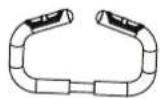
C x 1
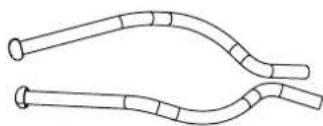
natural_image
Two curved, segmented biological or mechanical structures with no visible text or symbolsJ x 1
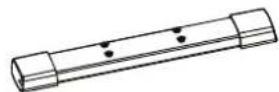
D x 1
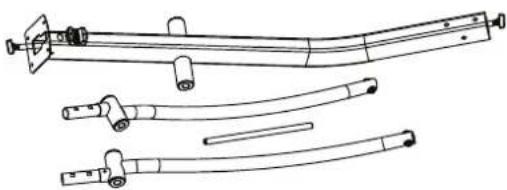
natural_image
Technical line drawing of four different mechanical or electrical components with no visible text or symbolsM x 1
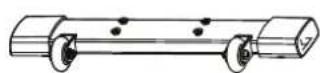
(K-L) x 1
natural_image
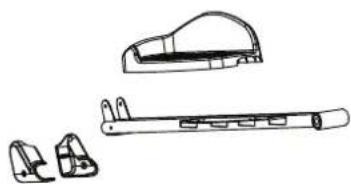
Line drawings of various mechanical components including a car, a cylindrical device with internal parts, and two separate parts (no text or symbols)(K-R x 1
natural_image
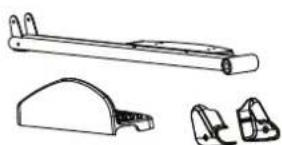
Technical line drawings of a mechanical component with three views (top, front, side), no text or symbols present.L x 1
Q x 1

R x 1

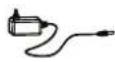
P x 1
Assembly instructions
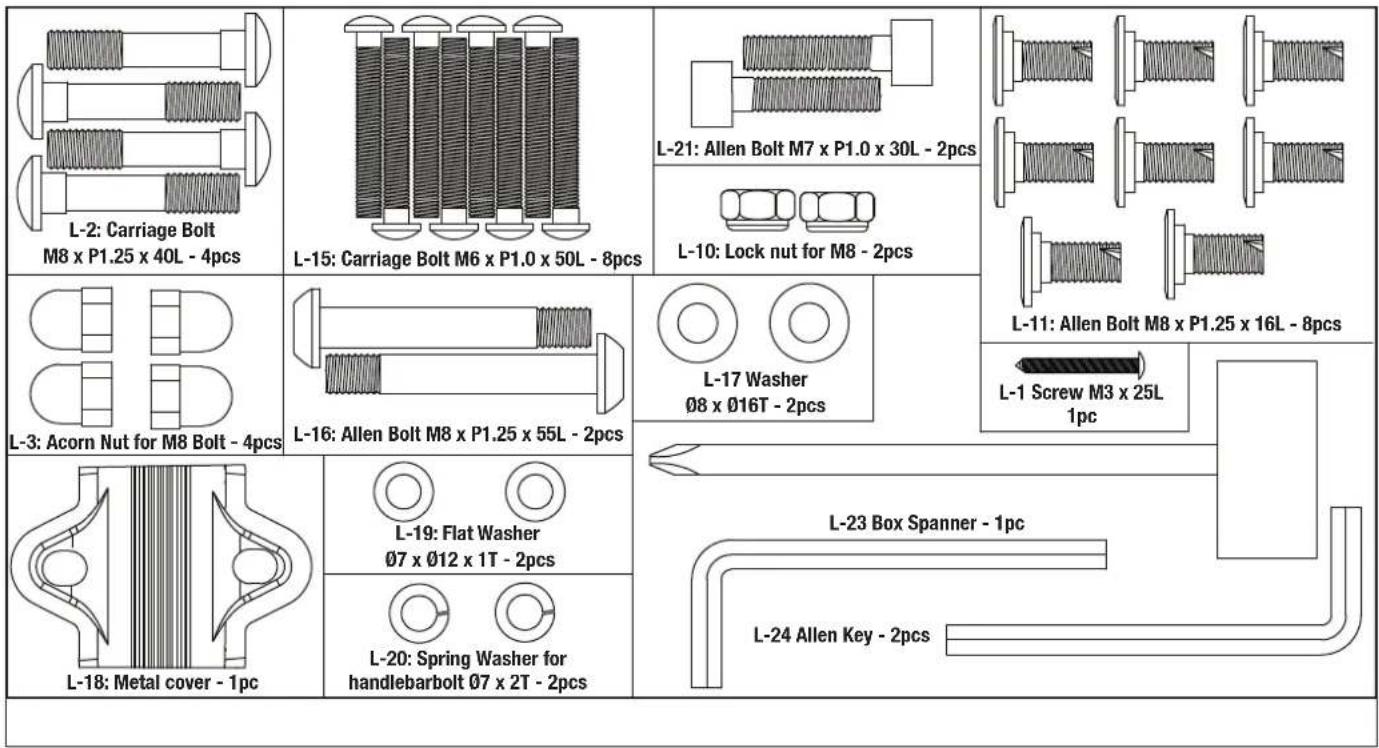
BLISTER PACK 1
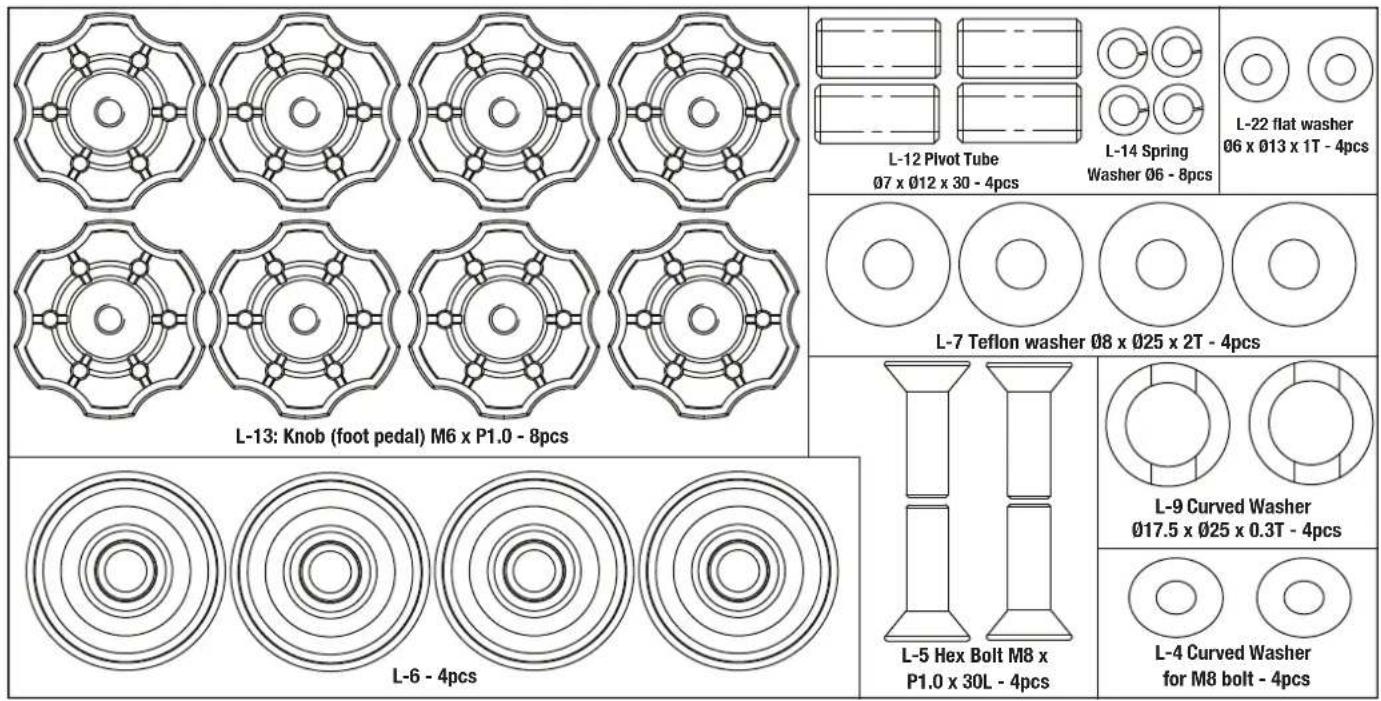
BLISTER PACK 2
Assembly instructions
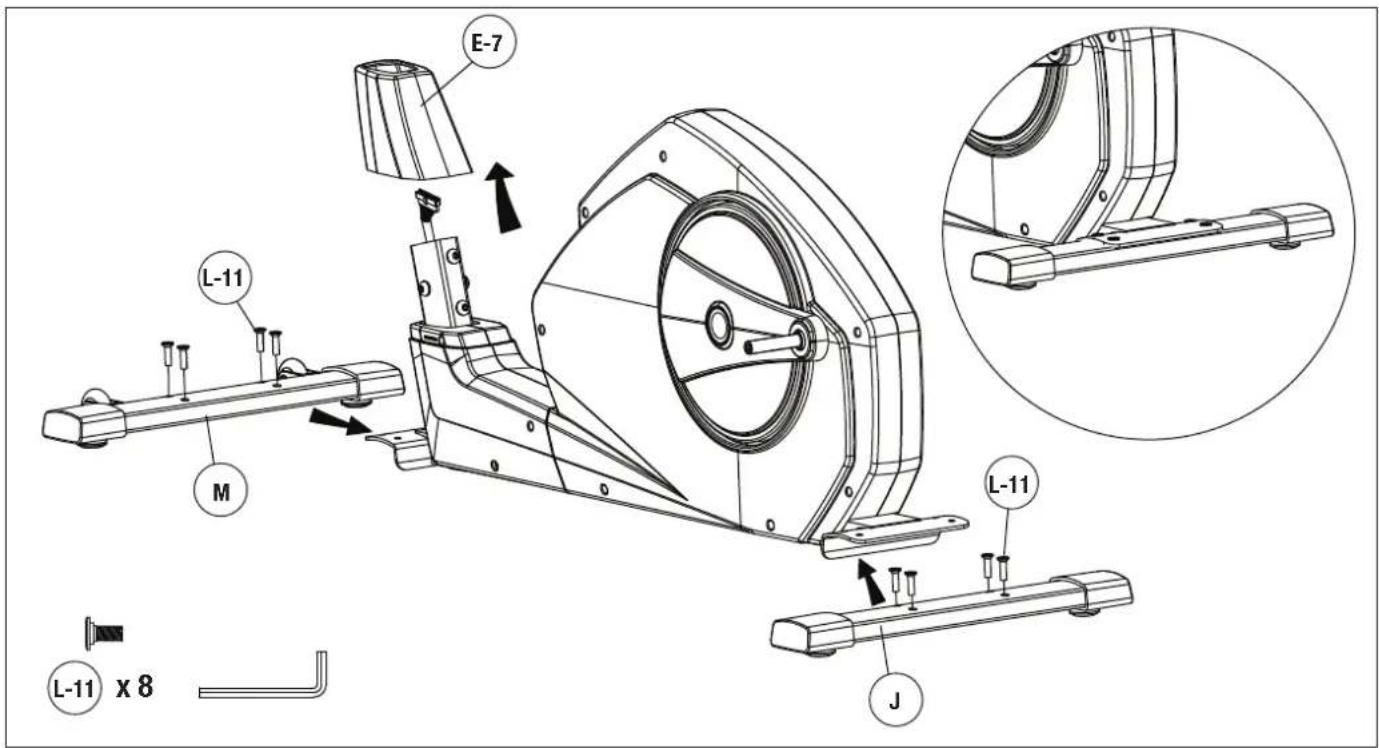
STEP 1
STEP 2
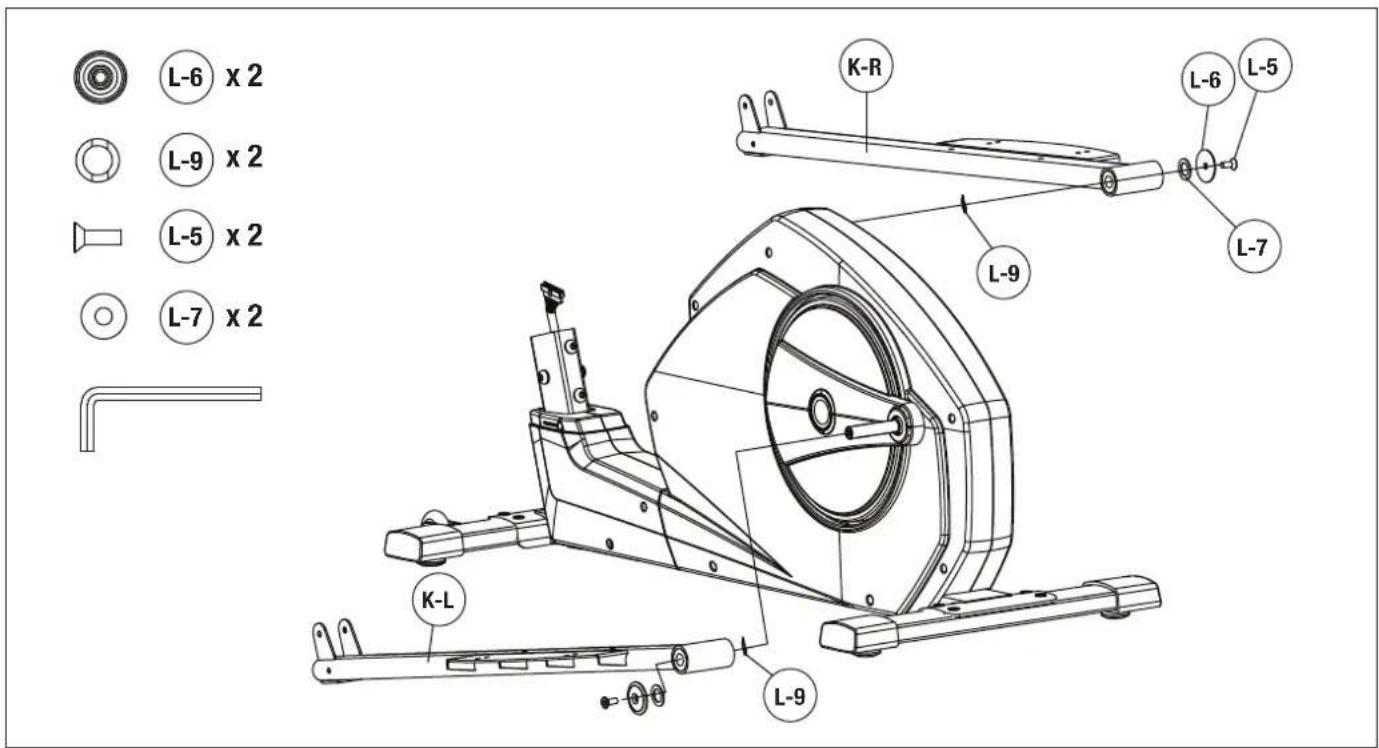
Assembly instructions
STEP 3
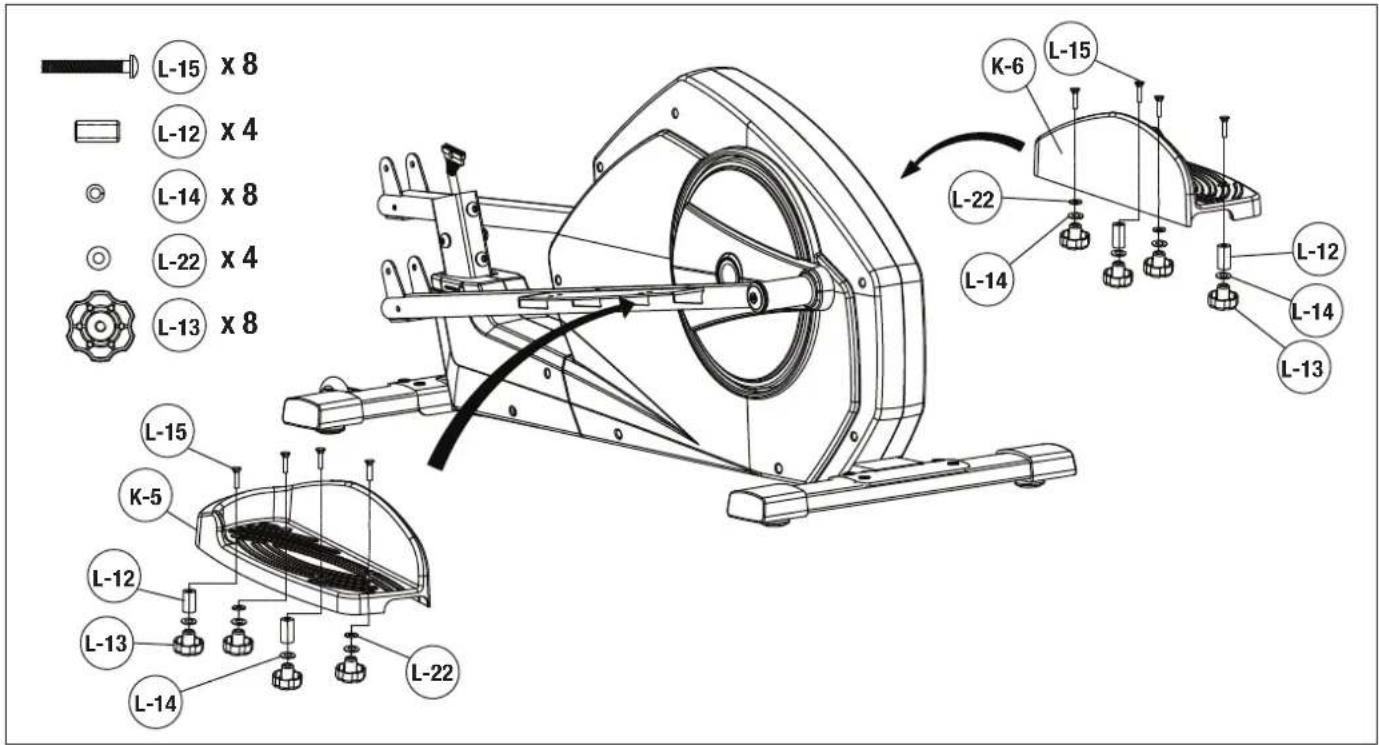
STEP 4
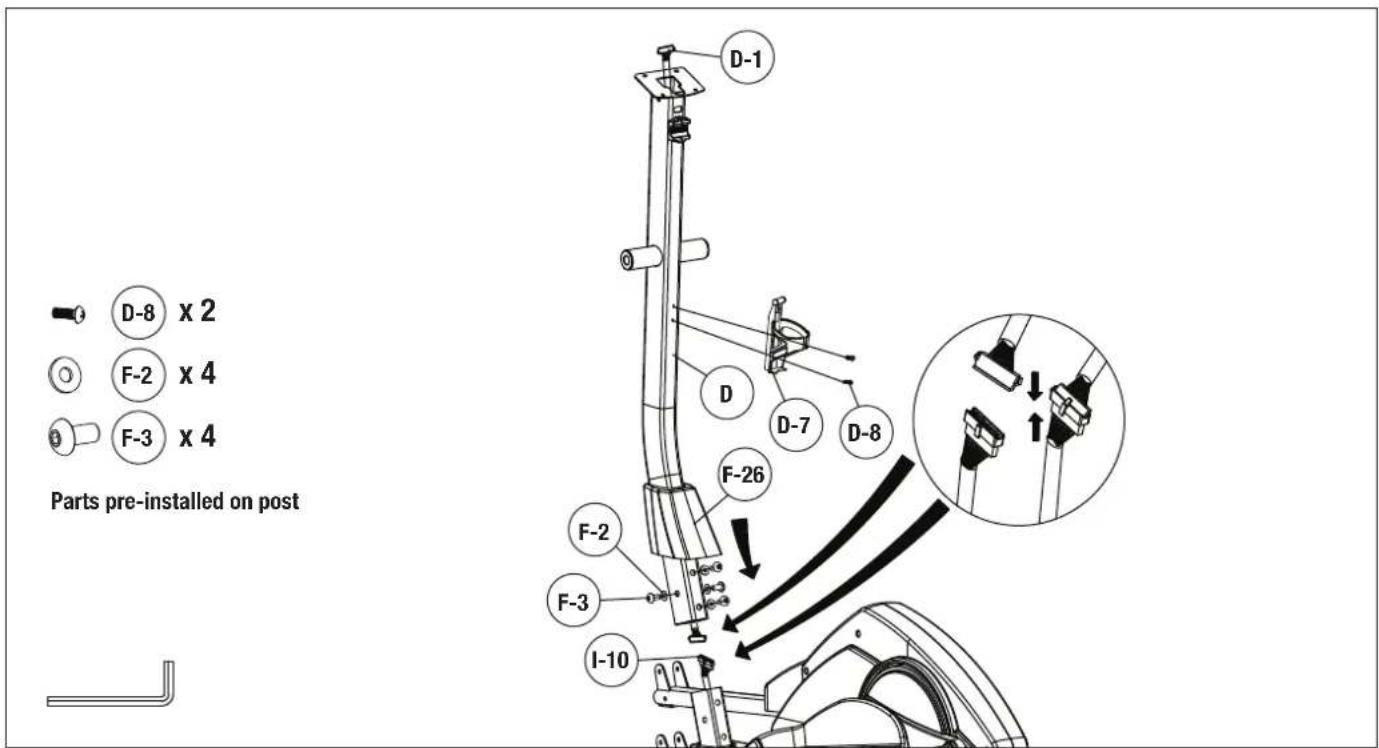
STEP 5
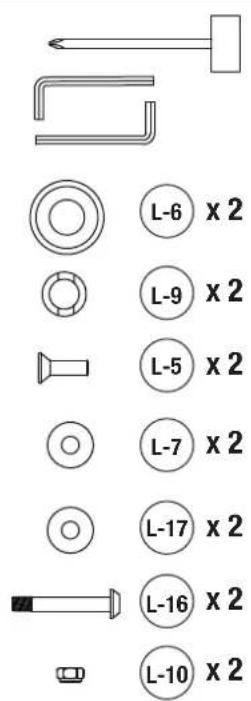
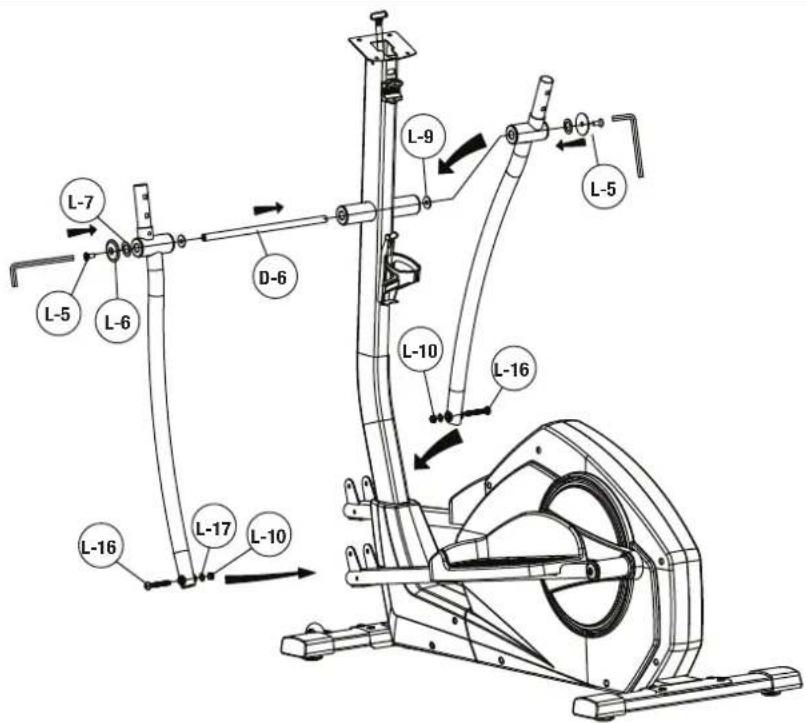
STEP 6
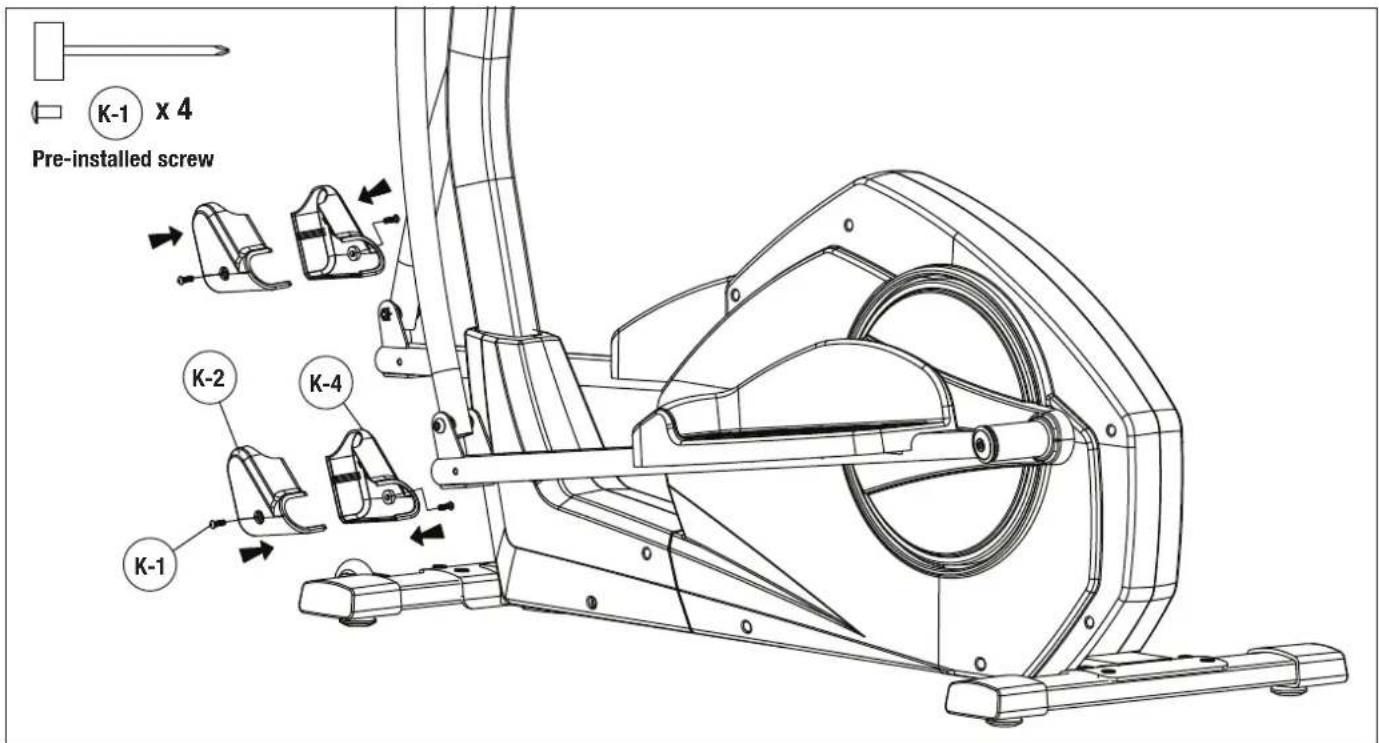
Assembly instructions
STEP 7
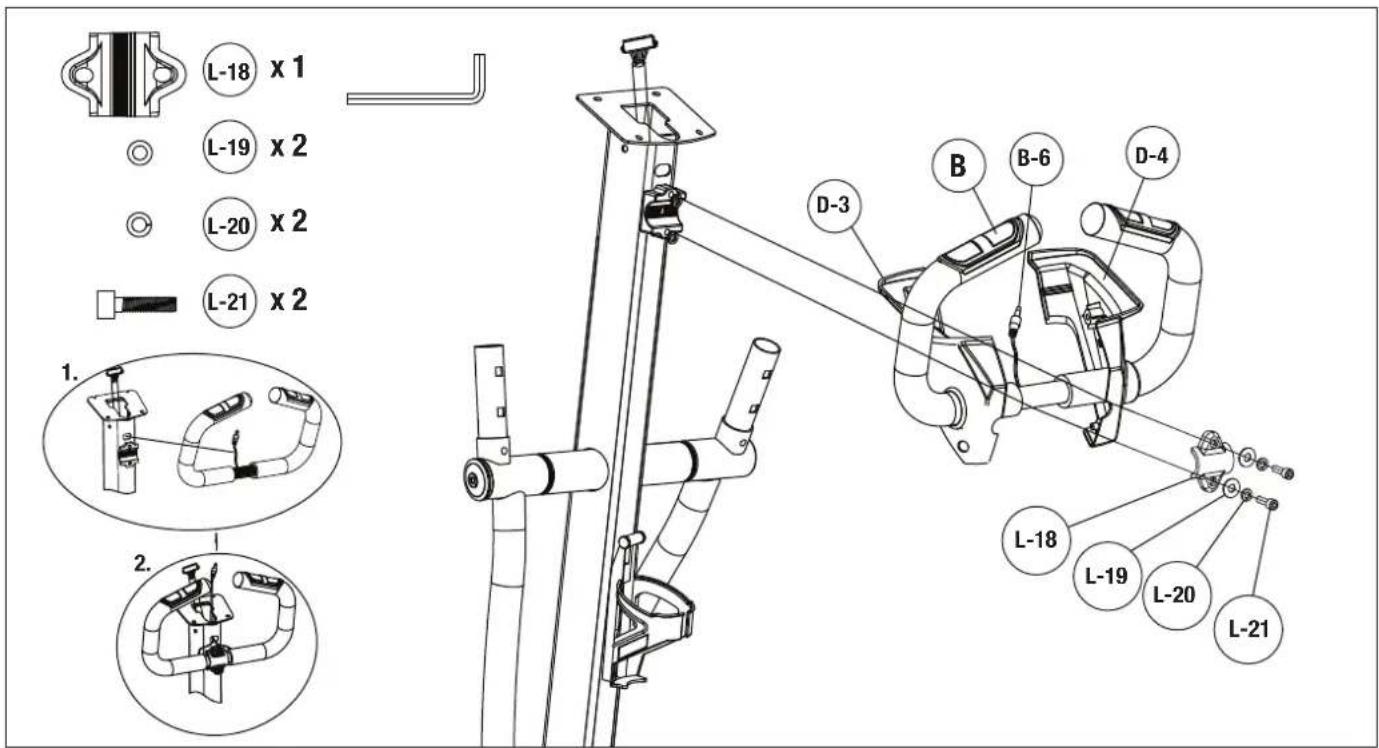
STEP 8
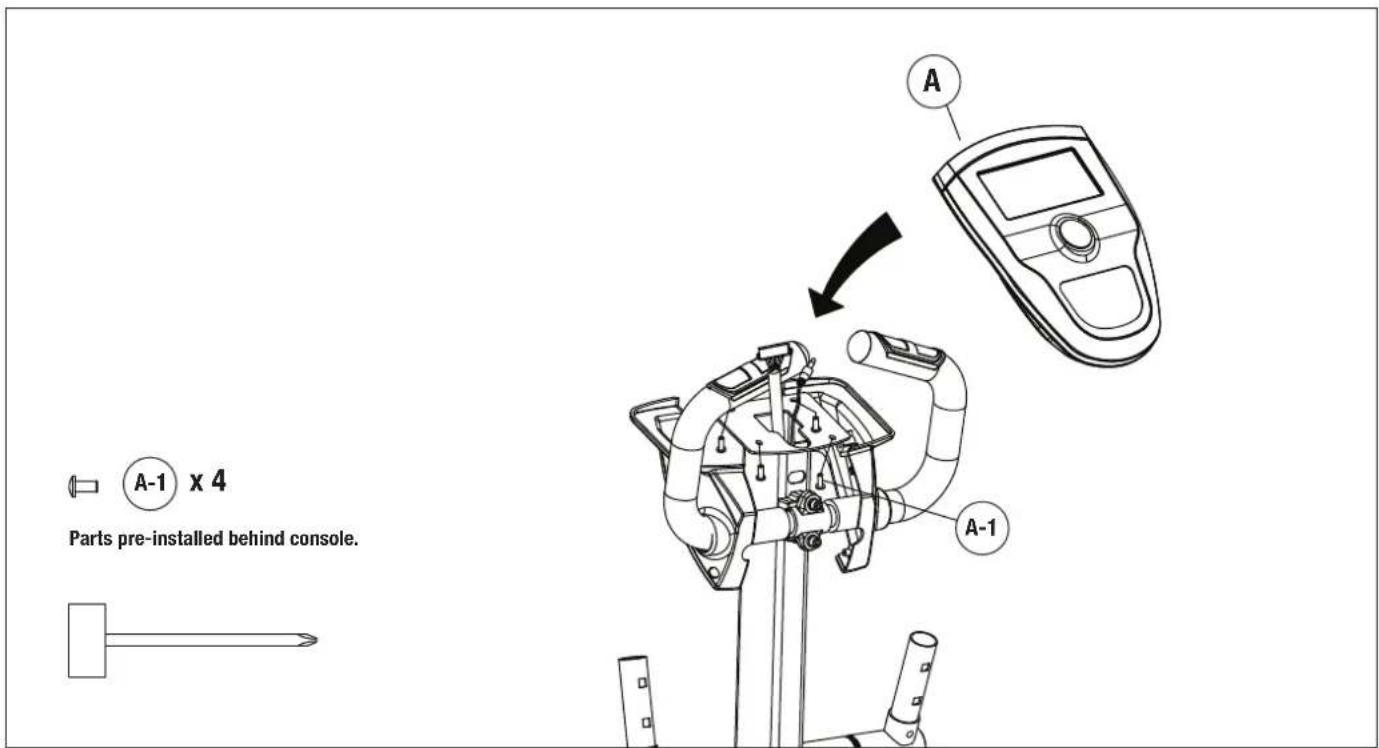
STEP 9
Pre-installed screw
STEP 10


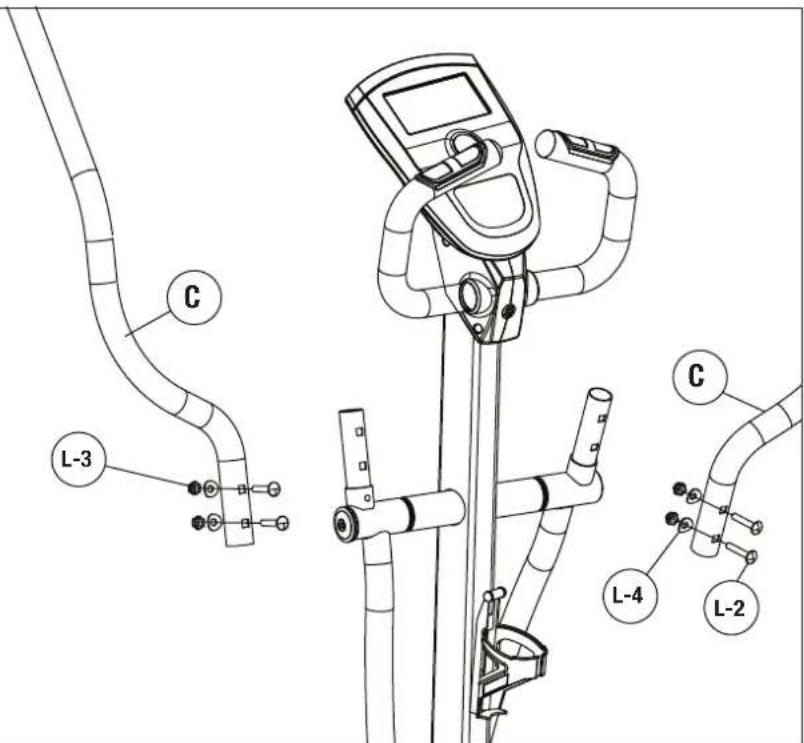
Operational instructions
Final Check
Your cross trainer is now assembled. Please make the following final checks:
• Make sure all screws / bolts are tightened.
• Make sure the equipment is on a flat, level surface.
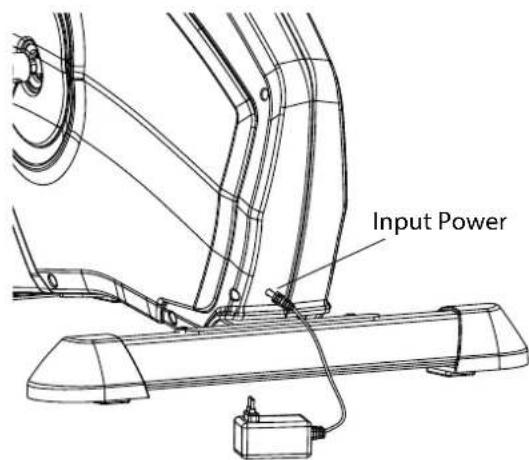
Input Power
Plug in the adaptor to the equipment then the computer will produce a beep sound and turn on the computer at the Manual mode.
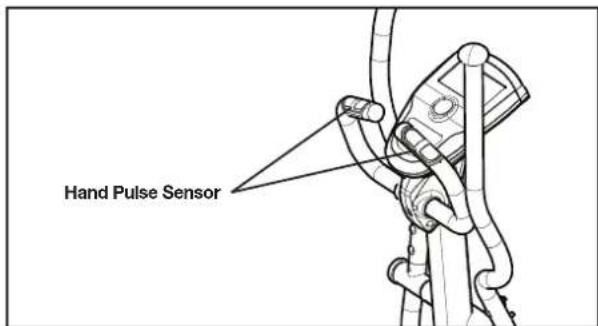
Hand Pulse Sensors
This exercise equipment is fitted with 2 hand pulse sensors. To obtain a pulse reading you must have both your left and right hands on the sensors at the same time. Do not grip the hand sensors too tight and allow the computer a few seconds to display the reading.
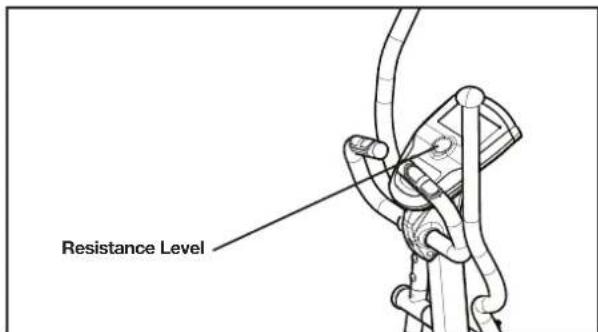
Adjusting The Resistance
This exercise equipment features a speed independent braking (resistance) system. The resistance is controlled by a magnet, which is moved closer or further away from the flywheel - the closer the magnet is to the flywheel the higher the resistance. The magnet is computer controlled, to adjust simply use the UP / DOWN dial on the console.
Built in Wireless Heart Rate Receiver
This machine is equipped with a built-in receiver for your heart rate monitoring. To get an accurate reading using these devices, you will need to be within 90cm of the console, and a minimum of 120cm from others using a heart rate monitoring device.
(Note: The transmitter may fluctuate erratically if you are too close to other heart rate monitoring equipment or there is other electronics near by, such as TV, Radio...)
Console
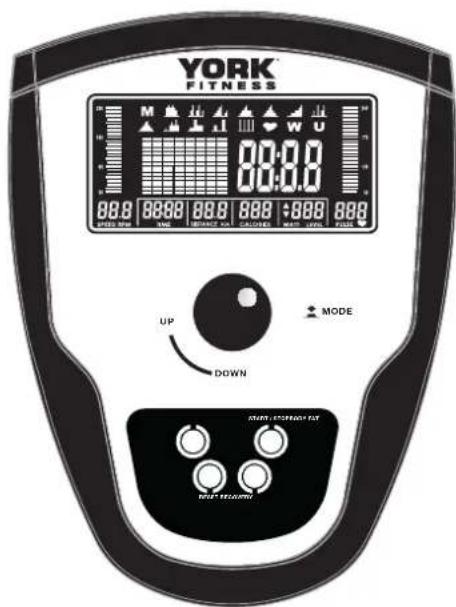
Key Function:
| KEY DESCRIPTION | |
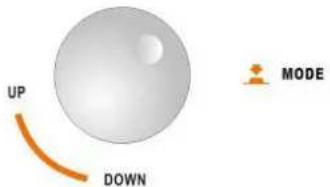 | Dial Clockwise (UP) - Increase resistance level.Dial Anti-Clockwise (DOWN) - Decrease resistance level.Dial - Setting selection.MODE - Confirm setting or selection.During workout, press MODE to lock current SCAN function. |
 | Press the RESET button once to go back to main menu during setup.Press and hold the RESET button for 2 seconds to reboot computer and start from default setting. |
 | Start / Stop a workout program. |
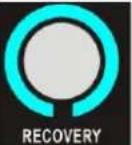 | Test your heart rate recovery. (See the “Recovery Mode” section) |
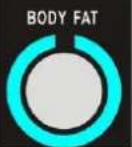 | Test your body fat % and BMI. (See the “Body Fat Mode” section) |
Operational instructions
Display Function:
| DISPLAY DESCRIPTION | |
| TIME • Display | the workout time during exercise.• Range 0:00 ~ 99:59 |
| SPEED • Display | the workout speed during exercise.• Range 0.0 ~ 99.9 |
| DISTANCE | • Display the workout distance travelled during exercise.• Range 0.0 ~ 99.9 |
| CALORIES • Display | the calories burnt during exercise.• Range 0 ~ 999 |
| PULSE • Display | the user pulse (bpm) during exercise.• An alarm will sound if your pulse is over the preset target. |
| RPM • Display | the rotation per minute during exercise.• Range 0 ~ 999 |
| WATT • Display | the power consumption during exercise.• In Watt Program mode, computer will remain preset watt value during exercise. (Setting range 0~350) |
| MANUAL • Display | the manual mode workout. |
| PROGRAM • Display | display the preset resistance level profile of the selected program mode. |
| USER • Display | the user resistance level profile during a user mode workout. |
| H.R.C. • Display | the H.R.C. mode workout. |
Power On:
Plug in power supply and the computer will power on and display all segments for 2 seconds.
After power on the monitor for the first time, the user will be prompted to enter his / her age, sex, height and weight. Use the UP / DOWN buttons to change the value and press the MODE key to confirm each setting. The monitor will enter the home screen after the setup.
Stand-by Mode: The LCD monitor will enter stand-by mode after 4 minutes of inactivity. Press on any key to wake the monitor.
Manual Mode
User can begin manual mode by pressing the START button in main menu.
- Use the UP / DOWN dial to select MANUAL M and press MODE to confirm.
- Use the UP / DOWN dial to preset a target TIME, DISTANCE, CALORIES or PULSE. Press MODE to confirm.
- Press on the START/STOP button to begin workout. Use the UP / DOWN dial to adjust resistance level during exercise.
- Press on the START/STOP button to pause. Press RESET to return to the main menu.
Program Mode
- Use the UP / DOWN dial to select one of the twelve preset programs and press MODE to confirm.
- Use the UP / DOWN dial to set a workout time.
- Press on the START/STOP button to begin workout. Use the UP / DOWN dial to adjust resistance level during exercise.
- Press on the START/STOP button to pause. Press RESET to return to the main menu.
User Program Mode
- Use the UP / DOWN dial to select and press MODE to confirm.
- Use the UP / DOWN dial to set a load level for the first column and press MODE to select the next column. Repeat this step for all 8 columns.
- Press and hold on the MODE button to finish or quit the setup.
- Use the UP / DOWN dial to set a workout time.
- Press on the START/STOP button to begin workout. Use the UP / DOWN dial to adjust resistance level during exercise.
- Press on the START/STOP button to pause. Press RESET to return to the main menu.
H.R.C. Mode
- Use the UP / DOWN dial to select and press MODE to confirm.
- Use the UP / DOWN dial to select 55%, 75%, 90% or TAG (Target H.R. - default: 100).
- Use the UP / DOWN dial to set a workout time.
- Press on the START/STOP button to begin workout.
- Press on the START/STOP button to pause. Press RESET to return to the main menu.
Recovery Mode
- User must be holding the hand pulse sensor to use this feature. When the pulse value is displayed on the computer, press on the RECOVERY button.
- Hold on the hand pulse sensor until the TIME display finish the countdown from 60 seconds.
- After the countdown ends, the result will be displayed on the monitor:
| 1.0 | OUTSTANDING |
| 1.0 « 1.9 | EXCELLENT |
| 2.0 « 2.9 | GOOD |
| 3.0 « 3.9 | FAIR |
| 4.0 « 5.9 | BELOW AVERAGE |
| 6.0 | POOR |
Operational instructions
WATT Mode
- Use the UP / DOWN dial to select and press MODE to confirm.
- Use the UP / DOWN dial to select a WATT target (Default: 120).
- Use the UP / DOWN dial to set a workout time.
- Press on the START/STOP button to begin workout. Use the UP / DOWN dial to adjust WATT level.
- Press on the START/STOP button to pause. Press RESET to return to the main menu.
Body Fat Mode
- After your workout, press on the BODY FAT button and hold on the handgrips.
- After 8 seconds, the computer will display the BMI, FAT% and fat symbol.
- Press on the BODY FAT button again to return to main menu.
B.M.I. (Body mass index) integrated
| B.M.I. SCALE LOW LOW / MED MEDIUM MED / HIGH | ||
| Range < 20 20-24 24.1 - 26.5 > | 26.5 |
BODY FAT
| SYMBOL | LOW (—) | LOW / MED (+) | MEDIUM (▲) | MED / HIGH (◆) |
| MALE | < 13% | 13% - 25.9% | 26% - 30% | >30% |
| FEMALE | < 23% | 23% - 35.9% | 36% - 40% | >40% |
Care & Maintenance
- This equipment should not be placed outdoors, in a garage or an outbuilding. Keep the equipment in a dry place with as little temperature variation as possible.
- We recommend placing a mat beneath the equipment to protect both the equipment and your flooring.
• Always place the equipment in a dry environment. - Use a warm, damp cloth to keep the product clean.
- No wet cleaning of electrical components. Unplug before any care and maintenance.
- The safety level of the equipment can be maintained only if it is regularly examined for damage and wear. This includes any ropes, pulleys, nuts, bolts, moving parts, bushes, chains, wheels, bearings & connection points etc.
- Ensure that you inspect the product regularly - at least once a week is recommended.
- Ensure that all fixings are tight before use.
• Always replace damaged / worn components with original parts from the manufacturer.
Troubleshooting
If you have a problem with your exercise equipment, before you do anything else please check that all the cables have been connected correctly. Loose cables are very common and many problems can be solved by making sure the cables are properly connected.
The following table details the most common problems and how to fix them. If you still have a problem after going through the troubleshooting guide please call your local YORK distributor for advice.
| PROBLEM CAUSE CORRECTION | ||
| NO DISPLAY | No power Check power adapter | |
| System halted | Unplug and re-plug the power cord to reset the system | |
| NO SPEED DISPLAY | Wires are damaged or not connected properly | Verify all wires are connected properly |
| Speed sensor is too far from magnet | Contact your local YORK distributor | |
| PARTIAL DISPLAY | The PA board is not connected properly | Verify all wires are connected properly |
| Disconnect and re-connect all cables | ||
| Contact your local YORK distributor | ||
| NO PULSE SIGNAL | Wires are damaged or not connected properly | Verify all wires are connected properly |
| Too much hand movement Dry palms | ||
| Palms too wet Grip using moderate pressure | ||
| Hand Pulse Sensor is being gripped too tightly | Remove all rings | |
| User is wearing rings Contact your local YORK distributor | ||
| ERROR CODE: E1 Hands are not hold on tightly on grips during BODY FAT test. | ||
| ERROR CODE: E4 | Check the user's age, height, weight figure setting when the test result is out of the range of FAT% 5~50 and BMI 5~50%. | |
| ERROR CODE: E5 C | Check the cable is well connected or connector broken. | |
FOR YOUR OWN SAFETY, DO NOT OPEN PROTECTIVE CASING. IF ERROR PERSIST, PLEASE CONTACT YOUR LOCAL YORK DISTRIBUTOR FOR ADVICE. KEEP THE EQUIPMENT OUT OF USE UNTIL IT IS REPAIRED.
If you are having problems with your heart rate reading, please note that some fibres used in clothes eg) polyester, create static electricity that may prevent a reliable heart rate reading. Mobile phones, TV's, microwaves and other electrical appliances that generate an electromagnetic field may also interfere with heart rate measurement.
Fitness guide
Starting and Finishing Your Workout
Begin and end each workout with a Warm Up / Down session - a few minutes of stretching to help prevent strains, pulls and cramps.
Correct Crosstraining Form
To start using the cross trainer, simply stand on the foot pedals with the front of your shoes close to the front edge of the pedal cap. Place your hands at a comfortable position on the handlebars. Simply move your highest foot forward and follow the natural path of the machine.
Start on a load level that is comfortable to familiarize yourself with the machine. Once you are comfortable, start adjusting the load level to achieve the workout desired.
Forward and Reverse: The cross trainer can be used in the forward and reverse direction to vary the muscles that you workout. This will also vary your workout helping you to stay motivated. To change directions, simply slow the pedals down until they stop and switch directions.
Load Level Adjustment: The load level of cross trainer can be changed at any time during your workout. Adjusting your load level will allow you to increase or decrease your intensity level.
Suggested Stretches
The correct form for several basic stretches is shown at the right. Move slowly as you stretch—never bounce.
1. Hamstring Stretch
Sit with one leg extended. Bring the sole of the opposite foot toward you and rest it against the inner thigh of your extended leg. Reach toward your toes as far as possible. Hold for 15 counts, then relax. Repeat 3 times for each leg. Stretches: Hamstrings, lower back and groin.
2. Calf/Achilles Stretch
With one leg in front of the other, reach forward and place your hands against a wall. Keep your back leg straight and your back foot flat on the floor. Bend your front leg, lean forward and move your hips toward the wall. Hold for 15 counts, then relax. Repeat 3 times for each leg. To cause further stretching of the achilles tendons, bend your back leg as well. Stretches: Calves, achilles tendons and ankles.
3. Quadriceps Stretch
With one hand against a wall for balance, reach back and grasp one foot with your other hand. Bring your heel as close to your buttocks as possible. Hold for 15 counts, then relax. Repeat 3 times for each leg. Stretches: Quadriceps and hip muscles.
4. Inner Thigh Stretch
Sit with the soles of your feet together and your knees outward. Pull your feet toward your groin area as far as possible. Hold for 15 counts, then relax. Repeat 3 times. Stretches: Quadriceps and hip muscles.
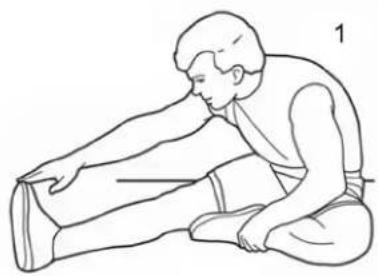
natural_image
Line drawing of a person performing a seated stretch or exercise (no text or symbols)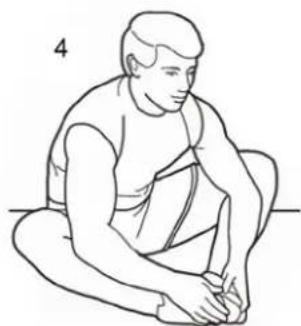
natural_image
Line drawing of a seated person in a relaxed posture, no text or symbols present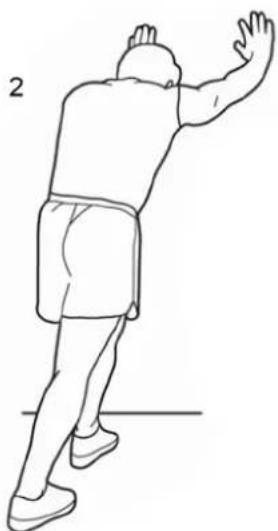
natural_image
Line drawing of a person in a basketball stance with arms raised (no text or symbols)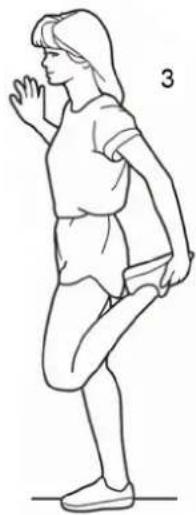
natural_image
Line drawing of a person in a squatting pose, no text or symbols presentHow Long Should I Exercise For?
That really depends on your current level of fitness. If you're just starting out on a new exercise program, you should start gradually and build up - do not try to do too much too quickly. 30 minutes, 3 times a week should be enough.
Don't push yourself too hard - you should never feel exhausted during or following exercise.
Heart Rate Training
To get the most out of your new piece of fitness equipment and see the best results from your training you should exercise at the right level of effort, and that means listening to your heart! Working out to a target heart rate means you can direct your workout to achieve different goals:
Good health - For those wishing to improve quality of life and general well being. Your sessions will need to be done at an intensity of between 50 - 60% of your estimated maximum heart rate, should last about 30 minutes and can be done on most days of the week.
Weight loss - To see a significant reduction in body fat, your sessions must be a little more intense - between 60 and 70% of your estimated maximum heart rate. These sessions can also be performed on most days of the week for up to 30 minutes.
Improving fitness levels - These sessions should be performed at 70 - 80% of your estimated maximum heart rate and can also involve bouts of interval training that would have your heart rate peaking for short times near your maximum heart rate level. These are intense sessions and will require at least a 48 hour rest between sessions.
Calculating Your Target Heart Rate
First, you need to find your estimated maximum heart rate using the formula “220 minus your age in years”. So, if you are 35 years old your estimated maximum heart rate is:
$$ 2 2 0 - 3 5 = 1 8 5 \mathrm{beatsperminute(bpm)} $$
Next, to calculate your target heart rate, simply multiply your estimated maximum heart rate (185bpm) by the applicable percentage. So, if your goal is better health:
$$ 185 \times 60\% = 111\text{bpm} $$
NOTE: The important issue to remember with all estimated calculations is that they are just estimates - if you don't feel comfortable exercising at your target then reduce it to a level you are comfortable with.
Heart rate training requires you to monitor your heart rate throughout the workout. For this we recommend using a chest strap (if your machine has a wireless receiver) or a heart rate monitor. For more information please get in touch using the Contact Us details.
ALWAYS CONSULT YOUR DOCTOR BEFORE UNDERTAKING A NEW EXERCISE REGIME. IF YOU EXPERIENCE NAUSEA, DIZZINESS OR OTHER ABNORMAL SYMPTOMS DURING EXERCISE, STOP AT ONCE AND CONSULT YOUR DOCTOR.
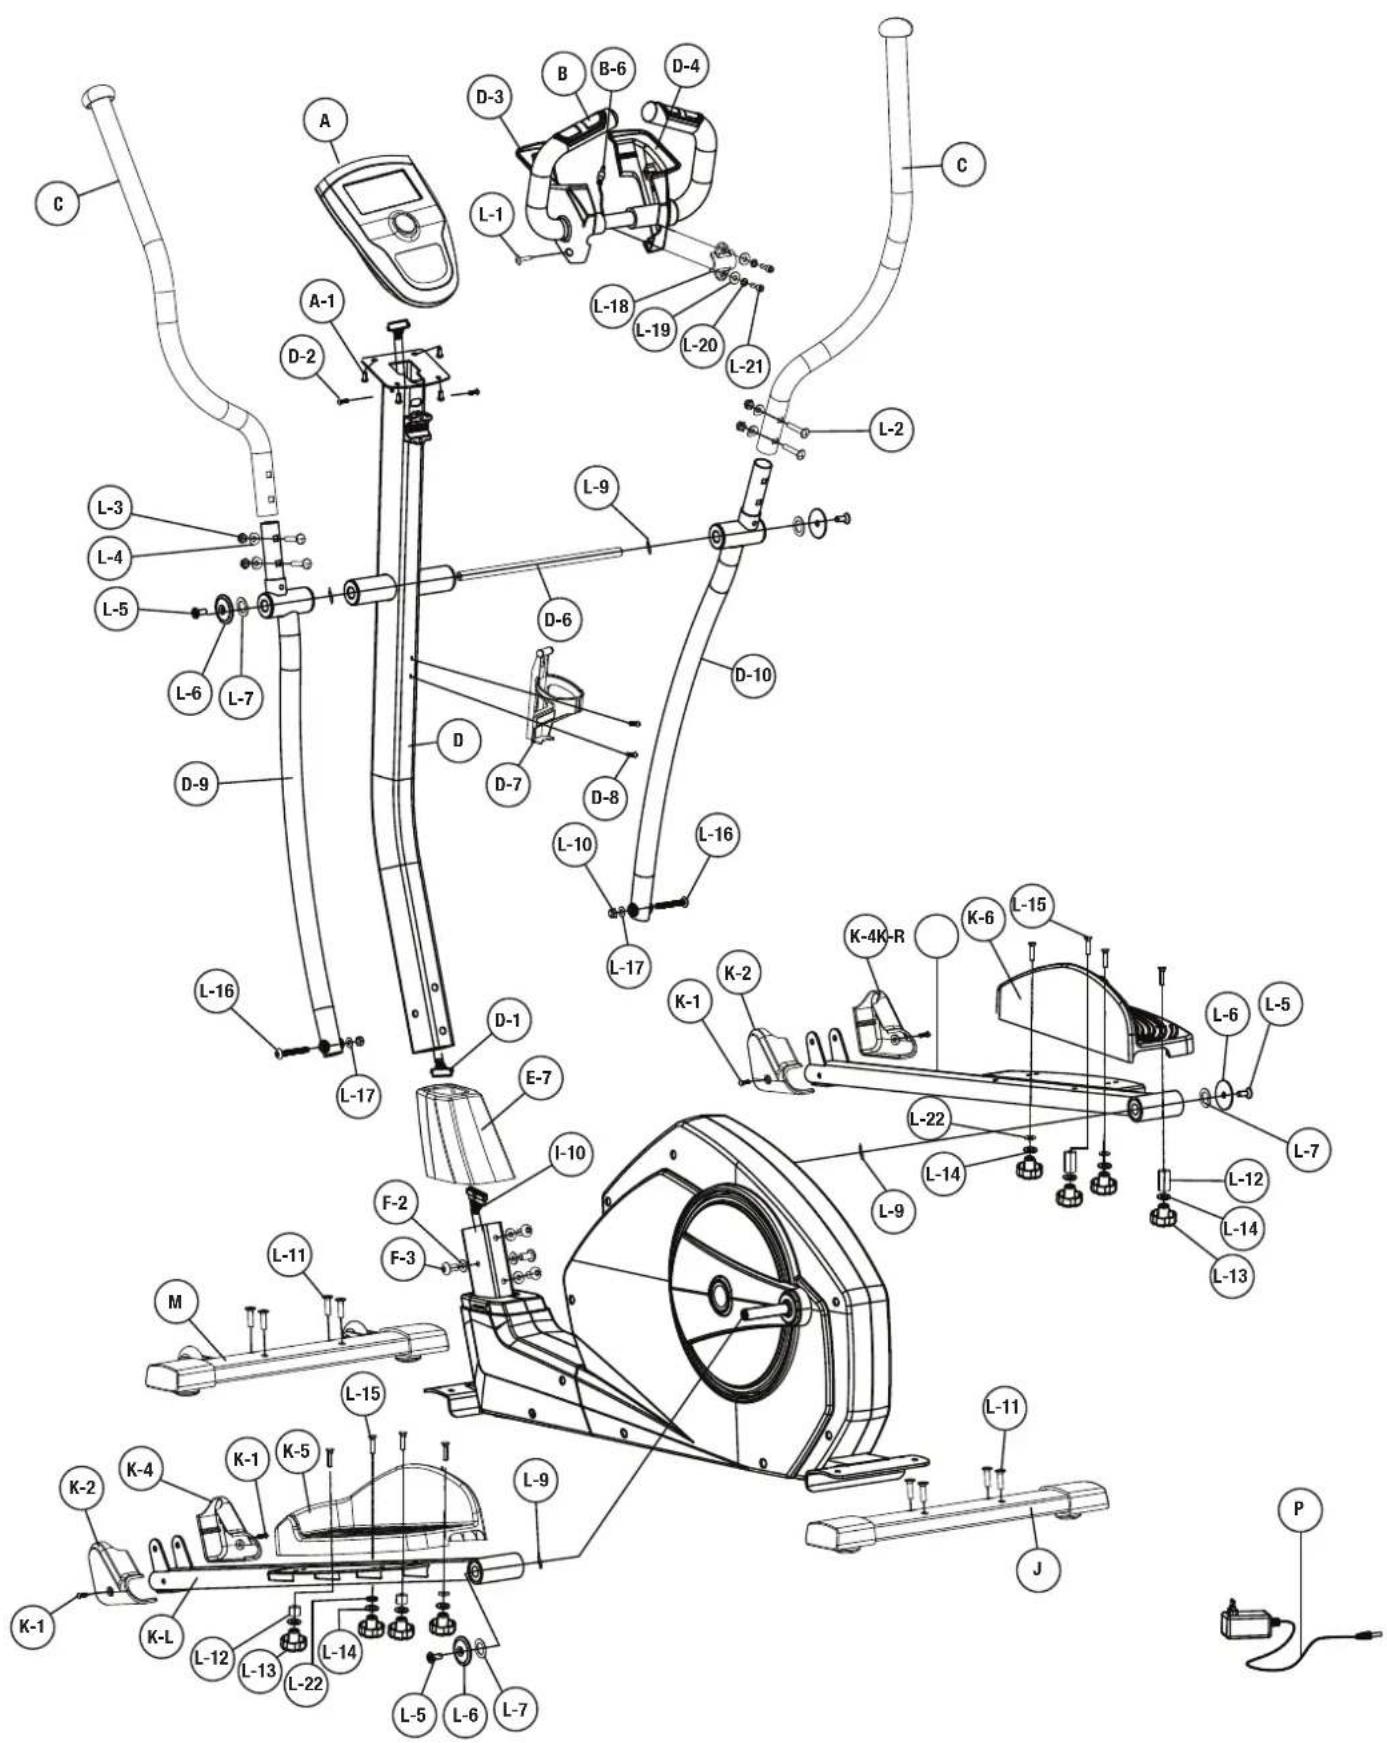
Exploded drawing
A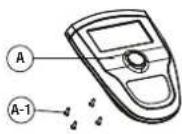 | B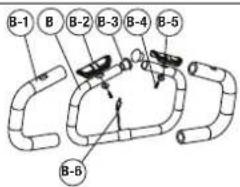 | C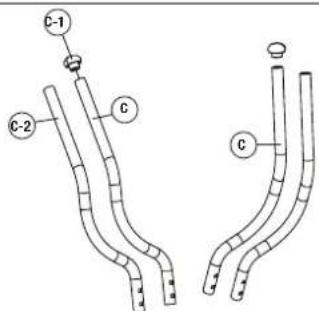 | ||
Q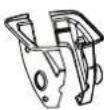 | R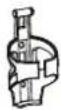 | |||
D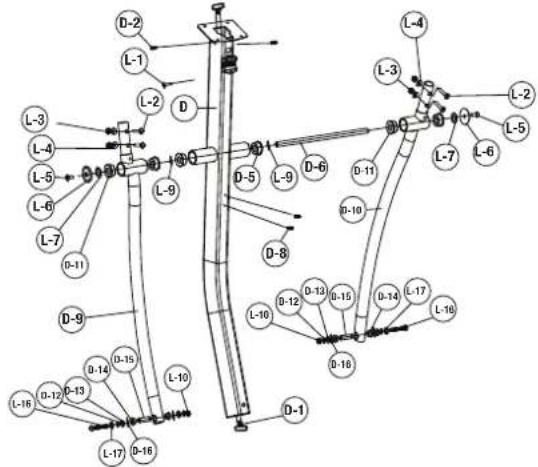 | M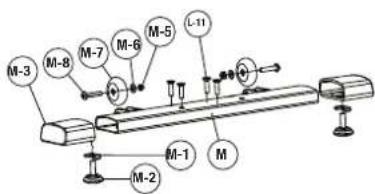 | |||
J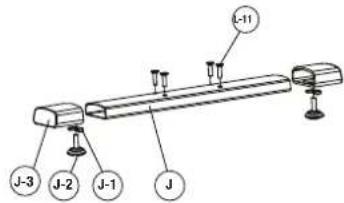 | ||||
E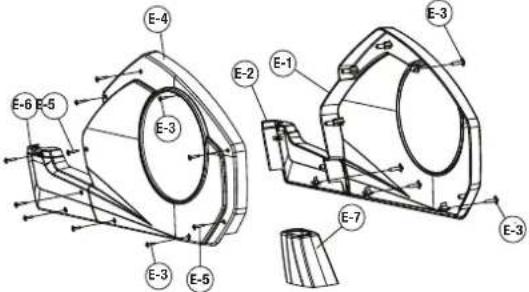 | F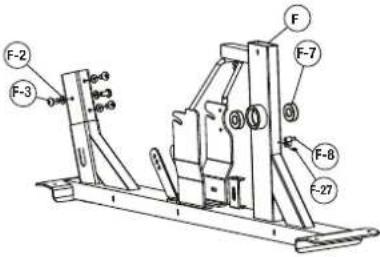 | |||
GH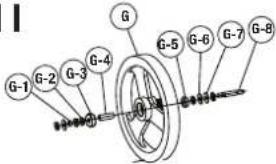 | 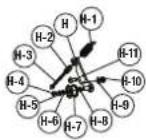 | 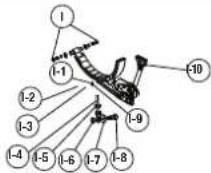 | ||
K-RK·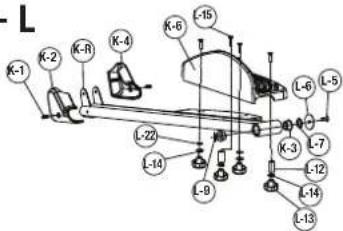 | 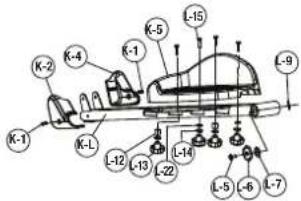 | |||
LNO | 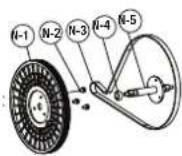 | 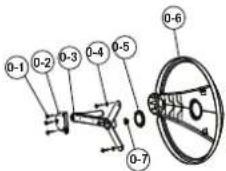 | ||
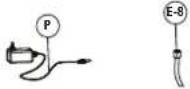 | ||||
Part list
YORK REF. REF. DESCRIPTION QTY.
| 52059-001 A CONSOLE SET 1PCS | |||
| 52059-002 A-1 SCREW M5*10 4PCS | |||
| 52059-003 B FRONT HANDLEBAR SET 1PCS | |||
| 52059-004 B-1 FOAM GRIP 2PCS | |||
| 52059-005 B-2 HAND PULSE SENSOR 2PCS | |||
| 52059-006 B-3 END CAP 2PCS | |||
| 52059-007 B-4 SCREW M4X20 | 2PCS | ||
| 52059-008 B-5 SEMI-CIRCUIT WASHER | 2PCS | ||
| 52059-009 B-6 HAND PULSE SENSOR WIRE | 1PCS | ||
| 52059-010 C | UPPER HANDLEBAR SET 2PCS | ||
| 52059-011 C-1 | END CAP 2PCS | ||
| 52059-012 C-2 | FOAM GRIP 2PCS | ||
| 52059-013 D | HANDLEBAR POST | 1PCS | |
| 52059-014 D-1 | CONSOLE CABLE, UPPER | 1PCS | |
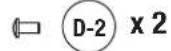
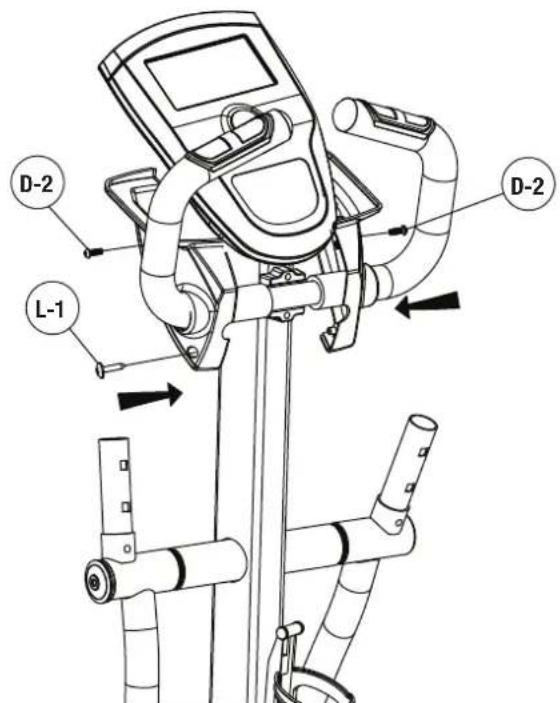
| 52059-015 D-2 | SCREW M5XP0.8X12L | 2PCS | |
| 52059-016 D-5 | BUSHING | 2PCS | |
| 52059-017 D-6 | HANDLEBAR AXLE | 1PCS | |
| 52059-018 D-8 | SCREW | 2PCS | |
| 52059-019 D-9 | LOWER HANDLEBAR, LEFT | 1PCS | |
| 52059-020 D-10 | LOWER HANDLEBAR, RIGHT | 1PCS | |
| 52059-021 D-11 | BUSHING | 4PCS | |
| 52059-022 D-12 | C-CLIP | 4PCS | |
| 52059-023 D-13 | FLAT WASHER 4PCS | ||
| 52059-024 D-14 | BUSHINHG | 4PCS | |
| 52059-025 D-15 | BUSHING | 2PCS | |
| 52059-026 D-16 | CURVE WASHER | 4PCS | |
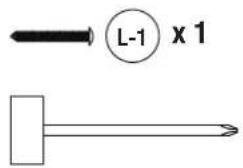
| 52059-027 L-1 | SCREW M3X25L | 1PCS | |
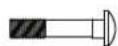
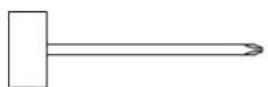
| 52059-028 L-2 | CARRIAGE BOLT M8XP1.25X40L | 4PCS | |
| 52059-029 L-3 | ACORN CAP NUT M8 | 4PCS | |
| 52059-030 L-4 | SEMI-CIRCUIT WASHER | 4PCS | |
| 52059-031 L-5 | SCEW M8XP1.0X30L | 2PCS | |
| 52059-032 L-6 | WASHER | 2PCS | |
| 52059-033 L-7 | FLAT WASHER 2PCS | ||
| 52059-034 L-9 | CURVE WASHER | 2PCS | |
| 52059-035 L-10 NYLON NUT M8 | 2PCS | ||
| 52059-036 L-16 SCEW M8XP1.25X55L | 2PCS | ||
| 52059-037 L-17 FLAT WASHER 2PCS | |||
| 52059-038 E-1 | SIDE COVER, RIGHT | 1PCS | |
| 52059-039 E-2 | FRONT COVER, RIGHT | 1PCS | |
| 52059-040 E-3 | SCREW M5X16L | 8PCS | |
| 52059-041 E-4 | SIDE COVER, LEFT | 1PCS | |
| 52059-042 E-5 | SCREW M4X50L | 7PCS | |
| 52059-043 E-6 | FRONT COVER, LEFT | 1PCS | |
| 52059-044 E-7 | HANDLEBAR POST COVER | 1PCS | |
| 52059-045 E-8 | DC WIRE | 1PCS | |
| 52059-046 F | FRAME | 1PCS | |
| 52059-047 F-2 | FLAT WASHER 4PCS | ||
| 52059-048 F-3 | HEXAGON HEAD SCREW M8*P1.25*16L | 4PCS | |
| 52059-049 F-7 | BEARING 6004RS | 2PCS | |
| 52059-050 F-8 | SPEED SENSOR+WIRE | 1PCS | |
| 52059-051 F-27 SCREW M4X10L | 1PCS | ||
| 52059-052 G | FLYWHEEL SET | 1SET | |
| 52059-053 G-1 | BUSH | 1PCS | |
| 52059-054 G-2 | NUT | 5PCS | |
| 52059-055 G-3 | BEARING 6300RS | 1PCS | |
| 52059-056 G-4 | BUSHING | 1PCS | |
| 52059-057 G-5 | BEARING 6000RS | 1PCS | |
| 52059-058 G-6 | FLAT WASHER 1PCS | ||
| 52059-059 G-7 | STAR WASHER | 2PCS | |
| 52059-060 G-8 | FLYWHEEL AXLE | 1PCS | |
| 52059-061 H | BELT TIGHTENER SET | 1SET | |
| 52059-062 H-1 | SPRING | 1PCS | |
| 52059-063 H-2 | SPRING HOLDER | 1PCS | |
| 52059-064 H-3 | HEX SCREW M6XP1.0X100L | 1PCS | |
| 52059-065 H-4 | HEX SCREW M6XP1.0X12L | 1PCS | |
| 52059-066 H-5 | FLAT WASHER 1PCS | ||
YORK REF. REF. DESCRIPTION QTY
| 52059-067 | H-6 | FLAT WASHER 1PCS | |
| 52059-068 | H-7 | PULLEY WHEEL | 1PCS |
| 52059-069 | H-8 | CURVE WASHER | 2PCS |
| 52059-070 | H-9 | FLAT WASHER 1PCS | |
| 52059-071 | H-10 | NYLON NUT M8 | 1PCS |
| 52059-072 | H-11 | HEX SCREW M8XP1.25X20L | 1PCS |
| 52059-073 | I | SERVOMOTOR AND MAGNETIC BRAKE SYS. | 1SET |
| 52059-074 | I-1 | BUSHING | 1PCS |
| 52059-075 | I-2 | HEX SCREW M6X20L | 1PCS |
| 52059-076 | I-3 | FLAT WASHER 1PCS | |
| 52059-077 | I-4 | EYEBOLT M6*Φ18*63L | 1PCS |
| 52059-078 | I-5 | HEX SCREW M6 | 2PCS |
| 52059-079 | I-6 | BUSHING | 1PCS |
| 52059-080 | I-7 | FLAT WASHER 1PCS | |
| 52059-081 | I-8 | SCREW | 1PCS |
| 52059-082 | I-9 | NYLON NUT M6 | 1PCS |
| 52059-083 | I-10 | CONSOLE CABLE, LOWER | 1PCS |
| 52059-084 | J | REAR STABILIZER | 1SET |
| 52059-085 | J-1 | NUT 3/8"-16X3T | 2PCS |
| 52059-086 | J-2 | ADJUSTABLE PAD | 2PCS |
| 52059-087 | J-3 | END CAP 2PCS | |
| 52059-088 | L-11 | SCREW M8X16 | 4PCS |
| 52059-089 | K-L | PEDAL ARM SET, LEF | 1PCS |
| 52059-090 | K-1 | SCREW M5XP0.8X12L | 2PCS |
| 52059-091 | K-2 | PEDAL ARM FRONT COVER, LEFT | 1PCS |
| 52059-092 | K-3 | BUSHING | 2PCS |
| 52059-093 | K-4 | PEDAL ARM FRONT COVER, RIGHT | 1PCS |
| 52059-094 | K-5 | PEDAL, LEFT | 1PCS |
| 52059-095 | L-5 | SCREW M8XP1.0X30L | 1PCS |
| 52059-096 | L-6 | WASHER | 1PCS |
| 52059-097 | L-7 | FLAT WASHER 1PCS | |
| 52059-098 | L-9 | CURVE WASHER | 1PCS |
| 52059-099 | L-12 | BUSHING | 2PCS |
| 52059-100 | L-13 | LOCKING KNOB | 4PCS |
| 52059-101 | L-14 | SPRING WASHER | 4PCS |
| 52059-102 | L-15 | CARRIAGE BOLT M6XP1.0X50L | 4PCS |
| 52059-103 | L-22 | FLAT WASHER 2PCS | |
| 52059-104 | K-R | PEDAL ARM FRONT COVER, RIGHT | 1PCS |
| 52059-105 | K-1 | SCREW M5XP0.8X12L | 2PCS |
| 52059-106 | K-2 | PEDAL ARM FRONT COVER, LEFT | 1PCS |
| 52059-107 | K-3 | BUSHING | 2PCS |
| 52059-108 | K-4 | PEDAL ARM FRONT COVER, RIGHT | 1PCS |
| 52059-109 | K-6 | PEDAL, RIGHT | 1PCS |
| 52059-110 | L-5 | SCREW M8XP1.0X30L | 1PCS |
| 52059-111 | L-6 | WASHER | 1PCS |
| 52059-112 | L-7 | FLAT WASHER 1PCS | |
| 52059-113 | L-9 | CURVE WASHER | 1PCS |
| 52059-114 | L-12 | BUSHING | 2PCS |
| 52059-115 | L-13 | LOCKING KNOB | 4PCS |
| 52059-116 | L-14 | SPRING WASHER | 4PCS |
| 52059-117 | L-15 | CARRIAGE BOLT M6XP1.0X50L | 4PCS |
| 52059-118 | L-22 | FLAT WASHER 2PCS | |
| 52059-119 | L | HARDWARE KIT | 1SET |
| 52059-120 | L-1 | SCREW M3X25L | 1PCS |
| 52059-121 | L-2 | CARRIAGE BOLT M8XP1.25X40L | 4PCS |
| 52059-122 | L-3 | ACORN CAP NUT M8 | 4PCS |
| 52059-123 | L-4 | SEMI-CIRCUIT WASHER | 4PCS |
| 52059-124 | L-5 | HEX SCREW M8XP1.0X30L | 4PCS |
| 52059-125 | L-6 | WASHER | 4PCS |
| 52059-126 | L-7 | FLAT WASHER 4PCS | |
| 52059-127 | L-9 | CURVE WASHER | 4PCS |
| 52059-128 | L-10 | NYLON NUT M8 | 2PCS |
| 52059-129 | L-11 | HEX SCREW M8X16 | 8PCS |
| 52059-130 | L-12 | BUSHING | 4PCS |
| 52059-131 | L-13 | LOCKING KNOB | 8PCS |
| 52059-132 | L-14 | SPRING WASHER | 8PCS |
| YORK REF. REF. DESCRIPTION QTY. | |||
| 52059-133 L-15 CARRIAGE BOLT M6XP1.0X50L 8PCS | |||
| 52059-134 L-16 HEX SCREW M8XP1.25X55L 2PCS | |||
| 52059-135 L-17 FLAT WASHER 2PCS | |||
| 52059-136 L-18 FIXING CLAMP 1PCS | |||
| 52059-137 L-19 FLAT WASHER 2PCS | |||
| 52059-138 L-20 SPRING WASHER 2PCS | |||
| 52059-139 L-21 SCREW M7XP1.0X30L 2PCS | |||
| 52059-140 L-22 FLAT WASHER 4PCS | |||
| 52059-141 L-23 BOX SPANNER 1PCS | |||
| 52059-142 L-24 ALLEN KEY 2PCS | |||
| 52059-143 | M | FRONT STABILIZER | 1SET |
| 52059-144 M-1 NUT | 2PCS | ||
| 52059-145 M-3 ADJUSTABLE PAD | 2PCS | ||
| 52059-146 M-4 NYLON NUT M8 | 2PCS | ||
| 52059-147 M-5 FLAT WASHER 2PCS | |||
| 52059-148 M-6 TRANSPORTATION WHEEL | 2PCS | ||
| 52059-149 M-7 HEX SCREW | 2PCS | ||
| 52059-150 L-11 SCREW M8X16 | 4PCS | ||
| 52059-151 N-1 PULLEY WHEEL | 1PCS | ||
| 52059-152 | N-2 | HEX SCREW M8XP1.25X12LX5T | 3PCS |
| 52059-153 | N-3 | DRIVE BELT | 1PCS |
| 52059-154 N-4 | BUSHING | 1PCS | |
| 52059-155 N-5 | AXLE | 1PCS | |
| 52059-156 O-1 | SCREW M4*12L | 10PCS | |
| 52059-157 O-2 | DISC INNER COVER | 2PCS | |
| 52059-158 O-3 | CROSS-BRACE SET | 2PCS | |
| 52059-159 O-4 | FLAT WASHER 4PCS | ||
| 52059-160 O-5 | DISC PLUG 2PCS | ||
| 52059-161 O-6 | DISC | 2PCS | |
| 52059-162 | O-7 | PATTERN NUT M10XP1.25X10T | 2PCS |
| 52059-163 P | ADAPTOR | 1PCS | |
| 52059-164 | Q | HANDLEBAR COVER SET | 1SET |
| 52059-165 Q-1 | HANDLEBAR COVER, LEFT | 1PCS | |
| 52059-166 Q-2 | HANDLEBAR COVER, RIGHT | 1PCS | |
| 52059-167 | R | BOTTLE HOLDER | 1PCS |

YORK®
FITNESS
- Table of contents
- Safety information
- YORK FITNESS
- Maximum user weight: 150kg
- Safety Standards
- Customer support
- ENGLAND
- York Barbell UK Ltd.
- AUSTRALIA
- York Fitness Australia
- Assembly instructions
- Operational instructions
- Final Check
- Input Power
- Hand Pulse Sensors
- Adjusting The Resistance
- Built in Wireless Heart Rate Receiver
- Console
- Key Function:
- Power On:
- Manual Mode
- Program Mode
- User Program Mode
- H.R.C. Mode
- Recovery Mode
- WATT Mode
- Body Fat Mode
- B.M.I. (Body mass index) integrated
- BODY FAT
- Care & Maintenance
- Troubleshooting
- FOR YOUR OWN SAFETY, DO NOT OPEN PROTECTIVE CASING. IF ERROR PERSIST, PLEASE CONTACT YOUR LOCAL YORK DISTRIBUTOR FOR ADVICE. KEEP THE EQUIPMENT OUT OF USE UNTIL IT IS REPAIRED.
- Fitness guide
- Starting and Finishing Your Workout
- Correct Crosstraining Form
- Suggested Stretches
- Hamstring Stretch
- Calf/Achilles Stretch
- Quadriceps Stretch
- Inner Thigh Stretch
- How Long Should I Exercise For?
- Heart Rate Training
- Calculating Your Target Heart Rate
- Exploded drawing
- Part list
Brand : York Fitness
Model : Perform 215
Category : Elliptical bike