PAB-3000 - Bread maker Palsonic - Free user manual and instructions
Find the device manual for free PAB-3000 Palsonic in PDF.


| Product Type | Bread Maker |
| Model | PAB-3000 |
| Brand | Palsonic |
| Dimensions (Approx.) | 30 x 25 x 35 cm |
| Weight | 5 kg |
| Power Supply | 220-240V, 50/60Hz |
| Power Consumption | 600 W |
| Capacity | Up to 1 kg loaf |
| Programs | 12 automatic programs including white, whole wheat, gluten-free, dough, jam, and cake |
| Crust Control | 3 settings (light, medium, dark) |
| Timer | Up to 15 hours delay start |
| Keep Warm Function | Automatic keep warm up to 1 hour |
| Display | LCD screen with backlight |
| Material | Stainless steel housing, non-stick baking pan |
| Viewing Window | Yes, with light |
| Safety Features | Automatic shut-off, cool-touch handle, overheat protection |
| Cleaning and Maintenance | Wipe exterior with damp cloth; wash pan and kneading paddle in warm soapy water |
| Spare Parts | Replacement baking pan and kneading paddle available |
| Repairability | Repairable by qualified technician; user-replaceable parts: pan and paddle |
| Accessories Included | Measuring cup, measuring spoon, kneading paddle, user manual |
Frequently Asked Questions - PAB-3000 Palsonic
User questions about PAB-3000 Palsonic
0 question about this device. Answer the ones you know or ask your own.
Ask a new question about this device
Download the instructions for your Bread maker in PDF format for free! Find your manual PAB-3000 - Palsonic and take your electronic device back in hand. On this page are published all the documents necessary for the use of your device. PAB-3000 by Palsonic.
USER MANUAL PAB-3000 Palsonic
From Sandwich Breads to Specialty Breads
Easy and Delicious - Right at Your Table
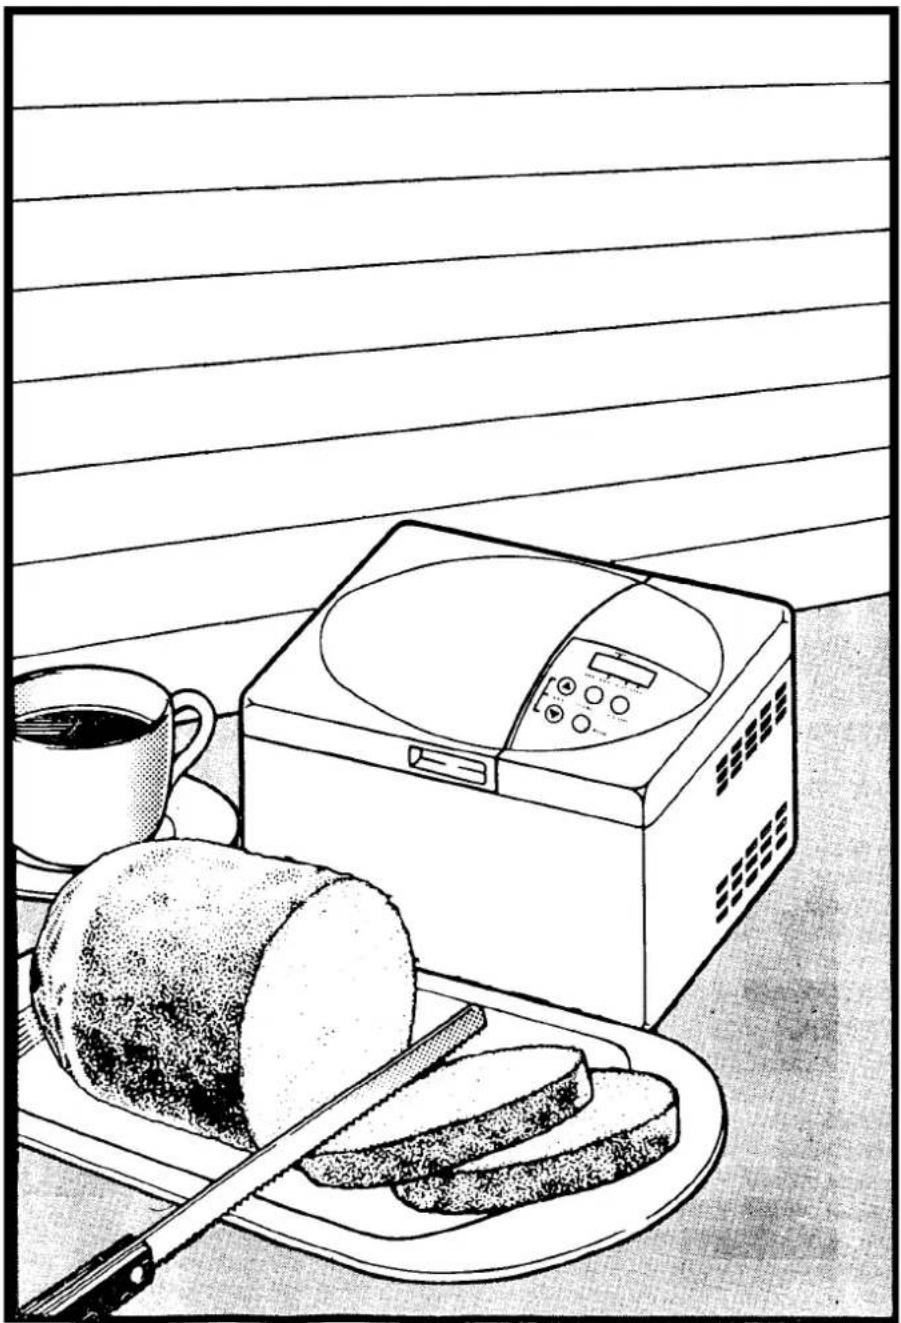
natural_image
Illustration of a kitchen setup with a bread roll, microwave oven, and plate of bread (no text or symbols)MODEL PAB-3000
Please take a few minutes to read these instructions before use. By carefully following the instructions, your Auto Bakery will serve you long and well.
CONTENTS
IMPORTANT SAFEGUARDS 2
PARTS AND INSTALLATION 3
Name and Function of Parts and Accessories
CONTROL PANEL 3
MOUNTING THE INNER POT.... 4
MENU SELECTION 4
BREAD MAKING 5
Full Auto Course 5
Manual Course for Kneading Only Option ...... 6
Using the Program Timer to Make Bread ...... 7
Removing the Bread 8
SAFETY INSTRUCTIONS 9, 10
CARE OF YOUR BREAD OVEN 11
BEFORE CALLING FOR SERVICE 12
SPECIFICATIONS 13
FCC INFORMATION 13
IMPORTANT SAFEGUARDS
HOUSEHOLD USE ONLY
When using electrical appliances, basic safety precautions should always be followed, including the following:
- Read all instructions before using the appliance.
- Do not touch hot surface.
- To protect against electrical shock do not immerse cord, plugs, or unit in water or other liquid.
- To prevent injuries or burns, do not insert your hand into appliance when appliance is operating.
- Close supervision is necessary when any appliance is used by or near children.
- Unplug from outlet when not in use and before cleaning. Allow to cool before putting on or taking off parts.
- Do not operate any appliance with a damaged cord or plug or after the appliance malfunctions, or has been damaged in any manner. Return appliance to the nearest authorized service facility for examination, repair, or adjustment.
- The use of accessory attachments not recommended by the appliance manufacturer may cause injuries.
- Do not use outdoors.
- Do not let cord hang over edge of table or counter, or touch hot surfaces.
- Do not place on or near a hot gas or electric burner, or in a heated oven.
- Extreme caution must be used when moving an appliance containing hot liquids.
- When using an extension cord always attach plug to appliance first, then plug cord into the wall outlet. To disconnect, turn any control to "off", then remove plug from wall outlet.
- Do not use appliance for other than intended use.
SAVE THESE INSTRUCTIONS.
A short power-supply cord for detachable
This unit has a short power supply cord to reduce the risk resulting from becoming entangled in or tripping over a longer cord. An extension cord may be used if you are careful in their use. If a longer detachable power-supply cord or extension cord is used, (1) the marked electrical rating of the cord set or extension cord should be at least as great as the electrical rating of the appliance, and (2) the cord should be arranged so that it will not drape over the countertop or tabletop where it can be pulled on by children or tripped over unintentionally. If the appliance is of the grounded type, the extension cord should be a grounding type 2-wire cord. The power cord must be kept dry and must not be bent or anything put on too of it.

CONTROL PANEL

1 Place inner pot into main unit with arrow on top rim facing the front and turn clockwise as far as it will turn. Turn counter clockwise to remove.
2 Position the dough blade onto shaft.
Make sure interior of oven is cleaned after each use by wiping out with a clean cloth dampened with hot water and mild dish washing liquid.
Before using, wipe out with a damp clean cloth.
NEVER pour water into oven.


MENU SELECTION
1 Plug the power cord into an AC power outlet. The Auto Course Medium Bake indicator (MED) will light.
2 Touch SELECT pad to choose desired course.
Notes: * Medium, Dark, Light and Manual can be selected in Auto Course.
* Medium, Dark and Light refer to the colour of the crust or the “doneness” of the baked bread.
* Manual Course is used only for making dough. Bread will not bake. Use this setting to make dough for pizza, dinner rolls, croissants, etc.
Full Auto Course
1 Make sure the inner pot is correctly positioned.
Prepare and add the ingredients for the bread you are making as described in your recipe.
2 First add the active dry yeast, then the other ingredients into the inner pot. All ingredients, except water, must be at room temperature.
Note: • Adding Yeast
For better baking results, add yeast near the edge of the inner pot.

3 Add a small quantity of warm water (approximately 40^ C - "hot to the touch") as required in your recipe.
4 Touch SELECT pad to select Auto course: Medium, Light or Dark. The type of bread being made will determine which one to choose. The three different settings refer to the colour of the crust or the "doneness" of the baked bread.
5 Touch START pad for immediate bread making. Your Bread will be ready in about 2 hours 15 minutes. The Bread Oven LED read out will tell you the hours and minutes remaining until the bread will be ready.
6 The Bread Oven will beep when the baking process has finished. The Bread Oven will then automatically go into a 1-hour cool down cycle.
- It is preferable to take the bread of out of Bread Oven immediately after baking. Keeping bread in the Bread Oven even after the completion of the cycle may affect the bread, causing it to become soggy.
- When you take bread out of the Bread Oven before the end of the cool down cycle, touch the CLEAR pad to turn the Bread Oven off.
- The CLEAR pad should be held down for longer than 1 second.
- Making Special Kinds of Bread cool down (ELIMINATE PERIOD)
Raisin bread and other types of bread can also be baked by adding ingredients as indicated in Recipe book. Ingredients like raisins and nuts, should be added 25 minutes after pressing the START pad, when the Bread Oven beeps 10 times.
- Do not operate the unit immediately after baking is completed. Allow the Bread Oven to cool to room temperature.
- CAUTION: After baking, the Bread Oven is extremely hot. When handling metal parts (interior, inner pot, dough hook and blades) be sure to use an oven mitt or pot holder.
Manual Course for Kneading Only Option
The process of making dough ONLY is performed with this course. The Manual Course is used for only making dough which then can be used to make pizza, table rolls, croissants or other breads which will be hand shaped and baked in a conventional oven.
1 Make sure the inner pot is correctly positioned.
Prepare and add the ingredients for the bread or dough as described in your recipe.
2 First add active dry yeast, then the other ingredients into the inner pot. All ingredients, except the water, must be at room temperature.
Note: • Adding Yeast
For better baking results, add yeast near the edge of the inner pot.
3 Add a small quantity of warm water (approximately 40^ C - “hot to the touch”) as required in your recipe.
4 Touch the SELECT pad to select the MANUAL course
5 Touch the START pad to begin kneading of dough. The LED read out will tell you the number of minutes remaining until the dough will be ready.
Note: • 25 minutes after pressing the START pad, the Bread Oven will beep 10 times indicating the best time to add other ingredients such as raisins, etc.
6 Dough is completed when the Bread Oven beeps for 5 minutes.
Notes: ♦ if you wish to mute the beep sound, press the CLEAR pad.
- When pressing the CLEAR pad, make sure you hold it down for longer than one second.
7 When the dough is ready, remove it from the inner pot
8 Proceed with the instructions given in your recipe.
Using the Program Timer to Make Bread or Dough
1 Make sure the inner pot is correctly positioned.
Prepare and add the ingredients for the bread or dough you are making as described in your recipe.
2 First add the active dry yeast, then other ingredients into the inner pot.
Note: • Adding Yeast
For better baking results, add yeast near the edge of the inner pot
3 Add specified amount of warm water (approximately 40^ C - “hot to the touch”) as required in your recipe.
4 Touch SELECT pad to select your desired baking course: Medium, Light, Dark or Manual.
5 Determine the time you want your bread or dough to be ready. Now count the number of hours remaining from the current time of day to the finished time you desire. Enter the number of hours and minutes remaining. For example: it is presently 1:00 PM and you want a loaf of baked bread at 6:10PM. Press the PROGRAM TIMER ( ▲) up pad until the display reads 5:10(which means: 5 hours and 10 minutes). The numbers will flash on and off. Press the START pad to lock in the programmed amount of time. To cancel, press the CANCEL pad holding the pad down for longer than one second in order to deactivate. The same procedure applies for just making dough with the Manual setting.
Notes: The PROGRAM TIMER can only be adjusted in 10 minute increments.
- Programmable time is as follows.
| Programmable Time | ||
| Min. | Max. | |
| Full Auto Course (MED., LIGHT, DARK) | 2-1/2 hrs. | 12 hrs. |
| Manual Course | 1 hour 10 hrs. | |
- Do no use the PROGRAM TIMER when making bread or dough containing ingredients that can be easily spoiled, such as eggs or milk, or ingredients that rapidly adsorb liquids such as oats and other grains.
Removing the Bread
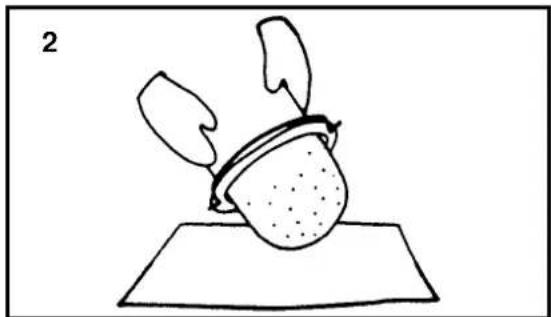
1 Turn the inner pot counter clockwise to remove it from the main unit.
2 Turn the inner pot upside down to carefully remove the baked bread.
3 With a plastic or other non metallic utensil, remove the dough blade which is imbedded in the bottom of the bread.
4 Let the bread cool to room temperature then cut as desired and serve.
CAUTION: All metal components of the Bread Oven are extremely hot during and after the baking process. Use oven mitts or a pot holder when handling the inner pot, dough blade or the dough hook.

natural_image
Simple line drawing of a teapot with two blades and a handle, placed on a flat surface (no text or symbols)
natural_image
Line drawing of two hands performing a circular motion or manipulation technique (no text or symbols)
natural_image
Line drawing of a hand using a tool to lift a mechanical component (no text or symbols)Baking Process
- Do not touch the Bread Oven as the temperature becomes extremely high when the unit starts the baking process, or immediately after baking is done. Take special care if infants and children are nearby. Always use oven mitts when taking out fresh-baked bread Be especially careful that flammable objects are never placed on top of the unit as they could ignite.

natural_image
Illustration of two cartoon kitchen models with expressive faces and steam rising (no text or symbols)Suitable Locations
- Do not obstruct the air intake opening which IS located on the bottom of the unit. - Do not use the unit near any fire-causing objects, in places exposed to rain or direct sunlight, or other inappropriate places, as it may cause the unit to malfunction or be damaged.

natural_image
Illustration of a washing machine and a steaming appliance with a smiling sun (no text or symbols)Power Supply
- Only use a correctly wired 240V AC 50Hz socket outlet. Never share the same outlet with other appliances. - Remove the plug if the unit is not to be used for an extended period of time.

natural_image
Illustration of a plug-in socket with three circular holes and a hand holding a tool (no text or symbols)Main Unit
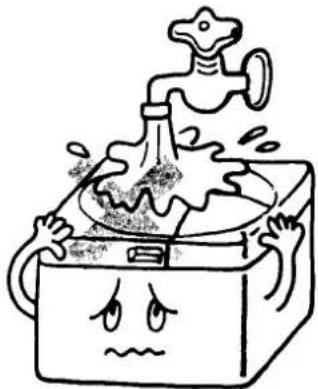
- Do not immerse the main unit in water, as this could lead to electrical shock, electrical leakage or other malfunctions.
natural_image
Cartoon illustration of a sad face inside a box with a faucet and splashing liquid (no text or symbols)Oven
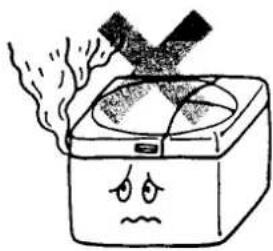
- Flour, bread crumbs or any foreign matter accumulated in the oven may make it impossible to insert the inner pot.
- Flour and other substances scattered on the heater may cause some smoke to be generated during baking.
natural_image
Cartoon illustration of a distressed open box emitting smoke or vapor (no text or symbols)Handling of the Unit
- Do not drop or transmit strong shocks to the unit as malfunctions could result.
- This unit is exclusively designed for bread making. Only use bread making ingredients.

natural_image
Cartoon illustration of a distressed, anthropomorphic object with arms and legs, falling in rain (no text or symbols)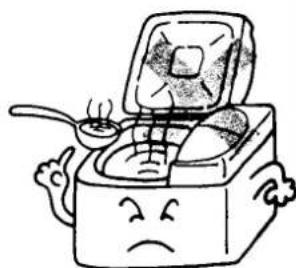
natural_image
Cartoon illustration of a sad, anthropomorphic food item with legs and arms, no text or symbols presentConsult Your Qualified Service Personnel:
- If damage or an abnormality is found in the power cord.
- If the unit operates improperly.
- If the temperature of the plug increases alarmingly during use.
- If unusual conditions occur.
If Power Goes Off During Use
- If there is a power failure or the unit is accidentally unplugged during the bread maxing process, the program will automatically end.
To proceed, remove all the ingredients from the inner pot, replace them with fresh ingredients and start again from the beginning. - The same applies when using the programmable timer. If power is lost or the unit accidentally unplugged when using the timer, the program will automatically end and the unit will revert back to the auto course. If the unit has already begun to make bread, remove all the ingredients from the inner pot, replace them with fresh ingredients and reset the timer.
If the timer had not yet been activated and the bread making process not begun, you need only reset the timer.
Inner Pot and Dough Blade
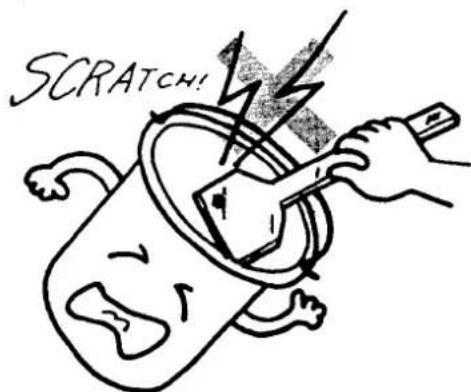
- Clean these parts thoroughly using a sponge or soft cloth dampened in hot water. After cleaning, dry completely and store inside the main unit.
Note: The inner pot and dough blade are fluorine resin-coated. To keep the coating from getting scratched and damaged, do not use hard utensils such as metal spoons, knives etc.
Main Unit
- Unplug the power cord from the AC outlet before cleaning.
- Gently wipe dirt off with a sponge or soft cloth dampened with hot water. Next wipe with a dry cloth.
- Never use thinner, benzine, or any other chemical cleaners or polishing powders. Nylon and metal brushes cannot be used.
• Non-kitchen detergents or bleach powder should not be used.

natural_image
Cartoon illustration of a distressed box with a 'Benz' bottle pouring liquid from it (no text or symbols)Shaft
- Remove all crumbs after each use. Use a sponge or cloth dampened in hot water and squeezed out.
- Do not use sharp implements to remove baked on dough. Soften with a damp cloth first and then wipe away.
Seal
- If crumbs accumulate on the bottom of the main unit, remove the seal and clean thoroughly with a sponge or soft cloth.
- Be sure to reinstall the seal properly or water may leak

natural_image
Cartoon illustration of a hand placing food into a box with a smiling face (no text or symbols)Oven
Remove flour and bread crumbs and all foreign matter, etc. from the inside of the oven, use a clean cloth dampened in hot water and mild dishwashing liquid. Wipe clean with a damp clean cloth.
| Problem | Cause | Solution |
| The unit does not start. | Is the power cord plugged in? | If not, plug the power cord in securely |
| Does the clock display indicate OE:01? | The unit will not operate if the oven's interior temperature is above 50°C - such as immediately after baking is done Open the lidand let the inside cool off | |
| Does the clock display indicate OE:02? | If so, contact qualified service personnel | |
| Water leaks from the inner pot. | Is the inner pot mounted correctly? | If not, mount the inner pot correctly. |
| Is the seal correctly seated on shaft? | If not, contact service personnel to replace the packing. | |
| Dough kneading cannot be performed. | Is the dough blade attached correctly? | If not, remove the inner pot, take out ingredients, and attach the dough blade correctly. |
| Smoke is generated during baking. | Have flour or other ingredients spilled and on the heater in the oven burned? | If so, clean the inside of oven. If smoke results from any other cause than the above, unplug the power cord and contact service personnel. |
| Dough does not rise enough. | Is the amount of water used correct? Is the temperature of the water correct? | Use the right amount of warm water. (Approximately 40°C) |
| Was bread flour used? Were all ingredients measured correctly and at room temperature with the exception of the water? | The use of bread flour is highly recommended. Measure all ingredients carefully and make sure they are at room temperature. | |
| Is the yeast you are using old or has it been left for a long time with the package opened? Has it been stored incorrectly? | Use fresh yeast from an unopened package. | |
| Is the bread being baked where the temperature is excessively high or low? | Use the unit in locations where the temperature is normal (18°-20°C) | |
| Bread cannot be baked. | Is the Manual course being used? | The Manual course is designed just for dough making and the unit will not enter the baking process. Remove the ingredients, replace with new ingredients, and start the unit in the correct course. Be sure to press Clear button first. |
| Bread cannot be baked with the program timer. | Does the display flash? | If so, forgot to press START pad. Press START pad. |
| Is the program timer set correctly? | Carefully read instructions for setting the program timer on page 7. | |
| Does the display show "Auto-MED" mode? | A power failure may have occurred. Remove ingredients and start all over. | |
| The program timer cannot be set. | Is the program timer set correctly? | Carefully read the instructions for setting the program timer on page 7. |
| Bread rises too much or colapses | Is it very hot and or humid? | Reduce yeast by 1/4-1/2 tsp. Reduce water by 3 Tbsp. Add reduced amount of water. If after kneading three minutes dough appears too dry, add additional water, 1 Tbsp. at a time, up to 3 Tbsp. Do not use rapid rise yeast. |
SPECIFICATIONS
| System Auto-blend method | |
| CPU | 4 Bit 6KB |
| Power supply AC 240V, 50Hz | |
| Power consumption 450W | |
| Size | 430(W) x 325(D)330(H) mm |
| Weight | Approx. 6.5kg (1 4.8 lbs) |
| Weight of bread | Approx. 360g (0.81 lbs.) |
| Size of bread | Approx. 135(D)x 160(H) mm |
*Specifications subject to change without notice.
PALSONIC CORPORATION PTY LTD
1 JOYNTON AVENUE
WATERLOO NSW 2017 AUSTRALIA
TEL:(02)9313 7111
FAX:(02)9313 7555
www.palsonic.com.au
PALSONIC CUSTOMER SERVICE
TELEPHONE
AUSTRALIA: 1300 657 888
- MODEL PAB-3000
- CONTENTS
- IMPORTANT SAFEGUARDS
- HOUSEHOLD USE ONLY
- SAVE THESE INSTRUCTIONS.
- A short power-supply cord for detachable
- MENU SELECTION
- Full Auto Course
- Manual Course for Kneading Only Option
- Using the Program Timer to Make Bread or Dough
- Removing the Bread
- Baking Process
- Suitable Locations
- Power Supply
- Main Unit
- Oven
- Handling of the Unit
- Consult Your Qualified Service Personnel:
- If Power Goes Off During Use
- Inner Pot and Dough Blade
- Shaft
- Seal
- SPECIFICATIONS
Brand : Palsonic
Model : PAB-3000
Category : Bread maker