Pressure Express KPR800 - Frying Pan Kambrook - Free user manual and instructions
Find the device manual for free Pressure Express KPR800 Kambrook in PDF.


| Product Type | Electric Pressure Cooker |
| Model | Pressure Express KPR800 |
| Brand | Kambrook |
| Capacity | 6 Litres |
| Housing Material | Brushed Stainless Steel |
| Cooking Bowl Material | Non-Stick Coating |
| Power Supply | 230-240V ~ 50/60Hz |
| Power Consumption | 1000W (estimated) |
| Dimensions (Approx.) | 35 x 35 x 30 cm (estimated) |
| Weight (Approx.) | 5.5 kg (estimated) |
| Cooking Functions | Sauté, Pressure Cook (White Rice, Brown Rice, Soup/Curry, Pot Roast), Slow Cook |
| Preset Cooking Times | White Rice: 12 min, Brown Rice: 18 min, Soup/Curry: 33 min, Pot Roast: 24 min, Slow Cook: 8 hrs |
| Keep Warm Function | Yes, up to 4 hours |
| Timer Adjustment | Yes, for White Rice, Brown Rice, Soup/Curry, Pot Roast in 1 min increments |
| Safety Features | Safety Locking Lid, Pressure Indicator Rod, Pressure Regulator/Release Valve, Pressure Safety Valve, Automatic Pressure Release |
| Lid Gasket | Silicone Rubber Gasket (replace every 1-2 years) |
| Accessories Included | Stainless Steel Trivet, Rice Measuring Cup, Heat-Resistant Serving Spoon, Heat-Resistant Soup Ladle, Removable Power Cord |
| Cleaning Instructions | Hand wash bowl and lid with warm soapy water; wipe housing with damp cloth; do not immerse base |
| Dishwasher Safe | Bowl: not specified (hand wash recommended); Lid: not dishwasher safe |
| Spare Parts Availability | Silicone Gasket, Pressure Indicator Valve Gasket, Pressure Safety Valve – contact Kambrook Service Centre |
| Repairability | Authorized Kambrook Service Centre only |
| Warranty | Contact Kambrook customer service |
| Country of Manufacture | Not specified |
Frequently Asked Questions - Pressure Express KPR800 Kambrook
User questions about Pressure Express KPR800 Kambrook
0 question about this device. Answer the ones you know or ask your own.
Ask a new question about this device
Download the instructions for your Frying Pan in PDF format for free! Find your manual Pressure Express KPR800 - Kambrook and take your electronic device back in hand. On this page are published all the documents necessary for the use of your device. Pressure Express KPR800 by Kambrook.
USER MANUAL Pressure Express KPR800 Kambrook
Please retain your instruction book for future use.
In the event that you need some assistance with your Kambrook appliance, please contact our Customer Service Department on 1300 139 798 (Australia) or 0800 273 845 (New Zealand). Alternatively, visit us on our website at www.kambrook.com.au or www.kambrook.co.nz
Contents
Kambrook Recommends p4
Safety First
Your Kambrook Pressure Express p7
Pressure Cooker
Pressure Express Quick Start Guide p8
Before First Use p12
Functions of Your Kambrook p13
Pressure Cooker
Pressure Express Cooking Guide p16
Troubleshooting Guide p28
Care, Cleaning and Storage p29
Handy Hints for Pressure Cooking p32
Recipes
p33
Kambrook Recommends Safety First
IMPORTANT: Please retain your instruction book for future use.
At Kambrook, we believe that safe performance is the first priority in any consumer product, so that you, our valued customer can confidently use and trust our products. We ask that any electrical appliance that you use be operated in a sensible fashion with due care and attention placed on the following important operating instructions.
Important Safeguards For Your Kambrook Pressure Express Pressure Cooker
- Carefully read all instructions before operating the pressure cooker for the first time and save for future reference.
- Remove and safely discard any packaging material and promotional labels before using the pressure cooker for the first time.
- To eliminate a choking hazard for young children, remove and safely discard the protective cover fitted to the power plug of this pressure cooker.
- Do not place the pressure cooker near the edge of a bench or table during operation. Ensure that the surface is level, clean and free of water and other substances.
- Position the pressure cooker so that the steam vent/pressure relief valve is directed away from yourself. Lift and remove the lid carefully to avoid scalding from escaping steam.
- Do not operate the pressure cooker on a sink drain board.
- Do not place your face or any other body part over the pressure cooker whilst in use as the steam can cause serious burns.
• Always ensure pressure cooker is properly assembled before use. Follow the instructions provided in this book. -
Do not touch hot surfaces. Use handles on the sides of the pressure cooker and on lid for lifting and carrying the pressure cooker.
-
Always insert the connector end of the power cord into the pressure cooker inlet before inserting power plug into power outlet and switching on pressure cooker. Ensure the pressure cooker inlet is completely dry before inserting the connector end of the power cord.
- This pressure cooker cooks under pressure. Improper use may result in injury.
- When using this pressure cooker, ensure the lid is properly assembled and locked into position before use.
- Do not touch hot surfaces; use oven mitts to remove the lid and removable cooking bowl. Lift and remove the lid carefully and away from yourself to avoid scalding from escaping steam.
- Use the removable cooking bowl supplied with the pressure cooker only. Do not use any other bowl inside the pressure cooker housing.
- Do not use a damaged or dented removable cooking bowl. If damaged or dented, replace bowl before using.
- Never plug in or switch on the pressure cooker without having the removable cooking bowl placed inside the pressure cooker housing.
-
Do not place food or liquid in the pressure cooker housing. Only the removable cooking bowl is designed to contain food or liquid.
-
Never operate the pressure cooker without food and liquid in the removable cooking bowl. Ensure that the level of food and liquid inside the removable cooking bowl is not below '2' level mark before cooking commences. Always follow the maximum and minimum quantities of liquid stated in instructions and recipes.
• Always operate the pressure cooker on a stable and heat resistant surface. - Do not use chemicals, steel wool, metal scouring pad or abrasive cleaners to clean the outside of the pressure cooker housing or cooking bowl as these can damaged the housing or the coating of the cooking bowl.
- Do not place anything, other than lid, on top of pressure cooker when assembled, when in use and when stored.
- Do not allow water from the lid to drip into the pressure cooker housing, only into the removable cooking bowl.
- Always have the lid placed correctly into position on the pressure cooker throughout operation of the pressure cooker unless it states in the recipe to have it removed.
- Do not leave the pressure cooker unattended when in use.
- Do not place anything on top of the lid when assembled, when in use and when stored.
- Extreme caution must be used when pressure cooker contains hot food and liquids and/or is under pressure. Improper use may result in injury. When using this pressure cooker, make sure the lid is properly locked and aligned before operating.
- Ensure the removable cooking bowl is correctly positioned in the pressure cooker base before you commence cooking.
- Before placing removable cooking bowl into stainless steel base ensure base of bowl and base of pressure cooker is dry by wiping with a dry soft cloth.
- Do not use the pressure cooker for anything other than its intended use. Do not attempt to operate pressure cooker by any method other than those described in this instruction book.
- Some foods to avoid when pressure cooking are; apple sauce, cranberries, pearl barley, oatmeal and other cereals, potatoes, noodles and pasta, and rhubarb; these foods can foam, froth and splatter and clog the pressure regulator/release valve and pressure indicator valve.
- The removable cooking bowl can be extremely heavy when full of ingredients, care should be taken when lifting from pressure cooker base.
-
Do not use the lid handle to carry pressure cooker when in use and after use.
-
Always ensure that the removable cooking bowl has cooled sufficiently before handling and use oven mitts when removing the steel housing.
- Do not adjust the "Pressure Regulator/Release Valve" whilst in use.
- Use only recommended "Steam Release" to depressurise cooker after use.
- Do not exceed maximum fill level. Some foods expand during pressure cooking such as rice and legumes, do not fill removable cooking bowl over 12 full. Over filling may cause a risk of clogging the pressure regulator/release valve/release valve and pressure indicator valve. It may also lead to the development of excess pressure.
- The temperature of accessible surfaces will be high when the pressure cooker is operating and for some time after use.
- Do not place the removable cooking bowl when hot on any surface that may be affected by heat.
- Avoid sudden temperature changes. Do not place frozen or very cold foods into the removable cooking bowl when it is hot. Do not place hot removable cooking bowl into cold water.
- Do not use the removable cooking bowl for food storage. The removable cooking bowl is not designed for storing food in the freezer.
- Ensure pressure cooker is fully cooled before storing power cord inside the removable cooking bowl.
- To prevent scratching the non-stick surface of the removable cooking bowl, always use wooden or plastic utensils.
• Always position steam vent on lid away from yourself to avoid scalding from escaping steam. - Suggested cooking times in this instruction book are approximate. Cooking times can vary depending on ingredients and quantities in recipes.
- Recommended cooking times in this instruction booklet may vary depending on the ingredients and quantities of food used for recipes.
- Do not attempt to open the pressure cooker lid after pressure cooking until all internal pressure has been released and is slightly cooled. If the lid will not turn to unlock, this indicates that pressure cooker is still under pressure – do not force the lid open. Any pressure remaining can be hazardous. See operating instructions for "steam release" directions in this instruction book.
- The ducts in the pressure regulator, allowing the escape of steam should be checked regularly to ensure that they are not blocked. The unit must not be opened until the pressure has decreased sufficiently.
Important Safeguards For Your Kambrook Pressure Express Pressure Cooker
continued
• Always check pressure regulator/release valve and pressure indicator valve for clogging before use and clean if necessary. Check to make sure the pressure indicator rod moves freely from under the lid.
- The pressure cooker electrical connector must be removed before the pressure cooker is cleaned and the appliance inlet must be dried before the pressure cooker is used again.
- Do not immerse pressure cooker housing/base, power cord or plug in water or any other liquid.
- Do not move the pressure cooker when in use.
- Keep the pressure cooker clear of walls, curtains and other heat or steam sensitive materials.
- Use the pressure release/regulator valve to release steam pressure.
- Never use the removable cooking bowl to sauté ingredients on a ceramic, electric or gas stove. Ensure that the safety locking lid is properly aligned, locked and closed before operating (see instructions on page 17).
- The pressure cooker is not intended to be operated by means of an external timer or separate remote control system.
• Always ensure that the power is off at the power outlet and remove power plug from the power outlet before attempting to move the appliance before cleaning and storing. - Keep the pressure cooker clean. Follow the cleaning instructions provided in the book.
Important Safeguards For All Electrical Appliances
• Fully unwind the power cord before use.
- Connect only to a 230V or 240V power outlet.
- Do not let the power cord hang over the edge of a bench or table, touch hot surfaces or become knotted.
• To protect against electric shock, do not immerse the power cord, power plug or appliance in water or any other liquid or allow moisture to come in contact with the part, unless it is recommended in the cleaning instructions.
• The appliance is not intended for use by persons (including children) with reduced physical, sensory or mental capabilities, or lack of experience and knowledge, unless they have been given supervision or instruction concerning use of the appliance by a person responsible for their safety.
- Children should be supervised to ensure that they do not play with the appliance.
- It is recommended to regularly inspect the appliance. To avoid a hazard, do not use the appliance if power cord, power plug or appliance becomes damaged in any way. Return the entire appliance to the nearest authorized Kambrook service centre for examination and / or repair.
- Any maintenance other than cleaning should be performed at an authorised Kambrook Service Centre.
- This appliance is for household use only. Do not use this appliance for anything other than its intended use. Do not use in moving vehicles or boats. Do not use outdoors. Misuse may cause injury.
- The installation of a residual current device (safety switch) is recommended to provide additional safety protection when using electrical appliances. It is advisable that a safety switch with a rated residual operating current not exceeding 30mA be installed in the electrical circuit supplying the appliance. See your electrician for professional advice.
- Always turn the appliance to the OFF position, switch off at the power outlet and unplug at the power outlet when the appliance is not in use.
- Before cleaning, always turn the appliance to the OFF position, switch off at the power outlet, unplug at the power outlet and remove the power cord, if detachable, from the appliance and allow all parts to cool.
- Do not place this appliance on or near a heat source, such as hot plate, oven or heaters.
- Position the appliance at a minimum distance of 20cm away from walls, curtains and other heat or steam sensitive materials and provide adequate space above and on all sides for air circulation.
Your Kambrook Pressure Express Pressure Cooker
- Cool touch lid handle
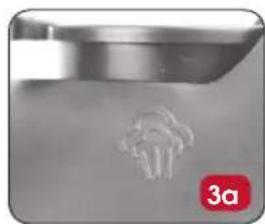
- Pressure regulator/release valve - controls the rate at which steam vents from Pressure Express and degree of pressure inside the Pressure Express
- a) Pressure vent sealed position b) Pressure release venting position to release the pressure inside the pressure cooker
- Safety locking lid – can not be opened during pressure cooking
- 6 litre non-stick removable cooking bowl (Not visible)
-
Digital control panel with pre-set cooking functions, allowing you to select the desired cooking setting, displaying the pre-set cooking time
-
Cool touch handles
- Brushed stainless steel housing
- Condensation Collector - attaches to the side of the Pressure Express and collects any excess water
-
Pressure indicating rod - once unit pressurises, rod will pop out
-
Pressure indicator valve
Not Shown
• Stainless steel trivet raises food out of the liquid when pressure cooking
- Removable power cord
- Rice measuring cup
• Heat resistant serving spoon and heat resistant soup serving ladle
• Pressure safety release valve cover
natural_image
Close-up of a metallic object with a white abstract shape and a red label '3a' in the corner (no readable text or symbols on the object itself)
natural_image
Close-up of a mechanical component with a red circle highlighting a circular feature, no visible text or symbols.
natural_image
Close-up of a mechanical component with a red circular badge labeled '3b' (no readable text or symbols)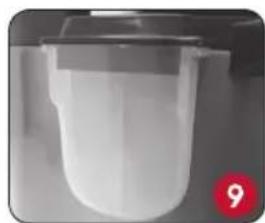
natural_image
Close-up of a transparent cylindrical container with a lid, possibly a container or filter, against a plain background (no text or symbols visible)
natural_image
Close-up of a mechanical component with a metallic shaft and circular badge showing number 10 (no text or symbols on the main subject)
Pressure Express Quick Start Guide
How to Sauté - Using the Sauté setting
natural_image
Close-up of a hand pressing down on a metal steamer (no text or symbols visible)Remove the safety locking lid by turning the handle clockwise to the unlock/align position and wash the removable cooking bowl.

natural_image
Hand holding a cooking pot over a stovetop (no text or symbols visible)Insert the removable cooking bowl into the stainless steel housing.
natural_image
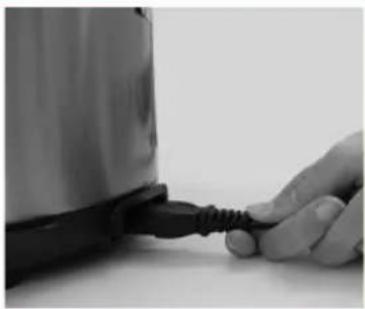
Close-up of a hand holding a black cable with a coiled cable, next to a metallic object (no visible text or symbols)Plug the removable power cord into the stainless steel housing.

natural_image
Close-up of a white electrical outlet with two switches and an open socket, no visible text or symbols.Plug power cord into a 230V or 240V power outlet and switch 'ON'.
natural_image
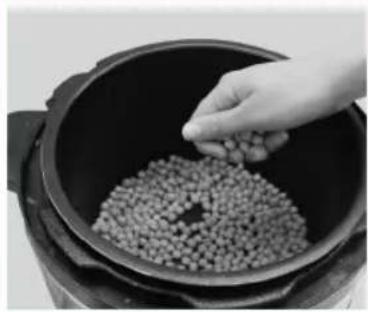
Hand placing nuts into a large pot (no text or symbols visible)Place ingredients to be cooked into removable cooking bowl.

Press the 'SAUTÉ' button.
Press the 'START/CANCEL' button to commence cooking.

The digital display screen will flash ‘- -’ while the saute setting is operating.

Press the 'START/CANCEL' button once sautéing is complete
Remove the safety locking lid by turning the handle clockwise to the unlock/align position and wash the removable cooking bowl.
Insert the removable cooking bowl into the stainless steel housing.
Remove the silicone rubber gasket from the safety locking lid and wash with warm soapy water.
Return the dry and clean silicone rubber gasket securely to the gasket holder.
Plug the removable power cord into the stainless steel housing.
Plug power cord into a 230V or 240V power outlet and switch 'ON'.
Place ingredients to be cooked into removable cooking bowl with minimum 250ml liquid.
Close the lid by turning the handle counter clockwise to lock into position.
Ensure pressure regulator/release valve is sitting in sealed position.
Pressure Express Quick Start Guide continued
How to Pressure Cook - Using the White Rice, Brown Rice, Soup/Curry, Pot/Roast settings (continued)

Select the desired pressure cooking setting.

Press the 'SET TIMER' button continuously to adjust the pre-set cooking time (if required or as per recipe recommendations).
Press the 'START/CANCEL' button to commence cooking (see Note below).

The 'START/CANCEL' light and the chosen pressure cooking setting light will both be illuminated during cooking.

Once the cooking time has counted down, the 'KEEP WARM' function will activate as long as the 'START/CANCEL' button is not pressed.
Alternatively, press the 'START/CANCEL' button to complete cooking.
natural_image
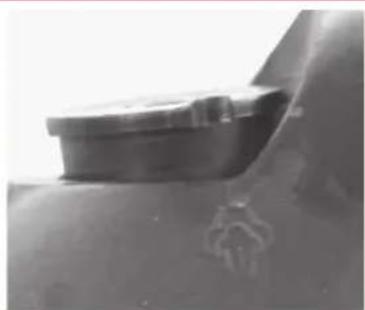
Close-up of a mechanical component with a cylindrical lid and a small handle, no visible text or symbolsTo manually release pressure turn the pressure regulator/release valve to the venting position. Allow 10 minutes for steam to release.
natural_image
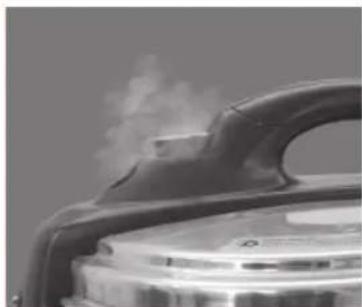
Close-up of a steam iron in a kitchen setting (no visible text or symbols)Alternatively, the Pressure Express will slowly release pressure automatically if the pressure regulator/release valve is not manually set to the venting position.

natural_image
Close-up of a hand pressing down on a metal steamer (no text or symbols visible)Remove the safety locking lid by turning the handle clockwise to the unlock/align position and then lift.
NOTE: The cooking lime countdown will only commence once the Pressure Express reaches full pressure. This may take up to 20 minutes. The Pressure Express will only pressurise on the pressure cooking settings.
Remove the safety locking lid by turning the handle clockwise to the unlock/align position and wash the removable cooking bowl.
Insert the removable cooking bowl into the stainless steel housing.
Plug the removable power cord into the stainless steel housing.
Plug power cord into a 230V or 240V power outlet and switch 'ON'.
Place ingredients to be cooked into removable cooking bowl with minimum 250ml liquid.
Close the lid by turning the handle counter clockwise to lock into position.
Press the 'SLOW COOK' button. Press the 'START/CANCEL' button to commence cooking. The Pressure Express will NOT pressurise on the Slow Cook setting.
Remove the safety locking lid by turning the handle clockwise to the unlock/align position and then lift.
NOTE: The lid can be removed during the slow cooking time to stir contents. Ensure the lid is replaced and locked into position when done stirring.
Before First Use
Remove and safely discard any packaging material and promotional labels before using the Pressure Express for the first time.
To eliminate a choking hazard for young children, remove and safely discard the protective cover fitted to the removable power cord of this appliance.
-
Make sure that the power outlet is switched OFF and that the removable power cord is unplugged from the power outlet and the Pressure Express.
-
Remove the safety locking lid by taking hold of the handle, turning it clockwise from the locked position to the unlock/align position and lift the lid up and off the appliance (See Fig. 1).
Fig. 1
-
Remove the silicone rubber gasket from the safety locking lid (See Fig. 2) and wash with warm soapy water. Dry thoroughly. Wash the safety locking lid in warm soapy water and dry thoroughly.
-
Return the dry and clean silicone rubber gasket securely to the gasket holder (See Fig. 3).
Fig. 3
NOTE: If the silicone rubber gasket is not correctly fitted back into the gasket holder, the lid will not close properly and it will prevent the Pressure Express from operating correctly.
-
Wipe the inside and the outside of the stainless steel housing with a soft damp cloth, and then dry thoroughly.
-
Remove and wash the removable cooking bowl in warm soapy water, rinse and dry thoroughly. Make sure there is no unwanted material on the exterior surface of the removable cooking bowl. The removable cooking bowl must sit flat on the temperature sensor to ensure proper contact.
Fig. 2
Functions of Your Kambrook Pressure Cooker
Cooking Methods
The Pressure Express allows you to use 3 different methods of cooking: these are slow cooking, sautéing, and pressure cooking. The Pressure Express also has digital pre-set settings that relate to each of the 3 cooking methods. These settings each have a default cooking time as per the table below.
| Cooking Method | Pre-Set Setting | Default Cooking Time* |
| Sauté Sauté Up to 60 min^ | ||
| Pressure Cook White Rice 12 min | ||
| Pressure Cook Brown Rice 18 min | ||
| Pressure Cook Soup/Curry 33 min | ||
| Pressure Cook Pot Roast 24 min | ||
| Slow Cook Slow Cook 8 hours |
*The time above is only an indication and does not include the time it taxes for the pressure cooker to reach full pressure. Timer will not start until the cooker is pressurised.
^The Pressure Express Sauté setting will operate for up to 60 minutes. If more time is required, press the Sauté digital setting again. No time will display when this setting is operating; the display screen will flash while on.
NOTE: Never operate the Pressure
Express without food and liquid in the removable cooking bowl.
Ensure that the level of liquid inside is no less than 250ml before cooking commences.
Always follow the maximum and minimum quantities of liquid stated in instructions and recipes.
NOTE: The time it takes for the unit to pressurise will vary depending on the amount of liquid used in the recipe.
NOTE: Depending on the quantity of food being cooked, it could take the Pressure Express up to 20 minutes to pressurise. To help speed this time up, use boiling, not cold, liquid.
NOTE: Do not use oil or milk as a liquid.
NOTE: If the pressure regulator/release valve is not manually moved to the venting position when cooking is finished, the steam will automatically vent out of the pressure regulator slowly. This method is recommended for recipes containing larger quantities of liquid such as soups and casseroles to prevent liquid being forced out with the steam. Alternatively, using a heat proof spatula, move the pressure release valve to the venting position and allow the pressure to escape.
Functions of Your Kambrook Pressure Cooker continued
Digital Pre-Set Settings
The Digital Control Panel has 6 settings including a Sauté', White Rice, Brown Rice, Soup/Curry, Slow Cook, and Pot Roast setting. The table below provides a summary of the cooking method and function of each setting. (See Fig.4)
NOTE: Foods to avoid when pressure cooking include; pearl barley and other cereals, root vegetables on their own, noodles and pasta, and rhubarb; as these foods can foam, froth, splatter and clog the pressure regulator/release valve and pressure indicator valve.
Fig. 4
NOTE: Do not exceed ‘MAX’ fill level in the removable cooking bowl. Some foods expand during pressure cooking such as rice and legumes.
Sauté Sautéing Vegetables,
simmer sauces and seal meat
White Rice Pressure Cooking
White rice, rice pudding, porridge
Brown Rice Pressure Cooking
Brown Rice
Soup/Curry Pressure Cooking
Soup, legumes (e.g. chickpeas, dried beans), casseroles and curries
Slow Cook Slow Cooking
Soups, casseroles, curries and stews
Pot Roast Pressure Cooking
Beef, lamb, pork, veal, whole chicken, silverside (corned beef)
Using the Set Timer Function
The Set Timer allows you to change the length of cooking time when using one of four digital pre-set settings. These include the White Rice, Brown Rice, Soup/Curry and Pot Roast setting. The Set Timer must be set before the Start/Cancel button is selected to commence cooking. Cooking time can be decreased or increased in one minute increments depending on the pre-set time associated with the selected cooking setting.
NOTE: The Set Timer CANNOT be changed on the Sauté or Slow Cook setting.
Using the Start/Cancel Function
The Start/Cancel Button starts and finishes the cooking process after the desired cooking setting is selected. If the Start/Cancel button is selected during the cooking process, to recommence cooking you will need to re-select the desired cooking setting and adjust the cooking time by minusing the initial time the Pressure Express has already cooked for on the selected setting. Once the desired cooking setting has been selected use the Set Timer to adjust timing, then press the 'START/CANCEL' button (refer to 'Using the Set Timer Function' on page 14).
NOTE: The Pressure Express will not operate unless the Start/Cancel button has been selected, after selecting a cooking setting on the Pressure Express digital display.
Automatic Keep Warm Function
The Keep Warm Function works on all settings except for the Sauté Setting. Once the cooking time is complete, and the Pressure Express regulator/release valve has been released, either manually or automatically, the Keep Warm function will automatically activate, keeping your food above 60°C for up to 4 hours. If you have not released the pressure, the unit will automatically depressurise and the Keep Warm Function will activate. The Keep Warm function will not activate if you have stopped the cooking process by pressing the Start/Cancel button.
NOTE: If the Start/Cancel button is pressed after the cooking process has finished, the Keep Warm function will not activate.
Using the Stainless Steel Trivet
The stainless steel trivet is for any food, that needs to be raised above the liquid level (See Fig. 5). Ensure that the stainless steel trivet is placed in the Pressure Express before plugging in the removable cord to the power outlet. The Trivet is especially recommended for cooking roasts.
Fig. 5
Pressure Express Cooking Guide
Using the Pressure Express
- Make sure that the power outlet is switched OFF and that the removable power cord is unplugged from the power outlet and from the Pressure Express.

WARNING: Always check the pressure release valve and pressure indicator valve for clogging before use and clean if necessary. Check to make sure the pressure indicator rod moves freely from under the lid.
NOTE: Ensure that the Pressure Express is placed in an open area with proper ventilation.
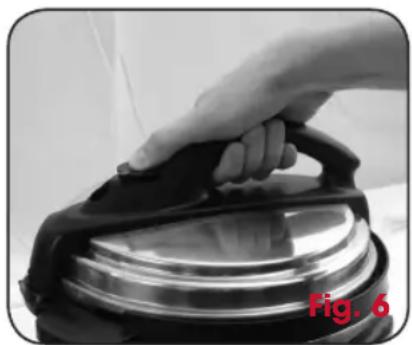
- Remove the safety locking lid by turning the handle clockwise to the unlock/align position and then lift (See Fig. 6).
natural_image
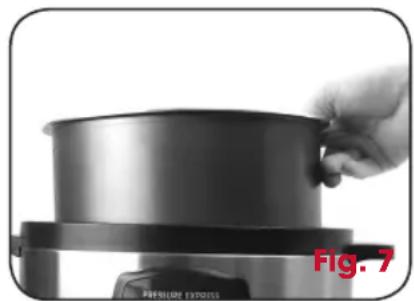
Hand pressing down of a black iron frying pan (no text or symbols visible)- Ensure the exterior of the removable cooking bowl is clean before placing it into the housing. Insert the removable cooking bowl into the stainless steel housing (See Fig. 7). The removable cooking bowl must sit flat on the temperature sensor to ensure proper contact.
natural_image
Close-up of a hand holding a cylindrical object on a metal heating pot (no text or symbols visible)- Ensure that the silicone rubber gasket is fitted correctly into the safety locking lid (See Fig. 2).

WARNING: Always operate the pressure cooker on a stable and heat resistant surface.
- Place the food to be cooked (as per recipe guidelines) into the Pressure Express.
NOTE: Ensure that the minimum liquid amount of 250ml is placed into the removable cooking bowl before proceeding.
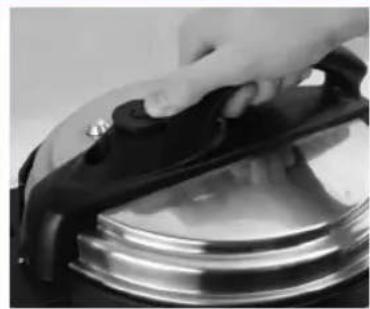
- Once all the ingredients have been added into the removable cooking bowl, take the safety locking lid and align the handle with the unlock/align position. When the safety locking lid is sitting correctly, turn it counterclockwise to lock into position (See Fig. 8).
Fig. 8
NOTE: The Pressure Express will not pressurise if the lid is not fitted and locked correctly. Ensure that the locking graphics are properly aligned when fitting the lid.
- Make sure that the pressure regulator/release valve is sitting in the sealed position (See Fig. 9). If the pressure regulator/release valve is in the venting position, the Pressure Express will not build up the required pressure needed to cook.
Fig. 9
-
Plug the removable power cord into the stainless steel housing and into a 230V or 240V power outlet and switch on. The unit will "Beep" one time and the standby lights will begin to flash '-' on the Digital Control Panel, which indicates that the pressure cooker is ready for use.
-
Select the required cooking function on the Digital Control Panel, by pressing the desired setting button. The indicator light on the selected setting button '- -' will flash continuously. Each setting except for sautéing has a pre-set cooking time. However the pre-set cooking time can be adjusted for the White Rice, Brown Rice, Soup/Curry and Pot Roast settings, by continuously pressing the 'SET TIMER' button to the desired cooking time in 1 minute increments. Please refer to 'Using the Set Timer Function' on page 14.
NOTE: Once the pre-set cooking time has been selected, if the Start/Cancel button has not been pressed within 30 seconds the Digital Control Panel will revert back to the standby mode ‘- -’. To commence cooking refer to step 9.
- Press the 'START/CANCEL' button to commence cooking. The unit will "Beep" three times and the red light will illuminate on the chosen setting button and Start/Cancel button.
- During pressure build up, the pressure indicator valve and the pressure regulator/ release valve will begin to "Hiss" and release minimal amounts of steam.
- The cooking timer displayed on the Digital Control Panel will not begin to count down until the Pressure Express has reached pressure.
Pressure Express Cooking Guide continued
NOTE: Once the internal temperature reaches 100^ C, the Pressure Express will pressurise. The pressure indicator valve will rise and the pressure indicator rod will pop out, locking the lid into position.

WARNING: Do not place your face or any other body part over the appliance whilst in use as the steam can cause serious burns.
- Once the timer has counted down and finished cooking, use the heat resistant serving spoon or an oven mitt to turn the pressure regulator/release valve to the venting position (See Fig. 10). This will cause the Pressure Express to release the steam that has built up inside the pressure cooker. Allow several minutes for the steam to be released.

natural_image
Close-up of a mechanical component with a small protrusion and a red label 'Fig. 10' (no readable text or symbols)NOTE: The pressure indicator valve and pressure indicator rod will return to the original position once all the pressure has been released.

WARNING: When pressure is released, there may be hot condensation liquid/steam droplets spitting through the pressure regulator/release valve. Avoid scalding yourself from any escaping hot liquid or steam.
- Once the cooking time for all pressure cooking settings or the slow cooking setting has counted down and the steam has been released from the Pressure Express (either manually or automatically), the Keep Warm function will automatically activate. This function will keep food above 60°C for up to 4 hours. This works on all settings, except for the Sauté Setting.
NOTE: If the Start/Cancel button is pressed after the cooking process has finished, the Keep Warm function will not activate.
-
Switch 'OFF' at the power outlet and unplug the removable cord from the power outlet and remove plug from the stainless steel housing before removing lid.
-
Once the pressure release value has released all the steam, and the pressure cooker has been unplugged from the power source, it is now safe to open the safety locking lid. Turn the handle clockwise to the unlock/align position, and then lift up the safety locking lid. Place the lid on a heat resistant surface.

WARNING: Do not attempt to open the pressure cooker lid after pressure cooking until all internal pressure has been released and is slightly cooled. If the lid will not turn to unlock, this indicates that the pressure cooker is still under pressure – do not force the lid open. Any pressure remaining can be hazardous. See operating instructions for “steam release” directions in this instruction booklet.
NOTE: Steam will rise quickly when the lid is taken off and can cause burns. Take extreme care when removing the safety locking lid. Angle the lid away from you face, and ensure that your hand and arm are not in the path of steam.
- Once selected cooking process has completed, check food to see if it has been cooked sufficiently as per required recipe guidelines. If ingredients do not appear to be cooked sufficiently refer to the' Trouble Shooting Guide' on page 28. Otherwise, use the heat resistant serving spoon or heat resistant soup serving ladle provided to serve the food.

WARNING: Do not touch hot surfaces, use oven mitts to remove the lid and or removable cooking bowl. Lift and remove the lid carefully and away from yourself to avoid scalding from escaping steam.
- Wait until the Pressure Express has cooled before cleaning. Follow the ‘Care, Cleaning and Storage’ instructions on page 29.

WARNING: When cooking under pressure, the safety locking lid can not be opened. Do not try to force the lid open.

WARNING: After pressure cooking, allow several minutes before releasing pressure and removing the lid to make sure that hot liquid inside will not boil over.

WARNING: Use caution when opening the safety locking lid. Steam escapes as soon as the lid is opened. Never place your face or hands over the Pressure Express when removing the lid. Always use oven mitts when handling the removable cooking bowl.
Pressure Express Cooking Guide continued
White Rice Setting
Pre-set cooking display time: 12min*
MIN - 2 cups | MAX - 8 cups
| Uncooked Rice Measures | Water Measures | Cooked Rice Measures |
| 2 2 4 | ||
| 4 4 8 | ||
| 6 6 12 | ||
| 8 8 16 |
NOTE: Total cooking times will vary depending on the time it takes for pressure to build up in the unit.
NOTE: Ensure that the rice cup provided is being used for each measure.
NOTE: To speed up the time it takes to reach pressure whilst pressure cooking, use boiling water or stock.
Porridge
The White Rice setting also allows you to cook porridge.
| Rolled Oats Measures | Water Measures | Cooked Porridge Measures |
| 2 4 6 | ||
| 4 8 12 | ||
| 6 12 18 |
- Add the rice or oats and water (as per table) to the Pressure Express removable cooking bowl and stir to combine, making sure that the ingredients are level in the bowl.
- Once all the ingredients have been added into the removable cooking bowl, take the safety locking lid, align the handle with the unlock/align position. When the safety locking lid is sitting correctly, turn it counterclockwise to lock into position.
- Select the 'WHITE RICE' setting, then press the 'START/CANEL' button to commence cooking process.
- Once the selected cooking timer has counted down and the cooking process has completed, use the heat resistant serving spoon or an oven mitt to turn the pressure regulator/release valve to the venting position. This will cause the Pressure Express to release the extra steam that has built up inside the pressure cooker. Allow several minutes for the steam to be released.
Brown Rice Setting
Pre-set cooking display time: 18min*
MIN - 4 CUPS | MAX - 8 CUPS
| Uncooked Rice Measures | Water Measures | Cooked Rice Measures |
| 4 4 8 | ||
| 6 6 12 | ||
| 8 8 16 |
*Pre-set times can be adjusted using Set Timer Function.
NOTE: Total cooking times will vary depending on the time it takes for pressure to build up in the unit.
NOTE: Ensure that the rice cup provided is being used for each measure.

WARNING: Do not use the Pressure Express to cook instant rice.
NOTE: Ensure that the minimum liquid amount of 250ml is placed into the removable cooking bowl before proceeding.
NOTE: To speed up the time it takes to reach pressure whilst pressure cooking, use boiling water or stock.
- Add the brown rice and water (as per table) to the Pressure Express removable cooking bowl and stir to combine, making sure that the ingredients are level in the bowl.
-
Once all the ingredients have been added into the removable cooking bowl, take the safety locking lid, align the handle with the unlock/align position. When the safety locking lid is sitting correctly, turn it counterclockwise to lock into position.
-
Select the 'BROWN RICE' setting, then press the 'START/CANEL' button to commence cooking process.
- Once the selected cooking timer has counted down and the cooking process has completed, use the heat resistant serving spoon or an oven mitt to turn the pressure regulator/release valve to the venting position. This will cause the Pressure Express to release the extra steam that has built up inside the pressure cooker. Allow several minutes for the steam to be released.
Soup/Curry Setting
Pre-set cooking display time: 33min*
The Soup/Curry setting is perfect for making soups, curries, legumes/dried beans and pulses and stews.
NOTE: Ensure that the minimum liquid amount of 250ml is placed into the removable cooking bowl before proceeding.

WARNING: Do not use a hand blender inside the pressure cooker removable cooking bowl as this will damage the non-stick surface.
NOTE: Ensure meat is thawed before pressure cooking. Do not cook frozen meat.
*Pre-set times can be adjusted using Set Timer Function.
Pressure Express Cooking Guide continued
Soup
Soup can be quickly and easily made using the Soup/Curry setting. Use the Sauté function to brown onions, garlic and vegetables to get the most flavour out of your food. Then add the rest of the ingredients and allow to cook. Serve chunky, or remove from the bowl and blend using a stick mixer until smooth and creamy.
NOTE: If sautéing is recommended before cooking on the Soup/Curry setting, refer to 'Using the Sauté Setting' on page 25.
- Add the recommended ingredients (as per recipe guidelines) to the Pressure Express removable cooking bowl and stir to combine, making sure that the ingredients are level in the bowl.
- Once all the ingredients have been added into the removable cooking bowl, take the safety locking lid, align the handle with the unlock/align position. When the safety locking lid is sitting correctly, turn it counterclockwise to lock into position.
- Select the 'SOUP/CURRY' setting on the Pressure Express, then press the 'START/CANEL' button to commence cooking process.
- Once the selected cooking timer has counted down and the cooking process has completed, use the heat resistant serving spoon or an oven mitt to turn the pressure regulator/release valve to the venting position. This will cause the Pressure Express to release the extra steam that has built up inside the pressure cooker. Allow several minutes for the steam to be released.
Curry
Cooking a traditional flavorsome curry can take hours but with the Pressure Express it can take under an hour to create a rich curry. It is recommended to use the Sauté Setting initially, to sauté off your fresh curry paste and meats and then simply add the remaining ingredients and set to cook as indicated in the following steps.
NOTE: If sautéing is recommended before cooking on the 'Soup/Curry' setting, refer to 'Using the Sauté Setting' on page 25.
- Add the recommended ingredients (as per recipe guidelines) to the Pressure Express removable cooking bowl and stir to combine, making sure that the ingredients are level in the bowl.
- Once all the ingredients have been added into the removable cooking bowl, take the safety locking lid, align the handle with the unlock/align position. When the safety locking lid is sitting correctly, turn it counterclockwise to lock into position.
- Select the 'SOUP/CURRY' setting on the Pressure Express, then press the 'START/CANEL' button to commence cooking process.
- Once the selected cooking timer has counted down and the cooking process has completed, use the heat resistant serving spoon or an oven mitt to turn the pressure regulator/release valve to the venting position. This will cause the Pressure Express to release the extra steam that has built up inside the pressure cooker. Allow several minutes for the steam to be released.
Dried Legumes, Beans & Pulses
Rather than soaking dried legumes, beans and pulses over night, you can place them straight into the Pressure Express. It is recommended that dried legumes, beans and pulses need to be cooked with the ratio 1:2 water. Legumes, beans and pulses are a perfect ingredient for dips, salads, casseroles, stews and curries.
- Add the recommended ingredients (as per recipe guidelines) to the Pressure Express removable cooking bowl and stir to combine, making sure that the ingredients are level in the bowl.
- Once all the ingredients have been added into the removable cooking bowl, take the safety locking lid, align the handle with the unlock/align position. When the safety locking lid is sitting correctly, turn it counterclockwise to lock into position.
- Select the 'SOUP/CURRY' setting on the Pressure Express, then press the 'START/CANEL' button to commence cooking process.
- Once the selected cooking timer has counted down and the cooking process has completed, use the heat resistant serving spoon or an oven mitt to turn the pressure regulator/release valve to the venting position. This will cause the Pressure Express to release the extra steam that has built up inside the pressure cooker. Allow several minutes for the steam to be released.
Pot Roast Setting
Pre-set cooking display time: 24min*
The Pot Roast setting allows you to cook a variety of meat cuts including beef, lamb, pork, veal and whole chicken. Prior to cooking, some recipe guidelines recommend that you sauté the meat to seal it, before switching to the Pot Roast setting, if so, refer to the 'Using the Sauté Setting' on page 25.
Cooking cuts of meat on the Pot Roast setting in the Pressure Express not only speeds up the cooking process, it also provides a tender and flavoursome finish as the steam keeps the meat moist at a high temperature and infuses the meat with the herbs and spices.
When cooking on the Pot Roast setting each meat cut will require a different cooking time, depending on the type, cut and weight of meat. The pre-set time for the Pot Roast setting is 24 minutes, to increase or decrease the cooking times as per recipe guidelines the cooking time may need to be manually adjusted using the Set Timer ('Using the Set Timer Function' on page 14).
E.g To produce a medium finish to a 1kg leg of lamb, select the 'POT ROAST' setting, then using the Set Timer button continuously press the '+' button until it reaches 30 minutes. Once set time is reached select the 'START/CANCEL' button to commence cooking.
NOTE: Ensure that the minimum liquid amount of 250ml is placed into the removable cooking bowl before pot roasting has commenced.
*Pre-set times can be adjusted using Set Timer Function.
Pressure Express Cooking Guide continued
TIP: Use the stainless steel trivet to raise meat above the liquid level if required.
NOTE: Ensure meat is thawed before pressure cooking. Do not cook frozen meat.
TIP: It is not recommended to use the Pressure Express to cook cuts of meat under 750g or over 1kg and whole chickens in 1.4kg size. Large cuts of meat should be cut into smaller sizes to ensure they cook through and should be sealed on the Sauté setting prior to pressure cooking to hold in the flavour.
Beef – rump roast, sirloin roast, rib roast, blade roast, rolled brisket.
Lamb - leg roast, loin roast, lamb rack, shoulder roast, eye roast, shank.
750g 30 - 35 minutes
1kg 35 - 40 minutes
750g 24 minutes - rare
28 minutes - medium rare
32 minutes - medium
36 minutes - well done
1kg 24 minutes - rare
30 minutes - medium rare
35 minutes - medium
40 minutes - well done
Pork – leg roast, rolled loin, loin rack, shoulder, rolled belly, forequarter roast, scotch fillet roast.
Veal - rump roast, sirloin roast, rib roast, blade roast, rolled brisket.
Whole Chicken 1.2kg 32 minutes
750g 35 - 45 minutes
1kg 45 - 50 minutes
750g 30 - 35 minutes
1kg 35 - 40 minutes
1.4kg 35 minutes
Silverside (corned beef) 750g 35 minutes
1kg 40 minutes
- If Sautéing is recommended before cooking on the Pot Roast setting, refer to the ‘Using the Sauté Setting’ on this page.
- Add 250ml of stock or water to the base of the removable cooking bowl and place the ‘TRIVET’ into the centre of the bowl (refer to ‘Using the Stainless Steel Trivet’ on page 15 if required.).
- Once all the ingredients have been added into the removable cooking bowl, take the safety locking lid, align the handle with the unlock/align position. When the safety locking lid is sitting correctly, turn it counterclockwise to lock into position.
- Select the ‘POT ROAST’ setting on the Digital Control Panel and adjust the cooking time as per meat cut chosen and recommended cooking time guidelines (refer to table on pg. 24). Using the ‘Set Timer’ button to increase or decrease cooking time (refer to ‘Using the Set Timer Function’ on page 14).
- Press the 'START/CANCEL' button to commence the cooking process.
- Once the selected cooking timer has counted down and the cooking process has completed, use the heat resistant serving spoon or an oven mitt to turn the pressure regulator/release valve to the venting position. This will cause the Pressure Express to release the extra steam that has built up inside the pressure cooker. Allow several minutes for the steam to be released.
Using the Sauté Setting
Pre-set cooking time: 60min*
The Sauté setting is recommended for sautéing onions, garlic and vegetables before pressure cooking or slow cooking. You can also brown a variety of meats and cook off curry pastes. The Sauté function allows meat and vegetables to develop complex flavours and caramelises the meat throughout the cooking process.
- Select the ‘SAUTÉ’ setting on the Digital Control Panel, by pressing the ‘SAUTÉ’ setting button. The indicator light on the ‘SAUTÉ’ setting button will flash continuously.
- Press the ‘START/CANCEL’ button, three “Beeps” will be heard and the red dot on the Sauté and the Start/Cancel button will illuminate and the pressure cooker will commence heating.
NOTE: The symbol ‘- -’ will display on the Digital Control Panel continuously throughout the Sauté cooking process.
- Allow the Pressure Express at least 3 minutes to preheat. Add oil/fat into the removable cooking bowl.
NOTE: Do not place the lid on the Pressure Express when using the Sauté function.
NOTE: Use the heat resistant serving spoon to stir and serve the food.
*Saute setting will operate for 60 minutes unless Start/Cancel button is pressed. The digital display will show flash ‘--’.
Pressure Express Cooking Guide continued
- Add the recommended ingredients as per recipe guidelines to the Pressure Express removable cooking bowl and stir to combine. Depending on the quantity of food to be cooked, you may have to Sauté' in small batches.
- Once all the ingredients have sautéed or sealed to the required level or as per recipe guidelines, select the 'START/CANCEL' button.
NOTE: To sauté onions and garlic with a small amount of oil the approximate cooking time is 5-6 minutes. Meat may need to be sealed in batches to effectively brown the surface and which will take approximately 5 minutes per side.
- When the sauteing process is complete, to switch to another setting follow desired setting instructions.
NOTE: The Sauté setting only operates for 60 minutes and the unit will switch to standby mode automatically.
NOTE: You will not be required to remove the removable power cord if switching from the Sauté setting to pressure cooking.
NOTE: The Sauté setting will not function correctly if the safety locking lid is placed on top of the Pressure Express.
Slow Cook Setting
Pre-set cooking display time: 8 hours
The Slow Cook setting allows you to set and forget. You can prepare the ingredients in advance and then place the recipe on and let the slow cook setting do the cooking for you. It is a good way to get a flavoursome, tender and cost effective meal for a large group of people.
NOTE: Sautéing and browning before slow cooking, seals in the moisture, intensifies the flavour and provides more tender results. It is recommended to sauté when using meat cuts to allow the meat to brown and form an even crust (refer to ‘Using the Sauté Setting’ on page 25).
- Add the recommended ingredients (as per recipe guidelines) to the Pressure Express removable cooking bowl and stir to combine, making sure that the ingredients are level in the bowl.
NOTE: Ensure that the food or liquid to be cooked on the Slow Cook setting fill 12 to 34 of the removable cooking bowl. If after cooking, the liquid quantity is excessive, remove the lid, press the 'START/CANCEL' button and select the 'Sauté' setting and then press the 'START/CANCEL' button. Sauté' for 30–45 minutes or until the liquid reduces to the desired amount. Alternatively the liquid can be thickened by adding a mixture of cornflour and water.
- Select the ‘SLOW COOK’ setting on the Digital Control Panel by pressing the ‘SLOW COOK’ button, and then the ‘START/CANCEL’ button to commence cooking. The unit will “Beep” three times and the red light will illuminate on the Slow Cook button and Start/Cancel button.
The set timer will display 8.0 on the Digital Control Panel and once cooking commences the unit will count down in 12 hour increments.
NOTE: Ensure meat is thawed before slow cooking. Do not slow cook frozen meat.
NOTE: The lid can be removed during the cooking process to be stirred, but then immediately returned to the safety locking position. The pressure cooker will not pressurise on the Slow Cook Function as a boiling temperature is not reached to pressurise the unit.
- Once the selected cooking timer has counted down, the slow cooking process has completed. Serve using the heat resistant ladle provided.
NOTE: The Set Timer cannot be changed on the Sauté or Slow Cook settings.
NOTE: Stirring is not necessary when slow cooking, however stirring occasionally will help to distribute flavours throughout the recipe.

WARNING: Ensure that the Pressure Express is placed in an open area with proper ventilation.
Trouble Shooting Guide
| Problem Possible Reason Solution | ||
| Difficulty closing the safety locking lid | ▪ Gasket not positioned properly▪ Push rod jammed by pressure indicator valve | ▪ Ensure that gasket is in position properly (page 12)▪ Push the rod gently and try again |
| Leakage from the safety locking lid | ▪ No gasket fitted▪ Worn gasket▪ Safety locking lid not closed and locked properly | ▪ Fit the gasket according to the instructions (page 12)▪ Replace the gasket▪ Ensure that the safety locking lid is fitted properly (page 17) |
| Leakage from the pressure indicator valve | ▪ Food trapped in valve▪ Pressure indicator valve gasket worn | ▪ Clean the pressure indicator valve gasket▪ Replace the pressure indicator valve gasket |
| Pressure indicator valve unable to rise | ▪ Not enough food content and liquid to create pressure▪ Leakage from pressure indicator valve | ▪ Add more liquid/food to bowl▪ Clean pressure indicator valve gasket or replace if required |
| Rice overcooked/undercooked | ▪ Too much or not enough water | ▪ Ensure rice ratio is 1 cup of rice to 1 cup of water▪ Minimum amount of brown rice that can be cooked is 4 cups |
| Meat undercooked | ▪ Roast meet was too large in size▪ Meat needs more time | ▪ Ensure large cuts of meat are cut in smaller portions, Roasts should not exceed 1kg▪ Replace pressure cooker lid and reset cooking time as required |
Care, Cleaning and Storage
- Before cleaning, switch ‘OFF’ and unplug from the power outlet and remove the removable power cord from the Pressure Express. Ensure the unit is fully cooled prior to commencing cleaning.
- Wash the removable cooking bowl with warm soapy water and a clean soft cloth or sponge. Rinse with clean water and dry thoroughly.
- The stainless steel housing and safety locking lid can be wiped over with a soft, damp cloth and then dried thoroughly.
- Remove the condensation collector by gently pulling the collector away from the Pressure Express housing body and clean it thoroughly in warm water. Dry thoroughly and place it back in its original position.
- Remove and disassemble lid First, gently pull the silicone rubber gasket straight up and out from under the gasket holder. Check periodically that it is clean, flexible and not cracked or torn. If damaged do not use the appliance. Wash the gasket and holder in warm, soapy water. Rinse with clean water, dry thoroughly and place back in their original position. See the instructions on how to remove the silicone rubber valve on page 12.
NOTE: Soak the silicone rubber gasket in a mixture of bicarbonate of soda and water to help eliminate odours from spices, before cleaning.
NOTE: After cooking rice or large meals, some cooking liquid may pool under the lid at the top of appliance around the cooking bowl. This is normal. Use a paper towel or kitchen cloth to clean after every use. Use a small brush or cotton swab if necessary.
NOTE: Replace the silicone rubber gasket every 1-2 years (see your nearest Kambrook Service Centre).
- Wash the inside of the safety locking lid with a wet, soapy sponge or cloth. Use a soft brush to remove oil residue if necessary. Wipe dry with a clean, damp cloth.
NOTE: Lid is not dishwasher safe. Do not wash lid in dishwasher.
NOTE: During cleaning of the safety locking lid, ensure that the pressure indicator rod moves freely (up and down). Wash and clean any oil or food residue from this area.
Care, Cleaning & Storage continued
- Regularly inspect that the pressure regulator/release valve cover is clean and free of liquid/food. Remove the pressure regulator/release valve cover from the safety locking lid, by twisting and lifting up and off the safety locking lid and wipe over with a soapy cloth and dry thoroughly. Replace by twisting it back into place (See Fig. 11).

natural_image
Close-up of a hand pressing down on a black iron iron (no text or symbols visible)- The pressure safety valve will need to be regularly checked and cleaned in order to avoid any clogging which could result in blocking the safety valve (See Fig. 12).

natural_image
Close-up of a mechanical component with metallic pins and a red label 'Fig.12' (no readable text or symbols on the main subject)- To clean the pressure safety valve, push the valve from inside the lid in and out with a long thin object (e.g. skewer). Wash and clean any oil or food residue. Ensure that the valve moves in and out smoothly after cleaning.

IMPORTANT: All safety locking lid parts must be reassembled correctly to ensure safety as well as optimal performance of your Pressure Express.

IMPORTANT: Ensure that both the appliance electrical connector and the appliance inlet are completely dry before use.

IMPORTANT: To prevent damage to the pressure cooker do not use alkaline cleaning agents when cleaning, use a soft cloth and mild detergent.

IMPORTANT: Do not use chemicals, steel wool, metal scouring pad or abrasive cleaners to clean the outside of the pressure cooker housing or cooking bowl as these can damage the housing or the coating of the removable cooking bowl.

IMPORTANT: Ensure the pressure cooker is fully cooled before storing power cord inside the removable cooking bowl.
NOTE: A mixture of 1 tbsp vanilla, 12 cup lemon juice, 1 tbsp lemon rind plus 500ml hot water, pressure cooked for 5 minutes can help eliminate food odours.
Always unplug the removable power cord and allow the unit to cool down before cleaning and storage.
Once the Pressure Express is clean and dry, place the removable power cord, measuring cups and serving spoons inside the removable cooking bowl and place bowl inside pressure cooking housing for storage.
Lock the safety locking lid into place to ensure that the unit cannot be dropped when moving. To prevent aromas, moulds and odours, never store your Pressure Express closed with safety locking lid locked in place.
Once the pressure cooker has been moved to where it will be stored, unlock the lid and place upside down on top of the pressure cooker.
Always store the Pressure Express in an upright position. Do not store anything on top of the Pressure Express. Store on the bench top or in a cupboard.
Handy Hints for Pressure Cooking
Do's
• Always thaw frozen meat and poultry before cooking.
- Use dry oven mitts when lifting the removable cooking bowl after cooking.
- Use tongs or the plastic spoon provided to release the pressure/venting valve - do not use your fingers.
• Always store the Pressure Express in a cool, dry place. Follow the cleaning guidelines on page 29.
- Pack and store with the lid resting upside down on the removable cooking bowl in a well ventilated area.
Don't
- Do not operate without the removable cooking bowl in position.
- Do not cook with frozen meats or poultry.
- Do not fill the bowl past the maximum line.
• Do not use oil or milk as a liquid. - Do not cook without at least 250ml of liquid.
Never
- Place water or other liquids into the stainless steel base.
- Immerse base, cord, or plug of the Pressure Express in water or any other liquid.
- Touch hot surfaces with bare hands.
• Deep fry in the Pressure Express. - Store your Pressure Express closed with safety locking lid locked in place to prevent aromas, moulds and odours.
- Leave the pressure cooker on and unattended.
Recipes
Honey Baked Pumpkin Risotto
Serves 8
1 tbsp honey
60g butter
400g pumpkin peeled, cubed to 1cm
3 cups Arborio rice
6 cups vegetable stock
1 large brown onion peeled, thinly sliced
2 cloves garlic peeled, minced
1 cup boiling water
100g parmesan cheese, grated to serve
12 bunch parsley washed, roughly chopped to serve
-
Select the 'SAUTÉ' setting on the Digital Control Panel and select the 'START/CANCEL' button and place the honey and butter into the Pressure Express removable cooking bowl to melt. Add the pumpkin and sauté for approximately 10 minutes. Once sautéing is complete press the 'START/CANCEL' button.
-
Add the rice, 5 cups of vegetable stock, onion and garlic and stir well to combine.
-
Securely place and seal the lid onto the Pressure Express, ensuring the pressure release valve is set to the sealed position.
-
To switch to the Soup/Curry setting, select the 'SOUP/CURRY' button and then the 'START/CANCEL' button. Allow to cook until the pressure cooking set time has counted down.
-
Release the pressure from the Pressure Express by turning the pressure release valve to the venting position.
-
Stir through the water and 1 cup of vegetable stock. Serve with parmesan and parsley.
Chicken and Pesto Risotto
Serves 8
3 tbsp olive oil
1 large brown onion peeled, thinly sliced
2 cloves garlic peeled, minced
500g chicken breast, thinly sliced
3 cups Arborio rice
6 cups chicken stock
12 cup basil pesto
14 cup pine nuts, toasted
1 cup boiling water
100g parmesan,s grated to serve
12 bunch basil, washed, roughly chopped to serve
-
Select the 'SAUTÉ' setting on the Digital Control Panel, and select the 'START/CANCEL' button and heat the oil. Sauté the onion and garlic until golden brown. Add the chicken and lightly cook for about 5 minutes, stirring occasionally. Once sautéing is complete press the 'START/CANCEL' button.
-
Add the rice, 5 cups chicken stock, pesto and pine nuts and stir well to combine.
-
Securely place and seal the lid onto the Pressure Express ensuring the pressure release valve is set to the sealed position.
-
To switch to the Soup/Curry setting, select the 'SOUP/CURRY' button and then the 'START/CANCEL' button. Allow to cook until the pressure cooking set time has counted down.
-
Release the pressure from the Pressure Express by turning the pressure release valve to the venting position.
-
Stir through the of water and 1 cup of chicken stock. Serve with parmesan cheese and basil.
Vanilla Rice Pudding
Serves 10
2 tbsp butter, melted
2 rice cups, medium grain white rice
13 cup caster sugar
1 12 cups water
2 cups milk
1 x 59g free range egg, lightly whisked
14 cup condensed milk
1 vanilla bean, split
-
Place the butter and rice into the Pressure Express removable cooking bowl and stir until the rice is completely coated in the butter.
-
In a 2 litre jug, whisk together the sugar, water, milk, egg and condensed milk.
-
Pour the milk mixture over the rice and stir through the vanilla bean.
-
Securely place and seal the lid onto the Pressure Express ensuring the pressure release valve is set to the sealed position. Select the 'WHITE RICE' button and then the 'START/CANCEL' button and allow to cook until the pressure cooking set time has counted down.
-
Release the pressure from the Pressure Express by turning the pressure release valve to the venting position.
-
Remove the rice pudding from the Pressure Express removable cooking bowl and serve with poached fruit.
Fruit and Nut Porridge
Serves 6
4 rice cups rolled oats
8 rice cups water
2 rice cups milk
12 cup brown sugar
12 cup hazelnuts, toasted, crushed
12 cup dried cranberries, halved
-
Place the rolled oats and water into the Pressure Express removable cooking bowl and stir well to combine.
-
Securely place and seal the lid onto the Pressure Express ensuring the pressure release valve is set to the sealed position. Select the 'WHITE RICE' button and then the 'START/CANCEL' button and allow to cook until the pressure cooking set time has counted down.
-
Release the pressure from the Pressure Express by turning the pressure release valve to the venting position.
-
Stir through the milk, sugar, hazelnuts and cranberries and serve immediately.
Pilaf Rice with Spicy Sunflower Seeds
Serves 8
175g butter
4 cloves garlic, minced
500g French shallots, peeled, sliced thinly
6 shallots, peeled, sliced thinly
1 tsp turmeric powder
1 tsp lemon zest
4 rice cups brown rice, washed
6 rice cups vegetable stock
200g sunflower seeds
2 tsp chilli flakes
2 tsp Mexican chilli powder
2 tsp smoked paprika
12 tsp cinnamon, ground
1 tbsp salt
2 tbsp caster sugar
1 bunch coriander, leaves removed
Sweet chilli sauce to serve
-
Select the 'SAUTÉ' setting on the Digital Control Panel and select the 'START/CANCEL' button and place 100g of butter into the Pressure Express removable cooking bowl and allow to melt. Add the garlic, French shallots and shallots and sauté until softened. Add the turmeric, lemon and rice. Stir well until combined. Once sauteing is complete press the 'START/CANCEL' button.
-
Pour the vegetable stock over the rice and securely place and seal the lid onto the Pressure Express ensuring the pressure release valve is set to the sealed position.
-
To switch to the Brown Rice setting, select the 'BROWN RICE' button and then the 'START/CANCEL' button. Allow to cook until the pressure cooking set time has counted down.
-
Release the pressure from the Pressure Express by turning the pressure release valve to the venting position.
-
Remove the rice from the Pressure Express removable cooking bowl and add the sunflower seeds, remaining 75g butter, spices, salt and sugar. Select the 'SAUTÉ' setting on the Digital Control Panel and select the 'START/CANCEL' button and sauté for about 10 minutes and then fold the sunflower seeds through the rice along with the coriander.
-
Serve with coriander and sweet chilli sauce.
Smoked Ham and Split Pea Soup
Serves 8
1 tbsp olive oil
1 large brown onion, diced
3 cloves garlic, minced
1 ham hock (800g)
500g green split peas, washed
1 bay leaf
4 sprigs thyme
2 carrots, peeled, diced
3 stalks celery, diced
2 tsp black peppercorns
1 cup white wine
1 litre vegetable stock
12 bunch parsley washed, roughly chopped, to serve
Sour cream (to taste), to serve
- Select the 'SAUTÉ' setting on the Digital Control Panel and select the 'START/CANCEL' button and heat the oil. Add the onion, garlic and ham hock and sauté until golden brown. Once sauteing is complete press the 'START/CANCEL' button.
- Add the peas, bay leaf, thyme, carrots, celery, peppercorns, wine and vegetable stock and stir well to combine. Securely place and seal the lid onto the Pressure Express ensuring the pressure release valve is set to the sealed position.
- To switch to the Soup/Curry setting, select the 'SOUP/CURRY' button and then the 'START/CANCEL' button. Allow to cook until the pressure cooking set time has counted down.
-
Release the pressure from the Pressure Express by turning the pressure release valve to the venting position.
-
Remove the hock and pull away any meat that is still left. Roughly chop the meat and set aside. Pour half the soup into another bowl and using a stick mixer gently blend that half of the soup. Combine chopped ham and the non-blended soup back together with the blended soup and stir until well combined.
-
Serve with sour cream and parsley.
NOTE: Do not use a stick mixer in the removable cooking bowl as this could damage the non-stick coating.
Green Curry Pumpkin Soup
Serves 10
4 cloves garlic, whole
1 brown onion, peeled, roughly chopped
1 tbsp green curry paste
750g pumpkin, skin and seeds removed, cut into 5cm pieces
550g potatoes, peeled, quartered
1 tsp salt
600ml boiling water
400ml coconut cream
- Place the garlic, onion, curry paste, pumpkin, potatoes, salt, water and coconut cream into the Pressure Express removable cooking bowl and stir until combined.
- Securely place and seal the lid onto the Pressure Express and ensure the pressure release valve is set to the sealed position. Select the 'SOUP/CURRY' button and then the 'START/CANCEL' button and allow to cook until the pressure cooking set time has counted down.
- Release the pressure from the Pressure Express by turning the pressure release valve to the venting position.
- Pour the soup into a large heat proof bowl and, using a stick mixer, blend the soup until it is thick and consistently smooth.
- Serve with fresh bread.
NOTE: Do not use a stick mixer in the removable cooking bowl as this could damage the non-stick coating.
Thai Sweet Potato Soup with Coriander Pesto
Serves 8
400ml can coconut milk
2 tbsp mild red curry paste
1.5kg sweet potato, peeled and cut into 5cm pieces
1 litre chicken stock
Lime wedges, to serve
Coriander Pesto
1 cup coriander leaves
14 cup blanched almonds
1 small red shallot
2 tsp lime juice
2 tbsp vegetable oil
Salt, to taste
- Carefully open the can of coconut milk without shaking; spoon the firm coconut into the Pressure Express removable cooking bowl and select the 'SAUTE' setting on the Digital Control Panel and select the 'START/CANCEL' button. Sauté while stirring until the coconut milk separates. Add the curry paste and continue to sauté, stirring until the paste becomes fragrant. Add sweet potato and chicken stock.
- Once sauteing is complete press the 'START/CANCEL' button and securely place and seal the lid onto the Pressure Express ensuring the pressure release valve is set to the sealed position.
- To switch to the Soup/Curry setting, select the 'SOUP/CURRY' button and then the 'START/CANCEL' button. Allow to cook until the pressure cooking set time has counted down.
- Release the pressure from the Pressure Express by turning the pressure release valve to the venting position.
- Using a mini food processor, combine the coriander pesto ingredients into the bowl and process until combined. Season to taste.
- To serve, ladle soup into bowls and spoon coriander pesto into the soup. Stir through and squeeze fresh lime to taste.
Brown Rice Salad
Serves 10
4 rice cups brown rice
2 tsp turmeric
4 rice cups water
1 cup rocket lettuce, washed, dried
1 red onion, peeled, thinly sliced
14 cup pinenuts, toasted
12 cup sultanas
1 red apple, quartered, thinly sliced
Juice of 1 lemon
2 tbsp extra virgin olive oil
- Place the rice, turmeric and water into the Pressure Express removable cooking bowl and stir well to combine.
- Securely place and seal the lid onto the Pressure Express ensuring the pressure release valve is set to the sealed position. Select the 'BROWN RICE' button and then the 'START/CANCEL' button and allow to cook until the pressure cooking set time has counted down.
- Release the pressure from the Pressure Express by turning the pressure release valve to the venting position.
- Remove the rice from the Pressure Express removable cooking bowl and place into a large salad bowl. Add the rocket lettuce, onion, pinenuts, sultanas and apple and fold to combine.
- Drizzle over the lemon and olive oil and serve immediately.
Red Wine, Beef, Mushroom and Thyme Stew
Serves 8
3 tbsp olive oil
6 large French shallots, peeled, sliced
3 cloves garlic, minced
40g butter
8 rindless bacon slices
1kg chuck steak, diced
2 tsp brown sugar
2 tbsp tomato paste
400g button mushrooms, washed
350ml dry red wine
1 litre beef stock
1 bay leaf
Mashed potatoes, to serve
- Select the 'SAUTÉ' setting on the Digital Control Panel and select the 'START/CANCEL' button and heat the oil. Add the shallots and garlic and sauté until golden brown. Add the butter, bacon and steak and cook for 10 minutes, stirring occasionally. Once Sauteing is complete press the 'START/CANCEL' button.
- Add the sugar, tomato paste, mushrooms, wine, stock and bay leaf and stir well to combine.
- Securely place and seal the lid onto the Pressure Express and ensure the pressure release valve is set to the sealed position. To switch to the Soup/Curry setting, select the 'SOUP/CURRY' button and then the 'START/CANCEL' button. Allow to cook until the pressure cooking time has counted down.
- Release the pressure from the Pressure Express by turning the pressure release valve to the venting position.
- Serve over mashed potatoes.
Butter Chicken
Serves 10
2kg chicken thighs, cut into quarters
1 tbsp lemon juice
12 cup (140g) Greek yoghurt
1 tsp ginger, minced
3 shallots, peeled, diced
2 cloves garlic, peeled, minced
1 tsp garam masala
1 tsp cayenne pepper, ground
1 tsp paprika, ground
1 tsp coriander seeds, ground
1 tsp turmeric, ground
1 tsp cumin, ground
100g almonds, ground
100ml olive oil
1 tbsp tomato paste
1 x 420ml can tomatoes, diced
14 cup chicken stock
1 tbsp brown sugar
300ml pure cream
Fresh coriander, to serve
5 cups white rice, cooked, to serve
-
In a bowl, coat the chicken in the lemon juice and yoghurt. Select the 'SAUTÉ' setting on the Digital Control Panel and select the 'START/CANCEL' button.
-
Using a food processor, process the ginger, shallots, garlic, spices, almonds and olive oil until it has formed a smooth paste. Spoon paste into the Pressure Express removable cooking bowl and allow to sauté until fragrant and bubbling, approximately 7 minutes, stirring occasionally. Once Sauteing is complete press the 'START/CANCEL' button.
-
Stir through the tomatoes, stock, sugar and chicken and securely place and seal the lid onto the Pressure Express.
-
Securely place and seal the lid onto the Pressure Express ensuring the pressure release valve is set to the sealed position.
-
To switch to the Soup/Curry setting, select the 'SOUP/CURRY' button and then the 'START/CANCEL' button. Allow to cook until the pressure cooking set time has counted down.
-
Release the pressure from the Pressure Express by turning the pressure release valve to the venting position.
-
Stir through the cream and allow to stand for 5 minutes. Serve with coriander and fluffy rice.
Satay Beef
Serves 6
1 tbsp peanut oil
1 brown onion, peeled, halved, thinly sliced
1 clove garlic, peeled, minced
12 tsp lemon rind
12 large red chilli, thinly sliced
1 tsp sweet chilli sauce
1 tsp curry powder
270ml light coconut milk
1 tbsp kecap manis
½ cup crunchy peanut butter
1kg beef blade steak, diced
Fresh coriander, to serve
- Select the 'SAUTÉ' setting on the Digital Control Panel and select the 'START/CANCEL' button and place the oil, onion and garlic into the Pressure Express removable cooking bowl and sauté for about 5 minutes.
- Add the lemon, red chilli, chilli sauce and curry powder and allow to sauté for another 3 minutes. Once sauteing is complete, press the 'START/CANCEL' button.
- Add the coconut milk, kecap manis, peanut butter and steak and stir to combine.
- Securely place and seal the lid onto the Pressure Express ensuring the pressure release valve is set to the sealed position.
- To switch to the Soup/Curry setting, select the 'SOUP/CURRY' button and then the 'START/CANCEL' button. Allow to cook until the pressure cooking set time has counted down.
- Release the pressure from the Pressure Express by turning the pressure release valve to the venting position.
- Serve with rice and coriander.
TIP: Kecap Manis is a sweet soy sauce and can be found in major supermarkets usually in the sauces section where soy and Worcestershire sauces are sold.
Sesame Chicken Wings
Serves 8
12 cup soy sauce
2 tbsp honey
1 tbsp sesame oil
1 tbsp kecap manis
2 tsp rice wine vinegar
2 tbsp sweet chilli sauce
2 x small birdseye chillis, minced
2 x cloves garlic, minced
2kg chicken wings/nibblets
2 tbsp plain flour
2 tbsp cold water
2 tbsp sesame seeds
1 cup shallots, peeled, thinly sliced, to serve
-
Place the soy, honey, oil, kecap manis, vinegar, chilli sauce, chilli, garlic and chicken into a bowl and mix until coated.
-
Place the chicken into the Pressure Express removable cooking bowl securely place and seal the lid onto the Pressure Express ensuring the pressure release valve is set to the sealed position.
-
Select the 'SOUP/CURRY' button and then the 'START/CANCEL' button and allow to cook until the pressure cooking set time has counted down.
-
Release the pressure from the Pressure Express by turning the pressure release valve to the venting position.
-
Remove the chicken from the Pressure Express removable cooking bowl and set aside. Drain the liquid in the Pressure Express removable cooking bowl though a sieve into another bowl. Press the 'START/CANCEL' button.
-
Place the liquid back into the Pressure Express removable cooking bowl and select the 'SAUTÉ' setting on the Digital Control Panel and select the 'START/CANCEL' button.
-
Whisk the flour with the water until smooth and add into the Pressure Express removable cooking bowl and simmer for 4 minutes.
-
Pour sauce over chicken wings and sprinkle with sesame seeds and shallots to serve.
TIP: Kecap Manis is a sweet soy sauce and can be found in major supermarkets usually in the sauces section where soy and Worcestershire sauces are sold.
Massaman Curry
Serves 8
500g diced lamb
500g diced beef
400g can coconut milk
1 cinnamon stick
2 fresh kafir lime leaves
500g baby chat potatoes, halved
1 tbsp brown sugar
2 whole star anise
2 tsp arrowroot (only if needed)
Fresh coriander, to serve
Curry Paste
14 cup olive oil
1 brown onion, peeled, roughly chopped
2cm piece ginger, peeled, minced
4 cloves garlic, peeled, minced
1½ tsp coriander seeds, ground
1 tsp cumin seeds, ground
1 tsp cinnamon, ground
1 tsp brown mustard seeds
1 tsp cardamom, ground
3 dried whole chillis, roughly chopped
Zest and juice of 1 lime
1 tsp white pepper
2 tsp flaked salt
-
Using a food processor, place all the curry paste ingredients into the bowl and pulse until the mixture is smooth and consistent.
-
Select the 'SAUTÉ' setting on the Digital Control Panel and select the 'START/CANCEL' button and place the curry paste into the Pressure Express removable cooking bowl and sauté for 5 minutes, stirring occasionally. Once sauteing is complete, press the 'START/CANCEL' button.
-
Add the meat, coconut milk, cinnamon, lime leaves, potatoes, brown sugar and star anise and stir well to combine.
-
Securely place and seal the lid onto the Pressure Express ensuring the pressure release valve is set to the sealed position.
-
To switch to the Soup/Curry setting, select the 'SOUP/CURRY' button and then the 'START/CANCEL' button. Allow to cook until the pressure cooking set time has counted down.
-
Release the pressure from the Pressure Express by turning the pressure release valve to the venting position.
-
Serve with rice and fresh coriander.
NOTE: If the consistency is not thick enough, remove 14 cup of the liquid and stir through 2 tsp of arrowroot until completely dissolved. Add back into the curry and simmer until thickened.
Spicy Tomato Sauce and Meatballs
Serves 8
1kg beef mince
1 red onion, peeled, diced
1 cup bread crumbs
1 tbsp tomato paste
2 tsp Italian herbs
1 x 59g free range egg, lightly whisked
3 tbsp olive oil
2 large brown onions, peeled, diced
4 cloves garlic, minced
1 birds eye chilli, thinly sliced
1 tbsp sugar
4 x 420g cans diced tomatoes
Cooked spaghetti, to serve
-
In a bowl, combine the mince, red onion, bread crumbs, tomato paste, herbs and egg until they form a consistent ball. Roll mixture into 1 tbsp sized balls and set aside.
-
Select the 'SAUTÉ' setting on the Digital Control Panel and select the 'START/CANCEL' button and heat the oil. Add the brown onion, garlic and chilli into the Pressure Express removable cooking bowl and sauté until clear. Add the sugar and tomatoes and simmer for about 2 minutes. Once sauteing is complete, press the 'START/CANCEL' button.
-
Add the meatballs to the tomato mixture and stir gently. Securely place and seal the lid onto the Pressure Express ensuring the pressure release valve is set to the sealed position.
-
To switch to the Soup/Curry setting, select the 'SOUP/CURRY' button and then the 'START/CANCEL' button. Allow to cook until the pressure cooking set time has counted down.
-
Release the pressure from the Pressure Express by turning the pressure release valve to the venting position.
-
Serve over hot spaghetti or the pasta of your choice.
Chicken with Sicilian Olives and Preserved Lemon Cous Cous
Serves 10
Special Note: for best results this dish should be marinated over night
2kg chicken thigh fillets, fat trimmed
2 tbsp olive oil
1 tsp cinnamon
2 tsp dried parsley
2 tsp dried oregano
1 tsp paprika
150g Sicilian olives, drained of liquid
2 cloves garlic, minced
1 tsp ginger, minced
1 lemon, thinly sliced
1 cup chicken stock
2 cups dried cous cous
Fresh parsley, to serve
-
Place the chicken, oil, herbs, spices, olives, garlic and ginger into a bowl and mix until completely coated. Layer in an airtight container with lemon dividing each chicken fillet, place into the refrigerator over night.
-
Place the chicken into the Pressure Express removable cooking bowl and pour the chicken stock over the top. Securely place and seal the lid onto the Pressure Express and ensure the pressure release valve is set to the sealed position.
-
Select the 'SOUP/CURRY' button and then the 'START/CANCEL' button and allow to cook until the pressure cooking set time has counted down.
-
Release the pressure from the Pressure Express by turning the pressure release valve to the venting position.
-
Remove the chicken from the Pressure Express removable cooking bowl and strain the liquid left in the bowl through a sieve into another bowl.
-
Add only 2 cups of the liquid back into the removable cooking bowl, along with the cous cous. Allow to sit for 5 minutes to absorb.
-
Serve with chicken and parsley.
Ginger Chicken with Baby Snow Peas
Serves 8
1 tbsp honey
2 ½ tsp rice wine vinegar
12 cup ginger syrup
2 tsp sesame oil
2cm piece of ginger, halved
1 red chilli, halved
4 cloves garlic, peeled, whole
1 tsp rock salt
12 cup chicken stock
2kg chicken drumsticks
2 tbsp soy sauce
1 tbsp corn flour
500g baby snow peas
1 cup shallots, peeled, thinly sliced, to serve
- Place the honey, vinegar, ginger syrup, oil, ginger, chilli, garlic, salt, chicken stock and chicken into a bowl and mix until completely coated.
- Place the chicken into the Pressure Express removable cooking bowl and securely place and seal the lid onto the Pressure Express ensuring the pressure release valve is set to the sealed position.
- Select the 'SOUP/CURRY' button and then the 'START/CANCEL' button and allow to cook until the pressure cooking set time has counted down.
- Release the pressure from the Pressure Express by turning the pressure release valve to the venting position.
- Remove the chicken from the Pressure Express removable cooking bowl and set aside. Strain the liquid though a sieve into another bowl.
-
Place the liquid back into the Pressure Express removable cooking bowl. Select the 'SAUTÉ' button and then the 'START/CANCEL' button.
-
Blend the corn flour with the soy sauce and then add to the Pressure Express removable cooking bowl and simmer for about 4 minutes. Add snow peas and simmer for 1 minute.
- Serve over chicken and sprinkle with fresh shallots.
TIP: You can find ginger syrup in the cordial section of major supermarkets.
Three Bean and Vegetable Stew
Serves 8
2 tbsp olive oil
40g butter
4 cloves garlic, peeled, minced
2 brown onions, peeled, halved, thinly sliced
2 tbsp tomato paste
2 carrots, peeled, diced
2 stalks celery, halved, diced
2 potatoes, peeled, diced into 2cm pieces
420g can red kidney beans, drained, rinsed
420g can butter beans, drained, rinsed
420g can chickpeas, drained, rinsed
4 cups vegetable stock
420g can diced tomatoes
1 bunch parsley, washed, roughly chopped
1 bunch basil, washed, roughly chopped
1 bay leaf
2 tsp flaked salt
1 tsp white pepper, ground
100g parmesan grated, to serve
12 bunch parsley washed, roughly chopped, to serve
Sour cream (to taste), to serve
-
Select the 'SAUTÉ' setting on the Digital Control Panel and select the 'START/CANCEL' button and heat the oil and butter. Add the garlic and onion and sauté until golden brown. Once sauteing is complete, press the 'START/CANCEL' button.
-
Add the tomato paste, carrots, celery, potatoes, beans, vegetable stock, tomatoes, parsley, basil, bay leaf and salt and pepper into the Pressure Express removable cooking bowl and stir well to combine.
-
Securely place and seal the lid onto the Pressure Express and ensure the pressure release valve is set to the sealed position To switch to the Soup/Curry setting, select the 'SOUP/CURRY' button and then the 'START/CANCEL' button. Allow to cook until the pressure cooking set time has counted down.
-
Release the pressure from the Pressure Express by turning the pressure release valve to the venting position.
-
Serve with fresh parsley, sour cream and grated parmesan cheese.
Spicy Tomato and Capsicum Chicken
Serves 8
3 tbsp lemon infused olive oil
1kg chicken thigh (approx 6)
1 red onion, peeled, thinly sliced
2 cloves garlic, peeled, thinly sliced
12 capsicum, membrane removed, thinly sliced, halved
700ml tomato passata
400g can chickpeas, drained
12 jar chargrilled capsicum with chilli
12 cup chicken stock
Rind of 12 lemon
2 tsp flaked salt
Penne pasta, cooked, to serve
12 bunch parsley washed, roughly chopped, to serve
-
Select the 'SAUTÉ' setting on the Digital Control Panel and select the 'START/CANCEL' button and heat 2 tbsp of the oil and then seal the chicken for 2 minutes on each side and set aside.
-
Add the remaining olive oil to the Pressure Express removable cooking bowl and sauté the onion, garlic and capsicum until golden brown. Once sautéing is complete press the 'START/CANCEL' button.
-
Place the chicken, passata, chickpeas, char grilled capsicum, chilli, chicken stock, lemon and salt into the Pressure Express removable cooking bowl and stir well to combine. Push the ingredients under the liquid and make sure that they are fully submerged.
-
Securely place and seal the lid onto the Pressure Express and ensure the pressure release valve is set to the sealed position.
-
To switch to the Soup/Curry setting, select the 'SOUP/CURRY' button and then the 'START/CANCEL' button. Allow to cook until the pressure cooking time has counted down.
-
Release the pressure from the Pressure Express by turning the pressure release valve to the venting position.
-
Serve with penne pasta and fresh parsley.
TIP: Make homemade tomato passata from the recipe on page 49 or bottled tomato passata can be found in all major supermarkets in the sauces section.
Red Wine, Garlic & Root Vegetable Lamb Shanks
Serves 4–6
3 tbsp olive oil
8 shallots (French shallots are recommended) peeled, halved
1 head garlic with the top cut off, peeled
4-6 medium lamb shanks
1 cup plain flour
6 baby carrots peeled, tops removed
2 potatoes peeled, cut into 8 pieces
500ml beef stock
500ml tomato passata
^3/_4 cup red wine
2 sprigs thyme
2 sprigs rosemary
2 sprigs marjoram
Cooked pasta or mashed potatoes, to serve
-
Select the 'SAUTÉ' setting on the Digital Control Panel and select the 'START/CANCEL' button and sauté the shallots and garlic until golden brown.
-
In a bowl, toss the shanks in the flour until well covered. Add the shanks to the Pressure Express removable cooking bowl, two at a time, and sauté until browned. Once sautéing is complete press the 'START/CANCEL' button. Add the remaining ingredients and stir well to combine.
-
Securely place and seal the lid onto the Pressure Express ensuring the pressure release valve is set to the sealed position.
-
To switch to the Pot Roast setting, select the 'POT ROAST' button. Using the 'SET TIMER' button increase the cooking time to 55 minutes. Press the 'START/CANCEL' button and allow to cook until the pressure cooking set time has counted down. Release the pressure from the Pressure Express by turning the pressure release valve to the venting position.
-
Remove the lamb shanks and sauce and serve with pasta or mashed potatoes.
Corned Beef
Serves 4-6
2 litres water
1 tsp black peppercorns
1 tbsp brown sugar
1 tbsp rock salt
2 tbsp white vinegar
1 bay leaf
1kg corned beef silverside
1 cup white sauce, to serve
Mixed steamed vegetables, to serve
-
Add the water, peppercorns, sugar, salt, vinegar and bay leaf into the removable cooking bowl and stir to combine.
-
Add the beef and securely place and seal the lid onto the Pressure Express and ensure the pressure release valve is set to the sealed position.
-
Select the 'POT ROAST' button and, using the 'SET TIMER', increase the time to 40 minutes. Press 'START/CANCEL' button and allow to cook until the pressure cooking set time has counted down.
-
Release the pressure from the Pressure Express by turning the pressure release valve to the venting position.
-
Remove the beef and serve with white sauce and steamed vegetables.
Whole Chicken Stock
Makes 2 litres
3 tbsp olive oil
2 brown onions, peeled, diced
3 cloves garlic, peeled, thinly sliced
4 sticks celery, roughly chopped
4 carrots, peeled, roughly chopped
1 tbsp mixed peppercorns
2 tsp rock salt
2 litres water
1.4kg free range whole chicken
-
Select the 'SAUTÉ' setting on the Digital Control Panel and select the 'START/CANCEL' button and heat the oil. Sauté the onion and garlic until golden brown, approximately 6 minutes, stirring occasionally. Once sautéing is complete press the 'START/CANCEL' button.
-
Add the celery, carrots, peppercorns, salt and water and stir well to combine.
-
Add the chicken into the removable cooking bowl. Securely place and seal the lid onto the Pressure Express ensuring the pressure release valve is set to the sealed position.
-
To switch to the Pot Roast setting, select the 'POT ROAST' button. Using the 'SET TIMER' button, increase the cooking time to 35 minutes, then press the 'START/CANCEL' button. Allow to cook until the pressure cooking set time has counted down.
-
Release the pressure from the Pressure Express by turning the pressure release valve to the venting position.
-
Remove the chicken and strain the vegetables so you are left with the chicken stock. Store in an airtight container over night and then skim the solidified fat off with a spoon.
Beef Ragu
Serves 10
2 tbsp grape seed oil
2 brown onions, peeled, diced
1 clove garlic, peeled, minced
1.5kg beef bolar blade, cut into 4cm chunks
8 baby Dutch carrots, tops removed, peeled
3 celery sticks, roughly diced
1 tbsp fresh thyme
1 tbsp fresh rosemary
2 cups tomato passata
2 cups beef stock
Mashed potatoes or cooked pasta, to serve
-
Select the 'SAUTÉ' setting on the Digital Control Panel and select the 'START/CANCEL' button and heat the oil. Sauté the onion and garlic until golden brown, approximately 6 minutes, stirring occasionally.
-
Add the beef and seal until browned on all sides. Add the carrots, celery, thyme, rosemary, passata and stock and stir until combined. Bring to a boil and once sautéing is complete press the 'START/CANCEL' button.
-
Securely place the lid onto the Pressure Express and select the 'SLOW COOK' button and then the 'START/CANCEL' button and allow to cook until the slow cooking set time has counted down.
-
Remove the lid and serve with mashed potatoes or cooked pasta.
TIP: Make homemade tomato passata from the recipe on page 49 or bottled tomato passata can be found in all major supermarkets in the sauces section.
Moroccan chicken
Serves 10
2 tbsp olive oil
1 brown onion, peeled, diced
2 cloves garlic, peeled, minced
1.5 kg chicken thigh fillets, trimmed
340g jar roasted capsicum, cut into strips, drained
360s jar green pitted olives, drained
400g can chick peas, drained
1 cup tomato passata
3 cups vegetable stock
1 bunch flat leaf parsley, roughly chopped Couscous, to serve
-
Select the 'SAUTÉ' setting on the Digital Control Panel and select the 'START/CANCEL' button and heat the oil. Sauté the onion and garlic until golden brown, approximately 6 minutes, stirring occasionally.
-
Add the chicken and seal until browned on both sides. Add the capsicum, olives, chickpeas, passata, ,stock and parsley and stir until combines. Bring to the boil. Once sautéing is complete press the 'START/CANCEL' button.
-
Securely place and seal the lid onto the Pressure Express ensuring the pressure release valve is set to the sealed position.
-
To switch to the Slow Cook setting, select the 'SLOW COOK' button, then press the 'START/CANCEL' button. Allow to cook until the pressure cooking set time has counted down.
-
Remove the lid and serve with couscous.
Tomato Passata
Makes 2 litres
3 tbsp olive oil
2 brown onions, peeled, diced
2 cloves garlic, peeled, minced
2 kg tomatoes, quartered
1 tbsp brown sugar
2 tsp salt
-
Select the 'SAUTÉ' setting on the Digital Control Panel and select the 'START/CANCEL' button and heat the oil. Sauté the onion and garlic until golden brown, approximately 6 minutes, stirring occasionally.
-
Add the tomatoes, sugar and salt and stir until combined. Bring to a boil. Once sauteing is complete, press the 'START/CANCEL' button.
-
Securely place and seal the lid onto the Pressure Express ensuring the pressure release valve is set to the sealed position.
-
To switch to the Slow Cook setting, select the 'SLOW COOK' button, then press the 'START/CANCEL' button. Allow to cook until the pressure cooking set time has counted down.
-
Pour into a large bowl and blend using a stick mixer. Pour mixture through a sieve and then store in air tight containers until needed.
TIP: If stored in airtight containers, you can freeze passata for up to 6 months or refrigerate for 5 days.
Vegetable Green Curry
Serves 10
2 potatoes, diced 2cm pieces
1 cup dried chick peas (washed)
270ml can coconut milk
230g can bamboo shoots, drained, sliced
230g water chestnuts, drained, halved
125g baby corn
12 cauliflower, florets only
5 cups rice, cooked, to serve
Fresh coriander, to serve
Curry Paste
1 large green chilli, finely sliced
1 bunch coriander, roughly chopped, soaked
1 brown onion, peeled, roughly chopped
1 stick lemon grass, roughly chopped
14 tsp ground white pepper
1 tsp ground coriander
1 tsp cumin seeds
3 cloves garlic, peeled, minced
2cm piece ginger, peeled, minced
1 tbsp cold water
2 tbsp olive oil
Zest and juice of 1 lime
2 kaffir lime leaves
2 tsp salt
2 tsp brown sugar
-
Select the 'SAUTÉ' setting on the Digital Control Panel and select the 'START/CANCEL' button.
-
Using a food processor, place all of the curry paste ingredients into the bowl with a processing blade and process until completely blended, approximately 2 minutes.
-
Add the paste to the Pressure Express removable cooking bowl and sauté for 5 minutes, stirring occasionally.
-
Add the potato, chickpeas, coconut milk, bamboo shoots, water chestnuts, corn and cauliflower and stir until combined. Bring to the boil.
-
Once sauteing is complete, press the 'START/CANCEL' button. Securely place and seal the lid onto the Pressure Express ensuring the pressure release valve is set to the sealed position.
-
To switch to the Slow Cook setting, select the 'SLOW COOK' button. Allow to cook until the pressure cooking set time has counted down.
-
Remove the lid and serve with fluffy rice and fresh coriander.
Kambrook - Australia
Building 2, Port Air Industrial Estate
1A Hale Street
Botany NSW 2019
Australia
Customer Service Line 1300 139 798
Customer Service Fax 1800 621 337
www.kambrook.com.au
Kambrook - New Zealand
Private Bag 94411
Botany, Manukau
Auckland 2163
New Zealand
Customer Service Line/
Spare Parts 0800 273 845
Customer Service Fax 0800 288 513
www.kambrook.co.nz


- Please retain your instruction book for future use.
- Contents
- Kambrook Recommends Safety First
- IMPORTANT: Please retain your instruction book for future use.
- Important Safeguards For Your Kambrook Pressure Express Pressure Cooker
- continued
- Important Safeguards For All Electrical Appliances
- Your Kambrook Pressure Express Pressure Cooker
- Not Shown
- Pressure Express Quick Start Guide
- Pressure Express Quick Start Guide continued
- How to Pressure Cook - Using the White Rice, Brown Rice, Soup/Curry, Pot/Roast settings (continued)
- Before First Use
- Functions of Your Kambrook Pressure Cooker
- Cooking Methods
- Functions of Your Kambrook Pressure Cooker continued
- Digital Pre-Set Settings
- Using the Set Timer Function
- Using the Start/Cancel Function
- Automatic Keep Warm Function
- Using the Stainless Steel Trivet
- Pressure Express Cooking Guide
- Using the Pressure Express
- Fig. 8
- Fig. 9
- Pressure Express Cooking Guide continued
- White Rice Setting
- Porridge
- Brown Rice Setting
- Soup/Curry Setting
- Soup
- Curry
- Pot Roast Setting
- Using the Sauté Setting
- Slow Cook Setting
- Care, Cleaning and Storage
- Care, Cleaning & Storage continued
- Handy Hints for Pressure Cooking
- Do's
- Don't
- Never
- Recipes
- Honey Baked Pumpkin Risotto
- Serves 8
- Chicken and Pesto Risotto
- Vanilla Rice Pudding
- Serves 10
- Fruit and Nut Porridge
- Serves 6
- Pilaf Rice with Spicy Sunflower Seeds
- Smoked Ham and Split Pea Soup
- Green Curry Pumpkin Soup
- Thai Sweet Potato Soup with Coriander Pesto
- Coriander Pesto
- Salt, to taste
- Brown Rice Salad
- Red Wine, Beef, Mushroom and Thyme Stew
- Butter Chicken
- Satay Beef
- Sesame Chicken Wings
- Massaman Curry
- Curry Paste
- Spicy Tomato Sauce and Meatballs
- Chicken with Sicilian Olives and Preserved Lemon Cous Cous
- Ginger Chicken with Baby Snow Peas
- Three Bean and Vegetable Stew
- Spicy Tomato and Capsicum Chicken
- Red Wine, Garlic & Root Vegetable Lamb Shanks
- Serves 4–6
- Corned Beef
- Serves 4-6
- Whole Chicken Stock
- Makes 2 litres
- Beef Ragu
- Moroccan chicken
- Tomato Passata
- Vegetable Green Curry
Brand : Kambrook
Model : Pressure Express KPR800
Category : Frying Pan