
NVR4-7082 - Voice recorder SWANN - Free user manual and instructions
Find the device manual for free NVR4-7082 SWANN in PDF.


| Product Type | Network Video Recorder (NVR) for IP cameras |
| Brand | Swann |
| Model | NVR4-7082 |
| Video Recording Resolution | 720p HD (1280x720) |
| Number of Channels | 8 |
| Hard Drive Support | Internal SATA HDD (removable), eSATA for external storage |
| Recording Modes | Continuous, Motion-triggered, Scheduled |
| Video Outputs | HDMI, VGA |
| Network Interface | 10/100 Mbps Ethernet (LAN), PoE on camera ports (NVR-7082) |
| Remote Access | SwannView Link app (iOS/Android) and PC software via P2P (UID) |
| Power Supply | DC 12V from included adapter; PoE for cameras (NVR-7082) |
| Dimensions (Approx.) | 300 x 250 x 50 mm (11.8 x 9.8 x 2.0 in) |
| Weight (Approx.) | 1.5 kg (3.3 lbs) |
| Operating Temperature | 0°C to 40°C (32°F to 104°F) |
| Storage Temperature | -20°C to 60°C (-4°F to 140°F) |
| Battery (RTC) | CR2032 lithium coin cell (removable) |
| Front Panel Indicators | Power (red), HDD activity (blinking green), LAN connection (solid blue) |
| USB Ports | 2 USB 2.0 (front and rear) for mouse, backup, firmware upgrade |
| Motion Detection | Adjustable sensitivity (1-50), per channel with email alerts |
| Email Alerts | Supports SMTP (Gmail, Outlook, Yahoo) with image attachment |
| Default Login | Username: admin, Password: 12345 (change recommended) |
| FCC Compliance | Class B digital device, Part 15 |
| Warranty | 1 year (parts and labor) |
Frequently Asked Questions - NVR4-7082 SWANN
User questions about NVR4-7082 SWANN
0 question about this device. Answer the ones you know or ask your own.
Ask a new question about this device
Download the instructions for your Voice recorder in PDF format for free! Find your manual NVR4-7082 - SWANN and take your electronic device back in hand. On this page are published all the documents necessary for the use of your device. NVR4-7082 by SWANN.
USER MANUAL NVR4-7082 SWANN
720p High Definition Network Video Recorder
NVR-7072/7082 models
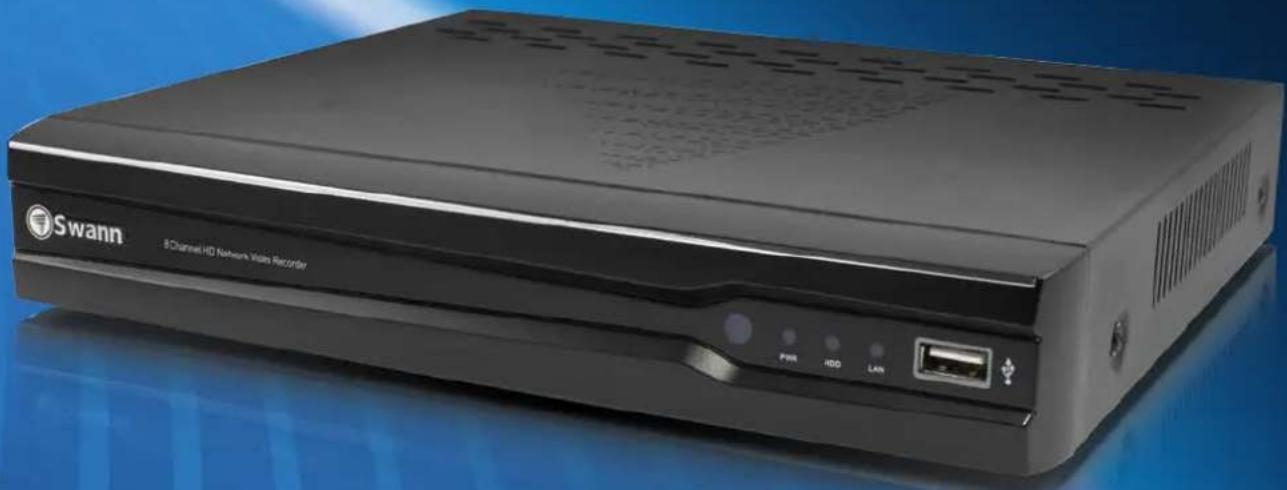
natural_image
Exterior view of a black Swann 8-Channel HD Network Wireless Recorder device with ports and indicator lights (no readable text beyond branding)Before You Begin
FCC Verification
Note: This equipment has been tested and found to comply with the limits for Class B digital device, pursuant to part 15 of the FCC Rules. These limits are designed to provide reasonable protection against harmful interference in a residential installation. This equipment generates, uses and can radiate radio frequency energy and, if not installat and used in accordance with the instructions, may cause harmful interference to radio or television reception, which can be determined by turning the equipment off and an, the user is encouraged to try to correct the interference by one or more of the following measures:
• Reorient or relocate the receiving antenna
- Increase the separation between the equipment and the receiver
- Connect the equipment into an outlet on a circuit different from that to which the receiver is connected
- Consult the dealer at an experienced radio/TV technician for help
These devices comply with part 15 of the FCC Rules. Operation is subject to the following two conditions:
• These devices may not cause harmful interference, and
• These devices must accept any interference received, including interference that may cause undesired operation.
IMPORTANT NOTE:
All jurisdictions have specific laws and regulations relating to the use of cameras. Before using any camera for any purpose, it is the buyer's responsibility to be aware of all applicable laws and regulations that prohibit or limit the use of cameras and to comply with the applicable laws and regulations.
FCC Regulation (for USA):
Prohibition against eavesdropping
Except for the operations of law enforcement officers conducted under lawful authority, no person shall use, either directly or indirectly, a device operated pursuant to the provisions of this Part for the purpose of overhearing or recording the private conversations of others unless such use is authorized by all of the parties engaging in the conversation.
WARNING
Modifications not approved by the party responsible for compliance could void user's authority to operate the equipment.
IMPORTANT SAFETY INSTRUCTIONS
- Make sure product is fixed correctly and stable if fastened in place
- Do not operate if wires and terminals are exposed
- Do not cover vents on the side or back of the NVR and allow adequate space for ventilation
DEFAULT PASSWORD INFORMATION
To ensure your privacy, this NVR supports password protection.
The default, all-access username is admin, the default password is '12345'.
To ensure your ongoing privacy, we strongly recommend selling a password as soon as possible. Choose something that you'll remember, but that others would be unlikely to guess.
IMPORTANT NOTICE - Do NOT lose or forget your password. To ensure that your NVR has the best security possible, password recovery has been designed to be complicated and time consuming process. Only a select number of staff at the Swann technical Support Telephone Helpdesk can assist. Password retrieval can take several days, which means you will NOT be able to access your NVR during this time.
BATTERY INFORMATION
This product contains a removable battery. If you need to replace or dispose of the internal battery. The battery is located on the main board of the NVR. It is a primary lithium CR2032 button cell.
To access, remove and/or replace the battery: - Ensure the NVR is turned OFF. NEVER open the NVR's case while power is connected.
- Remove the five screws holding the cover on the NVR. - If replacing the battery, ensures that it is an exact match for size, type and capacity.
- Be sure to safely dispose of the battery. The process for battery disposal/recycling varies from location to location, please check with the relevant local authority for method.
BATTERY SAFETY INSTRUCTIONS
- Do NOT attempt to open, puncture, disassemble or modify the battery in any way.
- Do NOT subject it to sudden shock or heat.
• Do NOT disperse of battery in hrs.
Contents
Introduction
| Before You Begin | |
| Contents | 2 |
| Introduction | |
Basic Setup
| Installation Guidelines | 7 | ||
| NVR Front Panel | |||
| NVR | Rear | Panel | |
| Connection | Diagram | ||
| Connecting Additional Devices | 10 | ||
| Controlling the NVR | |||
| Setup | Wizard: | General | |
| Setup Wizard: | Camera & Email | 13 | |
| Setup Wizard: | System Time | 14 | |
| Setup Wizard: | Account Configuration | 15 | |
| Setting your Smartphone or Tablet | 16 | ||
| Selling up your PC | |||
| Basic | NVR | Operation | |
| System: | General | 44 | |||
| System:User | 45 | ||||
| System:System | Information | 46 | |||
| System:Maintenance | 47 | ||||
| 5 |
Reference
| SwannView Link: Interface | |
| SwannView Link: Local Settings | 50 |
| SwannView Link: Device Settings | 51 |
| Troubleshooting@ | 55 |
| Appendendum: Third Party Hardware | 56 |
| Warranty Information | 57 |
| Helpdesk/Technical Support Details 12 | Rear Cover |
Advanced Configuration
| Advanced | Configuration | 22 | |
| IP Channel | 23 | ||
| Display: | Camera | 24 | |
| Display: | Output | 25 | |
| Recording: | Encode | 26 | |
| Recording: | Option | 27 | |
| Recording: | Schedule | 28 | |
| Search: | Playback | 29 | |
| Search: The Playback Interface | 30 | ||
| Specific | Incident | Backup | |
| Search: | Backup | 31 | |
| Search Event / Log Search | 32 | ||
| Network: | Donorul | 33 | |
| Network: | Advanced | 34 | |
| Network: | Advanced: | DDNS | |
| Network: | Advanced: | NTP | |
| Network: Advanced: Email Settings | 36 | ||
| Network: Advanced: IP Filter | 37 | ||
| Network: Advanced: Network Status | 37 | ||
| Alarm: | Motion | 38 | |
| Alarm: Motion Detection Configuration | 39 | ||
| Alarm: Motion Detection Notan | 40 | ||
| Alarm: Motion Detection - Action | 41 | ||
| Alarm: | Video | Loss | |
| Alarm: | Exception | 42 | |
| Device: | HOD | 43 | |
| Device: | S.M.A.R.T | 43 | |
Chapter
1
Introduction

INTRODUCTION
Introduction
Congratulations on your purchase of Swann's latest network video recording security system with 720p high definition live viewing and playback in real-time. Let's take a moment to talk about some of the features this NVR offers, and how to get the most out of them.
Oh my, this is a big manual. How long will this take?
Yes, but you won't have to read all of it - you should be up and running by page 20!
It can take a few hours to connect everything and run through the setup procedure.
The latter part of this manual is for advanced users only - the NVR is seriously configurable - the out-of-the-box settings do a great job in 70% of situations, but some users will want to gel into the nitty-gritty detail, so that information is presented for those who need it.
The Basic Setup
The default settings will cover most basic installation requirements of the NVR.
To get the most out of your hard drive, we've configured the NVR to record only when it detects motion - that way, you won't fill the hard drive with video of nothing happening.
Before installing anything, connect the NVR and cameras and test your system.
We ensure everything is working properly when we ship them out, but sometimes things can be damaged in transport, and occasionally components can fail. Better to find out now, before everything is fixed in place!
Getting the NVR Setup
There are three stages to getting your NVR set up. If you want to use the default settings, you'll only need to complete steps one and two.
Stage 1. Connecting the NVR (page 7 to page 10)
This section details what you can connect to the different inputs/outputs of the NVR.
Everyone's setup will vary a little bit - it depends what cameras came with the NVR [if any] and what device[s] you've already got.
Stage 2. Basic NVR Setup (page 11 to page 20)
The NVR needs a few things to be set properly before it can do its thing. Follow the instructions from page 11 to page 20 to get everything working.
3. Optional: Advanced NVR Configuration
The latter part of this manual covers advanced NVR operations. This NVR comes with all the professional-grade capabilities you'd expect from a quality Swann product, but many advanced capabilities require detailed setup to function correctly.
If you're not an advanced user, don't worry. The out-of-the-box settings really do work well, and we'd only suggest changing them if you've got a really specific plan in mind.
Accessing this NVR from your Smartphone or Tablet
This NVR supports live viewing on your Smartphone or Tablet. We have developed an app called SwannView Link for the Android and iOS platforms. For Android users, please download the app from Google Play. If you have an Apple device, please go to the Apple App Store. As we are continually improving the documentation that we include with our products, you can find the latest user guide for our app at www.swann.com.
Chapter
2
Basic Setup

BASIC SETUP
Installation Guidelines
- Do not expose the NVR to moisture. Water is the arch-enemy of electrical components and also poses a high risk of electric shock.
- Avoid dusty locations. Dust has a tendency to build up inside the NVR case, leading to a high risk of failure or even fire.
- Only install the NVR in a well ventilated space. Like all electronics, the circuitry and hard drive in the NVR produce heat, and this heat needs a way out.
- Do not open the NVR case except to install swap the hard drive inside. There are no user serviceable parts inside.
- Do not cut or modify any cable for any reason. Doing so
will void your warranty, as well as pose a great risk of fire or electrical shock.
- Do not expose the NVR to sudden bumps or shocks for example, being dropped. The NVR is as robust as possible, but many of the internal components are quite fragile.
- Remember that the NVR is, in all likelihood, going to be left on 24 hours a day, 7 days a week. Keep this in mind when choosing a location for installation.
- Never open the case whilst the NVR is plugged in, and never turn the NVR on whilst the case is open.
NVR Front Panel
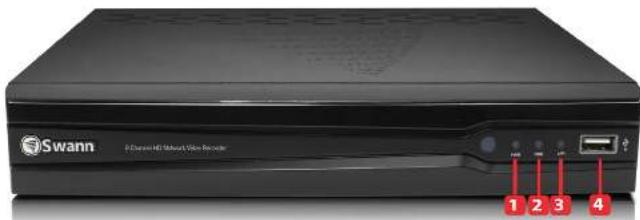
| Name | Function | |
| 1 | Power LED | Solid red indicates the NVR is supplied power and turned on. |
| 2 | HDD LED | Blinking green indicates the NVR is writing to / reading from the installed hard drive. |
| 3 | LAN LED | Solid blue indicates the NVR is connected to the network. |
| 4 | USB | For connecting USB external storage to the NVR for backup, or for applying new firmware. |
EN BASIC SETUP
NVR Rear Panel
8-channel NVR7082 model shown below
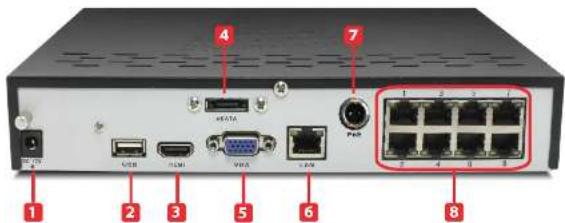
| Name Function | ||
| (###) | DC 12V Power Input | Where you connect the included DC12V power adapter. |
| USB 2.0 | For connecting the USB mouse or a USB storage device. | |
| (###) | HDMI | The primary video output of the NVR. For the highest possible video output quality, we suggest using this output. |
| eSATA | For connecting an external hard drive with an eSATA port. It can be used to store video recordings in the same way as the internal hard drive. | |
| (###) | VGA | For connecting a television or PC monitor with a VGA input (make sure the monitor you use supports the resolution you set in the menul. |
| 6 | Network (LAN) Port | Where you connect the NVR to your router or network switch for Internet connectivity. |
| (###) | PoE Power Port | (Only for NVR-7082 model) For connecting the PoE power adapter to supply power directly to the cameras connected on the Network Camera ports. |
| 8 | Network Camera Ports | These are network ports to connect your IP network cameras. Unlike conventional DVR BNC-type channel inputs, the numbers labelled on ports here have no bearing on the order in which cameras will appear on the NVR's Live View display. The 4-CH model will have four less inputs. |

EN BASIC SETUP
Connection Diagram
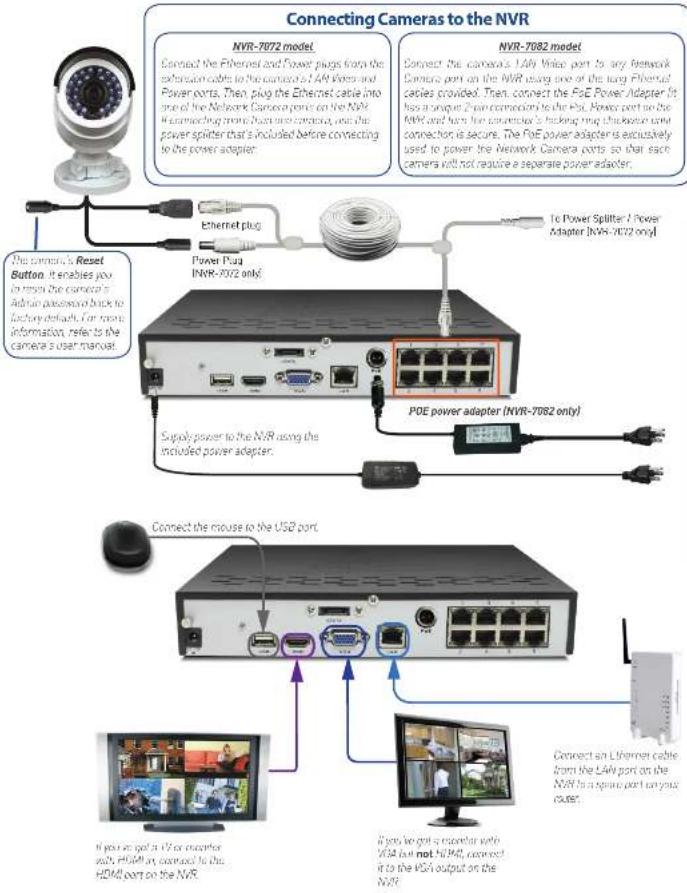
EN BASIC SETUP
Connecting Additional Devices
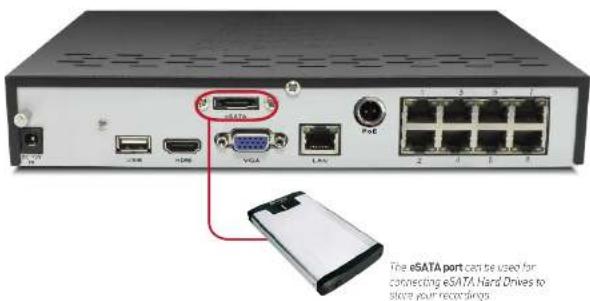
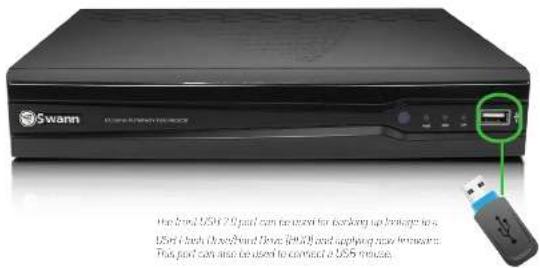
The level USB 2.0 port can be used for working up home to a USB (high channel Dev: [90,3]) and applying new hardware. This port can also be used to contact a USB mouse.
EN BASIC SETUP
Controlling the NVR
Starting the NVR for the first time
When you first boot the NVR, it will automatically start the Setup Wizard which will guide you through the various setup options available.
The USB Mouse
The easiest way to operate the NVR is to use the included USB optical mouse - we put together the look and feel of the menu system specifically for mouse-friendly navigation.
The controls are pretty easy to remember - heck, there are only two buttons. It couldn't be simpler.
Left click:
Selects an item or confirms a choice.
Right click:
Opens the menu bar from the live viewing screen.
Returns one "step" from a submenu.
Opens a context menu in some settings screens.
The Scroll Wheel:
Can be used to adjust the values of sliders and scales when highlighted by the mouse.
The Remote Control
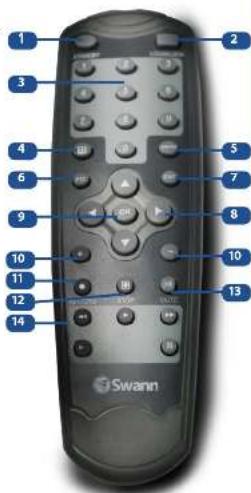
The NVR also comes supplied with a remote control unit. Like the USB Mouse, it can be used to perform all the main functions of the NVR. For details of what each button dates, size the layout of the remote control below.
1 Standby: Send the NVR into standby mode. No recording will occur while the NVR is set to Standby. To wake up the NVR from standby mode, just press the button again.
2 Login / Lock: Lock the NVR so that it requires a password to re-open, or initiates unlocking the NVR if it's already locked. Only works once the password function has been enabled and a password set (see page 45 for details).
3 Numeric Buttons: Can be used as shortcuts to a specific channel, and are useful for quickly entering numerical passwords.
4 Display Mode: Enter split-screen view, where the screen shows an, four ("quad" mode 2 x 2) or eight 13 x 3 with one space blank) video feeds at once.
5 Menu: Open the NVR's menu.
6 PTZ*: Open the ParvTilt/Zoom control screen
7 Exit: Return to the previous menu or exit to Live View screen while the main menu is displayed.
8 Arrow Buttons: Navigate around menus or toggle through options
9 OK: Confirm selection
10 + / - *: For adjusting the zoom of PTZ devices.
11 Record: Trigger manual recording mode
12 Stop: Stop manual recording. Won't have any effect on recordings triggered by the schedule in either normal or motion-based recording modes.
13 Mute*: As the name suggests, this mutes the audio output of the NVR.
14 Playback Controls: Open the playback interface from the live viewing mode. Pause, rewind, fast forward or resume playback from paused.
* not operational.
Note
Wireless Mice and Bluetooth devices are NOT compatible with the NVR. Please use the USB optical mouse supplied.
EN BASIC SETUP
Setup Wizard: General Setup Wizard:
The Setup Wizard will run automatically the first time you start the NVR.
The wizard will guide you through all the settings you need to get your NVR up and working, specifically:
- Choosing your Language
- Setting Video Format and Resolution
- Setting the Date Format and your Time Zone
- Configuring your email account settings as that the NVR can send you alerts and the NVR UID
• Synchronizing the NVR's time with an online server - Choosing the settings for DayLight Savings Time (DSTI)
- Changing the NVR's Admin account default password
General Configuration
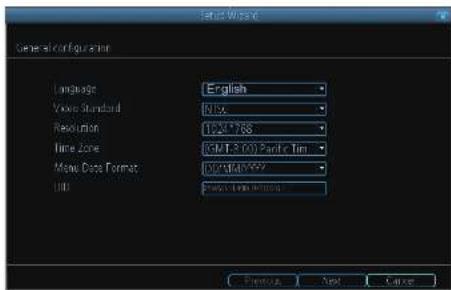
Language: Choose the language you'd like the menu system to be displayed in
Video Standards: Choose between NTSC (for the USA, Canada, Mexico, Japan, Korea and some other regions) or PAL [UK, Europe, Australia and some other areas]. If this is set incorrectly, images from your cameras will be distorted, black and white, or simply not appear at all.
Resolution: How many pixels the NVR will output. Typically, you'll want to set this to be equal to the native resolution of your monitor/television [check the manufacturer's documentation]. If your monitor's native resolution isn't an option, then you'll want to use the highest resolution possible without exceeding the maximum resolution of your monitor.
Time Zone: Choose the time zone you're in. It's really important to select the right time zone if you're using NTP (Network Time Protocol).
Some common time zones: In the USA, ESTI Eastern Standard Time is CMT -5:00, where PST (Pacific Standard Time) is CMT -8:00. The UK is GMT +0:00, and the East Coast of Australia is GMT +10:00.
Menu Date Format: How you'd like the date to be displayed. Choose whichever format that's standard in your region.
UID: This is the NVR's Unique Identifier number which will be used later to connect your PC or SmartPhone to the NVR using Swann's Peer to Peer technology.
If you need to change any of these settings later, you can find these options here: Main Menu -> System -> General
EN BASIC SETUP
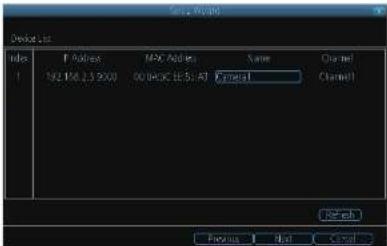
Camera
Here you can see a list of cameras that are connected to the NVR.
Note: The NVR automatically assigns cameras to channels in the order they were connected. Therefore, if there is a particular sequence that you want for your cameras, you will have to connect them one at a time. Or you can go to Main Menu > IP Camera > Edit screen and order the cameras manually.
IP Address: Displays the unique IP number and port number that is assigned to the network camera.
MAC Address: The Media Access Control address. This is a unique code which nothing else should share. You can't change this one it's hard set when the camera ships out.
Name: All cameras are by default named "Camera1". It's very important that you change this to a name that will help you easily identify the camera (particularly helpful when there are multiple cameras with different IP addresses connected on the network). Also, whilst a camera IP address may sometimes change if the NVR or router was rebooted, the assigned camera name will always stay the same unless if you change it. Channel: The channel to which the camera has been assigned.
If you want the NVR to send email alerts as alarm events are detected, then you'll need to configure an outgoing email server for the NVR to use, and choose an email address for it to send it. We recommend creating an account with Gmail, www.gmail.com specifically for the NVR. These instructions assume you're using a Gmail account. If you're using a different email, see "Network: Advanced. Email Settings" on page 36 for details.
Enable SSL or TLS: Enable.
SMTP Server: The SMTP address of your email server. There are 3 preset options to select from: smtp.gmail.com, smtp.live.com or smtp.mail.yahoo.com
Other: Allows for custom definition of an outgoing email server. See "Network Advanced Email"
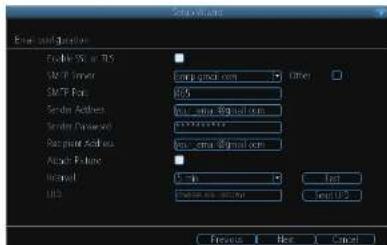
Settings* on page 36 if you want to use an email server other than ones provided. Recommended for advanced users ONLY. SMTP Port: The SMTP port of your email server. Email's is 465 (this value will self-populate)!
Sender Address: The email address you want your NVR to send alerts from. For example, your_email@gmail.com Sender Password: The password of your sending email address.
Recipient Address: Enter an email address for the NVR to send alerts to (usually your personal email address).
Attach Picture: When selected, the NVR will attach a still image to better illustrate what has caused the alarm/alert state.
Interval: The minimum amount of time that must elapse after the NVR sends an email alert before it can be triggered again. Test: To check if you've set up email alerts is properly, click the Test button. If your connection and email details are ok, you will say a message on the NVR screen confirming the email was sent successfully. After a short delay, you will also receive an email in your inbox (Recipient's Address) informing you that email alerts from the NVR has been set up. If the test is unsuccessful, please check your sender's address/password and recipient's address(s), and try again.
UID: This is the NVR's Unique Identifier number: We will use this UID to configure the SessionView Link app & software and connect to your NVR. You can click the Send UID button to receive an email containing the UID (that's assuming your email details are configured) or alternatively just make a note of the UID on a piece of paper or save it to a text file using NotePad application on your computer.
Send UID: When you've finished testing your email, click the Send UID button to send the NVR UID to your email address |Recipient's Address| so you can use it for access from SwannView Link on your PC etc.
EN BASIC SETUP
Setup Wizard: System Time
NTP
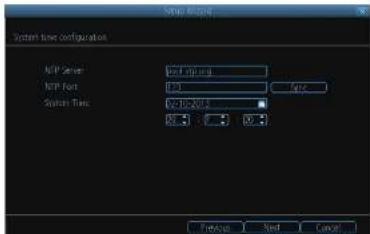
NTP stands for "Network Time Protocol". It's a way for the NVR to connect to the Internet and automatically update and maintain accurate time. There's no requirement to use NTP, but it's easy to setup and free to use, so there's really no reason not to.
NTP Server: The server you'd like to use for NTP. They're all quite comparable in terms of reliability and accuracy, so unless you've got some kind of master plan for world domination (which is affected by the time, for some reason) then the default (pool, http.org) works fine.
NTP Port: The default is 123. You should only charge this if you're using a different NTP server, and you know they use a different port. If you're using pool.ntp.org, ensure the port is 123.
Sync: Triggers the NVR to automatically synchronize its internal clock with the time server immediately. If your NVR is connected to the Internet and the network is correctly configured, this will update almost instantly.
System Time: The NVR's current date and time.
DST Configuration
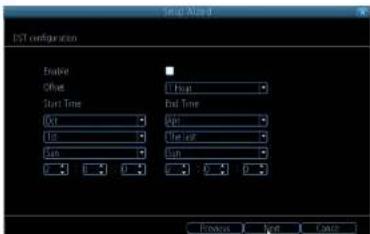
If your time zone observes daylight saving time and you want your NVR's clock to be updated automatically when daylight saving time starts and ends, make sure the Enable checkbox is selected.
Note: Make sure your time offset is set correctly or both your NVRs normal time and DST time may be out.
Offset: The amount by which the time changes during DST. For the vast majority of locations, the offset is one hour, but exceptions to this rule exist.
Start Time / End Time: When DST begins and ends in your locale.
EN BASIC SETUP
Setup Wizard: Account Configuration
Account Configuration
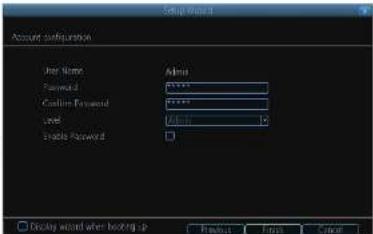
Here you can change the default password of the Admin account. For an-going protection against unauthorized access, we strongly suggest setting a new password for your Admin account.
User Name: The NVR's default administration account, which is always called "Admin". You can't change the Admin user name.
Password: The password you'd like to be associated with the Admin account. A password can be between 1 and 8 characters in length, and consists of numbers only (no letters or symbols). The default password that's masked on screen is "12345".
Confirm Password: Re-enter the password to ensure accuracy.
Level: This field is greyed out because the Admin
account always has the highest level of access. There are two additional access levels available - Guest and Operator.
Enable Password: Select this if you want to be prompted for the user account's password when accessing the main topic. Display wizard when booking up (check book) Enact how it was what the NKE in ouristically run, the configuration was read about
display when a button is clicking up (checkbox), then that if you will have NVR is continuously. It boots up. You can also run the wizard at any time by clicking the icon on the NVR menu bar.

Default Password Information
To ensure your privacy, this NVR supports password protection.
The default, all-access username is "admin". If the NVR asks you to log in before you've sat a password, enter admin as your username and leave the password blank. This will give you access to all areas of the NVR.
The password function is disabled by default. However, if you're asked for a password, the default is "12345".
To ensure your ongoing privacy, we strongly recommend selling a password as soon as possible. Choose something that you'll remember, but that others would be unlikely to guess.
If you do manage to lock yourself out of the NVR, you'll need to contact us at the Swann Technical Support Telephone Helpdesk – the number is on the back cover.
Finishing the Setup Wizard
When you click Finish, the NVR will update and save your settings. It may reboot while doing so.
EN BASIC SETUP
Setting up your Smartphone or Tablet
Have a Smartphone or Tablet?
Then head to the respective Apple App Store or Google Play, download the SwanView Link app for SwanView Link HD for tabletal for free and turn your iOS or Android device into a monitoring centre for your NVR. Have the place of mind that you can monitor your home at any time from any place. With "SwanLink" Peer to Peer technology, connecting your smartphone, tablet or PC to your NVR is so easy - there's practically no need to fliddle around with complicated network configuration. Best of all, it only takes minutes to get it all up and running!
Important Note: As the SwannView Link app is constantly under development to improve your user experience, the following screens may differ slightly from the actual app.
Configuring the SwannView Link App
After you have downloaded and installed SwannView Link (HD) on your smartphone or tablet, locate the app and tap the icon to run. Take your smartphone/tablet to your NVR and follow the instructions below.

- In the Devices menu, tap + to add a new Device as shown below.

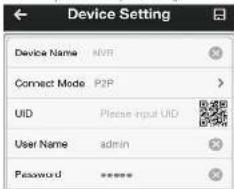
- On the NVR you will see a sticker with a QR Code and your UID number [the sticker will be on the top or bottom of the NVR case depending on which NVR model you have].
On the app, tap the QR Code button and use your smartphone's camera to scan the QR sticker on the NVR. This automatically populates the UID box with the NVR's UID. Enter a Device Name (anything you like), the username and password for your NVR as shown below and tap. To save your settings.
4 Next, tap. Start Preview to automatically check the number of channels and then you will see your cameras on screen and that's it, you're connected!
Remember to check the Swann website for updates and more information: www.swann.com
EN BASIC SETUP
Setting up your PC
SwannView Link Software
Your NVR comes with powerful remote access and interface software, called SwanView Link. You can setup and configure almost all aspects of the NVR from the SwanView Link interface.
The SwannView Link software will allow you to:
• view images from your NVR in real-time,
- playback recorded footage.
• copy footage to your local PC and
- adjust settings and configure the NVR.
In fact, the SwanView Link software is so powerful, you don't even need to connect a monitor to the NVR if there's a computer on the local network that you're running SwanView Link an.
For quick and easy configuration of the NVR's settings, recording quality and schedule, we suggest using the remote interface in SwannView Link.
How to install SwannView Link:
- Insert the included CD into your computer.
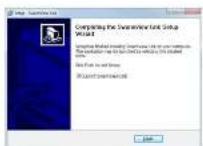
- Locate the file called SwannView Link and run this file.
- You may be asked by UAC (User Account Control) to allow SwanView Link to "make changes" to your system. Select Allow or Continue.
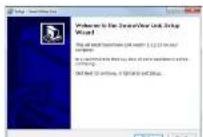
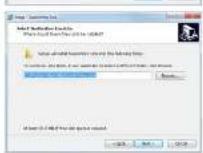
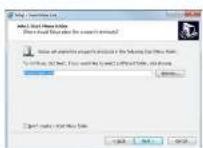
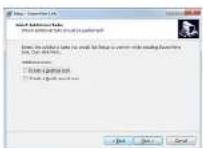
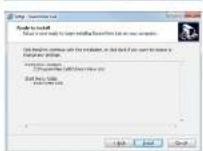
- You'll see an installation wizard. Simply follow the prompts to install the software.
- Once the SwanView Link software is installed, it should automatically detect your NVR on your network.
Minimum PC Requirements:
2.0GHz or faster CPU (Dual-core recommended) 1GB or more RAM (2GB recommended)
10/100Mbps Network (7000Mbps recommended) Internet connection (512kbps+recommended) 1024x769 resolution (1280x720 recommended)
Supported Operating Systems
Microsoft Windows XP, Microsoft Windows Vista, Microsoft Windows 7
NOTE: Windows XP, Windows Vista and Windows 7 are registered trademarks of Microsoft Corporation.
Got a Mac?
Check out www.swann.com/myDVRmac
for the latest Mac-based remote access software.
EN BASIC SETUP
Setting up your PC
Logging on to SwannView Link
- To connect from your PC to your NVR, make sure your NVR is an and all connections are ok.
- On your PC, open the email that your NVR sent when you were setting up your email account during the Setup Wizard which should look something like this image and locate the the UID:
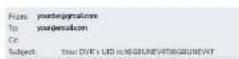
Your DVR'S UID IS:X5C8UNEVATX5C8UNEVIT
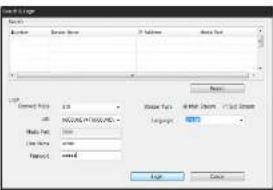
- Copy the UID highlight the text - right click with your mouse and click "Copy". In this example, start with the X and end with the T then paste it into the field marked UID as shown above right. If you made a note of the UID on a piece of paper or saved it to a text file using NotePad application on your computer, type or copy this into the UID field.
- Then, enter your Username (the default of admin is already entered) and Password (default is 12345), then click Login. After a few seconds, you will see your cameras live on your PC.
Main Stream or SubStream?
Each video feed of the NVR is comprised of two components, the Main Stream and the SubStream. Main Stream is the higher quality of the two streams, and is what you'll see on the NVR itself or via a local network. Substream is a fraction of the Main Stream, and what you'll see over the internet or via a mobile device. Typically, the Substream will be of significantly lower quality and bitrate than the Main Stream.
SwannView Link Interface
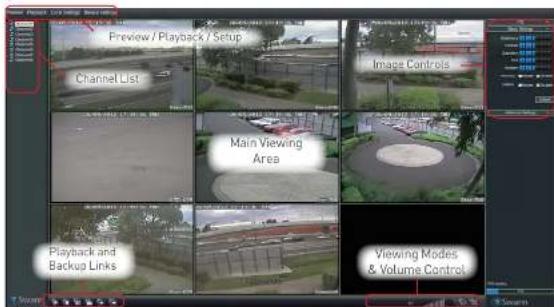
After you successful log on to SwannView Link, you will see the following screen:
Need more details?
Full explanation of the SwanView Link's software interface and remote configuration options are detailed in the Appendix from page 49 onwards. SwanView Link's software interface is functionally very similar to the NYR's menu system, and you'll find more detailed information about all menu options and settings there:
EN BASIC SETUP
Basic NVR Operation
Using the Live View Screen
Live View is the default mode for the NVR. All connected cameras are displayed on-screen. The NVR can display video feeds from up to four or eight cameras depending on model.
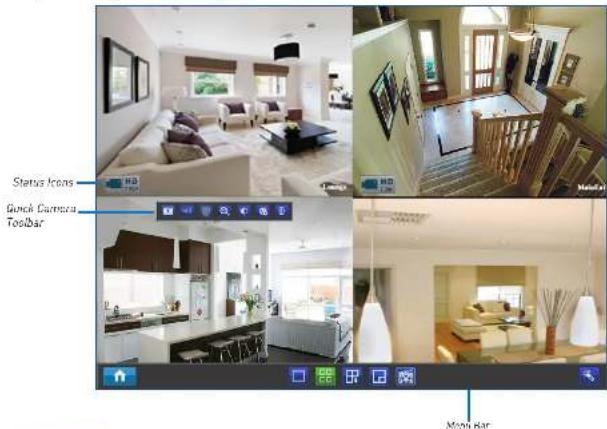
Status Icons
Information on the NVR and camera status is displayed as icons on the LiveView screen. Each camera will show its own status icons. Icons are there to give you a quick snippet of what's going on with your cameras - whether your camera has detected motion or even when your camera is having a connectivity issue. The following is a guide of what each icon represents,

This icon indicates that the camera can record at a 720p high definition resolution.

The camera icon indicates that this camera is currently recording. This icon will be the same whether the recording was scheduled, initiated manually or triggered by motion (though the motion icon will also be present if there's motion detected).

The motion icon indicates that the NVR is detecting motion coming from this camera. It doesn't necessarily mean it's recording (the camera icon will be there, too, if that's the case).

Video Loss indicates that the channel displaying this has lost the feed from its camera. This may be caused by a disconnected/damaged cable, the camera may have lost power, the camera may have been de-registered from the channel or the video standard might be wrong (PAL/NTSCI).

If you see this icon on-screen, it'll be lurking in the lower right corner by default; it indicates that something has gone wrong. Click the icon to access the Event Log where you'll get more information about exactly what has gone wrong.
EN BASIC SETUP
Live View Monitoring
Menu Bar
• To open, right click with the mouse on the live view screen.
![1 Menu: Opens the main menu. 2 Single Camera Views: Shows images from one camera in full screen. 3 Four-Camera [2 x 2] View: Divides the screen into four viewing windows, each showing images from one camera. 4 Next Cameras: Cycles the cameras displayed in viewing mode. 5 PIP: Picture-in-picture. Allows you to view two channels at once, with one full screen and the other as a small overlay. 6 Manual Record: Initiates manual recording. 7 Run Startup Wizard: Runs the initial startup wizard.](/content/2026/05/921729/images/911336bdee8f8019386fcdc794b1f534d165f80ce888f2b7b070855a9e6dd7af.jpg)
Quick Camera Toolbar
• To access the Quick Camera Toolbar, left click the USB mouse once on one of the live video channels available. Note: Unavailable functions are grayed out.
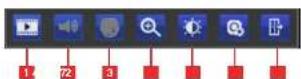
1 Playback: Opens the "Search: Playback" menu.
2 Audio: Requires Audio Enabled IP Camera and is not currently supported.
3 PTZ Control Menu: Opens the PTZ control menu I requires PTZ IP Cameral and is not currently supported.
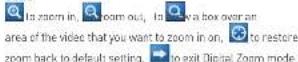
4 Digital Zoom In: Displays the selected video channel in full screen and shows the control panel
Click:
to zoom in.
(1)
18 260th 6th
to draw a box over an area of the video that you want to zoom in an.
to restore zoom back to default setting.
In our Digital Zoom music
5 Image Setting: Displays the selected video channel in full screen and shows the Image Settings window for you to change the brightness, contrast, saturation and hue. For more details, see Image Settings in "Display: Camera" on page 24.
6 Camera Setting: Opens the "Display: Camera" menu.
7 Exit: Closes the toolbar.
Shutting Down & Rebooting
If you want to shut down or reboot the NVR, or simply lag out of the user account you're logged in as, access the Shutdown menu which is accessible via the main menu.
To ensure the integrity of your data and recordings, always select Shut Down when powering off the NVR.
If you're reading this page, it means that either:
- You've got the NVR set up, but it's standard recording program isn't for you. Fair enough – we cater to all requirements here.
- You're interested in what other options and capabilities the NVR has. Excellent - the answer is "a lot".
- Everything works except just that one thing that isn't right but you don't know where the option is. Damn. We'll try and get you fixed up by the end of this page.
There are some sections of Advanced Configuration that we think are of benefit for most NVR owners to know about - in particular, the Alarm settings and the Email Configuration of the NVR.
By Default...
• The NVR has motion recording enabled on every channel, configured to operate at an average level of sensitivity
• To be a little more likely to record an border-line motion event than not live think it's better to get a false trigger than miss an event!
• To record video each time it delivers a motion event, but not notify you via email [all events will be listed in the log].
To alter the MYR's default behavior, you'll need to change some of the advanced settings.
You can do this by using either the NVR's built-in interface or SwannView Link PC software las detailed, see "SwannView Link: Device Settings" on page 51
Quick Reference
Some of the more common reasons to have a look in the Advanced Configuration include
Configuring the IP Cameras
If you want the NVR to display your IP cameras in a particular order or you've bought extra cameras and want to add them to your NVR display or you'd like to remove cameras from your NVR display, then you'll need to look at:
• "IP Channel" on page 23
Altering the Recording Schedule
The recording schedule is one of the most important things to get right when configuring the NVR. More information about the schedule can be found at:
• "Recording: Schedule" on page 26
Configuring the Auto-Email Functions
If you want the NVR to notify you via email when it detects a motion event, then you'll need to configure:
• "Network: Advanced: Email Settings" on page 36
• "Alarm: Motion Detection - Action" on page 41
• "Alarm: Motion Detection Notes" on page 40
Altering the Motion Detection Settings
If you want to change the way the NVR handles motion, then you'll need to look at:
• "Alarm: Motion" on page 38
• "Alarm: Malian Detection Configuration" on page 39
Ch: The channel number that the camera is connected to. Name: Shows the name of the camera associated with the channel.
IP Address: The IP address assigned to the camera.
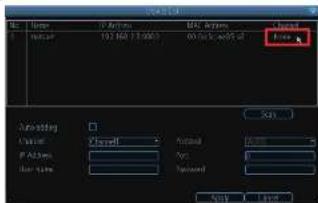
The IP Channel menu enables you to view specific information about cameras that are currently connected to your NVR such as channel number, IP address and status.
On the IP Channel: Edit screen, you can also
- scan for cameras that the NVR is able to detect - both directly connected as well as those on the same network (e.g., same router) as the NVR. Note: Cameras on the same network must be compatible with the NVR.
- add cameras to any available channels.
- delete cameras from their existing channels.
The Edit Screen
To scan for cameras:
- Click the Scan button to generate a list of all cameras as that your NVR can detect.
To add cameras:
- From the Channel drop-down list, select an available channel to which you want to assign a camera. A channel is available if its associated IP Address box is blank. You can also check out the Channel column in the detected camera list window on the top half of the screen - if a camera's been assigned to a channel, the associated channel number will be shown which means this channel has been taken up.
- Then, select a camera from the detected camera list window, that you want added to the channel. When you're finished, click the Apply button to save the new configuration. Note: The NWR auto populates the username and password holds with camera defaults.
- Note: A camera that has already been assigned to a channel cannot be added again to another channel because the NVR does not allow identical channels to be displayed. If there is a particular channel in which you want to display a camera, you will have to delete this camera from it's existing channel first.
To delete cameras:
- From the Channel drop-down list, select a channel that's currently associated to a camera.
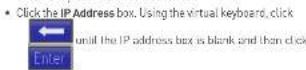
- When you're finished, click the Apply button to save the new configuration. Click the Scan button to refresh the camera list window. You will notice in the Channel column that the channel associated to the deleted camera appears as None (see picture on the right).
MAC Address: The Media Access Control address. This is a unique code which nothing else should share. Status: Whether the camera is Previewing (it's up and running, and you can see it displayed on Live View) or Offline.
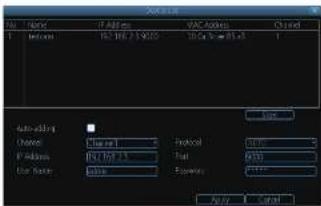
Swann Camera Default Account Configuration Username: admin Password: 12345
Auto-adding?
This option is enabled by default. Your NVR will automatically display video from cameras it has detected. If you intend to manually add or delete cameras on your NVR Live View display, you must de-select this option. Make sure you click the Apply button to save the change.

Camera No.: Choose the channel you want to edit here. When
a network camera is connected to the channel, the icon is shown. Otherwise, the icon is shown when there's nothing connected to the channel.
Camera Name: Shows the name of the camera that's currently connected to the channel. You can also specify a different name for the camera by clicking on the text field to display a virtual keyboard window. By default, all cameras are named as Camera 1.
We highly recommended that you give a suitable name (up to 16 characters) for each connected camera. (e.g., if you've got a camera that's monitoring the front entrance of your home, you could name it "FrontEntranceCan" as such).
Display Camera Name: When checked, the name you've selected for the camera will be displayed on-screen as an overlay.
Record Date: When checked, the date (as displayed) will be recorded directly on to your videos. This can be useful, as it creates an inseparable record of exactly when the footage was captured.
OSD Display Position: Gives you access to a screen where you can easily set the exact positions of any overlayed text, such as the camera name and the date and time.
Simply select any item you want to move Isuch as the Channel Name and/or the Date and Timel and click and drag it to the position you'd like it to be.
To exit the OSD Display Position screen, press the right click button. A context menu will appear with two options: Save and Exit. To exit without saving, simply choose Exit. If you want to save your changes, choose Save first.
Image Settings
Gives you access to image adjustment tools, allowing you to adjust the way the NVR interprets and displays video images. See opposite for more information.
The Image Settings you choose will affect your recordad loudags. Rather than applying the changes after the video has been processed [like many older NVRs] the Image Settings affect how the NVR decodes the video it is receiving from the cameras.
The upside of this is that you can use the Image Settings to dramatically improve the quality of the images being recorded by the NVR. This can be particularly useful for improving the accuracy of your Motion Detection settings by varying the settings to get the best blend of image quality, clarity and motion sensitivity.
The Display: Camera menu is where you can make adjustments to how the NVR displays the feed coming from your cameras.
You can adjust aspects of each channel/camera, such as: • The camera's name:
- what information will be displayed on screen, and where this information will be displayed.
- whether information such as the date will be recorded directly onto your videos.
- any areas of the video you want "masked" that is, left blank.
-
advanced camera video settings
-
Brightness: Changes how light the image appears to be. However, it can't make the camera see further in the dark, or increase the clarity of an ill. It image.
- Contrast: Increases the difference between the blackest black and the whitest white in the image. Useful if sections of the image "grey out" but selling the contrast too high will degrade image quality.
- Saturation: Alters how much color is displayed in the image. The higher the saturation, the more bright and vivid colors will appear to be. Again, setting this low high can degrade image quality.
- Use: Changes the color mix of the image (this can have very dramatic results). It's somewhat like moving through a rainbow.
Remember: Your image settings will affect your recordings!
Mask: When checked, allows you to create, place and shape a "privacy mask" which obscures part of the image on the associated channel.
Camera Parameters: Adjust various camera settings according to the environment where the camera is installed.
- Anti-flicker: Use this feature if some devices such as TV screens and lights are flickering. For USA and Canada, set this to 60Hz. For Australia and the UK, set this to 50Hz. Outdoor mode is also available.
- Exposure Mode. Select the exposure level of the camera based on pre-defined conditions. Select Manual to adjust shutter speed and gain value of the camera manually.
- Contextual: Change the way the camera processes white balance to correct image colors. Auto, Day, Night or Manual (adjust the red and blue gain manually).
- Day/Night: Set the camera's colour mode during different times of the day and night - ABC[Auto set by image sensor, Color [Always in Day mode], Black&While (Always in Night mode] or CDS [Auto set by light sensor].
- Backlight: Optimize brightness and contrast levels to compensate for differences between dark and bright objects using either BLC or WDR made. This may improve image clarity in high contrast situations but should be tested at different times of the day and night to ensure there is no negative effect.
- Mirroring: Change the orientation of the image to be horizontally reversed.
- Rotation: Turn the image upside down.

The Display: Output menu is where you can control how the NVR is going to deliver an image to your television, screen or monitor.
You'll be able to adjust items such as: screen resolution and position on your monitor
- the appearance of the menus, cand
- the sensitivity of the USB mouse.
Resolution: The number of "little dots" that make up an image. This should be set as high as possible, but equal to or lower than the maximum resolution on your screen/monitor can display. Things change a little depending on what kind of monitor you're using, and how it's connected. Make sure your monitor supports or exceeds the resolution you choose or it may not be able to display. The MR has many formats available, in four different aspect ratios:
Standard (4:3) - 1026 x 768
Standard (5:4) - 1759 x 1024, or 1400 x 1558
Widescreen(16:10)-1280 x 800, 1440 x 900, or 1680 x 1050
Widescreen (16:9) - 1200 x 720 (720pi), 1600 x 900,
or 1920 x 1980 (1080μ)
Note: 1280 x 1924 and 1490 x 1050 are considered standard aspect ratios, and are best displayed on monitors with anamorphic pixels. "Anamorphic" is a fancy term for "not quite square".
Most televisions are 16:9 widescreen. Computer monitors are still commonly produced in multiple aspect ratios, with 4:3, 16:9 and 16:10 being the most popular aspects.
Standard Monitor via VOA: Use one of the 4:3 formats to correctly align the NVR's output on your screen. Using a wide-screen format will "stretch" the image vertically.
Widescreen Monitor via VGA: If possible, use the widescreen [16.7 or 16.10] format. If your monitor can't display these resolutions, you might need to enable letter-boxing on your monitor and use a 4:3 format.
PC Monitor via HDMI: Choose a format appropriate for your monitor. If it's a widescreen, use a widescreen format. Set to the highest option that is equal to or less than the screen's maximum resolution.
Widescreen Plasma/LCD HDTV via HDMI: The resolution should be set to the maximum your television can process not display. Typically, this will be 1080p, as even screens which don't have that many pixels can still display the image, just with less detail. Check your television's documentation to learn this value. If your television can't display 1080p, then use 720p instead.
Transparency: You can set the NVR's menus to be partially transparent (see though) - in case you need to keep an eye on things while adjusting settings for it makes you feel like you're living in the future because it's so tech - we don't judge. The best way to set this is to simply experiment over time and see what works for you.
Mouse Sensitivity: How sensitive the mouse will be. On lowest, large and dramatic arm movements are required to move the mouse but a low inches prescreen. At the other end of the spectrum, a tiny bump or knock can send the cursor from one side at the screen to the other. Try somewhere around the lower end for starters, and then increase it little by little if it's moving too slowly.
Border Adjustment: Changes the size and position of the NVR's images on the screen. Altering the border size can be useful if you've got parts of the NVR's image extending beyond the part of the screen you can see.
The border adjustment is more likely to be required for older, CRT computer monitors connected via the VGA output. HDMI should in theory automatically adjust the NVR's image to perfectly fit your screen.

The Recording: Encode menu allows you to alter and customize how the NVR records lostags and "encodes" the files. "Encoding" is a term which refers to the compression algorithm [a fancy computer term for 'make the file smaller while retaining visual quality'] used by the NVR.
You can choose and alter:
• the resolution lper channel,
• the frame rate | how many images
per second the NVR recordsl, and
- the data-rate of each video stream. The higher the data rate, the "better" your images will look, but the more space they'll require on your HDD.
Camera No.: The channel load you want to alter the settings for.
Encoding Parameters (advanced user option): Whether you're editing the parameters for the mainstream or the substream. Main-Stream: The main-stream is the video food that the NVR will record and display. This is the higher-quality stream.
Sub-Stream: The sub stream is the video stream that the N/R will send to remote devices via a network or the Internet. It is the lower-quality stream as a reduction in video size makes it easier to send over a network.
Record Audio: Not functional.
Resolution: How many "little dots" are going to make up your image. There's only one option here, 720P.
Frame Rate: The number of frames per second (fps) that the NVR will record. The default (and maximum) is referred to as "real-time" and is 30fps (INTSC) or 25fps (IPALI).
Reducing the number of frames per second will not save hard drive space but potentially will improve the data-rate per frame (depending how you set the bit rate - see the next point). Remember that your FPS count is the same as saying "take X photograph per second" (where X is your FPS setting). 5fps doesn't sound like much, but it's still five individual photographs per second. If maintaining image clarity while reducing HDD consumption is your priority, it makes sense to lower the frame rate.
As with all settings on this screen, some experimentation is encouraged to find the settings which will work best for you! Max. BitRate(Kbps): The actual amount of data that the NVR will use to record video. The higher the bitrate, the more space each recording will take up on the hard disk. Generally speaking, recordings encased at higher bitrates will be of better quality, especially when recording movement
The main-stream uses a variable bitrate to record video - the more movement occurs in the video, the higher the bitrate will have to be. When there's little movement in view, the NVR will
automatically reduce the bitrate to conserve HDD space.
If the amount of movement in a recording would require a higher bitrate to accurately record than what you've selected as the maximum, the NVR will attempt to preserve as much of the quality as possible by applying compression to the image. This compression will take the form of irregular, fuzzy blocks over segments or the entire image. If you encounter this, it indicates that you might need to increase the overall bitrate.
If you've set a high bitrate but a low frame rate, the NVR will still use all the data it can, resulting in potentially higher quality per frame than at higher frame rates.
The sub-stream uses a constant bit-rate. This makes the video easier to stream over a network or the Internet.
Note: Both the main-stream and the sub-stream are always operating - in fact, the sub-stream forms part of the main-stream. The options will affect the output quality of each stream, but won't change which one is being used in different circumstances.

The Recording: Option menu lets you change some aspects of how the NVR will record footage, such as:
- whether the NVR will record a short video before events take place,
• how long after events take place the NVR will continue to record for,
• how the NVR will store and divide long recordings into "packs" and - whether the NVR will record over old footage to make room for new events
Overwrite: When enabled, the NVR will record over the files already stored on the hard drive. The NVR will always record over the oldest files on your hard drive first.
Using the overwrite option is advisable, as the NVR will always be able to record events as they happen. However, it does mean that you'll need to get important events off the HCD before they're overwritten.
Pre-Record: White Pre-Record is enabled, the NVR will record a few seconds before an event occurs. It's a little like making the NVR psychic (but not really - it's actually just caching a few seconds of video which it adds to event recordings as they occur).
If you're using Motion Detection (recommended) based recording as your primary recording methods, then it's a really good idea to use Pre-Record - sometimes, if an event is last enough, it might have left view before the NVR can trigger a recording. With Pre-Record, there's almost no chance you'll miss it.
Post-Records: How long after an event occurs that the NVR will continue to record. It can be very useful - for example, if an intruder or potential target triggers the motion detection but pauses in view, having post-record enabled will get a much better look at them. 30 seconds is the recommended length for the post-record setting, but it can be set higher (the options are 1, 2, 5 or 10 minutes) depending on your unique circumstances.
Pack Duration: Pack Duration is a measurement of how long the NVR will record for before splitting the output file into discrete units. "Packs" are something like the chapter numbers on a DVD - though the video is broken up into separate units, it will still play through as one continuous movie (unless interrupted by the schedule or motion detection forming the recording an or off). If you don't want to worry about setting Pack Durations, you can leave it on the default value; it will make little difference to the day-to-day running of the NVR.
This example image shows some of the NVR's recording modes. If the NVR was started with this shedule, the selected channel (in this case CHII would:
• Not record anything from midnight [00:00] to bam [06:00].
- Record based on Motion from 6am [06:00] until 6pm [18:00].
• Record constantly from 5pm |18:00| until midnight |00:00|.
Important Guidelines
The schedule presented on-screen applies to one channel only over one whole week.
Use the Copy To functions to quickly assign identical schedule layouts to multiple channels at once.
Be careful when programming your schedule. It's one of the most important aspects of setting up your NVR, and if it's wrong in any way, it could lead to disastrous complications later.
Copy To: There are two Copy To buttons on the Schedule Menu screen.
Copy To (Channel): Located at the base of the screen, with Default on one side and Apply on the other. This will allow you to copy the schedule from the channel you're editing to another channel or channels.
Note: The Action Options for Motion Detection will affect the way the schedule works.
By default, all channels are armed to use Motion Detection as their recording mode.
Any adjustments in the Alarm → Action menus will change the NVRs behavior, even if it is set to Motion Recording mode (see Advanced Configuration: "Alarm: Motion Detection - Action" on page 41.
Recording Modes:
There are three types of recording to choose from.
Normal: The NVR will constantly record for any period where Normal is selected. You won't miss anything, but constant recording will fill your hard drive very quickly. (The NVR does record the equivalent of a DVD film every hour on every channel, so that's rather a lot of detail. Typically, we suggest Motion as a better recording mode for most users.
Motion: The recommended recording setting for most applications. The NVR will only record when it detects something moving in front of a camera, and will then only record footage from the cameras[5] that do detect motion unless you alter your Action settings "Alarm: Motion Detection -Action" on page 41 to include other channels.
Before setting any of your schedule to Motion, ensure that Motion Detection is properly configured for the channel(s) you want to associate with it. See "Alarm: Motion" on page 38 for more information about setting up and configuring Motion Detection.
None: As the name suggests, the NVR will not record anything.
To initiate playback:
- Select the channel you'd like to playback. Note: To provide the highest quality video the NVP can only playback 1 channel at a time.
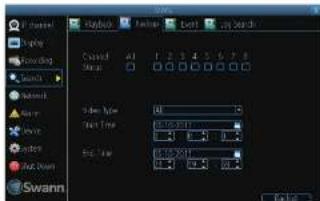
- From the Video Type menu, select the types of video you'd like to playback. The options are Manual, Schedule, Mahan and All.
- Set your Start Date/Time and your End Date/Time.
- If you want to see a graphical representation of when recordings were made and what recording mode triggered them, choose Details.
- Select Search.
- Choose which event(s) you want to play back, and which camera you'd like to view the video from.
• To initiate playback, select Play.
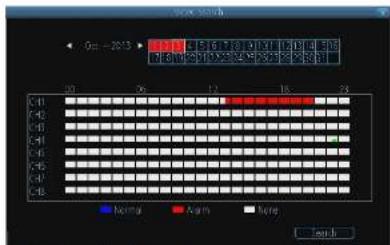
The Video Search Details screen
Recordings for the selected day are shown per channel by time.
Each recording is color-coded to match the recording mode the NVR was using at the time.
The Playback interface is quite similar to a computer's media player, or to the on-screen display of a DVD/Blu-ray player. Most of the controls are quite straight forward, and operate in the same way as a standard media player.
Current Position: A basic progress meter. You can click to move the current position icon to quickly scan through video events.
Volume Control: Alters the output volume of playback
Cut & Copy: Used to mark a Start Point and End Point for incident backups. Press Cut to mark an start point, and press Cut again to mark an end point. Press Copy to make a backup of everything in between. For more detail of the Cut & Copy commands, see "Specific Incident Backup" on page 31 for more details.
Rewind: Revises the footage.
Play: Plays footage at normal speed.
Pause / Step: Pauses playback but retains still images on-screen. Subsequent presses will move a single frame forward in the video. This will usually be 1/30th (NTSCI or 1/25th (PALI) of a second.
Fast-Forward: Spends up playback.
Slow: Plays back footage at reduced speed. Press multiple times to further reduce the speed: 1/2 speed, 1/4 speed, 1/8th speed, 1/16th speed and so on.
Recording Type: Whether the video being played back was recorded under normal recording [blue] or based on motion event [red].
Hide Console: Maximizes the area on-screen for playing back your footage by hiding the on-screen controls.
Exit Playback: Leaves the playback interface and returns to the live viewing mode.
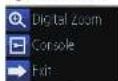
Digital Zoom menu

Click:
Note: While you're playing back footage, the NVR continues to monitor and record normally.
Specific Incident Backup

Say you've got an hour of video recorded as a single pack, and the interesting bit is from 33:12 to 33:26. We're sure you don't want to copy and convert the whole hour for those precious 14 seconds. So, there is a better way!
Shown above is the Playback Control Interface, explained in more detail over the page (see "Search: The Playback Interface" on page 30). We're going to discuss the functions of two buttons only, the Cut button and the Copy button.
Note: These don't work quite the same way they do on a computer! Those familiar with a video editor might recognize the function of the Cut button as being similar to the Mark in/Out function.
Cute: Marks the Start Point and End Point for a specific incident backup.
Press once to mark an start point at the current position marker. Typically, this will be immediately before the incident you want to copy.
Let the video play past the incident you want to save, and then press Cut again to mark the end point.
Pressing Cut a third time will erase the previous start/end points and begin the process again.
Copy: Initiates a backup of everything between the start and end points. You'll see the backup dialog shown above, but with only a single video listlet.
If there is no start point marked, the backup will commence from the start of the timeline. If no end point is marked, the backup will continue until the end of the current timeline.
Search: Backup
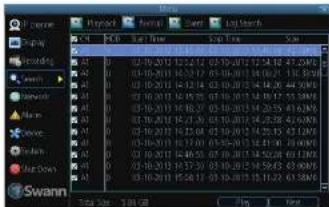
The Backup File List
Will show you a list of all the video events between the start and end times you've selected. All the ticked files will be part of the backup.
Refresh: Looks for devices to which footage can be backed up. This will include USB flash drives or hard drives connected to the front or rear USB port.
AVI Format File: When checked, the NVR will transcode the footage into a file format that can be played back on a computer.
About transcoding to AVI:
Don't be put off by the complex ward - transcoding is just a shortening of 'translating code'. Transcoding, while a straightforward process, is somewhat processor intensive. You may notice some slow-down for apparent non-responsiveness, on your NVR while the transcoding takes place.
To backup footage:
- Connect a USB flash drive or a USB hard drive (HDC) to the USB Port on the front or rear of the NVR
- Choose the cameras! you want to backup footage from. - From the Video Type menu, select the type(s) of video you want to backup.
- Set your Start Time and End Time. - Select Backup.

While the backup process is executed, the NVR will display a pair of progress meters. The top one indicates the progress of the current video event, the lower one shows the overall progress.
To end the backup process before it's complete, choose Cancel. Same or all of the incidents you selected will not have been copied. While backing up, particularly when transcoding to AVI, the NVR might take a few moments to register that you've selected Cancel.
Note that, while the backup is in progress the NVR will be inoperable locally. It will continue recording and monitoring, but won't respond to the mouse being moved or buttons being pressed (at least, not quickly - cut it some slack, it's working really, really hard).
You'll still be able to access the NVR remotely via the SixanaView Link software. However, due to the system requirements of backing up footage, the NVR's performance might be reduced.
Backing up footage can be a slow process - doubly so when transcoding to AVI. If you're backing up more than a few minutes footage at a time, you've got time to make a cup of coffee, maybe call a friend or catch up on some TV. Seriously, it can take a while - talk to any video editor about transcoding and they'll tell you it takes a long time...
Search: Event / Log Search
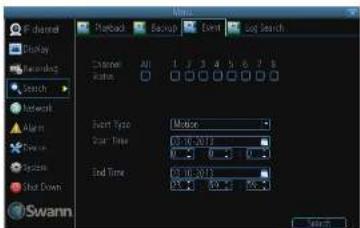
The Event Search menu will show you recordings that were triggered by the NVR telephing motion.
Typically, the majority of recordings based upon "Events" are likely to be recordings triggered by the MR's motion detection feature.
The search function operates in the same way as the main playback search; the only difference is you'll select an Event Type rather than a Video Type.
The Log Search displays a list of events, presented in chronological order: the most recent events will be at the end of the list. The Log will list all events that the NVR monitored, whether or not any footage was recorded as a result.
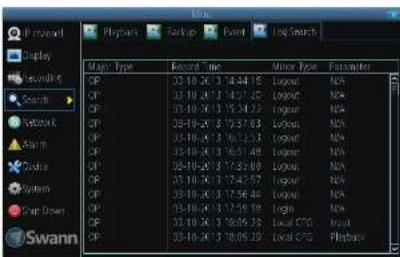

Network: GeneralSearch: Backup
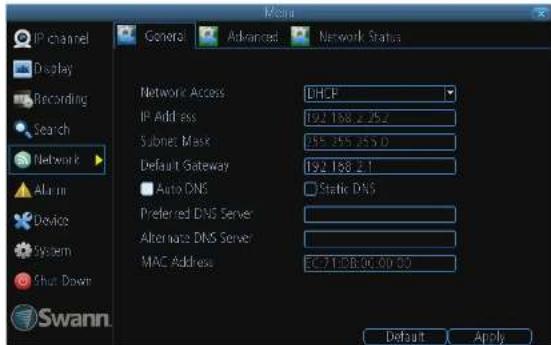
Network Access: Here you can choose between the three different types of networks that the NVR can be connected to. The three types of networks are:
DHCP: DHCP (Dynamic Host Configuration Protocol) is a system where one device on your network usually a router will automatically assign IP addresses to devices connected to the network.
STATIC: Static networks require all devices to have their IP addresses manually defined, as there is no device dedicated to automatically assigning addresses.
PPPoE: An advanced protocol that allows the NVR to be more directly connected via a DSL modem. This is an option for advanced users only.
IP Address: Just as houses and businesses need to have an address which identifies their location on the road network, so too do computers and other devices need addresses called IP ADDRESSEI to identify their position on the electronic network. The NVRuses IPv4 addressing, which consists of four groups of numbers between 11 and 255, separated by periods. For example, a typical IP address might be "192,168," "24" or something similar. The most important thing when setting the IP address is that nothing else on your network shares that IP address.
Subnet Mask: If the IP address is like a street address, then a subnetwork is like your neighborhood. This will be formatted in a similar way to the IP address [ie. four numbers up to 255 separated by periods] but contain very different numbers. In the above example, the Subnet Mask might be something like: "255.255.255.0".
Default Gateway: This is the address of the "way to the Internet" - to continue the road analogy, this is like your local
access point to the highway. This is an IP address in the same format as the others, and is typically very similar to the IP address of the NVR. To continue the above examples, it might be something such as: "192.168.1.254".
Auto DNS / Static DNS: Choose how you'd like to define your DNS servers. We recommend leaving it on Auto unless you've got a specific reason not to.
Auto DNS: The NVR will automatically choose a DNS server. This is the recommended setting.
Static DNS: If you need to manually define a DNS server, then choose Static DNS. This is recommended for advanced users only.
Preferred DNS Server: "Domain Name System". Everything on the Internet is located via an IP address - however, for ease of use, we associate domain names (such as "www.exampledomainname.com") with those IP addresses. This index is accessible in many locations online, and we call these locations "DNS servers".
DNS for STATIC configuration. Under most circumstances, you can set the DNS Server address to be the same address as your router (this is usually the same address as Gateway).
DNS for DHCP configuration: Typically the DNS Server address will automatically be detected by the NWR. In some cases, you'll need to enter a value - the address of your router (the same as the Gateway) should work.
Alternate DNS Server: A backup DNS server. This is here as a redundancy - your NVR will probably work without one.
MAC Address: The Media Access Control address. This is a unique code which nothing else should share. You can't change this one - it's pre-set when the NVR ships out.

Note: Many of the following networking settings are not required when using SwannLink P2P for remote access.
DDNS: The place to configure the NVR to automatically update a dynamic DNS service. If you want to remotely access the NVR via the Internet, you'll probably need to configure a DDNS account. See "Network: Advanced: DONS" on page 35 for details on setting up and configuring the DDNS.
NTP: Network Time Protocol. If you've got the NVR connected to the Internet, you can have it automatically sync time with an online server.
Email Settings: Where you can configure the NVR to work with an email account of your choice. This must be correctly configured for the NVR's auto-email feature to work. For more information, see "Network: Advanced: Email Settings" on page 34.
IP Filter: An advanced feature which allows you to exercise precise control over what devices/IP addresses(es) are allowed to communicate with the NVR and which are not. Recommended for advanced users only.
Server Port: This is the port that the NVR will use to send information through. The most important things are:
You'll need to enable UPnP on your router so your router can selectively open these ports, allowing the NVR to communicate via the Internet. If your router doesn't support UPnP, you have two options. You can either get a new router (which we'd actually recommend - UPnP is such a good feature!) or you can manually forward ports from the router to the NVR. Port forwarding is a technical and involved process, recommended only for the technically inclines.
Nothing else uses this port. The default port number is 9000, which is not used by many other devices/programs. However, particularly if you have another NVR or NVR-like device, something might be using this port already. If this is the case, change this value to be unique.
HTTP Port: This is the port through which you will be able to log in to the NVR
• Like the server port, it will need to be forwarded properly
in order to ensure smooth, latency-free communication. The default value is '85', as this port is seldom used by other devices or applications. If there is another device on your network using this port, you'll need to change it to be unique.
- This is the port number you'll need to remember when logging in remotely from a remote PC via the HTTP interface.
What port number(s) should I use?
If the default port numbers are in use (95 and/or 9000) then the simplest solution is just to keep "adding one" until you find a port which is not in use. So, if 85 is already taken, try 26 or 87.
There's no "right" port numbers) to use - any port number wall work provided the NVR is the only device using it. For this reason, avoid using port numbers 80, 81, 82, 88, 90, and 99 as these are often used by other devices/programs/protocols.
UPnP enable IThis feature is not required if you are using SwannLink F2P to access the NVRI: UPnP makes configuring your network easier and faster. To use the UPnP setting on the NVR, you'll need a router which supports this feature, with UPnP enabled. Note that many routers which do support UPnP do not come with the feature enabled by default. You may need to ask your internet service provider to turn it on
When UPnP is enabled on your NVR and your router, the Ports that the NVR requires to be open for access to and from the Internet will automatically be opened and closed as necessary by your router, saving you the trouble of manually forwarding these ports. If UPnP is not enabled, or your router does not support this feature, you'll need to forward the ports the NVR uses from the router to the NVR - since this is a technically challenging process, we strongly recommend using UPnP if possible.
UID: The NVR's Unique Identifier code for P2P. For convenience, you can have this code sent to your email account by clicking the Send UID button (provided that you've already set up your email account).

Network: Advanced: DDNS
How do I deal with a dynamic IP address?
One option is to contact your ISP and request a static IP address. They'll usually charge a small fee for doing this. It's worth noting that not all ISPs offer static IP addresses.
If your ISP does not offer static IP addresses then you can use a dynamic referencing service. We provide one free of charge. We recommend using SWANNOVR as your DNS service. This is a free service for Swann NVR owners, which we directly support.
To create an account with SWANDVR, go to:
http://www.swanndvr.com/
and click the Registration button.
Follow the prompts to create your account.
Note: ODNS is not required for SwannLink P2P remote access. If you intend to access your NVR using older IP technology you will need to configure this service.
Static and Dynamic
IP Addresses
In much the same way as your home network can use static or dynamic IP addresses, many Internet providers don't issue for charge more for a static IP address for users. The analytical way to find out is to contact your Internet service provider. Alternately, you can access the www.whiausmya.com service, make a note of your IP, then reboot your router/gateway. This should refresh your Internet connection. If your IP address changes, you have a dynamic IP address. If it slays the same, you may have a static IP - contact your ISP to confirm.
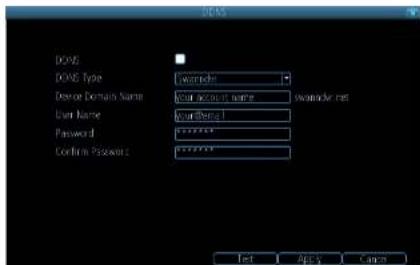
DDNS Type: Choose the server that you're using. We recommend SwannDVR - you can sign up for your free account at www.swanndvr.net.
Device Domain Name: Enter the host name that you set up in your DDNS service. This is the address you use to access your network. For example: yourhostname.swannDVR.net
Username and Password: Enter the username and password you setup with your DDNS server. These do not have to match your username/password combination in either your NVR or router for the sake of security, we suggest making them different.
For SwannNVR users: Your username is the email address you used to register the account. The password is whatever you selected when you registered.
Test: To check if the DONS is working, click the Test button. After a short delay, a message will be displayed on screen, informing you whether the update was successful or not.
If the test is unsuccessful, a message will appear on screen informing you that the "Update was Unsuccessful". This could mean there's a problem with your network setup, or there's a problem with the ODNS Account Name and Password you're using.
Network: Advanced: NTP
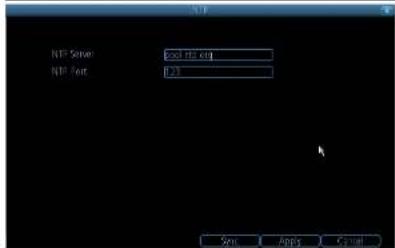
Particularly important if you've enabled NTP - set this to the time zone where you happen to be. For example, people in eastern Australia (Canberra, Sydney and Melbourne) choose GMT+10:00, whilst the Eastern Time zone in the USA and Canada is GMT-05:00, JGMT stands for Greenwich Mean Time - it's the baseline that keeps all the different time zones in sync.)
NOTE: Some NTP servers are NOT fully compatible with DST (Daylight Savings Time). This may cause your system to double-count adding one or removing one more hour than they should, or cancel each other out. You may need to intentionally change your time zone is compensated, or simply not use NTP and DST simultaneously.

Network: Advanced: Email Settings
If you want the NVR to occasionally drop you a line, share news, tell you about its day and - more importantly - tell you what's going on around your home or business as it happens, then you can configure it to automatically send email alerts as events happen.
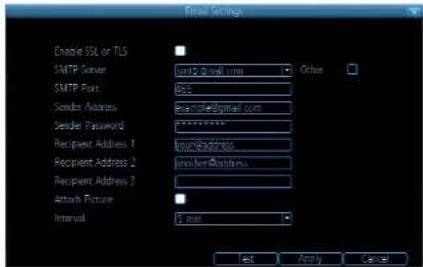
We suggest using Gmail as your email client - it's quite easy to set up an account and use it solely for the NVR. We've tested the email procedure with Gmail, and it does work. Other email servers may not work correctly - many interpret the procedurally generated email from the NVR as spam and block the mail from being sent.
For the Auto-Mail function to work correctly, the NVR will need to be correctly configured with the details of the email servers and addresses you want to use.
Enable SSL or TSL: Whether the email server you're using requires a secure link. This is on by default, and should be left on if you're using any of the preset email servers.
SMTP Server: There are three preset options to choose from, Email [smtp.gmail.com], Windows Live Mail [smtp.live.com] and Yahoo Mail [smtp.mail.yahoo.com].
You'll need to setup an account with one of these email providers. All offer free email accounts. To signup, visit the email provider's website:
Gmail (Google):
smtp.gmail.com
Yahoo Mail
smtp.mail.yahoo
Windows Live Mail Hotmail: smtp.live.com
The NVR will automatically adjust some settings (such as the SMTP port number) to make configuration significantly easier. Other (check-box): This is for user who want to use a different email server, typically the outgoing email server of their ISP. If you want to use your ISP's outgoing email, then you'll need to contact your ISP to learn the correct values for the other fields (such as the correct SMTP server, SMTP port, SSL or SSL requirements and so an).
SMTP Port: The SMTP port used by the email provider of your choice. This field will automatically self-populate if you use one of the presets.
Sender Address: The address you're sending the email from. This will be the username you've set up for the email server, you're using, followed by "fd" and then the email server. For example: "youraddress@gmail.com" or similar.
Sender Password: The password for the outgoing email account.
Recipient Address: The email address you want the NVR to send emails to. This can be any email address you like, however, bear in mind that the NVR might send a large number of automatic emails under certain conditions.
Attach Picture: When this is selected, the NVR will attach a small image to each email alert (where applicable).
For motion-based email alerts, this will be an image of whatever triggered the motion detection.
Interval: The length of time that must elapse after the NVR sends an email alert before it will send another.
Short Interval settings are likely to load to huge numbers of alerts being sent by the NVR - perhaps even several emails
for one event (if that one event lasts longer than the interval setting). In the other hand, a long interval setting might mean you'll miss a specific update that you needed. There's no right answer, and you'll probably have to fine-tune this setting to get the results you're after - it'll be different for everyone's unique circumstances.

Network: Advanced: IP Filter
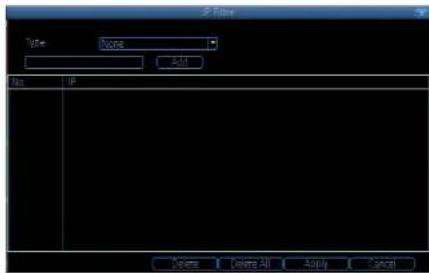
The IP Filter can be used to modify which IP addresses have permission to talk to the NVR and which do not.
This is an advanced feature, and is recommended for advanced users only. Tinkering with things here - if you're not sure what you're doing - is more likely to break things than make anything better.
Network: Network Status
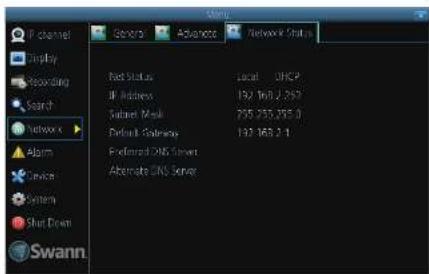
The Network Status screen displays a quick summary of your network settings. You can't alter things here – see the General and Advanced tabs for places to actually alter things.
Note that the values displayed in the image to the left are examples only. Your network settings may be similar or very different!

If you're planning to use Motion Detection as the primary (or sole) recording mode for the NVR, it's worth taking a moment to ensure it's properly configured.
If the motion detection sensitivity is too sensitive, then the NVR will record too frequently or continually - any benefit of motion detection will be lost.
If the motion detection sensitivity is not sensitive enough, then the NVR will not record when it should and may not record anything at all.
We think that motion detection is the best way to get your NVR to operate almost autonomously for long periods of time [typically weeks to months] without you having to worry about losing old footage.
However, it can be important that it's configured correctly!
How Motion Detection Works
The way that the NVR looks for motion is quite straight forward - it's a process where it compares one frame [that is, a single image taken approximately a 25th/30th of a second from the previous image] with the next. A certain amount of "difference" between these two "frames" is interpreted as motion.
As a result, the NVR is able to detect when there is a change in the picture. However, this does not necessarily need to be something moving in the frame. For example, a light being turned an or all, a lightning flash or even the sun coming out momentarily on a cloudy day might be enough to trigger the motion detection on the NVR. However, as these events last only a moment land are relatively rare, they will only create a few very short redundant clips, which will not take up too much space or pose a problem with scanning through footage.
For this reason, don't use PTZ systems and motion detection simultaneously. The NVR will interpret the camera moving as 'motion' and record. This is particularly true when using Cruise Mode - as the camera is moving almost continuously, so too is the NVR recording almost continuously!
Here, you'll be able to set the motion detection features of the NVR for each channel. We suggest that motion detection is, under most circumstances, the most practical recording method for the NVR to employ.
How It Works: Once motion detection has been enabled for a channel, it will register to the NVR as a Motion Event. Thus, you can use the Motion recording mode in the schedule to trigger the NVR to record when motion detection triggers an alarm signal.
Enable: Whether or not motion detection is enabled on a specific channel. Each channel can be configured independently of one another.
Motion Detection: Click the applicable Set button to setup the motion detection area for that channel. See "Alarm: Motion Detection Configuration" on page 39 for details on how to do this, and what it means.
Say, for example, you are trying to monitor your front yard, whilst in the background there is a busy street, and the cars driving past continually set off the motion delaction. What
can you do about it? Setting only part of the camera's view to be motion sensitive might be the answer. This is useful in a number of circumstances, such as monitoring one particular door at the end of a busy hallway, or a backyard with a tree that keeps blowing in the wind.
Action: Here you can define what will happen when the camera you've selected detects motion.
Note: If you've used the Copy-To feature to copy from one camera to another, remember that you'll still need to set the Action for each channel independently - that information isn't copied.

To set the MOTION DETECTION AREA
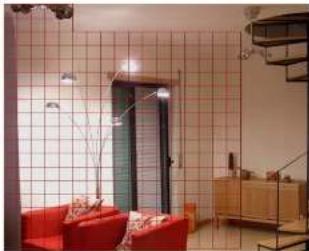
natural_image
Interior view of a modern living room with red sofas, tiled wall, and wooden furniture (no visible text or symbols)Sensitivity: The Sensitivity setting is controlled by a slider, allowing you to set a value between 0 and 50. The lower the number, the more sensitive the motion detection will be.
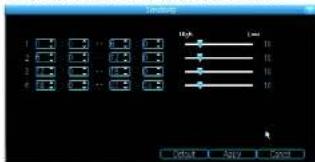
In the MOTION DETECTION menu, use the mouse or the arrow buttons to highlight the SETUP button for the channel you wish to setup the MOTION DETECTION AREA for, and confirm by pressing select or left clicking.
You will see a grid of red boxes. The outlined boxes mark the area that is sensitive to motion. The area without the red outlines is not sensitive to motion.
Use the mouse to move the cursor around the screen.
By pressing select or left clicking an area in the grid, you can toggle motion detection ON or OFF in that location.
Areas marked by red boxes will be sensitive to motion, those not marked will not be.
Click and drag to select the area you want to select or do-select.
In the sample image above, a person moving about the room would trigger the motion detection. However, a person entering from the right of screen and ascending the staircase should avoid the motion sensitive area. This is a good solution to monitor the door (center of image) without getting false triggers every time someone ascends the stairs.
There are four time periods which you can define different motion sensitivity values for.
You can change what time(s) each period starts and ends to best match the changing lighting conditions in your location.
Typically, values between 5 and 10 will give good results in the daytime.
At night, you may get numerous false triggers unless you raise the sensitivity setting, perhaps as high as 25 - 30. This is because when camera use active infrared night vision, they dramatically increase the gain controls to the image sensor. This creates a level of "noise" in the camera's images, which are interpreted by the NVR as motion.
By default, the day is divided into four periods:
00:00 Midnight - 56.00 (6:00 AM)
06:5016:09AM 12:00(Midday)
12:00 (Midday) 18:00 (6:00 PM)
18:50 (6.12 P/E) - 13.14 (Midnight)
You might need to shift the beginning and ends of these times to best suit the time(s) that lighting changes at your location.
The start and end times can be set to anything you like, provided the different time periods don't overlap and there's no gap between one ending and the next starting.
There's no requirement for all four time periods to have different sensitivity levels, although we suggest that usually gives the best performance.
To find the best sensitivity values for different times of day, night, it's best to test the system during different time periods. Get an able bodyed volunteer to move about in front of the cameras you'd like to tune the sensitivity for. The ideal sensitivity level is when your volunteer moving about always triggers the motion detection, but there are no false triggers (or very low) when your volunteer isn't moving about.

Motion Detection Recording Setup
False Triggers
Setting the motion detection at high sensitivity levels (4 or lower) increases the frequency of false alarms. On the other hand, low sensitivity levels (20 or higher) increase the risk that a significant motion event [such as an intruder] will not trigger the motion detection to record.
Check the Motion Detection settings both during the day and at night. In low-light conditions (or when your cameras are using infrared night vision) the NVR may be more or less sensitive to motion, depending on your unique circumstances. The difference might be very dramatic!
Weather
The weather conditions are going to affect your motion detection. Dramatic weather phenomenon such as heavy rain, strong winds, lightning and so on, may trigger the motion detection with surprising frequency.
On the other hand, things like fog, mist and other obscuring kinds of weather might mask or obscure something moving to the point that the NVR fails to detect them.
Here are a few steps you can take to minimize the amount of noise in your images.
- Try adjusting the Image Settings (see "Display: Camera" on page 24 for details) to line-tune the brightness and contrast to get a more stable image.
- Limit the motion sensitive area to only the areas in view that a target could be. In particular, large featureless areas in the camera's view are the ones most likely to give false triggers - turning off the motion sensitivity to any area a target cannot move infront of will help reduce false triggers.
Note: The motion detection feature will seem more sensitive at night, particularly when using low-light or active infrared cameras. We recommend that you test your motion detection sensitivity both during the day and at night to ensure your sensitivity setting is suitable for either lighting condition.
Some tips to customizing your motion detection sensitivity and actions:
- Consider how important it is to be notified of motion events as they happen.
Using the email alerts is a great way to be kept up to speed on what's happening, but may quickly become annoying if something occurs which will generate a number of false triggers. As a rule, we suggest employing the email alert only an interior cameras during times that no one should be moving about in front of them.
- It can be important to have a complete record of a subject's movements and actions for legal reasons.
If your cameras capture an illegal event typically an intruder, but we're continually surprised by stories from our users) it is important to have as much information as possible.
For example, images of someone in your home may not actually prove that they broke in - but footage of them breaking a window does. If you use a camera inside the home to trigger all exterior cameras with pre-record enabled, then you will have a record of how they entered in addition to what they did.
• Always consider what's really important.
Which is the bigger problem - a dozen false triggers per day, or missing one critical event?
There's no magic setting which will make motion detection work perfectly. There will always be some events that it's not sensitive enough to catch, or minor happenings that will trigger an overly sensitive camera to record. Typically, the best motion detection settings are one's that give few false triggers but don't miss anything.
Even motion detection which false triggers a few times per hour will still save a significant amount of hard drive space compared with a constant recording schedule for the same duration.
- Position your cameras well.
- Many issues seen with motion detection and security cameras can be traced back to poor positioning of the camera itself.
- Make sure the area in front of your cameras is as clear as possible so it has and unobstructed view of potential activity. Consider the center of the camera image is the "sweet spot" which gives you the highest detail and the best image clarity so the center of the image should be right where you need to see the real activity.
- Position you camera so that any potential instructor's face will have to pass the center of the image as closely as possible without allowing the camera to be tampered with.
- Also note that while having the cameras show some sky in the image might make the picture look nice it is also a higher level of contrast the camera has to deal with, keep the sky and any other bright objects to a minimum so that the camera has the best chance of getting the image you need to identify the intruder or licence plate.
- Keep the view distance to the shortest possible. Place the cameras as close to the subject as possible to ensure you get the best possible level of detail. Digital zoom can make the image bigger but if the camera is too far away. Then no amount of digital zoom will make the subject any clearer.
- Where possible have some overlap for your cameras. Overlapping camera views make it difficult for someone to access and tamper with one camera without another camera capturing some video of the event.
- Keep your cameras clean. Dirty lenses can affect the image quality, give the lens a clean from time to time. Note that spider webs are almost invisible during the day but are extremely reflective at night which can dramatically affect the night vision from your cameras, so keep the spider webs away from your cameras too.

Audio Warning: The NMR will use its internal buzzer to emit an alarm tone. It sounds like an old computer indicating an error, or a large truck backing up.
Send Email: The NVR will send an auto-email alert when the event type you've selected occurs. The Email Settings button will take you to the same email configuration scrace accessible from the Network menu - see "Network: Advanced: Email Settings" on page 36 for details.
Trigger Camera: You can define one camera's motion selection to trigger recording on one or more other cameras.
This can be useful in a number of situations. For example:
If you have two cameras overlooking a yard, one with a wide view from well-overhead and one with a much
narrower view of a corner or path. You may find that using the camera with the narrow view for motion detection gives fewer false triggers and doesn't miss an event as often as the really wide view might, so triggering the wide view to record as well ensures you know where the subject went alter they left the narrow view.
One camera might face a public area, while another camera looks down a private corridor which exits into the public area. Having the camera in the private area trigger the one in the public area to record can give you a record of where a subject went after they left the private area, without filling your hard drive with recordings triggered by random passers by.
Alarm: Video Loss
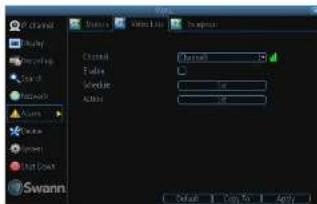
Video Loss is regarded as a potential alarm event, and is considered to occur any time that the NVR doesn't receive an active video signal on any of its inputs.
The default behaviour of the NVR, when a channel has no incoming video signal, is simply to display "Video Loss" in white text on a black background over the associated channel. If you're not using all the inputs on your NVR, then some channels will be in "permanent" Video Loss state. Just be sure that you don't Enable a video loss action for these channels.
Channel: Which channel/camera you'd like to set the video Loss behaviour far.
Enable: Whether the selected channel has video loss monitoring active or not.
Schedule: Alters when the current Video Loss Action will be active.
Action: The action you'd like the NVR to take when this event occurs. It's set in the same way as the Action for any other event.
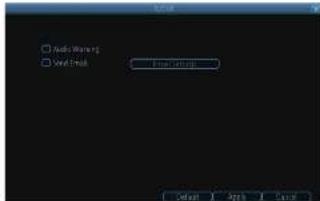
Alarm: Video Loss - Action
Audio Warning: The NVR will use its internal buzzer to emit an alarm tone. It sounds like an old computer indicating an error, or a large truck backing up.
Send Email: The NVR will send an auto-email alert when the event type you've selected occurs. The Email Settings button will take you to the same email configuration screen accessible from the Network menu - see "Network: Advanced. Email Settings" on page 36 for details.
An Exception is any deviation from the NVR's normal behaviour - phrased another way, it's like saying the NVR's been working fine except for these events
Exception Type: What event type you'd like the NVR to react to. By configuring the Action for these events, you can create any combination of audio alerts (see below or auto-emails to be sent for different event types.
- HDD Full: As the name suggests, this event occurs when the NVR runs out of space on the hard drive to save new footage. This event is redundant if you've got overwrite enabled, as the NVR will automatically delete old footage to ensure it can continue to record.
- HDD Error: Occurs when the NVR has trouble accessing its hard drives, or when it cannot detect one at all. This error could be generated by either an internal hard drive, or an external one connected to the e5ATA port.
- Net Disconnected: Will occur if the NVR has problems connecting to the Internet. This may indicate a problem with the NVR's configuration, a fault with your network or a problem with your Internet Service Provider [ISP].
- IP Conflict: This event will occur if the NVR detects another device on the same network with a conflicting IP address. It's a little like two houses with the same number being on the same street - one house might get the other's mail, or get woken up at all hours of the night being asked if someone named "Big Boi" lives there. Basically, it indicates that two devices are trying to use the same IP address. This shouldn't occur if you're using DHCP addressing, unless one or more devices is set to use a STATIC IP (the static addressing method overrides the automatic assignment process).
Audio Warning: The NVR will use its internal buzzer to emit an alarm tone. It sounds like an old computer indicating an error, or a large truck backing up.
Send Emails: The NVR will send an auto-email alert when the event type you've selected occurs.

Show Exception: The NVR will display the icon at the bottom right corner of the main screen when the event type that you've selected occurs. Click on the icon to access the Event Log and know more about the exception that occurred.
Here you'll find a comprehensive list of hard drives connected to the NVR. External drives connected via eSATA will be listed here, and will behave like a standard hard drive. They will be labeled as eSATA.
External drives connected via USB will not appear on this list, and can't be used to record footage - USB lacks the bandwidth to write multiple streams simultaneously. External USB drives can only be used for backing up footage.
Init.: Initializes the hard drive. You'll only need to do this for drives once, assuming that it's not already initialized. If the Mount column reads "No" then choose Init. to initialize the drive.
Label: A quick way of differentiating between hard drives. For the first setup, there will usually only be one hard drive - you can always add and initialize another hard drive later (connected via the eSATA port).
Capacity: The total amount of space on the hard drive. This will typically be slightly less than the rated capacity of the hard drive as a fraction of the space is required by the file allocation table (FATI).
Format: Whether the hard drive has been formatted to operate with the NVR. When the hard drive is formatted appropriately, this will simply read "yes". If it says anything else, such as an ominous "no", then select the disk and choose Format.
Mount: Whether the drive has been initialized and is detected by the NVR. If the drive isn't mounted then it needs to be initialized [see above].
Free Space: The amount of available space on the hard drive.
Warning! Don't initialize a drive that already has data on it, as the initialization process will erase any information on the drive.
Device: S.M.A.R.T
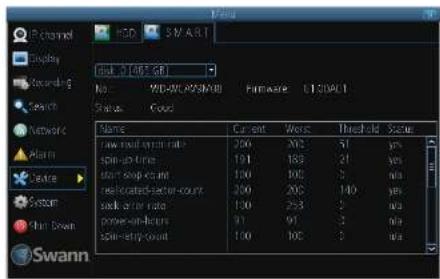
S.M.A.R.T [Sell-Monitoring, Analysis and Reporting Technology - gotta love a good acronym] is your hard drive's way of telling the NVR how it's going.
Status: The current condition of the hard drive. It should say "Good". If it says anything else, this indicates there's a problem with your hard drive.
If there's no problem, there's little else to do here, unless reading the output of the dozens of self-tests the hard drive performs on itself is of interest to you.
If you have been confronted with a HDD Error or the Status entry doesn't read "Good" then you can use the S.M.A.R.T. information to attempt to diagnose the problem. The information presented in the S.M.A.R.T. report is practically identical to what you'd see on a desktop PC while using Administrator Tools, or a similar service.

The System: General menu contains many of the settings you'll need to configure to get the most out of your NVR system. Most importantly:
• The time and date can be set here.
- You can select the language you want for the menus/CUI.
• The configuration for automatic adjustment to daylight savings time is here.
- You can easily enable or disable password protection – but will have to create a valid username/password
Language: The language that the NVR's menus, alerts and other communications will use. This usually defaults to English.
Be careful not to change this setting unintentionally - it might be tricky to find the setting to change it back when the NVR is speaking another language!
Video Standard: Here you can choose between PAL and NTSC. PAL is used in Western Europe and Australia, NTSC is used in the US, Canada and Japan. If the NVR's picture is black and white, flickering or similar, then this is probably caused by the video system being set incorrectly. Don't change this setting unless advised to do so by Swann Technical Support. You may not be able to see the NVR's output on your screen anymore!
Time Zone: Particularly important if you've enabled NTP - set this to the time zone where you happen to be. For example, people in eastern Australia (Canberra, Sydney and Melbourne choose GMT+10:00, whilst the Eastern Time zone in the USA and Canada is GMT-05:00. [GMT stands for Greenwich Mean Time - it is the baselines that keeps all the different time zones in sync.]
Menu Date Format: The format of the date (ag. DD/MM/YYYY or MM/DD/YYYY and so on)
System Time: This can be edited manually, or set to update automatically by using NTP (see "Network: Advanced: NTP" on page 35).
DST Setting: As the standards for daylight savings differ from country to country, and often state to state, you might need to manually sell the NVR exactly when it commences and ends in your locality. First, turn DST on. We suggest setting the Daylight Saving Time Mode to Date, and manually entering the dates and times that daylight savings time applies to and from, in your locality.
Note: Some NTP servers are NOT fully compatible with DST. This may cause your system to double-count adding one or removing one more hour than they should, or cancel each other out. You may need to intentionally change your time zone to compensate, or simply not use NTP and DST simultaneously.
Enable Password: When enabled, the NVR will require a password to access, even for local users. It's advisable to enable password protection
Auto Lock Time: When the password protection is enabled, the NVR will automatically time-out, whereas it will ask for a password before returning to normal functioning. The Auto Lock Time determines how long a period of inactivity will cause the NVR to lock itself again.
Device ID: Differentiates your NVR from other devices. If you don't have any other NVR's or similar devices, then you can leave this as-is. If you've got multiple NVRs running on the same network, then it's a great idea to give each a unique ID.

The System: User menu is where you can define and configure the different levels of access various users have to the NVR.
We suggest that at minimum the admin account be password protected, as it has access to all aspects of the NVR's operation.
To add additional users, choose Add
To remove a user, choose Delete.
To customize a user's level of access, choose Modify.
You cannot modify the access level of the default admin account - they can do everything. This is to prevent an unfortunate incident where, for example, no user has the permissions required to change another user's permissions - which could lead to the NVR being, in at least some senses, inoperable.
User Name: Select a name for the user, you want to define. The best usernames are short, to the point, are relevant to the specific user they're intended for, are easily memorable and hard to guess.
Password: A password can be any combination of numbers [0, though 9] between one and eight characters long.
Confirm Password: Must exactly match the password for the definition of a new user to be successful.
Level: There are two default levels of access to the NVR Guests and Operators.
Guest: By default, a Guest user has access to the live images on the NVR and can search through recorded events. They cannot change any settings or configure the NVR in any way.
Operator: The default permissions of an Operator allow them to access and configure all aspects of the NVR.
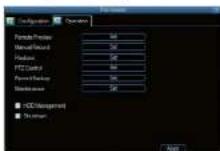
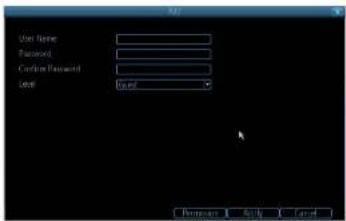
You can easily customize the level of access each individual user has. Simply choose the Permission button on either the Add User or Modify to set the specific access for the user you want. The Permission menu has two tabs - Configuration and Operation.
Configurations: The configuration page specifies which menu(s) the user can access. There is no hierarchy and any combination of menus can be selected (although some combinations would make little sense in practice).
Operations You can select which channels the user has access to, and what they can do with them. For example, you could set a user to have permission to view all channels in live viewing mode, but only playback channels 2 and 4.
Press the Set button next to each type of access to select specific channels that the user can access.
Also, this page contains permissions for HDD Management and Shutdown. These are surprisingly powerful levels of access: between them, a user can remove all footage from a NVR's hard drive and turn the NVR off. Be careful assigning these permissions!
If you're looking at the System Information screen, you've probably been directed to do so by Swann Technical Support.
If we haven't told you to come here, you might be wondering what all the information means. On a day to-day level, the answer is "very little". However, if you're still curious.
Device Name: The name that the NVR considers to be its own, and what it will use to register an IP address with your DHCP host. The remaining information is for use by Swan's Technical Support, in the event that you require assistance. The various model and build numbers help us track down any known issues, or catalogue new issues as they come to light. It also helps us figure out if you're running the most recent firmware on the NVR, and whether you'd benefit from an upgrade.
To maintain the operational integrity of the NVR, it is suggested that it be rebooted periodically. In much the same way that a computer can become unstable if left on for an extremely long time, the NVR can become unstable. It is strongly suggested that the NVR be rebooted at least once per week.
However, as this can be a hassle (particularly if the NVR is slashed away somewhere inconvenient) you can set the NVR up to reboot itself
Enable auto reboot: Will automatically shut the NVR down and restart it at a certain time of the day or week.
Auto reboot at: Choose when you'd Use the NVR to reboot. Typically, this will be a time when it's unlikely there'll be any activity for the NVR to record.
Firmware Upgrade [Upgrade]: Instructs the NVR to update its Firmware. You'll only need to use this option if instructed to do so by Swann Technical Support. (Remember to Export your configuration first so you don't have to re-set everything!)
Default Settings (Restore): Loads the factory default settings.
This must be done after a firmware upgrade to ensure proper operation of the NVR. You can retain your settings, recording schedule and so on by using the Import/Export Configuration function before upgrading the firmware.
Configuration (Export): Creates a file containing all the settings you've customized, including your recording preferences, schedule, user-list and so on.
To export your settings:
- Insert a USB flash drive into the USB port on the front of the NVR. Ensure it has enough free space for few MB is sufficient – the file is less than 50KB) and that it is not write-protected.
- Choose Configuration: Import/Export.
- You'll see a file browser, showing the contents of the storage device.
- Click Export to save your settings.
- Exporting your settings will overwrite any previous settings you've saved to that flash drive. If you want to do sequential configuration exports, you'll need multiple USB drives - or, rename the file using a PC [advanced users only].
Configuration (Import): Operates in the same way as the Export function, but is used to lead a previously saved configuration file.
Locate the file you want on your flash drive - it will be called config(time/date).tgz. Loading the file will cause the NVR to automatically reboot.
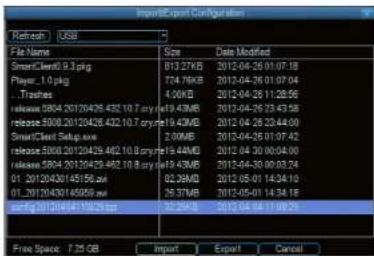
Chapter
4
Reference

REFERENCE
SwannView Link: Interface
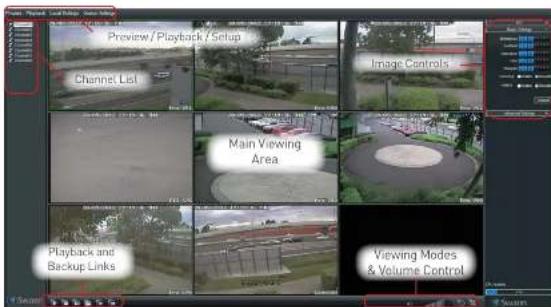
Preview: The default live-view screen of SwampView Link. The screen layout emulates the multi-channel live view screen of the NVR, showing you images coming directly from your cameras in near real time. I some delay is caused by the network/Internet connection you're using to access the NVR. You can select a single camera, or multi-channel viewing by using the Viewing Mode buttons in the lower right corner. Playback: Opens the Playback interface, which operates in much the same way as the playback interface on the NVR itself.
Local Settings: Defines how SwannView Link will manage and save footage and still images to your local PC. Device Settings: Allows access to the NVR's settings. The configurable options are very similar to those you'll find in the NVR menus.
Main Viewing Area: Where images from your camera will be shown. Select Preview to return to this view from the Playback interface or the Config menus.
Playback / Backup Links: Quick access to playback and backup.
Image Controls: You can alter the brightness, contrast, saturation and hue of your images here. They operate in the same way as those in the NVR's menu (see "Display: Camera" on page 24 for more information).
Viewing Modes: Choose between single camera viewing, four channels at once (2 x 2) or all eight channels at once (3 x 3). Volume Control: Alters how loud the audio output from the NVR will be. Remember that the final output volume will also be affected by the master volume control of your operating system, as well as the levels set an speakers or amplifiers connected to your system.
CPU Loading: How hard your computer is working to decode and display images as they arrive from the NVR. If this is consistently high, you can try:
- disabling multiple monitor setups. The SwannView Link application doesn't support hardware acceleration across multiple monitors. Disabling all but your primary monitor will greatly increase performance.
- reduce the number of video feeds being displayed. Select a channel and click Stop to disable the monitoring.
- switch to single channel view.
EN REFERENCE
SwannView Link: Local Settings
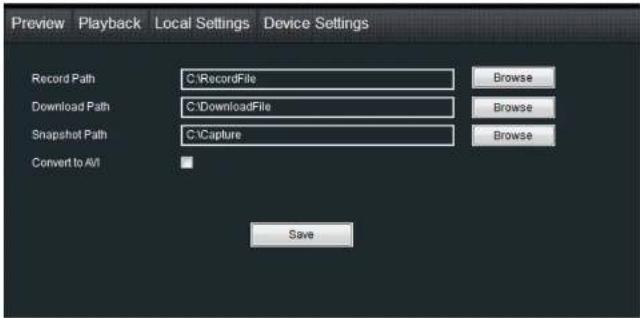
The local configuration screen is where you can customise how SwannView Link will store and process footage on the local PC when you download it from the NYR.
Record Path: Where Swannview Link will save recordings if you select Record from the Preview screen.
Download Path: Where SwannView Link will save footage that you've downloaded from the NVR.
Snapshot Path: Where SwannView Link will save still images captured using the snapshot function.
Convert to AVI: When selected, SwannView Link will use your PC to transcode footage from the NVR's native format (H.264) into a format that your computer (indeed, almost any computer) will be able to playback without special software.
About transcoding to AVI:
Don't be put off by the complex word - transcoding is just a shortening of "translating code".
Transcoding, while a straight-forward process, is very processor intensive. You may notice significant slow-down on your computer while the transcoding takes place. For best results, try not to over-burden your computer - just let it transcede the footage in peace.
Playback Problems?
Some media players have trouble playing back the transcoded AVI files from the SwannView Link software.
We recommend using VLC media player, which has no problems with the NVR's AV files. You can get it for free from .
Note: very few if any media players will be able to play the un-modified H.264 video streams that are the NVR's native format. The H.264 streams are raw video data with no "container" (AII is a "container"). It's a little like trying to read a book with no punctuation or capital letters or spaces - the "transcoding" process puts in the spaces and the full stops and makes it possible to be "read" by someone other than the author.

REFERENCE
SwannView Link: Device Settings
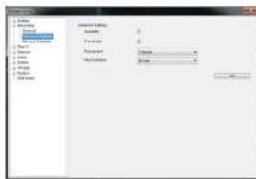
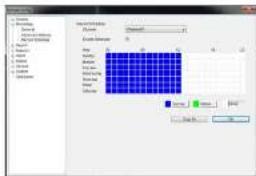
Display: Channel Settings
Channel Name (Check Box): Whether the channel's name will be displayed on screen or not.
Channel Name: The title you'd like to give that camera.
Record Data: Whether the overlays [Channel Name, Date and so on] will be recorded only the video with your images.
Position Settings: Select the position of the channel name and record date labels that are overlaid on the screen.
Mask (Check Box): Turns the masking function on or off.
Mask (Setup): Creates a black privacy overlay which masks part of your images. Will affect recordings.
Display: Output
Resolution; Set the screen resolution to output to your monitor.
Transparency: How transparent you want the NVR menus to be
Mouse Sensitivity: Adjust the sensitivity of mouse movements.
Dwell Time: Select how long channels will be displayed when using auto-sequence made.
Audio: This function is not supported by the cameras) supplied with the NVR.
Recording: General
Encoding Parameter: Choose from the main-stream or sub-stream to configure
Main Stream: The way the NVR will internally process and record video. Sub Stream: The way the NVR will encode and send video to a remote device (such as the PC you're using to access the NVRI).
Record Audio (Check Box); This function is not supported by the camera/s supplied with the NVR.
Resolution: How many pixels [little data] make up your image.
Frame Rate: How many images per second the NVR will capture. "Realtime" is 30fps (NTSC) or 25fps (PAL).
Max. Bitrate: The maximum size that your video files will be. The higher this is set, the better recordings will look – however, they'll also fill the hard drive faster.
Recording: Advanced Config
Overwrite: Whether the NVR will erase old recordings to make room for new ones, or not.
Pre-record: Whether the NVR will cache and save footage that occurs immediately before an alarm/motion event.
Delay: How long after an alarm event or motion the NVR will continue to record far.
Pack Duration: The amount of video that will be stored as a single "pack". Unless you have very specific requirements, leave this at the default value.
Recording: Schedule
Use the Copy To functions to quickly assign identical schedule layouts to multiple channels at once.
Be careful when programming your schedule. It's one of the most important aspects of setting up your NVR, and it is wrong in any way, it could lead to complications later.
Note: Do NOT select Normal and Motion/Alarm-based recording at the same time on the same channel - this can cause conflicts in the way that the NVR interprets footage and event information.
EN REFERENCE
SwannView Link: Device Settings
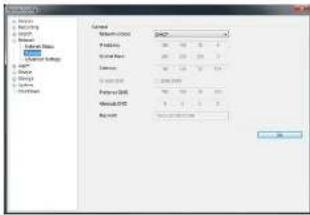
Network: General
Be careful adjusting settings here - If the NVR can't access the network anymore, you won't be able to configure it remotely! Network Access: How your network is addressed - either DHCP or STATIC IP addressing.
Subnet Mask: A required additional piece of IP addressing information.
Gateway: The way "out" of your network, to the Internet.
Auto DNS / Static DNS: Whether the NVR will automatically select a DNS server, or use one you assign
Preferred / Alternate DNS: The NVR has two DNS servers,
essentially a primary and a backup.
MAC Address: The Media Access Control address. For some advanced networking, it can help to know this value.
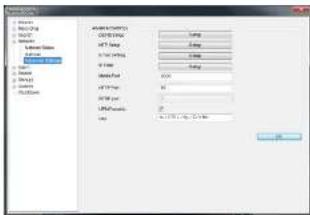
Network: Advanced Settings
DDNS Setup: Opens the DDNS setup window (below).
NTP Setup: Opens the Network Time Protocol setup window (see below).
Email Setting: Opens the Email Setup window (see below).
Server Port: One of the two ports the NVR needs to communicate over your network. Ensure nothing else uses this port. The default value is 9000. This is the port number you'll use when logging in over the Internet from the SwannView Link software or remote access from a mobile device.
HTTP Port: The second of two ports the NVR needs to communicate over your network. Ensure nothing else uses this port. The default value is 85.
- NTP Setup
NTP Domain or IP Address: The server you intend to use to access the current date and time. The default is pool.ntp.org.
NTP Port: The port that the NTP server uses. The default for pool.nlp.org is 123.
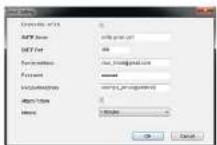
- Email Setting
Operates in the same way as the email setup menu in the NVR menu. Rather than attempt to summarize here, it's easier to simply turn to page 36 to learn more.
- DDNS Setup
Where you can configure a Dynamic DNS server to track the "position" of your NVR over the Internet. Check out page 35 for more information on ODNS servers.
We recommend using SWANNDVR as your DNS service. This is a free service for Swann NVR owners, which we directly support.
To create an account with SWANNOWR, go to
http://www.swannavr.com/
and click the Registration button. Follow the prompts to create your account.

REFERENCE
SwannView Link: Device Settings
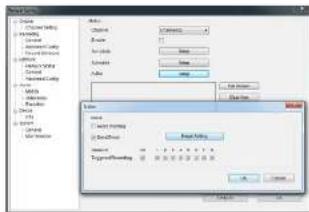
Alarm: Motion Detection
Channel: The channel you're configuring the motion detection settings for.
Enable: Whether the motion detection is enabled for the channel currently selected.
Sensitivity: A sliding scale between 1 and 50. The number refers to the number of pixels (as a percentage that have to "change" between frames - okay, this one is a little more complex than this summary will allow. Seriously - check out page 38 for a much more useful explanation of how motion detection works.
Action: What you'd like the NVR to do when it detects motion. Typically (assuming the schedule is configured to do so) this will be to record video. It can also be a cue to trigger an email alert, or to sound the NVR's internal buzzer.
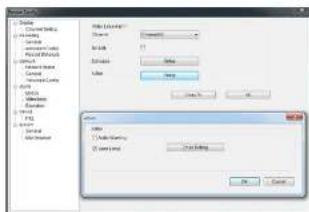
Alarm: Video Loss
Action [Check boxes]: Whether you'd like the NVR to send an email alert or to sound the NVR's internal buzzer.
Arm Schedule: The times of day/wack you'd like the NVR to be "armed" to detect video loss.
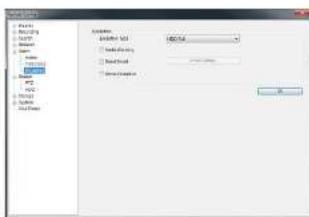
Alarm: Exception
Exception Type: What event type you'd like the NVR to react to. By configuring the Action for these events, you can create any combination of audio alerts (see below) or auto-emails to be sent for different event types.
Audio Warning: Sounds the NVR's internal buzzer.
Send Email: Commands the NVR to send an email alert
Show Exception: Shows any alerts that occur at the bottom right corner of the main screen. Double-click on the alert notification to non details.

REFERENCE
SwannView Link: Settings
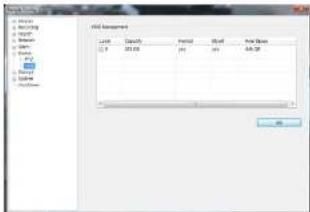
Device: HDD
Operales in the same way as the HDD management menu in the NVR menu. Rather than attempt to summarize here, it's easier to simply turn to page 43 to learn more.
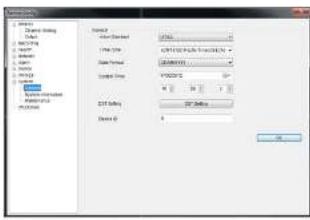
System: General / System Information / Maintenance
Operales in the same way as the System statements in the NVR menu. Rather than attempt to summarize here, it's easier to simply turn to page 44 to learn more.
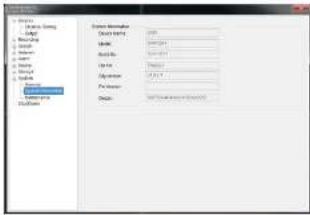
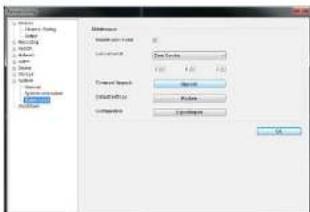

REFERENCE
Troubleshooting
Q: The images from my cameras are black & white, listening and/or totally blank. What's up?
A: Most likely, your Video Standard isn't set correctly for your region. Check out the section on PAL/NTSC ("System: General" on page 44) for more information. As a rule of thumb, set your video standard to NTSC if you're in the USA or Canada, or PAL if you're in Europe, the UK or Australia.
If this is happening to only some of your cameras, then there may be a problem with the compatibility of these cameras. If you've got them from a kit, then this shouldn't be the case at all and if indicates that something quite strange is happening. If you have cameras purchased separately - particularly if you've found them online or from overseas - then they might not match the standards of the cameras you've already got. The NVR can only support one video standard at a time: mixing PAL and WTSC cameras does not work.
Q: I can't login to or unlock the NVR - it says my password is wrong.
A: The default username/password combination for the NVR is "admin" with the password section left blank.
The MR does have a default password ["12345"] but it should be disabled by default. If leaving the password section blank doesn't work, try 12345. If that doesn't work (and you haven't set a password of your own that you've forgotten) then something strange has happened - contact Swann technical support [contact details are on the rear cover].
Q: The NVR will cool up and show two images, but there are no menus being displayed. Why?
A: There might be a fault with one for more of the hard drives installed in the NVR. Before the menu system is displayed, the NVR attempts to detect what drives are connected. If there is an ambiguous signal preventing the NVR from ascertaining whether there is a drive connected or not, then it will keep looking and waiting for the drive to respond.
If you've just installed a new drive, disconnect it and see if that fixes the problem. You can also try disconnecting one drive at a time to see if that one is the culprit.
Note that drives connected via eSATA can also cause the NVR's operating system to hang during startup.
Q: How do I eliminate false triggers on my motion detection?
A: There's no guarantee way to eliminate false triggers, but in the majority of cases - you can fine-tune the NVR's motion detection settings to reduce the number of false triggers you're likely to get. [See "Alarm: Motion" on page 38 for more detailed information about setting motion detection.]
-
Mask any redundant movement. This includes obvious things like trees blowing in the wind, roads with cars passing and so forth. Some less obvious things which might cause false triggers include: the "flickening" of screens, monitors or fluorescent lights, reflections of movement in windows/mirrors and so on, lights which are often turned on or off, shadows passing and so on. We can't possibly imagine what you're going to find in your unique circumstances, so we encourage you to experiment.
-
Fine-tune your sensitivity. There's no substitute for getting
a volunteer to play the part of intruder and experimenting. Some cameras are just more "touchy" than others, some lighting conditions are harder to get the settings "right" for. As a "rule", CCD cameras require a lower value than CMOS cameras, and that motion detection is going to be more sensitive at night (whenever the active infrared nightvision is active).
- Adjust your image settings (see "Display: Camera" on page 24). Unlike many image adjustment options, the NVR pre-processes video, which means that, when the NVR looks for motion, it is looking at your already processed images. By reducing the amount of video noise in your image, you can increase the accuracy of the motion detection dramatically. Typically, the settings that most often require adjustment are Brightness and Contrast.
Voice noise is a problem with any video signal. It's the very slight change in brightness and/or color of pixels between frames, and it's commonly regarded as being "just one of those things" when dealing with digital imaging. By breaking the brightness and contrast, you can usually remove a good deal of this noise, as it tends to be most pronounced near the blacks [the really dark bits] and the whites [the really bright bits] of your images.
Q: I'm getting too many email alerts from the NVR.
A: There are a few things that might help, depending what's generating the email alerts. Here are a few possibilities:
- The emails are for real events, however it is telling me about it multiple times.
This indicates that the NVR is functioning properly, but that the Interval setting for your email alerts is too low. Increasing the Interval time will decrease the number of email alerts the NVR sends.
- The NVR sends email alerts when nothing seems to be happening.
This suggests that there might be something amess with your Motion Detection settings, or with the configuration of your sensors (if used).
The most likely explanation is that there is something in view of your cameras which is moving, or causes the illusion of movement. Have a look at "Alarm: Motion Detection Configuration" on page 39 for some more information.
- The NVR keeps reporting errors (such as Video Loss, HDD Error or similar).
There seems to be a hardware or configuration fault with the NVR. These are most often caused by a faulty (or simply poorly connected) connection or cable. Check the integrity of your cables and connections.

REFERENCE
Addendum: Third Party Hardware
Due to it's nature as a networked device, the NVR is often required to operate with third party hardware. We do everything we can to ensure the NVR is compatible with as many third party devices as possible, there will always be some that require a little extra configuration.
Routers
I'm using a router which doesn't support DHCP addressing
Some devices on my network require STATIC addressing. You'll need to set the address of the NVR manually. You'll need to:
• Find Your Networks IP Address Range
- Create a Unique IP Address
- Assign the IP address information to the NVR.
Finding your Network's IP Address Range
First, you'll need to know the IP address, Subnet Mask and DNS Server of at least one other device on your network. It's easiest to find these addresses by using a computer on the same network.
For Windows-based PCs:
- Open the Start Menu, navigate to Accessories and open Command Prompt.
• Type "ipconfig" and press Enter.
- Your IP Address information will be displayed.
For Mac-based systems:
• From the Apple menu, select System Preferences.
- Click on the Network pane.
- Click on the Advanced button and look under the TCP/IP, DNS, and Ethernet tabs.
Creating a Unique IP Address
The IP Address of your computer will be made up of four groups of numbers, separated by periods: aaa.bbb.ccc.ddd The first three groups of numbers (aaa.bbb.ccc) must be the same as the other device on your network. The last number lddl must be changed to something unique that nothing else on your network uses.
For example:
If your computer's IP address is 192.168.1.10, then a suitable unique IP address for your NVR will be 192.168.1.210
Note: Each number in the IP address cannot exceed 255.
Assigning the IP Address information to the NVR.
We recommend doing this locally (on the NVR itself) even if you can access the NVR via the network (using the SwannView Link software) in the meantime.
If you're connected remotely and the networking information changes, you might lose the connection to the NVR.
- Open the Network: General menu on your NVR (see "Network: General" on page 33).
- Select Static addressing.
- IP Address: Enter the unique IP that you created for the NVR here.
- Subnet Mask: Enter the same value as the computer's Subnet Mask.
• DNS Server: Enter the same value as the computer's DNS.
The NVR should now be accessible via your local network. Before you can access the NVR remotely, you'll need to Forward Ports [STATIC addressing does not support UPnP, see below].
I'm using a router which doesn't support UPnP. How do I "forward ports"?
It depends on what type of router you have. There's no standard procedure for forwarding ports - each manufacturer has their own user interface and procedure for customising the behaviour of the router.
First, check the router's documentation - the instructions may be there.
If your router's documentation doesn't describe the method for port forwarding, then open a web browser and navigate to www.portforward.com - they've got instructions on port forwarding for (literally) thousands of different routers.
We can't offer much more information about forwarding parts here, as this is a process totally dependent on third-party hardware. If you do run into trouble, we suggest contacting the manufacturer of the router.
Alternately, if you're using an older router which doesn't support UPnP, then it might be time for an upgrade - modern routers are increasingly powerful and are (in most cases) easier than ever to setup. We think that UPnP is a fantastic feature that's well worth having, not just for NVRs.

REFERENCE
Warranty Information
USA
Swann Communications USA Inc. 12636 Clark Street
Santa Fe Springs CA 90670 USA
Australia
Swan Communications
Port Melbourne Vic 3207 Australia
United Kingdom
Swann Communications LTD. Stag Gates House 63/64 The Avenue 50171XS United Kingdom
Warranty Terms & Conditions
Swann Communications warrants this product against defects in workmanship and material for a period of one [1] year from its original purchase date. You must present your receipt as proof of date of purchase for warranty validation. Any unit which proves defective during the stated period will be repaired without charge for parts or labour or replaced at the sole discretion of Swann. The end user is responsible for all freight charges incurred to send the product to Swann's repair centres. The end user is responsible for all shipping costs incurred when shipping from and to any country other than the country of origin.
The warranty does not cover any incidental, accidental or consequential damages arising from the use of or the inability to use this product. Any costs associated with the fitting or removal of this product by a tradesman or other person or any other costs associated with its use are the responsibility of the end user. This warranty applies to the original purchaser of the product only and is not transferable to any third party. Unauthorized and user or third party modifications to any component or evidence of misuse or abuse of the device will render all warranties void.
By law some countries do not allow limitations on certain exclusions in this warranty. Where applicable by local laws, regulations and legal rights will take precedence.
For Australia: Our goods come with guarantees which cannot be excluded under Australian Consumer Law. You are entitled to a replacement or refund for a major failure and for compensation for any other reasonably foreseeable loss or damage. You are also entitled to have the goods repaired or replaced if the goods fail to be of acceptable quality and the failure does not amount to major failure.
Helpdesk / Technical Support Details
Swann Technical Support
All Countries E-mail: tech@swann.com
Telephone Helpdesk
USA Toll Free — 1 800 627 2799
USA Exchange & Repairs -1-800-627-2799 (Option 1)
(M-F, 9am-5pm US PT)
AUSTRALIA — 1300 138 324
NEW ZEALAND Toll Free —0800 479 266
UK 0203 027 0979
- 720p High Definition Network Video Recorder
- Before You Begin
- FCC Verification
- IMPORTANT NOTE:
- FCC Regulation (for USA):
- Prohibition against eavesdropping
- WARNING
- IMPORTANT SAFETY INSTRUCTIONS
- DEFAULT PASSWORD INFORMATION
- BATTERY INFORMATION
- BATTERY SAFETY INSTRUCTIONS
- Contents
- Chapter
- 1
- Introduction
- Oh my, this is a big manual. How long will this take?
- The Basic Setup
- Getting the NVR Setup
- Stage 1. Connecting the NVR (page 7 to page 10)
- Stage 2. Basic NVR Setup (page 11 to page 20)
- Optional: Advanced NVR Configuration
- Accessing this NVR from your Smartphone or Tablet
- 2
- Basic Setup
- Installation Guidelines
- NVR Front Panel
- NVR Rear Panel
- Connection Diagram
- Connecting Additional Devices
- Controlling the NVR
- Starting the NVR for the first time
- The USB Mouse
- Left click:
- Right click:
- The Scroll Wheel:
- The Remote Control
- Note
- Setup Wizard: General Setup Wizard:
- Camera
- Setup Wizard: System Time
- NTP
- DST Configuration
- Setup Wizard: Account Configuration
- Account Configuration
- To ensure your privacy, this NVR supports password protection.
- Finishing the Setup Wizard
- Setting up your Smartphone or Tablet
- Have a Smartphone or Tablet?
- Configuring the SwannView Link App
- Setting up your PC
- SwannView Link Software
- How to install SwannView Link:
- Minimum PC Requirements:
- Supported Operating Systems
- Got a Mac?
- Logging on to SwannView Link
- Main Stream or SubStream?
- SwannView Link Interface
- Need more details?
- Basic NVR Operation
- Using the Live View Screen
- Status Icons
- Live View Monitoring
- Menu Bar
- Quick Camera Toolbar
- Shutting Down & Rebooting
- If you're reading this page, it means that either:
- By Default...
- Quick Reference
- Configuring the IP Cameras
- Altering the Recording Schedule
- Configuring the Auto-Email Functions
- Altering the Motion Detection Settings
- The Edit Screen
- To scan for cameras:
- To add cameras:
- To delete cameras:
- Auto-adding?
- Image Settings
- Important Guidelines
- Recording Modes:
- To initiate playback:
- The Video Search Details screen
- Specific Incident Backup
- Search: Backup
- The Backup File List
- About transcoding to AVI:
- To backup footage:
- Search: Event / Log Search
- Network: GeneralSearch: Backup
- What port number(s) should I use?
- Network: Advanced: DDNS
- How do I deal with a dynamic IP address?
- Static and Dynamic
- IP Addresses
- Network: Advanced: NTP
- Network: Advanced: Email Settings
- Network: Advanced: IP Filter
- Network: Network Status
- How Motion Detection Works
- To set the MOTION DETECTION AREA
- Motion Detection Recording Setup
- False Triggers
- Weather
- Some tips to customizing your motion detection sensitivity and actions:
- Alarm: Video Loss
- Alarm: Video Loss - Action
- Device: S.M.A.R.T
- To export your settings:
- 4
- Reference
- SwannView Link: Interface
- SwannView Link: Local Settings
- Playback Problems?
- SwannView Link: Device Settings
- Display: Channel Settings
- Display: Output
- Recording: General
- Recording: Advanced Config
- Recording: Schedule
- Network: General
- Network: Advanced Settings
- - NTP Setup
- - Email Setting
- - DDNS Setup
- Alarm: Motion Detection
- Alarm: Exception
- SwannView Link: Settings
- Troubleshooting
- Addendum: Third Party Hardware
- Routers
- I'm using a router which doesn't support DHCP addressing
- Finding your Network's IP Address Range
- For Windows-based PCs:
- For Mac-based systems:
- Creating a Unique IP Address
- Assigning the IP Address information to the NVR.
- I'm using a router which doesn't support UPnP. How do I "forward ports"?
- Warranty Information
- USA
- Australia
- United Kingdom
- Warranty Terms & Conditions
- Helpdesk / Technical Support Details
Brand : SWANN
Model : NVR4-7082
Category : Voice recorder