
RC4750 - Rice cooker SUNBEAM - Free user manual and instructions
Find the device manual for free RC4750 SUNBEAM in PDF.


| Product Type | Rice Cooker (10-cup uncooked / 20-cup cooked capacity) |
| Model | Sunbeam RC4750 |
| Capacity | 10 cups (uncooked) / 20 cups (cooked) – serves approx. 16-18 people |
| Dimensions (approx.) | 30 cm (W) x 28 cm (D) x 28 cm (H) – estimated |
| Weight (approx.) | 2.8 kg (estimated) |
| Power Supply | 230-240 V AC, ~700 W (estimated) |
| Main Functions | Cook, Keep Warm automatic switch, Steam with included tray |
| Cooking Pan | Non-stick removable cooking pan for easy cleaning |
| Lid | Glass lid with steam vent |
| Handles | Cool-touch handles for safe carrying |
| Accessories | Measuring cup (150g uncooked rice), serving spoon, steaming tray |
| Safety Features | Automatic switch to Keep Warm, cool-touch handles, do not immerse heating vessel |
| Cleaning | Wash cooking pan, lid, spoon, cup in warm soapy water; heating vessel only wiped with damp cloth – never immerse |
| Spare Parts & Repairability | Non-stick pan, lid, spoon, cup available; service through Sunbeam appointed centers |
| Warranty | 12-month replacement guarantee (Australia/New Zealand) |
| Country of Origin | Made in China |
Frequently Asked Questions - RC4750 SUNBEAM
User questions about RC4750 SUNBEAM
0 question about this device. Answer the ones you know or ask your own.
Ask a new question about this device
Download the instructions for your Rice cooker in PDF format for free! Find your manual RC4750 - SUNBEAM and take your electronic device back in hand. On this page are published all the documents necessary for the use of your device. RC4750 by SUNBEAM.
USER MANUAL RC4750 SUNBEAM
Instruction/Recipe Booklet
This book covers the use and care of the following Sunbeam Rice Cookers:
RC4750 Rice Perfect 10 - 10 cup Rice Cooker
RC2650 Rice Perfect 8 - 8 cup Rice Cooker
RC2350 Rice Perfect 5 - 5 cup Rice Cooker
Please read these instructions carefully and retain for future reference.
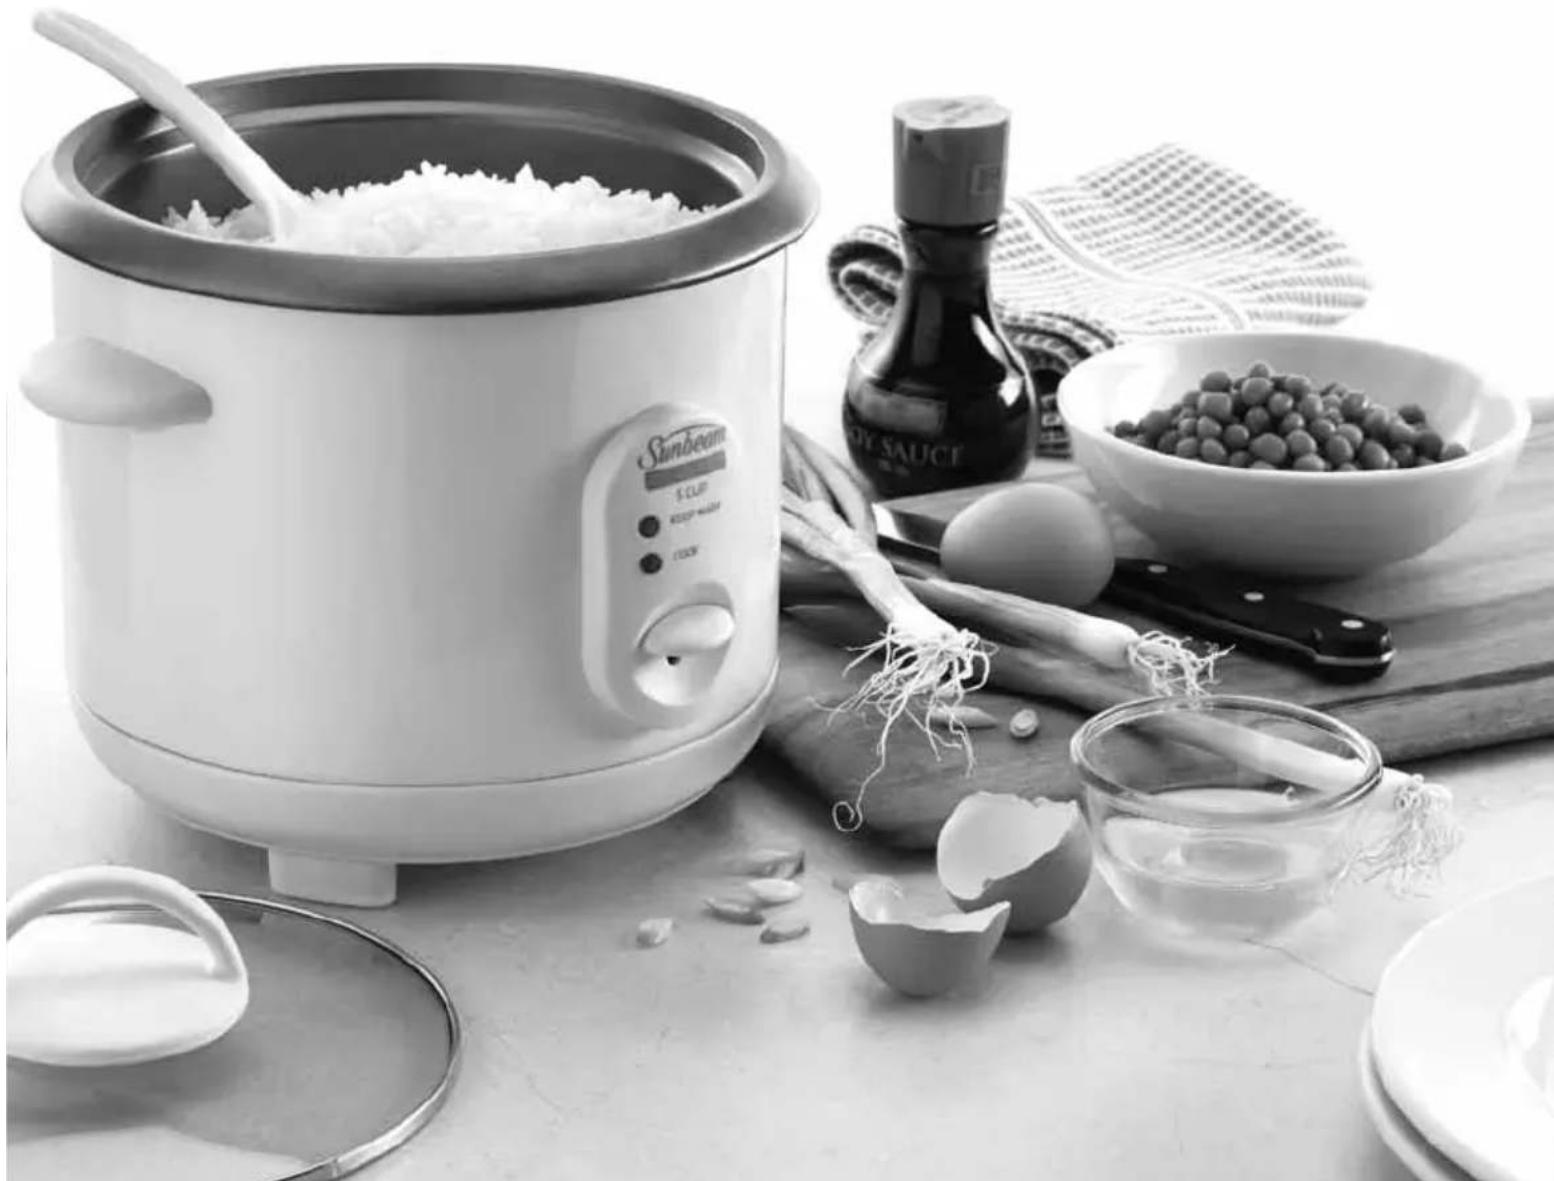
natural_image
Black-and-white photo of a sunbeam rice cooker with raw ingredients, accompanied by a cooking sauce bottle and bowls of beans (no text or symbols visible)Contents
Sunbeam's Safety Precautions 1
Features of your Rice Perfect 2
Using your Rice Perfect 6
Tips for cooking rice 7
Care and cleaning 8
Types of rice 8
Rice Cooking charts 9
Recipes 11
Sushi 17
Making Sushi 18
Steaming 19
Steaming Vegetables for
Rice Perfect 8 & 10 20
Steaming Fish and Seafood for
Rice Perfect 8 & 10 21
Steaming Poultry for
Rice Perfect 8 & 10 22
Important instructions – retain for future use.
Sunbeam's Safety Precautions
SAFETY PRECAUTIONS FOR YOUR RICE PERFECT.
- Do not operate the rice cooker on an inclined surface. Use a flat level surface.
- Do not move or cover the rice cooker whilst in operation. Unplug before moving.
-
Do not immerse the heating vessel of the rice cooker in water or any other liquid.
-
Use your rice cooker at least 200mm away from walls and curtains.
- Do not use your rice cooker in confined spaces.
- Remove the power cord before cleaning the rice cooker.
- After cleaning ensure that the cord inlet area is completely dry before using again.
Sunbeam is very safety conscious when designing and manufacturing consumer products, but it is essential that the product user also exercise care when using an electrical appliance. Listed below are precautions which are essential for the safe use of an electrical appliance:
- Read carefully and save all the instructions provided with an appliance.
- Always turn the power off at the power outlet before you insert or remove a plug. Remove by grasping the plug - do not pull on the cord.
- Turn the power off and remove the plug when the appliance is not in use and before cleaning.
- Do not use your appliance with an extension cord unless this cord has been checked and tested by a qualified technician or service person.
- Always use your appliance from a power outlet of the voltage (A.C. only) marked on the appliance.
- This appliance is not intended for use by persons (including children) with reduced physical, sensory or mental capabilities, or lack of experience and knowledge, unless they have been given supervision or instruction concerning use of the appliance by a person responsible for their safety.
- Children should be supervised to ensure that they do not play with the appliance.
-
The temperature of accessible surfaces may be high when the appliance is operating.
-
Never leave an appliance unattended while in use.
- Do not use an appliance for any purpose other than its intended use.
- Do not place an appliance on or near a hot gas flame, electric element or on a heated oven.
- Do not place on top of any other appliance.
- Do not let the power cord of an appliance hang over the edge of a table or bench top or touch any hot surface.
- Do not operate any electrical appliance with a damaged cord or after the appliance has been damaged in any manner. If damage is suspected, return the appliance to the nearest Sunbeam Appointed Service Centre for examination, repair or adjustment.
- For additional protection, Sunbeam recommend the use of a residual current device (RCD) with a tripping current not exceeding 30mA in the electrical circuit supplying power to your appliances.
- Do not immerse the appliance in water or any other liquid unless recommended.
- Appliances are not intended to be operated by means of an external timer or separate remote control system.
- This appliance is intended to be used in household and similar applications such as: staff kitchen areas in shops, offices and other working environments; farm houses; by clients in hotels, motels and other residential type environments; bed and breakfast type environments.
Features of your Rice Perfect 8 and 10 – RC2650, RC4750
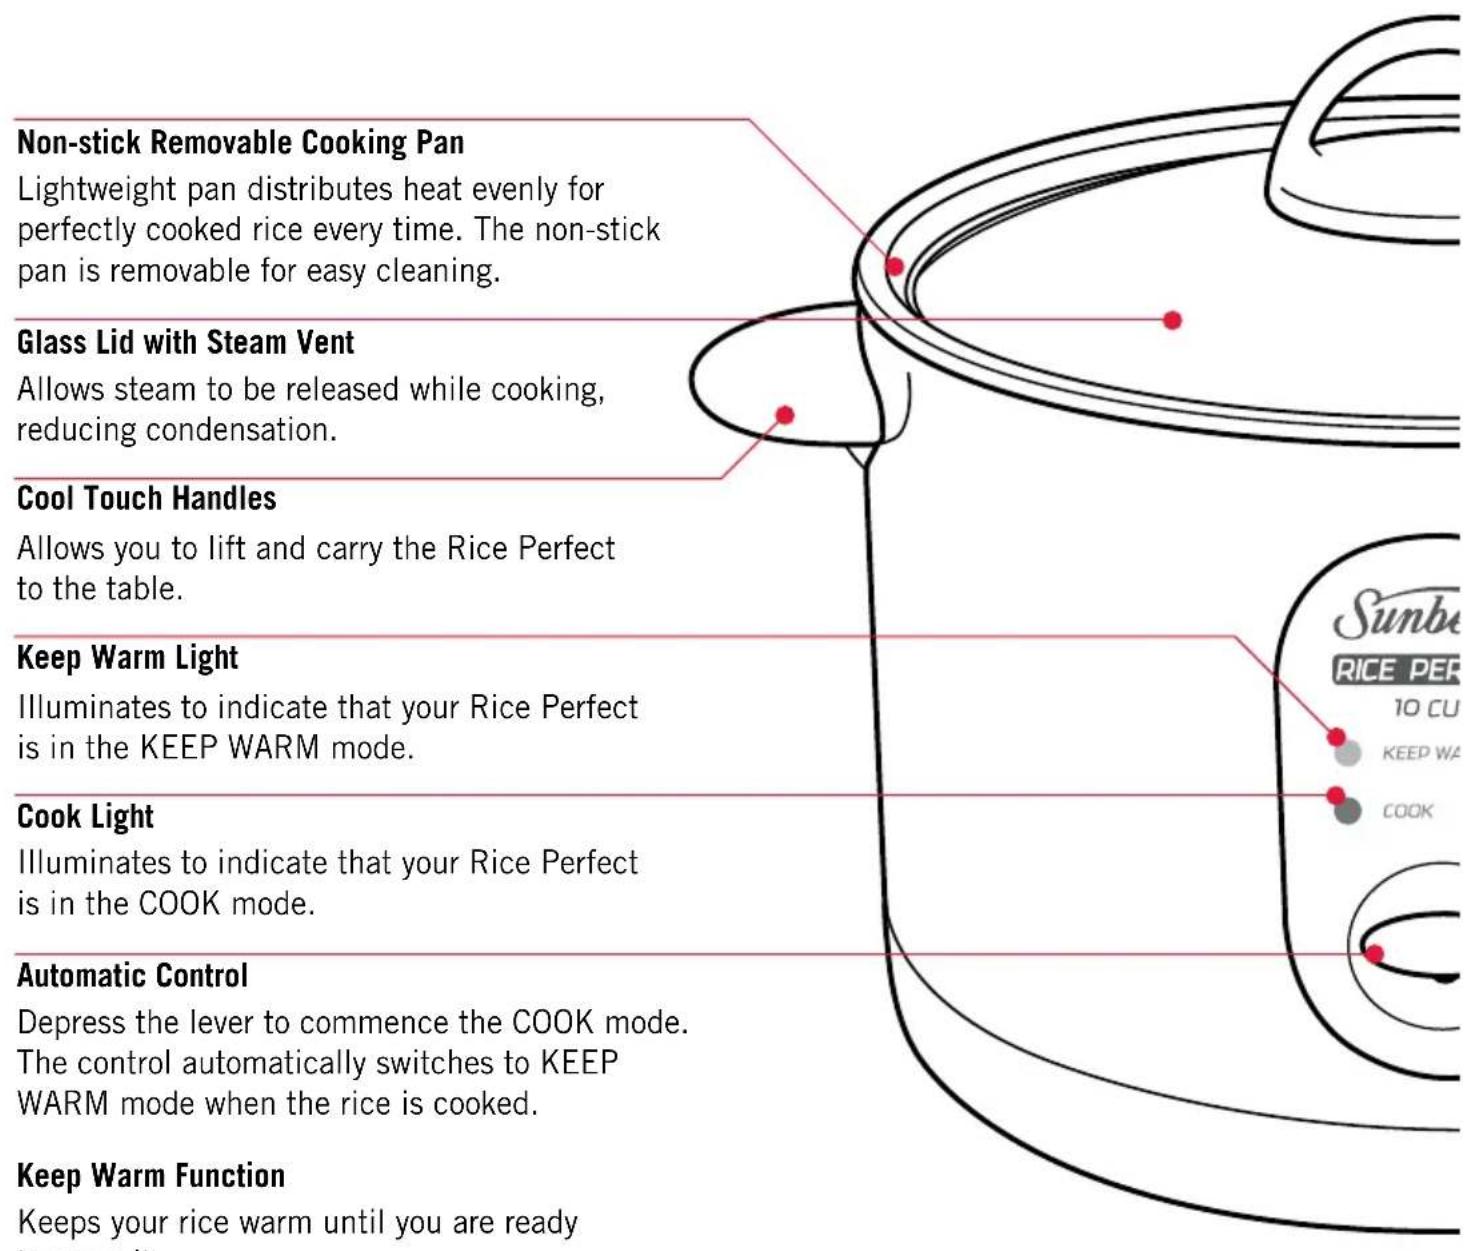
8 Cup Capacity (16 cups cooked rice)
Prepare from 2 to 8 cups of uncooked rice at any time. As a guide the 8 cup capacity will feed approximately 14-16 people.
10 Cup Capacity (20 cups cooked rice)
Prepare from 2 to 10 cups of uncooked rice at any time. As a guide the 10 cup capacity will feed approximately 16-18 people.
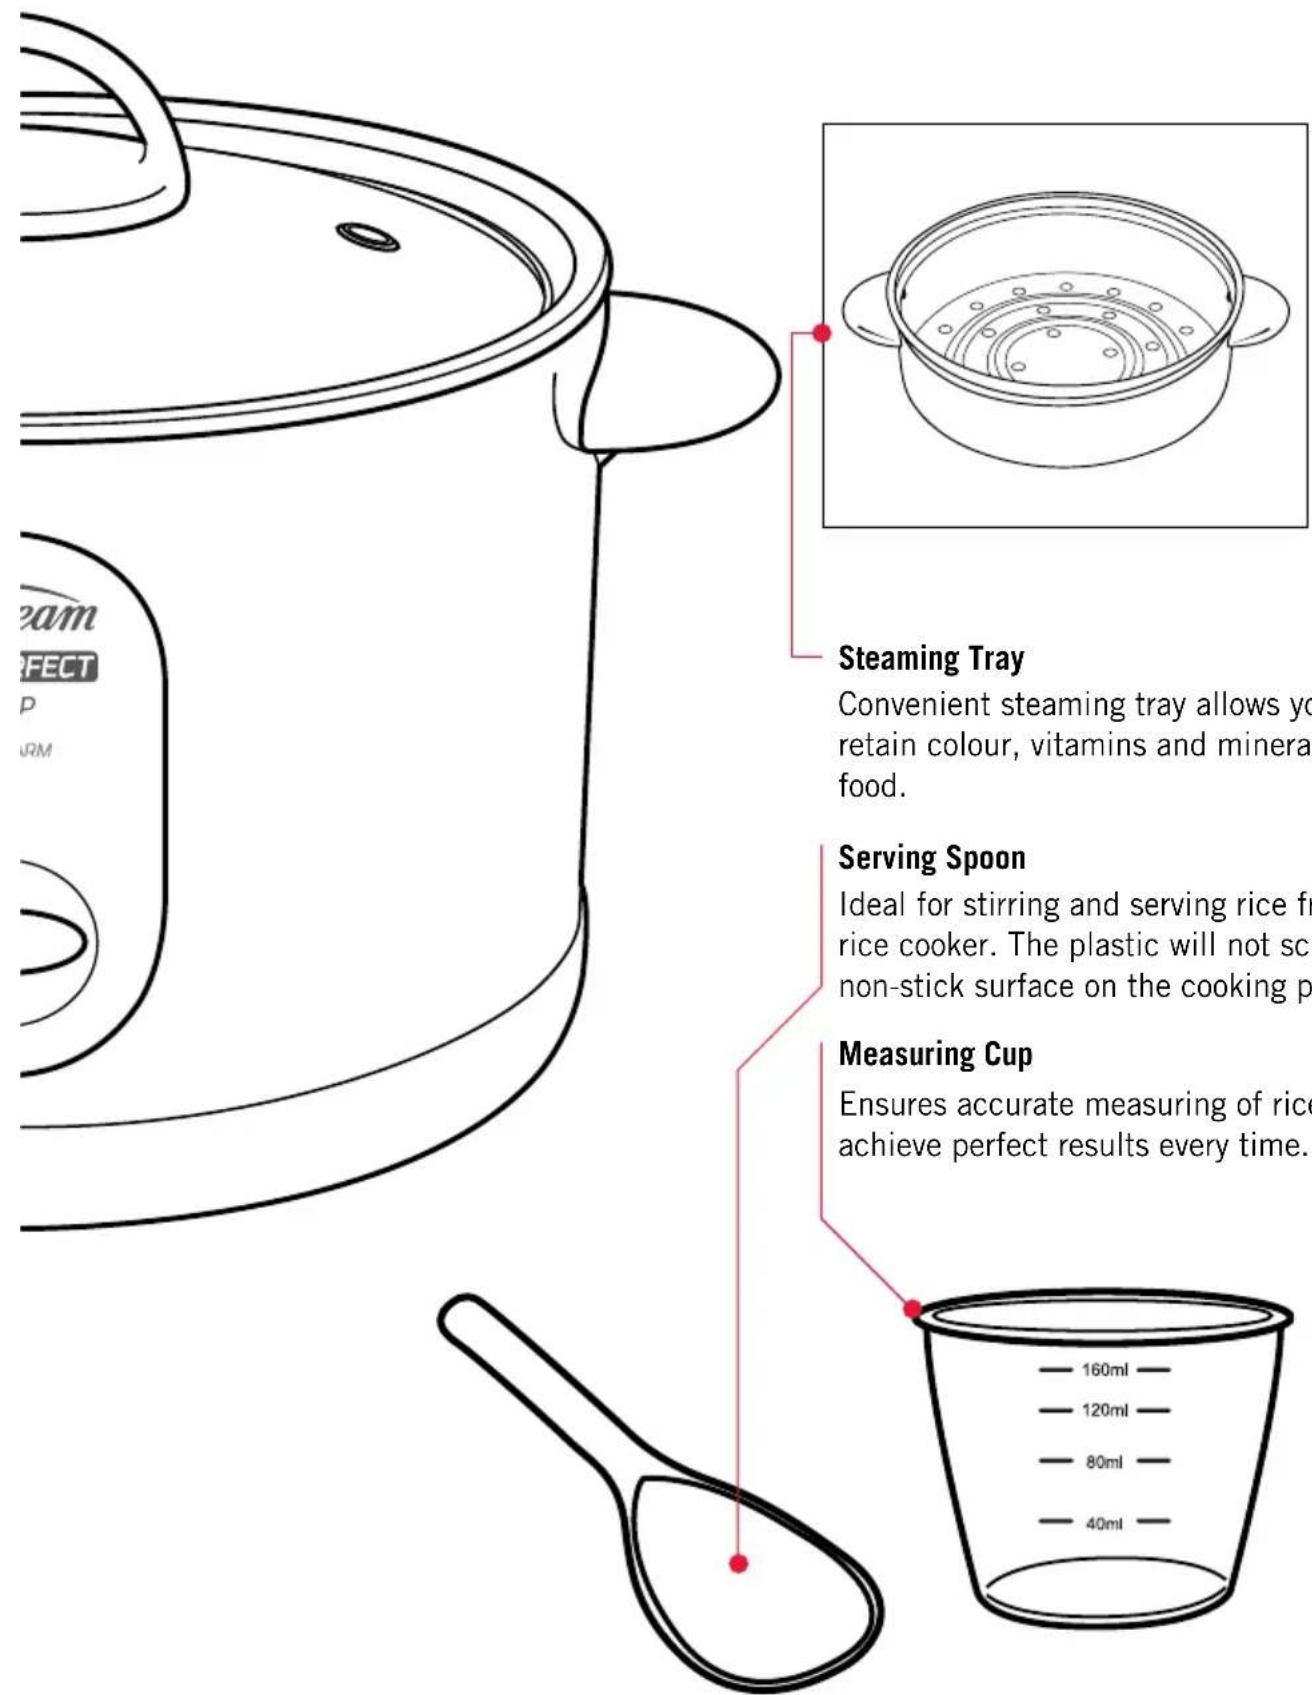
natural_image
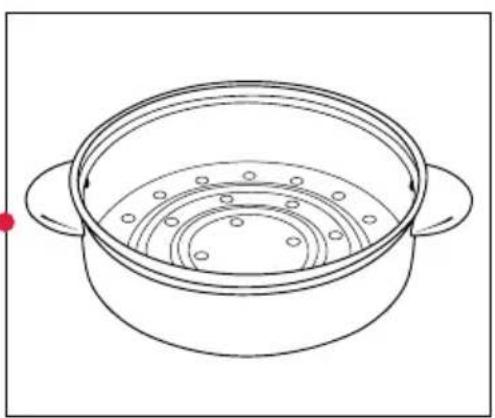
Line drawing of a cooking pot with two handles and concentric rings (no text or symbols)Steaming Tray
Convenient steaming tray allows you to retain colour, vitamins and minerals of your food.
Serving Spoon
Ideal for stirring and serving rice from the rice cooker. The plastic will not scratch the non-stick surface on the cooking pan.
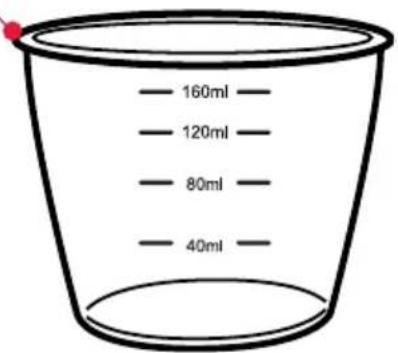
Measuring Cup
Ensures accurate measuring of rice to achieve perfect results every time.
Features of your Rice Perfect 5 – RC2350
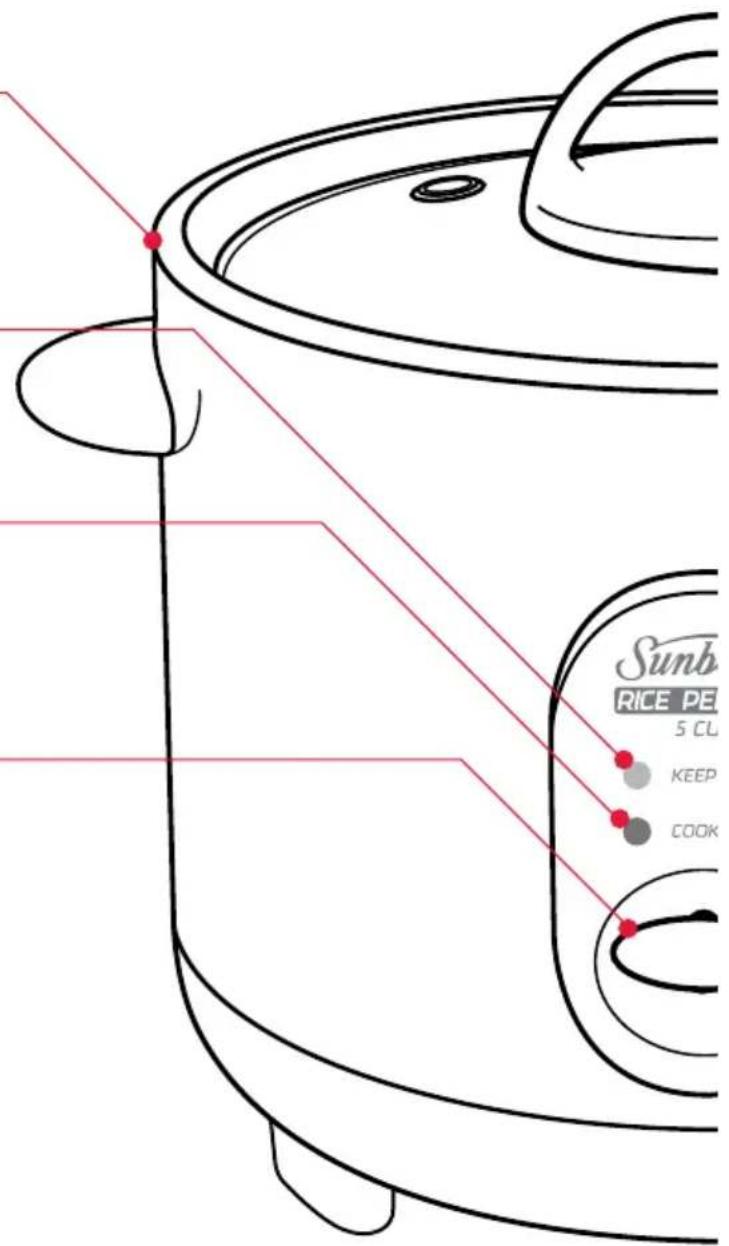
Non-stick Removable Cooking Pan
Lightweight pan distributes heat evenly for perfectly cooked rice every time. The non-stick pan is removable for easy cleaning.
Keep Warm Light
Illuminates to indicate that your Rice Perfect 5 cup is in the KEEP WARM mode.
Cook Light
Illuminates to indicate that your Rice Perfect 5 cup is in the COOK mode.
Automatic Control
Depress the lever to commence the COOK mode. The control automatically switches to KEEP WARM mode when the rice is cooked.
Keep Warm Function
Keeps your rice warm until you are ready to serve it.
5 Cup Capacity (10 cups cooked rice)
Prepare from 1 to 5 cups of uncooked rice at any time. As a guide the 5 cup capacity will feed approximately 8-10 people.
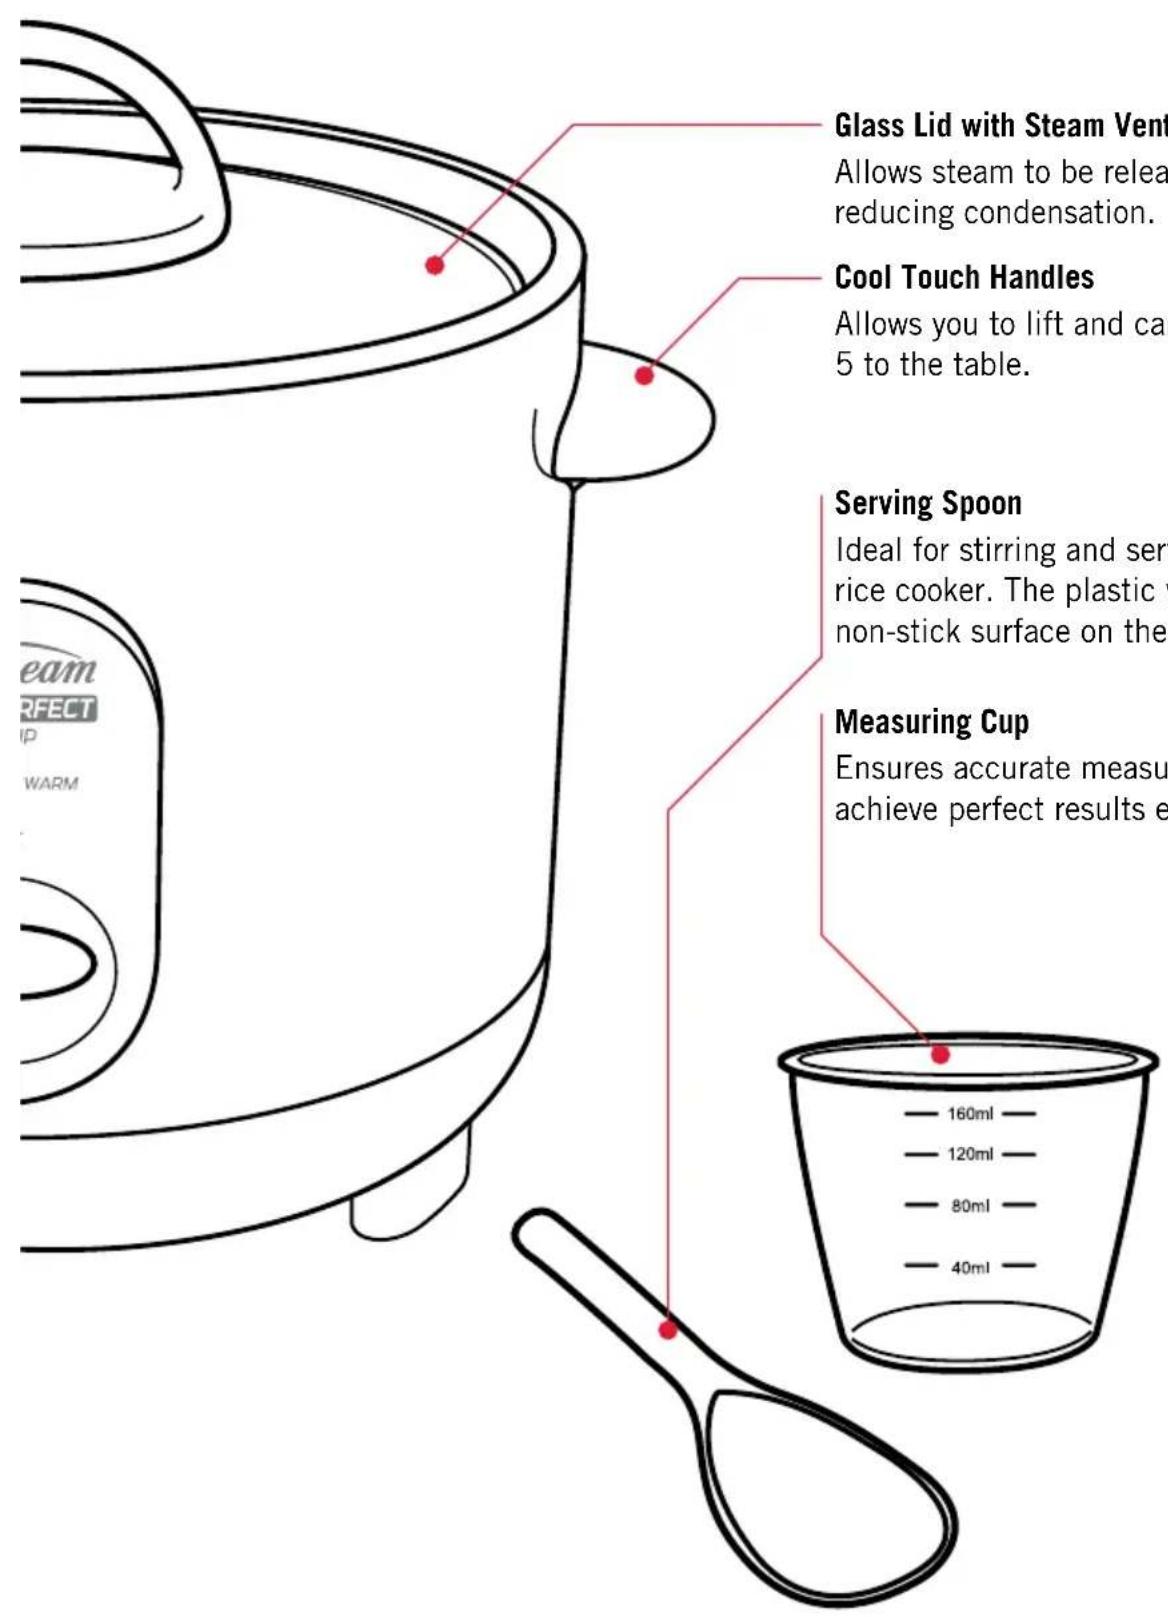
Glass Lid with Steam Vent
Allows steam to be released while cooking, reducing condensation.
Cool Touch Handles
Allows you to lift and carry the Rice Perfect 5 to the table.
Serving Spoon
Ideal for stirring and serving rice from the rice cooker. The plastic will not scratch the non-stick surface on the cooking pan.
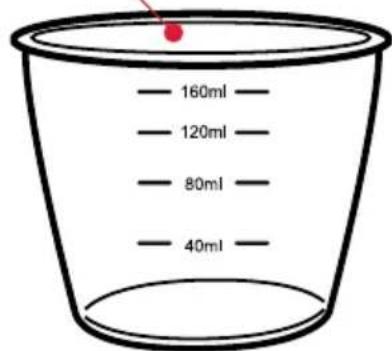
Measuring Cup
Ensures accurate measuring of rice to achieve perfect results every time.
Using your Rice Perfect
Before using your Rice Perfect for the first time wash the removable cooking pan, lid, rice measuring cup and serving spoon in warm soapy water. Rinse and dry thoroughly.
To Cook Rice
- Using the rice measuring cup provided, measure out the required quantity of rice (refer to rice cooking chart on page 9). Make sure the rice is a level cup measure.
NOTE:
1 level rice cup = 150g.
1 cup uncooked white rice = 2 rice cups of cooked white rice (approximately)
1 cup uncooked brown rice = 2½ cups cooked brown rice (approximately)
This Sunbeam rice cup is not the same measurement as a standard metric cup
- Place the measured rice in a sieve, and wash rice thoroughly under cold water. Wash until the water runs clear. This removes excess starch which helps to achieve fluffier rice. Alternatively, wash rice in the cooking pan two or three times until the water is clear, pouring out the milky water between each rinse.
- Ensure the exterior of the cooking pan is clean and dry before placing it inside the heating vessel.
-
Place the washed rice in the cooking pan. Add cold water to the cup level indicated on the inside of the cooking pan or add the quantity of water specified in the cooking charts on page 9. Make sure the rice on the bottom of the pan is even when adding the water.
-
Replace the lid.
-
Insert the plug into a 230-240 volt AC power outlet and turn the power on. The "KEEP WARM" light will illuminate.
-
Depress the automatic control lever to "COOK" to begin the cooking cycle. The "COOK" light will illuminate.
-
When cooking is complete, your Rice Perfect will automatically switch to "KEEP WARM" mode and the "KEEP WARM" light will illuminate.
-
With the lid on, allow rice to stand in the "KEEP WARM" mode for 5-10 minutes for small quantities and approximately 10-15 minutes for larger quantities. DO NOT use metal utensils as these will scratch the non-stick coating. A plastic spoon is supplied.
-
The “KEEP WARM” cycle will continue until the power is switched off. If keeping the rice warm, stir, then replace lid. Rice can be kept warm in the Rice Perfect for up to 2 hours. After 2 hours rice should be refrigerated for storage if required.
NOTE: Whilst operating, do not remove the lid as this may affect cooking results. Do not interfere with the automatic control lever. Do not keep rice in the cooker for extended periods of time on “KEEP WARM” mode as the rice becomes dry and the quality deteriorates.
Tips for cooking rice
Results may vary depending on the type of rice used.
- For fluffier rice, add a little extra water and for firmer rice, add a little less water.
- Should you happen to add too much extra water, the excess water may overflow during cooking. It is a good idea to cook the rice with the recommended quantity of water first and then if the rice is still firm, add a little extra water which can be stirred through at the end. You will then need to depress the automatic lever to “COOK” mode.
- The rice cup provided is not a standard metric measuring cup.
Sunbeam rice cup = 150g uncooked rice = 180ml water If you lose the rice measuring cup provided use the ratio:
1 cup uncooked white rice = 1 cup water 1 cup uncooked brown rice = 1 12 cups water
Cooking times will vary if using a larger measuring cup.
- Wash rice thoroughly until the water runs clear.
- Brown rice needs more water to cook, which results in a build up of starchy water and bubbles forming around the lid, which can cause spitting from the air vent. Make sure the brown rice is rinsed well before cooking.
Types of Rice
There are three main types of rice:
Short Grain: The grains are short and plump.
When cooked the grains are soft and sticky with a glossy appearance.
Varieties of short grain rice:
Japanese Koshihikari - a soft sticky rice, sold as “sushi rice” and used to make sushi
Pearl – a soft sticky rice used to make puddings and desserts.
Medium Grain: the grains are medium in size.
When cooked the grains are tender, moist and tend to stick together.
Varieties of medium grain rice:
Arborio – a soft cooking chalky rice used to make risotto and paella.
Medium white and brown rice
White calrose - a soft cooking rice used to make paella.
Medium brown – is whole grain that has been hulled but not polished. It has a nutty flavour and is slightly chewy in texture. It can be used as an all-rounder.
Long Grain: the grains are long and narrow.
When cooked the grains remain fluffy, dry and separate.
Varieties of long grain rice are:
Long – a perfect all-round rice used in a wide variety of cuisines.
Jasmine – a fragrant rice which is suited to Asian type cuisine.
Basmati – has a fragrant aroma which is suited to Indian type cuisine.
Care and cleaning
After using your Rice Perfect, turn the power off and remove the cord from the power outlet.
CAUTION: Never immerse the heating vessel in water.
CAUTION: Never use any chemical, steel wool, harsh abrasive cleaners, thinners or chemical dust cloths to clean any part of your Rice Perfect.
WARNING: Do not allow water to enter the inside of the heating vessel as this may cause electrocution.
Rice Cooking Chart – White Rice
RC2350
| Uncooked white long grain rice.Use rice cup or grams | WaterUse mls or Cookingpan water level | Approximate cooking time |
| 1/ 150g 180mls/ 1 15 mins | ||
| 2/ 300g 360mls/ 2 15-18 mins | ||
| 3/ 450g 540mls/ 3 22-24 mins | ||
| 4/ 600g 720mls/ 4 26-28 mins | ||
| 5/ 750g 900mls/ 5 30-32 mins |
RC2650
| Uncooked white long grain rice.Use rice cup or grams | WaterUse mls or Cookingpan water level | Approximate cooking time |
| 2 / 300g 360mls / 2 15-17 mins | ||
| 4 / 600g 720mls / 4 21-23 mins | ||
| 6 / 900g 1080mls / 6 26-28 mins | ||
| 8 / 1200g 1440mls / 8 30-32 mins |
RC4750
| Uncooked white long grain rice.Use rice cup or grams | WaterUse mls or Cookingpan water level | Approximate cooking time |
| 2 / 300g 360mls / 2 11-13 mins | ||
| 4 / 600g 720mls / 4 16-18 mins | ||
| 6 / 900g 1080mls / 6 20-22 mins | ||
| 8 / 1200g 1440mls / 8 23-25 mins | ||
| 10 / 1500g 1800mls/ 10 27-29 mins |
Rice Cooking Chart – Brown Rice
RC2350
| Uncooked brown long grain rice.Use rice cup or grams | WaterUse mls or Cookingpan water level | Approximate cooking time |
| 1 / 150g 270mls / 112 20-25 mins | ||
| 2 / 300g 540mls / 212 40-45 mins | ||
| 3 / 450g 810mls / 4 45-50 mins |
RC2650
| Uncooked brown long grain rice.Use rice cup or grams | WaterUse mls or Cookingpan water level | Approximate cooking time |
| 2 / 300g 540mls / 212 35-40 mins | ||
| 3/ 450g 810mls / 4 45-50 mins | ||
| 4/ 600g 1080mls / 5 45-50 mins | ||
| 5/ 750g 1350mls / 6 50-55 mins |
RC4750
| Uncooked brown long grain rice.Use rice cup or grams | WaterUse mls or Cookingpan water level | Approximate cooking time |
| 2 / 300g 540mls / 212 30-35 mins | ||
| 3 / 450g 810mls / 4 35-40 mins | ||
| 4 / 600g 1080mls / 5 40-45 mins | ||
| 5 / 750g 1350mls / 6 45-50 mins | ||
| 6 / 900g 1620mls / 8 45-50 mins |
Recipes
NOTE: Ensure rice has been thoroughly washed under cold water before cooking to prevent rice grains from sticking to the cooking pan.
Yellow Coconut Rice Serves 4-6
450g (3 rice cups) jasmine rice, rinsed * see page 8. 270mls (1½ rice cups) coconut milk
270mls (1½ rice cups) water
3 teaspoons brown sugar
2 teaspoons fish sauce
1 teaspoon ground turmeric
4 green onions (shallots), thinly sliced
- Place washed rice in the cooking pan. Add coconut milk, water, brown sugar, fish sauce and turmeric. Stir to combine.
- Place lid on cooking pan. Depress automatic control lever to "COOK". When cooking is complete, the lever will automatically switch to the "KEEP WARM" mode. Leave rice in the cooking pan with lid on for 10 minutes.
- Transfer rice to a bowl. Stir with a fork to separate grains. Top with onions. Serve.
Mushroom and Thyme Risotto Serves 4-6
1.25 litres chicken stock
2 tablespoons olive oil
1 leek, halved lengthways, thinly sliced
2 cloves garlic, crushed
400g Arborio rice (2 34 rice cups), rinsed * see page 8
400g Arborio rice (2 34 rice cups), rinsed * see page 8
12 cup white wine
2 tablespoons butter
200g button mushrooms, thinly sliced
200g swiss button mushrooms, thinly sliced
2 tablespoons finely chopped fresh thyme leaves
Salt and pepper, to taste
Grated parmesan, to serve
- Place stock in a saucepan. Bring to the boil over medium heat.
- Heat 1 tablespoon of oil in a frypan over medium heat. Add leek and garlic and cook for 3 minutes or until soft. Add rice and stir to coat. Add wine and cook, stirring until liquid has absorbed.
- Transfer mixture to the cooking pan. Add hot stock and stir to combine. Place lid on cooking pan. Depress automatic control lever to "COOK".
- Meanwhile heat remaining oil and butter in a frypan over medium heat. Add mushrooms and cook for 4-5 minutes or until soft. Stir in thyme.
- When rice cooking is complete, the lever will automatically switch to "KEEP WARM" mode. Stir through mushrooms. Season with salt and pepper. Leave rice in the cooking pan with lid on for 10 minutes. Serve.
Fried Rice Serves 6-8
300g (2 rice cups) long grain rice, rinsed * see page 8
2 eggs, lightly beaten
1 tablespoon peanut oil
100g bacon rashers, chopped
4 green onions (shallots), thinly sliced
^3/_4 cup frozen peas, thawed
2 tablespoons light soy sauce
- Place washed rice in the cooking pan. Add 360mls water (2 rice cups) or pour water in cooking pan to level indicator 2.
- Place lid on cooking pan. Depress automatic control lever to "COOK". When cooking is complete, the lever will automatically switch to the "KEEP WARM" mode. Remove rice and transfer to a sieve. Wash rice until rice grains separate. Drain and place in a bowl.
- Meanwhile, heat 1 teaspoon of oil in a wok or frypan over medium heat. Stir-fry egg until scrambled. Transfer to a bowl.
- Heat 1 teaspoon of oil. Add bacon and cook until golden and crisp. Transfer to a bowl lined with paper towel.
- Heat remaining oil. Add rice, green onions, peas, soy sauce, bacon and egg. Stir-fry until heated through. Serve.
Smoked Trout Kedgeree Serves 4-6
2 tablespoons olive oil
1 brown onion, finely chopped
2 cloves garlic, crushed
2 teaspoons curry powder
300g (2 rice cups) basmati rice, rinsed
* see page 8
180g smoked trout fillet, flaked
1 lemon, rind finely grated, juiced
13 cup finely chopped fresh flat-leaf parsley leaves
4 hard-boiled eggs, cut into quarters
- Heat oil in a frypan over medium heat. Add onion and garlic and cook until soft. Add curry powder and stir until fragrant.
- Place washed rice in the cooking pan. Add 360mls water or pour water in the cooking pan to level indicator 2. Add onions mixture and stir to combine.
- Place lid on cooking pan. Depress automatic control lever to "COOK". When cooking is complete, the lever will automatically switch to the "KEEP WARM" mode. Leave rice in the cooking pan with lid on for 10 minutes.
- Transfer rice to a bowl. Add trout, lemon rind, 14 cup lemon juice, parsley, salt and pepper. Toss to combine. Serve topped with egg.
NOTE: you can use smoked cod. The best way to cook this is to poach in a little milk for about 10 minutes or until fish flakes. Drain fish and flake.
Spanish Chicken and Chorizo Paella Serves 4-6
900ml chicken stock
12 teaspoon saffron threads
2 tablespoons olive oil
1 brown onion, finely chopped
2 cloves garlic, crushed
1 teaspoon ground paprika
1 teaspoon smoked paprika
300g (2 rice cups) medium grain rice, rinsed * see page 8
450g chicken thigh fillets, roughly chopped
125g chorizo sausage, halved lengthways, sliced
1 yellow capsicum, thinly sliced
^3/_4 cup frozen peas, thawed
^1/_4 cup chopped fresh flat-leaf parsley leaves
Salt and pepper, to taste
-
Place stock in a saucepan. Bring to the boil over medium heat.
-
Place saffron threads in a small bowl. Pour over 1 tablespoon boiling water. Leave to stand for 5 minutes.
-
Heat 1 tablespoon of oil in a frypan over medium heat. Add onion and garlic and cook for 3 minutes or until soft. Add paprika, smoked paprika and rice and stir to coat.
-
Transfer mixture to the cooking pan. Add hot stock and stir to combine. Place lid on cooking pan. Depress automatic control lever to "COOK".
-
Meanwhile heat remaining oil in a frypan over medium to high heat. Add chicken and cook for 4 minutes or until golden. Add sausage and capsicum. Cook for a further 3 minutes.
-
When rice cooking is complete, the lever will automatically switch to "KEEP WARM" mode. Stir through chicken mixture, peas and parsley. Season with salt and pepper. Leave rice in the cooking pan with lid on for 10 minutes. Serve.
Recipes for use with Steamer Tray - RC2650, RC4750
Brown Rice Salad Serves 4-6
300g (2 rice cups) brown rice, rinsed * see page 8
3 small corn cobs, husks removed
4 green onions (shallots), thinly sliced
185g tin tuna, drained, flaked
^1/_3 cup chopped sundried tomatoes
^1/_2 cup pitted kalamata olives, chopped
^1/_3 cup chopped fresh basil leaves
^1/_3 cup lemon juice
Salt and pepper, to taste
-
Place washed rice in the cooking pan. Add 540mls water (3 rice cups) or pour water in cooking pan to level indicator 3.
-
Place the steamer basket on top of the cooking pan. Place corn in the steamer basket.
-
Place lid on steamer basket. Depress automatic control lever to "COOK". Remove steamer basket and corn after 25 minutes. Replace lid. When cooking is complete, the lever will automatically switch to the "KEEP WARM" mode. Leave rice in the cooking pan with lid on for 10-15 minutes.
-
Remove rice and transfer to a sieve. Wash rice until rice grains separate. Drain and place in a bowl.
-
Using a sharp knife cut kernels from corn. Add corn and remaining ingredients. Season with salt and pepper and toss to combine. Serve.
Middle Eastern Chicken Pilaf Serves 4-6
300g (2 rice cups) basmati rice, rinsed * see page 8
360mls chicken stock
2 x 150g small chicken breast fillets
1 cup frozen peas, thawed
3 green onions (shallots), thinly sliced
^1/_3 cup currants
13 cup pistachio kernels, toasted
14 cup finely chopped fresh flat-leaf parsley leaves
14 cup finely chopped fresh mint leaves
Dressing
2 tablespoons olive oil
2 teaspoons finely grated orange rind
13 cup orange juice
12 teaspoon ground cumin
12 teaspoon ground coriander
Salt and pepper, to taste
-
Place washed rice in the cooking pan. Add chicken stock.
-
Place the steamer basket on top. Place chicken in the steamer basket and place lid on steamer basket. Depress automatic control lever to "COOK". When cooking is complete, the lever will automatically switch to the "KEEP WARM" mode. Leave rice and chicken for 10-15 minutes to stand.
-
Transfer chicken to a plate. Shred the chicken once it has cooled. Transfer rice to a serving bowl. Stir with a fork to separate grains. Add chicken and remaining ingredients.
-
Combine ingredients for dressing in a jug. Pour over rice. Season with salt and pepper and toss to combine. Serve.
Steamed Fish in Sweet Chilli Sauce Serves 4
2 tablespoons sweet chilli sauce
^1/_2 teaspoon sesame oil
1 teaspoon fish sauce
4 x 150g small salmon or trout fillets
Coriander, sliced red chillis and lime, to taste
-
Combine chilli sauce, soy sauce, sesame oil and fish sauce in a bowl.
-
Place salmon fillets on a large piece of baking paper. Spoon chilli mixture evenly over fish. Fold paper edges in to seal and form a parcel.
-
Place 360mls water (2 rice cups) in the cooking pan. Place the steamer basket on top. Place fish parcels in the steamer basket. Place lid on steamer basket. Depress automatic control level to "COOK". Steam for 15-20 minutes or until fish flakes. Switch lever to "KEEP WARM"
-
Transfer fish to a plate. Serve with steamed rice and vegetables.
-
Garnish with coriander, sliced red chillis and lime.
Steamed Chicken with Salsa Verde Serves 4
4 x 170g chicken breast fillets
Olive oil spray
Salsa verde
1 cup fresh flat-leaf parsley leaves
13 cup fresh dill leaves
13 cup fresh mint leaves
2 cloves garlic
1 tablespoon small capers
1 lemon, rind finely grated and juiced
14 cup extra virgin olive oil
Salt and pepper, to taste
-
Place 360mls water (2 rice cups) in the cooking pan. Place the steamer basket on top.
-
Spray chicken with olive oil and season with salt and pepper. Place chicken in steamer basket. Place lid on steamer basket. Depress automatic control level to "COOK". Steam for 20 minutes or until just cooked. Switch lever to "KEEP WARM". Stand with lid on for 5 minutes.
-
Meanwhile combine parsley, dill, mint, garlic and capers in a food processor. Process until finely chopped. Transfer mixture to a bowl. Add remaining ingredients and stir to combine. Season with salt and pepper.
-
Serve chicken with steamed potatoes, green beans and salsa verde.
Asparagus and Beans with Crispy Bacon Crumbs
Serves: 4-6 as a side dish
2 bunches asparagus, trimmed
150g green beans, trimmed
1 tablespoon olive oil
2 rashers bacon, chopped
1 cup roughly torn Italian bread
2 cloves garlic, crushed
1 tablespoon finely chopped fresh parsley leaves
Salt and pepper, to taste
-
Place 360mls water (2 rice cups) in the cooking pan. Place the steamer basket on top. Place asparagus and beans in the steamer basket.
-
Place the lid on top of the steamer basket. Depress automatic control lever to "COOK". Steam vegetables for 12-15 minutes or until tender. Switch lever to "KEEP WARM". Transfer vegetables to a serving plate.
-
Meanwhile heat oil in a frypan over medium heat. Add bacon and cook for 2 minutes or until just brown. Add breadcrumbs and garlic. Increase heat to medium high. Cook for 5 minutes or until crumbs are brown. Stir in parsley.
-
Serve asparagus with crispy bacon topping. Season with salt and pepper.
Chicken Breasts with Chilli Herb Pesto
Serves: 4
12 red onion, chopped
3 cloves garlic, halved
1 long red chilli, seeds removed, chopped
1 teaspoon ground cumin
2 cups fresh flat-leaf parsley leaves
1 cup fresh coriander leaves
1 lemon, rind finely grated and juiced
^1/_3 cup extra virgin olive oil
Salt and pepper, to taste
4 x 170g chicken breast fillets
- Combine onion, garlic, chilli, cumin, parsley and coriander in a food processor. Process until finely chopped. Add oil and process until a paste is formed. Stir in 14 cup lemon juice and rind. Season with salt and pepper.
- Brush a little mixture over chicken. Line the steamer basket with baking paper. Place chicken in steamer basket. Depress automatic control lever to "COOK". Steam for 20 minutes or until just cooked. Switch lever to "KEEP WARM". Stand with lid on for 5 minutes.
- Slice chicken and serve with remaining pesto, steamed rice and vegetables.
Sushi
You will find it a pleasure to be able to make your very own sushi with these simple steps. You will need to use Japanese style sushi rice which is a type of short grain rice and is readily available at good supermarkets. The cup measurement below is using the cup provided with your Sunbeam Rice Perfect.
Sushi Rice
3 cups sushi rice
3 cups water
Sushi Vinegar
^1/_3 cup rice vinegar
2 1/2 tablespoons sugar
^1/_4 teaspoon salt
- Place rice in a fine sieve and wash until the water runs clear. Drain for at least 10 minutes.
- Place washed rice in the cooking pan. Add 540mls of water (3 rice cups) or pour water in cooking pan to level indicator 3.
- Replace the lid.
-
Depress the automatic control lever to "COOK".
-
When cooking is complete, the lever will automatically switch to the "KEEP WARM" mode. Leave the rice in the cooker for 10 minutes at this stage. DO NOT REMOVE LID.
- Combine sushi vinegar ingredients together; mix well until the sugar dissolves.
- Spread the rice into a large flat bottomed wooden or plastic bowl or container. Using the rice spoon provided, gently slice through the rice removing any lumps; at the same time gradually pour over sushi vinegar.
- Using either an electric fan on low or a hand fan; fan the rice until it is almost cool. Continue to gently slice through the rice but don't stir as this will break up the rice grains.
- Place a clean damp cloth over the rice to prevent it from drying out while making sushi. Rice should be used as soon as possible.
- Do not put rice in the refrigerator as it will be too hard.
Makes approximately 9 cups of cooked sushi rice.
Making Sushi
Before you make sushi you will need to purchase a bamboo mat for rolling your sushi. For best results lightly dampen your mat before using.
6 sheets toasted seaweed (nori)
Small bowl of cold water with 2 teaspoons rice vinegar
Ready made wasabi paste
Japanese soy sauce to serve
Selection of ingredients listed below for 6 large rolls:
1cm strips sashimi grade tuna or salmon
Cooked prawns, shelled, deveined, halved lengthways
Cooked crabmeat
Pickled daikon, sliced thinly
Lebanese cucumbers, seeds removed, sliced thinly
Avocado, sliced thinly
Green onions, sliced into strips lengthways
Snow pea sprouts
Japanese mayonnaise
Pink pickled ginger
-
Place a sheet of seaweed, shiny side down onto the dampened bamboo mat.
-
Dip your fingers into the water and scoop approximately 16 of the rice onto the centre of the seaweed.

natural_image
Illustration of hands interacting with a gear-like object (no text or symbols visible)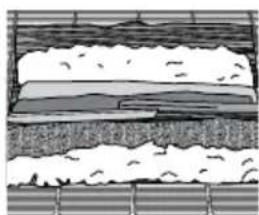
natural_image
Cross-sectional diagram of layered geological strata with no visible text or symbolsStep 1 Step 2 Step 3 Step 4
- Gently spread the rice over the seaweed without pushing down, leave approximately 3cm strip at the top of the seaweed uncovered. This will help seal the roll after rolling.
- If using wasabi paste, smear a very small amount across the centre of the rice. Place your choice of ingredients in a row over the wasabi, making sure that the ingredients go to both ends. Don't overfill as the sushi will be too difficult to roll. About 4-5 ingredients per roll is suitable.
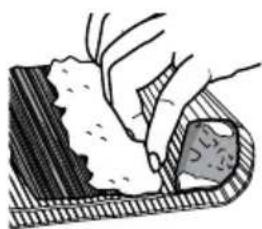
- Starting with the edge closest to you, pick up the mat with your thumb and forefingers and using your remaining fingers hold the filling in place while you start to roll away from you.
- Roll forward gently but firmly, moving the bamboo mat out of the way as you roll. Dip finger in water and slightly wet the uncovered seaweed. Finish rolling, lightly press to shape. Unroll mat.
- Place roll onto cutting board and using a very sharp knife cut into eight pieces.
- Repeat with remaining rice, seaweed and fillings.
- Serve with extra wasabi and Japanese soy sauce.
Makes 6 large rolls (48 pieces)
natural_image
Illustration of a hand holding a textured object over a striped surface (no text or symbols)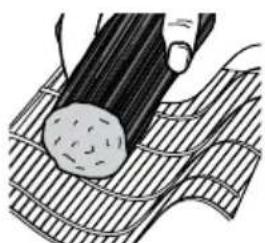
natural_image
Illustration of a hand pressing down on a textured surface with a circular object embedded (no text or symbols)Steaming
For use with the Steamer Tray included with RC2650 and RC4750.
Steaming foods helps to retain the nutritional value and is a healthy way of cooking.
When steaming there must be enough water in the cooking pan. It is recommended to add 180-360mls water (1-2 rice cups) to the cooking pan for steaming. The water must cover the base of the pan. Do not allow the pan to boil dry while steaming. Boiling water can be added whilst steaming.
The lid must be kept on the basket while steaming.
While the rice is cooking you can steam vegetables in the basket provided for the 8 cup and 10 Cup Rice Cookers. You will need to look at the cooking times. You may have to remove vegetables before the rice is cooked. The juices from the vegetables will go into the rice.
Steaming Vegetables
For best results:
- Wash and clean vegetables before steaming. Trim stems and peel skins.
- Cut vegetables into even sized pieces. The smaller the piece the faster it will cook.
- Steam vegetables until just tender, this retains the flavour.
- Frozen vegetables should be defrosted before steaming.
Vegetable Quantity Approximate cooking time
| Asparagus, trimmed 2 bunches, trimmed 12-15 mins | ||
| Beans, whole 250g, trimmed 12-15 mins | ||
| Beetroot 1 bunch - medium 20-30 mins | ||
| Bok Choy 2 bunches, separated 8-10 mins | ||
| Broccoli 1 head, cut into florets 10-15 mins | ||
| Brussel Sprouts 350g, trimmed 15-20 mins | ||
| Cabbage | 14 cabbage, sliced | 10-12 mins |
| Carrots | 3 medium | 15-20 mins |
| Cauliflower | 1 head, cut into florets 10-15 mins | |
| Corn | Whole cobs 20-25 mins | |
| Peas | 250g, shelled | 10-12 mins |
| Snow peas | 250g, trimmed 5-6 mins | |
| Spinach (English) | 1 bunch, trimmed | 5 mins |
| Squash | Baby, 350g 8-10 mins | |
| Potatoes | ||
| Chats | 10 x 50g, halved | 25-35 mins |
| Red or white | 6 x 150g, Cut into quarters | 20-30 mins |
| Potato sweet | 500g, cut into pieces 20-30 mins | |
| Pumpkin | 350g, cut into pieces 20-30 mins | |
| Zucchini | 2 medium, sliced | 6-8 mins |
| Frozen Vegetables | 10-15 mins | |
| Must be defrosted first | ||
Steaming Fish and Seafood
For best results:
- Place fish in a single layer in the steamer tray
- Seafood can be seasoned before steaming by using fresh herbs, spices, lemon slices and onions.
- It is best to add oils and liquids after steaming – or if using liquids wrap fish in baking paper.
- Fish is cooked when it flakes easily with a fork.
MINIMUM APPROXIMATE TYPE QUANTITY WATER COOKING TIME SUGGESTIONS (1 cup = 250ml) (minutes)
| Clams and pippies | 500g 1 | 5-8 | Steam until just open. | |
| FISH | ||||
| Fillet | 500g | 1 | 12 | Before cooking brush |
| Steak | 500g – 2cm thick | 1 | 12-18 | lightly with oil & season. |
| Mussels | 500g in the shell | 1 | 8-12 | Steam until just open. |
| Prawns (green) | 500g medium in shell | 1 | 12 | Steam until just pink. |
Steaming Poultry
For best results:
- Select pieces of similar size and thickness for even cooking
- Place poultry in a single layer in the steamer tray.
- Remove all fat and skin.
- For a more appealing look you can lightly brown chicken in a frying pan before steaming.
- Steam poultry until well done. Check by piercing the thickest part of the poultry. If the juices run clear it is cooked through.
- Cooking times will vary depending on the size and thickness of the pieces.
MINIMUM APPROXIMATE TYPE QUANTITY WATER COOKING TIME SUGGESTIONS (1 cup = 250ml) (minutes)
| Breast fillet 500g | 1 | 12 | 12-14 | Place the thickest part towards the outside of the basket and season. |
| Pieces – bone in | 500g (approx. 4) | 112 | 15-25 | Place the thickest part towards the outside of the basket and season. |
Notes
Notes
12 Month Replacement Guarantee
In the unlikely event that this appliance develops any malfunction within 12 months of purchase (3 months commercial use) due to faulty materials or manufacture, we will replace it for you free of charge.
Should you experience any difficulties with your appliance, please phone our customer service line for advice on 1300 881 861 in Australia, or 0800 786 232 in New Zealand. Alternatively, you can send a written claim to Sunbeam at the address listed below. On receipt of your claim, Sunbeam will seek to resolve your difficulties or, if the appliance is defective, advise you on how to obtain a replacement or refund.
Your Sunbeam 12 Month Replacement Guarantee naturally does not cover misuse or negligent handling and normal wear and tear.
Similarly your 12 Month Replacement Guarantee does not cover freight or any other costs incurred in making a claim. Please retain your receipt as proof of purchase.
The benefits given to you by this guarantee are in addition to your other rights and remedies under any laws which relate to the appliance.
Our goods come with guarantees that cannot be excluded under the Australian Consumer Law and under the New Zealand Consumer Guarantees Act.
In Australia you are entitled to a replacement or refund for a major failure and for compensation for any other reasonably foreseeable loss or damage. You are also entitled to have the goods repaired or replaced if the goods fail to be of acceptable quality and the failure does not amount to a major failure.
Should your appliance require repair or service after the guarantee period, contact your nearest Sunbeam service centre.
For a complete list of Sunbeam's authorised service centres visit our website or call:
Australia
www.sunbeam.com.au
1300 881 861
Units 5 & 6, 13 Lord Street
Botany NSW 2019 Australia
New Zealand
www.sunbeam.co.nz
0800 786 232
26 Vestey Drive, Mt Wellington
Auckland, New Zealand
Need help with your appliance?
Contact our customer service team or visit our website for information and tips on getting the most from your appliance.
In Australia
Visit www.sunbeam.com.au
Or call 1300 881 861
In New Zealand
Visit www.sunbeam.co.nz
Or call 0800 786 232
is a registered trademark.
'Rice Perfect' is a trademark of Sunbeam Corporation.
Made in China.
Due to minor changes in design or otherwise,
the product may differ from the one shown in this leaflet.
© Copyright. Sunbeam Corporation Limited 2011.
ABN 45 000 006 771
Units 5 & 6, 13 Lord Street
Botany NSW 2019 Australia
Unit 3, Building D
26 Vestey Drive
Mt Wellington Auckland
New Zealand
Sunbeam Corporation is a division of GUD Holdings Ltd.
- Contents
- Important instructions – retain for future use.
- Sunbeam's Safety Precautions
- SAFETY PRECAUTIONS FOR YOUR RICE PERFECT.
- Sunbeam is very safety conscious when designing and manufacturing consumer products, but it is essential that the product user also exercise care when using an electrical appliance. Listed below are precautions which are essential for the safe use of an electrical appliance:
- Features of your Rice Perfect 8 and 10 – RC2650, RC4750
- Cup Capacity (16 cups cooked rice)
- Cup Capacity (20 cups cooked rice)
- Steaming Tray
- Serving Spoon
- Measuring Cup
- Features of your Rice Perfect 5 – RC2350
- Non-stick Removable Cooking Pan
- Keep Warm Light
- Cook Light
- Automatic Control
- Keep Warm Function
- Cup Capacity (10 cups cooked rice)
- Glass Lid with Steam Vent
- Cool Touch Handles
- Using your Rice Perfect
- To Cook Rice
- NOTE:
- This Sunbeam rice cup is not the same measurement as a standard metric cup
- Tips for cooking rice
- Types of Rice
- Care and cleaning
- Rice Cooking Chart – White Rice
- Rice Cooking Chart – Brown Rice
- Recipes
- Yellow Coconut Rice Serves 4-6
- Mushroom and Thyme Risotto Serves 4-6
- Fried Rice Serves 6-8
- Smoked Trout Kedgeree Serves 4-6
- Spanish Chicken and Chorizo Paella Serves 4-6
- Recipes for use with Steamer Tray - RC2650, RC4750
- Brown Rice Salad Serves 4-6
- Middle Eastern Chicken Pilaf Serves 4-6
- Dressing
- Steamed Fish in Sweet Chilli Sauce Serves 4
- Steamed Chicken with Salsa Verde Serves 4
- Asparagus and Beans with Crispy Bacon Crumbs
- Chicken Breasts with Chilli Herb Pesto
- Sushi
- Sushi Rice
- Sushi Vinegar
- Making Sushi
- Selection of ingredients listed below for 6 large rolls:
- Makes 6 large rolls (48 pieces)
- Steaming
- Steaming Vegetables
- For best results:
- Steaming Fish and Seafood
- Steaming Poultry
- Notes
- Month Replacement Guarantee
- Australia
- New Zealand
- Need help with your appliance?
- In Australia
- In New Zealand
- is a registered trademark.
Brand : SUNBEAM
Model : RC4750
Category : Rice cooker