
GF-350 - DJ Equipment TEAC - Free user manual and instructions
Find the device manual for free GF-350 TEAC in PDF.


| Product Type | Direct Drive DJ Turntable |
| Brand | TEAC |
| Model | GF-350 |
| Drive System | Direct Drive |
| Motor | Quartz Lock DC Servo Motor |
| Speeds | 33 1/3, 45, 78 RPM |
| Pitch Control | ±10% with LED indicator |
| Dimensions (W x H x D) | 450 x 100 x 350 mm |
| Weight | 5.2 kg |
| Power Supply | AC 100-240V, 50/60Hz |
| Power Consumption | 15 W |
| Output Level | Phono: 2.5 mV, Line: 200 mV |
| Signal-to-Noise Ratio | > 65 dB |
| Wow and Flutter | < 0.1% WRMS |
| Tonearm Type | Static Balance S-Shape with Anti-Skate |
| Cartridge Included | Replaceable Moving Magnet (MM) Type |
| Accessories Included | Slipmat, 45 RPM Adapter, Counterweight |
| Maintenance | Clean with soft dry cloth; avoid moisture |
| Safety | Class II protection; use provided power cord |
| Spare Parts & Repairability | Stylus, belts, and motor available; service by qualified technician |
Frequently Asked Questions - GF-350 TEAC
User questions about GF-350 TEAC
0 question about this device. Answer the ones you know or ask your own.
Ask a new question about this device
Download the instructions for your DJ Equipment in PDF format for free! Find your manual GF-350 - TEAC and take your electronic device back in hand. On this page are published all the documents necessary for the use of your device. GF-350 by TEAC.
USER MANUAL GF-350 TEAC
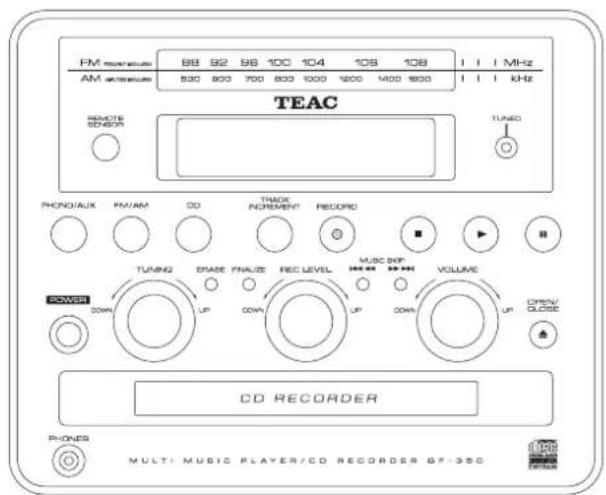
Multi music player/CD recorder
OWNER'S MANUAL
CAUTION
RISK OF ELECTRIC SHOCK DO NOT OPEN
CAUTION: TO REDUCE THE RISK OF ELECTRIC SHOCK, DO NOT REMOVE COVER (OR BACK). NO USER-SERVICEABLE PARTS INSIDE. REFER SERVICING TO QUALIFIED SERVICE PERSONNEL.

The lightning flash with arrowhead symbol, within an equilateral triangle, is intended to alert the user to the presence of uninsulated “dangerous voltage” within the product’s enclosure that may be of sufficient magnitude to constitute a risk of electric shock to persons.

The exclamation point within an equilateral triangle is intended to alert the user to the presence of important operating and maintenance (servicing) instructions in the literature accompanying the appliance.
IMPORTANT SAFETY INSTRUCTIONS
1) Read these instructions.
2) Keep these instructions.
3) Heed all warnings.
4) Follow all instructions.
5) Do not use this apparatus near water.
6) Clean only with dry cloth.
7) Do not block any ventilation openings. Install in accordance with the manufacturer's instructions.
8) Do not install near any heat sources such as radiators, heat registers, stoves, or other apparatus (including amplifiers) that produce heat.
9) Do not defeat the safety purpose of the polarized or grounding-type plug. A polarized plug has two blades with one wider than the other. A grounding type plug has two blades and a third grounding prong. The wide blade or the third prong are provided for your safety. If the provided plug does not fit into your outlet, consult an electrician for replacement of the obsolete outlet.
10) Protect the power cord from being walked on or pinched particularly at plugs, convenience receptacles, and the point where they exit from the apparatus.
11) Only use attachments/accessories specified by the manufacturer.
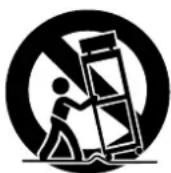
12) Use only with the cart, stand, tripod, bracket, or table specified by the manufacturer, or sold with the apparatus. When a cart is used, use caution when moving the cart/apparatus combination to avoid injury from tip-over.
13) Unplug this apparatus during lightning storms or when unused for long periods of time.
14) Refer all servicing to qualified service personnel. Servicing is required when the apparatus has been damaged in any way, such as power-supply cord or plug is damaged, liquid has been spilled or objects have fallen into the apparatus, the apparatus has been exposed to rain or moisture, does not operate normally, or has been dropped.
- Do not expose this apparatus to drips or splashes.
- Do not place any objects filled with liquids, such as vases, on the apparatus.
- Do not install this apparatus in a confined space such as a book case or similar unit.
●The apparatus draws nominal non-operating power from the AC outlet with its STANDBY/ON switch in the standby position.
●The apparatus should be located close enough to the AC outlet so that you can easily grasp the power cord plug at any time. - An apparatus with Class I construction shall be connected to an AC outlet with a protective grounding connection.
●Batteries (battery pack or batteries installed) shall not be exposed to excessive heat such as sunshine, fire or the like. - Excessive sound pressure from earphones and headphones can cause hearing loss.
WARNING: TO PREVENT FIRE OR SHOCK HAZARD, DO NOT EXPOSE THIS APPLIANCE TO RAIN OR MOISTURE.
CAUTION
●DO NOT REMOVE THE EXTERNAL CASES OR CABINETS TO EXPOSE THE ELECTRONICS. NO USER SERVICEABLE PARTS ARE WITHIN!
- IF YOU ARE EXPERIENCING PROBLEMS WITH THIS PRODUCT, CONTACT TEAC FOR A SERVICE REFERRAL. DO NOT USE THE PRODUCT UNTIL IT HAS BEEN REPAIRED.
- USE OF CONTROLS OR ADJUSTMENTS OR PERFORMANCE OF PROCEDURES OTHER THAN THOSE SPECIFIED HEREIN MAY RESULT IN HAZARDOUS RADIATION EXPOSURE.
Contents
Thank you for choosing TEAC. Read this manual carefully to get the best performance from this unit.
Before using the unit 4
How to Replace the Stylus. 5
Handling Records 5
Discs. 6
Remote Control Unit. 7
Connections 8
Parts of the Turntable 9
Unit Functions and Remote Control 10
Basic Operation....12
Listening to the Radio 12
Listening to a Record 13
Listening to a CD 15
Time Display 16
Repeat Playback 17
Shuffle Playback 17
Programmed Playback....18
Before Recording 19
Recording 20
Finalize 23
Erase or Unfinalize a CD-RW 24
Troubleshooting 25
Messages 26
Specifications 27
Read this before attempting any operations
●The nominal temperature should be between 5^ C and 35^ C ( 41^ F and 95^ F). The CD-RW recorder is more sensitive to extremes of temperature than ordinary CD players.
●Relative humidity should be 30 to 90 degrees noncondensing.
- As the unit may become warm during operation, always leave sufficient space around the unit for ventilation.
●The voltage supplied to the unit should match the voltage as printed on the rear panel. If you are in any doubt regarding this matter, consult an electrician.
- Choose the installation location of your unit carefully. Avoid placing it in direct sunlight or close to a source of heat. Also avoid locations subject to vibrations and excessive dust, heat, cold or moisture.
- Do not place the unit on an amplifier/receiver.
- Do not open the cabinet as this might result in damage to the circuitry or electrical shock. If a foreign object should get into the unit, contact your dealer or service company.
- When removing the power plug from the wall outlet, always pull directly on the plug, never yank the cord.
- To keep the laser pickup clean, do not touch it, and always close the disc tray.
- Do not attempt to clean the unit with chemical solvents as this might damage the finish. Use a clean, dry cloth.
- Keep this manual in a safe place for future reference.
DO NOT MOVE THE UNIT DURING PLAYBACK
During playback, the disc rotates at high speed. Do NOT lift or move the unit during playback. Doing so may damage the disc or the unit.
WHEN MOVING THIS UNIT
When changing the unit's location or packing the unit for moving, be sure to remove the record or disc. Moving this unit with the record or disc loaded may result in damage to this unit. If the unit is to be packed and moved a great distance, it is also advisable to tighten the turntable transport locking screw. See Page 9 for instructions.
Handling Records
- Do not touch the record's grooves. Only handle records, by the edges or the label, with clean hands. Skin oils from even clean hands can leave a residue on the record surface that will gradually deteriorate the quality of your record.
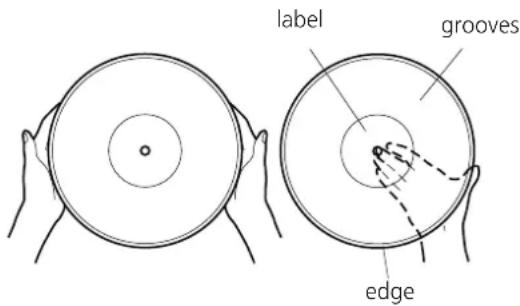
- Keep your records away from dust. Keep them in a cool, dry place.
- To avoid dust and scratches, keep records in their sleeves and jackets when not in use.
- Store records upright on their edges. Records stored horizontally will eventually bend and warp.
- Do not expose records to direct sunlight or high humidity and temperature. Long exposure to high temperatures will warp the record.
- Do not store your records in the trunk of your car. The temperature in a closed trunk can ruin your collection.
- Store records in an area with stable temperature and humidity.
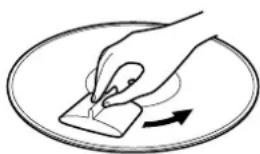
- Should the record become dirty, gently wipe the surface in a circular motion, using a soft anti-static cloth.
Commercial record cleaning systems are available from many retailers or on-line. TEAC does not endorse any specific product but, depending on the condition of your record collection, it may be advisable to look into one of these systems. Clean records protect your stylus from undue wear.
natural_image
Illustration of a hand pressing down on a surface with an arrow indicating motion (no text or symbols)How to Replace the Stylus
The stylus should last about 50 hours under normal use. However, it is recommended that the stylus be replaced as soon as you notice a change in sound quality.
Prolonged use of a worn-out stylus may damage the record. Wear and tear on the stylus will be accelerated when playing 78 RPM records. The higher speed of 78 RPM records wears the stylus more quickly.
Caution:
- Do not remove or bend the stylus.
●To avoid injury, do not touch the needle. - Turn off the unit's power before you replace the stylus.
- Keep out of the reach of children.
- Handle with care, as the stylus is delicate. Use of a bent or broken stylus may damage the record and cause the turntable to malfunction.
- Do not expose stylus to extreme heat.
- Contact a qualified repair company if you experience difficulty in changing the stylus.
Removing old stylus
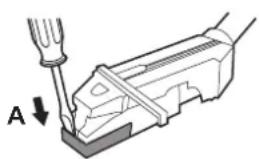
- Set a screwdriver at the tip of the stylus and push down to the direction "A".
- Remove the stylus by pulling it forward and down.
natural_image
Mechanical diagram showing a screwdriver inserted into a component with a labeled arrow (A), no text or symbols present.Installing a new stylus
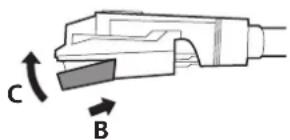
- Hold the tip of the stylus and insert the other edge by pressing in the direction "B".
- Push up in the direction "C" until it locks at the tip.
natural_image
Diagram of a mechanical component with labeled parts C and B, showing directional arrows (no text or symbols beyond labels)Please use CD, CD-R and CD-RW discs bearing the "DIGITAL AUDIO" mark.
CD

CD-R CD-RW
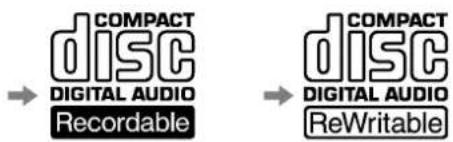
This unit CANNOT RECORD CD-R and CD-RW discs designed for computer systems.

In this manual, although we refer to "CD-R" and CD-RW" discs, we always mean "CD-R Digital Audio" and "CD-RW Digital Audio", even when this is not explicitly stated.
- CD-R and CD-RW discs designed for computer systems and properly recorded by a computer are playable, but this unit cannot record, finalize nor erase them.
- Depending on the quality of the disc and/or the condition of the recording, some CD-R/CD-RW discs may not be playable.
- Copy-protected discs and other discs which do not conform to the CD standard may not play back correctly in this player. If you use such discs in this unit, TEAC Corporation and its subsidiaries cannot be responsible for any consequences or guarantee the quality of reproduction. If you experience problems with such non-standard discs, you should contact the producers of the disc.
●Always place the disc on the disc tray with the label side uppermost. (Compact discs can be played or recorded only on one side.) - To remove a disc from its storage case, press down on the center of the case and lift the disc out, holding it carefully by the edges.
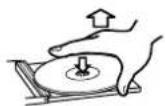
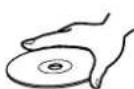
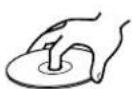
How to remove the disc How to hold the disc
- Should the disc become dirty, wipe the surface radially (from the center hole outward towards the outer edge) with a soft, dry cloth:
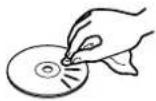
- Never use such chemicals as record sprays, antistatic sprays or fluid, benzine or thinner to clean the discs. Such chemicals will do irreparable damage to the disc's plastic surface.
- Discs should be returned to their cases after use to avoid dust and scratches that could cause the laser pickup to "skip."
- Do not expose discs to direct sunlight or high humidity and temperature for extended periods. Long exposure to high temperatures will warp the disc.
- Do not play any disc that is warped, deformed or damaged. Playing such discs may cause irreparable harm to the playing mechanisms.
- CD-R and CD-RW discs are more sensitive to the effects of heat and ultraviolet rays than ordinary CDs. It is important that they are not stored in a location where direct sunlight will fall on them, and away from sources of heat such as radiators or heat-generating electrical devices.
- Printable CD-R and CD-RW discs aren't recommended, as the label side might be sticky and damage the unit.
- Do not stick papers or protective sheets on the discs and do not use any protective coating spray.
- Use a soft oil-based felt-tipped pen to write the information on the label side. Never use a ball-point or hard-tipped pen, as this may cause damage to the recorded side.
●Never use a stabilizer. Using commercially available CD stabilizers with this unit will damage the mechanisms and cause them to malfunction. - Do not use CDs with an irregular shape (octagonal, heart shaped, business card size, etc.). CDs of this sort can damage the unit:
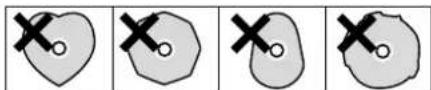
natural_image
Five identical abstract diagrams showing a heart shape with cross marks, each containing a circle and an X symbol (no text or labels)- If you are in any doubt as to the care and handling of a CDR/CD-RW disc, read the precautions supplied with the disc, or contact the disc manufacturer directly.
Remote Control Unit
About CD-R and CD-RW discs
CD-R discs can be recorded once only. Once they have been used for recording, they cannot be erased or re-recorded.
However, if space is available on the disc (and the disc has not been finalized), additional material can be recorded.
By contrast, a CD-RW disc can be used in much the same way as a CD-R disc, but the last track or tracks recorded can be erased, and the space on the disc can be re-used for other recordings.
However, you should note that an audio CD created using a CD-RW disc may not play back satisfactorily on every audio CD player.
CD-R, by contrast, may be played satisfactorily on the majority of audio CD players.
Finalizing
Although audio data may be written on a CD-R or CD-RW disc, a standard CD player will not be able to play back the audio until a final table of contents (TOC) has been written at the start of the disc.
The process of writing this table of contents is known as "finalizing". Once this has been done, no further data can be written to the disk.
Note that a CD-RW disc that has been finalized can be "unfinalized". This allows further tracks to be recorded to the disc, provided that there is space on the disc.
- Repeat, shuffle and programmed playback don't work with unfinalized (NO TOC) discs.
Recordable discs
In this manual, we use the term "recordable" disc to describe a CD-R or CD-RW disc that has not been finalized, and has enough space to record.
The provided Remote Control Unit allows the unit to be operated from a distance.
When operating the remote control unit, point it towards the REMOTE SENSOR on the front panel of the unit.
●Even if the remote control unit is operated within the effective range, remote control operation may be impossible if there are any obstacles between the unit and the remote control.
- If the remote control unit is operated near other appliances which generate infrared rays, or if other remote control devices using infrared rays are used near the unit, it may operate incorrectly. Conversely, the other appliances may operate incorrectly.
Battery Installation
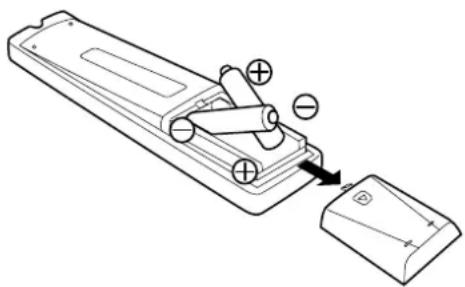
natural_image
Line drawing of a remote control device with battery and switch components (no text or symbols)1 Remove the battery compartment cover.
2 Insert two "AA" (R6, SUM-3) dry batteries. Make sure that the batteries are inserted with their positive "⊕" and negative "⊖" poles positioned correctly.
3 Close the cover.
Battery Replacement
If the distance required between the remote control unit and main unit decreases, the batteries are exhausted. In this case replace the batteries with new ones.
Precautions concerning batteries
- Be sure to insert the batteries with correct positive “⊕” and negative “⊖” polarities.
- Use batteries of the same type. Never use different types of batteries together.
●Rechargeable and non-rechargeable batteries can be used. Refer to the precautions on their labels. - When the remote control unit is not to be used for a long time (more than a month), remove the batteries from the remote control unit to prevent them from leaking. If they leak, wipe away the liquid inside the battery compartment and replace the batteries with new ones.
- Do not heat or disassemble batteries and never dispose of old batteries by throwing them in a fire.
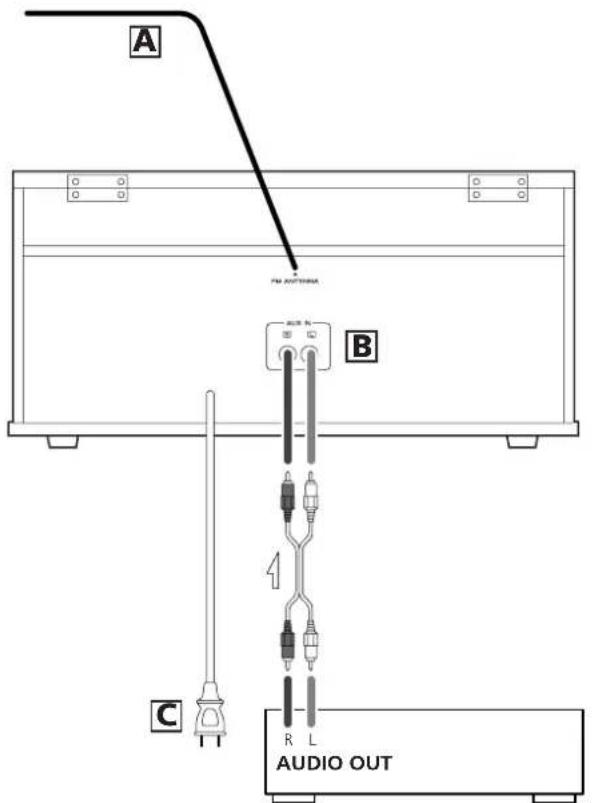
CD Player, Cassette Tape Deck, etc.
CAUTION:
- Switch off the power to all equipment before making connections.
- Read the instructions of each component you intend to use with this unit.
- Be sure to insert each plug securely. To prevent hum and noise, avoid bundling the signal interconnection cables together with the AC power cord.
A FM antenna
While in FM mode, tune in an FM station and extend the lead to find the best position for the reception. This antenna may need to be repositioned if you move your unit to a new location.
B AUX IN jacks
You can connect a CD player, cassette tape deck, etc. to this unit.
Connect the component with RCA pin cords. Make sure to connect the white plug to the white jacks (Left) and the red plug to the red jacks (Right).
C AC Power Cord
Plug this AC power cord into an AC wall socket.
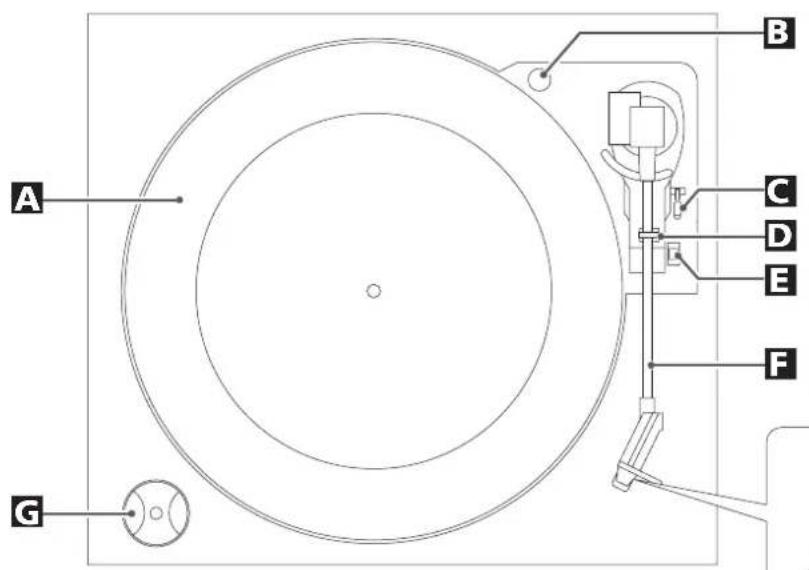
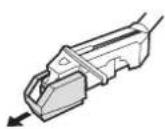
Before use, detach the stylus guard (white plastic cover) by pulling it straight off the front of the cartridge in the direction of the arrow.
A turntable
B screw fixing the turntable for transportation
Before use, completely loosen the screw by turning it clockwise with a coin or screwdriver.
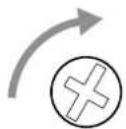
When you transport the unit, turn the screw counterclockwise to secure the turntable.
C cue-lever
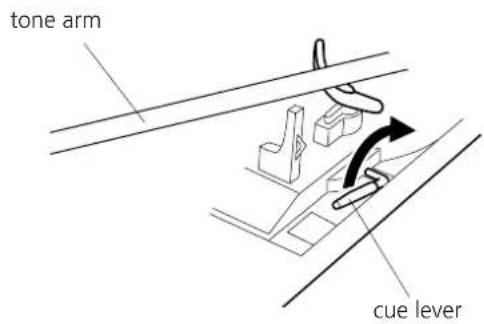
Use this lever to lift the tone arm.
D tone arm holder
E speed selector
F tone arm
G 45 RPM adaptor
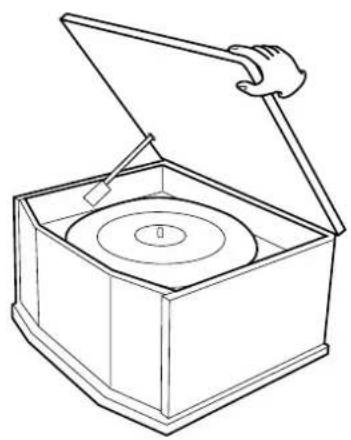
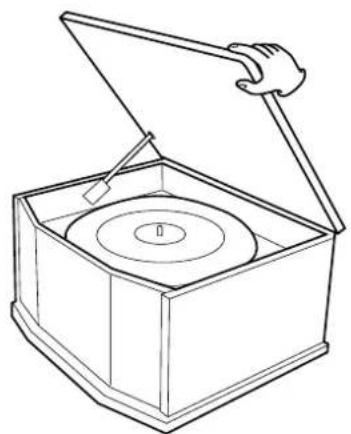
How to open/close the turntable cover
natural_image
Line drawing of a box with an open lid and circular base, no text or symbols presentTo Open:
1 Lift the turntable cover all the way up until it stops.
2. Lower the cover slowly until the latch engages.
3. The cover will now stay open. If the latch does not engage, repeat these steps again.
To Close:
- Lift the cover all the way up until it stops.
- The latch should disengage and you may now slowly lower the cover.
- Make sure you grasp the cover by the edges to avoid pinching your fingers as it closes.
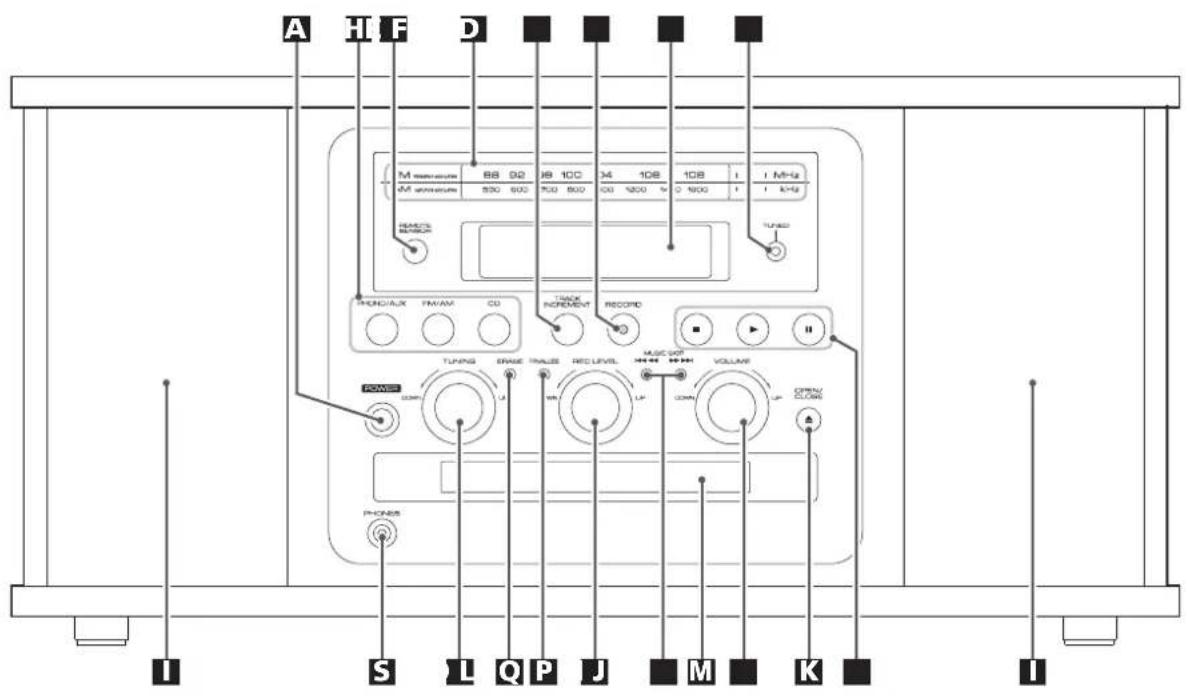
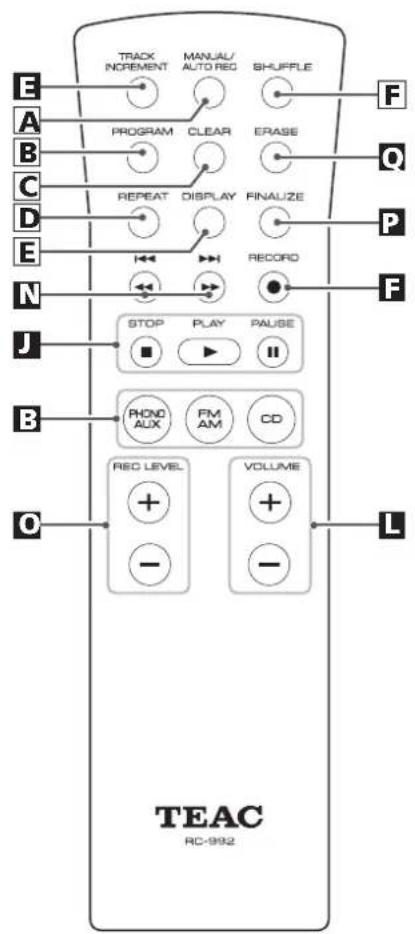
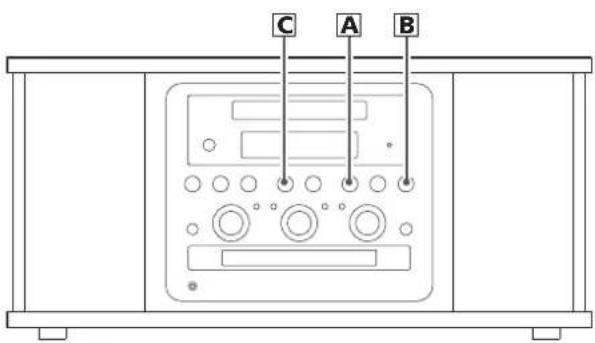
A POWER
Press this button to turn the unit on or off.
B PHONO/AUX, FM/AM, CD
Press the PHONO/AUX button and select PHONO to play a record.
Press the PHONO/AUX button and select AUX to listen to the external source connected to the AUX IN jacks.
Press the FM/AM button to listen to the radio.
Press the CD button to play a CD.
Remote Sensor
When operating the remote control unit, point it towards the REMOTE SENSOR.
D Display panel (frequency)
When the unit is on, this display will light.
E TRACK INCREMENT
During recording, use this button to divide tracks.
F RECORD
Use this button to enter record pause mode.
G Display
H TUNED indicator
Lights when a station is correctly tuned in.
Speakers (stereo)
CD operation buttons
STOP (■)
Use this button to stop playback or recording.
PLAY (▶)
Use this button to start playback, recording, finalizing and erasing.
PAUSE (II)
Use this button to pause playback or recording.
K OPEN/CLOSE
In CD or PHONO/AUX mode, use this button to open and close the disc tray.
- This button don't work in FM/AM mode.
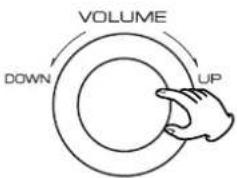
L VOLUME
Turn this knob to adjust the volume.
M Disc Tray
N MUSIC SKIP (◄◄◄ / ►►►)
In CD mode, use these buttons to skip tracks.
Hold down these buttons to search for a part of a track.
REC LEVEL
In record pause mode, use this knob to adjust the recording level.
P FINALIZE
Use this button to finalize a CD-R/CD-RW disc.
Q ERASE
Use this button to erase or unfinalize a CD-RW disc.
R TUNING
In FM/AM mode, turn this knob to tune in a station.
S PHONES
For private listening, first reduce the volume level to minimum. Then insert the plug from your headphones into the PHONES jack, and adjust the volume by turning the VOLUME knob. The sound from speakers will be cut off while the headphones are plugged in.
A MANUAL/AUTO REC
Use this button to select the mode of track number assignment.
B PROGRAM
In CD mode, use this button to program tracks.
C CLEAR
In CD mode, use this button to clear programmed tracks.
D REPEAT
In CD mode, use this button to select a repeat mode of CD.
E DISPLAY
In CD mode, use this button to change the display.
F SHUFFLE
In CD mode, use this button for shuffle playback.
Note:
To simplify explanations, instructions in this manual refer to the names of the buttons and controls on the front panel only. Associated controls on the remote control will also operate similarly.
Basic Operation Listening to
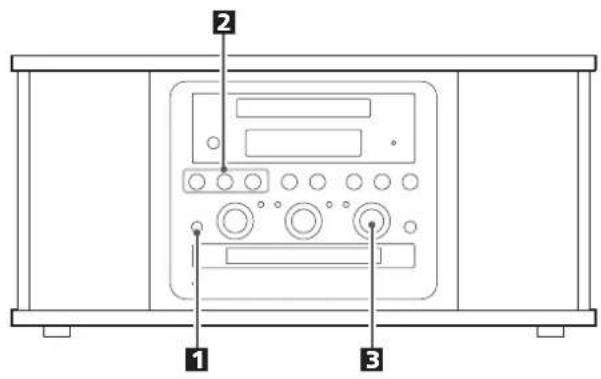
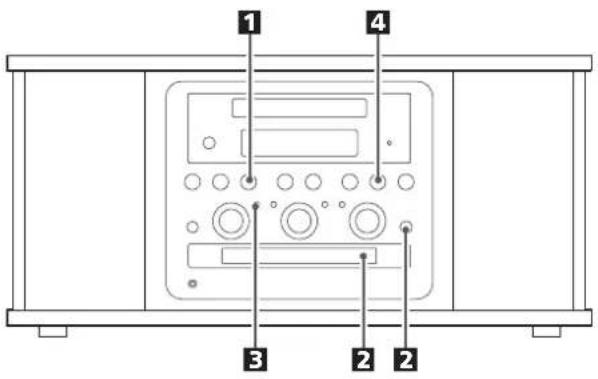
1 Press the POWER switch to turn the unit on.
2 Select a source by pressing the corresponding button.
- To listen to an external source connected to AUX jacks, select AUX by pressing the PHONO/AUX button once or twice.
3 Play the source, and adjust the volume by turning the VOLUME knob.
Radio
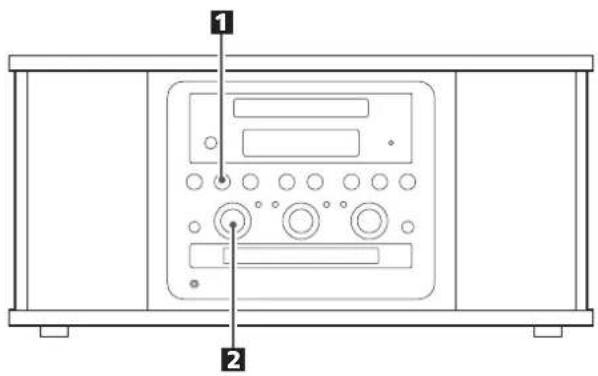
1 Select FM or AM using the FM/AM button.
PHONO/AUX

FM/AM
CD
2 Turn the TUNING knob to tune in a station.
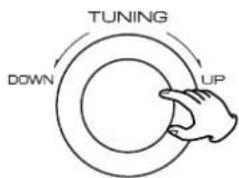
●The TUNED indicator lights when a station is correctly tuned in.
●The STEREO indicator lights when an FM stereo broadcast is tuned in.
If the reception is poor
AM broadcast
Turn around the unit to find the best position for AM stations.
FM broadcast
Extend and turn around the FM antenna so that you can receive the stations clearly.
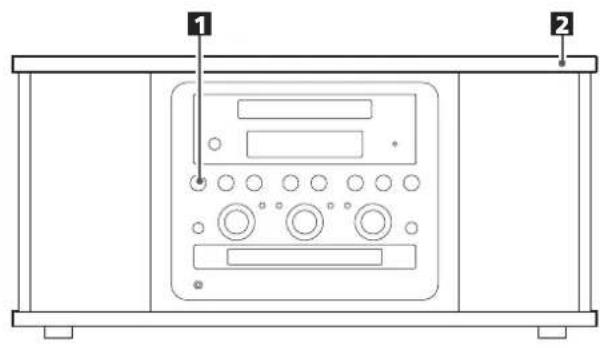
- Before use, completely loosen the transportation screw by turning them clockwise with a coin and remove the stylus guard.
1 Press the PHONO/AUX button once or twice to select PHONO.
PHONO/AUX
FM/AM

CD

2 Gently open the dust cover.
Be careful not to pinch your finger.
natural_image
Line drawing of a box with an open lid and circular base, no text or symbols present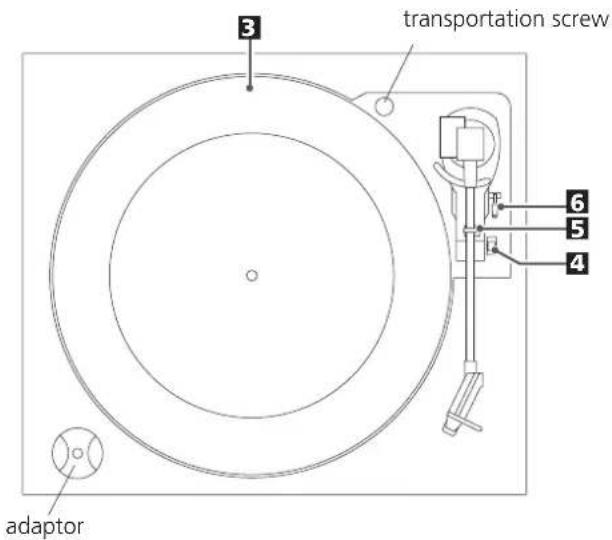
3 Put the record on the turntable.
When playing a 45 RPM record, use the included adaptor.
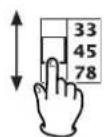
4 Select the speed.
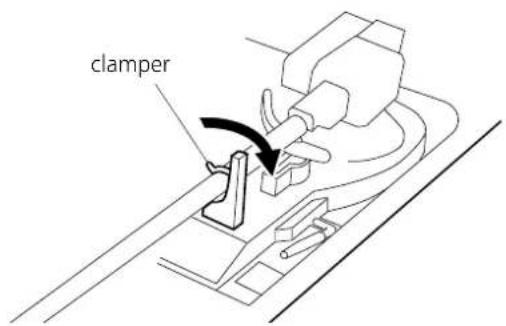
Gently push the clamper to the right to release the tone arm.
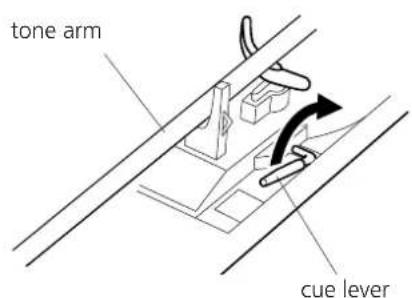
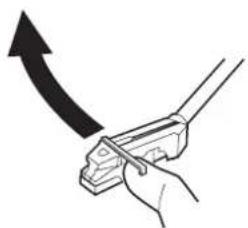
6 Raise the cue lever to lift the tone arm off the tone arm support.
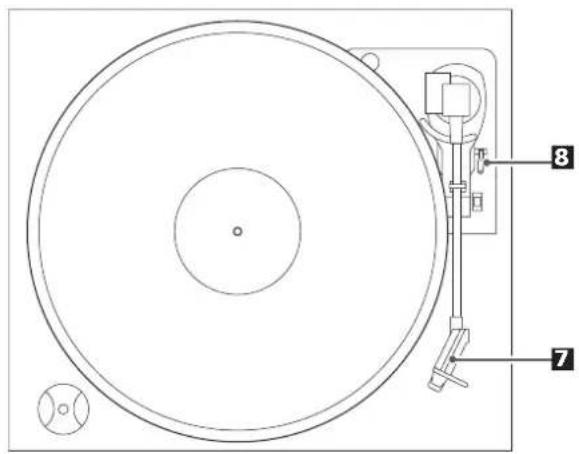
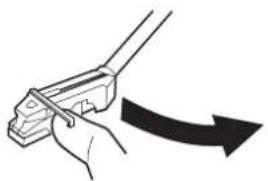
7 Move the tone arm gently to the edge of the record (or the starting point of a track).
The turntable will begin to turn.
natural_image
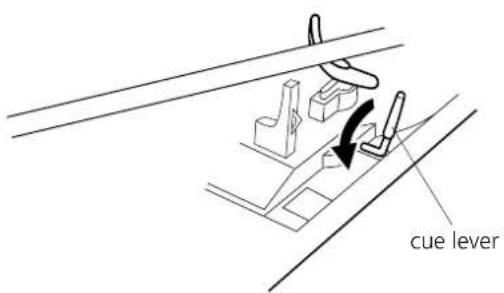
Illustration of a hand using a tool to cut a block with an upward arrow (no text or symbols)8 Gently lower the tone arm by slowly releasing the cue lever.
You can lower the tone arm manually if the cue lever has not been raised.
- Playing records with the dust cover down will prevent dust from settling on the turntable.
Please do not place anything on top of the turntable cover, especially while playing a record.
When the playback has been finished, the tone arm automatically returns to the tone arm holder and the rotation stops.
To stop playback manually, slightly lift the tone arm using the cue lever and return it to the tone arm holder.
natural_image
Illustration of a hand holding a tool with an arrow indicating direction (no text or symbols)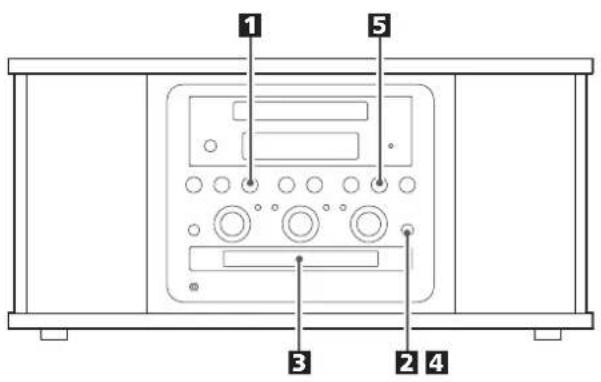
1 Press the CD button.
PHONO/AUX

FM/AM

CD
“--” blinks for a few seconds.
When no disc is set, "nOdISC" appears on the display.
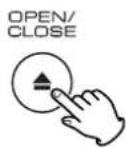
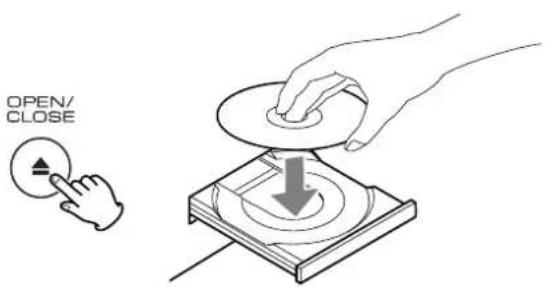
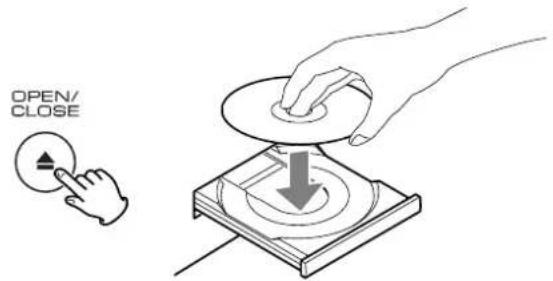
2 Press the OPEN/CLOSE button (▲).
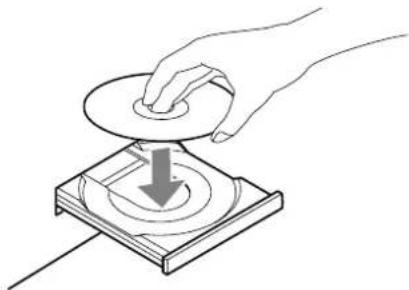
3 Place a disc on the tray with the printed label face up.
natural_image
Hand pressing down on a CD or DVD disc with a downward arrow indicating motion (no text or symbols)●Never place more than one disc on the tray.
●The disc must be placed in the center of the disc tray. If the disc is not correctly loaded, it may not be possible to open the tray again once it has closed, so you should ensure the disc is always centered on the tray.
- Do not force the tray by hand during opening and closing operations.
4 Press the OPEN/CLOSE button (▲) to close the tray.
- It takes a few seconds for the unit to load the disc. No buttons will work during loading. Wait until the total number of the tracks and the total play time of the disc are displayed.
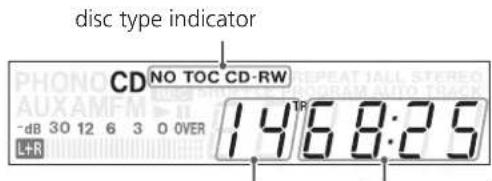
total play time of the disctotal numbe
●The disc type indicator shows the type of disc currently loaded.
CD:
A commercial pre-recorded CD
CD-R:
A finalized CD-R
CD-RW:
A finalized CD-RW
NO TOC CD-R:
A CD-R which has yet to be finalized
NO TOC CD-RW:
A CD-RW which has yet to be finalized
blank:
5 Press the PLAY button (▶) to start playback.
Disc playback starts from the first track, and the PLAY indicator (▶) lights on the display.
- If you load the disc, and then press the PLAY button without having first closed the disc tray, the disc tray closes and playback starts.
Listening to a CD 2 Time Displa
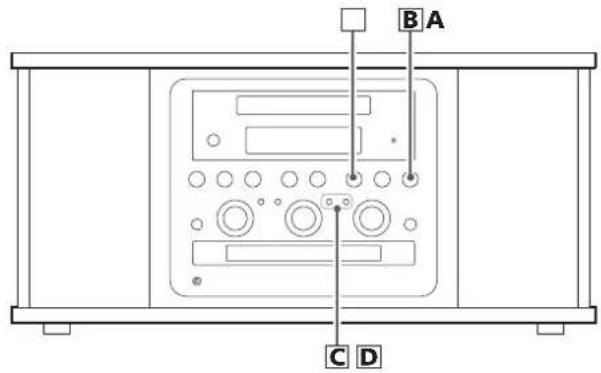
A To suspend playback temporarily (pause mode)
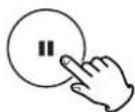
Press the PAUSE button (■) during playback. Playback stops at the current position.
To resume playback, press the PLAY button (▶) or the PAUSE button (■).
B To stop playback
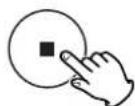
Press the STOP button (■) to stop playback.
C To skip to the next or a previous track
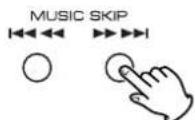
During playback, repeatedly press the SKIP button (I◄◄ or ►►) until the desired track is found. The selected track will be played from the beginning.
In the stop mode, press the SKIP button (◀◀ or ▶▶▶) repeatedly until the track you want to listen to is found, and press the PLAY button (▶) to start playback from the selected track.
- When the ◀◀ button is pressed during playback, the track being played will be played from the beginning. To return to the beginning of the previous track, press the ◀◀ button twice.
D Search for a part of a track
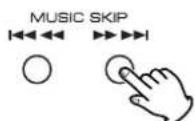
During playback, hold down the SKIP button (I◄◄ or ►►1) and release it when the part you want to listen to is found.
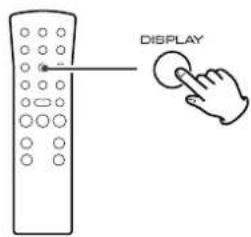
Each time the DISPLAY button is pressed, the display changes as follows:
CD/CD-R/CD-RW playback
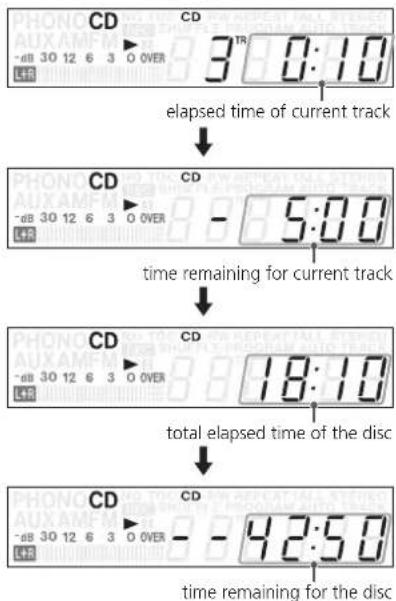
flowchart
graph TD
    A["CD"] --> B["3TR:0:10"]
    B --> C["elapsed time of current track"]
    C --> D["CD"]
    D --> E["-5:00"]
    E --> F["time remaining for current track"]
    F --> G["CD"]
    G --> H["18:10"]
    H --> I["total elapsed time of the disc"]
    I --> J["CD"]
    J --> K["-42:50"]
    K --> L["time remaining for the disc"]
During recording
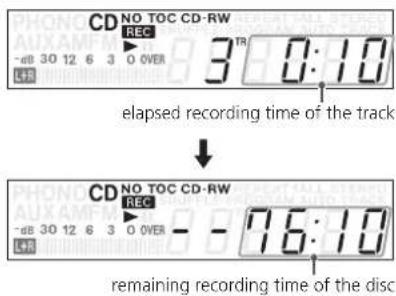
In record pause mode
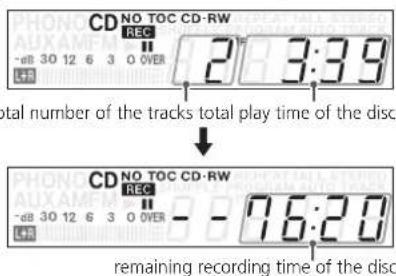
Repeat Playback
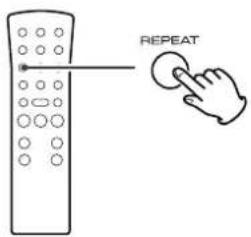
Each time the REPEAT button is pressed, the repeat mode is changed as follows:
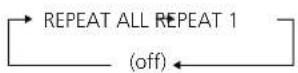
REPEAT ALL (Repeat All the Tracks)
Press the REPEAT button once during playback.
All the tracks of the disc will be played repeatedly.
REPEAT 1 (Repeat one track)
Press the REPEAT button twice during playback.
The track being played will be played repeatedly. If you press the MUSIC SKIP button and select another track, the track you selected will be played repeatedly.
It is also possible to select a track to be repeated in the stop mode. Press the REPEAT button twice and then select the track number by pressing the MUSIC SKIP button. Press the PLAY button to start playback.
- If one of the following buttons is pressed, repeat mode will be cancelled:
OPEN/CLOSE, POWER, FM/AM, PHONO/AUX
- Repeat playback works with finalized discs only.
Shuffle Playback
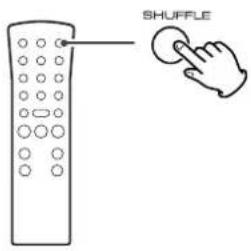
The tracks can be played randomly. Press the SHUFFLE button during playback. (In the stop mode, press the SHUFFLE button and the PLAY button.)
When the shuffle playback of all the tracks has been finished, the unit stops and the shuffle playback mode is cancelled.
- If you press the ▶▶I button during shuffle playback, next track will be randomly selected and played. If you press the I◀◀ button, the currently played track will be played from the beginning. A track cannot be replayed during shuffle playback.
- Shuffle playback doesn't work during programmed playback.
- If one of the following buttons is pressed, shuffle mode will be cancelled:
SHUFFLE in the stop mode, OPEN/CLOSE, POWER, FM/AM, PHONO/AUX
●Shuffle playback works with finalized discs only.
Up to 32 tracks can be programmed in the desired order.
- Insert a disc and select "CD" before beginning programming.
●Shuffle playback does not work during programmed playback.
●Programmed playback works with finalized discs only.
1 Press the PROGRAM button in the stop mode.
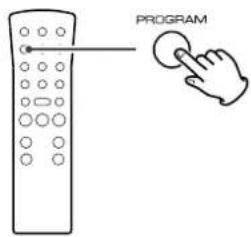
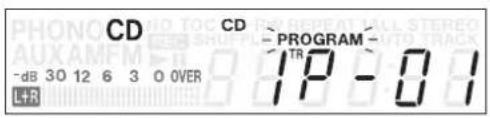
"PROGRAM" indicator blinks, and "P-01" appears on the display.
2 Press the MUSIC SKIP button (|◀◀ or ▶▶▶) to select a track.
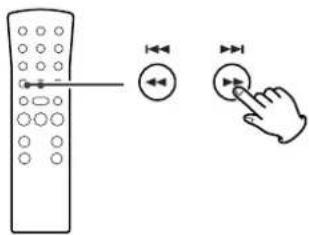
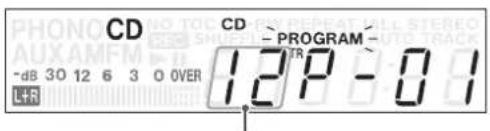
track number
3 Press the PROGRAM button.
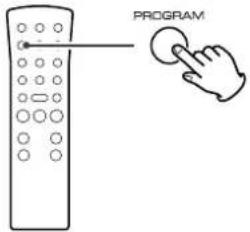
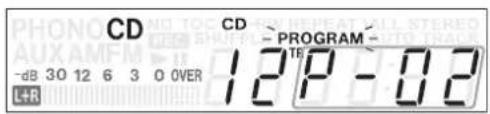
The track is programmed, and "P-02" is displayed.
Repeat step 2nd to 3 program more tracks.
●You can program up to 32 tracks.
- To cancel the program mode, press the STOP button (■).
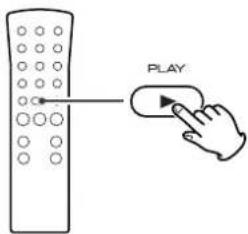
4 When the selection of track numbers has been finished, press the PLAY button (▶) to start program playback.
Before Recording
To check the programmed order
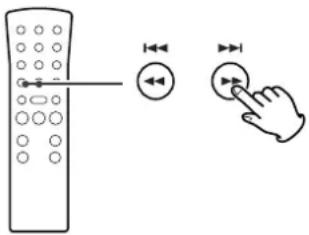
In the stop mode, press the MUSIC SKIP button repeatedly to show the track numbers that have been stored in memory.
To add a track to the end of the program
In the stop mode, press the PROGRAM button.
Select a track number by pressing the MUSIC SKIP button, and then press the PROGRAM button.
The track is added to the end of the program.
To delete the last track from the program
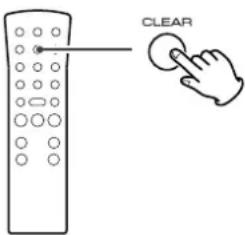
In the stop mode, press the CLEAR button to delete the last track from the program.
To clear the program
If one of the following buttons is pressed, the programmed contents will be cleared:
OPEN/CLOSE, POWER, FM/AM, PHONO/AUX, STOP in the stop mode
Before you start recording, make sure that you understand the following points:
●The unit requires Digital Audio CD-R or CD-RW media for recording. Computer CD-R or CD-RW discs do not work with this unit.
- Once you have recorded on a CD-R disc, the data cannot be erased from it.
- You can add tracks to an unfinalized recordable disc. Once finalized, a CD-R disc is "fixed" and behaves in the same way as a CD. Finalized CD-RW discs, however, can be unfinalized, erased and re-recorded.
- Due to the system restrictions of CD, a track cannot be less than four seconds in length, and there can be a maximum of 99 tracks on an audio CD.
- If the STOP button or PAUSE button is pressed within four seconds from the beginning of a track, the unit continues to record no signal and stops when the track's length reaches four seconds.
- When the recording is finished, "REC" and "----" blink for a few seconds, and the unit then goes into stop mode. Do not apply shock or vibration to the unit during recording.
- If the disc reaches the end during recording, the unit will start a fade-out over a few seconds.
When the fade-out has finished, the unit finalizes the disc automatically and stops.
- If the disc reaches the end of the 99th track during recording, the unit finalizes the disc automatically and stops.
●The recording time of a track may differ slightly from the original one.
Serial Copy Management System
This unit is in compliance with the Serial Copy Management System standard. This standard has been established to restrict digital-to-digital copying to only the first generation. The basic rules governing this system are as follows:
Rule 1
A digital recording is possible from a digital source such as a CD, DAT or MD onto a recordable CD-R, CD-RW, MD or DAT through a digital input connection. However, further digital to- digital recording is prohibited for the second and later generations.
Rule 2
When an analog source such as an analog disc or FM broadcast is digitally recorded by using a CD-R, CD-RW, MD or DAT, this recorded source can be digitally recorded on another CD-R, CD-RW, MD or DAT. However, further digital copying is prohibited.
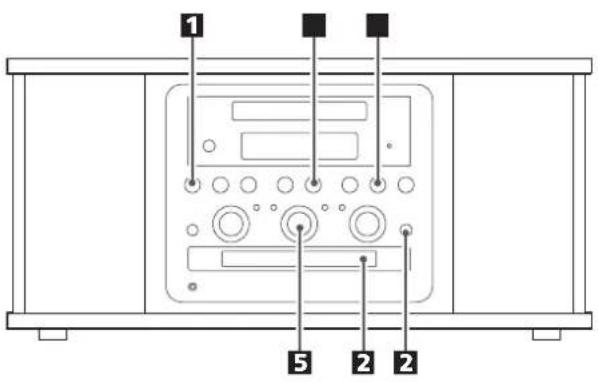
Audio from the PHONO or AUX sources can be recorded on the CD recorder.
1 Press the PHONO/AUX button once or twice to select the source to be recorded.
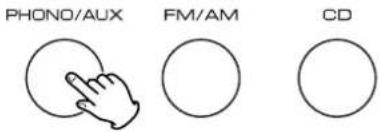
To record a record, select PHONO.
To record an external source connected to the AUX IN jacks, select AUX.
2 Load a recordable CD-R or CD-RW disc into the unit.
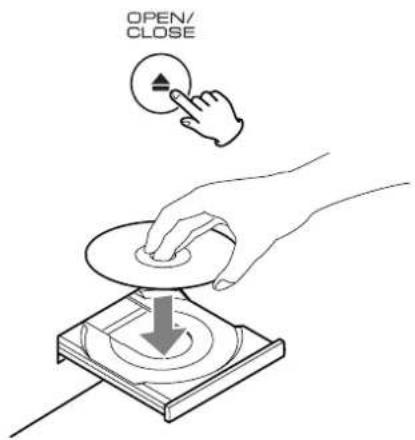
Press the OPEN/CLOSE button (▲), place a disc on the disc tray with the printed label side up, and then press the OPEN/CLOSE button (▲) to close the disc tray.
Make sure "NO TOC" and "CD-R" (or "CD-RW") indicators lights on the display, or the RECORD button in step 4 will not work.
E Select the mode of track number assignment using the MANUAL/AUTO REC button of the remote control unit.
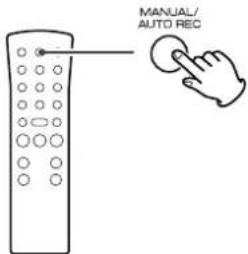
When the MANUAL/AUTO REC button is pressed once, the current mode is displayed. Press the MANUAL/AUTO REC button repeatedly to select any other mode.
-- (MANUAL)
The unit doesn't divide tracks.
Use the TRACK INCREMENT button to divide tracks.
MANUAL is recommended for recording an analog source such as a record.
-20db, -30db or -40db (AUTO REC)
The unit will automatically insert a track division in the recorded material when the sound level has dropped below the threshold for more than 2 seconds, and sound has re-started.
"-20db" takes a louder signal to trigger the track increment. "-40db" means that a relatively quiet signal will trigger the track increment. "-40db" is suitable for recording a noiseless source such as a CD.
●AUTO REC may not work properly with analog sources that contain low-level noises.
●The AUTO TRACK indicator lights when -20dB, -30dB or -40dB is selected.
●The default setting is MANUAL (off). When the unit is turned on, the setting is automatically reset to MANUAL (off).
- The MANUAL/AUTO REC button doesn't work during recording or in the record pause mode.
4 Press the RECORD button.
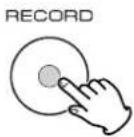
The red indicator on the RECORD button lights.
The unit enters record pause mode.
In record pause mode, "REC" indicator blinks and the Ⅱ indicator lights on the display.
- No button will work while "busy" is displayed. Wait a few seconds until "busy" disappears from the display.
- If the red indicator on the RECORD button doesn't light, reload a recordable disc, wait a few seconds until "NO TOC" and "CD-R" (or "CD-RW") indicators light on the display, and press the RECORD button again.
5 If necessary, adjust the recording level using the REC LEVEL knob.
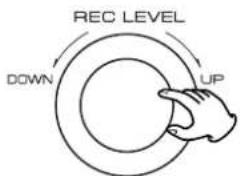
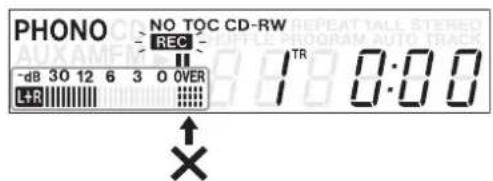
Play the source to be recorded and adjust the recording level so that the loudest sound does not exceed the "OVER" indicator on the peak level meter.
The level can be adjusted from -00 ( - ) dB to 18 dB.
●The default setting is 0 dB. When the unit is turned on, or when the STOP button is pressed, the setting is automatically reset to 0 dB.
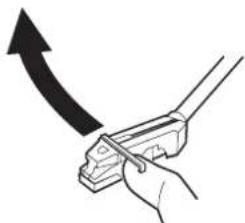
6 If PHONO is selected in step 1 gently lower the tone arm onto the edge of the record (or the track to be recorded).
natural_image
Illustration of a hand using a pliers to cut a curved black arrow (no text or symbols)When the turntable is stopped, the PLAY or the PAUSE button will not work and you cannot start recording.
7 Press the PLAY or the PAUSE button to start recording.
8 If AUX is selected in step 1 play the source to be recorded.
When the playback of the source has been finished, press the STOP button to stop recording.
When the rotation of the turntable stops, the recording will stop automatically.
But to prevent unwanted noise from the tone arm being recorded, stop the recording manually by using the STOP button.
Recording 2
A To stop recording
Press the STOP button (■) to stop recording.
B To suspend recording temporarily (pause mode)
Press the PAUSE button (Ⅱ). "busy" briefly appears on the display, and the recording is paused. To restart recording, press the PLAY button (▶) or the PAUSE button (Ⅲ).
- You cannot restart recording while "busy" is displayed.
- Remember that every time recording is paused or stopped, a new track number will always be assigned. It is not possible to record in two "stages" within one track.
C Manual track division
It is possible to divide the recording into tracks while recording.
While recording is taking place, press the TRACK INCREMENT button. The current track number will be incremented by one.
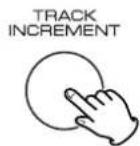
●The TRACK INCREMENT button works regardless of the MANUAL/AUTO REC setting.
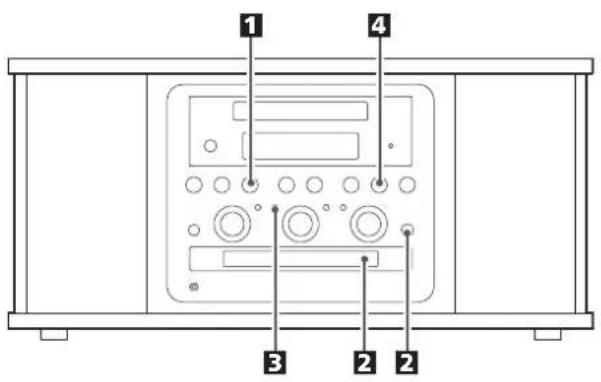
This section deals with the actions taken after recording. Once finalized, CD-R discs are truly final. No more tracks can be recorded on them. By contrast, CD-RW discs can be "unfinalized", and if there is space, further material can be recorded on them.
Finalizing
As has been explained earlier, in order for a disc to become a standard CD, it must have a Table of Contents (TOC) written to it. This process is known as finalizing.
1 Press the CD button to select "CD".
PHONO/AUX

FM/AM

CD
2 Load an unfinalized (recordable) disc.
3 Press the FINALIZE button in the stop mode.
FINALIZE

"FIn--d" appears on the display.
- To cancel the finalizing process, press the STOP button (■).
4 Press the PLAY (▶) button to start finalizing.
"NO TOC" and "REC" indicators blink, and the remaining time for the finalizing operation appears in the display.
When the operation has been finished, the NO TOC indicator turns off and the display returns to the track/time display.
During finalizing, no button works.
Never turn the power off nor unplug the power cord.
- Although finalized CD-R discs may be played on ordinary CD players, remember that finalized CD-RW discs may not play on ordinary CD players.
It is possible to erase the last recorded track. It is also possible to erase a whole disc.
Erase procedures are possible only on an unfinalized CD-RW disc. If a CD-RW disc has been finalized, unfinalize it prior to erasure. Remember that it is not possible to perform any erase or unfinalize procedures on a CD-R disc.
1 Press the CD button to select "CD".
PHONO/AUX

FM/AM

CD
2 Load a recorded CD-RW.
3 Press the ERASE button in the stop mode.
"Un Fln" (unfinalize) appears when a finalized disc is loaded.
"Er" and the last track number appear when the disc hasn't been finalized. Each time the ERASE button is pressed, the display changes as follows:
"Er" and the number of the last track recorded on the disc Select this to erase the last track on the disc.
●This will not appear when only one track is recorded on the disc.
Er ALL
Select this to erase all the tracks.
- To cancel the erasing or unfinalizing process, press the STOP button (■).
4 Press the PLAY button (▶) to start erasing or unfinalizing.
The remaining time for the operation appears in the display. When the operation has been finished, the display returns to the track/time display.
During erasing/unfinalizing, no buttons will work. Never turn the power off nor unplug the power cord.
- This operation cannot be undone. If you are going to erase a track or tracks, make sure that they are recordings that you really want to erase.
If you experience any problems with the unit, please take a moment to look through this chart and see if you can solve the problem yourself before you call your dealer or a TEAC service center.
No power
→Check the connection to the AC power source. Check and make sure the AC source is not a switched outlet and if it is, the switch is turned on. Make sure there is power to the AC outlet by plugging another item such as a lamp or fan.
No sound.
→Adjust the volume.
The sound is noisy.
→The unit is too close to a TV set or similar appliances. Relocate the unit further away from them, or turn the other appliances off.
Remote control doesn't work.
→Press the POWER switch of the main unit to turn it ON.
→If the batteries are dead, change the batteries.
→Use the remote control unit within the (5m) range and pointed at the front panel.
→Clear obstacles that are between the remote control unit and the main unit.
→If a strong light is near the unit, turn it off.
CD Recorder
Will not play.
→Load a disc with the playback side facing down.
→If the disc is dirty, clean the surface of the disc.
→A blank disc has been loaded. Load a prerecorded disc.
→Depending on the disc, etc. it may not be possible to play back CD-R/CD-RW discs. Try again with another disc.
Sound skips.
→Place the unit on a stable surface to avoid vibration and shock.
→If the disc is dirty, clean the surface of the disc.
→Don't use scratched, damaged or warped discs.
Recording is not possible.
→ A playback-only disc or finalized disc has been loaded. Use a recordable disc.
→The disc does not have a recordable area. Use another disc.
→The recording level is too low. Adjust the recording level.
This unit cannot record CD-R or CD-RW discs designed for computer systems. Use a disc bearing the "DIGITAL AUDIO" mark.
Tuner
Cannot listen to any station, or signal is too weak.
→Tune in the station properly.
→If a TV is near the unit, turn it off.
→Rotate the unit or antenna wire for the best reception position.
Turntable
Will not play.
→Loosen the transportation screw, and remove the stylus guard.
(The stylus guard is a plastic cover that protects the stylus during transportation. Failing to remove this guard will not allow the needle to contact the groove of the record and no sound will be heard!)
→If the stylus is worn-out, change the stylus.
→Select the correct playback speed.
Sound skips.
→Place the unit on a stable surface to avoid vibration and shock. Make sure the unit is level both front to back and side to side.
→Clean the surface of the record/disc.
→Don't use scratched, damaged or warped records/discs.
If normal operation cannot be obtained, unplug the power cord from the outlet and plug it again.
Beware of condensation
When the unit (or a record/disc) is moved from a cold to a warm place, or used after a sudden temperature change, there is the danger of condensation; vapor in the air could condense on the internal mechanism, making correct operation erratic or impossible. To prevent this, or if this occurs, leave the unit for one or two hours with the power turned on. The unit will stabilize at the temperature of its surroundings.
Maintenance
Always keep the turntable clean.
If the surface of the unit gets dirty, wipe with a soft cloth or use a diluted mild liquid soap. Be sure to remove any excess liquid completely. Do not use thinner, benzine or alcohol as they may damage the surface of the unit. Allow the surface of the unit to dry completely before using.
0^TR 0:00
A blank CD-R/CD-RW disc is set on the tray.
BUSY
The unit is reading the disc. Wait a few seconds.
CLOSE
Close the disc tray.
Er \*\*
Erase the last track of the CD-RW disc.
Er ALL
Erase all the tracks of the CD-RW disc.
FIN -- d
Finalize the disc.
-\*\*db
Increment level
NODISC
No readable disc has been loaded.
OPEN
Open the tray.
---:---
The unit is reading the disc.
P-\*\*
Program number
UN FIN
Unfinalize the CD-RW disc.
Error Messages
D FULL, OPFULL
There is no space on the disc, or no more tracks are available.
D DISC
Discs designed for computer systems cannot be used for recording. Use the discs bearing "DIGITAL AUDIO" mark.
P-FULL
32 tracks have been programmed. No more tracks can be programmed.
Err \*\*
An error occurred within the unit.
Press the POWER switch to turn the unit off, wait a minute, and turn it on again.
Err 03
Something is wrong with the disc.
Turn the unit off and on, and change the disc.
(** is variable.)
Amplifier Section
Output power 3.5 W + 3.5 W
Frequency response 60 Hz to 20 kHz
Audio input sensitivity/Impedance. . AUX: -6dBV (0.5V)/20kΩ
Maximum iutput level .... AUX: +6dBV (2.0V)
CD Recorder Section
Media type CD ( playback only)
CD-RW and CD-R for Digital audio (record and playback)
Recording sampling frequency....44.1kHz
Frequency response.....20Hz-20kHz
( playback:±2dB, recording:±3dB)
Signal to noise ratio .... More than 90dB (playback)
More than 80dB (recording)
Total harmonic distortion . . . . . . Less than 0.05% (playback)
Less than 0.07% (recording)
Tuner Section
Frequency range (FM) 87.5 MHz to 108.0 MHz
Frequency range (AM) 522 kHz to 1629 kHz
Record Player Section
Motor ..... DC servo motor
Drive system....Belt Drive
Speed....33-1/3 rpm, 45 rpm, 78 rpm
Wow and Flutter .... less than 0.35% (WDT)
Cartridge type . . . . . . . . . . . . . Ceramic Stereo Cartridge
Stylus....STL-103
Output level. 158 - 348mV
Speaker System Section
Unit 70 mm (3')
Impedance.... 4 ohms
General
Power requirements ..... 240V, 50Hz (Australian model)
230V, 50Hz (General export model)
Power consumption 28 W
Dimensions (W x H x D).... 480 x 230 x 380 mm
Weight 10.5 kg
Standard Accessories
Owner's manual x 1
Warranty card x 1
45 RPM adaptor x 1
Remote control unit (RC-992) x 1
Battery (AA, R6, SUM-3) x 2
- Design and specifications are subject to change without notice.
●Weight and dimensions are approximate.
●Illustrations may differ slightly from production models.
For European customers
Disposal of your old appliance
- When this crossed-out wheeled bin symbol is attached to a product it means the product is covered by the European Directive 2002/96/EC.
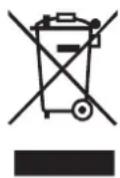
- All electrical and electronic products should be disposed of separately from the municipal waste stream via designated collection facilities appointed by the government or the local authorities.
- The correct disposal of your old appliance will help prevent potential negative consequences for the environment and human health.
- For more detailed information about disposal of your old appliance, please contact your city office, waste disposal service or the shop where you purchased the product.
TEAC
TEAC CORPORATION 3-7-3, Nakacho, Musashino-shi, Tokyo 180-8550, Japan Phone: (0422) 52-5081
TEAC AMERICA, INC. 7733 Telegraph Road, Montebello, California 90640 Phone: (323) 726-0303
TEAC CANADA LTD. 5939 Wallace Street, Mississauga, Ontario L4Z 1Z8, Canada Phone: (905) 890-8008
TEAC MEXICO, S.A. De C.V Campesinos N°184, Colonia Granjas Esmeralda, Delegacion Iztapalapa, CP 09810, México DF Phone: (525) 581-5500
TEAC UK LIMITED Unit 19 & 20, The Courtyards, Hatters Lane, Watford, Hertfordshire, WD18 8TE, U.K. Phone: (0845) 130-2511
TEAC EUROPE GmbH Bahnstrasse 12, 65205 Wiesbaden-Erbenheim, Germany Phone: 0611-71580
This appliance has a serial number located on the rear panel. Please record the model number and serial number and retain them for your records.
Model number Serial number
- Multi music player/CD recorder
- OWNER'S MANUAL
- CAUTION
- IMPORTANT SAFETY INSTRUCTIONS
- Contents
- Read this before attempting any operations
- DO NOT MOVE THE UNIT DURING PLAYBACK
- WHEN MOVING THIS UNIT
- Handling Records
- How to Replace the Stylus
- Caution:
- Removing old stylus
- Installing a new stylus
- Remote Control Unit
- About CD-R and CD-RW discs
- Finalizing
- Recordable discs
- Battery Installation
- Battery Replacement
- Precautions concerning batteries
- A FM antenna
- B AUX IN jacks
- C AC Power Cord
- A turntable
- B screw fixing the turntable for transportation
- C cue-lever
- D tone arm holder
- E speed selector
- F tone arm
- G 45 RPM adaptor
- How to open/close the turntable cover
- To Open:
- To Close:
- A POWER
- B PHONO/AUX, FM/AM, CD
- Remote Sensor
- D Display panel (frequency)
- E TRACK INCREMENT
- F RECORD
- G Display
- H TUNED indicator
- Speakers (stereo)
- CD operation buttons
- STOP (■)
- PLAY (▶)
- PAUSE (II)
- K OPEN/CLOSE
- L VOLUME
- M Disc Tray
- N MUSIC SKIP (◄◄◄ / ►►►)
- REC LEVEL
- P FINALIZE
- Q ERASE
- R TUNING
- S PHONES
- A MANUAL/AUTO REC
- B PROGRAM
- C CLEAR
- D REPEAT
- E DISPLAY
- F SHUFFLE
- Note:
- Basic Operation Listening to
- Radio
- If the reception is poor
- AM broadcast
- FM broadcast
- Press the CD button.
- Press the OPEN/CLOSE button (▲).
- Place a disc on the tray with the printed label face up.
- Press the OPEN/CLOSE button (▲) to close the tray.
- Press the PLAY button (▶) to start playback.
- Listening to a CD 2 Time Displa
- A To suspend playback temporarily (pause mode)
- B To stop playback
- C To skip to the next or a previous track
- D Search for a part of a track
- Repeat Playback
- REPEAT ALL (Repeat All the Tracks)
- REPEAT 1 (Repeat one track)
- Shuffle Playback
- Before Recording
- To check the programmed order
- To add a track to the end of the program
- To delete the last track from the program
- To clear the program
- Before you start recording, make sure that you understand the following points:
- Serial Copy Management System
- Rule 1
- Rule 2
- Press the RECORD button.
- If necessary, adjust the recording level using the REC LEVEL knob.
- If PHONO is selected in step 1 gently lower the tone arm onto the edge of the record (or the track to be recorded).
- Press the PLAY or the PAUSE button to start recording.
- If AUX is selected in step 1 play the source to be recorded.
- Recording 2
- A To stop recording
- B To suspend recording temporarily (pause mode)
- C Manual track division
- Press the CD button to select "CD".
- Load an unfinalized (recordable) disc.
- Press the FINALIZE button in the stop mode.
- Press the PLAY (▶) button to start finalizing.
- Er ALL
- No power
- No sound.
- The sound is noisy.
- Remote control doesn't work.
- CD Recorder
- Will not play.
- Sound skips.
- Recording is not possible.
- Tuner
- Cannot listen to any station, or signal is too weak.
- Turntable
- Beware of condensation
- Maintenance
- 0TR 0:00
- BUSY
- CLOSE
- Er \*\*
- FIN -- d
- -\*\*db
- NODISC
- OPEN
- ---:---
- P-\*\*
- UN FIN
- Error Messages
- D FULL, OPFULL
- D DISC
- P-FULL
- Err \*\*
- Err 03
- Amplifier Section
- CD Recorder Section
- Tuner Section
- Record Player Section
- Speaker System Section
- General
- Standard Accessories
- For European customers
- Disposal of your old appliance
- TEAC
Brand : TEAC
Model : GF-350
Category : DJ Equipment