
N 420 - Sewing machine NECCHI - Free user manual and instructions
Find the device manual for free N 420 NECCHI in PDF.


| Type de produit | Sewing Machine |
| Brand | Necchi |
| Model | N 420 |
| Dimensions (approx.) | 40 x 18 x 30 cm |
| Weight | 7.5 kg |
| Power supply | 220-240 V, 50/60 Hz |
| Power consumption | 85 W |
| Maximum sewing speed | Up to 900 stitches per minute |
| Number of built-in stitches | 20 |
| Stitch length range | 0 to 4 mm |
| Stitch width range | 0 to 5 mm |
| Needle system | 130/705H (HAx1) |
| Bobbin type | Class 15 (top drop-in) |
| Built-in needle threader | Yes |
| Automatic bobbin winder | Yes |
| Sewing light | Yes, LED |
| Drop feed dogs | Yes, for free-motion sewing |
| Reverse sewing | Yes, by lever |
| Buttonhole style | 4-step, built-in |
| Safety features | Safety switch (foot pedal release), needle stop up/down |
| Maintenance | Regular cleaning and oiling as per manual |
| Included accessories | Presser feet set, needles, bobbins, seam ripper, screwdriver, oil bottle, dust cover |
| Warranty | 2 years |
Frequently Asked Questions - N 420 NECCHI
User questions about N 420 NECCHI
0 question about this device. Answer the ones you know or ask your own.
Ask a new question about this device
Download the instructions for your Sewing machine in PDF format for free! Find your manual N 420 - NECCHI and take your electronic device back in hand. On this page are published all the documents necessary for the use of your device. N 420 by NECCHI.
USER MANUAL N 420 NECCHI
natural_image
Line drawing of a sewing machine (no text or symbols present)INSTRUCTION MANUAL
This sewing machine is intended for household use.
IMPORTANT SAFETY INSTRUCTIONS
When using a sewing machine, basic safety precautions should always be followed, including the following.
Read all instructions before using.

DANGER
- To reduce the risk of electric shock:
Never leave unattended when plugged in. Always unplug this machine from the electric outlet immediately after using and before cleaning.

WARNING-
To reduce the risk of burns, fire, electric shock, or injury to persons:
-
Do not allow to be used as a toy. Close attention is necessary when this sewing machine is used by or near children.
-
Use this sewing machine only for its intended use as described in this manual. Use only attachments recommended by the manufacturer as contained in this manual.
-
Never operate this sewing machine if it has a damaged cord or plug, if it is not working properly, if it has been dropped or damaged, or dropped into water. Return the sewing machine to the nearest authorized dealer or service center for examination, repair, electrical or mechanical adjustment.
-
Never operate the sewing machine with any air openings blocked. Keep ventilation openings of the sewing machine and foot controller free from the accumulation of lint, dust, and loose cloth.
-
Never drop or insert any object into any opening.
-
Do not use out doors.
-
Do not operate where aerosol (spray) products are being used or where oxygen is being administered.
-
To disconnect, turn the power switch to the off position (symbol O), then remove plug from outlet.
-
Do not unplug by pulling on cord. To unplug, grasp the plug, not the cord.
-
Keep fingers away from all moving parts. Special care is required around the sewing machine needle.
-
Always use the proper needle plate. The wrong plate can cause the needle to break.
-
Do not use bent needles.
13.Do not pull or push fabric while stitching. It may deflect the needle causing it to break.
-
Switch the sewing machine off (symbol O) when making any adjustments in the needle area, such as threading needle, changing needle, threading bobbin, or changing presser foot.
-
Always unplug sewing machine from the electrical outlet when removing covers, lubricating, or when making any other user servicing adjustments mentioned in the instruction manual.
-
Handle the foot controller with care and avoid dropping it on the floor. Be sure not to place anything on top of it.
-
Use only the handle to lift and move the machine.
-
Do not expose the machine or machine plastic case to sunlight directly. Also, do not keep it in a very warm or damp place.
SAVE THESE INSTRUCTIONS
Servicing should be performed by an authorized service representative.
CONTENTS
MAIN PARTS 2
CONTROL PANEL 3
CONNECTING THE MACHINE .... 4
FOOT CONTROLLER.... 4
ACCESSORIES 5
DUST COVER.... 5
EXTENSION TABLE 6
CHANGING THE PRESSER FOOT ...... 6
INSERTING THE NEEDLE 7
FABRIC, THREAD AND NEEDLE TABLE . 7
-TYPE A- FUNCTION OF EACH PART ..... 8
-TYPE B, C- FUNCTION OF EACH PART10
-TYPE A-
TO SELECT A UTILITY PATTERN...... 12
-TYPE B-
TO SELECT A UTILITY PATTERN...... 14
-TYPE C-
TO SELECT A PATTERN 16
BOBBIN SETTING 20
THREADING THE MACHINE ...... 22
STARTING TO SEW 24
-TYPE A- THREAD TENSION 27
-TYPE B, C-
ADJUSTING THE THREAD TENSIONS . 28
STRAIGHT STITCH SEWING 29
ZIGZAG STITCH SEWING 30
MULTI-STITCH ZIGZAG 30
FREE ARM SEWING 30
OVERCASTING-OVERLOCKING ...... 31
BLIND HEM STITCHING 32
ELASTIC STITCH SEWING.... 33
SCALLOP STITCH.... 33
INSERTING ZIPPERS
CENTERED INSERTION 34
LAPPED INSERTION 35
BUTTONHOLE SEWING 36
-TYPE A ONLY- BOUND BUTTONHOLE 38
SEWING ON BUTTONS 40
QUILTING 42
HAND LOOK QUILTING STITCH 43
UTILITY DECORATIVE STITCHES...... 43
-TYPE A-
DECORATIVE AND LETTER STITCH
SEWING.... 44
-TYPE B-
DECORATIVE AND LETTER STITCH
SEWING.... 47
APPLIQUE 50
PATCH WORK 50
TWIN NEEDLE SEWING 51
AUTOMATIC BAR-TACK / DARNING ..... 52
-TYPE A ONLY- NARROW HEMMING ... 53
natural_image
Symbol of a trash bin crossed with no text or numbers, representing waste sorting or restriction (no text present)

matri
www.matri.eu
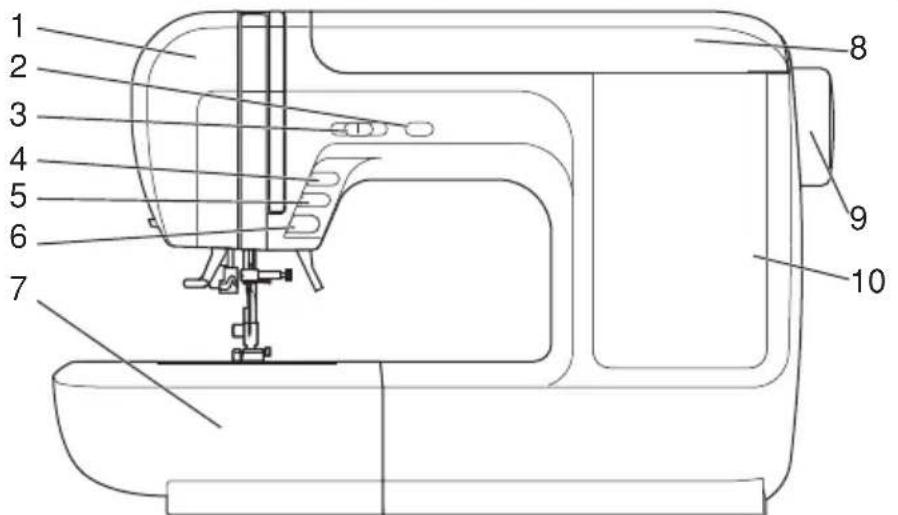
MAIN PARTS.
-
Light Cover
-
-TYPE A- Thread Cutter Button -Type B, C- Needle Up-Down Button
-
Speed Control Button
-
-TYPE A- Needle Up-Down/Slow Button -TYPE B, C- Slow Button
-
Reverse Button
-
Start/Stop Button
-
Extension Table
-
Top Cover
-
Hand Wheel
-
Control Panel
-
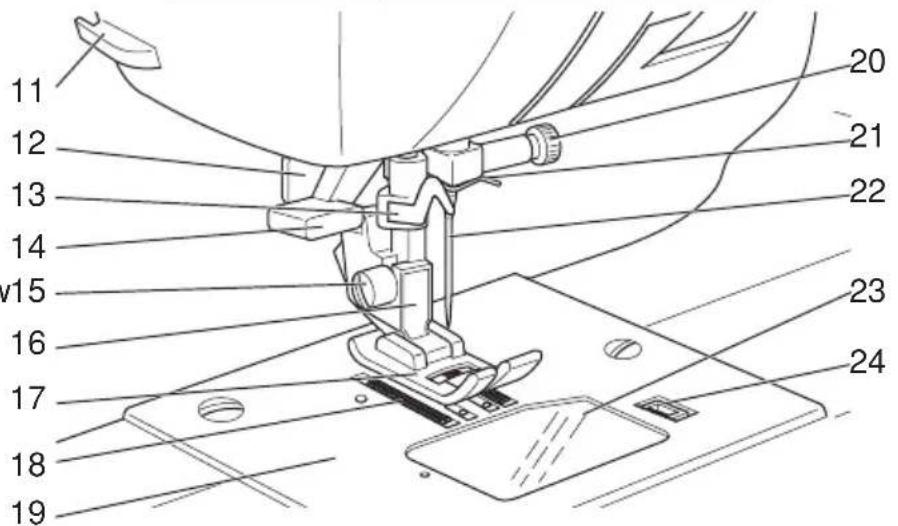
Thread Cutter
-
Buttonhole Lever
-
Needle Threader
-
Needle Threader Lever
-
Presser Foot Thumb Screw15
-
Presser Foot Holder
-
Presser Foot
-
Fabric Feed Dogs
-
Needle Plate
-
Needle Clamp Screw
-
Needle Bar Thread Guide
-
Needle
-
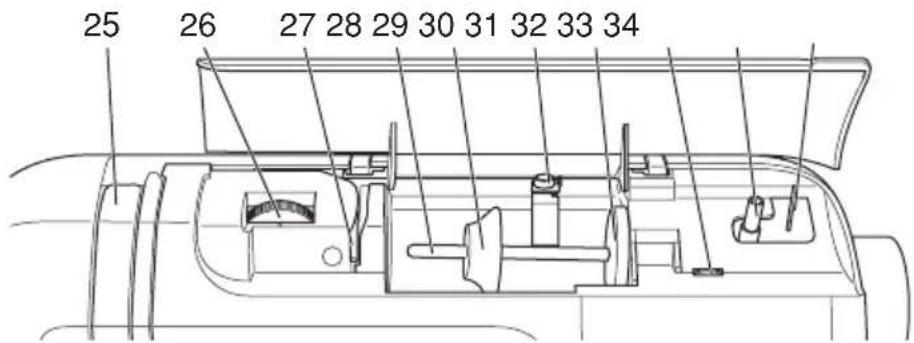
Bobbin Cover
-
Bobbin Cover Latch
-
Thread Take-Up Lever (Inside)
-
-TYPE B, C- Thread Tension Regulator
-
Thread Guide Plate
-
Spool Pin
-
Spool Cap
-
Bobbin Winder Thread Guide
-
Felt Washer
-
-TYPE A, B- L. C. D. Contrast Control
-
Bobbin Winder Shaft
-
Bobbin Winder Stop
-
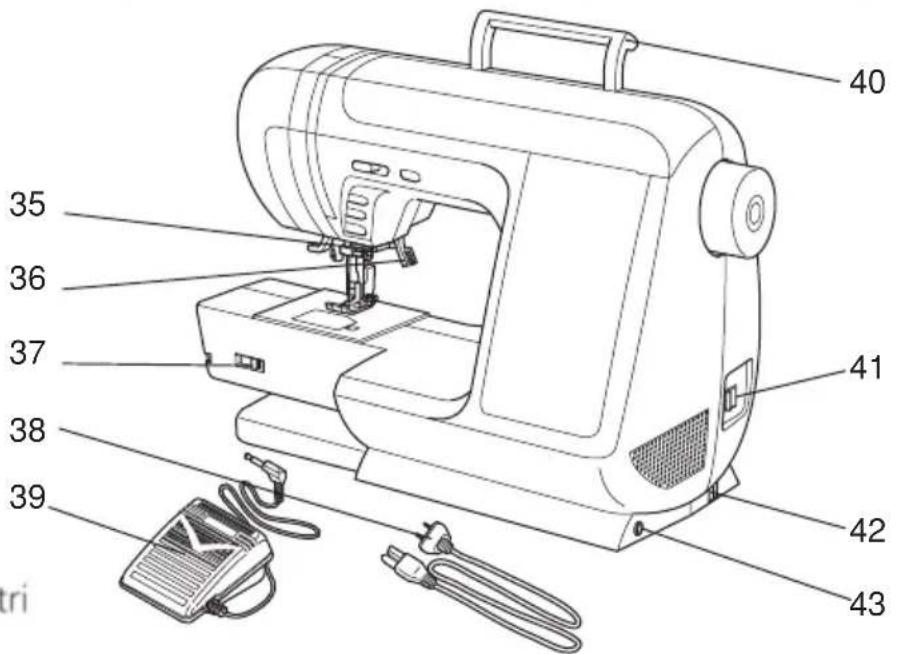
Thread Cutter
-
Presser Foot Lifter
-
Drop Feed Lever
-
Power Line Cord
-
Foot Controller
-
Handle
-
Power Switch
-
Terminal Box
-
Controller Jack
-TYPE A-
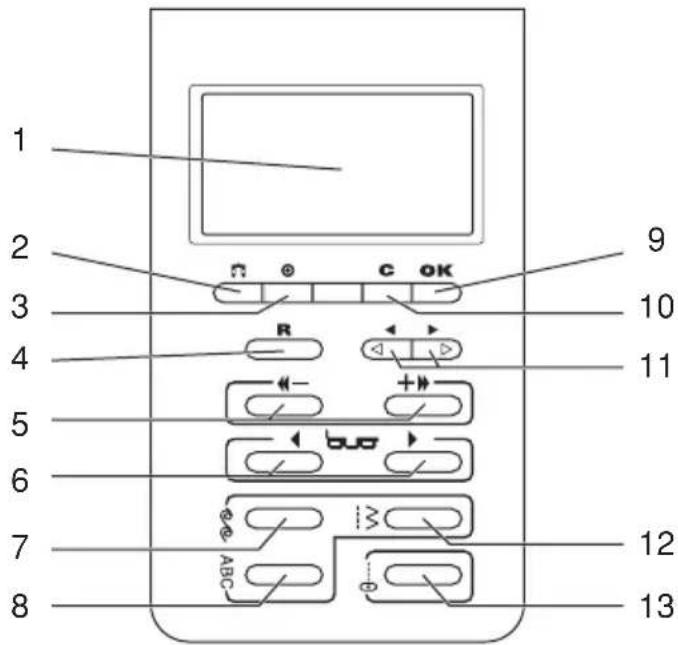
- Liquid Crystal Display (L. C. D.)
- Twin Needle Button
- Tack Button
- Read Button
- Up-Down Buttons
- Tab Buttons
- Decorative Stitch Button
- Letter Stitch Button
- OK Button
- Clear Button
- Cursor Buttons
- Utility Stitch Button
- Straight Stitch Button
-TYPE B-
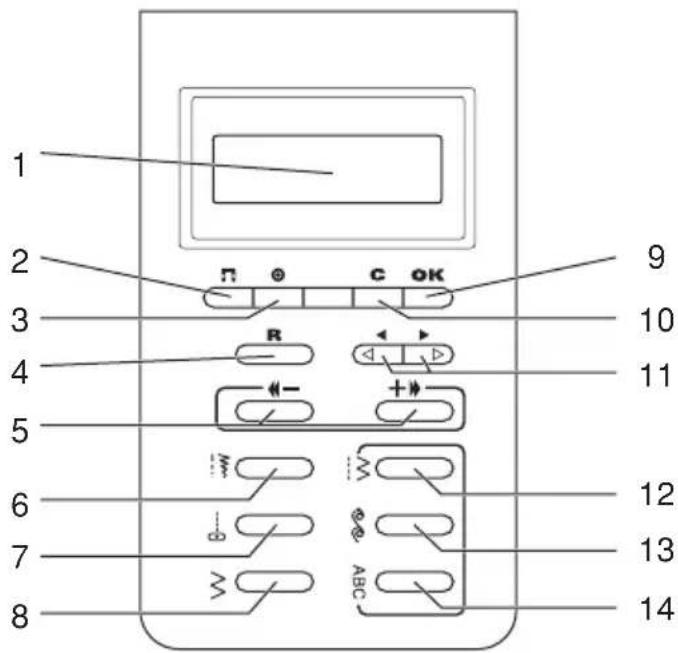
- Liquid Crystal Display (L. C. D.)
- Twin Needle Button
- Tack Button
- Read Button
- Up-Down Buttons
- Length / Width Button
- Straight Stitch Button
- Zigzag Stitch Button
- OK Button
- Clear Button
- Cursor Buttons
- Utility Stitch Button
- Decorative Stitch Button
- Letter Stitch Button
-TYPE C-
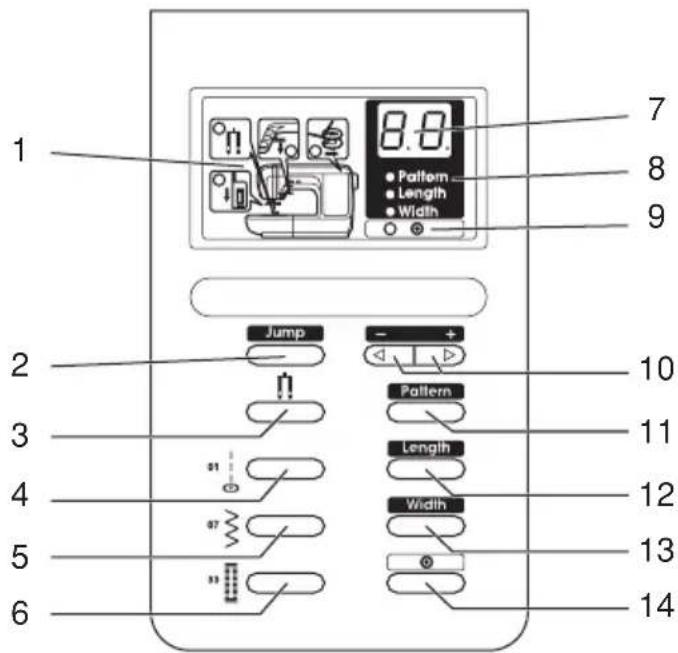
- Monitor Window
- Jump Button
- Twin Needle Button
- Straight Stitch Button
- Zigzag Stitch Button
- Buttonhole Button
- Stitch Number Indicator
- Stitch Mode Indicator
- Tack Stitch Indicator
- Up-Down Buttons
- Pattern Number Mode Button
- Stitch Length Mode Button
- Stitch Width Mode Button
- Tack Stitch Button
CONNECTING THE MACHINE

DANGER: To reduce the risk of electric shock.
Never leave unattended when plugged in. Always unplug this machine from the electric outlet immediately after using and before maintenance.

WARNING: To reduce the risk of burns, fire, electric shock, or injury to persons.
Do not unplug by pulling on cord. To unplug, grasp the plug, not the cord.
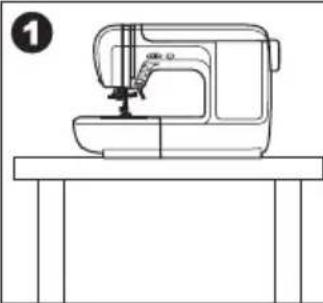
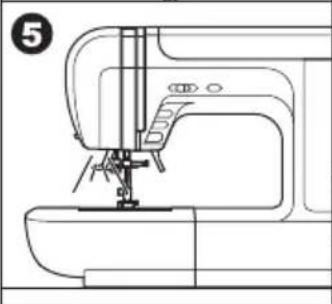
- Place machine on stable table.
- Connect the power line cord to the machine by inserting the 2-hole plug into the terminal box.
- Connect the power line plug to the electric outlet.
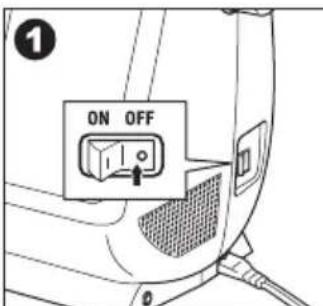
- Turn on the power switch.
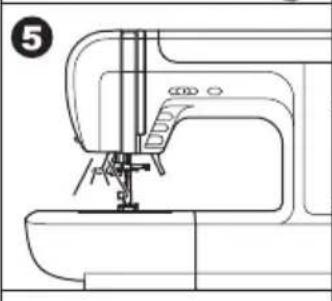
- A lamp will light up when switch is turned on.
- To disconnect, turn the power switch to the off position (symbol O), then remove plug from outlet.
natural_image
Line drawing of a sewing machine on a table (no text or symbols)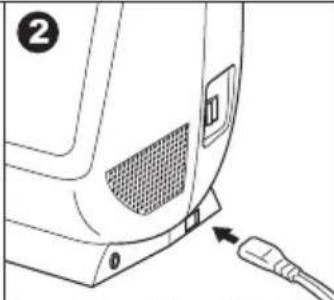
natural_image
Line drawing of a device's rear panel with a cable inserted, showing no text or symbols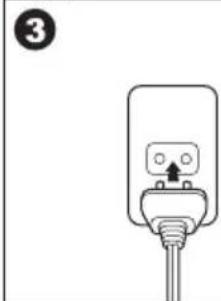
natural_image
Simple line drawing of a plug with a socket and cable (no text or symbols)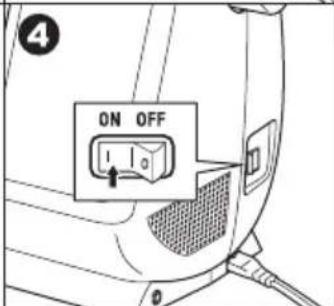
natural_image
Line drawing of a sewing machine with no visible text or symbols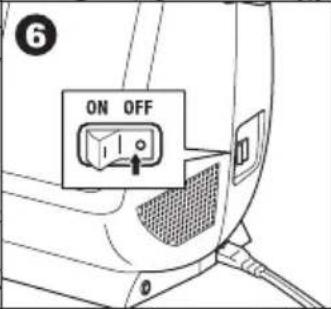
FOOT CONTROLLER
Use of foot controller will permit control of start, stop and speed with your foot. When the foot controller is connected, start/stop button will be disactivated. (See page 8, 10)
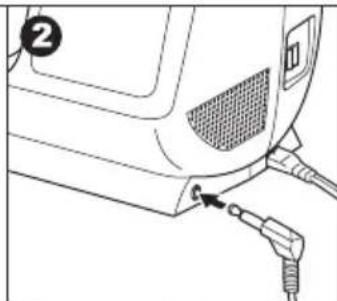
- Turn off the power switch. (symbol O)
- Push foot controller plug into the jack on machine.
- Place foot controller at your feet.
- Turn on the power switch.
- A lamp will light up when switch is turned on.
- The harder you press the foot controller, the faster the machine will sew. The machine will stop when foot controller is released.

WARNING: To reduce the risk of burns, fire, electric shock, or injury to persons.
- Turn off the power when connecting the foot controller to the machine.
- Handle the foot controller with care and avoid dropping it on the floor. Be sure not to place anything on top of it.
- Use only foot controller provided with this machine. (Type 4C-337B)
natural_image
Line drawing of a device's cable and plug connection (no text or symbols)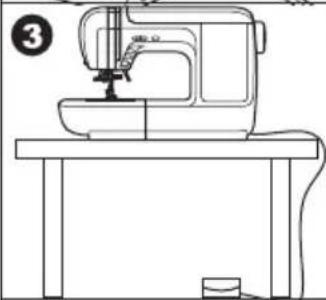
natural_image
Line drawing of a sewing machine on a workbench (no text or symbols)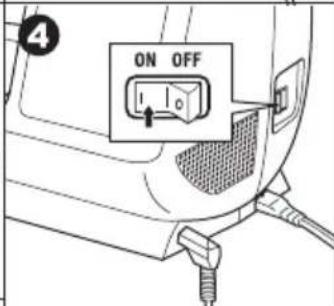
natural_image
Line drawing of a sewing machine needle and base (no text or symbols)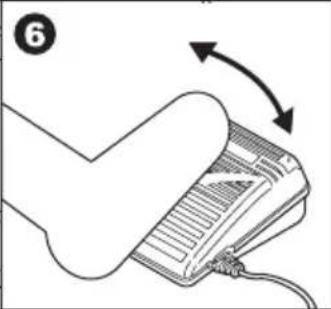
natural_image
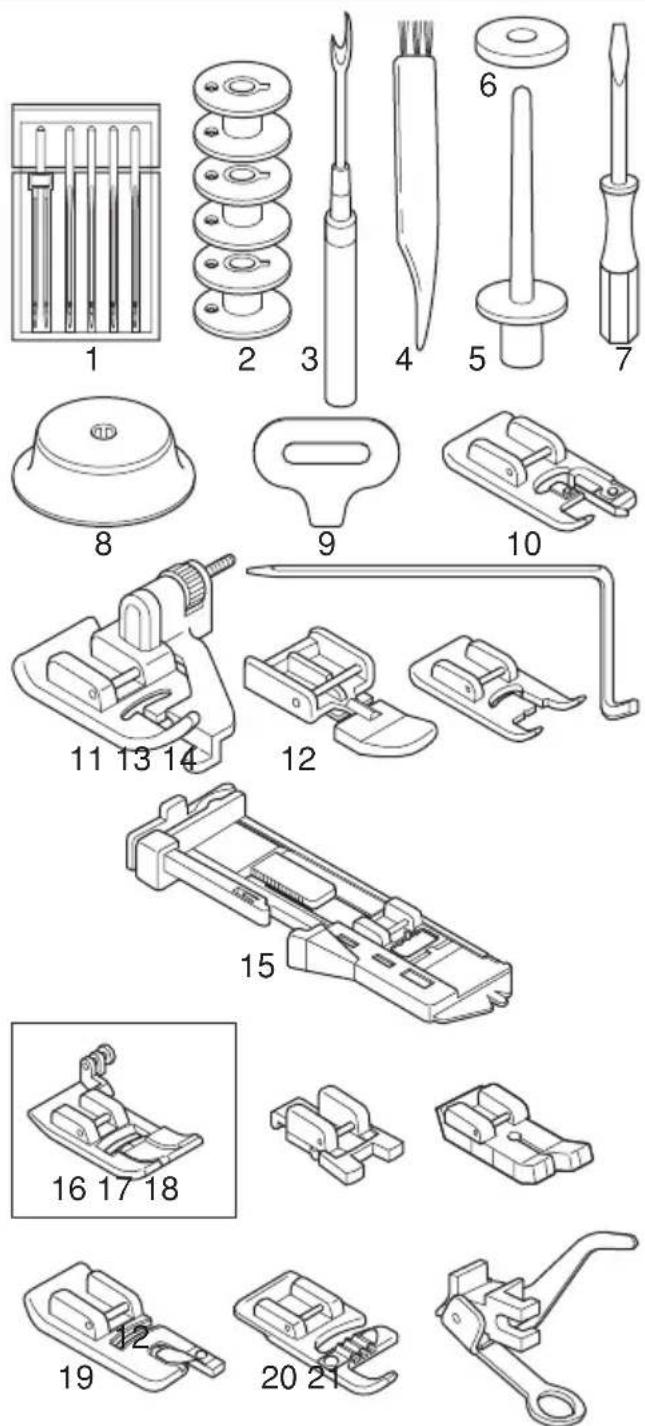
Illustration of a hand holding a device with an arrow indicating rotation (no text or symbols present)Accessories are provided in the accessory case.
(See next page, [EXTENSION TABLE])
- Needle Pack
- 4 Bobbins (1 is in the machine)
- Seam Ripper
- Brush
- Extra Spool Pin
- Felt
- Screw Driver
- Thread Cap (On the machine when delivered)
- Driver for Needle Plate
- Overcasting Foot (C)
- Blind Foot (D)
- Zipper Foot (E)
- Satin Foot (B)
- Quilting Bar
- Buttonhole Foot
- Regular Foot (A) (On machine when delivered)
-TYPE A & B-
- Button Sewing Foot
-TYPE A-
- Straight Stitch / Quilting Foot
- Narrow Hemming Foot
- Cording Foot
- Darning Embroidery Foot
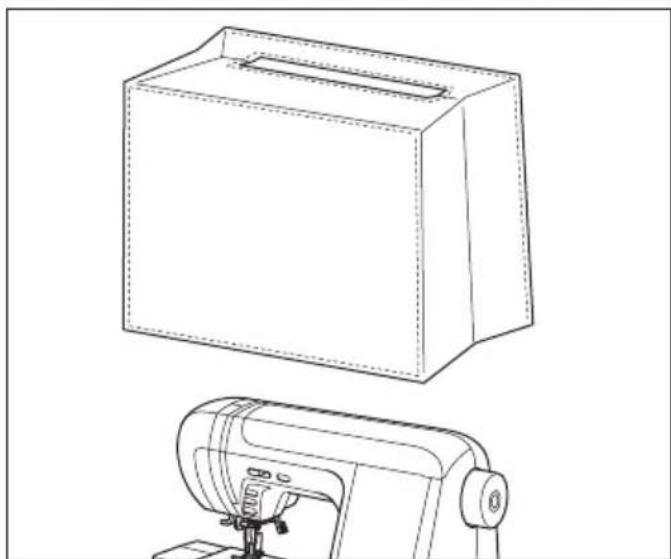
DUST COVER
Cover the machine with dust cover when it is not to be used.

matri
natural_image
Line drawing of a garment rental machine and its corresponding box cover (no text or symbols)EXTENSION TABLE.
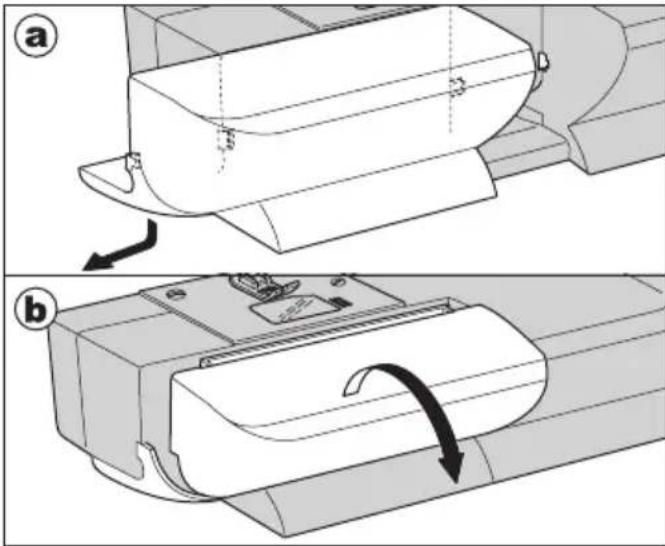
a. REMOVING THE EXTENSION TABLE
Hook your finger to the left bottom side of extension table and slide it to the left. To attach, insert to the right.
b. OPENING THE ACCESSORY CASE
Hook your finger to the this side of accessory case and pull toward you.
natural_image
Technical illustration showing two views (a and b) of a mechanical component with arrows indicating motion or assembly (no text or symbols present)CHANGING THE PRESSER FOOT
The presser foot must be changed according to the stitch you sew, or work you do.

CAUTION: To prevent accidents.
Turn off the power switch before you change the presser foot.
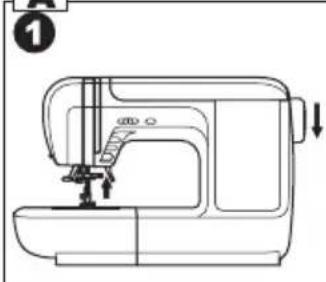
A. Changing the presser foot
- Turn the hand wheel toward you until the needle is at its highest point.
- Raise the presser foot lifter.
- Remove the presser foot by pushing the presser foot release lever toward you.
- Place desired foot with its pin directly under the slot in presser foot holder.
- Lower the presser foot lifting lever and the presser foot will snap into place.
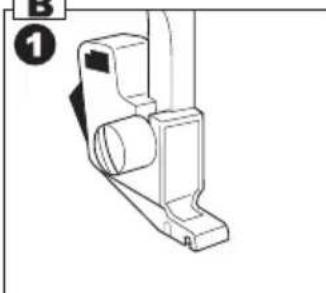
B. Removing the presser foot holder
When cleaning around the feed dog or attaching extra foot (option), you may remove the presser foot holder.
- Remove the presser foot.
- Loosen the presser foot thumb screw and remove the presser foot holder.
- To replace the holder, pull up the holder as far as it will go from bottom of presser bar.
- Tighten the thumb screw.
A
natural_image
Line drawing of a sewing machine with no text or symbols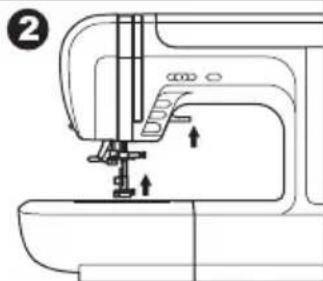
natural_image
Line drawing of a sewing machine needle and base (no text or symbols)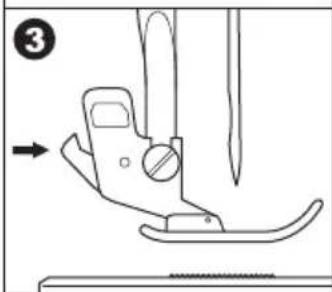
natural_image
Line drawing of a sewing machine needle and fabric (no text or symbols)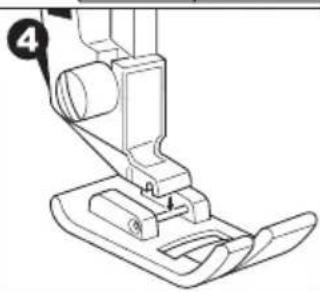
natural_image
Line drawing of a sewing machine needle and foot (no text or symbols)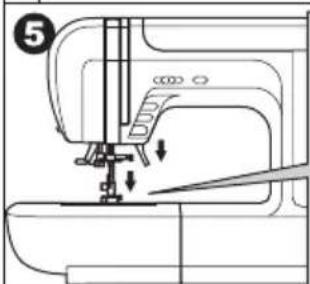
natural_image
Line drawing of a sewing machine needle and fabric (no text or symbols)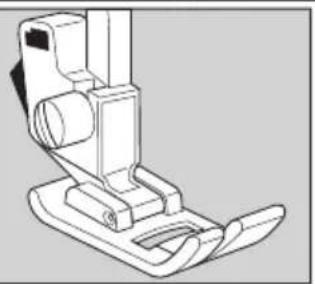
natural_image
Technical line drawing of a sewing machine (no text or symbols)B
natural_image
Technical line drawing of a mechanical bracket or clamp assembly (no text or symbols)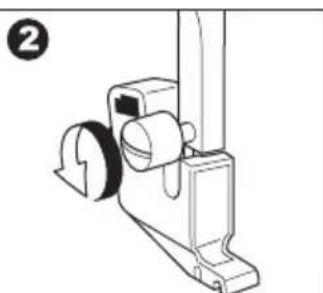
natural_image
Technical line drawing of a mechanical device with a rotating knob and lever (no text or symbols)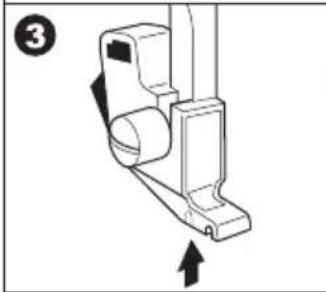
natural_image
Mechanical component diagram showing a lever mechanism with directional arrows (no text or symbols)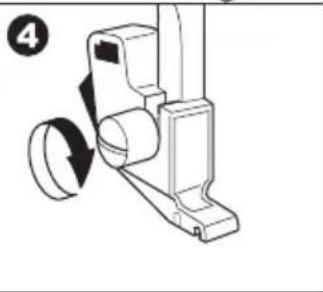
natural_image
Mechanical component diagram showing a rotating arm mechanism (no text or symbols)INSERTING THE NEEDLE\_
Select a needle of the right type and size for the fabric to be sewn.

CAUTION: To prevent accidents.
Turn off the power before removing the needle.
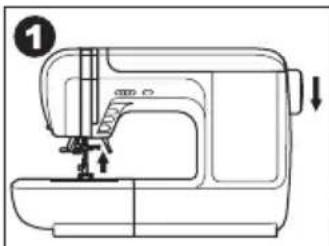
- Turn the hand wheel toward you until the needle is at its highest point.
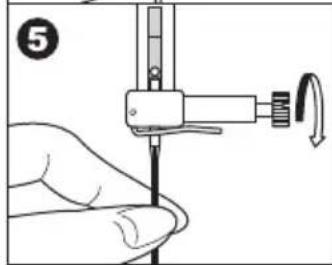
- Loosen the needle clamp screw.
- Remove the needle.
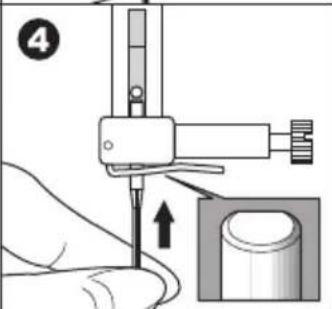
- Insert new needle into needle clamp with the flat side to the back and push it up as far as it will go.
- Tighten the needle clamp screw.
a. Do not use the bent or blunt needle. Place needle on a flat plate and check straightness.
natural_image
Line drawing of a sewing machine with no text or symbols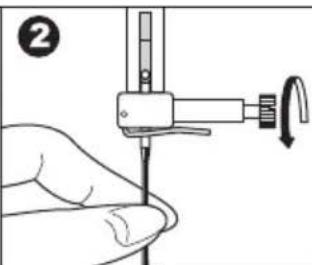
natural_image
Hand holding a needle inserted into a measurement device (no text or symbols visible)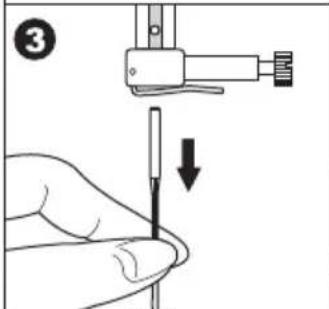
natural_image
Hand holding a needle or screwdriver with a mechanical component, no visible text or symbols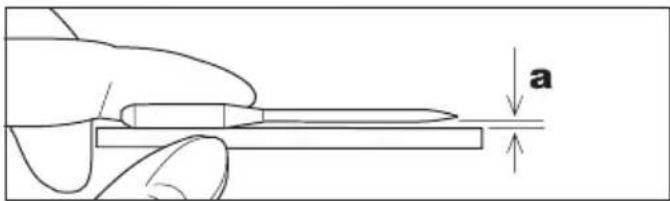
FABRIC, THREAD AND NEEDLE TABLE
Select size of thread and needle in accordance with fabric to be sewn.
| Type of Fabric | Thread Size | Needle Size |
| Light Weight - thin georgette, organdy, voile, taffeta, silk, etc. | Ctn #80 -100Silk 60 - 80Syn 80 -100 | 9/70-11/80 |
| Medium Weight - gingham, pique, linen, cotton, satin, thin corduroy, velvet | Ctn 50 - 80Silk 50Syn 50 - 80 | 11/80-14/90 |
| Heavy Weight - gabardine, tweed, denim, corduroy | Ctn 40 - 50Silk 50Syn 50 - 60 | 14/90-16/100 |
| Stretch - double knit, tricot, spandex, jersey | Syn 50 - 80Silk 50Thread for knit | 11/80-14/90Needle for knit and synthetic fabric |

Use a Home sewing machine needle.
FUNCTION OF EACH PART
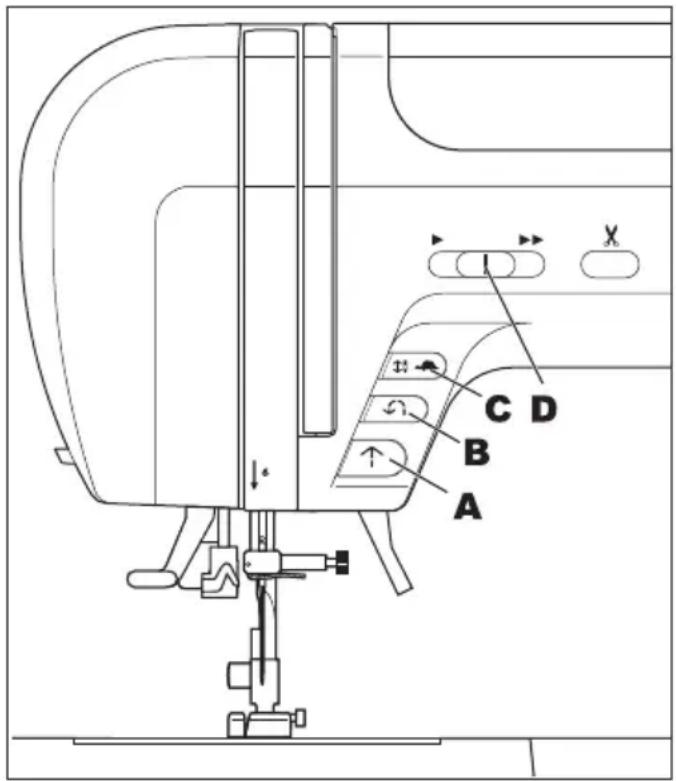
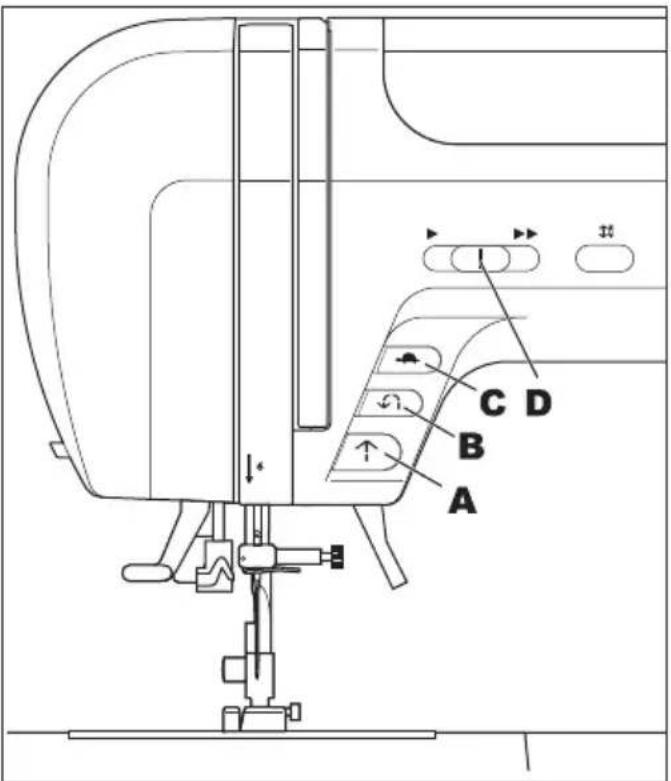
A. START/STOP BUTTON
The machine will start running when start/stop button is pressed and will stop when pressed the second time. The machine will rotate slowly at start of sewing.
MONITOR LAMP
Green Light "ON" Ready to sew or bobbin winding.
Red Light "ON" Presser foot is not in down position or buttonhole lever is not lowered. If the red light is on, the machine will not start even when start/stop button is pressed.
Note:
When the foot controller is connected, start/stop button will be deactivated.
B. REVERSE BUTTON
The machine will continue to sew in reverse at low speed while this button is pressed and stop when this button is released.
Note:
When the foot controller is connected, machine will sew in reverse (at low speed) while this button is pressed. When released, machine will sew forward.
C. NEEDLE UP-DOWN / SLOW BUTTON
While NOT sewing, needle position will be changed up or down by pressing this button.
While sewing, by pressing this button, machine will sew in slow speed. Pressing this button again, the speed will return.
D. SPEED CONTROL BUTTON
The machine will sew faster when the button is slid to the right, and sew slower when button is slid to the left.
Note:
When the foot controller is connected, this button limit the maximum speed.
E. THREAD CUTTER BUTTON
Press this button after sewing to cut the upper and bobbin threads.
The machine will cut both threads automatically.
CAUTION
-
Do not press this button when there is no fabric in the machine or no need to cut the threads. The thread may tangle, resulting in damage.
-
Do not use this button when cutting thread thicker than #30, nylon thread or other speciality threads.
In this case, use the thread cutter (H)
F. PRESSER FOOT LIFTER
The presser foot is lifted up or down by this lever.
Note: Machine will not start when the presser foot is lifted. (Except for bobbin winding)
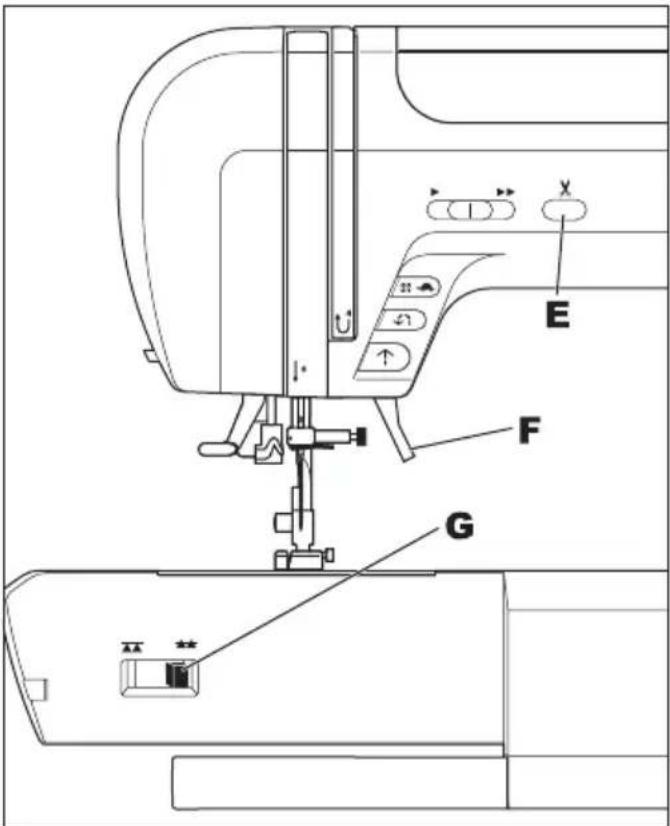
G. DROP FEED LEVER
The fabric feed dogs project up through the needle plate, directly below the presser foot. Their function is to move the fabric being sewn. The drop feed lever controls the fabric feed dogs.
For ordinary sewing, move the lever to the right. This raises feed dogs to their highest position. For most sewing, the lever should be in this position.
For darning or free motion embroidery or whenever fabric is to be moved by hand, move the lever to the left to lower the fabric feed dogs.
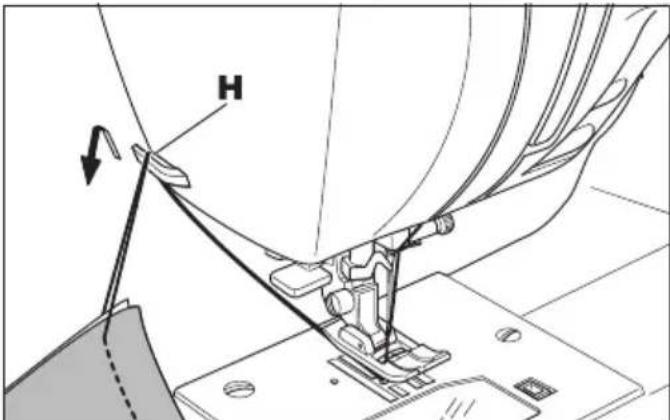
H. THREAD CUTTER
Use this cutter if the thread cutter button is not used.
- Raise the presser foot and bring fabric and threads backward after sewing.
- Hook the threads to the thread cutter from back to front.
- Pull fabric and cut threads.
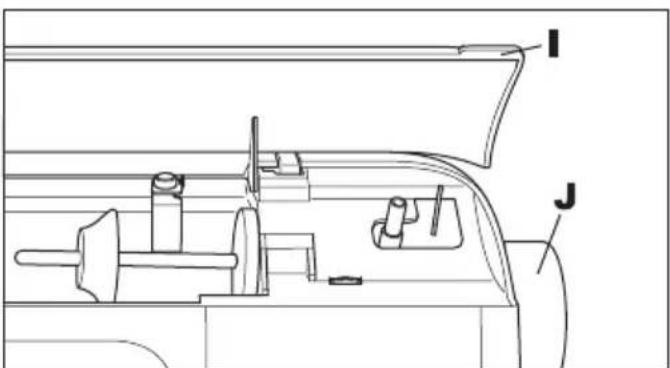
I. TOP COVER
To open the top cover, lift up the right side of cover.
J. HAND WHEEL
By turning the hand wheel, the needle will raise or lower. You should turn hand wheel toward you.
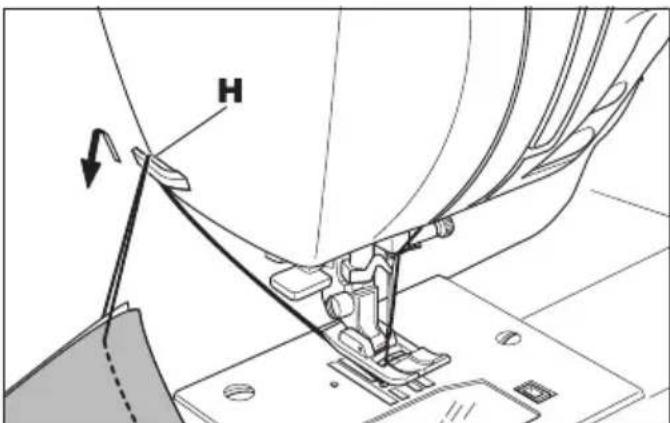
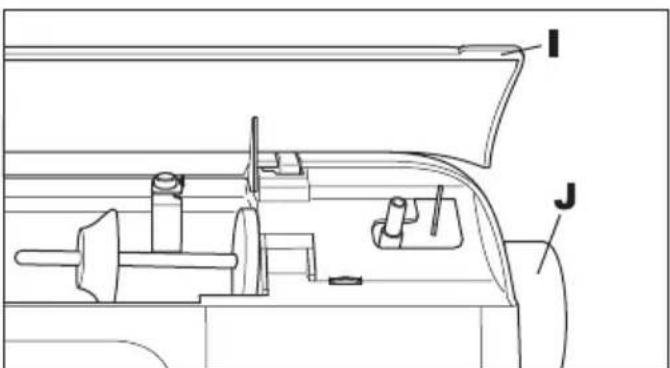
- TYPE B, C -\_\_\_\_ FUNCTION OF EACH PART
A. START/STOP BUTTON
The machine will start running when start/stop button is pressed and will stop when pressed the second time. The machine will rotate slowly at start of sewing.
MONITOR LAMP
Green Light "ON" Ready to sew or bobbin winding.
Red Light "ON" Presser foot is not in down position or buttonhole lever is not lowered. If the red light is on, the machine will not start even when start/stop button is pressed.
Note:
When the foot controller is connected, start/stop button will be disactivated.
B. REVERSE BUTTON
The machine will continue to sew in reverse at low speed while this button is pressed and stop when this button is released.
Note:
When the foot controller is connected, machine will sew in reverse (at low speed) while this button is pressed. When released, machine will sew forward.
C. SLOW BUTTON
While sewing, by pressing this button, machine will sew in slow speed. Pressing this button again, the speed will return.
D. SPEED CONTROL BUTTON
The machine will sew faster when the button is slid to the right, and sew slower when button is slid to the left.
Note:
When the foot controller is connected, this button limit the maximum speed.
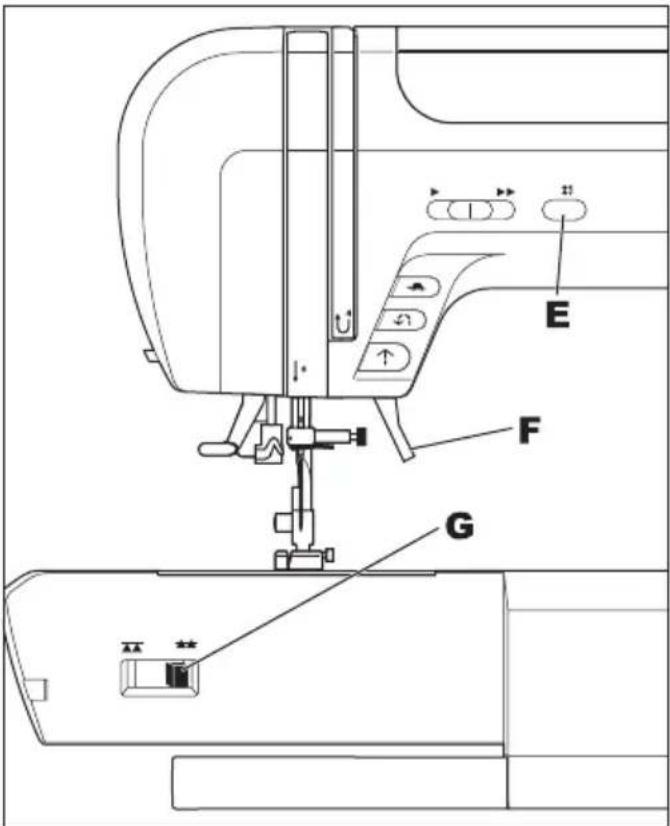
E. NEEDLE UP-DOWN BUTTON
Needle stop position will be changed up or down by pressing this button.
F. PRESSER FOOT LIFTER
The presser foot is lifted up or down by this lever.
Note: Machine will not start when the presser foot is lifted. (Except for bobbin winding)
G. DROP FEED LEVER
The fabric feed dogs project up through the needle plate, directly below the presser foot. Their function is to move the fabric being sewn. The drop feed lever controls the fabric feed dogs.
For ordinary sewing, move the lever to the right. This raises feed dogs to their highest position. For most sewing, the lever should be in this position.
For darning or free motion embroidery or whenever fabric is to be moved by hand, move the lever to the left to lower the fabric feed dogs.
H. THREAD CUTTER
After sewing, you can cut threads using the teread cutter.
- Raise the presser foot and bring fabric and threads backward after sewing.
- Hook the threads to the thread cutter from back to front.
- Pull fabric and cut threads.
I. TOP COVER
To open the top cover, lift up the right side of cover.
J. HAND WHEEL
By turning the hand wheel, the needle will raise or lower. You should turn hand wheel toward you.
- TYPE A - TO SELECT A UTILITY PATTERN
This machine has 52 utility patterns.
These patterns are separated into 4 groups.
(See page 58 or inside of the top cover [PATTERN CHART].)
When you turn on the machine, straight stitch will be selected and indicated on the L. C. D..
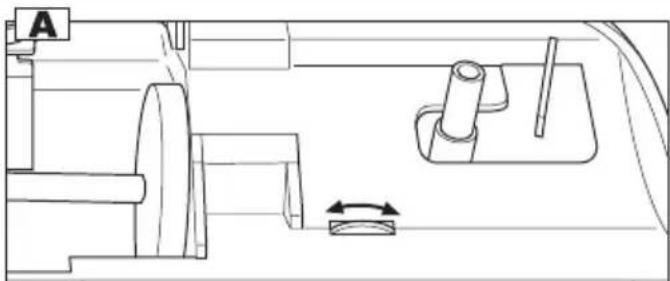
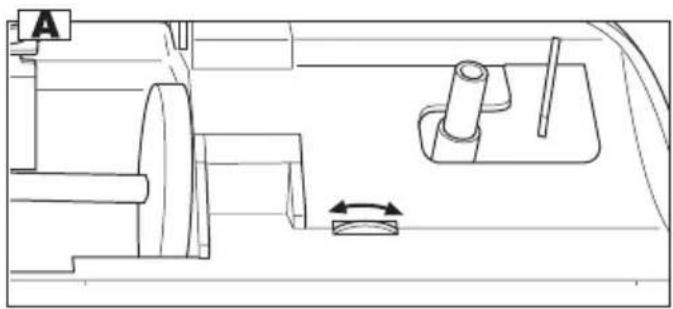
A. CONTRAST OF THE L.C.D.
The contrast of the L.C.D is adjusted by turning the L.C.D. contrast control dial.
B. STRAIGHT STITCH BUTTON
Whenever you can select straight stitch directly by pressing the straight stitch button.
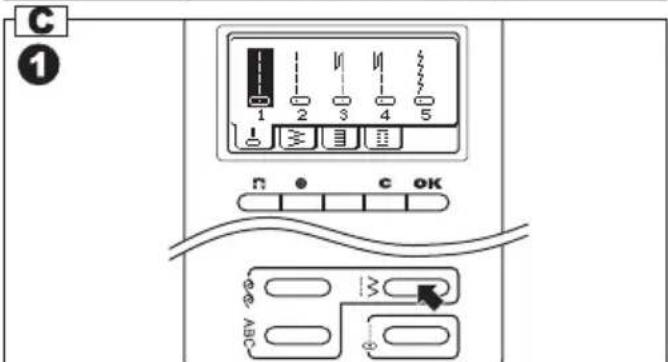
C. TO SELECT A UTILITY PATTERN
- Press the utility stitch button.
First 5 patterns of utility stitch will appear on the L.C.D..
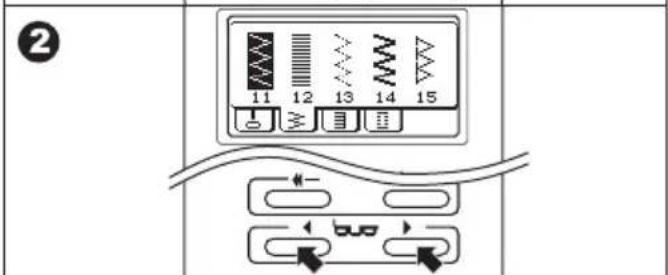
- By pressing the tab (>) or (<) button, utility 4 groups will change incrementally or decrementally.
Select a group you want to sew.
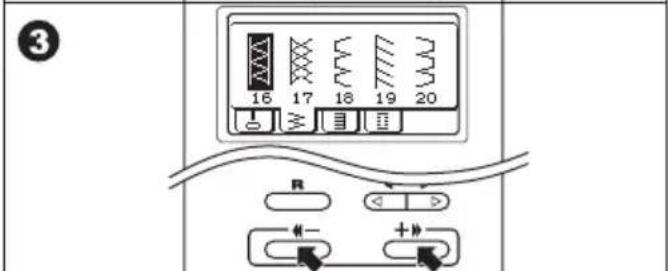
- By pressing the up ( + >> ) or down(<<-) button, 5 patterns will change incrementally or decrementaly.
Press these buttons until desired pattern will appear.
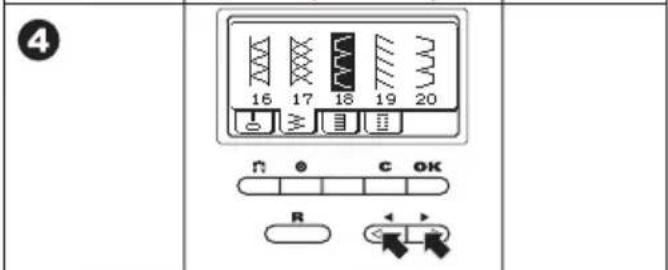
- Press the cursor (>) or (<) button to highlight the pattern you desire.
Note:
When the most right or left side pattern is highlighted, by pressing the cursor (>) or (<) button, next or previous 5 patterns of its group will appear.
- Press the OK button.
The L.C.D. screen will indicate the informations of selected pattern. (Next page)
To select decorative or letter stitch patterns, See page 44 [DECORATIVE AND LETTER STITCH SEWING].
natural_image
Technical line drawing of a mechanical assembly with no visible text or symbols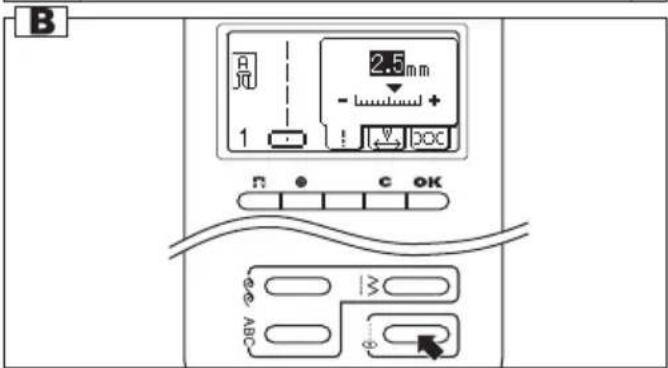
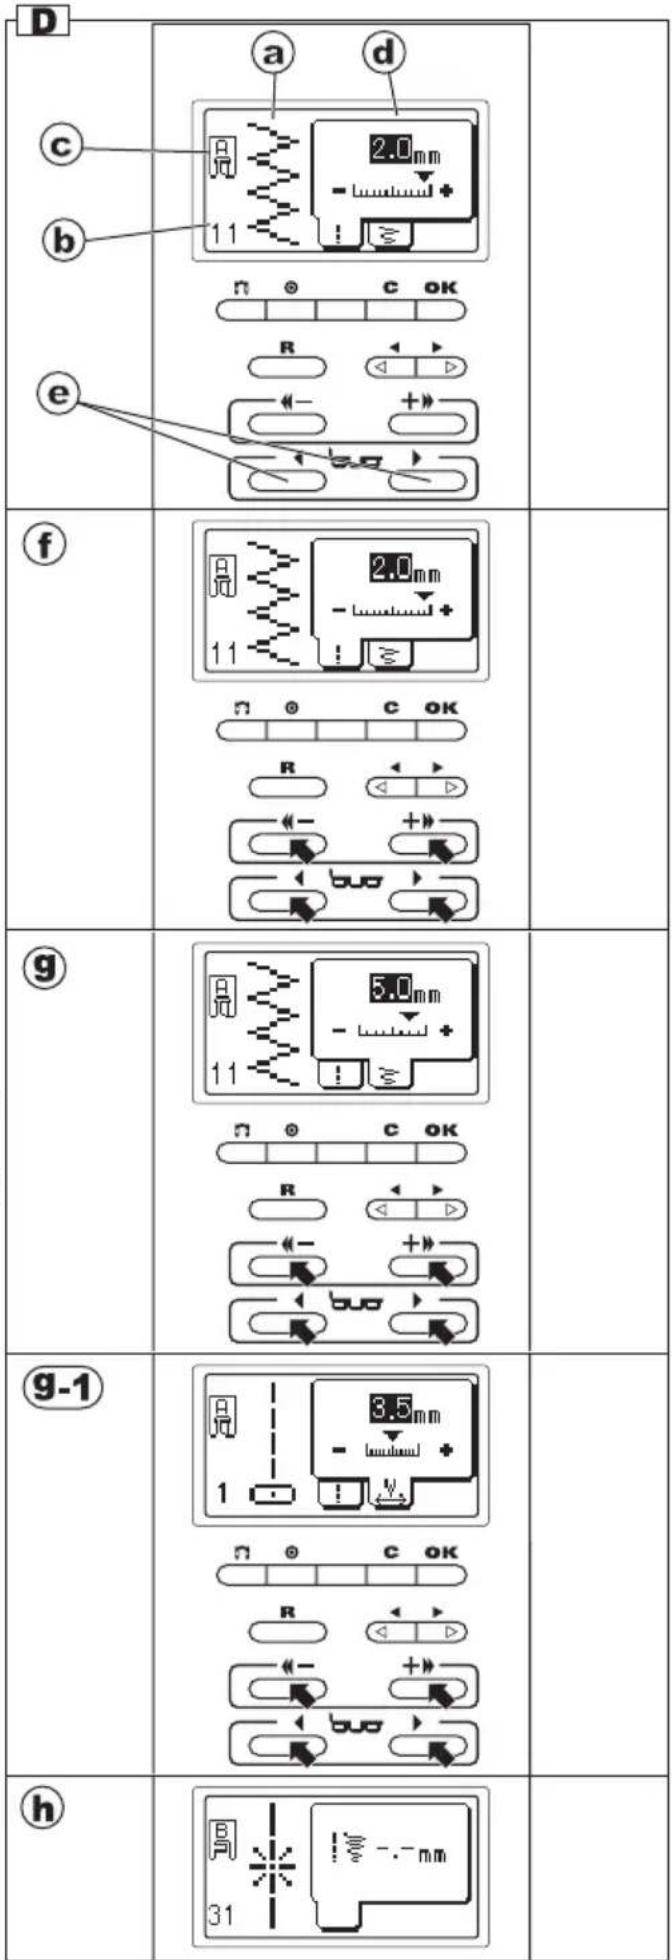
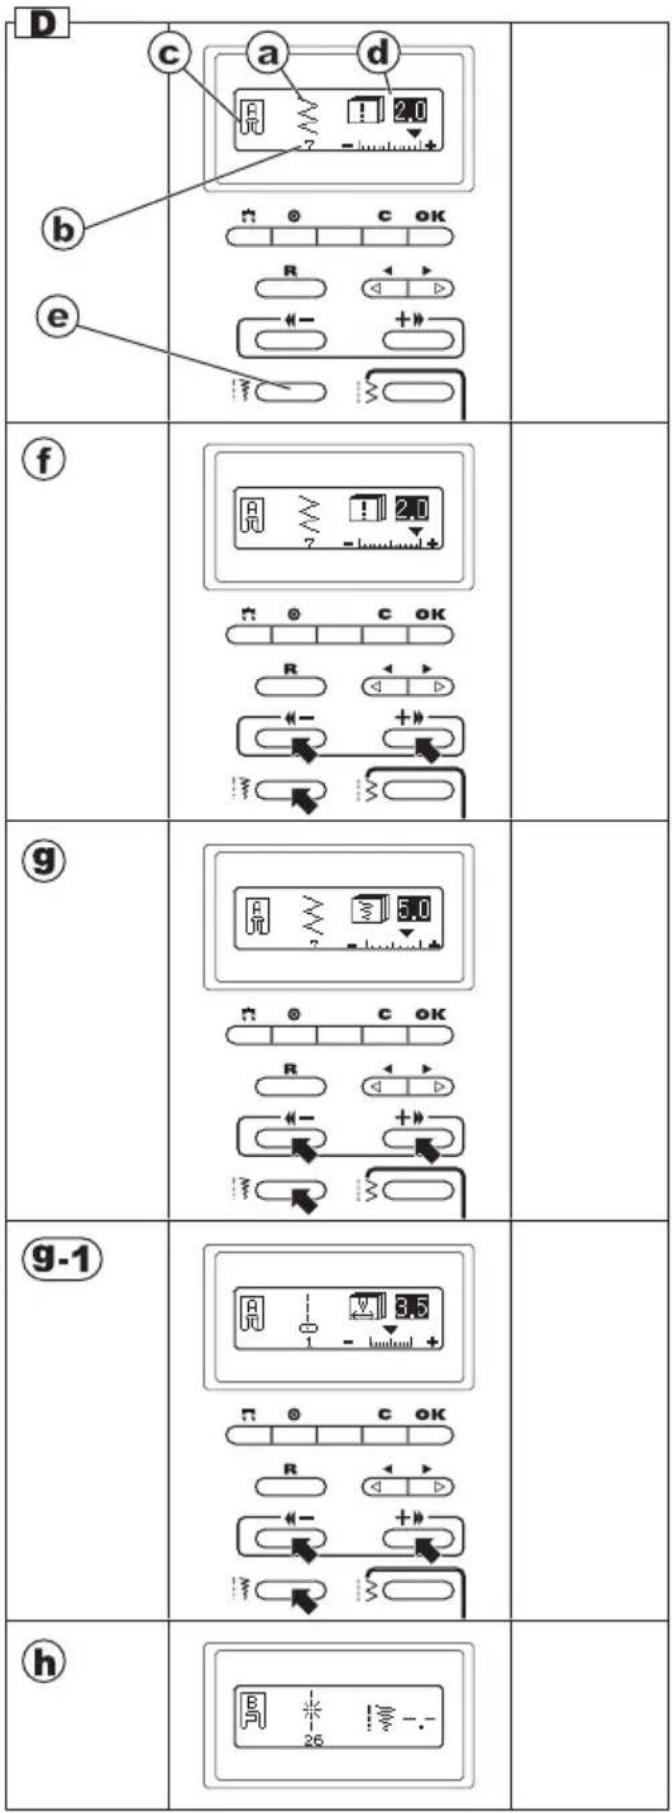
D. INFORMATIONS OF SELECTED PATTERN
When pattern is selected, L.C.D. will indicate following informations.
a. Stitch Pattern
b. Pattern Number
c. Suitable Presser Foot
Indicated presser foot is one of suggested foot for normal sewing. You can use other presser foot according to the purpose of sewing described in this booklet.
d. Stitch Length and Width
By pressing the tub buttons (e), these informations will change as follows.
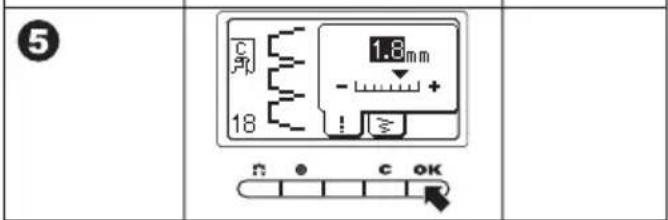
f. Stitch Length
Preset stitch length is indicated as a highlighted number.
For shorter stitch length, press the down (<<-) button.
For longer stitch length, press the up (++>) button.
g. Stitch Width
Preset stitch width is indicated as a highlighted number.
For narrower stitch width, press the down (<<-) button.
For wider stitch width, press the up (++>) button.
g-1. Needle Position Control
When straight stitch patterns has been selected, up-down buttons adjust the needle position.
NOTE:
When the mode of stitch length or width is not appeared (h), its pattern cannot change these settings.
 |
- TYPE B - TO SELECT A UTILITY PATTERN
This machine has 42 utility patterns. (See page 59 or inside of the top cover [PATTERN CHART].)
When you turn on the machine, straight stitch will be selected and indicated on the L. C. D..
A. CONTRAST OF THE L.C.D.
The contrast of the L.C.D is adjusted by turning the L.C.D. contrast control dial.
B. STRAIGHT STITCH AND ZIGZAG STITCH BUTTONS
Whenever you can select straight stitch or zigzag stitch directly by pressing the straight stitch or zigzag stitch button.
C. TO SELECT A UTILITY PATTERN
-
Press the utility stitch button. First 6 patterns of utility stitch will appear on the L.C.D..
-
By pressing the up (++) or down (<)<- button, 6 patterns will change incrementally or decrementaly. Press these buttons until desired pattern will appear.
-
Press the cursor (>) or (<) button to highlight the pattern you desire.
Note:
When the most right or left side pattern is highlighted, by pressing the cursor (>) or (<) button, next or previous 6 patterns will appear.
4. Press the OK button.
The L.C.D. screen will indicate the informations of selected pattern. (Next page)
To select decorative or letter stitch patterns, See page 47 [DECORATIVE AND LETTER STITCH SEWING].
natural_image
Technical line drawing of a mechanical assembly with no visible text or symbols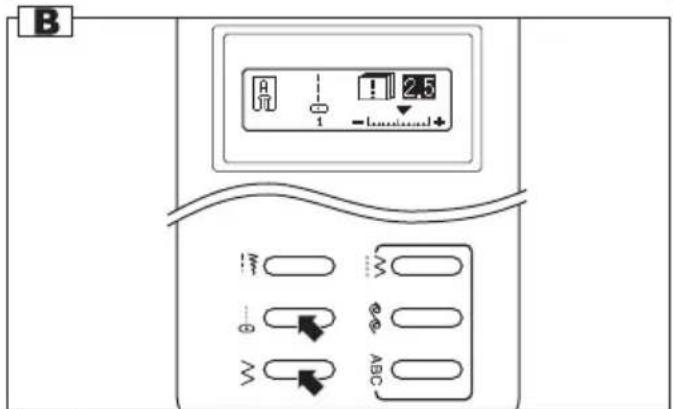
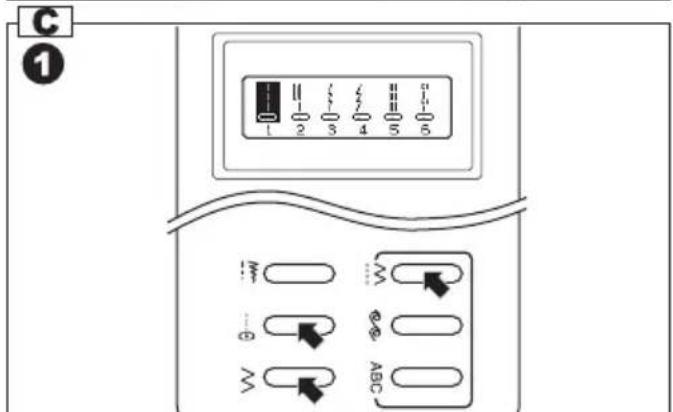
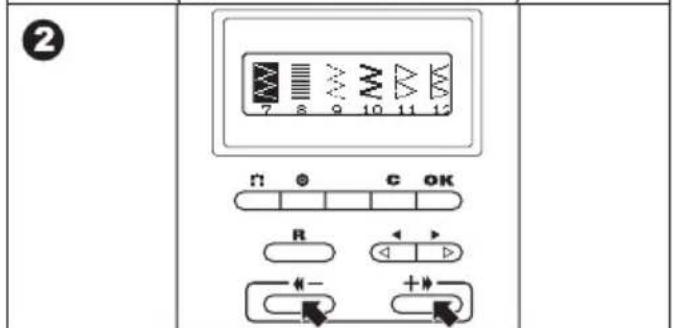
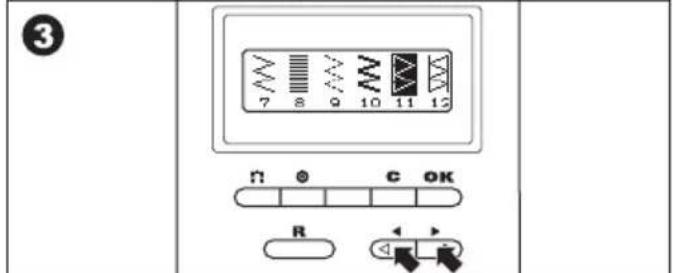
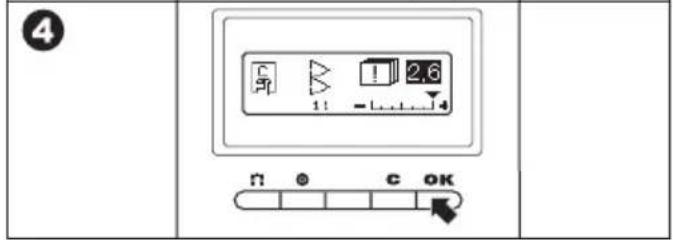
D. INFORMATIONS OF SELECTED PATTERN
When pattern is selected, L.C.D. will indicate following informations.
a. Stitch Pattern
b. Pattern Number
c.Suitable Presser Foot
Indicated presser foot is one of suggested foot for normal sewing. You can use other presser foot according to the purpose of sewing described in this booklet.
d. Stitch Length and Width
By pressing the length / width button (e), these informations will change as follows.
f. Stitch Length
Preset stitch length is indicated as a highlighted number.
For shorter stitch length, press the down (<<-) button.
For longer stitch length, press the up (++>) button.
g. Stitch Width
Preset stitch width is indicated as a highlighted number.
For narrower stitch width, press the down (<<-) button.
For wider stitch width, press the up (++>) button.
g-1. Needle Position Control
When straight stitch patterns has been selected, up-down buttons adjust the needle position.
NOTE:
When the mode of stitch length or width is not appeared (h), its pattern cannot change these settings.
 |
- TYPE C -
TO SELECT A PATTERN
This sewing machine can sew 100 stitch patterns and they are indicated in the pattern chart located inside of the top cover.
Each stitch pattern is numbered from "00" to "99".
When you turn on the machine, "01" will appear on the display indicating that the straight stitch (center needle position) is selected.
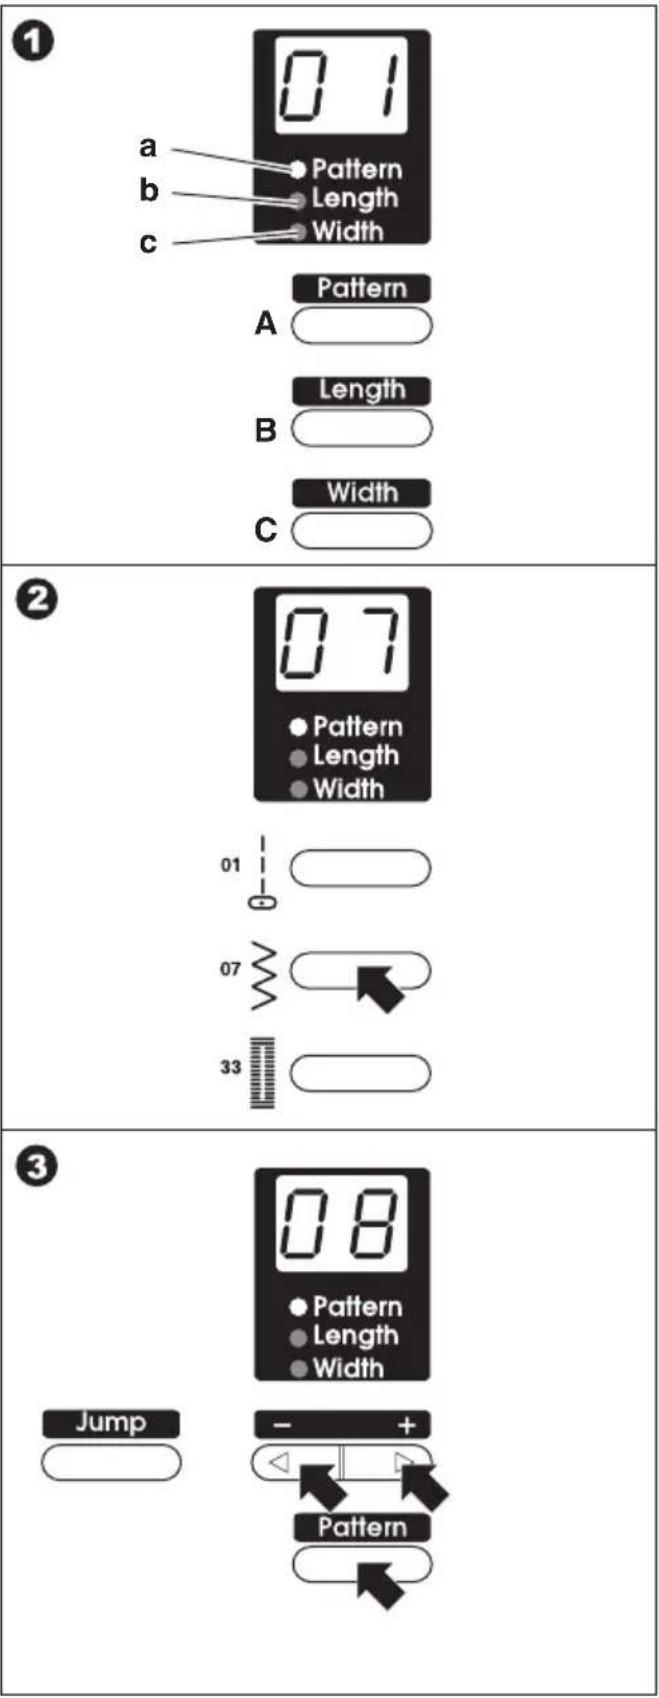
1. STITCH NUMBER INDICATOR
This indicator indicates three stitch mode.
A. Pattern Number
B. Stitch Length
C. Stitch Width
These modes are changed by pressing the each mode button (A-C).
The indicator light (a-c) of selected mode will turn on.
When you change the stitch pattern number, the stitch length and width will be re-set to pre-set length and width.
Therefore, you should select the pattern number first, and next, adjust the length and width.
2. TO SELECT STRAIGHT STITCH, ZIGZAG STITCH AND BUTTONHOLE
Whenever you can select straight stitch, zigzag stitch or keyhole buttonhole directly by pressing the each button.
3. TO SELECT OTHER STITCH PATTERN
-
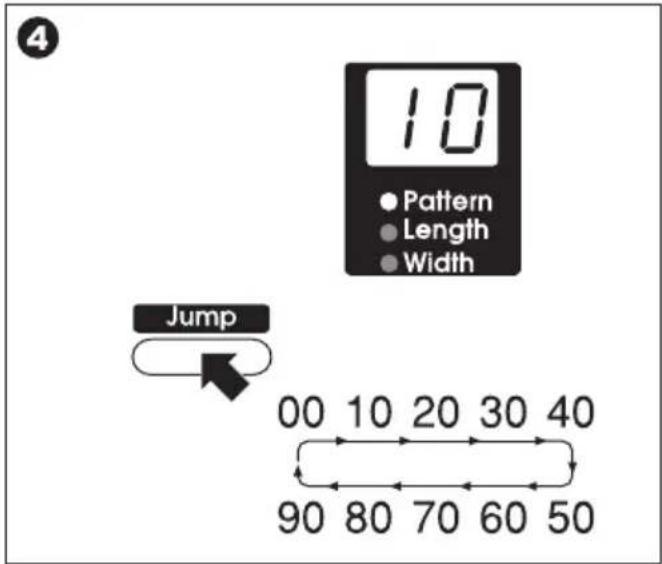
Press the Pattern Number Mode Button. Indicator light will turn on and pattern number will appear on the display. (If this mode has been selected already, it is need not to press this button.)
-
Select the pattern number you want to sew by pressing the up-down buttons. Use jump button to jump pattern number. (See next page)
You cannot change the pattern number while sewing.
4. JUMP BUTTON
Whenever you press this button, indicator changes to pattern number mode and pattern number jumps to next 10 digit.
Pressing this button, pattern number jumps 10 numbers up.

matri
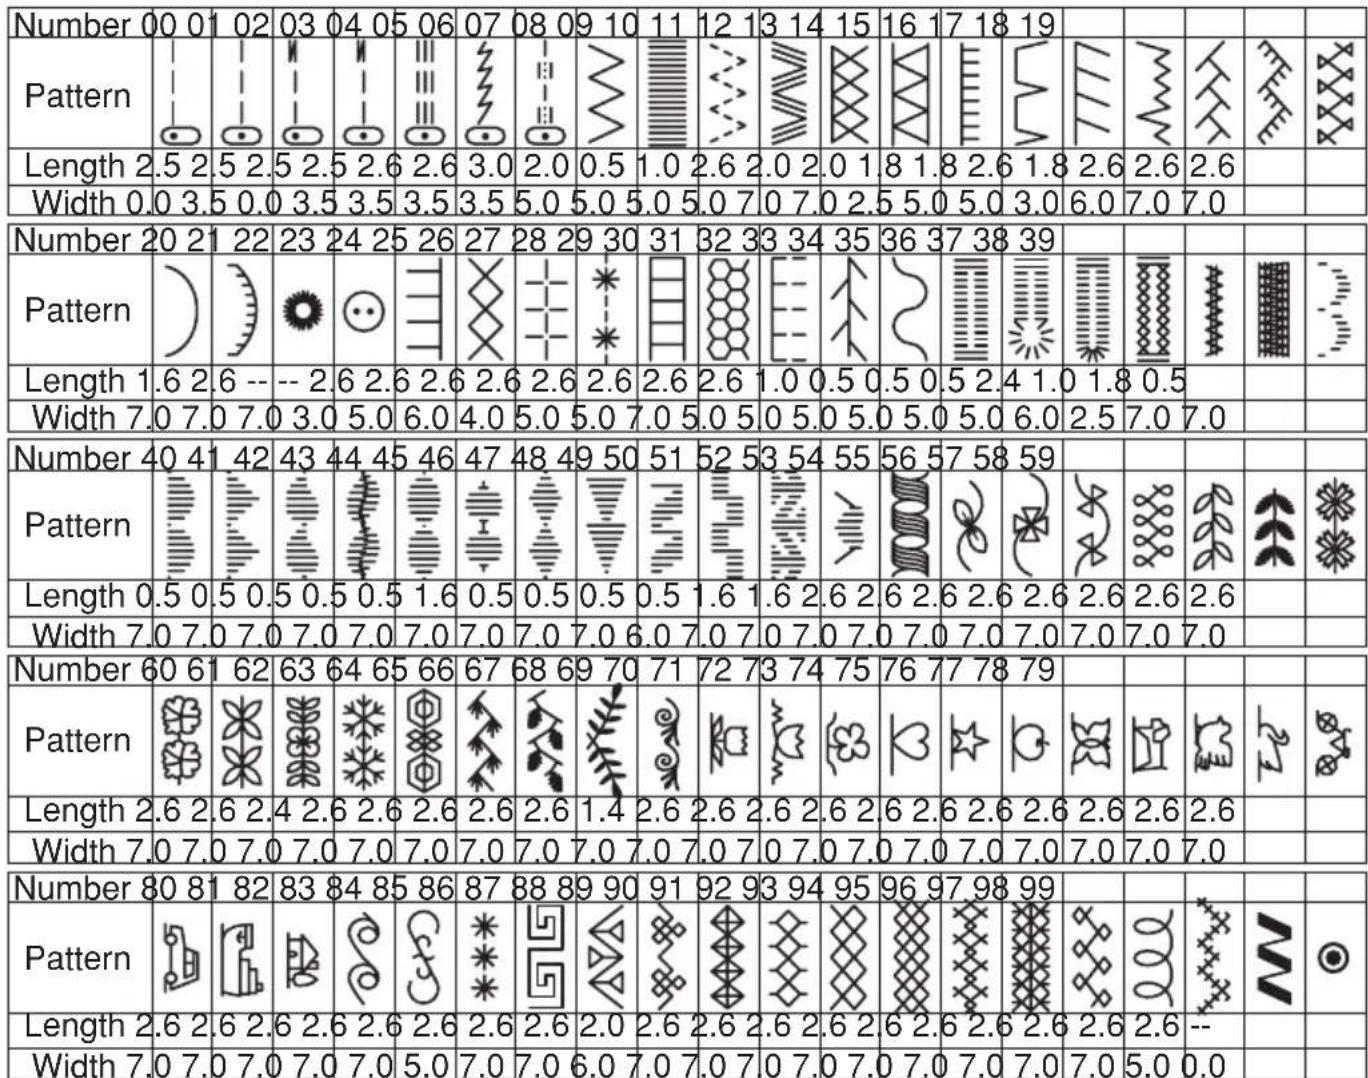
5. PATTERN CHART
All stitch patterns and numbers are described in below chart.
And also, preset stitch length and width are indicated.
See next page if you want to change these settings.
Straight stitches (No. 00, 01, 02, 03, 04, 06) will indicate the needle position instead of the stitch width.
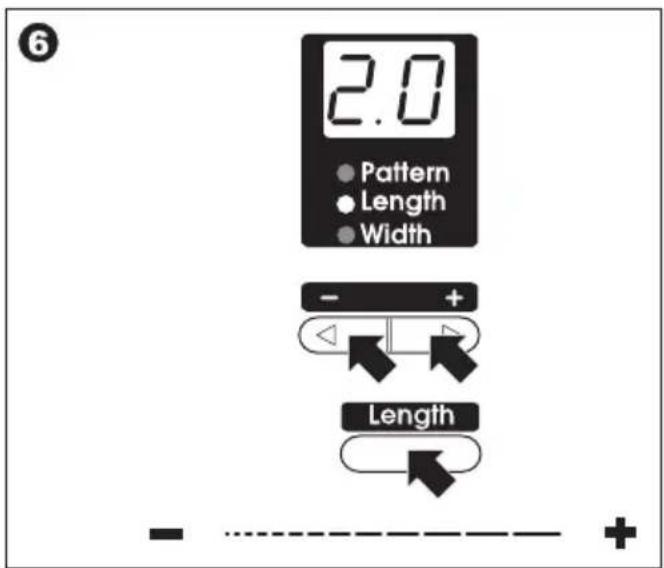
6. STITCH LENGTH
When you select the pattern number, suitable stitch length will be preset automatically. If you want to change this, adjust as follows.
- Press the Stitch Length Mode Button. Indicator light will turn on and stitch length will appear on the display.
- Adjust the stitch length by pressing the Up-Down buttons.
For longer stitch length, press the “+” button.
For shorter stitch length, press the “—” button.
You can adjust stitch length while sewing.
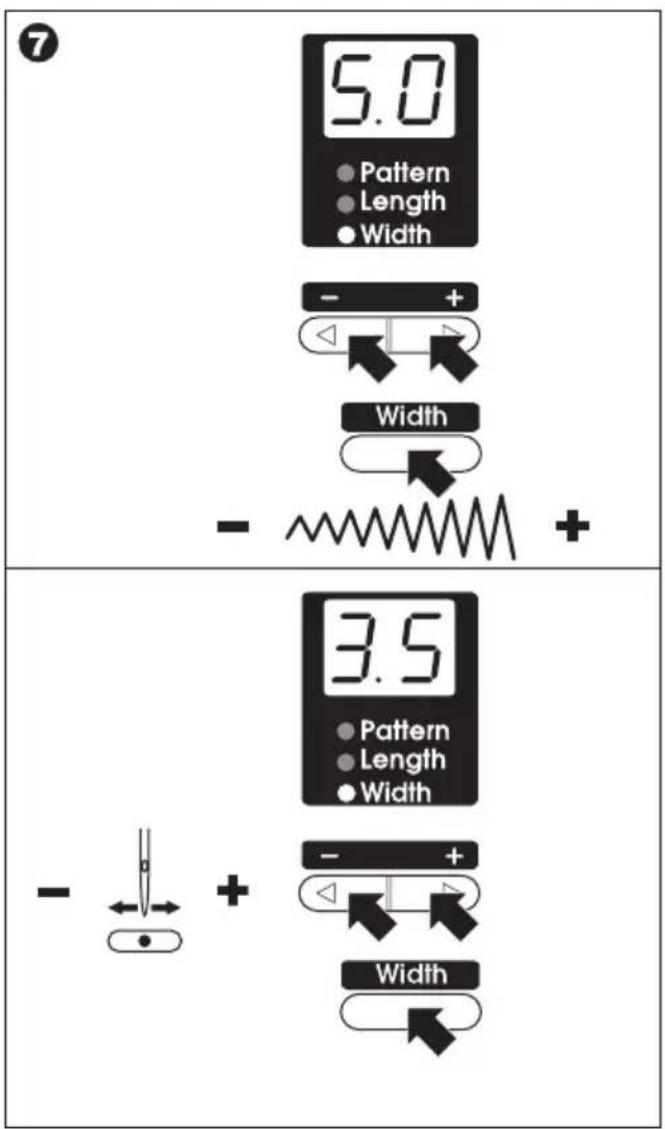
7. STITCH WIDTH
When you select the pattern number, suitable stitch width will be preset automatically. If you want to change this, adjust as follows.
- Press the Stitch Width Mode Button. Indicator light will turn on and stitch width will appear on the display.
- Adjust the stitch width by pressing the stitch selection buttons (a-d).
For wider stitch width, press the “+” button.
For narrower stitch width, press the “—” button.
You can adjust stitch width while sewing.
NEEDLE POSITION
Straight stitches (No. 00, 01, 02, 03, 04, 06) will change the needle position instead of the stitch width.
0.0: Left needle position
3.5: Center needle position
7.0: Right needle position
To move the needle position to the right, press the "+" button.
To move the needle position to the left, press the “—” button.
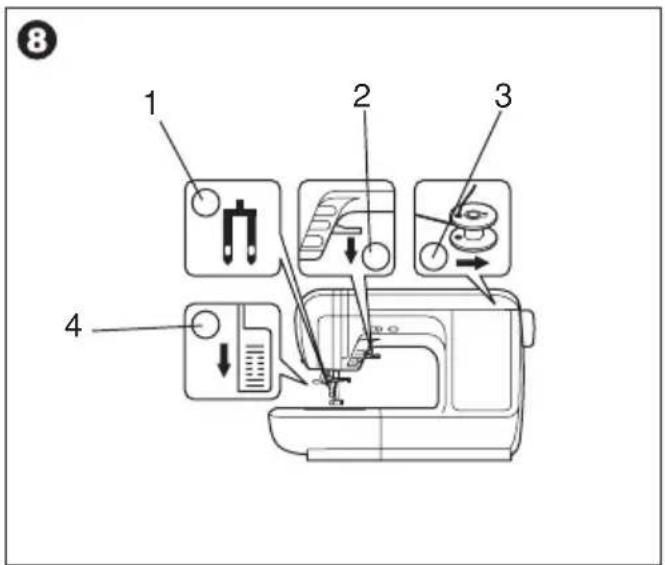
8. MONITOR WINDOW
This machine indicates the condition of machine.
- Twin needle setting.
Green light turn on
When twin needle button is pressed, this light will turn on and stitch width will be reduced.
See page 51 for twin needle sewing.
- Presser Foot Lifter
Red light blink
Start button is pressed although the presser foot is not lowered.
or
After buttonhole sewing, start button is pressed although presser foot is not raised to return to original position.
- Bobbin Winding
Green light turn on
Bobbin winder spindle is pushed to the right. (Bobbin winding mode)
Green light blink
Bobbin winding is full
- Buttonhole Lever
Red light blink
When buttonhole sewing, start button is pressed although the buttonhole lever is not lowered correctly.
or
After buttonhole sewing, start button is pressed although presser foot is not raised to return to original position.
BOBBIN SETTING
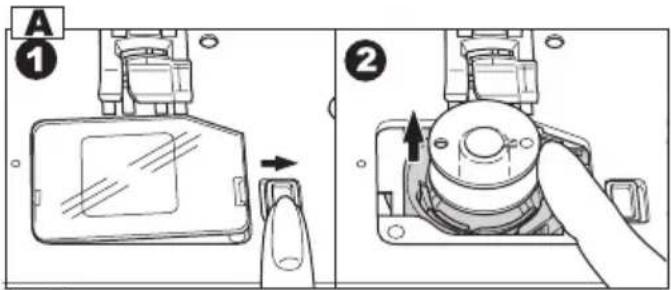
A. REMOVING THE BOBBIN
- Pull the bobbin cover latch to the right and remove the bobbin cover.
- Lift up the bobbin from the machine.
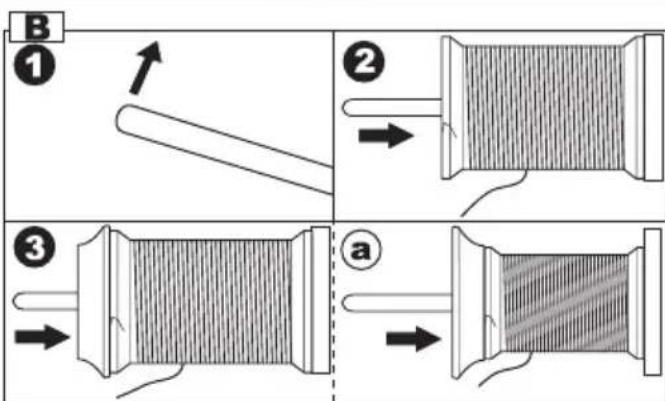
B. SETTING SPOOL OF THREAD ON SPOOL PIN
- Pull up the left end of spool pin.
- Set the spool of thread on spool pin so that the thread unrolls from the front of the spool.
- Set the spool cap on spool pin as far as it will go.
a: Reverse spool cap direction according to the size of spool.
C. WINDING THE BOBBIN
- Hold thread in both hands and hook thread to the guide from rear opening.
- Bring thread frontward and pass through the thread guide plate from right to left.
- Bring thread to the right and pass thread to the thread guide from under side. Pass through under tension disc in counterclockwise.
- Insert thread through hole in bobbin and place the bobbin on bobbin winder spindle. Push bobbin to the right to engage bobbin winder. L.C.D. will indicate the bobbin winding mode.
- Hold the end of the thread and start the machine by pressing the start/stop button or pressing the foot controller pedal.
- After the bobbin winds a few turns, stop the machine by pressitng the start/stop button or releasing the foot controller pedal. Cut the thread near hole.
- Start the machine again.
- The bobbin winding will stop automatically when bobbin is full. (Release the pedal.)
- Push the bobbin and spindle to the left.
10 Remove the bobbin from the spindle and cut the thread.
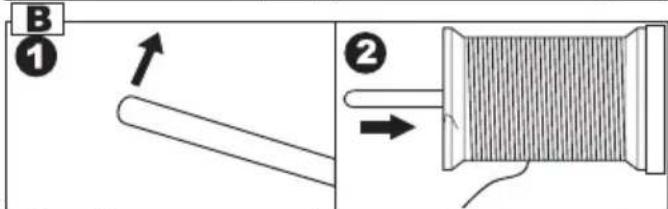
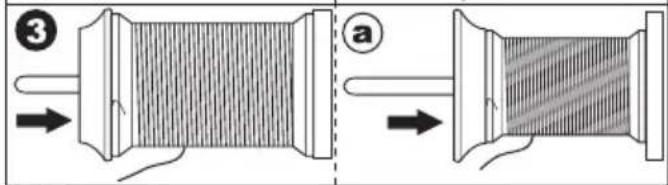
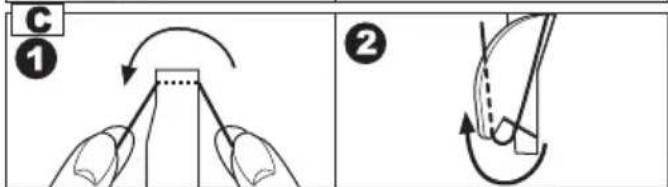
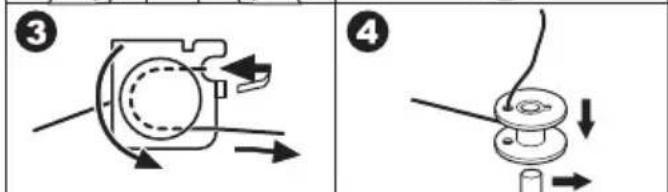
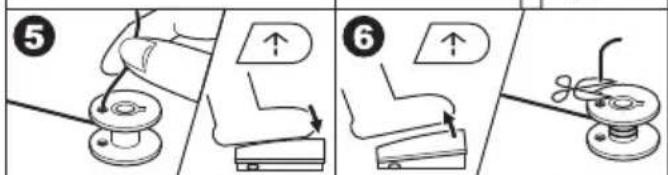
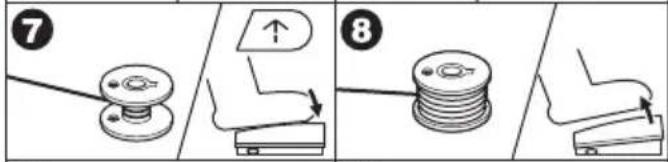
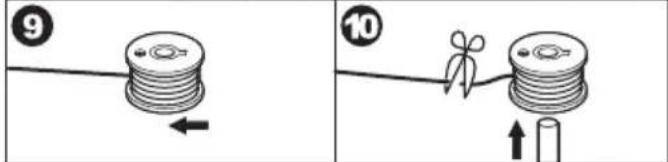
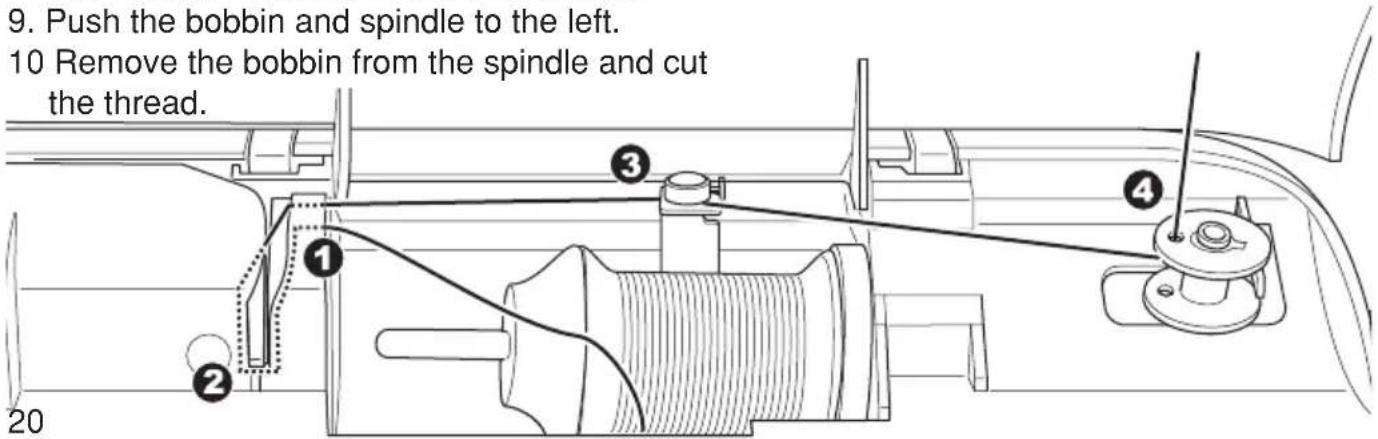
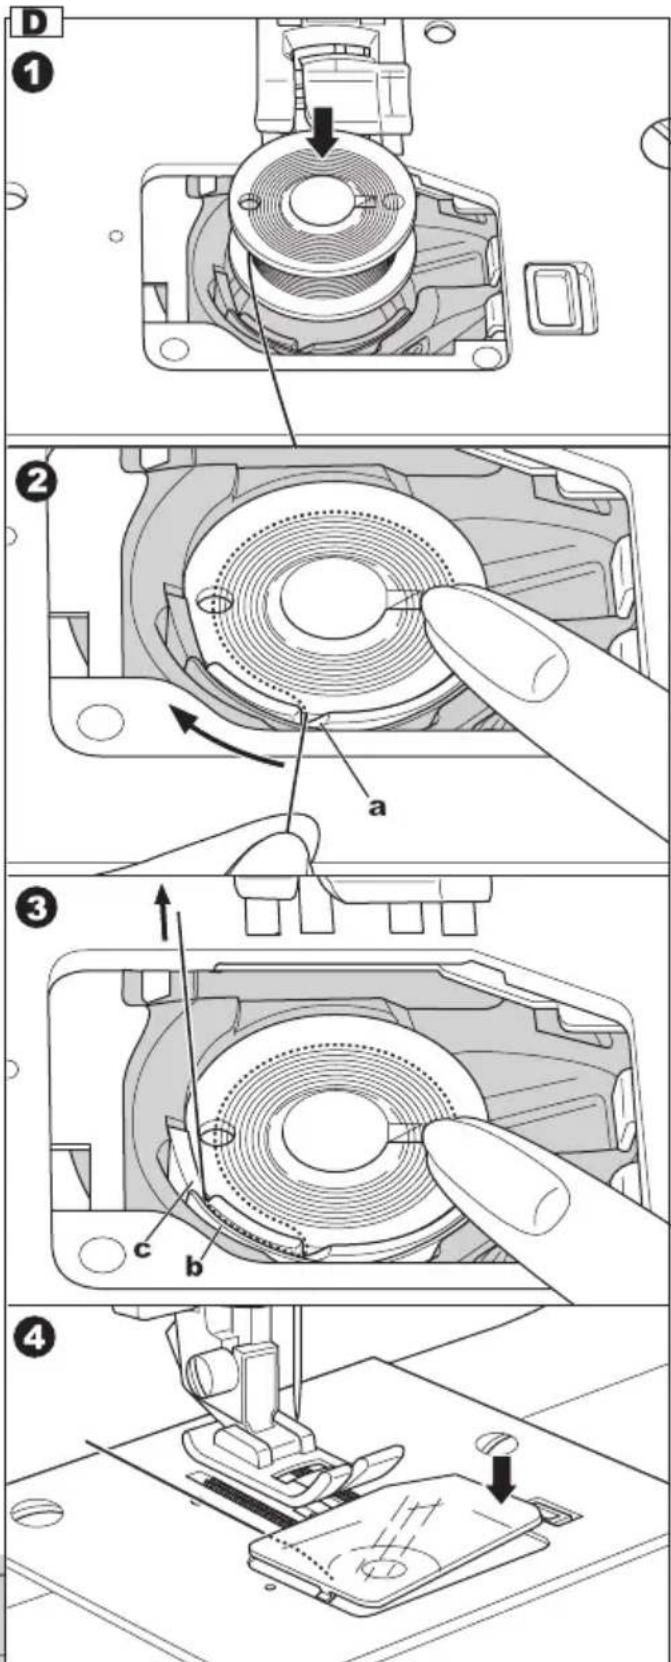
D. INSERTING THE BOBBIN
- Place bobbin into bobbin holder with the thread unwinding counter clockwise.
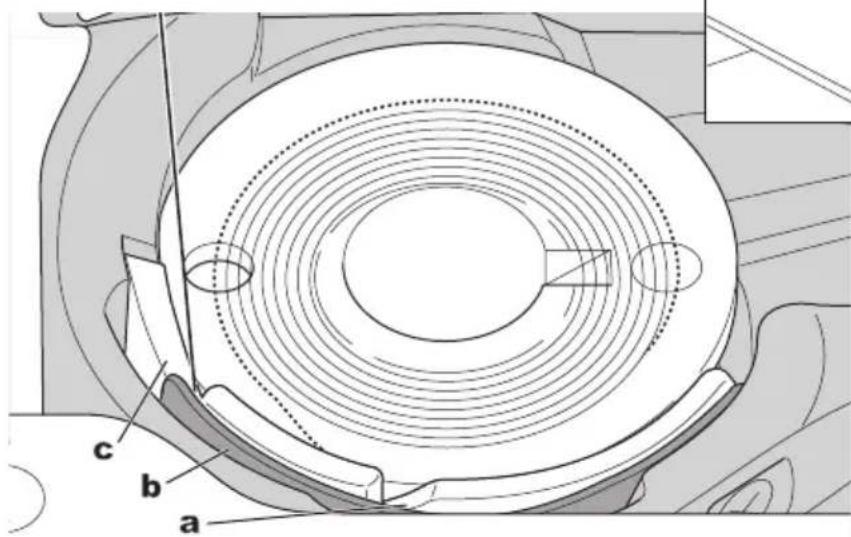
- Draw thread into notch (a) with holding the bobbin.
- Pull thread toward the left and along the inside of spring (b) until it slips into notch (c) being sure that thread does not slip out of notch (a).
- Pull thread out about 10 cm. Replace the bobbin cover. Set the left tab into the hole in needle plate and push the right side of bobbin cover down until it clicks into place.
THREADING THE MACHINE
A. PREPARING TO THREAD MACHINE
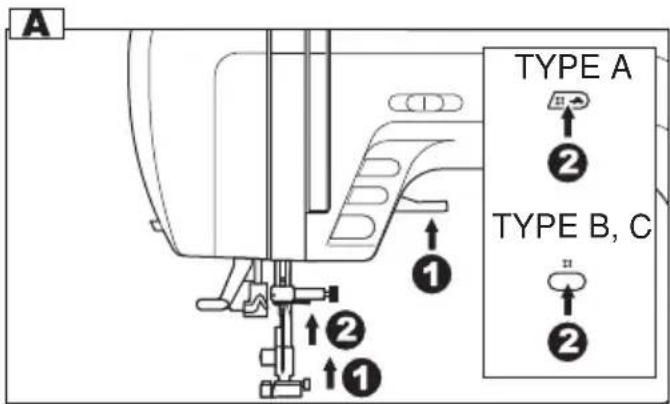
- Raise the presser foot lifter.
- Press the needle up-down button and set the needle in up position.
(Keep this position until needle eye threading.)
B. SETTING SPOOL OF THREAD ON SPOOL PIN
Open the top cover and set spool as below.
- Pull up the left end of spool pin.
- Set the spool of thread on spool pin so that the thread unrolls from the front of the spool.
- Set the spool cap on spool pin as far as it will go.
a: Reverse spool cap direction according to the size of spool.
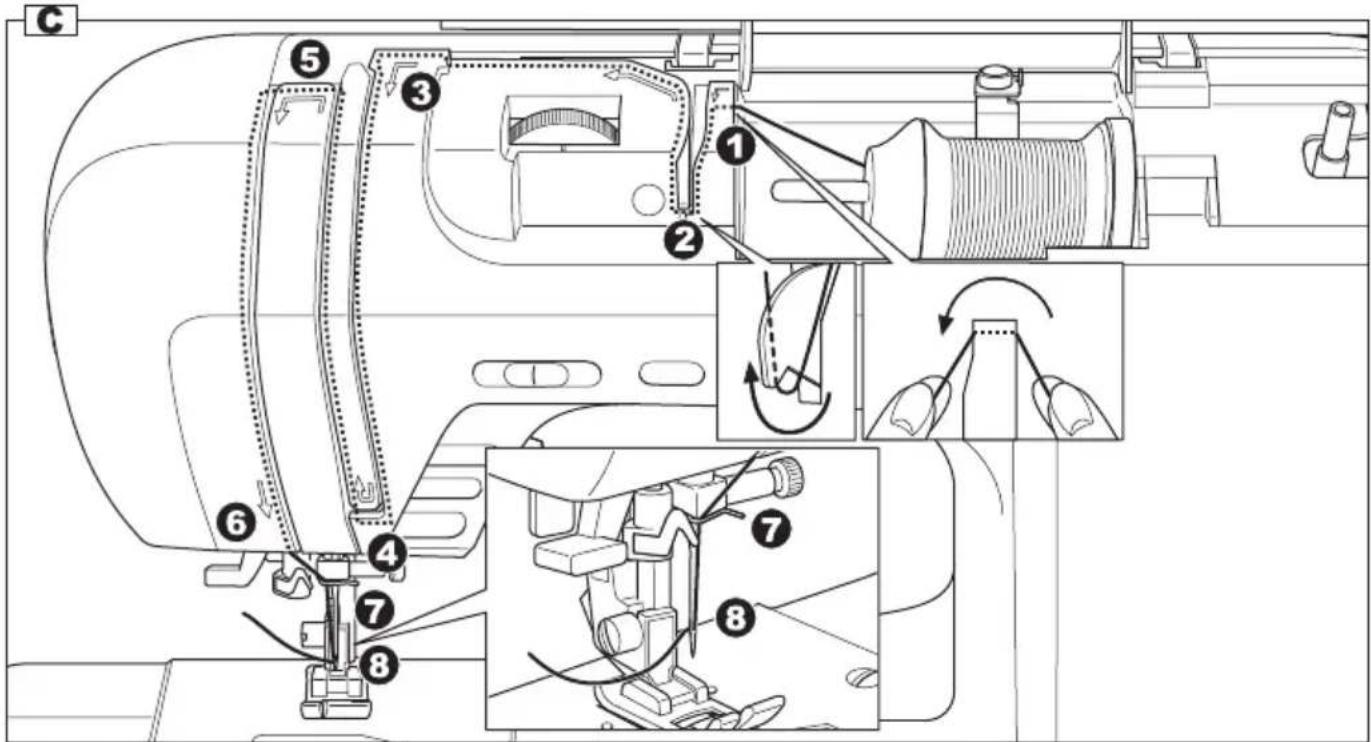
C. THREADING THE UPPER THREAD
- Hold thread in both hands and pass thread to the guide from rear opening.
- Bring thread frontward and pass through the thread guide plate from right to left.
- Bring thread to the left and pull down thread toward you along the slit.
- Bring thread right to left and pull up thread.
- To thread the take-up lever, draw thread up and bring thread back down again from right to left along the slit.
- Pull thread downward along the slit.
- Draw thread through thread guide from right side opening.
- Pass through needle eye from front to back.
Refer to next page for instructions on how to use needle threader.
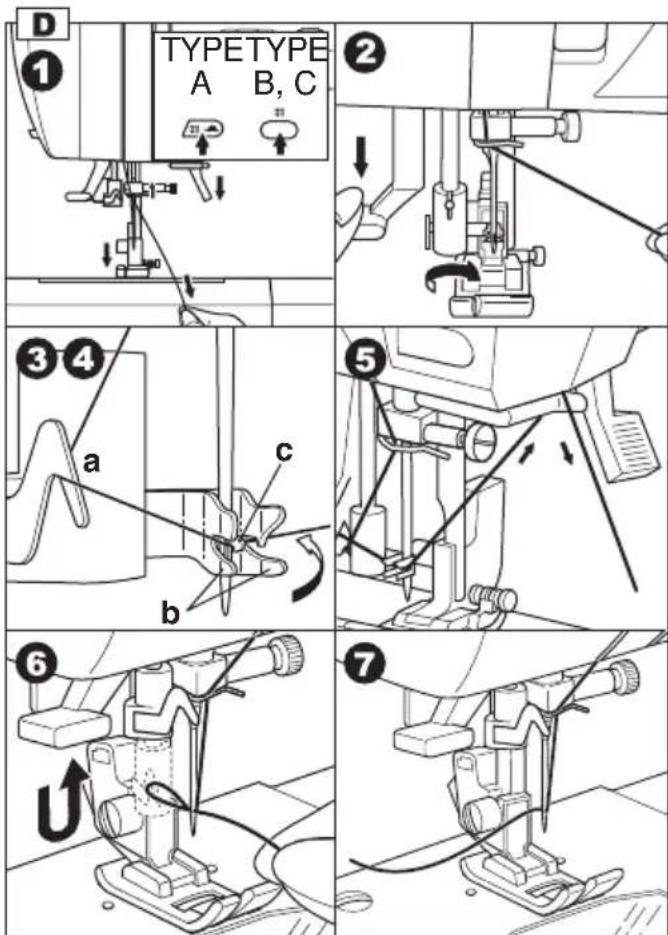
D. THREADING THE NEEDLE EYE

CAUTION: To prevent accidents.
Do not rotate the hand wheel when threader lever is lowered.
Note: The needle threader is used for needle sizes 11/80 - 16/100 and thread sizes 50-100.
- Pull thread from needle bar therad guide until front of extension table.
Lower the presser foot.
NOTE; Check that the needle is raised.
If it is not so, raise needle by pressing needle up-down button. - Lower the threader lever.
Lever will stop at lower position.
The threader will turn and the hook pin will go through the needle eye. - Draw thread through thread guide (a) and pull toward the right.
- Draw thread into the guide(b).
Thread will be hooked to the (c). - Hook the thread to the thread cutter from back to front. Pull and cut thread.
- Lower the lever once more and release the lever. Hook will turn and pass thread through needle eye while making a loop.
- Pull thread out about 10 cm from needle eye.
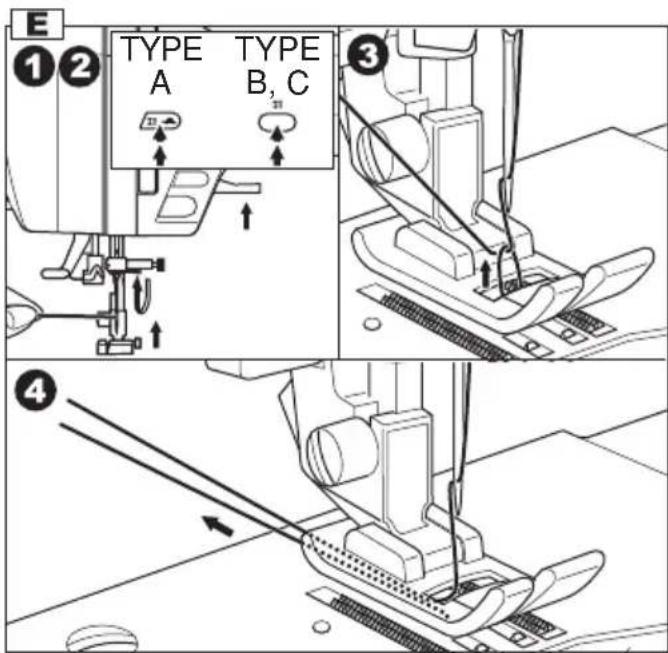
E. DRAWING UP THE BOBBIN THREAD
- Raise the presser foot.
- Hold thread loosely and press needle up-down button twice from up position.
The hand wheel will turn one complete turn. - Pull upper thread lightly. Bobbin thread will come up in a loop.
- Pull both upper and bobbin threads about 10 cm toward the back of presser foot.
STARTING TO SEW
The machine will be set to sew straight stitch when power switch is turned on.

CAUTION: To prevent accidents.
While sewing, special care is required around the needle.
As machine automatically feeds the fabric, do not pull nor push fabric.
A. START AND END OF SEAM
- Check the presser foot [Regular Foot (A)]. Refer to page 6 for changing the presser foot.
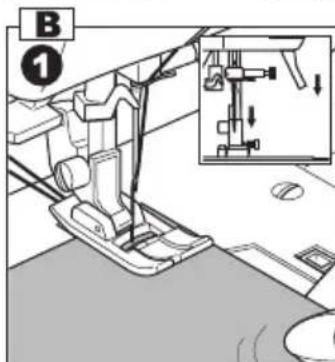
- Place the fabric under the presser foot and lower the presser foot.
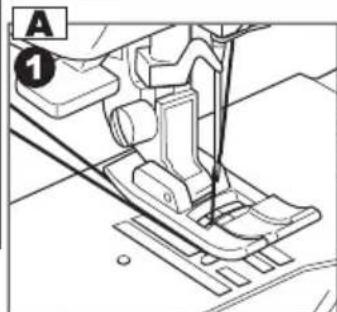
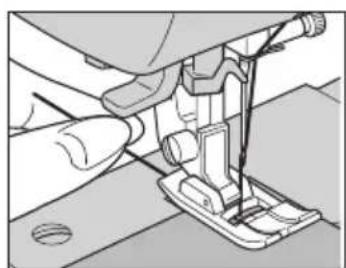
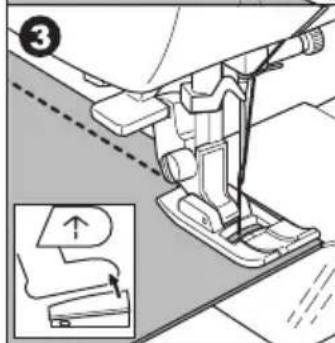
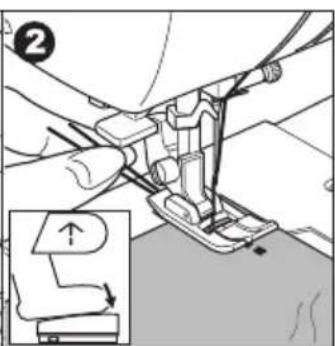
- Hold back both threads and press the start/stop button or press the foot controller pedal.
Keep holding threads after sewing a few stitches.
Lightly guide the fabric while sewing.
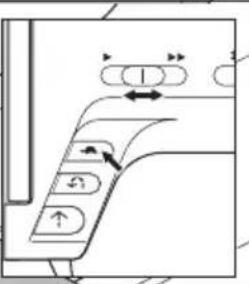
You can regulate the sewing speed by sliding the speed control button.
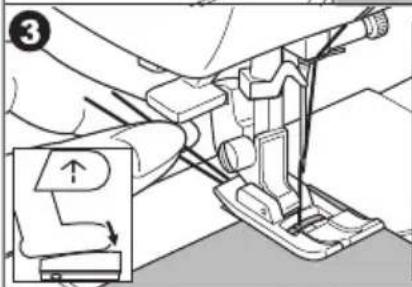
Also, you can reduce the sewing speed by pressing the slow button. - When you reach end of seam, press the start/stop button to stop sewing or release the foot controller pedal.
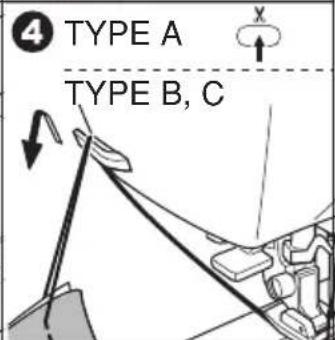
- TYPE A -
-
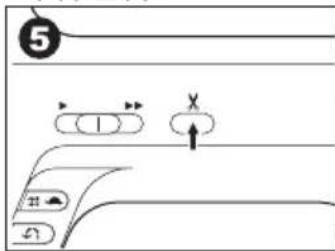
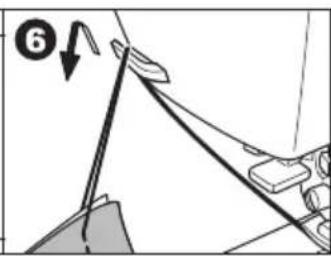
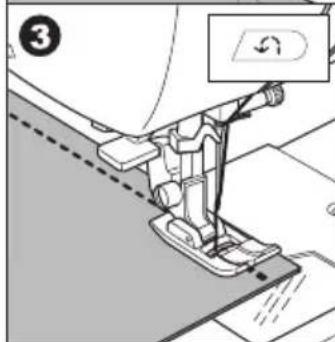
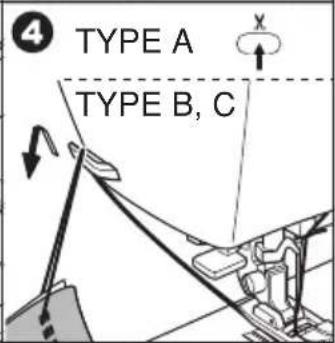
Press the thread cutter button.
-
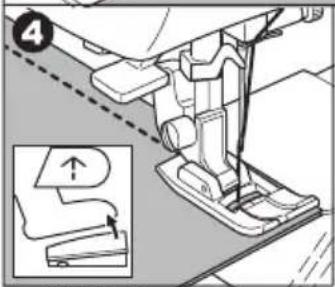
Raise the presser foot lifter and remove the fabric.
- TYPE B, C -
-
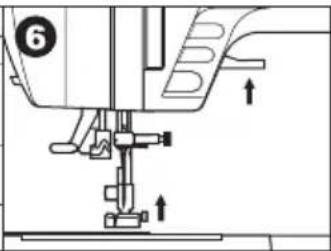
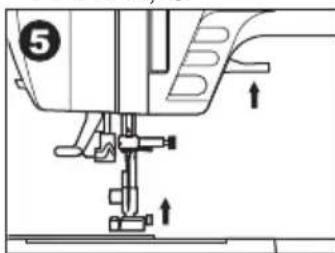
Raise the presser foot lifter.
-
Remove the fabric and cut threads with the thread cutter, back to front.
natural_image
Mechanical sewing machine diagram showing needle insertion and base structure (no text or symbols)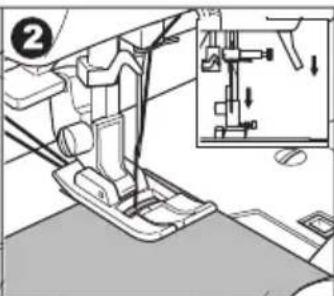
flowchart
graph TD
    A["Start"] --> B{Switch}
    B --> C["1"]
    B --> D["2"]
    B --> E["3"]
- TYPE A -
flowchart
graph TD
    A["Step 5"] --> B{Condition}
    B -->|Yes| C["Process Step"]
    B -->|No| D["End"]
- TYPE B, C -
- TYPE A ONLY -
CAUTION
-
Do not press the thread cutter button when there is no fabric in the machine or no need to cut the threads. The thread may tangle, resulting in damage.
-
Do not use the thread cutter button when cutting thread thicker than #30, nylon thread or other speciality threads. In this case, use the thread cutter located on the left side of the machine. (See page 9)
-
Do not press the thread cutter button when there is no fabric in the machine or no need to cut the threads. The thread may tangle, resulting in damage.
- Do not use the thread cutter button when cutting thread thicker than #30, nylon thread or other speciality threads. In this case, use the thread cutter located on the left side of the machine. (See page 9)
NOTE
After you cut the threads by using the thread cutter button, hold upper thread only at the next starting of seam. (No need to draw up the bobbin thread)
natural_image
Close-up of a sewing machine needle stitching fabric (no text or symbols visible)B. REVERSE STITCHING
Reverse stitching is used for reinforcing the ends of the seams.
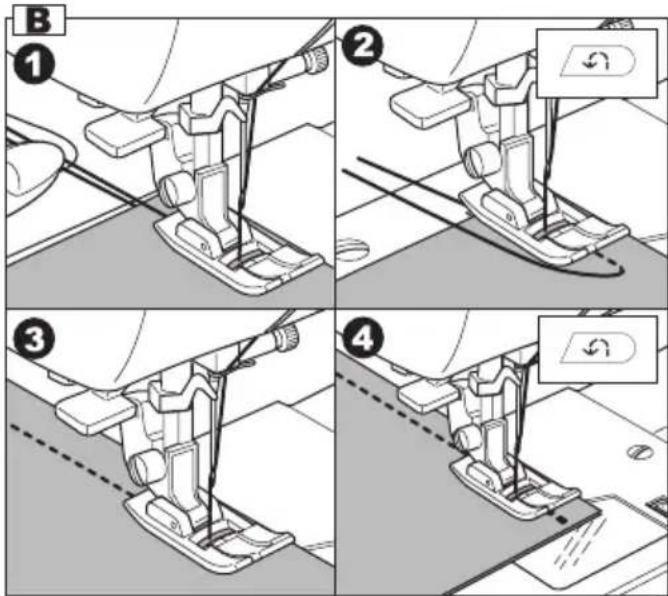
- Place the fabric in position where back stitching is to be made and lower the presser foot.
- Press and hold the reverse button. (Press the foot controller pedal if attached) Sew 4-5 reverse stitch.
- Release the reverse button and press the start/stop button (or press the pedal) Machine will change to forward sewing.
- When you reach the end of seam, press and hold reverse button and sew 4-5 reverse stitches.
Note:
- TYPE A -
The pattern No. 3 and No. 4 have a built-in reverse stitch. See page 29 to sew this stitch.
- TYPE B -
The pattern No. 2 have a built-in reverse stitch. See page 29 to sew this stitch.
- TYPE C -
The pattern No. 03 and 04 have a built-in reverse stitch. See page 29 to sew this stitch.
C. AUTO TACK STITCH
You can sew tack stitch at the beginning and end of the stitch.
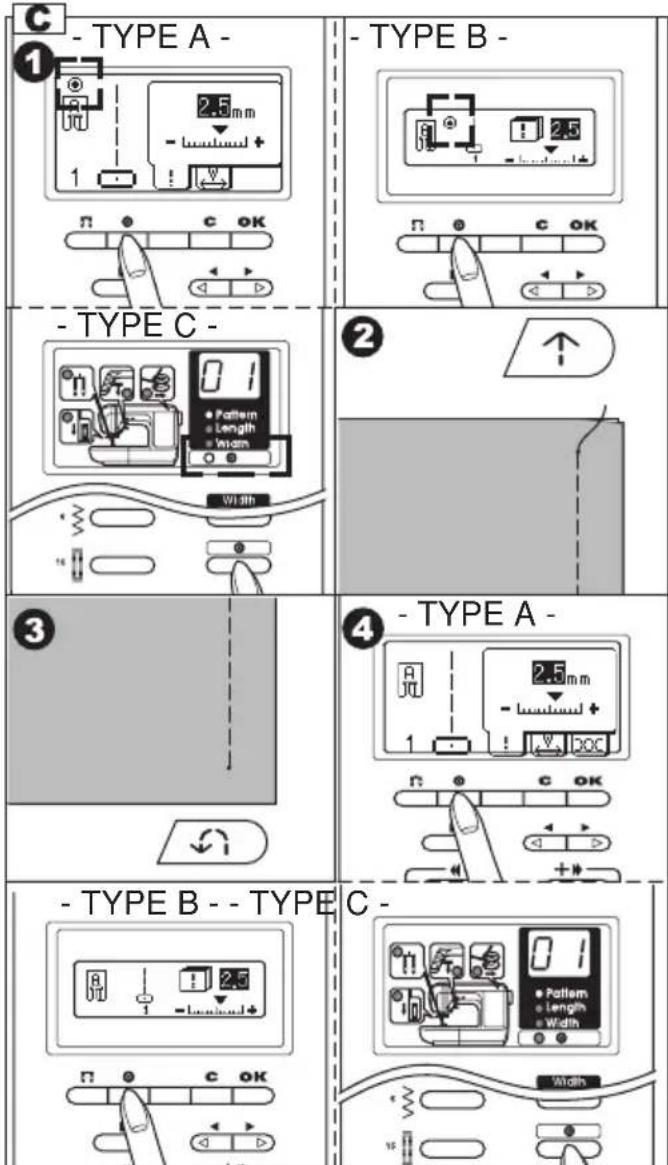
- Press the Tack button.
- TYPE A, B -
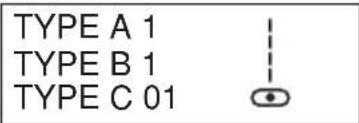
Tack mark "◎" will appear on the L.C.D..
- TYPE C -
Tack stitch indicator will turn on.
- Start to sew.
Machine will sew tacking automatically and start to sew the selected pattern.
- When you reach the end of seam, press the reverse button once.
Machine will sew tacking and stop automatically.
- If you want to cancel this function, press the tack button again.
- TYPE A, B -
Tack mark will disappear.
- TYPE C -
Tack stitch indicator will turn off.
- TYPE A, B -
This function can use all utility patterns.
- TYPE C -
You can sew tack stitch manually by selecting the pattern No. 99.
This stitch wil sew tack stitch only and stop automatically.
D. TURNING CORNERS
- Stop the machine when you reach a corner. The machine will stop the needle into the fabric.
- Raise the presser foot.
- Use the needle as a pivot and turn fabric.
- Lower the presser foot and resume sewing.
E. SEWING HEAVY FABRIC
When sewing heavy fabrics, the toe end of presser foot tends to lift up and sewing cannot be started smoothly. In such case, set as follows.
- Raise the presser foot.
- Push the lock button located on the right side of regular foot and lower the foot.
- Start sewing.
As presser foot hinge is locked, fabric will be feeded smoothly.
a. The presser bar lifter can be raised 1 step higher for placing heavy materials under the presser foot easily.
F. SEWING OVER OVERLAPPED AREAS
Guide the fabric with your hand when sewing over overlapped areas.
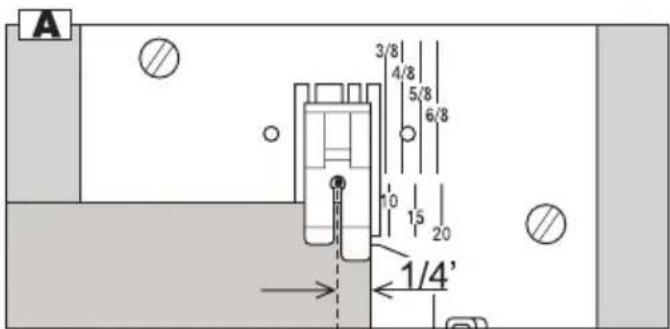
G. WIDTH OF SEAM ALLOWANCE
Guide lines on the needle plate indicate the distance from the center needle positon.
To keep the width of seam allowance, guide fabric edge aligning this guide line.
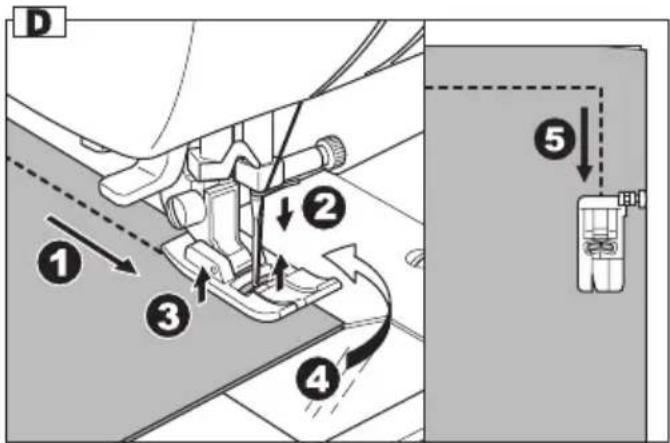
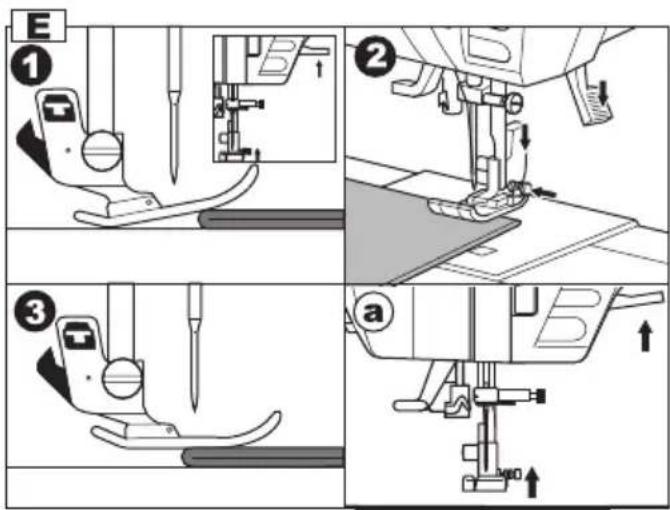
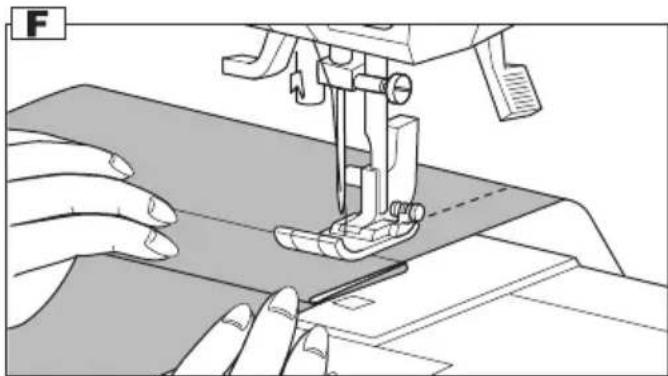
natural_image
Illustration of a sewing machine needle stitching fabric, with hands operating the work (no text or symbols visible)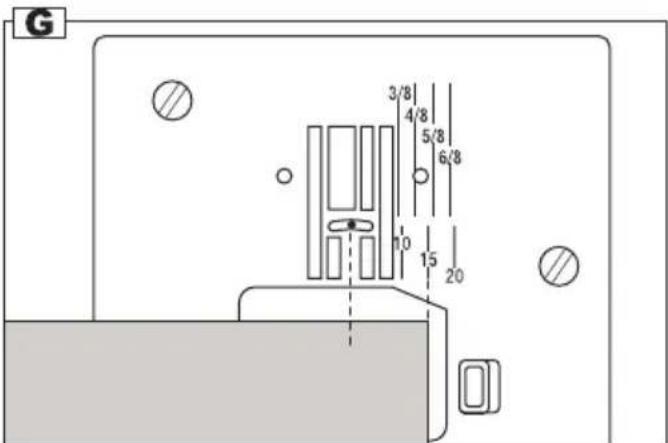
- TYPE A - \_ THREAD TENSION
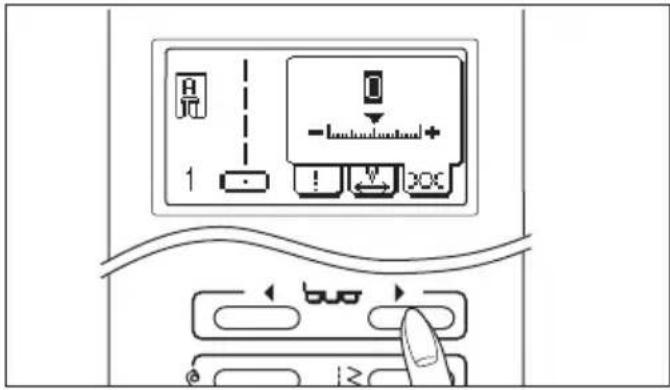
This machine adjust the thread tension automatically when pattern is selected. However you can change the thread tension as follows.
- Press the tab button until tension mode will appear.
- To increase the upper thread tension, press the Up (++) button.
To decrease the upper thread tension, press the Down (<<-) button.
Preset tension is "0" (highlighted).
The mark “▼” is indicating the absolute thread tension.
When another stitch pattern is selected, thread tension will return to preset.
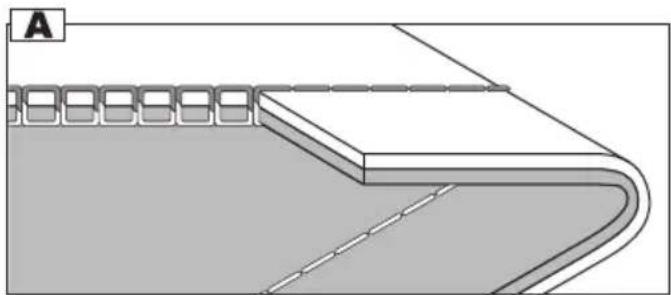
A. Preset thread tension
Upper and bobbin thread will lock approximately in the middle of fabric.
B. When thread tension is increased.
Bobbin thread will appear on the top side of fabric.
C. When thread tension is decreased.
Upper thread will appear on the bottom side of fabric.
D. Thread tension except for straight stitch
Thread tension except for straight stitch is set to a slightly weaker tension than when sewing straight stitch.
You will obtain a nicer stitch when upper thread appears on bottom side of fabric.
E. Helpful Hints
-
If your sewing appears as shown on drawing, stitches on top side of fabric are good but bottom side tends to look like a towel, it could be that the upper thread is not threaded correctly. Refer to page 22 for correct threading.
-
Although the thread tension is preset, bobbin thread appear on top side of fabric, it could be that the bobbin setting is no correctly. Refer to page 21 for correct setting.
natural_image
Cross-sectional diagram of a layered structure with labeled component A (no text or symbols present)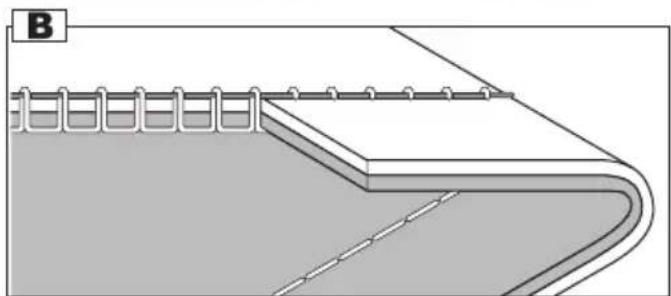
natural_image
Diagram of a curved architectural or mechanical structure with no visible text or symbols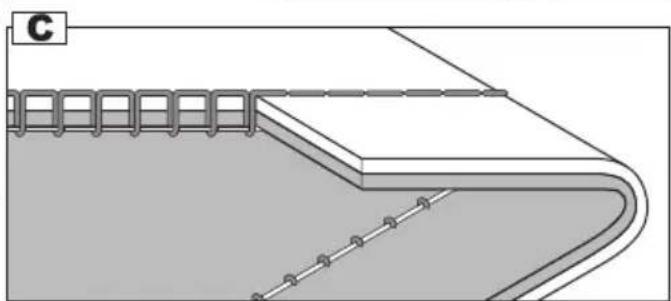
natural_image
Diagram of a curved structural component with embedded elements and a labeled section 'C' (no text or symbols present)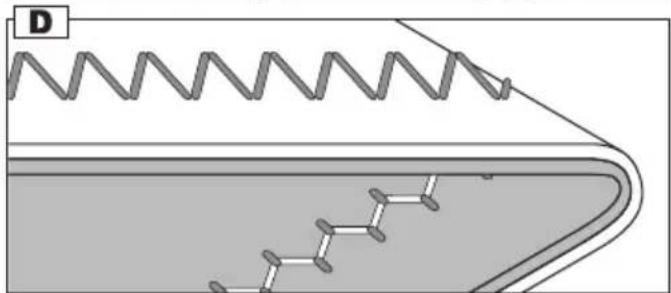
natural_image
Diagram of a mechanical component with zigzag spring and stepped base (no text or symbols)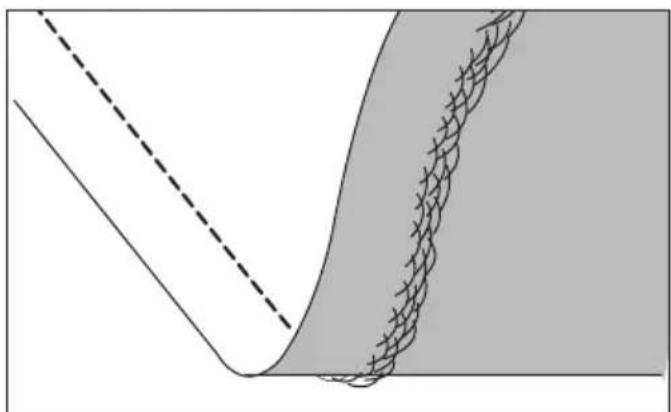
natural_image
Diagram showing a curved boundary with a dashed line and a shaded region with cross-hatched texture (no text or symbols)- TYPE B, C -\_\_\_\_ ADJUSTING THE THREAD TENSIONS
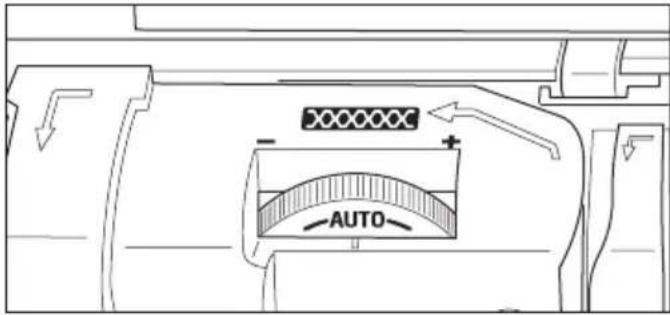
Normally, when upper thread regulating dial is set to [AUTO], thread tensions will be satisfactory for most all sewing.
If it is difficult to obtain correct tensions depending on the type of fabric and threads being used, adjust the upper thread tension dial to settings shown below.
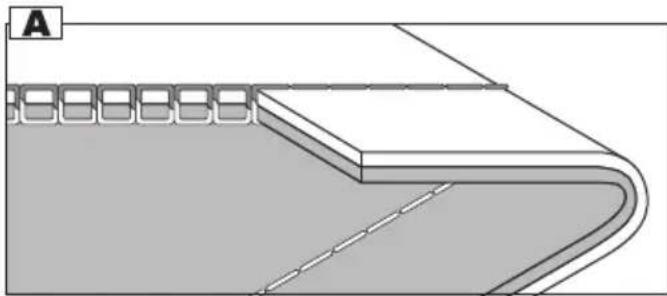
A. Correct Thread Tensions
Upper and bobbin threads should lock approximately in the middle of fabric.
B. When bobbin thread appears on top side of fabric.
Turn the tension dial to the left (−).
C. When upper thread appears on the bottom side of fabric.
Turn the tension dial to the right (+).
D. Thread Tension for Zigzag Stitches
To sew zigzag stitches, the thread tension should be set to a slightly weaker tension than when sewing straight stitches.
You will obtain a nicer stitch when upper thread appears on bottom side of fabric.
Helpful Hint
If your sewing appears as shown on drawing, stitches on top side of fabric are good but bottom side tends to look like a towel, it could be that the upper thread is not threaded correctly (especially threading of the upper thread tension regulator may not be correct.) Refer to page 22 for correct threading.
natural_image
Architectural cross-section diagram showing layered structure with no text or symbols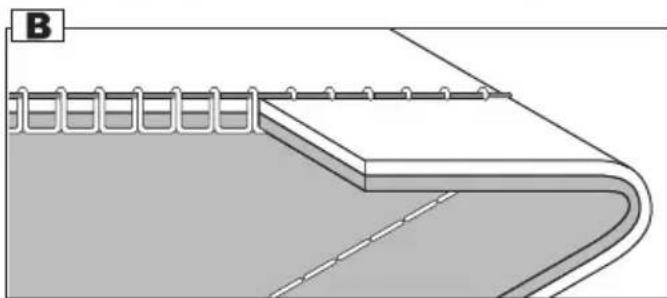
natural_image
Diagram of a notebook binding layer with no text or symbols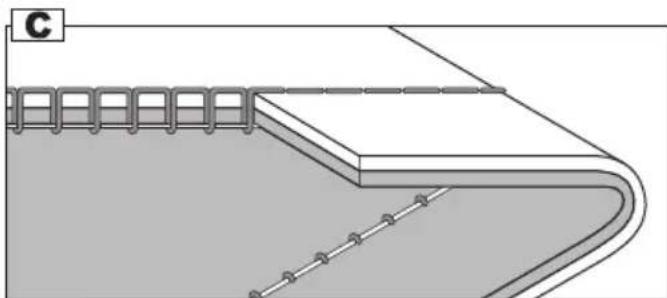
natural_image
Diagram of a curved structural component with embedded elements and a labeled section 'C' (no text or symbols present)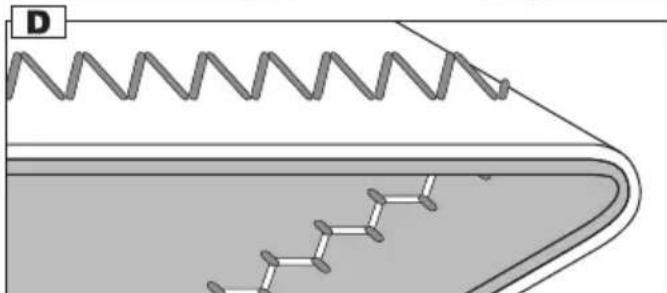
natural_image
Diagram of a mechanical component with zigzag spring and stepped features, no text or symbols present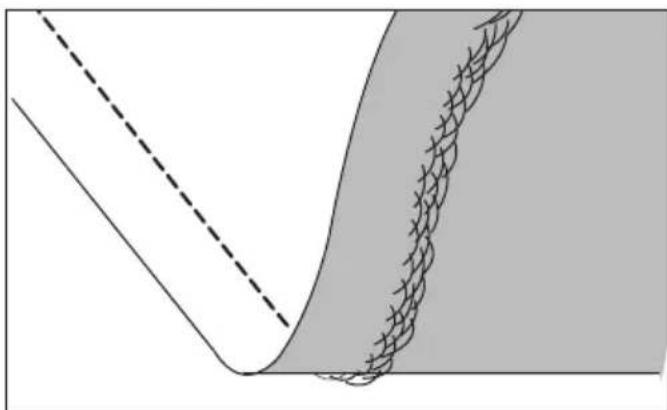
natural_image
Diagram showing a curved boundary with a dashed line and a shaded region, no text or symbols present.STRAIGHT STITCH
SEWING
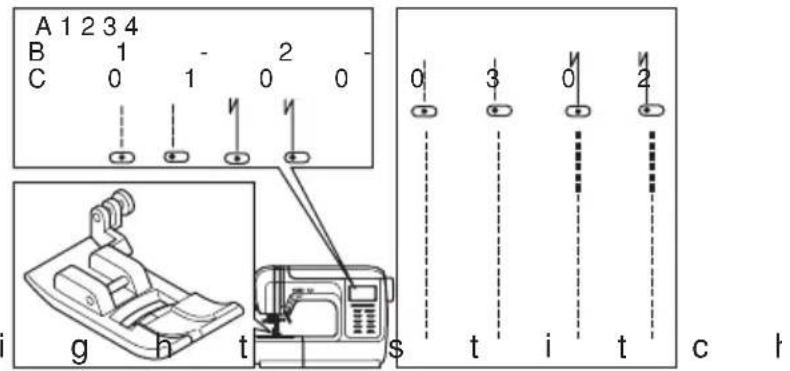
Straight stitch patterns should be selected to suit the type of fabric being sewn.

2 - 00 Straight stitch (left needle
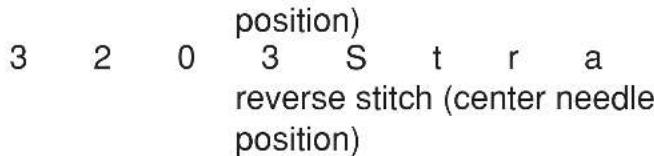
4 - 0 2 S t r a reverse stitch (left needle position)
Regular Foot (A)
A. Straight Stitch
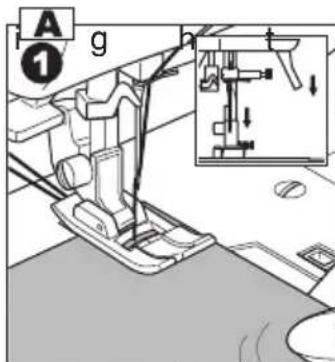
- Position the fabric under the presser foot and lower it.
- Hold the upper thread and bobbin thread loosely and start sewing.
Place hand lightly on the fabric while sewing.
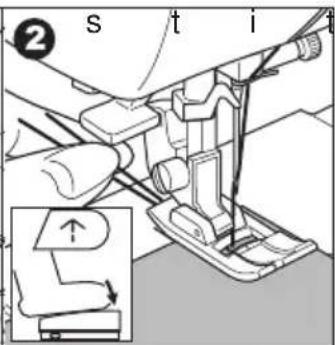
- When you reach the end of seam, stop sewing.
-
- TYPE A -
Press the thread cutter button.
- TYPE B -
Raise the presser foot and cut thread.
B. Straight Stitch With Auto-reverse Stitch
- Position the fabric under the presser foot and lower it.
- Hold the upper thread and bobbin thread loosely and start sewing.
Machine will sew 4-5 stitches forward and sew 4-5 stitches backward and continue sewing forward.
- When you reach the end of seam, press the reverse button once.
Machine will sew a few stitches backward and sew a few stitches forward and stop automatically.
-
- TYPE A -
Press the thread cutter button.
- TYPE B -
Raise the presser foot and cut thread.
ZIGZAG STITCH SEWING—
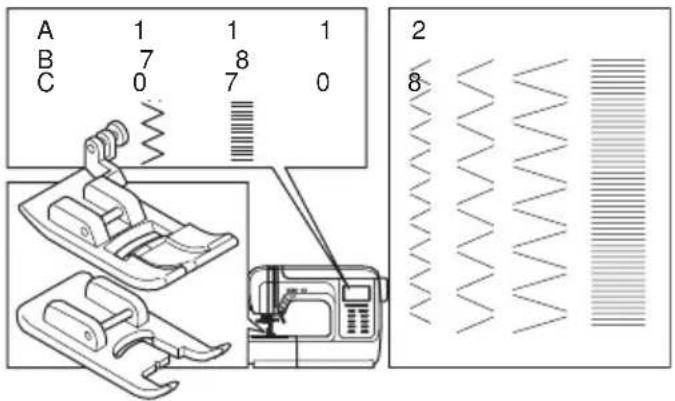
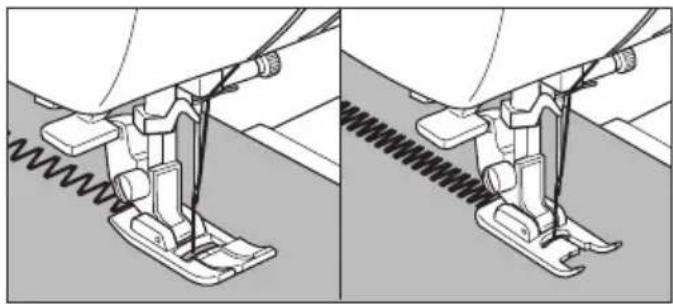
Your machine can sew zigzag stitches of various widths and lengths by changing the settings of the stitch width and stitch length.
A B C
11 7 07 Zigzag Stitch: Regular Foot (A)
12 8 08 Satin Stitch: Satin Foot (B)
Zigzag stitches are very good for joining two pieces of fabrics and sewing various decorative patterns.
SATIN STITCHING
When machine is set to satin stitch, it will preset to closer stitches than the normal zigzag stitch. Attach the satin foot for this stitch.
MULTI-STITCH ZIGZAG—
Used for sewing on elastic band and overcast stitching on knit fabrics.
A B C
13 9 09 Multi-Stitch Zigzag
Regular Foot (A)
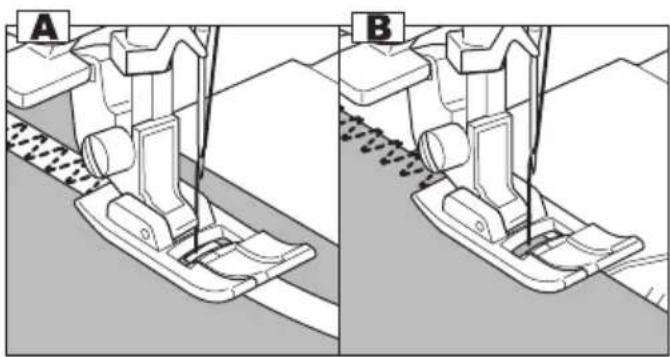
A. Elastic Band Sewing
Pull elastic band in front and back of needle while sewing.
B. Overcast Stitching
Used for easy to ravel and knit fabrics.
Needle should fall on extreme edge of fabric.
Refer to page 31 for overcast.
FREE ARM SEWING
By simply removing the extension table, machine becomes a free arm machine making hard to reach areas readily accessible.
Refer to page 6 for Removing The Extension Table.
natural_image
Technical illustration of a sewing machine with rope routing (no text or symbols)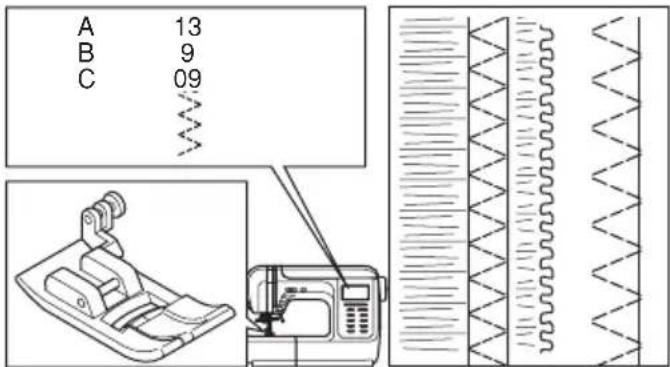
natural_image
Two technical diagrams showing sewing machine footprints in different angles (A and B), with no visible text or symbols.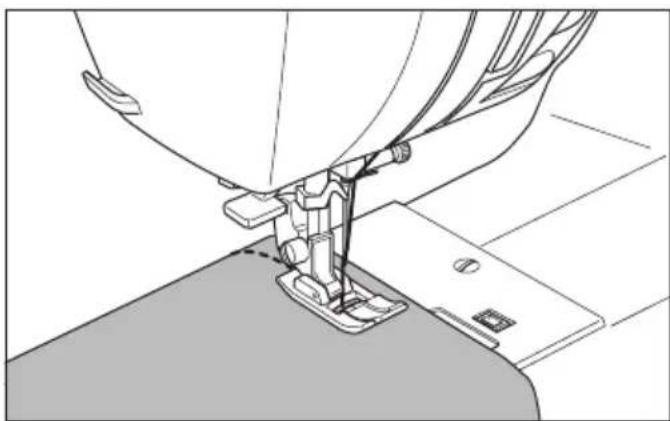
natural_image
Technical line drawing of a sewing machine needle and foot (no text or symbols)OVERCASTING- OVERLOCKING
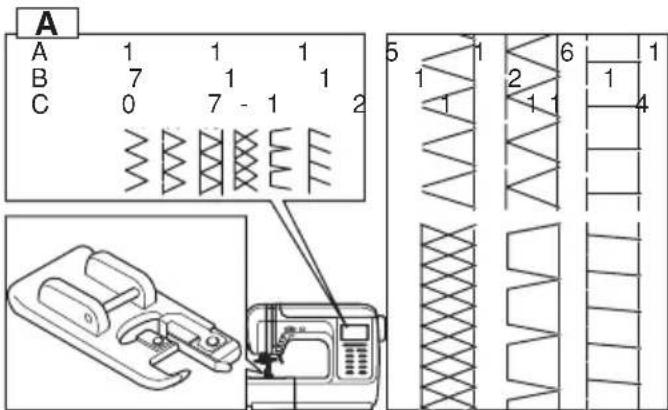
A. USING THE OVERCASTING FOOT
| A | B | C | |
| 11 7 0 | 7 Stitch Width 5 | 0-6.0 | |
| 15,16,17 | 11,12,13 | 11,12 | Stitch Width 5.0-7.0 |
| 18,19 1 | 4,15 14,15 |
Overcasting Foot (C)
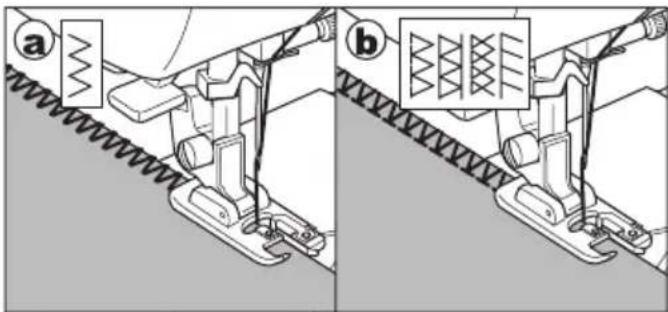
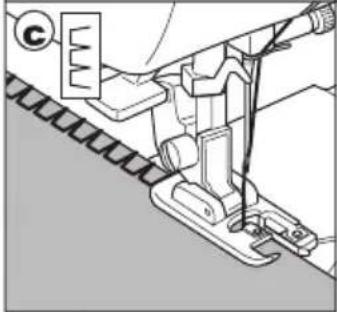
Press fabric against the guide plate of the overcasting foot so that needle falls near the edge of seam.
a. This pattern is used for preventing ravelling of fabrics.
b. These patterns can sew overcasting and regular stitches at the same time. Therefore it is convenient for sewing easy to ravel and stretch fabrics.
c. This pattern is suitable for overcasting thin or lightweight fabrics.

CAUTION: To prevent accidents.
Overcasting foot should be used for sewing above patterns only and do not change the stitch width narrower than 5.0. It is possible that needle could hit the presser foot and break when sewing other patterns and width.
B. USING THE REGULAR FOOT
A
B
C
11, 13 7, 9 07, 09, 13
Regular Foot (A)
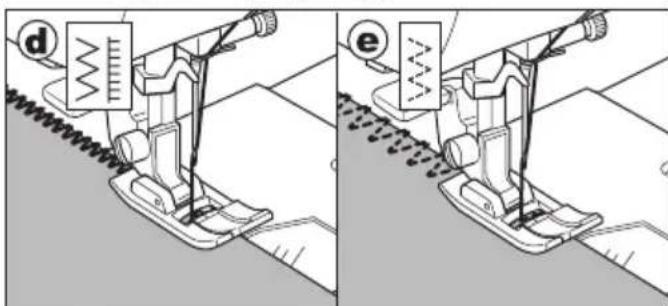
Place fabric so that needle will fall nearest to edge of fabric when using the Regular Foot.
d. For narrower zigzag width (Width=2.0-4.5).
e. When sewing easy to ravel or stretch fabrics.
C. NOTE:
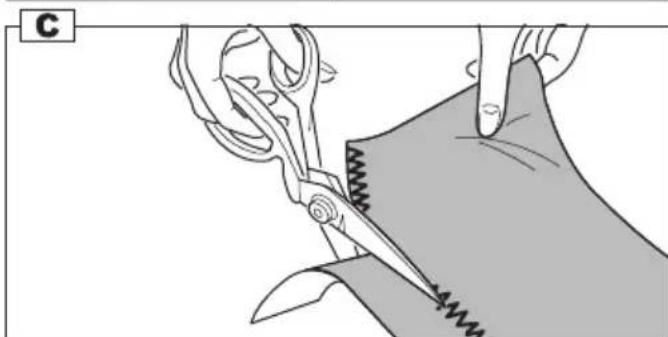
You can also cut off the excess material after sewing the inside of fabric.
Be careful not to cut thread when cutting excess materials.
natural_image
Mechanical assembly diagram showing a sewing machine with levers and base mount (no text or symbols)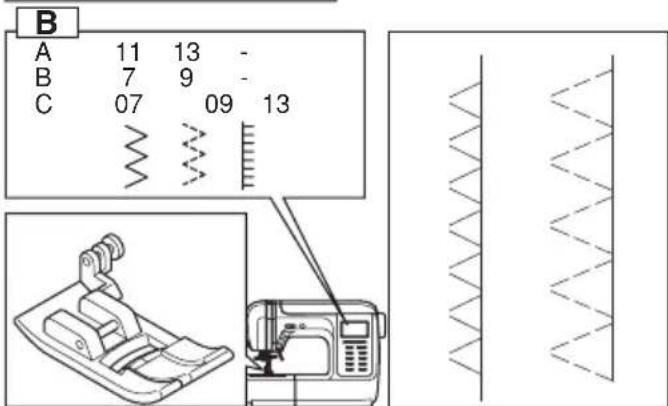
natural_image
Illustration of hands using scissors to cut fabric with a sewing machine (no text or symbols)BLIND HEM STITCHING—
This stitch will sew without stitches showing on right side of fabric.
A B C
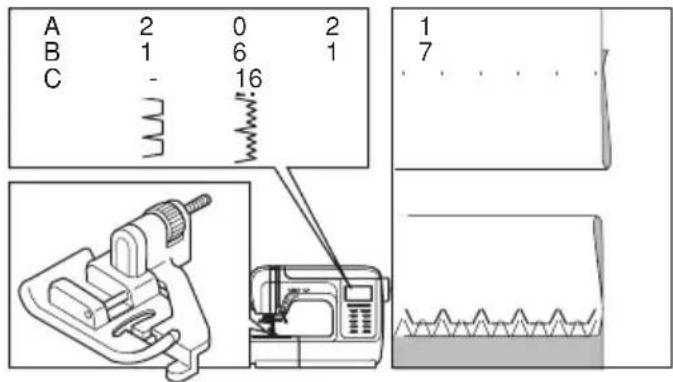
20 16 - Blind hem for regular fabric.
21 17 16 Blind hem for regular or stretch fabric.
Blind Foot (D)
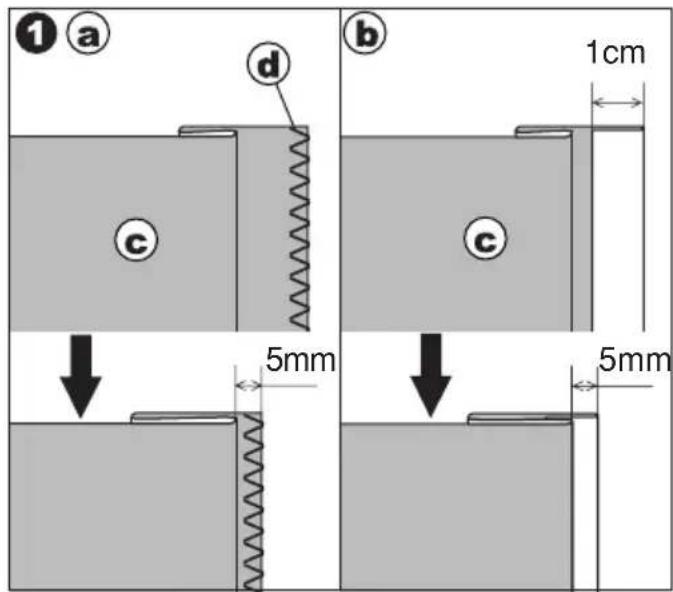
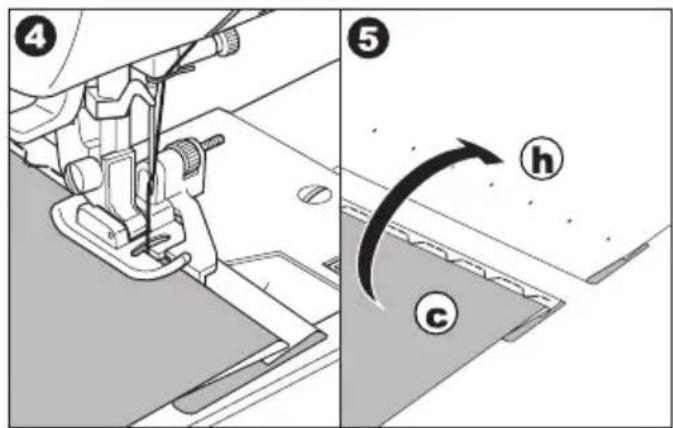
- Fold the fabric as shown on drawing.
a. Medium, Heavy weight fabric
b. Light weight fabric
c. Wrong side of fabric
d. Overcasting
-
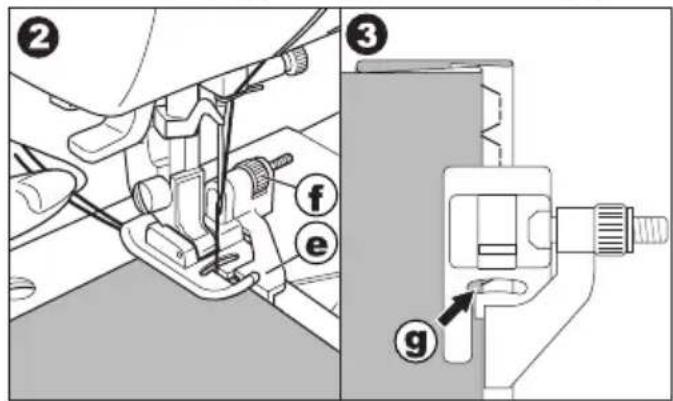
The guide (e) on the blind foot ensures even feeding of the fabric when blind hem stitching. The guide (e) is adjusted by turning the adjusting screw (f).
-
Place fabric so that the straight stitches (or small zigzag stitches) are on the protruding hem edge and the large zigzag stitches just catch one thread of the folded edge (g). Turn the screw so that the guide barely touches the folded edge of fabric.
-
Lower the presser foot and sew hem, guiding fabric evenly along the guide.
-
Turn the fabric over when you have completed sewing.
c. Wrong side of fabric
h. Right side of fabric
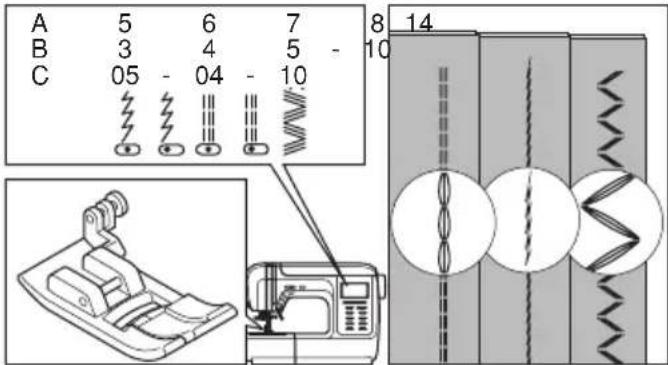
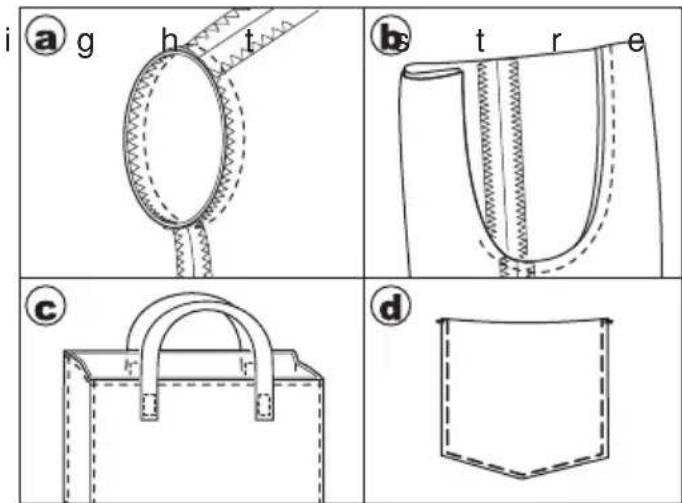
ELASTIC STITCH SEWING-
It assures you of a stitch that is strong and flexible and will give with the fabric without breaking. Good for easy to ravel and knit fabrics. It is good for joining durable fabrics such as denims.
A B C
5 3 05 Stem stitch for stretch fabrics (Center needle position)
6 4 - Stem stitch for stretch fabrics (Left needle position) 7 5 0 4 S t r a (Center needle position)
8 -- Straight stretch stitch (Left needle position)
14 10 10 Rick-rack Stitch
Regular Foot (A)
We recommend that you use a needle for knit and synthetic fabrics to prevent stitch skippings and thread breakages.
a. Jacket b. Trousers
c. Bag d. Pocket
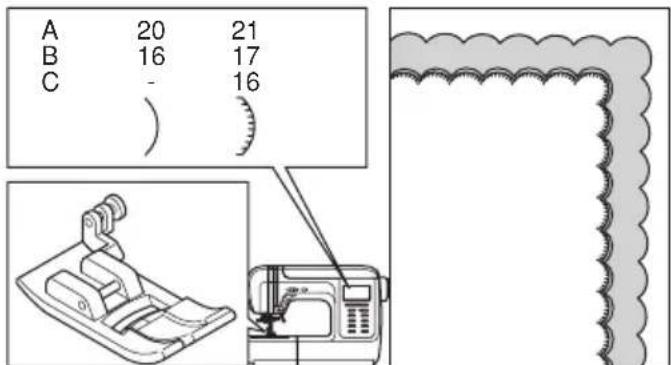
SCALLOP STITCH
A B C
27 21 20 Scallop hem
28 22 21 Scallop edging
Regular Foot (A)
This stitch is used to sew edge on women and children's wear and table cloths.
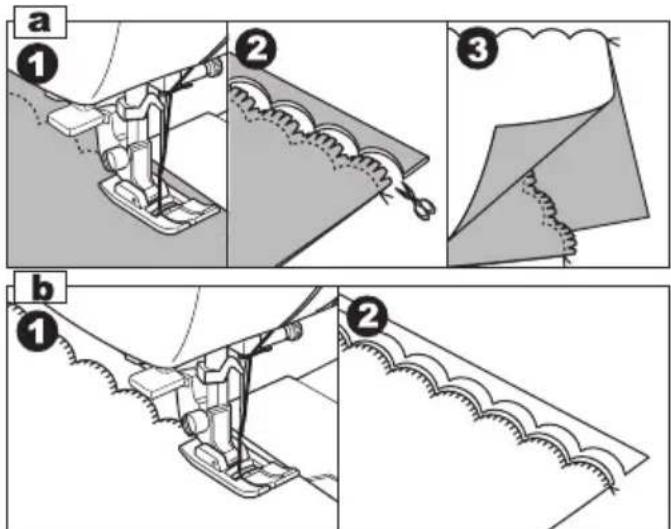
a. SCALLOP HEM
-
Fold the fabric right sides together in and sew along the edge.
-
Cut the fabric along the seam leaving an allowance of 3 mm (1/8") for seaming. Notch the allowance.
-
Turn fabric over and push out the curved seam to the surface and press it.
b. SCALLOP EDGING
- Sew on hem line.
- Trim fabric close to stitching taking care not to cut the thread.
INSERTING ZIPPERS CENTERED INSERTION
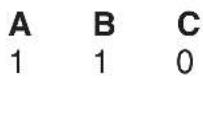
Zipper Foot (E)

CAUTION: To prevent accidents.
Zipper foot should be used for sewing center needle position straight stitch only. It is possible that needle could hit the presser foot and break when sewing other patterns.
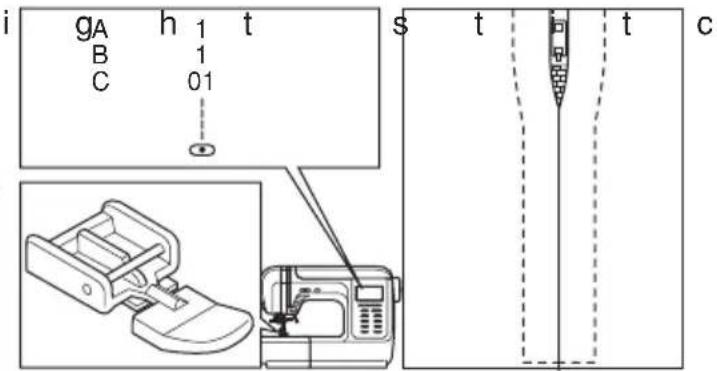
- Baste the zipper opening to the seam line.
a: Top stitch,
b: End of opening,
c: Basting
d: Wrong Side of fabric
- Press open the seam allowance.
Baste the zipper tape.
Place the open zipper face down on the seam allowance with the teeth against the seam line.
- Attach the zipper foot.
Attach the left side of the presser foot pin to the presser foot holder when sewing the right side of the zipper, and right side of the presser foot pin to the holder when sewing the left side of the zipper.
-
Stitch left side of the zipper from bottom to top.
-
Stitch across the lower end and right side of zipper.
Remove the basting and press.
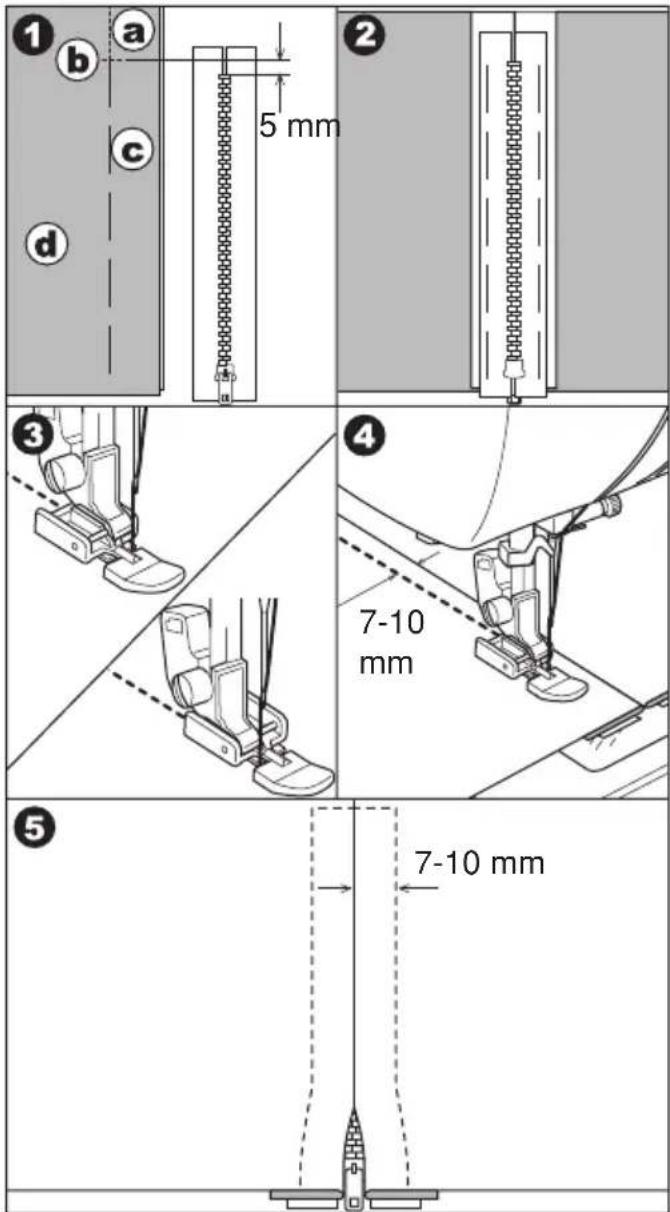
INSERTING ZIPPERS LAPPED INSERTION\_\_\_\_
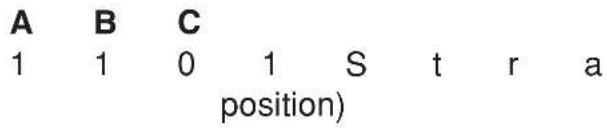
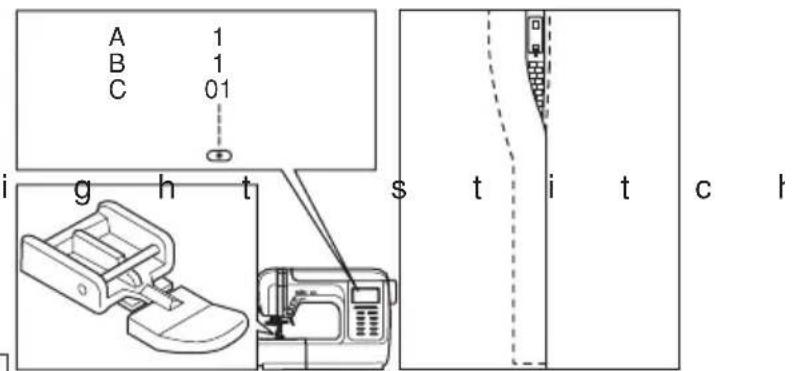
Zipper Foot (E)

CAUTION: To prevent accidents.
Zipper foot should be used for sewing center needle position straight stitch only. It is possible that needle could hit the presser foot and break when sewing other patterns.
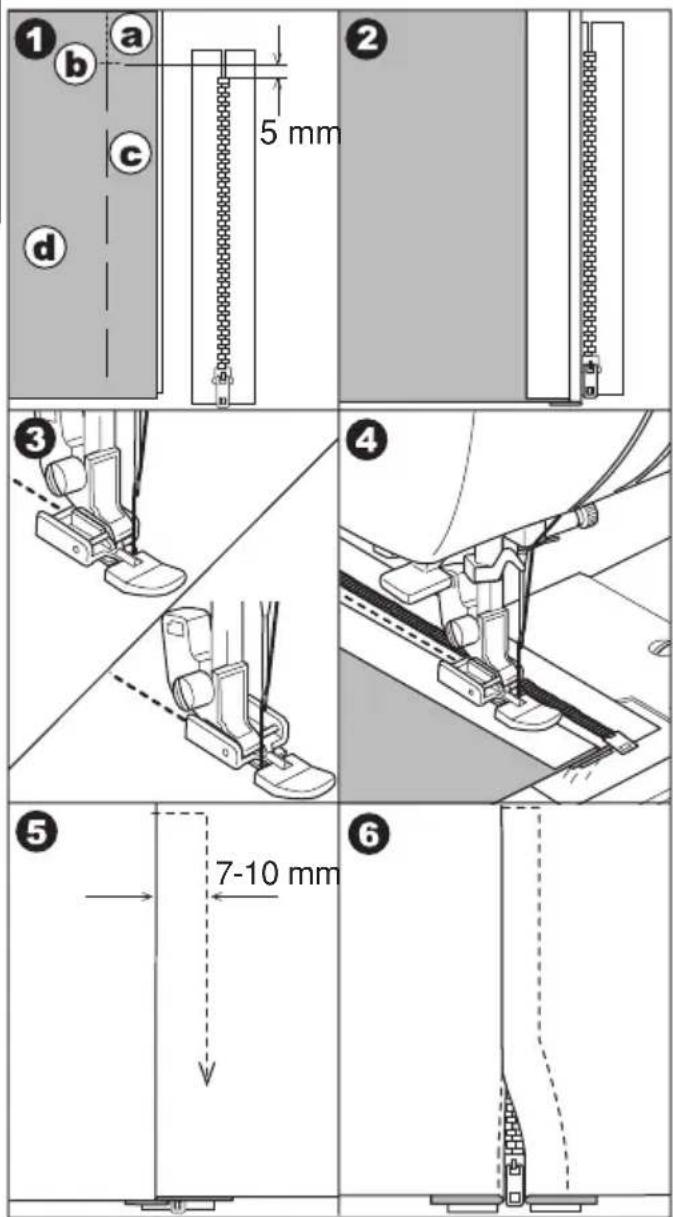
- Baste the zipper opening to the seam line.
a: Top stitch,
b: End of opening,
c: Basting
d: Wrong Side of fabric
- Fold back to the left seam allowance. Turn under the right seam allowance to form 3 mm fold.
- Attach the zipper foot.
- Attach the left side of the presser foot pin to the presser foot holder when sewing the right side of the zipper, and right side of the presser foot pin to the holder when sewing the left side of the zipper.
- Stitch the left side of zipper from bottom to top.
- Turn the fabric right side out stitch across the lower end and right side of zipper.
- Stop about 5 cm from the top of zipper. Remove the basting and open the zipper. Stitch the remainder of the seam.
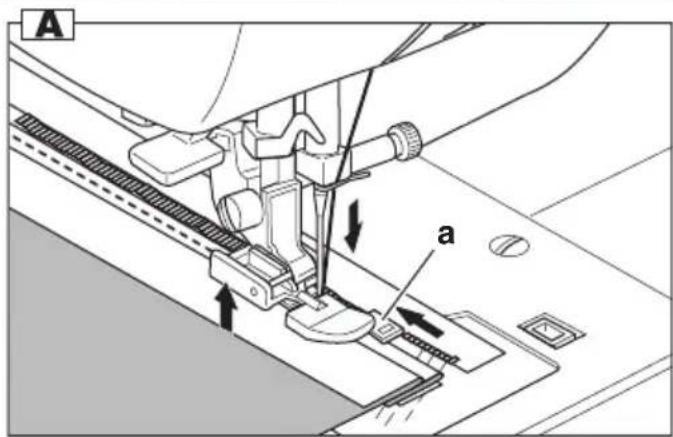
A. TO OPEN THE ZIPPER WHILE STITCHING
- Stop stitching before you reach the slider.
- Lower the needle into fabric.
- Raise the presser foot and open the zipper.
- Lower the presser foot and continue stitching.
a. Slider
BUTTONHOLE SEWING
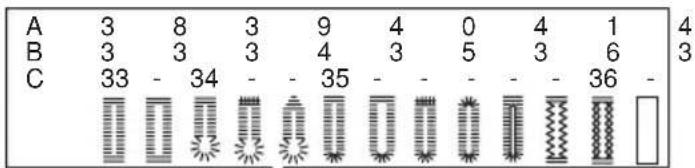
A B C
38 27 33 Bar-tack Buttonhole (Narrow) for light to medium weight fabrics
39 34 - Bar-tack Buttonhole (Wide) for large buttons
40 35 34 Keyhole Buttonhole for heavy weight fabrics
41 36 - Keyhole Buttonhole with reinforced bar tack
42 37 - Tapered Keyhole Buttonhole
43 38 35 Round Ended Buttonhole (Narrow) for light to medium weight fabrics
44 39 - Round Ended Buttonhole (Wide) for large buttons
45 40 - Round Ended Buttonhole with cross bar
46 -- Both Round Ended Buttonhole
47 -- Decorative Buttonhole
48 41 - Stretch Buttonhole
49 - 36 Heirloom Buttonhole
50 -- Bound Buttonhole (See page 38)
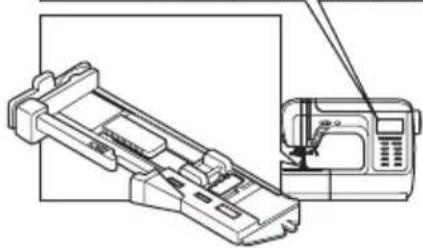
Buttonhole Foot (F)
- Mark position and length of buttonhole on fabric.
- Set button on the base.
* If button does not fit on the base, adjust slide on base to diameter of button plus thickness of button.
a = Length of button + thickness
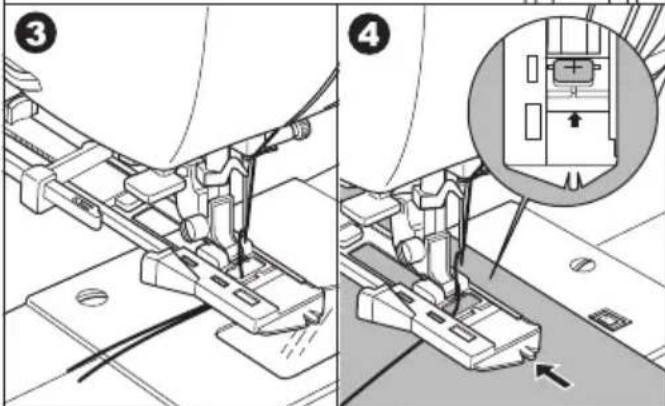
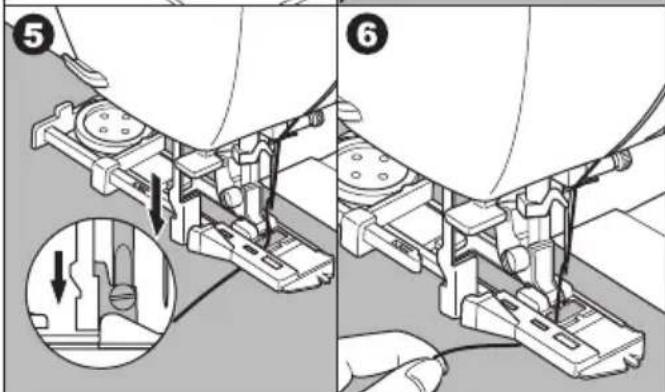
- Pass upper thread through the hole of buttonhole foot and bring upper and bobbin threads to the left.
- Position fabric under presser foot so that the center line mark is in the center of the buttonhole foot.
Lower the foot.
- Lower the buttonhole lever completely.
Note: Machine will not start to sew if buttonhole lever is not lowered properly or buttonhole foot is not positioned correctly. - Hold upper thread lightly and start the machine.
natural_image
Technical line drawing of a mechanical assembly with an inset showing a close-up of a device (no text or symbols present)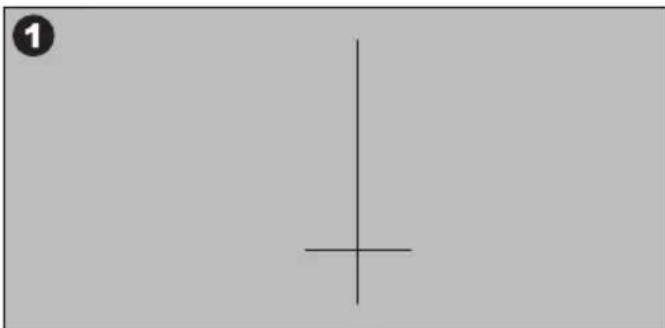
natural_image
Simple geometric diagram with a vertical line and two intersecting lines, no text or symbols present.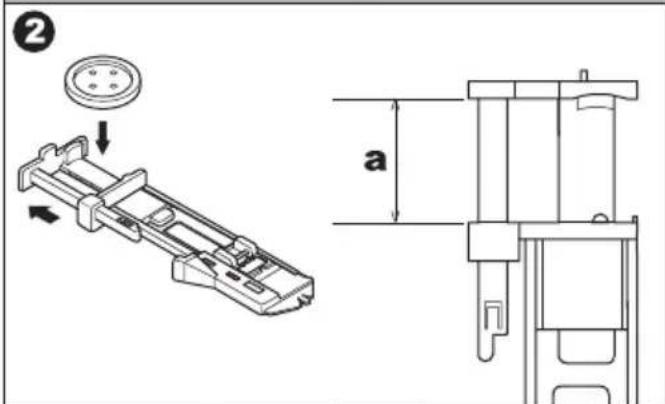
flowchart
graph TD
    A["Stage 7"] --> B["1"]
    B --> C["2"]
    C --> D["3"]
    D --> E["4"]
    E --> F["5"]
    F --> G["6"]

    H["Stage 1"] --> I["1"]
    I --> J["2"]
    J --> K["3"]
    K --> L["4"]

    M["Stage 2"] --> N["1"]
    N --> O["2"]
    O --> P["3"]
    P --> Q["4"]
    Q --> R["5"]

    S["Stage 3"] --> T["1"]
    T --> U["2"]
    U --> V["3"]
    V --> W["4"]
    W --> X["5"]

    Y["Stage 4"] --> Z["1"]
    Z --> AA["2"]
    AA --> AB["3"]
    AB --> AC["4"]
    AC --> AD["5"]
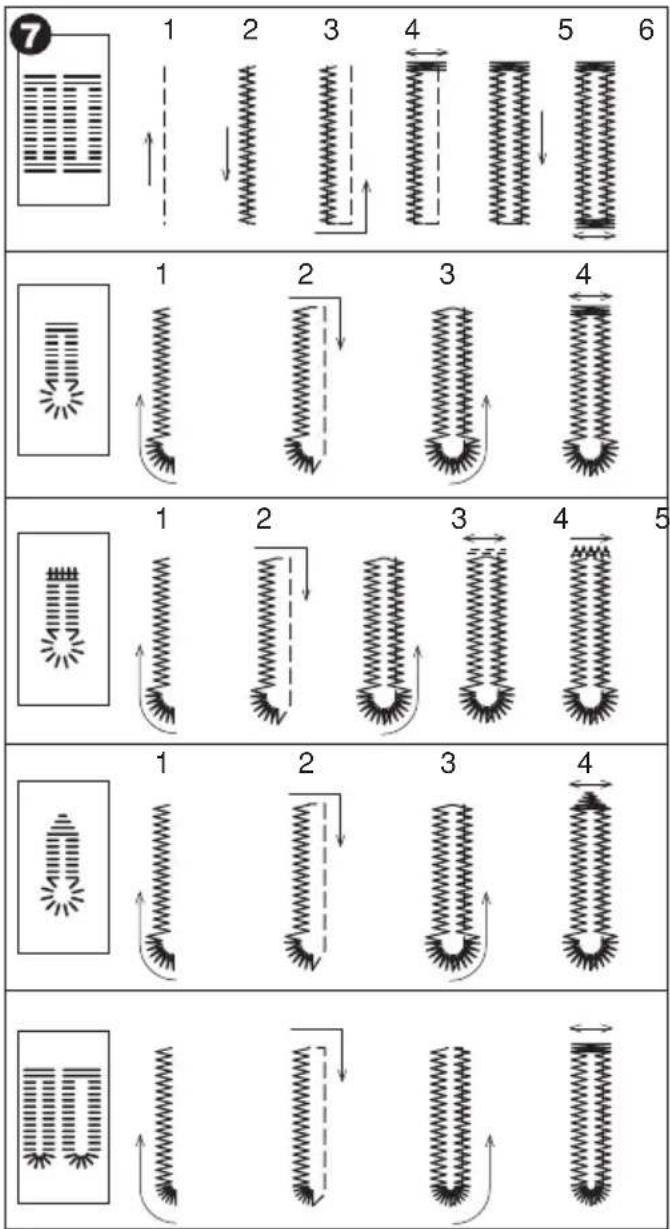
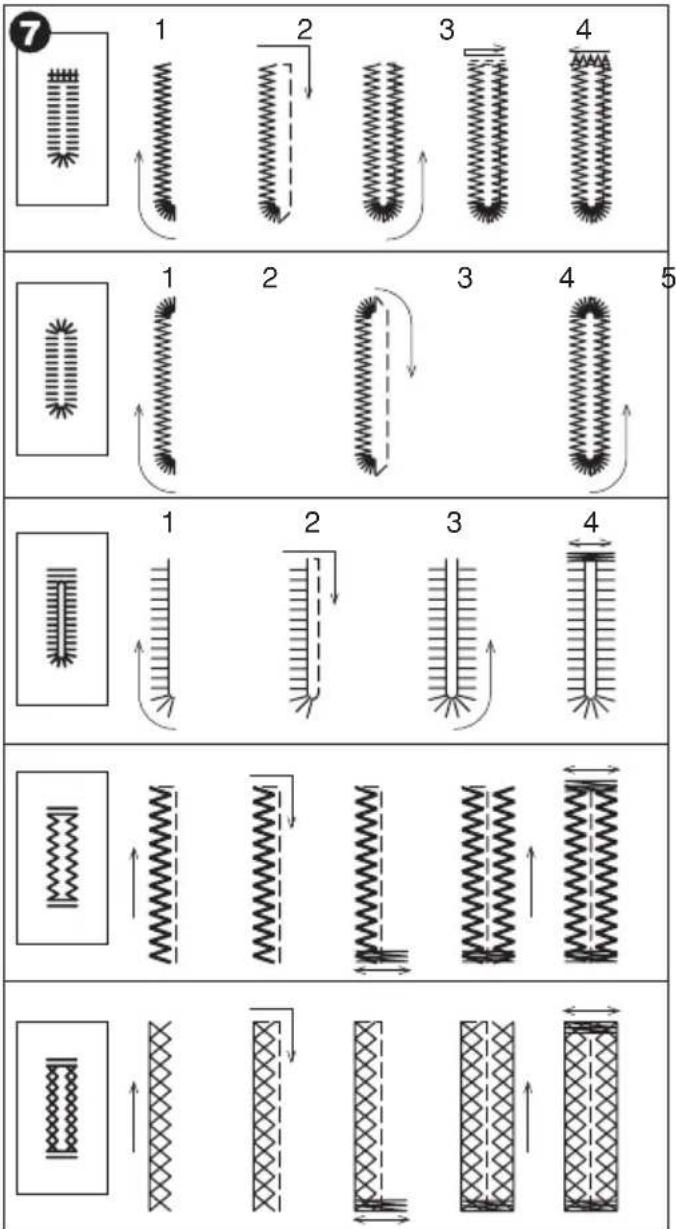
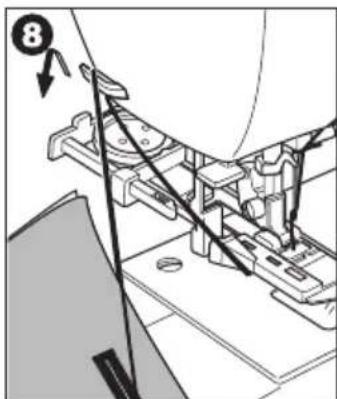
- Machine will sew the buttonhole in the order as shown and stop automatically after sewing.
- Raise the presser foot and cut thread. To sew over same buttonhole, raise presser foot to return to original position.
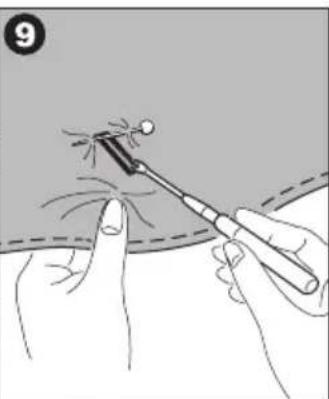
- Cut center of buttonhole being careful not to cut stitches on either side. Use a pin as a stopper.

CAUTION: To prevent accidents.
When using seam ripper, do not put your finger in the path of ripper.
A. WHEN SEWING STRETCH FABRIC
It is suggested that you use interfacing on the backside of the fabric.
Note: Density of buttonhole legs may be adjusted with stitch length control.
flowchart
graph TD
    A["Stage 1: Spring-loaded spring"] --> B["Stage 2: Directional flow with curved arrows"]
    B --> C["Stage 3: Linear flow with curved arrows"]
    C --> D["Stage 4: Linear flow with curved arrows"]
    D --> E["Stage 5: Linear flow with curved arrows"]

    F["Stage 1: Vertical spring with curved arrows"] --> G["Stage 2: Vertical spring with curved arrows"]
    G --> H["Stage 3: Vertical spring with curved arrows"]
    H --> I["Stage 4: Vertical spring with curved arrows"]

    J["Stage 1: Vertical spring with curved arrows"] --> K["Stage 2: Vertical spring with curved arrows"]
    K --> L["Stage 3: Vertical spring with curved arrows"]
    L --> M["Stage 4: Vertical spring with curved arrows"]

    N["Stage 1: Vertical spring with curved arrows"] --> O["Stage 2: Vertical spring with curved arrows"]
    O --> P["Stage 3: Vertical spring with curved arrows"]
    P --> Q["Stage 4: Vertical spring with curved arrows"]
natural_image
Illustration of a medical procedure showing a finger using a tool to draw or mark a small object (no text or symbols present)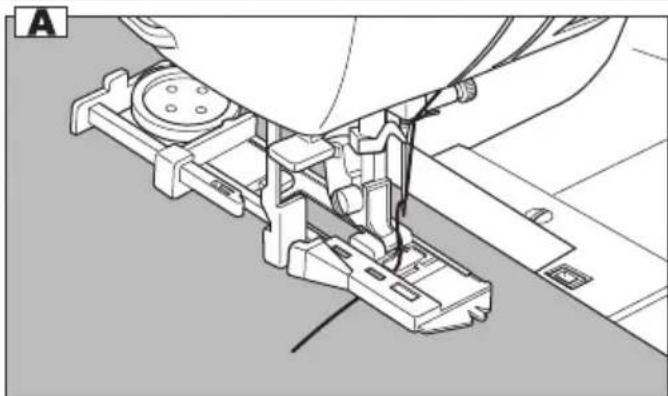
natural_image
Mechanical assembly diagram showing a sewing machine mechanism with no visible text or symbols- TYPE A ONLY - BOUND BUTTONHOLE
A bound buttonhole provides a professional tailored touch to women's dresses, suits and coats.
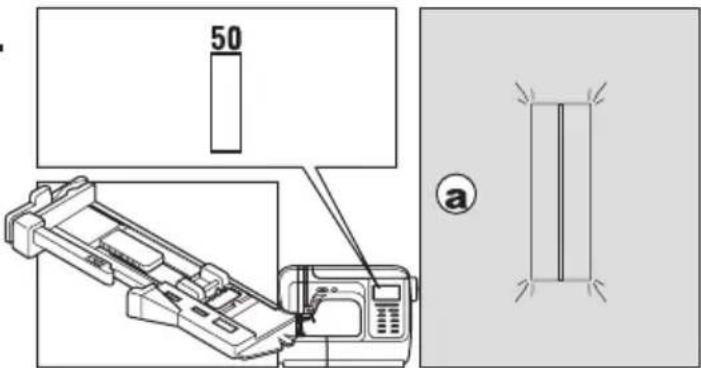
No. 50 Bound Buttonhole
Buttonhole Foot (F)
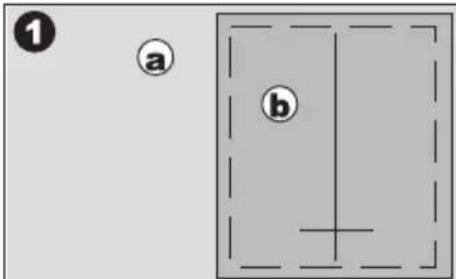
- Cut a patch of fabric 2.5 cm wide, 1cm longer than the finished buttonhole. Baste a patch so that the center line of patch will align with the center line mark of buttonhole.
a. Right side of fabric
b. Wrong side of patch
-
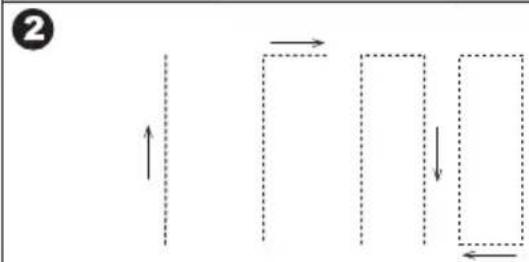
Lower the buttonhole lever and sew buttonhole. (See previous page) Machine will sew the buttonhole in the order as shown and stop automatically after sewing.
-
Raise the presser foot and cut thread.
-
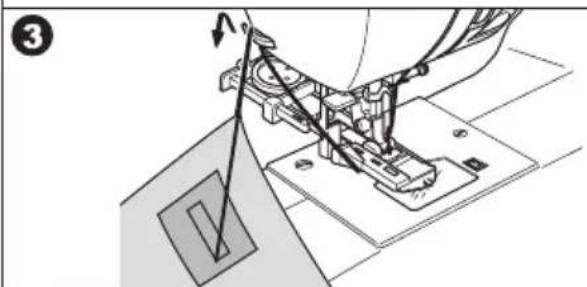
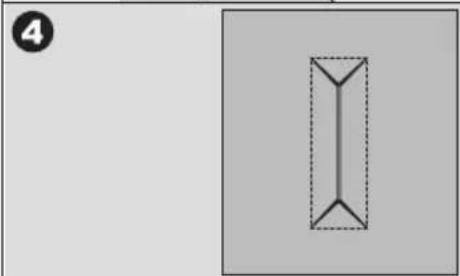
Carefully cut through the center of buttonhole to within 3 mm of each end. Cut diagonally to each corner as shown. Remove the basting.
-
Draw the patch through the opening to the underside.
-
Turn the fabric and pull the patch so that the buttonhole will shape rectangle. Press the patch.
c. Wrong side of fabric d. Right side of patch
flowchart
graph TD
    A["↑"] --> B["→"]
    B --> C["→"]
    C --> D["↓"]
    D --> E["←"]
natural_image
Simple geometric diagram with a vertical rectangle and dashed lines inside, no text or symbols present.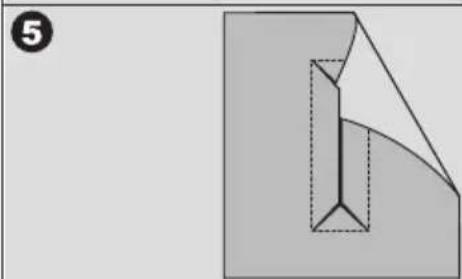
natural_image
Abstract geometric diagram showing a folded paper or sheet with dashed internal lines (no text or symbols)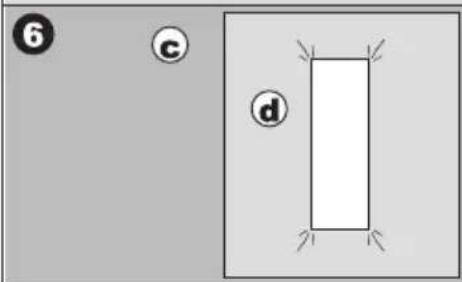
-
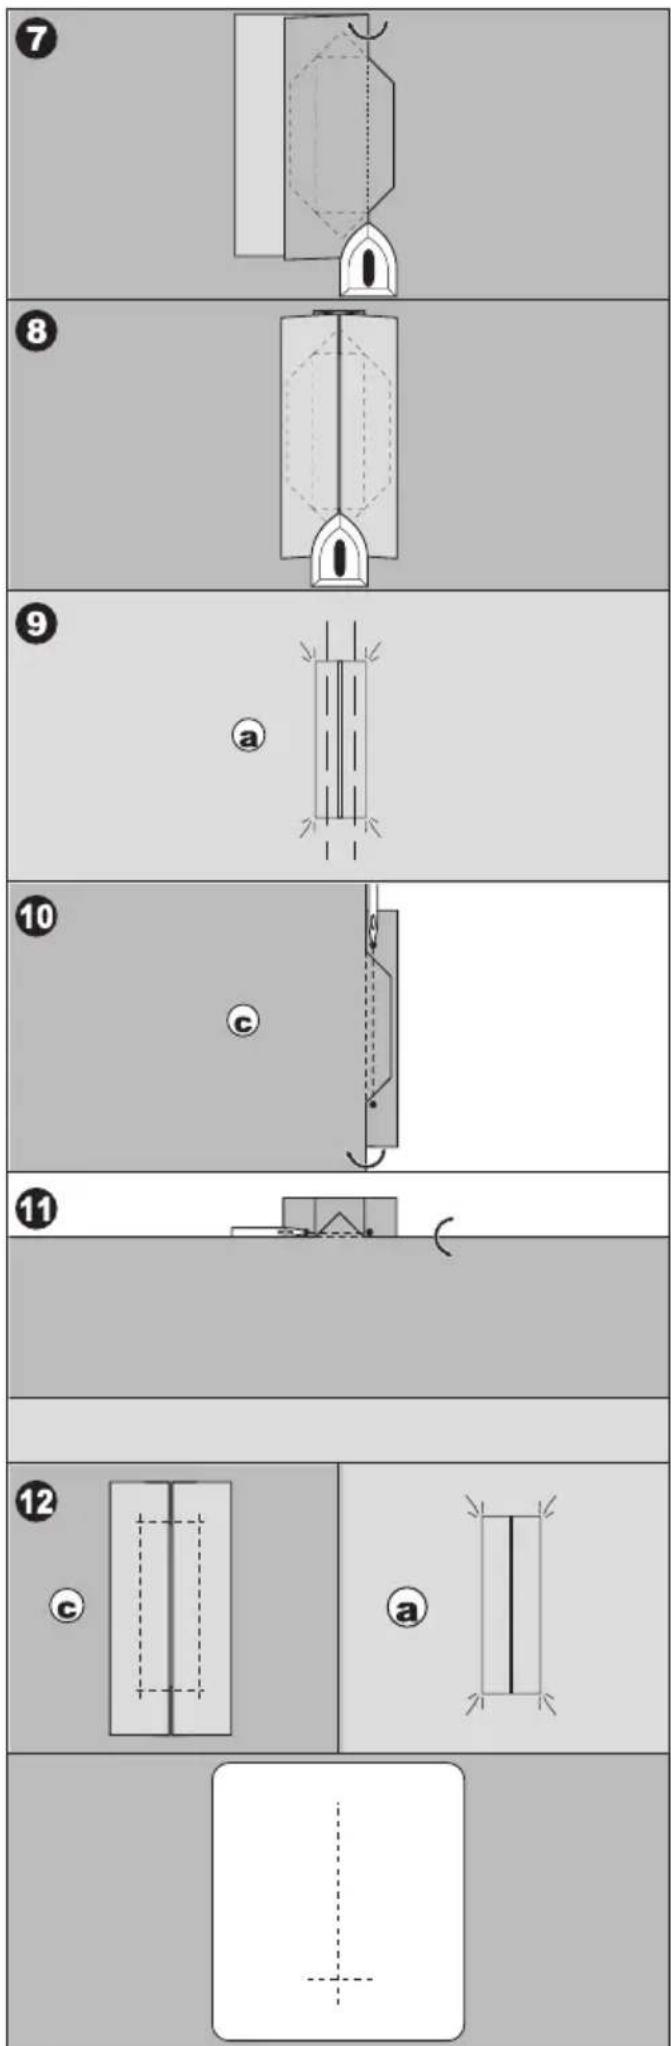
Turn the patch and press the side seam allowance.
-
Fold each side of the patch to form pleats that meet at the center of the buttonhole and cover the opening. Press the patch.
-
Turn the fabric to right side and baste along the center of each fold.
a. Right side of fabric
- Fold the fabric and stitch along the seams on each side, just a needle width from the original stitching line. Remove the basiting.
c. Wrong side of fabric
-
Fold the fabric another direction and stitch the triangular ends on the original stitching line.
-
Press and trim the patch to within 5 mm of the stitching.
a. Right side of fabric
c. Wrong side of fabric
NOTE:
When sewing weaker fabric, previously sewing, cut a patch of fusible interfacing 3 cm wide 2 cm longer than the buttonhole. Fuse to wrong side over each buttonhole marking.
- TYPE A, B - — SEWING ON BUTTONS
A B
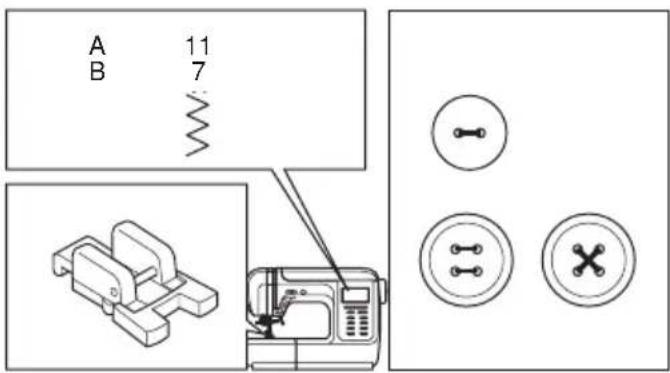
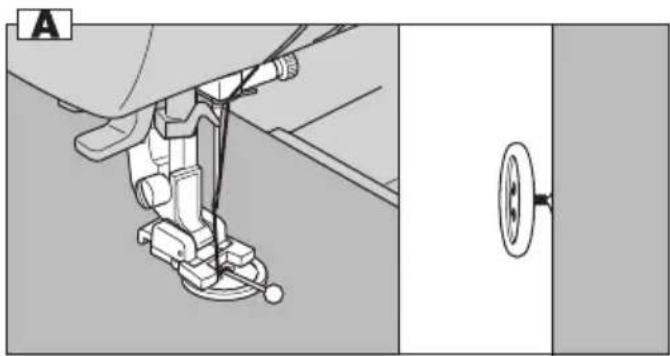
11 7 Button Sewing Foot
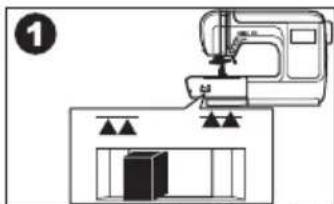
- Lower the feed dogs by moving the drop feed lever to the left.
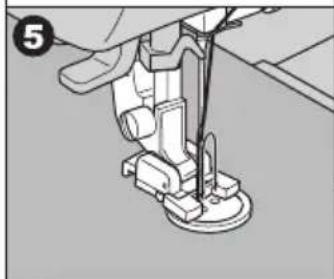
- Attach the button sewing foot and align two holes of button with slot of presser foot and lower foot to hold the button securely.
- Adjust the stitch width so that the needle enters the left hole of button.
- Turn hand wheel by hand so needle enters the second hole. You may need to adjust the stitch width again.

CAUTION: To prevent accidents.
Make sure that the needle does not hit the button during sewing. Otherwise needle may break.
- Sew approximately 10 stitches at slow speed.
- Raise the foot and cut the threads remaining about 2 inces to the fabric.
- Pull the end of bobbin thread and pull upper thread to the wrong side of fabric. Tie them together.
- After sewing, move the drop feed lever to the right.
Note:
To sew a 4-hole button, follow the procedure avobe for the first two holes. Then lift presser foot slightly and move fabric to permit stitching the other two holes, either independently, or criss-cross over the first two holes.
A. Thread Shank
Sew-through buttons on coats and jackets should have a thread shank to make them stand away from the fabric. Place a straight pin or sewing machine needle on top of button between the holes, and sew over the pin or needle.
Pull thread to back of button and wind around stitches to form a firm shank. Tie thread ends securely.
natural_image
Diagram of a sewing machine with a box and support structures (no text or symbols)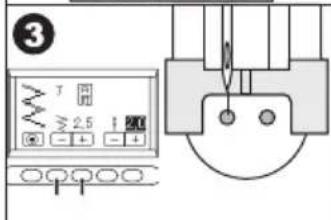
natural_image
Mechanical assembly diagram showing a sewing machine base with no visible text or symbols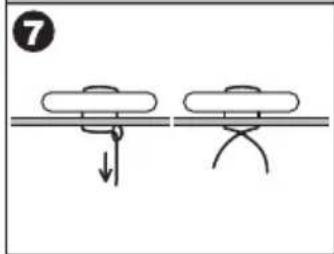
natural_image
Diagram showing two mechanical components with downward force arrows, no text or symbols present
natural_image
Pure electrical circuit lines without any symbols
natural_image
Mechanical assembly diagram showing a sewing machine needle and base plate (no text or symbols)
natural_image
Mechanical assembly diagram showing a sewing machine and a pulley mechanism (no text or symbols)- TYPE C - \_ SEWING ON BUTTONS
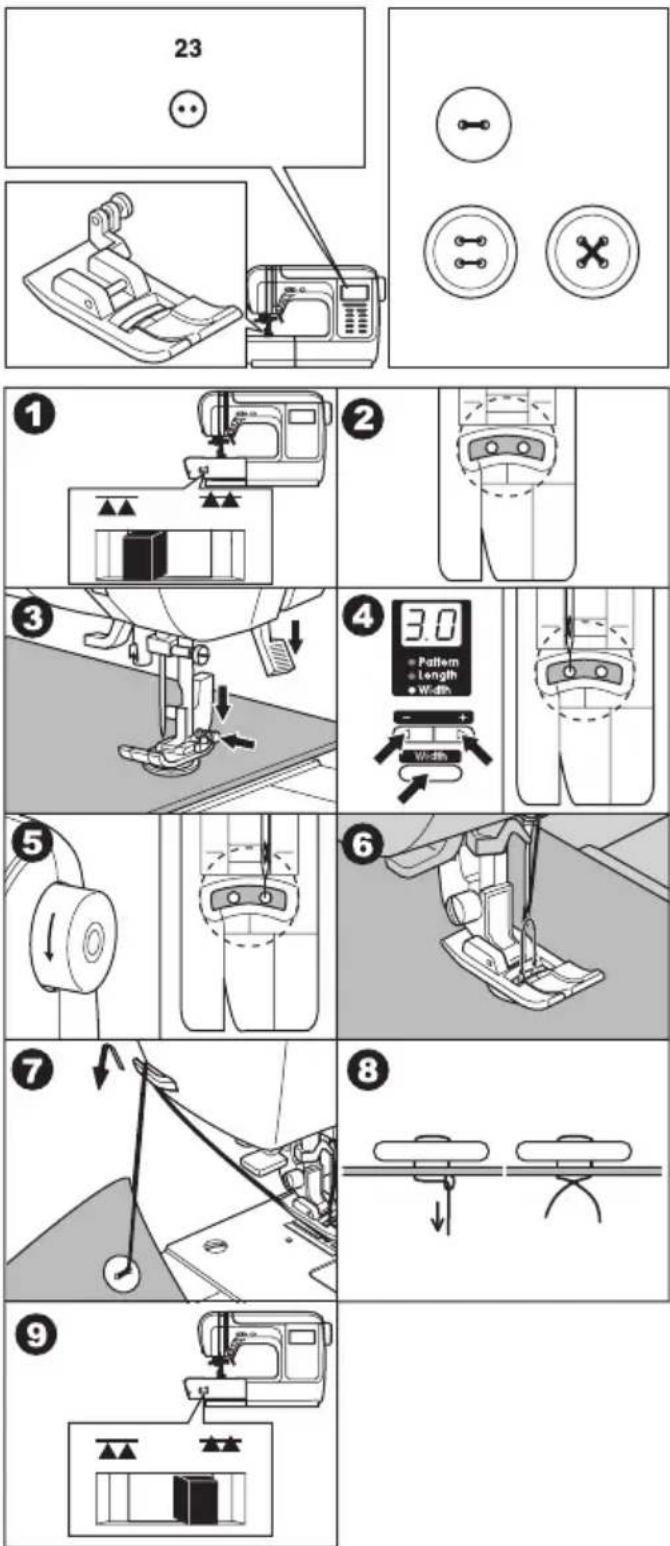
No. 23 Regular Foot
- Lower the feed dogs by moving the drop feed lever to the left.
- Attach the regular foot and align two holes of button with slot of presser foot.
- Push the button located on the right side of foot and lower the foot to hold the button securely.
- Adjust the stitch width so that the needle enters the left hole of button.
- Turn hand wheel by hand so needle enters the second hole. You may need to adjust the stitch width again.

CAUTION: To prevent accidents.
Make sure that the needle does not hit the button during sewing. Otherwise needle may break.
- Sew approximately 10 stitches at slow speed.
- Raise the foot and cut the threads remaining about 10 cm to the fabric.
- Pull the end of bobbin thread and pull upper thread to the wrong side of fabric. Tie them together.
- After sewing, move the drop feed lever to the right.
Note:
To sew a 4-hole button, follow the procedure avobe for the first two holes. Then lift presser foot slightly and move fabric to permit stitching the other two holes, either independently, or criss-cross over the first two holes.
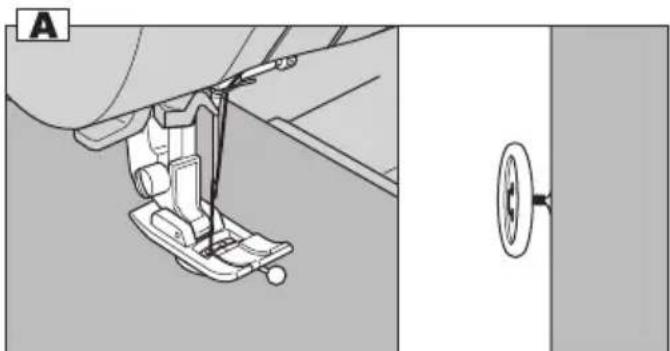
A. Thread Shank
Sew-through buttons on coats and jackets should have a thread shank to make them stand away from the fabric. Place a straight pin or sewing machine needle on top of button between the holes, and sew over the pin or needle.
Pull thread to back of button and wind around stitches to form a firm shank. Tie thread ends securely.
natural_image
Mechanical assembly diagram showing a sewing machine needle inserted into a component, with a separate close-up view of a circular component (no text or symbols present)- TYPE A - QUILTING
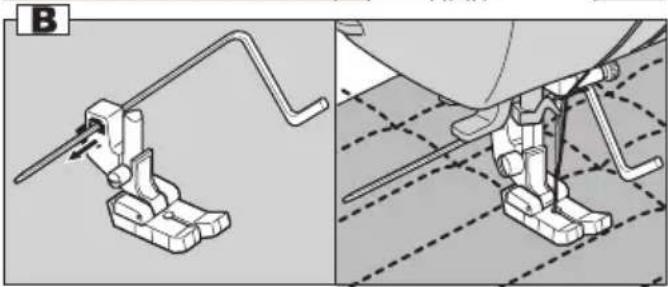
A quilt always consists of three layers of material.
The top middle and bottom.
The top layer is formed by multiple geometrically shaped pieces of materials joined together.
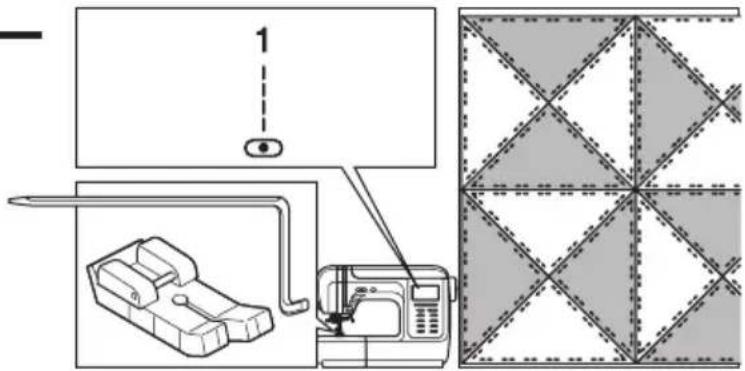
No. 1 Straight stitch (Center Needle Position)
Straight Stitch / Quilting Foot, Quilting Bar

CAUTION: To prevent accedents.
When you use Straight stitch / Quilting foot, do not move the needle position from center.
A. Joining the pieces of fabric
Join the pieces of fabric using Pattern No. 1 with a seam allowance of 1/4 inch (6.3 mm)
B. Quilting
Sew three layers of material.
Use quilting bar to sew successive rows. Insert quilting bar into the hole of presser foot holder and set the space as you desire.
natural_image
Mechanical assembly diagram showing two stages of a robotic arm mechanism (no text or symbols present)- TYPE B, C QUILTING
B
C
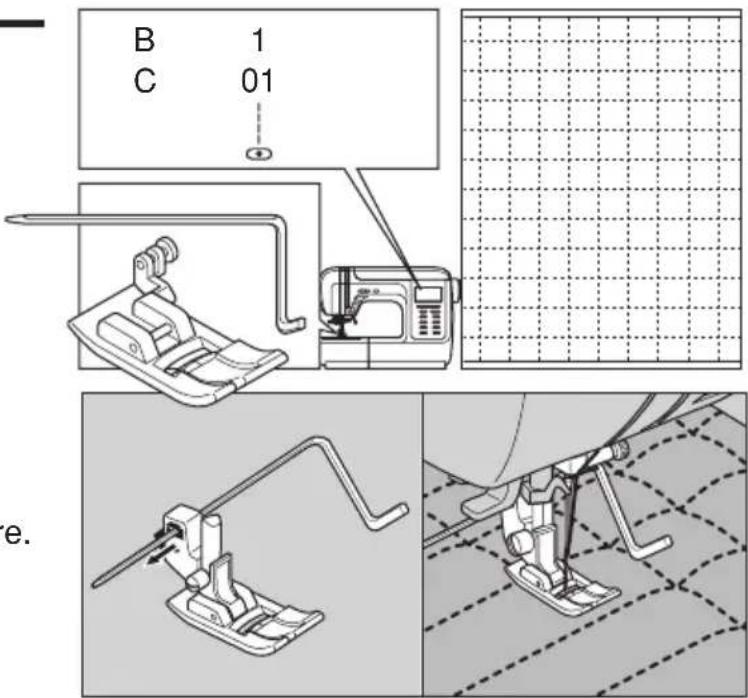
1 01 Straight stitch (Center Needle Position)
Regular Foot (A), Quilting Bar
Use quilting bar to sew successive rows. Insert quilting bar into the hole of presser foot holder and set the space as you desire.
HAND LOOK QUILTING STITCH
A B C 9 6 0 6 H a n d (center needle position)
10 - - Hand look Quilting Stitch (left needle position)
Regular Foot (A)
Use invisible nylon sewing thread or very lightweight thread that matches the fabric on top.
Place thread that contrasts to the color of the fabric on the bobbin.
- TYPE A -
The thread tension will be set to the maximum when this pattern is selected.
When you sew, bobbin thread will pull to the top and give the appearance of a traditional hand quilting stitch.
- TYPE B, C -
Increase the thread tension to the maximum. When you sew, bobbin thread will pull to the top and give the appearance of a traditional hand quilting stitch.
UTILITY DECORATIVE STITCHES
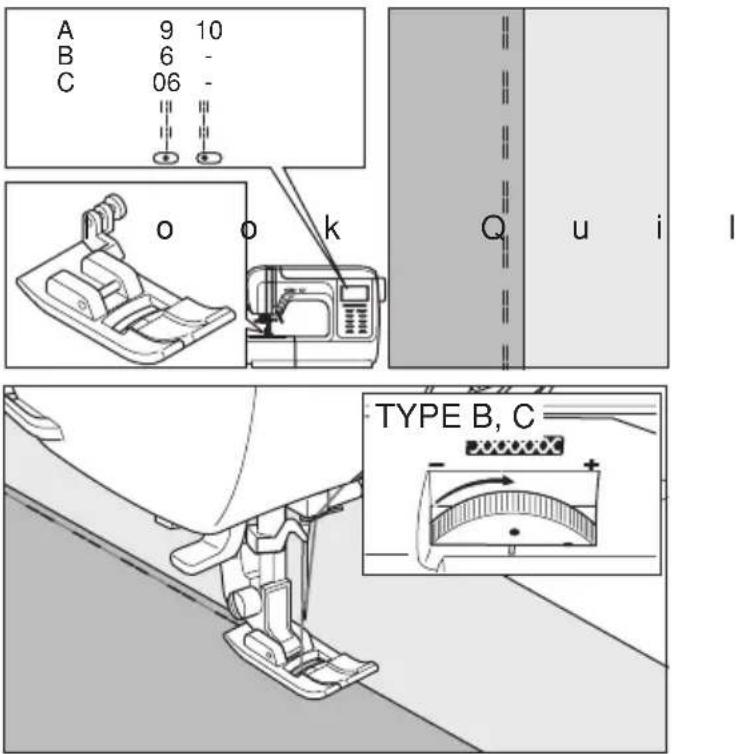
Use for decorative hems and decorative stitching on shirt fronts.
A
B
C
23, 29-37 23-31 18, 25-32, 39-98
Satin Foot (B)
When sewing very thin fabrics, it is suggested that you use interfacing on the backside of fabric.
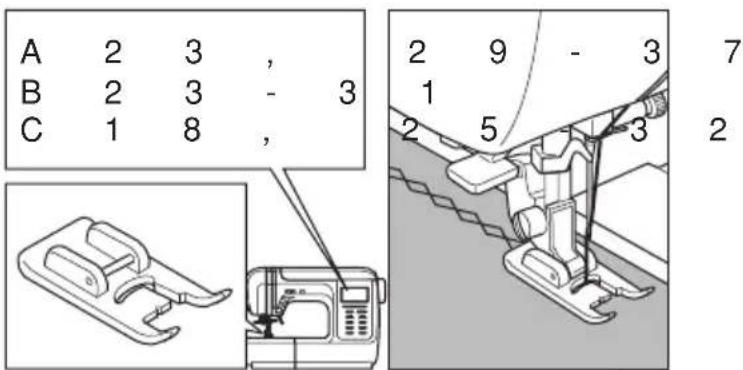
- TYPE A -
DECORATIVE AND LETTER STITCH SEWING
This machine has 76 decorative patterns and 2 style letter patterns (Block and script). See page 58 or inside of the top cover [PATTERN CHART]. You can combine and sew them easily.
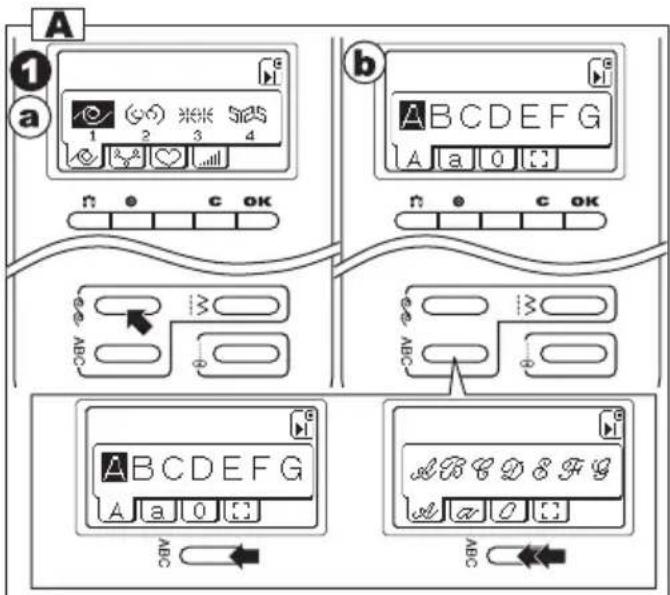
A. TO SELECT DECORATIVE AND LETTER PATTERN
- a. DECORATIVE PATTERN:
Press the decorative stitch button.
First 4 patterns of decorative stitch will appear on the center line of L.C.D..
b. LETTER PATTERN
By Pressing the letter stitch button, letter style will change as below.
Block letter
Script letter
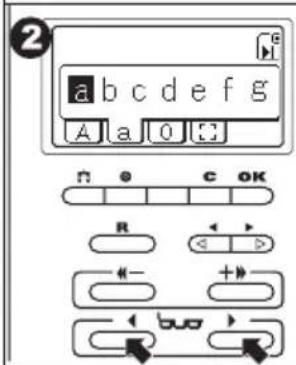
- By pressing the tab button, tab group will change incrementally or decrementaly.
Press these buttons until desired group will appear.
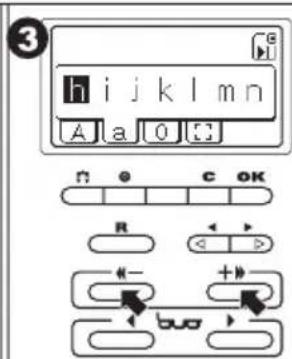
- By pressing the up ( + > ) or down ( < - ) button, 2-7 patterns will change incrementally or decrementally.
Press these buttons until desired pattern will appear.
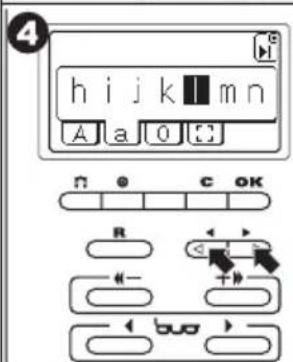
- Press the cursor (>) or (<) button to highlight the pattern you desire.
Note:
When the most right or left side pattern is highlighted, by pressing the cursor (>) or (<) button, next or previous patterns will appear.
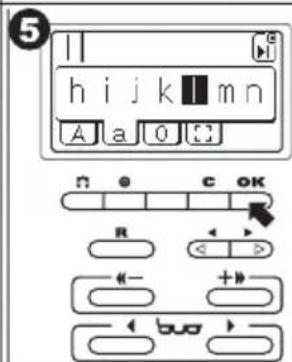
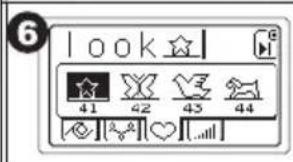
- Press the OK button. One unit of decorative pattern or one letter pattern will be memorized.
Selected pattern (unit) will appear on the upper side of L.C.D..
Note:
One unit of decorative pattern is indicated on the page 58.
- According to this procedure, select next patterns you desire.
L.C.D. will indicate selected patterns on top side in selected order.
Machine can memorize 60 patterns maximum.
- As selected patterns over the indicating area, disappear from the screen, you can check them by pressing the Read button. (See below)
![7 K ★ X Y ▼ 41 42 43 44 [○] [R] [♥] [..]](/content/2026/05/919744/images/ddf75f6c547d0529fb1729eaa489d72148ff4b0dba62cdab42f6482a2c2156bf.jpg)
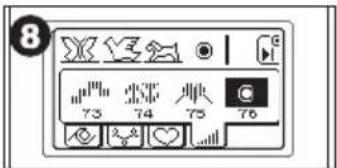
- Note;
The pattern “●76” of decorative pattern is Tack stitch. To prevent ravelling, it may be better to memorize the tack stitch at the end of decorative pattern. (Letter patterns are having built-in tack stitch.)
B. TO DELETE SELECTED PATTERN
- If you selected undesired pattern, press the clear (C) button short time (less than 0.5 sec.).
Machine will delete the last selected pattern.
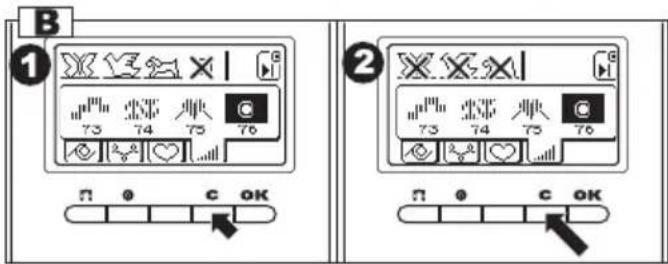
- If you want to delete all patterns, press the clear (C) button long time (over 0.5 sec.).
Machine will delete all selected patterns.
C. TO CHECK SELECTED PATTERNS
You can check selected patterns as following.
- Press the read (R) button.
Last selected pattern will be highlighted. - Press the cursol (<) button.
Highlight will move one pattern to the left. - Check selected patterns by pressing cursol (<) or (>) button.
- Press the read (R) button again to return to selecting mode.
D. ADJUSTING STITCH LENGTH AND WIDTH
You can adjust the stitch width and length of each decorative pattern.
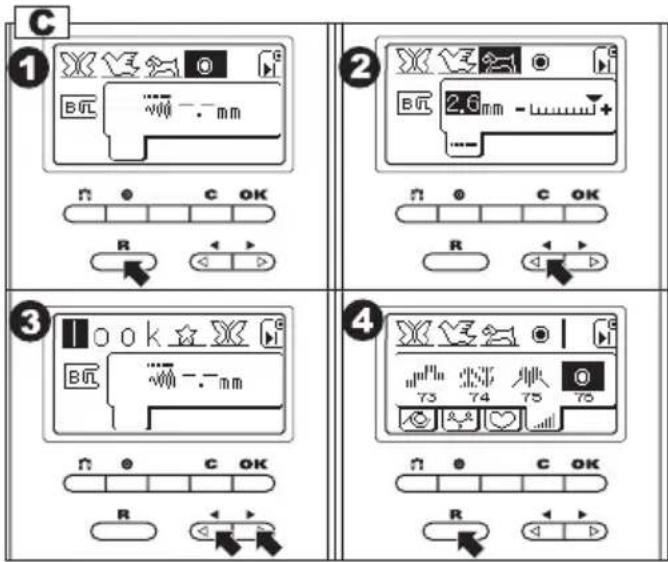
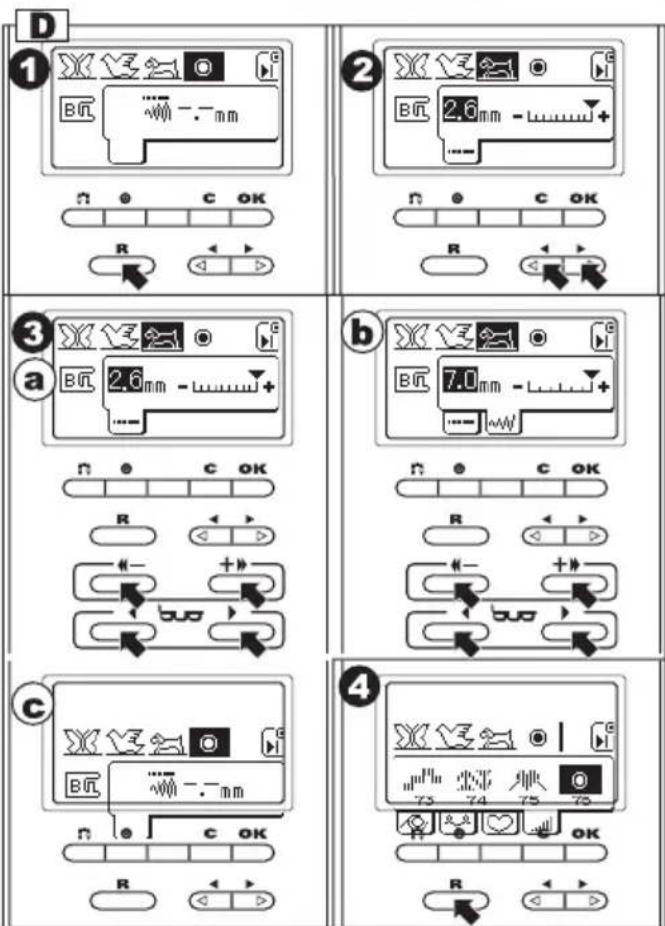
- Press the read (R) button.
- Select the pattern (highlight) you want to adjust by pressing the cursol buttons.
- Press the tab button until the mode you want to adjust will appear.
Mode a. Stitch Length can be adjusted.
Mode b. Stitch Width can be adjusted. Adjust each setting by pressing the up (++) or down (<<-) button.
The procedures to adjust them are same as adjusting utility stitch, see page 13 to adjust the length and width.
Note:
The letter patterns and some decorative patterns can not change the length and width. In this case, the mark c will appear.
- Press the read (R) button again to return to selecting mode.
E. TO SEW SELECTED PATTERNS
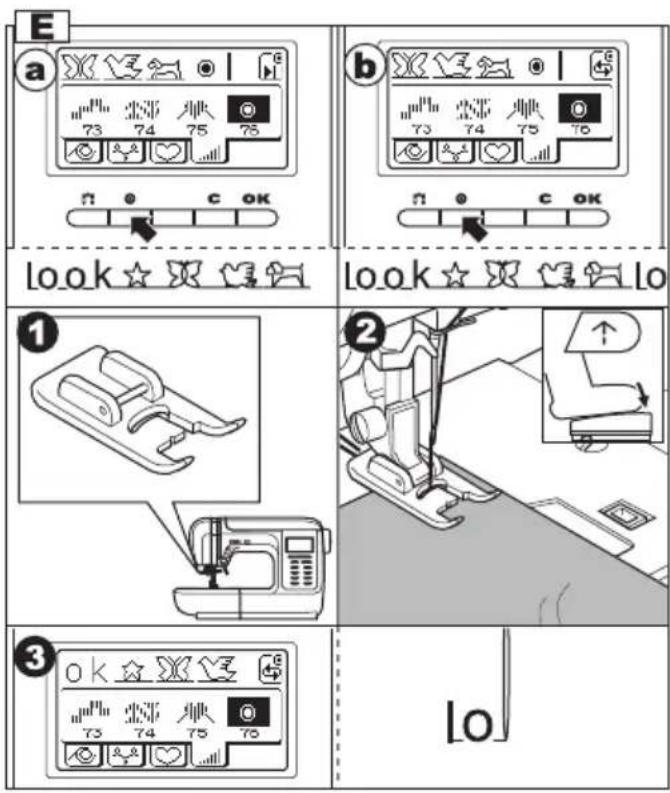
Sewing mode (Single / Repeat)
You can change the sewing mode alternately by pressing the tack button.
a. Single mode (Pre-set)
The mark “☐” will appear on the L.C.D.. Machine will stop automatically after sewing selected patterns one time.
b. Repeat mode
The mark “☐” will appear on the L.C.D.. Machine will sew selected patterns repeatedly until you stop the machine. Set to this mode when you sew one or more decorative pattern repeatedly.
- Attach the satin foot (B) when sewing decorative and letter stitch.
- Lower the presser foot and start sewing.
- Machine will indicate the sewing pattern on the top left side of LCD.
Note
If you change the sewing mode at the middle of sewing, it may change after sewing one memorized patterns completely.
F. TIPS
a. To sew selected patterns from beginning.
When you stop sewing at the middle of patterns, you may want to restart selected patterns.
In such case, press the Decorative or Letter stitch button.
b. To recall selected patterns
Machine will be retaining the selected patterns if you select the utility pattern. To recall these patterns, press the
Decorative or Letter stitch button and then press the Read button.
Machine will recall selected patterns and set to check mode.
In this case, sewing mode will return to single mode.
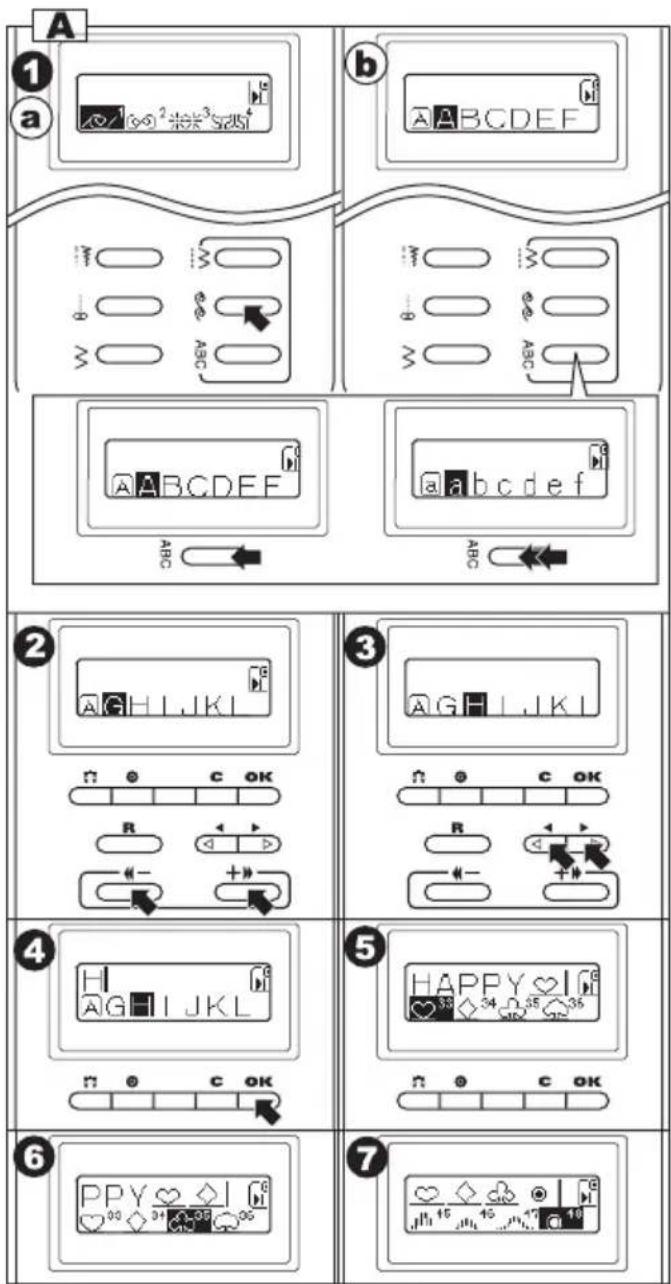
DECORATIVE AND LETTER STITCH SEWING
This machine has 48 decorative patterns and 2 style letter patterns (uppercase and lowercase). See page 59 [PATTERN CHART].
You can combine and sew them easily.
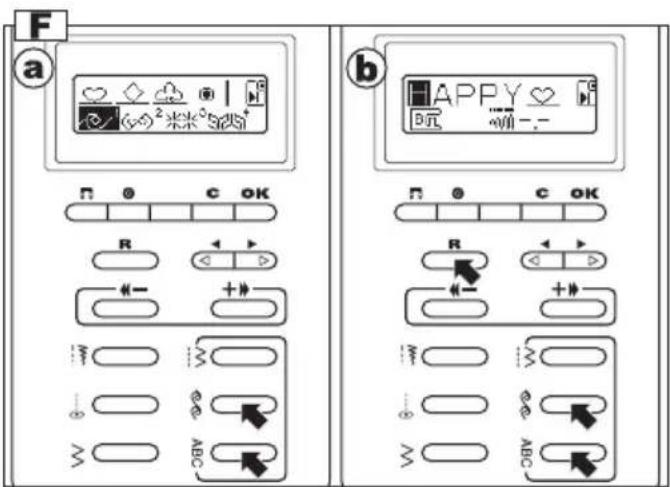
A. TO SELECT DECORATIVE AND LETTER PATTERN
- a. DECORATIVE PATTERN:
Press the decorative stitch button.
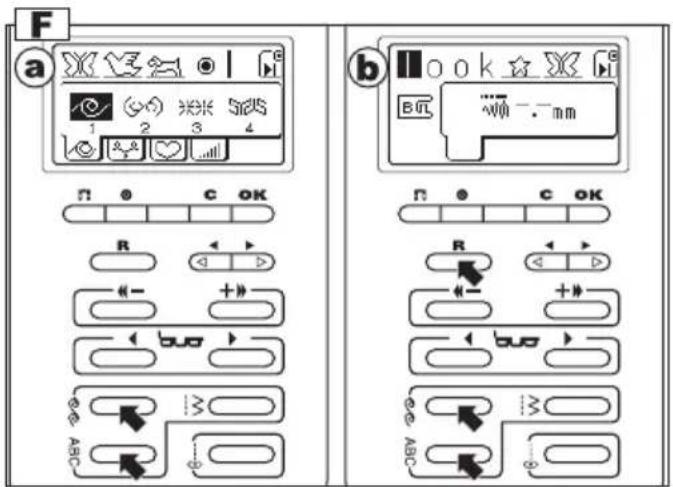
First 4 patterns of decorative stitch will appear on the lower line of L.C.D.. b. LETTER PATTERN
By pressing the letter stitch button, letter style will change as below.
Upper Case
Lower Case
- By pressing the up (++>) or down (<)<) button, 4 or 6 patterns will change incrementally or decrementaly.
Press these buttons until desired pattern will appear.
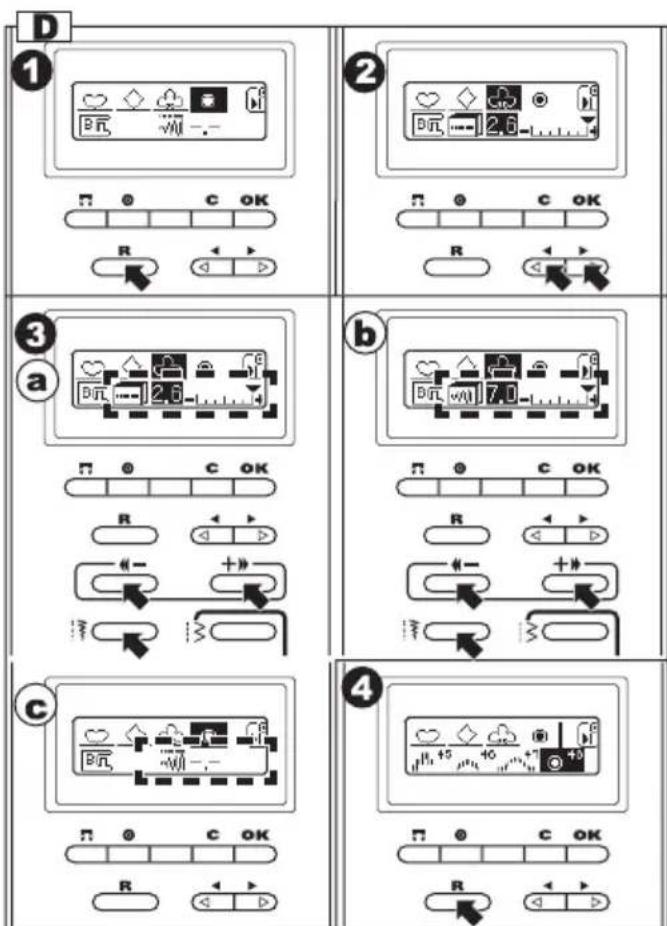
- Press the cursor (>) or (<) button to highlight the pattern you desire.
Note:
When the most right or left side pattern is highlighted, by pressing the cursor (>) or (<) button, next or previous patterns will appear.
- Press the OK button. One unit of decorative pattern or one letter pattern will be memorized.
Selected pattern (unit) will appear on the upper side of L.C.D..
Note:
One unit of decorative pattern is indicated on the page 59.
- According to this procedure, select next patterns you desire.
L.C.D. will indicate selected patterns on top side in selected order.
Machine can memorize 40 patterns maximum.
-
As selected patterns over the indicating area, disappear from the screen, you can check them by pressing the Read button. (See below)
-
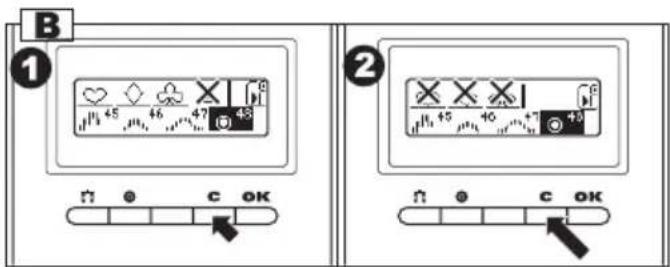
Note;
The pattern “◎ 48” of decorative pattern is Tack stitch. To prevent ravelling, It may be better to memorize the tack stitch at the end of decorative pattern. (Letter patterns are having built-in tack stitch.)
B. TO DELETE SELECTED PATTERN
- If you selected undesired pattern, press the clear (C) button short time (less than 0.5 sec.).
Machine will delete the last selected pattern.
- If you want to delete all patterns, press the clear (C) button long time (over 0.5 sec.).
Machine will delete all selected patterns.
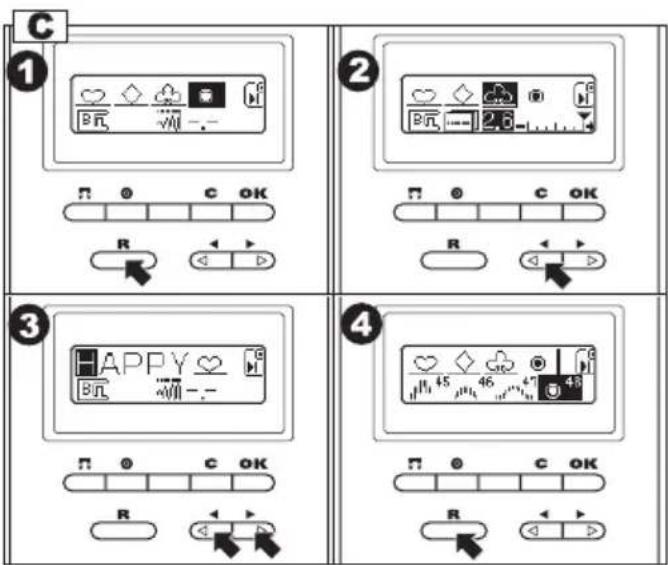
C. TO CHECK SELECTED PATTERNS
You can check selected patterns as following.
- Press the read (R) button.
Last selected pattern will be highlighted. - Press the cursol (<) button.
Highlight will move one pattern to the left. - Check selected patterns by pressing cursol (<) or (>) button.
- Press the read (R) button again to return to selecting mode.
D. ADJUSTING STITCH LENGTH AND WIDTH
You can adjust the stitch width and length of each decorative pattern.
- Press the read (R) button.
- Select the pattern (highlight) you want to adjust by pressing the cursol buttons.
- Press the length / width button until the mode you want to adjust will appear.
Mode a. Stitch Length can be adjusted. Mode b. Stitch Width can be adjusted.
Adjust each setting by pressing the up (++) or down (<<-) button.
The procedures to adjust them are same as adjusting utility stitch, see page 15 to adjust the length and width.
Note:
The letter patterns and some decorative patterns can not change the length and width. In this case, the mark c will appear.
- Press the read (R) button again to return to selecting mode.
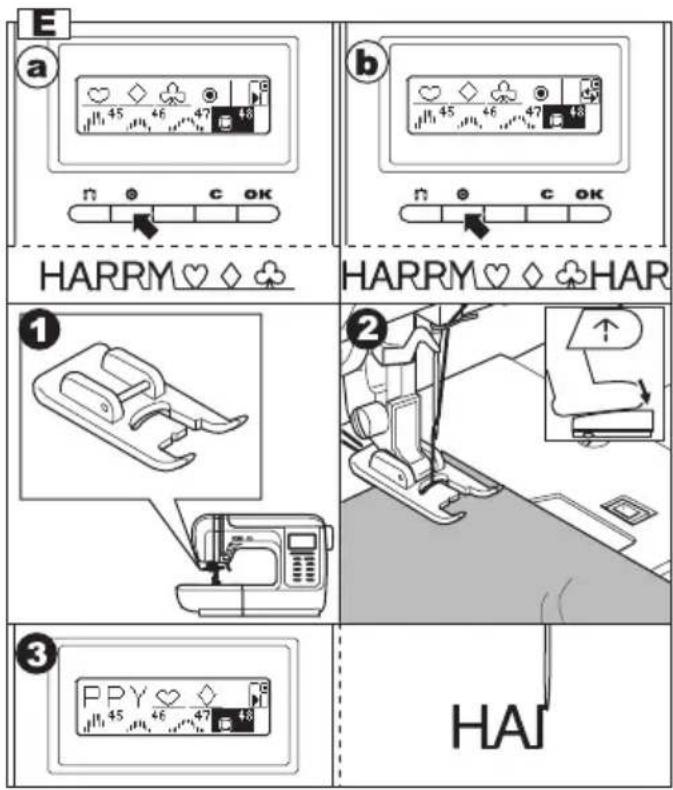
E. TO SEW SELECTED PATTERNS
Sewing mode (Single / Repeat)
You can change the sewing mode alternately by pressing the tack button.
a. Single mode (Pre-set)
The mark “☐” will appear on the L.C.D.. Machine will stop automatically after sewing selected patterns one time.
b. Repeat mode
The mark “☐” will appear on the L.C.D.. Machine will sew selected patterns repeatedly until you stop the machine. Set to this mode when you sew one or more decorative pattern repeatedly.
- Attach the satin foot (B) when sewing decorative and letter stitch.
- Lower the presser foot and start sewing.
- Machine will indicate the sewing pattern on the top left side of LCD.
Note
If you change the sewing mode at the middle of sewing, it may change after sewing one memorized patterns completely.
F. TIPS
a. To sew selected patterns from beginning.
When you stop sewing at the middle of patterns, you may want to restart selected patterns.
In such case, press the Decorative or Letter stitch button.
b. To recall selected patterns
Machine will be retaining the selected patterns if you select the utility pattern. To recall these patterns, press the Decorative or Letter stitch button and then press the Read button. Machine will recall selected patterns and set to check mode.
In this case, sewing mode will return to single mode.
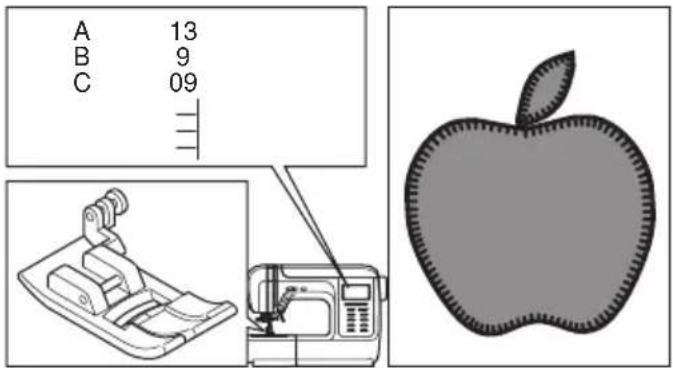
APPLIQUE
A
B
C
26 18 24
Regular Foot (A)
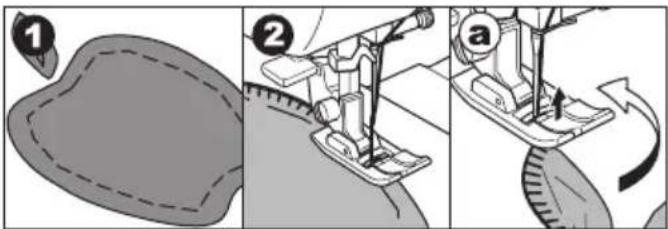
- Fix applique on fabric with fabric glue, fusible iron-on or basiting stitches.
- Sew edge of applique, while dropping the needle as close to the edge as possible. The straight stitch is almost entirely sink-stitched and a hand-made effect is obtained.
a. When sewing sharp angles
Bring needle to lowest position and raise the presser foot.
Use needle as pivot and turn fabric.
PATCH WORK
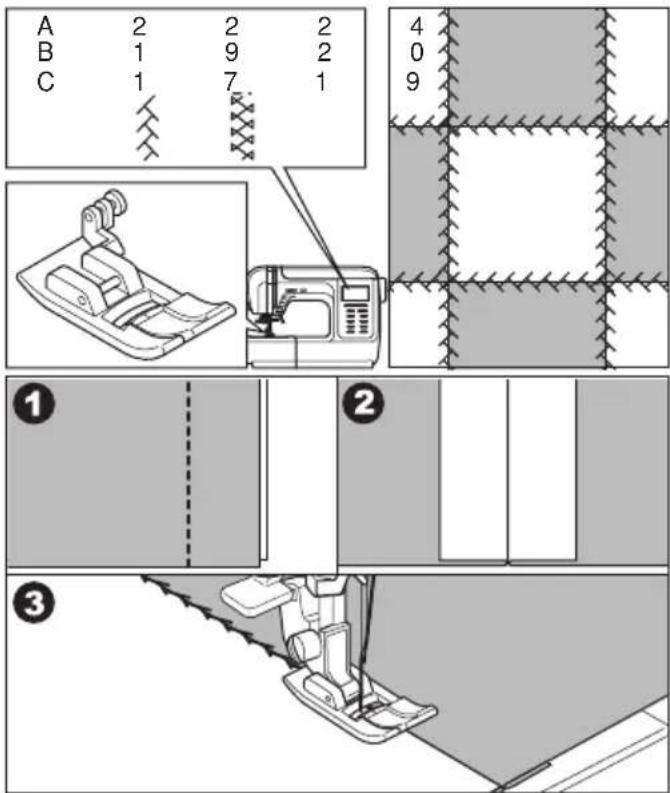
For additional decorative purposes, use different kind of materials.
A
B
C
22,24 19,20 17,19
Regular Foot (A)
- Place two pieces of fabric right sides together and sew a long straight stitch.
- Press the seam open.
- Be sure that stitches fall on both sides of fabric.
TWIN NEEDLE SEWING
Interesting decorative stitches can be produced by using twin needles and threading the machine with two different colors of thread. Always make test samples to help you determine the settings best suited to a specific purpose.
All patterns except Buttonholes, bar-tack and darning, may be sewn with a twin needle.
Regular or Satin Foot

CAUTION: To prevent accidents.
a. Use only needle designed for this machine. Other needles may break.
b. The needle threader cannot be used.
Thread each needle eye by hand.
-
Remove the single needle and insert twin needle.
-
Thread first thread as usual following threading route.
-
Thread the left needle eye by hand from front to back.
-
Place the Extra Spool Pin with felt washer on bobbin winder spindle.
-
Place second spool of thread.
-
Thread second thread the same as first.
-
For better sewing results, do not place the thread into the needle bar thread guide. Thread right needle eye by hand from front to back.
-
Press the twin needle button.
- TYPE A, B - Twin needle mark will appear on L.C.D.
- TYPE C - Twin needle indicator will turn on.
The stitch width will be reduced automatically.

CAUTION: To prevent accidents.
If you did not press the twin needle button, needle may hit the needle plate and break.
- Always test sew selected stitch,
- Sew project.
All patterns except Buttonholes, bar-tack and darning
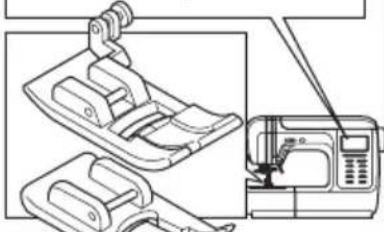
natural_image
Technical line drawing of mechanical clamps and a sewing machine (no text or symbols)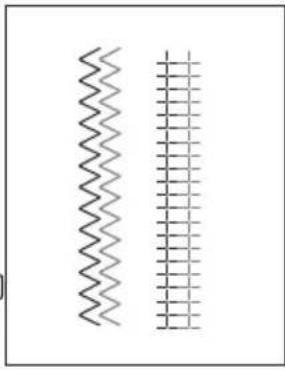
natural_image
Two vertical spring-like structures with grid patterns, no text or symbols present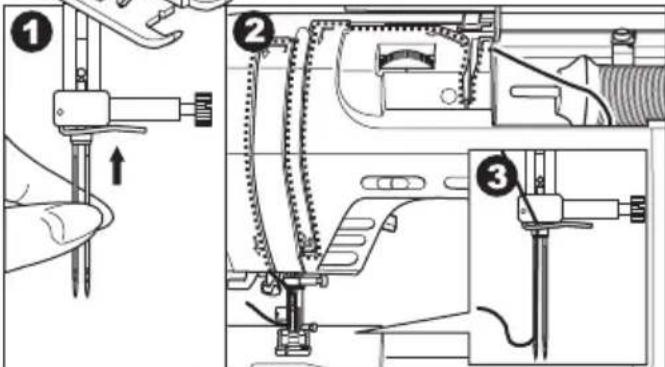
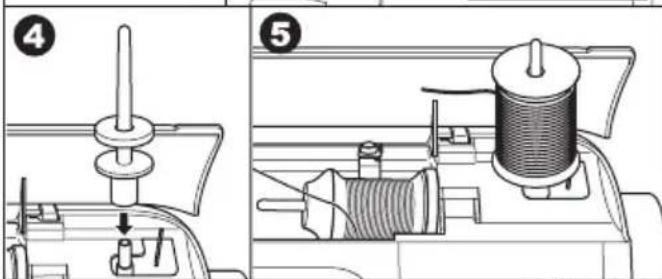
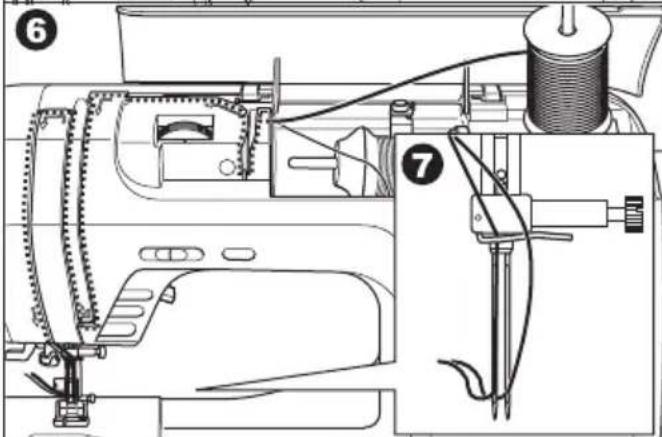
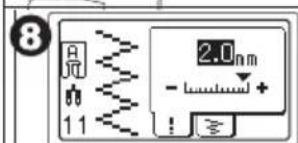
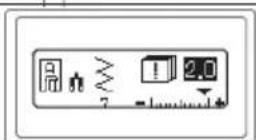
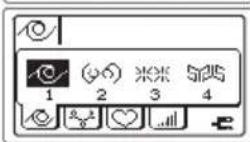
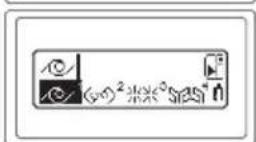
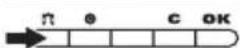

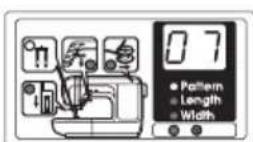
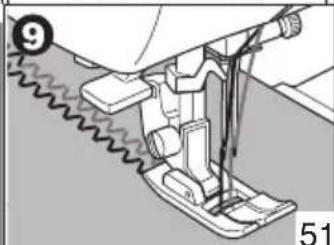
natural_image
Mechanical sewing machine diagram showing needle and base components (no text or labels)
AUTOMATIC BAR-TACK / DARNING
You can sew automatic bar-tack and darning using the buttonhole foot.
A B C
51 42 37 Bar-tack, to reinforce areas that will be subject to strain, such as pocket corners.
52 - 38 Darning, mending and other applications.
Buttonhole Foot (F)
- Adjust slide on base according to the length of bar-tack / darning.
a= Length of bar-tack / darning - Pass upper thread through the hole of buttonhole foot and bring upper and bobbin threads to the left.
- Position fabric under presser foot so that the starting point comes this side.
Lower the foot.
b. When you sew bar-tack on edge of thick fabric such as pocket, place same thickness fabric or cardboard beside the fabric. - Lower the buttonhole lever completely.
Note
Machine will not start to sew if buttonhole lever is not lowered properly or buttonhole foot is not positioned correctly.
- Hold upper thread lightly and start the machine.
- Machine will sew bar-tack or darning as shown.
And machine will stop automatically.
- Raise the presser foot lifter and cut the threads.
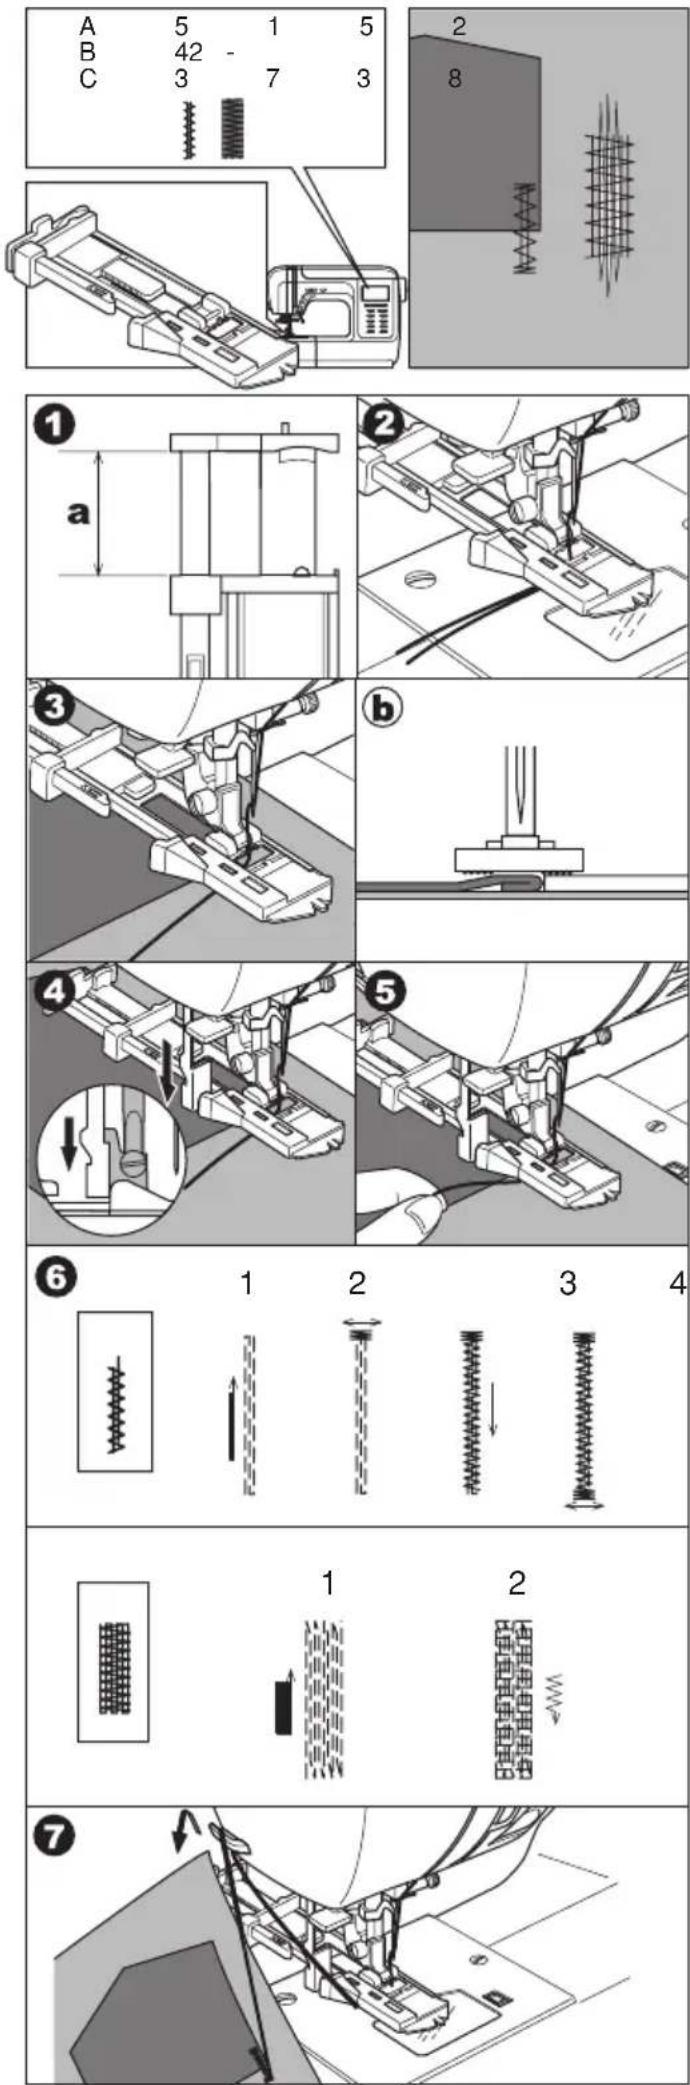
- TYPE A ONLY - \_ NARROW HEMMING
No. 1 Straight Stitch (Center Needle Position)
Narrow Hemming Foot
- Fold edge of fabric over about 3 mm (1/8 inch), then fold it over again 3 mm for about 5 cm (2 inches) along edge of fabric.
- Insert needle into the fold by rotating the hand wheel toward you, and lower the presser foot. Sew several stitches and raise the presser foot. Insert fabric fold into spiral opening of hemmer foot. Move fabric back and forth until the fold forms a scrolled shape.
- Lower the presser foot and start sewing slowly with guiding raw edge of fabric in front of hemmer evenly into scroll.
- TYPE A ONLY CORDING
No. 11 Zigzag Stitch for Single Cording No. 13 Multi Zigzag for Triple Cording
Cording Foot
A. SINGLE CORDING
- Set stitch pattern to No. 11. Insert the cord in the center groove of cording foot from the right side opening. Pull cord about 5 ~cm (2 inches) behind the foot.
- Adjust the stitch width so that the stitches are just cover the cord. Lower the foot and sew slowly, guiding the cord.
B. TRIPLE CORDING
Set the stitch pattern to No. 13 and set the stitch width to 6.0-7.0.
Insert three cords into the slots of cording foot.
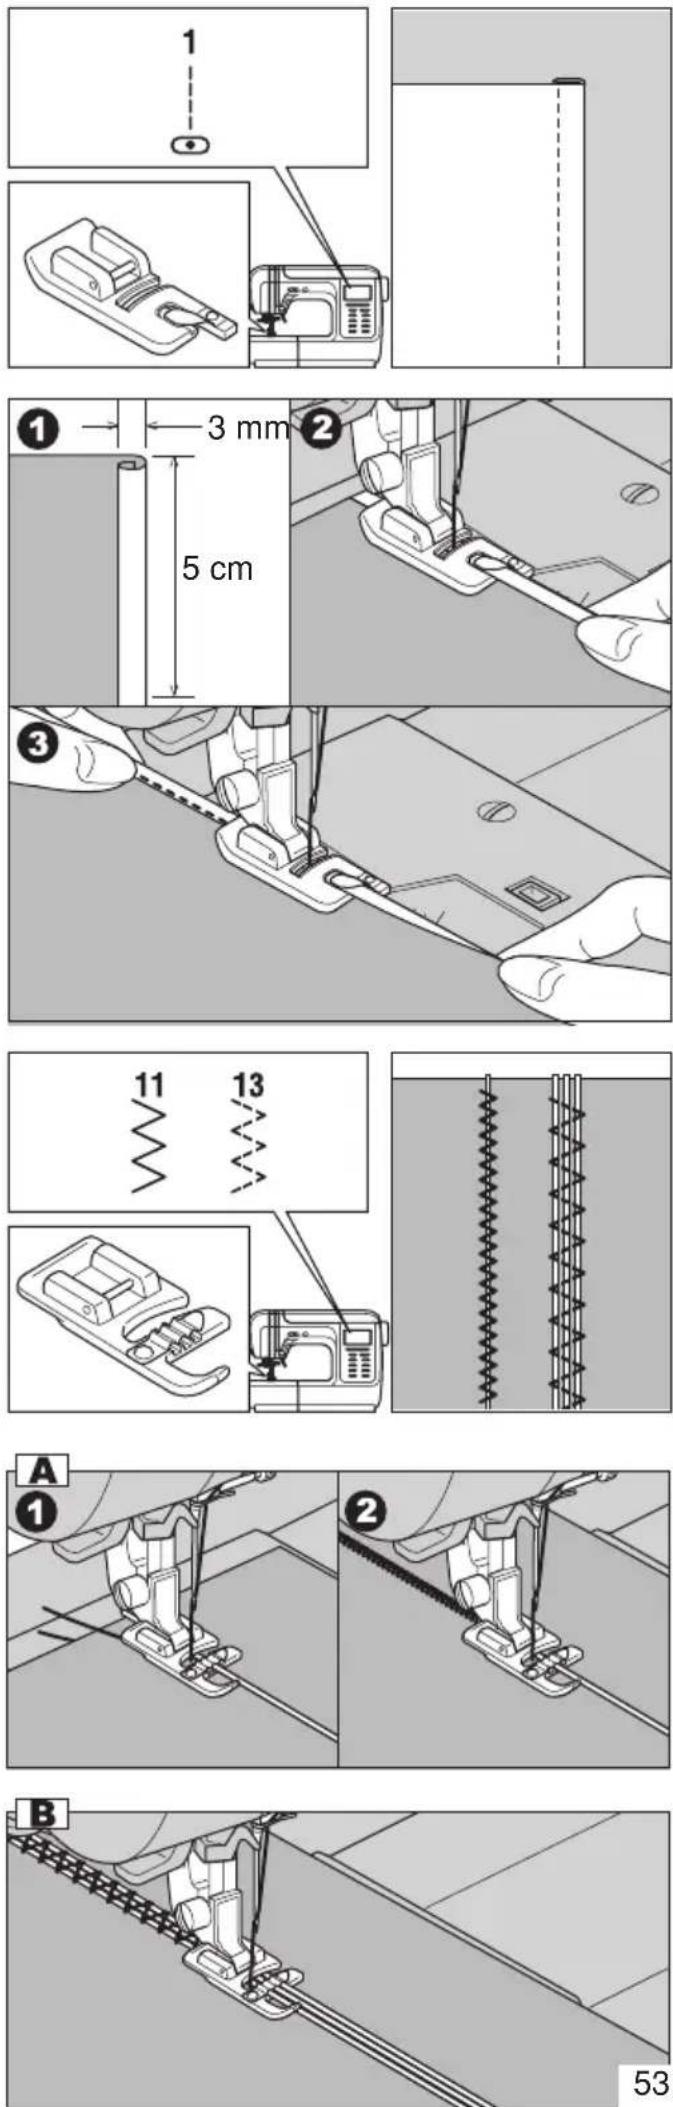
- TYPE A ONLY — DARNING/FREE-HAND EMBROIDERY
No. 1 Darning/Embroidery Foot
A. ATTACHING THE DARNING/EMBROIDERY FOOT
- Lower the feed dogs by moving the drop feed lever to the left.
- Remove the presser foot and holder.
- The arm of darning/embroidery foot should ride onto the shaft of the needle clamp screw.
- Slide the plastic attaching head from your left to right so that it is fitted into the presser bar.
- Tighten the presser foot thumb screw.
B. DARNING
- Place fabric under foot and lower it.
- Grasp fabric firmly in front and back of area to be darned. Operate machine, moving fabric by hand forward and backward with an even motion, stitching in closely spaced rows over the hole or worn area.
- When the area is filled with new stitches, move fabric from side to side in a similar manner to weave or reinforce the stitching.
a. Note: Reinforce open areas with an underlay, baste undelay in place before darning.
C. FREE-HAND EMBROIDERY
- Outline the design for embroidery on the surface of the fabric.
-
Place design to be embroidered between the two sections of embroidery hoop. Note:
Embroidery hoop is not included with this machine. -
Set embroidery hoop under needle and lower the foot.
-
Start the machine at medium speed, guiding hoop carefully so needle moves along line of the pattern.
D. After darning or free-hand embroidery Raise the feed degs by moving the drop feed lever to the right.
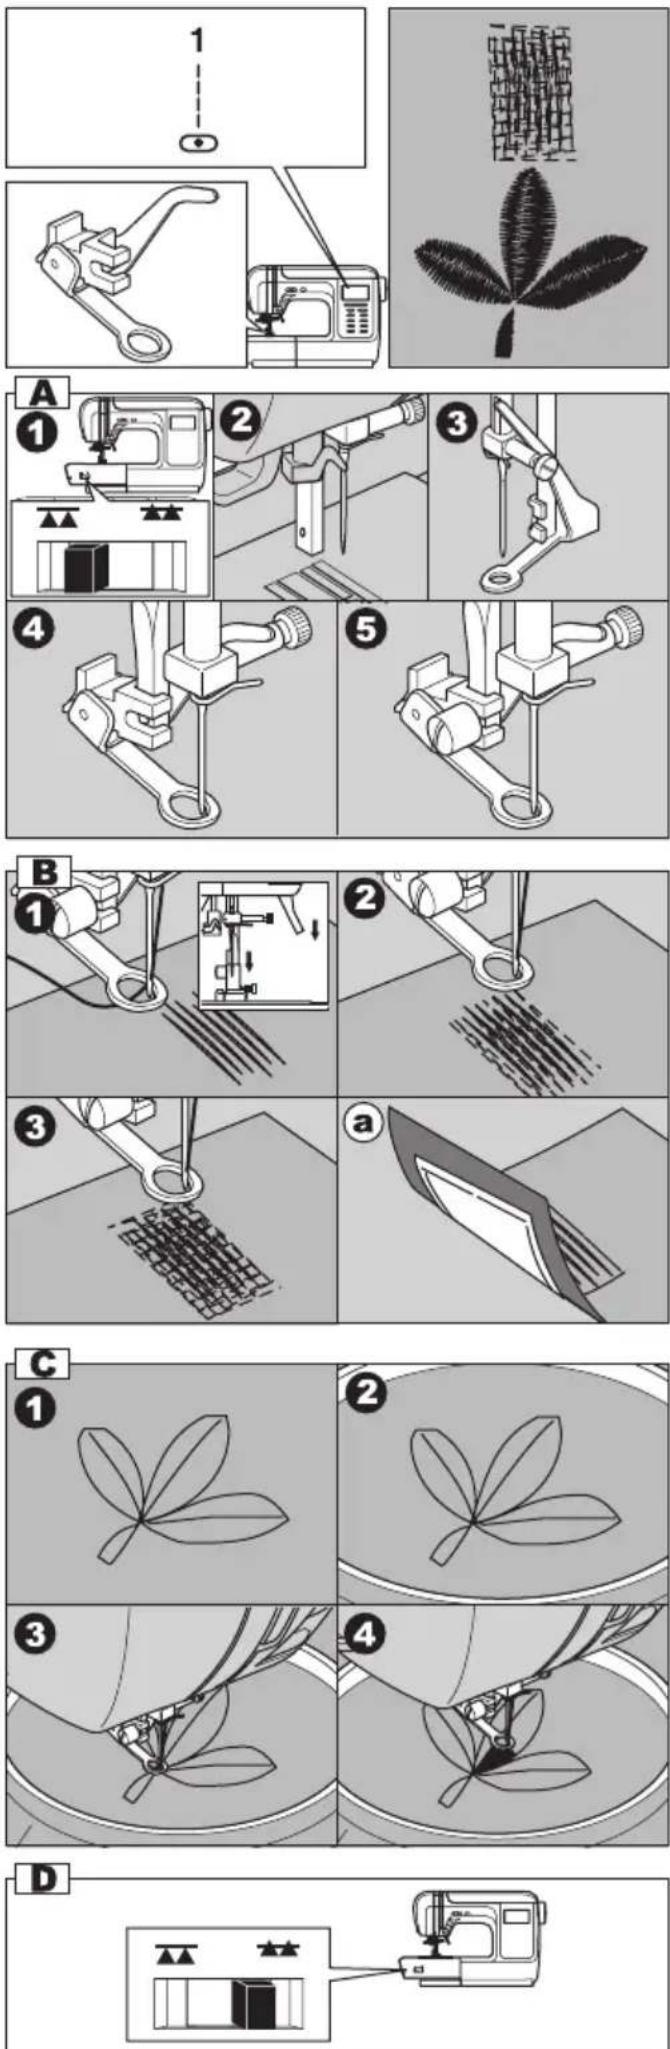
- TYPE A, C ONLY -\_\_\_\_ EYELET
This stitch pattern is used for making belt holes and other similar applications.
A C
25 22 Eyelet Satin Foot (B)
You can choose the 3 sizes of eyelet by changing the stitch length.
- Place the fabric under the presser foot and lower it. Start the machine. Machine will sew the eyelet and stop automatically.
- Raise the presser foot and cut the threads.
- Make a hole in the center of the eyelet. Note
Eyelet punch is not provided with this machine.
ADJUSTING THE FORWARD AND REVERSE STITCHES
Depending on the type of fabric you sew, it may be necessary to adjust the forward and reverse stitches.
This adjustment is needed when the decorative or the letter stitch pattern is misformed.
Turn screw which is located bottom of the machine in either direction as may be required.
DECORATIVE STITCH PATTERN
- If patterns are misformed as illustration (A), turn screw in direction of symbol (+).
- If patterns are misformed as illustration (B), turn screw in direction of symbol (-).
- TYPE A, B ONLY - LETTER STITCH PATTERN
- If patterns are misformed as illustration (C), turn screw in direction of symbol (+).
- If patterns are misformed as illustration (D), turn screw in direction of symbol (-).
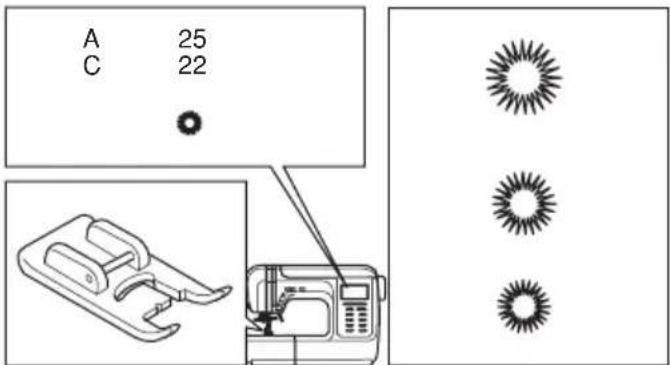
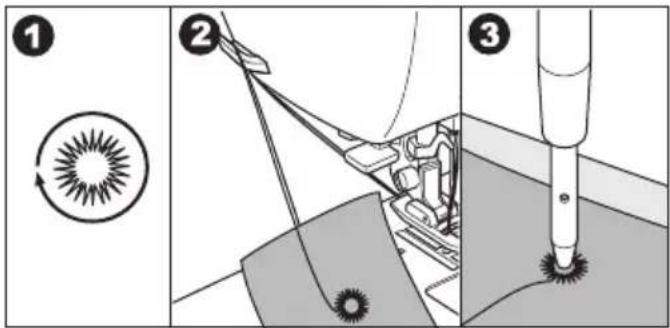
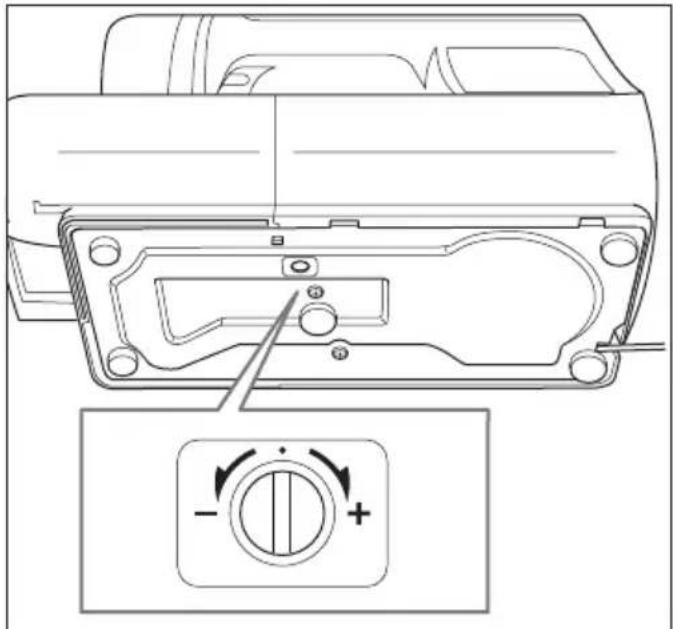
natural_image
Technical line drawing of a mechanical component with a circular dial indicator (no text or symbols)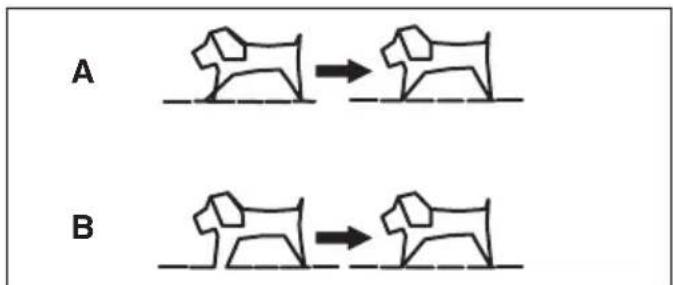
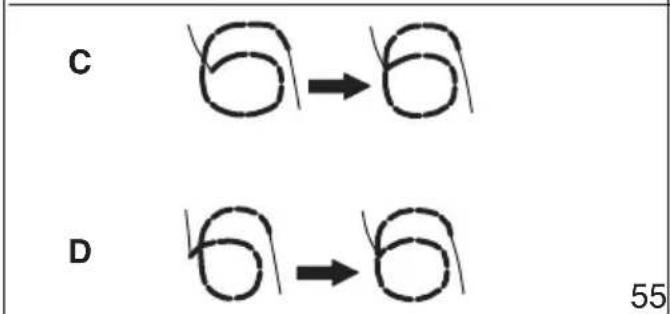
flowchart
graph TD
    A["C"] --> B["6"]
    B --> C["6"]
    D["D"] --> E["6"]
    E --> F["6"]
    style A fill:#f9f,stroke:#333
    style D fill:#f9f,stroke:#333
    style B fill:#ccf,stroke:#333
    style E fill:#ccf,stroke:#333
    style C fill:#ccf,stroke:#333
    style F fill:#ccf,stroke:#333
MAINTENANCE

DANGER: To reduce the risk of electric shock.
Disconnect the power line plug from electric outlet before carrying out any maintenance.
CLEANING
If lint and bits of thread accumulate in the hook, this will interfere with the smooth operation of the machine. Check regularly and clean the stitching mechanism when need.
A. Bobbin Holder
Remove the bobbin cover and bobbin. Clean the bobbin holder.
B. Hook Race and Feed Dog
- Remove the needle, presser foot and holder. Remove the bobbin cover and bobbin. Remove the screws holding the needle plate.
- Remove the needle plate by lifting up the right side of the plate.
- Lift up the bobbin holder and remove it.
- Clean the hook race, feed dogs and bobbin holder. Also clean them, using a soft, dry cloth.
- Replace the bobbin holder into the hook race so that the tip (a) fits to the stopper (b) as shown.
- Replace the needle plate inserting the hook into the machine. Retighten the screws.
Note:
* This machine is using LED light to light up stitching area. If it is not light up, call for your dealer.
* There is no need to lubricate this machine.
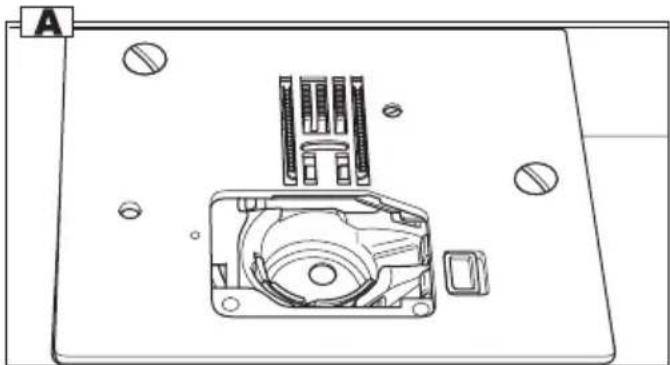
natural_image
Technical line drawing of a mechanical component with mounting holes and internal structure (no text or symbols)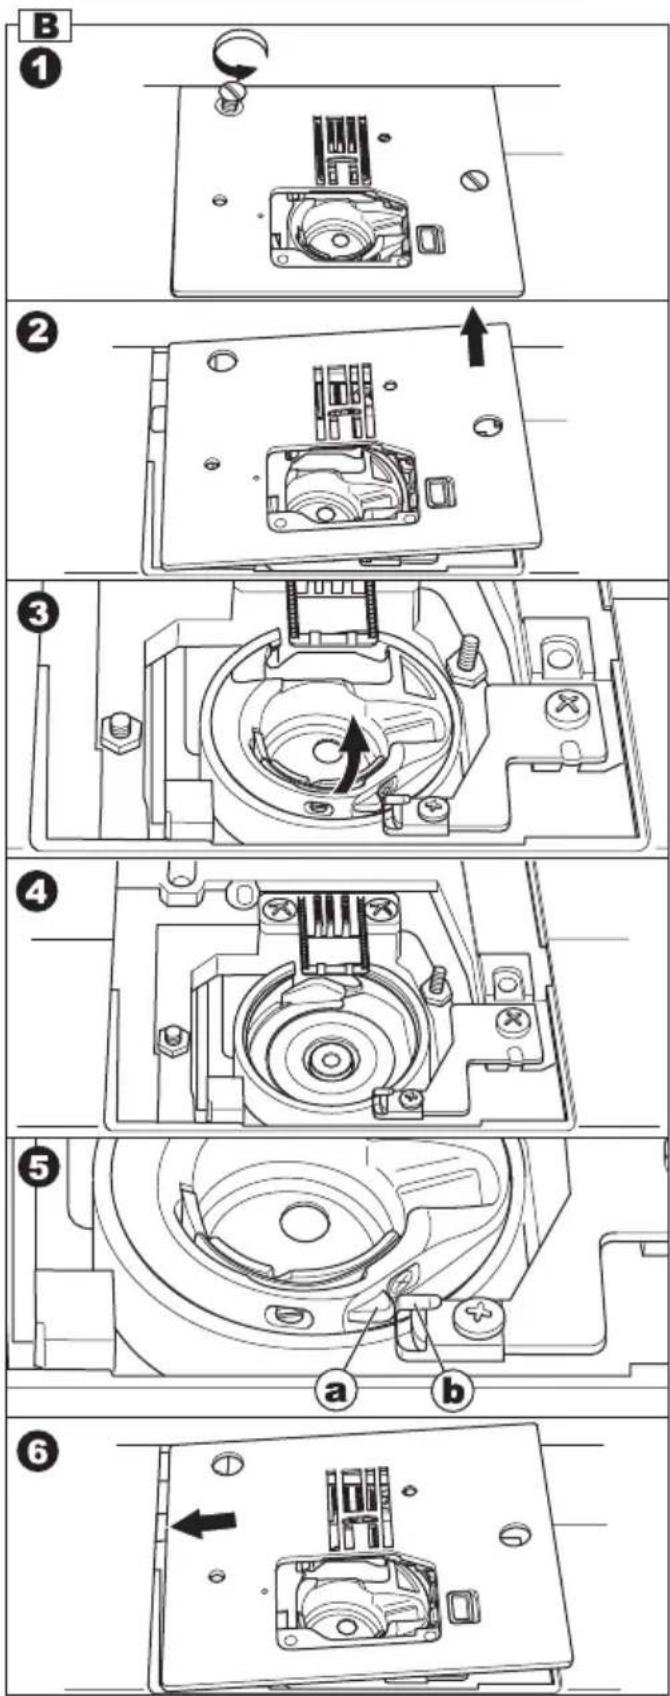
HELPFUL HINTS.
| PROBLEM | CAUSE | CORRECTION | Page |
| Upper thread breaks | Machine not properly threaded.Thread entwined around bobbin.Needle inserted incorrectly.Thread tension too tight.Thread of incorrect size or poor quality. | Re-thread machine.Remove entwined thread.Re-insert needle.Readjust thread tension.Choose correct thread. | 2221727,87 |
| Lower thread breaks | Bobbin threaded incorrectly.Bobbin wound unevenly or too full.Dirt on the bobbin holder. | Re-thread the bobbin.Rewind the bobbin.Clean the holder. | 212056 |
| Machine skips stitches | Needle inserted incorrectly.Bent or blunt needle.Incorrect size of needle.(on stretch fabric) | Re-insert needle.Insert new needle.Choose correct size needle for fabric.(use stretch needle) | 777 |
| Fabric puckers | Machine not properly threaded.Bobbin threaded incorrectly.Blunt needle.Thread tension too tight. | Re-thread machine.Re-thread the bobbin.Insert new needle.Readjust thread tension. | 2221727.8 |
| Machine makes loose stitches or loops | Bobbin threaded incorrectly.Machine not properly threaded.Tension not adjusted properly. | Re-thread the bobbin.Re-thread machine.Readjust thread tension. | 212227.8 |
| Stitch pattern is misformed | Presser foot is not suited for the pattern.Thread tension is not balanced. | Attach correct foot.Adjust the thread tension. | 29-27.8 |
| Threader does not thread needle eye | Needle is not raised.Needle inserted incorrectly.Bent needle. | Raise the needle.Re-insert needle.Insert new needle. | 8,1177 |
| Machine does not feed properly | Feed dogs are loweredStitch length not suitable for fabric.Lint and dust accumulated around feed dog. | Raise the feed dogsRegulate stitch length.Clean the feed dog area. | 9, 1113,15,1856 |
| Needle breaks | Fabric pulled while sewing.Needle is hitting the presser foot.Needle inserted incorrectly.Incorrect size needle or thread for fabric being sewn. | Do not pull fabric.Select correct foot and pattern.Re-insert needle.Choose correct size needle and thread. | 2429-77 |
| Machine runs with difficulty | Dirt or lint accumulated in the hook race and feed dog. | Remove the needle plate and bobbin holder and clean the hook race and feed dog. | 56 |
| Machine will not run | Cord not plugged into electrical outlet.Power switch is not turned on.Bobbin winder spindle is pushed to the right.Presser foot is not lowered.Buttonhole Sewing Mode;Buttonhole lever is not lowered completely.Buttonhole foot is not attached. | Insert plug fully into outlet.Turn on the switch.Push spindle to the left.Lower the foot.Lower the buttonhole lever.Attach the buttonhole foot. | 44209, 113636 |
TYPE A PATTERN CHART
Bold part of decorative stitch pattern is one unit of pattern.
UTILITY PATTERN DECORATIVE PATTERN
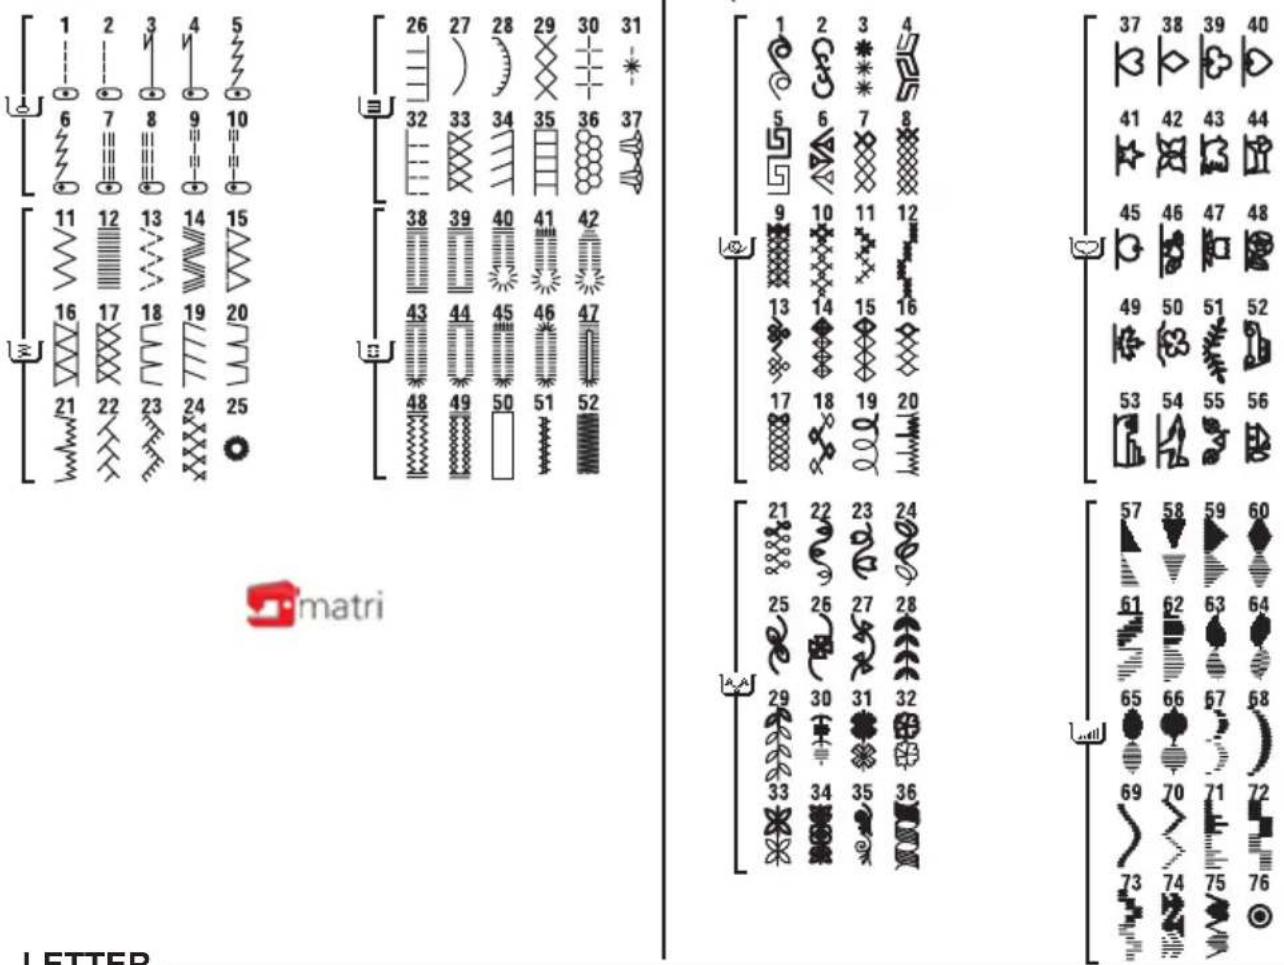
LETTER
![GOTHIC X 1 TIME ABC [ ABCDEFG H I JKLMN OPQRSTU A] VWXYZÀÄ ÀÆÇÈÉÑÖ ØÜ abcdefg h i jklmn opqrstu vwxyzàä åæçèénö Øü 0 1234 5 6789 [ : . , ' ? & ! - - + / = ( ) SCRIPT X 2 TIMES [ ABCD EFG H J JKLMN OP RPTU VWXY ZÄÄ ÀKÇÈËNO ØÜ [ abcdefg h i jklmn opqrstu vwxyzàä åæçèénö Øü [ a b c d e f g h i j k l mn o p q r s t u v w x y ð à ä å æ s è é ñ õ ø ü [ 0 1 2 3 4 5 6 7 8 9 [ : . , ' ? V ! - - + / = ( )](/content/2026/05/919744/images/16446e49c0cef8694ec718fd0e4f2a0bb758aba4b08d3e3ade543030fda1fe36.jpg)

matri
TYPE C PATTERN CHART
|>
UTILITY PATTERN
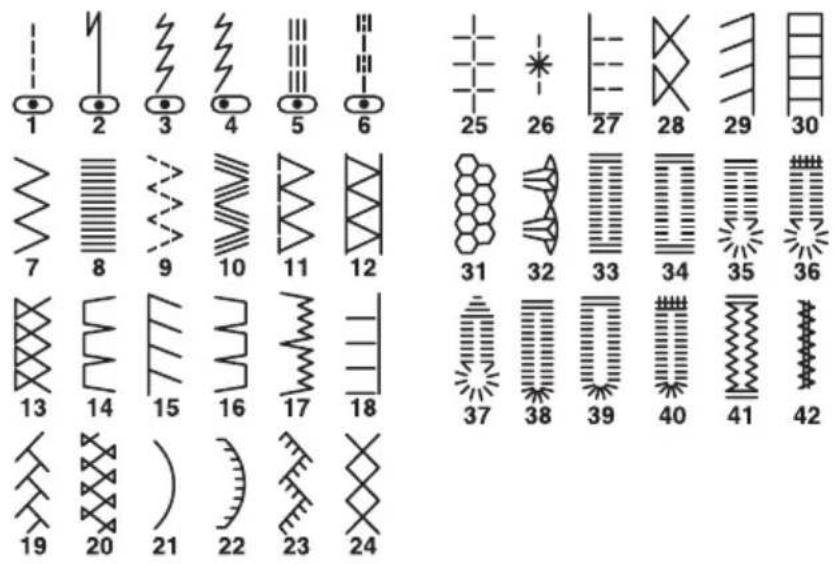

matri
S
DECORATIVE PATTERN
Bold part of decorative stitch pattern is one unit of pattern.
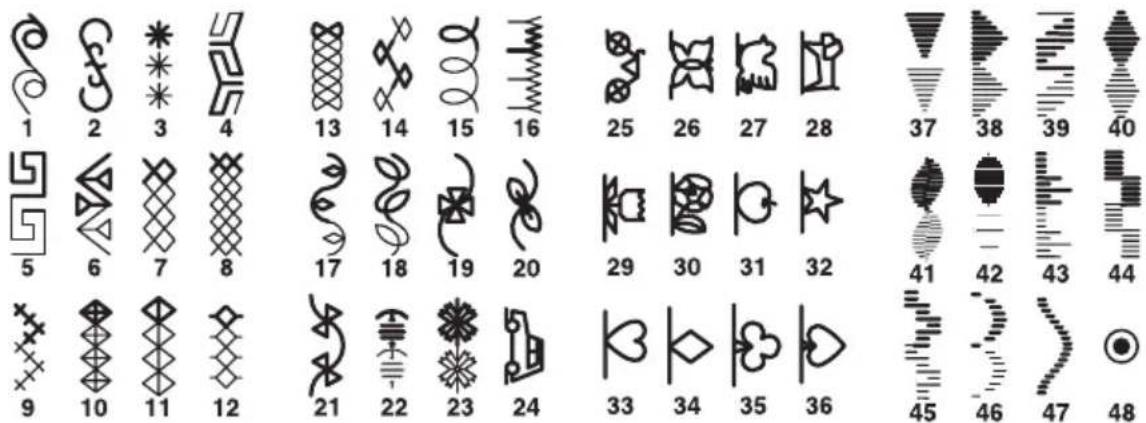
LETTER
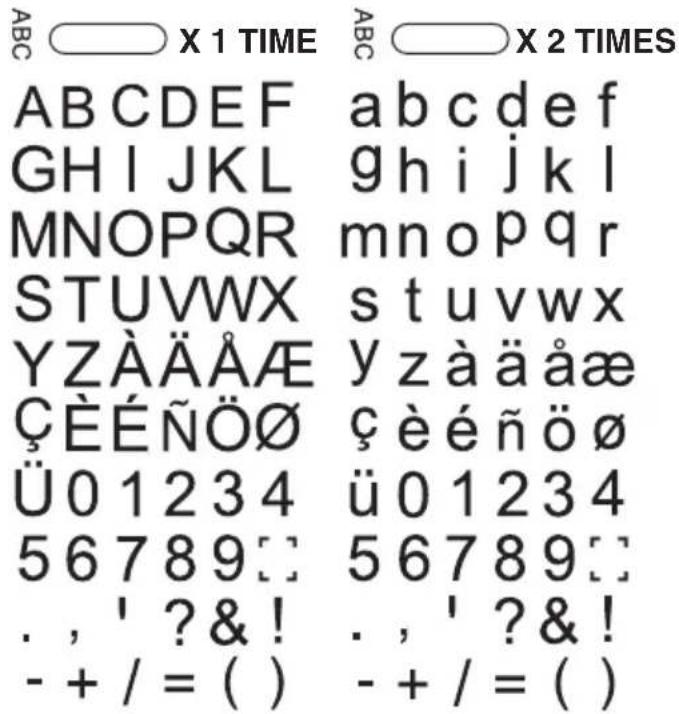

matri
GEBRAUCHSANWEISUNG
Mod. NECCHI 420
Mod. NECCHI 422
Mod. NECCHI 424
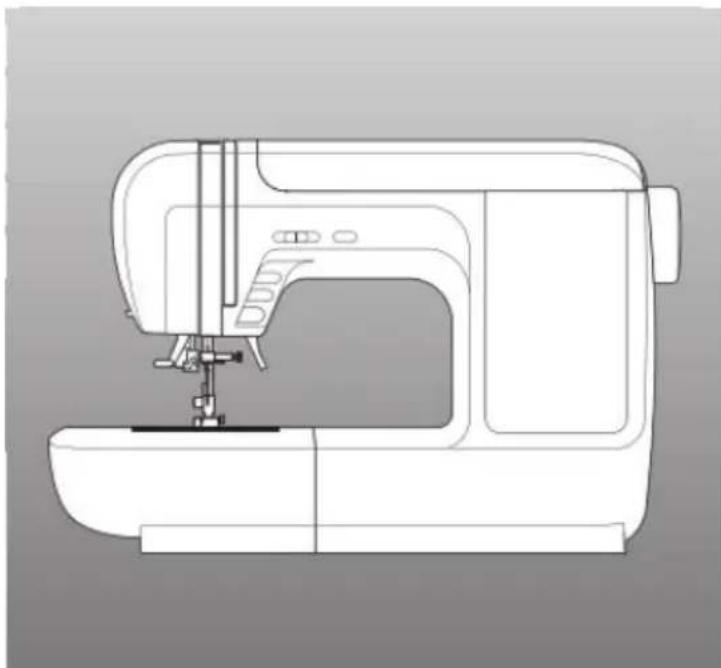
natural_image
Line drawing of a sewing machine with no visible text or symbols-NUR MOD. 424-VERDECKTES
KNOPFLOCH 38
KNÖPFE AUFNÄHEN 40
QUILTING
42
QUILTING MIT MANUELLEM EFFEKT...... 43
ZIERSTICHE 43
-MOD. 424-
-NUR MOD. 424,420- KNOPFLOCH.... 55
natural_image
Symbol of a trash bin crossed out by two diagonal lines (no text or numbers present)

natural_image
Line drawing of a sewing machine on a table (no text or symbols)3
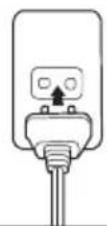
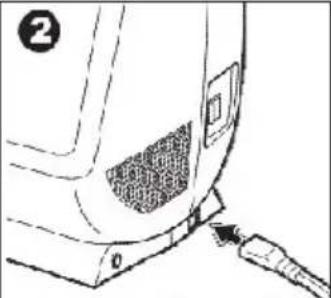
natural_image
Line drawing of a car's side panel with a plug inserted, showing no text or symbols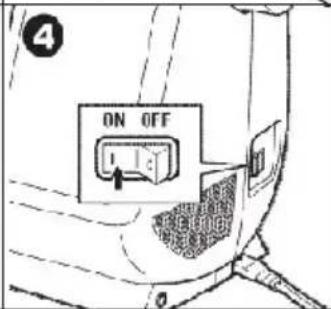
natural_image
Technical line drawing of a sewing machine (no text or symbols visible)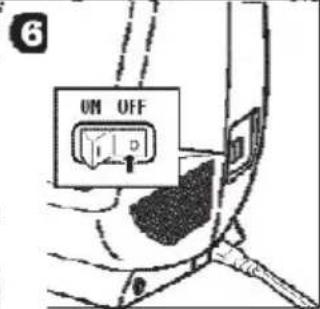
PEDALREGLER
natural_image
Line drawing of a car rear panel with a plug inserted, no text or symbols present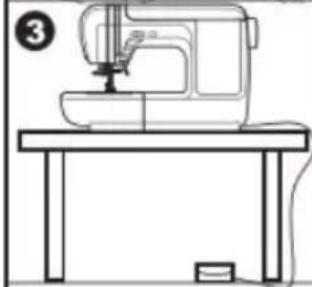
natural_image
Line drawing of a sewing machine on a table (no text or symbols)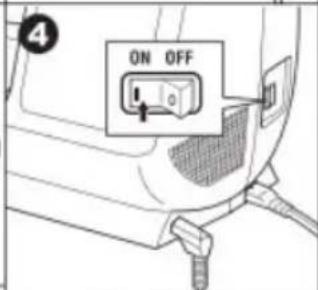
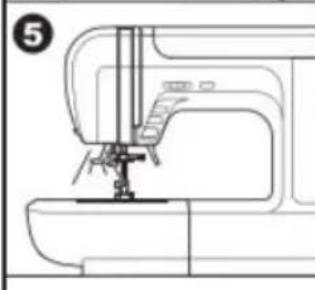
natural_image
Line drawing of a sewing machine needle and base (no text or symbols)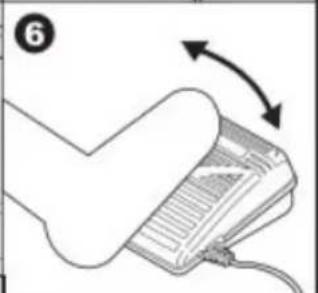
natural_image
Illustration of a folded paper or document with an arrow indicating rotation (no text or symbols present)ABDECKUNG
natural_image
Technical illustration showing two views (a and b) of a mechanical component with arrows indicating motion or assembly (no text or symbols present)A
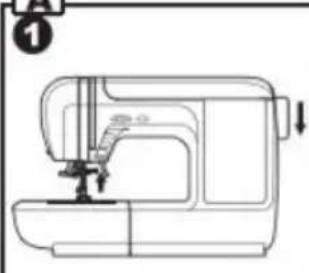
natural_image
Line drawing of a sewing machine with no text or symbols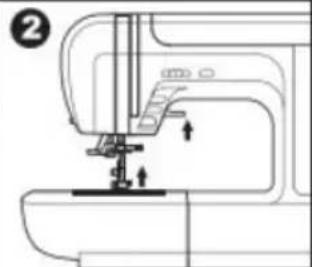
natural_image
Line drawing of a sewing machine needle and base (no text or symbols)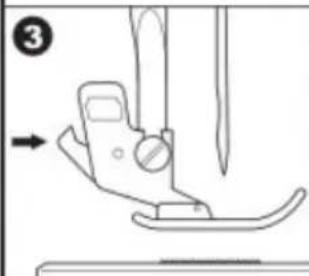
natural_image
Line drawing of a sewing machine needle and foot (no text or symbols)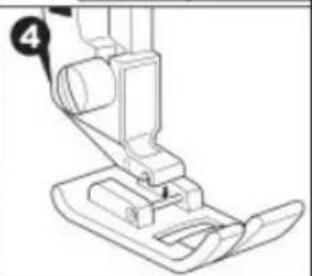
natural_image
Line drawing of a sewing machine needle and base (no text or symbols)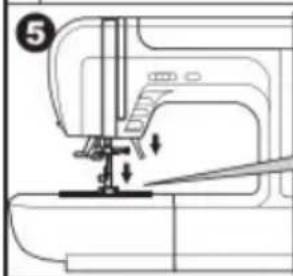
natural_image
Line drawing of a sewing machine needle and base (no text or symbols)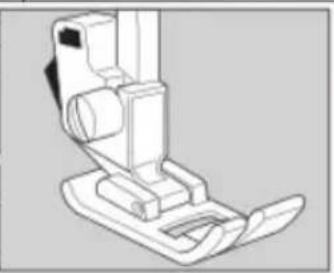
natural_image
Technical line drawing of a sewing machine (no text or symbols)B
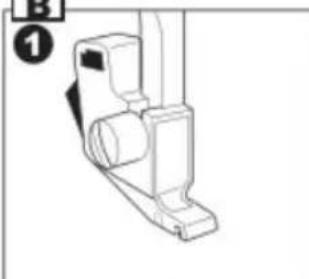
natural_image
Technical line drawing of a mechanical component with no visible text or symbols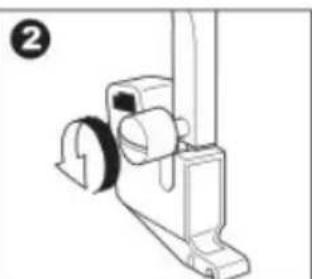
natural_image
Technical line drawing of a mechanical device with no visible text or symbols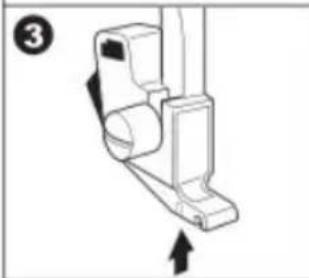
natural_image
Technical line drawing of a mechanical component with directional arrows indicating movement (no text or symbols)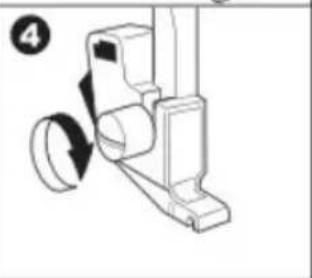
natural_image
Mechanical component diagram showing a rotating shaft and housing mechanism (no text or symbols)NADEL EINSETZEN
STOFF-, GARN-gUND NADELTABELLE
E. FADENTRENNER-TASTE
G. TRANSPORTEURHEBEL
natural_image
Technical diagram of a mechanical assembly with labeled component H and directional arrows (no readable text or symbols)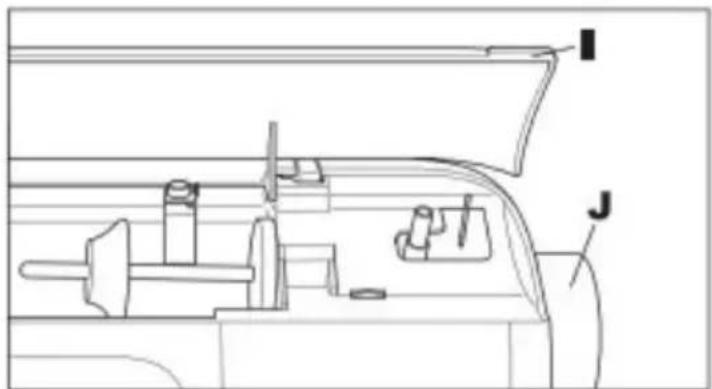
natural_image
Technical line drawing of a vehicle rear window with labeled components (I and J), no readable text or symbols beyond labels-gMod.422, 420 - TASTENFUNKTION
A. TASTE START/STOPP
E. TASTE NADEL OBEN-UNTEN
H. FADENTRENNER
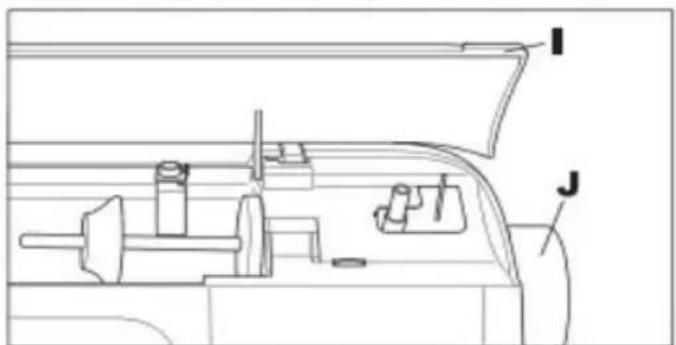
- MOD. 424 - STICHAUSWAHL
| D | a d c b e R C OK R << > + >> ← → → → → → → → → → → → → → → → → → → → → → → → → → → → → → → → → → → → → → → → → → → → → → → → → → → ↑ | |
| f | 11 | |
| g | 11 | |
| g-1 | 1 | |
| h | 31 |
- Mod. 422 - STICHAUSWAHL
natural_image
Technical line drawing of a mechanical assembly with no visible text or symbols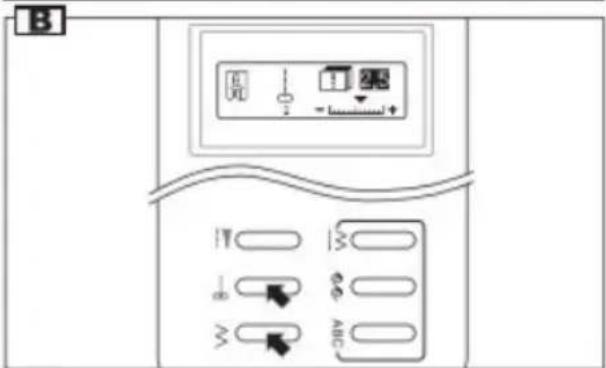
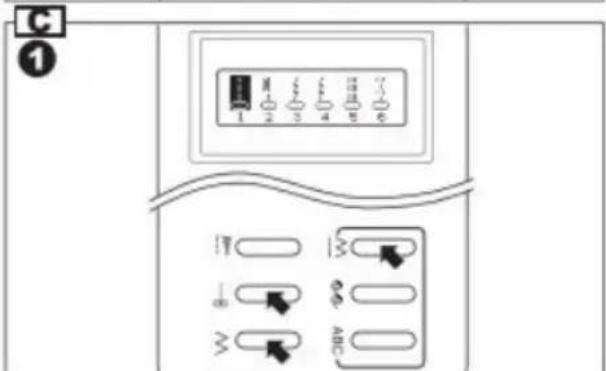
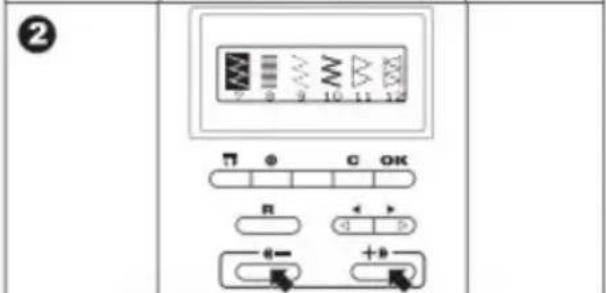
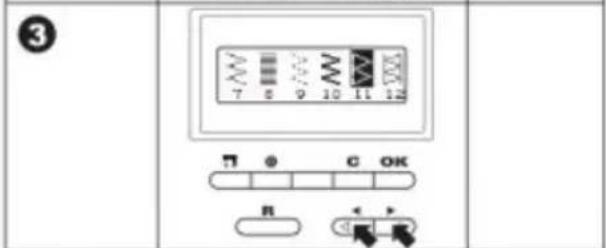
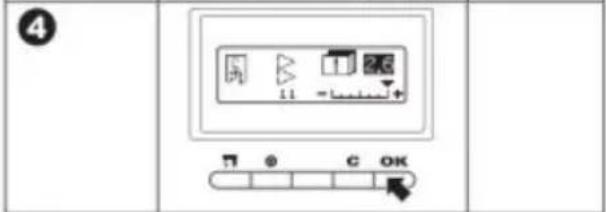
D. INFORMATIONEN ZUM AUSGEWÄHLTEN STICH
8. ANZEIGER
flowchart
graph TD
    A["Step 1: Lateral Tool"] --> B["Step 2: Thread Strip"]
    B --> C["Step 3: Rotation Coil"]
    C --> D["Step 4: Thread Strip with Arrow"]
    D --> E["Step 5: Thread Strip with Arrow"]
    E --> F["Step 6: Thread Strip with Arrow"]
    F --> G["Step 7: Thread Strip with Arrow"]
    G --> H["Step 8: Thread Strip with Arrow"]
    H --> I["Step 9: Thread Strip with Arrow"]
    I --> J["Step 10: Thread Strip with Arrow"]
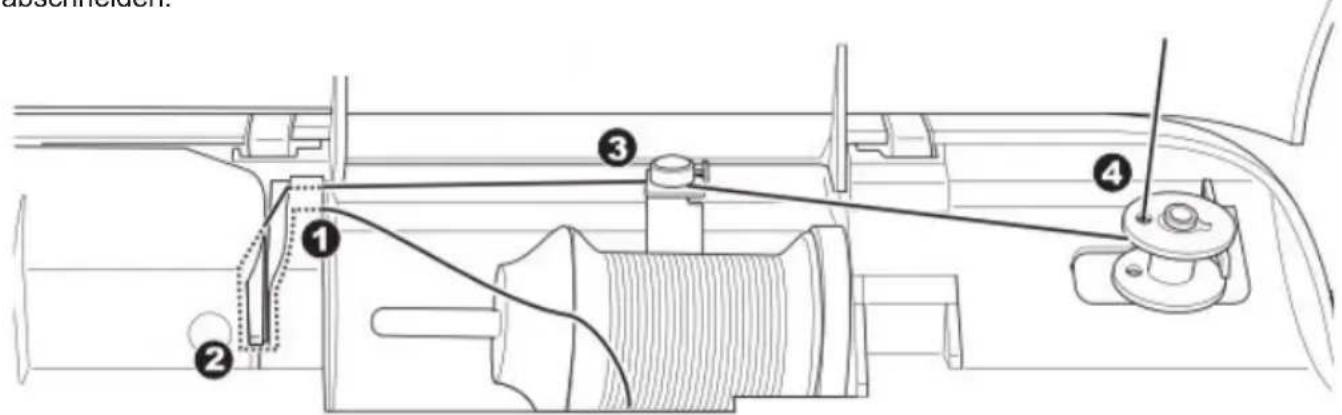
D. SPULE EINSETZEN
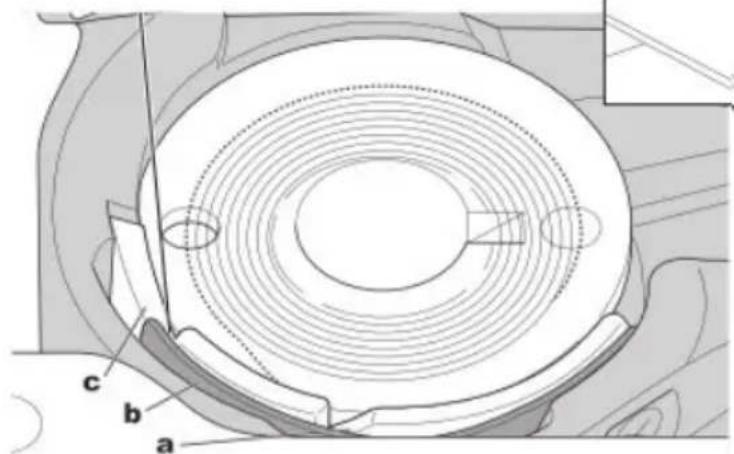

natural_image
Mechanical assembly diagram showing a lever mechanism with no visible text or symbols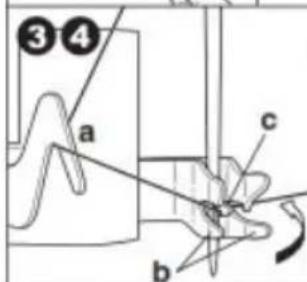
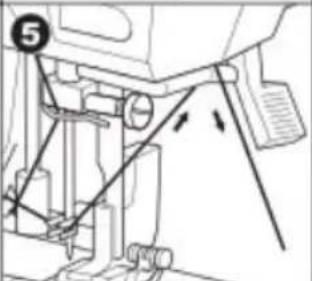
natural_image
Mechanical assembly diagram showing a lever mechanism with arrows indicating motion (no text or symbols present)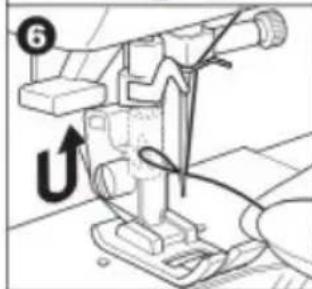
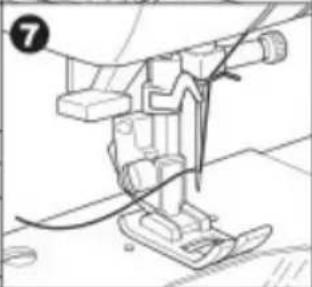
natural_image
Mechanical assembly diagram showing a sewing machine with no visible text or symbols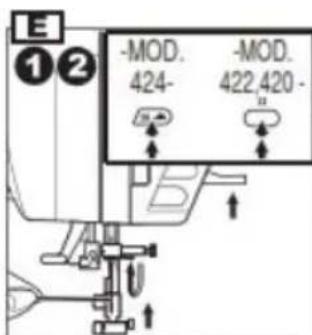
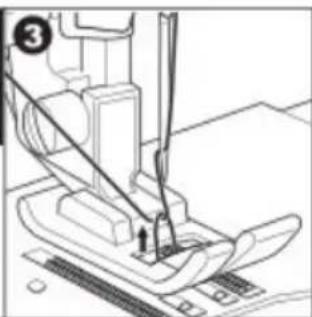
natural_image
Line drawing of a sewing machine needle and base (no text or symbols)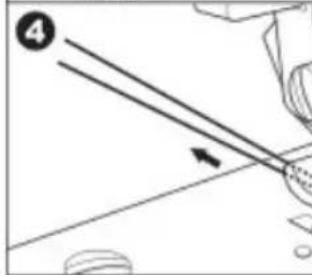
natural_image
Pure mechanical diagram showing two diagonal lines intersecting a horizontal line with an arrow, no text or symbols present.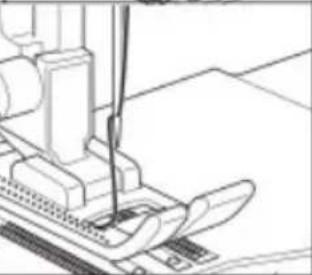
natural_image
Line drawing of a sewing machine needle stitching fabric (no text or symbols)natural_image
Close-up of a sewing machine needle stitching fabric (no text or symbols visible)B. RÜCKWÄRTSNÄHEN
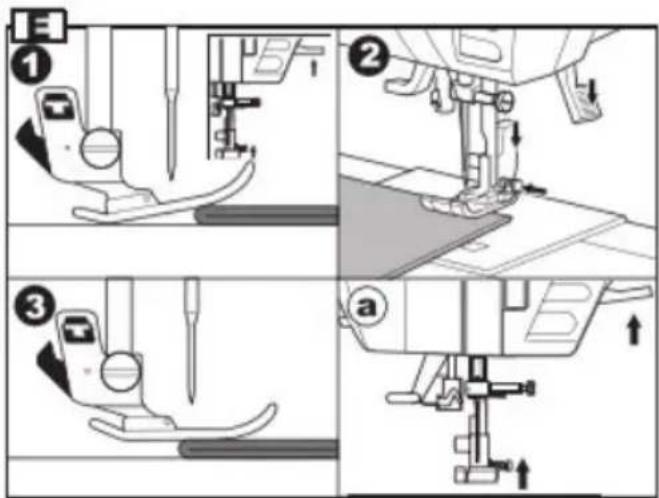
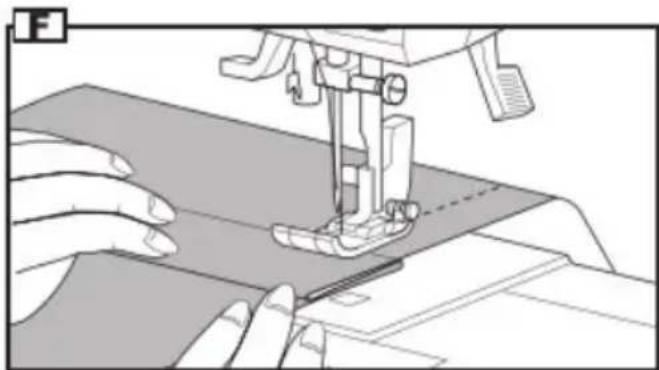
natural_image
Illustration of a sewing machine needle stitching fabric, with hands operating the process (no text or symbols visible)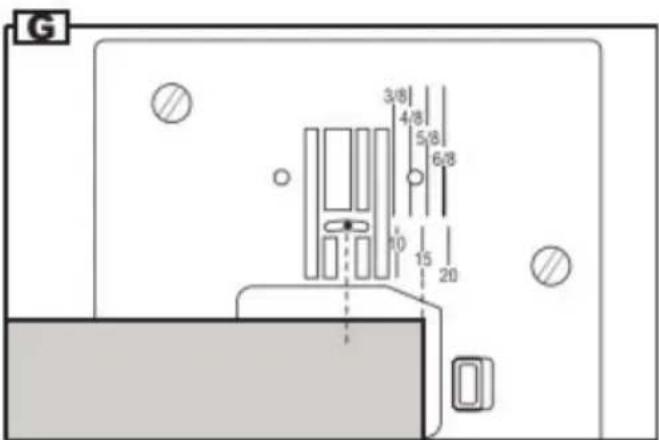
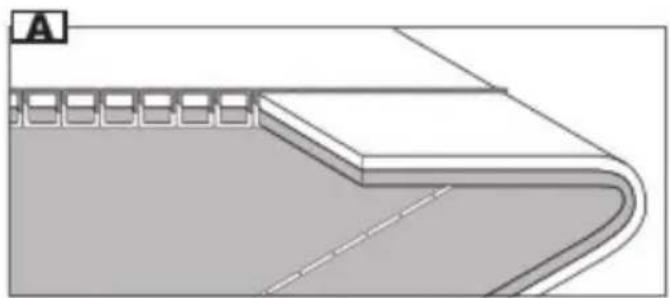
natural_image
Architectural cross-section diagram of a building facade with curved and rectangular elements (no text or symbols)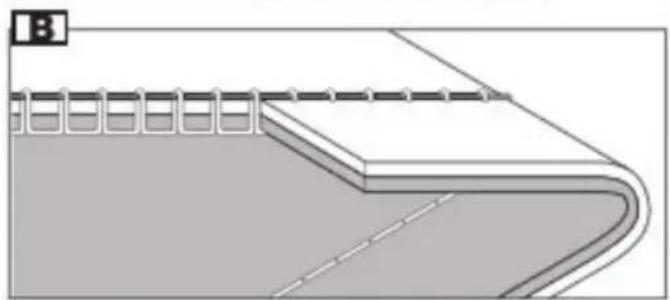
natural_image
Cross-sectional diagram of a layered structure with no visible text or symbols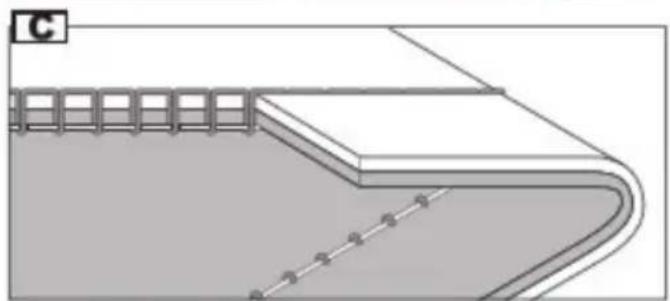
natural_image
Pure architectural or engineering diagram showing a curved structural element with grid-like elements, no text or symbols present.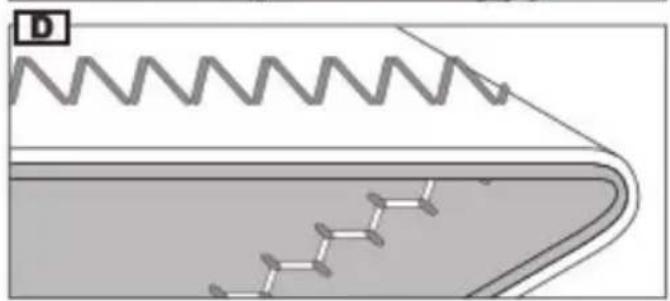
natural_image
Diagram of a mechanical component with zigzag lines and a wavy top surface (no text or symbols)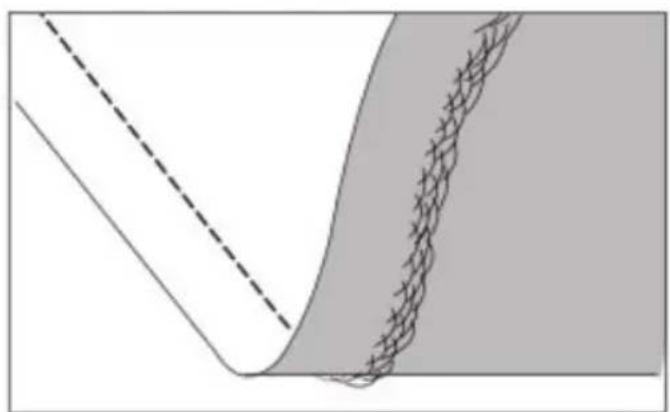
natural_image
Diagram showing a curved boundary with a dashed line and a shaded region, no text or symbols present.natural_image
Architectural cross-section diagram of a building facade with curved and rectangular elements (no text or symbols)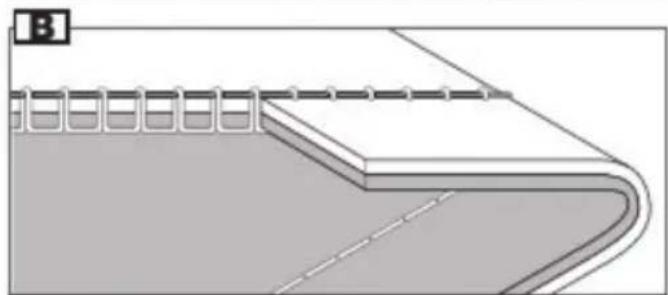
natural_image
Diagram of a notebook binding layer with no text or symbols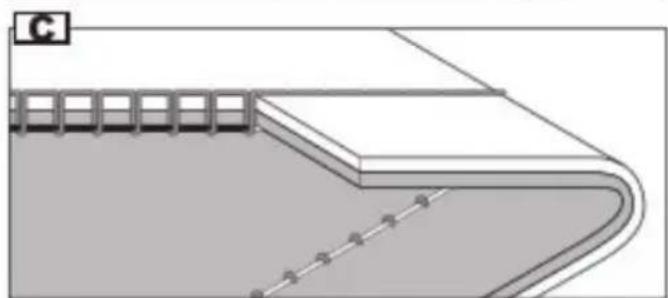
natural_image
Pure architectural or engineering diagram showing layered structure with no text, numbers, or symbols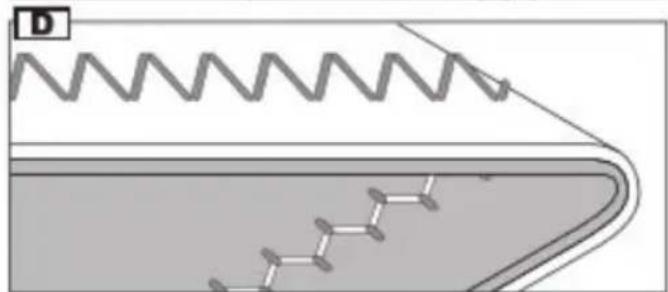
natural_image
Diagram of a mechanical component with zigzag spring and chain-like grooves, no text or symbols present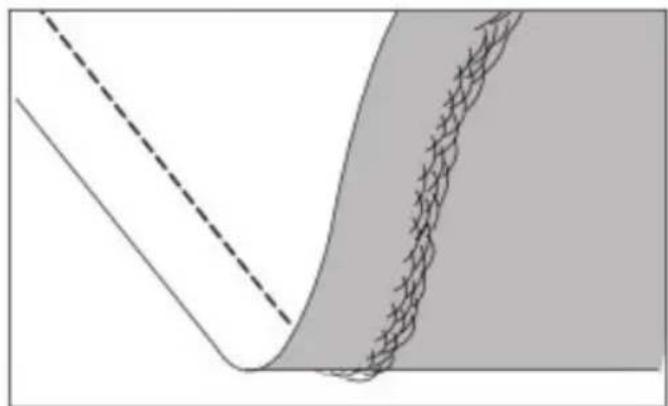
natural_image
Diagram showing a curved boundary with a dashed line and a shaded region, no text or symbols present.424 422 420
natural_image
Technical illustration of a sewing machine's side view showing two different configurations (no text or symbols present)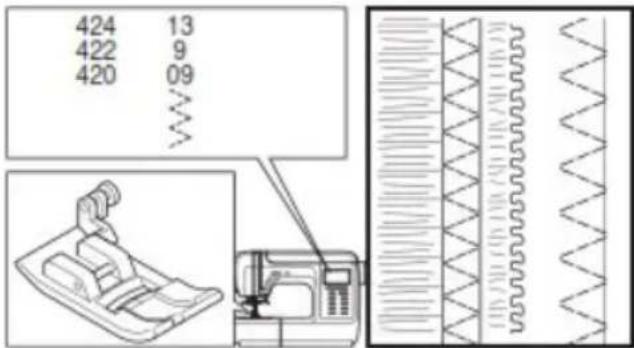
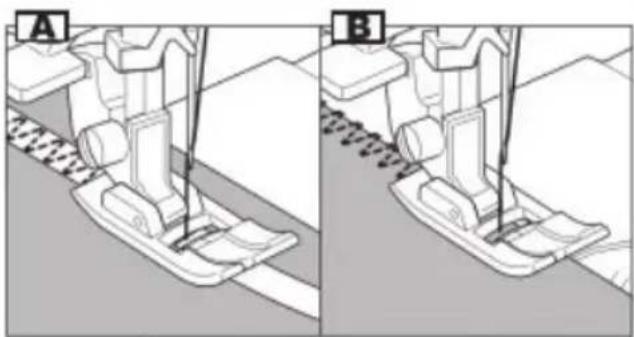
natural_image
Two technical diagrams showing mechanical components in different states (A and B), with no visible text or symbols.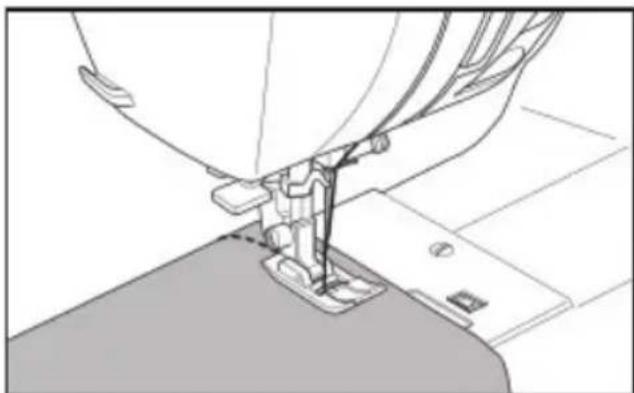
natural_image
Technical line drawing of a sewing machine needle and foot (no text or symbols)ÜBERWENDLINGSSTI CH-gOVERLOCK
A. MIT ÜBERWENDLINGSFUSS
| 424g422g420 | |||
| 11,7,07 | Breite 5.0 | -6.0 | |
| 15,16,17 | 11,12,13 | 11,12 | Breite 5.0-7.0 |
| 18,19, | 14,15, 14,15 | ||
11, 13, 7, 9, 07, 09, 13
Standardfuß (A)
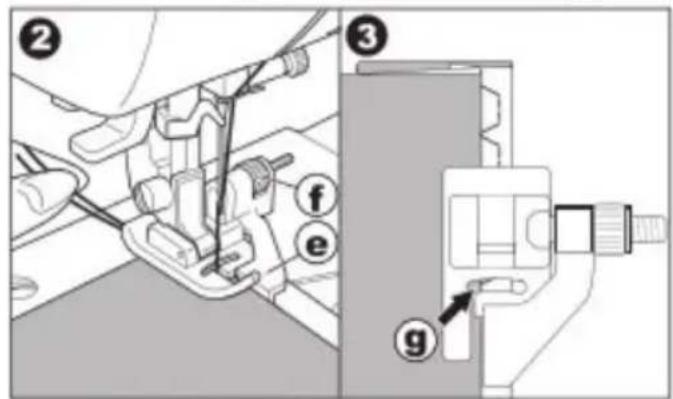
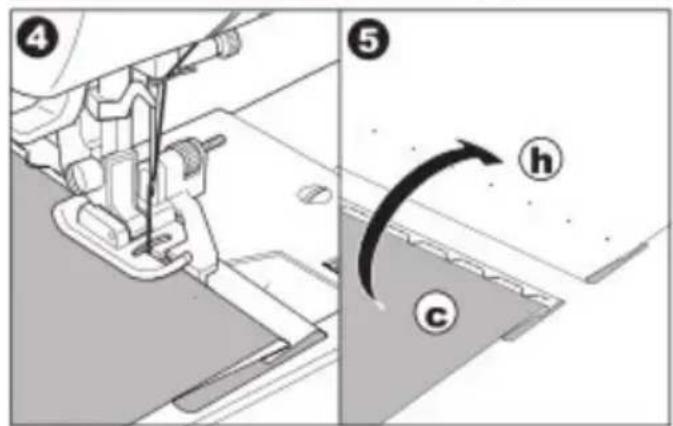
ELASTISCHE NAHT
natural_image
Diagram of a ring with dashed and solid lines, no text or symbols present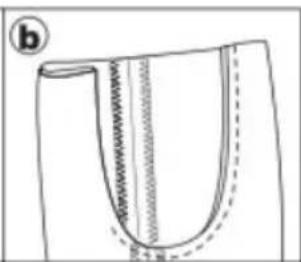
natural_image
Line drawing of a garment pattern piece with stitching details (no text or symbols)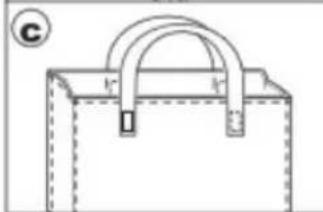
natural_image
Simple line drawing of a bag with a handle and dashed fill, no text or symbols present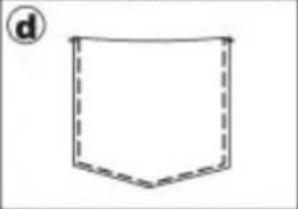
natural_image
Simple geometric shape with dashed outline and label (d), no text or symbols present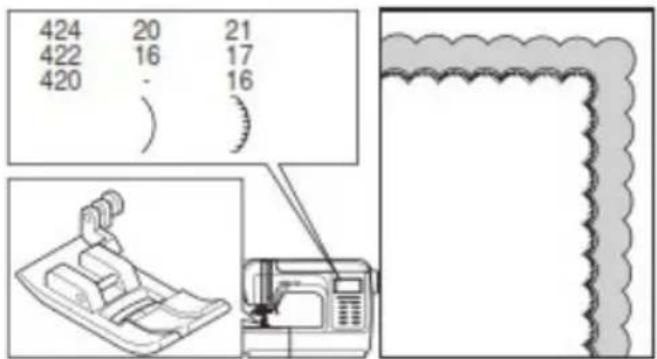
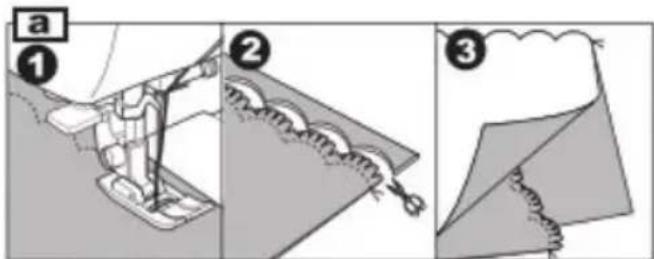
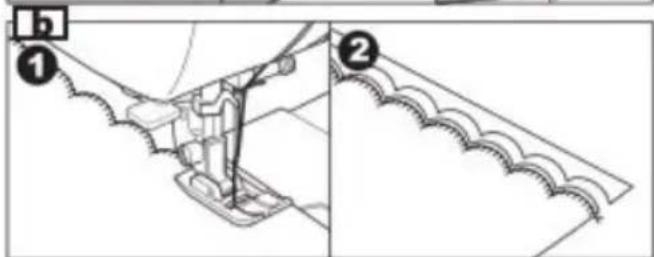
natural_image
Technical line drawing of a mechanical assembly with a close-up view of a device (no text or symbols)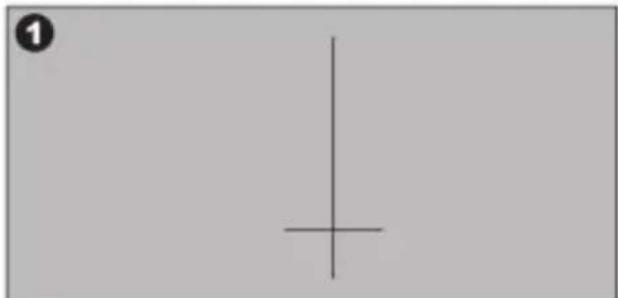
natural_image
Simple geometric diagram with a vertical line and a horizontal cross on a gray background (no text or symbols)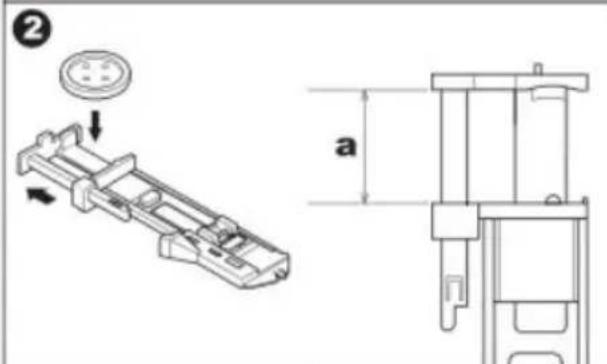
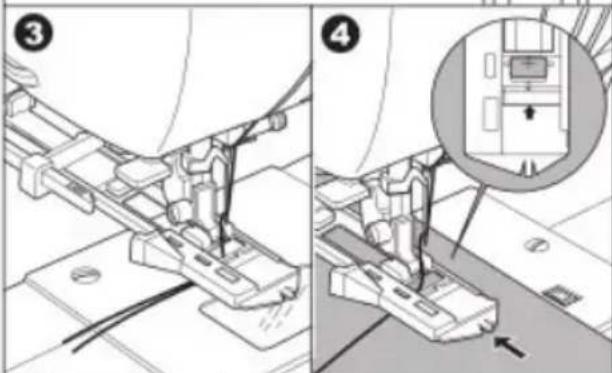
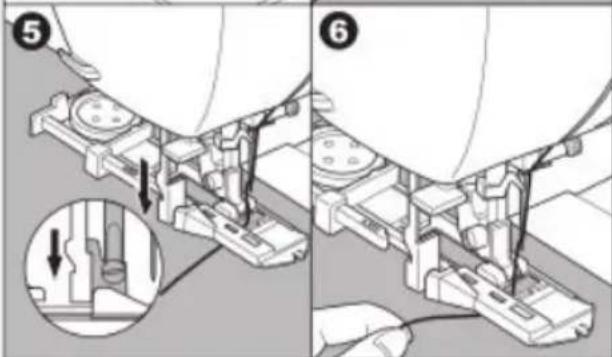
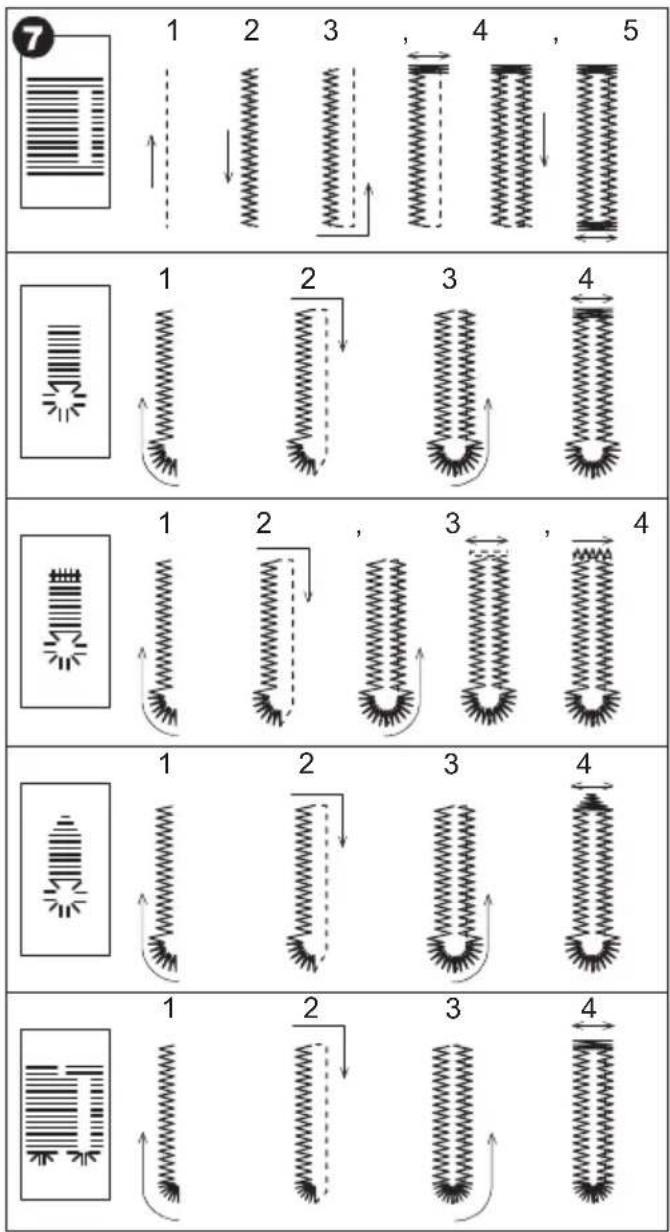
flowchart
graph TD
    A["1"] --> B["2"]
    B --> C["3"]
    C --> D["4"]
    D --> E["5"]
    F["1"] --> G["2"]
    G --> H["3"]
    H --> I["4"]
    I --> J["1"]
    J --> K["2"]
    K --> L["3"]
    L --> M["4"]
    M --> N["1"]
    N --> O["2"]
    O --> P["3"]
    P --> Q["4"]
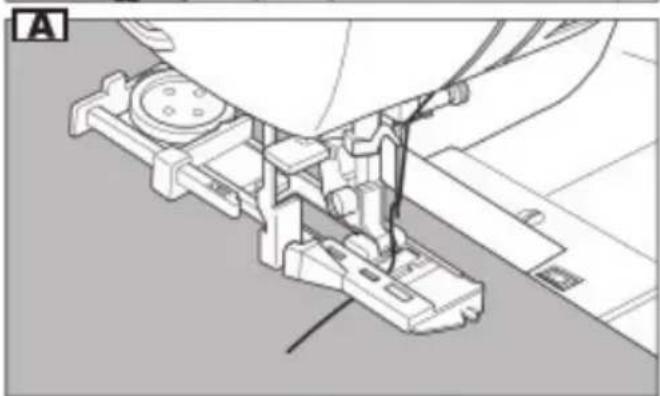
natural_image
Mechanical assembly diagram showing a sewing machine mechanism (no text or labels visible)- NUR Mod. 424
SCHNEIDER-KNOPFLOCH
-gMod. 424, 422 – KNÖPFE AUFNÄHEN
424 g422
11,7,Knopfnähfuß
natural_image
Diagram of a machine tool interacting with a box, no text or symbols present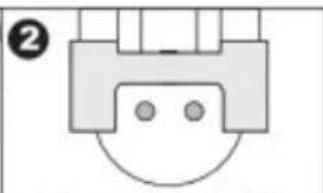
natural_image
Simple line drawing of a mechanical component with two circular holes and a curved base (no text or symbols)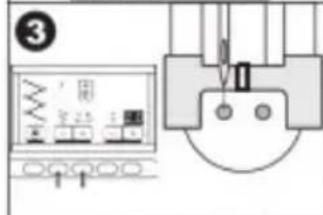
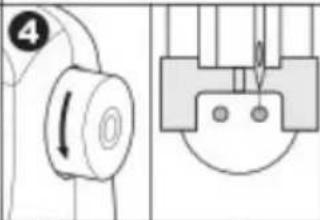
natural_image
Diagram showing a mechanical component with a rotating shaft and a cross-sectional view of a housing (no text or symbols)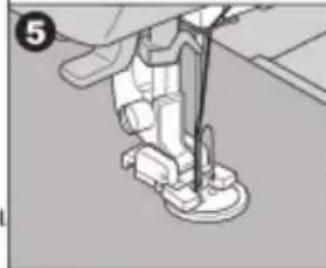
natural_image
Mechanical assembly diagram showing a foot and arm mechanism (no text or symbols)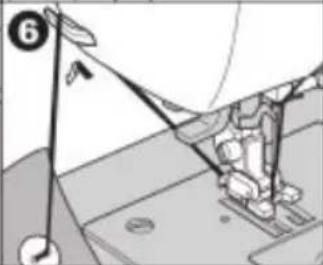
natural_image
Mechanical assembly diagram showing a sewing machine needle and base mount (no text or symbols)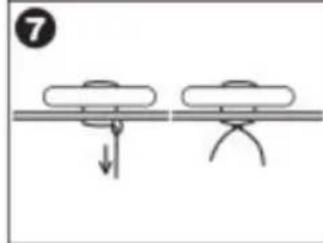
natural_image
Diagram showing two mechanical setups with a downward arrow, no text or symbols present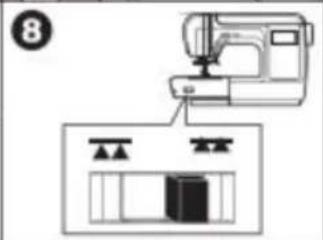
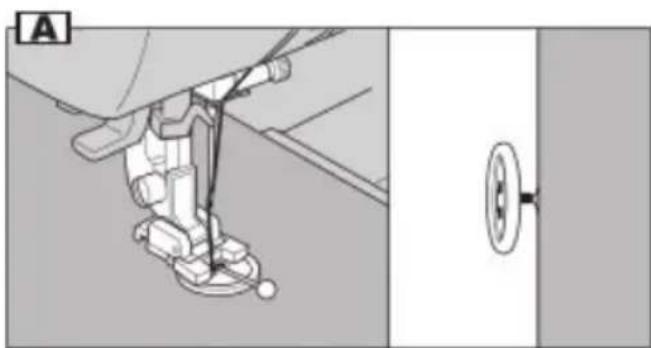
natural_image
Technical diagram showing a mechanical assembly with a vertical rod and a circular component, no visible text or symbols-gMod. 420 -gKNÖPFE AUFNÄHEN
Nr. 23 Standardfuß
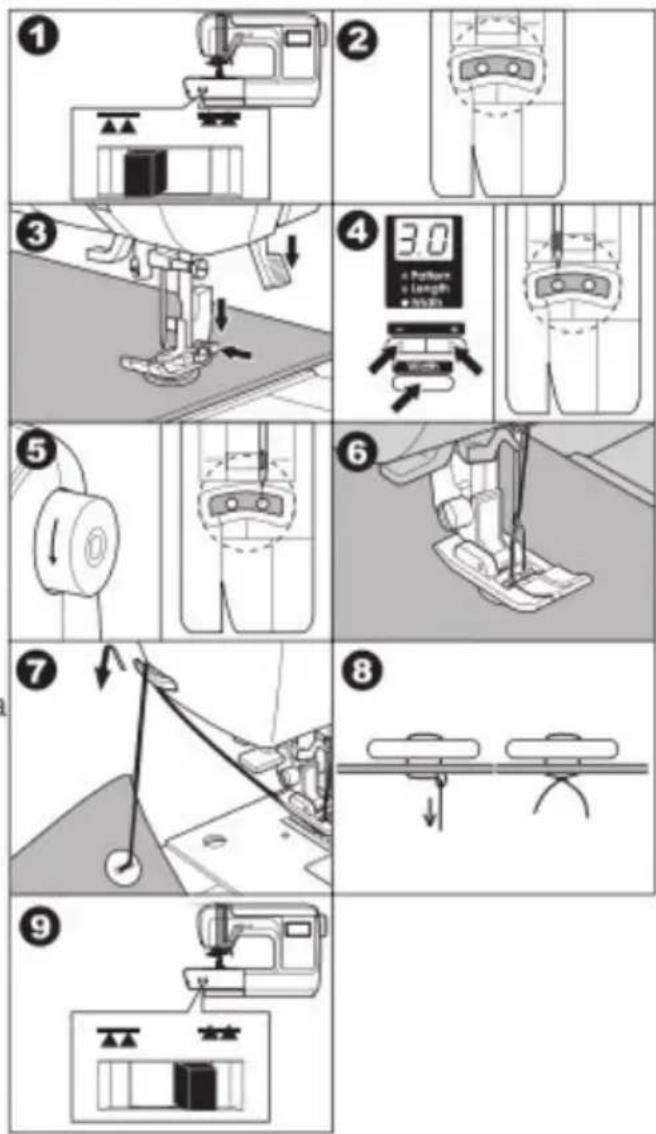
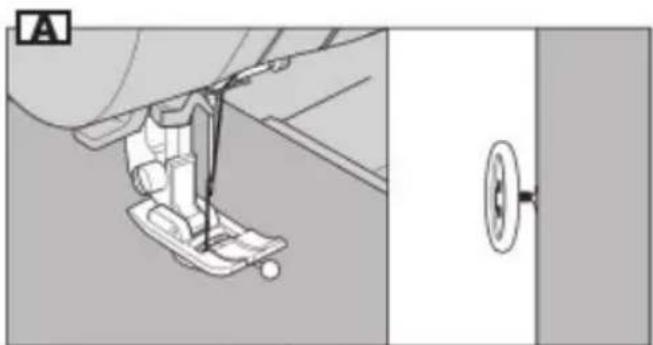
natural_image
Mechanical sewing machine diagram showing needle insertion and mounting detail (no text or symbols)-gMod. 424
QUILTING
23, 29-37 23-31 18, 25-32, 39-98
Satin-Fuß (B)
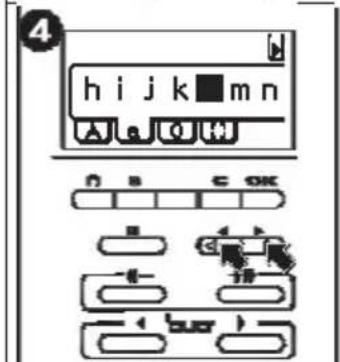
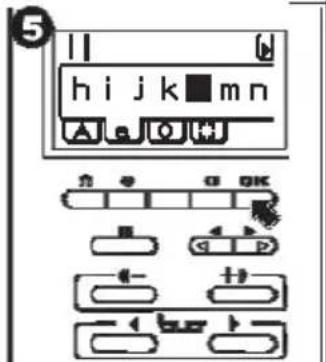
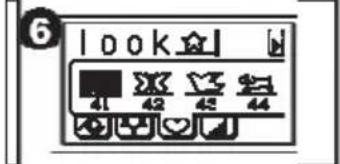
natural_image
Simple rectangular frame with a numbered label '7' in the top-left corner (no other text or symbols)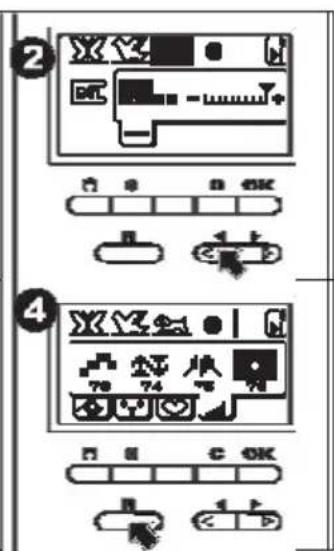
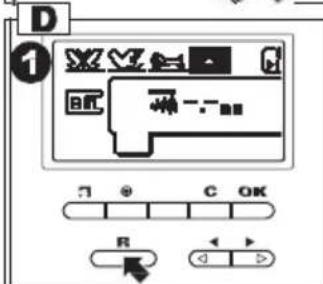
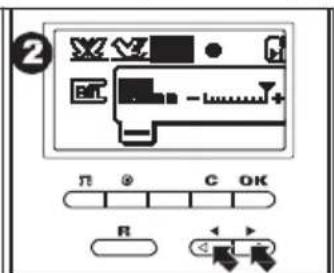
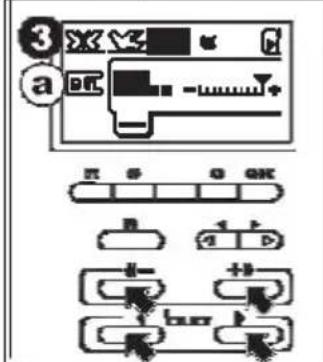
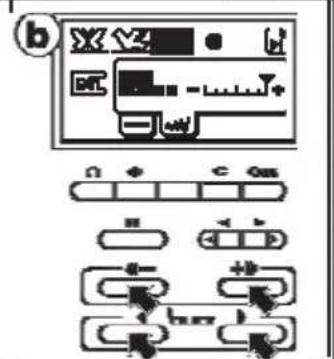
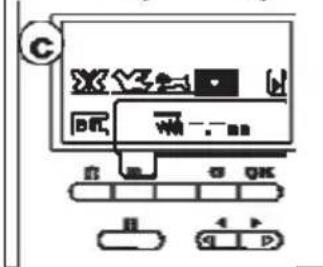
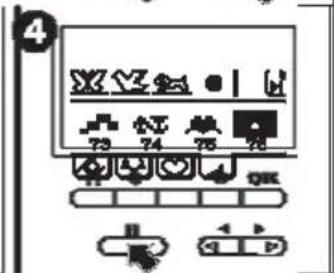
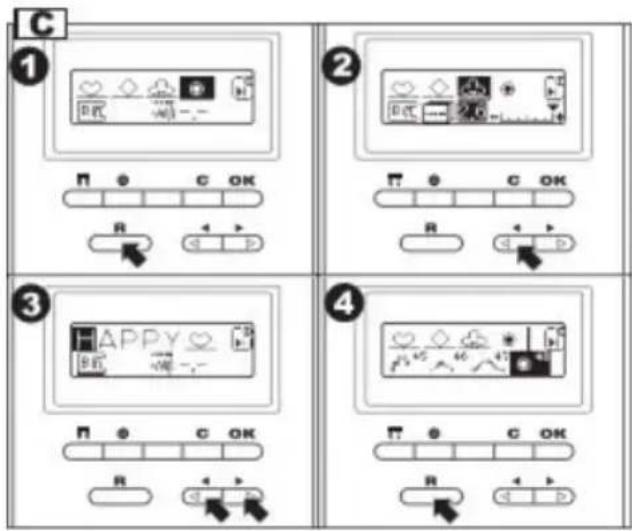
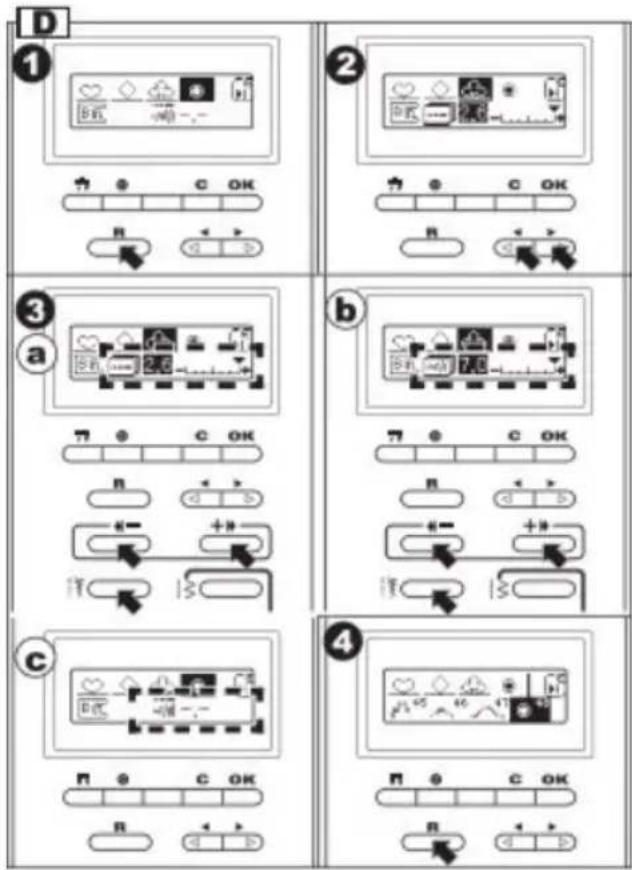
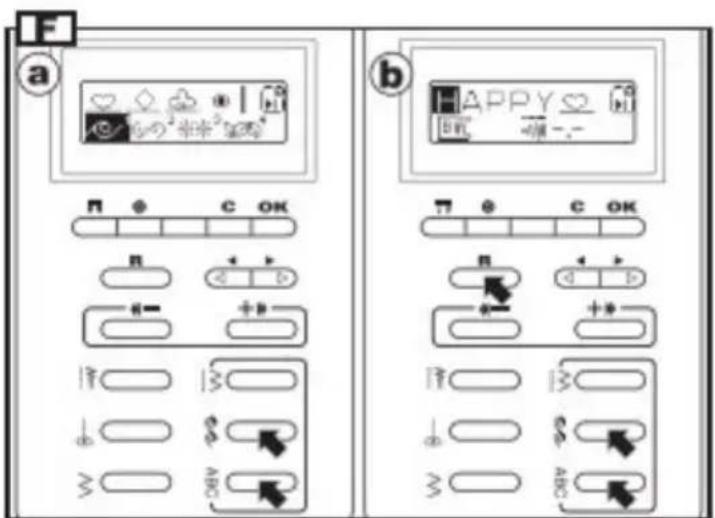
APPLIKATIONEN
| 424 | 422 | 420 |
| 26 | 18 | 24 |
Standardfuß (A)
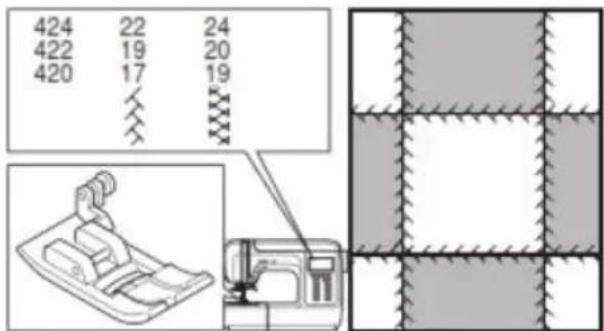
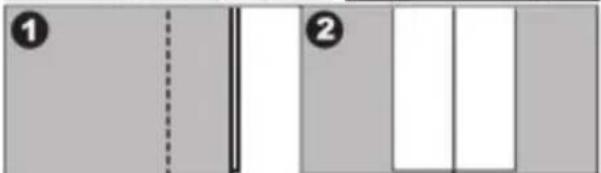
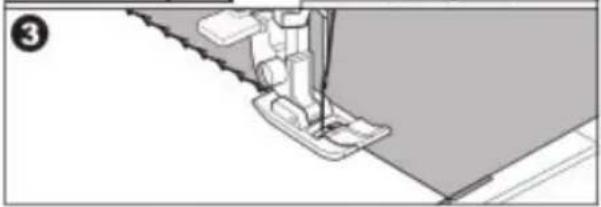
natural_image
Mechanical sewing machine needle stitching a fabric (no text or symbols visible)natural_image
Technical line drawing of a mechanical assembly with no visible text or symbols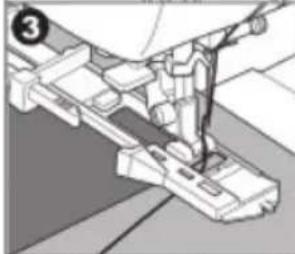
natural_image
Mechanical assembly diagram showing a sewing machine with no visible text or symbols
natural_image
Pure mechanical assembly diagram showing a base with a spring and connecting rod (no text or symbols)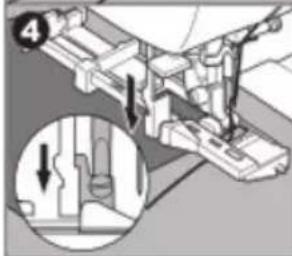
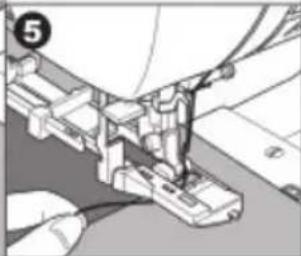
natural_image
Close-up of a sewing machine needle being sewn, showing fabric and metal components (no text or symbols visible)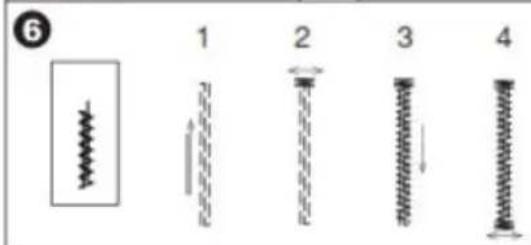
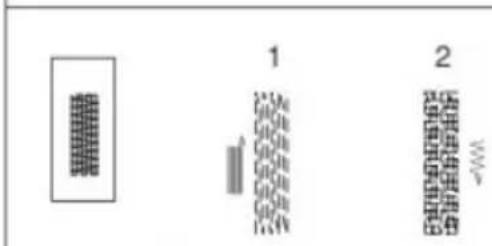
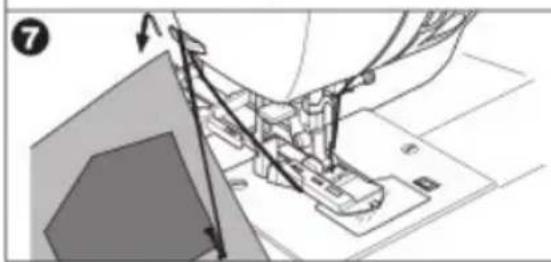
natural_image
Technical diagram of a sewing machine needle and foot assembly (no text or labels visible)- Nur Mod. 424 ENGNAHT
natural_image
Mechanical sewing machine needle stitching a fabric (no text or symbols visible)- Nur Mod. -424 STOPFEN/ FREIHAND- STICKEN
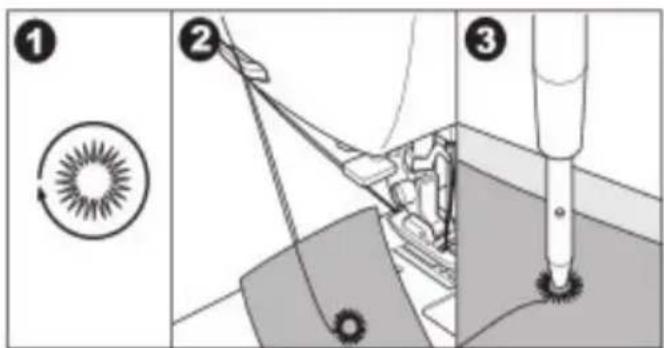
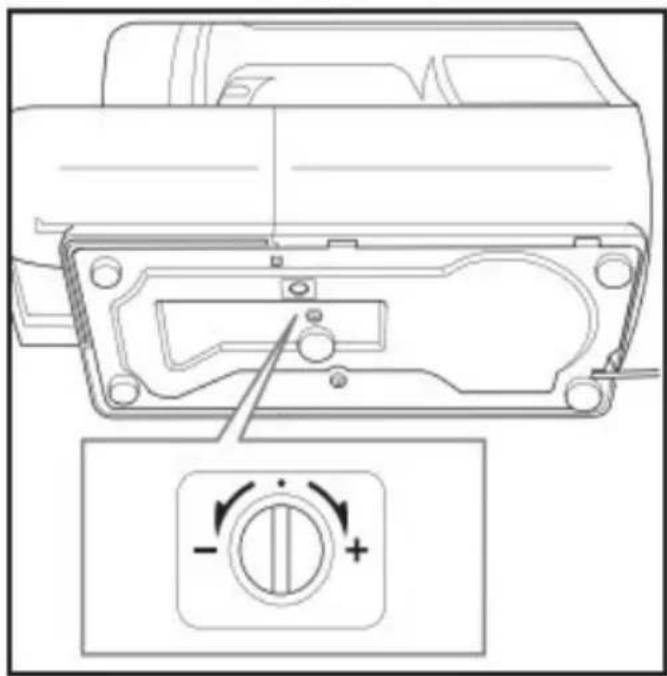
natural_image
Technical line drawing of a mechanical component with a circular dial indicator (no text or symbols)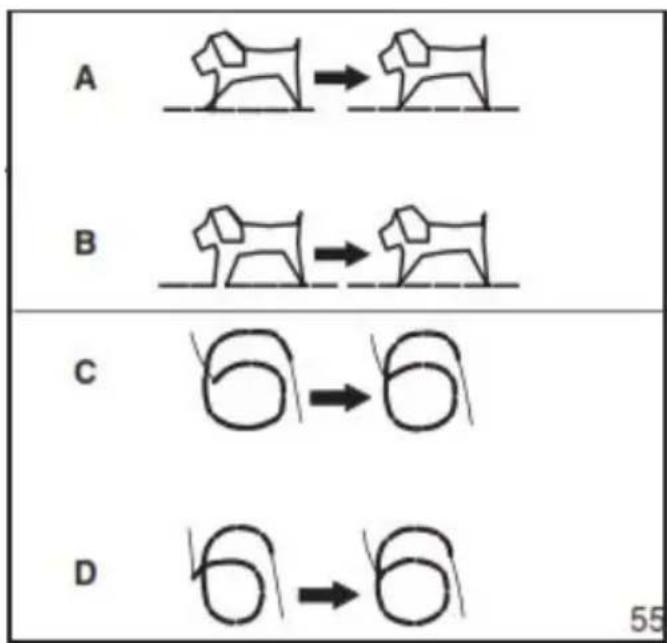
flowchart
graph TD
    A["Step A: Dog shape"] --> B["Step B: Dog shape"]
    B --> C["Step C: Dog shape"]
    C --> D["Step D: Dog shape"]

natural_image
Technical line drawing of a mechanical component with mounting holes and internal structure (no text or symbols)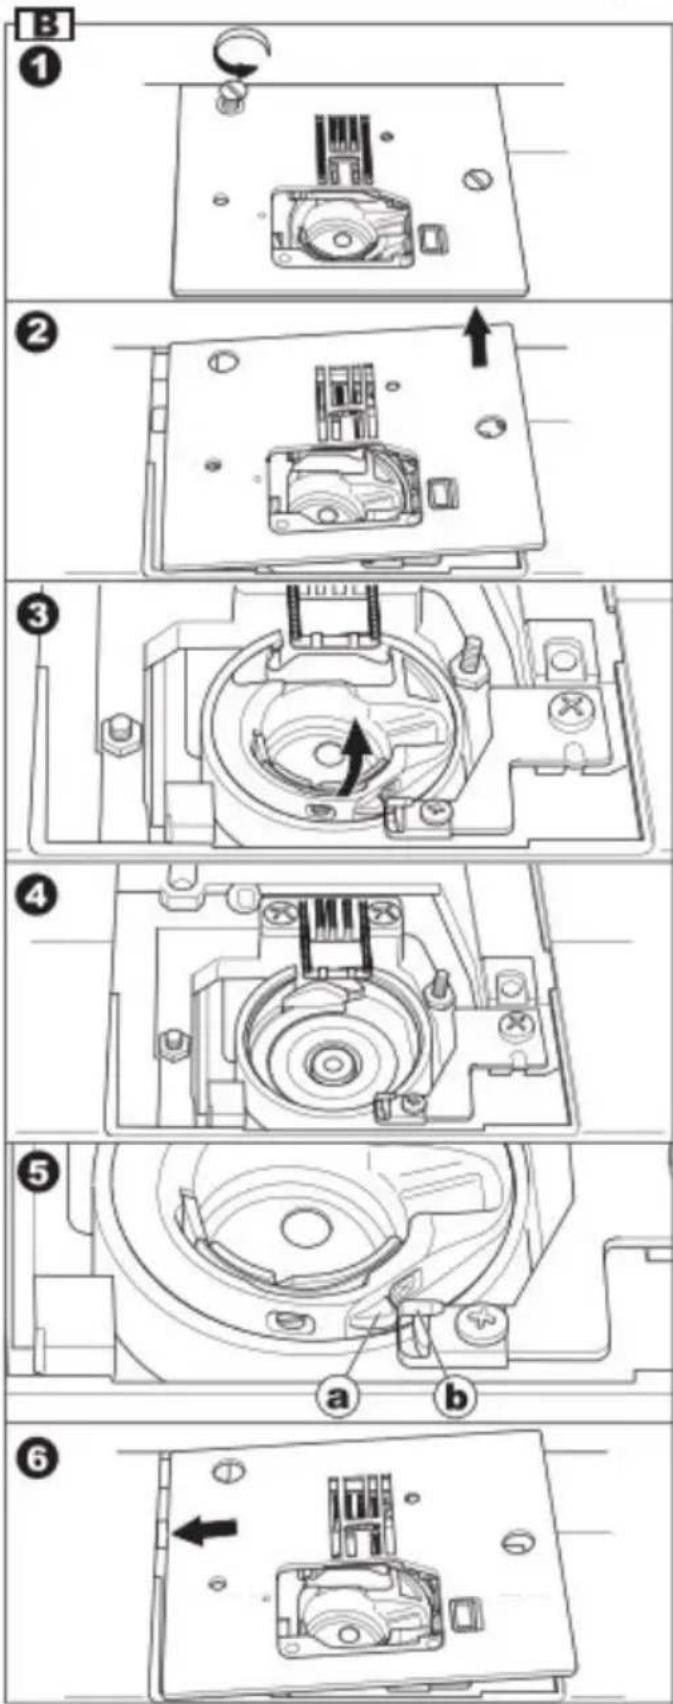
EMPFEHLUNGEN
- INSTRUCTION MANUAL
- IMPORTANT SAFETY INSTRUCTIONS
- DANGER
- - To reduce the risk of electric shock:
- WARNING-
- To reduce the risk of burns, fire, electric shock, or injury to persons:
- SAVE THESE INSTRUCTIONS
- CONTENTS
- MAIN PARTS.
- -TYPE A-
- -TYPE B-
- -TYPE C-
- CONNECTING THE MACHINE
- DANGER: To reduce the risk of electric shock.
- WARNING: To reduce the risk of burns, fire, electric shock, or injury to persons.
- FOOT CONTROLLER
- -TYPE A & B-
- DUST COVER
- EXTENSION TABLE.
- a. REMOVING THE EXTENSION TABLE
- b. OPENING THE ACCESSORY CASE
- CHANGING THE PRESSER FOOT
- CAUTION: To prevent accidents.
- Changing the presser foot
- Removing the presser foot holder
- INSERTING THE NEEDLE\_
- FABRIC, THREAD AND NEEDLE TABLE
- FUNCTION OF EACH PART
- START/STOP BUTTON
- MONITOR LAMP
- Note:
- REVERSE BUTTON
- NEEDLE UP-DOWN / SLOW BUTTON
- SPEED CONTROL BUTTON
- THREAD CUTTER BUTTON
- CAUTION
- PRESSER FOOT LIFTER
- DROP FEED LEVER
- THREAD CUTTER
- TOP COVER
- HAND WHEEL
- - TYPE B, C -\_\_\_\_ FUNCTION OF EACH PART
- SLOW BUTTON
- NEEDLE UP-DOWN BUTTON
- - TYPE A - TO SELECT A UTILITY PATTERN
- CONTRAST OF THE L.C.D.
- STRAIGHT STITCH BUTTON
- TO SELECT A UTILITY PATTERN
- INFORMATIONS OF SELECTED PATTERN
- - TYPE B - TO SELECT A UTILITY PATTERN
- STRAIGHT STITCH AND ZIGZAG STITCH BUTTONS
- Press the OK button.
- - TYPE C -
- TO SELECT A PATTERN
- STITCH NUMBER INDICATOR
- TO SELECT STRAIGHT STITCH, ZIGZAG STITCH AND BUTTONHOLE
- TO SELECT OTHER STITCH PATTERN
- JUMP BUTTON
- PATTERN CHART
- STITCH LENGTH
- STITCH WIDTH
- NEEDLE POSITION
- MONITOR WINDOW
- BOBBIN SETTING
- REMOVING THE BOBBIN
- SETTING SPOOL OF THREAD ON SPOOL PIN
- WINDING THE BOBBIN
- INSERTING THE BOBBIN
- THREADING THE MACHINE
- PREPARING TO THREAD MACHINE
- THREADING THE UPPER THREAD
- THREADING THE NEEDLE EYE
- DRAWING UP THE BOBBIN THREAD
- STARTING TO SEW
- START AND END OF SEAM
- - TYPE A ONLY -
- NOTE
- REVERSE STITCHING
- AUTO TACK STITCH
- TURNING CORNERS
- SEWING HEAVY FABRIC
- SEWING OVER OVERLAPPED AREAS
- WIDTH OF SEAM ALLOWANCE
- - TYPE A - \_ THREAD TENSION
- - TYPE B, C -\_\_\_\_ ADJUSTING THE THREAD TENSIONS
- Correct Thread Tensions
- When bobbin thread appears on top side of fabric.
- When upper thread appears on the bottom side of fabric.
- Thread Tension for Zigzag Stitches
- Helpful Hint
- STRAIGHT STITCH
- SEWING
- Straight Stitch
- Straight Stitch With Auto-reverse Stitch
- ZIGZAG STITCH SEWING—
- SATIN STITCHING
- MULTI-STITCH ZIGZAG—
- Elastic Band Sewing
- Overcast Stitching
- FREE ARM SEWING
- OVERCASTING- OVERLOCKING
- USING THE OVERCASTING FOOT
- Overcasting Foot (C)
- USING THE REGULAR FOOT
- Regular Foot (A)
- NOTE:
- BLIND HEM STITCHING—
- A B C
- Blind Foot (D)
- ELASTIC STITCH SEWING-
- SCALLOP STITCH
- a. SCALLOP HEM
- b. SCALLOP EDGING
- INSERTING ZIPPERS CENTERED INSERTION
- INSERTING ZIPPERS LAPPED INSERTION\_\_\_\_
- TO OPEN THE ZIPPER WHILE STITCHING
- BUTTONHOLE SEWING
- Buttonhole Foot (F)
- WHEN SEWING STRETCH FABRIC
- - TYPE A ONLY - BOUND BUTTONHOLE
- - TYPE A, B - — SEWING ON BUTTONS
- A B
- 7 Button Sewing Foot
- Thread Shank
- - TYPE C - \_ SEWING ON BUTTONS
- No. 23 Regular Foot
- - TYPE A - QUILTING
- CAUTION: To prevent accedents.
- Joining the pieces of fabric
- Quilting
- - TYPE B, C QUILTING
- B
- C
- HAND LOOK QUILTING STITCH
- UTILITY DECORATIVE STITCHES
- - TYPE A -
- DECORATIVE AND LETTER STITCH SEWING
- TO SELECT DECORATIVE AND LETTER PATTERN
- TO DELETE SELECTED PATTERN
- TO CHECK SELECTED PATTERNS
- ADJUSTING STITCH LENGTH AND WIDTH
- TO SEW SELECTED PATTERNS
- Sewing mode (Single / Repeat)
- TIPS
- a. To sew selected patterns from beginning.
- b. To recall selected patterns
- APPLIQUE
- a. When sewing sharp angles
- PATCH WORK
- TWIN NEEDLE SEWING
- AUTOMATIC BAR-TACK / DARNING
- - TYPE A ONLY - \_ NARROW HEMMING
- - TYPE A ONLY CORDING
- SINGLE CORDING
- TRIPLE CORDING
- - TYPE A ONLY — DARNING/FREE-HAND EMBROIDERY
- ATTACHING THE DARNING/EMBROIDERY FOOT
- DARNING
- FREE-HAND EMBROIDERY
- - TYPE A, C ONLY -\_\_\_\_ EYELET
- A C
- ADJUSTING THE FORWARD AND REVERSE STITCHES
- DECORATIVE STITCH PATTERN
- - TYPE A, B ONLY - LETTER STITCH PATTERN
- MAINTENANCE
- CLEANING
- Bobbin Holder
- Hook Race and Feed Dog
- TYPE A PATTERN CHART
- TYPE C PATTERN CHART
- GEBRAUCHSANWEISUNG
- PEDALREGLER
- ABDECKUNG
- NADEL EINSETZEN
- STOFF-, GARN-gUND NADELTABELLE
- FADENTRENNER-TASTE
- TRANSPORTEURHEBEL
- -gMod.422, 420 - TASTENFUNKTION
- TASTE START/STOPP
- TASTE NADEL OBEN-UNTEN
- FADENTRENNER
- - MOD. 424 - STICHAUSWAHL
- - Mod. 422 - STICHAUSWAHL
- INFORMATIONEN ZUM AUSGEWÄHLTEN STICH
- ANZEIGER
- SPULE EINSETZEN
- RÜCKWÄRTSNÄHEN
- 422 420
- ÜBERWENDLINGSSTI CH-gOVERLOCK
- MIT ÜBERWENDLINGSFUSS
- ELASTISCHE NAHT
- - NUR Mod. 424
- SCHNEIDER-KNOPFLOCH
- -gMod. 424, 422 – KNÖPFE AUFNÄHEN
- -gMod. 420 -gKNÖPFE AUFNÄHEN
- Nr. 23 Standardfuß
- -gMod. 424
- QUILTING
- APPLIKATIONEN
- Standardfuß (A)
- - Nur Mod. 424 ENGNAHT
- - Nur Mod. -424 STOPFEN/ FREIHAND- STICKEN
Brand : NECCHI
Model : N 420
Category : Sewing machine