Passport 9500ci - Detection radar Escort - Free user manual and instructions
Find the device manual for free Passport 9500ci Escort in PDF.


| Product Type | Ultimate Radar/Laser Defense System |
| Brand | Escort |
| Model | Passport 9500ci |
| Components Included | Front Radar Receiver, Front Laser Shifters (2), Rear Laser Shifter, GPS Antenna, Display Module, Control Module, Interface, Powered Speaker, Concealed Alert Indicator, Radio Mute Cable, Download Data Cable, Installation Manual |
| Radar Receiver | Miniature, weatherproof; 3-foot built-in cable with waterproof connector; 13-foot extension cable with inline grommet; mounting brackets with stainless steel hardware |
| Front Laser Shifters | Twin weatherproof sensors; 16-foot cables with inline grommets; adjustable mounting clamps; optional universal mounting brackets |
| Rear Laser Shifter | Weatherproof sensor mounts on license plate; 30-foot cable with inline grommet |
| GPS Antenna | Weatherproof, magnetic mount; 30-foot cable with modular connector; interior windshield bracket included |
| Display Module | Mounts on dash or console; bezel for optional in-dash mounting; adhesive pads |
| Control Module | Mounts on dash or console; adhesive pads |
| Interface | Central module; connects to switched 12V power and ground; modular connections for all components |
| Powered Speaker | Amplified; mounting brackets and hardware included |
| Concealed Alert Indicator | Bi-color (green/flashing red); 6-foot cable with modular connector; bezel for mounting |
| Radio Mute Cable | 6-foot; connects to compatible audio systems; auto-mutes during alerts |
| Download Data Cable | USB; for database updates; includes jack for interior mounting |
| Power Supply | 12V switched (via ignition); automatic power on/off |
| Build-in Diagnostics | Confirms all components are operational |
| Radar Band Detection | Not detailed, but includes AutoSensitivity, SpecDisplay, ExpertMeter |
| Laser Shifting | Receive only mode by default; shifting can be enabled via preferences |
| Mounting Options | Radar receiver: under bumper/grille; Laser shifters: grille or bracket; GPS antenna: roof/trunk/windshield; Display/Control: dash/console; Speaker: behind dash/console/under seat |
| Warranty | Not specified; improper installation may void warranty |
| Documentation | Comprehensive Owner's Manual, Installation Guide |
Frequently Asked Questions - Passport 9500ci Escort
User questions about Passport 9500ci Escort
0 question about this device. Answer the ones you know or ask your own.
Ask a new question about this device
Download the instructions for your Detection radar in PDF format for free! Find your manual Passport 9500ci - Escort and take your electronic device back in hand. On this page are published all the documents necessary for the use of your device. Passport 9500ci by Escort.
USER MANUAL Passport 9500ci Escort
5440 West Chester Road
West Chester OH 45069
Sales/Service 800-433-3487
www.EscortRadar.com
©2008 ESCORT Inc. Escort®, Passport®, AutoSensitivity™, SpecDisplay™, ExpertMeter™, and Laser Shifter™ are trademarks of Escort Inc. SWS™ is a trademark of SWS LC.
Features, specifications and prices subject to change without notice.
ULTIMATE RADAR / LASER DEFENSE SYSTEM
Installation Manual
PASSPORT 9500ci Comes Complete
Front Radar Receiver
- Miniature weatherproof radar receiver
- Two universal mounting brackets with stainless steel hardware
• Built-in 3-foot cable with waterproof connector
• 13-foot cable with waterproof connector and inline grommet
• 12 nylon wire ties to secure cable

Front Laser Shifters
- Twin weatherproof sensors
• 16-foot cables with inline grommets - Adjustable mounting clamps preinstalled
- Optional universal mounting brackets with stainless steel hardware
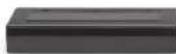

Rear Laser Shifter
• Weatherproof sensor mounts on license plate
• 30-foot cable with inline grommet

GPS Antenna
- Weatherproof magnetically mounted GPS Antenna
• 30-foot cable with modular connector
• Interior windshield mounting bracket included

Display Module
• Display mounts easily to instrument pod,
dashboard, or console
- Bezel provided for optional in-dash mounting
• Adhesive pads provided for secure mounting
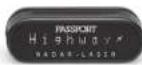
In-dash Display Bezel
- In-dash bezel for factory-installed look mounts easily to instrument pod, dashboard, or console
- Integrated adhesive backing for secure mounting

Control Module
- Controller mounts easily to instrument pod, dashboard, or console
• Adhesive pads provided for secure mounting

Interface
- Central module connects to switched 12-volt power and ground
- All components plug directly in using modular connections
• 3M connector taps into existing vehicle wiring

Powered Speaker
- Powerful Amplified speaker provides audible alerts
- Speaker mounting brackets and all hardware provided
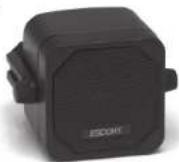
Concealed Alert Indicator
- Bi-color indicator is solid green when unit is powered and flashes red during alert
- 6-foot cable with modular connector
- Bezel provided mounts easily to instrument pod, dashboard, or console

Radio Mute Cable
- 6-foot cable connects to compatible vehicle audio systems and automatically mutes the audio during alerts
Download Data Cable
- Provides access to update data via the Internet
Documentation
• Comprehensive Owner's Manual
- Installation guide
Built-in Diagnostics
- Confirms all components are operational
Important Notes Installation
Read This First
Please read these instructions in their entirety before starting your installation.
For the easiest, trouble-free installation, install the interface first and wire it to a 12-volt switched circuit.
Then, before installing the other components, plug all of them into the interface and power up the unit to confirm proper operation.
Important Installation Warnings
1 It is recommended that you have a professional install your new PASSPORT. Installation of this system requires experience and expertise in automotive electronics. If you are unfamiliar with automotive electronics, car audio specialists and many car dealers can install your PASSPORT for you.
2 Attempting to install this product without expertise in automotive electronics installation can cause personal injury or damage to your vehicle.
3 If your vehicle is damaged during installation its safety systems may be compromised, which could cause personal injury or property damage.
4 Improper installation may void PASSPORT's warranty.
Performance Warning
To get the best performance possible, the mounting location of the radar receiver is critical. Although radar signals will pass through some types of plastic, mounting the radar receiver so that it has a clear "view" of the road will ensure maximum warning.
Since Laser signals will not pass through objects, including most plastics, it is critical that the Laser Shifters are mounted perfectly level and have an unobstructed "view" of the road.
tructions

Installation Tips
While following the steps throughout this manual, please refer to the following recommendations for a professional, trouble-free installation:
1 Determine the best location for the radar receiver. The best location is typically under the bumper, or inside the front grill of the vehicle. For the best radar performance, install the radar receiver horizontally, with a clear "view" of the road.
2 Entry points into the interior may be located behind the plastic liner in the wheel well, fuse box, or unused grommets.
3 There are often many existing entry points at the rear of the vehicle as well:
• Gaskets behind license plates, around illumination lamps, and near trunk lid hinges.
- Tail light wiring gaskets are often easily accessible and large enough to add cables.
4 If there are no suitable openings, it will be necessary to drill a hole through the firewall:
a. Thoroughly investigate all locations before drilling any holes! Ensure no wires, hoses, or other vehicle components will be damaged.
b. On vehicles with automatic transmissions, there is often a location for mounting a clutch pedal. This location is typically an ideal location to drill.
c. Before drilling, cover the surface being drilled with masking tape to prevent damage to the anti-corrosion coating in the event the drill bit slips.
d. Drill a 13/32" or 7/16" hole.
5 When pulling the inline grommet to the entry point, apply rubbing alcohol to a section of the cable to reduce friction and quickly pull the grommet along the length.
6 The cables of units mounted at the rear of the vehicle can generally be routed through the trunk compartment and concealed under trim panels quite easily. If necessary, the cables can also be routed under the vehicle and through an opening in the firewall. Be sure to secure cables away from moving parts and hot surfaces.
7 A quality crimper for modular connectors can be used to cut cables to length and replace the connector. Removing the connectors may also make it easier to enter the vehicle's interior through existing openings.
Note:
- Only an exact replacement for the standard connector can be used. Do not attempt to cut the wires unless the proper connector and crimping tools are available.
- Connectors cannot be reused.
- Do not cut the cable too short! Provide enough cable to route to the interface and add a couple extra feet to ease installation
• Install the new connector such that its locking tab is on the same side as the color coded stripe on the cable. - Do not attempt to cut the cable and splice the wires together.
8 When drilling or cutting interior trim panels (for instance, when installing the Concealed Installation Alert Indicator or the optional Display Bezel), first cover the surface of the panel with masking tape to prevent accidental scratches.

Interface

1 Install the Interface under the dash using supplied zip-ties.
Note:
Do Not Mount In Engine Compartment.
2 Connect black wire (-) to ground, and red-striped wire (+) to a switched 12-volt supply. (If PASSPORT is left in the "on" position, it will automatically power on and off with the ignition). Use blue 3M connector (provided) to tap into an existing circuit if needed.
3 Radar Receiver, Front Laser Shifters, Rear Laser Shifter, Display, Controller, GPS Antenna, Speaker, Concealed Alert Indicator and Radio Mute Cable all plug into the Interface. The connectors are labeled and are color-coded to match a stripe on each cord. Be sure that all components are plugged into the correct connector before applying power to unit.
4 It is recommended that after the interface is installed and connected to power, all other components are plugged in and tested for proper operation before completing the installation.
Front Radar Receiver White Stripe
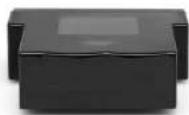
1 Determine the best location for the Radar Receiver. The best location is typically under the bumper or inside the front grille of the vehicle. For the best radar performance install the Radar Receiver with the label facing up and the arrow pointing forward, and provide a clear "view" of the road.
2 Using the supplied U-shaped bracket and the right-angle mounting bracket, mark the mounting location. Drill pilot holes in the vehicle if necessary.
3 Mount the Radar Receiver using the supplied hardware. It is recommended that the Radar Receiver is secured to the brackets first, and then the brackets and Receiver mounted to the vehicle.
4 Plug the Radar Receiver into the harness and route the cable toward the interior of the vehicle. Secure the cable with zip-ties. Although waterproof, it is best to locate the inline connector in a dry area protected from moving parts, road debris, and hot surfaces such as the radiator and radiator hoses.
Front Radar Receiver (Continued)
5 Find a suitable entry point into the vehicle's interior. Refer to the Installation Tips section.
6 Feed the harness into the vehicle's interior and to the Interface. Plug into the connector labeled "Front Receiver."
7 If entering through a drilled hole, pull the grommet on the harness until the end sticks through the hole. From inside the vehicle, pull grommet through until it seals against the outer surface.

Front Laser Shifters Purple Stripe


1 Determine the best locations for the Laser Shifters. For optimum performance, install each Laser Shifter on either side of the license plate, with an unobstructed "view" of the road. If possible, mount each Laser Shifter halfway between the license plate and the corner of the vehicle (see photo below).

Front Laser Shifters (Continued)
2 The Laser Shifters must be mounted horizontally. For best performance, ensure that the surface marked "This Side Up" faces upward and is perfectly level with the surface of the road.
3 The preinstalled mounting clamps can be used to easily secure the Laser Shifter to the slats in a grille or the edge of an opening.
- To tighten clamp jaws, insert a 9/64" hex key into the screws on the front of each clamp and turn clockwise.
- To adjust the angle or remove the clamps, use the screw on the side of each clamp.

Front Shifter Grille Clamp
Note:
- Shifters are shipped in the "receive only mode". In order to turn "Shifting" on, please see the "Preferences" section in the Owner's Manual.
(Continued page 10)
Installation Schematic Overview
Letter References For Components (Color Coded Connections To Interface)
A Interface
B Front Radar Receiver (White Stripe)
C Front Laser Shifters (Purple Stripe)
D Rear Laser Shifter (Green Stripe)
E GPS Antenna (Yellow Shrink)
F Display Module (Orange Shrink)
G Control Module (Blue Shrink)
H Concealed Alert Indicator (Gray Shrink)
Powered Speaker
J Radio Mute
K USB

Front Laser Shifters (Continued)
4 The supplied mounting brackets can be easily customized by removing any tabs that will not be used. Simply bend the tab along the scored line and snap off.
5 If using the supplied brackets, mark their location and drill pilot holes in the vehicle if necessary. Then mount the units with the supplied hardware.
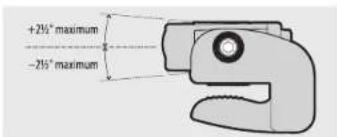
6 Level each Laser Shifter so that it is parallel with the road to within 5°. The upper surface of each unit is flat and can be used as a reference.
7 Route the cables to the entry point into the vehicle's interior, through the opening, and plug into the connectors labeled "Front Shifter." Refer to the Installation Tips section for locating a suitable entry point.
8 If using a drilled hole as an entry point, pull the grommet through the hole until it seals against the outer surface.
9 Secure the cables using zip-ties, being sure to keep them away from moving parts and hot surfaces.
Rear Laser Shifter Green Stripe

1 Remove two license plate screws. The screws on the top or on the bottom of the plate may be used.
2 Mount the Laser Shifter to the plate using the preinstalled brackets.
3 Do not block license plate illumination or cover any required license plate information.
4 Adjust the Laser Shifter such that is level to the road surface by gently bending the mounting brackets.
5 Locate a suitable entry point into the vehicle. Refer to the Installation Tips section for locating a suitable entry point.
6 Once inside the vehicle's interior, route the cable to the Interface and plug into the connector labeled "Rear Shifter."
7 Secure the cable using zip-ties, or conceal it under interior trim panels.
GPS Antenna Yellow Shrink

1 Determine the best location for the GPS antenna. The GPS Antenna requires a clear view of the sky. The magnetic base can be used on most vehicles to mount to the roof of the car or the trunk lid. For vehicles with non-magnetic surfaces such as aluminum or plastic, a window-mounted bracket is included for interior mounting. It can also be mounted to the dashboard or rear deck using double-sided tape.
2 Mount the GPS Antenna, being sure that roof racks or other obstructions do not block its view of the GPS satellites.
3 Locate a suitable entry point into the vehicle. Refer to the Installation Tips section for locating a suitable entry point.
4 Route the cable through the entry point and secure along its path. If mounting near the front or rear window, it is usually possible to tuck the cable under the gasket surrounding the glass.
5 Once inside the vehicle's interior, route the cable to the Interface and plug into the connector labeled "GPS Module."
6 Secure and conceal the cable under interior trim panels.
Interior Mounting Bracket
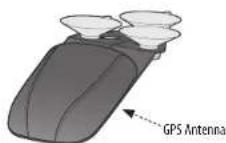
1 Choose a location on the inside of the windshield or rear window that will provide a wide, clear view of the sky. This is usually near the base of the window or just left of the rearview mirror for metalized windshields.
2 Insert the three suction cups into the holes on the mounting bracket.
3 Clean window thoroughly with alcohol.
4 Place the bracket on the window and press the bases of the suction cups firmly.
- Tip: To increase the adhesion of the each cup to the window, squirt a small amount of hairspray or other light adhesive onto the surface of the suction cup that mates with the window and then apply firmly.
5 Place the GPS Antenna onto the mount using the magnetic base and align the edges. The cable should point toward the window.
6 Route the cable to the Interface and plug into the connector labeled "GPS Module."
7 Secure and conceal the cable under trim panels.

Display Module Orange Shrink

1 Determine the best location for the Display Module. If installed by a professional, the customer should be consulted. An optimal location is clearly visible from the driver's position and does not take a driver's eyes off the road for more than a moment.
2 Clean the mounting surface thoroughly.
3 Mount the Display using the pre-applied adhesive.
4 Route the cable to the Interface and plug into the connector labeled "Display Module."
5 Secure and conceal the cable under trim panels.
Display Bezel Mounting

1 The supplied display bezel can be used to mount the Display permanently in the dash or console.
2 Determine the best location for the Display Module. If installed by a professional, the customer should be consulted. A flat, plastic surface with no obstructions behind it is best for this type of mounting.
3 Remove the Display Module's lens by inserting a fingernail at one end to unsnap the lens.
4 Replace the front lens with the display bezel by snapping it in place. Ensure that the cable protrudes from the left end when looking at the display bezel with the text oriented properly. A small key in the plastic helps proper assembly.
5 Cover the mounting surface with masking tape to prevent accidental scratches.
6 Using the supplied hole template, mark the location.
Display Bezel Mounting (Continued)
7 Ensure there are no hidden cables, brackets, or other components behind the location, and that there is adequate clearance behind the panel. The Display will protrude into the dash or console by 1/2" to 3/4".
8 Very carefully cut the hole in the mounting surface.
9 Feed the connector end of the cable through the opening and route to the Interface.
10 Remove the masking tape protecting the trim panel.
11 Clean the mounting surface thoroughly.
12 Apply the double-sided adhesive tape to the display bezel.
13 Mount the Display Module using the bezel adhesive.
14 Plug the connector into the Interface connector labeled "Display Module."
15 Secure and conceal the cable under trim panels.

Control Module Blue Shrink
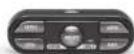
1 Determine the best location for the Control Module. If installed by a professional, the customer should be consulted. An optimal location is easily visible and accessible from the driver's position, and does not interfere with normal driving. Avoid locations that require reaching through or around the steering wheel.
2 Clean the mounting surface thoroughly.
3 Mount the Control using the pre-applied adhesive.
4 Route the cable to the Interface and plug into the connector labeled "Control Module."
5 Secure and conceal the cable under trim panels.

Concealed Alert Indicator Gray Shrink

1 Determine the best location for the Alert Indicator. If installed by a professional, the customer should be consulted. An optimal location is clearly visible from the driver's position and does not take a driver's eyes off the road for more than a moment.
2 Ensure there are no hidden cables, brackets, or other components behind the mounting location, and that there is adequate clearance behind the panel.
3 Cover the mounting surface with masking tape to prevent accidental scratches.
4 Carefully mark the location and drill a 1/4" hole through the mounting panel.
5 Remove the masking tape protecting the trim panel.
6 From the front side, snap one of the panel bezels provided into the hole.
7 Snap the Alert Indicator into the panel bezel from the back side.
8 Route the cable to the Interface and plug into the connector labeled "Concealed Alert LED."
9 Secure and conceal the cable under trim panels.
Powered Speaker

1 Determine the best location for the Speaker. It is loud enough to be mounted behind the dash or console, under the dash, or under a seat.
2 Using either the supplied hook & loop fastener or the bracket and hardware, mount the Speaker. If using the hook & loop fastener, first clean the mounting surface thoroughly.
3 Route the cables to the interface and plug into the jacks on the top of the unit marked "Speaker Power" and "Speaker Audio."
4 Secure and conceal the cable under trim panels.
J Radio Mute Cable
1 The radio mute cable (included) allows the detector to be connected to compatible audio systems with a "Radio Mute" wire or connector. Once connected, the audio level of the stereo is reduced automatically during an alert.
2 Please refer to your audio system's manual for proper connection to your audio system.
Operation Test
After all components are installed correctly:
1 Turn PASSPORT on by turning on the vehicle's ignition and, if necessary, press the power button on the Control Module.
2 PASSPORT will cycle through a startup sequence.
3 If any error messages come up, see the Owner's Manual troubleshooting section for suggested solutions.
Note:
- Shifters are shipped in the "receive only mode". In order to turn "Shifting" on, please see the "Preferences" section in the Owner's Manual.
Download Data Cable
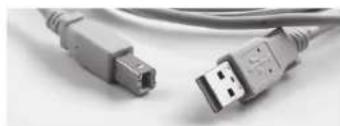
This USB cable allows easy access to the PASSPORT 9500ci's database. Once connected, the 9500ci can download data directly from our website, and back up your data to your computer.
The download data includes "safety camera" locations, including red-light and fixed position speed cameras. Other types of threats may be added in the future. Check our website at EscortRadar.com for the latest information.
Download Data Cable (Continued)
We recommend you install this cable at the time of installation to allow easy access. To do so, simply follow these steps:
1 Determine mounting location for USB jack inside vehicle. Optimum location is hidden but easily accessible.
2 Thoroughly clean surface to which USB jack will be adhered, as well as surface of USB jack.
3 Using double-sided foam tape, (supplied), mount jack as desired.
4 Route cable to interface and plug into jack marked "Test".
5 Conceal cable under vehicle trim.
Once installed, a standard printer cable is needed, (not supplied) to connect your computer to this port. Log on to our website for complete download instructions.
If you have any questions, please call or visit our website. One of trained radar specialists will be happy to assist you.
800-543-1608 / EscortRadar.com
9500ci
PASSPORT
- PASSPORT 9500CI COMES COMPLETE
- FRONT RADAR RECEIVER
- FRONT LASER SHIFTERS
- REAR LASER SHIFTER
- GPS ANTENNA
- DISPLAY MODULE
- IN-DASH DISPLAY BEZEL
- CONTROL MODULE
- INTERFACE
- POWERED SPEAKER
- CONCEALED ALERT INDICATOR
- RADIO MUTE CABLE
- DOWNLOAD DATA CABLE
- DOCUMENTATION
- BUILT-IN DIAGNOSTICS
- IMPORTANT NOTES INSTALLATION
- READ THIS FIRST
- IMPORTANT INSTALLATION WARNINGS
- PERFORMANCE WARNING
- TRUCTIONS
- INSTALLATION TIPS
- NOTE
- DO NOT MOUNT IN ENGINE COMPARTMENT
- FRONT RADAR RECEIVER WHITE STRIPE
- FRONT RADAR RECEIVER (CONTINUED)
- FRONT LASER SHIFTERS PURPLE STRIPE
- FRONT LASER SHIFTERS (CONTINUED)
- INSTALLATION SCHEMATIC OVERVIEW
- REAR LASER SHIFTER GREEN STRIPE
- GPS ANTENNA YELLOW SHRINK
- INTERIOR MOUNTING BRACKET
- DISPLAY MODULE ORANGE SHRINK
- DISPLAY BEZEL MOUNTING
- DISPLAY BEZEL MOUNTING (CONTINUED)
- CONTROL MODULE BLUE SHRINK
- CONCEALED ALERT INDICATOR GRAY SHRINK
- J RADIO MUTE CABLE
- OPERATION TEST
- DOWNLOAD DATA CABLE (CONTINUED)
Brand : Escort
Model : Passport 9500ci
Category : Detection radar