Double Stack TT-AF500D - Deep fryer TurboTronic - Free user manual and instructions
Find the device manual for free Double Stack TT-AF500D TurboTronic in PDF.


| Brand | TurboTronic |
| Model | Double Stack TT-AF500D |
| Product Type | Digital Double Stack Air Fryer |
| Power Consumption | 2460W |
| Voltage / Frequency | 220-240V, 50-60Hz |
| Total Capacity | 11L (5.5L per drawer) |
| Product Dimensions (WxDxH) | 465 x 260 x 433 mm |
| Gift Box Dimensions (WxDxH) | 510 x 295 x 485 mm |
| Master Carton Dimensions (WxDxH) | 525 x 310 x 505 mm |
| Net Weight | 8.42 kg |
| Gross Weight | 11.09 kg |
| Number of Cooking Zones | 2 (independent) |
| Preset Programs | Fries, Wings, Steak, Veg, Pizza, Bake |
| Temperature Range | 60 - 200°C (adjustable) |
| Timer Range | 1 - 60 minutes |
| Synchronization Functions | SYNC (same end time) and DUAL (copy settings) |
| Auto Reminder | Shake reminder at 1/4 remaining time (except Veg, Pizza, Bake) |
| Control Type | Digital touch panel with buttons |
| Material | Plastic exterior, non-stick coated mesh baskets and racks |
| Dishwasher Safe Parts | Baskets and racks |
| Safety Features | Auto shut-off, overheat protection, cool-touch handles |
| Warranty | Limited warranty (through third-party seller) |
| Included Accessories | 2 drawers, 2 racks, instruction manual |
Frequently Asked Questions - Double Stack TT-AF500D TurboTronic
User questions about Double Stack TT-AF500D TurboTronic
0 question about this device. Answer the ones you know or ask your own.
Ask a new question about this device
Download the instructions for your Deep fryer in PDF format for free! Find your manual Double Stack TT-AF500D - TurboTronic and take your electronic device back in hand. On this page are published all the documents necessary for the use of your device. Double Stack TT-AF500D by TurboTronic.
USER MANUAL Double Stack TT-AF500D TurboTronic
TurboTronic® Kitchen Electronics
airchef Pro
PROFESSIONAL DOUBLE STACK AIRFRYER
INSTRUCTION MANUAL
natural_image
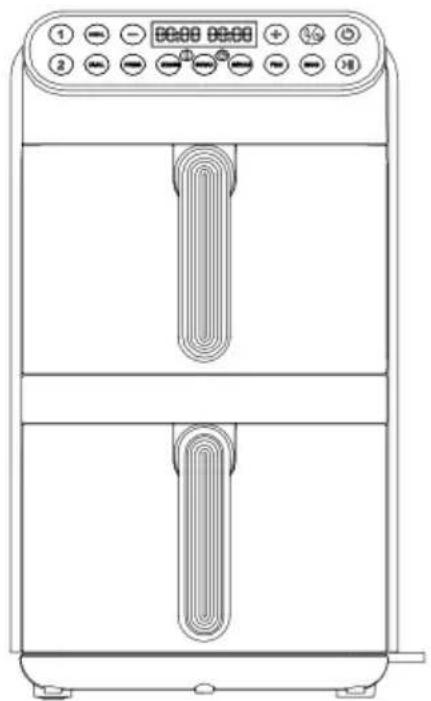
Line drawing of a dual-tier air fryer with control panel and digital display (no text or symbols)DIGITAL DOUBLE STACK AIR FRYER TT-AF500D

Thank you for buying the AirChef Pro- Digital Double Stack air fryer by TurboTronic®. 2 independently controlled baskets so you can cook 2 foods at once. stacked design lets you cook double the food in nearly half the space and still fits under standard cabinets. its slimmer than your traditional 2-basket air fryers.
| ITEM NUNBER: | TT-AF500D | BRAND | TURBOTRONIC |
| DESCRIPTION: | Digital Double Stack air fryer | POWER & VOLTAGE | 220-240V 50-60Hz 2460W |
| PRODUCT SIZE: | 465*260*433mm | QTY.: | 1 PCS/CTN |
| TOTAL CAPACITY: | 11L total capacity | N.W: | 8.42 kg |
| BASKETS CAPACITY: | 5.5L+5.5L | ||
| GB SIZE | 510*295*485mm | G.W: | 11.09 kg |
| MC SIZE: | 525*310*505mm | POWER CORD: | Out 0.8m VDE |

IMPORTANT NOTICES! PLEASE KEEP FOR REFERENCE!
ITEMS SUPPLIED
1x double chamber hot air frying machine
2x drawer
2x rack
1x operating instructions
Check the items supplied for complete-ness and the components for transport damage. If you find any damage, do not use the device but contact our customer service department.
Remove any possible films, stickers or transport protection from the device. Never remove the rating plate and any possible warnings!
AT A GLANCE
- Control panel
- Rack
- Drawer
- Handle
-
- 8 Ventilation openings
- Chamber with heating element (cooking zone) Control Panel
- POWER button: Switch device on / off
- TEMP/TIME button: Time/temperature choosing button
-
- /- button: Increase + temperature /time, reduce - temperature /time
-
SYNC button: Synchronize the end of the cooking time for both cooking zones
-
Display of the temperature and cooking time for cooking zone 1
- Display of the temperature and cooking time for cooking zone 2
- DUAL button: Apply all settings for cooking zone 1 to cooking zone 2
- START / STOP button: Start / pause cooking process
- Button 2: Call up setting mode for cooking zone 2
- Programmers: FRIES, WINGS, STEAK, VEG, PIZZA, BAKE
- Button 1: Call up setting mode for cooking zone 1
- Temperature/Time Indicator Light
SYMBOLS

Danger symbols:
These symbols indicate possible dangers.
Read the associated safety notices carefully and follow them.


Supplementary information

Read the operating instructions before use!
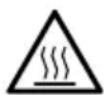
Caution: hot surfaces!

Suitable for use with food.

Alternating current
SIGNAL WORDS
Signal words indicate hazards of the associated notices are not followed.
DANGER – high risk, results in serious injury or death
WARNING – medium risk, may result in serious injury or death
NOTICE – may result in risk of damage to material
Information About the Operating Instructions
Before using the device for the first time, please read through these operating instructions carefully and keep them for future reference and other users. They form an integral part of the device. The manufacturer and importer do not accept any liability if the information in these operating instructions is not complied with.
INTENDED USE
- The device is intended to be used for grilling, baking, defrosting, warming up food.
- The device operates exclusively with hot air. Do not pour any oil or fat into the device, as you would do with a conventional fryer!
- The device is not suitable for preparing liquid dishes such as soups, sauces or stews!
- The device is for personal use only and is not intended for commercial or domestic-like applications, e.g., in hotels, bed and breakfasts, offices, staff kitchens or similar places.
- Use the device only for the specified purpose and as described in the operating instructions. Any other use is deemed to be improper.
- The warranty does not cover faults caused by incorrect handling, damage or attempted repairs. The same applies to normal wear and tear.

SAFETY NOTICES WARNING:
Note all safety notices, instructions, illustrations and technical data provided with this device. Failure to follow the safety notices and instructions may result in electric shock, fire and / or injuries.
- This device may be used by children aged 8 and over and by people with reduced physical, sensory or mental abilities or a lack of experience and/or knowledge if they are supervised or have received instruction on how to use the device safely and have understood the dangers resulting from failure to comply with the relevant safety precautions.
○ Children must not play with the device.
○ Cleaning and user maintenance must not be carried out by children, unless they are older than 8 years of age and are supervised.
○ Children younger than 8 years of age and animals must be kept away from the device and the connecting cable.

CAUTION: HOT SURFACES!
The device and accessories will become very hot during use. Do not come into contact with heated parts while or after using the device! Only ever touch the handles and control panel while the device is in operation or immediately after it has been switched off. Wait until the device has cooled down fully before it is transported, cleaned or stored away.
Use oven gloves when handling the hot accessories.
- Never immerse the device and the connecting cable in water or other liquids and ensure that they cannot fall into water or become wet. There is a danger of electric shock!
Do not pour any liquids (e.g. oil or water) directly into the device or the drawers or place a liquid-filled vessel into the device. It works exclusively with hot air.
- The device must always be disconnected from the mains power when it is left unattended and before transporting or cleaning the device.
Do not make any modifications to the device. Also do not replace the connecting cable yourself. If the device, the connecting cable or the accessories of the device are damaged, they must be repaired or replaced by the manufacturer, customer service department or a specialist workshop in order to avoid any hazards.
- The device is not designed to be operated with an external timer or a separate remote control system.
- Follow the instructions in the "Cleaning and Storage" chapter!

DANGER – DANGER OF ELECTRIC SHOCK
- Use and store the device only in closed rooms.
- Do not use and store the device in rooms with high humidity.
○ If the device falls into water while it is connected to the mains
power, pull the mains plug out of the plug socket immediately. Only after this should you retrieve the device from the water. Never attempt to pull it out of the water while it is connected to the mains power! Before using it again, have it checked by the manufacturer, customer service department or an authorised distributor in order to avoid possible hazards.
- Never touch the device and the con- necting cable with wet hands when the device is connected to the mains power.
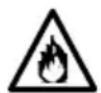
WARNING – DANGER OF FIRE
- Do not operate the device in the vicinity of combustible substances. Do not place any combustible materials (e.g. cardboard, paper, plastic) on or in the device.
- Do not cover the device during operation and keep the ventilation openings clear in order to prevent it from catching fire.
- In the event of a fire: Do not extinguish with water! Smother the flames with a fireproof blanket or a suitable fire extinguisher.

WARNING – DANGER OF INJURY
- Keep the packaging material away from children and animals. There is a danger of suffocation.
○ Make sure that the connecting cable is always kept out of the reach of young children and animals. There is a danger of strangulation.
- Hot steam can escape from the device during operation and when the drawers are pulled out. You should therefore keep your head and hands out
o of the danger zone. There is a danger of scalding from heat, hot steam or condensation. - The device must not be moved during operation. There is a danger of burns.
-
NOTICE – Risk of Damage to Material and Property
○ Make sure that the steam which emerges does not come into direct contact with electrical devices and equipment containing electrical com- ponents.
○ If a fault occurs during operation, pull out the mains plug. Otherwise always switch off the device first before the mains plug is pulled out.
○ Disconnect the device from the mains power before a thunderstorm or when there is a power cut. -
Always pull the mains plug and never the mains cable when disconnecting the device from the mains power.
- Do not pull or carry the device by the connecting cable.
- Protect the device from other heat sources, naked flames, persistent moisture, direct sunlight or impacts.
- Keep the device in a dry place at temperatures of between 0 and 40°C.
- Never place objects on the device or the connecting cable.
- Use only original accessories from the manufacturer in order to guarantee that there is no interference that may prevent the device from working and to avoid possible damage.
- Do not use metal kitchen utensils or other sharp-edged objects to turn and remove the food. They could damage the coating of the drawers and racks.
BEFORE INITIAL USE
- Wipe down the outside of the device with a clean, damp cloth. Clean the drawers and racks with detergent and warm water or in the dishwasher.
- The device should be used for the first time without any food in it as it may produce some smoke or odours due to coating residues. To do this, follow the instructions in the “Set-Up and Connection” and “Use” chap- ters. Allow the device to heat up on the highest temperature setting for approx. 10 minutes without any food in it.
- Then clean it again.
FUNCTIONS
The device has two cooking zones. A different programme can be selected for each cooking zone and the temperature and cooking time can be adjusted as you wish. There are 6 programmes.
Moreover, the cooking zones can be syn- chronised so that either all temperature and cooking time settings are identical for both cooking zones (DUAL function), or just the end of the cooking time is synchronised (SYNC function) so that the different foods can be served at the same time.
But the cooking zones can also be operated independently without synchronisation. In addition, it is possible to use just one cooking zone for smaller quantities of food.
PROGRAMMES- (Without Silicone Basket cooking)
To select a programme, press the respective button.
The device has the following programmes:
FRIES
| Temperature: 200°C |
| (Range: 120 – 200°C) |
| Cooking time: 20 min |
| (Range: 1 – 60 min) |
WINGS
| Temperature: 200°C(Range: 120 – 200°C)Cooking time: 20min(Range: 1 – 60 min) |
STEAK
| Temperature: 200°C(Range: 120 – 200°C)Cooking time: 13min(Range:1 – 60 min) |
VEG
| Temperature: 190°C(Range: 60 – 200°C)Cooking time: 10min(Range:1 – 60 min) |
PIZZA
| Temperature: 180°C(Range: 120 – 200°C)Cooking time: 20min(Range: 1 – 60 min) |
BAKE
| Temperature: 170°C(Range: 120 – 200°C)Cooking time: 15min(Range: 1 – 60 min) |
PROGRAMMES- (Use Silicone Basket cooking)
FRIES
| Temperature: 200°C(Range: 120 – 200°C)Cooking time: 25 min(Range: 1 – 60 min) |
WINGS
| Temperature: 200°C(Range: 120 – 200°C)Cooking time: 25min(Range: 1 – 60 min) |
STEAK
| Temperature: 200°C(Range: 120 – 200°C)Cooking time: 18min(Range:1 – 60 min) |
VEG
| Temperature: 190°C(Range: 60 – 200°C)Cooking time: 15min(Range:1 – 60 min) |
PIZZA
| Temperature: 180°C(Range:120 – 200°C)Cooking time: 25min(Range:1 – 60 min) |
BAKE
| Temperature: 170°C(Range:120 – 200°C)Cooking time: 20min(Range:1 – 60 min) |
Adjusting the Temperature and Cooking Time
After a programme has been chosen, the temperature can be adjusted with the buttons + and -, and the cooking time can be adjusted using the buttons + and-.
(You should press the time/temperature button to choose the time or temperature mode first.)
To scroll through the values quickly, hold down the respective button.
Synchronising Cooking Zones
Two functions are used to synchronise the cooking zones:
SYNC function – for two different foods that have different temperature and cooking time settings, but should be ready at the same time.
- DUAL function – for larger quantities of a food or for different foods with the same temperature and cooking time setting.
It is not possible to synchronise the cooking zones subsequently while the device is operating.
Functioning of the auto reminder function
This model of air fryer has "auto reminder" function. When the program runs for 1/4 of the remaining set time, the selected button 1 or 2 flash, and the display screen will display "SHA" and flash. At the same time, the device will sound twice (5 beeps each time) to alert you that you need to shake or stir the food. This is time to remove the drawer from the fryer. Once removed, the process will enter into Pause mode and the front panel will turn off. As soon as we stir the food and place the air fryer drawer back into its position and the air fryer activates automatically in order to complete the cooking process where it had left off. And in case if you don't want to stir the food, you can not pull out the drawer, the fryer will work until the completion of the cooking procedure.
NOTE: The following cooking programs "veg, pizza, bake" do not have an automatic reminder function.
Stand-By Mode
When the POWER button is pressed, the control panel is activated. If the device is not operating and no button
is pressed for 10 minutes, the device switches to stand-by mode.
TIPS
○ Generally no oil or only a small amount of oil (2 to 3 teaspoons) is required for preparing food.
- Very light pieces of food could be swirled around by the circulating air. If necessary, we recommend
sticking them together with toothpicks or a similar object.
- The cooking time is dependent on the size and quantity of the food and on the temperature. However, in general the cooking time is
shorter than in a conventional oven. Start with a shorter cooking time and gradually increase it if required.
- Mix the food around from time to time or turn it with plastic or
wooden tongs to obtain an even cooking result.
○ Check the condition of the food in be- tween times and, if it is cooked, switch off the device, even if the programme has not yet finished.
SET-UP AND CONNECTION
Please Note!
- Check the device and the connecting cable for damage each time before putting it into operation. Use the device only if it is undamaged and in working order.
- Never place the device on a soft surface. The ventilation openings on the bottom of the device must not be covered.
- Ensure there is sufficient clear space on all sides. Do not place the device below kitchen wall units or similar cupboards. The rising steam could cause damage to them!
○ Only connect the device to a plug socket that is properly installed and matches the technical data of the device. The plug socket must also be readily accessible after
connection so that the connection to the mains can quickly be isolated.
- Do not use any extension cables.
-
Do not connect the device along with other consumers (with a high wattage) to a multiple socket in order to pre-vent overloading and a possible short circuit (fire).
○ Make sure that the connecting cable does not present a trip hazard. It may not hang down from the surface on which the device is placed in order to prevent the device from being pulled down.
○ Make sure that the connecting cable is not squashed, bent or laid over sharp edges and does not come into contact with hot surfaces (e.g. of the device). -
Place the device on the kitchen unit or another dry, clean, flat and heat-re-sistant work surface. Ensure there is sufficient clear space on all sides (at least 20 cm to the sides and 50 cm above).
-
Fully unwind the connecting cable and plug the mains plug into a plug socket.
USE
In general, you can use this device to prepare all dishes that can also be prepared in a conventional fan oven.
For good results, read through the "Tips" chapter.
Please Note!
- Before using the device, make sure that the device and the outsides of the drawers are clean and dry.
- Do not use the device for longer than 4 hours without a break.
- Do not leave the device switched on when it is empty (apart from “burning off” prior to first use).
- Do not place food that is still wrapped in cling film or plastic bags into the device.
• Make sure that the food does not come into contact with the heating elements. - Do not overfill the drawers so that the hot air can circulate optimally inside the cooking chamber. Fill it
- no more than 1/3 full.
- Make sure that foodstuffs containing oil and fats are not overheated. They could ignite.
• Always place the hot drawers down on a heat-resistant surface after use.

Preheating of the device is not necessary.
- Prepare the food for cooking.
- To use the circulating air, insert the racks into the drawers. The racks are placed on their silicone feet.
- Place the food into the drawers, separated by type. If you are cooking a smaller quantity of just one type of food, just one drawer can be used. It is also possible to use a small baking tin (not supplied with the device).

If the food is going to be dehydrated, we recommend first spreading one layer directly on the bottom of the drawer, then inserting the rack and placing a second layer on the rack.
- Insert the drawer(s) into the chamber(s).
- Press the POWER button to activate the control panel.
Setting mode for cooking zone 1 is called up. (To switch to cooking zone 2, press the button)
- Select a programme and if necessary adjust the temperature and cooking time using the buttons + and -.
- If only one drawer is being used, con- tinue with step 9.
If both drawers have been filled, set the temperature and cooking time for cooking zone
2 in one of the following ways:
a. To copy the settings from cooking zone 1 for cooking zone 2, press the DUAL button.
b. Otherwise use the button 2 to call up the setting mode for cooking zone 2. Then choose a programme and make adjustments if necessary.
8. If different settings have been made for both cooking zones, but the cooking times should end simultaneously, press the SYNC button. Otherwise skip this step.
9. Use the START/STOP button to start the cooking process.

If the SYNC function is activated, the cooking zone with the longer cooking time starts first. The other cooking zone is only activated, accompanied by a beep, when the remaining cooking times for both cooking zones are the same length. Until this point, “hold” appears on the associated display.
The remaining cooking time can be read off the display. Once the cooking time has elapsed, a beep is heard and "End" is shown.
- Pull out the drawer(s) and place down on a heat-resistant surface. Do not stand on the device!
- Switch off the device using the POWER button and pull the mains plug out of the plug socket.
- Remove the food from the drawer(s).
- Allow the drawer and the rack to cool down. Then clean them (see the “Cleaning and Storage” chapter).
Briefly Pausing the Cooking Process
If the cooking process is to be paused to mix around or add further ingredients, for example, simply pull out the drawer. The countdown of the cooking time (for both cooking zones if they are synchronised) is stopped. It resumes after the drawer is inserted.
Manually Stopping a Cooking Zone
To stop the cooking process in one cooking zone, call up the respective setting mode using the buttons 1 or 2 and then press the START / STOP button. The other cooking zone continues the cooking process.
PREPARATION QUANTITY
As a guide, the following table shows you an overview for various foods:
| FOOD | SPECIFIED QUANTITY PER PORTION |
| Chips | 125 g |
| Potato wedges | 150 – 200 g |
| Vegetables | 200 g / 1 handful |
| Fish | 250 g or 6 pieces |
| Mini spring rolls | 160 g or 6 pieces |
| Nuggets | 120 g or 6 pieces |
| Chicken thighs | 370 g / 1 – 2 pieces |
| Chicken wings | 480 g or 6 pieces |
CLEANING AND STORAGE
Please Note!
- Do not use any sharp or abrasive cleaning agents or cleaning pads to clean the device. These may damage the surfaces.
- Clean the racks in the drawers with detergent and warm water or in the dishwasher. To maintain the quality of the parts for as long as possible, they should preferably be rinsed by hand.
In the case of stubborn dirt, soak in warm water and detergent beforehand.
- Wipe down the outside of the device and the chambers and heating elements with a clean, damp cloth if necessary.
Do not clean in the dishwasher or immerse in water!
-
Allow all parts to dry completely or dry them off.
-
Store the device away in a clean, dry location that is out of the reach of children and animals when not in use for a prolonged period.
TROUBLESHOOTING
If the device does not work properly, check whether you are able to rectify the problem yourself. If the problem cannot be solved with the steps below, contact the customer service department.

Do not attempt to repair an electrical device yourself!
THE DEVICE DOES NOT WORK.
The mains plug is not inserted in the plug socket correctly.
- Correct the fit of the mains plug. The plug socket is defective.
- Try another plug socket.
- There is no mains voltage.
- Check the fuse of the mains connection.
- The drawers are not inserted correctly.
- Slide the drawer fully into the chamber.
- The fuse in the fuse box is triggered. Too many devices connected to the same circuit.
- Reduce the number of devices in the circuit.
- The food has not been cooked evenly.
- The drawer is too full.
- Reduce the amount of food. Fill the drawer no more than 1/3 full.
- The items of food are piled on top of one another.
- Spread the food and mix it around from time to time.
- Different foods with different cooking times or temperatures have been prepared in one drawer.
Separate the different foods and spread them across both drawers. Set the correct temperature and cooking time for them. With the SYNC function they will be ready at the same time. - The set cooking time was too short or the temperature too low.
○ Increase the cooking time or temper- ature. - Chips made from fresh potatoes are not crispy.
- The potatoes contain too much water.
- Cut the potatoes into narrower pieces. Dab the potato pieces dry
with some kitchen towel and then trickle a little cooking oil over them.
- Spread the pieces of potato on the rack.
During use, an unpleasant smell is detected. /Smoke emerges from the device. - The device is dirty.
- Follow the instructions in the "Cleaning and Storage" chapter.
- The device is being used for the first time.
○ A smell often develops when new de- vices are first used. The smell should disappear once the device has been used several times. - Too much oil or fat
- Remove excess oil or fat.
DISPOSAL OF OLD ELECTRICAL APPLIANCES:
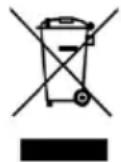
The European directive 2002/96/EC on Waste Electrical and Electronic Equipment (WEEE) mandates that old household electrical appliances should not be discarded with regular municipal waste. They must be collected separately to enhance material recovery and recycling, thereby minimizing
their impact on human health and the environment.
The crossed out "wheeled bin" symbol on the product serves as a reminder that when disposing of the appliance, it must be handled separately.
Consumers are advised to contact their local authority or retailer for guidance on the proper disposal of their old appliances.
LIMITED WARRANTY:
Limited Warranty applies to purchases made from TurboTronic ^® 's authorized retailers of TurboTronic ^® Warranty coverage applies to the original owner and to the original product only and is not transferable.
TurboTronic ^® warrants that the unit shall be free from defects in material and in workmanship. The Limited Warranty applies only when the unit is used under normal household conditions and maintained according to the requirements stated in the Instruction Manual, subject to the following conditions and exclusions:
ANY WARRANTY OR AFTER PURCHASE SERVICE, SHALL BE WITH THE THIRD-PARTY COMPANY. FROM WHICH YOU PURCHASED THE PRODUCT.
TURBOTRONIC® PROVIDES THE WARRANTY ONLY TO OUR THIRD-PARTY SUPPLIERS. SINCE THIS PRODUCT WAS NOT PURCHASED DIRECTLY FROM TURBOTRONIC® BUT VIA ONE OF OUR THIRD-PARTY SUPPLIERS, ANY ISSUE AFTER THE PURCHASE, CUSTOMER SERVICE OR RECEIVING THE WARRANTY, SHOULD BE ONLY / DIRECTLY HANDLED VIA THE THIRD-PARTY SUPPLIER FROM WHICH YOU PURCHASED THE PRODUCT.
What is covered by this warranty?
-
The original unit and/or non-wearing parts deemed defective will be repaired or replaced, at TurboTronic ^® sole discretion,
-
TurboTronic ^® reserves the right to replace the unit with one of equal or greater value.
What is not covered by this warranty?
-
Normal wear and tear of wearing parts (such as blending vessels, lids, cups, blades, blender bases, removable pots, racks, pans, etc.), which require regular maintenance and/or replacement to ensure the proper functioning of your unit, are not covered by this warranty.
-
Any unit that has been tampered with or used for commercial purposes.
-
Damage caused by misuse, abuse, negligent handling, failure to perform required maintenance (e.g., failure to keep the well of the motor base clear of food spills and other debris), or damage due to mishandling in transit.
-
Consequential and incidental damages.
-
Defects caused by repair persons not authorized by TurboTronic ^® . These defects include damage caused in the process of shipping, alteration, or repair of the TurboTronic ^® product (or any of its parts) when the repair is performed by a repair person not authorized by TurboTronic ^® .
-
Products purchased, used, or operated outside Europe.
Illustrations may differ from actual product.
We constantly strive to improve our products, so the specifications contained herein are subject to change without notice.
TurboTronic ^® , SportTronic ^® and Z-Line ^®
are registered trademarks of Z-GLOBAL B.V.B.A®.
PRINTED IN PRC
- TurboTronic® Kitchen Electronics
- airchef Pro
- INSTRUCTION MANUAL
- IMPORTANT NOTICES! PLEASE KEEP FOR REFERENCE!
- ITEMS SUPPLIED
- AT A GLANCE
- SYMBOLS
- Danger symbols:
- SIGNAL WORDS
- Information About the Operating Instructions
- INTENDED USE
- SAFETY NOTICES WARNING:
- CAUTION: HOT SURFACES!
- DANGER – DANGER OF ELECTRIC SHOCK
- WARNING – DANGER OF FIRE
- WARNING – DANGER OF INJURY
- BEFORE INITIAL USE
- FUNCTIONS
- PROGRAMMES- (Without Silicone Basket cooking)
- PROGRAMMES- (Use Silicone Basket cooking)
- Adjusting the Temperature and Cooking Time
- Functioning of the auto reminder function
- Stand-By Mode
- TIPS
- SET-UP AND CONNECTION
- Please Note!
- USE
- Preheating of the device is not necessary.
- If the food is going to be dehydrated, we recommend first spreading one layer directly on the bottom of the drawer, then inserting the rack and placing a second layer on the rack.
- Briefly Pausing the Cooking Process
- PREPARATION QUANTITY
- CLEANING AND STORAGE
- TROUBLESHOOTING
- THE DEVICE DOES NOT WORK.
- DISPOSAL OF OLD ELECTRICAL APPLIANCES:
- LIMITED WARRANTY:
- What is covered by this warranty?
- What is not covered by this warranty?
Brand : TurboTronic
Model : Double Stack TT-AF500D
Category : Deep fryer