
Revio KD-25 - Uncategorized KONICA MINOLTA - Free user manual and instructions
Find the device manual for free Revio KD-25 KONICA MINOLTA in PDF.


User questions about Revio KD-25 KONICA MINOLTA
0 question about this device. Answer the ones you know or ask your own.
Ask a new question about this device
Download the instructions for your Uncategorized in PDF format for free! Find your manual Revio KD-25 - KONICA MINOLTA and take your electronic device back in hand. On this page are published all the documents necessary for the use of your device. Revio KD-25 by KONICA MINOLTA.
USER MANUAL Revio KD-25 KONICA MINOLTA
Thank you for your purchase. For the correct usage of this product, please read this User's Manual and warranty card carefully and keep them in a safe place for future reference. Before accepting the warranty card, please make sure that the date of purchase and the dealer's details have been completed.
User Manual
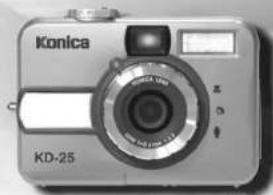
natural_image
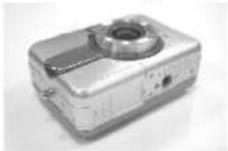
Exterior view of a Konica digital camera (no visible text or symbols on body)
Table Of Contents
GettingStarted----4
Important Safety Precautions 5-9
Introduction 10-14
■ Accessories Included ----10
■ External View 11
■ Mode Dial (Working Modes) 12
- Focus Range 12
- TET LCD Monitor Icon Definition 13
■ Icon Index 14
Preparation For Taking Pictures 15-18
■ How To Switch On Or Off The Camera 15
■ Loading The Batteries 15
eUsing In AG Adapter (Optional) 17
■ Using An AC Adapter (Optional)
■ Attachling The wrist Strap 17
■ Inserting An SD Card 18
■Removing An SD Card 18
Note 19
Setting Up Functions Before Taking Pictures 21-29
■ Under Shooting Mode(☐) 21
Setting Up Focus Range 21
Turning On Or Off The TFT LCD Monitor 2
Setting Up Flash Modes 21
Setting Up Sell timer 22
Setting Up Digital Zoom 22
Setting Up Image Size (Resolution) 22
Setting Up Image Size (Resolution) 22
Sitting Up Image Quality 23
Setting Up White Balance 24
Setting Up Exposure 24
■ Under Playback Mode (▶) 24
Formatting An SD Card 25
Formatting The Built-In Flash Memory 25
Setting Up Slide Show 25
Setting An Image At Protect Status Or Cancel The Protection ---- 2
Printing Out An Image With A Printer Without Going Through PC -26
■ Under Movie Clip Mode(■) ----2
Setting Up Recording Time 27
■ Under Setup Model [SE] 27
Setting Up Beep Sound 28
2

Table Of Contents
Setting Up Auto Power Off 28
Setting Up Date Stamp 28
Setting Up Date Type 28
Date Setup 29
Setting Up Quick View 29
Setting Up Language 29
Resetting to Default Setting
Taking Pictures 30
Playback / Erasing 31-32
Viewing A Part Of An Image 31
Showing The Information Of A Still Image 31
Playing A Recorded Movie Clip 32
Going Into Thumbnail Images (Small Images) ----32
Delicting Image(s) 32
Installing Camera Driver 33-41
Under Microsoft Windows 98 / 98SE 33
Under Microsoft Windows 2000 37
Under Microsoft Windows ME / XP 40
Under Mac 9.X or later 41
Installing Ulead Photo Explorer 42-51
Under Windows Operating System (Windows 98/98SE/2000/ME/XP) ----42
Under Macintosh Operating System (Mac 9.X or later) ---- 41
About Ulead Photo Explorer 52-60
Downloading The Image(s) Onto Your PC 61 - 64
Under Windows Operating System (Windows 98/98SE/2000/ME/XP) ----61
- Downloading Image(s) From Removable Disk 61
Downloading Image(s) Through Ulead Photo Explorer 62
Under Macintosh Operating System (Mac 9.X or later) 63
Downloading Image(s) From Removable Disk 6.3
Downloading Image(s) Through Ulead Photo Explorer 64
Error Message Table 65
Specifications 66-68
Warranty and After-sales Service 69 - 71
3

Getting Started
Please be sure to read this manual before use.
•Test shooting
Be sure to take some test shots before taking important pictures (such as business or weddings) to make sure that the camera is working properly.
•Results are not guaranteed
In the unlikely event that a problem arises in shooting or reproducing pictures due to the camera or memory card used, please understand that no compensation can be made.
•Be aware of Copyright
Any pictures that you take of existing images may be used for personal use only. Copyright law prohibits the use of pictures without the permission of the rightful owner. Also, please note that some occasions of the performing arts, demonstrations and exhibitions may restrict photography even for the purpose of personal enjoyment.
Caution for Extended Camera Use:
The camera body may become hot when used for a long period of time, but it doesn't mean that the camera is broken. However, if the camera keeps touching the skin for a long time, this may cause a cryogenic burn. Please be careful with it.
About trademarks
- Windows 98, Windows 98SE, Windows XP, Windows 2000 Professional and Windows Me are trademarks or registered trademarks of Microsoft Corporation in the U.S. and other countries.
•Apple, Macintosh, Mac OS, QuickTime and Power PC are trademarks or registered trademarks of Apple Computer in the U.S. and other countries.
•Other company names and product names are trademarks or registered trademarks of their respective owners.
* The illustrations in this guide are for the purpose of explanation and may differ from the actual design of your camera.
4

Important Safety Precautions
This product has been designed with safety in mind; however, please read the following display marks, warnings and cautions for its correct usage.
The following warning and caution symbols are to prevent damage to the user, other persons and property.
Definitions of the symbols
The following categories explain the degree of danger or damage that may occur if the displayed content is not followed or the product is misused.

Warning This symbol indicates that misuse may result in serious injury and even death.

Caution This symbol indicates that misuse may result in bodily injury or physical damage.
The following categories explain the contents to be followed using symbols.

This symbol indicates that the content requires caution when performed.

This symbol indicates that the content is prohibited.

This symbol indicates that the content must always be followed.
5

Important Safety Precautions

Warning
Should any of the following occur, stop using the product immediately. Remove the batteries from the unit and disconnect the AC adapter. If using the AC adapter,
disconnect the power plug from the wall outlet.
Consult the dealer from whom you bought the product for further assistance.
Continued use of the product may result in fire or electrical shock.
- If you notice any abnormality such as smoke or an abnormal smell, or if the camera becomes extremely hot.
- If liquid gets inside the camera.
•If any foreign object gets inside the camera.
Do not dismantle, modify or repair the camera yourself. Fire and/or electrical shock may occur as a result. For repair or internal inspection, consult the dealer from whom you bought the product.
Do not allow the camera to get wet. Fire, electrical shock and/or malfunction of the unit may occur if internal parts are exposed to water or other liquids.
Do not drop or insert metal objects or combustible items inside the camera. Fire, electrical shock and/or malfunction of the unit may occur as a result of metal objects, etc. getting inside the camera.
Do not use the camera while driving. May cause traffic accidents. When using the camera while walking, pay attention to the road surface, surroundings, etc.
Do not use the camera on unstable ground. Serious injury and even death may occur as a result especially when falling from high places.

Important Safety Precautions

Warning
Do not directly look at the sun through the viewfinder. Loss of or impaired eyesight may result.
Do not touch the metal parts on the camera during thunder and lighting. Death may occur if lighting strikes the
Do not use AC adapters other than those specified. Fire may occur as a result of AC specified being used.
Do not dismantle, short-circuit, coat (solder, etc.). Apply heat, apply pressure (with nail, battery, or throw into a fire. metals (wires, necklaces, etc.) to come into with batteries. Fluid leakage, heat, fire and damage may occur as a result.

Caution
Do not point the lens directly at the sun or at a strong light source. Mallunction of internal parts may occur from concentrated rays of light. Using the camera in such conditions cause short circuits and breakdown of insulation, resulting in overheating and/or fire.
Take care not to get fingers caught in the battery/card cover. Personal injury may occur as a result.
When using the camera inside an airplane, follow the directions of the airline company. Electric waves emitted from the camera may affect airplane cockpit instruments.
Do not use the flash near eyes. Eye injury may occur as a result.
camera.
adapters other
may

Important Safety Precautions

Caution

When taking a picture, wipe off the flash surface and be careful not to cover the If the flash surface is dirty or you take covered, it is possible for the flash so to change, due to the high temperature of the flash.

Check that the polarity is correct when inserting batteries. The battery may heat, damage or leak if the polarity is not correct, possibly causing skin burns and/or personal injury as a result.

Do not use batteries which have become soiled with oil or sweat. If soiled, wipe the contacts with a dry cloth before use.

When cleaning or carrying out non-photographic operations on the camera, for safety.

Do not leave the camera in locations such as: • A location exposed to direct sunlight or etc. where the temperature may become extremely Fire and/or damage to the unit may occur. • Within the reach of children. The strap may wrap around the neck causing str or accessories such as batteries. Memory Card, etc. May be swallowed. • Unstable surfaces such as on an unstable table or an angled surface. Camera dropping on the head or other body parts may not only cause personal injury but malfunction of the unit as well. • A location exposed to lampblack, steam, high humidity, v dust or vibration. If dust or liquid enters the camera or if the internal parts are damaged by strong vibration, overheating, fire or electrical shock may occur as a result.

Important Safety Precautions

Caution

Remove the batteries when the camera will not be used for an extended period. with the flash

Do not use force when operating the camera. The camera may become damaged, causing personal injury as a result.

Do not rotate the camera when mounting on a tripod.
About battery fluid leakage
- Should battery fluid leaks ever come into contact with hands or clothing, wash immediately with water. - Loss of eyesight may occur if battery fluid enters the eye. In such case, do not rub the eye. Immediately flush the eye with water and seek medical attention.
About the LCD monitor
- Due to the characteristics of liquid crystals, the brightness of the LCD monitor may appear uneven with changes in temperature, etc. - The LCD monitor has been developed using high-precision engineering and is superior in sharpness and picture quality. Due to the nature of liquid crystals, however, there may be missing or constantly lit pixels on the monitor. This is not a malfunction of the unit. - If the LCD monitor becomes damaged for some reason, take care to prevent personal injury from broken glass, etc. Furthermore, take care that liquid crystals do not touch the skin or enter the eyes or mouth.

ntroduction
Accessories Included
Digital Camera
Camera Driver & Ulead Software & User Manual
2 x AA Batteries


Camera Pouch
Wrist Strap
Quick Start Guide

USB Cable
10

Introduction
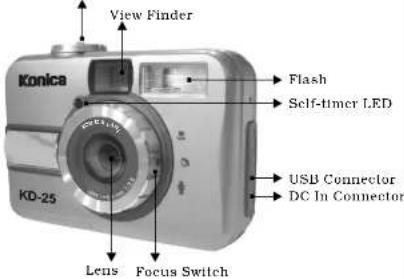
External View
Top
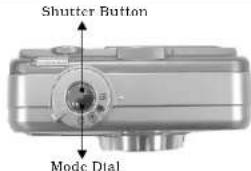
Front
Bottom
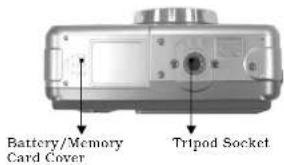
11

Introduction
Back
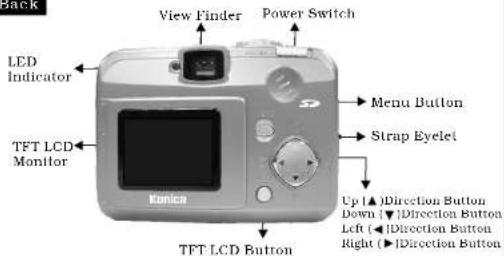
Mode Dial
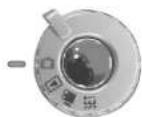
▶ Shooting Mode( □ )
▶ Playback Mode( ▶ )
▶ Movie Clip Mode( )
▶ Setup Mode( SET )
Focus Range
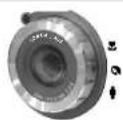
▶ Macro f 18m\~0.25m
▶ Portrait (8)m-1.3m
▶ Normal (1.3)m-infinity
12

Introduction
TFT LCD Monitor Icon Definition
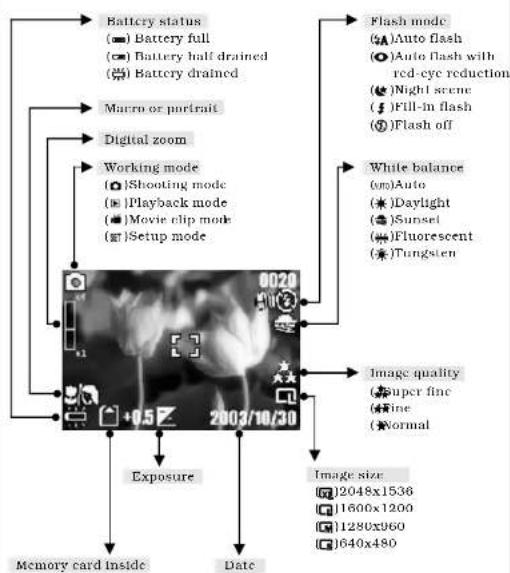
flowchart
graph TD
    A["Battery status (■) Battery full (□) Battery half drained (□) Battery drained"] --> B["Working mode (○) Shooting mode (■) Playback mode (■) Movie clip mode (□) Setup mode"]
    B --> C["Exposure"]
    C --> D["Memory card inside"]
    C --> E["Date"]
    F["Flash mode (□) Auto flash (○) Auto flash with red-eye reduction (●) Night scene (§) Fill-in flash (□) Flash off"] --> G["White balance (m) Auto (★) Daylight (□) Sunset (□) Fluorescent (★) Tungsten"]
    G --> H["Image quality (◆) super finc (◆) fine (◆) Normal"]
    H --> I["Image size: 2048x1536 1600x1200 1280x960 1640x480"]
    I --> J["Digital zoom"]
    J --> K["Macro or portrait"]
    K --> L["0.5 2003/10/30"]
13

Introduction
Icon Index
| Working Mode | [27V] | [827S] | [76V] | [0CH3] | |
| Focus Range | |||||
| Flash Modes | [26WT] | [192S] | [81TW] | [56HT] | [54ZS] |
| Digital Zoom | |||||
| Thumbnails | [18TW] | [W6X] |  | [87ZS] | [66C0] |
| Self-timer | |||||
| Movie Clip |  | [903A] | [827S] | [6Y8A] | [85D0] |
| Memory Card Inside | |||||
| Battery Status | [07VA] | ||||
| Image Size (Resolution) | |||||
| Imagc Quality | [C44S] | ||||
| White Balance | AUTO | ||||
| Exposure | [K25S] |  |  | [ABCW] | [W4ZZS] |
| Protected Image | |||||
| Print (DPOF) | [24WA] | [4CCS] |

Preparation For Taking Pictures
How to Switch On Or Off The Camera
To switch on the camera, slide the Power Switch to the side and hold it for 1 second.
To switch off the camera, slide the Power Switch to the side and hold it for 1 second again.
Loading the Batteries
This camera is using 2 x AA batteries.
- Make sure the camera is switched off.
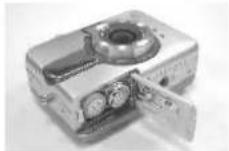
- Open the Battery / Memory Card Cover.
- Load the batteries into the battery chamber following the polarity indications.
- Close the Battery / Memory Card Cover.
Note
From the TFT LCD Monitor you can see the battery status shown below:
(☐): Battery power full.
(☐): Battery power half drained. Please prepare with new batteries.
(☐): Battery drained. Replace the old batteries with new ones.

Preparation For Taking Pictures
Note
- Do not change the battery with wet hands, as there is a danger of electric shock.
2. Warning
- When you continue using the camera for a long time, the batteries become hot. Contact with the batteries can lead to burns.
- Never open the battery/card cover while the camera is accessing the card or processing images.
- Do not leave the battery anywhere where the temperature may reach 60^ (140°F), such as inside a car, in the sun, near a heater, etc.
Do not get the battery wet, drop it or subject it to violent shocks.
- Batteries may lose power if kept inside the camera for a long time without using. Please remove the batteries while the camera is not in use.
- Do not use manganese batteries as they cannot supply sufficient power to support the camera's operation.
- Batteries may not work normally under 0 C.
- It's normal that the temperature of the camera body rises after being in use for a long period.
- It is suggested to use an AC adapter if you expect to use the camera for a long period.

Preparation For Taking Pictures
Using An AC Adapter(Optional)
- Switch off the camera.
- Make sure the AC adapter is 3.3V/2.0A.
- Plug the AC adapter into the DC In Connector.
- Switch on the camera.
Note
Only use the AC adapter (sold separately) specified for your camera as use of any other device may result in a breakdown, fire or electrical shock.
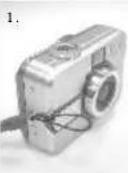
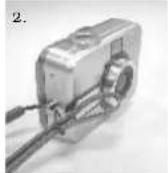
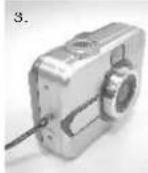
Attaching The Wrist Strap
Please refer to the figure 1.2.S. below:

Preparation For Taking Pictures
Inserting An SD Card
- Switch off the camera.
- Open the Battery / Memory Card Cover.
- Insert the SD card into the card slot and press it down until you hear a click sound.
- Close the Battery / Memory Card Cover.
Note
If a new SD card is used, you'll have to format it first. Please refer to page18r details.
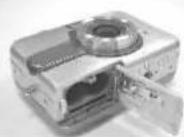
Note
This camera is equipped with a built-in flash memory. The image(s) can be stored either in the built-in memory or in a memory card. Please note that if a memory card is not inserted, all operations will affect only the built-in flash memory. All images will be stored onto the memory card rather than the built-in flash memory.
Removing An SD Card
- Make sure the camera is switched off.
- Open the Battery / Memory Card Cover
- Press down the SD card and the card will jump up.
- Take out the card and close the Battery / Memory Card Cover.

Preparation For Taking Pictures
Note
This camera comes with approximately 8 MB of memory installed, but if you would like to use additional memory, the following cards are compatible:
• SD Memory Card
About the SD Memory Card

Caution
SD Memory Cards are manufactured using precision electronic components. Do not perform the following as malfunction or damage may occur as a result.
- Do not touch the terminals with hands or metal objects. Damage to the components may occur as a result of static electricity. Before handling an SD Memory Card, discharge any static build-up from your body by touching grounded metal, etc.
- Do not bend, drop or apply excessive force.
- Avoid heat, liquid and direct sunlight when using and for storage.
- Do not open the battery/card cover or remove the SD Memory Card while data is being read or written.
- Do not dismantle or modify.

* The SD logo is a trademark.

Preparation For Taking Pictures
Important
• In the event of malfunction or damage, it is possible that data may be lost. Konica can not accept responsibility in any way for such data loss.
• Always back-up important data.
- When using SD Memory Cards on a PC, do not change the attributes(read-only, etc.) of the files (image data) on the card. Doing so may prevent the camera from working properly when deleting images, etc.
- Do not change the file names or the directory name of image data saved on an SD Memory Card using a PC or save files other than image data taken by this camera. Images that have been changed or added will not only play back on the camera but may cause the camera to malfunction as well.
• Always format SD Memory Cards using this camera. A card formatted in a PC may not operate properly.
• The SD Memory Card includes a write-protect switch. Sliding this switch downward prevents data from being written to the card and images, etc. saved on the card are protected. Please note that pictures cannot be taken or deleted when the writeprotect switch is on.
- When using a large-capacity card, card check and deletion may take some time.

Setting Up Functions Before Taking Pictures
Under Shooting Mode (☐)
Please set the Mode Dial at Shooting Mode ☐) before setting up the below functions.
Setting Up Focus Range
Before you take pictures, please make sure you set the Focus Switch at the correct focus range or the image may not be clear.
a. Macro(0.18m\~0.25m
b. Portrait (:0.8m\~1.3m
c. Normal( : ♦ .8m\~infinity
If the Focus Switch is set at ( ) or ( ), the symbol o/□/□) on the TFT LCD monitor indicates the focus is not set at normal focus range.
Turning On Or Off The TFT LCD Monitor (Preset : On status) The TFT LCD Monitor is automatically turned on when the camera is switched on. With the LCD Button, you can turn on or off the TFT LCD monitor.
Setting Up Flash Mode (Preset : Auto Flash mode)
There are five flash modes shown below(Use Down ▼)Direction Button to sleet):
a. Auto flash(5) the camera will identify the necessity of using the
flash. If the environment is too dark the flash will fire automatically.
b. Auto flash with red-eye reduction(●) the camera will identify the necessity of using the flash to reduce the occurrence of red-eye symptom in the image.
c. Night scene: The shutter speed will become slow in order to catch more light to make good images in low light circumstances. Under this mode, it is suggested to use a tripod to make sure the camera is held still while taking the picture.
d. Fill-in-flash: The flash will fire in any light circumstances.
e. Flash off (The flash will not fire in any light circumstances.

Setting Up Functions Before Taking Pictures
Setting Up Self-timer (Preset : off)
To activate the self-timer or cancel the self-timer, press Up ▲) Direction Button. Self-timer will be activated when the Shutter Button is pressed. This function can delay the shutter from release for 10 seconds. Self-timer is automatically canceled after the shutter is released.
Setting Up Digital Zoom
This camera is equipped with 4X digital zoom (Continuously). To activate digital zoom please press Right Direction ▶)Button. To adjust the status of digital zoom please use Right Direction ▶) Button and Left Direction {◀}Button. To cancel digital zoom function please adjust it to 1.0X.
Note
It is normal that the image with digital zoom is not as sharp as the image without digital zoom.
Setting Up Image Size (Preset : 1600 x 1200)
Please set the Mode Dial at (0)oting Mode and press Button to enter "Still Image" menu tablc.
(▲) and Down Direction Bu▼on to move the color bar to
the feature you would like to set up. Press Right Direction
(▶) to enter the selling and select
Up(▲) and (▼down Direction buttons. Press Direction Button to confirm the new setting or
Button to cancel the setting. When
"Still Image" menu table. please check if the new
on the right side of the LCD
nown please repeat the above procedure.
1.
Select
"Image
Size".
22

Setting Up Functions Before Taking Pictures
- There are four resolutions can be selected which are:
| Image Size | Compression Ratio | 8MB SD Memory Card |
| 2048x1536 | SUPER FINEFINENORMAL | About 8 PhotosAbout 16 PhotosAbout 25 Photos |
| 1600x1200 | SUPER FINEFINENORMAL | About 10 PhotosAbout 18 PhotosAbout 26 Photos |
| 1280x960 | SUPER FINEFINENORMAL | About 15 PhotosAbout 28 PhotosAbout 43 Photos |
| 640x480 | SUPER FINEFINENORMAL | About 48 PhotosAbout 83 PhotosAbout 153 Photos |
Setting Up Image Quality (Preset : Fine quality)
Please set the Mode Dial at Shooting Mode(☐) and press Menu Button to enter "Still Image" menu table.
-
Splect "Quindtton Button
-
Three levels of image quality can be selected as follows:
on (★) Super Fine
★Preferred
(★★) Fine
MenuNormal
- DEDs RightDisplaton Button (▶) tocknfirm the settingthe
g is shown
screen. If the new setting is not
Note
The better the image quality is set, the less the number of images can
be stored in the built-in flash memory or the memory card.
23

Setting Up Functions Before Taking Pictures
Setting Up White Balance (Preset: Auto White Balance) Please set the Mode Dial at Shooting Mode( ▶nd press Menu Button to enter "Still Image" menu table.
-
Select "White Balance"
-
Five modes can be selected as follows:
(Auto White Balance: The camera will adjust the white balance by itself. It is suggested that the user to stay with this mode unless the light environment is very different from normal.
( daylight: For strong light environment.
( Sunset: For sunset light environment.
( fluorescent: For fluorescent light environment.
- Press Right Direction Button( ▶)confirm the setting.
Setting Up Exposure (Preset : ± 0)
Please set the Mode Dial at Shooting Mode Grid press Menu Button to enter "Still Image" menu table.
-
Select "Exposure"
-
Select the exposure from +2.0 to -2.0 (0.5 per step).
-
Press Right Direction Button( ▶ ) confirm the setting.
Note
The higher the value is, the brighter the image will be.
Under Playback Mode(▶)
Please set the Modc Dial at Playback Modc forc setting up the below functions. The TFT LCD Monitor will show the latest captured image. Use Up And(Down Direction Buttons to select other captured images or movie clips.

Setting Up Functions Before Taking Pictures
Formatting An SD Card
Please formal the new card for the first time in advance before using it.
Please set the Mode Dial at Playback Mode( [ ]nd press Menu Button to enter "Play" menu table.
-
Select "Delete".
-
Select "Format"
-
Select "No" to cancel the order or select "Yes" to format the memory card.
-
Press Right Direction Button (▶ confirm the setting.
Formatting The Built-in Flash Memory
Make sure no memory card is inside.
-
Select "Delete".
-
Select 'Format'
-
Select "No" to cancel the order or select "Yes" to format the built-in flash memory.
-
Press Right Direction Button (▶) to confirm the setting.
Setting Up Slide Show (Preset : 1 second)
Please set the Mode Dial at Playback Mode( 📄)d press Menu Button to enter "Play" menu table.
-
Select "Slide Show"
-
Select the time for slide show from 1 second to 9 seconds (2 seconds per step).
-
Press Right Direction Button (▶) to start the slide show.
You can press Menu Button to cancel the slide show.
Setting An Image At Protect Status Or Cancel The Protection Of An Protected Image
Please set the Mode Dial at Playback Mode( [and] press Menu Button to enter "Play" menu table.

Setting Up Functions Before Taking Pictures
Setting An Image At Protect Status (Preset : Unlock)
To set an image at protect status can prevent the selected image
rom being erasing.
1. Select "Protect".
2. Select "Lock" to protect the selected image.
3. Press Right Direction Button (▶) confirm the setting.
Note
After the above steps are done, please check if the(e-e) shown on the right side of the TFT LCD screen. If it is not shown please repeat the above steps.
Cancelling The Protection Of An Protect Image
- Select "Protect"
- Select "Unlock" to cancel the protection.
- Press Right Direction Button (▶) confirm the setting.
Printing Out An Image With A Printer Without Going Through PC (Preset : X0)
Please set the Mode Dial at Playback Mode( □) and press Menu Button to enter "Play" menu table. Use Up Direction Button ( ▲) and Down Direction Button( ▼) move the color bar to the option you would like to set up.
- Select "Print"
- Select the number of copies you would like to print out from X0 to X9. The number means the number of the copies you would like to print out.
- Take out the memory card from the camera and put it into the card reader slot of the printer.
- Set the printer at DPOF Print and then the printer will print out the selected image(s) according to the number(s) you set.
- Press Right Direction Button (▶) confirm the setting or select Menu Button to cancel the setting.
Note
After the above steps are done, please check if the ( ) is shown on the left down corner. If it is not shown, please repeat the steps.
Note
This function can only work with a memory card, not with the built-in flash memory.
26

Setting Up Functions Before Taking Pictures
Under Movie Clip Mode( Preset : 10 Seconds )
Please set the Mode Dial at Movie Clip Mod(€)
Setting Up Recording Time
- Select the time for the movie clip, "10 seconds, 20 seconds, 30 seconds" or "Manual".
- Press Right Direction Button( ▶) confirm the setting.
- Press Shutter Button to start recording.
Notc
- In spite of selecting 10, 20 or 30 seconds, press the Shutter Button and the camera will start the recording and stop automatically according to the time you select.
- If "Manual" is selected, press the Shutter Button to start the recording or press the ShutterButton again to stop the recording.
Note
The TFT LCD Monitor will show "Low Light!" as a warning to remind you that the video that you are going to record is in a low light environment.
Under Setup Modc(SET)
Please set the Modc Dial at Setup Modd (S) Up Direction Button ( ▲) Down Direction Button to move the color bar to the feature you would like to set up. Press Right Direction Button ( ▶) enter the setting and select your preferred setting using Up ( ▲) Down Direction Buttons. Press Right Direction Button ( ▶) confirm the new setting or press Menu button to cancel the setting. When the LCD Display is back to the "Setup" menu table, please check if the new setting is shown on the right side of the LCD screen. If the new setting is not shown please repeat the above procedure.
27

Setting Up Functions Before Taking Pictures
Setting Up Beep Sound (Preset : On)
Please set the Mode Dial at Set Up Modd( SET ).
- Select "Beep
- Press Right Direction Button (.)
- Select "On" to activate the beep sound or select "No" to disable the beep sound.
- Press Right Direction Button (▶) confirm the setting.
Setting Up Auto Power Off (Preset: 2 Minutes)
- Select "Power Off".
- Press Right Direction Button( ▶ )
- Select the time of auto power off from 1 to 10 minutes Or select "Cancel" to cancel auto power off function.
- Press Right Direction Button (▶) confirm the setting.
Setting Date Stamp (Preset : On)
- Select "Date Stamp".
- Press Right Direction Button (.)
- Select "On" to activate date imprint or select "Off" to cancel it.
- Press Right Direction Button (▶) confirm the setting.
Setting Date Type
- Select "Date Type".
- Press Right Direction Button (.)
- Select the following date types:
YY/MMM/DD: Year/Month/Date
MM/DD/YY: Month/Date/Year
DD/MM/YY: Date/Month/Year - Press Right Direction Button (▶) to confirm the setting.

Setting Up Functions Before Taking Pictures
Date Setup
- Select "Date Setup"
- Press Right Direction Button (▶)
- Use Up( ▲n)d(Down Direction Buttons to change the
numbers. - Use Right (and Left) Direction Buttons to confirm
and move to next. - Press Right Direction Button (▶) confirm the setting.
Setting Up Quick View (Preset : On)
- Select "Quick View"
- Press Right Direction Button(▶)
- Select "On" to activate quick view or select "Off" to cancel
quick view - Press Right Direction Button (▶) confirm the setting.
Note
The quick view is to show the image that you just captured on the TFT
LCD one second after each shot.
Setting Up Language
- Select "Language"
- Press Right Direction Button(▶)
- Select the language that you prefer. There are English,
Japancsc, French, German, Spanish, Italian, Simplified
Chinese and Traditional Chinese provided.
Resetting to Default Setting
- Select "Reset"
- Press Right Direction Button(▶)
- Select "Yes" to reset to default setting or select "No" not to
reset to default setting. - Press Right Direction Button (▶) confirm the setting.

Taking Pictures
-
Switch on the power by sliding the Power Switch to the side, holding it for 1 second, and letting it go.
-
Set the Mode Dial at Shooting Mode (□r) still image capture or Movie Clip Mode (□r) videos.
-
If you would like to capture a still image, please set the focus switch at correct focus range which are:
Macro (☐): 0.18m\~0.25m Portrait (☐): 0.8m\~1.3m Normal (☐): 1.3m\~infinity
-
Set up all the preferred features and functions.
-
Hold still and press the Shutter Button.
-
The LED Indicator will start blinking after the Shutter Button is released. After the LED Indicator stops blinking, then you are able to take another shot.
Note
The TFT LCD Monitor will show "Low Light!" as a warning to remind you that the image that you are going to capture is under a low light environment. It is suggested to set the Flash Mode at Auto Flash or Fill-in Flash for supplementary light to compose a good image.
30

Playback / Erasing
Viewing A Part Of An Image
Set the Mode Dial at Playback Mode (The TFT LCD Monitor
will show the latest captured image
- Press Right Direction Button (▶).
- Press Up Direction Button (▲) to adjust the size of the image.
- Press Right Direction Button (▶) again to enter.
- Use four direction buttons to view the image.
- Press Menu Button to cancel this function
Showing The Information Of A Still Image
Please set the Mode Dial at Playback Modd ▶The TFT LCD
Monitor will show the latest capture image. Use Up ▲rld
Down ( Injection Buttons to select other captured images.
- Select an image.
- Press LCD Button to show the information.
- Press LCD Button again to erase the information.
31

Playback / Erasing
Playing A Recorded Movie Clip
Please set the Mode Dial at Playback Mode( ■sc(Up )
and Down/ Injection Buttons to select a movie clip. Select a recorded movie clip.
Press Right Direction Button( ▶ play the movie clip.
Note
You can press Right Direction Button(▶) pause the playing and press Right Direction Button(▶) again to cancel the pause.
Going Into Thumbnail Images (Small Images)
Please set the Mode Dial at Playback Mode( ▶ )
-
Press Left Direction Button ↕ enter thumbnail image table.
-
Use Up( ▲nd[Down to select an image or movie clip.
-
Press Right Direction Button(▶)enlarge the selected image or movie clip.
-
To go back to the thumbnail image table press Left Direction Button ( again.
Note
When a thumbnail image is selected, please check if it shows( 📄n) the left top corner of the LCD screen. It 📄 shown it means the selected thumbnail is a movie clip but not a still image.
Deleting Image(s)
Please set the Mode Dial at Playback Mode( ☐)d press Menu Button to enter "Play" menu table.
-
Select Delete
-
(a) Select "Delete Image" to confirm the willing to delete the selected image or movie clip. (b) Select "Delete All" to confirm the willing to delete all stored images or movie clips.
-
Select "No" to cancel the order or select "Yes" to delete.
-
Press Right Direction Button (▶) confirm the setting.

Installing Camera Driver
Under Microsoft Windows 98 / 98SE
-
Turn on the computer.
-
Insert the CD into the CD-ROM Drive.
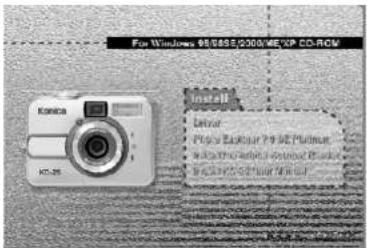
■ If the PC is set to auto run the program, simply click "Driver to start the installation.
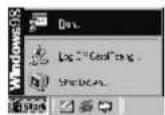
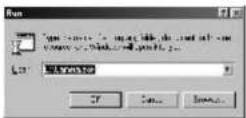
■ If the PC is not set to auto run the program, please go to the Start Menu, click "Run" and key in "CD-ROM Drive:\Camera.exe" and then click "OK" Button.

Installing Camera Driver
- A welcome window appears and please click "Next" to got to next step.
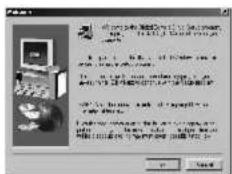
- The computer will start the installation.
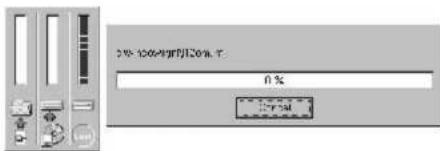
- Click "Finish" to start the installation of DirectX8.1.
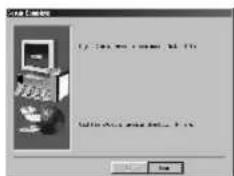
34

Installing Camera Driver
- Click "Yes" to proceed the installation of DirectX8.1.
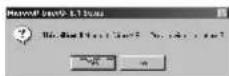
- A license agreement appears and please read the content of the agreement. If you accept the terms of the license agreement, click "Yes" to go the next step. Or you can click "No" to cancel the installation of Ullead Explorer 7.0 SE Platinum.
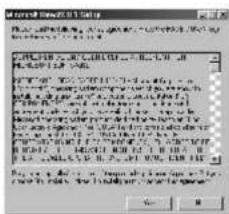
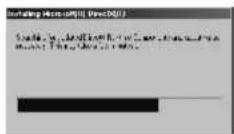
- The PC will start the installation of DirectX8.1. After the installation of DirectX8.1 the installation of camera driver is complete.
35

nstalling Camera Driver
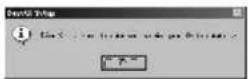
- Please click "OK" to restart the PC.

Installing Camera Driver
Under Microsoft Windows 2000
- Turn on the computer.
- Insert the CD into the CD-ROM Drive.
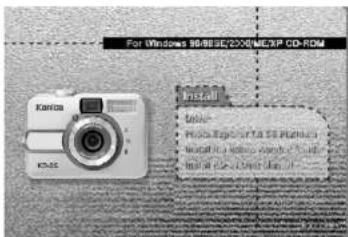
■ If the PC is set to auto run the program, simply click "Driver" to start the installation.
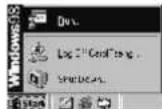
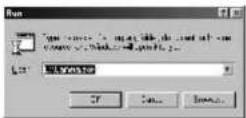
■ If the PC is not set to auto run the program, please go to the Start Menu, click "Run" and key in "CD-ROM Drive:\Camera.exe" and then click "OK" Button.

Installing Camera Driver
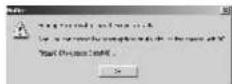
- Click "OK" to proceed the installation of DirectX8.1.
- A license agreement appears and please read the content of the agreement. If you accept the terms of the license agreement, click "Yes" to go the next step. Or you can click "No" to cancel the installation of Ulead Explorer 7.0 SE Platinum
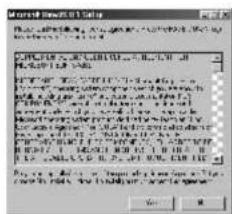
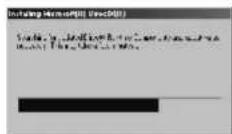
- The PC will start the installation of DirectX8.1. After the installation of DirectX8.1 the installation of camera driver is complete.
38

Installing Camera Driver
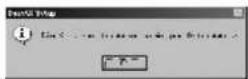
- Please click "OK" to restart the PC.
39

Installing Camera Driver
Under Microsoft Windows ME / XP
Windows ME and Windows XP do not need to install this driver. Please skip the driver installation and go to page 33 for installation of Ulead Photo Explorer or go to page 52 to download the stored image(s) onto the PC.

Installing Camera Driver
Under Mac 9.X or later
This camera supports only Mac 9.X or versions later. If the operating system that you are using is later than Mac 9.X, you will not need to install this driver. Please skip the driver installation and go to page 40 for installation of Ulcad Photo Explorer or go to page 54 to download the stored images onto the PC.

Installing Ulead Photo Explorer
Under Windows Operating System (Windows 98/98SE/2000/ME/XP)
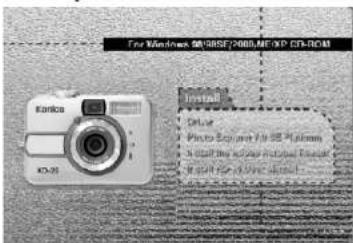
- Insert the CD into the CD-ROM Drive.
- Click "Photo Explorer 7.0 SE Platinum".
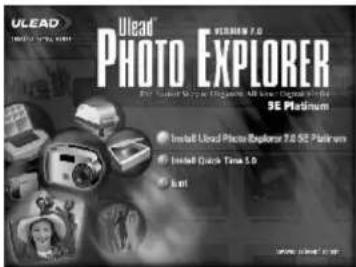
- Click "Install Ulead Photo Explorer 7.0 SE Platinum".
42

Installing Ulcad Photo Explorer
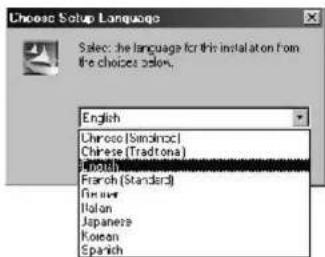
- Choose operating language. 9 languages offered can be selected, which are Simplified Chinese, Traditional Chinese, English, French, German, Italian, Japanese, Korean, and Spanish.
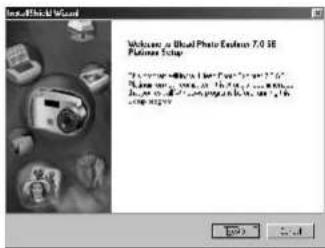
- A welcome window appears and please click "Next!" to go to next step.
43

Installing Ulead Photo Explorer
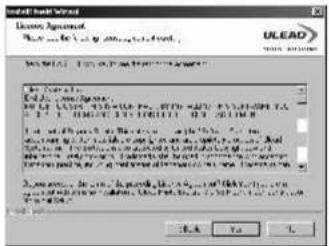
- A window of license agreement appears and please read the content and click "Yes" to go to next step if you accept the terms of the agreement. Or you can click "No" to cancel the installation of Ulead Explorer 7.0 SE Platinum.
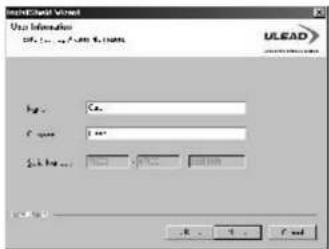
- Enter your name and your company's name and click "Next".
44

Installing Ulcad Photo Explorer
- This software will be installed at "Disk C \Program Files \Ulead Systems \ Ulead Photo Explorer 7.0" automatically if you click "Next". Or you can click "Browse" to choose the destination folder to install this software.
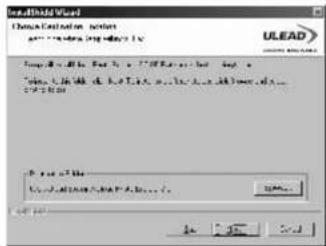
- Click "Next" to go to next step.
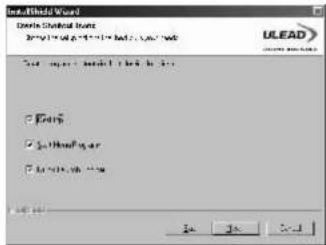
45

nstalling Ulead Photo Explorer
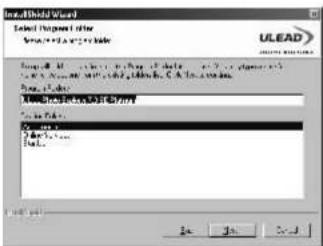
- The computer will add a new program folder named "Ulead Photo Explorer 7.0 SE Platinum". Click "Next" to go to next step.
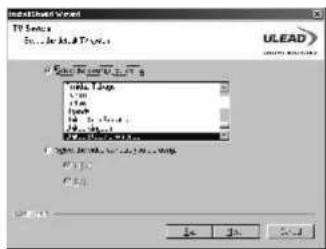
- Set up the default TV system. Please select the country you are in.
46

Installing Ulead Photo Explorer
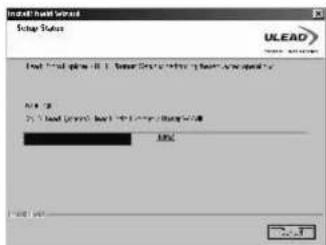
- The computer will start installing "Ulead Photo Explorer 7.0 SE Platinum" now. You can click "Cancel" to stop the installation.
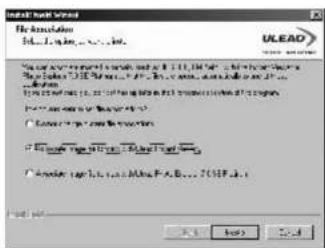
- Select the file association you would like to set and click "Next" to go to next step.
47

Installing Ulead Photo Explorer
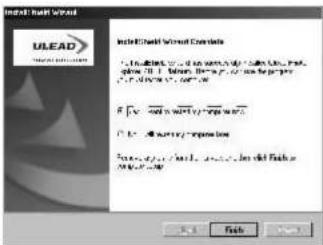
- If the operating system you are using is Windows 98, 98SE or ME, you'll have to restart the computer to complete the installation of Ulcad Photo Exlorer 7.0 SE Platinum. It is suggested to restart the computer now. Click "Finish" to complete the installation and restart the computer.

Installing Ulead Photo Explorer
Under Macintosh Operating System (Mac 9.X or later)
-
Turn on the computer.
-
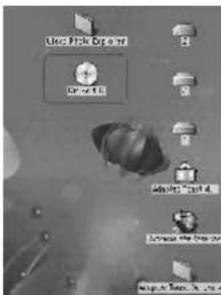
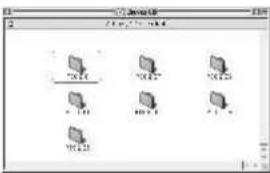
Insert the CD into the CD-ROM Drive. The computer will create an icon named "Driver CD" on the desktop.
-
Double click the icon and choose the language you prefer to use by double clicking on one of the below folders.
PEX 2.0: English
PEX 2.0F: French
PEX 2.0G: German
PEX 2.01: Italian
PEX 2.0J: Japanese
PEX 2.0P: Portuguese
PEX 2.0S: Spanish

nstalling Ulead Photo Explorer
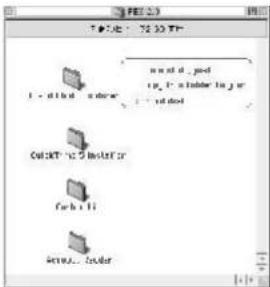
- Choose "Ulead Photo Explorer" and copy this file to the desktop.
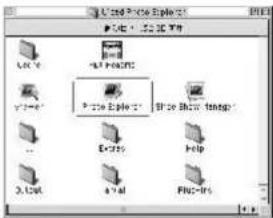
- Click on the newly created "Ulcad Photo Explorer" icon on the desktop and double click on "Photo Explorer" folder to start Ulcad Photo Explorer.
50

Installing Ulead Photo Explorer
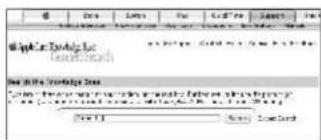
If a warning window shows please visit Apple's official web-site http://kbase.info.apple.com to download the latest version of CarbonLib.
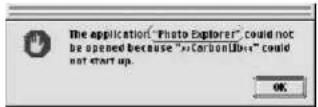
A.Key in "CarbonLib" in the search bar and click "Search" button.
b. Download the latest version of CarbonLib.
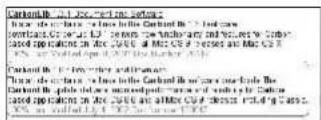
c.Restart the computer.
d. Go to the desktop and double click on the icon "Ulead Photo Explorer" to start Ulead Photo Explorer.
51

About Ulead Photo Explorer
Photo Explorer
Software license
The
License
Agreement
product.
software
Agreement
described
which
in
this
ted and
-
(五) 本说明仅供参考。
permitted
and
prohibited
USCS
Licenses
and
trademarks
ICI
And
other
trademarks
purposes
respective
library
1991-1992
CHCubicSystemsMInprosystems.
tradeSystems, of IndleadAll
nams
andregisterchny
mentioned
identificationthis
and re
the ofexcludie
regulated
manual
properly
Technical
support
Registered users are entitled to Ulead technical support. Our Web site has valuable up-to-date information about Photo Explorer, other Ulcad products, and free downloads. Visit our Web site at www.ulead.com, or send an e-mail at support@ulead.com.tw.
Headquarters:
Ulcad Systems, Inc.
http://www.ulead.com.tw
http://www.ulead.co.uk
http://www.ulead.co.uk/fr
E-mail: info@ulead.de
North & South America:
Ulcad Systems, Inc.
http://www.ulead.com
E-mail: info@ulcad.com
Asia-Pacific:
Ulead System, Inc.
http://www.asiapac.ulead.com
E-mail: info@astapac.ulead.com
China:
Ulead Systems, Inc.
http://www.ulead.com.cn
E-mail: info@ulead.com.cn
52

About Ulead Photo Explorer
System requirements
Before installing Photo Explorer, make sure your computer meets these requirements; furnished under a
- Intel® Reellium?processors [or 100% compatible processors]
the Microsoft Windows?95/98, NT 4.0, 2000 or higher
• 32 MB RAM (or more)
- 17.8 MB available hard drive space for program files
- True Color or HiColor display adapter and monitor (recommended)
- 800 X 600 minimum display resolution
• Windows compatible pointing device
• Microsoft Internet Explorer 4.0 or higher
- Insgnct connection (recommended)
- 16-bit or better soundcard and speakers (recommended)
- DirectX 6.0 or higher (for video functions only)
53

About Ulead Photo Explorer
The Browser
Just like Windows Explorer, Photo Explorer's Browser shows the hierarchy of drives and folders in your computer at the left hand side and displays the files in a selected folder at the right. What's special about Photo Explorer's Browser is that multimedia files can be shown as visual thumbnails for casier identification. Simply click a desired file to immediately get an idea of the file's contents. You can preview images and actually play sound, videos or even GIF animation files without actually opening them. Basic image editing functions are also available for enhancing images. In addition, you can bring together images, videos and sounds to create a slide show.
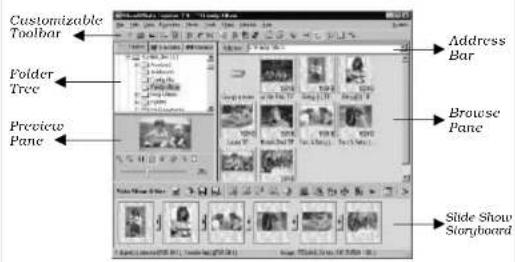
Photo Explorer's Browser gives you different folder views. In the Folder Tree, you can switch to the Favorites list to create a collection of frequently visited folders. The Browser also keeps track of Recent folders you accessed and lets you return to them quickly.
54

About Ulead Photo Explorer
Using the Ulead Photo Explorer Browser:
| Area | Icon | Function |
| Main Toolbar | ||
55

About Ulead Photo Explorer
| Preview Pane | |
| Original size | |
| Rotate left | |
| Invert | |
| Rotate right | |
| Image Properties | |
| Slider of Zoom in/out | |
| Slide Show Pane | |
| Number of selected files | |
| Open | |
| Have | |
| Have As | |
| Add | |
56

About Ulead Photo Explorer
| 带 | Package | |
| Create Slide Show Disc | ||
| Stitch Panorama | ||
| Share | ||
| Show | ||
| Slide Show Options | ||
| × | Close |
57

About Ulead Photo Explorer
The Viewer
Photo Explorer has a built-in Viewer integrated with the Browser. You can use the built-in Viewer to:
- Get a full-size or full-screen view of images.
- Navigate through images using the keyboard, toolbar buttons, or menu commands, or let Viewer automatically step through the images.
- Copy, rename or delete an image file.
- Copy an image for pasting onto your
desired image editor. - Rotate, flip and edit images, and then save the changes.
- Create wallpapers and screen savers using your images.
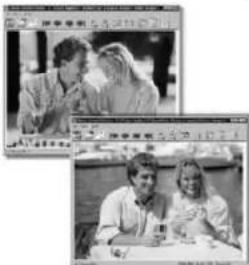
A standalone image viewer, the Ulead Instant Viewer, also comes with Photo Explorer. It is a simpler, independent application and its sole purpose is only for displaying images. Use Ulead Instant Viewer when you want to compare two or more full-size images. Each image will be opened in a separate window. You can also associate file types like JPG, GIF and BMP image files so that they will automatically display in the Ulead Instant Viewer.
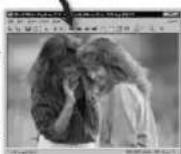
Photo Explorer's built-in Viewer
natural_image
Two black-and-white photos showing people in conversation, one seated and one standing, with no visible text or symbols.Ulead Instant Viewer windows
58

About Ulead Photo Explorer
When using any application, it is important for you to set up a work environment that's comfortable and convenient for you. Photo Explorer provides many options that can change the look and feel of what's on-screen to suit your needs. You can also make Photo Explorer as your default image viewer and editor, or configure other programs to open and edit your images.
59

About Ulead Photo Explorer
Using the Ulead Photo Explorer Viewer:
| Area | Icon | Function |
| Main Toolbar | Open Explorer | |
60

Downloading Image(s) Onto Your PC
Under Windows Operating System (Windows 98/98SE/2000/ME/XP)
Downloading Image(s) From Removable Disk
- Turn on the PC.
- Switch on the camera.
- Connect the camera to the PC with USB cable under any working mode. Please make sure the USB cable is well connected to the PC and camera.
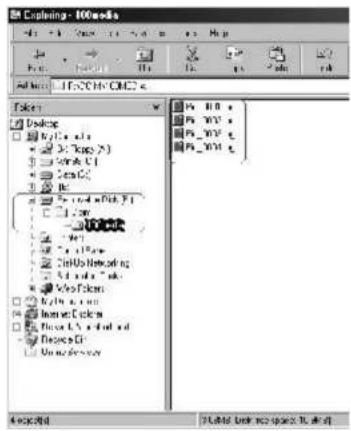
- When the USB cable is connected to the PC, it will create a new hard disk named Removable Disk.
- The stored "Image(s) can be found in" Removable Disk\Deim\100media.
- View the image with double click.
61

Downloading Image(s) Onto Your PC
Downloading Image(s) Through Ulead Photo Explorer
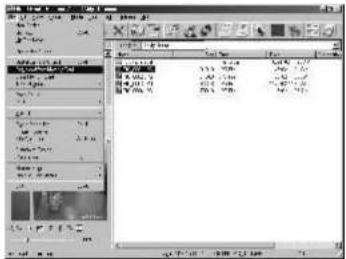
- Connect the camera to the PC with USB cable under any working mode. Please make sure the USB cable is well connected to the PC and camera.
- Start Ulead Photo Explorer 7.0 SE Platinum
- Click "File \ Download From Memory Card" to get the stored image(s).

Downloading Image(s) Onto Your PC
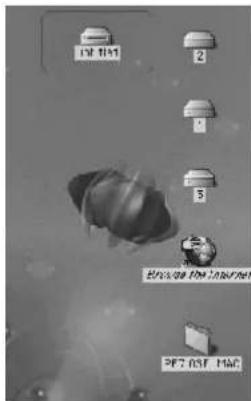
Under Macintosh Operating System (Mac 9.X or later)
Downloading Image(s) From Removable Disk
- Turn on the PC.
- Switch on the camera.
- Connect the camera to the PC with USB cable under any working mode. Please make sure the USB cable is well connected to the PC and camera.
- When the USB cable is connected to the PC, it will create a new icon named "untitled" on the desktop.
- Double click on the icon.
- The stored image(s) can be found in the folder of DCIM \ 100MEDIA \ .
- View the image with double click.

Downloading Image(s) Onto Your PC
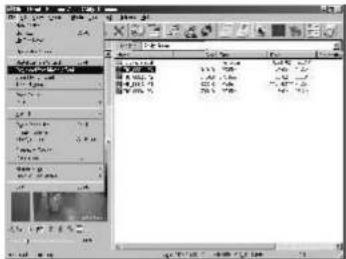
Downloading Image(s) Through Ulead Photo Explorer
- Connect the camera to the PC with USB cable under any working mode. Please make sure the USB cable is well connected to the PC and camera.
- Start Ulead Photo Explorer 7.0 SE Platinum
- Click File \ Download From Memory Card to get the stored image(s).

Error Message Table
| Message | Cause | Solution |
| CARD FULL | There is insufficient card memory capacity to store an image. | Delete the stored image(s) in the memory card or insert a new memory card. |
| MEMORY FULL | There is insufficient internal memory capacity to store an image. | Delete the stored image(s) in the flash memory. |
| CARD LOCKED (CARD ICON blinking) | The SD card is under protection. | Set the card protection switch at non-protection position. |
| LOCK | The Image can't be deleted under protection. | Unlock the protected image (please see page19). |
| NO IMAGE | There is no image stored in the memory card or built-in flash memory. | |
| FILE ERROR | Delete this image and take the picture again. | |
| MEMORY ERROR | Format the flash memory (see page18). | |
| CARD ERROR | Insert a new memory card. | |
| LOW LIGHT! | The environment is too dark with "Flash Off" mode. | Set the flash mode at Auto Flash or Fill-in Flash. |
| HAND SHAKE ICON ( [IMAGE] ) | The environment is too dark with "Flash Off" mode. | Set the flash mode at Auto Flash or Fill-in Flash. |

Specifications
| Image | Type | CCD |
| Sensor | Total Pixels | Approx. 2.1 Mega pixels |
| Effective Pixels | Approx. 1.92 Mega pixels | |
| Lens | Focal Length | 1=5.8mm (35mm film equivalent: 43mm) |
| F No. | F3 5/7 F8.0 | |
| Digital Zoom | Shooting Mode: 4X, Playback Mode: 4X (Continuously) | |
| LCD Display | 1.8" color TFT LCD | |
| Viewfinder | Optical Viewfinder | Optical Image viewfinder |
| Focusing | Type | Fixed Focus with three-step manual adjustment |
| Range | Macro: 0.18-0.25m, Portrait: 0.6-1.3m, Normal: 1.3m-infinity | |
| Shutter | Type | Mechanical shutter and Electrical shutter |
| Speed | 1/4 ~ 1/1000 sec, Mechanical shutter1/1000 sec, Electrical shutter | |
| Exposure | Control | Programmed AE |
| Compensation | ±2EV (0 SEV / step) | |
| ISO Equivalent | Auto (100-200) | |
| Flash | Modes | Auto Flash / Auto Flash with Red-Eye Reduction / Night Scene / Fill-in Flash / Flash Oil |
| Range | 0.8 ~ 3.0m | |
| Recharging | Approx.: 10 sec. | |
| White Balance | Auto / Daylight / Sunset / Fluorescent / Tungsten | |
| Shooting | Still Image | Single image |
| Movie Clip | Size : 320x240Recording time: 10-30 sec./10 sec. /step) and Manual | |
| Self-timer | 10 seconds with LED indicator | |
| Storage | Media | Internal memory: BMB flash memoryExternal memory: Support SD Card |
| File Format | Still Image: JPEG, EXIF 2.1, DCF 1.0, DPOF 1.1Movie Clip: AVI | |
| Image Size | Extra-Large: 2048 x1536 by interpolationLarge: 1600 x1200 pixelsMedium: 1280 x960 pixelsSmall: 640 x480 pixels | |
| Image Play | Single image / AVI play / Thumbnails / Slide show | |
| Interface | Digital output connector: USBDC power input connector : 3.3V / 2.0A | |
| Power Source | 2 x AA Alkaline / 2 pcs of NI-MHAC adapter(Optional) | |
| Dimensions (WxHxD) | 94 x 86 x 41 mm | |
| Weight | 140g | |
| Software | Camera Driver | Mass Storage Driver (Windows99/98SE/2000) |
| Application | Ulead PhotoExplorer 7.0 SE Platinum / PhotoExplorer 2.0 | |
66

Specifications
- The performance of the items above is according to the conditions used in our test. The specifications and/or appearance of the product may be altered without notification.
1) DCF (Design rule for Camera File system) is a standard by JEITA mainly for the purpose of simplifying the use of image files taken by digital cameras with other related devices. 2) DPOF (Digital Print Order Format) specified by Canon, Inc., Kodak Co., Ltd., Fuji Photo Film Co., Ltd., and Matsushita Electric Industrial Co., Ltd. is a standard for recording specified information such as the images or quantity to print from the images taken by a digital camera on a recording medium.
67

Specifications
| System Requirements | |
| For Windows | CPU:beiter than MMX Pentium 233MHz (XP : Pentium II 300MHz)Windows 98/98SE/2000/ME/XPMinimum 32.08 RAM(XP: 128MB)110MB of available hard disk spaceUSB port, CD-ROM drive800x600 pixels, 16 bit color display compatible monitor(24 bit color display recommended) |
| For Macintosh | Power Mac G3 or laterMac OS 9 X or laterMinimum 64MB RAM110MB of available hard disk spaceUSB port, CD-ROM driveQuickTime 4.0 or later for Morte Clip |
68

Warranty and After-sales Service
For repair, handling and care, first consult the dealer from whom you purchased the camera.
Warranty (separately attached)
Before accepting the warranty card, please make sure that the date of purchase and dealer of purchase and the dealer's details have been completed. After reading the warranty, keep it in a safe place.
Warranty period (main unit): one year from the date of purchase
When requesting service
If symptoms persist after having checked the table on pages 110 and 111. Troubleshooting, disconnect the power supply and contact the dealer from whom you purchased the camera.
Note: Transportation cost for taking/bringing back the product to/from repair, shipping costs or carrying charges are at the customer's expense. When shipping the product, pack the unit appropriately and use a shipping method such as registered mail or express mail to prevent loss of the product.
During the warranty period
Repairs will be made by the dealer from whom you purchased the camera according to the contents of the warranty. For repair, take the product and the warranty to the dealer from whom you purchased the camera.
Outside the warranty period
Repairable products can be repaired for a charge upon request. However, the minimum holding period of performance parts for repairing digital still cameras is 8 years after termination of production.
Note: Performance parts for repair are parts necessary to maintain the functions of the product.
69

Warranty and After-sales Service
FCC Compliance Statement:
Declaration of Conformity
Responsible party: KONICA PHOTO IMAGING
Address: 725 Darlington Avenue Mahwah, NJ 07430, U.S.A.
Telephone number: (201) 574 4000
This device complicity with Part. 15 of the FCC Rules. Operation is subject to the following two conditions:
(1) this device may not cause harmful interference and (2) this device must accept any interference received, including interference that may cause undesired operation.
This equipment has been tested and found to comply with the limits for a class B digital device, pursuant to Part 15 of the FCC Rules. These limits are designed to provide reasonable protection against harmful interference in a residential installation. This equipment generates, uses and can radiate radio frequency energy and, if not installed and used in accordance with the instructions, may cause harmful interference to radio communications. However, there is no guarantee that interference will not occur in a particular installation. If this equipment does cause harmful interference to radio or television reception, which can be determined by turning the equipment off and on, the user is encouraged to try to correct the interference by one or more of the following measures:
Reorient or relocate the receiving antenna.
Increase the separation between the equipment and receiver.
- Connect the equipment into an outlet on a circuit different from that to which the receiver is connected.
Consult the dealer or an experienced radin/TV technician for help.
• Shielded cables must be used for this equipment to comply with the relevant FCC regulation.
• Power requirement is DC 4.2V 10% and 1.5 A max. Use only listed certified power supply adapter.
- The user is cautioned that changes and modifications made to the equipment without approval of the manufacturer could void the user's authority to operate this equipment.

Tested To Comply
With FCC Standards
FOR HOME OR OFFICE USE
• However, note that operation of this unit near a radio or television receiver could possibly cause radio disturbance.
70

Warranty and After-sales Service
CANADA ONLY
Industry Canada's Compliance Statement
This Class B digital apparatus complies with Canadian ICES-003.
- Table Of Contents
- Getting Started
- •Test shooting
- Caution for Extended Camera Use:
- About trademarks
- Important Safety Precautions
- Definitions of the symbols
- Warning
- Caution
- ntroduction
- Accessories Included
- Introduction
- Preparation For Taking Pictures
- How to Switch On Or Off The Camera
- Loading the Batteries
- Note
- Warning
- Using An AC Adapter(Optional)
- Attaching The Wrist Strap
- Inserting An SD Card
- Removing An SD Card
- Important
- Setting Up Functions Before Taking Pictures
- Under Shooting Mode (☐)
- Under Playback Mode(▶)
- Under Movie Clip Mode( Preset : 10 Seconds )
- Notc
- Under Setup Modc(SET)
- Taking Pictures
- Playback / Erasing
- Installing Camera Driver
- Under Microsoft Windows 98 / 98SE
- Under Microsoft Windows ME / XP
- Under Mac 9.X or later
- Installing Ulead Photo Explorer
- Installing Ulcad Photo Explorer
- nstalling Ulead Photo Explorer
- Under Macintosh Operating System (Mac 9.X or later)
- About Ulead Photo Explorer
- Photo Explorer
- The Browser
- The Viewer
- Downloading Image(s) Onto Your PC
- Error Message Table
- Specifications
- Warranty and After-sales Service
- FCC Compliance Statement:
- CANADA ONLY
Brand : KONICA MINOLTA
Model : Revio KD-25
Category : Uncategorized