iAFS3 - Uncategorized iOptron - Free user manual and instructions
Find the device manual for free iAFS3 iOptron in PDF.


| Product Type | Electronic Inline Automatic Focuser |
| Model | iAFS3 (3") |
| Dimensions | 94 × 133 × 108 mm |
| Weight | 1062 g |
| Clear Aperture | 68 mm |
| Maximum Payload | 6 kg |
| Drawtube Travel | 30 mm |
| Focusing Resolution | 0.6 µm |
| Drive Train | Stepper motor with belt reduction |
| Power Supply | 5V USB via Type-C port |
| Communication Ports | 2× USB 2.0 Type-C |
| Computer Control | Yes (ASCOM and INDI compatible) |
| Automatic Focusing | Yes |
| Motorized Focusing Button | Yes |
| Manual Focusing | Yes, with mechanical override (powered or unpowered) |
| Temperature Sensor | Built-in |
| Camera Angle Adjustment | Yes, via grub screws |
| Zero Backlash | Yes, due to iLock™ technology |
| Position Memorization | Yes, during power off |
| Position Over-Run Protection | Yes |
| Warranty | One year limited |
| Included Accessories | Visual back (2"), USB-C cable |
| Compatible Telescope Adapters | Optional: M68×1 (camera), M117×1 (telescope) and more |
Frequently Asked Questions - iAFS3 iOptron
User questions about iAFS3 iOptron
0 question about this device. Answer the ones you know or ask your own.
Ask a new question about this device
Download the instructions for your Uncategorized in PDF format for free! Find your manual iAFS3 - iOptron and take your electronic device back in hand. On this page are published all the documents necessary for the use of your device. iAFS3 by iOptron.
USER MANUAL iAFS3 iOptron
Electronic Inline Automatic Focuser With iLock™ Technology
Instruction Manual
Feb 2025, Version 1.0
iOptron reserves the rights to revise this instruction without notice. Actual color/contents/design may differ from those described in this instruction.
Introducing the most versatile inline auto focuser: the iOptron iAFS ^TM focuser with iLock ^TM technology! Utilizing a lead worm movement is the key to the iAFS focusers patented design; this method passively locks it at the exact position when movement is stopped, maintaining focus for most any sized payload even as the instrument angle is changed. The iAFS incorporates three movement control modes, USB (computer control), on board directional buttons (for powered manual adjustments) and a manual focus wheel to override the motorized adjustment. Other features include a built-in temperature sensor, dual USB-C ports, solid all metal body, fingerprint resistant surface, 0.6 micron resolution, and position limiters to prevent over runs. It comes standard with a 2 inch visual back, and optional telescope adapters to fit various OTAs are available. The iAFS focusers will be available as the iAFS2 two inch model and the iAFS3 three inch version.
Features:
- High precision stepper motor with position over-run protection
• Built-in temperature sensor - Built-in CAA
- Quiet, smooth operation
- Compact and lightweight
- Zero backlash
- Dual USB-C port for computer connection and firmware upgrade
• ASCOM and INDI compatible - Manual adjustment (powered or unpowered)
- Position memorizing during power off
- Compatible with most OTAs with proper adapter
Package includes:
- 1X FA20 iAFS2 2" auto focuser w/ 2" visual back or 1X FA30 iAFS3 3" auto focuser w/ 2" visual back
- USB-C cable
Accessories:
P-FA20-CA iAFS2 camera adapter M48X0.75
P-FA20-M0800 iAFS2 telescope adapter Askar/65PHQ and other M80X1
P-FA20-M0835 iAFS2 telescope adapter Celestron/C11 and other M83.5X1.5
P-FA20-M0900 iAFS2 telescope adapter GSO/RC6, RC8 and other M90X1
P-FA30-CA iAFS3 camera adapter M68X1
P-FA30-M1170 iAFS3 telescope adapter GSO/RC10,12,14,16 and other M117X1
Others are coming.....
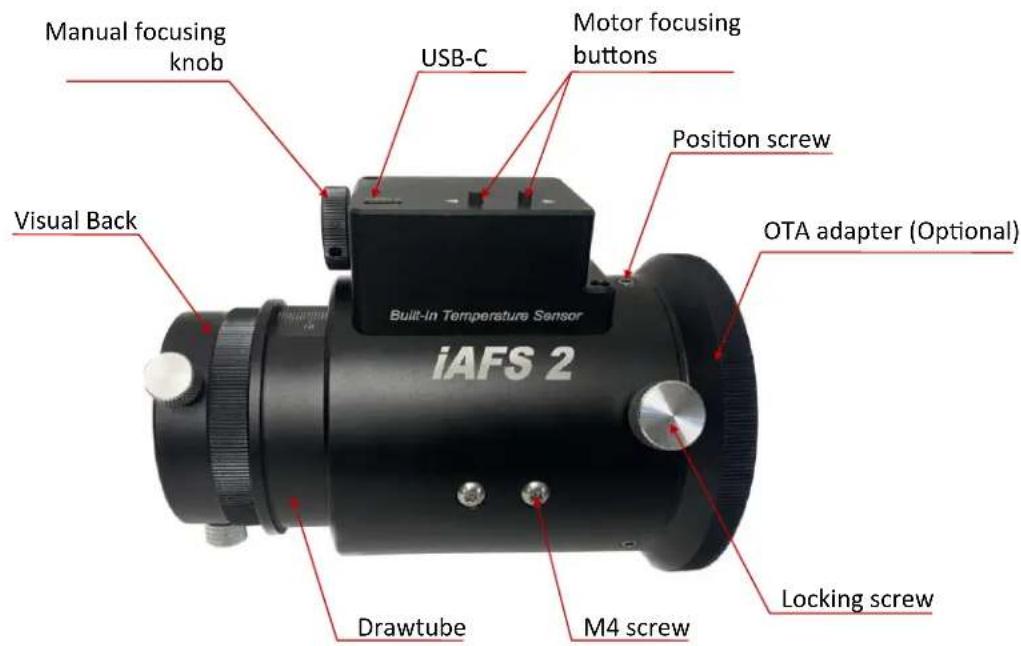
iAFS Parts
Attach Focuser to Scope
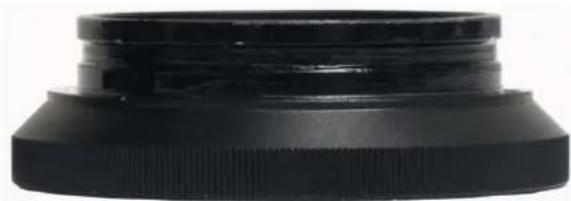
- Select a proper telescope adapter, such as FA20-M0900 for RC6 telescope.
natural_image
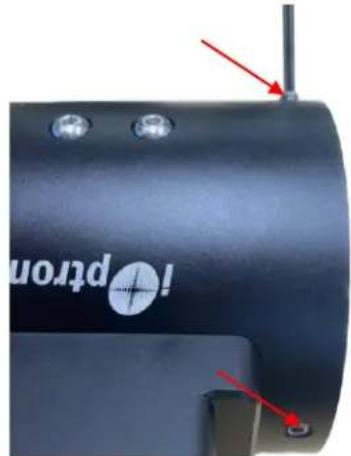
Close-up of a black plastic cap with ridged edge and flared rim (no text or symbols visible)- Install telescope adapter. First, back out three (3X) Position Screws and the Locking Screw on the iAFS body.
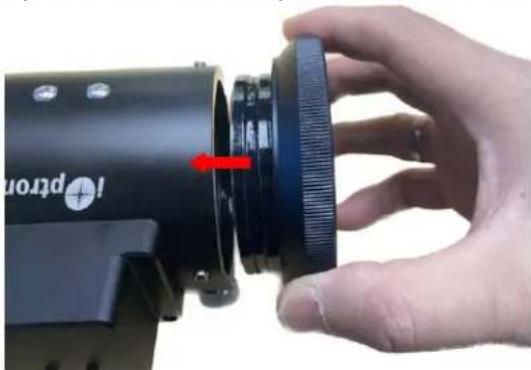
Next, insert OTA Adapter (FA20-M0900 shown) into the focuser body.
natural_image
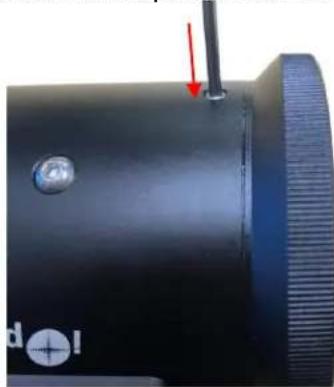
Close-up of a hand holding a black optical instrument with a red arrow pointing to the lens (no visible text or symbols)Thirdly, thread 3 Position Screws all the way in, then back out a quarter turn or so. The OTA adapter can be rotated freely but can not be pulled out from the focuser body.
natural_image
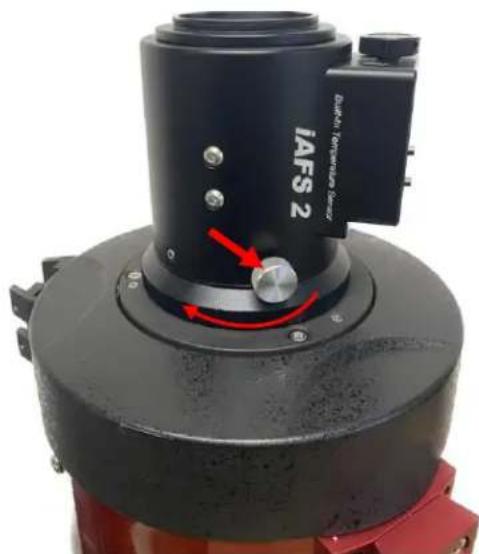
Close-up of a black cylindrical device with a red arrow pointing to a small component, no visible text or symbols.- Thread the focuser onto the OTA (RC6 is shown here). Turn the adapter ring to secure the iAFS onto the scope.
natural_image
Close-up of a black IAFS 2 mechanical device with red arrows indicating rotation and adjustment (no text or symbols on the device itself)- Tighten the Locking Screw to lock the focuser. Release the Locking Screw to adjust the focuser angle. Finally tighten three Position Screws after angle adjustment.
Attach Camera Adapter
- If a visual back is used, thread it onto the focuser camera end.
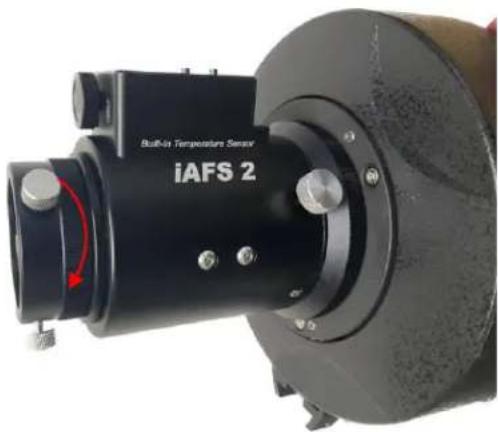
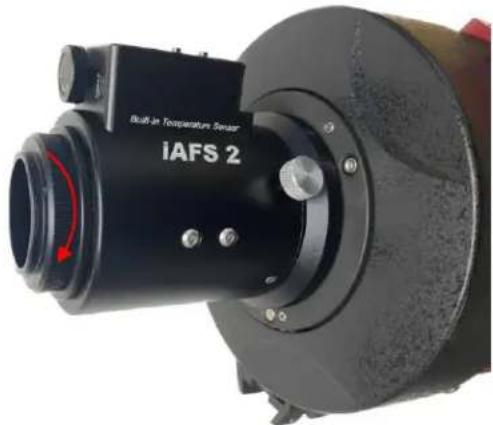
- If an optional camera ring (P-FA20-CA or P-FA30-CA) is used, thread it onto the focuser camera end.
natural_image
Close-up of a black IAFS 2 optical sensor module with no visible text or symbols on the device itself.There are three grub screws for fine angle adjustment between the focuser and an accessory, such as a filter wheel. A thread conversion adapter may be needed.
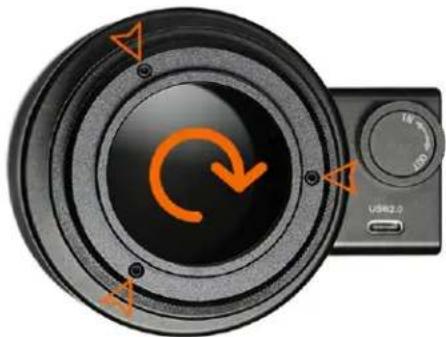
natural_image
Close-up of a black camera lens with orange circular button and directional arrows, next to a digital camera (no text or symbols on the lens itself)Adjust iAFS
- Connect to a 5V power source via USB port, such as a SmartPhone charger.
- Press arrow button to move the focuser forward or backward.
- Short press the button for fine adjustment.
- Turn the Manual Focusing Knob to adjust the focus, powered on not powered.
Connect to a Computer
- Download and install USB-Serial PL2303 VCP driver
- Download and install the iOptron Focuser ASCOM Driver Installer from iAFS product page and install it.
https://www.ioptron.com/v/ASCOM/iOptron_Focuser_ASCOM_DriverInstaller.exe
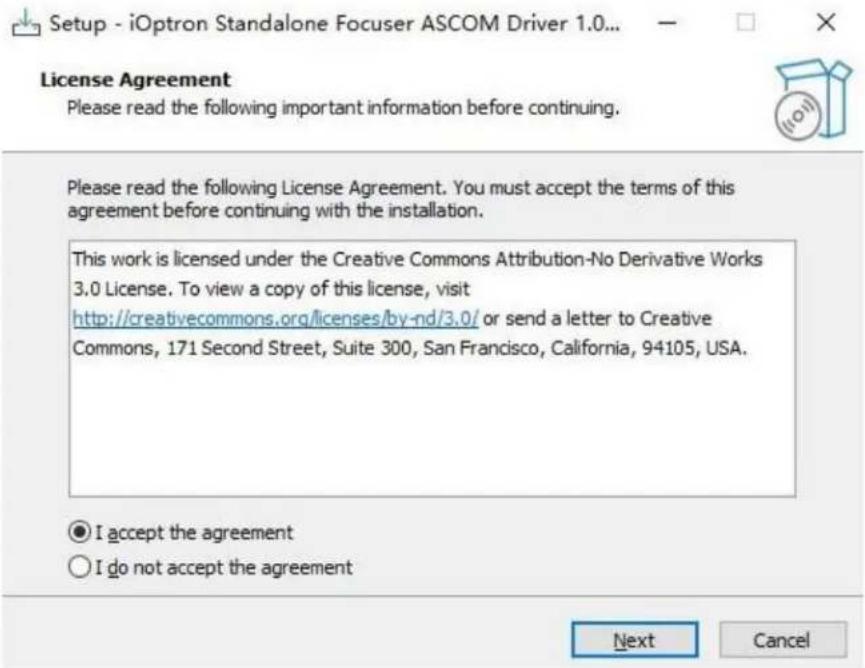
-
Connect any one of the focuser USB2.0 port to a PC USB port using included USB-C cable. The focuser will get the power from the USB port.
-
Click iOptron Standalone Focuser icon located on your computer desktop to launch the focuser.
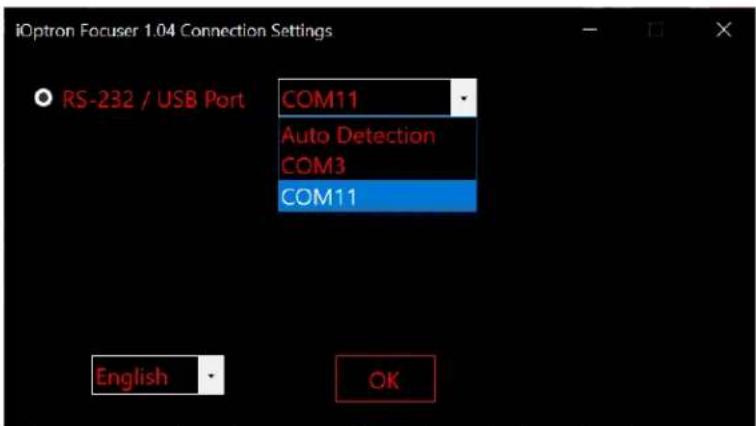
- Connect the focuser by either "Auto Detection" or select a COM port. Click OK.
- After the focuser is connected and a control interface is launched, you now can control the focuser.
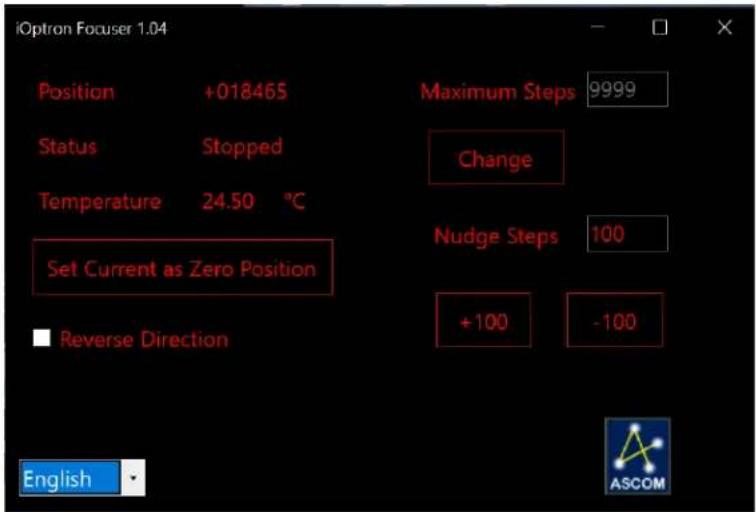
Set how many steps you want the focuser to move in Nudge Steps, here is 100 steps. Press +100 or -100 button to manually move the focuser forward or backward.
You also can set up the Maximum Steps by click on Change button.
The other functions are self-explained.
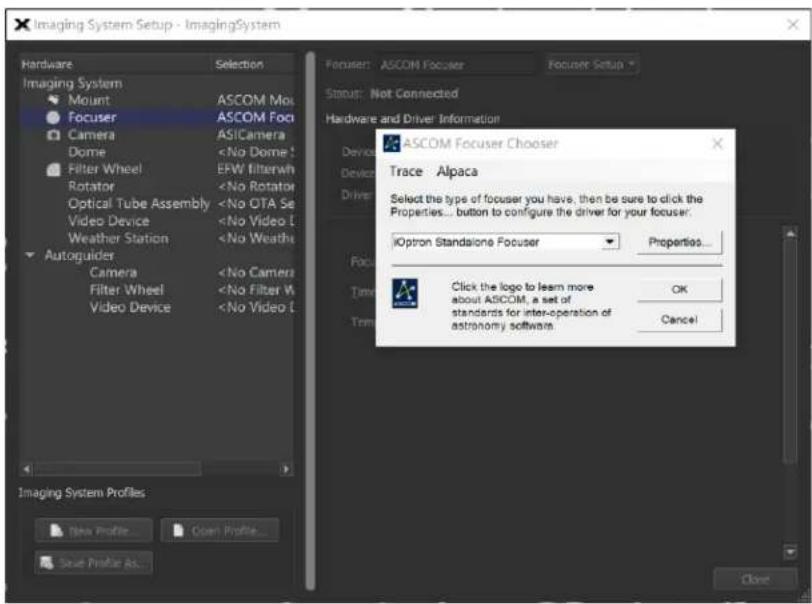
- When using an imaging software, choose "iOptron Standalone Focuser" from Image Software ASCOM Focuser setup menu to connect the iAFS to the Imaging Software.
Brand : iOptron
Model : iAFS3
Category : Uncategorized