
DS-4RSS - Hard Drive Docking Station Sabrent - Free user manual and instructions
Find the device manual for free DS-4RSS Sabrent in PDF.


| Product Type | 4-Bay SATA Hard Drive Docking Station |
| Compatible Drive Types | 2.5-inch and 3.5-inch SATA HDD/SSD |
| Number of Bays | 4 |
| Interface | USB 3.0 (SuperSpeed, backward compatible with USB 2.0) |
| Data Transfer Speed | Up to 5 Gbps |
| Power Supply | 12V DC, 4A external power adapter |
| Offline Clone Function | Yes, supports one-to-one cloning without a computer |
| Hot-Swap Support | Yes, each bay supports hot-swapping |
| Dimensions (L x W x H) | 20.0 x 15.0 x 10.0 cm |
| Weight | Approximately 800 g |
| Operating System Compatibility | Windows, macOS, Linux |
| LED Indicators | Power and HDD activity LEDs per bay |
| Maintenance | Clean with a soft, dry cloth; avoid liquid cleaners |
| Safety Precautions | Use only the provided power adapter; keep away from moisture |
| Included Accessories | Power adapter, USB 3.0 cable, user manual |
| Warranty | 1 year limited warranty |
Frequently Asked Questions - DS-4RSS Sabrent
User questions about DS-4RSS Sabrent
0 question about this device. Answer the ones you know or ask your own.
Ask a new question about this device
Download the instructions for your Hard Drive Docking Station in PDF format for free! Find your manual DS-4RSS - Sabrent and take your electronic device back in hand. On this page are published all the documents necessary for the use of your device. DS-4RSS by Sabrent.
USER MANUAL DS-4RSS Sabrent
Connecting Differently™
DS-4RSS
USB 3.0 4 BAY 2.5" HARD DRIVE/SSD DOCKING STATION

natural_image
Exterior view of a modern cylindrical water heater with a digital display and power button (no visible text or symbols)WITH BUILT IN COOLING FAN
User Manual
The Sabrent DS-4RSS SATA Hard Drive Docking Station enables you to access 2.5" hard drives, without the frustration of assembling hard drive enclosures. Just insert a 2.5" SATA hard drive into the docking station, and quickly access the drive contents or transfer files. Plug & Play mounting allows simple swapping of drives and USB 3.0 will transfer your files at speeds up to 5Gbps. In addition, the DS-4RSS supports Raid 0, Raid 1, Raid 3, Raid 5 and Raid 10 configurations.
FEATURES
- Read and write up to four hard drives simultaneously.
- Setup RAID modes: RAID 0, RAID 1, RAID 3, RAID 5, RAID 10
• Hot Swappable / Plug and Play - Tool-free installation.
- Transfer speeds up to 5Gbps.
• Supports 2.5" SATA I/ II/III HDD and SSD
• LED indicator for power and HDD access
PACKAGE CONTENTS
- 1x Docking Station
- 1x Power Adapter
- 1x Detachable Fan
- 1x USB 3.0 Data Cable
- 1x User Manual

natural_image
Black industrial air purifier device with cooling fan and digital display (no visible text or symbols)PARTS OF THE DOCKING STATION
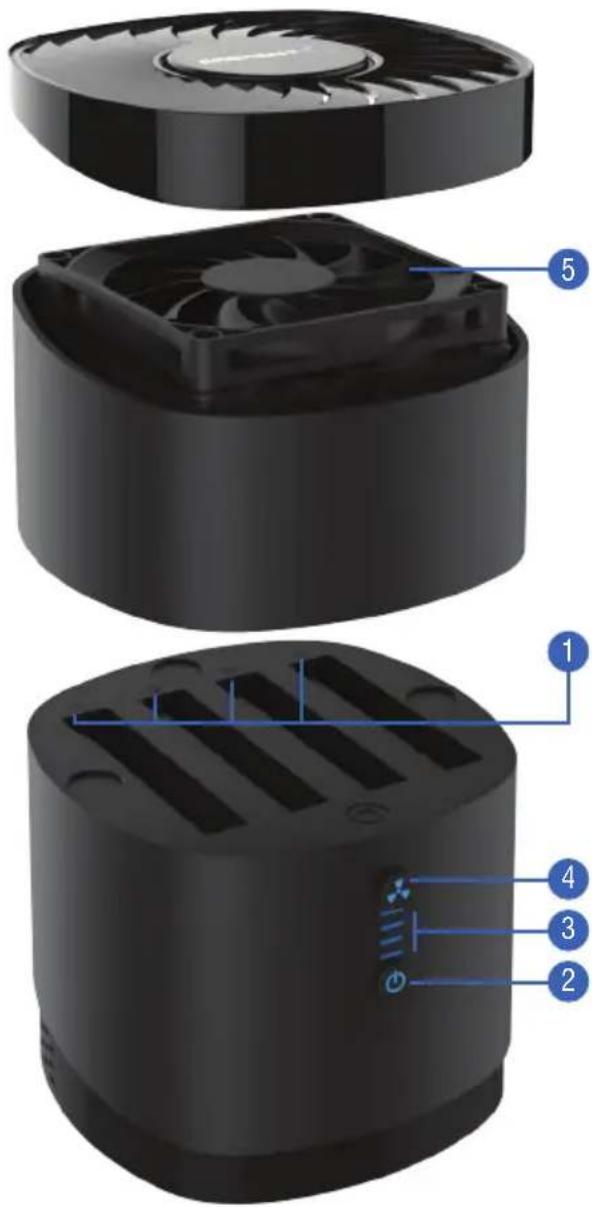
1 Hard drive slots
2 Power Switch
3 HDD Slots LEDs
4 Built In Fan Switch
5 Built In Fan
6 USB Cable Interface
7 Power Cable Interface
8 Raid selection dip switches

USING THE DOCKING STATION To use the Docking Station follow these steps
1 - Insert power cable and USB 3.0 cable into the Docking Station
2 - Plug the power cable into an appropriate power source

natural_image
Close-up of a black cylindrical device with attached cables and a small blue indicator light (no visible text or symbols)
natural_image
White electrical socket with two outlets inserted into a wall, connected by a black cable (no text or symbols visible)USING THE DOCKING STATION To use the Docking Station follow these steps
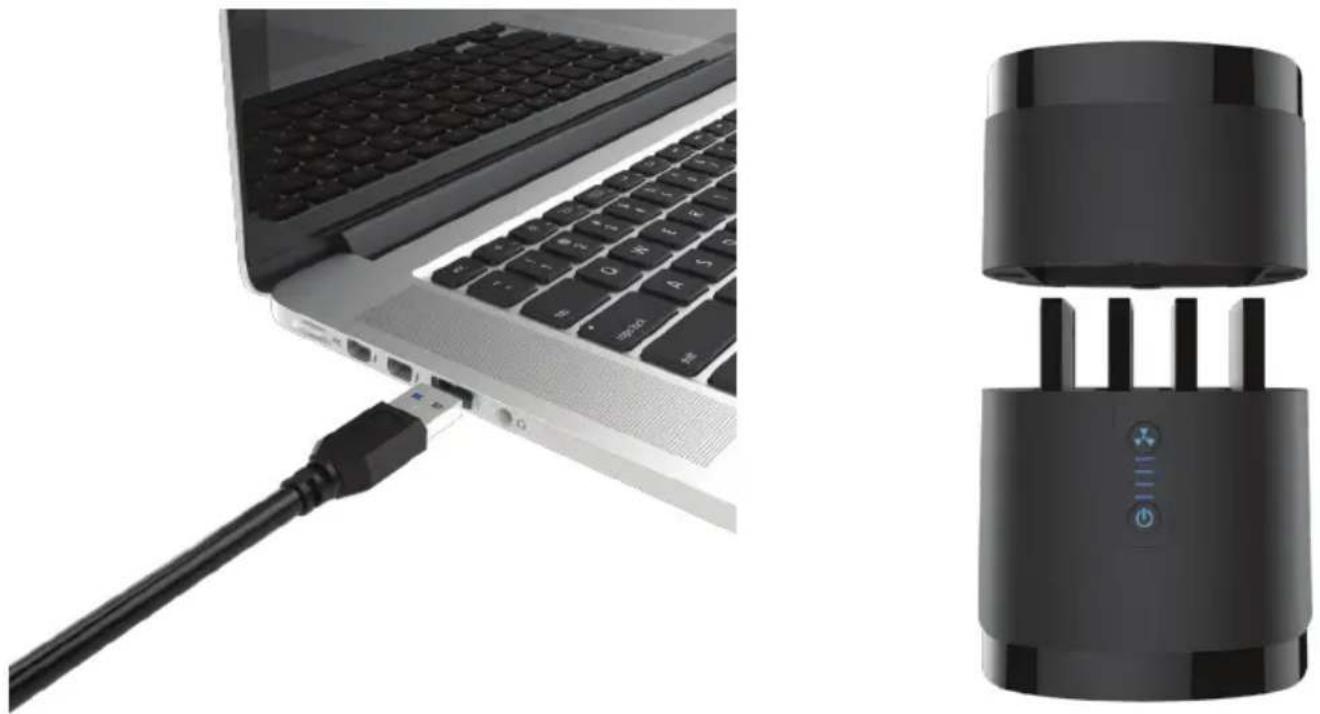
3 - Plug the USB 3.0 cable into a USB port on your computer
Note: To obtain the fastest speeds, you will need to plug into a USB 3.0 port, although the Docking Station is backwards compatible with USB 2.0 and 1.1, with their corresponding speeds.
4 - Insert up to (4) 2.5" hard drives into the drive bay(s)
5 - Attach the fan
natural_image
Laptop connected to a USB cable next to a black cylindrical device with LED indicator lights (no text or symbols visible)LED INSTRUCTIONS AND INDICATICATORS
1 - Press the power button to turn ON the Docking Station. When the power LED is lit, power is ON. To turn OFF the Docking Station, press the power button while the Docking Station is ON but not in use. When the Docking Station turns OFF, the power LED will also turn OFF.
2 - If the Fan LED is not lit, the fan is not ON. To Turn ON the fan press the fan button. The LED will illuminate indicating that it is turned ON. To turn OFF, press the fan button when the fan LED is ON. The LED will turn OFF to indicate that the fan is turned OFF.

natural_image
Vertical blue warning symbol with radiating lines and a power button, no text or numbers presentLED INSTRUCTIONS AND INDICATORS
3 - The 4 horizontal LEDs each correspond, in order, with the docking ports. ① slot, the top LED, ② slot, the 2nd LED, ③ slot, the 3rd LED, ④ slot, the 4th LED. If no drives are plugged in, all the lights will be off.
4 - When drives are inserted, the LED associated with that slot will illuminate.
5 - The corresponding LED will flash when data is being transferred to the drive inserted in that slot.

natural_image
Close-up of a black cylindrical device with a vertical control panel showing a radiation warning symbol and power button (no text or labels visible)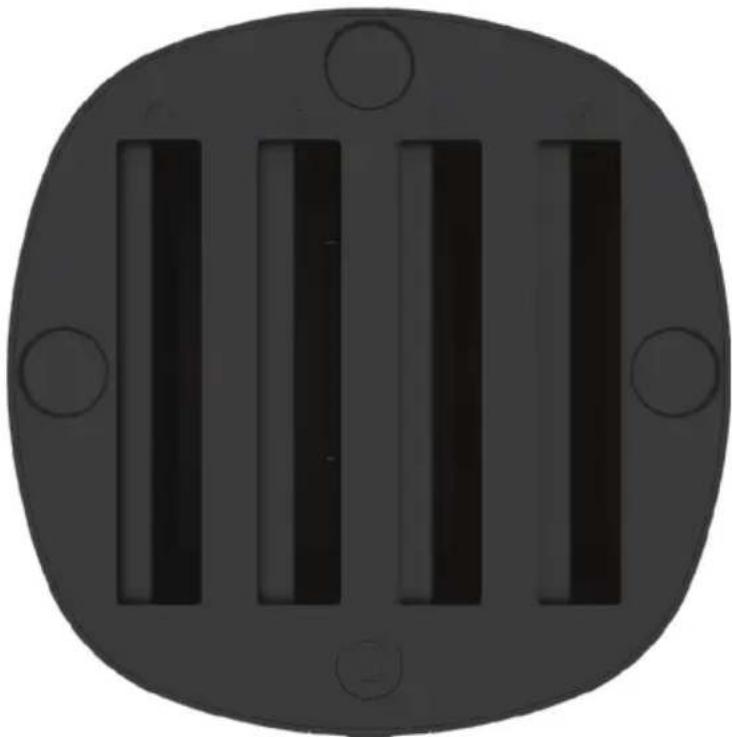
natural_image
Top-down view of a black plastic enclosure with three vertical slots and mounting holes (no text or symbols)RAID MODE SETUP

Switches are UP (H)/down (L)
The switch order from right to left is 1, 2, 3, 4
4 switch does not affect a RAID setup
| ON/L | 1 | 2 | 3 | NOTES |
| RAID 0 | H | H | H | Disk Block-level Striping across a minimum of 2 Drives |
| RAID 3 | L | L | H | Disk Byte Level striping across a minimum of 3 Drives |
| RAID 5 | L | H | L | Disk Block-level striping with dedicated parity across a minimum of 3 Drives |
| RAID 10 | L | H | H | Mirroring without parity, and block-level striping across a minimum of 4 Disks |
| RAID CLONE | H | H | L | The hard drive with less capacity will clone over to the rest of the drives |
| CANCEL/RESET | L | L | L | Cancel RAID/Reset |
| LARGE/JBOD | H | L | H | Combines the capacity of all hard drives to one sum |
| SEPARATE READING | L | L | H | All hard drives operate as independent external hard drives |
Power must be turned off when setting up a new RAID. Switching the RAID Mode to (LLL) will cancel all RAID functions. Turn on the power, press and hold the RAID (SET) switch for 3-5 seconds to clear the RAID Mode.
When setting up a RAID
1 - Set switches to the desired RAID Mode
2 - Power on the Docking Station
3 - Press and hold the RAID (SET) switch to start RAID function
Corresponding LED's flash indicating read and write. If one or more disks fail during a RAID setup, Red LED's will flash. Unplug the hard disks that fail and swap them out with spares. The Red LED's should then go away and flash back to normal.
TROUBLESHOOTING
My Computer Will Not Recognize My Docking Station:
-Make sure the USB cable is securely connected to your Docking Station and computer.
-Try connecting the Docking Station to a different USB port on your computer or laptop.
-Make sure you have the most recent updates for your operating system.
-Make sure your power outlet is working.
-Plug your USB device directly into a USB port on your computer (if plugged into a USB hub).
-If your computer still does not recognize the device, please contact Sabrent support.
Connection Is Slow:
Make sure the Docking Station is connected to a USB 3.0 port on your computer. While the Docking Station is backwards compatible, when connected to a USB 2.0 or 1.1 port, the Docking Station will operate at slower speeds.
Power Issues:
Try the power adapter on a different power outlet. Make sure that the power adapter is securely connected to the Docking Station.
Docking Station Disconnects From Computer:
Make sure the USB cable is securely connected to your Docking Station and computer. Connect the power adapter to the Docking Station and a working power outlet. Try connecting the Docking Station to a different USB port on your computer. Check your computer's sleep or standby settings.
- Connecting Differently™
- FEATURES
- PACKAGE CONTENTS
- PARTS OF THE DOCKING STATION
- USING THE DOCKING STATION To use the Docking Station follow these steps
- LED INSTRUCTIONS AND INDICATICATORS
- LED INSTRUCTIONS AND INDICATORS
- RAID MODE SETUP
- Switches are UP (H)/down (L)
- switch does not affect a RAID setup
- When setting up a RAID
- TROUBLESHOOTING
- My Computer Will Not Recognize My Docking Station:
- Connection Is Slow:
- Power Issues:
- Docking Station Disconnects From Computer:
Brand : Sabrent
Model : DS-4RSS
Category : Hard Drive Docking Station