
Image L40 LED DMX - Lighting Kino Flo - Free user manual and instructions
Find the device manual for free Image L40 LED DMX Kino Flo in PDF.


| Product Type | LED Panel Light |
| Model | Image L40 LED DMX |
| Brand | Kino Flo |
| AC Input Voltage | 100–240 VAC, 50/60 Hz, 200 W |
| Amperage | 2.0 A at 120 VAC, 1.0 A at 230 VAC |
| Kelvin Range (White Mode) | 2700 K – 6500 K |
| Kelvin Range (Color Mode) | 2500 K – 9900 K |
| Dimming Range | 100% – 1% |
| Weight (Yoke Mount) | 25 lb (11.5 kg) |
| Weight (Pole-Op) | 27 lb (12 kg) |
| Dimensions (Yoke Mount) | 54 × 6.5 × 17 in (137 × 16.5 × 43 cm) |
| Dimensions (Pole-Op) | 54.5 × 6.5 × 17 in (138.5 × 16.5 × 43 cm) |
| Control Modes | White, Gels/Hue, RGB, FX |
| DMX Protocol | DMX512 (1990), Class 2 Circuit |
| Auto Terminate | Yes (last fixture without DMX out cable) |
| Preset Buttons | 4 programmable (factory: 2700K, 3200K, 5000K, 6500K) |
| G/M Correction | Adjustable (000 – 255) |
| FX Effects | Candle, Fire, TV, Police, Lightning, Paparazzi, Pulse, Scroll |
| Ambient Temperature | 14 °F to 104 °F (-10 °C to 40 °C) |
| Power Connection | IEC with locking power cord |
| Mounting Options | Yoke mount (junior/baby pin) or Pole-Op (junior pin) |
| Included Accessories | Silver Louver, Gel Frame, Gel Clips |
| Optional Accessories | Barndoors (set of 4), Ship Case, Pole-Op Assembly, Various Mounts |
| Firmware Update | Via Mini B USB port |
Frequently Asked Questions - Image L40 LED DMX Kino Flo
User questions about Image L40 LED DMX Kino Flo
0 question about this device. Answer the ones you know or ask your own.
Ask a new question about this device
Download the instructions for your Lighting in PDF format for free! Find your manual Image L40 LED DMX - Kino Flo and take your electronic device back in hand. On this page are published all the documents necessary for the use of your device. Image L40 LED DMX by Kino Flo.
USER MANUAL Image L40 LED DMX Kino Flo
Image L80 LED Yoke Mount

Image L40 LED Pole-Op
KINO FLO
Lighting Systems
Image L80 & L40 LED Fixtures
Image LED Yoke Mount
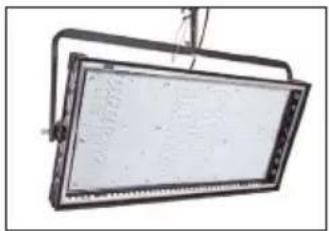
IMG-L80U
Image L80 LED DMX Yoke Mount, Univ

IMG-L40U
Image L40 LED DMX Yoke Mount, Univ
Image LED Pole-Op

IMG-L80PU
Image L80 LED DMX Pole-Op, Univ

IMG-L40PU
Image L40 LED DMX Pole-Op, Univ
Included w/ all Image Models

LVR-180-S
Image L80 Silver Louver (Included)
LVR-140-S
Image L40 Silver Louver (Included)

GFR-180
Image L80 Gel Frame (Included)
GFR-140
Image L40 Gel Frame (Included)
Image Yoke Mount Kits
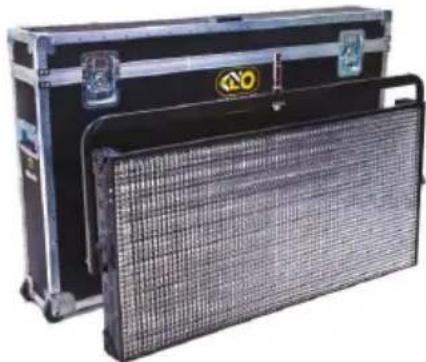
Image L80 LED DMX Kit
KIT-IL80U
Image L80 LED DMX Kit, Univ
Kit Contents:
1 Image L80 LED DMX
1 Jr. Pin
1 Ship Case
Dimensions:
58 × 9.5 × 36.5"
(147.5×24×93cm)
Weight:
75.5 lb
(34.5kg)

Image L40 LED DMX Kit
KIT-IL40U
Image L40 LED DMX Kit, Univ
Kit Contents:
1 Image L40 LED DMX
1 Jr. Pin
1 Ship Case
Dimensions:
58 × 9.5 × 25.5"
(147.5 × 24 × 65cm)
Weight:
56 lb
(25.5kg)
Inserting Gel Frame
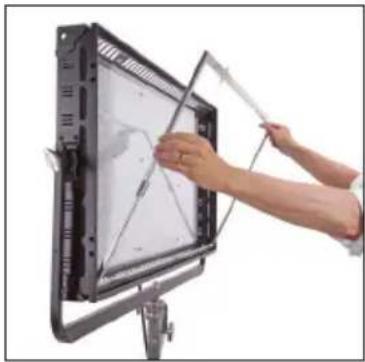

The gel frame is secured to the fixture by 4 spring-loaded pins. Align the pins of the gel frame with the oval receptacle holes on the edge of the fixture. Pull back the pins and release into the receptacles to properly secure the gel frame.
Applying Gel to Frame
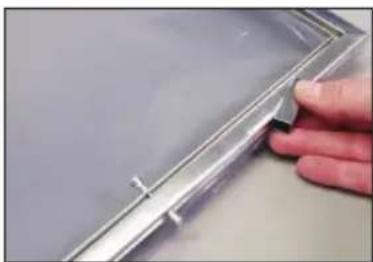

A) The Gel Frame comes with gel clips. Cut the gel or diffusion to size and use the clips to fasten to the frame.
Note: It is recommended to attach one clip on all four sides and two clips near all four corners of the Gel Frame.
B) Another method is to apply transfer tape directly to the gel frame. The clips are not necessary when taping the gel.
Inserting Louver
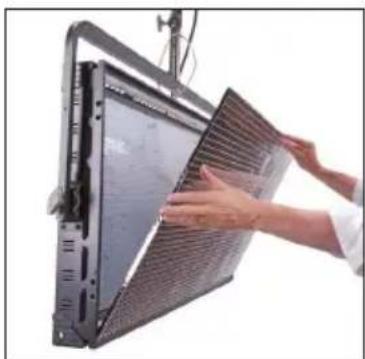

Place the long edge of the Louver into the lower channel containing a set of leaf springs. Press down on the Louver and slip the upper edge of the louver into the upper channel of the fixture. To remove, reverse the procedure.
Mounting Barndoors

Side Door (x2)

Top/ Bottom Door (x2)
Side Doors

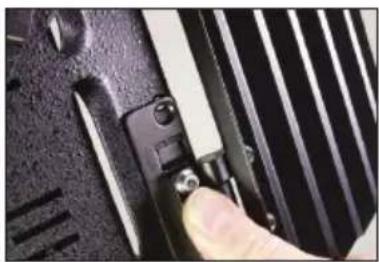
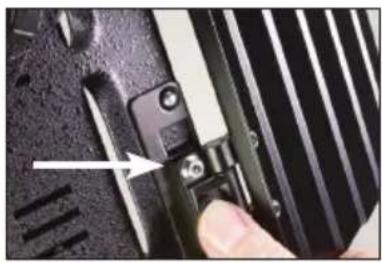
1) Align the hinge bracket tabs with the two square receptacles on the side of the fixture.
2) Press the tabs of both brackets into the square receptacles.
3) Slide the two brackets up until the silver lock pin snaps into place.
4) To release the barndoor, press the lock pin down and slide the bracket in reverse.
Top and Bottom Doors


1) Align the two hinge bracket tabs with the two square vents closest to the silver lock pins.
2) Press the brackets down into the vent and slide them over to engage the lock pins with the hole in the bracket.
3) To remove the barndoor, press down on the two lock pins and slide the brackets back.
4) Adjust the hinge tension with a Phillips head screwdriver.
Image Yoke Mount

The Yoke has a 1/2 " hole to accept industry standard mounting hardware.
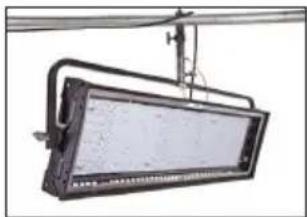
The Image L80 LED Yoke Mount can hang from a grid by a junior pipe hanger using a Junior Pin Assembly for Yoke (MTP-I80), sold separately.
The Image L40 LED Yoke Mount can also hang from a grid by a junior pipe hanger using a Junior Pin Assembly for Yoke (MTP-I80) or hang from a baby pipe hanger using a Baby Receiver Assembly for Yoke (MTP-I40), both sold separately.
Note: Because of weight capacity, the MTP-I40 can only be used on the Image L40 LED Yoke Fixture.

MTP-180 Junior Pin Assembly for Yoke (28mm)
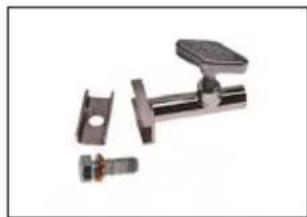
MTP-I40 Baby Receiver Assembly for Yoke (16mm)

The Yoke Mount is also designed with two holes to allow the yoke bracket to be placed in one of two positions. The additional option is useful when hanging the units in a studio with a low ceiling.
Warning: Use only 10-32 x 3/8" screws (supplied) to assemble yoke. Note that threads on the fixture are self-locking and may seem tight. Replacement screws: Part No. 2020058
Recommended torque setting: USA: 18 lb-in Metric: 2 Nm
Image Pole-Op

The Image L80 and L40 LED Pole-Op fixtures include a yoke with an attached junior pin.
They can be hung from a grid with a junior pipe hanger.

Junior pin attached to Pole-Op Yoke
Pole Operation

The Blue cup alters the Pan (left or right).
The White cup alters the Tilt (up or down).
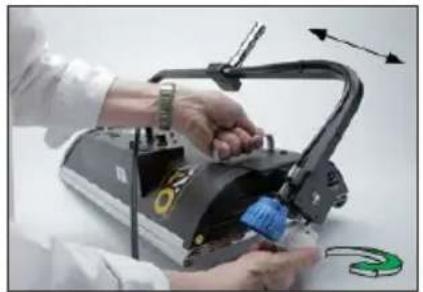
Warning!
Do not pull yoke to adjust tilt. Turn the white knob counter clockwise to angle the yoke 90°.
(ParaBeam shown for illustration purposes only.)

Fixture Power
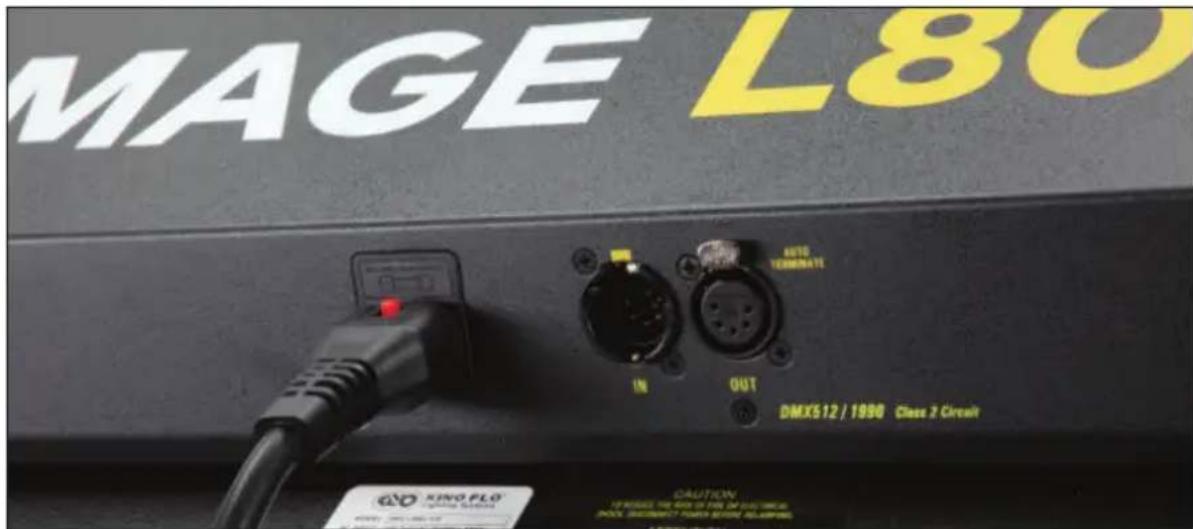
AC Input
The Image LED is powered AC and includes an IEC connection.
A locking power cord is included with the fixture. To remove the plug, move the red tab to release. The fixture has a built-in power supply with universal input from 100-240VAC.
Ambient Operating Temperature
The Image LED is designed to operate at temperatures from 14°F to 104°F (-10°C to 40°C).
Control Panel - White Mode

A B
C DEFGH
A) On /Off: On = Green light displayed. Off = Red light displayed. The display and all menu settings can be operated while the power button is in the Off position, as long as power is applied to the controller. The On /Off button only controls the light source.
B) Menu: Provides access to menu options such as General settings, Reset, DMX and DMX Wireless settings. Shortcut: While on control screen, press and hold for 3 seconds to switch through menus (White, Gels & Hue, RGB, FX).
C) Preset Buttons: Factory defaults left to right are: 2700K, 3200K, 5000K and 6500K. G/M default value is 000. User can also use these preset buttons to store custom Kelvin and G/M settings.
D) Display: Provides access to Dim, Kelvin, G/M, and DMX channel.
Factory reset will show: Dim = 10%, Kelvin = 2700K, G/M = 000, DMX = 001.
E) Lock: Press the Lock button to disable all buttons and Control knob. Press for 3 seconds to restore displayed presets to default factory settings.
F) Mode: Press to navigate from Dim to Kelvin and G/M settings. When in sub-menus, pressing Mode always returns you to main display. When DMX is applied, use Mode to access DMX channel on main display. Shortcut: Long press will bring you back one step.
G) Data Port: Mini B USB for firmware updates.
H) Control Knob: Manually adjusts Dim, Kelvin, G/M levels and DMX address. Press the Control knob to toggle between Fine and Coarse increments or when selecting options within menus.
DMX Note: Each LED Fixture has an "AUTO TERMINATE" feature. The last fixture that does not have an XLR cable attached to the DMX "Out" port will automatically terminate.
Control Panel - Gels/Hue Mode

Gels/Hue Mode
A) Menu:
Provides access to menu options such as General settings (Gels/Hue Mode), Reset, DMX and DMX Wireless settings. Shortcut: While on control screen, press and hold for 3 seconds to switch through menus (White, Gels & Hue, RGB, FX).
B) Preset Buttons:
Factory defaults left to right are: 2700K, 3200K, 5000K and 6500K. G/M default value is 000. User can also use these preset buttons to store custom Kelvin between 2500K and 9900K and custom G/M, Gel, Hue and Saturation settings.
C) Display:
Provides access to Dim, Kelvin, G/M, Gel, Hue/Saturation and DMX channel. Factory reset will show: Dim = 10%, Kelvin = 2700K, G/M = 000, DMX = 001.
D) Mode:
Press to navigate from Dim to Kelvin, G/M, Gel, Hue and Saturation settings. When on the Gel function, pushing the Control knob in/out will apply the gel or remove the gel. When in sub-menus, pressing Mode always returns you to main display. When DMX is applied, use Mode to access DMX channel on main display. Shortcut Tip: Long press will bring you back one step.
Control Panel - RGB Mode

ADCB
RGB Mode
A) Menu:
Provides access to menu options such as General settings (RGB Mode), Reset, DMX and DMX Wireless settings. Shortcut: While on control screen, press and hold for 3 seconds to switch through menus (White, Gels & Hue, RGB, FX).
B) Preset Buttons:
Factory defaults left to right are: 2700K, 3200K, 5000K and 6500K. G/M default value is 000. User can also use these preset buttons to store custom Kelvin between 2500K and 9900K and custom G/M, and RGB settings.
C) Display:
Provides access to Dim, Kelvin, G/M, RGB and DMX channel. Factory reset will show: Dim = 10%, Kelvin = 2700K, G/M = 000, DMX = 001.
D) Mode:
Press to navigate from Dim to Kelvin, G/M, RGB settings. When in sub-menus, pressing Mode always returns you to main display. When DMX is applied, use Mode to access DMX channel on main display. Shortcut: Long press will bring you back one step.
Control Panel - FX (Effects)
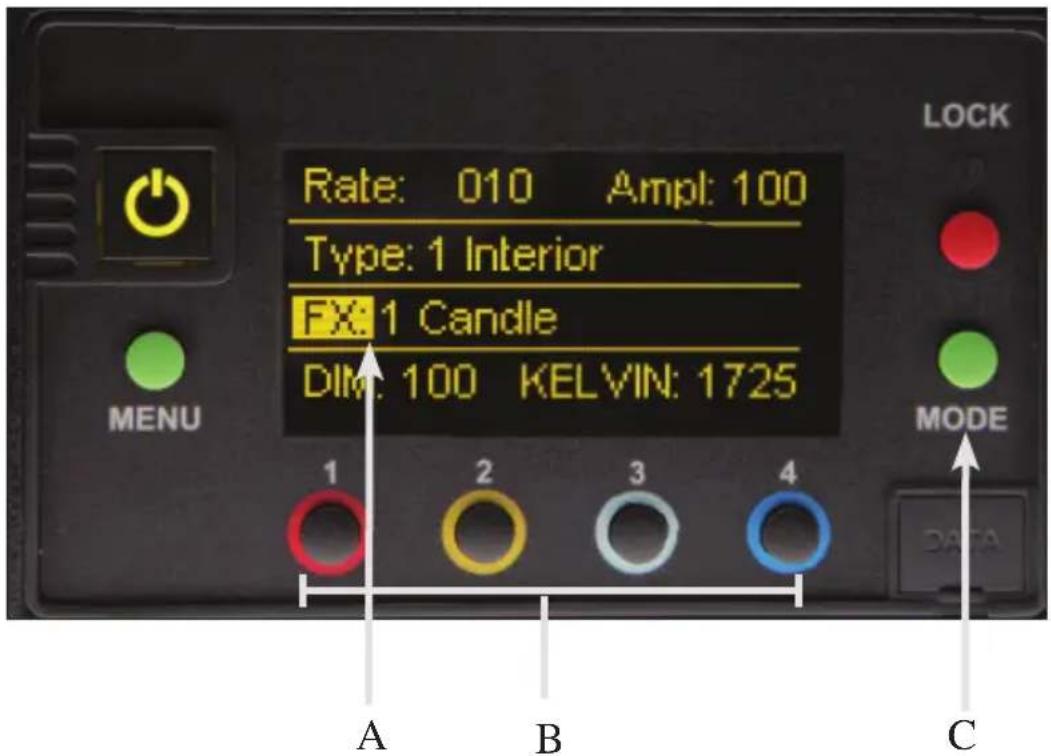
FX (Effects) Mode
FX mode provides access to effects including Candle, Fire, TV, Police, Lightning, Paparazzi, Pulse and Scroll. Candle mode used as an example:
A) FX Option:
Choose the desired FX Mode by rotating the control knob. When on the desired effect, there will be several pre-programmed effects as well as control parameters that can be altered.
B) Preset Buttons:
In FX Mode, Kelvin custom settings and any control functions displayed such as Rate and Amplitude (Ampl) can be saved as a preset. Chosen values can be assigned to any preset button by holding down the desired button for 3 seconds. The Kelvin display will flash once the setting is registered.
To restore presets to default factory settings, choose Reset under General settings and Clear Presets. This method will reset all buttons in all Modes. Shortcut: If only want to clear presets for Candle Mode, hold Lock button for 3 seconds while Candle mode is displayed.
C) Mode:
Press to navigate from Dim to Kelvin and FX settings.
Shortcut: Long press will bring you back one step.
Accessories

BRD-180 Image L80 Barndoors (Set of 4)
BRD-I40 Image L40 Barndoors (Set of 4)

KAS-180-I Image L80 Ship Case
KAS-140-I Image L40 Ship Case

7010016 Image L80 Pole-Op Assembly
7010015 Image L40 Pole-Op Assembly

MTP-180 Junior Pin Assembly for Yoke (28mm)
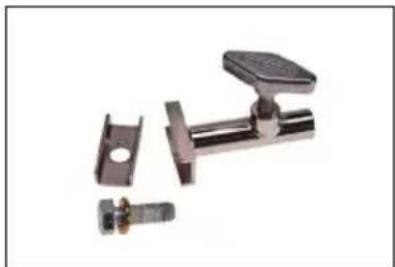
MTP-140 Baby Receiver Assembly for Yoke (16mm)
Fixture Specifications
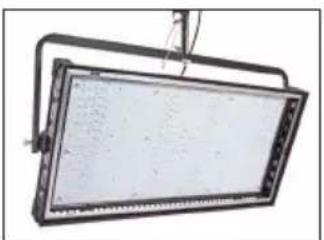
Image L80 LED DMX Yoke
IMG-L80U Image L80 LED DMX Yoke Mount, Univ
AC Input Voltage: 100\~240VAC 50/60Hz, 400W
Amperage VAC: 4.0A at 120VAC, 2.0A at 230VAC
Kelvin Range: 2700K\~6500K (White Mode)
2500K\~9900K (Color Mode)
Dimming Range: 100%\~1%
Weight: 41.5 lb (19kg)
Dimensions: 54 x 6.5 x 28"
(138.5 × 16.5 × 71cm)
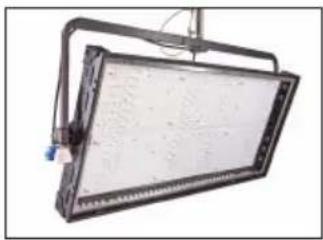
Image L80 LED DMX Pole-Op
IMG-L80PU Image L80 LED DMX Pole-Op, Univ
AC Input Voltage: 100\~240VAC 50/60Hz, 400W
Amperage VAC: 4.0A at 120VAC, 2.0A at 230VAC
Kelvin Range: 2700K\~6500K (White Mode) 2500K\~9900K (Color Mode)
Dimming Range: 100%\~1%
Weight: 45.5 lb (21kg)
Dimensions: 54.5 x 6.5 x 28"
(138.5 × 16.5 × 71cm)
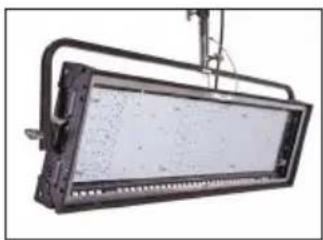
Image L40 LED DMX Yoke
IMG-L40U Image L40 LED DMX Yoke Mount, Univ
AC Input Voltage: 100\~240VAC 50/60Hz, 200W
Amperage VAC: 2.0A at 120VAC, 1.0A at 230VAC
Kelvin Range: 2700K\~6500K (White Mode) 2500K\~9900K (Color Mode)
Dimming Range: 100%\~1%
Weight: 25 lb (11.5kg)
Dimensions: 54 x 6.5 x 17"
(137 × 16.5 × 43cm)
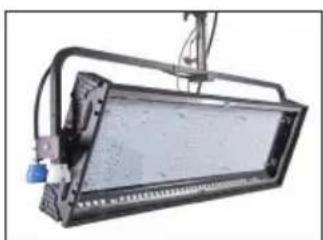
Image L40 LED DMX Pole-Op
IMG-L40PU Image L40 LED DMX Pole-Op, Univ
AC Input Voltage: 100\~240VAC 50/60Hz, 200W
Amperage VAC: 2.0A at 120VAC, 1.0A at 230VAC
Kelvin Range: 2700K\~6500K (White Mode) 2500K\~9900K (Color Mode)
Dimming Range: 100%\~1%
Weight: 27 lb (12kg)
Dimensions: 54.5 x 6.5 x 17"
(138.5×16.5×43cm)
FCC Part 15 Verification:
This device complies with Part 15 of the FCC Rules. Operation is subject to the condition that this device does not cause harmful interference.
FCC Part 15 Declaration of Conformity:
This device complies with Part 15 of the FCC Rules. Operation is subject to the following two conditions: (1) this device may not cause harmful interference, and (2) this device must accept any interference received, including interference that may cause undesired operation.

KINO FLO, INC
Image L80 & L40 LED
ID: XRSCRMXTIMO101
IC: 8879A-CRMXT101
For full operation manual, latest Warranty information and Certifications, see Kino Flo website at www.kinoflo.com.

For latest Warranty information and Certifications, see Kino Flo website at www.kinoflo.com.
Environmental: Disposal of Old Electrical & Electronic Equipment.
This symbol on the product or on its packaging indicates that this product shall not be treated as household waste. This product is made of recyclable materials and should be disposed of in accordance with governmental regulations.
- IMAGE L80 & L40 LED FIXTURES
- INCLUDED W/ ALL IMAGE MODELS
- IMAGE YOKE MOUNT KITS
- KIT-IL80U
- KIT CONTENTS
- DIMENSIONS
- WEIGHT
- KIT-IL40U
- INSERTING GEL FRAME
- APPLYING GEL TO FRAME
- INSERTING LOUVER
- MOUNTING BARNDOORS
- SIDE DOORS
- TOP AND BOTTOM DOORS
- IMAGE YOKE MOUNT
- IMAGE POLE-OP
- POLE OPERATION
- WARNING
- FIXTURE POWER
- AC INPUT
- AMBIENT OPERATING TEMPERATURE
- CONTROL PANEL - WHITE MODE
- A B
- C DEFGH
- CONTROL PANEL - GELS/HUE MODE
- GELS/HUE MODE
- MENU
- PRESET BUTTONS
- DISPLAY
- MODE
- CONTROL PANEL - RGB MODE
- RGB MODE
- CONTROL PANEL - FX (EFFECTS)
- FX (EFFECTS) MODE
- FX OPTION
- ACCESSORIES
- FIXTURE SPECIFICATIONS
- FCC PART 15 VERIFICATION
- FCC PART 15 DECLARATION OF CONFORMITY
- ENVIRONMENTAL: DISPOSAL OF OLD ELECTRICAL & ELECTRONIC EQUIPMENT
Brand : Kino Flo
Model : Image L40 LED DMX
Category : Lighting