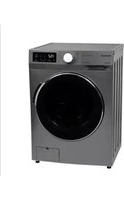
USER MANUAL NA-18MG1 PANASONIC
Operating Instructions
FRONT LOAD WASHING MACHINE
Model No: NA-16MG1 *
NA-18MG1 *
Thank you for purchasing this product.

*Picture is only for illustration * LSA/LAE/LMA/LKW/LAS-Silver * WSA/WAE/WMA/WKW/WAS-White

Before operating this unit, please completely read these instructions especially the Safety Precautions and Important Instructions.
CONTENTS
SAFETY INSTRUCTIONS 02
PRODUCT OVERVIEW 06
QUICK START GUIDE 07
PRODUCT INSTALLATION 09
OPERATION INSTRUCTIONS 13
CLEANING AND MAINTENANCE 24
TROUBLESHOOTING 26
SPECIFICATIONS 27
RAT PANEL INSTALLATION INSTRUCTION 31
DISPOSAL AND RECYCLING 32

Read all instructions and explanations before use. Follow the instructions carefully. Keep the operation instructions handy for later use. If the appliance is sold or passed on, ensure that the new owner always receives these operation instructions.
SAFETY INSTRUCTIONS
- This appliance is not intended for use by persons (including children) with reduced physical, sensory or mental capabilities or lack of experience and knowledge unless they have been given supervision or instruction concerning use of the appliance by a person responsible for their safety.
- Children should be supervised to ensure that they do not play with the appliance.
- If the power cord is damaged, it must be replaced by the manufacturer, its service agent or similarly qualified persons in order to avoid a hazard.
- The new hose-sets supplied with the appliance are to be used and old hose-sets should not be reused.
- The openings must not be obstructed by a carpet.
- This appliance is intended to be used in household and similar applications such as:
- Staff kitchen areas in shops, offices and other working environments;
- Farm houses;
- By clients in hotels, motels and other residential type environments;
- Bed and breakfast type environments;
- Areas for communal use in blocks of flats or in launderettes.
For your safety, the information in this manual must be followed to minimize the risk of fire or explosion, electric shock, or to prevent property damage, personal injury or loss of life.
Explanation of Symbols

DANGER
This symbol indicates that there are dangers to the life and health of persons due to extremely flammable gas.

WARNING OF ELECTRICAL VOLTAGE
This symbol indicates that there is a danger to life and health of persons due to voltage.

WARNING
This combination of symbol and signal word indicates a potentially dangerous situation which may result in death or serious injuries unless it's avoided.
Never stop a tumble dryer before the end of the drying cycle unless all items are quickly removed and spread out so that the heat is dissipated.
The appliance must not be supplied through an external switching device, such as a timer, or connected to a circuit that is regularly switched on and off by a utility.

CAUTION
This combination of symbol and signal word indicates a potentially dangerous situation which may result in slight or minor injuries or damage to property and the environment.

NOTE
This combination of symbol and signal word indicates a potentially dangerous situation which may result in slight or minor injuries.

OBSERVE INSTRUCTIONS
This symbol indicates that a service technician should only operate and maintain this appliance in accordance with the operating instructions.
SAFETY INSTRUCTIONS

WARNING:
Electric Shock!
- If the supply cord is damaged, it must be replaced by the manufacturer, its service agent or similarly qualified persons in order to avoid a hazard.
- The new hose-sets supplied with the appliance are to be used and old hose-sets should not be reused.
- Before any maintenance, unplug the appliance from the mains.
- Always unplug the machine and turn off the water supply after use. The max. inlet water pressure is 1.0 Mpa. The min. inlet water pressure is 0.05 Mpa.
- To ensure your safety, the power plug must be inserted into an earthed three-pole socket. Check carefully and make sure that your socket is properly and reliably earthed.
- Make sure that the water and electrical devices are connected by a qualified technician in accordance with the manufacturer's instructions and local safety regulations.
- The plug must be accessible after installation.
- Pull out the plug and cut off the water supply after operation. Take care that the power voltage and frequency shall be identical to those of the washing machine.
- The glass door may be very hot during operation. Keep kids and pets far away from the machine during operation.
- Remove all packages and transport bolts before using the appliance. Otherwise, serious damage may result.
- The washing machine with a single inlet valve can only be connected to the cold water supply. The product with double inlet valves should be correctly connected to both the hot and cold water supplies.
- Do not use any socket with a rated current less than that of the appliance. Never pull out the power plug with wet hands.
Risk to Children!
- This appliance is not intended for use by persons (including children) with reduced physical, sensory, or mental capabilities, or lack of experience and knowledge, unless they have been given supervision or instruction concerning use of the appliance by a person responsible for their safety.
- Children under 3 years should be supervised to ensure that they do not play with the appliance.
- Animals and children may climb into the machine. Check the machine before every operation.
- Children should be supervised to ensure that they do not play with the appliance.
Risk of Explosion!
- Do not wash or dry articles that have been cleaned in, washed in, soaked in, or dabbed with combustible or explosive substances (such as wax, oil, paint, gasoline, degreasers, dry-cleaning solvents, kerosene, etc.). This may result in fire or explosion.
- Before washing, thoroughly rinse items that have been hand-washed.
Installing the Product!
- This washing machine is for indoor use only.
- It is not intended for built-in use.
- The washing machine shall not be installed in a bathroom or very wet rooms, nor in rooms with explosive or caustic gases.
- Remove all packaging and transport bolts before using the appliance. Otherwise, serious damage may result.
- The washing machine with single inlet valve only can be connected to the cold water supply. The product with double inlet valves should be correctly connected to the hot water and cold water supply.
- Plug must be accessible after installation.
Risk of Damaging Appliance!
- Your product is only for home use and is only designed for the textiles suitable for machine washing.
- Do not climb up and sit on top cover of the machine.
- Do not lean against machine door.
- Cautions during Handling Machine:
- Transport bolts shall be reinstalled to the machine by a specialized person.
- The accumulated water shall be drained out of the machine.
- Handle the machine carefully. Never hold each protruded part on the machine while lifting. Machine door can not be used as the handle during the conveyance.
- This appliance is heavy. Transport with care.
5. A precaution indicates that hands shall not be inserted into the running water-extracting tub.
6. A precaution indicates that the appliance shall not be installed in a humid place.
- Please do not close the door with excessive force. If it is difficult to close the door, check if the clothes are put in or distributed well.
- It is forbidden to wash carpets.
Operating the Appliance!
- Before washing clothes for the first time, the product shall be operated for one round of the whole procedures without clothes inside.
- Flammable, explosive, or toxic solvents are forbidden.
- Gasoline and alcohol etc. shall not be used as detergents.
- Please only select detergents suitable for machine washing, especially for drum.
- Make sure that all pockets are emptied. Sharp and rigid items such as coins, brooches, nails, screws, or stones may cause serious damage to this machine.
- Please check whether the water inside the drum has been drained before opening its door. Do not open the door if there is any water visible.
- Be careful of burning when the product drains hot washing water.
- Never refill the water by hand during washing. After the program is completed, please wait for two minutes to open the door.
SAFETY INSTRUCTIONS
IMPORTANT STEPS WHEN MOVING THE APPLIANCE
- Unplug the appliance and close the water inlet tap.
- Check if the door and the detergent dispenser are closed properly.
- Remove the water inlet pipe and the outlet hose from the house installations.
- Let the water drain completely from the appliance (see “Cleaning the Drain Pump Filter”).
- Important: Re-install the 4 transport bolts in the back of the appliance.
- This appliance is heavy. Transport with care. Never hold any protruding part of the machine when lifting. The machine door cannot be used as a handle.
PRODUCT OVERVIEW


| 1 | Door |
| 2 | Detergent dispenser |
| 3 | Control panel |
| 4 | Drain hose |
| 5 | Power supply cord |
| 6 | Service flap |

NOTE
The product picture is for illustration only; please refer to the real product as reference.
Accessories
| 4 x Cover caps | 1 x Supply hose cold water | 1 x Owner's manual | Drain hose support (optional) | 1 x Rat panel |
 |  |  |  |  |
QUICK START GUIDE

CAUTION
- Before washing, please make sure the machine is installed properly.
- Your appliance was thoroughly checked before it left the factory. To remove any residual water and to neutralize potential odors, it is recommended to clean your appliance before first use. For this reason, it is recommended to clean the inner drum by running the "Drum Clean" or other program with an optional temperature of 90 °C. Be careful not to put laundry and detergent in the machine.
1. Before Washing
- Plug in. 2. Open tap. 3. Load.


- Close door.

- Add detergent.


NOTE
Detergent needs to be added in compartment I if the pre-wash function is selected.
2. Washing
- Select programme.

- Press Start/Pause to start the program.

- Select function or remain default settings.


NOTE
1: If default is selected, step 2 can be skipped.
2: The function button line chart is for reference only, please refer to real product as standard.
3. After Washing
Buzzer beeps and "End" appears on display.
PRODUCT INSTALLATION

Installation Area

WARNING
- Stability is important to prevent the product from wandering!
- Make sure the machine is standing leveled and stable. • Make sure that the product does not stand onto the power cord.
- Make sure to maintain the minimum distances from the walls as shown in the picture.


Before installing the machine, the location characterized as follows shall be selected:
- Rigid, dry, and level surface.
- Avoid direct sunlight.
- Sufficient ventilation. 4.Room temperature is above 5 °C.
- Keep far away from the heat sources such as coal or gas burning appliances.
Unpacking the Machine


WARNING
- Packaging material (e.g. Films, Styrofoam) can be dangerous for children.
- There is a risk of suffocation! Keep all packaging well away from children.
- Remove the cardboard box and styrofoam packing.
- Lift the machine and remove the base packaging.
- Remove the tape securing the power supply cord and drain hose.
- Remove the inlet hose from the drum.
Remove Transport Bolts

WARNING
You must remove the transport bolts from the backside before using the product.
- Loosen the 4 transport bolts with a spanner.

- Remove the bolts including the rubber parts and keep them for future use.

- Close the holes using the cover caps.

PRODUCT INSTALLATION
Levelling the Machine

WARNING
The lock nuts on all four feet must be screwed tightly against the housing.

- Loosen the lock nut.
- Turn the foot until it reaches the floor.
- Adjust the legs and lock the nuts with a spanner. Make sure the machine is level using a spirit level.
Connect the Water Supply Hose

WARNING
To prevent leakage or water damage, follow the instructions in this chapter.
- Do not kink, crush or modify water inlet hose.

Connect the water supply hose to the water inlet valve and a water tap with cold water as indicated.


NOTE
- Connect manually, do not use tools. Check if the connections are tight.
Drain Hose

WARNING
- Do not kink or protract the drain hose.
- Position the drain hose properly, otherwise damage might result in water leakage.
- It is not allowed to remove the buckle of the drain pipe.
There are two ways to place the end of the drain hose:
- Put it into the water trough.

- Connect it to the branch drain pipe of the trough.

OPERATION INSTRUCTIONS
Before Each Washing
- The ambient temperature of the machine should be 5°C to 40°C. If used below 0°C, the inlet valve and draining system may be damaged. If the machine is installed under freezing conditions, it should be transferred to normal ambient temperature to ensure the water supply hose and drain hose can unfreeze before use.
- Please check your laundry care labels and the detergent use instructions before washing. Use non-foaming or less-foaming detergent suitable for the machine properly.
- Take all items out of the pockets.

- Tie together long textile strips and belts, close zips and buttons.
- Sort laundry according to color and textile type.
![graph TD A["Top Paper"] --> B["Bottom Basket"] B --> C["Back to Basket"]](/content/2026/05/910776/images/65f19ddd453d27d83e7eb5b9ca1b64509f24ddc886126ed8e408de64ff49b349.jpg)
- Put small items into a laundry bag


WARNING
- Do not wash or dry articles that have been cleaned in, washed in, soaked in, or dabbed with combustible or explosive substances like wax, oil, paint, gasoline, alcohol, kerosene, and other flammable materials.
- Washing single clothes items may easily create big eccentricity. Therefore it is suggested to add one or two more laundry items to the wash so that spin can be done smoothly.
- Do not wash, spin water-proof seats, mats, or clothing.
Detergent Dispenser
I Pre wash
II Main wash

Softener

Release button to pull out the dispenser


CAUTION
- Detergent only need to be added in "compartment" after selecting pre-wash function.
| Programme | | | ||/◇ | ✿ | Programme | | | ||/◇ | ✿ |
| Cotton | ○ | ● | ○ | Spin Only | | | |
| Synthetic | ○ | ● | ○ | Bulky | ○ | ● | ○ |
| Mix | ○ | ● | ○ | Active Speed | ○ | ● | ○ |
| Cold Wash | ○ | ● | ○ | ABAYA/Delicates | | ● | ○ |
| Sportswear | ○ | ● | ○ | Cotton Eco | | ● | ○ |
| Baby Care | ○ | ● | ○ | Quick 15' | | ● | ○ |
| Jeans | ○ | ● | ○ | Rapid 45' | | ● | ○ |
| Rinse & Spin | | | ○ | | | | |
- Means must
○ Means optional
Control Panel

1 OFF
Turn the appliance on and off.
2 Start/Pause
Start or pause your programme.
3 Option
This allows you to select additional functions and will light when selected.
4 Programmes
Available according to the laundry type.
5 Display
The display shows settings, estimated remaining time, options and status messages.

NOTE
- The Chart is reference only, please refer to real product as standard.
OPERATION INSTRUCTIONS
Display
The Prewash function adds an extra wash before the main wash. It is suitable for washing away extra dust that rises to the surface of the clothes. When you select it, you need to put detergent into the Case (I).

Extra Rinse
After you select this, the laundry will undergo an extra rinse.

Strong Wash
This is for very dirty clothes. Selecting it increases the washing time and intensity to improve the washing effect.

HYGIENE PRO
When the HYGIENE PRO light is on, this function is automatically activated in the program. The Self-Clean function will be automatically activated during every washing cycle.
Press the button to regulate the temperature (Cold, 20°C, 30°C, 40°C, 60°C, 90°C).
Speed
Speed
Press the button to change the speed.
1400: 0-400-600-800-1000-1200-1400
| Programme | Default Speed(rpm) |
| 1400 |
| Cotton | 800 |
| Synthetic | 800 |
| Mix | 800 |
| Cold Wash | 800 |
| Sportswear | 800 |
| Baby Care | 1000 |
| Jeans | 800 |
| Rinse & Spin | 1000 |
| Programme | Default Speed(rpm) |
| 1400 |
| Spin Only | 1000 |
| Bulky | 1000 |
| Active Speed | 800 |
| ABAYA/Delicates | 800 |
| Cotton Eco | 1000 |
| Quick 15' | 800 |
| Rapid 45' | 800 |

Child Lock
To avoid misoperation by children.

Press [Delay] and [Funct.] simultaneously for 3 seconds until the buzzer beeps. The child lock indicator switches on.

CAUTION
When the Child Lock is activated, the display will alternately show “CL” and the remaining time.
Pressing any other button will cause the Child Lock indicator to flash.
When the program ends, "CL" and "End" will alternate on the display.
The Child Lock deactivates the function of all buttons except the Child lock button! Only the simultaneous pressing of the two buttons can deactivate the Child Lock!
Please deactivate the Child Lock before selecting a new program!

Reload
This operation can be executed during the washing progress. When the drum is still rolling and there is a large amount of water with high temperature in the drum, the state is unsafe and the door cannot be opened forcefully. To press
[▶] for 3 seconds to reload, and start the clothes adding in the midway function. Please follow the steps below:
- Wait until the drum stops rotating.
- The door lock is unlocked.
- Close the door when the clothes are reloaded and press the [Start/Pause] button.

Press [ ] for 3 seconds. Start/Pause


Reload the clothes


Start

CAUTION
Don't use the Reload function when the water level is over the edge of the inner tub or when the temperature is higher.

Mute the buzzer


Press 3 sec.
Choose the Programme
Press the [Temp.] button for 3 seconds; the buzzer is muted.
To activate the buzzer function, press the button again for 3 seconds. The setting will be kept until the next reset.

CAUTION
After muting the buzzer function, the sounds will not be activated anymore.

Delay
- Select a programme.
- Press the Delay button to choose the delaying time 0-24H.
- Press [Start/Pause] to start the delay operation.


Choose programme, Setting time, Start
To cancel the Delay function, press the “Delay” button before starting the program until the display shows 0H. If the program has already started, switch the appliance off and afterwards on and select a new programme.

CAUTION
If there is any break in the power supply while the machine is operating, a special memory stores the selected programme. The machine will continue the programme when the power supply is re-established.
OPERATION INSTRUCTIONS
Programmes are available according to the laundry type.
Programmes
| Cotton | Hard-wearing textiles, heat-resistant textiles made of cotton or linen. |
| Synthetic | Wash synthetic articles, for example: shirts, coats, blending.While washing the knitting textiles, detergent quantity shall be reduced due to its loose string construction and easily forming bubbles. |
| Baby Care | Washing the baby's clothes, it can make the baby's wear cleaner and make the rinse performance better to protect the baby skin. |
| Jeans | Specially for jeans. |
| Mix | Mixed load consisting of textiles made of cotton and synthetics. |
| Sportswear | Washing the activewear. |
| Quick 15' | Extreme short time program, suitable for wash small quantity slight dirty clothes. |
| Rapid 45' | Washing few and not very dirty clothes quickly. |
| ABAYA/ Del i cat es | For delicate, washable textiles, e.g. made of silk, satin, synthetic fibres or blended fabrics. |
| Active Speed | When you start this function, it will increase more foam in the bucket, then it will improve the wash performance. |
| Spin Only | Spins and drains the water.. |
| Rinse & Spin | Rinses and then spins the laundry, and then drains the water. |
| Cotton Eco | Hard-wearing textiles, heat-resistant textiles made of cotton or linen.Energy-saving programme. |
| Bulky | This program is specially designed for washing bulky clothes like bedsheets. |
| Cold Wash | Washing brightly colored clothes, it can protect the colors better. |

NOTE
- The chart is for reference only; please refer to the actual product as the standard.
- When the programme is finished, "End" will flash on the display. Please turn the knob to the Off position.
Washing Programmes Table
Model: NA-16MG1; NA-18MG1
| Programme | Load (kg) Default Threshold(mil) |
| 8.0 | 9.0 | Default | 8.0/9.0 |
| Cotton | 8.0 | 9.0 | 40 | 3:49 |
| Synthetic | 4.0 | 4.5 | 40 | 3:28 |
| Mix | 8.0 | 9.0 | 40 | 1:30 |
| Cold Wash | 4.0 | 4.5 | Cold | 1:08 |
| Sportswear | 4.0 | 4.5 | 20 | 0:57 |
| Baby Care | 8.0 | 9.0 | 60 | 1:52 |
| Jeans | 8.0 | 9.0 | 30 | 1:46 |
| Rinse & Spin | 8.0 | 9.0 | - | 0:30 |
| Spin Only | 8.0 | 9.0 | - | 0:12 |
| Bulky | 8.0 | 9.0 | 40 | 1:48 |
| Active Speed | 8.0 | 9.0 | 40 | 1:10 |
| ABAYA/Delicates | 2.5 | 2.5 | 30 | 0:50 |
| Cotton Eco | 8.0 | 9.0 | 30 | 0:59 |
| Quick 15' | 2.0 | 2.0 | Cold | 0:15 |
| Rapid 45' | 2.0 | 2.0 | 20 | 0:45 |
The UAE Energy Efficiency class is: ★ ★ ★ ★ ★. Energy test program: Cotton, Temp.: 60 °C; Speed: 1400 rpm, other settings as default. Half load for 8.0 kg machine: 4.0 kg. Half load for 9.0 kg machine: 4.5 kg.
The SASO/OM/KW Efficiency class is: A
Energy test program: Cotton Eco, Temp.: 60/40 °C;
Speed: 1400 rpm, other settings as default.
Half load for 8.0 kg machine: 4.0 kg.
Half load for 9.0 kg machine: 4.5 kg.

NOTE
- The parameters in this table are only for user's reference. The actual parameters may differ from those in the above-mentioned table.
CLEANING AND MAINTENANCE
Cleaning and Care

WARNING
• Always unplug the appliance and close the water tap before cleaning and maintenance.
Cleaning the Cabinet
Proper maintenance of the machine can extend its working life. The surface can be cleaned with diluted non-abrasive neutral detergents when necessary. If there is any water overflow, use a towel to wipe it off immediately. Never use sharp items to clean the appliance.


CAUTION
- Never use abrasive or caustic agents, such as formic acid or its diluted solvents, or similar substances like alcohol or chemical products.
Cleaning the Drum
Any rust stains left inside the drum by metal articles must be removed immediately using chlorine-free detergents. Never use steel wool for cleaning the drum!

NOTE
- Keep any laundry away from the machine while cleaning the drum.
Cleaning the Door Seal and Glass
Wipe the glass and seal after each wash to remove lint and stains. If lint builds up it can cause leakages.
Remove any coins, buttons and other objects from the seal after each wash.
Clean the door seal and glass every month to ensure the normal operation of the appliance.

Cleaning the Inlet Filter

NOTE
- Diminishing water flow is a sign that the filter needs to be cleaned.
- Close the tap and remove the water supply hose from it.

- Clean the filter with a brush.

- Unscrew the water supply hose from the backside of the machine.
Pull out the filter with long nose pliers.
- Use a brush to clean the filter.


- Reinstall the filter to the water inlet and reconnect the water supply hose.
- Clean the Inlet filter every 3 months to ensure the normal operation of the appliance.
CLEANING AND MAINTENANCE
Cleaning the Detergent Dispenser
- Press down the release [ ] on the softener cover and pull the dispenser drawer out of the recess. Clean the inside of the recess with a brush.
- Lift the softener cover off the dispenser drawer and wash both items with water.
- Restore the softener cover and push the drawer back into the recess.
- Press the release and remove the dispenser drawer

- Clean the dispenser drawer and the softener cover under water

- Clean the recess with a soft brush

- Insert the dispenser drawer


NOTE
- Do not use abrasive or caustic agents to clean plastic parts.
- Clean the detergent dispenser every 3 months to ensure the normal operation of the appliance.
Cleaning the Drain Pump Filter

WARNING
- Make sure that the machine has finished the washing cycle and is empty. Switch it off and unplug it before cleaning the drain pump filter.
- Be careful of hot water. Wait for water cooling down. Risk of scalding!
- Clean the filter periodically every 3 months to ensure the normal operation of the appliance.
1. Open the lower cover cap

- Remove extraneous matter

2. Open the filter by turning it counterclockwise

- Close the lower cover cap


CAUTION
- When the appliance is in use and depending on the programme selected there can be hot water in the pump. Never remove the pump cover during a wash cycle, always wait until the appliance has finished the cycle, and is empty. When replacing the cover, ensure it is securely re-tightened.
TROUBLESHOOTING
Whenever there is a problem with the appliance, check if you can solve it following the tables below. If the problem persists, please contact the customer service.
| Description | Possible Cause | Solution |
| Appliance does not start | Door is not closed properly.Clothes are stuck. | Close the door properly and restart.Check the laundry. |
| Door can’t be opened | Safety protection is activated. | Disconnect the power and restart. |
| Water leakage | Connections are not tight enough. | Check and fasten the water inlet pipe.Check and clean the outlet hose. |
| Detergent residues in the detergent dispenser | Detergent is damp and/or clotted. | Clean and wipe the detergent dispenser dry. |
| Indicator or display does not work | PC board or harness have connection problems. | Switch off the power and check if the mains plug is connected properly. |
| Abnormal noise | Fixing bolts are still in place.Floor is not solid or level. | Check if the fixing bolts have been removed.Make sure the appliance is installed on a solid and level floor. |
Error Codes
| Description | Possible Cause | Solution |
| E30 | Door is not closed properly. | Close the door properly and restart. |
| E10 | Water injecting problem during wash cycle. | Check if the water pressure is high enough.Straighten the water pipe.Clean the inlet valve filter. |
| E21 | Overtime water draining | Check the drain hose for blockage. |
| E12 | Water overflow | Restart the appliance. |
| EXX | Others | Restart the appliance. If problem persists, please contact the customer service. |
SPECIFICATIONS

| Model | NA-16MG1* NA-18MG1* |
| Power Supply | 220-240V~,50/60Hz |
| MAX. Current | 10A |
| Standard Water Pressure | 0.05MPa~1MPa |
| Washing Capacity | 8.0kg 9.0kg | |
| Dimension | | |
| A | 595mm | 595mm |
| B | 850mm | 850mm |
| C | 535mm | 535mm |
| Weight | 65kg | 65kg |
| Rated Power | 1900W | 1900W |
| Reference Dimension | | |
| D | 600mm | 600mm |
| E | 581mm | 581mm |
| F | 1045mm | 1045mm |
| G | 135mm | 135mm |
| Model | NA-16MG1* | |
| Capacity | 8.0 kg | |
| Spin Speed | 1400 rpm | |
| Annual water consumption: | 8360 L/year | * |
| Annual energy consumption: | 143 kWh/year | * |
| Power consumption of off-mode: | 0.5W | * |
| Power consumption of left-on mode: | 1.0W | * |
| Energy consumption of the standard 60°C at full load: | 0.738 kWh/cycle | * |
| Energy consumption of the standard 60°C at partial load: | 0.538 kWh/cycle | * |
| Energy consumption of the standard 40°C at partial load: | 0.535 kWh/cycle | * |
| Water consumption of the standard 60°C at full load: | 40 L/cycle | * |
| Water consumption of the standard 60°C at partial load: | 35 L/cycle | * |
| Water consumption of the standard 40°C at partial load: | 35 L/cycle | * |
| Programme duration of the standard 60°C at full load: | 180 min | * |
| Programme duration of the standard 60°C at partial load: | 180 min | * |
| Programme duration of the standard 40°C at partial load: | 180 min | * |
| Remaining moisture content of the standard 60°C at full load: | 53 % | * |
| Remaining moisture content of the standard 60°C at partial load: | 53 % | * |
| Remaining moisture content of the standard 40°C at partial load: | 53 % | * |
| Number of washing cycles for the standard 60°C at full load: | 1 | * |
| Number of washing cycles for the standard 60°C at partial load: | 1 | * |
| Number of washing cycles for the standard 40°C at partial load: | 1 | * |
| Water quantity of washing cycles for the standard 60°C at full load: | 22 L/cycle | * |
| Water quantity of washing cycles for the standard 60°C at partial load: | 13 L/cycle | * |
| Water quantity of washing cycles for the standard 40°C at partial load: | 13 L/cycle | * |
| Time of washing cycles for the standard 60°C at full load: | 117 min | * |
| Time of washing cycles for the standard 60°C at partial load: | 117 min | * |
| Time of washing cycles for the standard 40°C at partial load: | 117 min | * |
| Number of rinse cycles for the standard 60°C at full load: | 2 | * |
| Number of rinse cycles for the standard 60°C at partial load: | 2 | * |
| Number of rinse cycles for the standard 40°C at partial load: | 2 | * |
| Water quantity of rinse1 cycles for the standard 60°C at full load: | 9 L/cycle | * |
| Water quantity of rinse1 cycles for the standard 60°C at partial load: | 11 L/cycle | * |
| Water quantity of rinse1 cycles for the standard 40°C at partial load: | 11 L/cycle | * |
| Water quantity of rinse2 cycles for the standard 60°C at full load: | 9 L/cycle | * |
| Water quantity of rinse2 cycles for the standard 60°C at partial load: | 11 L/cycle | * |
| Water quantity of rinse2 cycles for the standard 40°C at partial load: | 11 L/cycle | * |
| Time of rinse1 cycles for the standard 60°C at full load: | 7 min | * |
| Time of rinse1 cycles for the standard 60°C at partial load: | 7 min | * |
| Time of rinse1 cycles for the standard 40°C at partial load: | 7 min | * |
| Time of rinse2 cycles for the standard 60°C at full load: | 11 min | * |
| Time of rinse2 cycles for the standard 60°C at partial load: | 11 min | * |
| Time of rinse2 cycles for the standard 40°C at partial load: | 11 min | * |
| Number of spin cycles for the standard 60°C at full load: | 3 | * |
| Number of spin cycles for the standard 60°C at partial load: | 3 | * |
| Number of spin cycles for the standard 40°C at partial load: | 3 | * |
| Time of spin1 cycles for the standard 60°C at full load: | 12 min | * |
| Time of spin1 cycles for the standard 60°C at partial load: | 12 min | * |
| Time of spin1 cycles for the standard 40°C at partial load: | 12 min | * |
| Time of spin2 cycles for the standard 60°C at full load: | 12 min | * |
| Time of spin2 cycles for the standard 60°C at partial load: | 12 min | * |
| Time of spin2 cycles for the standard 40°C at partial load: | 12 min | * |
| Time of spin3 cycles for the standard 60°C at full load: | 21 min | * |
| Time of spin3 cycles for the standard 60°C at partial load: | 21 min | * |
| Time of spin3 cycles for the standard 40°C at partial load: | 21 min | * |
*for KSA/Oman/Kuwait market
Product Fiche
| Model | NA-18MG1* | |
| Capacity | 9.0 kg | |
| Spin Speed | 1400 rpm | |
| Annual water consumption: | 8360 L/year | * |
| Annual energy consumption: | 143 kWh/year | * |
| Power consumption of off-mode: | 0.5W | * |
| Power consumption of left-on mode: | 1.0W | * |
| Energy consumption of the standard 60°C at full load: | 0.738 kWh/cycle | * |
| Energy consumption of the standard 60°C at partial load: | 0.538 kWh/cycle | * |
| Energy consumption of the standard 40°C at partial load: | 0.535 kWh/cycle | * |
| Water consumption of the standard 60°C at full load: | 40 L/cycle | * |
| Water consumption of the standard 60°C at partial load: | 35 L/cycle | * |
| Water consumption of the standard 40°C at partial load: | 35 L/cycle | * |
| Programme duration of the standard 60°C at full load: | 180 min | * |
| Programme duration of the standard 60°C at partial load: | 180 min | * |
| Programme duration of the standard 40°C at partial load: | 180 min | * |
| Remaining moisture content of the standard 60°C at full load: | 53 % | * |
| Remaining moisture content of the standard 60°C at partial load: | 53 % | * |
| Remaining moisture content of the standard 40°C at partial load: | 53 % | * |
| Number of washing cycles for the standard 60°C at full load: | 1 | * |
| Number of washing cycles for the standard 60°C at partial load: | 1 | * |
| Number of washing cycles for the standard 40°C at partial load: | 1 | * |
| Water quantity of washing cycles for the standard 60°C at full load: | 22 L/cycle | * |
| Water quantity of washing cycles for the standard 60°C at partial load: | 13 L/cycle | * |
| Water quantity of washing cycles for the standard 40°C at partial load: | 13 L/cycle | * |
| Time of washing cycles for the standard 60°C at full load: | 117 min | * |
| Time of washing cycles for the standard 60°C at partial load: | 117 min | * |
| Time of washing cycles for the standard 40°C at partial load: | 117 min | * |
| Number of rinse cycles for the standard 60°C at full load: | 2 | * |
| Number of rinse cycles for the standard 60°C at partial load: | 2 | * |
| Number of rinse cycles for the standard 40°C at partial load: | 2 | * |
| Water quantity of rinse1 cycles for the standard 60°C at full load: | 9 L/cycle | * |
| Water quantity of rinse1 cycles for the standard 60°C at partial load: | 11 L/cycle | * |
| Water quantity of rinse1 cycles for the standard 40°C at partial load: | 11 L/cycle | * |
| Water quantity of rinse2 cycles for the standard 60°C at full load: | 9 L/cycle | * |
| Water quantity of rinse2 cycles for the standard 60°C at partial load: | 11 L/cycle | * |
| Water quantity of rinse2 cycles for the standard 40°C at partial load: | 11 L/cycle | * |
| Time of rinse1 cycles for the standard 60°C at full load: | 7 min | * |
| Time of rinse1 cycles for the standard 60°C at partial load: | 7 min | * |
| Time of rinse1 cycles for the standard 40°C at partial load: | 7 min | * |
| Time of rinse2 cycles for the standard 60°C at full load: | 11 min | * |
| Time of rinse2 cycles for the standard 60°C at partial load: | 11 min | * |
| Time of rinse2 cycles for the standard 40°C at partial load: | 11 min | * |
| Number of spin cycles for the standard 60°C at full load: | 3 | * |
| Number of spin cycles for the standard 60°C at partial load: | 3 | * |
| Number of spin cycles for the standard 40°C at partial load: | 3 | * |
| Time of spin1 cycles for the standard 60°C at full load: | 12 min | * |
| Time of spin1 cycles for the standard 60°C at partial load: | 12 min | * |
| Time of spin1 cycles for the standard 40°C at partial load: | 12 min | * |
| Time of spin2 cycles for the standard 60°C at full load: | 12 min | * |
| Time of spin2 cycles for the standard 60°C at partial load: | 12 min | * |
| Time of spin2 cycles for the standard 40°C at partial load: | 12 min | * |
| Time of spin3 cycles for the standard 60°C at full load: | 21 min | * |
| Time of spin3 cycles for the standard 60°C at partial load: | 21 min | * |
| Time of spin3 cycles for the standard 40°C at partial load: | 21 min | * |
*for KSA/Oman/Kuwait market
Product Fiche
| Model | NA-16MG1* |
| Capacity | 8.0kg |
| Spin Speed | 1400 rpm |
| Energy efficiency class | ★★★★★ |
| Annual energy consumption | 89 kWh/annual |
| Annual water consumption | 8008 L/annual |
| Spin- drying efficiency class | ★★★★ |
| *Only for UAE market | |
| Model | NA-18MG1* |
| Capacity | 9.0kg |
| Spin Speed | 1400 rpm |
| Energy efficiency class | ★★★★★ |
| Annual energy consumption | 89 kWh/annual |
| Annual water consumption | 8346 L/annual |
| Spin- drying efficiency class | ★★★★ |
* Only for UAE market
RAT PANEL INSTALLATION INSTRUCTION
Before disassembling the shipping bolt, the rat resistance panel should be installed.
Please follow the steps below to install the panel.
- Incline the machine to a suitable angle for installation. Packaging pad can be used under the machine. When inclining the machine, make sure no damage to it.
- Remove the tapes pasted on four sides of panel.
- Adjust the panel as per marked direction to the correct position, make sure the mark "F" leads to the front of the machine.
- Stick the panel to the machine.
- Secure the panel with the screws provided in the accessory bag.
After all the steps above finished, please upright the machine to the correct position.

Arrow instruction of the inserting direction


First step

Second step

Third step

Fourth step

Last step
(Secure with screws)
DISPOSAL AND RECYCLING
Important Instructions for Environment
Compliance with the WEEE Directive and Disposing of the Waste Product: This product complies with EU WEEE Directive (2012/19/EU). This product bears a classification symbol for waste electrical and electronic equipment (WEEE).
This symbol indicates that this product shall not be disposed with other household wastes at the end of its service life. Used device must be returned to official collection point for recycling of electrical and electronic devices. To find these collection systems please contact your local authorities or retailer where the product was purchased. Each household performs important role in recovering and recycling of old appliance. Appropriate disposal of used appliance helps prevent potential negative consequences for the environment and human health.

Compliance with RoHS Directive
The product you have purchased complies with EU RoHS Directive (2011/65/EU). It does not contain harmful and prohibited materials specified in the Directive.
Packaging materials of the product are manufactured from recyclable materials in accordance with our National Environment Regulations. Do not dispose of the packaging materials together with the domestic or other wastes. Take them to the packaging material collection points designated by the local authorities.

Packing the machine
![graph LR A["Machine with lid"] --> B["Box with handle"] B --> C["Cube with grid pattern"]](/content/2026/05/910776/images/256df26696559a9c52c971c2fbb78a011642c1e8d7c855a723c56540523b29c9.jpg)
■ Transport and Handling Method
Manufacturer & Importer : Panasonic Marketing Middle East & Africa FZE
Address : P.O. Box 17985, Jebel Ali Free Zone, Dubai, United Arab Emirates