
fi-8190 - Scanner RICOH - Free user manual and instructions
Find the device manual for free fi-8190 RICOH in PDF.


| Product Type | ADF (Automatic Document Feeder) scanner |
| Scanning Speed | 90 ppm (simplex) / 180 ipm (duplex) at 200/300 dpi, A4, JPEG |
| Image Sensor | Monochrome CIS × 2 (front and back) |
| Light Source | RGB LED switching between 3 colors (front, back) |
| Optical Resolution | 600 dpi |
| Output Resolution | 50 to 600 dpi (1 dpi increments), 1,200 dpi via driver |
| Scanning Area (Min) | 48 × 50 mm |
| Scanning Area (Max) | A4 portrait (210 × 297 mm) / Legal portrait (8.5 × 14 in.); up to 240 mm width with side guide adjuster; long page up to 6,096 mm |
| Paper Weight | 20 to 465 g/m²; plastic cards up to 1.4 mm; passports up to 7 mm |
| Loading Capacity | 100 sheets (80 g/m²) |
| Interface | USB 3.2 Gen 1x1 / USB 2.0 / USB 1.1 (Type B); Wired LAN: IEEE 802.3 10BASE-T/100BASE-TX/1000BASE-T (RJ-45) |
| Network Protocol | TCP/IP (IPv4/IPv6), DHCP, HTTP/HTTPS, DNS, UDP, ICMP |
| Power Consumption (Operating) | 30 W or less (17 W in ECO mode) |
| Power Consumption (Power Saving) | 1.4 W (USB) / 2.0 W (wired LAN) |
| Power Consumption (Off) | 0.2 W or less |
| Dimensions (W × D × H) | 300 × 170 × 163 mm |
| Weight | 4 kg |
| Operating Temperature | 5 to 35 °C |
| Operating Humidity | 15 to 80% (non-condensing) |
| Main Features | High speed duplex scanning, network connectivity, LCD operator panel, mixed batch scanning, ultrasonic multifeed detection, intelligent multifeed, paper protection by noise/skew detection, advanced image processing, imprint option |
| Cleaning | Outside with soft cloth; inside ADF with cleaning paper or cloth; flatbed models: glass cleaning; carrier sheets cleanable |
| Consumables | Pick roller, brake roller, carrier sheets (standard, photo, booklet), imprinter cartridge |
| Safety Features | Paper protection function, ultrasonic multifeed sensors, emergency stop, error codes with explanations |
| Bundled Software | PaperStream IP driver, Network Setup Tool, Software Operation Panel, PaperStream ClickScan, PaperStream Capture, fi Series Online Update |
Frequently Asked Questions - fi-8190 RICOH
User questions about fi-8190 RICOH
0 question about this device. Answer the ones you know or ask your own.
Ask a new question about this device
Download the instructions for your Scanner in PDF format for free! Find your manual fi-8190 - RICOH and take your electronic device back in hand. On this page are published all the documents necessary for the use of your device. fi-8190 by RICOH.
USER MANUAL fi-8190 RICOH
natural_image
Line drawings of two different printer designs (no text or symbols)Introduction 11
About This Product ....11
Manuals 11
Trademarks....18
Manufacturer....18
Issue Date/Issuer 18
Safety Information....18
Symbols Used in This Manual 19
Abbreviations Used in This Manual....20
Arrow Symbols in This Manual....22
Screen Examples in This Manual....22
Notice....22
Scanner Overview 23
Main Features....23
Operating Methods....26
Parts and Functions [fi-8190/fi-8170/fi-8150/fi-8150U] 28
Parts and Functions [fi-8290/fi-8270/fi-8250/fi-8250U] 32
Parts and Functions [Common Parts for All Models]....37
Scanner Setup 41
Overview of the Bundled Software....43
System Requirements 46
Connecting the Scanner via a Wired LAN in order to Operate It with a Computer (When Obtaining an IP Address Automatically) [fi-8190/fi-8290/fi-8170/fi-8270/fi-8150/fi-8250] .... 47
Connecting the Scanner via a Wired LAN in Order to Operate It with a Computer (When Assigning an IP Address Manually) [fi-8190/fi-8290/fi-8170/fi-8270/fi-8150/fi-8250] ....52
Connecting the Scanner to a Computer via the USB Cable in Order to Operate It with the Computer....57
Connecting the Scanner via a Wired LAN in Order to Operate It with PaperStream NX Manager (When Obtaining an IP Address Automatically) [fi-8190/fi-8290/fi-8170/fi-8270/fi-8150/fi-8250]....60
Connecting the Scanner via a Wired LAN in Order to Operate It with PaperStream NX Manager (When Setting an IP Address Manually) [fi-8190/fi-8290/fi-8170/fi-8270/fi-8150/fi-8250] 64
Starting Up Scanner Selection Tool [fi-8190/fi-8290/fi-8170/fi-8270/fi-8150/fi-8250] ....69 Starting Up IP Address Setting Tool [fi-8190/fi-8290/fi-8170/fi-8270/fi-8150/fi-8250] ....70
Basic Operations 71
Turning the Power ON/OFF....71 How to Turn the Power ON....71 How to Turn the Power OFF....72
Entering and Resuming from Power Saving Mode ....74 Opening/Closing the ADF....76 How to Open the ADF....76 How to Close the ADF....77
Opening/Closing the Document Cover [fi-8290/fi-8270/fi-8250/fi-8250U] .... 78 How to Open the Document Cover .... 78 How to Close the Document Cover .... 79
Setting Up the ADF Paper Chute (Feeder)....80 Setting Up the Stacker [fi-8190/fi-8170/fi-8150/fi-8150U]....81 Document Length Is A4 (Portrait) or Longer....81 Document Length Is Shorter than A4 (Portrait)....82 Documents with Different Sizes....84
Setting Up the Stacker [fi-8290/fi-8270/fi-8250/fi-8250U] ....86 Document Length Is A5 (Portrait) or Longer....86 Document Length Is Shorter than A5 (Portrait)....89 Documents with Different Sizes....90
How to Perform a Basic Scan 92
Performing a Scan with an Image Scanning Application....94 Pressing a Button on the Scanner in order to Start an Image Scanning Application and Perform a Scan....96 Configuring the Settings for a Button on a Computer (For USB Connection)....102
Processing a Job (With PaperStream NX Manager) [fi-8190/fi-8290/fi-8170/fi-8270]....105 Processing a Job (With PaperStream NX Manager) [fi-8150/fi-8250]....109
How to Load Documents 110
Loading a Document in the ADF Paper Chute (Feeder)....110
Preparing Documents to Load Them in the ADF Paper Chute (Feeder) 110
How to Load a Document in the ADF Paper Chute (Feeder)....112
Placing a Document on the Flatbed [fi-8290/fi-8270/fi-8250/fi-8250U] 115
Documents for Scanning 116
Paper Size 116
Document Type 116
Document Thickness (Paper Weight) 117
Documents That May Not Be Scanned Successfully ....117
Documents That Must Not Be Scanned 118
Precautions 119
Loading Capacity....122
Area Not to Be Perforated....123
Conditions Required to Accurately Detect Overlapped Documents (Multifeed)....124
Conditions for Mixed Batch Scanning....126
Conditions for Automatic Page Size Detection....130
Conditions for Using the Carrier Sheet....131
Conditions for Using the Photo Carrier Sheet....133
Conditions for Using the Booklet Carrier Sheet....135
How to Use the Operator Panel [fi-8190/fi-8290/fi-8170/fi-8270] 137
Operator Panel Overview....137
Names and Functions of the Operator Panel ....137
Indications on LCD 139
Description of the Indicator 142
How to Use Settings Menu 145
Checking the Guidance Contents....149
Checking the Information ....151
Checking the Scanner Information ....153
Operational Settings for the Scanner 155
Checking and Clearing the Consumable Counters....157
Document Count....159
Configurable Items in the Settings Menu 161
How to Use Function Selection....170
Item Configurable in Function Selection....173
How to Use the Operator Panel [fi-8150/fi-8250/fi-8150U/fi-8250U] 174
Operator Panel Overview....174
Names and Functions of the Operator Panel 174
Indications on Function Number Display....176
Various Ways to Scan 178
Scanning Documents with Different Widths 178
Scanning Documents That Are 220 mm to 240 mm in Width....180
Scanning Documents Folded in Half....183
Scanning Documents such as Envelopes or Multi-Layered Transfer Paper 186
Scanning Booklets such as Passports....189
Scanning Documents Larger than A4/Letter Size....192
Scanning Photographs and Clippings without Damaging Them 195
Scanning Booklets such as Passports without Damaging Them 197
Scanning Long Page Documents....199
Scanning Books with the Flatbed [fi-8290/fi-8270/fi-8250/fi-8250U]....200
Scanning Large Documents with the Flatbed [fi-8290/fi-8270/fi-8250/fi-8250U] 202
Feeding Documents Manually....204
Configuring Not to Detect Certain Overlap Patterns 208
Operational Procedure [fi-8190/fi-8290/fi-8170/fi-8270]....210
Operational Procedure [fi-8150/fi-8250/fi-8150U/fi-8250U] 213
Disabling the Paper Protection Function [fi-8190/fi-8290/fi-8170/fi-8270]....215
Operational Procedure 215
Daily Care 217
Cleaning Materials 217
Location and Frequency....219
Cleaning the Outside of the Scanner....220
Cleaning the Inside of the Scanner (ADF) with Cleaning Paper 222
Cleaning the Inside of the Scanner (ADF) with a Cloth....225
Cleaning the Inside of the Scanner (Flatbed) [fi-8290/fi-8270/fi-8250/fi-8250U] ....232
Cleaning the (Carrier) Sheet....233
Replacing the Consumables 234
Consumables and Replacement Cycles....234
Replacing the Brake Roller 236
Replacing the Pick Roller 241
Troubleshooting 249
When a Paper Jam Occurs 249
Errors....251
Imprinter Error (When the Imprinter Is Installed) [fi-8190/fi-8170/fi-8150/fi-8150U]....257
Memory Error/LSI Error 258
Internal Communication Error of the Scanner 259
Flatbed Carrier Error [fi-8290/fi-8270/fi-8250/fi-8250U]....259
Optical Error (Flatbed) [fi-8290/fi-8270/fi-8250/fi-8250U]....260
Optical Error (ADF) 261
Operator Panel Error....261
EEPROM Error....262
Image Memory Read-Write Error....262
Background Switching Mechanism Error....263
Motor Circuit Error....264
Imprinter System Error (When the Imprinter Is Installed) [fi-8190/fi-8170/fi-8150/fi-8150U] ......265
Lamp Circuit Error 265
Paper Protection....266
Paper Jam/Pick Error 267
Paper Jam (When the Imprinter Is Installed) [fi-8190/fi-8170/fi-8150/fi-8150U]....268
Multifeed....268
Sensor(s) Dirty....269
Sensor Error 270
Module Error 271
Network Setting Error [fi-8190/fi-8290/fi-8170/fi-8270/fi-8150/fi-8250]....272
Scanner Central Admin Server Setting Error [fi-8190/fi-8290/fi-8170/fi-8270/fi-8150/fi-8250] ....274
Server Setting Error [fi-8190/fi-8290/fi-8170/fi-8270/fi-8150/fi-8250]....275
Authentication Failed [fi-8190/fi-8290/fi-8170/fi-8270] 277
Transport Lock Error [fi-8290/fi-8270/fi-8250/fi-8250U]....277
ADF Open 278
Imprinter Cover Open (When the Imprinter Is Installed) [fi-8190/fi-8170/fi-8150/fi-8150U] ....279
Print Cartridge Not Installed (When the Imprinter Is Installed) [fi-8190/fi-8170/fi-8150/fi-8150U]......280
Outside Designated Scan Area Error (When Operating with PaperStream NX Manager) [fi-8190/fi-8290/fi-8170/fi-8270/fi-8150/fi-8250] 280
Imprinting Area Error (When the Imprinter Is Installed) [fi-8190/fi-8170/fi-8150/fi-8150U]....282
Being Used by Others....282
The Scanner Is in Doc Counting Mode [fi-8190/fi-8290/fi-8170/fi-8270]....282
No Paper 282
Stop....283
Pause....283
Outside Designated Scan Area Error (When Operating with a Computer)....283
Invalid Command 284
Interface Malfunction....285
Unit Attention 285
Troubleshooting....286
The Scanner Cannot Be Powered ON....288
The LCD or the [Scan/Enter] Button or Both Turn Off [fi-8190/fi-8290/fi-8170/fi-8270] 289
The Function Number Display or the [Scan/Stop] Button or Both Turn Off [fi-8150/fi-8250/fi-8150U/fi-8250U] 290
Cannot Connect the Scanner and a Computer with the Network [fi-8190/fi-8290/fi-8170/fi-8270/fi-8150/fi-8250] 291
Cannot Connect the Scanner and a Computer via the USB Cable 296
Cannot Connect the Scanner (Operated with PaperStream NX Manager) to a Server by Specifying an IP Address [fi-8190/fi-8290/fi-8170/fi-8270/fi-8150/fi-8250]....298
Cannot Connect the Scanner (Operated with PaperStream NX Manager) to a Server by Specifying a Host Name (With PaperStream NX Manager) [fi-8190/fi-8290/fi-8170/fi-8270/fi-8150/fi-8250] ....302
Scanning Does Not Start....307
Scanning Takes a Long Time ....309
The Scanned Image of a Picture or Photo is Rough/Image Noise Appears....310
Quality of Scanned Text or Lines Is Unsatisfactory ....311
Images Are Distorted or Not Clear....313
Vertical Streaks Appear on the Images....315
An Error (Error Code "U0:10", "U4:40" or "U5:4A") is Already Displayed in the LCD After Power-on [fi-8190/fi-8290/fi-8170/fi-8270]....316
An Error ("E" or Other Letter or Number) is Already Displayed in the Function Number Display After Power-on [fi-8150/fi-8250/fi-8150U/fi-8250U]....317
Overlapped Documents Are Frequently Fed into the Scanner....318
Situation in Which the Document Is not Fed into the ADF Occurs Frequently....321
Paper Protection Is Set Off Frequently 323
Paper Jams/Pick Errors Occur Frequently....325
Images Turn Out Elongated ....327
A Shadow Appears at the Top or the Bottom of the Image 329
There Are Black Traces on the Document 330
The (Carrier) Sheet Is Not Fed Smoothly or a Jam Occurs....331
Part of the Image Appears Missing in the Case Where the (Carrier) Sheet Is Used....333
Before You Contact the Scanner Service Provider....334
Actions to Take Before You Contact the Scanner Service Provider ....334
Items to Check Before You Contact the Scanner Service Provider....334
Checking the Product Label....336
Scanner Settings (Software Operation Panel) 337
Starting Up the Software Operation Panel....337
Setting the Software Operation Panel to [View Only mode]....339
Setting [View Only mode] 340
Exiting [View Only mode]....342
Setting a Password....344
Changing the Password ....345
Clearing the Password ....347
Resetting the Password....349
Setting Items 351
Device Setting....351
Device Setting 2....353
Settings Related to Sheet Counters....356
Checking the Sheet Counters 356
Clearing the Sheet Counters....359
Messages for Cleaning or Replacing Consumables....360
Scanner Cleaning Cycle [Cleaning Cycle] 361
Specifying the Cycle to Replace Consumables [Life Counter Alarm Setting] 362
Settings Related to Scanning 363
Adjusting the Starting Position for Scanning [Offset Setting/Vertical magnification Adjustment] ......363
Removing Shadows/Streaks that Appear around Edges of Images [Page Edge Filler (ADF)/Page Edge Filler (FB) [fi-8290/fi-8270/fi-8250/fi-8250U]] 365
Configuring the Scan Setting to Drop Out Specified Colors When Scanning [Dropout Color]....368
Shortening the Scanning Intervals [Pre-Pick] 369
Specifying the Number of Retries for Paper Feeding [Number of paper feeding retries] ....370
Feeding [Pick Speed] 371
Cropping the Image Boundary [AutoCrop Boundary]....372
Protecting the Documents from Being Damaged [Paper Protection]....373
Specifying the Sensitivity Level for Paper Protection [Paper Protection Sensitivity] 375
Scanning Slowly at Low Resolution [Low-speed Feed Mode] 377
Scanning at High Altitude [High Altitude Mode] 378
Specifying the Image Quality for Scanning [Image Quality Mode] 379
Preventing an Image from Missing Any Parts When Documents Are Fed Skewed (Overscan Control) [fi-8190/fi-8290/fi-8170/fi-8270]....380
Settings Related to the Detection for Overlapped Documents (Multifeed).... 382
Specifying a Method to Detect Overlapped Documents [Multifeed]....382
Specifying the Area to Detect Overlapped Documents [Document check area specification for Multifeed Detection] 384
Setting to Ignore Certain Overlap Patterns [Intelligent Multifeed Function]....390
Settings Related to Waiting Time....392
Waiting Time in Manual Feeding [Manual Feeding] 392
Waiting Time for the Scanner to Enter Power Saving Mode [Power saving]....394
Settings Related to the Connection Between the Scanner and Computer....396
Specifying the USB Operation [USB] [fi-8150/fi-8250/fi-8150U/fi-8250U] 396
Settings to Use the Scanner Only via the USB Connection [Network Function] [fi-8190/fi-8290/fi-8170/fi-8270/fi-8150/fi-8250] 397
Settings Related to Power On/Off and the Power Consumption of the Scanner....398
Method for Turning the Scanner ON/OFF [Power Switch Control]....398
Settings for Saving the Power Consumption of the Scanner (ECO Mode) 399
Settings Related to Scanner Maintenance 400
Detecting Vertical Streaks [Vertical Streak Detection] 400
Specifying the Sensitivity Level for Vertical Streak Detection [Vertical Streak Sensitivity] 401
Setting the Maintenance/Inspection Cycles for the Scanner [Maintenance and Inspection Cycle] [fi-8190/fi-8290/fi-8170/fi-8270]....402
Network Settings (fi Series Network Settings) [fi-8190/fi-8290/fi-8170/fi-8270/fi-8150/fi-8250] 403
Starting Up fi Series Network Settings 403
Setting Items 406
Scanner Information 408
Scanner Information 408
Network 409
Scanner Name....409
Scanner Code....410
Wired LAN 411
Security 413
Network Encryption 413
Linking with Server....414
Proxy Server 414
PaperStream NX Manager 416
Scanner Central Admin Server....417
Maintenance....418
Admin Password....418
Export the Scanner Setting Information....419
Import the Scanner Setting Information ....420
Restore Factory Defaults....421
License....422
Appendix 423
Basic Specification......423
Installation Specification 427
Outer Dimensions 429
Outer Dimensions [fi-8190/fi-8170/fi-8150/fi-8150U] 429
Outer Dimensions [fi-8290/fi-8270/fi-8250/fi-8250U] 430
Scanner Options....431
Uninstalling the Software 434
Notes When Using IPv6 [fi-8190/fi-8290/fi-8170/fi-8270/fi-8150/fi-8250] 436
Supplementary Notes for operating with PaperStream NX Manager [fi-8190/fi-8290/fi-8170/fi-8270/fi-8150/fi-8250]....437
Exporting the Scanner Settings....437
Notes for Distributing Assets with the Scanner Central Admin Server....438
Contact for Inquiries 439
Thank you for purchasing this product.
About This Product
"This product" refers to the following eight scanner models: fi-8190/fi-8290/fi-8170/fi-8270/fi-8150/fi-8250/fi-8150U/fi-8250U
All models are equipped with an Automatic Document Feeder (ADF) that allows duplex (double-sided) scanning, and can be connected via a USB cable.
In addition, some models are equipped with a flatbed or can be connected via a wired LAN. Refer to the list below for the differences between each scanner model.
| Model Scanner Type | Interface Scanning Speed | (*2) | |||
| ADF Flatbed: (*1) USB Wired LAN | |||||
| fi-8190 ○— ○○90 ppm/180 ipm | (*3) | ||||
| fi-8290 ○○○○90 ppm/180 ipm | |||||
| fi-8170 ○— ○○70 ppm/140 ipm | |||||
| fi-8270 ○○○○70 ppm/140 ipm | |||||
| fi-8150 ○— ○○50 ppm/100 ipm | |||||
| fi-8250 ○○○○50 ppm/100 ipm | |||||
| fi-8150U ○— ○— 50 ppm/100 ipm | |||||
| fi-8250U ○○○— 50 ppm/100 ipm | |||||
○: Equipped
—:Not equipped
*1: Flatbed allows you to scan thin paper and thick documents such as a book.
*2: When A4 size documents are scanned at 200/300 dpi using JPEG compression.
The scanning speed is the same when the scanner is connected via a USB or via a wired LAN.
*3:The scanning speed when the imprinter is installed is 80 ppm/160 ipm.
Manuals
The following manuals are included for this product.
Read them as needed.
| Manual Description | |
| Safety Precautions (paper, PDF) Contains important information about the safe use of this product.Make sure to read this manual before using the scanner.The PDF version is included in the Setup DVD-ROM. | |
| Getting Started (paper) Explains the items included in the package of the scanner,how to remove the materials used for protection, andhow to prepare the scanner before using it. | |
| Operator's Guide (this manual)(HTML) | Provides detailed information on how to set up the scanner, how to operate and maintain the scanner daily,how to replace the consumables, and how to troubleshoot problems.Included in the Setup DVD-ROM. |
| fi-819PRB Imprinter Operator's Guide(PDF) | Provides detailed information on how to operate andmaintain the fi-819PRB daily, how to replace theconsumables, and how to troubleshoot problems.Included in the Setup DVD-ROM. |
| PaperStream Capture User's Guide(PDF) | Provides an overview of PaperStream Capture, anddetailed information on installation, how to scandocuments, activation, and multistation operation.Included in the Setup DVD-ROM. |
| Scanner Central Admin User's Guide(PDF) | Explains about the overview, installation, operation andmaintenance of Scanner Central Admin.Included in the Setup DVD-ROM. |
| PaperStream IP Help Explains how to use and configure the settings for the PaperStream IP driver.Included in the Setup DVD-ROM. | |
| Network Setup Tool for fi Series Help Explains how to use various tools for connecting the scanner to a network.Included in the Setup DVD-ROM. | |
| PaperStream ClickScan Help Explains how to use and configure the settings for PaperStream ClickScan.Included in the Setup DVD-ROM. | |
| fi Series Online Update Help Explains how to use and configure the settings for fi Series Online Update.Included in the Setup DVD-ROM. | |
Depending on the software that you want to use refer to the manual of the software (Other than the softwares above).
For details about the software, refer to Overview of the Bundled Software (page 43).
● Manuals to refer to when setting up the scanner
Actions to take and manuals to refer to for each operating method when setting up the scanner are as follows. Read them as needed.
For details about operating methods, refer to Operating Methods (page 26).
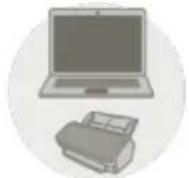
Operating with a Computer
| Action Refer to | ||
| From unpacking to the preparation before use Getting Started | ||
| Scanner Setup Setting | a connection method | Operator's Guide Connecting the Scanner via a Wired LAN in order to Operate It with a Computer (When Obtaining an IP Address Automatically)[fi-8190/fi-8290/fi-8170/fi-8270/fi-8150/fi-8250] (page 47) Connecting the Scanner via a Wired LAN in order to Operate It with a Computer (When Obtaining an IP Address Automatically)[fi-8190/fi-8290/fi-8170/fi-8270/fi-8150/fi-8250] (page 47) Connecting the Scanner via a Wired LAN in Order to Operate It with a Computer(When Assigning an IP Address Manually)[fi-8190/fi-8290/fi-8170/fi-8270/fi-8150/fi-8250] (page 52) Connecting the Scanner via a Wired LAN in Order to Operate It with a Computer(When Assigning an IP Address Manually)[fi-8190/fi-8290/fi-8170/fi-8270/fi-8150/fi-8250] (page 52) Connecting the Scanner to a Computer via the USB Cable in Order to Operate It with the Computer (page 57)Network Settings (fi Series Network Settings)[fi-8190/fi-8290/fi-8170/fi-8270/fi-8150/fi-8250](page 403) Connecting the Scanner to a Computer via the USB Cable in Order to Operate It with the Computer (page 57)Network Settings (fi Series Network Settings)[fi-8190/fi-8290/fi-8170/fi-8270/fi-8150/fi-8250](page 403) |
| Structuring a server | Configuring preferences for a DNS server (if you use a DNS server when usingScanner Central Admin Agent) | Manual for the DNS server that is used |
| Configuring preferences for a proxy server (if you use a proxy server when using Scanner Central Admin Agent) | Manual for the proxy server that is used | |
| From the installation to operations of Scanner Central Admin (when using Scanner Central Admin Agent) | Scanner Central Admin User's GuideChapter 2 Installation of Scanner Central AdminChapter 3 Using the Scanner Central Admin ServerChapter 4 Using e-Mail AlertsChapter 5 Linking with the Integrated Management System | |
| Scanning Scanning | procedure Operator's Guide | Performing a Scan with an Image Scanning Application (page 94)Pressing a Button on the Scanner in order to Start an Image Scanning Application and Perform a Scan (page 96) |
| Scan settings | Help for the scanner driverManual/Help for the image scanning application | |
| Operational settings for the scanner | Operator's GuideHow to Use the Operator Panel [fi-8190/fi-8290/fi-8170/fi-8270] (page 137)Scanner Settings (Software Operation Panel)(page 337) | |
natural_image
Illustration of five printer machines arranged around a central tower (no text or symbols)| Action Refer to | ||
| From unpacking to the preparation before use G | Getting Started | |
| Scanner Setup Setting | ng a connection method | Operator's Guide Connecting the Scanner via a Wired LAN in Order to Operate It with PaperStream NX Manager (When Obtaining an IP Address Automatically) [fi-8190/fi-8290/fi-8170/ fi-8270/fi-8150/fi-8250] (page 60) Connecting the Scanner via a Wired LAN in Order to Operate It with PaperStream NX Manager (When Obtaining an IP Address Automatically) [fi-8190/fi-8290/fi-8170/ fi-8270/fi-8150/fi-8250] (page 60) Connecting the Scanner via a Wired LAN in Order to Operate It with PaperStream NX Manager (When Setting an IP Address Manually) [fi-8190/fi-8290/fi-8170/fi-8270/ fi-8150/fi-8250] (page 64) Connecting the Scanner via a Wired LAN in Order to Operate It with PaperStream NX Manager (When Setting an IP Address Manually) [fi-8190/fi-8290/fi-8170/fi-8270/ fi-8150/fi-8250] (page 64) |
| Structuring a server | Configuring preferences for a DNS server (when using a DNS server) | Manual for the DNS server that is used |
| Configuring preferences for a proxy server (when using a proxy server) | Manual for the proxy server that is used | |
| From the installation to operations of PaperStream NX Manager | PaperStream NX Manager User's GuideFlow from the Installation to the OperationsInstallationSettingsOperations | |
| From the installation to operations of Scanner Central Admin (when using Scanner Central Admin Server) | Scanner Central Admin User's GuideChapter 2 Installation of Scanner Central AdminChapter 3 Using the Scanner Central Admin Server | |
| Scanning Scanning | procedure Operator's Guide | |
| ●Processing a Job (With PaperStream NX Manager) [fi-8190/fi-8290/fi-8170/fi-8270] (page 105)●Processing a Job (With PaperStream NX Manager) [fi-8150/fi-8250] (page 109) | ||
| Scan settings PaperStream NX | Manager User's Guide●Settings | |
| Operational settings for the scanner | Operator's Guide●How to Use the Operator Panel [fi-8190/ fi-8290/fi-8170/fi-8270] (page 137)●Scanner Settings (Software Operation Panel) (page 337) | |
Trademarks
ISIS is a trademark of Open Text.
Intel and Intel Core are trademarks of Intel Corporation or its subsidiaries in the U.S. and/or other countries.
Google and Google Chrome are trademarks or registered trademarks of Google LLC.
ABBYY™ FineReader™ Engine © ABBYY. OCR by ABBYY
ABBYY and FineReader are trademarks of ABBYY Software, Ltd. which may be registered in some jurisdictions.
Besides the software authored by the product developer (PFU Limited), this product contains open source software created by third parties. For details concerning the conditions of the licenses for the open source software, refer to the window that appears by clicking [License] in the menu for fi Series Network Settings.
Microsoft, Excel, Internet Explorer, Windows, and Windows Server are trademarks of the Microsoft group of companies.
ScanSnap and PaperStream are registered trademarks or trademarks of PFU Limited in Japan.
Other company names and product names are the registered trademarks or trademarks of the respective companies.
Manufacturer
PFU Limited
YOKOHAMA i-MARK PLACE, 4-5 Minatomirai 4-chome, Nishi-ku, Yokohama-shi, Kanagawa 220-8567 Japan.
Issue Date/Issuer
Issue date: February 2023
Issued by: PFU Limited
Regulatory Model : P3810A/P3810C/P3810E/P3810F/P3810H/P3810J
© PFU Limited 2021-2023
Safety Information
The attached "Safety Precautions" manual contains important information about the safe and correct use of this product.
Make sure that you read and understand it before using the scanner.
Symbols Used in This Manual
The following indications are used in this manual to obviate any chance of accident or damage to you, people near you, and your property.
Warning labels consist of a symbol indicating the severity and a warning statement.
The symbols and their meanings are as follows.

WARNING
This indication alerts operators of an operation that, if not strictly observed, may result in severe injury or death.

CAUTION
This indication alerts operators of an operation that, if not strictly observed, may result in safety hazards to personnel or damage to the product.
For notational convention, the following symbols are used in this manual:
ATTENTION
This symbol alerts operators to particularly important information. Be sure to read this information.
HINT
This symbol alerts operators to helpful advice regarding operations.
Abbreviations Used in This Manual
The following abbreviations are used in this manual.
| Name Indication | |
| Windows Server® 2012 Standard (64-bit) | Windows Server 2012 (*1) |
| Windows Server® 2012 R2 Standard (64-bit) | Windows Server 2012 R2 (*1) |
| Windows® 10 Home (32-bit/64-bit) Windows® 10 Pro (32-bit/64-bit) Windows® 10 Enterprise (32-bit/64-bit) Windows® 10 Education (32-bit/64-bit) | Windows 10 (*1) |
| Windows Server® 2016 Standard (64-bit) | Windows Server 2016 (*1) |
| Windows Server® 2019 Standard (64-bit) | Windows Server 2019 (*1) |
| Windows Server® 2022 Standard (64-bit) | Windows Server 2022 (*1) |
| Windows® 11 Home (64-bit) Windows® 11 Pro (64-bit) Windows® 11 Enterprise (64-bit) Windows® 11 Education (64-bit) | Windows 11 (*1) |
| Internet Explorer® | Internet Explorer |
| Google ChromeTM | Google Chrome |
| Microsoft® Word | Word |
| Microsoft® Excel® | Excel |
| ABBYY FineReader for ScanSnapTM | ABBYY FineReader for ScanSnap |
| PaperStream IP (TWAIN) PaperStream IP (TWAIN x64) PaperStream IP (ISIS) fi-8000 Series | PaperStream IP driver |
| Scanner Selection Tool for fi Series Scanner Selection Tool | |
| IP Address Setting Tool for fi Series IP Address Setting Tool | |
| Button Event Manager for fi Series Button Event Manager | |
| fi-819PRB Imprinter | |
| Carrier Sheet Photo Carrier Sheet Booklet Carrier Sheet | (Carrier) Sheet |
*1: Where there is no distinction between the different versions of the above operating system, the general term "Windows" is used.
Arrow Symbols in This Manual
Right-arrow symbols ( ) are used to separate icons or menu options which should be selected in succession.
Example:Click [Start] menu → [Control Panel].
Screen Examples in This Manual
Microsoft product screenshots are reprinted with permission from Microsoft Corporation.
The screen examples in this manual are subject to change without notice in the interest of product development.
If the actual displayed screen differs from the screen examples in this manual, operate by following the actual displayed screen while referring to the user's manual of the scanner application that you are using.
The screenshots used in this manual are of Windows 10. The actual windows and operations may differ depending on the operating system. Also note that the screens and operations may differ from this manual after the scanner application software is updated. In that case, refer to the manual provided upon updating the software.
Notice
- The contents of this manual are subject to change without notice.
- PFU Limited assumes no liability for incidental or consequential damages arising from the use of this product, and any claims by a third party.
- Copying of the contents of this manual, in whole or in part, as well as the scanner applications is prohibited under the copyright law.
This section explains the main features of this product, the names of parts and their functions.
Main Features
The scanner is equipped with the following features:
●High speed scanning
Realizes a scanning speed of 90 ppm/180 ipm [fi-8190/fi-8290] (*1) (*2), 70 ppm/140 ipm [fi-8170/fi-8270] (*1), or 50 ppm/100 ipm [fi-8150/fi-8250/fi-8150U/fi-8250U] (*1). Furthermore, up to 100 sheets of documents (*3) can be loaded for continuous scanning which enables you to quickly digitize a large volume of documents.
● Network connection [fi-8190/fi-8290/fi-8170/fi-8270/fi-8150/fi-8250]
The scanner can be connected via a wired LAN.
Even with a network connection, the scanning speed is equivalent to that of a USB connection.
During a network communication, in order to prevent information leaks due to interception of communications, you can encrypt scanned images.
For details, refer to the Network Setup Tool for fi Series Help or Network Settings (fi Series Network Settings) [fi-8190/fi-8290/fi-8170/fi-8270/fi-8150/fi-8250] (page 403).
●Equipped with a Liquid Crystal Display [fi-8190/fi-8290/fi-8170/fi-8270]
The scanner mounts an LCD that displays various operational settings for scanning, number of pages scanned, and error status.
This allows you to easily configure various operational settings for a scan or check the number of pages scanned or the error status.
●Equipped with a Function Number Display [fi-8150/fi-8250/fi-8150U/fi-8250U]
The scanner mounts the Function Number Display that displays the error status.
This allows you to easily check the error status.
- Capable of scanning documents folded in half, envelopes, multi-layered transfer paper, and booklets such as passports
This scanner mounts the [Manual Feed] button that is used to switch the mode to Manual Feed Mode.
Switching the mode to Manual Feed Mode reduces the load on documents being fed so that documents are fed and scanned successfully.
● Improved efficiency for pre-scan work
The scanner can perform "mixed batch scanning" which allows you to scan documents with different paper weights and sizes, such as A4 size wood-free paper and plastic cards, at once.
This simplifies the process of sorting the documents before scanning.
●Reduced work loss caused by multifeeds
The scanner has ultrasonic multifeed sensors that accurately detect "multifeed" errors where two or more sheets are fed through the scanner at once.
This detection for overlapped documents is reliable even when scanning a mixed batch of documents with different paper weights and sizes, such as A4 size wood-free paper and plastic cards, avoiding potential work loss.
●Intelligent multifeed detection function
When there is paper of the same size attached to a designated location on the page, the intelligent multifeed detection function enables the scanner to recognize the area of the attachment.
The scanner does not detect the recognized area where the attachment is on as overlapping of documents so that scanning can continue.
●Paper protection function by detecting paper jam noise [fi-8190/fi-8290/fi-8170/fi-8270]
The scanner is equipped with a function that detects a paper jam by noise made while a document is being fed and stops the scan.
This function reduces the risk of having valuable documents damaged.
●Paper protection function by monitoring documents that are fed skewed
The scanner is equipped with a function that detects a paper jam by the amount of skew that has occurred on a document while it is being fed and stops the scan.
This function reduces the risk of having valuable documents damaged.
●Advanced image processing function
The scanner is equipped with a function that automatically detects whether a document is in color or monochrome and then outputs an image of the document.
This function reduces the risk of color deviation or stripes from occurring on documents and allows you to output highly reproducible images.
- Preventing images form missing any parts even if documents are fed skewed [fi-8190/fi-8290/fi-8170/fi-8270]
The scanner is equipped with a function that detects the top and bottom of a document when a document is fed skewed and then outputs an image of the document.
This function prevents images from missing any parts even if documents are fed skewed.
●An imprinter can be installed [fi-8190/fi-8170/fi-8150/fi-8150U]
The imprinter is available as an optional imprinter that can print characters on a document after a scan.
Using an imprinter improves work efficiency in document management or in the verification of documents.
- Capable of scanning a document in a black background on the flatbed [fi-8290/fi-8270/fi-8250/fi-8250U]
A black document pad for the flatbed is available as an option.
Using a black document pad when scanning a document that has a white background allows you to output the scanned image in the actual size of the document.
- Capable of scanning photographs, clippings, and documents that are too big to be loaded in the scanner
The Carrier Sheet and Photo Carrier Sheet are available as an option.
Using them allows you to scan photographs that can be damaged quite easily, clippings, or non-standard size documents that cannot be loaded in the scanner.
● Capable of scanning a booklet such as a passport without damaging it
The Booklet Carrier Sheet is available as an option.
Even if the scanner is not equipped with the flatbed, using it allows you to open and scan a booklet such as a passport that can be damaged quite easily.
● Centralized operation of multiple scanners [fi-8190/fi-8290/fi-8170/fi-8270/fi-8150/fi-8250]
With PaperStream NX Manager, multiple scanners can be operated together.
For example, you can specify the scanner that you want to use and specify scanning menus that are customized for each scanner, and distribute them to the scanners.
You can also save images in a specified linked destination, and monitor the processing status of images.
For details, refer to the PaperStream NX Manager User's Guide.
The PaperStream NX Manager User's Guide can be downloaded from the following web page:
https://www.fujitsu.com/global/support/products/computing/peripheral/scanners/fi/manuals/
● Centralized management of multiple scanners
With Scanner Central Admin Server, multiple scanners can be managed together.
For example, the application can be used to update the setting information and scanner drivers for all scanners at once, and can be used to check the operating status of each scanner.
If the scanner is operated with a computer, you can use Scanner Central Admin Agent to link with Scanner Central Admin Server.
If the scanner is operated with PaperStream NX Manager, you can link with Scanner Central Admin Server directly.
For details, refer to the Scanner Central Admin User's Guide.
*1: When A4 size documents are scanned at 200/300 dpi using JPEG compression.
*2:The scanning speed of fi-8190 when the imprinter is installed is 80 ppm/160 ipm.
*3: When the paper weight is 80 g/m ^2 (20 lb).
Operating Methods
This section shows the operating methods of the scanner.
●Operating with a Computer
This operating method is a method that uses a USB cable or a wired LAN to connect the scanner and the computer to manage images on the computer.
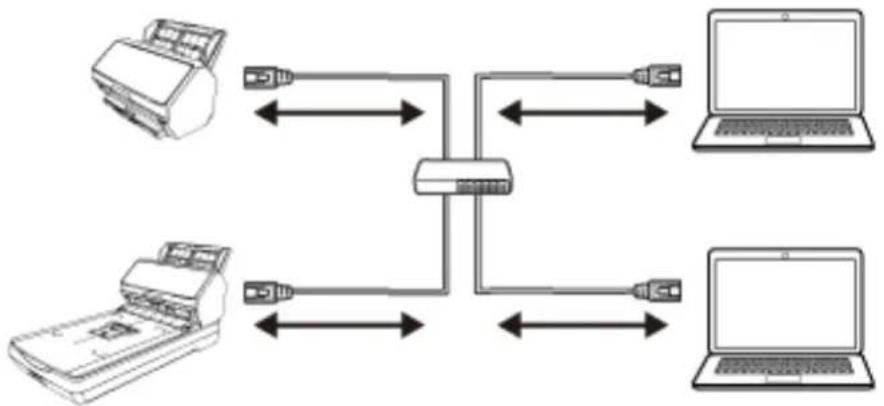
- When connecting a computer and the scanner via a wired LAN [fi-8190/fi-8290/fi-8170/fi-8270/fi-8150/fi-8250]
Images are managed on the computer by connecting the computer and the scanner via a wired LAN.
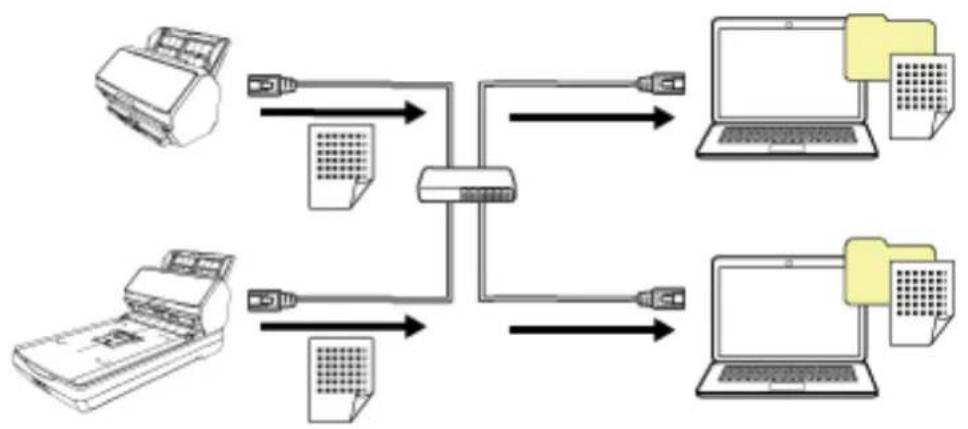
flowchart
graph TD
    A["Printer"] -->|Data Transmission| B["Switch"]
    C["Printer"] -->|Data Transmission| B
    B --> D["Laptop"]
    B --> E["Laptop"]
    B --> F["Laptop"]
ATTENTION
When connecting the scanner and the computer via a wired LAN, the scanner can be used with multiple computers, but not at the same time.
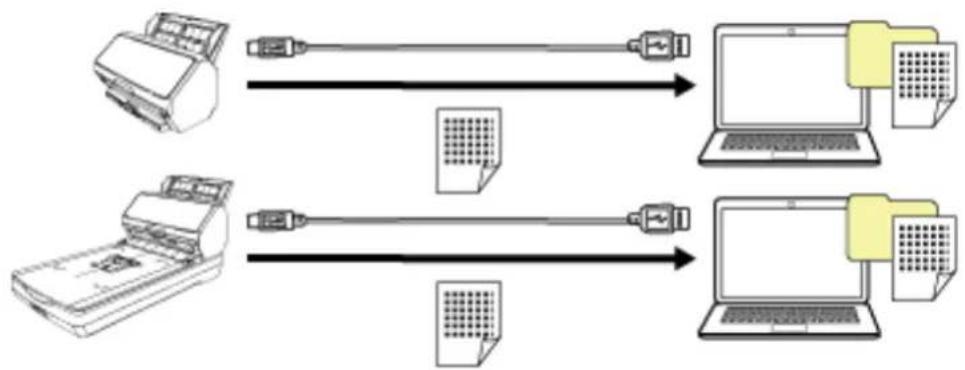
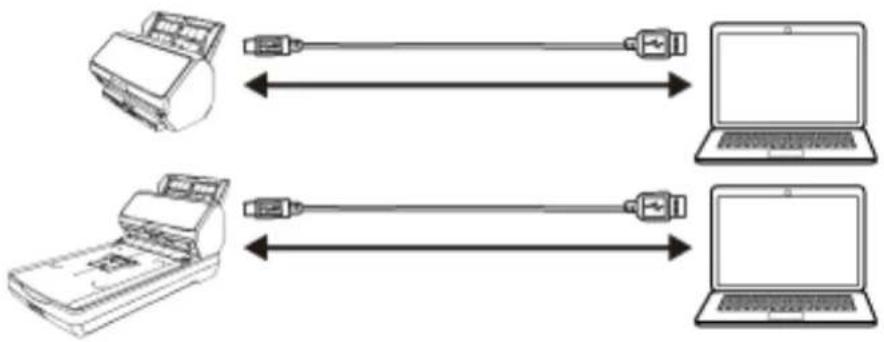
- When connecting a computer and the scanner via a USB Cable
Images are managed on the computer by connecting the computer and the scanner via a USB cable.
●Operating with PaperStream NX Manager
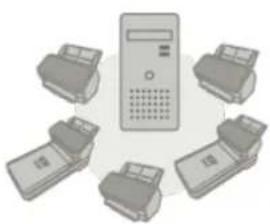
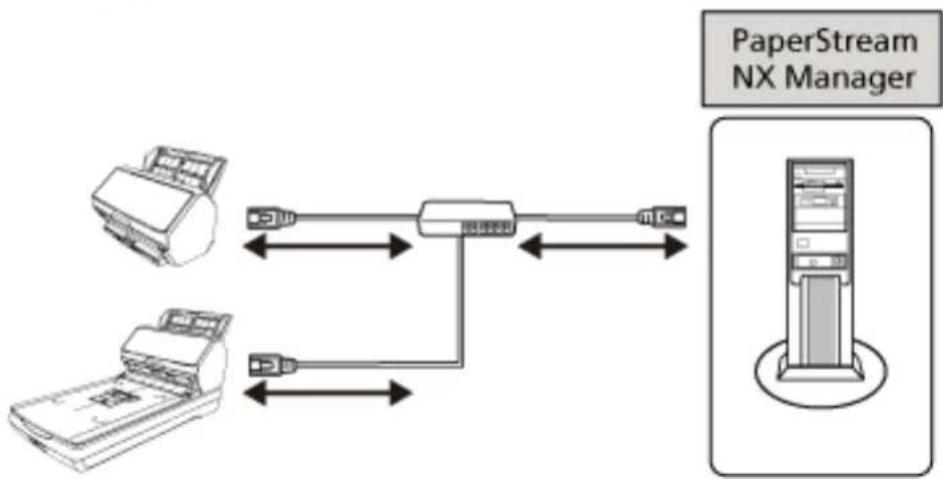
This operating method is a method that uses a wired LAN to connect the scanner to a server where PaperStream NX Manager is installed, and uses PaperStream NX Manager to process images sent from the scanner.
You can monitor the processing status of images and save images in a specified linked destination. For details about the operation with PaperStream NX Manager, refer to the PaperStream NX Manager User's Guide.
The PaperStream NX Manager User's Guide can be downloaded from the following web page: https://www.fujitsu.com/global/support/products/computing/peripheral/scanners/fi/manuals/
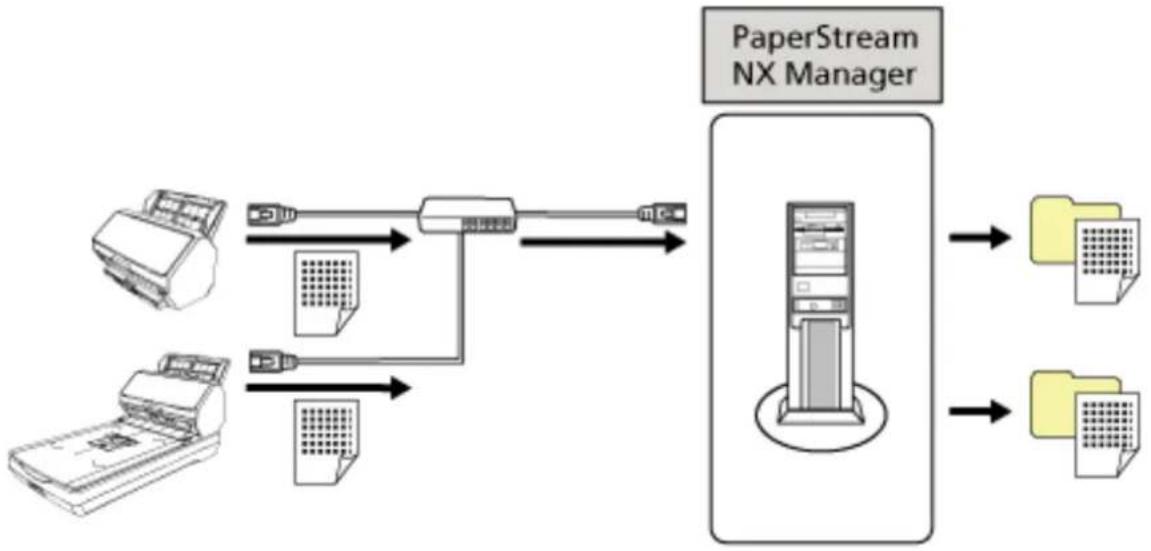
flowchart
graph LR
    A["Printer"] --> B["Printer"]
    C["Printer"] --> D["Printer"]
    B --> E["PaperStream NX Manager"]
    D --> E
    E --> F["Server"]
    F --> G["Yellow Folder"]
    F --> H["Yellow Folder"]
ATTENTION
For scanning documents, operating with PaperStream NX Manager has priority over operating with the computer.
Parts and Functions [fi-8190/fi-8170/fi-8150/fi-8150U]
This section shows the names of the scanner parts.
- Front
![RICOH fi-8190 - Parts and Functions [fi-8190/fi-8170/fi-8150/fi-8150U] - 1](/content/2026/05/903199/images/feead5c7b2f30c98de638836d4c1624cf4ef34f93cffeff53ce3ed0f8efc9803.jpg)
| No. Name Function | |
| 1 ADF (Automatic Document Feeder) | Pulls and feeds the documents one sheet at a time from the ADF paper chute (feeder).Open this to replace consumables or to clean the inside of the scanner. |
| 2 Chute extension 2 Pull out to adjust to the document length. | |
| 3 Chute extension 1 Pull out to adjust to the document length. | |
| 4 ADF paper chute (feeder) Holds the documents to be scanned. | |
| 5 Side guide Positions the documents in place when the documents are loaded in the ADF paper chute (feeder) as they are fed into the scanner. | |
| 6 ADF release tab Pull this tab to open the ADF. | |
| 7 Operator panel | ●For fi-8190/fi-8170It consists of an LCD and buttons.Used to operate the scanner or check the status.For details, refer to How to Use the Operator Panel [fi-8190/fi-8290/fi-8170/fi-8270] (page 137).●For fi-8150/fi-8150UIt consists of a Function Number Display, buttons and an LED indicator.Used to operate the scanner or check the status.For details, refer to How to Use the Operator Panel [fi-8150/fi-8250/fi-8150U/fi-8250U] (page 174). |
| 8 Stack supporter Supports the ejected documents to be neatly piled up when it is pulled out. | |
| 9 Stacker Stacks up the ejected documents when it is pulled out. | |
| 10 Stacker extension 1 Pull it out towards you to adjust the document length. | |
| 11 Stacker extension 2 Pull it out towards you to adjust the document length. | |
| 12 Stopper Lift up to adjust to the document length. | |
| 13 Side guide adjuster If you use a ballpoint pen to pull out the side guide adjuster and then attach the ADF paper chute (feeder) to the scanner, the side guides can be adjusted in accordance with the width of the document (from 220 mm to 240 mm).For details, refer to Scanning Documents That Are 220 mm to 240 mm in Width (page 180). | |
- Back
![RICOH fi-8190 - Parts and Functions [fi-8190/fi-8170/fi-8150/fi-8150U] - 2](/content/2026/05/903199/images/bf023e84123a74edeb3d0c36c6eb055a1209426c37fd6408b017f935847f1f87.jpg)
| No. Name Function | |
| 1 Security cable slot Used to connect an anti-theft security cable (commercially available). | |
| 2 Ventilation port Holes for ventilating hot air from inside the scanner. | |
| 3 Power connector Used to connect a power cable."Power cable" refers to the AC cable and AC adapter connected together. | |
| 4 LAN connector [fi-8190/fi-8170/ fi-8150] | Used to connect a LAN cable. |
| 5 USB connector Used to connect the USB cable. | |
| 6 EXT connector Used to connect the imprinter.The imprinter is available as an optional imprinter that can print text (e.g. alphabets, numbers) on a document after scanning.It can be used to organize your documents by printing a name, date or serial number on the scanned document.For details, refer to Scanner Options (page 431). | |
●Removable Parts
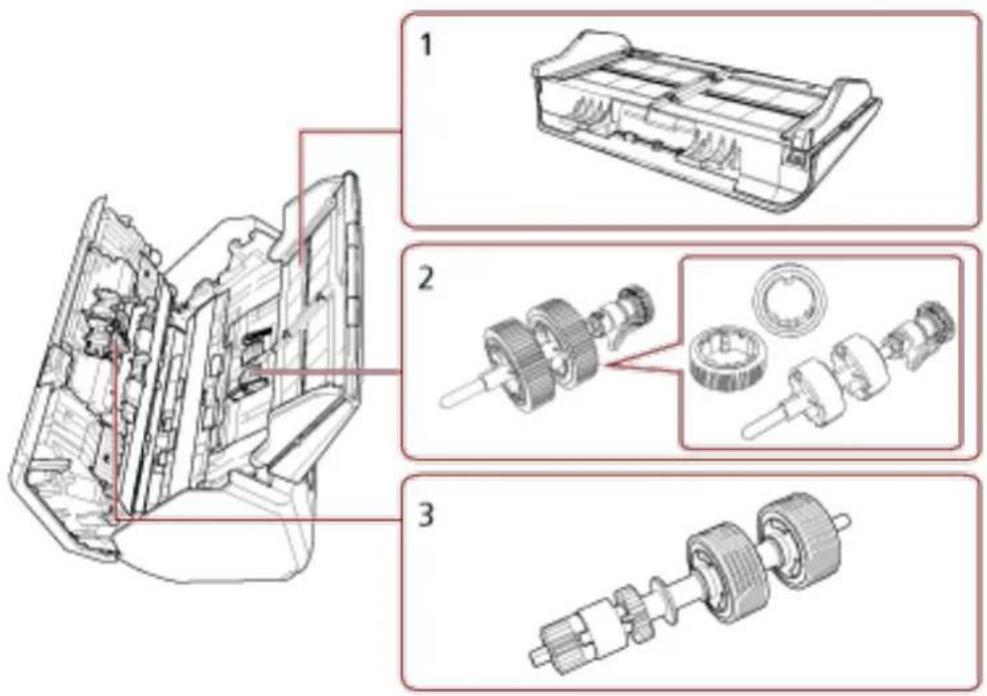
| No. Name Function | |
| 1 ADF paper chute (feeder) Holds the documents to be scanned. | |
| 2 Pick roller A roller which feeds documents loaded on the ADF paper chute (feeder) into the ADF. | |
| 3 Brake roller A roller that prevents more than one sheet of documents to be fed into the ADF at once. | |
Parts and Functions [fi-8290/fi-8270/fi-8250/fi-8250U]
This section shows the names of the scanner parts.
- Front
![RICOH fi-8190 - Parts and Functions [fi-8290/fi-8270/fi-8250/fi-8250U] - 1](/content/2026/05/903199/images/c8eefdf79bfe7a539f11d6739f3144714d6d84a6401c5a0e5661888337948598.jpg)
| No. Name Function | |
| 1 ADF (Automatic Document Feeder) | Pulls and feeds the documents one sheet at a time from the ADF paper chute (feeder).Open this to replace consumables or to clean the inside of the scanner. |
| 2 Chute extension 2 Pull out to adjust to the document length. | |
| 3 Chute extension 1 Pull out to adjust to the document length. | |
| 4 ADF paper chute (feeder) Holds the documents to be scanned. | |
| 5 Side guide Positions the documents in place when the documents are loaded in the ADF paper chute (feeder) as they are fed into the scanner. | |
| 6 ADF release tab Pull this tab to open the ADF. | |
| 7 Operator panel | ●For fi-8290/fi-8270It consists of an LCD and buttons.Used to operate the scanner or check the status.For details, refer to How to Use the Operator Panel [fi-8190/fi-8290/fi-8170/fi-8270] (page 137).●For fi-8250/fi-8250UIt consists of a Function Number Display, buttons and an LED indicator.Used to operate the scanner or check the status.For details, refer to How to Use the Operator Panel [fi-8150/fi-8250/fi-8150U/fi-8250U] (page 174). |
| 8 Stack supporter Supports the ejected documents to be neatly piled up when it is pulled out. | |
| 9 Stacker Stacks up the ejected documents when it is opened towards you. | |
| 10 Stacker extension Pull it out towards you to adjust the document length. | |
| 11 Stopper Lift up to adjust to the document length. | |
| 12 Flatbed Place documents on the glass section when scanning documents (such as thin paper or books) that cannot be scanned with the ADF. | |
| 13 Transport lock switch Locks the carrier unit (which is inside the flatbed) to prevent damage during transportation. | |
| 14 Side guide adjuster If you use a ballpoint open to pull out the side guide adjuster and then attach the ADF paper chute (feeder) to the scanner, the side guides can be adjusted in accordance with the width of the document (from 220 mm to 240 mm).For details, refer to Scanning Documents That Are 220 mm to 240 mm in Width (page 180). | |
- Back
![RICOH fi-8190 - Parts and Functions [fi-8290/fi-8270/fi-8250/fi-8250U] - 2](/content/2026/05/903199/images/eae8b5898644f0f9fdc948a4c8b56afa7eb4c243cf189452520418f1eecde8ff.jpg)
| No. Name Function | |
| 1 Security cable slot Used to connect an anti-theft security cable (commercially available). | |
| 2 Ventilation port Holes for ventilating hot air from inside the scanner. | |
| 3 Power connector Used to connect a power cable."Power cable" refers to the AC cable and AC adapter connected together. | |
| 4 LAN connector [fi-8290/fi-8270/ fi-8250] | Used to connect a LAN cable. |
| 5 USB connector Used to connect the USB cable. | |
●Removable Parts
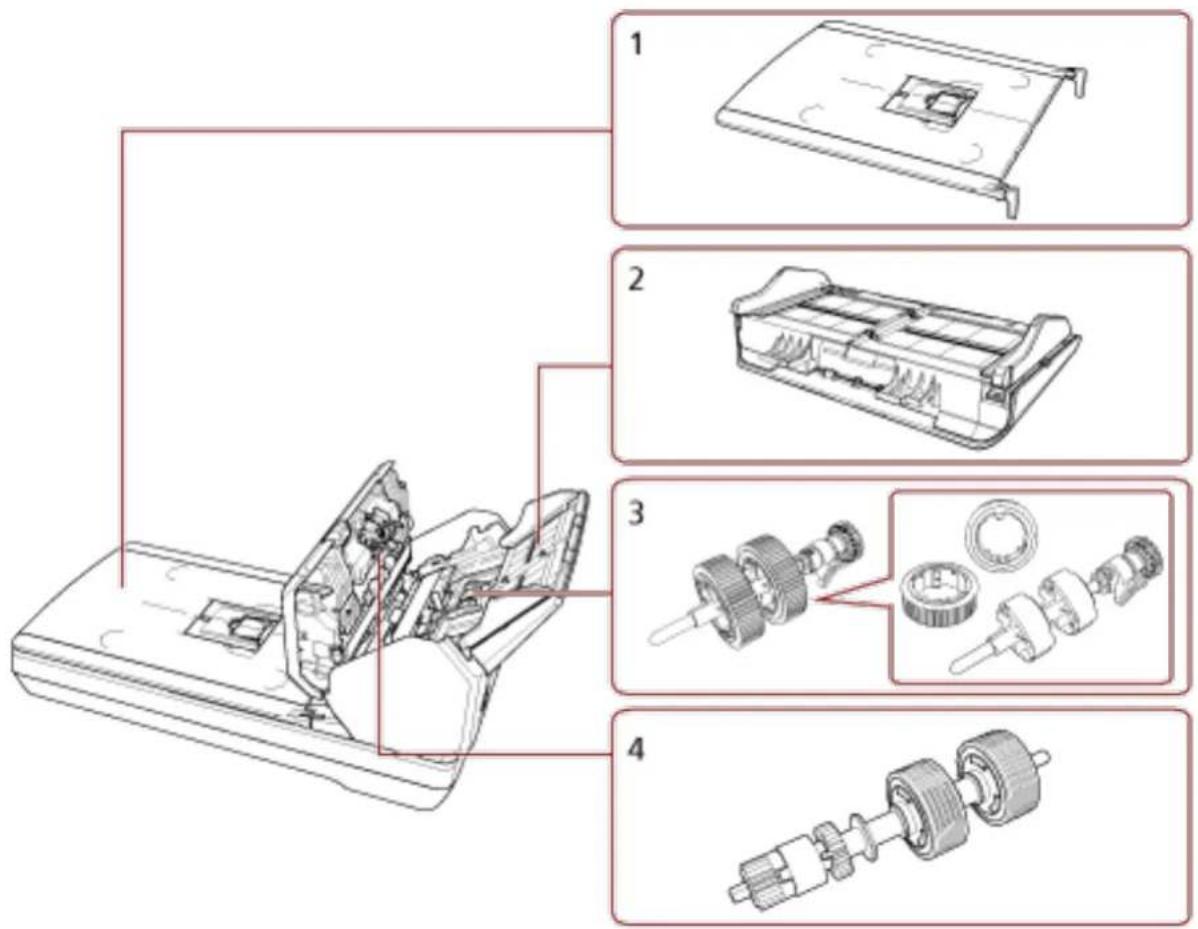
| No. Name Function | |
| 1 Document cover Close it to hold the document in place. | |
| 2 ADF paper chute (feeder) Holds the documents to be scanned. | |
| 3 Pick roller A roller which feeds documents loaded on the ADF paper chute (feeder) into the ADF. | |
| 4 Brake roller A roller that prevents more than one sheet of documents to be fed into the ADF at once. | |
●Inside (Flatbed)
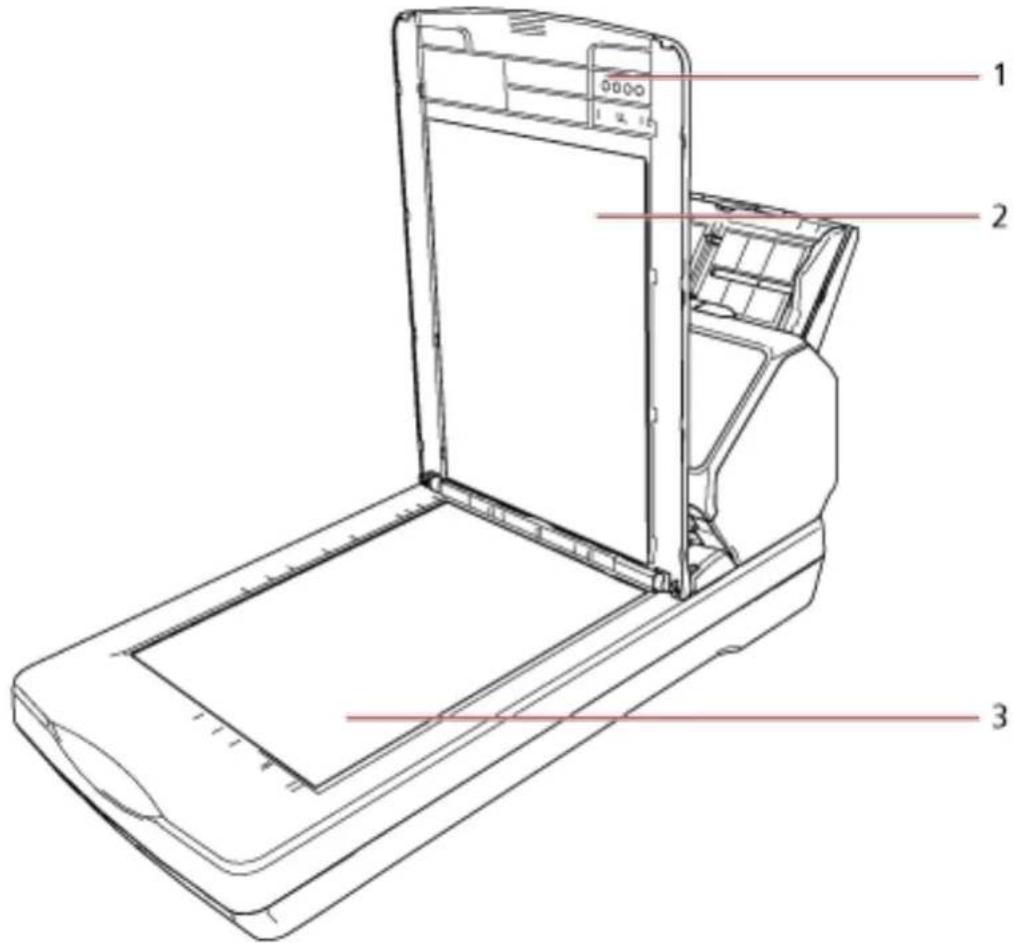
| No. Name Function | |
| 1 Document cover Close it to hold the document in place. | |
| 2 Document pad Holds the document down against the document bed.Document cover with a black document pad is available as an option.Use it to perform scanning in black background on the flatbed.For details, refer to Scanner Options (page 431). | |
| 3 Document bed Place a document on the glass section when scanning with the flatbed. | |
Parts and Functions [Common Parts for All Models]
●Inside (ADF)
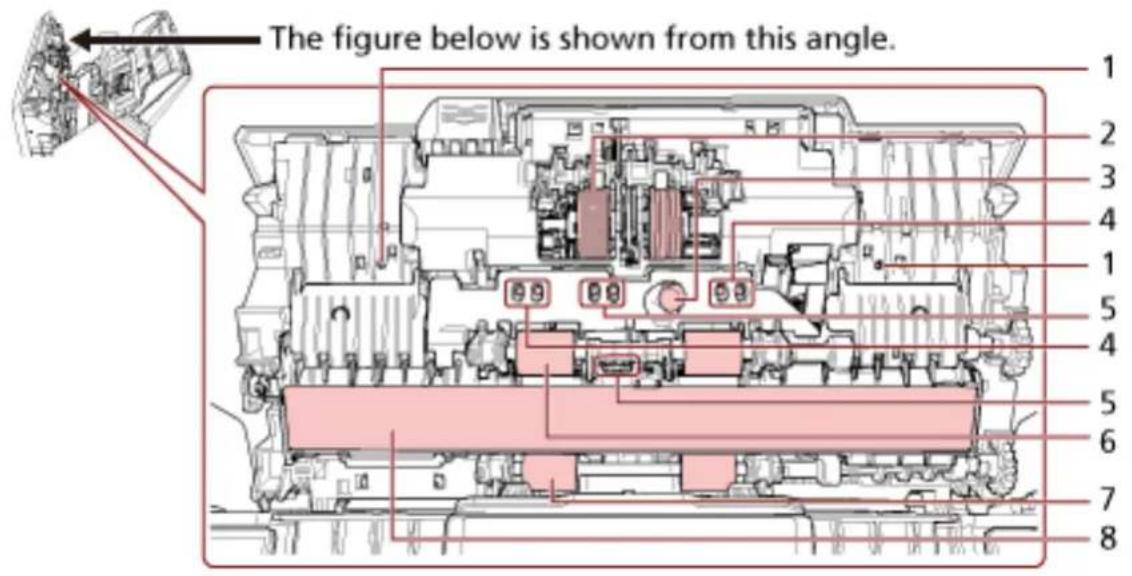
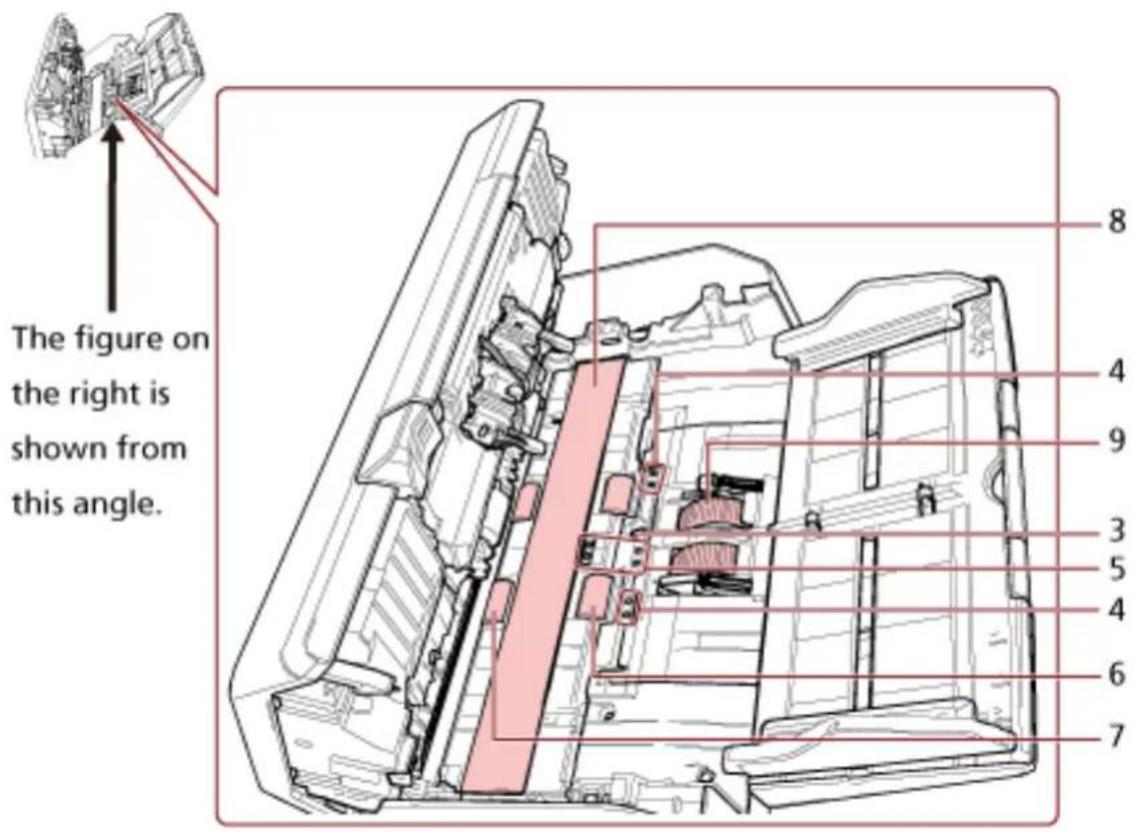
| No. Name Function | |
| 1 Microphone (× 2) [fi-8190/fi-8290/fi-8170/fi-8270] | Detects paper jam noises. |
| 2 Brake roller (× 2) A roller that prevents more than one sheet of documents to be fed into the ADF at once. | |
| 3 Ultrasonic sensor (× 2) A sensor which detects overlapped documents by ultrasonic soundwave.It detects overlapped documents by monitoring the difference in the amount of ultrasonic waves transmitted through the documents. | |
| 4 Document sensor (× 8) [fi-8190/fi-8290/fi-8170/fi-8270] | A sensor which detects whether there is a document. |
| 5 Document sensor (× 8) A sensor which detects whether there is a document. | |
| 6 Feed roller (× 4) A roller which feeds documents through the ADF. | |
| 7 Eject roller (× 4) Rollers that feed documents from the ADF onto the stacker. | |
| 8 Glass (× 2) The surface which scans documents. | |
| 9 Pick roller (× 2) A set of rollers which separates one sheet off the documents loaded in the ADF paper chute (feeder), and feeds the document into the ADF. | |
- Document sensor
This section explains about names of the document sensors in detail.
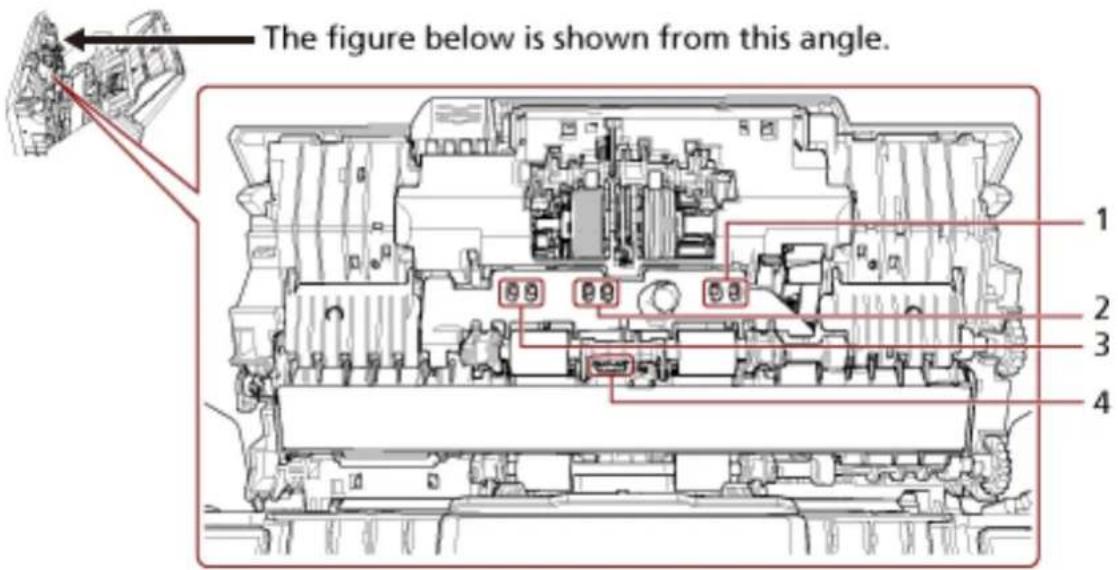
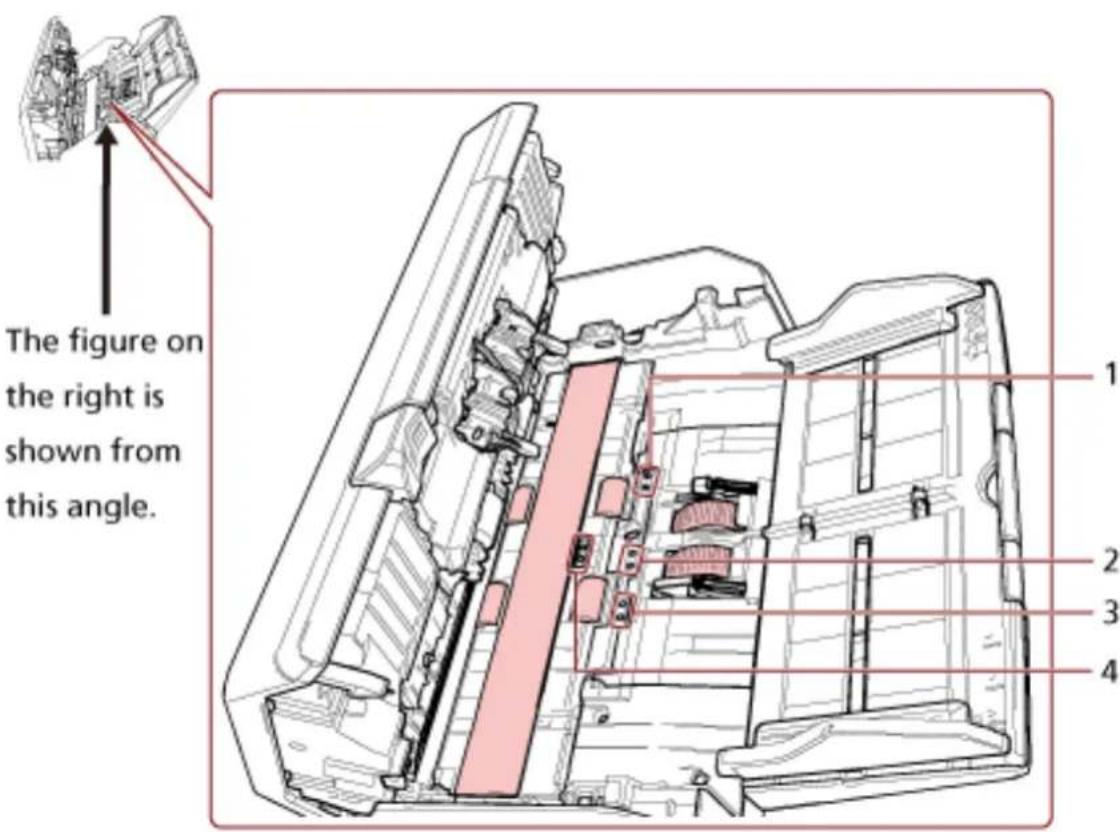
| No. Name Function | |
| 1 Skew sensor (left) (× 4) [fi-8190/fi-8290/fi-8170/fi-8270] | A sensor which detects whether there is a document. |
| 2 Pick sensor (× 4) A sensor which detects wh | ether there is a document. |
| 3 Skew sensor (right) (× 4) [fi-8190/fi-8290/fi-8170/fi-8270] | A sensor which detects whether there is a document. |
| 4 Read-top sensor (× 4) A sensor which det | s whether there is a document. |
Scanner Setup
This section describes the software that is required for the computer you want to connect the scanner to, the system requirements, and the scanner setup method.
The scanner setup procedure depends on the connection method of the scanner.
Check the reference page for each method to set up the scanner.
For details about required actions to set up the scanner, refer to Manuals to refer to when setting up the scanner (page 13).
Operating with a Computer

Connecting the Scanner via a Wired LAN in order to Operate It with a Computer (When Obtaining an IP Address Automatically) [fi-8190/fi-8290/fi-8170/fi-8270/fi-8150/fi-8250] (page 47)

Connecting the Scanner via a Wired LAN in Order to Operate It with a Computer (When Assigning an IP Address Manually) [fi-8190/fi-8290/fi-8170/fi-8270/fi-8150/fi-8250] (page 52)
flowchart
graph TD
    A["Printer"] <--> B["Central Device"]
    C["Printer"] <--> B
    D["Laptop"] <--> B
    E["Laptop"] <--> B

Connecting the Scanner to a Computer via the USB Cable in Order to Operate It with the Computer (page 57)
natural_image
Illustration of a central tower with surrounding printer and printer icons (no text or symbols)● Operating with PaperStream NX Manager

Connecting the Scanner via a Wired LAN in Order to Operate It with PaperStream NX Manager (When Obtaining an IP Address Automatically) [fi-8190/fi-8290/fi-8170/fi-8270/fi-8150/fi-8250] (page 60)

Connecting the Scanner via a Wired LAN in Order to Operate It with PaperStream NX Manager (When Setting an IP Address Manually) [fi-8190/fi-8290/fi-8170/fi-8270/fi-8150/fi-8250] (page 64)
flowchart
graph TD
    A["Printer"] <--> B["Network"]
    C["Printer"] <--> B
    B --> D["PaperStream NX Manager"]
    style D fill:#f9f,stroke:#333
HINT
When operating scanners with PaperStream NX Manager, you need to set up an environment and configure settings for PaperStream NX Manager.
For details, refer to the PaperStream NX Manager User's Guide.
The PaperStream NX Manager User's Guide can be downloaded from the following web page: https://www.fujitsu.com/global/support/products/computing/peripheral/scanners/fi/manuals/
Overview of the Bundled Software
This section describes the software that is required for the computer you want to connect the scanner to.
This product is bundled with the following software.
HINT
The software can be installed from the bundled Setup DVD-ROM or downloaded from the download site and then installed.
●PaperStream IP driver
The PaperStream IP driver is a scanner driver that conforms to the TWAIN/ISIS standard. It supports scanners connected to a network.
There are three types of PaperStream IP drivers.
-PaperStream IP (TWAIN)
Conforms to the TWAIN standard. Used when you operate the scanner using TWAIN-compliant 32-bit applications.
-PaperStream IP (TWAIN x64)
Conforms to the TWAIN standard. Used when you operate the scanner using TWAIN-compliant 64-bit applications.
Regardless of your operating system, if the image scanning application that you are using is a 32-bit application, use PaperStream IP (TWAIN).
-PaperStream IP (ISIS) fi-8000 Series
Conforms to the ISIS standard. Used when you operate the scanner using ISIS-compliant applications.
For details, refer to the PaperStream IP driver Help.
●Network Setup Tool for fi Series
The following applications are included.
These applications are used to connect the scanner to a network to make the scanner available.
-Scanner Selection Tool
Use this application to set a computer to be able to use the scanner connected to a network.
-IP Address Setting Tool
Use this application to set a scanner's IP address and scanner name.
-Button Event Manager
Use this application to specify an image scanning application to be launched when the button on the scanner is pressed.
For details, refer to the Network Setup Tool for fi Series Help.
●Software Operation Panel
You can configure settings that are related to scanning documents and managing consumable parts.
It is installed together with the PaperStream IP driver.
For details, refer to Scanner Settings (Software Operation Panel) (page 337).
- Error Recovery Guide
Use this application to display the status of the scanner and a solution for a problem if an error occurs in the scanner.
It is installed together with the PaperStream IP driver.
Solutions for problems can also be checked in Troubleshooting (page 249).
- Error Recovery Guide (manual)
This is a manual which describes solutions for errors notified by Error Recovery Guide.
●PaperStream ClickScan
A 32-bit image scanning application which supports PaperStream IP (TWAIN).
Scanning can be performed via simple settings and operations.
This program starts automatically when you log in to your computer and resides in the notification area located at the far right of the task bar.
For details, refer to the PaperStream ClickScan Help.
●PaperStream ClickScan Searchable PDF Option
An application to output images in a format such as searchable PDF, Word (*1), or Excel (*1).
It can be used with PaperStream ClickScan.
For details, refer to the PaperStream ClickScan Help.
●PaperStream Capture
A 32-bit image scanning application which supports PaperStream IP (TWAIN)/PaperStream IP (ISIS) fi-8000 Series.
By defining scan settings as document profiles, you can customize the settings according to your preference.
For details, refer to the PaperStream Capture User's Guide.
●PaperStream Capture Pro (EVALUATION)
A 32-bit image scanning application which supports PaperStream IP (TWAIN).
It is the trial version of PaperStream Capture Pro.
To use the full version, purchase and activate a license.
In addition to the functions in PaperStream Capture, PaperStream Capture Pro also allows you to perform multistation operations and advanced meta data settings.
For details, refer to the PaperStream Capture User's Guide.
- ABBYY FineReader for ScanSnap
This application converts images into files for applications such as Word (*1) or Excel (*1).
It can be used when you scan documents with PaperStream Capture/PaperStream Capture Pro.
Download it from the download site and install it.
- Manual
Safety Precautions, the Operator's Guide, and fi-819PRB Imprinter Operator's Guide are installed.
- Scanner Central Admin Agent
Install this application on the computer which the scanner is connected to in order to operate the scanner with a computer and link with Scanner Central Admin Server.
When the computer is linked with Scanner Central Admin Server, you can apply the updates such as the setting information of the scanner to multiple scanners.
For details, refer to the Scanner Central Admin User's Guide.
•fi Series Online Update
This application checks for the latest updates for the software that is installed on the computer, checks for firmware updates for the scanner that is connected to the computer, and applies them.
For details, refer to the fi Series Online Update Help.
*1:Microsoft® Office products need to be installed.
System Requirements
The system requirements for the computer on which software is to be installed are as follows.
| Operating system | ●Windows Server®2012 Standard (64-bit) (*1)●Windows Server®2012 R2 Standard (64-bit) (*1)●Windows®10 Home (32-bit/64-bit) (*1)●Windows®10 Pro (32-bit/64-bit) (*1)●Windows®10 Enterprise (32-bit/64-bit) (*1)●Windows®10 Education (32-bit/64-bit) (*1)●Windows Server®2016 Standard (64-bit) (*1)●Windows Server®2019 Standard (64-bit) (*1)●Windows Server®2022 Standard (64-bit) (*1)●Windows®11 Home (64-bit) (*1)●Windows®11 Pro (64-bit) (*1)●Windows®11 Enterprise (64-bit) (*1)●Windows®11 Education (64-bit) (*1) |
| CPU Intel or Intel-compatible processor | |
| Display resolution 1024 × 768 pixels | or higher, 65,536 or more colors(Text size: Magnification is up to 125% in the display settings for the operating system) |
| Hard disk space 12 GB or more of free hard disk space (*2) | |
| DVD drive Required for installing software from the bundled Setup DVD-ROM | |
| Interface USB 3.2 Gen 1x1 (USB 3.0)/USB 2.0/USB 1.1 | |
| Browsers (*3) | ●Google Chrome●Microsoft Edge |
*1:The bundled software operates as a desktop application.
*2: Required disk space for scanning documents varies according to the file size of the scanned images.
*3: One of the browsers is required when you configure the network settings in fi Series Network Settings.
Internet Explorer mode in Microsoft Edge is not supported.
Connecting the Scanner via a Wired LAN in order to Operate It with a Computer (When Obtaining an IP Address Automatically) [fi-8190/fi-8290/fi-8170/fi-8270/fi-8150/fi-8250]
This section explains about the setup procedure for you to connect the scanner to a network device via a wired LAN in order to operate the scanner with a computer and automatically obtain an IP address for the scanner from the DHCP server.
For the procedure to unpack the scanner, refer to Getting Started.
ATTENTION
If an old version of the software is installed, uninstall it first.
For the procedure to uninstall the software, refer to Uninstalling the Software (page 434).
HINT
The factory default setting for obtaining an IP address for the scanner is set to obtain the IP address automatically.
1 Turn on the computer and log onto Windows as a user with administrator privileges.
2 Insert the Setup DVD-ROM into the DVD drive.
The [fi Series Setup] window appears.
HINT
If the [fi Series Setup] window does not appear, double-click "Setup.exe" in the Setup DVD-ROM via [File Explorer] or [Computer].
3 Click the scanner model name to be used (if the window for selecting a model name is displayed).
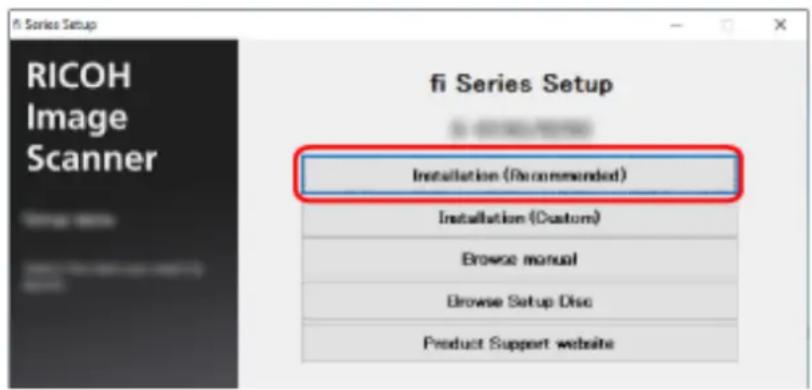
4 Select either [Installation (Recommended)] or [Installation (Custom)].
- For [Installation (Recommended)]
Select [Installation (Recommended)] to install all the software required to operate the scanner.
a Click the [Installation (Recommended)] button.
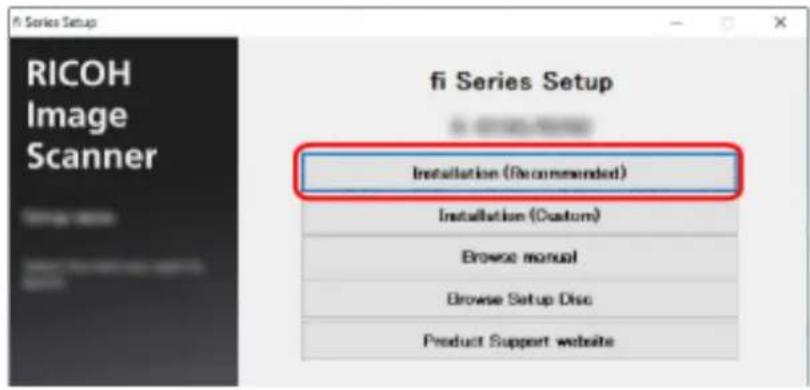
b Install the software by following the instructions displayed in the window.
The [How to Connect the Scanner] window appears when the installation of the software is complete.
HINT
When [Installation (Recommended)] is selected, the following software is installed:
●PaperStream IP (TWAIN)
●Network Setup Tool for fi Series
- Software Operation Panel
- Error Recovery Guide
- PaperStream ClickScan
●PaperStream Capture
- Manual
•fi Series Online Update
Note that Network Setup Tool for fi Series is installed for fi-8190/fi-8290/fi-8170/fi-8270/fi-8150/fi-8250.
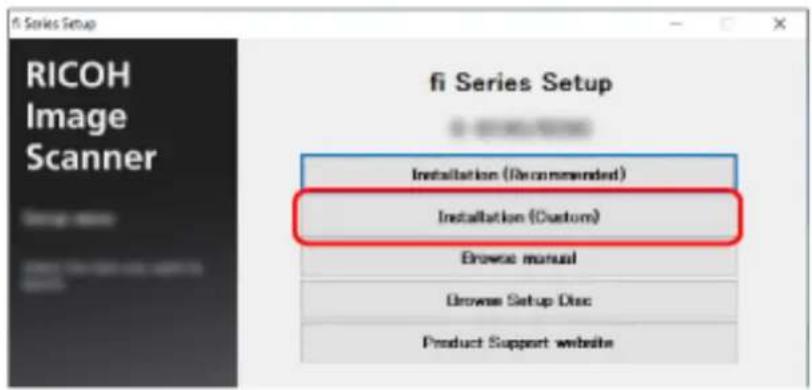
- For [Installation (Custom)]
Select [Installation (Custom)] to select and install the software that you need.
a Click the [Installation (Custom)] button.
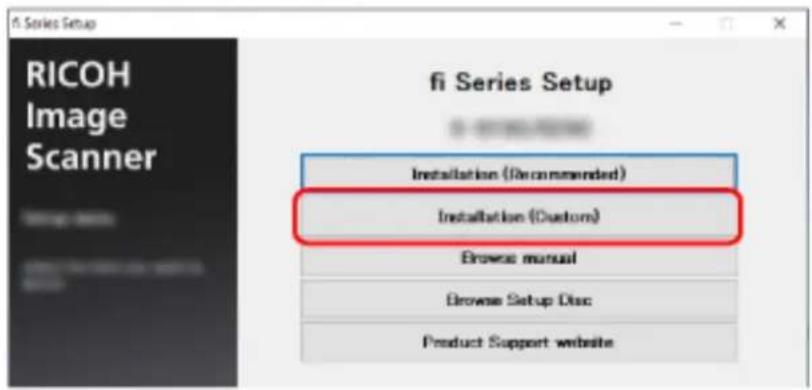
b Check the displayed contents and click the [Next] button.
c Select the check boxes for the software to be installed and click the [Next] button.
d Install the software by following the instructions displayed in the window.
The [How to Connect the Scanner] window appears when the installation of the software is complete.
5 Select [Network].
![How to Connect the Scanner Select a connection method for the scanner: USB Connect the scanner to the computer using the USB cable, and turn on the scanner. Network Turn on the scanner, and after connecting it to a network, click the [Select a Scanner] button. A scanner can be used with multiple computers Select a Scanner Cancel](/content/2026/05/903199/images/ba69df9f7aaf1f2f6b099545fe91be459f26295957f61a6ca94b25af9623356d.jpg)
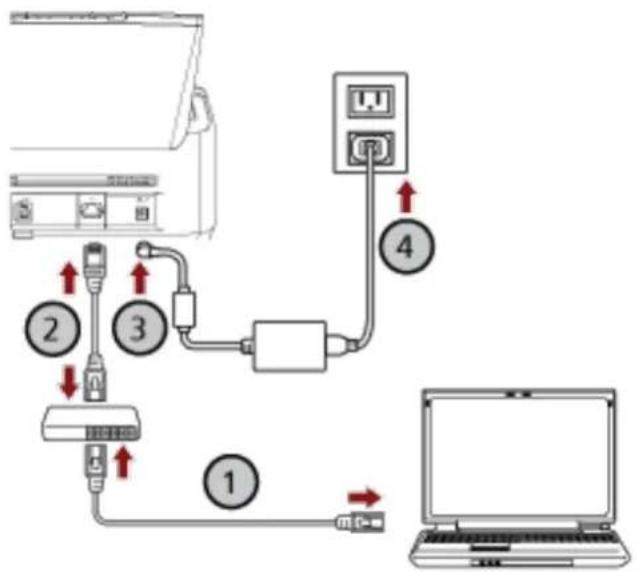
6 Connect the scanner to the computer as follows.
![RICOH fi-8190 - Select [Network]. - 2](/content/2026/05/903199/images/ed37fb0ab877b77a9e6e857a7119033838b23eb34d7918c358b163ae69b6dc42.jpg)
flowchart
graph TD
    A["Laptop"] --> B["Port 1"]
    B --> C["Port 2"]
    C --> D["Port 3"]
    D --> E["Port 4"]
    E --> F["Laptop"]
a Connect the computer to a network device via a wired LAN or Wi-Fi ( ).①
The procedure below shows an example of connecting the computer to a network device via a wired LAN.
For details about how to connect the computer to the network, refer to your computer manual.
b Connect the scanner to the network device via a wired LAN ( ).②
c Connect the power cable to the scanner and the AC outlet (, ) ③ ④
d Turn on the scanner.
For details, refer to How to Turn the Power ON (page 71).
7 Click the [Select a Scanner] button in the [How to Connect the Scanner] window.
The [Scanner Selection Tool] window appears.
8 In the scanner list, select the check box for the scanner that you want to use.
The default scanner name is "(Model Name) - (Serial No.)".
The serial number is printed on the label on the back of the scanner, so remove the ADF paper chute (feeder) to check the number. For details, refer to Checking the Product Label (page 336). For details about Scanner Selection Tool, refer to the Network Setup Tool for fi Series Help.
9 Click the [OK] button to close the [Scanner Selection Tool] window.
10 Click the [Exit] button in the [fi Series Setup] window.
11 Check whether the scanner is ready to start scanning.
For details, refer to How to Perform a Basic Scan (page 92).
HINT
- If Scanner Selection Tool does not start up, refer to Starting Up Scanner Selection Tool [fi-8190/fi-8290/fi-8170/fi-8270/fi-8150/fi-8250] (page 69), and start it up.
- Network settings for the scanner can also be configured in fi Series Network Settings. For details, refer to Network Settings (fi Series Network Settings) [fi-8190/fi-8290/fi-8170/fi-8270/fi-8150/fi-8250] (page 403).
Connecting the Scanner via a Wired LAN in Order to Operate It with a Computer (When Assigning an IP Address Manually) [fi-8190/fi-8290/fi-8170/fi-8270/fi-8150/fi-8250]
This section explains about the setup procedure for you to connect the scanner to a network device via a wired LAN in order to operate the scanner with a computer and manually assign an IP address to the scanner.
For the procedure to unpack the scanner, refer to Getting Started.
ATTENTION
If an old version of the software is installed, uninstall it first.
For the procedure to uninstall the software, refer to Uninstalling the Software (page 434).
1 Turn on the computer and log onto Windows as a user with administrator privileges.
2 Insert the Setup DVD-ROM into the DVD drive.
The [fi Series Setup] window appears.
HINT
If the [fi Series Setup] window does not appear, double-click "Setup.exe" in the Setup DVD-ROM via [File Explorer] or [Computer].
3 Click the scanner model name to be used (if the window for selecting a model name is displayed).
4 Select either [Installation (Recommended)] or [Installation (Custom)].
- For [Installation (Recommended)]
Select [Installation (Recommended)] to install all the software required to operate the scanner.
a Click the [Installation (Recommended)] button.
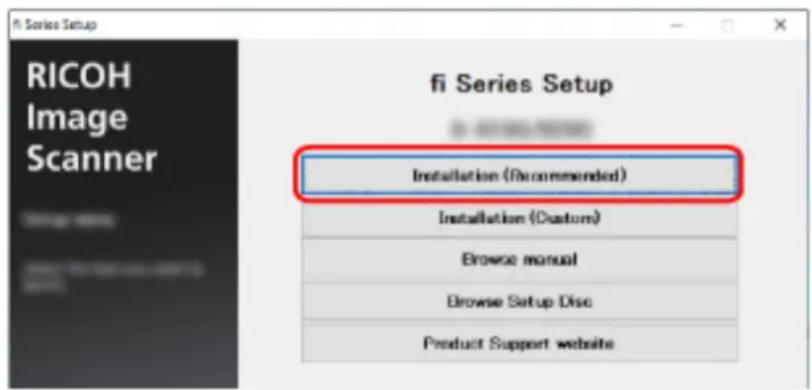
b Install the software by following the instructions displayed in the window.
The [How to Connect the Scanner] window appears when the installation of the software is complete.
HINT
When [Installation (Recommended)] is selected, the following software is installed:
●PaperStream IP (TWAIN)
●Network Setup Tool for fi Series
●Software Operation Panel
- Error Recovery Guide
●PaperStream ClickScan
●PaperStream Capture
- Manual
•fi Series Online Update
Note that Network Setup Tool for fi Series is installed for fi-8190/fi-8290/fi-8170/fi-8270/fi-8150/fi-8250.
- For [Installation (Custom)]
Select [Installation (Custom)] to select and install the software that you need.
a Click the [Installation (Custom)] button.
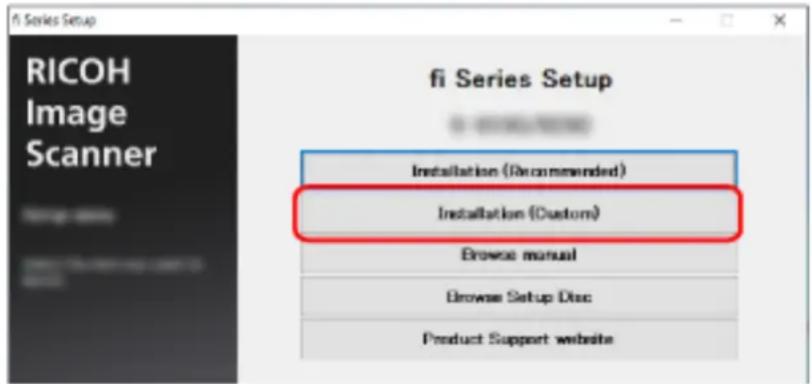
b Check the displayed contents and click the [Next] button.
c Select the check boxes for the software to be installed and click the [Next] button.
d Install the software by following the instructions displayed in the window.
The [How to Connect the Scanner] window appears when the installation of the software is complete.
5 Select [Network].
![How to Connect the Scanner Select a connection method for the scanner. USB Connect the scanner to the computer using the USB cable, and turn on the scanner. Network Turn on the scanner, and after connecting it to a network, click the [Select a Scanner] button. A scanner can be used with multiple computers. Select a Scanner Cancel](/content/2026/05/903199/images/09ae9a9a9de914626cd71ced885fe21a330ec185bcdff63631ae82c0bfea7fcc.jpg)
6 Connect the scanner to the computer as follows.
flowchart
graph TD
    A["Computer"] --> B["Port 1"]
    A --> C["Port 2"]
    A --> D["Port 3"]
    A --> E["Port 4"]
    B --> F["Laptop"]
    C --> G["Laptop"]
    D --> H["Laptop"]
    E --> I["Laptop"]
a Connect the computer to a network device via a wired LAN or Wi-Fi ( ).①
The procedure below shows an example of connecting the computer to a network device via a wired LAN.
For details about how to connect the computer to the network, refer to your computer manual.
b Connect the scanner to the network device via a wired LAN ( ).
c Connect the power cable to the scanner and the AC outlet ( , ). ③ ④
d Turn on the scanner.
For details, refer to How to Turn the Power ON (page 71).
7 Click the [Select a Scanner] button in the [How to Connect the Scanner] window.
The [Scanner Selection Tool] window appears.
8 Click the [Set an IP Address] button.
A message appears, prompting you to connect the scanner to the computer via the USB cable.
9 Connect the scanner to the computer by using the USB cable that is supplied, and click the [OK] button in the message window.
The login window for IP Address Setting Tool appears.
HINT
You do not need to disconnect the LAN cable from the scanner when connecting the USB cable.
10 Enter the default administrator password which is "password", and click the [Login] button.
The [IP Address Setting Tool] window appears.
11 Set the IP address and the scanner name, and then click the [OK] button.
For details about the IP Address Setting Tool, refer to the Network Setup Tool for fi Series Help.
HINT
The scanner name and the IP address that you set are displayed in the scanner list in Scanner Selection Tool.
12 Disconnect the USB cable from the scanner.
13 Click the [Search again] button in the [Scanner Selection Tool] window to search for the scanner that you want to use.
The scanner is not displayed in the scanner list right after setting the IP address. Search for the scanner by clicking the [Search again] button.
For details about Scanner Selection Tool, refer to the Network Setup Tool for fi Series Help.
14 In the scanner list, select the check box for the scanner that you want to use.
15 Click the [OK] button to close the [Scanner Selection Tool] window.
16 Click the [Exit] button in the [fi Series Setup] window.
17 Check whether the scanner is ready to start scanning.
For details, refer to How to Perform a Basic Scan (page 92).
HINT
- If Scanner Selection Tool does not start up, refer to Starting Up Scanner Selection Tool [fi-8190/fi-8290/fi-8170/fi-8270/fi-8150/fi-8250] (page 69), and start it up.
- If IP Address Setting Tool does not start up, refer to Starting Up IP Address Setting Tool [fi-8190/fi-8290/fi-8170/fi-8270/fi-8150/fi-8250] (page 70), and start it up.
- Network settings for the scanner can also be configured in fi Series Network Settings. For details, refer to Network Settings (fi Series Network Settings) [fi-8190/fi-8290/fi-8170/fi-8270/fi-8150/fi-8250] (page 403).
Connecting the Scanner to a Computer via the USB Cable in Order to Operate It with the Computer
This section explains about the setup procedure for connecting the scanner to a computer by using the USB cable in order to operate the scanner with the computer.
For the procedure to unpack the scanner, refer to Getting Started.
ATTENTION
If an old version of the software is installed, uninstall it first.
For the procedure to uninstall the software, refer to Uninstalling the Software (page 434).
1 Turn on the computer and log onto Windows as a user with administrator privileges.
2 Insert the Setup DVD-ROM into the DVD drive.
The [fi Series Setup] window appears.
HINT
If the [fi Series Setup] window does not appear, double-click "Setup.exe" in the Setup DVD-ROM via [File Explorer] or [Computer].
3 Click the scanner model name to be used (if the window for selecting a model name is displayed).
4 Select either [Installation (Recommended)] or [Installation (Custom)].
- For [Installation (Recommended)]
Select [Installation (Recommended)] to install all the software required to operate the scanner.
a Click the [Installation (Recommended)] button.
b Install the software by following the instructions displayed in the window.
The [How to Connect the Scanner] window appears when the installation of the software is complete.
HINT
When [Installation (Recommended)] is selected, the following software is installed:
●PaperStream IP (TWAIN)
●Network Setup Tool for fi Series
●Software Operation Panel
- Error Recovery Guide
- PaperStream ClickScan
●PaperStream Capture
- Manual
•fi Series Online Update
Note that Network Setup Tool for fi Series is installed for fi-8190/fi-8290/fi-8170/fi-8270/fi-8150/fi-8250.
- For [Installation (Custom)]
Select [Installation (Custom)] to select and install the software that you need.
a Click the [Installation (Custom)] button.
b Check the displayed contents and click the [Next] button.
c Select the check boxes for the software to be installed and click the [Next] button.
d Install the software by following the instructions displayed in the window.
-When you want to install Network Setup Tool for fi Series
When the [How to Connect the Scanner] window is displayed, proceed to step 5.
-When you do not want to install Network Setup Tool for fi Series
After the installation of the software is complete, proceed to step 6.
5 Select [USB].
![How to Connect the Scanner Select a connection method for the scanner: USB Connect the scanner to the computer using the USB cable, and turn on the scanner. Network Turn on the scanner, and after connecting it to a network, click the [Select a Scanner] button. A scanner can be used with multiple computers. OK Cancel](/content/2026/05/903199/images/5a1d161ac6bb8351c82bd92cfa76a437cedb05f756f6ab8d1fccdfd76d321817.jpg)
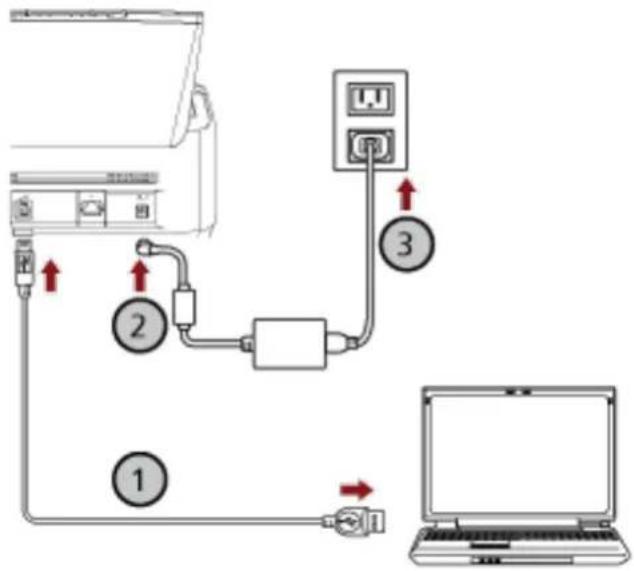
6 Connect the scanner to the computer as follows.
flowchart
graph TD
    A["Device 1"] --> B["Router 2"]
    B --> C["Router 3"]
    C --> D["Laptop"]
    style A fill:#f9f,stroke:#333
    style D fill:#ccf,stroke:#333
a Connect the scanner to the computer by using the USB cable that is supplied ( ).
b Connect the power cable to the scanner and the AC outlet ( , ).
c Turn on the scanner.
For details, refer to How to Turn the Power ON (page 71).
7 Click the [OK] button in the [How to Connect the Scanner] window.
8 Click the [Exit] button in the [fi Series Setup] window.
9 Check whether the scanner is ready to start scanning.
For details, refer to How to Perform a Basic Scan (page 92).
Connecting the Scanner via a Wired LAN in Order to Operate It with PaperStream NX Manager (When Obtaining an IP Address Automatically) [fi-8190/fi-8290/fi-8170/fi-8270/fi-8150/fi-8250]
This section explains about the setup procedure for you to connect the scanner to a network device via a wired LAN in order to operate the scanner with PaperStream NX Manager and automatically obtain an IP address for the scanner from the DHCP server.
For the procedure to unpack the scanner, refer to Getting Started.
ATTENTION
If an old version of the software is installed, uninstall it first.
For the procedure to uninstall the software, refer to Uninstalling the Software (page 434).
HINT
- The factory default setting for obtaining an IP address for the scanner is set to obtain the IP address automatically.
- Install the necessary software to operate the scanner with PaperStream NX Manager by referring to the PaperStream NX Manager User's Guide.
Use the Setup DVD-ROM to configure the network settings of the scanner.
1 Turn on the computer and log onto Windows as a user with administrator privileges.
The computer is used to set up the scanner so that it can be operated with PaperStream NX Manager.
2 Insert the Setup DVD-ROM into the DVD drive.
The [fi Series Setup] window appears.
HINT
If the [fi Series Setup] window does not appear, double-click "Setup.exe" in the Setup DVD-ROM via [File Explorer] or [Computer].
3 Click the scanner model name to be used (if the window for selecting a model name is displayed).
4 Click the [Installation (Custom)] button.
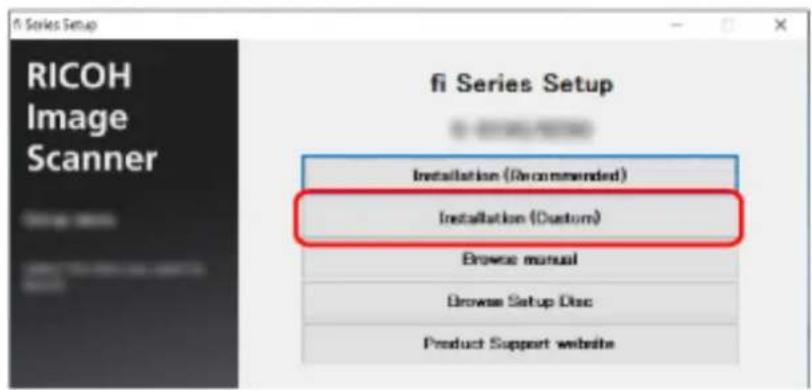
5 Check the displayed contents and click the [Next] button.
6 Select the check box for one of the following scanner drivers that you want to use.
●PaperStream IP (TWAIN)
●PaperStream IP (TWAIN x64)
●PaperStream IP (ISIS) fi-8000 Series
7 Select the [Network Setup Tool for fi Series] check box and click the [Next] button.
8 Install the software by following the instructions displayed in the window.
The [How to Connect the Scanner] window appears when the installation of the software is complete.
9 Select [Network].
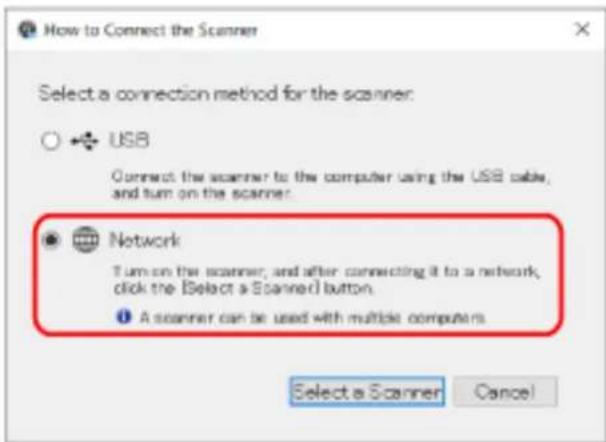
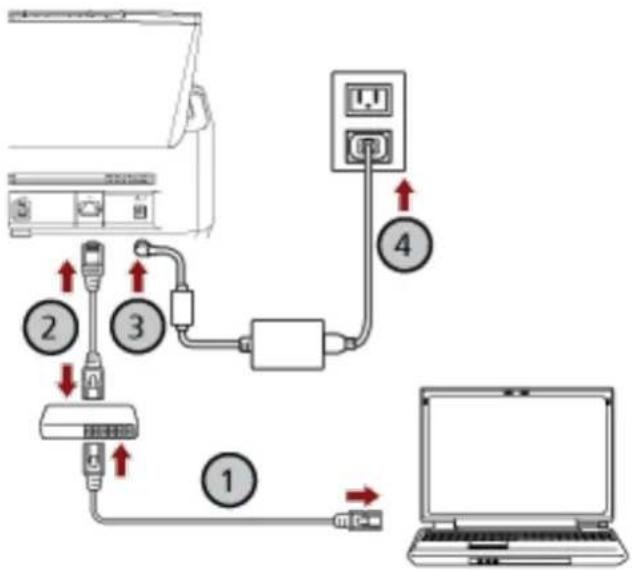
10 Connect the scanner to the computer as follows.
flowchart
graph TD
    A["Laptop"] --> B["Server"]
    B --> C["Switch 1"]
    B --> D["Switch 2"]
    B --> E["Switch 3"]
    B --> F["Switch 4"]
    C --> G["Data Link 1"]
    D --> H["Data Link 2"]
    E --> I["Data Link 3"]
    F --> J["Data Link 4"]
a Connect the computer to a network device via a wired LAN or Wi-Fi ( ).①
The procedure below shows an example of connecting the computer to a network device via a wired LAN.
For details about how to connect the computer to the network, refer to your computer manual.
b Connect the scanner to the network device via a wired LAN ( ).②
c Connect the power cable to the scanner and the AC outlet (,) ③ ④
d Turn on the scanner.
For details, refer to How to Turn the Power ON (page 71).
11 Click the [Select a Scanner] button in the [How to Connect the Scanner] window.
The [Scanner Selection Tool] window appears.
12 In the scanner list, select the IP address of the scanner that you want to use.
The default scanner name is "(Model Name) - (Serial No.)".
The serial number is printed on the label on the back of the scanner, so remove the ADF paper chute (feeder) to check the number. For details, refer to Checking the Product Label (page 336).
For details about Scanner Selection Tool, refer to the Network Setup Tool for fi Series Help.
The browser opens and the login window for fi Series Network Settings appears.
13 Enter the administrator password, and click the [Login] button.
For details about the administrator password, refer to Admin Password (page 418).
The [Scanner Information] window for fi Series Network Settings appears.
14 Specify the following items:
Specify each setting item on each web page and click the [Apply to the scanner] button. For details about each setting item, refer to Network Settings (fi Series Network Settings) [fi-8190/fi-8290/fi-8170/fi-8270/fi-8150/fi-8250] (page 403).
- Scanner name
Set a scanner name.
- Scanner Code
Specify whether or not to issue a scanner code.
If the "PaperStream NX Manager" setting is enabled, a scanner code can be used when scanning with a user application on a computer/mobile device/thin client.
●Wired LAN
Set an IPv4 address for the scanner.
ATTENTION
An IPv6 address is not supported when the scanner is operated with PaperStream NX Manager.
●Network Encryption
Specify whether or not to encrypt network communications.
- Proxy Server
Set this item to operate the scanner with PaperStream NX Manager using a proxy server.
●PaperStream NX Manager
Set this item to operate the scanner with PaperStream NX Manager.
Select [Enable] check box and specify [Host name/IP address] and [Port number].
Click the [Check connection] button to check if the scanner can be connected to PaperStream NX Manager.
- Scanner Central Admin Server
Set this item to operate the scanner with PaperStream NX Manager using Scanner Central Admin Server.
You can monitor scanners or perform a single operation on them at the same time with Scanner Central Admin Server.
15 In the scanner list in the [Scanner Selection Tool] window, select the check box for the scanner that you want to use.
16 Click the [OK] button to close the [Scanner Selection Tool] window.
17 Click the [Exit] button in the [fi Series Setup] window.
18 Check whether the scanner is ready to start scanning.
For details, refer to How to Perform a Basic Scan (page 92).
HINT
If Scanner Selection Tool does not start up, refer to Starting Up Scanner Selection Tool [fi-8190/fi-8290/fi-8170/fi-8270/fi-8150/fi-8250] (page 69), and start it up.
Connecting the Scanner via a Wired LAN in Order to Operate It with PaperStream NX Manager (When Setting an IP Address Manually) [fi-8190/fi-8290/fi-8170/fi-8270/fi-8150/fi-8250]
This section explains about the setup procedure for you to connect the scanner to a network device via a wired LAN in order to operate the scanner with PaperStream NX Manager and manually assign an IP address to the scanner.
For the procedure to unpack the scanner, refer to Getting Started.
ATTENTION
If an old version of the software is installed, uninstall it first.
For the procedure to uninstall the software, refer to Uninstalling the Software (page 434).
HINT
Install the necessary software to operate the scanner with PaperStream NX Manager by referring to the PaperStream NX Manager User's Guide.
Use the Setup DVD-ROM to configure the network settings of the scanner.
1 Turn on the computer and log onto Windows as a user with administrator privileges.
The computer is used to set up the scanner so that it can be operated with PaperStream NX Manager.
2 Insert the Setup DVD-ROM into the DVD drive.
The [fi Series Setup] window appears.
HINT
If the [fi Series Setup] window does not appear, double-click "Setup.exe" in the Setup DVD-ROM via [File Explorer] or [Computer].
3 Click the scanner model name to be used (if the window for selecting a model name is displayed).
4 Click the [Installation (Custom)] button.
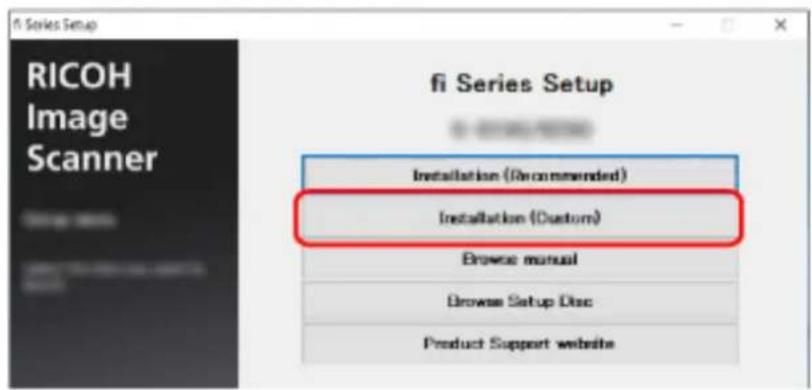
5 Check the displayed contents and click the [Next] button.
6 Select the check box for one of the following scanner drivers that you want to use.
●PaperStream IP (TWAIN)
●PaperStream IP (TWAIN x64)
●PaperStream IP (ISIS) fi-8000 Series
7 Select the [Network Setup Tool for fi Series] check box and click the [Next] button.
8 Install the software by following the instructions displayed in the window.
The [How to Connect the Scanner] window appears when the installation of the software is complete.
9 Select [Network].
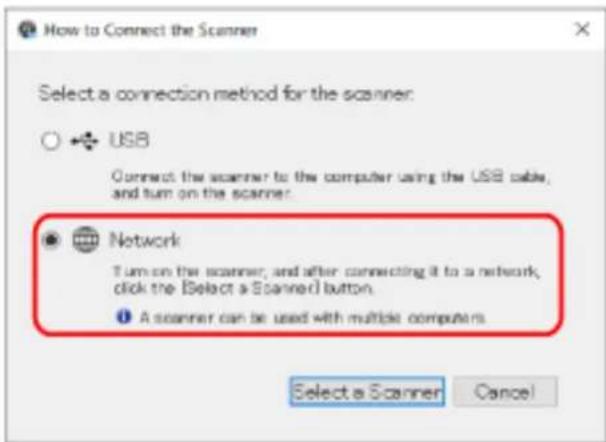
10 Connect the scanner to the computer as follows.
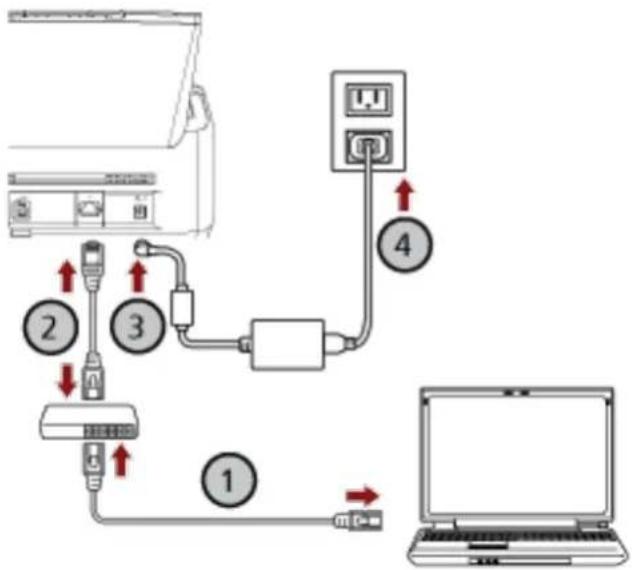
flowchart
graph TD
    A["Laptop"] --> B["Server"]
    B --> C["Switch 1"]
    B --> D["Switch 2"]
    B --> E["Switch 3"]
    B --> F["Switch 4"]
    C --> G["Data Link 1"]
    D --> H["Data Link 2"]
    E --> I["Data Link 3"]
    F --> J["Data Link 4"]
a Connect the computer to a network device via a wired LAN or Wi-Fi ( ).①
The procedure below shows an example of connecting the computer to a network device via a wired LAN.
For details about how to connect the computer to the network, refer to your computer manual.
b Connect the scanner to the network device via a wired LAN ( ).②
c Connect the power cable to the scanner and the AC outlet (, ) ③ ④
d Turn on the scanner.
For details, refer to How to Turn the Power ON (page 71).
11 Click the [Select a Scanner] button in the [How to Connect the Scanner] window.
The [Scanner Selection Tool] window appears.
12 Click the [Set an IP Address] button.
A message appears, prompting you to connect the scanner to the computer via the USB cable.
13 Connect the scanner to the computer by using the USB cable that is supplied, and click the [OK] button in the message window.
The login window for IP Address Setting Tool appears.
HINT
You do not need to disconnect the LAN cable from the scanner when connecting the USB cable.
14 Enter the default administrator password which is "password", and click the [Login] button.
The [IP Address Setting Tool] window appears.
15 Set the IP address and the scanner name, and then click the [OK] button.
For details about the IP Address Setting Tool, refer to the Network Setup Tool for fi Series Help.
HINT
The scanner name and the IP address that you set are displayed in the scanner list in Scanner Selection Tool.
16 Disconnect the USB cable from the scanner.
17 Click the [Search again] button in the [Scanner Selection Tool] window to search for the scanner that you want to use.
The scanner is not displayed in the scanner list right after setting the IP address. Search for the scanner by clicking the [Search again] button.
For details about Scanner Selection Tool, refer to the Network Setup Tool for fi Series Help.
18 In the scanner list, select the IP address of the scanner that you want to use.
The browser opens and the login window for fi Series Network Settings appears.
19 Enter the administrator password, and click the [Login] button.
For details about the administrator password, refer to Admin Password (page 418).
The [Scanner Information] window for fi Series Network Settings appears.
20 Specify the following items:
Specify each setting item on each web page and click the [Apply to the scanner] button.
For details about each setting item, refer to Network Settings (fi Series Network Settings) [fi-8190/fi-8290/fi-8170/fi-8270/fi-8150/fi-8250] (page 403).
- Scanner name
Set a scanner name.
- Scanner Code
Specify whether or not to issue a scanner code.
If the "PaperStream NX Manager" setting is enabled, a scanner code can be used when scanning with a user application on a computer/mobile device/thin client.
●Wired LAN
Set an IPv4 address for the scanner.
ATTENTION
An IPv6 address is not supported when the scanner is operated with PaperStream NX Manager.
●Network Encryption
Specify whether or not to encrypt network communications.
- Proxy Server
Set this item to operate the scanner with PaperStream NX Manager using a proxy server.
●PaperStream NX Manager
Set this item to operate the scanner with PaperStream NX Manager.
Select [Enable] check box and specify [Host name/IP address] and [Port number].
Click the [Check connection] button to check if the scanner can be connected to PaperStream NX Manager.
- Scanner Central Admin Server
Set this item to operate the scanner with PaperStream NX Manager using Scanner Central Admin Server.
You can monitor scanners or perform a single operation on them at the same time with Scanner Central Admin Server.
21 In the scanner list in the [Scanner Selection Tool] window, select the check box for the scanner that you want to use.
22 Click the [OK] button to close the [Scanner Selection Tool] window.
23 Click the [Exit] button in the [fi Series Setup] window.
24 Check whether the scanner is ready to start scanning.
For details, refer to How to Perform a Basic Scan (page 92).
HINT
- If Scanner Selection Tool does not start up, refer to Starting Up Scanner Selection Tool [fi-8190/fi-8290/fi-8170/fi-8270/fi-8150/fi-8250] (page 69), and start it up.
- If IP Address Setting Tool does not start up, refer to Starting Up IP Address Setting Tool [fi-8190/fi-8290/fi-8170/fi-8270/fi-8150/fi-8250] (page 70), and start it up.
Starting Up Scanner Selection Tool [fi-8190/fi-8290/fi-8170/fi-8270/fi-8150/fi-8250]
Scanner Selection Tool can be started up in the following procedure:
●For Windows Server 2012
Right-click the Start screen, and select [All apps] on the app bar → [Scanner Selection Tool for fi Series] under [fi Series].
●For Windows Server 2012 R2
Click [↓] on the lower left side of the Start screen and select [Scanner Selection Tool for fi Series] under [fi Series].
To display [↓], move the mouse cursor.
- For Windows 10/Windows Server 2016/Windows Server 2019/Windows Server 2022
Click [Start] menu → [fi Series] → [Scanner Selection Tool for fi Series].
- For Windows 11
Click [Start] menu → [All apps] → [fi Series] → [Scanner Selection Tool for fi Series].
Starting Up IP Address Setting Tool [fi-8190/fi-8290/fi-8170/fi-8270/fi-8150/fi-8250]
IP Address Setting Tool can be started up in the following procedure:
●For Windows Server 2012
Right-click the Start screen, and select [All apps] on the app bar → [IP Address Setting Tool for fi Series] under [fi Series].
●For Windows Server 2012 R2
Click [↓] on the lower left side of the Start screen and select [IP Address Setting Tool for fi Series] under [fi Series].
To display [↓], move the mouse cursor.
- For Windows 10/Windows Server 2016/Windows Server 2019/Windows Server 2022
Click [Start] menu → [fi Series] → [IP Address Setting Tool for fi Series].
- For Windows 11
Click [Start] menu → [All apps] → [fi Series] → [IP Address Setting Tool for fi Series].
This section explains how to operate the scanner.
Turning the Power ON/OFF
This section explains how to power on/off the scanner.
HINT
The method by which the scanner is powered on/off can be specified from one of the following:
- Pressing the [Power] button on the scanner
- Using an AC power strip to control power supply for peripherals such as a scanner in accordance with the computer's power
- Turning on/off the scanner in accordance with the computer's power For details, refer to Method for Turning the Scanner ON/OFF [Power Switch Control] (page 398).
How to Turn the Power ON
1 Press the [Power] button on the scanner.
●For fi-8190/fi-8290/fi-8170/fi-8270
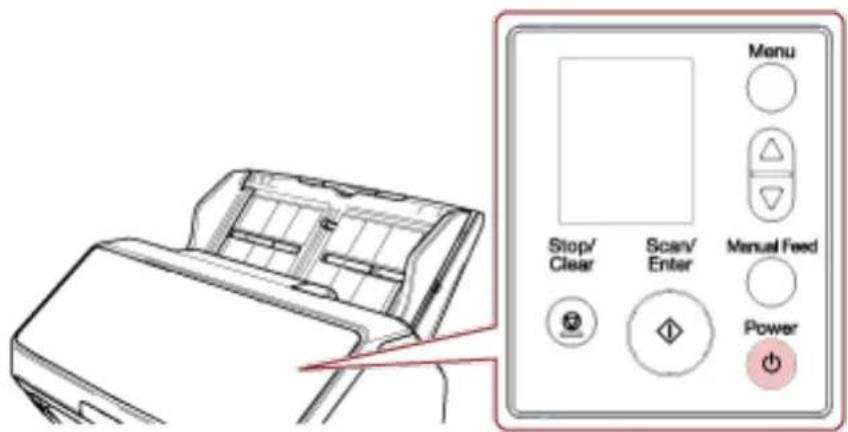
The scanner is turned on, and the [Scan/Enter] button lights in green.
Note that the following screen is displayed on the LCD during initialization.

When the [Ready] screen is displayed on the LCD, the scanner is ready to start scanning. - For fi-8150/fi-8250/fi-8150U/fi-8250U
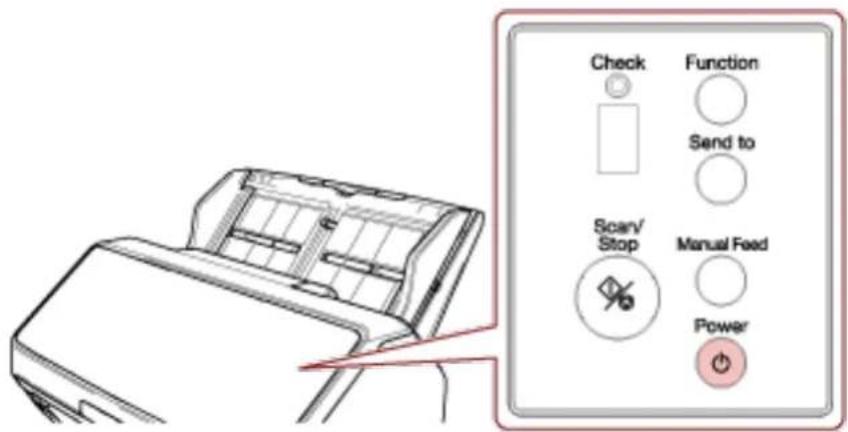
The scanner is turned on, and the [Scan/Stop] button lights in green.
During initialization, the indications displayed on the Function Number Display changes in the following order: "8" → "P" → "0" → "1".
The scanner is ready when "1" is shown on the Function Number Display.
HINT
When the [Power] button is pressed, the LED indicator lights for a moment. Note that it is due to an initial diagnosis and not a failure.
How to Turn the Power OFF
1 Press the [Power] button on the scanner for 2 seconds or more.
●For fi-8190/fi-8290/fi-8170/fi-8270
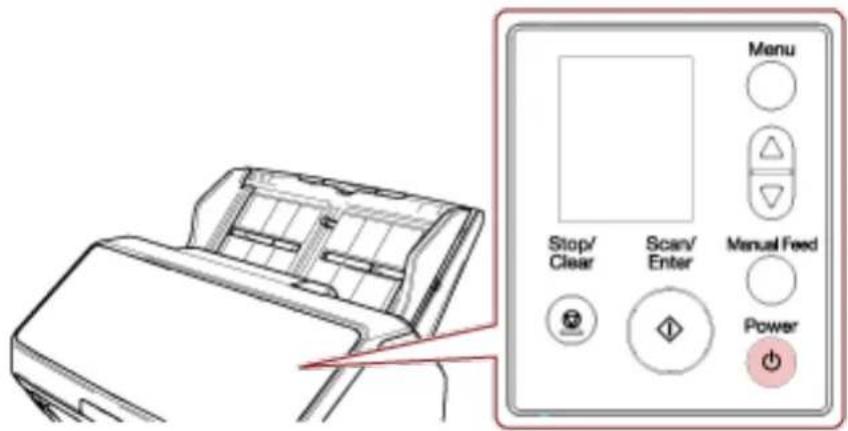
The scanner is turned off, and the [Scan/Enter] button lights off.
- For fi-8150/fi-8250/fi-8150U/fi-8250U
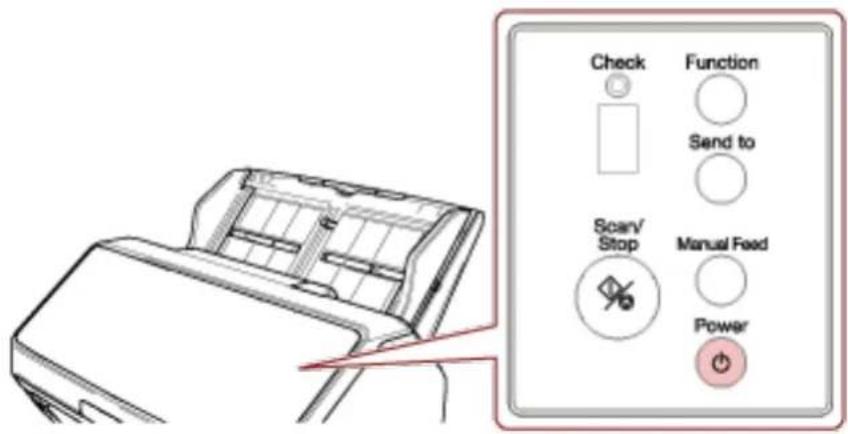
The scanner is turned off, and the [Scan/Stop] button lights off.
Entering and Resuming from Power Saving Mode
The scanner enters power saving mode when it is left on without being used for a certain period of time.
Power saving mode keeps the power consumption low when the scanner has not been used for a certain period of time.
Power saving mode has two types of settings.
●Power Save
If the scanner is left powered on for 15 minutes (factory default setting) or longer without being used, it automatically enters power saving mode.
When the scanner enters power saving mode, the LCD or Function Number Display and button on the scanner operate as follows.
-For fi-8190/fi-8290/fi-8170/fi-8270
The LCD switches off. The [Scan/Enter] button flashes in green.
-For fi-8150/fi-8250/fi-8150U/fi-8250U
The Function Number Display switches off. The [Scan/Stop] button flashes in green.
To resume from power saving mode, perform one of the following:
-Load a document in the ADF paper chute (feeder).
-Press any button on the scanner (except the [Power] button).
-Scan a document with the image scanning application.
●Auto Shutdown
The scanner is turned off automatically if it is left on without being used for a certain period of time (4 hours for the factory default setting).
To turn the power back on after the power is turned off automatically, press the [Power] button. For details, refer to How to Turn the Power ON (page 71).
ATTENTION
- If there is a document that remains on the paper path, the scanner may not enter power saving mode. Remove the documents by referring to When a Paper Jam Occurs (page 249).
- Depending on the image scanning application being used, the scanner might not turn off even if the [Power off after a certain period of time] check box is selected.
- If the scanner is automatically turned off while you are using the image scanning application, exit the application, and then turn the scanner back on.
HINT
- The waiting time for the scanner to enter power saving mode can be changed.
-For fi-8190/fi-8290/fi-8170/fi-8270
Use one of the following methods to change the waiting time for the scanner to enter power saving mode.
- You can change the waiting time for the scanner to enter power saving mode in [22]:
Power saving] on the [Settings Menu] screen of the operator panel.
For details, refer to How to Use Settings Menu (page 145). - You can change the waiting time for the scanner to enter power saving mode in the Software Operation Panel.
For details, refer to Waiting Time for the Scanner to Enter Power Saving Mode [Power saving] (page 394).
-For fi-8150/fi-8250/fi-8150U/fi-8250U
You can change the waiting time for the scanner to enter power saving mode in the Software Operation Panel.
For details, refer to Waiting Time for the Scanner to Enter Power Saving Mode [Power saving] (page 394). - To disable this function, clear the [Power off after a certain period of time] check box in [Device Setting] of the Software Operation Panel.
For details, refer to Waiting Time for the Scanner to Enter Power Saving Mode [Power saving] (page 394).
Opening/Closing the ADF
This section describes how to open and close the ADF.
How to Open the ADF
1 Remove any documents from the ADF paper chute (feeder).
2 Pull the ADF release tab towards you to open the ADF.
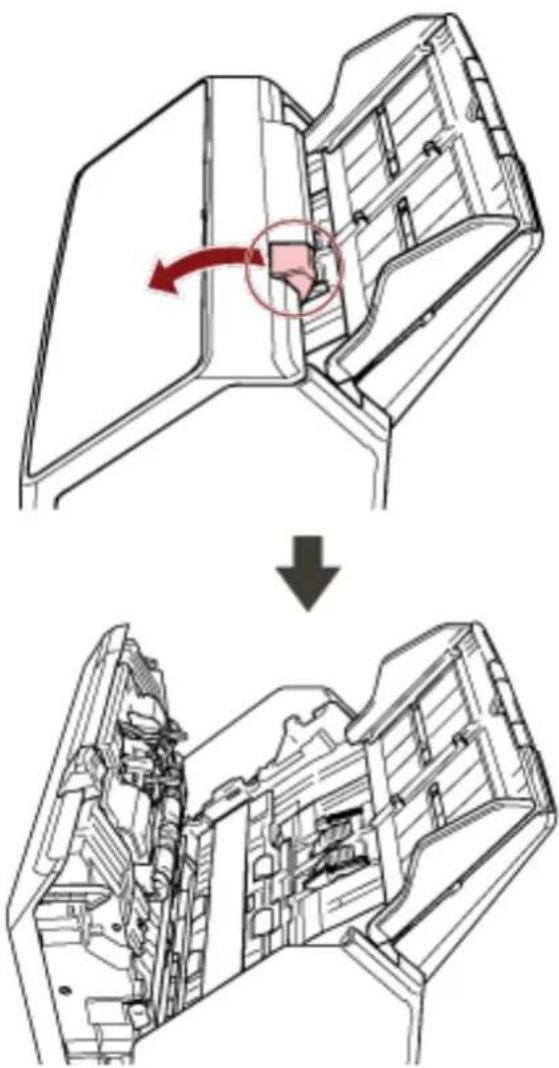

When the ADF is open, it might close accidentally. Be careful not to get your fingers caught.
How to Close the ADF
1 Close the ADF.
Push the center of the ADF until it locks in place.
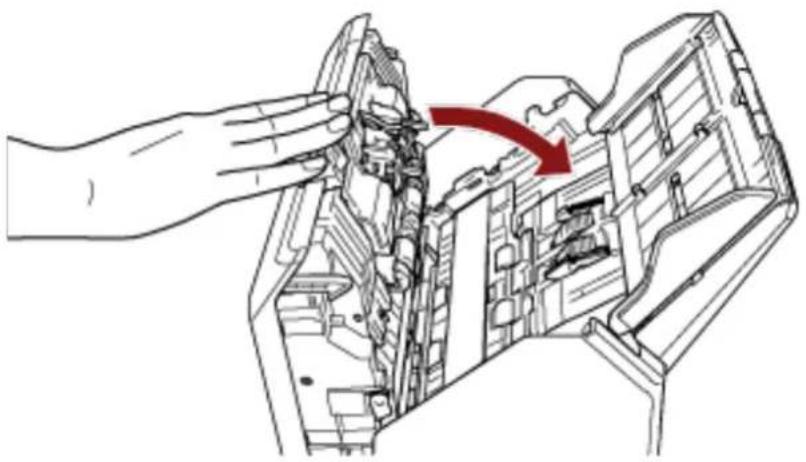
natural_image
Technical line drawing of a mechanical assembly with a hand inserting a component into a housing (no text or symbols present)
Be careful not to get your fingers caught when closing the ADF.
ATTENTION
Make sure there is no foreign matter caught inside the ADF when closing the ADF.
Opening/Closing the Document Cover [fi-8290/fi-8270/fi-8250/fi-8250U]
This section describes how to open and close the document cover.
How to Open the Document Cover
1 Open the document cover.
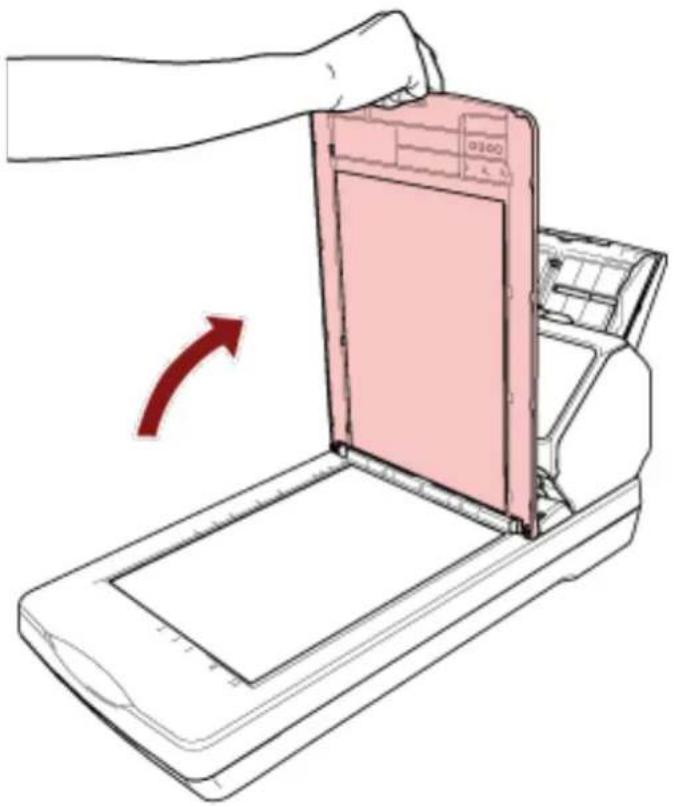
natural_image
Illustration of a hand opening a pink electronic device into a tray, with a red arrow indicating the process (no text or symbols present)HINT
Removing the document cover is also possible.
Even books or large documents can be scanned once the document cover is removed.
For information on how to scan such documents with the document cover removed, refer to the following.
- Scanning Books with the Flatbed [fi-8290/fi-8270/fi-8250/fi-8250U] (page 200)
- Scanning Large Documents with the Flatbed [fi-8290/fi-8270/fi-8250/fi-8250U] (page 202)
How to Close the Document Cover
1 Gently close the document cover.
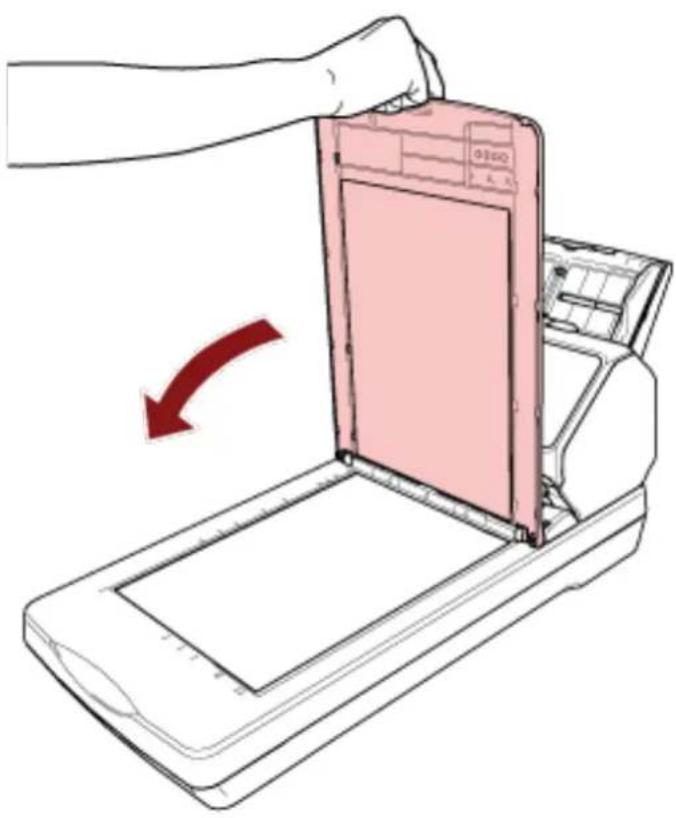
natural_image
Illustration of a hand opening a pink electronic device into a tray, with a red arrow indicating the process (no text or symbols present)Setting Up the ADF Paper Chute (Feeder)
Documents loaded in the ADF paper chute (feeder) are fed into the ADF one by one when scanning starts.
When scanning a relatively long document such as an A4 size document, use the chute extensions 1 and 2 as described below so that the document will be kept straight and fed smoothly.
1 Pull out the chute extension 1 and chute extension 2.
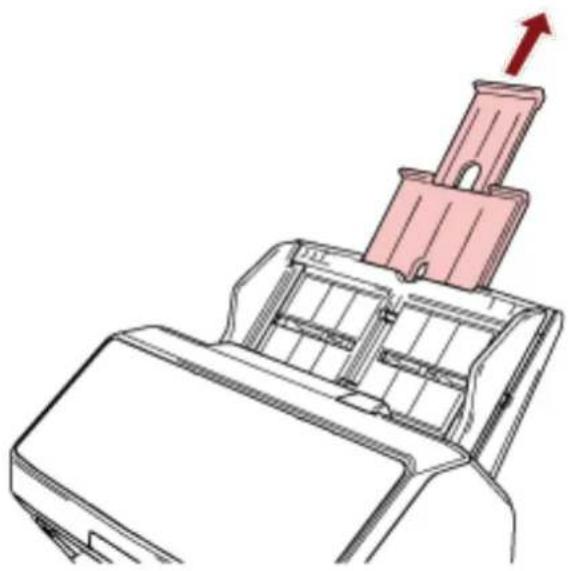
natural_image
Technical line drawing of a mechanical component with a pink component inserted, showing internal structure and an upward arrow (no text or symbols)HINT
Make sure you hold the ADF paper chute (feeder) while pulling out the chute extension 1 and chute extension 2.
Setting Up the Stacker [fi-8190/fi-8170/fi-8150/fi-8150U]
Documents loaded in the ADF paper chute (feeder) are ejected onto the stacker one by one during scanning.
When scanning a relatively long document such as an A4 size document, using the stacker, stacker extensions 1 and 2, and the stopper as described below will keep the documents straight and feed them smoothly.
Document Length Is A4 (Portrait) or Longer
1 Pull out the stacker and stacker extensions 1 and 2.
Be sure to pull them out according to the length of the document.
The stopper rises automatically when you pull out the stacker extension 2.
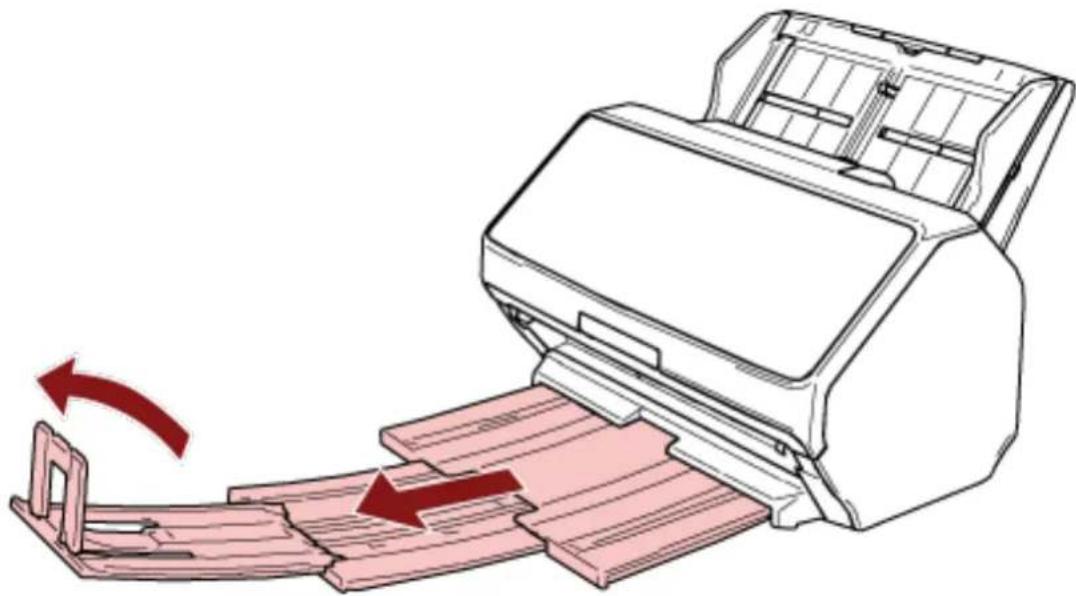
natural_image
Illustration of a printer being inserted into a stack of sheets, showing paper movement (no text or symbols)ATTENTION
Do not lift up the stopper more than 90 degrees, because it may break.
HINT
When scanning an A4 size document, pull out the stacker extension 2 until the stopping point.
When scanning a legal size document, pull out the stacker extension 2 all the way.
Document Length Is Shorter than A4 (Portrait)
1 Pull out the stacker and stacker extensions 1 and 2.
The stopper rises automatically when you pull out the stacker extension 2.
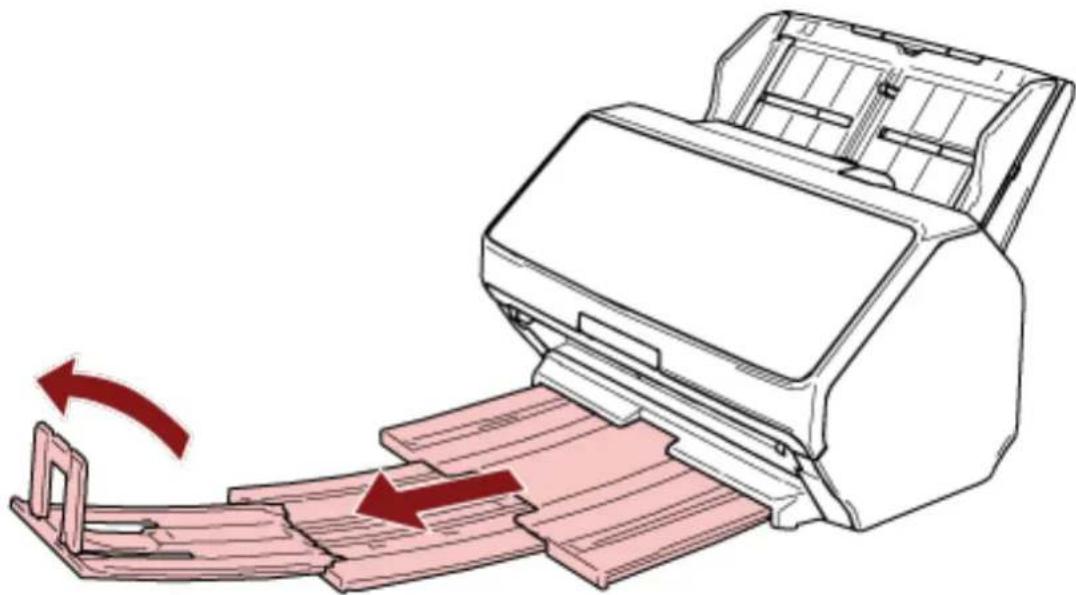
natural_image
Illustration of a printer being inserted into a stack of sheets, showing paper movement (no text or symbols)ATTENTION
Do not lift up the stopper more than 90 degrees, because it may break.
2 Push the stacker extensions 1 and 2 back and adjust the stacker length according to the length of the document.
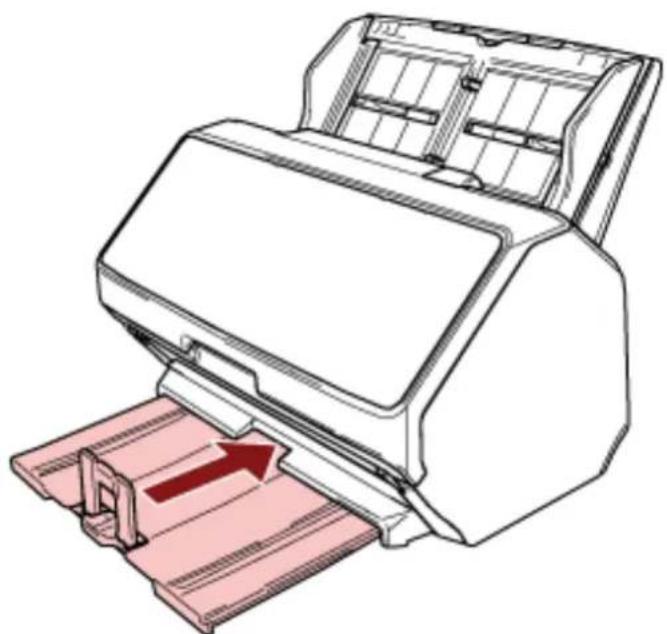
natural_image
Illustration of a printer with a red arrow indicating print direction (no text or symbols present)HINT
If the stopper comes off, attach it by inserting the protrusion on one side of the stopper into the hole on the stacker extension 2 in the direction of arrow 1, and then inserting the protrusion on the other side in the direction of arrow 2.
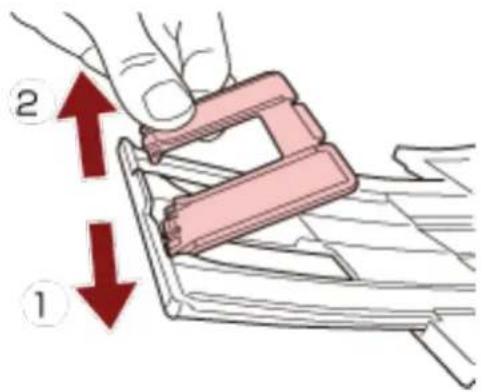
Documents with Different Sizes
1 Adjust the stacker to fit the longest document.
For details, refer to Document Length Is A4 (Portrait) or Longer (page 81).
2 Pinch the stack supporter and pull it out.
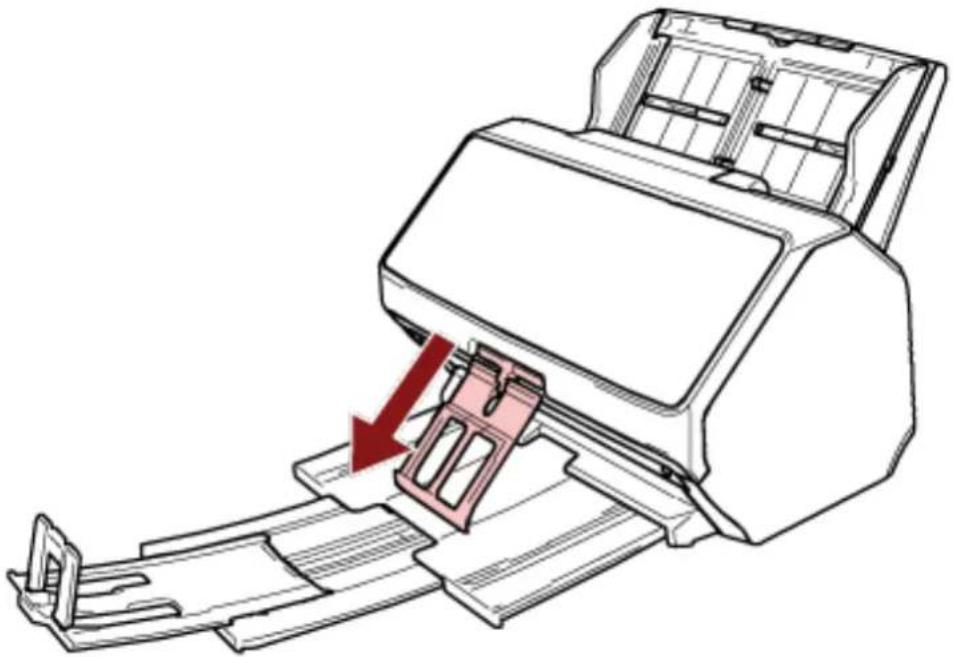
natural_image
Diagram of a printer printer with a red arrow indicating the process (no text or symbols present)ATTENTION
- Do not apply too much force to the stack supporter after pulling it out, because it may break.
- Documents that are damaged easily, such as thin paper documents, may not stack neatly when they are ejected because the stack supporter may prevent documents from ejecting fully or may cause documents to curl.
HINT
- When scanning documents including documents smaller than A6 size, using the stack supporter prevents documents from scattering.
- To return it to the original position, hold the upper part of the stack supporter, lift it in the direction of arrow 1, and return it in the direction of arrow 2.
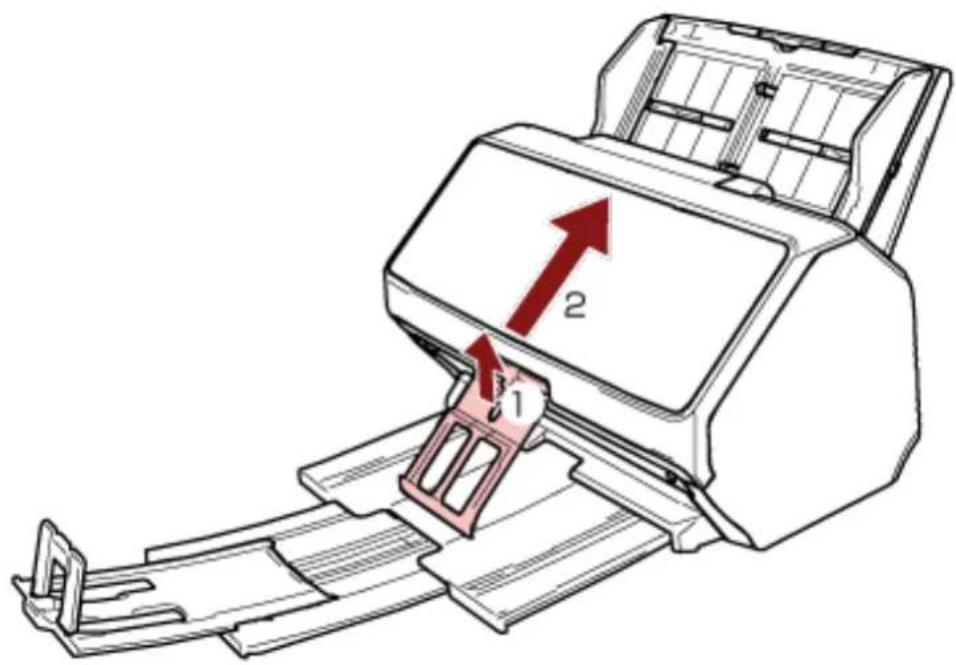
- If the stack supporter comes off, attach it by inserting the protrusion on one side of the stack supporter into the hole where it was originally attached in the direction of arrow 1, and then inserting the protrusion on the other side in the direction of arrow 2.
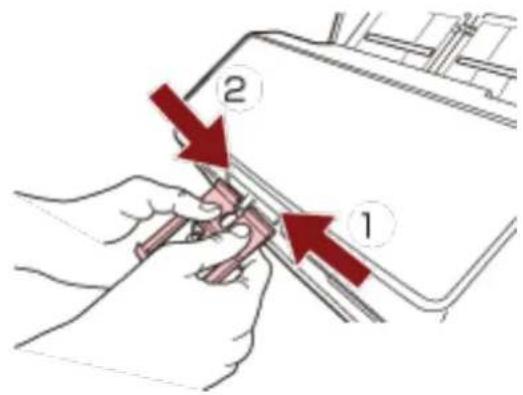
Setting Up the Stacker [fi-8290/fi-8270/fi-8250/fi-8250U]
Documents loaded in the ADF paper chute (feeder) are ejected onto the stacker one by one during scanning.
When scanning a relatively long document such as an A4 size document, using the stacker, stacker extension, and stopper as described below will keep the documents straight and feed them smoothly.
Document Length Is A5 (Portrait) or Longer
1 Hold the stacker and open it towards you.
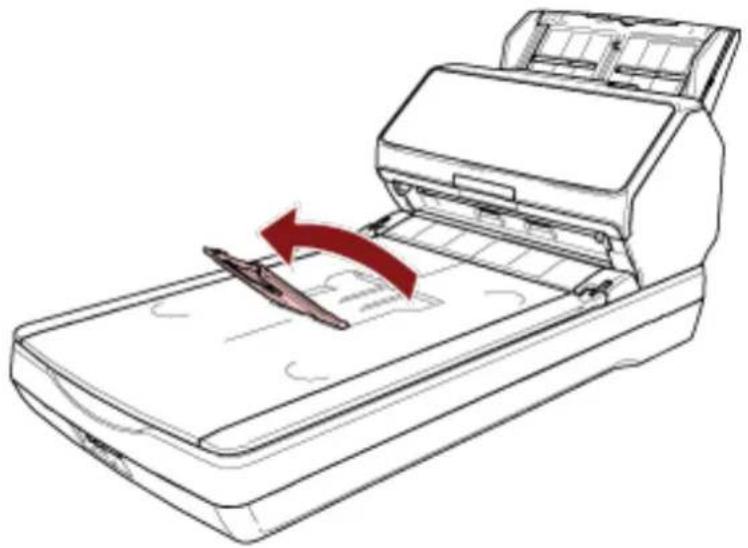
natural_image
Line drawing of a printer with a paper airplane being inserted, showing the blade and paper plane (no text or symbols)2 Lift up the stopper towards you.
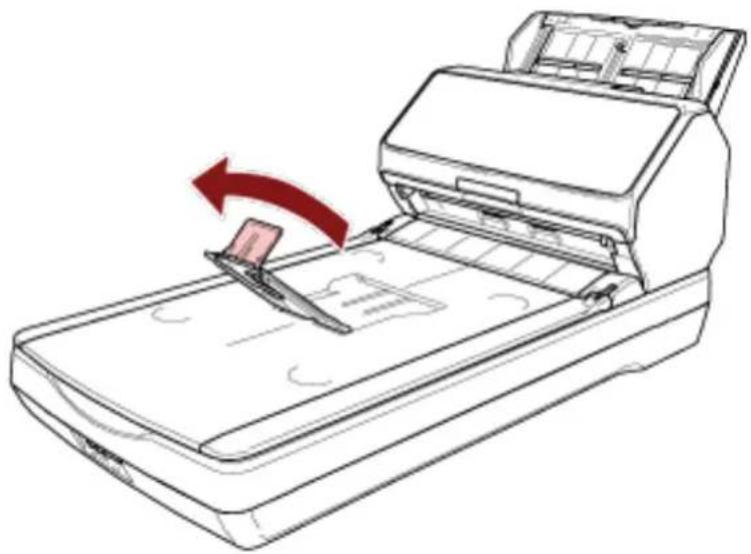
natural_image
Line drawing of a printer with a paper feed being inserted, showing the blade and paper sheet (no text or symbols)ATTENTION
Do not lift up the stopper more than 90 degrees, because it may break.
HINT
- You can adjust the length of the stacker to fit the length of a document by moving the stacker extension accordingly.
-For Letter size documents
Lower the stacker extension to its lowest position.
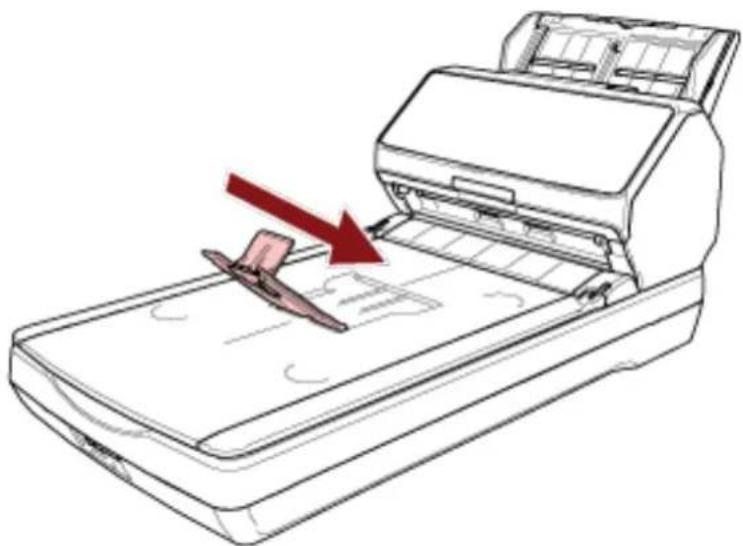
natural_image
Line drawing of a printer with a paperclip inserted, showing the printer's internal structure and a red arrow indicating the process (no text or symbols present)-For A4 size documents
Move the stacker extension so that it meets the top end of the stacker.
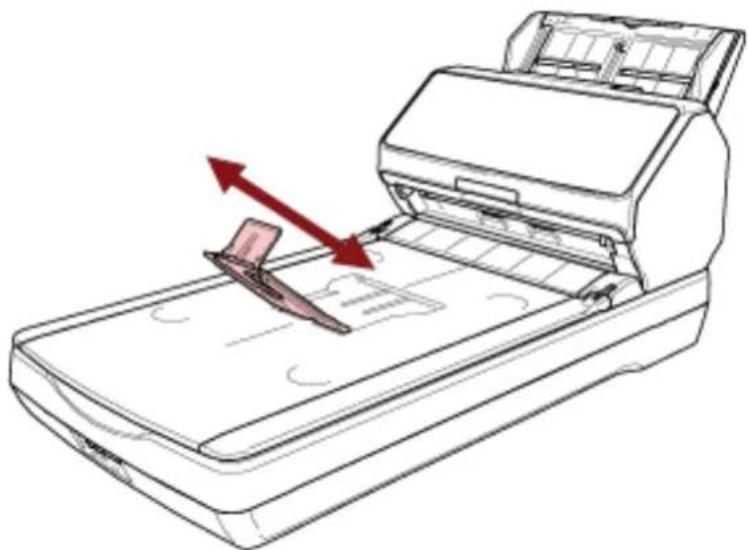
natural_image
Line drawing of a printer with a paper feed being inserted, showing no text or symbols on the device itself.-For Legal size documents
Raise the stacker extension to its highest position.
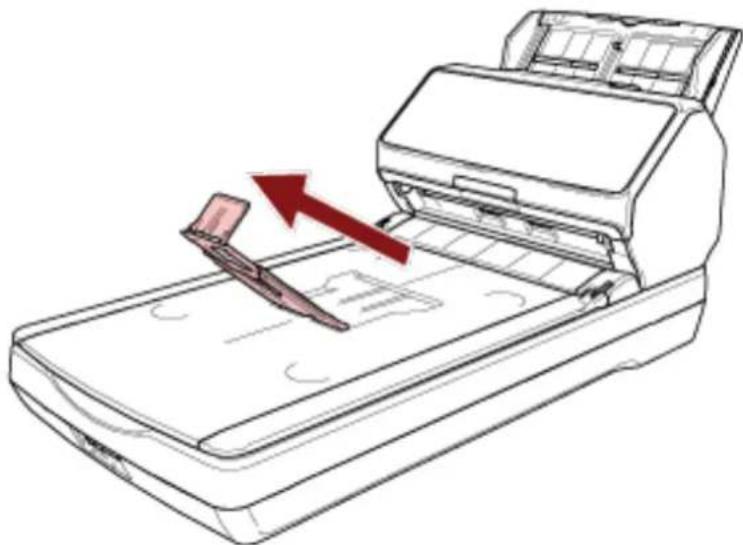
natural_image
Line drawing of a printer with a paper clip inserted, showing internal structure and a red arrow indicating motion (no text or symbols)- If the stopper comes off, attach it by inserting the protrusion on one side of the stopper into the hole where it was originally attached in the direction of arrow 1, and then inserting the protrusion on the other side in the direction of arrow 2.
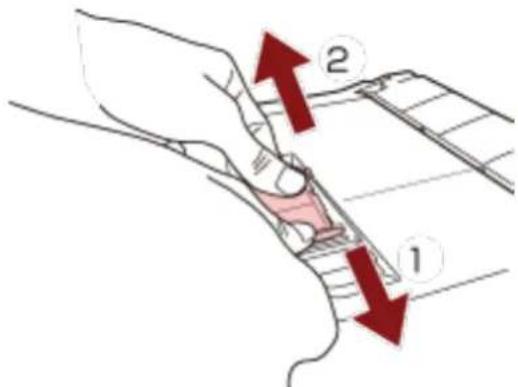
Document Length Is Shorter than A5 (Portrait)
1 Lift up the stopper.
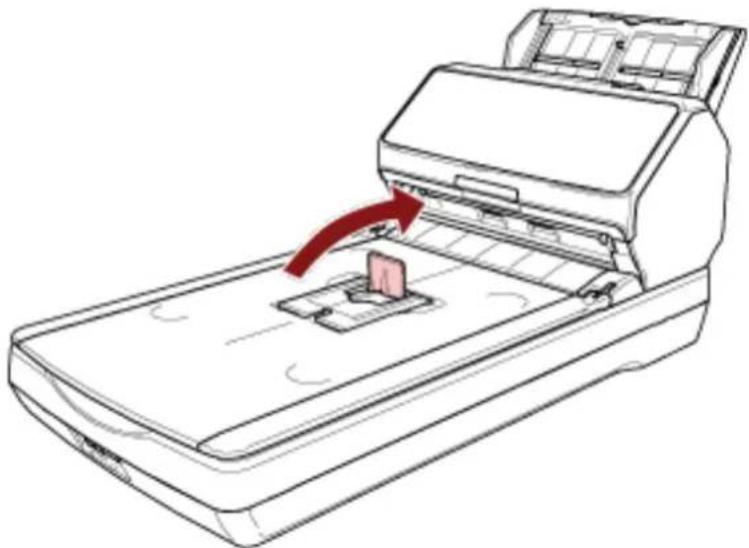
natural_image
Line drawing of a printer with a red arrow indicating the process, showing no text or symbols on the device itself.ATTENTION
Do not lift up the stopper more than 90 degrees, because it may break.
HINT
If the stopper comes off, attach it by inserting the protrusion on one side of the stopper into the hole where it was originally attached in the direction of arrow 1, and then inserting the protrusion on the other side in the direction of arrow 2.
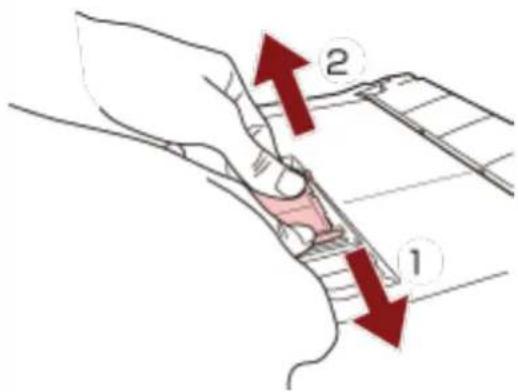
Documents with Different Sizes
1 Adjust the stacker to fit the longest document.
For details, refer to Document Length Is A5 (Portrait) or Longer (page 86).
2 Pinch the stack supporter and pull it out.
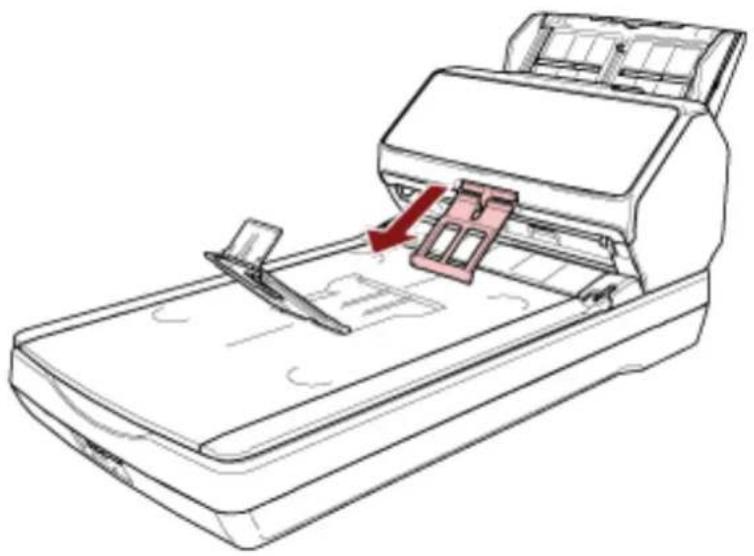
natural_image
Line drawing of a printer with a paperclip inserted into the cover, showing no text or symbols.ATTENTION
- Do not apply too much force to the stack supporter after pulling it out, because it may break.
- Documents that are damaged easily, such as thin paper documents, may not stack neatly when they are ejected because the stack supporter may prevent documents from ejecting fully or may cause documents to curl.
HINT
- When scanning documents including documents smaller than A6 size, using the stack supporter prevents documents from scattering.
- To return it to the original position, hold the upper part of the stack supporter, lift it in the direction of arrow 1, and return it in the direction of arrow 2.
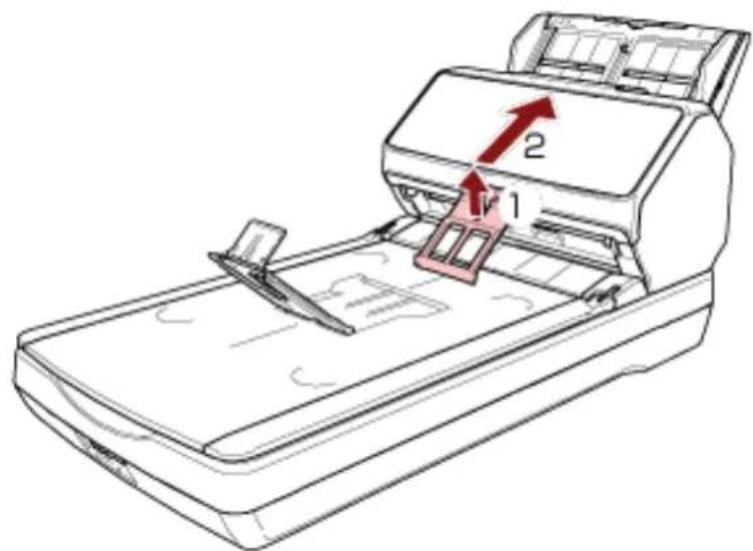
- If the stack supporter comes off, attach it by inserting the protrusion on one side of the stack supporter into the hole where it was originally attached in the direction of arrow 1, and then inserting the protrusion on the other side in the direction of arrow 2.
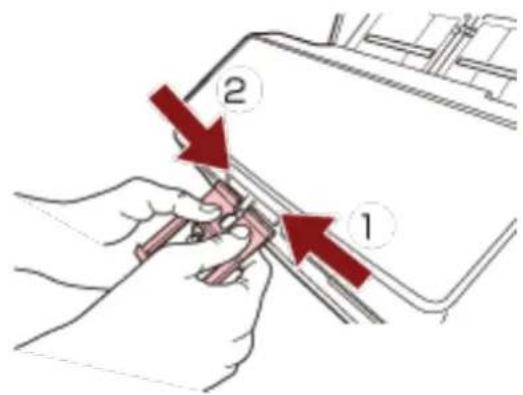
How to Perform a Basic Scan
This section explains how to perform a basic scan.
ATTENTION
Depending on the connection method of the scanner, use only the USB cable to connect to a computer or use only a LAN cable to connect to a network device. Do not use both cables at the same time.
HINT
When scanning with the scanner connected to a network, because the image transfer speed is prioritized, the image quality is lower than when scanning with the scanner connected via a USB cable.
In the scanner driver, you can set the image quality to the same level as the level that is set when scanning with the scanner connected via a USB cable. For details, refer to the help for the scanner driver.
● Operating with a Computer
Start scanning with one of the following methods.
- Performing a Scan with an Image Scanning Application (page 94)
- Pressing a Button on the Scanner in order to Start an Image Scanning Application and Perform a Scan (page 96)
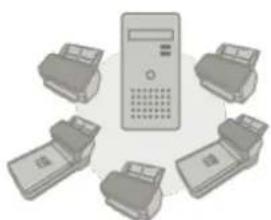
natural_image
Illustration of a central telephone handset connected to five other printer devices (no text or symbols)Operating with PaperStream NX Manager
Start scanning with the following method.
- Processing a Job (With PaperStream NX Manager) [fi-8190/fi-8290/fi-8170/fi-8270] (page 105)
- Processing a Job (With PaperStream NX Manager) [fi-8150/fi-8250] (page 109)
ATTENTION
Note that scanners operated with PaperStream NX Manager cannot be operated by a computer.
HINT
- When operating scanners with PaperStream NX Manager, you need to set up an environment and configure settings for PaperStream NX Manager.
For details, refer to the PaperStream NX Manager User's Guide.
The PaperStream NX Manager User's Guide can be downloaded from the following web page: https://www.fujitsu.com/global/support/products/computing/peripheral/scanners/fi/manuals/
- For details about how to start a scan from a browser on a computer/thin client when operating with PaperStream NX Manager, refer to the PaperStream NX Manager Web Scan User's Guide.
The PaperStream NX Manager Web Scan User's Guide can be downloaded from the following web page:
https://www.fujitsu.com/global/support/products/computing/peripheral/scanners/fi/manuals/When you start a scan from a browser on a computer/thin client, the [Occupied by an application] window is displayed on the LCD.
Performing a Scan with an Image Scanning Application
This section explains about the basic flow of performing a scan using an image scanning application on the computer.
In this case, a scanner driver and an image scanning application that supports the scanner driver must be installed on the computer.
The following scanner driver and image scanning applications are bundled with the scanner:
- Scanner driver
-PaperStream IP driver
• Image scanning application
-PaperStream ClickScan
-PaperStream Capture
-PaperStream Capture Pro (EVALUATION)
HINT
- For details about the scanner driver and image scanning applications, refer to Overview of the Bundled Software (page 43).
- Scanning procedures, operations, and scan setting items slightly vary depending on the scanner driver and the image scanning application.
For details, refer to the help for your scanner driver and the manual/help for your image scanning application.
1 Turn on the scanner.
For details, refer to How to Turn the Power ON (page 71).
2 Load a document in the ADF paper chute (feeder).
Load the document face-down in the ADF paper chute (feeder).
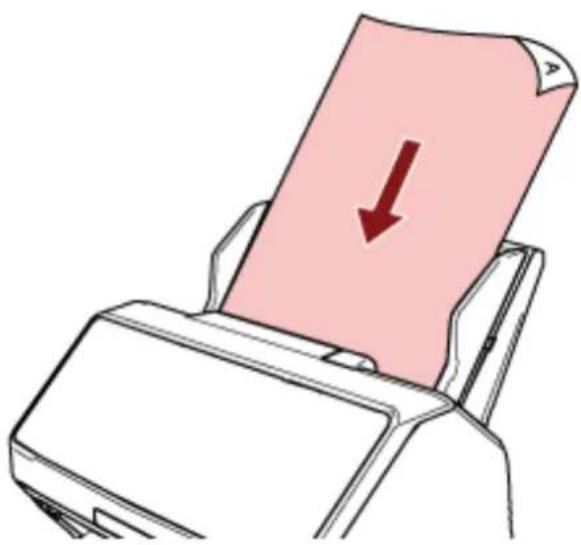
natural_image
Illustration of a printer with a pink paper sheet being inserted, showing a red downward arrow (no text or symbols)For details, refer to How to Load a Document in the ADF Paper Chute (Feeder) (page 112).
3 Start an image scanning application.
4 Select a scanner driver to be used for scanning.
For some image scanning applications, selection of a scanner driver may not be needed.
5 Select the scanner to be used for scanning.
The scanner name depends on the scanner driver type and the scanner connection method. For details, refer to the help for the scanner driver.
For some image scanning applications, selection of the scanner may not be needed.
To use the scanner connected to a network, you need to select the scanner in Scanner Selection Tool beforehand.
For details about how to start up Scanner Selection Tool, refer to Starting Up Scanner Selection Tool [fi-8190/fi-8290/fi-8170/fi-8270/fi-8150/fi-8250] (page 69).
6 In the setup window for the scanner driver, configure the scan settings.
For some image scanning applications, the setup window for the scanner driver may not appear.
7 Scan the document with the image scanning application.
ATTENTION
Do not perform any of the following operations.
Doing so stops a scan.
- Disconnecting the USB cable
- Disconnecting the LAN cable
- Disconnecting the network
- Logging off
Pressing a Button on the Scanner in order to Start an Image Scanning Application and Perform a Scan
This section explains about the basic flow of starting an image scanning application and performing a scan by pressing the button on the scanner.
In this case, you need to configure the settings for the button in advance in order to perform a scan.
HINT
The image scanning application that is started up when the button on the scanner is pressed differs depending on whether PaperStream ClickScan resides in the taskbar or not.
- When it resides in the taskbar PaperStream ClickScan will be started up.
- When it does not reside in the taskbar PaperStream Capture will be started up.
The buttons below are used to start a scan (the button that is featured depends on the scanner):
●For fi-8190/fi-8290/fi-8170/fi-8270
[Scan/Enter] button
However, this is only possible when [No.00] is selected in the [Function Selection] screen on the scanner.
For details about how to select which button on the computer to be applied to the button on the scanner, refer to How to Use Function Selection (page 170).
- For fi-8150/fi-8250/fi-8150U/fi-8250U [Scan/Stop] button
1 Configure the scan settings in the image scanning application.
For details about the procedure, refer to Performing a Scan with an Image Scanning Application (page 94).
2 Configure the settings for the button.
Configure the settings for the button to be used for starting a scan on your computer.
Specify an image scanning application for the button on the computer, which you want to start up when the button on the scanner is pressed.
You can configure multiple buttons on the computer and select one of the configured buttons for the button on the scanner.
The button setting procedure varies depending on the connection method of the scanner.
When establishing a connection via a USB cable
Display the [Devices and Printers] setting window for Windows, and set the buttons in [Scan properties] for the scanner. For details, refer to Configuring the Settings for a Button on a Computer (For USB Connection) (page 102).
When establishing a connection via a wired LAN
Use Button Event Manager to set the button. For details about Button Event Manager, refer to the Network Setup Tool for fi Series Help.
You can view the details of the button setting procedure by referring to the Button Event Manager Help in the following procedure.
a Start up Button Event Manager.
●For Windows Server 2012
Right-click the Start screen, and select [All apps] on the app bar → [Button Event Manager for fi Series] under [fi Series].
●For Windows Server 2012 R2
Click [↓] on the lower left side of the Start screen → [Button Event Manager for fi Series] under [fi Series].
To display [↓], move the mouse cursor.
- For Windows 10/Windows Server 2016/Windows Server 2019/Windows Server 2022 Click [Start] menu → [fi Series] → [Button Event Manager for fi Series].
- For Windows 11
Click [Start] menu → [All apps] → [fi Series] → [Button Event Manager for fi Series].

When Button Event Manager is started, at the far right of the task bar.
appears in the notification area located
b Right-click .

Click [Help] on the menu that appears.
3 Load a document in the ADF paper chute (feeder).
Load the document face-down in the ADF paper chute (feeder).
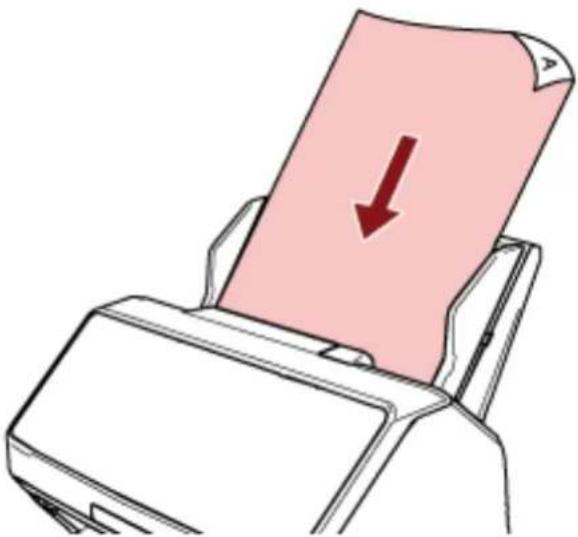
natural_image
Illustration of a printer with a pink paper being inserted, showing a red downward arrow (no text or symbols)For details, refer to How to Load a Document in the ADF Paper Chute (Feeder) (page 112).
4 Select one of the buttons on the computer to be applied to the button on the scanner and start a scan
●For fi-8190/fi-8290/fi-8170/fi-8270
![Menu Stop/ Clear Scan/ Enter Manual Feed Power [Scan/Enter] Button](/content/2026/05/903199/images/830d09c8165b8250a7ffed4bca08382b16a4977c17d102374adea810a3fea559.jpg)
a Select a number (configured to start up the desired image scanning application) in the [Function Selection] screen on the scanner.
The number displayed in the [Function Selection] screen corresponds to the button configured on the computer as follows.
| Number in the [Function Selection] Screen Button Configured on the Computer |
| No.00 [Scan Button] |
| No.01 to No.50 [Send to 01] to [Send to 50] |
HINT
[SOP] is also available in the [Function Selection] screen.
The Software Operation Panel has been specified for [SOP] to start up by factory default and cannot be changed.
The procedure below shows an example of selecting a number (that corresponds to [Send to 02] configured on the computer) for the [Scan/Enter] button on the scanner.
i Display the [Function Selection] screen on the LCD.
Press the [△] button/[ ] button while the [Ready] screen is displayed on the LCD.
ii Press the [ ] button/[ ] button to select [No.02], and then press the [Stop/Clear] button.
Confirm that the indicator displays [F02].
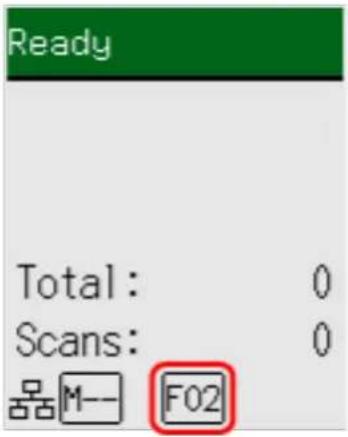
For more details about the indicators, refer to Description of the Indicator (page 142).
b Press the [Scan/Enter] button.
The image scanning application specified for [Send to 02] starts up.
●For fi-8150/fi-8250/fi-8150U/fi-8250U
![Check Function Send to [Send to] Button Scan/ Stop Manual Feed Power [Scan/Stop] Button](/content/2026/05/903199/images/36caf0ec2982e6dec976be9ddab62c81b974522cb7fd4cb2308141d392fd1d4f.jpg)
-To start up an image scanning application specified for [Scan Button] on the computer Press the [Scan/Stop] button.
The image scanning application specified for [Scan Button] starts up.
-To start up one of the image scanning applications specified for the buttons from [Send to 1] to [Send to 9] on the computer
a For the [Send to] button, select a number that corresponds to a button which has been specified to start up a desired image scanning application.
Press the [Function] button to switch the number which is displayed on the Function Number Display.
The number displayed on the Function Number Display corresponds to a button configured on the computer as follows.
| Number on Function Number Display Button Configured on the Computer |
| 1 to 9 [Send to 1] to [Send to 9] |
HINT
Besides the numbers, [C] is also displayed on the Function Number Display by pressing the [Function] button to switch the number.
The Software Operation Panel has been specified for [C] to start up by factory default and cannot be changed.
The procedure below shows an example of selecting a number (that corresponds to [Send to 02] configured on the computer) for the [Send to] button on the scanner. Press the [Function] button until [2] is displayed on the Function Number Display.
b Press the [Send to] button.
The image scanning application specified for [Send to 02] starts up.
HINT
For more details about the operator panel, refer to How to Use the Operator Panel [fi-8190/fi-8290/fi-8170/fi-8270] (page 137) or How to Use the Operator Panel [fi-8150/fi-8250/fi-8150U/fi-8250U] (page 174).
5 If necessary, scan documents with the image scanning application.
ATTENTION
Do not perform any of the following operations.
Doing so stops a scan.
- Disconnecting the USB cable
- Disconnecting the LAN cable
- Disconnecting the network
- Logging off
Configuring the Settings for a Button on a Computer (For USB Connection)
Configure the settings for the button to be used for starting a scan on your computer.
Specify an image scanning application for the button on the computer, which you want to start up when the button on the scanner is pressed.
You can configure multiple buttons on the computer and select one of the configured buttons for the button on the scanner.
The procedure when the scanner is connected via a USB cable is as follows.
1 Turn on the scanner and confirm that the scanner is connected to the computer via the USB cable.
For details about how to turn on the scanner, refer to How to Turn the Power ON (page 71).
2 Display the [Control Panel] window.
- For Windows Server 2012
Right-click the Start screen, and select [All apps] on the app bar → [Control Panel] under [Windows System].
●For Windows Server 2012 R2
Click [↓] on the lower left side of the Start screen → [Control Panel] under [Windows System]. To display [↓], move the mouse cursor. - For Windows 10/Windows Server 2016/Windows Server 2019/Windows Server 2022 Click [Start] menu → [Windows System] → [Control Panel].
- For Windows 11
Click [Start] menu → [All apps] → [Windows Tools] and double-click [Control Panel].
3 Click [View devices and printers].
The [Devices and Printers] window appears.
4 Right-click on the scanner icon, and select [Scan properties] from the displayed menu.
The properties window of the scanner appears.
5 Click the [Events] tab and select a button to be set.
From the [Select an event] drop-down list, select a button.
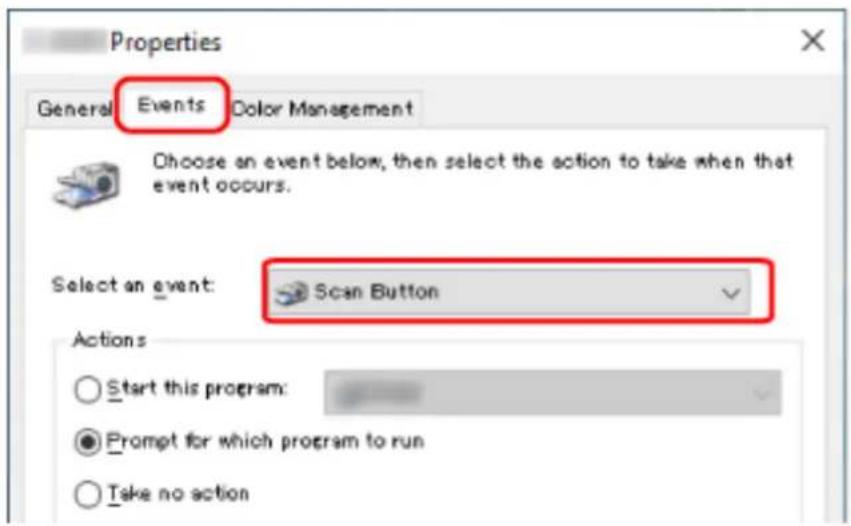
The following table shows how to apply the button configured on the computer to the button on the scanner that will be used for starting a scan.
| Button Configured on the Computer | For fi-8190/fi-8290/fi-8170/fi-8270 | For fi-8150/fi-8250/fi-8150U/fi-8250U | |
| How to Apply the Button Settings to the [Scan/Enter] Button | How to Apply the Button Settings to the [Scan/Stop] Button | How to Apply the Button Settings to the [Send to] Button | |
| [Scan Button] | Select [No.00] in the [Function Selection] screen on the scanner. The indicator displays [F00]. | No operation is required.[Scan Button] configured on the computer is always applied to the [Scan/Stop] button on the scanner. | — |
| [Send to 01] to [Send to 50] | Select one of the numbers from [No.01] to [No.50] in the [Function Selection] screen on the scanner.The indicator displays a number from [F01] to [F50] in accordance with the number you selected. | — | — |
| [Send to 1] to [Send to 9] | — — Press the [Function] | button to switch the number displayed on the Function NumberDisplay to a number from [1] to [9]. | |
6 Select an image scanning application to be launched when the button is pressed.
Click [Start this program] under [Actions], and select an image scanning application from the program list.
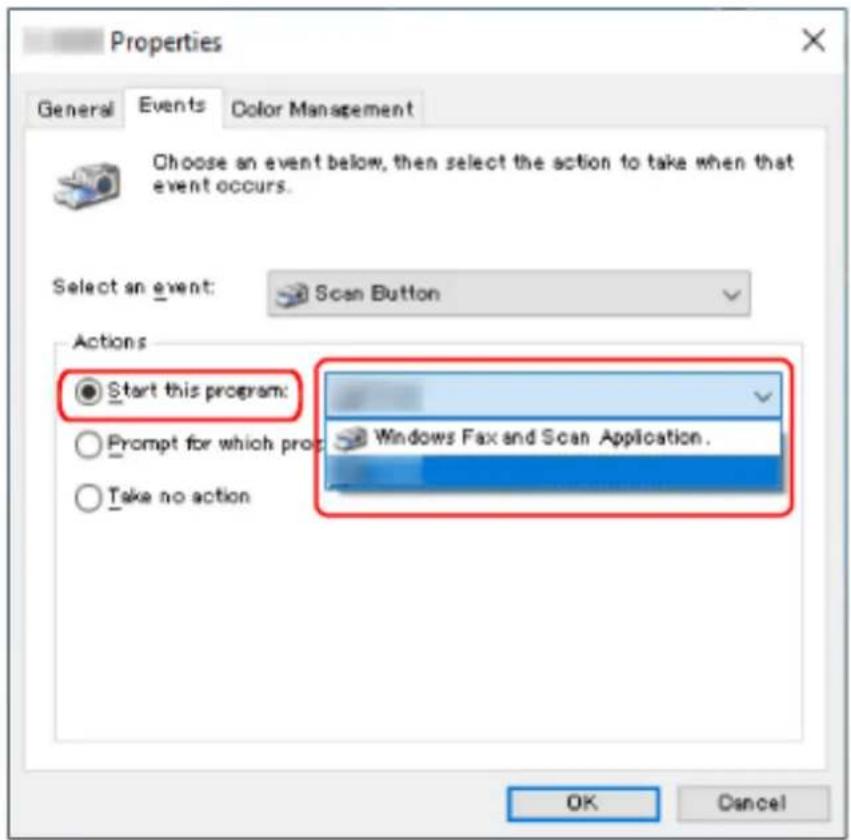
7 Click the [OK] button.
HINT
To set multiple buttons, repeat steps 5 to 6.
Processing a Job (With PaperStream NX Manager) [fi-8190/fi-8290/fi-8170/fi-8270]
This section explains about the basic flow of starting a scan by processing a job set in PaperStream NX Manager.
To process a job with the scanner, you need to set up an environment and configure the settings for PaperStream NX Manager.
For details, refer to the PaperStream NX Manager User's Guide.
1 Turn on the scanner.
For details, refer to How to Turn the Power ON (page 71).
- When the [Job Group Code] screen is displayed on the LCD Proceed to step 2.
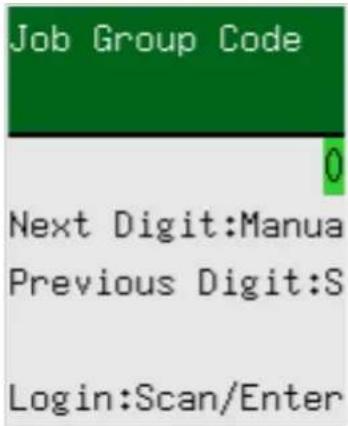
- When the [Job list] screen is displayed on the LCD Proceed to step 3.
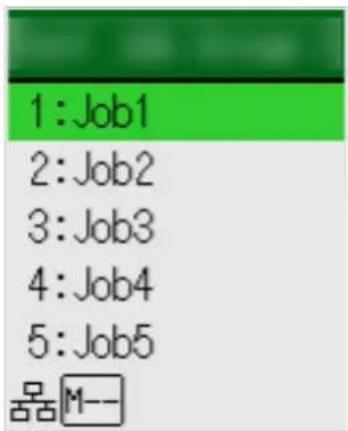
HINT
Press the [Stop/Clear] button while the [Job list] screen is displayed to log out and connect to the server again.
2 Enter a job group code in the [Job Group Code] screen on the LCD.
a Press the [ ] button/[ ] button to select a number (0 to 9), and then press the [Manual Feed] button to move to the next digit.
Enter [123] for a job group code as an example here.
i Press the [ △] button/[ ] button to select [1], and then press the [Manual Feed] button to move to the next digit.
ii Press the [ ] button/[ ] button to select [2], and then press the [Manual Feed] button to move to the next digit.
iii Press the [ △]/[ ] button to select [3].
b Press the [Scan/Enter] button after a job group code is entered.
The [Job list] screen is displayed.
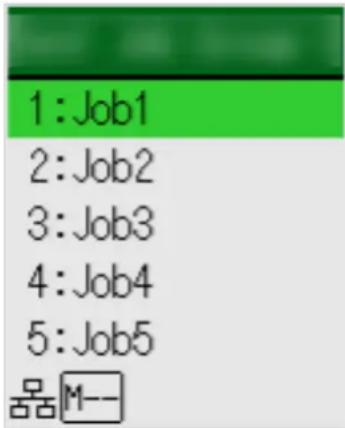
HINT
Press the [Stop/Clear] button while the [Job list] screen is displayed to log out and return to the [Job Group Code] screen.
In the factory default setting, if the scanner is left on for a minute with the [Job list] screen displayed, you are automatically logged out from PaperStream NX Manager. For details about the automatic log-out setting, refer to PaperStream NX Manager (page 416).
Names and functions of the operator panel are as follows.
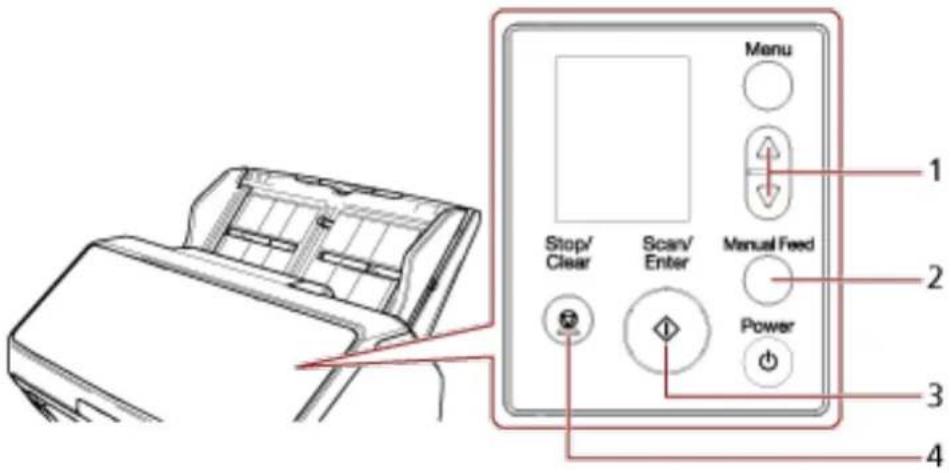
| No. Name Function | ||
| 1 | [4-button/[ ] button | Used to select the number (within 0 to 9).Enter numbers starting from the first digit. |
| 2 [Manual Feed] button Moves to the next digit for you to enter a number in.The cursor is always at the far right of the input field.You can enter up to 8 number of digits. | ||
| 3 [Scan/Enter] button Logs in to PaperStream NX Manager. | ||
| 4 [Stop/Clear] button Deletes the number you entering and moves to the previous digit for you to enter a number in.The cursor is always at the far right of the input field. | ||
3 Load a document in the ADF paper chute (feeder).
Load the document face-down in the ADF paper chute (feeder).
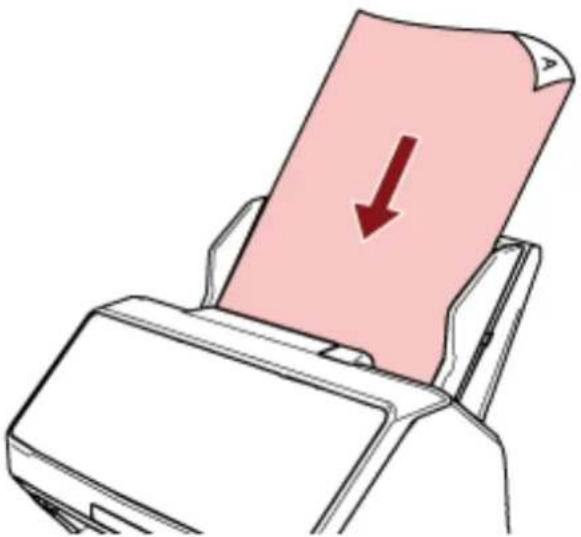
natural_image
Illustration of a printer with a pink paper being inserted, showing a downward arrow (no text or symbols)For details, refer to How to Load a Document in the ADF Paper Chute (Feeder) (page 112).
4 Select a job in the [Job list] screen on the LCD, and start a scan.
a Press the [ ] button/[] button to select a job, and then press the [Scan/Enter] button. Scanning starts.
HINT
A message may appear on the screen.
Check the message and press the [Scan/Enter] button to start a scan.
Press the [Stop/Clear] button to return to the [Job list] screen.
b When a notice saying that the saving process has ended is displayed on the screen, press the [Scan/Enter] button.
Return to the [Job list] screen.
Images are sent to PaperStream NX Manager.
For details, refer to the PaperStream NX Manager User's Guide.
Processing a Job (With PaperStream NX Manager) [fi-8150/fi-8250]
This section explains about the basic flow of starting a scan by processing a job set in PaperStream NX Manager.
To process a job with the scanner, you need to set up an environment and configure the settings for PaperStream NX Manager.
For details, refer to the PaperStream NX Manager User's Guide.
1 Turn on the scanner.
For details, refer to How to Turn the Power ON (page 71).
2 When "1" is displayed on the Function Number Display, load a document in the ADF paper chute (feeder).
Load the document face-down in the ADF paper chute (feeder).
![RICOH fi-8190 - Processing a Job (With PaperStream NX Manager) [fi-8150/fi-8250] - 1](/content/2026/05/903199/images/59c20aa28e43b57f136f0ec33a28507931d47fd34459ead94f39f1cc90634c29.jpg)
natural_image
Illustration of a printer with a pink paper being inserted, showing a downward arrow (no text or symbols)For details, refer to How to Load a Document in the ADF Paper Chute (Feeder) (page 112).
3 Press the [Function] button to select a number for a job (from 1 to 9), and then press the [Scan/Stop] button.
Scanning starts.
Images are sent to PaperStream NX Manager.
For details, refer to the PaperStream NX Manager User's Guide.
HINT
Ask the administrator which job to select in advance.
This section explains how to load documents on the scanner.
Loading a Document in the ADF Paper Chute (Feeder)
This section explains how to load documents of normal paper in the ADF paper chute (feeder).
Preparing Documents to Load Them in the ADF Paper Chute (Feeder)
When you load multiple documents in the ADF paper chute (feeder), make the following preparations.
HINT
For details about the paper size and quality required for normal operations, refer to Documents for Scanning (page 116).
1 Check the documents.
a Check whether the documents to be loaded are of the same width or not.
Ways to load documents differ depending on whether the documents are of the same width or not.
If the documents are of different width, refer to Conditions for Mixed Batch Scanning (page 126) or Scanning Documents with Different Widths (page 178).
b Check the number of sheets.
Up to 100 sheets can be loaded (with paper weight of 80 g/m^2 [20 lb] and thickness of the document stack under 10 mm).
For details, refer to Loading Capacity (page 122).
2 Fan the documents.
a Grab a stack of documents, which should be 10 mm or less.
b Hold both ends of the documents and fan them a few times.
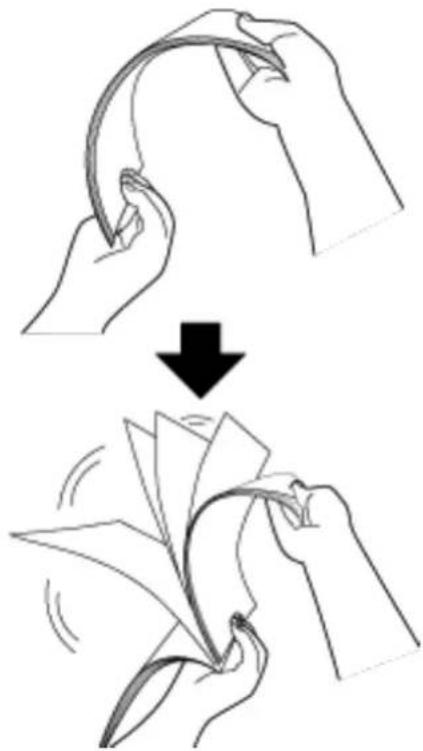
natural_image
Illustration of hands folding paper strips with a curved cord, showing a downward motion (no text or symbols)c Rotate the documents by 90 degrees and fan them in the same manner.
d Perform steps a to c for all documents.
e Align the top of the documents.
How to Load a Document in the ADF Paper Chute (Feeder)
1 Pull out the chute extensions according to the length of the document. For details, refer to Setting Up the ADF Paper Chute (Feeder) (page 80)
2 Adjust the stacker according to the length of the documents. For details, refer to Setting Up the Stacker [fi-8190/fi-8170/fi-8150/fi-8150U] (page 81) or Setting Up the Stacker [fi-8290/fi-8270/fi-8250/fi-8250U] (page 86).
3 Load a document in the ADF paper chute (feeder). Load the document face-down in the ADF paper chute (feeder).
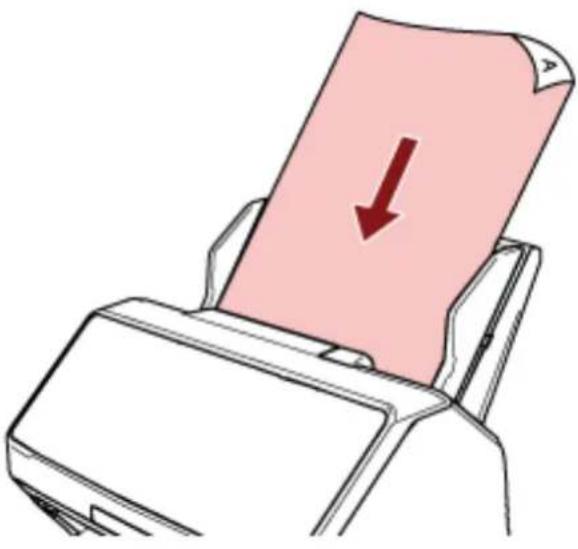
natural_image
Illustration of a printer with a pink paper being inserted, showing a downward arrow (no text or symbols)ATTENTION
- Remove all paper clips and staples.
- Reduce the number of documents when documents are not fed into the scanner or overlapped documents are fed.
4 Adjust the side guides to the width of the documents.
Move the side guides so that there is no space between the side guides and the documents.
When there is a space between the side guides and the documents, the documents may be fed skewed.
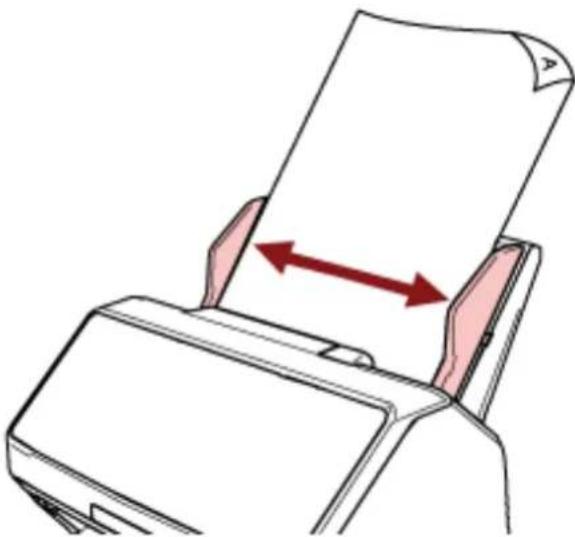
natural_image
Illustration of a printer with paper being inserted, showing paper spread and red double-headed arrows indicating orientation (no text or symbols)ATTENTION
When you scan long pages, take note of the following:
- When loading a document
Support the loaded document with your hand so it does not fall out of the ADF paper chute (feeder).
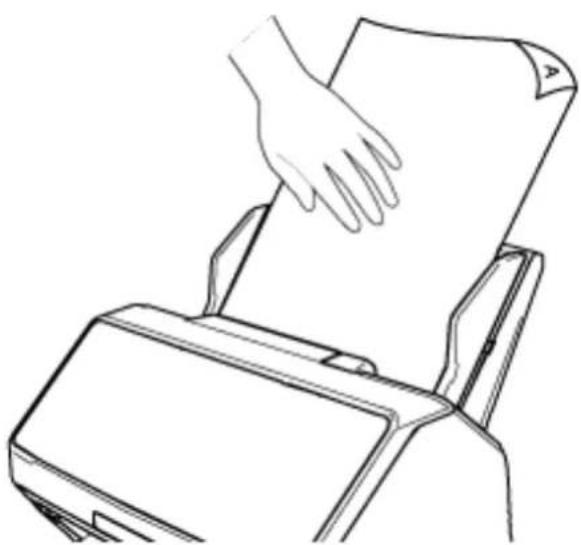
natural_image
Line drawing of a hand pressing down on a document into a printer (no text or symbols present)- When the document is ejected
Secure enough space around the stacker and catch the ejected sheet so that it does not fall off the stacker.
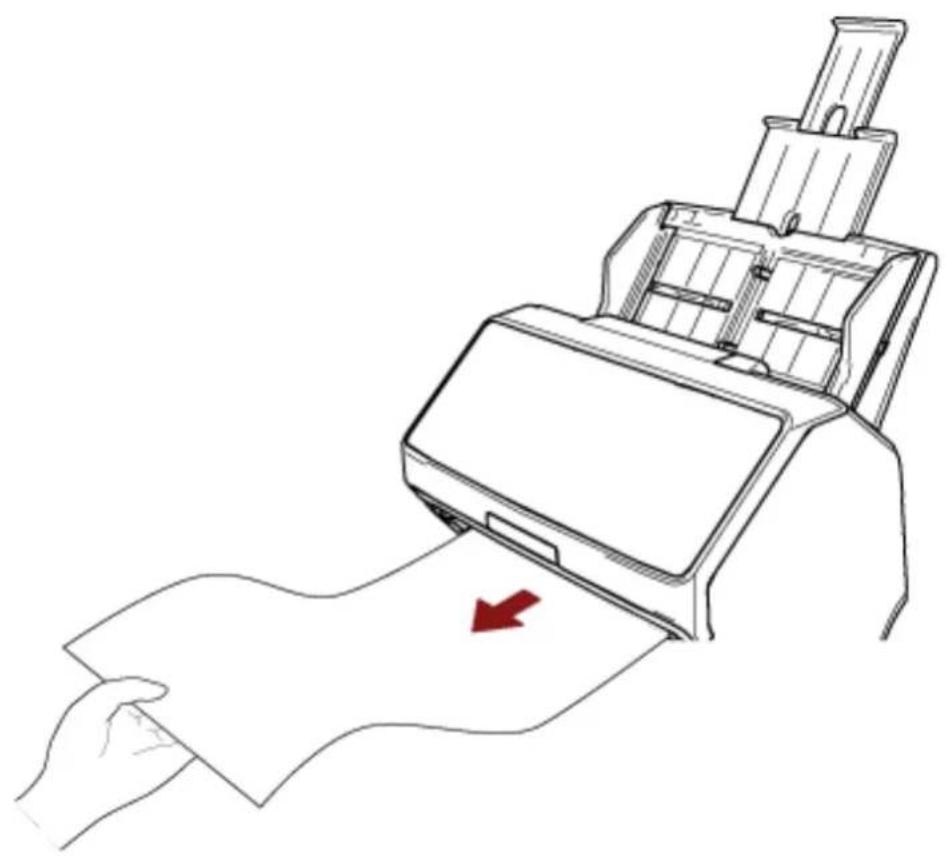
natural_image
Line drawing of a printer being placed on paper, with a hand holding the paper (no text or symbols present)Be careful not to cut your finger on the edge of the document.
Placing a Document on the Flatbed [fi-8290/fi-8270/fi-8250/fi-8250U]
1 Open the document cover.
For details, refer to How to Open the Document Cover (page 78).
2 Place a document on the document bed.
Place the document face-down to align its top left-hand corner with the reference point.
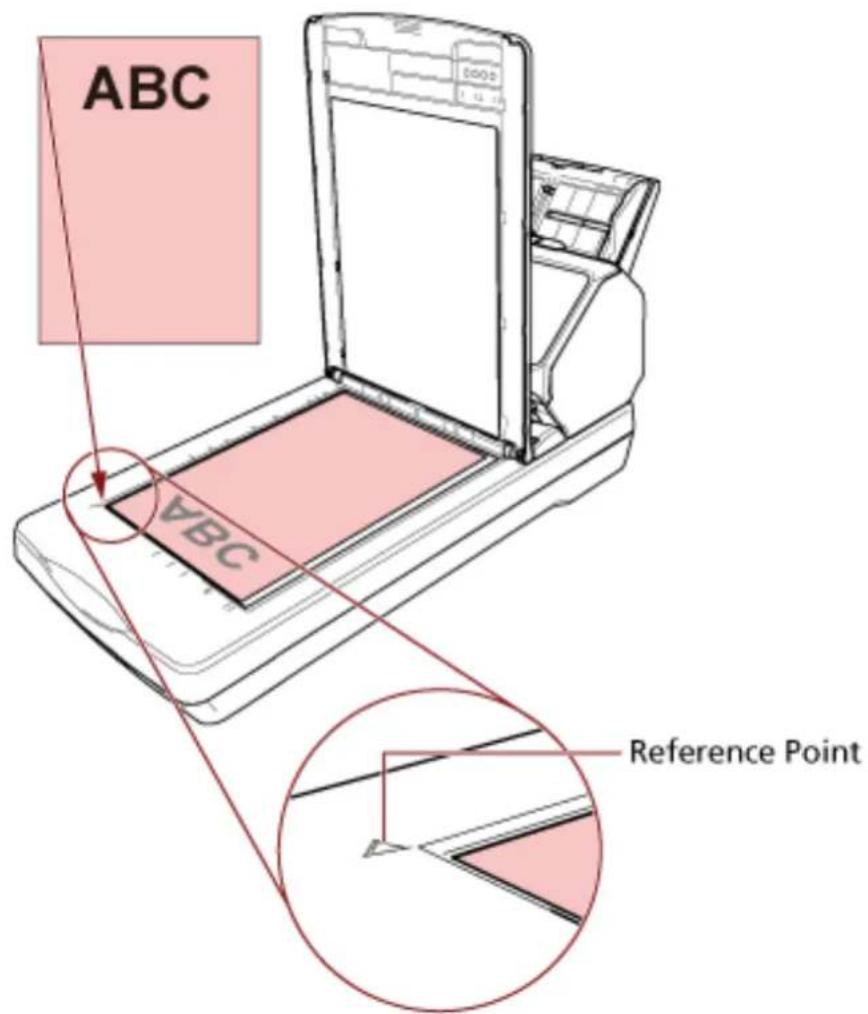
3 Close the document cover.
For details, refer to How to Close the Document Cover (page 79).
Documents for Scanning
Paper Size
The following paper sizes can be scanned:
| ADF Maximum size (width × length) (*1) | ●A4 (portrait) (210 × 297 mm/8.3 × 11.7 in.)●Legal (portrait) (8.5 × 14 in.)●Long page document (*2) (215.9 × 863.6 mm/8.5 × 34 in., 215.9 × 6,096 mm/8.5 × 240 in.) |
| Minimum size (width × length) | 48 × 50 mm/1.9 × 2.0 in. |
| Flatbed [fi-8290/fi-8270/fi-8250/fi-8250U] | Maximum size (width × length) 215.9 × 297 mm/8.5 × 11.7 in. |
*1: If you use a ballpoint pen to pull out the side guide adjuster and then attach the ADF paper chute (feeder) to the scanner, documents with a width of up to 240 mm (9.4 in.) can be fed. For details, refer to Scanning Documents That Are 220 mm to 240 mm in Width (page 180).
*2: Depending on the scanner driver or the scan setting of the image scanning application, the memory may be insufficient to perform scanning.
Long page scanning supports documents with a length up to 6,096 mm (240 in.) when the resolution is set to 200 dpi or lower.
Note that the resolution must be set to the following dpi value depending on the document size.
- A length that exceeds 863.6 mm (34 in.) but does not exceed 2,700 mm (106.3 in.) 600 dpi or less
- A length that exceeds 2,700 mm (106.3 in.) but does not exceed 4,064 mm (160 in.) 400 dpi or less
- A length that exceeds 4,064 mm (160 in.) but does not exceed 5,461 mm (215 in.) 300 dpi or less
- A length that exceeds 5,461 mm (215 in.) but does not exceed 6,096 mm (240 in.) 200 dpi or less
Document Type
The document types (paper types) are as follows:
- Wood-free paper
●Wood-containing paper -
PPC paper (recycled)
-
Plastic card
●Booklet such as a passport
When scanning a document in a type other than the above, perform a test on the same type of document (paper) first to check whether it can be scanned.
Document Thickness (Paper Weight)
Documents with the following paper weights (thickness) can be scanned:
- 20 to 465g / m^2 (5.3 to 124 lb)
- For A8 size, 128 to 209g / m^2 (34 to 56 lb)
- 1.4 mm or less for plastic cards (Embossed cards allowed (ISO7810 ID-1 type compliant))
- 7 mm or less for passports (ISO/IEC 7810 ID-3 compliant) (*1)
*1: For fi-8190/fi-8290/fi-8170/fi-8270, a passport with a thickness of up to 7 mm can be scanned without the Booklet Carrier Sheet.
For fi-8150/fi-8250/fi-8150U/fi-8250U, use the Booklet Carrier Sheet to scan a passport.
When using the Booklet Carrier Sheet, a document thickness that includes the Booklet Carrier Sheet must be up to 7 mm.
Documents That May Not Be Scanned Successfully
The following types of documents may not be scanned successfully:
- Documents of non-uniform thickness (such as envelopes or documents with attachments)
●Wrinkled or curled documents
●Folded or torn documents - Tracing paper
- Coated paper
- Carbon paper
- Photosensitive paper
●Perforated documents - Documents that are not square or rectangular
- Very thin paper
●Photographs (photographic paper)
HINT
Documents that may not be scanned successfully can be scanned by using the (Carrier) Sheet. Wrinkled, curled, or folded documents can also be scanned by smoothing out wrinkles, curls, or folds on documents.
Documents That Must Not Be Scanned
The following types of documents must not be scanned:
●Paper-clipped or stapled documents
- Documents on which the ink is still wet
- Documents smaller than 48 × 50 ~mm (1.9 × 2.0 in.)
- Documents wider than 240 mm (9.5 in.) (*1)
- Documents other than paper/plastic card (such as fabric, metal foil and OHP film)
- Important documents such as certificates and cash vouchers which must not be damaged
*1: If you use a ballpoint pen to pull out the side guide adjuster and then attach the ADF paper chute (feeder) to the scanner, documents with a width of up to 240 mm (9.4 in.) can be fed. For details, refer to Scanning Documents That Are 220 mm to 240 mm in Width (page 180).
ATTENTION
Since carbonless paper contains chemical substances that may harm the brake roller and rollers for feeding documents (such as the pick roller), the scanner may fail.
Precautions
● Notes on the documents to be scanned
Depending on the documents to be scanned, take note of the following.
- Since carbonless paper contains chemical substances that may harm the rollers such as the brake roller and pick roller, take note of the following:
-Cleaning
If paper jams occur frequently, clean the brake roller and pick roller.
For details, refer to Daily Care (page 217).
-Replacing the consumables
The life of the brake roller and pick roller may end sooner compared to scanning wood-free papers.
- When scanning wood containing papers, the life of the brake roller and pick roller may end sooner compared to scanning wood-free papers.
- The brake roller and pick roller may be damaged when a photo/sticky note on a document comes into contact with these parts during scanning.
- The surface of the document may be damaged when gloss papers such as photographs are scanned.
For documents that can be damaged quite easily, use the optional Carrier Sheet or Photo Carrier Sheet.
- The light of the LED may reflect brightly when glossy papers are scanned.
- When scanning semi-transparent documents, set [Brightness] higher in the scanner driver to avoid bleed-through.
- When you scan documents written in lead pencil, there may be black traces left on the document, which may cause feeding errors.
Clean the rollers frequently.
For details about cleaning, refer to Daily Care (page 217).
- If documents are not fed, or documents are fed overlapped or jammed frequently, refer to Troubleshooting (page 286).
- When you scan documents with the ADF, all the documents must be flat on the leading edge. Make sure that curls on the leading edge of the documents are kept within the following range.
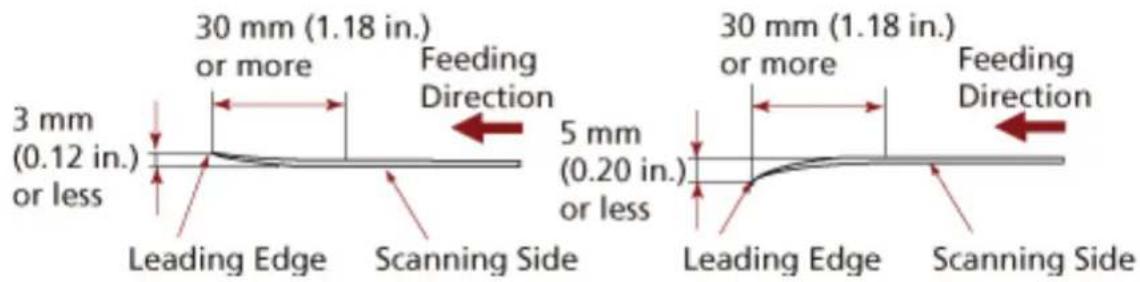
● Notes on plastic cards
When you scan plastic cards, take note of the following.
- Make sure you use a card that meets the following specifications, and check if the card can be fed before scanning it.
-Type: Compliant with the ISO7810 ID-1 type
-Size: 85.6 × 53.98 mm/3.37 × 2.13 in.
-Thickness: 1.4 mm or less (Embossed cards allowed)
-Material: PVC (polyvinyl chloride) or PVCA (polyvinyl chloride acetate)
●The number of plastic cards that can be loaded in the ADF paper chute (feeder) is as follows:
-Up to 10 for non-embossed plastic cards with a thickness of 0.76 mm or less
-Up to 5 for non-embossed plastic cards with a thickness of 1.4 mm or less
Note that you can only load one card at a time if the plastic card is embossed.
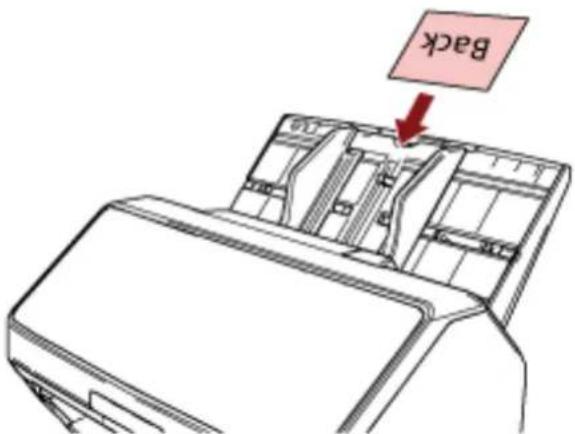
- It is recommended to place the card face-down in the ADF paper chute (feeder).
●Rigid cards may not be fed properly.
- If there is dirt on the surface of the card, such as grease marks (fingerprints), perform scanning after wiping the dirt off.
- If an imprinter is connected, plastic cards cannot be scanned.
Notes on booklets
When you scan booklets, take note of the following.
- Make sure you use a booklet that meets the following specifications, and check if the booklet can be fed before scanning it.
-Thickness: 7 mm/0.28 in. or less
When you scan a passport, make sure that it also meets the following specifications.
-Type: Compliant with ISO/IEC 7810 ID-3
-Size: 125 × 88 mm/4.92 × 3.46 in. (when unopened)
-Size: 125 × 176 mm/4.92 × 6.93 in. (when opened)
- If pages are added or a VISA is attached to a passport, which results in the page thickness exceeding 7 mm, it cannot be fed.
- Load the open booklet face-down with the edge of the side which has more pages first in the ADF paper chute (feeder). If you scan a booklet in the wrong orientation, the booklet may be damaged or the image may turn out elongated vertically.
- Open the booklet fully and load it in the ADF paper chute (feeder). Otherwise, the booklet may not be fed.
- When scanning a booklet, press the [Manual Feed] button to switch the feed mode to Manual Feed Mode.
If you started a scan but did not switch the feed mode to Manual Feed Mode, close the ADF, open it again, and then switch the feed mode to Manual Feed Mode.
The setting for switching the feed mode to Manual Feed Mode can also be configured in the scanner driver.
- Dirty rollers may cause feeding errors or dirt to get on a booklet.
Clean the rollers frequently.
For details about cleaning, refer to Daily Care (page 217).
- If there is dirt on the front or back side of a booklet, such as grease marks (fingerprints), wipe the dirt off then perform a scan.
- If you do not want a booklet to become dirty or damaged, use the optional Booklet Carrier Sheet.
- If an attachment such as a VISA is attached to a page (a side to be scanned) of an open booklet, it is recommended to use the optional Booklet Carrier Sheet.
- When using the Booklet Carrier Sheet, configure the scan settings for the Booklet Carrier Sheet in the scanner driver, and perform a scan.
Loading Capacity
The number of sheets that can be loaded in the ADF paper chute (feeder) is determined by the paper size and paper weight.
See the graph below.
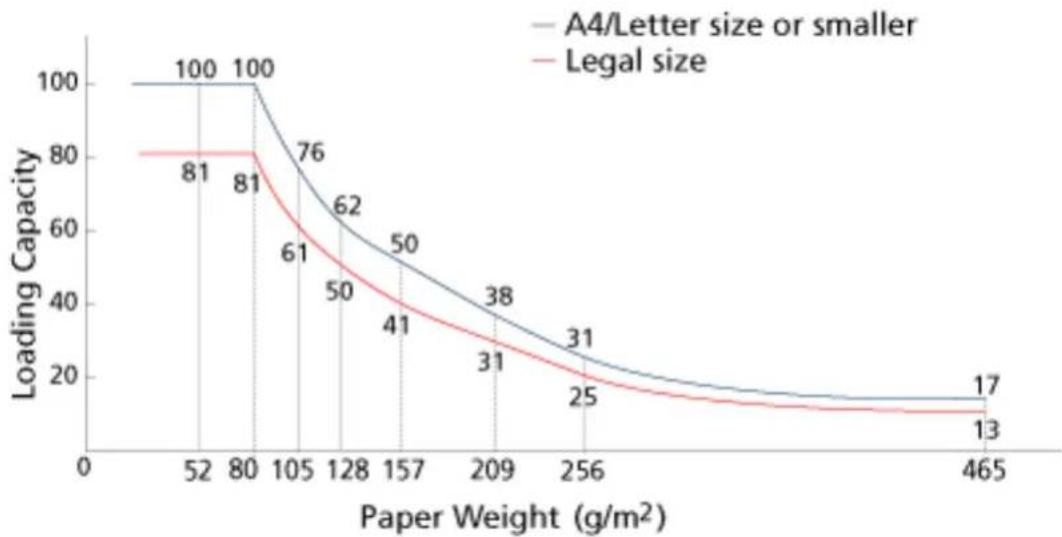
line
| Paper Weight (g/m²) | A4/Letter size or smaller | Legal size | | ------------------- | ------------------------- | ---------- | | 52 | 100 | 81 | | 80 | 100 | 81 | | 105 | 76 | 61 | | 128 | 62 | 50 | | 157 | 50 | 41 | | 209 | 38 | 31 | | 256 | 31 | 25 | | 465 | 17 | 13 || Unit | g/m2 | lb kg | |
| Conversion | 20 5.3 | 17 | |
| 27 7.2 | 23 | ||
| 30 8.0 | 26 | ||
| 40 11 | 34.5 | ||
| 52 14 | 45 | ||
| 64 17 | 55 | ||
| 75 20 | 65 | ||
| 80 21 | 69 | ||
| 105 28 | 90 | ||
| 128 34 | 110 | ||
| 157 42 | 135 | ||
| 209 56 | 180 | ||
| 256 68 | 220 | ||
| 465 124 | 400 |
Area Not to Be Perforated
An error may occur when there are punched holes in the area colored in light pink in the Figure 1. Use the flatbed [fi-8290/fi-8270/fi-8250/fi-8250U] to scan such documents.
Fig. 1
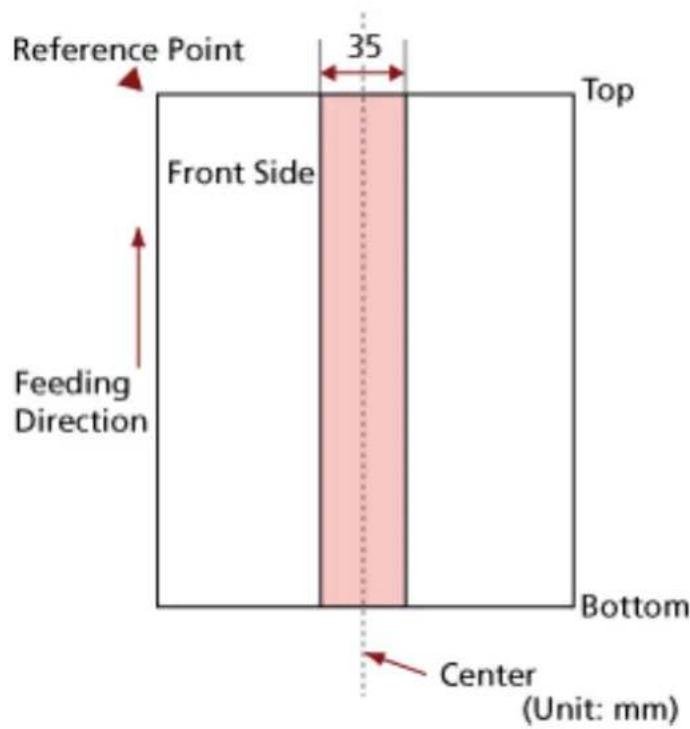
ATTENTION
The above condition applies when the document is set to the center of the pick roller width.
HINT
If there are any holes in the 35 mm-wide central column, you can move the document to the left or right to avoid an error.
Conditions Required to Accurately Detect Overlapped Documents (Multifeed)
Multifeed is an error that occurs when two or more sheets are overlapped and fed at once.
Overlapped documents are detected with the ultrasonic sensor or according to the difference in length of the documents.
For documents that are loaded, the following conditions are required for overlapped documents to be detected accurately.
Detecting Overlapped Documents with the Ultrasonic Sensor
●Paper weight: 20 to 465 g/m ^2 (5.3 to 124 lb)
- Do not punch holes within 35 mm (1.38 in.) over the center of the document.
Refer to Fig. 1 in Area Not to Be Perforated (page 123).
- Do not attach other documents with glue or other adhesive within 35 mm (1.38 in.) over the center of the document.
Refer to Fig. 1 in Area Not to Be Perforated (page 123).
Detecting Overlapped Documents according to the Difference in Length
- Load the documents of the same length in the ADF paper chute (feeder).
●Variation in document lengths: 1% or less - Do not punch holes within 35 mm (1.38 in.) over the center of the document.
Refer to Fig. 1 in Area Not to Be Perforated (page 123).
Detecting Overlapped Documents with the Ultrasonic Sensor and According to the Difference in Length
- Load the documents of the same length in the ADF paper chute (feeder).
●Paper weight: 20 to 465 g/m ^2 (5.3 to 124 lb)
●Variation in document lengths: 1% or less - Do not punch holes within 35 mm (1.38 in.) over the center of the document.
Refer to Fig. 1 in Area Not to Be Perforated (page 123). - Do not attach other documents with glue or other adhesive within 35 mm (1.38 in.) over the center of the document.
Refer to Fig. 1 in Area Not to Be Perforated (page 123).
ATTENTION
The above condition applies when the document is set to the center of the pick roller width.
HINT
- The accuracy of detection for overlapped documents may drop depending on the document type.
Overlapping cannot be detected for the top 30 mm (1.18 in.) of a document in the feeding direction.
- In the Software Operation Panel, you can specify an area not to detect overlapping of documents within the area described in Fig. 1 in Area Not to Be Perforated (page 123)
For details, refer to Settings Related to the Detection for Overlapped Documents (Multifeed) (page 382). - When [Standard mode] is selected for [Intelligent Multifeed Function], overlapping is not detected for a piece of paper (80 mm (3.15 in.) or less in the feeding direction) attached on a document (such as sticky notes).
Conditions for Mixed Batch Scanning
The following conditions apply when a mixed batch of documents with different paper weights/friction coefficients/sizes is scanned.
Make sure to test a few sheets first to check if the mixed batch of documents can be fed.
For details about scanning, refer to Scanning Documents with Different Widths (page 178).
Paper Direction
Align the direction of the paper fiber with the feed direction.
Paper Weight (Thickness)
When scanning documents with different paper weight in the same batch, keep the paper weight within the following range:
27 to 413 g/m ^2 (7.2 to 110 lb)
Friction Coefficient
It is recommended that the same paper brand from the same manufacturer is used for documents.
When different paper manufacturers/brands are mixed in documents to be scanned, it affects the feeding performance as the difference in friction coefficient increases.
The following friction coefficients are recommended:
0.35 to 0.60 (reference value for paper friction coefficient)
Document Position
Load all documents covering the width of the pick roller (approx. 39 mm/1.54 in. wide).
For a guideline for mixed batch scanning, refer to Combinations of Standard Paper Sizes in a Mixed Batch (page 128) in Paper Size (page 127).
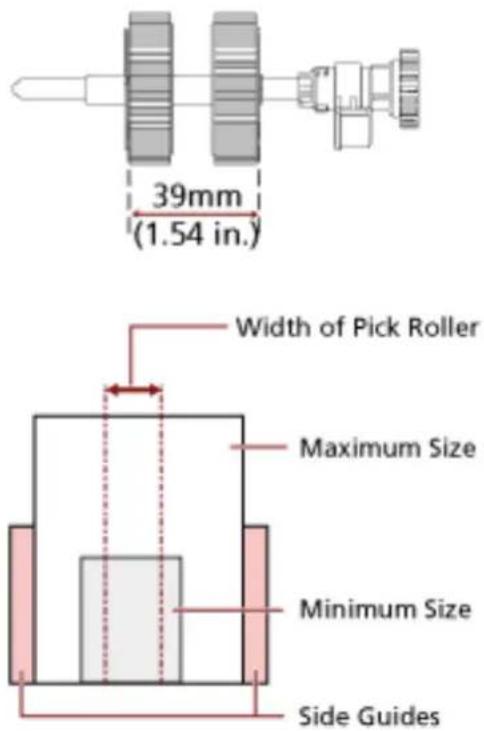
HINT
When the smallest document covers the width of the pick roller even when it is loaded towards one side as shown in the image below, load documents aligned on one side. So that it prevents documents from skewing when being fed.
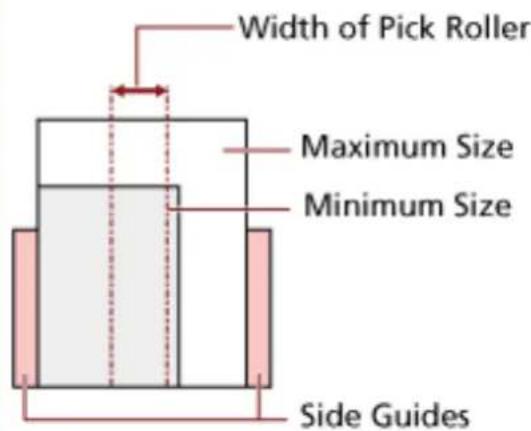
Paper Size
When a mixed batch with different sizes is scanned, not feeding the documents straight may cause troubles such as paper jams or part of the image to appear missing.
It is recommended that you check the scanned images if the documents were fed skewed.
ATTENTION
- When a mixed batch with different sizes is scanned, documents are more likely to skew because the side guides do not fit every sheet properly.
- Do not specify the detection method by document length when scanning a mixed batch of documents with different lengths and detecting overlapped documents.
Combinations of Standard Paper Sizes in a Mixed Batch
Refer to the table below for a guideline of the range available for mixed batch scanning.
| Document Size Width (mm) (*1) | Maximum Size | |||||||||||
| LTR (P) A3-CS | A4 (P) A5 (L) | B5 (P) B6 (L) | A5 (P) A6 (L) | B6 (P) B7 (L) | A6 (P) A7 (L) | B7 (P) B8 (L) | A7 (P) A8 (L) | B8 (P) | A8 (P) | |||
| 216 | 210 | 182 | 149 | 129 | 105 | 91 | 74.3 | 64.3 | 52.5 | |||
| Minimum Size | LTR (P) A3-CS | 216 | ||||||||||
| A4 (P) A5 (L) | 210 | |||||||||||
| B5 (P) B6 (L) | 182 | |||||||||||
| A5 (P) A6 (L) | 149 | |||||||||||
| B6 (P) B7 (L) | 129 | |||||||||||
| A6 (P) A7 (L) | 105 | |||||||||||
| B7 (P) B8 (L) | 91 | |||||||||||
| A7 (P) A8 (L) | 74.3 | |||||||||||
| B8 (P) | 64.3 | |||||||||||
| A8 (P) | 52.5 | |||||||||||

Available Range
LTR: Letter size
A3-CS:Carrier Sheet
*1: The following figure shows how to set the widest and the narrowest documents of the batch between the side guides.
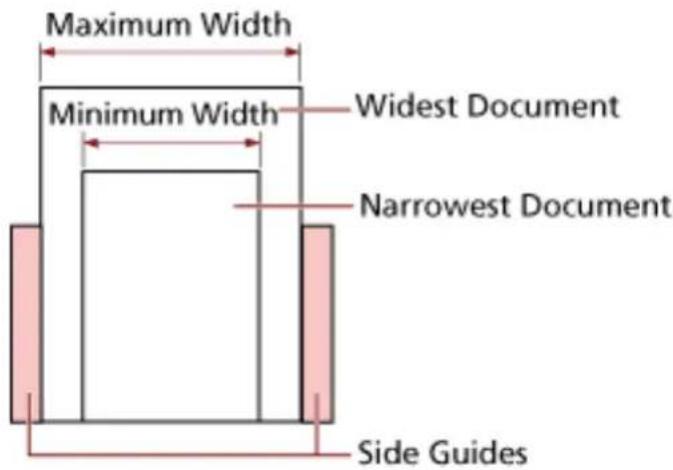
ATTENTION
B8 (portrait) and A8 (portrait) documents cannot be mixed with other sizes in the same batch.
Documents That Cannot Be Scanned in a Mixed Batch
The following types of documents cannot be mixed in the same batch:
- Carbonless paper
- Bond paper
●Perforated documents
•Thermal paper
•Carbon-backed paper
•OHP film - Tracing paper
Conditions for Automatic Page Size Detection
[Automatic Page Size Detection] does not work with the following type of documents:
•Non-rectangular documents
[Automatic Page Size Detection] may not work with the following types of documents:
•Thin paper (52 g/m ^2 [14 lb] or less)
- White documents with glossy edges
- Documents with darkish (gray) edges
Conditions for Using the Carrier Sheet
●Paper Size
The following paper sizes can be scanned:
●Carrier Sheet (216 × 297 mm)
●A3 (297 × 420 mm) (*1)
●A4 (210 × 297 mm)
●A5 (148 × 210 mm)
●A6 (105 × 148 mm)
●B4 (257 × 364 mm) (*1)
●B5 (182 × 257 mm)
●B6 (128 × 182 mm)
●Business card (51 × 89 mm) (*2)
●Letter (8.5 × 11 in./216 × 279.4 mm)
●Double Letter (11 × 17 in./279.4 × 431.8 mm) (*1)
- Custom size
-Width
25.4 to 431.8 mm (1 to 17 in.) (*1)
-Length
25.4 to 297 mm (1 to 11.69 in.)
*1: For documents wider than 216 mm (8.5 in.), fold them in half to scan them.
*2: Available when scanning with PaperStream IP (ISIS) fi-8000 Series.
●Document Conditions
Document Type
The document types (paper types) are as follows:
- Standard office paper
- Documents larger than A4/Letter size
- Documents that can be damaged quite easily such as photographs
- Documents that might cause paper jams such as clippings
Paper Weight (Thickness)
Documents with the following paper weight can be scanned:
- Up to 209g / m^2 (56 lb)
Documents with the following paper weight can be scanned when folded in half:
- Up to 105g / m^2 (28 lb)
Precautions
Take note of the following:
- When using the Carrier Sheet
-Up to three Carrier Sheets can be loaded at once.
-Depending on the image scanning application, there may be insufficient memory to perform a [Double-page spread] scan using the Carrier Sheet in high resolution.
In that case, specify a lower resolution and try scanning again.
-Do not write on, color, stain, or cut the end with a black and white pattern on the Carrier Sheet.
Otherwise, the Carrier Sheet may not be recognized correctly.
-Do not load the Carrier Sheet upside down.
Otherwise, a paper jam may occur and damage the Carrier Sheet and the document inside.
-As you keep using the Carrier Sheet, dirt and dust will accumulate on the surface and the inside.
Clean it regularly because it may cause problems related to scanning or affect the scanned results.
For details, refer to Cleaning the (Carrier) Sheet (page 233).
If the problem still persists, replace the Carrier Sheet.
-Do not fold or pull the Carrier Sheet.
-Do not use a damaged Carrier Sheet.
Doing so may damage or cause the scanner to malfunction.
-Do not slide your finger on the edge of the Carrier Sheet.
Doing so may cut your finger.
-If paper jams occur frequently, feed about 50 sheets of PPC paper (recycled paper) before scanning with the Carrier Sheet.
The PPC paper can either be blank or printed.
-Paper jams may occur when several small documents (such as photos or postcards) are placed in the Carrier Sheet for scanning.
It is recommended to place only one document at a time in the Carrier Sheet.
-Do not place a booklet (such as a passport) in the Carrier Sheet for scanning.
Doing so may cause a paper jam.
- When storing the Carrier Sheet
-Do not leave a document inside the Carrier Sheet for a long time.
Otherwise, the ink on the document may be transferred onto the Carrier Sheet.
-Do not leave the Carrier Sheet in high temperature places such as under direct sunlight or near a heating apparatus for a long time.
Also, do not use the Carrier Sheet in such environments.
Otherwise, the Carrier Sheet may deform.
-To avoid deformation, keep the Carrier Sheet on a flat surface without any weight on it.
Conditions for Using the Photo Carrier Sheet
●Paper Size
The following paper sizes can be scanned:
●Photo Carrier Sheet (178×127 mm)
●A6 (105 × 148 mm)
●Business card (51 × 89 mm) (*1)
- Custom size
-Width
25.4 to 178 mm (1 to 7 in.)
-Length
25.4 to 127 mm (1 to 5 in.)
*1: Available when scanning with PaperStream IP (ISIS) fi-8000 Series.
●Document Conditions
Document Type
The document types (paper types) are as follows:
- Documents that can be damaged quite easily such as photographs
- Documents that might cause paper jams such as clippings
Paper Weight (Thickness)
Documents with the following paper weight can be scanned:
- Up to 209g / m^2 (56 lb)
Precautions
Take note of the following:
- When using the Photo Carrier Sheet
-Up to three Photo Carrier Sheets can be loaded at once.
-Do not write on, color, stain, or cut the end with a black and white pattern on the Photo Carrier Sheet.
Otherwise, the Photo Carrier Sheet may not be recognized correctly.
-Do not load the Photo Carrier Sheet upside down. Otherwise, a paper jam may occur and damage the Photo Carrier Sheet and the document inside.
-As you keep using the Photo Carrier Sheet, dirt and dust will accumulate on the surface and the inside.
Clean it regularly because it may cause problems related to scanning or affect the scanned results.
For details, refer to Cleaning the (Carrier) Sheet (page 233).
If the problem still persists, replace the Photo Carrier Sheet.
-Do not fold or pull the Photo Carrier Sheet.
-Do not use a damaged Photo Carrier Sheet.
Doing so may damage or cause the scanner to malfunction.
-Do not slide your finger on the edge of the Photo Carrier Sheet.
Doing so may cut your finger.
-If paper jams occur frequently, feed about 50 sheets of PPC paper (recycled paper) before scanning with the Photo Carrier Sheet.
The PPC paper can either be blank or printed.
-Even if the setting for a double-page spread image is enabled in the scanner driver, only the front side image is output.
-Do not place a booklet (such as a passport) in the Photo Carrier Sheet for scanning.
Doing so may cause a paper jam.
- When storing the Photo Carrier Sheet
-Do not leave a document inside the Photo Carrier Sheet for a long time.
Otherwise, the ink on the document may be transferred onto the Photo Carrier Sheet.
-Do not leave the Photo Carrier Sheet in high temperature places such as under direct sunlight or near a heating apparatus for a long time.
Also, do not use the Photo Carrier Sheet in such environments.
Otherwise, the Photo Carrier Sheet may deform.
-To avoid deformation, keep the Photo Carrier Sheet on a flat surface without any weight on it.
Conditions for Using the Booklet Carrier Sheet
●Paper Size
The following paper sizes can be scanned:
●Booklet Carrier Sheet (150 × 195 mm)
- Passport (88 × 125 mm)
●Passbook (87 × 140 mm)
- Custom size
-Width
25.4 to 150 mm (1 to 5.9 in.)
-Length
25.4 to 195 mm (1 to 7.67 in.)
●Document Conditions
Document Type
The document types (paper types) are as follows:
- Booklet
Paper Weight (Thickness)
Documents with the following paper weight can be scanned:
- 7 mm or less (including the thickness of the Booklet Carrier Sheet)
Precautions
Take note of the following:
- When using the Booklet Carrier Sheet
-One Booklet Carrier Sheet can be loaded at a time.
-Do not write on, color, stain, or cut the end with a black and white pattern on the Booklet Carrier Sheet.
Otherwise, the Booklet Carrier Sheet may not be recognized correctly.
-As you keep using the Booklet Carrier Sheet, dirt and dust will accumulate on the surface and the inside.
Clean it regularly because it may cause problems related to scanning or affect the scanned results.
For details, refer to Cleaning the (Carrier) Sheet (page 233).
If the problem still persists, replace the Booklet Carrier Sheet.
-Do not fold or pull the Booklet Carrier Sheet.
-Do not use a damaged Booklet Carrier Sheet.
Doing so may damage or cause the scanner to malfunction.
-Do not slide your finger on the edge of the Booklet Carrier Sheet.
Doing so may cut your finger.
-If paper jams occur frequently, feed about 50 sheets of PPC paper (recycled paper) before scanning with the Booklet Carrier Sheet.
The PPC paper can either be blank or printed.
-Even if the setting for a double-page spread image is enabled in the scanner driver, only the front side image is output.
- When storing the Booklet Carrier Sheet
-Do not leave a document inside the Booklet Carrier Sheet for a long time. Otherwise, the ink on the document may be transferred onto the Booklet Carrier Sheet.
-Do not leave the Booklet Carrier Sheet in high temperature places such as under direct sunlight or near a heating apparatus for a long time.
Also, do not use the Booklet Carrier Sheet in such environments.
Otherwise, the Booklet Carrier Sheet may deform.
-To avoid deformation, keep the Booklet Carrier Sheet on a flat surface without any weight on it.
How to Use the Operator Panel [fi-8190/fi-8290/fi-8170/fi-8270]
This section explains how to use the operator panel.
Operator Panel Overview
The operator panel consists of an LCD and buttons.
Names and Functions of the Operator Panel
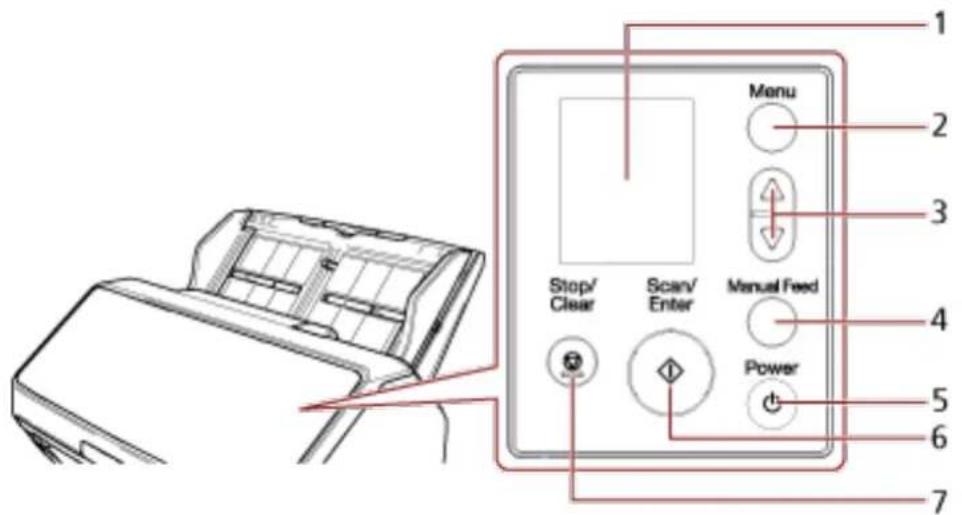
| No. Name Function | ||
| 1 LCD Displays the status of the scanner and | the menuused for configuring the settings for the operations of the scanner.When the scanner enters power saving mode, the LCD turns off. | |
| 2 [Menu] button Displays the menu used for | configuring the settingsfor the operations of the scanner on the LCD.This button is also used to switch operations during scanning. | |
| 3 | [ ]button/[] button | These buttons are used to move the cursor, scroll up/down, and set a number in the screen on the LCD. |
| 4 [Manual Feed] button (*1) Switches the feed | d mode to Manual Feed Modebefore scanning.After scanning is complete, Manual Feed Mode is cleared. | |
| No. Name Function | ||
| The setting for switching the feed mode to Manual Feed Mode can also be configured in the scanner driver. | ||
| 5 [Power] | button Turns the power ON/OFF. | |
| 6 [Scan/Enter] | button Starts scanning. | Pressing this button during scanning pauses the scan.This button is also used to eject a document or configure settings for the operations of the scanner on the LCD.Lights in green when the scanner is on.Flashes in green when the scanner enters power saving mode.Flashes in green three times when the feed mode is switched to Manual Feed Mode. |
| 7 [Stop/Clear] | button Stops scanning. | This button is also used to clear an error on the screen of the LCD, return to the previous screen while configuring the scanner, and clear the page counter (when pressed down for three seconds or longer). |
*1: For information on how to scan documents with the [Manual Feed] button, refer to the following.
- Scanning Documents Folded in Half (page 183)
- Scanning Documents such as Envelopes or Multi-Layered Transfer Paper (page 186)
- Scanning Booklets such as Passports (page 189)
- Feeding Documents Manually (page 204)
ATTENTION
Do not use the operator panel while the Software Operation Panel is running.
HINT
For information on how to use the operator panel when operating PaperStream NX Manager, refer to Processing a Job (With PaperStream NX Manager) [fi-8190/fi-8290/fi-8170/fi-8270] (page 105).
Indications on LCD
| Indication Description | |
 | This screen appears during the initialization process. |
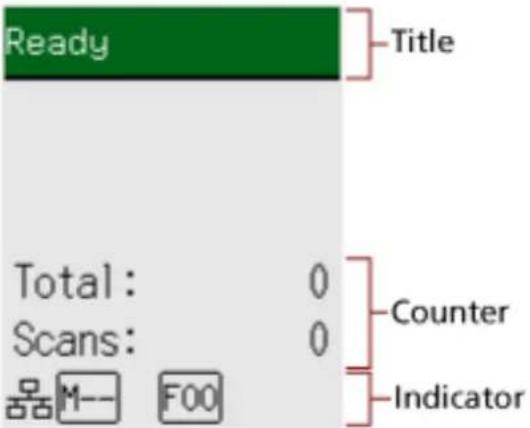 | Ready to start scanning.Indicates that the initialization was successfully completed.For more details about the indicators, refer to Description of the Indicator (page 142). |
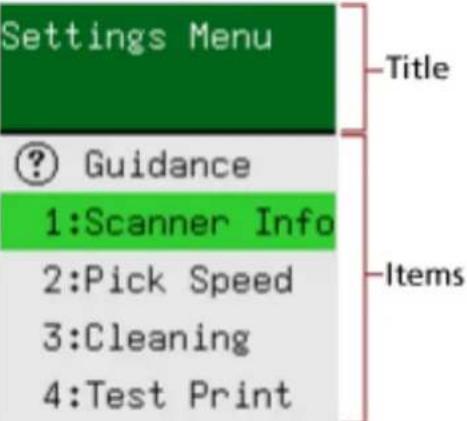 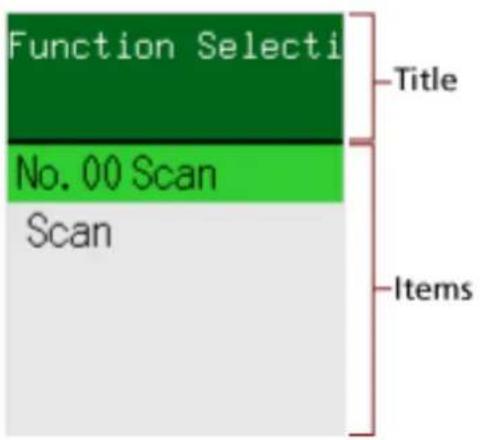 | This screen is used to configure settings for operations of the scanner.When you press the [Menu] button while the [Ready] screen is displayed, the [Settings Menu] screen appears.The Settings Menu can be used to configure various operational settings upon scanning.For details about the Settings Menu screen, refer to How to Use Settings Menu (page 145).This screen is used to select an action to be taken when starting a scan by pressing the [Scan/Enter] button.Select an action when a button on the computer is configured to start up an image scanning application.When you press the [J-button/[]button in the [Ready] screen, the [Function Selection] screen is displayed.By using Function Selection, you can configure an image scanning application to be started up when the [Scan/Enter] button is pressed in the [Ready] screen.For details about the Function Selection screen, refer toHow to Use Function Selection(page 170). |
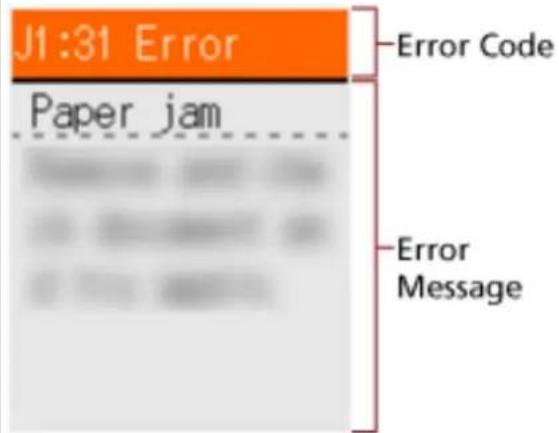 | This screen appears when an error occurred during scanning.An error code beginning with the letter "J", "M", or "U" is displayed.For details about errors, refer toErrors(page 251).You can clear the error display by pressing the [Stop/Clear] button.Note that for a paper jam error, the message disappears after a certain amount of time elapses with no documents ([Ready] status) in the scanner. |
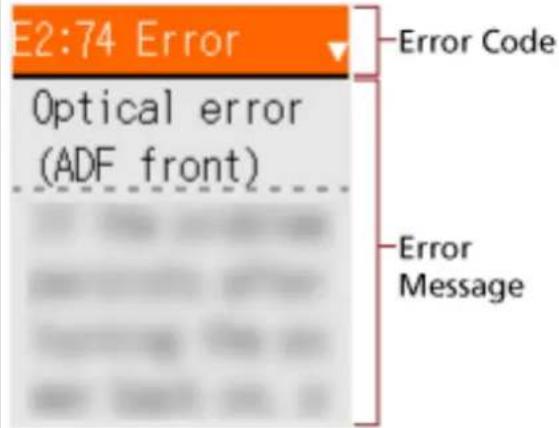 | This screen appears when an error occurred on the scanner itself.Error codes beginning with the letter "A", "C", "E", "F", "H", "L", or "M" are displayed.For details about errors, refer toErrors(page 251).When this screen appears, turn the power off then back on.If the problem still persists, write down the error code, check each item inBefore You Contact the Scanner Service Provider(page 334) and then contact the distributor/dealer where you purchased this product. |
| Refer to the contact information in the Contact List if supplied with this product, or refer to the contact information in the Contact for Inquiries section if provided in Safety Precautions supplied with this product, and then make an inquiry. | |
| If the scanner is not operated for the length of time that is set for the sleep interval, it enters power saving mode. Press any button on the scanner (except the [Power] button) to resume from power saving mode. |
Description of the Indicator
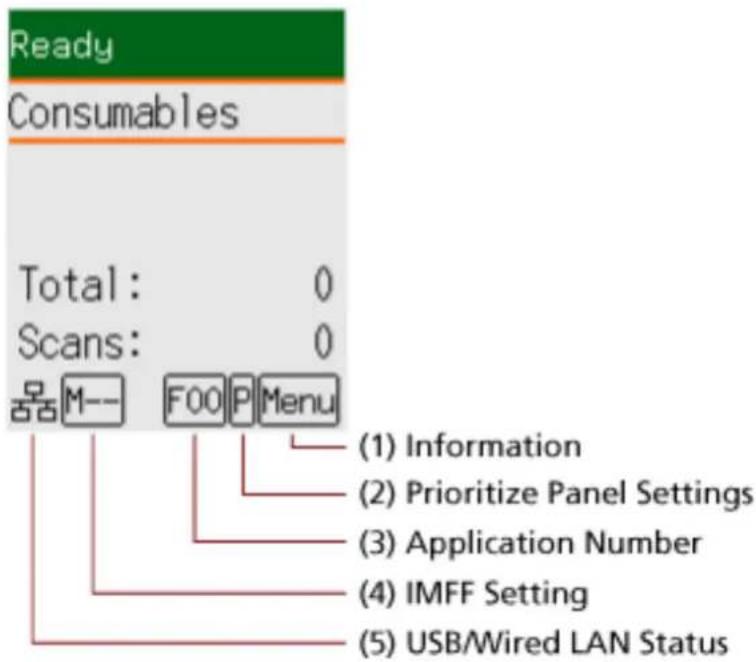
(1) Information
Menu flashes when there is a message for replacing consumables/cleaning/glass cleaning/ regular maintenance.
[Consumables], [Cleaning], [Clean glass!], or [maintenance] also flashes on the second line in the [Ready] screen.
Press the [Menu] button and select [Information].
For instructions on when Flashes, refer to How to Use Settings Menu (page 145).
(2) Prioritize Panel Settings
appears when the operator panel settings are prioritized over the Software Operation Panel settings.
For details, refer to How to Use Settings Menu (page 145).
(3) Application Number
Displays the number for the application that you want to launch when you press the [Scan/Enter] button while the [Ready] screen is displayed.
For details, refer to How to Use Function Selection (page 170).
HINT
The application number does not appear when the scanner is operated with PaperStream NX Manager.
(4) iMFF Setting
Displays the iMFF setting as follows:
| Icon Operation mode | |
| - Standard mode | |
 | Manual mode |
 | Auto mode 1 |
 | Auto mode 2 |
There is no icon for [Standard mode].
In Manual mode, M-- is displayed at all times.
In Auto mode 1 and Auto mode 2, it displays the number of overlap patterns memorized.
The number of overlap patterns that can be memorized depends on the operation mode that is described below:
- For Auto mode 1
In this operation mode, up to four overlap patterns can be memorized at a time (when one sheet is scanned), and up to 32 overlap patterns can be memorized in total.
When the 33rd overlap pattern is detected, the first pattern that was memorized is overwritten.
However, when turning the scanner off and on, the number of memorized overlap patterns depends on the setting for [Remember overlap patterns at power-off] in the Software Operation Panel.
For details, refer to Setting to Ignore Certain Overlap Patterns [Intelligent Multifeed Function] (page 390).
- For Auto mode 2
Only one overlap pattern can be memorized in this operation mode.
For details about the iMFF setting, refer to How to Use Settings Menu (page 145).
(5) USB/wired LAN Status
The USB/wired LAN status is displayed as follows.
| Icon Connection Status via a USB Cable | Connection Status via a LAN Cable (*1) | Network Function Setting (*2) |
 | Connected Connected Enable | |
| [AHEX] | Connected Connected Disable | |
| Connected Not connected Disable | ||
| Connected Not connected Enable | ||
| Not connected Connected Enable | ||
| Not connected Not connected Enable | ||
| None Not connected Connected Disable | ||
| Not connected Not connected Disable |
*1: If no communication takes place even if the LAN cable is connected, it is regarded as "Not connected".
*2: When the network function is disabled, the wired LAN status does not appear. For information on how to configure the network settings, refer to Settings to Use the Scanner Only via the USB Connection [Network Function] [fi-8190/fi-8290/fi-8170/fi-8270/fi-8150/fi-8250] (page 397).
How to Use Settings Menu
This section explains about Settings Menu.
When you press the [Menu] button while the [Ready] screen is displayed, the [Settings Menu] screen appears.
The Settings Menu can be used to configure various operational settings upon scanning.
There are two menus in the [Settings Menu] screen.
-User menu
You can configure basic settings for operating the scanner and using the operator panel.
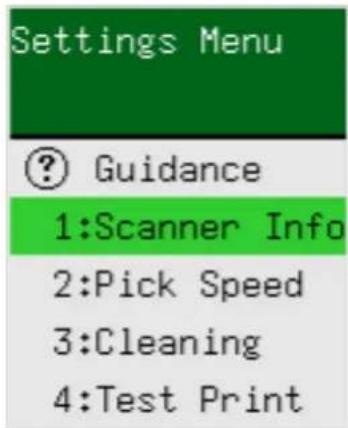
- Administrator menu
You can configure advanced settings for operating the scanner and using the operator panel.
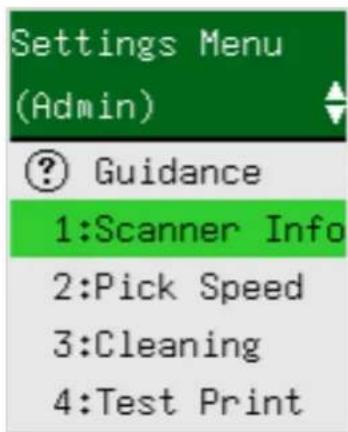
To switch between the menus, press down both the [ ] and [ ] buttons at the same time for three seconds or longer while the [Settings Menu] screen is displayed.
When the scanner is turned off, the menu is switched to the user menu.
This section explains how to use the Settings Menu of the operator panel according to the following categories.
| Operation Description | Setting Item User | Menu | Adminis trator Menu | |
| ○: Available —: Not Available | ||||
| Checking the guidance contents | You can check the way to clear the page counter. For more details, refer to Checking the Guidance Contents (page 149). | Guidance ○○ | ||
| Checking the Information | flashes on the LCD when there is a message for replacing consumables/ cleaning/glass cleaning/regular maintenance. Read the message and take measures accordingly. For more details, refer to Checking the Information (page 151). | Information ○○ | ||
| Checking the scanner information | You can check the scanner information such as the scanner name and network information. For more details, refer to Checking the Scanner Information (page 153). | 1: Scanner Information | ○ | ○ |
| Operational settings for the scanner | You can configure various settings for operating the scanner and using the operator panel. Also, you can check the certification. For more details, refer to Operational Settings for the Scanner (page 155). | 2: Pick Speed ○○ | ||
| 6: Language ○○ | ||||
| 7: Brightness ○○ | ||||
| 8: Check Blink Speed | ○ | ○ | ||
| 9: LCD Scroll Speed ○○ | ||||
| 10: Low-speed Feed Mode | ○ | ○ | ||
| 11: ECO Mode ○○ | ||||
| 12: Certification ○○ | ||||
| 14: iMFF Setting — ○ | ||||
| 15: No. of Paper Feed Retries | — ○ | |||
| 16: Manual/ Continuous Feed Setting | — ○ | |||
| 17: Manual Feed Timeout | — ○ | |||
| 18: Paper Protection | — ○ | |||
| 19: Vertical streak detection | — ○ | |||
| 20: Prioritize panel settings | — ○ | |||
| 21: Ope. Panel Initialization | — ○ | |||
| 22: Power saving — | ○ | |||
| 23: Power-off time — | ○ | |||
| 24: Pre-pick — ○ | ||||
| 25: USB — ○ | ||||
| Cleaning the scanner | You can clean the scanner by using Cleaning Paper, Cleaning Wipe, or cloth.For more details, refer toDaily Care(page 217). | 3: Cleaning ○○ | ||
| Test print for Imprinter | You can run a test print when the imprinter is installed.For more details, refer to the fi-819PRB Imprinter Operator's Guide. | 4: Test Print ○○ | ||
| Checking and Clearing the Consumable Counters | You can check the replacement cycle of the consumables and the total page count.Also use it to clear the counter when you have replaced the consumables or performed cleaning.For more details, refer toChecking and Clearing the Consumable Counters(page 157). | 5: Consumable counters | ○ | ○ |
| Counting documents | You can count the number of sheets scanned. | 13: Doc Counting Mode | ○ | ○ |
| Operation Description Setting Item User | Menu | Administrator Menu | |
| ○: Available—: Not Available | |||
| For more details, refer to Document Count (page 159). | |||
Checking the Guidance Contents
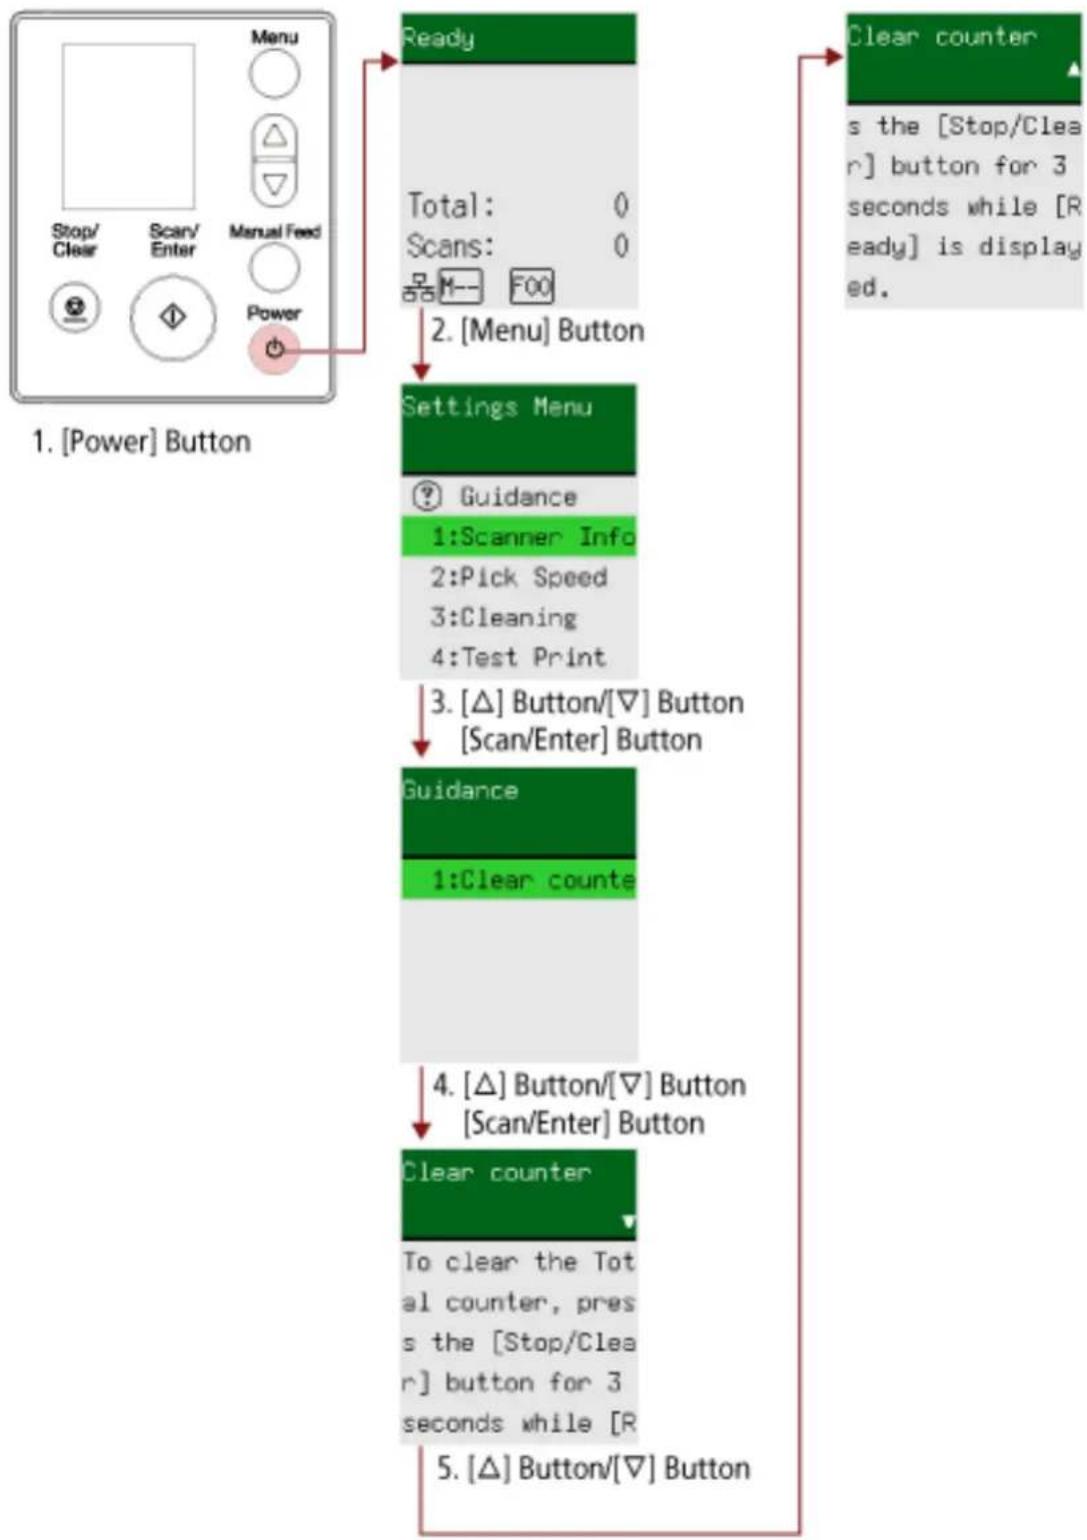
flowchart
graph TD
    A["1. [Power"] Button] --> B["2. [Menu"] Button]
    B --> C["3. [Δ"] Button/[∇] Button["Scan/Enter"] Button]
    C --> D["4. [Δ"] Button/[∇] Button["Scan/Enter"] Button]
    D --> E["5. [Δ"] Button/[∇] Button]
    E --> F["Clear counter"]
    F --> G["Clear counter is the [Stop/Clear"] button_for_3_seconds_while["Ready"] is displayed.]
1 Press the [Power] button on the scanner.
The [Ready] screen is displayed on the LCD.
2 Press the [Menu] button.
The [Settings Menu] screen is displayed on the LCD.
3 Press the [ ]/ [ ] button to select [3: Guidance], and then press the [Scan/Enter] button.
The [Guidance] screen is displayed on the LCD.
4 Press the [△]/[ ] button to select [1: Clear counter], and then press the [Scan/Enter] button.
The [Clear counter] screen is displayed on the LCD.
5 Press the [ ]/[ ] button and check the contents of the guidance.
You can check the way to clear the page counter.
Checking the Information
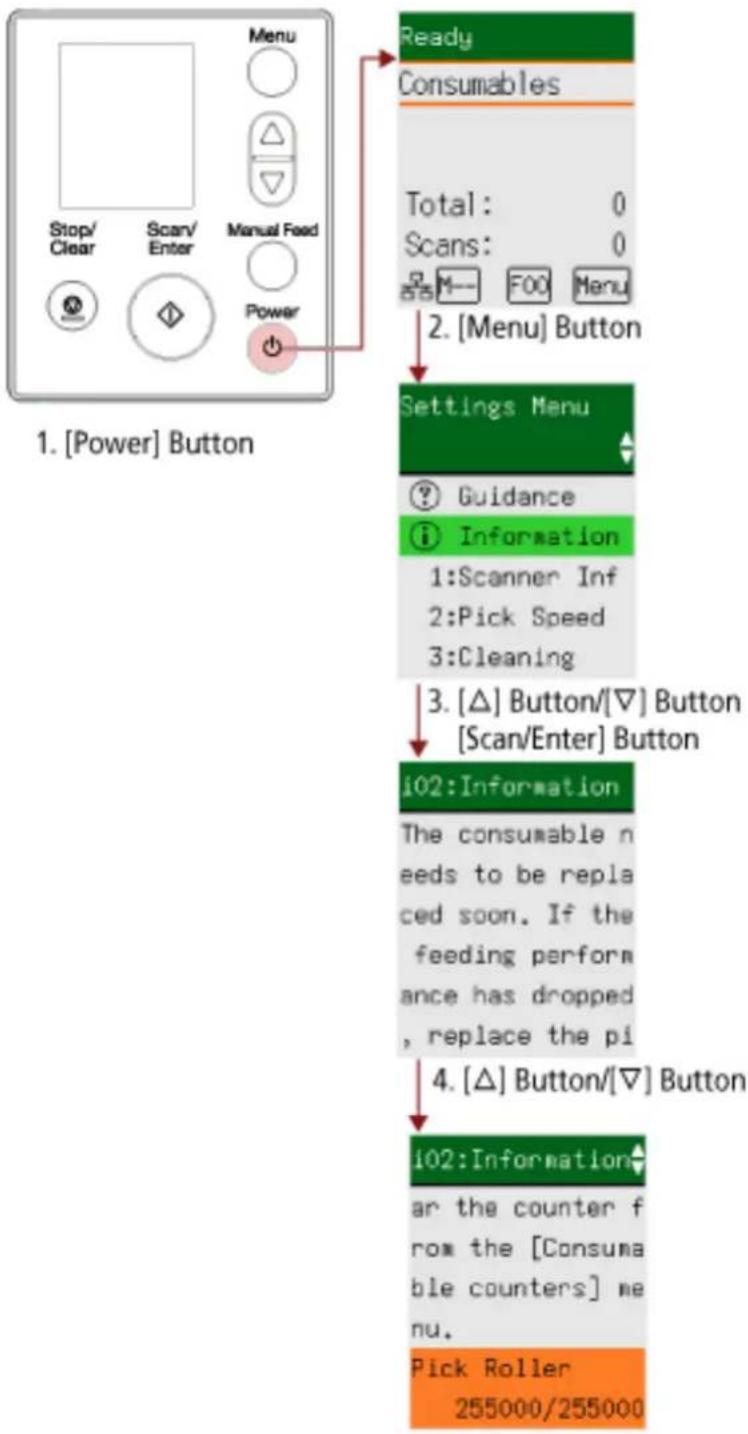
flowchart
graph TD
    A["Stop/ Clear"] --> B["Menu"]
    C["Scan/ Enter"] --> D["Manual Feed"]
    E["Power"] --> F["Control Button"]
    B --> G["Ready Consumables"]
    D --> H["2. [Menu"] Button]
    F --> I["Settings Menu"]
    I --> J["? Guidance"]
    I --> K["Information"]
    K --> L["1: Scanner Inf"]
    K --> M["2: Pick Speed"]
    K --> N["3: Cleaning"]
    I --> O["3. [Δ"] Button/[∇] Button["Scan/Enter"] Button]
    O --> P["i02: Information"]
    P --> Q["4. [Δ"] Button/[∇] Button]
    Q --> R["i02: Information"]
    R --> S["ar the counter from the [Consumable counters"] menu.]
    R --> T["Pick Roller 255000/255000"]
1 Press the [Power] button on the scanner.
The [Ready] screen is displayed on the LCD.
2 Press the [Menu] button.
The [Settings Menu] screen is displayed on the LCD.
3 Press the [] button/ [] button to select [Information], and then press the [Scan/Enter] button.
The [Information] screen is displayed on the LCD.
ATTENTION
[Information] can be selected only when there is a message for replacing consumables/cleaning/glass cleaning/regular maintenance.
4 Press the [ ]/[ ] button and check the contents of the information.
You can check messages for consumable replacement/cleaning/glass cleaning/maintenance. When the message prompts replacing consumables/cleaning, the corresponding counter that requires consumable replacement/cleaning is highlighted.
Counters will appear highlighted when:
- The page count after the consumable is replaced reaches 95% of the value configured in Specifying the Cycle to Replace Consumables [Life Counter Alarm Setting] (page 362) in the Software Operation Panel. (For the brake roller/pick roller counters)
- The page count after cleaning reaches the value configured in Scanner Cleaning Cycle [Cleaning Cycle] (page 361) in the Software Operation Panel. (For the cleaning counter)
- The amount of remaining ink is below 33% . This is only displayed when the imprinter is installed. (For the ink counter)
5 Take measures according to the contents of [Information].
Follow the instructions in the message if it prompts consumable replacement/cleaning/glass cleaning.
For details about replacing consumables, refer to the following:
●Replacing the Pick Roller (page 241)
●Replacing the Brake Roller (page 236)
For details about cleaning, refer to Daily Care (page 217).
If the message prompts regular maintenance, please have the scanner checked by a service engineer for regular maintenance/inspection.
For regular maintenance and inspection on the scanner by a service engineer, contact the distributor/dealer where you purchased this product. Refer to the contact information in the Contact List if supplied with this product, or refer to the contact information in the Contact for Inquiries section if provided in Safety Precautions supplied with this product, and then make an inquiry.
Checking the Scanner Information
![RICOH fi-8190 - Take measures according to the contents of [Information]. - 1](/content/2026/05/903199/images/b397f076fea0e5e4309730bfa67b1c938e90d8fb55f042fc76887a788ffab736.jpg)
flowchart
graph TD
    A["Menu"] --> B["Stop/ Clear"]
    A --> C["Scan/ Enter"]
    A --> D["Manual Feed"]
    A --> E["Power"]
    B --> F["1. [Power"] Button]
    C --> F
    D --> F
    E --> F
    F --> G["Ready"]
    G --> H["Total: 0 Scans: 0"]
    H --> I["2. [Menu"] Button]
    I --> J["Settings Menu"]
    J --> K["? Guidance"]
    K --> L["1: Scanner Info"]
    K --> M["2: Pick Speed"]
    K --> N["3: Cleaning"]
    K --> O["4: Test Print"]
    J --> P["3. [Δ"] Button/[∇] Button["Scan/Enter"] Button]
    P --> Q["Scanner Information"]
    Q --> R["1: Scanner"]
    Q --> S["2: Network"]
    Q --> T["3: Server"]
    P --> U["4. [Δ"] Button/[∇] Button["Scan/Enter"] Button]
    U --> V["Scanner"]
1 Press the [Power] button on the scanner.
The [Ready] screen is displayed on the LCD.
2 Press the [Menu] button.
The [Settings Menu] screen is displayed on the LCD.
3 Press the [ ] button/[] button to select [1:Scanner Information], and then press the [Scan/Enter] button.
The [Scanner Information] screen is displayed on the LCD.
4 Press the [△] button/[▽] button to select [1:Scanner], [2:Network], or [3:Server], and then press the [Scan/Enter] button.
The selected item is displayed on the LCD.
5 Check the contents of the selected item.
You can check the settings for each item.
In this example, the indicator displays a scanner name because [1:Scanner] is selected.
Operational Settings for the Scanner
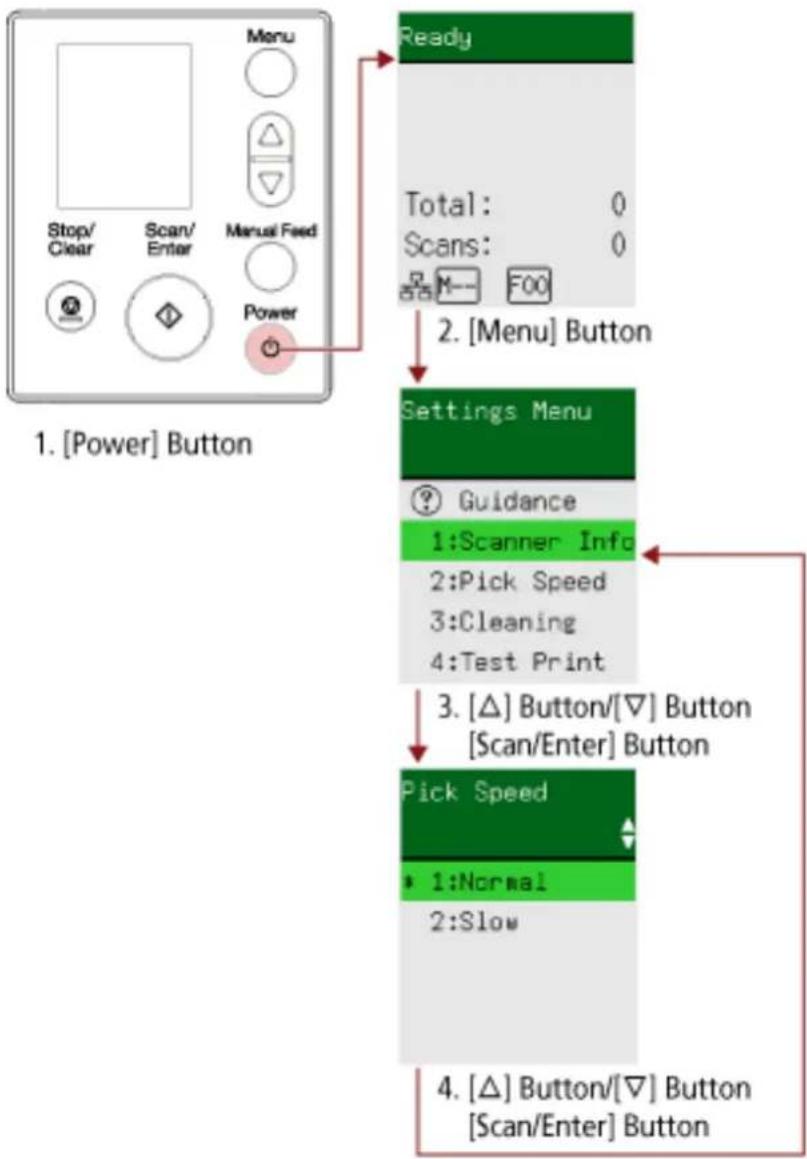
flowchart
graph TD
    A["Menu"] --> B["Stop/ Clear"]
    A --> C["Scan/ Enter"]
    A --> D["Manual Feed"]
    A --> E["Power"]
    B --> F["Ready"]
    C --> F
    D --> F
    E --> F
    F --> G["Total: 0 Scans: 0"]
    G --> H["2. [Menu"] Button]
    H --> I["Settings Menu"]
    I --> J["? Guidance"]
    J --> K["1:Scanner Info"]
    J --> L["2:Pick Speed"]
    J --> M["3:Cleaning"]
    J --> N["4:Test Print"]
    I --> O["3. [Δ"] Button/[∇] Button["Scan/Enter"] Button]
    O --> P["Pick Speed"]
    P --> Q["1:Normal"]
    P --> R["2:Slow"]
    P --> S["4. [Δ"] Button/[∇] Button["Scan/Enter"] Button]
1 Press the [Power] button on the scanner.
The [Ready] screen is displayed on the LCD.
2 Press the [Menu] button.
The [Settings Menu] screen is displayed on the LCD.
3 Press the [△] button/[▽] button to select a setting item, and then press the [Scan/Enter] button.
For details about the setting items, refer to Configurable Items in the Settings Menu (page 161). The screen with the selected item is displayed on the LCD.
4 Press the [△] button/[▽] button to select a parameter, and then press the [Scan/Enter] button.
For more details about the setting parameters, refer to Configurable Items in the Settings Menu (page 161).
HINT
- "*" is displayed for the factory default setting.
- When the screen with setting items is displayed, the parameter currently selected is highlighted.
If the [Settings Menu] screen is displayed on the LCD, it indicates that the setup has been completed.
If the LCD displays a screen with setting items, repeat step 4 until it shows the [Settings Menu] screen.
Checking and Clearing the Consumable Counters
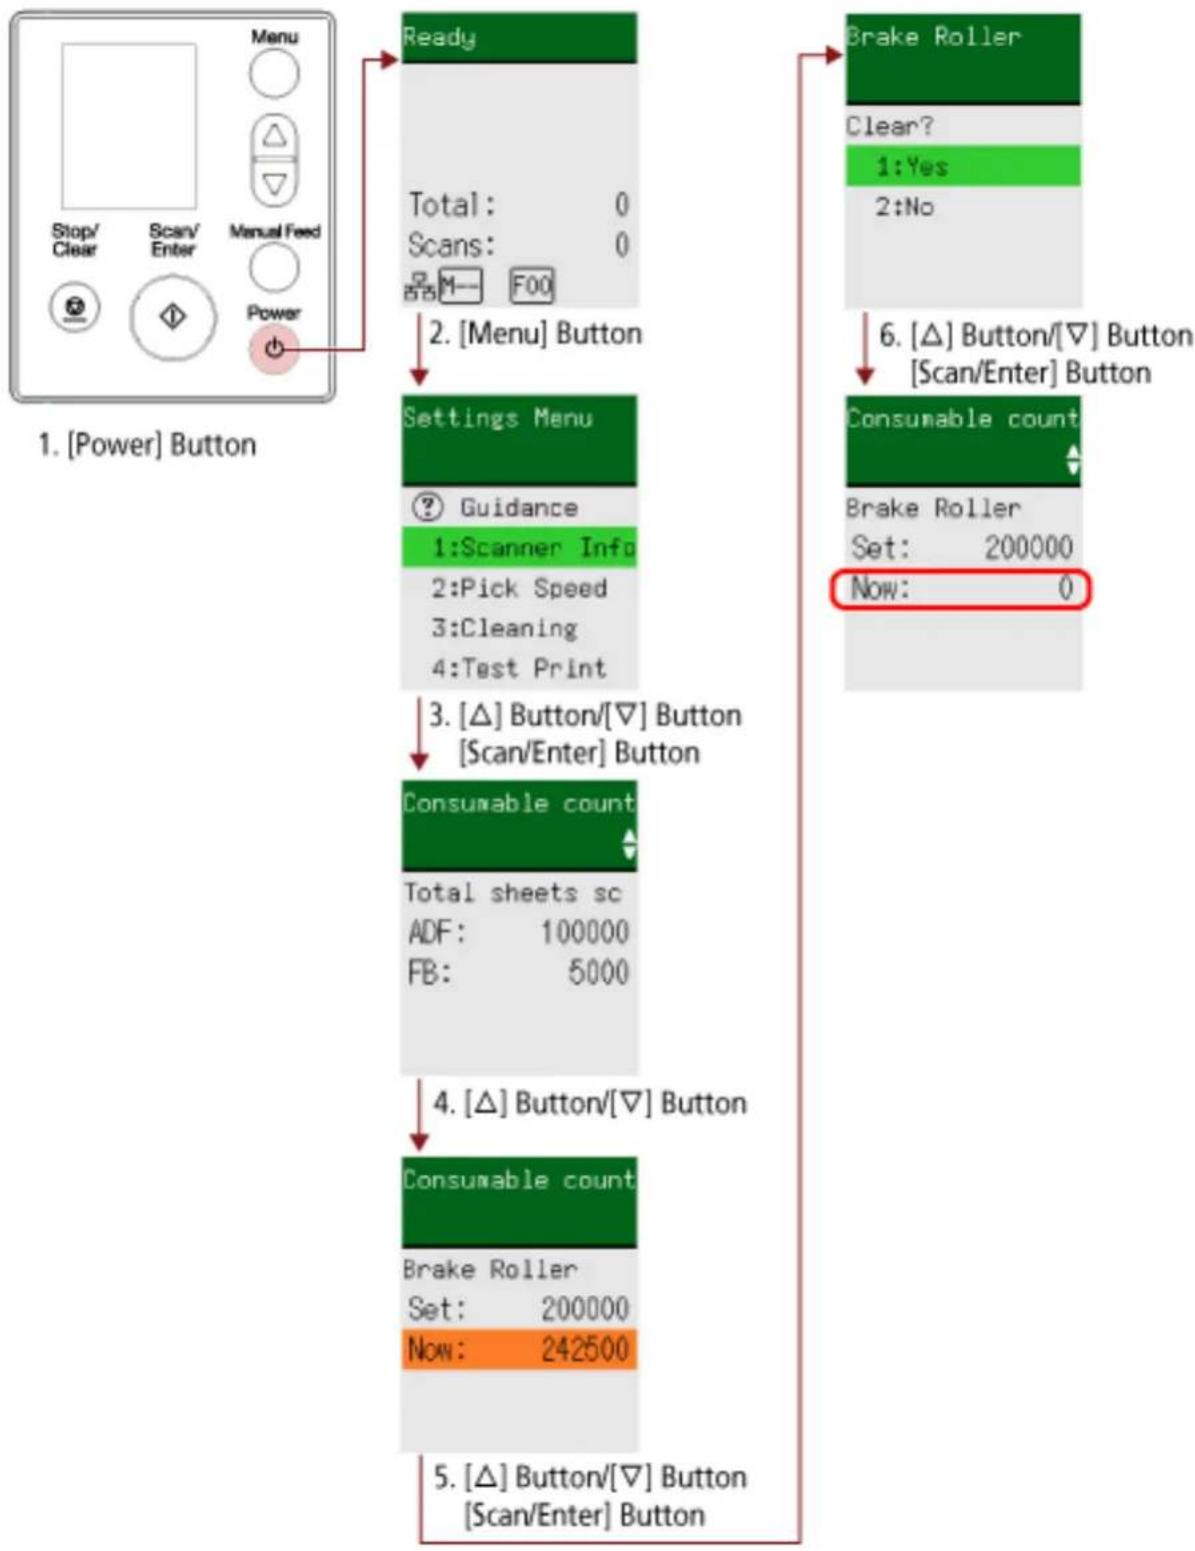
flowchart
graph TD
    A["1. [Power"] Button] --> B["Ready"]
    B --> C["2. [Menu"] Button]
    C --> D["Settings Menu"]
    D --> E["3. [Δ"] Button/[∇] Button["Scan/Enter"] Button]
    E --> F["Consumable count"]
    F --> G["4. [Δ"] Button/[∇] Button]
    G --> H["5. [Δ"] Button/[∇] Button["Scan/Enter"] Button]
    H --> I["Brake Roller"]
    I --> J["6. [Δ"] Button/[∇] Button["Scan/Enter"] Button]
    J --> K["Consumable count"]
1 Press the [Power] button on the scanner.
The [Ready] screen is displayed on the LCD.
2 Press the [Menu] button.
The [Settings Menu] screen is displayed on the LCD.
3 Press the [ ]/[ ] button to select [5: Consumable counters], and then press the [Scan/Enter] button.
The [Consumable counters] screen is displayed on the LCD.
4 Press the [ △]/[ ] button and check the counter.
Counters are highlighted when consumable replacement or cleaning is required. Counters will appear highlighted when:
- The page count after the consumable is replaced reaches 95% of the value configured in Specifying the Cycle to Replace Consumables [Life Counter Alarm Setting] (page 362) in the Software Operation Panel. (For the brake roller/pick roller counters)
- The page count after cleaning reaches the value configured in Scanner Cleaning Cycle [Cleaning Cycle] (page 361) in the Software Operation Panel. (For the cleaning counter)
- The amount of remaining ink is below 33% . This is only displayed when the imprinter is installed. (For the ink counter)
HINT
The total number of sheets scanned is displayed in total count. Total count cannot be cleared.
5 After replacing the consumables or cleaning, press the []/[] button to select the highlighted counter, and then press the [Scan/Enter] button.
A message appears to confirm that you want to clear the counter.
6 Press the [ ] button/[ ] button to select [1: Yes], and then press the [Scan/Enter] button.
The counter is reset to 0.
For remaining ink, it is reset to 100.
Document Count
![RICOH fi-8190 - Press the [ ] button/[ ] button to select [1: Yes], and then press the [Scan/Enter] button. - 1](/content/2026/05/903199/images/3b236b24f3f46a209af748d10920a7142985ea20bd674431d8b15b314973f030.jpg)
flowchart
graph TD
    A["1. [Power"] Button] --> B["Menu"]
    B --> C["Stop/ Clear"]
    B --> D["Scan/ Enter"]
    B --> E["Manual Feed"]
    B --> F["Power"]
    B --> G["Ready"]
    G --> H["2. [Menu"] Button]
    H --> I["Settings Menu"]
    I --> J["? Guidance"]
    I --> K["1: Scanner Info"]
    I --> L["2: Pick Speed"]
    I --> M["3: Cleaning"]
    I --> N["4: Test Print"]
    I --> O["3. [Δ"] Button/[∇] Button]
    O --> P["Scan/Enter"] Button]
    P --> Q["Doc Counting Mod"]
    Q --> R["More documents (Return:Menu)"]
    Q --> S["Total: 0"]
    Q --> T["Count: 0"]
    Q --> U["4. [Scan/Enter"] Button]
    U --> V["Doc Counting Mod"]
    V --> W["More documents (Return:Menu)"]
    V --> X["Total: 100"]
    V --> Y["Count: 100"]
1 Press the [Power] button on the scanner.
The [Ready] screen is displayed on the LCD.
2 Press the [Menu] button.
The [Settings Menu] screen is displayed on the LCD.
3 Press the []/[] button to select [13: Doc Counting Mode], then press the [Scan/Enter] button.
The [Doc Counting Mode (More documents)] screen is displayed on the LCD.
4 Load documents in the ADF paper chute (feeder), and press the [Scan/Enter] button.
The scanned documents are counted.
The number of counted sheets is displayed in [Count].
ATTENTION
Documents may not be counted correctly if overlapped documents are detected during scanning.
HINT
- To clear [Count], press the [Stop/Clear] button while the [Doc Counting Mode (More documents)] screen is displayed.
- To end Doc Counting Mode, press the [Stop/Clear] button for three seconds or longer while the [Doc Counting Mode (More documents)] screen is displayed.
Configurable Items in the Settings Menu
| Setting Item D | Description Parameter(*1)/Value Factory | Default | (*2) |
| - : No parameters/values | |||
| Guidance Displays the way to clear the page counter. | 1:Clear counter 1:Clear counter | ||
| Information [Information] appears as an item in the [Settings Menu] screen that is flashing on and off, only if flashing on the LCD. | Message for replacing consumables/cleaning/glass cleaning/regular maintenance | Only displayed when there is information | |
| 1:Scanner Information | Displays the scanner information such as the scanner name and network information. | 1:Scanner2:Network3:Server | — |
| 2:Pick Speed You can specify the timing of when document feeding is started.When overlapped documents or paper jams occur frequently, delaying the timing of document feeding may improve the performance.This setting is effective when you scan thin paper.It can also be configured in the Software Operation Panel. | 1:Normal2:Slow | 1:Normal | |
| 3:Cleaning Use this setting when you clean the scanner.For more details, refer toDaily Care(page 217). | 1:Cleaning Paper2:Roller Wipe | — | |
| 4:Test Print Use this option to run a test print when the Imprinter is installed.For more details, refer to the fi-819PRB Imprinter Operator's Guide. | No. of sheets scanned:1:Single sheet only2:Multiple sheetsPrint Pattern:1:(L)ABCDEFGHIJKLMNOPQRSTUVWXYZ[]^_000000002:(L)abcdefghijklmnopqrstuvwxyz{}~00000000 | (*3) | |
| Setting Item | Description Parameter(*1)/Value Factory | Default | (*2) |
| - : No parameters/values | |||
| 3:(L)!"#%&'()*+,-./0123456789;;<=>?@000000004:(P)ABCDEFGHIJKLMNOPQRSTUVWXYZ[¥]^_`000000005:(P)abcdefghijklmnopqrstuvwxyz~000000006:(P)!"#%&'()*+,-./0123456789;;<=>?@00000000Test Print:1:Yes2:No | |||
| 5:Consumable counters | The status of each consumable part can be viewed to determine when to replace or clean the consumables.When you have replaced or cleaned a consumable part, clear the corresponding counter. | Total sheets scanned/Brake Roller/PickRoller/Cleaning | 0 |
| Remaining Ink (when the imprinter is installed) | Only displayed when imprinter is installed | ||
| 6:Language Specify the language in which data is displayed. | 1:Japanese2:English3:French4:German5:Italian6:Spanish7:Russian8:Chinese (S)9:Chinese (T)10:Portuguese11:Turkish12:Korean13:Arabic | 2:English | |
| 7:Brightness Specify the brightness for the LCD. Weak | ←→ Strong■□□□□■■□□□ | ■■■□□ | |
| ■■■□□■■■■□■■■■■ | |||
| 8:Check Blink Speed | Specify an interval between each flash for [Information] in the [Settings Menu] screen when Israel flashing on the LCD. | 0.5, 1.0, 1.5, 2.0, 2.5 (seconds) | 2.0 |
| 9:LCD Scroll Speed | Specify the speed at which the display is horizontally scrolled.The displayed item is scrolled horizontally when the text does not fit in the LCD. | 1:Fast2:Normal3:Slow4:OFF | 2:Normal |
| 10:Low-speed Feed Mode | Specify this to slow down the scanning speed in order to protect the documents.When performing a scan at a low resolution (lower than 400 dpi), the scan is performed at a slow speed regardless of the resolution that is set.This setting is effective for scanning long page documents.It can also be configured in the Software Operation Panel. | 1:Enable2:Disable | 2:Disable |
| 11:ECO Mode | When performing a scan at a low resolution (300 dpi or less), the scan is performed at a slow speed, which saves the power consumption of the scanner.When this is enabled, the scanning speed is as follows:●For fi-8190/fi-8290/fi-8170/fi-8270 Scanning is performed at the same speed as performing a scan at 600 dpi.●For fi-8150/fi-8250/fi-8150U/fi-8250UScanning is performed at the same speed as performing a scan at 400 dpi.It can also be configured in the Software Operation Panel. | 1:Enable2:Disable | 2:Disable |
| 12:Certificati on | Displays logos. — — | ||
| 13:Doc Counting Mode | You can count the number of sheets scanned. | — | — |
| 14:iMFF Setting | Configure the setting to automatically ignore certain patterns of overlapped documents when the setting to detect overlapped documents is enabled.Note that you first need to specify [Check Overlapping(Ultrasonic)] or [Check Overlapping and Length] in the scanner driver and Specifying a Method to Detect Overlapped Documents [Multifeed] (page 382) on the Software Operation Panel before setting this item.By selecting [4:Clear pattern], you can clear the overlapping patterns (length, location) that were previously memorized in Auto mode.It can also be configured in the Software Operation Panel. | 1:Standard mode2:Manual mode3:Auto mode 14:Auto mode 25:Clear pattern | 1:Standard mode |
| 15:No. of Paper Feed Retries | Specify the number of feeding retries when a document is not fed from the ADF paper chute (feeder).It can also be configured in the Software Operation Panel. | 1 to 12 (times) 3 | |
| 16:Manual/ Continuous Feed Setting | Configure the settings when manually loading and scanning one sheet at a time.When you scan by manually loading one sheet at a time, you can specify the waiting time (interval) for loadingthe next document in the ADF paper chute (feeder). This enables continuous scanning as long as you load a document within the specified time.If the specified time is exceeded, the scan is finished automatically.It can also be configured in the Software Operation Panel. | 1:Enable2:Disable | 2:Disable |
| 17:Manual FeedTimeout | Specify a waiting time for scanning documents manually.It can also be configured in the Software Operation Panel. | 5, 10, 20, 30, 40, 50, 60, 70, 80, 90, 100, 110(seconds) | 10 |
| 18:Paper Protection | Configure the setting to detect feeding errors.This function detects feeding errors in the following cases:When the scanner detects an abnormal document skew caused by a feeding errorWhen the scanner detects paper jam noisePaper jams due to feeding errors could damage or tear valuable documents.Detecting a feeding error and stopping the scan can prevent damage to documents.This function is effective when you scan documents which are difficult to feed such as thin paper documents.Specify the sensitivity level for detecting feeding errors when the paper protection function is enabled.Documents are skewed abnormally or paper jam noise is made when documents are not being fed properly.Specify the sensitivity level to detect an abnormal document skew or paper jam noise.The paper protection setting can also be configured in the scanner driver or the Software Operation Panel.When the paper protection setting is set to on in the scanner driver,[Feeding Skew & Noise] is enabled regardless of the setting on the Software Operation Panel.For the paper protection setting,priority will be given in the following order:1 [Paper Protection] in the scanner driver2 [18:Paper Protection] on the [Settings Menu] screen of the operator panel (when prioritize the operator panel settings)3 [18:Paper Protection] on the [Settings Menu] screen of the operator panel or [Paper Protection] of the Software Operation Panel.Sensitivity can also be configured from the Software Operation Panel. | 1:Disable2:Feeding Skew3:Feeding Noise4:Feeding Skew & NoiseSkew Sensitivity:1:Normal2:HighSensitivity for feeding noise:1:Low2:Normal3:High | 4:Feeding Skew & NoiseSkew Sensitivity:1:NormalSensitivity for feeding noise:2:Normal |
| 19:Vertical streak detection | You can configure the settings for detecting dirt on the glass.Vertical streaks may appear on images if the glass is dirty.If [Enable] is selected for the vertical streak detection setting, the following message appears when vertical streaks appear on the image that you scanned with the ADF.• flashes on the LCD.[Clean glass!] also flashes on the second line in the [Ready] screen.Check the information, and then clean the glass.For details about how to check the information, refer to Checking the Information (page 151).•A message is displayed on the computer.Check the message, and then clean the glass.For details about cleaning, refer to Daily Care (page 217).Specify the sensitivity level to detect vertical streaks (dirt on the glass) when [Enable] is selected for [Vertical Streak Detection].Adjust the sensitivity level according to how dirty the glass is.The vertical streak detection setting can also be configured in the scanner driver or on the Software Operation Panel.Note that priority is given to the scanner driver setting.Sensitivity can also be configured from the Software Operation Panel. | 1:Enable2:DisableSensitivity:1:Low2:Normal3:High | 2:DisableSensitivity:2:Normal |
| 20:Prioritize panel settings | For the paper protection setting,prioritize the operator panel setting over the Software Operation Panel setting.You cannot prioritize the setting over the scanner driver setting.When [1:Paper Protection] is selected,the Paper Protection setting of the operator panel is prioritized.When [2:Clear] is selected, the Paper Protection setting is no longer prioritized. | 1:Paper Protection2:Clear | 2:Clear |
| 21:Ope.PanelInitialization | Initialize the settings of the operator panel, except for the language setting and any items without a factory default setting. | 1:Yes2:No | (*4) |
| 22:Power saving | Specify the waiting time before the scanner enters power saving mode. It can also be configured in the Software Operation Panel. | 5 to 115 (in increments of 5) (minutes) | 15 |
| 23:Power-off time | Specify a time for the scanner to turn off automatically. It can also be configured in the Software Operation Panel. | Disable, 1, 2, 4, 8 (hours) | 4 |
| 24:Pre-pick Enable this to shorten the scanning time when scanning continuously. "Pre-pick" refers to feeding the next document into the ADF before ejecting the current document being scanned when scanning documents continuously. It can also be configured in the scanner driver or the Software Operation Panel. Note that priority is given to the scanner driver setting. | 1:Yes2:No | 1:Yes | |
| 25:USB Change | the USB setting if an error occurred on a computer during communication. If this setting is changed, the scanner is restarted. | 1:Automatic2:USB 2.0 | 1:Automatic |
*1: When the screen with setting items is displayed, the parameter currently selected is highlighted.
*2:"*" is displayed for the factory default setting in the screen.
*3: Although there is no factory default setting, the settings are configured as follows when you turn on the power: [2: Multiple sheets] for [No. of sheets scanned], [1:
(L)ABCDEFGHIJKLMNOPQRSTUVWXYZ[^]^_00000000] for [Print Pattern], and [1:Yes] for [Test Print]. Therefore, the setting does not change even when you initialize the settings of the operator panel.
*4: Although there is no factory default setting, it is set to [2:No] when you turn on the power. Therefore, the setting does not change even when you initialize the settings of the operator panel.
How to Use Function Selection
This section explains the Function Selection.
When you press the [ ] button/[] button in the [Ready] screen, the [Function Selection] screen is displayed.
By using Function Selection, you can configure an image scanning application to be started up when the [Scan/Enter] button is pressed in the [Ready] screen.
A button on the computer must be configured to start up an image scanning application in advance. For details, refer to Pressing a Button on the Scanner in order to Start an Image Scanning Application and Perform a Scan (page 96).
The indicator displays the number selected in the [Function Selection] screen.
If you select [No.02] in the [Function Selection] screen, the indicator displays [F02].
HINT
The application number does not appear when the scanner is operated with PaperStream NX Manager.
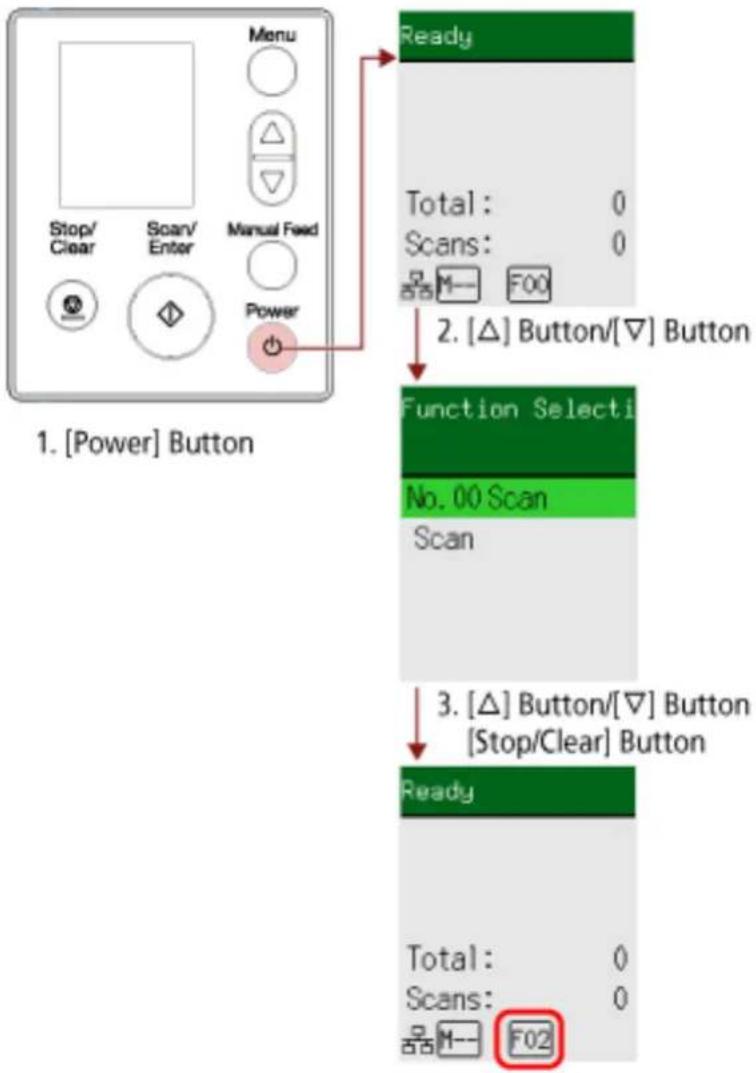
flowchart
graph TD
    A["Stop/ Clear"] --> B["Scan/ Enter"]
    B --> C["Manual Feed"]
    C --> D["Power"]
    D --> E["1. [Power"] Button]
    E --> F["Ready"]
    F --> G["Total: 0 Scans: 0"]
    G --> H["2. [Δ"] Button/[∇] Button]
    H --> I["Function Selecti No. 00 Scan Scan"]
    I --> J["3. [Δ"] Button/[∇] Button["Stop/Clear"] Button]
    J --> K["Ready"]
    K --> L["Total: 0 Scans: 0"]
    L --> M["F02"]
1 Press the [Power] button on the scanner.
The [Ready] screen is displayed on the LCD.
The indicator displays [F00] when the power has just been turned on.
2 Press the []/[] button.
The [Function Selection] screen is displayed on the LCD.
3 Press the [ ] button/[ ] button to select a number that has been configured to start up a desired image scanning application, and then press the [Stop/Clear] button.
For more details about the setting parameters, refer to Item Configurable in Function Selection (page 173).
The setup is completed when the LCD displays the [Ready] screen.
The indicator displays the number selected in the [Function Selection] screen.
In this example, the indicator displays [F02] because [No.02] is selected.
HINT
- If you select a number from [No.00] to [No.50], a number from [F00] to [F50] that corresponds to the one you selected is displayed on the indicator.
- If you select [SOP], the indicator displays [SOP]. The Software Operation Panel has been specified for [SOP] to start up by factory default and cannot be changed.
Item Configurable in Function Selection
| Setting Item | Description Setting Factory | Default | |
| Function Selection | You can configure an image scanning application to be started up when the [Scan/Enter] button is pressed in the [Ready] screen.It displays numbers that correspond to the buttons configured on the computer ([Scan Button], from [Send to 01] to [Send to 50]).[No.00] corresponds to [Scan Button].Numbers from [No.01] to [No.50]correspond to buttons from [Send to 01] to [Send to 50].[SOP] corresponds to [Software Operation Panel].For information on how to configure the settings for the button, refer toPressing a Button on the Scanner in order to Start an Image Scanning Application and Perform a Scan (page 96). | No.00 to No.50/SOP(The Software Operation Panel has been specified for [SOP] to start up by factory default and cannot be changed.) | (*1) |
*1: Although there is no factory default setting, it is set to [No.00] when you turn on the power. Therefore, the setting does not change even when you initialize the settings of the operator panel.
How to Use the Operator Panel [fi-8150/fi-8250/fi-8150U/fi-8250U]
This section explains how to use the operator panel.
Operator Panel Overview
The operator panel consists of a Function Number Display, buttons and LED an indicator.
Names and Functions of the Operator Panel
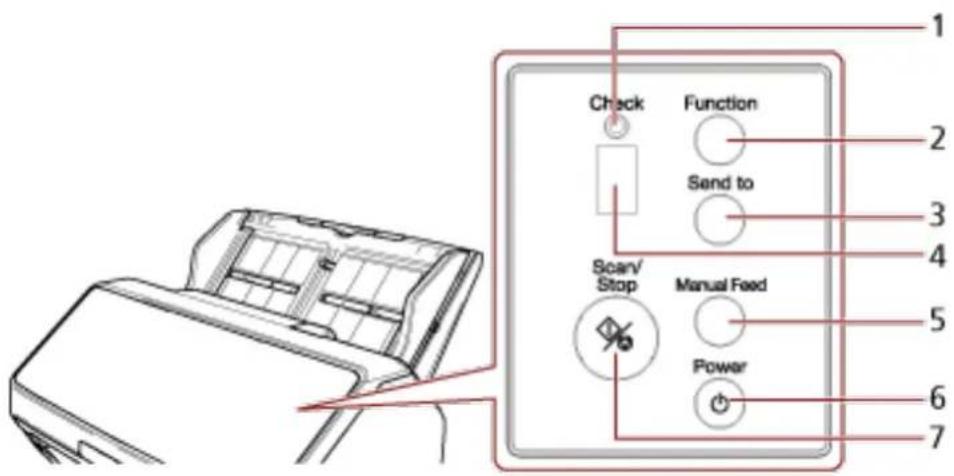
| No. Name Function | |
| 1 LED indicator Lights in orange when an error occurs. Flashes in orange when the ADF is open. | |
| 2 [Function] button Switches the number (1 to 9/C) for the image scanning application to be started up by pressing the [Send to] button. | |
| 3 [Send to] button (*1) (*2) Starts scanning. | Pressing this button during scanning pauses the scan.This button is also used to clear an error indication on the Function Number Display. |
| 4 Function Number Display Indicates the status of the scanner.When the scanner enters power saving mode, the Function Number Display on the operator panel turns off. | |
| 5 [Manual Feed] button (*3) Switches the feed mode to Manual Feed Mode before scanning.After scanning is complete, Manual Feed Mode is cleared. | |
| 6 [Power] button Turns the power ON/OFF. | |
| 7 [Scan/Stop] button Starts scanning. | Pressing this button during scanning stops the scan.This button is also used to clear an error indication on the Function Number Display.Lights in green when the scanner is on.Flashes in green when the scanner enters power saving mode.Flashes in green three times when the feed mode is switched to Manual Feed Mode. |
*1: For information on how to scan documents by using the [Send to] button, refer to Pressing a Button on the Scanner in order to Start an Image Scanning Application and Perform a Scan (page 96).
*2: Pressing the [Send to] button when scanning a document, pauses the scanning process, after the document is scanned.
*3: For information on how to scan documents with the [Manual Feed] button, refer to the following.
- Scanning Documents Folded in Half (page 183)
- Scanning Documents such as Envelopes or Multi-Layered Transfer Paper (page 186)
- Scanning Booklets such as Passports (page 189)
- Feeding Documents Manually (page 204)
HINT
For information on how to use the operator panel when operating PaperStream NX Manager, refer to Processing a Job (With PaperStream NX Manager) [fi-8150/fi-8250] (page 109).
Indications on Function Number Display
| Indication Description | |
| 8 Displayed when the scanner is turned on. | |
| P Indicates that the initialization is in process after the scanner is turned on. | |
| 0 Indicates that the initialization is in process and is near the end of process after the scanner is turned on. | |
| 1 Ready to start scanning.Indicates that the initialization is successfully complete.This is referred to as "ready" status. | |
| Function number (such as "1") (flashing) | After overlapped documents are detected, the function number flashes.This indicates that you can determine whether or not to memorize the overlap pattern.For details, refer to Configuring Not to Detect Certain Overlap Patterns (page 208). |
| c (flashing) Indicates that the scanner is in a ready status and the ADF is open.In this case, the LED indicator also flashes.When the ADF is closed, the display returns to the ready status ("1").For information on how to close the ADF, refer to How to Close the ADF (page 77).If the display does not return to the ready status ("1") even after the ADF is closed, turn the power off then back on.If the indication continues to appear after turning the power back on, contact the distributor/dealer where you purchased this product. Refer to the contact information in the Contact List if supplied with this product, or refer to the contact information in the Contact for Inquiries section if provided in Safety Precautions supplied with this product, and then make an inquiry. | |
| P (flashing) Indicates that the [Send to] button was pressed to pause the scan.Press the [Scan/Stop] button to resume the paused scan. | |
| n (upper) Displayed when the [Send to] button is pressed while the scanner is in a ready status. | |
| n (lower) Displayed when the [Scan/Stop] button is pressed while the scanner is in a ready status. | |
| JnU | Indicates that an error occurred during scanning.The letter "J", "n", or "U" and an number appear alternately. A letter combined with a number is an "error code".For details about errors, refer to Errors (page 251).Press the [Scan/Stop] button/[Send to] button in this status to return to the ready status ("1"). |
| A Indicates that an error occurred on the scanner itself. | |
| Indication Description | |
| C | The letter "A", "C", "E", "F", "H", "L", or "n" and a number appear alternately. |
| E | A letter combined with a number is an "error code". |
| F | For details about errors, refer to Errors (page 251). |
| H | Press the [Scan/Stop] button/[Send to] button in this status to return to the ready status ("1"). |
| L | |
| n | When this error appears, turn the power off then back on.If the problem still persists, write down the error code, check each item in Before You Contact the Scanner Service Provider (page 334) and then contact the distributor/dealer where you purchased this product. Refer to the contact information in the Contact List if supplied with this product, or refer to the contact information in the Contact for Inquiries section if provided in Safety Precautions supplied with this product, and then make an inquiry. |
| None If the scanner | is not operated for the length of time that is set for the sleep interval, it enters power saving mode.Press any button on the scanner (except the [Power] button) to resume from power saving mode. |
Various Ways to Scan
This section explains how to configure the scanner settings and scan different types of documents with a scanner driver or the image scanning application.
For information on other ways to scan which are not explained here, refer to the help for the scanner driver, and the manual/help for the image scanning application.
Scanning Documents with Different Widths
ATTENTION
When you scan a mixed batch with different widths, some of the narrower documents may be skewed or not fed into the ADF.
In that case, separate the documents by their widths, and scan them in different batches.
HINT
For details about document requirements for scanning a mixed batch of documents, refer to Conditions for Mixed Batch Scanning (page 126).
1 Align the top of the documents.
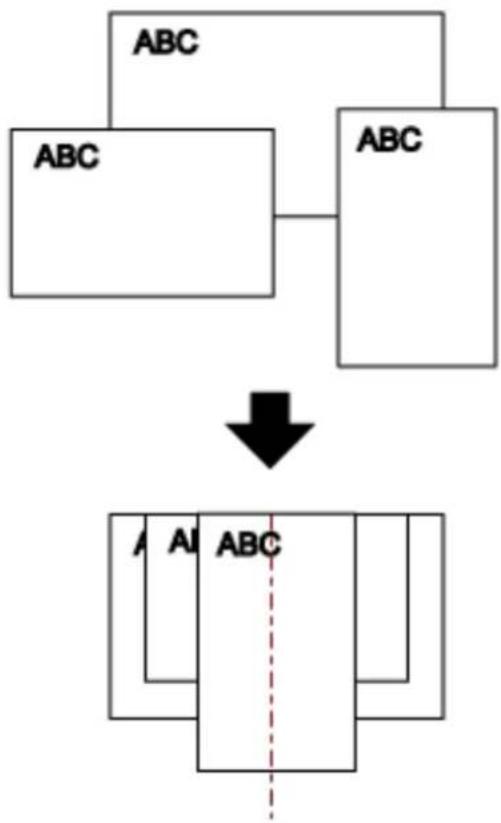
flowchart
graph TD
    A["ABC"] --> B["ABC"]
    C["ABC"] --> D["ABC"]
    E["AI"] --> F["ABC"]
    style E stroke-dasharray: 5 5
2 Pull out the chute extensions to fit the longest document.
For details, refer to Setting Up the ADF Paper Chute (Feeder) (page 80).
3 Adjust the stacker to fit the longest document.
For details, refer to Setting Up the Stacker [fi-8190/fi-8170/fi-8150/fi-8150U] (page 81) or Setting Up the Stacker [fi-8290/fi-8270/fi-8250/fi-8250U] (page 86).
4 Place the documents at the center of the ADF paper chute (feeder), and adjust the side guides to the widest document in the batch.
ATTENTION
Load all documents above the center of the pick roller. If documents are loaded outside of the pick roller width, they may be fed skewed or not fed into the ADF.
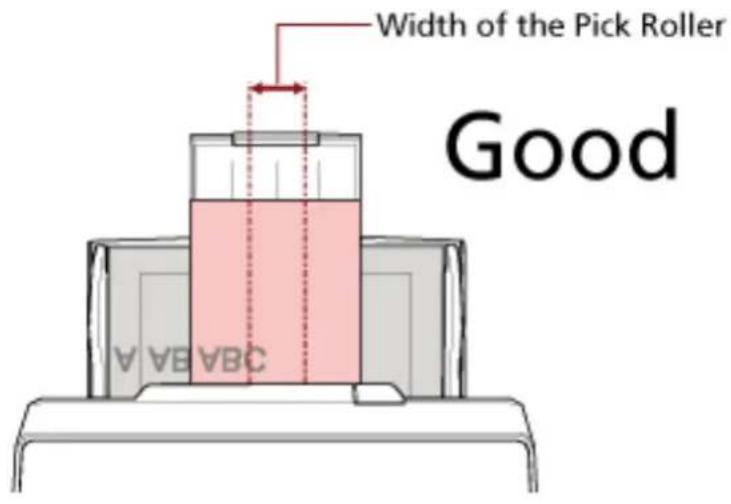
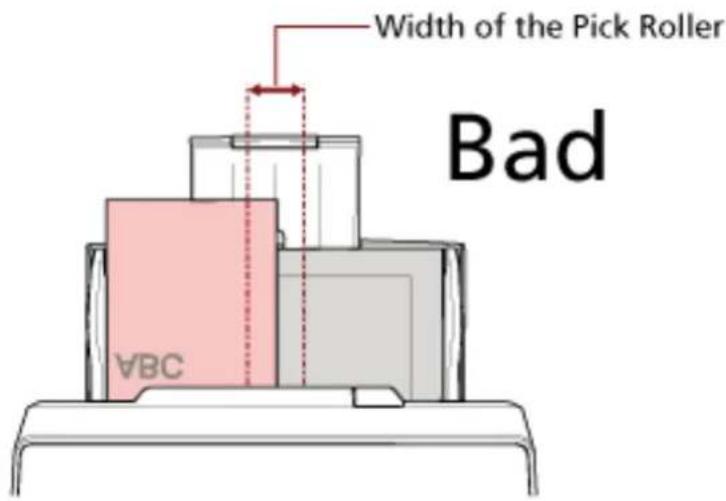
5 In the scanner driver, configure the scan settings to detect the paper size automatically.
For details, refer to the help for the scanner driver.
6 Scan documents with the image scanning application.
For details, refer to the manual/help of the image scanning application.
Scanning Documents That Are 220 mm to 240 mm in Width
ATTENTION
Documents that are 220 mm to 240 mm in width can be fed, but the specification for document sizes that can be scanned is still the same.
For details about document sizes that can be scanned, refer to Paper Size (page 116).
1 Remove the ADF paper chute (feeder).
Hold both ends of the ADF paper chute (feeder), then lift it in the direction of arrow 1 and pull it out in the direction of arrow 2.
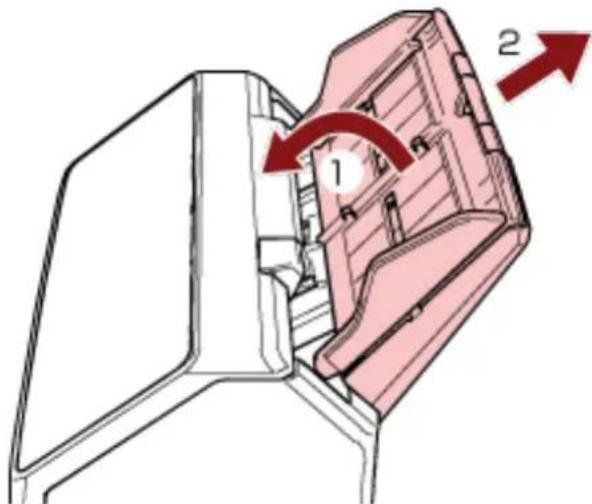
2 Insert a ballpoint pen into the round indentation on the side guide adjuster of the ADF paper chute (feeder) and pull out the side guide adjuster.
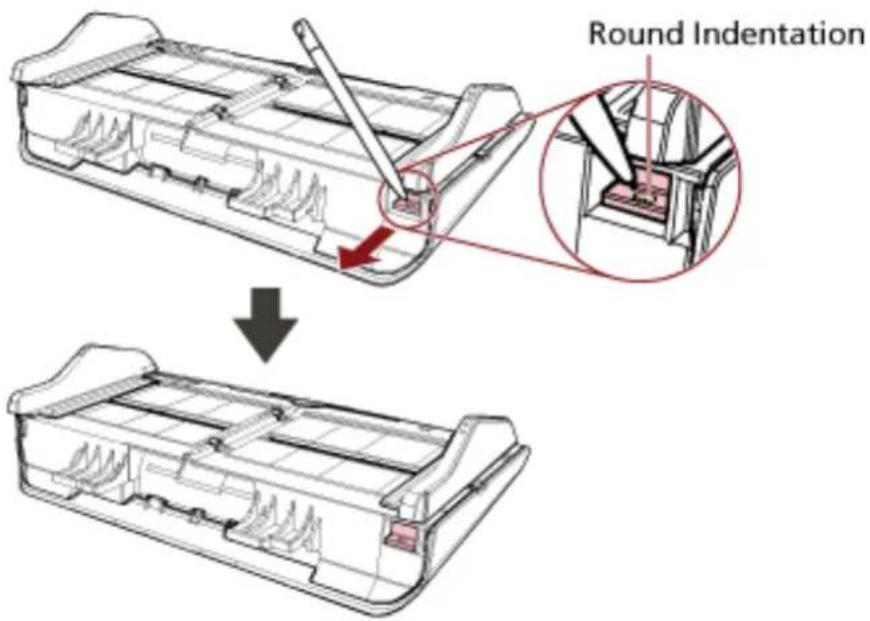
3 Attach the ADF paper chute (feeder).
Insert the tabs into the slots on the back of the scanner in the direction of arrow 1 and tilt the ADF paper chute (feeder) downwards in the direction of arrow 2 until it locks in place. Attach the ADF paper chute (feeder) with the side guides facing upwards.
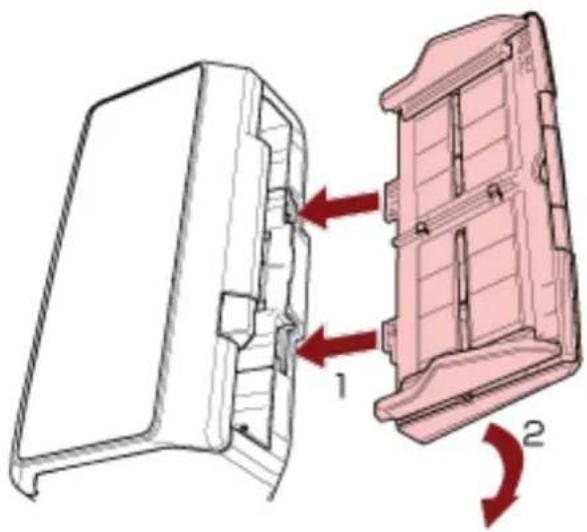
natural_image
Technical diagram of a mechanical component with two views, showing internal structure and directional arrows (no text or symbols)ATTENTION
Do not leave any space between the ADF paper chute (feeder) and the scanner.
4 Pull out the chute extensions according to the length of the document.
For details, refer to Setting Up the ADF Paper Chute (Feeder) (page 80).
5 Adjust the stacker according to the length of the documents.
For details, refer to Setting Up the Stacker [fi-8190/fi-8170/fi-8150/fi-8150U] (page 81) or Setting Up the Stacker [fi-8290/fi-8270/fi-8250/fi-8250U] (page 86).
6 Load a document in the ADF paper chute (feeder).
For details, refer to How to Load Documents (page 110).
7 Adjust the side guides to the width of the document.
The side guides can be adjusted in accordance with the width of the document (from 220 mm to 240 mm).
Move the side guides so that there is no space between the side guides and the document.
When there is a space between the side guides and the document, the document may be fed skewed.
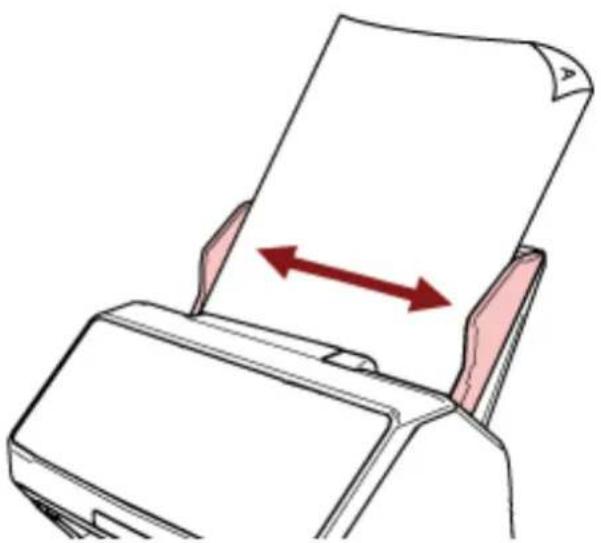
natural_image
Illustration of a printer with paper being inserted, showing paper movement with red arrows (no text or symbols)8 Scan the document with the image scanning application.
For details, refer to the manual/help of the image scanning application.
Scanning Documents Folded in Half
Pressing the [Manual Feed] button to switch the feed mode to Manual Feed Mode allows you to scan a document folded in half (a document of up to A3 or Double Letter in size with a thickness of 64 to 105 g/m ^2 [17 to 28 lb]) as it is.
1 Fold the document in half so that the sides to be scanned are facing out.
Fold it firmly and smooth out any creases.
ATTENTION
The document may be fed skewed if the folded part is too thick.
Example
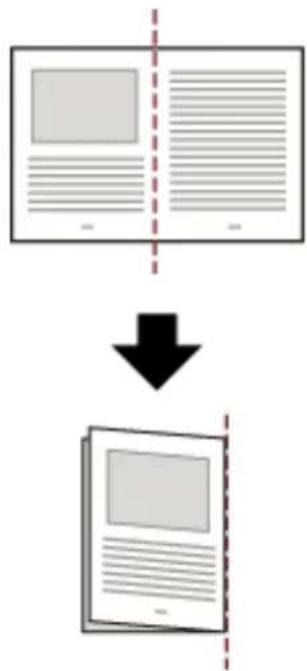
flowchart
graph TD
    A["Document with blank pages"] --> B["File with blank pages"]
    B --> C["Print with blank pages"]
2 Load the document folded in half in the ADF paper chute (feeder).
For details, refer to How to Load a Document in the ADF Paper Chute (Feeder) (page 112).
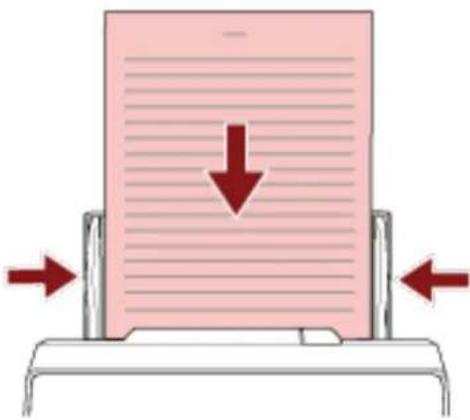
natural_image
Diagram of a document being compressed with red arrows indicating compression or compression (no text or symbols present)3 Press the [Manual Feed] button to switch the feed mode to Manual Feed Mode.
●For fi-8190/fi-8290/fi-8170/fi-8270
![Menu Stop/ Clear Scarf/ Enter Manual Feed [Manual Feed] Button Power](/content/2026/05/903199/images/09d07a9d48a5a084d4f4493a41807ac108f8d492c5c4281058b74adfd22d4fec.jpg)
[Manual Feed (Multifeed Detection is disabled)] is displayed on the LCD.
●For fi-8150/fi-8250/fi-8150U/fi-8250U
![Check Function Send to Scan/ Stop Manual Feed Power [Manual Feed] Button](/content/2026/05/903199/images/85be128de1f54db981a67a70745f4b7a83f1015b59875e77138f916499684483.jpg)
The Function Number Display shows " " and the function number alternately.
ATTENTION
The scanning speed slows down when the feed mode is switched to Manual Feed Mode.
HINT
The setting for switching the feed mode to Manual Feed Mode can also be configured in the scanner driver.
For details, refer to the help for the scanner driver.
4 Scan the document with the image scanning application.
For details, refer to the manual/help of the image scanning application.
ATTENTION
Manual Feed Mode is the mode for scanning a document folded in half or a multi-layered document such as an envelope.
Therefore, even if the setting for detecting overlapped documents is enabled, such documents are not detected as overlapped documents.
HINT
- In Manual Feed Mode, the scanner will wait for documents to be loaded in the ADF paper chute (feeder) until the timeout time elapses after scanning is started or a document is ejected.
Scanning will stop if no document is loaded within the timeout time.
You can set a timeout time as follows.
-For fi-8190/fi-8290/fi-8170/fi-8270
Use one of the following methods to set a timeout time.
- In [17: Manual Feed Timeout] on the [Settings Menu] screen of the operator panel, set a timeout time.
For details, refer to How to Use Settings Menu (page 145).
- In the Software Operation Panel, set a timeout time.
For details, refer to Waiting Time in Manual Feeding [Manual Feeding] (page 392).
-For fi-8150/fi-8250/fi-8150U/fi-8250U
In the Software Operation Panel, set a timeout time.
For details, refer to Waiting Time in Manual Feeding [Manual Feeding] (page 392).
- When you press the [Manual Feed] button to switch the feed mode to Manual Feed Mode, after scanning is complete, Manual Feed Mode is cleared.
If you want to scan more than one document in succession in Manual Feed Mode, select [Continue] for [Manual Feed Mode] in the Software Operation Panel.
When [Continue] is selected for [Manual Feed Mode], documents are scanned in succession in Manual Feed Mode until the [Manual Feed] button is pressed.
For details, refer to Waiting Time in Manual Feeding [Manual Feeding] (page 392).
Scanning Documents such as Envelopes or Multi-Layered Transfer Paper
Pressing the [Manual Feed] button to switch the feed mode to Manual Feed Mode allows you to scan documents such as envelopes and multi-layered transfer paper.
ATTENTION
For details about the paper weights of the documents that can be scanned, refer to Document Thickness (Paper Weight) (page 117).
1 Load a document in the ADF paper chute (feeder).
To scan a multi-layered transfer paper, position the bound edge first when loading the paper. For details, refer to How to Load a Document in the ADF Paper Chute (Feeder) (page 112).
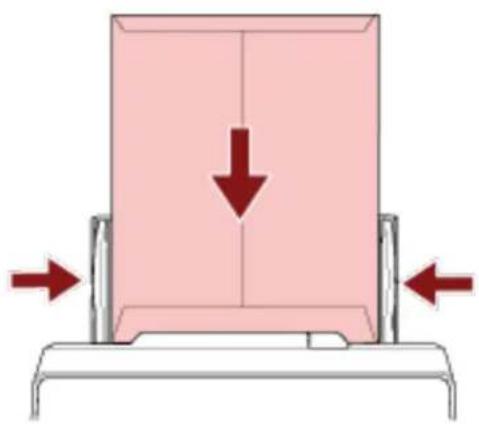
natural_image
Diagram of a mechanical press or lifting device with red arrows indicating downward force, no text or symbols present2 Press the [Manual Feed] button to switch the feed mode to Manual Feed Mode.
●For fi-8190/fi-8290/fi-8170/fi-8270
![Menu Stop/ Clear Scan/ Enter Manual Feed Power [Manual Feed] Button](/content/2026/05/903199/images/e4d7f06f0c06fbd75d54d1572a8aac8ec9f4cf66a0ecc7cd4c861d2abf6ac5cb.jpg)
[Manual Feed (Multifeed Detection is disabled)] is displayed on the LCD.
●For fi-8150/fi-8250/fi-8150U/fi-8250U
![Check Function Send to Scan/ Stop Manual Feed Power [Manual Feed] Button](/content/2026/05/903199/images/ee8c41d9ec7d738785b76fd550c4be89771ae59a22e812c97668d751f02820a0.jpg)
The Function Number Display shows " " and the function number alternately.
ATTENTION
The scanning speed slows down when the feed mode is switched to Manual Feed Mode.
HINT
The setting for switching the feed mode to Manual Feed Mode can also be configured in the scanner driver.
For details, refer to the help for the scanner driver.
3 Scan the document with the image scanning application.
For details, refer to the manual/help of the image scanning application.
ATTENTION
Manual Feed Mode is the mode for scanning a document folded in half or a multi-layered document such as an envelope.
Therefore, even if the setting for detecting overlapped documents is enabled, such documents are not detected as overlapped documents.
HINT
- In Manual Feed Mode, the scanner will wait for documents to be loaded in the ADF paper chute (feeder) until the timeout time elapses after scanning is started or a document is ejected.
Scanning will stop if no document is loaded within the timeout time.
You can set a timeout time as follows.
-For fi-8190/fi-8290/fi-8170/fi-8270
Use one of the following methods to set a timeout time.
- In [17: Manual Feed Timeout] on the [Settings Menu] screen of the operator panel, set a timeout time.
For details, refer to How to Use Settings Menu (page 145).
- In the Software Operation Panel, set a timeout time.
For details, refer to Waiting Time in Manual Feeding [Manual Feeding] (page 392).
-For fi-8150/fi-8250/fi-8150U/fi-8250U
In the Software Operation Panel, set a timeout time.
For details, refer to Waiting Time in Manual Feeding [Manual Feeding] (page 392).
- When you press the [Manual Feed] button to switch the feed mode to Manual Feed Mode, after scanning is complete, Manual Feed Mode is cleared.
If you want to scan more than one document in succession in Manual Feed Mode, select
[Continue] for [Manual Feed Mode] in the Software Operation Panel.
When [Continue] is selected for [Manual Feed Mode], documents are scanned in succession in Manual Feed Mode until the [Manual Feed] button is pressed.
For details, refer to Waiting Time in Manual Feeding [Manual Feeding] (page 392).
Scanning Booklets such as Passports
Pressing the [Manual Feed] button to switch the feed mode to Manual Feed Mode allows you to scan booklets such as passports.
ATTENTION
For details about the paper weights of the documents that can be scanned, refer to Document Thickness (Paper Weight) (page 117).
1 Load a document in the ADF paper chute (feeder).
Open the booklet fully and load it in the ADF paper chute (feeder). Otherwise, the booklet may not be fed.
For details, refer to How to Load a Document in the ADF Paper Chute (Feeder) (page 112).
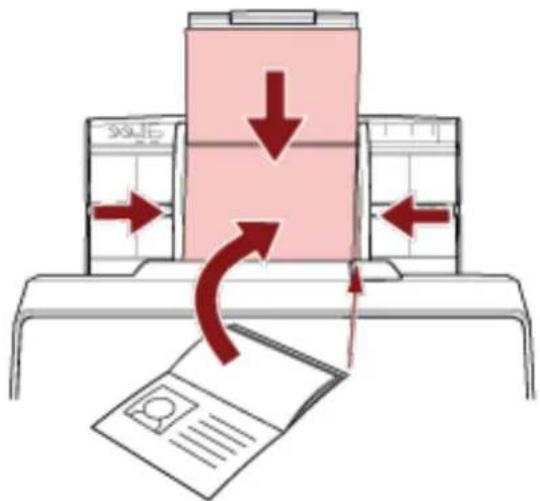
ATTENTION
- Load the open booklet face-down with the edge of the side which has more pages first in the ADF paper chute (feeder). If you scan a booklet in the wrong orientation, the booklet may be damaged or the image may turn out elongated vertically.
- If you do not want a booklet to become dirty or damaged, use the optional Booklet Carrier Sheet.
For details, refer to Scanning Booklets such as Passports without Damaging Them (page 197).
2 Press the [Manual Feed] button to switch the feed mode to Manual Feed Mode.
●For fi-8190/fi-8290/fi-8170/fi-8270
![Menu Stop/ Clear Scan/ Enter Manual Feed [Manual Feed] Button Power](/content/2026/05/903199/images/2802a3853e1803586e03deb1775f5412d29c51ee24f26fe28c691a19ffe2a30d.jpg)
[Manual Feed (Multifeed Detection is disabled)] is displayed on the LCD.
●For fi-8150/fi-8250/fi-8150U/fi-8250U
![Check Function Send to Scan/ Stop Manual Feed Power [Manual Feed] Button](/content/2026/05/903199/images/ab7539e9a66287f8a76d1cf714ab97e164564e2dfd254577d04c880ad289e261.jpg)
The Function Number Display shows " " and the function number alternately.
ATTENTION
The scanning speed slows down when the feed mode is switched to Manual Feed Mode.
HINT
The setting for switching the feed mode to Manual Feed Mode can also be configured in the scanner driver.
For details, refer to the help for the scanner driver.
3 Scan the document with the image scanning application.
For details, refer to the manual/help of the image scanning application.
ATTENTION
Manual Feed Mode is the mode for scanning a document folded in half or a multi-layered document such as an envelope.
Therefore, even if the setting for detecting overlapped documents is enabled, such documents are not detected as overlapped documents.
HINT
- In Manual Feed Mode, the scanner will wait for documents to be loaded in the ADF paper chute (feeder) until the timeout time elapses after scanning is started or a document is ejected.
Scanning will stop if no document is loaded within the timeout time.
You can set a timeout time as follows.
-For fi-8190/fi-8290/fi-8170/fi-8270
Use one of the following methods to set a timeout time.
- In [17: Manual Feed Timeout] on the [Settings Menu] screen of the operator panel, set a timeout time.
For details, refer to How to Use Settings Menu (page 145).
- In the Software Operation Panel, set a timeout time.
For details, refer to Waiting Time in Manual Feeding [Manual Feeding] (page 392).
-For fi-8150/fi-8250/fi-8150U/fi-8250U
In the Software Operation Panel, set a timeout time.
For details, refer to Waiting Time in Manual Feeding [Manual Feeding] (page 392).
- When you press the [Manual Feed] button to switch the feed mode to Manual Feed Mode, after scanning is complete, Manual Feed Mode is cleared.
If you want to scan more than one document in succession in Manual Feed Mode, select [Continue] for [Manual Feed Mode] in the Software Operation Panel.
When [Continue] is selected for [Manual Feed Mode], documents are scanned in succession in Manual Feed Mode until the [Manual Feed] button is pressed.
For details, refer to Waiting Time in Manual Feeding [Manual Feeding] (page 392).
Scanning Documents Larger than A4/Letter Size
The optional Carrier Sheet can be used to scan documents larger than A4/Letter size, such as A3 or B4. Fold a document in half and place it inside the Carrier Sheet.
1 Place the document inside the Carrier Sheet.
a Fold the document in half so that the sides to be scanned are facing out.
Fold it firmly and smooth out any creases.
The document may be fed skewed if the folded part is too thick.
Example
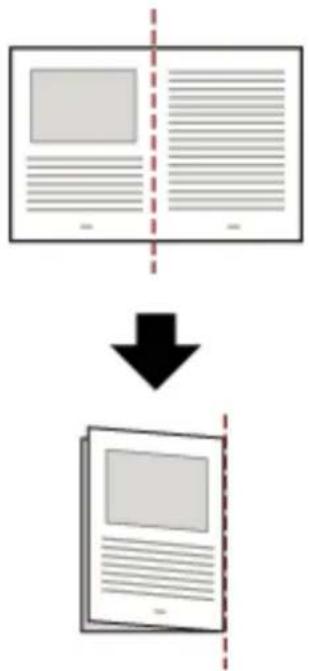
flowchart
graph TD
    A["Document with blank pages"] --> B["File with blank pages"]
    B --> C["Printed sheet with blank pages"]
b Open the Carrier Sheet to place the document inside.
Note that the front side of the Carrier Sheet has a black and white pattern at the top and a thick vertical line in the upper right-hand corner.
Align the top and the fold line of the document with the Carrier Sheet so that no space is left in the upper and right sides of the Carrier Sheet.
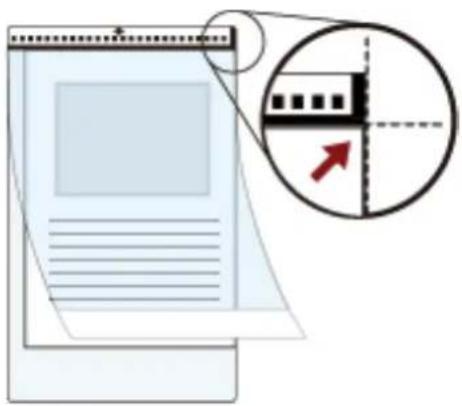
2 Load the Carrier Sheet with the end with the black and white pattern as the leading edge and with the scanning side facing the ADF paper chute (feeder) (face-down).
Secure the Carrier Sheet with the side guides to avoid skewing.
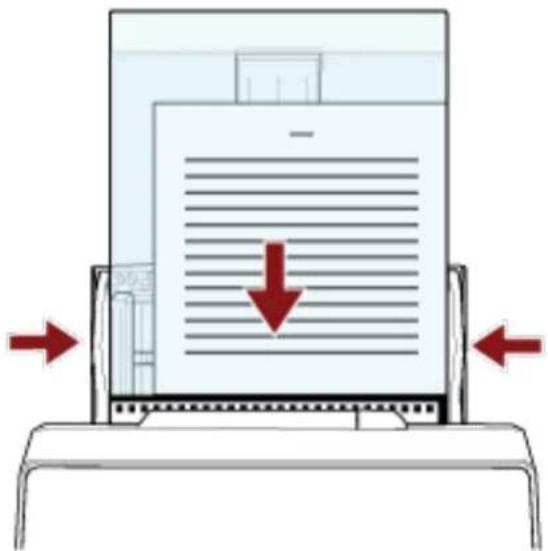
3 Configure the scan settings in the scanner driver to use the Carrier Sheet.
For details, refer to the help for the scanner driver.
4 Scan the document with the image scanning application.
For details, refer to the manual/help of the image scanning application.
ATTENTION
- The image printed on the document is cropped and it is pasted in the center of a blank image. The size of a blank image is the size specified for [Paper Size] in the scanner driver.
Example
When an A5 size image is printed on an A4 size document and [A4] is specified for [Paper Size] in the scanner driver.
→An A5 size image is pasted in the center of an A4 size blank image.
- When [Automatic] is specified for [Paper Size] in the scanner driver, the most suitable size is selected from standard sizes which can be specified for [Paper Size]. Note that the size of the image may become smaller than the original document depending on the document scanned, or part of the image may appear missing.
Example
When an A5 size image is printed in the center of an A4 size document →The image is output in A5 size.
To output the scanned image in the actual size of the document, specify the document size for [Paper size].
Scanning Photographs and Clippings without Damaging Them
Using the optional Carrier Sheet or Photo Carrier Sheet allows you to scan non-standard size documents such as photographs or clippings without damaging them.
The procedure to perform a scan with the Photo Carrier Sheet is described as an example below.
1 Place a document inside the Photo Carrier Sheet.
Open the Photo Carrier Sheet and centrally place the top end of the document against the side with a black and white pattern of the Photo Carrier Sheet.
Note that the front side of the Photo Carrier Sheet has a black and white pattern at the top and a thick vertical line in the upper right-hand corner.
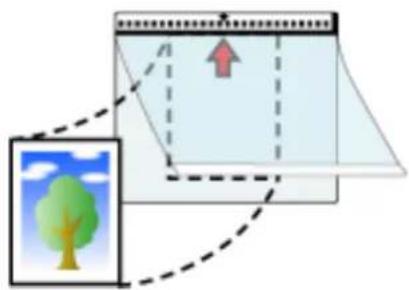
natural_image
Diagram showing a tree inside a water frame with an upward arrow, no text or symbols present2 Load the Photo Carrier Sheet with the end with the black and white pattern as the leading edge and with the scanning side facing the ADF paper chute (feeder) (face-down).
Secure the Photo Carrier Sheet with the side guides to avoid skewing.
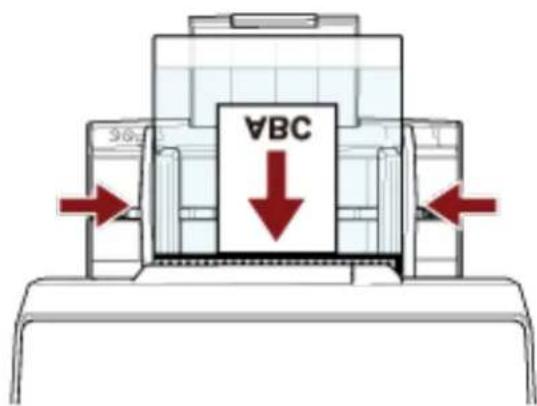
3 Configure the scan settings in the scanner driver to use the Photo Carrier Sheet.
For details, refer to the help for the scanner driver.
4 Scan the document with the image scanning application.
For details, refer to the manual/help of the image scanning application.
ATTENTION
- The image printed on the document is cropped and it is pasted in the center of a blank image. The size of a blank image is the size specified for [Paper Size] in the scanner driver.
Example
When an image the size of a business card is printed on an A6 size document and [A6] is specified for [Paper Size] in the scanner driver.
→An image the size of a business card is pasted in the center of an A6 size blank image.
- An image printed on a document is cropped and output as it is when [Automatic] is specified for [Paper size] in the scanner driver.
Example
When a business card size image is printed in the center of an A6 size document →The image is output in A6 size.
HINT
In the following cases, place a blank (white) sheet of paper behind the document when scanning.
- The scanned image is not output in the actual size of the document when [Automatic] is specified for [Paper size] in the scanner driver.
- Shadows appear around the edges of the scanned image.
- Black lines appear around the edges of a uniquely shaped cutting.
- Image outside the document appears on the scanned image.
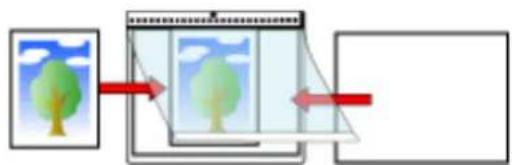
flowchart
graph LR
    A["Tree Image"] --> B["Processing Step"]
    B --> C["Output"]
Scanning Booklets such as Passports without Damaging Them
The optional Booklet Carrier Sheet enables you to scan a passport without damaging the photo and other documents attached to the passport.
The procedure to perform a scan with the Booklet Carrier Sheet is described as an example below.
ATTENTION
As you keep using the Booklet Carrier Sheet, the surface may be damaged, which may affect the scanned images. If the problem still persists after you clean the Booklet Carrier Sheet, it is recommended to replace it.
1 Place the document inside the Booklet Carrier Sheet.
Face the front side of the Booklet Carrier Sheet upwards. Then, open the booklet to display the pages to be scanned and place it inside the Booklet Carrier Sheet.
Note that the front side of the Booklet Carrier Sheet has a black and white pattern.
Also, note that the end of the Booklet Carrier Sheet with the black and white pattern is the top end, and the end of the Booklet Carrier Sheet with only white is the bottom end.
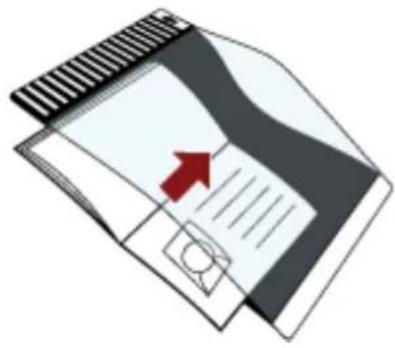
natural_image
Illustration of a folded document or paper with a red arrow pointing to a document (no text or symbols present)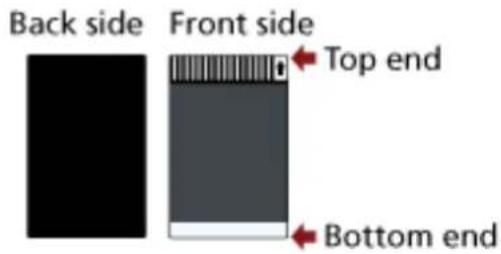
HINT
Insert the side which has more pages against the top end of the Booklet Carrier Sheet.
2 Load the Booklet Carrier Sheet with the top end as the leading edge and with the front side of the Booklet Carrier Sheet facing the ADF paper chute (feeder) (face-down).
Secure the Booklet Carrier Sheet with the side guides to avoid skewing.
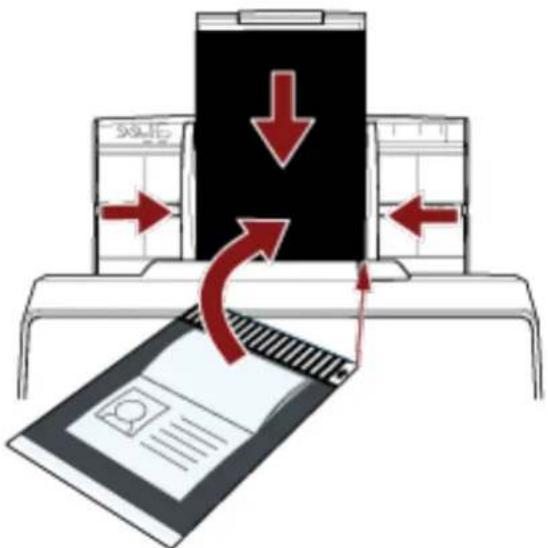
3 Configure the scan settings in the scanner driver to use the Booklet Carrier Sheet. For details, refer to the help for the scanner driver.
4 Scan the document with the image scanning application. For details, refer to the manual/help of the image scanning application.
Scanning Long Page Documents
Documents with a length up to 6,096 mm (240 in.) can be scanned by long page scanning.
Depending on the resolution setting or the image scanning application, the document sizes that can be scanned may differ.
For details, refer to the help for your scanner driver and the manual/help for your image scanning application.
1 Pull out the chute extensions all the way.
For details, refer to Setting Up the ADF Paper Chute (Feeder) (page 80).
2 Adjust the stacker.
For details, refer to Setting Up the Stacker [fi-8190/fi-8170/fi-8150/fi-8150U] (page 81) or Setting Up the Stacker [fi-8290/fi-8270/fi-8250/fi-8250U] (page 86).
3 Load a document in the ADF paper chute (feeder).
For details, refer to How to Load a Document in the ADF Paper Chute (Feeder) (page 112).
ATTENTION
Long page documents should be loaded one sheet at a time in the ADF paper chute (feeder).
4 In the scanner driver, configure the scan settings to scan the paper size of the long page.
For details, refer to the help for the scanner driver.
For some image scanning applications, the setup window for the scanner driver may not appear.
5 Scan the document with the image scanning application.
For details, refer to the manual/help of the image scanning application.
ATTENTION
When scanning a long page document, support the document with your hand so that it does not fall off.
For details, refer to How to Load a Document in the ADF Paper Chute (Feeder) (page 112).
Scanning Books with the Flatbed [fi-8290/fi-8270/fi-8250/fi-8250U]
1 Open the document cover.
For details, refer to How to Open the Document Cover (page 78).
2 Remove the document cover by pulling it out in the direction of the arrow.
![RICOH fi-8190 - Scanning Books with the Flatbed [fi-8290/fi-8270/fi-8250/fi-8250U] - 1](/content/2026/05/903199/images/0c5520ec545ca597e00727cd7a27090053c2935f2bcf465a8ccea340ba5a1dc0.jpg)
natural_image
Illustration of a hand using a handheld device to remove or clean material, with no visible text or symbols.3 Place a document on the document bed.
Place the document face-down to align its top left-hand corner with the reference point.
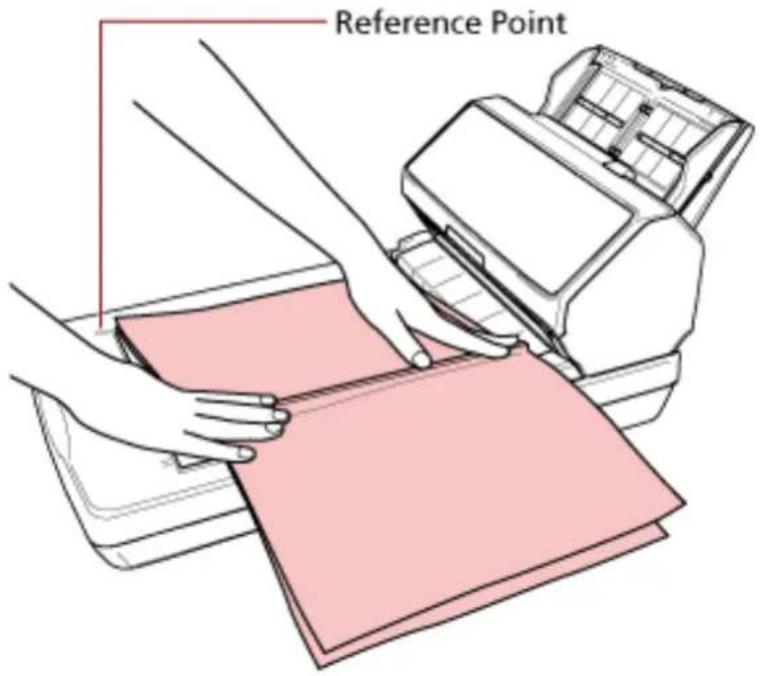
4 In the scanner driver, configure the scan settings for the flatbed.
For details, refer to the help for the scanner driver.
5 Scan the document with the image scanning application.
For details, refer to the manual/help of the image scanning application.
![RICOH fi-8190 - Scanning Books with the Flatbed [fi-8290/fi-8270/fi-8250/fi-8250U] - 3](/content/2026/05/903199/images/d933e84e8e6cbf554701fc155cc99db3616ae6e014a179ab05cfe83345aae60d.jpg)
Do not look at the light source directly during scanning.
ATTENTION
- Do not move the document during scanning.
- If glare from interior light gets caught in a scanned image, it may not be output in the actual size it was scanned in.
Place your scanner in a place where it is not affected by interior light.
In the scanner driver, you can configure the settings for removing ambient light.
For details, refer to the help for the scanner driver.
6 Attach the document cover.
7 Close the document cover.
For details, refer to How to Close the Document Cover (page 79).
Scanning Large Documents with the Flatbed [fi-8290/fi-8270/fi-8250/fi-8250U]
1 Open the document cover.
For details, refer to How to Open the Document Cover (page 78).
2 Remove the document cover by pulling it out in the direction of the arrow.
![RICOH fi-8190 - Scanning Large Documents with the Flatbed [fi-8290/fi-8270/fi-8250/fi-8250U] - 1](/content/2026/05/903199/images/e0c97dbed19107dddde61ed648d3425f67a0dc0571e7103ce735fb3e8bd6e398.jpg)
natural_image
Illustration of a hand using a handheld device to remove a pink strip, with no visible text or symbols.3 Place a document on the document bed.
Place the document face-down to align its top left-hand corner with the reference point.
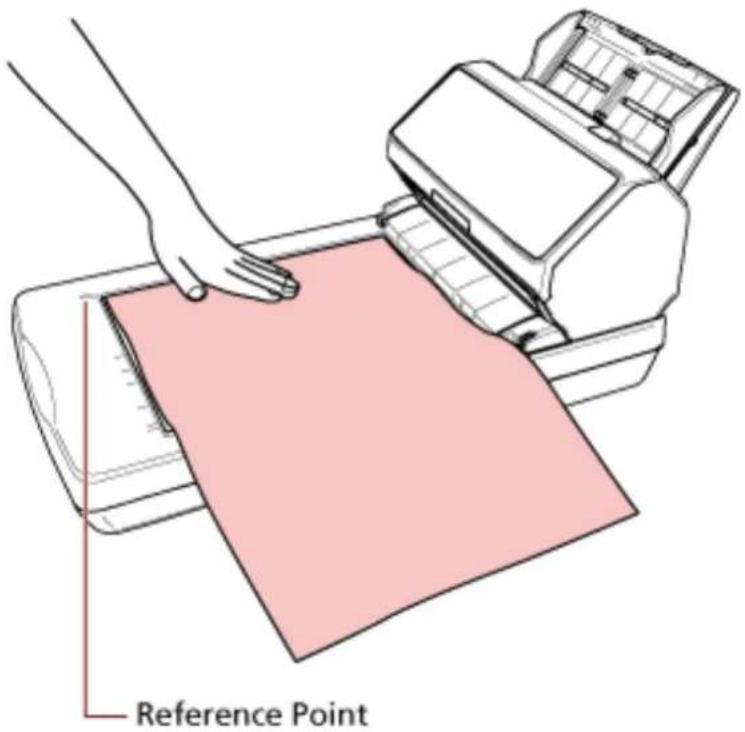
4 In the scanner driver, configure the scan settings for the flatbed.
For details, refer to the help for the scanner driver.
5 Scan the document with the image scanning application.
For details, refer to the manual/help of the image scanning application.
![RICOH fi-8190 - Scanning Large Documents with the Flatbed [fi-8290/fi-8270/fi-8250/fi-8250U] - 3](/content/2026/05/903199/images/c1529266f868089a0bd406ca253e0e8be34d27158499386cdd50792428d34e33.jpg)
Do not look at the light source directly during scanning.
ATTENTION
- Do not move the document during scanning.
- If glare from interior light gets caught in a scanned image, it may not be output in the actual size it was scanned in.
Place your scanner in a place where it is not affected by interior light.
In the scanner driver, you can configure the settings for removing ambient light.
For details, refer to the help for the scanner driver.
6 Attach the document cover.
7 Close the document cover.
For details, refer to How to Close the Document Cover (page 79).
Feeding Documents Manually
Documents can also be loaded manually one sheet at a time in the ADF paper chute (feeder).
After scanning is started or a document is ejected, the scanner will wait for documents to be loaded in the ADF paper chute (feeder) until the timeout time elapses.
Scanning will stop if no document is loaded within the timeout time.
By using this method, you can perform scanning as you check the documents one by one.
Manual feeding is effective in the following cases:
- To scan documents as you check the contents of each sheet
- To scan documents that are fed overlapped or jammed when the documents are loaded together in a batch
- To continue scanning documents such as magazines or newspaper clippings that cannot be loaded together, one at a time
- To scan a document folded in half, an envelope, a multi-layered transfer paper, or a booklet such as a passport one at a time
1 Configure the settings for the scanner.
- When scanning more than one document manually
a Switch to Manual Continuous Mode and set a timeout time.
-For fi-8190/fi-8290/fi-8170/fi-8270
Use one of the following methods to switch to Manual Continuous Mode, and set a timeout time.
- Switch to Manual Continuous Mode in [16: Manual/Continuous Feed Setting] on the [Settings Menu] screen of the operator panel, and specify a timeout time in [17: Manual Feed Timeout].
For details, refer to How to Use Settings Menu (page 145).
- In the Software Operation Panel, switch to Manual Continuous Mode, and set a timeout time.
For details, refer to Waiting Time in Manual Feeding [Manual Feeding] (page 392).
-For fi-8150/fi-8250/fi-8150U/fi-8250U
In the Software Operation Panel, switch to Manual Continuous Mode, and set a timeout time.
For details, refer to Waiting Time in Manual Feeding [Manual Feeding] (page 392).
- When scanning a document folded in half, an envelope, a multi-layered transfer paper, or a booklet such as a passport manually
a Press the [Manual Feed] button to switch the feed mode to Manual Feed Mode.
ATTENTION
The scanning speed slows down when the feed mode is switched to Manual Feed Mode.
HINT
The setting for switching the feed mode to Manual Feed Mode can also be configured in the scanner driver.
For details, refer to the help for the scanner driver.
b Set a timeout time.
-For fi-8190/fi-8290/fi-8170/fi-8270
Use one of the following methods to set a timeout time.
- In [17: Manual Feed Timeout] on the [Settings Menu] screen of the operator panel, set a timeout time.
For details, refer to How to Use Settings Menu (page 145).
- In the Software Operation Panel, set a timeout time.
For details, refer to Waiting Time in Manual Feeding [Manual Feeding] (page 392).
-For fi-8150/fi-8250/fi-8150U/fi-8250U
In the Software Operation Panel, set a timeout time.
For details, refer to Waiting Time in Manual Feeding [Manual Feeding] (page 392).
ATTENTION
For details about the paper weights of the documents that can be scanned, refer to Document Thickness (Paper Weight) (page 117).
When a document folded in half is scanned, the document may be fed skewed if the folded part is too thick.
2 Load a document in the ADF paper chute (feeder).
Load the document face-down in the ADF paper chute (feeder).
To scan a multi-layered transfer paper, position the bound edge first when loading the paper.
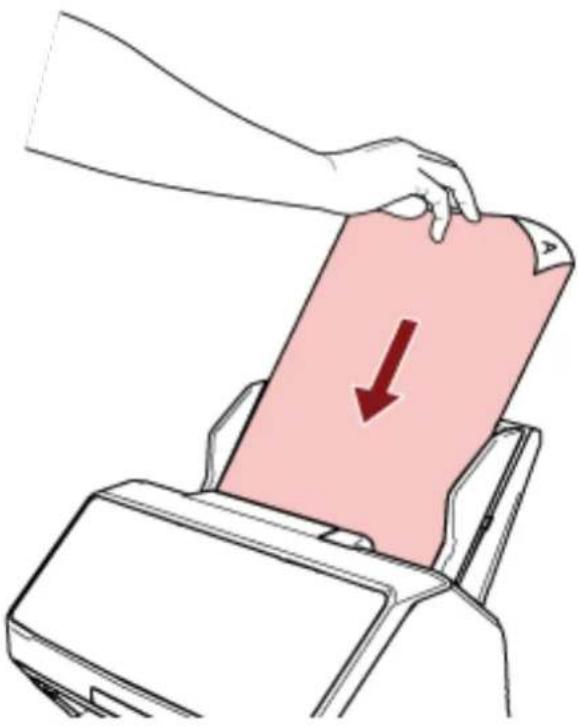
natural_image
Illustration of a hand placing a pink card into a printer with a red arrow indicating downward motion (no text or symbols)3 Scan the document with the image scanning application.
For details, refer to the manual/help of the image scanning application.
After scanning is started or a document is ejected, the scanner will wait for documents to be loaded in the ADF paper chute (feeder) until the timeout time elapses.
In Manual Continuous Mode, the rollers inside the ADF keep rotating.
In Manual Feed Mode, the rollers inside the ADF do not rotate.
4 Load the next document in the ADF paper chute (feeder).
5 Repeat step 4 until all documents are scanned.
6 Finish scanning.
Scanning will stop if no document is loaded within the timeout time after the last document is ejected.
To immediately stop scanning, press the following button depending on the scanner.
●For fi-8190/fi-8290/fi-8170/fi-8270
[Stop/Clear] button
●For fi-8150/fi-8250/fi-8150U/fi-8250U
[Send to] button
HINT
- When you press the [Manual Feed] button to switch the feed mode to Manual Feed Mode, after scanning is complete, Manual Feed Mode is cleared.
If you want to scan more than one document in succession in Manual Feed Mode, select [Continue] for [Manual Feed Mode] in the Software Operation Panel.
When [Continue] is selected for [Manual Feed Mode], documents are scanned in succession in Manual Feed Mode until the [Manual Feed] button is pressed.
For details, refer to Waiting Time in Manual Feeding [Manual Feeding] (page 392).
- If you use manual feeding frequently, the replacement cycle of the consumables may be shortened.
Configuring Not to Detect Certain Overlap Patterns
If detecting overlapped documents during a scan is set, when you scan a document with a paper attachment such as a sticky note, receipt, or photo, it is detected as overlapped documents, and the scan may stop. Use the intelligent multifeed detection function not to detect these types of documents.
This function has two modes, a mode that is used to configure the settings manually by a user every time the scanner detects overlapped documents, and a mode that is used to configure the settings automatically by the scanner based on the overlap patterns (length and location) for paper attachments such as sticky notes, receipts, or photos that the scanner has memorized. To use this setting, detecting overlapped documents needs to be set in advance.
•[Multifeed Detection] in the scanner driver
For details, refer to the help for the scanner driver.
•[Multifeed] in the Software Operation Panel
For details, refer to Specifying a Method to Detect Overlapped Documents [Multifeed] (page 382).
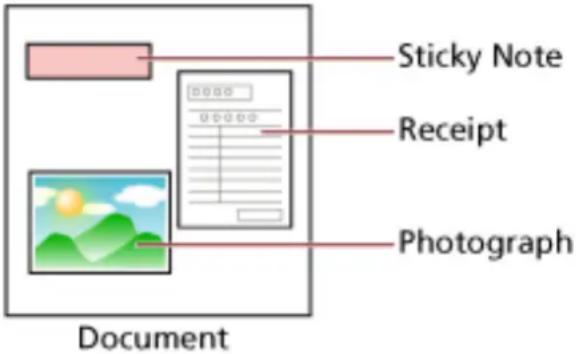
The following four operation modes are available.
| Operation Mode Description | |
| Standard mode Specify whether or not | to detect overlapped documentsevery time they are detected.Overlapping is not detected for a piece of paper (80 mm or less in the feeding direction) attached on a document (such as sticky notes).Scanning will stop immediately if overlapped documents are detected.Note that if the setting for stopping the scan to check images is set to on in the scanner driver, scanning will stop after overlapped documents are ejected. |
| Manual mode Specify whether or not to | detect overlapped documentsevery time they are detected.Scanning will stop immediately if overlapped documents are detected.Note that if the setting for stopping the scan to check images is set to on in the scanner driver, scanning will stop after overlapped documents are ejected. |
| Auto mode 1 Specify the setting not to | automatically detect overlappeddocuments when the paper attachment is the same length and in the same location as memorized.Scanning will stop after the overlapped documents are ejected.In this operation mode, up to four overlap patterns can be memorized at a time (when one sheet is scanned), and up to 32 overlap patterns can be memorized in total.When the 33rd overlap pattern is detected, the first pattern that was memorized is overwritten.However, when turning the scanner off and on, the number of memorized overlap patterns depends on the setting for [Remember overlap patterns at power-off] in the Software Operation Panel.For details, refer to Setting to Ignore Certain Overlap Patterns [Intelligent Multifeed Function] (page 390). |
| Auto mode 2 Specify the setting not to | automatically detect overlappeddocuments when the paper attachment is the same length or shorter as memorized.Scanning will stop after the overlapped documents are ejected.Only one overlap pattern can be memorized in this operation mode. |
Select an operation mode.
●For fi-8190/fi-8290/fi-8170/fi-8270
Use one of the following methods to select an operation mode.
-Select an operation mode in [14: iMFF Setting] on the [Settings Menu] screen of the operator panel.
For details, refer to How to Use Settings Menu (page 145).
-Select the operation mode in the Software Operation Panel.
For details, refer to Setting to Ignore Certain Overlap Patterns [Intelligent Multifeed Function] (page 390).
●For fi-8150/fi-8250/fi-8150U/fi-8250U
Select the operation mode in the Software Operation Panel.
For details, refer to Setting to Ignore Certain Overlap Patterns [Intelligent Multifeed Function] (page 390).
Operational Procedure [fi-8190/fi-8290/fi-8170/fi-8270]
1 When overlapped documents are detected, the following is displayed on the LCD:
| When Overlapped Documents Are Detected |
| Multifeed detected (Overlap)Press the [Scan/Enter] button. If there is a document that is being fed, it will be ejected. |
| Multifeed detected (Length)Press the [Scan/Enter] button. If there is a document that is being fed, it will be ejected. |
2 Follow each instruction below depending on the operation mode that is selected.
- Standard mode/Manual mode
Scanning will stop immediately when overlapped documents are detected. Either press the [Scan/Enter] button to eject the document from the paper path, or open the ADF to remove the document. Then, load the overlapped documents back in the ADF paper chute (feeder). For more details about opening the ADF, refer to How to Open the ADF (page 76).
![RICOH fi-8190 - Operational Procedure [fi-8190/fi-8290/fi-8170/fi-8270] - 1](/content/2026/05/903199/images/00ea2f52380fc692cb1bfa77f5b74e11e6eae8b072c94c0a24ea38d2fb5a53e4.jpg)
When the ADF is open, it might close accidentally. Be careful not to get your fingers caught.
After removing the documents while the ADF is open, close the ADF.
For more details about closing the ADF, refer to How to Close the ADF (page 77).
![RICOH fi-8190 - Operational Procedure [fi-8190/fi-8290/fi-8170/fi-8270] - 2](/content/2026/05/903199/images/81f454393e7137c5cd77e13474ce540e9a99d760454c6cfb41e9037f6b89f14f.jpg)
Be careful not to get your fingers caught when closing the ADF.
ATTENTION
Confirm that the ADF is closed properly. Otherwise, documents may not be fed into the ADF.
Note that if the setting for stopping the scan to check images is set to on in the scanner driver, scanning will stop after overlapped documents are ejected, so press the [Scan/Enter] button and load the overlapped documents back in the ADF paper chute (feeder).
●Auto mode 1/Auto mode 2
Scanning will stop after overlapped documents are ejected, so press the [Scan/Enter] button and load the overlapped documents back in the ADF paper chute (feeder).
3 When documents are ejected, the indication on the LCD changes to the following depending on the selected operation mode.
- Standard mode/Manual mode
| When Overlapped Documents Are Detected When Documents Are Ejected | |
| Multifeed detected (Overlap) Detecting a multifeed for the next document is enabled. | |
| Press the [Scan/Enter] button. If there is a document that is being fed, it will be ejected. | ____Pressing the [Menu] button enables/disables the function. Pressing the [Scan/Enter] button resumes scanning. |
| Multifeed detected (Length)Press the [Scan/Enter] button. If there is a document that is being fed, it will be ejected. | [Ready] screen |
●Auto mode 1/Auto mode 2
| When Overlapped Documents Are Detected When Documents Are Ejected | |
| Multifeed detected (Overlap)Press the [Scan/Enter] button. If there is a document that is being fed, it will be ejected. | The function to memorize a overlap pattern is disabled.Pressing the [Menu] button enables/disables the function. Pressing the [Scan/Enter] button resumes scanning. |
| Multifeed detected (Length)Press the [Scan/Enter] button. If there is a document that is being fed, it will be ejected. | [Ready] screen |
4 Operate the scanner as follows, and restart scanning.
The indication on the LCD switches between [Detecting a multifeed for the next document is enabled.] and [Detecting a multifeed for the next document is disabled.] or between [The function to memorize a overlap pattern is enabled.] and [The function to memorize a overlap pattern is disabled.] every time the [Menu] button is pressed.
Make sure that [Detecting a multifeed for the next document is disabled.] or [The function to memorize a overlap pattern is enabled.] is displayed on the LCD, and then press the [Scan/Enter] button or start scanning from the computer.
If documents are scanned while [Detecting a multifeed for the next document is disabled.] or [The function to memorize a overlap pattern is enabled.] is displayed, the scanner operates in each mode as follows.
- Standard mode/Manual mode (Bypass by front panel button)
The scanner scans the next sheet without detecting overlapped documents, and from the second sheet onwards, detects overlapped documents based on the setting configured in the scanner driver or on the Software Operation Panel.
●Auto mode 1 (Bypass by combination of length and position)
The scanner memorizes the length and location of the paper attachment that was detected as overlapped documents, and continues scanning.
When a paper attachment of a similar pattern is detected, the scanner does not detect overlapped documents automatically. (*1)(*2)
●Auto mode 2 (Bypass by length)
The scanner memorizes the length of the longest paper attachment that was detected as overlapped documents, and continues scanning.
When a paper attachment of the same length or shorter is detected, the scanner does not detect overlapped documents automatically. (*2)(*3)
*1: In this operation mode, up to four overlap patterns can be memorized at a time (when one sheet is scanned), and up to 32 overlap patterns can be memorized in total.
When the 33rd overlap pattern is detected, the first pattern that was memorized is overwritten.
However, when turning the scanner off and on, the number of memorized overlap patterns depends on the setting for [Remember overlap patterns at power-off] in the Software Operation Panel.
For details, refer to Setting to Ignore Certain Overlap Patterns [Intelligent Multifeed Function] (page 390).
*2: The memorized overlap patterns can be erased in [14: iMFF Setting] on the [Settings Menu] screen of the operator panel or can be erased in the Software Operation Panel.
The LCD will display or when the memory is erased.
This allows you to erase overlap patterns that were not supposed to be memorized. Be careful with this operation because all memorized overlap patterns will be erased.
*3: Only one overlap pattern can be memorized in this operation mode.
Operational Procedure [fi-8150/fi-8250/fi-8150U/fi-8250U]
1 When overlapped documents are detected, "J" and "2" are displayed alternately on the Function Number Display.
2 Follow each instruction below depending on the operation mode that is selected.
- Standard mode/Manual mode
Scanning will stop immediately when overlapped documents are detected. Either press the [Send to] button to eject the document from the paper path, or open the ADF to remove the document. Then load the overlapped documents back in the ADF paper chute (feeder).
For more details about opening the ADF, refer to How to Open the ADF (page 76).
![RICOH fi-8190 - Operational Procedure [fi-8150/fi-8250/fi-8150U/fi-8250U] - 1](/content/2026/05/903199/images/689e83ae7405dda7c34664b79327e1f5295d8e3c8b8f896dde001ec75d3fb54a.jpg)
When the ADF is open, it might close accidentally. Be careful not to get your fingers caught.
After removing the documents while the ADF is open, close the ADF.
For more details about closing the ADF, refer to How to Close the ADF (page 77).
![RICOH fi-8190 - Operational Procedure [fi-8150/fi-8250/fi-8150U/fi-8250U] - 2](/content/2026/05/903199/images/4b90322abb2e65d8f39c74051d37417cf7d717e87658f2c836a196bc44aae442.jpg)
Be careful not to get your fingers caught when closing the ADF.
ATTENTION
Confirm that the ADF is closed properly. Otherwise, documents may not be fed into the ADF.
Note that if the setting for stopping the scan to check images is set to on in the scanner driver, scanning will stop after overlapped documents are ejected so press the [Send to] button and load the overlapped documents back in the ADF paper chute (feeder).
●Auto mode 1/Auto mode 2
Scanning will stop after overlapped documents are ejected so press the [Send to] button and load the overlapped documents back in the ADF paper chute (feeder).
3 When documents are ejected, the function number flashes on the Function Number Display.
4 Operate the scanner as follows, and restart scanning.
Note that the function number flashing speed switches between [slower] [faster] every time you press the [Function] button.
What the [slower] and [faster] statuses indicate for the function number flashing speed is described below.
- What the [slower] status indicates
Detecting a multifeed for the next document is enabled. Or, memorizing an overlap pattern is disabled.
●What the [faster] status indicates
Detecting a multifeed for the next document is disabled. Or, memorizing an overlap pattern is enabled.
Make sure that the function number is flashing in the [faster] status and press the [Scan/Stop] button or start scanning from the computer.
When the function number is flashing in the [faster] status, the scanner operates in each mode as follows:
ATTENTION
When switching the flashing speed between [slower] [faster] by pressing the [Function] button, do not hold down the button for five seconds or more.
Doing so may erase the memorized overlap patterns.
- Standard mode/Manual mode (Bypass by front panel button)
The scanner scans the next sheet without detecting overlapped documents, and from the second sheet onwards, detects overlapped documents based on the setting configured in the scanner driver or on the Software Operation Panel.
●Auto mode 1 (Bypass by combination of length and position)
The scanner memorizes the length and location of the paper attachment that was detected as overlapped documents, and continues scanning.
When a paper attachment of a similar pattern is detected, the scanner does not detect overlapped documents automatically. (*1)(*2)
●Auto mode 2 (Bypass by length)
The scanner memorizes the length of the longest paper attachment that was detected as overlapped documents, and continues scanning.
When a paper attachment of the same length or shorter is detected, the scanner does not detect overlapped documents automatically. (*2)(*3)
*1: In this operation mode, up to four overlap patterns can be memorized at a time (when one sheet is scanned), and up to 32 overlap patterns can be memorized in total.
When the 33rd overlap pattern is detected, the first pattern that was memorized is overwritten.
However, when turning the scanner off and on, the number of memorized overlap patterns depends on the setting for [Remember overlap patterns at power-off] in the Software Operation Panel.
For details, refer to Setting to Ignore Certain Overlap Patterns [Intelligent Multifeed Function] (page 390).
*2: The memorized overlap patterns can be erased by holding down the [Function] button for five seconds or more while the function number flashes or they can be erased in the Software Operation Panel.
After erasing is completed, the Function Number Display shows □.
This allows you to erase overlap patterns that were not supposed to be memorized.
Be careful with this operation because all memorized overlap patterns will be erased.
*3: Only one overlap pattern can be memorized in this operation mode.
Disabling the Paper Protection Function [fi-8190/fi-8290/fi-8170/fi-8270]
When the paper protection function is enabled, in the following cases, the scan may stop even when the documents are being fed correctly.
- If you scan a wrinkled document
- If you scan a document that is not square or rectangular
- If you scan a document that has a dark background
- If you scan a document that has text or patterned background printed close to the edge
- If a document is fed skewed.
In this case, you can disable paper protection only for the protected document to be scanned again.
Operational Procedure
1 When paper protection is set off while a document is being scanned, the following is displayed on the LCD.
| When Paper Protection Is Set Off |
| Paper protection (feeding noise)Remove the document. Be careful not to get the document jammed or skewed when reloading it. For details, refer to the Operator's Guide. |
| Paper protection (feeding skew)Remove the document. Be careful not to get the document jammed or skewed when reloading it. For details, refer to the Operator's Guide. |
2 Open the ADF and remove the document.
For details, refer to How to Open the ADF (page 76).

When the ADF is open, it might close accidentally. Be careful not to get your fingers caught.
3 Close the ADF.
For details, refer to How to Close the ADF (page 77).
When you close the ADF, the indication on the LCD changes as follows.
| When Paper Protection Is Set Off When Documents Are Ejected | |
| Paper protection (feeding noise)Remove the document. Be careful not to get the document jammed or skewed when reloading it. For details, refer to the Operator's Guide. | The paper protection function is enabled.Pressing the [Menu] button enables/disables the function. Pressing the |
| Paper protection (feeding skew) | |
| Remove the document. Be careful not to get the document jammed or skewed when reloading it. For details, refer to the Operator's Guide. | [Scan/Enter] button resumes scanning. |

Be careful not to get your fingers caught when closing the ADF.
ATTENTION
Confirm that the ADF is closed properly. Otherwise, documents may not be fed into the ADF.
4 Load the removed document back in the ADF paper chute (feeder).
5 Operate the scanner as follows, and restart scanning.
Note that the indication on the LCD switches between [The paper protection function is enabled.] [The paper protection function is disabled.] every time the [Menu] button is pressed. Confirm that [The paper protection function is disabled.] is displayed on the LCD, and then press the [Scan/Enter] button or start scanning from the computer.
When [The paper protection function is disabled.] is displayed, the next document is scanned with paper protection disabled. After that, the subsequent documents are scanned according to the paper protection setting of either scanner driver, the Software Operation Panel, or operator panel.
HINT
If errors to protect documents are frequently displayed on the LCD, refer to Paper Protection Is Set Off Frequently (page 323).
This section describes how to clean the scanner.

CAUTION
- Do not use aerosol spray or spray that contains alcohol. Paper dust blown up by strong air from the spray may enter inside the scanner which may cause the scanner to fail or malfunction.
Also note that sparks generated by static electricity may cause a fire.
●The inside of the ADF becomes very hot when the scanner is being used.
Before you start cleaning the inside of the ADF, make sure to turn off the power, unplug the power cable and wait for at least 15 minutes for the inside of the ADF to cool down.
Cleaning Materials
| Name Part No. Notes | ||
Cleaner F1 PA03950-0352 100 | ml | Liquid cleaner to use for removing dirt and stains |
Cleaning Paper CA99501-0012  | 10 sheets | Used to clean the inside of the scanner with ease.Spray it with Cleaner F1 and scan it with the scanner in the same way as a document. |
Cleaning Wipe PA03950-0419 | 24 packets | Pre-moistened with Cleaner F1. It can be used instead of moistening a cloth with Cleaner F1. |
| Cotton swab Commercially | available | Used to clean a tiny part such as the ultrasonic sensor. |
| Dry cloth Used to wipe off dirt and stains. Moisten | Cleaner F1 for cleaning. |
ATTENTION
In order to use the cleaning materials safely and correctly, read the precautions on each product thoroughly.
For more information about the cleaning materials, contact the distributor/dealer where you purchased this product. Refer to the contact information in the Contact List if supplied with this product, or refer to the contact information in the Contact for Inquiries section if provided in Safety Precautions supplied with this product, and then make an inquiry.
Location and Frequency
| Location Frequency | ||
| Inside of the scanner (ADF) Brake roller Every 5,000 sheets | ||
| Inside of the scanner(Flatbed) [fi-8290/fi-8270/fi-8250/fi-8250U] | Document pad | |
| Document bed | ||
| Plastic frame | ||
The inside of the scanner (ADF) needs to be cleaned regularly for every certain number of sheets scanned. The scanner records the number of sheets scanned so that you can check the number of sheets scanned after you cleaned it last.
●For fi-8190/fi-8290/fi-8170/fi-8270
Use one of the following methods to check the number of sheets that have been scanned.
-You can select [5: Consumable counters] from the [Settings Menu] screen on the operator panel to check the number of sheets that have been scanned.
For details, refer to How to Use Settings Menu (page 145).
-You can check the number of sheets that have been scanned in the Software Operation Panel. For details, refer to Checking the Sheet Counters (page 356).
●For fi-8150/fi-8250/fi-8150U/fi-8250U
You can check the number of sheets that have been scanned in the Software Operation Panel. For details, refer to Checking the Sheet Counters (page 356).
ATTENTION
Cleaning cycles may vary depending on the condition of the documents. Also, cleaning must be performed more frequently when the following types of documents are scanned:
- Smooth-faced documents such as coated paper
- Documents with printed text/graphics that almost cover the entire surface
- Chemically-treated documents such as carbonless paper
- Documents containing a large amount of calcium carbonate
- Documents written in lead pencil
- Documents on which the toner is not sufficiently fused
Cleaning the Outside of the Scanner
The scanner including the ADF paper chute (feeder) and the stacker should be cleaned with either a piece of dry cloth, a cloth moistened with Cleaner F1/mild detergent, or a sheet of Cleaning Wipe.
ATTENTION
- To avoid deformation and discoloration, never use paint thinner or any other organic solvents.
- Be careful not to let any moisture or water inside the scanner during cleaning.
- It may take a long time to dry if an excessive amount of Cleaner F1/mild detergent is used. Use only a small amount. Wipe off the cleaner completely to leave no residue on the cleaned parts.
●For fi-8190/fi-8170/fi-8150/fi-8150U
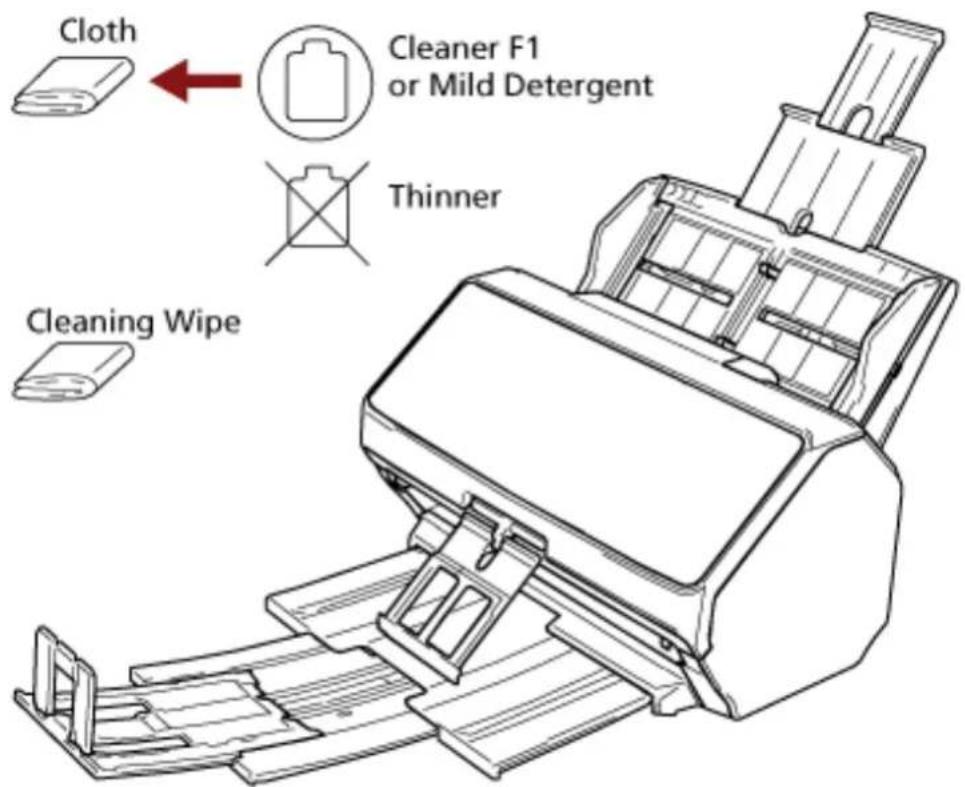
●For fi-8290/fi-8270/fi-8250/fi-8250U
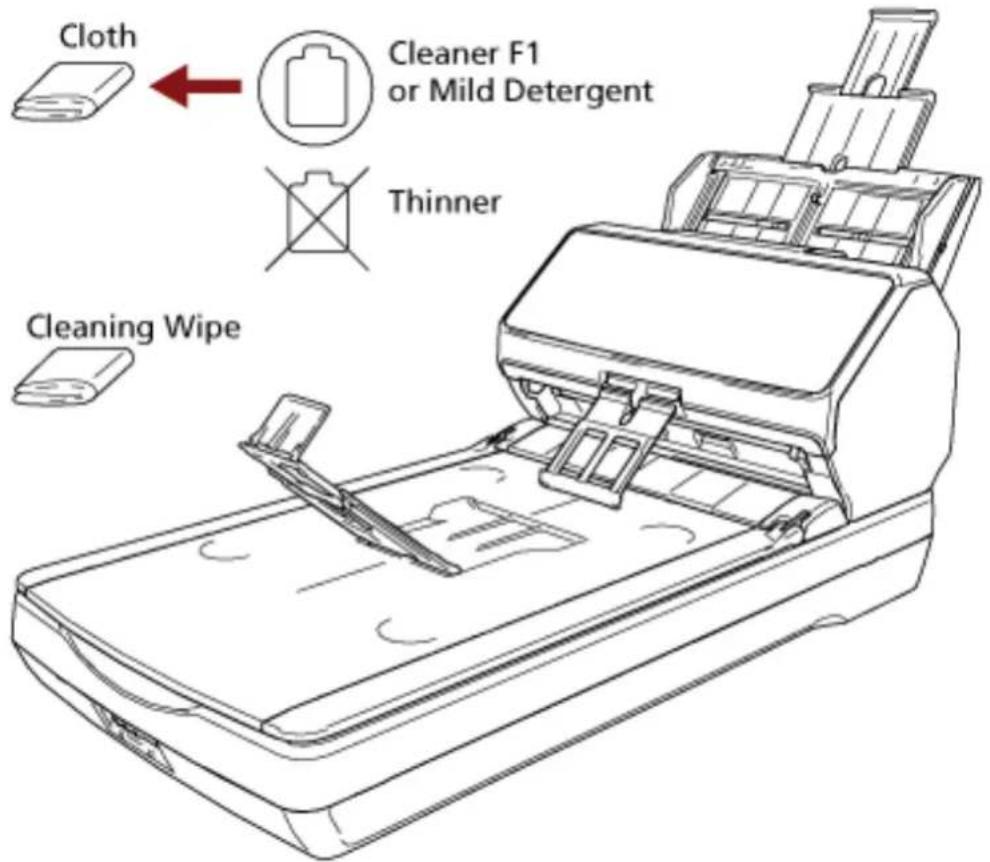
Cleaning the Inside of the Scanner (ADF) with Cleaning Paper
The inside of the ADF can be cleaned with a sheet of Cleaning Paper moistened with Cleaner F1. As the scanner continues to feed the documents, paper dust will accumulate inside the ADF and it may cause problems related to scanning or affect the scanned results. Cleaning should be performed approximately every 5,000 sheets scanned. Note that this guideline varies depending on the types of documents you scan. For instance, it may be necessary to clean the scanner more frequently when you scan documents on which the toner is not sufficiently fused.
ATTENTION
- Do not use water or mild detergent to clean the ADF.
- It may take a long time to dry if an excessive amount of Cleaner F1 is used. Use only a small amount.
1 Turn on the scanner.
For details, refer to How to Turn the Power ON (page 71).
●For fi-8190/fi-8290/fi-8170/fi-8270
When the [Ready] screen is displayed on the LCD, proceed to step 2.
●For fi-8150/fi-8250/fi-8150U/fi-8250U
When "1" is displayed on the Function Number Display, proceed to step 5.
2 Press the [Menu] button.
The [Settings Menu] screen is displayed on the LCD.
3 Press the [△]/[1] button to select [3: Cleaning], then press the [Scan/Enter] button.
The [Cleaning] screen is displayed on the LCD.
4 Press the [ ]/[ ] button to select [1: Cleaning Paper], then press the [Scan/Enter] button.
A message is displayed on the LCD.
ATTENTION
Do not start scanning with an image scanning application during cleaning.
5 Spray the Cleaning Paper with Cleaner F1.
6 Pull out the chute extensions according to the length of the Cleaning Paper.
For details, refer to Setting Up the ADF Paper Chute (Feeder) (page 80).
7 Adjust the stacker according to the length of the Cleaning Paper.
For details, refer to Setting Up the Stacker [fi-8190/fi-8170/fi-8150/fi-8150U] (page 81) or Setting Up the Stacker [fi-8290/fi-8270/fi-8250/fi-8250U] (page 86).
8 Load the Cleaning Paper in the ADF paper chute (feeder).
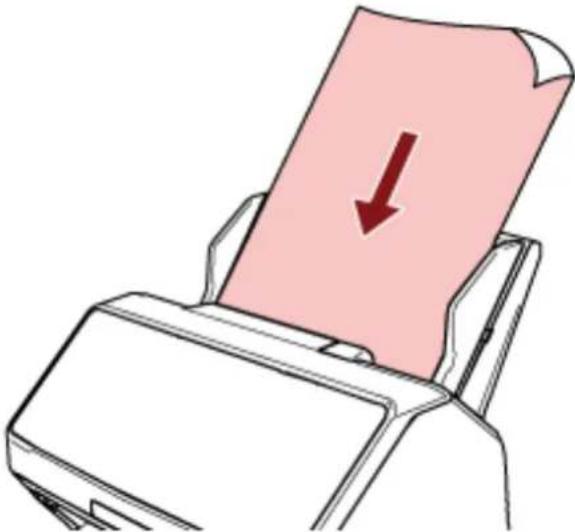
natural_image
Illustration of a printer with a pink paper being inserted, showing a downward arrow (no text or symbols)9 Adjust the side guides to the width of the Cleaning Paper.
Move the side guides so that there is no space between the side guides and the Cleaning Paper. Otherwise, the Cleaning Paper may be fed skewed.
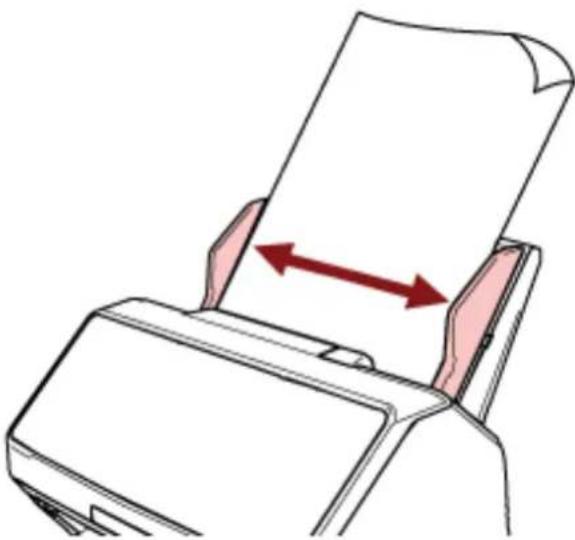
natural_image
Illustration of a printer with paper being inserted, showing paper movement arrows (no text or symbols)10 Scan the Cleaning Paper.
- For fi-8190/fi-8290/fi-8170/fi-8270
Press the [Scan/Enter] button, and scan the Cleaning Paper.
The Cleaning Paper is fed and ejected onto the stacker.
●For fi-8150/fi-8250/fi-8150U/fi-8250U
Start an image scanning application and scan the Cleaning Paper.
The Cleaning Paper is fed and ejected onto the stacker.
11 Clear the cleaning counter.
●For fi-8190/fi-8290/fi-8170/fi-8270
Use one of the following methods to clear the cleaning counter.
-Select [5: Consumable counters] from the [Settings Menu] screen on the operator panel, then clear the cleaning counter.
For details, refer to How to Use Settings Menu (page 145).
-Clear the cleaning counter in the Software Operation Panel.
For details, refer to Clearing the Sheet Counters (page 359).
●For fi-8150/fi-8250/fi-8150U/fi-8250U
Clear the cleaning counter in the Software Operation Panel.
For details, refer to Clearing the Sheet Counters (page 359).
Cleaning the Inside of the Scanner (ADF) with a Cloth
The inside of the ADF can be cleaned with a piece of cloth moistened with Cleaner F1, or a sheet of Cleaning Wipe.
As the scanner continues to feed the documents, paper dust will accumulate inside the ADF and it may cause problems related to scanning or affect the scanned results. Cleaning should be performed approximately every 5,000 sheets scanned. Note that this guideline varies depending on the types of documents you scan. For instance, it may be necessary to clean the scanner more frequently when you scan documents on which the toner is not sufficiently fused.

CAUTION
The inside of the ADF becomes very hot when the scanner is being used. Before you start cleaning the inside of the ADF, make sure to turn off the power, unplug the power cable and wait for at least 15 minutes for the inside of the ADF to cool down.
ATTENTION
- Do not use water or mild detergent to clean the ADF.
- It may take a long time to dry if an excessive amount of Cleaner F1 is used. Use only a small amount. Wipe off the cleaner completely to leave no residue on the cleaned parts.
1 Turn off the scanner, unplug the power cable and wait for at least 15 minutes.
For details, refer to How to Turn the Power OFF (page 72).
2 Open the ADF.
For details, refer to How to Open the ADF (page 76).

CAUTION
When the ADF is open, it might close accidentally. Be careful not to get your fingers caught.
3 Clean the following locations with a cloth moistened with Cleaner F1, or a sheet of Cleaning Wipe.
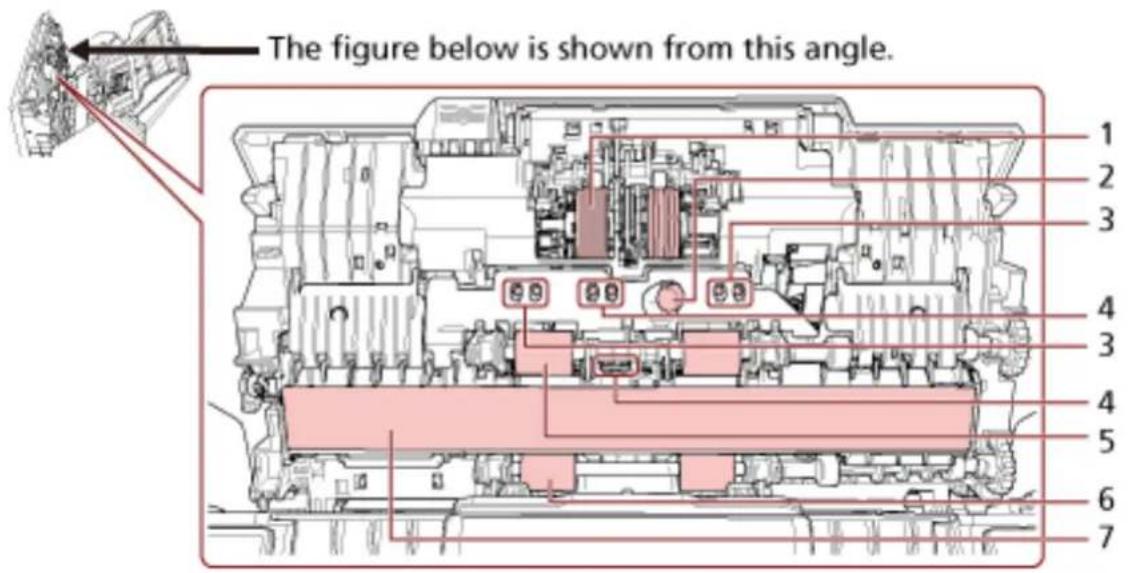
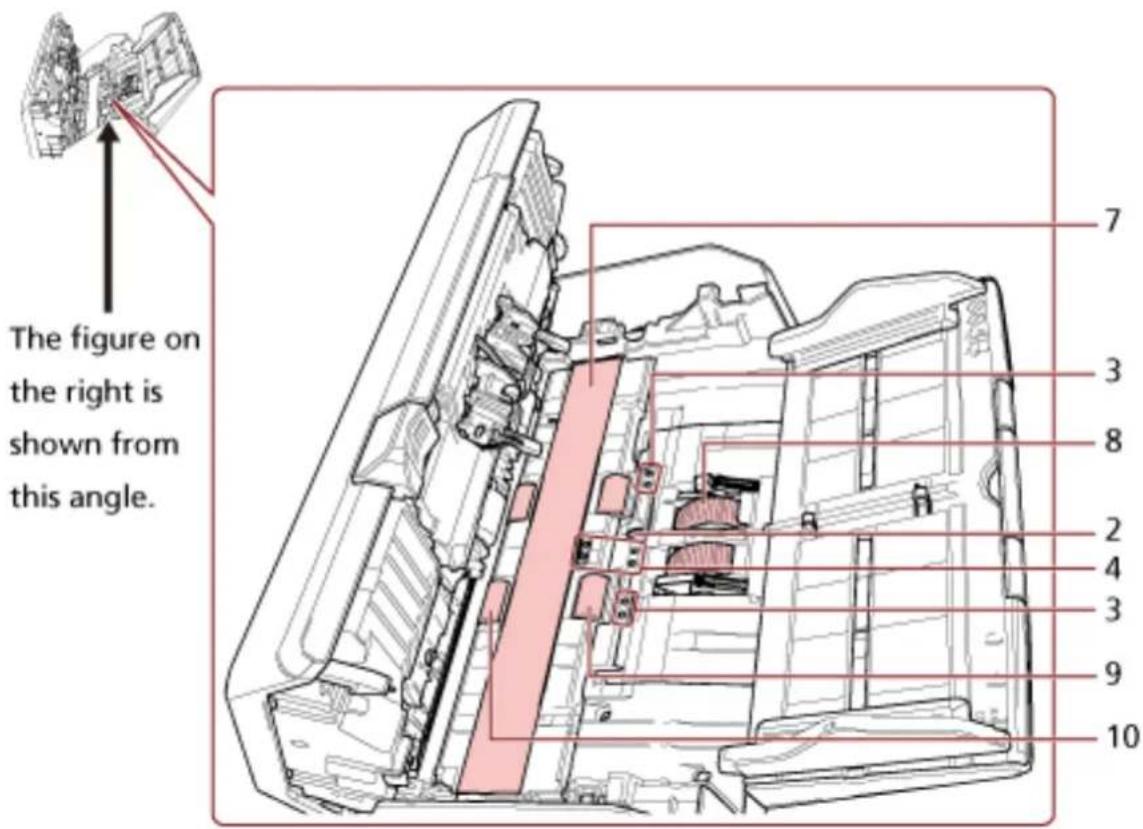
| No. Location | |
| 1 Brake roller (× 2) | |
| 2 Ultrasonic sensor (× 2) | |
| No. Location | |
| 3 Document sensor (× 8) [fi-8190/fi-8290/fi-8170/fi-8270] | |
| 4 Document sensor (× 8) | |
| 5 Feed roller to be cleaned as you rotate the roller manually (× 2) | |
| 6 Eject roller to be cleaned as you rotate the roller manually (× 2) | |
| 7 Glass (× 2) | |
| 8 Pick roller (× 2) | |
| 9 Feed roller to be cleaned as you rotate the roller with the power turned on (× 2) | |
| 10 Eject roller to be cleaned as you rotate the roller with the power turned on (× 2) | |
1 Brake roller (× 2)
Remove the brake roller from the scanner.
For details about removing the brake roller, refer to Replacing the Brake Roller (page 236).
Gently wipe off any dirt or dust along the grooves, taking care not to damage the roller surface.
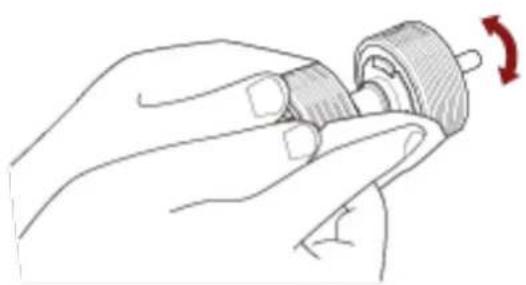
natural_image
Hand holding a mechanical component with a red arrow indicating rotation (no text or symbols)2 Ultrasonic sensor (× 2)
3 Document sensor (× 8) [fi-8190/fi-8290/fi-8170/fi-8270]
4 Document sensor (× 8)
Gently wipe dirt and dust off the surface of the ultrasonic and document sensors.
HINT
If it is difficult to clean, use a cotton swab.
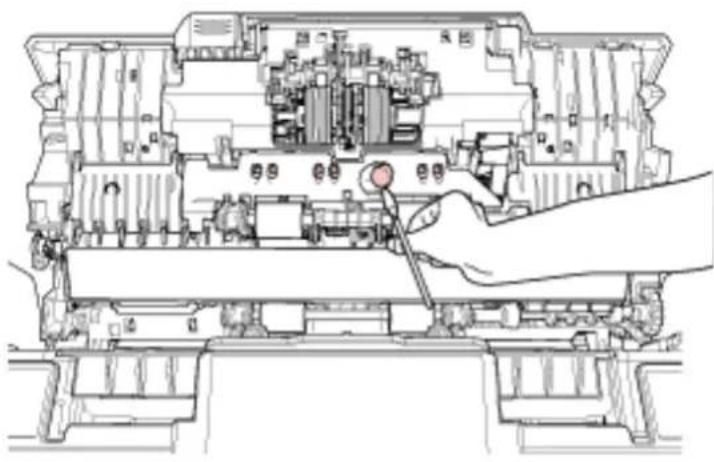
natural_image
Technical line drawing of a mechanical assembly with a hand adjusting a component (no text or symbols visible)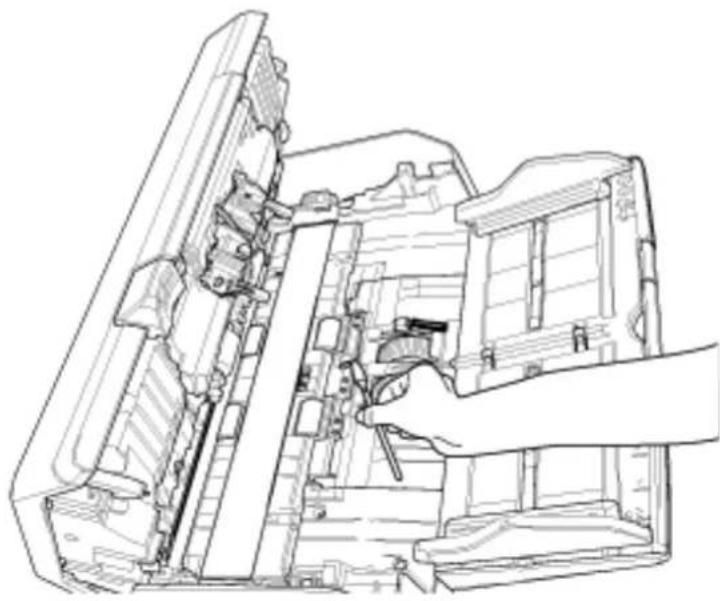
natural_image
Technical line drawing of a mechanical assembly with a hand operating a tool (no text or symbols present)5 Feed roller to be cleaned as you rotate the roller manually (× 2)
6 Eject roller to be cleaned as you rotate the roller manually (× 2)
Gently wipe dirt and dust off the roller, taking care not to damage the roller surface. Make sure that it is wiped properly because black residue on the rollers will affect the feeding performance.
7 Glass (× 2)
Gently wipe dirt and dust off the glass sections.
ATTENTION
Vertical streaks may appear on images if the glass section is dirty.
8 Pick roller (× 2)
Gently wipe off any dirt or dust along the grooves as you rotate the roller manually, taking care not to damage the roller surface. Make sure that it is wiped properly because black residue on the rollers will affect the feeding performance.
9 Feed roller to be cleaned as you rotate the roller with the power turned on (× 2)
10 Eject roller to be cleaned as you rotate the roller with the power turned on (× 2)
The power must be turned on to rotate the feed/eject rollers for cleaning.
a Plug in the power cable and turn on the scanner.
For details, refer to How to Turn the Power ON (page 71).
●For fi-8190/fi-8290/fi-8170/fi-8270
When the [Ready] screen is displayed on the LCD, proceed to step b.
●For fi-8150/fi-8250/fi-8150U/fi-8250U
When "1" is displayed on the Function Number Display, proceed to step e.
b Press the [Menu] button.
The [Settings Menu] screen is displayed on the LCD.
c Press the [ △]/ [ ] button to select [3: Cleaning], then press the [Scan/Enter] button.
The [Cleaning] screen is displayed on the LCD.
d Press the [ ]/[ ] button to select [2: Roller Wipe], then press the [Scan/Enter]
button.
A message is displayed on the LCD.
ATTENTION
Do not start scanning with an image scanning application during cleaning.
e Open the ADF.
For details, refer to How to Open the ADF (page 76).

When the ADF is open, it might close accidentally. Be careful not to get your fingers caught.
f If you press the following button on the scanner, the feed rollers/eject rollers rotate a certain amount of times simultaneously.
●For fi-8190/fi-8290/fi-8170/fi-8270
Pressing the [Scan/Enter] Button
![Menu Stop/ Clear Scan/ Enter Manual Feed Power [Scan/Enter] Button](/content/2026/05/903199/images/580c3abc954ab47156d6332b25aea6f1fb115533477ffd44a6394813f819b21e.jpg)
HINT
Pressing the [Scan/Enter] button 14 times will rotate the feed rollers/eject rollers one revolution.
●For fi-8150/fi-8250/fi-8150U/fi-8250U
Press the [Send to] button and the [Scan/Stop] button simultaneously
![Check Function Send to [Send to] Button Scan/ Stop Manual Feed Power [Scan/Stop] Button](/content/2026/05/903199/images/bce45101922d644c8e2ca7eeedb555de17b913e7e8e13225e0a937dd18dc81ca.jpg)
HINT
Pressing the [Send to] button and the [Scan/Stop] button 14 times simultaneously will rotate the feed rollers/eject rollers one revolution.

Be careful not to touch the rollers with your hand while they are rotating.
g Put a piece of cloth moistened with Cleaner F1 or a sheet of Cleaning Wipe against the surface of the rotating feed/eject roller, and wipe horizontally to clean dirt and dust off the whole surface.
Make sure that it is wiped properly because black residue on the rollers will affect the feeding performance.
4 Close the ADF.
For details, refer to How to Close the ADF (page 77).

Be careful not to get your fingers caught when closing the ADF.
ATTENTION
Confirm that the ADF is closed properly. Otherwise, documents may not be fed into the ADF.
5 Clear the cleaning counter.
●For fi-8190/fi-8290/fi-8170/fi-8270
Use one of the following methods to clear the cleaning counter.
-Select [5: Consumable counters] from the [Settings Menu] screen on the operator panel, then clear the cleaning counter.
For details, refer to How to Use Settings Menu (page 145).
-Clear the cleaning counter in the Software Operation Panel.
For details, refer to Clearing the Sheet Counters (page 359).
●For fi-8150/fi-8250/fi-8150U/fi-8250U
Clear the cleaning counter in the Software Operation Panel.
For details, refer to Clearing the Sheet Counters (page 359).
Cleaning the Inside of the Scanner (Flatbed) [fi-8290/fi-8270/fi-8250/fi-8250U]
The flatbed can be cleaned with a piece of cloth moistened with Cleaner F1, or a sheet of Cleaning Wipe.
1 Open the document cover.
For details, refer to How to Open the Document Cover (page 78).
2 Clean the following locations with a cloth moistened with Cleaner F1, or a sheet of Cleaning Wipe.
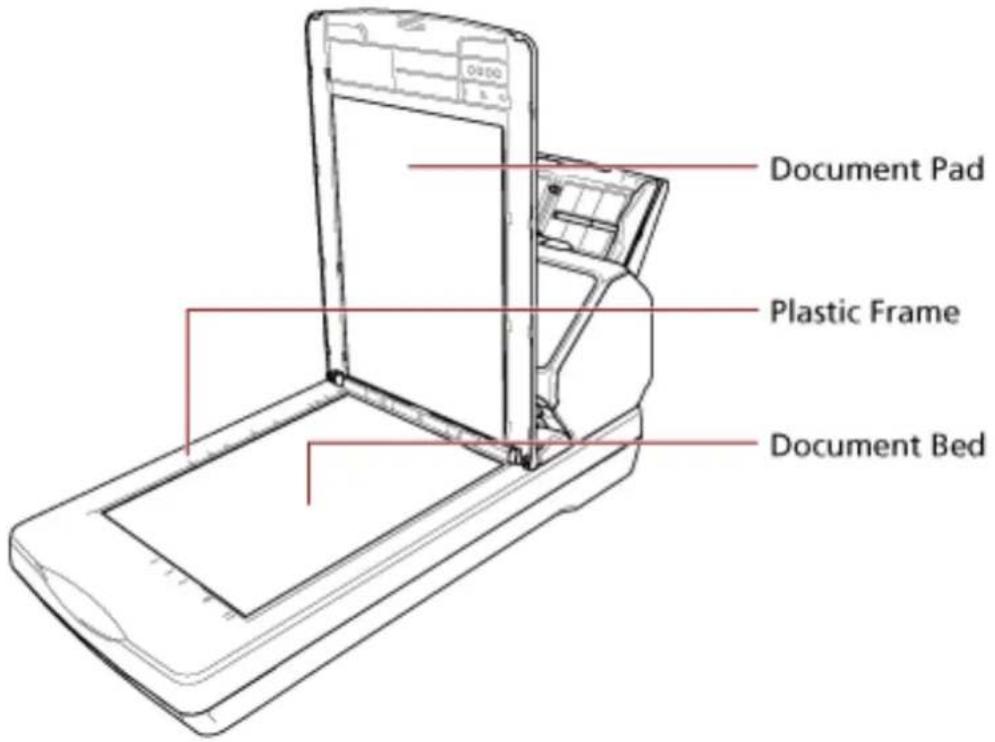
ATTENTION
Be careful not to let the cleaner in between the document bed and the plastic frame.
Cleaning the (Carrier) Sheet
The (Carrier) Sheet should be cleaned with either a piece of dry cloth, a cloth moistened with Cleaner F1/mild detergent, or a sheet of Cleaning Wipe.
Gently wipe dirt and dust off the surface and the inside of the (Carrier) Sheet.
As you keep using the (Carrier) Sheet, dirt and dust will accumulate on the surface and the inside.
Clean it regularly because it may cause problems related to scanning or affect the scanned results.
ATTENTION
- Make sure that the (Carrier) Sheet is not creased.
- To avoid deformation and discoloration, never use paint thinner or any other organic solvents.
- Do not use force to rub against the (Carrier) Sheet because doing so may cause damage or deformation.
- After cleaning the inside of the (Carrier) Sheet with a cloth moistened with Cleaner F1/mild detergent or a sheet of Cleaning Wipe, do not close the (Carrier) Sheet until it is completely dry.
- The Carrier Sheet and Photo Carrier Sheet should be replaced approximately every 500 scans. The Booklet Carrier Sheet should be replaced approximately every 2,500 scans.
Note that these guidelines vary depending on the type of documents scanned and how often the scanner is used and cleaned.
For information on purchasing the (Carrier) Sheets, contact the distributor/dealer where you purchased this product. Refer to the contact information in the Contact List if supplied with this product, or refer to the contact information in the Contact for Inquiries section if provided in Safety Precautions supplied with this product, and then make an inquiry.
Replacing the Consumables
This section explains how to replace the consumables for the scanner.

CAUTION
The inside of the ADF becomes very hot when the scanner is being used. Before you replace the consumables, make sure to turn off the power, unplug the power cable and wait for at least 15 minutes for the inside of the ADF to cool down.
Consumables and Replacement Cycles
| Name Part No. Suggested Replacement Cycle | ||
BRAKE ROLLER PA03810-0001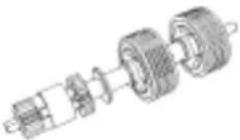 | 200,000 sheets or one year | |
PICK ROLLER PA03670-0002  | 200,000 sheets or one year | |
Consumables need to be replaced periodically. It is recommended that you keep a stock of new consumables and replace them before it reaches the end of the consumable life. The scanner records the number of sheets scanned for each consumable (pick roller and brake roller) and the amount of remaining ink (print cartridge), which allows you to determine when to replace consumables.
●For fi-8190/fi-8290/fi-8170/fi-8270
Use one of the following methods to check the number of sheets that have been scanned and the amount of remaining ink.
-You can select [5: Consumable counters] from the [Settings Menu] screen on the operator panel to check the number of sheets that have been scanned and the amount of remaining ink. For details, refer to How to Use Settings Menu (page 145).
-You can check the number of sheets that have been scanned and the amount of remaining ink in the Software Operation Panel. For details, refer to Checking the Sheet Counters (page 356).
●For fi-8150/fi-8250/fi-8150U/fi-8250U
You can check the number of sheets that have been scanned and the amount of remaining ink in the Software Operation Panel.
For details, refer to Checking the Sheet Counters (page 356).
Note that the suggested replacement cycles are guidelines for using A4 (80 g/m ^2 [20 lb]) wood-free or wood-containing paper, as these cycles vary depending on the type of documents scanned and how often the scanner is used and cleaned.
ATTENTION
Only use the specified consumables.
For information on purchasing the consumables, contact the distributor/dealer where you purchased this product. Refer to the contact information in the Contact List if supplied with this product, or refer to the contact information in the Contact for Inquiries section if provided in Safety Precautions supplied with this product, and then make an inquiry.
Replacing the Brake Roller
Replace the brake roller in following procedure.
1 Turn off the scanner, unplug the power cable and wait for at least 15 minutes. For details, refer to How to Turn the Power OFF (page 72).
2 Remove all documents from the ADF paper chute (feeder).
3 Open the ADF. For details, refer to How to Open the ADF (page 76).

When the ADF is open, it might close accidentally. Be careful not to get your fingers caught.
4 Remove the brake roller.
a Hold both ends of the cover, and open it in the direction of the arrow.
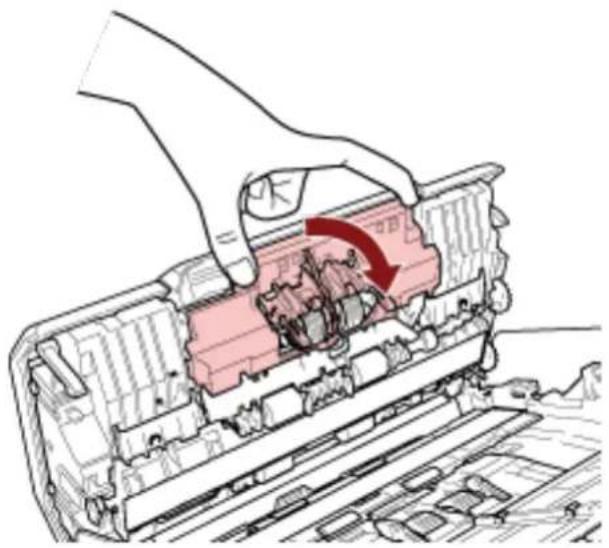
natural_image
Illustration of a hand pressing down on a mechanical component with a red curved arrow indicating motion (no text or symbols present)b Slightly pull out the brake roller to release the left side of the shaft, and then pull out the right side of the shaft from the hole.
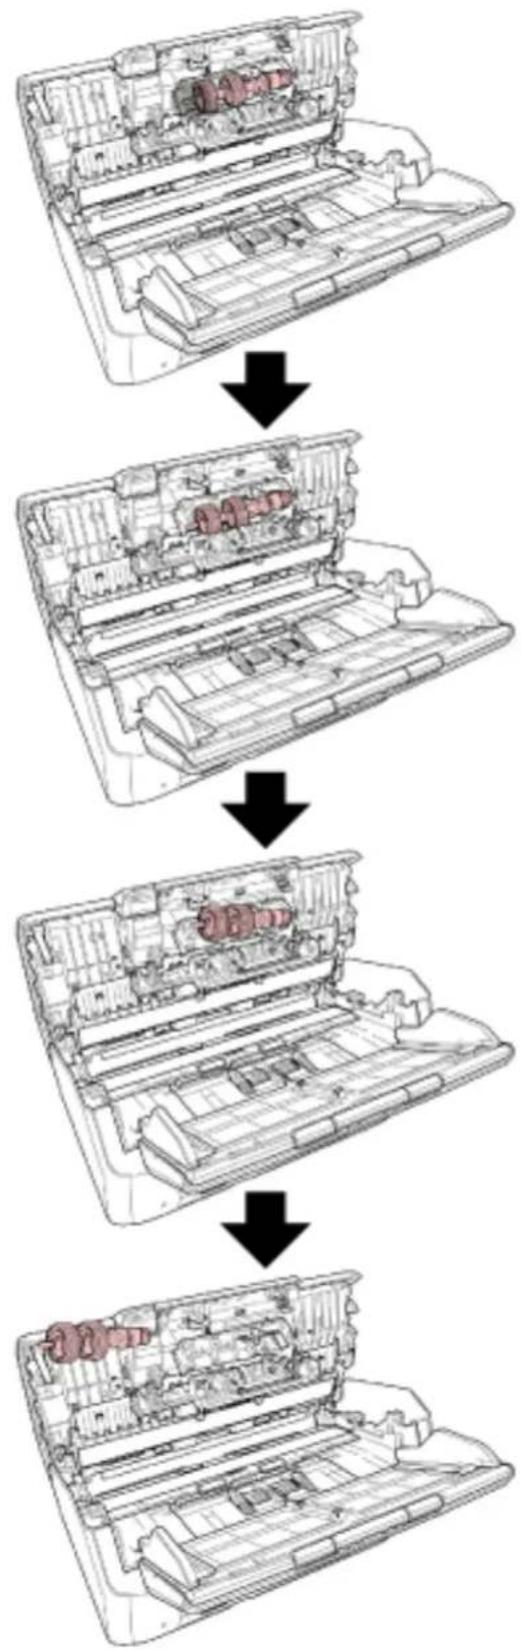
flowchart
graph TD
    A["Initial Air Condition"] --> B["Add Air Condition"]
    B --> C["Add Air Condition"]
    C --> D["Add Air Condition"]
    D --> E["Final Assembly with Internal Combustion"]
5 Attach the shaft.
a Insert the right end of the shaft into the hole in accordance with the hole shape, and then attach the left side of the shaft.
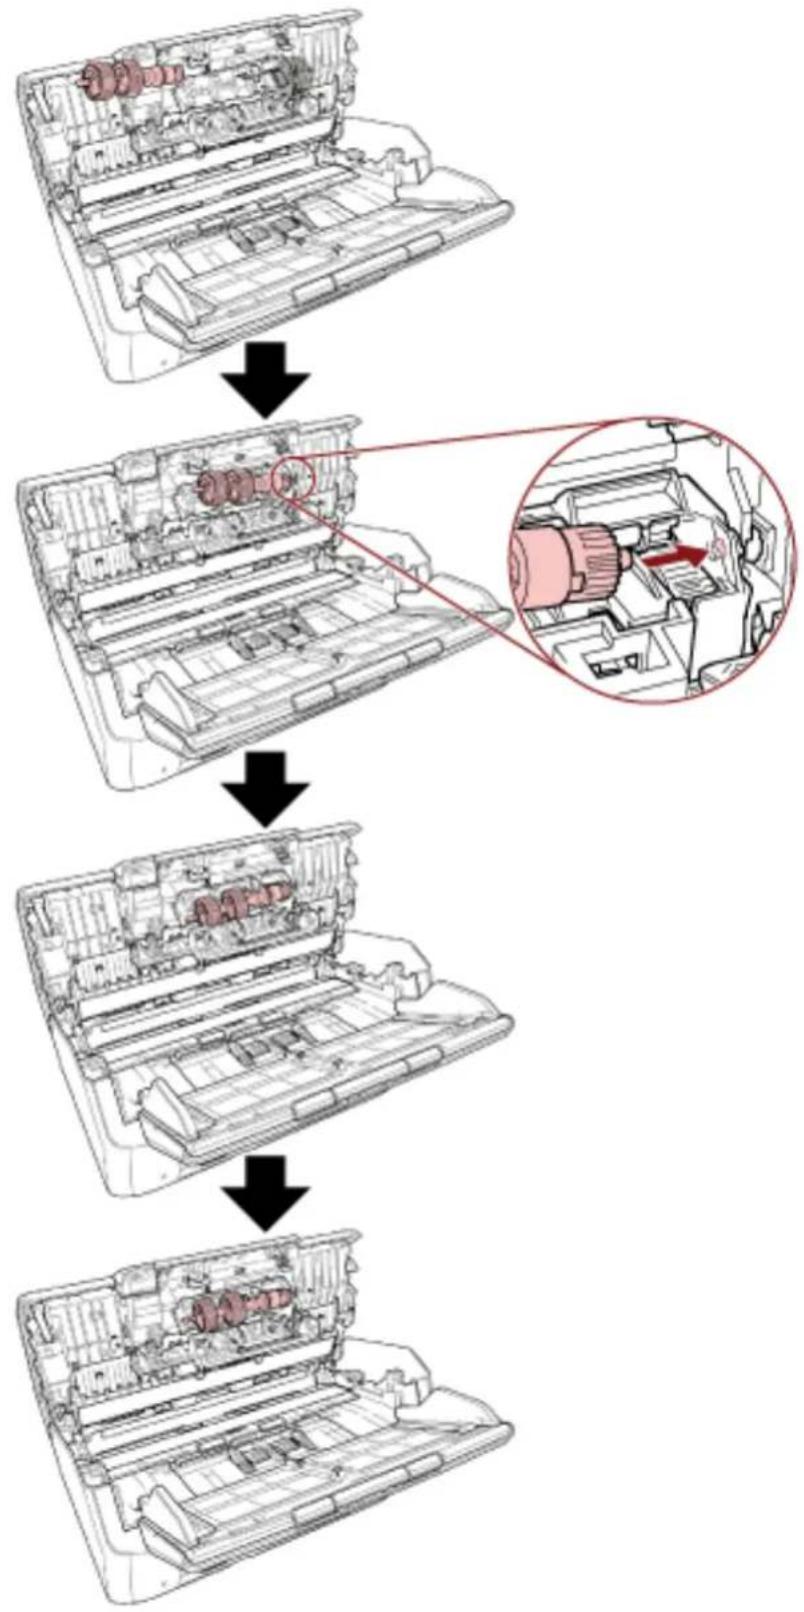
flowchart
graph TD
    A["Initial Air Condition"] --> B["Assembly Step 1"]
    B --> C["Add Air Condition to Internal Component"]
    C --> D["Final Assembly"]
    D --> E["Final Air Condition"]
b Close the brake roller cover.
ATTENTION
Confirm that the brake roller is installed properly. Otherwise, paper jams or other feeding errors may occur.
6 Close the ADF.
For details, refer to How to Close the ADF (page 77).
Be careful not to get your fingers caught when closing the ADF.
7 Plug in the power cable and turn on the scanner.
For details, refer to How to Turn the Power ON (page 71).
8 Clear the brake roller counter.
●For fi-8190/fi-8290/fi-8170/fi-8270
Use one of the following methods to clear the brake roller counter.
-Select [5: Consumable counters] from the [Settings Menu] screen on the operator panel, then clear the brake roller counter.
For details, refer to How to Use Settings Menu (page 145).
-Clear the brake roller counter in the Software Operation Panel. For details, refer to Clearing the Sheet Counters (page 359).
- For fi-8150/fi-8250/fi-8150U/fi-8250U
Clear the brake roller counter in the Software Operation Panel. For details, refer to Clearing the Sheet Counters (page 359).
Replacing the Pick Roller
Replace the pick roller in following procedure.
1 Turn off the scanner, unplug the power cable and wait for at least 15 minutes.
For details, refer to How to Turn the Power OFF (page 72).
2 Remove all documents from the ADF paper chute (feeder).
3 Remove the ADF paper chute (feeder).
Hold both ends of the ADF paper chute (feeder), then lift it in the direction of arrow 1 and pull it out in the direction of arrow 2.
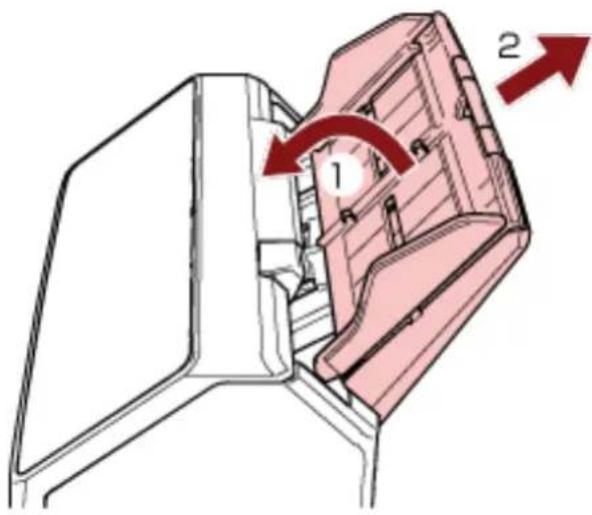
4 Open the ADF.
For details, refer to How to Open the ADF (page 76).
When the ADF is open, it might close accidentally. Be careful not to get your fingers caught.
5 Remove the pick roller with its shaft.
a Open the sheet guide by lifting the tab.
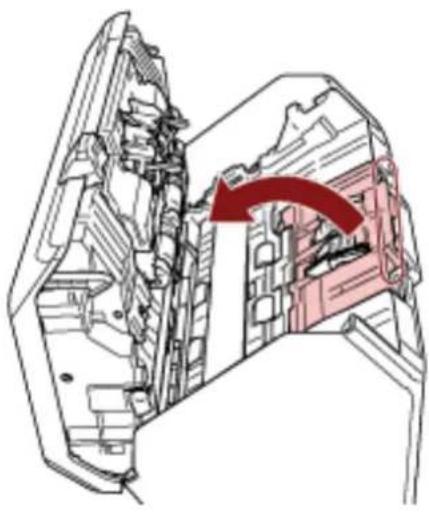
natural_image
Cross-sectional diagram of a building interior with a red arrow indicating direction (no text or symbols present)b Rotate the bushing on the shaft from left to right. Hold the bushing to lift up the shaft end, and pull the other shaft end out of the slot.
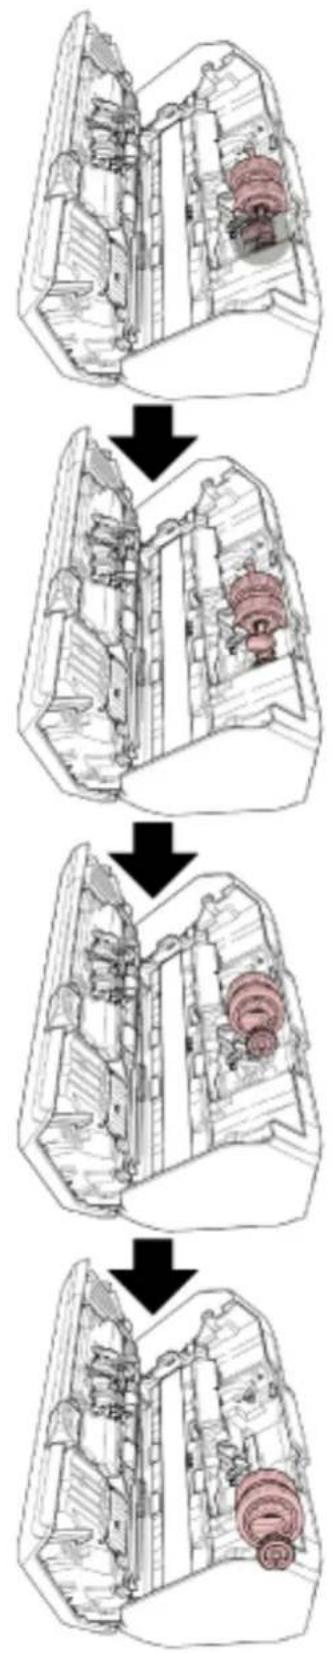
ATTENTION
Be careful not to touch the gear near the bushing on the shaft because it has grease over it.
6 Remove the pick rollers ( × 2) one by one from the shaft.
a Pull out the pick roller from the shaft as you lift the retaining clip.
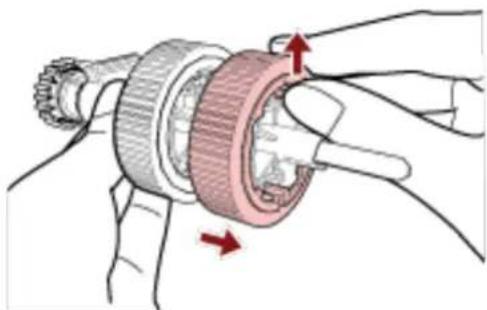
natural_image
Illustration of a mechanical assembly with hands and arrows indicating motion (no text or symbols)b Pull out the other pick roller from the shaft as you lift the retaining clip.
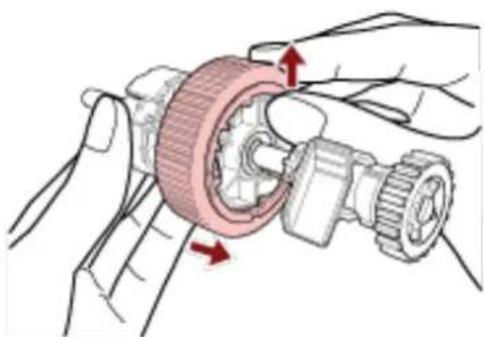
natural_image
Illustration of hands operating a mechanical gear assembly with red arrows indicating motion direction (no text or symbols)7 Attach new pick rollers ( × 2) on the shaft one by one.
a Insert the retaining clip of the pick roller into the slot.
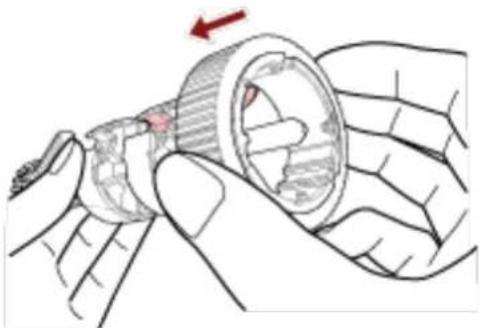
natural_image
Illustration of hands holding a mechanical component with a red arrow indicating rotation (no text or symbols present)b Insert the retaining clip of the other pick roller into the slot.
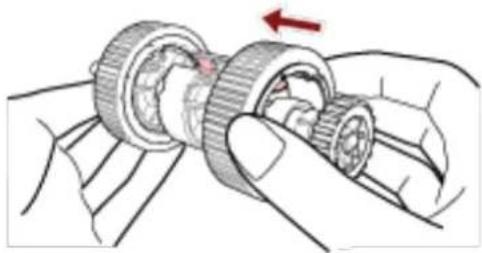
natural_image
Illustration of hands assembling a mechanical gear assembly with a red arrow indicating rotation (no text or symbols present)ATTENTION
Confirm that the pick rollers are attached properly. Otherwise, paper jams or other feeding errors may occur.
Make sure you insert the pick rollers until they lock in place.
8 Attach the shaft.
a Hold the bushing on the shaft and insert the other shaft end into the slot. Lower the shaft end with the bushing to fit the entire shaft in and rotate the bushing from right to left until the shaft locks in place.
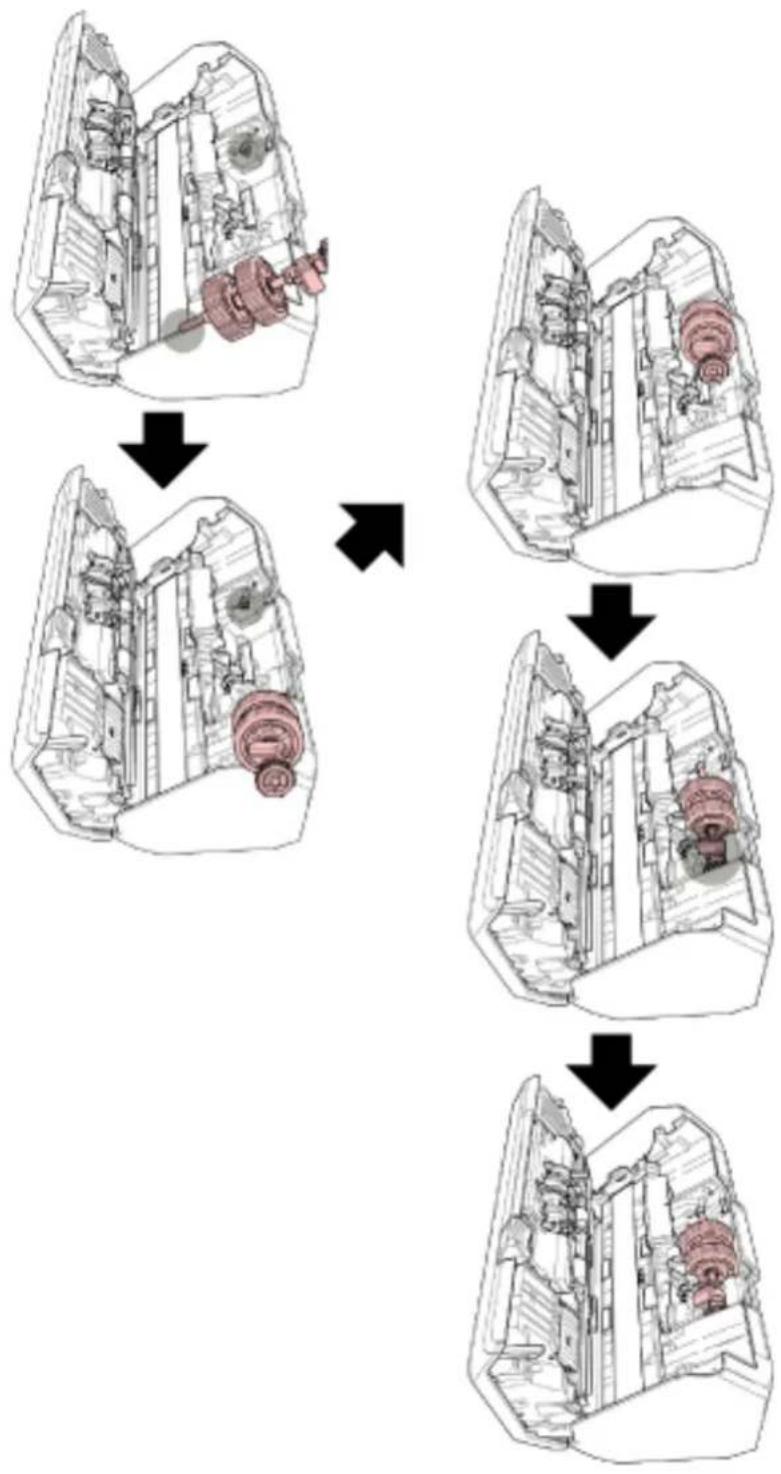
flowchart
graph TD
    A["Top Gear Component"] --> B["Downward Arrow"]
    B --> C["Bottom Gear Component"]
    C --> D["Arrow Right"]
    D --> E["Downward Arrow"]
    E --> F["Bottom Gear Component"]
b Close the sheet guide. Make sure that both ends of the sheet guide are locked firmly.
ATTENTION
Confirm that the pick rollers are installed properly. Otherwise, paper jams or other feeding errors may occur.
9 Close the ADF.
For details, refer to How to Close the ADF (page 77).

Be careful not to get your fingers caught when closing the ADF.
10 Attach the ADF paper chute (feeder).
Insert the tabs into the slots on the back of the scanner in the direction of arrow 1 and tilt the ADF paper chute (feeder) downwards in the direction of arrow 2 until it locks in place. Attach the ADF paper chute (feeder) with the side guides facing upwards.
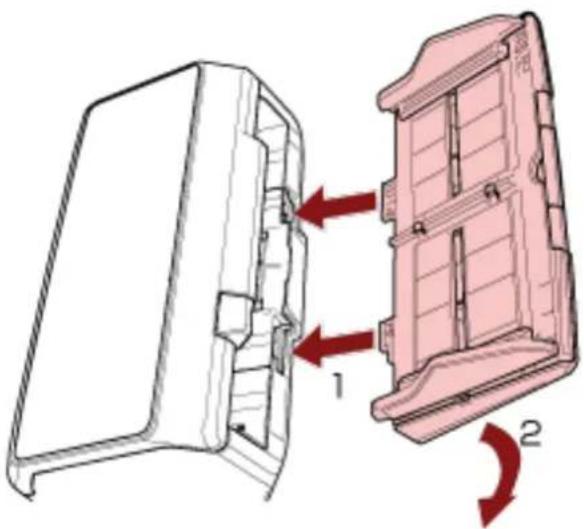
natural_image
Technical diagram of a mechanical component with two views, showing internal structure and directional arrows (no text or symbols)ATTENTION
Do not leave any space between the ADF paper chute (feeder) and the scanner.
11 Plug in the power cable and turn on the scanner.
For details, refer to How to Turn the Power ON (page 71).
12 Clear the pick roller counter.
●For fi-8190/fi-8290/fi-8170/fi-8270
Use one of the following methods to clear the pick roller counter.
-Select [5: Consumable counters] from the [Settings Menu] screen on the operator panel, then clear the pick roller counter.
For details, refer to How to Use Settings Menu (page 145).
-Clear the pick roller counter in the Software Operation Panel.
For details, refer to Clearing the Sheet Counters (page 359).
●For fi-8150/fi-8250/fi-8150U/fi-8250U
Clear the pick roller counter in the Software Operation Panel.
For details, refer to Clearing the Sheet Counters (page 359).
Troubleshooting
This section explains about the countermeasures against paper jams and other troubles, items to check before contacting your scanner service provider, and how to read the product label on the scanner.
ATTENTION
For details about other errors/troubles that are not covered in this section, refer to the scanner driver's Help.
When a Paper Jam Occurs
Remove the documents that are left in the ADF in the following procedure:

CAUTION
- Do not use force to pull out jammed documents, and make sure to open the ADF first.
- Be careful not to touch any sharp parts when removing jammed documents. Doing so could result in injury.
- Be careful not to get things such as hair, a tie or necklaces caught inside the scanner when removing jammed documents.
- The inside of the ADF may become extremely hot during operation. Be careful not to burn yourself.
1 Remove all documents from the ADF paper chute (feeder).
2 Open the ADF.
For details, refer to How to Open the ADF (page 76).

When the ADF is open, it might close accidentally. Be careful not to get your fingers caught.
3 Remove the jammed document.
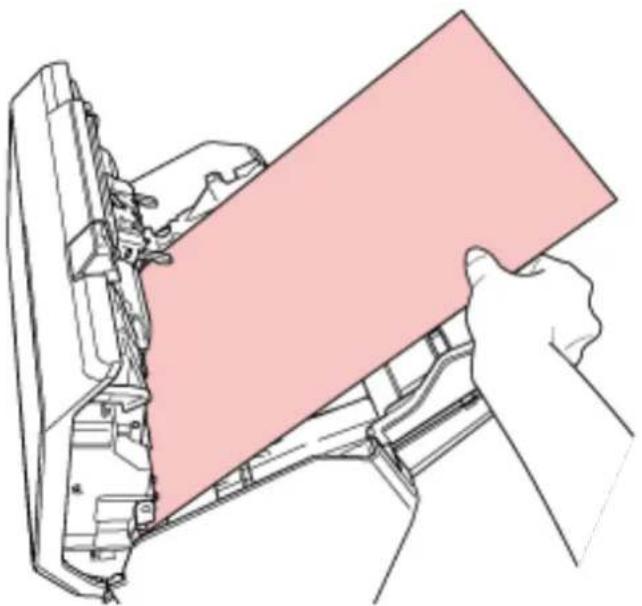
natural_image
Line drawing of a hand holding a pink rectangular object over a mechanical component (no text or symbols)ATTENTION
- Make sure to check the documents and the paper path thoroughly. Remove any metal objects such as staples or paper clips to prevent paper jams.
- Be careful not to damage the glass surface and the guides when removing documents with metal objects such as staples or paper clips.
4 Close the ADF.
For details, refer to How to Close the ADF (page 77).
Be careful not to get your fingers caught when closing the ADF.
ATTENTION
- Confirm that the ADF is closed properly. Otherwise, documents may not be fed into the ADF.
- Occasionally when scanning is complete or canceled, documents may remain in the ADF without any error message displayed. In that case, follow steps 1 through 4 above to remove the documents.
- To continue scanning, check which page you want to resume from, and load the document in the ADF paper chute (feeder) again.
Errors
- Error Indication
If an error occurs while the scanner is used, an error notification is displayed as follows.
●For fi-8190/fi-8290/fi-8170/fi-8270
When an error occurs while the scanner is used, an error code is displayed on the LCD.
You can clear the error display by pressing the [Stop/Clear] button.
Note that for a paper jam, the message disappears after a certain amount of time elapses with no documents ([Ready] status) in the scanner.
![Menu LCD Stop/ Clear Scan/ Enter Manual Feed Power [Scan/Enter] Button [Stop/Clear] Button](/content/2026/05/903199/images/cc85730d3aa14ee5efa729543f27d62523f48d28fad4644063e1022ea77ae1f4.jpg)
- For fi-8150/fi-8250/fi-8150U/fi-8250U
When an error occurs while the scanner is used, the LED indicator lights up in orange, and an alphabetical character and a number for the error code are displayed alternately on the Function Number Display.
You can clear the error display by pressing the [Scan/Stop] button/[Send to] button.
Note that for a paper jam, the message disappears after a certain amount of time elapses with no documents ([Ready] status) in the scanner.
![LED Indicator Check Function Send to [Send to] Button Function Number Display Scan/Stop Manual Feed Power [Scan/Stop] Button](/content/2026/05/903199/images/cd71bd2c88f53b7971a3a44d4e457353d1a0d4a385594229be46727957911049.jpg)
HINT
Error Recovery Guide is started up and the icon is displayed in the notification area located at the far right of the task bar when you logged onto Windows.
When an error occurs on the scanner, the error name and code number is displayed in the Error Recovery Guide window.
Take note of the displayed information and click the [More Info] button to check the troubleshooting procedure.
![Error Recovery Guide The following information was transmitted by the scanner. [038001, 31] Document jam Page count Error More Info...](/content/2026/05/903199/images/fb111584efbc05e04463997facaecbb4b92ae860a4fb90eaf5b6a2406ab436b0.jpg)
- Error Code List
An error code is displayed on the LCD.
An alphabetical character and a number for the error code are displayed alternately on the Function Number Display.
| Error Code (LCD) Error Code(Function Number Display) | Error Details Refer to | ||
| A1:B3 A1 Imprinter | error | (communication timeout)(when the imprinter is installed) [fi-8190/fi-8170/ fi-8150/fi-8150U] | Imprinter Error (When the Imprinter Is Installed)[fi-8190/fi-8170/fi-8150/ fi-8150U] (page 257) |
| A2:B5 A2 Imprinter | error (print head) | (when the imprinter is installed) [fi-8190/fi-8170/ fi-8150/fi-8150U] | |
| A3:B6 A3 Imprinter | error (EEPROM) | (when the imprinter is installed) [fi-8190/fi-8170/ fi-8150/fi-8150U] | |
| A4:B8 A4 Imprinter | error (ROM) | (when the imprinter is installed) [fi-8190/fi-8170/ fi-8150/fi-8150U] | |
| C0:E5 C0 Memory error (Back) | Error (Front) Memory | Error/LSI Error | (page 258) |
| C0:E6 Memory error | |||
| C0:E9 LSI error (Front) | |||
| C0:EA LSI error (Back) | |||
| C1:E0 C1 LSI error (Initialization) | failure) | ||
| C8:F2 C8 Internal communication | error of the scanner | Internal Communication Error of the Scanner (page 259) | |
| E0:87 E0 Flatbed carrier error | [fi-8290/fi-8270/fi-8250/fi-8250U] | Flatbed Carrier Error [fi-8290/fi-8270/fi-8250/fi-8250U] (page 259) | |
| E1:7E E1 Optical error (flatbed) | [fi-8290/fi-8270/fi-8250/fi-8250U] | Optical Error (Flatbed) [fi-8290/fi-8270/fi-8250/fi-8250U] (page 260) | |
| E2:74 E2 Optical error (ADF Front) Optical Error (ADF) (page | 261) | ||
| E3:75 E3 Optical error (ADF Back) | |||
| E6:D3 E6 Operator Panel error Operator Panel Error (page | 261) | ||
| E7:D2 E7 EEPROM error EEPROM Error (page 262) | |||
| E9:F5 E9 Image memory read-write | error (Front) | Image Memory Read-Write Error (page 262) | |
| E9:F6 Image memory read-write | error (Back) | ||
| F4:C2 F4 Background switching | mechanism error (ADF Front) | Background Switching Mechanism Error (page 263) | |
| F4:C3 Background switching | mechanism error (ADF Back) | ||
| H0:83 | H0 | Motor circuit error | Motor Circuit Error (page 264) |
| H0:84 | |||
| H1:80 H1 | |||
| H2:81 H2 | |||
| H6:B1 | H6 | Imprinter system error (when the imprinter isinstalled) [fi-8190/fi-8170/fi-8150/fi-8150U] | Imprinter System Error (When the Imprinter Is Installed) [fi-8190/fi-8170/fi-8150/fi-8150U] (page 265) |
| H7:84 H7 Lamp circuit error Lamp Circuit Error (page | 265) | ||
| H8:88 H8 Motor circuit error Motor Circuit Error (page | 264) | ||
| J0:37 J0 Paper protection (feeding) | noise) | Paper Protection (page 266) | |
| J0:3F Paper protection (feeding) | skew) | ||
| J1:31 J1 Paper jam Paper Jam/Pick Error (page) | 267) | ||
| J1:40 | |||
| J1:50 Pick error | |||
| J1:5A Paper jam (when the) | imprinter is installed)[fi-8190/fi-8170/fi-8150/fi-8150U] | Paper Jam (When the Imprinter Is Installed)[fi-8190/fi-8170/fi-8150/fi-8150U] (page 268) | |
| J2:55 J2 Multifeed detected | (Overlap) | Multifeed (page 268) | |
| J2:56 Multifeed detected (Length) | |||
| J8:01 J8 Sensor(s) dirty Sensor(s) Dirty (page 269) | |||
| J8:02 | |||
| J8:04 | |||
| J8:08 | |||
| L0:11 L0 Sensor error Sensor Error (page 270) | |||
| L2:13 L2 | |||
| L5:17 L5 | |||
| L5:18 L5 | |||
| L6:1B L6 | |||
| M1:D5 | n1 | Module error | Module Error (page 271) |
| M4:A2 | n4 | Network setting error[fi-8190/fi-8290/fi-8170/fi-8270/fi-8150/fi-8250] | Network Setting Error[fi-8190/fi-8290/fi-8170/ |
| M4:A3 | |||
| M4:A4 | tral Admin | fi-8270/fi-8150/fi-8250](page 272) | |
| M4:A5 | |||
| M4:A6 | |||
| M4:A8 | |||
| M4:A9 | |||
| M4:AA | |||
| M4:AB | |||
| M4:AC Scanner Central | Server setting error [fi-8190/fi-8290/fi-8170/fi-8270/fi-8150/fi-8250] | Scanner Central AdminServer Setting Error [fi-8190/fi-8290/fi-8170/fi-8270/fi-8150/fi-8250] (page 274) | |
| M5:A2 n5 Server setting error [fi-8190/ | tral Admin | fi-8290/fi-8170/fi-8270/fi-8150/fi-8250] | Server Setting Error [fi-8190/fi-8290/fi-8170/fi-8270/fi-8150/fi-8250] (page 275) |
| M5:A3 Scanner Central | Server setting error [fi-8190/fi-8290/fi-8170/fi-8270/fi-8150/fi-8250] | Scanner Central AdminServer Setting Error [fi-8190/fi-8290/fi-8170/fi-8270/fi-8150/fi-8250](page 274) | |
| M5:A4 | |||
| M5:A5 | |||
| M5:AC Server setting error [fi-8190/ | fi-8290/fi-8170/fi-8270/fi-8150/fi-8250] | Server Setting Error [fi-8190/fi-8290/fi-8170/fi-8270/fi-8150/fi-8250] (page 275) | |
| M6:AE n6 Authentication failed | [fi-8190/fi-8290/fi-8170/fi-8270] | Authentication Failed[fi-8190/fi-8290/fi-8170/fi-8270] (page 277) | |
| M6:AF | |||
| U0:10 U0 Transport lock error | [fi-8290/fi-8270/fi-8250/fi-8250U] | Transport Lock Error[fi-8290/fi-8270/fi-8250/fi-8250U] (page 277) | |
| U4:40 U4 ADF open ADF Open (page 278) | |||
| U5:4A U5 Imprinter Cover Open (when the imprinter is installed) [fi-8190/fi-8170/fi-8150/fi-8150U] | Imprinter Cover Open(When the Imprinter Is Installed) [fi-8190/fi-8170/fi-8150/fi-8150U] (page 279) | ||
| Error Code (LCD) Error Code(Function Number Display) | Error Details Refer to | |
| U6:B4 U6 Print cartridge not installed | (when the imprinter is installed) [fi-8190/fi-8170/fi-8150/fi-8150U] | Print Cartridge Not Installed(When the Imprinter Is Installed) [fi-8190/fi-8170/fi-8150/fi-8150U] (page 280) |
| U7:20 U7 Outside Designated Scan | Area Error (When Operating with PaperStream NX Manager)[fi-8190/fi-8290/fi-8170/fi-8270/fi-8150/fi-8250] | Outside Designated Scan Area Error (When Operating with PaperStream NX Manager)[fi-8190/fi-8290/fi-8170/fi-8270/fi-8150/fi-8250](page 280) |
| U7:B9 U7 Imprinting area error | (When the imprinter is installed) [fi-8190/fi-8170/fi-8150/fi-8150U] | Imprinting Area Error(When the Imprinter Is Installed) [fi-8190/fi-8170/fi-8150/fi-8150U] (page 282) |
| — — Being used by others Being Used by Others (page | 282) | |
| — — The scanner is in Doc | Counting mode [fi-8190/fi-8290/fi-8170/fi-8270] | The Scanner Is in Doc Counting Mode [fi-8190/fi-8290/fi-8170/fi-8270](page 282) |
| — — No Paper No Paper (page 282) | ||
| — — Stop Stop (page 283) | ||
| — — Pause Pause (page 283) | ||
| — — Outside designated scan | area error (when operating with a computer) | Outside Designated Scan Area Error (When Operating with a Computer)(page 283) |
| — — Invalid Command Invalid Command (page | 284) | |
| — — Interface Malfunction Interface Malfunction (page | 285) | |
| — — Unit Attention Unit Attention (page 285) | ||
Imprinter Error (When the Imprinter Is Installed) [fi-8190/fi-8170/fi-8150/fi-8150U]
If an error occurs in the imprinter, the following is displayed on the operator panel.
- For the LCD
An error code, error details, and a solution for the problem are displayed on the LCD.
| Error Code Error Details and | the Solution |
| A1:B3 A1:B3 Error | Imprinter error (communication timeout)Turn the power back on. If the problem persists, refer to the Operator's Guide and take measures accordingly. |
| A2:B5 A2:B5 Error | Imprinter error (print head)Turn the power back on. If the problem persists, refer to the Operator's Guide and take measures accordingly. |
| A3:B6 A3:B6 Error | Imprinter error (EEPROM)Turn the power back on. If the problem persists, refer to the Operator's Guide and take measures accordingly. |
| A4:B8 A4:B8 Error | Imprinter error (ROM)Turn the power back on. If the problem persists, refer to the Operator's Guide and take measures accordingly. |
- For the Function Number Display
An alphabetical character and a number for the error code are displayed alternately on the Function Number Display.
| Error Code Error Details (displayed in the Error Recovery Guide window) | |
| A1 Imprinter error (communication timeout) | |
| A2 Imprinter error (print head) | |
| A3 Imprinter error (EEPROM) | |
| A4 Imprinter error (ROM) |
Take the following measures.
- Refer to the fi-819PRB Imprinter Operator Guide to check if the print cartridge is installed correctly.
- Refer to the fi-819PRB Imprinter Operator's Guide to reconnect the EXT cable.
- Turn the scanner off then back on.
If the problem still persists, write down the error code, check each item in Before You Contact the Scanner Service Provider (page 334) and then contact the distributor/dealer where you purchased
this product. Refer to the contact information in the Contact List if supplied with this product, or refer to the contact information in the Contact for Inquiries section if provided in Safety Precautions supplied with this product, and then make an inquiry.
Memory Error/LSI Error
If a memory error or LSI error occurs, the following is displayed on the operator panel.
- For the LCD
An error code, error details, and a solution for the problem are displayed on the LCD.
| Error Code Error Details and | the Solution |
| C0:E5 C0:E5 Error | Memory error (Front)Turn the power back on. If the problem persists, refer to the Operator's Guide and take measures accordingly. |
| C0:E6 C0:E6 Error | Memory error (Back)Turn the power back on. If the problem persists, refer to the Operator's Guide and take measures accordingly. |
| C0:E9 C0:E9 Error | LSI error (Front)Turn the power back on. If the problem persists, refer to the Operator's Guide and take measures accordingly. |
| C0:EA C0:EA Error | LSI error (Back)Turn the power back on. If the problem persists, refer to the Operator's Guide and take measures accordingly. |
| C1:E0 C1:E0 Error | LSI error (Initialization failure)Turn the power back on. If the problem persists, refer to the Operator's Guide and take measures accordingly. |
- For the Function Number Display
An alphabetical character and a number for the error code are displayed alternately on the Function Number Display.
| Error Code Error Details (displayed in the Error Recovery Guide window) | |
| C0 Memory error (Front) | |
| Memory error (Back) | |
| LSI error (Front) | |
| LSI error (Back) | |
| C1 LSI error (Initialization failure) | |
Turn the scanner off then back on.
If the problem still persists, write down the error code, check each item in Before You Contact the Scanner Service Provider (page 334) and then contact the distributor/dealer where you purchased this product. Refer to the contact information in the Contact List if supplied with this product, or refer to the contact information in the Contact for Inquiries section if provided in Safety Precautions supplied with this product, and then make an inquiry.
Internal Communication Error of the Scanner
If an internal communication error occurs in the scanner, the following is displayed on the operator panel.
- For the LCD
An error code, error details, and a solution for the problem are displayed on the LCD.
| Error Code Error Details and | the Solution |
| C8:F2 C8:F2 Error | Internal communication error of the scannerTurn the power back on. If the problem persists, refer to the Operator's Guide and take measures accordingly. |
- For the Function Number Display
An alphabetical character and a number for the error code are displayed alternately on the Function Number Display.
| Error Code Error Details (displayed in the Error Recovery Guide window) |
| C8 Internal communication error of the scanner |
Turn the scanner off then back on.
If the problem still persists, write down the error code, check each item in Before You Contact the Scanner Service Provider (page 334) and then contact the distributor/dealer where you purchased this product. Refer to the contact information in the Contact List if supplied with this product, or refer to the contact information in the Contact for Inquiries section if provided in Safety Precautions supplied with this product, and then make an inquiry.
Flatbed Carrier Error [fi-8290/fi-8270/fi-8250/fi-8250U]
If a flatbed carrier error occurs, the following is displayed on the operator panel.
- For the LCD
An error code, error details, and a solution for the problem are displayed on the LCD.
| Error Code Error Details and | the Solution |
| E0:87 E0:87 Error | Flatbed carrier errorUnlock the transport lock switch. |
- For the Function Number Display
An alphabetical character and a number for the error code are displayed alternately on the Function Number Display.
| Error Code Error Details (displayed in the Error Recovery Guide window) | |
| E0 Flatbed carrier error | |
Check that the transport lock switch is not locked.
If the transport lock switch is locked, unlock the transport lock switch.
For details, refer to Transport Lock Error [fi-8290/fi-8270/fi-8250/fi-8250U] (page 277).
If the problem still persists, write down the error code, check each item in Before You Contact the Scanner Service Provider (page 334) and then contact the distributor/dealer where you purchased this product. Refer to the contact information in the Contact List if supplied with this product, or refer to the contact information in the Contact for Inquiries section if provided in Safety Precautions supplied with this product, and then make an inquiry.
Optical Error (Flatbed) [fi-8290/fi-8270/fi-8250/fi-8250U]
If an optical error occurs in the flatbed, the following is displayed on the operator panel.
- For the LCD
An error code, error details, and a solution for the problem are displayed on the LCD.
| Error Code Error Details and | the Solution |
| E1:7E E1:7E Error | Optical error (flatbed)Turn the power back on. If the problem persists, refer to the Operator's Guide and take measures accordingly. |
- For the Function Number Display
An alphabetical character and a number for the error code are displayed alternately on the Function Number Display.
| Error Code Error Details (displayed in the Error Recovery Guide window) | |
| E1 Optical error (flatbed) | |
Take the following measures.
- Check that the transport lock switch is not locked.
If the transport lock switch is locked, unlock the transport lock switch.
For details, refer to Transport Lock Error [fi-8290/fi-8270/fi-8250/fi-8250U] (page 277).
- Refer to Cleaning the Inside of the Scanner (Flatbed) [fi-8290/fi-8270/fi-8250/fi-8250U] (page 232) and clean the document bed (glass section).
- Turn the scanner off then back on.
If the problem still persists, write down the error code, check each item in Before You Contact the Scanner Service Provider (page 334) and then contact the distributor/dealer where you purchased this product. Refer to the contact information in the Contact List if supplied with this product, or refer to the contact information in the Contact for Inquiries section if provided in Safety
Precautions supplied with this product, and then make an inquiry.
Optical Error (ADF)
If an optical error occurs in the ADF, the following is displayed on the operator panel.
- For the LCD
An error code, error details, and a solution for the problem are displayed on the LCD.
| Error Code Error Details and | the Solution |
| E2:74 E2:74 Error | Optical error (ADF Front)Turn the power back on. If the problem persists, refer to the Operator's Guide and take measures accordingly. |
| E3:75 E3:75 Error | Optical error (ADF Back)Turn the power back on. If the problem persists, refer to the Operator's Guide and take measures accordingly. |
- For the Function Number Display
An alphabetical character and a number for the error code are displayed alternately on the Function Number Display.
| Error Code Error Details (displayed in the Error Recovery Guide window) | |
| E2 Optical error (ADF Front) | |
| E3 Optical error (ADF Back) | |
Take the following measures.
- Refer to Cleaning the Inside of the Scanner (ADF) with a Cloth (page 225) and clean the glass.
- Turn the scanner off then back on.
If the problem still persists, write down the error code, check each item in Before You Contact the Scanner Service Provider (page 334) and then contact the distributor/dealer where you purchased this product. Refer to the contact information in the Contact List if supplied with this product, or refer to the contact information in the Contact for Inquiries section if provided in Safety Precautions supplied with this product, and then make an inquiry.
Operator Panel Error
If an operator panel error occurs, the following is displayed on the operator panel.
- For the LCD
An error code, error details, and a solution for the problem are displayed on the LCD.
| Error Code Error Details and | the Solution |
| E6:D3 E6:D3 Error | Operator Panel errorTurn the power back on. If the problem persists, refer to the Operator's Guide and take measures accordingly. |
- For the Function Number Display
An alphabetical character and a number for the error code are displayed alternately on the Function Number Display.
| Error Code Error Details (displayed in the Error Recovery Guide window) | |
| E6 Operator Panel error | |
Turn the scanner off then back on.
If the problem still persists, write down the error code, check each item in Before You Contact the Scanner Service Provider (page 334) and then contact the distributor/dealer where you purchased this product. Refer to the contact information in the Contact List if supplied with this product, or refer to the contact information in the Contact for Inquiries section if provided in Safety Precautions supplied with this product, and then make an inquiry.
EEPROM Error
If an EEPROM error occurs, the following is displayed on the operator panel.
- For the LCD
An error code, error details, and a solution for the problem are displayed on the LCD.
| Error Code Error Details and | the Solution |
| E7:D2 E7:D2 Error | EEPROM errorTurn the power back on. If the problem persists, refer to the Operator's Guide and take measures accordingly. |
- For the Function Number Display
An alphabetical character and a number for the error code are displayed alternately on the Function Number Display.
| Error Code Error Details (displayed in the Error Recovery Guide window) | |
| E7 EEPROM error | |
Turn the scanner off then back on.
If the problem still persists, write down the error code, check each item in Before You Contact the Scanner Service Provider (page 334) and then contact the distributor/dealer where you purchased this product. Refer to the contact information in the Contact List if supplied with this product, or refer to the contact information in the Contact for Inquiries section if provided in Safety Precautions supplied with this product, and then make an inquiry.
Image Memory Read-Write Error
If an error occurs when data is read from the image memory or written to the image memory, the following is displayed on the operator panel.
- For the LCD
An error code, error details, and a solution for the problem are displayed on the LCD.
| Error Code Error Details and | the Solution |
| E9:F5 E9:F5 Error | Image memory read-write error (Front)Turn the power back on. If the problem persists, refer to the Operator's Guide and take measures accordingly. |
| E9:F6 E9:F6 Error | Image memory read-write error (Back)Turn the power back on. If the problem persists, refer to the Operator's Guide and take measures accordingly. |
- For the Function Number Display
An alphabetical character and a number for the error code are displayed alternately on the Function Number Display.
| Error Code Error Details (displayed in the Error Recovery Guide window) | |
| E9 Image memory read-write error (Front) | |
Turn the scanner off then back on.
If the problem still persists, write down the error code, check each item in Before You Contact the Scanner Service Provider (page 334) and then contact the distributor/dealer where you purchased this product. Refer to the contact information in the Contact List if supplied with this product, or refer to the contact information in the Contact for Inquiries section if provided in Safety Precautions supplied with this product, and then make an inquiry.
Background Switching Mechanism Error
If a background switching mechanism error occurs in the ADF, the following is displayed on the operator panel.
- For the LCD
An error code, error details, and a solution for the problem are displayed on the LCD.
| Error Code Error Details and | the Solution |
| F4:C2 F4:C2 Error | Background switching mechanism error (ADF Front)Turn the power back on. If the problem persists, refer to the Operator's Guide and take measures accordingly. |
| F4:C3 F4:C3 Error | Background switching mechanism error (ADF Back)Turn the power back on. If the problem persists, refer to the Operator's Guide and take measures accordingly. |
- For the Function Number Display
An alphabetical character and a number for the error code are displayed alternately on the Function Number Display.
| Error Code Error Details (displayed in the Error Recovery Guide window) | |
| F4 Background switching me | chanism error (ADF Front) |
| Background switching mechanism error (ADF Back) | |
Open the ADF to check that there are no documents remaining, and then turn the scanner off then back on.
If the problem still persists, write down the error code, check each item in Before You Contact the Scanner Service Provider (page 334) and then contact the distributor/dealer where you purchased this product. Refer to the contact information in the Contact List if supplied with this product, or refer to the contact information in the Contact for Inquiries section if provided in Safety Precautions supplied with this product, and then make an inquiry.
Motor Circuit Error
If a motor circuit error occurs, the following is displayed on the operator panel.
- For the LCD
An error code, error details, and a solution for the problem are displayed on the LCD.
| Error Code Error Details and | the Solution |
| H0:83 H0:83 Error | Motor circuit errorTurn the power back on. If the problem persists, refer to the Operator's Guide and take measures accordingly. |
| H0:84 H0:84 Error | Motor circuit errorTurn the power back on. If the problem persists, refer to the Operator's Guide and take measures accordingly. |
| H1:80 H1:80 Error | Motor circuit errorTurn the power back on. If the problem persists, refer to the Operator's Guide and take measures accordingly. |
| H2:81 H2:81 Error | Motor circuit errorTurn the power back on. If the problem persists, refer to the Operator's Guide and take measures accordingly. |
| H8:88 H8:88 Error | Motor circuit errorTurn the power back on. If the problem persists, refer to the Operator's Guide and take measures accordingly. |
- For the Function Number Display
An alphabetical character and a number for the error code are displayed alternately on the Function Number Display.
| Error Code Error Details (displayed in the Error Recovery Guide window) | |
| H0 Motor circuit error | |
| H1 | |
| H2 | |
| H8 | |
Turn the scanner off then back on.
If the problem still persists, write down the error code, check each item in Before You Contact the Scanner Service Provider (page 334) and then contact the distributor/dealer where you purchased this product. Refer to the contact information in the Contact List if supplied with this product, or refer to the contact information in the Contact for Inquiries section if provided in Safety Precautions supplied with this product, and then make an inquiry.
Imprinter System Error (When the Imprinter Is Installed) [fi-8190/fi-8170/fi-8150/fi-8150U]
If a circuit error occurs in the imprinter, the following is displayed on the operator panel.
- For the LCD
An error code, error details, and a solution for the problem are displayed on the LCD.
| Error Code Error Details and | the Solution |
| H6:B1 H6:B1 Error | Imprinter system errorTurn the power back on. If the problem persists, refer to the Operator's Guide and take measures accordingly. |
- For the Function Number Display
An alphabetical character and a number for the error code are displayed alternately on the Function Number Display.
| Error Code Error Details (displayed in the Error Recovery Guide window) | |
| H6 Imprinter system error | |
Turn the scanner off then back on.
If the problem still persists, write down the error code, check each item in Before You Contact the Scanner Service Provider (page 334) and then contact the distributor/dealer where you purchased this product. Refer to the contact information in the Contact List if supplied with this product, or refer to the contact information in the Contact for Inquiries section if provided in Safety Precautions supplied with this product, and then make an inquiry.
Lamp Circuit Error
If a lamp circuit error occurs, the following is displayed on the operator panel.
- For the LCD
An error code, error details, and a solution for the problem are displayed on the LCD.
| Error Code Error Details and | the Solution |
| H7:84 H7:84 Error | Lamp circuit errorTurn the power back on. If the problem persists, refer to the Operator's Guide and take measures accordingly. |
- For the Function Number Display
An alphabetical character and a number for the error code are displayed alternately on the Function Number Display.
| Error Code Error Details (displayed in the Error Recovery Guide window) | |
| H7 Lamp circuit error | |
Turn the scanner off then back on.
If the problem still persists, write down the error code, check each item in Before You Contact the Scanner Service Provider (page 334) and then contact the distributor/dealer where you purchased this product. Refer to the contact information in the Contact List if supplied with this product, or refer to the contact information in the Contact for Inquiries section if provided in Safety Precautions supplied with this product, and then make an inquiry.
Paper Protection
When the function to protect documents (Paper protection) is activated, paper feeding stops, and the following is displayed on the operator panel.
- For the LCD
An error code, error details, and a solution for the problem are displayed on the LCD.
| Error Code Error Details and | the Solution |
| J0:37 J0:37 Error | Paper protection (feeding noise)Remove the document. Be careful not to get the document jammed or skewed when reloading it. For details, refer to the Operator's Guide. |
| J0:3F J0:3F Error | Paper protection (feeding skew)Remove the document. Be careful not to get the document jammed or skewed when reloading it. For details, refer to the Operator's Guide. |
- For the Function Number Display
An alphabetical character and a number for the error code are displayed alternately on the Function Number Display.
| Error Code Error Details (displayed in the Error Recovery Guide window) | |
| J0 Paper protection (feeding skew) |
The function to protect documents (Paper protection) prevents documents from being damaged during scanning with the ADF by increasing the level of sensitivity to detect paper jams.
Take the following measures.
- If this error occurs, check if the document meets the requirements described in Documents for Scanning (page 116).
- If this error occurs frequently even when the document meets the requirements for scanning, lower the paper protection sensitivity level.
- If documents remain in the ADF, remove the documents by referring to When a Paper Jam Occurs (page 249).
Paper Jam/Pick Error
If a paper jam or pick error occurs, the following is displayed on the operator panel.
- For the LCD
An error code, error details, and a solution for the problem are displayed on the LCD.
| Error Code Error Details and | the Solution |
| J1:31 J1:31 Error | Paper jamRemove the document. |
| J1:40 J1:40 Error | Paper jamRemove the document. |
| J1:50 J1:50 Error | Pick errorRemove the document. |
- For the Function Number Display
An alphabetical character and a number for the error code are displayed alternately on the Function Number Display.
| Error Code Error Details (displayed in the Error Recovery Guide window) | |
| J1 Paper jam | |
| Pick error | |
Take the following measures.
- When a paper jam occurs inside the scanner, refer to When a Paper Jam Occurs (page 249) to remove jammed documents.
- Refer to Documents for Scanning (page 116) in order to check if the document is suitable for scanning.
- If paper jams occur frequently, take measures according to Paper Jams/Pick Errors Occur Frequently (page 325).
If the problem still persists, write down the error code, check each item in Before You Contact the Scanner Service Provider (page 334) and then contact the distributor/dealer where you purchased this product. Refer to the contact information in the Contact List if supplied with this product, or refer to the contact information in the Contact for Inquiries section if provided in Safety Precautions supplied with this product, and then make an inquiry.
Paper Jam (When the Imprinter Is Installed) [fi-8190/fi-8170/fi-8150/fi-8150U]
If a paper jam occurs in the imprinter, the following is displayed on the operator panel.
- For the LCD
An error code, error details, and a solution for the problem are displayed on the LCD.
| Error Code Error Details and | the Solution |
| J1:5A J1:5A Error | Paper jamRemove the document. |
- For the Function Number Display
An alphabetical character and a number for the error code are displayed alternately on the Function Number Display.
| Error Code Error Details (displayed in the Error Recovery Guide window) | |
| J1 Paper jam | |
Take the following measures.
- When a paper jam occurs in the imprinter, refer to the fi-819PRB Imprinter Operator's Guide to remove jammed documents.
- Refer to the fi-819PRB Imprinter Operator's Guide to make sure that the document satisfies the requirements for documents that can be fed into the imprinter
- Refer to the fi-819PRB Imprinter Operator's Guide to clean the rollers.
If the problem still persists, write down the error code, check each item in Before You Contact the Scanner Service Provider (page 334) and then contact the distributor/dealer where you purchased this product. Refer to the contact information in the Contact List if supplied with this product, or refer to the contact information in the Contact for Inquiries section if provided in Safety Precautions supplied with this product, and then make an inquiry.
Multifeed
If a multifeed occurs, the following is displayed on the operator panel.
- For the LCD
An error code, error details, and a solution for the problem are displayed on the LCD.
| Error Code Error Details and | the Solution |
| J2:55 J2:55 Error | Multifeed detected (Overlap)Press the [Scan/Enter] button. If there is a document that is being fed, it will be ejected. |
| J2:56 J2:56 Error | Multifeed detected (Length)Press the [Scan/Enter] button. If there is a document that is being fed, it will be ejected. |
- For the Function Number Display
An alphabetical character and a number for the error code are displayed alternately on the Function Number Display.
| Error Code Error Details (displayed in the Error Recovery Guide window) | |
| J2 Multifeed detected (Length) | |
If documents remain in the scanner, refer to When a Paper Jam Occurs (page 249) to remove the documents.
If documents are overlapped and fed into the scanner frequently, take measures according to Overlapped Documents Are Frequently Fed into the Scanner (page 318).
If the problem still persists, write down the error code, check each item in Before You Contact the Scanner Service Provider (page 334) and then contact the distributor/dealer where you purchased this product. Refer to the contact information in the Contact List if supplied with this product, or refer to the contact information in the Contact for Inquiries section if provided in Safety Precautions supplied with this product, and then make an inquiry.
Sensor(s) Dirty
If sensors are dirty, the following is displayed on the operator panel.
- For the LCD
An error code, error details, and a solution for the problem are displayed on the LCD.
| Error Code Error Details and | the Solution |
| J8:01 J8:01 Error | Sensor(s) dirtyClean the Pick Sensor. |
| J8:02 J8:02 Error | Sensor(s) dirtyClean the Skew Sensor (left). |
| J8:04 J8:04 Error | Sensor(s) dirtyClean the READ-TOP Sensor. |
| J8:08 J8:08 Error | Sensor(s) dirtyClean the Skew Sensor (right). |
- For the Function Number Display
An alphabetical character and a number for the error code are displayed alternately on the Function Number Display.
| Error Code Error Details (displayed in the Error Recovery Guide window) | |
| J8 Sensor(s) dirty | |
Take the following measures.
- Clean the document sensors by referring to Cleaning the Inside of the Scanner (ADF) with a Cloth (page 225).
- Turn the scanner off then back on.
If the problem still persists, write down the error code, check each item in Before You Contact the Scanner Service Provider (page 334) and then contact the distributor/dealer where you purchased this product. Refer to the contact information in the Contact List if supplied with this product, or refer to the contact information in the Contact for Inquiries section if provided in Safety Precautions supplied with this product, and then make an inquiry.
Sensor Error
If a sensor error occurs, the following is displayed on the operator panel.
- For the LCD
An error code, error details, and a solution for the problem are displayed on the LCD.
| Error Code Error Details and | the Solution |
| L0:11 L0:11 Error | Sensor errorTurn the power back on. If the problem persists, refer to the Operator's Guide and take measures accordingly. |
| L2:13 L2:13 Error | Sensor errorTurn the power back on. If the problem persists, refer to the Operator's Guide and take measures accordingly. |
| L5:17 L5:17 Error | Sensor errorTurn the power back on. If the problem persists, refer to the Operator's Guide and take measures accordingly. |
| L5:18 L5:18 Error | Sensor errorTurn the power back on. If the problem persists, refer to the Operator's Guide and take measures accordingly. |
| L6:1B L6:1B Error | Sensor errorTurn the power back on. If the problem persists, refer to the Operator's Guide and take measures accordingly. |
- For the Function Number Display
An alphabetical character and a number for the error code are displayed alternately on the Function Number Display.
| Error Code Error Details (displayed in the Error Recovery Guide window) | |
| L0 Sensor error | |
| L2 | |
| L5 | |
| L6 | |
Take the following measures.
- Refer to Cleaning the Inside of the Scanner (ADF) with a Cloth (page 225) to clean the ultrasonic sensors.
- Turn the scanner off then back on.
If the problem still persists, write down the error code, check each item in Before You Contact the Scanner Service Provider (page 334) and then contact the distributor/dealer where you purchased this product. Refer to the contact information in the Contact List if supplied with this product, or refer to the contact information in the Contact for Inquiries section if provided in Safety Precautions supplied with this product, and then make an inquiry.
Module Error
If a module error occurs, the following is displayed on the operator panel.
- For the LCD
An error code, error details, and a solution for the problem are displayed on the LCD.
| Error Code Error Details and | the Solution |
| M1:D5 M1:D5 Error | Wired LAN errorTurn the power back on. If the problem persists, refer to the Operator's Guide and take measures accordingly. |
- For the Function Number Display
An alphabetical character and a number for the error code are displayed alternately on the Function Number Display.
| Error Code Error Details (displayed in the Error Recovery Guide window) | |
| n1 | — |
Turn the scanner off then back on.
If the problem still persists, write down the error code, check each item in Before You Contact the Scanner Service Provider (page 334) and then contact the distributor/dealer where you purchased this product. Refer to the contact information in the Contact List if supplied with this product, or refer to the contact information in the Contact for Inquiries section if provided in Safety Precautions supplied with this product, and then make an inquiry.
Network Setting Error [fi-8190/fi-8290/fi-8170/fi-8270/fi-8150/fi-8250]
If a network settings error occurs, the following is displayed on the operator panel.
- For the LCD
An error code, error details, and a solution for the problem are displayed on the LCD.
| Error Code Error Details and | the Solution |
| M4:A2 M4:A2 Error | Network errorCannot connect to the network. Refer to the Operator's Guide and take measures accordingly. |
| M4:A3 M4:A3 Error | Network errorCannot connect to the proxy server. Refer to the Operator's Guide and take measures accordingly. |
| M4:A4 M4:A4 Error | Network errorCannot connect to PaperStream NX Manager. Refer to the Operator's Guide and take measures accordingly. |
| M4:A5 M4:A5 Error | Network errorCannot connect to PaperStream NX Manager or the proxy server.Refer to the Operator's Guide and take measures accordingly. |
| M4:A6 M4:A6 Error | Network errorCommunicating with PaperStream NX Manager has timed out.Refer to the Operator's Guide and take measures accordingly. |
| M4:A8 M4:A8 Error | Network errorCannot send data to PaperStream NX Manager. Refer to the Operator's Guide and take measures accordingly. |
| M4:A9 M4:A9 Error | Network errorCannot receive data from PaperStream NX Manager. Refer to the Operator's Guide and take measures accordingly. |
| M4:AA M4:AA Error | Network errorCannot connect to the network. Refer to the Operator's Guide and take measures accordingly. |
| M4:AB M4:AB Error | Network errorCannot send data. Refer to the Operator's Guide and take measures accordingly. |
- For the Function Number Display
An alphabetical character and a number for the error code are displayed alternately on the Function Number Display.
| Error Code Error Details (displayed in the Error Recovery Guide window) | |
| n4 | — |
Take the following measures.
- Check the network settings for the scanner.
You can check the network settings for the scanner as follows.
-For fi-8190/fi-8290/fi-8170/fi-8270
The network settings for the scanner can be checked using one of the following methods.
- The network settings for the scanner can be checked in [1:Scanner Information] on the [Settings Menu] screen of the operator panel.
For details, refer to How to Use Settings Menu (page 145).
- The network settings for the scanner can be checked by using IP Address Setting Tool. For details, refer to the Network Setup Tool for fi Series Help.
For details about how to start up IP Address Setting Tool, refer to Starting Up IP Address Setting Tool [fi-8190/fi-8290/fi-8170/fi-8270/fi-8150/fi-8250] (page 70).
- The network settings for the scanner can be checked in fi Series Network Settings.
For details, refer to Network Settings (fi Series Network Settings) [fi-8190/fi-8290/fi-8170/fi-8270/fi-8150/fi-8250] (page 403).
-For fi-8150/fi-8250
The network settings for the scanner can be checked using one of the following methods.
- The network settings for the scanner can be checked by using IP Address Setting Tool. For details, refer to the Network Setup Tool for fi Series Help.
For details about how to start up IP Address Setting Tool, refer to Starting Up IP Address Setting Tool [fi-8190/fi-8290/fi-8170/fi-8270/fi-8150/fi-8250] (page 70).
- The network settings for the scanner can be checked in fi Series Network Settings.
For details, refer to Network Settings (fi Series Network Settings) [fi-8190/fi-8290/fi-8170/fi-8270/fi-8150/fi-8250] (page 403).
- Check the connection status of the network.
- Check the settings on the proxy server.
- Check the settings in PaperStream NX Manager.
If the problem still persists, write down the error code, check each item in Before You Contact the
Scanner Service Provider (page 334) and then contact the distributor/dealer where you purchased this product. Refer to the contact information in the Contact List if supplied with this product, or refer to the contact information in the Contact for Inquiries section if provided in Safety
Precautions supplied with this product, and then make an inquiry.
Scanner Central Admin Server Setting Error [fi-8190/fi-8290/fi-8170/fi-8270/fi-8150/fi-8250]
If an error occurs in the settings in the Scanner Central Admin Server, the following is displayed on the operator panel.
- For the LCD
An error code, error details, and a solution for the problem are displayed on the LCD.
| Error Code Error Details and | the Solution |
| M4:AC M4:AC Error | Network errorCannot register scanner details with Scanner Central Admin Server. Refer to the Operator's Guide and take measures accordingly. |
| M5:A3 M5:A3 Error | Server errorCannot connect to Scanner Central Admin Server. Refer to the Operator's Guide and take measures accordingly. |
| M5:A4 M5:A4 Error | Server errorCannot register scanner details with Scanner Central Admin Server. Refer to the Operator's Guide and take measures accordingly. |
| M5:A5 M5:A5 Error | Server errorMaintenance work for Scanner Central Admin Server in progress.Refer to the Operator's Guide and take measures accordingly. |
- For the Function Number Display
An alphabetical character and a number for the error code are displayed alternately on the Function Number Display.
| Error Code Error Details (displayed in the Error Recovery Guide window) | |
| n4 (*1) — | |
| n5 | |
*1: Displayed when the scanner details cannot be registered with Scanner Central Admin Server. Take the following measures.
- Check the "Scanner Central Admin Server" setting on the scanner. You can check the "Scanner Central Admin Server" setting as follows.
-For fi-8190/fi-8290/fi-8170/fi-8270
The "Scanner Central Admin Server" setting for the scanner can be checked using one of the following methods.
- The "Scanner Central Admin Server" setting for the scanner can be checked in [1:Scanner Information] on the [Settings Menu] screen of the operator panel. For details, refer to How to Use Settings Menu (page 145).
- The "Scanner Central Admin Server" setting for the scanner can be checked in fi Series Network Settings. For details, refer to Network Settings (fi Series Network Settings) [fi-8190/fi-8290/fi-8170/fi-8270/fi-8150/fi-8250] (page 403).
-For fi-8150/fi-8250
The "Scanner Central Admin Server" setting for the scanner can be checked in fi Series Network Settings.
For details, refer to Network Settings (fi Series Network Settings) [fi-8190/fi-8290/fi-8170/fi-8270/fi-8150/fi-8250] (page 403).
- Check the connection status of the network.
- Check the settings in the Scanner Central Admin Server.
- Try again later.
If the problem still persists, write down the error code, check each item in Before You Contact the Scanner Service Provider (page 334) and then contact the distributor/dealer where you purchased this product. Refer to the contact information in the Contact List if supplied with this product, or refer to the contact information in the Contact for Inquiries section if provided in Safety Precautions supplied with this product, and then make an inquiry.
Server Setting Error [fi-8190/fi-8290/fi-8170/fi-8270/fi-8150/fi-8250]
If an error occurs in the settings in PaperStream NX Manager, the following is displayed on the operator panel.
- For the LCD
An error code, error details, and a solution for the problem are displayed on the LCD.
| Error Code Error Details and | the Solution |
| M5:A2 M5:A2 Error | Server errorCannot save the file to PaperStream NX Manager. Refer to the Operator's Guide and take measures accordingly. |
| M5:AC M5:AC Error | Server errorCannot connect to PaperStream NX Manager. Refer to the Operator's Guide and take measures accordingly. |
- For the Function Number Display
An alphabetical character and a number for the error code are displayed alternately on the Function Number Display.
| Error Code Error Details (displayed in the Error Recovery Guide window) | |
| n5 | — |
Take the following measures.
- Check the "PaperStream NX Manager" setting on the scanner.
You can check the "PaperStream NX Manager" setting on the scanner as follows.
-For fi-8190/fi-8290/fi-8170/fi-8270
The "PaperStream NX Manager" setting on the scanner can be checked using one of the following methods.
- The "PaperStream NX Manager" setting on the scanner can be checked in [1:Scanner Information] on the [Settings Menu] screen of the operator panel.
For details, refer to How to Use Settings Menu (page 145).
- The "PaperStream NX Manager" setting on the scanner can be checked in fi Series network settings.
For details, refer to Network Settings (fi Series Network Settings) [fi-8190/fi-8290/fi-8170/fi-8270/fi-8150/fi-8250] (page 403).
-For fi-8150/fi-8250
The "PaperStream NX Manager" setting on the scanner can be checked in fi Series network settings.
For details, refer to Network Settings (fi Series Network Settings) [fi-8190/fi-8290/fi-8170/fi-8270/fi-8150/fi-8250] (page 403).
- Check the connection status of the network.
- Check the settings in PaperStream NX Manager.
If the problem still persists, write down the error code, check each item in Before You Contact the Scanner Service Provider (page 334) and then contact the distributor/dealer where you purchased this product. Refer to the contact information in the Contact List if supplied with this product, or refer to the contact information in the Contact for Inquiries section if provided in Safety Precautions supplied with this product, and then make an inquiry.
Authentication Failed [fi-8190/fi-8290/fi-8170/fi-8270]
If the authentication for PaperStream NX Manager fails, the following is displayed on the operator panel.
- For the LCD
An error code, error details, and a solution for the problem are displayed on the LCD.
| Error Code Error Details and | the Solution |
| M6:AE M6:AE Error | Server errorThe job group code entered is incorrect. Refer to the Operator's Guide and take measures accordingly. |
| M6:AF M6:AF Error | Server errorCannot log in to PaperStream NX Manager automatically. Refer to the Operator's Guide and take measures accordingly. |
- For the Function Number Display
An alphabetical character and a number for the error code are displayed alternately on the Function Number Display.
| Error Code Error Details (displayed in the Error Recovery Guide window) | |
| n6 | — |
Take the following measures.
- Make sure that the job group code is correct.
- Check the "Auto Login" settings for the scanner.
The "Auto Login" settings for the scanner can be checked using one of the following methods.
- The "Auto Login" settings for the scanner can be checked in [1:Scanner Information] on the [Settings Menu] screen of the operator panel.
For details, refer to How to Use Settings Menu (page 145).
- The "Auto Login" settings for the scanner can be checked in fi Series Network Settings. For details, refer to PaperStream NX Manager (page 416).
- Check the connection status of the network.
- Check the settings in PaperStream NX Manager.
If the problem still persists, write down the error code, check each item in Before You Contact the Scanner Service Provider (page 334) and then contact the distributor/dealer where you purchased this product. Refer to the contact information in the Contact List if supplied with this product, or refer to the contact information in the Contact for Inquiries section if provided in Safety Precautions supplied with this product, and then make an inquiry.
Transport Lock Error [fi-8290/fi-8270/fi-8250/fi-8250U]
If an transport lock error occurs, the following is displayed on the operator panel.
- For the LCD
An error code, error details, and a solution for the problem are displayed on the LCD.
| Error Code Error Details and | the Solution |
| U0:10 U0:10 Error | Transport lock errorUnlock the transport lock switch. |
- For the Function Number Display
An alphabetical character and a number for the error code are displayed alternately on the Function Number Display.
| Error Code Error Details (displayed in the Error Recovery Guide window) |
| U0 Transport lock error |
Check that the transport lock switch is not locked.
If the the transport lock switch is locked, unlock the transport lock switch.
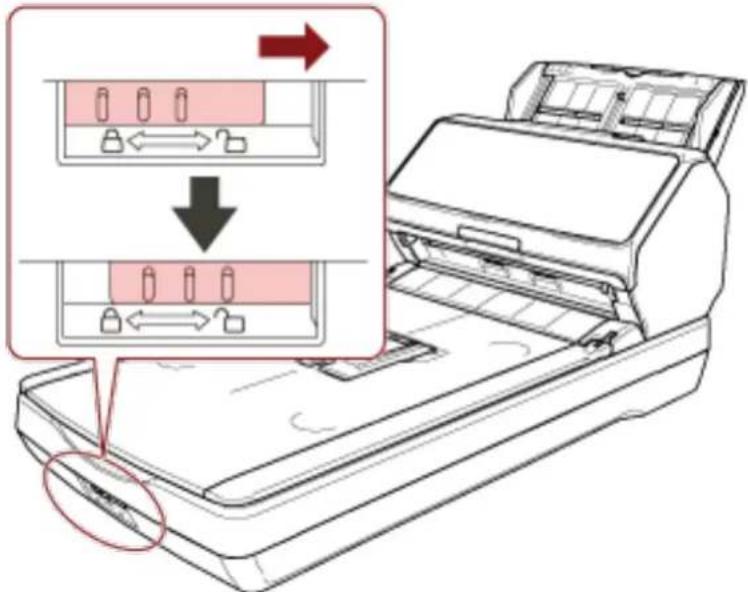
ADF Open
If you open the ADF during a scan, the following is displayed on the operator panel.
- For the LCD
An error code, error details, and a solution for the problem are displayed on the LCD.
| Error Code Error Details and | the Solution |
| U4:40 U4:40 Error | ADF open |
- For the Function Number Display
An alphabetical character and a number for the error code are displayed alternately on the Function Number Display.
| Error Code Error Details (displayed in the Error Recovery Guide window) | |
| U4 ADF open | |
HINT
- If you open the ADF while the scanner is in standby, the following is displayed on the operator panel.
-For fi-8190/fi-8290/fi-8170/fi-8270
Only an error message appears on the LCD without an error code
-For fi-8150/fi-8250
"c" which is displayed on the Function Number Display and the LED indicator flashes alternately. - Note that operations on the operator panel are disabled while the ADF is open.
Remove the document from the ADF, and close the ADF.
Confirm that the ADF is closed properly.
To check whether or not it is closed completely, open the ADF and then close it again.
For more details about opening and closing the ADF, refer to Opening/Closing the ADF (page 76).
Imprinter Cover Open (When the Imprinter Is Installed) [fi-8190/fi-8170/fi-8150/fi-8150U]
If you open the print section (imprinter cover) while scanning, the following is displayed on the operator panel.
- For the LCD
An error code, error details, and a solution for the problem are displayed on the LCD.
| Error Code Error Details and | the Solution |
| U5:4A U5:4A Error | Imprinter Cover Open |
- For the Function Number Display
An alphabetical character and a number for the error code are displayed alternately on the Function Number Display.
| Error Code Error Details (displayed in the Error Recovery Guide window) | |
| U5 Imprinter Cover Open | |
HINT
If you open the print section (imprinter cover) while the scanner is in standby, the following is displayed on the operator panel.
- For fi-8190/fi-8170
Only an error message appears on the LCD without an error code
- For fi-8150/fi-8150U
"c" which is displayed on the Function Number Display and the LED indicator flashes alternately.
Remove the document from the ADF, and close the print section (imprinter cover).
Confirm that the print section (imprinter cover) is closed properly.
To check whether or not it is closed completely, open the print section (imprinter cover) and then close it again.
For details about opening and closing the print section (imprinter cover), refer to the fi-819PRB Imprinter Operator's Guide.
Print Cartridge Not Installed (When the Imprinter Is Installed) [fi-8190/fi-8170/fi-8150/fi-8150U]
If the print cartridge is not installed in the imprinter, the following is displayed on the operator panel.
- For the LCD
An error code, error details, and a solution for the problem are displayed on the LCD.
| Error Code Error Details and | the Solution |
| U6:B4 U6:B4 Error | Print cartridge not installedCheck if the Print Cartridge is mounted correctly. |
- For the Function Number Display
An alphabetical character and a number for the error code are displayed alternately on the Function Number Display.
| Error Code Error Details (displayed in the Error Recovery Guide window) |
| U6 Print cartridge not installed |
Refer to the fi-819PRB Imprinter Operator Guide to install the print cartridge.
Outside Designated Scan Area Error (When Operating with PaperStream NX Manager) [fi-8190/fi-8290/fi-8170/fi-8270/fi-8150/fi-8250]
A paper jam occurs when the bottom edge of the document is detected before the specified area is scanned with the ADF. If a paper jam occurs, the following is displayed on the operator panel.
- For the LCD
An error code, error details, and a solution for the problem are displayed on the LCD.
| Error Code Error Details and | the Solution |
| U7:20 U7:20 Error | Outside designated scan area errorDetected the page end before starting scanning.Please change the scan area, and scan again. |
- For the Function Number Display
An alphabetical character and a number for the error code are displayed alternately on the Function Number Display.
| Error Code Error Details (displayed in the Error Recovery Guide window) |
| U7 Outside designated scan area error |
Example:
![RICOH fi-8190 - Outside Designated Scan Area Error (When Operating with PaperStream NX Manager) [fi-8190/fi-8290/fi-8170/fi-8270/fi-8150/fi-8250] - 1](/content/2026/05/903199/images/8a838ec82c8d5e4512b93d412dc9902af8ca67ba85e67aeaed6f4540b16e3da6.jpg)
flowchart
graph TD
    A["Incorrect Document"] --> B["Scan Area"]
    B --> C["Correct (1) Document"]
    C --> D["Scan Area"]
    D --> E["Correct (2) Document"]
    E --> F["Scan Area"]
    F --> C
    style A fill:#f9f,stroke:#333
    style B fill:#ccf,stroke:#333
    style C fill:#cfc,stroke:#333
    style D fill:#fcc,stroke:#333
    style E fill:#cff,stroke:#333
    style F fill:#ffc,stroke:#333
Outside of the document may have been scanned because the scanned document is shorter than the specified paper size.
In this case, take one of the following measures, and then scan again.
- Load a document of the specified paper size in the ADF paper chute (feeder).
- Change the scan settings so that the scanning area is set inside of the document.
ATTENTION
Ways to designate the scanning area differ depending on scanner drivers and image scanning applications. For details, refer to the help for your scanner driver and the manual/help for your image scanning application.
Imprinting Area Error (When the Imprinter Is Installed) [fi-8190/fi-8170/fi-8150/fi-8150U]
If an error occurs with the print start position in the imprinter, the following is displayed on the operator panel.
- For the LCD
An error code, error details, and a solution for the problem are displayed on the LCD.
| Error Code Error Details and | the Solution |
| U7:B9 U7:B9 Error | Imprinting area error |
- For the Function Number Display
An alphabetical character and a number for the error code are displayed alternately on the Function Number Display.
| Error Code Error Details (displayed in the Error Recovery Guide window) |
| U7 Imprinting area error |
Adjust the start position and character string for printing so that the print area is inside the document.
For details, refer to the fi-819PRB Imprinter Operator's Guide.
Being Used by Others
The scanner is already being used.
●Make sure that another application is not using the scanner.
- Make sure that the connection method of the scanner is correct.
- Make sure that no operations are being performed on the operator panel.
The Scanner Is in Doc Counting Mode [fi-8190/fi-8290/fi-8170/fi-8270]
The Scanner is in "Doc Counting mode" and therefore scanning cannot be performed.
Press down the [Stop/Clear] button for more than three seconds on the [Doc Counting Mode (More documents)] screen of the operator panel to exit the Doc Counting mode.
No Paper
No document has been loaded.
Load a document in the ADF paper chute (feeder).
Stop
Pressing the following button on the following scanners in the middle of a scan caused the scan to stop.
●For fi-8190/fi-8290/fi-8170/fi-8270
[Stop/Clear] button
Before resuming a scan, if documents remain in the scanner, refer to When a Paper Jam Occurs (page 249) to remove the documents. Then press the [Stop/Clear] button to clear the display.
●For fi-8150/fi-8250/fi-8150U/fi-8250U
[Scan/Stop] button
Before resuming a scan, if documents remain in the scanner, refer to When a Paper Jam Occurs (page 249) to remove the documents.
Pause
Scanning has been paused by the user.
When you press the following button on the following scanner in the middle of a scan, scanning stops temporarily.
●For fi-8190/fi-8290/fi-8170/fi-8270
[Scan/Enter] button
To resume scanning, press the [Scan/Enter] button.
●For fi-8150/fi-8250/fi-8150U/fi-8250U
[Send to] button
To resume scanning, press the [Scan/Stop] button.
Outside Designated Scan Area Error (When Operating with a Computer)
A paper jam occurs when the bottom edge of the document is detected before the specified area is scanned with the ADF.
Example:
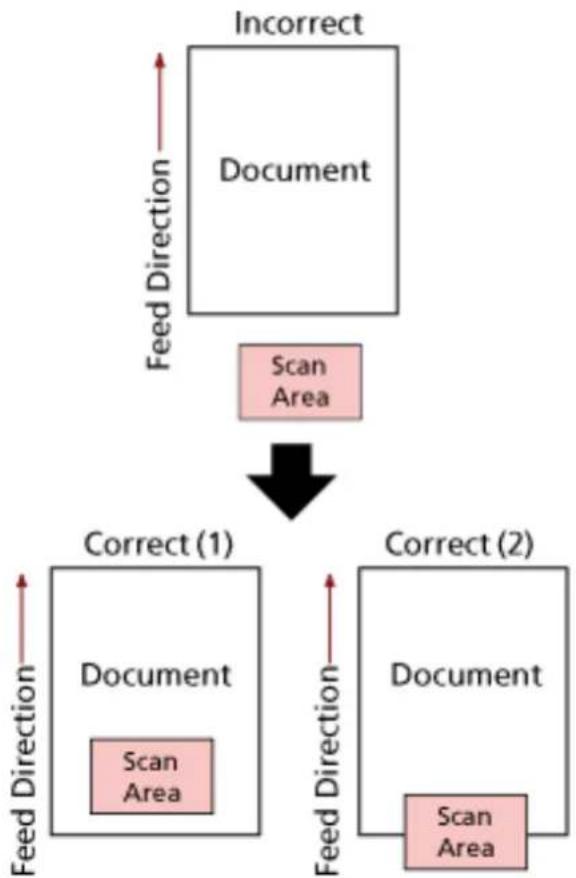
flowchart
graph TD
    A["Incorrect Document"] --> B["Scan Area"]
    B --> C["Correct (1) Document"]
    C --> D["Feed Direction"]
    D --> E["Correct (2) Document"]
    E --> F["Feed Direction"]
    F --> G["Scan Area"]
    G --> H["Correct (1) Document"]
    H --> I["Feed Direction"]
    I --> J["Correct (2) Document"]
Outside of the document may have been scanned because the scanned document is shorter than the specified paper size.
In this case, take one of the following measures, and then scan again.
- Load a document of the specified paper size in the ADF paper chute (feeder).
- Change the scan settings so that the scanning area is set inside of the document.
ATTENTION
Ways to designate the scanning area differ depending on scanner drivers and image scanning applications. For details, refer to the help for your scanner driver and the manual/help for your image scanning application.
Invalid Command
The command was ended abnormally.
There may be a problem with the USB cable connection.
- Make sure that the USB cable is connected properly.
- Turn the scanner off then back on.
If the problem still persists, write down the error code, check each item in Before You Contact the Scanner Service Provider (page 334) and then contact the distributor/dealer where you purchased
this product. Refer to the contact information in the Contact List if supplied with this product, or refer to the contact information in the Contact for Inquiries section if provided in Safety Precautions supplied with this product, and then make an inquiry.
Interface Malfunction
An interface malfunction occurred.
Take the following measures.
- Connect the USB cable properly.
- Use a new USB cable and connect it properly.
- Use the USB cable that is supplied with the scanner.
- If more than one USB hub is used, connect the scanner to the hub that is connected directly to the computer. If the problem persists, connect the scanner directly to the computer.
- Turn the scanner off then back on.
If the problem still persists, write down the error code, check each item in Before You Contact the Scanner Service Provider (page 334) and then contact the distributor/dealer where you purchased this product. Refer to the contact information in the Contact List if supplied with this product, or refer to the contact information in the Contact for Inquiries section if provided in Safety Precautions supplied with this product, and then make an inquiry.
Unit Attention
If the same message appears after a scan is retried, turn off both the computer and the scanner, then turn them back on.
If the problem still persists, write down the error code, check each item in Before You Contact the Scanner Service Provider (page 334) and then contact the distributor/dealer where you purchased this product. Refer to the contact information in the Contact List if supplied with this product, or refer to the contact information in the Contact for Inquiries section if provided in Safety Precautions supplied with this product, and then make an inquiry.
Troubleshooting
This section describes examples of troubles that you may encounter when using the scanner and also describes the solutions to them.
Before you request for a repair, take measures by looking through the examples of the troubles and solutions.
If the problem still persists, check each item in Before You Contact the Scanner Service Provider (page 334) first, then contact the distributor/dealer where you purchased this product. Refer to the contact information in the Contact List if supplied with this product, or refer to the contact information in the Contact for Inquiries section if provided in Safety Precautions supplied with this product, and then make an inquiry.
The following are examples of troubles that you may encounter.
●Power of the scanner
●The Scanner Cannot Be Powered ON (page 288)
- The LCD or the [Scan/Enter] Button or Both Turn Off [fi-8190/fi-8290/fi-8170/fi-8270] (page 289)
- The Function Number Display or the [Scan/Stop] Button or Both Turn Off [fi-8150/fi-8250/fi-8150U/fi-8250U] (page 290)
●Connection of the scanner
- Cannot Connect the Scanner and a Computer with the Network [fi-8190/fi-8290/fi-8170/fi-8270/fi-8150/fi-8250] (page 291)
- Cannot Connect the Scanner and a Computer via the USB Cable (page 296)
- Cannot Connect the Scanner (Operated with PaperStream NX Manager) to a Server by Specifying an IP Address [fi-8190/fi-8290/fi-8170/fi-8270/fi-8150/fi-8250] (page 298)
- Cannot Connect the Scanner (Operated with PaperStream NX Manager) to a Server by Specifying a Host Name (With PaperStream NX Manager) [fi-8190/fi-8290/fi-8170/fi-8270/fi-8150/fi-8250] (page 302)
● Scanning operations
- Scanning Does Not Start (page 307)
- Scanning Takes a Long Time (page 309)
- An Error (Error Code "U0:10", "U4:40" or "U5:4A") is Already Displayed in the LCD After Power-on [fi-8190/fi-8290/fi-8170/fi-8270] (page 316)
- An Error ("E" or Other Letter or Number) is Already Displayed in the Function Number Display After Power-on [fi-8150/fi-8250/fi-8150U/fi-8250U] (page 317)
•Overlapped Documents Are Frequently Fed into the Scanner (page 318) - Situation in Which the Document Is not Fed into the ADF Occurs Frequently (page 321)
●Paper Protection Is Set Off Frequently (page 323)
●Paper Jams/Pick Errors Occur Frequently (page 325)
- Scanning results
- The Scanned Image of a Picture or Photo is Rough/Image Noise Appears (page 310)
●Quality of Scanned Text or Lines Is Unsatisfactory (page 311)
●Images Are Distorted or Not Clear (page 313)
•Vertical Streaks Appear on the Images (page 315) - Images Turn Out Elongated (page 327)
●A Shadow Appears at the Top or the Bottom of the Image (page 329) - There Are Black Traces on the Document (page 330)
●(Carrier) Sheet
- The (Carrier) Sheet Is Not Fed Smoothly or a Jam Occurs (page 331)
- Part of the Image Appears Missing in the Case Where the (Carrier) Sheet Is Used (page 333)
The Scanner Cannot Be Powered ON
Check the following points
- Is the power cable connected properly? (page 288)
- Did you press the [Power] button on the scanner? (page 288)
If the problem still persists, check each item in Before You Contact the Scanner Service Provider (page 334) first, then contact the distributor/dealer where you purchased this product. Refer to the contact information in the Contact List if supplied with this product, or refer to the contact information in the Contact for Inquiries section if provided in Safety Precautions supplied with this product, and then make an inquiry.
●Is the power cable connected properly?
Solution
Connect the power cable properly.
For details, refer to Scanner Setup (page 41).
- Did you press the [Power] button on the scanner?
Solution
Press the [Power] button on the scanner.
For details, refer to How to Turn the Power ON (page 71).
The LCD or the [Scan/Enter] Button or Both Turn Off [fi-8190/fi-8290/fi-8170/fi-8270]
Check the following points
- Has the scanner been left out of operation for a long time after being powered on? (page 289) If the problem still persists, check each item in Before You Contact the Scanner Service Provider (page 334) first, then contact the distributor/dealer where you purchased this product. Refer to the contact information in the Contact List if supplied with this product, or refer to the contact information in the Contact for Inquiries section if provided in Safety Precautions supplied with this product, and then make an inquiry.
●Has the scanner been left out of operation for a long time after being powered on?
Solution
The scanner has entered power saving mode or has been automatically turned off.
- If the scanner has entered power saving mode The LCD turns off and the [Scan/Enter] button flashes in green. Resume from power saving mode by one of the following methods: -Load a document in the ADF paper chute (feeder). -Press any button on the scanner (except the [Power] button). -Scan a document with the image scanning application. For details, refer to Entering and Resuming from Power Saving Mode (page 74).
- If the scanner has been automatically turned off Both the LCD and the [Scan/Enter] button turn off. Turn on the scanner. For details, refer to How to Turn the Power ON (page 71).
The Function Number Display or the [Scan/Stop] Button or Both Turn Off [fi-8150/fi-8250/fi-8150U/fi-8250U]
Check the following points
- Has the scanner been left out of operation for a long time after being powered on? (page 289) If the problem still persists, check each item in Before You Contact the Scanner Service Provider (page 334) first, then contact the distributor/dealer where you purchased this product. Refer to the contact information in the Contact List if supplied with this product, or refer to the contact information in the Contact for Inquiries section if provided in Safety Precautions supplied with this product, and then make an inquiry.
●Has the scanner been left out of operation for a long time after being powered on?
Solution
The scanner has entered power saving mode or has been automatically turned off.
- If the scanner has entered power saving mode The Function Number Display turns off and the [Scan/Stop] button flashes in green. Resume from power saving mode by one of the following methods:
-Load a document in the ADF paper chute (feeder). -Press any button on the scanner (except the [Power] button). -Scan a document with the image scanning application. For details, refer to Entering and Resuming from Power Saving Mode (page 74).
- If the scanner has been automatically turned off Both the Function Number Display and the [Scan/Stop] button turn off. Turn on the scanner. For details, refer to How to Turn the Power ON (page 71).
Cannot Connect the Scanner and a Computer with the Network [fi-8190/fi-8290/fi-8170/fi-8270/fi-8150/fi-8250]
Check the following points
- Is the scanner connected to a network device (such as a switch, a hub, or a router) via a LAN cable? (page 291)
- Is the network device (such as a switch, a hub, or a router) turned on? (page 292)
- Is the firmware version for the network device the latest? (page 292)
- Is the computer connected to a network device (such as a switch, a hub, or a router)? (page 292)
- Did you configure the settings related to communication conditions on a network device (such as a switch, a hub, or a router)? (page 292)
- Are there any security limitations in the network? (page 293)
•Is the network stable? (page 293) - Did you select the scanner in Scanner Selection Tool? (page 293)
- Is the communication status between the scanner and the computer stable? (page 293)
- Is the scanner connected to another computer? (page 294)
- Is the IP address of the scanner correct? (page 294)
- Is the IP address of the scanner used for other communication devices? (page 295)
- Is the correct scanner name set for the image scanning application? (page 295)
- Has [Network Function] been disabled in the Software Operation Panel? (page 295)
If the problem still persists, check each item in Before You Contact the Scanner Service Provider (page 334) first, then contact the distributor/dealer where you purchased this product. Refer to the contact information in the Contact List if supplied with this product, or refer to the contact information in the Contact for Inquiries section if provided in Safety Precautions supplied with this product, and then make an inquiry.
- Is the scanner connected to a network device (such as a switch, a hub, or a router) via a LAN cable?
Solution
Connect the scanner to a network device (such as a switch, a hub, or a router) via a LAN cable. Also, connect the LAN cable properly.
When the LAN cable is connected properly, take the following measures:
-Replace the LAN cable.
- Change the port on the network device, which the LAN cable is connected to.
- Change the transmission method for the network device to "full-duplex" or "half-duplex".
●Is the network device (such as a switch, a hub, or a router) turned on?
Solution
Turn on the network device (such as a switch, a hub, or a router).
Also, check that there is no error or malfunction on the network device.
For errors that occur on the network device, refer to the manual of your network device.
●Is the firmware version for the network device the latest?
Solution
If the firmware version for the network device is not the latest, unexpected operations may occur.
Contact the network administrator to check the firmware version, and consider updating it to the latest version.
For details about how to update the firmware for the network device, refer to the manual of your network device.
●Is the computer connected to a network device (such as a switch, a hub, or a router)?
Solution
Connect the computer to a network device (such as a switch, a hub, or a router).
For details, refer to the manual of your computer.
- Did you configure the settings related to communication conditions on a network device (such as a switch, a hub, or a router)?
Solution
When the following are set on the network device (such as a switch, a hub, or a router), take measures accordingly.
- Protocol filter function is enabled.
Allow the protocol which is to be used for communication.
- MAC address filtering is enabled.
Configure the network device (such as a switch, a hub, or a router) with the MAC address of the scanner.
You can check the MAC address of the scanner as follows.
-For fi-8190/fi-8290/fi-8170/fi-8270
The MAC address of the scanner can be checked using one of the following methods.
- The MAC address of the scanner can be checked in [1: Scanner Information] on the [Settings Menu] screen of the operator panel.
For details, refer to How to Use Settings Menu (page 145).
- The MAC address of the scanner can be checked by using IP Address Setting Tool.
For details, refer to the Network Setup Tool for fi Series Help.
For details about how to start up IP Address Setting Tool, refer to Starting Up IP Address
Setting Tool [fi-8190/fi-8290/fi-8170/fi-8270/fi-8150/fi-8250] (page 70).
-For fi-8150/fi-8250
The MAC address of the scanner can be checked by using IP Address Setting Tool.
For details, refer to the Network Setup Tool for fi Series Help.
For details about how to start up IP Address Setting Tool, refer to Starting Up IP Address
Setting Tool [fi-8190/fi-8290/fi-8170/fi-8270/fi-8150/fi-8250] (page 70).
For the settings on the network device, refer to the manual of your network device.
●Are there any security limitations in the network?
Solution
The access limitations for users may be configured in the network.
For details, contact the network administrator.
●Is the network stable?
Solution
Connect to the network after it becomes stable.
A network can be unstable by the following events:
- A network monitoring program is running.
- A file is transferring.
If the network is unstable, restart the network devices. However, before restarting them, make sure that communications with other devices are not affected if the network devices are restarted. The network devices may become unstable.
- Did you select the scanner in Scanner Selection Tool?
Solution
Start up Scanner Selection Tool, and check whether the scanner that you want to connect the computer to is displayed in the list.
For details about how to start up Scanner Selection Tool, refer to Starting Up Scanner
Selection Tool [fi-8190/fi-8290/fi-8170/fi-8270/fi-8150/fi-8250] (page 69).
- Is the communication status between the scanner and the computer stable?
Solution
Check the communication status between the scanner and the computer.
Start up the command prompt on your computer, specify the IP address of the scanner by using the PING command, and then check the communication status.
You can check the IP address of the scanner as follows.
●For fi-8190/fi-8290/fi-8170/fi-8270
The IP address of the scanner can be checked using one of the following methods.
-The IP address of the scanner can be checked in [1:Scanner Information] on the [Settings Menu] screen of the operator panel.
For details, refer to How to Use Settings Menu (page 145).
-The IP address of the scanner can be checked by using IP Address Setting Tool.
For details, refer to the Network Setup Tool for fi Series Help.
For details about how to start up IP Address Setting Tool, refer to Starting Up IP Address
Setting Tool [fi-8190/fi-8290/fi-8170/fi-8270/fi-8150/fi-8250] (page 70).
- For fi-8150/fi-8250
The IP address of the scanner can be checked by using IP Address Setting Tool.
For details, refer to the Network Setup Tool for fi Series Help.
For details about how to start up IP Address Setting Tool, refer to Starting Up IP Address Setting Tool [fi-8190/fi-8290/fi-8170/fi-8270/fi-8150/fi-8250] (page 70).
●Is the scanner connected to another computer?
Solution
The scanner can be connected to only one computer at a time. Wait until the other computer is disconnected from the scanner, and then connect the computer to be used again.
●Is the IP address of the scanner correct?
Solution
Check the IP address of the scanner.
You can check the IP address of the scanner as follows.
●For fi-8190/fi-8290/fi-8170/fi-8270
The IP address of the scanner can be checked using one of the following methods.
-The IP address of the scanner can be checked in [1:Scanner Information] on the [Settings Menu] screen of the operator panel.
For details, refer to How to Use Settings Menu (page 145).
-The IP address of the scanner can be checked by using IP Address Setting Tool.
For details, refer to the Network Setup Tool for fi Series Help.
For details about how to start up IP Address Setting Tool, refer to Starting Up IP Address Setting Tool [fi-8190/fi-8290/fi-8170/fi-8270/fi-8150/fi-8250] (page 70).
- For fi-8150/fi-8250
The IP address of the scanner can be checked by using IP Address Setting Tool.
For details, refer to the Network Setup Tool for fi Series Help.
For details about how to start up IP Address Setting Tool, refer to Starting Up IP Address Setting Tool [fi-8190/fi-8290/fi-8170/fi-8270/fi-8150/fi-8250] (page 70).
When specifying an IP address manually, specify the correct IP address.
When setting the IP address automatically, check whether the DHCP server functions normally.
Even when the DHCP server functions normally, an IP address may not be assigned correctly depending on the settings for the DHCP server. Check the operation status and the settings for the DHCP server.
●Is the IP address of the scanner used for other communication devices?
Solution
If there are multiple communication devices using the same IP address on the same network, communication may fail. Avoid duplicates in IP addresses.
●Is the correct scanner name set for the image scanning application?
Solution
Check whether the scanner name for a wired LAN connection is set for the image scanning application.
Depending on the scanner driver, the scanner name that you select differs as follows.
- For PaperStream IP (TWAIN)/PaperStream IP (TWAIN x64)
PaperStream IP xxx Net
- For PaperStream IP (ISIS) fi-8000 Series
PaperStream_IP xxx Net
The scanner model name is shown in [xxx]. For details, refer to the help for the scanner driver.
●Has [Network Function] been disabled in the Software Operation Panel?
Solution
Enable [Network Function] in the Software Operation Panel.
Cannot Connect the Scanner and a Computer via the USB Cable
Check the following points
- Is the USB cable connected properly? (page 296)
- Is the connector on the USB cable broken or damaged? (page 296)
- Is the correct scanner name set for the image scanning application? (page 296)
- Did you select [Auto] for the USB setting for the scanner? (page 296)
If the problem still persists, check each item in Before You Contact the Scanner Service Provider (page 334) first, then contact the distributor/dealer where you purchased this product. Refer to the contact information in the Contact List if supplied with this product, or refer to the contact information in the Contact for Inquiries section if provided in Safety Precautions supplied with this product, and then make an inquiry.
●Is the USB cable connected properly?
Solution
Use the USB cable that is supplied.
Check whether the scanner and computer are connected via the USB cable.
For details, refer to Scanner Setup (page 41).
●Is the connector on the USB cable broken or damaged?
Solution
Use a new USB cable and connect it properly.
●Is the correct scanner name set for the image scanning application?
Solution
Check whether the scanner name for a USB connection is set for the image scanning application.
Depending on the scanner driver, the scanner name that you select differs as follows.
- For PaperStream IP (TWAIN)/PaperStream IP (TWAIN x64)
PaperStream IP xxx
- For PaperStream IP (ISIS) fi-8000 Series
PaperStream_IP xxx
The scanner model name is shown in [xxx]. For details, refer to the help for the scanner driver.
- Did you select [Auto] for the USB setting for the scanner?
Solution
If you select [Auto] for the USB setting for the scanner, the connection between the scanner and a computer may not be able to be established.
Configure the USB settings so that the scanner operates with USB 2.0.
●For fi-8190/fi-8290/fi-8170/fi-8270
Select [2: USB 2.0] in [25: USB] on the [Settings Menu] screen of the operator panel.
For details, refer to How to Use Settings Menu (page 145).
- For fi-8150/fi-8250/fi-8150U/fi-8250U
Select [USB 2.0] in [USB] in the Software Operation Panel.
For details, refer to Specifying the USB Operation [USB] [fi-8150/fi-8250/fi-8150U/fi-8250U] (page 396).
Cannot Connect the Scanner (Operated with PaperStream NX Manager) to a Server by Specifying an IP Address [fi-8190/fi-8290/fi-8170/fi-8270/fi-8150/fi-8250]
Check the following points
- Is the IP address of the server correct? (page 298)
- Are the scanner and server connected to the network? (page 299)
- Is the IP address of the scanner correct? (page 299)
- Is the IP address of the scanner used for other communication devices? (page 299)
- Have you connected another communication device with the same IP address as the scanner to the server in the past? (page 300)
- Is there a firewall device between the scanner and the server? (page 300)
- Are the settings for [Linking with Server] in fi Series Network Settings specified correctly? (page 300)
- Are the settings on the server specified correctly? (page 300)
- Are the "Network Encryption" settings the same for the scanner and server? (page 301) If the problem still persists, check each item in Before You Contact the Scanner Service Provider (page 334) first, then contact the distributor/dealer where you purchased this product. Refer to the contact information in the Contact List if supplied with this product, or refer to the contact information in the Contact for Inquiries section if provided in Safety Precautions supplied with this product, and then make an inquiry.
●Is the IP address of the server correct?
Solution
Make sure that the IP address of the server is correct.
You can check the IP address of the server as follows.
●For fi-8190/fi-8290/fi-8170/fi-8270
The IP address of the server can be checked using one of the following methods.
-The IP address of the server can be checked in [1:Scanner Information] on the [Settings Menu] screen of the operator panel.
For details, refer to How to Use Settings Menu (page 145).
-The IP address of the server can be checked in fi Series Network Settings.
For details, refer to Network Settings (fi Series Network Settings) [fi-8190/fi-8290/fi-8170/fi-8270/fi-8150/fi-8250] (page 403).
- For fi-8150/fi-8250
The IP address of the server can be checked in fi Series Network Settings.
For details, refer to Network Settings (fi Series Network Settings) [fi-8190/fi-8290/fi-8170/fi-8270/fi-8150/fi-8250] (page 403).
●Are the scanner and server connected to the network?
Solution
Refer to Cannot Connect the Scanner and a Computer with the Network [fi-8190/fi-8290/fi-8170/fi-8270/fi-8150/fi-8250] (page 291) and take measures accordingly.
●Is the IP address of the scanner correct?
Solution
Check the IP address of the scanner.
You can check the IP address of the scanner as follows.
●For fi-8190/fi-8290/fi-8170/fi-8270
The IP address of the scanner can be checked using one of the following methods.
-The IP address of the scanner can be checked in [1:Scanner Information] on the [Settings Menu] screen of the operator panel. For details, refer to How to Use Settings Menu (page 145).
-The IP address of the scanner can be checked by using IP Address Setting Tool. For details, refer to the Network Setup Tool for fi Series Help. For details about how to start up IP Address Setting Tool, refer to Starting Up IP Address Setting Tool [fi-8190/fi-8290/fi-8170/fi-8270/fi-8150/fi-8250] (page 70).
-The IP address of the scanner can be checked in fi Series Network Settings. For details, refer to Network Settings (fi Series Network Settings) [fi-8190/fi-8290/fi-8170/fi-8270/fi-8150/fi-8250] (page 403).
- For fi-8150/fi-8250
The IP address of the scanner can be checked using one of the following methods.
-The IP address of the scanner can be checked by using IP Address Setting Tool. For details, refer to the Network Setup Tool for fi Series Help. For details about how to start up IP Address Setting Tool, refer to Starting Up IP Address Setting Tool [fi-8190/fi-8290/fi-8170/fi-8270/fi-8150/fi-8250] (page 70).
-The IP address of the scanner can be checked in fi Series Network Settings. For details, refer to Network Settings (fi Series Network Settings) [fi-8190/fi-8290/fi-8170/fi-8270/fi-8150/fi-8250] (page 403).
When specifying an IP address manually, specify the correct IP address.
When setting the IP address automatically, check whether the DHCP server functions normally. Even when the DHCP server functions normally, an IP address may not be assigned correctly depending on the settings for the DHCP server. Check the operation status and the settings for the DHCP server.
●Is the IP address of the scanner used for other communication devices?
Solution
If there are multiple communication devices using the same IP address on the same network, communication may fail. Avoid duplicates in IP addresses.
- Have you connected another communication device with the same IP address as the scanner to the server in the past?
Solution
Communication fails if you connect the scanner to the server and change the preferences settings without turning off the server after the server communicated with another host or communication device with the same IP address as the scanner. Restart the server.
●Is there a firewall device between the scanner and the server?
Solution
Check that the access from the scanner is not prohibited by the firewall device.
- Are the settings for [Linking with Server] in fi Series Network Settings specified correctly?
Solution
Check the following setting items for the server linkage settings.
- Whether the server settings are enabled.
- Whether [Host Name/IP address] and [Port Number] are correct.
- Whether the setting for [Use User Authentication] for a proxy sever is correct. You can check the server linkage settings as follows.
●For fi-8190/fi-8290/fi-8170/fi-8270
The server linkage settings can be checked using one of the following methods.
-The server linkage settings can be checked in [1:Scanner Information] on the [Settings Menu] screen of the operator panel.
For details, refer to How to Use Settings Menu (page 145).
-The server linkage settings can be checked in fi Series Network Settings.
For details, refer to Network Settings (fi Series Network Settings) [fi-8190/fi-8290/fi-8170/fi-8270/fi-8150/fi-8250] (page 403).
- For fi-8150/fi-8250
The server linkage settings can be checked in fi Series Network Settings.
For details, refer to Network Settings (fi Series Network Settings) [fi-8190/fi-8290/fi-8170/fi-8270/fi-8150/fi-8250] (page 403).
●Are the settings on the server specified correctly?
Solution
Refer to the manual for your server and check the settings.
●Are the "Network Encryption" settings the same for the scanner and server?
Solution
Check that the "Network Encryption" setting for the scanner is the same as the setting in PaperStream NX Manager/Scanner Central Admin Server.
You can check the "Network Encryption" setting as follows.
- For fi-8190/fi-8290/fi-8170/fi-8270
The "Network Encryption" setting for the scanner can be checked using one of the following methods.
-The "Network Encryption" setting for the scanner can be checked in [1:Scanner Information] on the [Settings Menu] screen of the operator panel.
For details, refer to How to Use Settings Menu (page 145).
-The "Network Encryption" setting for the scanner can be checked by using IP Address Setting Tool.
For details, refer to the Network Setup Tool for fi Series Help.
For details about how to start up IP Address Setting Tool, refer to Starting Up IP Address Setting Tool [fi-8190/fi-8290/fi-8170/fi-8270/fi-8150/fi-8250] (page 70).
- The "Network Encryption" setting for the scanner can be checked in fi Series Network Settings.
For details, refer to Network Settings (fi Series Network Settings) [fi-8190/fi-8290/fi-8170/fi-8270/fi-8150/fi-8250] (page 403).
- For fi-8150/fi-8250
The "Network Encryption" setting for the scanner can be checked using one of the following methods.
-The "Network Encryption" setting for the scanner can be checked by using IP Address Setting Tool.
For details, refer to the Network Setup Tool for fi Series Help.
For details about how to start up IP Address Setting Tool, refer to Starting Up IP Address Setting Tool [fi-8190/fi-8290/fi-8170/fi-8270/fi-8150/fi-8250] (page 70).
- The "Network Encryption" setting for the scanner can be checked in fi Series Network Settings.
For details, refer to Network Settings (fi Series Network Settings) [fi-8190/fi-8290/fi-8170/fi-8270/fi-8150/fi-8250] (page 403).
For details about the setting in PaperStream NX Manager/Scanner Central Admin Server, refer to the PaperStream NX Manager User's Guide/Scanner Central Admin User's Guide.
Cannot Connect the Scanner (Operated with PaperStream NX Manager) to a Server by Specifying a Host Name (With PaperStream NX Manager) [fi-8190/fi-8290/fi-8170/fi-8270/fi-8150/fi-8250]
Check the following points
- Is the host name of the server correct? (page 302)
- Is the DNS server information configured correctly? (page 303)
- Does the DNS server function normally? (page 303)
- Are the scanner and server connected to the network? (page 304)
- Is the IP address of the scanner correct? (page 304)
- Is the IP address of the scanner used for other communication devices? (page 304)
- Have you connected another communication device with the same IP address as the scanner to the server in the past? (page 305)
- Is there a firewall device between the scanner and the server? (page 305)
- Are the settings for [Linking with Server] in fi Series Network Settings specified correctly? (page 305)
- Are the settings on the server specified correctly? (page 305)
- Are the "Network Encryption" settings the same for the scanner and server? (page 306) If the problem still persists, check each item in Before You Contact the Scanner Service Provider (page 334) first, then contact the distributor/dealer where you purchased this product. Refer to the contact information in the Contact List if supplied with this product, or refer to the contact information in the Contact for Inquiries section if provided in Safety Precautions supplied with this product, and then make an inquiry.
●Is the host name of the server correct?
Solution
Make sure that the host name of the server is correct.
You can check the host name of the server as follows.
●For fi-8190/fi-8290/fi-8170/fi-8270
The host name of the server can be checked using one of the following methods.
-The host name of the server can be checked in [1:Scanner Information] on the [Settings Menu] screen of the operator panel.
For details, refer to How to Use Settings Menu (page 145).
-The host name of the server can be checked in fi Series Network Settings.
For details, refer to Network Settings (fi Series Network Settings) [fi-8190/fi-8290/fi-8170/fi-8270/fi-8150/fi-8250] (page 403).
- For fi-8150/fi-8250
The host name of the server can be checked in fi Series Network Settings.
For details, refer to Network Settings (fi Series Network Settings) [fi-8190/fi-8290/fi-8170/fi-8270/fi-8150/fi-8250] (page 403).
●Is the DNS server information configured correctly?
Solution
Check the following setting items for the DNS server settings for the scanner.
- Whether the DNS server settings are enabled.
- Whether the primary DNS and secondary DNS settings are correct.
You can check the DNS server settings as follows.
- For fi-8190/fi-8290/fi-8170/fi-8270
The DNS server settings for the scanner can be checked using one of the following methods.
-The DNS server settings for the scanner can be checked in [1:Scanner Information] on the [Settings Menu] screen of the operator panel. For details, refer to How to Use Settings Menu (page 145).
-The DNS server settings for the scanner can be checked in fi Series network settings. For details, refer to Network Settings (fi Series Network Settings) [fi-8190/fi-8290/fi-8170/fi-8270/fi-8150/fi-8250] (page 403).
- For fi-8150/fi-8250 The DNS server settings for the scanner can be checked in fi Series network settings. For details, refer to Network Settings (fi Series Network Settings) [fi-8190/fi-8290/fi-8170/fi-8270/fi-8150/fi-8250] (page 403).
- Does the DNS server function normally?
Solution
Check whether the DNS server functions normally. Start up the command prompt on your computer, specify the IP address for the DNS server by using the PING command, and then check whether the DNS server functions. You can check the IP address for the DNS server as follows.
●For fi-8190/fi-8290/fi-8170/fi-8270
The IP address for the DNS server can be checked using one of the following methods.
-The IP address for the DNS server can be checked in [1:Scanner Information] on the [Settings Menu] screen of the operator panel.
For details, refer to How to Use Settings Menu (page 145).
-The IP address for the DNS server can be checked in fi Series Network Settings. For details, refer to Network Settings (fi Series Network Settings) [fi-8190/fi-8290/fi-8170/fi-8270/fi-8150/fi-8250] (page 403).
- For fi-8150/fi-8250 The IP address for the DNS server can be checked in fi Series Network Settings. For details, refer to Network Settings (fi Series Network Settings) [fi-8190/fi-8290/fi-8170/fi-8270/fi-8150/fi-8250] (page 403).
●Are the scanner and server connected to the network?
Solution
Refer to Cannot Connect the Scanner and a Computer with the Network [fi-8190/fi-8290/fi-8170/fi-8270/fi-8150/fi-8250] (page 291) and take measures accordingly.
●Is the IP address of the scanner correct?
Solution
Check the IP address of the scanner.
You can check the IP address of the scanner as follows.
●For fi-8190/fi-8290/fi-8170/fi-8270
The IP address of the scanner can be checked using one of the following methods.
-The IP address of the scanner can be checked in [1:Scanner Information] on the [Settings Menu] screen of the operator panel. For details, refer to How to Use Settings Menu (page 145).
-The IP address of the scanner can be checked by using IP Address Setting Tool. For details, refer to the Network Setup Tool for fi Series Help. For details about how to start up IP Address Setting Tool, refer to Starting Up IP Address Setting Tool [fi-8190/fi-8290/fi-8170/fi-8270/fi-8150/fi-8250] (page 70).
-The IP address of the scanner can be checked in fi Series Network Settings. For details, refer to Network Settings (fi Series Network Settings) [fi-8190/fi-8290/fi-8170/fi-8270/fi-8150/fi-8250] (page 403).
- For fi-8150/fi-8250
The IP address of the scanner can be checked using one of the following methods.
-The IP address of the scanner can be checked by using IP Address Setting Tool. For details, refer to the Network Setup Tool for fi Series Help. For details about how to start up IP Address Setting Tool, refer to Starting Up IP Address Setting Tool [fi-8190/fi-8290/fi-8170/fi-8270/fi-8150/fi-8250] (page 70).
-The IP address of the scanner can be checked in fi Series Network Settings. For details, refer to Network Settings (fi Series Network Settings) [fi-8190/fi-8290/fi-8170/fi-8270/fi-8150/fi-8250] (page 403).
When specifying an IP address manually, specify the correct IP address.
When setting the IP address automatically, check whether the DHCP server functions normally. Even when the DHCP server functions normally, an IP address may not be assigned correctly depending on the settings for the DHCP server. Check the operation status and the settings for the DHCP server.
●Is the IP address of the scanner used for other communication devices?
Solution
If there are multiple communication devices using the same IP address on the same network, communication may fail. Avoid duplicates in IP addresses.
- Have you connected another communication device with the same IP address as the scanner to the server in the past?
Solution
Communication fails if you connect the scanner to the server and change the preferences settings without turning off the server after the server communicated with another host or communication device with the same IP address as the scanner. Restart the server.
●Is there a firewall device between the scanner and the server?
Solution
Check that the access from the scanner is not prohibited by the firewall device.
- Are the settings for [Linking with Server] in fi Series Network Settings specified correctly?
Solution
Check the following setting items for the server linkage settings.
- Whether the server settings are enabled.
- Whether [Host Name/IP address] and [Port Number] are correct.
- Whether the setting for [Use User Authentication] for a proxy sever is correct.
You can check the server linkage settings as follows.
●For fi-8190/fi-8290/fi-8170/fi-8270
The server linkage settings can be checked using one of the following methods.
-The server linkage settings can be checked in [1:Scanner Information] on the [Settings Menu] screen of the operator panel.
For details, refer to How to Use Settings Menu (page 145).
-The server linkage settings can be checked in fi Series Network Settings.
For details, refer to Network Settings (fi Series Network Settings) [fi-8190/fi-8290/fi-8170/fi-8270/fi-8150/fi-8250] (page 403).
- For fi-8150/fi-8250
The server linkage settings can be checked in fi Series Network Settings.
For details, refer to Network Settings (fi Series Network Settings) [fi-8190/fi-8290/fi-8170/fi-8270/fi-8150/fi-8250] (page 403).
●Are the settings on the server specified correctly?
Solution
Refer to the manual for your server and check the settings.
●Are the "Network Encryption" settings the same for the scanner and server?
Solution
Check that the "Network Encryption" setting for the scanner is the same as the setting in PaperStream NX Manager/Scanner Central Admin Server.
You can check the "Network Encryption" setting as follows.
- For fi-8190/fi-8290/fi-8170/fi-8270
The "Network Encryption" setting for the scanner can be checked using one of the following methods.
-The "Network Encryption" setting for the scanner can be checked in [1:Scanner Information] on the [Settings Menu] screen of the operator panel.
For details, refer to How to Use Settings Menu (page 145).
-The "Network Encryption" setting for the scanner can be checked by using IP Address Setting Tool.
For details, refer to the Network Setup Tool for fi Series Help.
For details about how to start up IP Address Setting Tool, refer to Starting Up IP Address Setting Tool [fi-8190/fi-8290/fi-8170/fi-8270/fi-8150/fi-8250] (page 70).
- The "Network Encryption" setting for the scanner can be checked in fi Series Network Settings.
For details, refer to Network Settings (fi Series Network Settings) [fi-8190/fi-8290/fi-8170/fi-8270/fi-8150/fi-8250] (page 403).
- For fi-8150/fi-8250
The "Network Encryption" setting for the scanner can be checked using one of the following methods.
-The "Network Encryption" setting for the scanner can be checked by using IP Address Setting Tool.
For details, refer to the Network Setup Tool for fi Series Help.
For details about how to start up IP Address Setting Tool, refer to Starting Up IP Address Setting Tool [fi-8190/fi-8290/fi-8170/fi-8270/fi-8150/fi-8250] (page 70).
- The "Network Encryption" setting for the scanner can be checked in fi Series Network Settings.
For details, refer to Network Settings (fi Series Network Settings) [fi-8190/fi-8290/fi-8170/fi-8270/fi-8150/fi-8250] (page 403).
For details about the setting in PaperStream NX Manager/Scanner Central Admin Server, refer to the PaperStream NX Manager User's Guide/Scanner Central Admin User's Guide.
Scanning Does Not Start
Check the following points
- Did you unlock the transport lock switch? [fi-8290/fi-8270/fi-8250/fi-8250U] (page 307)
- Did you configure the settings for the button to be used for starting a scan? (page 307)
- Is the document loaded in the ADF paper chute (feeder) correctly? (page 307)
- Is the ADF closed properly? (page 307)
- Are the scanner and the computer properly connected? (page 307)
If the problem still persists, check each item in Before You Contact the Scanner Service Provider (page 334) first, then contact the distributor/dealer where you purchased this product. Refer to the contact information in the Contact List if supplied with this product, or refer to the contact information in the Contact for Inquiries section if provided in Safety Precautions supplied with this product, and then make an inquiry.
- Did you unlock the transport lock switch? [fi-8290/fi-8270/fi-8250/fi-8250U]
Solution
Turn off the scanner, and unlock the transport lock switch.
For details about how to turn off the scanner, refer to Turning the Power ON/OFF (page 71).
For details about unlocking the transport lock switch, refer to Transport Lock Error [fi-8290/fi-8270/fi-8250/fi-8250U] (page 277).
- Did you configure the settings for the button to be used for starting a scan?
Solution
Configure the settings for the button to be used for starting a scan.
For details, refer to Pressing a Button on the Scanner in order to Start an Image Scanning Application and Perform a Scan (page 96).
●Is the document loaded in the ADF paper chute (feeder) correctly?
Solution
Reload the document in the ADF paper chute (feeder).
●Is the ADF closed properly?
Solution
Close the ADF firmly.
If the document is caught in the ADF, remove the document and close the ADF.
●Are the scanner and the computer properly connected?
Solution
- For a wired LAN
Check whether the scanner is connected to a network.
-In Scanner Selection Tool, make sure that the scanner that you want to use is selected.
For details about Scanner Selection Tool, refer to the Network Setup Tool for fi Series Help.
-If the scanner that you want to use is not displayed in the Scanner Selection Tool window, check the network settings for the scanner.
You can check the network settings for the scanner as follows.
●For fi-8190/fi-8290/fi-8170/fi-8270
The network settings for the scanner can be checked using one of the following methods.
-The network settings for the scanner can be checked in [1:Scanner Information] on the [Settings Menu] screen of the operator panel. For details, refer to How to Use Settings Menu (page 145).
-The network settings for the scanner can be checked by using IP Address Setting Tool. For details, refer to the Network Setup Tool for fi Series Help. For details about how to start up IP Address Setting Tool, refer to Starting Up IP Address Setting Tool [fi-8190/fi-8290/fi-8170/fi-8270/fi-8150/fi-8250] (page 70).
-The network settings for the scanner can be checked in fi Series Network Settings. For details, refer to Network Settings (fi Series Network Settings) [fi-8190/fi-8290/fi-8170/fi-8270/fi-8150/fi-8250] (page 403).
- For fi-8150/fi-8250
The network settings for the scanner can be checked using one of the following methods.
-The network settings for the scanner can be checked by using IP Address Setting Tool. For details, refer to the Network Setup Tool for fi Series Help. For details about how to start up IP Address Setting Tool, refer to Starting Up IP Address Setting Tool [fi-8190/fi-8290/fi-8170/fi-8270/fi-8150/fi-8250] (page 70).
-The network settings for the scanner can be checked in fi Series Network Settings. For details, refer to Network Settings (fi Series Network Settings) [fi-8190/fi-8290/fi-8170/fi-8270/fi-8150/fi-8250] (page 403).
-If the scanner that you want to use has been selected in Scanner Selection Tool but is not able to connect to the computer, refer to Cannot Connect the Scanner and a Computer with the Network [fi-8190/fi-8290/fi-8170/fi-8270/fi-8150/fi-8250] (page 291).
- For USB
Check whether the scanner and computer are connected via the USB cable.
If you still cannot connect the scanner to the computer, refer to Cannot Connect the Scanner and a Computer via the USB Cable (page 296).
Scanning Takes a Long Time
Check the following points
- If a USB connection is used, is the USB cable connected to the USB 1.1 port on the computer? (page 309)
- Did you start a scan while the computer was unstable (for example, immediately after computer start-up or logon)? (page 309)
- Are the rollers clean? (page 309)
- Does the computer meet the specifications for the system environment used for measuring scan speed? (page 309)
If the problem still persists, check each item in Before You Contact the Scanner Service Provider (page 334) first, then contact the distributor/dealer where you purchased this product. Refer to the contact information in the Contact List if supplied with this product, or refer to the contact information in the Contact for Inquiries section if provided in Safety Precautions supplied with this product, and then make an inquiry.
- If a USB connection is used, is the USB cable connected to the USB 1.1 port on the computer?
Solution
If a USB connection is used, connect the USB cable to the USB 3.2 Gen 1x1 (USB 3.0)/USB 2.0 port.
- Did you start a scan while the computer was unstable (for example, immediately after computer start-up or logon)?
Solution
When you start or log onto the computer, wait a while before starting a scan.
●Are the rollers clean?
Solution
Clean the rollers.
For details, refer to Daily Care (page 217).
- Does the computer meet the specifications for the system environment used for measuring scan speed?
Solution
If the computer does not meet the specifications of the system environment used for measuring scan speed listed in Basic Specification (page 423) (such as CPU and memory), use on a computer that meets the specifications.
The Scanned Image of a Picture or Photo is Rough/Image Noise Appears
Check the following points
- Did you configure the settings in the scanner driver to scan in black & white mode? (page 310)
- Did you specify a lower resolution for scanning in the scanner driver? (page 310)
- Are the glass and rollers inside the ADF clean? (page 310)
If the problem still persists, check each item in Before You Contact the Scanner Service Provider (page 334) first, then contact the distributor/dealer where you purchased this product. Refer to the contact information in the Contact List if supplied with this product, or refer to the contact information in the Contact for Inquiries section if provided in Safety Precautions supplied with this product, and then make an inquiry.
- Did you configure the settings in the scanner driver to scan in black & white mode?
Solution
Use a scanner driver to configure the scan settings that do not "binarize" (output in black and white), and then perform a scan.
The scanned image may differ from the original image significantly if you simply "binarize" (output in black & white) a picture or a photo.
- Did you specify a lower resolution for scanning in the scanner driver?
Solution
If you scan a halftone printed document, patterned noise (moire) may appear on the image. Specify a higher resolution in the scanner driver.
●Are the glass and rollers inside the ADF clean?
Solution
Clean the dirty parts.
For details, refer to Daily Care (page 217).
Quality of Scanned Text or Lines Is Unsatisfactory
Check the following points
- Are the document pad and document bed clean when you scan documents with the flatbed? [fi-8290/fi-8270/fi-8250/fi-8250U] (page 311)
- Are the glass and rollers inside the ADF clean? (page 311)
- Is the resolution appropriate? (page 311)
- Did you configure the settings in the scanner driver to scan in grayscale or color mode? (page 311)
- Is there any foreign matter (such as dust or paper dust) on the document? (page 312) If the problem still persists, check each item in Before You Contact the Scanner Service Provider (page 334) first, then contact the distributor/dealer where you purchased this product. Refer to the contact information in the Contact List if supplied with this product, or refer to the contact information in the Contact for Inquiries section if provided in Safety Precautions supplied with this product, and then make an inquiry.
●Are the document pad and document bed clean when you scan documents with the flatbed? [fi-8290/fi-8270/fi-8250/fi-8250U]
Solution
Clean the dirty parts.
For details, refer to Daily Care (page 217).
●Are the glass and rollers inside the ADF clean?
Solution
Clean the dirty parts.
For details, refer to Daily Care (page 217).
●Is the resolution appropriate?
Solution
Specify a higher resolution in the scanner driver.
- Did you configure the settings in the scanner driver to scan in grayscale or color mode?
Solution
Configure the settings in the scanner driver to scan in black & white mode.
When you scan in grayscale or in color mode, the scanned image may not become sharp and clear.
- Is there any foreign matter (such as dust or paper dust) on the document?
Solution
Remove any foreign matter off the document.
Foreign matter may get on the glass that is inside the ADF or on the document bed of the flatbed [fi-8290/fi-8270/fi-8250/fi-8250U] causing the image to appear dirty.
Images Are Distorted or Not Clear
Check the following points
- Are the document pad and document bed clean when you scan documents with the flatbed? [fi-8290/fi-8270/fi-8250/fi-8250U] (page 313)
- Are the glass and rollers inside the ADF clean? (page 313)
- Is the ADF being pushed down during scanning? Or, is there a heavy object on top of the ADF? (page 313)
- Is a scan performed on a place that is unstable or vibrates? (page 313)
- Is the scanner placed on a flat, level surface? Are the rubber pads attached on the bottom of the scanner? (page 314)
- Are there any wrinkles or curls on the document? (page 314)
- Did you scan a booklet? (page 314)
If the problem still persists, check each item in Before You Contact the Scanner Service Provider (page 334) first, then contact the distributor/dealer where you purchased this product. Refer to the contact information in the Contact List if supplied with this product, or refer to the contact information in the Contact for Inquiries section if provided in Safety Precautions supplied with this product, and then make an inquiry.
- Are the document pad and document bed clean when you scan documents with the flatbed? [fi-8290/fi-8270/fi-8250/fi-8250U]
Solution
Clean the dirty parts.
For details, refer to Daily Care (page 217).
●Are the glass and rollers inside the ADF clean?
Solution
Clean the dirty parts.
For details, refer to Daily Care (page 217).
- Is the ADF being pushed down during scanning? Or, is there a heavy object on top of the ADF?
Solution
Do not push down the top of the ADF, or place any heavy objects on the ADF during scanning.
●Is a scan performed on a place that is unstable or vibrates?
Solution
Perform a scan on a place that is stable and does not vibrate.
- Is the scanner placed on a flat, level surface? Are the rubber pads attached on the bottom of the scanner?
Solution
Place the scanner on a flat and level surface.
Or, attach the rubber pads on the bottom of the scanner.
●Are there any wrinkles or curls on the document?
Solution
Smooth out the wrinkles or curls on the document.
●Did you scan a booklet?
Solution
When scanning an open booklet, load it face-down with the side which has more pages as the leading edge in the ADF paper chute (feeder). If you scan a booklet in the wrong orientation, the booklet may be damaged or the image may turn out elongated vertically.
Open the booklet fully and load it in the ADF paper chute (feeder). Otherwise, the booklet may not be fed.
If you scan a booklet as it is, and the scanned image turns out to be distorted, place the booklet inside the Booklet Carrier Sheet and perform a scan.
Vertical Streaks Appear on the Images
Check the following points
- Are the document pad and document bed clean when you scan documents with the flatbed? [fi-8290/fi-8270/fi-8250/fi-8250U] (page 315)
- Are the glass and rollers inside the ADF clean? (page 315)
- Is there any foreign matter (such as dust or paper dust) on the document? (page 315)
- Is [Vertical Streaks Reduction] enabled in the scanner driver for a scan? (page 315) If the problem still persists, check each item in Before You Contact the Scanner Service Provider (page 334) first, then contact the distributor/dealer where you purchased this product. Refer to the contact information in the Contact List if supplied with this product, or refer to the contact information in the Contact for Inquiries section if provided in Safety Precautions supplied with this product, and then make an inquiry.
- Are the document pad and document bed clean when you scan documents with the flatbed? [fi-8290/fi-8270/fi-8250/fi-8250U]
Solution
Clean the dirty parts.
For details, refer to Daily Care (page 217).
●Are the glass and rollers inside the ADF clean?
Solution
Clean the dirty parts.
For details, refer to Daily Care (page 217).
●Is there any foreign matter (such as dust or paper dust) on the document?
Solution
Remove any foreign matter off the document.
Foreign matter may get on the glass that is inside the ADF or on the document bed of the flatbed [fi-8290/fi-8270/fi-8250/fi-8250U] causing the image to appear dirty.
●Is [Vertical Streaks Reduction] enabled in the scanner driver for a scan?
Solution
Enable [Vertical Streaks Reduction] in the scanner driver, and then perform a scan.
An Error (Error Code "U0:10", "U4:40" or "U5:4A") is Already Displayed in the LCD After Power-on [fi-8190/fi-8290/fi-8170/fi-8270]
Check the following points
- Did you unlock the transport lock switch? [fi-8290/fi-8270] (page 316)
- Is the ADF closed firmly? (page 316)
- Is the print section (imprinter cover) closed firmly? (when the imprinter is installed) [fi-8190/fi-8170] (page 316)
If the problem still persists, check each item in Before You Contact the Scanner Service Provider (page 334) first, then contact the distributor/dealer where you purchased this product. Refer to the contact information in the Contact List if supplied with this product, or refer to the contact information in the Contact for Inquiries section if provided in Safety Precautions supplied with this product, and then make an inquiry.
●Did you unlock the transport lock switch? [fi-8290/fi-8270]
Solution
Turn off the scanner, and unlock the transport lock switch.
For details about how to turn off the scanner, refer to Turning the Power ON/OFF (page 71).
For details about unlocking the transport lock switch, refer to Transport Lock Error [fi-8290/fi-8270/fi-8250/fi-8250U] (page 277).
●Is the ADF closed firmly?
Solution
Close the ADF firmly.
For details, refer to How to Close the ADF (page 77).
- Is the print section (imprinter cover) closed firmly? (when the imprinter is installed) [fi-8190/fi-8170]
Solution
Close the print section (imprinter cover) firmly.
For details, refer to the fi-819PRB Imprinter Operator's Guide.
An Error ("E" or Other Letter or Number) is Already Displayed in the Function Number Display After Power-on [fi-8150/fi-8250/fi-8150U/fi-8250U]
Check the following points
- Did you unlock the transport lock switch? [fi-8250/fi-8250U] (page 317)
- Is the ADF closed firmly? (page 317)
- Is the print section (imprinter cover) closed firmly? (when the imprinter is installed) [fi-8150/fi-8150U] (page 317)
If the problem still persists, check each item in Before You Contact the Scanner Service Provider (page 334) first, then contact the distributor/dealer where you purchased this product. Refer to the contact information in the Contact List if supplied with this product, or refer to the contact information in the Contact for Inquiries section if provided in Safety Precautions supplied with this product, and then make an inquiry.
- Did you unlock the transport lock switch? [fi-8250/fi-8250U]
Solution
Turn off the scanner, and unlock the transport lock switch.
For details about how to turn off the scanner, refer to Turning the Power ON/OFF (page 71).
For details about unlocking the transport lock switch, refer to Transport Lock Error [fi-8290/fi-8270/fi-8250/fi-8250U] (page 277).
●Is the ADF closed firmly?
Solution
Close the ADF firmly.
For details, refer to How to Close the ADF (page 77).
- Is the print section (imprinter cover) closed firmly? (when the imprinter is installed) [fi-8150/fi-8150U]
Solution
Close the print section (imprinter cover) firmly.
For details, refer to the fi-819PRB Imprinter Operator's Guide.
Overlapped Documents Are Frequently Fed into the Scanner
Check the following points
- Do the documents meet the paper requirements? (page 318)
- Are you using the (Carrier) Sheet? (page 318)
- If the setting to detect overlapped documents is enabled, do the documents fulfill the conditions to detect overlapped documents accurately? (page 318)
- Did you fan the documents before loading them? (page 319)
- Have the documents just been printed out from a copy machine or a laser printer? (page 319)
- Is the document stack thinner than 10 mm? (page 319)
- Are the brake roller and pick roller installed correctly? (page 319)
- Are the brake roller and pick roller clean? (page 319)
- Are the brake roller and pick roller worn out? (page 319)
- Are you using the scanner at an altitude of 2,000 m or higher? (page 320) If the problem still persists, check each item in Before You Contact the Scanner Service Provider (page 334) first, then contact the distributor/dealer where you purchased this product. Refer to the contact information in the Contact List if supplied with this product, or refer to the contact information in the Contact for Inquiries section if provided in Safety Precautions supplied with this product, and then make an inquiry.
●Do the documents meet the paper requirements?
Solution
Use documents that meet the requirements.
For details, refer to Documents for Scanning (page 116).
●Are you using the (Carrier) Sheet?
Solution
Configure the scan settings in the scanner driver to use them.
For details, refer to the following:
- Scanning Documents Larger than A4/Letter Size (page 192)
- Scanning Photographs and Clippings without Damaging Them (page 195)
- Scanning Booklets such as Passports without Damaging Them (page 197)
- If the setting to detect overlapped documents is enabled, do the documents fulfill the conditions to detect overlapped documents accurately?
Solution
Some documents may be detected as overlapped documents accidentally.
For details, refer to Conditions Required to Accurately Detect Overlapped Documents (Multifeed) (page 124).
If necessary, specify the area to detect overlapped documents.
For details, refer to Specifying the Area to Detect Overlapped Documents [Document check area specification for Multifeed Detection] (page 384).
●Did you fan the documents before loading them?
Solution
Fan the documents.
For details, refer to Preparing Documents to Load Them in the ADF Paper Chute (Feeder) (page 110).
●Have the documents just been printed out from a copy machine or a laser printer?
Solution
Fan the documents a few times to remove static electricity.
For details, refer to Preparing Documents to Load Them in the ADF Paper Chute (Feeder) (page 110).
●Is the document stack thinner than 10 mm?
Solution
Up to 10 mm in thickness of the document stack can be loaded. Reduce the number of sheets to make the document stack thinner than 10 mm.
●Are the brake roller and pick roller installed correctly?
Solution
Install the brake roller and pick roller correctly.
For details, refer to Replacing the Brake Roller (page 236) and Replacing the Pick Roller (page 241).
●Are the brake roller and pick roller clean?
Solution
Clean the brake roller and pick roller.
For details, refer to Daily Care (page 217).
●Are the brake roller and pick roller worn out?
Solution
Check the counters for the brake roller and pick roller.
●For fi-8190/fi-8290/fi-8170/fi-8270
Check the counters for the brake roller and pick roller with one of the following methods.
-Check the counters for the brake roller and pick roller in [5:Consumable counters] on the [Settings Menu] screen of the operator panel.
For details, refer to How to Use Settings Menu (page 145).
-Check the counters for the brake roller and pick roller in the Software Operation Panel.
For details, refer to Checking the Sheet Counters (page 356).
- For fi-8150/fi-8250/fi-8150U/fi-8250U
Check the counters for the brake roller and pick roller in the Software Operation Panel.
For details, refer to Checking the Sheet Counters (page 356).
If necessary, replace the brake roller and pick roller.
For details, refer to Replacing the Brake Roller (page 236) and Replacing the Pick Roller (page 241).
●Are you using the scanner at an altitude of 2,000 m or higher?
Solution
Enable [High Altitude Mode] in the Software Operation Panel.
For details, refer to Scanning at High Altitude [High Altitude Mode] (page 378).
If the scanner is being used on level ground lower than 2,000 m with [High Altitude Mode]
enabled, overlapped documents may not be detected.
Situation in Which the Document Is not Fed into the ADF Occurs Frequently
Check the following points
- Do the documents meet the paper requirements? (page 321)
- Did you fan the documents before loading them? (page 321)
- Are the brake roller and pick roller installed correctly? (page 321)
- Are the brake roller and pick roller clean? (page 321)
- Are the brake roller and pick roller worn out? (page 322)
If the problem still persists, check each item in Before You Contact the Scanner Service Provider (page 334) first, then contact the distributor/dealer where you purchased this product. Refer to the contact information in the Contact List if supplied with this product, or refer to the contact information in the Contact for Inquiries section if provided in Safety Precautions supplied with this product, and then make an inquiry.
●Do the documents meet the paper requirements?
Solution
Use documents that meet the requirements.
For details, refer to Documents for Scanning (page 116).
●Did you fan the documents before loading them?
Solution
Fan the documents.
For details, refer to Preparing Documents to Load Them in the ADF Paper Chute (Feeder) (page 110).
●Are the brake roller and pick roller installed correctly?
Solution
Install the brake roller and pick roller correctly.
For details, refer to Replacing the Brake Roller (page 236) and Replacing the Pick Roller (page 241).
●Are the brake roller and pick roller clean?
Solution
Clean the brake roller and pick roller.
For details, refer to Daily Care (page 217).
●Are the brake roller and pick roller worn out?
Solution
Check the counters for the brake roller and pick roller.
●For fi-8190/fi-8290/fi-8170/fi-8270
Check the counters for the brake roller and pick roller with one of the following methods.
-Check the counters for the brake roller and pick roller in [5:Consumable counters] on the [Settings Menu] screen of the operator panel.
For details, refer to How to Use Settings Menu (page 145).
-Check the counters for the brake roller and pick roller in the Software Operation Panel.
For details, refer to Checking the Sheet Counters (page 356).
●For fi-8150/fi-8250/fi-8150U/fi-8250U
Check the counters for the brake roller and pick roller in the Software Operation Panel.
For details, refer to Checking the Sheet Counters (page 356).
If necessary, replace the brake roller and pick roller.
For details, refer to Replacing the Brake Roller (page 236) and Replacing the Pick Roller (page 241).
Paper Protection Is Set Off Frequently
Check the following points
- Do the documents meet the paper requirements? (page 323)
- Is there any foreign matter in the ADF? (page 323)
- Are the brake roller and pick roller installed correctly? (page 323)
- Are the brake roller and pick roller clean? (page 323)
- Are the brake roller and pick roller worn out? (page 324)
- Is the sensitivity level for the paper protection function set to high? (page 324)
If the problem still persists, check each item in Before You Contact the Scanner Service Provider (page 334) first, then contact the distributor/dealer where you purchased this product. Refer to the contact information in the Contact List if supplied with this product, or refer to the contact information in the Contact for Inquiries section if provided in Safety Precautions supplied with this product, and then make an inquiry.
●Do the documents meet the paper requirements?
Solution
Use documents that meet the requirements.
For details, refer to Documents for Scanning (page 116).
●Is there any foreign matter in the ADF?
Solution
Clean the ADF.
Remove any foreign matter from the ADF.
For details, refer to Daily Care (page 217).
●Are the brake roller and pick roller installed correctly?
Solution
Install the brake roller and pick roller correctly.
For details, refer to Replacing the Brake Roller (page 236) and Replacing the Pick Roller (page 241).
●Are the brake roller and pick roller clean?
Solution
Clean the brake roller and pick roller.
For details, refer to Daily Care (page 217).
●Are the brake roller and pick roller worn out?
Solution
Check the counters for the brake roller and pick roller.
●For fi-8190/fi-8290/fi-8170/fi-8270
Check the counters for the brake roller and pick roller with one of the following methods.
-Check the counters for the brake roller and pick roller in [5:Consumable counters] on the [Settings Menu] screen of the operator panel.
For details, refer to How to Use Settings Menu (page 145).
-Check the counters for the brake roller and pick roller in the Software Operation Panel.
For details, refer to Checking the Sheet Counters (page 356).
●For fi-8150/fi-8250/fi-8150U/fi-8250U
Check the counters for the brake roller and pick roller in the Software Operation Panel.
For details, refer to Checking the Sheet Counters (page 356).
If necessary, replace the brake roller and pick roller.
For details, refer to Replacing the Brake Roller (page 236) and Replacing the Pick Roller (page 241).
●Is the sensitivity level for the paper protection function set to high?
Solution
Lower the paper protection sensitivity level.
●For fi-8190/fi-8290/fi-8170/fi-8270
Use one of the following methods to lower the paper protection sensitivity level.
-Select [1: Normal] for [Skew Sensitivity] and [1: Low] for [Sensitivity for feeding noise] in [18: Paper Protection] on the [Settings Menu] screen of the operator panel.
For details, refer to How to Use Settings Menu (page 145).
-Select [Normal] for [Feeding Skew] and [Low] for [Feeding Noise] in the Software Operation Panel.
For details, refer to Specifying the Sensitivity Level for Paper Protection [Paper Protection Sensitivity] (page 375).
●For fi-8150/fi-8250/fi-8150U/fi-8250U
Select [Normal] for [Feeding Skew] in the Software Operation Panel.
For details, refer to Specifying the Sensitivity Level for Paper Protection [Paper Protection Sensitivity] (page 375).
Paper Jams/Pick Errors Occur Frequently
Check the following points
- Do the documents meet the paper requirements? (page 325)
- Is there any foreign matter in the ADF? (page 325)
- Is there a document remaining in the ADF? (page 325)
- Are the brake roller and pick roller installed correctly? (page 325)
- Are the brake roller and pick roller clean? (page 326)
- Are the brake roller and pick roller worn out? (page 326)
If the problem still persists, check each item in Before You Contact the Scanner Service Provider (page 334) first, then contact the distributor/dealer where you purchased this product. Refer to the contact information in the Contact List if supplied with this product, or refer to the contact information in the Contact for Inquiries section if provided in Safety Precautions supplied with this product, and then make an inquiry.
●Do the documents meet the paper requirements?
Solution
Use documents that meet the requirements.
For details, refer to Documents for Scanning (page 116).
●Is there any foreign matter in the ADF?
Solution
Clean the ADF.
Remove any foreign matter from the ADF.
For details, refer to Daily Care (page 217).
●Is there a document remaining in the ADF?
Solution
Remove the document from the ADF.
For details, refer to When a Paper Jam Occurs (page 249).
●Are the brake roller and pick roller installed correctly?
Solution
Install the brake roller and pick roller correctly.
For details, refer to Replacing the Brake Roller (page 236) and Replacing the Pick Roller (page 241).
●Are the brake roller and pick roller clean?
Solution
Clean the brake roller and pick roller.
For details, refer to Daily Care (page 217).
●Are the brake roller and pick roller worn out?
Solution
Check the counters for the brake roller and pick roller.
●For fi-8190/fi-8290/fi-8170/fi-8270
Check the counters for the brake roller and pick roller with one of the following methods.
-Check the counters for the brake roller and pick roller in [5:Consumable counters] on the [Settings Menu] screen of the operator panel.
For details, refer to How to Use Settings Menu (page 145).
-Check the counters for the brake roller and pick roller in the Software Operation Panel. For details, refer to Checking the Sheet Counters (page 356).
- For fi-8150/fi-8250/fi-8150U/fi-8250U
Check the counters for the brake roller and pick roller in the Software Operation Panel.
For details, refer to Checking the Sheet Counters (page 356).
If necessary, replace the brake roller and pick roller.
For details, refer to Replacing the Brake Roller (page 236) and Replacing the Pick Roller (page 241).
Images Turn Out Elongated
Check the following points
- Are the rollers clean? (page 327)
- Do the documents meet the paper requirements? (page 327)
- Are the brake roller and pick roller worn out? (page 327)
- Have you adjusted the magnification level? (page 328)
- Did you scan a booklet? (page 328)
If the problem still persists, check each item in Before You Contact the Scanner Service Provider (page 334) first, then contact the distributor/dealer where you purchased this product. Refer to the contact information in the Contact List if supplied with this product, or refer to the contact information in the Contact for Inquiries section if provided in Safety Precautions supplied with this product, and then make an inquiry.
●Are the rollers clean?
Solution
Clean the rollers.
For details, refer to Daily Care (page 217).
● Do the documents meet the paper requirements?
Solution
Use documents that meet the requirements.
For details, refer to Documents for Scanning (page 116).
●Are the brake roller and pick roller worn out?
Solution
Check the counters for the brake roller and pick roller.
●For fi-8190/fi-8290/fi-8170/fi-8270
Check the counters for the brake roller and pick roller with one of the following methods.
-Check the counters for the brake roller and pick roller in [5:Consumable counters] on the [Settings Menu] screen of the operator panel.
For details, refer to How to Use Settings Menu (page 145).
-Check the counters for the brake roller and pick roller in the Software Operation Panel. For details, refer to Checking the Sheet Counters (page 356).
- For fi-8150/fi-8250/fi-8150U/fi-8250U Check the counters for the brake roller and pick roller in the Software Operation Panel. For details, refer to Checking the Sheet Counters (page 356).
If necessary, replace the brake roller and pick roller.
For details, refer to Replacing the Brake Roller (page 236) and Replacing the Pick Roller (page 241).
●Have you adjusted the magnification level?
Solution
In the Software Operation Panel, adjust the magnification level for feed direction.
For details, refer to Adjusting the Starting Position for Scanning [Offset Setting/Vertical magnification Adjustment] (page 363).
●Did you scan a booklet?
Solution
When scanning an open booklet, load it face-down with the side which has more pages as the leading edge in the ADF paper chute (feeder). If you scan a booklet in the wrong orientation, the booklet may be damaged or the image may turn out elongated vertically.
Open the booklet fully and load it in the ADF paper chute (feeder). Otherwise, the booklet may not be fed.
If you scan a booklet as it is, and the scanned image turns out to be distorted, place the booklet inside the Booklet Carrier Sheet and perform a scan.
A Shadow Appears at the Top or the Bottom of the Image
Check the following points
- Have you adjusted the offset (position to start the scan)? (page 329)
- Did you use the page edge filler function to fill in the shadow around the edge? (page 329) If the problem still persists, check each item in Before You Contact the Scanner Service Provider (page 334) first, then contact the distributor/dealer where you purchased this product. Refer to the contact information in the Contact List if supplied with this product, or refer to the contact information in the Contact for Inquiries section if provided in Safety Precautions supplied with this product, and then make an inquiry.
●Have you adjusted the offset (position to start the scan)?
Solution
In the Software Operation Panel, adjust the offset in the sub-scanning direction. For details, refer to Adjusting the Starting Position for Scanning [Offset Setting/Vertical magnification Adjustment] (page 363).
- Did you use the page edge filler function to fill in the shadow around the edge?
Solution
Use one of the following methods to fill in the shadow around the edge.
- In the Software Operation Panel, fill in the shadow around the edge.
For details, refer to Removing Shadows/Streaks that Appear around Edges of Images [Page Edge Filler (ADF)/Page Edge Filler (FB) [fi-8290/fi-8270/fi-8250/fi-8250U]] (page 365).
- In the scanner driver, fill in the shadow around the edge. For details, refer to the help for the scanner driver.
There Are Black Traces on the Document
Check the following points
- Are you scanning documents written in lead pencil or carbon paper? (page 330)
- Are the glass and rollers inside the ADF clean? (page 330)
If the problem still persists, check each item in Before You Contact the Scanner Service Provider (page 334) first, then contact the distributor/dealer where you purchased this product. Refer to the contact information in the Contact List if supplied with this product, or refer to the contact information in the Contact for Inquiries section if provided in Safety Precautions supplied with this product, and then make an inquiry.
●Are you scanning documents written in lead pencil or carbon paper?
Solution
When you scan documents written in lead pencil, make sure you clean the rollers frequently. For details, refer to Daily Care (page 217).
●Are the glass and rollers inside the ADF clean?
Solution
Clean the dirty parts.
For details, refer to Daily Care (page 217).
The (Carrier) Sheet Is Not Fed Smoothly or a Jam Occurs
Check the following points
- Did you scan just the (Carrier) Sheet continuously? (page 331)
- Is the (Carrier) Sheet clean? (page 331)
- Did you start the scan after loading the (Carrier) Sheet in the ADF paper chute (feeder)? (page 331)
- Are the glass and rollers inside the ADF clean? (page 332)
- Are the brake roller and pick roller worn out? (page 332)
- Is there any foreign matter in the ADF? (page 332)
- Did you place a thick document inside the Carrier Sheet/Photo Carrier Sheet? (page 332) If the problem still persists, check each item in Before You Contact the Scanner Service Provider (page 334) first, then contact the distributor/dealer where you purchased this product. Refer to the contact information in the Contact List if supplied with this product, or refer to the contact information in the Contact for Inquiries section if provided in Safety Precautions supplied with this product, and then make an inquiry.
●Did you scan just the (Carrier) Sheet continuously?
Solution
Feed about 50 sheets of PPC paper (recycled paper) before scanning with the (Carrier) Sheet. The PPC paper can either be blank or printed.
●Is the (Carrier) Sheet clean?
Solution
Perform one of the following.
- Clean the (Carrier) Sheet.
For details, refer to Cleaning the (Carrier) Sheet (page 233).
-Replace the (Carrier) Sheet.
For information on purchasing the (Carrier) Sheets, contact the distributor/dealer where you purchased this product. Refer to the contact information in the Contact List if supplied with this product, or refer to the contact information in the Contact for Inquiries section if provided in Safety Precautions supplied with this product, and then make an inquiry.
- Did you start the scan after loading the (Carrier) Sheet in the ADF paper chute (feeder)?
Solution
Start the scan after loading the (Carrier) Sheet in the ADF paper chute (feeder). For details, refer to the following:
- Scanning Documents Larger than A4/Letter Size (page 192)
- Scanning Photographs and Clippings without Damaging Them (page 195)
- Scanning Booklets such as Passports without Damaging Them (page 197)
●Are the glass and rollers inside the ADF clean?
Solution
Clean the dirty parts.
For details, refer to Daily Care (page 217).
●Are the brake roller and pick roller worn out?
Solution
Check the counters for the brake roller and pick roller.
●For fi-8190/fi-8290/fi-8170/fi-8270
Check the counters for the brake roller and pick roller with one of the following methods.
-Check the counters for the brake roller and pick roller in [5:Consumable counters] on the [Settings Menu] screen of the operator panel.
For details, refer to How to Use Settings Menu (page 145).
-Check the counters for the brake roller and pick roller in the Software Operation Panel. For details, refer to Checking the Sheet Counters (page 356).
- For fi-8150/fi-8250/fi-8150U/fi-8250U
Check the counters for the brake roller and pick roller in the Software Operation Panel.
For details, refer to Checking the Sheet Counters (page 356).
If necessary, replace the brake roller and pick roller.
For details, refer to Replacing the Brake Roller (page 236) and Replacing the Pick Roller (page 241).
●Is there any foreign matter in the ADF?
Solution
Clean the ADF.
Remove any foreign matter from the ADF.
For details, refer to Daily Care (page 217).
- Did you place a thick document inside the Carrier Sheet/Photo Carrier Sheet?
Solution
Some papers may be too thick to place inside the Carrier Sheet/Photo Carrier Sheet.
Use documents that meet the requirements.
When scanning a thick document such as a booklet, place the document inside the Booklet
Carrier Sheet to scan it.
For details about conditions for using the (Carrier) Sheet, refer to the following:
- Conditions for Using the Carrier Sheet (page 131)
- Conditions for Using the Photo Carrier Sheet (page 133)
- Conditions for Using the Booklet Carrier Sheet (page 135)
Part of the Image Appears Missing in the Case Where the (Carrier) Sheet Is Used
Check the following points
- Did you place several small documents (such as photos or postcards) in the (Carrier) Sheet for scanning? (page 333)
- Is the fold line of the document outside the range of the Carrier Sheet? (page 333) If the problem still persists, check each item in Before You Contact the Scanner Service Provider (page 334) first, then contact the distributor/dealer where you purchased this product. Refer to the contact information in the Contact List if supplied with this product, or refer to the contact information in the Contact for Inquiries section if provided in Safety Precautions supplied with this product, and then make an inquiry.
- Did you place several small documents (such as photos or postcards) in the (Carrier) Sheet for scanning?
Solution
Place only one document (such as a photo or postcard) at a time in the (Carrier) Sheet.
●Is the fold line of the document outside the range of the Carrier Sheet?
Solution
If the fold line of the document is outside the range of the Carrier Sheet, part of the image may appear missing around the fold line.
Place the document so that the fold line of the document is placed about 1 mm inside from the edge of the Carrier Sheet.
Before You Contact the Scanner Service Provider
This section explain about actions to take and items to check before contacting the distributor/dealer where you purchased this product.
Actions to Take Before You Contact the Scanner Service Provider
If you encounter any errors or troubles while using the scanner, take the following measures before you contact the scanner service provider:
- Make sure that sufficient power is supplied. Do not use an extension cable.
- Use the AC cable and AC adapter that are supplied.
- Refer to Daily Care (page 217) to clean the inside of the scanner.
- Turn the scanner off then back on.
If the problem still persists, check each item in Items to Check Before You Contact the Scanner Service Provider (page 334) first, then contact the distributor/dealer where you purchased this product. Refer to the contact information in the Contact List if supplied with this product, or refer to the contact information in the Contact for Inquiries section if provided in Safety Precautions supplied with this product, and then make an inquiry.
Items to Check Before You Contact the Scanner Service Provider
●General
| Item Findings | |
| Scanner name Example: fi-8190 | For details, refer to Checking the Product Label (page 336). |
| Serial No. Example: XXXX000001 | For details, refer to Checking the Product Label (page 336). |
| Date of manufacture Example: 20XX-01 (January 20XX) | For details, refer to Checking the Product Label (page 336). |
| Date of purchase | |
| Symptom | |
| Frequency of trouble | |
| Warranty | |
| Options used Example: fi-819PRB | For details, refer to Scanner Options (page 431). |
- Error Status
Computer Connection Issues
| Item Findings | |
| Operating system (Windows) | |
| Error message | |
| Interface Example: USB interface | |
| Interface controller Example: A LAN board is used. | |
| Connection method Example: USB, Wired LAN |
Feeding Issues
| Item Findings | |
| Paper type | |
| Main purpose of use | |
| Date of last cleaning | |
| Date of consumable replacement | |
| Operator panel status |
Image Quality Issues
| Item Findings | |
| Scanner driver and version | |
| Interface controller Example: A LAN board is used. | |
| Operating system (Windows) | |
| Application Example: PaperStream ClickScan | |
| Scanning sides Example: front, back, both | |
| Resolution Example: 600 dpi, 75 dpi | |
| Image mode Example: color, grayscale, black & | white |
Other
| Item Findings | |
| Can you send the output image and a photo that shows the paper condition by e-mail or fax? |
Checking the Product Label
This section explains about the product label on the scanner.
The label is located on the place indicated in the following figure: Remove the ADF paper chute (feeder) to check it.
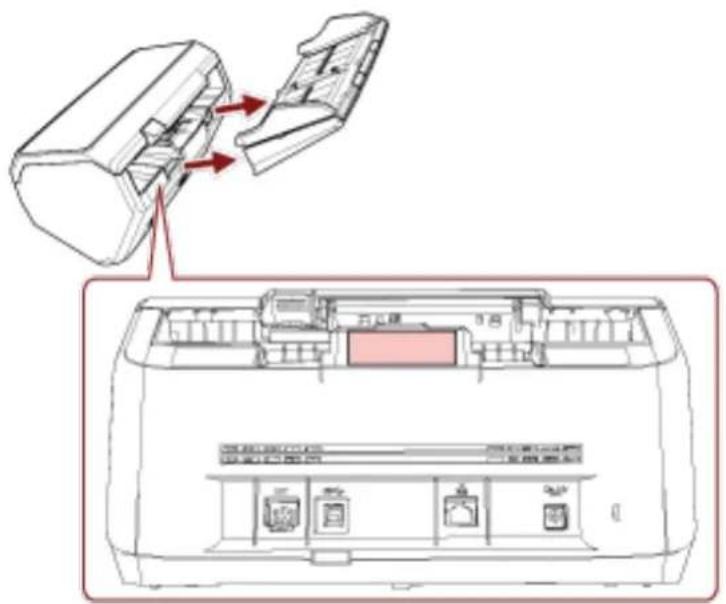
Label (example): Shows the scanner information.
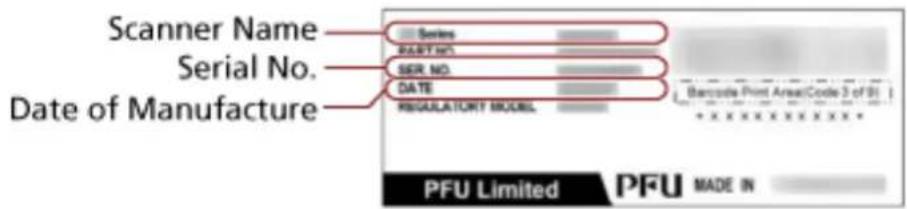
Scanner Settings (Software Operation Panel)
This section explains how to use the Software Operation Panel to configure the scanner settings. With the Software Operation Panel, you can configure settings for operations of the scanner and management of the consumable parts.
Starting Up the Software Operation Panel
Start up the Software Operation Panel in the following procedure.
ATTENTION
- Do not start up the Software Operation Panel during scanning.
- If you change the Software Operation Panel settings while the scanner driver window is displayed, the changes may not be applied immediately. In that case, close the scanner driver window and open it again.
- Do not use the operator panel while the Software Operation Panel is running.
1 Make sure that the setup process for the scanner is complete, then turn on the scanner.
For details about how to setup the scanner, refer to Scanner Setup (page 41).
For details about how to turn on the scanner, refer to How to Turn the Power ON (page 71).
2 Display the [Software Operation Panel] window.
●For Windows Server 2012
Right-click the Start screen, and select [All apps] on the app bar → [Software Operation Panel] under [fi Series].
●For Windows Server 2012 R2
Click [↓] on the lower left side of the Start screen and select [Software Operation Panel] under [fi Series].
To display [↓], move the mouse cursor.
- For Windows 10/Windows Server 2016/Windows Server 2019/Windows Server 2022
Click [Start] menu → [fi Series] → [Software Operation Panel].
- For Windows 11
Click [Start] menu → [All apps] → [fi Series] → [Software Operation Panel].
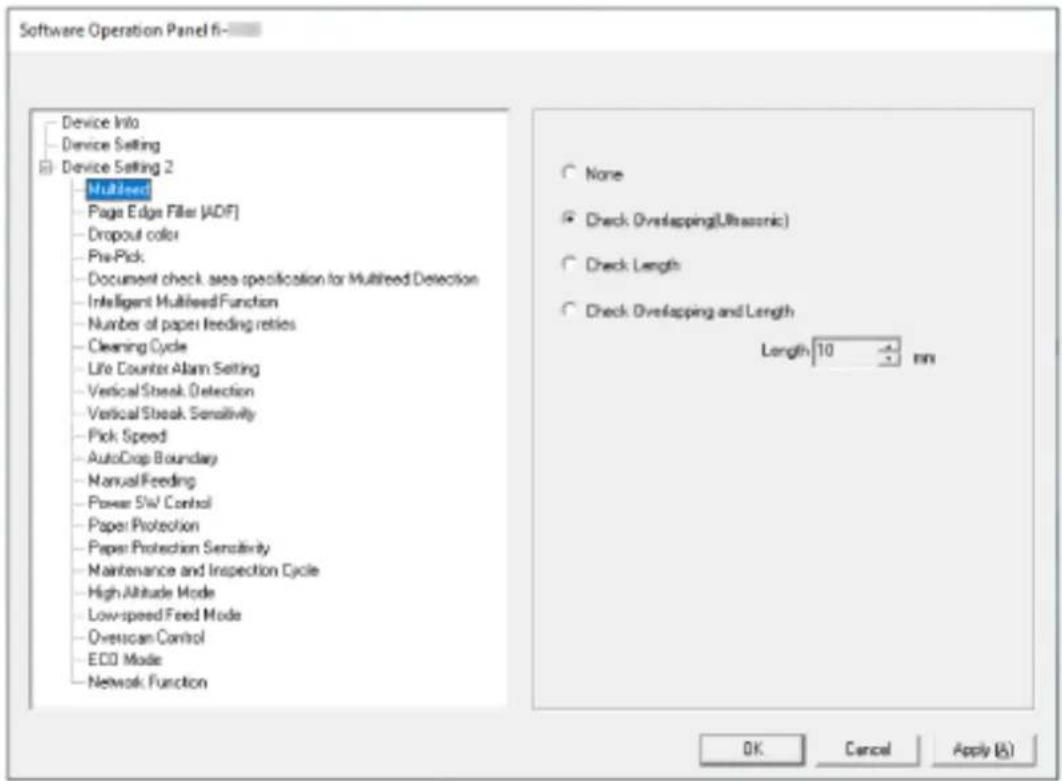

The Software Operation Panel icon is displayed in the menu that appears when you click the notification area.
To have the Software Operation Panel icon always displayed in the notification area, drag and drop the icon onto the notification area.
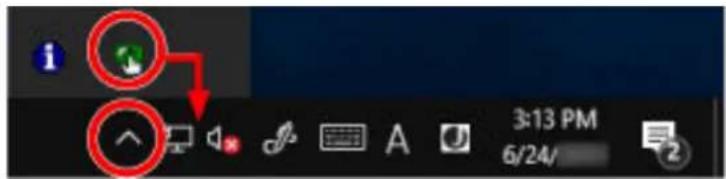
ATTENTION
Take note of the following for fi-8190/fi-8290/fi-8170/fi-8270/fi-8150/fi-8250:
- If the scanner is connected via a wired LAN, a message window appears when the scanner is not selected in Scanner Selection Tool.
Take measures according to the instructions displayed in the message window.
- If the window for selecting a device appears, select a device to perform a particular action that you want by using the Software Operation Panel.
Setting the Software Operation Panel to [View Only mode]
By setting a password, the Software Operation Panel can run in [View Only mode] which allows users to only view the scanner settings.
The scanner settings can be configured if no password is set.
In order to prevent unnecessary changes to the settings, a password can be used to restrict user operations.
Setting [View Only mode]
Set the Software Operation Panel to [View Only mode].
1 Set a password.
For details, refer to Setting a Password (page 344).
2 Right-click the Software Operation Panel icon in the notification area, and select [View Only mode] from the menu.
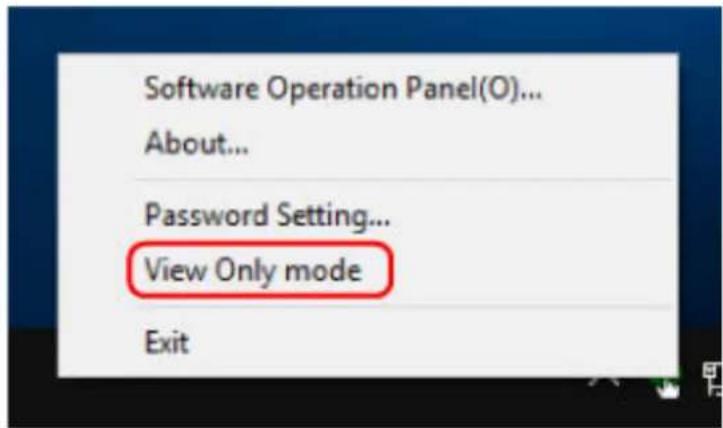
The Software Operation Panel enters [View Only mode].
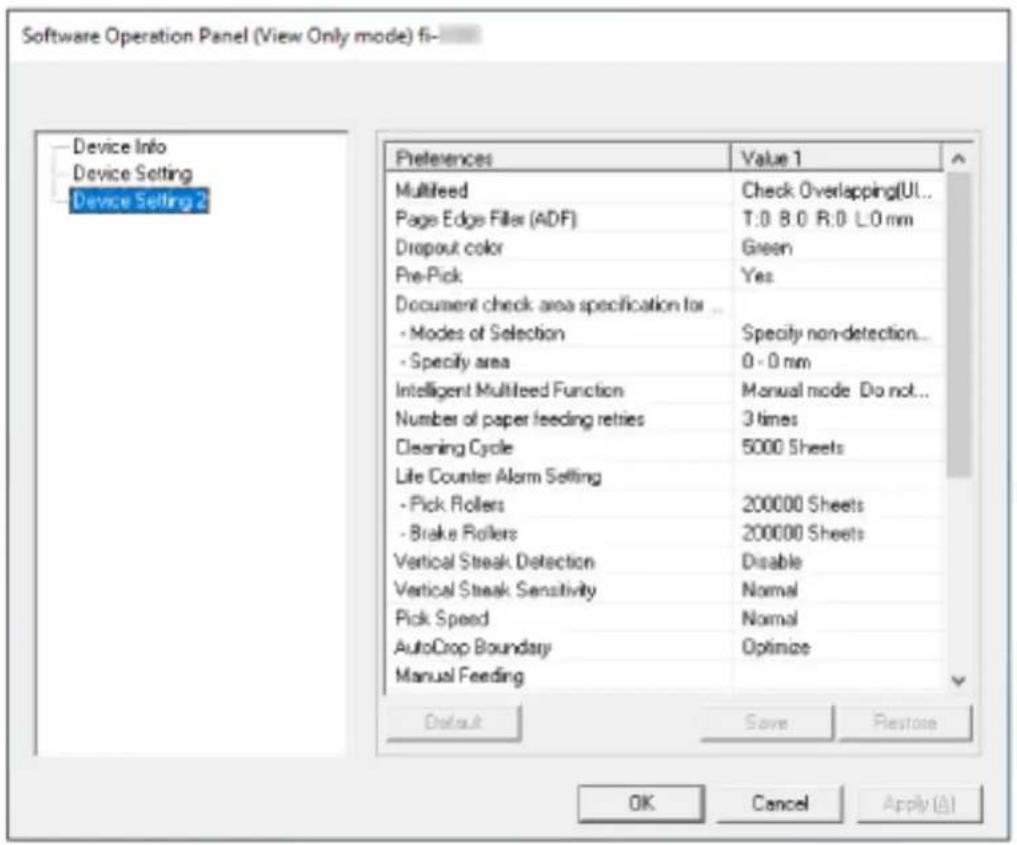
HINT
In [View Only mode], a check mark appears next to [View Only mode] in the menu that is displayed by right-clicking the Software Operation Panel icon in the notification area.
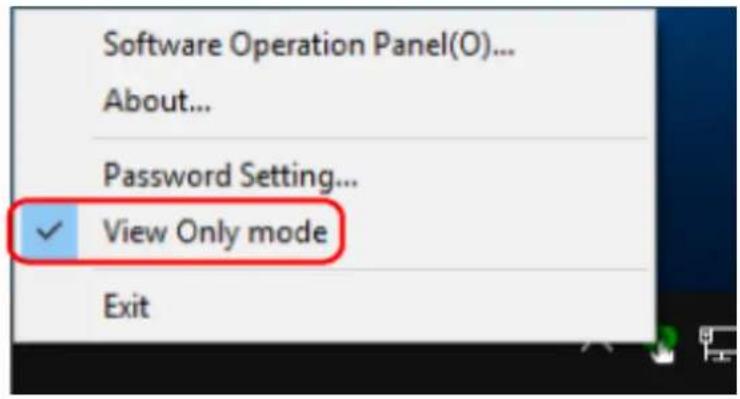
Exiting [View Only mode]
Exit [View Only mode] on the Software Operation Panel in the following procedure.
1 Right-click the Software Operation Panel icon in the notification area, and select [View Only mode] from the menu.
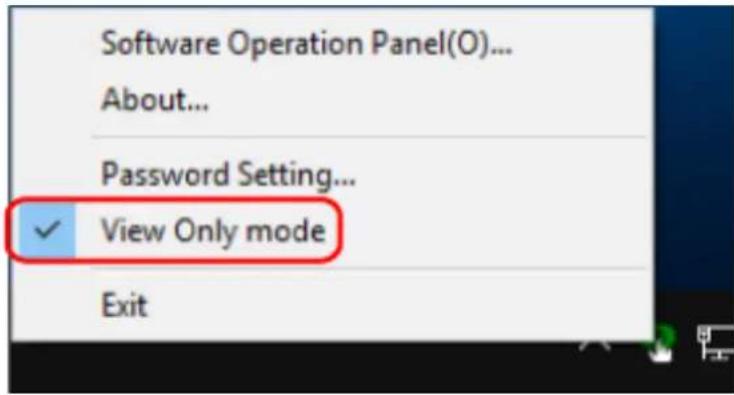
The [Password setting] window appears.
2 Enter the current password and click the [OK] button.
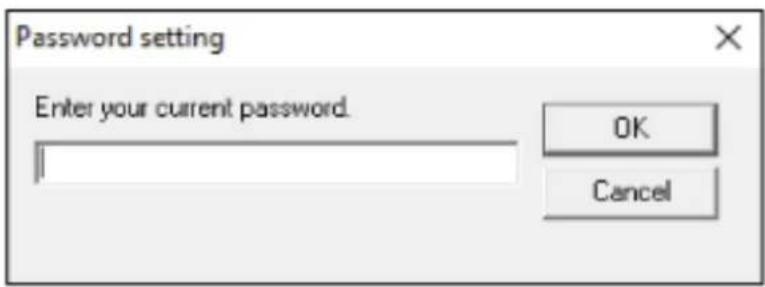
The Software Operation Panel exits [View Only mode], and the scanner settings can now be changed.
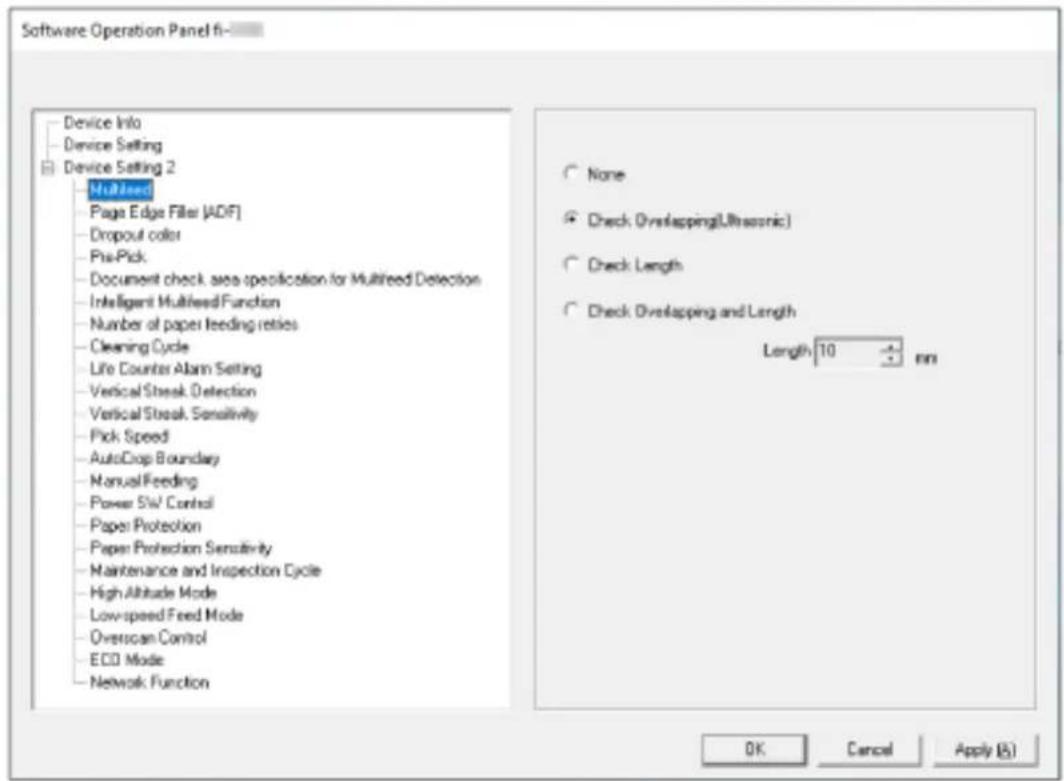
HINT
When the Software Operation Panel exits [View Only mode], the check mark next to [View Only mode] disappears from the menu that is displayed by right-clicking the Software Operation Panel icon in the notification area.
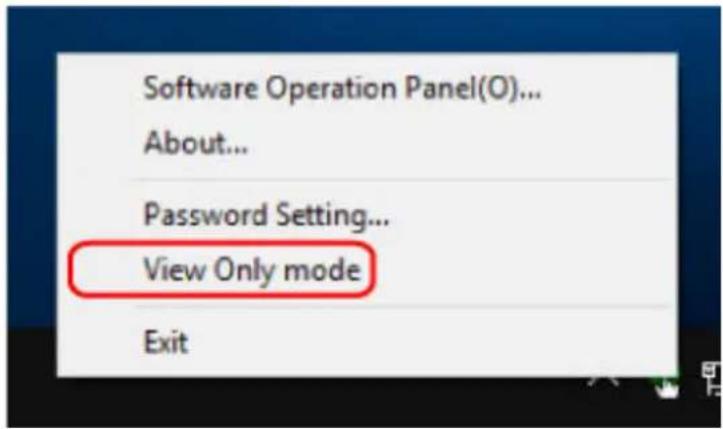
Setting a Password
Set a password in the following procedure.
1 Right-click the Software Operation Panel icon in the notification area, and select [Password Setting] from the menu.
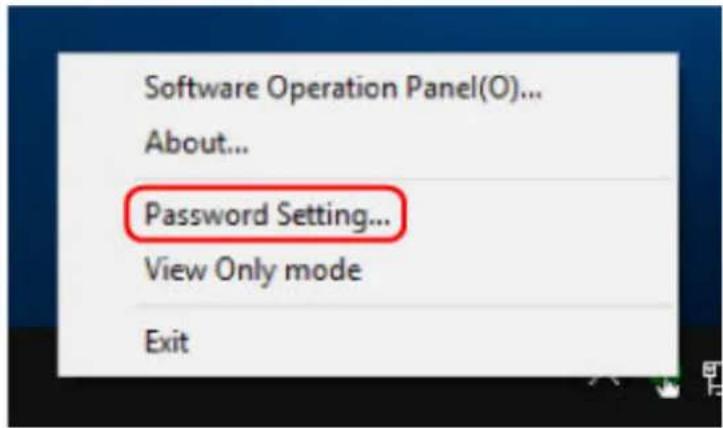
The [Password setting] window appears.
2 Enter a new password then again to confirm, and click the [OK] button.
Up to 32 characters can be used for the password.
Note that only alphanumeric characters (a to z, A to Z, 0 to 9) are allowed.
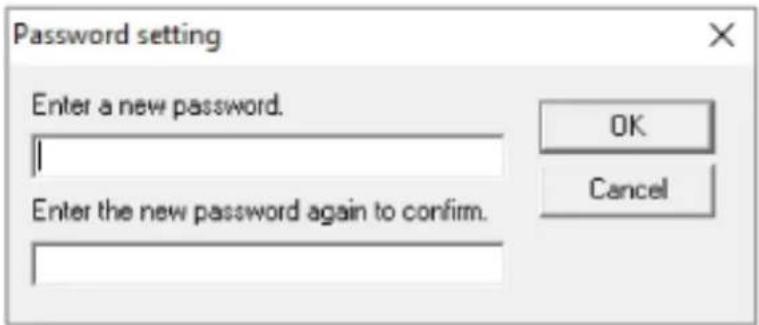
A message window appears.
3 Click the [OK] button.
The password is set.
Changing the Password
Change the password in the following procedure.
1 Right-click the Software Operation Panel icon in the notification area, and select [Password Setting] from the menu.
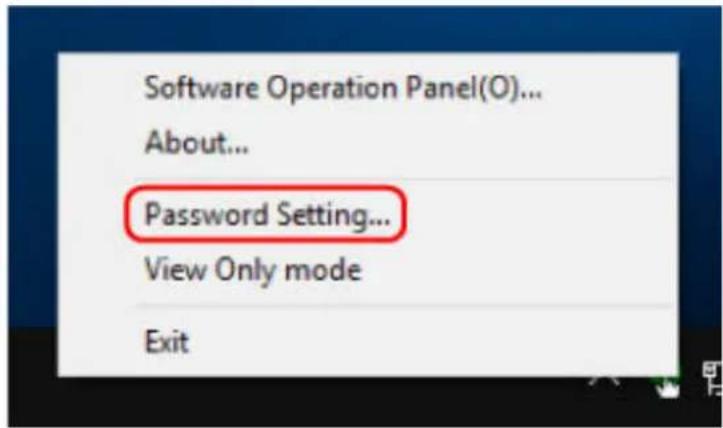
The [Password setting] window appears.
2 Enter the current password and click the [OK] button.
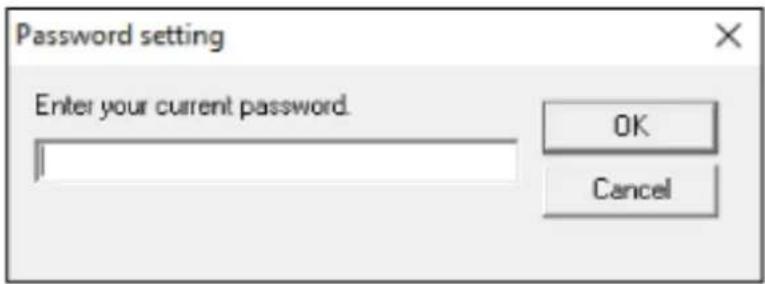
The [Password setting] window appears.
3 Enter a new password then again to confirm, and click the [OK] button.
Up to 32 characters can be used for the password.
Note that only alphanumeric characters (a to z, A to Z, 0 to 9) are allowed.
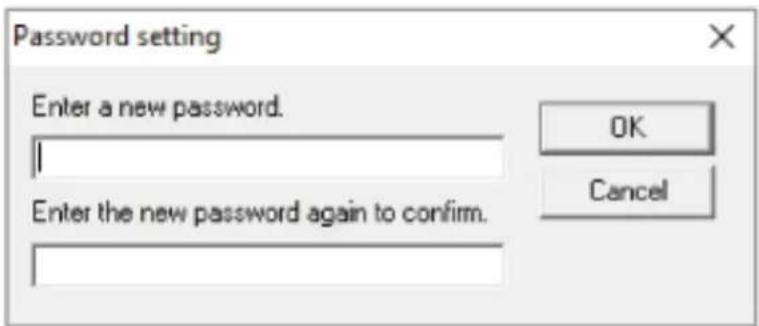
A message window appears.
4 Click the [OK] button.
The password is set.
Clearing the Password
Clear the password in the following procedure.
1 Right-click the Software Operation Panel icon in the notification area, and select [Password Setting] from the menu.
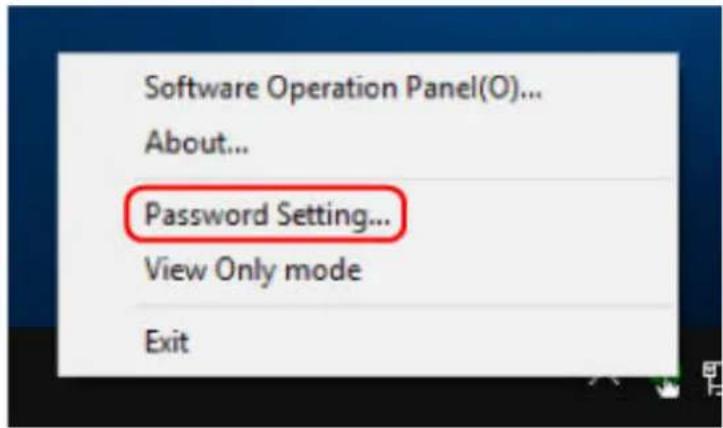
The [Password setting] window appears.
2 Enter the current password and click the [OK] button.
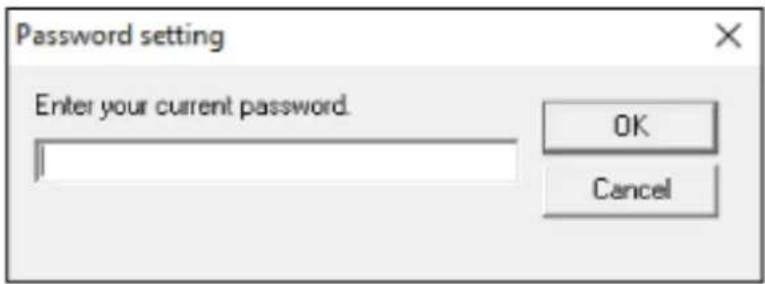
The [Password setting] window appears.
3 Leave both fields blank and click the [OK] button.
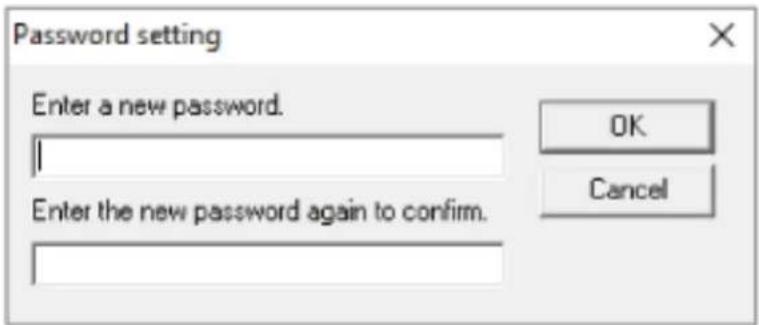
A message window appears.
4 Click the [OK] button.
The password is cleared.
Resetting the Password
If you forgot your password, reset it.
1 Right-click the Software Operation Panel icon in the notification area, and select [Password Setting] from the menu.
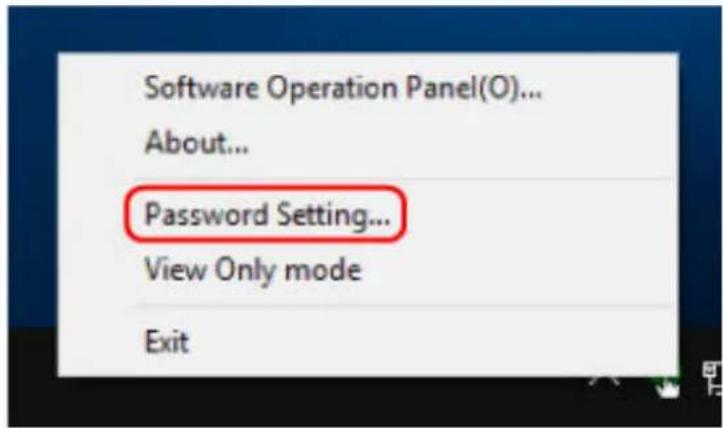
The [Password setting] window appears.
2 Enter the default password which is "fi-scanner", and click the [OK] button.
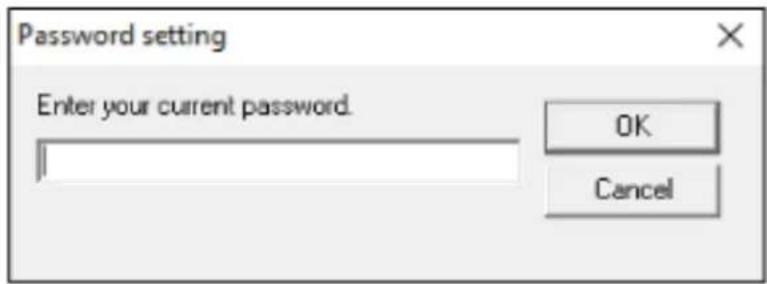
The [Password setting] window appears.
3 Enter a new password then again to confirm, and click the [OK] button.
Up to 32 characters can be used for the password.
Note that only alphanumeric characters (a to z, A to Z, 0 to 9) are allowed.
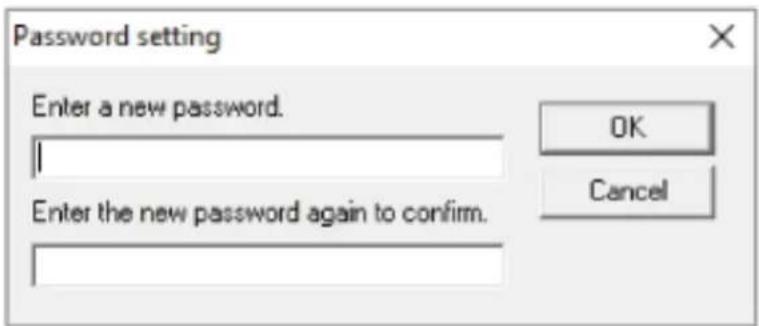
A message window appears.
4 Click the [OK] button.
The password is set.
Setting Items
The Software Operation Panel allows the configuration of the settings that are related to scanning documents or managing consumable parts for the scanner that is connected to the computer. The following lists are used for configuration.
•[Device Setting]
You can configure settings that are related to counting the number of sheets scanned and managing consumable parts. You can also configure settings that are related to managing the power of a scanner and adjusting the position to start the scan.
•[Device Setting 2]
You can configure settings that are related to scanning documents.
Device Setting
1 Start up the Software Operation Panel.
For details, refer to Starting Up the Software Operation Panel (page 337).
2 From the list on the left, select [Device Setting] and click the [Offset] button.
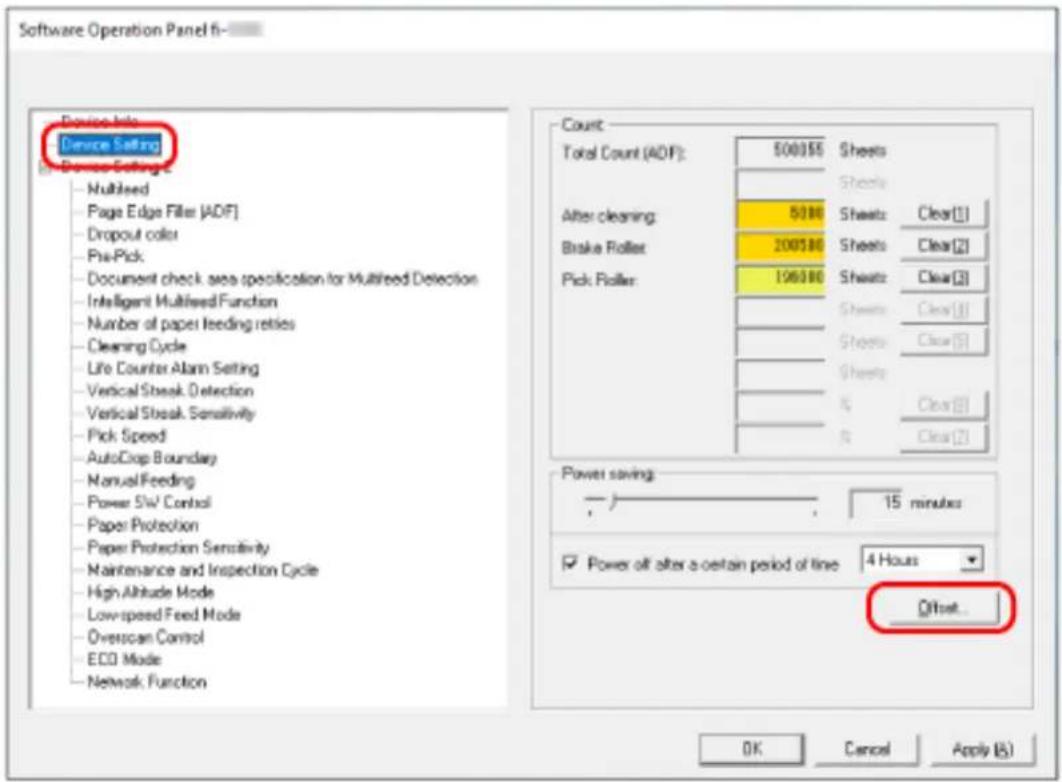
The [Offset] window appears.
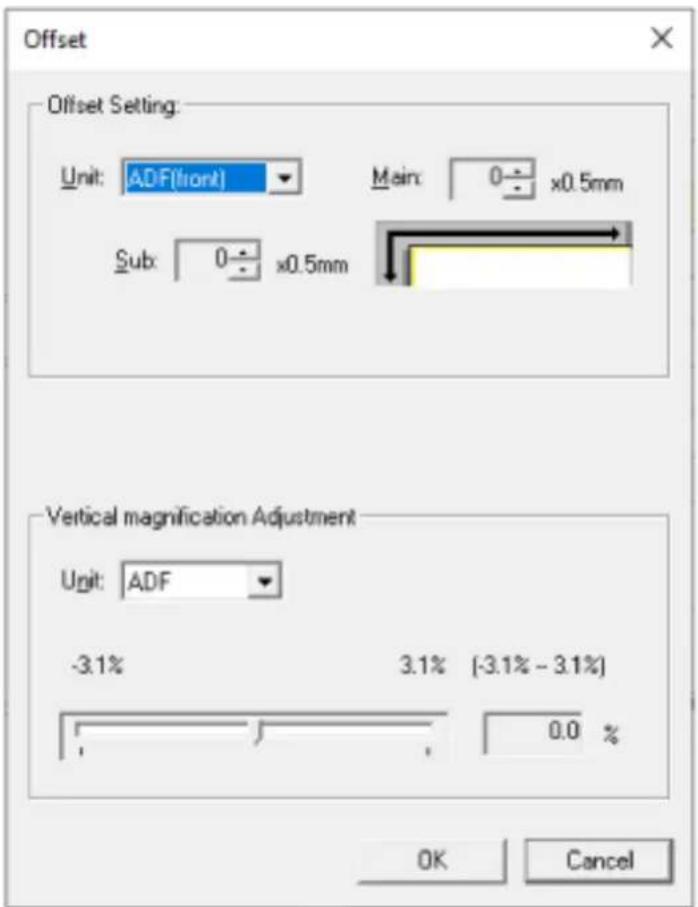
Items that can be configured in these windows are as follows:
| Setting Item Description | |
| Count(Checking/Clearing) | The status of each consumable part can be viewed to determine when to replace or clean the consumables. When you have replaced or cleaned a consumable part, clear the corresponding counter. |
| Power saving Specify the waiting time | before the scanner enters power saving mode. |
| Offset Setting Specify a starting position for scanning. | |
| Vertical magnification Adjustment Specify the magnification level for the feed direction. | |
Device Setting 2
1 Start up the Software Operation Panel.
For details, refer to Starting Up the Software Operation Panel (page 337).
2 From the list on the left, select [Device Setting 2].
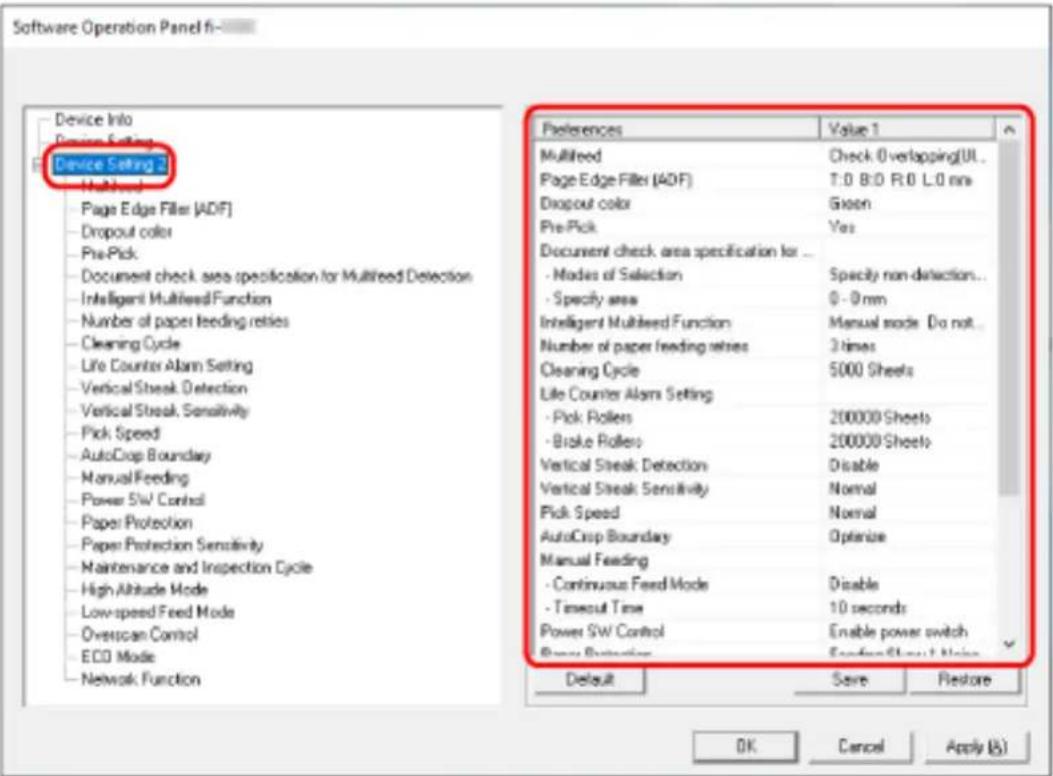
The settings that are currently configured in [Device Setting 2] are listed on the right of the window.
HINT
- The Software Operation Panel settings can be restored to the factory default.
To restore the settings to the factory default, click the [Default] button. After a message is displayed, click the [OK] button.
Note that the settings you have configured will be cleared.
●The Software Operation Panel settings can be backed up.
To back up the settings, click the [Save] button, then specify the file name and click the [Save] button in the displayed window.
- You can use a backup file of the Software Operation Panel settings to restore the settings on other scanners only if the scanner type is the same.
To restore the settings, click the [Restore] button, then specify the backup file and click the [Open] button in the displayed window. After a message is displayed, click the [OK] button. Note that restoration cannot be performed for other types of scanners.
Items that can be configured in [Device Setting 2] are as follows:
| Setting Item Description | |
| Multifeed For documents that are loaded in the ADF paper chute (feeder), configure the settings to detect overlapped documents during a scan. | |
| Page Edge Filler (ADF)/Page Edge Filler (FB) [fi-8290/fi-8270/fi-8250/fi-8250U] | Configure the settings to fill in the shadow or streaks around the edge of the scanned image. |
| Dropout color You can exclude a color from being scanned by selecting either red, green, or blue (three primary colors). | |
| Pre-Pick Enable this to shorten the scanning time when scanning continuously. | |
| Document check area specification for Multifeed Detection | Specify an area to detect overlapped documents. |
| Intelligent Multifeed Function Configure the setting to automatically ignore certain patterns of overlapped documents when the setting to detect overlapped documents is enabled. | |
| Number of paper feeding retries Specify the number of feeding retries when a document is not fed from the ADF paper chute (feeder). | |
| Cleaning Cycle Specify the cleaning cycle for the scanner inside. | |
| Life Counter Alarm Setting Specify the replacement cycle for the consumables. | |
| Vertical Streak Detection You can configure the settings for detecting dirt on the glass. | |
| Vertical Streak Sensitivity Specify the sensitivity level to detect vertical streaks (dirt on the glass) when [Enable] is selected for [Vertical Streak Detection]. | |
| Pick Speed You can specify the timing of when document feeding is started. | |
| AutoCrop Boundary When the scanner is set to detect the paper size automatically, specify whether or not to optimize (round up/down) the fractional part of the scanned image. | |
| Manual Feeding Configure the settings when manually loading and scanning one sheet at a time. | |
| Power Switch Control Specify whether or not to turn on/off the scanner by pressing the [Power] button on the scanner. | |
| Paper Protection Configure the setting to detect feeding errors. | |
| Paper Protection Sensitivity Specify the | sensitivity level for detecting feeding errors when the paper protection function is enabled. |
| Maintenance and Inspection Cycle [fi-8190/fi-8290/fi-8170/fi-8270] | Specify the maintenance and inspection cycle for the scanner that is performed by a service engineer. |
| High Altitude Mode Enable this mode | to use the scanner at an altitude of 2,000 m or higher. |
| Low-speed Feed Mode Specify this to sl | low down the scanning speed in order to protect the documents. |
| Image Quality Mode To obtain an image | quality that is close to the image quality for scanning with fi-6x30Z/fi-6x40Z, set the image quality mode. |
| Overscan Control [fi-8190/fi-8290/ fi-8170/fi-8270] | Specify whether or not to prevent a part of an image from being missing when documents are fed skewed. |
| ECO Mode When performing a scan at | a low resolution (300 dpi or less), the scan is performed at a slow speed, which saves the power consumption of the scanner. |
| USB [fi-8150/fi-8250/fi-8150U/ fi-8250U] | Change the USB setting if an error occurred on a computer during communication. |
| Network Function [fi-8190/fi-8290/ fi-8170/fi-8270/fi-8150/fi-8250] | Specify whether or not to use the scanner only via the USB connection. |
Settings Related to Sheet Counters
Checking the Sheet Counters
The status of each consumable part can be viewed to determine when to replace or clean the consumables.
The background color of the counter changes as it gets closer to the time to replace the consumables or to clean the scanner.
The color of each counter changes as follows:
•[Brake Roller]/[Pick Roller] counters
These counters turn light yellow when the sheet count after the consumable replacement reaches 95% of the value specified in Specifying the Cycle to Replace Consumables [Life Counter Alarm Setting] (page 362) in the Software Operation Panel, and turn yellow when the sheet count reaches 100%.
•[After cleaning] counter
This counter turns yellow when the sheet count after cleaning reaches the value specified in Scanner Cleaning Cycle [Cleaning Cycle] (page 361) in the Software Operation Panel.
•[Remaining Ink] counter
This counter turns yellow when the amount of remaining ink reaches below 33% (only displayed when the imprinter is installed).
1 Start up the Software Operation Panel.
For details, refer to Starting Up the Software Operation Panel (page 337).
2 From the list on the left, select [Device Setting].
3 Check each counter.
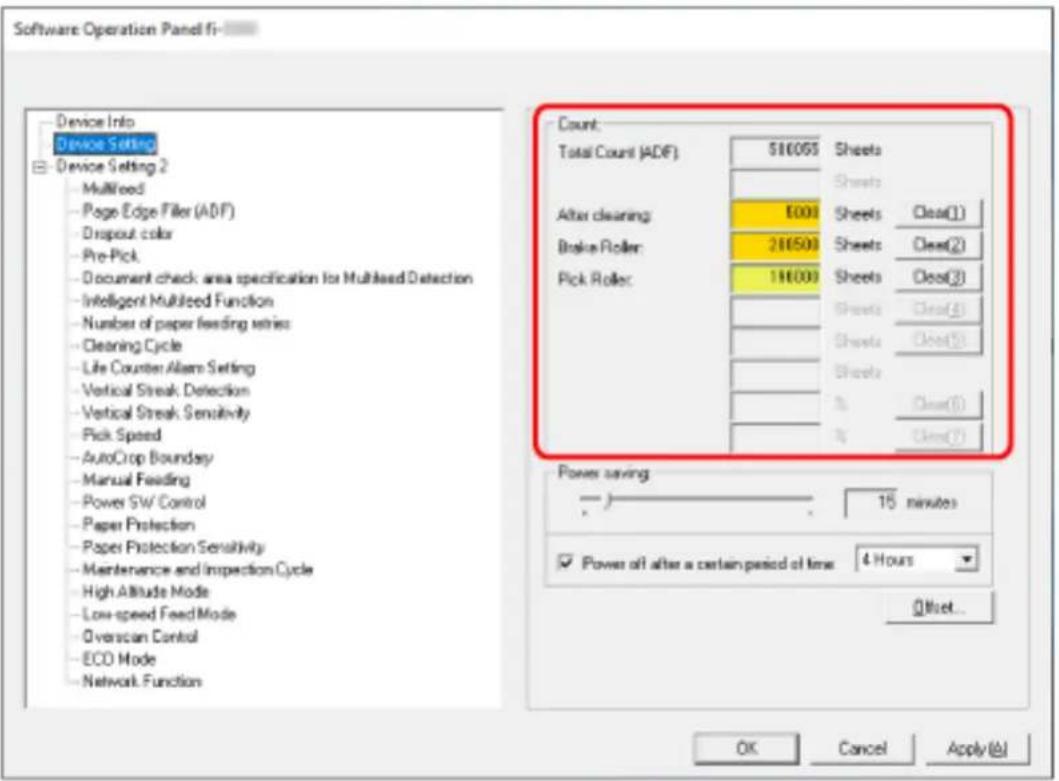
Total Count (ADF)
Total number of sheets scanned using the ADF (in 1 sheet increments)
Total Count (FB) [fi-8290/fi-8270/fi-8250/fi-8250U]
Total number of sheets scanned using the flatbed [fi-8290/fi-8270/fi-8250/fi-8250U] (in 1 sheet increments)
After cleaning
Total number of sheets scanned after the last cleaning (in 1 sheet increments)
Brake Roller
Approximate number of sheets scanned since the last replacement of brake roller (in units of 500)
Pick Roller
Approximate number of sheets scanned since the last replacement of pick rollers (in units of 500)
Remaining Ink
Amount of ink remaining in the print cartridge of the imprinter (only displayed when the imprinter is installed)
The factory default setting for each counter is "0".
The factory default setting for the [Remaining Ink] counter is displayed only when the imprinter is installed.
ATTENTION
If you turned off the scanner by unplugging the power cable, or selected [Disable power switch], the number of scanned sheets may not be counted in [Total Count].
For details about disabling the power switch, refer to Method for Turning the Scanner ON/OFF [Power Switch Control] (page 398).
Clearing the Sheet Counters
When you have replaced or cleaned a consumable part, clear the corresponding counter.
1 Start up the Software Operation Panel.
For details, refer to Starting Up the Software Operation Panel (page 337).
2 From the list on the left, select [Device Setting] and click the [Clear] button for [After cleaning] when cleaning is performed or click the [Clear] button for the consumable that you replaced.
The counter is reset to 0.
For remaining ink, it is reset to 100.
3 Click the [OK] button.
A message window appears.
4 Click the [OK] button.
The settings are saved.
Messages for Cleaning or Replacing Consumables
The following message may appear on the computer while the scanner is in use.
Example: Message for replacing consumables
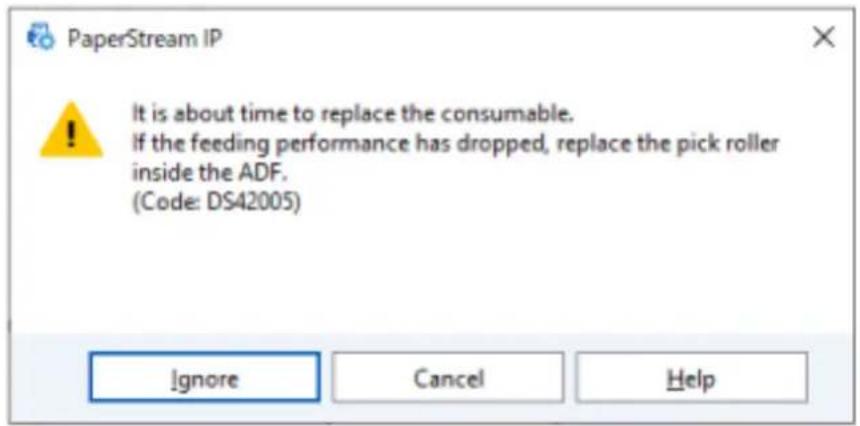
Example: Message for cleaning
![PaperStream IP Clean the inside of the scanner. After cleaning, start up Software Operation Panel. Under [Device Setting], reset the count for [After clearing:] by clicking the [Clear(1)] button. (Code: DS42009) OK](/content/2026/05/903199/images/b6c64ccd61dae47471a83df36e455f8a81ecbf4cfd1cf3afcd3da37e66fabd50.jpg)
Take the following measures according to the displayed message.
- When a message for replacing consumables appears
Check the message, and replace the consumable accordingly.
If you click the [Ignore] button, the message disappears and the scan can be continued. However, it is recommended that you replace the consumable as soon as possible.
To stop the scan and replace the consumable right away, click the [Cancel] button.
For details about replacing consumables, refer to the following:
-Brake roller
Replacing the Brake Roller (page 236)
-Pick roller
Replacing the Pick Roller (page 241)
- When a message for cleaning appears
Check the message, and perform cleaning accordingly.
For details about cleaning, refer to Daily Care (page 217).
Scanner Cleaning Cycle [Cleaning Cycle]
Specify the cleaning cycle for the scanner inside.
The background color of the [After cleaning] counter in [Device Setting] changes to yellow when the counter reaches the specified value for this item.
You can also display a cleaning instruction message that is described in Messages for Cleaning or Replacing Consumables (page 360).
1 Start up the Software Operation Panel.
For details, refer to Starting Up the Software Operation Panel (page 337).
2 From the list on the left, select [Device Setting 2] → [Cleaning Cycle].
3 Specify a value for the cleaning cycle.
The value can range from 1,000 to 255,000 sheets (in increments of 1,000).
The factory default setting is "5".
4 Specify whether or not to display the cleaning instruction message.
The [Show cleaning instructions.] check box is cleared for the factory default settings.
Specifying the Cycle to Replace Consumables [Life Counter Alarm Setting]
Specify the replacement cycle for the consumables.
The background color of the counter for [Brake Roller] or [Pick Roller] in [Device Setting] changes to light yellow when the sheet count (after a consumable replacement) reaches 95% of the value specified for this setting and turns yellow when the sheet count reaches 100%.
You can also display the message for replacing consumables, which is described in Messages for Cleaning or Replacing Consumables (page 360).
1 Start up the Software Operation Panel.
For details, refer to Starting Up the Software Operation Panel (page 337).
2 From the list on the left, select [Device Setting 2] → [Life Counter Alarm Setting].
3 Specify a value as the replacement cycle for each of the consumables (brake roller and pick roller).
The value can range from 10,000 to 2,550,000 sheets (in increments of 10,000).
The factory default setting is "20".
Settings Related to Scanning
Adjusting the Starting Position for Scanning [Offset Setting/Vertical magnification Adjustment]
When the output position of the scanned image is not correct or the image appears shortened/elongated (vertically), adjust the offset and the vertical magnification.
ATTENTION
Normally, you should not have to modify anything as the factory default settings already use adjusted values.
1 Start up the Software Operation Panel.
For details, refer to Starting Up the Software Operation Panel (page 337).
2 From the list on the left, select [Device Setting] and click the [Offset] button.
3 Adjust the level of offset/vertical magnification as needed.
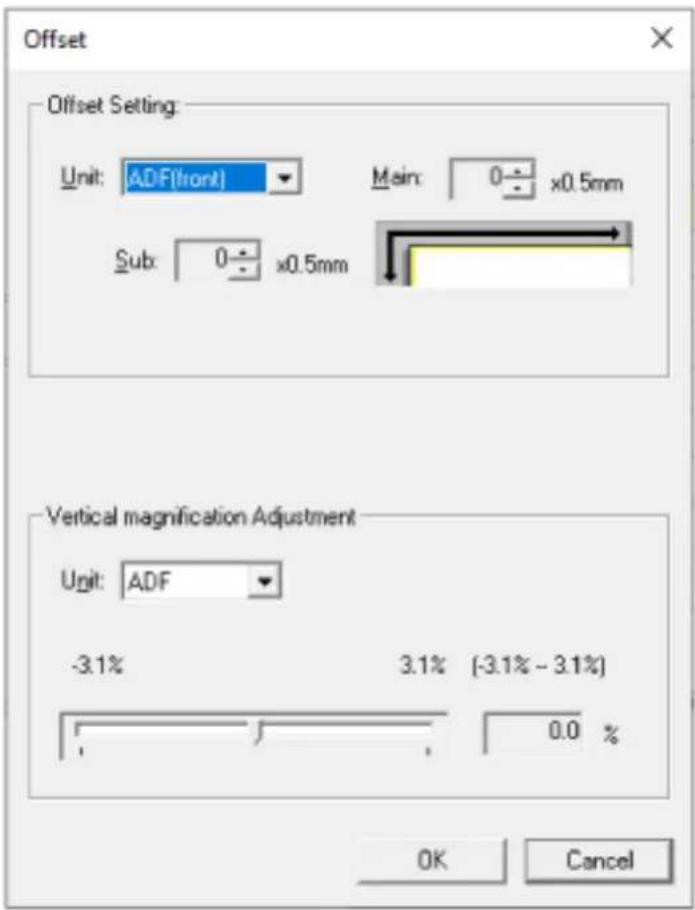
Offset Setting
Unit
Select [Flatbed] [fi-8290/fi-8270/fi-8250/fi-8250U], [ADF (front)], or [ADF (back)] as the unit for an offset adjustment.
Main
Specify the horizontal (width) offset.
The specified value can range from -2 to +2 mm (in increments of 0.5).
The factory default setting is "0".
Sub
Specify the vertical (length) offset.
The specified value can range from -2 to +2 mm (in increments of 0.5).
The factory default setting is "0".
Vertical magnification Adjustment
Unit
Select [Flatbed] [fi-8290/fi-8270/fi-8250/fi-8250U] or [ADF] as the unit for an offset adjustment.
Vertical magnification Adjustment
Specify the vertical (length) magnification.
The specified value can range from -3.1 to +3.1% (in increments of 0.1).
The factory default setting is "0.0".
Removing Shadows/Streaks that Appear around Edges of Images [Page Edge Filler (ADF)/Page Edge Filler (FB) [fi-8290/fi-8270/fi-8250/fi-8250U]]
Configure the settings to fill in the shadow or streaks around the edge of the scanned image.
Depending on the condition of the documents that you scan, the shadow of a document may appear as black streaks on the edges of the scanned image.
In this case, remove the black streaks by filling in the edges of the scanned image.
1 Start up the Software Operation Panel.
For details, refer to Starting Up the Software Operation Panel (page 337).
2 From the list on the left, select [Device Setting 2] → [Page Edge Filler (ADF)] or [Page Edge Filler (FB)] [fi-8290/fi-8270/fi-8250/fi-8250U].
3 Specify the width of each margin (Top/Bottom/Right/Left) to fill in.
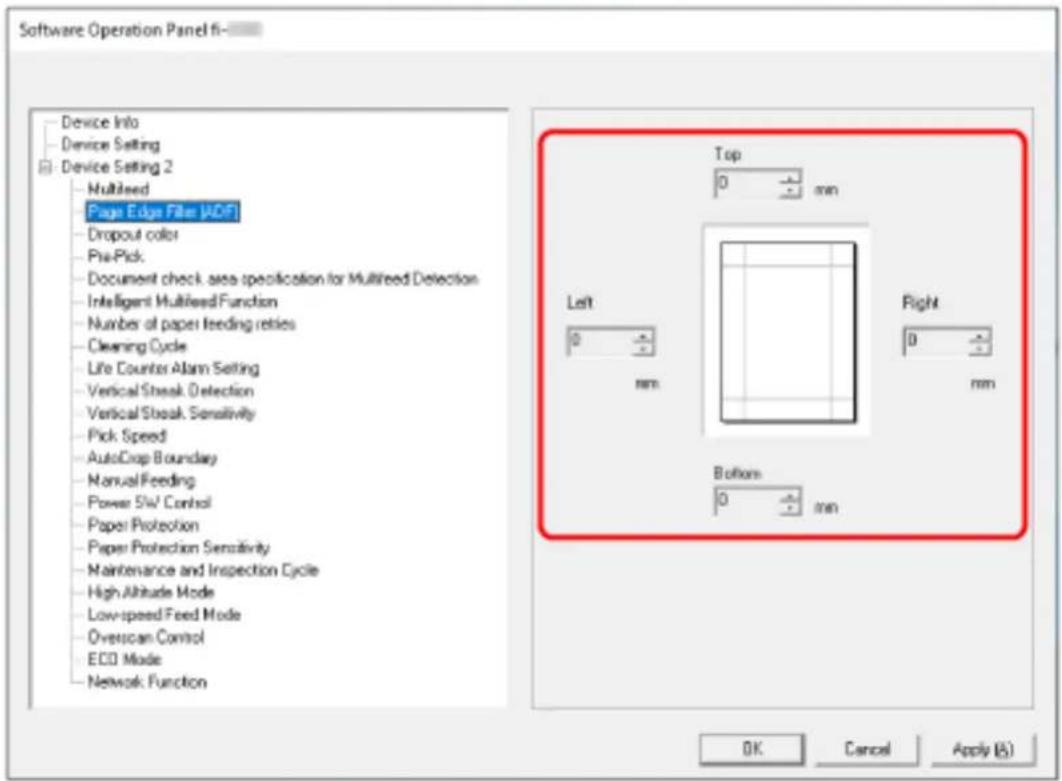
The factory default setting is "0".
The specified area is filled in white or black, according to the background color.
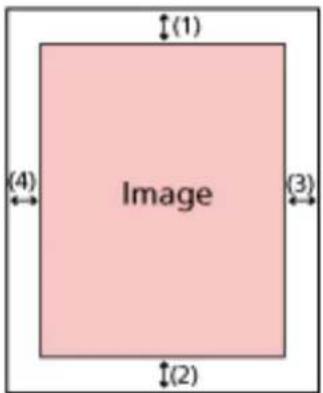
ADF
(1): Top = 0 to 15 mm
(2): Bottom = -7 to 7 mm
(3): Right = 0 to 15 mm
(4): Left = 0 to 15 mm
FB [fi-8290/fi-8270/fi-8250/fi-8250U]
(1): Top = 0 to 15 mm
(2): Bottom = 0 to 15 mm
(3): Right = 0 to 15 mm
(4): Left = 0 to 15 mm
(in 1 mm increments)
ATTENTION
Note that if the target range of page edge filler is too wide, some characters near the edge may appear missing.
HINT
- You can change the background color to black or white in the scanner driver. For details, refer to the help for the scanner driver.
- Depending on the value you specify for the bottom margin of [Page Edge Filler (ADF)], the page edge filler function operates as follows:
-1 to 7 mm
Fills in the specified area with the background color from the bottom edge of the image towards the inside.
--1 to -7 mm
Outputs the image without filling in the specified area with the background color from the bottom edge of the image towards the outside. (Outputs the image with the specified area added when [Page End Detection] is set in the scanner driver.)
- This setting can also be configured in the scanner driver.
In such a case, the page edge filler of the scanner driver is used on the image which the scanner already filled in the edges.
Configuring the Scan Setting to Drop Out Specified Colors When Scanning [Dropout Color]
You can exclude a color from being scanned by selecting either red, green, or blue (three primary colors).
Documents can be scanned without excluding any colors.
For example, when scanning a document with black characters and a green frame, if you select green for the dropout color, only the black characters of the document are scanned.
1 Start up the Software Operation Panel.
For details, refer to Starting Up the Software Operation Panel (page 337).
2 From the list on the left, select [Device Setting 2] → [Dropout Color].
3 Select a color that you want to remove.
Red, Green, Blue
The selected color is removed.
The factory default setting is [Green].
None
No color is removed.
ATTENTION
- This function works the best with light (low intensity) colors, and dark colors may not be excluded.
- You cannot specify a color other than Red, Green, and Blue.
To drop out other colors, configure the setting in the scanner driver.
For details, refer to the help for the scanner driver.
HINT
- This is only available in black & white or grayscale mode.
- This setting can also be configured in the scanner driver.
Note that priority is given to the scanner driver setting.
Shortening the Scanning Intervals [Pre-Pick]
Enable this to shorten the scanning time when scanning continuously.
"Pre-pick" refers to feeding the next document into the ADF before ejecting the current document being scanned when scanning documents continuously.
1 Start up the Software Operation Panel.
For details, refer to Starting Up the Software Operation Panel (page 337).
2 From the listing on the left, select [Device Setting 2] → [Pre-Pick].
3 Specify whether or not to enable pre-pick.
Select [Yes] or [No].
The factory default setting is [Yes].
HINT
- If you cancel in the middle of scanning while pre-pick is enabled, you have to remove the pre-picked document, then load the document again.
- This setting can also be configured in the following tools.
-For fi-8190/fi-8290/fi-8170/fi-8270
This setting can also be configured in the scanner driver or on the operator panel.
Note that priority is given to the scanner driver setting.
-For fi-8150/fi-8250/fi-8150U/fi-8250U
This setting can also be configured in the scanner driver.
Note that priority is given to the scanner driver setting.
Specifying the Number of Retries for Paper Feeding [Number of paper feeding retries]
Specify the number of feeding retries when a document is not fed from the ADF paper chute (feeder).
1 Start up the Software Operation Panel.
For details, refer to Starting Up the Software Operation Panel (page 337).
2 From the list on the left, select [Device Setting 2] → [Number of paper feeding retries].
3 Specify the number of paper feeding retries.
The value can range from 1 to 12 times.
The factory default setting is "3 times".
HINT
For fi-8190/fi-8290/fi-8170/fi-8270, this setting can also be configured in the operator panel.
Feeding [Pick Speed]
You can specify the timing of when document feeding is started.
When overlapped documents or paper jams occur frequently, delaying the timing of document feeding may improve the performance.
This setting is effective when you scan thin paper.
1 Start up the Software Operation Panel.
For details, refer to Starting Up the Software Operation Panel (page 337).
2 From the list on the left, select [Device Setting 2] → [Pick Speed].
3 Select the feeding speed.
Normal
This is the optimum feeding speed.
This is the factory default setting.
Slower
The timing of document feeding is delayed more than [Normal].
ATTENTION
The total time for scanning is longer because the timing of document feeding is delayed.
HINT
For fi-8190/fi-8290/fi-8170/fi-8270, this setting can also be configured in the operator panel.
Cropping the Image Boundary [AutoCrop Boundary]
When the scanner is set to detect the paper size automatically, specify whether or not to optimize (round up/down) the fractional part of the scanned image.
When the paper size is detected, there may be a fractional part of the scanned image compared to the standard paper size.
Output image size varies depending on how the fractional part is processed.
1 Start up the Software Operation Panel.
For details, refer to Starting Up the Software Operation Panel (page 337).
2 From the list on the left, select [Device Setting 2] → [AutoCrop Boundary].
3 Select whether to include or exclude the fractional data.
Select [Optimize] to prevent information from missing a part.
The factory default setting is [Optimize].
ATTENTION
- While selecting [Optimize] can prevent information from missing a part, a shadow may appear around the edges.
- When you scan a document with text around the edges while [Round Down] is selected, a part of the information may be missing in the output image.
- For details about setting automatic page size detection, refer to the help for the scanner driver.
HINT
This setting is effective only for scanning images in black & white.
Protecting the Documents from Being Damaged [Paper Protection]
Configure the setting to detect feeding errors.
This function detects feeding errors in the following cases:
- When the scanner detects an abnormal document skew caused by a feeding error
- When the scanner detects paper jam noise
Paper jams due to feeding errors could damage or tear valuable documents.
Detecting a feeding error and stopping the scan can prevent damage to documents.
This function is effective when you scan documents which are difficult to feed such as thin paper documents.
ATTENTION
fi-8190/fi-8290/fi-8170/fi-8270 is supported to detect paper jam noise.
1 Start up the Software Operation Panel.
For details, refer to Starting Up the Software Operation Panel (page 337).
2 From the list on the left, select [Device Setting 2] → [Paper Protection].
3 Select a detection method.
●For fi-8190/fi-8290/fi-8170/fi-8270
Disable
Does not detect feeding errors.
Feeding Skew
Stops the scan when the scanner detects an abnormal document skew caused by a feeding error.
Feeding Noise
Stops the scan when the scanner detects paper jam noise.
Feeding Skew & Noise
Stops the scan when the scanner detects an abnormal document skew caused by a feeding error, or when the scanner detects paper jam noise.
This is the factory default setting.
●For fi-8150/fi-8250/fi-8150U/fi-8250U
Enable
Stops the scan when the scanner detects an abnormal document skew caused by a feeding error.
This is the factory default setting.
Disable
Does not detect feeding errors.
ATTENTION
- Note that the paper protection function is to prevent damages to documents, but the protection of all documents is not guaranteed.
- When you use the paper protection function, make sure to load the documents with their top edges aligned and so that there is no space between the side guides and the document (especially for a mixed batch of documents with different lengths).
If the top edges are not aligned properly, or if there is a space between the side guides and the document, the scan may stop even when the documents are being fed correctly.
HINT
- In the following cases, the scan may stop even when the documents are being fed correctly.
-If you scan a wrinkled document
-If you scan a document that is not square or rectangular
-If you scan a document that has a dark background
-If you scan a document that has text or patterned background printed close to the edge
-If a document is fed skewed.
For fi-8190/fi-8290/fi-8170/fi-8270, the paper protection function can be disabled only for the document on the operator panel.
For details, refer to Disabling the Paper Protection Function [fi-8190/fi-8290/fi-8170/fi-8270] (page 215).
- If the paper protection function stops scans frequently, refer to Paper Protection Is Set Off Frequently (page 323).
- When the setting for using the (Carrier) Sheet is enabled in the scanner driver, the paper protection function is disabled.
- This setting can also be configured in the following tools.
-For fi-8190/fi-8290/fi-8170/fi-8270
This setting can also be configured in the scanner driver or on the operator panel.
When the paper protection setting is set to on in the scanner driver, [Feeding Skew & Noise] is enabled regardless of the setting on the Software Operation Panel.
For the paper protection setting, priority will be given in the following order:
1 [Paper Protection] in the scanner driver
2 [18:Paper Protection] on the [Settings Menu] screen of the operator panel (when prioritize the operator panel settings)
3 [18:Paper Protection] on the [Settings Menu] screen of the operator panel or [Paper Protection] of the Software Operation Panel.
-For fi-8150/fi-8250/fi-8150U/fi-8250U
This setting can also be configured in the scanner driver.
Note that priority is given to the scanner driver setting.
Specifying the Sensitivity Level for Paper Protection [Paper Protection Sensitivity]
Specify the sensitivity level for detecting feeding errors when the paper protection function is enabled.
Documents are skewed abnormally or paper jam noise is made when documents are not being fed properly.
Specify the sensitivity level to detect an abnormal document skew or paper jam noise.
ATTENTION
fi-8190/fi-8290/fi-8170/fi-8270 is supported to detect paper jam noise.
1 Start up the Software Operation Panel.
For details, refer to Starting Up the Software Operation Panel (page 337).
2 From the list on the left, select [Device Setting 2] → [Paper Protection Sensitivity].
3 Select the sensitivity level.
●For fi-8190/fi-8290/fi-8170/fi-8270
-Select the sensitivity level to detect [Feeding Skew].
Normal
Detects an abnormal document skew with the optimum sensitivity.
This is the factory default setting.
High
Increases the sensitivity level to detect an abnormal document skew.
Specify this to detect an abnormal document skew even if there is a slight skew in the document.
HINT
To detect an abnormal document skew immediately and stop the scan, select [High].
-Select the sensitivity level to detect [Feeding Noise].
Low
Decreases the sensitivity level to detect paper jam noise.
Specify this to detect only loud paper jam noise.
Normal
Detects paper jam noise with the optimum sensitivity level.
This is the factory default setting.
High
Increases the sensitivity level to detect paper jam noise.
Specify this to detect even slight paper jam noise.
HINT
- To detect paper jam noise immediately and stop the scan, select [High].
- If scanning stops frequently due to the paper protection function, select [Low].
- This setting can also be configured in the operator panel.
●For fi-8150/fi-8250/fi-8150U/fi-8250U
Select the sensitivity level to detect [Feeding Skew].
Normal
Detects an abnormal document skew with the optimum sensitivity.
This is the factory default setting.
High
Increases the sensitivity level to detect an abnormal document skew.
Specify this to detect an abnormal document skew even if there is a slight skew in the document.
HINT
To detect an abnormal document skew immediately and stop the scan, select [High].
Scanning Slowly at Low Resolution [Low-speed Feed Mode]
Specify this to slow down the scanning speed in order to protect the documents.
When performing a scan at a low resolution (lower than 400 dpi), the scan is performed at a slow speed regardless of the resolution that is set. This setting is effective for scanning long page documents.
1 Start up the Software Operation Panel.
Refer to Starting Up the Software Operation Panel (page 337).
2 From the list on the left, select [Device Setting 2] → [Low-speed Feed Mode].
3 Select [Enable] if you perform a slow scanning speed in order to protect the documents.
The factory default setting is [Disable].
HINT
For fi-8190/fi-8290/fi-8170/fi-8270, this setting can also be configured in the operator panel.
Scanning at High Altitude [High Altitude Mode]
Enable this mode to use the scanner at an altitude of 2,000 m or higher.
Low atmospheric pressure at high altitudes may lower the accuracy in detections for overlapped documents with the ultrasonic sensor.
Setting [Enable] to on for High Altitude Mode improves the accuracy to detect overlapped documents.
1 Start up the Software Operation Panel.
For details, refer to Starting Up the Software Operation Panel (page 337).
2 From the list on the left, select [Device Setting 2] → [High Altitude Mode].
3 Select [Enable] to use the scanner at high altitude.
The factory default setting is [Disable].
Specifying the Image Quality for Scanning [Image Quality Mode]
To obtain an image quality that is close to the image quality for scanning with fi-6x30Z/fi-6x40Z, set the image quality mode.
1 Start up the Software Operation Panel.
For details, refer to Starting Up the Software Operation Panel (page 337).
2 From the list on the left, select [Device Setting 2] → [Image Quality Mode].
3 Select whether to obtain an image quality that is close to the image quality with fi-6x30Z/fi-6x40Z.
The factory default setting is [Disable].
Preventing an Image from Missing Any Parts When Documents Are Fed Skewed (Overscan Control) [fi-8190/fi-8290/fi-8170/fi-8270]
Specify whether or not to prevent a part of an image from being missing when documents are fed skewed.
If you set [Enable] for [Overscan Control], when documents are fed skewed, the scanning area is automatically widened to prevent the image from missing any parts.
![RICOH fi-8190 - Preventing an Image from Missing Any Parts When Documents Are Fed Skewed (Overscan Control) [fi-8190/fi-8290/fi-8170/fi-8270] - 1](/content/2026/05/903199/images/58402eeb1cf05a795852534f78461440e9c878c4dd5471d19dbd603be7bfdfc8.jpg)
flowchart
graph TD
    A["Missing Part"] --> B["When a part of an image is missing"]
    B --> C["When [Enable"] is selected]
1 Start up the Software Operation Panel.
Refer to Starting Up the Software Operation Panel (page 337).
2 From the list on the left, click [Device Setting 2] → [Overscan Control].
3 Select [Enable] to prevent the image from missing any parts.
The factory default setting is [Enable].
HINT
It is recommended that you scan in the largest available paper size.
Settings Related to the Detection for Overlapped Documents (Multifeed)
Specifying a Method to Detect Overlapped Documents [Multifeed]
Multifeed is an error that occurs when two or more sheets are overlapped and fed at once.
For documents that are loaded in the ADF paper chute (feeder), configure the settings to detect overlapped documents during a scan.
Overlapped documents are detected with the ultrasonic sensor or according to the difference in length of the documents.
When overlapped documents are detected, an error message is displayed and the scan stops. If documents are overlapped within 30 mm from the leading edge, they are not detected as overlapped.
1 Start up the Software Operation Panel.
For details, refer to Starting Up the Software Operation Panel (page 337).
2 From the list on the left, select [Device Setting 2] → [Multifeed].
3 Select a detection method.
None
Does not detect overlapped documents.
Check Overlapping(Ultrasonic)
Detects overlapped documents with the ultrasonic sensor.
When this is selected, you can specify the following two options:
- Specify an area to detect overlapped documents by the length from the leading edge of the document in the feeding direction.
For details, refer to Specifying the Area to Detect Overlapped Documents [Document check area specification for Multifeed Detection] (page 384).
- When a piece of paper is attached on a document, the length and position of the paper can be memorized, and set to ignore overlapping of documents.
For details, refer to Configuring Not to Detect Certain Overlap Patterns (page 208).
This is the factory default setting.
Check Length
Detects overlapped documents according to the difference in length.
Select this to scan documents of the same length.
Note that overlapped documents cannot be detected accurately when a mixed batch of different lengths are scanned.
Check Overlapping and Length
Detects overlapped documents by the combination of [Check Overlapping(Ultrasonic)] and [Check Length].
When this is selected, you can specify the following two options:
- Specify an area to detect overlapped documents by the length from the leading edge of the document in the feeding direction.
For details, refer to Specifying the Area to Detect Overlapped Documents [Document check area specification for Multifeed Detection] (page 384). - When a piece of paper is attached on a document, the length and position of the paper can be memorized, and set to ignore overlapping of documents.
For details, refer to Configuring Not to Detect Certain Overlap Patterns (page 208).
Note that overlapped documents cannot be detected accurately when a mixed batch of different length are scanned.
Length
Specify the difference in length of documents to be detected as overlapped documents. Overlapped documents are detected when the difference in length of documents is longer than the specified value.
Specify this item when [Check Length] or [Check Overlapping and Length] is selected. Any length under the specified value is tolerated as a slight error and not detected as overlapped documents.
Select from 10/15/20 mm. The factory default setting is "10".
ATTENTION
- To scan documents with different lengths, select [Check Overlapping(Ultrasonic)].
- When an attachment such as a sticky note, receipt, or photo is attached on the document, the attachment part of the document may be detected as overlapping of documents if [Check Overlapping(Ultrasonic)] is selected. In that case, select [Check Length].
Otherwise, detect overlapping of documents by specifying an area on the document that does not include an area attached with paper in order to ignore the overlapping of documents for that area.
HINT
- This setting can also be configured in the scanner driver. Note that priority is given to the scanner driver setting.
- When the setting for using the (Carrier) Sheet is enabled in the scanner driver, the error message is displayed from the scanner driver.
Specifying the Area to Detect Overlapped Documents [Document check area specification for Multifeed Detection]
Specify an area to detect overlapped documents.
Specify this item when [Check Overlapping(Ultrasonic)] or [Check Overlapping and Length] is selected for [Multifeed].
1 Start up the Software Operation Panel.
For details, refer to Starting Up the Software Operation Panel (page 337).
2 From the list on the left, select [Device Setting 2] → [Document check area specification for Multifeed Detection].
3 Specify the detection range.
Select the [Selected range] check box.
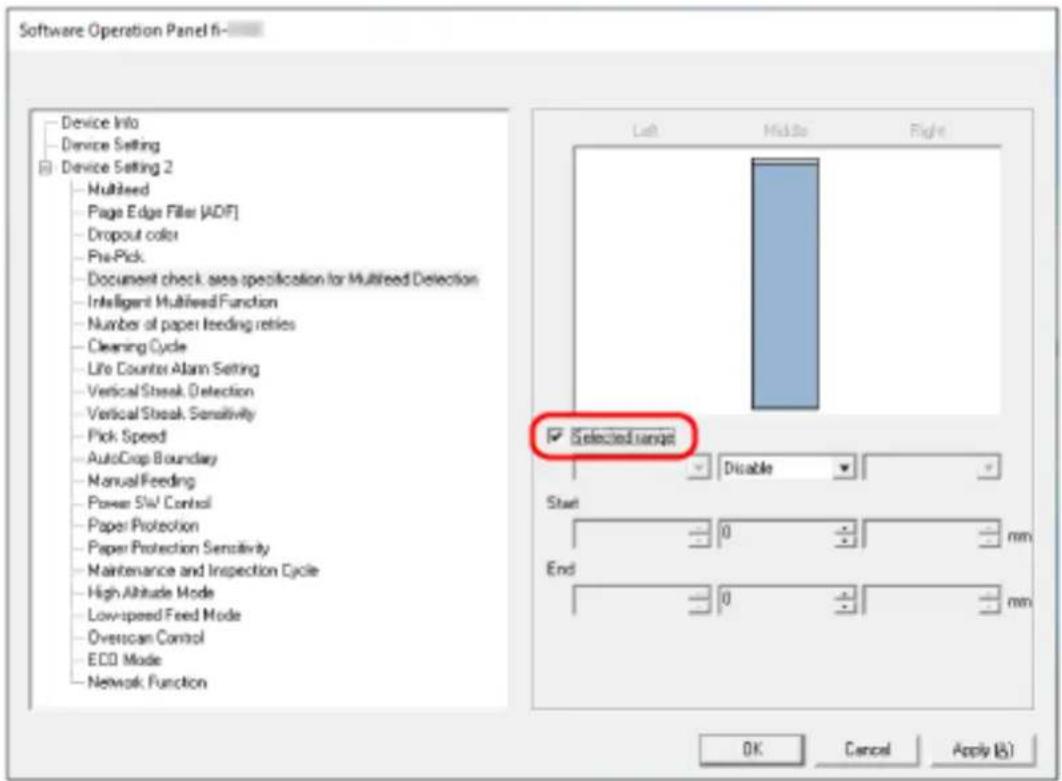
[Selected range] check box
Select the check box to specify the detection range (colored in light pink) in the figure below.
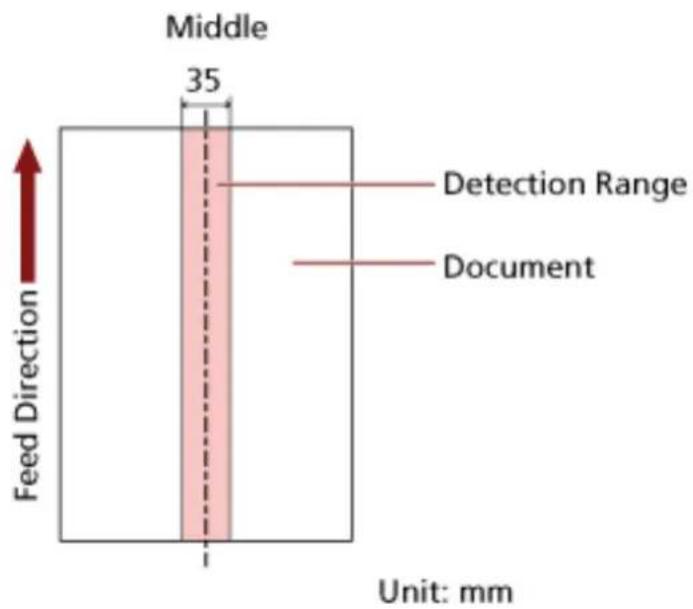
The check box is cleared for the factory default settings.
Clearing this check box sets both start and end positions to "0", and overlapped documents are detected within the whole document.
The above condition applies when the document is set to the center of the pick roller width. If documents are overlapped within 30 mm from the leading edge, they are not detected as overlapped.
Disable (Middle)
This can be selected when the [Selected range] check box is selected.
Overlapped documents are not detected within the specified area.
This is the factory default setting.
Enable (Middle)
This can be selected when the [Selected range] check box is selected.
Overlapped documents are detected within the specified area.
Start (Middle)
Specify the start position of the detection area by the length from the leading edge of the document in the feeding direction.
Range: 0 to 510 mm, in 2 mm increments, Start < End
The factory default setting is "0".
End (Middle)
Specify the end position of the detection area by the length from the leading edge of the document in the feeding direction.
Range: 0 to 510 mm, in 2 mm increments, Start < End
The factory default setting is "0".
HINT
- When the start and end positions are both "0", overlapped documents are detected in the whole document regardless of the setting for [Selected range].
- To disable the detection of overlapped documents for the whole document, select [Disable] for [Selected range], and set the start position to "0" and the end position to equal the document length or longer.
- If the start position is set at a length longer than the document length, overlapped documents are detected in the whole document when [Disable] is selected for [Selected range], and overlapped documents are not detected anywhere in the whole document when [Enable] is selected for [Selected range].
- To detect overlapped documents, the area must be at least 5 mm in length. Configure the setting so that the value of the end position minus the start position is 6 mm or more.
- You can also set the start position and the end position by the following methods:
-On the window for specifying the detection area, draw a square by dragging the mouse pointer.
-On the window for specifying the detection area, drag the handles that indicate the start position and the end position. - For examples of the overlapping detection area settings, refer to Examples of the Settings for the Area to Detect the Overlapping of Documents (page 387).
■ Examples of the Settings for the Area to Detect the Overlapping of Documents
Example 1
Setting details are as follows.
Detection area: Specify the enabled area, Start: 50 mm, End: 200 mm
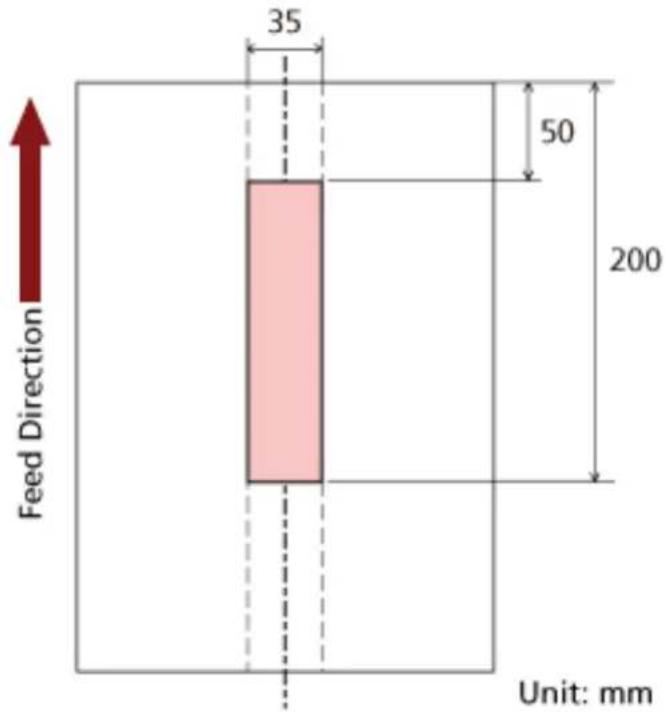
other
| Dimension | Value | | --------- | ----- | | Width | 35 | | Height | 50 | | Unit | 200 |Overlapping of documents is detected only within the light pink area.
Example 2
Setting details are as follows.
Detection area: Specify the disabled area, Start: 0 mm, End: 300 mm
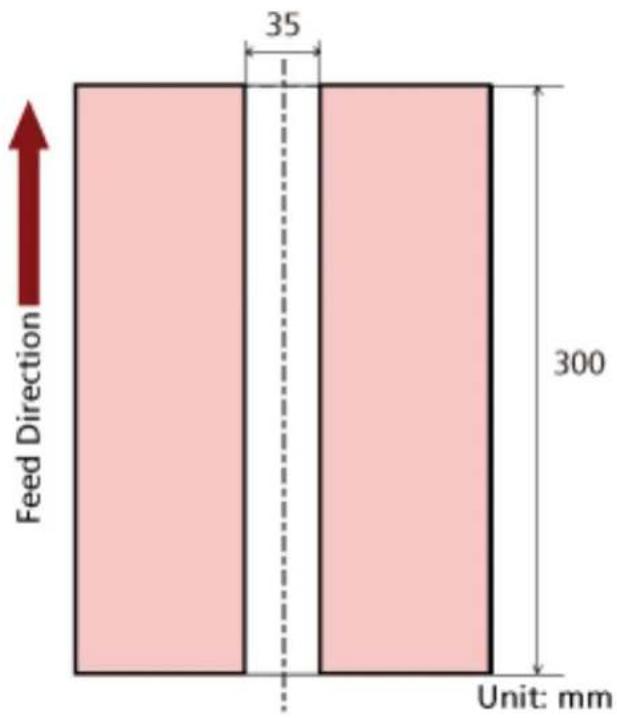
other
| Dimension | Value | | --------- | ----- | | Width | 35 | | Height | 300 |Overlapping of documents is detected only within the light pink area.
Example 3 (Bad Example)
Setting details are as follows.
Detection area: Specify the enabled area, Start: 100 mm, End: 102 mm
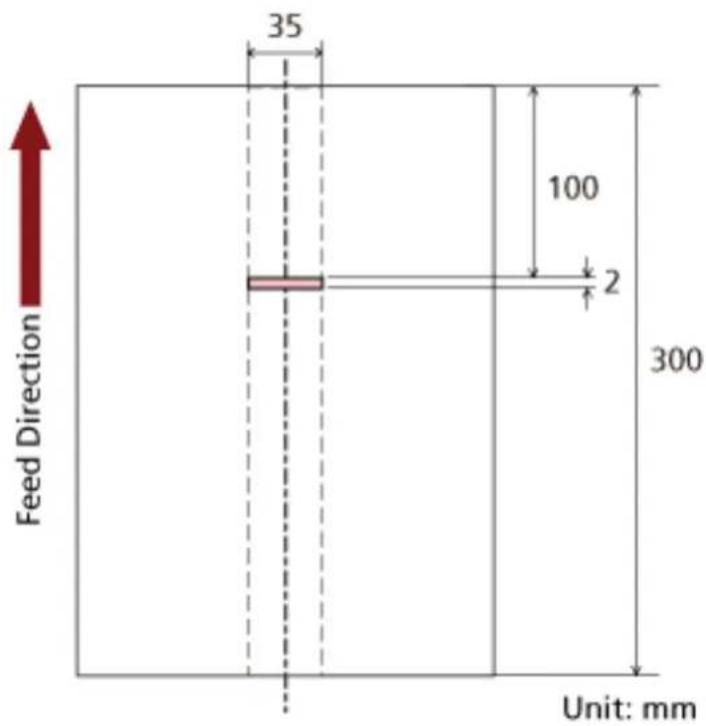
other
| Dimension | Value | | --------- | ----- | | Width | 35 | | Height | 100 | | Base | 2 | | Height | 300 |Since the detection area (length) is less than 5 mm, overlapped documents cannot be detected accurately.
Setting to Ignore Certain Overlap Patterns [Intelligent Multifeed Function]
Configure the setting to automatically ignore certain patterns of overlapped documents when the setting to detect overlapped documents is enabled.
Note that you first need to specify [Check Overlapping(Ultrasonic)] or [Check Overlapping and Length] in the scanner driver and Specifying a Method to Detect Overlapped Documents [Multifeed] (page 382) on the Software Operation Panel before setting this item.
1 Start up Software Operation Panel.
For details, refer to Starting Up the Software Operation Panel (page 337).
2 From the list on the left, select [Device Setting 2] → [Intelligent Multifeed Function].
3 Select an operation mode.
Standard mode
Specify whether overlapped documents are detected when re-scanning documents detected as overlapped documents.
Does not memorize the size or location of the paper attachment.
Overlapping is not detected for a piece of paper (80 mm or less in the feeding direction) attached on a document (such as sticky notes).
Scanning will stop immediately if overlapped documents are detected.
Note that if the setting for stopping the scan to check images is set to on in the scanner driver, scanning will stop after overlapped documents are ejected.
This is the factory default setting.
Manual mode
Specify whether overlapped documents are detected when re-scanning documents detected as overlapped documents.
Does not memorize the size or location of the paper attachment.
Scanning will stop immediately if overlapped documents are detected.
Note that if the setting for stopping the scan to check images is set to on in the scanner driver, scanning will stop after overlapped documents are ejected.
Auto mode 1
Specify whether the length and position of a piece of paper attached on a document detected as overlapped documents are memorized as an overlap pattern.
If the overlap pattern is memorized, documents with the same overlap pattern are not detected as overlapped documents from the next scan.
Scanning will stop after the overlapped documents are ejected.
In this operation mode, up to four overlap patterns can be memorized at a time (when one sheet is scanned), and up to 32 overlap patterns can be memorized in total.
When the 33rd overlap pattern is detected, the first pattern that was memorized is overwritten.
However, when turning the scanner off and on, the number of memorized overlap patterns depends on the setting for [Remember overlap patterns at power-off] in the Software Operation Panel.
For details, refer to Setting to Ignore Certain Overlap Patterns [Intelligent Multifeed Function] (page 390).
Auto mode 2
Specify whether the length of the longest piece of paper attached on a document detected as overlapped documents is memorized as an overlap pattern.
If the overlap pattern is memorized, a document with a piece of paper in the same length or shorter attached is not detected as overlapped documents from the next scan.
Scanning will stop after the overlapped documents are ejected.
Only one overlap pattern can be memorized in this operation mode.
[Clear overlap pattern] check box
Select this to erase the overlap patterns that were memorized in Auto mode.
By selecting this, you can erase the overlap patterns that were memorized in Auto mode.
You can erase overlap patterns that were not supposed to be memorized, but be careful with this operation because all memorized patterns will be erased.
The check box is cleared for the factory default settings.
[Memorize the overlap pattern automatically] check box
For Auto mode 1 or Auto mode 2, manually switch whether or not to memorize an overlap pattern when overlapped documents are detected.
Select this to change the default setting to enable in order to memorize the overlap pattern when overlapped documents are detected.
The check box is cleared for the factory default settings.
For details about the function that memorizes an overlap pattern, refer to Configuring Not to Detect Certain Overlap Patterns (page 208).
Remember overlap patterns at power-off
You can specify whether or not to keep the overlap pattern upon turning the power off. When [Remember] is specified, you can use eight of the most recent overlap patterns the next time the scanner is powered on.
The factory default setting is [Do not remember].
HINT
- When the setting for using the (Carrier) Sheet is enabled in the scanner driver, [Intelligent Multifeed Function] is disabled.
- For fi-8190/fi-8290/fi-8170/fi-8270, this setting can also be configured in the operator panel.
- For fi-8150/fi-8250/fi-8150U/fi-8250U, The memorized overlap patterns can be also erased by holding down the [Function] button for five seconds or more while the function number is flashing on the operator panel.
Settings Related to Waiting Time
Waiting Time in Manual Feeding [Manual Feeding]
Configure the settings when manually loading and scanning one sheet at a time.
When you scan by manually loading one sheet at a time, you can specify the waiting time (interval) for loading the next document in the ADF paper chute (feeder). This enables continuous scanning as long as you load a document within the specified time.
If the specified time is exceeded, the scan is finished automatically.
1 Start up the Software Operation Panel.
For details, refer to Starting Up the Software Operation Panel (page 337).
2 From the list on the left, select [Device Setting 2] → [Manual Feeding].
3 Set [Timeout Time].
For [Timeout Time], specify the time period until which the scanner confirms that no documents are loaded in the ADF paper chute (feeder) (the interval between the last scan and the detection of whether the next document is loaded or not).
The factory default setting is "10 seconds".
- When scanning more than one document in succession manually
-
Select [Enable] for [Continuous Feed Mode] to switch the feed mode to Manual Continuous Mode.
-
Select the time for [Timeout Time].
- When scanning a document folded in half, an envelope, a multi-layered transfer paper, or a booklet such as a passport manually and one at a time
-
Press the [Manual Feed] button to switch the feed mode to Manual Feed Mode.
-
Select the time for [Timeout Time].
HINT
- You can select whether to scan documents in succession in Manual Feed Mode for [Manual Feed Mode].
When [Do not continue] is selected, Manual Feed Mode is cleared after scanning is complete. When [Continue] is selected, documents are scanned in succession in Manual Feed Mode until the [Manual Feed] button is pressed.
The factory default setting is [Do not continue].
- In Manual Continuous Mode or Manual Feed Mode, the scanner will wait for documents to be loaded in the ADF paper chute (feeder) until the timeout time elapses after scanning is started or a document is ejected.
Scanning will stop if no document is loaded within the timeout time.
To immediately stop scanning, press the following button depending on the scanner.
-For fi-8190/fi-8290/fi-8170/fi-8270
[Stop/Clear] button
-For fi-8150/fi-8250/fi-8150U/fi-8250U
[Send to] button
- The setting for switching the feed mode to Manual Feed Mode can also be configured in the scanner driver.
For details, refer to the help for the scanner driver. - For fi-8190/fi-8290/fi-8170/fi-8270, this setting can also be configured in the operator panel.
Waiting Time for the Scanner to Enter Power Saving Mode [Power saving]
Specify the waiting time before the scanner enters power saving mode.
1 Start up the Software Operation Panel.
For details, refer to Starting Up the Software Operation Panel (page 337).
2 From the list on the left, select [Device Setting].
3 Specify the waiting time for the scanner to enter power saving mode.
![Software Operation Panel 6 Device Info Device Setting Device Setting 2 - Multileed - Page Edge Filter (ADF) - Dropout color - Pre-Pick - Document check, area specification for Multileed Detection - Intelligent Multileed Function - Number of paper feeding reties - Cleaning Cycle - Life Counter Alarm Setting - Vertical Streak Detection - Vertical Streak Sensitivity - Pick Speed - AutoCrop Boundary - Manual Feeding - Power SW Control - Paper Protection - Paper Protection Sensitivity - Maintenance and Inspection Cycle - High Altitude Mode - Low-speed Feed Mode - Diverian Control - ECO Mode - Network Function Count Total Count (ADF): 5000$5 Sheets Sheets After cleaning: 5080 Sheets Clear[1] Brake Roller: 200580 Sheets Clear[2] Pick Roller: 196380 Sheets Clear[3] Sheets Clear[4] Sheets Clear[5] Sheets Clear[6] % Clear[7] % Clear[8] % Clear[9] Power saving: - - - - - - - - - - - - - - - - - - - - - - - - - - - - - - - - - - - - - - - - - - - - - - - - - - - - - - - - - - - - - - - - - - - - - - - - - - - - - - - - - - - - - - - - - - - - - - - - - - - - + - + - + - + - + - + - + - + - + - + - + - + - + - + - + - + - + - + - + - + - + - + - + - + - + - + - + - + - + - + - + - + - + - + - + - + - + - + - + - + - + - + - + - + - + - + - + - + - + - + - + Power off after a certain period of time 4 Hours OK Cancel Apply (A)](/content/2026/05/903199/images/e91de4ef82bface68699415736a86b7d87d39829b52ba5915a463c0ab8a841b4.jpg)
Power saving
Use the slider to specify the waiting time before entering power saving mode in the range from 5 to 115 minutes (in increments of 5).
The factory default setting is "15" minutes.
[Power off after a certain period of time] check box
Select this when you turn off the scanner automatically.
When this is selected, the scanner is turned off automatically if it is left on without being used for a certain period of time.
The check box is selected for the factory default setting.
You can select the timeout period for the scanner to be automatically turned off by [1 Hour]/[2 Hours]/[4 Hours]/[8 Hours].
The factory default setting is [4 Hours].
HINT
- If [Disable power switch] is set for [Power Switch Control of [Device Setting 2] in the Software Operation Panel, the scanner is not turned off even when the specified period of time for an auto shutdown has passed.
- For fi-8190/fi-8290/fi-8170/fi-8270, this setting can also be configured in the operator panel.
Settings Related to the Connection Between the Scanner and Computer
Specifying the USB Operation [USB] [fi-8150/fi-8250/fi-8150U/fi-8250U]
Change the USB setting if an error occurred on a computer during communication. If this setting is changed, the scanner is restarted.
1 Start up the Software Operation Panel.
For details, refer to Starting Up the Software Operation Panel (page 337).
2 From the list on the left, select [Device Setting 2] → [USB].
3 Specify how the USB function operates.
Automatic
Operates in accordance with the connection environment. This is the factory default setting.
USB 2.0
Operates with USB 2.0.
Settings to Use the Scanner Only via the USB Connection [Network Function] [fi-8190/fi-8290/fi-8170/fi-8270/fi-8150/fi-8250]
Specify whether or not to use the scanner only via the USB connection.
Disable the wired LAN connection if you want to use the scanner only via a USB connection for the following reasons.
- Reducing power consumption
●Enhancing the security
If this setting is changed, the scanner is restarted.
1 Start up the Software Operation Panel.
Refer to Starting Up the Software Operation Panel (page 337).
2 From the list on the left, select [Device Setting 2] → [Network Function].
3 Select [Disable] to use the scanner only via a USB connection.
The factory default setting is [Enable].
HINT
- If [Enable] is selected for [Network Function], you can use the scanner either via a USB connection or a wired LAN connection.
- [Network Function] appears when the Software Operation Panel is started up via a USB connection.
Settings Related to Power On/Off and the Power Consumption of the Scanner
Method for Turning the Scanner ON/OFF [Power Switch Control]
Specify whether or not to turn on/off the scanner by pressing the [Power] button on the scanner.
1 Start up the Software Operation Panel.
For details, refer to Starting Up the Software Operation Panel (page 337).
2 From the list on the left, select [Device Setting 2] → [Power Switch Control].
3 Select a method for turning on/off the scanner from the following.
Enable power switch
The [Power] button on the scanner is used to turn on/off the scanner.
This is the factory default setting.
Disable power switch
Select this to use an AC power strip to control power supply for peripherals such as a scanner in accordance with the computer's power.
The [Power] button on the scanner is not used to turn on/off the scanner.
Enable USB power feeding
This can be selected when the scanner and the computer are connected via a USB cable. In addition to the [Power] button on the scanner, turning on/off the computer can simultaneously turn on/off the scanner.
Connecting/disconnecting a USB cable can turn on/off the scanner.
ATTENTION
- If [Enable] is selected for [Network Function] of [Device Setting 2] in the Software Operation Panel, [Enable USB power feeding] works as [Enable power switch] instead.
- Some types of computers and USB hubs keep supplying power to the USB bus even after the computer is turned off.
In that case, [Enable USB power feeding] may not work properly.
Settings for Saving the Power Consumption of the Scanner (ECO Mode)
When performing a scan at a low resolution (300 dpi or less), the scan is performed at a slow speed, which saves the power consumption of the scanner.
When this is enabled, the scanning speed is as follows:
●For fi-8190/fi-8290/fi-8170/fi-8270
Scanning is performed at the same speed as performing a scan at 600 dpi.
●For fi-8150/fi-8250/fi-8150U/fi-8250U
Scanning is performed at the same speed as performing a scan at 400 dpi.
1 Start up the Software Operation Panel.
For details, refer to Starting Up the Software Operation Panel (page 337).
2 From the list on the left, select [Device Setting 2] → [ECO Mode].
3 Select [Enable] to save the power consumption of the scanner.
The factory default setting is [Disable].
HINT
For fi-8190/fi-8290/fi-8170/fi-8270, this setting can also be configured in the operator panel.
Settings Related to Scanner Maintenance
Detecting Vertical Streaks [Vertical Streak Detection]
You can configure the settings for detecting dirt on the glass.
Vertical streaks may appear on images if the glass is dirty.
If [Enable] is selected for the vertical streak detection setting, the following message appears when vertical streaks appear on the image that you scanned with the ADF.
●For fi-8190/fi-8290/fi-8170/fi-8270
A message appears as follows.
- flashes on the LCD.
[Clean glass!] also flashes on the second line in the [Ready] screen.
Check the information, and then clean the glass.
For details about how to check the information, refer to Checking the Information (page 151).
-A message is displayed on the computer.
Check the message, and then clean the glass.
●For fi-8150/fi-8250/fi-8150U/fi-8250U
A message is displayed on the computer.
Check the message, and then clean the glass.
For details about cleaning, refer to Daily Care (page 217).
1 Start up the Software Operation Panel.
For details, refer to Starting Up the Software Operation Panel (page 337).
2 From the list on the left, select [Device Setting 2] → [Vertical Streak Detection].
3 Select whether or not to detect dirt on the glass (vertical streaks).
When you select [Enable], the scanner detects dirt on the glass (vertical streaks).
The factory default setting is [Disable].
HINT
For fi-8190/fi-8290/fi-8170/fi-8270, this setting can also be configured in the operator panel.
Specifying the Sensitivity Level for Vertical Streak Detection [Vertical Streak Sensitivity]
Specify the sensitivity level to detect vertical streaks (dirt on the glass) when [Enable] is selected for [Vertical Streak Detection].
Adjust the sensitivity level according to how dirty the glass is.
1 Start up the Software Operation Panel.
For details, refer to Starting Up the Software Operation Panel (page 337).
2 From the list on the left, select [Device Setting 2] → [Vertical Streak Sensitivity].
3 Select the sensitivity level to detect dirt on the glass.
Low
Decreases the sensitivity level to detect dirt on the glass.
Specify this to detect dirt only when the glass is very dirty.
Normal
Detects dirt on the glass with the optimum sensitivity.
This is the factory default setting.
High
Increases the sensitivity level to detect dirt on the glass.
Specify this to detect dirt even when the glass is slightly dirty.
HINT
- If [Clean glass!] frequently flashes on the second line in the [Ready] screen, select [Low].
- For fi-8190/fi-8290/fi-8170/fi-8270, this setting can also be configured in the operator panel.
Setting the Maintenance/Inspection Cycles for the Scanner [Maintenance and Inspection Cycle] [fi-8190/fi-8290/fi-8170/fi-8270]
Specify the maintenance and inspection cycle for the scanner that is performed by a service engineer.
If the specified period has passed after the last maintenance and inspection date, Menus on the LCD.
[maintenance] also flashes on the second line in the [Ready] screen.
Check the information and ask a service engineer to perform regular maintenance and inspection for the scanner.
For details about how to check the information, refer to Checking the Information (page 151).
For regular maintenance and inspection on the scanner by a service engineer, contact the distributor/dealer where you purchased this product. Refer to the contact information in the Contact List if supplied with this product, or refer to the contact information in the Contact for Inquiries section if provided in Safety Precautions supplied with this product, and then make an inquiry.
1 Start up the Software Operation Panel.
For details, refer to Starting Up the Software Operation Panel (page 337).
2 From the list on the left, select [Device Setting 2] → [Maintenance and Inspection Cycle].
3 Select [Enable] to receive a message on the LCD when it gets closer to the time for maintenance. The factory default setting is [Disable].
4 Select the cycle to receive a message.
The factory default setting is "12 months".
Network Settings (fi Series Network Settings) [fi-8190/fi-8290/fi-8170/fi-8270/fi-8150/fi-8250]
This section explains how to use fi Series Network Settings to configure the network settings. The network settings for the scanner can be configured by using fi Series Network Settings.
Starting Up fi Series Network Settings
Start Up fi Series Network Settings in the following procedure.
1 Connect the scanner to the computer as follows.
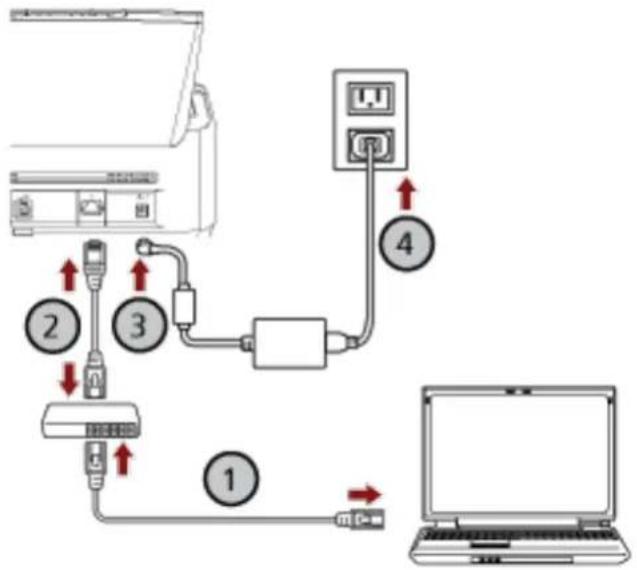
flowchart
graph TD
    A["Printer"] -->|①| B["Switch"]
    A -->|②| C["Port 1"]
    A -->|③| D["Port 2"]
    A -->|④| E["Port 3"]
    E --> F["Switch"]
    F --> G["Laptop"]
a Connect the computer to a network device via a wired LAN or Wi-Fi ( ).①
The procedure below shows an example of connecting the computer to a network device via a wired LAN.
For details about how to connect the computer to the network, refer to your computer manual.
b Connect the scanner to the network device via a wired LAN ( ).②
c Connect the power cable to the scanner and the AC outlet ( , )
d Turn on the scanner.
For details, refer to How to Turn the Power ON (page 71).
2 Check an IP address of the scanner.
You can check the IP address of the scanner as follows.
●For fi-8190/fi-8290/fi-8170/fi-8270
The IP address of the scanner can be checked using one of the following methods.
-The IP address of the scanner can be checked in [1:Scanner Information] on the [Settings Menu] screen of the operator panel.
For details, refer to How to Use Settings Menu (page 145).
-The IP address of the scanner can be checked by using IP Address Setting Tool.
For details, refer to the Network Setup Tool for fi Series Help.
For details about how to start up IP Address Setting Tool, refer to Starting Up IP Address
Setting Tool [fi-8190/fi-8290/fi-8170/fi-8270/fi-8150/fi-8250] (page 70).
- For fi-8150/fi-8250
The IP address of the scanner can be checked by using IP Address Setting Tool.
For details, refer to the Network Setup Tool for fi Series Help.
For details about how to start up IP Address Setting Tool, refer to Starting Up IP Address
Setting Tool [fi-8190/fi-8290/fi-8170/fi-8270/fi-8150/fi-8250] (page 70).
3 Turn on the computer and enter the following URL in the URL input field on the browser to establish a connection with a scanner.
http or https (*1)://IP address of the scanner
Example
For an IPv4 address
http://xxx.xxx.xxx.xxx/ (xxx should be a value from 0 to 255)
Example
For an IPv6 address
http://[xxxx:xxxx:xxxx:xxxx:xxxx:xxxx:xxxx]:/ (xxxx should be a value from 0 to ffff)
*1:Enter "http" when [Encryption Off (HTTP)] is selected for [Network Encryption]. Or, enter "https" when [Encryption On (HTTPS)] is selected.
The login window for fi Series Network Settings appears.
4 Enter the administrator password, and click the [Login] button.
For details about the administrator password, refer to Admin Password (page 418).
The [Scanner Information] window for fi Series Network Settings appears.
5 Click each menu to configure the settings.
For details about each menu, refer to Scanner Information (page 408), Network (page 409), Security (page 413), Linking with Server (page 414), and Maintenance (page 418).
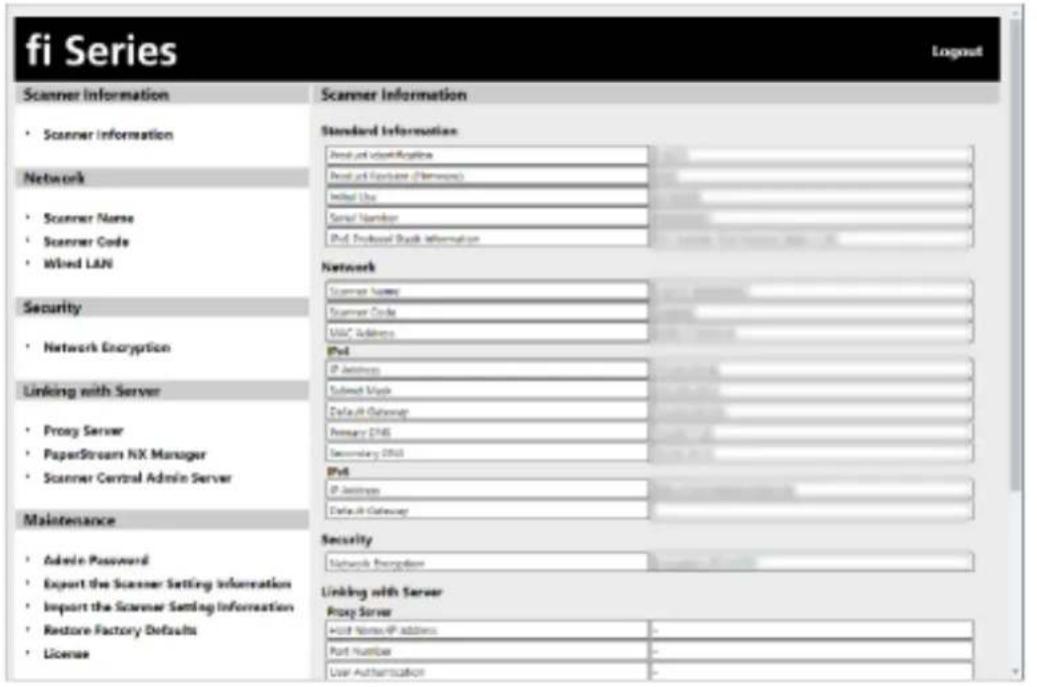
ATTENTION
To be able to use the function on the window without any problems, make sure that the following settings are configured on your browser.
- Cookies are enabled
- JavaScript is enabled
Setting Items
Network settings can be changed in the fi Series Network Settings window. This section shows a list of setting items that you can configure.
ATTENTION
To change the network settings, the administrator password is required. The default password is "password". Change the administrator password to prevent the settings from being changed by other users. Also, change the administrator password regularly. The administrator password can be changed in [Admin Password] under [Maintenance].
- Scanner Information
| Setting Item Description | |
| Scanner Information (page 408) Displays the scanner information such as standard information, scanner name, and network information. | |
●Network
| Setting Item Description | |
| Scanner Name (page 409) Set a scanner | name. |
| Scanner Code (page 410) Specify whether | er or not to issue a scanner code.If the "PaperStream NX Manager" setting is enabled, a scanner code can be used when scanning with a user application on a computer/mobile device/thin client. |
| Wired LAN (page 411) Set an IPv4 address | or IPv6 address for the scanner.ATTENTIONAn IPv6 address is not supported when the scanner is operated with PaperStream NX Manager. |
●Security
| Setting Item Description | |
| Network Encryption (page 413) Specify | whether to encrypt network communications. |
- Linking with Server
| Setting Item Description | |
| Proxy Server (page 414) Set this item to | operate the scanner with PaperStream NX Manager using a proxy server. |
| PaperStream NX Manager (page 416) Set | set this item to operate the scanner with PaperStream NX Manager. |
| Scanner Central Admin Server (page 417) | Set this item to operate the scanner with PaperStream NX Manager using Scanner Central Admin Server. |
● Maintenance
| Setting Item Description | |
| Admin Password (page 418) Change or | disable the administrator password. |
| Export the Scanner Setting Information (page 419) | Export the scanner settings. |
| Import the Scanner Setting Information (page 420) | Imports the scanner settings. |
| Restore Factory Defaults (page 421) Restore the scanner settings to the factory default. | |
| License (page 422) Displays the license information. | |
Scanner Information
Scanner Information
Displays the scanner information such as standard information, scanner name, and network information.
Click [Scanner Information] under [Scanner Information] to display the window.
Network
Scanner Name
Set a scanner name.
Click [Scanner Name] under [Network] to display the window.
Scanner Name
Enter a scanner name within 64 characters.
The following characters can be used for a scanner name:
●Alphanumerical characters
•Space
The space before or after the character string is ignored.
Symbols
[Apply to the scanner] button
Applies the configured settings.
Scanner Code
Specify whether or not to issue a scanner code.
If the "PaperStream NX Manager" setting is enabled, a scanner code can be used when scanning with a user application on a computer/mobile device/thin client.
Click [Scanner Code] under [Network] to display the window.
Scanner Code
Enter a scanner code within 64 characters.
The following characters can be used for a scanner code:
•Alphanumerical characters
•Space
The space before or after the character string is ignored.
- Symbols
$$ - /:: () \yen \& @".,?! ^ {\prime} # \% ^ {*} + = _ {-} | \sim < > [ ] ^ {\prime} } $$
• Diacritics
èéêëÈÉÊEùúúüUÚÜÜiīmìlǐlìòóõööœÓÓÔÕÖŒaááãäæÀÁÂÃÄÆsŞğĞçÇBñÑ
[Apply to the scanner] button
Applies the configured settings.
Wired LAN
Set an IPv4 address or IPv6 address for the scanner.
Click [Wired LAN] in [Network] to display the window.
ATTENTION
An IPv6 address is not supported when the scanner is operated with PaperStream NX Manager.
IPv4 Configuration
Set an IPv4 address.
•Auto
This is the factory default setting.
- Manual
When [Manual] is selected, specify the following items:
-IP Address
-Subnet Mask
-Default Gateway
DNS Server
Set a DNS server.
•Auto
This is the factory default setting.
- Manual
When [Manual] is selected, specify the following items:
-Primary DNS
-Secondary DNS
IPv6 Configuration
Set an IPv6 address.
•Auto
This is the factory default setting.
- Manual
When [Manual] is selected, specify the following items:
-[Receive RA packet] check box
Select the [Receive RA packet] check box to enable an IPv6 address that has been generated automatically.
You can check an IPv6 address that has been generated automatically in the [Scanner Information] window.
The check box is selected for the factory default setting.
-IP Address
ATTENTION
The following IPv6 addresses cannot be set manually.
- Loopback address
- Link-local address
- Site-local address
- Multicast address
- IPv4-compatible address
- IPv4-mapped address
- Address beginning with 2001:0000
- Address beginning with 2002
- Address beginning with 3FFE
-Subnet prefix length
-Default Gateway
- Disabled
[Apply to the scanner] button
Applies the configured settings.
Security
Network Encryption
Specify whether to encrypt network communications.
Click [Network Encryption] under [Security] to display the window.
HINT
When operating with PaperStream NX Manager, the setting for the scanner must be the same as the setting in PaperStream NX Manager/Scanner Central Admin Server.
For details, refer to the PaperStream NX Manager User's Guide/the Scanner Central Admin User's Guide.
Encryption Off (HTTP)
This is a transmission method prioritizing the scanning speed.
This is the factory default setting.
Encryption On (HTTPS)
This is a transmission method prioritizing the security. The scanning speed is slow with this setting.
[Apply to the scanner] button
Applies the configured settings.
Linking with Server
Proxy Server
Set this item to operate the scanner with PaperStream NX Manager using a proxy server. Click [Proxy Server] under [Linking with Server] to display the window.
[Enable] check box
Set whether or not to use a proxy server.
The check box is cleared for the factory default setting.
If you select the check box, also set the following items.
- Host Name/IP address
ATTENTION
An IPv4 address is supported.
Note that an IPv6 address is not supported.
- Port Number
The factory default setting is "8080".
- [Use User Authentication] check box
Set this item if a proxy server has a user authentication function.
If you select the check box, also set the following items.
-Username
Enter a user name within 256 characters.
The following characters can be used for a user name:
●Alphanumerical characters
•Space
The space before or after the character string is ignored.
Symbols
$$ - /:: () \yen \& @".?! ^ {\prime} # \% ^ {*} + = _ {-} | \sim < > [ ] ^ {\prime} {} $$
• Diacritics
èéêëÈÉËüúuüÜÚÜÜiîmìlǐlìòóôõöœÓÓÔÕÖŒàáâãäæÀÁÂÃÄÆsŞgĞçÇßñÑ
-Password
Enter a password within 256 characters.
The following characters can be used for a password:
•Alphanumerical characters
•Space
- Symbols
$$ - /:: () ^ {\yen} \& @".?! ^ {\prime} # \% ^ {\wedge *} + = _ {-} | \sim < > [ ] ^ {\prime} {} $$
• Diacritics
èéêëÈÉÊEùúuùUÚÛÜiīmìlǐlìòóõööceÓÓÔÕÖŒaááãäæÀÁÂÃÄÆsŞgĞçÇBñÑ
[Apply to the scanner] button
Applies the configured settings.
PaperStream NX Manager
Set this item to operate the scanner with PaperStream NX Manager.
Click [PaperStream NX Manager] under [Linking with Server] to display the window.
[Enable] check box
Specify whether to operate with PaperStream NX Manager.
The check box is cleared for the factory default setting.
If you select the check box, also set the following items.
- Host Name/IP address
ATTENTION
An IPv4 address is supported.
Note that an IPv6 address is not supported.
- Port Number
The factory default setting is "20447".
●Auto Logout minutes [fi-8190/fi-8290/fi-8170/fi-8270]
Specify a time (minutes) to automatically log out from PaperStream NX Manager if the scanner is left on for a certain period of time without being used.
-Disabled (Never)
This is the factory default setting.
-1
-2
-3
●Auto Login [fi-8190/fi-8290/fi-8170/fi-8270]
Specify an auto login method for PaperStream NX Manager.
-Disabled
This is the factory default setting.
-Job Group Code
For details, refer to the PaperStream NX Manager User's Guide.
- [Enable Application (Internet)] check box
Set this item when scanning with a user application on a computer or mobile device in an environment in which PaperStream NX Manager and a scanner are connected via the Internet.
The check box is cleared for the factory default setting.
[Check connection] button
Check if the scanner can be connected to PaperStream NX Manager.
[Apply to the scanner] button
Applies the configured settings.
Scanner Central Admin Server
Set this item to operate the scanner with PaperStream NX Manager using Scanner Central Admin Server.
You can monitor scanners or perform a single operation on them at the same time with Scanner Central Admin Server.
Click [Scanner Central Admin Server] under [Linking with Server] to display the window.
[Enable] check box
Specify whether to use Scanner Central Admin Server.
The check box is cleared for the factory default setting.
If you select the check box, also set the following items.
- Host Name/IP address
ATTENTION
An IPv4 address is supported.
Note that an IPv6 address is not supported.
- Port Number
The factory default setting is "20444".
[Check connection] button
Check if the scanner can be connected to Scanner Central Admin Server.
[Apply to the scanner] button
Applies the configured settings.
Maintenance
Admin Password
Change or disable the administrator password.
Specify whether or not to disable the administrator password depending on the operation.
Change the administrator password regularly.
Click [Admin Password] under [Maintenance] to display the window.
Current Password
Enter the current password.
The factory default of the password is "password".
New Password
Enter a new password within 16 characters to change the current password.
The following characters can be used for a new password:
•Alphanumerical characters
•Space
- Symbols
$$ - /:; () \yen \& @".,?! ^ {\prime} # \% ^ {\wedge *} + = _ {-} | \sim < > [ ] ^ {\prime} } $$
• Diacritics
èéêëÈÉËùúuüUÚÜÜiímiìlìlìòóõõœòÓÔÕÖŒàáâãäæÀÁÂÃÄÆsŞgĞçÇBñÑ
Confirm New Password
Re-enter the password entered for [New Password] for confirmation to change the current password.
[Apply to the scanner] button
Applies the configured settings.
Export the Scanner Setting Information
Export the scanner settings.
Click [Export the Scanner Setting Information] under [Maintenance] to display the window.
Version/Name
Enter a version or name within 31 characters to identify the scanner settings.
The characters you entered will be used for the name of the file to be exported.
[Export] button
Export the scanner settings.
The file will be output with a character string you entered for [Version/Name].
Example: ScannerSettings_Version/Name.cab
Import the Scanner Setting Information
Imports the scanner settings.
Click [Import the Scanner Setting Information] under [Maintenance] to display the window.
[Select a file] button
Select the file exported in Export the Scanner Setting Information (page 419).
[Import] button
This is available when a file is selected.
Imports the scanner settings.
The scanner is restarted.
Restore the scanner settings to the factory default.
Click [Restore Factory Defaults] under [Maintenance] to display the window.
[Restore Factory Defaults] button
Restores the factory defaults.
The scanner is restarted.
License
Displays the license information.
Click [License] under [Maintenance] to display the window.
Basic Specification
| Item Specification | ||
| Scanner type | For fi-8190/fi-8170/fi-8150/fi-8150UADF (Automatic Document Feeder)Manual feeding (Single/Continuous) is available with the ADF.For fi-8290/fi-8270/fi-8250/fi-8250UADF (Automatic Document Feeder) + Flatbed Manual feeding (Single/Continuous) is available with the ADF. | |
| Image sensor | For fi-8190/fi-8170/fi-8150/fi-8150UMonochrome CIS × 2 (front × 1, back × 1)For fi-8290/fi-8270/fi-8250/fi-8250UMonochrome CIS × 2 (front × 1, back × 1) + Color CCD × 1 | |
| Light source | For fi-8190/fi-8170/fi-8150/fi-8150URGB LED switching between 3 colors (front, back)For fi-8290/fi-8270/fi-8250/fi-8250URGB LED switching between 3 colors (front, back) + White LED (flatbed) | |
| Scanning area (width × length) | Minimum size ADF: 48 × | 50 mm |
| Maximum size (*1) (*2) | For fi-8190/fi-8170/fi-8150/fi-8150UADF: A4 (portrait) (210 × 297 mm/8.3 × 11.7 in.), Legal (portrait) (8.5 × 14 in.)Flatbed: -For fi-8290/fi-8270/fi-8250/fi-8250UADF: A4 (portrait) (210 × 297 mm/8.3 × 11.7 in.), Legal (portrait) (8.5 × 14 in.)Flatbed: 215.9 × 297 mm/8.5 × 11.7 in. | |
| Paper weight (thickness) | 20 to 465 g/m2(5.3 to 124 lb)For A8 size, 128 to 209 g/m2(34 to 56 lb)1.4 mm or less for plastic cards (Embossed cards allowed (ISO7810 ID-1 type compliant))7 mm or less for passports (ISO/IEC 7810 ID-3 compliant) (*3) | |
| Scanning speed (A4, Portrait, 300 dpi) (*4) | Binary (black & white) | ●For fi-8190/fi-8290Simplex: 90 ppm, Duplex: 180 ipm (*5)●For fi-8170/fi-8270Simplex: 70 ppm, Duplex: 140 ipm●For fi-8150/fi-8250/fi-8150U/fi-8250USimplex: 50 ppm, Duplex: 100 ipm |
| Grayscale | ||
| Color | ||
| Loading capacity (*6) 100 sheets | Paper weight: 80 g/m2(20 lb)Total thickness: 10 mm or less | |
| Optical resolution 600 dpi | ||
| Output resolution Binary | (black & white) 50 to 60 | 0 dpi (configurable in 1 dpi increments)1,200 dpi can be set from the scanner driver |
| Grayscale | ||
| Color | ||
| Grayscale level 8,192 gradation levels (13-bit) | ||
| Interface | ●For fi-8190/fi-8290/fi-8170/fi-8270/fi-8150/fi-8250-USBUSB 3.2 Gen 1x1 (USB 3.0)/USB 2.0/USB 1.1(*7)Type B-Wired LANIEEE802.3 Ethernet10BASE-T/100BASE-TX/1000BASE-TRJ-45type8-pole connector●For fi-8150U/fi-8250U-USBUSB 3.2 Gen 1x1 (USB 3.0)/USB 2.0/USB 1.1(*7)Type B-Wired LAN- | |
| Network protocol (wired LAN) | ●For fi-8190/fi-8290/fi-8170/fi-8270/fi-8150/fi-8250TCP/IP(IPv4/IPv6), DHCP, HTTP/HTTPS, DNS, UDP, ICMP●For fi-8150U/fi-8250U- | |
| LCD | ●For fi-8190/fi-8290/fi-8170/fi-8270Display: ColorDisplayed dots: 16Displayed lines: 7 × 16 (row × character)●For fi-8150/fi-8250/fi-8150U/fi-8250U- | |
| Other function Hardware real-time JPEG compression | ||
*1: If you use a ballpoint pen to pull out the side guide adjuster and then attach the ADF paper chute (feeder) to the scanner, documents with a width of up to 240 mm (9.4 in.) can be fed. For details, refer to Scanning Documents That Are 220 mm to 240 mm in Width (page 180).
*2:Long page scanning supports documents with a length up to 6,096 mm (240 in.) when the resolution is set to 200 dpi or lower.
Note that the resolution must be set to the following dpi value depending on the document size.
- A length that exceeds 863.6 mm (34 in.) but does not exceed 2,700 mm (106.3 in.) 600 dpi or less
- A length that exceeds 2,700 mm (106.3 in.) but does not exceed 4,064 mm (160 in.) 400 dpi or less
- A length that exceeds 4,064 mm (160 in.) but does not exceed 5,461 mm (215 in.) 300 dpi or less
- A length that exceeds 5,461 mm (215 in.) but does not exceed 6,096 mm (240 in.) 200 dpi or less
*3: For fi-8190/fi-8290/fi-8170/fi-8270, a passport with a thickness of up to 7 mm can be scanned without the Booklet Carrier Sheet.
For fi-8150/fi-8250/fi-8150U/fi-8250U, use the Booklet Carrier Sheet to scan a passport.
When using the Booklet Carrier Sheet, a document thickness that includes the Booklet Carrier Sheet must be up to 7 mm.
*4: Note that this is the hardware limitation, and the software's processing time such as data transfer time is added to the actual time of scanning.
The scanning speed is the same when the scanner is connected via a USB or via a wired LAN. The system environment used for measuring scan speed is as follows:
| Operating system Windows 10 | |
| CPU | Intel® CoreTM i3-10105 3.7 GHz |
| Memory 8 GB | |
| Storage SSD |
*5: The scanning speed of fi-8190 when the imprinter is installed is 80 ppm (simplex)/160 ipm (duplex).
*6:The capacity varies depending on the paper weight.
For details, refer to Documents for Scanning (page 116).
*7: Use the USB cable that is supplied.
When connecting the USB cable to a USB hub, make sure you connect it to a USB hub that is connected to the USB port of a computer.
Connection with USB 3.2 Gen 1x1 (USB 3.0)/USB 2.0 requires the USB port and the hub to support USB 3.2 Gen 1x1 (USB 3.0)/USB 2.0.
Also note that the scanning speed slows down when USB 1.1 is used.
If you connect the USB cable to the scanner, connect the USB cable with the USB logo on the head of the cable facing upwards.
Installation Specification
| Item Specification | ||
| Outer dimensions (W × D × H) (*1) | ●For fi-8190/fi-8170/fi-8150/fi-8150U 300 × 170 × 163 mm/11.81 × 6.69 × 6.42 in●For fi-8290/fi-8270/fi-8250/fi-8250U 300 × 577 × 234 mm/11.81 × 22.72 × 9.21 in. | |
| Installation space (W × D × H) (*2) | ●For fi-8190/fi-8170/fi-8150/fi-8150U 400 × 700 × 440 mm/15.75 × 27.56 × 17.32 in.●For fi-8290/fi-8270/fi-8250/fi-8250U 400 × 800 × 570 mm/15.75 × 31.50 × 22.44 in. | |
| Weight | ●For fi-8190/fi-8170/fi-8150/fi-8150U 4 kg (8.82 lb)●For fi-8290/fi-8270/fi-8250/fi-8250U 8.8 kg (19.40 lb) | |
| Input power Voltage range A | C 100 to 240 V ±10% | |
| Phase Single phase | ||
| Frequency range 50/60 Hz ±3 Hz | ||
| Power consumption Operating | ●For fi-8190/fi-8290 30 W or less (17 W in ECO Mode)●For fi-8170/fi-8270 28 W or less (17 W in ECO Mode)●For fi-8150/fi-8250/fi-8150U/fi-8250U 21 W or less (17 W in ECO Mode) | |
| Power saving | ●For fi-8190/fi-8290/fi-8170/fi-8270/fi-8150/fi-8250 For wired LAN connection: 2.0 W or less For USB connection: 1.4 W or less●For fi-8150U/fi-8250U For wired LAN connection: None For USB connection: 1.4 W or less | |
| Power off 0.2 W or less | ||
| Ambient conditions Temperature | Figure Operating: 5 to 35°C (41 to 95°F) | |
| Not operating: -20 to 60°C (-4 to 140°F) | ||
| Humidity Operating: 15 to 80%Not operating: 8 to 95% | ||
| Calorific value Operating | For fi-8190/fi-829025.8 kcal/h or lessFor fi-8170/fi-827024 kcal/h or lessFor fi-8150/fi-8250/fi-8150U/fi-8250U18.9 kcal/h or less | |
| Power saving | For fi-8190/fi-8290/fi-8170/fi-8270/fi-8150/fi-8250For wired LAN connection: 1.7 kcal/h or lessFor USB connection: 1.2 kcal/h or lessFor fi-8150U/fi-8250UFor wired LAN connection: NoneFor USB connection: 1.2 kcal/h or less | |
| Power off 0.17kcal/h or less | ||
| Shipping weight (*3) | For fi-8190/fi-8170/fi-8150/fi-8150U6.5 kg (14.33 lb)For fi-8290/fi-8270/fi-8250/fi-8250U14 kg (30.87 lb) | |
| Support period 5 years | ||
*1: The depth indicates the size of the scanner without the ADF paper chute (feeder) and the stacker.
*2:The required installation space is a reference for scanning A4 size documents.
*3: Includes the package weight.
Outer Dimensions
The outer dimensions are as follows:
Outer Dimensions [fi-8190/fi-8170/fi-8150/fi-8150U]
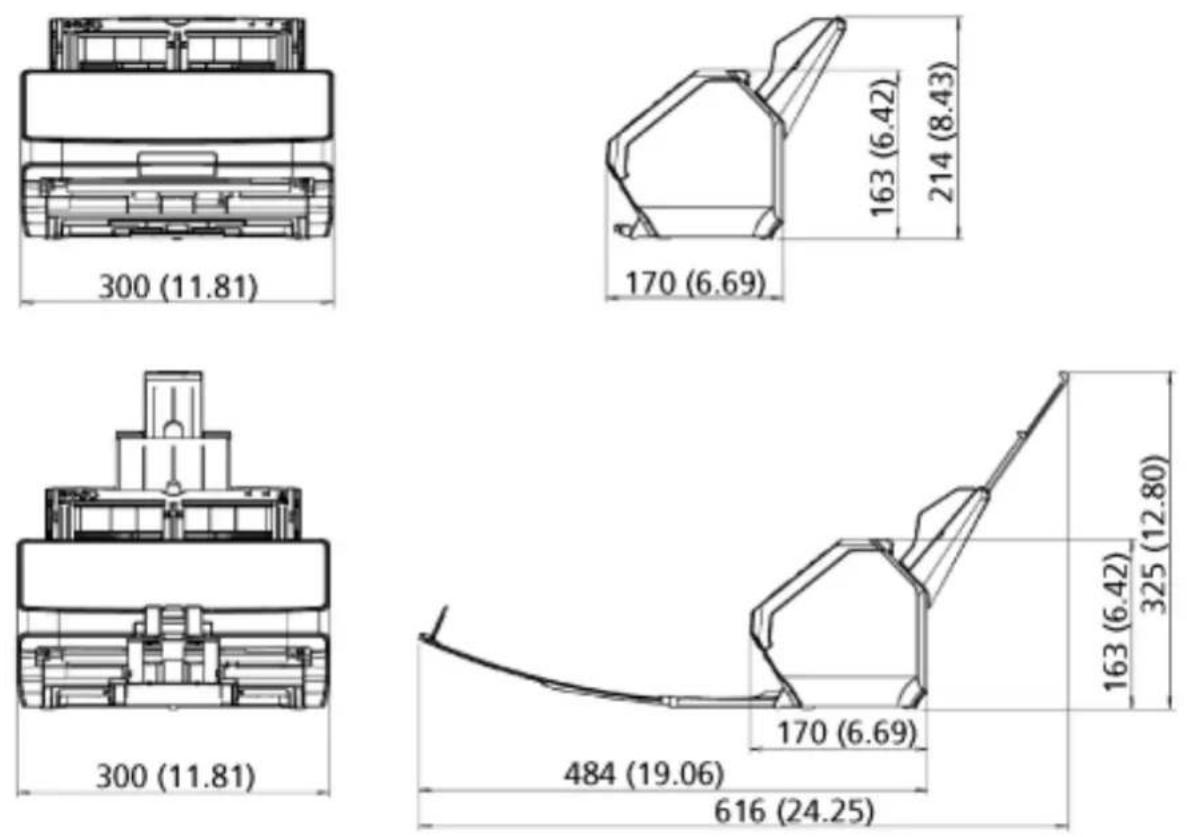
Unit: mm (in.)
Outer Dimensions [fi-8290/fi-8270/fi-8250/fi-8250U]
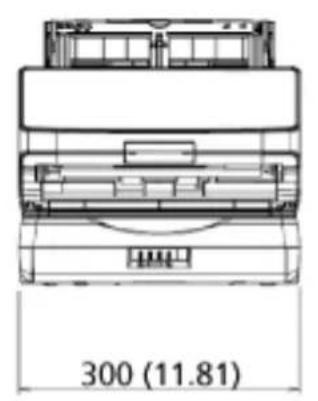
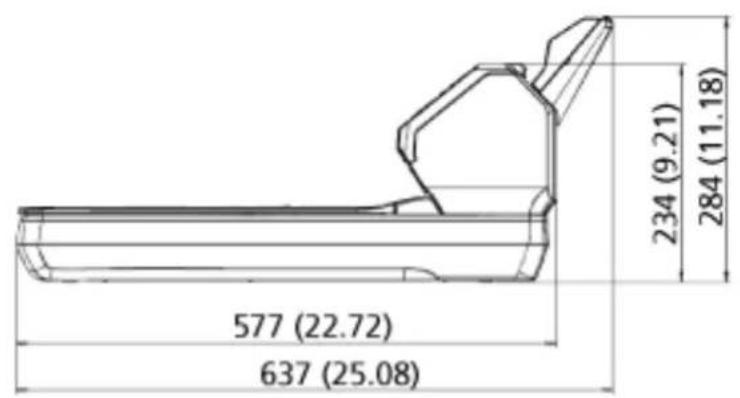
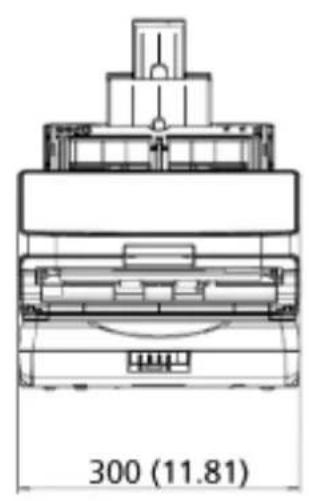
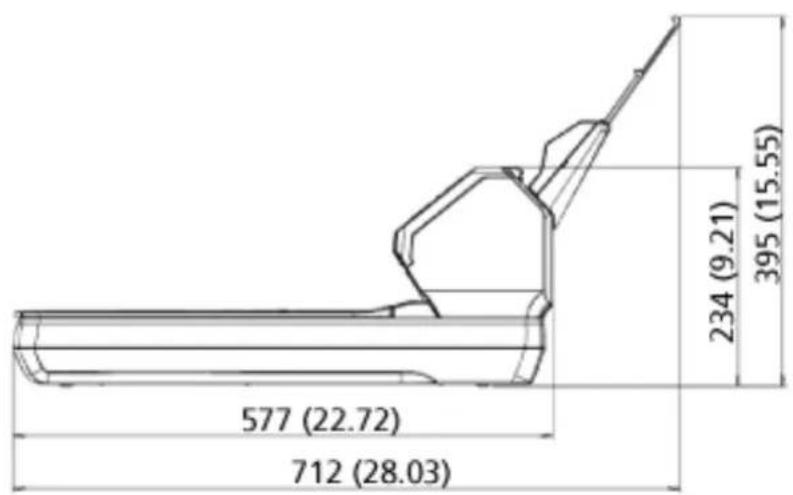
Unit: mm (in.)
Scanner Options
| Name Part No. Supported model Description | |||
fi-819PRB PA03810-D201 fi-8 | 90/fi-8170/ | fi-8150/fi-8150U | fi-819PRB is an option that can print text (e.g.alphabets, numbers) on the back of the document after scanning.You can organize your documents by printing a name, date, or serial number on the back of the scanned document.For details, refer to the fi-819PRB Imprinter Operator's Guide. |
Black Document Pad PA03810 | -D301 fi-8290/fi-8270/ | fi-8250/fi-8250U | The black document pad is an option that enables scanning in black background on the flatbed.It is available as a document cover with a black document pad, and can be replaced with the standard document cover that has a white document pad.It can be used to automatically correct skewed images or accurately detect the size of the scanned document when scanning with the flatbed. |
Carrier Sheets PA03360-0013 | All models Carrier Sheets: These are | sheets that are used to feed documents without damaging them.The Carrier Sheet enables you to scan documents larger than A4/Letter size (for example, A3 or B4 size) and documents such as | |
| Name Part No. Supported model Description | |||
| clippings without damaging them.The Carrier Sheet should be replaced approximately every 500 scans.However, replace it if damage or dirt is noticeable. | |||
| Photo Carrier Sheets PA03770-X8TC] | -0015 All models Photo Carrier Sheets: | These are sheets that are used to feed documents without damaging them.The Photo Carrier Sheet enables you to scan documents such as photographs and clippings without damaging them.The Photo Carrier Sheet should be replaced approximately every 500 scans.However, replace it if damage or dirt is noticeable. | |
Booklet Carrier Sheet PA0381 | 0-0020 All models Booklet Carrier Sheet: | This is a sheet that is used to feed documents without damaging them.The Booklet Carrier Sheet enables you to scan booklets such as passports with attached photos without damaging them.The Booklet Carrier Sheet should be replaced approximately every 2,500 scans.However, replace it if damage or dirt is noticeable. | |
For details about purchasing the scanner options and more information, contact the distributor/dealer where you purchased this product. Refer to the contact information in the Contact List if
supplied with this product, or refer to the contact information in the Contact for Inquiries section if provided in Safety Precautions supplied with this product, and then make an inquiry.
Uninstalling the Software
1 Turn on the computer and log onto Windows as a user with administrator privileges.
2 Exit all running software.
3 Display the [Control Panel] window.
- For Windows Server 2012
Right-click the Start screen, and select [All apps] on the app bar → [Control Panel] under [Windows System].
●For Windows Server 2012 R2
Click [↓] on the lower left side of the Start screen → [Control Panel] under [Windows System]. To display [↓], move the mouse cursor. - For Windows 10/Windows Server 2016/Windows Server 2019/Windows Server 2022
Click [Start] menu → [Windows System] → [Control Panel]. - For Windows 11
Click [Start] menu → [All apps] → [Windows Tools] and double-click [Control Panel].
4 Select [Uninstall a program].
The [Programs and Features] window appears with a list of the currently installed software.
5 Select a software to uninstall.
- When uninstalling the PaperStream IP driver Select one of the following:
-PaperStream IP (TWAIN)
-PaperStream IP (TWAIN x64)
-PaperStream IP (ISIS) fi-8000 Series
- When uninstalling Network Setup Tool for fi Series Select [Network Setup Tool for fi Series].
- When uninstalling Software Operation Panel/Error Recovery Guide Select [Software Operation Panel].
- When uninstalling Error Recovery Guide (manual) Select [Error Recovery Guide for fi-8190/fi-8290/fi-8170/fi-8270/fi-8150/fi-8250/fi-8150U/fi-8250U].
- When uninstalling PaperStream ClickScan Select [PaperStream ClickScan].
- When uninstalling PaperStream ClickScan Searchable PDF Option Select [PaperStream ClickScan Searchable PDF Option].
- When uninstalling PaperStream Capture/PaperStream Capture Pro (EVALUATION) Select [PaperStream Capture].
- When uninstalling ABBYY FineReader for ScanSnap Select [ABBYY FineReader for ScanSnap(TM)].
- When uninstalling manuals Select [fi Series manuals for fi-8190/fi-8290/fi-8170/fi-8270/fi-8150/fi-8250/fi-8150U/fi-8250U].
- When uninstalling Scanner Central Admin Agent Select [Scanner Central Admin Agent].
- When uninstalling fi Series Online Update Select [fi Series Online Update].
6 Click the [Uninstall]/[Uninstall/Change] button.
7 If a confirmation message appears, click the [OK]/[Yes] button.
The software is uninstalled.
Notes When Using IPv6 [fi-8190/fi-8290/fi-8170/fi-8270/fi-8150/fi-8250]
- Scanner settings that do not support IPv6
The following settings do not support IPv6:
•DNS Server
- Proxy Server
●PaperStream NX Manager
- Scanner Central Admin Server
Supplementary Notes for operating with PaperStream NX Manager [fi-8190/fi-8290/fi-8170/fi-8270/fi-8150/fi-8250]
Exporting the Scanner Settings
Scanner Central Admin Server allows you to manage scanners that are operated with PaperStream NX Manager.
Also, Scanner Central Admin Server allows you to distribute and apply the scanner settings to other scanners.
This section explains how to export the scanner settings that you want to distribute to other scanners.
For details about how to distribute the scanner settings to other scanners by using Scanner Central Admin Server, refer to the Scanner Central Admin User's Guide.
HINT
You can also import the scanner settings to other scanners in [Import the Scanner Setting Information] in fi Series Network Settings.
For details, refer to Import the Scanner Setting Information (page 420).
The following shows the items of the scanner settings and the exporting procedure.
Items of the Scanner Settings
The scanner settings include the following:
- The scanner settings that are set in fi Series Network Settings Note that the following settings cannot be exported:
-Scanner name
-Wired LAN
For details about fi Series Network Settings, refer to Network Settings (fi Series Network Settings) [fi-8190/fi-8290/fi-8170/fi-8270/fi-8150/fi-8250] (page 403).
●Backup of Software Operation Panel
- Overlap patterns memorized by the intelligent multifeed detection function
Exporting Procedure
Export the scanner settings in the following procedure:
1 Configure the scanner settings in fi Series Network Settings. For details, refer to Network Settings (fi Series Network Settings) [fi-8190/fi-8290/fi-8170/fi-8270/fi-8150/fi-8250] (page 403).
2 Export the scanner settings in [Export the Scanner Setting Information] in fi Series Network Settings.
For details, refer to Export the Scanner Setting Information (page 419).
Notes for Distributing Assets with the Scanner Central Admin Server
This section describes notes for distributing assets such as the scanner settings and firmware to scanners that are operated with PaperStream NX Manager by using the Scanner Central Admin Server.
For details about how to distribute assets to other scanners by using the Scanner Central Admin Server, refer to the Scanner Central Admin User's Guide.
- Depending on the network environment, the communication between the Scanner Central Admin Server and the scanner may fail due to the network load.
In this case, use Scanner Central Admin Console to reduce the number of scanners for which the assets are distributed, and the maximum number of scanners which can be connected together at the same time.
For details, refer to the Scanner Central Admin User's Guide.
- Assets such as the scanner settings and firmware will be distributed and applied to scanners in the following cases:
-When a scanner is turned on
-When an operation to log out from PaperStream NX Manager is performed
To prevent assets from being distributed or applied during working hours, secure sufficient time between the time the scanner is turned on and the time operations begin.
In addition, Scanner Central Admin Console allows you to specify a time zone in which assets are to be distributed.
For details, refer to the Scanner Central Admin User's Guide.
- Contact for Inquiries
Refer to the contact list on the following web page:
https://imagescanner.fujitsu.com/r/ctl/
- ABBYY FineReader for ScanSnap
-Windows Server 2012
Right-click the Start screen, select [All apps] on the app bar, and then select [User's Guide] under [ABBYY FineReader for ScanSnap (TM)]→[Technical Support].
-Windows Server 2012 R2
Click [↓] on the lower left side of the Start screen, and then select [User's Guide] under [ABBYY FineReader for ScanSnap(TM)]→[Technical Support].
To display [↓], move the mouse cursor.
-Windows 10/Windows Server 2016/Windows Server 2019/Windows Server 2022
Select [Start] menu→[ABBYY FineReader for ScanSnap (TM)]→[User's Guide]→[Technical Support].
-Windows 11
Select [Start] menu→[All apps]→[ABBYY FineReader for ScanSnap (TM)]→[User's Guide]→[Technical Support].
- Image Scanner fi Series
For other inquiries regarding the scanner, refer to the following web page:
https://www.fujitsu.com/global/support/products/computing/peripheral/scanners/fi/
If the solution to your problem cannot be found on the above web page, refer to the contact information for your distributor/dealer on the following web page:
https://www.fujitsu.com/global/about/resources/shop/computing/peripheral/scanners/index.html
- Contact for Purchasing Consumables or Cleaning Materials
https://imagescanner.fujitsu.com/r/ctl/
- Introduction 11
- Scanner Overview 23
- Scanner Setup 41
- Basic Operations 71
- How to Perform a Basic Scan 92
- How to Load Documents 110
- Placing a Document on the Flatbed [fi-8290/fi-8270/fi-8250/fi-8250U] 115
- Documents for Scanning 116
- How to Use the Operator Panel [fi-8190/fi-8290/fi-8170/fi-8270] 137
- Operator Panel Overview....137
- How to Use Settings Menu 145
- Configurable Items in the Settings Menu 161
- How to Use Function Selection....170
- Item Configurable in Function Selection....173
- How to Use the Operator Panel [fi-8150/fi-8250/fi-8150U/fi-8250U] 174
- Operator Panel Overview....174
- Various Ways to Scan 178
- Daily Care 217
- Replacing the Consumables 234
- Troubleshooting 249
- When a Paper Jam Occurs 249
- Errors....251
- Troubleshooting....286
- Before You Contact the Scanner Service Provider....334
- Checking the Product Label....336
- Scanner Settings (Software Operation Panel) 337
- Starting Up the Software Operation Panel....337
- Setting the Software Operation Panel to [View Only mode]....339
- Setting Items 351
- Settings Related to Sheet Counters....356
- Settings Related to Scanning 363
- Settings Related to the Detection for Overlapped Documents (Multifeed).... 382
- Settings Related to Waiting Time....392
- Settings Related to the Connection Between the Scanner and Computer....396
- Settings Related to Power On/Off and the Power Consumption of the Scanner....398
- Settings Related to Scanner Maintenance 400
- Network Settings (fi Series Network Settings) [fi-8190/fi-8290/fi-8170/fi-8270/fi-8150/fi-8250] 403
- Appendix 423
- Contact for Inquiries 439
- About This Product
- Manuals
- Trademarks
- Manufacturer
- Issue Date/Issuer
- Safety Information
- Symbols Used in This Manual
- ATTENTION
- HINT
- Abbreviations Used in This Manual
- Arrow Symbols in This Manual
- Screen Examples in This Manual
- Notice
- Main Features
- ●High speed scanning
- ● Network connection [fi-8190/fi-8290/fi-8170/fi-8270/fi-8150/fi-8250]
- ●Equipped with a Liquid Crystal Display [fi-8190/fi-8290/fi-8170/fi-8270]
- ●Equipped with a Function Number Display [fi-8150/fi-8250/fi-8150U/fi-8250U]
- - Capable of scanning documents folded in half, envelopes, multi-layered transfer paper, and booklets such as passports
- ● Improved efficiency for pre-scan work
- ●Reduced work loss caused by multifeeds
- ●Intelligent multifeed detection function
- ●Paper protection function by detecting paper jam noise [fi-8190/fi-8290/fi-8170/fi-8270]
- ●Paper protection function by monitoring documents that are fed skewed
- ●Advanced image processing function
- - Preventing images form missing any parts even if documents are fed skewed [fi-8190/fi-8290/fi-8170/fi-8270]
- ●An imprinter can be installed [fi-8190/fi-8170/fi-8150/fi-8150U]
- Operating Methods
- ●Operating with a Computer
- ●Operating with PaperStream NX Manager
- Parts and Functions [fi-8190/fi-8170/fi-8150/fi-8150U]
- Parts and Functions [fi-8290/fi-8270/fi-8250/fi-8250U]
- Parts and Functions [Common Parts for All Models]
- - Document sensor
- Scanner Setup
- Operating with a Computer
- Overview of the Bundled Software
- System Requirements
- Connecting the Scanner via a Wired LAN in order to Operate It with a Computer (When Obtaining an IP Address Automatically) [fi-8190/fi-8290/fi-8170/fi-8270/fi-8150/fi-8250]
- Select [Network].
- Connecting the Scanner via a Wired LAN in Order to Operate It with a Computer (When Assigning an IP Address Manually) [fi-8190/fi-8290/fi-8170/fi-8270/fi-8150/fi-8250]
- Connect the scanner to the computer as follows.
- Connecting the Scanner to a Computer via the USB Cable in Order to Operate It with the Computer
- Select [USB].
- Connecting the Scanner via a Wired LAN in Order to Operate It with PaperStream NX Manager (When Obtaining an IP Address Automatically) [fi-8190/fi-8290/fi-8170/fi-8270/fi-8150/fi-8250]
- Connecting the Scanner via a Wired LAN in Order to Operate It with PaperStream NX Manager (When Setting an IP Address Manually) [fi-8190/fi-8290/fi-8170/fi-8270/fi-8150/fi-8250]
- Click the [Installation (Custom)] button.
- Select [Network].
- Connect the scanner to the computer as follows.
- Starting Up Scanner Selection Tool [fi-8190/fi-8290/fi-8170/fi-8270/fi-8150/fi-8250]
- Starting Up IP Address Setting Tool [fi-8190/fi-8290/fi-8170/fi-8270/fi-8150/fi-8250]
- Turning the Power ON/OFF
- How to Turn the Power ON
- How to Turn the Power OFF
- Entering and Resuming from Power Saving Mode
- ●Power Save
- ●Auto Shutdown
- Opening/Closing the ADF
- How to Open the ADF
- How to Close the ADF
- Close the ADF.
- Opening/Closing the Document Cover [fi-8290/fi-8270/fi-8250/fi-8250U]
- How to Open the Document Cover
- How to Close the Document Cover
- Setting Up the ADF Paper Chute (Feeder)
- Setting Up the Stacker [fi-8190/fi-8170/fi-8150/fi-8150U]
- Document Length Is A4 (Portrait) or Longer
- Pull out the stacker and stacker extensions 1 and 2.
- Document Length Is Shorter than A4 (Portrait)
- Documents with Different Sizes
- Setting Up the Stacker [fi-8290/fi-8270/fi-8250/fi-8250U]
- Document Length Is A5 (Portrait) or Longer
- Document Length Is Shorter than A5 (Portrait)
- How to Perform a Basic Scan
- ● Operating with a Computer
- Operating with PaperStream NX Manager
- Performing a Scan with an Image Scanning Application
- Pressing a Button on the Scanner in order to Start an Image Scanning Application and Perform a Scan
- When establishing a connection via a wired LAN
- a Start up Button Event Manager.
- b Right-click .
- Select one of the buttons on the computer to be applied to the button on the scanner and start a scan
- Configuring the Settings for a Button on a Computer (For USB Connection)
- Select an image scanning application to be launched when the button is pressed.
- Click the [OK] button.
- Processing a Job (With PaperStream NX Manager) [fi-8190/fi-8290/fi-8170/fi-8270]
- Turn on the scanner.
- Processing a Job (With PaperStream NX Manager) [fi-8150/fi-8250]
- Loading a Document in the ADF Paper Chute (Feeder)
- Preparing Documents to Load Them in the ADF Paper Chute (Feeder)
- Check the documents.
- Fan the documents.
- How to Load a Document in the ADF Paper Chute (Feeder)
- Placing a Document on the Flatbed [fi-8290/fi-8270/fi-8250/fi-8250U]
- Documents for Scanning
- Paper Size
- Document Type
- Document Thickness (Paper Weight)
- Documents That May Not Be Scanned Successfully
- Documents That Must Not Be Scanned
- Precautions
- ● Notes on the documents to be scanned
- ● Notes on plastic cards
- Notes on booklets
- Loading Capacity
- Area Not to Be Perforated
- Conditions Required to Accurately Detect Overlapped Documents (Multifeed)
- Detecting Overlapped Documents with the Ultrasonic Sensor
- Detecting Overlapped Documents according to the Difference in Length
- Detecting Overlapped Documents with the Ultrasonic Sensor and According to the Difference in Length
- Conditions for Mixed Batch Scanning
- Paper Direction
- Paper Weight (Thickness)
- Friction Coefficient
- Document Position
- Combinations of Standard Paper Sizes in a Mixed Batch
- Available Range
- Documents That Cannot Be Scanned in a Mixed Batch
- Conditions for Automatic Page Size Detection
- Conditions for Using the Carrier Sheet
- ●Paper Size
- ●Document Conditions
- Conditions for Using the Photo Carrier Sheet
- Conditions for Using the Booklet Carrier Sheet
- How to Use the Operator Panel [fi-8190/fi-8290/fi-8170/fi-8270]
- Operator Panel Overview
- Description of the Indicator
- Information
- Prioritize Panel Settings
- Application Number
- iMFF Setting
- USB/wired LAN Status
- How to Use Settings Menu
- Checking the Information
- Press the [] button/ [] button to select [Information], and then press the [Scan/Enter] button.
- Press the [ ]/[ ] button and check the contents of the information.
- Take measures according to the contents of [Information].
- Operational Settings for the Scanner
- Press the [Menu] button.
- Press the [ ]/[ ] button to select [5: Consumable counters], and then press the [Scan/Enter] button.
- Press the [ △]/[ ] button and check the counter.
- After replacing the consumables or cleaning, press the []/[] button to select the highlighted counter, and then press the [Scan/Enter] button.
- Press the [ ] button/[ ] button to select [1: Yes], and then press the [Scan/Enter] button.
- How to Use Function Selection
- How to Use the Operator Panel [fi-8150/fi-8250/fi-8150U/fi-8250U]
- Names and Functions of the Operator Panel
- Various Ways to Scan
- Scanning Documents with Different Widths
- Adjust the stacker to fit the longest document.
- Place the documents at the center of the ADF paper chute (feeder), and adjust the side guides to the widest document in the batch.
- Scanning Documents That Are 220 mm to 240 mm in Width
- Remove the ADF paper chute (feeder).
- Scanning Documents Folded in Half
- Scan the document with the image scanning application.
- Scanning Documents such as Envelopes or Multi-Layered Transfer Paper
- Load a document in the ADF paper chute (feeder).
- Press the [Manual Feed] button to switch the feed mode to Manual Feed Mode.
- Scan the document with the image scanning application.
- Scanning Booklets such as Passports
- Scanning Documents Larger than A4/Letter Size
- Place the document inside the Carrier Sheet.
- Example
- Scanning Photographs and Clippings without Damaging Them
- Place a document inside the Photo Carrier Sheet.
- Scanning Booklets such as Passports without Damaging Them
- Place the document inside the Booklet Carrier Sheet.
- Load the Booklet Carrier Sheet with the top end as the leading edge and with the front side of the Booklet Carrier Sheet facing the ADF paper chute (feeder) (face-down).
- Scanning Long Page Documents
- Scanning Books with the Flatbed [fi-8290/fi-8270/fi-8250/fi-8250U]
- Scanning Large Documents with the Flatbed [fi-8290/fi-8270/fi-8250/fi-8250U]
- Feeding Documents Manually
- Configure the settings for the scanner.
- Load the next document in the ADF paper chute (feeder).
- Repeat step 4 until all documents are scanned.
- Finish scanning.
- Configuring Not to Detect Certain Overlap Patterns
- Operational Procedure [fi-8190/fi-8290/fi-8170/fi-8270]
- Operate the scanner as follows, and restart scanning.
- Operational Procedure [fi-8150/fi-8250/fi-8150U/fi-8250U]
- Disabling the Paper Protection Function [fi-8190/fi-8290/fi-8170/fi-8270]
- Operational Procedure
- CAUTION
- Location and Frequency
- Cleaning the Outside of the Scanner
- Cleaning the Inside of the Scanner (ADF) with Cleaning Paper
- Press the [△]/[1] button to select [3: Cleaning], then press the [Scan/Enter] button.
- Press the [ ]/[ ] button to select [1: Cleaning Paper], then press the [Scan/Enter] button.
- Spray the Cleaning Paper with Cleaner F1.
- Pull out the chute extensions according to the length of the Cleaning Paper.
- Adjust the stacker according to the length of the Cleaning Paper.
- Cleaning the Inside of the Scanner (ADF) with a Cloth
- Brake roller (× 2)
- Pick roller (× 2)
- Feed roller to be cleaned as you rotate the roller with the power turned on (× 2)
- Eject roller to be cleaned as you rotate the roller with the power turned on (× 2)
- Close the ADF.
- Clear the cleaning counter.
- Cleaning the Inside of the Scanner (Flatbed) [fi-8290/fi-8270/fi-8250/fi-8250U]
- Cleaning the (Carrier) Sheet
- Replacing the Consumables
- Replacing the Brake Roller
- Close the ADF.
- Plug in the power cable and turn on the scanner.
- Clear the brake roller counter.
- Replacing the Pick Roller
- Close the ADF.
- Attach the ADF paper chute (feeder).
- Plug in the power cable and turn on the scanner.
- Clear the pick roller counter.
- Troubleshooting
- When a Paper Jam Occurs
- Remove the jammed document.
- Errors
- - Error Indication
- - Error Code List
- Imprinter Error (When the Imprinter Is Installed) [fi-8190/fi-8170/fi-8150/fi-8150U]
- Memory Error/LSI Error
- Internal Communication Error of the Scanner
- Flatbed Carrier Error [fi-8290/fi-8270/fi-8250/fi-8250U]
- Optical Error (Flatbed) [fi-8290/fi-8270/fi-8250/fi-8250U]
- Optical Error (ADF)
- Operator Panel Error
- EEPROM Error
- Image Memory Read-Write Error
- Background Switching Mechanism Error
- Motor Circuit Error
- Imprinter System Error (When the Imprinter Is Installed) [fi-8190/fi-8170/fi-8150/fi-8150U]
- Lamp Circuit Error
- Paper Protection
- Paper Jam/Pick Error
- Paper Jam (When the Imprinter Is Installed) [fi-8190/fi-8170/fi-8150/fi-8150U]
- Multifeed
- Sensor(s) Dirty
- Sensor Error
- Module Error
- Network Setting Error [fi-8190/fi-8290/fi-8170/fi-8270/fi-8150/fi-8250]
- Scanner Central Admin Server Setting Error [fi-8190/fi-8290/fi-8170/fi-8270/fi-8150/fi-8250]
- Server Setting Error [fi-8190/fi-8290/fi-8170/fi-8270/fi-8150/fi-8250]
- Authentication Failed [fi-8190/fi-8290/fi-8170/fi-8270]
- Transport Lock Error [fi-8290/fi-8270/fi-8250/fi-8250U]
- ADF Open
- Imprinter Cover Open (When the Imprinter Is Installed) [fi-8190/fi-8170/fi-8150/fi-8150U]
- Print Cartridge Not Installed (When the Imprinter Is Installed) [fi-8190/fi-8170/fi-8150/fi-8150U]
- Outside Designated Scan Area Error (When Operating with PaperStream NX Manager) [fi-8190/fi-8290/fi-8170/fi-8270/fi-8150/fi-8250]
- Imprinting Area Error (When the Imprinter Is Installed) [fi-8190/fi-8170/fi-8150/fi-8150U]
- Being Used by Others
- The Scanner Is in Doc Counting Mode [fi-8190/fi-8290/fi-8170/fi-8270]
- No Paper
- Stop
- Pause
- Outside Designated Scan Area Error (When Operating with a Computer)
- Invalid Command
- Interface Malfunction
- Unit Attention
- ●Power of the scanner
- ●Connection of the scanner
- ● Scanning operations
- - Scanning results
- ●(Carrier) Sheet
- The Scanner Cannot Be Powered ON
- Check the following points
- Solution
- The LCD or the [Scan/Enter] Button or Both Turn Off [fi-8190/fi-8290/fi-8170/fi-8270]
- ●Has the scanner been left out of operation for a long time after being powered on?
- The Function Number Display or the [Scan/Stop] Button or Both Turn Off [fi-8150/fi-8250/fi-8150U/fi-8250U]
- Cannot Connect the Scanner and a Computer with the Network [fi-8190/fi-8290/fi-8170/fi-8270/fi-8150/fi-8250]
- ●Is the scanner connected to another computer?
- ●Is the IP address of the scanner correct?
- Cannot Connect the Scanner and a Computer via the USB Cable
- ●Is the USB cable connected properly?
- ●Is the connector on the USB cable broken or damaged?
- ●Is the correct scanner name set for the image scanning application?
- - Did you select [Auto] for the USB setting for the scanner?
- Cannot Connect the Scanner (Operated with PaperStream NX Manager) to a Server by Specifying an IP Address [fi-8190/fi-8290/fi-8170/fi-8270/fi-8150/fi-8250]
- ●Is the IP address of the server correct?
- Cannot Connect the Scanner (Operated with PaperStream NX Manager) to a Server by Specifying a Host Name (With PaperStream NX Manager) [fi-8190/fi-8290/fi-8170/fi-8270/fi-8150/fi-8250]
- ●Is the host name of the server correct?
- ●Is the DNS server information configured correctly?
- - Does the DNS server function normally?
- Scanning Does Not Start
- Scanning Takes a Long Time
- The Scanned Image of a Picture or Photo is Rough/Image Noise Appears
- Quality of Scanned Text or Lines Is Unsatisfactory
- Images Are Distorted or Not Clear
- Vertical Streaks Appear on the Images
- An Error (Error Code "U0:10", "U4:40" or "U5:4A") is Already Displayed in the LCD After Power-on [fi-8190/fi-8290/fi-8170/fi-8270]
- ●Did you unlock the transport lock switch? [fi-8290/fi-8270]
- ●Is the ADF closed firmly?
- - Is the print section (imprinter cover) closed firmly? (when the imprinter is installed) [fi-8190/fi-8170]
- An Error ("E" or Other Letter or Number) is Already Displayed in the Function Number Display After Power-on [fi-8150/fi-8250/fi-8150U/fi-8250U]
- - Did you unlock the transport lock switch? [fi-8250/fi-8250U]
- - Is the print section (imprinter cover) closed firmly? (when the imprinter is installed) [fi-8150/fi-8150U]
- Overlapped Documents Are Frequently Fed into the Scanner
- ●Do the documents meet the paper requirements?
- ●Are you using the (Carrier) Sheet?
- - If the setting to detect overlapped documents is enabled, do the documents fulfill the conditions to detect overlapped documents accurately?
- Situation in Which the Document Is not Fed into the ADF Occurs Frequently
- ●Did you fan the documents before loading them?
- ●Are the brake roller and pick roller installed correctly?
- ●Are the brake roller and pick roller clean?
- ●Are the brake roller and pick roller worn out?
- Paper Protection Is Set Off Frequently
- ●Is there any foreign matter in the ADF?
- ●Is the sensitivity level for the paper protection function set to high?
- Paper Jams/Pick Errors Occur Frequently
- ●Is there a document remaining in the ADF?
- Images Turn Out Elongated
- ●Are the rollers clean?
- ● Do the documents meet the paper requirements?
- A Shadow Appears at the Top or the Bottom of the Image
- There Are Black Traces on the Document
- The (Carrier) Sheet Is Not Fed Smoothly or a Jam Occurs
- Part of the Image Appears Missing in the Case Where the (Carrier) Sheet Is Used
- Before You Contact the Scanner Service Provider
- Actions to Take Before You Contact the Scanner Service Provider
- Items to Check Before You Contact the Scanner Service Provider
- - Error Status
- Checking the Product Label
- Scanner Settings (Software Operation Panel)
- Starting Up the Software Operation Panel
- Setting the Software Operation Panel to [View Only mode]
- Setting [View Only mode]
- Exiting [View Only mode]
- Setting a Password
- Changing the Password
- Click the [OK] button.
- Clearing the Password
- Resetting the Password
- Setting Items
- Device Setting
- Device Setting 2
- Settings Related to Sheet Counters
- Checking the Sheet Counters
- Check each counter.
- Total Count (ADF)
- Total Count (FB) [fi-8290/fi-8270/fi-8250/fi-8250U]
- After cleaning
- Brake Roller
- Pick Roller
- Remaining Ink
- Clearing the Sheet Counters
- Messages for Cleaning or Replacing Consumables
- Scanner Cleaning Cycle [Cleaning Cycle]
- Specifying the Cycle to Replace Consumables [Life Counter Alarm Setting]
- Settings Related to Scanning
- Adjusting the Starting Position for Scanning [Offset Setting/Vertical magnification Adjustment]
- Offset Setting
- Unit
- Main
- Sub
- Vertical magnification Adjustment
- Removing Shadows/Streaks that Appear around Edges of Images [Page Edge Filler (ADF)/Page Edge Filler (FB) [fi-8290/fi-8270/fi-8250/fi-8250U]]
- ADF
- FB [fi-8290/fi-8270/fi-8250/fi-8250U]
- Configuring the Scan Setting to Drop Out Specified Colors When Scanning [Dropout Color]
- Shortening the Scanning Intervals [Pre-Pick]
- Specifying the Number of Retries for Paper Feeding [Number of paper feeding retries]
- Feeding [Pick Speed]
- Cropping the Image Boundary [AutoCrop Boundary]
- Protecting the Documents from Being Damaged [Paper Protection]
- Specifying the Sensitivity Level for Paper Protection [Paper Protection Sensitivity]
- Normal
- High
- Low
- Scanning Slowly at Low Resolution [Low-speed Feed Mode]
- Scanning at High Altitude [High Altitude Mode]
- Specifying the Image Quality for Scanning [Image Quality Mode]
- Preventing an Image from Missing Any Parts When Documents Are Fed Skewed (Overscan Control) [fi-8190/fi-8290/fi-8170/fi-8270]
- Select [Enable] to prevent the image from missing any parts.
- Settings Related to the Detection for Overlapped Documents (Multifeed)
- Specifying a Method to Detect Overlapped Documents [Multifeed]
- Check Overlapping(Ultrasonic)
- Check Length
- Check Overlapping and Length
- Length
- Specifying the Area to Detect Overlapped Documents [Document check area specification for Multifeed Detection]
- [Selected range] check box
- Disable (Middle)
- Enable (Middle)
- Start (Middle)
- End (Middle)
- ■ Examples of the Settings for the Area to Detect the Overlapping of Documents
- Example 1
- Example 2
- Example 3 (Bad Example)
- Setting to Ignore Certain Overlap Patterns [Intelligent Multifeed Function]
- Standard mode
- Manual mode
- Auto mode 1
- Auto mode 2
- [Clear overlap pattern] check box
- [Memorize the overlap pattern automatically] check box
- Remember overlap patterns at power-off
- Settings Related to Waiting Time
- Waiting Time in Manual Feeding [Manual Feeding]
- Waiting Time for the Scanner to Enter Power Saving Mode [Power saving]
- Power saving
- [Power off after a certain period of time] check box
- Settings Related to the Connection Between the Scanner and Computer
- Specifying the USB Operation [USB] [fi-8150/fi-8250/fi-8150U/fi-8250U]
- Settings to Use the Scanner Only via the USB Connection [Network Function] [fi-8190/fi-8290/fi-8170/fi-8270/fi-8150/fi-8250]
- Settings Related to Power On/Off and the Power Consumption of the Scanner
- Method for Turning the Scanner ON/OFF [Power Switch Control]
- Enable power switch
- Disable power switch
- Enable USB power feeding
- Settings for Saving the Power Consumption of the Scanner (ECO Mode)
- Settings Related to Scanner Maintenance
- Detecting Vertical Streaks [Vertical Streak Detection]
- Specifying the Sensitivity Level for Vertical Streak Detection [Vertical Streak Sensitivity]
- Setting the Maintenance/Inspection Cycles for the Scanner [Maintenance and Inspection Cycle] [fi-8190/fi-8290/fi-8170/fi-8270]
- Network Settings (fi Series Network Settings) [fi-8190/fi-8290/fi-8170/fi-8270/fi-8150/fi-8250]
- Starting Up fi Series Network Settings
- - Scanner Information
- ●Network
- ●Security
- Scanner Information
- Network
- Scanner Name
- [Apply to the scanner] button
- Scanner Code
- Wired LAN
- IPv4 Configuration
- DNS Server
- IPv6 Configuration
- Security
- Network Encryption
- Encryption Off (HTTP)
- Encryption On (HTTPS)
- Linking with Server
- Proxy Server
- [Enable] check box
- PaperStream NX Manager
- [Check connection] button
- Scanner Central Admin Server
- Maintenance
- Admin Password
- Current Password
- New Password
- Confirm New Password
- Export the Scanner Setting Information
- Version/Name
- [Export] button
- Import the Scanner Setting Information
- License
- Outer Dimensions
- Uninstalling the Software
- Notes When Using IPv6 [fi-8190/fi-8290/fi-8170/fi-8270/fi-8150/fi-8250]
- - Scanner settings that do not support IPv6
- Supplementary Notes for operating with PaperStream NX Manager [fi-8190/fi-8290/fi-8170/fi-8270/fi-8150/fi-8250]
- Exporting the Scanner Settings
- Items of the Scanner Settings
- Exporting Procedure
- Notes for Distributing Assets with the Scanner Central Admin Server
- - Contact for Inquiries
- - Contact for Purchasing Consumables or Cleaning Materials
Brand : RICOH
Model : fi-8190
Category : Scanner