
MR-EX574X - Fridge MITSUBISHI - Free user manual and instructions
Find the device manual for free MR-EX574X MITSUBISHI in PDF.


| Product Type | Refrigerator-Freezer |
| Model | MR-EX574X |
| Brand | Mitsubishi |
| Total Gross Volume | 574 L |
| Total Storage Volume | 379 L |
| Refrigerator Compartment Storage Volume | 228 L |
| Freezer Compartment Storage Volume | 59 L |
| Vegetable Compartment Storage Volume | 71 L |
| Ice Making Compartment Storage Volume | 4 L |
| Versa Compartment Storage Volume | 17 L |
| Refrigerant | R600a (isobutane) |
| Automatic Ice Maker | Yes |
| Touch Control Panel | Yes |
| Supercool Freezing | Yes |
| Soft-Freezing Mode | Yes |
| Rapid Cool Bulk Shopping | Yes |
| Cool Drinks Quickly | Yes |
| ECO Mode (Energy Saving) | Yes |
| Power Save Mode | Yes (for ice making and versa compartments) |
| Child Safety Lock | Yes |
| Temperature Fine Adjustment | Yes (19 levels for refrigerator/freezer, 5 for versa Soft-Freezing) |
| Adjustable Supports | Yes |
| Auto Closer for Refrigerator Door | Yes |
| LED Interior Light | Yes (10 LEDs) |
| Removable Parts for Cleaning | Water tank, ice tray, shelves, cases |
Frequently Asked Questions - MR-EX574X MITSUBISHI
User questions about MR-EX574X MITSUBISHI
0 question about this device. Answer the ones you know or ask your own.
Ask a new question about this device
Download the instructions for your Fridge in PDF format for free! Find your manual MR-EX574X - MITSUBISHI and take your electronic device back in hand. On this page are published all the documents necessary for the use of your device. MR-EX574X by MITSUBISHI.
USER MANUAL MR-EX574X MITSUBISHI
Refrigerator-Freezer
MODEL
MR-EX574X
OPERATING INSTRUCTIONS
Function Overview
Complicated controls
become easy with a touch panel!
natural_image
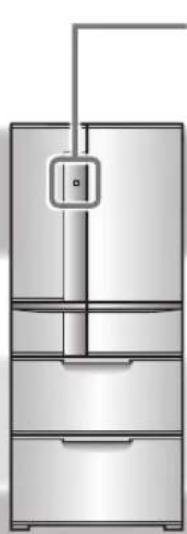
Illustration of a multi-tier refrigerator with an attached control panel (no text or symbols)Operation panel
If you touch the operation panel, icon will be displayed. You can select the setting that you prefer.

Want to Rapid cool bulk shopping

Want to Keep vegetables moist

Want to Cool drinks quickly

Power Saving

Want to make ice quickly

Want to stop making ice

Want to store food with Soft-Freezing

Freeze to savory taste (Supercool Freezing)
ECO ★★★
Check the power-saving condition
Contents
Safety Precautions
The danger and degree of danger caused by improper handling are categorized and described with the following indicators.

Warning
Improper handling that can result in death or serious injury.

Caution
Improper handling that can result in personal injury or damage to your house, household furnishings, etc.
■ Meaning of symbols.

Never do

Never touch

Never attempt to disassemble, repair or alter

Never expose to water

Never touch with wet hands

Be sure to follow the instructions

Be sure to remove the power plug from the socket

If an abnormality or malfunction occurs, stop operation
immediately and contact the retail store where you purchased the refrigerator or a Mitsubishi Electric Maintenance Service or Customer Service representative.
Installation
Leave space around the refrigerator.
If refrigerant leaks, it may accumulate and catch fi re or explode.
▶ Page 6
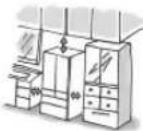

Leave space
Do not install the refrigerator outdoors or in places exposed to water or excessive humidity.
Water may cause insulation failure, resulting in an electric shock or fire.
▶ Page 6
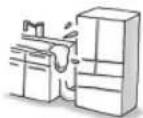

Water prohibited
If the power cord is damaged, call our MITSUBISHI ELECTRIC SERVICE CENTRE for the replacement.
If the power cord is damaged, purchase a new cord from ELECTRIC SERVICE CENTRE. Make sure that the power cord is designed for this model. Power cords should only be replaced by a qualified person.
▶ Page 6

Service Call
Anchor the refrigerator to a strong wall or post to protect against damage during earthquakes.
The refrigerator may tip over and cause injury
▶ Page 7
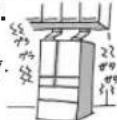

Prevent tipping
Use a dedicated outlet for the power supply that meets the rating specified on the rating label. (The rating label is located on the door-liner of the refrigerator compartment.)
Using extension cords and plugging too many leads into a single socket can cause heat build-up or fire.
▶ Page 6
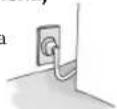

Only use an outlet that meets the specified rating
Insert the power plug with the cord facing down, and fully insert the prongs
Inserting the plug upside-down places stress on the cord and may cause heat generation or fire.
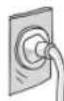

Cord facing down
Power and power plug
Remove the power plug before cleaning.
Otherwise an electric shock or injury may result.
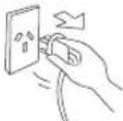

Remove plug
Do not crush the power plug with the rear of the refrigerator.
Do not damage the power cord.
Pressing, folding, bundling or placing heavy objects on the power cord may cause an electric shock or fire.
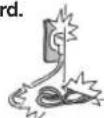

Prohibited
Do not use damaged cords or plugs, or loose sockets.
Doing so may cause an electric shock or fire.
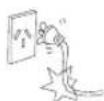

Do not use
Do not pull the cord when unplugging the power plug.
The cord may be damaged, resulting in a electric shock or fire.
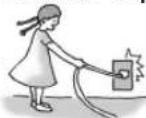

Prohibited
Remove dust periodically from the power plug.
Dust may cause insulation failure, resulting in fi re.
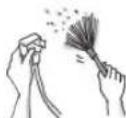

Remove dust
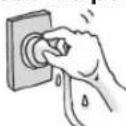
Do not plug in or out the power plug with wet hands.
Doing so may cause an electric shock.
Installation and transportation
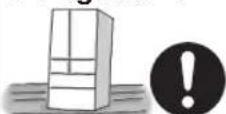
Anchor the
refrigerator to a strong and level floor by adjusting the adjustable supports.
Otherwise, the refrigerator may move and cause injury.
▶ Pages 6 - 7
Install level
Use the
transportation hand-holds when transporting the refrigerator.
Holding other parts may result in injury.
▶ Page 31
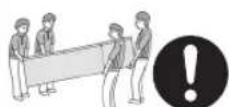
Use the hand-holds
Be careful not to damage the floor or injure yourself when moving the refrigerator.
Lay a protective sheet on the floor and move the refrigerator slowly.
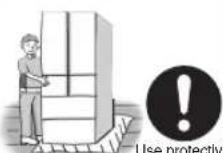
Use protective material
Do not pack in excessive amounts of food.
Do not pull the shelves with excessive force.
Food may fall and cause an injury
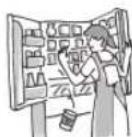

Prohibited
| Operation | |||
Do not place water containers on top of the refrigerator.Exposing electrical parts to water may cause an electric shock or fi re. 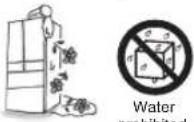 prohibited prohibited | Do not use electrical appliances inside the refrigerator.The refrigerant gas leaking into the compartment with sparks from an electrical contact may cause fi re and explosion. 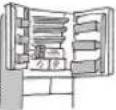 Prohibited Prohibited | Do not place volatile, infl ammable objects inside the refrigerator.Benzene, cosmetics and hair dressing products may catch fi re or explode. 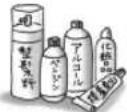  | |
Do not place objects on top of the refrigerator. Objects may fall when the doors are opened or closed and cause injury. 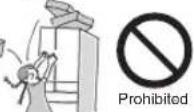 | Do not store chemicals or scientific specimens in the refrigerator.Substances that require strict control must not be stored in household refrigerators.  Do not store Do not store | Do not hang from the door or handle.Do not climb on an open door.Do not apply a heavy load.The refrigerator may tip over and cause injury. 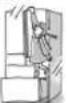  | |
Do not touch the mechanical area of the automatic ice maker (area above the ice trayDoing so may result in injury. 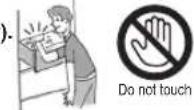 | Do not damage or drive screws into the refrigerator's refrigerant circuit (pipes).Because combustible refrigerant is used, this may result in fire or an explosion.   | If you notice a gas leak, do not touch the refrigerator. Open windows to ventilate.Sparks from an electrical contact may cause an explosion or fi re. 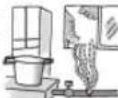  | |
Do not wash with water or spill soup or juice onto the refrigerator.Water or other liquid may cause an electric shock or fire. Wipe off any liquid immediately. 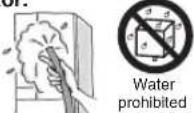 | Do not use combustible sprays near the refrigerator.Sparks from an electric contact may cause an ignition and fi re. 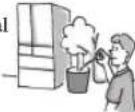 Do not use Do not use | Do not use in a shed or garage.Small animals may damage the electrical wiring and cause an electric shock or fi re.  | |
| When the doors are opened or closed, beware not to hit any furnitureThe door or furniture may be damaged and cause any injury. Prohibited | |||
Malfunctions and long-term storage When Recycling
If the refrigerant circuit (pipe) is damaged, do not touch the refrigerator and avoid using flames. Open windows to ventilate.
If the refrigerant circuit is damaged, contact the retail store.
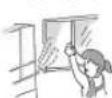

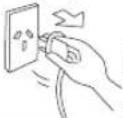
If an abnormality occurs (such as a burning odour), unplug the power plug and stop the refrigerator operation.
Continuing to operate with an abnormality may cause an electric shock or fire.
For storage, make sure to pull out and remove the door seal.
There is a possibility of a child getting trapped in the refrigerator during storage.
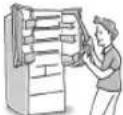

Do not disassemble, repair or alter. Do not use while parts are damaged.
Doing so may cause injury, electric shock or fire.
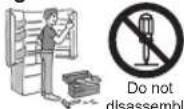
When not using the refrigerator for a long time, unplug the power plug and open the doors to dry the refrigerator.
If the refrigerator is not dried sufficiently refrigerant may leak due to condenser corrosion and cause a fi re or explosion.

Contact the retail store or municipal government for details about correct refrigerator disposal.
Improper disposal may cause refrigerant leaks, resulting in a fl re or explosion if exposed to a fl ame.

Dispose properly
Caution
Do not touch food or containers in the freezer compartment with wet hands.
It may cause a cold injury.
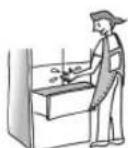

Wet hands prohibited
Do not place glass bottles in the freezer, ice making and versa compartments.
The bottle may break if the liquid inside freezes, causing an injury.
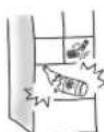

Operation
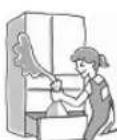
Do not put your hands or feet under the refrigerator.
The steel plates or other parts may cause injury.
Do not eat food that is discolored or has a bad odour.
It may result in food poisoning or illness.
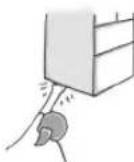

Do not touch

Prohibited
Observe the following when opening and closing the doors.
- Do not open or close the doors when another person is touching the refrigerator.
- Do not put your fingers on the top edge of a drawer-type door while closing it.
- Do not open or close the doors with excessive force. (Food may fall out and cause injury.)
- Be careful not to trap your fingers or any other part of your body.
- Be careful not hit a part of your body.
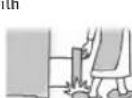
- Do not trap your feet with the bottom drawer.
(Danger of your toes caught by the drawer.)

Prohibited
From Installation to Operation
1 Installation
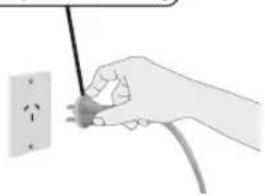
Dedicated outlet that meets the specified rating.
natural_image
Hand holding a plug inserted into an electrical outlet (no text or symbols visible)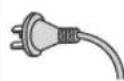
Turn on the power of the refrigerator as soon as possible.
The refrigerator will not be damaged even if you turn on the power immediately after the installation.
2 Connect the power supply
* Connect power supply soon after installing the refrigerator
Install the refrigerator at:
● A place with good ventilation and not exposed to direct sunlight or hot air
To keep good cooling performance and reduce power costs.
● A place with low humidity
To prevent it from rusting, electric shock and fi re.
● A strong and level place
To prevent vibration, noise, and ajar or tilting doors.
To prevent deformation or discoloration of the floor materials due to the weight or heat.
(If the refrigerator supports may sink into the floor, lay a strong plate or board underneath.
●A place away from other devices
To prevent noise or video interference with devices such as televisions.
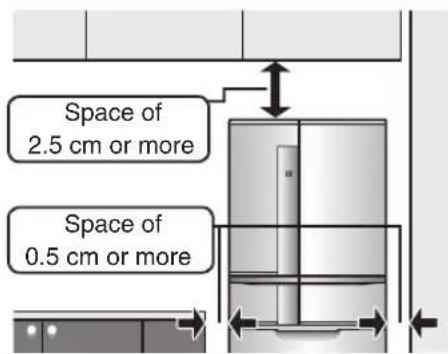
● There should be space of 0.5 cm on the left and right of the refrigerator, and 2.5 cm or more from the ceiling.
To allow heat to dissipate from the top and the sides of the refrigerator.
Use in hot spring areas
Corrosion control treatment may be required for the refrigerant circuit (pipe) due to generation of corrosive gases. Contact the retail store where you purchased the refrigerator.
Warning
Do not obstruct the refrigerator vents or the space around the refrigerator. If refrigerant leaks, it may accumulate and catch fi re or explode.
- Use a dedicated outlet
Use a dedicated outlet for the power supply that meets the rating specified on the rating label. (The rating label is located on the door-liner of the refrigerator compartment.)
Warning
Using outlets that do not meet the specified rating or plugging in too many leads into a single socket can cause heat buildup or fi re
- The refrigerator will not be damaged even if the power is supplied soon after installation.
It takes a while for the refrigerator to cool, therefore supply power as soon as possible.
● Electrical Connections
Make sure this unit is properly grounded.
● The refrigerator should always be plugged into its dedicated electrical outlet.
This will provide the best performance and prevent electrical circuits from being overloaded and causing a fire.
Make sure that the electrical outlet provides the proper voltage. Extension cords are not recommended.
- If your refrigerator is installed in the high humidity location, not only ground connection but also installation of the earth leakage breaker is recommended.
- If the power cord is damaged, purchase a new cord from MITSUBISHI ELECTRIC SERVICE CENTRE. Make sure that the power cord is designed for this model, in order to avoid a hazard.
● Power cords should only be replaced by a qualified person.
The outside of the refrigerator and the rotating partition get hot.
- Heat dissipation causes the temperature to rise to about 50 to 60^ or even higher when operation is first started, and during the summer.
•The rotating partition may get hot when heated by the heater.
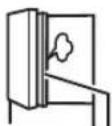
Rotating partition
It takes time for cooling even after turning on the refrigerator.
- Wait until the refrigerator has been fully cooled before storing non-cooled food or ice cream.
- Do not open the doors more than necessary, and close them as soon as possible.
When making ice for the first time
When the weather is hot in summer, it may take more than 24 hours.
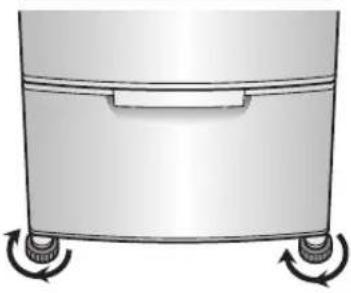
Bottom front of refrigerator
natural_image
Illustration of a cylindrical container with four wheels and a handle, showing rotational motion (no text or symbols)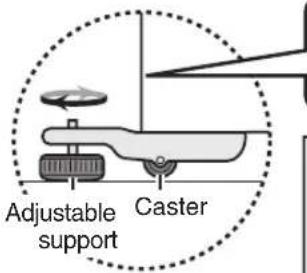
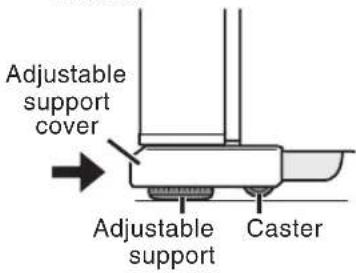
Turn the adjustable supports in the arrow direction until they touch the floor.

Caution If the supports are not adjusted properly, the refrigerator may move and cause injury.
3 Adjustment and anchoring
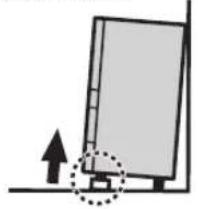
(To prevent vibration, noise, movement, and doors left ajar) Turn and lower the adjustable supports until they touch the floor and the front casters are raised from the floor to fix the refrigerator.
● Preventing doors from being left ajar
Adjust the supports to make the refrigerator level.
If the front of the refrigerator is slightly raised, the doors are easier to close.
natural_image
Simple line drawing of a monitor with an upward arrow and dotted circle highlighting the screen area (no text or symbols)- Adjusting a tilted door or unevenness
Adjust the adjustable supports as shown in the figures below.
The right door tilts down
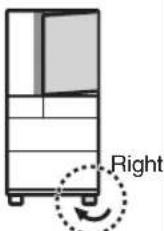
Rotate and lower the right side
Rotate and lower the left side
If the installation location is not level or the supports sink after a few days of installation due to the weight of the food, the doors may appear tilted. Readjust the supports.
* More than 100 kg of food can be stored in the refrigerator.
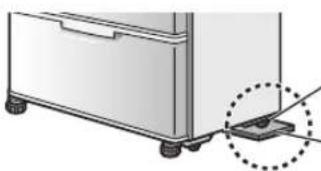
- If the door is still tilted after adjustment of the supports
When installing the refrigerator in the corner of a room, one of the rear supports may sink, causing the refrigerator to tilt. If this happens, use a caster support or strong board for adjustment. (Normally, use a board with a thickness of 2 to 3 mm.)
natural_image
Illustration of a refrigerator with wheels and a dotted line indicating a mechanical component (no text or symbols)Rear support
Caster support or strong board
natural_image
Diagram of a kitchen appliance with wheels and a side panel, showing an upward arrow indicating motion (no text or symbols)Adjustable support cover
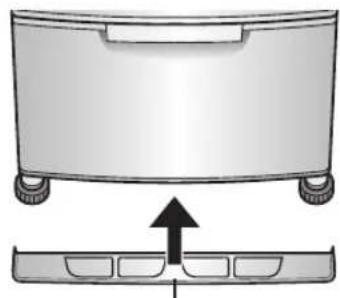
4 Adjustable support cover
The adjustable support cover is stored inside the refrigerator compartment at shipment.
● Installing the adjustable support cover
Fully insert the adjustable support cover horizontally until it touches the rear side.
The operation noise gets louder immediately after installation.
Immediately after instillation, when: the weather is hot, the doors are frequently opened or closed, or any similar situation; the operation noise will get louder because the refrigerator will switch to high-speed operation to cool with high power.

Do not damage the refrigerant circuit (pipes) or drive screws into it.
Although flammable refrigerant is used, the refrigerant circuit is hermetically sealed and normally leaks will not occur.
Warning
Should the refrigerant circuit be damaged:
- Do not use flames or electrical appliances nearby.
- Open the windows to fully ventilate the room.
Then, contact the retail store where you purchased the refrigerator.
Prepare for earthquakes (for areas prone to earthquakes)
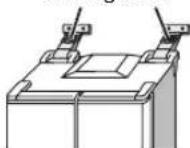
Pass 2 strong belts through the hand-holds on the top rear of the refrigerator and anchor them to a strong location, such as wall or post.
Warning
The refrigerator may tip over and cause injury.
Strong belts
Placing Food Inside
You are now a skillful storage organizer♪ Get the most out of your refrigerator to make cooking more fun and dishes tastier!
Approximate temperature setting
Use the refrigerator, freezer, and vegetable compartments set to "M" usually. Use the versa compartment in your preferred setting.
- Initial settings (at time of purchase): refrigerator, freezer, and vegetable compartments "M", versa compartment "Soft-Freezing, M"
Note
- The temperatures described here are measured in the lower centre of the refrigerator after the temperature has stabilized when the surrounding temperature is 30°C and the doors are closed without any food inside. The temperature fluctuates with factors such as food storage conditions and how often the doors are opened and closed.
- Plastic may have odours when you first start using the refrigerator. Ventilate the room to prevent odours from being contained, just in case. Odours will gradually disappear.
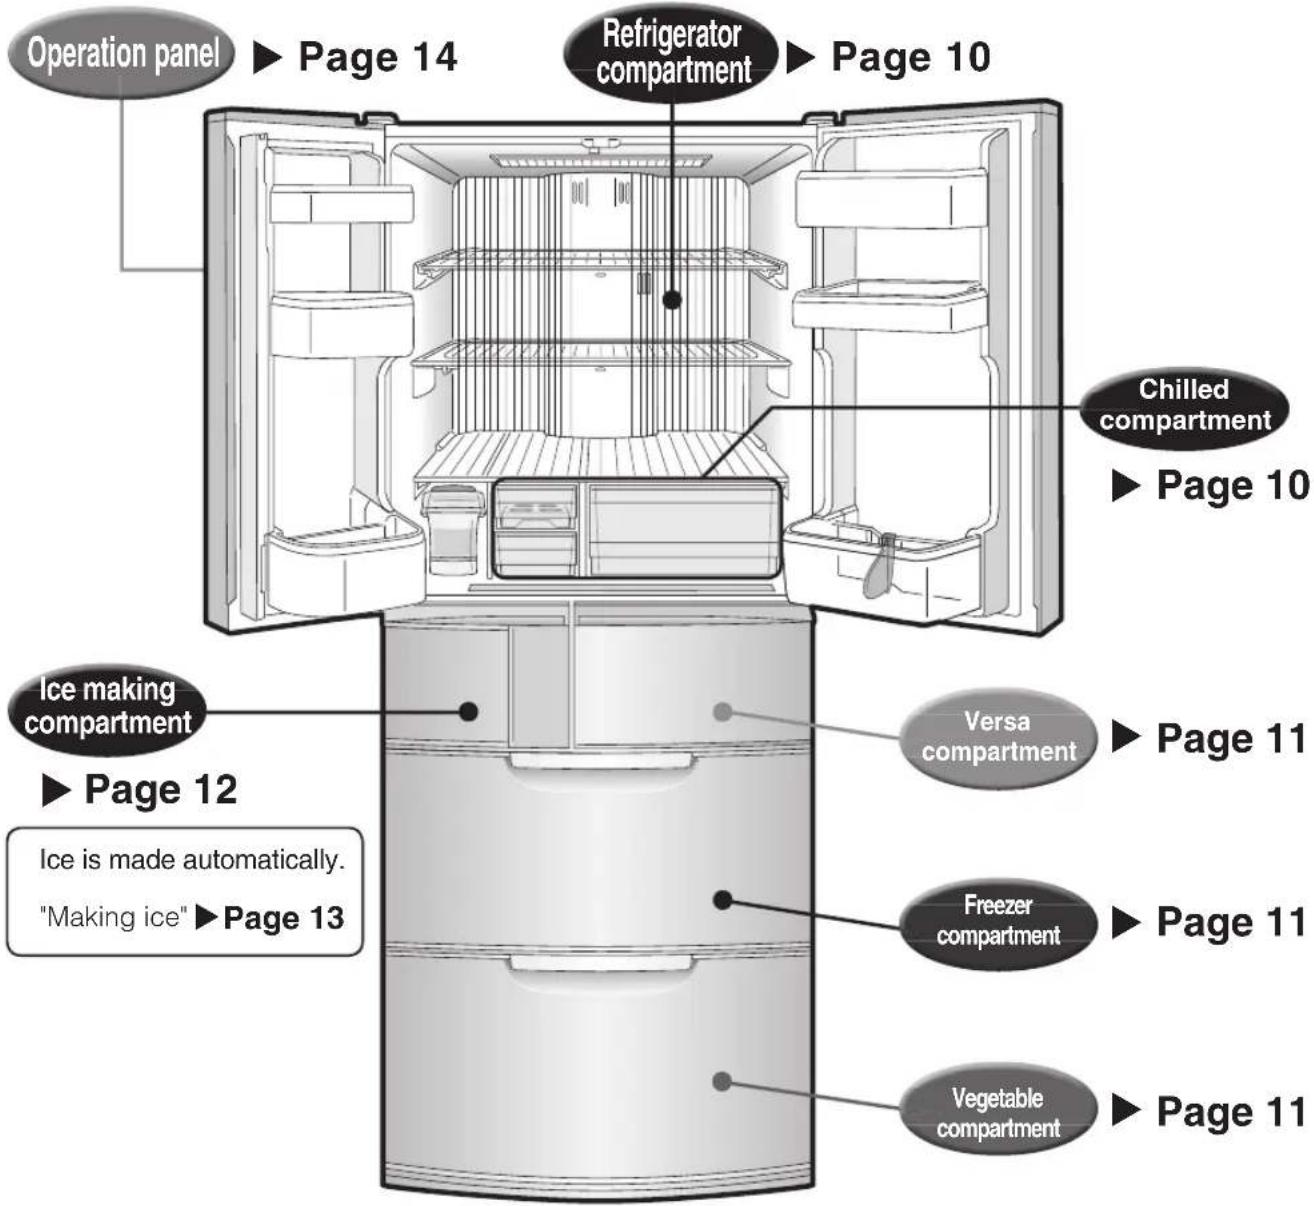
Refrigerator compartment
About 0°C to 6°C
- Food that are used daily
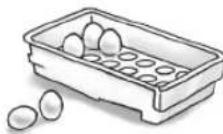
- Keep eggs in the chilled egg compartment
- Food you do not want to freeze
Chilled compartment
About -3°C to 3°C
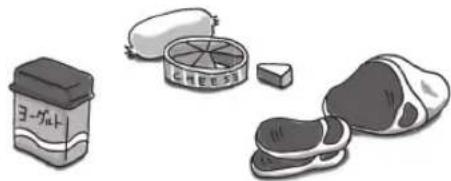
● Dairy products: Yoghurt, cheese, etc.
- Fish paste products: Steamed fish paste, fi sh cake, etc.
● Processed food: Ham, sausages, etc.
● Fresh food: Meat, fi sh, shellfi sh, etc.
natural_image
Illustration of various food items including cheese, steak, and instant noodles (no text or symbols)Wrap foods that have strong odour thoroughly before storage
Food that transfers odours easily
Rakkyo, dried fi sh, natto, miso, beef, takuan, sardines, kimchi, jiaozi, etc.
Food to which odours may easily be transferred
Puddings, rice, potato salad, tofu, bread, milk, cake, etc.
Versa compartment
Soft-Freezing: About -9°C to -5°C (Can be changed to freezing)
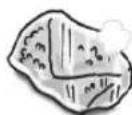
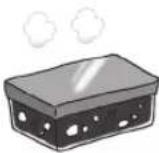
- Cooked rice
- Curry
- Sauces
- Blocks of meat
- Ground meat
- Cutlets, cod roe
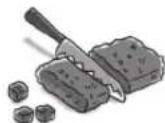
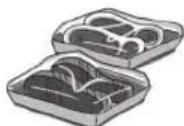
Tips for Supercool Freezing and Soft-Freezing
▶ Pages 20 - 21
Freezer compartment
About -22°C to -16°C
- Frozen food
- Ice cream
● Food frozen at home - Bread
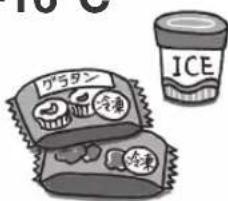
If you store the food that is Supercool Freezing in the freezer compartment, it can be stored for a long time without losing its taste and texture.
Vegetable compartment
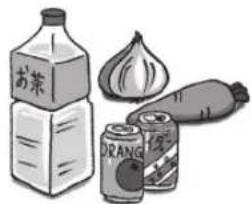
About 3°C to 9°C
- Vegetables
- Fruit
- Drinks
natural_image
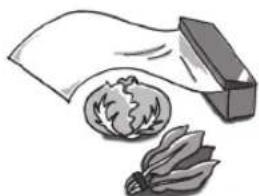
Illustration of various food items including milk carton, onion, can, and soda can (no text or symbols)The water that evaporates from the food is kept inside the compartment to maintain the moisture. Storing fruit and vegetables in plastic wrap keeps them even fresher.
natural_image
Illustration of a cloth cutting into a bowl and a flower, with a box partially visible (no text or symbols)Caution
- Do not stack food higher than the case. The food will be caught at the rear of the case and may leave the door ajar.
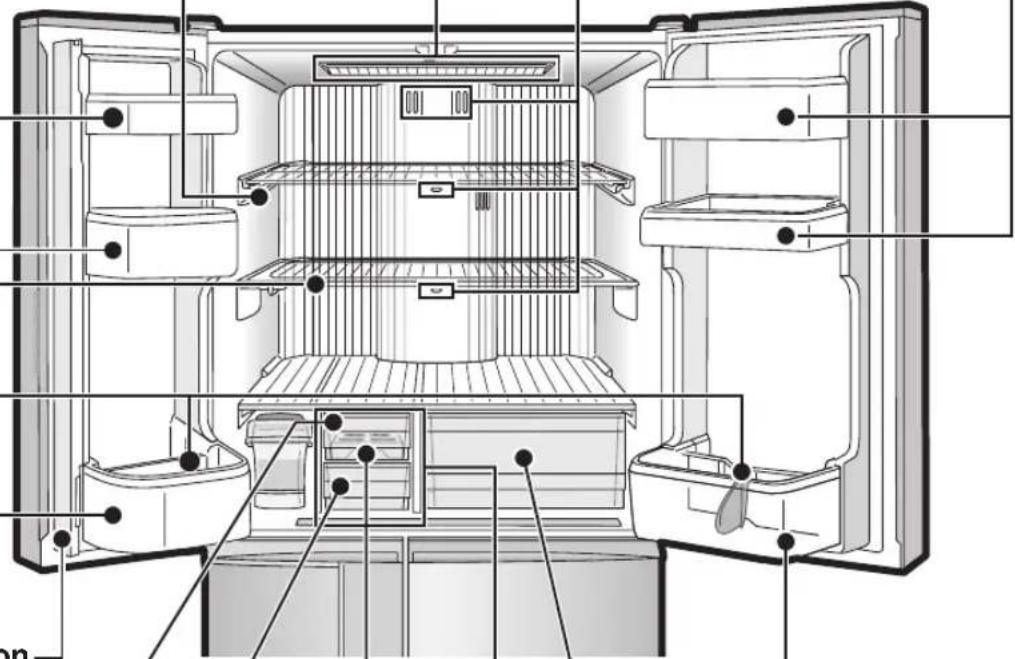
Refrigerator compartment
Adjustable pocket:
- The lower (short) adjustable pockets (large and small) are 32 mm smaller.
- The upper adjustable pockets (large and small) are non-adjustable.
Two-way flexishelf
If you take out the partitions, the shelf will be wide. If you insert the partitions, you can store high objects in the lower shelf.
Adjustable pocket (small)
Vertically adjustable to 2 positions
AUTO Shelf
Move the lever to the left or right to adjust the space between the shelves.
Small item holder
Bottle pocket (small)
Rotating partition
Do not close the door while the rotating partition is opened out to the front.
If you open or close the doors with force, the rotating partition may open to the front. Open and close the doors slowly. (Otherwise it may be damaged.)
Interior light
The interior light uses 10 LEDs. If the interior light is damaged, call our MITSUBISHI ELECTRIC SERVICE CENTRE or its service agent for the replacement, in order to avoid a hazard.
Air outlet
If food with a high water content is placed near the air outlets, it may freeze.
▶ Page 35
Adjustable pocket (large)
Vertically adjustable to 2 positions
natural_image
Cross-sectional diagram of a refrigerator showing internal compartments and doorways (no text or labels)Egg shelf
Small item case (lower)
Small item case (upper)
Bottle pocket (large)
Chilled (-3 to 3°C)
Chilled
Egg
compartment
Slide chilled case
Store food such as meat, fi sh, processed food (fi sh cake, ham, etc.) and yoghurt.



Do not leave food hanging over shelves or pockets. Do not place glass bottles that cannot fit all the way to the bottom at the front of the bottle pocket.

Do not attach a case that you purchased separately onto the outside of a pocket.

Do not close the door while food is in front of the slide chilled case or the small item case.

Fully stow away the cases.
It may keep a door ajar and reduce the cooling performance, or food may fall and cause an injury or damage to a case or lid.
Auto closer
With the door of refrigerator room open at an angle of about 20 degrees or less, the door closes automatically.
- The auto closer is not intended to automatically close doors kept open slightly (doors left ajar). The door may stop before closing completely if you swing close the door too softly.
- The amount of food inside the compartment may affect the closing speed.
Versa compartment
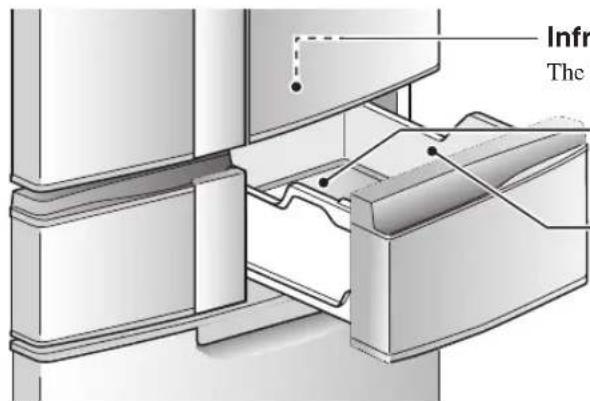
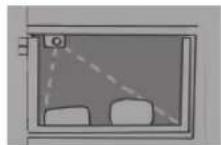
Infrared sensor
The food temperature is detected with an infrared sensor.
Aluminum tray
The cold tray quickly cools the food.
Versa case
Caution
Do not stack food higher than the case.
• The door may not be closed.
- Food may be thawed.
- Food may be damaged.
Freezer compartment
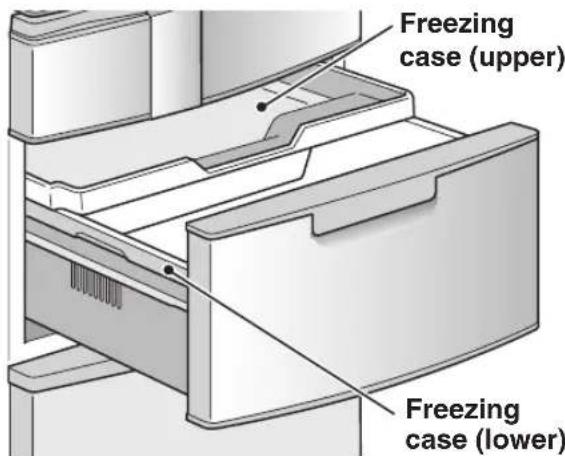
Caution
Do not place tall objects in the freezing case (lower).
- Food or the freezing case (upper) may be damaged.
• The door may not be closed.
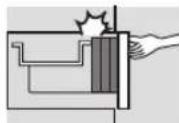
Do not put in plastic drink bottles other than those meant for freezing. Do not place glass bottles in freezer.
• The frozen contents may break the bottle.
▶ Page 5
Vegetable compartment
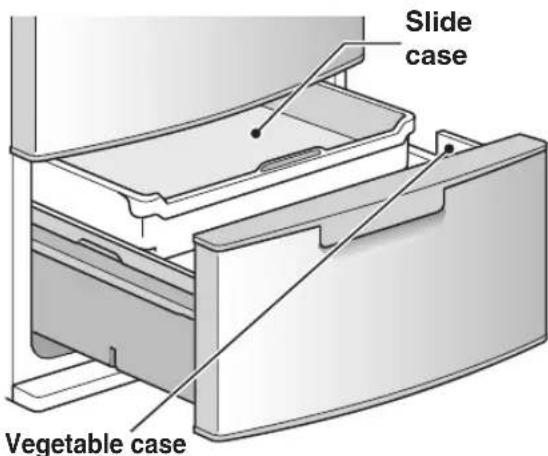
Caution
Do not stack food higher than the case.
- Food or the slide case may be damaged.
• The door may not be closed.
Because the vegetable compartment has a high humidity depending on the amount or types of vegetables, frost or condensation may form on the roof of the vegetable compartment or the surface of the cases.
When condensation forms, wipe it off with a dry cloth.
Ice Making Compartment
(Automatic Ice Maker)
Ice making compartment
Water tank cap
Water tank lid
The lid can be set on the tank in both directions, facing the front or rear.
Water tank—(about 1.2 L)
Tank Pipe
Water supply pump Optical catalyst and lead- cleaning filter
Ice tray
It can be removed for cleaning.
Ice making compartment label
Ice server
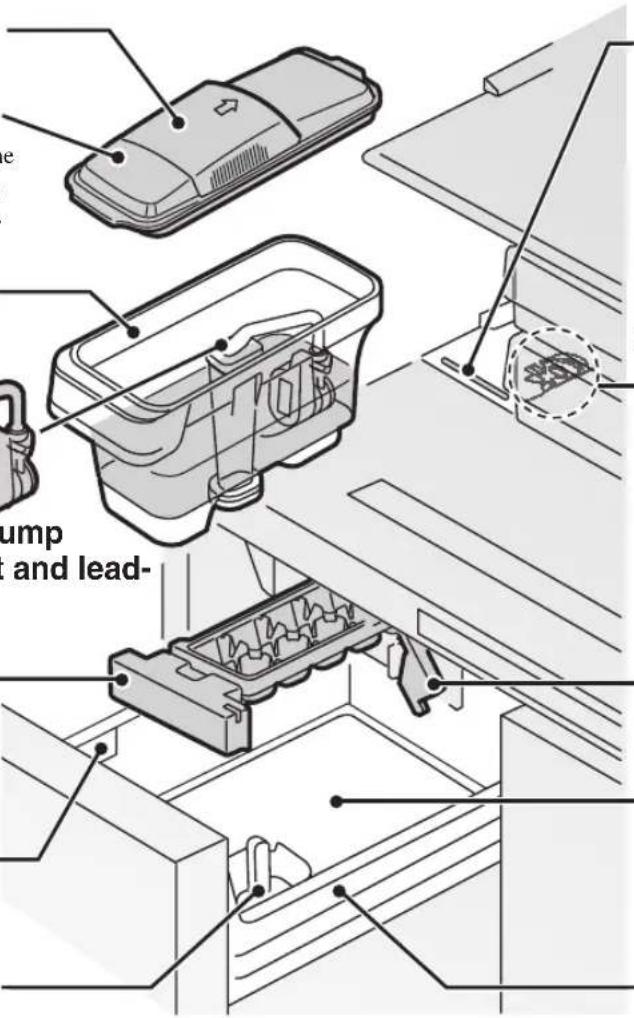
Water tank setting position line
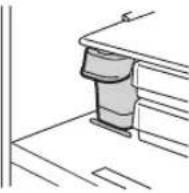
This is the guideline for the water tank setting position.
Push in the water tank until it makes contact with the inner side. Make sure that the line can be seen in front of the water tank.
Water supply pipe
Ice tray lock lever
Soundproof mat
Reduces the sound of dropping ice. Do not dispose of it.
Ice storage box
Ice making precautions
Do not place objects at the rear of the ice storage box. Ice tray
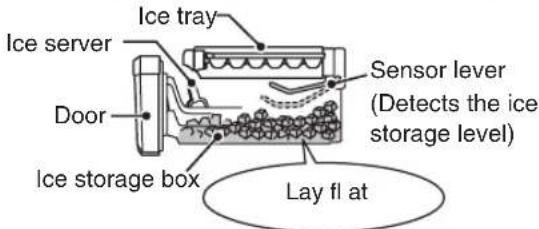
- Store food lower than the red line of the ice making compartment label (because it may cause an ajar door, malfunction or damage). Set the ice making compartment to "STOP" mode when storing food.
▶ Page 17
- The level of the ice storage is checked automatically by the sensor lever, and ice making is stopped when the ice reaches a certain level (about 80 to 140 ice cubes). To detect the ice storage level correctly, make sure that the ice is flat and that the ice server is kept in its storage position in the front right of the ice storage box.
●Clean the ice maker periodically to ensure that the ice is pure and delicious.
▶ Pages 26 - 27
- Do not pour anything other than cold water into the water tank, such as warm water, juice, tea, soft drinks, or other liquids (the tank can resist heat up to 60°C). Pouring anything other than cold water into the tank may cause damage.
- Do not pour water directly into the ice tray to make ice. Unfrozen water in the ice tray may fall into the ice storage box, and the ice may join not forming cubes.
- When ice is made using water with a high mineral content, such as mineral water, white deposits (white crystals) may form in the ice. This is the crystallized mineral content and is not harmful.
1
Check that is not displayed.
- Check this after touching to light up the display.
- If the lamp is on, insert the ice tray and lock the ice tray lock lever. Inserting ice tray ▶ Page 26
2
natural_image
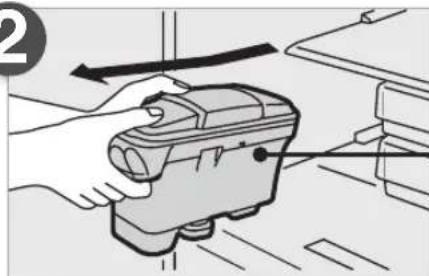
Illustration of a hand holding a handheld device with a curved arrow indicating rotation (no text or symbols present)Hold the tank with both hands.
Remove the water tank from the refrigerator compartment.
Water tank
When using it for the first time, or if you have not made ice for more than a week.
- Wash the water tank, water supply pipe, and ice tray. Odours or dust may be adhered to the parts. How to wash ▶ Page 26
3
natural_image
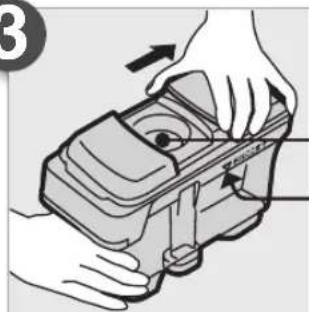
Illustration of hands using a tool to adjust or install a mechanical component (no text or symbols visible)Slide the water tank cap and pour water into the water supply port up to the full position.
Water supply port
Full position
Do not pour water above the full position.
- If water is filled beyond the full position, water may spill when you carry or tilt the tank. Further, it may cause the water channels in the ice tray to freeze, and the ice to join together or form a protrusion. WARNING-Fill with potable water only.
4
natural_image
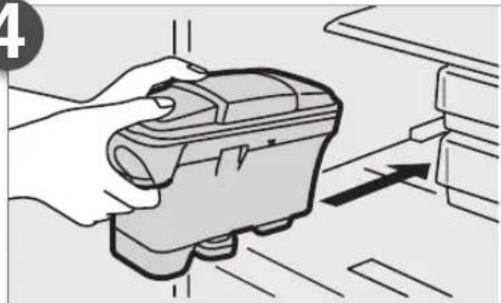
Illustration of a hand holding a device with an arrow indicating direction (no text or symbols present)Carry the water tank with both hands and insert it horizontally until it makes contact with the rear side.
Close the water tank cap, return the water tank to its original position, and close the door of the refrigerator compartment.
- Check that there are no foreign objects between the tank holder and the water supply pipe area. It may cause freezing.
How to check ▶ Page 26
- Push in the water tank until it touches the rear side. Setting the water tank incorrectly may prevent ice from forming.
The ice making time for a single batch is about 2 hours.
When you want to make ice quickly ▶ Page 17
Caution
- If Ic of the compartment display blinks.
Ice tray is operating. Do not remove the ice tray while it is operating. Doing so may cause injury. If you release the ice tray lock lever while the ice tray is operating, you will be alerted by a repetitive buzzer.
About the ice
- About 10 to 12 ice cubes can be made each time. The ice cube size and the number of ice cubes in one batch depend on various factors, such as the amount of water in the water tank.
- If the ice is stored in the ice storage box for a long time, the ice cubes may join together or shrink (due to a phenomenon called sublimation).
- If you try to crush ice that has joined together, be careful not to injure your hands.
How to Use the Operation Panel
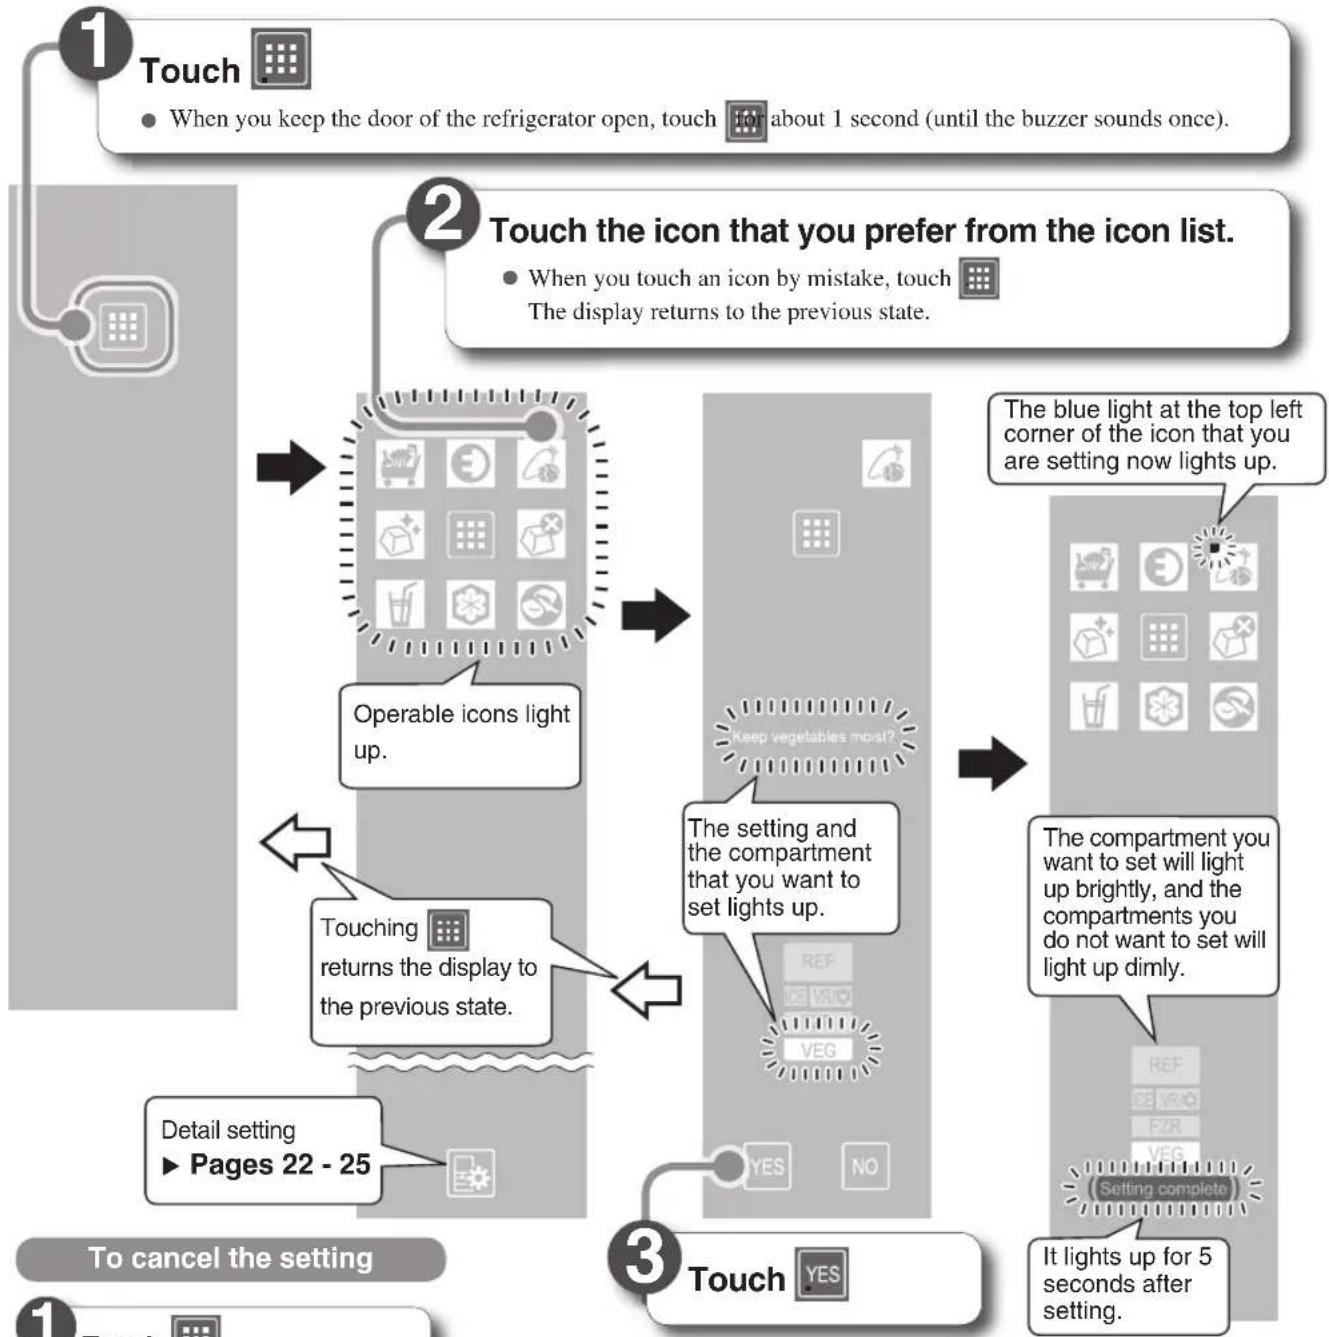
The operation panel is a touch-style panel operated by touching the operation items with a finger.
● To save power, all displays other than 📄 are usually turned off (It turns off if there is no operation for about 30 seconds).
- To check the setting status, touch to light up the display.
- The blue light at the top left corner of the "Soft-Freezing" icon lights up at the time of purchase.
flowchart
graph TD
    A["1 Touch"] --> B["2 Touch the icon that you prefer from the icon list."]
    B --> C["3 Touch"]
    C --> D["4 Detail setting ▶ Pages 22 - 25"]
    D --> E["To cancel the setting"]

    subgraph Section 1
        A --> A1["When you keep the door of the refrigerator open, touch for about 1 second (until the buzzer sounds once)."]
    end

    subgraph Section 2
        B --> B1["When you touch an icon by mistake, touch The display returns to the previous state."]
    end

    subgraph Section 3
        C --> C1["The blue light at the top left corner of the icon that you are setting now lights up."]
        C --> C2["The setting and the compartment that you want to set lights up."]
        C --> C3["The compartment you want to set will light up brightly, and the compartments you do not want to set will light up dimly."]
        C --> C4["Setting complete"]
        C --> C5["It lights up for 5 seconds after setting."]
    end

Touch


After touching the icon that you want to cancel, touch NO.


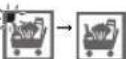
The blue light at the top left corner of the icon turns off.
Example:
Note
- Operate this operation panel with a finger.
- In the following cases, it may not operate properly.
- When the operation panel or fingers are wet or dirty
- When operating with gloves or band-aid on
- When using a sharp object to operate it
- If the display does not change even though you are touching an item, touch the item again after moving away your finger once. If the interval between each touch is too short, it may be misdetected (as a continuous touch). Detecting sensitivity does not change even if an item is touched hard.
- The response may vary, depending on the surrounding temperature, humidity, the health condition of the person who operates it, and the operating condition of neighboring electric appliances.

Rapid Cool Bulk Shopping
Automatically select the compartment whose door was opened and closed, and then cool it down quickly.
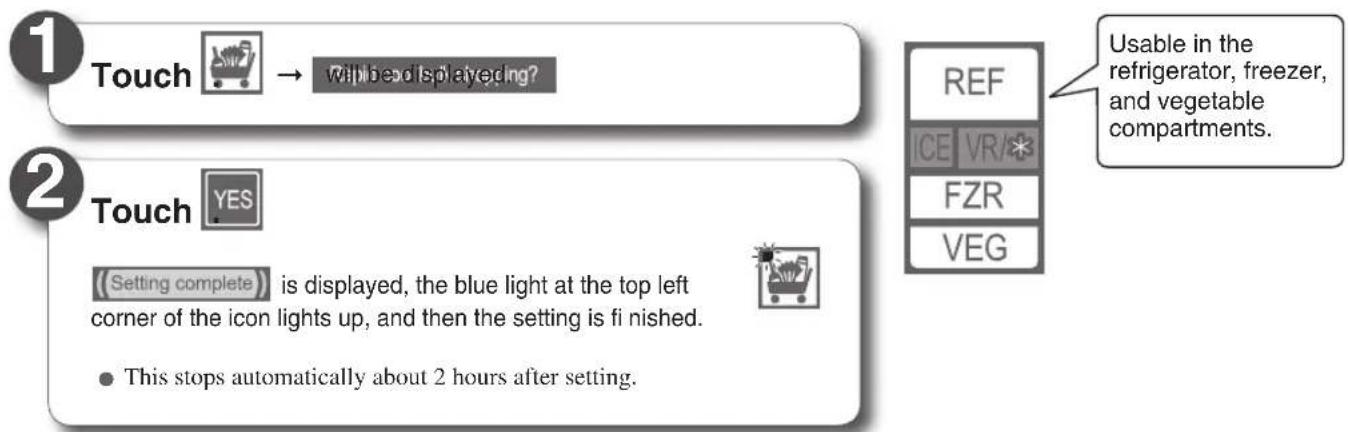
flowchart
graph TD
    A["1 Touch"] --> B["Will be displayed?"]
    C["2 Touch"] --> D["Setting complete"]
    D --> E["is displayed, the blue light at the top left corner of the icon lights up, and then the setting is finished."]
    E --> F["This stops automatically about 2 hours after setting."]

Keep Vegetables Moist
The vegetables can be freshly kept for a long time in the temperature suitable for leaf vegetables.
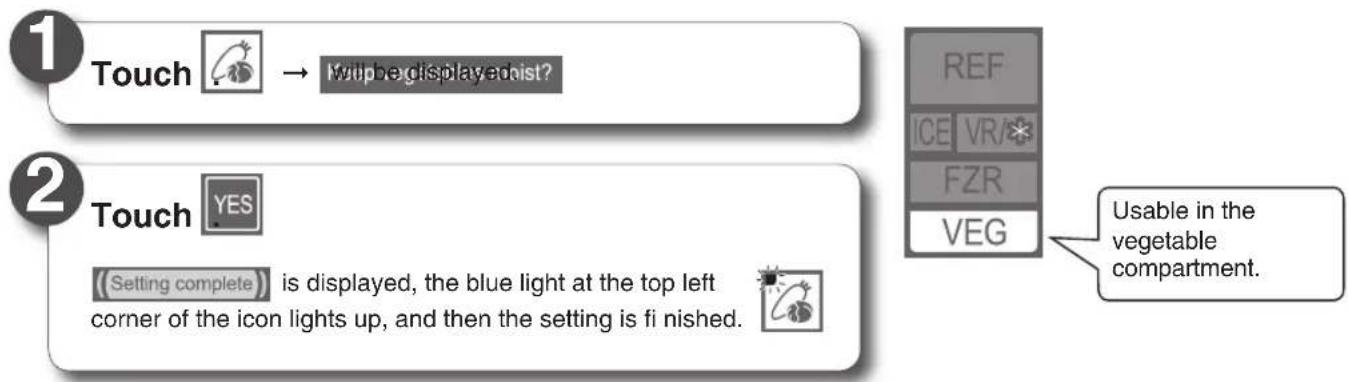
flowchart
graph TD
    A["1 Touch"] --> B["Will be displayed?"]
    C["2 Touch"] --> D["(Setting complete) is displayed, the blue light at the top left corner of the icon lights up, and then the setting is finished."]
    E["REF"] --> F["ICE VR/VZR VEG"]
    F --> G["Usable in the vegetable compartment."]

Cool Drinks Quickly
Quickly cool down drinks or food in the refrigerator compartment.
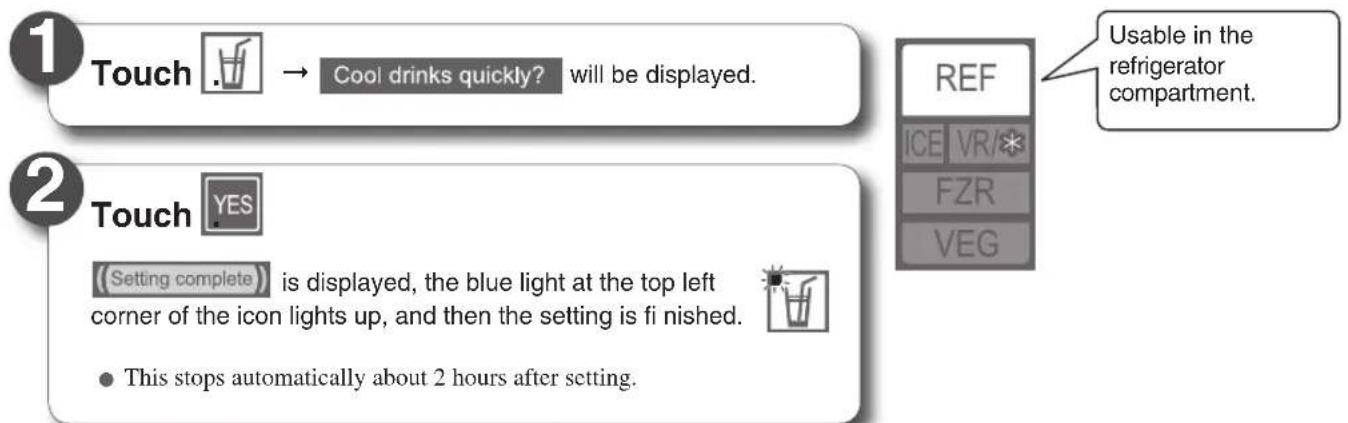
flowchart
graph TD
    A["1 Touch"] --> B["2 Touch"]
    B --> C["Setting complete"]
    C --> D["This stops automatically about 2 hours after setting."]
    style A fill:#f9f,stroke:#333
    style B fill:#ccf,stroke:#333
    style C fill:#cfc,stroke:#333
    style D fill:#fcc,stroke:#333
- Canceling the operation panel setting ▶ Page 14

Set Energy Saving Mode (ECO MODE)
An appropriate timing is selected for each compartment and the power-saving mode is performed automatically. With the power saving operation, the temperature of the compartment is set a little higher while compartment operations are performed.
● Power-saving is canceled for compartments with doors that are frequently opened and closed, as well as the compartments on the fast cooling setting,

Touch


will be displayed?

Touch

(Setting complete) is displayed, the blue light at the top left corner of the icon lights up, and then the setting is finished.
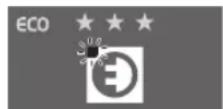
- As for the compartment in power saving mode, ECO lights up.
- If 30 seconds pass without any operations, the display turns off.
Usable in all compartments.
REF
FZR
VEG
■ Check the power-saving condition.
When checking the power saving conditions of each compartment, touch ROOM to switch the display area by compartment and you can check the compartment in power-saving mode by the ECO display.
Example: When the freezer compartment and the refrigerator compartment are in power-saving mode (ECO level 2)
| Display example | ★★ | ECO ★★ | ★★ | ECO ★★ |
| Compartment display |
ECO lights up to indicate the compartment in power-saving mode.
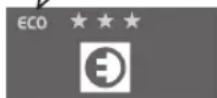
ECO GUIDE
The ECO Level of the previous 24 hours is determined by factors such as the temperature settings of the compartments and the frequency of opening and closing the doors, and is indicated by the number of ★ marks.
| ECO level Level 0 Level 1 Level 2 Level 3 | ||||
| ECO GUIDE | ||||
○ represents a blinking display (such as when the doors are opened and closed frequently or the surrounding temperature of the refrigerator is hot).
- The ECO Level is indicated in 4 levels from 0 to 3. (Eco-friendly use can save power and increase the ECO level.)
- The ECO Level is updated about once every hour. (If there is no change in the ECO Level, the number of the mark does not change.)
- At the time of purchase, level 1 is displayed.
- The ECO GUIDE is displayed even when Energy Saving Mode is not set.
- After a door is closed, the ECO GUIDE and the ECO display light up for about 30 seconds (then they go off).
- When Energy Saving Mode is set, the compartment in power saving mode will light up.
*Even though Energy Saving Mode is set, the display does not light up if the compartment is not on the power-saving mode.
How can I increase the ECO level?
Set Energy Saving Mode
When the temperature inside the refrigerator is stable, the power-saving operation is performed automatically. This is not set initially.
Set Power Save Mode
Performs the power-saving operation by reducing refrigerating capacity. This mode can be set for the ice making and versa compartments. ▶Pages 24 - 25
Set the temperature relatively high
By setting the temperature of each compartment relatively high,
power consumption can be reduced. We also recommend setting the versa compartment to Soft-Freezing.
Do not open the doors more than necessary, and close them as soon as possible
If doors are opened frequently or are kept open for a long time, cold air escapes from the refrigerator and more power is consumed. •Even when a door is open only slightly, it can cause frost or condensation, reduce the cooling performance, or generate water drips.


When the blue light does not light up on either icon, the compartment is in the regular ice making mode.
● Regular ice making is set at the time of purchase.

Making ice quickly (quick ice making)
The ice making time for a single batch is 60 to 80 minutes.
1
Touch


wRabeIdisplayedg?
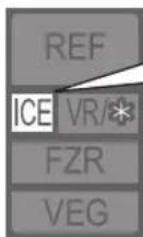
Makes ice quickly.
2
Touch

(Setting complete)
is displayed, the blue light at
the top left corner of the icon lights up, and then the setting is finished.

- Setting the compartment to "quick ice making" cancels "stop ice making."
About quick ice making
• In the following cases, quick ice making is stopped automatically.
- When the ice storage box is full (about 80 to 140 ice cubes)
- When there is no water in the water tank
- When about 10 hours have passed in quick ice making mode
The blue light at the top left corner of the icon turns off.
Example

- The sound of the refrigerator running gets louder during fast cooling, because it is operating at high speed.
- It may take more than 24 hours to make ice immediately after installation, even in quick ice making mode.
- When quick ice making is performed, the ice may split or crack because the freezing is performed quickly.
Approximate ice making time

Quick ice making: 60 to 80 minutes

ular ice making: about 2 hours
- The ice making time is the approximate time for a single batch (10 to 12 ice cubes).
- In addition to the surrounding temperature, water type, and water volume and temperature in the water tank, ice making times may vary with the following conditions, and be longer than those described above.
- In winter or at other times when the surrounding temperature is low. When the doors are frequently opened and closed, When the freezer compartment is set to "L" - When setting to Energy Saving Mode ▶ Page 16 - When the ice tray is pulled out and reinserted during ice making
- When

is displayed, ice cannot be made. Cancel the setting.
▶Page 24

Stopping ice making (stop ice making)
Select this setting when not making ice for a long time or cleaning the ice making compartment. ^*1
1
Touch


Stop making ice?
will be displayed.
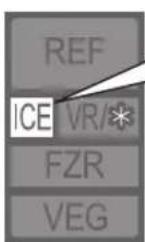
Stops making ice.
2
Touch

Setting complete
is displayed, the blue light at the top left corner of , and then the setting is finished.

- Setting the compartment to "stop ice making" cancels "quick ice making."
When you want to make ice again
Touch and
in order.
- The blue light at the top left corner of the icon turns off and the compartment is set to the regular ice making mode.
*1: For short term storage of frozen food. Not to be used for long term storage of frozen food or ice cream.

Changing the Setting of the Versa Compartment

When the blue light at the top left corner of the icon is not on, the versa compartment is set to freezing.

When the blue light at the top left corner of the icon lights up, the versa compartment is set to Soft-Freezing.
- Soft-Freezing is set at the time of purchase.
● "Tips for Supercool Freezing and Soft-Freezing"▶ Pages 20 - 21

Setting Soft-Freezing
■ When the versa compartment is set to freezing

Touch

Now
Normal freezing
and
Soft-freezing
Select the setting above
are displayed in order.
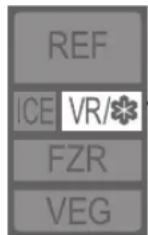
The setting can be switched between Soft-Freezing and freezing.

Touch

(Setting complete) is displayed, the blue light at the top left corner of the icon lights up, and then Soft-Freezing is set.

- Soft-Freezing M is the initial setting. ▶ Page 23
- Touching NO sets the compartment to freezing.

Setting Freezing
■ When the versa compartment is set to Soft-Freezing

Touch

Now
Soft-freezing
and
Normal freezing
are displayed in
order.

Touch

(Setting complete) is displayed, the blue light at the top left corner of the icon lights up, and then it will be set to freezing.

● Freezing M is the initial setting. ▶ Page 23
- Touching set the compartment to Soft-Freezing.

Setting Supercool Freezing
Food can be frozen without losing its taste and texture by using the "Supercool Freezing" mode.
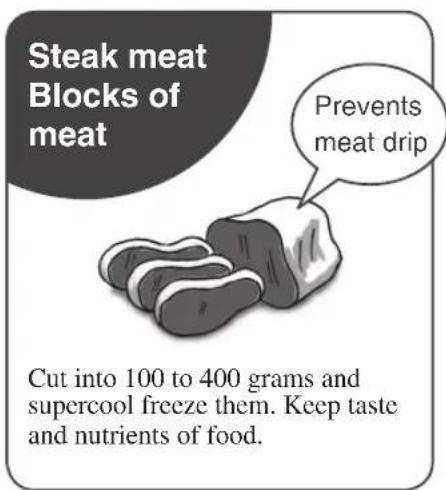
After supercool freezing, store the meat and fish with Soft-Freezing so that you can easily cut them.
● "Tips for Supercool Freezing and Soft-Freezing" ▶ Pages 20 - 21

Check if the blue light at the top left corner of is on.

- Supercool freezing cannot be performed during the freezing setting. Switch the versa compartment setting to Soft-Freezing. ▶ Page 18
- Touch 📋 to light up the blue light at the top left corner of the icon, and then wait until the temperature stabilizes (after about 2 hours) before performing ② operation.
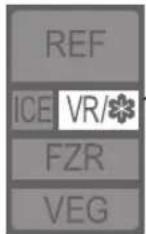
Usable in the versa compartment.

Store food in the versa compartment and touch


Touch

( Setting complete ) is displayed, the blue light at the top left corner of the icon lights up, and then the setting is finished.


is touched, the setting is canceled.
- Supercool freezing finishes automatically after about 3 to 12 hours. (The time varies depending on the amount, temperature and type of food.) After supercool freezing finishes, the food is stored with Soft-Freezing. (Meat, fish, etc. can be stored for 2 to 3 weeks.)
-
If you want to store the food for a long time, move it to the freezer compartment after supercool freezing has finished. (Meat, fi sh, etc. can be stored for about 1 month.)
-
When a display other than ☐ turns off during supercool freezing, VR/ lights up.
- The door of the versa compartment can be opened and closed even during supercool freezing.
- You can use supercool freezing even when other foods are still inside.
- Supercool freezing cannot be performed during Power Save Mode or the freezing setting.
- Even after supercool freezing has finished, the food may not be completely frozen. (With supercool freezing and Soft-Freezing, food is frozen at about -7°C, so it takes about 24 hours for the food to freeze completely.)
- When adding foods to be stored, refrain from opening the doors often.
- Supercool freezing may not be possible or the degree of freezing or freezer burn may vary depending on the food type, cooking method, storage arrangement (stacking, storage location), the amount of food, and the storage time.
- Depending on how much sugar, salt, moisture, or fat the food contains, freezing may not be possible or the food may harden when frozen (cannot be cut immediately with a kitchen knife).
- If the food has frozen too hard, leave it for about 5 to 15 minutes at room temperature and you should be able to cut it with a kitchen knife.
- Adjust the temperature according to how the food is frozen. ▶ Pages 22 - 23
Note
Tips for Supercool Freezing Soft-Freezing
Take it out and cook immediately!
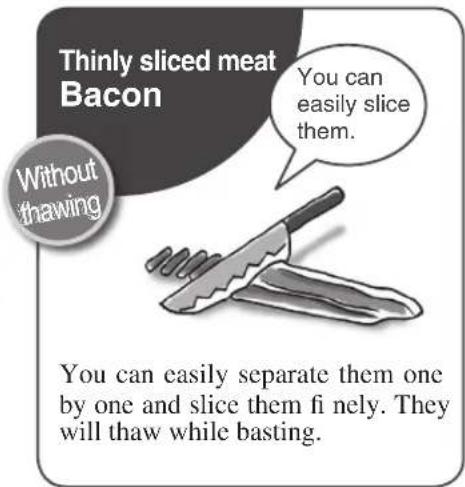
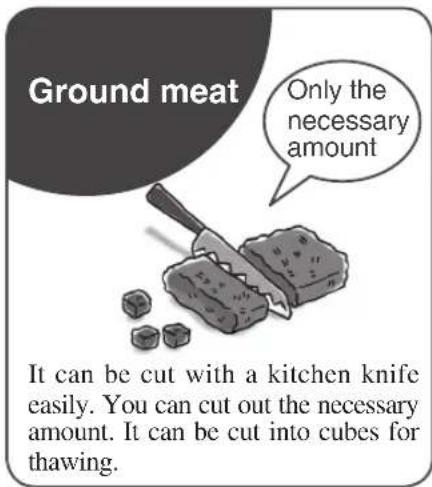
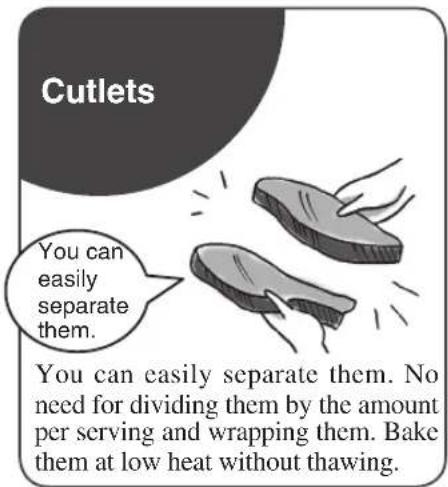
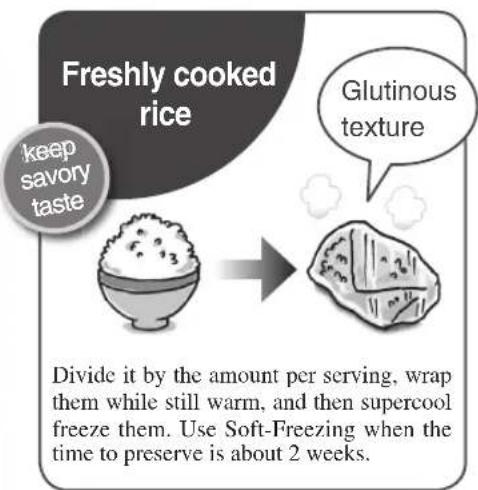
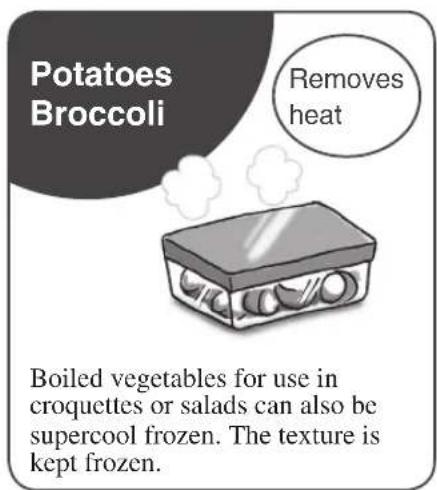
Supercool freeze to savory taste!
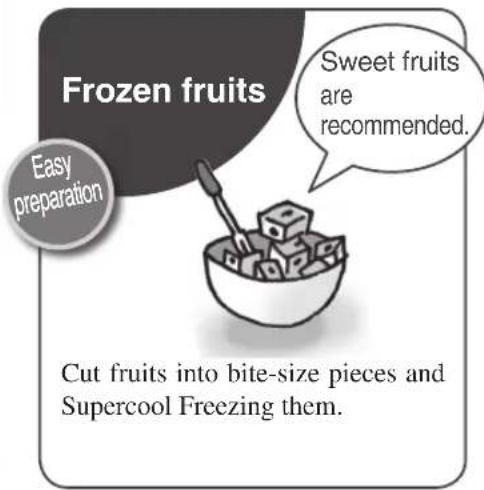
Easy dessert recipe using fruits!
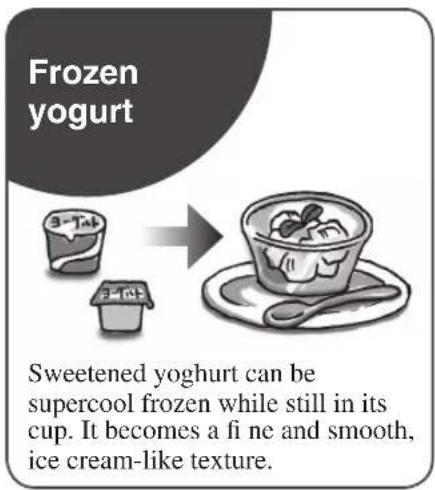
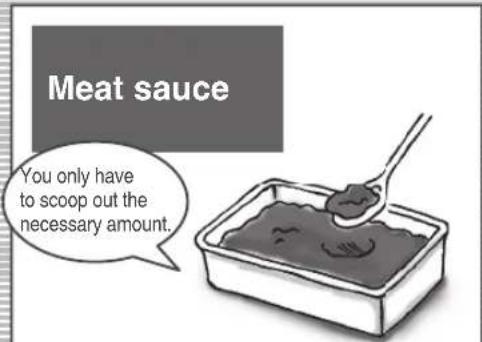
Supercool freeze in storage containers. Scoop out only the necessary amount and dress the pasta with it to make a meat sauce pasta.
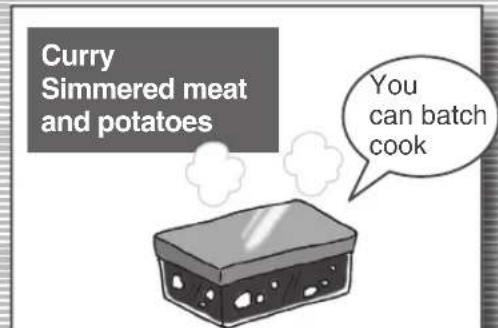
Leftover curry and simmered meat and potatoes in storage containers can be supercool frozen while still hot. Even food containing potatoes can be stored without losing its taste.
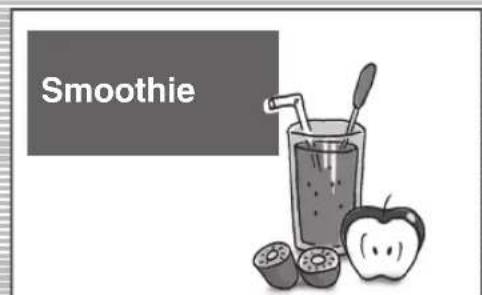
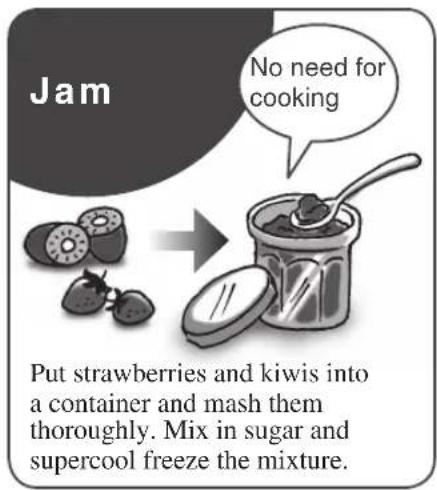
Cut apple into large bite-size pieces, and kiwi into circular slices. Supercool freeze them. Put the supercool frozen apple and kiwi into a blender with milk and some honey.
Tips for Supercool Freezing
① Put foods at the same time.
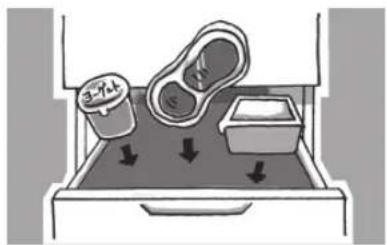
natural_image
Illustration of a shoe being inserted into a drawer with arrows indicating flow (no text or symbols)If more food is added afterward, the supercool freezing may not work.
We recommend that hot food be separated from the frozen food and placed at the front.
● The hot food may touch and thaw the frozen food.
- If hot food and food below room temperature are placed inside at the same time, priority is given to cooling the hot food.
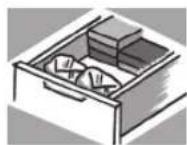
② Lay the food out fl at on top in the versa compartment.
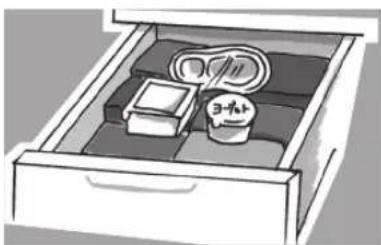
natural_image
Illustration of a drawer containing a tray with items, one labeled '3-Fax' (no other text or symbols)The infrared sensor measures the temperature of food from the top of the versa
compartment.
Arrange the food in a way that makes it easy for the
sensor to measure the temperature.
Food not suitable for Supercool Freezing
● Food that has already thawed once
The texture and quality cannot be guaranteed.
● Food that cannot be frozen
(Konjac (devil's tongue), tofu, milk, raw eggs, etc.) Preservation of the pre-freezing texture and quality cannot be guaranteed.
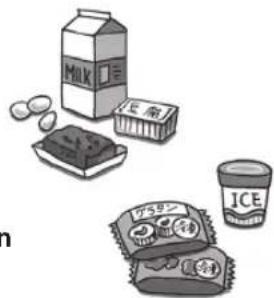
- For preserving groceries like frozen foods and ice cream.
Store them in the freezer compartment.
natural_image
Illustration of various food items including milk carton, ice cream, and instant noodles (no text or symbols)
Do not store food that is hotter than 80^ C.
If food is too hot, it may deform nearby containers. Also, when food is too hot to hold with your bare hands, be very careful not to burn yourself. (Freshly cooked rice is about 70^ C.)
- When Soft-Freezing after freezing, or freezing after Soft-Freezing, use the food within a short period of time (about 1 to 2 weeks).
- After supercool freezing has finished, if you want to store the food for a long time, move it to the freezer compartment quickly.
- When fruit is thawed it does not return to its original condition. Eat frozen fruit without thawing it.
- If fruit is stored for more than a week with Soft-Freezing, its taste may change. To enjoy the fresh texture, we recommend eating within 2 to 3 days.
- It can be cut 2 to 5 hours after transferring from freezing to Soft-Freezing.
- Avoid using aluminum foil or paper wrapping, because it interferes with accurate measurement of the food temperature.
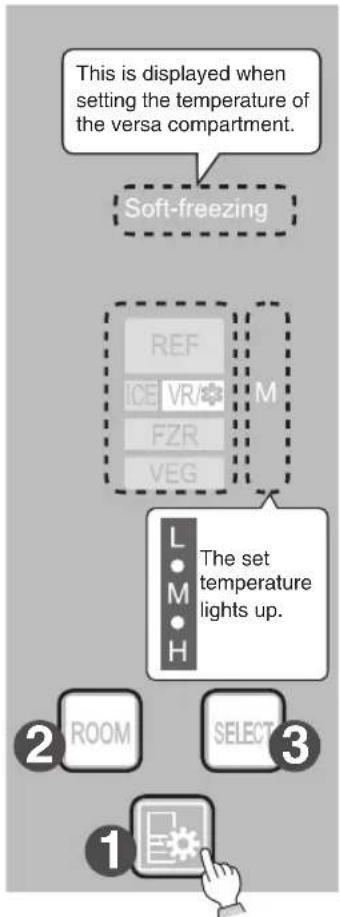
Change the temperature of each compartment
The temperature of each compartment can be adjusted according to the conditions of use.
- Touch to light up
- Initial condition (at the time of purchase): refrigerator, freezer, and vegetable compartments ... "M," versa compartment ... "Soft-Freezing/M"
flowchart
graph TD
    A["Soft-freezing"] --> B["REF"]
    B --> C["ICE VR"]
    C --> D["FZR"]
    D --> E["VEG"]
    E --> F["M"]
    F --> G["L M H"]
    G --> H["The set temperature lights up."]
    H --> I["ROOM"]
    H --> J["SELECT"]
    I --> K["1"]
    J --> K
    K --> L["2"]
    L --> M["3"]
* This is a display example when the versa compartment is set to "Soft-Freezing M".
2 Touch to light up the compartment display that you want to set the temperature for.
The compartment display changes each time the button is touched.

flowchart
graph LR
    REF --> ICE --> VR/*
    VR/* --> FZR --> VEG
    VEG -->|Feedback| REF
- VR/ Israel displayed at the time of purchase.
- In addition to the compartment display, the temperature settings of the compartments are displayed.
3 Repeatedly touch to set the temperature.
● The temperature setting of each compartment▶ Page 23
- The temperatures described here are measured in the lower centre of the refrigerator after the temperature has stabilized when the surrounding temperature is 30^ C and the doors are closed without any food inside. The temperature fluctuates with factors such as food storage conditions and how often the doors are opened and closed.
- Before and after defrosting, the temperature inside the refrigerator may drop or rise temporarily.
- If food in the refrigerator compartment freezes in the following kinds of situations, set the refrigerator compartment temperature on M to L
- When the temperature setting of the compartments is H
- In winter or at other times when the surrounding temperature is 5^ or less
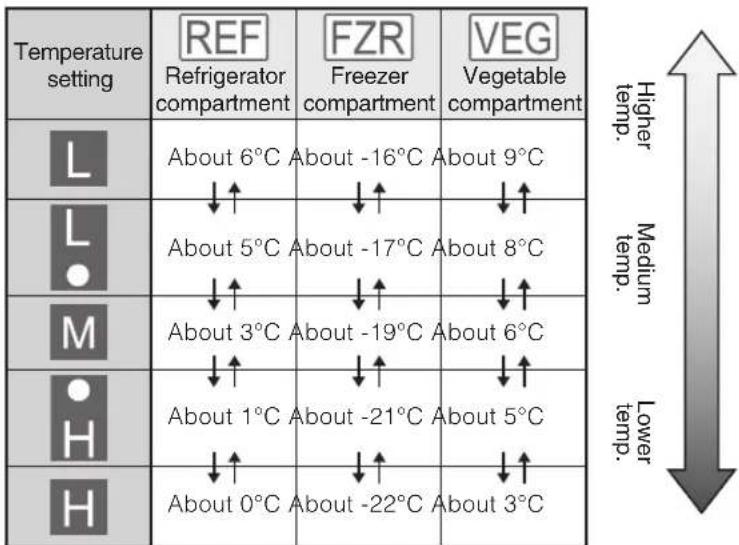
■ The temperature settings for the refrigerator, freezer, and vegetable compartments
The display changes each time the icon is touched and temperature can be set to 5 different levels.
other
| Temperature setting | REF Refrigerator compartment | FZR Freezer compartment | VEG Vegetable compartment | |---|---|---|---| | L | About 6°C | About -16°C | About 9°C | | L· | ↓↑ | ↓↑ | ↓↑ | | M | About 5°C | About -17°C | About 8°C | | M | ↓↑ | ↓↑ | ↓↑ | | H | About 3°C | About -19°C | About 6°C | | H· | ↓↑ | ↓↑ | ↓↑ | | H | About 1°C | About -21°C | About 5°C | | H | ↓↑ | ↓↑ | ↓↑ | | H | About 0°C | About -22°C | About 3°C | Higher temp. : | Medium temp. : | Lower temp. :■ Ice making compartment settings
The display changes each time the icon is touched.
| Ice making setting | Application |
| ●When you want to make ice | |
| ●When not in use for a long time●For cleaning●When you want to use as a freezer compartment |
* Quick ice making cannot be set in the detail setting.
▶ Page 17
* The freezer compartment temperature is different from the freezing temperature of the versa compartment.
● To control the temperature more precisely ▶ Page 33
■ The temperature setting of the versa compartment
The display changes each time the button is touched and temperature can be set to 6 different levels.
| Temperature setting | Versa compartment | Application | |
| Soft-freezing |  | About -5°C | For frozen food that is too hard to cutStore food with a high moisture content onL.Boiled vegetablesLarge blocks of low-fat meat 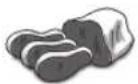 |
 | About -7°C | The optimum temperature for Supercool FreezingThe food is easy to cut even when frozen.Can be frozen in its package. 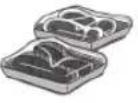 | |
 | About -9°C | For food that is diffi cult to freezeStore food that has a high salt or sugar content onH.Food pickled in soy sauce or misoCod roc  | |
| Normal freezing | 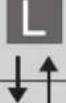 | About -12°C | For preserving food containing a lot of salt or sugarEnjoy the texture of the food.  Ice cream or frozen food that was purchased cannot be stored in modesLorM Ice cream or frozen food that was purchased cannot be stored in modesLorM |
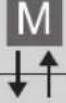 | About -15°C | For preserving food that was frozen at home 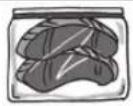 | |
 | About -18°C | For preserving frozen food and ice cream that were purchasedPreserves ice cream at the optimum hardness so that it is easy to eat. 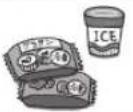 | |
* The freezer compartment temperature is different from the freezing temperature of the versa compartment.
* After changing from freezing to Soft-Freezing, it takes some time for the temperature inside the refrigerator to stabilize (about 2 hours).
* If you touch the setting will be changed to either Soft-Freezing or freezing. M ▶ Page 18
● To control the temperature more precisely ▶ Page 33
Set Power Save Mode
This function reduces freezing capability of the set compartment for the purpose of power saving.
- Can be set for the ice making compartment and the versa compartment.
- If the ice making compartment is set to Power Save Mode, it is automatically set to "stop ice making." (Ice cannot be stored.) Empty the water from the water tank as well as the water and ice from the ice tray and the ice storage box, and then select Power Save Mode (the operation in "When not in use for a long time"
② - ⑤ ▶ Page 30).
- Touch to light up
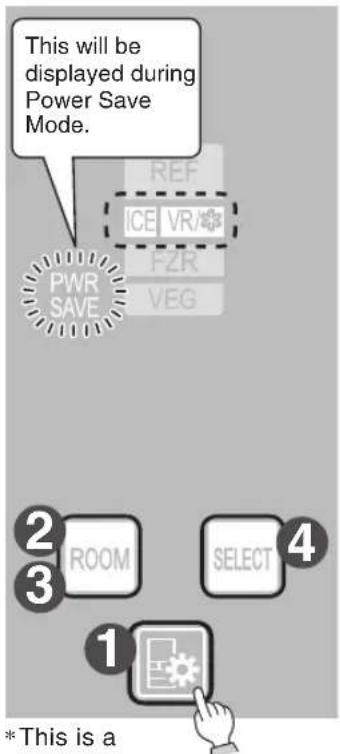
*This is a display example
1
Touch

2
Touch ROOM for about 3 seconds (until the buzzer sounds twice).
3
Touch to light up the compartment display that you want to set.
The lit compartment is set to Power Save Mode. The display changes each time the button is touched.

● represents a blinking display. This is the condition where Power Save Mode was canceled.
● Power Save Mode is canceled at the time of purchase.
4
If is touched, is changed from blinking to staying lit, and then the setting is fi nished(the buzzer sounds twice).
- If the ice making compartment is set to Power Save Mode, is displayed.
- If 30 seconds pass without any operation panel operations, all displays turn off without being set.
To cancel the setting
1
Select the versa compartment or ice making compartment, and then touch □.


- If the temperature setting of the compartment is adjusted, the setting will be canceled.
- The cancellation can also be performed if ICE VR/★ is selected after steps 1 and 2 of the setting procedure.
Food that can be stored in Power Save Mode
(Dry foods) Seaweeds, seasoning powder, coffee beans, nuts, dry noodles, (pasta, vermicellifine noodles, etc.) etc.
(Seasonings) Salt, sugar, spice powder, etc.
(Grains) Rice, wheat, potato starch, etc.
(Sweets) Dry confectioneries, chocolates, cookies, etc.
- In Power Save Mode, the freezing temperature is set to between about -10^ and 0^ .
- It is not suitable for storing ice, fresh food, frozen food, ice cream, and food frozen at home. Move food from the versa compartment to the freezer compartment in advance.
- Check the items in the compartment before setting.
• Temperature may be lower when the ambient temperature is low, such as during winter, or when the freezer compartment is set to high. - Do not store food higher than the ice storage box into the ice making compartment (because it may cause an ajar door, malfunction or damage).
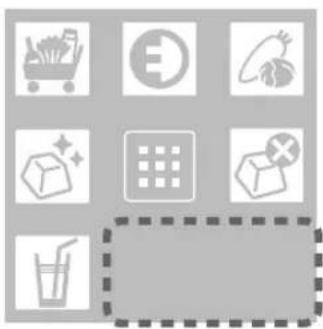
■ The operation panel display during Power Save Mode setting
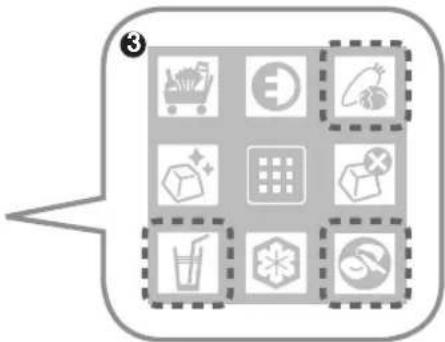
When Power Save Mode is set, there are icons that do not light up on the operation panel.
When an icon turns off, that means it is not operable. Cancel Power Save Mode before setting. X Page 24
natural_image
Grid of nine grayscale icons including shopping cart, food, cube, grid, and drink (no text or symbols)When the versa compartment is set to Power Save Mode
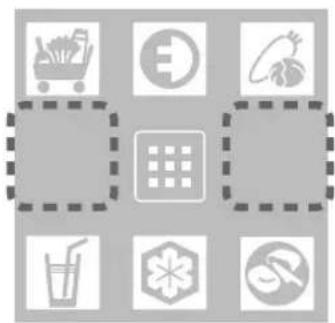
natural_image
Grid of nine grayscale icons including shopping cart, energy symbol, and food icons, arranged in a 2x2 grid with dashed borders (no text or labels)When the ice making compartment is set to Power Save Mode
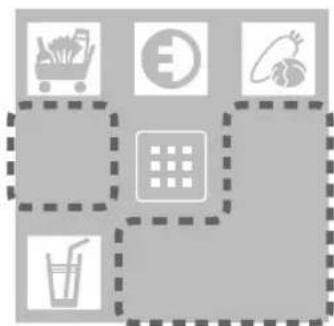
flowchart
graph TD
    A["Car with waste"] --> B["Menu with 'E'"]
    C["Drink with vegetables"] --> D["Drink with drink"]
    E["Drink with drink drop"] --> F["Drink with drink drop"]
When the versa compartment and the ice making compartment are set to Power Save Mode
Cleaning the Automatic Ice Maker
Clean the ice maker periodically to ensure that the ice is pure and delicious.
Prevents formation of water scale and mold.
* Do not use a dishwashing machine, because it may deform the parts.
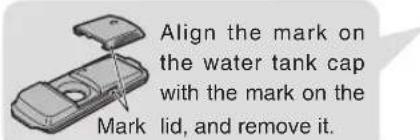
Water tank
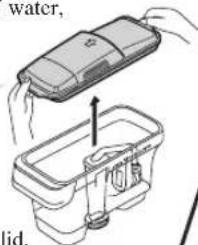
1 Remove the lid and wash it. (Upper temperature limit about 60°C)
* If mold forms easily in the certain types of water, clean about 2 or 3 times a week.
When using bleach to clean the water tank and lid, follow the product instructions.
Water supply pipe and tank holder
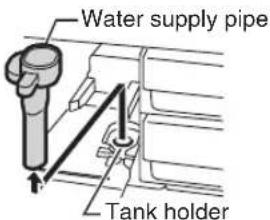
1 Pull out the water supply pipe and wipe the tank holder with a clean cloth.
- Do not pour water into the tank holder. Doing so may cause a malfunction.
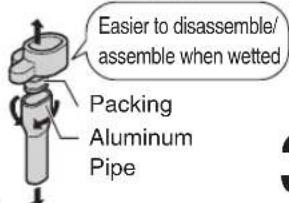
2 Disassemble and wash the parts.
- Rotate and remove the aluminum pipe. * White minerals or chlorine accumulation may be adhered to the parts, this is not abnormal. Wash off such substances and reuse the parts.
3 Follow the procedure in reverse to return the parts to their original positions.
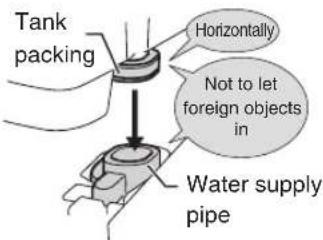
- Push in the water supply pipe fi rmly so that there is no unevenness. Using the water supply pipe while it is unevenly set may cause a malfunction. - If the water supply pipe is not installed, the food inside the refrigerator compartment may freeze
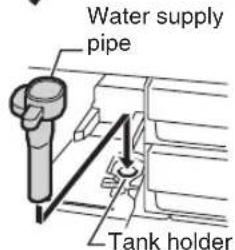
4 Check that there are no foreign objects between the water supply pipe and the tank packing or tank holder.
- If the parts are not inserted firmly or there are gaps due to foreign objects, it may cause abnormal noise or prevent ice from forming. It may also cause the water in the water tank or food in the refrigerator compartment to freeze.

1
2
3
4
5
6
Set to "STOP" ice making mode. ▶ Page 17
- Check that the blue light at the top left corner of the icon is on.
Open the door of the ice making compartment and unlock the ice tray lock lever.
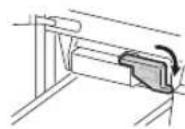
- When the ice tray lock lever is unlocked the display turns on.
- If the alarm sounds continuously when unlocking the ice tray lock lever, lock the lever, close the door, wait for the blinking ICE to turn off, and then perform operation 2.
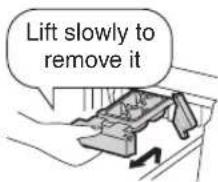
Pull the ice tray towards the front and then remove it.
● There is a risk of the water spilling. Pull out the tray slowly.
Empty the ice tray and wash it.
● After washing the tray, dry off any moisture.
Push in the ice tray until it makes a clicking sound, and then lock the ice tray lock lever.
- Check that is OK! If the lamp is on, check the setting status such as the position of the ice tray lock lever and the up and down orientation of the ice try. Ice tray lock lever is locked. Ice tray lock lever is released
Cancel "STOP" ice making mode. ▶ Page 17
once a
week
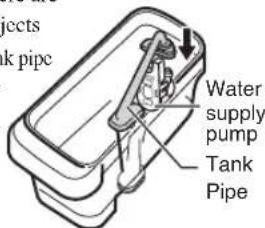
Tank pipe, water supply pump, optical catalyst and lead-cleaning filter
1
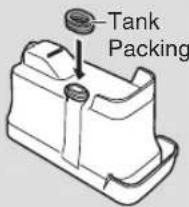
Pull out the tank packing (①) from the water tank.
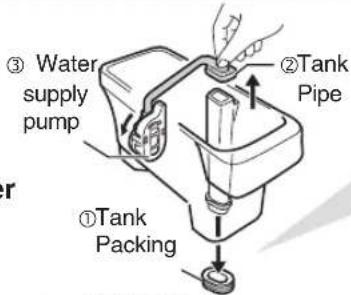
When setting, align the triangle mark on the tank with the triangle mark on the packing and fully put them together.
2
Pull out the tank pipe (②), and rotate and remove the water supply pump (③).
3
Disassemble the parts and wash them.
The impeller is made from a magnet. Wash it thoroughly to remove any foreign objects.
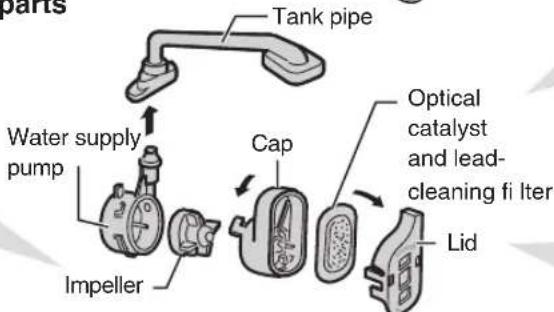
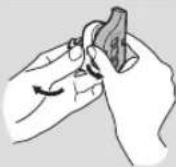
Do not use cleaners such as kitchen detergents (neutral), benzene or bleach to clean the optical catalyst and lead-cleaning fi Iter. ● Doing so may result in odours of the ice.
Remove the cap while opening the tab with your finger.
4
Return the water supply pump, tank pipe, tank packing to their original positions.
Procedures for returning the water supply pump and tank pipe to their original positions
Incorrect assembly may prevent ice from forming, or increase the operation noise.
Assembling the water supply pump Installing th
1 Fit the fi Iter into the cap.
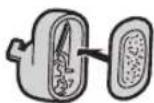
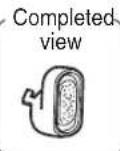
2 Fit the lid onto the cap.
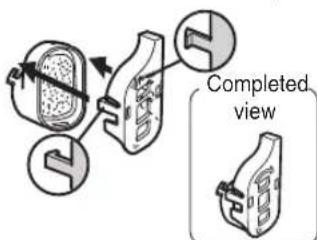
3 Attach the impeller onto the water supply pump.
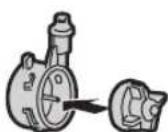
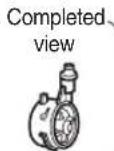
4 Rotate and fix the tab① of the cap into the projection (②) on the water supply pump.
* Make sure that the impeller is inside.
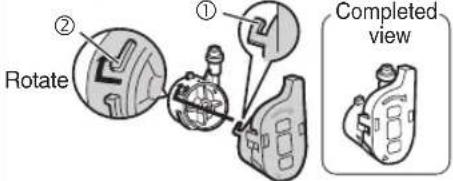
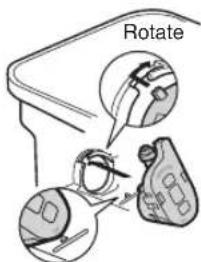
5 Rotate and set the water supply pump onto the water tank.
* Align the triangle mark on the bottom of the water tank with the triangle mark on the filter and push in while making sure that there is no gap.
ank pipe
1 Insert the tank pipe into the water tank.
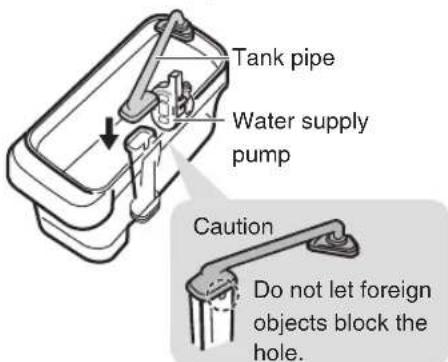
2 Connect the tank pipe to the water supply pump.
* Check that there are no foreign objects between the tank pipe and the water supply pump.
Note
- If the tank packing is not installed, it may cause the water in the water tank or food in the refrigerator compartment to freeze.
-
Replacement is not usually required for the optical catalyst and lead-cleaning filter. However, it may require replacement in the following cases.
-
When it clogs because something other than water was put in the tank
- When it is damaged
- When mold has formed
To purchase a new fi Iter, contact the retail store where you purchased the refrigerator.
* If mold forms easily in the certain types of water, clean about 2 or 3 times a week.
Removing and Cleaning the Parts
Stepp 1
Remove the power plug.
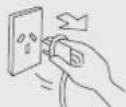
Warning Otherwise an electric shock or injury may be caused.
Wait at least 10 minutes before reinserting the power plug into the socket. If you insert the plug immediately, the mechanism will not function.
Stepp2
How to cleanBefore clea
● Wipe with a soft cloth soaked in warm water, or remove and rinse with water.
- When cleaning the operation panel, set it to the Child Safety Lock. ▶Page 31 (Wipe the operation panel with a soft, dry cloth.)
- For stubborn dirt, wipe using water mixed with a weak concentration of kitchen. In particular, be sure to wipe off oily dirt because leaving it may damage
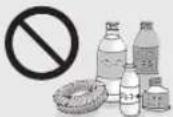
Do not use insecticide spray, alkaline or low alkaline kitchen powdered soap, alcohol, benzene, thinner, oil, acid, scrubbers, Doing so may cause the plastic parts (such as the door split, or damage or rust the doors or painted surfaces.
AUTO Shelf (Do not disassemble the AUTO Shelf, or use chemicals such as grease to clean it. Doing so may cause a malfunction.)
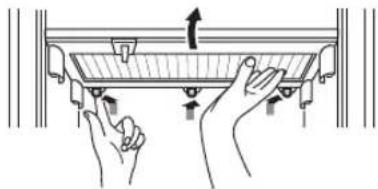
Tray removal
① Push up the tray while pulling the 3 white tabs on the rear of the tray to the front with your finger.
natural_image
Illustration of hands performing a mechanical press or lifting operation on a metal frame (no text or symbols visible)② Lift up the rear of the tray until the 3 front tabs and the 2 side tabs disengage.
There is a risk of the tray falling. Move it slowly.
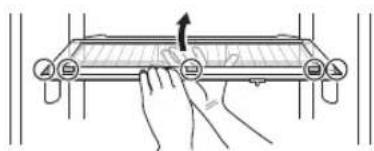
natural_image
Line drawing of a hand pressing down on a device panel with control buttons (no text or symbols)③ Pull out with both hands.
Shelf removal
Remove the tray before performing this.
① Move the lever to the right end.
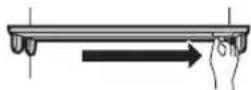
② Strongly push up each support, one by one. (4 locations.) (A clicking sound is made when the support disengages.)
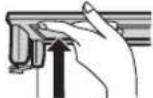
If the supports are firmly set and difficult to disengage, tilt the inner tabs to the inner side.
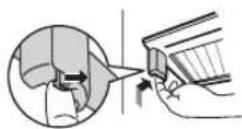
③ Remove from the refrigerator.
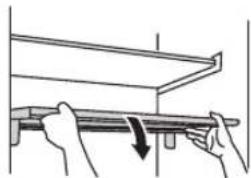
natural_image
Illustration of hands using a tool to lift a wall-mounted object (no text or symbols visible)Shelf installation
Remove the tray before performing this.
① Make sure that the lever is on the right side.
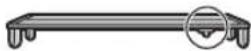
② Make sure that the 4 metal stoppers are fitted, and place the shelf lightly so that the 4 supports are aligned with the 4 metal stoppers.
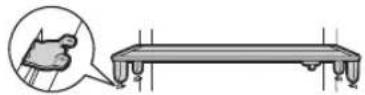
③ Push in each of the 4 supports in turn from above. (A clicking sound is made.)
④ Move the lever to the left and right and check that the AUTO Shelf is kept level when moved up and down. (If the shelf is not kept level, remove the AUTO Shelf and repeat steps ① to ④.)
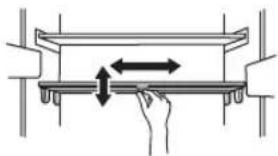
natural_image
Diagram showing a hand pressing a horizontal bar with bidirectional arrows indicating motion (no text or symbols)Two-way flexishelf
Push in and lift up.
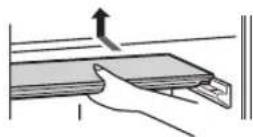
Slide chilled case and small item case
① Fully pull out the case.
② Lift out to the front.
flowchart
graph LR
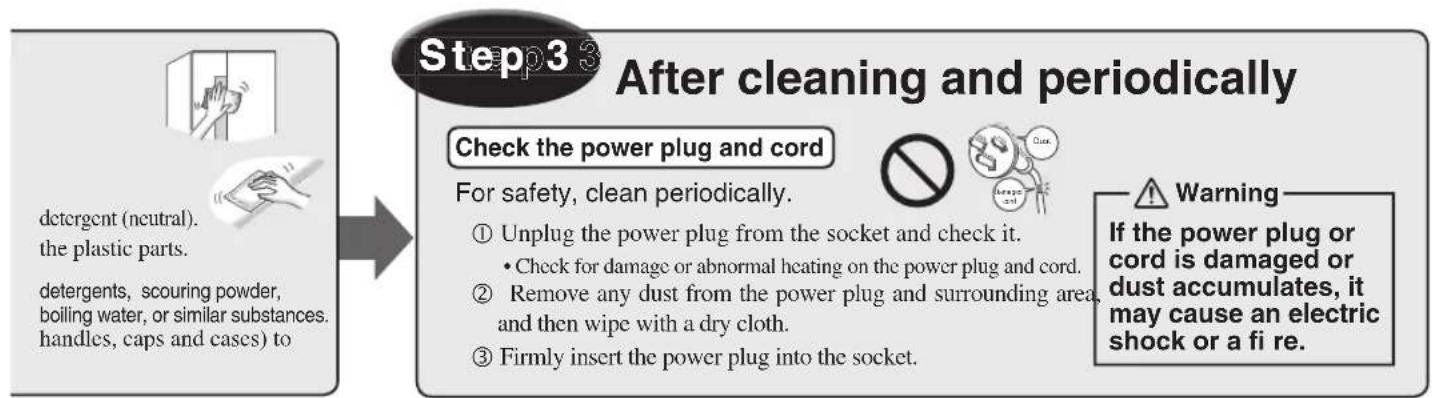
    A["detergent (neutral). the plastic parts. detergents, scouring powder, boiling water, or similar substances. handles, caps and cases) to"] --> B["Step 3 After cleaning and periodically"]
    B --> C["Check the power plug and cord For safety, clean periodically. ① Unplug the power plug from the socket and check it. • Check for damage or abnormal heating on the power plug and cord. ② Remove any dust from the power plug and surrounding area, and then wipe with a dry cloth. ③ Firmly insert the power plug into the socket."]
    B --> D["Warning: If the power plug or cord is damaged or dust accumulates, it may cause an electric shock or a fi re."]
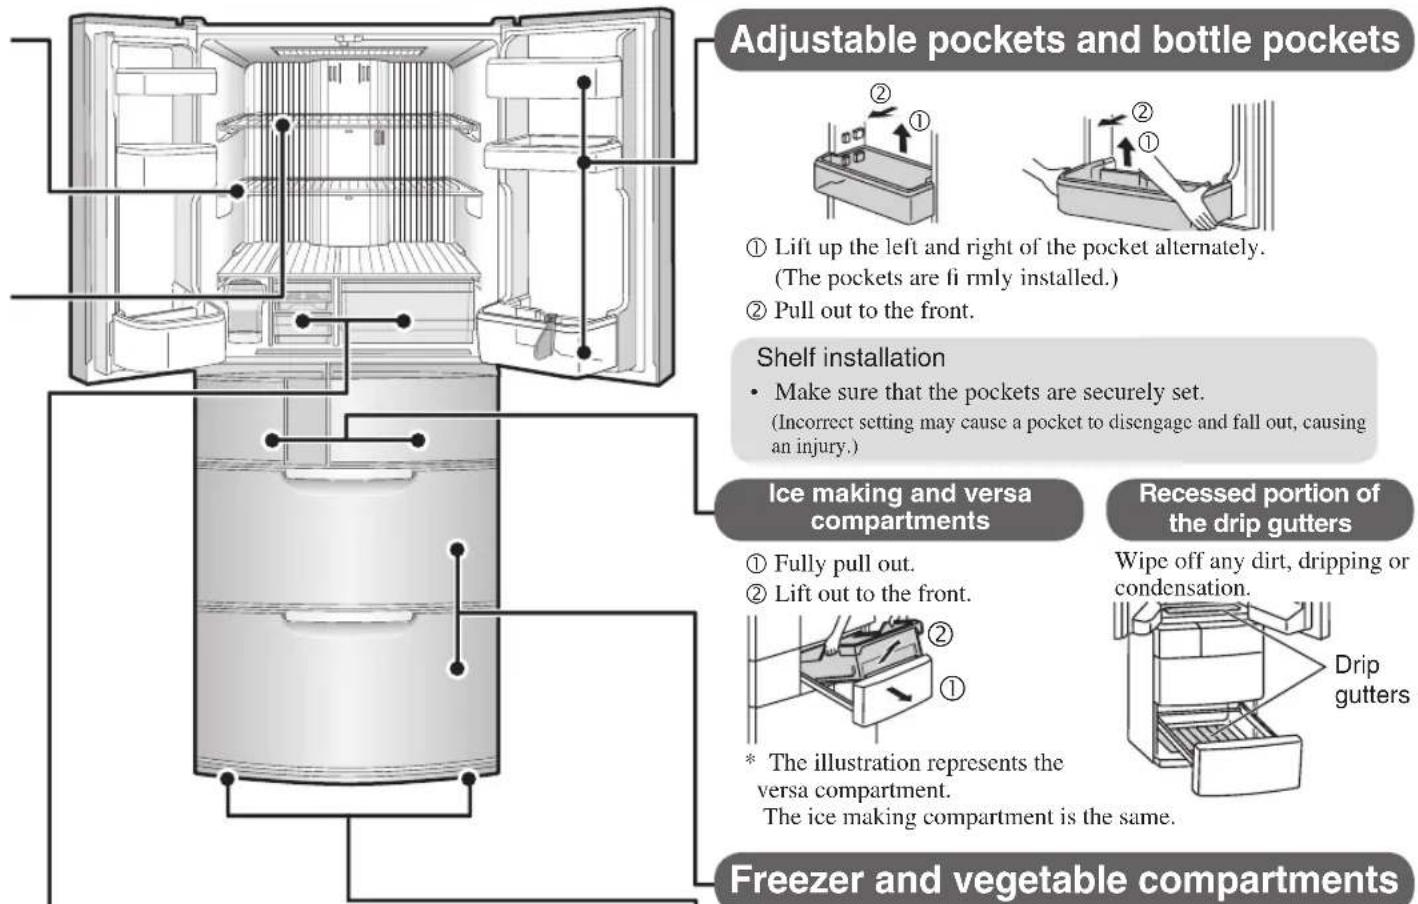
Refrigerator rear side and floor
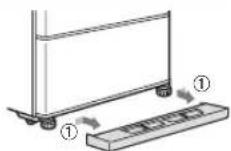
① Remove the adjustable support cover.
② Turn the adjustable supports to raise them from the floor, and pull out the refrigerator. (We recommend laying out protective material on the floor to prevent the floor from being damaged. Also, be careful not to injure yourself.)
③ Remove the dust from the rear panels, walls and floor, and wipe off any dirt.
(These areas are prone to buildup of dust and black dirt due to air convection. Periodical cleaning will also improve power efficiency.)
④ Check for water dripping on the floor.

Caution
Do not put your hands under the refrigerator. It may cause injury.
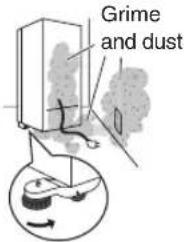
Adjustable pockets and bottle pockets
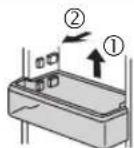
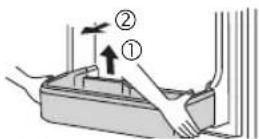
① Lift up the left and right of the pocket alternately. (The pockets are firmly installed.)
② Pull out to the front.
Shelf installation
- Make sure that the pockets are securely set. (Incorrect setting may cause a pocket to disengage and fall out, causing an injury.)
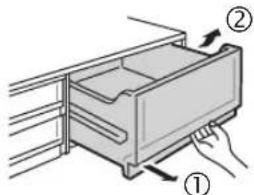
Ice making and versa compartments
① Fully pull out.
② Lift out to the front.
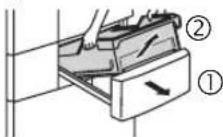
* The illustration represents the versa compartment.
The ice making compartment is the same.
Recessed portion of the drip gutters
Wipe off any dirt, dripping or condensation.
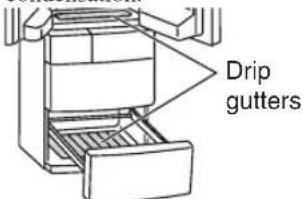
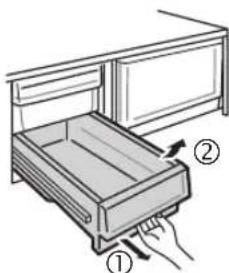
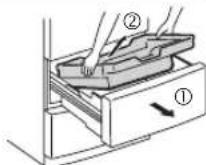
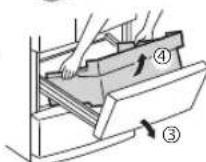
Freezer and vegetable compartments
① Fully pull out the door.
② Lift the upper case out to the front.
* The illustration represents the freezer compartment.
The vegetable compartment is the same.
③ Pull out while slightly lifting up the door, and then tilt.
④ Lift the lower case out to the front.
Adjustable support cover
① Push the left and right sides of the support covers inward alternately, and pull the support covers to the front to remove them.
A power outage occurred
- Minimize the frequency of opening the doors, and avoid adding more food.
● Operation panel settings other than the temperature settings may change. Check the settings. (Child Safety Lock, etc.)
To move the refrigerator or change its orientation
① Remove the adjustable support cover, and then rotate and raise the adjustable supports. ▶ Page 7
② Lay protective material under the casters and rear supports.
③ Move the refrigerator in the forward and backward directions.
* Dragging in any direction other than forward and backward may damage the floor.
When not using the refrigerator for a long time

t to the "STOP" ice making mode. ▶ Page 17
- Check that the blue light at the top left corner of the icon is on.
2 Remove the water tank and empty the water.
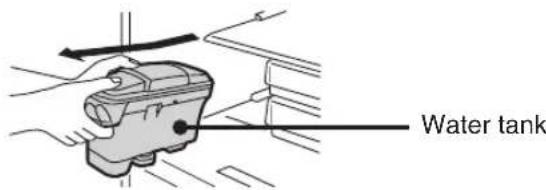
③ Remove the ice tray and empty the water and ice.
- For details on removal, see the page that describes the cleaning methods. ▶ Page 26
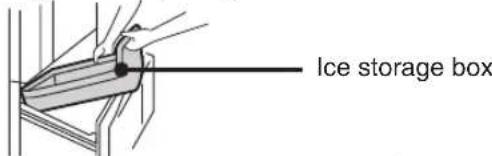
④ Remove the ice storage box and empty the water and ice.
- Do not dispose of the soundproof mat.
⑤ Wash the water tank (water supply pump, tank pipe, optical catalyst and lead-cleaning filter), water supply pipe, ice storage box, soundproof mat, ice tray and ice server, dry them completely, and then return them to their original positions. ▶ Pages 26 - 27
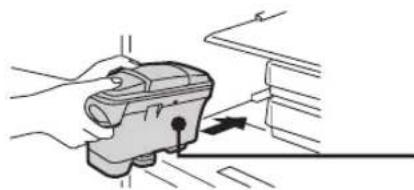
- If the water tank is not returned to its original position, the food inside the refrigerator compartment may freeze.
natural_image
Illustration of a hand holding a handheld device with a circular button, no text or symbols presentReturn the water tank to its original position
⑥ Unplug the power plug, clean the interior of the refrigerator, and open the doors for 2 to 3 days to dry the inside.
* If the refrigerator is not dried sufficiently, it may cause mold, odours, or refrigerant (gas) leaks due to condenser corrosion.
Note
- Wash the water tank, water supply pipe and ice tray before making ice for the first time, or if you have not made ice for more than a week. Odours or dust may be adhered to the parts.
To transport the refrigerator
① Empty any water or ice from the water tank and ice tray. ▶ Pages 26 and 30
② Wear protective gear (gloves).
③ Remove the adjustable support cover, and then rotate and raise the adjustable supports. ▶ Page 7
④ Remove the power plug
⑤ Lay towels under the drainage port and the lower rear edge of the refrigerator, and position a container or tray with a height of about 3 cm on the towels to collect the water.
*The towels prevent floor damage, and water from being spilled on the floor.
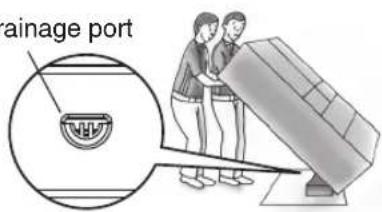
⑥ Tilt the refrigerator slowly to the rear by about 30 degrees, and drain the water from the evaporation tray via the drainage port on the lower rear side. (The evaporation tray is not visible from the outside.)
* Because the refrigerator is heavy, the work must be performed by at least 2 people.
* The work must not be performed by small children or people who are not capable of doing heavy work. Ask a specialist transportation company.
7 2 or more people should hold the hand-holds on the lower inside of the front and the upper side of the rear, and carry the refrigerator slowly.
- Do not lay down the refrigerator on its side. (The compressor may be damaged.)
Drainage port
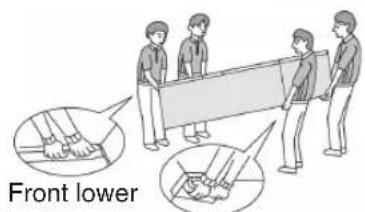
Front lower inside
Rear upper side
When the transportation time is long, for example when moving house
- Frost from the condenser inside the freezer compartment will melt, and may spill water when the refrigerator is transported. It may take 1 day to defrost after unplugging the power plug.
Warning
Do not damage the refrigerant circuit, because it contains a combustible refrigerant. If refrigerant leaks, it may accumulate and catch fi re or explode.
To prevent accidental button operation (Child Safety Lock)
Locks the operation panel to prevent accidental icon operation by children.
① Touch for about five seconds or more when the door is closed (until the buzzer sounds twice).

lights up when the setting is fi nished.
- Setting cannot be changed during Child Safety Lock.
To cancel
① Again, touch for about fi ve seconds when the door is closed (until the buzzer sounds twice).

goes off when the setting is canceled.
When the mO mark blinks rapidly (about 5 times per second)
An inspection is required. Contact the retail store where you purchased the refrigerator.
Other Issues (Continued)
To reset settings
To return each setting to their initial conditions (at the time of purchase), for example if you have forgotten the settings.
① Touch to light up an icon.
② Touch for about 10 seconds (until the buzzer sounds twice).
The following settings will be canceled.
- Cool drinks quickly

- Quick ice making

- Energy Saving Mode

• Rapid cool bulk shopping

- Supercool Freezing

- Power Save Mode

● The temperature setting of the versa compartment (freezing and Soft-Freezing) does not change.
● The setting for "stop ice making" will not be canceled.
When the door alarm sounds and the interior light of the refrigerator compartment blinks
The door alarm sounds when either door is open for 1 minute or longer.
When a door is open for 4 minutes or longer, the interior light of the refrigerator compartment blinks.
The number of times the door alarm sounds and the action of the interior light are as follows depending on how long the door has been left open.
Example:
When the doors of refrigerator compartment and ice making
compartment are open
| Time for which the door left open | 1 minute 2 | minutes 3 minutes | 4 minutes | 5 minutes or longer | 60 minutes or longer | |
| Alarm | 2 beeps | 3 beeps | 4 beeps | Continuous long beeps | Continuous short beeps | |
| Interior light | On Blinks twice per minute Off | |||||
| Compartment display area | The display for the compartment whose door is open blinks in time with the door alarm sound. | |||||
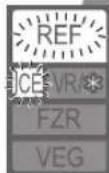
Blinks in time with the door alarm sound
Compartment display area
- Check that the doors are not left ajar or do not have any food trapped (the packing, the back of the drawer cases). (Check at least once a month.)
● All doors have an opening and closing sensor. - If the door is kept open for 60 minutes, the interior light turns off.
When the alarm cannot be turned off
Press 📋 for about 5 seconds to stop the alarm. Check if the doors are closed. An inspection is required when there is no error state. Contact the retail store where you purchased the refrigerator.

When this icon lights up
When D lights up, the refrigerator is in demonstration mode. The refrigerator does not cool in this mode. Contact the retail store where you purchased the refrigerator, or cancel the demonstration operation by the following methods.
To cancel the demonstration mode
① Touch to light up an icon.
② Keep the doors of the versa compartment open.
3 Press 📄, 🌐, and 📋 at the same time for about five seconds (until the buzzer sounds twice).
④ Check that D is turned off.
● The demonstration mode was not canceled if it lights up.
To control the temperature more precisely (temperature fi ne adjustment mode)
The temperature can be set to 19 different levels for the refrigerator compartment, freezer compartment, or versa compartment (with freezing setting), while it can be set to 5 different levels for versa compartment (Soft-Freezing).
- When temperature fi ne adjustment mode is set, the compartment display blinks about every 10 seconds.
■ Setting the temperature fi ne adjustment mode
① Touch

② Touch for about 3 seconds or more
(until the buzzer sounds twice).
To cancel
The same operation as above.
- If the setting is reset, it will be canceled.
■ Performing the temperature fi ne adjustment
Example: To set the refrigerator compartment lower by 1.2^ C than the low setting (when the setting is refrigerator compartment 5)
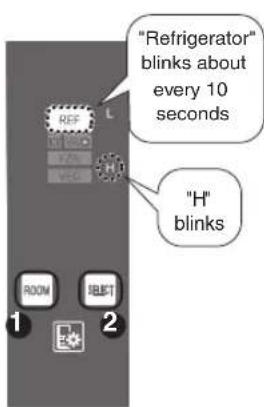
① Touch to select the compartment to perform temperature fine adjustment.
② Repeatedly touch SMO perform temperature fi ne adjustment.
* The values on the right are approximate. The temperature may differ from the values on the right, depending on factors such as food storage conditions and how often the doors are opened. ◦ represents a blinking display.
| Temperature setting | Versa compartment (Soft-Freezing setting) | |
| 1 | About -5°C | |
| 2 | About -6°C | |
| 3 | About -7°C | |
| 4 | About -8°C | |
| 5 | About -9°C |
| Temperature setting | Refrigerator/freezer compartments | Versa compartment (Freezing setting) | |||
| 1 |  | Low setting►Page 23 | About -12°C►Page 23 | ||
| 2 | 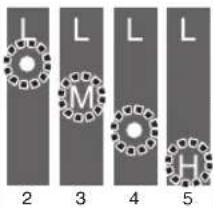 | About 0.3°C lower than “L” | About 2.4°C higher than “M” | ||
| 3 | About 0.6°C lower than “L” | About 2.1°C higher than “M” | |||
| 4 | About 0.9°C lower than “L” | About 1.8°C higher than “M” | |||
| 5 | About 1.2°C lower than “L” | About 1.5°C higher than “M” | |||
| 6 |  | Low medium setting►Page 23 | About 1.2°C higher than “M” | ||
| 7 | 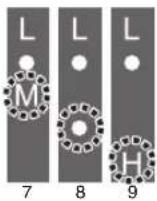 | About 0.9°C higher than “M” | About 0.9°C higher than “M” | ||
| 8 | About 0.6°C higher than “M” | About 0.6°C higher than “M” | |||
| 9 | About 0.3°C higher than “M” | About 0.3°C higher than “M” | |||
| 10 |  | Medium setting►Page 23 | About -15°C►Page 23 | ||
| 11 | 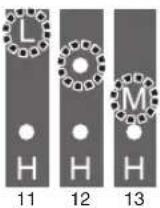 | About 0.3°C lower than “M” | About 0.3°C lower than “M” | ||
| 12 | About 0.6°C lower than “M” | About 0.6°C lower than “M” | |||
| 13 | About 0.9°C lower than “M” | About 0.9°C lower than “M” | |||
| 14 |  | Medium high setting►Page 23 | About 1.2°C lower than “M” | ||
| 15 | About 1.2°C higher than “H” | About 1.5°C lower than “M” | |||
| 16 | 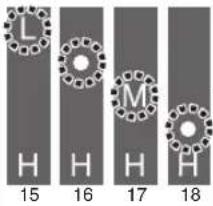 | About 0.9°C higher than “H” | About 1.8°C lower than “M” | ||
| 17 | About 0.6°C higher than “H” | About 2.1°C lower than “M” | |||
| 18 | About 0.3°C higher than “H” | About 2.4°C lower than “M” | |||
| 19 |  | High setting►Page 23 | About -18°C►Page 23 | ||
Specifications
This appliance is designed for use in Australia and New Zealand only and cannot be used in any other country. No servicing is available outside of Australia and New Zealand.
| Parts Quantity | ||
| Refrigerator compartment | AUTO shelf | 1 |
| Two-way fl exishelf | 1 | |
| Slide chilled case | 1 | |
| Water tank (with optical catalyst and lead-cleaning fi iter) | 1 | |
| Adjustable pocket (large) | 1 | |
| Adjustable pocket (short, large) | 1 | |
| Adjustable pocket (small) | 1 | |
| Adjustable pocket (short, small) | 1 | |
| Small item case (upper) | 1 | |
| Small item case (lower) | 1 | |
| Egg shelf | 1 | |
| Bottle pocket (large) | 1 | |
| Bottle pocket (small) | 1 | |
| Small item holder | 2 | |
| Ice making compartment | Ice tray | 1 |
| Ice storage box | 1 | |
| Soundproof mat | 1 | |
| Ice server | 1 | |
| versa compartment | Versa case | 1 |
| Aluminum tray | 1 | |
| Vegetable compartment | Vegetable case | 1 |
| Slide case | 1 | |
| Freezer compartment | Freezing case (upper) | 1 |
| Freezing case (lower) | 1 | |
| Adjustable support cover | 1 |
| Food storage compartment type | Gross volume (litres) | Storage volume (litres) | |
| Refrigerator compartment | Fresh food 252 228 | ||
| Ice making compartment | Short term frozen food | 27 | 4 |
| Versa compartment | Short term frozen food | 48 | 17 |
| Freezer compartment | Freezer 118 59 | ||
| Vegetable compartment | Special (unfrozen food) | 129 | 71 |
| Total volume 574 379 | |||
Troubleshooting
First, check the items described in this section. If the problem persists, contact the retail store where you purchased the refrigerator as soon as possible.
■ Frequently asked questions in the initial period and in summer
■ Questions about operation and handling
The refrigerator does not cool at all!
- The refrigerator takes time to cool when you first start using it. In summer, it may take up to 24 hours for the inside to be fully cooled.
● Has on the operation panel turned on?
→ Demonstration operation: ▶ Page 32 - Is the power plug disconnected or has the circuit breaker tripped?
The outer walls heat up!
- The outer walls heat up signifi cantly (to about 50 to 60°C) immediately after installation and in summer. This is because the heat discharging and condensation prevention pipes are located on the sides and the top of the refrigerator. They are required for cooling and the heat is not an abnormality.
● The refrigerator compartment rotating partition also has a
condensation prevention heater that heats up. ▶ Page 6 - A heat discharging fan is located under the refrigerator. Warm air may be discharged from here.
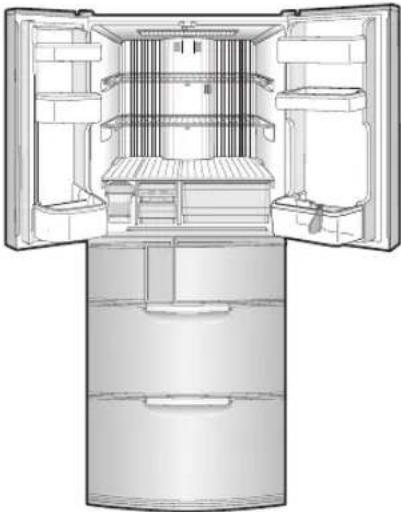
natural_image
Interior view of a refrigerator showing open doors, shelves, and internal compartments (no text or symbols visible)The operation panel turns off automatically!
- If 30 seconds pass without any operation panel button operations, displays turn off. ▶ Page 14
Smells the strong odour on the food or ice!
- Do you clean the water tank and the water supply pump once a week?
▶ Pages 26 - 27
- Have you placed food with strong odour inside the refrigerator without sealing in a container? ▶ Page 9
▶ Page 9
Cooling performance
| Problem | Check | Explanation and action |
| Food freezes in the refrigerator and vegetable compartments | 1 Is the temperature on the operation panel set to “H”? | Set the temperature to “M”. The temperature drops temporarily depending on the setting. ▶ Pages 22 - 23 |
| 2 Is food with a lot of moisture stored at the rear of the shelf? | Place drinks and food containing a lot of water, such as tofu, vegetables and fruit, at the front. | |
| 3 Is the surrounding temperature 5°C or less? | Freezing is likely to be prevented when the temperature settings of the refrigerator compartment and vegetable compartment are set to “L”. ▶ Pages 22 - 23 | |
| 4 Is the water supply pipe installed correctly? | When the installation is incorrect or a gap is caused by a foreign object, the cold air may flow in reverse and cause food in the refrigerator compartment to freeze. | |
| Food in the versa compartment melts | 1 Has enough time passed after temperature adjustment or installation? | The refrigerator takes time to cool completely. Wait at least 30 minutes before placing food inside. |
| 2 Is food stuck up in the upper area? | Leave a gap in the upper area so that the cold air can flow. | |
| 3 Did the hot food make contact with other foods? | Frozen food may thaw if it makes contact with hot food. | |
| 4 Did you set the supercool freezing after placing hot food inside? | set the supercool freezing after placing hot food inside. The food temperature will drop quickly. | |
| 5 Was ice cream or frozen food stored with the “FZR” “L” or “FZR” “M” setting? | Set to “FZR” “H”. ▶ Pages 22 - 23 | |
| 6 Is the versa compartment set to Power Save Mode? | Cancel Power Save Mode. ▶ Page 24 | |
| Does not cool wellNot much ice is madeIce melts | 1 Is “L” set as the temperature for the compartment? | Set the temperature to “M” or “H”. ▶ Pages 22 - 23 |
| 2 Has enough time passed after installation? | It takes 4 to 5 hours for the refrigerator to cool, and 24 hours or more in summer to fully cool. | |
| 3 Is heat discharging being blocked? Check if there is gap around the refrigerator and the refrigerator is not exposed to direct sunlight. | Check that the refrigerator is installed correctly. ▶ Page 6 | |
| 4 Is the flow of cold air being blocked? Are the doors being opened frequently, or left ajar? | Check the quantity of food inside and ajar door. | |
| 5 Is the ice making compartment or versa compartment set to Power Save Mode? | Cancel Power Save Mode. ▶ Page 24 |
Troubleshooting (Continued)
| Problem | Check | Explanation and action | |
| Ice making | Cannot make ice Water in the tank stays at the same level | Has enough time passed after installation? | It takes 4 to 5 hours after first starting operation for the refrigerator to cool, and 24 hours or more in summer to make ice. |
| Is the ice tray installed correctly? | Set the ice tray lock lever to the correct position and check the installation status of the ice tray. ▶ Page 26 | ||
| Are the water supply pump and tank pipe installed correctly onto the water tank? | Install them correctly onto the water tank. (In particular, ensure that the opening of the tank pipe inside the tank is installed firmly to the tank.) ▶ Page 27 | ||
| Is the water supply pipe installed correctly in the tank holder area? | When the installation is incorrect or a gap is caused by a foreign object, the cold air may flow in reverse and prevent ice from forming. ▶ Page 26 | ||
| Has food, the ice server, or other object been left in the ice storage box? | The ice storage box is judged to be full of ice. Remove food or other objects from the ice storage box. Also, spread the ice out fl at all the way to the front. | ||
| Is the ice making setting for the ice making compartment set to "STOP"? | Cancel the "STOP" ice making mode. ▶ Page 17 | ||
| Is the ice making compartment set to Power Save Mode? | Cancel Power Save Mode and then set the ice making compartment to "REG" or "QCK". ▶ Page 24 | ||
| Is there enough water in the water tank? Is the refrigerator tilted? | The number of ice cubes in one batch may be reduced. Pour water into the water tank. ▶ Page 13 | ||
| Ice is small or joined together | Has ice been stored inside the ice storage box for a long time? | If the ice is stored inside the ice storage box for a long time, ice cubes may join together or shrink (due to a phenomenon called sublimation). | |
| Is the ice making compartment set to Power Save Mode? | Cancel Power Save Mode. ▶ Page 24 | ||
| Supercool freezing | Supercool frozen food does not taste good | Did you set the Supercool Freezing? | Set the Supercool Freezing. ▶ Page 19 |
| Is the food that you want to supercool freeze placed in the top of the versa compartment, and not being overlapped by other food? | The food temperature is measured with the infrared sensor. Lay out the food for supercool freezing fl at and on top in the versa compartment. ▶ Page 21 | ||
| Has enough time passed after changing the versa compartment to "Soft-Freezing"? | Set to Soft-Freezing, and when the temperature has stabilized (after about 2 hours), perform supercool freezing. ▶ Page 19 | ||
| Door and operation panel | Doors open easily | Is a door making contact with food or case? Is too much food packed inside? | Store food so that the door does not make contact with objects when closed. |
| Doors do not close | Has food fallen behind a case in a drawer door, or is the power cord or another object trapped between the refrigerator and a door? | Remove any objects. Make sure that the door does not trap objects such as food, power cords or plastic bags. | |
| Is the refrigerator installed stably? Are the adjustable supports making contact with the floor? | Lower the adjustable supports to raise the front side slightly and make the doors easier to close. ▶ Page 7 | ||
| Door alarm sounds | Are any of the doors open? | Close the door. The alarm sounds at every minute after the door is opened, and after 4 minutes it sounds continuously. ▶ Page 32 | |
| Interior light turns off | Is the rotating partition of the refrigerator compartment open to the front? | If the alarm sounds even after closing the door, press the button for 5 seconds or more to stop it. An inspection is required. Contact the retail store where you purchased the refrigerator. | |
| Compartment display on the operation panel blinks | Check the position of the rotating partition while the doors are open. | ||
| The operation panel does not respond | Is | Cancel the Child Safety Lock. ▶ Page 31 | |
| Are the user's fingers or the operation panel wet or dirty? | Wipe off the moisture and dirt on the operation panel and fingers. | ||
| Are you wearing a band-aid on your finger or gloves during operation? | Touch the operation panel with your finger directly. | ||
| Door and operation panel | The operation panel does not respond (continued) | 4 Are you trying to operate the operation panel with the tip of your fi ngemail or a sharp object? | Touch the operation panel with your fi nger directly. |
| 5 Are you touching out of position? | Touch the centre of the icon. | ||
| 6 Are seals and tapes put on the operation panel? | Remove the seals and tapes. | ||
| Reacts without a touch | 1 Are there any towels, plastic bags, papers, etc. over the operation panel? | Remove the towel, plastic bag, paper, etc. | |
| Some icons do not light up | 1 Is the compartment set to Power Save Mode? | The icons that cannot be set during Power Save Mode are off. ▶ Page 25 | |
| Sound | Loud noises Annoying noise (These noises are normal) | 1 The noise gets louder suddenly or the tone changes. | Immediately after installation, when the weather is hot, when the doors are frequently opened and closed, during the operation of Rapid cool bulk shopping, and in similar situations, the refrigerator switches to high-speed operation and cools with high power. |
| 2 A rattling or squeaking sound is made sometimes (every 1 to 2 hours). | This is the sound of the automatic ice maker. Even when there is no water in the water tank, the automatic ice maker and pump make a sound about every 100 minutes. | ||
| 3 After turning on the power, a thumping or creaking sound may be heard in the ice making "STOP" mode (every 1 to 2 hours). | This is the sound of the automatic ice maker's operation check. The check is performed even in the "STOP" ice making mode. | ||
| 4 A whistling sound is made after closing a door. | This is the sound of the fan motor starting. | ||
| 5 A hissing, bubbling, or running water sound is made sometimes. | This is the sound of the refrigerant (gas) fl owing. | ||
| 6 A whipping or dripping sound is sometimes heard from inside the refrigerator after a door is opened. | This is the creaking sound as warm air enters and expands the plastic. | ||
| 7 A buzzing sound is made sometimes. | This is the operating sound of the damper as it adjusts the air fl ow. | ||
| 8 A low whirring sound is made after opening the freezer compartment door. | This is the sound of air blowing through the cooling fan. | ||
| Others | Condensation forms on the outer walls and inside the refrigerator | 1 Are the doors being opened frequently, or left ajar? | When moisture in the air cools, it forms frost or condensation. Even when a door is open only slightly, it can cause frost or condensation, or dripping onto the fl oor. |
| Frost forms in the freezer compartment | 2 Is the humidity high, for example is it raining? | Condensation may form temporarily. Wipe off with a dry cloth. Condensation may cause frost to form in Freezer compartment, please minimise the time that doors are kept open. | |
| Water drips onto the fl oor | |||
| Frost and condensation forms in the vegetable compartment | Depending on the amount and type of vegetables, the moisture from the vegetables may cause frost or condensation on the roof or the surface of the cases. When condensation forms, wipe it off with a dry cloth. If you care that, store vegetables in plastic wrap. | ||
| Water tank or water supply pipe freezes | 1 Are the water supply pipe and tank pipe installed fi rmly in the water tank? Is there a foreign object between the water tank and the water supply pipe? | When the installation is incorrect or a gap is caused by a foreign object, the cold air may fl ow in reverse and cause freezing. ▶ Page 26 | |
| 2 Has food, a plastic bag, or another object fallen behind the case in the ice making compartment or freezer compartment? | The cold air may fl ow in reverse and cause freezing. Remove any objects. | ||
| Water tank or water supply pipe is warm | This is because of the anti-freeze heater. It is not an abnormality. | ||
| Noise interferes with televisions or other devices | 1 Is the refrigerator installed near to an electronic device such as a television? | Install the refrigerator away from electronic devices such as televisions. | |
| 2 Is the power to the refrigerator supplied from a socket near the entry hole of the antenna cable? | We recommend using a separate power supply. When there is no grounded terminal on the plug, connect the grounding wire. | ||
Memo
Memo
■ This refrigerator uses fl ammable foaming gas for insulation.
Please deliver the unit to specialized industrial waste dealer when you do away it. Please follow the rules in your country.
■ WARNING - Do not use mechanical devices or other means to accelerate the defrosting process, other than those recommended by the manufacturer.
■ WARNING - Do not use electrical appliances inside the food storage compartments of the appliance, unless they are of the type recommended by the manufacturer.
■ WARNING - Just in case of having damaged the refrigerant circuit, do not use electric items or fi re equipments near by, and open the window to ventilate the room. And contact the retail store at which you purchased it or the following MITSUBISHI ELECTRIC SERVICE CENTRE.
■ The refrigerator contains fl ammable refrigerant (R600a: isobutane).
■ The refrigeration system behind and inside the refrigerator contains refrigerant.
Do not allow any sharp objects to come into contact with the refrigeration system.
■ Do not block the openings on the circumstances of the refrigerator.
■ The user manual should be handed over to any person who would use or handle the refrigerator whenever the refrigerator would be transferred to another location and delivered to a recycling plant.
■ The appliance is not intended for use by young children or infi rm persons without supervision.
■ Young children should be supervised to ensure that they do not play with the appliance.
- Do not store explosive substances such as aerosol cans with a fl ammable propellant in this appliance.
■ This appliance is intended to be used in household application only.
R600a Refrigerant Warning
- This appliance contains a small quantity of R600a refrigerant which is fl ammable.
- During transportation and installation, ensure that the tubing of the refrigerant circuit is not damaged.
- Leaking refrigerant can ignite and may damage the eyes.
- In the event any damage does occur, avoid exposure to open fires and any device which creates a spark. Disconnect the appliance from the mains power.
- Thoroughly ventilate the room in which the appliance is located for several minutes.
- Notify Mitsubishi Electric Australia Pty Ltd. for necessary action and advice.
- The room for installing the appliance must be at least 1 cubic metre per 8 grams of refrigerant. The refrigerant quantity contained in this appliance is noted on the Rating Label of the appliance.
- If your Mitsubishi Electric Refrigerator should require service, please contact Mitsubishi Electric Australia Pty Ltd see back page of this user manual for contact details.
NOTE: MITSUBISHI ELECTRIC AUSTRALIA PTY LTD. DO NOT ALLOW SERVICE TO THE REFRIGERATION CIRCUIT OF THIS APPLIANCE.

If an abnormality or malfunction occurs, stop operation immediately and contact the retail store where you purchased the refrigerator or a MITSUBISHI ELECTRIC SERVICE CENTRE or its service agent.
SOLE AGENT in Australia
MITSUBISHI ELECTRIC AUSTRALIA PTY LTD.
(Incorporated in New South Wales) ABN 58 001 215 792
348 Victoria Road, Rydalmere NSW 2116
For more information and support contact
www.mitsubishielectric.com.au
Call 1300 651 808
SOLE AGENT in New Zealand
BLACK DIAMOND TECHNOLOGIES LIMITED (BDT)
Wellington Offi ce (Head Offi ce)
1 Parliament Street, Lower Hutt, PO Box 30772, Lower Hutt 5040 Ph: (04) 560 9147, Fax: (04) 560 9133
Auckland Offi ce
Unit 1, 4 Walls Road, Penrose, PO Box 12726, Penrose, Auckland 1061 Ph: (09) 526 9347, Fax: (09) 526 9348
Christchurch Office
44 Halwyn Drive, Hornby, PO Box 16904, Hornby, Christchurch 8441 Ph: (03) 341 2837, Fax: (03) 341 2838
MITSUBISHI ELECTRIC CORPORATION
- MR-EX574X
- Function Overview
- Complicated controls
- become easy with a touch panel!
- Contents
- Safety Precautions
- Warning
- Caution
- Installation
- Leave space around the refrigerator.
- Do not install the refrigerator outdoors or in places exposed to water or excessive humidity.
- If the power cord is damaged, call our MITSUBISHI ELECTRIC SERVICE CENTRE for the replacement.
- Anchor the refrigerator to a strong wall or post to protect against damage during earthquakes.
- Use a dedicated outlet for the power supply that meets the rating specified on the rating label. (The rating label is located on the door-liner of the refrigerator compartment.)
- Insert the power plug with the cord facing down, and fully insert the prongs
- Power and power plug
- Remove the power plug before cleaning.
- Do not crush the power plug with the rear of the refrigerator.
- Do not use damaged cords or plugs, or loose sockets.
- Do not pull the cord when unplugging the power plug.
- Remove dust periodically from the power plug.
- Do not plug in or out the power plug with wet hands.
- Installation and transportation
- Malfunctions and long-term storage When Recycling
- Operation
- From Installation to Operation
- Installation
- Connect the power supply
- Install the refrigerator at:
- Use in hot spring areas
- The outside of the refrigerator and the rotating partition get hot.
- It takes time for cooling even after turning on the refrigerator.
- When making ice for the first time
- Adjustment and anchoring
- ● Preventing doors from being left ajar
- - Adjusting a tilted door or unevenness
- - If the door is still tilted after adjustment of the supports
- Adjustable support cover
- ● Installing the adjustable support cover
- The operation noise gets louder immediately after installation.
- Do not damage the refrigerant circuit (pipes) or drive screws into it.
- Prepare for earthquakes (for areas prone to earthquakes)
- Placing Food Inside
- Approximate temperature setting
- Refrigerator compartment
- About 0°C to 6°C
- Chilled compartment
- About -3°C to 3°C
- Wrap foods that have strong odour thoroughly before storage
- Food that transfers odours easily
- Food to which odours may easily be transferred
- Versa compartment
- Soft-Freezing: About -9°C to -5°C (Can be changed to freezing)
- Freezer compartment
- About -22°C to -16°C
- Vegetable compartment
- About 3°C to 9°C
- Adjustable pocket:
- Two-way flexishelf
- Adjustable pocket (small)
- AUTO Shelf
- Small item holder
- Bottle pocket (small)
- Rotating partition
- Interior light
- Air outlet
- ▶ Page 35
- Adjustable pocket (large)
- Chilled
- Egg
- compartment
- Slide chilled case
- Auto closer
- With the door of refrigerator room open at an angle of about 20 degrees or less, the door closes automatically.
- Ice Making Compartment
- (Automatic Ice Maker)
- Water tank cap
- Water tank lid
- Water tank—(about 1.2 L)
- Ice tray
- Ice making compartment label
- Water tank setting position line
- Water supply pipe
- Ice tray lock lever
- Soundproof mat
- Ice storage box
- Ice making precautions
- ▶ Page 17
- ▶ Pages 26 - 27
- 1
- Check that is not displayed.
- 2
- Remove the water tank from the refrigerator compartment.
- Water tank
- 3
- Slide the water tank cap and pour water into the water supply port up to the full position.
- Water supply port
- Full position
- Do not pour water above the full position.
- 4
- Close the water tank cap, return the water tank to its original position, and close the door of the refrigerator compartment.
- The ice making time for a single batch is about 2 hours.
- About the ice
- How to Use the Operation Panel
- Rapid Cool Bulk Shopping
- Keep Vegetables Moist
- Cool Drinks Quickly
- Set Energy Saving Mode (ECO MODE)
- ■ Check the power-saving condition.
- ECO GUIDE
- How can I increase the ECO level?
- Set Energy Saving Mode
- Set Power Save Mode
- Set the temperature relatively high
- Do not open the doors more than necessary, and close them as soon as possible
- Making ice quickly (quick ice making)
- About quick ice making
- Approximate ice making time
- Stopping ice making (stop ice making)
- Changing the Setting of the Versa Compartment
- Setting Soft-Freezing
- ■ When the versa compartment is set to freezing
- Setting Freezing
- ■ When the versa compartment is set to Soft-Freezing
- Setting Supercool Freezing
- Check if the blue light at the top left corner of is on.
- Store food in the versa compartment and touch
- Touch
- Note
- Tips for Supercool Freezing Soft-Freezing
- Take it out and cook immediately!
- Supercool freeze to savory taste!
- Easy dessert recipe using fruits!
- Tips for Supercool Freezing
- ① Put foods at the same time.
- ② Lay the food out fl at on top in the versa compartment.
- Food not suitable for Supercool Freezing
- Do not store food that is hotter than 80° C.
- Change the temperature of each compartment
- Touch to light up the compartment display that you want to set the temperature for.
- Repeatedly touch to set the temperature.
- ■ The temperature settings for the refrigerator, freezer, and vegetable compartments
- ■ Ice making compartment settings
- ■ The temperature setting of the versa compartment
- To cancel the setting
- Food that can be stored in Power Save Mode
- ■ The operation panel display during Power Save Mode setting
- Cleaning the Automatic Ice Maker
- Water supply pipe and tank holder
- Tank pipe, water supply pump, optical catalyst and lead-cleaning filter
- Procedures for returning the water supply pump and tank pipe to their original positions
- Assembling the water supply pump Installing th
- ank pipe
- Removing and Cleaning the Parts
- Stepp 1
- Stepp2
- How to cleanBefore clea
- AUTO Shelf (Do not disassemble the AUTO Shelf, or use chemicals such as grease to clean it. Doing so may cause a malfunction.)
- Tray removal
- Shelf removal
- Shelf installation
- Slide chilled case and small item case
- Refrigerator rear side and floor
- Adjustable pockets and bottle pockets
- Ice making and versa compartments
- Recessed portion of the drip gutters
- Freezer and vegetable compartments
- Adjustable support cover
- A power outage occurred
- To move the refrigerator or change its orientation
- When not using the refrigerator for a long time
- To transport the refrigerator
- When the transportation time is long, for example when moving house
- To prevent accidental button operation (Child Safety Lock)
- To cancel
- When the mO mark blinks rapidly (about 5 times per second)
- Other Issues (Continued)
- To reset settings
- When the door alarm sounds and the interior light of the refrigerator compartment blinks
- When the alarm cannot be turned off
- When this icon lights up
- To cancel the demonstration mode
- To control the temperature more precisely (temperature fi ne adjustment mode)
- Specifications
- Troubleshooting
- The refrigerator does not cool at all!
- The outer walls heat up!
- The operation panel turns off automatically!
- Smells the strong odour on the food or ice!
- Troubleshooting (Continued)
- Memo
- R600a Refrigerant Warning
- SOLE AGENT in Australia
- MITSUBISHI ELECTRIC AUSTRALIA PTY LTD.
- SOLE AGENT in New Zealand
- BLACK DIAMOND TECHNOLOGIES LIMITED (BDT)
- Wellington Offi ce (Head Offi ce)
- Auckland Offi ce
- Christchurch Office
- MITSUBISHI ELECTRIC CORPORATION
Brand : MITSUBISHI
Model : MR-EX574X
Category : Fridge