
Multi II - Vacuum Cleaner Gerni - Free user manual and instructions
Find the device manual for free Multi II Gerni in PDF.


| Product Type | Wet/dry vacuum cleaner |
| Model | Multi II |
| Brand | Gerni |
| Container Material | Polypropylene (PP) |
| Voltage | 220 - 240 V |
| Nominal Power | 1130 W |
| Maximum Power | 1200 W |
| Maximum Vacuum | 20 kPa / 200 mbar |
| Suction Power (Machine) | 270 W |
| Sound Power Level | 85 dB(A) |
| Tank Capacity | 22 L |
| Dry Capacity (in bag) | 9 L |
| Liquid Capacity | 14 L |
| Filter Type | Cartridge filter with Push to Clean function |
| Filter Indicator | Yes |
| Push to Clean | Yes |
| Power Tool Outlet | Yes, max 1100 W |
| Auto On/Off | Yes |
| Variable Suction Control | Yes |
| Blow Function | Yes |
| Wet Suction Capability | Yes (remove dust bag first) |
| Accessory Storage | On-board storage for tubes, nozzles, and accessories |
| Warranty | 2 years for domestic use |
| Optional Accessories | Premium car kit, convenience kit, suction hoses, filter kit, dust bags, floor nozzle |
Frequently Asked Questions - Multi II Gerni
User questions about Multi II Gerni
0 question about this device. Answer the ones you know or ask your own.
Ask a new question about this device
Download the instructions for your Vacuum Cleaner in PDF format for free! Find your manual Multi II - Gerni and take your electronic device back in hand. On this page are published all the documents necessary for the use of your device. Multi II by Gerni.
USER MANUAL Multi II Gerni
natural_image
Warning symbol with exclamation mark inside a triangle (no text or numbers)
User Guide

natural_image
Exterior view of a vacuum cleaner with black handle and white body (no text or symbols visible)
natural_image
Black Cerni vacuum cleaner with attached hose and handle (no visible text or symbols)
natural_image
Black and white photo of a vacuum cleaner with attached hose and control lever (no visible text or symbols)
natural_image
Exterior view of a black and silver industrial vacuum cleaner (no text or symbols visible)


| Optional accessories | ||
| 107417198 Premium car kit |  | |
| 107417199 Convenience kit |  | |
| 107417200 Suction hose 2.5 m, 1 pcs. |  | |
| 107417201 Suction hose 4 m, 1 pcs. | 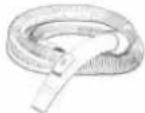 | |
| 107417202 Filter kit 1 pcs. | 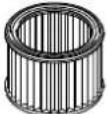 | |
| 107417203 Dust bag fl eece 22 l / 30 l, 4 pcs. | 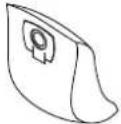 | |
| 107417204 Dust bag fl eece 50 l, 4 pcs. |  | |
| 107417205 Floor nozzle D 36 W/D 1, 1 pcs. |  | |
Dear Gerni customer


Congratulations on the purchase of your new Gerni vacuum cleaner.
Prior to using the appliance for the first time, be sure to read this document through and keep it ready to hand.
Purpose and intended use
The vacuum cleaner is suitable for private use, e.g. for household, hobby workshops, car cleaning - sucking up non-hazardous dust and non-fl ammable liquids.
Symbols used to mark instructions
WARNING

Danger that can lead to serious injuries and damage.
Important warnings
WARNING

- No changes to the mechanical, electrical or thermal safety devices must be made.
- This appliance can be used by children aged from 8 years and above and persons with reduced physical, sensory or mental capabilities or lack of experience and knowledge if they have been given supervision or instruction concerning use of the appliance in a safe way and understand the hazards involved.
• Children shall be supervised to make sure that
they do not play with the appliance.
- Cleaning and user maintenance shall not be made by children without supervision.
- Never spray water on the upper section of the vacuum cleaner. Danger for persons, risk or short-circuiting.
- Never use the vacuum cleaner if the fi Iter is not installed or if damaged.
- The vacuum cleaner features a blow function. Do not blow the air out in the open space. Only use the blow function with a clean tube. Dust may be harmful to health.
Hazardous materials
WARNING
⚠️ Vacuuming up hazardous materials can lead to serious or even fatal injuries. The following materials must not be picked up by the vacuum cleaner:
- hazardous dust
• hot materials (burning cigarettes, hot ashes etc.) - fl ammable, explosive, aggressive liquids (e.g. petrol, solvents, acids, alkalis, etc.)
- fl ammable, explosive dust (e.g. magnesium or aluminium dust etc.)
Electrical connection
WARNING

- Before using the vacuum cleaner make sure that the voltage shown on the rating plate of the vacuum cleaner corresponds to the voltage of the local mains power supply.
- It is recommended that the vacuum cleaner should be connected via a residual current circuit breaker.
- The vacuum cleaner must not be used if the electrical cable or plug shows any sign of damage. Regularly inspect the cable and the plug for damage. If the power cord is damaged, it must be replaced by Gerni Service or an electrician to avoid danger before use of the vacuum cleaner is continued.
- Do not handle the electrical cable or plug with wet hands.
- Do not unplug by pulling on cable. To unplug, grasp the plug, not the cable. The plug must always be removed from the socket
outlet before starting any service or repair work of the machine or cable.
Maintenance
Always remove the electric plug from the socket before carrying out maintenance work on the machine.
Recycling the vacuum cleaner

The packaging materials can be recycled. Please recycle the components instead of throwing them in your household rubbish. You can also leave the packaging directly at your Gerni location to be properly
recycled from there.
As specified in WEEE Directive 2012/19/EC on old electrical and electronic appliances, used electrical goods must be collected separately and recycled ecologically. Contact your local authorities or your nearest dealer for further information.
Warranty
Gerni guarantees vacuum cleaners for domestic use for 2 years. If your vacuum cleaner or accessories is/are handed in for repair, a copy of the receipt must be enclosed.
Guarantee repairs are being made on the following conditions:
- that defects are attributable to fl aws or defects in materials or workmanship. (wear and tear as well as misuse are not covered by the guarantee).
- that the directions of this instruction manual have been thoroughly observed.
- that repair has not been carried out or attempted by other than Gerni-trained service staff.
- that only original accessories have been applied.
- that the product has not been exposed to abuse such as knocks, bumps or frost.
- that the vacuum cleaner has not been used for rental nor used commercially in any other way.
Batteries, lamps and wearing parts are excluded from the warranty.
In the event of defects arising during the duration of the warranty and of which Gerni is given notice, Gerni will, of their own choice, either repair the defects, replace the unit or refund the purchase price upon return of the unit. Opening the unit housing causes the warranty to become void. Further claims may not be made on the basis of the warranty. The statutory
warranty rights of the customer remain unaffected. Manufacturer warranty claims shall be made to the manufacturer. Statutory warranty rights also remain unaffected in this case.
Our goods come with guarantees that cannot be excluded under the Australian Consumer Law. You are entitled to a replacement or refund for a major failure and for compensation for any other reasonably foreseeable loss or damage. You are also entitled to have the goods repaired or replaced if the goods fail to be of acceptable quality and the failure does not amount to a major failure.
Gerni vacuum cleaners for domestic use are warranted for 2 years from the date of purchase by:
Gerni Pty Ltd
Unit 1/13 Bessemer Street
Blacktown NSW 2148
Phone: 1300 556 710
E-mail: Warranty.au@Gerni.com
Find your local service agent here:
http://www.Gerni.com.au.
The benefit is under this warranty are in addition to your national law of sale.
Picking up liquids
Before liquids are picked up, always remove the filter bag. Make sure the machine is equipped with a filter appropriate for wet suction. Check that the float works properly. If foam develops or liquid emerges from the machine, stop work immediately and empty the dirt tank.
Connecting electrical appliances
Use the socket on the vacuum cleaner for the purpose defined in the operating instructions only. Before plugging an appliance into the appliance socket:
- Switch off the vacuum cleaner.
- Switch off the appliance to be connected.
CAUTION! Follow the operating instructions and safety instructions for appliances connected to the power tool socket. Always unwind the cable of the vacuum cleaner completely before use.
The power consumption of the connected appliance must never exceed the value stated on the type plate of the vacuum cleaner.
The operating voltage shown on the rating plate must correspond to the voltage of the mains power supply.
Parts identification (ref. illu. 1&2, page 4)
A. Button for automatic on/off switch for attached power tool (auto on/off) *
B. Filter cleaning indicator
C. Button for "Push to Clean"-function *
D. Power outlet
E. On/off switch
F. Variable suction controller *
G. Connection for hose when vacuuming
H. Connection for hose when blowing
1. Handle bar (& storage of power cord)
J. Quick park position (female)
K. Storage options for tubes, nozzles and accessories
L. Storage option for tube and accessories
M. Tensioning plate for fi Iter
N. Filter
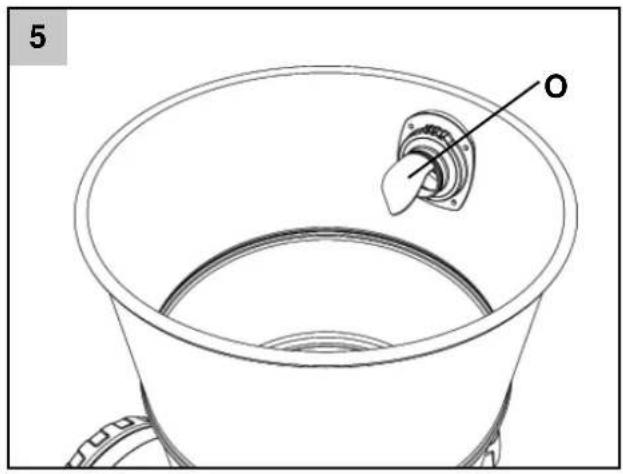
O. Dust bag mounting
* Varies depending on model.
Technical specifications
| Model | Multi 22 Multi 22 T Inox | Multi 30 T Inox | Multi 50 Inox | |
| Container material | PP INOX INOX | INOX | ||
| Voltage (V) | 220 - 240 220 - 240 220 - 240 | |||
| PNOM (W) | 1130 1130 1260 1260 | |||
| Pmax (W) 1200 1200 1400 1400 | ||||
| Max Vacuum, kPa/bar 20/200 20/200 21/210 | 21/210 | |||
| Max Suction power - machine, W | 270 | 270 | 292 | 292 |
| Sound power (EN 60704-2-1), dB(A) | 85 | 85 | 87 | 87 |
| Tank size, L | 22 | 22 | 30 | 50 |
| Net filling dry, in bag, L | 9 | 9 | 13 | 20 |
| Net filling liquid, L | 14 | 14 | 20 | 36 |
| Filter indicator | yes | yes | yes | yes |
| Push to Clean | yes | yes | ||
| Power out, max 1100 W | yes | yes | ||
| Auto on/off | yes | yes | ||
| Variable suction control | yes | |||
Operational instructions
Using the vacuum cleaner
On/Off - position "E"
Switch "0-1"

| Switch position | Function |
| 1 | On |
| 0 | Off |
Powertool Auto On/Off - position "A"
Switch "0-1"

| Switch position | Function |
| 1 | On |
| 0 | Off |
The machine provides two modes of operation: vacuuming and blowing.
When using the machine for vacuuming, the hose is connected to "G". When using the machine for blowing, the hose is connected to "H".
The machine is turned on or off at switch "E". When running and operational the light in "B" will not light. The light "B" will light when a drop in suction performance occurs due to a dirty filter.
Cleaning the filter with Push to Clean\*)
If the light "B" is turned on, the filter may be clogged.
-
Hold one hand against the end of the hose to form a closed wall. Push the "Push to Clean" button "C" for 2-3 seconds to let the machine clean the filter. Wait for 3-5 seconds and repeat Step 1, max. 3 times.
-
If the indicator still lights, the cause may lie in a too heavily clogged filter. Occasionally a light rinse is sufficient. If not, then replace the filter by a new one.
Filter change (ref. illu. 4, page 2)
- Open the machine so the filter is accessible.
- Unscrew the tensioning plate "M" to release the filter.
- Remove the filter and replace it by a new one.
-
Tighten tensioning plate (turn right). Make sure the threads on the tensioning plate are aligned properly with the threads on the machine. Tighten the tensioning plate firmly so the filter seals make a closed connection to the machine. Beware not to over-tighten the tensioning plate.
-
Assemble the machine again making sure the motor head has a proper fit to the container.
Dust bag change
- Open the machine so the dust bag is accessible.
- Remove the old dust bag.
- Gently slide the new dust bag over the angled
tube "O" and place the lip of the dust bag firmly in the groove.
- Assemble the machine again making sure the motor head has a proper fit to the container.
Using the machine to clean up liquids
Prepare for use
- Open the machine so the dust bag is accessible.
- Remove the dust bag.
- Assemble the machine again making sure the motor head has a proper fit to the container.
Empty for liquids
- Make sure the liquid in the hose has entered the container to avoid spilling dirty water.
- Disconnect the hose from the machine.
- Open the machine and make container accessible alone.
- Empty the machine over the backside or the sides to prevent dirty water to slip out of the hose connection.
- Assemble the machine again making sure the motor head has a proper fit to the container.
Storage
- Make sure the hose is emptied for dust or dirt and the material has entered the container.
- Remove the electric cable from power supply.
- The cable may be stored by rolling it around the handle bar.
- Place tubes and nozzles in Accessory storage areas "K" or in quick park position "J".
- Wind hose around machine and use hose hook to get a grip of the hose.
AUSTRALIA:
Nilfi sk Pty Ltd
Unit 1/13 Bessemer Street
Blacktown NSW 2148
Phone: 1300 556 710
E-mail: Info.au@nilfi sk.com
NEW ZEALAND:
Accent Tools Ltd
232 Bush Road
Albany
Auckland 0632
Phone: 09 968 2610
E-mail: sales@accent-tools.co.nz
- Dear Gerni customer
- Purpose and intended use
- Symbols used to mark instructions
- WARNING
- Important warnings
- Hazardous materials
- Electrical connection
- Maintenance
- Recycling the vacuum cleaner
- Warranty
- Picking up liquids
- Connecting electrical appliances
- Parts identification (ref. illu. 1&2, page 4)
- Operational instructions
- Using the vacuum cleaner
- Powertool Auto On/Off - position "A"
- Cleaning the filter with Push to Clean\*)
- Filter change (ref. illu. 4, page 2)
- Dust bag change
- Using the machine to clean up liquids
- Prepare for use
- Empty for liquids
- Storage
- AUSTRALIA:
- NEW ZEALAND:
Brand : Gerni
Model : Multi II
Category : Vacuum Cleaner