60143 - Uncategorized WilTec - Free user manual and instructions
Find the device manual for free 60143 WilTec in PDF.


| Product Type | Mailbox |
| Brand | WilTec |
| Model | 60143 |
| Intended Use | Everyday outdoor mail collection |
| Color | Black (as per illustration) |
| Material | Metal body with rust-resistant screws and nuts |
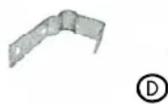
| Lock Type | Two locks: top lock (A) and bottom lock (D) |
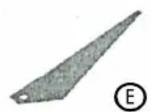
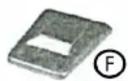
| Flag | New mail flag (E) with flag holder (F) included |
| Assembly Required | Yes, simple assembly with provided hardware |
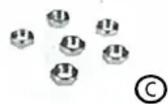
| Included Components | Top lock (A), bottom lock (D), short screws (B₁) x5, long screw (B₂) x1, nuts (C) x6, flag (E), flag holder (F), mailbox body (G), washers (H) x2, assembly instruction (I) |
| Safety Features | Hinge pinch hazard warning; ensure secure mounting to prevent accidents |
| Care Instructions | Clean with water only, wipe dry; grease door hinges annually |
| Mounting | Wall or post mount (user-provided; ensure secure attachment) |
| Manual Languages | Available in multiple languages via translation service (English included) |
| Manual Format | PDF, 4 pages |
| Manufacturer | WilTec Wildanger Technik GmbH |
| Support Contact | Email: service@wiltec.info; online contact form at https://www.wiltec.de/contacts/ |
| Return Policy | Contact customer service before returning goods |
Frequently Asked Questions - 60143 WilTec
User questions about 60143 WilTec
0 question about this device. Answer the ones you know or ask your own.
Ask a new question about this device
Download the instructions for your Uncategorized in PDF format for free! Find your manual 60143 - WilTec and take your electronic device back in hand. On this page are published all the documents necessary for the use of your device. 60143 by WilTec.
USER MANUAL 60143 WilTec
natural_image
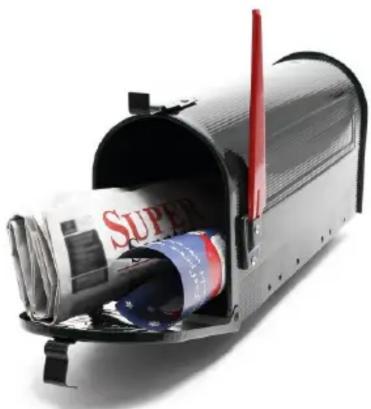
Exterior view of a mailbox with mail being inserted (no visible text or symbols)Illustration similar, may vary depending on model
Read and follow the operating instructions and safety information before using for the first time.
Technical changes reserved!
Due to further developments, illustrations, functioning steps, and technical data can differ insignificantly.
Updating the documentation
If you have suggestions for improvement or have found any irregularities, please contact us.
The information contained in this document may alter at any time without previous notice. It is prohibited to copy or spread any parts of this document in any way without prior written allowance. All rights reserved.
The WilTec Wildanger Technik GmbH cannot be held accountable for any possible mistakes in this operating manual, nor in the diagrams and figures shown.
Even though, the WilTec Wildanger Technik GmbH has undergone biggest possible efforts to ensure that the operating manual is complete, faultless, and up to date, mistakes cannot be entirely avoided. If you should find a mistake or wish to make a suggestion for improvement, we look forward to hearing from you.
Send an e-mail to:
service@wiltec.info
or use our contact form:
https://www.wiltec.de/contacts/
The most recent version of this manual in various languages can be found in our online shop via:
https://www.wiltec.de/docsearch
Our postal address is:
To return orders for exchange, repair, or other purposes, please use the following address. Attention! To allow for a smooth execution of your complaint or return, it is important to contact our customer service team before returning the goods.
Returns Department
Thank you for purchasing this quality product. To minimise the risk of injury we urge that our clients take some basic safety precautions when using this device. Please read the operation instructions carefully and make sure you have understood its content.
Keep these operation instructions safe.
Intended use
Designed as a mailbox for everyday use, being suitable for outdoor use
Parts list
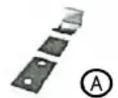
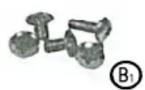
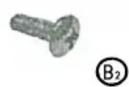
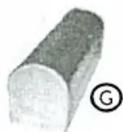


| No | Name | Qty. | No | Name | Qty. |
| A | Top lock | 1 | E | New mail flag | 1 |
| B_1 | Rust-resistant screws (short) | 5 | F | Flag holder | 1 |
| B_2 | Rust-resistant screws (long) | 1 | G | Letterbox/mailbox | 1 |
| C | Rust-resistant screw nuts | 6 | H | Washer | 2 |
| D | Bottom lock | 1 | I | Assembly instruction | 1 |
Safety precautions
- When assembling, please be careful to ensure that the hinges do not pinch your skin.
- When mounting the article, please ensure that it is attached securely, and take into account the risk of accidents when selecting a location.
Care and storage
- Clean with water only, never with abrasive products!
- Then wipe dry with a clean cloth.
- Hint! Grease the door hinges once a year.
Assembly
- Place the top lock (A) over the mailbox (G) so that the holes match the appropriate drilling holes.
- Screw two screws ( B_1 ) into the drilled holes.
- Secure the screws from the inside with two nuts (C).
- Place the bottom lock (D) so that the holes match the appropriate drilling holes.
- Screw two screws ( B_1 ) into the bored holes.
- Secure the screws from the inside with two nuts (C).
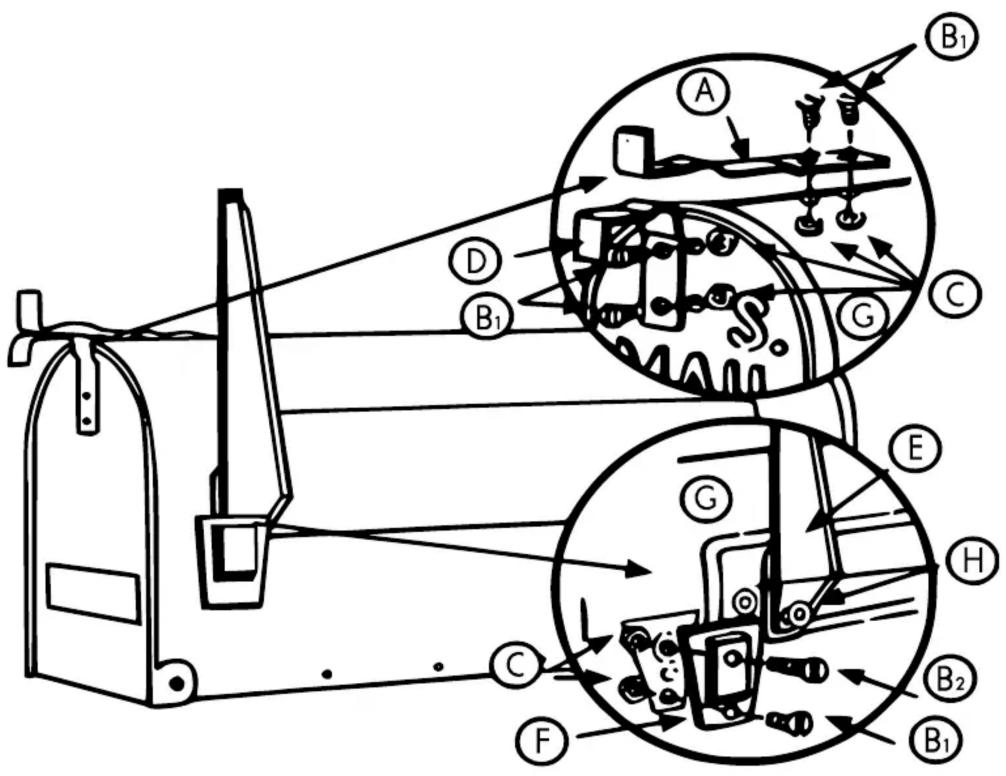
Attaching the flag
- Place one washer (H) on the front and one on the rear of the flag (E).
- Put the flag (E) and the flag holder (F) according to the drawing so that the holes match the appropriate drilling holes.
- Screw the long screw ( B_2 ) into the top hole and the short screw ( B_1 ) into the bottom hole.
- Secure the screws from the inside with two hexagon nuts (C).
Important notice:
The reprint or reproduction, even of excerpts, and any commercial use, even in part, of this instruction manual require the written permission of WilTec Wildanger Technik GmbH.
Brand : WilTec
Model : 60143
Category : Uncategorized