
NV7B6675CAA - Kitchen appliance SAMSUNG - Free user manual and instructions
Find the device manual for free NV7B6675CAA SAMSUNG in PDF.


| Product Type | Built-in Oven |
| Brand | Samsung |
| Model | NV7B6675CAA |
| Installation Type | Built-in |
| Main Unit Dimensions (W x H x D) | 595 x 596 x 570 mm |
| Built-in Dimensions (W x H x D) | 560 x 579 x 549 mm |
| Usable Volume | 76 L |
| Power Connection | 230 V ~ 50 Hz, 3650 W |
| Display Type | LCD non-touch screen with dial knob and touch buttons |
| Oven Modes | Convection, Conventional, Eco Convection, Large Grill, Eco Grill, Fan Grill, Top Heat + Convection, Bottom Heat + Convection, Bottom Heat, Pro-Roasting, Air Sous Vide, Air Fry |
| Steam Assisted Modes | Steam Cook, Steam Convection, Steam Top Heat + Convection, Steam Bottom Heat + Convection |
| Special Functions | Keep Warm, Plate Warm, Defrost, Prove Dough, Pizza Cook, Slow Cook, Drying |
| Auto Cook Programmes | 50 (or 70 for steam models) |
| Healthy Cook Programmes | 20 (applicable models only) |
| Cleaning Methods | Pyrolytic (self-cleaning), Steam Clean, Descale, Drain |
| Safety Features | Child Lock, Smart Safety Mechanism, Soft Closing Door (select models) |
| Connectivity | Wi-Fi, SmartThings app compatible |
| Meat Probe | Yes (applicable models) |
| Water Reservoir | Yes (for steam functions) |
| Accessories Included | Wire rack, wire rack insert, baking tray, universal tray, extra-deep tray, divider, meat probe, steam container, air fry tray (depending on model) |
| Energy Efficiency Standard | Eco Convection mode per EN60350-1 |
Frequently Asked Questions - NV7B6675CAA SAMSUNG
User questions about NV7B6675CAA SAMSUNG
0 question about this device. Answer the ones you know or ask your own.
Ask a new question about this device
Download the instructions for your Kitchen appliance in PDF format for free! Find your manual NV7B6675CAA - SAMSUNG and take your electronic device back in hand. On this page are published all the documents necessary for the use of your device. NV7B6675CAA by SAMSUNG.
USER MANUAL NV7B6675CAA SAMSUNG
User & Installation manual
NV7B666**** / NV7B667**** / NV7B668**** / NV7B669**** /
NV7B676**** / NV7B677**** / NV7B678**** / NV7B679****
Preparation
Wi-Fi MODEL
Connecting SmartThings
- Launch the QR Code Reader app to scan the QR image attached to the product.
- When the SmartThings app is running, tap 'Add' to connect the SmartThings app to the product.
Registering the product / Reading the manual / Customer support
- Launch the QR Code Reader app to scan the QR image attached to the product.
- When the SmartThings app is running, press 'Product support'.
- Select 'Product registration', 'Manual' or 'Customer support'. ^ Product registration may not be available in all countries.
NON Wi-Fi MODEL
Registering the product / Reading the manual / Customer support
- Launch the QR Code Reader app to scan the QR image attached to the product.
- Select 'Product registration', 'Manual' or 'Customer support'. * Product registration may not be available in all countries.

NOTE
• We provide online manuals that can be accessed via your smartphone or our website to contribute in reducing the usage of manuals in paper format, as part of efforts to save the Earth.
Contents
Using this manual 3
The following symbols are used in this user manual 3
Safety instructions 4
Important safety precautions 4 Auto energy saving function 6
Installation 7
What's included 7 Power connection 8 Cabinet mount 8
Before you start 10
Control panel 10 Initial settings 11 New oven smell 12 Smart safety mechanism 12 Soft closing door (gentle, safe, and silent) (applicable models only) 12 Assembling the steam container (applicable models only) 13 Accessories 13 Flexible Door (applicable models only) 15 Water reservoir 16
Operations 16
Oven modes 16 Steam assisted modes 19 Dual cook modes 21 Air Fry (applicable models only) 22 Air Sous Vide (applicable models only) 23 Cooking with the meat probe (applicable models only) 25 Special Function 26 Healthy Cook (applicable models only) 28 Auto Cook 28
| Timer | 29 |
| Cleaning | 30 |
| Settings | 32 |
| Lock | 33 |
Cooking Smart 33
Manual cooking 33
Auto Cook programmes 40
Special Function 47
Test dishes 48
Collection of frequent Auto Cook recipes 50
Maintenance 52
| Cleaning | 52 |
| Replacement | 55 |
Troubleshooting 55
| Checkpoints | 55 |
| Information codes 58 |
Technical specifications 59
Appendix 59
Open Source Announcement 59
Using this manual
Thank you for choosing SAMSUNG Built-In Oven.
This User Manual contains important information on safety and instructions intended to assist you in the operation and maintenance of your appliance.
Please take the time to read this User Manual before using your oven and keep this book for future reference.
The following symbols are used in this user manual
WARNING
Hazards or unsafe practices that may result in severe personal injury, death, or property damage.
CAUTION
Hazards or unsafe practices that may result in personal injury or property damage.
NOTE
Useful tips, recommendations, or information that helps users manipulate the product.
Safety instructions
Installation of this oven must be performed only by a licensed electrician. The installer is responsible for connecting the appliance to the mains power supply in observance of the relevant safety recommendations.
IMPORTANT SAFETY PRECAUTIONS
WARNING
This appliance is not intended for use by persons (including children) with reduced physical, sensory or mental capabilities, or lack of experience and knowledge, unless they have been given supervision or instruction concerning use of the appliance by a person responsible for their safety.
Children should be supervised to ensure that they do not play with the appliance.
The means for disconnection must be incorporated in the fixed wiring in accordance with the wiring rules.
This appliance should be allowed to be disconnected from the supply after installation. The disconnection may be achieved by having the plug accessible or by incorporating a switch in the fixed wiring in accordance with the wiring rules.
If the supply cord is damaged, it must be replaced by the manufacturer, its service agent or similarly qualified persons in order to avoid a hazard.
The method of fixing stated is not to depend on the use of adhesives since they are not considered to be a reliable fixing means.
This appliance can be used by children aged from 8 years and above and persons with reduced physical, sensory or mental capabilities or lack of experience and knowledge if they have been given supervision or instruction concerning use of the appliance in a safe way and understand the hazards involved. Children shall not play with the appliance. Cleaning and user maintenance shall not be made by children without supervision. Keep the appliance and its cord out of reach of children less than 8 years.
During use the appliance becomes hot. Care should be taken to avoid touching heating elements inside the oven.
WARNING: Accessible parts may become hot during use. Young children should be kept away.
Do not use harsh abrasive cleaners or sharp metal scrapers to clean the oven door glass since they can scratch the surface, which may result in shattering of the glass.
If this appliance has cleaning function, excess spillage must be removed before cleaning and all utensils should not be left in the oven during steam cleaning or self cleaning. The cleaning function depends on the model.
If this appliance has cleaning function, during cleaning conditions the surfaces may get hotter than usual and children should be kept away. For appliances with pyrolytic cleaning process, Some animals, particularly birds, can be sensitive to the fumes and local temperature fluctuations during the pyrolytic cleaning process and should be moved to an appropriate well ventilated area during this process.
Ventilate the room during and after the pyro cleaning process.
The cleaning function depends on the model.
Only use the temperature probe recommended for this oven. (Meat probe model only)
A steam cleaner is not to be used.
WARNING: Ensure that the appliance is switched off before replacing the lamp to avoid the possibility of electric shock.
The appliance must not be installed behind a decorative door in order to avoid overheating.
WARNING: The appliance and its accessible parts become hot during use. Care should be taken to avoid touching heating elements. Children less than 8 years of age shall be kept away unless continuously supervised.
CAUTION: The cooking process has to be supervised. A short term cooking process has to be supervised continuously.
The door or the outer surface may get hot when the appliance is operating.
The temperature of accessible surfaces may be high when the appliance is operating. The surfaces are liable to get hot during use.
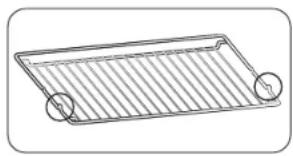
Insert the wire rack into position with the protruding parts (stoppers on both sides) towards the front so that the wire rack supports the rest position for large loads.
Safety instructions
CAUTION
If the oven has been damaged in transport, do not connect it.
This appliance must be connected to the mains power supply only by a specially licensed electrician.
In the event of a fault or damage to the appliance, do not attempt to operate it. Repairs should be performed by a licensed technician only. Improper repair may result in considerable danger to you and others. If your oven needs repair, contact a SAMSUNG Service center or your dealer.
Electrical leads and cables should not be allowed to touch the oven.
The oven should be connected to the mains power supply by means of an approved circuit breaker or fuse. Never use multiple plug adapters or extension leads.
The power supply of the appliance should be turned off when it is being repaired or cleaned.
Take care when connecting electrical appliances to sockets near the oven. If this appliance has a vapour or steam cooking function, do not operate this appliance when the water supply cartridge is damaged. (Vapour or steam function model only)
When the cartridge is cracked or broken, do not use it and contact your nearest service center. (Vapour or steam function model only)
This oven has been designed only for the cooking of household foods.
During use, the oven interior surfaces become hot enough to cause burns. Do not touch heating elements or interior surfaces of the oven until they have had time to cool.
Never store flammable materials in the oven.
The oven surfaces become hot when the appliance is operated at a high temperature for an extended period of time.
When cooking, take care when opening the oven door as hot air and steam can escape rapidly.
When cooking dishes that contain alcohol, the alcohol may evaporate caused by the high temperatures and the Vapour can catch fire if it comes into contact with a hot part of the oven.
For your safety, do not use high-pressure water cleaners or steam jet cleaners.
Children should be kept at a safe distance when the oven is in use.
Frozen foods such as pizzas should be cooked on the big grid. If the baking tray is used, it may become deformed caused by the great variation in temperatures. Do not pour water into the bottom of the oven when it is hot. This could cause damage to the enamel surface.
The oven door must be closed during cooking.
Do not line the bottom of the oven with aluminum foil and do not place any baking trays or tins on it. The aluminum foil blocks the heat, which may result in damage to the enamel surfaces and cause poor cooking results.
Fruit juices will leave stains, which can become permanent on the enamel surfaces of the oven.
When cooking very moist cakes, use the deep pan.
Do not rest bakeware on the open oven door.
Keep children away from the door when opening or closing it as they may bump themselves on the door or catch their fingers in the door.
Do not step, lean, sit or place heavy items on the door.
Do not open the door with unnecessarily strong force.
WARNING: Do not disconnect the appliance from the main power supply even after the cooking process is completed.
WARNING: Do not leave the door open while the oven is cooking.
Auto energy saving function
Light: During the cooking process, you can turn off the oven lamp by pressing the 'Oven light' button. For energy saving, the oven lighting is switched off a few minutes after the cooking programme has started.
Installation
WARNING
• This product is dedicated to built-in products. - This oven must be installed by a qualified technician. The installer is responsible for connecting the oven to the main power, while observing the relevant safety regulations of your area. - This appliance is designed for use up to a maximum altitude of 2,000 metres.
What's included
Make sure all parts and accessories are included in the product package. If you have a problem with the oven or accessories, contact a local Samsung customer centre or the retailer.
Oven at a glance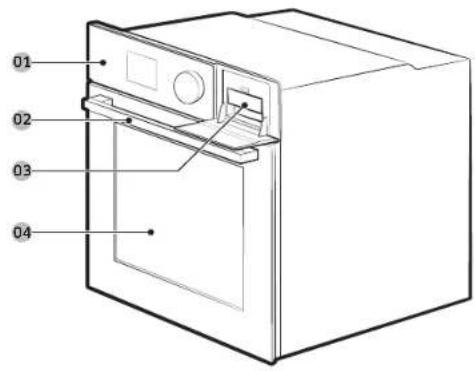
01 Control panel 02 Door handle 03 Water reservoir 04 Door
NOTE
Depending on the model, this oven comes in two types: single door and dual door.
Accessories
The oven comes with different accessories that help you prepare different types of food.
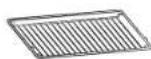
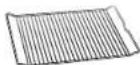
Wire rack, wire rack insert, baking tray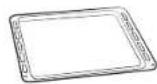
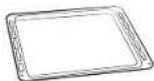
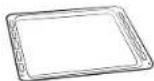
Universal tray, extra-deep tray, divider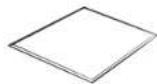
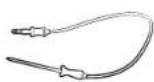
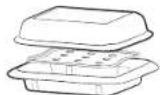
Meat probe, steam container, 2 screws (M4 L25)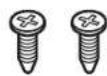
Air fry tray*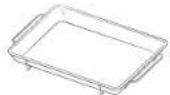
NOTE
Availability of accessories with an asterisk (*) depends on the oven model.
Installation
CAUTION
Remove the child lock before using the Pyrolytic cleaning programme to avoid vent blockages that can heat up the door.
Power connection
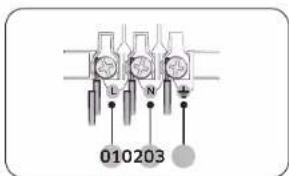
01 BROWN or BLACK 02 BLUE or WHITE 03 YELLOW and GREEN
Plug the oven into an electrical socket. If a plug-type socket is not available due to allowable current limitations, use a multi-pole isolator switch (with at least 3 mm spacing in-between) to meet safety regulations. Use a power cord of sufficient length that supports the specification H05 RR-F or H05 VV-F, min. 1.5-2.5 mm².
| Rated current (A) | Minimum cross-sectional area |
| 10 < A ≤ 16 1.5 | mm2 |
| 16 < A ≤ 25 2.5 | mm2 |
Check the output specifications on the label attached to the oven.
Open the rear cover of the oven using a screwdriver, and remove the screws on the cord clamp. Then, connect the power lines to the relevant connection terminals.
The (±)-terminal is designed for earth grounding. First connect the yellow and green lines (earth grounding), which must be longer than the others. If you use a plug-type socket, the plug must remain accessible after the oven is installed. Samsung is not responsible for accidents caused by missing or faulty earth grounding.
WARNING
Do not step on or twist the wires during installation, and keep them away from heat-emitting parts of the oven.
Cabinet mount
If installing the oven in a built-in cabinet, the cabinet must have its plastic surfaces and adhesive parts resistant to temperatures in accordance to EN 60335. Samsung is not responsible for damage to furniture from the oven's heat emission. The oven must be properly ventilated. For ventilation, leave a gap of about 50 mm between the lower shelf of the cabinet and the supporting wall. If you install the oven under a cooktop, follow the cooktop's installation instructions.
Required dimensions for installation
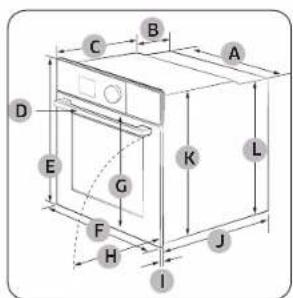
Oven (mm)
| A 560 G 503 | ||
| B 166 H 481 | ||
| C 383 I 21 | ||
| D 45 J 549 | ||
| E 596 K 579 | ||
| F 595 L 559 |
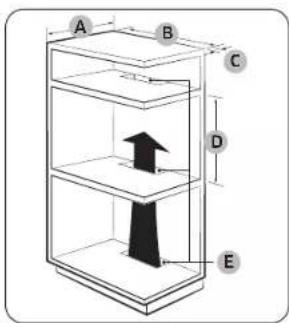
Built-in cabinet (mm)
| A Min. 550 |
| B Min. 560 |
| C Min. 50 |
| D Min. 590 - Max. 600 |
| E Min. 460 x Min. 50 |
NOTE
The built-in cabinet must have vents (E) to ventilate heat and circulate the air.
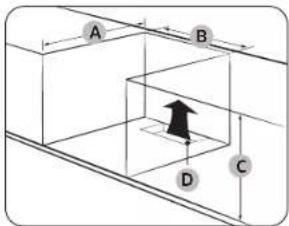
Under-sink cabinet (mm)
| A Min. 550 |
| B Min. 560 |
| C Min. 600 |
| D Min. 460 x Min. 50 |
NOTE
• The built-in cabinet must have vents (D) to ventilate heat and circulate the air. - Minimum height requirement (C) is for oven installation alone.
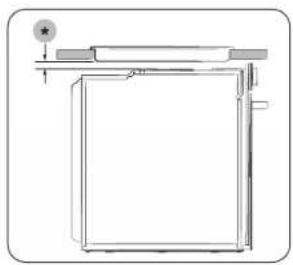
Installing with a hob
To install a hob on top of the oven, check the installation guide of the hob for the installation space requirement (*).
Mounting the oven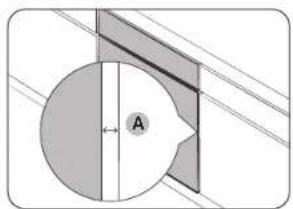
Make sure to leave a gap (A) of at least 5 mm between the oven and each side of the cabinet.
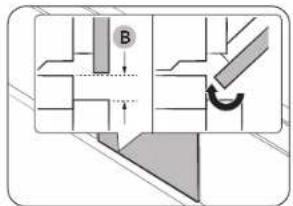
Secure at least 2 mm of gap (B) so that the door opens and closes smoothly.
Installation
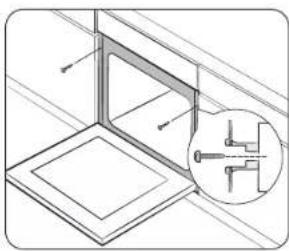
Fit the oven into the cabinet and fix the oven firmly on both sides using 2 screws.
After installation is complete, remove the protective film, tape, and other packing material, and take out the provided accessories from inside the oven. To remove the oven from the cabinet, first disconnect power to the oven and remove 2 screws on both sides of the oven.
WARNING
The oven requires ventilation for normal operation. Do not block the vents under any circumstance.
NOTE
The actual appearance of the oven may differ with the model.
Before you start
Control panel
The oven's control panel features a display (non-touch), dial knob and touch buttons to control the oven. Please read the following information to learn about the oven's control panel.
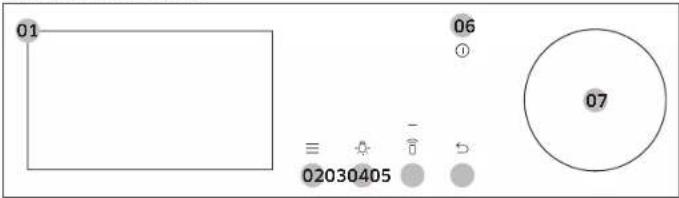
| 01 Screen Displays the menu, information, and cooking progress. | |
| 02 Options Tap to see the Options list. | |
| 03 Light Tap to turn the oven light on or off. | |
| 04 Smart Control | Tap to turn the Smart Control function on or off.NOTEEasy Connection should be set prior to use this function. |
| 05 Back Tap to move to the previous screen. | |
| 06 Power Tap to turn the screen on or off.NOTEOnly thePowerbutton can stop the operation of the oven when the door is open. | |
| 07 Dial Knob | Turn left and right to navigate through the menus and lists. An item will be underlined to show you where you are on the screen.Press to select the underlined item. |
Initial settings
When you turn on the oven for the first time, the Welcome screen appears with the Samsung logo. Follow the on-screen instructions to complete the initial settings. You can change the initial settings later by accessing the Settings screen.
- On the welcome screen, select Start setup, and then press the Dial Knob.
- Set the language.
a. Select the language, and then press the Dial Knob. b. Select Next, and then press the Dial Knob.
- Agree with the "Terms and Conditions" and "Privacy Policy".
- Connect your appliance to the SmartThings app.
a. On the Mobile Experience screen, select Next, and then press the Dial Knob. b. Scan the QR code on the screen with your phone and follow the onscreen instruction on your phone to complete the connection.
- If you do not wish to proceed this step, select Skip, and then press the Dial Knob to proceed next step.
c. Once you get the message that you are successfully connected, select OK, and the press the Dial Knob.
- Set the time zone.
a. Select your time zone, and then press the Dial Knob. b. Select Next, and then press the Dial Knob.
- Set the date.
a. Select the day, month, and year. Press the Dial Knob after selecting each item. b. Select Next, and then press the Dial Knob.
NOTE
Skip this step if you have connected your appliance to the SmartThings app.
- Select the time.
a. Set the hour and minute. Press the Dial Knob after selecting each item. b. Select Next, and then press the Dial Knob.
NOTE
Skip this step if you have connected your appliance to the SmartThings app.
- Select Done, and then press the Dial Knob to complete the setting.
- Guide for first use screen appears. You can select LEARN MORE, and then press the Dial Knob to see the guide or select LATER, and then press the Dial Knob to skip this step.
Setting the screen to stay always on
The screen automatically turns off after a certain time. If you want to set the screen to stay on all the time, follow the below instructions.
- Touch the ≡ button on the control panel.
- Select Settings, and then press the Dial Knob.
- On the Settings screen, select Display, and then press the Dial Knob.
- On the Display screen, select Timeout, and then press the Dial Knob.
- Select Always on, and then press the Dial Knob.
NOTE
• Energy consumption may increase depending on your setting. - When the timeout setting is set to "Always on", the brightness of the LCD automatically changes to level 2 if there is no action for 3 minutes. - "Always on" setting is available only when the screen saver is set to On.
Before you start
New oven smell
Before using the oven for the first time, clean inside the oven to remove the new oven smell.
- Remove all accessories from inside the oven.
- Run the oven with Convection 200 °C or Conventional 200 °C for an hour. This will burn any remaining production substances in the oven.
- When complete, turn off the oven.
NOTE
- At the first-time use, you may see some smoke inside the oven while it is operating. However, this is not a product failure.
- As the temperature of the cooking room increases at an initial period, you may find some spots on the inner glass of the door. If this is the case, turn off the oven and wait until it cools down. Then, use kitchen paper or neutral detergent with a clean cloth to wipe up the inner glass.
- It is also important to make sure that you operate the oven in a well-ventilating kitchen environment.
Smart safety mechanism
If you open the door while the oven is operating, the oven light turns on and both the fan and the heating elements stop operation. This is to prevent physical injuries such as burns as well as to prevent unnecessary energy loss. When this happens, simply close the door and the oven continues to operate normally because this is not a system failure.
Soft closing door (gentle, safe, and silent) (applicable models only)
The Samsung Built-in Oven features a soft closing door that gently, safely, and silently closes.
When closing the door, the specially designed hinges catch the door a few centimetres before the final position. This is the perfect touch for added comfort, allowing the door to be closed silently and gently.
(Availability of this feature depends on the oven model.)
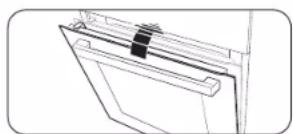
The door starts to be closed softly at about 15 degrees and completely closed within approx. 5 seconds.
Assembling the steam container (applicable models only)
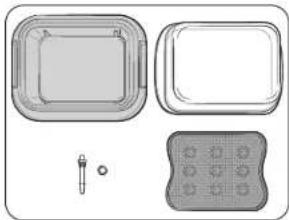
- Check and make sure you have all the parts for the steam container.
- Parts includes glass lid, metal pan, steam tray, and steam nozzle.
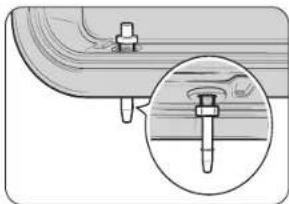
- Insert the steam nozzle to the hole on the right-rear side of the metal pan, and then tighten the provided nut.
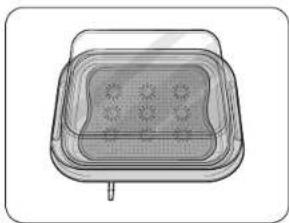
- Put the steam tray in the metal pan, and then close the glass lid to use it in the oven.
Accessories
For first time use, clean the accessories thoroughly with warm water, detergent and a soft clean cloth.
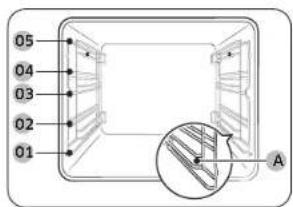
01 Level 1 02 Level 2
03 Level 3 04 Level 4
05 Level 5 (A) Steam
container level
- Insert the accessory into the correct position inside the oven.
- The steam container level (A) is only for the steam container. Do not place the steam container on any other level, and do not place any other accessories on the steam container level (A). The steam container level (A) is provided for applicable models only.
- Leave at least a 1 cm gap between the accessory and the bottom of the oven, and between the accessory and any other accessory. Be careful when removing cookware or accessories from the oven. Hot meals or accessories can cause burns.
- The accessories may deform while they are heating up. Once they have cooled down, they will return to their original shape and performance.
Before you start
Basic use: For a better cooking experience, familiarize yourself with how to use each accessory.
| Wire rack The wire rack is designed for grilling and roasting.Insert the wire rack into position with the protruding parts (stoppers on both sides) towards the front. |
| Wire rack insert * The wire rack insert is used with the tray, and prevents liquid from dropping onto the bottom of the oven. |
| Baking tray * The baking tray (depth: 20 mm) is used to bake cakes, cookies, and other pastries. Put the slanted side to the front. |
| Universal tray * The universal tray (depth: 30 mm) is used for cooking and roasting. Use the wire-tray insert to prevent liquid from dropping onto the bottom of the oven. Put the slanted side to the front. |
| Extra-deep tray * The extra-deep tray (depth: 50 mm) is used for roasting with or without the wire-tray insert. Put the slanted side to the front. |
| Air fry tray * Use the air fry tray only in Air Fry mode. As the tray becomes hot during or immediately after cooking, be sure to use oven gloves or wait until the oven cools down completely to remove the tray. |
| Divider The divider is designed to separate the oven in two zones. Use the divider with Dual cook mode. Do not use the divider for any other purpose than dividing the compartment into two cooking zones. Do not use the divider as a shelf. |
| Telescopic rails * Use the te | escopic rail plate to insert the tray as follows:1. Stretch the rail plate out from the oven.2. Put the tray on the rail plate and slide the rail plate into the oven.3. Close the oven door. |
| Meat probe * The meat probe | measures the internal temperature of the meat to cook. Use only the meat probe that comes with your oven. |
| Steam container * The steam | container and glass lid are only for full steam cook function. Use the steam container on the steam container level only and make sure to insert fully into the comparment so the container touches the rear wall.The steam container has 4 separate parts: Glass lid, metal pan, steam tray, and steam nozzle.WARNING : Do not use glass lid for grill, baking.⚠ WARNING• Always wear oven mittens when handling the steam container and be careful not to drop the steam container.• Sudden temperature changes could cause glass parts to break or shalter. |

NOTE
Availability of accessories marked with an asterisk (*) depends on the oven model.
Flexible Door (applicable models only)
This oven features a unique Flexible Door that is hinged in the middle, so you only need to open the top half to access the upper zone. When using the Dual Cook capability, you can access the top oven space more easily and with greater energy efficiency.
How to use the upper door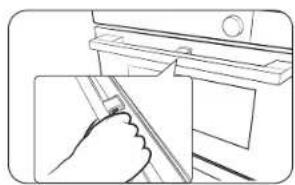
- Press the handle lever completely.
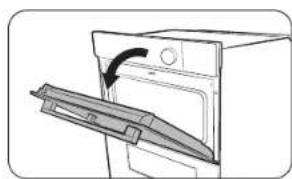
- Pull the handle.
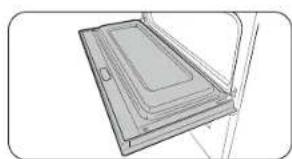
- This will open only the upper door as shown.
How to use the full door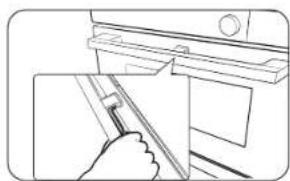
- Hold the lever-less area of the handle, and then pull.
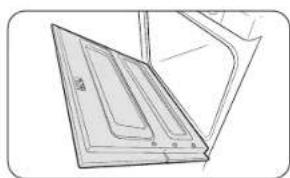
- This will open the whole door as shown.
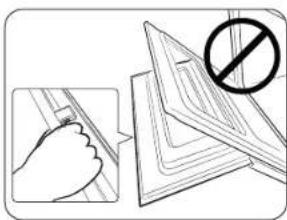
CAUTION
When opening the whole door, make sure to grasp the handle by the lever-less portion. If the lever is pressed halfway through opening the door, the upper door may open, causing physical injury.

NOTE
- Do not put heavy objects on, or apply excessive force, to the upper door.
- Do not let children play with or on the upper door.
Before you start
Water reservoir
The water reservoir is used for steam functions. Fill it with water in advance of steam cooking.
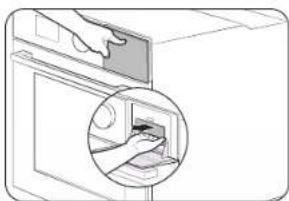
- Locate the water reservoir in the top-right corner. Push in the reservoir to open and remove.
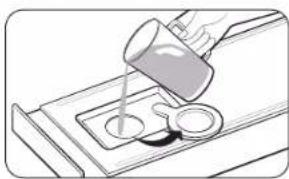
- Open the reservoir cap, and fill the reservoir with 500 ml of drinkable water.
- Close the cap, and reinsert the reservoir.
NOTE
Insert the water reservoir to the end until it locks.
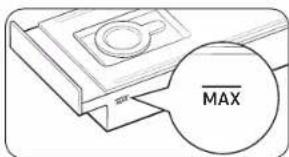
NOTE
Do not exceed the max line.
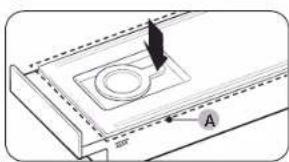
NOTE
Make sure the upper case (A) of the water reservoir is closed before using the oven.
Operations
Oven modes
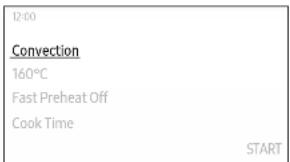
12:00
Convection
160°C
Fast Preheat Off
Cook Time
START
17:00
Conventional
180°C
Fast Preheat Off
Cook Time
START
12:00
Conventional
200°C
Fast Preheat Off
Cook Time
START
- On the main screen, select Convection, and then press the Dial Knob.
- Select the desired cook mode, and then press the Dial Knob. (For detailed information of each mode, see "Oven mode descriptions")
- You can use the meat probe in some modes. To cook using the meat probe, see "Cooking with the meat probe (applicable models only)".
- Set the desired temperature.
• The default temperature and the temperature range differ depending on the cook mode.
- Set the Fast Preheat option.
- The default setting is "Off".
| 10:40 |
| Conventional |
| 200°C |
| Fast Preheat On |
| Cook Time |
| START |
- Select Cook Time, and then press the Dial Knob to set the desired cooking time. • Maximum cooking time is 23 hours and 59 minutes.
- After setting the cooking time, select the option you want to run at the end of cooking, and then press the Dial Knob. • You can select Oven Off, Keep Temp., or Keep Warm. • The Large Grill and Eco Grill modes do not support the Keep Warm option.
NOTE
If you start cooking without setting the cooking time or set Keep Temp. for the option, you must stop the oven manually.
- Select Ready at, and then press the Dial Knob to set the desired end time.
- When you set the cooking time, the oven displays the time cooking will end. (For example, Ready at 13:30)
| 12:00 | |
| Conventional | |
| 200°C | |
| Fast Preheat On | |
| Thr 30mln | Oven Off | |
| Ready at 14:30 | START |
- Select START, and then press the Dial Knob.
• If you did not change the end time, the oven starts cooking immediately.
- If you changed the end time, the oven will automatically adjust the start time to end cooking at the set time.
NOTE
- You can change the temperature, Fast Preheat option, and cooking time during cooking.
- During cooking, you can select OFF, press the Dial Knob, select OK, and then press the Dial Knob to cancel cooking.
- When cooking is complete, +5 mins appears on the screen.
- You can select +5 mins, and then press the Dial Knob to extend the cooking for 5 more minutes.
| 12:00 |
| Conventional |
| 200°C |
| Fast Preheat On |
| 1hr 30min | Oven Off |
| Ready at 13:30 START |
Operations
Oven mode descriptions
| Mode | Temperature range (°C) | Suggested temperature (°C) | ||||
| Single | Dual | |||||
| Upper Low | Lower Dual | |||||
| Convection | 30 - 275 | 40 - 250 | 40 - 250 | 40 - 250 | 160 | |
| The rear heating element generates heat, which is evenly distributed by the convection fan. Use this mode for baking and roasting on different levels at the same time. | ||||||
| Conventional | 30 - 275 | - - 180 | ||||
| The heat is generated from the top and bottom heating elements. This function should be used for standard baking and roasting for most types of dishes. | ||||||
| Eco Convection | 30 - 275 | - - 160 | ||||
| Eco Convection uses the optimized heating system to save energy while cooking. The cooking times slightly increases, but the cooking results remain the same. Note that this mode does not require preheating. | ||||||
| NOTE Eco Convection mode of heating used to determine the energy efficiency class is in accordance with EN60350-1. | ||||||
| Large Grill | 100 - 300 | 40 - 250 | - - 220 | |||
| The large-area grill emits heat. Use this mode for browning the tops of food (for example, meat, lasagne, or gratin). | ||||||
| Eco Grill | 100 - 300 | - - 220 | ||||
| The small-area grill emits heat. Use this mode for food that requires less heat, such as fish and filled baguettes. | ||||||
| Fan Grill | 100 - 275 | - - 180 | ||||
| Two top heating elements generate heat, which is distributed by the fan. Use this mode for grilling meat or fish. | ||||||
| Mode | Temperature range (°C) | Suggested temperature (°C) | ||||
| Single | Dual | |||||
| Upper Lower Dual | ||||||
| Top Heat + Convection | 40 - 275 | 40 - 250 - - | 180 | |||
| The top heating element generates heat, which is evenly distributed by the convection fan. Use this mode for roasting that requires a crispy top (for example, meat or lasagne). | ||||||
| Bottom Heat + Convection | 40 - 275 | - | 40 - 250 | - | 200 | |
| The bottom heating element generates heat, which is evenly distributed by the convection fan. Use this mode for pizza, bread, or cake. | ||||||
| Bottom Heat | 100 - 230 | - 40 | 250 40 - 250 150 | |||
| The bottom heating element generates heat. Use this mode at the end of baking or cooking to brown the bottoms of a quiche or pizza. | ||||||
| Pro-Roasting | 80 - 200 | -- 160 | ||||
| Pro-Roasting runs an automatic pre-heating cycle until the oven temperature reaches 220 °C. Then, the top heating element and the convection fan start operating to sear food such as meat. After searing, the meat will be cooked at low temperatures. Use this mode for beef, poultry, or fish. | ||||||
| Air Sous Vide | 50 - 95 | --- | 60 | |||
| Air Sous Vide mode uses low-temperature hot air to implement Sous Vide mode without steam or the water tank. In this mode, the oven keeps constant low temperatures inside the cooking chamber. | ||||||
| Air Fry | - 150 | - 250 | - 220 | |||
| Air Fry mode uses hot air for crispier and healthier frozen or fresh foods without, or less oil, than normal convection modes. | ||||||
Steam assisted modes
CAUTION
Make sure the water reservoir is filled before using the steam assisted modes.
| 12:00 |
| Convection |
| 160°C |
| Fast Preheat Off |
| Cook Time |
| START |
- On the main screen, select Convection, and then press the Dial Knob.
- Select the desired cook mode, and then press the Dial Knob. (For detailed information of each mode, see "Steam assisted mode descriptions")
- If you selected Steam Cook, go to step 5. (Step 2-4 is not applicable for Steam Cook.)
- You can use the meat probe in some modes. To cook using the meat probe, see "Cooking with the meat probe (applicable models only)".
NOTE
Steam Cook is available on applicable models only.
- Set the desired temperature.
• The default temperature and the temperature range differ depending on the cook mode.
| 12:00 |
| Steam Convection |
| 200°C |
| Fast Preheat Off |
| Medium Steam |
| Cook Time |
| START |
| 12:00 |
| Steam Convection |
| 200°C |
| Fast Preheat On |
| Medium Steam |
| Cook Time |
| 12:00 |
| Steam Convection |
| 200°C |
| Fast Preheat On |
| High Steam |
| Cook Time |
- Set the Fast Preheat option.
- The default setting is "Off".
- Set the steam level.
- The default setting is "Medium".
- Select Cook Time, and then press the Dial Knob to set the desired cooking time.
• Maximum cooking time is 23 hours and 59 minutes.
- After setting the cooking time, select the option you want to run at the end of cooking, and then press the Dial Knob.
- You can select Oven Off, Keep Temp., or Keep Warm.
NOTE
If you start cooking without setting the cooking time or set Keep Temp. for option, you must stop the oven manually.
| Grade |
| Steam Convection |
| 160°C |
| Fast Preheat Off |
| Medium Steam |
| Cook Time |
| START |
Operations
| 12:00Steam Convection200°CFast Preheat OnHigh Steam1hr 30min | Oven OffReady at 13-30 START | |
| 12:00Steam Convection200°CFast Preheat OnHigh Steam1hr 30min | Oven OffReady at 14-30 | START |
- Select Ready at, and then press the Dial Knob to set the desired end time.
- When you set the cooking time, the oven displays the time cooking will end. (For example, Ready at 13:30)
- Select START, and then press the Dial Knob.
- If you did not change the end time, the oven starts cooking immediately.
- If you changed the end time, the oven will automatically adjust the start time to end cooking at the set time.
NOTE
- You can change the temperature, Fast Preheat option, and cooking time during cooking.
- During cooking, you can select OFF, press the Dial Knob, select OK, and then press the Dial Knob to cancel cooking.
- When cooking is complete, +5 mins appears on the screen.
- You can select +5 mins, and then press the Dial Knob to extend the cooking for 5 more minutes.
Steam assisted mode descriptions
| Mode | Temperature range (°C) | Default temperature (°C) | Fast Preheat | Meat probe | |
 | Steam Cook * | --XX | |||
| The hot steam from the steam generator is injected through the steam nozzle into the oven to cook food. This mode is suitable for cooking vegetables, fish, eggs, fruits, and rice. | |||||
 | Steam Convection | 120 - 275 160 0 0 | |||
| The heat generated by the convection heater and fans is continuously supported by hot steam. The intensity of the steam can be adjusted to Low. Medium, or High. This mode is suitable for baking puff pastries, yeast cake, bread, and pizza and roasting meat and fish. | |||||
| [CSTX] | Steam Top Heat + Convection | 120 - 275 180 0 0 | |||
| The heat generated by the top heater and the convection heater is shared evenly in the oven by the fan, and the hot steam supports the heating elements. This mode is suitable for roasting crusty dishes like meat, poultry, or fish. | |||||
 | Steam Bottom Heat + Convection | 120 - 275 200 0 0 | |||
| The heat generated by the bottom heating element and the convection heater is shared evenly in the oven by the fan, and the hot steam supports the heating elements. This mode is suitable for crispy baking foods like pizza or apple pie. | |||||
NOTE
- Availability of the modes with an asterisk (*) depends on the oven model.
- Always fill the water reservoir with fresh water when cooking with these modes.
Dual cook modes
You can use the provided divider to separate the cooking chamber in the upper and lower zones. This allows users to enable two different cooking modes simultaneously, or to simply choose one zone to cook with.
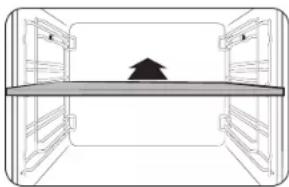
- Insert the divider in level 3 to separate the cooking chamber in two zones.
- When the divider is inserted, the oven senses the divider and the main screen changes automatically.
| 12:00 |
| Upper Oven |
| Lower Oven |
- Select the desired cooking zone, and then press the Dial Knob.
| 12:00 | Upper |
| Convection | |
| 160℃ | |
| Cook Time | |
| START | |
- Set the desired cooking settings and start cooking.
- For instructions, see "Oven modes" or "Steam assisted modes".
- For available modes and options, refer to "Available modes in each zone".
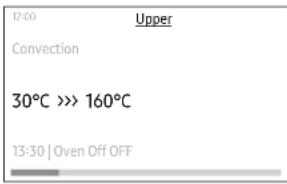
NOTE
- Once you have started cooking in either zone, you can start cooking in the other zone. Select the zone indicator at the top-middle of the screen, press the Dial Knob, and then repeat steps 2 to 3 to cook in the other zone.
- There may be some restrictions on modes or temperature ranges that you can select when you try to cook in both zones simultaneously.
Available modes in each zone
| Zone | Available mode | Temperature range (°C) | Default temperature (°C) | Fast Preheat | Meat probe |
| Upper | Convection 40 - Large Grill 40 - Top Heat + Convection | 250 160 X X | |||
| 250 220 X X | |||||
| 40 - 250 180 X X | |||||
| Air Fry 150 - | 250 220 X X | ||||
| Lower | Convection 40 - | 250 160 X X | |||
| Bottom Heat + Convection | 40 - 250 200 X X | ||||
| Bottom Heat 40 - | 250 150 X X | ||||
| Steam Cook * | - | - | X | X | |
| Steam Convection | 120 - 250 160 X X | ||||
| Steam Bottom Heat + Convection | 120 - 250 200 X X |
NOTE
- Refer to "Oven mode descriptions" or "Steam assisted mode descriptions" for a description of each mode.
- Availability of the modes with an asterisk (*) depends on the oven model.
Operations
Air Fry (applicable models only)
Preheating is not necessary for this mode. It is recommended to place a baking sheet or tray on the divider to catch any drippings.
For better cooking results, flip food over during the process.
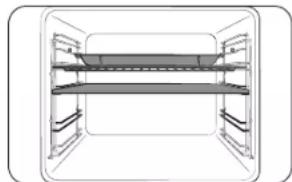
- Insert divider and place the tray with wire rack on rack position 4.
- Select Air fry mode using the Dial Knob.
- Use the Dial Knob to change the default temperature. Enter the suggested temperature for your food as recommended in the cooking guide. The default temperature is 220 °C.
- Select Cook Time, and then press the Dial Knob to set the desired cooking time.
- After setting the cooking time, select the option you want to run at the end of cooking, and then press the Dial Knob.
- Select Start and press the Dial Knob.
- When cooking is complete, tap OFF and take out the food.
NOTE
- Place a baking sheet or tray on the divider to catch any drippings. This will help reduce splatter and smoke.
- Before using a baking sheet, check the maximum allowable temperature of the baking sheet.
- Air fry is designed for a dual upper oven rack. Insert divider and place food on rack position 4 for best results.
- For cooking fresh or homemade foods, spread the oil over a larger area more evenly, crisping up the food more effectively.
WARNING
- If anything is in progress in the lower zone, Air fry is not available in the upper zone.
- When Air fry is in progress in the upper zone, the lower zone is not available at all.
Recommended turn over after half of cooking time for the best results.
| Food | Accessory | Level | Temp. (°C) | Time (min.) |
| Potatoes | ||||
| Frozen French fries | Wire rack + Air fry tray | 4 210 | - 220 20 - 25 | |
| Frozen French fries, seasoned | Wire rack + Air fry tray | 4 210 | - 220 20 - 25 | |
| Frozen tater tots | Wire rack + Air fry tray | 4 210 | - 220 15 - 20 | |
| Frozen hash brown | Wire rack + Air fry tray | 4 210 | - 220 15 - 20 | |
| Frozen potato wedges | Wire rack + Air fry tray | 4 210 | - 220 15 - 20 | |
| Homemade French fries | Wire rack + Air fry tray | 4 200 | - 210 20 - 25 | |
| Homemade potato wedges | Wire rack + Air fry tray | 4 210 | - 220 20 - 25 | |
| Frozen | ||||
| Frozen chicken nuggets | Wire rack + Air fry tray | 4 210 | - 220 15 - 20 | |
| Frozen chicken wings | Wire rack + Air fry tray | 4 210 | - 220 25 - 30 | |
| Frozen onion rings | Wire rack + Air fry tray | 4 210 | - 220 15 - 20 | |
| Frozen chicken strips | Wire rack + Air fry tray | 4 210 | - 220 20 - 25 | |
| Frozen Churros | Wire rack + Air fry tray | 4 190 | -200 10 - 15 | |
| Chicken | ||||
| Fresh drumsticks | Wire rack + Air fry tray | 4 200 | -210 30 - 35 | |
| Fresh wings | Wire rack + Air fry tray | 4 200 | -210 25 - 30 | |
| Breasts, breaded | Wire rack + Air fry tray | 4 200 | -210 25 - 30 | |
| Vegetable | ||||
| Asparagus, breaded | Wire rack + Air fry tray | 4 200 | -210 15 - 20 | |
| Aubergine, sliced and breaded | Wire rack + Air fry tray | 4 200 | -210 15 - 20 | |
| Onion rings, breaded | Wire rack + Air fry tray | 4 200 | -210 15 - 20 | |
| Squash cubes | Wire rack + Air fry tray | 4 200 | -210 20 - 25 | |
| Cauliflower florets | Wire rack + Air fry tray | 4 190 | -200 15 - 20 | |
| Vegetable mix | Wire rack + Air fry tray | 4 200 | -210 15 - 20 | |
Air Sous Vide (applicable models only)
Air Sous Vide mode uses low-temperature hot air to implement Sous Vide mode without steam or the water tank. In this mode, the oven keeps constant low temperatures inside the cooking chamber, cooking food that can keep its original fragrance and nutrients while offering enriched flavor and soft texture.
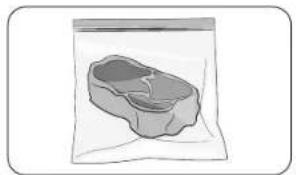
- Put food in a clean vacuum bag and seal it up. Then, load the food in rack position 3 of the oven.
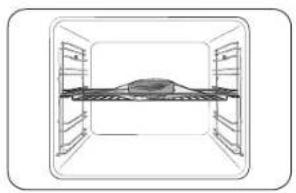
- Select Air Sous Vide mode.
- Use the Dial Knob to change the default temperature. Enter the suggested temperature for your food as recommended cooking guide. The default temperature is 60 °C. (You can change the temperature by 1 °C)
- Press the Dial Knob and set the cooking time.
- After setting the cooking time, select the option you want to run at the end of cooking, and then press the Dial Knob.
- Select Start and press the Dial Knob.
Operations
NOTE
- Use fresh and quality ingredients only. Trim them in a clean condition and store under refrigeration. • Use heat-resistant vacuum bags for moving and storing ingredients. • Do never reuse the heat-resistant vacuum bags.
- The cooking time depends on the thickness of food. Addition of salt or sugar may shorten the cooking time.
Tips
- To keep the original taste, recommend you use less herbs and spices than in ordinary recipes. • Meat and fishery offer better flavors when seared and served.
- If not served immediately after cooked, put the food in ice water and cool down completely. Then, store them under 5 °C to keep the fragrance and texture of food. • Exceptionally, chicken is recommended to eat immediately after cooked.
Recommended preheat the oven for the best results.
| Food Doneness | Accessory Level | Temp. (°C) | Time (hrs.) | ||
| Beef | |||||
| Steak, 4cm thick | Rare | Wire rack | 3 | 54 | 3 - 4 |
| Steak, 4cm thick | Medium | Wire rack | 3 | 60 | 3 - 4 |
| Steak, 4cm thick | Well done | Wire rack | 3 | 68 | 3 - 4 |
| Roast | Medium | Wire rack | 3 | 62 | 6 - 8 |
| Roast | Well done | Wire rack | 3 | 68 | 6 - 8 |
| Pork | |||||
| Chop, boneless | Tender | Wire rack | 3 | 60 | 3 - 4 |
| Chop, boneless | Firm | Wire rack | 3 | 71 | 3 - 4 |
| Roast | Medium | Wire rack | 3 | 62 | 4 - 6 |
| Roast | Well done | Wire rack | 3 | 72 | 4 - 6 |
| Food Doneness | Accessory Level | Temp. (°C) | Time (hrs.) | ||
| Pulled pork Well | done Wire rack 3 | 74 18 - 24 | |||
| Poultry | |||||
| Chicken, breast | Tender | Wire rack | 3 | 66 | 3 - 4 |
| Chicken, breast | Firm | Wire rack | 3 | 72 | 3 - 4 |
| Duck, breast | Tender | Wire rack | 3 | 63 | 3 - 4 |
| Fish | |||||
| Salmon steak | Tender | Wire rack | 3 | 52 | 2 - 3 |
| Salmon steak | Well done | Wire rack | 3 | 63 | 2 - 3 |
| Cod fillet | Tender | Wire rack | 3 | 55 | 2 - 3 |
| Vegetables | |||||
| Asparagus | - | Wire rack | 3 | 85 | 2 - 3 |
| Potato, sliced | - | Wire rack | 3 | 90 | 2 - 3 |
| Sweet potato, sliced | - | Wire rack | 3 | 90 | 2 - 3 |
| Carrot, sliced | - | Wire rack | 3 | 90 | 2 - 3 |
| Squash, cubes | - | Wire rack | 3 | 90 | 2 - 3 |
| Fruit | |||||
| Apple, sliced | - | Wire rack | 3 | 80 | 2 - 3 |
| Pineapple, sliced | - | Wire rack | 3 | 85 | 1 - 2 |
| Pear, sliced | - | Wire rack | 3 | 83 | 2 - 3 |
| Others | |||||
| Hen's eggs | Poached | Wire rack | 3 | 63 | 2 - 3 |
| Hen's eggs | Hard boiled | Wire rack | 3 | 71 | 2 - 3 |
* Cook hen's eggs without vacuum sealing.
Cooking with the meat probe (applicable models only)
The meat probe measures the internal temperature of meat while it's cooking. When the temperature reaches the target temperature, the oven stops and finishes cooking.
• Use only the meat probe that comes with your oven. - You cannot set the cooking time if the meat probe is plugged in.
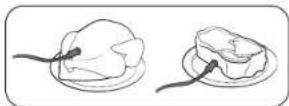
- Insert the tip of the meat probe into the center of the meat to cook. Make sure the rubber handle is not inserted.
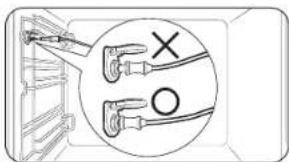
- Plug the probe connector into the socket on the left wall. If the probe is connected properly, you will see a message of "Meat probe inserted".
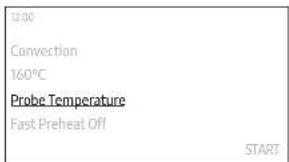
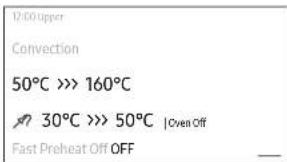
- If the meat probe is inserted, Probe Temperature will appear instead of Cook Time.
- Select Probe Temperature, and then press the Dial Knob to set the target temperature of your meat.
- Set the desired cooking settings.
- Refer to "Oven mode descriptions" or "Steam assisted mode descriptions" for the modes you can use the meat probe. - Refer to steps 1-3 of "Oven modes" or steps 1-4 of the "Steam assisted modes".
- Select START, and then press the Dial Knob.
- The oven completes cooking with a melody when the internal temperature of the meat reaches the set temperature.
WARNING
- To prevent damage, do not use the meat probe with the spit accessory.
- When cooking is complete, the meat probe becomes very hot. To prevent burns, use oven gloves to take out the food.
NOTE
Not all modes support using the meat probe. If you use the meat probe with inapplicable modes, you will see a message of "The selected mode does not support the use of the meat probe." When this happens, remove the meat probe instantly.
Operations
Special Function
| Unit |
| Convection |
| 160°C |
| Fast Preheat Off |
| Cook Time |
| START |
| Special Function Keep Warm | |
| Plate Warm | |
| Defrost | |
| 12:00 |
| < Keep Warm |
| 60°C |
| Cook Time |
| START |
| 12:00 |
| Keep Warm |
| 80°C |
| Cook Time |
- On the main screen, select Convection, and then press the Dial Knob.
- Select Special Function, and then press the Dial Knob.
- Select the desired function, and then press the Dial Knob.
- For detailed information of each function, see "Special Function description".
- Set the desired temperature.
- The default temperature and the temperature differ depending on the cook mode.
- Select Cook Time, and then press the Dial Knob to set the desired cooking time, or select Probe Temperature, and then press the Dial Knob to set the target temperature of your meat.
• Probe Temperature is only applicable for Slow Cook.
• Maximum cooking time is 23 hours and 59 minutes.
| 12:00 |
| < Keep Warm |
| 80°C |
| Thr 30min |
| Ready at 13:30 |
| 12:00 |
| < Keep Warm |
| 80°C |
| Thr 30min |
| Ready at 14:30 |
- Select Ready at, and then press the Dial Knob to set the desired end time.
- When you set the cooking time, the oven displays the time cooking will end. (For example, Ready at 13:30)
- This step is not applicable for Slow Cook.
- Select START, and then press the Dial Knob.
- If you did not change the end time, the oven starts cooking immediately.
- If you changed the end time, the oven will automatically adjust the start time to end cooking at the set time.
- If you selected Slow Cook, the oven completes cooking with a melody when the internal temperature of the meat reaches the set temperature.
Special Function description
| Mode | Temperature range (°C) | Default temperature (°C) | Descriptions |
| Keep Warm 40 | 100 60 | Use this only for keeping foods warm that have just been cooked. | |
| Plate Warm 30 | 80 50 | Use this for warming dishes or ovenware. | |
| Defrost 30 - 60 | 30 | This mode uses for defrosting frozen products, baking goods, fruit, cake, cream and chocolate. The defrosting time is depending on the type, size and quantity of the food. | |
| Prove Dough 30 | - 50 35 | This mode uses for proving the dough and making the homemade yogurt. | |
| Pizza Cook 160 | - 250 200 | This mode is suitable for pizza and the cooking temperature and time will depend on the pizza size and the thickness of pizza dough. |
| Mode | Temperature range (°C) | Default temperature (°C) | Descriptions |
| Slow Cook 70 - | 120 80 | This mode uses low temperature for the tender texture. This is suitable for roasting beef, pork, veal or lamb when you want to a tender texture. Recommend searing the meat all over at high temperature on the hob before roasting. | |
| Drying 40 - 90 60 | This mode uses for drying the fruit, vegetable and herb. The drying time is depending on the type and thickness and quantity of the food. |
Operations
Healthy Cook (applicable models only)
The oven offers 20 healthy cook programs. The cook settings will be adjusted automatically according to the selected programme.
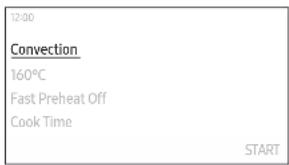
- On the main screen, select Convection, and then press the Dial Knob.
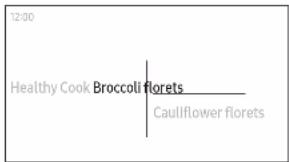
- Select Healthy Cook, and then press the Dial Knob.
- Select the desired programme, and then press the Dial Knob.
- For detailed information of each programme, see "Healthy Cook" in "Cooking Smart" section on page 47.)
- Read the tip, select Next, and then press the Dial Knob.
- Pour the water in the water reservoir as instructed on the screen, select Next, and then press the Dial Knob.
- Prepare food and accessories as instructed on the screen, select Next, and then press the Dial Knob.
- If you want to start cooking at a certain time, select Delay Start, and then press the Dial Knob to set the desired time.
- Select START, and then press the Dial Knob.
Auto Cook
The oven offers 50 or 70 (for Steam cook model) Auto Cook programmes. Take advantage of this feature to save your time or shorten your learning curve. The cooking time, power level and temperature will be adjusted according to the selected programme.
| 12:00 | |
| Auto Cook Bakes & Bakery | Roast Side Dishes |
- On the main screen, select Convection, and then press the Dial Knob.
- Select Auto Cook, and then press the Dial Knob.
- Select the category, and then press the Dial Knob.
- Select the subcategory, and then press the Dial Knob.
- Some categories may not have a subcategory.
- Select the desired programme, and then press the Dial Knob.
- For detailed information of each programme, see "Auto Cook programmes" in "Cooking Smart" section on page 40.)
- Read the tip, select Next, and then press the Dial Knob.
| 10:40 | |
| <Herb roasted lamb chops | |
| Weight | 0.4 kg |
| 0.5 | |
- Select the weight, and then press the Dial Knob.
- This step may not apply to some programmes. • Available weight differs depending on the selected programme.
- Pour the water in the water reservoir as instructed on the screen, select Next, and then press the Dial Knob.
- This step may not apply to some programmes.
- Prepare food and accessories as instructed on the screen, select Next, and then press the Dial Knob.
- If you want to start cooking at a certain time, select Delay Start, and then press the Dial Knob to set the desired time.
- Select START, and then press the Dial Knob.
Timer
Adding the new Timer
- Touch the ≡ button on the control panel.
- Select Timer, and then press the Dial Knob.
- On the Timer screen, select + and then press the Dial Knob. Skip this step if you are adding the timer for the first time.
- Set the time.
Editing the existing Timer
- Touch the ≡ button on the control panel.
- Select Timer, and then press the Dial Knob.
- On the Timer screen, select the Timer you want to edit, and then press the Dial Knob.
- Change the time.
Deleting the Timer
- Touch the ≡ button on the control panel.
- Select Timer, and then press the Dial Knob.
- On the Timer screen, select 📄, and then press the Dial Knob.
- Select Delete on the right side of the Timer you want to delete, and then press the Dial Knob.
- Select Done, and then press the Dial Knob.
Using the Timer
- Touch the ≡ button on the control panel.
- Select Timer, and then press the Dial Knob.
- Select Start on the right side of the Timer you want to use, and then press the Dial Knob.
Once you start the timer, you can pause or cancel the timer.
NOTE
When the time has elapsed to a set point, a message of "Time is up." appears with a melody. Select OK, and then press the Dial Knob to dismiss the message.
Operations
Cleaning
Pyrolytic (applicable models only)
Pyrolytic features high temperature thermal cleaning. It burns off oily leftovers to facilitate manual cleaning.
- Touch the ≡ button on the control panel.
- Select Cleaning, and then press the Dial Knob.
- Select Pyrolytic, and then press the Dial Knob.
- Select the time, and then press the Dial Knob.
- Select Next, and then press the Dial Knob.
- Follow the instruction on the screen, select Next, and then press the Dial Knob.
- Read the message on the screen, select Start, and then press the Dial Knob.
- Wait until the oven cools down, and then wipe the door along its edges using a wet cloth.
CAUTION
- Do not touch the oven because the oven becomes very hot during the cycle. • To avoid accidents, keep children away from the oven. • After the cycle is complete, do not power off while the cooling fan is operating to cool the oven down.
NOTE
- Once the cycle starts, the oven becomes hot inside. Then, the door will be locked for safety. When the cycle is complete, and the oven cools down, the door will be unlocked.
- Make sure you empty the oven before cleaning. Accessories can be deformed caused by high temperatures inside the oven.
Steam Clean
This is useful for cleaning light soiling with steam.
This automatic function saves you time by removing the need for regular manual cleaning.
- Touch the ≡ button on the control panel.
- Select Cleaning, and then press the Dial Knob.
- Select Steam Clean, and then press the Dial Knob.
- Follow the instruction on the screen, select Next, and then press the Dial Knob.
- Select START, and then press the Dial Knob.
WARNING
Do not open the door before the cycle is complete. The water inside the oven is very hot, and it can cause burns.
NOTE
- If the oven is heavily soiled with grease, for example, after roasting or grilling, it is recommended to remove stubborn soil manually using a cleaning agent before activating Steam cleaning.
- Leave the oven door ajar when the cycle is complete. This is to allow the interior enamel surface to dry thoroughly.
- While the oven is hot inside, auto cleaning is not activated. Wait until the oven cools down and try again.
- Do not pour water onto the bottom by force. Do it gently. Otherwise, the water overflows to the front.
Descale
Clean inside the steam generator to prevent affecting the food quality and taste.
NOTE
- The oven counts the time of steam assisted modes and notifies you to run the Descale function when required. You can still use the steam assisted modes for the next two hours without running the Descale function. However, you cannot use the steam assisted modes after two hours unless you run and complete the Descale function.
- When you get the notification message, select Start now, and then press the Dial Knob to run the Descale function, or select Later, and then press the Dial Knob to postpone it.
- : Descale required.
- Touch the ≡ button on the control panel.
- Select Cleaning, and then press the Dial Knob.
- Select Descale, and then press the Dial Knob.
- Select Next, and then press the Dial Knob.
- Follow the instruction on the screen, select Start, and then press the Dial Knob.
- If you get a notification message that you have insufficient water, add more water in the water reservoir, select OK, and then press the Dial Knob.
- When descaling is complete, the oven drains water automatically.
- Once draining is complete, empty the water reservoir.
- Refill the water reservoir with 500 ml of drinkable water as instructed on the screen, select OK, and then press the Dial Knob to start rinsing.
- When rinsing is complete, empty the water reservoir.
• After emptying the reservoir, clean it before putting it back to the oven.
WARNING
- Wear oven gloves when you handle the water reservoir.
- Use only descaling agents that are specific to steam ovens or coffee machines.
CAUTION
- Do not cancel descaling in the process. Otherwise, you must restart the descaling cycle and complete within the next three hours in order to enable steam assisted modes. • To avoid accidents, keep children away from the oven.
- For the mixture ratio of water and the descaling agent, follow the agent manufacturer's instructions.
Drain
After using the steam assisted modes, you must drain the remaining water to prevent affecting other cooking modes. Also, if you want to drain again for cleaning purposes, use this function.
- Touch the ≡ button on the control panel.
- Select Cleaning, and then press the Dial Knob.
- Select Drain, and then press the Dial Knob.
- Select Start, and then press the Dial Knob.
- Follow the instruction on the screen, select OK, and then press the Dial Knob.
- The oven drains water from the steam generator to the water reservoir.
- When draining is complete, empty the water reservoir. • After emptying the reservoir, clean it before putting it back to the oven.
WARNING
- Wear oven gloves when you handle the water reservoir.
- Do not remove the water reservoir while draining.
NOTE
- Once the oven starts draining, please wait until the draining cycle is complete.
- Depending on the product's environment, the drain operation may take a long time. This is not a product malfunction; it is for safety, so wait for the water to cool down.
Operations
Settings
Touch the ☐ button on the control panel, select Settings, and then press the Dial Knob to change various settings for your oven. Please refer to the following table for detailed descriptions.
| Menu Submenu Description | ||
| Connections | Wi-Fi You can turn the Wi-Fi on or off. | |
| Easy Connection | You can connect the oven to the SmartThings server through a Wi-Fi connection. When the oven is connected, you can use the SmartThings app to check the status of the oven or control it from a mobile device. | |
| Remote management | Select Activate, and then press the Dial Knob to allow the Call Centre to access your oven remotely to check internal information. | |
| Menu Sub | menu Description | |
| Display | Brightness | You can change the brightness of the display screen. |
| Screen saver | You can turn the screen saver on or off.NOTEThe Screen saver is a function that displays the date and time on your screen if there is no input for a certain time in standby status. | |
| Clock theme You can select the clock theme. | ||
| Timeout | You can set the length of time before the screen saver turns on.NOTEEnergy consumption may increase depending on your setting.When the timeout setting is set to "Always on", the brightness of the LCD automatically changes to level 2 if there is no action for 3 minutes. | |
| Date & time | Automatic date and time | You can turn on or turn off to update time from the Internet. You must be connected to the Wi-Fi network. |
| Select time zone | You can select the time zone. (You must disable Automatic date and time.) | |
| Set date | You can manually set a date. (You must disable Automatic date and time.) | |
| Set time | You can manually set time. (You must disable Automatic date and time.) | |
| Select time format | You can select the time format from 12-hour or 24-hour format. | |
| Language You can select a language. | ||
Cooking Smart
| Menu Sub | menu Description | |
| Volume You can adjust the volume of the oven. | ||
| Water hardness | You can adjust the water hardness of the water you use for steam assisted modes.Soft: Up to 120 ppmMedium: 120-240 ppmMedium Hard: 240-350 ppmHard: Over 350 ppm | |
| Help | Troubleshooting | You can check the troubleshooting. |
| Guide for first use | You can check the simple instructions on basic use of the oven. | |
| About device | Model name You can check the model name of our oven. | |
| SW version | You can check the current version of the firmware. When you have new software available, SW update button will appear on this menu. | |
| Legal information | You can check the legal information. | |
Lock
You can lock the control panel to prevent any unintended operation.
- To activate the Lock function, touch the button on the control panel, select Lock, and then press the Dial Knob.
- To deactivate the Lock function, touch and hold the button until you see the "Control is unlocked." message.
Manual cooking
WARNING on acrylamide
Acrylamide produced while baking starch-containing food such as potato chips, French fries, and bread may cause health problems. It is recommended to cook these foods at low temperatures and avoid overcooking, heavy crisping, or burning.
CAUTION
Foods that can easily spoil (such as milk, eggs, fish, meat, or poultry) should not stand in the oven for more than 1 hour before cooking begins, and should be removed promptly when cooking is completed. Eating spoiled food can result in sickness from food poisoning.
NOTE
- Pre-heating is recommended for all cooking modes unless otherwise specified in the cooking guide.
- When using Eco Grill, put food in the centre of the accessory tray.
Accessory tips
Your oven comes with a different number or kind of accessories. You may find that some accessories are missing from the table below. However, even if you are not provided with the exact accessories specified in this cooking guide, you can follow along with what you already have, and achieve the same results.
- The Baking tray and the Universal tray are interchangeable.
- When cooking oily foods, it is recommended to put a tray under the Wire rack to collect oil residue. If you are provided with the Wire rack insert, you can use it together with the tray.
- If you are provided with the Universal tray or Extra deep tray, or both, it is better to use whichever is deeper for cooking oily foods.
Cooking Smart
Baking: Recommend to preheat the oven for best results.
| Food Accessory Level | Type of heating | Temp. (°C) | Time (min.) | ||
| Sponge cake | Wire rack,∅ 25-26 cm tin | 2 | 160 - 170 | 35 - 40 | |
| Marble cake | Wire rack,Gugelhopf tin | 3 | 175 - 185 | 50 - 60 | |
| Tart | Wire rack,∅ 20 cm tart tin | 3 | 190 - 200 | 50 - 60 | |
| Yeast cake on tray with fruits and crumbles | Universal tray 2 | 160 - 180 | 40 - 50 | ||
| Fruit crumble | Wire rack, 22-24 cm oven dish | 3 | 170 - 180 | 25 - 30 | |
| Scones Universal tray 3 | 180 - 190 | 30 - 35 | |||
| Lasagne | Wire rack, 22-24 cm oven dish | 3 | 190 - 200 | 25 - 30 | |
| Meringues Universal tray 3 | 80 - 100 | 100 - 150 | |||
| Soufflé | Wire rack, soufflé cups | 3 | 170 - 180 | 20 - 25 | |
| Apple yeast tray cake | Universal tray 3 | 150 - 170 | 60 - 70 | ||
| Homemade pizza,1-1.2 kg | Universal tray 2 | 190 - 210 | 10 - 15 | ||
| Frozen puff pastry, filled | Universal tray 2 | 180 - 200 | 20 - 25 | ||
| Quiche | Wire rack, 22-24 cm oven dish | 2 | 180 - 190 | 25 - 35 | |
| Food Accessory Level | Type of heating | Temp. (°C) | Time (min.) | ||
| Apple pie | Wire rack,∅ 20 cm tin | 2 | 160 - 170 | 65 - 75 | |
| Chilled pizza Universal tray 3 | 180 - 200 | 5 - 10 | |||
Roasting
| Food Accessory Level | Type of heating | Temp. (°C) | Time (min.) | ||
| Meat (Beef/Pork/Lamb) | |||||
| Sirloin of beef, 1 kg | Wire rack + Universal tray | 31 | 160 - 180 | 50 - 70 | |
| Boned loin of veal, 1.5 kg | Wire rack + Universal tray | 31 | 160 - 180 | 90 - 120 | |
| Pork roast, 1 kg | Wire rack + Universal tray | 31 | 200 - 210 | 50 - 60 | |
| Joint of pork, 1 kg | Wire rack + Universal tray | 31 | 160 - 180 | 100 - 120 | |
| Leg of lamb on the bone, 1 kg | Wire rack + Universal tray | 31 | 170 - 180 | 100 - 120 | |
| Poultry (Chicken/Duck/Turkey) | |||||
| Chicken, whole, 1.2 kg * | Wire rack + Universal tray (to catch drippings) | 31 | 200 - 60 | -80 * | |
| Chicken pieces | Wire rack + Universal tray | 31 | 200 - 220 | 25 - 35 | |
| Duck breast | Wire rack + Universal tray | 31 | 200 - 210 | 20 - 30 | |
| Small turkey, whole, 5 kg | Wire rack + Universal tray | 31 | 180 - 200 | 120 - 150 | |
| Vegetables | |||||
| Vegetables, 0.5 kg | Universal tray | 3 | 220 - 230 | 15 - 20 | |
| Baked potato halves, 0.5 Kg | Universal tray 3 | 190 - 200 | 40 - 50 | ||
| Fish | |||||
| Fish fillet, baked | Wire rack + Universal tray | 31 | 200 - 220 | 20 - 30 | |
| Roast fish | Wire rack + Universal tray | 31 | 180 - 200 | 30 - 40 | |
* Turn over after 2/3 of cooking time.
Grilling: Recommend preheat the oven using Large Grill mode. Turn over after half of time.
| Food Accessory Level | Type of heating | Temp. (°C) | Time (min.) | ||
| Bread | |||||
| Toast Wire rack 5 | 270 - 300 | 2 - 4 | |||
| Cheese toast Universal tray 4 | 200 4 - 8 | ||||
| Beef | |||||
| Steak * | Wire rack + Universal tray | 41 | 240 - 250 | 15 - 20 | |
| Burgers * | Wire rack + Universal tray | 41 | 250 - 270 | 13 - 18 | |
| Pork | |||||
| Pork chops | Wire rack + Universal tray | 41 | 250 - 270 | 15 - 20 | |
| Sausages | Wire rack + Universal tray | 41 | 260 - 270 | 10 - 15 | |
| Poultry | |||||
| Chicken, breast | Wire rack + Universal tray | 41 | 230 - 240 | 30 - 35 | |
| Chicken, drumstick | Wire rack + Universal tray | 41 | 230 - 240 | 25 - 30 | |
* Turn over after 2/3 of the cooking time.
Cooking Smart
Frozen ready-meal
| Food Accessory Level | Type of heating | Temp. (°C) | Time (min.) | ||
| Frozen pizza, 0.4 - 0.6 kg | Wire rack 3 | [409] | 200 - 220 | 15 - 25 | |
| Frozen lasagne | Wire rack 3 | [TC2K] | 180 - 200 | 45 - 50 | |
| Frozen oven chips | Universal tray 3 | [YS3K] | 220 - 225 | 20 - 25 | |
| Frozen croquettes | Universal tray 3 | [YC3Z] | 220 - 230 | 25 - 30 | |
| Frozen oven camembert | Wire rack 3 | [2Y7K] | 190 - 200 | 10 - 15 | |
| Frozen baguettes with topping | Wire rack + Universal tray | 31 | [WD6X] | 190 - 200 | 10 - 15 |
| Frozen fish fingers | Wire rack + Universal tray | 31 |  | 190 - 200 | 15 - 25 |
| Frozen fish burger | Wire rack 3 | [FA2T] | 180 - 200 | 20 - 35 | |
Steam assisted mode
With steam enabled, the oven generates steam and evenly distributes it inside the cooking zone, covering the whole area across every rack and corner. This helps to brown the food, giving a crispy top and soft, juicy inside. Fill the reservoir with drinkable water up to the max line, and select a steam level that best suits your recipe.
Steam Convection
Recommend preheating the oven with steam mode for baking.
| Food Accessory Level | Steam level | Temp. (°C) | Time (min.) | ||
| Chilled bread rolls | Universal tray 3 Low | 180 - 190 | 10 - 20 | ||
| Chilled croissants | Universal tray 3 Low | 180 - 190 | 10 - 20 | ||
| White bread loaf | Wire rack, 24 cm loaf cake tin | 2 Med | 180 - 190 | 30 - 40 | |
| Mixed grain bread loaf | Wire rack, 24 cm loaf cake tin | 2 Med | 180 - 190 | 30 - 40 | |
| Puff pastry Universal tray 3 Low | 180 - 190 | 15 - 20 | |||
| Vanilla flan caramel | Wire rack 3 High | 120 - 130 | 20 - 30 | ||
| Cheese cake Wire rack 3 Med | 150 - 160 | 55 - 65 | |||
| Baguette * Universal tray 3 High | 180 - 200 | 25 - 35 | |||
| Frozen self-rising pizza | Universal tray 3 | Med | 190 - 210 | 15 - 25 | |
* Baguette needs steam only at the beginning of baking. Recommend using the Steam Convection mode for 10 minutes and then using the Convection mode with the same temperature for the remaining baking time.
Steam Top Heat + Convection
Recommend adjusting the cooking mode after half of the cooking time to remove steam for a crispy texture. Recommend using the Top Heat + Convection mode or Convection mode and keeping the temperature.
| Food | Accessory Level | Steam level | Temp. (°C) | Time (min.) | |
| Pork roast with crackling, 1.2 kg | Wire rack + Universal tray | 31 | Med | 170 - 180 | 90 - 120 |
| Chicken, whole, 1.2 kg | Wire rack + Universal tray | 21 | Med | 190 - 200 | 55 - 65 |
| Chicken pieces | Wire rack + Universal tray | 41 | Low | 210 - 220 | 25 - 35 |
| Duck breast | Wire rack + Universal tray | 41 | Low | 170 - 180 | 15 - 25 |
| Duck, whole, 2.5 kg | Wire rack + Universal tray | 21 | Med | 170 - 180 | 100 - 120 |
| Small turkey, whole, 4.0 kg | Wire rack + Universal tray | 21 | Med | 180 - 200 | 120 - 150 |
| Whole fish, 0.5 kg * | Wire rack + Universal tray | 41 | Med | 170 - 190 | 20 - 30 |
| Fish fillets * | Wire rack + Universal tray | 41 | Low | 190 - 200 | 15 - 25 |
* Recommend using the Steam Top Heat + Convection mode during cooking time for a moist texture.
Steam Bottom Heat + Convection
Recommend preheating the oven with steam mode for crispy baking.
| Food Accessory Level | Steam level | Temp. (°C) | Time (min.) | ||
| Homemade pizza | Universal tray | 2 | Mcd | 190 - 200 | 15 - 20 |
| Self-rising pizza | Universal tray | 2 | Med | 190 - 210 | 15 - 20 |
| Quiche | Wire rack | 2 | Low | 180 - 190 | 25 - 35 |
| Bread rolls | Universal tray | 2 | Low | 180 - 190 | 15 - 25 |
| Foccacia | Wire rack | 2 | Low | 200 - 210 | 15 - 25 |
Steam Cook (applicable models only)
This Steam Cook mode allows you to use a wide range of recipes.
Be sure to use a steam container for steam cook and fill the reservoir with drinkable water up to the max line.
| Food | Accessory | Level | Time (min.) |
| Broccoli florets | Steam container | A | 10 - 15 |
| Sliced vegetables (Courgette, carrot, bell pepper) | Steam container | A | 10 - 20 |
| Green asparagus | Steam container | A | 15 - 20 |
| White asparagus | Steam container | A | 15 - 20 |
| Green beans | Steam container | A | 15 - 20 |
| Brussel sprouts | Steam container | A | 15 - 20 |
| Peeled potato halves | Steam container | A | 25 - 35 |
| Fish fillet | Steam container | A | 15 - 25 |
| Mussels | Steam container | A | 10 - 20 |
| Prawns | Steam container | A | 10 - 20 |
| Chicken breast | Steam container | A | 20 - 30 |
| Boiled eggs | Steam container | A | 13 - 18 |
Cooking Smart
NOTE
Level A refers to an exclusive rack for the steam container. See the Accessories section on page 13 for exact location of the level A.
Pro-Roasting
This mode includes an automatic heating-up cycle up to 220 °C. The top heater and the convection fan are operating during the process of searing the meat. After this stage the food is cooked gently by the low temperature of pre-selection. This process is done while the top and the bottom heaters are operating. This mode is suitable for meat roasts and poultry.
| Food Accessory Level Temp. (°C) Time (hrs.) | ||||
| Roast beef | Wire rack +Universal tray | 31 | 80-100 3 | 4 |
| Pork roast | Wire rack +Universal tray | 31 | 80-100 4 | 5 |
| Lamb roast | Wire rack +Universal tray | 31 | 80-100 3 | 4 |
| Duck breast | Wire rack +Universal tray | 31 | 80-100 2 | 3 |
Dual cook
Before using dual cook function insert the divider into the oven. Recommend preheat the oven for best results.
The following table presents 5 dual cook guides recommend for cooking, roasting and baking. Using dual cook function, you will be able to cook your main dish & side dish or main dish & dessert simultaneously.
- Using dual cook function, preheating time can be extended.
| No. | Zone Food | Accessory Level | Type of heating | Temp. (°C) | Time (min.) | ||
| 1 | Upper | Sponge cake | Wire rack, ∅ 25-26 cm tin | 4 | 160 - 170 | 40 - 45 | |
| Lower | Homemade pizza, 1.0-1.2 kg | Universal tray | 1 | 190 - 210 | 13 - 18 | ||
| 2 | Upper | Roast vegetables, 0.4-0.8 kg | Universal tray | 4 | 220 - 230 | 13 - 18 | |
| Lower | Apple pie | Wire rack, ∅ 20 cm tin | 1 | 165 - 175 | 70 - 80 | ||
| 3 | Upper | Pita bread | Universal tray | 4 | 230 - 240 | 13 - 18 | |
| Lower | Potato gratin, 1.0-1.5 kg | Wire rack, 22-24 cm oven dish | 1 | 180 - 190 | 45 - 50 | ||
| 4 | Upper | Chicken, drumstick | Wire rack + Universal tray | 44 | 230 - 250 | 30 - 35 | |
| Lower | Lasagne, 1.0-1.5 kg | Wire rack, 22-24 cm oven dish | 1 | 190 - 200 | 30 - 35 | ||
| 5 | Upper | Fish fillet, baked | Wire rack + Universal tray | 44 | 210 - 230 | 15 - 20 | |
| Lower | Apple puff pastry | Universal tray | 1 | 170 - 180 | 25 - 30 |
You can also use upper or lower zone only to save power. The cooking time can be extended when you use separated zone. Recommend preheat the oven for best results.
Upper
| Food | Accessory | Level | Type of heating | Temp. (°C) | Time (min.) |
| Potato gratin | Wire rack, 22-24 cm oven dish | 4 | 160 - 170 40 - 50 | ||
| Scones | Universal tray | 4 | 180 - 190 30 - 35 | ||
| Lasagne | Wire rack, 22-24 cm oven dish | 4 | 180 - 190 25 - 35 | ||
| Chicken, drumstick * | Wire rack + Universal tray | 4 | 230 - 250 30 - 35 |
* Do not preheat the oven.
Lower
| Food Accessory Level | Type of | heating | Steam level | Temp. (°C) | Time (min.) | |
| Dutch loaf cake | Wire rack, 24 cm loaf cake tin | 1 | - | 170 - 180 | 50 - 60 | |
| Apple pie | Wire rack, ∅ 20 cm tin | 1 | - | 160 - 170 | 70 - 80 | |
| Homemade pizza, 1.0-1.2 kg | Universal tray | 1 | - | 190 - 210 | 15 - 20 | |
| Croissants | Universal tray | 1 Low | 180 - 190 | 15 - 20 | ||
| Cheese cake | Wire rack 1 | Med | 150 - 160 | 60 - 70 | ||
| Bread rolls | Universal tray | 1 Low | 180 - 190 | 15 - 25 | ||
| Broccoli florets * | Steam container | A | - | - 10 | 15 | |
| Peeled potato halves * | Steam container | A | - | - 25 | 35 | |
| Fish fillet * | Steam container | A | - | - 15 | 25 | |
| Boiled eggs * | Steam container | A | - | - 13 | 18 | |
NOTE
- Level A refers to an exclusive rack for the steam container. See the Accessories section on page 13 for exact location of the level A. • Availability of the cook modes depends on the oven model.
Cooking Smart
Eco Convection
This mode uses the optimized heating system so that you save energy while cooking your dishes. The times for this category are suggested not to be preheated before cooking to save more energy.
| Food | Accessory | Level | Temp. (°C) | Time (min.) |
| Fruit crumble, 0.8-1.2 kg | Wire rack, 24 cm oven dish | 2 160 | - 180 60 - 80 | |
| Jacket potatoes, 0.4-0.8 kg | Universal tray 2 | 190 - 200 70 | - 80 | |
| Sausages, 0.3-0.5 kg | Wire rack + Universal tray | 3 1 | 160 - 180 | 20 - 30 |
| Frozen oven chips, 0.3-0.5 kg | Universal tray 3 | 180 - 200 25 | - 35 | |
| Frozen potato wedges, 0.3-0.5 kg | Universal tray 3 | 190 - 210 25 | - 35 | |
| Fish fillets, baked, 0.4-0.8 kg | Wire rack + Universal tray | 3 1 | 200 - 220 | 30 - 40 |
| Crispy fish fillets, breaded, 0.4-0.8 kg | Wire rack + Universal tray | 3 1 | 200 - 220 | 30 - 45 |
| Roast sirloin of beef, 0.8-1.2 kg | Wire rack + Universal tray | 2 1 | 180 - 200 | 65 - 75 |
| Roast vegetables, 0.4-0.6 kg | Universal tray 3 | 200 - 220 25 | - 35 |
Meat probe
| Type of food Core temperature (°C) | ||
| Beef/Lamb | Rare 45 - 50 | |
| Medium 55 - 60 | ||
| Well done | 65 - 70 | |
| Pork | 80 - 85 | |
| Poultry | 85 - 90 | |
Auto Cook programmes
CAUTION
Foods that can easily spoil (such as milk, eggs, fish, meat, or poultry) should not stand in the oven for more than 1 hour before cooking begins, and should be removed promptly when cooking is completed. Eating spoiled food can result in sickness from food poisoning.
Single cook
The following table presents 50 auto programmes for cooking, roasting, and baking.
It contains their quantities, weight ranges, and appropriate recommendations. Cooking modes and times have been pre-programmed for your convenience. You will find some recipes for the auto programmes in your instruction book.
WARNING
Always use oven gloves while taking out food.
1. Bakes & Bakery
The Auto Cook programmes include preheating during baking and display the preheating progress. Start the programme; after the preheating beep sounds, insert the food. Always use oven gloves while taking out food.
Recommend the 22-24 cm ovenproof dish that can resist heat (up to 300 °C) and is made from glass or glass ceramic.
| Food Weight (kg) Accessory Level | |||
| Bakes | |||
| Potato gratin | 1.0 - 1.5 Wire | rack 3 | |
| Prepare fresh potato gratin using an ovenproof dish, 22 - 24 cm. Start programme, after preheating beep sounds, put dish on the centre of rack. | |||
| Vegetable gratin | 0.8 - 1.2 Wire | rack 3 | |
| Prepare fresh vegetable gratin using an ovenproof dish, 22 - 24 cm. Start programme, after preheating beep sounds, put dish on the centre of rack. | |||
| Food Weight | (kg) Accessory Level | ||
| Pasta bake | 1.2 - 1.5 Wire | rack 3 | |
| Prepare pasta gratin using 22 - 24 cm ovenproof dish.Start programme, after preheating beep sounds, put dish on the centre of rack. | |||
| Lasagne | 1.0 - 1.5 Wire | rack 3 | |
| Prepare homemade lasagna using 22 - 24 cm ovenproof dish. Start programme, after preheating beep sounds, put dish on the centre of rack. | |||
| Ratatouille | 1.2 - 1.5 Wire | rack 3 | |
| Put ingredients for Ratatouille in casserole dish with lid.Start programme, after preheating beep sounds, put dish on the centre of rack. Bake covered. Stir before serving. | |||
| Pies & Pastry | |||
| Apple pie | 1.2 - 1.4 Wire | rack 2 | |
| Prepare apple pie using a 20 - 24 cm round metal baking tin. Start programme, after preheating beep sounds, put tin on the centre of rack. | |||
| Croissants * | 0.3 - 0.4 Universal tray 3 | ||
| Prepare croissants (chilled ready dough). Put on baking paper on universal tray. Start programme, after preheating beep sounds, put tray into the oven. | |||
| Apple puff pastry * | 0.3 - 0.4 Universal tray 3 | ||
| Put apple puff pastries on baking paper on universal tray.Start programme, after preheating beep sounds, put tray into the oven. | |||
| Fruit flan base | 0.4 - 0.5 Wire | rack 3 | |
| Put the dough into a black metal buttered baking dish for cake base. Start programme, after preheating beep sounds, put tin on the centre of rack. | |||
| Food Weight | (kg) Accessory Level | ||
| Quiche Lorraine | 1.2 - 1.5 Wire | rack 2 | |
| Prepare quiche dough, put in a round quiche dish with 22 - 24 cm diameter. Start programme, after preheating beep sounds add filling and put dish on the centre of rack. | |||
| Madeleines | 0.2 - 0.4 Wire | rack 3 | |
| Put dough into black metal madeleine moulds. Start programme, after preheating beep sounds add filling and put dish on the centre of rack. | |||
| Bread | |||
| White bread loaf * | 0.6 - 0.7 Wire | rack 2 | |
| Prepare dough and put into a black metal rectangular baking dish (length 25 - 30 cm). Start programme, after preheating beep sounds put dish on the centre of rack. | |||
| Mixed grain bread loaf * | 0.8 - 0.9 Wire | rack 2 | |
| Prepare dough and put into a black metal rectangular baking dish (length 25 - 30 cm). Start programme, after preheating beep sounds put dish on the centre of rack. | |||
| Baguettes * | 0.6 - 0.7 Universal tray 3 | ||
| Prepare dough as 2 pieces and put on the universal tray. | |||
| Walnut bread * | 1.0 - 1.1 Universal tray 3 | ||
| Prepare dough as 4 pieces and distribute on the universal tray. | |||
| Bread roll * | 0.3 - 0.5 Universal tray 3 | ||
| Prepare rolls (chilled ready dough). Put on baking paper on universal tray. Start programme, after preheating beep, put tray into the oven. | |||
Cooking Smart
| Food Weight (kg) Accessory Level | |||
| Cakes & Desserts | |||
| Fruit crumbles | 0.8 - 1.2 Wire | rack 3 | |
| Put fresh fruits (raspberries, blackberries, apple slices, or pear slices) into oven dish 22 - 24 cm. Distribute crumbles on lop. Start programme, after preheating beep sounds, put dish on the centre of rack. | |||
| Scones | 0.5 - 0.6 Universal tray 3 | ||
| Put scones (5 - 6 cm diameter) on baking paper on universal tray. Start programme, after preheating beep sounds, put tray into the oven. | |||
| Sponge cake | 0.5 - 0.6 Wire | rack 3 | |
| Prepare cake batter and put into a black metal round baking tin with 25 - 26 cm diameter. Start programme, after preheating beep sounds, put tin on the centre of rack. | |||
| Marble cake | 0.7 - 0.8 Wire | rack 2 | |
| Prepare cake batter and put into a metal round gugelhupf or bundt tin. Start programme, after preheating beep sounds, put tin on the centre of rack. | |||
| Dutch loaf cake | 0.7 - 0.8 Wire | rack 2 | |
| Prepare cake batter and put into a black metal rectangular baking dish (length 25 - 26 cm). Start programme, after preheating beep sounds, put tin on the centre of rack. | |||
| Cheesecake * | 0.8 - 0.9 Wire | rack 2 | |
| Prepare dough and put into a black metal round baking tin (20 - 24 cm). Start programme, after preheating beep sounds, put tin on the centre of rack. | |||
| Brownies | 0.7 - 0.8 Wire | rack 3 | |
| Prepare cake batter using a 22 - 24 cm ovenproof dish. Start programme, after preheating beep sounds, put dish on the centre of rack. | |||
* Fill the reservoir with drinkable water up to the max line for steam-assisted cooking.
2. Roast
Recommend fresh chilled meat, poultry and fish for better taste. Recommend thawing frozen ingredients thoroughly if you use them. The auto programmes don't include preheating and turning over. But you can turn over after half time for better results if you want.
| Food Weight (kg) Accessory Level | |||
| Meat | |||
| Roast sirloin of beef ** | 0.8 - 1.2 | Wire rack 2 | |
| Universal tray 1 | |||
| Season the beef and leave in refrigerator for 1 hour. Put on the wire - rack with fat - side up. | |||
| Slow cooked roast beef ** | 0.8 - 1.2 | Wire rack 2 | |
| Universal tray 1 | |||
| Season the beef and leave in refrigerator for 1 hour. Put on the wire - rack with fat - side up. | |||
| Herb roasted lamb chops | 0.4 - 0.8 | Wire rack 4 | |
| Universal tray 1 | |||
| Marinate the lamb chops with herbs and spices and put them on wire rack. | |||
| Leg of lamb on the bone ** | 0.8 - 1.4 | Wire rack 3 | |
| Universal tray 1 | |||
| Marinate the lamb and put on wire rack. | |||
| Roast pork with crackling ** | 0.8 - 1.2 | Wire rack 3 | |
| Universal tray 1 | |||
| Put pork roast with fat side to the top on wire rack. | |||
| Rack of pork ribs | 0.8 - 1.2 | Wire rack 3 | |
| Universal tray 1 | |||
| Put rack of pork rib on rack. | |||
| Food Weight | (kg) Accessory Level | ||
| Poultry | |||
| Chicken, whole */** | 0.8 - 1.4 | Wire rack 2 | |
| Universal tray 1 | |||
| Rinse and clean chicken. Brush chicken with oil and spices. Put it breast side down on the rack. Put the meat probe into the thickest area of breast. | |||
| Chicken, breast | 0.5 - 0.9 | Wire rack 4 | |
| Universal tray 1 | |||
| Marinate breast and put on the rack. | |||
| Chicken drumstick | 0.5 - 0.9 | Wire rack 4 | |
| Universal tray 1 | |||
| Brush with oil and spices and put on rack. | |||
| Butterfly chicken * | 1.0 - 1.3 | Wire rack 3 | |
| Universal tray 1 | |||
| Rinse and clean chicken. Cut the back of chicken and brush chicken with oil and spices. Put it on wire rack and universal tray and then cook. | |||
| Duck, whole */** | 1.5 - 2.3 | Wire rack 2 | |
| Universal tray 1 | |||
| Rinse and clean duck. Brush duck with spices. Put it breast side up on the wire rack and universal tray. Put the meat probe into the thickest area of breast. | |||
| Duck, breast | 0.3 - 0.7 | Wire rack 4 | |
| Universal tray 1 | |||
| Put duck breast with fat - side up on the rack. | |||
| Food Weight (kg) Accessory Level | |||
| Fish | |||
| Trout fillet, baked | 0.3 - 0.7 Universal tray 4 | ||
| Put trout fillets with the skin side up on the universal tray. | |||
| Trout | 0.3 - 0.7 | Wire rack 4 | |
| Universal tray 1 | |||
| Rinse and clean the fish and put head to tail on the rack.Add lemon juice, salt and herbs inside fish. Cut skin surface with knife. Brush oil and salt. | |||
| Sole | 0.3 - 0.7 Universal tray 3 | ||
| Put sole on baking paper on the universal tray. Cut surface with knife. | |||
| Salmon steak/fillet | 0.3 - 0.7 | Wire rack 4 | |
| Universal tray 1 | |||
| Rinse and clean fillets or steaks. Put fillets skin side up on rack. | |||
* Fill the reservoir with drinkable water up to max line for steam assisted cooking. ** Use the meat probe into the thickest part of meat.
Cooking Smart
3. Side Dishes
The auto programmes don't include preheating. Use fresh vegetables.
| Food Weight (kg) | Accessory Level | ||
| Roast vegetables | 0.3 - 0.7 Universal tray 4 | ||
| Rinse and prepare slices of courgette, aubergine, pepper, onion and cherry tomatoes. Brush with olive oil, herbs and spices. Distribute evenly on tray. | |||
| Stuffed tomatoes | 0.3 - 0.7 Universal tray 3 | ||
| Rinse and cut the tomatoes into halves, core them. Stuff with mixtures (for example, rice, minced beef) and put it on tray. | |||
| Potato wedges | 0.3 - 0.7 Universal tray 3 | ||
| Rinse and cut potatoes into wedges. Brush with olive oil, herbs and spices. Distribute evenly on tray and cook. | |||
| Baked potato halves | 0.5 - 0.9 Universal tray 3 | ||
| Cut large potatoes (each 200 g) into halves lengthways. Put with cut side up on universal tray and brush with olive oil, herbs and spices. | |||
4. Convenience
The auto programmes don't include preheating. Use frozen pre-cooked conveniences.
| Food Weight (kg) | Accessory Level | ||
| Frozen oven chips | 0.3 - 0.7 Universal tray 3 | ||
| Distribute frozen oven chips evenly on tray. | |||
| Frozen potato wedges | 0.3 - 0.7 Universal tray 3 | ||
| Distribute frozen potato wedges evenly on tray. | |||
| Frozen lasagne | 0.3 - 0.7 Wire rack 3 | ||
| Put the frozen lasagne in the oven dish and put on the wire rack. | |||
5. Pizza & Dough
The Auto Cook programmes include preheating during baking and display the preheating progress. Start programme, after preheating beep sounds, insert food. Always use oven gloves while taking out food.
| Food Weight (kg) Accessory Level | |||
| Frozen pizza | 0.3 - 0.7 Wire rack 3 | ||
| Start programme, after preheating beep sounds, put the frozen pizza on the middle of the wire rack. | |||
| Homemade pizza | 0.8 - 1.2 Universal tray 2 | ||
| Prepare homemade pizza with the yeast dough and put it on the universal tray. The weight include dough and topping such as sauce, vegetables, ham and cheese. Start programme, after preheating beep sounds, put tray into the oven. | |||
| Calzone | 0.8 - 1.2 Universal tray 3 | ||
| Prepare 4 pieces of fresh calzone and put it on tray. | |||
| Dough proofing | 0.3 - 0.7 Wire rack 2 | ||
| Prepare dough in bowl, cover with cling film. Put in centre of rack. | |||
Dual cook
The following table presents 20 auto programmes for cooking, roasting and baking. You can use only upper zone or lower zone and use the upper and lower zones at the same time.
The programme contains its quantities, weight ranges and appropriate recommendations. Cooking modes and times have been pre-programmed for your convenience. You will find some recipes for the auto programmes in your instruction book.
All dual Auto Cook programmes include preheating and display the preheating progress.
Please put the food in the oven after preheating beep.
WARNING
Always use oven gloves while taking out food.
- Upper
| Food Weight (kg) | Accessory Level | ||
| Potato gratin | 1.0 - 1.5 Wire | rack 4 | |
| Prepare fresh potato gratin using an ovenproof dish, 22 - 24 cm. Start programme, after preheating beep sounds, put dish on the centre of rack. | |||
| Pasta bake | 1.2 - 1.5 Wire | rack 4 | |
| Prepare pasta gratin using 22 - 24 cm ovenproof dish.Start programme, after preheating beep sounds, put dish on the centre of rack. | |||
| Lasagne | 1.0 - 1.5 Wire | rack 4 | |
| Prepare homemade lasagna using 22 - 24 cm ovenproof dish. Start programme, after preheating beep sounds, put dish on the centre of rack. | |||
| Food Weight (kg) Accessory Level | |||
| Scones | 0.5 - 0.6 Universal tray 4 | ||
| Put scones (5 - 6 cm diameter) on baking paper on universal tray. Start programme, after preheating beep sounds, put tray into the oven. | |||
| Chicken drumstick | 0.5 - 0.9 | Wire rack 4 | |
| Universal tray 4 | |||
| Brush with oil and spices and put on rack. | |||
| Salmon steak/fillet | 0.3 - 0.7 | Wire rack 4 | |
| Universal tray 4 | |||
| Rinse and clean fillets or steaks. Put fillets skin side up on rack. | |||
| Roast vegetables | 0.3 - 0.7 Universal tray 4 | ||
| Rinse and prepare slices of courgette, aubergine, pepper, onion and cherry tomatoes. Brush with olive oil, herbs and spices. Distribute evenly on tray. | |||
| Baked potato halves | 0.5 - 0.9 Universal tray 4 | ||
| Cut large potatoes (each 200 g) into halves lengthways. Put with cut side up on universal tray and brush with olive oil, herbs and spices. | |||
| Frozen potato wedges | 0.3 - 0.7 Universal tray 4 | ||
| Distribute frozen potato wedges evenly on tray. | |||
| Frozen oven chips | 0.3 - 0.7 Universal tray 4 | ||
| Distribute frozen oven chips evenly on tray. | |||
Cooking Smart
- Lower
| Food Weight (kg) | Accessory Level | ||
| Apple pie | 1.2 - 1.4 Wire | rack 1 | |
| Prepare apple pie using a 20 - 24 cm round metal baking tin. Start programme, after preheating beep sounds, put tin on the centre of rack. | |||
| Apple puff pastry * | 0.3 - 0.4 Universal tray 1 | ||
| Put apple puff pastries on baking paper on tray. Start programme, after preheating beep sounds, put tray into the oven. | |||
| Croissants * | 0.3 - 0.4 Universal tray 1 | ||
| Prepare croissants (chilled ready dough). Put on baking paper on universal tray. Start programme, after preheating beep sounds, put tray into the oven. | |||
| Quiche Lorraine | 1.2 - 1.5 Wire | rack 1 | |
| Prepare quiche dough, put in a round quiche dish with 22 - 24 cm diameter. Start programme, after preheating beep sounds add filling and put dish on the centre of rack. | |||
| Bread roll * | 0.3 - 0.5 Universal tray 1 | ||
| Prepare rolls (chilled ready dough). Put on baking paper on universal tray. Start programme, after preheating beep, put tray into the oven. | |||
| Fruit crumbles | 0.8 - 1.2 Wire | rack 1 | |
| Put fresh fruits (raspberries, blackberries, apple slices, or pear slices) into oven dish 22 - 24 cm. Distribute crumbles on top. Start programme, after preheating beep sounds, put dish on the centre of rack. | |||
| Food Weight | (kg) Accessory Level | ||
| Cheesecake * | 0.8 - 0.9 Wire | rack 1 | |
| Prepare dough and put into a black metal round baking tin (20 - 24 cm). Start programme, after preheating beep sounds, put tin on the centre of rack. | |||
| Stuffed tomatoes | 0.3 - 0.7 Universal tray 1 | ||
| Rinse and cut the tomatoes into halves, core them. Stuff with mixtures (for example, rice, minced beef) and put it on tray. | |||
| Frozen pizza | 0.3 - 0.7 Wire | rack 1 | |
| Start programme, after preheating beep sounds, put the frozen pizza on the middle of the wire rack. | |||
| Homemade pizza | 0.8 - 1.2 Universal tray 1 | ||
| Prepare homemade pizza with the yeast dough and put it on the universal tray. The weight include dough and topping such as sauce, vegetables, ham and cheese. Start programme, after preheating beep sounds, put tray into the oven. | |||
* Fill the reservoir with drinkable water up to max line for steam assisted cooking.
3. Twin
You can select one auto programme for the lower and upper zones and cook simultaneously.
CAUTION
When you use either the upper or lower zone, the fan and the heater of the other zone may operate for optimal performance. The zone that is not being used must not be used for any unintended purposes.
Healthy Cook (applicable models only)
The oven offers 20 healthy cook programmes. The cook settings will be adjusted automatically according to the selected programme. You can use single zone or lower zone. Be sure to use steam container for steam cook and fill the reservoir with drinkable water up to max line.
WARNING
Always use oven gloves while taking out food.
| Food | Weight (kg) | Accessory | Level |
| Broccoli florets | 0.4 - 0.6 | Steam containers | A |
| Cauliflower florets | 0.4 - 0.6 | Steam containers | A |
| Carrot slices | 0.4 - 0.6 | Steam containers | A |
| Courgette slices | 0.4 - 0.6 | Steam containers | A |
| Pumpkin cubes | 0.4 - 0.6 | Steam containers | A |
| Green asparagus | 0.4 - 0.6 | Steam containers | A |
| White asparagus | 0.4 - 0.6 | Steam containers | A |
| Green beans | 0.4 - 0.6 | Steam containers | A |
| Brussels sprouts | 0.4 - 0.6 | Steam containers | A |
| Peeled potato halves | 0.6 - 0.8 | Steam containers | A |
| Apple slices | 0.4 - 0.6 | Steam containers | A |
| Prawns | 0.6 - 0.8 | Steam containers | A |
| Mussels | 0.8 - 1.0 | Steam containers | A |
| Fish fillet | 0.6 - 0.8 | Steam containers | A |
| Chicken breast | 0.8 - 1.0 | Steam containers | A |
| Crème caramel | - | Steam containers | A |
| Frozen dumplings | 0.4 - 0.6 | Steam containers | A |
| Egg, hard-boiled | 0.5 - 0.7 | Steam containers | A |
| Egg, medium-boiled | 0.5 - 0.7 | Steam containers | A |
| Egg, soft-boiled | 0.5 - 0.7 | Steam containers | A |
NOTE
Level A refers to an exclusive rack for the steam container. See the Accessories section on page 13 for exact location of the level A.
Special Function
Defrost
This mode is used for defrosting frozen products, baking goods, fruit, cake, cream and chocolate. The defrosting time is depending on the type, size and quantity of the food.
| Food | Accessory | Level | Temp. (°C) | Time (min.) |
| Frozen productsChicken nuggets,Sausage, potatoes | Wire rack +Universal tray | 31 | 50 - | |
| Baked goodsBread and bread rolls | Wire rack +Universal tray | 31 | 50 - | |
| Fruit | Wire rack, oven dish | 3 | 30 | - |
| Cake, cream, chocolate | Wire rack, oven dish | 3 | 30 | - |
Drying
This mode is used for drying the fruit, vegetable and herb. The drying time is depending on the type and thickness and quantity of the food.
| Food Accessory Level Temp. (°C) Time (min.) | ||||
| Fruit | Wire rack | 3 | 70 - 80 | 300 - 420 |
| Vegetable | Wire rack | 3 | 70 - 80 | 200 - 500 |
| Herb | Wire rack | 3 | 70 - 80 | 60 - 90 |
Prove Dough
This mode is used for proving the dough and making the homemade yogurt.
| Food Accessory Level Temp. (°C) Time (min.) | ||||
| Pizza dough | Wire rack | 2 | 30 - 40 | 30 - 40 |
| Cake/Bread dough | Wire rack, oven dish | 2 | 30 - 40 | 40 - 50 |
| Homemade yogurt | Wire rack, oven dish | 2 | 40 - 50 | 6 - 7 (hours) |
Cooking Smart
Pizza Cook
This mode is suitable for pizza. Cooking temperature and time will depend on the pizza size and the thickness of pizza dough.
| Food | Accessory | Level | Temp. (°C) | Time (min.) |
| Homemade pizza | Universal tray | 2 | 190 - 210 | 15 - 25 |
| Homemade thin pizza | Universal tray | 2 | 210 - 230 | 10 - 15 |
Slow Cook
This mode uses the low-temperature for the tender texture. This mode is suitable for roasting beef, pork, veal or lamb when you want to a tender texture. Recommend sear the meat all over at high temperature on the hob before roasting.
| Food Accessory Level Temp. (°C) | Time (hours) | |||
| Roast beef | Wire rack + Universal tray | 31 | 80 - 100 | 3 - 4 |
| Sirloin, 5-6 cm thick | Wire rack + Universal tray | 31 | 70 - 80 4 - 5 | |
| Pork roast | Wire rack + Universal tray | 31 | 80 - 100 | 4 - 5 |
| Lamb roast | Wire rack + Universal tray | 31 | 80 - 100 | 3 - 4 |
| Duck breast | Wire rack + Universal tray | 31 | 70 - 90 2 - 3 | |
Test dishes
According to standard EN 60350-1.
1. Baking
The recommendations for baking refer to a preheated oven. Do not use the Fast Preheat function. Always place trays with the slanted side facing the door.
| Type of food | Accessory Level | Type of heating | Temp. (°C) | Time (min.) | |
| Small cakes | Universal tray | 3 | 165 23 - 28 | ||
| 3 | 165 25 - 30 | ||||
| 1+3 | 155 33 - 38 | ||||
| Shortbread | Universal tray 1+3 | 140 28 - 33 | |||
| Fatless sponge cake | Wire rack + Spring form cake tin (Dark coated, ∅ 26 cm) | 2 | 165 30 - 35 * | ||
| 2 | 160 30 - 35 | ||||
| 1+4 | 155 35 - 40 | ||||
| Apple pie | Wire rack + 2 Spring form cake tins ** (Dark coated, ∅ 20 cm) | 2, placed diagonally | 160 70 - 80 | ||
| Universal tray + Wire rack + 2 Spring form cake tins *** (Dark coated, ∅ 20 cm) | 1+3 | 160 80 - 90 | |||
* Increase the cooking time by 5 minutes if you are cooking in Conventional mode using a glass ovenware (∅ 26 cm).
** Two cakes are arranged on the grid at the back left and at the front right.
** Two cakes are arranged in the center on top of each other.
2. Grilling
Preheat the empty oven for 5 minutes using the Large Grill function.
| Type of food | Accessory Level | Type of heating | Temp. (°C) | Time (min.) | |
| White bread toast | Wire rack 5 | [TXKD] | 300 (Max.) | 1 - 2 | |
| Beef burgers * (12 ea) | Wire rack + Universal tray (to catch drippings) | 41 |  | 300 (Max.) | 1st15-182nd5-8 |
* Turn over after 1/3 of the cooking time.
- Roasting
| Type of food | Accessory Level | Type of heating | Temp. (°C) | Time (min.) | |
| Whole chicken * 1.3-1.5 kg | Wire rack + Universal tray (to catch drippings) | 31 | [500V] | 200 60 | -75 |
| Whole chicken * 1.5-1.7 kg | Wire rack + Universal tray (to catch drippings) | 31 | [64°C] | 200 70 | -85 |
* Turn over after half of the time.
4. Steam cooking
Fill the reservoir with drinkable water up to the max line for steam cooking.
| Type of food Accessory Level | Type of heating | Time (min.) | |
| Broccoli florets 0.5 kg | Steam container A | [8CKS] | 12 - 15 |
| Steamed eggs 10 ea | Steam container A | [237T] | 15 - 18 |
| Peeled potatoes 0.5 kg | Steam container A |  | 18 - 23 |
| Frozen salmon Steam container A |  | 18 - 23 |
NOTE
Level A refers to an exclusive rack for the steam container. See the Accessories section on page 13 for the exact location of level A.
Cooking Smart
Collection of frequent Auto Cook recipes
Potato gratin
Ingredients: 800 g potatoes, 100 ml milk, 100 ml cream, 50 g beaten whole egg, 1 tbsp each of salt, pepper, nutmeg, 150 g grated cheese, butter, thyme.
Directions: Peel potatoes and slice them to 3 mm thickness. Rub the butter all over the surface of a gratin dish (22-24 cm). Spread the slices on a clean towel and keep them covered with the towel while you prepare the rest of the ingredients. Mix the rest of the ingredients except for grated cheese into a large bowl and stir well. Layer the potato slices in the dish slightly overlapping and pour the mixture over the potatoes. Spread the grated cheese over the top and bake. After cooking, serve sprinkled with a few fresh thyme leaves.
Vegetable gratin
Ingredients: 800 g vegetables (courgette, tomato, onion, carrot, pepper, pre-cooked potatoes), 150 ml cream, 50 g beaten whole egg, 1 tbsp each of salt, herb (pepper, parsley or rosemary), 150 g grated cheese, 3 tbsp olive oil. Some thyme leaves.
Directions: Wash the vegetables and slice them to 3-5 mm thickness. Layer the slices on a gratin dish (22-24 cm) and pour the oil on the vegetables. Mix the rest of the ingredients except for grated cheese and pour on the vegetables. Spread the grated cheese over the top and bake. Then serve sprinkled with a few fresh thyme leaves.
Lasagne
Ingredients: 2 tbsp olive oil, 500 g minced beef, 500 ml tomato sauce, 100 ml beef stock, 150 g dried lasagne sheets, 1 onion (chopped), 200 g grated cheese, 1 tbsp each of dried parsley flakes, oregano, basil.
Directions: Prepare tomato meat sauce. Heat the oil in a frying pan, then cook the minced beef and chopped onion for about 10 min until browned all over. Pour over the tomato sauce and beef stock, add the dried herbs. Bring up to the boil, then simmer for 30 min. Cook lasagne noodles according to package directions. Layer the lasagne noodle, meat sauce, and cheese then repeat. Then sprinkle evenly with remaining cheese on the top of layer of noodles and bake.
Apple pie
Ingredients: • Pastry: 275 g flour, 1/2 tbsp salt, 125 g white castor sugar, 8 g vanilla sugar, 175 g cold butter, 1 egg (beaten).
- Filling: 750 g firm whole apples, 1 tbsp lemon juice, 40 g sugar, 1/2 tbsp cinnamon, 50 g seedless raisins, 2 tbsp bread crumbs.
Directions: Sift the flour with the salt above a big bowl. Sift the castor sugar and vanilla sugar with it. Cut with 2 knives the butter through the flour in small cubes. Add 3/4 of the beaten egg. Knead all the ingredients in the food processor until a crumbly mass appears. Form the dough into a ball with your hands. Wrap it in plastic foil and leave it chilled for about 30 min. Grease the spring tin (24-26 cm diameter) and dust the surface with flour. Roll out 1/2 of the dough till 5 mm thickness. Put it in the tin (bottom and sides). Peel and core the apples. Cut them in cubes of about 3/4 x 1/4 cm. Sprinkle the apples with lemon juice and mix well. Wash and dry the currants and raisins. Add sugar, cinnamon, raisins and currants. Mix well and sprinkle the bottom of dough with bread crumbs. Press slightly. Roll out the rest of the dough. Cut the dough in small strips and put them cross wise on the filling. Brush the pie evenly with the rest of the beaten egg.
Quiche Lorraine
Ingredients: Pastry: 200 g plain flour, 80 g butter, 1 egg.
Filling: 75 g cubed fatless bacon, 125 ml cream, 125 g crème fraiche, 2 eggs, beaten, 100 g grated cheese from Switzerland, salt and pepper.
Directions: To make the pastry, put the flour, butter and egg in a bowl and mix to a soften pastry and then rest it in the refrigerator for 30 min. Roll out the pastry and placed in the greased ceramic dish for quiche (25 cm diameter). Prick the bottom with a fork. Mix the egg, cream, crème fraîche, cheese, salt and pepper. Pour it on the pastry just before baking.
Fruit crumbles
Ingredients: Topping: 200 g flour, 100 g butter, 100 g sugar, 2 g salt, 2 g cinnamon powder.
Fruit: 600 g mixed fruits.
Directions: Mix all ingredients until to be crumble for making topping. Spread the mixed fruits into an oven dish and sprinkle the crumble.
Homemade pizza
Ingredients: Pizza dough: 300 g flour, 7 g dried yeast, 1 tbsp olive oil, 200 ml warm water, 1 tbsp sugar and salt.
Topping: 400 g sliced vegetable (aubergine, courgette, onion, tomato), 100 g Ham or bacon (chopped), 100 g grated cheese.
Directions: Put the flour, yeast, oil, salt, sugar and warm water in a bowl and mix to a wettish dough. Knead in a mixer or by hand about 5-10 min. Cover with lid and place in oven for 30 min at 35 °C to prove. Roll out the dough on a floured surface into a rectangle shape and put on the tray or pizza pan. Spread the tomato puree on the dough and place ham, mushroom, olive and tomato. Sprinkle evenly with cheese on the top and bake.
Roast sirloin of beef
Ingredients: 1 kg sirloin of beef joint, 5 g salt, 1 g pepper, 3 g each of rosemary, thyme.
Directions: Season the beef with salt, pepper, and rosemary, and leave it in the refrigerator for 1 hour. Place it on the wire rack. Put it in the oven and cook.
Herb roasted lamb chops
Ingredients: 1 kg lamb chops (6 pieces), 4 large garlic cloves (pressed), 1 tbsp fresh thyme (crushed), 1 tbsp fresh rosemary (crushed), 2 tbsp salt, 2 tbsp olive oil.
Directions: Mix the salt, garlic, herbs, and oil, and add the lamb. Turn to coat and leave at room temperature for at least 30 minutes to 1 hour.
Rack of pork ribs
Ingredients: 2 racks pork spare ribs, 1 tbsp black peppercorns, 3 bay leaves, 1 onion (chopped), 3 garlic cloves (chopped), 85 g brown sugar, 3 tbsp Worcestershire sauce, 2 tbsp tomato puree, 2 tbsp olive oil.
Directions: Make a barbecue sauce. Heat oil in a saucepan and add the onion. Cook until softened and add remaining ingredients. Bring to a boil, then reduce heat and simmer for 30 minutes until thickened. Marinate the ribs with the barbecue sauce for at least 30 minutes to 1 hour.
Maintenance
Cleaning
WARNING
• Make sure the oven and accessories are cool before cleaning. - Do not use abrasive cleaning agents, hard brushes, scouring pads or cloths, steel wool, knives, or any other abrasive materials.
Oven interior
- For cleaning the interior of the oven, use a clean cloth and a mild cleaning agent or warm soapy water.
- Do not hand-clean the door seal.
- To avoid damaging the enamelled oven surfaces, only use standard oven cleaners. • To remove stubborn soils, use a special oven cleaner.
- As the temperature of the cooking room increases at an initial period, you may find some spots on the inner glass of the door. If this is the case, turn off the oven and wait until it cools down. Then, use kitchen paper or neutral detergent with a clean cloth to wipe up the inner glass.
Oven exterior
If there are fingerprints, grease, or stains on the exterior (such as the door surface, handle, or display), clean with a soft cloth with a glass cleaner or neutral detergent, and then wipe dry with a soft, clean, dry cloth. Grease and dirt can remain, especially around the handle because of the hot air coming from inside. It is recommended to clean the handle after each use.
Accessories
Wash the accessories after every use, and dry it with a tea towel. To remove stubborn impurities, soak the used accessories in warm soapy water for about 30 minutes before washing.
Catalytic enamel surface (applicable models only)
The removable parts are coated with dark grey catalytic enamel. They can be soiled with oil and fat spattered by the circulating air during convection heating. However, these impurities burn off at oven temperatures of 200 °C or above.
- Remove all accessories from the oven.
- Clean the interior of the oven.
- Select Convection mode with max temperature, and run the cycle for an hour.
Door (applicable models only)
Do not remove the oven door unless for cleaning purposes. To remove the door for cleaning, follow these instructions.
WARNING
The oven door is heavy.
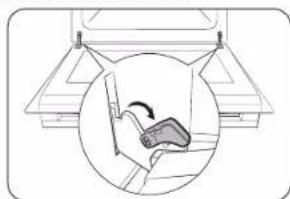
- Open the door and flip open the clips at both hinges.
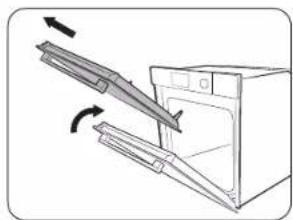
- Close the door approximately 70°. Hold the oven door by the sides using both hands, and lift and pull upwards until the hinges are removed.
- Clean the door with soapy water and a clean cloth.
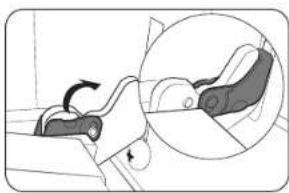
- When done, follow steps 1 to 2 in the reverse order to reinstall the door. Make sure the clips are hinged on both sides.
Door glass
Depending on the model, the oven door is equipped with 3-4 sheets of glass placed against each other. Do not remove the door glass unless for cleaning purposes. To remove the door glass for cleaning, follow these instructions.
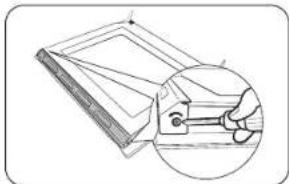
- Use a screwdriver to remove the screws on the left and right sides.
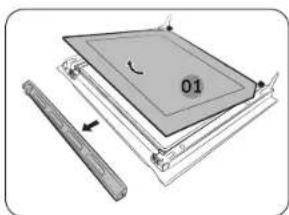
- Detach the coverings in the arrow directions.
- Remove the first sheet from the door.
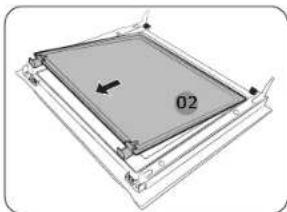
- Remove the second sheet from the door in the arrow direction.
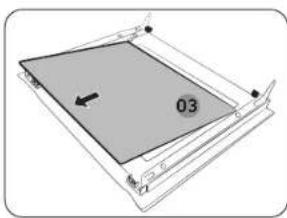
- Remove the third sheet from the door in the arrow direction.
- Clean the glass with soapy water and a clean cloth.
CAUTION
To identify the correct side of the sheet, locate the "PYRO" mark on the corner of every sheet.
Correct direction: PYRO-**
Wrong direction: ----ORY9
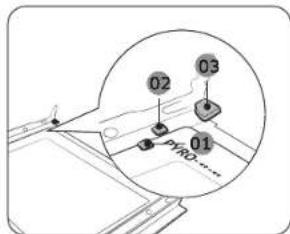
- When done, reinsert the sheets as follows:
- See the picture and locate the hinges. Insert sheet 3 below support clip 1, sheet 2 between support clip 1 and 2, and sheet 1 into support clip 3 in this order. Make sure the printed side of sheets is inserted inward.
01 Support clip 1
02 Support clip 2
03 Support clip 3
Maintenance
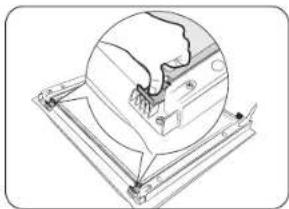
- After inserting sheet 2, press down the glass clips and check if they secure the glass sheet properly.
- Follow steps 1 - 2 above in the reverse order to reinstall the coverings.
WARNING
To prevent heat leaks, make sure you properly reinsert the glass sheets.
Dual door glass (applicable models only)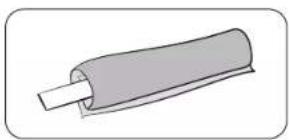
- Tie the wet tissue to stick.
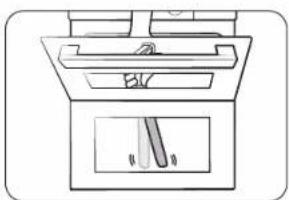
- Put on the towel below door.
- Clean the door.
- Apply detergent to tissue and clean again.
- Wipe the dry tissue to the moisture and bubble:
CAUTION
Do not detach the door for cleaning.
Water collector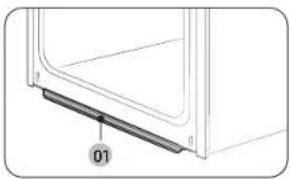
01 Water collector
The water collector collects not only excess moisture from cooking but also food residue. The water collector cannot be detached. Wipe water on the water collector when the oven cools down after a cooking process.
WARNING
If you encounter a water leak from the water collector, contact us at a local Samsung service centre.
Side racks (applicable models only)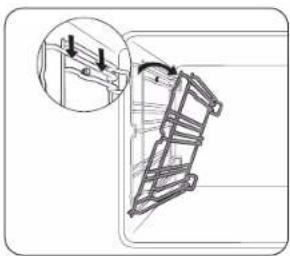
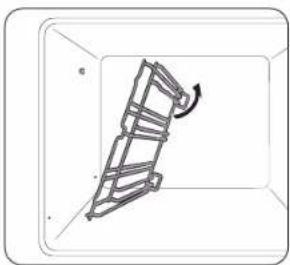
- Press the top line of the left side rack, and lower by approximately 45°.
- Pull and remove the bottom line of the left side rack.
- Remove the right side rack in the same way.
- Clean both side racks.
- When done, follow steps 1 to 2 in the reverse order to reinsert the side racks.
NOTE
The oven operates without the side racks and racks in position.
Replacement
Bulbs
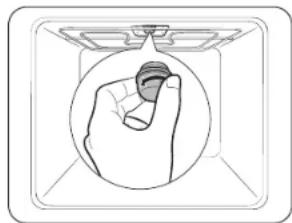
WARNING
- Before replacing a bulb, turn off the oven and unplug the power cord.
- Use only 25 - 40 W / 220 - 240 V, 300 °C heat-resistant bulbs. You can purchase approved bulbs at a local Samsung service center.
- Always use a dry cloth when handling a halogen bulb. This is to prevent the bulb from being tampered with fingerprints or sweat, resulting in a shortened lifecycle.
Side oven light
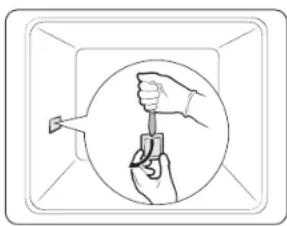
- Hold the lower end of the cover of the side oven light with one hand, and use a flat-sharp tool such as a table knife to remove the cover as shown.
- Replace the side oven light.
- Reinsert the light cover.
Troubleshooting
Checkpoints
If you encounter a problem with the oven, first check the table below and try the suggestions. If the problem continues, contact a local Samsung service centre.
| Problem Cause | Action | |
| The buttons cannot be pressed properly. | If there is foreign matter caught between the buttonsTouch model: if there is moisture on the exteriorIf the Lock function is set | Remove the foreign matter and try again.Remove the moisture and try again.Check whether the Lock function is set. |
| The time is not displayed. | If there is no power supplied | Check whether there is power supplied. |
| The oven does not work. | If there is no power supplied | Check whether there is power supplied.Check if the Demo mode is on. |
| The oven stops while in operation. | If it is unplugged from the power socket | Reconnect the power. |
| The power turns off during operation. | If continuous cooking takes a long timeIf the cooling fan does not workIf the oven is installed in a place without good ventilationWhen using several power plugs in the same socket | After cooking for a long time, let the oven cool.Listen for the sound of the cooling fan.Keep the gaps specified in the product installation guide.Use a single plug. |
Troubleshooting
| Problem Cause | Action | |
| There is no power to the oven. | If there is no power supplied | Check whether there is power supplied. |
| The oven exterior is too hot during operation. | If the oven is installed in a place without good ventilation | Keep the gaps specified in the product installation guide. |
| The door cannot be opened properly. | If there is food residue stuck between the door and product interior | Clean the oven well and then open the door again. |
| The interior light is dim or does not turn on. | If the lamp turns on and then offIf the lamp is covered by foreign matter during cooking | The lamp automatically turns off after a certain amount of time to save power. You can turn it on again by pressing Oven light.Clean the inside of the oven and then check. |
| There is electricity coming from the machine. | If the power supply is not properly groundedIf you are using a socket without grounding | Check whether the power supply is properly grounded. |
| Problem Cause | Action | |
| There is water dripping. | · There may be water or steam in some cases depending on the food. This is not a product malfunction. | · Let the oven cool and then wipe with a dry dish towel. |
| There is steam through a crack in the door. | ||
| There is water remaining in the oven. | ||
| The brightness inside the oven varies. | · The brightness changes depending on power output changes. | · Power output changes during cooking are not malfunctions, so there is no need to worry. |
| Cooking is finished, but the cooling fan is still running. | · The fan automatically runs for a certain amount of time to ventilate inside the oven. | · This is not a product malfunction, so there is no need to worry. |
| The oven does not heat. | · If the door is open· If oven controls are not correctly set· If the household fuse has been blown or the circuit breaker has operated | · Close the door and restart.· Refer to the chapter on oven operation and reset the oven.· Replace the fuse or reset the circuit. If it happens repeatedly, call an electrician.· Check if the Demo mode is on. |
| Smoke comes out during operation. | During initial operationIf there is food on the heater | Smoke may come from the heater when you first use the oven. This is not a malfunction, and if you run the oven 2 - 3 times, it should stop happening.Let the oven cool sufficiently and remove the food from the heater. |
| There is a burning or plastic smell when using the oven. | If using plastic or other containers that are not heat-resistant | Use glass containers suitable for hot temperatures. |
| The oven does not cook properly. | If the door is often opened during cooking | Do not frequently open the door unless you are cooking things that need to be turned. If you frequently open the door, the interior temperature will be lower and this may affect the results of your cooking. |
| I can hear water boiling during steam cooking. | This is because water is heated using the steam heater | This is not a product malfunction, so there is no need to worry. |
| Steam cooking does not work. | If there is no water in the water supply tank | Add water to the tank and try again. |
| Problem Cause Action | ||
| The set is warm during pyro cleaning | This is because pyro cleaning uses high temperatures | This is not a product malfunction, so there is no need to worry. |
| There is a burning smell during pyro cleaning. | Pyro cleaning uses high temperatures, so you may smell food residue burning. | This is not a product malfunction, so there is no need to worry. |
| Steam cleaning does not work. | This is because the temperature is too high | Let the oven cool and then use. |
Troubleshooting
Information codes If the oven fails to operate, you may see an information code on the display. Check the table below and try the suggestions.
| Code | Meaning Action | |
| C-d1 | Door lock malfunctions | Turn off the oven and then restart. If the problem continues, turn off all power for 30 seconds or more and then reconnect.If the problem is not fixed, please contact a service centre. |
| C-20 | Sensor malfunctions | |
| C-21 | ||
| C-22 | ||
| C-23 | ||
| C-F1 | Only occurs during EEPROM Read/Write | |
| C-70 | Steam-related problems | |
| C-72 | ||
| C-F0 | If there is no communication between the main PCB and sub PCB | |
| C-F2 | Occurs when a communication problem is maintained between the Touch IC <-> Main or Sub micom | |
| C-d0 | Button problemOccurs when a button is pressed and held for a period of time. | Clean the buttons and make sure there is no water on/around them. Turn off the oven and try again. If the problem continues, contact a local Samsung service centre. |
| Code | Meaning Action | |
| -dC- | If the divider is removed during cooking in Dual cook mode.If the divider is inserted during cooking in Single cook mode. | The divider must not be removed during cooking in Dual cook mode.Turn off the oven and then restart. If the problem continues, turn off all power for 30 seconds or more and then reconnect.If the problem is not fixed, please contact a service centre. |
| S-01 | Safety shutoffOven has continued operating at a set temperature for an extended time.Under 100 °C - 16 hoursFrom 105 °C to 240 °C - 8 hoursFrom 245 °C to Max - 4 hours | This is not a system failure. Turn off the oven and remove food. Then, try again normally. |
Technical specifications
SAMSUNG strives to improve its products at all times. Both the design specifications and these user instructions are thus subject to change without notice.
| Connection voltage 230 V | ~ 50 Hz | |
| Maximum connected load power 3650 W | ||
| Dimensions(W x H x D) | Main unit 595 x 596 x 570 mm | |
| Built-in 560 x 579 x 549 mm | ||
| Volume 76 liter | ||
Complies with IMDA Standards DA100790
Appendix
Open Source Announcement
The software included in this product contains open source software. You may obtain the complete corresponding source code for a period of three years after the last shipment of this product by contacting our support team through http://opensource.samsung.com (Please use the "Inquiry" menu.)
It is also possible to obtain the complete corresponding source code in a physical medium such as a CD-ROM; a minimal charge will be required.
The following URL http://opensource.samsung.com/opensource/COMMON_R18_
TZ4_0/seq/0 leads to the open source license information as related to this product. This offer is valid to anyone in receipt of this information.

QUESTIONS OR COMMENTS?
| COUNTRY / LOCATION | CALL WEBSITE | |
| CHINA | 400 810 5858 (B2C)400 910 5858 (VIP)400 610 5858 (B2B) | www.samsung.com/cn/support |
| TAIWAN | 0800-32-9999 (All Product)0809-00-5237 (B2B / Dealer) | www.samsung.com/tw/support |
| HONG KONG | 3698 4698 (All Product)3698 4688 (B2B) | www.samsung.com/nk/support(Chinese)www.samsung.com/hk_en/support(English) |
| MACAU 0800 333 | www.samsung.com/nk/support(Chinese)www.samsung.com/hk_en/support(English) | |
| SINGAPORE | 1800 7267864 | 1800-SAMSUNG (Other) | www.samsung.com/sg/support |
| AUSTRALIA | 1300 362 603 (Other) | www.samsung.com/au/support |
| NEW ZEALAND | 0800 726 786 (All Product) | www.samsung.com/nz/support |
| VIETNAM |  | www.samsung.com/vn/support |
| THAILAND | Hotline no : 12821800-29-3232 (Toll free for all product) | www.samsung.com/th/support |
| COUNTRY / LOCATION | CALL WEBSITE | |
| MYANMAR +95 1 2399 888 | www.samsung.com/mm/support | |
| CAMBODIA 1800-20-3232 (Toll free) | www.samsung.com/th/support | |
| LAOS +856-214-17333 | www.samsung.com/th/support | |
| MALAYSIA | 1800-88-9999 (OTH)+603-7713 7420 (Overseas contact) | www.samsung.com/my/support |
| INDONESIA | 021-5699-77770800-112-8888 (All Product, Toll Free)0800-112-7777 (All Product, Toll Free) | www.samsung.com/id/support |
| PHILIPPINES | All Products :1-800-10-7267864 [PLDT-Toll Free]1-800-8-7267864 [Globe-Toll Free]84222111 [Landline ] | www.samsung.com/ph/support |
| JAPAN 0120-363-905 | www.samsung.com/jp/support | |
| INDIA | 1800 5 SAMSUNG(1800 5 7267864) (Toll-Free)1800 40 SAMSUNG(1800 40 7267864) (Toll-Free) | www.samsung.com/in/support |
| NEPAL | 16600172667 (Toll Free for NTC Only)9801572667 (Toll Free for Ncell users) | www.samsung.com/in/support |
| BANCLADESH | 08000-300-300 (Toll free)09612-300-300 | www.samsung.com/bd/support |
| SRI LANKA 011 SAMSUNG (011 7267864) | www.samsung.com/in/support | |

DG68-01411N-01
- PREPARATION
- WI-FI MODEL
- CONNECTING SMARTTHINGS
- REGISTERING THE PRODUCT / READING THE MANUAL / CUSTOMER SUPPORT
- NON WI-FI MODEL
- NOTE
- CONTENTS
- USING THIS MANUAL
- SAFETY INSTRUCTIONS
- INSTALLATION
- BEFORE YOU START
- OPERATIONS
- COOKING SMART
- MAINTENANCE
- TROUBLESHOOTING
- TECHNICAL SPECIFICATIONS
- APPENDIX
- THE FOLLOWING SYMBOLS ARE USED IN THIS USER MANUAL
- WARNING
- CAUTION
- IMPORTANT SAFETY PRECAUTIONS
- AUTO ENERGY SAVING FUNCTION
- WHAT'S INCLUDED
- ACCESSORIES
- POWER CONNECTION
- CABINET MOUNT
- REQUIRED DIMENSIONS FOR INSTALLATION
- CONTROL PANEL
- INITIAL SETTINGS
- SETTING THE SCREEN TO STAY ALWAYS ON
- NEW OVEN SMELL
- SMART SAFETY MECHANISM
- SOFT CLOSING DOOR (GENTLE, SAFE, AND SILENT) (APPLICABLE MODELS ONLY)
- ASSEMBLING THE STEAM CONTAINER (APPLICABLE MODELS ONLY)
- FLEXIBLE DOOR (APPLICABLE MODELS ONLY)
- WATER RESERVOIR
- OVEN MODES
- CONVECTION
- °C
- FAST PREHEAT OFF
- STEAM ASSISTED MODES
- DUAL COOK MODES
- AIR FRY (APPLICABLE MODELS ONLY)
- AIR SOUS VIDE (APPLICABLE MODELS ONLY)
- TIPS
- COOKING WITH THE MEAT PROBE (APPLICABLE MODELS ONLY)
- HEALTHY COOK (APPLICABLE MODELS ONLY)
- AUTO COOK
- TIMER
- ADDING THE NEW TIMER
- EDITING THE EXISTING TIMER
- DELETING THE TIMER
- USING THE TIMER
- CLEANING
- PYROLYTIC (APPLICABLE MODELS ONLY)
- STEAM CLEAN
- DESCALE
- DRAIN
- SETTINGS
- LOCK
- MANUAL COOKING
- WARNING ON ACRYLAMIDE
- ACCESSORY TIPS
- STEAM ASSISTED MODE
- STEAM CONVECTION
- STEAM TOP HEAT + CONVECTION
- STEAM BOTTOM HEAT + CONVECTION
- STEAM COOK (APPLICABLE MODELS ONLY)
- PRO-ROASTING
- DUAL COOK
- ECO CONVECTION
- AUTO COOK PROGRAMMES
- SINGLE COOK
- BAKES & BAKERY
- ROAST
- SIDE DISHES
- CONVENIENCE
- PIZZA & DOUGH
- TWIN
- SPECIAL FUNCTION
- DEFROST
- DRYING
- PROVE DOUGH
- PIZZA COOK
- SLOW COOK
- TEST DISHES
- BAKING
- GRILLING
- STEAM COOKING
- COLLECTION OF FREQUENT AUTO COOK RECIPES
- POTATO GRATIN
- VEGETABLE GRATIN
- LASAGNE
- APPLE PIE
- QUICHE LORRAINE
- FRUIT CRUMBLES
- HOMEMADE PIZZA
- ROAST SIRLOIN OF BEEF
- HERB ROASTED LAMB CHOPS
- RACK OF PORK RIBS
- OVEN INTERIOR
- OVEN EXTERIOR
- CATALYTIC ENAMEL SURFACE (APPLICABLE MODELS ONLY)
- DOOR (APPLICABLE MODELS ONLY)
- DOOR GLASS
- REPLACEMENT
- BULBS
- SIDE OVEN LIGHT
- CHECKPOINTS
- OPEN SOURCE ANNOUNCEMENT
Brand : SAMSUNG
Model : NV7B6675CAA
Category : Kitchen appliance