
RM-900 - Remote control MAJESTIC - Free user manual and instructions
Find the device manual for free RM-900 MAJESTIC in PDF.


| Type | Remote Control |
| Brand | Majestic |
| Model | RM-900 |
| Dimensions (approx.) | 21 x 5 x 2.5 cm (8.3 x 2.0 x 1.0 in) |
| Weight (without batteries) | 120 g (4.2 oz) |
| Power Supply | 2x AAA batteries (1.5V each) |
| Control Type | Infrared (IR) |
| Number of Buttons | 40+ buttons for full device control |
| Compatible Devices | TV, DVD, satellite, streaming devices |
| Range | Up to 10 meters (33 ft) |
| Material | ABS plastic |
| Color | Black |
| Programming | Automatic code search or manual code entry |
| Backlit Buttons | No (standard model) |
| Battery Life | Approximately 6 months with normal use |
| Replacement Batteries | Use alkaline batteries for best performance |
| Cleaning | Wipe with a soft, dry cloth; do not use liquids |
| Safety | Keep away from water and extreme temperatures |
| Spare Parts | Batteries only; no other user-serviceable parts |
| Repairability | Not repairable by user; contact support for issues |
| Warranty | 1 year limited warranty |
| Manual Language | English (PDF available) |
Frequently Asked Questions - RM-900 MAJESTIC
User questions about RM-900 MAJESTIC
0 question about this device. Answer the ones you know or ask your own.
Ask a new question about this device
Download the instructions for your Remote control in PDF format for free! Find your manual RM-900 - MAJESTIC and take your electronic device back in hand. On this page are published all the documents necessary for the use of your device. RM-900 by MAJESTIC.
USER MANUAL RM-900 MAJESTIC
This manual is designed to make using the RM-900 Touch Screen Remote Control as easy as possible. Information in this document has been carefully checked for accuracy; however, no guarantee is given to the correctness of the contents. The information in this document is subject to change without notice.
Copyright
© Copyright 2004
This document contains proprietary information protected by copyright. All rights are reserved. No part of this manual may be reproduced by any mechanical, electronic or other means, in any form, without the prior written permission of Majestic Global Pty Ltd.
Trademarks
All trademarks and registered trademarks are the property of their respective owners.
Majestic Customer Service & Support Info
E-Mail: info@majestic-global.com
URL: www.majestic-global.com
Table of Contents
Chapter 1 Introducing the RM-900......4
RM-900 Features....5
Unpacking the RM-900....5
Identifying Components....6
Chapter 2 Getting Started ....7
Installing Batteries....7
Battery Indicator 7
Battery Tips and Precautions....8
About the Touch Screen....9
Turning the Touch Screen On....9
Touch Screen Precautions....9
Using the Touch Screen Soft Keys....10
Accessing Setup....10
Chapter 3 Setting Up the RM-900 ......12
LCD Layout: Device Keys....12
Code and Learn Setting Key....13
Using Pre-programmed Code to Program Devices ..... 15
Using Code Learning Mode 18
Before Using Learning Mode....18
Learning from Another Remote Control .... 19
Erasing Key Codes and Device Codes (Delete) ...... 21
Using Macros 22
Creating a New Macro 22
Resetting the RM-900 to Factory Defaults.... 24
Chapter 4 Miscellaneous Settings......25
Using the Transmission Feature 25
Setting the Backlight Mode.... 26
Set Backlight On Mode....26
Set Backlight Sensor Sensitivity.... 27
Setting the Beep Signal.... 28
Chapter 5 Controlling Devices ......29
Alternating Touch Screen Pages....29
Viewing the Macro Key 29
Macro Interruption.... 30
Controlling Devices 31
Appendix A Functions and Specifications ..32
Functions 32
Specifications 33
Appendix B Accessories ....34
Appendix C Troubleshooting......35
Troubleshooting Tables 35
Chapter 1 Introducing the RM-900
Congratulations on your purchase of the RM-900 Touch Screen Remote Control. The RM-900 is a digital universal remote control that is easy to use, enabling you to control all of your electronic devices equipped with an infrared (IR) remote.
The RM-900 uses a user-friendly Touch Screen panel. You can control up to eight devices, including VCRs, DVDs, TVs, and satellite dishes.
The RM-900 enables you to quickly configure each device in your household or office using the innovative “learning eye” feature. In addition, the advanced macro function enables you to initiate a chain of up to 60 commands with the touch of a single key.
Convenient and easy to use, the RM-900 provides you with a complete central control solution.
NOTE: This manual helps you learn how to use the advanced features of the RM-900. It does not explain how to use the functions for your devices. Please refer to your device user's manual for information related to your device.
RM-900 Features
The following list identifies the RM-900's key features.
• Large Touch Screen display
- Macro sequence function—each macro can store 60 commands
- Eight device controls, including DVDs, TVs, Satellite Receivers, VCRs, and CDs
- IR code learning from your existing remote controls to quickly set up devices
- Pre-programmed manufacturer's codes for many models
- User programmable keys for each device, up to 56 keys in total
- Automatic Power Saving mode turns off the remote after 90 seconds of inactivity
Unpacking the RM-900
After you have unpacked the RM-900, check the contents to make sure the following items are included.
- RM-900
- User's Manual
• Pre-programmed Code List
If any of the above items are missing or appear damaged, contact your dealer immediately. Do not throw the shipping carton away in case you need to ship your RM-900.
Identifying Components
Refer to the following illustration to identify the components of the RM-900.
Infrared Eye
Point the infrared eye at the device you want to operate.
Light Sensor
Detects ambient light to automatically set the LCD panel backlight.
LCD Touch Screen
The soft keys enable you to change settings, configure the RM-900, create macros, and more.
Backlight
The RM-900 is equipped with a blue backlight that lights up for a preset period, according to the ambient lighting conditions.
Device keys
Press these keys to display layout screens for the devices listed.
Learning Eye
Point your device's remote control at the learning eye to enable the RM-900 to learn your device's infrared codes.

Figure 1: Front View
Chapter 2 Getting Started
This chapter provides you with the information to quickly start using the RM-900.
Installing Batteries
The RM-900 operates on three AAA alkaline batteries (not included). Batteries must be inserted before you can operate the RM-900.
-
Turn the remote over, push the tab in the direction of the arrow on the battery cover and lift the cover off.
-
Insert the batteries, matching the batteries to the (+) and (-) marks inside the battery case.
-
Snap the battery cover back into place.
Battery Indicator
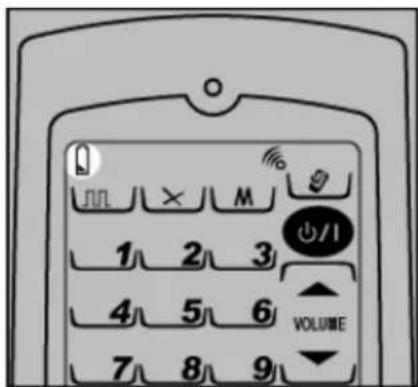
A battery icon is displayed in the upper left-hand corner above the System Setup Key:
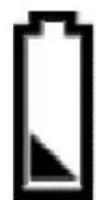
Battery low icon
Figure 2: The Battery Low Icon
When the batteries are almost depleted, the battery low icon appears.
Battery Tips and Precautions
- Pay attention to the batteries when the battery half full icon appears and replace batteries if needed.
- The RM-900 will not lose programmed data when batteries are replaced.
- Always use fresh batteries. Alkaline batteries are recommended. Do not mix different types of batteries.
- Be sure that the positive (+) and negative (−) polarities of the batteries match the diagram shown in the compartment.
- Do not expose the batteries to excessive heat or flame.
- Keep batteries out of the reach of children.
- Weak batteries reduce the effective distance of the unit.
- To reduce danger of leakage and damage, remove batteries that have been used for more than two years.
About the Touch Screen
The Touch Screen changes the number of soft keys according to the device that is selected.
Turning the Touch Screen On
Turn on the RM-900 by touching the screen. The RM-900 turns itself off after 90 seconds.
Touch Screen Precautions
Please read the following instructions carefully.
- Tap the LCD Touch Screen gently. Never use force.
- Do not use a pen or any sharp object to tap the screen, because you might damage the surface.
- Keep the Touch Screen dry. Wipe off any spills immediately. The RM-900 is not waterproof. Never immerse it in liquid.
- Don't expose the RM-900 to extreme temperatures. Keep it away from heat sources.
- Avoid dropping the RM-900.
- Don't drop anything on the Touch Screen.
- Clean the LCD Touch Screen with a soft cloth. If needed, dampen the cloth slightly before cleaning. Never use abrasives or cleaning solutions.
Using the Touch Screen Soft Keys
The Touch Screen Soft Keys enable you to operate the RM-900 and your external devices. Use these keys to program codes from your existing remotes, control your devices, and set up command sequences called macros. You will hear a beep when you press a key. To turn the beep off and on, see on page 28. The RM-900 turns itself off after 90 seconds.
Accessing Setup
The following table provides an overview of major key functions. To enter setup mode, press a function key for three seconds; a confirmation screen appears. Confirm setup mode entry by pressing the four number keys that appear (in any order) and then selecting the desired setup mode.

| Name & Key Icon | Function Setup Description | |
Device keys    [SBBO] [SBBO]  | Device setting and LCD layout | Key: Enter device setting and arrange the LCD touch screen layout to correspond to your remote control. Refer to page 12.You can also toggle device pages by pressing the key again.Bank: Arrange the device key icon.(refer to page 13) |
| Code Setup key[HDXS] | Setup device code manually, automatically, or by code learning | Code: Enables you to enter preprogrammed code. Refer to page 14.Learn: Enables the remote to learn codes from other remote controls. Refer to page 14. |
| Macro key[H2AX] | Setup macro | Enables you to set Macro function. Refer to page 22.You can also view the macro setting by pressing and holding the key. |
| Delete key[SW68] | Delete and reset to default | Key: Erase key codes. Refer to page 21.Bank: Erase device codes. Refer to page 21.Key & Bank: Reset to factory default. Refer to page 24. |
System setup key | Transmission, backlight and beep setup | Backlit: Setup backlighting period and level. Refer to page 26.Code: Transmit all data. Refer to page 25.Beep icon: Turns the beep sound on/off. Refer to page 28.After each setting, press the System setup key to confirm your selection or modification. |
Figure 3: Major Function Keys
The following chapters describe each function in detail.
Chapter 3 Setting Up the RM-900
Before the RM-900 can be used to control a device, it needs to be configured to display your existing remote control keys and it must be programmed to send the correct infrared signals.
This chapter guides you through the Touch Screen layout and RM-900 setup procedures.
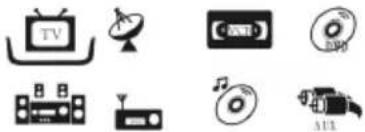
NOTE: The RM-900 includes eight default devices, including TV, satellite TV, VCR, DVD player, hi-fi stereo, radio/cassette player, CD player, and auxiliary.
LCD Layout: Device Keys
Layout edit mode enables you to customize the RM-900's Touch Screen display to match your existing remote controls.
-
Press any device key for three seconds to enter the confirmation screen.
-
Press the four numerical keys in any sequence to enter the selection screen.
-
Press ▲ and ▼ to scroll through the options. Select Key mode and press ⏻.

- On the device page, select a key you want to modify. Continue pressing the key to scroll through the available choices for the key.
- Press ☐ to display the available icons for the page of LCD display and repeat Step 4 to finish all modifications.
NOTE: You can also change the layout for device keys. Repeat Steps 1-3 and select Bank mode in Step 3. You can set up two devices for each key under Bank mode for the four device keys SAT/Cable, DVD/DVD Record, Tuner/Tape and CD/MD (refer to the Figure on the right.)
- After you have finished customizing the layout, press 📋 to confirm changes or 📋 to exit without making any changes.
![graph TD A["TVVIDEO"] --> B["1"] B --> C["2"] C --> D["3"] D --> E["4"] E --> F["5"] F --> G["6"] G --> H["7"] H --> I["8"] I --> J["9"] J --> K["+100"] K --> L["0"] L --> M["ENTER"] M --> N["CHANNEL"] N --> O["VOLUME"] O --> P["1"] P --> Q["2"] Q --> R["3"] R --> S["4"] S --> T["5"] T --> U["6"] U…](/content/2026/05/895534/images/3627e876fbfaca62f7cf2e10257f551b7d6f9607b1c9d161e37a57fda2cc74da.jpg)
Code and Learn Setting Key
Press U(Code setup key) for three seconds to enter the confirmation screen. Then press the four numerical keys in
any sequence to enter the selection screen. Press ▲ and ▼ to scroll through the following options.
- Code: Use this option to automatically configure all keys on the RM-900 for use with a specific manufacturer's model number. This option is the fastest way to program the RM-900 but requires that your device be located in the Pre-programmed Code List that was bundled with the RM-900. Refer to the supplied code list. Some newer or less-common devices may not be pre-programmed and their codes must be learned using the Learning Function by the RM-900.
- Learn: Use this option to directly learn the infrared signals from another remote control. This option is perfect for newer or less common devices, or if a certain key does not perform the desired function after using the CODE option. However, if you come across the problem that the RM-900 cannot learn your device codes, refer to “Troubleshooting” on page 35 or contact Majestic.
Using Pre-programmed Code to Program Devices
Follow these instructions to program a device using pre-programmed codes.
Manually Selecting the Code
- Select a device (for example TV).
- Turn on the target device you want the RM-900 to control.
- Search for the four-digit code number of your target device in the Pre-programmed Code List.

NOTE: If there is no entry for your target device, try automatically selecting the code.
- Enter the four-digit code number manually to finish the setting.

NOTES:
- Some codes are designed to operate more than one model. It may take several tries to find the code that works with your unit.
- When you enter the manufacturer's code and an ERROR icon is displayed, it could be that the code number doesn't exist in the manufacturer's code table yet.
- Each device set up can be used for any type of target devices under the manually programming procedure only.
Example: You have two different types of TV device and want to be set up in a RM-900.
-
The first target device (TV1) is set up by following up the indications of the user's manual.
-
The second target device (TV2) set up likes the first step, but the device you select from RM-900 should be the others (for example Tuner, DVD, ....etc.)
Automatically Selecting the Code
- Automatically Selecting the Code
- Turn on the target device you want the RM-900 to control.
- Press the device key (for example TV). Point the RM-900 at the target device.
- Press AUTO. Wait for the device to turn off and immediately touch any part of the screen to stop automatic searching.
- Press and keys to look for the correct power key of the device to turn on the device.
- Press 📄 to confirm if the number is correct. Now press the DISPLAY key to show the correct pre-programmed code in sequence.
- Press 📋 to confirm the selection and save settings or click 🔉 to cancel.
NOTES:
• Each device can auto search the target device code under the same classification only.

Using Code Learning Mode
Follow these instructions to enable the RM-900 to detect and learn a remote control's configuration.
Before Using Learning Mode
Note the following before using the RM-900's learning function: not all infrared codes are learnable by the RM-900. You may need to collect the codes first. To change from a device that has already been programmed, delete all of the commands of the first device before teaching new ones. For example, to operate the living room TV instead of the bedroom TV, delete all commands for the bedroom TV first. Then re-configure the TV device screen for the living room TV.
NOTES:
• Code learning does not work with all devices.
- Select one device screen in advance before using code learning mode.
- All keys except the Code Setup key, Delete key, Macro key, and System setup key can be learned.
Learning from Another Remote Control
Before using learning mode, set both remotes on a flat surface so that the target device's remote control IR is pointed at the RM-900's learning eye, which is located at the bottom of the unit. Keep a distance of 2-4 inches (5-10 cm).
- Press 📄 for three seconds to enter the confirmation screen. Refer to page 10.

-
Press ▲ and ▼ to scroll through the options.
-
Select LEARN and press
-
Select a device (for example TV).
-
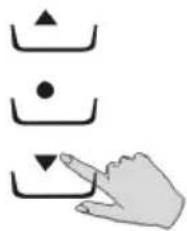
Point the target device's remote control at the RM-900 learning eye located at the base of the unit (see Figure 1: Front View). The RM-900 sequentially displays PAGE 1 and PAGE 2 and the keys to be pressed to lead you through the operation.
-
The blinking frame denotes the key being learned. Press the corresponding keys on the target device's remote control. Press the device key till it shows OK, the next key will blink and the remote code is recorded into the selected device key. If it shows ERROR please learn again.
The RM-900 will automatically guide you to the next button to program by flashing it on the Touch Screen. When all buttons are programmed on the current page it will automatically switch to the next page. You can also directly select the next button to program by touching it or press the device key to go to the next page.
NOTE: If a key is preset with a code, CODE appears on the screen to remind you that the key is preset. Continuously learning new codes overwrite the existing settings.
The RM-900 screen displays an OK 📷 icon if the code was successfully learned or an ERROR icon if the code was not learned.
NOTE: When the remote has learned the last key on the page, the next page is automatically displayed.
- Press → to exit learning mode.
Learning the Device key
The device key can store code. Under code learning model, press device key for 3 seconds when the device frame is blinking, press the target device's remote control's power key. If the code was successfully learned, the RM-900 screen displays an OK icon.
Erasing Key Codes and Device Codes (Delete)
Follow these instructions to delete key codes or device codes from the RM-900.
- Press the ✗key for three seconds to enter the confirmation screen.
- Press the four numerical keys in any sequence to enter the selection screen. Refer to page 10.
- Press ▲ and ▼ to scroll through the options. Select the Key or Bank that you want to erase, and press ⚙.

-
If you select ☐, select a device whose codes you want to delete (for example TV). Delete each setting by pressing any key.
-
Press ☐ to cancel the operation or the RM-900 exits automatically.
-
If you select Bank mode, selecting a device key will delete all settings for the device. Pressing the Device key again will change to the next page.
NOTE: Device keys can also save codes. To delete the codes saved in device keys, press a device key for one second to delete the saved remote code.
- Press ☐ to confirm deletion or ☐ to cancel the operation.
Using Macros
A macro is a series of commands. The Macro feature enables you to initiate a sequence of up to 60 commands with a single key. You can create a macro on any control key and insert time delays into the sequence. Remember, however, assigning a macro eliminates the key's original function.
Creating a New Macro
Follow these steps to create a new macro.
- Press Macro key for three seconds to enter the confirmation screen.
- Press the four numerical keys in any sequence to enter Macro mode. The M on the upper right begins to flash.
- Select a device key you want to use for this macro (for example TV), and then press any key to define as the macro key. You hear three beeps to indicate that macro creation mode has started.

NOTE: If you select a key that already has a macro stored in it, the new macro will replace the old macro.
-
Press the key sequence that you want to record.
-
Do one of the following:
- Press the DELAY and then press 1–9 to enter the number of seconds you want to delay between each command. For example, if you want a two-second delay between turning on your TV and then turning on your VCR, press '2'.
- Press 📋 to confirm or 📋 to cancel the operation.

The following example will help you to better understand creating a macro sequence. It is provided to teach you how to record a macro but is by no means the only macro sequence you can create.
Example: the following example defines a macro that turns on your TV, switches the TV to DVD viewing mode, turns on the DVD, delay 5 seconds and plays a DVD.
- Press the TV device key.
- Press the TV power key.
- Press the TV/Video key.
- Press the DVD device key.
- Press the DVD power key.
- Press the Delay key to select the time delay (5 sec) for this step.
- Press the DVD play key.
NOTE: You cannot use the Macro function to call up another specific macro setting. If the currently set macro key sequence contains an existing preset macro key, it will skip the key and does not start the preset macro sequence which the preset macro key triggers.
Resetting the RM-900 to Factory Defaults
This item enables you to set the RM-900 back to the factory default configuration.
NOTE: All macros and user-defined keys are erased when resetting the RM-900 to factory defaults.
- Press the ☒ Delete key for three seconds to enter the confirmation screen.
- Press the four numerical keys in any sequence to enter the selection screen.
-
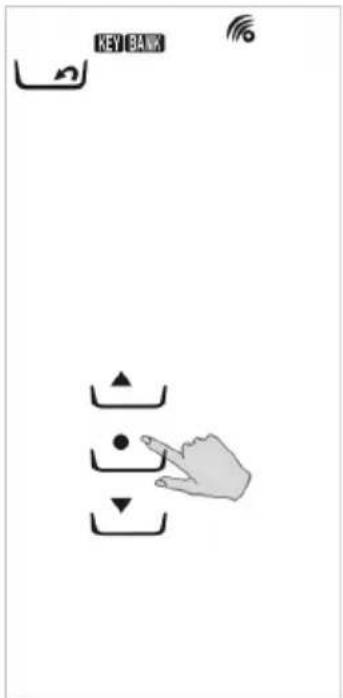
Press ▲or ▼to select KEY BANK and then press ⚙.
-
You are prompted to confirm the reset. Press the four numerical keys in any sequence again. RM-900 will return to the factory defaults.
-
When OK appears, the reset is finished. The RM-900 will automatically return to the original layout screen.

Chapter 4 Miscellaneous Settings
This chapter will describe how to use transmission feature, set up the backlight, and enable the beep sound.
Using the Transmission Feature
The RM-900 can transmit data to another RM-900. You can transmit preprogram and flash memory data.
NOTE: Before you use this feature to transfer data, you must connect two devices with the optional connection cable. Refer to Appendix B for more information.
-
Press and hold for three seconds to enter the system setup function. Press the four numerical keys in any sequence in the confirmation screen.
-
Press ▲ or ▼ to select CODE
-
Press 🙏 to begin transmission.
-
During the transmission, the LCD displays blank keys as shown in the illustration on the next page.
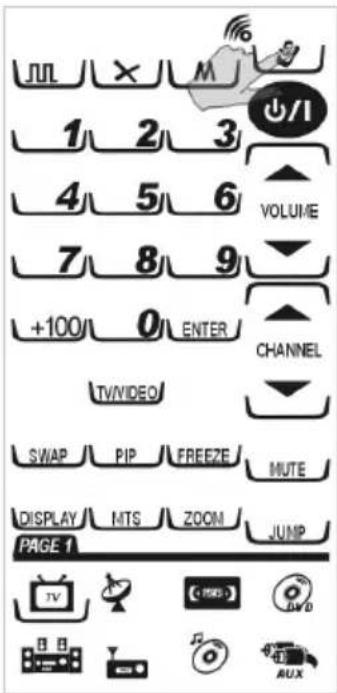
When the transmission is completed, OK is displayed on the LCD. If there is an error in transmitting the data, ERROR is displayed.
- For a double transmission, repeat Step 3.
- Press ⓤ to cancel the transmission.
NOTE: Ensure that both RM-900 remote controls have fresh batteries and are turned on, and then connect the transmission wire to transmit the data.

Setting the Backlight Mode
Set Backlight On Mode
- Follow the steps shown in the Transmission section Steps 1-2, but select BACKLIT instead of CODE
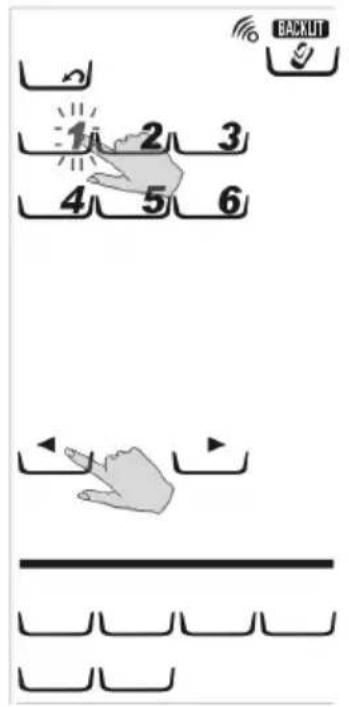
- Press a numerical key 1-6 to select the time that the backlight stays on after pressing a key.
NOTE: The backlight ON time can be set from 10 to 60 seconds in 10-second increments, '1' for 10 seconds, '2' for 20 seconds, and so on.

Set Backlight Sensor Sensitivity
-
Refer to Set Backlight On Mode, Step 1 and press ◀ or ▶ to set the light sensor sensitivity. The number of frames indicates the current setting value. The light sensor sensitivity levels are 1\~8. The more frames you select, the more sensitively the backlight reacts to the ambient lighting. The RM-900 activates the backlight automatically. The backlight function cannot be turned off. When the light is off in the environment, the RM-900 activates the backlight automatically.
-
Press 📋 to confirm or 📋 cancel the operation.
Setting the Beep Signal
- Follow the steps shown in the Transmission section Step 1-2, but select instead of CODE
- Press ⚙ to toggle the beep on and off. When on, % appears on the LCD screen.
- Press to exit.

Chapter 5 Controlling Devices
The RM-900 is designed to be simple and straightforward to operate. This chapter explains how to use the RM-900 to control all your devices.
NOTE: This chapter assumes you have already set up the RM-900 and assigned Infrared codes to different keys. See Chapter 3 Setting Up the RM-900 on page 12 for more information on assigning codes.
Alternating Touch Screen Pages
Press a device key to alternate between page 1 and page 2.
Viewing the Macro Key
You can view which keys are assigned to macros for any particular device. Follow these instructions:
- Press the device key (for example TV).

- Press the key. The assigned macro keys are displayed for this device page.
For example, if you set number 9 as the macro key for TV- PAGE 1, when you press the ⏚key, the preset macro key "9" will appear.
- If you want to check the macro key for Page 2, press the device key to switch to the second device page, and then repeat Step 2.

Macro Interruption
After pressing the preset Macro key for a device, you can interrupt the command sequence by pressing on the upper left corner. The ERROR message appears and the Macro stops.
Controlling Devices
- Make sure the RM-900 is pointing at the target device.
- Tap gently on the Touch Screen.
- Select a device key and give remote commands as usual.
If ERROR appears, the pressed key is not pre-programmed with a specific function.
NOTE: The Record Key (under VCR device, page 1) must be held down for two seconds. As a safety feature, the record key needs to be pressed for two seconds. This is to prevent accidentally pressing the VCR record key and overwriting a tape.
Appendix A
Functions and Specifications
Functions
- 8-in-1 IR learning type and pre-programmed remote control
- High performance MCU capable of upgrading programs
- 512 KB Flash Memory for learning/pre-programming codes, so that you never lose your data
• Each device includes up to 56 keys on two pages - Capable of learning carrier (frequency: 20KHz-455 KHz) and pulse codes
- Capable of deleting single key, single device or all remote codes
- User-definable device layout
- Macro key can have up to 60 commands, including time delays between commands
- Macro commands are shown on the LCD screen while being replayed
- Backlight lights up automatically depending on the environment
• Automatic Power Saving function - Movement detection function to turn on RM-900 automatically
- Battery low indicator
Specifications
| Model RM-900 | |
| Dimensions (WxHxD) 3.1 x 7.5 x 1.25 inches(7.9 x 19 x 3.2 cm) | |
| Weight (without Batteries) 125 g | |
| Number of Device 8 devices | |
| Keys 2 pages/56 keys/ each device | |
| Backlighting Blue LED | |
| Learning Frequency 20 KHz - 455 KHz & pulse up to 256 bits long | |
| Memory 512 KB flash memory | |
| Batteries AAA x3 Alkaline batteries | |
| Power Consumption | LCD Off: 50 μALCD On: 300 μAOperation: 30–150 mA (Max.) |
| Operating Distance Approx. | 30 feet (8-10 meters) |
| Interface UART/115,200 bps (optionalSLC-2080 USB cable) | |
| IR Distance 8-10 meters | |
| LCD Screen (W*H) TN LCD 2.3 x 4.8 inches(5.8 cm x 12 cm) | |
Appendix B Accessories
Transmit wire

The transmit wire is an optional link cable that enables transmission of system setup to another RM-900. All settings including MCU program, data in the flash memory and pre-programmed code will be transferred using the TRANS selection as described in Chapter 4 “Miscellaneous Settings.”
By connecting a transmit wire between two RM-900s, you can duplicate settings and functions from one RM-900 to another.
Appendix C Troubleshooting
Troubleshooting Tables
| Problem Solution | |
| LCD does not show anything when you touch it. | Batteries may be dead. Replace the batteries with three new AAA alkaline batteries (page 7). Check that the batteries are properly installed. |
| The RM-900 doesn’t operate a device. | Make sure that the desired device key on the RM-900 LCD panel has been selected. Move closer to the device. The maximum operating distance is approximately 30 feet. Ensure that you are aiming the RM-900 directly at the device and that there are no obstructions between the RM-900 and the device. Ensure programming with the learning function (page 18) or the manufacturer codes has been properly done. Re-teach the key (page 13). |
| You cannot operate a device even after teaching the device using the learning function. | Make sure that your RM-900 has correctly learned the target device's remote control code (page 19).Delete the device data from the RM-900 and carry out the learning function again (page 19).Make sure you did not program more than one remote for a given device. |
| You see “ERROR” display on the LCD during the learning procedure. | Make sure you hold the target remote's key till the screen displays Ok or Error on the screen.Make sure the two remotes are not too close or too far apart - keep them about 2~4 inches (5~10 cm) apart, and your device remote control is aiming directly at the RM-900's learning eye. |
| You see “ERROR” displayed during operation. | The key that you pressed has not been taught.Teach the key using the learning procedure (page 18). |
| Your VCR will not record. As a safety feature on the RM-900, you must press the REC key for two seconds. | |
| IR LEARNING is not successful. Replace batteries in the RM-900 and the remote you are trying to configure.Keep the distance between the remote control and the RM-900's learning eye to about 2~4 inches.Do not use the learn function near an incandescent lamp.Memory capacity is full (56 keys for each of eight models).The learning process has no errors, but you still can't control your AV devices: repeat the learning procedure again. If you still can't solve the problem, contact Sunwave for help.Original remote might not be compatible with learning procedure. | |
| Macro does not work. Be sure | to aim the RM-900 at the devices while the macro commands are being sent.Macro was not properly set up. Repeat macro set-up procedure (page 22). |
| A key of your existing remote performs two or more functions | Some remotes issue multiple commands when a key is held down. Please be sure to teach different keys of RM-900 for these different commands. Each key of RM-900 can only learn one command. |
| The LCD screen turns off. The RM | M-900 is preset automatically to switch the LCD off after the Power Down time (90 seconds). Just tap the touch screen to turn the RM-900 back on again. |
- COPYRIGHT
- TRADEMARKS
- TABLE OF CONTENTS
- CHAPTER 1 INTRODUCING THE RM-900......4
- CHAPTER 2 GETTING STARTED ....7
- CHAPTER 3 SETTING UP THE RM-900 ......12
- CHAPTER 4 MISCELLANEOUS SETTINGS......25
- CHAPTER 5 CONTROLLING DEVICES ......29
- APPENDIX A FUNCTIONS AND SPECIFICATIONS ..32
- APPENDIX B ACCESSORIES ....34
- APPENDIX C TROUBLESHOOTING......35
- CHAPTER 1 INTRODUCING THE RM-900
- RM-900 FEATURES
- UNPACKING THE RM-900
- IDENTIFYING COMPONENTS
- INFRARED EYE
- LIGHT SENSOR
- LCD TOUCH SCREEN
- BACKLIGHT
- DEVICE KEYS
- LEARNING EYE
- CHAPTER 2 GETTING STARTED
- INSTALLING BATTERIES
- BATTERY INDICATOR
- BATTERY TIPS AND PRECAUTIONS
- ABOUT THE TOUCH SCREEN
- TURNING THE TOUCH SCREEN ON
- TOUCH SCREEN PRECAUTIONS
- USING THE TOUCH SCREEN SOFT KEYS
- ACCESSING SETUP
- CHAPTER 3 SETTING UP THE RM-900
- LCD LAYOUT: DEVICE KEYS
- CODE AND LEARN SETTING KEY
- USING PRE-PROGRAMMED CODE TO PROGRAM DEVICES
- MANUALLY SELECTING THE CODE
- NOTES
- AUTOMATICALLY SELECTING THE CODE
- USING CODE LEARNING MODE
- BEFORE USING LEARNING MODE
- LEARNING FROM ANOTHER REMOTE CONTROL
- LEARNING THE DEVICE KEY
- ERASING KEY CODES AND DEVICE CODES (DELETE)
- USING MACROS
- CREATING A NEW MACRO
- RESETTING THE RM-900 TO FACTORY DEFAULTS
- CHAPTER 4 MISCELLANEOUS SETTINGS
- USING THE TRANSMISSION FEATURE
- SETTING THE BACKLIGHT MODE
- SET BACKLIGHT ON MODE
- SET BACKLIGHT SENSOR SENSITIVITY
- SETTING THE BEEP SIGNAL
- CHAPTER 5 CONTROLLING DEVICES
- ALTERNATING TOUCH SCREEN PAGES
- VIEWING THE MACRO KEY
- MACRO INTERRUPTION
- CONTROLLING DEVICES
- APPENDIX A
- FUNCTIONS AND SPECIFICATIONS
- FUNCTIONS
- APPENDIX B ACCESSORIES
- APPENDIX C TROUBLESHOOTING
Brand : MAJESTIC
Model : RM-900
Category : Remote control