
CX-30 - Wireless pointer Barco - Free user manual and instructions
Find the device manual for free CX-30 Barco in PDF.


| Product Type | Wireless Presentation System (ClickShare Base Unit) |
| Brand | Barco |
| Model | CX-30 |
| Dimensions (HxWxD) | 34 mm x 135 mm x 135 mm |
| Weight | 900 g |
| Power Supply | Standard 110/220 V AC plug; DC adapter with regionalized AC clips |
| Power Consumption | Operational: 5-10 W, Max: 24 W; Eco standby: 2.6 W |
| Compatible Operating Systems | Windows 8/8.1/10, macOS 10.13+, Android v9+, iOS 12+ |
| Video Output | 4K UHD (3840x2160) @ 30 Hz, HDMI 1.4b |
| Audio Output | USB, HDMI |
| USB Ports | 1x USB Type-A 2.0 (front), 1x USB Type-C 2.0 (front) |
| Wireless Standards | IEEE 802.11 a/g/n/ac, IEEE 802.15.1 |
| Frequency Bands | 2.4 GHz and 5 GHz (DFS channels supported in select countries) |
| Maximum Range | Up to 30 m (100 ft) between Button and Base Unit |
| Number of Buttons Included | 2 x Conferencing Button (model R9861600D01C) |
| Wireless Transmission Protocol | WPA2-PSK (standalone), WPA2-PSK or IEEE 802.1X (network integration) |
| Anti-theft | Kensington lock |
| Certifications | FCC, CE, IC |
| Operating Temperature | 0°C to +40°C (+32°F to +104°F) |
| Operating Humidity | 0% to 85% relative humidity, non-condensing |
| Mounting Options | Table mount, wall mount, ceiling mount (mounting base included) |
| Warranty | 1 year standard; 5 years with SmartCare |
| Maintenance & Cleaning | Clean with a dry, soft cloth; avoid exposure to dust and excessive humidity |
Frequently Asked Questions - CX-30 Barco
User questions about CX-30 Barco
0 question about this device. Answer the ones you know or ask your own.
Ask a new question about this device
Download the instructions for your Wireless pointer in PDF format for free! Find your manual CX-30 - Barco and take your electronic device back in hand. On this page are published all the documents necessary for the use of your device. CX-30 by Barco.
USER MANUAL CX-30 Barco
natural_image
Line drawing of a retro computer with ventilation slots and brand logos (no text or symbols on device body)Installation manual
Barco NV
Beneluxpark 21, 8500 Kortrijk, Belgium
www.barco.com/en/support
www.barco.com
Registered office: Barco NV
President Kennedypark 35, 8500 Kortrijk, Belgium
www.barco.com/en/support
www.barco.com
Copyright ©
All rights reserved. No part of this document may be copied, reproduced or translated. It shall not otherwise be recorded, transmitted or stored in a retrieval system without the prior written consent of Barco.
Trademarks
USB Type- C^M and USB- C^M are trademarks of USB Implementers Forum.
Trademarks
Brand and product names mentioned in this manual may be trademarks, registered trademarks or copyrights of their respective holders. All brand and product names mentioned in this manual serve as comments or examples and are not to be understood as advertising for the products or their manufacturers.
HDMI Trademark Notice

The terms HDMI, HDMI High Definition Multimedia Interface, and the HDMI Logo are registered trademarks of HDMI Licensing Administrator, Inc.
Product Security Incident Response
As a global technology leader, Barco is committed to deliver secure solutions and services to our customers, while protecting Barco's intellectual property. When product security concerns are received, the product security incident response process will be triggered immediately. To address specific security concerns or to report security issues with Barco products, please inform us via contact details mentioned on https://www.barco.com/psirt. To protect our customers, Barco does not publicly disclose or confirm security vulnerabilities until Barco has conducted an analysis of the product and issued fixes and/or mitigations.
Patent protection
This product is covered by patents and/or pending patent applications. For more info: https://www.barco.com/en/about-barco/legal/patents.
Guarantee and Compensation
Barco provides a guarantee relating to perfect manufacturing as part of the legally stipulated terms of guarantee. On receipt, the purchaser must immediately inspect all delivered goods for damage incurred during transport, as well as for material and manufacturing faults Barco must be informed immediately in writing of any complaints.
The period of guarantee begins on the date of transfer of risks, in the case of special systems and software of the date of commissioning, at latest 30 days after the transfer of risks. In the event of justified notice of complaint, Barco can repair the fault or provide a replacement at its own discretion within an appropriate period. If this measure proves to be impossible or unsuccessful, the purchaser can demand a reduction in the purchase price or cancellation of the contract. All other claims, in particular those relating to compensation for direct or indirect damage, and also damage attributed to the operation of software as well as to other services provided by Barco, being a component of the system or independent service, will be deemed invalid provided the damage is not proven to be attributed to the absence of properties guaranteed in writing or due to the intent or gross negligence or part of Barco.
If the purchaser or a third party carries out modifications or repairs on goods delivered by Barco, or if the goods are handled incorrectly, in particular if the systems are operated incorrectly or if, after the transfer of risks, the goods are subject to influences not agreed upon in the contract, all guarantee claims of the purchaser will be rendered invalid. Not included in the guarantee coverage are system failures which are attributed to programs or special electronic circuitry provided by the purchaser, e.g. interfaces. Normal wear as well as normal maintenance are not subject to the guarantee provided by Barco either.
The environmental conditions as well as the servicing and maintenance regulations specified in this manual must be complied with by the customer.
Barco ClickShare Product Specific End User License Agreement
THIS PRODUCT SPECIFIC USER LICENSE AGREEMENT (EULA) TOGETHER WITH THE BARCO GENERAL EULA ATTACHED HERETO SET OUT THE TERMS OF USE OF THE SOFTWARE.
PLEASE READ THIS DOCUMENT CAREFULLY BEFORE OPENING OR DOWNLOADING AND USING THE SOFTWARE.
DO NOT ACCEPT THE LICENSE, AND DO NOT INSTALL, DOWNLOAD, ACCESS, OR OTHERWISE COPY OR USE ALL OR ANY PORTION OF THE SOFTWARE UNLESS YOU CAN AGREE WITH ITS TERMS AS SET OUT IN THIS LICENSE AGREEMENT.
1. Entitlement
Barco ClickShare (the "Software") offered as a wireless presentation solution that includes the respective software components as further detailed in the applicable Documentation.
The Software can be used upon purchase from, and subject to payment of the relating purchase price to, a Barco authorized distributor or reseller of the ClickShare base unit and button or download of the authorized ClickShare applications (each a "Barco ClickShare Product").
- Term
The Software can be used under the terms of this EULA from the date of first use of the Barco ClickShare Product, for as long as you operate such Barco ClickShare Product.
- Deployment and Use
The Software shall be used solely in association with a Barco ClickShare Product in accordance with the Documentation issued by Barco for such Product.
2. Support
The Software is subject to the warranty conditions outlined in the Barco warranty rider. Maintenance, including the provision of upgrades and updates to the Software, and helpdesk support are available at your option on the terms of Barco's then current warranty rider.
Higher maintenance and support levels can be obtained at the moment of product sale or during the Barco ClickShare Product and/or Software warranty term.
Higher maintenance and support levels may be included in the initial transaction if ordered and paid for additionally. It is strongly suggested to maintain the maintenance and support agreement without interruption. Barco reserves the right not to restart maintenance following an interruption by the customer.
3. Terms of Use
The Software can be used as set out in the Barco EULA attached hereto.
The provisions of this Product Specific EULA override the Barco generic EULA in case of conflicts or inconsistencies.
In case of (inadvertent or other) non-compliance (e. g. where the actual use overshoots the use authorized hereunder), Barco shall have the option to suspend access to the Software until the non-compliance is remedied, failing of which Barco may terminate the License Agreement as set out herein.
4. Privacy
You are controller for personal data which are being processed via the Software. Therefore, you remain solely responsible for complying with all applicable data protection laws and for implementing and maintaining privacy protection and security measures (especially for components that you provide or control). Barco disclaims any liability in this regard.
Barco created a specific privacy policy for the ClickShare software application for mobile devices, which describes the processing of personal data via this application (http://www.barco.com/en/about-barco/legal/privacy-policy/clickshare-app).
5. Other Terms
- Open Source components
The Software contains software components released under an Open Source license.
A list of the third party components used is available in the Software's README files, through the "My Barco" section of the Barco website or through other (online) means. The applicable license terms,
copyright notices and, as relevant, source code access conditions apply as set out in the Barco EULA attached hereto.
• Retention of data
Barco right to use and retain Functional Information (section 10.2 of the EULA) shall survive the term of this EULA.
BARCO END USER LICENSE AGREEMENT
By accepting these terms (through tick box or other mechanism designed to acknowledge agreement to the terms of an electronic copy of this License Agreement), or by installing, downloading, accessing, or otherwise copying or using all or any portion of the Software (as defined below), (i) you accept this License Agreement on behalf of the entity for which you are authorized to act (e.g., your employer) and you agree to act in a manner consistent with this License Agreement (or, if there is no such entity for which you are authorized to act, you accept this License Agreement on behalf of yourself as an individual and acknowledge that you are legally bound by this Agreement), and (ii) you represent and warrant that you are duly empowered by the end user in case you act on behalf of such entity.
These terms apply to your use of the Software as of and for the original Term of your license. When you ren or purchase an additional license, the then current version of this License Agreement shall apply and will remain unchanged during the term of that license and/or in respect of such changed elements. The other contract documents (Product Specific EULA; Maintenance and Support Agreement, if and when provided alongside with this document) applies in addition to these terms and constitute the entire License Agreement. You acknowledge that an electronic copy of this Agreement shall have the same proving value as a hard copy signed by the parties.
If you are unwilling to accept this License Agreement on these terms, or you do not have the right, power and authority to act on behalf of and bind such entity (or yourself as an individual if there is no such entity), DO NOT SELECT THE "I ACCEPT" BUTTON OR OTHERWISE CLICK ON ANY BUTTON OR OTHER MECHANISM DESIGNED TO ACKNOWLEDGE AGREEMENT, AND DO NOT INSTALL, DOWNLOAD, ACCESS, OR OTHERWISE COPY OR USE ALL OR ANY PORTION OF THE SOFTWARE.
1. Definitions
“Affiliate” means any corporation or other entity directly or indirectly, controlling, controlled by or under common control with such corporation or entity. For the purpose of the above, “control” shall mean (i) the ownership or control, directly or indirectly, of fifty percent (50%) or more of the equity capital or the shares or voting rights in the corporation or other entity in question or (ii) the control of the composition of the board of directors of the corporation or other entity in question.
"Barco" means Barco NV (company number 0473.191.041) with company address at Beneluxpark 21, 8500 Kortrijk, Belgium, or its designated Affiliate licensing to you the proprietary software which is the subject matter of this Agreement.
"Documentation" means all technical, reference and installation manuals, user guides, published performance specifications and other written documentation provided by Barco generally to its licensees with respect to the Software, along with any modifications and updates thereto;
“DRM” means Barco’s digital rights management platform used to provide access to and access conditions of the Software.
“License Agreement” means this Barco End User License Agreement (EULA), incorporating the terms of the Product Specific EULA, and any modifications thereof as set out herein.
"Product Specific EULA" means the supplemental software terms applicable
“Software” means the computer software, released in object code only, which is being licensed hereunder, as described in the applicable purchase order and related Product Specific EULA.
“Term” means the period set out in article 9.1 hereof, as well as any agreed renewal period.
“you” means the entity on behalf of which these terms are accepted, and any of its representatives having access to the Software.
2. License Grant
2.1 License Scope. Subject to compliance with all license terms and payment of applicable fees, Barco grants you a limited, non-exclusive, non-assignable, non-transferable, non-sub-licensable license to use the Software exclusively in accordance with the conditions and parameters set forth herein. Save for the Product Specific EULA or any broader license terms confirmed through the DRM tool, the license under this License Agreement applies to one (1) copy of the Software to be used on one single computing device by one (1)
single user. Installation on a computing device that may be concurrently accessed by more than one user shall not constitute a permitted use and a separate license is required for each user connecting at the same time to a computing device on which the Software is being deployed.
2.2 License Type. The applicable license type, and your rights in time, deployment and usage, are further detailed in the Product Specific EULA (in the absence of which the scope shall be as set in article 2.1 hereof). 2.3 License restrictions.
Intended Use. You agree to use the Software solely as permitted by this License Agreement (and any Product Specific EULA made part of it), by any applicable laws and in a matter consistent with its design and Documentation.
No Transfer (License Agreement). You agree not to transfer, assign or sublicense your license rights to any other person or entity, unless Barco's prior written consent is obtained.
No Transfer (Software). If you deactivate or uninstall the Software from the computer device on which it was originally installed, this will terminate this License Agreement unless otherwise and specifically approved by Barco. You agree not to use the Software in association with other hardware or software that allows to pool connections, reroute information or in any other way enables to breach or circumvent the license restrictions by enabling the deployment and use of the Software by more than the authorized number of devices or users (e.g. multiplexing) or otherwise attempts to reduce the number of licenses actually required.
Authorized Users. The use of the Software is restricted to persons within your organization, or any third party representatives operating under your responsibility and control, provided any such persons have accepted the terms of this License Agreement. You agree not to use or permit the Software to be used to perform services for third parties, whether on a service bureau or time sharing basis or otherwise, without the prior written authorization of Barco. You shall not lease, rent, sell or otherwise transfer or grant a security or other interest in the Software.
No Modifications. You shall not make error corrections to or otherwise modify or adapt the Software or create derivative works based upon the Software, or permit third parties to do the same.
No Reverse Engineering. You agree not to reverse engineer or decompile, decrypt, disassemble or otherwise reduce the Software to human-readable form, except to the extent otherwise expressly permitted under applicable law notwithstanding this restriction, or except to the extent Barco is legally required to permit such specific activity pursuant to any applicable open source license.
Code required to ensure interoperability. To the extent required by law, and at your written request, Barco shall provide you with the interface information needed to achieve interoperability between the Software and another independently created programs used by you, on payment of Barco's applicable fee (if any). You shall observe strict obligations of confidentiality with respect to such information and shall use such information in compliance with terms and conditions which Barco makes applicable.
No Unbundling. The Software may include various applications and components, may support multiple platforms and languages, and may be provided on multiple media or in multiple copies. Nonetheless, the Software is designed and provided to you as a single product to be used as a single product on devices as permitted herein. You agree not to unbundle the component parts of the Software for use on different computer devices.
Territory. You agree to use the Software solely in the territory or region where you obtained the Software from Barco or its authorized reseller or as otherwise stated in the Documentation. Any export if permitted shall comply with any applicable (export) laws and regulations.
2.4 Your Infrastructure. You remain responsible to procure and maintain hardware, operating system, network and other infrastructure (the "Infrastructure") required to operate the Software and to keep such Infrastructure functioning and virus-free. You acknowledge that the Software is a complex computer software application, and that the performance thereof may vary depending hardware platform, software interactions and configuration. You acknowledge that the Software is not designed and produced specifically to meet your requirements and expectations and the selection of the Software by you is entirely your own choice and decision.
3. Ownership. Intellectual Property Rights.
3.1 Ownership. Any Software is licensed, not sold to you, on a non-exclusive basis for use only under the terms of this License Agreement, and Barco and its suppliers reserve all rights not expressly granted to you. You may own the carrier on which the Software is provided, but the Software is owned and copyrighted by Barco or by third party suppliers. Your license confers no title or ownership and is not a sale of any rights in Software or its Documentation.
3.2 Third Party Materials. The Software may contain or require the use of certain third party technology (whether proprietary or open source software), identified by Barco in the Documentation, readme file, third-party click-accept, on www.barco.com or elsewhere (the "Identified Components"). Identified Components may be subject to additional and/or different terms and you agree that the Identified Components are licensed under the terms, disclaimers and warranties of their respective licenses which in the forthcoming case shall override the provisions of this License Agreement.
3.3 Source Code Access. To the extent required under third party (open source) license terms, and for a period of 36 months following your acceptance of this License Agreement, Barco shall provide access to the source code controlled by a third party (open source) license, via email or download link. If the relevant license terms require so, you may require Barco (attn. its legal department, at the address stated above) to obtain such code on tangible medium against payment of the cost of media, shipping and handling.
3.4 Trademarks / Copyright. Any brand and product names mentioned in relation to the Software may be trademarks, registered trademarks or copyrights of their respective (third party) holders. In addition, the Software is protected by national and international laws and treaty provisions. Copyright on the Software components belongs to the respective initial copyright holder, each additional contributor and/or their respective assignee(s), as may be identified in the Software Documentation, source code, README file, or otherwise. You shall not remove or obscure or otherwise alter any trademark, copyright or other proprietary notices, legends or logo's placed on or contained within the Software.
3.5 Trade Secrets. You acknowledge that the Software embodies valuable trade secrets of Barco and its third party licensors and agree not to disclose, provide or otherwise make available such trade secrets contained within the Software and Documentation in any form to any third party without the prior written consent of Barco. You shall implement all reasonable security measures to protect such trade secrets.
4. Support
4.1 Principle. Barco is under no obligation to provide support and maintenance in respect of the Software, except as included in a Product Specific EULA and/or to the extent you have entered into a separate maintenance and support agreement and paid applicable maintenance and support fees. Any unauthorized use of the Software, as specified in any maintenance and support agreement, may prohibit Barco from providing such support and maintenance.
4.2 Support policy. Maintenance releases updates or upgrades can be obtained under the terms of a separate maintenance and support agreement which is being offered to you. Such agreements, together with the support included in a Product Specific EULA, include Barco's sole liability and your sole remedy in respect of the support and maintenance of the Software. You agree to install any maintenance releases to address bugs or security issues in the Software if the same are being provided to you. Barco will keep you informed as of when earlier versions of the Software are no longer serviced.
4.3 Remote connectivity. Barco may require, as a material condition to provide maintenance or support, that the Software remains remotely connected with Barco over a network.
5. Warranty
EXCEPT FOR THE LIMITED WARRANTY THAT MAY APPLY AS PER THE PRODUCT SPECIFIC EULA, YOU UNDERSTAND THAT THE SOFTWARE IS BEING PROVIDED TO YOU "AS IS". BARCO DOES NOT MAKE NOR INTENDS TO MAKE ANY WARRANTIES OR REPRESENTATIONS, EXPRESS OR IMPLIED AND SPECIFICALLY DISCLAIMS ALL IMPLIED WARRANTIES OF MERCHANTABILITY, FITNESS FOR A PARTICULAR PURPOSE AND NON-INFRINGEMENT OF INTELLECTUAL PROPERTY AND DOES NOT WARRANT THAT THE SOFTWARE WILL BE FREE FROM ERRORS OR THAT YOU WILL BE ABLE TO OPERATE THE SOFTWARE WITHOUT INTERRUPTIONS OR THAT SUCH ERRORS WILL BE CORRECTED BY BARCO. EXCEPT FOR ANY MAINTENANCE AND SUPPORT OBLIGATIONS SEPARATELY AGREED, YOU ARE SOLELY RESPONSIBLE FOR ALL COSTS AND EXPENSES ASSOCIATED WITH RECTIFICATION, REPAIR OR DAMAGE CAUSED BY SUCH ERRORS. IN THE FORTHCOMING CASE, THE WARRANTY DISCLAIMER FOUND IN APPLICABLE OPEN SOURCE LICENSES SHALL OVERRIDE THE PROVISIONS OF THIS LICENSE AGREEMENT.
6. Compliance and Enforcement
6.1 Reporting and Audit. In addition to good practice record-keeping obligations, you agree to report the use of the Software and relating billing metrics in the DRM or otherwise as agreed. You grant to Barco and it designated auditors, at Barco's expenses, the right to verify your deployment and use of the Software during your normal business hours so as to verify your compliance with the License Agreement. In the event such audit reveals non-compliance with your payment obligations hereunder, you shall promptly pay to Barco the appropriate license fees plus the reasonable cost of conducting the audit.
6.2 Fair Use Monitor. You are informed and acknowledge that the Software includes technology which allows to remotely decrease (in part or in full) the functionality of the Software (the "Fair Use Monitor"). Such technology is an enabling tool and a material condition precedent for Barco to enter into this License Agreement.
6.3 Enforcement. Upon breach of the License Agreement (including overdue payment), Barco shall inform the then known user, through the DRM or otherwise in writing, (i) which condition of the License Agreement (including payment terms) is violated; (ii) allow a period of 8 calendar days to cure such breach, if it can be cured at all; and (iii) inform which part of the functionality Barco intends to reduce (all Software or certain additionally licensed features only; in part or in full) if the breach is not remedied on time and in full.
6.4 Remedy. If the breach is not cured within the applicable remedy period (or cannot be cured at all), Barco shall have the option (i) to cause you to procure such additional licenses required as per the actual usage; (ii) to reduce the Software's functionality, including through the use of the Fair Use Monitor; or (iii) to terminate the License Agreement as set out herein, without prejudice to any other remedies available at law, under contract or in equity.
6.5 Indemnification. YOU HEREBY AGREE TO INDEMNIFY, DEFEND AND HOLD HARMLESS BARCO AND BARCO'S AFFILIATES FROM AND AGAINST ANY AND ALL ACTIONS, PROCEEDINGS, LIABILITY, LOSS, DAMAGES, FEES AND COSTS (INCLUDING ATTORNEY FEES), AND OTHER EXPENSES INCURRED OR SUFFERED BY BARCO ARISING OUT OF OR IN CONNECTION WITH ANY BREACH BY YOU OF THE TERMS OF THIS SOFTWARE LICENSE.
7. Limitation of Liability
TO THE MAXIMUM EXTENT PERMITTED BY LAW, BARCO ACCEPTS NO LIABILITY FOR ANY DAMAGES, LOSSES OR CLAIMS YOU OR ANY THIRD PARTY MAY SUFFER AS A RESULT OF YOUR USE OF THE SOFTWARE. IN JURISIDCTIONS WHERE BARCO'S LIABILITY CANNOT BE EXCLUDED, BARCO'S LIABILITY FOR DIRECT DAMAGES SHALL BE LIMITED TO THE LICENSE FEES ACTUALLY PAID FOR THE SOFTWARE DURING THE TWELVE MONTHS PRECEEDING THE CLAIM (OR AN AMOUNT OF 250 EURO IF NO FEE WOULD BE PAID) IN THE AGREGATE.
TO THE MAXIMUM EXTENT PERMITTED BY LAW, IN NO EVENT WILL BARCO BE LIABLE FOR ANY INDIRECT, SPECIAL, PUNITIVE, INCIDENTAL OR CONSEQUENTIAL LOSS OR DAMAGES OF ANY KIND WHICH MAY ARISE OUT OF OR IN CONNECTION WITH THE SOFTWARE, THIS SOFTWARE LICENSE OR THE PERFORMANCE OR PURPORTED PERFORMANCE OF OR FAILURE IN THE PERFORMANCE OF BARCO'S OBLIGATIONS UNDER THIS SOFTWARE LICENSE OR FOR ANY ECONOMIC LOSS, LOSS OF BUSINESS, CONTRACTS, DATA, GOODWILL, PROFITS, TURNOVER, REVENUE, REPUTATION OR ANY LOSS ARISING FROM WORK STOPPAGE, COMPUTER FAILURE OR MALFUNCTION OF THE SOFTWARE AND ANY AND ALL OTHER COMMERCIAL DAMAGES OR LOSSES WHICH MAY ARISE IN RESPECT OF USE OF THE SOFTWARE, EVEN IF BARCO HAS BEEN ADVISED OF THE POSSIBILITY OF THEIR OCCURRENCE.
8. Confidentiality
8.1 Confidential Information. You will be receiving information which is proprietary and confidential to Barco during the procurement and Term of this License Agreement. "Confidential Information" shall include (i) the underlying logic, source code and concepts of the Software or other trade secrets (the access to which is strictly limited as expressly set out herein), (ii) any information designated as confidential by Barco or which has the necessary quality of confidence about it and (iii) any license key provided by Barco to you hereunder.
8.2 Non-Disclosure. You agree not to divulge any Confidential Information to any persons without Barco's prior written consent provided that this article 8 shall not extend to information which was rightfully in your possession prior to the commencement of this License Agreement, which is already public knowledge or becomes so at a future date (otherwise than as a result of a breach of this article 8), to the extent it is required to be disclosed by law or which is trivial or obvious. You agree not to use any Confidential Information except for the authorized purpose hereunder. The foregoing obligations as to confidentiality shall survive the Term of this License Agreement.
9. Term and Termination
9.1 Term. The duration of this License Agreement will be from the date of your acceptance (as set forth above) of the Software (whereby you acknowledge that use of the Software implies acceptance), until you deactivate the Software, discontinue the use of the device on which the Software was first installed for its intended use or the expiration of the limited time period set out in the Product Specific EULA, whichever comes first.
9.2 Termination. You may terminate this License Agreement at any time by destroying all copies of the Software then in your possession and destroying all Documentation and associated materials, or returning the
same to Barco or the appointed Barco reseller that sold or provided these to you. Barco may terminate this License Agreement, immediately or gradually in accordance with article 6 hereof, by informing you at any time if any user is in breach of any of the License Agreement's terms.
9.3 Consequences of Termination. All rights associated with the use of the Software and the acquisition of updates and upgrades cease once the License Agreement is terminated or expires. Termination or expiry of your license will not entitle you to any retroactive refund of current or past payments.
10. Other relevant terms
10.1 Personal Data. Whether or not Barco assumes the role of processor of personal data (as stated in the Product Specific EULA), you remain solely responsible for complying with all applicable data protection laws and for implementing and maintaining privacy protection and security measures (especially for components that you provide or control). Barco disclaims any liability for any data not provided by Barco, or any use of the Software outside the intended use as per this License Agreement or an applicable data processing annex.
10.2 Functional Information. Via the Software, Barco may gather technical information about (i) the functioning and the functionality of the products which are connected through the Software, and/or (ii) as provided by you or generated by your use of the Software (“Functional Information”). Barco may make use of such Functional Information for purposes of analytics, for developing and improving products and services, offering products and services to your organization and/or allowing third parties to access such Functional Information; based on the legitimate interest of Barco of evaluating the market, assessing and improving its products and conducting research and development. All knowhow, inventions and works derived by Barco from the Functional Information will be exclusively owned by Barco.
11. Final Clauses
11.1 Entire Agreement. This License Agreement is the only understanding and agreement between you and Barco for use of the Software. This License Agreement supersedes all other communications, understandings or agreements we had prior to this License Agreement (with the exception of any continuing confidentiality agreement).
11.2 Notices. Notices can be validly delivered through the DRM and alternatively or additionally to the parties' last known address.
11.3 Severability. This License Agreement shall not be altered, amended or varied, except by written agreement signed by its parties. If any provision of this License Agreement is determined to be illegal, void or unenforceable, or if any court of competent jurisdiction in any final decision so determines, this License Agreement shall continue in full force save that such provision shall be deemed to be deleted with effect from the date of such decision, or such earlier date, and shall be replaced by a provision which is acceptable by law and which embodies the intention of this License Agreement a close as possible.
11.4 Export. You acknowledge that this Software may be subject to U.S. or other governments' Export control laws and regulations. You agree to comply with all applicable international and national laws that apply to the Software, including the U.S. Export Administration Regulations, as well as end-user, end-use, and destination restrictions issued by the U.S. or other governments.
11.5 Survival. The provisions of articles 3, 5, 6, 7, 8, 10 and 11 will survive the termination of this License Agreement, howsoever caused, but this will not imply or create any continued right to use the Software after termination of this License Agreement.
11.6 Assignment. You are not allowed to assign this Agreement in part or in full to any third party without Barco's consent. Barco shall be entitled to assign all or any of Barco's obligations hereunder to a third party and/or any of Barco's Affiliates.
11.7 Law and Jurisdiction. The construction, validity and performance of this License Agreement shall be governed in all respects by the laws of Belgium, without recourse to its conflict of law principles. All disputes arising in any way out of or affecting this License Agreement shall be subject to the exclusive jurisdiction of th courts of Kortrijk (Belgium), without prejudice to enforcement of any judgment or order thereof in any other jurisdiction. The United Nations Convention on Contracts for the International Sale of Goods (the "Convention") shall not apply to this License Agreement, however, if the Convention is deemed by a court of competent jurisdiction to apply to this License Agreement, Barco shall not be liable for any claimed non-conformance of the Software under Article 35(2) of the Convention.
YOU HEREBY ACKNOWLEDGE TO HAVE READ, UNDERSTOOD AND ACCEPTED TO BE BOUND BY ALL THE TERMS AND CONDITIONS OF THIS LICENCE AGREEMENT AS INDICATED ABOVE
Barco ClickShare Product Specific Privacy policy
You are controller for personal data which are being processed via the Software. Therefore, you remain solely responsible for complying with all applicable data protection laws and for implementing and maintaining privacy protection and security measures (especially for components that you provide or control). Barco disclaims any liability in this regard. Barco created a specific privacy policy for the ClickShare software application for mobile devices, which describes the processing of personal data via this application (http://www.barco.com/en/about-barco/legal/privacy-policy/clickshare-app).
Via the Software, Barco may gather technical information about (i) the functioning and the functionality of the products which are connected through the Software, and/or (ii) as provided by you or generated by your use of the Software (“Functional Information”). Barco may make use of such Functional Information for purposes of analytics, for developing and improving products and services, offering products and services to your organization and/or allowing third parties to access such Functional Information; based on the legitimate interest of Barco of evaluating the market, assessing and improving its products and conducting research and development. All knowhow, inventions and works derived by Barco from the Functional Information will be exclusively owned by Barco.
Open Source Software provisions
This product contains software components released under an Open Source license. A copy of the source code is available on request by contacting your Barco customer support representative.
EACH SEPARATE OPEN SOURCE SOFTWARE COMPONENT AND ANY RELATED DOCUMENTATION ARE PROVIDED "AS IS" WITHOUT EXPRESS OR IMPLIED WARRANTY INCLUDING, BUT NOT LIMITED TO, THE IMPLIED WARRANTIES OF MERCHANTABILITY AND FITNESS FOR A PARTICULAR PURPOSE. IN NO EVENT SHALL THE COPYRIGHTHOLDER OR ANY OTHER CONTRIBUTOR BE LIABLE FOR DIRECT, INCIDENTAL, SPECIAL, EXEMPLARY OR CONSEQUENTIAL DAMAGES, EVEN IF ADVISED OF THE POSSIBILITY OF SUCH DAMAGES, HOWEVER CAUSED AND ON ANY THEORY OF LIABILITY, WHETHER IN CONTRACT, STRICT LIABILITY, OR TORT (INCLUDING NEGLIGENCE OR OTHERWISE) ARISING IN ANY WAY OUT OF THE USE OF THIS OPEN SOURCE SOFTWARE. MORE INFORMATION/DETAILS IS TO BE FOUND IN EACH SPECIFIC OPEN SOURCE LICENSE.
Copyright on each Open Source Software component belongs to the respective initial copyright holder, each additional contributor and/or their respective assignee (s), as may be identified in the respective documentation, source code, README file, or otherwise. You shall not remove or obscure or otherwise alter the respective copyrights.
You acknowledge living up to the conditions of each separate Open Source Software license.
In the development of the Software, the following Open Source Software components have been used:
| PACKAGE | VERSION | SOURCE |
| alsa-lib | 1.1.7 | ftp://ftp.alsa-project.org/pub/lib |
| alsa-utils | 1.1.7 | ftp://ftp.alsa-project.org/pub/utils |
| libsamplerate | 0.1.9 | http://www.mega-nerd.com/SRC |
| libsndfile | 1.0.28 | http://www.mega-nerd.com/libsndfile/files |
| ncurses | 6,1 | http://ftpmirror.gnu.org/ncurses |
| avahi | 0,7 | https://github.com/lathiat/avahi/releases/download/v0.7 |
| dbus | 1.12.16 | https://dbus.freedesktop.org/releases/dbus |
| expat | 2.2.7 | http://downloads.sourceforge.net/project/expat/expat/2.2.7 |
| libselinux | 2,8 | https://raw.githubusercontent.com/wiki/SELinuxProject/selinux/files/releases/20180524 |
| libsepol | 2,8 | https://raw.githubusercontent.com/wiki/SELinuxProject/selinux/files/releases/20180524 |
| pcre | 8,42 | https://ftp.pcre.org/pub/pcre |
| python3 | 3.7.4 | https://python.org/ftp/python/3.7.4 |
PACKAGE VERSION SOURCE
| libffi v3.3-rc0 | https://github.com/libffi/libffi/archive/v3.3-rc0 | |
| libzlib | 1.2.11 | http://www.zlib.net |
| libdaemon | 0,14 | http://0pointer.de/lennart/projects/libdaemon |
| libglib2 | 2.56.4 | http://ftp.gnome.org/pub/gnome/sources/glib/2.56 |
| elfutils(tool) | 0,176 | https://sourceware.org/elfutils/ftp/0.176 |
| elfutils(library) | 0,176 | https://sourceware.org/elfutils/ftp/0.176 |
| bzip2 | 1.0.8 | http://www.bzip.org/1.0.8 |
| util-linux | 2,33 | https://cdn.kernel.org/pub/linux/utils/util-linux/v2.33 |
| linux-pam | 1.3.1 | https://github.com/linux-pam/linux-pam/releases/download/v1.3.1 |
| flex 2.6.4 | https://github.com/westes/flex/files/981163 | |
| readline 8 | http://ftpmirror.gnu.org/readline | |
| bc 1.06.95 | http://alpha.gnu.org/gnu/bc | |
| bellagio | 0.9.3 | http://downloads.sourceforge.net/project/omxil/omxil/Bellagio%200.9.3 |
| bitstream | 1,4 | https://get.videolan.org/bitstream/1.4 |
| bluez5_utils | 5,5 | https://cdn.kernel.org/pub/linux/bluetooth |
| libical 1.0.1 | https://github.com/libical/libical/releases/download/v1.0.1 | |
| eudev 3.2.7 | http://dev.gentoo.org/~blueness/eudev | |
| kmod 25 | https://cdn.kernel.org/pub/linux/utils/kernel/kmod | |
| bridge-utils | 1,6 | https://cdn.kernel.org/pub/linux/utils/net/bridge-utils |
| busybox | 1.29.3 | http://www.busybox.net/downloads |
| dosfstools | 4,1 | https://github.com/dosfstools/dosfstools/releases/download/v4.1 |
| e2fsprogs (libss and libet) | 1.44.5 | https://cdn.kernel.org/pub/linux/kernel/people/tytso/e2fsprogs/v1.44.5 |
| iproute2 | 4.19.0 | https://cdn.kernel.org/pub/linux/utils/net/iproute2 |
| iptables | 1.8.2 | http://ftp.netfilter.org/pub/iptables |
| netcat 0.7.1 | http://downloads.sourceforge.net/project/netcat/netcat/0.7.1 | |
| ntp 4.2.8p13 | https://www.eecis.udel.edu/~ntp/ntp_spool/ntp4/ntp-4.2 | |
| libedit 20180525-3.1 | http://www.thrysoee.dk/editline | |
| libbsd 0.10.0 | https://archive.hadrons.org/software/libbsd | |
| libevent 2.1.8-stable | https://github.com/libevent/libevent/releases/download/release-2.1.8-stable | |
| libopenssl | 1.1.1c | http://www.openssl.org/source |
| pciutils | 3.5.5 | https://cdn.kernel.org/pub/software/utils/pciutils |
| unzip | 60 | ftp://ftp.info-zip.org/pub/infozip/src |
PACKAGE VERSION SOURCE
| usbutils 10 | https://cdn.kernel.org/pub/linux/utils/usb/usbutils | |
| libusb 1.0.22 | https://github.com/libusb/libusb/releases/download/v1.0.22 | |
| c-ares 1.15.0 | http://c-ares.haxx.se/download | |
| ca-certificates 20190110 | http://snapshot.debian.org/archive/debian/20190513T145054Z/pool/main/c/ca-certificates | |
| collectd 5.7.2 | http://collectd.org/files | |
| libgcrypt | 1.8.4 | https://gnupg.org/ftp/gcrypt/libgcrypt |
| libgpg-error | 1,33 | ftp://ftp.gnupg.org/gcrypt/libgpg-error |
| lm-sensors (libsensors) | 3.5.0 | https://github.com/lm-sensors/lm-sensors/archive/V3-5-0 |
| lm-sensors (programs) | 3.5.0 | https://github.com/lm-sensors/lm-sensors/archive/V3-5-0 |
| crda | 4,14 | https://git.kernel.org/pub/scm/linux/kernel/git/mcgrof/crda.git/snapshot |
| libnl 3.4.0 | https://github.com/thom311/libnl/releases/download/libnl3_4_0 | |
| cryptsetup | 2.0.6 | https://cdn.kernel.org/pub/linux/utils/cryptsetup/v2.0 |
| json-c | 0.13.1 | https://s3.amazonaws.com/json-c_releases/releases |
| lvm2 | 2.02.183 | ftp://sources.redhat.com/pub/lvm2/releases |
| libaio 0.3.111 | https://releases.pagure.org/libaio | |
| popt | 1,16 | http://rpm5.org/files/popt |
| dhcp | 4.3.6 | http://ftp.isc.org/isc/dhcp/4.3.6 |
| dnsmasq | 2,79 | http://thekelleys.org.uk/dnsmasq |
| dropbear | 2018,76 | https://matt.ucc.asn.au/dropbear/releases |
| dvblast | 3,4 | https://get.videolan.org/dvblast/3.4 |
| libev | 4,24 | http://dist.schmorp.de/libev/Attic |
| faad2 2.8.8 | http://downloads.sourceforge.net/project/faac/faad2-src/faad2-2.8.0 | |
| fbv 1.0b | http://s-tech.elsat.net.pl/fbv | |
| giflib | 5.1.4 | http://downloads.sourceforge.net/project/giflib |
| jpeg-turbo | 2.0.1 | https://downloads.sourceforge.net/project/libjpeg-turbo/2.0.1 |
| libpng | 1.6.37 | http://downloads.sourceforge.net/project/libpng/libpng16/1.6.37 |
| ffmpeg | 4.1.3 | http://ffmpeg.org/releases |
| fontconfig | 2.13.1 | http://fontconfig.org/release |
| freetype | 2.9.1 | http://download.savannah.gnu.org/releases/freetype |
| libva 2.4.0 | https://github.com/01org/libva/releases/download/2.4.0 | |
| libdrm 2.4.97 | https://dri.freedesktop.org/libdrm | |
| libpthread-stubs | 0,4 | http://xcb.freedesktop.org/dist |
PACKAGE VERSION SOURCE
| libvorbis 1.3.6 | http://downloads.xiph.org/releases/vorbis | |
| libogg | 1.3.3 | http://downloads.xiph.org/releases/ogg |
| libvpx | 1.7.0 | http://storage.googleapis.com/downloads.webmproject.org/releases/webm |
| opus | 1.3.1 | https://downloads.xiph.org/releases/opus |
| speex | 1.2.0 | http://downloads.us.xiph.org/releases/speex |
| speexdsp | 20e-d3452074664a-d07e380-e51321b148a-cebdf20 | https://git.xiph.org/speexdsp.git |
| file | 5,36 | ftp://ftp.astron.com/pub/file |
| gdb | 8.1.1 | http://ftpmirror.gnu.org/gdb |
| gnupg2 | 2.2.17 | https://gnupg.org/ftp/gcrypt/gnupg |
| libassuan 2.5.2 | ftp://ftp.gnupg.org/gcrypt/libassuan | |
| libksba 1.3.5 | ftp://ftp.gnupg.org/gcrypt/libksba | |
| libnpth | 1,6 | https://www.gnupg.org/ftp/gcrypt/npth |
| sqlite | 3280000 | https://www.sqlite.org/2019 |
| gssdp | 1.0.2 | http://ftp.gnome.org/pub/gnome/sources/gssdp/1.0 |
| libsoup | 2.62.3 | http://ftp.gnome.org/pub/gnome/sources/libsoup/2.62 |
| gst1-libav | 1.14.4 | https://gstreamer.freedesktop.org/src/gst-libav |
| gst1-plugins-base | 1.14.4 | https://gstreamer.freedesktop.org/src/gst-plugins-base |
| gstreamer1 | 1.14.4 | https://gstreamer.freedesktop.org/src/gstreamer |
| gst1-plugins-bad | 1.14.4 | https://gstreamer.freedesktop.org/src/gst-plugins-bad |
| gst1-plugins-good | 1.14.4 | https://gstreamer.freedesktop.org/src/gst-plugins-good |
| libv4l 1.16.3 | https://linuxtv.org/downloads/v4l-utils | |
| icu | 60,2 | http://download.icu-project.org/files/icu4c/60.2 |
| pcre2 | 10,32 | https://ftp.pcre.org/pub/pcre |
| gst1-vaapi | 1.14.4 | https://gstreamer.freedesktop.org/src/gstreamer-vaapi |
| htop | 2.2.0 | http://hisham.hm/htop/releases/2.2.0 |
| input-event-daemon v0.1.3 | https://github.com/gandro/input-event-daemon/archive/v0.1.3 | |
| iperf3 | 3,6 | https://downloads.es.net/pub/iperf |
| iw | 4,14 | https://cdn.kernel.org/pub/software/network/iw |
| jansson | 2,12 | http://www.digip.org/jansson/releases |
| jose | 10 | https://github.com/latchset/jose/releases/download/v10 |
PACKAGE VERSION SOURCE
| jsoncpp | 1.8.4 | https://github.com/open-source-parsers/jsoncpp/archive/1.8.4 |
| libarchive 3.3.3 | http://www.libarchive.org/downloads | |
| libxml2 2.9.9 | ftp://xmlsoft.org/libxml2 | |
| libconfig | 1.7.2 | http://www.hyperrealm.com/libconfig |
| libcurl 7.65.3 | https://curl.haxx.se/download | |
| libestr 0.1.10 | http://libestr.adiscon.com/files/download | |
| libfastjson | v0.99.8 | https://github.com/rsyslog/libfastjson/archive/v0.99.8 |
| libhttpparser | v2.9.0 | https://github.com/nodejs/http-parser/archive/v2.9.0 |
| liblogging | 1.0.6 | http://download.rsyslog.com/liblogging |
| libnspr | 4,2 | https://ftp.mozilla.org/pub/mozilla.org/nspr/releases/v4.20/src |
| libnss 3.42.1 | https://ftp.mozilla.org/pub/mozilla.org/security/nss/releases/NSS_3_42_1_RTM/src | |
| libopusenc | 0.2.1 | https://downloads.xiph.org/releases/opus |
| libpcap | 1.9.0 | http://www.tcpdump.org/release |
| libqrencode | 4.0.0 | http://fukuchi.org/works/qrencode |
| libsha1 | 0,3 | https://github.com/dottedmag/libsha1/archive/0.3 |
| libtool 2.4.6 | http://ftpmirror.gnu.org/libtool | |
| libuv v1.25.0 | https://github.com/libuv/libuv/archive/v1.25.0 | |
| libyaml | 0.2.1 | http://pyyaml.org/download/libyaml |
| libzip | 1.5.1 | http://www.nih.at/libzip |
| lighttpd | 1.4.53 | http://download.lighttpd.net/lighttpd/releases-1.4.x |
| logrotate | 3.13.0 | https://github.com/logrotate/logrotate/archive/3.13.0 |
| memtester 4.3.0 | http://pyropus.ca/software/memtester/old-versions | |
| monit 5.25.3 | http://mmonit.com/monit/dist | |
| netsnmp | 5,8 | https://downloads.sourceforge.net/project/net-snmp/net-snmp/5.8 |
| nodejs | 8.15.1 | http://nodejs.org/dist/v8.15.1 |
| opkg | 0.3.6 | http://git.yoctoproject.org/git/opkg |
| opus-tools | 0,2 | https://downloads.xiph.org/releases/opus |
| opusfile | 0,11 | https://downloads.xiph.org/releases/opus |
| php | 7.3.9 | https://ftp.pcre.org/pub/pcre |
| portaudio | v190600_20161030 | http://www.portaudio.com/archives |
| powertop | 2,9 | https://01.org/sites/default/files/downloads/powertop |
| protobuf | 2.6.1 | https://github.com/google/protobuf/archive/v2.6.1 |
PACKAGE VERSION SOURCE
| python-pyyaml | 4.2b4 | https://files.pythonhosted.org/packages/a8/c6/a8d1555e795db0375c3c93b576ca13bbf139db51ea604afa19a2c35fc03 |
| python-serial | 3,4 | https://files.pythonhosted.org/packages/cc/74/11b04703ec416717b247d789103277269d567db575d2fd88f25d9767f-e3d |
| qt5base | 5.12.4 | https://download.qt.io/archive/qt/5.12/5.12.4/submodules |
| qt5declarative | 5.12.4 | https://download.qt.io/archive/qt/5.12/5.12.4/submodules |
| qt5xmlpatterns 5.12.4 | https://download.qt.io/archive/qt/5.12/5.12.4/submodules | |
| qt5imagefor-mats 5.12.4 | https://download.qt.io/archive/qt/5.12/5.12.4/submodules | |
| qt5multimedia | 5.12.4 | https://download.qt.io/archive/qt/5.12/5.12.4/submodules |
| qt5quickcon-trols 5.12.4 | https://download.qt.io/archive/qt/5.12/5.12.4/submodules | |
| qt5quickcon-trols2 5.12.4 | https://download.qt.io/archive/qt/5.12/5.12.4/submodules | |
| qt5serialport | 5.12.4 | https://download.qt.io/archive/qt/5.12/5.12.4/submodules |
| qt5svg | 5.12.4 | https://download.qt.io/archive/qt/5.12/5.12.4/submodules |
| qt5webchan-nel 5.12.4 | https://download.qt.io/archive/qt/5.12/5.12.4/submodules | |
| qt5websock-ets 5.12.4 | https://download.qt.io/archive/qt/5.12/5.12.4/submodules | |
| qt5webengine | 5.12.4 | https://download.qt.io/archive/qt/5.12/5.12.4/submodules |
| webp | 1.0.1 | http://downloads.webmproject.org/releases/webp |
| ramspeed | 2.6.0 | http://www.alasir.com/software/ramspeed |
| rsync | 3.1.3 | http://rsync.samba.org/ftp/rsync/src |
| rsyslog | 8.22.0 | http://rsyslog.com/files/download/rsyslog |
| strace | 4,26 | http://downloads.sourceforge.net/project/strace/strace/4.20 |
| tcpdump | 4.9.2 | http://www.tcpdump.org/release |
| trousers 0.3.14 | http://downloads.sourceforge.net/project/trousers/trousers/0.3.14 | |
| tpm-tools | 1.3.9.1 | http://downloads.sourceforge.net/project/trousers/tpm-tools/1.3.9.1 |
| tzdata 2018e | http://www.iana.org/time-zones/repository/releases | |
| wireless-regdb | 2019.06.03 | https://cdn.kernel.org/pub/software/network/wireless-regdb |
| wireless_tools | 30.pre9 | https://hewlettpackard.github.io/wireless-tools |
| zip | 30 | ftp://ftp.info-zip.org/pub/infozip/src |
| splashutils | 1.5.4.4 | http://dev.gentoo.org/~spock/projects/gensplash/archive |
| json | 1.8.4-cs2 | http://json.org/ |
| libresample | 0.1.3 | ftp://ftp.ubuntu.com/ubuntu/pool/universe/libr/libresample |
PACKAGE VERSION SOURCE
| alsa-plugins | 1.1.1 | ftp://ftp.alsa-project.org/pub/plugins |
| arphic-uming-fonts 20080216 | http://archive.ubuntu.com/ubuntu/pool/main/t/ttf-arphic-uming | |
| dejavu-fonts | 2,34 | http://downloads.sourceforge.net/project/dejavu/dejavu/2.34 |
| flexnet 1.0.5 | https://www.flexerasoftware.com/monetize/products/flexnet-licensing.html | |
| sazanami-fonts 20040629 | http://sourceforge.jp/projects/efont/downloads/10087 | |
| unfonts | 1 | http://kldp.net/frs/download.php/1425 |
| linux-firmware | 65b1c68c63-f974d72610d-b38dfa-e49861117cae2 | http://git.kernel.org/pub/scm/linux/kernel/git/firmware/linux-firmware.git |
| libsrp | 2.1.2 | https://github.com/secure-remote-password/stanford-srp/tree/master/libsrp |
| libfdk-aac 0.1.4 | https://github.com/mstorsjo/fdk-aac | |
| libalac | 4 | https://github.com/macosforge/alac |
| mDNSResponder | 878.30.4 | https://opensource.apple.com/source/mDNSResponder/ |
| AOP Alliance Class library | 1 | https://sourceforge.net/projects/aopalliance/files/aopalliance/1.0/ |
| Apache Log4j | 1.2.17 | https://archive.apache.org/dist/logging/log4j/1.2.17/ |
| ASM Bytecode Manipulation | 5.0.1 | https://gitlab.ow2.org/asm/asm/tags/ASM_5_0_1 |
| AspectJ Runtime 1.8.10 | http://www.eclipse.org/downloads/download.php?file=/tools/aspectj/aspectj-1.8.10-src.jar | |
| Boost | 1,59 | http://sourceforge.net/projects/boost/files/boost/1.59.0/boost_1_59_0.tar.bz2 |
| Commons beanutils 1.8.0 | https://archive.apache.org/dist/commons/beanutils/source/commons-beanutils-1.8.0-src.tar.gz | |
| Commons beanutils 1.9.3 | https://archive.apache.org/dist/commons/beanutils/source/commons-beanutils-1.9.3-src.tar.gz | |
| Commons codec 1.9.0 | https://archive.apache.org/dist/commons/codec/source/commons-codec-1.9-src.tar.gz | |
| Commons codec | 1,1 | https://archive.apache.org/dist/commons/codec/source/commons-codec-1.10-src.tar.gz |
| Commons collections | 3,1 | https://archive.apache.org/dist/commons/collections/source/commons-collections-3.1-src.tar.gz |
| Commons collections 3.2.2 | https://archive.apache.org/dist/commons/collections/source/commons-collections-3.2.2-src.tar.gz | |
| Commons digester | 2,1 | https://archive.apache.org/dist/commons/digester/source/commons-digester-2.1-src.tar.gz |
PACKAGE VERSION SOURCE
| Commons fileupload | 1.3.2 | https://archive.apache.org/dist/commons/fileupload/source/commons-fileupload-1.3.2-src.tar.gz |
| Commons httpclient | 3,1 | https://www.apache.org/dist/httpcomponents/commons-httpclient/source/commons-httpclient-3.1-src.tar.gz |
| Commons httpclient | 4.5.3 | http://apache.belnet.be/httpcomponents/httpclient/source/httpcomponents-client-4.5.3-src.tar.gz |
| Commons IO | 2,2 | https://archive.apache.org/dist/commons/io/source/commons-io-2.2-src.tar.gz |
| Commons IO | 2,5 | https://archive.apache.org/dist/commons/io/source/commons-io-2.5-src.tar.gz |
| Commons lang | 3,1 | https://archive.apache.org/dist/commons/lang/source/commons-lang3-3.1-src.tar.gz |
| Commons lang | 3,6 | https://archive.apache.org/dist/commons/lang/source/commons-lang3-3.6-src.tar.gz |
| Commons logging | 1,2 | https://archive.apache.org/dist/commons/logging/source/commons-logging-1.2-src.tar.gz |
| Commons schema 1.4.5 | https://github.com/apache/webservices-commons-xmlschema/archive/XmlSchema-1.4.5.tar.gz | |
| Commons text | 1,1 | https://archive.apache.org/dist/commons/text/source/commons-text-1.1-src.tar.gz |
| Commons Validator | 1,6 | https://archive.apache.org/dist/commons/validator/source/commons-validator-1.6-src.tar.gz |
| Eclipselink | 2.6.4 | http://mirror.switch.ch/eclipse/rt/eclipselink/releases/2.6.4/eclipselink-src-2.6.4.v20160829-44060b6.zip |
| Freemarker 2.3.22 | https://sourceforge.net/projects/freemarker/files/freemarker/2.3.22/ | |
| Glassfish Components | 2.2.4 | https://mvnrepository.com/artifact/org.glassfish.web/javascript.el/2.2.4 |
| Google Guava Library | 23 | https://github.com/google/guava/releases/tag/v23.0 |
| Graylog Extended Log Format for Java 1.1.15 | https://github.com/t0xa/gelfj/archive/v1.1.15.tar.gz | |
| H2 embedded database 1.4.196 | http://repo2.maven.org/maven2/com/h2database/h2/1.4.196/h2-1.4.196-sources.jar | |
| Hibernate Bean Validator 5.3.5.Final | https://github.com/hibernate/hibernate-validator/releases/tag/5.3.5.Final | |
| HttpComponents 4.5.3 | https://github.com/apache/httpcomponents-client/archive/4.5.3.tar.gz | |
| Jackson JSON processor | 2.2.3 | http://central.maven.org/maven2/com/fasterxml/jackson/core/jackson-core/2.2.3/jackson-core-2.2.3-sources.jar |
| Jackson JSON Processor 2.8.9 | http://central.maven.org/maven2/com/fasterxml/jackson/core/jackson-core/2.8.9/jackson-core-2.8.9-sources.jar |
PACKAGE VERSION SOURCE
| Jakarta TaglibStandards 1.1.0 | https://archive.apache.org/dist/jakarta/taglibs/standard/source/jakarta-taglibs-standard-1.1.0-src.tar.gz | |
| JavaBeansActivationFramework | 1,1 | https://mvnrepository.com/artifact/javascript.activation/activation/1.1 |
| JAXB XMLProcessor 0.6.4 | https://mvnrepository.com/artifact/org.jvnet.jaxb2_commons/jaxb2-basics-runtime/0.6.4 | |
| Jcabi Manifest | 1,1 | https://github.com/jcabi/jcabi-manifests/releases/tag/1.1 |
| Jettyembeddedserver 9.3.14 | https://github.com/eclipse/jetty.project/releases/tag/jetty-9.3.14.v20161028 | |
| JQuery | 1.4.4 | https://github.com/jquery/jquery/releases/tag/1.4.4 |
| JQuery-ui | 1.8.9 | https://github.com/jquery/jquery-ui/releases/tag/1.8.9 |
| JSON in Java(org.json) | 20131018 | http://central.maven.org/maven2/org/json/json/20131018/json-20131018-sources.jar |
| JSONprocessorused byGELFJ | 1.1.1 | https://github.com/t0xa/gelfj/archive/v1.1.1.tar.gz |
| JSON WebToken Library | 0.7.0 | http://central.maven.org/maven2/io/jsonwebtoken/jjwt/0.7.0/jjwt-0.7.0-sources.jar |
| KopiLuaScriptingEngine | 5.1.5 | https://github.com/NLua/KopiLua |
| libCurl 7.48.0 | https://github.com/curl/curl/releases/tag/curl-7_48_0 | |
| Liquibasedatabasemigration | 3.5.3 | https://github.com/liquibase/liquibase/releases/tag/liquibase-parent-3.5.3 |
| Log4j | 1.2.16 | https://archive.apache.org/dist/logging/log4j/1.2.16/apache-log4j-1.2.16.tar.gz |
| Lua ScriptingEngine | 5.2.2 | https://www.lua.org/ftp/lua-5.2.2.tar.gz |
| Luaj | 3 | https://sourceforge.net/projects/luaj/files/luaj-3.0/3.0/ |
| Mapstruct | 1.0.0 | https://github.com/mapstruct/mapstruct/releases/tag/1.0.0.Final |
| MPI | 1.8.6 | https://download.open-mpi.org/release/open-mpi/v1.8/openmpi-1.8.6.tar.bz2 |
| MVEL | 2.2.8.Final | http://central.maven.org/maven2/org/mvel/mvel2/2.2.8.Final/mvel2-2.2.8.Final-sources.jar |
| nanohttpd | ? | https://github.com/NanoHttpd/nanohttpd |
| Object-GraphNavigationLanguage(OGNL) | 3.0.19 | http://central.maven.org/maven2/ognl/ognl/3.0.19/ognl-3.0.19-sources.jar |
| OpenSSL | 1.0.2l | http://www.openssl.org/source/openssl-1.0.2l.tar.gz |
PACKAGE VERSION SOURCE
| Passay | 1.1.0 | https://github.com/vt-middleware/passay/releases/tag/v1.1.0 |
| SHA2 C-library | ? | https://github.com/ouah/sha2 |
| Simple Logging Façade for Java 1.7.25 | https://github.com/qos-ch/slf4j/releases/tag/v_1.7.25 | |
| Spring Boot | 1.5.6 | https://repo1.maven.org/maven2/org/springframework/boot/spring-boot/1.5.6.RELEASE/spring-boot-1.5.6.RELEASE-sources.jar |
| Spring framework | 4.2.4 | https://github.com/spring-projects/spring-framework/releases/tag/v4.2.4.RELEASE |
| Springfox | 2.5.0 | https://github.com/springfox/springfox/releases/tag/2.5.0 |
| StarkSoft 1.0.130 | https://www.nuget.org/packages/starksoft.aspen/1.0.1 | |
| Struts 2.3.34 | https://archive.apache.org/dist/struts/2.3.34/struts-2.3.34-src.zip | |
| Swagger | 1.5.9 | https://github.com/swagger-api/swagger-core/releases/tag/v1.5.9 |
| Tiles framework 2.0.6 | https://archive.apache.org/dist/tiles/v2.0.6/tiles-2.0.6-src.tar.gz | |
| TinyXML | 2.5.3 | https://sourceforge.net/projects/tinyxml/files/tinyxml/2.5.3/ |
| Tomcat JDBC Connection Pool 8.5.6 | http://central.maven.org/maven2/org/apache/tomcat/tomcat-jdbc/8.5.6/tomcat-jdbc-8.5.6-sources.jar | |
| T-Rex | 1,3 | https://sourceforge.net/projects/tiny-rex/files/t-rex/trex%201.3/ |
| YAML | 1,17 | https://mvnrepository.com/artifact/org.yaml/snakeyaml/1.17 |
| wpa_supplicant | a5ffe45908-cae43925bb5c-b13d98251-c802b4717 | http://w1.fi/hostap.git |
| wpa_passphrase | a5ffe45908-cae43925bb5c-b13d98251-c802b4717 | http://w1.fi/hostap.git |
| wpa_cli | a5ffe45908-cae43925bb5c-b13d98251-c802b4717 | http://w1.fi/hostap.git |
| hostapd | a5ffe45908-cae43925bb5c-b13d98251-c802b4717 | http://w1.fi/hostap.git |
| hostapd_cli | a5ffe45908-cae43925bb5c-b13d98251-c802b4717 | http://w1.fi/hostap.git |
| qca6174a-30 | 4.5.25.38 | https://source.codeaurora.org/external/wlan/qcacld-2.0/ |
| gsl | master | https://github.com/microsoft/GSL |
PACKAGE VERSION SOURCE
| nlohmann::json | 3.7.3 | https://github.com/nlohmann/json |
| mongo-java-driver 3.4.1 | https://mongodb.github.io/mongo-java-driver/3.4/ | |
| org.mongodb.morphia | 1.3.1 | https://mongodb.github.io/morphia/1.3/ |
| spark-core | 2.5.3 | https://github.com/perwendel/spark/releases/tag/2.5.3 |
| gson | 2.8.0 | https://github.com/google/gson |
| slf4j-api | 1.7.22 | https://www.slf4j.org |
| AspectJWeaver &Runtime 1.8.7 | https://www.eclipse.org/aspectj/ | |
| oval | 1,87 | http://oval.sourceforge.net/ |
| CommonsLang | 3,5 | https://commons.apache.org/proper/commons-lang/ |
| ApacheCommonsLogging | 1,2 | https://commons.apache.org/proper/commons-logging/ |
| swagger-annotations 1.5.4 | https://github.com/swagger-api/swagger-core/wiki/Annotations | |
| swagger-models 1.5.4 | https://github.com/swagger-api/swagger-core/wiki/overriding-models | |
| swagger-jaxrs | 1.5.4 | https://github.com/swagger-api/swagger-core/wiki/Swagger-Core-JAX-RS-Project-Setup-1.5.X |
| javax.ws.rs-api | 2.0.1 | https://jersey.github.io/download.html |
| Commons IO | 2,5 | https://commons.apache.org/proper/commons-io/ |
| spring-web | 4.3.11 | https://projects.spring.io/spring-framework/ |
| jackson-core | 2.9.1 | https://github.com/FasterXML/jackson-core |
| jose4j | 0.6.0 | https://bitbucket.org/b_c/jose4j/wiki/Home |
| uboot | f44ca27357563-e9ed43f1ff76d3-bd8dd14f4747e | https://github.com/rockchip-linux/u-boot |
| linux | 805e544f539-b96d-e96388960173-bb673dab5a9dd | https://github.com/rockchip-linux/kernel |
| avb-vbmeta | 21e95266704-e572ced1c633-bbc4aea9f42afa0a5 | https://android.googlesource.com/platform/external/avb/+/21e95266704e572ced1c633bbc4aea9f42afa0a5/avbtool |
| bootcontrol | b18c9afdb7-d02e1249cee5-cb430dc9f15a3-ccc27 | https://github.com/rockchip-linux/avb/tree/master/boot_control |
PACKAGE VERSION SOURCE
| libavb | 7617e69a524a-cc1a50a8a98-b257d1374ea6fe4a4 | https://github.com/rockchip-linux/avb/tree/master/libavb |
| libavb-ab | 7617e69a524a-cc1a50a8a98-b257d1374ea6fe4a4 | https://github.com/rockchip-linux/avb/tree/master/libavb_ab |
| libavb-user | 7617e69a524a-cc1a50a8a98-b257d1374ea6fe4a4 | https://github.com/rockchip-linux/avb/tree/master/libavb_user |
| rockchip-linux-bin | d6676eb02-c8a1b4966df7-d8c4bb203e-a25fc98b2 | https://github.com/rockchip-linux/bin |
| rockchip-tee-user | 1e3bdb582-c52707d71e5c-be29-ca1064d7c04-b696 | https://github.com/rockchip-linux/rk_tee_user |
| rockchip-binary | 04e55089bb4b-ba-de7c50d9b54-b5a1c-fa70771cd6 | https://github.com/rockchip-linux/rkbin |
| rockchip-gstreamer1 | 59c3bdd06-a22844957fe20-f47c998bb8255-bedd2 | https://github.com/rockchip-linux/gstreamer-rockchip |
| rockchip-mpp | 862b0d89363-e18e45e5db5c-c6c316a173-c5ac2e7 | https://github.com/rockchip-linux/mpp |
| rockchip-libmali | f226-e982386287a4-df669e2832d9d-dd613d4153b | https://github.com/rockchip-linux/libmali |
| rockchip-linux-rga | 72e7764a9f-e358e6a-d50eb1b21176-cc95802c7fb | https://github.com/rockchip-linux/linux-rga |
| NXP SDK 2.5.0 | https://www.nxp.com/support/developer-resources/software-development-tools/mcuxpresso-software-and-tools/mcuxpresso-software-development-kit-sdk:MCUXpresso-SDK?tab=Design_Tools_Tab | |
| unlz4 | - | https://github.com/lz4/lz4/blob/dev/lib/lz4.h |
| ring-buff | - | https://code.google.com/archive/p/ring-buff/ |
| wpa_supplicant | 2.6 | http://w1.fi/wpa_supplicant/ |
Federal Communication Commission Interference Statement
You are cautioned that changes or modifications not expressly approved by the part responsible for compliance could void the user's authority to operate the equipment.
This equipment has been tested and found to comply with the limits for a Class B digital device, pursuant to Part 15 of the FCC rules. These limits are designed to provide reasonable protection against harmful interference in a residential installation. This equipment generates, uses and can radiate radio frequency energy and, if not installed and used in accordance with the instructions, may cause harmful interference to radio communications. However, there is no guarantee that interference will not occur in a particular installation.
This device complies with Part 15 of the FCC Rules. Operation is subject to the following two conditions: (1) this device may not cause harmful interference, and (2) this device must accept any interference received, including interference that may cause undesired operation
If this equipment does cause harmful interference to radio or television reception, which can be determined by turning the equipment off and on, the user is encouraged to try to correct the interference by one or more of the following measures:
• Reorient or relocate the receiving antenna.
- Increase the separation between the equipment and receiver.
- Connect the equipment into an outlet on a circuit different from that to which the receiver is connected.
- Consult the dealer or an experienced radio/TV technician for help.
You may also find helpful the following booklet, prepared by the FCC: "How to Identify and Resolve Radio-TV Interference Problems." This booklet is available from the U.S. Government Printing Office, Washington D.C. 20402.
Changes and Modifications not expressly approved by the manufacturer or registrant of this equipment can void your authority to operate this equipment under Federal Communications Commissions rules.
In order to maintain compliance with FCC regulations shielded cables must be used with this equipment. Operation with non-approved equipment or unshielded cables is likely to result in interference to radio & television reception.
FCC RF Radiation Exposure Statement: This device is capable of operating in 802.11a mode. For 802.11a devices operating in the frequency range of 5.15 - 5.25 GHz, they are restricted for indoor operations to reduce any potential harmful interference for Mobile Satellite Services (MSS) in the US. WIFI Access Points that are capable of allowing your device to operate in 802.11a mode (5.15 - 5.25 GHz band) are optimized for indoor use only. If your WIFI network is capable of operating in this mode, please restrict your WIFI use indoors to not violate federal regulations to protect Mobile Satellite Services.
- This Transmitter must not be co-located or operating in conjunction with any other antenna or transmitter.
- This equipment complies with RF radiation exposure limits set forth for an uncontrolled environment.
This equipment should be installed and operated with a minimum distance of 20 cm between the radiator and your body.
Base Unit FCC ID: 2AAED-R9861511
Button FCC ID (model R9861600D01C): 2AAED-R9861600D01
ClickShare Button 2AAED-R9861600D01 has been tested and meets the FCC RF exposure guidelines. The maximum SAR value reported is 1.19 W/kg.
ClickShare button 2AAED-R9861600D01 should be installed and operated with a minimum distance of 5 mm between the radiator and your body.
FCC responsible: Barco Inc., 3059 Premiere Parkway Suite 400, 30097 Duluth GA, United States, Tel: +1 678 475 8000
For country code selection usage (WLAN devices) :
Note: The country code selection is for non-US model only and is not available to all US model. Per FCC regulation, all WiFi product marketed in US must fixed to US operation channels only.
Canada, Industry Canada (IC) Notices
This device complies with Industry Canada licence-exempt RSS standard (s). Operation is subject to the following two conditions: (1) this device may not cause interference, and (2) this device must accept any interference, including interference that may cause undesired operation of the device.
Radio Frequency (RF) Exposure Information
The radiated output power of the Barco Wireless Device is below the Industry Canada (IC) radio frequency exposure limits. The Barco Wireless Device should be used in such a manner such that the potential for human contact during normal operation is minimized.
Caution: Exposure to Radio Frequency Radiation.
- To comply with the Canadian RF exposure compliance requirements, this device and its antenna must not be co-located or operating in conjunction with any other antenna or transmitter.
- To comply with RSS 102 RF exposure compliance requirements, a separation distance of at least 20 cm must be maintained between the antenna of this device and all persons.
Base Unit IC: IC: 21559-R9861511
Button IC (model R9861600D01C): 21559-R9861600D01
IC Antenna statement
Under Industry Canada regulations, this radio transmitter may only operate using an antenna of a type and maximum (or lesser) gain approved for the transmitter by Industry Canada. To reduce potential radio interference to other users, the antenna type and its gain should be so chosen that the equivalent isotropically radiated power (e.i.r.p.) is not more than that necessary for successful communication.
This radio transmitter 23575-R9861511 has been approved by Industry Canada to operate with the antenna types listed below with the maximum permissible gain and required antenna impedance for each antenna type indicated. Antenna types not included in this list, having a gain greater than the maximum gain indicated for that type, are strictly prohibited for use with this device.
Indoor use only warning
Operation in the band 5150-5250 MHz is only for indoor use to reduce the potential for harmful interference to co-channel mobile satellite systems.
Certification information (SAR)
This device is also designed to meet the requirements for exposure to radio waves established by the Industry Canada.
The SAR limit adopted by Canada is 1.6 W/kg averaged over one gram of tissue. The highest SAR value reported to the IC for this device type complies with this limit.
The highest SAR value reported to the IC for this device type when using in portable exposure conditions is 1.15 W/kg.
Canada, avis d'Industry Canada (IC)
1.1 Documentation....26
1.2 Symbols and fonts 26
1.1 Documentation
About the documentation
This installation guide explains how to install your CX-30 in a meeting room, It explains also how to make everything operational. It provides detailed information on how to configure your CX-30.
Available System documentation
Next to the installation manual, a user guide, a safety guide, an API guide and a service manual are available on Barco's website, www.barco.com/clickshare.
A printed copy of the Safety Guide is included in the CX-30 box at purchase.

Depending on the CX-30 version, some graphics might be different to the ones used in this manual. This however does not have any effect on the functionality.
1.2 Symbols and fonts
Symbol overview
The following icons are used in the manual :
 | Caution |
 | Warning |
 | Info, term definition. General info about the term |
 | Note: gives extra information about the described subject |
 | Tip: gives extra advice about the described subject |
Font overview
- Buttons are indicated in bold, e.g. OK.
- Menu items are indicated in italic.
- Step related notes, tips, warnings or cautions are printed in italic.
- Procedure related notes, tips, warnings or cautions are printed in bold between 2 lines preceded by the corresponding icon.
CX-30
Specifications
2
2.1 About the CX-30
CX-30 sets
With the Conferencing Button, in seconds, you are automatically connected to cameras, mics, soundbars and any other AV peripherals in the room for a better, more immersive meeting experience. Everything becomes part of your laptop.
This CX-30 not only helps the presenter get the presentation on-screen in a second, but it also allows the other people in the conference to participate more actively. The result is enhanced meeting efficiency and better decision-making.
The set is compatible with any laptop, desktop tablet or smartphone OS. It works with most conferencing platforms and connects instantly with most brands of peripherals (speakers, microphones, webcams, soundbars) when using the Conferencing Button.
At the moment 6 different sets are available on the market. Each set is sold in its specific region and it can be used in that specific region because of WiFi regulations.
Components CX-30 set
A standard CX-30 set consists of a Base Unit and 2 Conferencing Buttons. Depending on the location where you buy the product, the software of the Base Unit is different. If needed, you can buy additional Conferencing Buttons and a tray to store the Buttons.
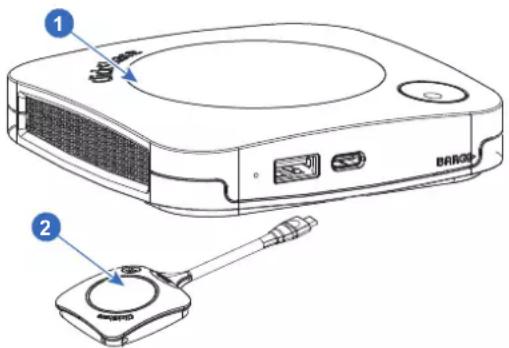
Image 2-1
1 Base unit
2 Conferencing Button 2
Accessories included
Depending on the country where you buy the product, the following regionalized accessories are also included in the CX-30 box.
Products Contains Accessories included
R9861513xx ^3
R9861511
• DC adapter with AC clips type
• 2x R9861600D01C ^4
A, C, G, ^5 I
- Wall mount system
- Printed safety manual
R9861600D01C4
1x R9861600D01C
Contact your local sales representative for the correct regional variant to be used in your country.
2.2 CX-30 Specifications
Base unit
| Dimensions (HxWxD) 34 mm x 135 mm x 135 mm | |
| Power supply Standard 110/220 V AC plug | |
| Power consumption Operational: 5-10W, 24W Max | |
| Weight 900 gr | |
| Operating system Windows | 8/8.1/10. macOS 10.13 and higher. Android v9 and higher (ClickShare App). iOS 12 and higher (ClickShare App) |
| Video outputs 4K UHD (3840*2160) @ 30Hz. HDMI 1.4b | |
| Audio output USB, HDMI | |
| USB 1 X USB-A, 1 X USB-C | |
| ClickShare Buttons 2 | |
| ClickShare App | Desktop & Mobile |
| Native protocols | Airplay, Google Cast, Miracast* |
| Noise Level | Max. 25dBA @ 0-30°C Max. 30dBA @ 30-40°C |
| Authentication protocol | WPA2-PSK in stand alone mode WPA2-PSK or IEEE 802.1X using the ClickShare Button in network integration mode |
| Wireless transmission protocol | IEEE 802.11 a/g/n/ac and IEEE 802.15.1 |
| Reach | Adjustable with signal strength modulation; max. 30m (100 ft) between ClickShare Button and ClickShare Base Unit Frequency band 2.4 GHz and 5 GHz (DFS) |
| Frequency band | 2.4 GHz and 5 GHz (DFS channels supported in select number of countries) |
| Connections | 1x Ethernet LAN 1Gbit 1x USB Type-C 2.0 (front); 1x USB Type A 2.0 (front) |
| Temperature range | Operating: 0°C to +40°C (+32°F to +104°F) Max: 35°C (95°F) at 3000m Storage: -20°C to +60°C (-4°F to +140°F) |
| Humidity | Storage: 0 to 90% relative humidity, non-condensing Operation: 0 to 85% relative humidity, non-condensing |
| Anti-theft system | Kensington lock |
| Certifications | FCC/CE |
| Touch screen support & Interactivity | Yes* |
| Room Dock (peripheral support) | Yes |
| Local view & moderation | Yes* |
| Network connection LAN & | WiFi * |
| Management and reporting | Yes |
| Warranty 1 year standard. 5 | years coverage via SmartCare |
| * * depends on configuration, | available in future firmware updates |
2.3 About the Base Unit
Base Unit functionality
The Base Unit receives the wireless input from the Buttons and controls the content of the meeting room display and the peripherals connected to the Base Unit (speakers, microphones, webcam and soundbar). Furthermore, it will send out the content from the camera and/or the echo-cancelling speakerphone towards the Button.
The Base Unit can be put on the meeting room table or mounted on a wall or ceiling. Check the installation guide for instructions on how to install the Base Unit.
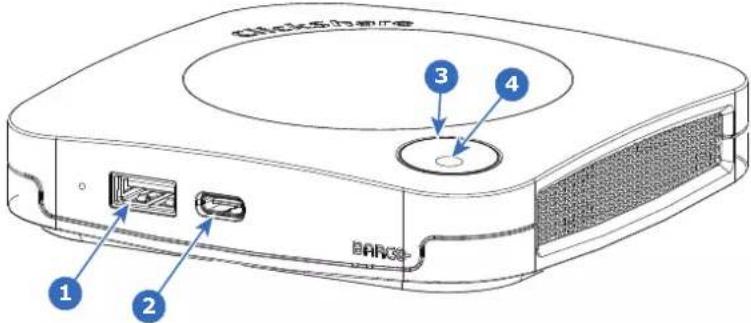
Image 2-2
1 USB Type-A port (USB 2.0)
2 USB Type-C port (USB 2.0)
3 Status LED ring
4 Standby Button
USB ports
Both USB ports, one USB Type™ and one USB Type-A, are used to connect a touch screen, USB camera or USB echo-cancelling speakerphone to the Base Unit. Additionally these ports are also used to pair the Buttons or update the software when both are not done via XMS.
When plugging in the Button into the Base Unit, the Button is paired to the Base Unit. The Base Unit checks whether the software and firmware of the Button is up to date. If not, the Base Unit updates the software and or firmware.
The use of a convertor is sometimes necessary to connect to one of these ports.
Status LED ring
The color of the LED ring around the power button of the Base Unit give information on the status of the system.
LEDs behavior Explanation
| static red | • receiving content from the Buttons and streaming towards the display. • during the first phase of the Base Unit boot process. |
| blinking white | • system is starting up (during the second phase) • Button pairing is in progress • software update of the Base Unit |
| breathing white | • ECO standby mode |
| static white | • awake and ready (i.e. showing the welcome message on the display) • pairing and software update of the Button is done, you can now unplug the Button from the Base Unit.. |
| red blinking | • an error occurred |
| dark | • deep standby/off |
Back layout of the Base unit
The connection panel is situated at the back of the Base unit.
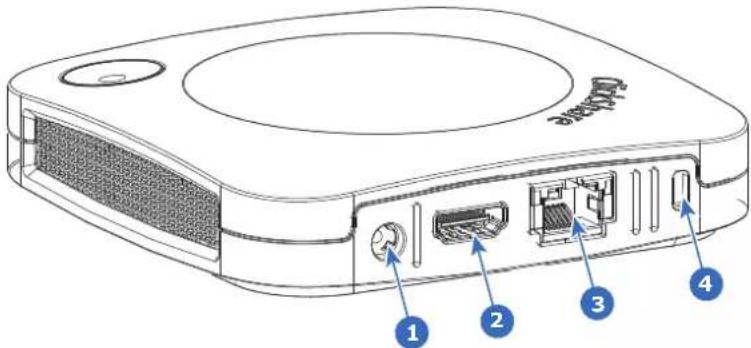
Image 2-3
1 Power connection
2 HDMI out
3 LAN Ethernet connection
4 Kensington lock
Mechanical fixture points
The mechanical fixture points are located at the bottom of the Base Unit.
Antenna
The antenna is built-in in the CX-30 .
Bottom layout of the Base Unit
The serial number label containing the Barco part number, the revision number, production date (week-year) and the serial number.
The product label with the applicable certification logos.
The product label contains:
• the Barco logo
• the product name
• the Barco part number
CX-30 Specifications
- the power rating
- markings for applicable standards (CE, CCC, UL, ...)
• markings for waste regulation - “Made in ...”
Getting started 3
3.1 Environmental Condition Check....34
3.2 Basic Workflow....34
3.1 Environmental Condition Check
Environment condition check
For installations in environments where the device is subject to excessive dust, then it is highly advisable and desirable to have this dust removed prior to it reaching the device clean air supply. Devices or structures to extract or shield excessive dust well away from the device are a prerequisite; if this is not a feasible solution then measures to relocate the device to a clean air environment should be considered.
It is the customer's responsibility to ensure at all times that the device is protected from the harmful effects of hostile airborne particles in the environment of the device. The manufacturer reserves the right to refuse repair if a device has been subject to negligence, abandon or improper use.
Ambient temperature conditions
Max. ambient temperature : +40°C or 104°F
Min. ambient temperature: +0°C or 32°F
Storage temperature: -10^ to +60^ ( 14^ to 140^ )
Humidity Conditions
Storage: 0 to 90% relative humidity, non-condensing
Operation: 0 to 85% relative humidity, non-condensing
Environment
Do not install the device in a site near heat sources such as radiators or air ducts, or in a place subject to direct sunlight, excessive dust or humidity. Be aware that room heat rises to the ceiling; check that temperature near the installation site is not excessive.
3.2 Basic Workflow
Before using CX-30
- Unpack the ClickShare components and accessories from the box.
For a detailed overview of the content of the CX-30 box, see "About the CX-30", page 28.
- Install the Base Unit in the meeting room using one of the possible installation methods.
For more information on the installing procedures, see "CX-30 Installation", page 35
-
Connect the video signal between the Base Unit and the display, see "Video signal connections to the Base unit", page 39.
-
Connect USB camera to Base Unit if any, see "Camera connection", page 40
-
Connect the Base Unit to the mains power.
For more information see "Power connection", page 42,
-
Connect a network cable between the Base Unit and the local network (make sure the Base Unit is connected to the internet to be able to reach the update server).
-
Register you device, online or offline.

For more information on using CX-30, refer to the CX-30 User Guide. This manual can be found on Barco's website www.barco.com/clickshare.
CX-30 Installation
4
4.1 Installation methods for the Base Unit 36
4.2 Table mounting....36
4.3 Wall or ceiling mounting 36
4.4 Out-of-the-box use of the Base Unit 38
4.5 Out-of-the-box use of the Base Unit with Ethernet link 39
4.6 Video signal connections to the Base unit....39
4.7 Touch screen connections to the Base unit 40
4.8 Camera connection....40
4.9 Content Audio connection 40
4.10 Echo Canceling Speakerphone audio connection....41
4.11 LAN connection....42
4.12 Power connection....42
4.13 Starting up for the first time....43
4.14 First setup of the Base Unit....43
4.15 Registration to XMS Cloud 44
4.16 Use without registration of the device 47
4.17 Basic configuration of the ClickShare device....50
4.1 Installation methods for the Base Unit

For optimal performance, install the Base unit close to the display and avoid obstacles between the Base unit and the Buttons.

Make sure not to install the Base Unit in a metal enclosure.
Physical installation
The Base unit can be installed in different ways in a meeting room.
- Table mount
- Wall mount
- Ceiling mount
Standalone or network integration
The Base Unit can be use as standalone unit or integrated in a corporate network.
- Out-of-the-box use
• Out-of-the-box use with Ethernet link
4.2 Table mounting
Overview
Put the Base Unit directly on the meeting room table.
The total weight of the Base Unit is 530 g.
4.3 Wall or ceiling mounting
About wall or ceiling mounting
A mounting base is used to mount the CX-30 to the wall or ceiling. This base has key-shaped screw holes to allow you to fasten the base to a wall or ceiling or you can use the self-adhesive layer to mount the base. O you determine the location for your device follow the next procedure to mount the device.
Mounting with screws
- Take the mounting base out of the package.
- Place the mounting base on the wall or ceiling and mark the screw holes (1).
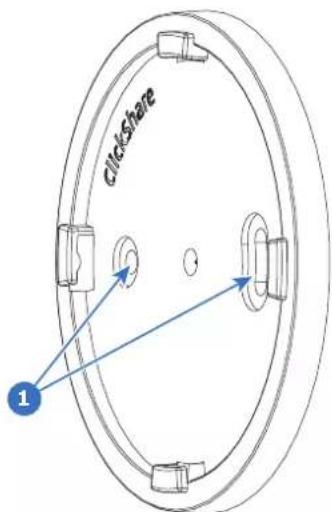
Image 4-1
- Select a drill bit slightly smaller than the size of the used anchors to ensure a snug fit.
- Drill the holes where marked.
- Tap plastic screw anchors into the drill holes with a hammer (if needed, depending on the wall or ceiling type).
- Place the mounting base on the ceiling or wall, drive in the screws.
- Place your device on the mounting base and turn it clockwise until it is locked.
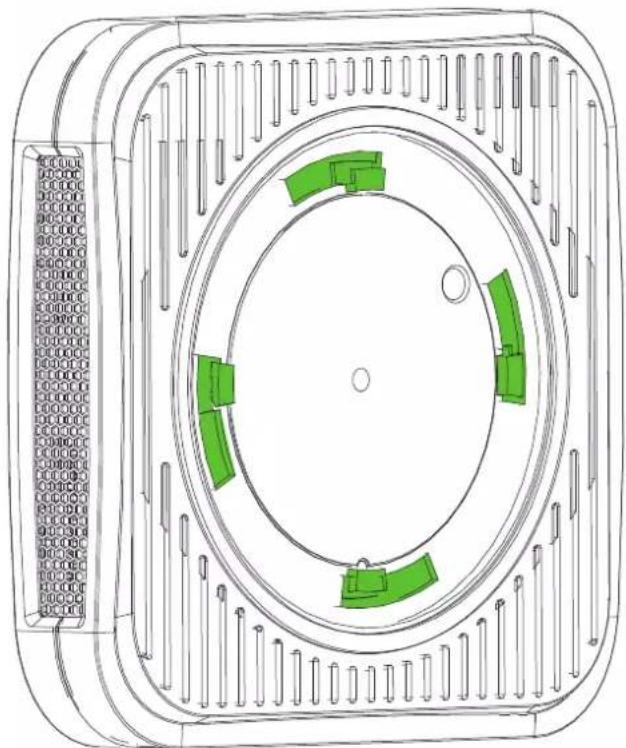
natural_image
Technical line drawing of a circular mechanical component with green directional arrows indicating movement or flow (no text or symbols)Image 4-2
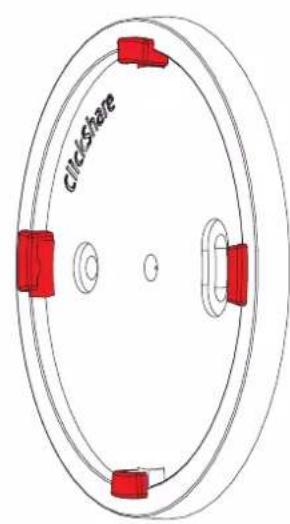
Mounting with the self-adhesive layer
- Peel off the removable protection foil.
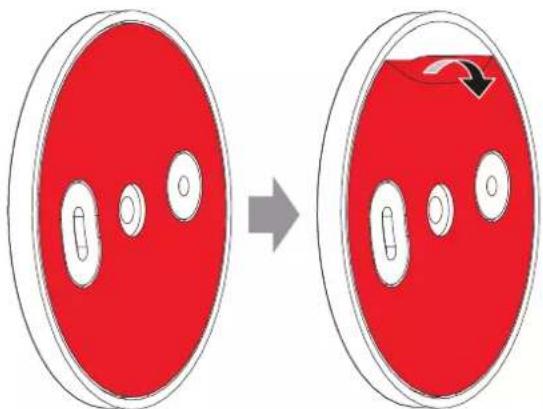
Image 4-3
- Stick the base on the chosen location.
- Place your device on the mounting base and turn it clockwise until it is locked (Image 4-2).
4.4 Out-of-the-box use of the Base Unit
Overview
The ClickShare Base Unit and Button (s) operate directly out of the box, without any integration in the Enterprise network. The Base Unit should be connected to the internet at least once to update and to register. Users can connect directly to the Base Unit via the ClickShare Buttons, using the ClickShare App or Miracast or with their mobile devices using Airplay or Google Cast.
Using a ClickShare Button allows you to stay connected to the internet. Using the ClickShare App, Airplay or Google Cast will require connecting to the Base Unit directly and will only be able to access the internet if the device supports to use data (3G/4G) at the same time.
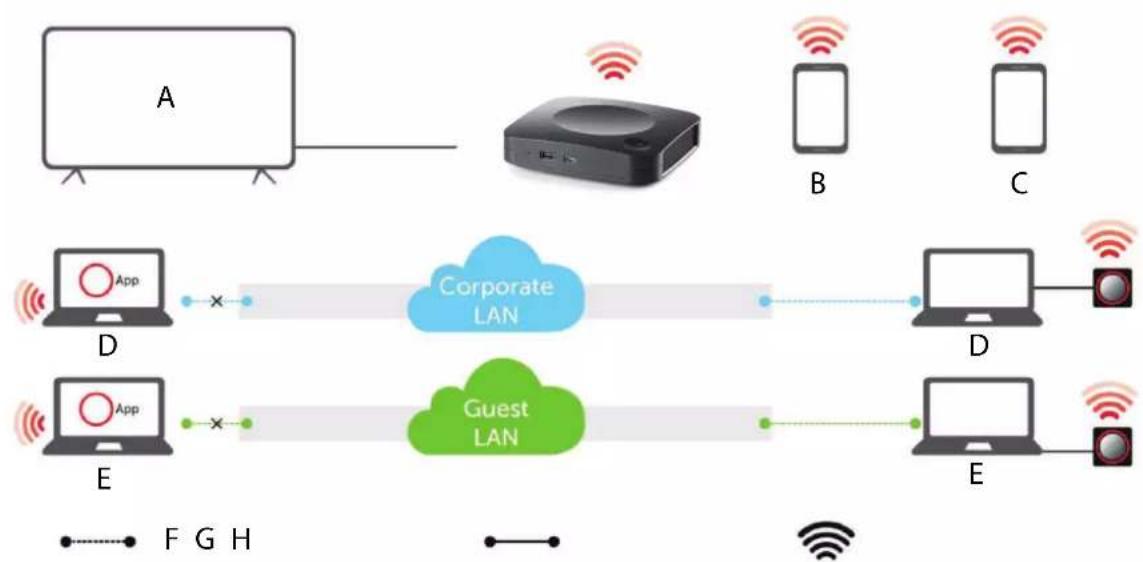
flowchart
graph TD
    A["Device A"] -->|Wireless Signal| Device1["Device"]
    Device1 -->|Wireless Signal| Device2["Device"]
    Device2 -->|Wireless Signal| Device3["Device"]
    Device3 -->|Wireless Signal| Device4["Device"]
    Device4 -->|Wireless Signal| Device5["Device"]
    Device5 -->|Wireless Signal| Device6["Device"]
    Device6 -->|Wireless Signal| Device7["Device"]
    Device7 -->|Wireless Signal| Device8["Device"]
    Device8 -->|Wireless Signal| Device9["Device"]
    Device9 -->|Wireless Signal| Device10["Device"]
    Device10 -->|Wireless Signal| Device11["Device"]
    Device11 -->|Wireless Signal| Device12["Device"]
    Device12 -->|Wireless Signal| Device13["Device"]
    Device13 -->|Wireless Signal| Device14["Device"]
    Device14 -->|Wireless Signal| Device15["Device"]
    Device15 -->|Wireless Signal| Device16["Device"]
    Device16 -->|Wireless Signal| Device17["Device"]
    Device17 -->|Wireless Signal| Device18["Device"]
    Device18 -->|Wireless Signal| Device19["Device"]
    Device19 -->|Wireless Signal| Device20["Device"]
Image 4-4: Out-of-the-Box use
A Meeting room screen
B Employee mobile
C Guest mobile
D Employee laptop
E Guest laptop
F Wireless or Ethernet connection
G Ethernet connection
H Wireless connection
Using the ClickShare Base Unit and Buttons directly out of the box is ideal for temporary setups, visitor centers and small to medium installations without network integration needs or possibilities. This setup
requires the least installation effort and keeps any shared data completely separated from your Enterprise network. Updating and configuring the Base Units will need to be done manually.
4.5 Out-of-the-box use of the Base Unit with Ethernet link
Overview
In this extended out-of-the-box mode, an Ethernet connection is made between the ClickShare Base Unit and the corporate network. The ClickShare Base Unit Wi-Fi is kept enabled, ensuring users can still connect directly to the Base Unit via the ClickShare Buttons, using the ClickShare App, Miracast, Airplay or Google Cast. Employee computers running the ClickShare App and employee mobile devices using Airplay or Google Cast can connect via the corporate LAN.
Using a ClickShare Button allows guests to stay connected to the Guest LAN and thus retain internet connectivity. Guest mobile devices will usually need to connect to the Base Unit directly and will only be able to access the internet if the device supports to use data (3G/4G) at the same time.
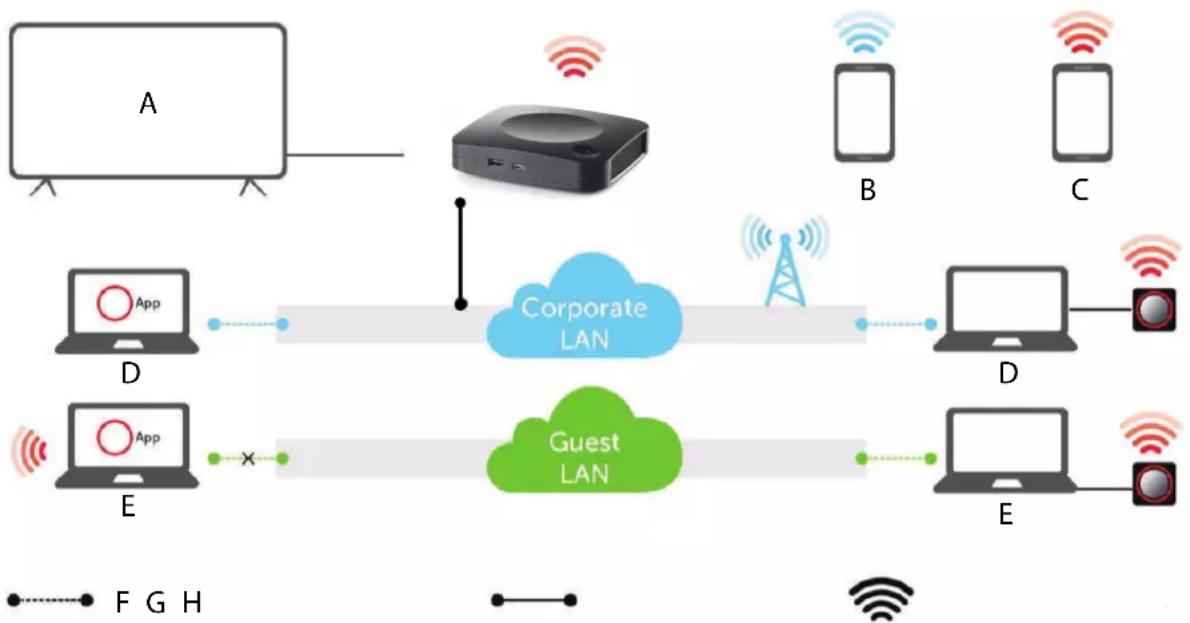
flowchart
graph LR
    A["Entity A"] -->|Wireless Signal| Device["Device"]
    Device -->|Wireless Signal| Cloud1["Cloud LAN"]
    Device -->|Wireless Signal| Cloud2["Cloud LAN"]
    Device -->|Wireless Signal| Cloud3["Cloud LAN"]
    Cloud1 -->|Wireless Signal| Mobile1["Mobile Device"]
    Cloud2 -->|Wireless Signal| Mobile2["Mobile Device"]
    Cloud3 -->|Wireless Signal| Mobile3["Mobile Device"]
    Cloud1 -->|Wireless Signal| FGH["F GH"]
    Cloud2 -->|Wireless Signal| FGH
    Cloud3 -->|Wireless Signal| FGH
    Cloud1 -->|Wireless Signal| GWH["Wireless Signal"]
    Cloud2 -->|Wireless Signal| GWH
    Cloud3 -->|Wireless Signal| GWH
Image 4-5: Out-of-the-Box use with Ethernet link
A Meeting room screen
B Employee mobile
C Guest mobile
D Employee laptop
E Guest laptop
F Wireless or Ethernet connection
G Ethernet connection
H Wireless connection
Using the ClickShare Base Unit and Buttons directly out of the box is ideal for temporary setups, visitors' centers and small to medium installations without network integration needs. The Ethernet connection allows employees to use the ClickShare App without switching their Wi-Fi network.
4.6 Video signal connections to the Base unit
About Video signal connection
A single screen can be connected to the Base unit.
To connect a display, an HDMI connection should be made between the Base Unit and the display.
To connect
- Connect the Base unit to the display using a display cable.

Note: No display cables are included in the ClickShare box at purchase.
When setting up a display configuration, connect the HDMI cable to the display. When necessary, use an adapter piece to connect to a display port or a DVI port on the display side.
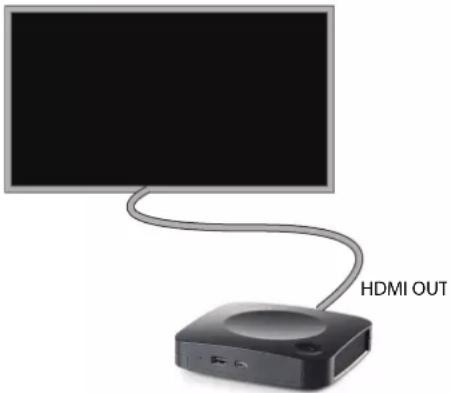
Image 4-6: Display connection
4.7 Touch screen connections to the Base unit
About the connection
A single screen can be connected to the Base unit.
To connect video, an HDMI connection should be made between the Base Unit and the display. To connect the touch functionality, an USB cable should be connected between the touch screen and the Base Unit. A list of supported touch screen can be found on Barco's website. See https://www.barco.com/en/support/docs/TDE9538.
To connect
- Connect a HDMI cable between the Base Unit and touch screen display. When necessary, use an adapter piece to connect to a display port or a DVI port on the display side.
- Connect the USB output of the touch screen with an USB connector on the Base Unit.
4.8 Camera connection
About USB cameras
Any USB camera can be connected to the Base Unit. A list of supported cameras can be found on Barco's website.
To connect
- Connect the camera via USB to the Base Unit.
Camera connected to the Base Unit is accessible when plugging in the button. No drivers required, all camera's will be visible to the user as "ClickShare Camera".
4.9 Content Audio connection
About content audio (no speakerphone connected)
The ClickShare Button captures the audio output of the user's laptop and sends it to the Base Unit together with the video signal. The audio can be output at line levels from the mini jack socket (3.5mm), TOSLINK socket or via the HDMI connector (can be set in the configurator).
It is up to the user to decide whether or not to send the audio signal together with the video signal. The use can decide this by using the same tools as he would to control the laptop's speakers or a headphone: the audio controls of the operating system or the physical buttons on the keyboard of their laptop (mute/unmute, lower volume, higher volume).
There will be synchronization between the audio and video signal when the user is sharing content.
About content audio (speakerphone connected)
The content audio captured on the user' laptop is transmitted via the sharing Button to the Base Unit and is send to USB port with speakerphone connected.
Audio via HDMI (no speakerphone connected)
When your display is connected via HDMI and it supports audio, a separate audio connection is not necessary. The audio signal is sent together with the video signal to the display.
When USB speakerphone is attached to the Base Unit, this will output all audio. Even if separate audio system is attached.
Sound is not sent out
In some Windows environments sound is not sent out. This can be solved as follow (depending on your Windows version):
E.g. for Windows 7:
- Right click on the sound icon in the system tray and select Default device. The Sound window opens.
- Select Speakers ClickShare, select Set default and click Apply.
E.g. for Windows 10
- Click on the sound icon in the system tray and click on the arrow up to open possibilities.
- Select the desired device.
4.10 Echo Canceling Speakerphone audio connection
About echo canceling speakerphone audio
The audio capture by an echo canceling speakerphone connected to the Base Unit is send to the Button and can be used in remote conference. The content audio transmitted from the Button to the Base Unit is send to the speakerphone.
It is a bidirectional audio transmission between the Button and the speakerphone.
USB speakerphone support
A list of supported speakerphones can be found on Barco's website.
How to connect an echo-canceling speakerphone
- Connect your speakerphone device via USB to the Base Unit.
When USB speakerphone is attached to the Base Unit, this will output all audio. Even if separate audio system is attached for the content audio..
Sound is not sent out
In some Windows environments sound is not sent out. This can be solved as follow:
E.g. for Windows 7
-
Right click on the sound icon in the system tray and select Default communication device. The Sound window opens.
-
Select Echo Cancelling Speakerphone, select Set default and click Apply.
E.g. for Windows 10
- Click on the sound icon in the system tray and click on the arrow up to open possibilities.
- Select the desired device.
4.11 LAN connection
About LAN connection
The Base Unit can be connected to a local network or directly to a laptop.
Maximum allowed LAN speed: 1000 Mbit
We do strongly advise the LAN connection and the use of XMS cloud for configuration, monitoring and additional functionality. The LAN connection also greatly improves the user experience when using the ClickShare Apps and native sharing protocols such as Airplay and others.
How to connect
- Insert a network cable with RJ-45 connector into the LAN port.
- Connect the other side to a LAN.
4.12 Power connection
About power
An external power adapter is delivered with the product. The output rate is 12 VDC 2A.

CAUTION: Once the Base Unit is powered, it starts up. Then the power button can be used to switch on or off.
How to connect the external power adapter
- Plug the barrel connector of the power adapter into the power input of the Base unit.
- Slide a power input adaptor piece (US, AU, IN, CH, EU or UK) on the power adapter of the ClickShare until it clicks. Use the one
which is applicable in your country.
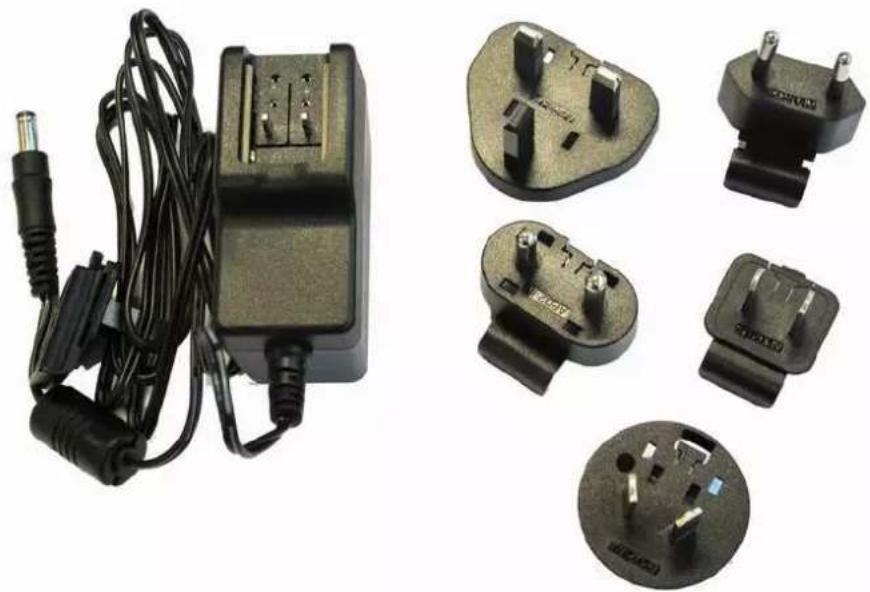
natural_image
Product photo of an electric power adapter with attached cable and terminal socket, alongside six black electrical plug connectors (no visible text or symbols)Image 4-7: Power adapter
- Connect the power cable to the wall outlet.
4.13 Starting up for the first time
How to startup
The following steps are necessary before the Base Unit can be used:
- Connect the screen, all USB devices and the power to the Base Unit.
- The Base Unit reboots when the update is finished.
- Base unit needs Internet access to start up for the first time. The Base Unit updates to the latest firmware version.
- Register and configure your device in XMS cloud.
- Pair the buttons with the Base Unit.
- Base Unit is ready to use.
4.14 First setup of the Base Unit

After the physical installation is done, start with the first setup procedure to activate and configure your device.
Preferred workflow
- Plug in the power supply and HDMI cable.
The Base Unit starts up.
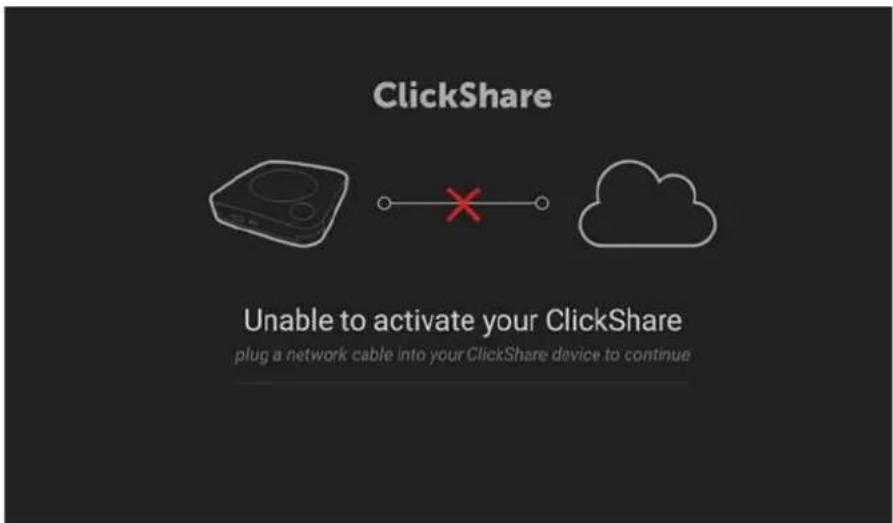
Image 4-8
- Plug in a network cable.
The system checks for updates.
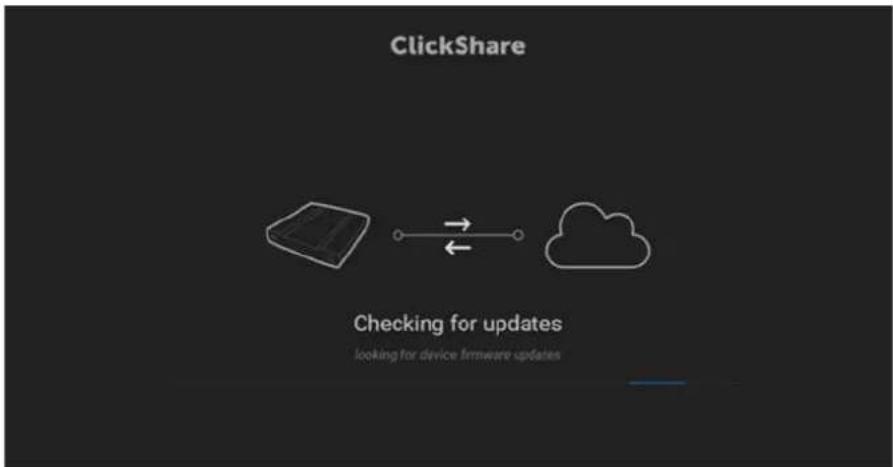
flowchart
graph LR
    A["Device Icon"] <--> B["Cloud Icon"]
    style A fill:#f9f,stroke:#333
    style B fill:#ccf,stroke:#333
    note right of A: "ClickShare"
    note bottom of B: "Checking for updates"
    note right of B: "looking for device firmware updates"
Image 4-9
If an update is available, the base unit will download, update and reboot if no update is available, the unit will continue to the next step
- Start registration to XMS cloud.
4.15 Registration to XMS Cloud
About registration
When your device is connected to the internet and updated you can start to register your device. You have to register your device in order to claim your 5 years SmartCare warranty.
Registration can be done to
• XMS cloud by the end customer (preferred flow) or reseller.
Online to XMS cloud
- When software update is finished and reboot is done, the customer will be asked to surf to https://xms.cloud.barco.com/add.
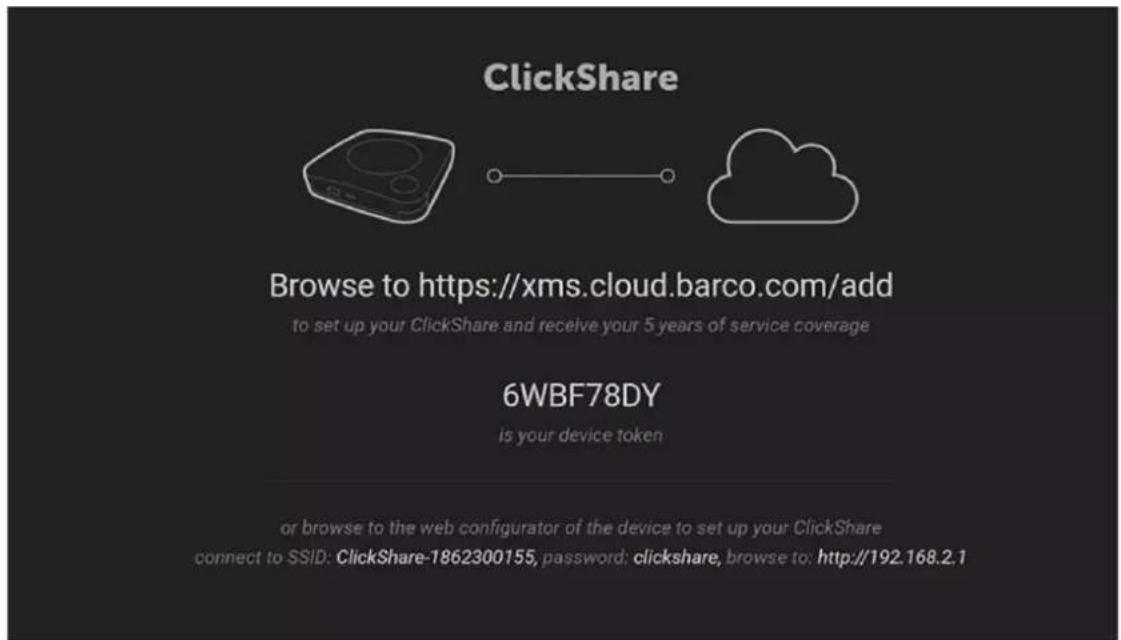
Image 4-10
The XMS login page is displayed.
- Login with your Barco account. When you do not have a Barco account yet, click on register here and follow the instructions.
natural_image
Interior view of a modern hotel lobby with curved ceiling, large windows, and seating areas (no visible text or signage)Image 4-11: Sign in page

Sign in with your Banco account

Don't have a Baron account?
- Click Sign in.
The XMS cloud welcome page is displayed.
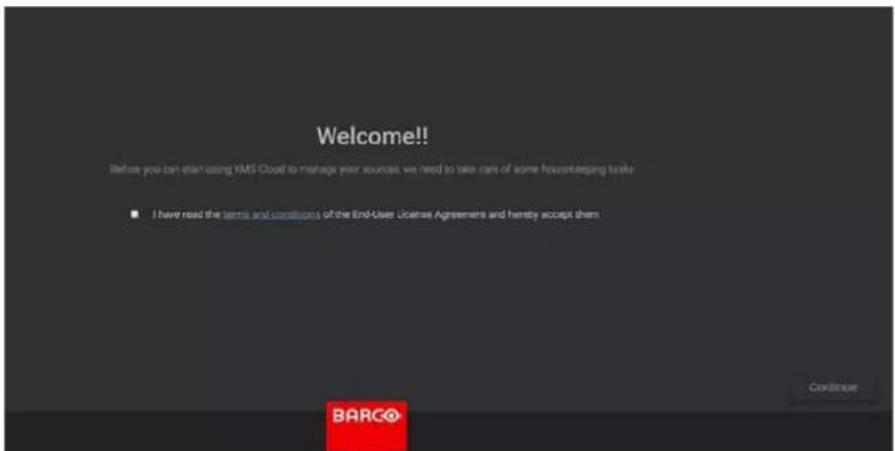
Image 4-12: Welcome page to XMS-cloud
- Accept the End User License agreement and click Continue.
- Fill out your company information and click Continue.
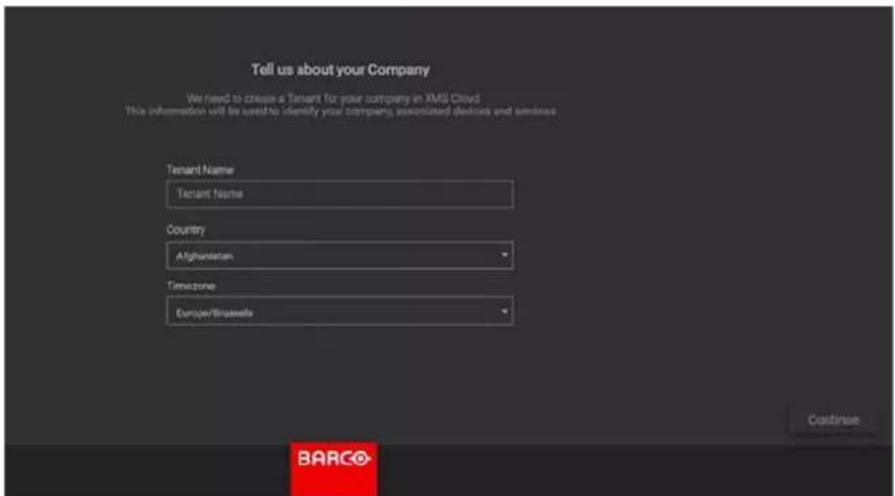
Image 4-13: Company information
- Enter the device token to setup your device and to receive your 5 years of service coverage. The device token is indicated on the ClickShare screen (see Image 4-10)
Click Continue.
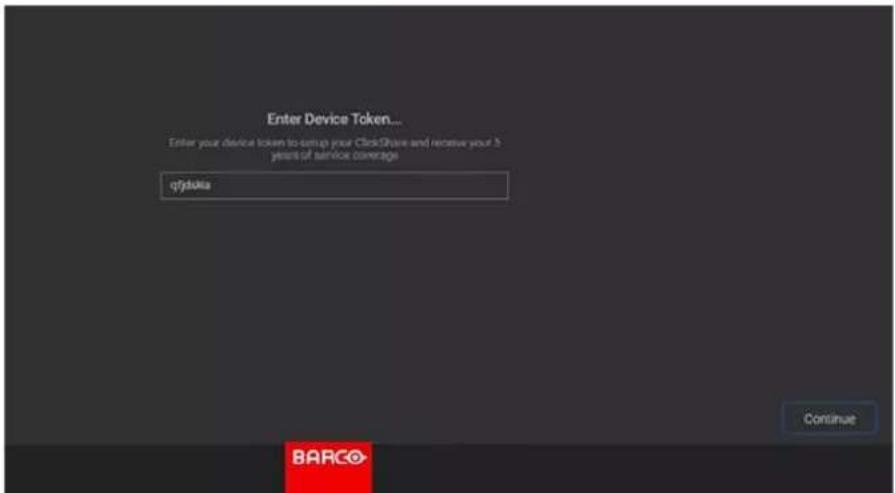
Image 4-14: Enter device token
- Assign a meeting room and click Continue.
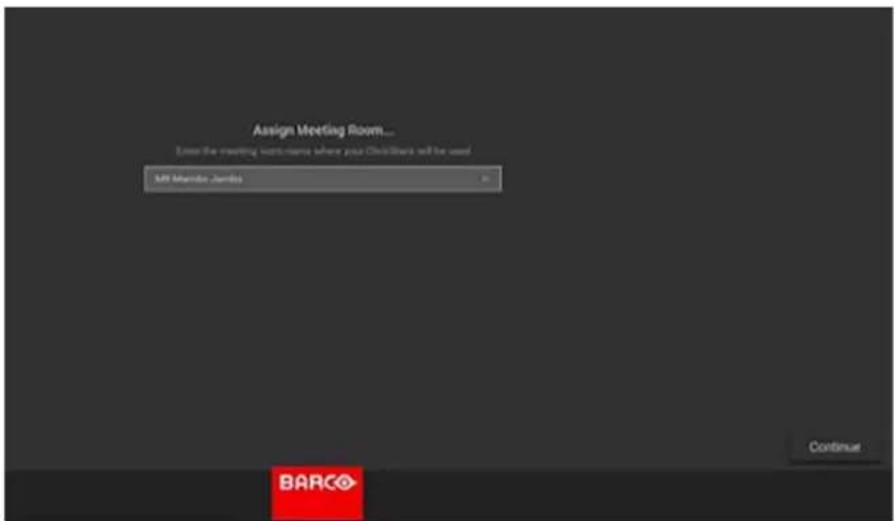
Image 4-15: Assign meeting room
Your device is successfully registered.
- Start pairing your buttons to start using your device.
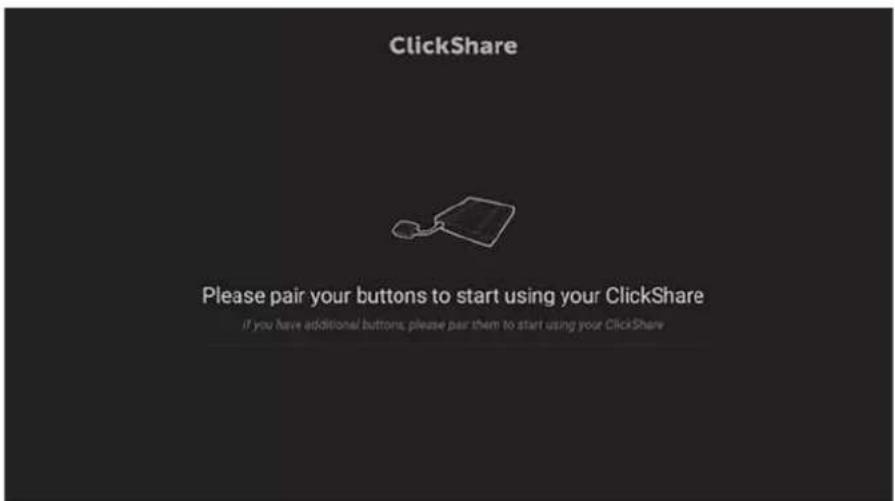
Image 4-16: Start pairing buttons
The wallpaper page will be displayed.
4.16 Use without registration of the device
Why using offline
Several reasons are possible to use your product without registration:
- When you cannot reach the XMS servers at this moment
• If you cannot accept the XMS eula - if you do not want the smart care package,.
then you can skip the registration

The end-customer, then has 6 months to still register the unit in XMS cloud to activate the Smart Care package
How to handle
- Connect the device's WiFi with the instruction given on the wallpaper.
The default SSID is ClickShare-
Password : clickshare
- Once your WiFi connection is made, continue with the network setting of your device.
Browse to http://192.168.2.1
The ClickShare Configurator starts up.
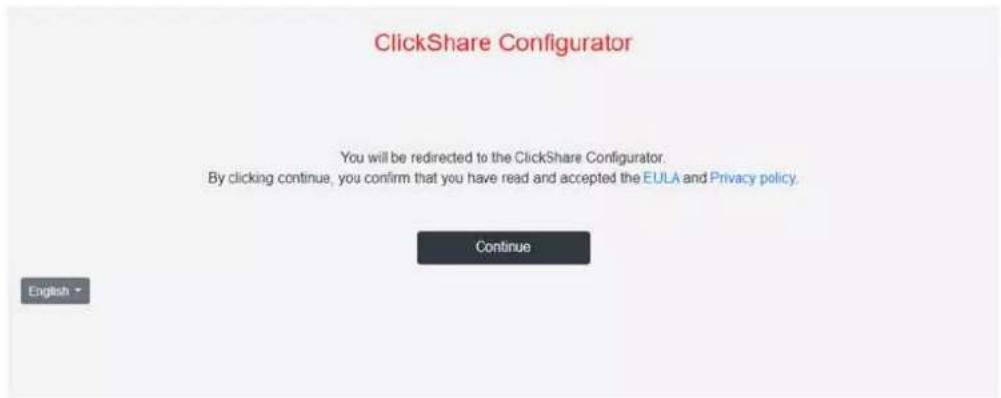
© 2019. Barco. All rights reserved.

Image 4-17: Configurator startup
- To change the language, click on the drop down box of the current indicated language and select the desired language.
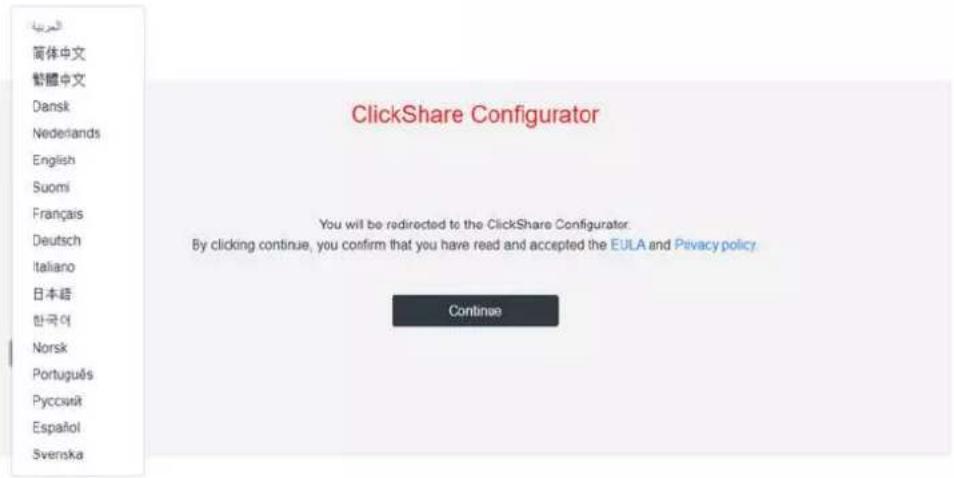
© 2019, Barco. All rights reserved

Image 4-18: Configurator, language selection
- Click Continue to start.
A registration message is displayed.
You have chosen to skip the product registration.
To enjoy Barco SmartCare, you (the final owner of this Base Unit) have to register this ClickShare unit within the next 6 months.
SmartCare offers 5 years service coverage, free software updates and usage insights in XMS Cloud. If you do not register this unit, a standard 1-year warranty will apply.
Register Lute
Image 4-19: Registration message

- Click Register Later.
- Start pairing your buttons.
Pair buttons
Please pair your buttons to start using your ClickShare.

Image 4-20: Start pairing
- Start configuring the network settings. For more info, see "Basic configuration of the ClickShare device", page 50

Your still have to register your device to get your 5 years warranty.
XMS Cloud note in Configurator
When browsing in the Configurator to Wi-Fi & Network → Services, you will see a XMS Cloud integration message how to register it and the token to use.
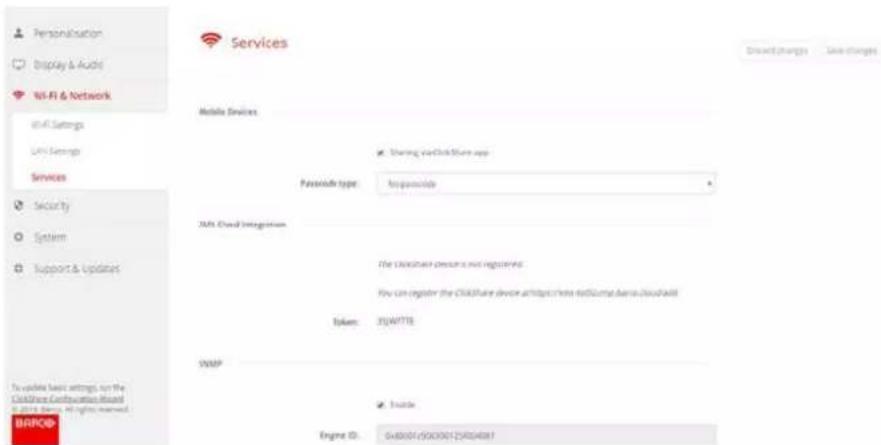
Image 4-21: XMS cloud message
4.17 Basic configuration of the ClickShare device

Make sure you are connected via WiFi to the Base Unit.
How to setup
- Open an internet browser and browse to http://192.168.2.1 The ClickShare Configurator starts up.
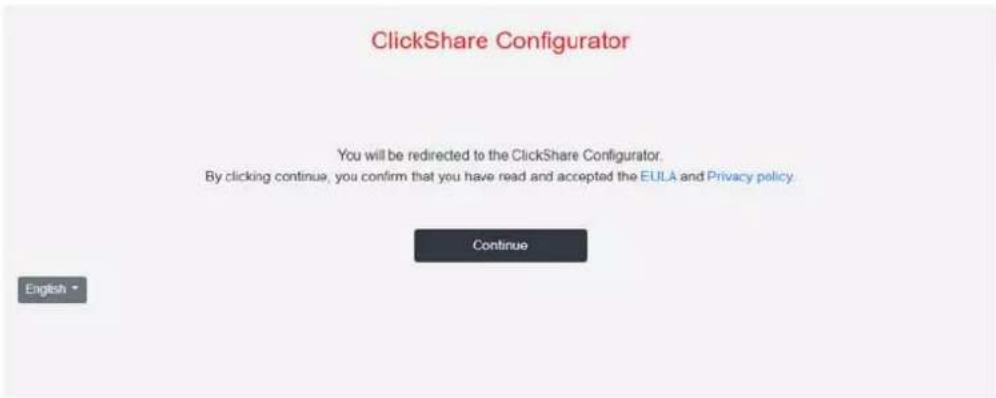
© 2019, Barco. All rights reserved.
BARCO
Image 4-22: Configurator startup
- To change the language, click on the drop down box of the current indicated language and select the desired language.
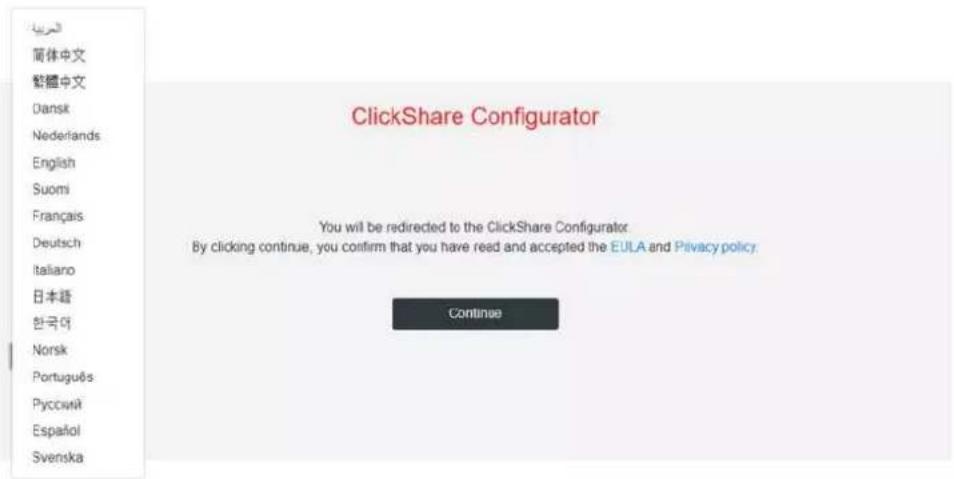
© 2019. Barco. All rights reserved

Image 4-23: Configurator, language selection
- Click Continue to start.
A registration message is displayed.
- Click Next to continue.
The Configurator Login page is displayed.
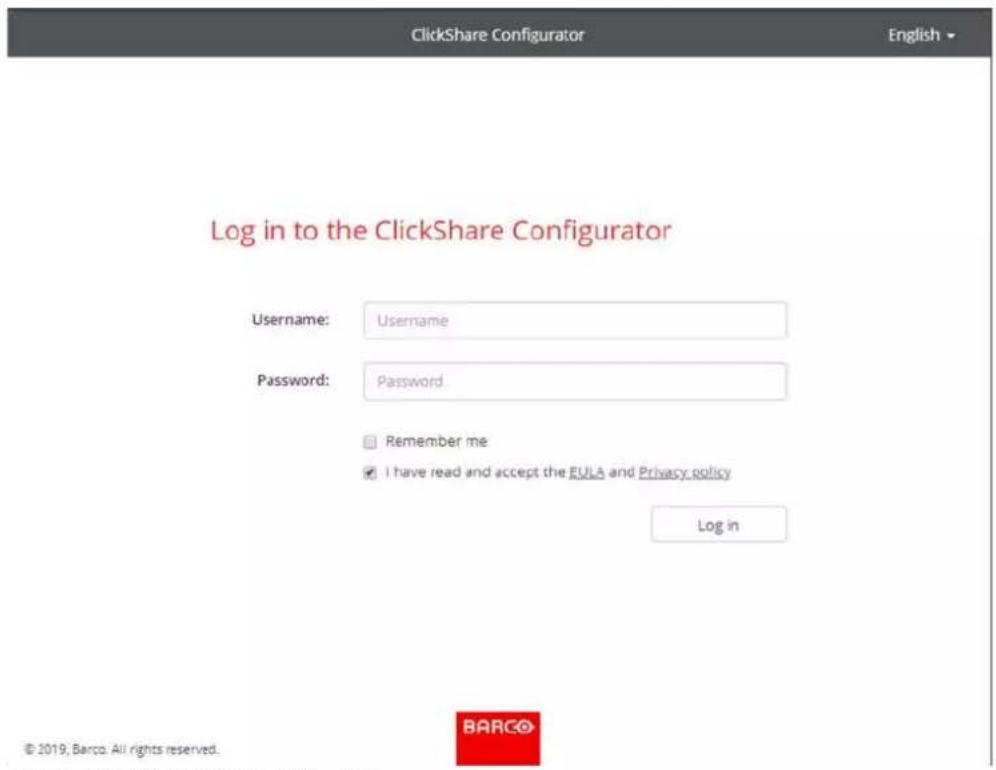
Image 4-24: Configurator, login page
- Log in with the following default credentials. These credentials can be changed later on.
Username: admin
Password: admin
A welcome page to the ClickShare Configuration Wizard opens.
6. Click Start configuration.
Follow the instructions as given on the different pages.
Click Next to continue to the next page and Back to return to the previous page.
7. Fill out:
| Personalisation | Language for on-screen textMeeting room nameLocation nameWelcome message |
| System | Select your time zonedate and time mode setting, manually or via NTP. |
| Security select your desired security level | |
| Password Enter a new password to login to the ClickShare Configurator. | |
| Network Setup the network settings:Select frequency bandSelect a channelChange the SSID if you want. The default value is ClickShare-.Check or uncheck broadcast SSIDEnter a new WiFi passphrase. | |
For more detailed information about all these settings,
Your Base Unit can now communicate via LAN.
Start pairing the buttons.
Preparing the Buttons
5
5.1 Pairing....54
5.2 ClickShare Extension Pack 55
5.3 ClickShare Extension Pack installer 55
5.4 ClickShare Windows Certified driver 56
5.5 ClickShare Desktop app....56
5.1 Pairing
Pairing of the Buttons with the Base Unit
To be able to use a Button it should be assigned to the Base Unit you are using. This process is called pairi All Buttons will need to be updated and paired before use.
In case you buy additional Buttons or when a Button should be assigned to another Base Unit, the Button needs to be paired (again). The Button software update runs in the background and will not impact users while using the system. When downgrading or updating to an older version of the Base Unit software the Buttons need to paired manually to update their software.

A Button can only be paired to one Base Unit at a time.
The Button will always make connection to the Base Unit it was last paired to.
Pairing a Button can be done in two ways:
• by plugging the Button to the Base Unit.
- by using the Button Manager application running on your laptop.
To pair a Button to the Base unit by plugging in
- Insert the Button in one of the USB port available on the Base Unit you are using (image is only given as example, all USB connectors can be used).

Note: For some ports or Buttons, it can be necessary to use a convertor.
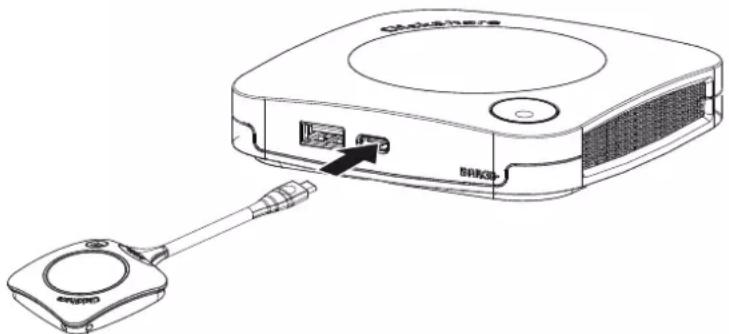
The Base Unit LED is blinking while the Button LED fills up a circle. This means pairing is in progress.
The Base Unit automatically checks whether the software of the Button is up to date. If not, the Base Unit updates the Button software. This may take more time.
The result of the pairing process can be as follows:
- When the LEDs on the Button become green and on static white on the Base Unit, the Button is paired to the Base Unit. You can unplug the Button from the Base Unit.
- Unplug the Button from the Base Unit.
The Button is now ready for use. Plug in a button to conference.
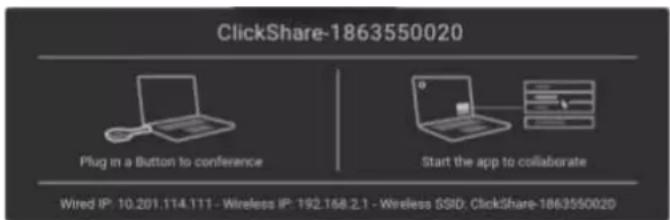
Image 5-2
5.2 ClickShare Extension Pack
About
The ClickShare Extension Pack is a collection of tools to upgrade your ClickShare user experience. This Extension Pack contains the ClickShare Launcher service and a driver to enable the Extended Desktop functionality (only on Windows). Both tools will be installed by default. To change the default behavior of the installer, the installer will need to be executed with command line parameters.
The ClickShare Extension Pack can be installed by the end user manually, pre-installed on your company's laptop image or deployed company-wide with SCCM or other tools.
The ClickShare Extension Pack can be used in combination with a Button and/or with the ClickShare desktop app.
The latest extension pack can be downloaded via http://www.barco.com/en/product/clickshare-extension-pack
5.3 ClickShare Extension Pack installer
Interactive setup
In this setup, the user runs the installer which will install the ClickShare Extension Pack on his computer after the user accepts the EULA.
After the setup finished, the ClickShare launcher will be started automatically. The Extended desktop driver can only be used after the user reboots his computer.
Starting the setup
- Download the ClickShare Extension Pack (download via http://www.barco.com/en/product/clickshare-extension-pack).
- Unzip the downloaded file.
- Click ClickShare-Extension-Pack.msi to start the installation.
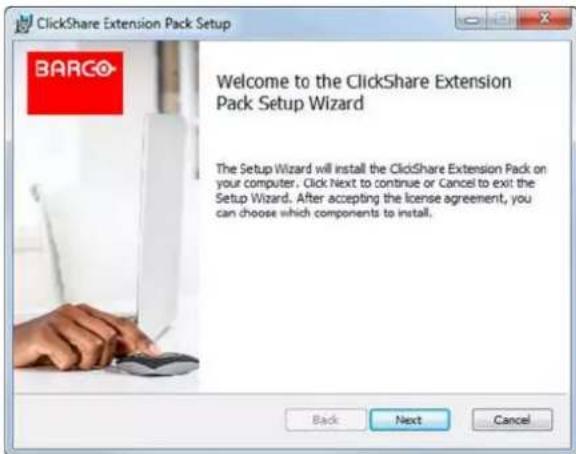
Image 5-3
- Click Next, accept the License Agreement and click Next to continue.
If necessary, follow the on screen instructions.
Silent setup
In this setup, a user or an IT admin can install the ClickShare Extension pack using the Windows command prompt. Following is an example of a silent installation (version numbers are only given as example, always check Barco's web for the latest version):
Launcher only install:
msiexec.exe /i ClickShare-Extension-Pack-01.00.02.0003.msi ACCEPT_EULA=YES INSTALLFOLDER=C:\LAUNCH_APP=YES /qn
Extended desktop only install :
msiexec.exe /i ClickShare-Extension-Pack-01.00.02.0003.msi ACCEPT_EULA=YES ADDLOCAL=ExtendedDesktopDriverFeature INSTALLFOLDER=C:\LAUNCH_APP=YES /qn
Full install (laucher + extended desktop):
msiexec.exe /i ClickShare-Extension-Pack-01.00.02.0003.msi ACCEPT_EULA=YES ADDLOCAL=ALL INSTALLFOLDER=C:\LAUNCH_APP=YES /qn

The computer will reboot. This can be suppressed with /norestart. A reboot will be needed afterwards for the extended desktop feature to be working. In case the end-user should decide if they want to reboot, /promptrestart /QB!+ can be used (basic UI, no cancel option, but prompt to reboot)
Parameter Description
ACCEPT_EULA This parameter shows that the installer accepts the EULA text as is. This parameters must be set to YES in order to continue to the installation.
INSTALLFOLDER This parameter specifies the installation directory for ClickShare launcher. If not specified, the default folder will be the Program Files folder.
LAUNCH_APP The ClickShare launcher application will be started right after the installation finishes if this parameter is set to YES. Otherwise, the launcher application will not be started.
/qn This parameter indicates that the installation will be done in silent mode, meaning that there will be no visible windows during the installation.
ADDLOCAL This parameter indicated the type of the installation. No parameter added, installs only the launcher.
Windows environment variable
The variable to be used is CLICKSHARE_LAUNCHER_CLIENT_PATH. The value should be the path to the client software.
5.4 ClickShare Windows Certified driver
About
The ClickShare Windows Certified driver is auto-installed when plugging in a Button in a Window PC.
This Windows driver automatically launches the executable on the Button.
Note that at least version 1.16.0 is required. In case an older version is installed on your PC, start windows update check for updates with a button inserted into your PC.
5.5 ClickShare Desktop app
About the
With the ClickShare desktop app installed on your computer you can enter a meeting room and get on the screen in a few seconds without the need to plug in a Button. The ClickShare app can be used in combination with a Button.
The ClickShare desktop app connects to the meeting room screen in order to share your content. Presence detection technology is used to do so. The ClickShare desktop app uses presence detection technics to determine which meeting room is closest to the user. Just click on your meeting room name. This means you will never have to enter IP addresses or scroll long lists of meeting rooms before being connected to your meeting room.
Installation
When the ClickShare desktop app is not pre-deployed in your IT environment, you can download and install the software without administrator rights from www.clickshare.app.
CX-30 Configurator
6
6.1 Accessing the Configurator 60
6.2 ClickShare Configuration Wizard 63
6.3 On-Screen ID information....65
6.4 Personalisation, Wallpaper....66
6.5 Personalisation, Personalized wallpaper 68
6.6 Manage configuration files....69
6.7 Display setup, Output....70
6.8 Display & Audio setup....71
6.9 WiFi settings 72
6.10 LAN settings....76
6.11 Services, Mobile devices....78
6.12 XMS Cloud Integration....79
6.13 Services, SNMP 80
6.14 Security, security level....81
6.15 Security, passwords....82
6.16 Status information Base Unit 83
6.17 Date & Time setup, manually 84
6.18 Date & Time setup, time server 85
6.19 Energy savers 86
6.20 Buttons....87
6.21 Firmware Update....88
6.22 Support & Updates, Troubleshoot, log settings....89
6.23 Factory defaults....90
About configuration
The configuration of your device can be done in
- XMS cloud
• the local configurator
The configurator in XMS cloud will (in time) more elaborated than the local configurator. Therefore it preferred to configure your devices via XMS cloud. For more info see XMS documentation.
The next topics are describing the local configurator.

Within some menus the Configurator is indicated as WebUI. E.g. WebUI password, that is the password to enter the Configurator.
6.1 Accessing the Configurator
Getting access to the Configurator
There are three ways to access the Configurator:
- Via the LAN
- Direct Ethernet connection between PC and Base Unit.
• Via the Base Unit's wireless network
When accessing the configurator for the first time, the ClickShare Configuration Wizard starts automatically. This configuration wizard can be started at any moment to change your configuration instead of using the menus.
To access the Configurator via the LAN
- Open a browser.
Note: Supported browsers are Internet Explorer, Firefox, Google Chrome and Safari.
- Browse to the IP address you can find in the bottom left corner of the startup screen.
Note: The Wired IP address is only visible when the Base Unit is connected to the LAN.
A login screen appears.
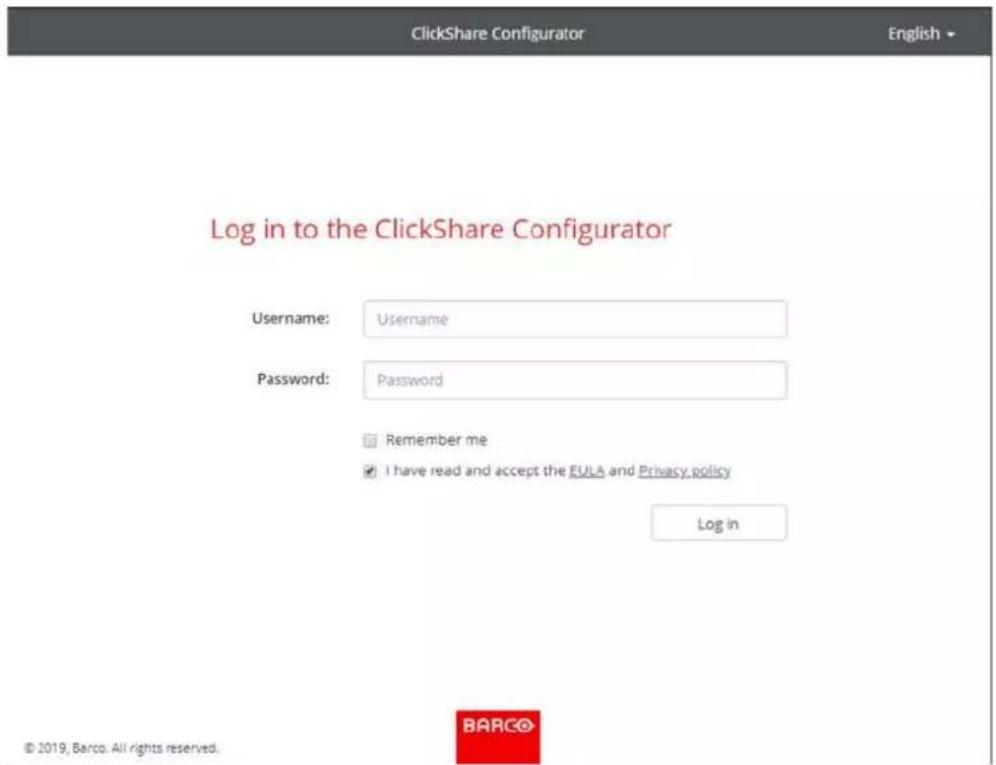
Image 6-1: Login screen
- To change the language of the Configurator, click on the drop down next to the current selected language and select the desired language.
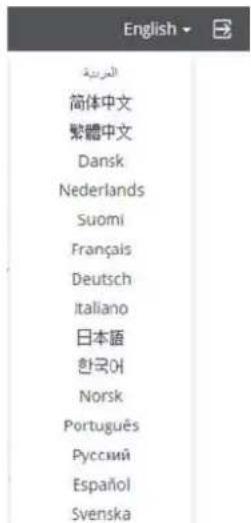
Image 6-2: Configurator lanuguages
The following languages are possible:
- Arabic
- Simplified Chinese
• Traditional Chinese
Danish
• Dutch - English
- Finnish
- French
German - Italian
- Japanese
- Korean
• Norwegian - Portuguese
• Russian - Spanish
- Swedish
The Configurator language changes to the selected language.
- Enter the user name 'admin' and the password, read and accept the EULA and the Privacy policy and click OK.
By default, the password is set to 'admin'.
Warning: It is strongly recommended to change the default password into a strong password on first use, to prevent that anyone else accessing the configurator can change the settings of the ClickShare Base Unit. See section "Security, passwords".
The configurator opens.
Personalisation
Display & Audio
Wi-Fi & Network
Security
System
Support & Updates
What do you want to do today?
Change wallpaper
View Button status
Download log files
View Base Unit status
Change energy saving settings
Launch configuration wizard

2.4 GHz ClickShare-675F2D

ClickShare-675F2D 10.200.20.138

Showing wallpaper 0 Buttons connected

Your Base Unit is up to date.
To update basic settings, run the CidShare Configuration Wizard © 2019, Barco. All rights reserved.
BARCO
Image 6-3: Start screen
The language of the configurator can be changed on any page in the interface.
The screen is split up in 2 panes. Left pane with the selection buttons and a right pane to configure the selected function.
The startup screen itself shows:
• the wired IP address
• the wireless IP address
• the wireless SSID
• the number of Buttons connected
• the system state

If you cannot find the IP address (e.g. there is no screen available) you should connect to the Base Unit directly with your laptop via an Ethernet crossover cable and access the web interface using the fixed IP address 192.168.1.23. Make sure your own LAN adapter is set in the 192.168.1.x range.
To access the Configurator via a direct connection.
- Connect the Base Unit to your laptop using an Ethernet cable.
- On your laptop, open a browser.

Note: Supported browsers are Internet Explorer, Firefox and Safari.
- Browse to http://192.168.1.23.
A login screen appears.
- Enter the user name 'admin' and the password, read and accept the EULA and click OK.
By default the password is set to 'admin'.
The configurator opens.
To access the Configurator via the Base Unit wireless network
- On your laptop, connect to the Base Unit wireless network.
The default SSID and password to connect to the Base Unit are respectively 'ClickShare-
- On your laptop, open a browser.

Note: Supported browsers are Internet Explorer, Firefox and Safari.
- Browse to http://192.168.2.1.
A login screen appears.
- Enter the user name 'admin' and the password, read and accept the EULA and click OK.
By default the password is set to 'admin'.
The web interface opens.

Older laptops might not support the 5 GHz Frequency Band. If your Base Unit is set to that frequency range, those devices will not be able to connect to the Base Unit via the wireless network.
6.2 ClickShare Configuration Wizard
About the configuration wizard
During the first start up of the Base Unit, the configuration wizard starts up automatically.
All basic settings necessary to configure the Base Unit are covered by the configuration wizard. Once the configuration wizard is finished, the Base Unit is ready to be used.

Welcome to the ClickShare Configuration Wizard
This wizard will guide you through a couple of steps to configure your ClickShare Base Unit. Click "Start configuration" to begin. At any time you can abort the wizard by clicking the close button.

Cancel


To start the wizard, click on Start Configuration.


Personalisation
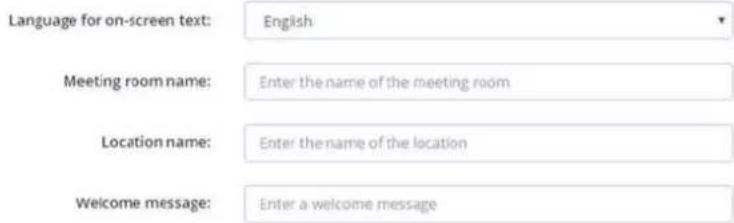


Image 6-5: Configuration wizard, Personalisation
Fill out the necessary field and click Next to continue.
To return to the previous step, click on Back.
For more information about a specific topic, see one of the following topics.
The ClickShare Configuration Wizard can be started at any time to change the configuration just by clicking on ClickShare Configuration Wizard at the left bottom of each screen.
| Personalisation | Language on-screen text See “On-Screen ID information”, page 65. | |
| Meeting room name, location name and welcome message | See “On-Screen ID information”, page 65. | |
| System | Time zone, manual time setup | See “Date & Time setup, manually”, page 84. |
| Use NTP See “Date & Time setup, time server”, page 85. | ||
| Security Level settings See “Security, security level”, page 81. | ||
| Password ClickShare Configurator (WebUI) password See “”, . | ||
| Network | Frequency band, channel Wi-Fi passphrase | See “”, . |
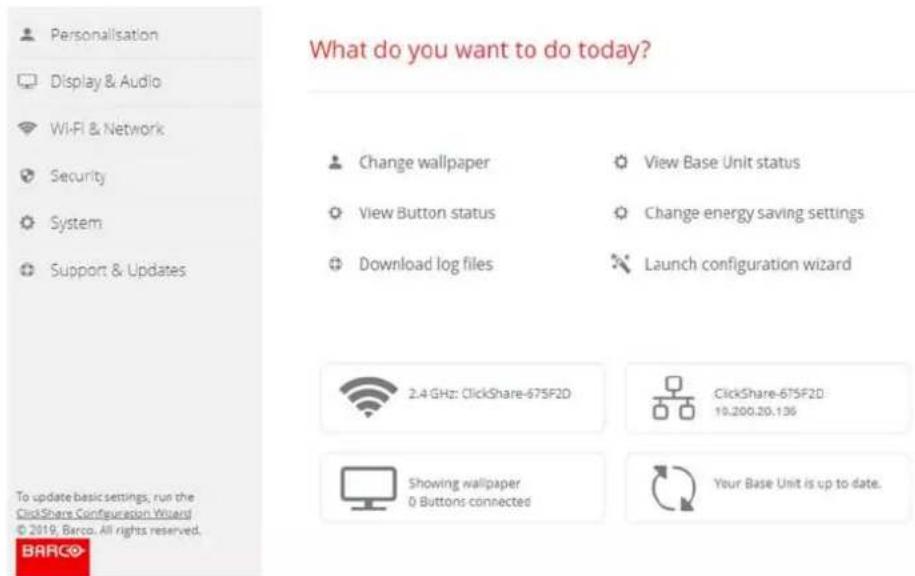
Image 6-6: Configuration Wizard start
6.3 On-Screen ID information
About device identification
The following items can be set:
- On-Screen language. Independent from the Configurator language.
• Meeting room name
• Location of the meeting room -
Welcome message to be displayed in the meeting room
• Show the network information -
Checked: LAN information such as wired IP address, hostname are displayed. Also the Wi-Fi IP address and SSID are displayed.
- Not checked: no LAN nor Wi-Fi information is displayed (default setup)
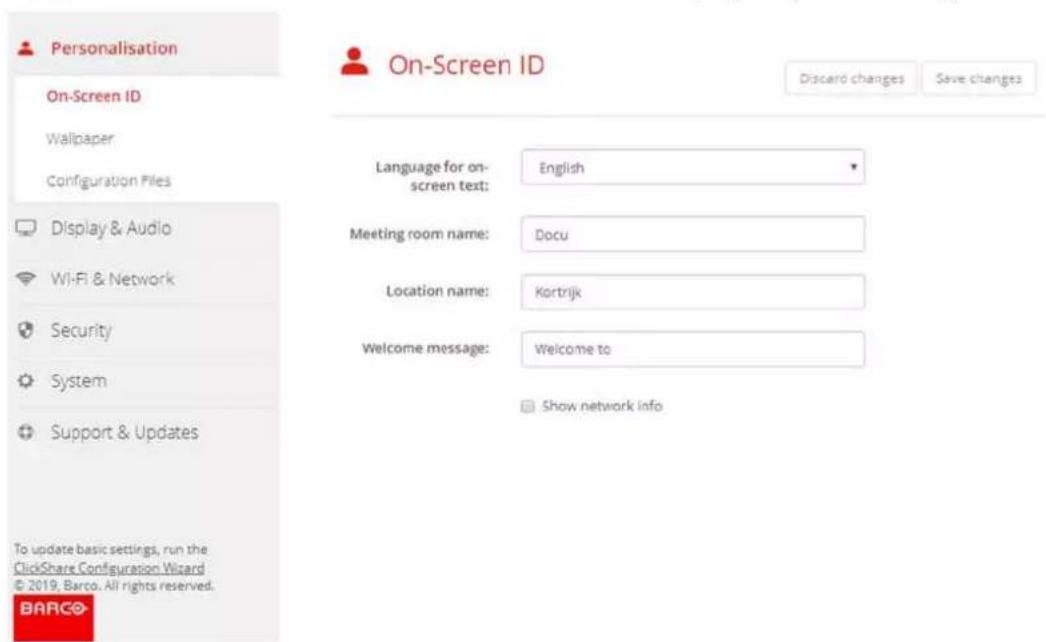
Image 6-7: On-Screen ID
On Screen language selection
- Log in to the Configurator.
- Click Personalisation → On-screen ID.
- Select the language of the on-screen text. Click on the drop down box next to Language for on-screen text and select the desired language.
The following languages are possible:
- Arabic
- Simplified Chinese
• Traditional Chinese - Danish
• Dutch - English
- Finnish
- French
• German
• Italian - Japanese
- Korean
- Norwegian
- Portuguese
• Russian - Spanish
- Swedish
Meeting room name, location and welcome message
- Log in to the Configurator.
- Click Personalisation → On-screen ID.
- Click in the input field next to Meeting room name and enter a name for the meeting room.
This text is shown on the user's device when the Button is ready to share ("Ready to share on..."), on the central screen connected to the Base Unit and in the list of AirPlay receivers on the user's iOS device.
- Click in the input field next to Location name and enter the location.
- Click in the input field next to Welcome message and enter the desired message.
6.4 Personalisation, Wallpaper
About wallpaper
When CX-30 starts up, a background (wallpaper) is displayed. The display of this background wallpaper can be disabled.
By default two general ClickShare wallpapers are available. The possibility exists to upload personal backgrounds (wallpapers). The default wallpapers cannot be removed from the system.
Wallpaper selection
- Log in to the Configurator
- Click Personalisation → Wallpaper.
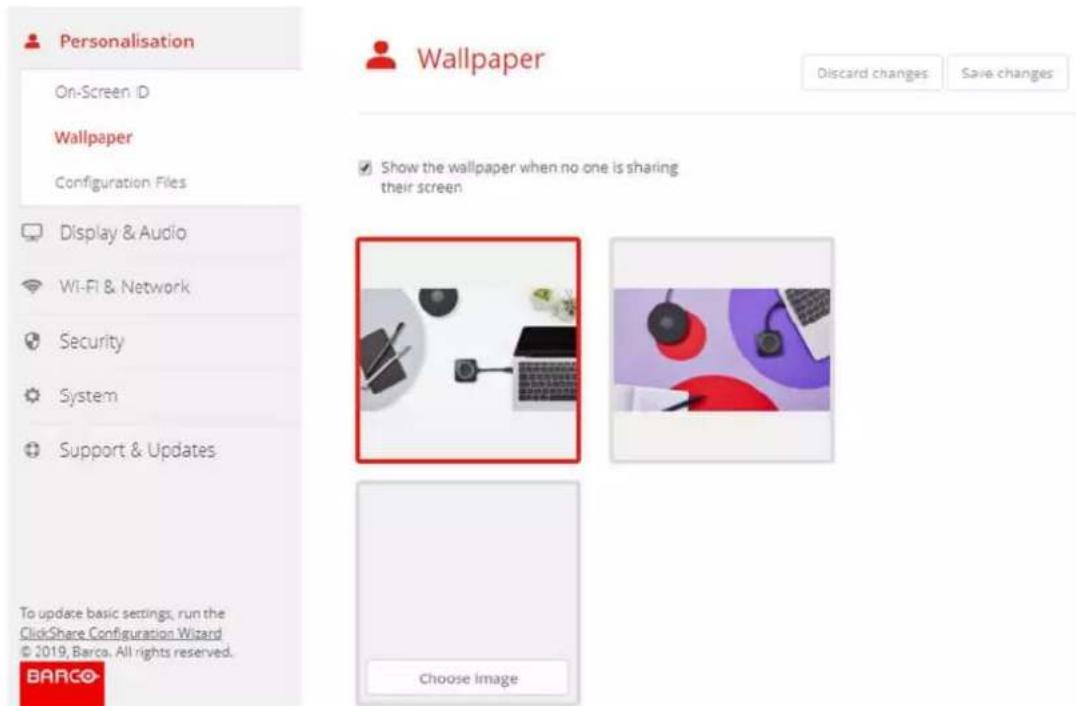
Image 6-8: Wallpaper selection
The Wallpaper selection pane is shown. The current selected wallpaper is shown with a red border.
- Select one of the available wallpapers and click on Save Changes.

Note: By default two general Barco wallpapers are available.
They are automatically resized to fit the aspect ratio of the screen.
The selected wallpaper is indicated with a red border.
The message Successfully applied changes appears on top of the wallpaper selection window.

You can also add a personal wallpaper, e.g. your company logo. For more information on adding a new wallpaper to the list, see "Personalisation, Personalized wallpaper", page 68.
Download wallpaper
- Hoover with your mouse over the wallpaper to download and click on the download symbol on the upper right corner.
natural_image
Top-down view of a desk setup with a laptop, notebook, pen, and a small icon (no visible text or symbols)Image 6-9: Download wallpaper
The wallpaper is downloaded to your PC.
Enable - disable Wallpaper
- Within the Wallpaper pane, check the check box next to Show the wallpaper when no one is sharing their screen.
Checked: wallpaper will be displayed when no one is sharing content.
Not checked: no wallpaper will be displayed when no one is sharing content. The video output of the Base Ur is disabled when no content is shared. This feature is especially useful when the Base Unit is integrated in a larger AK system
6.5 Personalisation, Personalized wallpaper
How to upload
- Log in to the Configurator
- Click Personalisation → Wallpaper.
The Wallpaper selection pane is shown. The current selected wallpaper is shown with a red border.
- Hoover your mouse over the free place and click on Choose image.
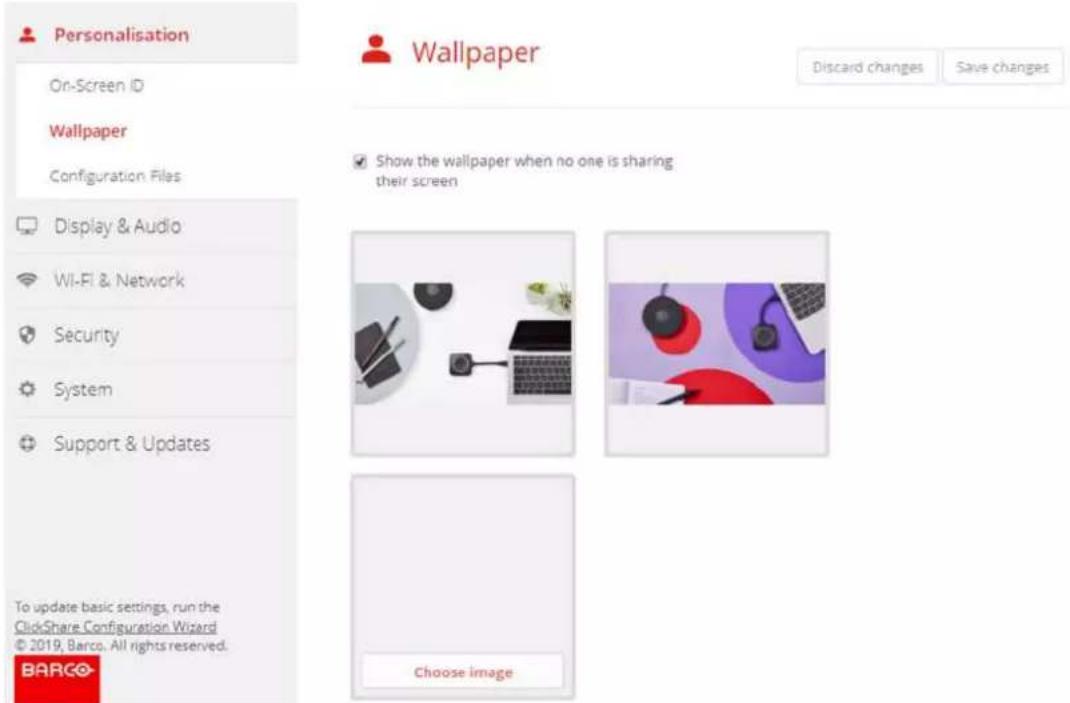
Image 6-10: Personalized wallpaper selection
A browser window opens.
- Browse for the desired image, click Open to load the image.
The content of the file is checked and when valid (format and size), the file is uploaded. The new wallpaper gets a red border.
- Click on Save changes to apply the personalized wallpaper
The message Successfully applied changes is displayed on top of the page.
Change personalized image
- Click Personalisation → Wallpaper.
- Hoover your mouse over the current personalized image and click Change image.
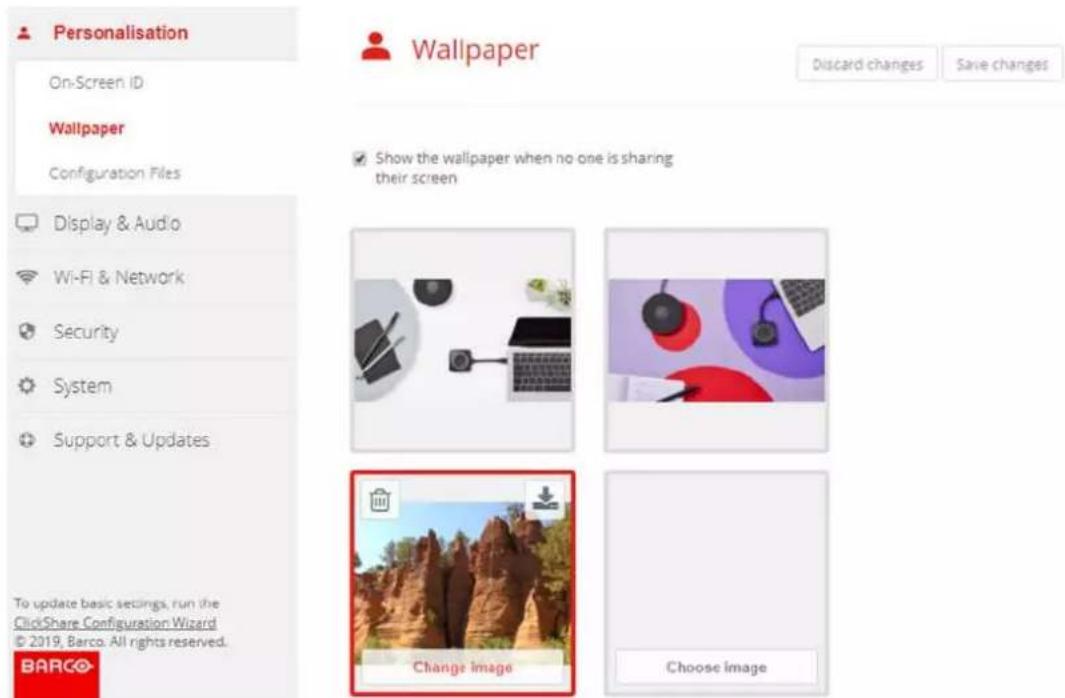
Image 6-11: Change image
- Browse for the desired image, click Open to load the image.
The content of the file is checked and when valid (format and size), the file is uploaded. The new wallpaper gets a red border.
- Click on Save changes to apply the personalized wallpaper and replace the previous file.
The message Successfully applied changes is displayed on top of the page.
Remove personalized wallpaper
- Hoover your mouse over the current image and click on the trash bin to remove the image.

natural_image
Rocky desert landscape with ancient buildings and a building, labeled 'Change image' at bottom (no other text or symbols)Image 6-12: Remove wallpaper
The personalized wallpaper is removed and the default wall paper is activated.
6.6 Manage configuration files
About Manage configuration files
A full backup can be downloaded but cannot be used to duplicate configuration settings to other Base units. Therefore, it is possible to download a Portable version. This portable version can be uploaded via the upload configuration button on other Base units (same type). Via the same button, the full backup can be uploaded or the original Base Unit.
A portable backup contains:
- Wallpapers
- Wallpapers settings
-
Logging settings
-
All display settings
- OSD language
- Location
- Welcome message
- WiFi channel
- WiFi frequency
To manage the configuration files
- Log in to the Configurator.
- Click Personalisation → Configuration Files.
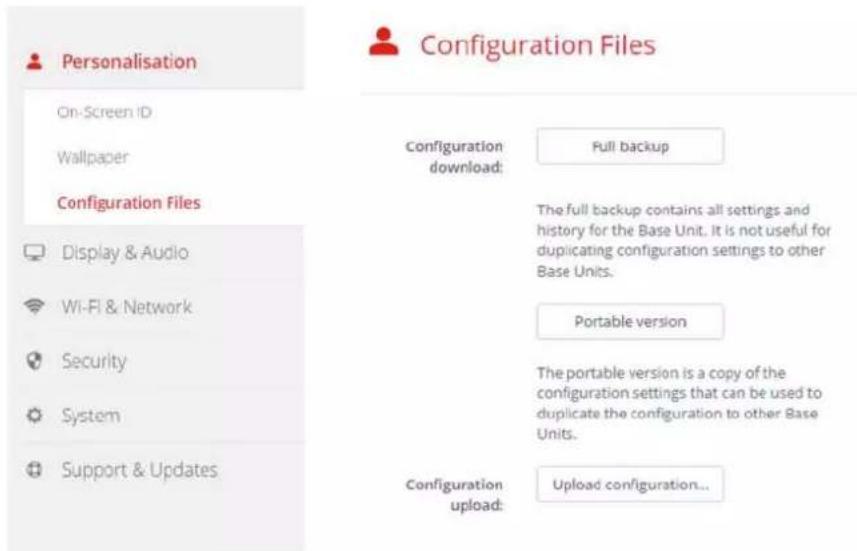
Image 6-13: Configuration files
- To download a full backup, click on Full Backup.
An xml file, containing all information and history will be downloaded. This file can be reused on the same Base Unit only.
- To download a portable version, click on Portable Version.
An xml file, containing portable information to duplicate settings on another Base Unit.
- To upload a configuration, click on Upload Configuration.
A browser window opens. Navigate to the upload file (xml file) and click Open to upload.
A full backup can be uploaded on the Base Unit where the backup was created and a portable version can be uploaded on any other Base Unit of the same model.

When uploading a config file, the history of software updates and paired Buttons is lost. Paired buttons will however remain functional if the Base Unit has not changed from SSID or wireless password.
6.7 Display setup, Output
Resolution
The output resolution to the display is set on Auto. That means that the CX-30 output resolution is automatically adapted to the resolution of the display. For HDMI displays, a hot plug detection is available.
HDMI hot plug display detection
The HDMI hot plug display detection can be enabled by checking the check box before HDMI Hot-Plug display detection.
CEC
Consumer Electronics Control (CEC) is a feature of HDMI designed to allow users to command and control devices connected through HDMI by using only one remote control.
To enable CEC, check the check box before Enable CEC.
Screen saver setup
-
Log in to the Configurator.
-
Click Display & Audio → Outputs.
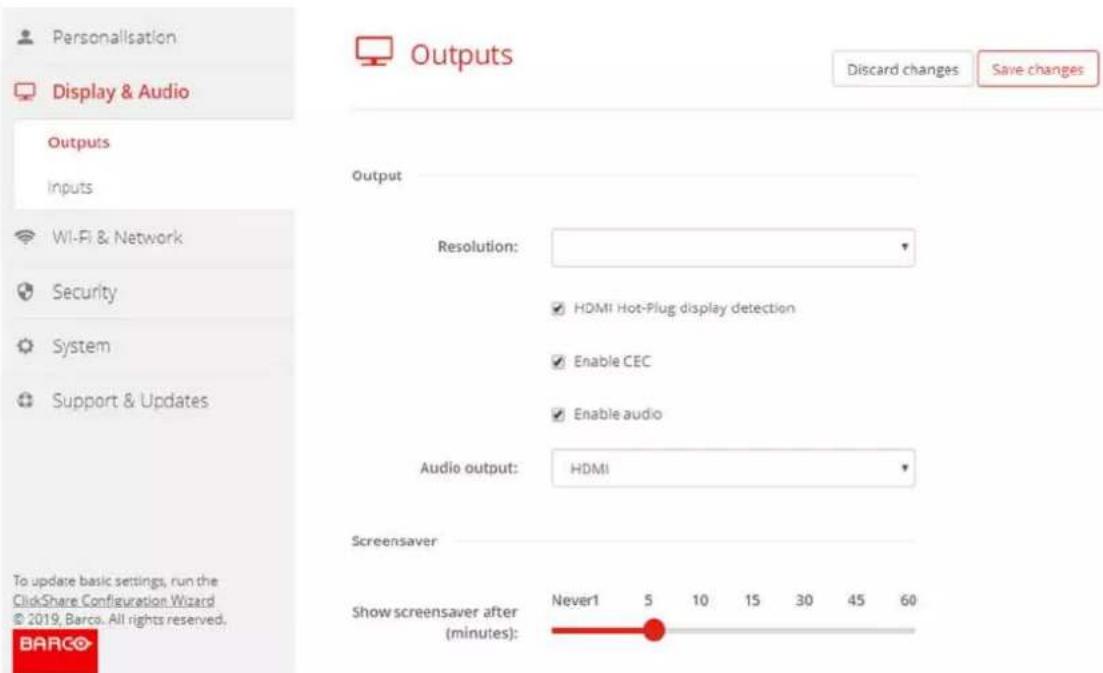
Image 6-14: Display settings
- To activate the screen saver, drag the slider bar to the left or to the right until the desired delay time is reached.
When the slider is set completely to the left, the screen saver will never be activated.
6.8 Display & Audio setup
Resolution
The output resolution to the display is set on Auto. That means that the CX-30 output resolution is automatically adapted to the resolution of the display. For HDMI displays, a hot plug detection is available.
HDMI hot plug display detection
The HDMI hot plug display detection can be enabled by checking the check box before HDMI Hot-Plug display detection.
CEC
Consumer Electronics Control (CEC) is a feature of HDMI designed to allow users to command and control devices connected through HDMI by using only one remote control.
To enable CEC, check the check box before Enable CEC.
Audio
Enable or disable audio output.
Check the check box in front of Enable audio to enable audio output.
Screen saver setup
1. Log in to the Configurator.

Personalisation

Display & Audio
Display & Audio

Wi-Fi & Network

Security

System

Support & Updates
To update basic settings, run the ClickShare Configuration Wizard © 2019, Barco. All rights reserved.

Image 6-15

Display & Audio
Discard changes
Save changes
Output
Resolution:
Auto
HDMI Hot-Plug display detection
Enable CEC
Enable audio
Screensaver
Show screensaver after (minutes):

- Click Display & Audio → Display & Audio.
- To activate the screen saver, drag the slider bar to the left or to the right until the desired delay time is reached. When the slider is set completely to the left, the screen saver will never be activated.
- Click Save changes.
6.9 WiFi settings

WARNING: It is not allowed to operate the Base Unit outside its intended geographical region.
About WiFi
A connection with the Base Unit can be made via a wireless connection. A fixed wireless IP address is used establish the connection.
The transmission power of the wireless signal can be reduced.
An overview of the current settings is given when Wi-Fi Settings is selected and operational mode is Access Point.

Personalisation

Display & Audio

Wi-Fi & Network
Wi-Fi Settings
LAN Settings
Services

Security

System

Support & Updates
To update basic settings, run the ClickShare Configuration Wizard © 2020; Barco. All rights reserved.
BARCO
Image 6-16: WiFi settings

Wi-Fi Settings
Edit settings
Operation Mode: Access Point
Access Point Mode Settings
Broadcast SSID: Yes
ClickShare Yes
Configurator available via Wi-Fi:
Frequency band: 5 GHz
Channel: 36
SSID: ClickShare-1863550236
MAC address: 10:63:C8:96:FD:A7
IP Settings
IP address: 192.168.2.1
Subnet mask: 255.255.255.0
When operational mode is set to Off. The following info is given: "When disabling the access point, the Buttons will need to be integrated in the corporate network. This is not supported yet."
Click on here to start the button configuration. For more info, see "Buttons", page 87.
To change any WiFi-setting, click on Edit settings. The view depends on the previous selected operational mode. Here given with Access Point selected.
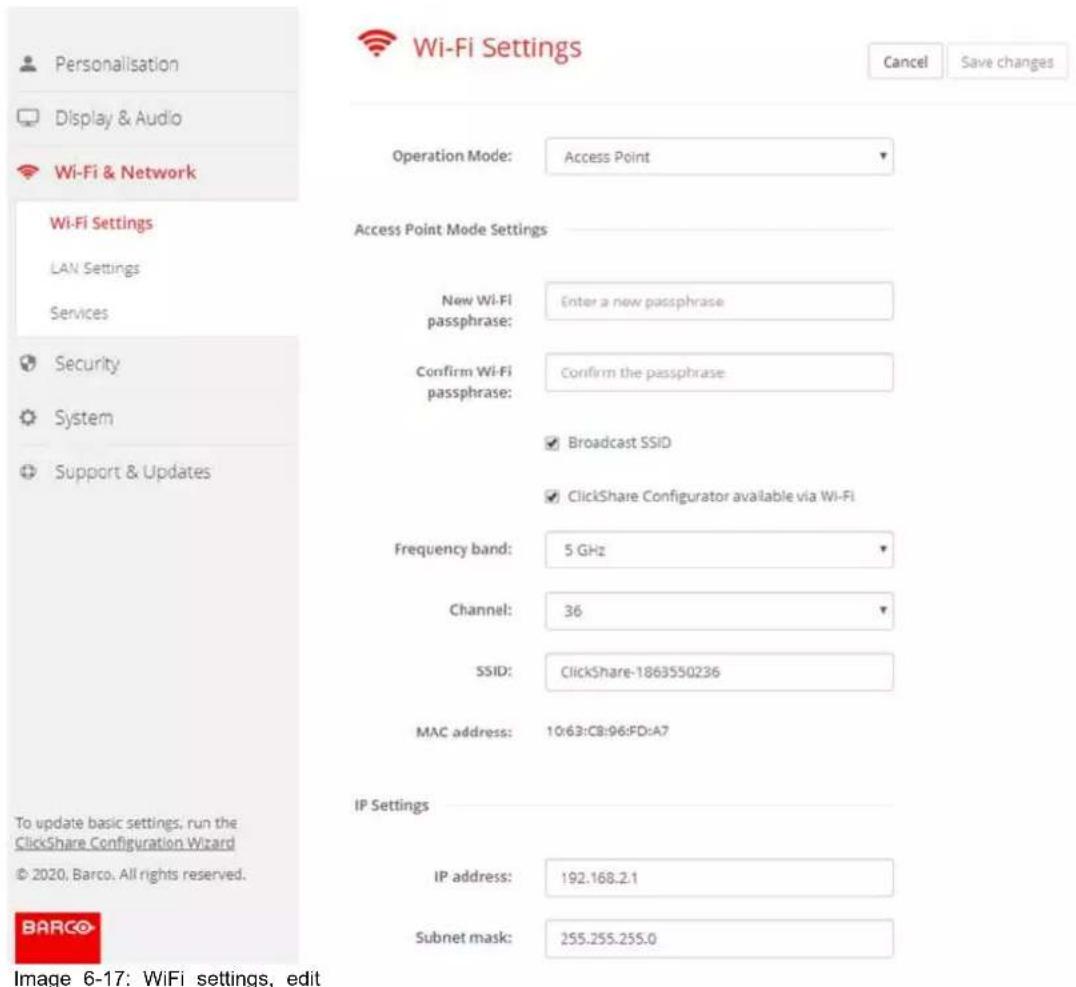

Changing the IP address will require a repairing of the Buttons used with this Base Unit.
Change operational mode
- Log in to the Configurator.
- Click Wi-Fi & Network → WiFi Settings.
- Click Edit settings.
- Click on the drop down box next to Operational Mode and select the desired mode.
The following options are possible:
- Access Point: continue with the next blocks in this topic.
• Off
About frequency band & channel selection
In an ideal setup, overlapping channels should not be used for two ClickShare Base Units within range of each other. As the channels in the 2.4 GHz band overlap with each other, best practice is to use channels 1, 6 an 11 on a single floor. On floors above and below, the channel pattern will be shifted to avoid overlap between floors, e.g. by placing channel 6 at the center of the illustrated pattern.
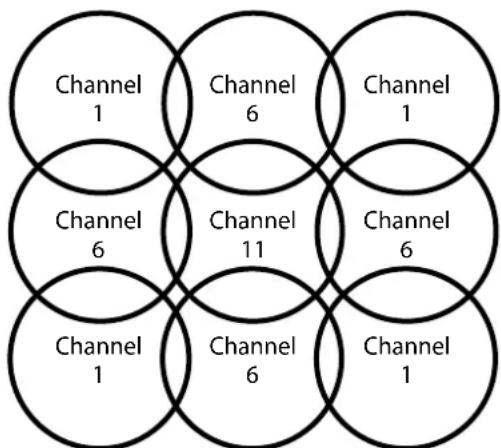
Image 6-18
To limit the effect of overlapping networks, it is highly recommended to reduce the signal strength (standard range of about 30m) of the ClickShare Base Units. Reducing the signal strength to its minimal value will reduce the actual range of the ClickShare to about 10m. By doing so, the size of coverage overlapping area will shrink and the risk for quality degradation will decrease or even disappear.
The 5 GHz channels do not overlap with each other and are less used by non-Wi-Fi devices than the 2.4 GH channels. Moreover, 5 GHz signals are more rapidly damped than 2.4 GHz signals. Therefore, the use of a 5 GHz channel is recommended. This will limit the impact of a ClickShare system on other installed ClickShare units and on other WLAN users.
Frequency band & channel selection
- Select the wireless connection channel by clicking on the drop down box and selecting the desired channel.
The channels available in the list vary according to the regional version of your Base Unit. Re-pairing the Buttons is not required when changing the frequency band or wireless connection channel.
Ideally, the ClickShare channel is selected after conducting a wireless site survey. A site survey maps out the sources of interference and the active RF systems. There are several Wi-Fi survey tools available on the market. Based on the results from a site survey, the least occupied channel can be found and selected for each meeting room.
- Select the wireless connection frequency band: 2.4 GHz or 5 GHz by clicking on the drop down box and selecting the correct band.
Below the channel selection pane, an indication is given of the available bandwidth of the current channel. To see if sufficient bandwidth is available in a different channel, select the channel in the drop down and save the changes. The page will reload with the new settings and an indication of the channel fit will be given after approximately 1 minute. There is no need to reload the page to see the result.
The channels available in the list vary according to the regional version of your Base Unit. Re-pairing the Buttons is not required when changing the frequency band or wireless connection channel.
When Intense use, change to another Wi-Fi channel is displayed, change to another channel. The page will reload after approximately 1 minute.
SSID & passphrase
- Enter a public name (SSID) for the wireless network.
The default SSID is ClickShare-
-
If you want to broadcast this SSID, check the checkbox before Enable SSID broadcast.
-
Enter a new WiFi passphrase and confirm that passphrase.

CAUTION: It is strongly recommended to change the Wi-Fi passphrase on first use to prevent anyone else accessing the Wi-Fi network.
Signal strength
- Select the Signal Strength. Click on the slider and reduce the broadcasted power (signal strength) until the desired strength is obtained.

Note: Too low power and interference by others might lead to connection issues. If so, increase again the signal strength until the issues are solved.
By default the strength is set to 100%.
Reducing the signal strength limits the effect of overlapping networks in the 2.4 GHz channels. Not necessary for the 5 GHz channels as their is no overlap.
ClickShare Configurator (WebUI) access via Wi-Fi
- To allow access to the configurator via Wi-Fi, check the check box in front of WebUI available via Wi-Fi.
Checked: Configurator accessible via Wi-Fi.
Not checked: access to the configurator via Wi-Fi is blocked.
IP address & subnet mask
- Log in to the Configurator.
- Click Wi-Fi & Network → WiFi Settings.
- To change the IP address or subnet mask, click in the input field and enter the 4 octets of the new IP address or subnet mask.

Note: This must NOT be 0.0.0.0 for static IP-Address assignment.
6.10 LAN settings
About LAN network settings
A network connection can be configured through DHCP or by manually entering a fixed IP address.

DHCP
Dynamic host configuration protocol. DHCP is a communications protocol that lets network administrators manage centrally and automate the assignment of IP addresses in an organization's network. Using the Internet Protocol, each machine that can connect to the Internet needs a unique IP address. When an organization sets up its computer users with a connection to the Internet, an IP address must be assigned to each machine. Without DHCP, the IP address must be entered manually at each computer and, if computers move to another location in another part of the network, a new IP address must be entered. DHCP lets a network administrator supervise and distribute IP addresses from a central point and automatically sends a new IP address when a computer is plugged into a different place in the network.
Hostname & method
- Log in to the Configurator.
- Click Wi-Fi & Network → LAN Settings.
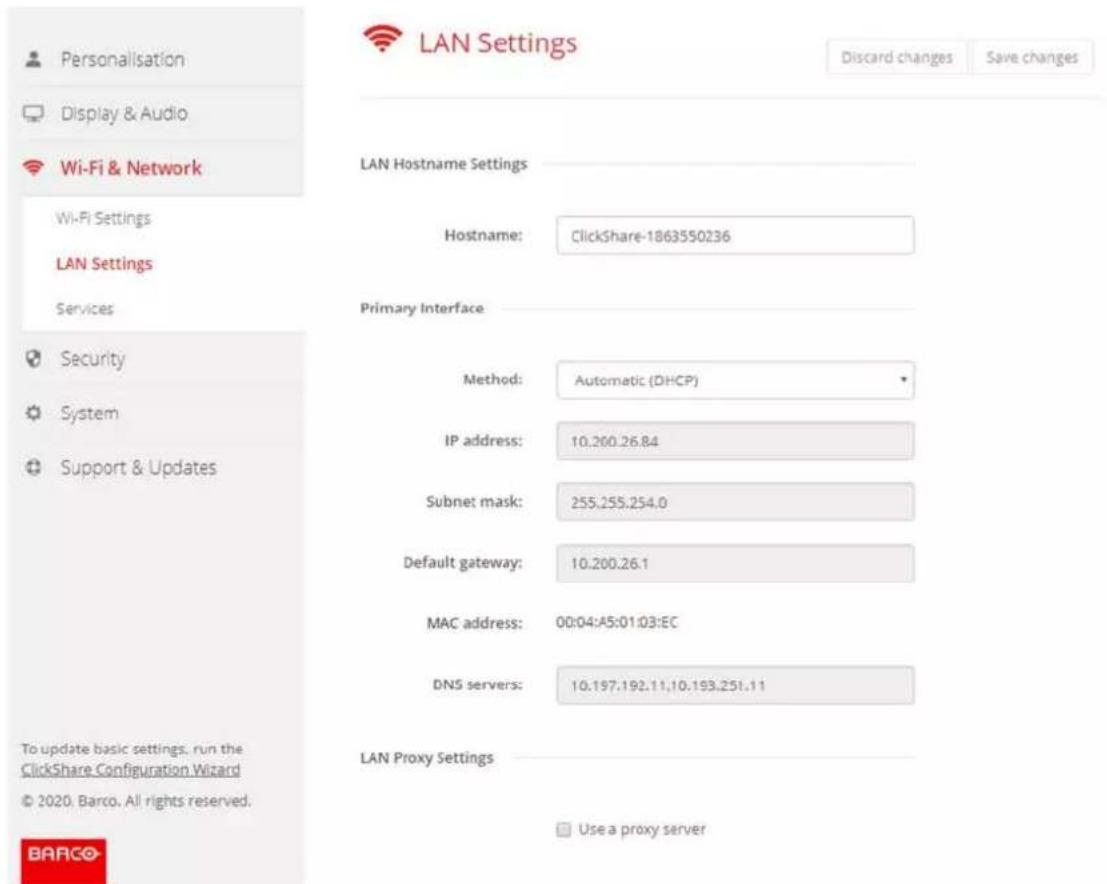
Image 6-19: LAN settings
- Click in the input field next to Hostname and enter a host name for the Base Unit.
The default host name is ClickShare-
- To select the method, click on the drop down box next to Method and select the Automatic (DHCP) or Manual.
When Automatic (DHCP) is selected, the IP address, subnet mask and default gateway fields are grayed out but the currently used settings are filled out.
- Click Save changes to apply the settings.
Manual (fixed) IP address
- Click on the drop down box next to Method and select Manual.
The IP address, subnet and gateway input fields are activated.
- Click in the input field of the IP address and fill out the 4 octets.

Note: An address contains 4 octets with a maximum value of 255.
This must NOT be 0.0.0.0 for static IP-Address assignment
-
Click in the Subnet mask input fields and fill out the 4 octets as appropriate for the local subnet.
-
Click in the Default Gateway input fields and fill out the 4 octets. Set the Default-Gateway to the IP-Address of the router (MUST be on the local subnet!).

Note: This must NOT be 0.0.0.0.
If there is no router on the local subnet then just set this field to any IP-Address on the subnet.
-
Click in the DNS Servers input field and fill out the preferred DNS servers (maximum 5) in a comma separated list.
-
Click Save changes to apply the settings.

Do not use IP address 192.168.2.x for a Subnet mask 255.255.255.0 and IP address 192.168.x.x for a Subnet mask 255.255.0.0
Use a proxy server
This setting is important for the auto-update feature of the Base Unit, which require internet access.
- Check the check box next to Use a proxy server.
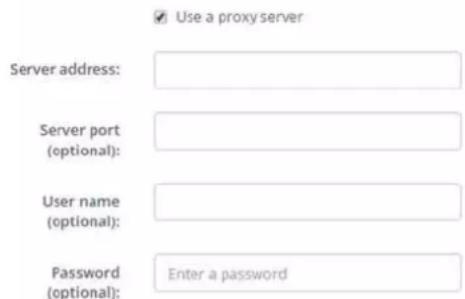
Image 6-20: Proxy settings
The proxy settings become available.
- Enter the proxy server address. Enter the IP address or hostname.
Some proxy servers need a port number, user name and password, for others is this optional. - Optionally, enter the used server port.
- Optionally, enter the user name.
- Optionally, enter the password.
- Click Save changes to apply the settings.
6.11 Services, Mobile devices
ClickShare app
The ClickShare app is enabled by default and makes it possible to connect with a mobile device to the Base Unit.
Passcode type selection
- Log in to the Configurator.
- Click WiFi & Network → Services.
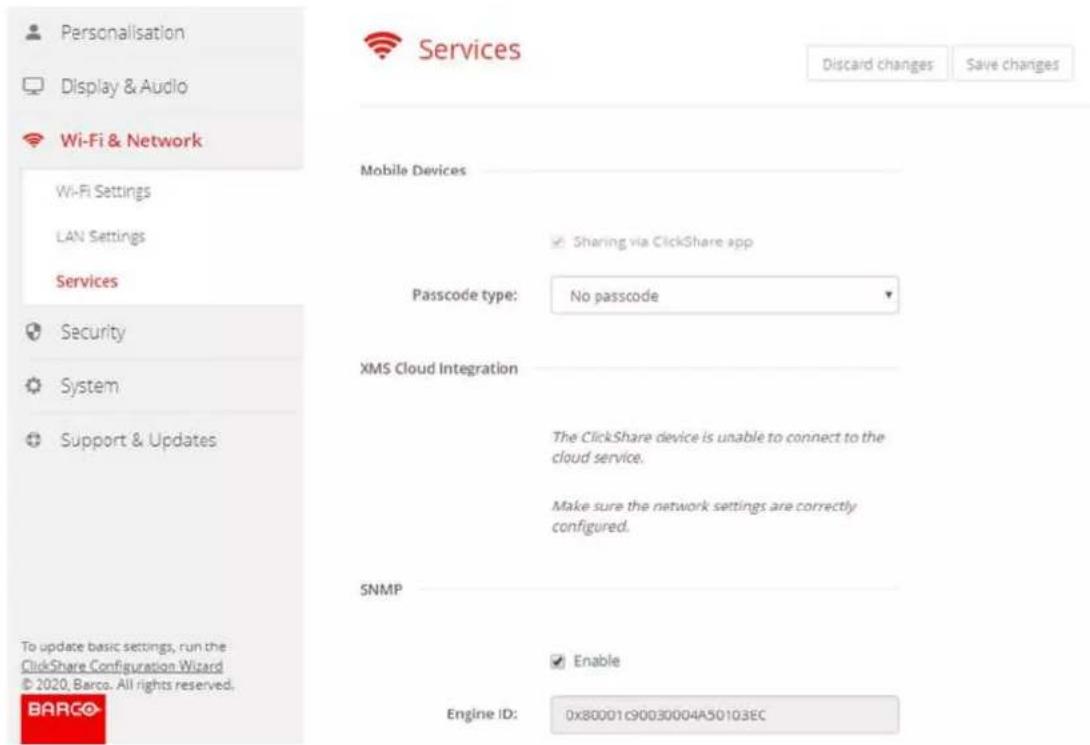
Image 6-21: Services, mobile devices
-
Click on the drop down box and select the desired passcode type.
-
No passcode
- Numeric passcode
6.12 XMS Cloud Integration
Overview
When your device is not registered and connected to the cloud service, the following message will be displayed: The ClickShare device is unable to connect to the cloud service. Make sure the network settings are correctly configured.
When your device is correctly registered, the following message is displayed: The ClickShare device has been successfully registered;
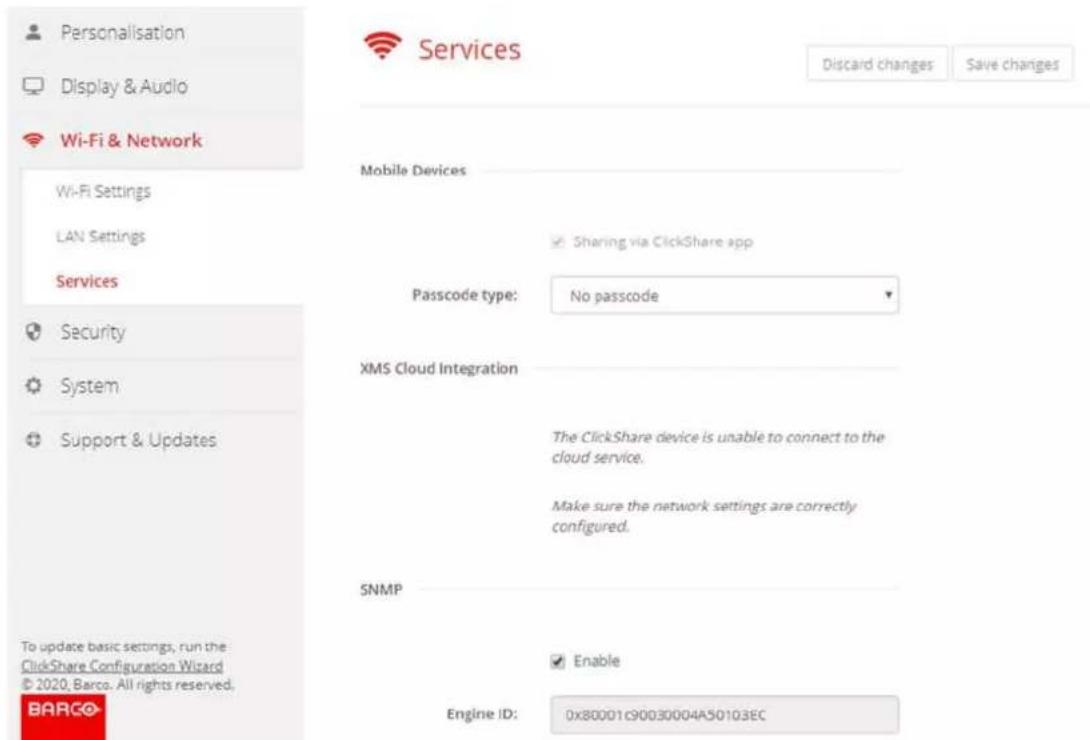
Image 6-22: Services, XMS cloud
What can be done?
- Check your network settings or register your device to XMS Cloud.
Follow procedure as described in "Registration to XMS Cloud", page 44.
6.13 Services, SNMP
About SNMP
Simple Network Management Protocol (SNMP) is an internet standard protocol for collecting and organizing information about managed devices on IP networks and for modifying that information to change device behaviour. In general a SNMP management suite (running on a server) communicates with an SNMP agent (running on the device). The SNMP agent collects and exposes device information in the form of variables according to MIB (Management Information Base). SNMP management suites will be able to approach ClickShare devices via SNMP protocol for requesting device information.
SNMPv3 is supported.
How to enable
- Log in to the Configurator.
- Click WiFi & Network → Services.
- Scroll to SNMP.
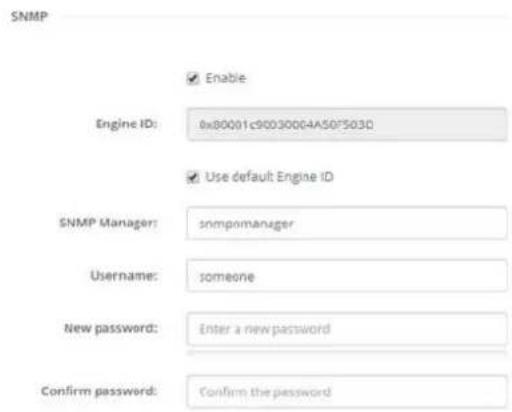
Image 6-23: Service, SNMP
- Check the check box in front of Enable.
The configuration fields become available.
How to configure
-
When using the default Engine ID, make sure the check box before Use default Engine ID is checked. The default engine ID is a combination of the Barco Enterprise Number with the MAC-address (eth0).
-
Fill out the SNMP Manager address.
That is the host address which will receive the TRAP events/messages. Possible traps can be:
- Alarm CPU temperature trap which indicates that CPU temperature exceeds the threshold.
-
Alarm Case Fan Speed trap which indicates the case fan is spinning too slow.
• Alarm Process Not Running trap which indicates one of the monitored processes is not running. -
Enter the Username.
-
Enter a new password and confirm that password.
6.14 Security, security level
About security levels
For the use of the ClickShare system, a security level can be set. By default, level 1 is activated. A security level is a predefined set of settings which are automatically set when a level is selected.
Level 1 : offers support for normal day-to-day operations in any organization.
Level 1 contains the standard security options and encryption of audio and video data.
The standard security options are:
• PIN code activation for mobile apps and Buttons,
- ClickShare Configurator (WebUI) access via HTTPS with login management,
- no wireless ClickShare Configurator (WebUI) access,
• SSID of Wi-Fi network is hidden.
Level 2 : this level offers a higher degree of security, fit for organizations that are more sensitive to security matters.
Level 2 contains the level 1 security and a mandatory PIN code for mobile devices. Alphanumeric PIN codes for mobile apps and Buttons and the Buttons require a certificate for pairing.
Level 3: this level is used for organizations that have extremely strict requirements with regards to security.
Level 3 contains the level 2 security extended with blocking of mobile apps, downgrading firmware not possible and no wireless access to the Configurator (WebUI).
When a security level is set, the individual items included in that security level can be changed using the individual item in the Configurator. When changing an individual item the security level indication will be adapted accordingly, but no other settings will be changed automatically.
E.g. when level 3 is set and you change mobile app blocking to allowed, then the security level indication will change to level 2. But all other items initially in level 3 remains in the level 3 state.

To reset your individual changes, select the desired security level and click Save changes.

Changing the security level will require a re-pairing of the Buttons.
Changing the security level from 1 to a higher level will change the compatibility setting for Buttons with certificate (R9861006D01). They cannot re-pair as long as the security setting is higher than level 1.
How to set the security level
- Log in to the Configurator.
- Click Security → Security Level.
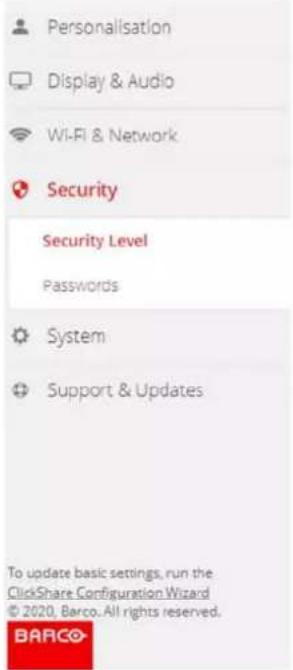

Security Level
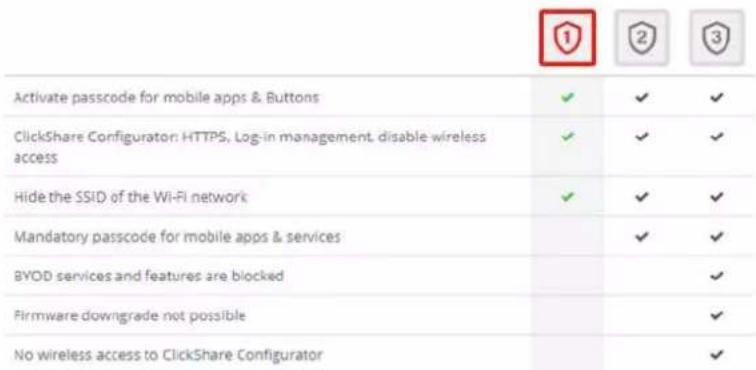
Image 6-24: Security levels
- Select the desired security level icon.
- Click Save changes to apply the setting.
6.15 Security, passwords
About passwords
To access the ClickShare Configurator a user name and password is needed. That password can be changed at any time to protect the ClickShare Configuration settings.
Changing the ClickShare Configurator password
- Log in to the Configurator.
- Click Security → Passwords.
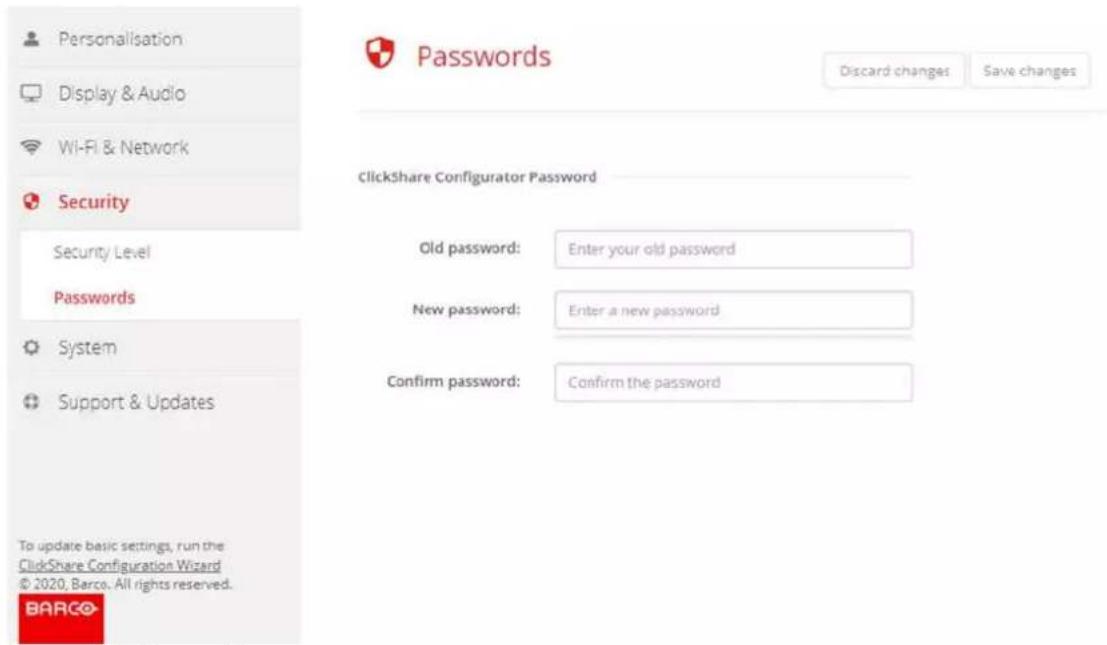
Image 6-25: Passwords
- Click in the WebUI Password (configuration password) pane in the input field next to Old password and enter the old password.
- Click in the input field next to New password and enter a new password.
- Click in the input field next to Confirm password and enter the new password again.
- Click Save changes to apply.
6.16 Status information Base Unit
Status information
The following information can be found:
• Model information, name and part number
- Serial number
- Firmware version
- First used
- Last used
• Current uptime: time since last startup
• Lifetime uptime: time used since first startup
- Overall status
Base Unit restart
- Log in to the Configurator.
- Click Support → Base Unit Status.
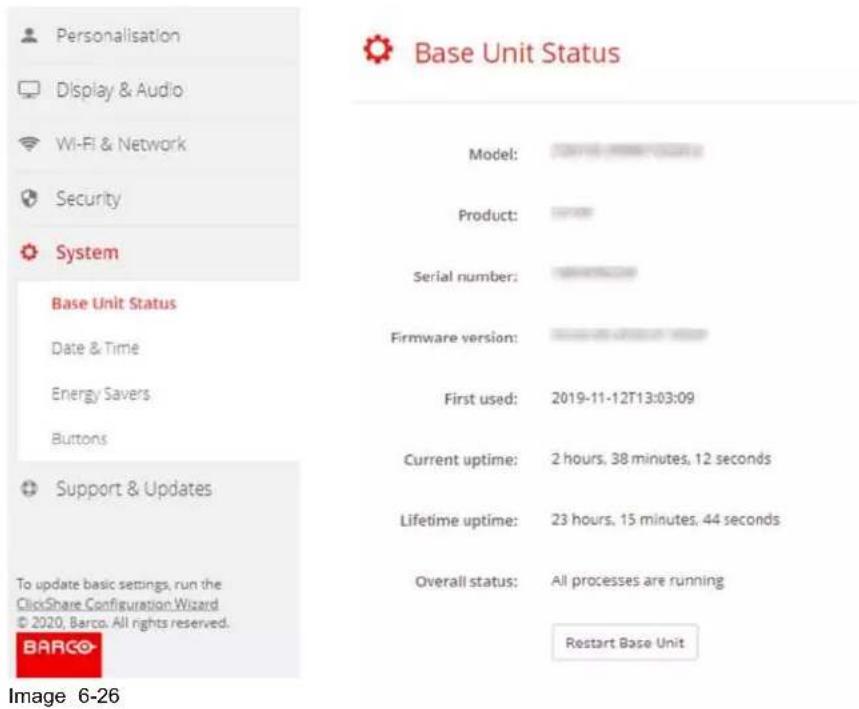
- To restart the Base Unit, click on Restart Base Unit.
A ClickShare system reboot message with progress bar is displayed while rebooting takes place. When the reboot is finished, a re-login is necessary.
6.17 Date & Time setup, manually
About Date & Time setup
The date and time can be set manually using the time zone indication or using at least one NTP servers.
How to setup
- Log in to the Configurator.
- Click System → Date & Time.
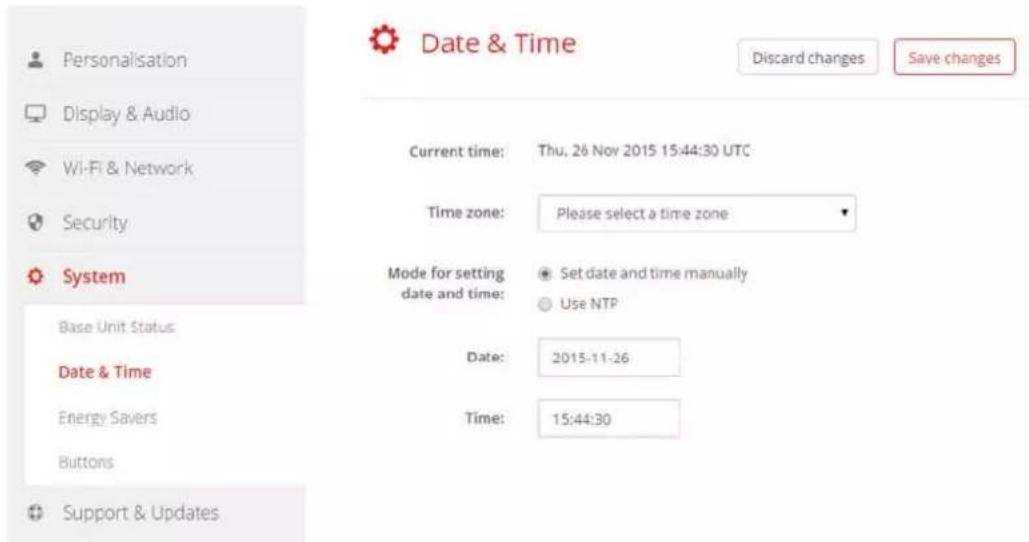
Image 6-27: Manual time & date update
The current time is indicated next to Current time.
-
Select your time zone. Click on the drop down box next to Time zone and select the corresponding time zone.
-
Check the radio button in front of Set time and date manually.
-
To change the date, click in the input field next to Date.
A calendar window opens. The current date is indicated with a red background.
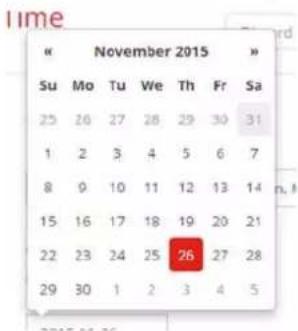
Image 6-28: Date selection
- To change the month, click on the left or right arrows next the month name until the desired month and year are obtained.
Click on a number in the number field to setup the day.
- To change the time, click in the time field next to Time.
A window with 3 scroll counters open.
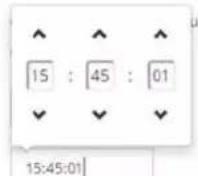
Image 6-29: Time setup
-
Click on the up down arrow of each scroll counter until the correct hour, minutes and seconds are obtained.
-
Click Save changes to apply.
6.18 Date & Time setup, time server
About using NTP server
The clock is continuously synchronized with an external time server and the deviation is in the order of milliseconds. Extra time servers can be added.
As long as there is no synchronization with a time server the status is indicated as disabled.
How to setup
-
Log in to the Configurator.
-
Click System → Date & Time.
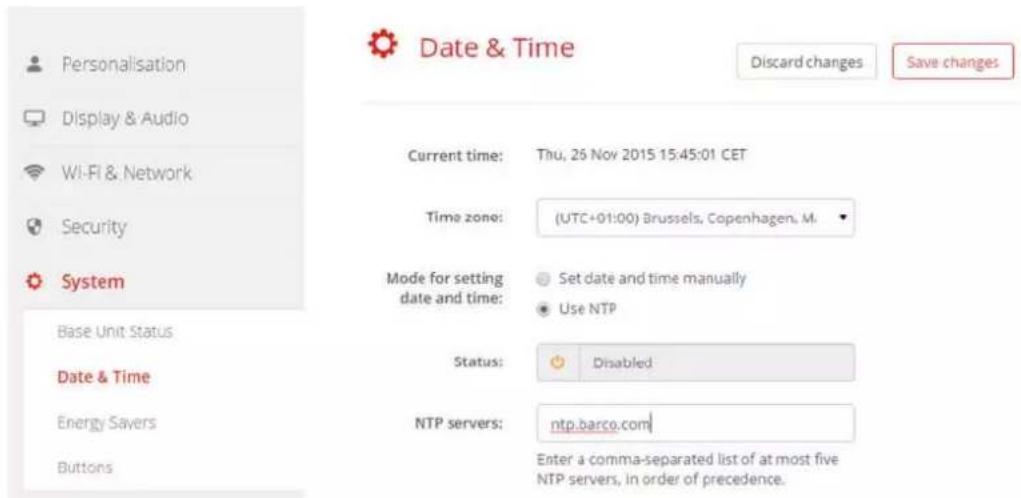
Image 6-30: Time server setup
The current time is indicated next to Current time.
- Check the radio button next Use NTP.
- Enter a NTP server address next to NTP servers. Enter the IP address or server name.
Note: Multiple servers (maximum 5) can be added, separated by a comma.
- Click Save changes to apply.
A synchronization with the NTP server takes place. The status field indicates the progress.
6.19 Energy savers
About standby
Standby after (minutes): If there is no client connection detected during the standby timeout period, the Base Unit will enter the selected standby mode.
Default setting: Time to standby: 10 min, the Base Unit will enter the Eco standby mode.
Eco mode
When the Base Unit enters ECO standby mode, it will disable the HDMI output signal. The Base Unit's LEDs will be breathing white to indicate the ECO standby mode.
Power consumption in Eco standby: 2.6W
The Base Unit will wake up with one of the following actions:
- Button or app connecting with the Base Unit
- Press the standby button on the Base Unit
• Pairing a Button on the Base Unit's USB port - Plugging in an HDMI display
- When a CEC event is received
Standby mode
When the Base Unit goes in Deep standby mode, it will shut down all processes, including the Wi-Fi access point and LAN connection. The Base Unit's LEDs will be dark to indicate this standby mode.
The Base Unit will wake up only when the standby button on the Base Unit is pressed.
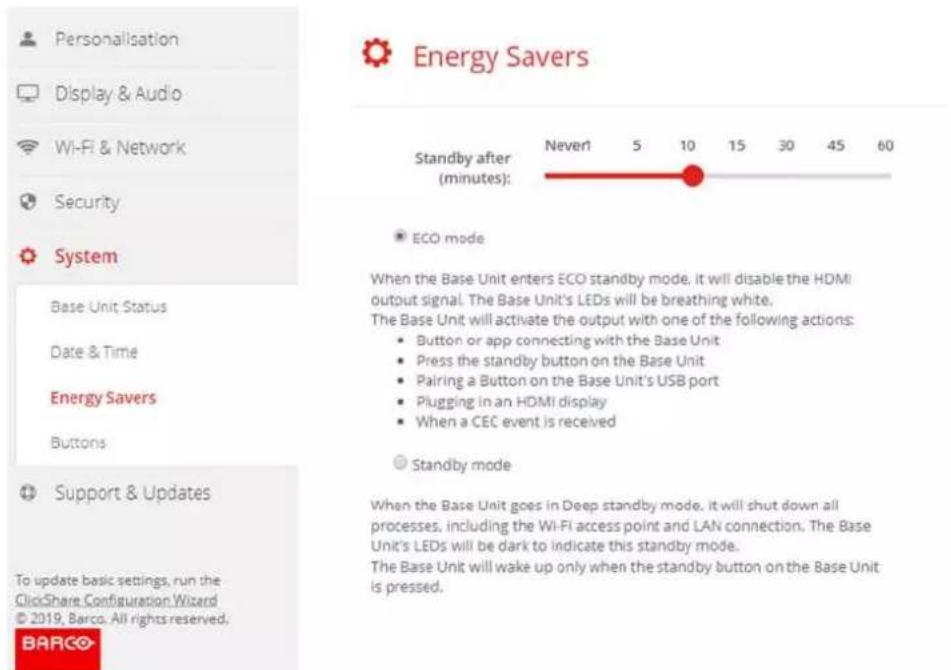
Image 6-31: Energy savers
How to change the display timeout
- Log in to the Configurator.
- Click System → Energy Savers.
- To set a display time out, move the slider to the left or to the right until the desired standby timeout is reached.
6.20 Buttons
About Buttons
The Button page indicates to which Base Unit the Buttons are connected. It indicates also the current state. All Buttons used with the Base Unit are indicated in the Buttons List. The list contains the state, the signal strength, the serial number, the firmware version, the number of connections and last connection.
It is possible to update the software of the Buttons over Wi-Fi.
To edit the settings
- Log in to the Configurator.
- Click System → Buttons.
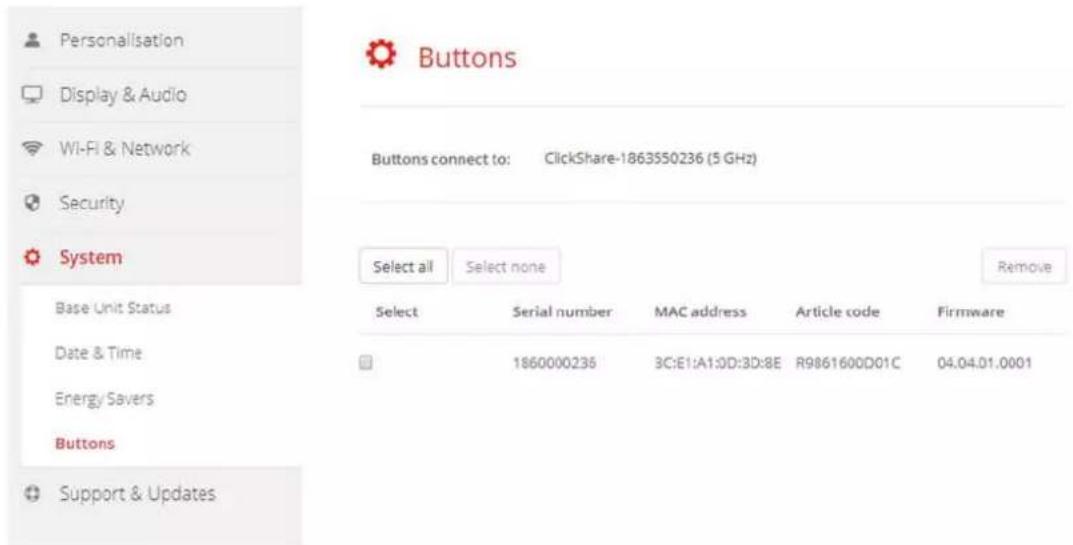
Image 6-32: Buttons overview
The current state is indicated and the list of Buttons is given.
3. Click Edit settings.
- Select to which access point the Buttons are connected. Click on the drop down list next to Buttons connect to and select the desired point.
Depending on the selection, internal access point or external access point, settings should be filed out. For an internal access point, no settings are needed.
6.21 Firmware Update
About Firmware update
The firmware of the Base Unit can be updated via the web interface. The latest version of the firmware is available on Barco's website.
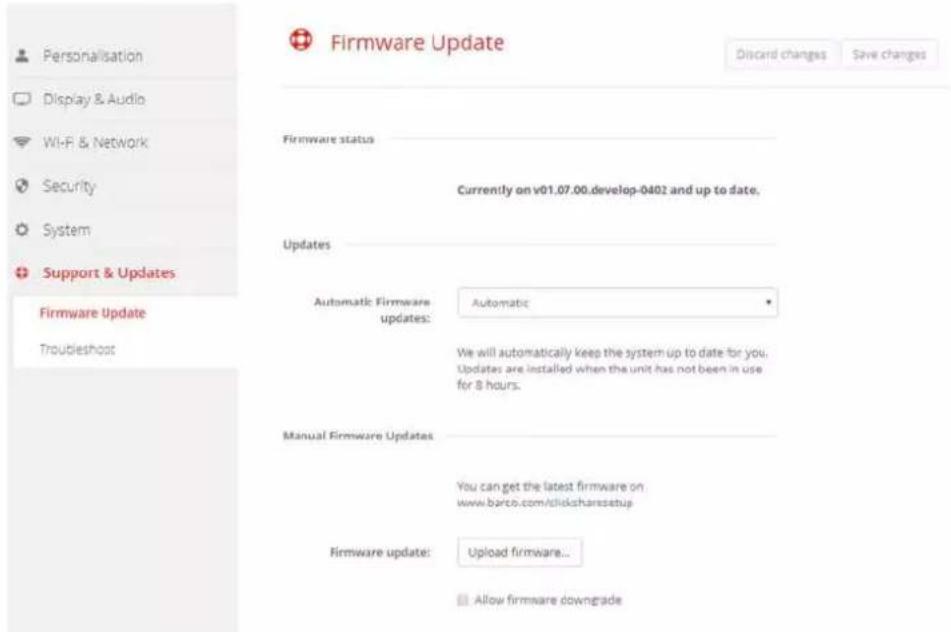
Image 6-33: Firmware update
About automatic firmware updates
There are 3 ways to configure automatic updates:
- Automatic: The system will automatically detect firmware updates and install them for you when it's not in use.
- Notify: The system will automatically detect firmware updates and notify you on the web interface dashboard and firmware page. The update can then be initiated via the Support & Updates > Firmware page
- Off: The system will not detect firmware updates and will not notify you.
Manual firmware update
- Download the latest version of the firmware from Barco's website.
- Log in to the Configurator.
- Click Support & Updates → Firmware.
-
To upload a firmware version, click on Upload firmware...
A browser window opens. -
Browse to the file with the new firmware and click Open to start the upload.

Note: This should be an .enc file. You might have to unzip the file downloaded from Barco's website.

Note: Updating the software to the Base Unit takes several minutes. Progress can be followed on the meeting room display.
The Base Unit software is updated.

If a firmware downgrade is required on the Base Unit, check the check box in front of Allow firmware downgrade.
Firmware update without using the Configurator
Next to using the configurator to upgrade the firmware, the following ways are also possible:
- When your device is connected to a network and managed via the XMS (Cloud) management platform or the Collaboration Management Suite (CMGS), the firmware can be upgrade via this Management solution. For more information on upgrading firmware in this way, consult Barco's web pages on XMS (https://www.barco.com/en/page/xms-cloud-management-platform) or CMGS (https://www.barco.com/nl/product/collaboration-management-suite).
- Download the firmware on a USB stick and plug in this USB in your device. For more information, see "Updating the CX-30 firmware", page 94
6.22 Support & Updates, Troubleshoot, log settings
About logging
Both Button and Base Unit log data is saved in log files on the Base Unit. These log files can contain debugging information. They can be downloaded on a local computer and cleared on the Base Unit. Debug logging covers only a few hours before it will be overwritten. Therefore, it is important if you discover a problem with your system to download the logging immediately.
How to use
- Log in to the Configurator.
- Click Support & Updates → Troubleshoot.
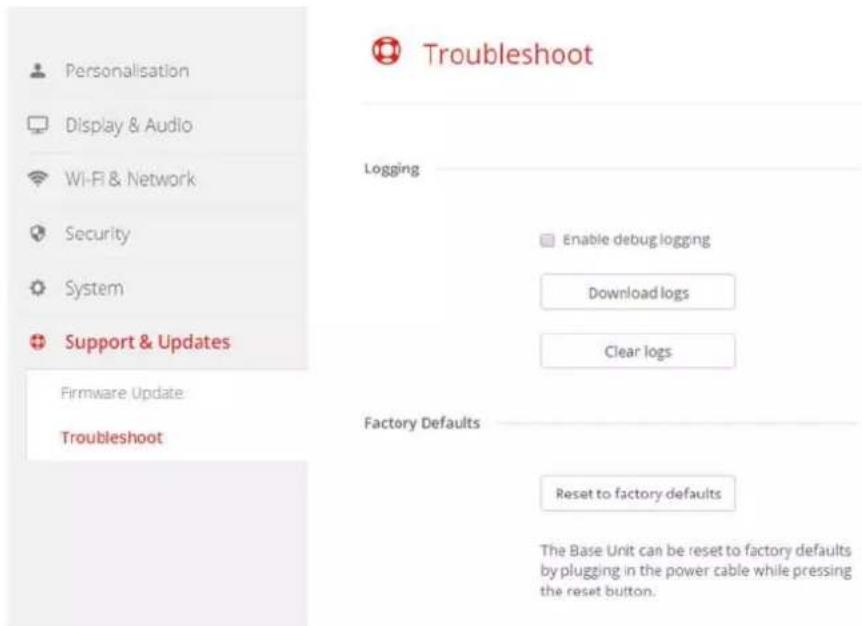
Image 6-34: Troubleshoot, logging
- To create a debug log, check the check box next to Enable debug logging.
- Reproduce the issue you want to report.
- To download the current log file, click on Download logs.
- To clear the current log file, click Clear logs.
6.23 Factory defaults
About default settings
The ClickShare Base Unit can return to the factory default settings.
The following settings are the defaults:
• Meeting room identification info is cleared.
• Language is set to English.
- Custom wallpapers are removed and the default wallpaper is restored.
• Standby timer is reset to 10 min.
- Hostname and SSID is set to clickshare-serialnumber.
• The SSID is broadcasted
• WiFi password is reset to clickshare.
• The default WiFi channel is set back to frequency 5 GHz, channel 36.
• The update history is cleared.
• The table with the associated Buttons is cleared.
• The admin password is reset to admin.
- Debug logging and remote logging are disabled.

Restoring to factory defaults will require a repairing of the Buttons used with this Base Unit and the setup flow has to be redone..
How to restore factory defaults
- Log in to the Configurator.
- Click Support & Updates → Troubleshoot.
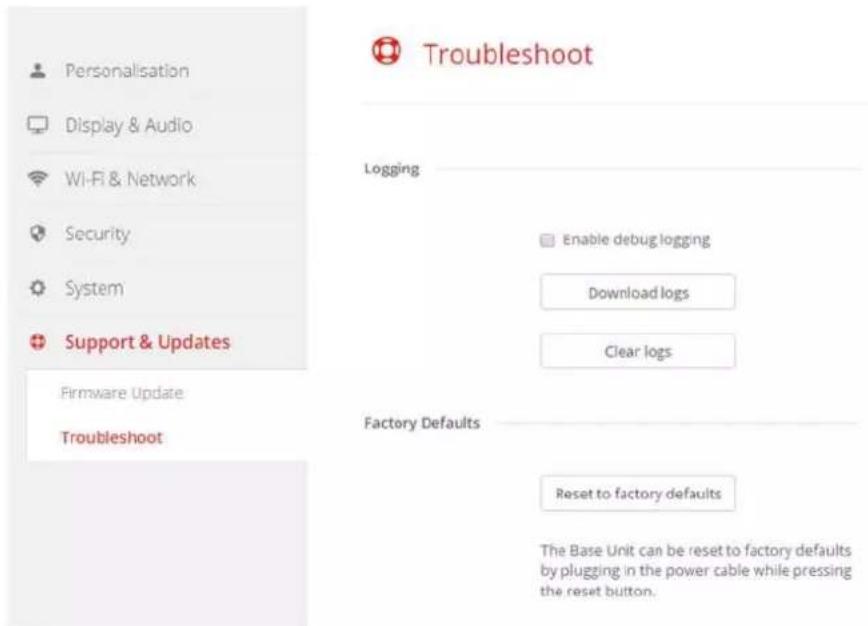
Image 6-35: Troubleshoot, factory defaults
3. Click Reset to factory defaults.
The following message is displayed: "This action will remove all settings of the Base Unit and replace them with the default settings. Are you sure you want to continue?"
4. If you want to continue, click Yes, remove all settings otherwise click No, I changed my mind.
When yes is clicked, the system starts a reboot.

Alternative way: The Base Unit can be reset to factory defaults by plugging in the power cable while pressing the reset button.
Firmware updates
7
7.1 Updating the CX-30 firmware

When starting up the device for the first time a software update is necessary. This update can only be done via the network.
About Firmware updates
There are different ways to update the Base Unit software:
• automatic update when connected with the network or your device is configured in XMS cloud.
• via the Configurator, for more information, see "Firmware Update", page 88.
• by copying the software on a USB stick
To update the Base Unit software by copying the software on a USB stick
- Download the latest version of the firmware from Barco's website, www.barco.com/clickshare. Click on Support and select the update firmware button of your device type.
- Unzip the zip file.
- Copy the ENC file to a USB stick.
You can have multiple firmwares for multiple device types on the same stick.
- Insert the USB stick into the USB port at the front of the Base Unit.
- Follow the instructions on the meeting room screen.
- When the on-screen message indicates that the process is finished, remove the USB stick. The Base Unit reboots.
Troubleshooting
8
8.1 Troubleshooting list
Problem solving
Problem Cause Solution
| Quality of the image on the meeting room display is not satisfactory | The quality or length of the cable between the Base Unit and the display or the connection between these two. Bad resolution of the display The system can handle the average laptop resolution of 3 Megapixel. However, up or down scaling on the meeting room display can cause visible artefacts. | Replace the cable. Use another cable. Change the resolution on the web interface and match it to the native resolution of the meeting room display. |
| Users have a bad wireless connection. The connection from the Button to the Base Unit keeps falling away. | Wireless congestion Low signal strength | Use a WiFi scanner to find a free wireless channel and select it via the web interface. You can use commercial as well as free online tools such as inSSIDer or Xirrus for this. Refer to “WiFi settings”. Put the Base Unit closer to the meeting room table. Change the orientation of the antennas at the back of the Base Unit. Remove or limit as much as possible all obstructions between the Buttons and the Base Unit. |
| Web interface is not accessible | Browser No connection | Use another browser (version). Check the browser settings. There are three methods to access the web interface. Refer to the corresponding chapter of the documentation. Check the proxy settings |
| Users do not get a ClickShare drive when inserting the Button in their laptop. | No automatic refresh of drives Windows tries to assign the ClickShare drive to an already reserved drive letter Bad connection at USB port on the laptop Some types of USB devices might be blocked as a company policy. USB port settings on the laptop might limit the usage of high power USB devices when on battery power. | Refresh your view on the laptop. Use Microsoft Windows Disk Management to assign it to a free drive letter. Reconnect to the USB port. Try another USB port. Reboot the laptop. If possible, change the USB port policy on the laptop. |
Problem Cause Solution
Low video performance Laptop performance
- Lower the screen resolution of the laptop.
- Disable the hardware acceleration for video.
- Use only a part of the display to show the video.
- Right click ClickShare icon in system tray and click on Capture mode to toggle the current setting..
Wireless connectivity See "Users have bad connectivity"
Video is not shown on screen Player uses overlays Disable the usage of overlays in the preferences of the video player.
Some programs of Windows are Use of overlays, 3D or hardware not shown on the display acceleration in the GPU
- Disable overlays or hardware acceleration in the GPU.
- Disable AeroGlass in Windows 7
- Upgrade the Base Unit to the latest software version.
When using Windows 7 the ClickShare uses resources from the following message about the the GPU. In combination with other programs which do so, it appears: "Windows has detected Windows 7 sometimes shows this your computer's performance is message suggesting to disable slow. This could be because there Aero to improve the performance are not enough resources to run of your laptop. The Windows Aero color scheme. To improve...".
It is safe to ignore this message and choose 'Keep the current color scheme'.
Your screen is not shown on the The number of shared video'son display when pressing the Button the screen is exceeded. When roomdock is used, only one participant can share his screen.
Click and hold the button for 2 seconds to use the Show me full screen function.
The ClickShare software is not running.
Go to the ClickShare drive and run the software.
Your content is removed from the Connection to the Base Unit is display and the LEDs on the buttost. are blinking white
ClickShare tries to restore the connection automatically. If it fails, the LEDs on the Button start blinking red. Unplug the button from your laptop and try a new button.
Noting is shown on the displays the displays are switched off. Switch on the displays. all.
The display cable is not correctly Insert the display cable to the connected display and the Base Unit.
The display does not recognize of Change the corresponding setting is not able to display the Base Unit the web interface. output resolution.
The Base Unit is in standby mode Briefly push the standby button on the Base Unit or insert a button and run the ClickShare software.
Problem Cause Solution
| Bad WiFi connectivity Congestion of the wireless channel | Use wireless network scan tools to look for free or the least congested channels. |
| Metal cabinets, walls, construction elements, ... can cause reflections deteriorating the wireless signal.Obstructions between Buttons and Base Unit cause lowering of the wireless strength and quality. | Move the Base Unit to another place in the room. |
| Avoid placing it inside cabinets, false ceiling, below the table, behind a wall, in another room, ....Re-orient he Base Unit antennasCheck out the ClickShare White paper on WiFi See www.barco.com/clickshare. | |
| Web Interface shows error in the Configuration file is corrupted processes “WiFi Access Point Daemon” and/or “DHCP Server” | Browse to the Configuration tab on the Web Interface and press “Load Default Settings”. |
| ClickShare Base Unit does not start up correctly | Configuration file is corrupted Browse to the Configuration tab of the Web Interface and press “Load Default Settings”. |
| No LAN connection with the Base Wrong IP address IP address is wrong Unit | not within your LAN range.DHCP is not enabled. |
| No WiFi connection with Base Unit SSID not correct Enter the correct SSID | |
Locate the problem you are experiencing in the table below and apply the solution.
Barco knowledge base and YouTube videos
Go to the product page on Barco's website and select in the right column Support. You will get access to Barco's Knowledge base and Latest tutorial videos. For more YouTube videos, consult https://www.youtube.com/user/barcoTV and select ClickShare.
- Copyright ©
- Trademarks
- HDMI Trademark Notice
- Product Security Incident Response
- Patent protection
- Guarantee and Compensation
- Barco ClickShare Product Specific End User License Agreement
- Entitlement
- - Term
- - Deployment and Use
- Support
- Terms of Use
- Privacy
- Other Terms
- - Open Source components
- • Retention of data
- BARCO END USER LICENSE AGREEMENT
- Definitions
- License Grant
- Ownership. Intellectual Property Rights.
- Support
- Warranty
- Compliance and Enforcement
- Limitation of Liability
- Confidentiality
- Term and Termination
- Other relevant terms
- Final Clauses
- Barco ClickShare Product Specific Privacy policy
- Open Source Software provisions
- Federal Communication Commission Interference Statement
- Canada, Industry Canada (IC) Notices
- Radio Frequency (RF) Exposure Information
- Caution: Exposure to Radio Frequency Radiation.
- IC Antenna statement
- Indoor use only warning
- Certification information (SAR)
- Canada, avis d'Industry Canada (IC)
- Documentation
- About the documentation
- Available System documentation
- Symbols and fonts
- Symbol overview
- Font overview
- CX-30
- Specifications
- 2
- About the CX-30
- CX-30 sets
- Components CX-30 set
- Accessories included
- Products Contains Accessories included
- CX-30 Specifications
- About the Base Unit
- Base Unit functionality
- USB ports
- Status LED ring
- Back layout of the Base unit
- Mechanical fixture points
- Antenna
- Bottom layout of the Base Unit
- CX-30 Specifications
- Getting started 3
- Environmental Condition Check
- Environment condition check
- Ambient temperature conditions
- Humidity Conditions
- Environment
- Basic Workflow
- Before using CX-30
- CX-30 Installation
- 4
- Installation methods for the Base Unit
- Physical installation
- Standalone or network integration
- Table mounting
- Overview
- Wall or ceiling mounting
- About wall or ceiling mounting
- Mounting with screws
- Mounting with the self-adhesive layer
- Out-of-the-box use of the Base Unit
- Out-of-the-box use of the Base Unit with Ethernet link
- Video signal connections to the Base unit
- About Video signal connection
- To connect
- Touch screen connections to the Base unit
- About the connection
- Camera connection
- About USB cameras
- Content Audio connection
- About content audio (no speakerphone connected)
- About content audio (speakerphone connected)
- Audio via HDMI (no speakerphone connected)
- Sound is not sent out
- Echo Canceling Speakerphone audio connection
- About echo canceling speakerphone audio
- USB speakerphone support
- How to connect an echo-canceling speakerphone
- LAN connection
- About LAN connection
- How to connect
- Power connection
- About power
- How to connect the external power adapter
- Starting up for the first time
- How to startup
- First setup of the Base Unit
- Preferred workflow
- Registration to XMS Cloud
- About registration
- Online to XMS cloud
- Use without registration of the device
- Why using offline
- How to handle
- XMS Cloud note in Configurator
- Basic configuration of the ClickShare device
- How to setup
- Click Start configuration.
- Fill out:
- Preparing the Buttons
- 5
- Pairing
- Pairing of the Buttons with the Base Unit
- To pair a Button to the Base unit by plugging in
- ClickShare Extension Pack
- About
- ClickShare Extension Pack installer
- Interactive setup
- Starting the setup
- Silent setup
- Parameter Description
- Windows environment variable
- ClickShare Windows Certified driver
- ClickShare Desktop app
- About the
- Installation
- CX-30 Configurator
- 6
- About configuration
- Accessing the Configurator
- Getting access to the Configurator
- To access the Configurator via the LAN
- What do you want to do today?
- To access the Configurator via a direct connection.
- To access the Configurator via the Base Unit wireless network
- ClickShare Configuration Wizard
- About the configuration wizard
- Welcome to the ClickShare Configuration Wizard
- Personalisation
- On-Screen ID information
- About device identification
- On Screen language selection
- Meeting room name, location and welcome message
- Personalisation, Wallpaper
- About wallpaper
- Wallpaper selection
- Download wallpaper
- Enable - disable Wallpaper
- Personalisation, Personalized wallpaper
- How to upload
- Change personalized image
- Remove personalized wallpaper
- Manage configuration files
- About Manage configuration files
- To manage the configuration files
- Display setup, Output
- Resolution
- HDMI hot plug display detection
- CEC
- Screen saver setup
- Display & Audio setup
- Audio
- Log in to the Configurator.
- WiFi settings
- About WiFi
- Wi-Fi Settings
- Change operational mode
- About frequency band & channel selection
- Frequency band & channel selection
- SSID & passphrase
- Signal strength
- ClickShare Configurator (WebUI) access via Wi-Fi
- IP address & subnet mask
- LAN settings
- About LAN network settings
- DHCP
- Hostname & method
- Manual (fixed) IP address
- Use a proxy server
- Services, Mobile devices
- ClickShare app
- Passcode type selection
- XMS Cloud Integration
- What can be done?
- Services, SNMP
- About SNMP
- How to enable
- How to configure
- Security, security level
- About security levels
- How to set the security level
- Security Level
- Security, passwords
- About passwords
- Changing the ClickShare Configurator password
- Status information Base Unit
- Status information
- Base Unit restart
- Date & Time setup, manually
- About Date & Time setup
- Date & Time setup, time server
- About using NTP server
- Energy savers
- About standby
- Eco mode
- Standby mode
- How to change the display timeout
- Buttons
- About Buttons
- To edit the settings
- Click Edit settings.
- Firmware Update
- About Firmware update
- About automatic firmware updates
- Manual firmware update
- Firmware update without using the Configurator
- Support & Updates, Troubleshoot, log settings
- About logging
- How to use
- Factory defaults
- About default settings
- How to restore factory defaults
- Click Reset to factory defaults.
- If you want to continue, click Yes, remove all settings otherwise click No, I changed my mind.
- Firmware updates
- 7
- Updating the CX-30 firmware
- About Firmware updates
- To update the Base Unit software by copying the software on a USB stick
- Troubleshooting
- 8
- Troubleshooting list
- Problem solving
- Problem Cause Solution
- Barco knowledge base and YouTube videos
Brand : Barco
Model : CX-30
Category : Wireless pointer