S10 - Smartphone Nomu - Free user manual and instructions
Find the device manual for free S10 Nomu in PDF.


| Product Type | Smartphone |
| Brand | Nomu |
| Model | S10 |
| Dimensions | 158 x 77 x 12 mm |
| Weight | 240 g |
| Display Size | 5.5 inches |
| Display Resolution | HD (1280 x 720 pixels) |
| Operating System | Android |
| Processor | Quad-core, 1.3 GHz |
| RAM | 3 GB |
| Internal Storage | 32 GB |
| Expandable Storage | microSD up to 128 GB |
| Rear Camera | 13 MP with autofocus and LED flash |
| Front Camera | 5 MP |
| Battery Capacity | 5000 mAh |
| Security | Fingerprint sensor |
| Water & Dust Resistance | IP68 certified |
| Connectivity | 4G LTE, Wi-Fi 802.11 b/g/n, Bluetooth 4.0, GPS, NFC |
| SIM Card | Dual SIM (Nano-SIM, dual standby) |
| Sensors | Accelerometer, proximity, compass |
| Included Accessories | USB cable, power adapter, user manual |
| Cleaning Instructions | Wipe with a soft, dry cloth; avoid harsh chemicals |
| Repairability | Battery and display replaceable by authorized service centers |
Frequently Asked Questions - S10 Nomu
User questions about S10 Nomu
0 question about this device. Answer the ones you know or ask your own.
Ask a new question about this device
Download the instructions for your Smartphone in PDF format for free! Find your manual S10 - Nomu and take your electronic device back in hand. On this page are published all the documents necessary for the use of your device. S10 by Nomu.
USER MANUAL S10 Nomu
OperationInstruction
Safety Information
Safety Specifications and Instructions for Battery of Mobile Phone
Recommended Use Considerations
- Before the use of battery, please carefully read this operation instruction and the battery surface mark.
- During use, the battery shall be away from the heat source high pressure, and the children shall be prevented from playing batteries. Never knock the battery. This battery shall be only charged with the original match able charger.
- Do not enable the battery anode and cathode short-circuited. If not assemble or disassemble the battery by yourself. Do not put battery in the damp place to avoid danger.
- Store the battery in good condition if it is not used for a Make the batter in the half-charge state, not fully charged and not fully discharged.
Danger warning
- Forbid to assemble and disassemble the battery
The protection mechanism and the protection circuit are arranged the circuit to avoid danger. The improper assembly and disasseri will damage the protection function, which will cause battery heating, smoking, distortion or burning.
- Forbid to cause the battery to be short-circuited
Do not connect the anode with the cathode through the metal. not store and move the batter and the metal together. If the short-circuited, the ultrahigh circuit will flow through the battery damage the battery and result in battery heating, smoking, distor or burning.
- Avoid using the battery near the power supply
Do not use the battery near the fire source and the oven or environment exceeding 80°C. Overheat will cause short circuit inside the battery to result in battery heating, smoking, distortio burning.
- Use the special charger and correctly charge
The use of non-special charger to charge the battery will cause
danger. Charging in the abnormal condition will cause the loss the function of the protection circuit inside the battery and abn chemical reaction, and the battery may be heated, smoke, and distorted or burnt.
- Forbid to damage the battery
Forbid to penetrate into the battery with the metal, beat or kn battery or damage the battery by other means, otherwise it will cause battery heating, smoking, distortion or burning, even result danger.
- Do not use the battery for other devices
The improper service conditions will damage the battery performance and reduce the service life, even cause battery heat smoking, distortion or burning.
Warnings
- Do not place the battery on the charger for a long time. If the charger still charges the battery beyond the normal charge time, it should stop charging. Abnormal charging may cause bar heating, smoking, distortion or burning.
- Do not place the charger into the microwave oven or other pressure vessels.
Transient heating or structural damage will cause battery heating smoking, distortion or burning.
- The leaky battery should be kept away from fire
If the leaky battery is found (or there is peculiar smell), it she kept away from fire, otherwise the leaked electrolyte will catch even cause other dangers.
Precautions
- Do not use the battery under strong sunlight
Do not use the battery under strong sunlight for fear of heating distortion and smoking. At least avoid reducing the battery performance and the service life.
- Anti-static
The protection circuit installed in the battery can avoid various unforeseen circumstances. Do not use the battery in the high-voltage electrostatic site as the static is easy to damage th
protection board to cause the abnormal operations of the battery such as heating, smoking, distortion or burning.
- User manual
Before using the battery, please carefully read the user manual frequently read it as required.
- Charging mode
Please use the special charger and the recommended charging n Charge the battery in the recommended environmental condition.
Use and maintenance of mobile phone
This mobile phone is a product designed by the good technolo Please carefully use it. The following suggestions will help the better use and maintain the mobile phone.
- Place the mobile phone and all parts at the place that the cannot touch.
- Do not store the mobile phone at the high temperature place temperature may shorten the service life of the electric device, damage the battery, distort or melt some plastic parts.
- Do not store the mobile phone at the low temperature place. the battery is move to the normal temperature place from the temperature place, the moisture may be generated inside the bat to cause the damage of circuit board.
- Never try to disassemble the mobile phone. The improper hand of unprofessional personnel may cause the damage of this device
- Never use the irritant chemicals, clean solvent or corrosive detergent to clean the mobile phone. To cleaning the mobile phone please scrub the mobile phone with the duster cloth dipped with mild suds.
- Please use the original fittings recommended by the manufacture. The unauthorized fittings may damage the mobile phone.
- If the mobile phone is moistened accidentally, please turn off remove the battery, determine that the mobile phone has been and then use the mobile phone.
- Never make the metal parts (specially configured charger inter and data line interface) in contact with the charger interface of
mobile phone for fear of short circuit.
Import Instructions
When using this mobile phone, please exactly follow the following precautions to avoid possible disasters or legal penalties.
Pay attention to flight safety
Never use the mobile phone on the airplane. The navigation sy on the airplane may be interfered by the mobile phone. Many countries regulate that the mobile phone shall be prohibited to used on the airplane.
Pay attention to the surrounding environmental safety
Never use the mobile phone in the gasoline station. In addition, never use the mobile phone in the oil storage plant, the chem plant and when there are flammable or explosive objects around
Pay attention to the traffic safety
Be careful when driving the vehicle, and avoid calling and driving at the same time as far as possible.
Pay attention to radiated interference
When using the mobile phone, keep the mobile phone away from the article or instrument susceptible to interference as far as po. We suggest that you should be 2.5 CM away from the antenna using the mobile phone.
Pay attention to the interference with the medical facilities
Some medical instruments may be interfered when the mobile phone is used. Most of hospitals prohibit you to use the mobile phone in the hospitals.
Pay attention to the storage environment
Keep the mobile phone away from the magnetic equipment such magnetic card and floppy disk. The radiation of mobile phone erase the information stored on the magnetic equipment.
Warnings
There is no part for the user to self-repair in the mobile phone you doubt that the mobile phone is damaged, please rapidly set to the designated service and maintenance center to be maintain by the qualified technical personnel. Never disassemble the mobile phone by yourself, otherwise you may suffer from electric shock
other injuries.
Never let the children to use the mobile phone or its fittings. improper operation of the children may damage the mobile phone, its fittings or cause injuries to yourself or others. At the same the removable parts of the mobile phone such as SIM card, no card, etc. may be swallowed by the children to cause the danger. When using the mobile phone, keep the mobile phone away from high temperature and avoid solarization. Please keep it in the cold and cool place.
Attentions:
- Before waterproof test, tightly close each position of the bat cover so as to avoid water leakage.
- As the USB seat, the earphone seat and the charger seat machine belong to waterproof devices, the machine needs to be dried and placed for a period of time after waterproof test and can be used after there is no water in the earphone seat, the seat and the charger seat.
1. Introduction
1.1 Insertion and removal of SIM Card
Turn off the mobile phone, insert the pin into the lateral pin press to pop up the SIM card holder, and then take out the Place card 1/2 into the slot with the metal surface downward bevel angle aligned with that of the slot, and then insert the into the mobile phone.
Please turn off the mobile phone before taking out the SIM can insert the pin into the lateral pinhole and press to pop up the holder and take it out.
Tips: SIM does not support hot plug. Do not remove SIM in standby mode for fear of damaging SIM card.
1.2 Insertion and removal of Memory Card
Turn off the mobile phone, insert the pin into the lateral pinh press to pop out the SIM card holder, and then take it out. place the storage card into card slot 2, and then inset the hol the mobile phone.
Please turn off the mobile phone before taking out the storage
insert the pin into the lateral pinhole and press to pop up the holder and take it out.
- This phone does not support memory card hot plug.
- The slot 2 is compatible to both SIM card and storage car both kinds of card cannot be placed simultaneously.
1.3 Remove and install the battery
The battery is built-in.
Note: the battery of the phone cannot be removed manually.
1.3.1 Battery Charging
When the new battery is not fully charged, before the use of phone, you should use up the power of the battery, and then the battery by the following ways.
- Insert the connector of the charger into the charger socket mobile phone.
- Insert the charger into the power supply, the battery symbol be dynamically displayed, indicating that the battery is being charged.
When charging is finished, the full battery symbol will be disp to prompt that charging is finished.
After charging is finished, please remove the charger from the power supply, and then unplug the charging plug from the mol phone.
Tips: you can charge your mobile phone through USB data connecting line and the computer connection. If the battery pow of your mobile phone has been fully used up, it may be imp to charge the mobile phone through USB data connecting line. this time, you should use the charger to charge the mobile ph
2. Basic Operation
2.1 Power On/Off Phone
Long press the power key to turn on/off the mobile phone.
Tip: it takes some time to initialize the mobile phone. Please patiently.
If the mobile phone is started firstly but SIM card is not ins part of functions in the mobile phone cannot be normally used
After SIM card is inserted, the mobile phone will automatically inspect whether SIM card can be used or not.
2.2 Screen locking and unlocking
After the mobile phone is idle for a long time, the screen is enter into the screen locking state to save the battery power.
Lock screen/mobile phone: press the power key
Unlock screen/mobile phone: press the power key, light up the screen and display the screen locking state. Press the unlocking and slide towards the upside to unlock.
If you have set the locking pattern or password, the mobile pl will prompt you to draw the pattern or enter the password.
Main menu→setting→security→screen locking
Set screen locking→pattern locking
- Set screen locking→pattern
- Pay attention to view the screen tip and the pattern example select next for two times.
- Drag to connect four points by finger to draw the pattern.
- Continue to select.
- Draw the pattern again to confirm.
- Select OK.
After the unlocking pattern is set, the mobile phone requires to towards the upside to enter the unlocking pattern when being t on each time. If you want not to enter the unlocking pattern, change the screen locking in “Set→security”, enter the unlocking pattern, and then click None.
Set screen locking→password
- Set screen locking→password locking
- Enter four characters at least.
- Continue to select.
- Enter the character password again to confirm.
- Select OK.
After the password is set, the mobile phone will require to sli towards the upside to enter the unlocking password when being turned on each time. If you want not to enter the unlocking password, please change the screen locking in “Set→security”, enter the unlocking password, and then click None
Note: the steps for setting PIN screen lock mode are the same above-said steps.
2.3 Touch methods
You can operate the mobile phone by the following methods (press the corresponding function keys by finger pulp).
2.3.1 Press:
You can select one icon or option through the press function display screen. If under the main menu, click Information to enter browse all SMS/MMS and other information.
2.3.2 Click and press:
You can view more menu options through Click and press. For example, when you click and press a number in the contact d interface, a pop-up menu will be opened, and you can execute option functions in the menu.
2.3.3 Scroll:
Press the scroll bar, and then dray upwards or downwards. For example, when you browse the contact list, a scroll bar will be popped up on the right. Drag the scroll bar to facilitate to se contacts.
2.3.4 Drag and drop:
Press an item by finger, and then drag the finger to move th
2.3.5 Double click:
When viewing the photos or web pages, click quickly for two by finger to zoom in or out.
2.3.6 Quick slide
When you select the contact in the list through the scroll bar, quick slide of the touch screen can be rapidly realized.
When you quickly slide a long column of contacts, click the 'to stop sliding.
Warm tips: to avoid scraping the touch screen, do not use th tool.
Forbid the touch screen to contact with other electric devices. discharge will cause the failure of touch screen.
To better use the touch screen, remove the protective film of touch screen before using the mobile phone.
2.4 Query of IMEI number
- Main menu→Set→About mobile phone→Status message View IMEI number in Status message
- Enter “*#06#” in the dial pad to query IMEI number
2.5 Main Keys
| Key | Definition |
| HOME key | Return to home screen |
| Task Manager Key | Enter to Task Manager |
| Return key | Return to the previous screen |
| Power key | Turn on/off; sleep; wake up; switch mode, press 8 seconds to re-boot. |
| Volume Key | Adjust the volume and press the “volume” the camera interface to photograph (No wa function). |
2.6 Screen sleep and wake-up
- To save the power and prevent the unexpected screen touch starting the program, or when cleaning the screen, press the pc key to enable the screen to sleep. Press the power key again up the screen.
- To change the time when the mobile phone automatically enter into the sleep mode, enter Set→Display→Sleep.
2.7 Main screen
The main screen can be scrolled on the left and right, the applications such as shortcut and widget can be customized and added.
2.7.1 Add items to main screen
Customize the main screen by adding applications, widgets, folders and shortcut keys for applications or items.
2.7.2 Move items on main screen
- Click and press the item to be moved.
- Drag the item to the required location after being selected.
2.7.3 Delete items from main screen
-
Click and press the item to be deleted.
-
Drag the item to delete.
2.8 WLAN setting
Main menu→Set→WLAN
- WLAN: turn on or off WLAN function.
- Network notification: set the mobile phone as “Notify the user, there is an open network nearby”.
-
WLAN network: search surrounding wireless networks:
-
Press Set→WLAN
-
Select and turn on WLAN. The mobile phone will scan and search the available WLAN network and list the found WLAN network names in the WLAN network list.
- Click and press a network to connect.
- If the network is protected, the system will prompt to enter password. Consult the network service provider or administrator concrete details.
2.8.1 Delete WLAN network
You can make the mobile phone not store the remembered WI network details.
- Turn on WLAN function.
- Click and press the connected network name in the WLAN setting screen.
- Click in the opened WLAN dialog box to cancel the stored
2.9 Phone Operating Status
| 4G network signal strength | 3G network signal strength | ||
| GSM network using | Full battery power | ||
| Battery charging | Mute Mode | ||
| WLAN signal strength | Open the portable WL hotspot | ||
| Headset is plugged in | Off-line mode | ||
| New Message | Alarm clock is set | ||
| Calling | Missed Call |
| 4G network signal strength | 3G network signal strength | ||
| GSM network using | Full battery power | ||
| Battery charging | Mute Mode | ||
| WLAN signal strength | Open the portable WL hotspot | ||
| Headset is plugged in | Off-line mode | ||
| New Message | Alarm clock is set | ||
| Calling | Missed Call |
2.10 Management notice
The top status column of the home screen shows new message emails, calendar events, alarm clock, and the on-going activity (calling).
3. Dial
3.1 Dial pad:
Main menu→Call
3.1.1 Click and press the keys on the dial pad to enter the 1 number.
If you enter the wrong number, click to clear the figures one by one; if you want to clear the whole number, long press. To make an international call, long press 0 key to enter the international connection code “+”.
3.1.2 Click and press the dial key under the dial pad to dial number you enter.
3.2 End a call
Click and press Hang up to end a call.
3.3 Answer or Refuse to answer a call
When you receive a call, the relevant incoming information will be displayed on the screen. If you have a missed call, you will a notice.
Slide the icon on the incoming call interface to answer the call(drag the screen lock controller rightward to answer the call if the screen is locked).
Note: Press the drive-by-wire button of the earphone to answer call if the earphone is fit into the phone
Slide the icon leftward on the incoming call interface to to refuse the call.
3.4 Refuse via message
Slide the icon downward on the incoming call interface to to refuse the call and send a message of refusal reason.
3.5 Hold a call
Click the wait icon during the call.
3.6 Mute during call
Click Mute icon during the call.
3.7 Switching between current calls
Get through 2 calls, and then click the call interface.
3.8 Call options
You can execute the following operations during the call:
- Click Hands-free to use the loudspeaker of the mobile phon
- Click Bluetooth to use Bluetooth device.
Tip: before the use of this function, please be sure that the 1 phone has been bound with Bluetooth audio device and the connection is established.
-
Click the dial pad to enter the figures.
-
Click Add Call to add a new call.
-
Click Call Recording to record the call.
3.9 Call records
The call records include your all dialed calls, received calls or missed calls.
Main menu→Call
-
Press the right item to call back.
-
Press the right item, and click the “Details” at the bottom see the details of the number and do other work.
-
Press icon → Remove call records to remove the list of call records.
3.10 Make an emergency phone call
Notes: your network service supplier has set one or more emergency numbers. There are different emergency call numbers different countries, so the emergency call numbers of your mob phone will not be valid in all regions. The emergency call may be dialed due to the impact of network, environment or interface accidents.
Main menu→Call (if the mobile phone has been locked, click Emergency Call).
-
Enter the emergency call number.
-
Click the dial icon to dial the emergency call.
4. Contacts
Create and manage the list of personal or company contacts stored in the mobile phone or SIM card. Contacts can be used for clients and deleting the contacts, etc.
4.1 New contact
Main menu→Contacts, click New Contact icon to pop up New Contact, and select Phone or SIM card to create the contact Enter the contact name and its relevant information, and then completed.
4.2 Backup Contacts
Main menu→Contacts→Press icon →Import/Export→Pop up import/export contact box, select to be exported to SD/SIM card and determine to export.
Note: Backing up contacts requires memory card in the phone.
4.3 Edit or delete contact
Main menu→Contacts
Click the required contact, press icon to modify the contact, and then click OK on the upper right corner.
Long press any contadelete to delete the selected contick icon → delete, to confirm to delete this contact.
4.4 Add contact into list of favorites
You can add the frequently used contacts into the list of favo
- Open your contact program.
- Click to enter the contact details interface.
- Click the star icon to add to favorites.
4.5 Delete favorite contact
Main menu→Contacts→Favorites
Open the Favorite enter the contact details screen, and click the five-pointed star icon, to delete the contact in the Favorite.
4.6 Use contact group function
Contact groups include the groups you create. You can add members to these groups.
4.6.1 View groups
-
Click the Contacts on the main menu interface and enter the contact list.
-
Click group icon to enter the contact groups interface to view or manage your groups.
4.6.2 Add group
-
Open the contact group interface
-
Click the icon, add Group to add group
-
Name the group and click OK.
4.6.3 Add members to a group
-
Enter the contact groups interface
-
Click the group name and view the group members
-
Click icon -Amend", add members and directly input or enter the address book to select "Add contacts".
-
Select the contacts to be added and click OK.
4.6.4 Delete group
-
Open the contact groups interface
-
Click the group name, press the Menu button, and delete the group (the Menu presents only after the user customizes the group
4.6.5 Edit group
-
Open the contact groups interface
-
Click icon →Modify on the group details interface to modify or edit name
-
Rename the group, and click OK.
4.6.6 Search contact
-
Open the contact list
-
Click the search icon for searching
-
Enter the name of the contact to be searched
-
Click the searched contacts to view the details
5. Message
You can send and receive the SMS or MMS including the multimedia file.
5.1 SMS
Main menu→Message
5.1.1 Send SMS
- Open the Message and view the message list
- Click the Create Message icon on the bottom of the screen write a new message
- Enter the phone number of the receiver into the receiver be select receiver from the contacts list by clicking the icon on the right.
- Click the Enter Message box to enter message.
- Click Send icon to send the message
5.2 MMS
5.2.1 Create and send MMS
- Open the Message and view the message list
- Click the Create Message icon on the bottom of the screen write a new message
- Enter the phone number or email address of the receiver in receiver box, or select receiver from the contacts list by clickir icon on the right.
-
Click the Enter Message box to enter message.
-
Press icon → Add Theme, to add message theme.
Note: A SMS will change into a MMS automatically upon a attachment, etc. are added. Conversely, a MMS will change into SMS automatically upon the theme, attachment, etc. are deleted.
-
Press the icon to choose required attachment.
-
After finishing writing a message, click Send button to send
5.2.2 Read and reply message
- Click a message to open and view the message session.
- If it is necessary to reply message, you only need to enter reply content in the text input area below after opening the m
5.3 View message details
- Open the Message and view the message list
-
Directly click the message to be viewed to open it.
-
Press and hold the message of which the details need to be viewed.
-
Click Message Details from the popping Message Options b
5.3 Transfer Message
- Open the Message and view the message list
- Directly click the message to be transferred to open it.
- Press and hold the message to be transferred, and click "transfer" from the popping Message Options bar.
5.5 Delete Message
5.5.1 Delete all messages from and to a contact
- Open the Message and view the message list
- Press and hold the messages
- Click the Delete messages
Note: another method:
- Open the message list, press the Menu button, and select "Delete", select the message to be deleted and click "delete" o upper right corner.
5.5.2 Delete a message
- Open the Message and view the message list
- Directly click the message to be deleted to open it
- Press and hold the message to be deleted
- Select the delete from the popping message options bar
- Click “delete” from the popping dialogue box
5.5.3 Change message settings
- Open the Message and view the message list
- Click icon to set any item.
6. Email
You can read and send email conveniently via the phone. The “Email” with a built-in guide can make your email service set very easy.
6.1 Set your email account
You need to set your email account when using the email fun
first time.
6.1.2 Click Email on the main menu interface to open it and your email account.
6.1.3 Enter your email address and password, and click Next button. Then the system will connect with the server and inspe server settings automatically, or you can manually set the server
6.1.4 Set email check frequency, default account, email notify, etc., and click Next button.
6.1.5 Name your email account and set the name showing to other email receivers, and click Next button.
6.1.6 The system will synchronize the settings with the mail's you set. Then your email will present on your phone.
6.2 Read email
6.2.1 After setting email account, Click Email to enter the Inb
6.2.2 Click the email to be read, the very email will then be opened and presented in the screen, with addressor, theme etc. shown, and the email contents shown below.
Note: when receiving a new email, the status column also notice you of the email. You can open the notice panel, and click the email to read it.
6.3 Edit and send email
6.3.1 Click Email from the main menu to enter the Inbox.
6.3.2 Click the creation icon at the right bottom corner.
6.3.3 Enter the receiver, or click the rightmost addressee icon the receiver bar to add CC or BCC email address.
6.3.4 Click the Theme to enter the theme of the email.
6.3.5 Click Content to enter the email content.
6.3.6 Click the attachment icon on the menu→Add Attachment, add any photo, video, audio and/or other document as the attachment of the email.
6.3.7 Click the send icon on the upper right of the screen to the email.
6.4 Add signature to email
6.4.1 Click Email on the main menu, to enter the Inbox.
6.4.2 Click the upper left icon->Set.
6.4.3 Click the email account you have set.
6.4.4 Click Signature.
6.4.5 Enter your desired signature and click OK.
6.5 Add email account
6.5.1 Click Email on the main menu, to enter the Inbox.
6.5.2 Click the upper left icon->Set->Add account.
6.5.3 Then you can add new email account. For details, see S Email Account.
6.6 Edit email account
-
6.1 Click Email on the main menu, to enter the Inbox.
-
- 2 Click the upper left icon->Set
-
6.3 Click the email account you have set to edit it, for Get Setting, Notice Setting and Server Setting.
7. Chrome
You can use the browser to view the web pages or search re information on the Internet.
Note: 1. Your mobile phone can be enabled to visit the network-based applications through the browser. If required, please contact your network service provider for advice on how connect.
- As the relevant data traffic cost must be generated when the browser is used, please contact your network service provider for specific charges.
Main menu->Chrome browser
- When you enter the Chrome browser for the first time, enter “Welcome to use Chrome” interface. Once the application is used, means that you agree to and have the right to use the “service terms” and the “privacy statements” of Chrome. As required, click “Send usage statistics and crash reports to Google so as to help perfect Chrome”. Select “Accept and Continue” to continue.
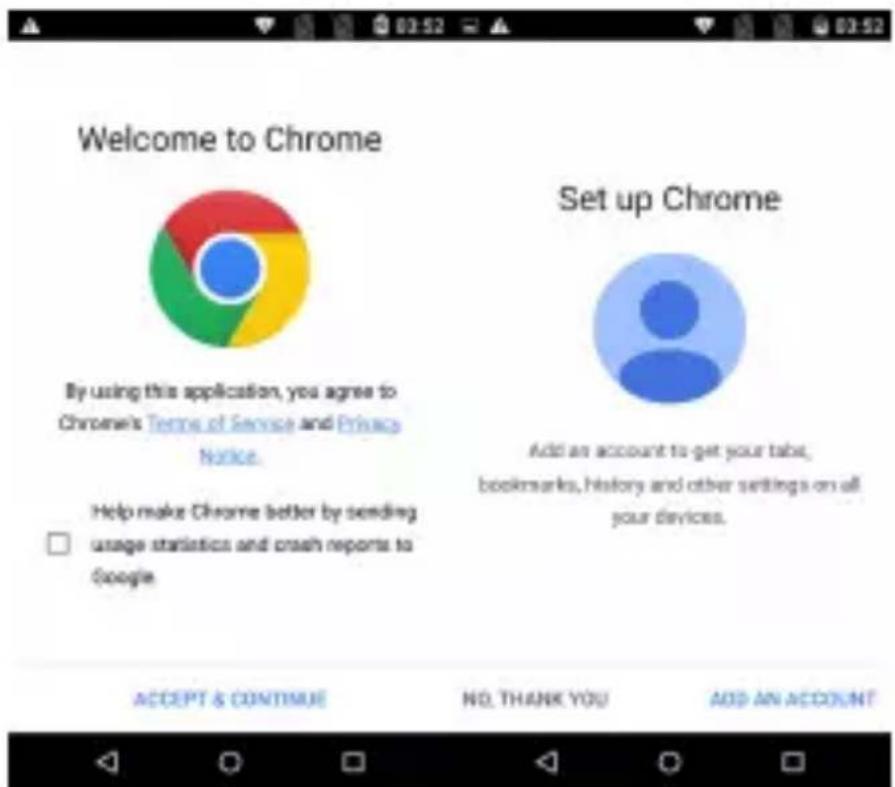
- Enter the “Set Chrome” interface and add an account so as obtain all tabs opened at present, saved bookmarks, histories an other settings on your equipment. If no Google account is applied you can also directly click “No, thanks” to continue.
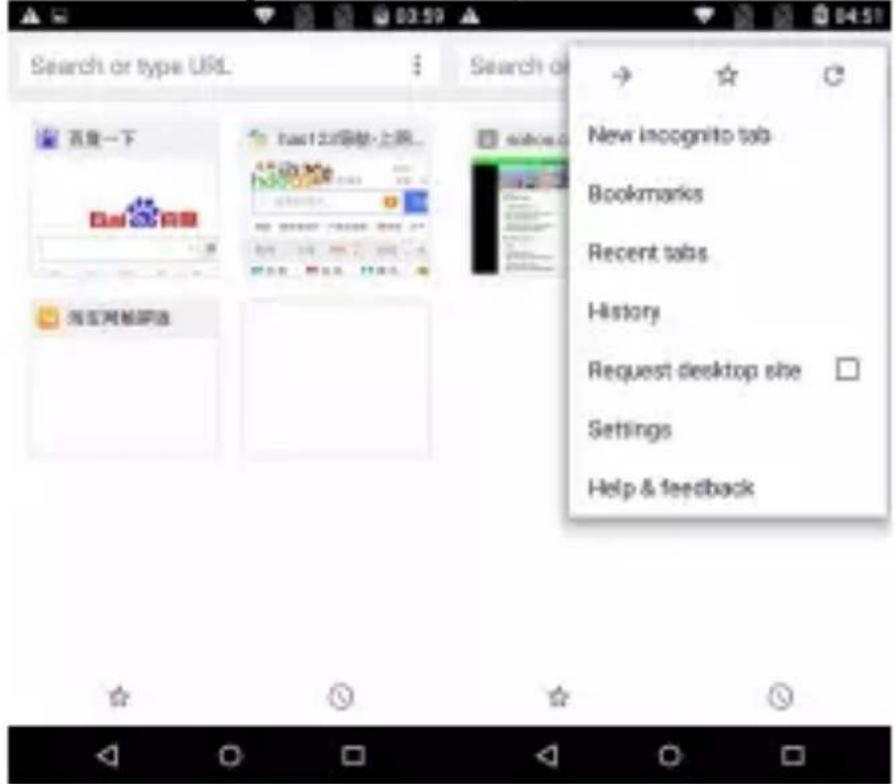
- Display the collected bookmarks on the home page, click to view the saved bookmarks and the mobile device bookmarks
click to view tab histories opened and closed recently as well as information related to other equipment. Note, please log Chrome for the other equipment.
- Click on the right of the search bar and open the option bar. The icons at the top of the option
bar are to open the web page which has been closed and exit now, add the new bookmarks and refresh the current web page respectively. There are the operations of opening the new tabs, the new stealthy tabs, the saved tabs, the recently-opened tabs the histories, sharing, printing, searching in the web pages, add to the home screen, requesting to switch to the desktop web settings, helping, performing feedback and the like.
8. Music
You can enjoy music saved in your phone or SD card via th player.
8.1 Copy audio document to your phone
- Connect your phone with computer via USB cable
- When USB setting interface pops on your phone, select more SD card.
- Copy the audio document to SD card via your computer.
8.2 Open the music library
8.2.1 Open and view the music library
Click Music in the main menu, then the system will automatic scan audio documents in your phone. Scanned audio documents be displayed in the list. After opening the music application, y can see 4 labels, musician, album, songs and playlist.
By pressing any view mode on the music interface, you can of the music list in various modes.
8.2.2 Delete songs from SD card
- Open the music application and view audio document list.
- Press and hold a song.
- Select Delete from the popping window.
- Click Ok in the opened dialogue box.
8.3 Open music document
8.3.1 Play music
- Open the music application and view audio document list.
- Click Musician/Album/Songs/Playlist screen, to find the music document to be played.
- Click the music document to play it.
8.3.2 Add a song to ringtone list
Press and hold the song in the music library. Click Add to R List in the opened menu (only applicable for Songs, Play List)
Or click the icon -> Add to Ringtone List when playing song
8.4 Use the playlist
You can create a playlist, to put your music documents into the songs set, in order to play songs in the order you set or in order.
8.4.1 Create playlist
- Open the music application and view audio document list.
- Select the music documents to be added to the playlist, pre and hold it until a shortcut menu pops up.
- Click Add to Playlist.
- Click Create Playlist.
- Name the new playlist.
- Click Save, and then the playlist is finished, with the select music documents in it.
8.4.2 Add songs to playlist
- Open Music, select the songs tag screen.
- Select the music documents to be added to the playlist, pre and hold it until a shortcut menu pops up.
- Click Add to Playlist.
- Select the target playlist.
8.4.3 Remove a song from playlist
- Open Music, select the songs tag screen.
- Click the playlist and view the songs in it.
- Press and hold the song to be deleted from the playlist un shortcut menu pops up.
- Click Delete from Playlist.
8.5 Play music
Open the music library, and select your desired music to listen 8.6 Control buttons of the music player
| Function | Instruction |
| Play/Pause | Click and Press |
| Previous/next song | Click and Press |
| Fast forward/Rewind | Press and hold |
| View playlist | Click and Press |
| Shuffle | Click and Press |
| Repeat | Click and Press |
| Volume | Press volume + or - |
8.7 Hide, activate and turn off the music player
Pressing the home button can hide the music player, and using application can continue you music playing shown in the status column indicates the music player is playing songs. Sliding down the status column enables you to view the details. Click press to return to the music player interface. Pressing enables pauzing of music playing, and pressing the home button enables you to return to the home screen.
9. Camera
Your phone is installed with an 13 mega-pixel camera for shot. You can take a picture of anything via the camera, and then picture as wallpaper or share pictures via message, Bluetooth, e etc. The phone saves the pictures you take into external SD c internal storage.
Note: in order to reach the best shooting effect, please clean a camera before shooting. Please respect rights and interests of ot and observe local laws, regulations and customs when taking a picture.
9.1 ake picture
- Main MenuCamera
- Aim the camera at the target object to adjust.
- Click to take a picture. The picture will be saved automatically.
Thumbnail of the latest photo you take is shown at the lower of the screen. Press the thumbnail to view the photos.
- Press icon, select Delete, to delete the photo.
- Press icon, select Play Slides, to play your photos as slide show.
- Press icon, select Edit, to edit photo
- Press icon, select Rotate Left/Rotate Right, to correct photo by rotation.
- Press icon, select Cut, to cut photo.
- Press icon, select Set Photo as, to set the photo as walls and contact photo.
- Press icon, select Details, to view details of the photo.
- Press icon, select Print, to save photo into PDF format.
9.2 Record video
-
Main Menu→Camera
-
Aim the camera to the target location/object, click to start to record video, click to stop video recording and automatically save the recorded video.
-
Press the home button to shut off the camera, and return the home screen.
The latest video thumbnail recorded is shown at the lower right the screen. Press the thumbnail and then you can:
- Press <, to share the video via message, Bluetooth, email,
- Press icon, select Delete, to delete the video.
-
Press icon, select Prune, to cut the video.
-
Press icon select Mute, then the video will be saved into camera and will be mute when being played.
- Press icon, select Details, to view the details of the video.
9.3 Panorama Mode
- Main menu→camera, press icon to switch to the panorama mode
- Aim the camera to the target location/object
- Press icon, and then move the phone to record panorama.
9.4 Set camera mode
When shooting a picture via camera mode, you can set the ca. On the view screen of the camera, the menu with View Mode Effect, Switch Camera, Beautify, Camera Settings are shown on top of the screen.
Click the icon to set photo size, quality, flash lamp mode, focus mode, white balance, etc., or to restore the default. Resize the screen and adjust focus via two fingers.
9.5 Set Camera Shooting Modes
On the camera, you can set vidicon.
In the camera viewfinder screen, the video quality, sound record mode and sound recording can be set by clicking icon and it can also select “restore default settings”.
Resize the screen and adjust focus via two fingers.
10. Picture Library
You can open the picture library to view your pictures album.
10.1 View picture album
Click Picture Album from the main menu and view the picture album.
The picture album can show pictures in SD card or the phone, including the pictures you take by the camera and download from internet or other devices.
10.2 Process pictures
10.2.1 View and browse pictures
- Click the picture library to open it and view picture album.
- Click an album in the list to open it, and then the picture album will be shown in the thumbnail format.
- Click a thumbnail to view it in large format.
10.2.2 View slides
- Open an album, and then the pictures in the album will be shown in the thumbnail format.
-
Click thumbnails in the album to view pictures.
-
Click icon →Play Slides, to play all the pictures in the album in the form of slideshow
10. 2.3 Edit pictures
When you view the picture, click icon ->Edit, to edit any picture.
10. 2.4 Rotate pictures
When you view the picture, click icon ->Rotate Left, to rotate the picture 90 degrees to left
When you view the picture, click icon ->Rotate Right, to rotate the picture 90 degrees to right
10. 2.5 Crop picture
When you view the picture, click icon ->Crop, to crop the picture
10. 2.6 Set a picture to be wallpaper or a contact's photo
-
For viewing pictures, click thumbnails of “Camera” album in the gallery.
-
Click icon, pop up the menu options, click "Set the Picture to be".
-
Select Wallpaper in the popping window to set the picture standby wallpaper, and select the contact icon to set the picture be the contact's photo.
10.2.7 Details
When you view the picture, click icon ->Details, to view the picture size, manufacturer, shooting time, etc.
10.2.8 Print
Click icon:→Print, to save the picture in the form of pdf.
10.2.9 Delete picture
Click icon:->Delete, to delete the picture.
10.3 Share picture
-
Open the picture to be shared from the picture library.
-
Click the share icon on the upper right to share the picture others via message, Bluetooth, email and other third party.
11. Other Applications
11.1 Clock
-
Enter the Clock from the main menu, and click the clock enter the clock setting interface.
-
Select the existing clock in the list to enter the editing into or click icon at the bottom of the screen to enter the editing interface
-
Set related parameters and slide rightward for activating the clock.
11.2 Calendar
-
Enter Calendar from the main menu
-
Click the dropdown button at the upper left corner to view week, month views, schedules etc.
-
Click icon, to create an event, search, refresh, show calendar or set the calendar, etc.
11.3 Calculator
-
Enter the calculator from the main menu.
-
Enter numbers and select operators.
-
Click equal sign.
-
Slide the button leftward to enter “Senior Panel”, to do n calculation work.
11.4 Manage documents
The file manager enables you to view and manage files and f in the phone and memory.
File management:
View and manage files in the external SD card and internal sp Touch icon : lightly to pop up submenus:
- Click icon : search folders, songs, videos, APK and other information required to be viewed.
- Click icon : create a new folder, edit name and click "OK
- Press icon to pop out menu options, click “Select Files or Folders” and select files and folders, and then operations of sh copy and cutting can be carried out.
- Press icon to pop out menu options, click “Sorting”, the modes of sorting include type, name, size and date.
- Press icon to pop out menu options, click “Show Hidden Files/Not Show Hidden Files”.
11.4 Stop watch
- Click Clock in the main menu and select stop watch.
- Click the start icon for timing.
- Click Stop for ending timing.
- Click Times-based Timing for timing several times..
- Click Reset to clear timer.
11.6 Sound recorder
Enter the sound recorder from the main menu interface.
-
Make the phone and microphone close to your mouth, and to record sound.
-
Click to stop recording.
- Click playback recorded sound file.
- Click icon to set the sound quality and recording mode.
- Long press a file in the sound record file list until the ch is showed, click icon to delete such sound record file.
11.7 Flashlight
Pull down the status bar, click icon on the upper right corner, click “Torch” in the drop-down menu, and then it can turn or torch.
11.8 FM Radio
Enter Radio from the main menu(it is necessary to fit in the earphone as antenna for operating the radio)
-
Click to turn on the radio.
-
Click to turn off the radio.
-
Click to enter the radio station list interface searched by the radio.
-
Click to search radio stations previous to the current radio station frequency band.
-
Click icon to fine turn 0.1 MHz of the current radio frequency forward.
-
Click ☆ to add Favorite or cancel Favorite
-
Click icon ➤ to fine turn 0.1 MHz of the current radio frequency backward.
-
Click to search radio stations following the current radi station frequency band
-
Click 🔍 to switch the headset and loudspeaker.
-
Click ☐, and then the following list will present:
a、 Start Sound Recording: record sound with the radio
b、The saved recording: enter to play list.
12. Settings
You can use Set Application Configuration to set parameters of phone
Click Set from the main menu
12.1 WLAN and internet
1、WLAN
a. Click WLAN to enter WLAN interface, and then slide Switch On/Off WLAN.
b. After switch on WLAN, you can view WLAN connections nearby, and after you log in a WLAN account, you can connect phone to internet via the WLAN.
c. Click : to select Add Network, Existing Networks, Refresh, Advanced, etc.
2、Turbo Download
a. Click Turbo Download to enter Turbo Download, slide Switc On/Off Turbo Download.
b. Click to view the help.
3、Bluetooth
a. Click Bluetooth to enter the Bluetooth interface, and then switch On/Off button to switch on or off the Bluetooth.
b. After switching on the Bluetooth, you can search Bluetooth hotspots nearby, and after matching Bluetooth, you can transfer or receive from documents, photos, etc. another Bluetooth-bearing device.
c. Click : to refresh and rename the device, and show documents received.
4、SIM
a. Switch on/off SIM card: after SIM card is fit in, the SIM operator can be shown and the SIM card can be switched on/Note: when 2 SIM cards are fit in, the 2 SIM cards cannot forbidden simultaneously. When 1 single SIM card is fit in, the card cannot be forbidden.
b. Preferred SIM card: the SIM card for mobile data networks.
5、Data flow consumption
a. View mobile data network flow consumption by every application module of SIM 1 and SIM 2
b. Click ☐: to set Limit Background Dataflow, Display WLAN Data Flow, Prohibit Network, Mobile Network, etc.
6、More
a. Flight mode
Switch on/off the flight mode by sliding left/right the Switch.
b. Network sharing and portable hotspots
After entering the Network Sharing and Portable Hotspots interface you can use the phone as a portable WLAN hotspot, to share data connection with several devices simultaneously.
You can connect the phone with a USB cable, to share data connection of the phone with PC via USB.
Bluetooth-based Network Sharing enables you to use the phone Bluetooth-based sharing hotspot, to share data connection of the phone with another device.
c. VPN
Note: before using VPN, set screen lock PIN or password.
Click the icon + on the upper right, add new VPN, enter nar server address, user's name and password, and then connect the phone to VPN.
After successful connection, you can log in websites of foreign countries.
Note: you need to apply VPN server address, user's name and password by yourself.
d. Mobile network
After entering the mobile network interface, you can switch on/mobile data flow and data roaming, set the access point and s-network operator, and select preferred network type.
Access Point Name: view and add access point.
Network Operator: select network operator.
Preferred network type: set SIM card network mode
12.2 Device
- Display
The displays of the device can be set.
Luminance: adjust screen luminance.
Automatic Luminance Adjustment: slide the switch to switch on/Screen Luminance, the screen luminance can be optimized as po the environmental light changes after the Screen Luminance is switched on.
MiraVision: to set Standard, Gorgeous and Customize, etc.
Wallpaper: to set desktop wallpaper
Hibernate: delay before auto screen lock.
Auto-rotate Screen: rotate screen contents to keep current direction
You can also set interactive screensaver and font size.
- Warning tone and notice
In this interface, you can set sound of the device
- Smart-aid
Navigation bar: combined mode of activate/deactivate “navigation bar can be hid” and be select virtual navigation bar.
Activate smart aid: relevant functions such as smart screen on gesture operation can be set when it is activated.
Distant operation: activate/deactivate distant album operation and distance standby interface switching.
The method for viewing distant operation function: open the corresponding menu and consult the functional tip popped up.
- Application
In this interface, you can view and manage applications in the phone
- Storage and USB
In this interface, you can view and manage internal and extern memories of the phone, and can view the following details:
Total internal space
Available space of the internal space
Total SD Capacity
Available SD Space
Uninstall SD Card/Install SD Card
- Battery
In this interface, you can switch On/Off Standby intelligent power saving and view battery use information.
- Internal Memory
On this interface, it can also view mobile phone function, total memory, average amount of use, available capacity and memory used by each application.
- User
This interface can switch the visitor mode and add the user.
12.3 Personal
1. Location
Activate or deactivate position information. There are modes of high precision, power saving, limited to device position informat for selection when it is activated.
2. Security
Set the related safety options for the phone.
a. Device Safety
Screen lock modes: use pattern, voice, PIN or password to lock screen
Display Pattern: This menu appears only when the screen lock mode is set as pattern. Slide the switch to switch on/off this After this function is switched off, sliding on the screen lock interface is not accompanied with the pattern shown. After this function is switched on, sliding on the screen lock interface is accompanied with the pattern shown.
Auto Lock: the screen will automatically lock as per the autom lock time you set
Real-time lock by power button: Slide the switch to switch on/ this function. After this function is switched off, pressing the p key cannot lock the screen in real time
Lock screen message: the message set by you will be displayed, the screen lock interface when it is activated.
b. Encryption
Encrypt Phone: Encrypting the phone requires over 80% power the battery. If the power in the battery is below 80%, a note requiring you to charge your phone and then retry will pop up the interface.
c. SIM card lock mode
Set SIM card lock: switch on or off SIM card lock, and chair card PIN
d. Password
Display password: select to display or hide the password.
e. Device management
Set Manager: view or deactivate device manager.
Unknown source: allow applications not from the non-market to
installed. Application other than those provided by App Store is allowed to install after it is deactivated.
Anti-theft: anti-theft can be activated/deactivated. When this function is activated, you can send remote control instruction SI via the emergency contact mobile phone to realize remote contr the phone is lost.
f. Credential storage
Storage type: default hardware support
Trusted credential: display trusted CA certificate
Install from SD card: install the certificate encrypted from SD
Erase Credential: erase all credential saved and reset other passwords.
g. Advanced
Trusted agent: view or deactivate trusted agent.
Screen fixing: the device can always show the current screen.
Applications entitled to view use situations: third party application entitled to view use situations.
3. Account
Add Account function enables you to add google or email acc
- Language and input method
Set the system language and input method.
Language: select system language.
Spell checking tool: Android default spell checking tool.
Personal dictionary: add or view any words and phrases you see Keyboard and input method: set current input method.
5. Backup and reset
Factory data reset: erase all data on phone.
12.4 System
- Date and time
Set date and time
a. Automatically confirm date and time: automatically confirm date and time based on internet data, and can be switched on/b. Automatically determine the time zone: use the time zone provided in the network (supported in the network) to support opening/closing.
c. Set date: after switching off the automatic confirming date a time function, you can set date manually.
d. Set time: after switching off the automatic confirming date a time function, you can set time manually.
e. Select time zone: after cancelling the automatic confirming time zone function, you can set time zone manually.
f. Adopt 24-hour format: after check this option, the 24-hour format will be adopted.
- Scheduled Power-on/off
After setting automatic power-on/off time, the phone will automatically power on/off based on the set time.
- Barrier-free mode
Large font: adjust font size.
Zoom gesture: switch on/off zoom gesture.
In addition, there are some options of automatically rotating scr speaking out passwords, touching, pressing and holding for delay opening and closing color correction and the like.
- Print:
When no plug-in is installed, it will prompt no service installed when the printing service plug-in is installed, it will show the and automatically search printer upon activating.
- About phone
System software upgrade: you can use this function to update mobile version.
Status: view current battery status, battery level, SIM Card status, IMEI, IP address, Bluetooth address, network, serial number and boot time, etc.
Legal information: view related legal information.
Model number: phone model number.
Android version: Android version of the phone.
Kernel version: version of the kernel of the phone.
Version number: the software version number of the phone.
13. Play Store
On the main screen, tap the shop icon into the application. W you first time enter to Play store, you need to create a new
you can follow the prompts to complete the creation process. You use the account to enter Play store home page, you can variety of mobile phone software, you can choose according to needs and install it to your phone. You can switch APP & Entertainment to search software..
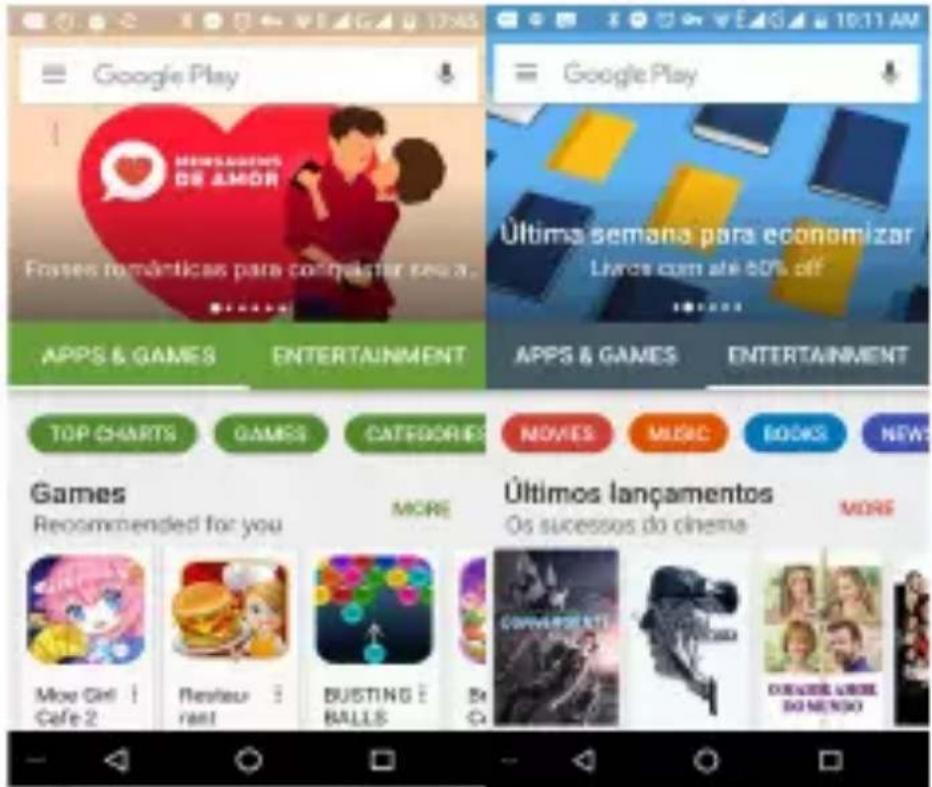
In the Play Store screen, click an icon on your favorite software enter the details interface:
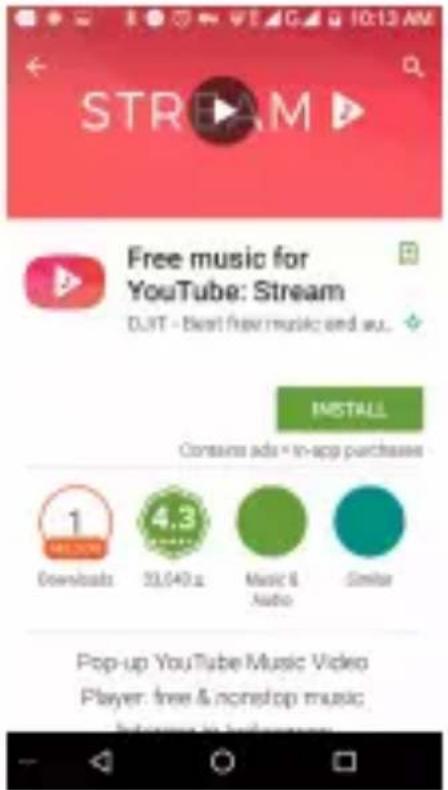
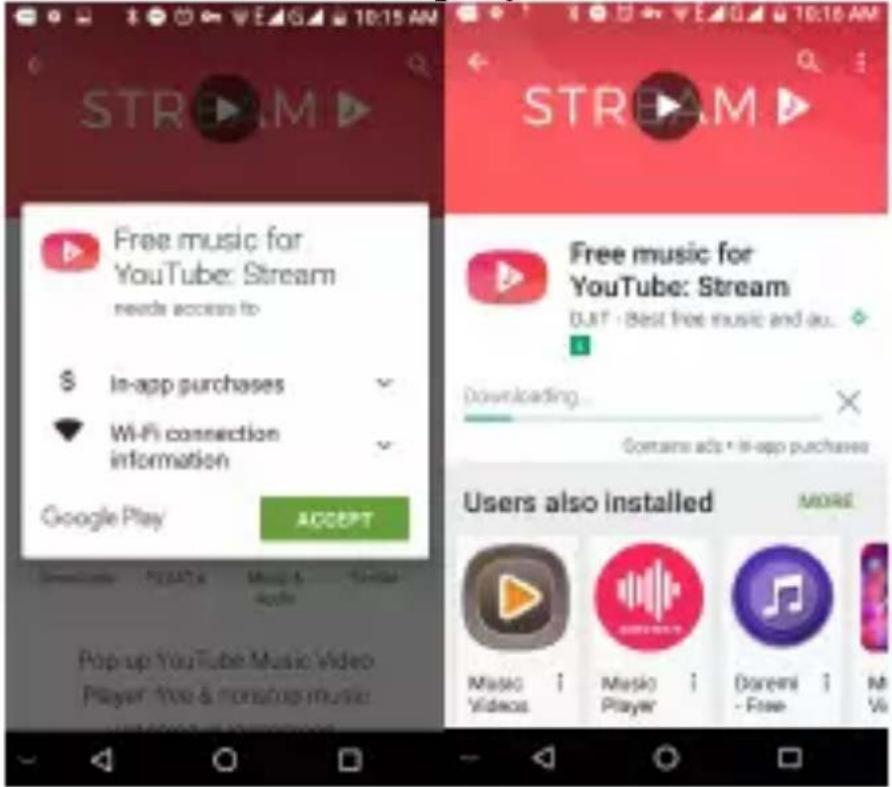
Click to install the selected software, application permissions in the popup choose to accept, the phone automatic starts to download the software, if you want to cancel the do click next to the download progress bar.
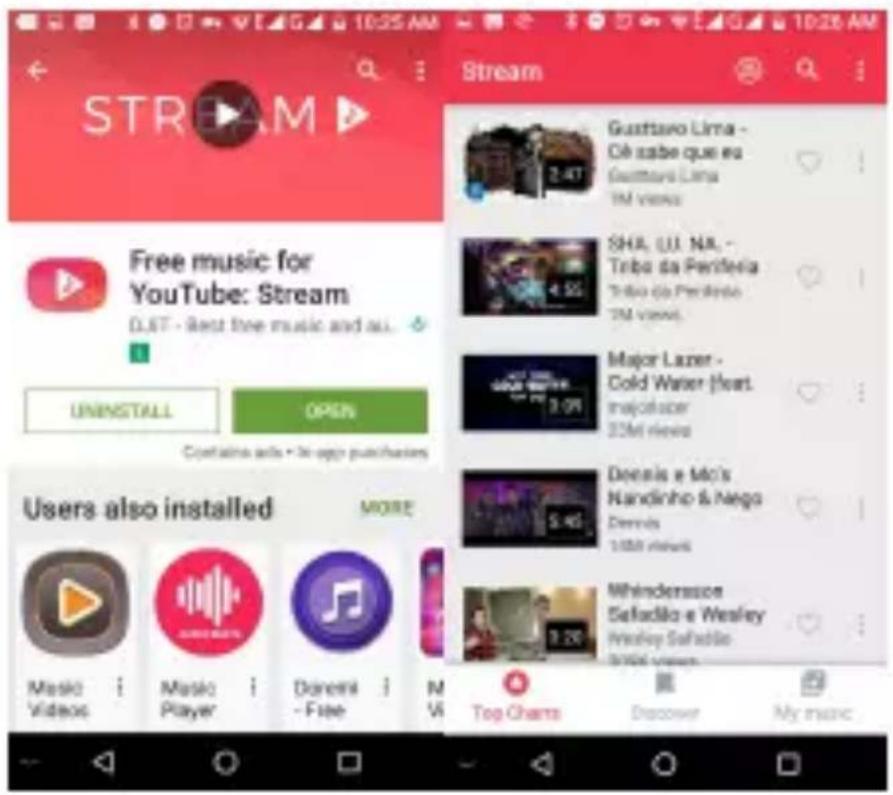
After the download is complete, click Open, you can start to your newly downloaded this software.
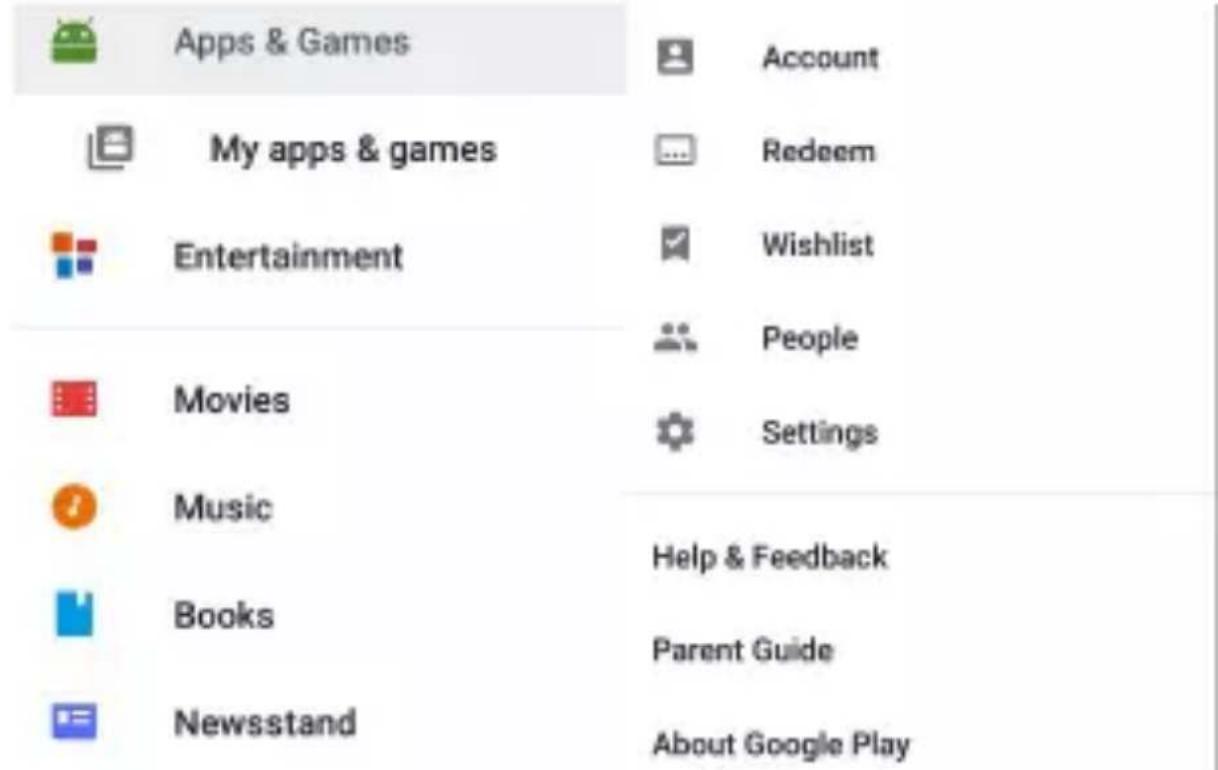
In the Play Store homepage, click to bring up the following menu:
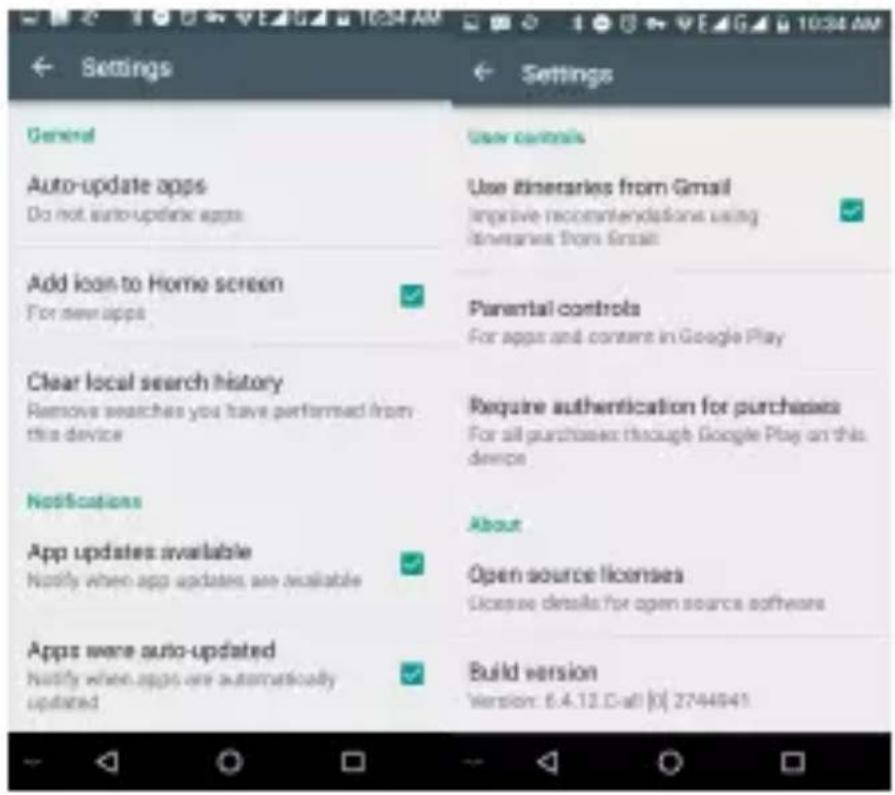
Click "Settings", the play store can be set up in detail, the m as follows:
Common Problems & Solutions
If an exception occurs while using your phone, please refer the following table to troubleshoot
| Common problems | The causes | The solutions |
| Poor signal | Using the mobile phor in poor reception area such as nearby buildin or basement, the radic waves cannot effective communicate; | Try to avoid |
| Using the mobile phor in the call dense peri such as commute time line congestion caused by the inability of the calls. | Try to avoid | |
| Associated with the launch of the base station network built | Can ask Internet service providers provides service are | |
| near and far | map | |
| Echo or noise | Due to poor network trunk, is a regional problem | Hang up and redial trunk lines may replace good one. |
| Some regional bad line | ||
| Standby time shorter | Standby time is related to the network system setting | Turn off the mobile phone in the poor reception area. |
| The battery need to replaced, please replac new battery. | Please replace new battery. | |
| The phone will continue to search base station will use a lot of batte power, causing the standby time become shorter. | Please move to strong signal place turn off the phone. | |
| Unable to boot | The battery power is exhausted. | Check the battery power or charge it. |
| SIM card error | SIM card is damaged | Contact your network service supplier. |
| SIM card not installed | Make sure SIM Car has been installed. | |
| SIM card metal surfac have dirt | Use clean cloth to brush the SIM card metal contact point | |
| unable to connect the network | SIM card is invalid | Contact your network service supplier. |
| Beyond the GSM or 30 network service area. | Ask your network service supplier the service area. | |
| The signal is weak | Please move to the strong signal place to retry | |
| Calls unable to call | set up the call barring function | cancel the call barr function |
| set up the fixed dial function | cancel the fixed dia function. | |
| PIN error | input incorrect PIN Co in three times | contact your network service supplier. |
| Unable to charge | Battery or charger damaged | need to replace new battery or charger |
| Charge in lower than -10 °C or higher than 55°C environment | change the charging environment | |
| Bad contact | check whether the plug connection well | |
| Unable to add phonebook record | Phonebook memory is full | delete some part of phonebook record. |
| unable to set up some function | Network provider does not support this feature, or you did not apply for this function | contact your network provider. |
- Safety Information
- Safety Specifications and Instructions for Battery of Mobile Phone
- Recommended Use Considerations
- Danger warning
- Warnings
- Precautions
- Use and maintenance of mobile phone
- Import Instructions
- Pay attention to flight safety
- Pay attention to the surrounding environmental safety
- Pay attention to the traffic safety
- Pay attention to radiated interference
- Pay attention to the interference with the medical facilities
- Pay attention to the storage environment
- Attentions:
- Introduction
- Insertion and removal of SIM Card
- Insertion and removal of Memory Card
- Remove and install the battery
- Battery Charging
- Basic Operation
- Power On/Off Phone
- Screen locking and unlocking
- Touch methods
- Press:
- Click and press:
- Scroll:
- Drag and drop:
- Double click:
- Quick slide
- Query of IMEI number
- Main Keys
- Screen sleep and wake-up
- Main screen
- Add items to main screen
- Move items on main screen
- Delete items from main screen
- WLAN setting
- Delete WLAN network
- Phone Operating Status
- Management notice
- Dial
- Dial pad:
- Answer or Refuse to answer a call
- Refuse via message
- Mute during call
- Switching between current calls
- Call options
- Call records
- Make an emergency phone call
- Contacts
- New contact
- Backup Contacts
- Edit or delete contact
- Add contact into list of favorites
- Delete favorite contact
- Use contact group function
- Message
- SMS
- Send SMS
- Create and send MMS
- Read and reply message
- View message details
- Transfer Message
- Delete Message
- Delete all messages from and to a contact
- Delete a message
- Change message settings
- Set your email account
- Read email
- Edit and send email
- Add signature to email
- Add email account
- Edit email account
- Chrome
- Music
- Copy audio document to your phone
- Open the music library
- Open and view the music library
- Delete songs from SD card
- Open music document
- Play music
- Add a song to ringtone list
- Use the playlist
- Create playlist
- Add songs to playlist
- Remove a song from playlist
- Play music
- Hide, activate and turn off the music player
- Camera
- ake picture
- Record video
- Panorama Mode
- Set camera mode
- Set Camera Shooting Modes
- Picture Library
- View picture album
- Process pictures
- View and browse pictures
- View slides
- 2.3 Edit pictures
- 2.4 Rotate pictures
- 2.5 Crop picture
- 2.6 Set a picture to be wallpaper or a contact's photo
- Details
- Other Applications
- Clock
- Calendar
- Calculator
- Manage documents
- File management:
- Stop watch
- Sound recorder
- Flashlight
- FM Radio
- Settings
- WLAN and internet
- 1、WLAN
- 2、Turbo Download
- 3、Bluetooth
- 4、SIM
- 5、Data flow consumption
- 6、More
- Device
- Personal
- Location
- Security
- a. Device Safety
- b. Encryption
- c. SIM card lock mode
- d. Password
- e. Device management
- f. Credential storage
- g. Advanced
- Account
- Backup and reset
- System
- Play Store
- Common Problems & Solutions
Brand : Nomu
Model : S10
Category : Smartphone