PRO-SD400B - Lighting GVM - Free user manual and instructions
Find the device manual for free PRO-SD400B GVM in PDF.


| Product Type | Photography Fill Light |
| Model | GVM PRO-SD400B |
| Brand | GVM |
| Light Dimensions (mm) | 436 × 150 × 265 |
| Controller Dimensions (mm) | 136 × 133 × 335 |
| Light Net Weight (kg) | 5.0 |
| Controller Net Weight (kg) | 2.6 |
| Maximum Power Consumption (W) | 400 |
| Power Supply | AC 100-240V or DC 24-36V (V-mount battery) |
| Color Temperature Range (K) | 2700 – 6800 |
| Color Rendering Index (CRI) | ≥97 |
| Control Modes | DMX (8bit/16bit), Wireless Remote, Light Body, APP Bluetooth Mesh |
| Dimming Method | Stepless (0-100%) |
| Number of LEDs | 1 COB LED |
| Cooling System | Heat Sink + Fan (adjustable) |
| Housing Material | Aluminum Alloy |
| Mount Type | Bowens Mount |
| Light Effects | 12 FX: Lightning, CCT Cycle, Candle, Bad Bulb, TV, Paparazzi, Explosion, Breathing Light, Strobe, Flame, Firework, Welding |
| Wireless Control | APP (iOS/Android) via Bluetooth Mesh Networking |
| DMX Support | Yes, 8bit and 16bit precision |
| Package Includes | Light, Controller, AC Cable, Controller Cable, Standard Cover, Protective Cover, Controller Clip, Magic Cable Ties, Carrying Case, Manual |
| Maintenance | Clean with damp cloth; disconnect power before cleaning |
| Safety Precautions | Not waterproof; avoid corrosive liquids; ensure stable placement; disconnect when not in use |
Frequently Asked Questions - PRO-SD400B GVM
User questions about PRO-SD400B GVM
0 question about this device. Answer the ones you know or ask your own.
Ask a new question about this device
Download the instructions for your Lighting in PDF format for free! Find your manual PRO-SD400B - GVM and take your electronic device back in hand. On this page are published all the documents necessary for the use of your device. PRO-SD400B by GVM.
USER MANUAL PRO-SD400B GVM
natural_image
Line drawing of a GVM radio telescope with lens and control panel (no text or symbols)GVM
Great Video Maker
GVM-PRO-SD400B
GVM-PRO-SD500B
CONTENTS
Product introduction Page 1
Disclaimers Page 1
GVM-PRO-SD400B Product parameter Page 2
GVM-PRO-SD500B Product parameter Page 3
Product structure diagram Page 4
Installation method Page 5\~9
Description of product control keys --Page 10
Function introduction & instructions for use --Page 11\~12
APP control Page 13\~14
Use and save Page 14
Simple faults and troubleshooting Page 15
Packing list Page 16
Precautions Page 16
PRODUCT INTRODUCTION
Welcome to use " GVM-PRO-SD400B/GVM-PRO-SD500B", this product is designed for senior photography enthusiasts, The product is suitable for live broadcast / outdoor / film shooting / studio photography, It can also be used for YouTube video shooting.
① It has high-definition COB beads, which help to restore and enrich the color of objects, providing you with natural and vivid shooting effects.
② APP control, can be controlled through your iOS and Android smart mobile device connection; support Bluetooth Mesh networking, you can group control with GVM brand devices that support Mesh networking.
③ With standard DMX interface, DMX control mode of low precision 8bit and high precision 16bit can be realized.
④ 3 lighting modes, CCT mode, light source matching mode, light effect Mode.
We firmly believe that the correct use of this product, for your shooting work will certainly have a great help. Before using the product, we strongly recommend that you read the following user guide carefully.
DISCLAIMERS
- Before using this product, please read the text carefully to ensure that the correct operation of the product has been carried out. Failure to follow and not following the instructions and warnings in this document may cause harm to you and others around you, or even damage the product or other surrounding items.
- By using this product, you are deemed to have carefully read the disclaimer and warning, understand and acknowledge all the terms and contents of this statement, and promise to take full responsibility for the use of this product and the possible consequences.
- Design and specifications are subject to change without notice.
GVM-PRO-SD400B PRODUCT PARAMETER
Brand: GVM
Product Name: Photography light
Product type: photography fill light
◆ Function control: multiple light effect modes, high display index lamp beads
Control mode: DMX, wireless remote control, light body control, APP Bluetooth MESH network control
Lumen: Bare light ----lux/1m;
Plus standard cover ----lux/1m
◆ Number of lamp beads: 1 (COB lamp beads)
◆ Color rendering index : ≥97
Color temperature: 2700K\~6800K
Light adjustment method: Stepless adjustment
Product net weight: 5KG
Maximum power: 400W
Power supply mode: AC&Battery (V-mount battery)
AC input: 100V\~240V
DC input: 24V\~36V
Product Size (mm): 436×150×265
◆ Controller size (mm): 136×133×335
◆ Controller net weight: 2.6KG
Product material: Aluminum alloy
- Heat dissipation: Heat sink + fan
◆ Commodity origin: Huizhou, China
GVM-PRO-SD500B PRODUCT PARAMETER
Brand: GVM
Product Name: Photography light
Product type: photography fill light
◆ Function control: multiple light effect modes, high display index lamp beads
Control mode: DMX, wireless remote control, light body control, APP Bluetooth MESH network control
Lumen: Bare light ----lux/1m;
Plus standard cover ----lux/1m
◆ Number of lamp beads: 1 (COB lamp beads)
◆ Color rendering index : ≥97
Color temperature: 2700K\~6800K
Light adjustment method: Stepless adjustment
Product net weight: 5KG
Maximum power: 500W
Power supply mode: AC&Battery (V-mount battery)
AC input: 100V\~240V
DC input: 24V\~36V
Product Size (mm): 436×150×265
◆ Controller size (mm): 136×133×335
◆ Controller net weight: 2.6KG
Product material: Aluminum alloy
◆ Heat dissipation: Heat sink + fan
◆ Commodity origin: Huizhou, China
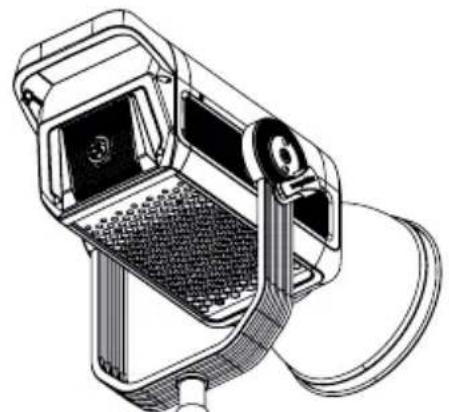
PRODUCT STRUCTURE DIAGRAM
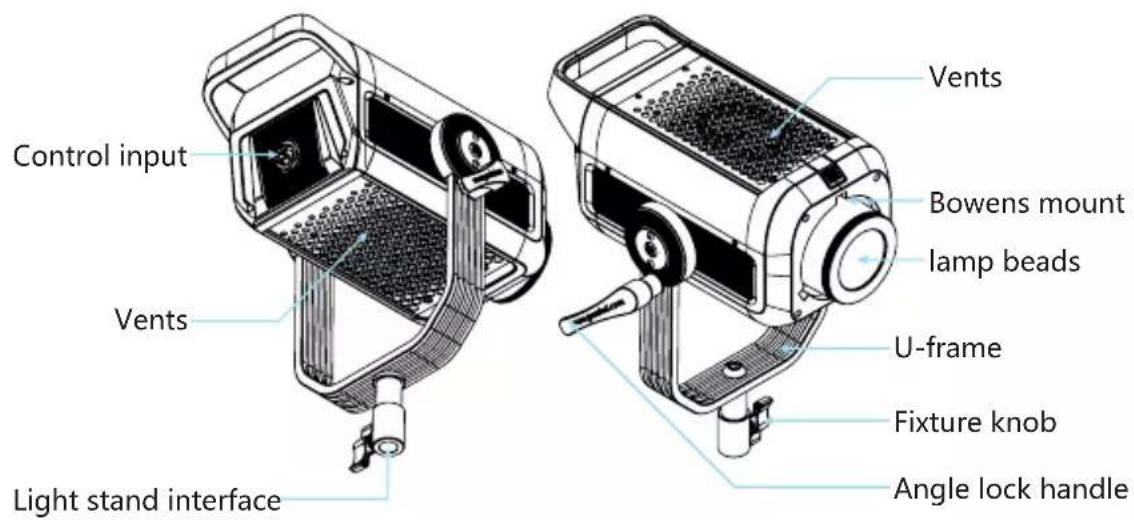
灯
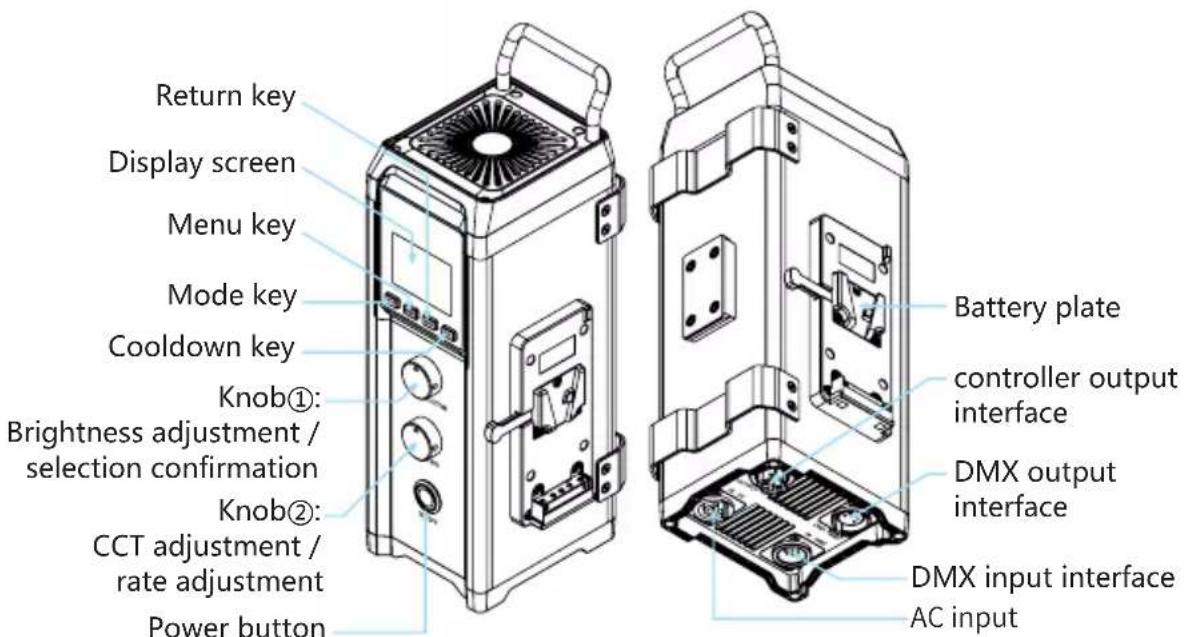
控制器
INSTALLATION METHOD
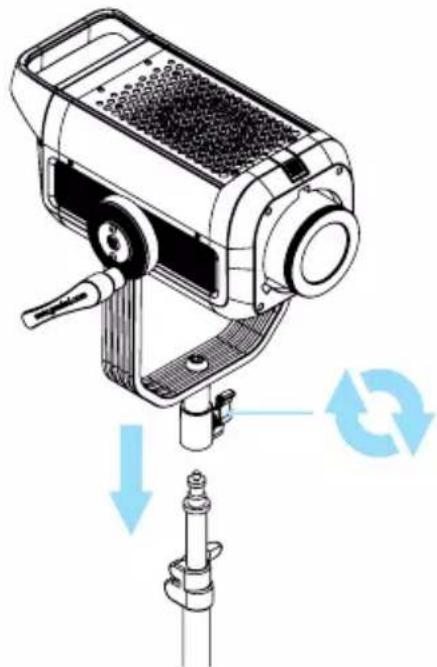
1 Loosen the light stand fixing knob, install the light to the light stand as shown below, then tighten the light stand fixing knob.
natural_image
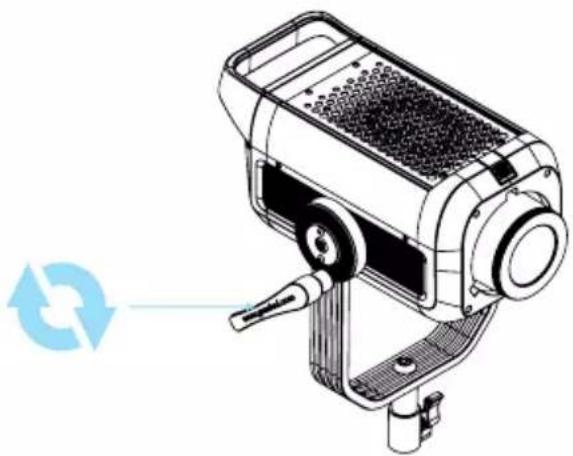
Technical illustration of a manual washing machine with a rotating shaft and mechanical components (no text or symbols)② Loosen the angle locking handle, adjust the angle of the spotlight, z then turn the angle locking handle tightly.
natural_image
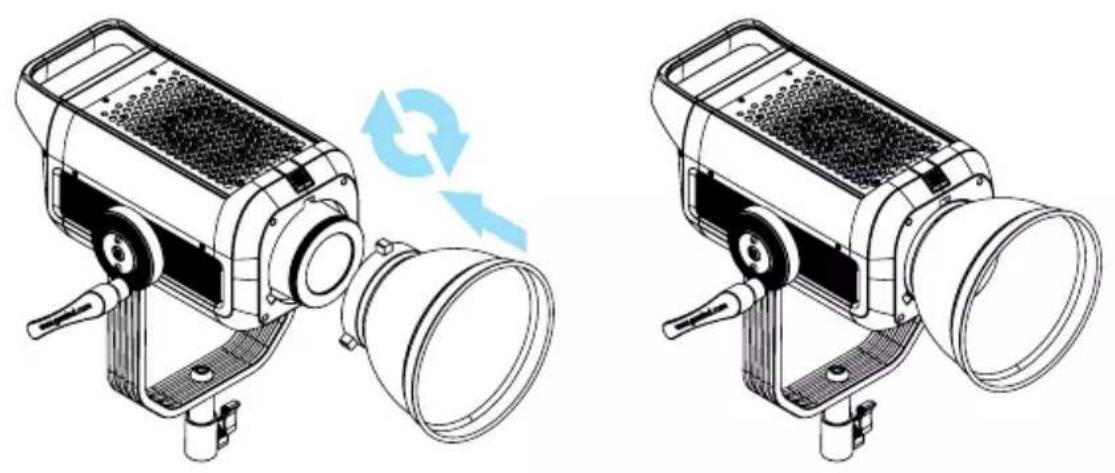
Technical illustration of a mechanical device with a circular arrow indicating refresh or recycling (no text or symbols present)3 Insert the Bowens bayonet of the standard cover into the Bowens bayonet of the lamp correspondingly, and then turn it clockwise lightly. you can install the standard cover to the light. Push the Bowens removal catch upward to the right while rotating the standard cover counter clockwise to remove the standard cover.
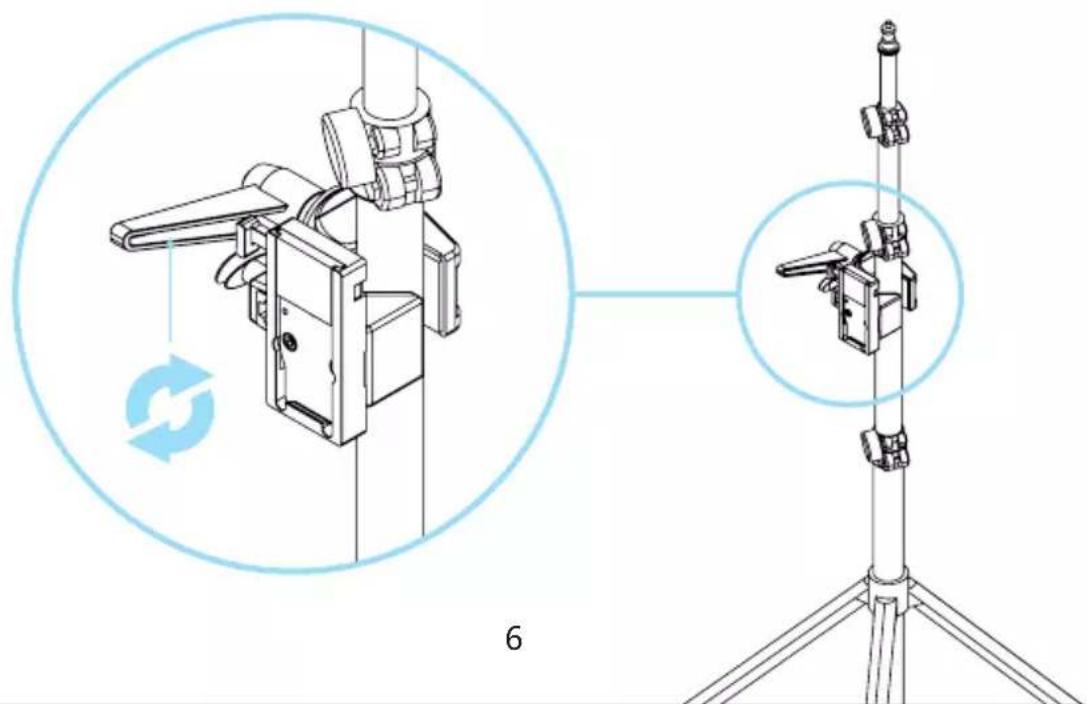
4 Install the controller fixing clip on the light stand as shown in the figure below.
natural_image
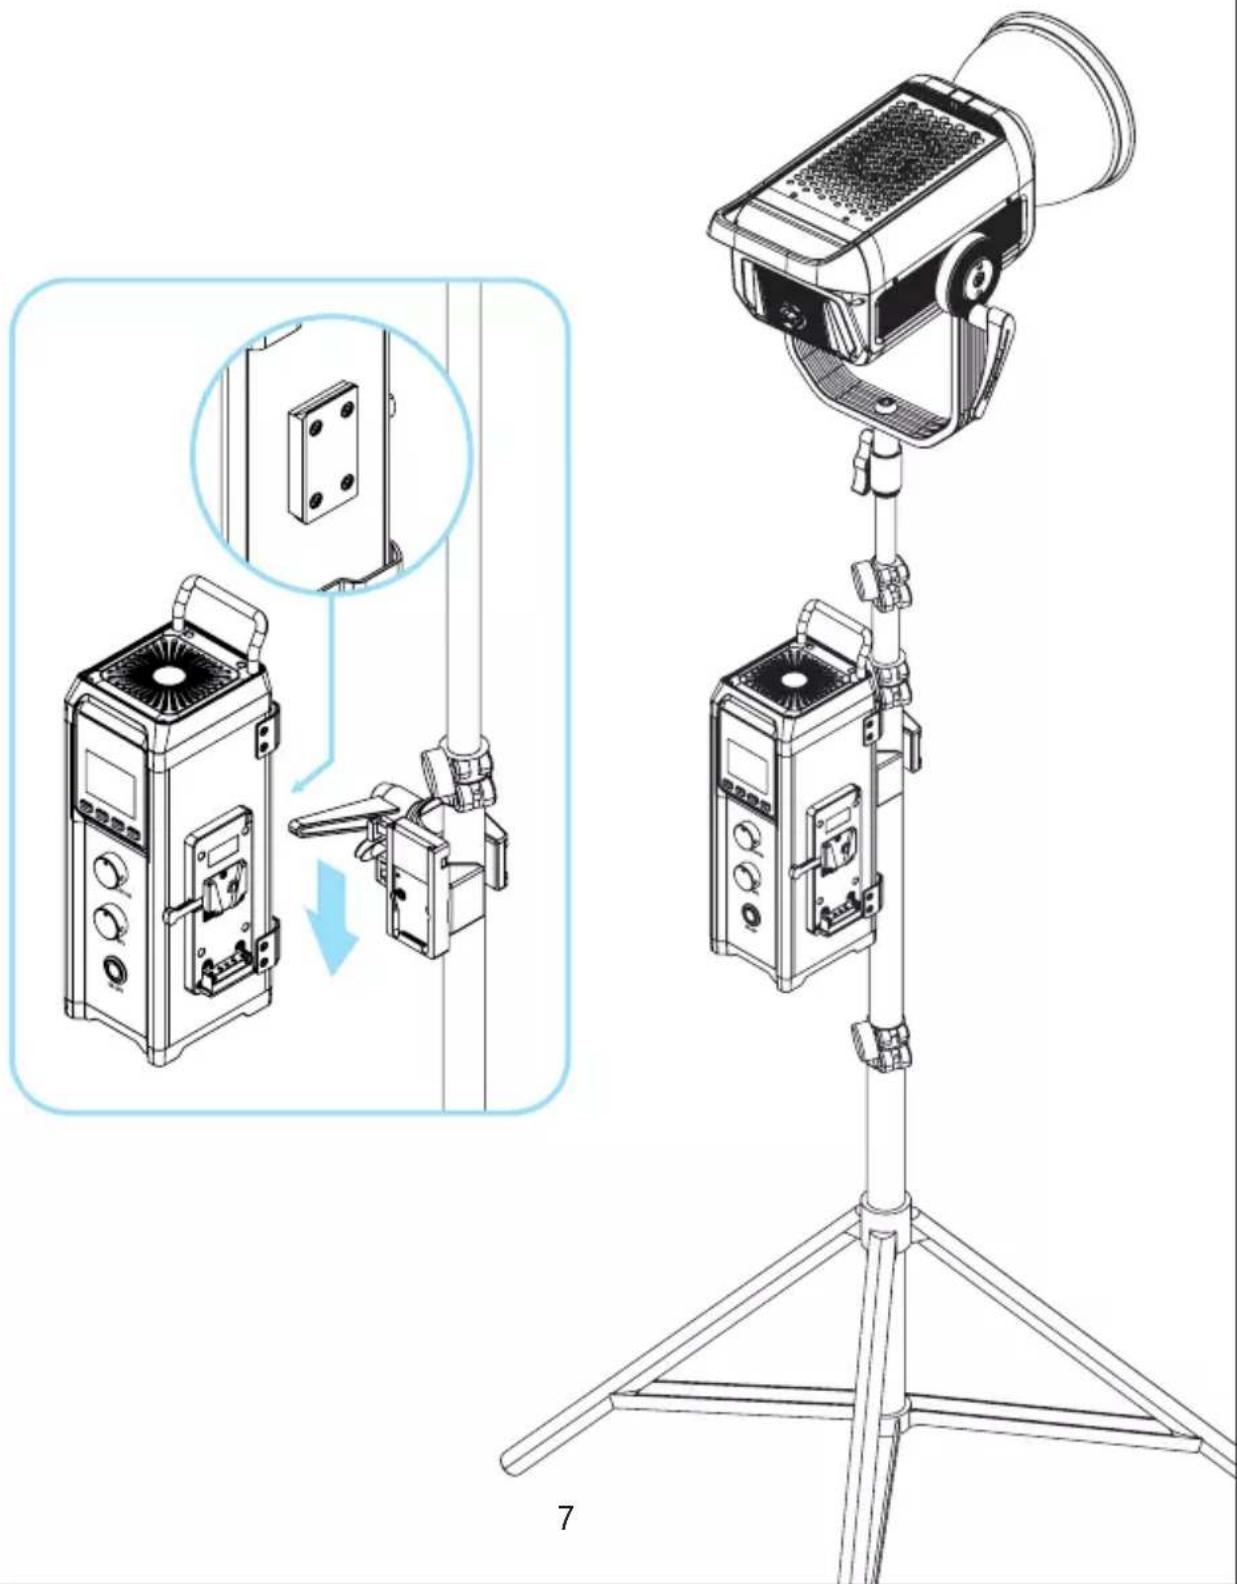
Technical diagram of a mechanical device with two views: top shows a mounted device, bottom shows a tripod-mounted device (no text or symbols present)5 Follow the steps shown in the figure below to install the controller on the controller fixing clip first.
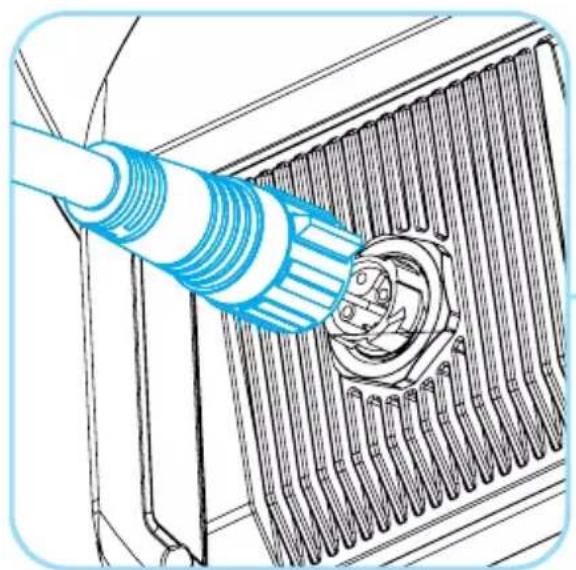
6 As shown in the figure below, use the control wire to connect the light and the controller.
natural_image
Diagram of a blue cable inserted into a heat exchanger with cooling fins (no text or symbols)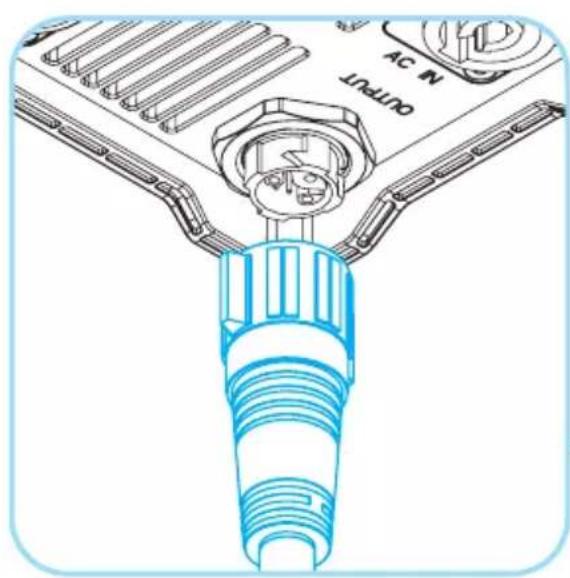
natural_image
Technical diagram of a connector with blue plastic cable and labeled ports (no text or symbols beyond labels)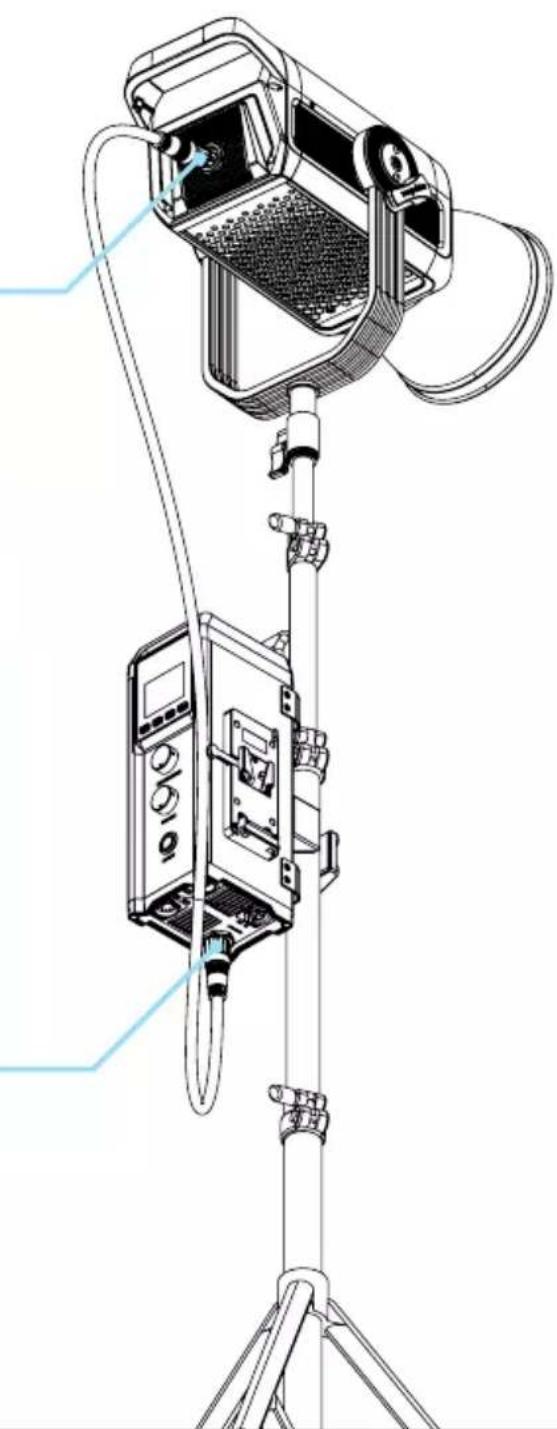
natural_image
Technical line drawing of a handheld device mounted on a tripod stand, showing internal components and wiring (no text or symbols)6 There are two power supply modes to choose from:
①Use the AC power cord for power supply.
② Use two V button batteries for power supply.
(Batteries must be inserted into both battery slots to provide power, and the power is halved when using batteries.)
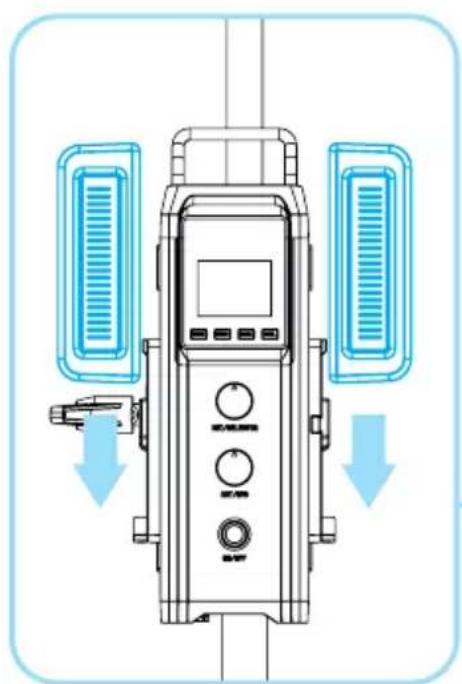
natural_image
Diagram of a medical or laboratory device with two blue ventilation grilles and directional arrows indicating flow or movement (no text or symbols present)Battery slot
(Battery needs to be purchased separately)
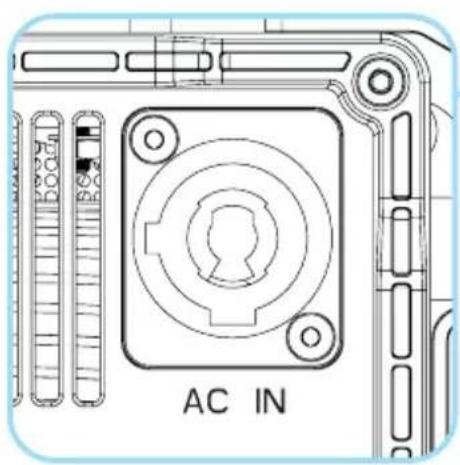
Power input interface
natural_image
Technical line drawing of a handheld device with mesh base and cable (no text or symbols)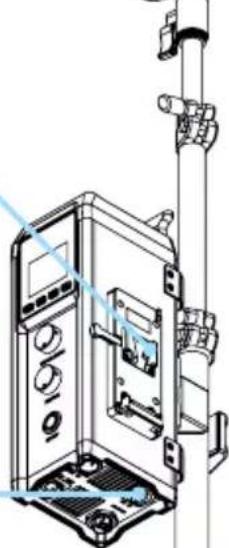
natural_image
Technical line drawing of a computer tower case with visible internal components and wiring (no text or symbols)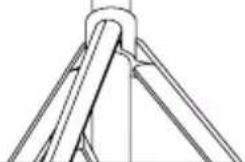
natural_image
Pure mechanical diagram of a triangular support structure without any text, numbers, or symbolsDESCRIPTION OF PRODUCT CONTROL KEYS
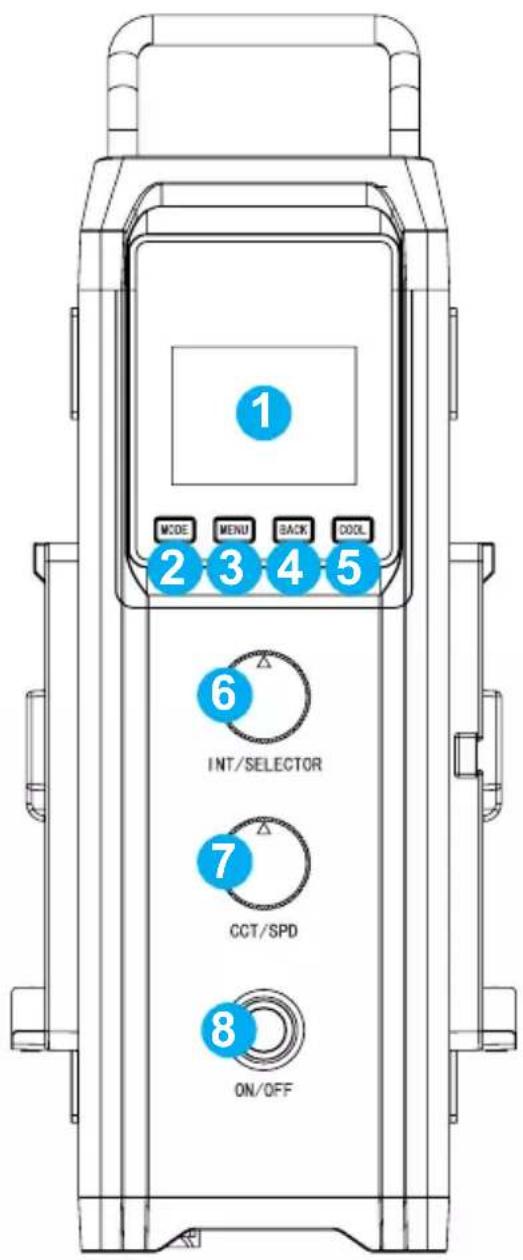
1 Display: Display current settings, modes and parameters.
② Mode key: light mode switch button.
3 Menu key: press this key to enter the settings menu.
4 Return key: Press this key to return to the previous level menu.
5 Cooling key: start a large air volume cooling until the temperature is reduced to a touchable temperature.
6 Knob ①: INT/SELECTOR multi-functional coding knob, by pressing or rotating can be"Select/Brightness" adjustment.
7 Knob ②: CCT/SPEED adjustment, by rotating it, you can make the adjustment of color temperature and light effect change rate.
8 Power ON/OFF button.
FUNCTION INTRODUCTION & INSTRUCTIONS FOR USE
① MENU :
DMX SETTINGS (Figure 1):
Set the DMX parameters, [address (001-512)] and configure the mo mode [(8bit/16bit)].
DIM CURVE (Figure 2):
Set the dimming curve, [linear / logarithmic / exponential / S curve].
WL SETTINGS (Figure 3):
RF channel settings, RF switch, Bluetooth switch, Bluetooth reset.
STUDIO (Figure 4):
Set the studio mode and non-studio mode. Studio mode: power off and turn the light back on, restore the memory brightness value before the power failure.
Non-Studio mode: turn on the light again after power failure, restore the default brightness value of factory settings.
FREQUENCY SETTINGS (Figure 5):
Set the dimming frequency.
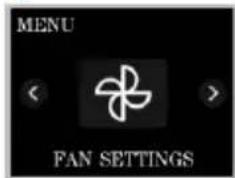
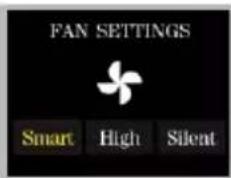
FAN SETTINGS (Figure 6):
set the cooling fan mode.
Figure 1
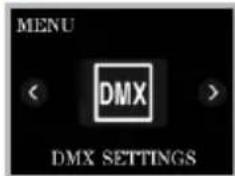
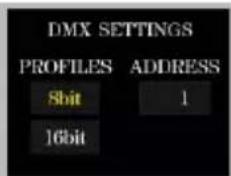
Figure 2
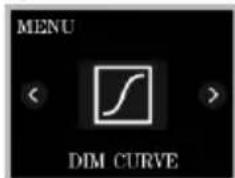
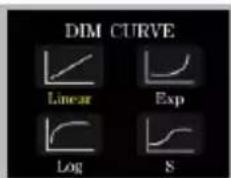
Figure 3
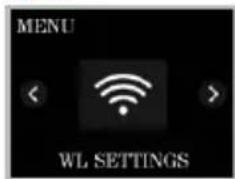
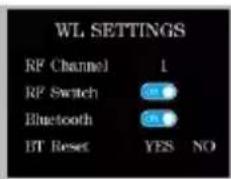
Figure 4
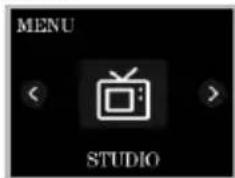
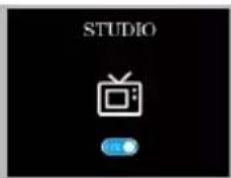
Figure 5
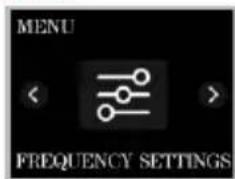
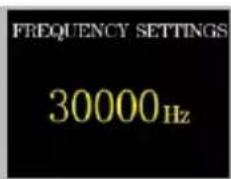
Figure 6
LANGUAGE (Figure 7):
Set the system language.
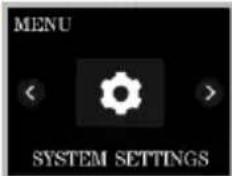
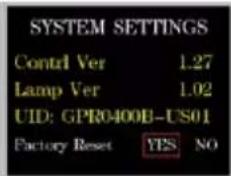
SYSTEM SETTINGS (Figure 8):
View x system information and restore Factory Settings.
Figure 7
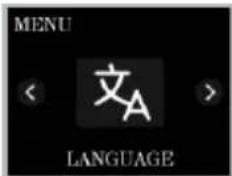

Figure 8
① MODE :
Press MODE button ,enter the main page of mode selection (Figure 9) → rotate [knob ①] to select the mode → press [knob ①] to enter the corresponding mode interface → set the parameter of the item by pressing or rotating [knob ①] → press [BACK] to go up one level.
CCT mode (Figure 10):
White light mode, adjustable light intensity and color temperature. [Knob 1] can be provided to adjust the brightness, and [Knob 2] can be used to adjust the color temperature.
Light source mode (Figure 11):
This mode provides 12 different types of light source types to choose from, which can save a lot of adjustment time when you need a specific light source. Rotate and short press the [SELECTOR] key to select Source mode to select the desired light source effect.
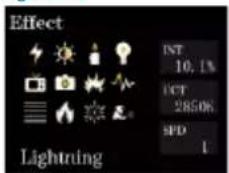
Light Effect Mode (Figure 12):
This mode provides 12 light effects: lightning, CCT cycle, candle, bad bulb, TV, paparazzi, explosion, breathing light, strobe, flame, firework, welding.
Rotate and short press the [SELECTOR] button to select FX mode, you can choose a variety of light effect.
Figure 9
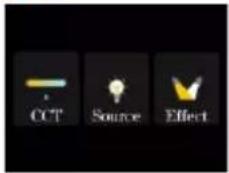
Figure 10
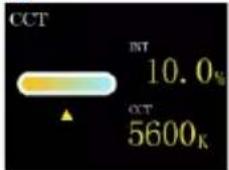
Figure 11
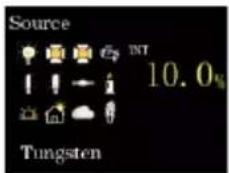
Figure 12
APP CONTROL
APP download method
(Scan the QR code on the back of the manual to download the APP)
Android version : Official website QR code, Google Play, Huawei Store, etc.
iOS version : App Store
Register Account
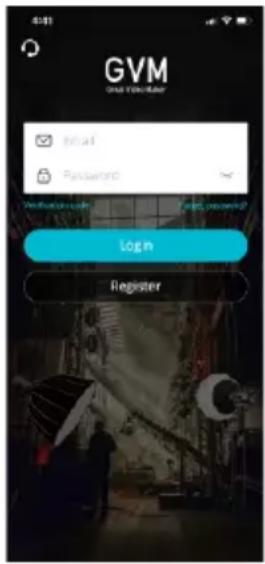
Register and sign in with your email address; (Figure 1)
There may be a delay in sending the verification code, and the delivery speed depends on the email server you are using. the email server used;
Some email servers may recognize our verification emails as advertising Please check your blocked email inbox.
Figure 1
Adding Devices
① Before adding devices, please make sure you have turned on the Bluetooth and network data function of your phone, and reset the Bluetooth of your lighting device.
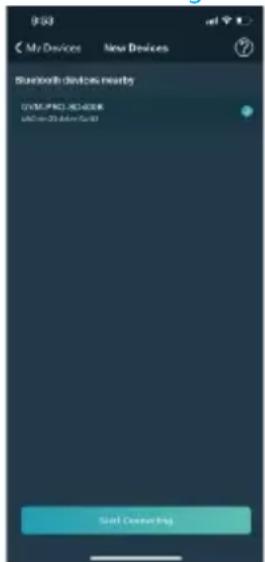
② Click the "Add Device" button on the "My Devices" page to find the nearby Bluetooth lighting devices that have been opened, and select the device to be connected to the network connection. (Figure 2)
* Android system needs to open the location permission to connect the device with Mesh technology, we will not collect any of your location information in this process.
Figure 2
Equipment management
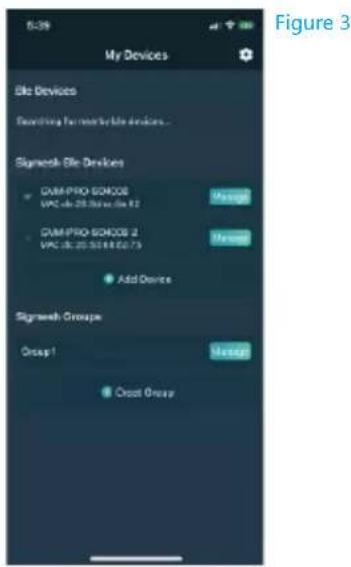
① After successfully adding your lighting device, your device will be displayed in the "My Devices" list; (Figure 3)
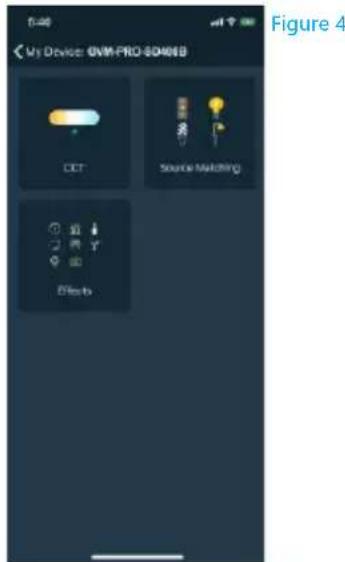
② Click the device bar to enter the device control. (Figure 4)
USE AND SAVE
Do not place the product in high humidity, strong electromagnetic field, direct sunlight, high temperature environment. If the product is not to be used for a long time, disconnect the power supply.
Clean: Please unplug the power plug before cleaning. And use a damp cloth instead of any detergent or soluble liquid, so as not to damage the surface layer.
Power supply: Ensure that the power supply is within the scope of use, too high or too low will affect the work.
Maintenance: If there is a malfunction or performance degradation, please do not open the shell package by yourself, so as not to damage the machine and lose the right of maintenance. In the event of a malfunction, please feel free to contact us, and we will do our best to solve the problem.
Accessories: Please use the accessories provided by the manufacturer or approved accessory products in order to give full play to the best performance.
Warranty: Do not modify the product, otherwise the right to repair will be lost.
SIMPIE FAULTS AND TROUBLESHOOTING
| Phenomenon | Check the product | Troubleshooting |
| The switch indicator does not light up. | 1 Whether the connection between the lamp and the power supply is normal. | Make sure the adapter is well contacted with the power plug. |
| 2 When using a lithium battery to supply power, make sure that the battery does not have "low battery" protection. | Use the product after charging the battery. | |
| After the APP enters to add a device, the Bluetooth of the device cannot be searched. | Check whether the device is normally turned on and whether it has been bound by another person's connection. | Normal steps:1 The mobile phone turns on the Bluetooth and network data functions, and the Android system needs to turn on the location permission;2 Reset the device Bluetooth. |
| The APP fails to connect to thenetwork configuration of the device. | Check whether the device is turned on normally and whether it has been bound by another person's connection;Check whether the Bluetooth and network conditions of the mobile phone are good. | After resetting the device's Bluetooth and restarting the App, try to connect again. |
| The device cannot be searched after being removed from the APP. | Whether the device is offline or in network status.Remove the device if it is not in good condition. | After resetting the Bluetooth of the device, search and add the device again. |
| Clicking on the device in the APP cannot enter the control. | Check whether the device is online (a small green dot is displayed); If it is offline, you can check according to the steps of the d istr i butio n n etwo r k connection failure. | Restart the device, wait for 5 seconds, and then control it when it is displayed as online; reset the Bluetooth of the device, and re-add the device to the device list. |
PACKING LIST
| Name | Quantity | Notes | ||||
| Photography lights | 1 | |||||
| AC Power Cable | 1 | |||||
| Controller cable | 1 | |||||
| Controller | 1 | |||||
| Controller clip | 1 | |||||
| Standard cover | 1 | |||||
| Spotlight protective cover | 1 | |||||
| Magic cable tie | 4 | |||||
| Carrying case | 1 | |||||
| Manual | 1 | |||||
PRECAUTIONS
① When using DC/battery power supply, ensure that the DC/battery power supply voltage is 24-36V/180W range to achieve maximum brightness;
② The product is not waterproof, please use it in a rain-proof environment;
③ The product is not anti-corrosion, do not let the product come into contact with any corrosive liquid;
④ When the product is in use, ensure that the product is placed firmly to prevent the product from falling and being damaged;
⑤ When the product is not used for a long time, please turn off the power of the product to save energy consumption;
GVM
Great Video Maker

website


FacebookGVM OfficiaDownload APP
Web: www.gvmled.com
B&H Email: bh@gvmled.com
GVM Email: support@gvmled.com
Amazon Email: amazonsupport@gvmled.com
Warehouse Add: 4301 N Delaware ave, unit D. PHILADELPHIA, PA19137, USA
- GVM
- CONTENTS
- PRODUCT INTRODUCTION
- DISCLAIMERS
- GVM-PRO-SD400B PRODUCT PARAMETER
- GVM-PRO-SD500B PRODUCT PARAMETER
- INSTALLATION METHOD
- DESCRIPTION OF PRODUCT CONTROL KEYS
- FUNCTION INTRODUCTION & INSTRUCTIONS FOR USE
- ① MENU :
- DMX SETTINGS (Figure 1):
- DIM CURVE (Figure 2):
- WL SETTINGS (Figure 3):
- STUDIO (Figure 4):
- FREQUENCY SETTINGS (Figure 5):
- FAN SETTINGS (Figure 6):
- ① MODE :
- CCT mode (Figure 10):
- Light source mode (Figure 11):
- Light Effect Mode (Figure 12):
- APP CONTROL
- APP download method
- Register Account
- Adding Devices
- Equipment management
- USE AND SAVE
- PACKING LIST
- PRECAUTIONS
- Great Video Maker
Brand : GVM
Model : PRO-SD400B
Category : Lighting