
Pocketstudio 5 - Audio recorder TASCAM - Free user manual and instructions
Find the device manual for free Pocketstudio 5 TASCAM in PDF.


| Product Type | 4-Track Digital Recorder / MIDI Arranger / MP3 Encoder |
| Audio Recording | 4-track simultaneous recording, mixdown to stereo MP3 |
| Input Channels | Two inputs (A and B) with dedicated effectors (FX1 for guitar, FX2 for vocal/drums) |
| Internal Effects | Two input effectors (FX1, FX2) with preset banks and user storage; mixdown reverb with adjustable Time, PreDly, HiCut, Density, Attack |
| Equalizer (EQ) | Two-band shelving EQ per input and each track: Low Freq (32 Hz–1.6 kHz) and High Freq (1.7 kHz–18 kHz), gain ±12 dB |
| Panning | Per-track pan from L63 (hard left) to R63 (hard right), center position |
| MIDI Tone Generator | General MIDI compatible with 128 instruments, 5 drum kits, pattern arranger, SMF playback |
| Pattern Arranger | Up to 100 sections or 999 measures; chord progression editing with various chord types and bass note selection |
| Storage Media | CompactFlash (CF) card (FAT16 formatted) |
| Computer Connectivity | USB 1.1 (appears as removable drive); compatible with Windows 98SE and later, Mac OS |
| Audio Editing | Copy, paste, erase, and cut data within tracks; single-level undo/redo |
| Transport Controls | Play, stop, rewind, fast forward, record, punch in/out, repeat playback, markers |
| Markers | 8 user-defined marks plus dedicated IN/OUT points for punch and repeat |
| Power Supply | 6x AA batteries (alkaline or rechargeable) or optional AC adapter (9V DC, center positive) |
| Dimensions | Approx. 205 mm × 130 mm × 45 mm (8.1" × 5.1" × 1.8") |
| Weight | Approx. 400 g (14 oz) without batteries |
| Cleaning Instructions | Unplug before cleaning; use a damp cloth only; do not use liquid or aerosol cleaners |
| Safety Precautions | Do not expose to rain or moisture; unplug during lightning; do not block ventilation slots |
| Repairability | No user-serviceable parts; refer all servicing to qualified service personnel |
| Spare Parts | Use manufacturer-specified replacement parts only |
| Accessories Included | CD-ROM with MusicMatch software, printed Getting Started manual, reference manual (PDF on CD) |
Frequently Asked Questions - Pocketstudio 5 TASCAM
User questions about Pocketstudio 5 TASCAM
0 question about this device. Answer the ones you know or ask your own.
Ask a new question about this device
Download the instructions for your Audio recorder in PDF format for free! Find your manual Pocketstudio 5 - TASCAM and take your electronic device back in hand. On this page are published all the documents necessary for the use of your device. Pocketstudio 5 by TASCAM.
USER MANUAL Pocketstudio 5 TASCAM
TEAC Professional Division
POCKETSTUDIO 5
4-Track Recorder/MIDI Arranger/MP3 Encoder
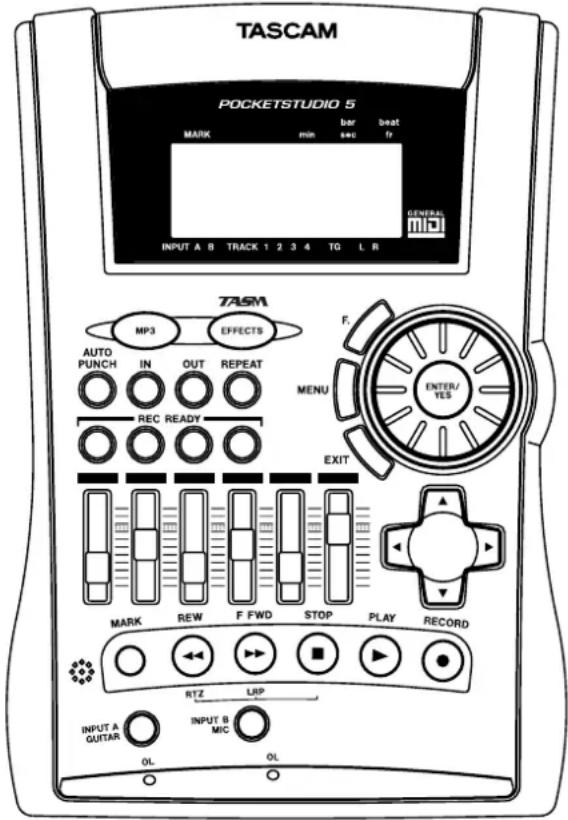
REFERENCE MANUAL

CAUTION
RISK OF ELECTRIC SHOCK DO NOT OPEN

CAUTION: TO REDUCE THE RISK OF ELECTRIC SHOCK, DO NOT REMOVE COVER (OR BACK). NO USER-SERVICEABLE PARTS INSIDE. REFER SERVICING TO QUALIFIED SERVICE PERSONNEL.

The lightning flash with arrowhead symbol, within an equilateral triangle, is intended to alert the user to the presence of uninsulated “dangerous voltage” within the product’s enclosure that may be of sufficient magnitude to constitute a risk of electric shock to persons.

The exclamation point within an equilateral triangle is intended to alert the user to the presence of important operating and maintenance (servicing) instructions in the literature accompanying the appliance.
This appliance has a serial number located on the rear panel. Please record the model number and serial number and retain them for your records.
Model number
Serial number
WARNING: TO PREVENT FIRE OR SHOCK HAZARD, DO NOT EXPOSE THIS
APPLIANCE TO RAIN OR MOISTURE.
Important Safety Precautions
IMPORTANT (for U.K. Customers)
DO NOT cut off the mains plug from this equipment.
If the plug fitted is not suitable for the power points in your home or the cable is too short to reach a power point, then obtain an appropriate safety approved extension lead or consult your dealer.
If nonetheless the mains plug is cut off, remove the fuse and dispose of the plug immediately, to avoid a possible shock hazard by inadvertent connection to the mains supply.
If this product is not provided with a mains plug, or one has to be fitted, then follow the instructions given below:
IMPORTANT: DO NOT make any connection to the larger terminal which is marked by the letter E or by the safety earth symbol ± or coloured GREEN or GREEN-and-YELLOW.
The wires in this mains lead are coloured in accordance with the following code:
BLUE : NEUTRAL
BROWN : LIVE
As the colours of the wires in the mains lead of this apparatus may not correspond with the coloured markings identifying the terminals in your plug proceed as follows:
The wire which is coloured BLUE must be connected to the terminal which is marked with the letter N or coloured BLACK.
The wire which is coloured BROWN must be connected to the terminal which is marked with the letter L or coloured RED.
When replacing the fuse only a correctly rated approved type should be used and be sure to re-fit the fuse cover.
IF IN DOUBT — CONSULT A COMPETENT ELECTRICIAN.
The equipment draws nominal non-operating power from the AC outlet with its POWER switch in the off position.
For U.S.A.
TO THE USER
This equipment has been tested and found to comply with the limits for a Class B digital device, pursuant to Part 15 of the FCC Rules. These limits are designed to provide reasonable protection against harmful interference in a residential installation. This equipment generates, uses, and can radiate radio frequency energy and, if not installed and used in accordance with the instruction manual, may cause harmful interference to radio communications. However, there is no guarantee that interference will not occur in a particular installation. If this equipment does cause harmful interference to radio or television reception, which can be determined by turning the equipment off and on, the user is encouraged to try to correct the interference by one or more of the following measures.
a) Reorient or relocate the receiving antenna.
b) Increase the separation between the equipment and receiver.
c) Connect the equipment into an outlet on a circuit different from that to which the receiver is connected.
d) Consult the dealer or an experienced radio/TV technician for help.
CAUTION
Changes or modifications to this equipment not expressly approved by TEAC CORPORATION for compliance could void the user's authority to operate this equipment.
For the consumers in Europe
WARNING
This is a Class A product. In a domestic environment, this product may cause radio interference in which case the user may be required to take adequate measures.
IMPORTANT SAFETY INSTRUCTIONS
CAUTION:
- Read all of these Instructions.
- Save these Instructions for later use.
- Follow all Warnings and Instructions marked on the audio equipment.
1) Read Instructions — All the safety and operating instructions should be read before the product is operated.
2) Retain Instructions — The safety and operating instructions should be retained for future reference.
3) Heed Warnings — All warnings on the product and in the operating instructions should be adhered to.
4) Follow Instructions — All operating and use instructions should be followed.
5) Cleaning — Unplug this product from the wall outlet before cleaning. Do not use liquid cleaners or aerosol cleaners. Use a damp cloth for cleaning.
6) Attachments — Do not use attachments not recommended by the product manufacturer as they may cause hazards.
7) Water and Moisture — Do not use this product near water — for example, near a bath tub, wash bowl, kitchen sink, or laundry tub; in a wet basement; or near a swimming pool; and the like.
8) Accessories — Do not place this product on an unstable cart, stand, tripod, bracket, or table. The product may fall, causing serious injury to a child or adult, and serious damage to the product. Use only with a cart, stand, tripod, bracket, or table recommended by the manufacturer, or sold with the product. Any mounting of the product should follow the manufacturer's instructions, and should use a mounting accessory recommended by the manufacturer.
9) A product and cart combination should be moved with care. Quick stops, excessive force, and uneven surfaces may cause the product and cart combination to overturn.
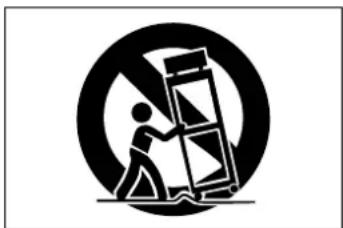
natural_image
Symbolic icon of a person lifting a large object inside a circle (no text or symbols)10) Ventilation — Slots and openings in the cabinet are provided for ventilation and to ensure reliable operation of the product and to protect it from overheating, and these openings must not be blocked or covered. The openings should never be blocked by placing the product on a bed, sofa, rug, or other similar surface. This product should not be placed in a built-in installation such as a bookcase or rack unless proper ventilation is provided or the manufacturer's instructions have been adhered to.
11) Power Sources — This product should be operated only from the type of power source indicated on the marking label. If you are not sure of the type of power supply to your home, consult your product dealer or local power company. For products intended to operate from battery power, or other sources, refer to the operating instructions.
12) Grounding or Polarization — This product may be equipped with a polarized alternating-current line plug (a plug having one blade wider than the other). This plug will fit into the power outlet only one way. This is a safety feature. If you are unable to insert the plug fully into the outlet, try reversing the plug. If the plug should still fail to fit, contact your electrician to replace your obsolete outlet. Do not defeat the safety purpose of the polarized plug.
13) Power-Cord Protection — Power-supply cords should be routed so that they are not likely to be walked on or pinched by items placed upon or against them, paying particular attention to cords at plugs, convenience receptacles, and the point where they exit from the product.
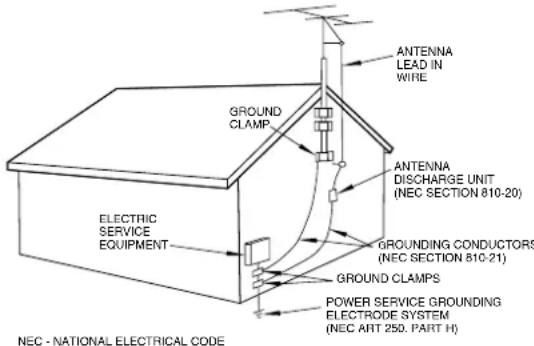
14) Outdoor Antenna Grounding — If an outside antenna or cable system is connected to the product, be sure the antenna or cable system is grounded so as to provide some protection against voltage surges and built-up static charges. Article 810 of the National Electrical Code, ANSI/NFPA 70, provides information with regard to proper grounding of the mast and supporting structure, grounding of the lead-in wire to an antenna discharge unit, size of grounding conductors, location of antenna-discharge unit, connection to grounding electrodes, and requirements for the grounding electrode.
"Note to CATV system installer:
This reminder is provided to call the CATV system installer's attention to Section 820-40 of the NEC which provides guidelines for proper grounding and, in particular, specifies that the cable ground shall be connected to the grounding system of the building, as close to the point of cable entry as practical.
Example of Antenna Grounding as per National Electrical Code, ANSI/NFPA 70
15) Lightning — For added protection for this product during a lightning storm, or when it is left unattended and unused for long periods of time, unplug it from the wall outlet and disconnect the antenna or cable system. This will prevent damage to the product due to lightning and power-line surges.
16) Power Lines — An outside antenna system should not be located in the vicinity of overhead power lines or other electric light or power circuits, or where it can fall into such power lines or circuits. When installing an outside antenna system, extreme care should be taken to keep from touching such power lines or circuits as contact with them might be fatal.
17) Overloading — Do not overload wall outlets, extension cords, or integral convenience receptacles as this can result in risk of fire or electric shock.
18) Object and Liquid Entry — Never push objects of any kind into this product through openings as they may touch dangerous voltage points or short-out parts that could result in a fire or electric shock. Never spill liquid of any kind on the product.
19) Servicing — Do not attempt to service this product yourself as opening or removing covers may expose you to dangerous voltage or other hazards. Refer all servicing to qualified service personnel.
20) Damage Requiring Service — Unplug this product from the wall outlet and refer servicing to qualified service personnel under the following conditions:
a) when the power-supply cord or plug is damaged.
b) if liquid has been spilled, or objects have fallen into the product.
c) if the product has been exposed to rain or water.
d) if the product does not operate normally by following the operating instructions. Adjust only those controls that are covered by the operating instructions as an improper adjustment of other controls may result in damage and will often require extensive work by a qualified technician to restore the product to its normal operation.
e) if the product has been dropped or damaged in any way.
f) when the product exhibits a distinct change in performance – this indicates a need for service.
21) Replacement Parts — When replacement parts are required, be sure the service technician has used replacement parts specified by the manufacturer or have the same characteristics as the original part.
Unauthorized substitutions may result in fire, electric shock, or other hazards.
22) Safety Check — Upon completion of any service or repairs to this product, ask the service technician to perform safety checks to determine that the product is in proper operating condition.
23) Wall or Ceiling Mounting — The product should be mounted to a wall or ceiling only as recommended by the manufacturer.
24) Heat — The product should be situated away from heat sources such as radiators, heat registers, stoves, or other products (including amplifiers) that produce heat.
Table of Contents
1 - About this manual
2 - Pan and EQ
Panning 6
EQ 6
3 - Effects
Input effectors....8
FXn 8
Ctgry 8
Param 8
Bank 8
In Level 8
Out Level 8
Switch 8
Write 8
FX1....9
FX2....10
Reverb 11
Customizing the reverb sound .... 11
Sample settings 11
4 – Patterns on the Pocketstudio 5
A sample song 12
Selecting a style.... 12
Setting up the song arrangement.... 12
Select the user area 12
Start arranging the song 12
Removing song sections 13
Adding song sections 13
Copying and pasting sections 13
Deleting sections 14
Setting up the chords.... 14
Save your song! 16
Arranging the parts.... 16
Advanced part arrangement 17
Playing an external MIDI instrument with the patterns 17
More details about patterns....17
Categories and styles.... 17
More about chord progressions....20
Chord change points.... 20
The effect of changing and inserting sections 20
Available chords.... 20
Octave 21
Root chord 21
Chord type 21
"On" field 21
Instruments....21
Drum kits.... 24
5 – Standard MIDI files and the
Pocketstudio 5
Transferring SMFs to the Pocketstudio 5 ..... 25
Deleting SMFs.... 25
Using SMFs on the Pocketstudio 5......26
Loading an SMF from the card.... 26
Setting SMF song tempo 26
Setting part parameters in the SMF.... 26
6 - Advanced options and operations
Choosing the meter display 28
Choosing the time type....28
Reducing input noise.... 28
Absolute location.... 29
To jump to a location (mm:ss:ff): ......29
To jump to a bars and beats location .....29
Marks.... 29
Setting a mark....30
Deleting a mark....30
Naming and editing mark points....30
Repeat playback.... 30
Punch recording.... 31
Manual punch recording ....31
Automated punch recording....31
Setting the IN and OUT points....31
Rehearsing a punch operation....31
Recording the punch....32
Checking the punch 32
Track bouncing.... 32
Bounce modes ....33
To enter bounce mode ....33
To go back to tracking mode ....33
Mixdown tips.... 33
Renaming an MP3 file 34
Selecting MP3s for playback 34
Using an MP3 as a recorded backing....34
7 – Data, cards, etc.
Managing cards 36
Working with songs with the Pocketstudio 5....38
To use the Pocketstudio 5 with a computer (non Windows 98SE) ....38
To use the Pocketstudio 5 with a computer (Windows 98SE)....38
Managing songs 39
Creating a new song....39
Loading and renaming a song 39
Deleting a song....39
Saving a song....40
Seeing how much space is on a card......40
Optimizing a card....40
Editing data.... 40
Copy and paste ....41
Erasing data....41
Cutting data 42
Undo and redo 42
Making CDs from your mixed songs .....43
Sharing your songs.... 43
Sending a Pocketstudio 5 song....43
Receiving a song 45
Things you can do with the Pocketstudio 5....47
8 – Specifications, etc.
MIDI Implementation Chart 48
Specifications 49
The printed manual, Getting Started (also included on the CD-ROM), helps you to get up and running with your Pocketstudio 5.
Use this Reference Manual to help you with the more advanced functions of the unit, and to help you make the most of the facilities provided.
The following is a list of the different sections, and how you can use them to help you:
| Section Description | |
| 1, “About this manual” (page 5) This section | |
| 2, “Pan and EQ” (page 6) How to master | the “extra” sections of the Pocketstudio 5’s mixer. Adding bass and treble settings to the inputs and recorded sounds, and how to position the recorded tracks in the stereo image. |
| 3, “Effects” (page 8) Using the three internal (two input and one mixdown) effects of the Pocketstudio 5 to give your recordings a more professional sound. | |
| 4, “Patterns on the Pocketstudio 5” (page 12) | The internal MIDI tone generator is very flexible when it comes to setting up backing tracks in the style you choose, together with chord changes and breaks just where you want them, played by the instruments that suit your music best. |
| 5, “Standard MIDI files and the Pocket-studio 5” (page 25) | As well as playing backing tracks that you set up, the Pocketstudio 5 is also capable of taking standard MIDI files and playing them back, allowing you to sing or play along to your favorite music, “karaoke-style” |
| 6, “Advanced options and operations” (page 28) | This covers some of the features of the Pocketstudio 5 that you may not use every day. For example, repeat playback, automatic punch recording, etc. |
| 7, “Data, cards, etc.” (page 36) | To manage the data (songs, etc.) on your Pocketstudio 5, and to make the most of the link between your Pocketstudio 5 and your computer, and your world of shared music using the Pocketstudio 5. |
| 8, “Specifications, etc.” (page 48) The facts and figures about your Pocketstudio 5. | |
2 – Pan and EQ
Although you can get to the pan and EQ separately from the main menu, as described here, you can also move between these screens, as well as the reverb
screen (“Reverb” on page 11), by moving the cursor to the to line of the display and using the left and right keys of the cursor pad.
Panning
In audio terms, panning refers to the left-right placement of a signal in the stereo “image” created by the left and right speakers (or headphones).
Placing instruments successfully in the left-right image helps to create a realistic sound, or, if the effect is exaggerated, can be used to create special effects.
The panning on the Pocketstudio 5 is used with the four recorded tracks to place them in the left-right image when mixing to a stereo MP3 file.
NOTE
It is also possible to pan the tone generator instruments within the tone generator's own mixer. This operation is described in the sections on patterns and Standard MIDI files ("Patterns on the Pocketstudio 5" on page 12 and ("Standard MIDI files and the Pocketstudio 5" on page 25).
Since the outputs from both the FX1 and the FX2 “recording” effects are stereo, you will probably want to make the most of these stereo effects.
1 From the main home screen, press MENU, move the cursor to PAN, and press ENTER.
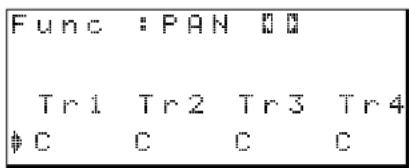
2 Move the cursor to the bottom of the screen and then move the cursor between the four tracks.
3 Use the wheel to set the pan position (if you do this while you play back the recorded tracks, you can hear your changes).
The full left position is shown as L63, the center position as C, and the full right position as R63.
EQ
Both inputs A and B, as well as the four recorded tracks, can have EQ (equalization) settings added to them, to add or subtract treble or bass.
When the input EQ is used, it affects the sound which is recorded onto the track (or if an instrument is played through the inputs on mixdown, to the stereo mix), and when track EQ is used, it affects the sound sent to the stereo mix and the headphones/line outputs.
On most stereo systems with tone controls, there are two controls; treble (high) and bass (low), which add or subtract sound at a fixed pitch.
On the Pocketstudio 5, the low and high EQ controls allow you to choose the frequency (pitch) that will be cut or boosted) as well as the amount of cut or boost (gain).
1 From the main home screen, press MENU, move the cursor to EQ, and press ENTER.
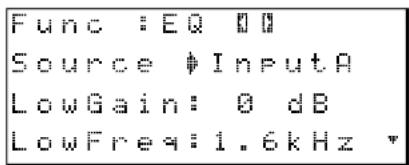
2 Move the cursor to the Source field and then use the wheel to select the source that will be affected by these settings (TR1, TR2, TR3, TR4, InputA, or InputB).
3 Move to the LowGain field and select the amount of cut or boost (-12 dB to 12 dB in 1 dB steps).
4 Move to the LowFreq field and select the frequency which will be cut or boosted. The available frequencies are: 32Hz, 40Hz, 50Hz, 60Hz, 70Hz, 80Hz, 90Hz, 100Hz, 125Hz, 150Hz, 175Hz, 200Hz, 225Hz, 250Hz, 300Hz, 350Hz, 400Hz, 450Hz, 500Hz,
600Hz, 700Hz, 800Hz, 850Hz, 900Hz, 950Hz, 1kHz, 1.1kHz, 1.2kHz, 1.3kHz, 1.4kHz, 1.5kHz, or 1.6kHz.
TIP
If these numbers confuse you, remember that Middle C on a piano is 512 Hz, the A below this is 440 Hz, and going down an octave halves the frequency, and going up an octave doubles it.
5 Move down to the bottom two lines of the display, HiGain and HiFreq. Set the HiGain value to between -12 dB and 12 dB in 1 dB steps.
6 Set the high frequency that will be cut or boosted. The available frequencies are: 1. 7kHz, 1. 8kHz, 1. 9kHz, 2kHz, 2. 2kHz, 2. 4kHz, 2. 6kHz,
2. 8kHz, 3kHz, 3. 2kHz, 3. 4kHz,
3. 6kHz, 3. 8kHz, 4kHz, 4. 5kHz,
5kHz, 5. 5kHz, 6kHz, 6. 5kHz,
7kHz, 7. 5kHz, 8kHz, 9kHz, 10kHz,
11kHz, 12kHz, 13kHz, 14kHz,
15kHz, 16kHz, 17kHz, and 18kHz.
The any meters of of armed tracks show the total level of the signal, including the amount cut or boosted by the EQ settings and the effects. Be aware that adding EQ and effects can cause the level to rise, and may even cause distortion of the recorded sound. Accordingly, keep an eye on the meters, to make sure that the signal remains clean.
NOTE
Many people can't hear very much above 15 kHz. If you find that you can't tell any difference between different settings at high frequencies, don't worry!
3 - Effects
The Pocketstudio 5 contains two input effectors for recording and one effector for the recorded audio tracks on mixdown.
There are also two effects units built into the MIDI tone generator. These cannot be used by the audio effectors described here, and the audio signals cannot be processed by the tone generator's effects units.
Input effectors
The first two effectors (FX1 and FX2) are accessed through the EFFECTS key.
NOTE
If this key is not lit, you will not be able to hear any change made to these effects. Press and hold the key for a second or two to turn it on and off.
Press the EFFECTS key momentarily to cycle between the FX1 screen, the FX2 screen, and the current screen.
Settings can be recalled from the preset area, edited, and stored in a user area for future recall.
Both the FX1 and the FX2 have the same parameters available:
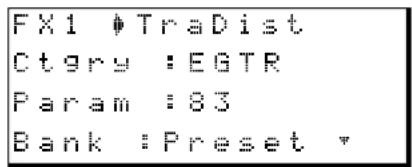
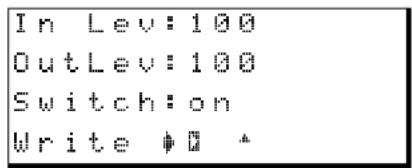
With a further screen:
FXn This shows the effector (FX1 or FX2) currently being edited, and the name of the preset or user setting (see below).
Ctgry This shows the category of the currently selected preset or user setting (see below).
Param Each preset (or user setting based on a preset) has one parameter which can be edited. The possible values of these parameters vary, depending on the effect.
This parameter is set to affect the most characteristic element of the effect. Accordingly, what this parameter does to the sound depends on the preset.
Bank Choose between the Preset bank (as listed below) or any settings stored in the User bank.
In Level This is the input level (the level of the signal fed to the effector after it has passed through the level control on the front panel). You can set this level between 0 and 127.
Out Level This is the output level of the effect to the destination track(s). You can set this level between 0 and 127.
Switch Turn the effect on or off with this setting. Note that even if this setting is on, if the EFFECTS key is unlit, you will not hear the effector.
Write Press the right cursor pad to write the current parameter settings (the Param values only) to the appropriate user area. There are 50 user areas (1 through 50) available for storage for each of the FX1 (these are referred to as UB) and FX2 (referred to as UB) settings.
![Patch :KotoDist Write to UA-50 Write>>[ENTER]](/content/2026/05/888513/images/3cc6aed0cf45f5844d1186fc6a4af1889dbeb7c71f03ab076538871b78536637.jpg)
First, set the name of the effect in the user area, with the cursor pad and wheel, as described in the Getting Started manual.
Then move to the next row, and select a user area to store the setting in. If data has already been stored in the user area, it will be overwritten.
FX1
Refers to the effector which is between INPUT A and the recorded tracks. It is primarily meant for use with guitars (either electric or acoustic) and bass guitars.
The presets available for this effector are:
Name Description
| EGTR (electric guitar) settings | |
| Tradist | Traditional distortion and doubling with a short delay |
| Tube OD | Tube (valve) overdrive and vibrato |
| BlueDry | Blues overdrive with an auto-wah. Use short picking strokes with this setting |
| BlueSlid | Blues with a right and left tremelo |
| R.Bottom | 80's heavy rock sound |
| ClsRock1 | A classic 70's British stack sound |
| ClsRock2 | A deeper classic sound with a detuned chorus effect |
| MelSus | Mellow sustain setting with longish sustain. Use this with a front humbucker for a sweet drive sound |
| SmthDist | Smooth distortion for solos, using echo with an overdrive sound |
| Speeking | Single-coil pickup distortion |
| Heavy1 | Distorted "tube"-type sound for heavy rock |
| Heavy2 | Fuzz and flange for a heavy feel |
| Heavy3 | Chorus and distortion |
| Metal | Traditional metal sound (twin lead) |
| 80sRock1 | 80s metal with a cutting edge |
| 80sRock2 | Deeper echo and a high cut with distortion |
| 90sRock | Bright distortion and reverb; good for solo use |
| FstChor | Good with a single-coil pickup for chords and arpeggios. Similar to acoustic. |
| CompChr1 | For single-coil pickups - chorus with pre-delay expands the treble-emphasized sound |
| CompChr2 | A good backing sound |
| Rhythm1 | A backing sound with an edge to it |
| Rhythm2 | Smooth backing sound, suitable for jazz |
| Rhythm3 | A harder backing sound |
| Funk | A "feather" effect for funk/fusion backing |
| Groove | Flanger provides a rolling sound for backing, and arpeggio playing |
| Country | Short echo and compression |
| Crying | Very emotional — use at different volumes for a variety of effects |
| Weeping | Overdrive with a "big heart" |
| Fusion1 | Sweet sustained overdrive |
| Fusion2 | Long delay and bright distortion |
| ClnSolo | Long sustained solos are possible with this sound |
| PurDist1 | A tube settingwith echo |
Name Description
| PwrDist2 | A deep chorused distortion for an American rock sound |
| PwrDist3 | A rough, metal distortion sound |
| PwrDist4 | Doubled distortion with an edge |
| Texas1 | The classic “black panel amp” sound |
| Texas2 | A powerful overdriven sound |
| Texas3 | A sharper overdrive sound |
| Texas4 | Chorus and “stretched” overdrive |
| Swingy | Mid-peaking warm sound |
| FatJazz1 | Use on jazz pieces with breaks |
| FatJazz2 | Compressed “fat” jazz setting |
| R&B | High emphasis with a rough sound |
| CInVerb | Clear long sustained sound |
| CtyBlues | Fat-sounding overdrive |
| LtlWing | Bright crunch sound |
| CoolPick | 3D sound with some “feathering” on the crunch |
| Fuzzy | A fuzzy deepened sound |
| Hazy | No matter what color it is, it’s still hazy (use with a single-coil pickup) |
| BritCln | The traditional British clean sound |
| PowChord | Distorted backing power chord setting |
| BmLead | A special lead sound with pitch shift of a seventh and distortion |
| FlngGtr | Treble overdrive and a “jet” flanger |
| Oct. Dist | One octave down split distortion |
| PhaseRev | Phase and reverb for backing |
| Ensemble | 3D chorus effect — good with single-coil pickups |
| Surf | Suitable for West Coast surf |
| Violin | Smooth attack — nice with a humbucker |
| BlkPanel | A famous tube combo with spring reverb |
| UK Stack | Maybe the most famous stack in the world |
| Jimi Box | There was only one Jimi and his distorted sound was something like this |
| MBoogie | Famous combo sounds |
| HeartBrk | Tube stack at low gain |
| GentWeep | Chorus and distortion—great for a “crying” solo |
| Bfinger | Distortion and retuned chorus. Good for finger-style playing |
| Tweed | Tweed-covered amp sound — use with the front single-coil pickup and blues |
| RSCrunch | A warm “crunch” guitar setting for single-coil |
| NightDry | A deeper shade of purple. Single-coil sounds good here |
| Ult.Funk | Ultimate funky cutting sound |
| Axe Bom | Heavy metal with a doubling edge |
| Doctor | Wah-wah pedal halfway down |
Name Description
| Sold No | Simulated high-quality tube amp |
| Run Away | Play a cutting sound using a pick |
| Remains | Double-neck 12-string sound |
| Nostal9i | Tube-based overdrive |
| RealDst1 | Distortion only, influenced by a large stack |
| RealDst2 | Distortion only, influenced by a famous small combo |
| RealDst3 | Power tube distortion sound |
| RealDst4 | Distortion only, influenced by echo on a smaller combo |
| AGTR (acoustic guitar) settings | |
| Heaven | Reverb with treble boost for a spacious feel |
| Stroke | Echo and chorus—good for backing |
| Solo | For acoustic solos |
| Blues | For acoustic blues slide work |
| Arpeggio | Acoustic picked arpeggios sound good with this setting |
| 12String | 12-string guitar sound (chorus and exciter) |
| Crystal | A crystal-clear sound, emphasizing the treble, and making the best of a not-so-good guitar |
| Nashvill | For that Nashville sound (“fat” acoustic) |
| Mellow | A mellow acoustic setting—simulates nylon guitar on steel strings, using a treble cut |
Name Description
| ChorVib | A “thick” vibrato chorus sound |
| TremSolo | A stereo tremolo solo sound |
| BASS (bass guitar) settingsThese sound best with bass instruments—other sources may not give such a good effect | |
| Miller | Flanger—good for “chopper” bass |
| Singing | A “singing” bass tone (chorus and distortion)Progressive sound |
| Fretless | A fretless bass sound |
| Chopper | Useful for slap-style playing |
| Heavy | For heavy rock, etc. Distortion adds depth to the sound |
| Peculiar | A warm bass sound |
| RockBass | Distorted pick-bass setting with emphasized treble |
ELSE (other) settings
| FX1 Thru A “neutral” bypass setting |
| Note that you do not have to use the settings exactly as they are classified—you can put an acoustic guitar through an electric guitar setting if you want. The bass sounds will probably sound strange with a guitar, though. |
FX2
Refers to the effector which is between INPUT B and the recorded tracks. It is primarily meant for use with vocals, but other settings (drums and percussion, etc.) are available.
Name Description
| VOCAL (vocal) settingsOtherinstruments may sound strange here | |
| De-Esser | Removes sibilance (ess) sounds |
| Chorist | Choir sound using detuning |
| Emphasis | Adds emphasis to vocals to make them stand out |
| Shout | For loud distorted vocals |
| Moody | Moody feeling for quieter smooth vocal lines |
| Response | Echo vocal setting |
| Proclaim | “Echo plus”—a distinctive sound |
| Quiverin | A quavering voice with vibarto |
| Duet | For two (male and female) singers and harmony groups |
| Lo-Fi | Imitates low-fidelity equipment (high and low treated specially) |
| Megaphon | For “megaphone”-type sound |
Name Description
| Screamin | Screaming sound using flanger |
| Panning | A panned stereo vocal sound |
| DRUM (drum) settings | |
| Rhythm machines sound good with these settings | |
| Groove | A groove setting with flanger |
| Stepping | Stepping beat — delay with a small amount of feedback |
| TrnAroun | Stereo “bouncing” setting |
| GetSpace | Drum reverb |
| CsBottom | Classic “bass heavy” sound |
| Trem.Pad | Another stereo bounce setting |
| PerfrmEQ | Echo and pan |
| Lo-Fi | Low fidelity for drums |
| Reverb | Reverberation only |
| Comp. | Compressor only |
| Vibrato | A vibrato effect |
| Filter | A creative low-pass filter effect |
| ELSE (other) settings | |
| FX2 Thru | A “neutral” bypass setting |
Reverb
The reverb is available only on mixdown. The four recorded tracks can be sent to the reverb, as can the two inputs.
The six input levels (send levels) can be adjusted individually (through 127), and the master input level to the reverb can then be adjusted with the same values.
The output (return) level from the reverb can also be set from through 127.
You reach the reverb setup screen through the main menu, or "sideways" from the EQ and Pan screens (see "Pan and EQ" on page 6).
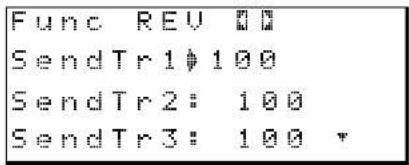
The first four lines are the four recorded track send levels (SendTr1 through SendTr4), and the next two are the two input send levels (SendInA and SendInB).
Following this are the master send (SendMst) and the return level (RtrnLev) parameters.
All of the above can be set with value from through 127.
Customizing the reverb sound You can make the reverb sound individual with the following parameters: Time, PreDly, HiCut, Density and Attack.
These are explained in more detail in the Getting Started manual (see the description on page 21).
Sample settings Here are some examples of settings you can make of popular reverb types. Use these as starting points for your own experiments.
The hall setting gives a spacious feeling to your work
| Time | 2.7 |
| PreDly | 49 |
| HiCut | 50 |
| Density | 75 |
| Attack | 36 |
This setting provides a sound similar to that of a small, live room
| Time | 0.7 |
| PreDly | 28 |
| HiCut | 80 |
| Density | 47 |
| Attack | 32 |
This sound provides a sound similar to that of a live performance in a large arena, etc.
| Time | 3.7 |
| PreDly | 68 |
| HiCut | 50 |
| Density | 80 |
| Attack | 33 |
The “instrument booth” simulates the sound when you play an instrument in a professional recording studio.
| Time | 1.4 |
| PreDly | 47 |
| HiCut | 70 |
| Density | 61 |
| Attack | 100 |
4 – Patterns on the Pocketstudio 5
The tone generator built into the Pocketstudio 5 allows you to make up sophisticated backing tracks for your songs easily and quickly.
The preset patterns have been professionally set up to give you the widest possible choice for a base to your compositions. You can change the key, the running order of the patterns, and even the instrumentation of the songs to make them uniquely your own.
Since the Pocketstudio 5 provides a high degree of flexibility and there are a lot of choices available to you, you should spend some time reading this section, and seeing what's available.
We assume that you know about the basic navigation techniques to use with the Pocketstudio 5. If you are not yet familiar with these, we suggest that you read “Basic use of the Pocketstudio 5” on page 13 of the Getting Started guide.
A sample song
First, we'll work through a simple 12-bar blues pattern with an intro, a couple of verses, a fill and another verse in a bluesy rock and roll style in E. Don't worry if 12-bar blues isn't your personal taste,
and you like to play in another key—the principles we'll use will work with your songs, no matter what your personal style of music.
Selecting a style
The first thing to do is to select the style in which you are going to work.
Make sure that the TGMode parameter in the SYSTEM menu is set to Pattern.
From the main menu, select Pattern, to enter the pattern menu.
$$ \begin{array}{l} \text { Ctgry } \nmid \text { Rock 1 } \ \text { Style: 60sHrock } \ \text { Tempo: } \downarrow = 1 0 0 \ \text { Arnge: Preset } \quad \Downarrow \end{array} $$
The first field, Ctgry (category) allows you to select a category (the different styles are arranged in categories, so you can find them easier).
Here, you use the wheel to select Rock3.
Use the cursor pad to move to the Style (style) field, and use the wheel to select OldRockRol (old rock and roll).
$$ \begin{array}{l} \text { Ctgry } \nmid \text { Rock3 } \ \text { Style: 01dRockRol } \ \text { Tempo: } J = 1 0 0 \ \text { Arnge: Preset } \mathbb {Q} ^ {*} \end{array} $$
Bring up the TG fader and the MASTER fader, and press PLAY to audition the preset arrangement.
Press STOP followed by REW when you've heard enough.
Setting up the song arrangement
We use arrangement here to mean the order in which the parts of the song are arranged, rather than the arrangement in terms of instrumentation (which is another musical use of the term).
For this song, we'll have a 4-bar Intro, a 12-bar verse (type A), a 12-bar verse (type B), a 4-bar fill from a B to an A verse, a 12-bar A-type verse, followed by a 4 bar ending.
There are two pattern holders for the arrangement. One is the preset area (as the name suggests, you can't edit it) and the other is the user area (you're the user—it's your area!). When you create a song, the preset area is copied to the user area.
Select the user area Use the cursor pad to move up to Arrange (arrange), and use the wheel to select User.
$$ \begin{array}{l} \text {ArngeUser} \ \text {Chord:} \ \text {Drum:Standard} \ \text {Bass:FingerBs} \end{array} $$
Start arranging the song Then press ▶ to enter the song arrangement screen:
$$ \begin{array}{c c} \text { 1 - Intro ( 4 ) } \ \text { 5 - VerseA( 4 ) } \ \text { 9 - VerseA* 3 } \ \text { 12 - FillAB( 1) } \end{array} $$
Each row of the screen represents a section of the song, and is divided into three columns.
The first column shows the bar number at which the section starts.
The second column shows the type of section.
The third column shows the number of bars taken up by this section.
If the whole row is flashing, you can add or remove sections from the song.
On the first row, make sure that the first row shows 1 - Intro-4 (at bar 1 play an Intro pattern for 4 bars).
Use ▼ key move to the next row.
Use ▶ to highlight (flashing) the third column (the number of bars). Use the wheel to change this value to 12.
Note that the start point (value of the first column) of the next section of the song changes as you change the length of the previous section. Also, an asterisk (*) appears whenever you change the length of a section to a value which is not the default value.
Use ▼ to move to the third line. Note that the third column is still highlighted (flashing). Use the wheel to change the value to 12, and then press ◀ to select the section type.
Use the wheel to change the third section to become VerseB.
Keep using the cursor keys and the wheel until your song looks like:
$$ 1 - \text { Intro } (4) $$
$$ 5 - \text { VerseA } * 1 2 $$
$$ 1 7 - \text { U r s e B } * 1 2 $$
$$ 2 9 - F i l l A B * 8 $$
$$ 3 7 - \text { U r s e } A * 1 2 $$
$$ 4 9 - \text { Ending } (4) $$
TIP
You can also use the copy function as described below in order to shorten the process, but it is probably a good idea to set up the chords before using the copy function, to save you work later on.
However, you will have too many sections in the Preset section, starting at bar 53. This is how you remove them:
Removing song sections Move to the section to be deleted and use ◀ and ▶ so that the whole line is blinking.
Turn the wheel counterclockwise.
Repeat the process until one section is left, followed by a line saying ---SongEnd---. You cannot delete all the sections in a song—there always must be at least one section.
When you've finished arranging the song, press EXIT to go back to the main pattern menu.
Adding song sections This is the opposite of deleting sections. Move to the section to be deleted and use ◀ and ▶ so that the whole line is blinking.
Turn the wheel clockwise. A new section is added, which you can edit (type and length) later on.
Repeat as necessary until you have the right number of sections for your song.
NOTE
The maximum length of a song is 100 sections or 999 measures (bars), whichever comes first.
Copying and pasting sections To save you the trouble of manually entering and adding, deleting, etc. sections of the song, you can select a portion of the song for copying and inserting (similar to copying and pasting on a computer).
Move the cursor to the Copy menu item
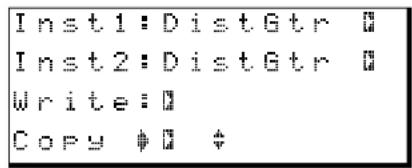
Enter the copy screen:
![In ♦1-Intro Out : 1-Intro To : 5-VerseB* Sure >> [ENTER]](/content/2026/05/888513/images/a8d14ed4d8dc1faa84f3993e83867bb18b648f956f5e6e0ad4610349a4158933.jpg)
Use the cursor pad to move to the In (start section of the area to be copied) and Out (end section of the area to be copied) and use the wheel to select the start and end sections of the area to be copied. These can be the same area (for example, if the In and Out fields both point to the same Intro section as in the example above, when you make a copy, only that section will be copied, in this case, it will be inserted immediately before the VerseB section).
Move the cursor to the T o field (the position before where the data will be copied) and use the wheel to set this point.
Finally, move the cursor down to the Time field, which allows you to set the number of times (up to
4 – Patterns on the Pocketstudio 5
99) that you want the In-Out section(s) to be copied.
Press ENTER to copy the selected area to the To point, inserting it at that point.
Repeat the process as often as necessary.
NOTE
You cannot set the To point at a position between the In and the Out points.
When you copy, you copy not only the arrangement, but any chord changes that you may have made. We therefore suggest that if you have a complex series of chord changes which is repeated throughout the song, you set up this set of chord changes once and then perform the copy operation.
Deleting sections Sometimes you want to delete several sections at once. This is easy to do with the delete function:
Move the cursor to the De1 menu item:
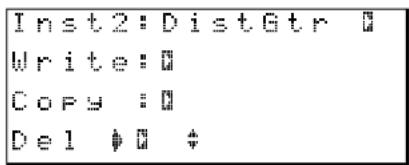
Enter the delete screen:
![In 1 - Intro Out : 1 - Intro * Sure >> [ENTER]](/content/2026/05/888513/images/366fda064a45d9a154e944d73dead30572622d98297d29c66605d6039c1f3e20.jpg)
Use the cursor pad to move to the In (start section of the area to be deleted) and Out (end section of the area to be deleted) and use the wheel to select the start and end sections of the area to be deleted.
The In and Out section can be the same, in which case only that section will be deleted.
Press ENTER to delete the selected area.
NOTE
Remember that this only deletes the pattern data. Any recorded audio data is unaffected.
Setting up the chords
Since we're doing an elementary song here, the choice of chords may seem rather uninspired. When you've worked through this, and read a little more through this part, you'll find how to make somewhat more interesting arrangements.
The final chord pattern we're going to end up with for the whole song is:
Song section Bar Chord
| Intro 1 E | ||
| 2 | (E)a | |
| 3 | (E) | |
| 4 | E / | |
| Verse 1 (Verse A) 5 (E) | ||
| 6 | (E) | |
| 7 | (E) | |
| 8 | (E) | |
| 9 | A | |
| 10 | (A) | |
| 11 | E | |
| 12 | (E) | |
| 13 | B | |
| 14 | A | |
| 15 | E | |
| 16 | E / B7 | |
| Song section Bar Chord | ||
| Verse 2 (VerseB) | 17 | (E) |
| 18 | (E) | |
| 19 | (E) | |
| 20 | (E) | |
| 21 | A | |
| 22 | (A) | |
| 23 | E | |
| 24 | (E) | |
| 25 | B | |
| 26 | A | |
| B | 27 | 7 E |
| 28 | E / B7 | |
| Middle 8 (FillAB) | 29 | E7 |
| 30 | (E7) | |
| 31 | A7 | |
| 32 | E7 | |
| 33 | B7 | |
| 34 | A7 | |
| 35 | E7 | |
| 36 | E7 / B7 | |
| Verse 3 (VerseA) 37 E | ||
| 38 (E) | ||
| 39 (E) | ||
| 40 (E) | ||
| 41 | A | |
| 42 (A) | ||
| 43 | E | |
| 44 (E) | ||
| 45 | B | |
| 46 | A | |
| 47 | E | |
| 48 E / B7 | ||
| Ending 49 Bm7 | ||
| 50 E7 | ||
a. Following the convention on the Pocketstudio 5 itself, any chords which carry on from the previous bar are enclosed in parentheses.
As we said, this is not great art, but it will explain how to set up the song chord changes!
TIP
When you write your own songs, or if you are making your own arrangement of an existing song, you may find it helpful to draw up a chart like this as a guideline when you are programming the chords into the Pocket-studio 5.
From the Pattern menu, move to the Chord menu item, and press ▶.
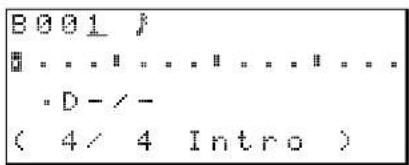
The first line of this screen shows the current bar, followed by the musical representation of the way that the bar is divided for chord changes (see below).
The next line shows the selected change points (points where the chord changes) within the bar.
The third line shows the chord that will be played at the selected change point.
The last line of the display is for information only. It shows the time signature of the current bar, as well as the current song section.
NOTE
In this screen, the cursor is always marked by the field being underlined.
The bar number should be 001 (if it's not, use the wheel to change it). Right now, we won't bother with the bar change divisions.
1 Move the cursor to the second line and make sure that the first dot (") is selected. It should be inverted (☐). to allow for a chord change at this point. Beat divisions are shown by ("). Use the wheel to change between these two symbols. Turning the wheel clockwise sets the chord change point, and counterclockwise disables it.
2 Use the cursor pad to move the cursor to the third line, to the root chord field:
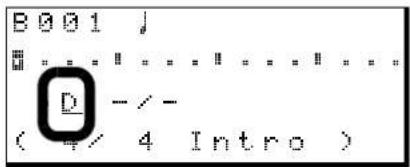
3 Use the wheel to change the root chord to E. The default chord type is E major, so you don't need to do anything else.
NOTE
In this screen, the scale starts at C and moves upwards to B in semitone steps. There are no sharps represented, so:
Display shows: Alternative:
| Db | C# |
| Eb | D# |
| Gb | F# |
| Ab | G# |
| Bb | A# |
4 Move the cursor up to the top row, and scroll through to bar ☐☐☐. If you see any inverted dots (☐) in the second line of any bar on the way, use the cursor and wheel (counterclockwise) to change them to the normal setting (*).
Note that when a chord is carried over from a previous change, the chord name is shown in parentheses
5 In bar 004, we'll make the change from E to B7 halfway through the bar. For this, we'll need to set the change points to occur every half-note (minim). Move the cursor to the musical note symbol on the top line of the screen. Turn the wheel clockwise to change the symbol to ↓ (strictly speaking, you don't need to do this, but it makes your life easier
4 – Patterns on the Pocketstudio 5
by reducing the number of possible change points displayed).
Note that the number of change points available in the bar, as shown on the second line, changes as you change the division value.
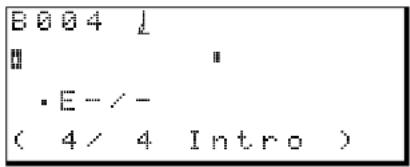
6 Move to the first change point and make sure that the root chord is still E.
7 Now move to the second change point and select B as the root chord. Then use ▶ to move to the chord type immediately to the left of the root chord, and then use the wheel to select 7 as the chord type).
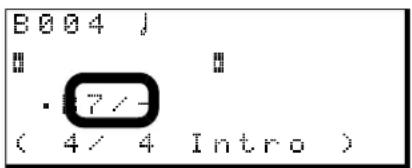
NOTE
You cannot move the cursor from a change point on the second line which has not been set (.) to the third line, and so you will not be able to change the root chord or the chord type. You must always move the cursor from a set change point to the third line to change the root chord and chord type.
You'll see that there are other fields on this line, but we'll explain them later on. Right now, we'll concentrate on setting up this sample song.
This is the basic procedure for setting up chords within a song: move to the bar where the chord change will happen, set the change points if necessary, and change the chord.
8 Repeat this process for the whole song, referring to the chart we made earlier.
TIP
You can also use the copy and insert functions ("Copying and pasting sections" on page 13) to save time when setting up repeating sections like verse-chorus combinations.
Save your song! It's important that you write the chord progression to the card. If you don't, you'll lose all your hard work if the Pocketstudio 5 gets turned off!
9 When you've finished writing the chord sequence, press EXIT twice to return to the main menu. Use the cursor pad to move to the CARD menu, and press ENTER. Scroll down to the Song Save menu item, and press ENTER. Answer yes by pressing ENTER when you are invited (twice) to save the song (and overwrite the song already in memory).
This saves the chords and pattern ready for later use.
Arranging the parts
When you've got the chords and pattern you want, you can then arrange the parts as you want.
There are four parts in each pattern: the drum kit (counts as one part), a bass, and two other instruments, used for backing parts. The overall output level of the tone generator is adjusted with the TG fader, but you may want to adjust other ways in which you heat these parts.
Select the part (Drum, Bass, Inst1 or Inst2), and turn the wheel.
You'll find that the preset instruments in the blues patterns sound pretty good, but just for fun, we'll change the instruments for a bit of variety.
You will find that you can only select drum kits of different types to use with the Drum part and bass instruments to use with the Bass part. The other two parts can have any instrument in the set assigned to them.
To adjust volume and pan position, etc., press ▶.
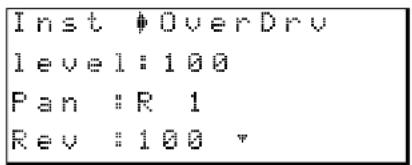
Use the cursor and the wheel to change the different values:
Display Explanation Min value Max value
| Level | The level of the part in the mix | 0 | 127 |
| Pan | The left-right position of the part in the stereo mix | L63 | R63a |
| Mute | Whether the instrument sounds or not | off | on |
| Rev | The level of the part sent to the TG internal reverb | 0 | 127 |
Display Explanation Min value Max value
| Cho | The level of the part sent to the TG internal chorus | 0 | 127 |
| KeyTr | The pitch above or below the default in semitones | -36 | 36 |
a. The center position is shown as .
In this way, you can tailor the sound to your exact requirements.
Press EXIT when you have finished.
When you've set up the sample song following these instructions, you will have a good idea of what is possible using the Pocketstudio 5's internal tone generator and the preset backing patterns.
Advanced part arrangement We mentioned that the bass instruments only can be used for the bass part. However, if you want to change this, you
can go from the PATTERN menu to the TG menu, and change the instrument settings there. See “Setting part parameters in the SMF” on page 26.
When you do this, remember that the bass instrument is on channel 2, instrument 1 on channel 3, instrument 2 on channel 4, and the drums on channel 10.
Playing an external MIDI instrument with the patterns You can plug a MIDI keyboard or other controller into the Pocketstudio 5's MIDI input jack and play along with the patterns. Though this cannot be recorded in the normal way on a track, it can be recorded (together with the patterns) either on mixdown or during a bounce process.
The MIDI instrument is only received on MIDI channel 1 and so you should set the instrument of part 1 to match your MIDI input when playing with patterns.
More details about patterns
This contains lists, etc. of the different options available to you when using the Pocketstudio 5 patterns.
Categories and styles
The different categories and styles available to you are listed here.
Note that you cannot change categories or styles while the Pocketstudio 5 is playing back (the unit must be stopped before you can change them):
Category Style Description
| Rock 1 90sHrock | Into the 90s with this rock sound | |
| 80sHrock A rock sound from the 80s | ||
| 70sHrock More of a 70s feel to this UK rock sound | ||
| 70sHrock2 A driving UK 70s rhythm | ||
| 60sHrock A guitar-based 60s-style psychedelic rock sound. | ||
| HrockShf1 Hard rock with a shuffle beat | ||
| HvyRock Heavy rock | ||
| GlamRock Typifies one of the most famous “glam rock” band sounds | ||
| Grunge The “Seattle sound” | ||
| Rock 2 SpdMetal | High-speed metal music | |
| HuMetal A solid heavy metal beat | ||
| Thrash High-speed thrash | ||
| DeathMt1 Classic dark metal rhythms | ||
4 – Patterns on the Pocketstudio 5
Category Style Description
| Rock3 Shuffle1 | Shuffle-based rock | |
| Shuffle2 | A slower, more easy shuffle | |
| 80sVintag | A vintage 80s rock sound with acoustic touches | |
| 70sVintag | 70s vintage rock sounds | |
| Blues | Blue-based rock | |
| 70sRckRol | Rock and roll, 70s style | |
| Alternaty | Represents the "alternative" sound of the 90s | |
| PianoTrio | Piano, bass and drums playing rock | |
| Progress | Hammond/synth 70s-based "progressive" rock | |
| LiverPool | A city in England, famous for producing many groups, but one in particular! | |
| Electric | Synth-based rock | |
| LatinRock | A touch of Latin added to rock, together with a fine solo guitar | |
| JungleR | Rock on drum 'n' bass | |
| 80sIrish | One Irish band overflow the world! | |
| Surf | The classic California surf sound (and you don't even have to get your feet wet!) | |
| OldRckRol | Back to the 50s with this one | |
| Rockabily | Guitar, stripped-down drumkit and stand-up bass for that rockabilly sound | |
| C&WRock | Where country and western and rock all meet | |
| C&W16rock | 16-beat version of C&W meets rock | |
| Ballad 90'sPop | A pop style made famous in the 90s, featuring a Wurlitzer-type electric piano | |
| Organ Hammond-based backing for this slow 16-beat ballad | ||
| PianoPop Piano-based classic slow ballad | ||
| HardRock What happens when hard rock bands play ballads | ||
| SlowBlues Soulful slow blues ballad | ||
| 16Beat A ballad in 16-beat style | ||
| Unplugged Acoustic-guitar based balladeering | ||
| AOR A slight Latin feel to the percussion here | ||
| Fusion Jazz and soul in this pop number | ||
| Pop LitePop | A classic pop song sound | |
| AOR1 Light funky backing | ||
| AOR2 Synth-based pop backing | ||
| 16beat Choppy guitar work and a touch of Latin percussion add to this distinctive sound | ||
| BritPop That classic British pop sound | ||
| 24beat Bouncy 24-beat pop | ||
| 80sBritish An arresting sound! | ||
| R&B Funk1 | Brass stabs characterize this classic funk backing | |
| Funk2 Wah-wah rhythm drives this funk groove | ||
| Motown Golden days of 8-beat Detroit R&B | ||
| Soul Classic 70s soul groove | ||
| R&B1 Modern R&B rhythms | ||
| R&B2 More R&B with a dynamic moving guitar part | ||
| 90'sBlues The blues come up to date with this slap bass backing | ||
| 6/8R&B R&B in another rhythm | ||
| BluesShuf Hammond/guitar pairing for a blues shuffle | ||
| Gospel Gospel-based R&B | ||
| Oldies Play this and go back in time! | ||
Category Style Description
| Dance HipHop | Slower hip-hop (listen for the scratches) | |
| R&bHipHop | Faster R&B-based hip-hop dance grooves | |
| JazHipHop | Where jazz riffs and phrasing meet hip-hop rhythms | |
| Bigbeat | The big beat | |
| Techno | Techno-style dance grooves | |
| DrumNbass | Jungle | |
| House | House dance mix | |
| Disco | The classic disco sound | |
| Jazz BrshSwing | Lazy, classic backing, perfect for that smoky sax solo | |
| Combo Piano, drums and bass; just add your own genius! | ||
| Cool Laid-back and rhythmical | ||
| FastBeBop So cool, your ears will freeze! | ||
| Waltz In 6/8, rather than 3/4, but you can still waltz to it! | ||
| BigBand The great sound of a tight brass section playing in classic style | ||
| 5/4 Jazz The 5/4 style, made famous once. See if you can repeat the success! | ||
| AcidJazz Jazz with a twist or two | ||
| Fusion ContempoF | Contemporary fusion style | |
| Samba Latin percussion adds to the feel of this samba-based backing | ||
| Funk1 Slap bass driven funk | ||
| Funk2 Faster and less four-square than the first funk rhythm | ||
| HighTec Fast and furious high-tech fusion | ||
| 24beatF Quite wonderful 24-beat fusion | ||
| Country Western | Yeeee-hah! Classic Western rhythms | |
| Folk Country-style folk ballad | ||
| Ballad Nashville-style ballad in triplet time | ||
| Waltz Country-style 3/4 rhythms | ||
| Bluegrass Downhome pickin' | ||
| CajunRock Louisiana-style country | ||
| Dixie That classic New Orleans sound | ||
| Latin Salsa | Hot and spicy NY-Cuban groove for Latin pieces | |
| Samba The samba just keeps on going | ||
| Bossa Remember when all drum boxes played bossa nova? This is the modern version. | ||
| Mambo The Cuban mambo rhythm brought up to date | ||
| ChaCha A classic rhythm | ||
| Rumba The all-time Latin favorite | ||
| Caribben1 Calypso time! Break out the rum! | ||
| Caribben2 More calypso (with steel drums) | ||
| World Reggae1 | Take your best shot with this one! | |
| Reggae2 Solid, driving bass in this Jamaican-based rhythm | ||
| Reggae3 Classic brass-based blue beat | ||
| Ska 60s Jamaica meets late 70s London (and Coventry) | ||
More about chord progressions
In the sample song, we only used a few chords. The Pocketstudio 5 is capable of producing almost any
chord progression written (using Western-style notation, anyway).
Chord change points
First, the way in which the bars are divided for the chord change points can be set to match the following musical divisions:
| c | whole note (semibreve) |
| d | half-note (minim) |
| d ≥slant | triplet quarter-note (triplet) |
| d | quarter-note (crochet) |
| d ≥slant | triplet eighth-note (triplet quaver) |
| f | Eighth-note (quaver) |
| f ≤slant | Sixteenth-note (semiquaver) |
When this setting is made on the first line of the screen, the second line of the screen divides the current bar into the number of parts determined by the change point setting. Here we see a 4/4 bar divided into eighth-notes (quavers), meaning that there are
eight divisions in the bar (the chord could change a maximum of eight times in this bar).
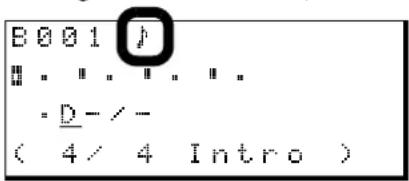
When you move to the second line of the screen, use ◀ and ▶ to move between the possible chord change points, and the wheel to set (clockwise) and unset (counterclockwise) these points as actual change points.
When a valid (set) change point is highlighted, use ▼ to move to the third line to set the chord at that point.
A set change point is represented by: ☐.
An unset change point is represented by if it marks a beat boundary, or · in other cases.
The effect of changing and inserting sections
As explained earlier (“Setting up the song arrangement” on page 12) it is possible to change the structure of a song by changing the type of section and by adding and copying sections within the arrangement.
The way that the chords are set up in these new sections depends on whether you are using the User or the Preset area (see “Select the user area” on page 12).
In the Preset area whenever you add a new section or you change the type of an existing section, the chord progression within that section will be the default for that particular pattern.
In the User area whenever you add a new section, there will be one chord all the way through that section. That chord will be the last chord of the previous section. Since it is a “continuation” chord, it is shown in parentheses (e.g. (·Dbm7/−)).
In the User area, when you change the type of an existing section, the chord progression remains the same as previously, but the actual notes played will vary.
This means that it is very easy to create “instant songs” in the Preset area by simply using the default chord progressions and working from there. Further adjustment (deletion of unwanted chord changes, etc.) is then possible by copying the Preset area to the User area (using the Write function in the PATTERN menu) and editing it there.
TIP
If you have made a song in the preset area which sounds right, except that it is in the wrong key for you to sing or play, you can change the key of the three parts (bass and two other instruments—you can't change the key of the drums!) using the KeyTr parameter ("Arranging the parts" on page 16).
Available chords
There are four parameters that you can set for each chord change:
Octave There are three settings here: * sets the chord at normal pitch, ÷ takes it up an octave, and -- takes it down an active, relative to normal.
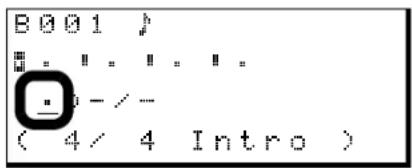
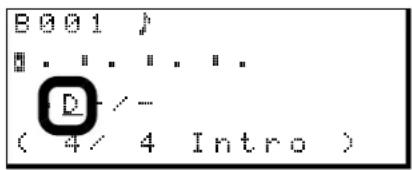
Root chord This is the basic key in which the chord will be played. Chords are always expressed as flats, not sharps, so if you need an F# chord, you must dial Gb.
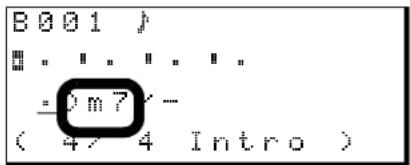
Chord type This provides you with access to the most common (and many of the uncommon!) chord types that you can play. The list of available settings is:
Display
| -a |
| M |
| Madd9 |
| M6 |
| M69 |
| M7 |
| M7(9) |
| M7(#11) |
| M7(#5) |
| m |
| madd9 |
| m6 |
| m69 |
| m7 |
| m7b5 |
| m7(9) |
Display
a. Means that the chord type selected is the default one for this type of pattern (for instance, an intro often has a lead line with which the chord must harmonize). Any changes to the default may change the pattern's feel.
If you are in doubt regarding what any of these chords really mean in musical terms, consult a reference book on harmony.
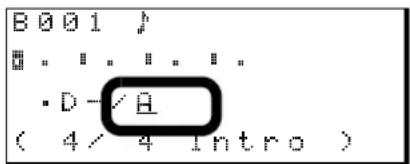
"On" field This field provides you with the ability to specify the bass note for the chord (assuming you don't want the root note to be the bass note). Use the wheel to select the bass note for the chord.
Instruments
The instruments that you assign to parts follow the General MIDI standard, and are as follows (in most cases, the names shown on screen explain themselves, but in some cases, they may need a little explanation).
TIP
If you have a MIDI instrument connected to the MIDI jack of the Pocketstudio 5, you can preview the instruments as you select them (use MIDI channel 2 for instru-
4 – Patterns on the Pocketstudio 5
ment 1, channel 3 for part 2, channel 4 for the bass, and channel 10 for drums).
Number Name Description
Piano group
| 1 | Piano1 | Acoustic piano |
| 2 | Piano2 | Acoustic piano (bright) |
| 3 | EG_Piano | Electric grand piano |
| 4 | Honky_Tonk | Honky-tonk piano |
| 5 | E_Piano 1 | Electric piano 1 |
| 6 | E_Piano 2 | Electric piano 2 |
| 7 | Harpsichord | Harpsichord |
| 8 | Clavi | Clavichord |
Chromatic percussion
| 9 | Celesta | Celesta |
| 10 | Glocken | Glockenspiel |
| 11 | Music_Box | Music box |
| 12 | Vibraphone | Vibraphone |
| 13 | Marimba | Marimba |
| 14 | Xylophone | Xylophone |
| 15 | Tubular | Tubular bells |
| 16 | Dulcimer | Dulcimer (santur) |
Organ group
| 17 | Full_Organ | Drawbar organ |
| 18 | Per_Organ | Percussive organ |
| 19 | Rock_Organ | Rock organ |
| 20 | Church_Org | Church organ |
| 21 | Reed_Organ | Reed organ |
| 22 | Accordion | Accordion |
| 23 | Harmonica | Harmonica (mouth-organ) |
| 24 | Tango | Tango accordion |
Guitar group
| 25 | Nylon_Gtr | Spanish guitar |
| 26 | Steel_Gtr | Steel-strung (folk) guitar |
| 27 | Jazz_Gt | Jazz electric guitar |
| 28 | Clean_Gtr | Clean electric guitar |
| 29 | Muted_Gtr | Muted electric guitar |
| 30 | Over_Drive | Overdriven electric guitar |
| 31 | Disk_Gtr | Distorted electric guitar |
| 32 | Harmonics | Guitar harmonics |
Bass group ^a
| 33 | Ac_Bass | Acoustic (upright) bass |
| 34 | Finger_Bs | Electric bass (fingered) |
| 35 | Pc_Bs | Electric bass (pick) |
| 36 | Fretless | Electric bass (fretless) |
| 37 | Slap_Bs 1 | Slap bass 1 |
| 38 | Slap_Bs 2 | Slap bass 2 |
| 39 | Synth_Bs 1 | Synthesizer bass 1 |
| 40 | Synth_Bs 2 | Synthesizer bass 2 |
String section group
Number Name Description
| 41 | Violin | Violin |
| 42 | Viola | Viola |
| 43 | Cello | Violoncello |
| 44 | Contrabass | Double bass |
| 45 | TremoloStr | Tremolo strings |
| 46 | Pizzicato | Pizzicato strings |
| 47 | Harp | Harp |
| 48 | Timpani | Timpani (kettledrums) |
String ensemble group
| 49 | Marcato | String ensemble (fast) |
| 50 | SlowString | String ensemble (slow) |
| 51 | SynString1 | Synthesized strings 1 |
| 52 | SynString2 | Synthesized strings 2 |
| 53 | Choir | Choir ("aahs") |
| 54 | Syn_Voice1 | Voices ("oohs") |
| 55 | Syn_Voice2 | Synthesized voices |
| 56 | Orch_Hit | Orchestral hit |
Brass group
| 57 | Trumpet | Trumpet |
| 58 | Trombone | Trombone |
| 59 | Tuba | Tuba |
| 60 | Mute Trmpt | Trumpet (muted) |
| 61 | FrenchHrn | French horn |
| 62 | BrassSect | Brass section |
| 63 | Syn_Brass1 | Synthesized brass 1 |
| 64 | Syn_Brass2 | Synthesized brass 2 |
Reed group
| 65 | SopranoSax | Soprano saxophone |
| 66 | Alto_Sax | Alto saxophone |
| 67 | Tenor_Sax | Tenor saxophone |
| 68 | BaritonSax | Baritone saxophone |
| 69 | Oboe | Oboe |
| 70 | EnglishHrn | Cor anglais |
| 71 | Bassoon | Bassoon |
| 72 | Clarinet | Clarinet |
Pipe group
| 73 | Piccolo | Piccolo |
| 74 | Flute | Flute |
| 75 | Recorder | Recorder |
| 76 | Pan_Flute | Panpipes |
| 77 | BlowBottle | Blown bottle |
| 78 | Shakuhachi | Shakuhachi |
| 79 | Whistle | Whistle |
| 80 | Ocarina | Ocarina |
Synth lead group
| 81 | SquareLead | Square wave lead |
| 82 | Saw_Lead | Sawtooth wave lead |
| 83 | Calliope | Synthesized calliope |
Number Name Description
| 84 | Chiff_Lead | “Chiff” lead sound |
| 85 | Charang | “Charang” sound |
| 86 | Voice_Lead | Vocal lead sound |
| 87 | 5th_Lead | Sawtooth lead in fifths |
| 88 | Bass+Lead | Bass and lead voices |
Synthesizer group
| 89 | Fantasia | A “new age” sound |
| 90 | Warm_Pad | Warm pad |
| 91 | Poly_Pad | A polyphonic synth pad |
| 92 | Choir Pad | Space-age choir |
| 93 | Bowed_Pad | Strings-like sound |
| 94 | Metal_Pad | Metallic sound |
| 95 | Halo_Pad | Halo pad sound |
| 96 | Sweep_Pad | A sweeping pad sound |
Synthesizer effect group
| 97 | Rain | Rain sounds |
| 98 | SoundTrack | A film soundtrack |
| 99 | Crystal | Crystalline sound |
| 100 | Atmosphere | Atmospheric effects |
| 101 | Brightness | A bright sound |
| 102 | Goblins | Goblin-like effects |
| 103 | Echoes | Echoing effects |
| 104 | Star_Theme | An SF-like sound |
Ethnic group
| 105 | Sitar | Sitar (Indian) |
| 106 | Banjo | Banjo |
| 107 | Shamisena | Shamisen (Japanese) |
| 108 | Koto | Koto (Japanese) |
| 109 | Kalimba | Kalimba (African) |
| 110 | Bag_Pipe | Bagpipe (Celtic, etc.) |
| 111 | Fiddle | Folk violin |
| 112 | Shanai | Double-reed wind (Indian) |
Percussion group
| 113 | TinkleBell | Light bell |
| 114 | Agogo | Agogo |
| 115 | SteelDrums | Steel drum |
| 116 | Wood_Block | Wood block |
| 117 | Taiko | Taiko (Japanese drum) |
| 118 | MelodicTom | Melodic tom-tom |
| 119 | Synth_Drum | Synth drum |
| 120 | ReverseCymb | Reversed cymbal sound |
Sound effect group
| 121 | Fret_Noise | Guitar fret noise |
| 122 | Breath | Breath noise |
| 123 | Seashore | Waves and surf |
| 124 | Bird_Tweet | Birdsong |
| 125 | Telephone | Telephone ring tone |
| 126 | Helicopter | Helicopter |
Number Name Description
| 127 | Applause | Audience reaction |
| 128 | Gun_Shot | Gunshot |
a. Only instruments from this group can be assigned to the bass part
Drum kits
In addition to these instruments, there are five different drum kits which you can use with the drum parts of the patterns:
Name Description
| Standard | A standard drum kit |
| Power Set | A more powerful, rock-oriented kit |
| Brush | A standard kit played with brushes,suitable for jazz, etc. |
| Orchestr | More of an orchestral feel to the percussion sounds |
| CM-64/32 | Emulates a popular rhythm machine |
5 – Standard MIDI files and the Pocketstudio 5
The Pocketstudio 5 can take Standard MIDI files (we'll use SMF as the abbreviation for these) and play them back using the tone generator.
You can either use a public-domain SMF, available over the Internet, etc. or you can transfer MIDI files you have created yourself on a sequencer over to the Pocketstudio 5's memory card.
TIP
You can also play MIDI directly into the Pocketstudio 5 from a keyboard or a sequencer, using the internal tone
generator. However, you cannot record MIDI sequences on the Pocketstudio 5 using this setup.
From the Pocketstudio 5, you can choose the instruments that will play the SMF, adjust their level and position in the stereo mix, transpose them, add reverb and chorus, etc.
This allows you to produce a “karaoke” backing, perfectly matched for your vocals. Or, if you want to practice a particular instrumental part, you can play along to the rest of the “backing band” and mute the MIDI solo instrument.
Transferring SMFs to the Pocketstudio 5
You can copy SMFs to the Pocketstudio 5 in the same way that you copy any file on your computer.
NOTE
SMFs may contain copyright material. Make sure that you respect the copyright holder's interests when you use such files.
See "Data, cards, etc." on page 36 for full details of how to connect the Pocketstudio 5 to a computer.
When the Pocketstudio 5 is connected to the computer, the card appears as an extra disk.
Copy the SMF to the card in the usual way (drag and drop between folders).
Any SMF should have an 8.3 type filename (that is, the name of the file should be no longer than eight characters long) and the extension should be .MID.
Note that if the name is longer than eight characters, it will be abbreviated, spaces are removed, and lowercase letters will be converted to uppercase, so My Blue Rose.mid will become MYBLUE+1.
NOTE
Make sure that you copy the SMFs to the SMF folder on the card. If you copy them anywhere else, you will not be able to use them with the Pocketstudio 5.
Deleting SMFs
You can delete an SMF loaded on the card using the Pocketstudio 5.
From the CARD menu, use the cursor pad to move down to SMF DELETE, and press ENTER.
![ELLIE1 YOU4ME WAITING * Delete >> [ENTER]](/content/2026/05/888513/images/1a6c5d8ffbde5f819531b218ad3d4d414b468b7adc42d4674687e65381c04432.jpg)
Use the cursor pad to scroll the cursor down to the song you want to delete, and press ENTER.
After a short time, the display shows Complete !!
NOTE
There is no undo possible from this operation. Make sure that if this is an SMF you may want to use again, that there is a copy stored on your computer.
Using SMFs on the Pocketstudio 5
When you play back an SMF on the Pocketstudio 5, you can record along with it.
Use the PLAY, STOP, REW, F FWD and MARK transport keys to play back the SMF along with the audio tracks. When you work in this way, the audio will always be synchronized to the MIDI.
Playing back an SMF when the T G screen is displayed means that when a part is playing a note, an o flashes briefly on the third line of the display above the part number.
You can also disable playback of the SMF, if you want, and use the transport keys to control the audio only.
Control the volume of the tone generator with the TG fader (just like the backing tracks).
TIP
When you are using an SMF as backing to your audio tracks, you may prefer to set the time display to bars and beats, rather than minutes, seconds and frames. See "Choosing the time type" on page 28.
Since the card can contain many SMFs, you must choose the one to play back.
Loading an SMF from the card
To load an SMF from the card, use the CARD menu:
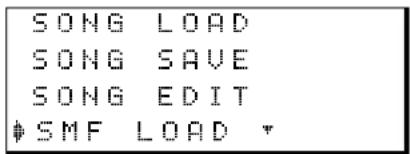
Move the cursor to the SMF Load menu item and press ENTER.
![BLUEDOLL I WANT YOU THRASH1 Load >> [ENTER]](/content/2026/05/888513/images/b69f6c2ccc5d5694b2862bc07b6d3604805b110ba54112b2e69ddce36e21ea54.jpg)
Move the cursor to the title of the SMF you want to load, and press ENTER.
When an SMF is loaded, the tone generator is automatically set to play back SMFs (not patterns).
If you want to check this, from the main menu, enter the SYSTEM menu, and select the TgMode option.
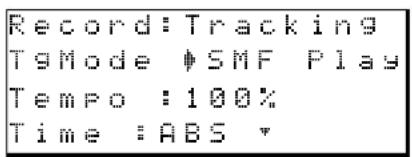
TIP
You may also want to set the time display to bars and beats, since you are working with a MIDI file. See "Choosing the time type" on page 28.
Setting SMF song tempo
Also in the SYSTEM menu is the option to play the SMF at a tempo different from that it was originally saved at. Since MIDI does not change pitch with tempo, this can be a great way of learning guitar licks, etc. at a slow speed and working up to full speed.
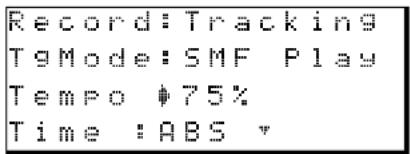
You see the tempo expressed as a percentage of the original value of the SMF. Set this, using the wheel, between 50% (half speed) and 200% (double speed) of the original. 100% is, of course, the original speed. Tempo changes within the SMF are preserved.
Setting part parameters in the SMF
As mentioned earlier, you can set the following for each of the 16 parts in the SMF (not every SMF will
have all of these parameters set, and not every SMF will use 16 instruments):
5 – Standard MIDI files and the Pocketstudio 5
- Instrument—there are 128 instruments and 5 drumkits (a special kind of instrument) to choose from, corresponding to the settings defined in the General MIDI list. See “Instruments” on page 9 of the Patterns documentation for a full list of the General MIDI instruments as implemented on the Pocketstudio 5. Note that you do not have to assign only bass instruments to bass parts, etc. but you can only assign drum kits to part 10 (traditionally reserved for drums).
• Level—from 0 to 127 - Pan—from L63 (hard left) through C (center) to R63 (hard right)
- Mute—on (part does not sound) or off (part sounds)
- Rx. Ch (receive channel)—the MIDI channel that the part receives data on. Typically, part 1 receives data on channel 1, etc., but you can change this.
- ChoType (chorus type)—there are several types of chorus/effect available. Use this parameter to pick the effect that you will use with the tone generator.
- ChoSend (chorus send)—the level of signal sent to the “chorus” effect, whose type is determined above.
- RevType (reverb type)—in addition to the first “chorus” effect, the tone generator can also use its own reverb/delay effect. Pick the type of effect to use here.
- RevSend (reverb send)—the level of signal sent to the second “reverb” effect.
- KeyTrans (key transposition) —transpose the original ±36 semitones (three octaves).
TIP
The transposition is useful if you are learning a piece written in F#, for example, but you're not yet sure of
the chords, or if you are singing along to a MIDI backing track, but can't quite make the high notes.
NOTE
The two effects here are entirely independent of any other effects in the Pocketstudio 5. You cannot use these effects with the audio tracks, the audio effects cannot be used with the tone generator, and you cannot use the audio effects with the tone generator effects.
From the main menu, select the T G menu:
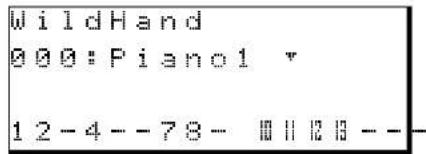
The name of the sequence (if the SMF contains the sequence name this is used, otherwise the filename is used here) is given at the top, together with the first part.
Press ▼ to start editing the parameters.
Use ◀ and ▶ to select the part. The number of the selected part flashes on the bottom line of the display (if the part is muted, a hyphen – represents the number), and the part number and selected instrument are shown on the top line of the display.
Use ▲ and ▼ to select the parameter to be changed.
The second line shows the parameter to be changed, as listed above.
Use the wheel to change the value. There is no need to press ENTER—the value changes instantly.
This way of working allows you to work easily in one of two ways: either setting all the parameters for one part (use ▲ and ▼) or setting the same parameter for different parts (use ◀ and ▶).
Choosing the meter display
You can choose between four different styles of meter shown on the screen: short/slim (ShrtSlim), long/slim (LongSlim), short/fat (ShrtFat) or long/fat (LongFat).
1 From the system menu, move to the Meter: option:
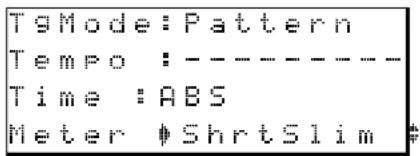
2 Use the wheel to select the meter type to be displayed on the home screen.
Choosing the time type
Depending on your preference, the time can be displayed in minutes, seconds and frames (there are either 38 or 39 frames in a second) or in measures (bars) and beats.
1 From the system menu, move to the Time: option:
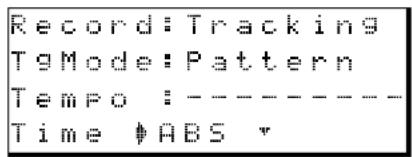
2 Use the wheel to change between the minutes and seconds, and the bars and beats display. When you make the change, either the word ABS (for “absolute time”) or BAR/BEAT (bars & beats) shows on the screen.
NOTE
The bars and beats display is not a "magic" indicator. If you are not playing in time with the MIDI tone generator, there is no way for the Pocketstudio 5 to know anything about the musical tempo or structure of your music.
Songs on the Pocketstudio 5 always start at 00:00:00 (minutes, seconds and frames) or at 001-01 (bars and beats).
NOTE
Because of the slightly uneven nature of the internal timing, you may sometimes find that the bars/beats measurement is not as precise (to small fractions of a second) as the ABS timing. However, it remains a very useful way in which to jump around quickly within the song's structure.
Reducing input noise
You may notice, especially with some of the guitar-based input effects, that you can hear a certain amount of noise as the effect amplifies any string noise, pickup noise, etc. Typically, when you play the instrument, the sound of the instrument will cover the noise of the effect, but in quiet passages, this can be annoying.
The Pocketstudio 5 therefore provides noise suppressors for both inputs, so that any background noise will be suppressed. Any sounds which go over the level set for the suppressor will be passed through.
1 From the home screen, press MENU, and enter the SYSTEM menu.
2 Use the cursor keys to move to the bottom of the menu:
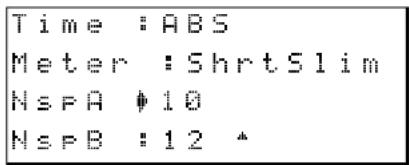
3 The two noise suppressors for inputs A and B, NsPA and NsPB, are at the bottom of the screen. Use the wheel to change the level from OFF (equivalent to 0) through to 60.
At the OFF setting, all signals (together with the noise) are passed through. At the high settings, only relatively loud sounds are passed through the suppressor.
If your song includes quiet passages, you may not be able to hear these quiet parts if you make this setting too high.
When the gate is opened to let the sound through, it takes a certain time to close. During that time, you may be able to hear some noise, even after the sound you want has stopped. You may also note that the
sound appears to cut off slowly when the value is decreased to the OFF setting, but reappears fast when the value is increased from OFF.
Absolute location
From the home screen, you can jump to different parts of the song.
You can either make the jump to a value in minutes, seconds and frames (there are 37 or 38 frames to a second), or in bars and beats), depending on the time type that has been selected in the way described above.
To jump to a location (mm:ss:ff): Follow the steps below:
1 Stop playback or recording.
2 On the home screen, move the cursor so that the cursor (underline) is under one of the three time fields (minutes, seconds or frames):
$$ \boxed {0 0: 1 \underline {{0}}: 3 3} $$
3 Turn the wheel to change the value. Note that if you turn the seconds value past 59, the value resets to zero and the value of the minutes goes up by one (the reverse happens if you go below zero). The frames and minutes fields also interact in the same way.
As you turn the wheel, the number flashes. If you are going to set other fields, use the cursor pad to move to another field (it starts to flash), and the number you have just left stops flashing.
4 When you have finished setting the values, press ENTER to locate to the position you have just set.
5 You can use this position to start playback or recording, as the IN or OUT point for punch recording or repeat playback, or as the point to set a mark.
To jump to a bars and beats location This is basically the same as the time-based location procedure, except for the following:
$$ \boxed {1 4 - 0 2} $$
Bars and beats are separated by a hyphen (-) , rather than a colon () .
Increasing the beat counter does not automatically move to the next bar, and turning the beat counter below zero does not move to the previous bar.
Like the time-based location, you must press ENTER to move to the new location.
Marks
Use the mark functions to set and recall critical points (verse beginnings, instrumental breaks, etc. within a song). These marks can be used with song editing functions (see “Editing data” on page 40) as well as for location. As well as the eight user-defin-
able breaks which you can set anywhere within the song and rename to whatever suits you best, there are also two other special points, IN and OUT, used with the repeat and the auto punch function. These cannot be renamed.
Using marks
When marks have been set as described below, simply press the REW or F FWD keys to jump while playback is stopped or playing back (but not recording) to the previous or next mark position (including the IN and OUT points). If no mark positions have
been set behind the current playback position, the playback position will be set to the start (REW) of the song. See below for details of how to set and edit the marks.
Setting a mark
During playback or while playback is stopped, press the MARK key to insert a mark at the current position.
TIP
You don't need to have the home screen displayed in order to use marks.
The home screen shows Mark x at the top left of the screen, where x is the next available mark number. This is the default name of the mark, which you
can change later (see below) to something more useful, like “Verse 2” or “Chorus”. If a mark has been deleted from the sequence, the deleted number is then reused.
When mark points have been set (including the IN and OUT points), the name of the mark immediately before the current playback position is shown during playback or winding.
Deleting a mark
When a mark is displayed (that is, it is the mark at or before the current playback position on the home screen, you can delete it in the following way:
1 Press and hold down the STOP key.
2 Press the MARK key.
The mark is then deleted, and the previous mark (if any) is then shown. To delete this previous mark, release all keys, press and hold the STOP key again, and press the MARK key again. Repeat as necessary.
Naming and editing mark points
You name and edit mark points in the following way:
1 Select the CARD menu from the main menu.
2 Select the Song Edit menu. Scroll down with the wheel until the Edit Mark menu item is highlighted.
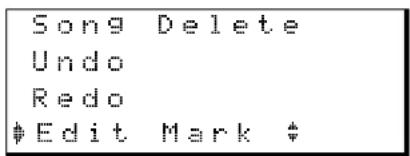
3 Press ENTER/YES, and use the ▼ and ▲ keys to scroll through the list of marks that have been set:
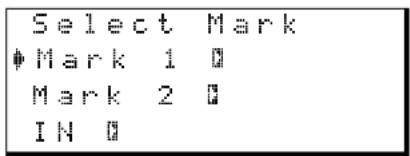
4 Press the ▶ key when you have highlighted the mark you want to edit:
![Name: Mark 1 Time: 00:00:00 Write >> [ENTER]](/content/2026/05/888513/images/8ce4e9017f23bb88de7160cdf9a449e2ff9efbb08b18b76c43c5e8a06a395cdb.jpg)
5 Use the ▼ and ▲ keys to move between the mark name and the mark time value.
Name the mark as described in “Naming songs, etc.” on page 12 of Getting Started. Note that you cannot rename the IN and OUT points.
Use the ▶ and ◀ keys to move the cursor to the minutes, seconds or frames value, and then use the wheel to set the value on the screen.
6 Set the values with the ENTER key.
Repeat playback
You can repeat and loop a part of the song, in order to practice a particular guitar lick or vocal phrase, for example.
When the REPEAT key is on (lit), playback loops between the IN and OUT points, if these have been set.
When you press the REPEAT key to turn repeat on (if the IN and OUT points are set, and are not too close together, otherwise a message is displayed), playback starts at the first point, continues to the second point and then returns to the first point and replays again.
6 – Advanced options and operations
NOTE
In repeat mode, unlike auto punch rehearsal mode, the IN point can come after the OUT point.
Remember that it is also possible to loop rehearsal of auto punch points, allowing you to repeat a difficult phrase until you get it right.
Press the REPEAT key so that it is unlit to turn off the repeat mode.
You can set the IN and OUT points even while repeat playback is taking place.
Punch recording
There are two ways of carrying out punch recording, manual and automatic. In both cases, when you are playing back the previously recorded track, you listen to (or monitor) the sounds which have already been recorded. Adjust the level of what you hear with the track fader.
When you punch in (start recording), you monitor the input signal (guitar, vocals, etc.).
When you punch out (stop recording), monitoring changes back to the off-track monitoring.
Manual punch recording
Manual punch recording is carried out in the following way. If a track is armed (its REC READY key is flashing), simply playback the track, and press the RECORD key at the point you want to start recording—the REC READY light will stop flashing and light (as will the RECORD key) as recording starts.
Start recording the correct version of the part.
Press PLAY at the point you want to stop recording. The Pocketstudio 5 goes from record to playback, the RECORD key will flash for a short time as the recorded data is written, and the REC READY key starts to flash.
Automated punch recording
Although you can use the method above, it is difficult to press keys on the Pocketstudio 5 when you are playing an instrument that needs two hands, like a guitar. Also, automation allows you to rehearse the punch, so that you punch in and out at the right times,
and don't overwrite any of the important material that you've recorded before.
There are two important location points that you must set for punch recording: the IN point and the OUT point, where you punch in and punch out.
Setting the IN and OUT points
Set these points either “on the fly” while playing back, while playback is stopped at the appropriate point.
Simply press the IN or OUT key at the appropriate point where you want punching to start or to stop.
(if a phrase like this occurs in your song), and to set the IN and OUT points in that silence.
When you have set the IN and OUT points, they appear on the display like marks (see “Marks” on page 29), and they can be edited and deleted in the same way. They cannot be renamed, though.
TIP
Even if you have played just one wrong note, you may find it very difficult to play just that one note correctly. The best way of punching in and out is usually to record a whole phrase, with a little silence before and after it
NOTE
Note that you cannot delete the IN and OUT points while the AUTO PUNCH key is flashing or lit (see below).
Rehearsing a punch operation
When the marks have been set, press the AUTO PUNCH key, which starts flashing.
Playback goes back to a little (three seconds) before the IN point.
Arm the track you want to record, and assign an input to it ("Routing an input to a track" on page 14 of Getting Started). The REC READY light of the track will flash.
6 – Advanced options and operations
Press PLAY. Playback starts until the IN point is reached. Then the playback monitoring stops, and the RECORD key flashes until the OUT point is reached. Then playback from the track starts again, and the RECORD key stops flashing.
Three seconds after the OUT point, the playback point then rewinds to three seconds before the IN point.
At this point, you may decide that the IN and OUT points need to be adjusted (maybe you were a little
slow in hitting the keys when you first set them). See “Naming and editing mark points” on page 30 for details.
TIP
If the REPEAT key is pressed so that it is lit, you can automatically repeat this rehearsal process as many times as you want, "hands-free". You can press the REPEAT key to turn repeat or off while the rehearsal is taking place.
Recording the punch
When you are ready to record, rewind to before the IN point if necessary (usually the Pocketstudio 5 will have done this for you).
Press the flashing AUTO PUNCH key so that it lights steadily (if the REPEAT key is on, it will turn off).
Press the PLAY key. When the Pocketstudio 5 reaches the IN point, the RECORD key lights, and recording starts. Off-track monitoring stops.
When the OUT point is reached, the off-track monitoring starts again
Repeat the punch recording for as many times as it takes to get it right (but you can't set automatic repeat). You probably won't get it right first time, so don't worry. Just carry on until you get a take you're happy with.
Checking the punch
To check the punch, rewind to before the IN point, turn off the AUTO PUNCH key, and press PLAY. You will hear the lead-in to the punch point, the punched material, and the material after the punch.
If you are not happy with the punch, you can turn on the AUTO PUNCH key again (the IN and OUT points will remain), and re-record the punch.
Track bouncing
Like many multitrack devices, the Pocketstudio 5 allows you to bounce tracks (that is, combine already-recorded tracks with each other so that the old tracks are then available for further recording) On the Pocketstudio 5, you can even bounce tracks to themselves.
The way in which this works is that the MASTER outputs are “looped back” inside and can then be recorded on any armed tracks.
This means that you can record more than four tracks in the Pocketstudio 5.
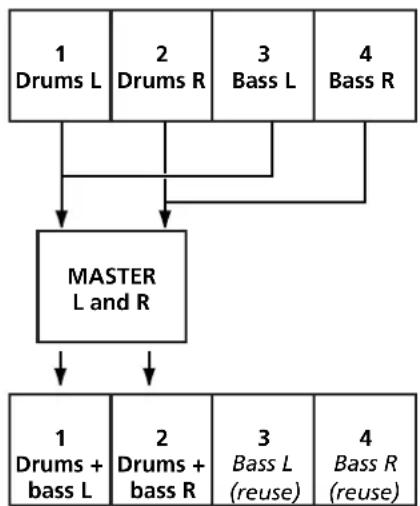
flowchart
graph TD
    A["1 Drums L"] --> D["MASTER L and R"]
    B["2 Drums R"] --> D
    C["3 Bass L"] --> D
    E["4 Bass R"] --> D
    D --> F["1 Drums + bass L"]
    D --> G["2 Drums + bass R"]
    D --> H["3 Bass L (reuse)"]
    D --> I["4 Bass R (reuse)"]
However, when you are bouncing tracks, you should take note of the following:
- When you enter the bounce mode, the only sources are the left and right stereo master outputs, allowing you to record all tracks, as well as the output of the tone generator. You should therefore be careful that the tone generator is turned off at this point
- Although you can bounce tracks to themselves, you lose the original track (in the last diagram, drum tracks 1 and 2 will be overwritten by the mixed bounce). However, you can use the Pocketstudio 5's undo function that allows you to recover your original tracks if you have made a mistake.
- If you start recording after a bounce operation, the undo operation will no longer allow you to restore the tracks you have overwritten.
Bounce modes There are two bounce modes.
One of these, Bouncing, simply routes the stereo master outputs to the armed tracks. The other bounce mode, Bounce+, does the same, but allows the two inputs to be routed to the armed tracks as well.
The Bouncing mode is provided so that “overspill” noise from the inputs will not accidentally be recorded, and this is the option you should choose if
you are not adding any signals from the inputs during the bounce operation.
To enter bounce mode Select the SYSTEM menu from the main menu.
The first menu item, Record, should be set to Tracking for normal recording. Use the wheel to change this to either Bouncing (recorded tracks only) or Bounce+ (recorded tracks plus inputs).
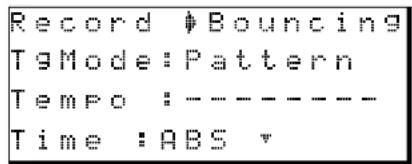
TIP
We strongly suggest that before you start bouncing tracks, you back up all your tracks to your computer (see "Managing songs and data on your Pocketstudio 5" on page 23 of the Getting Started guide for details). This provides you with a "safety net" if things go bad.
To go back to tracking mode Select the SYSTEM menu from the Main menu and set Tracking as the value for the first menu item; Record.
Mixdown tips
When mixing down, you may want to try different mixes, using different effect settings, different relative levels of instruments, etc.
The Pocketstudio 5 allows you to do this, and to keep a number of different mixes of the same song, which you can use for comparison. When you've picked the one you like best, you can delete the others (or keep them all if you can't decide!).
When you press the MP3 key so that it flashes red (select a mix file), if no MP3 files are on the card, you see:
![STMIX Load >> [ENTER]](/content/2026/05/888513/images/56bf19fc5f4e02889c9dee84dad57ed813d4b28f93d2954f149dd403ae4a186c.jpg)
Press ENTER to create a new mix.
Carry out the mixdown process (PLAY+RECORD and carry out the mix level adjustments, etc.).
When you stop the mix, and the RECORD key has stopped flashing (the mix is complete), the MP3 key now flashes green briefly and then lights solidly in green, meaning that the stereo MP3 mix you have just made is ready for playback. This MP3 file is always called S T M I X immediately after it has been created.
If you now press the MP3 key until it flashes red again, you can see that the mix you have just made is called S T M I X.
![STMIX Load >> [ENTER]](/content/2026/05/888513/images/f9613844c189381420a9379942d9ee940e8278bc86cb7fe6b5ee0828268ef548.jpg)
In this case, selecting STMIX will overwrite the mix you have just made, which is still called STMIX.
In order to preserve this mix, you must give it a different name.
Press the MENU key, and enter the CARD menu.
6 – Advanced options and operations
Move the cursor down to MP3 NAME and press ENTER:
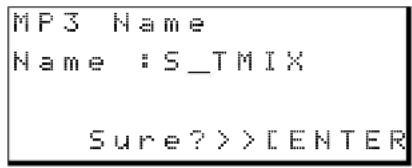
Use the cursor pad and wheel to reset the name (say to M I X 1).
Now, when you press the MP3 key to start mixdown, you will see the new name in the list:
![STMIX MIX1 Load>>[ENTER]](/content/2026/05/888513/images/45a9a3abc750ac036d8ded525f73664705a53ae18d13d1e2c2374e618d1eee65.jpg)
You can select a new mix (STMIX) or you can overwrite any existing mixes (here, there is only one—MIX1).
The important thing to remember is that whenever you create a new mix, it will be saved as S T M I X. If
there is already a file called S T M I X, it will be overwritten by the new mix, and you cannot undo the operation!
Renaming an MP3 file You must rename the STMIX MP3 file to keep it, following the procedure here:
1 Load the STMIX MP3 file for recording or playback (see this section and the following).
2 Press the MP3 key so that it is unlit.
3 From the CARD menu, select MP3 NAME, and press ENTER:
![MP3 Name Name :S_TMIX Sure>>>[ENTER]](/content/2026/05/888513/images/0683e448061e643403fab4ba7055c0ce0ccd5080bed5b3bcfc652580e177d7cc.jpg)
4 Use the cursor keys and the wheel to enter the characters of the name, and then press ENTER to confirm the setting of the name.
Selecting MP3s for playback
When you have made a number of mixes, you will want to select the different mixes to play back so that you can compare the different versions of your work.
Press the MP3 key until it flashes green. The list of available MP3s (mixes, etc.) appears on screen.
![MIX1 MIX2 BIGBASS * Load >> [ENTER]](/content/2026/05/888513/images/45bf20f9ffbe18f27079b5159b4a3f5178bc3cef168394857f32304147aafbac.jpg)
Use the cursor pad to select the MP3 file to be loaded and press ENTER.
The MP3 key lights green.
Now you can use the transport keys to control the playback of the stereo MP3 file. PLAY and STOP work as usual. RECORD has no effect on the MP3 file, but allows the MP3 file to be recorded on the multitrack tracks (see below). Pressing and holding
either REW or F FWD will start fast rewind or forward (playback is muted).
To return to the start, use the STOP + REW combination (the LRP combination naturally has no meaning here).
Repeat playback is not possible, and it is not possible to set marks while playing back an MP3 file. Bars and beats timing is not possible, and the frames field is not available for display or location (minutes and seconds only).
NOTE
If there are no MP3 files currently on the Pocketstudio 5, the display shows No File.
TIP
You can also use the Pocketstudio 5 as an MP3 player for MP3 files which have not been produced using the Pocketstudio 5. This same technique is used to load MP3 files which you have placed in the MP3 folder when the Pocketstudio 5 is connected to a computer. Such files should be encoded at 128 kbps.
Using an MP3 as a recorded backing
When an MP3 file has been loaded on the Pocketstudio 5's card, you can use it as backing in your multi-track recording. This applies either to mixes you have
made of your own recordings, or other MP3 files at 128 bps which you have loaded.
Press the MP3 key until it flashes green, and select the MP3 file to be played back.
The guitar and microphone inputs cannot be assigned to the tracks in this mode. The MP3 file can be recorded on either tracks 1 and 2, or 3 and 4. Arm tracks 1 and 2 (or 3 and 4) and start recording (PLAY + RECORD). The MP3 will be played back and recorded to the armed tracks.
Adjust the level of the MP3 playback (and hence the level that the tracks record at) using the MASTER fader.
Stop playback, make sure the MP3 key is off, and rewind.
Patch the inputs to the unused tracks. You can then start singing or playing along to the MP3 playback on the other two tracks, and add harmony vocals to your favorite numbers, etc.
Managing cards
All CF cards must be formatted on the Pocketstudio 5 before they are used.
Use cards between 8MB and up to 128MB in size (smaller than 8MB is too small for practical use, and the Pocketstudio 5 does not support cards, including CF-type hard disk cards, over 128MB).
The card format is essentially a DOS format, with "8.3" standard filenames. Long filenames are not supported.
![Removable Disk (L:) File Edit View Favorites Tools Help Back Search Folders Address Removable Disk (L:) Go Folders Removable Disk (L:) MP3 SYSINFO.PKT SMF SONG1 SONG2 SONG3 SONG4 FXPATCH.PKT pattern.001 9 object(s) [Disk free space: 26.8 MB] 936 KB My Computer](/content/2026/05/888513/images/d826cb1b628b32563857464a86b06970eadf7b1c9c94eaaf14457d7c69861bbc.jpg)
The directory structure of the cards is explained here.
Note the following file and folder names (if you are recreating these folders after an accidental delete, or if you have to create them on a new card, these names should all be uppercase):
| MP3 | Folder Contains the songs mixed down to stereo MP3 files. You can also copy other stereo MP3 files encoded at 128kbps, so that you can use the Pocketstudio 5 as an MP3 player. |
| SMF | Folder Contains Standard MIDI Files which you can use as backing tracks for your recordings |
| SONGx | Folders These song folders contain the audio, MIDI backing, effect settings, etc. which make up a song. If you delete any files from inside these song folders, the song will probably not play back properly (or at all). Each song folder includes three files: MTRK . PKT, which includes the multitrack audio data, SONGINFO . PKT, which contains all other information (MIDI pattern and setting data (or SMF name), effect settings, etc.), and an empty file with the song name followed by . 100 to help you identify the songs (for example, TRUEBLUE . 100). |
| FXPATCH . PKT | File This file contains the effect settings |
| PATTERN . 001 | File This contains the patterns which you can use as backing to your songs (they are not part of the songs themselves). |
| SYSINFO . PKT | File This contains important system information regarding the use of the card, etc. |
NOTE
All these files and folders are created automatically when a card is formatted, except for the PATTERN.001 file, which must be copied manually after a format. One song folder with the correct files included may also be optionally created after a format. See "Before you start using a new CF card" on page 24 of the Getting Started guide.
Do not delete or rename these folders or files. If you do, you will not be able to access the data on the card from the Pocketstudio 5.
When the Pocketstudio 5 is used with a Macintosh computer, the following files are automatically created and will appear when the Pocketstudio 5 is connected to a Windows computer afterwards. They should cause no problems and there is no need to delete them:
| The VolumeSettingsFolder | Folder |
| _Move&Rename | Folder |
| AppleShare DDS | File |
| Desktop DB | File |
| Desktop DF | File |
| Fileid.dat | File |
| Finder.dat | File |
See the later sections (“Optimizing a card” on page 40, etc.) for details of other operations which involve the card.
Working with songs with the Pocketstudio 5
You can store up to four songs on the Pocketstudio 5's card, regardless of the card size or the song.
As explained above, a song consists of three files included in a folder. The folder is always called Songx, where x is a number between 1 and 4.
The 8-character song name used within the Pocketstudio 5 is held as a zero-length file with a .100 extension (for example, songname .100). If you change the name of this file on your computer, when you reload the song onto the Pocketstudio 5, the name of the song that you see on the Pocketstudio 5
will not change, however. The song must be renamed on the Pocketstudio 5.
When you transfer the files to your computer, you will probably want to rename the folder to something more readable. However, note that you will not be able to restore the song to the Pocketstudio 5 with the new folder name that you have given it. You must rename it with the original SONGx name.
Transferring songs between your computer and the Pocketstudio 5, in either direction, must always be done so that all files are transferred together.
To use the Pocketstudio 5 with a computer (non Windows 98SE)
1 Make sure the Pocketstudio 5 is unplugged from the computer and turned off. Turn down the line and headphone levels and the master fader.
2 Press and hold down the ENTER key while turning on the Pocketstudio 5. The screen shows USB MODE.
3 Now connect the Pocketstudio 5 to the computer using a standard USB cable.
Your Pocketstudio 5 can be used with any of the following computer operating systems.
- Microsoft Windows 98 SE (Second Edition) ^1
- Microsoft Windows Me
- Microsoft Windows 2000 (Workstation and Professional)
- When using the Pocketstudio 5 with Windows 98SE, a driver is required, as supplied on the CD-ROM accompanying the unit.
- Microsoft Windows XP (Home and Professional)
- Mac OS 9.x
The Pocketstudio 5 cannot be used with Microsoft Windows 95, Microsoft Windows 98 (first edition), or Microsoft Windows NT (any version).
When the Pocketstudio 5 is connected, it appears as an external disk, to which you can copy files, etc.
To disconnect the Pocketstudio 5 from the computer, follow the instructions of your operating system regarding disconnecting removable drives, as summarized in the printed Getting Started manual.
NOTE
Your Pocketstudio 5 has been tested thoroughly and will work with most modern computers. However, depending on the configuration and the model of your computer, it is possible that the Pocketstudio 5 will not work together with it. On account of the large number of different possible computer configurations TASCAM cannot guarantee that your computer system can be used with the Pocketstudio 5.
To use the Pocketstudio 5 with a computer (Windows 98SE)
Using the Pocketstudio 5 with Windows 98 SE requires the driver supplied with the Pocketstudio 5 to be installed.
1 When the Pocketstudio 5 is connected in USB mode (turn on the Pocketstudio 5 while holding down the ENTER key) for the first time to a computer running Windows 98SE, a Add New Hardware Wizard appears. Click Next.
2 Select the Search for best driver for your device option and click Next.
3 With the CD-ROM in the drive, select the CD-ROM Drive option and click Next.
4 When the drivers have been located, click Next.
5 When the driver has been copied, click Finish. The driver is now loaded, and the unit now appears as a drive (removable disk).
Managing songs
The Pocketstudio 5 regards all pieces as being a song. A song contains the audio and other data and settings you have set up, and may be created, saved, named and deleted.
Remember that you must save the song manually whenever you make any changes to any data that is not recording data. This includes any tone generator or pattern changes, naming, etc. If you do not do this, these changes will not be there when you turn the machine off and on again.
Creating a new song
To create a new song:
From the main menu, enter the CARD menu and enter SONG LOAD:
![New Song SONG1 Load >> [ENTER]](/content/2026/05/888513/images/5656d2c907f82cc0d4c9ecafd7015078cb747c641f0ca7caf823fcf32b25305c.jpg)
Make sure the cursor is pointing to New Song, and then press ENTER.
The display shows a * as the card is accessed, and then shows Complete as a new song is created with the name SONGx, where x is one higher than the last song created (even if the song has been renamed).
A new song may automatically be created when you format a card (see below).
When a song has been created, it can be renamed as described below.
Only 4 songs at a time can be stored on the card, regardless of how full the card has become.
Loading and renaming a song
You can rename a song at any time.
If the song to be renamed is not loaded (as shown on the home screen), load the song to be renamed, using the procedure described above, but selecting an existing song, rather than the new song option before renaming the song.
Next, from the main menu, enter the CARD menu, the SONG EDIT menu, and then the SONG NAME menu:
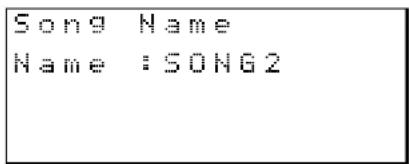
Name the song using the wheel and the cursor keys as described in the Getting Started manual.
You should save the song when you are done (the Pocketstudio 5 does not automatically save the song with its new name when a name is entered). See below for details.
Deleting a song
Delete a song to make more space on the card.
From the main menu, enter the CARD menu, the SONG EDIT menu, and then the SONG
DELETE menu. The list of songs on the card is shown:
![SONG1 SONG2 Delete>>[ENTER]](/content/2026/05/888513/images/caa0ab9e660994542239f4d166956a29e2cd0031f89e05f078ad6944b68c2ee8.jpg)
Use the wheel to point to the song to be deleted and then press ENTER. The song is then deleted (after a
7 – Data, cards, etc.
confirm message). If the deleted song is the currently-loaded song, the screen shows the song loading menu (if the deleted song was the only one on the card, you will have to create a new song).
If you do not create a new song at this point, and there is no other song in memory, the home screen shows No Data where a song title should be.
Saving a song
Because the Pocketstudio 5 automatically saves audio data when you stop the recording process, there is no need for you to do any manual saving of this data.
NOTE
There is no way to undo this operation. Once you delete a song, it has gone for ever. Only delete a song if you really do not want it, or if you have it safely backed up on your computer.
However, a song consists not only of the audio data, but also of all the other settings (effects, source settings, arrangements, etc.).
Save the song using the SONG SAVE option from the CARD menu, as explained in the Getting Started manual.
Seeing how much space is on a card
To see how much space is used, and how much is available for future recording, from the main menu, pick the CARD menu, followed by the CARD SPACE menu. The screen then shows something like:
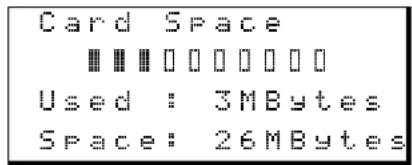
Press EXIT to go up a menu level.
NOTE
It is impossible to give a really accurate answer to the question "how much space does a song take up?". On average, the Pocketstudio 5 uses about 0.6 megabytes per minute per track, but there are just too many variables to be able to give a completely accurate answer. You have to rely on what is already there on the card and work out from there, using your best judgement, how much time remains.
Optimizing a card
If you are running out of space on the card, especially after many edits, deletes or undo operations, you may need to optimize the data on the card.
Before optimizing a card, we suggest that you back up your work to your computer to avoid any possibility of data loss.
From the main menu, go to the CARD menu, and then select the CARD OPTIMIZE item:
![Card Optimize Sure>>>[ENTER]](/content/2026/05/888513/images/3174e0d976c2bb75965ddfd0f1b643a4c07238555b85acfc7a4788c8b250caa0.jpg)
Press ENTER to optimize the data. The screen shows an asterisk (*) while the data is being optimized, possibly for a few seconds, and the display then returns to the CARD menu.
NOTE
If your card becomes full, you can delete SMFs, MP3 files or songs (all accessed through the CARD menu).
Editing data
The Pocketstudio 5 allows you to cut, copy and paste parts of an audio track, just as in a word processor you can cut, copy and paste words and phrases from one part of a document to another.
Like many computer programs, the Pocketstudio 5 allows you a “safety net”—an undo option, that allows you to go back to the way you were before the last editing operation.
Copy and paste
In one screen, you can select a portion of a track, defining the start and end points of the portion, and copy and paste (insert) this portion to another point in the track.
NOTE
You cannot copy material between tracks, only within a track.
You can make multiple copies of the audio, which may be useful if you have a repeating section, for example. This can be useful if you want to repeat an identical phrase at different points throughout a song.
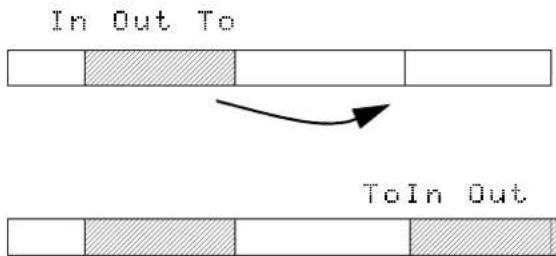
flowchart
graph TD
    A["In Out To"] --> B["ToIn Out"]
    style A fill:#f9f,stroke:#333
    style B fill:#bbf,stroke:#333
Before performing a copy operation, mark the start of the section to be copied with the IN point. See “Setting the IN and OUT points” on page 31 for further details of these points. If these are not set, or in the wrong order, an error appears.
Mark the end of the section to be copied with the OUT point.
Set a mark at the position where you want the mark to be copied. See “Setting a mark” on page 29 for details of how to do this.
TIP
If you are playing along to a pattern played by the internal tone generator, you may want to set the timing reference to bars and beats, rather than seconds, so that you can align the audio with the MIDI backing.
To enter this function, from the main menu, enter the CARD menu and scroll to SONG EDIT. Press ENTER.
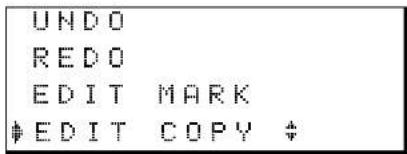
Scroll to EDIT COPY and press ENTER.
![Trk #Trk1 Start:IN End :OUT * Sure>>>[ENTER]](/content/2026/05/888513/images/88a076a7af27db80182141d29de82fcdfba387ec01159d414f1f1ab66309f15e.jpg)
Now set the track where the copy will take place.
The Start and End times are fixed as the IN and OUT points. Move down to the next screen and set more parameters:
![End :OUT To :Mark 1 Time #1 times* Sure>>>[ENTER]](/content/2026/05/888513/images/f912a89339f1a3a0e0a5eb2d1fd59459f83deccd3f4e8c7367626233ec0f912b.jpg)
The To point can be set to any of the marks that have been previously set.
Finally, set the number of times that the section should be repeated when it is copied (up to 99 times).
When you have set the destination point and the number of times for copying, press the ENTER key to copy the selected area to the End point.
TIP
To copy the same guitar hook to different chorus sections of the song (for example), keep the Start and End points the same, and simply change the To value.
Erasing data
To erase data between two points on a track (leaving silence between the two points):
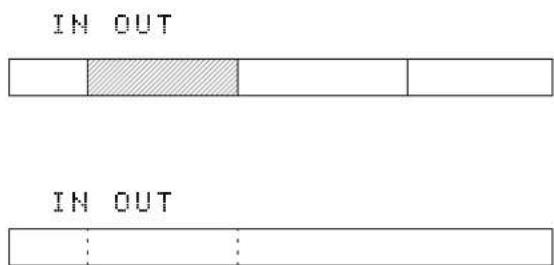
7 – Data, cards, etc.
From the main menu, enter the CARD menu and scroll to SONG EDIT. Press ENTER.
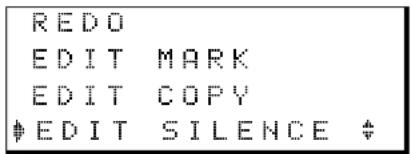
Scroll to EDIT SILENCE and press ENTER.
![Trk #Trk1 Start:IN End :OUT Sure>>>[ENTER]](/content/2026/05/888513/images/f0eaf93c45c40789a9d10fd1ee21caf2e1c7db0c6237a8acfd962112c7dc47e8.jpg)
Cutting data
Cutting data differs from erasing data. When you erase data, a blank space is left between the start and end points. When you delete data, the sound between the start and end points is removed, and the space between these points is closed up (the points remain in the same place, though).
IN OUT

IN OUT

Now use the wheel to select the track from which data will be erased.
The Start time must come before the End time. If this is not the case, an error message appears.
Press ENTER to erase the data between the two points on the selected track.
The way you delete data is the same as erasing data. From the SONG EDIT menu, select EDIT CUT. The screen and operations are identical to the erase screen above, but space which contained the material you remove is closed up, rather than being left as silence.
TIP
You can only work on one track at a time. If you want to delete more than one track (say both tracks of a stereo pair), select the first track, set the start and end points, delete the data, change the Trk parameter, and redo the delete operation until all the tracks have been deleted.
NOTE
If you are working with MIDI, remember that the MIDI data is not deleted, and that the audio will not match the MIDI any more.
Undo and redo
You can undo and redo certain operations on the Pocketstudio 5. Operations that you can undo include:
• Recording (including punch recording)
- Bouncing between tracks
- Copy and erase operations
Operations that you cannot undo include:
• MIDI editing of any kind
- Formatting cards
- System settings
You can only undo and redo one level of operation (in other words, you can only undo the last undoable operation, and only redo the last undo).
To undo the last operation, from the CARD menu, scroll to the SONG EDIT menu, scroll to UNDO and press ENTER.
![Undo ?? Sure>>>[ENTER]](/content/2026/05/888513/images/82cb9296793e6a33375593cd202423e4178178c6d3e91f9e212c3a0afb03c427.jpg)
Press ENTER to undo the last operation. If the last operation cannot be undone (or there is no operation to be undone), the screen shows: Can't Undo ! ! . Press ENTER or EXIT to continue.
Redoing an undone operation is similar. From the CARD menu, scroll down to REDO and press ENTER.
Redo ?? Sure>>> [ENTER]
If there is no undo operation to be redone, the screen shows Can't Redo !!!. Press either ENTER or EXIT to continue.
Making CDs from your mixed songs
On the CD-ROM which comes with your Pocketstudio 5, there is software (musicmatch ^TM ) which enables you to create audio CDs from the MP3s you create on your Pocketstudio 5.
Read the documentation supplied with this software for details of how to install this software on your computer and operate it.
Sharing your songs
Because songs on the Pocketstudio 5 are saved in a folder as a collection of files which must be moved together, you will find it easier and more convenient if you put the files together into an archive, which makes one smaller file out of many separate files.
When you connect the Pocketstudio 5 to your computer, you will see the song stored as a folder with the “name file”, multitrack data and other song data (MIDI settings, etc.). Such a folder is difficult to send by mail.
For Windows users, the most common way of producing an archive is the “zip” format (Macintosh users can also view and use this kind of archive file). A suitable tool for Windows users is WinZip, which is available for free evaluation. It is not free software,
though, and must be registered and paid for if you continue using it after the evaluation period, as specified in the terms and conditions included with the product. We suggest that you download an evaluation version from the Web site: http://www.winzip.com
Follow the instructions with the demonstration version of WinZip to set up the software.
NOTE
Some mail systems (especially within large companies) will not allow ZIP files through, as they regard them as a possible source of viruses. Also, you should be aware that there is a size limit on mail messages imposed by many mail servers. If you can, try to find out what the size limit is for your mail server (or rather, the one used by your Internet provider), and the one at the other end (used by the person that you will send the files to).
Sending a Pocketstudio 5 song
This is a sample of the process you should go through in order to send a file from your Pocketstudio 5 to a friend. Don't worry, although it may seem a little daunting at first, in fact, it is surprisingly straightforward.
The exact way in which you perform the operation may vary from this, depending on the way that your system asset up.
1 Turn off the Pocketstudio 5 and connect it to the computer's USB port. Hold down the ENTER key and turn on the Pocketstudio 5.
The Pocketstudio 5 then appears as a removable disk drive attached to the computer:
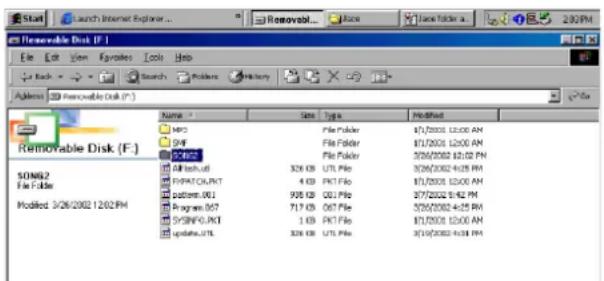
The songs are shown as folders. Here, you can see that SONG2 is the only song on the card. You can see the files inside the song
7 – Data, cards, etc.
folder when you double-click the folder to open it:
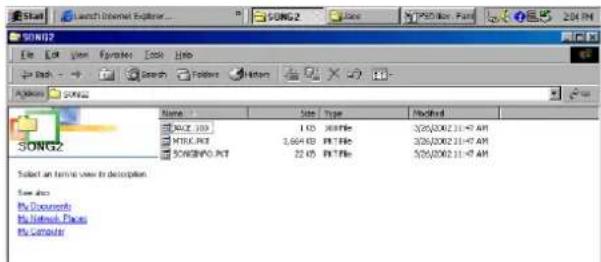
2 To back up this song, we'll create a folder on the computer's hard disk called JACE (you can call your folder whatever you want!). Drag and drop the files from the song folder on the Pocketstudio 5 into this folder:
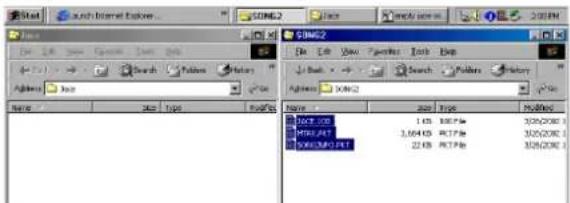
If you look at the song folder on the card side-by-side with the new JACE folder, you'll see that the contents of the two should be identical.
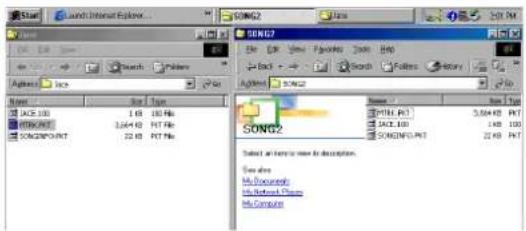
3 Now is the time to start compressing the files, so that they are smaller. Select all the files in the JACE folder and right-click them. Select the Add to Zip option from the popup menu.
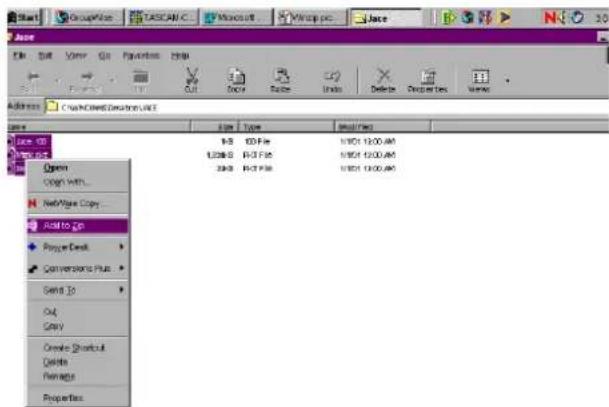
4 When you do this, you start WinZip. If you have not registered the program, a WinZip panel appears:
Click I Agree, to show that you agree to the 21-day evaluation period, as stated on the panel.
5 On the next panel that appears, type Jace.zip at the end of the path in the Add to Archive text field. Click Add.
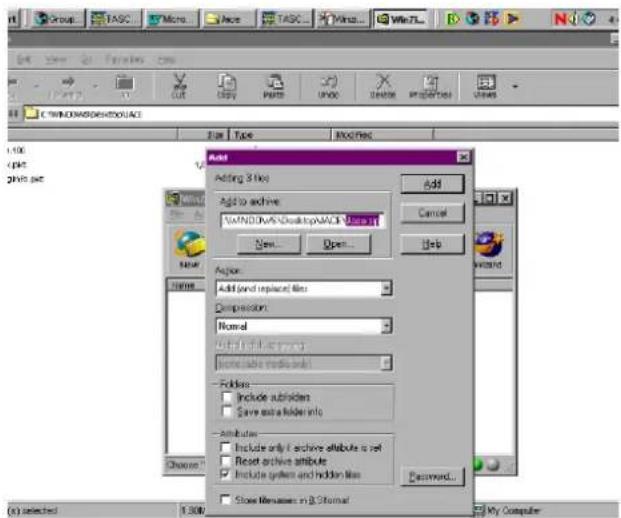
The WinZip program then compresses your files and adds them to an archive called Jace.zip. It shows you the results of its work in a new window.
NOTE
If you are sending a song which uses an SMF as a backing track, remember to include the SMF with the song data in the archive before you send it.
6 Close the new window after you've checked that everything seems OK.
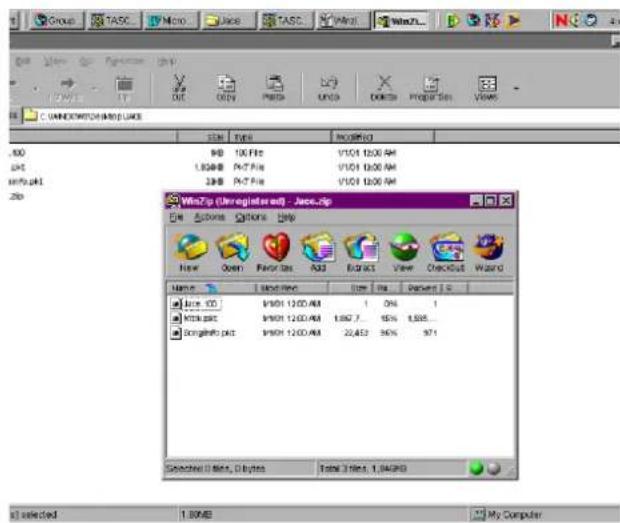
7 The Jace.zip file now appears in the JACE folder on your computer.
8 Start your e-mail program and add this file as an attachment to the mail message you're sending to your friend (the way that your
mail program looks may be slightly different to this one, of course).
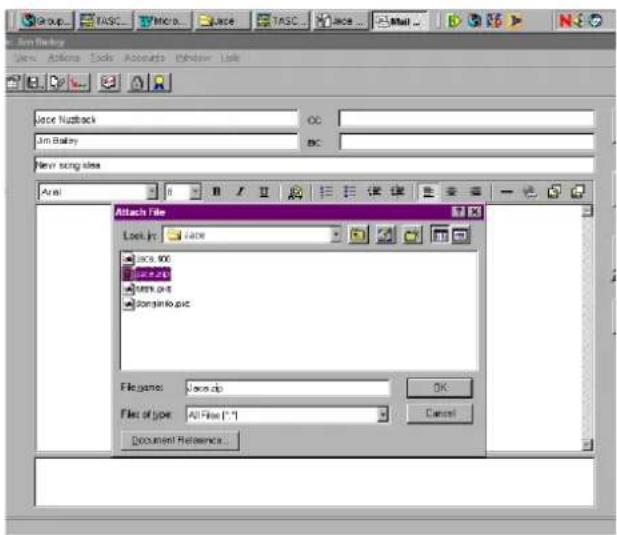
9 Write your e-mail message and send the mail message. Because it's a large file, it may take some time to transmit to the Internet.
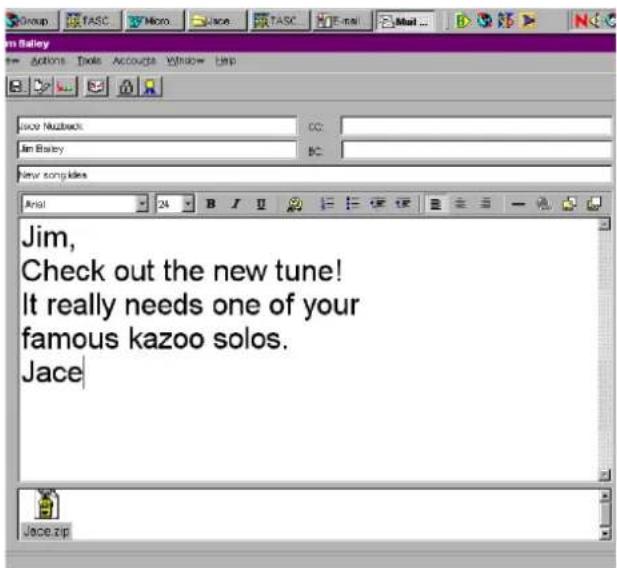
Receiving a song
When you receive a song in a message created this way, you must reverse the process.
1 From your mail program, save the attached Jace.zip (or whatever it's called) file into a
7 – Data, cards, etc.
folder on your hard drive. Right-click the file, and choose Extract.
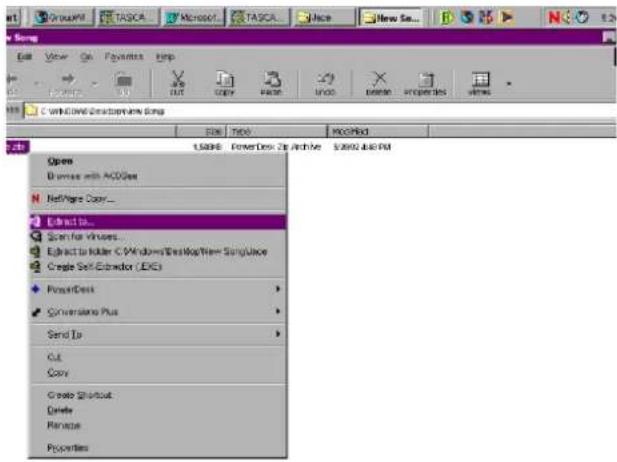
2 WinZip will launch. If you have not registered the program, click I agree.
3 If you don't give any further instructions to WinZip, it will extract the files contained in the archive to the folder where the archive
lives. This should be OK, so just click Extract.
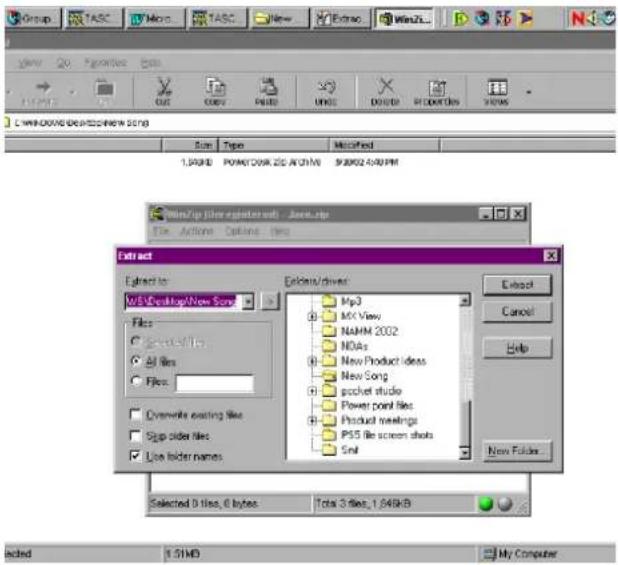
4 Now WinZip shows you the files it extracted from this screen. Check to see that all three files are there, and then close this panel.
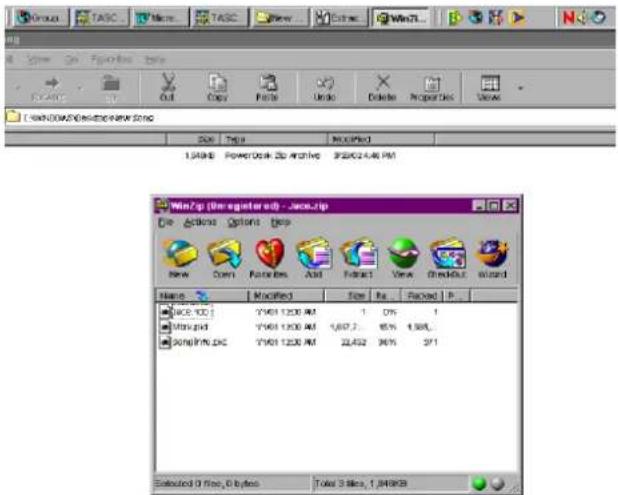
5 Now these three files are in the folder on your hard disk, connect your Pocketstudio 5 while it's switched off, and turn it on while holding down ENTER to allow your computer to see it as a drive.
6 Create a folder on the Pocketstudio 5 card called SONGx (x can be from 1 through 4, and should not be the same as any other SONGx folder already on the card).
7 Drag and drop the three extracted files (not the zip file) from the hard disk to the SONGx
folder that you created on the Pocketstudio 5 card.
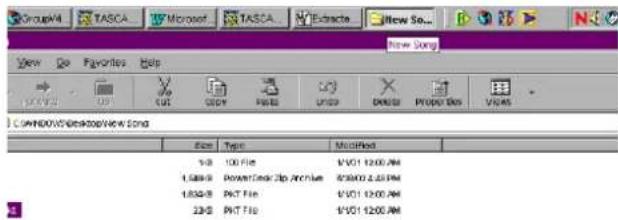
8 Disconnect the Pocketstudio 5 from the computer (see the Reference Manual for details), turn it off and restart it.
You should now be able to load and play the song you have just transferred from the mail message (and add your kazoo solo).
When you're done, you can send the file back, as described above.
Things you can do with the Pocketstudio 5
You've probably got lots of ideas of your own how you can use the Pocketstudio 5. Here are a few that you might not have thought of:
- Set the two inputs to line level and feed them from a pair of aux sends of the mixer at a live gig for a stereo recording.
- If you're in a cover band, fill the Pocketstudio 5 with stereo MP3s of the original recording and use them as backing while you learn the songs.
- If you're a solo keyboard artist, record your MIDI backings onto Standard MIDI Files, load them into the Pocketstudio 5 and take it along to your next gig. Add a MIDI keyboard, cable, mic and cable, audio cables and some powered speakers, and that's it! You can even get your guitarist friends to join in.
- If you're producing a solo artist, make a rough of the backing onto SMF, and pass it on to the artiste to practice at home on their Pocketstudio 5. Once they've got it worked out, they can come into the studio and lay down their vocal lines to the proper backing.
• Take the Pocketstudio 5 anywhere—inspiration might even strike on the beach! The batteries allow you to record your ideas anywhere. The line output can plug into your car stereo with a cassette adapter or a line input.
- If you're a guitarist or singer, but not a MIDI arranger, you can get someone else to do the MIDI backing, based on your ideas, and then you add your acoustic lines afterwards.
- Download SMFs (the legal, free ones) from the Internet, and jam along, or sing karaoke.
- You can even use the Pocketstudio 5 as a removable disk drive for boring things like word processing documents and spreadsheets. Your digital camera probably uses the same media (CF cards).
And on a less serious note...
- Who's got the biggest MP3 player? As the owner of a Pocketstudio 5, you'll probably win every time.
- Keep a 7-year-old happy for hours by telling them it's a video game! Peace and quiet guaranteed.
MIDI Implementation Chart
TEAC Professional Division
POCKETSTUDIO 5
TEAC CORPORATION
Phone: (0422) 52-5082 3-7-3, Nakacho, Musashino-shi, Tokyo 180-8550, Japan
TEAC AMERICA, INC.
Phone: (323) 726-0303 7733 Telegraph Road, Montebello, California 90640
TEAC CANADA LTD.
Phone: 905-890-8008 Facsimile: 905-890-9888
5939 Wallace Street, Mississauga, Ontario L4Z 1Z8, Canada
TEAC MEXICO, S.A. De C.V
Phone: 5-851-5500
Campesinos No. 184, Colonia Granjes Esmeralda, Delegaacion Iztapalapa CP 09810, Mexico DF
TEAC UK LIMITED
Phone: 01923-819699
5 Marlin House, Croxley Business Park, Watford, Hertfordshire. WD1 8TE, U.K.
280 William Street, Port Melbourne, Victoria 3000, Australia
- TEAC Professional Division
- POCKETSTUDIO 5
- 4-Track Recorder/MIDI Arranger/MP3 Encoder
- REFERENCE MANUAL
- Important Safety Precautions
- IMPORTANT (for U.K. Customers)
- DO NOT cut off the mains plug from this equipment.
- TO THE USER
- CAUTION
- For the consumers in Europe
- WARNING
- IMPORTANT SAFETY INSTRUCTIONS
- CAUTION:
- "Note to CATV system installer:
- Table of Contents
- - About this manual
- - Pan and EQ
- - Effects
- – Patterns on the Pocketstudio 5
- – Standard MIDI files and the
- - Advanced options and operations
- – Data, cards, etc.
- – Specifications, etc.
- – Pan and EQ
- Panning
- NOTE
- EQ
- TIP
- Input effectors
- FX1
- FX2
- Reverb
- A sample song
- Selecting a style
- Setting up the song arrangement
- Setting up the chords
- Arranging the parts
- More details about patterns
- Categories and styles
- More about chord progressions
- Chord change points
- The effect of changing and inserting sections
- Available chords
- . . . . .
- Instruments
- Drum kits
- – Standard MIDI files and the Pocketstudio 5
- Transferring SMFs to the Pocketstudio 5
- Deleting SMFs
- Using SMFs on the Pocketstudio 5
- Loading an SMF from the card
- BLUEDOLL
- Setting SMF song tempo
- Setting part parameters in the SMF
- Choosing the meter display
- Choosing the time type
- Reducing input noise
- Absolute location
- Marks
- Using marks
- Setting a mark
- Deleting a mark
- Naming and editing mark points
- Repeat playback
- – Advanced options and operations
- Punch recording
- Manual punch recording
- Automated punch recording
- Setting the IN and OUT points
- Rehearsing a punch operation
- Recording the punch
- Checking the punch
- Track bouncing
- Mixdown tips
- Selecting MP3s for playback
- Using an MP3 as a recorded backing
- Managing cards
- Working with songs with the Pocketstudio 5
- To use the Pocketstudio 5 with a computer (non Windows 98SE)
- To use the Pocketstudio 5 with a computer (Windows 98SE)
- Managing songs
- Creating a new song
- Loading and renaming a song
- Deleting a song
- Saving a song
- Seeing how much space is on a card
- Optimizing a card
- Editing data
- Copy and paste
- EDIT COPY #
- Erasing data
- EDIT SILENCE #
- Cutting data
- Undo and redo
- Making CDs from your mixed songs
- Sharing your songs
- Sending a Pocketstudio 5 song
- Close the new window after you've checked that everything seems OK.
- The Jace.zip file now appears in the JACE folder on your computer.
- Start your e-mail program and add this file as an attachment to the mail message you're sending to your friend (the way that your
- Write your e-mail message and send the mail message. Because it's a large file, it may take some time to transmit to the Internet.
- Receiving a song
- From your mail program, save the attached Jace.zip (or whatever it's called) file into a
- Things you can do with the Pocketstudio 5
- TEAC CORPORATION
Brand : TASCAM
Model : Pocketstudio 5
Category : Audio recorder