
RCU300TR - Joystick RCA - Free user manual and instructions
Find the device manual for free RCU300TR RCA in PDF.


| Product Type | Joystick |
| Brand | RCA |
| Model | RCU300TR |
| Dimensions (L x W x H) | 150 mm x 100 mm x 100 mm |
| Weight | 200 g |
| Power Source | 2 x AAA batteries (not included) |
| Wireless Technology | 2.4 GHz RF |
| Operating Range | Up to 10 meters |
| Number of Buttons | 8 (including directional pad, action buttons, and start/select) |
| Compatibility | RCA TVs and set-top boxes (requires USB receiver) |
| Color | Black |
| Material | ABS plastic |
| Main Functions | Directional control, button inputs for navigation and selection |
| Cleaning Instructions | Wipe with a soft, dry cloth. Do not use liquids or cleaners. |
| Safety Precautions | Keep away from water and heat sources. Do not disassemble. |
| Spare Parts Availability | Not available separately; contact RCA for replacements. |
| Repair Information | No user-serviceable parts. Consult authorized service center. |
| Warranty | 1 year limited warranty |
Frequently Asked Questions - RCU300TR RCA
User questions about RCU300TR RCA
0 question about this device. Answer the ones you know or ask your own.
Ask a new question about this device
Download the instructions for your Joystick in PDF format for free! Find your manual RCU300TR - RCA and take your electronic device back in hand. On this page are published all the documents necessary for the use of your device. RCU300TR by RCA.
USER MANUAL RCU300TR RCA
Battery Installation and Information ....3
Key Descriptions ....3
Program for TV—Direct Entry Method ....5
Program for DVD or VCR—Direct Entry Method .....6
Program for Satellite, Cable Box or Digital TV Converter—
Direct Entry Method ....7
Code Search Methods ....8
Manual Code Search 8
Automatic Code Search 8
Code Retrieval....9
On-screen Menus ....10
Accessing a Menu System ....10
Highlighting and Selecting Menu Items .....10
Exiting a Menu System ....11
Troubleshooting 12
Limited 90-Day Warranty ....14
Actual model may vary from picture shown
RCA
3-Component Universal Remote
Congratulations on your purchase of the 3-component universal remote. This universal remote controls up to three electronic components and makes juggling remote controls. A thing of the past. You can program this RCA brand universe remote to operate most models of most brands of infrared remote-controlled components manufactured after 1990. (See the enclosed Code List for a complete list of brands. The 3-component universal remote is easy to use, easy to program and gives you control at the touch of your finger). Note: The 3-component universal remote is already programmed to operate most RCA, GE and PROSCAN branded TVs, VCRs, DVD players and satellite receivers. It press the corresponding component key—VCR•DVD for a VCR or DVD player; TV for a television; SAT•CBL•DTC for a satellite receiver, cable box or a digital TV converter.
Battery Installation and Information
Your universal remote requires two AAA Alkaline batteries (batteries may or may not be included, depending on mode). To install the batteries:
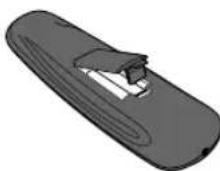
- Remove the battery compartment cov
- Insert the batteries, matching the batteries to the (+) and (-) marks inside the battery compartment.
- Press and push the battery cover back into place.
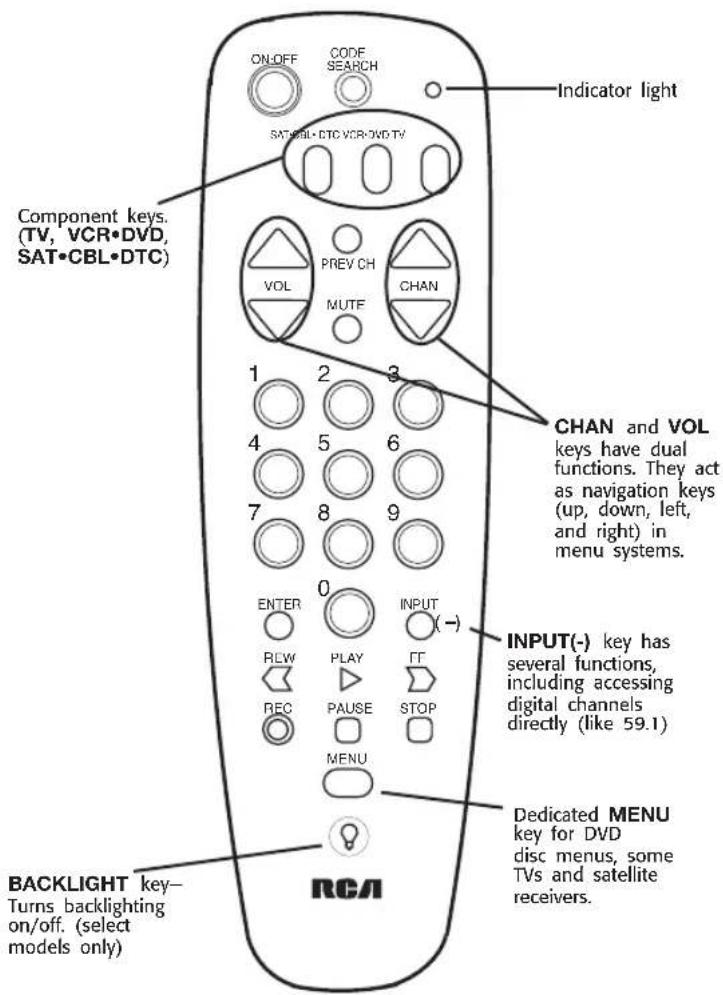
Key Descriptions
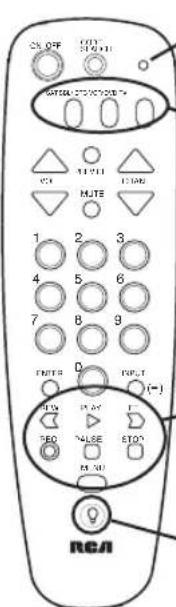
IndicatorLight—flashes when a valid key is pressed to indicate the remote is workStatus of this light is important when you are programming the remote.
Componentkeys(SAT•CBL•DTC, VCR•DVD, TV): selects the component you want the remote to operate.
For example, after you've programmed the remote to operate your TV, you must pre the TV key first to put the remote in TV Mode. While in TV Mode, the CHAN key change the channel on the TV, the VOL adjust the TV's volume, etc.
- Transportkeys—REW (Rewind), PLAY, FF (Fast Forward), PAUSE, STOP: operate the same as your original VCR or DVD remote control, although key labels may vary (REVERSE, FORWARD).
-BacklightKey(selectmodelsonly)_Turns backlighting on/off. Backlighting will remain on for approximately 6 seconds after last keypress to conserve battery life.
Other Keys (listed alphabetically)
0-9 (Number Keys): operate the same as number keys on original remote and are used to enter component codes w programming the remote control with Direct Entry method.
INPUT(-): in TV mode, switches between the signal coming from a satellite receiver or cable box and an off-air antenna or digital TV converter. In VCR mode, switches between the signal coming from a VCR and a TV. When accessing data TV channels directly, this key lets you separate the main channel number from the sub-channel number (such as "59.1")
CHAN (Channel) UP AND DOWN: goes to the next highest or lowest channel number in the component channel list, respectively, except for DVDs. In DVDs the CHAN UP/DO ^1 goes to the NEXT/PREVIOUS chapter. Additionally, when you're using the remote with On-screen Menus, the CHAN keys act as UP ARROW and DOWN ARROW keys (moving the cursor or highlight up or down).
CODE SEARCH: use to program the remote.
ENTER: use with Manual or Automatic Code Search method to accept code (See Code Search on page 8). Also, some brands require you to press the ENTER key after you enter a channel number. In some menu systems, you must press ENTER to select a highlighted item.
MENU: accesses DVD disc menus when VCR•DVD key is programmed to operate a DVD player. Accesses menu systems of some TVs, a few RCA brand VCRs and satelli receivers. (For more information, refer to Using On-screen Menus section on page 10).
MUTE: lowers the TV's volume to its minimum level.
ON•OFF: turns component on and off.
Note: Some RCA, GE and PROSCAN models require that you press the component key to turn ON the component and the ON•OFF key to turn OFF the component.
PREV CH (Previous Channel): switches back to previous channel—operates the same as LAST CHANNEL, GO BACK or RECALL key found on some brands of remote controls
REC (Record): used with VCR to record programming. You must press the REC key to start recording.
VOL (Volume) UP and DOWN: increases or decreases the TV's volume level. Additionally, when you're using the remote with On-screen Menus, the VOL keys act as RIGHT or LEFT ARROW keys (moving the highlight or cursor
Program for TV—Direct Entry Method
In order for the 3-component universal remote to control your TV, you must program it with the TV code that m your TV. These instructions explain the preferred method programming the remote—the Direct Entry method.
CODE INDICATOR
SEARCH LIGHT
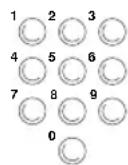


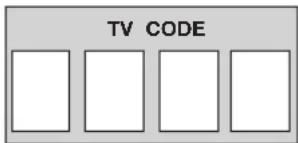
- Manually turn on the TV.
-
Locate the enclosed TV Code List. Find your brand of TV.
Note: If your brand isn't listed, use one of the Code Search methods to program this remote control (See Code Search on page 8). -
Press and hold the CODE SEARCH key until the indicator light illuminates. Then release the CODE SEARCH key.
-
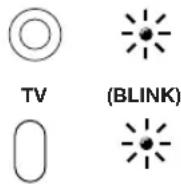
Press and release the TV key. The indicator light blinks and then remain
-
Use the number keys to enter the first code listed for your brand. After you enter a valid four-digit code, the indicator light turns off.
Note: If you enter an invalid code, the LED will flash rapidly for 2 seconds. Start over at step 3.
-
Aim the remote at your TV and pr the ON•OFF key. If your TV turns off, you have found the correct code
-
Enter the code in the box provided on this page for future reference.
-
If your TV doesn't turn off, repeat steps 3-6 above, entering the next code for your brand.
If none of the codes work or your brand is not listed, use one of the Code Search methods to program this remote (See Code Search on page 8). For a description of each key on the remote control, refer to the Key Descriptions section on page 3-4.
Program for DVD or VCR—Direct Entry Method
In order for the 3-component universal remote to control DVD or VCR, you must program it with the code that n your component. The VCR•DVD key can be programmed t operate eithen DVD or a VCR player. These instructions explain the preferred method of programming the remote—the Direct Entry method.
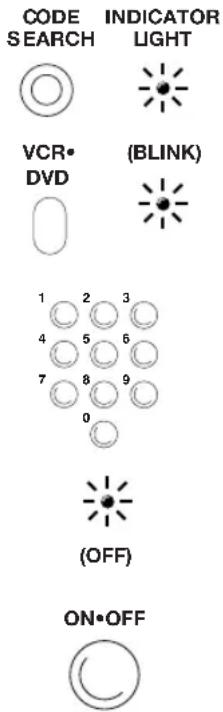
- Manually turn on the VCR or DVD player.
- Locate the enclosed VCR or DVD Code List. Find your brand in the VCR Codes or DVD Codes section, respectively.
Note: If your brand isn't listed, use or of the Code Search methods to progra this remote cont(See Code Search on page 8). - Press and hold the CODE SEARCH key until the indicator light illuminates Then release the CODE SEARCH key.
- Press and release the VCR•DVD key. The indicator light blinks and then remains lit.
- Use the number keys on the remote enter the first code listed for your b After you enter a valid four-digit code, the indicator light turns off. Note: If you enter an invalid code, the LED will flash rapidly for 2 seconds. Start over at step 3.
- Aim the remote at the component (VCR or DVD player). Press the ON•OFF key. If your VCR or DVD player turns off, you have found the correct code.
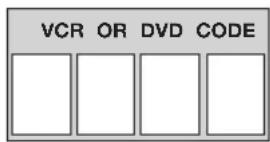
- Enter the code in the box provided on this page for future reference.
- If your VCR or DVD player doesn't turn off, repeat steps 3-6 above, entering the next code for your brand. If none of the codes work or your brand is not listed, use one of the (Search methods to program this remc (See Code Search on page 8).
For a description of each key on the remote control, refer to the Key Descriptions section on page 3-4.
Program for Satellite, Cable Box or Digital TV Converter—Direct Entry Me
In order for the 3-component universal remote to control satellite, cable box or digital TV converter, you must prog with the code that matches your component. The SAT•CBL•DTC key can be programmed to operate either satellite receiver, cable box or digital TV converter. These instructions explain the preferred method of programming the remote—the Direct Entry method.
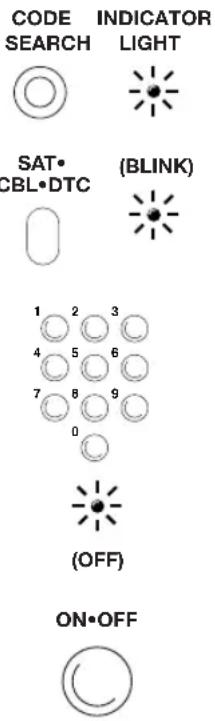
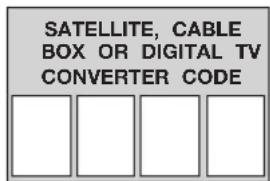
- Manually turn on the satellite receiver, cable box or digital TV converter.
- Locate the enclosed Code Lists. Find brand in the Satellite, Cable Box or TV Converter Codes.
Note: If your brand isn't listed, use one of the Code Search methods to program this remote control (See Cod Search on page 8). - Press and hold the CODE SEARCH key until the indicator light illuminates Then release the CODE SEARCH key.
- Press and release the SAT•CBL•DTC key. The indicator light blinks and then remains lit.
- Use the number keys on the remote enter the first code listed for your b After you enter a valid four-digit code, the indicator light turns off.
Note: If you enter an invalid code, the LED will flash rapidly for 2 seconds. Start over at step 3. - Aim the remote at your satellite, call box or digital TV converter and pres the ON•OFF key. If your Satellite receiver, cable box or digital TV converter turns off, you have found correct code.
- Enter the code in the box provided on this page for future reference.
- If your device doesn't turn off, repeat steps 3-6 above, entering the next color for your brand.
If none of the codes work or your brand is not listed, use one of the Code Search methods to program this remote (See Code Search on pag For a description of each key on the remote control, refer to the Key Descriptions section page 3-4.
Code Search Methods
If your component's brand isn't listed in the Code List of you have tried all of the codes for your brand and the does not operate your component, use one of the Code S methods below—Manual Code Search or Auto Code Search. Both Code Search methods search all of the codes because your component's code may be listed under another brand in the code list.
Note: The Code Search method may take a long time because the remote searches all of the codes in its memory for the code which operates your component. Therefore, if your brand is listed in the Code List, use the Direct Entry model described on pages 5-7.
Manual Code Search
CODE INDICATOR
SEARCH LIGHT


SAT• VCR• TV
CBL•DTC DVD


ON♦OFF

ENTER

-
Turn on the component you want the remote to operate.
-
Press and hold the CODE SEARCH key until the indicator light illuminates. Then release the CODE SEARCH key.
-
Press and release the component key that corresponds to the component you want the remote to operate (TV, VCR•DVD or SAT•CBL•DTC).
The indicator light blinks once and then remains lit.
- Aim the remote at the component a press the ON•OFF key continuously until the component turns off.
Important: Because there are so many codes, you may have to press the ON•OFF key many times—possibly up to 200 times.
-
When the component turns off, press the ENTER key to store the code.
-
Use Code Retrieval on the next page to identify the code for your component for future reference.
Auto Code Search
-
Turn on the component you want the remote to operate.
-
Press and hold the CODE SEARCH key until the indicator light illuminates. Then release the CODE SEARCH key.
-
Press and release the component key that corresponds to the component you want the remote to operate (TV, VCR•DVD or SAT•CBL•DTC).
The indicator light blinks once and then remains lit.
CODE INDICATOR
SEARCH LIGHT

SAT• VCR• TV
CBL•DTC DVD


ON·OFF

ENTER

- Aim the remote at the component and press the ON•OFF key once. The remote automatically sends every code for the specified component one at a time, with a 3-second delay between each code. Keep the remote aimed at the component throughout the process.
- As soon as the component turns off, you must press the ENTER key immediately so the remote stores the correct code. If you don't press ENTI within 3 seconds, the remote will ser the next code in the list, and you w have to start over from step 2.
- Use Code Retrieval to identify the c for your component for future referer
Code Retrieval
If you used one of the Code Search methods to program your remote, follow the steps below to find out which co is compatible with your component. Finding the actual cod and writing it down will save you time if you ever need program the remote again.
CODE INDICATOR
SEARCH LIGHT

SAT• VCR• TV
CBL•DTC DVD

CODE
SEARCH
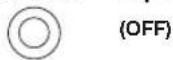


(BLINK)

- Press and hold the CODE SEARCH key until the indicator light illuminates Then release the CODE SEARCH key.
- Press and release the component key that matches the component's code you are retrieving (TV, VCR•DV or SAT•CBL•DTC). The indicator light blinks once and then remains li
- Press and release the CODE SEARCH key. The indicator light turns off.
- Starting with 0 on the keypad, press the number keys in order (0-9) until the indicator light blinks.
- The number that causes the indicator light to blink is the first digit of your code.
- Repeat step 4 until you have retrieval all three numbers of the code.
- Refer to the code box to write down the code for your component within the Direct Entry Section (pages 5-7) for the component just programmed.
Using On-screen Menus
This remote cannot access every menu system of all models and brands of consumer electronics components. However, if you've successfully programmed the VCR•DVD key to operate a DVD player, you can access DVD disc menus in the MENU key.
The MENU key will also access TV menu systems for most RCA, GE and PROSCAN TV's, as well as some other popular brands. Also, some RCA VCR menus are supported by this remote's menu key. This remote also supports select satellite receiver menus.
If this remote's MENU key doesn't access the menu syster for your component, you'll need to use the original remot to change menu settings.
Note: This remote's MENU key doesn't support cable box menu systems and some VCR menu systems.
Accessing a Menu System
SAT• VCR• TV CBL•DTC DVD

- Make sure your components are turned on and your TV is set to the component's input.
- Press the component key on the remote (TV, VCR•DVD or SAT•CBL•DTC).
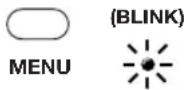
- Press the MENU key. The indicator light blinks continuously to indicate the remote is in Menu Mode and the component's menu should appear on the TV screen.
Highlighting and Selecting Menu Items
To navigate On-screen Menus, use the VOL UP/DOWN and/or CHAN UP/DOWN keys.
VOL UP/DOWN keys move the cursor (or the highlight) right/left. CHAN UP/DOWN keys move the cursor (or the highlight) up/down.
For RCA, GE or PROSCAN products, press the MENU or ENTER key to select the highlighted item. If menu items numbers next to them, you can use the number keys to an item. Additionally, the ENTER key can be used to select menu choices.
For Sony products, pressing the ENTER key while in Menu Mode returns you to the previous menu.

This is an example of a DVD disc On-screen Menu. English is the menu choice highlighted. Using this remote control, you would press the ENTER key to select English.
To highlight another language, you would press the CHANDOWNkey (In the example above, the highlight would move to Español).
Notes:
All functions in competitive models and brands of products may not be fully supported.
The remote will automatically time out in Menu Mode and the indicator light will stop blinking after approximately 10 seconds of inactivity (no keys being pressed). For DVD menus, the Menu Mode will time out after approximately 15 seconds.
Because of the wide variety of menu formats, some experimenting may be required.
Exiting a Menu System
To exit Menu Mode, press the corresponding component key on the remote (TV, VCR•DVD or SAT•CBL•DTC). The indicator light goes out and the remote reverts to its nor: mode of operation.
Troubleshooting
Problem: The remote can't be programmed to operate your component.
- You may be too far away from the component or at: wrong angle. This remote uses IR (infrared) technology to communicate with components. The remote sends the code and the component's IR sensor reads the code.
Therefore, there must be an unobstructed path between remote and the IR sensor on the component. Move clos make sure you point the remote at the component (VC DVD player when programming the VCR•DVD key; TV when programming the TV key; cable box, satellite receiver digital TV converter when you're programming the SAT•CBL•DTC key).
- If you've entered all of the codes for your brand that are in the accompanying Code List and followed the instructions, try one of the Code Search methods (See Code Search on page 8)
- You must put the remote in the correct mode by pres: the corresponding component key (TV, VCR•DVD, SAT•CBL•DTC) so the remote knows which component you want to operate.
- To program the 3 component universal remote to opera a combination unit (TV/VCR or TV/DVD), first try the VCR or DVD codes for your brand. Some units, however require that you program both the TV (using the TV codes) and the VCR or DVD (using the VCR or DVD codes) for full operation.
Problem: The indicator light does not light when you press a ke
- You must put the remote in the correct mode by pres: the corresponding component key (TV, VCR•DVD, SAT•CBL•DTC) so the remote knows which component you want to operate.
- You may have pressed an invalid key for the mode that remote is in (for example, REC only works in VCR Mo
- Make sure the batteries are properly installed.
- Replace the batteries with two new AAA batteries.
Problem: The remote does not operate your component.
- You must put the remote in the correct mode by pres: the corresponding component key (TV, VCR•DVD, SAT•CBL•DTC) so the remote knows which component you want to operate.
- Remove any obstacles between the remote and the component. Make sure to aim the remote at the IR sensor on the component.
- Make sure the batteries are properly installed (See Battery Installation on page 3).
- Replace the batteries with two new AAA batteries.
Problem: The remote is not performing commands properly.
- You must put the remote in the correct mode by press the corresponding component key (TV, VCR•DVD, SAT•CBL•DTC) so the remote knows which component you want to operate.
- Make sure component is "ready" (e.g., DVD player has disc loaded; VCR has tape loaded, etc.)
- You may have pressed an invalid key for the mode that remote is in (for example, REC only works in VCR mc)
- If you're trying to turn on an RCA, GE or PROSCAN component, press the component key (TV, VCR•DVD, SAT•CBL•DTC) instead of the ON•OFF key.
- If operating a VCR to record, you must press the REC key two times.
- If you're trying to change channels, try pressing the ENTER key after entering the channel number as this is a requirement of certain models and brands.
- There is a possibility that a programmed code may only be able to control some of your component features (e.g., turns a component on and off). Follow the steps provided for programming the remote (See Programming Sections on pages 5-7). If the component can be turned on and make sure you press the CHAN UP/DOWN key to see component responds. If not, try the next code from the
Problem: The VCR won't record.
- As a safety feature, you must press the REC key twice to begin recording.
- Make sure the tape is properly loaded in the VCR.
- Make sure the tape is not write-protected. If the safety tab is removed the tape is write-protected and you can record onto that tape.
Problem: The remote will not change channels.
- You must put the remote in the correct mode by press the corresponding component key (TV, VCR•DVD, SAT•CBL•DTC) so the remote knows which component you want to operate.
- Press the ENTER key after you enter a channel numbe:
Problem: The component's menu doesn't appear on the TV screen.
- The TV must be tuned to the Video Input that matches manner in which you connected the component to the 'For example, if you connected your DVD player to you TV by connecting audio/video cables (usually color-coded yellow, red, and white) to the TV's Input 1 jack you must tune the TV to its Video Input 1 channel. Remember, different manufacturers label these jacks differently. Consult the instruction manual that came with the TV for more information.
- You must put the remote in the correct mode by pres: the corresponding component key (TV, VCR•DVD, SAT•CBL•DTC) so the remote knows which component you want to operate.
- Menu access isn't supported for all brands. If that's the case, you'll need to use your original remote control to access menu functions for these components.
If you have further questions, please visit www.rcaaccessories.com.
90-Day Limited Warranty
Audiovox Electronics Corporation (the "Company") warrants to the original retail purchaser of this product that should product or any part thereof, under normal use and condit be proven defective in material or workmanship within 90 days from the date of original purchase, such defect(s) will repaired or replaced with a new or refurbished product (a Company's option) without charge for parts and repair lab To obtain repair or replacement within the terms of this Warranty, the product along with any accessories included the original packaging is to be delivered with proof of warranty coverage (e.g. dated bill of sale), specification of defect(s), transportation prepaid, to the Company at the address shown below. Do not return this product to the Retailer.
This Warranty is not transferable and does not cover prod purchased, serviced or used outside the United States or Canada. The warranty does not extend to the elimination externally generated static or noise, to costs incurred for the installation, removal or reinstallation of the product.
The warranty does not apply to any product or part thereof which, in the opinion of the company, has suffered or being damaged through alteration, improper installation, mishandling, misuse, neglect, accident or exposure to moist
THE EXTENT OF THE COMPANY'S LIABILITY UNDER THIS WARRANTY IS LIMITED TO THE REPAIR OR REPLACEMENT PROVIDED ABOVE AND, IN NO EVENT, SHALL THE COMPANY'S LIABILITY EXCEED THE PURCHASE PRICE PAID BY PURCHASER FOR THE PRODUCT. This Warranty is in lieu of all other express warranties or liabilities. ANY IMPLIED WARRANTIES, INCLUDING ANY IMPLIED WARRANTY OF MERCHANTABILITY OR FITNESS FOR A PARTICULAR PURPOSE, SHALL BE LIMITED TO DURATION OF THIS WARRANTY. ANY ACTION FOR BREACH OF ANY WARRANTY HEREUNDER, INCLUDING ANY IMPLIED WARRANTY, MUST BE BROUGHT WITHIN A PERIOD OF 18 MONTHS FROM THE DATE OF ORIGINAL PURCHASE IN NO CASE SHALL THE COMPANY BE LIABLE FOR A CONSEQUENTIAL OR INCIDENTAL DAMAGES WHATSOEVER. No person or representative is authorized to assume for the Company any liability other than expressed herein in connection with the sale of this product.
Some states/provinces do not allow limitations on how lor an implied warranty lasts or the exclusion or limitation of incidental or consequential damage so the above limitations exclusions may not apply to you. This Warranty gives you specific legal rights and you may also have other rights v vary from state/province to state/province.
U.S.A.: Audiovox Electronics Corporation, 150 Marcus Blvd., Hauppauge, New York 11788
CANADA: Audiovox Return Center, c/o Genco, 6685 Kenn Road, Unit 3, Door 16, Mississauga, Ontario L5T 3A5
Battery Precautions
- Do not mix old and new batteries.
- Do not mix alkaline, standard (carbon-zinc) or rechargeal (nickel-cadmium) batteries.
- Always remove old, weak or worn-out batteries promptly and recycle or dispose of them in accordance with Local National Regulations.
Care and Maintenance
- Keep the remote dry. If it gets wet, wipe it dry imme
- Use and store the remote only in normal temperature environments.
- Handle the remote gently and carefully. Dont drop it.
- Keep the remote away from dust and dirt.
- Wipe the remote with a damp cloth occasionally to kee looking new.
- Modifying or tampering with the remotes internal components can cause malfunction and invalidate its warranty.
- RCA
- 3-Component Universal Remote
- Battery Installation and Information
- Key Descriptions
- Other Keys (listed alphabetically)
- Program for TV—Direct Entry Method
- Program for DVD or VCR—Direct Entry Method
- Program for Satellite, Cable Box or Digital TV Converter—Direct Entry Me
- Code Search Methods
- Manual Code Search
- Auto Code Search
- Code Retrieval
- Using On-screen Menus
- Accessing a Menu System
- Highlighting and Selecting Menu Items
- Notes:
- Exiting a Menu System
- Troubleshooting
- Problem: The remote can't be programmed to operate your component.
- Problem: The indicator light does not light when you press a ke
- Problem: The remote does not operate your component.
- Problem: The remote is not performing commands properly.
- Problem: The VCR won't record.
- Problem: The remote will not change channels.
- Problem: The component's menu doesn't appear on the TV screen.
- 90-Day Limited Warranty
- Battery Precautions
- Care and Maintenance
Brand : RCA
Model : RCU300TR
Category : Joystick