
Pa600 - Keyboard KORG - Free user manual and instructions
Find the device manual for free Pa600 KORG in PDF.


| Product Type | Professional Arranger Keyboard |
| Number of Keys | 61 keys (velocity-sensitive) |
| Display | 7-inch TouchView TFT color display |
| Sound Engine | EDS (Enhanced Definition Synthesis) |
| Polyphony | 128 voices |
| Styles | Over 340 styles (factory), user definable |
| Sound Sets | Over 950 sounds, including stereo pianos |
| Effects | Stereo global effect, insert effects per track |
| Sequencer | 16-track sequencer with full editing |
| Connectivity | MIDI, USB, audio out (L/R), headphones, sustain pedal |
| Storage | Internal memory, SD card slot |
| Power Supply | AC adapter (included) |
| Dimensions (W x D x H) | 1020 x 348 x 130 mm |
| Weight | 10.5 kg |
| Maintenance | Wipe with a soft, dry cloth; avoid liquids |
| Safety | Do not open; keep away from water and heat sources |
| Spare Parts | Contact Korg authorized service centers |
| Repairability | Serviceable by qualified technicians only |
| General Info | Korg Pa600 arranger keyboard with professional features |
Frequently Asked Questions - Pa600 KORG
User questions about Pa600 KORG
0 question about this device. Answer the ones you know or ask your own.
Ask a new question about this device
Download the instructions for your Keyboard in PDF format for free! Find your manual Pa600 - KORG and take your electronic device back in hand. On this page are published all the documents necessary for the use of your device. Pa600 by KORG.
USER MANUAL Pa600 KORG
professional arranger
Pa 600
professional arranger
QT
User Manual
Important safety instructions
- Read these instructions.
- Keep these instructions.
- Heed all warnings.
- Follow all instructions.
- Do not use this apparatus near water.
- Clean only with a dry cloth.
- Do not block any ventilation openings, install in accordance with the manufacturer's instructions.
- Do not install near any heat sources such as radiators, heat registers, stoves, or other apparatus (including amplifiers) that produce heat.
- Protect the power cord from being walked on or pinched particularly at plugs, convenience receptacles, and the point where they exit from the apparatus.
- Only use attachments/accessories specified by the manufacturer.
- Unplug this apparatus during lightning storms or when unused for long periods of time.
- Refer all servicing to qualified service personnel. Servicing is required when the apparatus has been damaged in any way, such as power-supply cord or plug is damaged, liquid has been spilled or objects have fallen into the apparatus, the apparatus has been exposed to rain or moisture, does not operate normally, or has been dropped.
- Turning off the power switch does not completely isolate this product from the power line so remove the plug from the socket if not using it for extended periods of time, or before cleaning. Please ensure that the mains plug or appliance couple remains readily accessible.
- Mains powered apparatus shall not be exposed to dripping or splashing and that no objects filled with liquids, such as vases, shall be placed on the apparatus.
- Install this product near the wall socket and keep the power plug easily accessible.
- Do not install this equipment on the far position from wall outlet and/or convenience receptacle.
- Do not install this equipment in a confined space such as a box for the conveyance or similar unit.
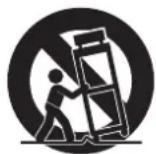
- When a cart is used, use caution when moving the cart/apparatus combination to avoid injury from tip-over.

WARNING - Do not ingest battery, chemical burn hazard. This product contains a coin/button cell battery.
If the coin/button cell battery is swallowed it can cause severe internal burns in just 2 hours and can lead to death.
Keep new and used batteries away from children. If the
battery compartment does not close securely, stop using the product and keep it away from children.
If you think the battery may have been swallowed or placed inside any part of the body seek immediate medical attention.
- WARNING – Date/time Lithium button cell battery inside. Danger of explosion if battery is incorrectly replaced. Replace only with the same or equivalent type. 'The internal date/time Lithium button cell battery is user replaceable.
- Do not expose batteries to excessive heat, such as direct sunshine, fire or the like.
- Dispose of used batteries according to the battery manufacturer's instructions.
WARNING:
TO REDUCE THE RISK OF FIRE OR ELECTRIC SHOCK DO NOT EXPOSE THIS PRODUCT TO RAIN OR MOISTURE.

CAUTION
RISK OF ELECTRIC SHOCK DO NOT OPEN

AVERTISSEMENT:
RISQUE DE CHOC ÉLECTRIQUE—NE PAS OUVRIR.
注意
感電の恐れあり、キャビネットをあけるな
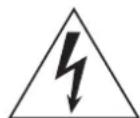
The lightning flash with arrowhead symbol within an equilateral triangle, is intended to alert the user to the presence of uninsulated “dangerous voltage” within the product’s enclosure that may be of sufficient magnitude to constitute a risk of electric shock to persons.
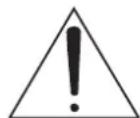
The exclamation point within an equilateral triangle is intended to alert the user to the presence of important operating and maintenance (servicing) instructions in the literature accompanying the product.

NOTICE REGARDING DISPOSAL (EU ONLY)
If this symbol is shown on the product, manual, battery, or package, you must dispose of it in the correct manner to avoid harm to human health or damage to the environment. Contact your local administrative body for details on the correct disposal method. If the battery contains heavy metals in excess of the regulated amount, a chemical symbol is displayed below the symbol on the battery or battery package.
IMPORTANT NOTICE TO CONSUMERS
This product has been manufactured according to strict specifications and voltage requirements that are applicable in the country in which it is intended that this product should be used. If you have purchased this product via the internet, through mail order, and/or via a telephone sale, you must verify that this product is intended to be used in the country in which you reside.
WARNING: Use of this product in any country other than that for which it is intended could be dangerous and could invalidate the manufacturer's or distributor's warranty.
Please also retain your receipt as proof of purchase otherwise your product may be disqualified from the manufacturer's or distributor's warranty.
THE FCC REGULATION WARNING (FOR U.S.A.)
This equipment has been tested and found to comply with the limits for a Class B digital device, pursuant to Part 15 of the FCC Rules. These limits are designed to provide reasonable protection against harmful interference in a residential installation. This equipment generates, uses, and can radiate radio frequency energy and, if not installed and used in accordance with the instructions, may cause harmful interference to radio communications. However, there is no guarantee that interference will not occur in a particular installation. If this equipment does cause harmful interference to radio or television reception, which can be determined by turning the equipment off and on, the user is encouraged to try to correct the interference by one or more of the following measures:
- Reorient or relocate the receiving antenna.
- Increase the separation between the equipment and receiver.
- Connect the equipment into an outlet on a circuit different from that to which the receiver is connected.
- Consult the dealer or an experienced radio/TV technician for help.
Unauthorized changes or modification to this system can void the user's authority to operate this equipment.
PERCHLORATE (CALIFORNIA, USA ONLY)
Perchlorate Material – special handling may apply.
See www.dtsc.ca.gov/hazardouswaste/perchlorate.
Further notices
Automatic Power-Off
To avoid wasting power, Pa600 will by default automatically enter standby mode after two hours of non-active use (playing, pressing buttons or using the touch-screen). Please save your data (Performances, Styles, Songs, and so on) before taking a prolonged pause.
Data Handling
Data in memory may sometimes be lost due to incorrect user action. Be sure to save important data to the internal memory or to an external USB device. KORG will not be responsible for damages caused by data loss.
Cleaning
If the exterior becomes dirty, wipe it with a clean, dry cloth. Do not use liquid cleaners such as benzene or thinner, or cleaning compounds or flammable polishes.
Use a soft cotton cloth to clean the display. Some materials, such as paper towels, could cause scratches and damage it. Computer wipes are also suggested, provided they are specifically designed for LCD screens.
Do not spray any liquid on the LCD screen directly. Always apply the solution to your cloth first, then clean the screen.
Example screens
Some pages of the manuals show LCD screens along with an explanation of functions and operations. All sound, style, song or parameter names, as well as shown values, are merely examples and may not always match the actual display you are working on.
Trademarks
Acrobat and PDF are registered trademarks of Adobe Systems Incorporated. Mac is a registered trademark of Apple, Inc. MS-DOS and Windows are registered trademarks of Microsoft Corporation. All other trademarks or registered trademarks are the property of their respective holders.
Open Source notice
Portions of this product's software are copyright ©2007 "The FreeType Project" (www.freetype.org). All rights reserved.
Disclaimer
The information contained in this manual have been careful revised and checked through. Due to our constant efforts to improve our products, the specifications might differ to those in the manual. KORG is not responsible for any difference found between the specifications and the contents of the instruction manual – all specifications being subject to change without prior notice.
Liability
KORG products are manufactured under strict specifications and voltages required by each country. These products are warranted by the KORG distributor only in each co KORG product not sold with a warranty card or carrying a serial number disqualifies the product sold from the manufacturer's/ distributor's warranty and liability. This requirement is for your own protection and safety.
Service and User's Assistance
For service, please contact your nearest Authorized KORG Service Center. For more information on KORG products, and to find software and accessories for your keyboard, please contact your local Authorized KORG distributor. For up-to-date information, please point your web browser to our web site.
Keep your keyboard up-to-date
Your instrument can be constantly updated as new versions of the operating system are released by KORG. You can download the operating system from our web site. Please, read the instructions supplied with the operating system.
Copyright © 2017 KORG Italy Spa.
Table of Contents
Introduction
Welcome!......6
What's in the box 7
About this manual 7
Contacts 7
Making a safety copy of your data ....7
Restoring the original factory data ....7
Loading the Operating System ....7
Overview 8
Front Panel....8
Rear Panel 17
Start up 19
Connecting the AC power cord 19
Turning the instrument on (or setting it to standby) ..... 19
Controlling the Volume 19
Headphones 19
Loudspeakers 19
Audio Outputs 19
MIDI connections....19
Damper pedal 20
Assignable pedal 20
The music stand 20
Glossary of Terms 21
Sound 21
Style 21
Pad 21
Keyboard tracks 21
Performance 22
Sequencer 22
Player 22
The LOGO decoder 22
Interface basics 23
Color TouchView graphical user interface 23
Operative modes 25
Selected, highlighted items 25
Non-available, grayed-out parameters 25
Shortcuts 25
Easy Mode 26
The Style Play page in detail 27
The Song Play page in detail 28
Quick Guide
Turning the instrument on....30
Turning the instrument on and viewing the main screen ... 30
Connecting and calibrating the Damper pedal .....31
Programming the Damper pedal 31
Playing the Demo ....33
Starting and stopping the Demo 33
Playing Sounds 35
Selecting a Sound and playing it on the keyboard 35
Playing two or three Sounds at the same time 37
Playing different Sounds with your left and right hand ..... 39
Changing the split point 41
Raising or lowering the Upper octave 42
Selecting and saving Performances....43
Selecting a Performance ....43
Saving your settings to a Performance 44
Selecting and saving the "My Setting" Performance ... 46
Selecting the startup parameters (the "My Setting" Performance) 46
Saving the startup parameters into the "My Setting" Performance 46
Selecting and playing Styles 47
Selecting and playing a Style 47
Tempo 49
Intro, Variation, Fill, Break, Ending 50
Single Touch Settings (STS) 51
The Pads 52
Adjusting the balance between the Style and the keyboard .. 53
Adjusting the volume of the separate tracks .....53
Turning the Style tracks on/off 54
Adding harmony notes to your right-hand melody with the ENSEMBLE function 56
The Chord Sequencer 58
Song Play 60
Selecting a Song to play 60
Playing back a Song....62
Changing the tracks' volume 63
Turning the Song tracks on/off 65
Soloing a track 66
Removing the Melody track from a Standard MIDI File or the Lead Vocal from an MP3 file....66
The SongBook 68
Selecting the desired Entry from the Main List....68
Displaying Artist or Genre 69
Sorting Entries 70
Searching for Entries 70
Adding Entries 72
Editing the Entries....72
Creating a Custom List....74
Selecting and using a Custom List 76
Using the SongBook with external software .....76
Recording a new Song (Standard MIDI File) .....77
Preparing the Style and Sounds....77
Accessing the Backing Sequence (Quick Record) mode .....77
Setting the Record parameters 79
Recording 79
Second-take recording (Overdubbing) 81
Saving a Song 81
Searching files and musical resources....83
How to use the Search function 83
Notes about searching....85
Reference
Selecting elements 88
Style Select window 88
Sound Select window 89
Performance Select window....90
Pad Select window....90
STS Select 91
Song Select window 91
Style Play mode .....94
Start-up settings 94
How Styles, Variations, Performances and STSs are linked together ....
Styles and Pads 94
Master Volume and Balance 94
Factory, Favorite and User Styles 94
Main page 95
STS Name panel 97
Volume panel 97
Pad panel 99
Split panel 100
Sub-Scale panel 100
Edit menu 101
Edit page structure 101
Mixer/Tuning: Volume/Pan 101
Mixer/Tuning: FX Send 102
Mixer/Tuning: EQ Gain 103
Mixer/Tuning: EQ Control 103
Mixer/Tuning: Tuning 104
Mixer/Tuning: Sub Scale 104
Effects: A/B FX Configuration ..... 106
Effects: Master 1, 2 ...... 107
Track Controls: Mode 107
Track Controls: Drum Edit 108
Track Controls: Easy Edit 109
Keyboard/Ensemble: Key/Velocity Range ..... 110
Keyboard/Ensemble: Ensemble 111
Keyboard/Ensemble: Keyboard Control .....112
Pad/Switch: Pad 112
Pad/Switch: Switch 113
Style Controls: Drum/Fill 113
Style Controls: Keyboard Range On/Off / Wrap Around ... 114
Page menu 114
Write Performance dialog box 115
Write Single Touch Setting dialog box 116
Write Current Style Settings dialog box 116
The Favorite banks 117
Style/Pad Record mode 118
Recording Styles and Pads 118
Style/Pad Import/Export 120
Entering the Style/Pad Record mode 120
Exit by saving or deleting changes 120
Listening to the Style while in Edit mode ..... 120
List of recorded events 121
Main page - Record 1 121
Main page - Record 2/Cue 125
Main page - Guitar Mode 126
Style/Pad Record procedure 130
Edit menu 132
Edit page structure....132
Event Edit: Event Edit 133
Event Edit: Filter 135
Style/Pad Edit: Quantize 136
Style/Pad Edit: Transpose 136
Style/Pad Edit: Velocity 137
Style/Pad Edit: Cut 138
Style/Pad Edit: Delete 138
Style/Pad Edit: Delete All 139
Style/Pad Edit: Copy from Style 139
Style/Pad Edit: Copy from Pad 140
Style Element Track Controls: Sound/Expression ..... 141
Style Element Track Controls: Keyboard Range .....142
Style Element Track Controls: Noise/Guitar .....142
Pad Track Controls: Sound/Expression .....143
Style Element/Pad Chord Table: Chord Table .....144
Style Track Controls: Type/Trigger/Tension .....144
Import: Import Groove .....145
Import: Import SMF 145
Export SMF 148
Page menu 149
Write Style/Pad dialog box ....150
Copy Key/Chord dialog box .....150
Copy Sounds dialog box 150
Copy Expression dialog box .....151
Copy Key Range dialog box 151
Copy Chord Table dialog box ....151
Overdub Step Recording window .....152
Song Play mode 153
MIDI Clock ....153
Tempo Lock....153
Master Volume, Balance .....153
Track parameters 153
Standard MIDI Files and Sounds .....153
Keyboard, Pad and Player tracks .....154
Main page (Normal view) .....154
STS Name panel 157
Volume panel 157
Pad panel 157
Split panel 157
Sub-Scale panel 158
Jukebox panel .....158
Edit menu 159
Edit page structure .....159
Mixer/Tuning: Volume/Pan 159
Mixer/Tuning: FX Send .....159
Mixer/Tuning: EQ Gain 160
Mixer/Tuning: EQ Control 160
Mixer/Tuning: Tuning .....160
Effects: A/B FX Configuration .....161
Effects: Master 1, 2 .....161
Track Controls: Mode .....161
Track Controls: Drum Edit .....161
Track Controls: Easy Edit .....162
Keyboard/Ensemble: Key/Velocity Range .....162
Keyboard/Ensemble: Ensemble .....162
Keyboard/Ensemble: Keyboard Control .....162
Pad/Switch: Pad 162
Pad/Switch: Assignable Switch .....162
Jukebox Editor 162
Page menu 163
Sequencer mode 165
Standard MIDI Files and MP3 .....165
Sequencer Play - Main page 165
Entering Record mode....167
Record mode: Multitrack Sequencer page .....168
Record mode: Step Record page .....170
Record mode: Backing Sequence (Quick Record) page .....172
Record mode: Step Backing Sequence page .....175
Edit menu 177
Edit page structure .....177
Mixer/Tuning: Volume/Pan 178
Mixer/Tuning: FX Send .....178
Mixer/Tuning: EQ Gain 178
Mixer/Tuning: EQ Control 178
Mixer/Tuning: Tuning 179
Mixer/Tuning: Sub Scale 179
Effects: A/B FX Configuration 179
Effects: Master 1, 2 .... 180
Track Controls: Mode 180
Track Controls: Drum Edit 180
Track Controls: Easy Edit 180
Event Edit: Event Edit 180
Event Edit: Filter 182
Song Edit: Quantize 182
Song Edit: Transpose 183
Song Edit: Velocity 183
Song Edit: Cut/Insert Measures 184
Song Edit: Delete 184
Song Edit: Copy 185
Song Edit: Move 185
Song Edit: RX Convert 185
Page menu 186
Song Select window 187
Save Song window 187
Sound mode 189
The MIDI channel 189
How to select oscillators.... 189
Sounds, Drum Kits 189
Main page 189
Edit menu 191
Edit page structure 191
Basic: Sound Basic 191
Basic: OSC Basic 193
Basic: Vel/Key Zone 195
Basic: Damper Mode 195
Basic: Damper Trigger 196
Basic: EQ 197
DrumKit: Sample Setup (Drum Kits) 197
DrumKit: EQ (Drum Kits) 199
DrumKit: Voice Mixer (Drum Kits) 199
Pitch: Pitch Mod 200
Pitch: Pitch EG 202
Filter: Filter Type 204
Filter: Filter Mod 205
Filter: Filter LFO 206
Filter: Filter EG 207
Amp: Amp Level/Pan 209
Amp: Amp Mod 209
Amp: Amp EG 210
LFO: LFO1 212
LFO: LFO2 213
Effects: "B" FX Config 213
Effects: Master 1 / Reverb 214
Effects: Master 2 / Chorus 214
Page menu 214
Write Sound dialog box 215
Copy Oscillator dialog box 215
Copy Drum Kit dialog box 215
AMS (Alternate Modulation Source) list 216
Sampling mode 218
Entering and exiting the Sampling mode 218
Creating new Sounds from the Samples 218
Creating new Drum Kits from the Samples 219
Creating new Sounds from an Audio Groove 219
Edit menu 220
Sampling: Edit 220
Sampling: Loop Edit 221
Sampling: Sampling Info 222
Time Slice 223
The Time Slice procedure 226
The Extend procedure 227
Multisample: Edit MS 227
Multisample: Key Assign 228
Page menu 228
Write Sample dialog box 230
Write MultiSample dialog box 230
Write Slice dialog box 231
Delete Sample dialog box 231
Delete Multisample dialog box 231
Export Sample page 232
Export Multisample page 232
Merging Samples from various sources 232
Global mode ....233
Overview on the Global mode 233
Main page 233
Edit menu 233
Edit page structure 233
General Controls: Basic 234
General Controls: Interface 235
General Controls: Lock 236
General Controls: Clock & Power 238
Mode Preferences: Style 239
Mode Preferences: Song & Sequencer 240
Mode Preferences: Media 241
Controllers: Hand Controllers .... 242
Controllers: Foot Controllers 242
Tuning: Basic 243
Tuning: Transpose Control 243
Tuning: Scale 244
MIDI: General Controls 245
MIDI: MIDI In Controls 246
MIDI: MIDI In Channels 247
MIDI: MIDI Out Channels 247
MIDI: Filters 248
Audio & EQ: MP3 / Speakers 248
Audio & EQ: Limiter 249
Audio & EQ: Master EQ....249
Touch Panel Calibration 250
Page menu 251
Write Quarter Tone SC Preset dialog box ....251
Write Midi Preset dialog box....251
Write Limiter Preset dialog box 252
Write Master EQ Preset dialog box 252
Media mode .....253
Storage devices and internal memory 253
Supported device 253
Selecting and deselecting files 253
Searching files 253
Preferences 253
File types 254
Media structure 255
Main page 256
Page structure 256
Navigation tools 256
Load 257
Save 260
Copy 264
Delete 265
Format 266
Utility 266
USB 268
Page menu....269
Care of mass storage devices 270
Merging Samples from various sources 270
SongBook 271
Book 271
Custom List 274
List Edit 274
Book Edit 1 ...... 275
Book Edit 2 277
Book Edit 3 ...... 277
Info 278
Page menu 279
Lyrics, Score, Markers 280
Lyrics page 280
Score page 282
Markers page 283
MIDI 284
What is MIDI? 284
What is MIDI Over USB? 284
Standard MIDI Files 285
The General MIDI standard 285
The Global channel 285
The Chord 1 and Chord 2 channels ..... 285
The Control channel 285
MIDI Presets 285
Connecting Pa600 to a Master keyboard 286
Connecting Pa600 to a MIDI accordion....286
Connecting Pa600 to an external sequencer 287
Playing another instrument with Pa600 288
Appendix
Factory data 290
Styles 290
Style Elements 294
Style and Player controls 294
Single Touch Settings (STS) 294
Sounds 295
DNC Sounds 307
Drum Kits 308
Multisamples ....309
Drum Samples 314
Pads 321
Effects 324
MIDI Preset....326
Assignable parameters 327
List of Pedal/Footswitch functions .....327
List of Assignable Switches functions .....328
Scales 329
Effects 330
Dynamic Modulation sources ....330
Dynamics (Dynamic)....331
EQ and Filters (EQ/Filter)....334
Overdrive, Amp models, and Mic models (OD Amp Mic) ..341
Chorus, Flanger, and Phaser (Cho/Fln Phaser) .....346
Modulation and Pitch Shift (Mod./P.Shift) .....352
Delay....363
Reverb and Early Reflections (Reverb ER) ....373
Mono-Mono Serial (Mono-Mono) ....375
Double Size 392
Installing the KORG USB MIDI Driver ....401
Connecting Pa600 to a personal computer .....401
KORG USB-MIDI Driver system requirements .....401
Please note before use ....401
Windows: Installing the KORG USB-MIDI Driver .....401
Mac OS X: Installing the KORG USB-MIDI Driver .....402
MIDI Data 403
MIDI Controllers ....403
Recognized chords 404
Replacing the clock backup battery .....406
Precautions 406
Installation....406
Shortcuts 408
Troubleshooting 409
Technical specifications ....410
MIDI Implementation Chart 412
Index 413
Introduction
Welcome!
Welcome to the world of KORG Pa600 Professional Arranger! Pa600 is one the most powerful arranger available today, both for professional and home entertainment use.
Here are some of the features of your new instrument:
Physical Features and User Experience
- 61 synth-type keys with velocity.
- Slim and compact, lightweight, elegant cabinet design.
- Wide TFT graphic touch screen display. Professional TouchView™ graphic interface for direct access to the on-screen controls and to the musical resources.
- High-quality integrated amplification, and high-quality output (DAC) audio converters.
- RX (Real eXperience) Technology, the cutting edge engine that drives every aspect of the Pa600 – from the synthesis to the display and how it all works together.
- Two assignable switches, a joystick and an assignable pedal ensure total control for all the various levels of articulation of the sound.
- Quick access to Arabic Scale programming via the Quarter Tone controls right on the front panel (Quarter Tone model only).
Sounds and Effects
- Powerful sound generation system, for crystal-clear, realistic sounds.
- DNC (Defined Nuance Control) Sounds, more realistic and vivid than ever.
- 96 MB of Sample memory for User PCM Samples. Sampling function to edit imported Samples.
• 128 voices of polyphony. - General MIDI Level 2 Sound-compatible. Enhanced Sound compatibility for GM Songs.
- More than 950 Sounds, plus 64 Drum Kits.
- 320 Performance locations, plus 4 Single Touch Settings (STS) for each Style and SongBook entry, for fast setting of keyboard sounds and effects.
- Four Stereo Master FX, with 125 effect types. Mastering Limiter and Final 4-band Parametric EQ.
Styles and Songs
• Over 360 Factory Styles with 4 Variations and 4 Fill In + Break, plus 10 Favorite and 3 User Style banks for unlimited storage of your custom Styles and settings.
- Style and Pad Record, including the enhanced “Guitar Mode 2” for even more realistic guitar parts.
- “Chord Sequencer” function to record on-the-fly any chord progression.
- Standard MIDI File player and recorder, and MP3 player with Vocal Remover.
- Lyrics, Score and Marker display. Enhanced compatibility with Lyrics in graphical format (+G) for Standard MIDI Files and MP3 files.
• Full-featured 16-track sequencer. Quick Record function to record playing with the Styles.
- Fully editable SongBook music database, for fast song retrieving.
Other Features
- Search function, to instant retrieving of Songs and files.
- Operating System updates, to load new features and enhancements. Don't let your instrument get old!
- Generous internal memory, to store the greatest amount of data.
- USB 2.0 High Speed Host port, for connecting external devices like hard disks, CD-ROM drives, USB memory sticks, etc.
- USB 2.0 High Speed Device port, to connect a personal computer to your Pa600. This port can be used for file transfer, and for MIDI connection (without the need of a dedicated MIDI interface for the personal computer).
What's in the box
After you buy your Pa600, please check that all the following items are included in the package. If any of the following items is missing, please contact your KORG dealer immediately.
• Pa600
• M u s i c s t a n d
- P o w e r c a b l e
• Q u i c k G u i d e
- Accessory Disc (containing the Video Manual, the User Manual, the USB driver)
About this manual
This manual contains all the informations divided in four sections:
• A n Introduction, containing an overview of the ment and of basic operations.
• A Quick Guide, containing a series of practical guides.
• A Reference Guide, with each page and paramo described in detail.
• An Appendix, with a list of data and useful information for the advanced user.
In addition, in the Accessory Disc and in our web site you will find a multilingual Video Manual, showing how to use your Pa600 in easy steps.
Contacts
Your preferred KORG dealer not only delivers this keyboard, but also a whole bunch of hardware and software accessories, as well as service information. You should ask them for any help should you eventually need.
Our international web site is www.korg.com. KORG distributors around the world may have their own web page on the internet.
A list of all KORG Distributors can be found in our dedicated web site (www.korg.com/us/corporate/distributors/).
Making a safety copy of your data
Making a safety copy
In case you like to customize your Musical Resources (Sounds, Performances and Styles), we suggest you use the Media > Utility > Backup Resources command to make frequent backup copies into compact archives.
Also, you can use the Media > Save All command to save files that you can separately reload one by one.
Restoring a safety copy
To restore a backup, use the Media > Utility > Restore Resources. If you saved your data with the Media > Save All command, use the Media > Load operations to reload them.
Restoring the original factory data
In case you want to restore the original factory data, use the Media > Utility > Factory Restore command.
Warning: This operation will overwrite all the Factory, Local, Favorite and User data!
Loading the Operating System
Your Pa600 can be constantly updated as new versions of the operating system are released by KORG. You can download the operating system from our web site. Please, read the instructions supplied with the operating system on the site.
You can see which version of the operating systems is installed in your Pa600 by going to the Media > Utility page.
Warning: Do not install an OS other than the official OS supplied by KORG for the Pa600. Trying to install an OS created for different models or downloaded from unofficial web sites may cause data loss and permanent damage to the instrument. KORG is not responsible for any damage caused by improper installation of the OS.
Overview
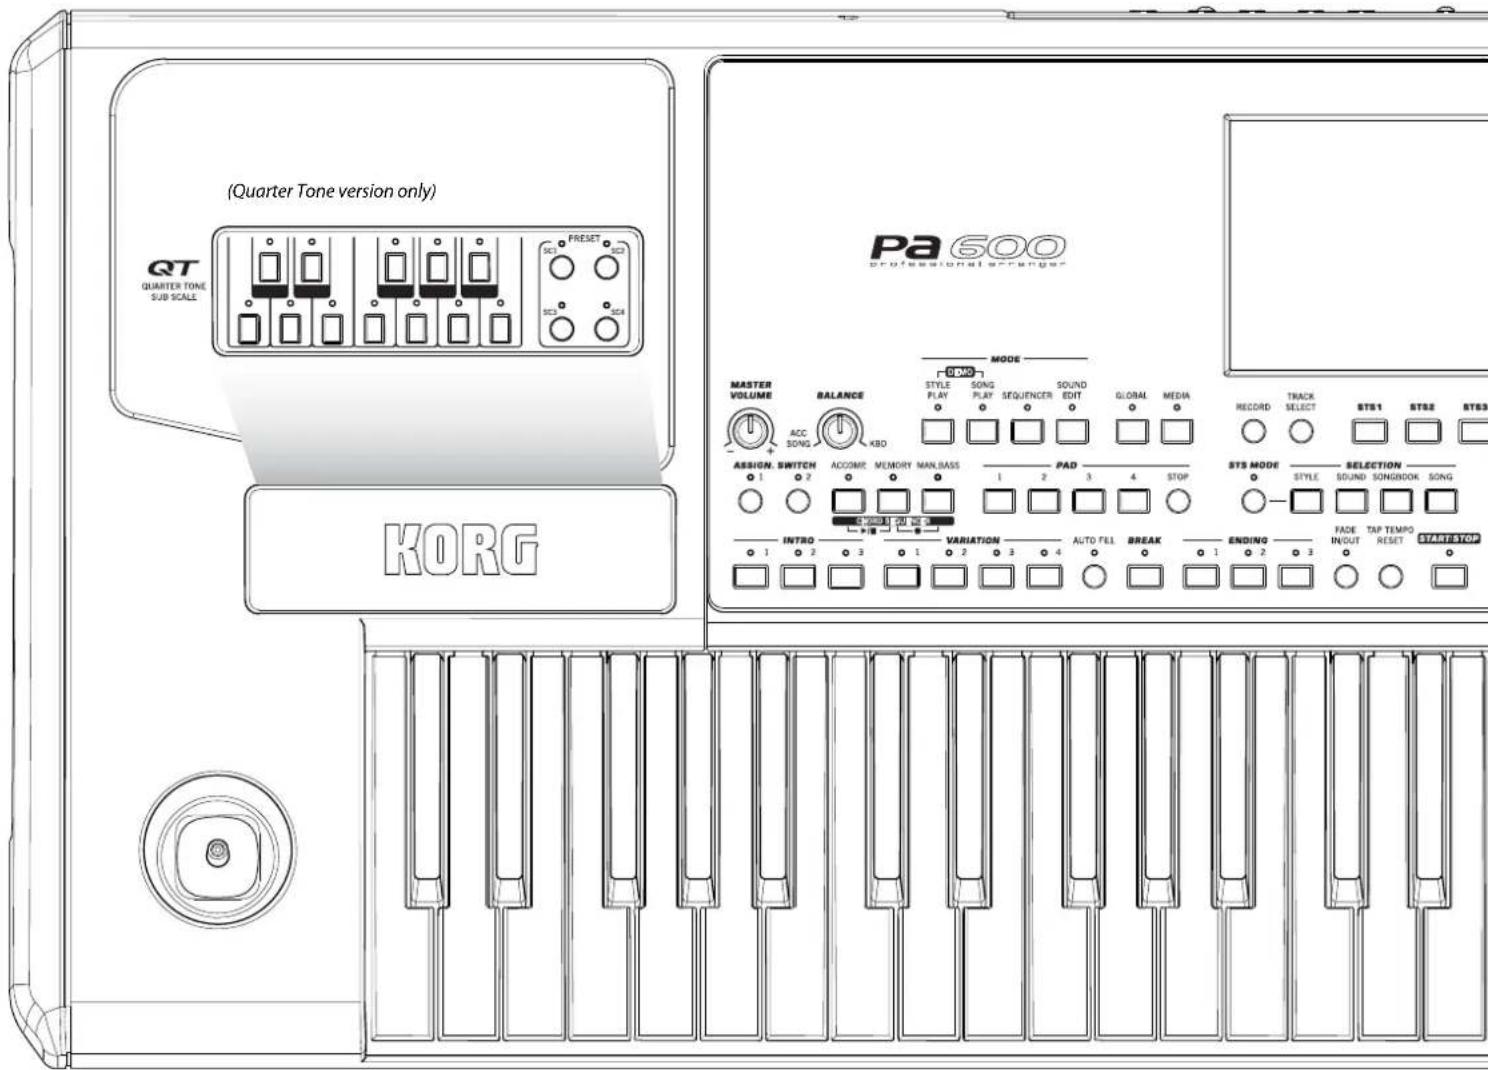
Front Panel
Speakers
The integrated speakers give a faithful reproduction of the sound of Pa600. They are automatically deactivated when inserting a jack into the PHONES connector. They can be manually deactivated with the "Speakers On/Off" parameter you can find in the Global > Audio & EQ > MP3/Speakers page.
Quarter Tone
The Quarter Tone / Sub Scale section is only available in the Pa600 Quarter Tone version.
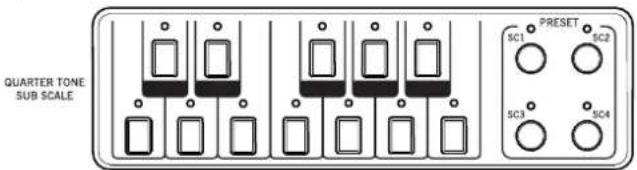
QUARTER TONE / SUB SCALE
Use the mini-keyboard to modify the Quarter Tone Scale, and the four SC Preset buttons to select one of the preset scales. Keep one of the buttons pressed to memorize the current scale into the corresponding SC Preset.
Joystick lever
The joystick is on the left side of the front panel.
JOYSTICK
This joystick triggers different functions, depending on the direction it is moved towards.
natural_image
Concentric circles diagram with concentric squares and a central spiral (no text or symbols)X (+/-) Move the joystick towards the left (-) to lower the pitch, or towards the right (+) to raise it. This effect is called the Pitch Bend.
Y+Move the joystick forward to trigger Modulation
Y- Move the joystick backward, to trigger the function assigned in Sound mode.
Volume controls
Use these knobs to control the master volume, and to balance between the Keyboard and the Style or the Song.
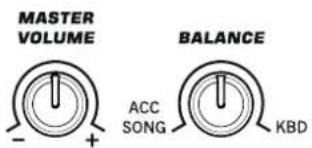
MASTER VOLUME
This knob controls the overall volume of the instrument, both of the integrated speakers, the AUDIO OUT and the PHONES outputs. It also controls the volume of the AUDIO IN inputs in the final mix.
BALANCE
While in Style Play and Song Play mode, this knob usually balances the volume of the Keyboard tracks against the Style (ACC, Accompaniment), Song (SNG) and Pad tracks. This is a relative control, whose effective maximum value is determined by the MASTER VOLUME knob position.
When moved, a magnified version of a virtual slider appears in the display, for more accurate adjustment.
It can be programmed to work as the volume control. Accompaniment/Song tracks only, leaving the Keyboard tracks unchanged (in the Controllers > Hand Controllers page of the Global mode).
Note: This does not work in the Sequencer and Sound modes.
Assignable Switches
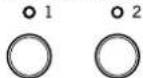
ASSIGNABLE SWITCH
Freely assignable switches, that can be programmed in the Pad/Assignable Switch >Switch page of the Style Play or Song Play mode.
ASSIGN. SWITCH
Mode selection
Each of these buttons recalls one of the instrument's operating modes. When selected, each mode excludes all the others.
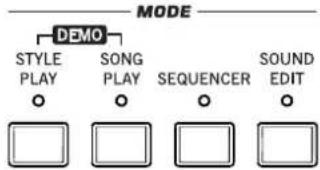
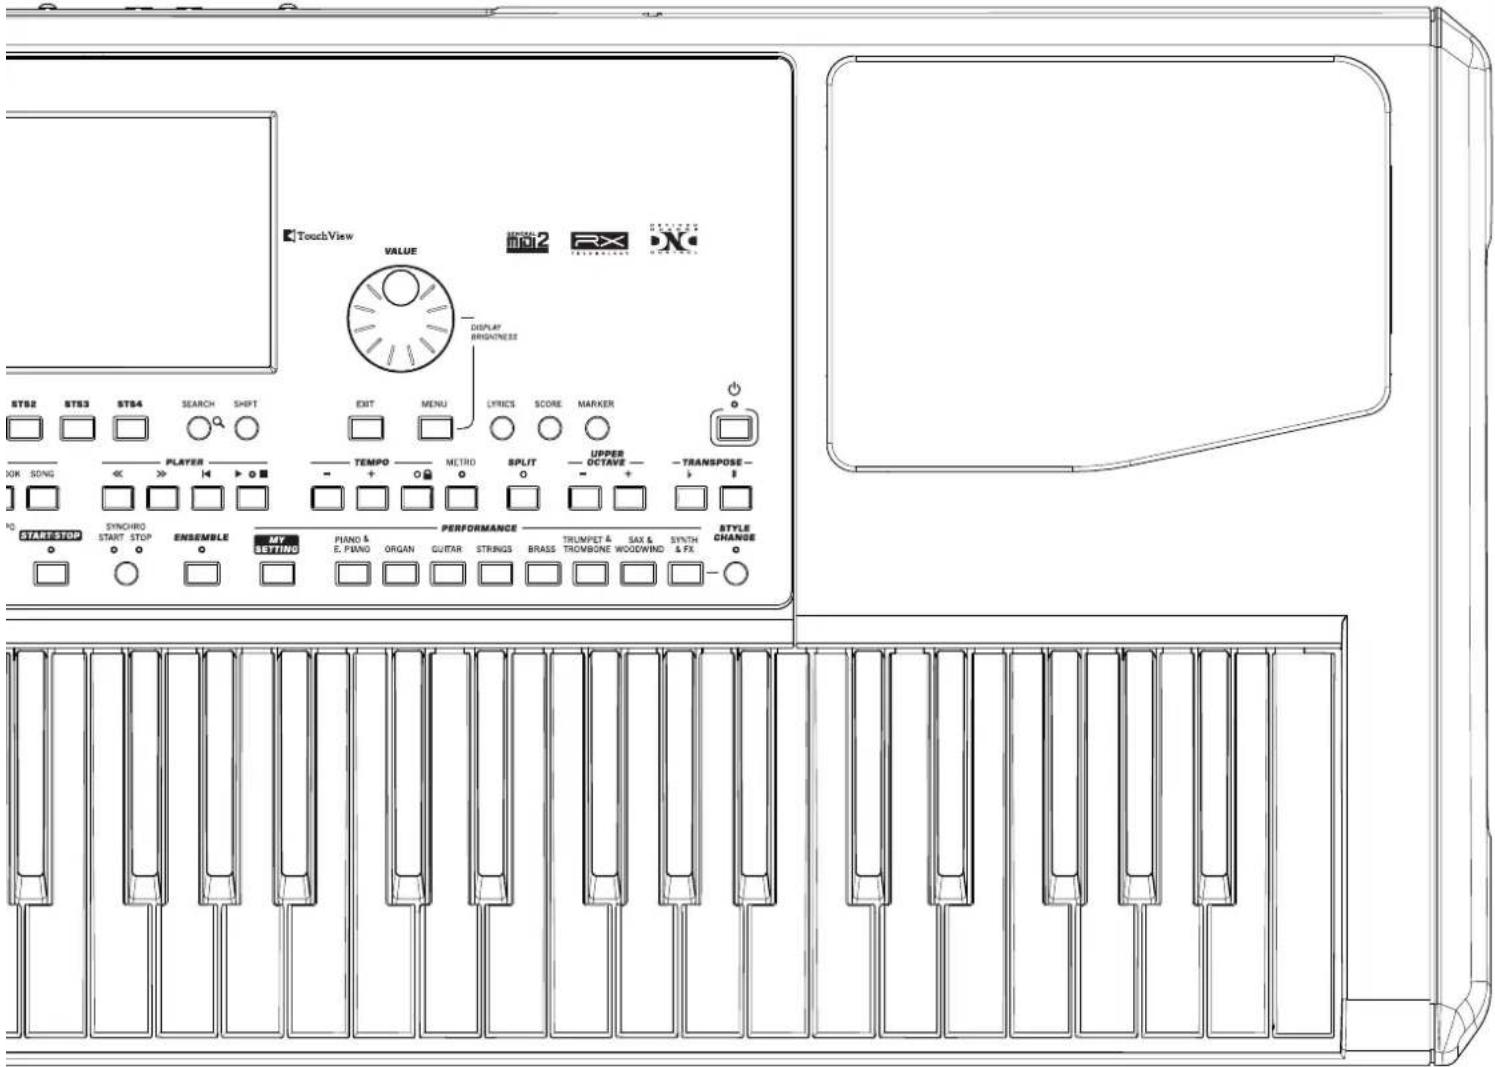
Style Play mode, where you can play Styles (eight tracks of automatic accompaniments) and play up to four Keyboard tracks and four Pad tracks. In the main page, Keyboard tracks are shown in the right half of the display.
You can recall the main page by pressing EXIT from any of Style Play edit pages. If you are in a different operating mode, press STYLE PLAY to recall the Style Play mode. If Keyboard tracks are not shown in the display, press the TRACK SELECT button until you can see them.
This operating mode is automatically selected when turning the instrument on. The "My Setting" Performance will be automatically selected.
SONG PLAY
Song Play mode, where you can play back Songs in Standard MIDI File (SMF or KAR) or MP3 format. In addition to the Song tracks, you can play up to four Keyboard tracks and four along with the Song(s). In the main page, Keyboard tracks are shown in the right half of the display.
You can recall the main page of this mode by pres from any of the Song Play edit pages. If you are in a d operating mode, press SONG PLAY to recall the Song Play mode. Use the TRACK SELECT button to cycle between the Keyboard and Song tracks.
SEQUENCER
Sequencer mode, where you can play, record or edit Songs (in Standard MIDI File format). The Backing Seq record a new Song based on the Keyboard and Style tracks, and save it as a new Standard MIDI File.
Note: In this mode, you cannot play MP3 files.
SOUND EDIT
Sound Edit mode, to play single Sounds on the keyboard, or edit them.
User Sounds may be based on User PCM Samples to be loaded into the dedicated Sample RAM memory.
Note: Pa600 cannot load compressed User PCM Sa other Pa-Series models.
SHIFT While in any other operating mode, keep the SHIFT button pressed and press this button, to send the selected Sound to the Sound Edit mode.
DEMO
Press the STYLE PLAY and SONG PLAY buttons together to select the Demo mode. This mode lets you listen to some Demo
Songs, to let you experience the sonic power of the Pa600. To exit from this mode, press any of the MODE buttons.
Special Mode Buttons
These buttons are used to recall settings, file management and record modes.
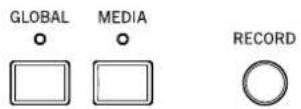
GLOBAL
This button recalls the Global mode, where you can adjust various global settings. Most Global settings are automatically memorized as soon as you edit them. This mode overlaps any operating mode, that will still remain active in the background. Press EXIT to go back to the underlying operating mode.
MEDIA
This button recalls the Media mode, where you can perform various operations on files and storage devices (Load, Save, Format, etc...). This mode overlaps any operating mode, that still remains active in the background. Press EXIT to go back to the underlying operating mode.
The internal memory contains both the internal data ("SYS [KORG SYSTEM]" area) and a space where to save data ("DISK [KORG DISK]" area).
r Pads RECORD
This button sets the instrument to the Record mode (which one depends on the current operating mode).
Accompaniment, Memory, Manual Bass, Chord Sequencer
These buttons let you turn all Accompaniment tracks on/off, decide what should remain in memory, and how to play the bass. In addition, they have the Chord Sequencer as a second function.
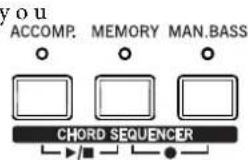
ACCOMP. (Accompaniment)
In Style Play and Sequencer-Backing Sequence mode, use this button to turn the Accompaniment tracks (ACC1 \~ ACC5) on or off.
On After pressing START/STOP, the full accompaniment plays and follows the detected chords.
Off No chords detected. After pressing START/STOP, only the Drum and Percussion accompaniment tracks can play.
SHIFT You can jump to the Global > Mode Preferences > Style Play page by keeping SHIFT pressed and pressing the ACCOMP button.
MEMORY
This button allows you to choose whether the Lower notes and/or chord triggering the accompaniment must remain in memory after raising your hand from the keyboard.
On Depending on the setting of the "Memory Mode"
parameter (in the Global > Mode Preferences > Style Play), the sound on the left of the split point (Lower), and/or the chords for the automatic accompaniment can kept in memory even when you raise your hand from the keyboard.
Off Both the sound and chord are released as soon as you raise your hand from the keyboard.
Note: This function can be automatically activated by playing the keyboard harder, by setting the "Velocity Control" parameter (in the Global > Mode Preferences > Style Play page).
SHIFT You can jump to the Global > Mode Preferences > Style Play page by keeping SHIFT pressed and pressing the MEMORY button.
MAN. BASS (Manual Bass)
This button turns the Manual Bass function on or off.
On The automatic accompaniment stops playing
(except for the Drum and Percussion tracks), and you can manually play the Bass track on the Lower part of the keyboard. You can start the automatic accompaniment again after pressing this button to turn off the Manual Bass function.
Off The bass track is automatically played by the Style.
Note: When you press the MANUAL BASS button, the Bass track volume is automatically set to its maximum value. The volume is automatically set back to the original value when the MANUAL BASS button is deactivated.
CHORD SEQUENCER (PLAY/STOP AND RECORD)
While a Style is in play, you can use this section as a Chord Sequencer and record a looping sequence of chords. The chords will drive the arranger, leaving your hands free for solo playing.
RECORD (MEMORY + MAN. BASS): Press these buttons together to start recording the Chord Sequence. Recording will start from the next measure. Press these buttons a recording.
PLAY/STOP (ACCOMP. + MEMORY): Press these buttons together to let the Chord Sequence play in loop, and automatically drive the arranger. The Chord Sequence will start on the next measure. Press these buttons again to stop the sequence.
The Chord Sequence will remain in memory up until you record a new Chord Sequence, or you turn the Pa600 off.
Pads
Here you can play (and stop) the Pads, i.e. single sounds or looping sequences.
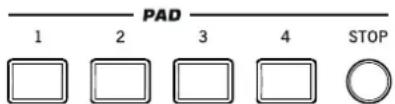
PAD 1-4 STOP
Each Pad button corresponds to a dedicated Pad track. Use these buttons to trigger up to four sounds or sequences time.
- Press a single PAD button to trigger a single sequence.
- Press more PAD buttons to trigger seven sequences.
The sequences will play up to the end. Then, they will stop or continue repeating, depending on their “One Shot/Loop” status (see the “Pad Type” parameter in the Pad Record mode).
You can stop all sequences, or just some of them, by pressing the STOP button of the PAD section:
• Press STOP to stop all sequences at once.
- Keep STOP pressed and press one (or more) of the PAD buttons to stop the corresponding sequence(s).
- Press one of the ENDING buttons to stop both the accom-
paniment and the Pads at the same time.
About Pad synchronization. In Style Play mode, Pads are synchronized to the Style's Tempo. In Song Play mode, they are synchronized to the Player.
Note: There is no synchronization with MP3 files. Pads can only be synchronized to the Tempo of the latest selected Standard MIDI Files. Therefore, when an MP3 file is assigned to the last select Player, Pads will synchronize to the Tempo of the last Standard MIDI File that has been played back.
About Pads and the Player's Play command. When you press the PLAY button to start the Player, all Pads will stop playing.
SHIFT You can jump to the Style Play > Pad/Assignable Switch page by keeping SHIFT pressed and pressing one of the PAD buttons.
Selection
Here you can select a Style, Sound, SongBook entry, or Song, and activate the automatic selection of the STSs.
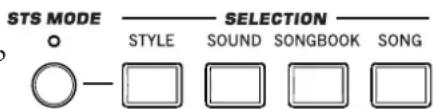
STS MODE
This button lets you cycle between the following functions.
On When a Style is selected, STS 1 is also automatically selected. The Keyboard sounds and effects will change, along with the Style sounds and effects.
Flashing Variation/STS Link function activated. This function makes each Variation recall the corresponding STS when selected. For example, select Variation 2, and STS 2 will be automatically recalled; select Variation 3, and STS 3 will be automatically recalled.
Off When you select a Style, the Style sounds and effects will change. The Keyboard sounds and effects will not change.
STYLE
Use this button to open the Style Select window and select a Style. This is the same as touching the name of the Style in the display. Repeatedly press it to cycle between the Style bank pages.
For each type of Styles there are several banks, that can be selected by touching the side tabs. Each Style bank contains various pages, each with up to eight Styles, that can be selected touching the lower tabs.
Styles of the Factory type are usually write-protected (unless you uncheck the “Factory Style and Pad Protect” option in the Global > Mode Preferences > Media page). Styles of the Favorite type can be used to load new Styles from an external device, or to save newly created or edited Styles into banks with a freely editable name. Styles of the User type are like the Favorites, but you cannot edit the bank name, and are better suited for temporary materials.
By keeping this button pressed for about one second, the "Write Current Style Settings" dialog box will appear.
SOUND
Use this button to open the Sound Select window and select a Sound to be assigned to the selected track. This is the same as touching a Sound name in the display. Repeated cycle between the Sound bank pages.
For each type of Sounds there are several Sound banks, that can be selected by touching the side tabs. Each Sound bank contains various pages, each with up to eight Sounds, that can be selected by touching the lower tabs.
Sounds of the Factory type are usually write-protected (unless you uncheck the "Factory Sound Protect" option in the Global > Mode Preferences > Media page). Sounds of the Legacy type are standard Factory Sounds allowing greater compatibility with older Pa-Series instruments. Factory Sounds of the GM type allow for compatibility with General MIDI sounds. Sounds of the User type are locations where you can load new Sounds from an external device, or save new or edited Sounds. The User DK type is where you can load new Drum Kits, or save new or edited Drum Kits.
SONGBOOK
Press this button to open the SongBook (when you are in Style Play or Song Play mode). While the SongBook is shown on t display, you can browse through the music database.
By keeping this button pressed for about one second, a new SongBook Entry with the current settings is added to the database. You will be able to give it a name and save.
SHIFT You can jump to the SongBook > Custom List page by keeping SHIFT pressed and pressing the SONGBOOK button.
SONG
Press this button to open the Song Select window and choos Songs. This is the same as touching the Song name in the display.
Style Elements
This section contains the separate elements of a Style (Intro, Variation, etc.).

INTRO 1-3 buttons
These buttons turn the corresponding Intro on. After pressing one of these buttons, start the Style, and it will begin with the selected intro. The INTRO LED will automatically go off at the end of the intro.
At the end of the Intro, the Variation whose LED was blinking will be selected.
Press one of the INTRO buttons twice (LED blinking) to let the corresponding Intro play in loop, and select any other Style element (Intro, Variation, Ending) to exit the loop (or press the same button again).
Note: Intro 1 plays a short sequence with different chords, while Intro 2 plays on the latest recognized chord. Intro 3 is usually a one-bar Count In.
VARIATION 1-4 buttons
Each of these buttons selects one of the four Variations of the current Style. The higher the Variation number, the denser the arrangement.
When the STS to MODE LED is flashing, the Variation/STS Link function is activated: when selected, each Variation recalls the corresponding STS.
SHIFT You can jump to the Style Play > Drum/Fill page by keeping SHIFT pressed and pressing one of the VARIATION buttons.
AUTO FILL
This button allows to turn the Auto Fill function on or off.
On When selecting a different Variation, the Fill having the same number of the previous Variation is automatically selected. For example, if going from Variation 2 to Variation 3, Fill 2 is automatically selected.
Off When choosing a Variation, no fill is selected.
BREAK
This button triggers a break. Press it twice (LED blinking) to let the play in loop. Press it again or select any other Style Element (Intro, Variation, Ending) to exit from the loop.
ENDING 1-3 buttons
While the Style is running, these three buttons trigger an Ending, and stop the Style. Press one of them, and the Style will stop running with an Ending.
Press them twice (LED blinking) to let them play in loop, and select any other Style element (Intro, Variation...) to exit the loop (or press the same button again).
^e Note: Ending 1 plays a short sequence with different chords, while Ending 2 plays on the latest recognized chord. Ending 3 starts immediately, and is just two measures long.
Style Controls
Use these buttons to start/stop the accompaniment.
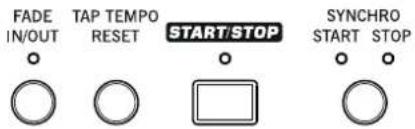
FADE IN/OUT
When a Style or Song is not playing, press this button to start it with the volume "fading in" (the volume goes from zero to the maximum).
When a Style or Song is playing back, press this button to stop it with the volume "fading out" (the volume gradually decreases).
You don't need to press START/STOP or PLAY/STOP to start or stop the Style or Song.
Note: This does not work in Sequencer mode.
SHIFT You can jump to the Global > Basic page by keeping SHIFT pressed and pressing the FADE IN/OUT button.
TAP TEMPO/RESET
This is a double-function button, acting in a different way depending on whether the Style is running or not.
Note: This button only works while in Style Play mode.
Tap Tempo: When the Style is not playing, you can "beat" the tempo on this button. Tap as many times as the Time Signature's numerator (for example, four times with a 4/4 Time Signature, or three times with a 3/4 one). At the end, the accompaniment starts playing, using the "tapped in" tempo.
Reset: If you press this button while the Style is playing back, the Style pattern goes back to the beginning of measure 1.
START/STOP
Starts or stops the Style.
Note: This function can be automatically activated by playing the keyboard harder, by setting the "Velocity Control" parameter (in the Global > Mode Preferences > Style Play page).
SHIFT You can reset all 'frozen' notes and controllers on the Pa600 and any instrument connected to its MIDI OUT or the USB Device port, by using the "Panic" (SHIFT + START/STOP) key combination. Just press SHIFT + START/STOP to stop all notes and reset all controllers.
SYNCHRO START / STOP button
These buttons turn the Synchro Start and Synchro Stop functions on or off. With this feature, you can choose to press the START/STOP button to start and/or stop a Style, or just play the keyboard in the Chord Scan area.
Start On, Stop Off
In this situation, just play a chord in the chord recognition area to automatically start the Style. If you like, turn one of the INTROs on before starting the Style.
Start On, Stop On
When both LEDs are lit, raising your hands the keyboard will momentarily stop the Style. If you play a chord again, the Style will start again.
Start Off, Stop On
In this case, raising your hands from the keyboard will stop the Style.
Start Off, Stop Off
All Synchro functions are turned off.
SHIFT You can jump to the Global > MIDI > Setup/General Control by keeping the SHIFT button pressed and pressing the SYNCHRO START/STOP button.
Display and Brightness Controls
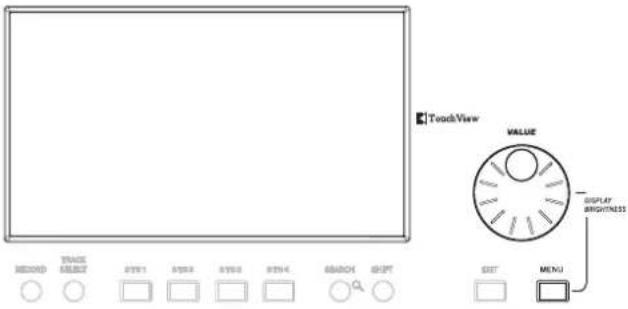
COLOR TOUCHVIEW™ GRAPHICAL DISPLAY
Use this display to interact with the instrument. To adjust the display brightness, keep the MENU button pressed, and turn the DIAL counter-clockwise to make the display darker, or clockwise to make it brighter.
Special Function Controls
Use the TRACK SELECT, SEARCH and SHIFT buttons to choose special functions.
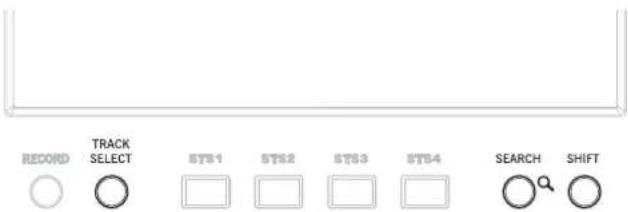
TRACK SELECT
Depending on the operating mode, this button switches between the various track views.
STYLE PLAY MODE
Toggles between Keyboard and Style tracks.
SONG PLAY MODE
Toggles between Keyboard tracks, Song tracks 1-8, and Song tracks 9-16.
SEQUENCER MODE
Toggles between Song tracks 1-8 and Song tracks 9-16.
SEARCH
Press this button to open the Search window, specified file or musical resource. The Search window appears slightly different depending on the current context.
SHIFT
With this button held down, pressing certain other buttons gives access to a second function.
STS Section
Use the STS (Single Touch Settings) buttons to assign Sounds to the keyboard.
STS 1-4 buttons
These buttons allow to select up to four Single Touch Settings (abbreviated as STS). Each one of the Styles and SongBook entries includes four Single Touch Settings (STS), to automatically configure Keyboard tracks and effects at the touch of a finger. When the STS MODE LED is lit, an STS is also selected when choosing a Style.
Note: STS contained inside Factory Styles are usually write-protected (unless you uncheck the "Factory Style and Pad Protect" option in the Global > Mode Preferences > Media page)
By keeping one of these buttons pressed for about one second, the "Write Single Touch Setting" dialog box will appear.
Player Controls
Pa600 is equipped with a Standard MIDI File and MP3 Player. Its controls can be used in Song Play and Sequencer mode.
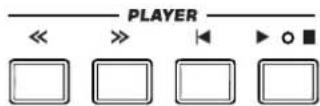
<< and >>
Rewind and Fast Forward commands, to scroll the Song back or forward.
When pressed once, these buttons move the Song to the previous or following measure (with a Standard MIDI File) or to the previous or next second (with an MP3 file). When kept pressed, they make the Song scrolling continuously until released.
In Sequencer mode, if you set a Locate Measure other than 1, when pressing the << button the Song will rewind up to that measure instead of the first one.
SHIFT In Jukebox mode, keep the SHIFT button pressed, and press these buttons to scroll to the previous or next Song in the Jukebox list.
(HOME)
Sends the Song Position back to measure 1 (i.e., the beginning of the Song).
In Sequencer mode, if you set a Locate Measure other than 1, the Song Position will go back to that measure.
▶/■ (PLAY/STOP)
a nd look the Song from the current Song Position, or stops it at the current Song Position.
Lyrics, Score, Marker
Use these buttons to access the Lyrics, Score or Marker pages.
LYRICS
This button recalls the Lyrics page for the Song, the Style or the SongBook entry.
SCORE
Press this button to open the Score page (in Song Play or Song-Book mode).
MARKER
Press this button to open the Marker page (in Song Play or Song-Book mode).
Data Entry and Navigation
The VALUE DIAL can be used to assign a different value to the parameter selected in the display, or to scroll a list of files in the Song Select, SongBook, Search and Media pages.
VALUE DIAL
Turn the dial clockwise to increase the value of the selected parameter. counter-clockwise to decrease its value.
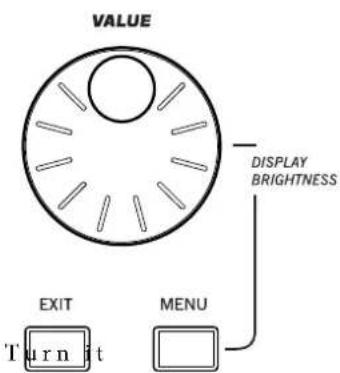
MENU When used while pressing the MENU button, this control always acts as a Display Brightness control.
EXIT
Use this button to perform various actions, leaving from the current status:
- exit the edit menu page, without selecting any item
• make the page menu disappear, without selecting any item - return to the main page of the current operating mode
- exit the Global or Media edit environment, and return to the current page of the current operating mode
- exit from the SongBook mode
- exit from the Lyrics, Score and Marker pages
- exit from a Style, Pad, Performance or Sound Select window
MENU
This button opens the edit menu page for the current operating mode. After opening an edit menu, you can jump to one of the
edit sections by touching the corresponding button in the display.
Otherwise, press EXIT to return to the main page of the current operating mode, or the current page of the underlying operating mode.
Tempo Section
The TEMPO and METRO buttons can be used to control the Tempo.
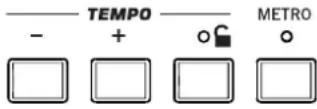
TEMPO +/- buttons
TEMPO- decreases the Tempo value of the Style or Standard MIDI File; TEMPO+ increases it. With MP3 files, the speed of the file is respectively decreased or increased.
Press both buttons together to reset the Tempo to the value memorized in the Style or Standard MIDI File. With MP3 files, the original speed of the file is recalled (value reset to "0").
TEMPO LOCK
This button turns the Tempo Lock function on or off.
On When you select a different Style or Performance,
or select a different Song, the Tempo will not change. You can still manually change it, by using the TEMPO +/- buttons, or select the Tempo value and change it by using the VALUE dial.
Off When you select a different Style or Performance,
or select a different Song, the memorized Tempo will be automatically selected.
Note: This button does not work with MP3 files.
SHIFT You can jump to the Global > Lock page
SHIFT pressed and pressing this button.
METRO
Use this button to turn the metronome click on or off.
SHIFT You can jump to the Global > General Controls > Basic page by keeping SHIFT pressed, and pressing this button.
Split
Splitting the keyboard allows you to separate the chords area from the melody.
SPLIT
C

SPLIT
In Style Play, Song Play and Sequencer-Backing Sequence mode, use this button to choose how the four Keyboard tracks are positioned on the keyboard, and how chords are recognized by the arranger.
Note: The ACCOMP LED must be turned on for the accompaniment to play.
On The Lower track plays below the split point, while
the Upper 1, Upper 2 and Upper 3 tracks play above it. This is called the Split keyboard mode.
By default, turning on the Split mode automatically selects the Lower chord scanning mode. In this mode, chords are detected below the split point.
Off The Upper 1, Upper 2 and/or Upper 3 tracks play over the whole keyboard range. The Lower track does not play. This is also called the Full keyboard mode.
Turning off the Split mode automatically selects the Full chord scanning mode. In this mode, chords are detected over the full keyboard range. You must always play three or more notes to the arranger recognize a chord.
By keeping this button pressed for about one second, the Split Point window appears. When there, play the new split point on the keyboard.
Ensemble
The Ensemble function automatically harmonizes the melody played with the right hand.
ENSEMBLE
0

ENSEMBLE
This button turns the Ensemble function on or off.
When on, the right-hand melody is harmonized with the left-hand chords.
Note: The Ensemble function only works when the keyboard is in SPLIT mode.
SHIFT You can jump to the Style Play > Keyboard/Ensemble page by keeping SHIFT pressed and pressing the ENSEMBLE button.
Performance Select Section
Use these buttons to select a Performance. Performances memorize all Sounds assigned to the keyboard, most control panel settings, and an associated Style.

MY SETTING
This is a special direct-access Performance, that is automatically selected when the instrument is turned on. When pressing this button, the Performance is immediately selected.
Keep this button pressed for about one second to save the current settings into the My Setting Performance.
PERFORMANCE buttons
Use these buttons to open the Performance Select window, and select a Performance.
Each Performance bank contains five pages, each eight Performances. Repeatedly press a PERFORMANCE button to cycle between the available pages.
All Performances can be freely customized, by accessing the edit pages of the Style Play and Song Play modes by pr MENU button.
By keeping one of these buttons pressed for about one second, the "Write Performance" dialog box will appear.
STYLE CHANGE
This button turns the Style Change function on or off.
On When you select a Performance, the Style might change according to which Style is memorized onto the Performance.
Off When you select a Performance, the Style will remain the same. Only Keyboard tracks (Sounds, Effects...) will be changed.
Transpose Section
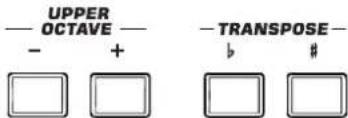
Use these buttons to transpose the Sounds.
UPPER OCTAVE
Use these buttons to transpose the Upper tracks in steps of one whole octave (12 semitones; max ±3 octaves). The octave transposition value is always shown (in octaves) next to the Sound's name.
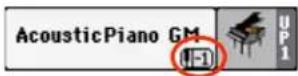
Press both buttons together, to reset the Octave Transpose to the saved value.
- Lowers the selected track by one octave.
+ Raises the selected track by one octave.
SHIFT You can jump to the Style Play > Tuning page by keeping SHIFT pressed and pressing one of the UPPER OCTAVE buttons. Hint: Go to the Tuning page to separately transpose each track.
TRANSPOSE
These buttons transpose the whole instrument in steps of one semitone (Master Transpose). The transpose value is usually shown in the page header.

Press both buttons together, to reset the Master Transpose to zero.
Note: You can also transpose MP3 files. Keep in mind, however, that transposition always remains inside the range -5...+6 semitones. This range is enough to cover all keys, but allows to avoid excessive audio degradation. Any further transposing will be reversed to fit the range. So, you might see a +7 transpose value (Just Fifth Up) shown in the display, but the MP3 will actually play 5 semitones lower (Just Fourth Down).
b Lowers the Master Transpose in steps of one semitone.
# Raises the Master Transpose in steps of one semi-tone.
SHIFT You can jump to the Global > Transpose Control page by keeping SHIFT pressed, and pressing one of the TRANSPOSE buttons.
Power On/Off
POWER
Use this button to let the instrument exit (LED off) or enter (LED on) standby.
Press it briefly to let the instrument exit standby. In case there are User Sounds based on User PCM Samples, loading may take some time.
Keep it pressed for about one second to let it enter standby.
Warning: When the instrument is in standby mode, it is still connected to the power line. Accessing the inside of the instrument can be dangerous. To completely disconnect the instrument from the power, unplug the power plug from the power socket on the wall.
Note: To avoid wasting power, Pa600 will by default automatically enter standby mode after two hours of non-active use (playing, pressing buttons or using the touch-screen). Please save your data (Performances, Styles, Songs, and so on) before taking a prolonged pause. You can change the auto power-off timer in Global > General Controls > Clock & Power.
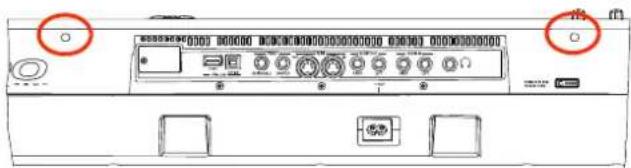
Rear Panel

Music stand
Music stand holes
A music stand comes standard with your Pa600. Insert its legs into these two dedicated holes.
USB Connectors
Use these connectors to connect USB devices, or a personal computer.
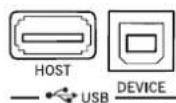
HOST(R)
This is a USB Type A (Master/Host) connector, USB 2.0 compliant (High Speed only - to connect older, slower USB devices, please use an USB hub). Use it to connect to the Pa600 an USB Flash Memory stick, an external CD-ROM drive, an USB hard disk. You can access the connected device in the Media mode.
DEVICE
This is a USB Type B (Slave/Device) connector, USB 2.0 (High Speed). Use it to connect the Pa600 to a personal computer, and transfer data to/from its internal memory (Disk). You can enable USB connection in the "USB" page of the Media mode.
MIDI over USB is supported, so you can use this connector instead of the MIDI ports. The drivers for PC and Mac, needed to make full use of this type of connection, are supplied in the Accessory Disk that comes with the instrument, or can be downloaded from our web site.
Pedals
Use these connectors to connect various types of pedals.
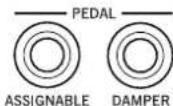
ASSIGNABLE
Use this port to connect a continuous- or footswitch-type pedal, like the (optional) KORG EXP-2, XVP10, PS-1 or PS-3, or a VOX V860. To program and calibrate it, go to the Controllers > Foot Controllers page of the Global mode.
DAMPER
Use this to connect a Damper pedal, like the (optional) KO PS-1, PS-3 or DS1H. To change its polarity and calibrate it, go to the Controllers > Foot Controllers page of the Global mode.
Note: Half-pedalling on Piano Sounds is available when connecting a DS1H damper pedal.
MIDI Interface
The MIDI interface allows your Pa600 to be connected to external controllers (master keyboard, MIDI guitar, wind controller, MIDI accordion...), to a series of expanders, or to a computer running a sequencer.
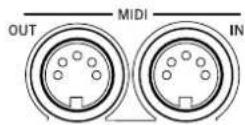
OUT
This connector sends MIDI data generated by Pa600's keyboard, controllers, and/or the internal expander's or computer's MIDI IN.
IN
This connector receives MIDI data from a computer or a controller. Connect it to an external controller's or computer's MIDI OUT.
AUDIO OUT Section
Use these connectors to send the audio signal (sound) to a mixer, a PA system, a set of powered monitors, or your hi-fi system.
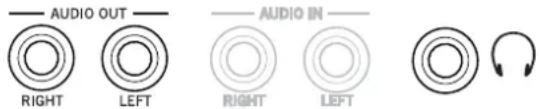
LEFT, RIGHT
Use these line-level outputs to send the final stereo mix to an external device. Connect either of them to output the mono. Adjust the output level with the MASTER VOLUME knob.
Connect two mono cables to these outputs. Connect the other end of the cables to a stereo channel of your mixer, two mono channels, two powered monitors, or the CD, LINE IN or TAPE/AUX input of your audio system. Don't use the PHONO inputs of your audio system!
PHONES
Connect a pair of headphones to this output. You can use headphones with an impedance of 16-200 Ohms (50 Ohms suggested). Use a headphone splitter to connect more than one pair of headphones.
AUDIO IN Section
Use these connectors to input sound from another line-level device. The signal goes directly to the final mix.
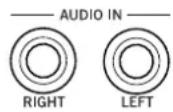
LEFT, RIGHT
Use these connectors to connect a line-level input source, such as a keyboard/ synthesizer, a CD or MP3 player, or a mixer's (non-powered) output. Adjust the input level with the source's output volume.
Power
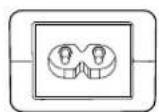
This is where you connect the Pa600 to the power line.
ACV cable connector
Plug the supplied AC cable into this connector. When the cable is connected, the instrument is in standby mode. To let it enter or exit standby, use the POWER switch located on the front panel.
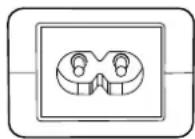
Warning: When the instrument is in standby mode, it is still connected to the power line. Accessing the inside of the instrument can be dangerous. To completely disconnect the instrument from the power, unplug the power plug from the power socket on the wall.
Start up
Connecting the AC power cord
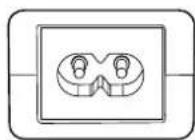
Connect the supplied power cord to the dedicated socket on the rear of the instrument. Then, plug it into a wall socket. You don't need to worry about the local voltage, since the Pa600 uses a universal power adapter.
When the cable is connected to the power, the instrument automatically enters standby mode.
Turning the instrument on (or setting it to standby)
Press the POWER button on the front panel to let the instrument exit standby. The display will light up, showing the boot procedure.
Note: When the instrument exits standby, User PCM Samples used by some User Sounds may be automatically loaded. Loading them may take some time.
Keep the POWER button pressed for about one second to let the instrument enter standby.
Warning: When putting the instrument in standby, all data contained in RAM (Song recorded or edited in Sequencer mode, the Chord Sequence) will be lost.
On the contrary, data contained in the internal memory (Factory data, User Sounds, Performances, Styles) will be preserved.
Controlling the Volume
Master Volume
MASTER VOLUME

Use the MASTER VOLUME knob to control the overall volume of the instrument. This knob controls the volume of the sound going to the integrated speakers, the AUDIO OUT and PHONES connectors.
Note: Begin at a moderate level, then raise the MASTE UME up. Don't keep the volume at an uncomfortable level for too long.
Keyboard, Style Accompaniment and Song Volume
By default, the BALANCE knob balances the volume of the Keyboard (KBD) tracks, against the Style's Accompaniment (ACC), Song and Pad tracks.
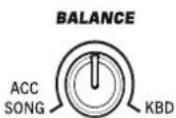
- When in Style Play mode, this knob balances between the Keyboard tracks, and the Style and Pad tracks.
- When in Song Play mode, this knob balances between the Keyboard tracks, and the Player and Pad tracks.
This is a relative control, whose effective maximum level is determined by the MASTER VOLUME knob position.
When moved, a magnified version of the virtual slider appears in the display, for more accurate positioning.
As an alternative, the knob can be used to control the Style/Song Volume without affecting the Keyboard tracks (choose the desired behavior by editing the "Balance Control" parameter in the Global >Controllers > Hand Control page).
Note: This knob only works in Style Play and Song Play mode; i does not work in Sequencer mode.
Headphones
Connect a pair of headphones to the PHONES output, on the back of the instrument. You can use headphones with an impedance of 16-200 Ohms (50 Ohms suggested). Use a headphone splitter to connect more than one pair of headphones.
Note: When connecting the headphones, the speakers are automatically deactivated.
Loudspeakers
Pa600 is fitted with a pair of powerful, high-quality integrated speakers and a bass-reflex box, powered by a 15+15 Watt amplification system.
The overall volume can be controlled via the MASTER VOLUME knob.
Speakers can be deactivated with the "Speakers On/Off" parameter, that you can find in the Global > Audio & EQ: MP3/Speakers page.
Audio Outputs
Audio outputs allow for connecting Pa600 to an external amplification system. The overall volume can be controlled via the MASTER VOLUME knob.
MIDI connections
You can play the internal sounds of your Pa600 with an external controller, i.e. a master keyboard, a MIDI guitar, a wind controller, a MIDI accordion, or a digital piano.
You can also control other MIDI devices with Pa600, or connect it to a computer for use with an external sequencer.
As an alternative to the MIDI connectors, you can use the USB Device port for direct connection to a personal computer.
See the "MIDI" chapter on page 284 for more information on MIDI connections.
Damper pedal
Connect a Damper (Sustain) pedal to the DAMPER connector on the back panel. Use an (optional) KORG PS1, PS3 or DS1H footswitch pedal, or a compatible one. With the KORG DS1H, half-pedalling can be used on some Grand Piano sounds. To calibrate and switch the Damper polarity, go to the Controlled Foot Controller page of the Global mode.
Assignable pedal
Connect either a footswitch or an expression pedal to the ASSIGNABLE connector on the back panel. Use an (optional) KORG PS1 or PS3 footswitch pedal, a KORG EXP-2 expression pedal, a KORG XVP-10 or VOX V860 volume pedal, or a compatible one. To calibrate the pedal, go to the Controllers > Foot Controller page of the Global mode.
The music stand
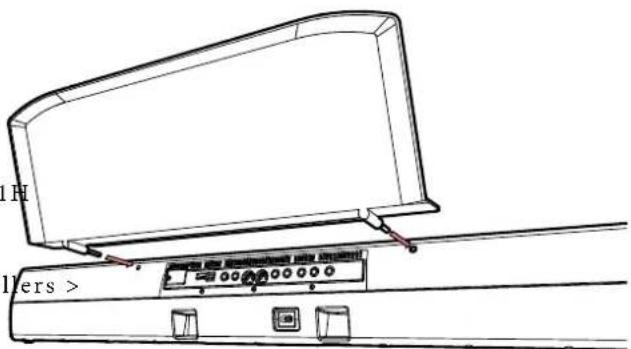
A music stand comes standard with your Pa600. Insert its legs into the two dedicated holes on the rear panel, as shown in the illustration:
Glossary of Terms
Before you begin, take a few moments to familiarize yourself with the names and terms we will be using to talk about the various elements of the Pa600.
In this section, you will find a brief description of various key elements of the Pa600. A professional arranger (Pa) keyboard uses different terminology than a traditional synthesizer or workstation. By familiarizing yourself with the names and functions in this section, you will get a better understanding of how all the different parts of the Pa600 work together to create a realistic musical performance. This will also help you to get the most out of the rest of the manual.
Sound
A Sound is the most basic unit of an Arranger Keyboard performance. A Sound is basically a playable instrument timbre (piano, bass, sax, guitar...) that can be edited, saved, recalled and assigned to any track. An individual Sound can be played on the keyboard in the Sound mode. In the Style Play, Sequencer mode, Sounds may be freely assigned to Sequencer tracks, Style tracks, or Keyboard tracks.
Style
The Style is the heart of a professional arranger keyboard. At its basic level, a Style will consist of up to eight parts, or "Tracks".
Drums
The Drum track will provide a repeating rhythmic phrase, played by the standard instruments of a Drum Kit.
Percussion
An additional rhythmic phrase played by instruments (conga, shaker, cowbell, etc.) is provided by the Percussion track.
Bass & Accompaniment
The Bass track and the (up to) five additional Accompaniment tracks will each play musical phrases that are musically related to and in sync with the Drum and Percussion tracks. However, the notes being played by these tracks will change to follow the chord progression that you play on the keyboard.
Again, any Sound you choose may be assigned to any track in a Style.
Variation
For each Style, there are four Variations, to be used for the Verse, Bridge and Chorus of a song. In general, each slightly different version of the others. As you progress from Variation one to Variation four, the arrangements will become more complex, and more parts (Tracks) may be added. This allows your performance to have a more dynamic arrangement, without losing the original “feel” of the Style.
Fill-in & Break
During a performance, a drummer may often perform a "fill" - such as when transitioning from a verse to a chorus - adding extra dynamics and keeping the beat from getting too repetitive. The Pa600 offers four Fill-ins specifically programmed for each Style, that may be automatically recalled when choosing the corresponding Variation (Auto Fill). A Fill-in may be drums alone or drums with instrumentation. Then, there is even a silent "break".
Song Play or Intro & Ending
Each Style also allows you to complete your performance with a set of musical introductions and endings. A long and short version of the Intro and Ending are usually provided, with the former more harmonically elaborated, and the latter with a fixed chord. A “count-in” Style Intro is also provided, as we quick Ending 3.
Pad
Pads are single sounds or single-track patterns, that can be triggered by using the dedicated PAD buttons. They can be used to play in realtime single sounds, as well as short, cycling sequences that play in time with the Style or Standard MIDI File, and transposed according to the recognized chords.
Keyboard tracks
In addition to the Style and Pad tracks, up to four additional parts can be played on the keyboard in real-time. Each of these Keyboard tracks can be limited to a particular range of keys or velocities, but in general up to three can be assign above the split point (Upper), and one below (Lower). This allows the Upper Sounds to be layered together. The split point can be set to any note on the keyboard. In addition to performing along with a Style, these same Keyboard tracks will allow you to play along with the Player.
STS (Single Touch Settings)
Single Touch Settings allow you to instantly change the sounds assigned to each of the Keyboard tracks with a single button press, allowing for wide variation in sounds during a perfor-
mance. Four STS (Single Touch Settings) can be saved with each Style or SongBook Entry.
Ensemble
By turning the Ensemble feature on, a single note played on one of the Keyboard tracks will be embellished by additional notes to create a complete chord voicing. The Ensemble knows which notes to add by looking at the chord that you are playing. In addition, the Ensemble parameters allow you to select the type of voicing that will be added – from a simple one-note harmony to a full “Brass” section – even a marimba-style trill!
Performance
The Performance is the most encompassing setting on the Pa600 – a single setting that can remember a Style (with all the appropriate sounds), the Keyboard tracks (with all the appropriate sounds) and all their Tempo, transposition, effects, etc... A Performance can be stored in one of the Performance bank locations, or it can be saved in a "database" format using the SongBook function.
Sequencer
The Sequencer acts as a recorder, so you can capture and playback your performances. The Pa600 sequencer can function in different modes. In the Backing Sequence mode, each Style element and each Keyboard and Pads element can be recorded on a separate track in a single pass. This can be a big help in getting a song recorded quickly. The sequencer can also behave as a traditional 16-track linear sequencer, where each track is recorded individually one at a time.
Player
The Player lets you playback your performances or any Standard MIDI File or MP3 file.
The LOGO decoder
On the front panel of your Pa600 you have probably noticed a series of logos, and may have even wondered what they stand for. Well, here is a quick explanation of each one.

General MIDI (GM) is a standard that ensures the compatibility of sounds and messages between GM compatible instruments available from different manufacturers. For example, sequenced songs created on any GM equipped product and saved in the GM format will playback correctly on the Pa600.
General MIDI 2 extends the basic features of the General MIDI, allowing for 256 Sounds and 9 Drum Kits (instead of 128 and 1).

RX Technology is the cutting edge engine that drives every aspect of the Pa600 - from the synthesis to the display and how it all works together.

DNC (Defined Nuance Control) is the wa fine-controlling KORG's powerful sound engine. Every nuance and every detail of the sound can be assigned to a different control, be it the keyboard
velocity or a physical controller.
TouchView
TouchView is the sophisticated technology allowing for touching the objects in the display, instead of pointing to them through an external device (a mouse, a series of buttons). straight to the musical elements, instead of catching keys somewhere on the control panel.
Interface basics
Color TouchView graphical user interface
Pa600 features our exclusive easy-to-use TouchView graphic interface, based on a touch-panel LCD screen. By touching items on the LCD screen, you can select pages, tabs, and parameters, and set parameter values via on-screen menus and buttons. Here are the basic elements of the user interface.
Menus and sections
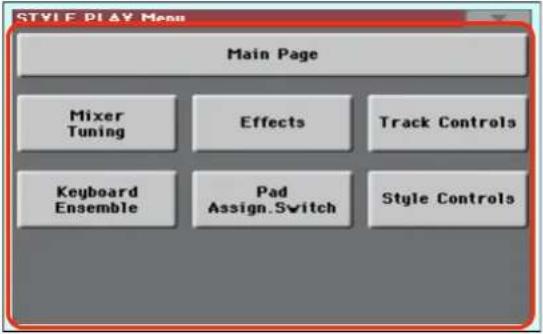
Pages are grouped in sections, to be selected by touching the corresponding buttons in the Edit menu that opens up when press the MENU button.
Pages
Parameters are grouped into separate pages, to be selected by touching the corresponding tabs on the lower area of the display.

Overlapping windows
Several windows, like the Style Select or Pad Select, the Global, the Media, or the Lyrics, overlap the current window. After you select an item in the window, or press the EXIT button, the window closes, and the underlying page is shown again. (The following example is the Sound Select window).
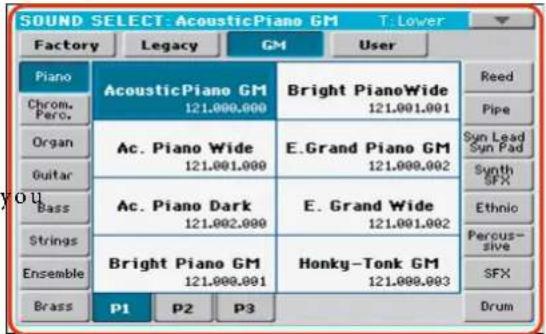
Dialog boxes
Similar to selecting windows, dialog boxes overlap the underlaying page. Touch one of the button on the display to give Pa600 an answer, and the dialog box will close.
Page menus
Touch the icon on the upper right corner of each page, and a menu with suitable commands for the current page will appear. Touch one of the available commands to select it. (Or, touch anywhere else on the screen to make it disappear, with no command selected).
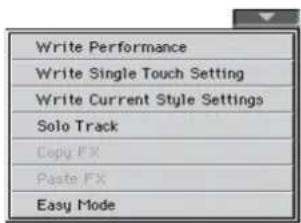
Pop-up menus
When an arrow appears next to a parameter name, touch it to open a pop-up menu. Select any of the available options (or anywhere else on the screen to make the menu disappear).
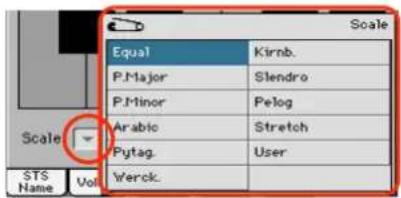
Checkboxes
This kind of parameters are on/off switches change their status.
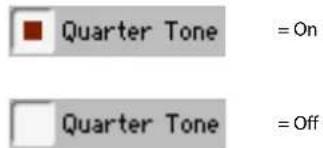
Numeric fields
When a numeric value can be edited, touch it a second time to open the Numeric Keypad.
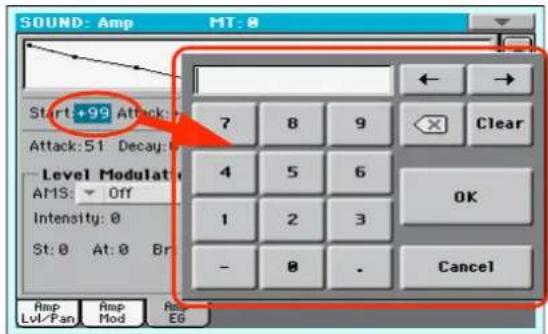
The virtual numeric keypad works exactly as the numeric keypad of a personal computer.
As an alternative, touch a numeric field and keep it held. Then move your fingers up (or right) to increase the value, or move it down (or left) to decrease it.
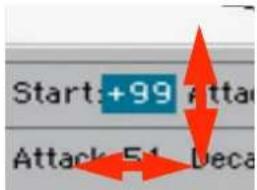
This also includes the Tempo numeric field in the main page of the Style Play, Song Play, and Sequencer modes.
Editable names
When the Text Edit) button appears next to a name, touch it to open the Text Edit window and edit the name.
![Filter Name: T Clear Genre: T Clear Artist: Meter: Tempo: ON SCREEN KEYBOARD 1 2 3 4 5 6 7 8 9 0 - q w e r t y u i o p [ a s d f g h j k l ; ' z x c v b n m = \ ↑ Alt Space , . / ] . Cancel OK Touch them to](/content/2026/05/882139/images/bcedff18ce6ee441da7dcdff321635dfa1667d7608336e0fdce0975cb93ce628.jpg)
The virtual keyboard works exactly as a personal computer's keyboard. Some of the symbols are context-sensitive, and only appear when they can actually be used.
Lists and scrollbars
Files on storage media, as well as other kinds of data, are shown as lists. Use the scrollbar to scroll the list content. Also, you can use the VALUE DIAL to scroll.
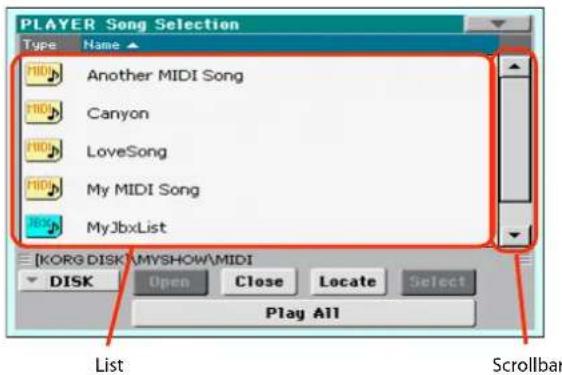
When the Name label is selected, keep the SHIFT button pressed while touching one of the arrows on the scrollbar, to scroll to the next or previous alphabetic section.
Virtual sliders
To change a virtual slider's position, select it, then use the VALUE dial to change its position. As an alternative, touch a slider with your fingers and keep it held; then move it up or down to change its position.
Virtual knobs
To change a virtual knob's position, select it, then use the VALUE dial to change its position. As an alternative, touch a knob with your finger and keep it held; then move your right) to rotate it clockwise, or move it down (or left) to the knob counter-clockwise.
Icons
Various icons help identifying the type of a file, a Song, a folder. For example:

Folder

File of Style bank

Standard MIDI File
Operative modes
iThe pages of Pa600 are grouped in various operating modes. The mode is accessed by pressing the corresponding button in the MODE section on the control panel.
Each operating mode is marked with a different color code, that helps you understand at first sight where you are.
Two special modes (Global and Media) overlap the current operating mode, that remains active in the background.
The Record mode can be accessed from the S Sequencer modes, and allows for creating new Styles or Songs. It can also be accessed from the Sound mode, where allows you to edit Samples.
Selected, highlighted items
Any operation on parameters, data or list entries, is executed on highlighted items. First select the parameter or item, then execute the operation.
Non-available, grayed-out parameters
When a parameter or command is not currently available, it is shown in grey on the display. This means it cannot be selected, but may become available when a different option is selected, or you switch to a different page.
Shortcuts
Some commands or pages can be recalled by keeping the SHIFT button pressed, and pressing other buttons or elements in the display. Some others can be accessed by keeping a button pressed for more than one second. See the "Shortcuts" chapter on page "Shortcuts" on page 408 for a list of available shortcuts.
Easy Mode
If you have never used an arranger before, we suggest to choose the "Easy Mode" menu item, to make the checkmark switch to the Easy Mode. Easy Mode allows you to play apples
and Songs with a simple user interface, free from the many advanced parameters that you will want to learn later.
Turning the Easy Mode on
Touch the little rectangle on the top right corner of the display, to open the page menu:
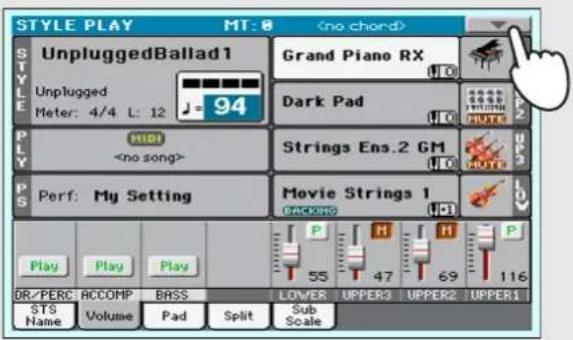

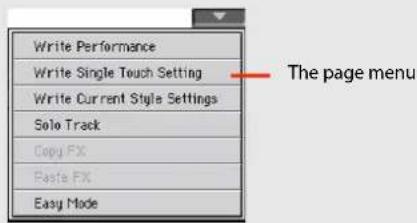
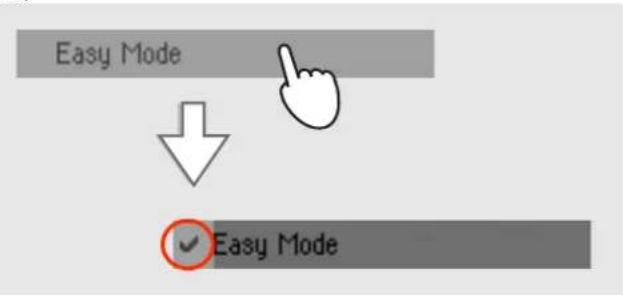
At this point, the Easy Mode has been activated, and the elements in the display appear less crowded:
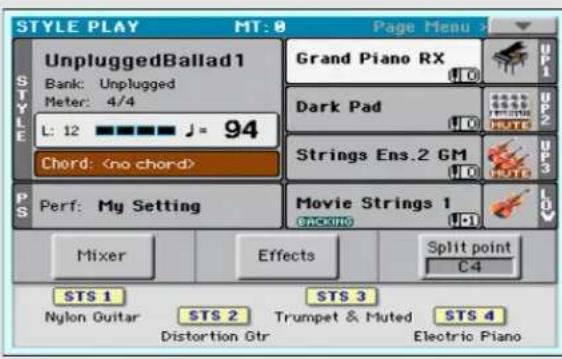
Turning the Easy Mode off
Reverse the above operation when you want to deactivate the Easy Mode.
The Style Play page in detail
To see this page, press the STYLE PLAY button.
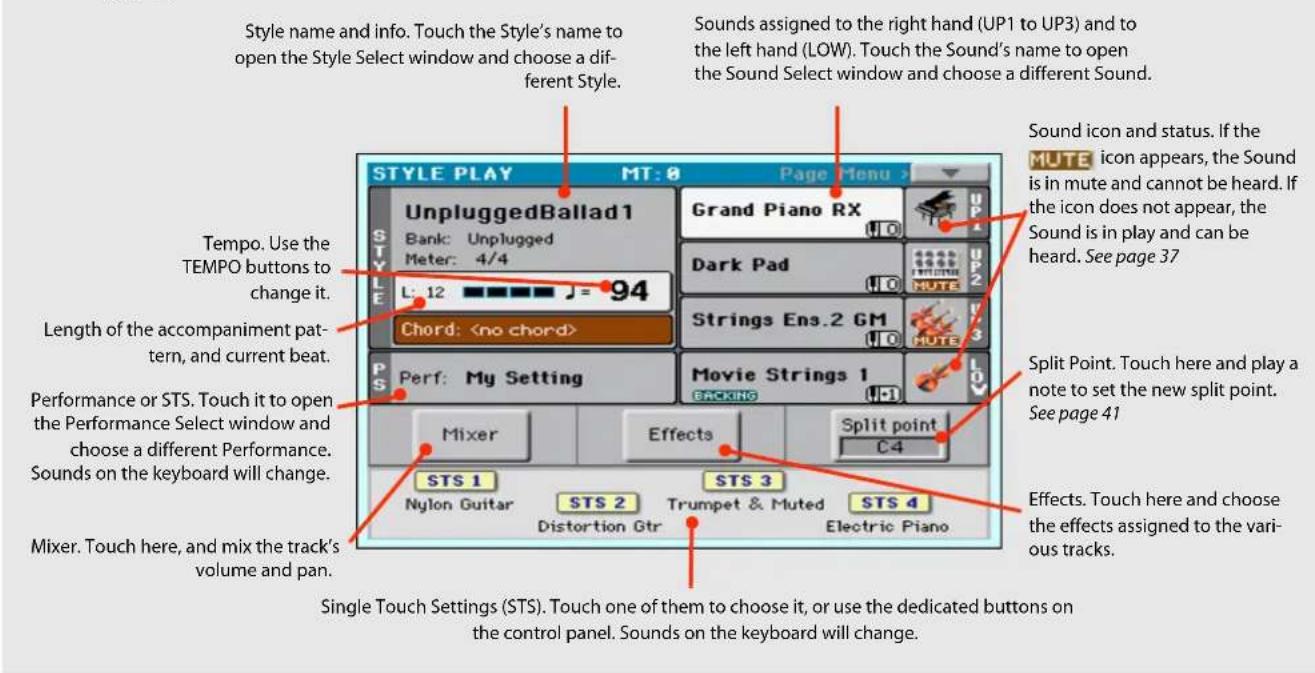
Notes:
- There are three Sounds for the right hand (Upper 1, Upper 2, Upper 3), and a single Sound for the left hand (Lower). Their names are abbreviated as UP1, UP2, UP3, LOW, and are shown on the right side of the display.
-
Right hand (Upper) and left hand (Lower) Sounds are separated by the Split Point.
-
Performances and STSs are collections of Sounds. Just choose one of them to change all the keyboard's Sounds.
- Choose a Style to change the musical style of the accompaniment patterns.
The Song Play page in detail
To see this page, press the SONG PLAY button.
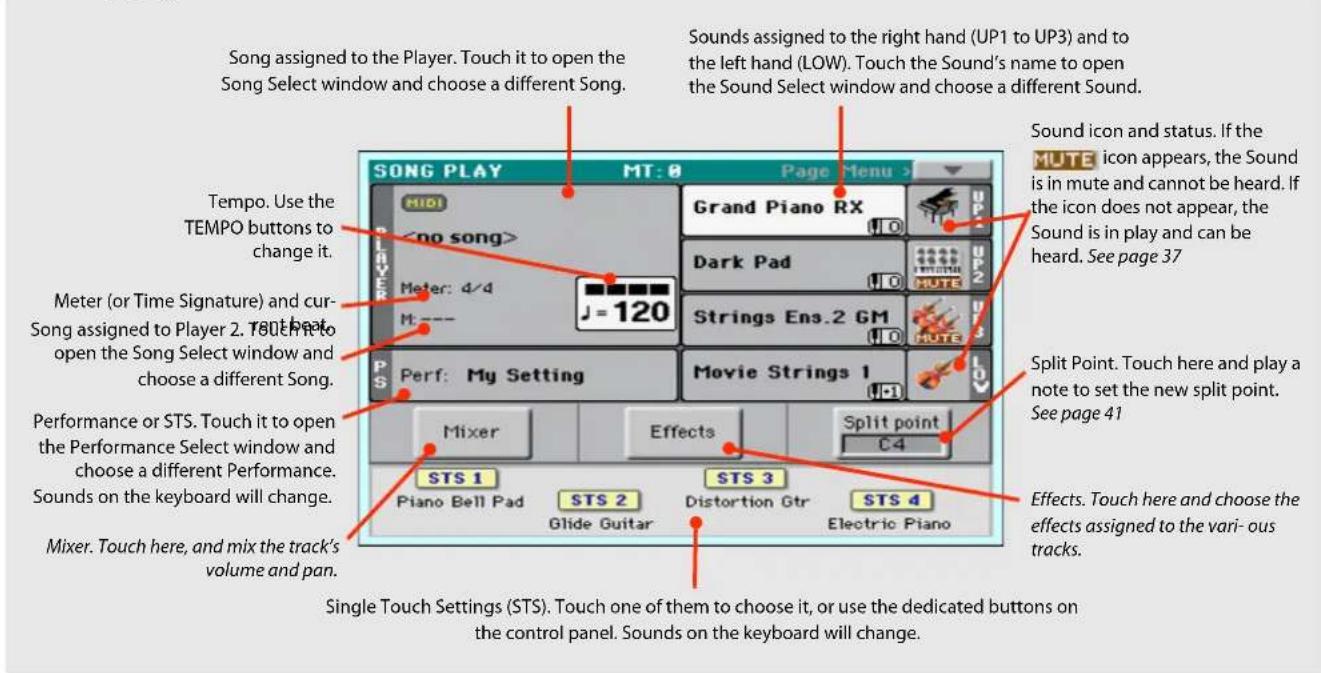
Notes:
- As in Style Play mode, there are three Sounds for the right hand (Upper 1, Upper 2, Upper 3), and one Sound for the left hand (Lower). Their names are abbreviated as UP1, UP2, UP3, LOW, and are shown in the right side of the display.
-
Right hand (Upper) and left hand (Lower) Sounds are separated by the Split Point.
-
Performances and STSs are collections of Sounds. Just choose one of them to change all the keyboard's Sounds.
• Available STSs depend on the Style or SongBook Entry you last selected. - Touching a Song name in the display is the same as pressing the SONG button in the SELECTION section of the control panel.
Quick Guide
Turning the instrument on
First of all, turn the instrument on and familiarize with the main screen. You can also listen to the demos.
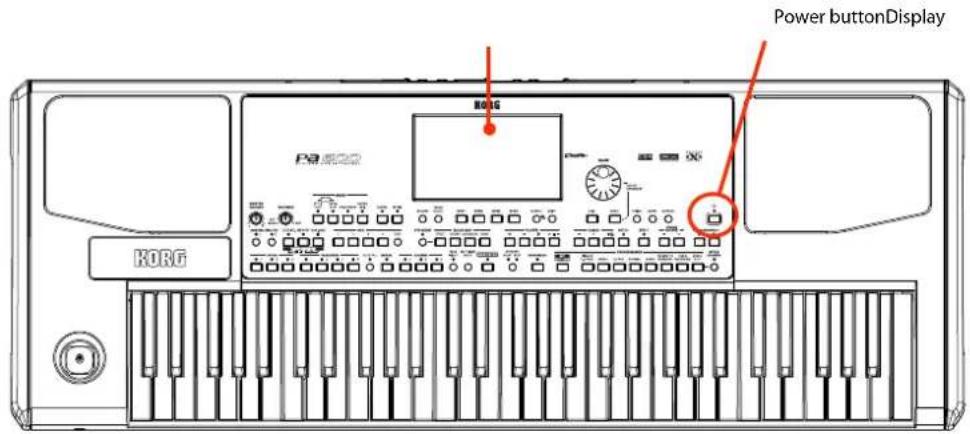
Turning the instrument on and viewing the main screen
1 Turn Pa600 on (exit from standby) by pressing the POWER button located in the control panel.
After you turn the instrument on, a welcome screen is shown for some seconds, then the main display appears.
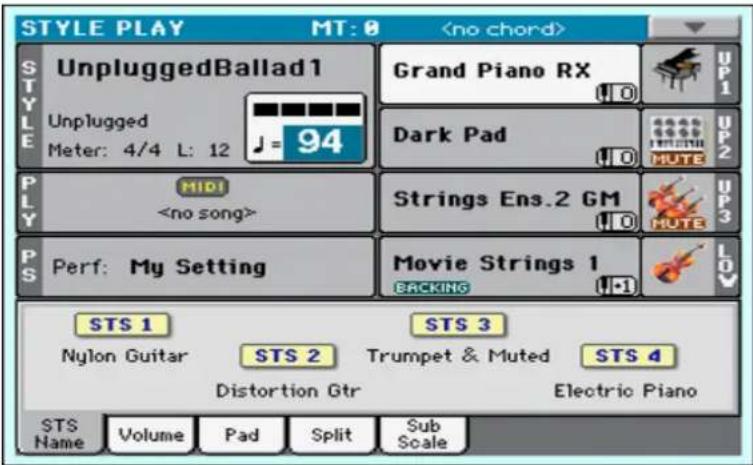
2 When you want to put Pa600 to standby, keep the POWER button pressed for about one second, and release it when the screen appears dimmed.
After having pressed the POWER button, the display brightness will be dimmed. At this point, the shutdown procedure will begin and last for a few seconds. Please do not disconnect the power cable during this procedure.
Connecting and calibrating the Damper pedal
If you want to play Piano, you will want to connect a Damper pedal to sustain notes while playing. You can connect a KORG PS1, PS3 or DS1H to the DAMPER connector on the back of the instrument.
The difference between the PS1/PS3 footswitch, and a dedicated Damper pedal like the DS1H, is that this latter also supports all the nuances of half-pedalling; you can experiment how it works by gradually pressing it down, and gradually depressing it up while playing the Grand Piano RX Sound.
Damper and Assignable pedal connectors

Programming the Damper pedal
Calibrating the Damper pedal will let you use the full run of the pedal, without "dead spots". Also, this might be the only way to connect a third-party Damper pedal that seems to work in reverse, sustaining the notes when they are not pressed!
1 Connect the Damper pedal to the DAMPER connector on the back of the instrument.
2 Press the GLOBAL button to access the Global mode.
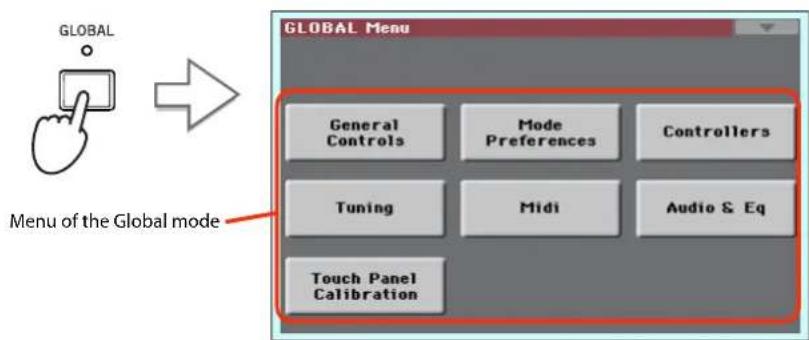
Global mode is where you can set some global parameters, like this one, the Master Tuning or the Date & Time. These settings are not tied to any specific operative mode, so they are programmed in these separate pages.
3 Touch the Controllers button to access the Controllers section of the Global mode.
If you have not yet chosen a different page, the "Hand Controller" page will appear (being the first one in the Controllers section).
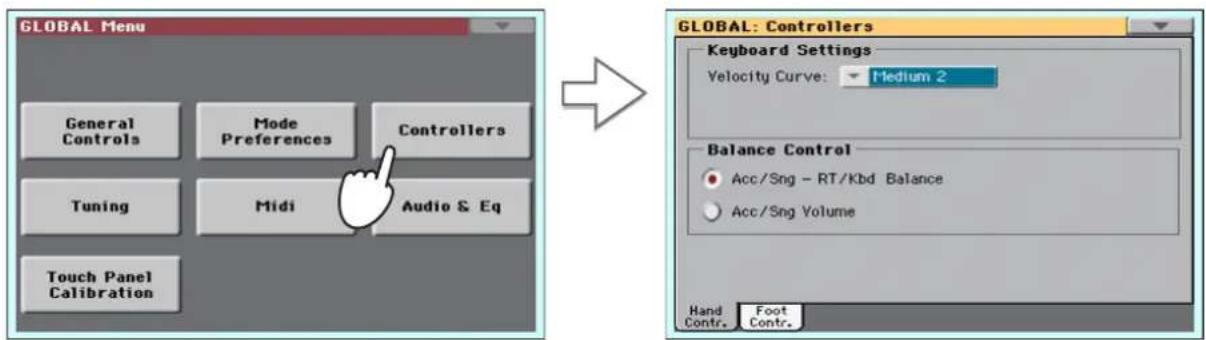
4 Touch the Foot Contr. tab to select the "Foot Controllers" page.
This is the page where you can program the Assignable Pedal/Footswitch and the Damper pedals.
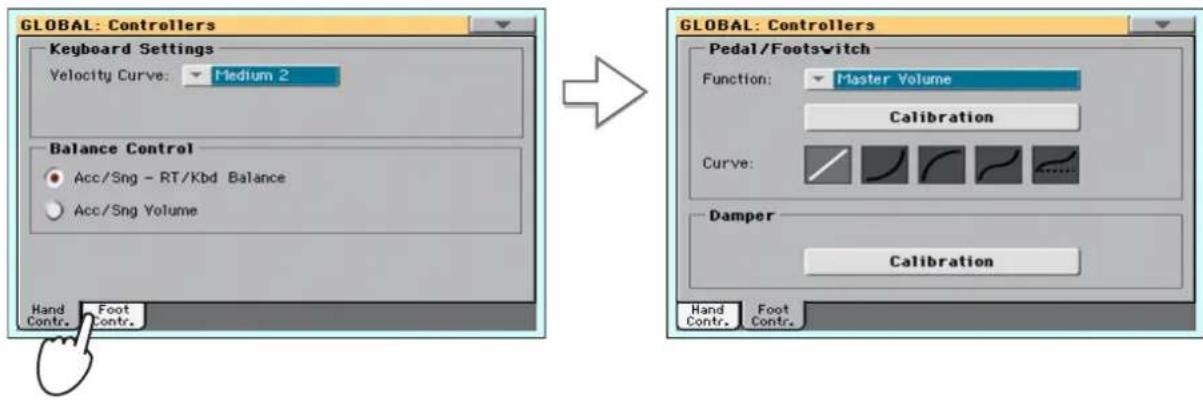
5 Touch the "Calibration" button in the Damper section, to make the "Damper & Pedal/Footswitch Calibration" dialog box appear.
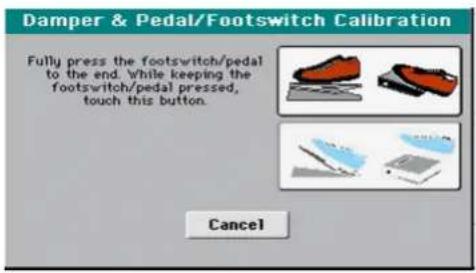
6 Fully press the Damper pedal down, and while continuing to press touch the "Push" button to confirm the maximum value.
7 When the following dialog box appears, release the pedal.
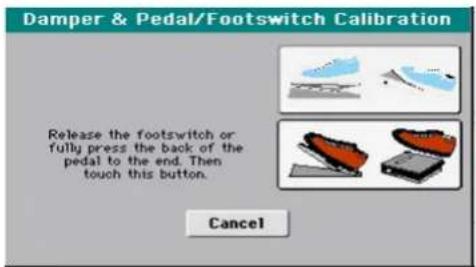
8 Touch the "Push" button in the display to confirm the minimum value.
Check if the pedal is working properly. In case it isn't, repeat the procedure.
9 Press the EXIT button to return to the previous operative mode.
Playing the Demo
Listen to the built-in Demo Songs to appreciate the power of Pa600. There are several Demo Songs to choose from.
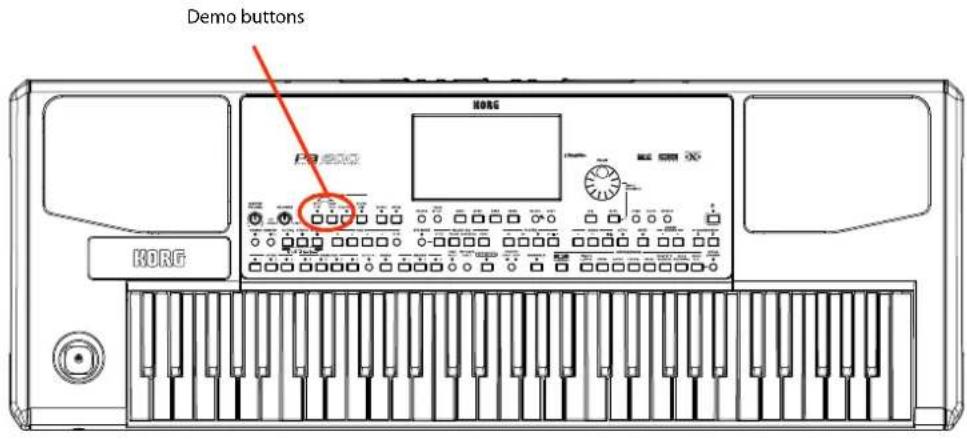
Starting and stopping the Demo
Here is how to start, choose and stop the Demo Songs.
1 Press the STYLE PLAY and SONG PLAY buttons together.
The LED of the two buttons will start blinking. Pa600 will be set in Demo mode.
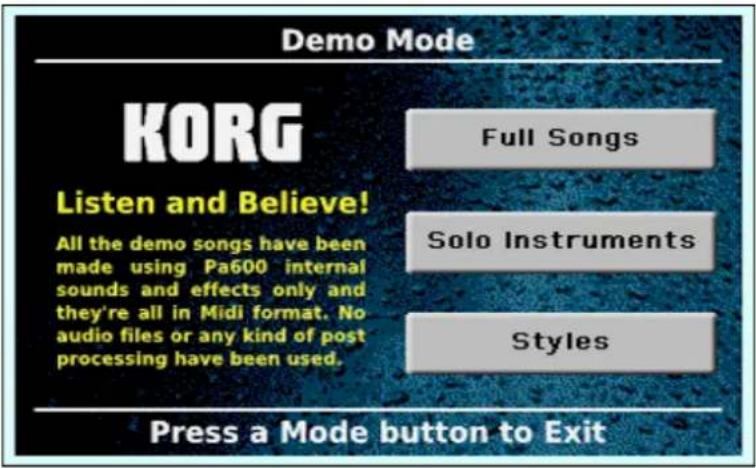
At this point, if no other button is pressed, all the Demo Songs will be played back.
2 In case you want to listen to a specified Demo Song, select one of the available options on the display (Full Songs, Solo Instruments, Styles).
3 Choose one of the Demo. To stop it, touch the STOP button on the display.
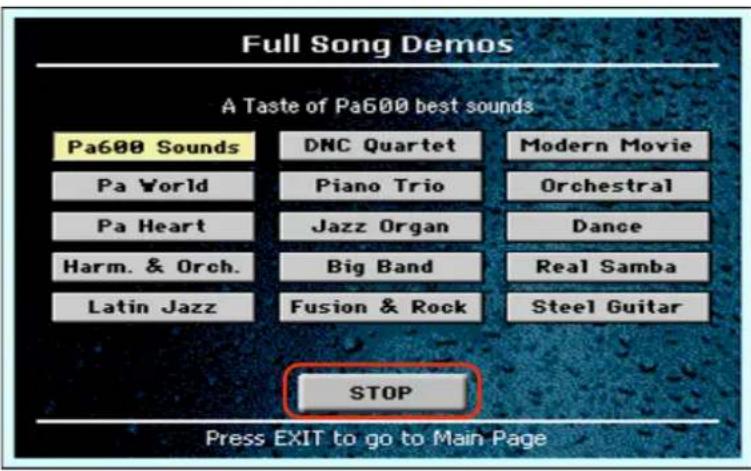
4 Exit from the Demo mode by pressing any one of the MODE buttons.
Playing Sounds
You can play up to three sounds at the same time on the keyboard. You can also split the keyboard in two parts, to play up to three sounds with your right hand (Upper) and one with your left hand (Lower).
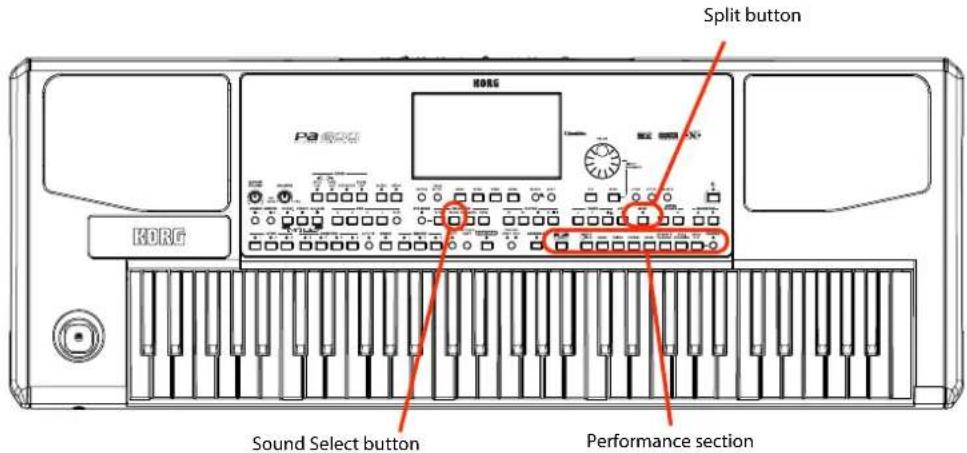
Selecting a Sound and playing it on the keyboard
1 Be sure the Upper 1 track is selected and set to play.
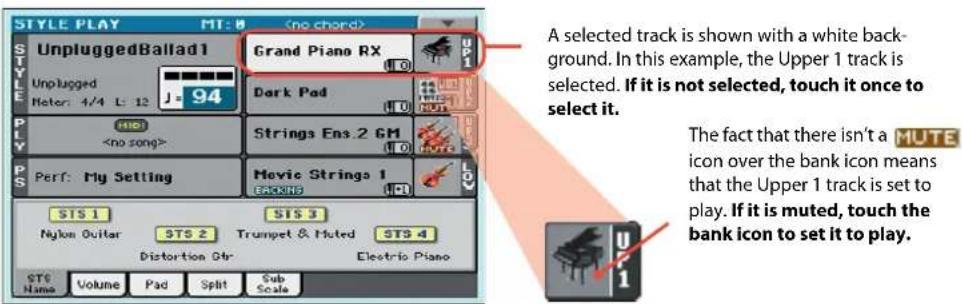
2 If you want to play the Sound on the whole keyboard, be sure the keyboard is in Full Upper mode (i.e., the SPLIT LED is turned off). If it is split in two parts, press the SPLIT button to turn its LED off.

i Note: Be sure tracks Upper 2 and Upper 3 are muted and are not playing. If you hear more than one sound, see also page 37 for how to mute tracks.
3 Touch the Upper 1 track's area in the display to open the Sound Select window.
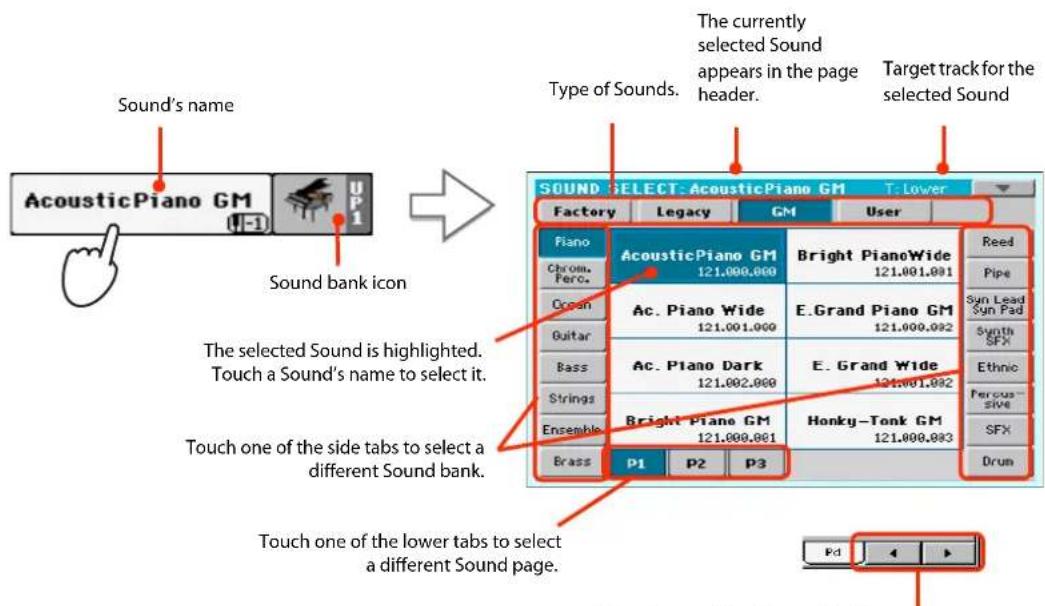
A Previous and Next Page pair of button may appear in this area, when more than six pages are available. As an alternative, repeatedly press the SOUND button to cycle between the pages.
i Note: You can also open the Sound Select window by first touching the track to which to assign the new Sound, then pressing the SOUND button in the SELECTION section.
4 Select a Sound from the Sound Select window, then press the EXIT button to close the window.
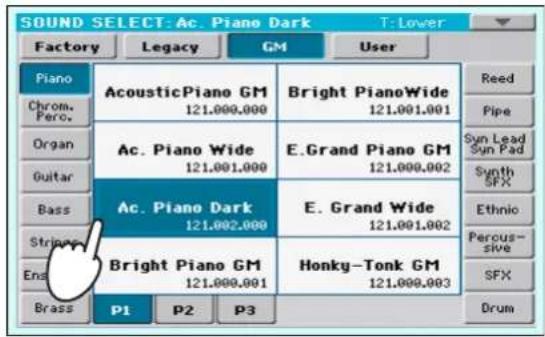
The Sound Select window closes, and the main screen appears again, with the selected Sound assigned to the Upper 1 track.
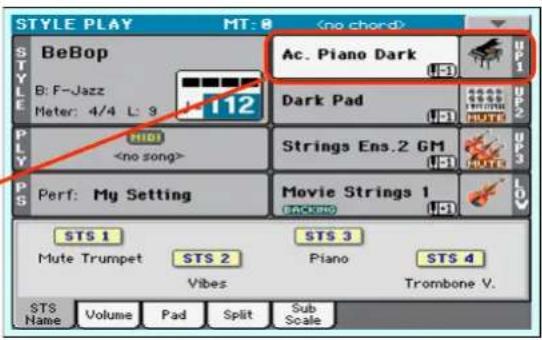
5 Play the Sound on the keyboard.
Note: Selection windows may automatically close after a selection. To do this, uncheck the "Display Hold" box in the Global > General Controls > Interface page. In this case, press the EXIT button only if you don't make any selection but want to close the window.
Playing two or three Sounds at the same time
You can layer all three Upper tracks and play them on the keyboard.
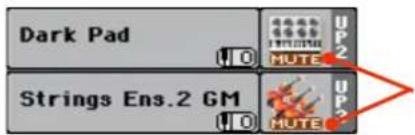
Please note how the MUTE icon appears in the Upper 2 and Upper 3 status boxes. These tracks will not be heard.
1 Touch the MUTE icon in the Upper 2 status box, to set the Upper 2 track to play.
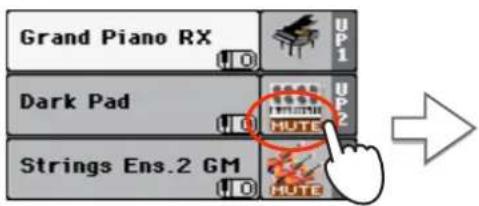
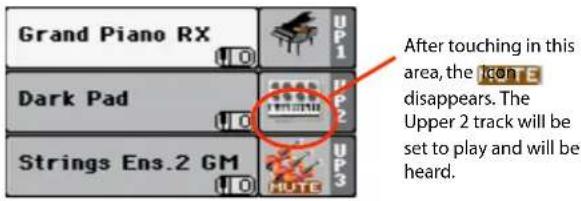
2 Play the keyboard.
Note how the 'Dark Pad' Sound (assigned to the Upper 2 track) has been layered with the 'Grand Piano RX' (assigned to the Upper 1 track).
3 Touch the icon in the Upper 3 status box, to set the Upper 3 track to play.
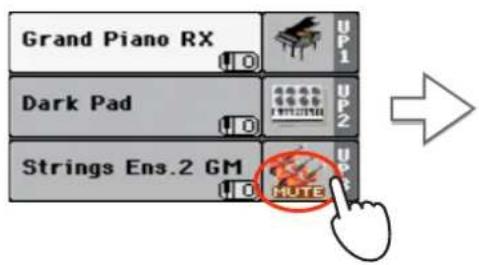
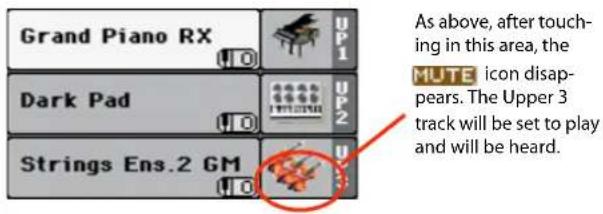
4 Play the keyboard.
Note how the 'Strings Ens.2 GM' Sound (assigned to the Upper 3 track) has been added to the 'Dark Pad' (assigned to the Upper 2 track) and the 'Grand Piano RX' (assigned to the Upper 1 track).
5 Touch the bank icon in the Upper 3 status box, to mute the Upper 3 track again.
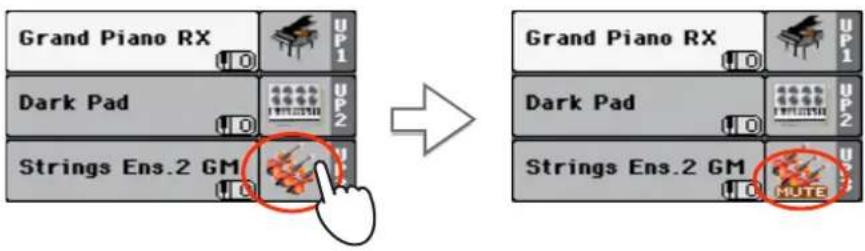
flowchart
graph TD
    A["Grand Piano RX"] --> B["Dark Pad"]
    B --> C["Strings Ens.2 GM"]
    D["Grand Piano RX"] --> E["Dark Pad"]
    E --> F["Strings Ens.2 GM"]
    style A fill:#f9f,stroke:#333
    style D fill:#f9f,stroke:#333
    style B fill:#ccf,stroke:#333
    style C fill:#cfc,stroke:#333
    style E fill:#cfc,stroke:#333
    style F fill:#fcc,stroke:#333
6 Play the keyboard.
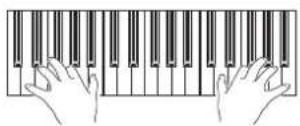
Note how the 'Strings Ens.2 GM' Sound (assigned to the Upper 3 track) has been muted again. Only tracks Upper 1 and Upper 2 can be heard at this time.
7 Touch the bank icon in the Upper 2 status box, to mute the Upper 2 track again.
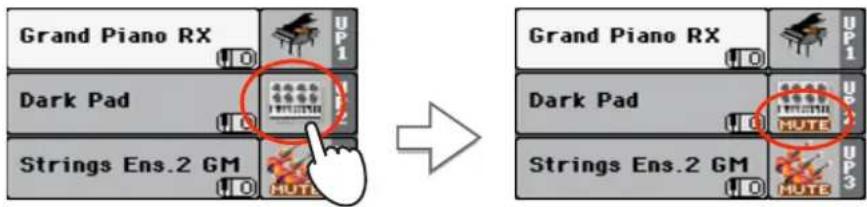
8 Play the keyboard.
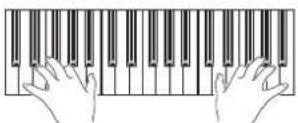
Note how the 'Dark Pad' Sound (assigned to the Upper 2 track) has been muted again. Only track Upper 1 can be heard at this time.
Playing different Sounds with your left and right hand
You can play a single Sound with your left hand, in addition to playing up to three Sounds with your right hand.
1 Press the SPLIT button to turn its LED on, and split the keyboard in the Lower (left hand) and Upper (right hand) parts.

2 Be sure the Lower track is set to play.

If the Bass & Lower Backing function is turned on, and the Style is not running, the Lower track will always play.
3 Play the keyboard.
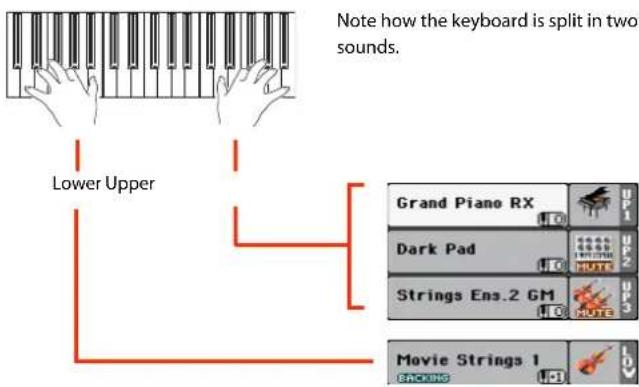
4 Return to the full keyboard playing mode by pressing the SPLIT button to turn its LED off.

5 Play the keyboard.
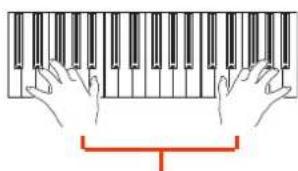
natural_image
Illustration of two hands typing on a piano keyboard (no text or symbols)Upper
Note how the keyboard once again plays the Upper tracks over the entire length of the keyboard.
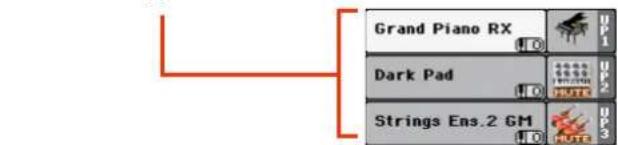
Changing the split point
If you are not comfortable with the selected split point, you may set the split point to a different key.
1 Touch the Split tab to see the Split Point panel.
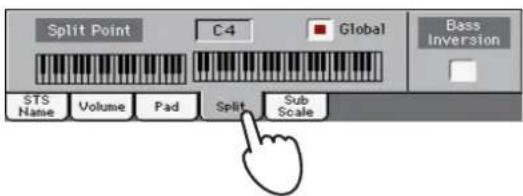
2 Touch the keyboard in the display, then play the lowest note of the Upper section on the keyboard.
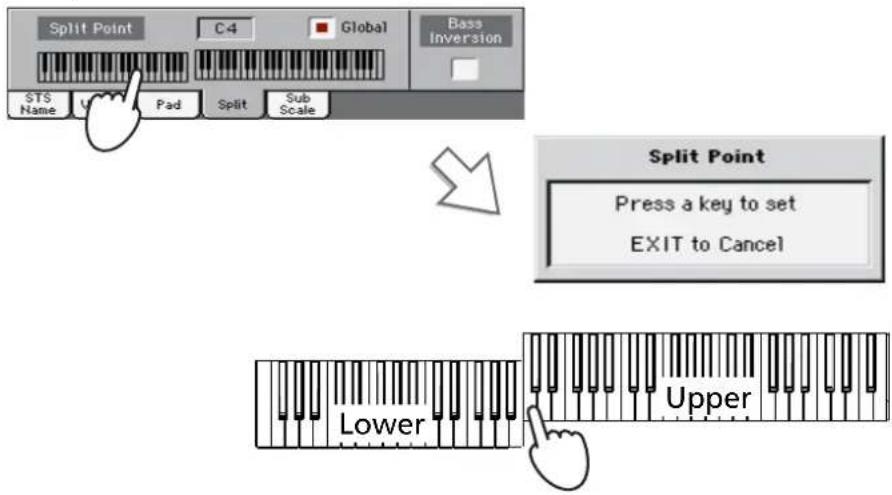
Hint: As an alternative, keep the SPLIT button pressed to open the Split Point dialog.
3 As an alternative, touch the Split Point parameter to select it, and use the VALUE dial to select the new split point.
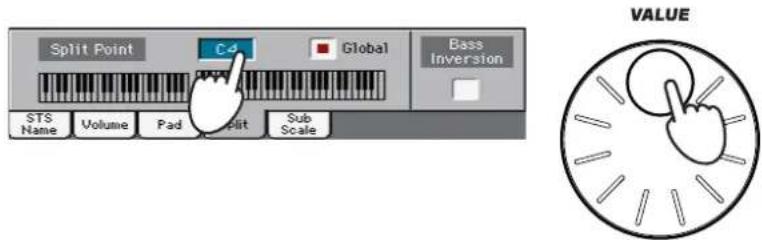
When you change the split point, the "Global" parameter is automatically unchecked. This is because you are setting a "local" or "temporary" split point, and not the "global" one, used across the whole instrument.
To change the "global" split point, go to the Global > Mode Preferences > Style page, and set the "Split Point" parameter.
You can save the "local" split point into a Performance, as described in the following pages (see "Saving your settings to a Performance" on page 44).
Raising or lowering the Upper octave
If all Upper tracks sound too high or too low, you can quickly change which octave they are playing in.
1 Use the UPPER OCTAVE buttons on the control panel, to transpose all Upper tracks at the same time.
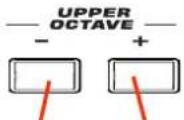
Each time you press this button, the pitch will be lowered by one octave.
Each time you press this button, the pitch will be raised by one octave.
Note: The Octave Transpose value for each of the keyboard track is shown under the Sound's name.
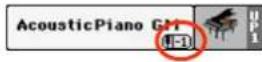
2 Press both UPPER OCTAVE buttons together to reset the octave to the value saved in the current Performance.
Selecting and saving Performances
Performances are the musical heart of Pa600. Unlike selecting single Sounds, selecting a Performance will recall several Sounds at the same time, the needed effects and transpositions, plus many more parameters useful for playing in a musical situation (like the Assignable Switches). Performance can be considered a snapshot of the current situation.
You can save these settings to a Performance memory location. While many Performances are already supplied with the instrument, you can customize each of them to your own taste, and then save them in their customized version.
Similar to Performances, but dedicated to the Styles and SongBook Entries, you can also save your settings to a Single Touch Setting (STS), which will store all the settings for the Keyboard tracks. Four STSs are supplied with each Style and SongBook Entry, and can be selected with the four dedicated buttons under the display.
Please note that settings saved in the "My Setting" Performance are automatically selected when the instrument is turned on (exit from standby). This means you can save your preferred startup settings to this Performance (see below for more information).
Note: Style tracks are saved to a third object called the Style Settings.
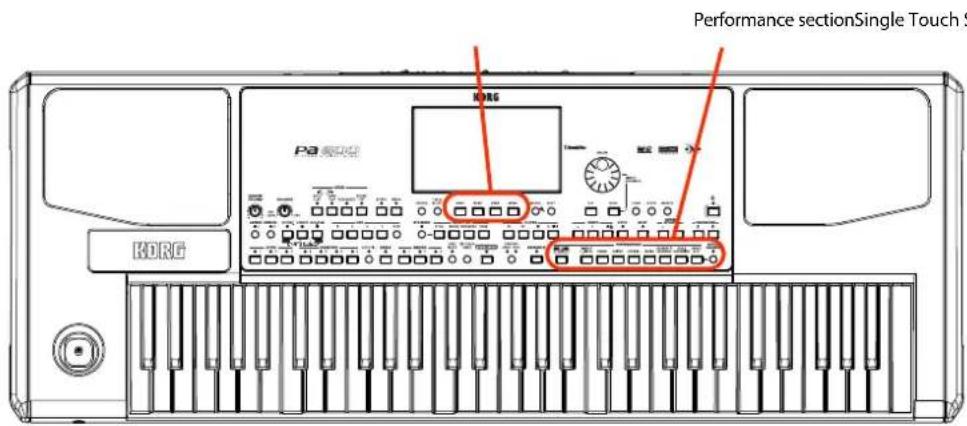
Selecting a Performance
1 Touch the Performance area in the display, to open the Performance Select window.
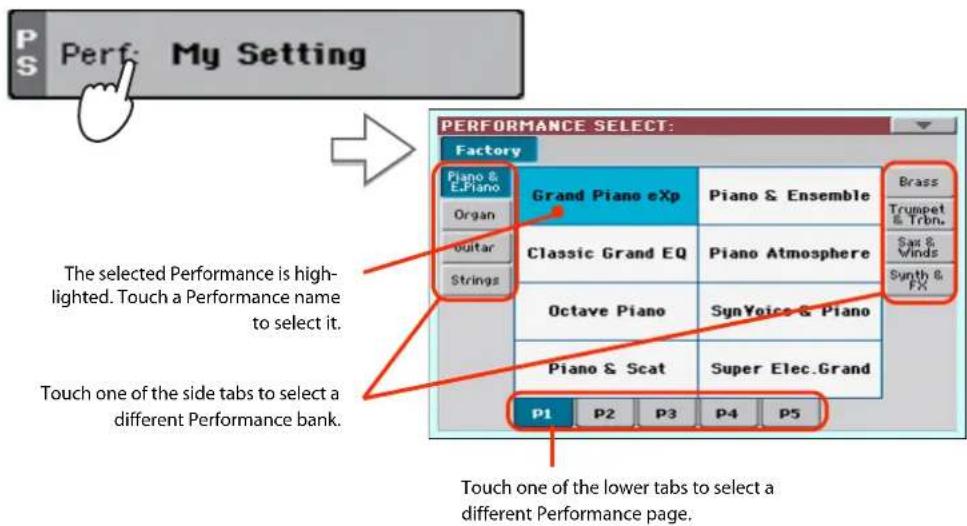
Hint: You can also open the Performance Select window by pressing one of the buttons in the PERFORMANCE section. This will let you jump direct desired Performance bank.
2 Select one of the Performances in the Performance Select window, then press the EXIT button to close the window.
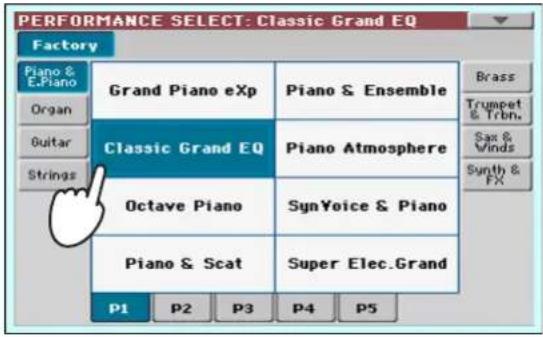
flowchart
graph TD
    A["Start"] --> B["EXIT"]
    B --> C["boxed"]
After pressing the EXIT button, the Performance Select window closes, and the main screen appears again. Sounds, Effects, and other settings, change according to the setting memorized in the selected Performance.
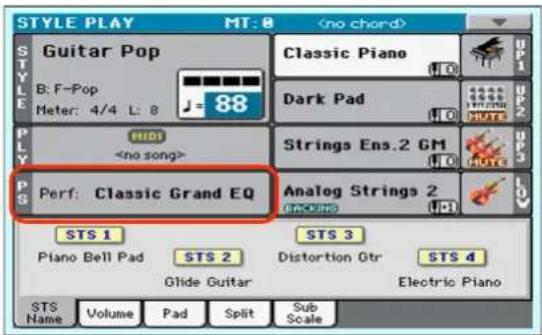
Note that Selection windows may automatically close after a selection. To do this, uncheck the "Display Hold" box in the Global > General Controls > Interface page. In this case, press the EXIT button only if you don't make any selection but want to close the window.
3 Play the keyboard.
Settings memorized in the selected Performance have been selected. Sounds, effects and other settings have been recalled.
Note: If the LED of the STYLE CHANGE button is turned on, selecting a Performance may automatically select a different Style and its settings (Sounds, Effects for the Style tracks...)
Saving your settings to a Performance
The Sounds and Effects assigned to the Keyboard tracks, together with the parameters you can access by pressing the MENU button while in Style Play and Song Play mode, can be saved into a single Performance, to be quickly recalled at a later time.
1 Keep one of the PERFORMANCE buttons pressed for about one second to open the Write Performance dialog box.
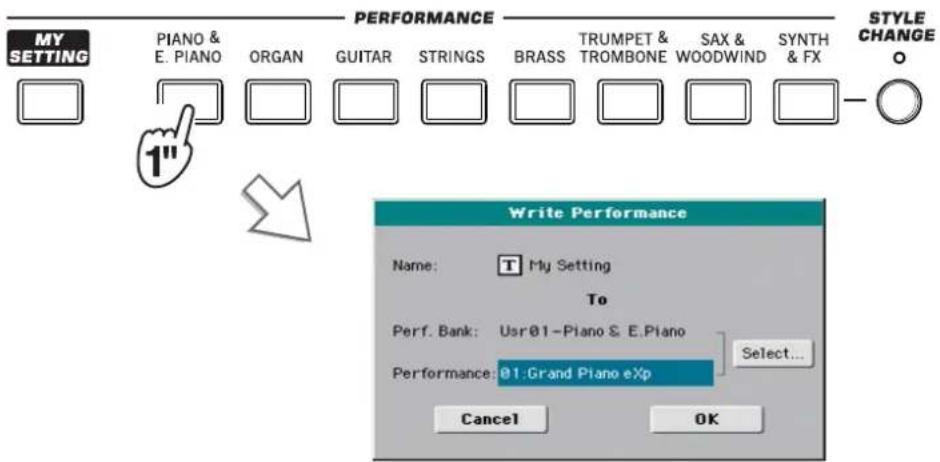
Hint: To open the Write Performance dialog box, you can also choose the 'Write Performance' command from the page menu.
2 If you like, you may assign a new name to the Performance.
![Write Performance Name: My Setting To Perf. Ba Dsr 01-Piano E.Piano Performances 01:Grand Piano eXp Select... Cancel OK Use the '<-' and '->' buttons or the DIAL to move the cursor. Touch the 'Backspace' symbol to delete just a single character, 'Clear' to delete the whole string. ON SCREEN KEYBOARD ←→ → Clear 1 2 3 4 5 6 7 8 9 0 - q w e r tyt y u>i pivot[_ a s d f g h j k,l ;' z x c v b n=m=\ Alt Space , ./]_ ? * Cancel OK Touch the (Text Edit) symbol to open the Text Edit dialog box. Use the alphabetic characters to enter text. Touch the Shift key to switch between capitals and small characters. When done, touch OK to confirm the new name, or Cancel to abandon all changes.](/content/2026/05/882139/images/2b799fcbf1ddf1b2dbd406e655a7ec0dfb15057ee9774fdb5181bad43d07c333.jpg)
3 Select a bank and Performance location in memory, where you would like to save the Performance.
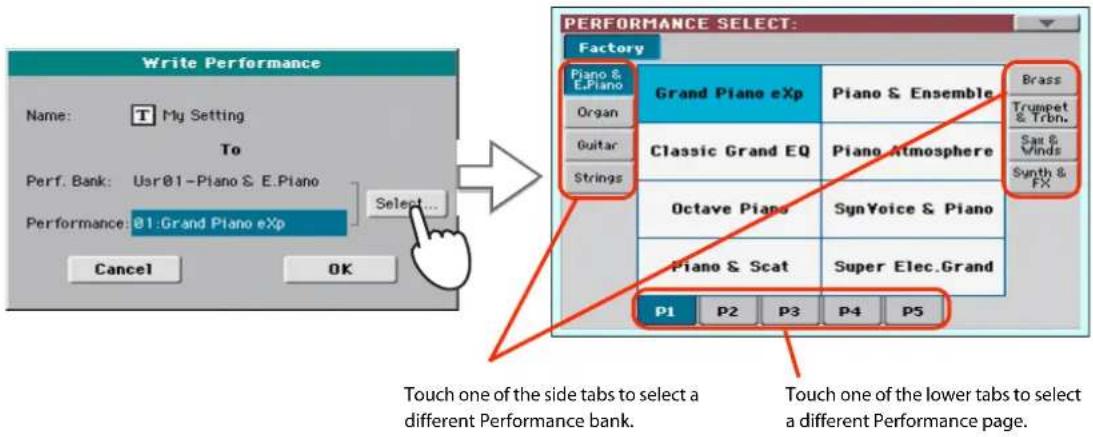
The selected Performance location is highlighted. Touch a Performance's name to select it.
4 When you have edited the name to the Performance, and selected the target location, touch OK to save the Performance to memory (or Cancel to stop the operation).
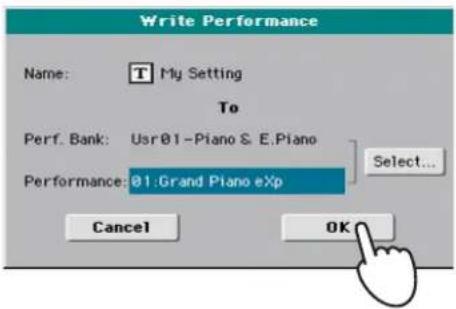
Warning: Saving a Performance to an already used location overwrites any existing data at that location. The old data are lost. Make a backup of all your important data.
Selecting and saving the "My Setting" Performance
There is a special Performance, where you can save your preferred startup settings for things like Keyboard Sounds, Effects, Transposition, Assignable Switches. This Performance is automatically selected when the instrument is turned on (exit from standby). It is called the "My Setting" Performance.
'My Setting' Performance
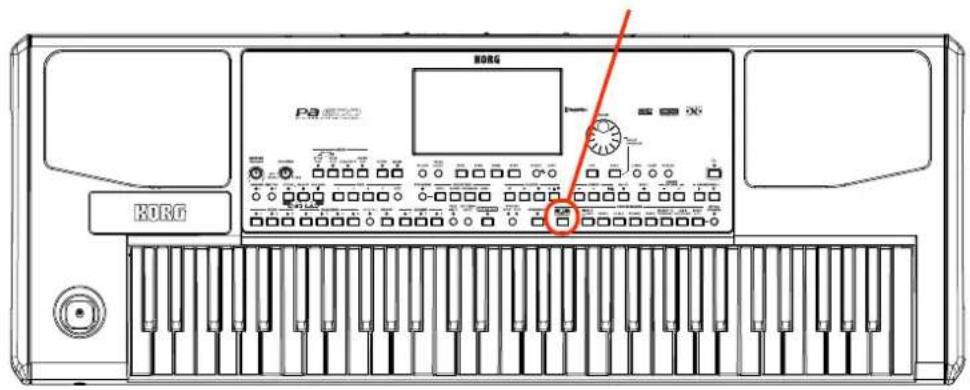
Selecting the startup parameters (the "My Setting" Performance)
After having done some changes to the Sounds, transposition, or other parameters, you can return to the startup situation by pressing the MY SETTING button in the control panel.
- Press the MY SETTING button to recall the "startup" settings.
Saving the startup parameters into the "My Setting" Performance
You can save the startup settings (Sounds and other settings, including most of the settings on the control panel) into this special Performance.
- Keep the MY SETTING button pressed for about one second, until the "Write Startup Settings" dialog box appears, then touch the OK button to confirm saving to memory.
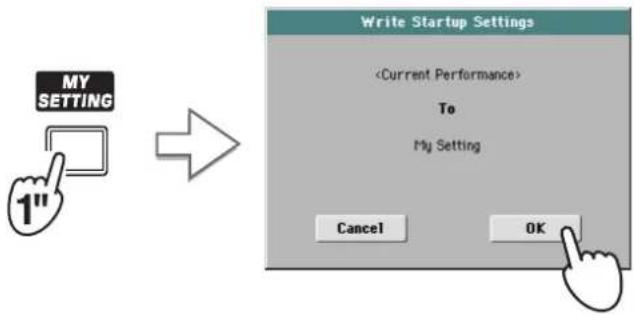
Selecting and playing Styles
Pa600 is an arranger, i.e. a musical instrument providing automatic accompaniments, or arrangements. Each arrangement style is called, as a consequence, a Style.
A Style is made of several Style Elements (Intro, Variation, Fill, Break, Ending), corresponding to the various sections of a song. By selecting Style Elements, you can make your playing more varied and musical.
When selecting a Style, Sounds, Effects and various configuration parameters for the Style tracks are also selected. These are called the Style Settings. Selecting a Style also selects the four Pads it contains. Pads are single sounds or single-track patterns, that can be triggered with the dedicated PAD buttons.
If the STS MODE LED is turned on, the first of the four Single Touch Settings (STS) associated to the Style is also selected, and Keyboard tracks, Effects and some other useful parameters are automatically configured.
Use the Style controls to start or stop the Style.
Style Select and STS Mode buttons
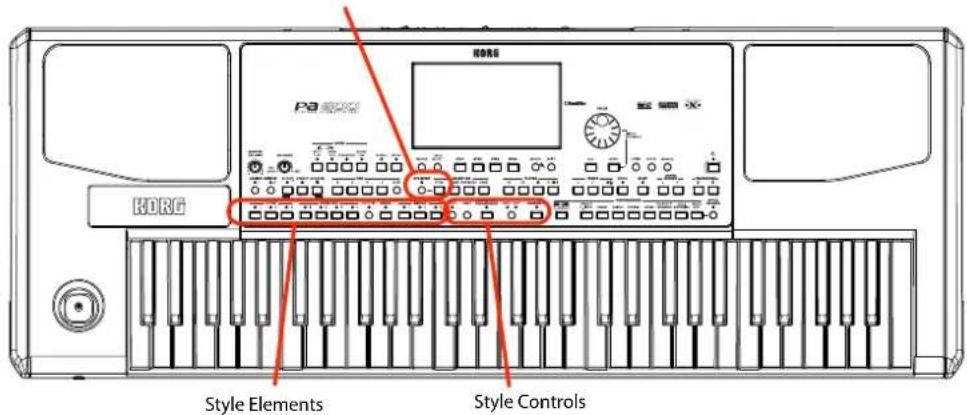
Selecting and playing a Style
1 Touch the Style area in the display. The Style Select window appears.
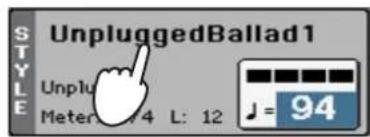
The selected Style is highlighted. Touch a Style's name to select it.
Touch one of the side tabs to select a different Style bank.
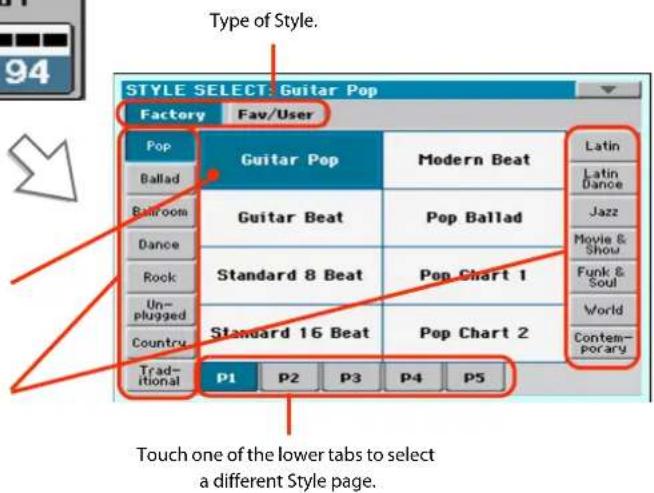
i Hint: You can also open the Style Select window by pressing the STYLE button in the SELECTION section of the control panel.
2 Select a Style from the Style Select window.
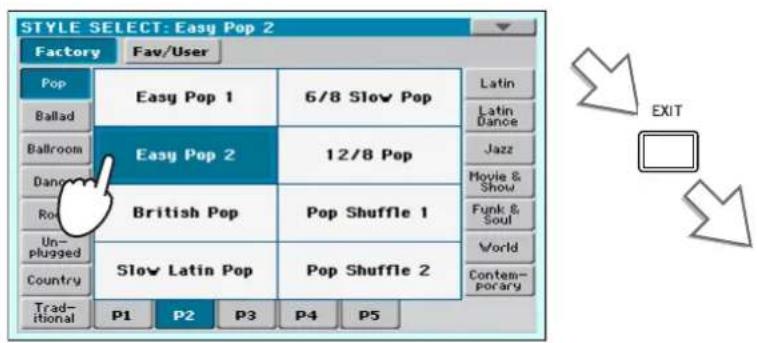
After pressing the EXIT button, the Style Select window closes, and the main screen appears again, with the selected Style ready to go.
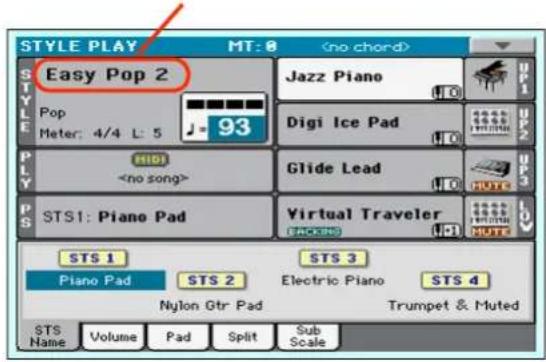
3 Be sure the ACCOMP. LED is turned on.
ACCOMP.
。

For the accompaniment tracks to play, the LED of this button (meaning "Accompaniment") must be turned on.
4 Press the SYNCHRO-START/STOP button to turn the START LED on.
This will turn the Synchro-Start function on, and let the accompaniment start as soon as you play a chord on the keyboard.
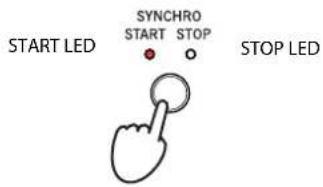
5 Play the keyboard.
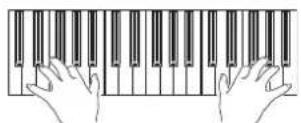
When the Syncho-Start function is turned on, the Style starts playing as soon as you play a note or chord in the chord scan area. Play chords with your left hand, and the melody with your right hand. The arranger will follow your playing.
6 Press START/STOP to stop the Style.
i Note: You could simply press START/STOP to start the Style, but the Synchro-Start function allows you to make the Style start in sync with your playing on the keyboard. Therefore, it may be considered a "more musical" way of starting a Style.
i Note: The chord scan area depends on the status of the SPLIT LED and the Chord Recognition parameter (see Global > Mode Preferences > Style).
Tempo
While a Tempo setting is saved with each Style or Performance, you can change it to be whatever you like. You can use either of the following two methods.
- Use the TEMPO + or - buttons to change the Tempo value.
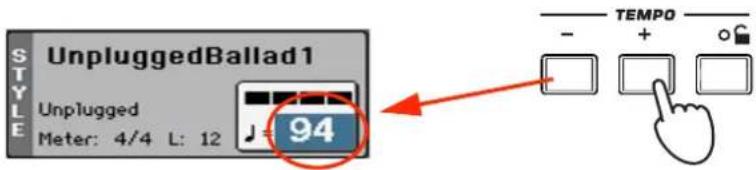
- Press the TEMPO – and + buttons together to recall the saved Tempo value.
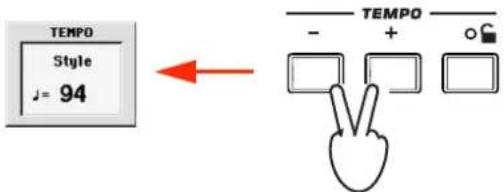
- As an alternative, keep the SHIFT button pressed, and use the VALUE dial to change the Tempo. The selected tempo will be shown in a small window.
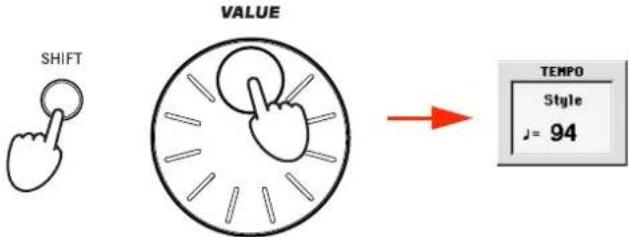
- If you like to keep the currently selected Tempo value unchanged, turn on the LED of the TEMPO LOCK) button.
When the Tempo Lock function is turned on, the Tempo will not change when selecting a different Style (or a different Song in Song Play mode).
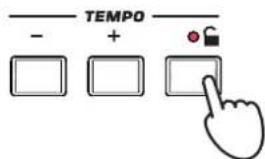
Hint: As an alternative to using the TEMPO buttons, hold the Tempo value in the display, then move your finger up/down or left/right (or change the value with the VALUE dial).
Intro, Variation, Fill, Break, Ending
When playing Styles, you can select various "Style Elements" to cover the various sections of a song. A Style is made of three Intros (or two Intros and a Count-In), up to four basic patterns (Variations), four Fills, a Break, and three Endings.
1 Make sure the SYNCHRO-START LED is turned on (otherwise, press the button to turn it on).
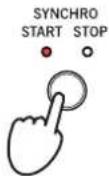
Activating the Synchro Start function is not mandatory, but it might be handy.
2 Press one of the INTRO buttons to set the corresponding Intro to play.
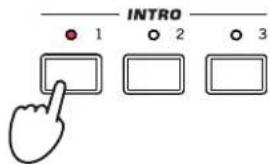
3 Play the keyboard.
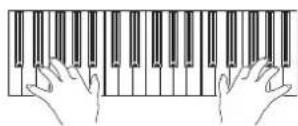
The Style starts with the selected Intro. When the Intro is completed, the basic pattern (selected Variation) starts to play.
4 Be sure the LED of the AUTO FILL button is turned on.
When the Auto Fill function is turned on, a Fill is automatically performed before switching to a different variation.
5 While playing, press one of the VARIATION buttons, to select a different variation of the basic pattern.
If you turned the Auto Fill function on in the previous step, a Fill will be performed before the Variation begins.
When the Fill ends, the selected Variation will start playing.
6 When you like to stop playing, press one of the ENDING buttons to stop the Style with an Ending.
When the Ending is fin- ished, the Style automati- cally stops.
Single Touch Settings (STS)
Each Style or SongBook Entry may come with up to four Keyboard track settings, called the STS (short for "Single Touch Settings"). STSs are very similar to Performances, but they are fine-tuned to the Style or SongBook Entry they are associated to.
If the STS MODE LED is turned on, STS #1 is automatically selected when choosing a Style. STS #1 is also recalled each time a SongBook Entry is selected.
1 In case it is not shown, touch the STS Name tab to see the STS Name panel.
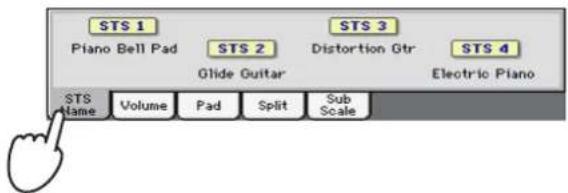
2 Press one of the four STS buttons under the display, or touch the name of an STS in the STS panel in the display.
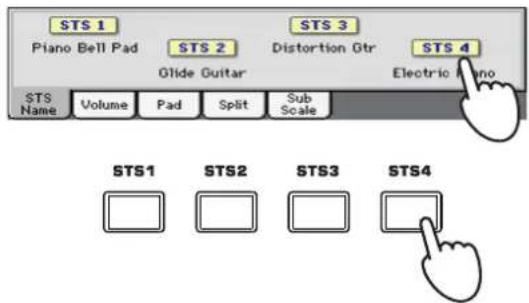
3 Play the keyboard.
Settings memorized in the selected STS have been selected. Sounds, effects and other settings have been recalled.
4 Try all the other STSs, and see how settings change with each of them.
5 You can also link the STSs to the Variations. First of all press the STS MODE button, to make its LED flash.
6 Then press the various VARIATION buttons, and see how an STS is automatically selected when the corresponding Variation is selected.
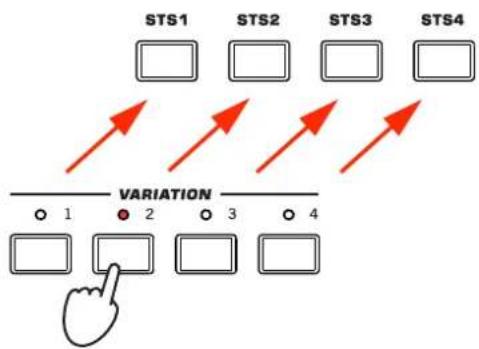
flowchart
graph TD
    A["STS1"] --> B["↑"]
    C["STS2"] --> D["↑"]
    E["STS3"] --> F["↑"]
    G["STS4"] --> H["↑"]
    I["VARIATION"] --> J["1"]
    K["2"] --> L["○"]
    M["3"] --> N["□"]
    O["4"] --> P["□"]
    Q["Hand Click"] --> R["→"]
7 Press the STS MODE again to turn its LED on (or off).
The Pads
Each Style or SongBook Entry can assign different sounds or patterns to the four PADS. These sounds or patterns can be played along with the Keyboard and Style tracks.
1 If you want to see which sounds or patterns are associated to the four Pads for the current Style, touch the Pad tab to see the Pad panel.
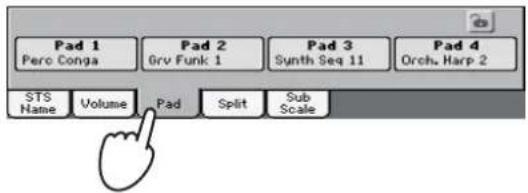
2 Press one of the four PADS to play the corresponding Pad.
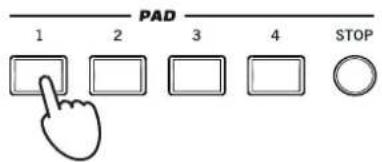
3 If the selected PAD triggers an endless pattern (i.e. a guitar arpeggio), press the same PAD button again to stop it.
4 Select a different Style, and see how the sounds or patterns assigned to the PADS change.
5 Press more PAD buttons at once, to play two or more sounds or patterns at the same time.
6 Press STOP to stop all the Pads at the same time.
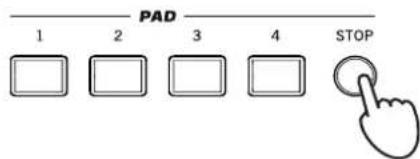
i Hint: You can open the Pad Select window to assign a different sound or pattern to the Pads, by pressing SHIFT + one of the PADs.
Adjusting the balance between the Style and the keyboard
Balancing between the Keyboard and Style tracks may be useful, to gently fade them and adjust their respective volume.
- While the Style is playing, use the BALANCE knob to balance between the Keyboard (KBD) and Style's Accompaniment (ACC) volume.
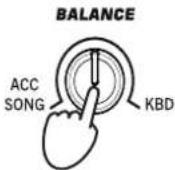
This knob also balances between the Keyboard and the Pad tracks. Also, it balances between the Keyboard and the Song tracks (in Song Play mode).
Adjusting the volume of the separate tracks
You can adjust the volume of each of the Style and Keyboard tracks, for example to soften the bass a little, or to make the keyboard solo louder.
1 Touch the Volume tab to see the Volume panel.
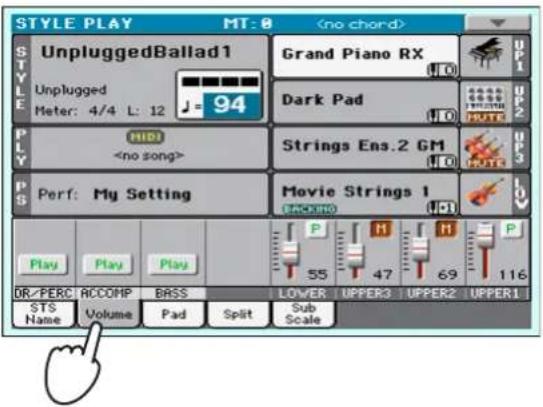
2 Hold & drag the Virtual Sliders in the display to adjust each Keyboard track's volume.
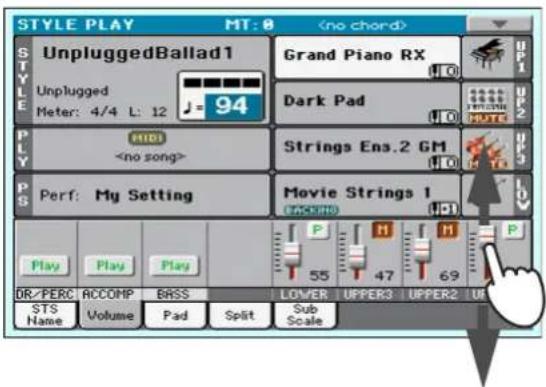
3 To separately adjust each Style track, press the TRACK SELECT button to change the track's view.
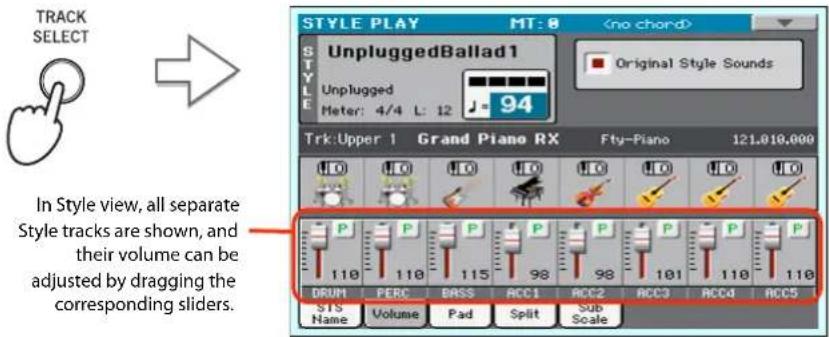
4 To return to the Keyboard Tracks view, press the TRACK SELECT button again.
Turning the Style tracks on/off
You may easily turn on or off any Style track while you are playing. For example, try muting all accompaniment tracks, while drums and bass continue to play.
1 Be sure the Volume panel is shown, or touch the Volume tab to show it.
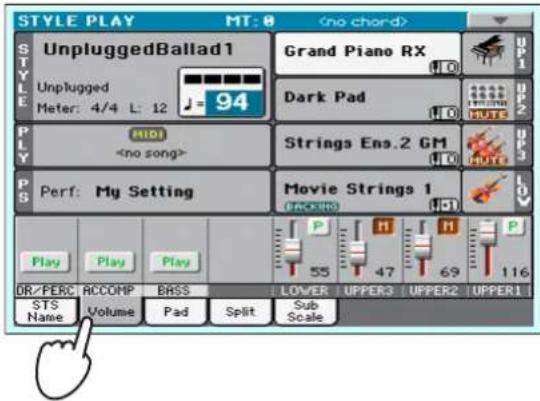
2 While the Style is playing, touch the Play button to set the track to Mute.
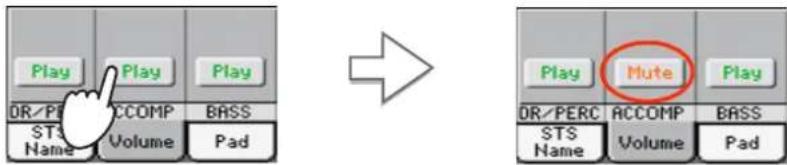
Mute the ACCOMP track. All accompaniment tracks will go silent (apart from Drum, Percussion and Bass).
3 To set the tracks back to the Play status, touch the Mute icon on the muted track.
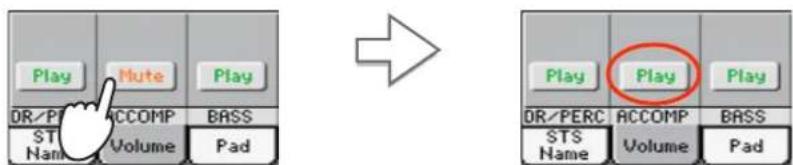
Set the ACCOMP track to Play. All accompaniment tracks will return to their original volumes.
i Hint: As an alternative, you can change each track's volume, by touching a track's area to select it, then using the VALUE dial to change the volume.
i Note: While in the Normal view of the Style Play mode, you can see Style tracks grouped in just three "grouped" tracks. To see each Style track as separate, individual tracks, just press the TRACK SELECT button.
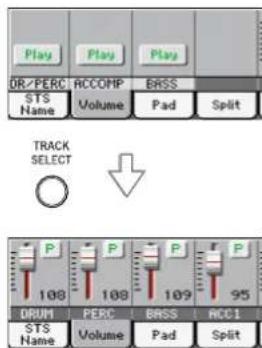
i Hint: To turn all Accom- paniment tracks (including the Bass track) off while you are not in the Main page, press the ACCOMP button on the control panel to turn its LED off.
4 To mute/unmute each single Style track, first press TRACK SELECT to switch to the Style Tracks view, then repeat the above procedure.
5 Press the TRACK SELECT button again to go back to the Normal view.
Adding harmony notes to your right-hand melody with the ENSEMBLE function
Chords played with your left hand may be applied to the right-hand melody.
1 Press the SPLIT button to turn its LED on and split the keyboard.
The Ensemble function only works in Split mode.
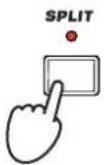
2 Press the ENSEMBLE button to turn its LED on.
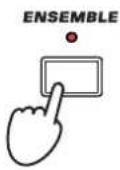
3 Play chords with the left hand and single notes in the right hand.
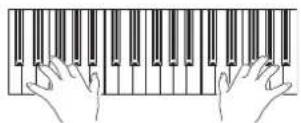
Notice how the right hand is automatically harmonized, according to the chords composed with your left hand.
4 To select a different harmonization style, keep the SHIFT button pressed, and press the ENSEMBLE button to open the Ensemble page.
This is a fast 'shortcut' to recall this page. The longer procedure would have consisted in accessing the Edit mode by pressing the MENU button, touching the Keyboard/Ensemble section, and then going to the Ensemble page.
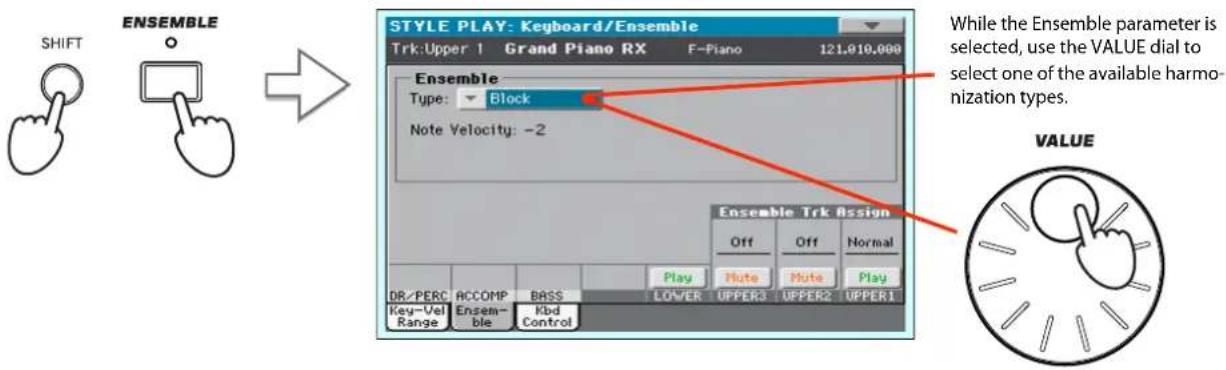
5 When the right harmonization type has been selected, press the EXIT button to go back to the main page.
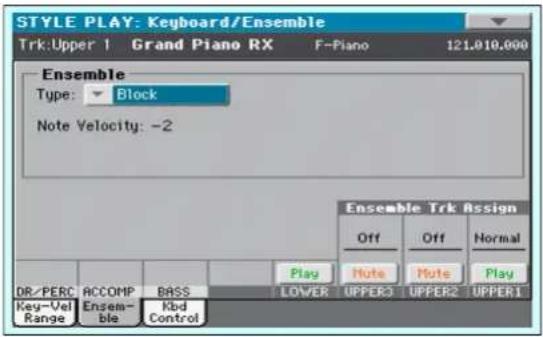

While in an Edit page, press EXIT to go back to the Main page of the current operating mode.
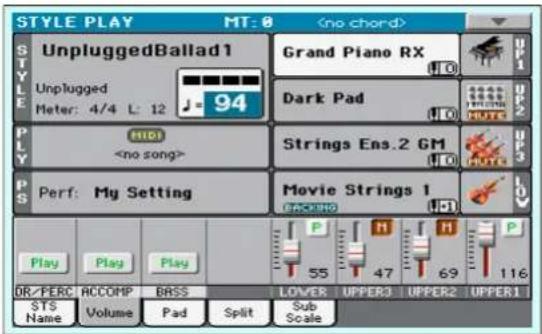
6 Press the ENSEMBLE button again to turn its LED off. The automatic harmonization will be turned off.
The Chord Sequencer
In case you need both hands free for playing a solo while a Style is playing, you can record a Chord Sequence and let Pa600 play the chords for you.
1 Press the START/STOP button to set the Style to play.
2 Press the MEMORY and MAN. BASS (RECORD) buttons together to start recording.
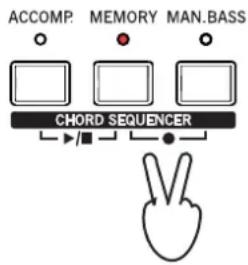
flowchart
graph TD
    A["ACCOMP"] --> B["CHORD SEQUENCER"]
    C["MEMORY"] --> B
    D["MAN.BASS"] --> B
    B --> E[" peace sign"]
3 Start recording your Chord Sequence at the beginning of the next measure.

While recording, you will see a red flashing icon in the display.
4 Play the chords in the chord scan area.
The chord scan area is under the Split Point if the SPLIT LED is turned on. Usually, it is over the whole keyboard if the SPLIT LED is turned off. The chord scan area also depends on the status of the Chord Recognition parameter (Global > Mode Preferences > Style).
5 When the Chord Sequence is done, press the MEMORY and MAN. BASS (RECORD) buttons together again to stop recording.
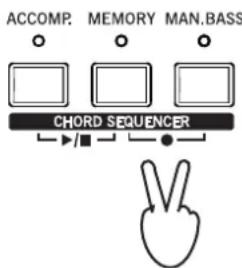
6 Press the ACCOMP. and MEMORY (PLAY/STOP) buttons to start playback.
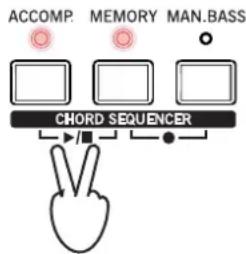
flowchart
graph TD
    A["ACCOMP."] --> B["CHORD SEQUENCER"]
    C["MEMORY"] --> B
    D["MAN.BASS"] --> B
    B --> E["+"]
    B --> F["-"]
The LED of the two buttons will start flashing. The Chord Sequence will be played back in loop starting from the next measure. Recorded chords will be sent to the arranger, and the Style will play with the recorded chords.
7 Play your solo part, while the Chord Sequencer plays the chords for you.
During Chord Sequence looping, you can freely select any Fill or Variation, as if you where playing chords with your hands.
i Hint: You can avoid stopping the Chord Sequencer after recording, and immediately set the Sequence to play, as explained in the following step.
8 Press the ACCOMP. and MEMORY (PLAY/STOP) buttons together again to stop playback of the recorded Chord Sequence.
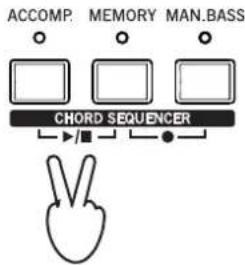
flowchart
graph TD
    A["ACCOMP."] --> B["CHORD SEQUENCER"]
    C["MEMORY"] --> B
    D["MAN.BASS"] --> B
    B --> E[" peace sign gesture"]
The last chord played by the Chord Sequence remains in memory. The Chord Sequence will remain in memory up until you record a new Chord Sequence, or you set Pa600 to standby.
Song Play
Pa600 is equipped with an onboard Player that can read Songs in Standard MIDI File (MID), Karaoke" (KAR) and MP3 format. It may be of great interest to singers and guitar players to know that if a Standard MIDI File or an MP3 file contains lyrics and chords, they can be seen in the display. Lyrics in the graphical "+G" format are also supported.
In addition to lyrics and chords, with Standard MIDI Files and Karaoke files you can also see the score in traditional notation, as well as the markers, to quickly jump to any section of a Song.
The SONG PLAY button
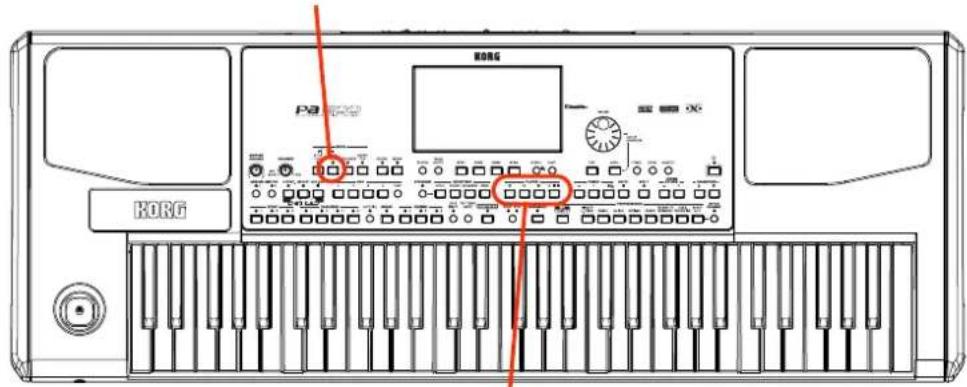
Player controls
Selecting a Song to play
1 Press the SONG PLAY button to switch to the Song Play mode.
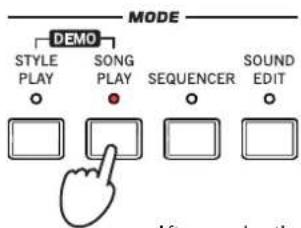
After pressing the SONG PLAY button, the main page of the Song Play mode appears.

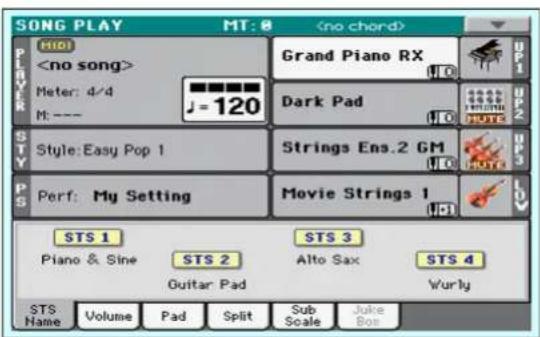
i Hint: In Style Play mode, you can pre-select the Song to be assigned to the Player. This way, you will be ready to start it, as soon as you switch to Song Play mode.
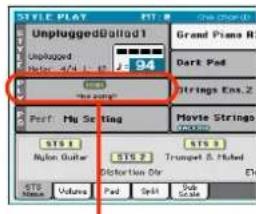
The Song area of the Style Play main page.
2 Touch the Player area to open the Song Select window.
This window is very similar to the one you can see when pressing the MEDIA button on the control panel, and touching the Load tab to see the Load page. This page is, however, "filtered" to only show Song files.
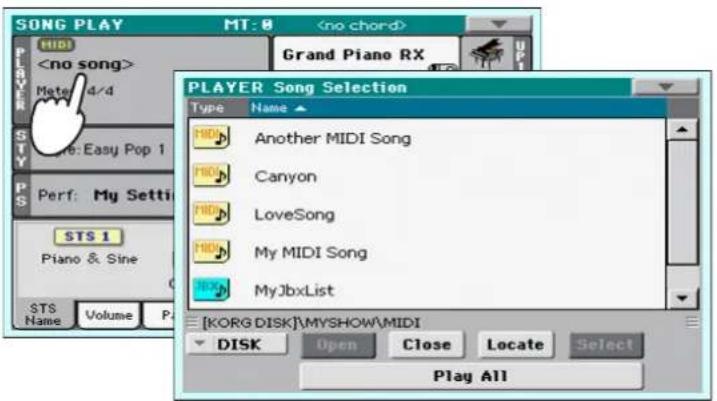
Hint: As an alternative, you can open the Song Select window by pressing the SONG button in the SELECTION section of the control panel.
3 Scroll through the list and select the Song to play.
![PLAYER Song Selection Type Name Another MIDI Song Canyon LoveSong My MIDI Song MyJbxList [ KORG DISK ] MYSHOW\MIDI DISK Open Close Locate Select Play All Use the Device pop-up menu to select the available mass-storage devices. Use the Open and Close buttons to browse through the folders. Use the Locate button to 'locate' and go to the folder of the selected Song. The selected Song is high- lighted. Touch a Song's name to select it. Use the scroll bar or the VALUE DIAL to see all the Songs in the list. Keep SHIFT pressed and touch the Up/ Down arrow to jump to the next/ previous alphabetic section. Touch the Select button to select the high- lighted Song, and assign it to the Player.](/content/2026/05/882139/images/16b7b74186a57362d95aff342fe62c222967580d25bc8925f60f3c7ff6a34f4e.jpg)
4 When the Song is selected, touch the Select button to confirm your selection; this will automatically close the Song Select window.
![PLAYER Song Selection Type Name ▲ MIDI Another MIDI Song Canyon LoveSong My MIDI Song MyJbxList [ KORG DISK ]\MYSHOW\MIDI DISK Open Close Locate Select Play All Selected Song SONG PLAY MT: 0 MIDI LoveSong Grand Piano RX Meter: 1/4 Dark Pad H: --- H: 240 Style: Easy Pop 1 Strings Ens.2 GM Perf: My Setting Movie Strings 1 STS 1 STS 3 Piano & Sine STS 2 Alto Sax STS 4 Guitar Pad Wurly STS Name Volume Pad Split Sub Scale Juke Box](/content/2026/05/882139/images/b53c5c5959c29cffd48aae487b0c308e3aaf007c1028508d121b4592f90bc096.jpg)
After touching the Select button in the display, the main page of the Song Play mode will appear again.
Playing back a Song
Once a Song has been selected, it may be played back by the Player.
1 Press the ▶/■ (PLAY/STOP) button in the PLAYER section to start playback.
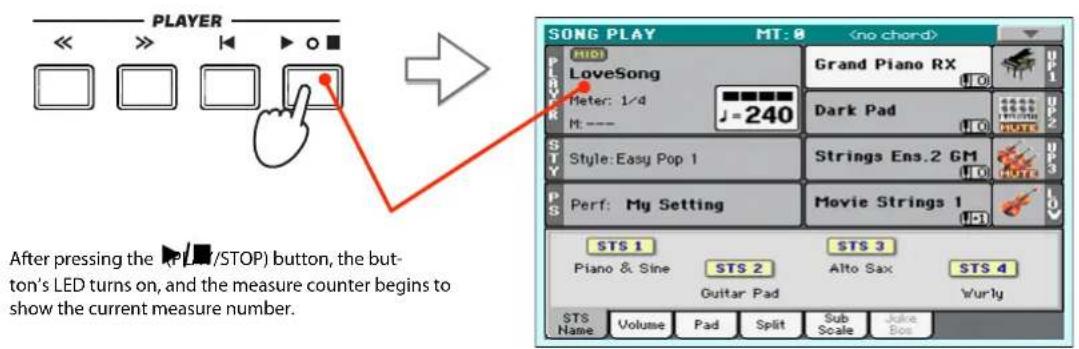
2 Use the PLAYER control section to control the Song's playback.
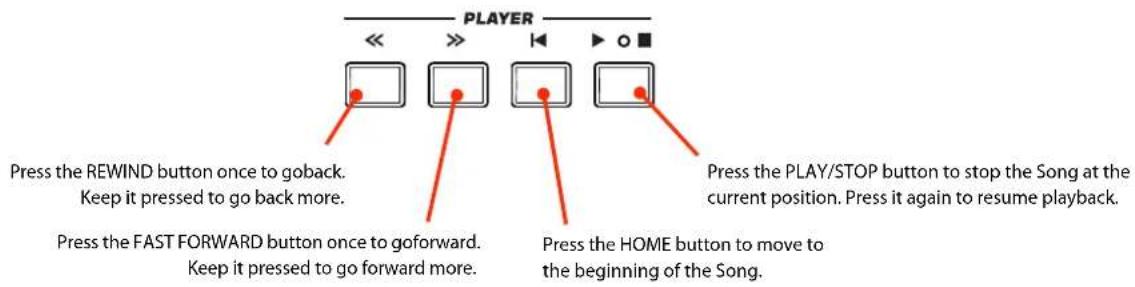
3 When you want to stop the song and go back to the beginning, press the (HOME) button.
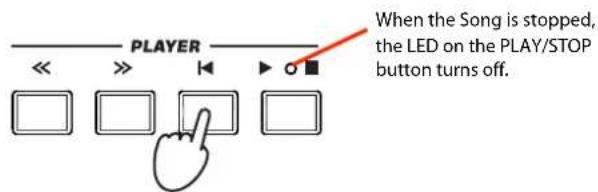
i Note: In any case, the Player will automatically stop when the end of the Song is reached.
Changing the tracks' volume
While playing back a Standard MIDI File, you may wish to change each track's volume, to create a mix "on the fly".
1 Be sure the Volume panel is shown, or touch the Volume tab to show it.
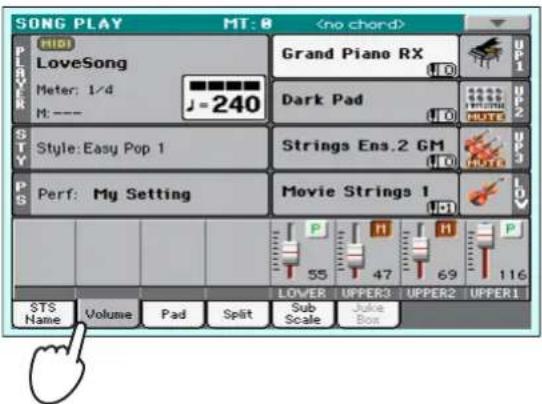
2 As seen for the Styles, you can hold & drag the Virtual Sliders on the display to adjust each track's volume. Use the TRACK SELECT button to cycle between track groups.
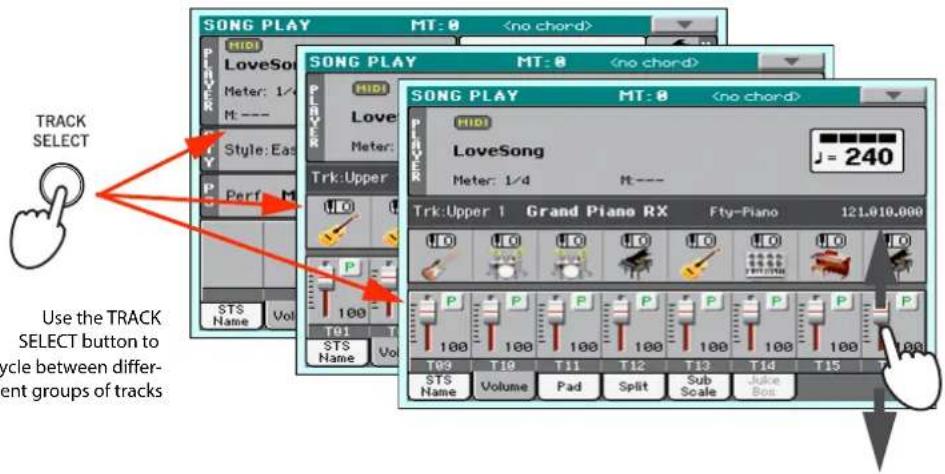
3 In Normal view, you can adjust each Keyboard track's volume.
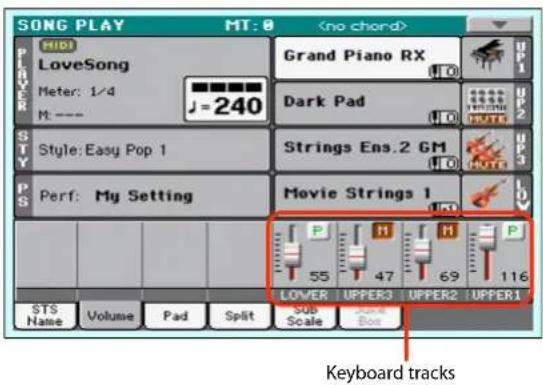
Hint: As an alternative, you can change each track's volume, by touching a track's area to select it, then us the VALUE dial to change the volume.
4 Press the TRACK SELECT button once to see tracks 1-8 (Track 1-8 view).
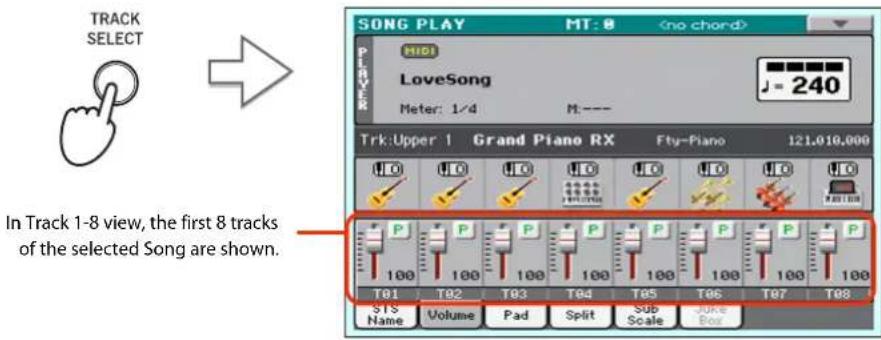
i Note: Changes to Song tracks will not be saved, and are reset each time you press the (home) button, or you select a different Marker. To save changes, you must edit the Song in Sequencer mode.
5 Press TRACK SELECT once again to see tracks 9-16 (Track 9-16 view).
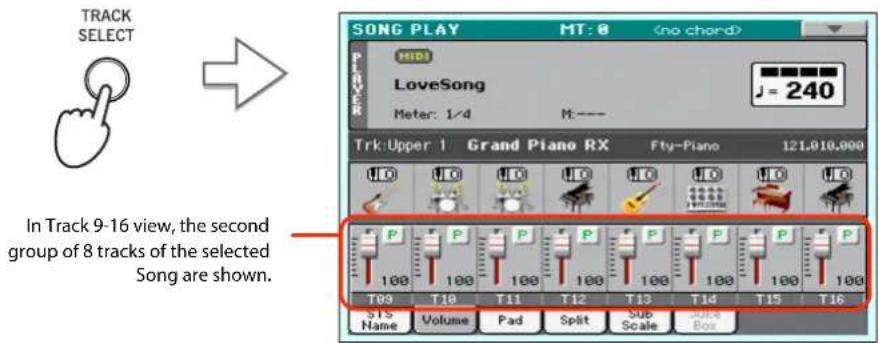
6 Press TRACK SELECT again, to return to the Normal view (Keyboard tracks).
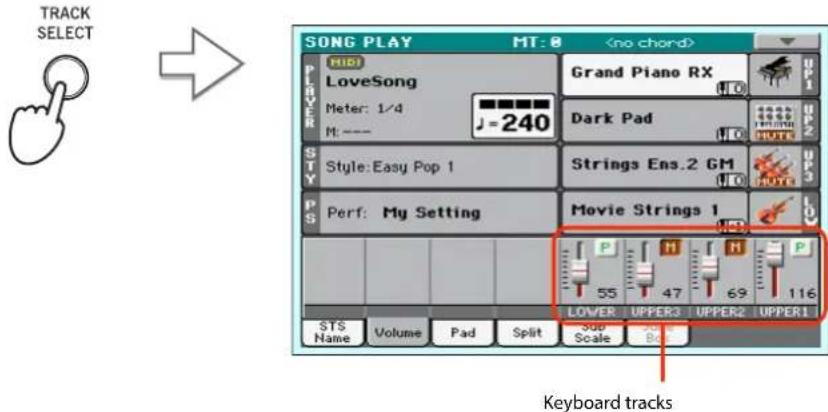
7 Press the (RZ/STOP) button to start the Song.
8 While listening to the Song, switch from Normal view to Track 1-8 and Track 9-16 view, to see which tracks are playing.
To see if a track is playing, look at the label with its name, and see if it is changing color.
- Touch each track's channel strip, to see each track's detail in the Track Info line.
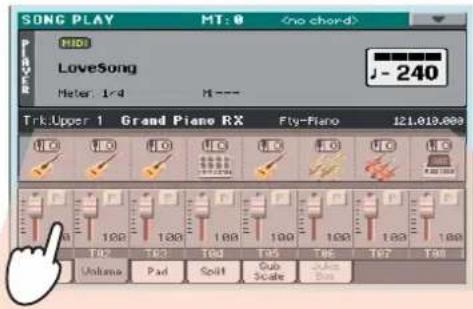

Selected track Assigned Sound. Touch it to open the Sound Select window.
Sound bank Program Change
• Also, you can see which type of Sound is assigned to each track in the Sound area of the Track 1-8 and Track 9-16 views.
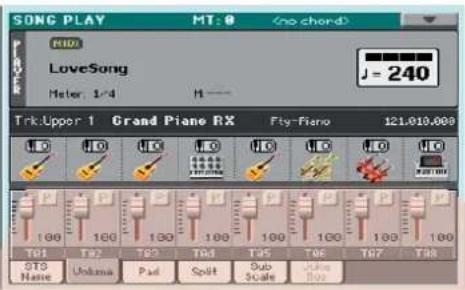

Octave Transpose
Sound bank icons. Touch to open the Sound Select window.
Turning the Song tracks on/off
While playing back a Standard MIDI File, you may wish to mute one or more tracks, for example to sing along with the Song, or play an instrumental part live on the keyboard.
To mute/unmute Song tracks you simply touch the Play/Mute icon in the Volume panel.
Soloing a track
Opposite to the above, you may want to make a single track of a Standard MIDI File play alone. This is called the Solo function.
1 While the Song is playing, keep the SHIFT button pressed and touch the track you want to listen to in Solo mode.
2 To set all tracks back to the Play status, keep the SHIFT button pressed again, and touch the track that is currently in Solo mode.
Please remember that you can also use the Solo function in Style Play and Sequencer mode. The Solo command can also be selected from the page menu.
Removing the Melody track from a Standard MIDI File or the Lead Vocal from an MP3 file
If you want to sing along with a Song (in Standard MIDI File or MP3 format), you can remove the Melody track or the Lead Vocal from the Song. Please note that removing the Lead Vocal from an MP3 file may be more or less effective, depending on the Song.
Programming the Assignable Switches
1 Program the Assignable Switches as the Song-Melody and Vocal Remover switches.
Press the MENU button, and choose the "Pad/Assignable Switch" section. Then touch the Switch tab to open the "Switch" page. While in this page, assign the Song-Melody function to the ASSIGNABLE SWITCH 1, and the Vocal Remover function to the ASSIGNABLE SWITCH 2:
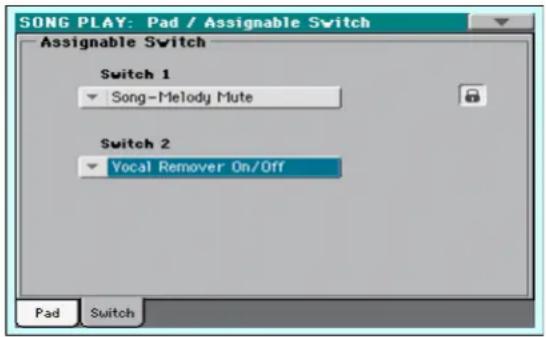
2 Press the EXIT button to return to the main page of the Song Play mode.
Using the Assignable Switches with a Song
1 Assign a Song (either in Standard MIDI File or MP3 format) to the Player.
2 Start the Player.
3 Press the ASSIGNABLE SWITCH 1 to mute the Melody track, or the ASSIGNABLE SWITCH 2 to activate the Vocal Remover, and remove the Melody track or the original lead singer's voice.
Listen how the Melody track disappears. If it is the wrong track, continue to the instructions below to select a different track.
Or, listen to how the original lead singer's voice is reduced or totally removed.
Hint: You can open this page by keeping the SHIFT button pressed and pressing one of the ASSIGNABLE SWITCHES.
i Note: The Assignable Switches' assignment can be saved into each Performance or STS.
4 When done, you can press the ASSIGNABLE SWITCH 1 to unmute the Song's Melody track and let the original MIDI instrument play the Melody line again, or press the ASSIGNABLE SWITCH 2 to deactivate the Vocal Remover and let the original lead singer's voice appear again.
5 Stop the Player.
Choosing a different Melody track
You can choose a different Melody track, in case the Standard MIDI Files does not use a standard configuration of tracks.
1 Keep the SHIFT button pressed and press the SONG PLAY button to open the Global > Mode Preferences > Song Play & Sequencer page.
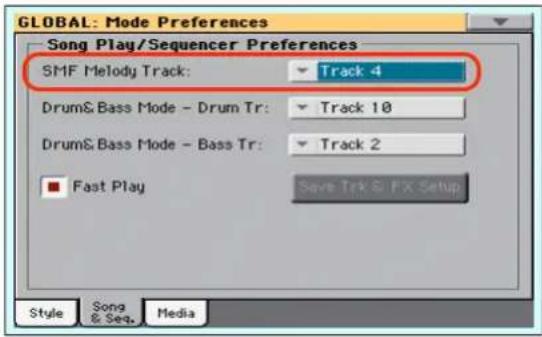
2 Choose a different Melody track.
3 When done, press EXIT to return to the main page.
The SongBook
One of the most powerful features of Pa600 is the onboard music database, that allows you to organize your Styles and Songs for easy retrieving. Each Entry of this database may include the artist, title, genre, number, key, tempo, and meter (time signature) of a specified song. When selecting one of the Entries, the associated Style, Standard MIDI File or MP3 file – as well as the Style Play or Song Play mode – is automatically recalled.
In addition to helping you organize your shows, the SongBook allows you to assign up to four Pads, and up to four STSs to each Entry. Also, you can link a text file to any Entry, to be used as the Lyrics of a song, even if there are no Lyrics events in the associated Standard MIDI File or MP3 file, or if you prefer to play the song live with the backing of the Styles.
You can add your own Entries to the SongBook, as well as edit the existing ones. KORG has already supplied some hundred Entries as standard. Furthermore, the SongBook allows you to create various custom lists, that may suit your different types of show.
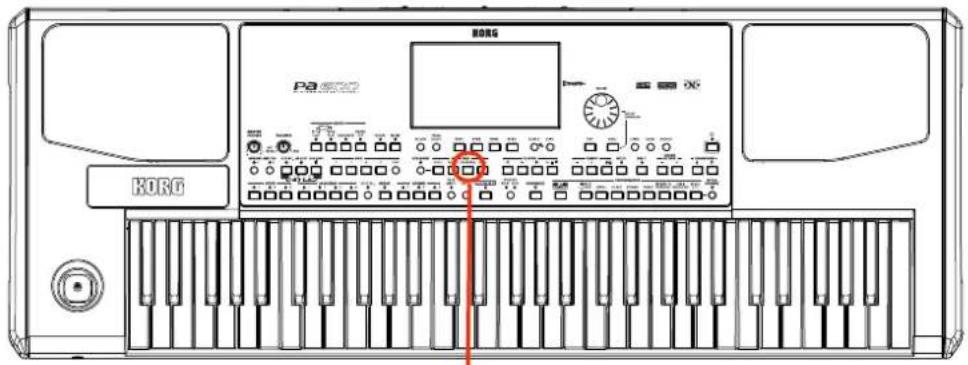
The SONGBOOK button
Selecting the desired Entry from the Main List
A large database is already included with the instrument, and you can later customize it. You may browse through this database in a variety of ways.
1 While you are in Style Play or Song Play mode, press the SONGBOOK button to open the SongBook window.
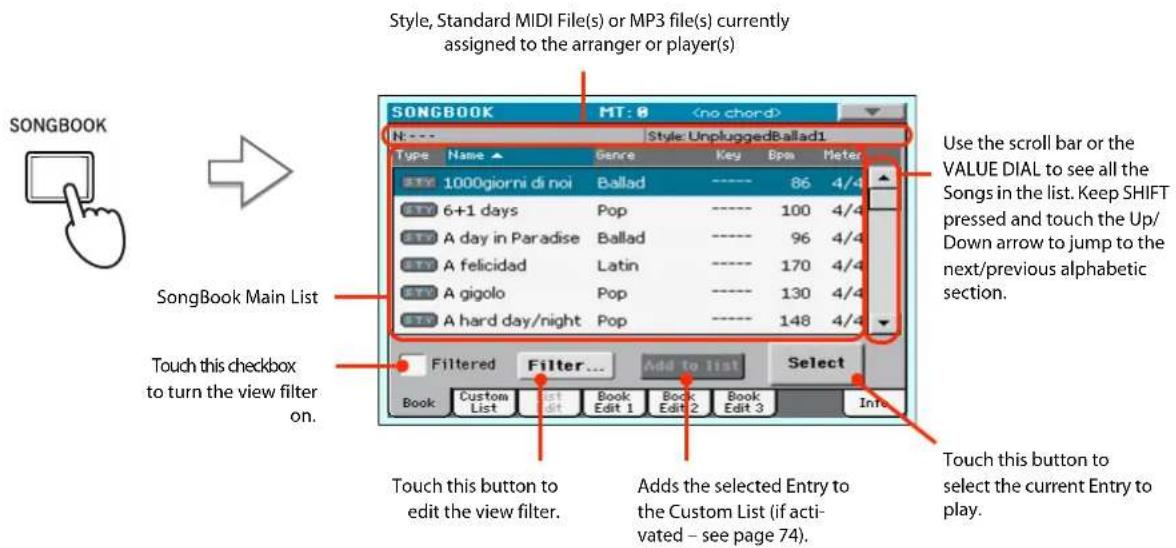
2 Browse through the Entries.
Icons in the Type column will help you identify the type of the Entry. The Genre column is shown by default, but you can switch to the Artist column (see "Displaying Artist or Genre" below).
3 When the Entry you are looking for becomes visible in the display, select it and touch the Select button in the display.
After selecting an Entry, the corresponding Style, MID, KAR or MP3 file will be recalled, together with the relevant operating mode (Style Play or Song Play). Up to four STSs and four Pads will also be recalled. Any TXT file associated with the Entry can be seen in the Lyrics page.
The selected Style, MID, KAR or MP3 file will be shown in the top area of the screen.
Displaying Artist or Genre
For space matters, either the Genre or Artist column can be seen in the display. You cannot see both at the same time.
1 Touch the page menu icon to open the page menu.
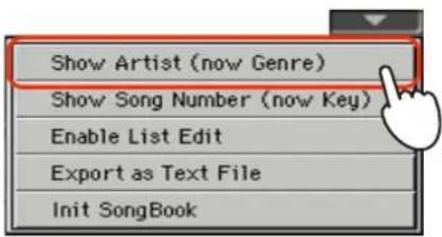
Note: The Artist and Key fields of all supplied Entries have been intentionally left empty.
2 Choose Show Artist (now Genre) to switch from Genre to Artist in the List view. The Artist column will be shown.
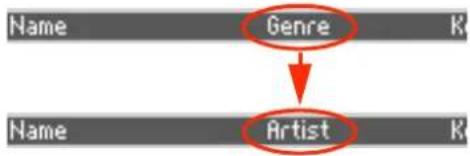
flowchart
graph TD
    A["Name"] --> B["Genre"]
    B --> C["Artist"]
3 Open the page menu again, and choose the Show Genre (now Artist) item. The Genre column will be shown again.
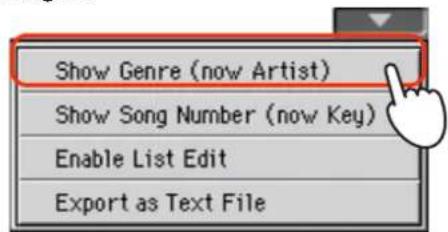
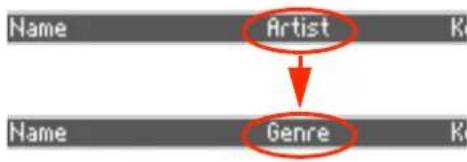
flowchart
graph TD
    A["Name"] --> B["Artist"]
    B --> C["Genre"]
Sorting Entries
You can change the order of the Entries shown in the display.
1 You can change the sorting order by touching one of the labels in a list of names.
Touch the Name label...

...to alphabetically reorder the names in the list.
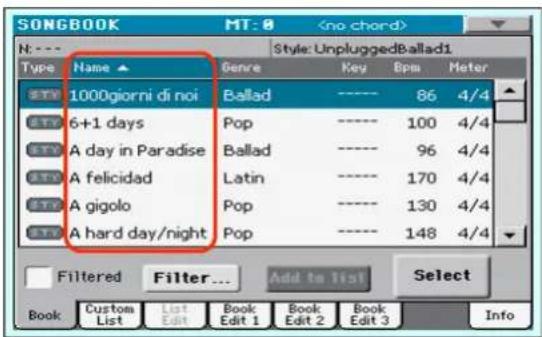
You can do the same by touching the Type, Name, Genre, Artist, Key, Number, Tempo or Meter label.
2 Each time you touch the same label again, the order changes between ascending and descending.
Searching for Entries
The SongBook database may be really huge. You can, however, look for (say) specific artists or song titles, using the filtering functions.
1 Touch the Filter button in the display, to open the Filter dialog box.
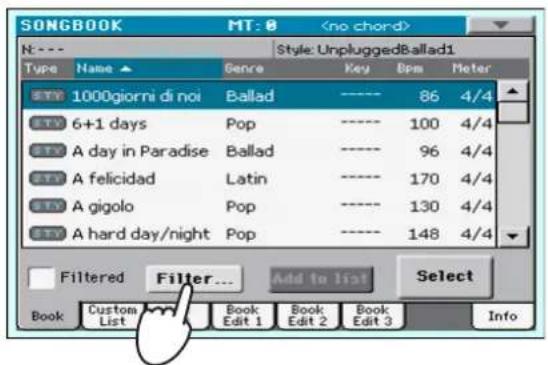

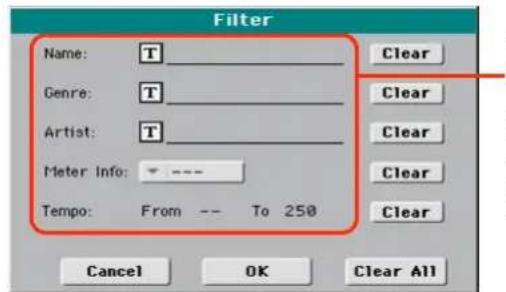
Available search criteria. "Genre" and "Artist" are both considered, even though only one of them may be shown in the List
2 Touch the T (Text Edit) button next to the search criteria (even more than one) you want to enter.
For example, you may want to find all songs containing the word "love" in the title (in any position in the string). If so, select the 'Name' criterion, and enter the word 'love'. Capitals are not relevant for the search.
![Filter Name: T Clear Genre: T Clear Artist: T Clear Meter Info: --- Clear Tempo: From -- To 250 Clear Cancel OK Clear All ON SCREEN KEYBOARD Love ← → ✗ Clear 1 2 3 4 5 6 7 8 9 0 - q w e r t y u i o p [ a s f g h j k l ; ' ↓ Alt Space , . / ] ? * Cancel OK](/content/2026/05/882139/images/c0522657f229c1c8320eebeabe6b94814bd8953ab1d4434ef00527fba1ca9825.jpg)
3 Touch OK in the display, and close the Text Edit dialog box. The entered text is now the search criteria.
![ON SCREEN KEYBOARD Love 1 2 3 4 5 6 7 8 9 0 - q w e r t y u i o p [ a s d f g h j k l ; ✓ z x c v b n m = \ ↑ Alt Space , . / ] ? * Cancel OK Filter Name: T Love Clear Genre: T Clear Artist: T Clear Meter Info: --- Clear Tempo: From -- To 258 Clear Cancel OK Clear All](/content/2026/05/882139/images/4b2292a4ad74e5d1e9cc19eebbecf80bc7b204f6d91753fbf158b09a4b7240e0.jpg)
4 Touch OK to close the Filter dialog box and return to the SongBook page.
Once the Filter dialog box has been closed by touching OK, the Filtered check box is automatically checked, and the filter is activated. Only Entries matching the entered criterion are seen in the Main List.
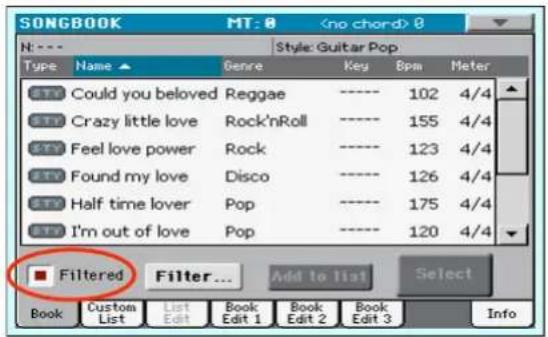
5 To see the whole SongBook database again, touch the Filtered check box again, to make the check mark disappear.
Adding Entries
You can add your own Entries to the SongBook database.
1 Go to the Style Play or Song Play mode, depending on the type of Entry you want to add to the SongBook database.
2 Select the Style, Standard MIDI File or MP3 file to be added to the SongBook.
3 Edit the Keyboard and Style tracks the way you prefer, by selecting different Sounds and Effects, or editing any other relevant parameter.
Please note that changes to Standard MIDI File tracks will not be saved as SongBook data. Only the data included in the Standard MIDI File will be used.
4 Choose a Voice Processor Preset.
5 When ready, keep the SONGBOOK button pressed for about one second to create a new SongBook Entry with the current settings.
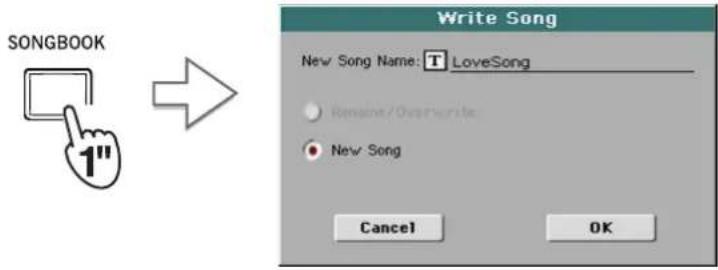
6 Touch the T (Text Edit) button to assign a name to the Entry, then touch OK to save the Entry to the SongBook database.
Editing the Entries
You can edit any SongBook Entry and customize it according to your taste. When done, you can overwrite the current Entry or save it as a new Entry.
1 Press the SONGBOOK button to access the SongBook pages.
2 Touch the Book Edit 1 tab to see the Book Edit 1 page and see the linked Musical Resources.
While in the Book Edit 1 page, you will be able to see the name of the selected Style or Song, and choose whether to replace them or not.
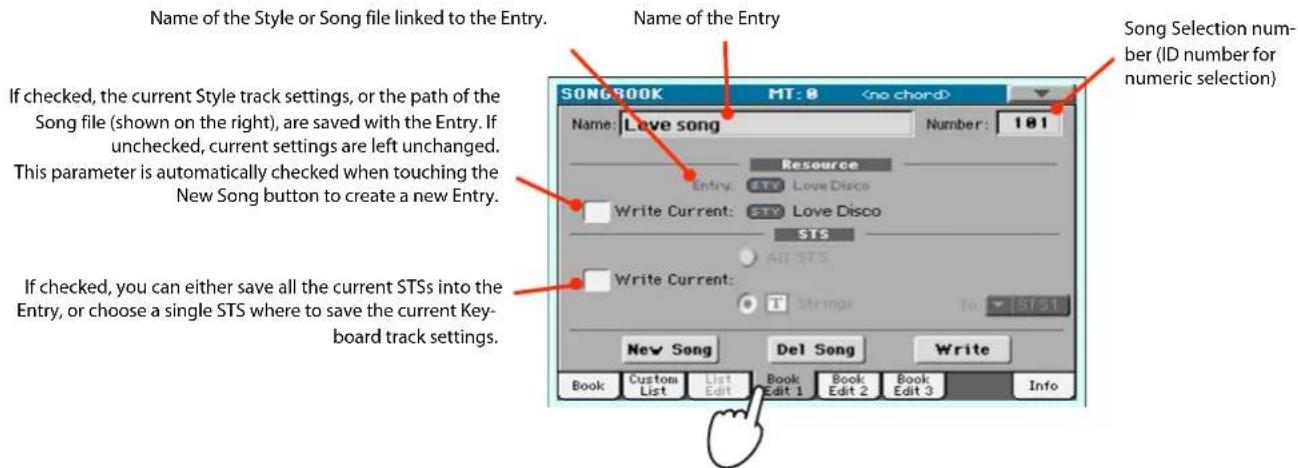
3 When done with this page, touch the Book Edit 2 tab to see the Book Edit 2 page and edit the SongBook database details.
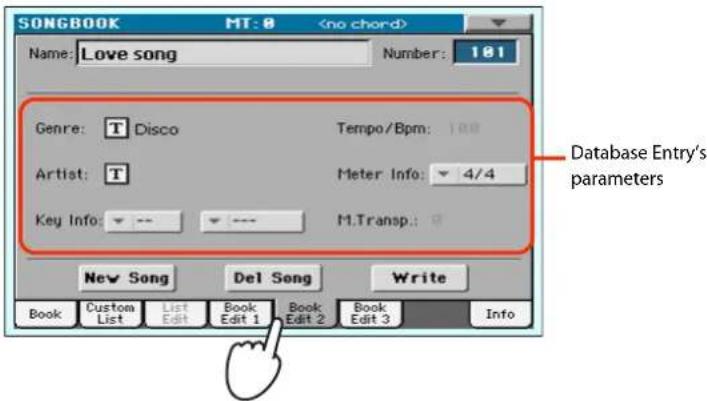
4 Touch the T (Text Edit) button next to the field(s) you want to edit. Set all the other parameters.
You can write the Genre and Artist name. Select a Tempo matching the Song's Tempo, and select the Meter (Time Signature) and Key of the Song. You can also specify a Master Transpose value, to be automatically selected when selecting the Entry.
5 When done with this page, touch the Book Edit 3 tab to go to the Book Edit 3 page, where you can and set the Synchro and Memory parameters, and link a text file to the Entry.
Note: The Master Transpose might not change, if a Lock is preventing it. See Global > General Controls > Locks.
Synchro (for Style) and Memory (for Style and Songs) On/Off status
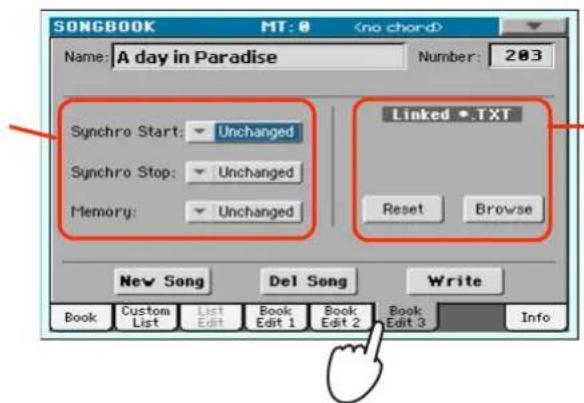
Text file linked to the Entry. This text will be seen in the same way of ordinary Lyrics in the display (or in the external monitor).
6 After having filled up all the desired fields (be as comprehensive as you can), touch the Write button in the display to open the Write dialog box.
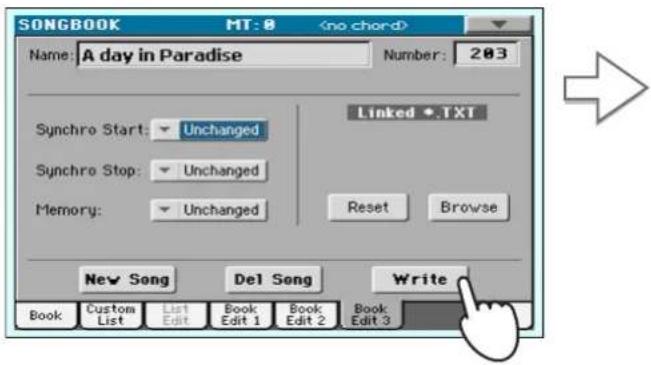
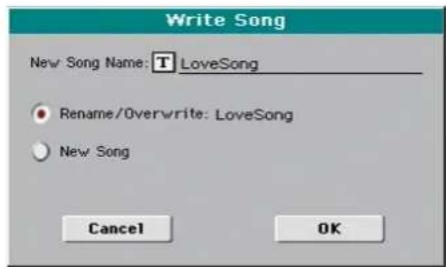
7 Touch the T (Text Edit) button to assign a name to the Entry, then touch OK to save the Entry to the SongBook database.
Select Rename/Overwrite to replace an existing Entry. This option is automatically selected when editing an existing Entry; it cannot be selected when saving a new Entry. Warning: the older Entry will be deleted!
Select New Song to add a new Entry to the SongBook database. This option is automatically selected when a new Entry has been created (by touching the New Song button).
Entry's name. By default it is the same name of the associated Style, Standard MIDI File of MP3 file. The name can be up to 16 characters long.
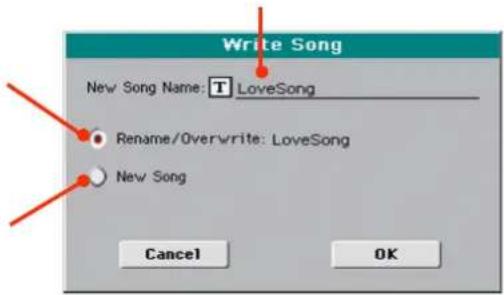
Creating a Custom List
You can create several Custom Lists in the SongBook, to make a set of Entries suitable for your various shows. Before starting a new Custom List, be sure you have added all needed Entries to the SongBook main database (see "Adding Entries" above).
1 While in SongBook mode, open the page menu and check the 'Enable List Edit' item.
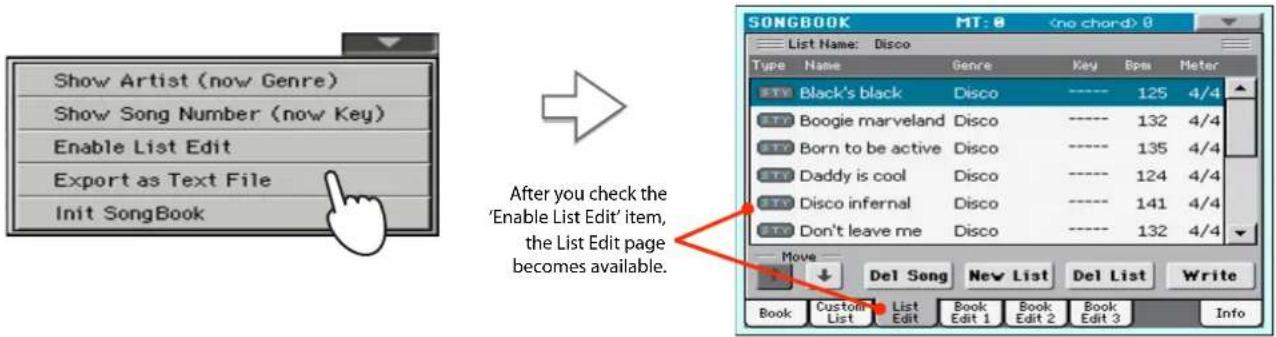
2 Select a Custom List to be edited.
To edit an existing list, touch the Custom List tab to open the Custom List page, and select one of the available Custom Lists. To create a new list, touch the List Edit tab to open the List Edit page, and touch the New List button to create a new, blank list.
3 Touch the Book tab to open the Book page and see the full database. Use the various sorting, searching and filtering options (seen above) to find the Entries you are looking for. Touch the Add to List button when the desired Entry has been selected.
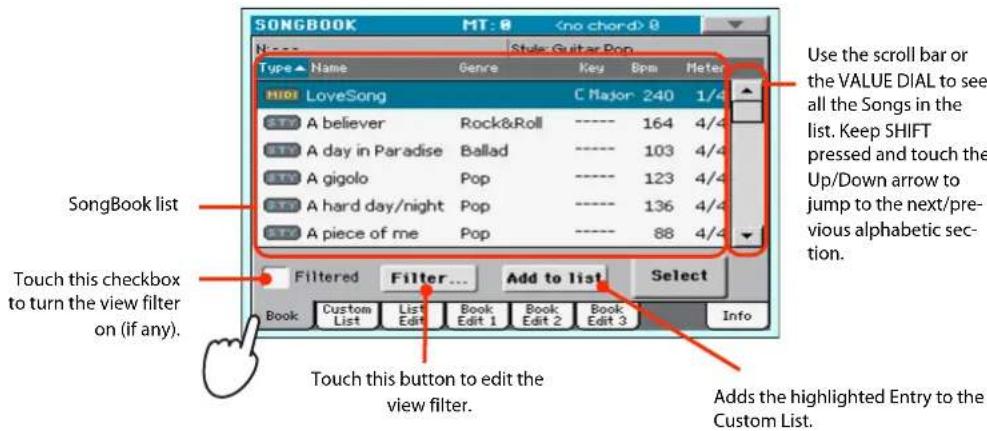
4 When finished adding Entries to the Custom List, touch the List Edit tab to go to the List Edit page, and use the various commands to edit the list.
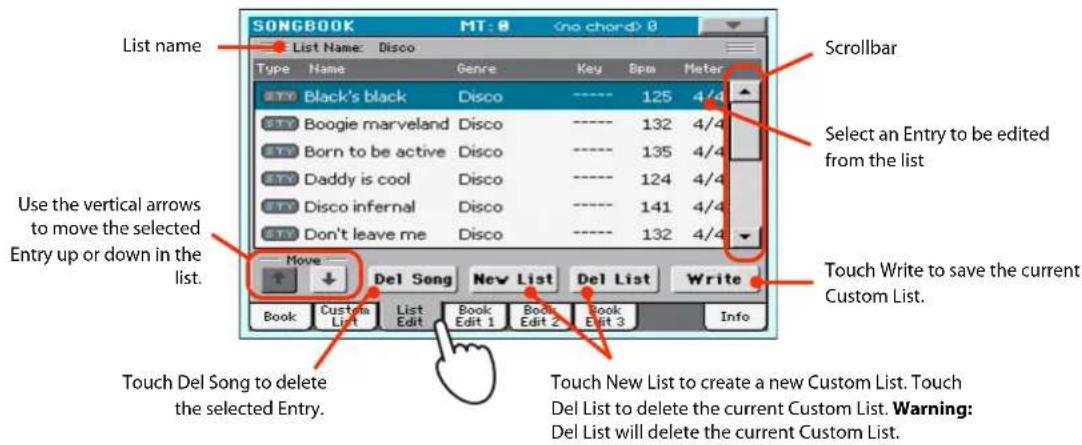
5 When the Custom List is ready, touch the Write button in the display to save it to memory. Assign a new name to the Custom List.
![Write List New List Name: Disco Rename: write: Disco New List Cancel OK Use thearrows or the VALUE DIAL to move the cursor. Touch Delete to delete just a single character, Clear to delete the whole string. ON SCREEN KEYBOARD Tonight Show ←→ Clear 1 2 3 4 5 6 7 8 9 0 - q w e r tyt y u>i pivot[_ a s d f g h j k,l ; # z x c v b n=m=\ Alt Space ,./] Cancel OK Use alphabetic char- acters to enter text. Touch the Shift key to switch between capitals and small characters. When done, touch OK to confirm the new name, or Cancel to abandon all changes.](/content/2026/05/882139/images/fdfa0e4fc09479ab5f18d6efb5fc3930947497fa1e869e49be7443a9fc90243c.jpg)
6 When finished editing the Custom List, open the page menu and uncheck the 'Enable List Edit' item.
Selecting and using a Custom List
After having created one or more Custom Lists, you can select one and use it for your show.
1 Touch the Custom List tab to select the Custom List page.
2 Use the List pop-up menu to select one of the available Custom Lists.
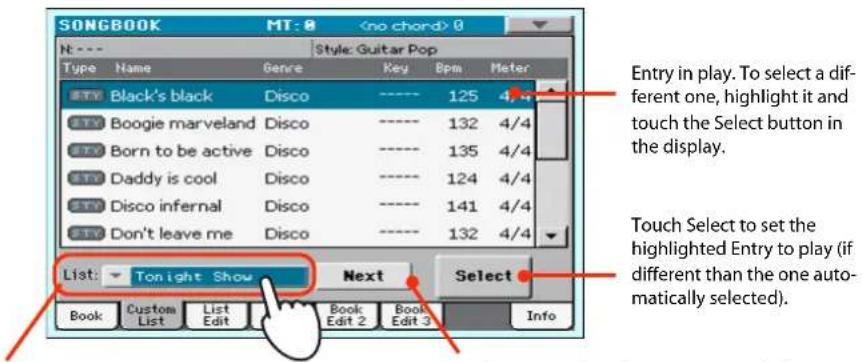
Use the List pop-up menu to select one of the available Custom Lists.
Touch Next to select the next Entry in the list. (This command can also be assigned to an Assignable Switch).
3 Select one of the Entries in the list (it turns blue), then touch the Select button in the display to confirm selection (the selected Entry turns green). Press the PLAY button to start playing back the selected Song.
Using the SongBook with external software
Additional software has been created to work with the SongBook. You can use KORG's own Song-Book Editor to edit single entries, the SongBook database and the Custom Lists on a Windows PC. You can also use BauM Software's SongBook+ for iPad, or Zubersoft's MobileSheets for Android, to synchronize the SongBook entries with a tablet, and read lyrics and sheet music on the wider tablet display.
Other software is under development. Please check our web site regularly, for news about their release.
Recording a new Song (Standard MIDI File)
There are several ways to create a Song on the Pa600. The easiest and fastest is to use the Styles to record what you are playing in realtime on the keyboard, while the arranger gives you the accompaniment tracks.
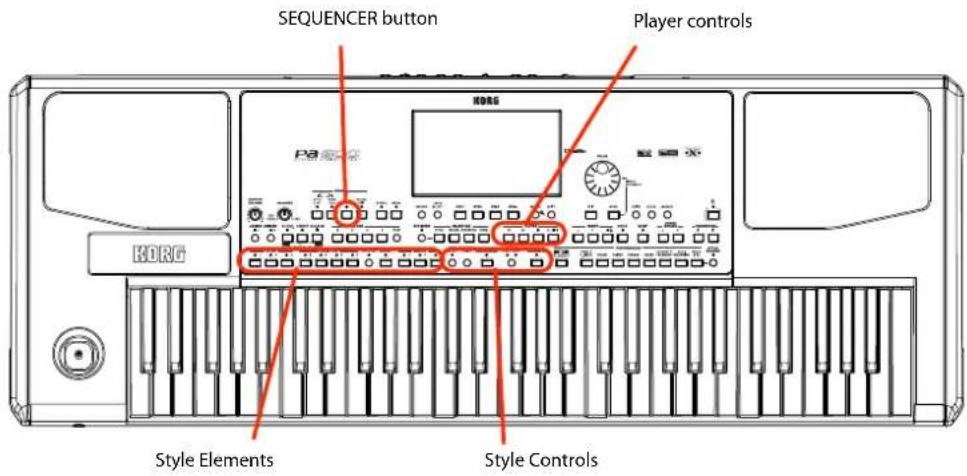
Preparing the Style and Sounds
Before accessing the Record mode, we suggest you prepare the Style and Sounds with which to record your Song.
1 Select a Style with which you want to record.
2 Select the Sounds by choosing a Performance or STS.
That's all! You are ready to access Record mode.
Accessing the Backing Sequence (Quick Record) mode
1 Press the SEQUENCER button to switch to the Sequencer mode.
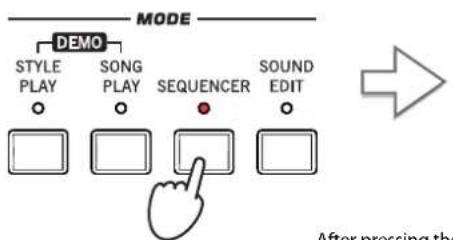
After pressing the SEQUENCER button, the main page of the Sequencer mode appears.
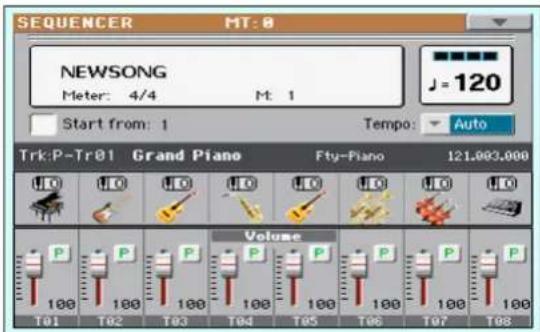
2 Press the RECORD button to open the Song Record Mode Select dialog box.
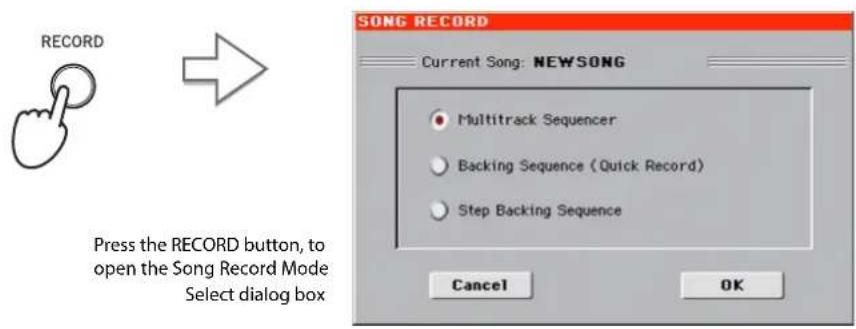
3 Select the Backing Sequence (Quick Record) option and touch OK to enter the Backing Sequence Record mode.
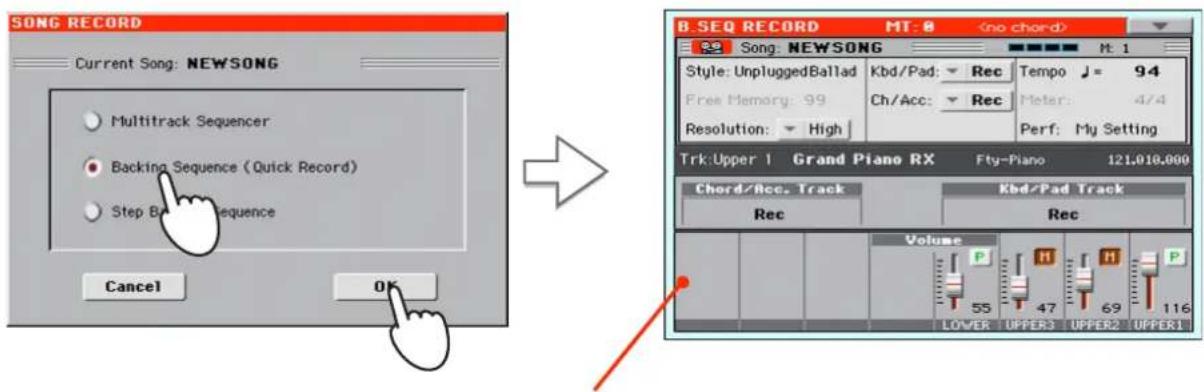
After having chosen the Backing Sequence (Quick Record) option, the Backing Sequence Record page appears.
Setting the Record parameters
When you enter Backing Sequence Record, the latest selected Style and Sounds are already selected, and all tracks are ready to record. You could simply start recording as if you were playing in realtime with the Styles. However, there are some further settings that you may want to do.
- If you like, adjust any editable parameter in the display.
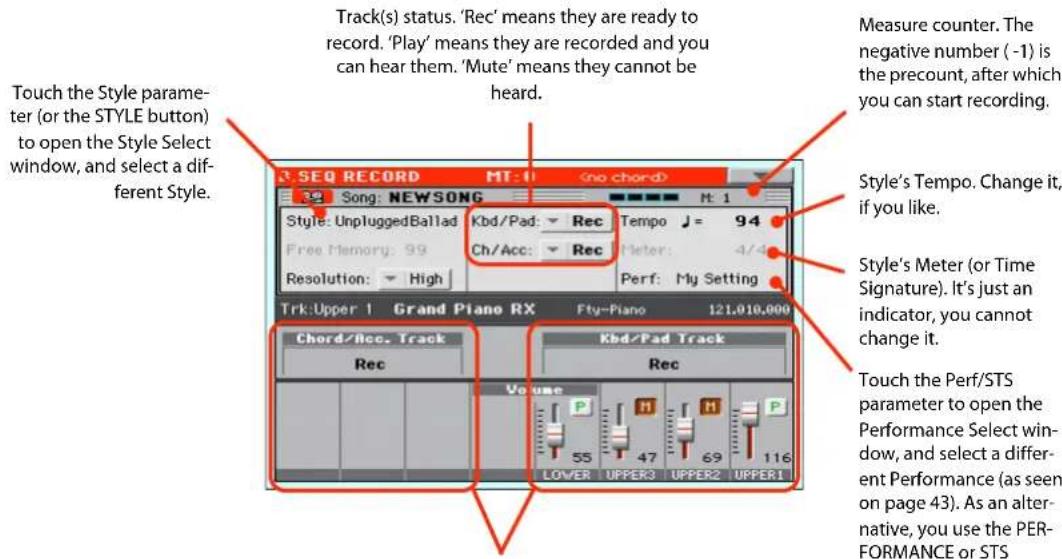
Grouped tracks. During Quick Record, you cannot access each separate Song track. For ease of use, just two 'master' tracks are provided: Kbd/Pad (Keyboard/Pads) and Ch/Acc (Chord/Accompaniment).
Recording
1 Select the Style Element you wish to use before starting to play.
Select any of the Variations before starting to record. Select one of the Intros to start with an introduction.

2 Start recording, by pressing the START/STOP button.
3 Play as if you were performing live with the Styles.
During recording, select any Style Element (Intro, Variation, Break, Ending...) you like. You can also press START/STOP to stop the Style, and press it again to start the Style again!
Please remember that, while recording in Backing Sequence Record mode, you cannot use the SYNCHRO, TAP TEMPO/RESET, BALANCE controls.
i Note: If you do not wish to start the Song with the Style already playing, you can simply start recording by pressing the ▶/PLAY/ STOP button in the PLAYER section, then start the Style only at a later time. The Style will start at the beginning of the following measure.
4 When finished recording your Song, press the (PL/STOP) button in the PLAYER section to exit recording, and return to the main page of the Sequencer mode.
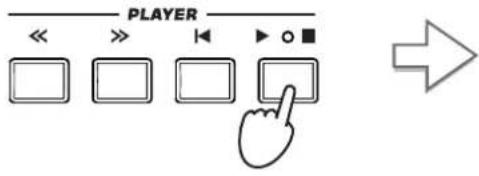
After pressing the PLAY/STOP button, the main page of the Sequencer mode will appear again.
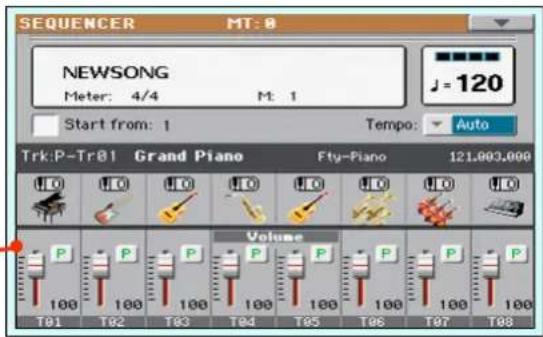
5 While in the main page of the Sequencer mode, press the (PLA/STOP) button in the PLAYER section to listen to the recorded Song.
The Backing Sequence Song has been converted to an ordinary Song (in Standard MIDI File, or "MID", format). If you like it, you can save it. You can then read it in Song Play mode, or transfer it to any external sequencer.
6 If you want to edit the Song, press MENU to access Edit mode.
Second-take recording (Overdubbing)
You may want to record an additional “grouped” track, or replace a bad-recorded track with a new one. A good idea may be to record all chords and Style Element changes during the first take, then record Keyboard tracks and Pads during the second take.
1 Press the RECORD button to enter Record mode again. When the Song Record Mode Select dialog box appears, select Backing Sequence (Quick Record) again.
2 If you are recording just one of the "grouped" tracks, set to Play the track to be preserved.
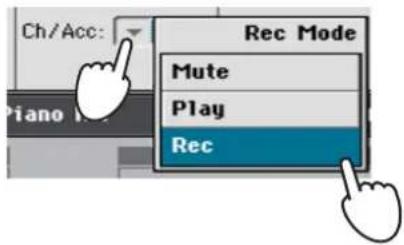

3 Repeat the recording procedure, and press the (P.A/STOP) button in the PLAYER section to stop recording and return to the main page of the Sequencer mode.
4 While in the main page of the Sequencer mode, press the (PL/STOP) button in the PLAYER section to listen to the recorded Song.
Again, the Backing Sequence Song has been converted to an ordinary Song.
Saving a Song
After having recorded a Song that you like, it is a good idea to save it, to avoid losing it when the instrument is turned off (or put in standby).
1 While in the main page of the Sequencer mode, touch the page menu icon to open the page menu.
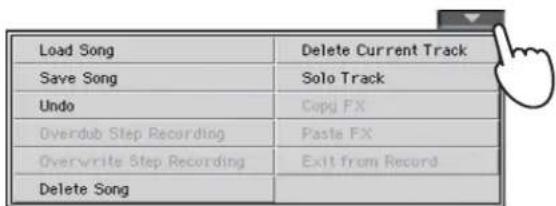
2 Select the Save Song command to open the Save Song window.
This window is very similar to the one you can see when pressing the MEDIA button on the control panel, and touch the Save tab to see the Save page. This page is, however, "filtered" to only see Song files.
![Load Song Delete Current Track Save Song Solo Track Undo Copy FX Overdub Step Ping Paste FX Overwrite Step Recording Exit from Record Delete Song After you select the Save song command, the Save Song page appears. PLAYER Save Song Type Name Size Date Another MIDI Song 22K 23-09-03 14:59 Canyon 25K 21-01-11 22:33 LoveSong 22K 23-09-03 14:59 My MIDI Song 22K 23-09-03 14:59 Pinball 25K 21-01-11 22:32 [KORG DISK]\MYSHOW\MIDI DISK Open Close Locate Save](/content/2026/05/882139/images/c043cbd4501f79673aebae9a3379fc3490aa10813b0b01c87d6eefb00f2d34a1.jpg)
3 Select a device and folder where you want to save your Song.
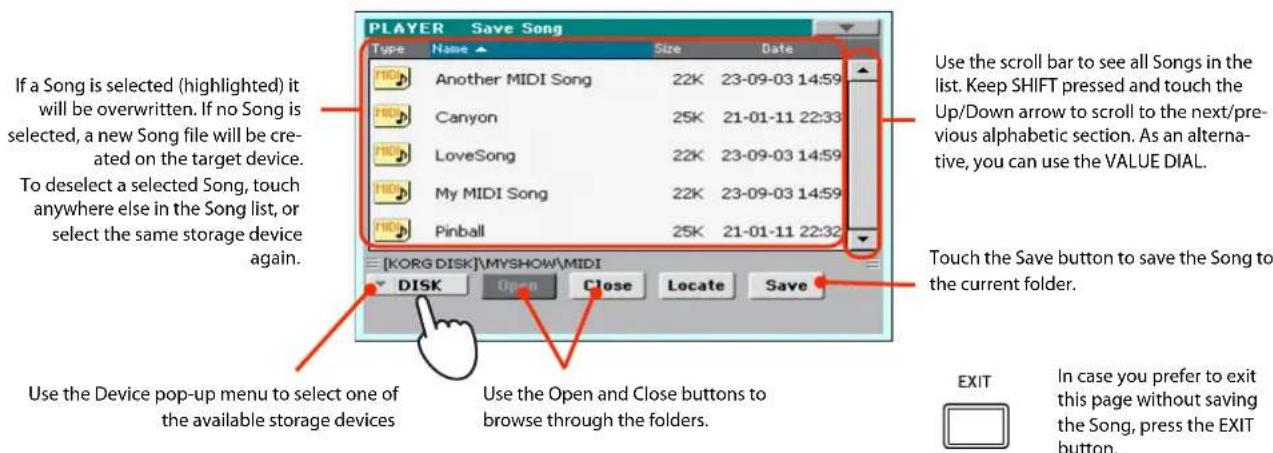
4 Touch the Save button in the display to open the Save Song dialog box.
![Touch the Text Edit icon to edit the Song's name. NEWSONG To [KORG DISK]\MYSHOW\MIDI Cancel OK](/content/2026/05/882139/images/9bf34dbfc0700d0e137e799b1059bd6bc82009bee432e8c1945796a6524fe608.jpg)
5 Touch OK in the display to save the Song, or Cancel to stop the Save operation.
Searching files and musical resources
With Pa600, you can press the SEARCH button to search for files or musical resources.
How to use the Search function
Depending on the page you are in, you can search for different types of data. For example, while in Media mode you can only search for files, while in Style Play or Song Play mode you can search for several different types of data (Styles, Songs, Lyrics...).
There are some pages where the Search function is not available, since there are no relevant data to search for that page (for example, the pages of the Global mode).
Here is the general procedure.
1 Press the SEARCH button to open the Search window.
![SEARCH: Type: Styles Media Browse 1 2 3 4 5 6 7 8 9 0 - q w e r t y u i o p [ a s d f g h j k l ; ' ↓ z x c v b n m = \ ↑ Alt Space , . / ] . ? * Cancel Search](/content/2026/05/882139/images/8adee2e0480f90cb989a67115175f82d343e9b1f89eda925980b337f70e66c28.jpg)
2 If needed, touch the "Type" pop-up menu, and choose the type of item you are looking for.
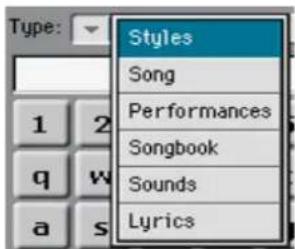
When choosing Files, Songs or Lyrics, the "Browse" button will be activated, to allow for searching files in the disks.

3 In case you are searching for a file in a disk, touch the "Browse" button to open the Media window.
![SEARCH-[KORG DISK] Type ▲ Name Size Date MYSHOW 20-03-12 00:41 SET MyData.SET 20-03-12 00:41 [KORG DISK] DISK Open Close Root Select](/content/2026/05/882139/images/b43138fc6ae451e3af56c640771435b1bc6db1bf197cfbd3790328560916d917.jpg)
Use the Device pop-up menu to select one of the available storage devices
Use the Open and Close buttons to browse through the folders
In case you are lost among the directories, touch the "Root" button to go to the root of the selected device
When you see the folder containing the file you are looking for, touch it, then touch the Select button to close the Media window. The name of the selected folder will be shown in the title bar of the Search window.
4 Type the name of the file to be searched.
There is no difference between upper and lower cases ("LOVE" is the same as "Love" or "love").
![SEARCH: Type: ▼ Styles Media Browse Love ← → Clear 1 2 3 4 5 6 7 8 9 0 - q w e r t y u i o p [ a s d f g h j k l ; ' ↓ z × c v b n m = \ ↑ Alt Space , . / ] . ? * Cancel Search](/content/2026/05/882139/images/47c7b8b595e07a48db5e62df049e2ee21220d7bffaf39b2e481c0b6dde8e4f45.jpg)
5 When finished entering the name, touch the "Search" button.
After a while, the list of files found begins to appear in the display.
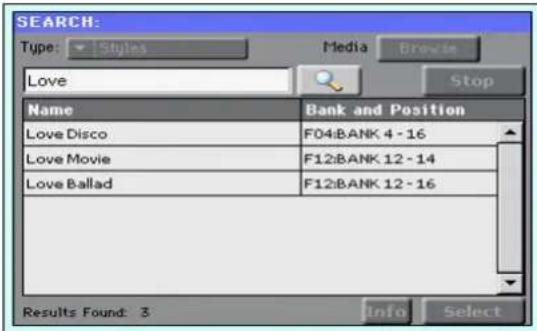
After you have touched the "Search" button, its name changes to "Stop". If needed, touch this button to stop the ongoing search. The name of the button reverts to "Search". Any file found will remain in the display, until you do a new search.
The time needed to complete a search depends on the size of the device(s) and the number of files.
Note: Only one search a-time can be carried on. Please wait for the current search to be completed, or touch the Stop button in the display to stop the current search and do a new one.
Hint: You can touch the Cancel button in the display, or press the EXIT button in the control panel, to exit from this window and carry on other operations. The search will continue in the background.
6 You can touch one of the found items to select it, and then touch the "Info" button to see information on it.
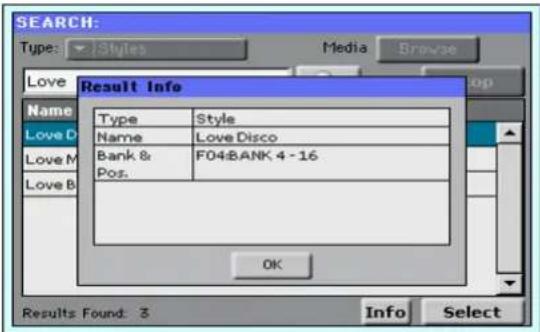
Touch OK to close the Info dialog box.
7 If you want to return to the main Search page and type a search string again, touch the

icon. Otherwise,
8 If you have found what you were looking for, touch its name and then touch the "Select" command.
9 You can exit from the Search window at any time, by pressing the EXIT or SEARCH button.
Notes about searching
Wildcards
During search, the string entered will be search as a whole word or as part of a word. For example, if you entered "love", Pa600 will find "Love" and "LoveSong", or any other word containing the string "love".
You can use the wildcards “?” (any single character) and “*” (any sequence of characters) to search exactly that string. For example, “*love” will find “MyLove”, but not “LoveSong”. “??love” will find “MyLove” but not “TrueLove”.
Also, if you are looking for words that can be spelled in a slightly different way, you can use the “?” wildcard to find all occurrences; “gr?y” will find out both “gray” and “grey”.
Reference
Selecting elements
The following windows are shown in the various operating modes, whenever you try to select a Sound, Performance, Style or Song.
Style Select window
To open the Style Select window, touch the Style area whereas it appears in the display, or the STYLE button in the SELECTION section on the control panel.
Press EXIT to exit from this page and go back to the previous page without selecting any Style.
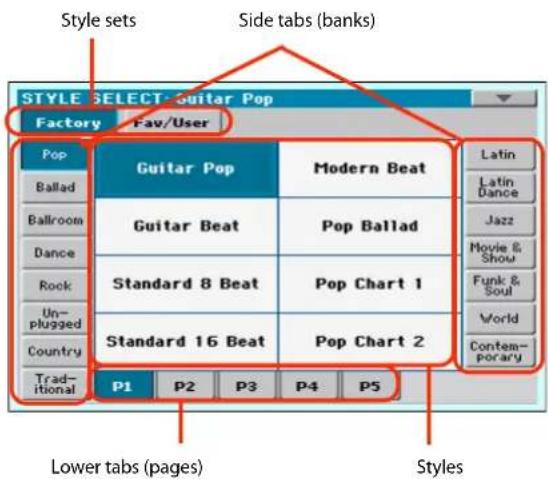
Note: Depending on the status of the "Auto Select" parameter (see page 235), a Style may be immediately selected when touching one of the side tabs. The latest selected Style for that bank will be selected.
Style sets
Selected set of Styles. Factory Styles are Styles supplied as standard. Fav/User are Favorite Styles (locations for custom-made Styles with editable names) and User Styles (locations for custom-made Styles with fixed names).
Side tabs (banks)
Use these tabs to select a bank of Styles. Favorite renamed (see "Renaming the Favorite banks" on page 117).
Lower tabs (pages)
Use these tabs to select one of the available pages in the selected bank.
Styles
Touch one of these buttons in the display to select a Style. Unless the "Display Hold" parameter (see page 235) is turned on, the window automatically closes shortly after you select a Style.
After selecting a Style from this window, and another Style is playing, the name of the new Style name begins to flash, meaning it is ready to start playing at the beginning of the next measure.
Style Select page menu
Touch the page menu icon to open the menu. Touch a command to select it. Touch anywhere in the display to close the menu without selecting a command.
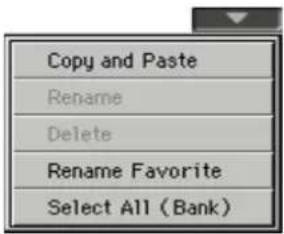
Copy and Paste
Use this command to copy the selected Style to a different selection,
-
Select the Style to be copied. To select more items, keep the SHIFT button pressed and touch all the item to be selected for copying. Hint: You can deselect one of the selected items by touching it while still keeping the SHIFT button pressed. You can deselect all by touching a single item.
-
Choose the Copy and Paste command.
-
Select the target location. In case you are copying more than a single item, all subsequent items will sequentially follow the first one. If there aren't enough locations available, the procedure will be cancelled. Warning: If you confirm, any Style already existing at the target location will be overwritten!
Rename
Use this command to edit the name of the selected item. Please keep in mind that you can only rename non-protected items.
- Select the Style to be renamed,
- Choose the Rename command, and use the virtual keyboard to edit the name.
- When done, touch OK to confirm.
Delete
Choose this command to delete the selected item. Please keep in mind that you can only delete non-protected items. abs can be
-
Select the Style to be deleted. To select more items, keep the SHIFT button pressed and touch all the item to be selected for deleting. Hint: You can deselect one of the selected items by touching it while still keeping the SHIFT button pressed. You can deselect all by touching a single item.
-
Choose the Delete command, and confirm deletion. Warning: Unless you have a copy of it, the deleted item will be gone forever!
Note: This command does not delete any User PCM Sample used by User Sounds. In case you need more free PCM Sample memory, and you know there are unused Samples and Multisamples in memory, use the "Not assigned to any Multisample/Drumkit" option of the "Delete" command in the Sampling mode to clean memory (see page 231).
Rename Favorite
Choose this command to edit the name of the banks.
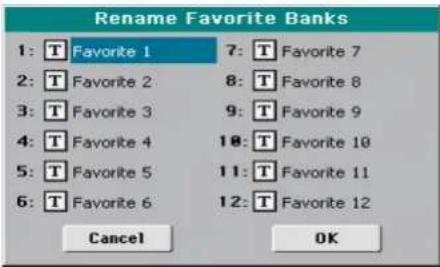
The assigned name can be spanned over two lines, by separating them with the paragraph character (§). For example, to write "World Music" on two lines, enter "WorldMusic".
Be careful not to write words exceeding the width of the side tabs of the Style Select window.
- Choose the Rename Favorite command.
- Touch the (Text Edit) symbol next to the bank to be renamed.
- Use the virtual keyboard to edit the name.
- When done, touch OK to confirm.
Select All (Bank)
Choose this command to select all items in the current bank.
You can deselect one of the selected items by touching it keeping the SHIFT button pressed. You can select all by touching any single item.
Sound Select window
To open the Sound Select window, touch the Sound area whereas it appears in the display, or the SOUND button in the SELECTION section of the control panel.
Press EXIT to exit from this page and go back to the previous page without choosing any Sound. The con
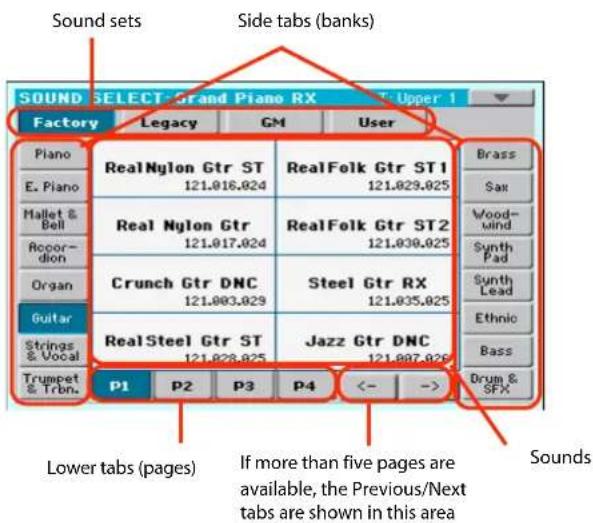
Sound sets
Selected set of Sounds. Factory Sounds are the Sounds supplied as standard. Legacy Sounds are Sounds compatible with older Pa-Series models. GM are Drum Kits mapped according to the General MIDI 2 or XG standards. User Sounds are custom-created or edited Sounds.
Side tabs (banks)
Use these tabs to select a bank of Sounds.
Lower tabs (pages)
Use these tabs to select one of the available pages in the selected bank.
Previous/Next tabs
Scroll the lower tabs to the left or the right, when additional tabs are available but cannot be seen in the display.
Sounds
Touch one of these buttons in the display to select a Sound. Unless the "Display Hold" parameter (see page 235) is turned on, the window automatically closes shortly after you select a Sound.
Program Change
Program Change number. Shown only when the "Show" parameter is turned on in Global mode. (See page 235).
Sound Select page menu
Touch the page menu icon to open the menu. Touch a command to select it. Touch anywhere in the display to close without selecting a command.
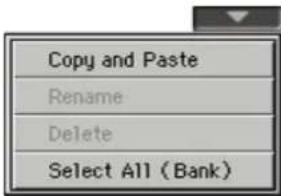
The commands are the same seen for the Style Select window's page menu, apart for a difference with the Delete command.
Delete
Choose this command to delete the selected Sound.
- Select the Sound to be deleted. To select more items, keep the SHIFT button pressed and touch all the item to be selected for deleting. Hint: You can deselect one of the selected items by touching it while still keeping the SHIFT button pressed. You can deselect all by touching a single item.
- Choose the Delete command, and confirm deletion. Warning: Unless you have a copy of it, the deleted item will be gone forever!
Note: This command does not delete any User PCM Sample used by User Sounds. In case you need more free PCM Sample memory, and you know there are unused Samples and Multisamples in memory, use the "Not assigned to any Multisample/Drumkit" option of the "Delete" command in the Sampling mode to clean memory (see page 231).
Performance Select window
To open the Performance Select window, touch the Performance area whereas it appears in the display, or one of the PERFORMANCE buttons on the control panel. Use the PERFORMANCE buttons to go directly to the selected bank.
Press EXIT to exit from this page and go back to the previous page without selecting any Performance.
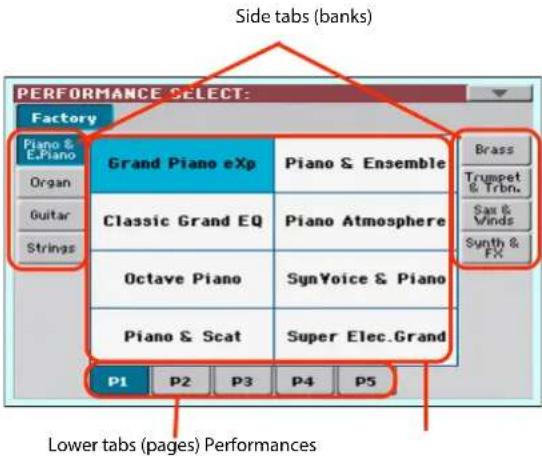
Note: Depending on the status of the "Auto Select" parameter (see page 235), a Performance may be immediately selected when pressing one of the PERFORMANCE buttons. The latest selected Performance for that bank will be selected.
Side tabs (banks)
Use these tabs to select a bank of Performance. Each tab corresponds to one of the PERFORMANCE buttons on the control panel.
Lower tabs (pages)
Use these tabs to select one of the available pages in the selected bank.
If you press again the same PERFORMANCE button on the control panel, the next page in the same bank is selected. This way, you do not need to touch one of the corresponding tabs in the display in order to select a different page.
Performances
Touch one of these buttons in the display to select a Performance. Unless the "Display Hold" parameter (see page 235) is turned on, the window automatically closes shortly after you select a Performance.
Performance Select page menu
Touch the page menu icon to open the menu. Touch a command to select it. Touch anywhere in the display to close the menu without selecting a command.
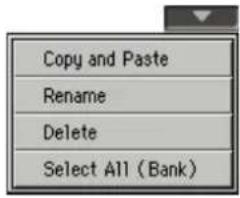
The commands are the same seen for the Style Select window's page menu.
Pad Select window
Touch the Pad area whereas it appears in the display, to open the Pad Select window.
Press EXIT to exit from this page and go back to the previous page without selecting any Pad.
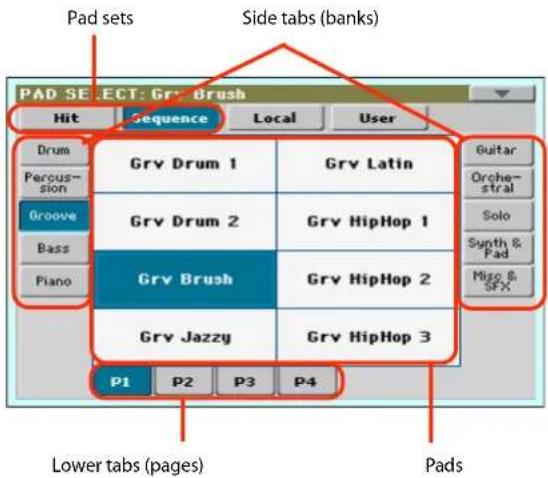
Pad sets
Selected set of Pads. Hit are single-note, pre-programmed factory Pads. Sequence are sequence-based, pre-programmed factory Pads. Local are like Factory Pads, but contain Pads customized for the music of your Country. User can be either single-note or sequence-based Pads, and can be user-created or modified.
Side tabs (banks)
Use these tabs to select a bank of Pads.
Lower tabs (pages)
Use these tabs to select one of the available pages in the selected bank.
Pad
Touch one of these buttons in the display to select a Pad. Unless the "Display Hold" parameter (see page page 235) is turned on, the window automatically closes short after you select a Pad.
Pad Select page menu
Touch the page menu icon to open the menu. Touch a command to select it. Touch anywhere in the display to close the menu without selecting a command.
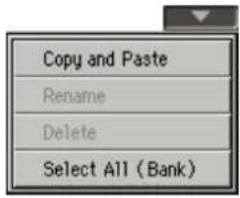
The commands are the same seen for the Style Select window's page menu.
STS Select
To select one of the four STS associated with the current Style or the selected SongBook Entry, use the four STS buttons on the control panel.
As an alternative, touch the STS name tab in the main page of the Style Play or Song Play mode, where you can see the name of the available STSs.
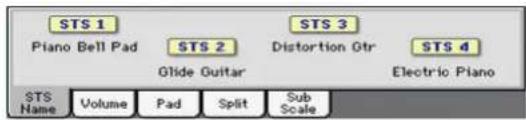
The STS's name can also be seen in the Lyrics and Markers page:

Song Select window
This page appears when you touch the Song name in the display, or press the SONG button in the SELECTION sections on the control panel.
Press EXIT to exit from this page and go back to the main page of the Song Play operating mode without selecting a Song.
![PLAYER Song Selection Type Name Another MIDI Song Canyon LoveSong My MIDI Song MyJbxList [KORG DLDK]MYSHOW\MIDI DISK Open Close Locate Select Play All Storage device Song path Directory Page menu](/content/2026/05/882139/images/dda85d9e4901d2325719cb9b98a03bc284317c114a9dd45576c49b90c6d26cef.jpg)
While in this page, you can select a Standard MIDI File, Karaoke, MP3 or Jukebox file.
Directory
This is the list of the selected device's content.
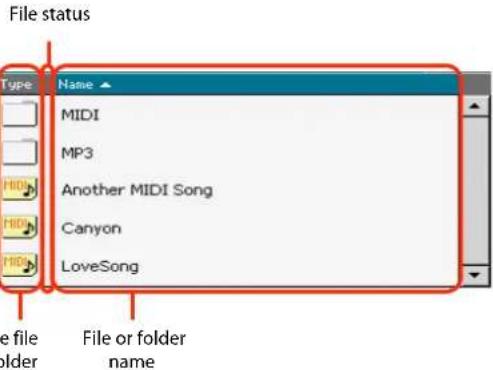
Use the scrollbar to scroll the list items. As an alternative, you can scroll the list using the VALUE dial.
When the Name label is selected on top of the list, keep the SHIFT button pressed and touch one of the arrows to jump to the previous or next alphabetical section.
You can touch one of the labels on top of the list, to reorder the list items accordingly. By touching the label again, the order of the files will switch between ascending and descending.
A list can contain several different types of files or folders.
| Type icon File/folder type | |
 | Standard MIDI File (MID) |
 | Karaoke file (KAR) |
 | MPEG Layer 3 (MP3) |
 | Jukebox file (JBX) |
 | Folder |
A file or folder may be in one of the following status. (See "Protect" and "Unprotect" on page 269 for information on how to change the file status).
| Status icon File/folder status | |
| Protected | |
| - Unprotected | |
Page menu icon
Touch the page menu icon to open the menu. See "Song Select page menu" on page 92 for more information.
Storage device
Use this menu to select one of the available storage devices.
| Device Type | |
| DISK Internal memory | |
| USB Optional device connected to the rear USB Host port | |
The actual name (label) of the device appears within square brackets ([]).
Song path
This line shows the current device path.
Open
Opens the selected folder (item whose icon looks like this one: □).
Close
Closes the current folder, returning to the parent ("upper") folder.
Locate
Touch this button to go back to the folder containing the selected Song. This is useful to quickly locate it, after you have browsed through long directories and "dug" into different folders.
Select
Selects the highlighted item in the display. If a Song is already playing, it stops, and the new Song is ready to play. You will return to the main page.
Play All
When you touch this button, all Standard MIDI Files and MP3 files contained in the current directory are added to a new Juke-box list, that is automatically assigned to the Player. The order in which they are played depends on the current sorting method, i.e., how the files are shown in the display.
You can use this Jukebox list as any other list of this type (i.e., start the playback with PLAY/STOP, jump to the next Song in the list with SHIFT + >>, edit it in the Jukebox page...).
Note: A Jukebox list can include up to 127 Songs. If your folder contains more items, only the first 127 will be considered.
Hint: If you don't want the list to be deleted when setting the instrument to standby, go to the Jukebox page and save it as a "JBX" file.
Selecting a Song by its ID number
Each Song in a folder on a device (up to 9,999) has a progressive ID number assigned. When the "Show Song Number" option is selected in the Song Select page menu (see below), you can this number before the Song's name in the Song Select window. You can use this number to select the Song by composing the corresponding number, speeding up the Song retrieval when you are using an hard disk filled with midfiles.
While in the Song Select window, press the SONG button in the SELECTION section to open the keypad, and enter the number corresponding to the Song to be selected.
While in any page of the Song Play mode, press the SONG button in the SELECTION section twice to open the keypad.
Note: If no Song corresponds to the dialed number, the "Song not available" message will appear.
Note: While the directory may contain more than 9999 files, you can't select Songs outside the 0001-9999 range when using the numeric keypad.
Song Select page menu
Touch the page menu icon to open the menu. Touch a command to select it. Touch anywhere in the display to close the menu without selecting a command.
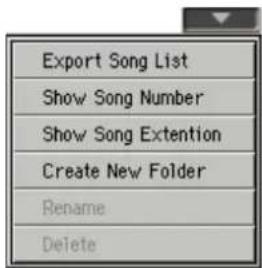
Export Song List
Select this command to save the current list as a text file. This way, you will be able to print a list of Songs, to see which number matches each Song.
-
While in the Song Select window, select the folder whose Song list you wish to save as a text file.
-
Select the Export Song List command from the page menu.
-
A dialog box will appear, asking you to select one of the available storage devices.
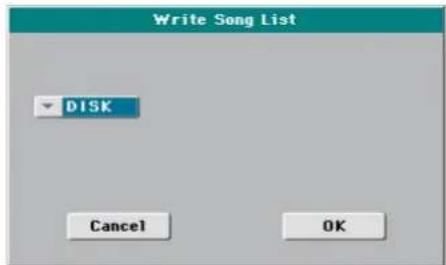
- Select one of the options, and touch OK to confirm.
Note: The text file will contain a list of “*.mid”, “*.kar”, “.mp3 and “*.jbx” files only. Folders and other types of files will not be included.
When saved, the text file will be named after the selected folder. For example, a folder named "Dummy" will generate a \$Dummy.txt" file. If a file with the same name already exists in the target, it will be overwritten without waiting for any confirmation. A file containing the list of all valid files contained into the root of the disk will generate a "Root.txt" file.
The list will include the progressive number assigned to each Song, the file names, the total number of files in the list.
To correctly display and print the list on a personal computer, use a fixed size (i.e., non-proportional) character in your text editor.
Show Song Number
Check this option to make the Song's progressive ID number appear in the list, next to each Song.
Show Song Extension
Check this option to make the file extension (“*.mid”, “*.kar”, “*.jbx”, “*.mp3”) appear in the list, at the end of each Song’s name.
Create New Folder
This command will let you create a new generic folder in the root of any device, or inside any other generic folder. You can't create a ".SET" folder with this command, since this type of folder is reserved to the Save operations (and can be created with the New SET button in any Save page).
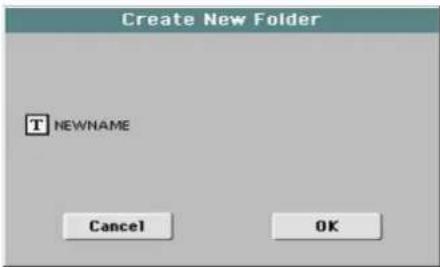
By touching the Text Edit) button you can open the Text Edit window. Enter the name, then touch OK to confirm and close the Text Edit window.
Rename
(Only available when an item is selected in a list) Use this function to change the name of an existing file or folder. You cannot change the 3-character extension of files and ".SET" folders, since they are used to identify the type of file or folder.
Touch the Text Edit) button to open the Text Edit window. Enter the new name, then touch OK to confirm and close the Text Edit window.
Delete
(Only available when an item is selected in a list) Use this command to delete the selected file or folder.
Style Play mode
The Style Play mode is the boot-up operating mode. When in this mode, you can play along with the Styles (i.e. automatic accompaniments), using up to four t Lower) to play on the keyboard. You can choose different Sounds and Effects by selecting Performances and STSs. Four Pads will provide single-shot sounds or repeating patterns in sync with the Style. You can also use the SongBook to automatically select Styles suited for a particular song.
Start-up settings
Since the “My Setting” Performance is automatically selected when turning the instrument on, you can save your preferred start-up settings to it.
Select the Sounds, Effects, and other settings you would like to see automatically selected when turning the instrument on. Then keep the MY SETTING button pressed for about one second. When the Write Startup Settings window appears, confirm by touching OK.
Note: If you like some settings to be preserved even when choosing different Performances, STSs and Styles, turn on the desired "locks" to avoid changes to the selected parameters (see "General Controls: Lock" on page 236).
How Styles, Variations, Performances and STSs are linked together
Styles, Variations, Performances and STSs are linked in many ways.
- When the STS MODE LED is steadily on or blinking, selecting a Style also changes the Keyboard tracks (STS 1 is automatically selected). Performance settings are overridden.
- When the STS MODE LED is blinking, selecting a Variation also select the corresponding STS.
- When the STYLE CHANGE LED is on, selecting a Performance also selects a Style (the one memorized with the Performance).
- Current track settings can be saved either to a Performance, an STS, or the Style Settings, depending on the Write command you select.
Styles and Pads
cks ( Upper 1-3 and
Each Style includes four Pads. Each time you select a Style, the four Pads it contains are assigned to the four PAD buttons. The Style and the Pads will play using the same Tempo value.
Master Volume and Balance
While the MASTER VOLUME knob controls the general volume of the instrument, you can use the BALANCE knob to balance the Style's Accompaniment and Pad tracks against the Keyboard tracks.
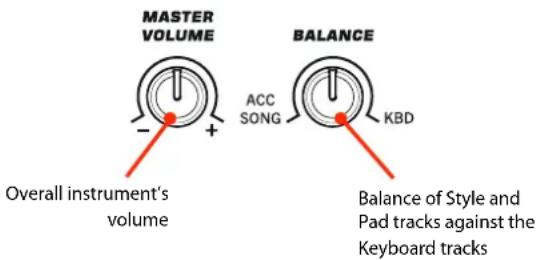
Note: As an alternative, the BALANCE knob can also work as a volume control. See "Balance knob" on page 242.
Factory, Favorite and User Styles
There are three different types of Style locations:
- Factory Style banks are the preloaded Styles, that you can't usually edit (unless you want to do so by turning off the protection, see “Factory Style and Pad Protect” on page 241).
- Favorite Style banks are Styles that can be loaded from an external device, or can be created or edited in Style Record mode. You can rename the tabs in the Style Select window to create places for custom banks, or for additional music genres that are not already included among the supplied banks. See “The Favorite banks” on page 117 for information on how to manage these Styles.
- User Style banks are, like the Favorite banks, Styles loaded from an external device, created or edited by yourself (the User). These are banks conceived as a 'workbench' – a place where to manage Styles and banks before saving them to a final location. See the "Style/Pad Record mode" chapter for information on how to edit or create Styles.
Main page
This is the page you see when you turn the instrument on.
To access this page from another operating mode, press the STYLE PLAY button.
To return to this page from one of the Style Play edit pages, press the EXIT button.
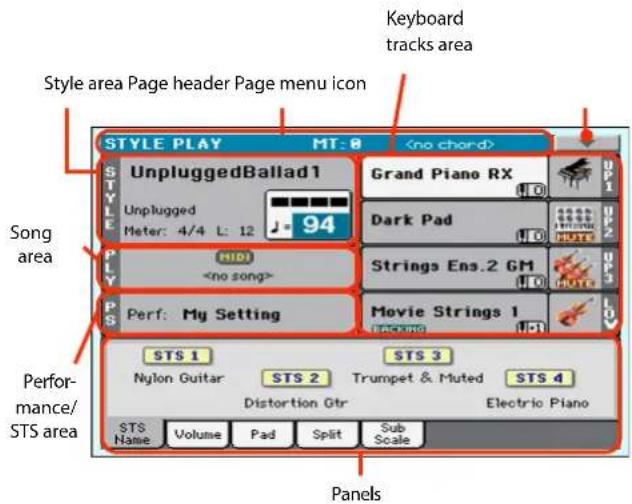
Details on individual tracks can be seen by pressing the Volume tab. Use the TRACK SELECT button to switch between Normal view (Keyboard tracks, grouped Style tracks) and Style view (individual Style tracks). (See "Volume panel" starting from page 97).
Page header
This line shows the current operating mode, transposition and recognized chord.
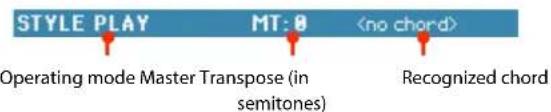
Operating mode name
Name of the current operating mode.
Master transpose
Master transpose value in semitones. This value can be changed by using the TRANSPOSE buttons on the control panel.
Note: Transpose may automatically change when selecting a different Performance or Style. It may also change when loading a Standard MIDI File generated with an instrument of the KORG Pa-Series.
To avoid transposition, the Master Transpose is "locked" by default. If you want to unlock it, change the Mas Lock parameter's status (see "General Controls: Lock" on page 236).
Recognized chord
Displays the recognized chord, when you play a chord on the keyboard. If no chord abbreviation is s ACCOMP LED is turned on.
You can choose how chords are recognized by using the "Chord Recognition" parameter in the Global > Style page (see page 239).
Page menu icon
Touch the page menu icon to open the menu. See "Page menu" on page 114 for more information.

Style area
This is where the Style name is shown, together with its Tempo and Meter (Time Signature) parameters.
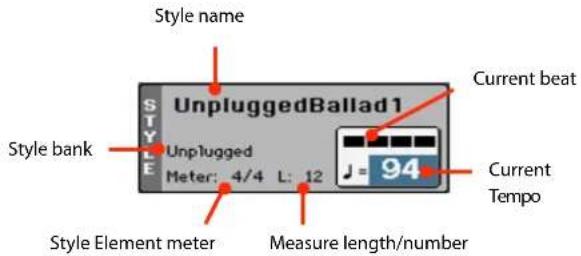
Style name
Currently selected Style. Touch the Style name (or press the STYLE button in the SELECTION section) to open the Style Select window.
Style bank
Bank the current Style belongs to.
Style Element meter
Meter (time signature) of the current Style Element.
Measure length/number
While the Style is playing, an 'M' appears, to show the current measure number of the current Style Element playing. While it is in stop, an 'L' appears, to show the length (total number of measures) of the current Style Element.
Current beat
Beat number currently playing.
Current Tempo
Metronome Tempo (from 30 to 250). Use the TEMPO buttons to change the Tempo value.
As an alternative, keep the SHIFT button pressed and use the VALUE DIAL to change the Tempo. Also, you can Tempo field and drag it with your finger, or change it with VALUE DIAL.
To recall the Tempo stored in the current TEMPO buttons together.
You can prevent Tempo from changing by turning the TEMPO LOCK LED on.
Note: Since Style Elements may contain Tempo Change data, Tempo may change while a Style Element is playing.
Songs area
This is where the Song assigned to the onboard Player is shown.
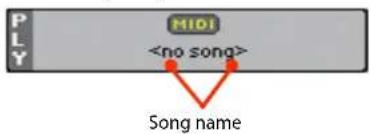
Song name
Name of the Song assigned to the Player. You can select while playing Styles, to have them ready when switching to Song Play mode.
Performance/STS area
This is where the latest selected Performance or STS name is shown.
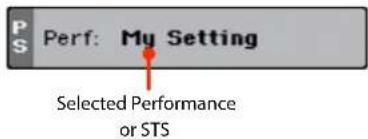
Selected Performance or STS
This is the latest selected Performance (Perf) or Single Touch Setting (STS#).
Touch the name to open the Performance Select window (see "Performance Select window" on page 90). As an alternative, use the PERFORMANCE section to select a different Performance.
To select a different STS, use the four STS buttons under the display, or the STS panel in the display.
Keyboard tracks area
This is where Keyboard tracks are shown.
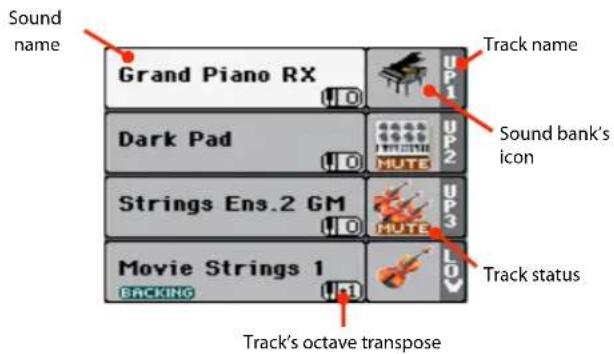
- If the track is already selected (white background), touch the Sound name to open the Sound Select window.
- If the track is not selected (dark background), first select it, then touch the Sound name to open the Sound Select window.
You can also open the Sound Select window by pressing the SOUND button in the SELECTION section on the control panel.
For more information about the Sound Select window, see "Sound Select window" on page 89.
Keyboard track octave transpose
Non editable. Octave transpose of the corresponding track. To individually edit the octave transpose for each track, go to the "Mixer/Tuning: Tuning" edit page (see page 104).
You can also transpose all Upper tracks by using the UPPER OCTAVE buttons on the control panel. Songs
Bass & Lower Backing icon
When the Bass & Lower Backing function is active, the Backing icon appears in the Lower track Sound area (see "Bass & Lower Backing" or
BACKING
Keyboard track name
Non editable. Name of the corresponding track:
| Abbreviation Track Hand | ||
| UP1 Upper 1 Right hand (or both | when in Full Key-board mode) | |
| UP2 Upper 2 | ||
| UP3 Upper 3 | ||
| LOW Lower | Left hand | |
Sound bank's icon
This picture illustrates the bank the current Sound belongs to.
Keyboard track status
Play/mute status of the current track. Select the track, then touch this area to change the track status.
No icon Play status. The track can be heard.
MUTE
Mute status. The track cannot be heard.
Panels
The lower half of the main page contains the various panels, you can select by touching the corresponding tabs. See more information in the relevant sections, starting from page 97.
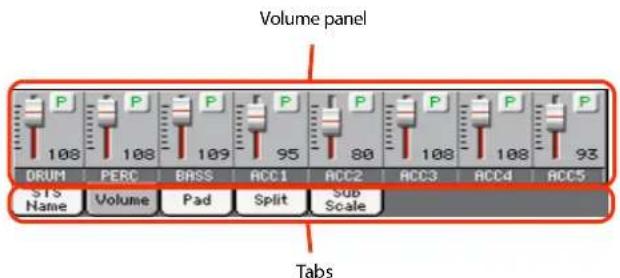
Sound name
Name of the Sound assigned to the corresponding Keyboard track.
STS Name panel
Touch the STS Name tab to select this panel. Single Touch Settings (STS) are memory locations intended for quickly choosing Keyboard Sounds, contained in each Style or SongBook Entry. While in this panel, you can see the name of the four STSs belonging to the latest selected Style or SongBook Entry. Touch one of the names to select the corresponding STS.
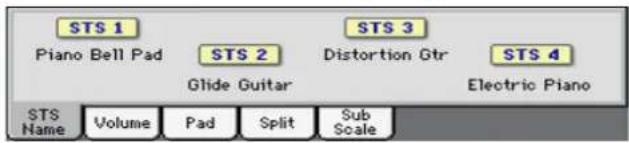
Note: You cannot edit the STS names in this panel. To edit a name, select the STS to be renamed, then select the Write Single Touch Setting command from the page menu (see "Write Single Touch Setting dialog box" on page 116).
Volume panel
Touch the Volume tab to select this panel. This is where you can set the volume of each track, and mute/unmute them.
Changing the tracks' volume
You can change the volume of each track by dragging the sliders in the display. You can also change the volume by touching a track's slider, then using the VALUE DIAL.
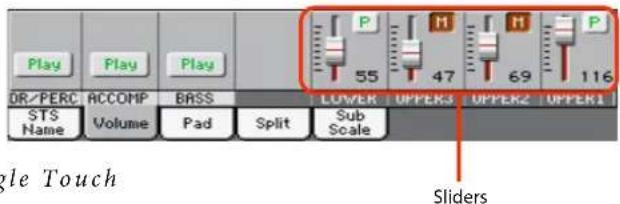
Changing the Play/Mute status
Play/mute status of the current track. Select the track, then touch this area to change its status.
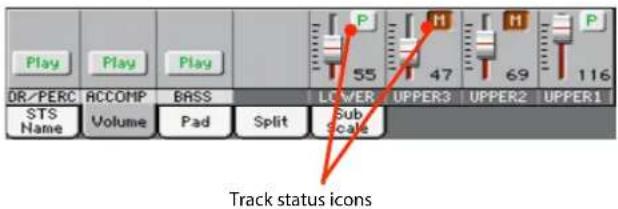

Play status. The track can be heard.

Mute status. The track cannot be heard.
Saving the track's volume and play/mute status
Each set of tracks can be saved into a different memory. This allows for a great flexibility when mixing Keyboard and Accompaniment tracks through the use of Performances, STSs and Styles.
- The volume and play/mute status of the Keyboard tracks can be saved to a Performance or STS (see "Write Performance" on page 114 and "Write Single Touch Setting" on page 114).
- The volume and play/mute status of the separate Style tracks can be saved to the current Style Settings (see "Write Current Style Settings" on page 114).
- The offset volume of the grouped Style tracks is automatically saved to the Global.
Track names
Under the sliders, a label for each track is shown. Use the TRACK SELECT button to switch between the Normal (grouped Style tracks, Keyboard tracks) and the Style Tracks view (separate Style tracks).
TRACK
SELECT

| Track Description | |
| Normal View | |
| DR/PERC (*) | Grouped Drum and Percussion tracks. |
| ACCOMP (*) | Grouped Accompaniment tracks (Acc1-5). |
| BASS (*) | Grouped Bass Style track. |
| LOWER Lower track. | |
| UPPER1...3 Upper tracks. | |
| Style Tracks View | |
| DRUM Drum Style track. | |
| PERC Percussion Style track. | |
| BASS Bass Style track. | |
| ACC1...5 Accompaniment Style tracks. | |
(*).Volume for these grouped tracks is a global offset, that can be adjusted in the Global > Mode Preferences > Style page.
Normal view
In Normal view you can see the grouped Style tracks (Play/Mute only), and the separate controls for the Keyboard tracks:
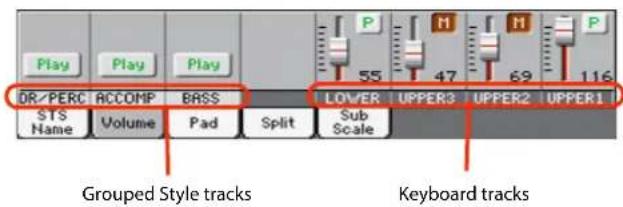
Grouped Style tracks
In the Normal view, Style tracks are grouped together (Dr/Perc, Accomp, Bass groups), to allow for instant play/mute of several tracks at the same time.
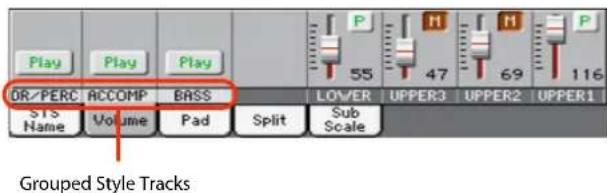
Changing the volume of the grouped Style tracks can be done (as a general control) in the Global mode > Mode Preferences > Style page (see “Style Tracks Global Volume” on page 240).
Keyboard tracks
Here you can separately control the volume and play/mute status of each Keyboard track.
Style Tracks view
Press the TRACK SELECT button to switch from the Normal view to the Style Tracks view. In this view, individual Style tracks are shown in the lower half of the display, while the upper half of the main page changes to show parameters for the selected Style track.
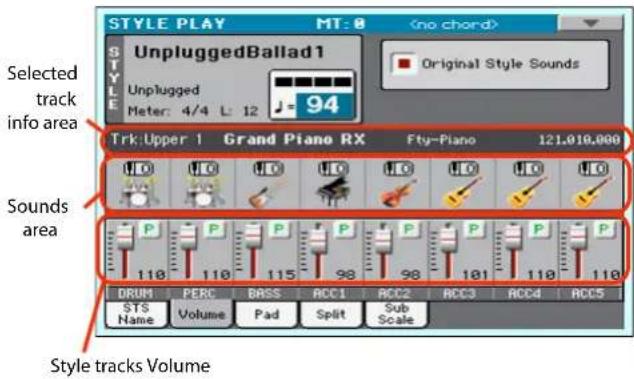
Press TRACK SELECT again to return to the Normal view (Keyboard tracks, grouped Style tracks, Mic/In controls).
Style tracks Volume
Here you can change the volume and play/mute status of each one of the individual Style tracks.
Original Style Sounds
This parameter lets you decide if the Style has to play the Sounds saved in the Performance or Style Settings, or the ones saved in each Style Element.
Note: When assigning a Sound to a Style track, the "Original Style Sounds" parameter is automatically turned off to allow its use.
Note: This parameter can be saved with the Performance or Style Settings.
On Style tracks always use the original Sounds recorded inside each Style Element. If you assign a different Sound to a Style track, this parameter is automatically set to Off.
Off You can assign different Sounds to each Style track, and save them in a Performance or Style Settings. The selected Sounds remain the same for all Style Elements. These Sounds can be saved into a Performance or Style Settings with the "Write Performance" or "Write Current Style Settings" commands (see page 114). Assigned Sounds are shown in the Sounds area of this page.
Selected Track Info area
This line lets you see the Sound assigned to the selected track. It appears both in the main page, and in several edit pages.
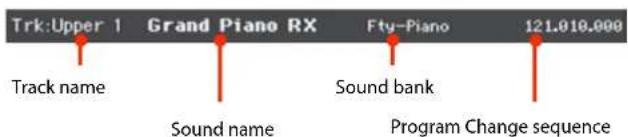
Track name
Name of the selected track.
Sound name
Sound assigned to the selected track. Touch anywhere in this area to open the Sound Select window, and select a different Sound.
Sound bank
Bank of the selected Sound.
Program Change
Program Change number sequence (Bank Select MSB, Bank Select LSB, Program Change).
Sounds area
This area lets you see the Sound bank's icon and octave transposition for the eight Style tracks.
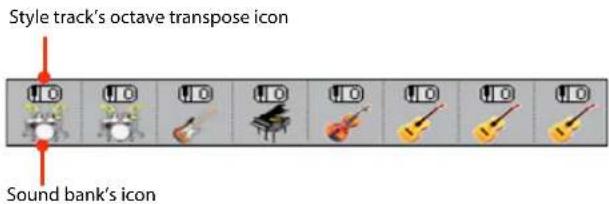
Style track's octave transpose icon
Non editable. Octave transpose of the corresponding track. To change the octave transpose, use the UPPER OCTAVE buttons, or go to the "Mixer/Tuning: Tuning" edit page (see page 104).
Sound bank's icon
This picture illustrates the bank the current Sound belongs to. Touch an icon a first time to select the corresponding track (detailed information are shown on the Selected Track Info area, see above). Touch it a second time to open the Sound Select window.
Pad panel
Touch the Pad tab to select this panel. This is where you can assign a different Hit or Sequence Pad to each of the four pads, and see at a glance how pads are programmed. For more options, go to the "Pad/Switch: Pad" page (see page 112).
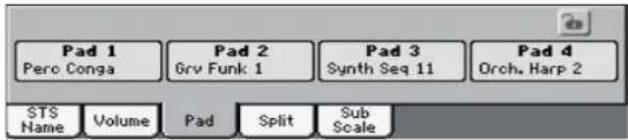
Pad assignment
Name of the Hit or Sequence assigned to each Pad. Touch box to make the Pad Select window appear (see "Pad Select window" on page 90).
When the lock is open, Pads could automatically change when choosing a Style or SongBook Entry.
Pads lock icon (
Close this lock to prevent Pads from changing when choosing a different Style or SongBook Entry.
Split panel
Touch the Split tab to select this panel. This is where you can set the split point and activate the Bass Inversion.
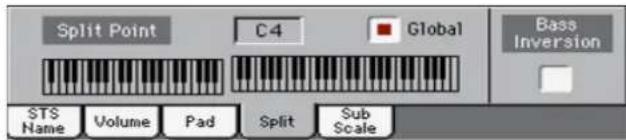
Split Point
Use this parameter to select a different split point. A full-range piano keyboard is shown in the display, divided at the selected split point. Upper tracks play on the right of this point, while the Lower track plays on the left.
Keyboard diagram
Touch anywhere on the keyboard diagram. A message will appear, asking you to press the new split point on the keyboard of your Pa600 (or to press the EXIT button to close the message with no changes).
Global
There is a global split point, and a "local" one, that can be memorized into the Performances and STSs.
On You are editing the global split point. The global split point is considered when selecting a Performance or STS that does not contain a "local" split point.
Off You are editing the "local" split point memorized in the current Performance or STS.
Bass Inversion
Use this parameter to turn the Bass Inversion function on or off.
On The lowest note of a chord played in inverted form will always be detected as the root note of the chord. Thus, you can specify to the arranger composite chords such as "Am7/G" or "F/C".
Off The lowest note is scanned together with the other chord notes, and is not always considered as the root note.
Note: This function can be automatically activated by playing the keyboard harder. See "Velocity Control" on page 239.
Sub-Scale panel
Touch the Sub-Scale tab to select this panel. This panel replicates the "Mixer/Tuning: Sub Scale" edit page (see page 104). When the Quarter Tone button is pressed, it corresponds to the QUARTER TONE section on the control panel (Pa600 Quarter tone only)..
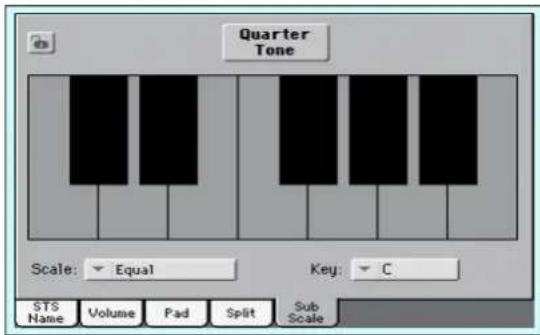
With the "Quarter Tone" button not pressed
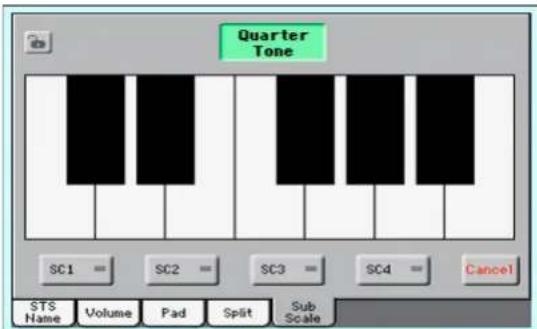
With the "Quarter Tone" button pressed
Edit menu
From any page, press the MENU button to open the Style Play edit menu. This menu gives access to the various Style Play edit sections.
When in the menu, select an edit section, or STYLE PLAY to exit the menu and return to the main page. return to the main page, you can also select the Main Page menu item.
When in an edit page, press EXIT or the STYLE PLAY button to return to the main page of the Style Play operating mode.
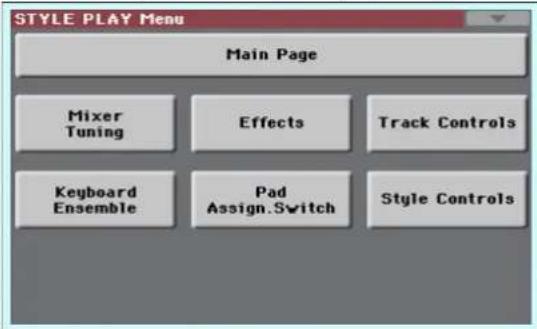
Each item in this menu corresponds to an edit section. Each edit section groups various edit pages, that may be selected by touching the corresponding tab on the lower part of the display.
Edit page structure
All edit pages share some basic elements.
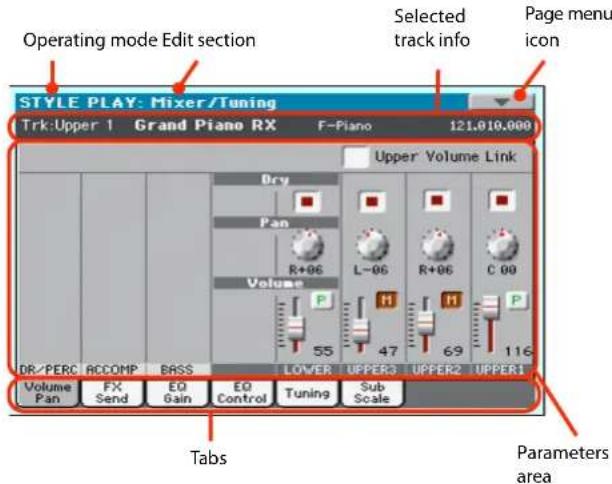
Operating mode
This indicates that the instrument is in Style Play mode.
Edit section
This identifies the current edit section, corresponding to one of the items of the edit menu (see "Edit menu" on page 101).
Page menu icon
Touch this icon to open the page menu (see "Page in page 114).
Parameters area
Each page contains various parameters. Use the tabs to select one of the available pages. For detailed information on the variable EXIT or various types of parameters, see sections starting below.
Tabs
Use tabs to select one of the edit pages of the current edit section.
Mixer/Tuning: Volume/Pan
This page lets you set the volume and pan for each of the Keyboard or Style tracks. Volume settings are the same as in the Volume panel of the main page.
Use the TRACK SELECT button to switch from the Keyboard to the Style tracks, and vice versa.
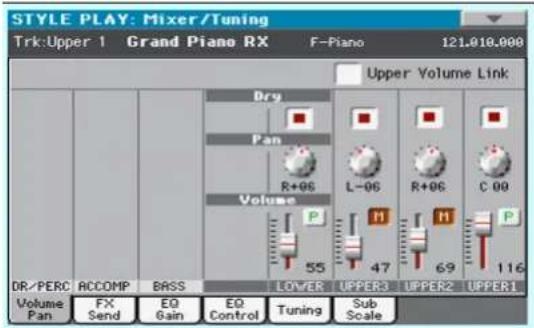
Upper Volume Link
With this parameter, you define if changing the volume of one of the Upper tracks proportionally changes the volume of the other Upper tracks.
On When changing the volume of one of the Upper tracks, volume for the other Upper tracks changes proportionally.
Off When changing the volume of one of the Upper tracks, only that track's volume is changed. The other Upper tracks are left unchanged.
Dry
Use this checkbox to turn the dry (direct) track signal on or of from the outputs.
On When checked, the direct signal coming from the track is sent to the output, mixed with the Master FXs.
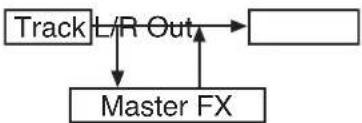
flowchart
graph TD
    A["Track L/R Out"] --> B["Master FX"]
    B --> A
Off When unchecked, the direct signal coming from the track is removed from the audio output, and only sent to the Master FXs. The effected signal will still be panned (in stereo FXs only) according to the Pan value.
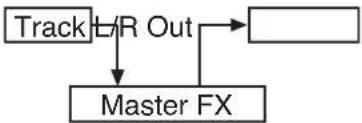
flowchart
graph TD
    A["Track"] --> B["L/R Out"]
    B --> C["Master FX"]
    C --> B
Pan
Track position in the stereo field.
L-64...L-1 Left stereo channel.
C 00 Center.
R+1...R+63 Right stereo channel.
Volume
Track's volume. This is the volume of each track, as saved in the Style (Style Settings), Performance or STS. It may change when choosing a different Style, Performance or STS.
0...127 MIDI value of the track's volume.
Play/Mute icon
Track's play/mute status.

Play status. The track can be heard.

Mute status. The track cannot be heard.
Mixer/Tuning: FX Send
Pa600 includes two groups of effects (FX A and FX B). While in Style Play mode, the A group is reserved to the Style and Pad tracks, the B group to the Keyboard tracks.
Choosing and editing the effects is done in the dedicated Effect section (see "Effects: A/B FX Configuration" on page 106).
This page lets you set the level of the track's signal going to the Master FX processors. The Master FX processors are connected in parallel with the dry/direct signal, so you can decide the amount of direct signal that will be sent to the Master FX processors.
In case you do not want to hear the direct signal, just set the Dry parameter to Off (see "Dry" above).
You can assign to the Master FXs any kind of available effects, but we found it convenient to arrange them in the following way, for most of the Styles, STS and Performances included with the Pa600:
A-Master 1 Reverb processor for the Style and Pad tracks.
A-Master 2 Modulating FX processor for the Style and Pad tracks.
B-Master 1 Reverb processor for the Keyboard tracks.
B-Master 2 Modulating FX processor for the Keyboard tracks.
Use the TRACK SELECT button to switch from Keyboard to Style tracks, and vice-versa.
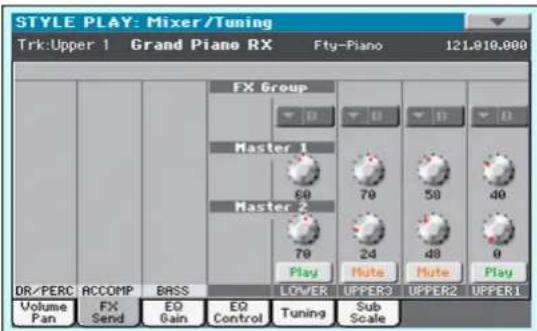
FX Group
This indicates the FX group (A or B) assigned to the group of tracks shown.
Send level (Master 1, Master 2)
0...127 Level of the track (direct) signal sent to the corresponding Master FX effect processor.
Play/Mute icon
Track's play/mute status.

Play status. The track can be heard.

Mute status. The track cannot be heard.
Mixer/Tuning: EQ Gain
In this page you can set the three-band equalization (EQ) for each individual track.
Use the TRACK SELECT button to switch from the Keyboard to the Style tracks, and vice-versa.
![STYLE PLAY: Mixer/Tuning Trk:Upper 1 Grand Piano RX Fty:Piano 121.010.000 Hi Gain [dB] +0.0 +0.0 +0.0 +0.0 Mid Gain [dB] +0.0 +0.0 +0.0 +0.0 Low Gain [dB] +0.0 +0.0 +0.0 +0.0 Play Nute Nute Play DR/PERC ACCOMP BASS LOWER UPPER3 UPPER2 UPPER1 Volume Pan FX Send EQ Gain EQ Control Tuning Sub Scale](/content/2026/05/882139/images/09bfa179c8dbdcf1daeb588da3f6d278681596b6dd8b8acbfb4a14e48732f841.jpg)
Hi (High) Gain
This parameter lets you adjust the high frequencies equalization on each individual track. This is a shelving curve filter. Values are shown in decibels (dB).
-18...+18dB High gain value in decibels.
Mid (Middle) Gain
This parameter lets you adjust the middle frequencies equalization on each individual track. This is a bell curve filter, are shown in decibels (dB).
-18...+18dB Middle gain value in decibels.
Low Gain
This parameter lets you adjust the low frequencies equalization on each individual track. This is a shelving curve filter. Values are shown in decibels (dB).
-18...+18dB Low gain value in decibels.
Play/Mute icon
Track's play/mute status.

Play status. The track can be heard.

Mute status. The track cannot be heard.
Mixer/Tuning: EQ Control
This page lets you reset or bypass the track's equalization, programmed in the previous page.
Use the TRACK SELECT button to switch from the Keyboard to the Style tracks, and vice-versa.
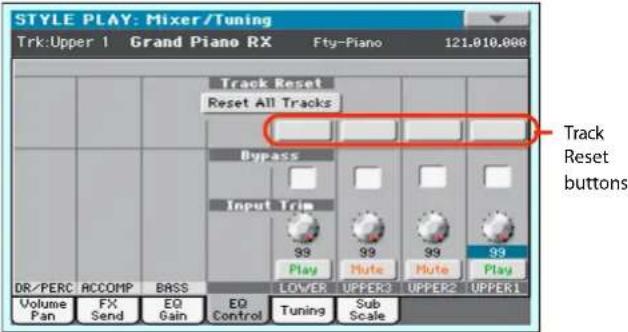
Reset All Tracks button
Touch this button to reset (i.e., "flatten") equalization for all tracks (both Realtime and Style tracks).
Track Reset buttons
Use these buttons to reset (i.e., "flatten") equalization for the corresponding track.
Bypass
Check any of these checkboxes to bypass the equalization for the Values corresponding track. When bypassed, equalization has no effect on the track, but all parameters are preserved. When the box is unchecked, equalization is activated again.
On The bypass function is engaged, so no equalization is active on the corresponding track.
Off The bypass function is not engaged, so the equalization is active on the corresponding track.
Input Trim
This knob allows you to limit the level of the signal passing through the equalizer. Extreme equalization values can overload the audio circuits and lead to distortion. This control lets you set equalization as desired, and at the same time avoid overloading.
0...99 Limiting value. The higher, the most effective it is.
Play/Mute icon
Track's play/mute status.

Play status. The track can be heard.

Mute status. The track cannot be heard.
Mixer/Tuning: Tuning
This page is where you can set the octave transpose and fine tuning for each track. Plus, you can program the Pitch Bend range for each track.
Use the TRACK SELECT button to switch from the Keyboard to the Style tracks, and vice-versa.
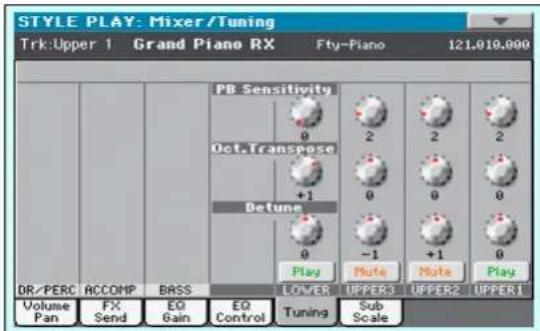
PB Sensitivity
These parameters show the Pitch Bend range for each track, in semitones.
1...12 Maximum up/down pitch bend range (in semi-tones). 12 = ± 1 octave.
0 No pitch bend allowed.
Oct(ave) Transpose
This is the octave transpose value.
-3 Lowest octave.
0 Standard tuning.
+3 Highest octave.
Detune
This is the fine tuning value.
-64 Lowest pitch.
00 Standard tuning.
+63 Highest pitch.
Play/Mute icon
Track's play/mute status.

Play status. The track can be heard.

Mute status. The track cannot be heard.
Mixer/Tuning: Sub Scale
You can assign a different scale (a sub-scale) to the Keyboard tracks, the Upper tracks or all tracks. This will allow, for example, to play a solo with a particular Quarter Tone tuning, while the backing tracks play in the Equal tuning.
This page is where you can program the sub-scale for the selected tracks; a different sub-scale can be associated to each Performance or STS. Track selection is general, and can be done with the "Scale Mode" parameter of the Global > Mode Preferences > Style page (see page 239).
The remaining tracks will use the basic scale set in the Global > Tuning > Scale page (see “Main Scale” on page 244). This is the “standard” scale of the instrument.
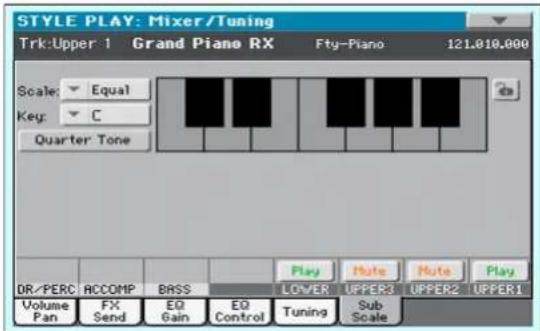
With the "Quarter Tone" button not pressed
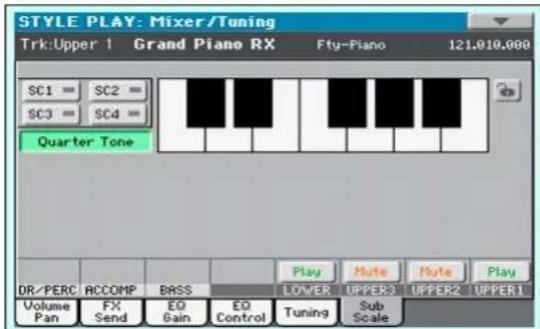
With the "Quarter Tone" button pressed
Note: Quarter Tone selection can be received via MIDI (i.e., from an external sequencer or controller). Conversely, selection of Quarter Tone settings can be sent by the Pa600 to an external MIDI recorder as System Exclusive data.
Scale
Selected scale. See “Scales” on page 329 for a list of the available scales. When selecting the User scale, the keyboard diagram becomes active, letting you program a custom scale (see “How to create a custom scale by fine-tuning each note of the User scale” below).
Key
This parameter is needed by some scales to set the preferred key (see "Scales" on page 329).
Quarter Tone
Pa600 Quarter Tone only: When this option is turned on, this page corresponds to the QUARTER TONE section of the control panel. You can program the Quarter Tone scale on the display, or by using the keys on the control panel. The controls on the control panel remain functional, even when going to a different page.
Press the Quarter Tone button in the display to make the keyboard diagram active (Pa600 Quarter Tone only: this also activates the QUARTER TONE section of the control panel). In the display, touch any note you want to lower a quarter tone, making a big dot appear on the note diagram. Touch the note again to make the dot disappear.

Touch one of the four SC Preset buttons to recall the corresponding preset, and touch any note you want to lower a quarter tone down, making a big dot appear on the detuned note in the diagram. Touch the note again to make the dot disappear.
Scale alteration made in this page is momem memorised. It is only meant to allow for fast scale alteration while playing.
To make realtime changes faster, you can also assign the Quarter Tone function to the footswitch or an Assignable Switch (see below "How to use the Quarter Tone function with a footswitch or Assignable Switch" for more information).
The use of SC Presets allows for immediate recall of previously programmed Quarter Tone scales (see below “How to use the Quarter Tone function with the SC Presets” for more information).
SC Preset buttons
These buttons only appear when the "Quarter Tone" parameter is checked. Use these buttons to recall the corresponding custom scale presets. See "How to use the Quarter Tone function with the SC Presets" below for information on how to use them.
Keyboard diagram
When "Quarter Tone" is checked, this diagram allows for lowering each note of a quarter tone. When a User scale is selected, it allows you to fine-tune each note's pitch.
Scale lock icon
When locked, Scale parameters remain unchanged when selecting a different Performance or STS.
For more information on parameter locks, see "General Controls: Lock" on page 236.
How to create a custom scale by fine-tuning each note of the User scale
When the User scale is selected, the keyboard diagram becomes active. You can then change each note tuning in cents of a semi-tone (within a range of ±99 cents, referred to Equal tuning). This
way, you can create a custom scale, that you can save to a Performance or STS.
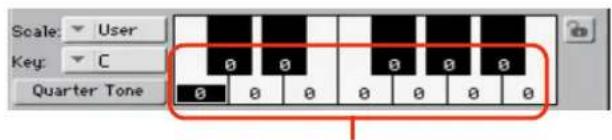
Fine tuning values
After having selected the User scale, touch a note in board diagram, and use VALUE DIAL to adjust the selected note tuning in cents.
Note: These settings can be saved to a Performance or STS, as described below.
How to use the Quarter Tone function with the SC Presets
When the "Quarter Tone" button is pressed, four "SC Preset" buttons appear, and you can select one of four SC Presets to recall a preset custom scale. (Pa600 Quarter Tone: these buttons correspond to the SC buttons in the QUARTER TONE section of the control panel.)
- Program and save a custom scale into an SC Preset.
To do so, go to the Global mode, and reach the "Tuning: Scale" page. When programming is done, choose the "Write SC Preset" command from the page menu, then select one of the preset locations where to save the current settings (see "Write Quarter Tone SC Preset dialog box" on page 251).
-
Return to this page, and touch the "Quarter Tone" button to make the "SC Preset" buttons appear.
-
Touch one of the "SC Preset" buttons to recall a preset custom scale.
Each preset contains custom detuning of each note of the scale, and memorizes the selected degree(s) of the scale.
When no preset is selected, the default scale is automatically recalled. This scale assigns a -50 cent value to all notes, and turns all scale degrees off.
You can also select an SC Preset by assigning the function to an Assignable Switch (see "Pad/Switch: Swit on page 113) or Assignable Footswitch (see "Controllers: Foot Controllers" on page 242).
- Use the keyboard diagram to turn the note detuning on or off.
Make a big dot appear to detune the corresponding note, or make it disappear to reset tuning.
- Reset the original scale.
Touch the "Quarter Tone button again, to deselect recall the main scale.
How to use the Quarter Tone function with a footswitch or Assignable Switch
You can assign the "Quarter Tone" function to a footswitch or an Assignable Switch, to program a custom scale in realtime, for example to allow for those sudden scale changes typical of the Arabic music. These changes are not saved anywhere, so the scale is easily "wiped-out" when selecting a different Performance or STS, or when pressing the Quarter Tone pedal again.
Note: While in Style Play mode, you can create a custom scale, to be assigned to a Performance or STS, simply by selecting and editing a User scale, and saving any change to a Performance or STS. See "How to create a custom scale by fine-tuning each note of the User scale" above.
While in Global mode, you can create a custom scale and save it to one of the four SC Presets, and recall it by touching one of the SC Preset buttons in the display. Then, you can start your realtime scale editing from the selected preset. See "How to use the Quarter Tone function with the SC Presets" above.
- Program the footswitch or an Assignable Switch to be the Quarter Tone switch.
Simply go to the Global mode, and reach the "Controllers: Foot Controllers" page. There, you will find the "Pedal/Footswitch" parameter, to which you can assign the Quarter Tone function.
- Lower some note pitches.
Keep the Quarter Tone pedal pressed. The keyboard will not play at this time. Press the notes you want to lower a quarter tone. Release the pedal.
- Play with your new scale.
Notes you pressed on step 2 are now lowered of a quarter tone.
- Reset the original scale.
Press and release the Quarter Tone pedal again, without playing any note. All pitches will be reset, and the scale selected by the Performance or STS will be recalled.
Effects: A/B FX Configuration
This page allows you to select the A (Style and Pads) and B (Keyboard) groups of effects. Please use the "FX A" and "FX B" side tabs to switch from one group to the other one.
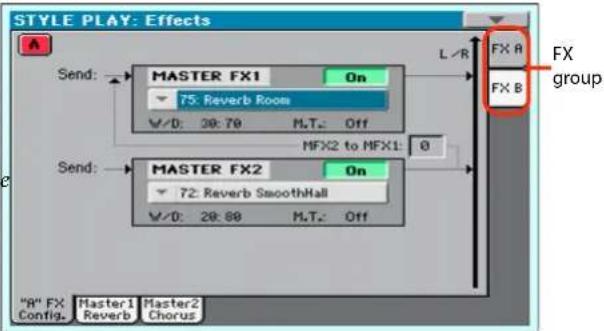
FX Groups (FX A, FX B)
Pa600 includes two groups of effects (FX A and FX B). There are two master FXs for group. In Style Play mode, the A group is reserved to the Style and Pad tracks, the B group to the Realtime (Keyboard) tracks.
Master FX 1, 2
Effects assigned to the corresponding effect processors. Usually, FX1 are reverbs, while FX2 are modulating effects (chorus, flanger, delay...). For a list of the available effects, see in the Appendix.
Effects assigned to both FX groups can be saved to a Per mance. Effect assigned to the FX A group (Style and Pad tracks) can be saved to the Style Settings. Effects assigned to the FX B group (Keyboard tracks) can be saved to an STS.
W/D
Use this parameter to set the amount of the effect (Wet) against the non-effected (Dry) signal coming from the track.
MFX2 to MFX1
Amount of the MFX2 effect going back to the input of the MFX1 effect.
M.T. (Modulating Track)
Source track for modulating MIDI messages. You can modulate an effect parameter with a MIDI message generated by an internal physical controller.
Effects: Master 1, 2
These pages contain the editing parameters for the four effect processors. Here is an example of the FX A page, with the Reverb Wet Plate effect assigned.
![Selected effect FX group STYLE PLAY: Effects A MFX 1 75: Reverb Room On FX A Reverb Time [sec]: 1.4 High Damp [%]: 58 Pre Delay [msec]: 50 Pre Delay Thru [%]: 0 ER Level: 70 Reverb Level: 80 EQ Trim: 100 Pre LEQ Fc: Low Pre HEQ Fc: High Pre LEQ Gain [dB]: -5.0 Pre HEQ Gain [dB]: -12.0 Wet/Dry: 30:70 Src: Off Amt: +0 FX "R" Master1 Master2 Config. Reverb Chorus FX parameters](/content/2026/05/882139/images/65d28b8c4a13ad734c7760725638cb1ecb9d83b81ae5a6205db3d344dab78ced.jpg)
Selected effect
Select one of the available effects from this pop-up menu.
FX parameters
Parameters may be different, depending on the selected effect. See the relevant chapter in the Appendix for a list of the available parameters for each effect type.
Wet/Dry
Use this parameter to set the amount of the effect (Wet) against the non-effected (Dry) signal coming from the track.
Src (Source)
Modulation source. To select the track generating this message, see the "M.T. (Modulating Track)" parameters found in the "Effects: A/B FX Configuration" page (see above). See the relevant chapter in the Appendix for a list of the modulation sources.
Track Controls: Mode
This page lets you connect each track to the internal sound generator and to external MIDI devices. This is very useful to let a Style track drive an external expander, or play a digital piano with one of Pa600's Keyboard tracks. In addition, here you can set the polyphony mode for each track.
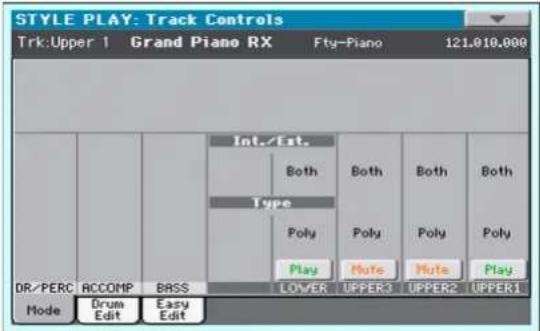
Int./Ext. (Internal/External)
Internal The track plays the sounds generated by the internal sound engine. It does not play an external instrument connected to the MIDI OUT.
External The track plays an external instrument connected
to the MIDI OUT. The connected device receive on the MIDI channel associated with this track on the Pa600 (see "MIDI: MIDI Out Channels" on page 247).
A track set to this status cannot play the internal sounds.
Instead of the assigned Sound name, the
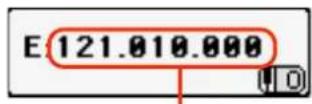
Control Change/Program Change area
This indicator begins with a remark saying the track is in External ("E") mode, and continues with a strings of transmitted Control Change and Program Change data. This will what the track is transmitting to the MIDI OUT. In the following example, CC#0 is the Control Change 0 (Bank Select MSB), CC#32 is the Control Change 32 (Bank Select LSB), PC is the Program Change:
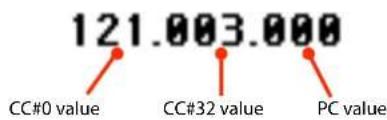
When touching the Sound area, the numeric keypad appears, instead of the Sound Select window. You can enter the Control Change/Program Change bundle shown above, separating the three parts with a dot (.).
Both The track plays both the internal sounds and an external instrument connected to the MIDI OUT.
Type
Drum Drum/Percussion track. Set a track to Drum mode if you wish to separately adjust the volume and set a different output for each percussive family of the assigned Drum Kit Sound. (See "Track Controls: Drum Edit" on page 108).
Note: Tracks set to Drum or Percussion mode while in Style Record (see "Track Type" on page 144) cannot be edited here. This option appears in grey. Other Style tracks cannot be set to Drum mode here.
Note: Drum Kits are not affected by transpose whichever the type of track they are assigned to.
Hint: Set a track to Drum mode, if you don't want the assigned Sound to be transposed (it will behave as a Drum Kit).
Poly Tracks of this kind are polyphonic, i.e. they can play more than one note at the same time.
Mono Tracks of this kind are monophonic, i.e. each new note stops the previous note.
Mono Right A Mono track, but with priority assigned to the rightmost (highest) note.
Mono Left A Mono track, but with priority assigned to the leftmost (lowest) note.
Play/Mute icon
Track's play/mute status.
Play
Play status. The track can be heard.
Mute
Mute status. The track cannot be heard.
Track Controls: Drum Edit
In this page you can adjust the volume and edit the main parameters for each family of Drum and Percussion instrument for the selected track. A list of families is shown below.
These parameters can be accessed only on tracks set to the Drum mode (see above). Use them on tracks with a Drum Kit assigned, or you will not be able to hear any change.
Hint: Use the TRACK SELECT button to cycle between the track groups. After selecting a track, choose the "Solo Track" command from the page menu to avoid listening to the other tracks during editing.
Note: All values are offsets referred to the value of the original Sounds.
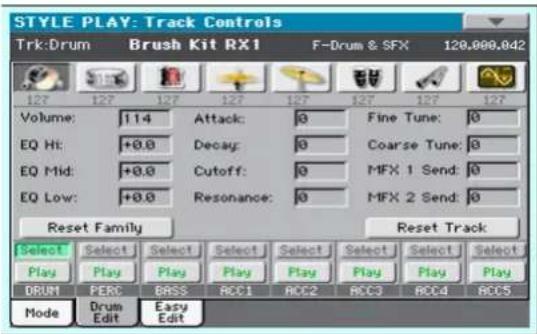
Family Select
Use these icons/buttons to select the drum family you want to edit. These buttons are only accessible when you select a Drum track.
| Drum family icon Drum family | |
 | Kick drums |
 | Snare drums |
 | Toms |
 | Hi-Hat cymbals |
 | Ride, Crash and other cymbals |
 | Low-pitched percussions |
 | High-pitched percussions |
 | Special effects |
Overview of the current parameter
Under the icons of the Drum families you can see the value of the selected parameter for all the families. This will let you compare the value of the selected family with all the others. The values are shown in grey (non editable).
Drum Edit parameters
Use these parameters to adjust the offset value.
| Sound parameters Meaning | |
| Volume Instrument's Volume. | |
| EQ Hi Equalization, High band. | |
| EQ Mid Equalization, Middle band. | |
| EQ Low Equalization, Low band. | |
| Attack | Attack time. This is the time during which the sound goes from zero (at the moment when you strike a key) to it's maximum level. |
| Decay | Decay time. Time to go from the final Attack level to the minimum level. |
| Cutoff | Filter cutoff. This sets the sound brightness. |
| Resonance | Use the Filter Resonance to boost the cutoff frequency. |
| Fine Tune | Fine instrument tuning. |
| Coarse Tune | Coarse instrument tuning. |
| MFX 1 Send | Scales the Send level to the Master FX1. |
| MFX 2 Send | Scales the Send level to the Master FX2. |
0...127 Volume (see above).
-64...0...+63 Offset value for all sound generation parameters. '0' means no change to the original value memorized in the Drum or Percussive instrument, while any other value means a decrease or increase to the original value.
Select
Use these buttons to select the track to edit. The button corresponding to the selected track turns green.
Reset Family
Touch this button to reset all changes to the selected family.
Reset Track
Touch this button to reset all changes to percussive instrument volumes in the selected track.
Play/Mute icon
Track's play/mute status.

Play status. The track can be heard.

Mute status. The track cannot be heard.
How to edit a single Drum Family
Here is a quick example of the use of the Drum Volume tion.
-
While in this page, press TRACK SELECT to see individual Style tracks.
-
Touch the "Select" button, in the display, corresponding to the Drum track to edit.
-
Press START/STOP to let the Style go.
-
If you like, choose the "Solo Track" command from the page menu to solo the Drum track.
-
While listening to the Style, select the Snare family, then select the Volume parameter, and use the VALUE DIAL to turn the volume completely off.
You'll notice how all snares stops sounding.
- Touch the Reset Track button in the display to recall the original Snare's volume.
Track Controls: Easy Edit
In this page you can edit the main parameters of the assigned to each track.
Hint: Use the TRACK SELECT button to cycle between the track groups. After selecting a track, choose the "Solo Track" command from the page menu to avoid listening to the other tracks during editing.
Note: All values are offsets referred to the value of the original Sound.
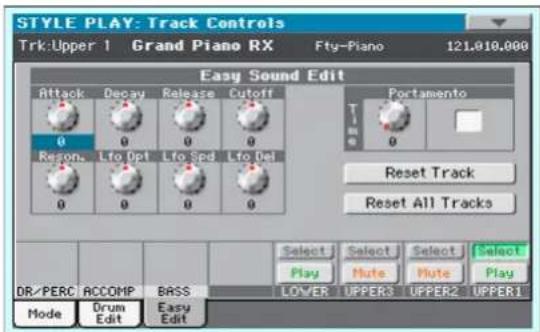
Easy Sound Edit parameters
Use these knobs to adjust the offset value.
| Sound parameters Meaning | |
| Attack | Attack time. This is the time during which the sound goes from zero (at the moment when you strike a key) to it's maximum level. |
| Decay | Decay time. Time to go from the final Attack level to the beginning of the Sustain. |
| Release Release time. | This is the time during which the sound goes from the sustaining phase, to zero. The Release is triggered by releasing a key. |
| Cutoff | Filter cutoff. This sets the sound brightness. |
| Resonance | Use the Filter Resonance to boost the cutoff frequency. |
| LFO Depth | Intensity of the Vibrato (LFO). |
| LFO Speed | Speed of the Vibrato (LFO). |
| LFO Delay | Delay time before the Vibrato (LFO) begins, after the sound starts. |
-64...0...+63 Offset value. '0' means no change to the original value memorized in the Sound, while any other value means a decrease or increase to the original value.
Portamento knob and switch
Use the Time knob to adjust the speed of the portamento (a slide between notes). Check the box to turn portamento on, or uncheck it to turn portamento off.
Select
Use these buttons to select the track to edit. The button corresponding to the selected track turns green.
Reset Track
Touch this button to reset all changes to Sound parameters in the selected track.
Reset All Tracks
Touch this button to reset all changes to Sound parameters in all tracks.
Play/Mute icon
Track's play/mute status.

Play status. The track can be heard.

Mute status. The track cannot be heard.
How to adjust sound parameters for a single Sound
Here is a quick example of the use of the Easy Sound Edit function.
-
If needed, while in this page press TRACK SELECT to see Keyboard tracks.
-
Touch the "Select" button, in the display, corresponding to the Upper 1 track.
-
While playing on the keyboard to hear the Sound, the Cutoff knob, and use the VALUE DIAL to turn its value completely off.
You'll notice how the filter progressively cuts out high frequencies, making the sound darker and mellower.
- Touch the Reset Track button in the display to recall the original Cutoff value.
Keyboard/Ensemble: Key/Velocity Range
This page lets you program a key and dynamic (velocity) range for each of the Keyboard tracks.
Key range is useful to create a set of Keyboard tracks playing in different zones of the keyboard. For example, you may have French Horns and Woodwinds playing in the center range of the keyboard, while only Woodwinds play on the higher range.
Velocity range is useful to create a sound made of up to three dynamic layers, assigning each of the Upper tracks to a different dynamic range.
As an example, you may assign the El.Piano 1 Sound Upper 1, and the El.Piano 2 Sound to the Upper 2 track. Then, set Upper 1 to [Bottom=0, Top=80], and Upper 2 to [Bottom=81, Top=127]. The El.Piano 1 will play when playing softer, the El.Piano 2 when playing louder.
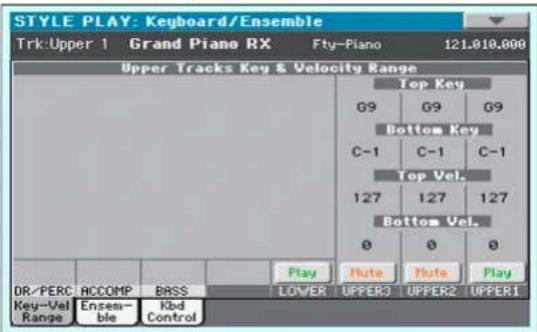
select
Top/Bottom Key (Key Range)
This parameter pair sets the Top and Bottom key range for the track.
C-1...G9 Selected key.
Top/Bottom Vel. (Velocity Range)
This parameter pair sets the Top and Bottom dynamic range for the track.
0 Lowest velocity value.
127 Highest velocity value.
Play/Mute icon
Track's play/mute status.

Play status. The track can be heard.

Mute status. The track cannot be heard.
Keyboard/Ensemble: Ensemble
This page lets you program the Ensemble function. This function harmonizes the right-hand melody (played in realtime) using the recognized chords played by the left hand.
The Ensemble works both in the Style Play and the Song Play modes. Chords are always recognized in the Lower Chord Scan area.
Note: The Ensemble function only works when the keyboard is in Split mode.
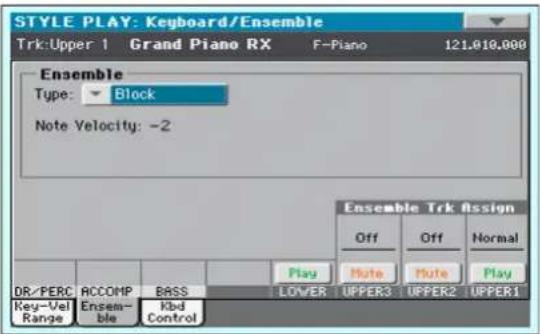
Ensemble
Harmonization type.
Duet Adds a single note to the melody.
Close Adds a closed-position chord to the melody.
Open 1 Adds an open-position chord to the melody.
Open 2 As the above, but with a different algorithm.
Block Block harmonization - very typical of jazz music.
Power Ensemble
Adds a fifth and an octave to the melody, as heard in hard rock.
Third Up This option adds a third over the melody note (depending on the recognized chord).
Fourths LO Typical of jazz, this option adds two perfect fourths under the melody.
Fourths UP As the above, but with notes added over the melody.
Fifths This adds two fifths below the original note.
Octave Adds an octave to the melody.
Dual This option adds to the melody line a second note, at a fixed interval set with the "Note" parameter. When selecting this option, a transposition value appears (-24...+24 semitones to the original note).
Brass Typical Brass section harmonization.
Reed Typical Reed section harmonization.
Trill
When two notes are played on the keyboard, this option trills them. If three or more notes are played, only the last two are trilled. You can set the trill speed by using the Tempo parameter (see below).
Repeat
The played note is repeated in sync with the Tempo parameter (see below). When playing a chord, only the last note is repeated.
Echo
As the Repeat option, but with the repeated notes fading away after the time set with the Feedback parameter (see below).
AutoSplit1
If more than a single Upper track is in play, the Upper 1 track plays the melody in mono, while the other Upper tracks play the chord notes.
If only the Upper 1 track is in play, it plays polyphonically all the chord notes.
AutoSplit2
Similar to AutoSplit1, but the Upper 1 track always plays the uppermost note.
Note Velocity
This parameter sets the velocity difference between the right-hand melody and the added harmonization notes.
-10...0
Subtracted velocity value.
Tempo
Note: This parameter only appears when the Trill, Repeat or Echo options are selected.
Note value for the Trill, Repeat or Echo Ensemble options. This is in sync with the Metronome Tempo.
Feedback
Note: This parameter only appears when the Echo option is selected.
This parameter sets how many times the original note/chord is repeated by the Echo option.
Ensemble Track Assign
Use these parameters to separately set Upper tracks for the Ensemble function.
Off
There is no harmonization on this track.
Normal
This track is included in the harmonization.
Mute
This track only plays the Ensemble notes, but not the original note.
Play/Mute icon
Track's play/mute status.

Play status. The track can be heard.

Mute status. The track cannot be heard.
Keyboard/Ensemble: Keyboard Control
This page lets you enable/disable the Damper and Expression pedals, plus the Joystick, for each of the Upper Keyboard tracks.
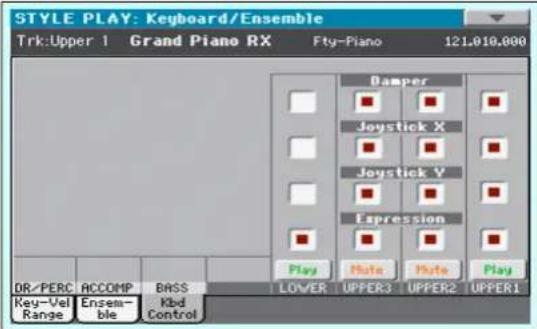
Damper
On When you press the Damper pedal and release the keys, the track's sound is kept sustained.
Off The Damper pedal is not active on any track set to this status.
Joystick X
This enables/disables the left/right movement of the Joystick (Pitch Bend, and sometimes a Sound parameter's control; for Pitch Bend settings, see "Mixer/Tuning: Tuning" on page 104).
Joystick Y
This enables/disables the front/rear movement of the Joystick (Y+: Modulation, and sometimes a different Sound parameter's control; Y-: Various controls, or non-active).
Expression
This parameter allows you to switch the Expression control on/off on each individual Keyboard track. The Expression control is a relative level control, always subtracted from the Volume value of the track.
As an example, imagine you have a Piano sound assigned to Upper 1, and a Strings sound assigned to Upper 2. If you turn the Expression switch on on Upper 2, and off on Upper 1, you can use a continuous pedal to control only the Strings' volume, while the Piano remains unchanged.
To program a pedal to act as an Expression control, see trollers: Foot Controllers" on page 242. You can only assign this function to a volume-type pedal, not to a switch-type one. Assign the "KB Expression" option to the pedal.
Play/Mute icon
Track's play/mute status.

Play status. The track can be heard.

Mute status. The track cannot be heard.
Pad/Switch: Pad
This page lets you select a different hit sound or sequence for each of the four PAD buttons.
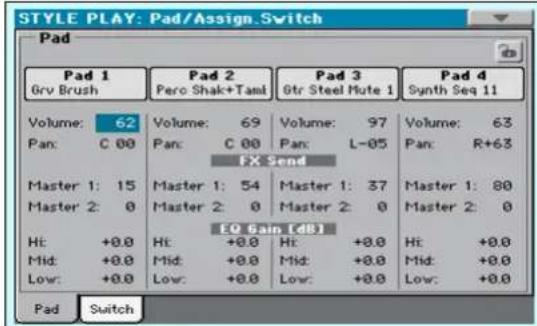
Assignments can be saved into the current Style Settings or SongBook Entry.
Note: Each Style or SongBook Entry can change the Pad assignment.
Pad assignment
Name of the Hit or Sequence assigned to each Pad. Touch the box to make the Pad Select window appear (see "Pad Select window" on page 90).
Note: You can also choose Hits or Sequences from the Pad panel of the main page.
Volume
Volume for each of the four Pad tracks.
0...127 Volume level.
Pan
Pan for each of the four Pad tracks.
-64...-1 Left stereo channel.
0 C e n t e
+1...+63 Right stereo channel.
FX Send (Master 1, 2)
Send level to the Master FX processors for each of the four Pad tracks. The Pads share the FX A group with the Style tracks.
"Cop27 Level of the Pad track (direct) signal sent to the effect processor.
EQ Gain [dB] (Hi, Mid, Low)
Equalization for each of the four Pad tracks.
-18.0...+0.0...18.0
Gain value of the High, Middle, or Low band.
Pad lock icon
This lock avoids selecting a different Style or SongBook Entry changes also the Hit or Sequence Pads assigned to the Pads.
For more information on parameter locks, see "General Controls: Lock" on page 236.
Pad/Switch: Switch
This page lets you select a different function ASSIGNABLE SWITCH buttons.
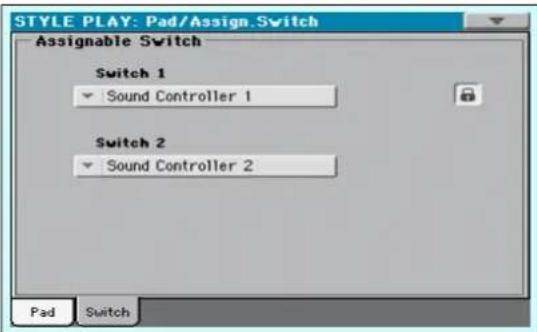
Style Controls: Drum/Fill
f oIn this pageyoh can select various general parameters for the Style.
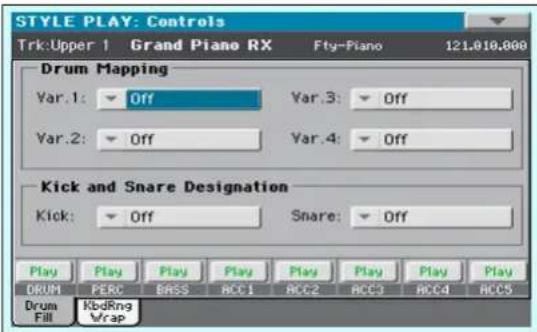
Assignable Switches can be saved into a Performance, STS or SongBook Entry Drum Mapping (Var.1...Var.4)
Switch 1, 2
Each of the ASSIGNABLE SWITCH buttons. Use these pop-up menus to assign a function to each switch. See "List of Assignable Switches functions" on page 328.
Assignable Switch lock icon
This lock avoids selecting a different Performance or STS changes also the functions assigned to the switches.
For more information on parameter locks, see "General Controls: Lock" on page 236.
The Drum Mapping lets you select an alternative arrangement of percussive instruments for the selected Drum Kit, without any additional programming. Just select a Drum Map, and some percussive instruments will be replaced with different instruments.
Off Standard mapping.
Drum Mapping 1...7
Drum Map number. Mapping 1 is "soft-sounding", while mapping 7 is "loud-sounding".
Kick and Snare Designation
The Kick Designation replaces the original Kick (Bass Drum) sound with a different Kick of the same Drum Kit, v Snare Designation replaces the original Snare Drum sound with a different Snare of the same Drum Kit.
Hint: Select different Designations while listening to the Style, and see how they affect the Style. When you like the result, save your setting to a Performance or Style Settings.
Off Original Kick or Snare.
Type 1...3 Kick or Snare replacing the original one.
Track status
Track play/mute status. Touch these icons to change it.

Play status. The track can be heard.

Mute status. The track cannot be heard.
Style Controls: Keyboard Range On/Off / Wrap Around
In this page you can program the Wrap Around point, and turn on/off the Keyboard Range included in each Style tracks.
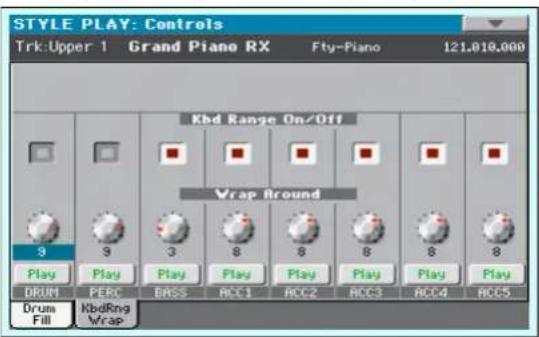
Keyboard Range On/Off
This parameter is an on/off switch for the Key Range parameter memorized inside each Style Element track.
On The Keyboard Range is considered – provided it has been programmed (see "Style Element Track Controls: Keyboard Range" on page142 in S Record mode). When a track goes over the lower or higher Keyboard Range point, it is auto cally transposed, to stay in the programmed range.
Off No Keyboard Range used.
Wrap Around
The wrap-around point is the highest key range limit for the backing track. The accompaniment patterns will be transposed according to the detected chord. If the chord is too high, the Style tracks might play in a range that is too high, and therefore unnatural. If, however, it reaches the wrap-around point, it will be automatically transposed an octave lower.
The wrap-around point can be individually set for each track in semitone steps up to a maximum of 12 semitones, relative to the chord root set in Style Record mode (see "Key/Chord" on page 123).
It is advisable to set different Wrap Around points for each track, to avoid all tracks "jump" to a different octave at the same time. We suggest to consider the actual range of the real instrument.
1...12 Maximum transposition (in semitones) of the track, referred to the original key of the Style pattern.
Play/Mute icon
Track's play/mute status.
Play status. The track can be heard.
Mute status. The track cannot be heard.
Page menu
Touch the page menu icon to open the menu. Touch a command to select it. Touch anywhere in the display to close the menu without selecting a command.
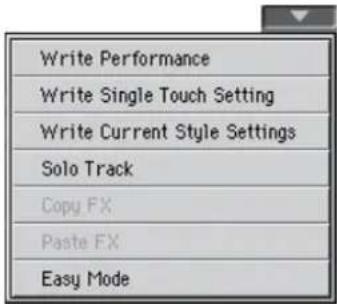
Write Performance
Select this command to open the Write Performance dialog box, and save most of the current control panel settings to a Performance.
See "Write Performance dialog box" on page 115 for more information.
Write Single Touch Setting
Select this command to open the Write Single Touch Setting (STS) dialog box, and save Keyboard track settings to one of the Single Touch Settings (STS) of the current Style.
See "Write Single Touch Setting dialog box" on page 116 for more information.
Write Current Style Settings
Select this command to open the Write Current Style Settings dialog box, and save Style track settings to the current Style.
See "Write Single Touch Setting dialog box" on page 116 for more information.
Solo Track
Select the track to be soloed, and check this item. You will hear only the selected track, and the 'Solo' warning will flash on the page header.
Uncheck this item to exit the Solo function.
The Solo function works in a slightly different way, depending on the selected track:
- Keyboard track: The selected Keyboard track is the only track you can hear when playing on the keyboard. All other Keyboard tracks are muted. The status of the Style tracks is unaffected.
- Style track: The selected track is the only Style track you can hear. All other Style tracks are muted. The status of the Keyboard tracks is unaffected.
- Grouped Style tracks: The Solo function does not work on these special tracks.
SHIFT Keep the SHIFT button pressed and touch one of the tracks to solo it. Do the same on a soloed track to deactivate the Solo function.
Copy/Paste FX
You can copy a single effect (Master 1, Master 2), or both effects of an FX group (A or B). You can copy them between different elements (for example, between Styles and Performances, or STSs and Songs or Sounds).
Note: This operation only copies the parameters of the "Effects" section. Parameters contained in other sections, like "Dry" or Send", are not copied. Please note that these parameters are relevant in the overall sound of the effect, so please fine-tune them.
To copy a single effect:
- Select the source Performance, STS, Style, Song or Sound.
- Choose the source FX group (A or B) by touching the corresponding side tab.
- Go to the page of the single effect you want to copy (Master 1, Master 2).
- Choose the "Copy FX" command from the page menu.
- Select the target Performance, STS, Style, Song or Sound,
- Choose the same FX group (A or B) as the target by touching the corresponding side tab.
- Go to the page of the single effect you want to paste (Master 1, Master 2).
- Choose the "Paste FX" command from the page menu.
To copy all the effects in an FX group:
- Select the source Performance, STS, Style, Song or S then go to the Effects > A/B FX Config page, to copy all the effects.
- Choose the source FX group (A or B) by touching the corresponding side tab.
- Choose the "Copy FX" command from the page menu.
- Select the target Performance, STS, Style, Song or Sound, then go to the page of the Effects > A/B FX Config page.
- Choose the FX group (A or B) as the target by touching the corresponding side tab.
- Choose the "Paste FX" command from the page menu.
Easy Mode
Easy Mode allows you to use the Style Play and Song Play modes with an easier-to-use user interface. It is recommended to beginners, and to professionals alike that do not want to deal with the extra parameters of the Advanced mode.
At any time, you can manually turn the Easy Mode on/off with the Easy Mode command in the page menu of the Style Play and Song Play modes.
Write Performance dialog box
Open this window by keeping one of the PERFORMANCE buttons pressed for about one second, or by choosing the Write Performance item from the page menu. Here, you can save all track Settings, the selected Style, and various Style settings to a Performance.
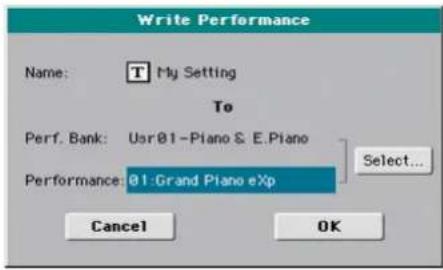
Name
Name of the Performance to be saved. Touch the (Text Edit) button next to the name to open the Text Edit window.
Perf Bank
Target bank of Performances. Each bank corresponds to one the PERFORMANCE buttons. Use the VALUE DIAL to select a different bank.
Performance
Target Performance location in the selected bank. Use the VALUE DIAL to select a different location.
Select... button
Touch this button to open the Performance Select window, and select a target location.
Write Single Touch Setting dialog box
Open this window by keeping one of the STS buttons pressed for about one second, or by choosing the Write Single Touch Setting item from the page menu. Here, you can save the Keyboard track settings to one of the four single Touch Settings (STS) belonging to the current Style.
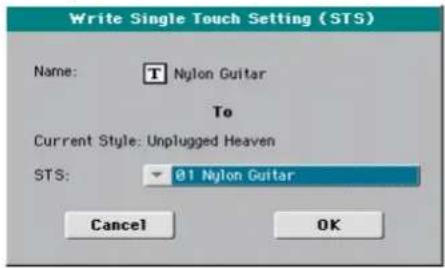
Note: When the "Factory Style and Pad Protect" option is checked in the Global > Mode Preferences > Media page, you cannot write an STS over a Factory Style. The "Write Single Touch Setting" command in the page menu is greyed out and cannot be selected. All original settings of the Factory Styles will be left untouched.
Name
Name of the STS to be saved. Touch the (Text Edit) button next to the name to open the Text Edit window.
Current Style
Non editable. Settings are saved in one of the four STSs belonging to the current Style. This parameter displays the name of the "parent" Style.
STS
Target STS location. The name of the STS currently saved at the target location is shown. Use the VALUE DIAL to select a different location.
Write Current Style Settings dialog box
Open this window by keeping the STYLE button in the SELECTION section pressed for about one second, or by selecting the Write Style Settings item from the page menu. Here, you can save Style track settings to the Style Settings of the current Style.
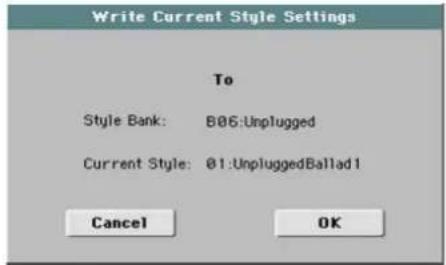
Note: When the "Factory Style and Pad Protect" option is checked in the Global > Mode Preferences > Media page, you cannot write any Style Settings onto Factory Styles. The "Write Current Style Settings" command in the page menu is greyed out and cannot be selected. All original settings of the Factory Styles will be left untouched.
Style bank
Non editable. Bank of Styles the current Style belongs to.
Current Style
Non editable. Name of the current Style.
The Favorite banks
You can create a custom set of Styles, made of up to ten Favorite banks. You can assign a different name to the tabs that appear in the Style Select window, in order to add musical genres not included among the Factory Styles.
The Favorite Styles are contained in ten files, automatically created by the Pa600 inside the Style folder in the SYS area of the internal storage memory. Even if different bank names can appear in the display, these files have fixed names:
| File Name FAVORITE Banks | |
| FAVORITE01...10.STY Bank 1...10 |
Creating the Favorite banks
There are various ways to create the Favorite banks:
- While in Style Play mode, you can copy & paste any Style into the Favorite banks, as an alternative to the User Style banks. See the "Selecting" chapter for more information on the Copy & Paste operations.
- While in Style Record mode, you can write the new or edited Style to the Favorite banks, as an alternative to the User Style banks. See the "Style Record" chapter for more information on saving a Style.
- While in Media mode, you can load any Style into the Favorite banks, as an alternative to the User Style banks. See the "Media" chapter for more information on the Load operations.
Renaming the Favorite banks
While the Style Select window is in the display, you can choose the "Rename Favorite" command from the page menu, and assign the Favorite Style tabs any name you like.
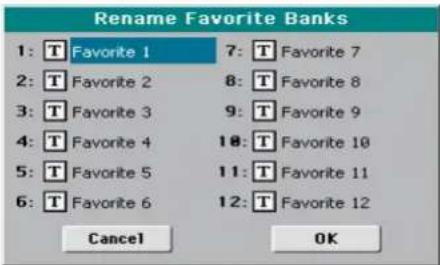
The assigned name can be spanned over two lines, by separating them with the paragraph character (¶). For example, to write "World Music" on two lines, enter "World¶Music".
Be careful not to write words exceeding the width of the side tabs of the Style Select window.
Style/Pad Record mode
By entering the Style/Pad Record mode, you can create your own Styles or Pads, or edit an existing Style or Pad.
Recording Styles and Pads
Styles and Pads share most of the same structure and recording/editing operations. Here is how they are made.
The Style's structure
The term "Style" relates with music sequences automatically played by the arranger of the Pa600. A Style consists of a predefined number of Style Elements (E) (Pa600 features fifteen different Style Elements: Variation 1-4, Intro 1-3, Fill 1-4, Break, Ending 1-3). When playing, most of these Style Elements can be directly selected by using the corresponding buttons on the control panel.
To explain the Style structure, we can use a tree structure, as shown in the following diagram:
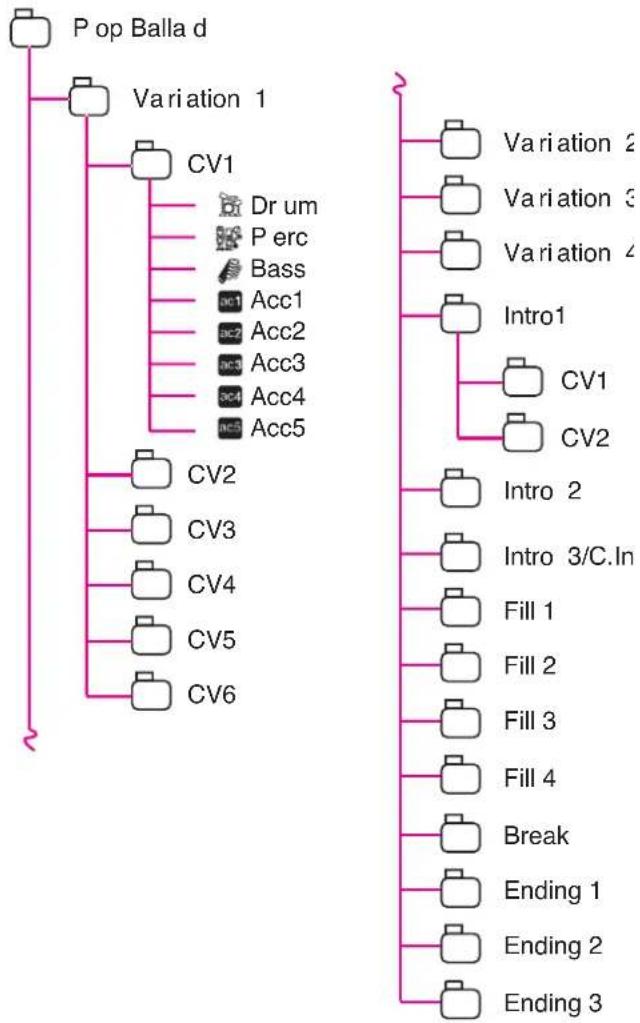
flowchart
graph TD
    A["Pop Balla d"] --> B["Variation 1"]
    B --> C["CV1"]
    C --> D["Dr um"]
    C --> E["P erc"]
    C --> F["Bass"]
    C --> G["Acc1"]
    C --> H["Acc2"]
    C --> I["Acc3"]
    C --> J["Acc4"]
    C --> K["Acc5"]
    B --> L["CV2"]
    B --> M["CV3"]
    B --> N["CV4"]
    B --> O["CV5"]
    B --> P["CV6"]
    Q["Variation 2"] --> R["CV1"]
    S["Variation 3"] --> T["CV2"]
    U["Variation 4"] --> V["Intro1"]
    W["Intro 2"] --> X["Intro 3/C.In"]
    Y["Fill 1"] --> Z["Fill 2"]
    AA["Fill 3"] --> AB["Fill 4"]
    AC["Break"] --> AD["Ending 1"]
    AE["Ending 2"] --> AF["Ending 3"]
Each Style Element is made up of smaller units, called Chord Variations (CV), but not all of them have the same number of CVs. Variations 1-4 have up to 6 CVs each, while the other Style Elements have only up to 2 CVs.
When you play in the chord recognition area (Lower or Full, depending on the On or Off status of the SPLIT button), the arranger scans the keyboard and determines which chord you are playing. Then, depending on the selected Style Element, it determines which Chord Variation (CV) should be played the scanned chord. Which Chord Variation corresponds to each scanned chord is a setting of the Style: the Chord Variation Table. Each Style Element contains a Chord Variation Table, whose prototype is the following:
| Chord Chord Variations (CVs) | ||
| Variation 1-4 | Intro 1-2, Count-In, Fill 1-4, Break, Ending 1-3 | |
| Major | CV1 - CV6 CV1 - CV2 | |
| 6 | ||
| M7 | ||
| M7^(b5) | ||
| sus | ||
| sus2 | ||
| M7sus | ||
| m | ||
| m6 | ||
| m7 | ||
| m7^(b5) | ||
| m^(M7) | ||
| 7 | ||
| 7^(b5) | ||
| 7sus4 | ||
| dim | ||
| dim^(M7) | ||
| #5 | ||
| 7^(#5) | ||
| M7^(#5) | ||
| 1+5 | ||
| 1+8 | ||
| b5 | ||
| dim7 | ||
After deciding what CV to play, the arranger triggers the right sequence for each track. Since each sequence is written in a particular key (for example, CMajor, GMajor or Emin), the arranger transposes it according to the scanned chord. Notes in the sequence are carefully transposed, to make them work fine with all recognized chords.
Going deeper into the Style structure, we can see that each Chord Variation is made up of Track Sequences, and the Pa600 supports 8 different tracks. DRUM and PERC are used for drum and percussion sequences, BASS for bass and ACC1-5 are for
accompaniment sequences (string, guitar, piano or other accom- paniment instruments).
Just to summarize, when you play a chord on the chord recognition area, the arranger determines which Style Element is used, then determines which Chord Variation should be used for the played chord, then Style sequences for every track of that Chord Variation are transposed from the original chord to the recognized chord, and so on every time you play a chord.
The Pad's structure
A Pad is basically a single-track Style. Most of what applies to Style recording also applies to Pad recording.
There are two different categories of Pads:
- “H i t” P mostly used as non-transposing events, they can also be transposing notes or chords. Basically, they are single-note or single-chord Sequences (see below).
- "Sequence" Pads, i.e., complex single-track patterns, that can be transposed by playing different chords on the keyboard – exactly as a Style track. They are roughly equivalent to single-element, single-track, multi-chord variation Styles (see illustration).
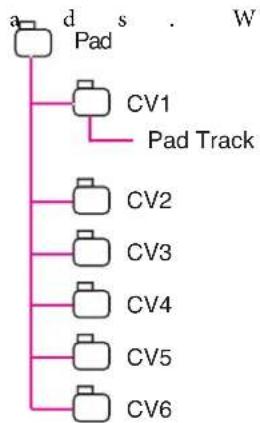
flowchart
graph TD
    A["Pad"] --> B["CV1"]
    B --> C["Pad Track"]
    C --> D["CV2"]
    D --> E["CV3"]
    E --> F["CV4"]
    F --> G["CV5"]
    G --> H["CV6"]
    H --> I["W"]
Each Pad is made up of up to six smaller units, called Chord Variations (CV). Each Chord Variation is made of a single track (the Pad track).
Exactly as with the Styles, when playing a chord in the chord recognition area, the corresponding Chord Variation is recalled. Recognized chords are associated to a Chord Variation by means of the Chord Variation Table. Each Pad contains a Chord Variation Table.
As with the Styles, the Note Transposition Tables (NTT) applies to the Pads.
The same differences between the different types of tracks applies (see "Track Type" on page 143).
Ordinary, Guitar and Drum tracks
There are different types of tracks (see "Track Type" on page 144), and each of them is treated in a different way by the arranger;
- Acc (Accompaniment) and Bass tracks: When a chord is recognized, the programmed chord notes are transposed to a suitable scale, according to the Note Transposition Tables (NTT) The NTT allows you to record Chord Variations, and have all the notes play in the right place, avoiding dissonances and transposing the pattern notes to the notes of the recognized chord.
- Drum & and Perc (Percussion) tracks: No transposition is applied. The original pattern plays always.
- Gtr (Guitar) tracks: When a chord is recognized, the arranger triggers single notes, strumming and arpeggios on a “virtual guitar”, keeping care of the way notes are played on the guitar keyboard. Note that inside a Guitar track you can also have some parts typical of an Acc track - a useful addition for short “free-form” passages.
What to record in a Style
Recording a Style means recording tracks, inside a series of Chord Variations, inside a series of Style Elements, inside the Style itself.
You don't have to record all Chord Variations for all Styments. It is often only needed to record a single Chord Variation for each Style Element. Exceptions are the Intro 1 and Ending 1, where we suggest to record both a Major and minor Chord Variations.
What to record in a Pad
Recording a Pad is a matter of recording a single track, inside a series of Chord Variations, inside the Pad itself.
You don't need to record all Chord Variations. It is often only needed to record just a Chord Variation.
Pattern data vs. track data
While the Style/Pad Record mode is where you can create or edit the music patterns, track parameters (like Volume, Pan, Octave Transpose, FX settings...) are to be edited in Style Play mode.
- After having created or edited music patterns in Style/Pad Record mode, save them by selecting the "Write Style" "Write Pad" command from the page menu of the Record mode (see "Write Style/Pad dialog box" on page 150).
- After having edited track parameters in Style Play mode, save them to the Style Settings by selecting the "Write Current Style Settings" command from the page men Style Play mode (see "Write Current Style Settings dialog box" on page 116).
Sounds
There are two ways of assigning Sounds to the Style tracks.
- While in Style Record mode you can assign different Sounds to each Style Element in the "Style Element Track Controls: Sound/Expression" page (see "Sounds area" on page 125). You can assign a Sound to the Pad in the same page of the Pad Record mode.
- While in Style Play mode, you can assign a single Sound to the Style Settings (together with the other track parameters), that remains the same for all Style Elements.
Which Sounds are used by the Style tracks depends on the status of the "Original Style Sounds" parameter (see page 98).
Note: When assigning a Sound in Style Play mode, the "Original Style Sounds" parameter is automatically turned off.
Style/Pad Import/Export
As an alternative to creating Styles on the Pa600, you can import a Standard MIDI Files (SMF) from your computer to a Pa600's Style. See "Import: Import SMF" on page 145 and "Export SMF" on page 148.
Entering the Style/Pad Record mode
While in the Style Play operating mode, press the RECORD button. The following page will appear in the display:
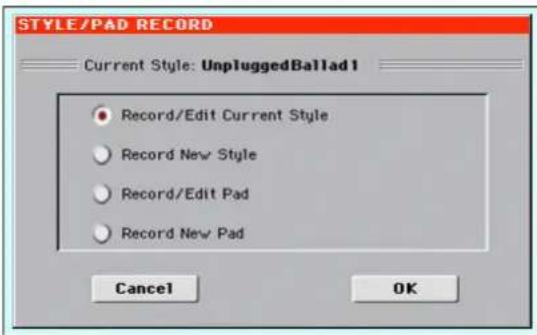
You can edit Factory Styles or Pads, assuming the status of the "Factory Style and Pad Protect" parameter in the Global > Mode Preferences > Media page is set to Off (see page 241)
- Select Record/Edit Current Style to edit the current Style.
- Select Record New Style to start from a new, empty Style. Default Style Settings will be recalled. When finished recording, you will save the new Style onto a Favorite or User Style location. (Styles may also be saved onto Factory Style locations only when the "Factory Style and Pad Protect" parameter is set to Off).
• Select Record/Edit Pad to select an existing Pad to edit. - Select Record New Pad to start from a new, empty Pad. When finished recording, you will save the new Pad into a User Pad location. (Pads can be saved into Factory Pad locations only when the "Factory Style and Pad Protect" parameter is set to Off).
After having edited the Style or Pad, please save it (see "Exit by saving or deleting changes" below) and exit the Style/Pad Record mode.
Then, edit the Style or Pad track settings.
- With a Style: Go to the Style Play mode, edit the Style Settings to adjust track settings (Tempo, Volume, Pan, FX Send... see page 101 and following in the "Style Play mode" chapter) and save it by selecting the "Write Current Style Settings" from the page menu (see "Write Current Style Settings page 116).
- With a Pad: Go to the Pad page of the Style Play or Song Play mode, assign the new Hit or Sequence to a Pad button, and adjust the various Pad settings (Volume, Pan, and FX Send... see "Pad/Switch: Pad" on page 112). Finally, save the Pad settings by selecting the "Write Current Style Settings" command from the page menu.
Note: After a record or edit operation, the memory is automatically reorganized. Therefore, when you press START/STOP there is a delay before you can actually listen to the Style. This delay higher with a Style containing more MIDI events.
Note: While in Record mode, the footswitch is disabled. On th contrary, volume/expression-type pedals can be used.
Exit by saving or deleting changes
When finished editing, you can save your Style or Pad in memory, or abort any change.
- To save changes, select the "Write Style/Pad" command from the page menu (see "Write Style/Pad dialog box" on page 150).
- To abort all changes, select the "Exit from Record" command from the page menu, or press the RECORD button, to exit from record and return to the main page of the Style Play mode.
Hint: Save often while recording, to avoid accidentally losing your changes to the Style/Pad.
Listening to the Style while in Edit mode
While you are in Style/Pad Record mode, you can listen to the selected Chord Variation or to the whole Style or Pad, depending on the page you are in.
To select a Chord Variation, go to the Main page of the Record/Edit mode. For more details, see "Element (Style Element)" and "Chord Var (Chord Variation)" on page 122.
- When you are in the Main, Event Edit, Quantize, Transpose, Velocity, or Delete pages, you can listen to the selected Chord Variation. Press START/STOP to check how it works. Press START/STOP again to stop the playback.
- When you are in the Sounds/Expression, Keyboard Range, Chord Table, Trigger/Tension, Delete All, Copy, Style/Pad Element Controls or Style/Pad Control pages, you can listen to the whole Style or Pad. Press START/STOP and play some chords to do your tests. Select any Style/Pad Element using the control panel buttons (VARIATION 1-4, INTRO 1-3, AUTO FILL, BREAK, ENDING 1-3). Press START/STOP again to stop the playback.
- When you are in the Guitar Mode page, you can listen to the pattern you are programming, played in the selected Key.
Note: When entering Style Record mode, the Chord Recognition mode changes according to the mode that was selected while in Style Play mode. For a chord to be recognized, a minimum of three notes must be played.
| Chord Recognition Mode | ||
| Style Play mode | Style Record mode | Notes (min.) |
| One Finger | Fingered | 3 |
| Fingered | Fingered | 3 |
| Expert | Expert | 3 |
Note: In this mode, the pattern is always played back in loop, even if the "Pad Type" parameter is set to "One Shot" (see page 143).
List of recorded events
The Style/Pad Record mode filters out some events that may cause wrong operation of the Style or Pad. Here are the recorded events.
| Control function CC# | |
| Allowed | |
| Note On | |
| RX Noise On | |
| Pitch Bend | |
| Channel After Touch | |
| Modulation 1 | |
| Breath 2 | |
| Pan 10 | |
| Expression 11 | |
| CC#12 12 | |
| CC#13 13 | |
| Ribbon Controller 16 | |
| Damper (Hold 1) 64 | |
| Filter Resonance (Harmonic Content) 71 | |
| Low Pass Filter Cutoff (Brightness) 74 | |
| CC#80 (General Purpose #5) 80 | |
| CC#81 (General Purpose #6) 81 | |
| CC#82 (General Purpose #7) 82 | |
Note: Some Control Change messages cannot be recorded directly by using the integrated controls of Pa600.
All allowed controllers can be assigned to an Assignable Pedal/Slider/Switch.
MIDI Control Change messaged inserted by using a software on an external computer are imported when using the Import function ("Import: Import SMF" on page 145).
Some controllers are reset at the end of the pattern.
Main page - Record 1
After having pressed the RECORD button, and having chosen whether you want to edit an existing Style or create a new one, the main page of the Style Record mode appears, with the tab "Record 1" selected.
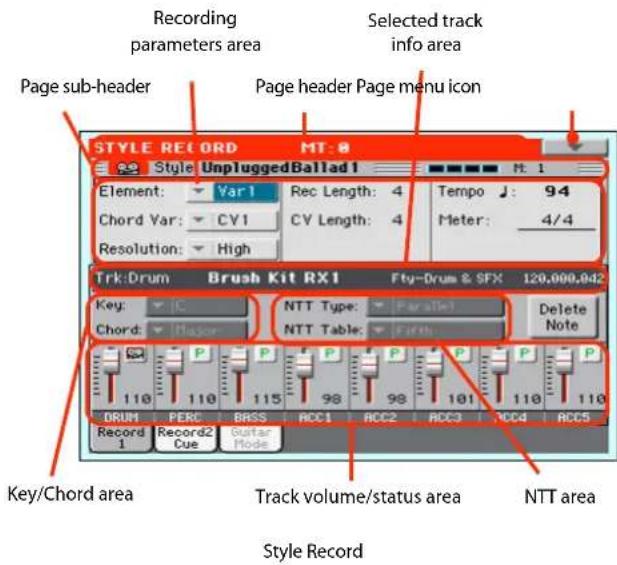
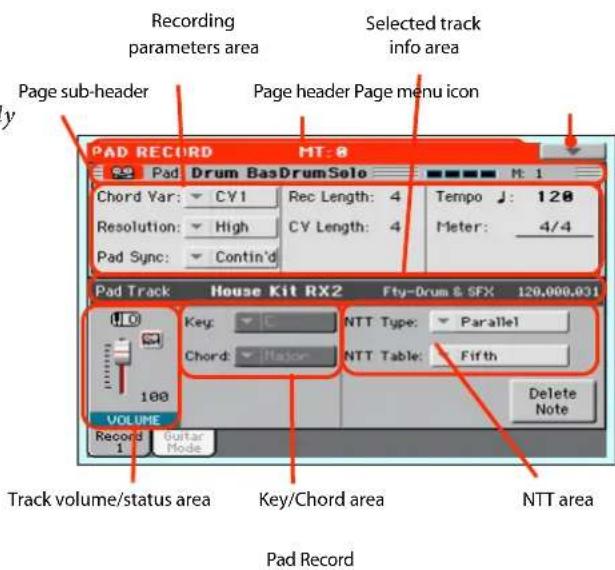
Page header
This line shows the current operating mode and transposition.
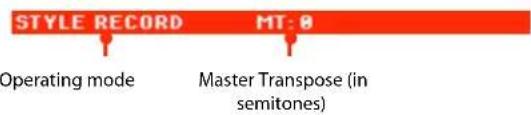
Operating mode name
Name of the current operating mode.
Master Transpose
Master Transpose value in semitones. This value can be changed using the TRANSPOSE buttons on the control panel.
Page menu icon
Touch this icon to open the page menu. See "Page menu" on page 149.
Page sub-header
This area shows some performing info on the Style/Pad.

Style/Pad in record/edit Beat counter Measure number
Style in record/edit
Name of the Style currently in edit or record.
Beat counter
This indicator shows the current beat.
Measure number
Current measure you are recording.
Recording parameters area
Element (Style Element)
(Style only) This parameter lets you select a Style Element for editing. Each Style Element corresponds to a button on the control panel carrying the same name. After selecting a Style Element, select a Chord Variation for actual editing (see below).
Var1...End3 This is the selected Style Element
Chord Var (Chord Variation)
This parameter lets you select a Chord Variation for editing (inside the selected Style Element or Pad).
Note: When this parameter and the assigned value is in small letters (cv1...cv6), the Chord Variation is empty; when it is in capitals (CV1...CV6), it is already recorded.
- If the Style Element is Var1, Var2, Var 3 or Var4, you can select one of 6 Chord Variations to edit.
- If the Style Element is Intro1, Intro2, Intro3, Fill1, Fill2, Fill3, Fill4, Ending1, Ending2 or Ending3, you can select one of 2 Chord Variations to edit.
- With a Pad you can choose one of the six available Chord Variations (CV1 ... CV6).
Resolution
Use this parameter to set the quantization during recording. Quantization is a way of correcting timing errors; notes played too soon or too later are moved to the nearest axis of a rhythmic "grid", set with this parameter, thus playing perfectly in time.
Note: To quantize after recording, use the Quantize function in the Edit section (see "Style/Pad Edit: Quantize" on page 136).
High No quantization applied.
(1/32)... (1/8)
Grid resolution, in musical values. For example, when you select 1/16, all notes are moved to the nearest 1/16 division. When you select 1/8, all
notes are moved to the nearest 1/8 division. A '3' after the quantization value means triplet.
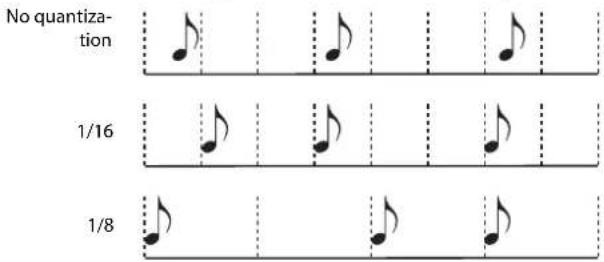
Off No synchronization. The sequence will start as soon as you press the PAD button.
Continued The pattern will start immediately, in sync with the arranger's or active player's tempo. Depending on the current position of the beat counter, it might not start from its very beginning; instead, it will continue from the current position.
For example, if the arranger's or player's beat counter shows the third beat, and is playing tick 91, the Pad will start from its third beat, at tick 91.
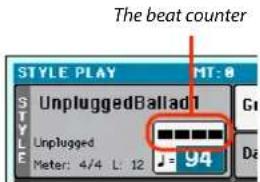
This works exactly as if it was a Fill.
Beat The sequence will start at the next beat, in sync with the arranger's or player's tempo. It will start from its very beginning (i.e., tick 1 or measure 1).
Rec Length (Recording Length)
This parameter sets the recording length (in measures) of the selected track. Its value is always equal to, or a divider of, the Chord Variation Length (see next parameter).
This is not the total length of the Chord Variation, but just of the current track. For example, you may have a Chord Variation eight measures long, with a drum pattern repeating each two measures. If so, set the CV Length parameter to "8", and the Rec Length parameter to "2" before starting recording the Drum track. When playing back the Style, saving it or executing an edit operation on the Style, the 2-measures pattern will be extended to the full 8-measures length of the Chord Variation.
Warning: If you assign a value lower than Rec Length to CV Length, the value of Rec Length is not immediately updated in the display. Therefore, you are still free of changing the value of CV Length, before the measures exceeding its value are deleted. For more details, see the warning in "CV Length (Chord Variation Length)" below.
However, if you press START/STOP to begin recording, the real Rec Length value is changed to the new one, even if the display still shows the old value.
For example, you may have CV Length = 4 and Rec Length = 4. If you set CV Length to 2, and press START/STOP to begin recording, Rec Length is still shown as 4, but it is in reality set to 2, and recording will cycle for just 2 measures. After you press START/STOP to stop recording, Rec Length is updated to 2, and all measures after the second measure are deleted.
CV Length (Chord Variation Length)
This parameter sets the total length (up to 32 measures) for the selected Chord Variation. When playing a Style, this will be t length of the accompaniment pattern, when the chord corresponding to the Chord Variation is recognized on the keyboard.
Warning: If you reduce the Chord Variation Length after recording, any measure after the selected length will be deleted. Be very careful when setting the CV Length to a lower value after recording! If it happens, we suggest to exit from record with (see "Exit from Record" on page 149).
Tempo
Select this parameter to use the TEMPO controls to set the Tempo value.
Hint: You can always change the Tempo, when other parameters are selected, by keeping the SHIFT button pressed, and rotating the DIAL.
Note: When recording Tempo, old data is always replaced by new data.
Note: The actual Tempo of the Style will be the one shown when saving the Style Settings in Style Play mode (see "Current Temp on page 95).
Meter
This is the meter (time signature) of the Style Element or the Pad Sequence. You can edit this parameter only when the Style Element or Pad is empty, i.e. before you begin recording anything.
Selected track info area
This line lets you see the Sound assigned to the selected track.
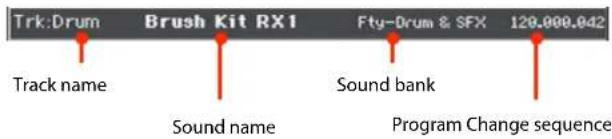
Track name
Name of the selected track.
Drum...Acc5 Style track.
Sound name
Sound assigned to the selected track. You can touch the name to open the Sound Select window, and select a different Sound.
Sound bank
Bank the selected Sound belongs to.
Program Change
Program Change number sequence (Bank Select MSB, Bank Select LSB, Program Change).
Key/Chord area
Key/Chord
This parameter pair allows you to define the track's original key and chord type, for the current Chord Variation. When playing the pattern back, this chord will be played back exactly as it was recorded, without any NTT processing (see above).
Note: To conform to KORG specifications, it is advisable to record both the “Major” and “minor” Chord Variations for the Intro 1 and Ending 1 Style Elements.
When you select a track, the original key/chord assigned to the selected track will be shown. All recorded tracks will play back on that key/chord. For example, if the original key/chord for the Acc1 track is A7th, when selecting the Acc1 track all the remaining tracks will play on the A7th key/chord.
In the example above, you will record the Acc1 track in the AMajor key, with notes pertaining to the A7th scale. This exact pattern will be recalled, when an A7th chord will be recognized.
Note: This does not apply to Guitar Mode, relying on a different rule. See "Main page - Guitar Mode" on page 126 for more information.
NTT Area
NTT Type/Table
NTTs (Note Transposition Tables) are the sophisticated algorithms that allow KORG arrangers to convert recognized chords into musical patterns. The Note Transposition Table (NTT) determines how the arranger will transpose pattern notes, when a chord is recognized that does not exactly match the original chord of a Chord Variation. For example, if you only recorded a Chord Variation for the CMaj chord, when a CMaj7 is recognized on the keyboard the arranger must transpose some notes to create the missing 7th.
Note: These parameters cannot be selected with Drum or Percussion tracks, and are therefore greyed out.
Note: NTT parameters are separately programmed for each track of the Style Element.
There are two general types of NTTs:
- When Parallel types are selected, notes are transposed inside the area set by the Wrap Around parameter. These tables are ideally suited to melody parts.
- When Fixed types are selected, the arranger moves as few notes as possible, making legato lines and chord changes more natural. They are ideally suited to chord tracks (strings, piano etc...).
Note: To conform to KORG specifications, it is advisable to set the NTT to "No Transpose" on the Intro 1 and Ending 1.
Parallel/Root The root note (in CMaj = C) is transposed to the missing notes.
Parallel/Fifth The 5th note (in CMaj = G) is transposed to the missing notes.
As recorded with NTT = Root or 5t h (Key/Chord = C)
When you play a C7 with NTT = Root
When you play a C7 with NTT = 5th
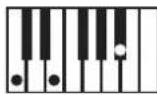
Parallel/i-Series
All original patterns must be programmed on the "Maj7" or "min7" chords. When loading old KORG i-Series Styles, this option is automatically selected.
As recorded with NTT = i-Series (Key/Chord = CM7)
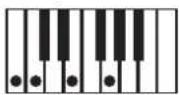
When you play a C with NTT = i-Series
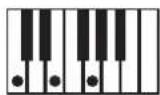
When you play a C7 with NTT = i-Series
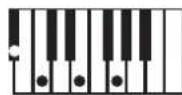
Parallel/No Transpose
The chord is not modified, and is moved to the new key unchanged. The pattern plays exactly the recorded notes, and is moved to the new key as is. This is the standard setting of Intro 1 and Ending 1 in KORG's original Styles (where a chord progression is usually recorded, and should remain unchanged in any key).
Fixed/Chord This table moves as few notes as possible, making legato lines and chord changes more natural. It is ideally suited to chord tracks (strings, piano etc...). Contrary to the Parallel mode, the programmed chord is not transposed according to the Wrap Around parameter, but always stays around its original position, looking for common notes between the chords.
Fixed/No Transpose
The programmed notes can only be transposed by the Master Transpose. They are never transposed when chords are changed.
Delete Note button
Use this command to delete a single note or a single percussive instrument from a track. For example, to delete a snare, keep the D2 note (corresponding to the snare) pressed.
- Select a track.
- Touch the "Delete Note" button, and keep it pressed.
-
Press START/STOP to start the Style.
-
When you reach the passage containing the note to be deleted, play the note on the keyboard. Keep it pressed, up to the last note to be deleted.
-
When finished, release the Delete button and the note to be deleted, and press START/STOP again to stop the Style.
Note: If the note is at the beginning of the pattern, press the note before starting the Style.
Tracks volume/status area
Virtual slider(s)
Drag a virtual sliders on the display to change the volume of the corresponding track.
As an alternative, touch a track to select it, and use VALUE DIAL to change the value.
Track status icons
Status of tracks. Touch this icon to change the status.

Play status. The track can be heard.

Mute status. The track cannot be heard.

Record status. After starting recording, the track will receive notes from the keyboard and the MIDI IN connector.
Track names
(Style only) Under the sliders, a label for each track is shown.
Drum...Acc5 Shown Style tracks.
Main page - Record 2/Cue
(Style only) While in the main page, touch the "Record 2/Cue" tab to see this page. Most parameters in this page are the same as in "Main page - Record 1". In addition, here you can see and select Sounds for each Style track, and the Cue mode for the Style Element.
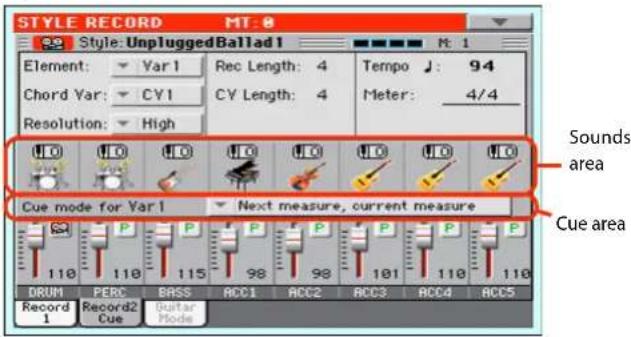
Sounds area
This area lets you see Sounds and octave transposition for the eight Style tracks.
Octave transpose icon
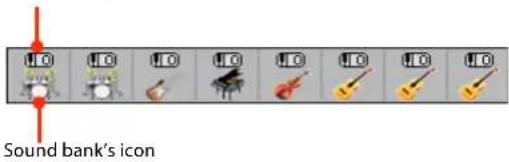
Octave transpose icon
Non editable. This indicator shows the track's octave transposition. Tracks will be recorded with the selected octave transposition. To change this value, use the UPPER OCTAVE buttons, or go to the "Mixer/Tuning: Tuning" edit page in the Style Play mode (see page 104). Save this value to the Style Settings.
Sound bank's icon
This picture illustrates the bank the current Sound belongs to. Touch an icon a first time to select the corresponding track (detailed information are shown on the Selected Track Info area, see the "Main page - Record 1" page above). Touch it a seco time to open the Sound Select window.
Note: These Sounds can be replaced by Sounds selected by a Per formance, provided the "Original Style Sounds" parameter is left unchecked in Style Play mode (see page 98).
Cue area
Cue mode for [Style element]
This parameter lets you decide how the current Style Element will enter after it has been selected. This setting is only available for the 'Variation' and 'Fill' Style Elements.
Immediate, first measure
The Style Element enters immediately, and begins from the first measure. Only available on Fills.
Immediate, current measure
The Style Element enters immediately, and begins from the current measure. Only available on Fills.
Next measure, first measure
The Style Element enters at the beginning of the next measure, and begins from the first measure of the new pattern. Available on both Fills and Variations
Next measure, current measure
The Style Element enters at the beginning of the next measure, and begins from the current measure. Only available on Variations.
Main page - Guitar Mode
While in the main page, and a Guitar track has been selected, touch the "Guitar Mode" tab to see this page. This is where you can access Guitar Mode programming:
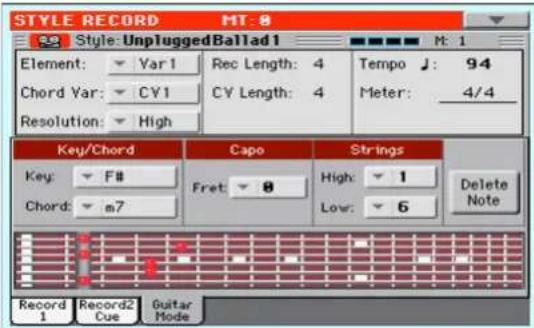
Note: To access this page, a Guitar track must first be selected (see "Track Type" on page 144). The Pad track must be of Guitar type (Pad Track Controls > Sound/Expression page, see "Track Type" on page 143). Otherwise, the Guitar Mode tab will remain grey (not selectable).
Note: When programming a Guitar track from sequencer, you must be sure the Guitar tracks is associated to the right channel. Go to the Global > MIDI > MIDI IN Channels page, and assign the corresponding Style track (usually Acc1 \~ Acc5) to the same channel of the Guitar track on the external sequencer. Then, go to the Style Record > Style Track Controls > Type/Tension/Trigger page, and set the track as a track of type "Gtr" (see "Track Type" on page 144).
Guitar Mode allows for easy creation of realistic rhythm guitar parts, without the artificial, unmusical playing typical of MIDI programming of guitar parts. Just record a few measures, and you will end up with realistic rhythm guitar tracks, where each chord is played according to its real position on the guitar, and not generated by simply transposing a written pattern.
Recording overview
Recording a Guitar track is unlike recording the other tracks, where you play exactly all the notes of a melody line or all the chords of an accompaniment part. With Guitar tracks you can:
a) play the keys corresponding to the strumming modes,
b) play an arpeggio using the six keys corresponding to the six guitar strings (and the special keys corresponding to the root and fifth notes),
c) play RX Noises to add realism to the pattern,
d) add regular patterns, for short melodic passages without wasting an Acc track,
e) use the finest MIDI programing to select Chord Shapes, and recreate any nuance of a guitar performance.
The following sections describe the various control keys available for this guitar simulation.
Recording strumming types
The octave from C1 to B1 is devoted to selecting a strumming type. By pressing these keys, you play fast strumming samples:
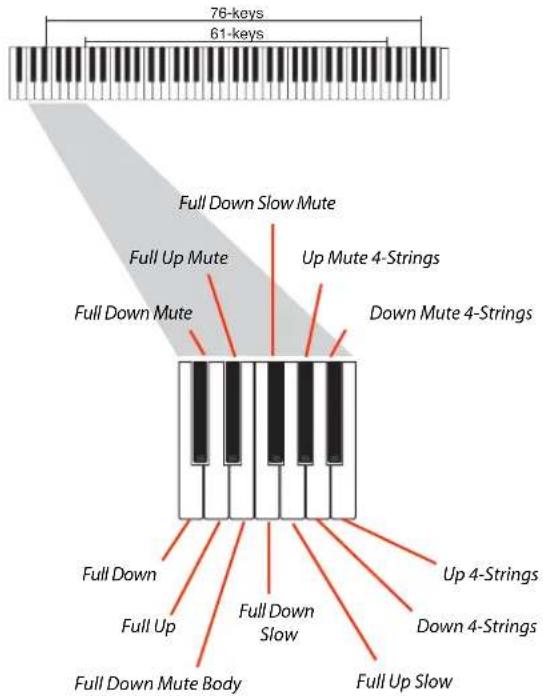
This octave also includes an 'all mute' key (F#):
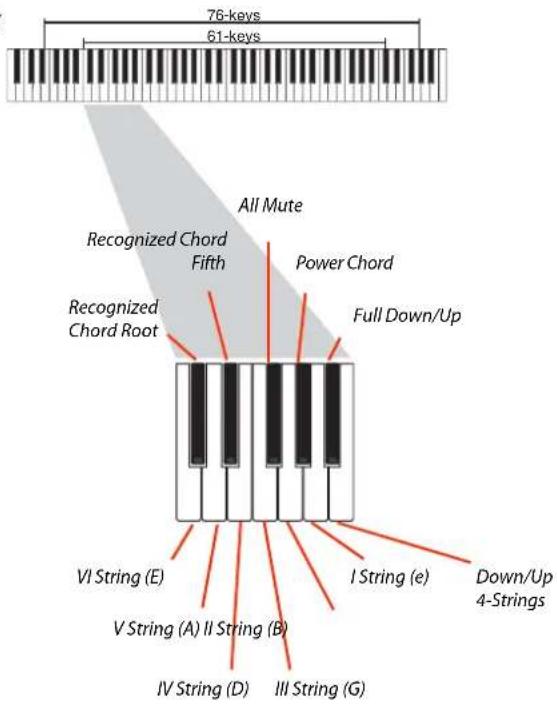
Recording RX Noises
Further on, the upper octaves are used to trigger RX Noises:
Recording single strings
The octave from C2 to B2 is devoted to selecting a single string (or more than one) for playing arpeggios or power chords. You can either play a free arpeggio with the six guitar chords assigned to the C\~A keys, or play one of the faster sampled arpeggios on the higher keys. The root note is always available on the C# key, while the fifth note is always assigned to the D# key; with them, you can always play the lowest notes of an arpeggio.
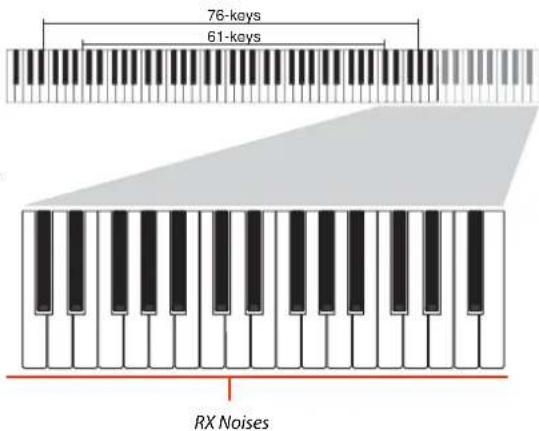
Selecting a Capo
Together with strumming types, single strings and RX Noises, you can choose a Capo ("capotasto"). Note that this might prevent some single strings to sound, depending on the compose chord. You can always see which strings are playing and which are not, as described in "Diagram" on page 129.
Recording a regular pattern
Together with strums and arpeggios, you can record regular patterns, exactly as if the track was of Acc type (see "Track Type" on page 144). This will save an Accompaniment track, when all you need is just to record some short melodic passages (for example, the closing of a strumming pattern).
You can record the pattern by playing it in the range shown by the diagram.
Recording a Chord Shape
You can finely choose Chord Shapes by using MIDI messages. When you play a C0 note with the velocity value shown in the following table, a chord is played in a particular position and on a certain number of strings.
| Vel. Range from Str. to Str. Position | ||||||||||||
| 0 | 6 | S | t | r | i | n | g | s | I | V | I | 0 |
| 1 | 6 | S | t | r | i | n | g | s | I | V | I | 0 |
| 2 | 6 | S | t | r | i | n | g | s | I | V | I | 1 |
| 3 | 6 | S | t | r | i | n | g | s | I | V | I | 2 |
| 4 | 6 | S | t | r | i | n | g | s | I | V | I | 3 |
| 5 | 6 | S | t | r | i | n | g | s | I | V | I | 4 |
| 6 | 6 | S | t | r | i | n | g | s | I | V | I | 5 |
| 7 5 Strings Bass II VI 0 | ||||||||||||
| 8 5 Strings Bass II VI 1 | ||||||||||||
| 9 5 Strings Bass II VI 2 | ||||||||||||
| 10 | 5 Strings Bass II VI 3 | |||||||||||
| 11 | 5 Strings Bass II VI 4 | |||||||||||
| 12 | 5 Strings Bass II VI 5 | |||||||||||
| 13 | 5 Strings Treble | I V | 0 | |||||||||
| 14 | 5 Strings Treble | I V | 1 | |||||||||
| 15 | 5 Strings Treble | I V | 2 | |||||||||
| 16 | 5 Strings Treble | I V | 3 | |||||||||
| 17 | 5 Strings Treble | I V | 4 | |||||||||
| 18 | 5 Strings Treble | I V | 5 | |||||||||
| 19 | 4 Strings Bass | III | VI 0 | |||||||||
| 20 | 4 Strings Bass | III | VI 1 | |||||||||
| 21 | 4 Strings Bass | III | VI 2 | |||||||||
| 22 | 4 Strings Bass | III | VI 3 | |||||||||
| 23 | 4 Strings Bass | III | VI 4 | |||||||||
| 24 | 4 Strings Bass | III | VI 5 | |||||||||
| 25 | 4 Strings Middle | II | V | 0 | ||||||||
| 26 | 4 Strings Middle | II | V | 1 | ||||||||
| 27 | 4 Strings Middle | II | V | 2 | ||||||||
| 28 | 4 Strings Middle | II | V | 3 | ||||||||
| 29 | 4 Strings Middle | II | V | 4 | ||||||||
| 30 | 4 Strings Middle | II | V | 5 | ||||||||
| 31 | 4 Strings Treble | I IV 0 | ||||||||||
| 32 | 4 Strings Treble | I IV 1 | ||||||||||
| 33 | 4 Strings Treble | I IV 2 | ||||||||||
| Vel. Range from Str. to Str. | Position | |||
| 34 | 4 Strings Treble | I IV 3 | ||
| 35 | 4 Strings Treble | I IV 4 | ||
| 36 | 4 Strings Treble | I IV 5 | ||
| 37 | 3 Strings Bass | IV | VI 0 | |
| 38 | 3 Strings Bass | IV | VI 1 | |
| 39 | 3 Strings Bass | IV | VI 2 | |
| 40 | 3 Strings Bass | IV | VI 3 | |
| 41 | 3 Strings Bass | IV | VI 4 | |
| 42 | 3 Strings Bass | IV | VI 5 | |
| 43 | 3 Strings MiddleBas | III | V | 0 |
| 44 | 3 Strings MiddleBas | III | V | 1 |
| 45 | 3 Strings MiddleBas | III | V | 2 |
| 46 | 3 Strings MiddleBas | III | V | 3 |
| 47 | 3 Strings MiddleBas | III | V | 4 |
| 48 | 3 Strings MiddleBas | III | V | 5 |
| 49 | 3 Strings MiddleTreble | II | IV 0 | |
| 50 | 3 Strings MiddleTreble | II | IV 1 | |
| 51 | 3 Strings MiddleTreble | II | IV 2 | |
| 52 | 3 Strings MiddleTreble | II | IV 3 | |
| 53 | 3 Strings MiddleTreble | II | IV 4 | |
| 54 | 3 Strings MiddleTreble | II | IV 5 | |
| 55 | 3 Strings Treble | I | III 0 | |
| 56 | 3 Strings Treble | I | III 1 | |
| 57 | 3 Strings Treble | I | III 2 | |
| 58 | 3 Strings Treble | I | III 3 | |
| 59 | 3 Strings Treble | I | III 4 | |
| 60 | 3 Strings Treble | I | III 5 | |
| 61 | 2 Strings Bass | V | VI 0 | |
| 62 | 2 Strings Bass | V | VI 1 | |
| 63 | 2 Strings Bass | V | VI 2 | |
| 64 | 2 Strings Bass | V | VI 3 | |
| 65 | 2 Strings Bass | V | VI 4 | |
| 66 | 2 Strings Bass | V | VI 5 | |
| 67 | 2 Strings MiddleBas | IV | V | 0 |
| 68 | 2 Strings MiddleBas | IV | V | 1 |
| 69 | 2 Strings MiddleBas | IV | V | 2 |
| 70 | 2 Strings MiddleBas | IV | V | 3 |
| 71 | 2 Strings MiddleBas | IV | V | 4 |
| 72 | 2 Strings MiddleBas | IV | V | 5 |
| 73 | 2 Strings Middle | III | IV 0 | |
| 74 | 2 Strings Middle | III | IV 1 | |
| 75 | 2 Strings Middle | III | IV 2 | |
| 76 | 2 Strings Middle | III | IV 3 | |
| 77 | 2 Strings Middle | III | IV 4 | |
| 78 | 2 Strings Middle | III | IV 5 | |
| 79 | 2 Strings MiddleTreble | II | III 0 | |
| 80 | 2 Strings MiddleTreble | II | III 1 | |
| 81 | 2 Strings MiddleTreble | II | III 2 | |
| 82 | 2 Strings MiddleTreble | II | III 3 | |
| 83 | 2 Strings MiddleTreble | II | III 4 | |
| 84 | 2 Strings MiddleTreble | II | III 5 | |
| 85 | 2 Strings Treble | I | II | 0 |
| 86 | 2 Strings Treble | I | II | 1 |
| Vel. | Range | from Str. | to Str. | Position |
| 87 | 2 Strings Treble | I | II | 2 |
| 88 | 2 Strings Treble | I | II | 3 |
| 89 | 2 Strings Treble | I | II | 4 |
| 90 | 2 Strings Treble | I | II | 5 |
Choosing a Key/Chord for Intro 1 and Ending 1
The pattern is recorded in the key indicated by the Key/Chord pair of parameters. However, this parameter playback by the Intro 1 and Ending 1 Style Elements. All other Style Elements will be played back according to the recognized chord.
With Intro 1 and Ending 1 (both Chord Variation 1 and 2) you can also prefer to enter a chord progression, to be played on the lowest MIDI octave (C-1 \~ B-1). Chord types are inserted by using velocity values, as shown in the following table:
| Vel. | Chord Type | Vel. | Chord Type |
| 1 | Major | 2 | Major 6th |
| 3 | Major 7th | 4 | Major 7th flatted 5th |
| 5 | Suspended 4th 6 Suspended 2nd | ||
| 7 | Major 7th suspended 4th | 8 | Minor |
| 9 | Minor 6th | 10 Minor 7th | |
| 11 | Minor 7th flatted 5th | 12 Minor major 7th | |
| 13 | Dominant 7th | 14 7th flatted 5th | |
| 15 | 7th suspended 4th | 16 Diminished | |
| 17 | Diminished major 7th | 18 Augmented | |
| 19 | Augmented 7th | 20 Augmented major 7th | |
| 21 | Major w/o 3rd | 22 Major w/o 3rd and 5th | |
| 23 | Flatted 5th | 24 Diminished 7th | |
Playing back the pattern
When in Stye Play mode, the recorded Guitar pattern posed according to the chord recognized on the keyboard. The way it is transposed depends on the programmed pattern, with the chosen positions, strumming mods, etc...
Guitar mode parameters
Here is a detailed description of the parameters of the Mode page.
Key/Chord
This parameter pair allows you to define the track's original key and chord type. This parameter works in a different way than the other tracks. While with other tracks this is always the reference key used for NTT transposition, with Guitar tracks there is a difference, whether you are recording a Chord Variation contained in an Intro 1, or Ending 1 Style Element, or any other Chord only used for Variation:
- With Intro 1 and Ending 1, this chord will be used as the reference key for the chord progression.
- With all the other Chord Variations, this chord will be used only for listening during recording. During playback in Style Play mode, the chord will follow chord recognition.
Capo - Fret
A capo (from the Italian “capotasto”, “head of fingerboard”) is a movable bar attached to the fingerboard of the guitar, to uniformly raise the pitch of all the strings. Its use makes the strings shorter, therefore changing the timbre and position of the chords (but not its shape).
0 Open string - no capo.
I...X Position of the capo over the fingerboard (i.e., "I" corresponds to the first fret, "II" to the second one, and so on).
Strings - High/Low
Use this pair of parameters to choose the strings the pattern will be played on.
1...6 Position of the capo over the fingerboard (i.e., "I" corresponds to the first fret, "II" to the second one).
Diagram
The diagram shows how a chord would be composed on the fingerboard. Here is the meaning of the various symbols:
Red dot Fingered string (i.e., played note).
White dot Fifth, playing on the D#2 key.
X Non played or muted note.
Light grey bar Barré (a finger crossing all the strings, like a mobile capo).
Dark grey bar Capo.
Style/Pad Record procedure
There are two different methods for recording a Style/Pad: Real-time and Step.
- Realtime Recording allows you to record Style/Pad patterns in realtime.
- Step Recording allows you to create a new Style/Pad by entering single notes or chords in each track. This is very useful when transcribing an existing score, higher grade of detail, and is particularly suitable to create drum and percussion tracks.
In addition, you can program a Style/Pad on a personal computer, and then import it via the Import function (see “Import: Import SMF” on page 145).
Preparing to record
- If you like to edit an existing Style/Pad, select it.
- Press the RECORD button to enter the Style/Pad Record mode. You are prompted to either select the Current Style or an existing Pad, or create a New Style or Pad.
Select “Record/Edit Current Style” or “Record/Edit Current Pad” if you want to edit the current Style/Pad, or make a new Style/Pad starting from an existing one. Select “Record New Style/Pad” if you want to start from scratch with an empty Style/Pad.
- After you select your preferred option, the main page of the Style/Pad Record mode will appear.
- Use the Element (Style Element) (Style only) and Chord Var (Chord Variation) parameters, to select the Chord Variation to be recorded/edited.
Note: For more information on the Style Elements and Chord Variations, and the Style/Pad structure in general, see “The Style’s structure” on page 118 or “The Pad’s structure” on page 119.
- Use the Rec Length (Recording Length) parameter to set the length (in measures) of the pattern to record.
- Use the Meter parameter to set the Style Element's or Pad's meter (time signature).
Note: You can edit this parameter only if you "Record New Style/Pad" option when entering the Record mode, or when editing an empty Style Element.
- Select the Tempo parameter and set the Tempo.
- (Style only) Touch the Record 2 tab to see the Sounds area. Here you can assign the right Sound to each Style track.
(Pad only) Press the SOUND button to select a Sound to be assigned to the Pad track.
- If needed, set the Octave Transpose for each track. Note: The Octave Transpose will affect only the notes coming from the keyboard, and not from the arranger.
- At this point, if you want to do a Realtime Recording go on reading “Realtime Record procedure” below. Otherwise, if you prefer to do a Step Record, jump to “Step Record procedure” on page 131.
Realtime Record procedure
- Select the track to record. Its status icon will turn to 'Record'. (For more details, see "Tracks volume/status area" on page 125).
Note: When entering the Record mode, a track is already in Record status. When you press START/STOP after entering the Record mode, you can immediately start recording.
If you like, you can try your part before recording:
needing a Mute the track, by repeatedly touching its icon until the (Mute) status icon appears.
- Press START/STOP to let any recorded track play back, and practice on the keyboard.
-
When you have finished practicing, press START/STOP to stop the arranger, and unmute the track by repeatedly touching its icon status, until the record) status icon appears again.
-
While the shown status icon is Record, press START/STOP to begin recording. A 1-bar precount will play before the recording actually begins. When it begins, play freely. The pattern will last for some measures, according to the Rec Length value, then restart.
Since the recording will happen in overdub, you can add notes on any following passage. This is very useful to record different percussive instruments at any cycle on a Drum or Percussion track.
Note: While recording, the track's Keyboard Range (see page 142) is ignored, and notes can be recorded and played back over the whole keyboard range. The Local parameter (see "Local Control On" on page 246) is also automatically set to On, to allow playing on the keyboard.
- When finished recording, press START/STOP to stop the arranger. Select a different track, and go on recording the full Chord Variation.
Note: You can select a different track only when the arranger is not running. - When finished recording the Chord Variation, select a different Chord Variation or Style Element (Style only) to go on recording the full Style/Pad.
select Word finished recording the new Style/Pad, select the "Write Style/Pad" command from the page menu, to open the Write Style/Pad dialog box (see "Write Style/Pad dialog box" on page 150) and save it to memory.
To exit the Style/Pad Record mode without saving any change, select the "Exit from Record" command from the page menu, or press the RECORD button.
Step Record procedure
-
While in the main page of the Style/Pad Record mode, select the "Overdub Step Recording" command from the page menu, to enter the Overdub Step Record mode.
-
The "Pos" parameter shows the current position.
-
If you do not want to insert a note or chord at the current position, insert a rest instead, as shown in step 4.
-
To jump to the next measure, filling the remaining beats with rests, touch the Next M. button in the display.
-
To change the step value, use the "Step Time values" area in the display.
-
Insert a note, rest or chord at the current position.
-
To insert a single note, just play it on the keyboard. inserted note length will match the step length. You may change the velocity and relative duration of the note, by editing the "Duration" and "Velocity" parameters (see page 152).
- To insert a rest, just touch the Rest button in the display. Its length will match the step value.
- To tie the note to be inserted to the previous one, touch the Tie button in the display. A note will be inserted, tied to the previous one, with exactly the same name. You don't need to play it on the keyboard again.
-
To insert a chord or a second voice, see "Chords and second voices in Step Record mode" on page 171.
-
After inserting a new event, you may go back by touching the Back button in the display. This will delete the previously inserted event, and set the step in edit again.
-
When the end of the pattern is reached, the "End of Loop" event is shown, and the recording restarts from the "001.01.000" position. Any note exceeding the pattern length, inserted at its end, will be reduced to fit the total length of the pattern.
At this point, you may go on, inserting new events in overdub mode (the previously inserted events will not be deleted). This is very useful when recording a drum or percussion track, where you may want to record the bass drum on a first cycle, the snare drum on the second cycle, and the hi-hat and cymbals during the following cycles.
- When finished recording, touch the Done button in the display to exit the Step Record mode.
A dialog box appears, asking you to either cancel, discard or save the changes.
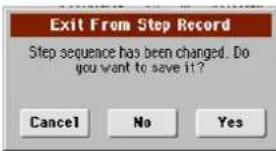
If you touch Cancel, exit is canceled, and you can continue editing. If you choose No, changes are not saved, and the Step Record window is closed. If you choose Yes, changes are saved, and the Step Record window is closed.
- When back to the main page of the Style Record mode, you may turn all tracks to the play status, then press START/STOP to listen to the Style. Press START/STOP again to stop the playback.
- From the main page of the Style Record mode, select the "Write Style/Pad" command to save, or the "Exit from Record" command to exit from the Style/Pad Record mode (see "Write Style/Pad dialog box" on page 150), or by canceling any change.
Chords and second voices
With Pa600, you are not limited to inserting single notes in a track. There are several ways to also insert chords and double voices. For more information, see "Chords and second voices in Step Record mode" on page 171.
Edit menu
From any page (apart for Step Record), press the MENU button Most edit pages share some basic elements.
to open the Style Record or Pad edit menu. This menu gives
access to the various Style/Pad Record edit sections.
When in the menu, select an edit section, or press EXIT to exit the menu and return to the main page. To return to the main page, you can also select the Main Page menu item.
When in an edit page, press the EXIT button to return to the main page of the Style Record mode.
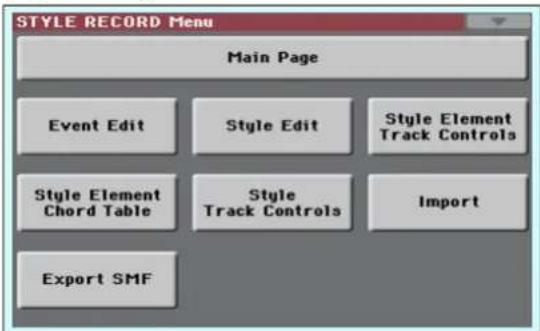
Style Record menu
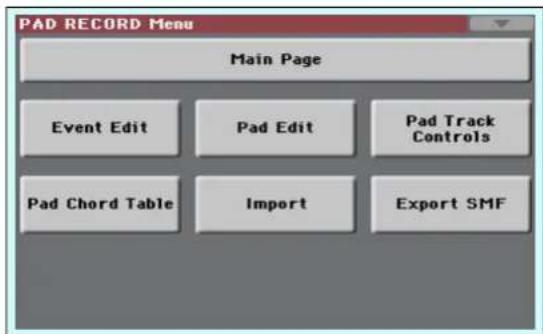
Pad Record menu
Note: While the Style/Pad is in play, you cannot access the Edit section pages from the main page (see page 121). Stop the playback before pressing MENU.
Note: When switching from the Edit section pages (Quantize, Transpose, Velocity, Delete) to the other pages, or vice-versa, the Style (if in play) is automatically stopped.
Edit page structure
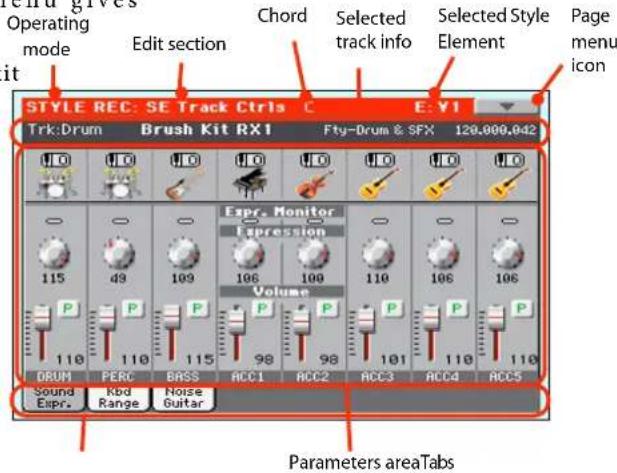
Most edit pages share some basic elements.
Other pages have a slightly different structure.
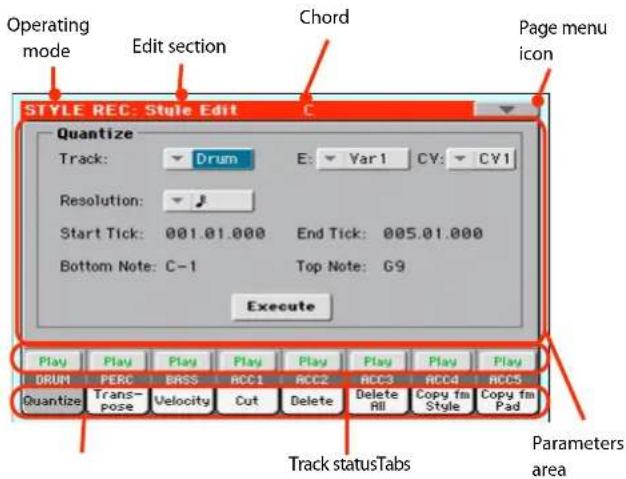
Operating mode
This indicates that the instrument is in Style/Pad Record mode.
Edit section
This identifies the current edit section, corresponding to one of the items of the edit menu (see "Edit menu" on page 132).
Chord
(Style only) Chord in edit.
Selected Style Element
(Style only) In Style Record mode, edits always happen on the selected Style Element.
Page menu icon
Touch this icon to open the page menu (see "Page menu" on page 149).
Parameters area
Each page contains various parameters. Use the tabs to select one of the available pages. For detailed information on the various types of parameters, see sections starting from page 133.
Track status
Use these buttons to mute/unmute tracks while editing.
Tabs
Use tabs to select one of the edit pages of the current edit section.
Event Edit: Event Edit
The Event Edit is the page where you can edit each single MIDI event of the selected Chord Variation. You can, for example, replace a note with a different one, or change its playing strength (i.e., velocity value). See "Event Edit procedure" on page 134 for more information on the event editing procedure.
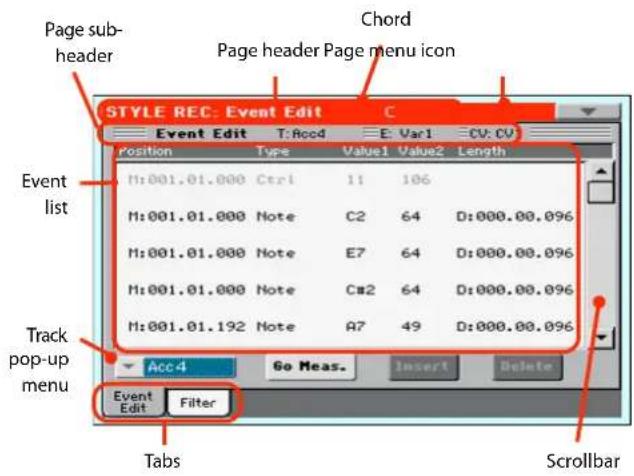
Page header
See "Page header" on page 121.
Page menu icon
Touch this icon to open the page menu. See "Page menu" on page 149.
Page sub-header
This area shows some performing info on the Song.

Selected track
(Style only) Name of the track in edit. Use the Track pop-up menu to select one of the Style tracks.
SE/CV (Style Element/Chord Variation)
Selected Style Element (Style only) and Chord Variation. This parameter cannot be edited. To select a different Style Element and Chord Variation, press EXIT to go back to the main page of the Style/Pad Record mode (see "Main page - R page 121).
Event list
Use the Event list to see all events contained in the selected track in the selected Style Element.
Use the scrollbar to browse through the events. You can also scroll by using the SHIFT + VALUE DIAL combination.
Touch the event to be selected. Selected events are highlighted and can be heard.
Position
Position of the event, expressed in the form 'aaa.bb.ccc':
• ‘ a a a ’ i s t h e m e a s u r • ‘ b b ’ i s t h e b e a t
- 'ccc' is the tick (each quarter beat = 384 ticks)
You can edit this parameter to move the event to a different position. You can edit a position in either of the following ways:
(a) select the parameter, and use the VALUE DIAL to change the value, or
(b) select the parameter, then touch it again; the numeric keypad will appear. Enter the new position by dialing in the three parts of the number, separated by a dot. Zeroes at the beginning can be omitted, as well as the least important parts of the number. For example, to enter position 002.02.193, dial "2.2.193"; to enter position 002.04.000 dial "2.4"; to enter position 002.01.000, simply dial "2".
Type, Value 1, Value 2
Type and values of the event shown in the display. Depending on the selected event, the value may change. This parameter also shows the (greyed-out, so non editable) "CC#11" (Expression) event at the beginning of the pattern, and the "End Of Track" marking, when the end of a track is reached.
To change the event type, select the Type parameter, then use the VALUE DIAL to select a different event type. A set of default values will be automatically assigned to the event.
To select and edit the event's value, select the corresponding parameter, and use VALUE DIAL.
Length
Length of the selected Note event. The value format is the same as the Position value. This is only available for Note events.
Note: If you change a length of "000.00.000" to a different value, you can't go back to the original value. This rather unzero-length value may be found in some drum or percussion tracks.
Scrollbar
Use the scrollbar to browse the event through the list. (As an alternative, use SHIFT + VALUE DIAL).
Other elements
Track pop-up menu
Use this pop-up menu to select the track to edit, inside the current Chord Variation.
Drum...Acc5 Style track.
Go Meas.
While the Style is not running, touch this button to open the Go to Measure dialog box:
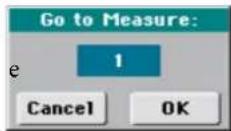
When in this dialog box, select a target measure, and touch OK. The first event available in the target measure will be selected.
Insert
Touch the Insert button in the display to insert a new event at the current shown Position. The default values are Type = Note, Pitch = C4, Velocity = 100, Length = 192.
Delete
Touch the Delete button in the display to delete the event selected in the display.
Event Edit procedure
Here is the general procedure to follow for the event editing.
-
Select the Style/Pad to edit, and press the RECORD button. Select the "Current Style/Pad" option to enter record. The main page of the Style/Pad Record mode will appear.
-
Select the "Element (Style Element)" (Style only) and "Chord Var (Chord Variation)" parameters.
Note: For more information on the Style Elements and Chord Variations, and the Style structure in general, see "The Style's structure" on page 118.
-
Press MENU, and select the Event Edit section. The Event Edit page appears (see "Event Edit: Event Edit" on page 133 for more information).
-
Press START/STOP to listen to the selected Chord Variation. Press START/STOP to stop it. Chord Scanning does not work, so you will listen the pattern at the original Key/uncommohChord.
-
Touch the Filter tab to select the Filter page, and uncheck the filters for the event types you wish to see in the display (see "Event Edit: Filter" on page 135 for more information).
-
Touch the Event Edit tab to go back to the Event Edit page.
-
(Style only) Use the Track pop-up menu to select the track to edit (see "Track pop-up menu" on page 134).
-
The list of events contained in the selected track (inside the Chord Variation selected on step 2) will appear in the display. Some events on the beginning of the Chord Variations, as well as the "EndOfTrk" event (marking its ending point) cannot be edited, therefore appearing in grey.
-
Scroll though the various events by using the scrollbar.
-
Select an event to be edited by touching it in the d. This is usually a note, that you can edit.
| M:001.01.000 Note | C#2 | 64 | D:000.00.096 |
For more information on the event types and their values, see "Event Edit: Event Edit" on page 133.
- Edit the event.
- Select the "M" parameter. Use VALUE DIAL to change the event's position.
- Select the Type parameter. You may use VALUE DIAL to change the event type, as well as its Value 1 and Value 2.
- If a Note event is selected, select the Length parameter, and use VALUE DIAL to change the event's length.
-
You may use the Go Meas. command to go to a different measure (see "Go Meas." on page 134)
-
As described in step 4, you may press START/STOP to listen how the pattern sounds after your changes. Press START/STOP again to stop the pattern running.
-
Touch the Insert button in the display to insert an event at the Position shown in the display (a Note event with default values will be inserted). Touch the Delete button in the display to delete the selected event.
-
When editing is complete, you may select a different track to edit (go to step 7).
-
When finished editing the selected Chord Variation, press EXIT to go back to the main page of the Style Record mode, then go to step 2 to select and edit a different Chord Variation.
-
When finished editing the whole Style, select the "Write Style/Pad" command from the page men Write Style/Pad dialog box (see "Write Style/Pad dialog box" on page 150), or select the "Exit from Record" command to cancel all changes.
- Touch the Text Edit) button to enter the Text Edit dialog box. Enter a name and confirm by selecting OK.
- Select a target memory location where to save the Style/Pad. The name of the Style/Pad already existing at the selected location is shown after the Bank-Location number.
Warning: If you select an existing Style/Pad and confirm writing, the older Style/Pad is deleted and replaced by the new one. Save the Styles/Pads you don't want to lose to a storage device, before overwriting them.
- Touch OK to save the Style/Pad to the internal memory, or Cancel to delete any changes made in Style/Pad Record mode. When the "Are you sure?" message appears, touch OK to confirm, or Cancel to go back to the "Write Style" or "Write Pad" dialog box.
Event Edit: Filter isplay.
This page is where you can select the event types to be shown in the Event Edit page.
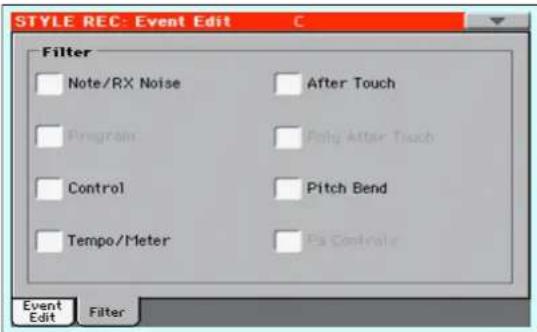
Turn On the filter for all event types you do not wish to see the Event Edit page.
Note: Some of the events are "ghosted", and non editable, since the corresponding events are not editable in a Style/Pad.
Note/RX Noise
Notes and RX Noises.
Control Control Change events. Only the following Control Change numbers are allowed with Styles/Pads.
| Control function | CC# (Control Change Number) |
| Modulation 1 | 1 |
| Modulation 2 | 2 |
| Pan | 10 |
| uExpression(a)pen the | 11 |
| CC#12 | 12 |
| CC#13 | 13 |
| Ribbon | 16 |
| Damper | 64 |
| Filter Resonance | 71 |
| Low Pass Filter Cutoff | 74 |
| CC#80 | 80 |
| CC#81 | 81 |
| CC#82 | 82 |
(a). Expression events cannot be inserted at the starting Position (001.01.000). An Expression value is already among the default "header" parameters of the Style Element or Pad Track.
Tempo/Meter Tempo and Meter (time signature) changes (Master Track only).
Pitch Bend Pitch Bend events.
Style/Pad Edit: Quantize
The quantize function may be used to correct any timing mistake after recording, or to give the pattern a "groovy" feeling.
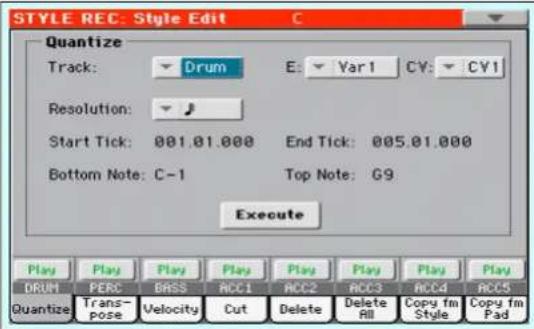
After setting the various parameters, touch Execute.
Track
(Style only) Use this parameter to select a track.
All All tracks selected.
Drum...Acc5 Selected track.
E / CV (Style Element/Chord Variation)
Use these parameters to select the Style Element (Style only) and Chord Variation for editing.
Resolution
This parameter sets the quantization after recording. For example, when you select 1/8, all notes are moved to the nearest 1/8 division. When you select 1/4, all notes are moved to the nearest 1/4 division.
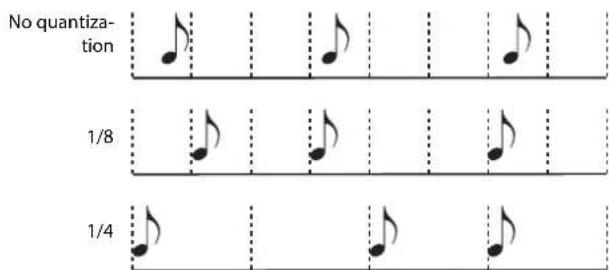
Grid resolution, in musical values. A "b...f" character added after the value means swing-quantization. A "3" means triplet.
Start / End Tick
Use these parameters to set the starting and ending points of the range to quantize.
If a Chord Variation is four measures long, and you want to select it all, the Start will be positioned at 1.01.000, and the End at 5.01.000.
Bottom / Top Note
Use these parameters to set the bottom and top of the keyboard range to quantize. If you select the same note as the Bottom and Top parameters, you can select a single percussive instrument in a Drum or Percussion track.
Note: These parameters are available only when a Drum or Percussion track is selected.
Execute
Touch this button to execute the operation set in this page.
Track status icon
Status of tracks. Touch this icon to change the status.

Play status. The track can be heard.

Mute status. The track cannot be heard.
Track names
Under the buttons, a label for each track is shown.
Style/Pad Edit: Transpose
In this page you can transpose the selected track(s).
Note: After transposing, please don't forget to readjust the "Key/Chord" parameter in the main page of the Style Record mode (see page 123).
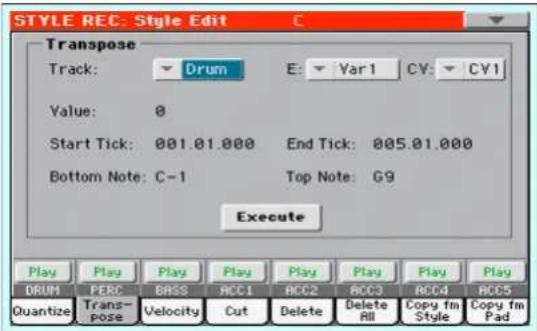
After setting the various parameters, touch Execute.
Track
(Style only) Use this parameter to select a track.
All All tracks selected, apart for tracks set in Drum mode (like the Drum and Percussion tracks). The whole selected Chord Variation will be transposed.
Drum...Acc5 Single selected track.
E / CV (Style Element/Chord Variation)
Use these parameters to select the Style Element (Style only) and Chord Variation for editing.
Value
Transpose value (±127 semitones).
Start / End Tick
Use these parameters to set the starting and ending points of the range to be transposed.
If a Chord Variation is four measures long, and you want to select it all, the Start will be positioned at 1.01.000, and the End at 5.01.000.
Bottom / Top Note
Use these parameters to set the bottom and top of the keyboard range to be transposed. If you select the same note as the Bottom and Top parameters, you can select a single percussive instrument in a Drum or Percussion track. Since in a Drum Ki instrument is assigned to a different note of the scale, transposing a percussive instrument means assigning the part to a different instrument.
Execute
Touch this button to execute the operation set in this page.
Track status icon
Status of tracks. Touch this icon to change the status.

Play status. The track can be heard.

Mute status. The track cannot be heard.
Track names
Under the buttons, a label for each track is shown.
Style/Pad Edit: Velocity
In this page you can change the velocity (dyn) notes in the selected track. An Advanced allowing you to select a velocity curve for the selected range. This is useful to create fade-ins or fade-outs.
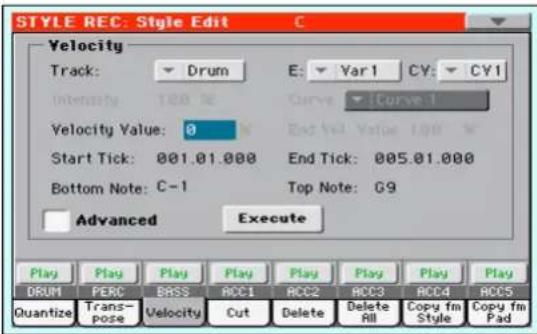
After setting the various parameters, touch Execute.
Note: When an RX Sound is assigned to the track being edited, the resulting sound may change, since this kind of Sounds is made of several different layers triggered by different velocity values.
Also, a fade-out may result in the level "jumping" up next to the zero, since a higher-level layer may be selected by low velocity values.
Track
(Style only) Use this parameter to select a track.
All All tracks selected. The velocity for all notes of the whole selected Chord Variation will be changed.
Drum...Acc5 Selected track.
E / CV (Style Element/Chord Variation)
Use these parameters to select the Style Element (Style only) and Chord Variation for editing.
Value
Velocity change value (±127).
Start / End Tick
Use these parameters to set the starting and ending points of the range to be modified.
If a Chord Variation is four measures long, and you want to select it all, the Start will be positioned at 1.01.000, and the End at 5.01.000.
Bottom / Top Note
Use these parameters to set the bottom and top of the keyboard range to be modified. If you select the same note as the Bottom and Top parameters, you can select a single percussive instrument in a Drum or Percussion track.
Advanced
When this checkbox is checked, the "Intensity", "Curve", "Start Velocity Value" and "End Velocity Value" p arame ters can be edited.
Intensity
(Only available in Advanced mode). Use this parameter to specify the degree to which the velocity data will be adjusted toward the curve you specify in "Curve".
cs) value of Oe 100% Intensity value. With a setting of 0 [%], the velocity will not change. With a setting of 100 [%], the velocity will be changed the most.
Curve
(Only available in Advanced mode). Use this parameter to select one of the six curves, and to specify how the velocity will change over time.
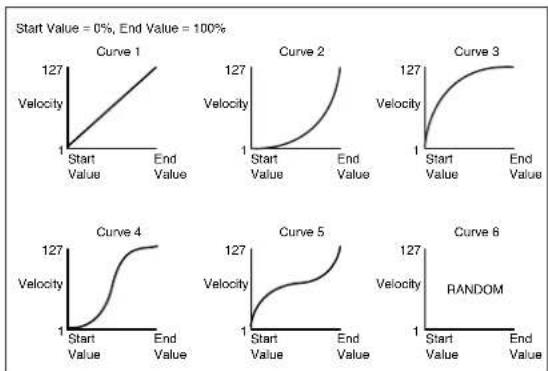
line
| Curve | Start Value | End Value | |-------|-------------|-----------| | Curve 1 | 1 | 127 | | Curve 2 | 1 | 127 | | Curve 3 | 1 | 127 | | Curve 4 | 1 | 127 | | Curve 5 | 1 | 127 | | Curve 6 | 1 | 127 | | RANDOM | Start Value | End Value |Start / End Vel. Value
(Only available in Advanced mode). Velocity change at the starting and ending ticks of the selected range.
0...100 Velocity change in percentage.
Execute
Touch this button to execute the operation set in this page.
Track status icon
Status of tracks. Touch this icon to change the status.

Play status. The track can be heard.

Mute status. The track cannot be heard.
Track names
Under the buttons, a label for each track is shown.
Style/Pad Edit: Cut
This function lets you quickly delete a selected measure (or a series of measures) from the selected Chord Variation. All following events are moved back, to replace the cut measure(s).
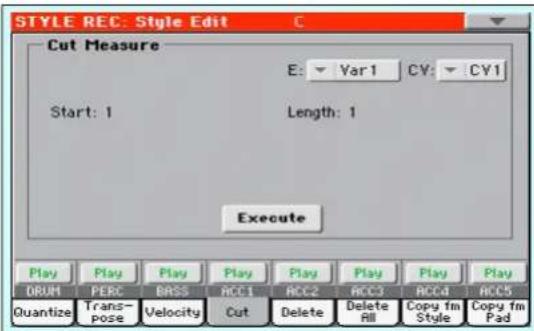
After setting the various parameters, touch Execute.
E / CV (Style Element/Chord Variation)
Use these parameters to select the Style Element (Style only) and Chord Variation for editing.
Start
First measure to be cut.
Length
Number of measures to be cut.
Execute
Touch this button to execute the operation set in this page.
Track status icon
Status of tracks. Touch this icon to change the status.

Play status. The track can be heard.

Mute status. The track cannot be heard.
Track names
Under the buttons, a label for each track is shown.
Style/Pad Edit: Delete
This page is where you can delete MIDI events out of the Style/Pad. This function does not remove measures from the pattern. To remove whole measure, use the Cut function (see "Style/Pad Edit: Cut" on page 138)
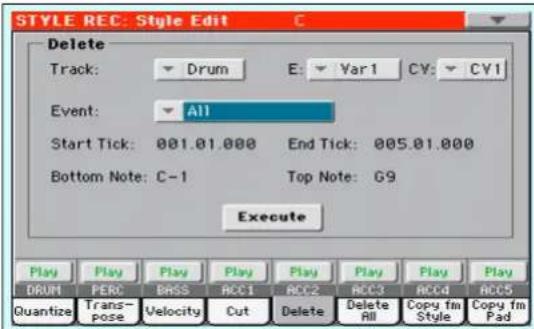
After setting the various parameters, touch Execute.
Track
(Style only) Use this parameter to select a track.
All All tracks selected. After deletion, the selected Chord Variation will remain empty.
Drum...Acc5 Selected track.
E / CV (Style Element/Chord Variation)
Use these parameters to select the Style Element (Style only) and Chord Variation for editing.
Event
Type of MIDI event to delete.
All All events. The measures are not removed from the Chord Variation.
Note All notes in the selected range.
Dup. Note All duplicate notes. When two notes with the same pitch are encountered on the same tick, the one with the lowest velocity is deleted.
After Touch After Touch events.
Pitch Bend Pitch Bend events.
Prog.Change Program Change events, excluding the bundled Control Change #00 (Bank Select MSB) and #32 (Bank Select LSB).
Note: This kind of data is automatically removed during recording.
Ctl.Change All Control Change events, for example Bank Select, Modulation, Damper, Soft Pedal...
CC00/32...CC127
Single Control Change events. Double Control Change numbers (like 00/32) are MSB/LSB bundles.
Note: Some CC data are automatically removed during recording. See the table on page 121 for more information on the allowed data.
Start / End Tick
Use these parameters to set the starting and ending points of the range to delete.
If a Chord Variation is four measures long, and you want to select it all, the Start will be positioned at 1.01.000, and the End at 5.01.000.
Bottom / Top Note
Use these parameters to set the bottom and top of the keyboard range to delete. If you select the same note as the Bottom and Top parameters, you can select a single percussive instrument in a Drum or Percussion track.
Note: These parameters are available only when the All or Note option is selected.
Execute
Touch this button to execute the operation set in this page.
Track status icon
Status of tracks. Touch this icon to change the status.

Play status. The track can be heard.

Mute status. The track cannot be heard.
Track names
Under the buttons, a label for each track is shown.
Style/Pad Edit: Delete All
This function lets you quickly delete a selected Style Element or Chord Variation, or the whole Style.
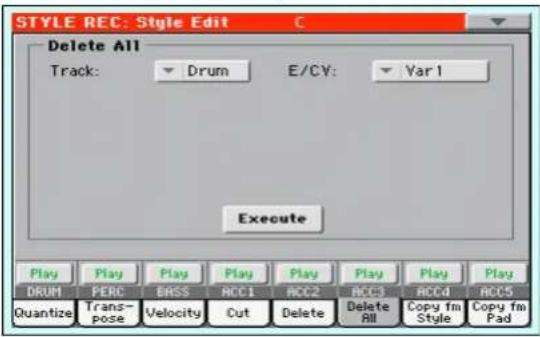
After setting the various parameters, touch Execute.
Track
(Style only) Use this parameter to select a track.
All All tracks of the selected Style, Style Element or Chord Variation.
Drum-Acc5 Single track of the selected Style, Style Element or Chord Variation.
E / CV (Style Element/Chord Variation)
Use these parameters to select the Style Element (Style only) and Chord Variation for editing.
All All Style Elements, i.e. the whole Style. When E/Track=All and CV=All, the whole Style is deleted, and all parameters are set to the default status.
Var1...CountIn
Single Style Element.
V1-CV1...CI-CV2
Single Chord Variation.
Execute
Touch this button to execute the operation set in this page.
Track status icon
Status of tracks. Touch this icon to change the status.

Play status. The track can be heard.

Mute status. The track cannot be heard.
Track names
Under the buttons, a label for each track is shown.
Style/Pad Edit: Copy from Style
Here you can copy a track, Chord Variation or Style Element inside the same Style, or from a different one. Furthermore, you can copy a whole Style.
Warning: The Copy operation deletes all data at the target location (overwrite).
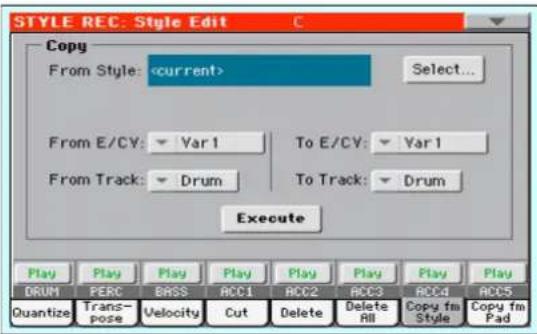
After setting the various parameters, touch Execute.
Note: If you copy too many events on the same tick, the "Too many events!" message appears, and the copy operation is aborted.
Note: When you copy over an existing Chord Variation, Program Change data is not copied, to leave the original Sounds unchanged for that Chord Variation.
From Style
Choose this option to select the source Style to copy the track, Chord Variation or Style Element from. Touch the Select button to open the Style Select window and select the source Style.
From... To E/CV (Style Element/Chord Variation)
Use these parameters to select the source and target Style Elements or Chord Variations.
Note: You can't copy from a Variation to a different Style Element (or vice-versa), because of their different structure.
All All Style Elements, i.e. the whole Style. You can't change the target, that is automatically set to All.
Var1...End2 Single Style Element.
V1-CV1...E2-CV2
Single Chord Variation.
From... To Track
Use this parameter to select the source and target track to copy. You can double a track, to strengthen a pattern.
All All tracks of the selected Style, Style Element or Chord Variation.
Drum-Acc5 Single track of the selected Style, Style Element or Chord Variation.
Execute
Touch this button to execute the operation set in this page.
Track status icon
Status of tracks. Touch this icon to change the status.

Play status. The track can be heard.

Mute status. The track cannot be heard.
Track names
Under the buttons, a label for each track is shown.
Copying to a Chord Variation of a different length
You can copy a Chord Variation to a different one of a different length. Just keep in mind the following:
- If the source length is a divider of the target length, the source Chord Variation will be multiplied to fit the target Chord Variation. For example, if the source is 4-measures long, and the target 8-measures, the source will be copied two times.
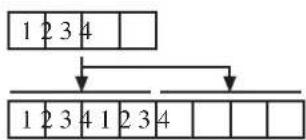
flowchart
graph TD
    A["1 2 3 4"] --> B["1 2 3 4 1 2 3 4"]
    A --> C[" "]
    D[" "] --> E[" "]
    F[" "] --> G[" "]
- If the source length is not a divider of the target length, the source Chord Variation will be copied for as many measures as can fit the target Chord Variation. For example, if the source is 6-measures long, and the target 8-measures, the source will be copied once, then the first 2 measures will be copied to fit the remaining 2 measures.
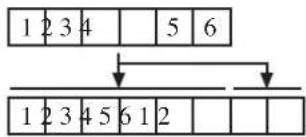
Note: Avoid copying to a Chord Variation with a different meter (time signature), for example a 4/4 Chord Variation onto a 3/4 one.
Style/Pad Edit: Copy from Pad
Here you can copy a Chord Variation from a Pad. Furthermore, you can copy a whole Pad.
Warning: The Copy operation deletes all data at the target location (overwrite).
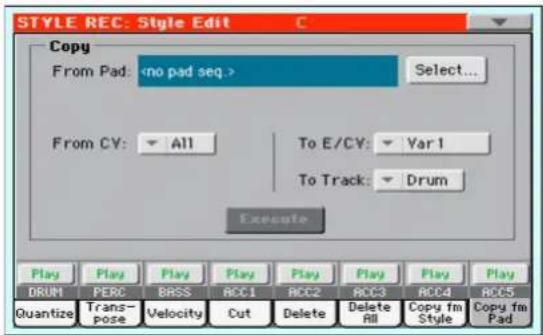
After setting the various parameters, touch Execute.
Note: If you copy too many events on the same "tick", the "Too many events!" message appears, and the copy operation is aborted.
Note: When you copy over an existing Chord Variation, Program Change data is not copied, to leave the original Sounds unchanged for that Chord Variation.
From Pad
Choose this option to select the source Pad to copy the Chord Variation from. Touch the Select button to open the Pad Select window and select the source Pad.
From CV (Chord Variation)
Use this parameter to select the source Chord Variation.
All All Chord Variations, i.e. the whole Pad. You can't change the target, that is automatically set to All.
CV1...CV6 Single Chord Variation.
To CV (Chord Variation)
Use this parameter to select a target Chord Variation inside the current Style/Pad.
CV1...CV6 Target Chord Variation. Automatically set to All if the "From CV" parameter is also set to All.
To Track
(Style only) Use this parameter to select the target track to copy.
All All tracks of the selected Style, Style Element or Chord Variation.
Drum-Acc5 Single track of the selected Style, Style Element or Chord Variation.
Execute
Touch this button to execute the operation set in this page.
Style Element Track Controls: Sound/Expression
In this page you can assign a different Sound to each track of the selected Style Element. Each Style Element can have different Sound; after saving the new Style, please don't forget to check the "Original Style Sounds" parameter in the Style Play mode (see page 98), to let the Style select the Sound bypassing the Style Settings.
In this page you can also check and modify (CC#11) value for each of the Style Element tracks. This lets you reduce the relative level of a track in a single Style Element, without reducing the overall Volume of the Style. This is a very useful control, when you have different Sounds assigned to the same track in different Style Elements, and the internal level of these Sounds must be different.
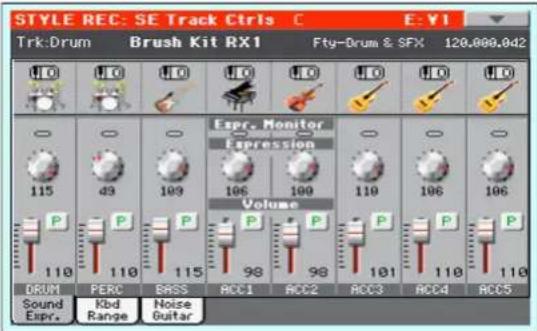
When in this page, press the corresponding button on the control panel to select a Style Element (VARIATION1 ... ENDING3).
To copy the settings of this page to another Style Element, use the "Copy Sound" and "Copy Expression" commands from the page menu (see "Copy Sounds dialog box" and "Copy sion dialog box" starting from page 150).
Selected Track Info area
See "Selected track info area" on page 123 for detailed information.
Sounds area
See "Sounds area" on page 125 for detailed information.
Expression area
Expression Monitor
You can use these indicators to check if CC#11 (Expression) messages are contained in a track. Expression messages contained in a track can vary the volume of the track. It is very difficult to catch them out – unless you carefully read all the events in the Event Edit page.
This monitor should help you keeping track of them, and let you access Event Edit only on the tracks containing the messages. Press the START/STOP button to start playback, and look at the indicators. When one of them lights up, you can enter Event Edit on the corresponding track, and edit or remove the Expression messages.
Expression
Use these knobs to set the Expression (CC#11) value for the corresponding track. This value can be seen at the beginning of the Event Edit list (see "Event Edit: Event Edit" on page 133).
Different Expression values can be defined for each Style Element. This way, you can set a different volume in each Style Element, relative to the general Volume value set in the Style Header.
Expression leveling
TheuExaprrqusiioknly and easily adjust the Expressi tracks in a Style Element (Variation, Intro...). This allows for a more precise control over the volume level of all Style Element.
- While in this page, select one of the Style Elements by pressing its button in the control panel.
Selected Style Element
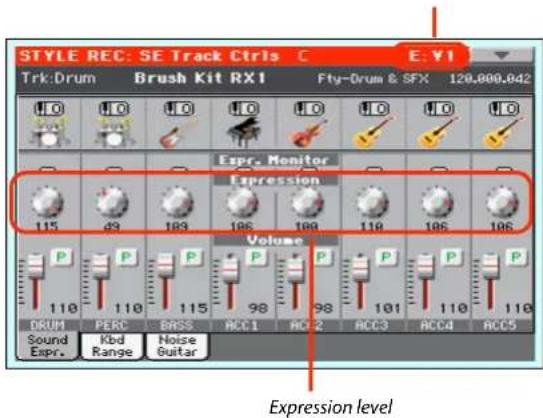
- Keep the SHIFT button pressed, and press the TEMPO+ button to increase the Expression value of all the Style Vari-Expression's tracks, TEMPO- to decrease it.
- Release the SHIFT button.
- Repeat the above operation with all the desired Style Elements.
Note: A track's volume may be changed by an Expre contained in a track. To check if any of these events exist in a track, let the Style Element play and look at the Expression Monitor in this same page. If one or more Expression events are found, go to the Event Edit page and delete it (or them)
Volume area
Use these controls to set the volume and status of each track. See page 125 for more information.
The Volume value is the same for the whole Style. Use the Expression controls to adjust the relative balance between tracks in each Style Element.
Style Element Track Controls: Keyboard Range
The Keyboard Range automatically transposes any pattern note that would otherwise play too high or too low in pitch, compared to the original acoustic instrument, when transposed by the arranger. This will result in a more natural sound for each accompaniment instrument.
For example, the lower limit for a guitar is E2. If you play a chord under the E2, the transposed pattern could exceed this limit, and sound unnatural. A Bottom limit set to E2 for the guitar track will solve the problem.
Different Keyboard Range values can be set for each Style Element.
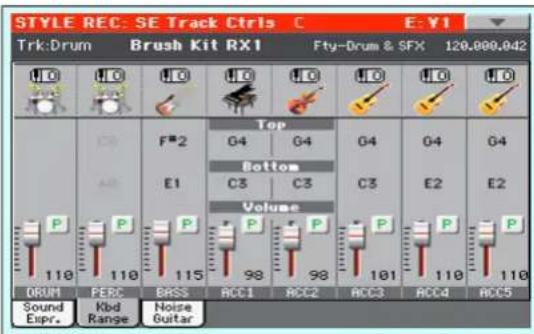
Note: The Keyboard Range is ignored while recording. The selected track can be recorded and played back on the full range of the keyboard.
When in this page, press the corresponding button on the control panel to select a Style Element (VARIATION1 ... ENDING3).
To copy the settings of this page to another Style Element, use the "Copy Keyboard Range" command from the page menu (see "Copy Key Range dialog box" on page 151).
Top/Bottom
Use these parameters to set the bottom and top of the keyboard range for the corresponding track of the current Style Element.
Volume area
Use these controls to set the volume and status of each track. See page 125 for more information.
Style Element Track Controls: Noise/Guitar
The Noise/Guitar page is where you can set the RX Noise level and the 'human feel' of Guitar tracks.
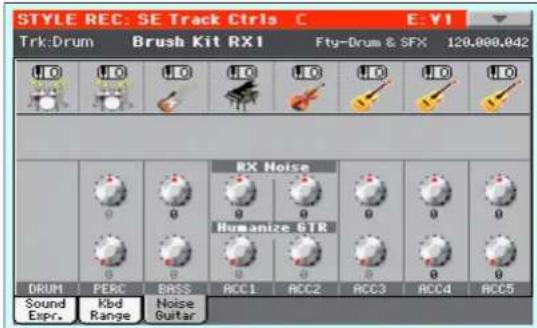
RX Noise
Use these controls to adjust the volume of RX Noises in the corresponding tracks. This control applies to all types of tracks (provided the Sound includes RX Noises).
Humanize GTR
Use these controls to apply a random value to the position, velocity and length of notes of Guitar tracks (see "Track Type" on page 144). This control has no effect on other types of track.
Pad Track Controls: Sound/Expression
In this page you can assign a Sound to the Pad track, adjust its Volume (CC#07) and Expression (CC#11) values, and set various other parameters, like the Keyboard Range, Track Type, Trigger Mode, Tension and Wrap Around.
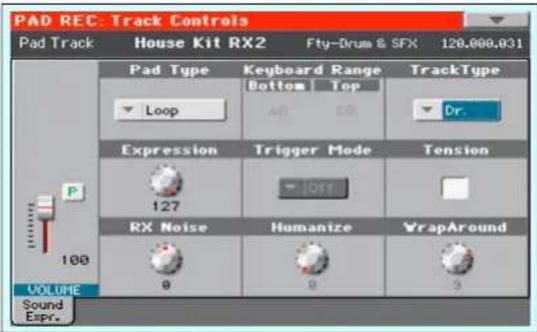
Sound/Bank
Sound assigned to the Pad track.
Volume
Use this slider to set the Volume (CC#07) value for the Pad track. This value is not saved with the Pad, and is only used to test the Pad's volume during editing or recording.
Pad Type
Use this parameter to decide if the Pad will play once or if it will loop.
Note: While in Pad Record mode, the pattern is always back in loop, even if this parameter is set to "One Shot".
One Shot When you press one of the PAD buttons, the corresponding Pad is only played once. This is useful for playing Hits or Sequences that must only play once.
Loop When you press one of the PAD buttons, the corresponding Pad plays up to the end, then continues playing from the start. Press STOP in the PAD section to stop it playing. This is useful playing cyclic sequences.
Keyboard Range
The Keyboard Range automatically transposes any pattern note that would otherwise play too high or too low in pitch, compared to the original acoustic instrument, when transp the arranger. This will result in a more natural sound for the Pad instrument.
Note: The Keyboard Range is ignored while recording. The Pad track can play on the full range of the keyboard.
Trigger Mode
(Not available if Track Type = Drum). This setting lets you define how Bass and Acc-type tracks are retriggered when the chord is changed.
Off Each time you play a new chord, current notes will be stopped. The track will remain silent until a new note will be encountered in the pattern.
Rt (Retrigger) The sound will be stopped, and new notes matching the recognized chord will be played back.
Rp (Repitch) New notes matching the recognized chord will be played back, by repitching notes already playing. There will be no break in the sound. This is very useful on Guitar: tracks.
Track Type
Use this parameter to set the type of the Pad track.
Drum Drum track. This type of track is not transposed by the arranger, and is used for Drum Kits, or for tracks that you don't want to be transposed when playing a different chord.
Bass Bass track. This type of track always plays the root when changing chord.
Acc Accompaniment track. This type of track can be used freely, for melodic or harmonic accompaniment patterns.
Expression
Use this knob to set the Expression (CC#11) value for the Pad track. This value can be seen at the beginning of the Event Edit list.
The Expression is useful to balance the Pad with the other Pads. For example, if you want the Pad you are recording to be mellower than the average, just lower the Expression value.
Tension
Tension added notes (a 9th, 11th and/or 13th) that have actually been played, even if they haven't been written in the Pad pattern. This parameter specifies whether or not the Tension included in the recognized chord will be added to an Acc-type track.
On The Tension will be added.
Off No Tension will be added.
RX Noise
Use these controls to adjust the volume of RX Noises in the corresponding tracks. This control applies to all types of tracks (provided the Sound includes RX Noises).
Humanize GTR
Use these controls to apply a random value to the position, velocity and length of notes of Guitar tracks (see "Track Type" on page 143). This control has no effect on other types of track.
Wrap Around
The wrap-around point is the highest register limit for the Pad track. The Pad pattern will be transposed according to the detected chord. If the chord is too high, the Pad track might play in a register that is too high, and therefore unnatural. If, however, it reaches the wrap-around point, it will be automatic transposed an octave lower.
The wrap-around point can be individually set in semitone steps up to a maximum of 12 semitones, relative to the chord root set in the main page of the Pad Record mode (see "Key/Chord" on page 123).
1...12 Maximum transposition (in semitones) of the track, referred to the original key of the Pad pattern.
Style Element/Pad Chord Table: Chord Table
This is the page where you can assign a Chord Variation to each of the most important recognized chord. When a chord is recognized, the assigned Chord Variation will be automatically selected by the arranger to play the accompaniment.
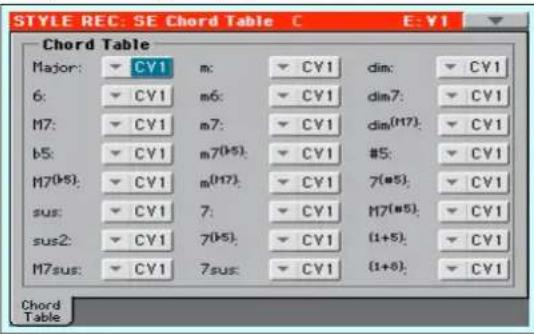
Use these parameters to assign a Chord Variation to each of the most important chords.
Style Track Controls: Type/Trigger/Tension
In this page you can set the Mode, Trigger mode for the Style tracks, and activate/deactivate the Tension for the Accompaniment tracks.
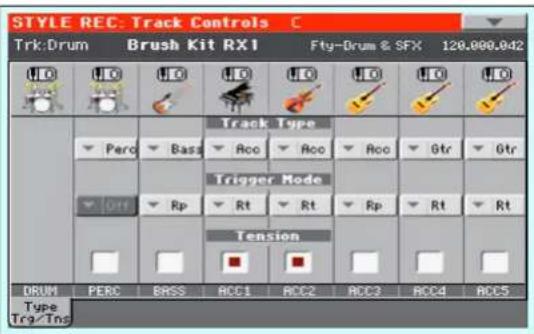
When in this page, press the corresponding button on the control panel to select a Style Element (VARIATION1 ... ENDING3).
Track Type
Use this parameter to set the type of the corresponding track.
Drum Drum track. This type of track is not transposed by the arranger, and is used for Drum Kits made of Drum sounds. It can be affected by the Drum Mapping of the Style Play mode (see "Drum Mapping (Var.1...Var.4)" on page 113).
Perc Percussion track. This type of track cannot be transposed, and is used for Drum Kit made of Percussion sounds. It is NOT affected Drum Mapping.
Bass Bass track. This type of track always plays the root when changing chord.
Acc Accompaniment track. This type of track can be used freely, for melodic or harmonic accompaniment patterns.
Gtr Guitar track. This type of track uses Guitar Mode to create guitar strumming (see "Main I Guitar Mode" on page 126). When this type is selected, the "Tension" parameter can no longer be edited.
Trigger Mode
This setting lets you define how Bass and Acc-type tracks are retriggered when the chord is changed.
Off Each time you play a new chord, current notes will be stopped. The track will remain silent until a new note will be encountered in the pattern.
Rt (Retrigger) The sound will be stopped, and new notes matching the recognized chord will be played back.
Rp (Repitch) New notes matching the recognized chord will be played back, by repitching notes already playing. There will be no break in the sound. This is very useful on Guitar and Bass tracks.
Tension
Tension adds notes (a 9th, 11th and/or 13th) that have actually been played to the accompaniment, even if they haven't been written in the Style pattern. This parameter specifies whether or not the Tension included in the recognized chord will be added to the Acc-type tracks.
On The Tension will be added.
Off No Tension will be added.
Import: Import Groove
The Import Groove function allows Grooves ("GRV" files). By importing these data to a track, and assigning the Sound based on the sliced samples to the same track, you can play the original audio groove, and freely change its Tempo.
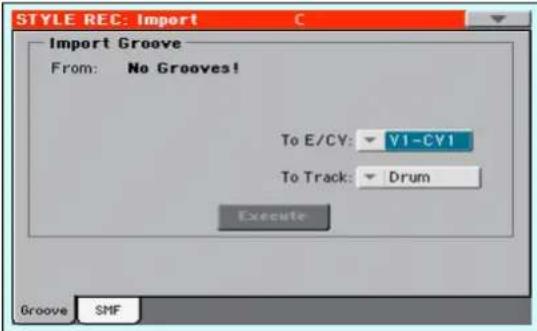
Note: After importing a groove generated by a melody line (not by a percussive groove), the imported groove and samples will not be transposed together with the other Style tracks. Audio data cannot be transposed by the arranger.
Note: Please execute the Import Groove operation before setting the instrument to standby. All ".GRV" files generated by a Time Slice operation are deleted when the instrument enters standby.
From
Use this parameter to select one of the MIDI Groove patterns (“.GRV” files) generated when saving data aft operation.
To E/CV (Style Element/Chord Variation)
Use this parameter to select the target Style Element (Style only) and Chord Variation.
To Track
(Style only) Use this parameter to select the target track inside the selected Chord Variation. The Percussion track is usually suggested, since the Drum track is still suitable for standard Drum Kit sounds (count-in, break etc.). After importing the MIDI Groove pattern, assign the Sound, to which the sliced samples are assigned, to the track playing the MIDI Groove pattern.
Import: Import SMF
The ImportaSMF function allows You to import MIDI data from a Standard MIDI File (SMF) created on your preferred external sequencer, and transform them in a Chord Variation.
Note: You cannot use this function to import a generic Song. The Standard MIDI File to be imported must be programmed as if it was one of Pa600's Chord Variations.
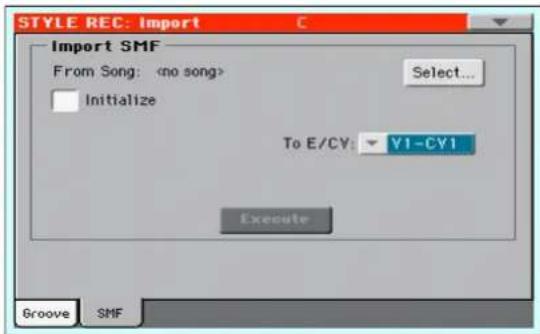
When importing an SMF, parameters like CV Length, Meter, Tempo Changes, Program Changes and Expression are recognized. These parameters will be imported as the header of the Style Element containing the Chord Variation, provided the "Initialize" parameter is checked, or the Style Element is empty.
Hint: It is a good idea to check the "Initialize" paramete importing the first Chord Variation of a Style Element, and uncheck it when importing the following Chord Variations.
- Sounds assigned to each track can be imported, provided the er a Time Slice Program Change, Bank Select MSB and LSB events are on the first 'tick' of the SMF. These data are loaded in the Style Element's header, and not as Sounds assigned to the Style Performance.
Note: Sounds in the Style Element header can be overridden by Sounds assigned to the Style Settings, by checking the "Original Style Sound" parameter in the main page of the Style Play mode (Style Track view).
- If the above data was not found on the first tick of the imported SMF, Sounds must be manually assigned to each track. You can do this in the "Record 1" or "Record 2", or the "Sound/Expression" page of the Style Record mode.
• Key/Chord, Chord Table, Expression, and any other Style Variation parameter, must be manually programmed in the relevant Style Record pages.
- The starting Tempo, and each track's Volume, must be programmed as Style Settings data, and then saved in the Style Settings.
- Meter (time signature) Change is not allowed, therefore not recognized.
- The Chord Variation length is the same as the imported SMF. You can change length by changing the value of the CV Length parameter, on the main page of the Style/Pad Record mode.
Hint: If a note extends beyond the last measure of the Chord Variation, an additional measure is appended (for example, if a note extends after the end of the fourth measure in a 4-measure pattern, a 5-measure Chord Variation will be generated). If so, change the CV Length value to reset the Chord Variation length. The exceeding note will be cut, to fit the new pattern length.
When programming a Chord Variation on an external sequencer, please assign each Style track to the correct MIDI channel, according to the following table.
| Style Track MIDI Channel | |
| Bass 09 | |
| Drum/Pad 10 | |
| Percussion 11 | |
| Accompaniment 1 12 | |
| Accompaniment 2 13 | |
| Accompaniment 3 14 | |
| Accompaniment 4 15 | |
| Accompaniment 5 16 |
When programming a Chord Variation on the external sequencer, please assign the Pad track to the MIDI channel #10.
Note: Only SMF in format 0 can be loaded.
From Song
This is the name of the Standard MIDI File to be loaded. Touch the Select button to open the file selector, and select an ".SMF" file.
Select
Touch this button to open the file selector and load the SMF.
Initialize
Check this parameter if you want all settings of the target Style Element (i.e., Key/Chord, Chord Table, Sounds...) are reset when loading the SMF.
Hint: It is a good idea to check the "Initialize" parameter when importing the first Chord Variation of a Style Element, and uncheck it when importing the following Chord Variations.
To E/CV
Use this parameter to select a target Chord Variation.
Execute
After setting all parameters in this page, touch this button to import the Standard MIDI File into the target Chord Variation.
Importing an SMF separated by Markers into a Style
As an alternative to importing single Chord Variations, you can import a whole Style as an SMF separated by Markers, i.e., a single SMF containing all the Chord Variations (Variation 1, Variation 2, etc.) each one separated by a Marker (the same even used in Song Play mode).
- While in this page, touch the Select button, and choose the Standard Midi File to be imported.
- Keep the SHIFT button pressed.
- Without releasing the SHIFT button, touch the Execute button in the display.
- Release the SHIFT button.
When creating a new Style, we suggest to check the "Initialize" checkbox. Do not check it if the SMF you are loading was previously exported from a Style to be edited; in this case, it is very important to keep all the previous settings.
Style Tracks and MIDI Channels must be lined as in the previous table, as per KORG's standard Style format definition.
Note: Tracks/MIDI Channels other than the above mentioned are ignored during the import procedure.
For a list of MIDI events supported during the import operations, please see "List of recorded events" on page 121. If any, the following events are stripped off and automatically transferred to the Style Element header during the import procedure:
• Time signature (this event is mandatory)
• Control Change bundle #00-32 (Bank Select MSB/LSB)
- Program Change
• Control Change #11 (Expression)
Control Change 00, Control Change 32 and Program Change messages must be placed at the very beginning of each Chord Variation (tick 0).
Whenever they are not saved in the SMF, Program Change, Control Change 00, 11 and 32, can be still programmed in Style Record mode, by using the edit features available.
Warning: Pa600 can only handle SMF format 0 (Zero). If you are in trouble importing your file, maybe your sequencer (or DAW) is exporting using SMF format 1. Please refer to the software's user's manual.
The naming structure for the Markers inside the SMF is "EnCVn", whose single components are shown in the following table:
| Component Meaning | |
| E Style Element | ('v' = variation, 'i' = intro, 'f' = fill,'e' = ending) |
| n Style Element | number ('1'~'4' for variations, '1'~'2' for allother style elements) |
| CV Chord Variation | ('cv' = chord variation – no other choicesallowed) |
| n Chord Variation | number [1~6 for Variations, 1~2 for all others] |
Warning: It is mandatory not to use capital letters in Marker names. Some examples of valid names:
^i1cv2' = Intro1 - Chord Variation 2
'v4cv3' = Variation 4 - Chord Variation 3
Examples of non accepted names:
'V1cv2', 'v1CV2', 'intro i1cv2', 'v1cv1 chorus'
The order of the Chord Variations inside the SMF is not relevant. They can be freely placed inside the SMF.
At the end of this page you can find a screenshot of a test file created in Steinberg Cubase, just as an example of how a SMF separated by Markers can look like. Considering analogies between actual workstations, it will not look much different in other applications like Logic, Digital Performer, Pro Tools or Sonar.
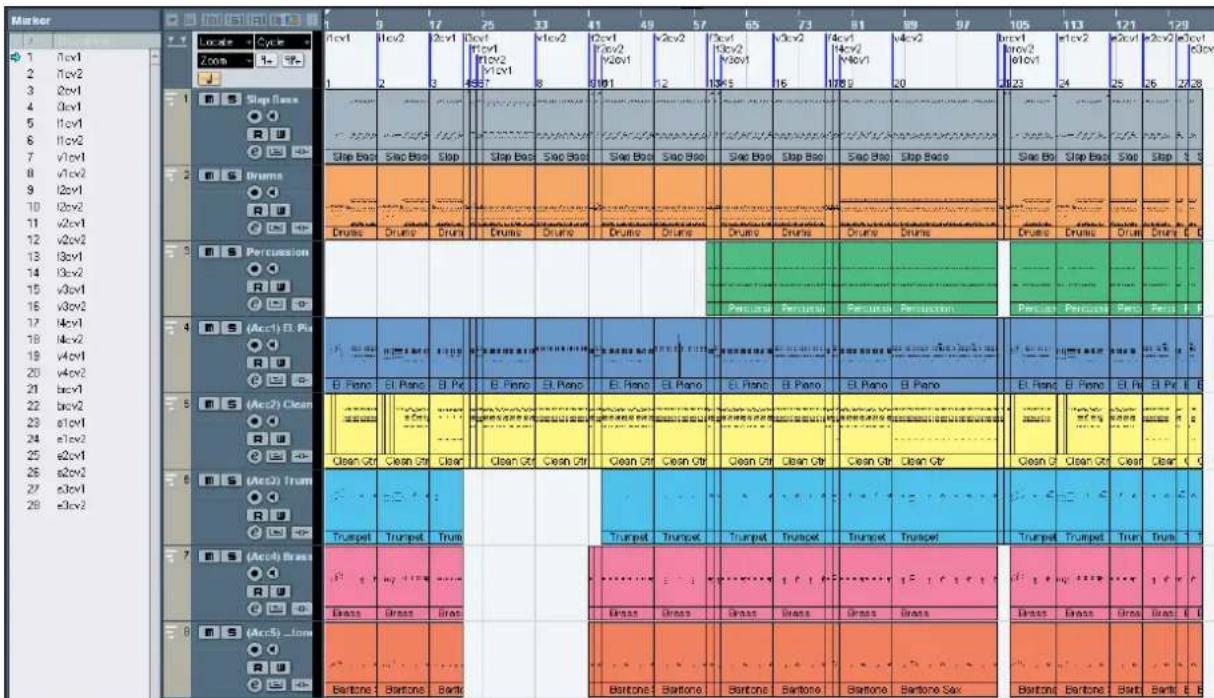
bar
| Measure | Cycle | Step Loss | Step Loss | Percussion | |---|---|---|---|---| | 1 | Tcv1 | 1 | 1 | 1 | | 2 | Tcv2 | 2 | 2 | 2 | | 3 | Tcv1 | 3 | 3 | 3 | | 4 | Tcv1 | 4 | 4 | 4 | | 5 | Tcv1 | 5 | 5 | 5 | | 6 | Tcv2 | 6 | 6 | 6 | | 7 | Tcv1 | 7 | 7 | 7 | | 8 | Tcv2 | 8 | 8 | 8 | | 9 | Tcv1 | 9 | 9 | 9 | | 10 | Tcv2 | 10 | 10 | 10 | | 11 | Tcv1 | 11 | 11 | 11 | | 12 | Tcv2 | 12 | 12 | 12 | | 13 | Tcv1 | 13 | 13 | 13 | | 14 | Tcv2 | 14 | 14 | 14 | | 15 | Tcv1 | 15 | 15 | 15 | | 16 | Tcv2 | 16 | 16 | 16 | | 17 | Tcv1 | 17 | 17 | 17 | | 18 | Tcv2 | 18 | 18 | 18 | | 19 | Tcv1 | 19 | 19 | 19 | | 20 | Tcv2 | 20 | 20 | 20 | | 21 | Tcv1 | 21 | 21 | 21 | | 22 | Tcv2 | 22 | 22 | 22 | | 23 | Tcv1 | 23 | 23 | 23 | | 24 | Tcv2 | 24 | 24 | 24 | | 25 | Tcv1 | 25 | 25 | 25 | | 26 | Tcv2 | 26 | 26 | 26 | | 27 | Tcv1 | 27 | 27 | 27 | | 28 | Tcv2 | 28 | 28 | 28 | | 29 | Tcv1 | 29 | 29 | 29 | | Total (x) = (Acc) / (Acc) / (Acc) / (Acc) / (Acc) / (Acc) / (Acc) / (Acc) / (Acc) / (Acc) / (Acc) / (Acc) / (Acc) / (Acc) / (Acc) / (Acc) / (Acc) / (Acc) / (Acc) / (Acc) / (Acc) / (Acc) / (Acc) / (Acc) / (Acc) / (Acc)Export SMF
The Export SMF function allows you to export a Chord Variation as a Standard MIDI File (SMF), and edit it on your preferred external sequencer.
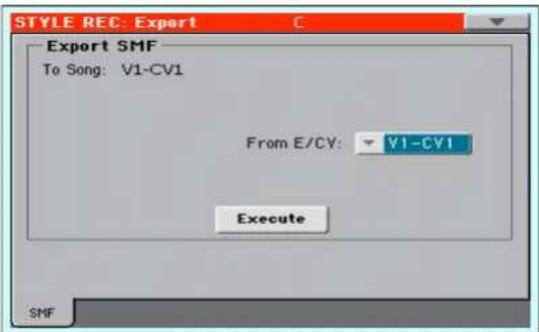
To Song
This (non editable) parameter shows the name of the Standard MIDI File to be generated. The (automatically assi will be the same of the exported Chord Variation.
From E/CV
Use this pop-up menu to select one of the available Chord Variations from the current Style.
Execute
After selecting a Chord Variation, touch this button to export it as a Standard MIDI File. A standard file selector will appear. Select the target device and directory, then touch Save. After you touch Save, a dialog box appears, letting you assign a name to the file.
Exporting a Style as an SMF separated by Markers
As an alternative to exporting single Chord Variations to individual Standard MIDI Files, you can export a whole Style as an SMF separated by Markers, i.e., a single SMF containing all the Chord Variations (Variation 1, Variation 2, etc.) each one separated by a Marker (the same events used in Song Play mode).
- While in this page, keep the SHIFT button pressed.
- Without releasing the SHIFT button, touch the Execute button in the display.
- Release the SHIFT button.
- Assign a name to the Standard Midi File where to save the Style in edit.
This operation creates, in the selected device, an SMF format 0 (Zero), containing all the MIDI data included in the selected Style, with each Chord Variation starting from a different Marker (named as per the naming convention explained in the Import section above).
Each G chord Variation will include, at the very beginning (tick 0), the following informations:
• Time e si g n a t u r e
• Control Change bundle #00-32 (Bank Select MSB/LSB)
- Program Change
• Control Change #11 (Expression)
Page menu
Touch the page menu icon to open the page menu. Touch a command to select it. Touch anywhere in the display to close the menu without selecting a command.
| Write Style | Copy Chord Table |
| Undo | Delete Current Track |
| Copy Key/Chord | Overdub Step Recording |
| Copy Sounds | Solo Track |
| Copy Expression | Exit from Record |
| Copy Keyboard Range |
Style Record
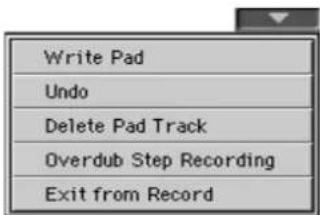
Pad Record
Write Style/Pad
Select this command to open the Write Style or Write Pad dialog box, and save the Style/Pad to the internal memory.
See "Write Style/Pad dialog box" on page 150 for more information.
Undo
Only available in Record mode. While in Record mode, cancel the latest recorded data and restores the previous situation. Selected a second time, it restores recorded data again ("Redo" function).
Delete Pad Track
Only available in the Main page of the Pad Record mode. this command to delete the Pad track.
Copy Key/Ch (Copy Key/Chord) button
Select this command to open the Copy Key/Chord dialog box, Style. and copy Key/Chord settings of the currently selected track to all other tracks of the same Chord Variation, or to the whole Style.
See "Copy Key/Chord dialog box" on page 150 for more information.
Copy Sound
(Only available in some edit pages). While the Style Element Track Control edit section is selected, use this command to open the Copy Sound dialog box and copy all Sounds assigned to the current Style Element tracks to a different Style Element.
See "Copy Sounds dialog box" on page 150 for more information.
Copy Expression
(Only available in some edit pages). While the Style Element Track Control edit section is selected, use this command to open the Copy Expression dialog box and copy all Expression values assigned to the current Style Element tracks to a different Style Element.
See "Copy Expression dialog box" on page 151 for more information.
Copy Keyboard Range
(Only available in some edit pages). While the Style Element Track Control edit section is selected, use this command to open the Copy Keyboard Range dialog box and copy all Keyboard Range values for the current Style Element tracks to a different Style Element.
See "Copy Key Range dialog box" on page 151 for more information.
Copy Chord Table
Only available while in the Style Element Chord Table page. Select this command to open the Copy Chord Table dialog box (see "Copy Chord Table dialog box" on page 151).
Delete Current Track
(Only available in the Main Record pages). Select this command to delete the selected track.
Overdub Step Recording
(Only available in the Main Record pages). Select this command to open the Overdub Step recording window (see "Overdub Step Recording window" on page 152).
Solo Track
Select the track to be soloed, then check this item. You will hear only the selected track, and the 'Solo' warning will flash on the page header.
Uncheck this item to exit the Solo function.
SHIFT Keep the SHIFT button pressed and touch one of the tracks to solo it. Do the same on a soloed track to deactivate the Solo function.
Exit from Record
Select this command to exit from Record without saving changes
Write Style/Pad dialog box
Open this window by choosing the Write Style or Write Pad item from the page menu. Here you can save the recorded or edited Style/Pad to memory.
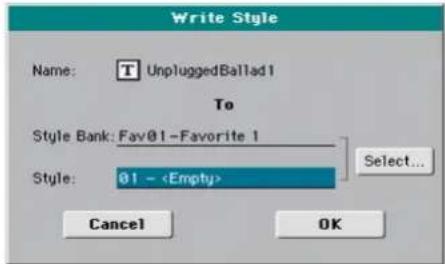
Name
Name of the Style/Pad to be saved. Touch the (Text Edit) button next to the name to open the Text Edit window.
Style/Pad Bank
Target bank of Styles/Pad. Use the Select button on the display, or the VALUE DIAL to select a different bank.
Style
Target Style/Pad location in the selected bank. Use the Select button on the display, or the VALUE DIAL to select a different location.
Note: A User or Favorite Style, or a User Pad, is usually prompted when writing a Style/Pad. However, you can overwrite a Factory Style/Pad when the "Factory Style and Pad Protect" parameter is left unchecked (see page 241).
Select... button
Touch this button to open the Style/Pad Select window, and select a target location.
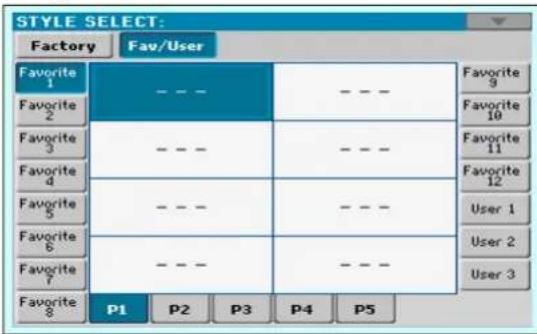
While in the Style/Pad Select window, use the buttons on top of the window to select either the User or the Favorite banks.
Copy Key/Chord dialog box
(Style only) Open this window by choosing the Copy Key/Chord item from the page menu. Here you can copy Key/Chord settings of the currently selected track to all other tracks of the same Chord Variation, or to the whole Style. This function is useful to speed-up pattern programming, and to avoid having different tracks in different keys within the same Chord Variation.
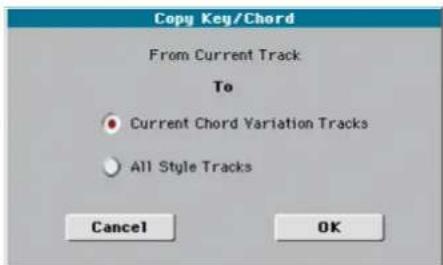
Current Chord Variation Tracks
The Key/Chord of the current track will be copied to all tracks of the current Chord Variation.
All Style Tracks
The Key/Chord of the current track will be copied to all tracks of the Style (i.e., all Chord Variations).
Copy Sounds dialog box
(Style only) Open this window by choosing the Copy Sounds item from the page menu. Here you can copy assigned to the current Style Element tracks to a different Style Element.
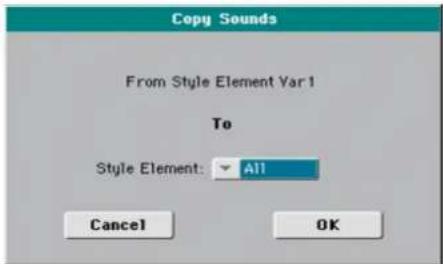
From Style Element
Non editable. Currently selected Style Element.
To Style Element
Target Style Element.
All Settings will be copied to all Style Element of the Style in edit.
Var1...CountIn
Single Style Element where to copy settings to.
Copy Expression dialog box
(Style only) Open this window by choosing the Copy Expression item from the page menu. Here you can copy all Expression values assigned to the current Style Element tracks to a different Style Element.
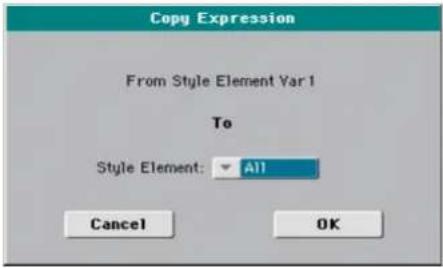
From Style Element
Non editable. Currently selected Style Element.
To Style Element
Target Style Element.
All Settings will be copied to all Style Element of the Style in edit.
Var1...CountIn
Single Style Element where to copy settings to.
Copy Key Range dialog box
(Style only) Open this window by choosing the Copy Keyboard Range item from the page menu. Here you can copy all Keyboard Range values for the current Style Element tracks to a different Style Element.
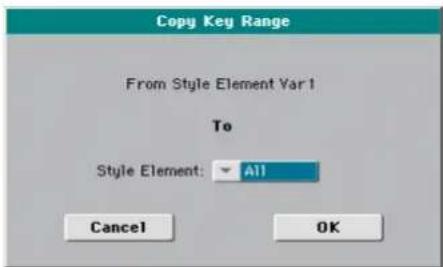
From Style Element
Non editable. Currently selected Style Element.
To Style Element
Target Style Element.
All Settings will be copied to all Style Element of the Style in edit.
Var1...CountIn
Single Style Element where to copy settings to.
Copy Chord Table dialog box
(Style only) Open this window by choosing the Cop Table item from the page menu. Here you can copy the Chord Table of the current Style Element to a different Style Element.
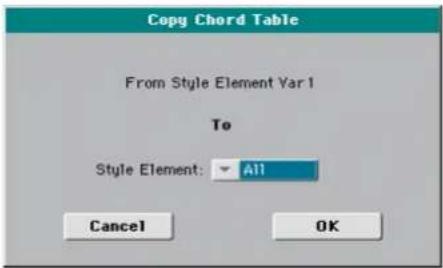
To Style Element
Target Style Element.
All Settings will be copied to all Style Element of the Style in edit.
Var1...CountIn
Single Style Element where to copy settings to.
Overdub Step Recording window
The Step Record allows you to create a new Style/Pad by entering single notes or chords to each track, by playing them on the keyboard one at a time, with no need to play on time. This is very useful when transcribing an existing score, or needing a higher grade of detail, and is particularly suitable to create drum and percussion tracks.
To access this page, select the "Overdub Step Recording" 85% Ordinary articulation. mand from the page menu. 100% Legato.
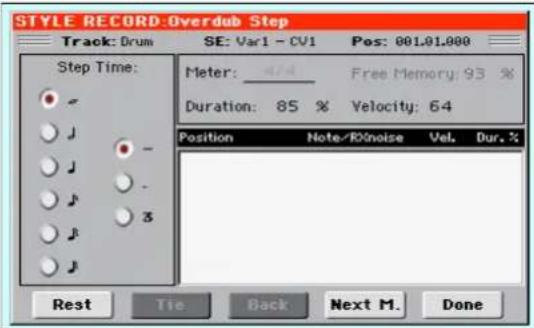
Track (Selected track)
Name of the selected track in record.
DRUM...ACC5
Style track.
SE (Selected Style Element)
See "Element (Style Element)" on page 122.
CV (Selected Chord Variation)
See "Chord Var (Chord Variation)" on page 122.
Pos (Position)
This is the position of the event (note, rest or chord) to be inserted.
Event list
Previously inserted events. You may delete this event, and set it in edit again, by touching the Back button.
Step Time values
Length of the event to be inserted.
... Note value.
Standard (−) Standard value of the selected note.
Dot (.) Augments the selected note by one half of its value.
Triplet (3) Triplet value of the selected note.
Meter
Meter (time signature) of the current measure. This parameter cannot be edited. You can set the Meter in the main page of the Style Record mode, before actually starting recording (see step 6 on page 130 for more information).
Free Memory
Remaining memory for recording.
Duration
Relative duration of the inserted note. The percentage is always referred to the step value.
25% Staccatissimo.
50% Staccato.
85% Ordinary articulation.
100% Legato.
Velocity
Set this parameter before entering a note or chord. This will be the playing strength (i.e., velocity value) of the event to be inserted.
Kbd Keyboard. You can select this parameter, by turning all counter-clockwise the dial. When this option is selected, the playing strength of the played note is recognized and recorded.
1...127 Velocity value. The event will be inserted with this velocity value, and the actual playing strength of the note played on the keyboard will be ignored.
Rest
Touch this button to insert a rest.
Tie
Touch this button to tie the note to be inserted to the previous note.
Back
Goes to the previous step, erasing the inserted event.
Next M. (Next Measure)
Goes to the next measure, and fills the remaining space with rests.
Done
Exits the Step Record mode. If you have inserted some notes, a dialog box appears, asking you to either cancel, discard or save the changes.
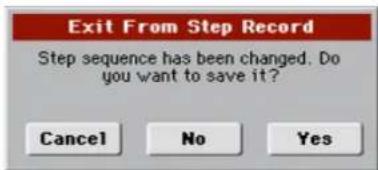
If you touch Cancel, exit is canceled, and you can continue editing. If you choose No, changes are not saved, and the Step Record window is closed. If you choose Yes, changes are saved, and the Step Record window is closed.
Song Play mode
The Song Play operating mode is where you can listen to Songs, while reading Lyrics and Chords (where available). An automatically-generated Score can also be seen for Standard MIDI Files, and Markers can let you quickly jump to a Song section.
Songs can be in Standard MIDI File, Karaoke™ or MP3 The MID+G and MP3+G formats are also supported.
You can play along with the Song with up to four Keyboard tracks (Upper 1-3, Lower) and four Pads. You can select different Sounds and Effects for Keyboard tracks by selecting Performances and STSs.
While in Song Play mode, you can use the SongBook to automatically select Songs for a desired music genre. With each Song entry in the SongBook, up to four STSs are also selected.
Song Play mode can also be used in Easy Mode.
MIDI Clock
In Song Play mode the MIDI Clock is always generated internal Player, even if the Clock parameter is set to MIDI or USB mode in the Global > MIDI > General Controls page "Clock Source" on page 246). While in this mode, Pa600 cannot receive MIDI Clock messages from the MIDI IN.
Pa600 only transmits to the MIDI OUT and USB port the MIDI Clock messages generated by the Player. For MIDI Clock messages to be sent, the "Clock Send" parameter must be activated in the Global > MIDI > General Controls page (see "Clock Send" on page 245).
Tempo Lock
If you don't want the Tempo value to change when new Song, turn on the Tempo Lock function by using the TEMPO LOCK button on the control panel. When this button's LED is turned on, you can still manually change the Tempo with the TEMPO +/- buttons, or by touching the Tempo field and using the VALUE DIAL.
Master Volume, Balance
While the MASTER VOLUME knob controls the general volume of the instrument, you can use the BALANCE knob to balance the Song and Pad tracks against the Keyboard tracks.
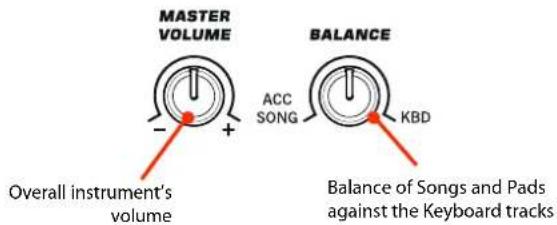
Track parameters
Changes to Keyboard tracks can be saved to a Performance. You may then recall different settings by just selecting a single Performance.
Settings for Song tracks, like Pan, Volume and FX Sends, depend on each individual Standard MIDI File. Changes to Song tracks made in Song Play mode cannot be saved to a Standard MIDI File, and are only intended for realtime control.
To make permanent changes Song tracks, edit and save the Standard MIDI File in Sequencer mode.
Standard MIDI Files and Sounds
The native Song file format of Pa600 is the Standard MIDI File (SMF), an universal standard set by all manufacturers. Filename extension is .MID, but Pa600 can also read files with the .KAR extension. You can read these files with any musical instrument orcomputer.
Even if the Standard MIDI File format is standard, difference may appear in sounds when playing the various recorded a Song on the Pa600 in Sequencer mode using only General MIDI sounds (i.e., those of the "GM" type), you can be confident you can play the same Song on virtually any other musical instrument or computer. If you used KORG native sounds, you may not find the same sounds on instruments from other manufacturers.
When you read Standard MIDI Files in Song Play mode, there is no problem reading files made using only General MIDI sounds. Sounds could be different when playing a Song made on a different instrument: despite the wide compatibility of Pa600 with other standards (like GS or XG), differences may arise.
Should this happen, load the Standard MIDI File in Sequencer mode, then manually reassign the non-matching Sounds, replacing them with similar Sounds on the Pa600. Finally, save the Standard MIDI File again, and you will be able to play it in Song Play mode with the correct Sounds.
Keyboard, Pad and Player tracks
Pa600 is equipped with a Player that can play up to a maximum of 16 Song tracks. In addition, you can play the keyboard with four additional Keyboard tracks (Upper 1-3 and Lower).
When the Volume panel is shown in the main page of the Song Play mode (see illustration below), you can adjust the Volume and Play/Mute status of these tracks, but please keep in mind that these changes will not be saved in the Standard MIDI File.
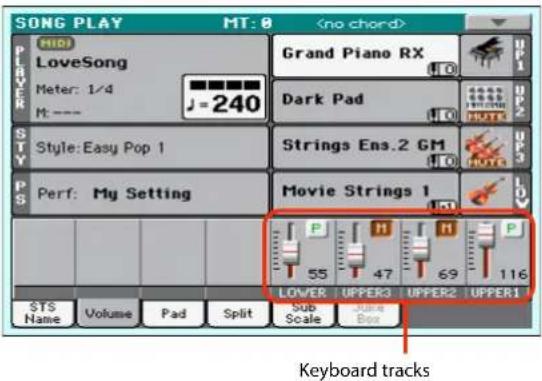
While in Song Play mode, you can select Performances or STSs. STSs are from the latest selected Style; choose a different Style to select a different set of STSs. You can see the name of the available STSs when the STS Name panel is shown in the main page of the Song Play mode (see illustration):
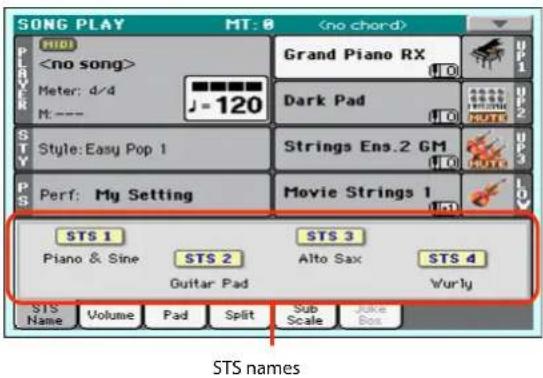
Selecting a different Style or SongBook Entry may also change the Pads.
When entering Song Play mode from the Style Play mode, Keyboard and Pad tracks remain the same they were in Style Play mode.
Main page (Normal view)
Press the SONG PLAY button to access this page from another operating mode.
Note: When switching from Style Play to Song Play mode, various track parameters and settings may change.
To return to this page from one of the Song Play edit pages, press the EXIT or SONG PLAY button.
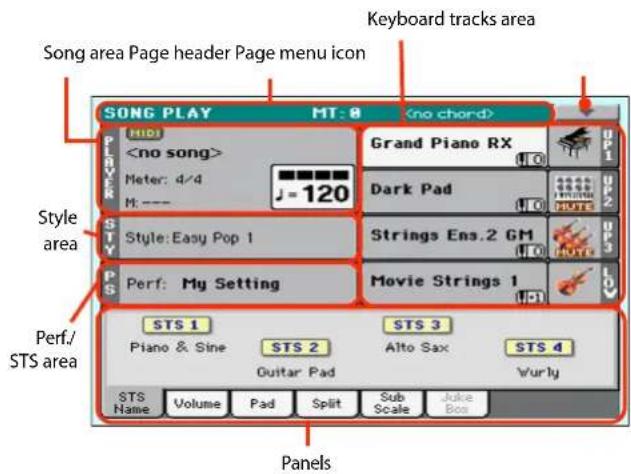
Details on individual tracks can be seen by touching the Volume tab. To switch between Keyboard tracks (Normal view) and Song tracks (Song Tracks views), use the TRACK SELECT button. Pressed a first time, you will see tracks 1-8; a second press will show tracks 9-16; pressed again will go back to Keyboard tracks.
Page header
This line shows the current operating mode, transposition and recognized chord.
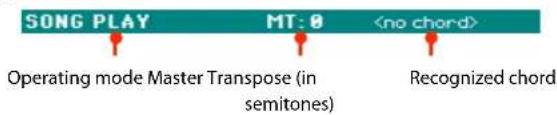
Operating mode name
Name of the current operating mode.
Master Transpose
Master Transpose value in semitones. This value can be changed using the TRANSPOSE buttons on the control panel.
Note: You can also transpose MP3 files. Keep in mind, however, that transposition always remains inside the -5...+6 semitones range. This is enough to cover all keys, while avoiding excessive audio degradation. Any further transposing will be reversed to fit the range. So, you might see a +7 transpose value (Just Fifth Up) shown in the display, but the MP3 will actually play 5 semitones lower (Just Fourth Down).
Note: Transpose may automatically change when selecting a different Performance. It may also change when loading a Standard MIDI File generated with an instrument of the KORG Pa-Series.
To avoid transposing, "lock" the Master Transpose parameter in the Global (see "General Controls: Lock" on page 236).
Recognized chord
This displays the recognized chord when you play a chord on the keyboard.
Page menu icon
Touch the page menu icon to open the menu. See "Page menu" on page 163 for more information.

Song area
This is where the Song name is shown, together with parameters depending on the selected type of Song.
This is how a Song's area appears when a Standard MIDI File or Karaoke file has been selected:
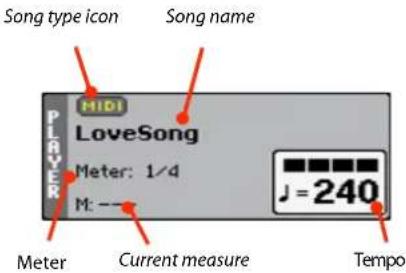
And this is how it appears when an MP3 File has been selected:
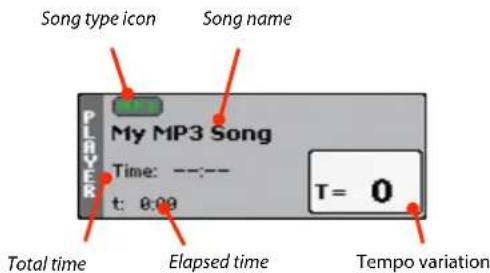
Song type icon
Songs of different types can be assigned to the Player. This icon shows the file type.
MIDI
Standard MIDI File, often abbreviated as SMF (file extension: *.MID or *.KAR). The SMF (*.MID) is the industry standard song format, used by Pa600 as its basic Song format when recording a new Song. A MIDI Karaoke File (*.KAR) is an extension of the SMF format.
MP3
MPEG Layer-3 format, or MP3 (file extension: *.MP3). This is a compressed audio file, that may be generated on any personal computer, or by the Pa600 itself.
TEX
A Jukebox file (file extension: *.JBX) can be assigned to the Player, but its name will not be shown in this area. The JBX icon will appear instead, together with the name of the currently selected Song, in the Jukebox list.
Note: To create or edit a Jukebox file, go Jukebox Edit page (see page 162).
Song name
Displays the name of the Song assigned to the Player.
- If the Player is already selected (white background), touch the Song name to open the Song Select window.
- If the player is not selected (dark background), first select it, then touch the Song name to open the Song Select window.
When the Song Select window appears, you can select a single Song or a Jukebox file (see "Song Select window" on page 91).
If you select another Song while a Song is playing, the previous Song will stop, and the new Song will be selected and be ready to play.
To select a Song, you can also press the SONG but to selection section of the control panel. Press it a second time to select a Song by dialing in its ID number (see "Selecting a Song by its ID number" on page 92).
Meter
This parameter only appears when a Standard MIDI File or Karaoke file has been selected.
Current Song's meter (time signature).
Measure number
This parameter only appears when a Standard MIDI File or Karaoke file has been selected.
Current measure number.
Tempo
This parameter only appears when a Standard MIDI File or Karaoke file has been selected.
Metronome Tempo. Select this parameter and use the TEMPO+ and TEMPO- buttons to change the Tempo. As an alterna touch this parameter and drag with your finger.
Total time
This parameter only appears when an MP3 file has been selected.
Total length (in minutes:seconds) of the selected MP3 file.
Elapsed time
This parameter only appears when an MP3 file has been selected.
Elapsed time (in minutes:seconds) of the MP3 file currently in play.
Tempo variation
This parameter only appears when an MP3 file has been selected.
Variation of the original MP3 file's tempo, inside a range of ± 30% of the original tempo. When Tempo is changed, MP3 files are smoothly accelerated or slowed down (inside a range of ± 30% of the original tempo). This may seem trivial, but it is really rocket-science instead, and it is made possible by KORG sophisticated time-stretching algorithms.
Style area
Currently selected Style. You can select a Style while playing Songs, to have it ready when switching to Style Play mode. Also, this lets you change the Pads and STSs (both are recalled by selecting a Style).
Touch the Style name to open the Style Select window. As an alternative, use the STYLE button in the SELECTION section of the control panel.
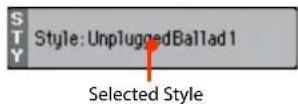
Performance/STS area
This is where the Performance or STS name is shown.
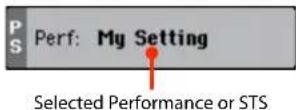
Selected Performance or STS
This is the latest selected Performance or Single Touch Setting.
Touch the name to open the Performance Select window. As an alternative, use the PERFORMANCE section to select a different Performance.
To select a different STS from the latest selected Style, use the four STS buttons under the display.
Keyboard tracks area
This is where Keyboard tracks are shown.
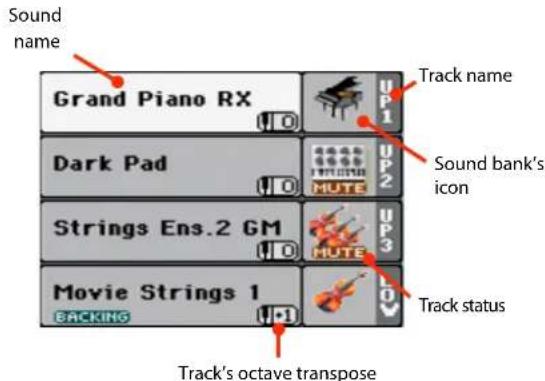
Keyboard track octave transpose
Non editable. Octave transpose of the corresponding track. To individually edit the octave transpose for each track, go to the "Mixer/Tuning: Tuning" edit page of the Song Play mode (s "Mixer/Tuning: Tuning" on page 104 for more details).
You can also transpose all Upper tracks by using the UPPER OCTAVE buttons on the control panel.
Keyboard track name
Non editable. Name of the corresponding track:
| Abbreviation Track Hand | ||
| UP1 Upper 1 Right hand | ||
| UP2 Upper 2 | ||
| UP3 Upper 3 | ||
| LOW Lower Left hand |
Sound bank's icon
This icon shows the bank the current Sound belongs to.
Keyboard track status
Play/mute status of the current track. Touch this icon to change the status.
No icon Play status. The track can be heard.
Mute status. The track cannot be heard.
Panels
The lower half of the main page contains the various panels, you can select by touching the corresponding tabs. See more information in the relevant sections, starting from page 157.
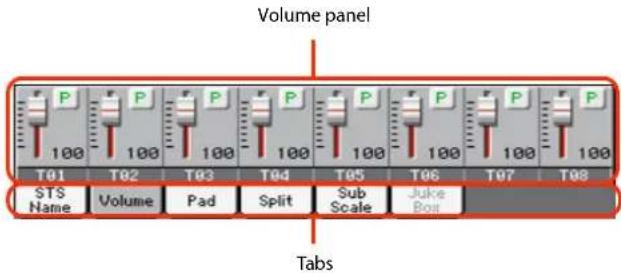
Sound name
Name of the Sound assigned to the corresponding Keyboard track.
- If the track is already selected (white background), touch the Sound name to open the Sound Select window.
- If the track is not selected (dark background), first select it, then touch the Sound name to open the Sound Select window.
You can also open the Sound Select window by using the SOUND button in the SELECTION section of the control panel.
For more information about the Sound Select window, see "Sound Select window" on page 89.
STS Name panel
Select this panel to see the name of the four available STSs. See "STS Name panel" on page 97 for details.
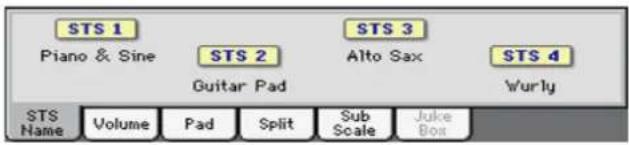
Volume panel
Touch the Volume tab to select this panel. This is where you can set the volume of each track, and mute/unmute tracks.
Changing the tracks' volume and play/mute status
You can change the volume and play/mute status of each track in the same way seen for the Style (see "Volume panel" on page 97 for details).
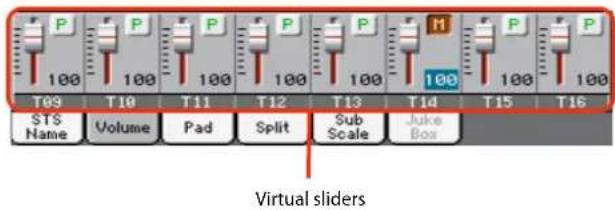
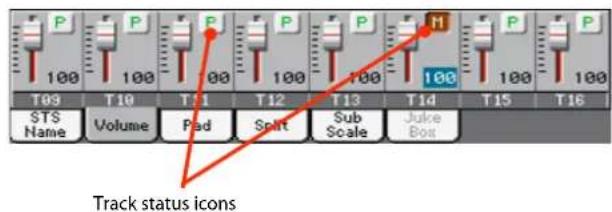
Saving the tracks' volume and play/mute status
Each set of tracks can be saved into a different structur allows for a great flexibility when mixing Keyboard and Song tracks through the use of Performances, STSs and Standard MIDI Files.
- The status of Keyboard tracks can be saved to a Performance or STS (see "Write Performance" on page 114 and "Write Single Touch Setting" on page 114).
- The status of the Song tracks can saved as a general setting in the Global > Mode Preferences > Song & Sequencer page (see "Save Trk & FX" on page 240).
This allows for leaving the track status unchanged even when playing a different Standard MIDI File. You can leave, for example, the bass track in mute, and let your bassist play it live for the whole show.
However, an exception to the above is when reading a Standard MIDI File created with a Pa-Series instrument. These files do include special commands to force the Play/Mute status of each track.
Track names
Under the sliders, a label for each track is shown. Use the TRACK SELECT button to switch between the Keyboard Traks and the Song Tracks 1-8 and Song Tracks 9-16 views.
| Abbreviation Track | |
| UPPER1...3 Upper tracks. | Volume and play/mute status memorized into a Performance or STS. |
| LOWER Lower track. Volume and play/mute status memorized into a Performance or STS. | |
| T01...T16 Song tracks. | Volume memorized into a Standard MIDI File. Play/mute status memorized as a general setting. |
Pad panel
Select this panel to see which Hit or Sequence Pads are assigned to the four Pads. See "Pad panel" on page 99 for details.
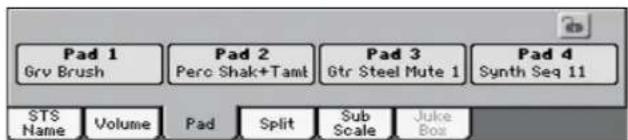
Split panel
Select this panel to adjust the split point for the Keyboard tracks. See "Split panel" on page 100 for details.
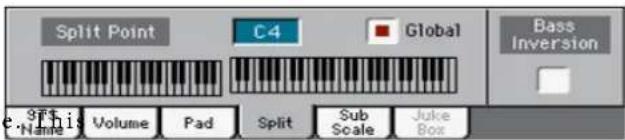
Sub-Scale panel
Select this panel to select a secondary scale for the Keyboard tracks. See "Mixer/Tuning: Sub Scale" on page 104 for details.
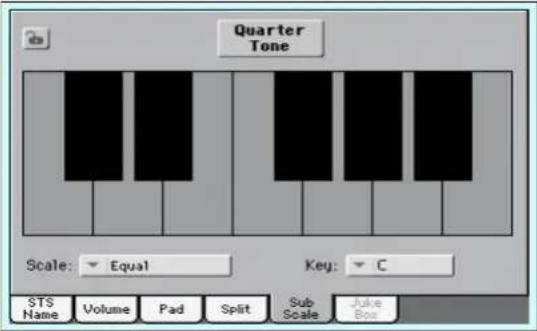
Jukebox panel
When a Jukebox (JBX) file is assigned to the Player, you can use the list shown in this panel to browse the Jukebox list, and touch the Select button in the display to select a Song to play. This way, you can select any Song in the list as your starting Song, and manually change the order of the Songs to play.
Note: This panel is only available after loading a Jukebox file.
Hint: To create or edit a Jukebox file, go to the Jukebox Edit page (see page 162). A quick way to create a Jukebox list is to touch the "Play All" button in the Song Select window (see page 92).
Warning: If you delete a Song included in the Jukebox list currently in play, the Player will stop, and the "No Song" message will appear. At this point, you can select the JukeBox tab to open the Jukebox panel, and select a different Song.
As an alternative, you can select the next Song by pressing SHIFT + >> (FAST FORWARD) in the PLAYER section of the control panel, then press ▶(■LAY/STOP) in the PLAYER section again.
Song list Jukebox fileSelected Song
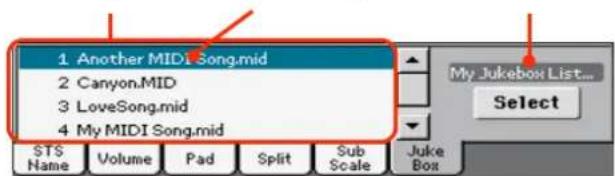
Song list
Use this list to browse through the Songs in the Jukebox list. Use the scrollbar to scroll the list.
Selected Song
Name of the Song currently in play. You can select a different Song from the list, and touch the Select button in the display to select it for playback.
Select button
Touch this button to select the Song highlighted in the list, and assign it to the player. If a Song is already playing, it v stopped, and the selected Song will start playing back.
Jukebox file
Name of the selected Jukebox file. To edit this file, see "Jukebox Editor" on page 162.
Transport controls for the Jukebox
When you select a Jukebox file, the Player's transport controls behave in a slightly different way than with single Songs.
<< and >>
Pressed alone, these buttons are the Rewind and Fast Forward commands.
SHIFT Keep the SHIFT button pressed, and press these buttons to scroll to the previous or next Song in the Jukebox list.
^g (HOME) Returns to measure 1 of the current Song.
▶/■ (PLAY/STOP)
Starts or stops the current Song. When you stop the Song, it is stopped at the current position. Press HOME to go back to measure 1 of the current Song.
If the Jukebox panel is open, you can select the Song from which to start. See "Jukebox panel" above.
Edit menu
From any page, press the MENU button to open the Song Play edit menu. This menu gives access to the various Song Play edit sections.
When in the menu, select an edit section, or pSONG PLAY to exit the menu.
When in an edit page, press the EXIT or SONG PLAY button to go back to the main page of the Song Play operating mode.
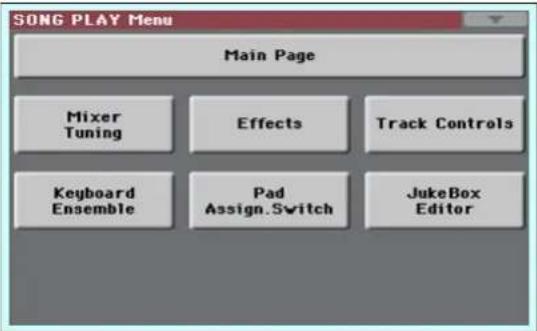
Each item in this menu corresponds to an edit section. Each edit section groups various edit pages, that may be selected by touching the corresponding tab on the lower part of the display.
Note: Some of the edit parameters are only meant for realtime use. As a general rule, Keyboard track parameters can be saved to a Performance or SongBook ST'S, while Song track's Play/Mute status and FX settings can be saved as a general setting in the Global > Mode Preferences > Song & Sequencer page (see "Save Trk & FX" on page 240).
Edit page structure
All edit pages share some basic elements, already described for the Style Play mode (see "Edit page structure" on page 101 for details).
Mixer/Tuning: Volume/Pan
This page lets you set the volume and pan for each of the Keyboard or Song tracks.
Note: The play/mute status of a Song track may be reset when selecting E&SbIg created on a Pa-Series instrument.
Use the TRACK SELECT button to switch from the Keyboard to the Song tracks, and vice versa.
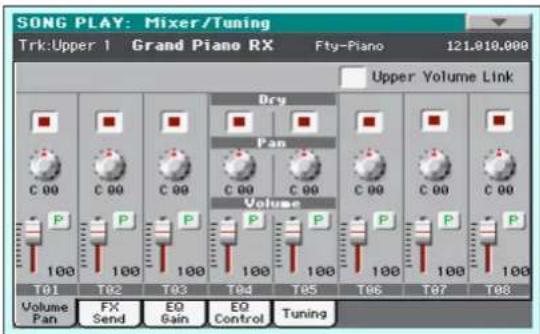
Parameters
The parameters shown in this page are the same already seen for the Style Play mode. See “Mixer/Tuning: Volume/Pan” on page 101 for details.
Mixer/Tuning: FX Send
Pa600 is equipped with two groups of effect processors (A and B). In Song Play mode, these groups can be used to process Keyboard, Pad and MIDI tracks.
- Keyboard tracks always use the effects of the FX B group.
- Pad tracks always use the effects of the FX A group.
- Standard MIDI Files and Karaoke files can only use the effects of the FX A group.
- Standard MIDI Files created on a Pa-Series instrument (in Sequencer mode) can use effects of the FX A and B groups.
Choosing and editing the effects is done in the dedicated Effect section (see "Effects: A/B FX Configuration" on page 161).
In case you do not want to hear the direct signal, just set the Dry parameter to Off (see the "Dry" parameter above).
You can assign to the Master FXs any kind of available effects, but we suggest you assign the effects based on this scheme:
A-Master 1 Reverb processor for the Song tracks.
A-Master 2 Modulating FX processor for the Song tracks.
B-Master 1 Reverb processor for the Keyboard tracks.
B-Master 2 Modulating FX processor for the Realtime (Keyboard) tracks.
Use the TRACK SELECT button to switch from Keyboard to
Song tracks, and vice-versa.
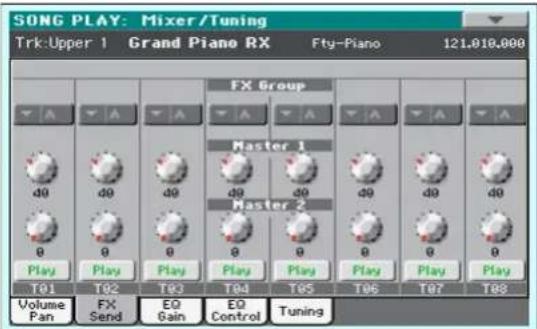
Note: When you stop, then start the Song again, or select a different Song, the default Song track settings are selected again. You can, however, pause the Song, change the effects, then exit from pause and start the Song again. Edit the Song in Sequencer mode to permanently change the effects.
Note: Track FX setting can be saved as a general setting in the Global > Mode Preferences > Song & Sequencer page (see "Save Trk & FX" on page 240). This will help adapting the Pa600's sound to personal taste for any Standard MIDI File (excluding those saved by a Pa-Series instrument, that may override the general preferences).
Parameters
The parameters shown in this page are the same already seen for the Style Play mode. See “Mixer/Tuning: FX Send” on page 102 for details.
Mixer/Tuning: EQ Gain
In this page you can set the three-band equalization (EQ) for each individual track.
Use the TRACK SELECT button to switch from the Keyboard to the Song tracks, and vice-versa.
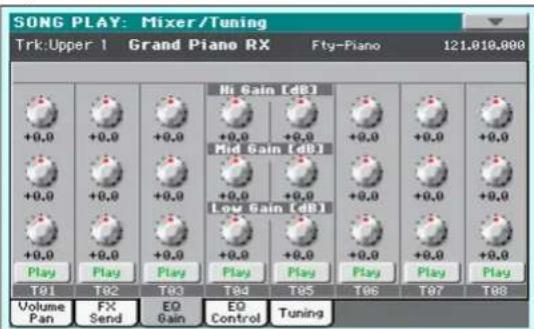
Hint: Track EQ can be saved as a general setting in the Global > Mode Preferences > Song & Sequencer page (see "Save Trk & FX" on page 240). This will help adapting the Pa600's sound to personal taste for any Standard MIDI File you will ever play (excluding those saved by a Pa-Series instrument, that may override the general preferences). Need a lighter Bass track? Save the right equalization, and the Bass will stay light with all the subsequent Songs.
Parameters
The parameters shown in this page are the same already seen for the Style Play mode. See “Mixer/Tuning: EQ Gain” on page 103 for details.
Mixer/Tuning: EQ Control
This page lets you reset or bypass track equalization, programmed in the previous page.
Use the TRACK SELECT button to switch from the Keyboard to the Song tracks, and vice-versa.
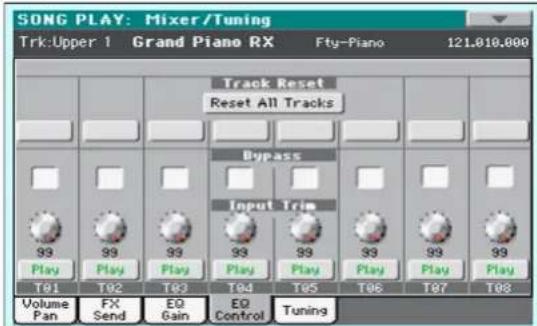
Parameters
The parameters shown in this page are the same already seen for the Style Play mode. See “Mixer/Tuning: EQ Control” on page 103 for details.
Mixer/Tuning: Tuning
Parameters in this page let you set various tuning settings. All parameters in this page are the same found in Global mode. See "Mixer/Tuning: Tuning" on page 104 for details.
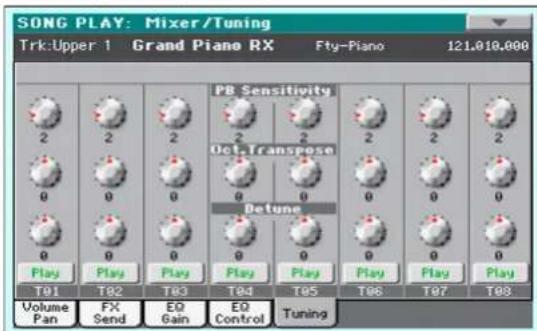
Parameters
The parameters shown in this page are the same already seen for the Style Play mode. See “Mixer/Tuning: Tuning” on page 104 for details.
Note: Song track values edited in this page are not saved, and are only intended for realtime use.
Effects: A/B FX Configuration
This page allows you to select the effects for the A (Song) and B (Keyboard) FX groups. You can use the "FX A" and "FX B" side tabs to switch from one group to the other one. (Songs created in Sequencer mode on a Pa-Series instrument can also use the B FX group).
The effect types and the FX matrix are the same seen for the Style Play mode (see "Effects: A / B page 106),
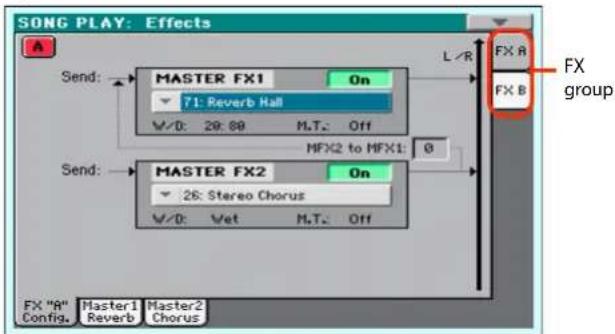
Note: The default effect settings can be saved as a general setting in the Global > Mode Preferences > Song & Sequencer page (see "Save Trk & FX" on page 240).
Note: When you stop the Song, or select a different Song, the default effects are selected again. You can, however, stop the Song, change the effects, then start the Song again with the new effects. Edit the Song in Sequencer mode to permanently change the effects.
Parameters
The parameters shown in this page are the same already seen for the Style Play mode. See "Effects: A/B FX Configuration" on page 106 for details.
M.T. (Modulating Track)
Source track for modulating MIDI messages. You can modulate an effect parameter with a MIDI message generated by an internal physical controller, or a MIDI message coming from a Song track.
Effects: Master 1, 2
These pages contain the editing parameters for the effect processors. Here is an example of the FX A page, with the Reverb Hall effect assigned.
![Selected effect SONG PLAY: Effects FX Configuration "On" On Reverb Time [sec]: 2.2 High Damp [%]: 33 Pre Delay [msec]: 0 Pre Delay Thru [%]: 28 EQ Trim: 100 Pre LEO Fo: Low Pre HEQ Fo: High Pre LEO Gain [dB]: -4.0 Pre HEQ Gain [dB]: +1.0 Wet/Dry: 28:30 Src: Off Rmt: +9 FX "A" Master1 Master2 Config. Reverb Chorus FX group FX parameters](/content/2026/05/882139/images/5b130db83f33a6961689ebe19389437679d48c5a7d0ac31a96bac121edc22c62.jpg)
Parameters
The parameters shown in this page are the same already seen for the Style Play mode. See "Effects: Master 1, 2" on page 107 for details.
Track Controls: Mode
These parameters let you set the Internal/External, and the Poly/Mono status of Song tracks.
Parameters
The parameters shown in this page are the same already seen for the Style Play mode. See “Track Controls: Mode” on page 107 for details.
Note: These parameters can be saved as a general setting in the Global > Mode Preferences > Song & Sequencer page (see "Save Trk & FX" on page 240).
Track Controls: Drum Edit
These parameters let you adjust the volume and edit the main parameters for each percussive instrument family.
Drum Edit parameters
The parameters shown in this page are the same already seen for the Style Play mode. See “Track Controls: Drum Edit” on page 108 for details.
Note: Song track values edited in this page are not saved, and are only intended for realtime use.
Track Controls: Easy Edit
These parameters let you "fine-tune" edit parameters for Sounds assigned to the tracks.
Easy Sound Edit parameters
The parameters shown in this page are the same already seen for the Style Play mode. See “Track Controls: Easy Edit” on page 109 for details.
Note: Song track values edited in this page are not saved, and are only intended for realtime use.
Keyboard/Ensemble: Key/Velocity Range
These parameters let you select a note and velocity range for the Keyboard tracks.
Parameters
The parameters shown in this page are the same already seen for the Style Play mode. See “Keyboard/Ensemble: Key/Velocity Range” on page 110 for details.
Keyboard/Ensemble: Ensemble
This page lets you program the Ensemble function.
Parameters
The parameters shown in this page are the same already seen for the Style Play mode. See “Keyboard/Ensemble: Ensemble” on page 111 for details.
Keyboard/Ensemble: Keyboard Control
These parameters let you set parameters for the Keyboard tracks.
Parameters
The parameters shown in this page are the same already seen for the Style Play mode. See "Keyboard/Ensemble: Keyboard Control" on page 112 for details.
Pad/Switch: Pad
This page lets you select a different hit sound or sequence for each of the four PAD buttons.
Parameters
The parameters shown in this page are the same already seen for the Style Play mode. See "Pad/Switch: Pad" on page 112 for details.
Pad/Switch: Assignable Switch
This page lets you select a different function for each of the ASSIGNABLE SWITCH buttons.
Parameters
The parameters shown in this page are the same already seen for the Style Play mode. See "Pad/Switch: Switch" on page 113 for details.
Jukebox Editor
The Jukebox function lets you play a list of Songs (127 max), at the touch of a button. You can play a Jukebox file by assigning it to the Player, after having selected it in the Song Select page, just as if it was an ordinary Song (see "Jukebox panel" on page 158).
![SONG PLAY: JukeBox Editor [KORG DISK]\MYSHOW\MIDI\NEWNAME_JBX Type Num Name MIDI 1 Canyon.MID MIDI 2 LoveSong.mid MIDI 3 Pinball.MID Move Add Insert Save Delete DelAll Song number: 3](/content/2026/05/882139/images/295062cde6bb14e64ad143c5566c9b5ec7df1a71ce4269c3c55f1b31011c1d35.jpg)
In this page you can create, edit and save a Jukebox file. A Jukebox list can contain Standard MIDI Files, Karaoke™ files, and MP3 files.
If a Jukebox file is already selected, you will enter this page with that file ready to be edited. Otherwise, you will enter this page with an empty list.
To create a new Jukebox file, touch Del All to remove all Songs from the current list. Add new Songs, then touch Save and enter a different name before confirming. A new Jukebox file will be saved to the storage device.
Move Up/Down
Use these button to move the selected item up or down in the list.
Add
Adds a Song at the end of the current list. You can add up to 127 Songs to a list. When this button is pressed, a standard file selector opens up in the display.
Note: A Jukebox list can include only Songs contained in the same folder.
Hint: Instead of a single Song, you can select a Jukebox file, and add its whole content to the current Jukebox list.
Insert
Inserts a Song at the current position (i.e., between the selected item and the preceding one). All subsequent Songs are moved to the next higher-numbered slot. You can add up to 127 Songs to a list.
Note: A Jukebox list can include only Songs contained in the same folder.
Hint: Instead of a single Song, you can select a Jukebox file, and insert its whole content to the current Jukebox list.
Delete
This command lets you delete the selected Song from the list.
Del All
Select this command to delete the whole Jukebox list.
Save
Touch this button to save the Jukebox file. The Save Jukebox File dialog box appears, allowing you to edit the name and save your file.
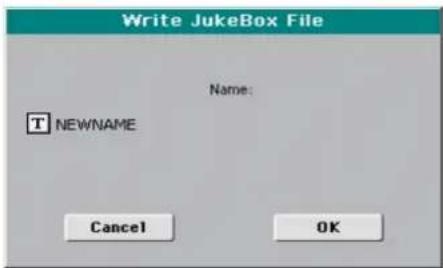
Touch the Text Edit) button to open the Text Edit window, and edit the name.
If you are editing an existing list, and do not change its name, the old file is overwritten. If you change it, a new file will be created in the storage device.
If you are saving a new list, the "NEWNAME.JBX" name is automatically assigned, and you can edit it.
Note: You can save your ".JBX" file only in the same folder as Song files included in the list.
Page menu
Touch the page menu icon to open the menu. Touch a command to select it. Touch anywhere in the display to close without selecting a command.
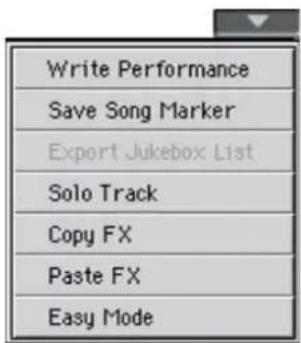
Write Performance
Select this command to open the Write Performance dialog box, and save most of the current control panel settings to a Performance.
See "Write Performance dialog box" on page 115 for more information.
Save Song Marker
Select this command to save the markers created in the P (see "Markers page" on page 283).
Export Jukebox List
Only available when a Jukebox list is selected. Select this command to save the current Jukebox list as a text file to a storage device. Here is how it works.
- While a Jukebox file is assigned to the player, select the Export Jukebox List command from the page menu.
- A dialog box will appear, asking you to select internal disk or a storage device connected to one of the USB Host ports.
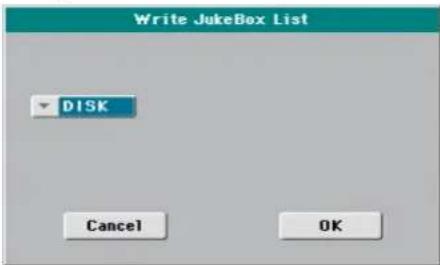
- Select an option, and touch OK to confirm.
Note: When saved, the text file will be named after the selected Jukebox file. For example, a Jukebox file named "Dummy.jbx" will generate a "Dummy.txt" file. A new, unnamed Jukebox file will generate a "New_name.txt" file. If a file with the same name already exists on the target device, it will be overwritten without waiting for any confirmation.
The list will include the progressive number assigned to each Song, the file names, the total number of files in the list.
For the correct display and printing of the list on a personal computer, use a fixed size (i.e., non-proportional) character in your text editor.
Solo Track
Select the track to be soloed, and check this item. You will hear only the selected track, and the 'Solo' warning will flash on the page header.
Uncheck this item to exit the Solo function.
The Solo functions works in a slightly different way, depending on the selected track:
- Keyboard track: The selected Keyboard track is the only track you can hear when playing on the keyboard. All other Keyboard tracks are muted. Song tracks are left in play status.
- Song track: The selected track is the only Song track you can hear. All other Song tracks are muted. Keyboard tracks are left in play status.
SHIFT Keep the SHIFT button pressed and touch one of the tracks to solo it. Do the same on a soloed track to deactivate the Solo function.
Copy/Paste FX
Use this command to copy a single effect, or both effects of an FX group (A or B). See "Copy/Paste FX" on page 115 for detailed instructions.
Easy Mode
Easy Mode allows you to use the Style Play and Song Play modes with an easier-to-use user interface. It is recommended to beginners, and to professionals alike that do not want to deal with the extra parameters of the Advanced mode.
At any time, you can manually turn the Easy Mode on/off with the Easy Mode command in the page menu of the Style Play and Song Play modes.
Sequencer mode
The Sequencer operating mode is the full-featured onboard sequencer, where you can create a Song from scratch, or edit it. You can also use this mode to edit the initial parameters of a Standard MIDI File, either made with an external sequencer or with Pa600's own sequencer.
You can save the new or edited Song as a Standard MIDI File (SMF, i.e., a file with the ".MID" extension), and play it back either in Song Play or Sequencer mode - or on any external sequencer.
Standard MIDI Files and MP3
The Songs and the Standard MIDI File format
The native Song format for Pa600 is the Standard MIDI File (“.MID” file).
When saving a Song as a SMF, a setup measure is automatically inserted at the beginning of the Song. This measure contains various Song initialization parameters.
When an SMF is loaded, the setup measure is automatically removed.
Sequencer mode and the MP3
While in Sequencer mode, you cannot load nor record MP3 files. This mode only allows for editing of the Standard MIDI Files.
Sequencer Play - Main page
Press the SEQUENCER button to access this page from another operating mode. In this page you can load a Song, and play it back using the PLAYER transport controls.
Note: When switching from Style Play to Sequencer mode, the Sequencer Setup is automatically selected, and various track parameters may change.
To return to this page from any of the Sequencer e press the EXIT or SEQUENCER button.
To switch between Song tracks 1-8 and 9-16, use the TRACK SELECT button.
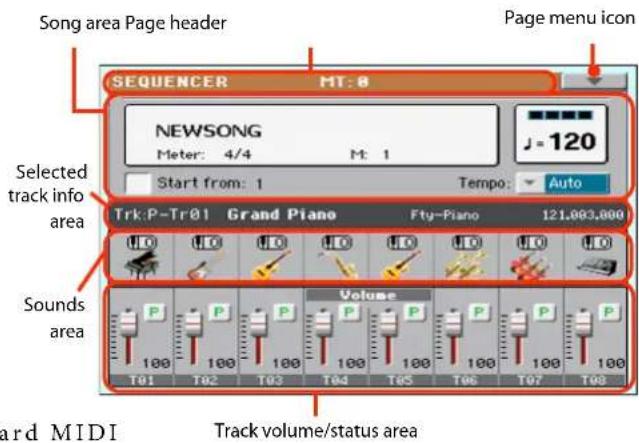
Page header
This line shows the current operating mode and transposition.
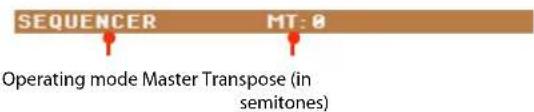
Operating mode name
Name of the current operating mode.
Master Transpose
Master transpose value in semitones. This value can be changed using the TRANSPOSE buttons on the control panel.
Note: Transpose may be automatically changed when loading a Standard MIDI File generated with an instrument of the KORG Pa-Series.
Page menu icon
Touch the page menu icon to open the menu. See "Page menu" on page 186 for more information.

Song area
This is where the Song name is shown, together with its tem and meter (time signature) parameters, and the current measure.
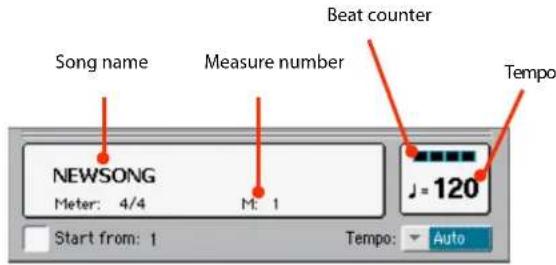
Song name
Displays the name of the selected Song. "NEWSONG" means that a new (blank) Song is selected, and you can record it.
Touch the Song name to make the Song Select window appear, allowing for selection of a different Song (see "Song Select window" on page 91).
To select a Song, you can also press the SONG button in the SELECTION section of the control panel. Press it a second time to select a Song by dialing in its ID number (see "Selecting a Song by its ID number" on page 92).
Note: Only Standard MIDI Files can be loaded. MP3 files cannot be loaded in Sequencer mode.
Meter
Current meter (time signature).
Measure number
Current measure number.
Tempo
Metronome Tempo. Select this parameter and use the TEMPO buttons to change Tempo. As an alternative, when a different parameter is selected, or you are in a different page, keep the SHIFT button pressed and use the DIAL to change Tempo for the sequencer.
Start from
When checked, the measure shown by this parameter is a temporary start point of the song, instead of measure 1. When you press the ⬆(HOME) button, or use the << (REWIND) button to go back to the beginning, the Song returns to this point.
Tempo (Tempo mode)
Use this menu to select the Tempo change mode.
Manual In this mode, you can change Tempo by using the TEMPO buttons. The Song will be played back using the manually selected tempo.
Auto Tempo recorded in the Song will be used.
Selected track info area
This line lets you see the Sound assigned to the selected track.
Not only it is shown on the main page, but also in several edit pages.
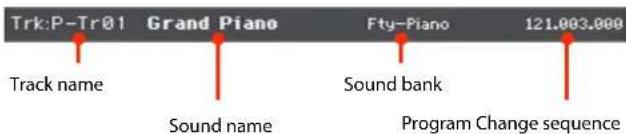
Track name
Name of the selected track.
Sound name
Sound assigned to the selected track. Touch anywhere in area to open the Sound Select window, and select a different Sound.
Sound bank
Bank the selected Sound belongs to.
Program Change
Program Change number sequence (Bank Select MSB, Bank Select LSB, Program Change).
Sounds area
This area lets you see Sounds and octave transposition for the eight tracks currently displayed.
Song track octave transpose icon
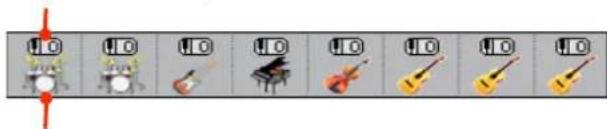
Sound bank's icon
Song track octave transpose
Non editable. Octave transpose of the corresponding track. To edit the octave transpose, go to the "Mixer/Tuning: Tuning" edit page (see page 104 for programming information).
Sound bank's icon
This picture illustrates the bank the current Sound belongs to. Touch an icon a first time to select the corresponding track (detailed information are shown on the Selected Track Info area, see above). Touch it a second time to open the Sound Select window.
Track volume/status area
This area is where you can set the volume of each Song track, and mute/unmute tracks.
Volume and virtual sliders
Drag the sliders to adjust the volume of the corresponding tracks. You can also change the volume by touching a slider and using the VALUE DIAL.
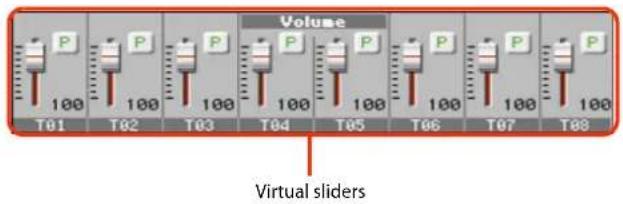
Use the TRACK SELECT button to switch between Song Tracks 1-8 and Song Tracks 9-16,
Track status icon
Play/mute status of the current track. Select the track, then touch this area to change the track status. The status of Song tracks is saved when saving the Song.

Play status. The track can be heard.

Mute status. The track cannot be heard.
Track names
Under the sliders, a label for each track is shown. Use the TRACK SELECT button to switch between tracks 1-8 and 9-16.
| Abbreviation Track | |
| T01...T16 Song tracks. | Volume memorized into a Standard MIDIFile. Play/mute status memorized into the Standard MIDI File as well, and can be read in Song Play mode. |
Entering Record mode
To enter Record mode, press the RECORD button while you are in Sequencer mode. The following dialog box will appear:
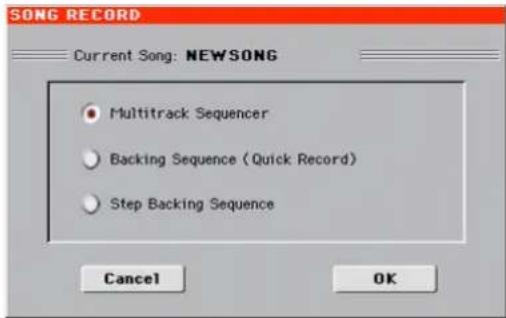
Select one of the three available recording options and touch OK (or Cancel if you don't want to enter Record mode).
Multitrack Sequencer
Full-featured sequencer. Select this option for classic multitrack recording. (See "Record mode: Multitrack Sequencer page" on page 168).
Backing Sequence (Quick Record)
Easy way of recording. Just play with Styles, an record your realtime performance.
Step Backing Sequence
Step-record. Edit chords and controls for the Style. Very useful if you are not a keyboard player.
Record mode: Multitrack Sequencer page
While in Sequencer mode, press the RECORD button and select the "Multitrack Sequencer" option. The Multitrack Sequencer page appears.
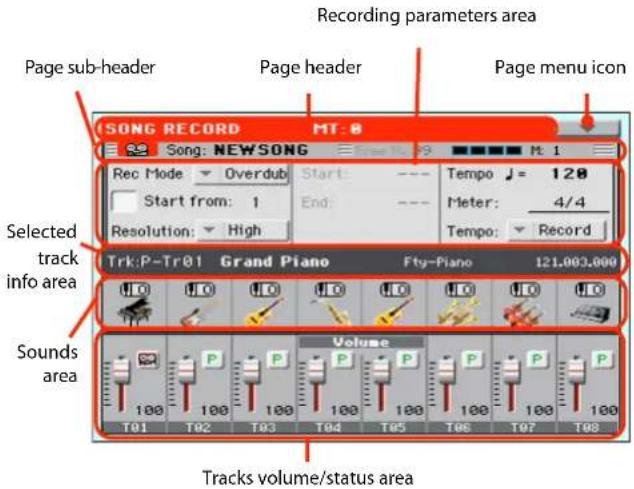
See "Multitrack recording procedure" on page 169 for information on the record procedure.
Page header
See "Page header" on page 165.
Page menu icon
See "Page menu icon" on page 165.
Page sub-header
This area shows some performing info on the Song.

Song name
Name of the Song in record.
Free memory %
Percentage of remaining memory available for recording.
Beat counter
This indicator shows the current beat inside the current measure.
Measure number
Current measure you are recording.
Recording parameters area
Rec mode (Recording mode)
Set this parameter before starting record, to select a recording mode.
Overdub The newly recorded events will be mixed to any existing events.
Overwrite The newly recorded events will replace any existing events.
Auto Punch Recording will automatically begin at the "Start" position, and stop at the "End" position.
Note: The Auto Punch function will not work on an empty Song. At least one track must already be recorded.
PedalPunch Recording will begin when pressing a pedal set to the "Punch In/Out" function, and will finish when pressing the same pedal again.
Note: The Pedal Punch function will not work on an empty Song. At least one track must already be recorded.
Start from
When checked, the measure shown by this parameter is a temporary start point of the song, instead of measure 1. When you press the ▶(■AY/STOP) button to stop recording, or use the << (REWIND) button to go back to the beginning, the Song returns to this point.
Resolution
Use this parameter to set the quantization during recording. Quantization is a way of correcting timing errors; notes played too soon or too late are moved to the nearest axis of a rhythmic "grid", set with this parameter, thus playing perfectly in time.
High No quantization applied.
(1/32)... (1/8)
Grid resolution, in musical values. For example, when you select 1/16, all notes are moved to the nearest 1/16 division. When you select 1/8, all notes are moved to the nearest 1/8 division.
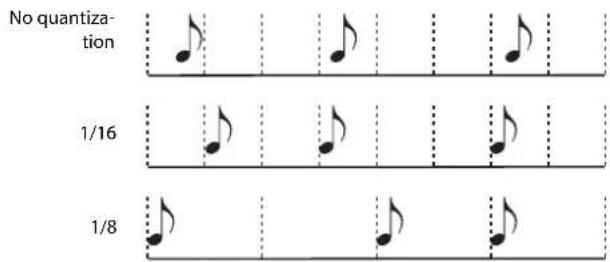
Start and End locators. These parameters area available only when the "Auto Punch" recording mode is selected. They set the starting and ending points of the Punch recording.
Tempo
Select this parameter, and use the TEMPO controls to set the Tempo value.
Meter
This is the basic meter (or time signature) of the Song. You can edit this parameter only when the Song is empty, i.e., before you begin recording anything. To insert a meter change in the middle of the Song, use the "Insert Measure" function (see page 184).
Tempo (Tempo mode)
This parameter sets the way tempo events are read or recorded.
Manual Manual reading. The latest manual Tempo setting (made using the TEMPO buttons) is considered the current Tempo value. No Tempo change events will be recorded. This is very useful when you want to record the Song at a much speed than the actual Tempo.
Auto Auto reading. The Sequencer plays back all recorded Temp o events. No Tempo change events are recorded.
Record All Tempo changes made during recording will be recorded to the Master Track.
Note: Tempo is always recorded in overwrite mode (old data is replaced by the new data).
Selected track info area
This line lets you see the Sound assigned to the selected track. See "Selected track info area" on page 166 for more information.
Sounds area
This area lets you see Sounds and octave transposition for the eight tracks currently displayed. See "Sounds area" on page 166 for more information.
Track volume/status area
This area is where you can set the volume of each Song and change track status. See "Track volume/status area" on page 167.
Track status icons
Play/mute/record status of the current track. Select the track, then touch this area to change its status.

Play status. The track can be heard.

Mute status. The track cannot be heard.

Record status. After pressing ▶/■PLAY/STOP) to start recording, the track will receive notes from the keyboard and the MIDI IN or USB Device connector.
Multitrack recording procedure
Here is the general procedure to follow for the Multitrack Recording.
- Press the SEQUENCER button to enter Sequence mode.
- Press the RECORD button, and select the "Multitrack Sequencer" option to enter the Multitrack Record mode. Now you can prepare your recording parameters. (For more details, see "Record mode: Multitrack Sequencer page" on page 168).
- Be sure the Overdub or Overwrite recording options is selected (see "Rec mode (Recording mode)" on page 168).
-
Set the Tempo. There are two ways of changing Tempo:
-
Use the TEMPO buttons to change the tempo
-
Touch the "Tempo" parameter, and use the VALUE DIAL to change Tempo.
-
Use the TRACK SELECT button to switch between Song Tracks 1-8 and Song Tracks 9-16, and assign the desired Sound to each track (see "Sound bank's icon" on page 166).
- Select the track to be recorded. Its status icon will automatically change to Record (see "Track status icons" on page 169).
- If this is a second-pass recording, use the "Start from" parameter to enter a measure where you want to start recording.
-
Press the METRO button to turn the metronome on, and start practicing.
-
Press ▶/■ (PLAY/STOP) to start recording. After a 1-bar precount, the recording actually begins. After the precount, play freely.
-
If you selected the Auto Punch recording mode, the recording will begin only when reaching the Start point.
- If you selected the Pedal Punch recording mode, press the pedal when you want to begin recording. Press it again to finish recording.
Note: The Punch functions will not work on an empty Song. At least one track must already be recorded.
- When finished recording, press ▶/■ (PLAY/STOP) to stop the sequencer. Select a different track, and go on recording the whole Song.
- When finished recording the new Song, either press the RECORD button, or select the "Exit from Record" command from the page menu (see page 187).
Warning: Save the Song to a storage device, to avoid losing it when the instrument enters standby.
Note: When exiting the Record mode, the Octave Transpose is automatically reset to "0".
- If you wish, edit the new Song, by pressing the MENU button, and selecting the various edit pages.
Record mode: Step Record page
The Step Record allows you to create a new Song by entering single notes or chords to each track. This is very useful when transcribing an existing score, or needing a higher grade of detail, and is particularly suitable to create drum and percussion tracks.
To access this page, select the "Overdub" "Overwrite Step Recording" command from the page menu.
In Overdub Step Recording mode you events, while in Overwrite Step Recording mode you will overwrite all existing events.
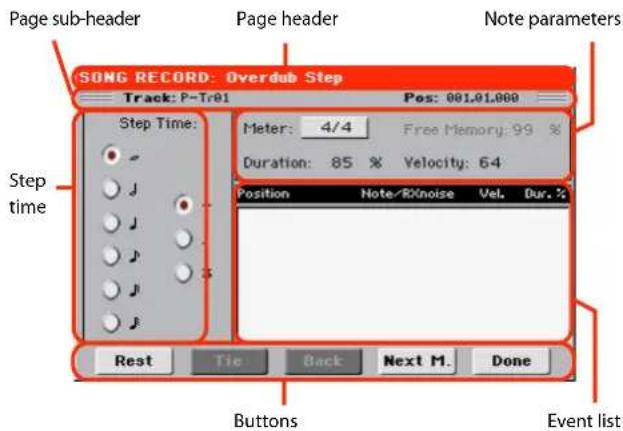
See "Step Record procedure" below, for information on the record procedure.
Page header
This line shows the current operating mode.
Page sub-header
Track
Name of the selected track in record.
Tr01...Tr16 Song track.
Pos (Position)
This is the position of the event (note, rest or chord) to be inserted.
Step Time area
Step Time
Length of the event to be inserted.
... Note value.
Standard (−) Standard value of the selected note.
Dot (.) Augments the selected note length by one half of its value.
Triplet (3) Triplet value of the selected note.
Note parameter area
Meter
Meter (Time Signature) of the current measure. This parameter cannot be edited. You can set a Meter change by using the Insert function of the Edit menu, and inserting a new series of measures with a different Meter (see "Song Edit: Cut/Insert Measures" on page 184). p Recording" or
Free Memory
Available memory for recording.
Duration
Relative duration of the inserted note. The percentage is always referred to the step value.
50% Staccato.
85% Ordinary articulation.
100% Legato.
Velocity
Set this parameter before entering a note or chord. This will be the playing strength (i.e., velocity value) of the event to be inserted.
Kbd Keyboard. You can select this parameter, by turning the VALUE DIAL all counter-clockwise. When this option is selected, the playing strength of the played note is recognized and recorded.
1...127 Velocity value. The event will be inserted with this velocity value, and the actual playing strength of the note played on the keyboard will be ignored.
Event list area
List of inserted events
Previously inserted events. You may delete the last of these events, and make it ready for a new event, by touching the Back button in the display.
Position Position where the event has been inserted. The value is shown in the "measure.beat.tick" format.
Note/RX Noise
Name of the inserted Note or RX Noise. When entering a chord, a series of dots is shown after the name of the root note.
Vel. Velocity of the inserted event.
Dur.% Percentage duration of the inserted event.
Buttons
Rest
Touch this button to insert a rest.
Tie
Touch this button to tie the note to be inserted to the previous one. A note with the same pitch, and the specified length, will be created, and tied to the previous one.
Back
Goes to the previous step, erasing the inserted event.
Next M. (Next Measure)
Goes to the next measure, and fills the remaining space with rests.
Done
Exits the Step Record mode.
Step Record procedure
Here is the general procedure to follow for the Step Recording.
-
Press the SEQUENCER button to enter Sequencer mode.
-
Press the RECORD button, and select the "Multitrack Sequencer" option to enter the Multitrack Record mode. From the page menu, select the "Overdub Step Recording" or "Overwrite Step Recording" mode. At th Step Record window will appear in the display.
-
The next event will be entered at the position shown by the Pos indicator in the upper right corner of the display.
-
If you don't want to insert a note at this position, insert a rest instead, as shown in step 5.
-
To jump to the next measure, filling the remaining beats with rests, touch the Next M. button in the display.
-
To change the step value, use the Step Time parameters.
-
Insert a note, rest or chord at the current position.
-
To insert a single note, just play it on the keyboard. inserted note length will match the step length. You may change the velocity and relative duration of the note, by editing the Velocity and Duration parameters. See “Velocity” and “Duration” on page 170.
• To insert a rest, just touch the Rest button in the display. Its length will match the step value. - To tie the note to be inserted to the previous one, touch the Tie button in the display. A note will be inserted, tied to the previous one, with exactly the same pitch. You don't need to play it on the keyboard again.
-
To insert a chord or a second voice, see "Chords and second voices in Step Record mode" on page 171.
-
After inserting a new event, you may go back by touching the Back button in the display. This will delete the previously inserted event, and set the step in edit again.
-
When finished recording, touch the Done button in the display. A dialog box appears, asking you to either cancel, discard or save the changes.
-
From the main page of the Multitrack Recording either select the "Exit from Record" command from the page menu, or press the RECORD button to exit the Record mode.
- While in the main page of the Sequencer mode, you may press the ▶(■AY/STOP) button in the PLAYER section to listen to the Song, or select the Save Song command from the page menu to save the Song to a storage device (see "Save Song window" on page 187).
Chords and second voices in Step Record mode
You are not obliged to insert single notes in a track. There are several ways to insert chords and double voices. Lets look at some.
Entering a chord. Simply play a chord instead of a single note. The event name will be the first note of the chord you pressed, I s p o i n t , t h e followed by the … ” abbreviation.
Entering a chord made of notes with different velocity values. You can make the upper or lower note of a chord, for example, louder than the remaining ones, to let the most important stand out from the chord. Here is how to insert a three-note chord:
- Edit the first note's Velocity value.
- Press the first note and keep it pressed.
- Edit the second note's Velocity value.
- Press the second note and keep it pressed.
- Edit the third note's Velocity value. The
- Press the third note, then release all notes.
Entering a second voice. You can insert passages where one note is kept pressed, while another voice moves freely.
Ex. 1:
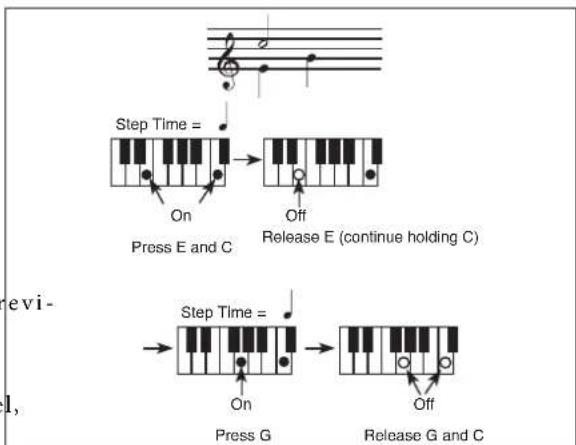
If you touch Cancel, exit is canceled, and you can continue editing. If you choose No, changes are not saved, and the Step Record window is closed. If you choose Yes, changes are saved, and the Step Record window is closed.
Ex.2:
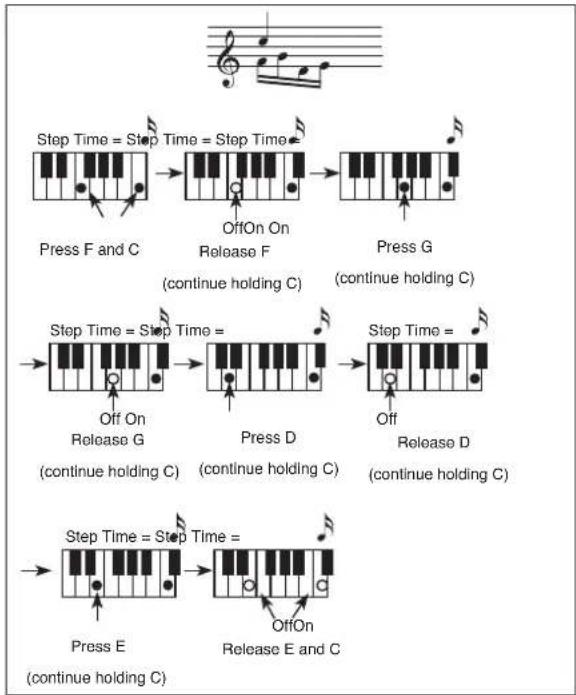
flowchart
graph TD
    A["Step Time = Step Time = Step Time"] --> B["Press F and C"]
    B --> C["OffOn On Release F (continue holding C)"]
    C --> D["Press G (continue holding C)"]
    D --> E["Step Time = Step Time = Off On Release G (continue holding C)"]
    E --> F["Press D (continue holding C)"]
    F --> G["Off Release D (continue holding C)"]
    G --> H["Step Time = Step Time = Off E (continue holding C)"]
    H --> I["Off On Release E and C"]
Ex.3:
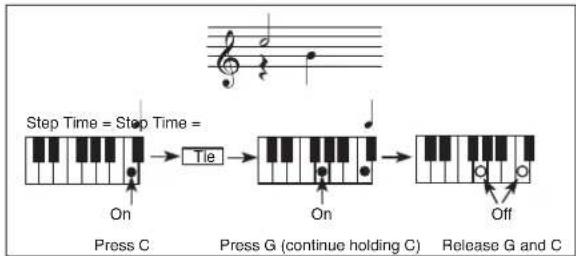
flowchart
graph LR
    A["Step Time = Step Time ="] --> B["Tie"]
    B --> C["Press G (continue holding C)"]
    C --> D["On"]
    D --> E["Off"]
    style A fill:#f9f,stroke:#333
    style B fill:#ccf,stroke:#333
    style C fill:#cfc,stroke:#333
    style D fill:#fcc,stroke:#333
Record mode: Backing Sequence (Quick Record) page
Backing Sequence (Quick Record) mode allows you to quickly record your live performance with the backing of the Styles. To make things easier, just two grouped tracks are provided: Kbd/Pad (Keyboard and Pads) to record keyboard and pads, and Ch/Acc (Chords/Accompaniment) to record chords and the accompaniment provided by the Style.
While in Sequencer mode, press the RECORD button and select the "Backing Sequence (Quick Record)" option. The Backing Sequence (Quick Record) page appears.
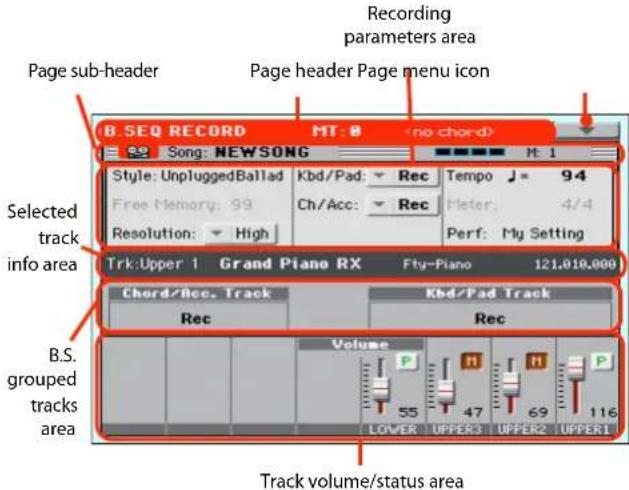
See "Backing Sequence (Quick Record) recording procedure" on page 174 for information on the record procedure.
Page header
See "Page header" on page 165. Here, this line also shows the recognized chord.
Page menu icon
See "Page menu icon" on page 165.
Page sub-header
See "Page sub-header" on page 168.
Recording parameters area
Style
This parameter shows the selected Style. Either touch it, or press the STYLE button in the SELECTION section to open the Style Select window and select a different Style (see "Style Select window" on page 88).
Free memory
Percentage of remaining memory for recording.
Resolution
Use this parameter to set the quantization during recording. Quantization is a way of correcting timing errors; notes played too soon or too late are moved to the nearest axis of a rhythmic "grid", set with this parameter, thus playing perfectly in time.
High No quantization applied.
(1/32)... (1/8)
Grid resolution, in musical values. For example, when you select 1/8, all notes are moved to the nearest 1/8 division. When you select 1/4, all notes are moved to the nearest 1/4 division.
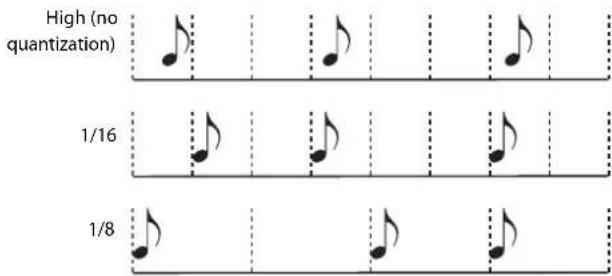
Chord/Acc Track, Kbd/Pad Track
These parameters let you define grouped track status during recording. This status is reflected by the big status indicator above the track sliders.
Play The Backing Sequence track is set to play. If there are recorded data, they will be heard while recording the other Backing Sequence track.
Mute The Backing Sequence track is muted. If this tracks has already been recorded, it will not be heard during recording of the other Backing Sequence track.
Rec The Backing Sequence track is in record. All previously recorded data will be deleted. After pressing ▶(■AY/STOP) to start recording, the track will receive notes from the keyboard, the MIDI IN or the USB Device connector.
Chord/Acc: This Backing Sequence track groups all Style tracks, together with recognized chords and Style controls and Style Elements selection. After finishing recording, they will be saved as Song tracks 9-16, as in the following table:.
| Chord/Acc track Song track/Channel | |
| Bass 9 | |
| Drum 10 | |
| Percussion | 11 |
| Accompaniment 1 | 12 |
| Accompaniment 2 | 13 |
| Accompaniment 3 | 14 |
| Accompaniment 4 | 15 |
| Accompaniment 5 | 16 |
Kbd/Pad: This Backing Sequence track includes the four Keyboard tracks and the four Pads. After finishing recording, they will be saved as Song tracks 1-8, as in the following table:
| Kbd/Pad track | Song track/Channel |
| Upper 1 | 1 |
| Upper 2 | 2 |
| Upper 3 | 3 |
| Lower | 4 |
| Pad 1 | 5 |
| Pad 2 | 6 |
| Pad 3 | 7 |
| Pad 4 | 8 |
Tempo
Metronome Tempo. Select this parameter and use the VALUE DIAL to change Tempo. You can always change Tempo using the TEMPO buttons.
Meter
(Non Editable). This parameter shows the meter (or time signature) of the selected Style for reference.
PERF or STS (Performance or STS)
This parameter shows the selected Performance or STS (depending on the latest item selected).
To select a Performance, either touch it, or press one of the PERFORMANCE buttons to open the Performance Select window and select a different Performance (see "Performance Select window" on page 90).
To select an STS (Single Touch Setting), use the four STS buttons under the display.
Backing Sequence tracks area
Backing Sequence tracks status indicators
These giant indicators show the status of the Backing Sequence tracks. They reflect the status of the Kbd/Pad and Ch/Acc parameters (see "Chord/Acc Track, Kbd/Pad Track" above).
Selected track info area
This line lets you see the Sound assigned to the selected track. See "Selected track info area" on page 166 for more information.
Track volume/status area
This area is where you can set the volume of each single Keyboard track, and mute/unmute tracks.
Sliders (track volume)
Graphical display of each track's volume.
Individual track status icons
While you can use the Kbd/Pad Backing Sequence track to change the status of all Keyboard tracks at once, you can also change the status of each separate track. Touch this icon to change the status of the corresponding individual track.

Play status. The track can be heard.

Mute status. The track cannot be heard.
Track names
Under the sliders, a label for each track is shown.
| Abbreviation | Track |
| MIC/IN | Microphone audio input |
| UPPER1...3 | Upper tracks. |
| LOWER | Lower track. |
Backing Sequence (Quick Record) recording procedure
Here is the general procedure to follow for the Backing Sequence (Quick) Recording.
-
Press the SEQUENCER button to enter the Song mode.
-
Press the RECORD button, and select the "Backing Sequence (Quick Record)" option to enter the Backing Sequence (Quick Record) mode. Now you can prepare your recording parameters. (For more details, see "Record mode: Backing Sequence (Quick Record) page" on page 172).
-
The latest selected Style is currently selected. If it is not the right one, select a different Style to start recording with. (See "Style Select window" on page 88).
-
The latest selected Performance or STS is currently selected. If you prefer, select a different Performance or STS. (See "Performance Select window" on "STS Select" on page 91).
-
Select the status of the Backing Sequence tracks, by using the Kbd/Pad and Ch/Acc parameters. (Kbd/Pad stays for Keyboard and Pads; Ch/Acc stays for Chord and Accompaniment, i.e. the Style tracks). To record all you play on the keyboard, plus the automatic accompaniment, leave their status to Rec (see "Track status icons" on page 169).
Warning: Tracks set to REC are automatically overwritten when starting recording. Set a track to the PLAY or MUTE status, when you don't want to delete it. For example, if you are recording a keyboard part on an existing Style track, set the Ch/Acc parameter to PLAY, and the Kbd/Pad track to REC.
- Start recording by pressing the left ▶/■ (PLAY/STOP) button (or the START/STOP button, if you want the Style to start immediately).
- By pressing the ▶/■eft (PLAY/STOP) button (or the START/STOP button), you can record a keyboard intro with no Style playing. After a count-in, start recording.
Play a solo intro, then start the auto-accompaniment by pressing the START/STOP button.
- By pressing the START/STOP button you can start the Style right at the beginning of the Song.
Since you can use any Style control, you could start with the usual combinations (INTRO, ENDING...).
Note: While in Backing Sequence mode, you can't record the SYNCHRO, TAP TEMPO/RESET, MANUAL BASS, BALANCE controls.
-
Play your music. While recording you can even change the Style, or stop it by pressing START/STOP or one of the ENDINGS. While recording you can even start the style again, by pressing START/STOP.
-
When finished recording your performance
▶/■ (PLAY/STOP) button in the PLAYER section. You will go back to the Sequencer Play Main page (see "Sequencer Play - Main page" on page 165).
At this point, you may press the ▶/■ (PLAY/STOP) button in the PLAYER section to listen to the new Song.
You may also edit the Song by pressing the MENU button (see "Edit menu" on page 177).
- Save the song to a storage device (see "Save Song window" on page 187).
Warning: The recorded Song will be deleted when the instrument enters standby, switching to the Style Play or Song Play mode, or entering Record again. If you wish to preserve it save the Song to a storage device.
Record mode: Step Backing Sequence page
The Step Backing Sequence mode allows you to enter single chords, to create or edit the Style (Chord/Acc) part of a Song. This mode lets you enter chords even if you are not a keyboard player, or fix any error made playing chords or selecting Style controls, during a Backing Sequence (Quick Record) recording.
In this mode, you can only edit Songs created using the Backing Sequence (Quick Record) recording mode. When saving a Song created using the Backing Sequence (Quick Record) recording mode, all Chord/Acc data is preserved, and can be loaded later, to be edited again by using the Step Backing Sequence mode.
While in Sequencer mode, press the RECORD button and select the "Step Backing Sequence" option. The Step Backing Sequence window appears.
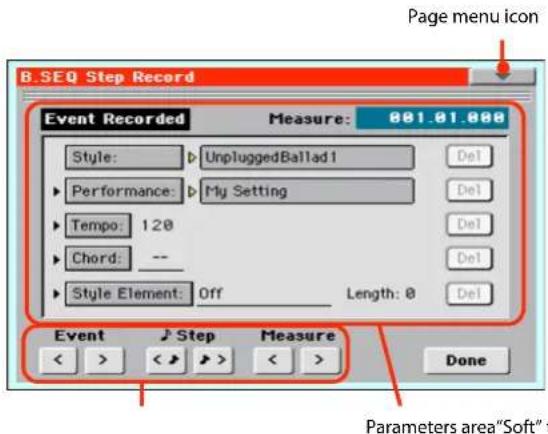
See "Step Backing Sequence procedure" on page 177 for information on the record procedure.
Page menu icon
Touch the page menu icon to open the menu. See "Step Backing Sequence page menu" on page 176 for more information.
Parameters area
Side arrow (1)
The small arrow next to a parameter means that its value is effective at the current position. For example, if you are at the "003.01.000" position, and an arrow lights up next to the Chord parameter, this means that a chord change happens at the "003.01.000" position.
Measure
This parameter shows the current position of the Step Editor. To go to a different position within the Song, use one of the following systems:
- Select this parameter, then use the VALUE DIAL to go to a different measure.
- Use the Measure buttons in the display to move to a different measure. Use the Step buttons in the display to move in steps of 1/8 (192 ticks). Use the Event buttons in the display to jump to the next event.
The locator value is shown in the "measure.beat.tick" format.
Measure Measure or bar number.
Beat Divider in the Time Signature ratio (e.g., a quarter in a 3/4 time).
Tick Smallest position value. The internal Player feature a resolution of 384 ticks per quarter.
Style
This is the latest selected Style. To insert a Style change, current position, touch the Style name to open the Style Select window, or follow the standard selecting procedure STYLE button in the SELECTION section.
Note: Any Style Change inserted after the beginning of the measure (i.e., to a position other than Mxxx.01.000) will be effective at the following measure. For example, if a Style Change event has been inserted at M004.03.000, the selected Style will be effectively selected at M005.01.000. (This works exactly as in Style Play mode).
Note: When inserting a Style Change, you may also insert a Tempo Change at the same position. A Style Change will not automatically insert the Style's Tempo.
Performance
This is the latest selected Performance. Select a Performance to recall the Style it links to. To insert a Performance change at the current position, touch the Performance name to open the Performance Select window, or follow the standard selecting procedure using the PERFORMANCE section.
Note: The STYLE CHANGE LED is automatically turned on when entering the Chord/Acc Step Mode. This means that selecting a Performance automatically selects the Style memorized in the Performance.
The STS MODE and STS buttons are automatically disabled, meaning that you can't change Keyboard tracks while in Acc Step Mode.
Tempo
This is the Tempo Change parameter. To insert a Tempo Change event at the current position, select this parameter and use the VALUE DIAL to change its value.
Chord
The chord parameter is divided in four separate parts:
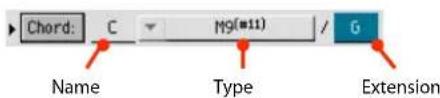
Select one of the parts, then use the VALUE DIAL to modify it. As an alternative, you can play a chord, and it will be automatically recognized. While recognizing a chord, the status of the Bass Inversion parameter will be considered.
The lack of a chord (--) means that the accompaniment will not play at the current position (apart for the Drum and Percussion tracks). To select the “--” option, select the Name part of the Chord parameter, then use VALUE DIAL to select the very la value (C...B, Off).
Note: If you replace a chord with a different one, please remember that the Lower track (if recorded) will not be automatically changed, and may cause a dissonance against the accompaniment.
Style Element
This is the Style Element (i.e., a Variation, Fill, Intro, or Ending). The length of the selected Style Element is always shown by the "Length" parameter (see below).
"Off" means that the accompaniment will not play at the selected position – only Keyboard and Pad tracks will play.
Hint: Insert a Style Element Off event exactly where the automatic accompaniment must stop (at the end of the Song).
Length
This parameter will let you know where to place the following Style Element Change. For example, if you inserted an Intro event lasting for 4 measures, you can insert 4 empty measure after this event, and a Variation event at the end of the Intro, beginning at the 4th empty measure.
Del (Delete) button
When a side arrow ( ) is shown next to a parameter, there is an event at the current position. You can touch the Del button next to it, to delete the event at the current position.
Hint: To delete all events starting from the current position, select the "Delete All from Selected" command from the page menu (see below).
"Soft" transport buttons

Previous or Next Event
Use these buttons to move to the previous or next recorded event.

Previous or Next Step
Use these buttons to go to the previous or next step (1/8, or 192 ticks). If an event is located before the previous or next step, the locator stops on that event. For example, if you are positioned on M001.01.000, and no event exists before M001.01.192, the > button moves to the M001.01.192 location. If an event exists on M001.01.010, the > button stops to the M001.01.010 location.
These commands are effective even if the Measure parameter is not selected.

Previous or Next Measure
Use these buttons to move to the previous or following measure. These commands are effective even if the Measure parameter is not selected.
Done button
Done
Touch this button to exit the Step Backing Sequence mode. All changes will be saved to memory.
Hint: Save the Song to a storage device, by selecting the "Save Song" command from the page menu, to avoid losing it when the instrument enters standby.
Step Backing Sequence page menu
Touch the page menu icon to open the menu. Touch a command to select it. Touch anywhere in the display to close the menu without selecting a command.
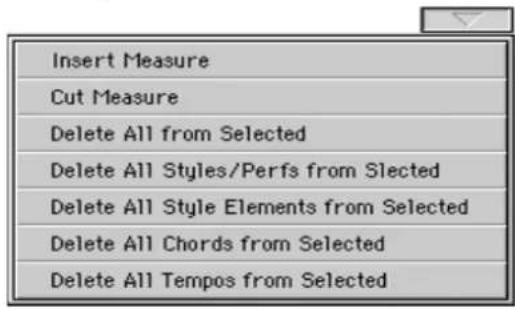
Insert Measure
Use this command to insert an empty measure starting from the current measure. All Chord/Acc events contained in the current measure will be moved to the following measure. The event at the Mxxx.01.000 position (i.e., exactly at the beginning of the measure, like a Time Signature or Style change) will not be moved.
Cut Measure
Use this command to delete the current measure. All Chord/Acc event contained in the following measures will be moved one measure back.
Delete All from Selected
Use this command to delete events of all types, starting from the current position.
Note: All events on the very first tick (M001.01.000), like Perf, Style, Tempo, Chord, Style Element selection, cannot be deleted.
Delete All Styles/Perfs from Selected Delete All Styles Elements from Selected Delete All Chords from Selected Delete All Tempos from Selected
Select one of these commands to delete all events of the corresponding type, starting from the current position to the end of the Song. To delete all events of the same type from the whole Song, go back to the M001.01.000 position, and select one of these commands.
Note: All events on the very first tick (M001.01.000), like Perf, Style, Tempo, Chord, Style Element selection, cannot be deleted.
Step Backing Sequence procedure
Here is the general Step Backing Sequence recording procedure.
Hint: Before entering Step Backing Sequence mode to edit an existing Song, select the "Save Song" command from the page menu, and save the Song to a storage device. This way, you will have a copy of the Song, in case you don't like the results of your editing.
- While in Sequencer mode, press the RECORD button, and choose the "Step Backing Sequence" recording option.
- Select the Measure parameter, and go to the desired position in the Song, by using the VALUE DIAL. Alternatively, you can move the locator using the "soft" transport buttons in the display. See ""Soft" transport buttons" on page 176.
- Select the parameter type (Style, Performance, Tempo...) to insert, edit or delete at the current position. If an arrow (▶) appears next to a parameter, the shown event has been inserted at the current position.
-
Use the VALUE DIAL to modify the selected event. Delete it by touching the Del button next to the event. When editing a parameter without the arrow (▶) next to it, a new event is inserted at the current position.
-
Exit the Step Backing Sequence recording mode, by touching the Done button in the display.
-
Press (PLA/STOP) in the PLAYER section to listen to the result of your editing. If it is fine, save the Song to a storage device.
Edit menu
From any page, press the MENU button to open the Sequencer edit menu. This menu gives access to the various Sequencer edit sections.
When in the menu, select an edit section, or press EXIT to exit the menu.
When in an edit page, press EXIT or the SEQUENCER button to go back to the main page of the Sequencer operating mode.
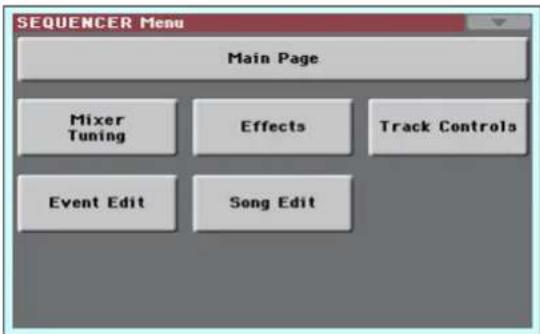
Each item in this menu corresponds to an edit section. Each edit section groups various edit pages, that may be selected by touching the corresponding tab on the lower part of the display.
Edit page structure
All edit pages share some basic elements.
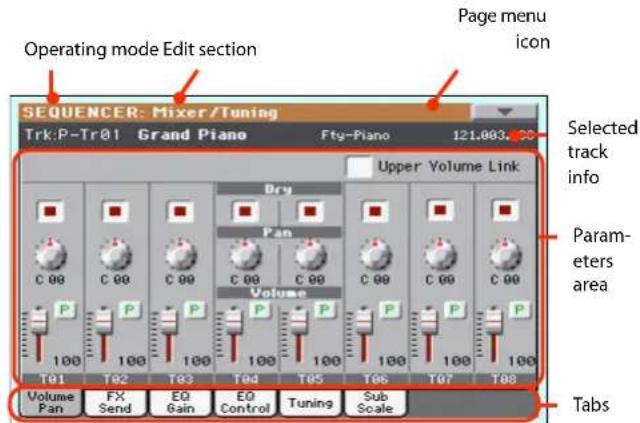
Operating mode
This indicates that the instrument is in Sequencer mode.
Edit section
This identifies the current edit section, corresponding to one of the items of the edit menu (see "Edit menu" on page 177).
Page menu icon
Touch this icon to open the page menu (see "Page m page 186).
Parameters area
Each page contains various parameters. Use the tabs to select one of the pages. For detailed information on the various types of parameters, see sections starting below.
Tabs
Use tabs to select one of the edit pages of the current edit section.
Mixer/Tuning: Volume/Pan
This page lets you set the volume and pan for each Song track.
Use the TRACK SELECT button to switch between Song tracks 1-8 and 9-16.
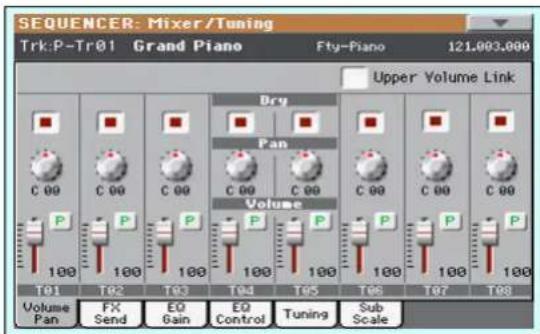
Parameters
All parameters in this page are the same found in the same page of the Song Play mode (see "Mixer/Tuning:page 159).
Mixer/Tuning: FX Send
This page lets you set the level of the track's direct (uneffected) signal going to the Internal FX processors.
Use the TRACK SELECT button to switch between Song tracks 1-8 and 9-16, and vice-versa.
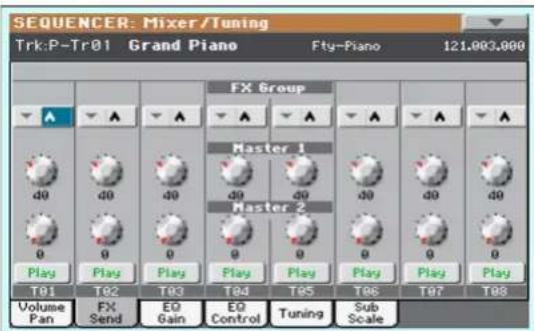
FX Groups
Use this pop-up menu to select one of the two FX groups (A or B).
Pa600 includes two groups of effects (FX A and FX B). While in Song Play mode, the A group is reserved to the Song tracks, the B group to the Keyboard tracks.
However, Songs created in Sequencer mode could also assign the B group to the Song tracks.
Parameters
All parameters in this page are the same found in the same page of the Style Play mode (see "Mixer/Tuning: FX Send" on page 159).
Mixer/Tuning: EQ Gain
In this page you can set the three-band equalization (EQ) for each individual track.
Use the TRACK SELECT button to switch between Song tracks 1-8 and 9-16, and vice-versa.
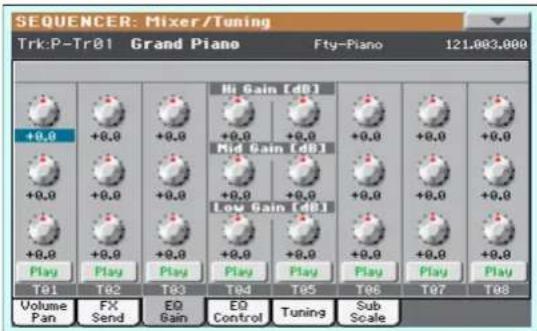
Volume/Pan" on Parameters
All parameters in this page are the same found in the same page of the Song Play mode (see "Mixer/Tuning:page 160).
Mixer/Tuning: EQ Control
This page lets you reset or bypass track equalization, programmed in the previous page.
Use the TRACK SELECT button to switch between Song tracks 1-8 and 9-16, and vice-versa.
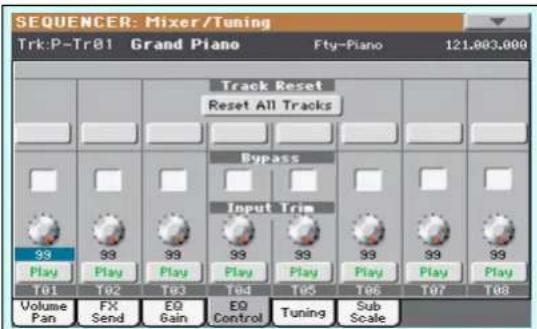
Parameters
All parameters in this page are the same found in the same page of the Song Play mode (see "Mixer/Tuning: EQ Cont page 160).
Mixer/Tuning: Tuning
Parameters
All parameters in this page are the same found in Global mode. See "Mixer/Tuning: Tuning" on page 104).
Mixer/Tuning: Sub Scale
This page lets you program an alternative scale for the selected tracks (via the "Track Assign" parameter). The remaining tracks (if any) use the basic scale set in Global mode (see "Main Scale" on page 244).
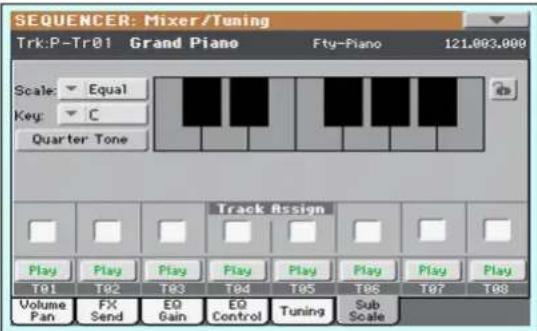
Note: Quarter Tone selection and activation of the Sub-Scale on each track of a Song, can be received by MIDI (i.e., by an external sequencer or controller). Conversely, selection of Quarter Tone settings, or activation of the Sub-Scale on each track of the Song, can be sent by the Pa600 to an external MIDI recorder as System Exclusive data.
Parameters
All parameters in this page are the same found in Global mode. See "Mixer/Tuning: Sub Scale" on page 104.
Track Assign
Check the parameter corresponding to each track where the Sub-Scale must be used.
Play/Mute icon
Track's play/mute status.

Play status. The track can be heard.

Mute status. The track cannot be heard.
Effects: A/B FX Configuration
This page allows you to select the effects for the A (Song) and B (Keyboard) FX groups. You can use the "FX A" and "FX B" side tabs to switch from one group to the other one. Songs created in Sequencer mode on a Pa-Series instrument can also use the B FX group.
The effect types and the FX matrix are the same seen for the Style Play mode (see "Effects: A/B F page 106).
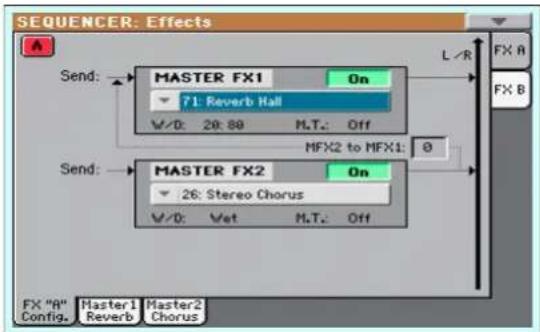
Note: When you stop the Song, or select a different Song, the default effects are selected again. You can, however, stop the Song, change the effects, then start the Song again. Save the Song to permanently change the effects.
FX Group
Use these side tabs to choose the FX group (A or B) for the corresponding track.
Pa600 includes two groups of effects (FX A and FX B). While in Song Play mode, the A group is reserved to the Song and Pad tracks, the B group to the Realtime (Keyboard) tracks.
However, Songs created in Sequencer mode could also assign the B group to the Song tracks.
Parameters
All parameters in this page are the same found in the same page of the Song Play mode (see "Effects: A/B FX Configuration" on page 161).
Effects: Master 1, 2
These pages contain the editing parameters for the effect processors. Here is an example of the FX A page, with the Reverb Hall effect assigned.
![SEQUENCER: Effects A MFX 1 71: Reverb Hall On FX A Reverb Time [sec]: 2.2 High Damp [%]: 33 Pre Delay [msec]: 0 Pre Delay Thru [%]: 20 EQ Trim: 100 Pre LEO Fo: Low Pre HEQ Fo: High Pre LEO Gain [dB]: -4.8 Pre HEQ Gain [dB]: +1.0 Wet/Dry: 28:80 Src: Off Rmt: +0 FX "A" Master1 Master2 Config. Reverb Chorus](/content/2026/05/882139/images/70d752a3e74d3ef2fa918643c603a6f47bdd810c6040c38f567c596990ccccb9.jpg)
Selected effect
Select one of the available effects from this pop-up menu. This is equivalent to the "FX Group" parameters found in the "Effects: A/B FX Configuration" page (see above).
Parameters
The parameters shown in this page are the same already seen for the Style Play mode. See "Effects: Master 1, 2" on page 107 for details.
Track Controls: Mode
Parameter
See "Track Controls: Mode" on page 107.
Track Controls: Drum Edit
Parameter
See "Track Controls: Drum Edit" on page 108.
Track Controls: Easy Edit
Parameter
See "Track Controls: Easy Edit" on page 109.
Event Edit: Event Edit
The Event Edit is the page where you can edit each single MIDI event of the selected track. You can, for example, replace a note with a different one, or change its playing strength. See also "Event Edit procedure" on page 181 for more information on the event editing procedure.
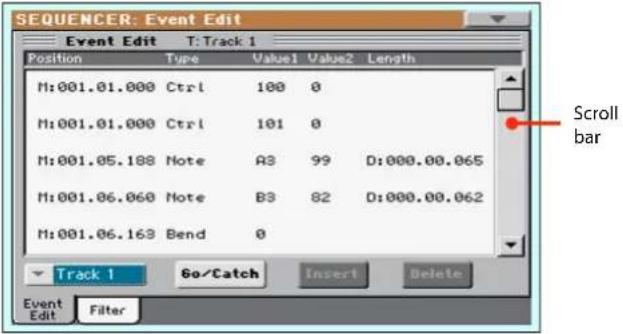
Position
Position of the event, expressed in the form 'aaa.bb.ccc':
- ' a a a ' i s t h e m e a s - ' b b ' i s t h e b e a t
- 'ccc' is the tick (each quarter beat = 384 ticks)
You can edit this parameter to move the event to a different position. You can edit a position in either of the following ways:
(a) select the parameter, and use the VALUE DIAL to change the value, or
(b) select the parameter, then touch it again; the numeric keypad will appear. Enter the new position by dialing in the three parts of the number, separated by a dot. Zeroes at the beginning can be omitted, as well as the least important parts of the number. For example, to enter position 002.02.193, dial "2.2.193"; to enter position 002.04.000 dial "2.4"; to enter position 002.01.000, simply dial "2".
Type
Type of the event shown in the display. To edit it, select the parameter and use the VALUE DIAL to change its value.
This parameter also shows the (non editable) "End Of Track" marking, when the end of the track is reached.
Value 1 and 2
Values of the event shown in the display. Depending on the selected event, the meaning may change.
Here are the events contained in ordinary tracks (1-16).
| Type First value | Second value | |
| Note | Note name | Velocity |
| RX Noise | Note name | Velocity |
| Prog | Program Change number | - |
| Ctrl | Control Change number | Control Change value |
| Bend | Bending value | - |
| Aftt | Mono (Channel) Aftertouch value | - |
| PAft | Note to which the Aftertouch is applied | Poly Aftertouch value |
And here are the events contained in the Master track.
| Type | First value | Second value |
| Tempo | Tempo change | - |
| Volume | Master Volume value | - |
| Meter | Meter (time signature) change(*) | - |
| KeySign | Key Signature(†) | - |
| Scale | One of the available preset Scales | Root note for the selected Scale |
| UScale (User Scale) | Altered note | Note alteration(‡) |
| QT (Quarter Tone) | Altered note | Note alteration (0, 50)(b) |
| QT Clear (Quarter Tone Clearing) | Reset of all Quarter Tone (QT) changes | - |
(*). Meter changes can't be edited or inserted separately from a measure. To insert a Meter change, use the Insert function in the Edit section and insert a series of measures with the new meter. Existing data can then be copied or entered to these measures
(f). This is the key signature shown in the Score. If this event is missing, the Score will be shown as if it was in the key of C Major.
(‡). To edit User Scale and Quarter Tone settings, select the first value, then select the scale's degree to edit. Edit the second value to change the tuning of the selected note of the scale.
To edit the event Type and Values, select the parameter and use the VALUE DIAL to change their value. In case of numeric values, you can also press them twice to open the numeric keypad.
Length
Length of the selected Note event. The value format is the same as the Position value. Edit it in the same way.
Note: If you change a length of "000.00.000" to a different value, you can't go back to the original value. This rather zero-length value may be found in the drum and percussion tracks of Songs made in Backing Sequence mode.
Track
Use this pop-up menu to select the track to edit.
Track 1...16 One of the ordinary tracks of the Song. These tracks contains musical data, like notes and controllers.
Master This is a special track, containing Tempo changes, Meter changes, Scale and Transpose data, and the effect parameters.
Scrollbar
Use the scrollbar to browse the event through the list. You can also scroll by using the SHIFT + DIAL combination.
Go/Catch
This is a dual-function command.
- While the sequencer is not running, it works as a Go to Measure command. Touch it to open the Go to Measure dialog box:
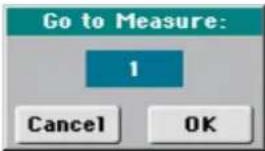
When in this dialog box, select a target measure, and touch OK. The first event available in the target measure will be selected.
- While the sequencer is running, it works as a Catch L command. Touch it to show the event that is currently playing.
Insert
Touch the Insert button in the display to insert a new event at the current shown Position. The default values are Type = Note, Pitch = C4, Velocity = 100, Length = 192.
Note: You can't insert new events in an empty, non-recorded Song. To insert an event, you must first insert some empty measures by using the Insert Measure function (see "Song Edit: Cut/Insert Measures" on page 184).
Delete
Touch the Delete button in the display to delete the event selected in the display.
Note: The "End of Track" event cannot be deleted.
Event Edit procedure
Here is the general event editing procedure.
-
While in the Event Edit page, press ▶/■ (PLAY/STOP) in the PLAYER section to listen to the Song. Press it again to stop the Song.
-
Select the Filter page, and turn "Off" the filter for the event types you wish to see in the display (see "Event Edit: Filter" on page 182 for more information).
-
Return to the Event Edit page.
-
Use the "Track" pop-up menu to select the track to edit. The list of events contained in the selected track will appear in the display.
For more information on the event types and their values, see above.
-
Select the "Position" parameter. Use the VALUE DIAL (or touch the parameter again to open the numeric keypad) to change the event's position.
-
Select the "Type" parameter and use the VALUE DIAL to change the event type. Select the "Value 1 and 2" parameters and use the VALUE DIAL (or touch the parameter again to open the numeric keypad) to modify the selected value.
-
In the case of a Note event, select the Length parameter, and use the VALUE DIAL (or touch the parameter again to open the numeric keypad) to change the event's length.
- While the sequencer is not running, you may touch the Go/Catch button in the display to go to a different measure (see "Go/Catch" above)
- While the sequencer is running, you may use the Go/Catch button in the display to see the currently playing event in the display (see "Go/Catch" above).
- Use the PLAYER transport controls to listen to the Song.
- Touch the Insert button in the display to insert an event at the Position shown in the display (a Note event with default values will be inserted). Touch the Delete button in the display to delete the selected event.
- When the editing is complete, you may select a different track (go to step 4).
- When finished editing the whole Song, select the Save Song command from the page menu to save the Song to a storage device. See "Save Song window" on page 187 for more information on saving a Song.
Event Edit: Filter
This page is where you can select the event types to be shown in the Event Edit page.
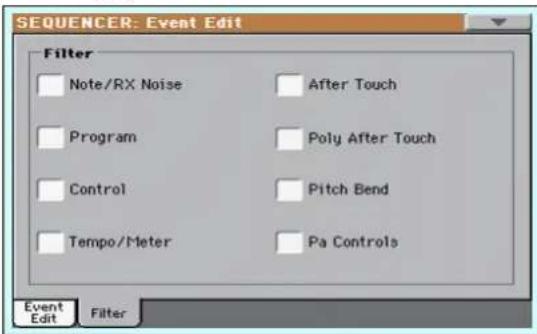
Turn On the filter for all event types you do not wish to see in the Event Edit page.
Note/RX Noise
Notes and RX Noises.
Program Program Change events.
Control Control Change events.
Tempo/Meter Tempo and Meter (time signature) changes (Master Track only).
After Touch Mono (Channel) Aftertouch events.
Poly After Touch
Poly Aftertouch events.
Pitch Bend Pitch Bend events.
Pa Controls Controls exclusive to Pa600, like the Scale settings. These controls are recorded to the Master Track, and saved as System Exclusive data.
Song Edit: Quantize
The quantize function corrects any rhythm error after recording.
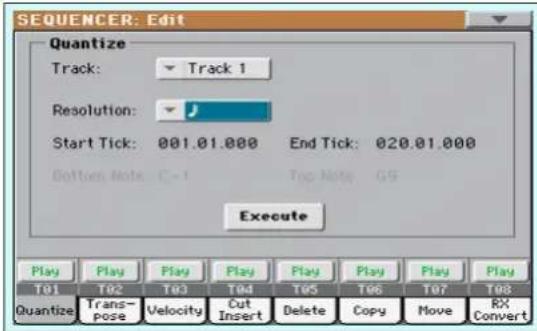
After setting the various parameters, touch Execute to start the operation.
Track
Use this parameter to select a track.
All Quantize will apply to all tracks.
Track 1...16 Quantize will apply only to the selected track.
Resolution
This parameter sets the quantization value. For example, when you select a 1/8-note, all notes are moved to the nearest 1/8 division. When you select 1/4, all notes are moved to the nearest 1/4 division.
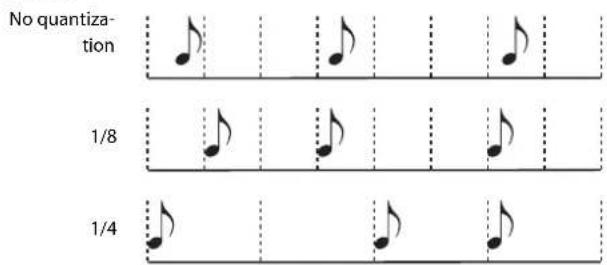
Grid resolution, in musical values. A "b...f" character added after the value means swing-quantization. A "3" means triplet.
Start / End Tick
Use these parameters to set the starting and ending points of the range to be quantized.
If you wish to select a four-measure sequence starting at the beginning of the Song, the Start will be positioned at 1.01.000, and the End at 5.01.000.
Bottom / Top Note
Use these parameters to set the bottom and top note of the keyboard range to quantize. If you select the same note as the Bottom and Top parameters, you can select a single percussive instrument in a Drum track.
Note: These parameters are available only when a Drum track is selected.
Song Edit: Transpose
Here you can transpose the Song, a track or a part of a track.
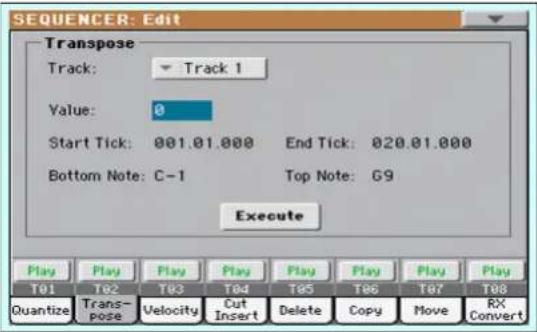
After setting the various parameters, touch Execute to start the operation.
Track
Use this parameter to select a track.
All All tracks selected (apart for Drum tracks).
Track 1...16 Selected track.
Value
Transpose value (±127 semitones).
Start / End Tick
Use these parameters to set the starting and ending points of the range to transpose.
If you wish to select a four-measure sequence beginning of the Song, the Start will be positioned at 1.01.000, and the End at 5.01.000.
Bottom / Top Note
Use these parameters to set the bottom and top of the keyboard range to transpose. If you select the same note as the Bottom and Top parameters, you can select a single note, or a single percussive instrument in a Drum track.
Song Edit: Velocity
Here you can change the Velocity value for the notes. An Advanced mode is available, allowing you to select a velocity curve for the selected range. This is useful to create fade-ins or fade-outs.
![SEQUENCER: Edit Velocity Track: Track 1 Intensity 100 % Curve [Curve 1] Velocity Value: 0 End Yet Value: 100 % Start Tick: 001.01.000 End Tick: 020.01.000 Bottom Note: C-1 Top Note: G9 Advanced Execute Play Play Play Play Play Play Play T81 T82 T83 T84 T85 T86 T87 T88 Quantize Trans- pose Velocity Cut Insert Delete Copy Move RX Convert](/content/2026/05/882139/images/b8db6bd56ef673d42f3ab25ccf77ef4c5f19de7cce4c7edbb9672e3905f946e1.jpg)
After setting the various parameters, touch Execute to start the operation.
Track
Use this parameter to select a track.
All All tracks selected.
Track 1...16 Selected track.
Value
Velocity y change value.
Start / End Tick
Use these parameters to set the starting and ending points of the range to edit.
If you wish to select a four-measure sequence beginning of the Song, the Start will be positioned at 1.01.000, and the End at 5.01.000.
Bottom / Top Note
Use these parameters to set the bottom and top of the keyboard range to edit. If you select the same note as the Bottom and To parameters, you can select a single percussive instrument in a Drum track.
Advanced
When this checkbox is checked, the "Intensity", "Curve", "Start Velocity Value" and "End Velocity Value" parameters can be edited.
Intensity
(Only available in Advanced mode). Use this parameter to specify the degree to which the velocity data will be adjusted toward the curve you specify in "Curve".
0...100% Intensity value. With a setting of 0 [%], the velocity will not change. With a setting of 100 [%], the velocity will be changed the most.
Curve
(Only available in Advanced mode). Use this parameter to select one of the six curves, and to specify how the velocity will change over time.
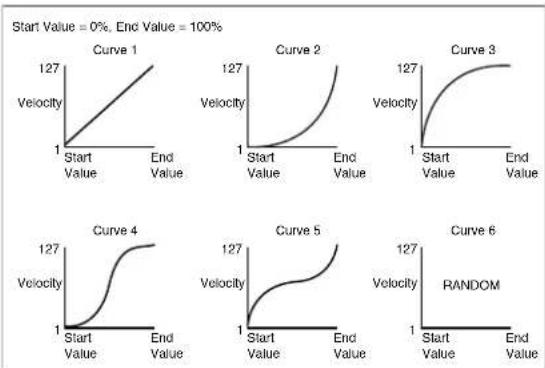
line
| Curve | Start Value | End Value | |-------|-------------|-----------| | Curve 1 | 1 | 127 | | Curve 2 | 1 | 127 | | Curve 3 | 1 | 127 | | Curve 4 | 1 | 127 | | Curve 5 | 1 | 127 | | Curve 6 | 1 | 127 | * RANDOM*Start / End Vel. Value
(Only available in Advanced mode). Velocity change at the starting and ending ticks of the selected range.
0...100 Velocity change in percentage.
Song Edit: Cut/Insert Measures
In this page you can cut or insert measures from the Song.
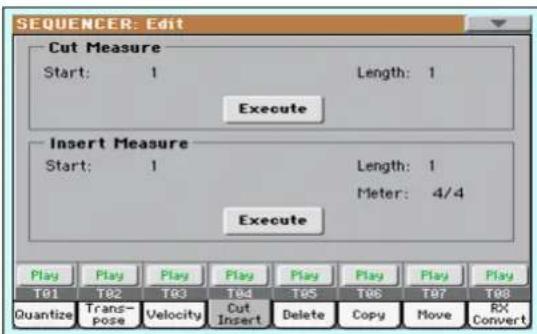
After selecting the Start and Length parameters, touch Execute to start the operation.
After the Cut, the following measures are moved back, to fill the cut measures.
After the Insert, the following measures are pushed forward to accommodate the inserted measures.
Start
First measure where to begin cutting/inserting.
Length
Number of measures to be cut/inserted.
Meter
Meter (time signature) of the measures to be inserted.
Song Edit: Delete
This page is where you can delete MIDI events from the Song.
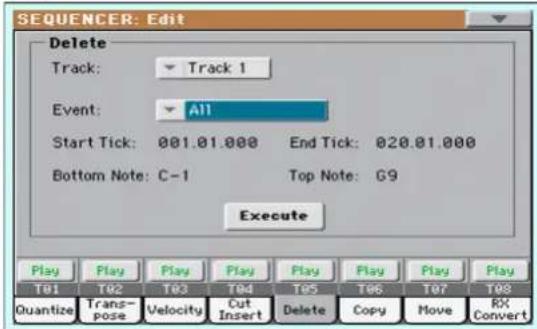
After setting the various parameters, touch Execute to start the operation.
Track
Use this parameter to select a track.
All All tracks selected.
Track 1...16 Selected track.
Master Master track. This is where the Tempo, Scale and Effect events are recorded.
Event
Type of MIDI event to delete.
All All events. Measures will not be removed from the Song, and will remain empty.
Note All notes in the selected range.
Dup. Note All duplicate notes. When two notes with the same pitch are encountered on the same tick, the one with the lowest velocity is deleted.
After Touch After Touch events.
Pitch Bend Pitch Bend events.
Prog.Change Program Change events, excluding the bundled Control Change #00 (Bank Select MSB) and #32 (Bank Select LSB).
Ctl.Change All Control Change events, for example Bank Select, Modulation, Damper, Soft Pedal...
CC00/32...CC127
Single Control Change events. Double Control Change numbers (like 00/32) are MSB/LSB bundles.
Start / End Tick
Use these parameters to set the starting and ending points of the range to edit.
If you wish to select a four-measure sequence starting at the beginning of the Song, the Start will be positioned at 1.01.000, and the End at 5.01.000.
Bottom / Top Note
Use these parameters to set the bottom and top of the keyboard range to delete. If you select the same note as the Bottom and
Top parameters, you can select a single note, or a single percussive instrument in a Drum track.
Note: These parameters are available only when the All or Note options are selected.
Song Edit: Copy
Here you can copy tracks or phrases.
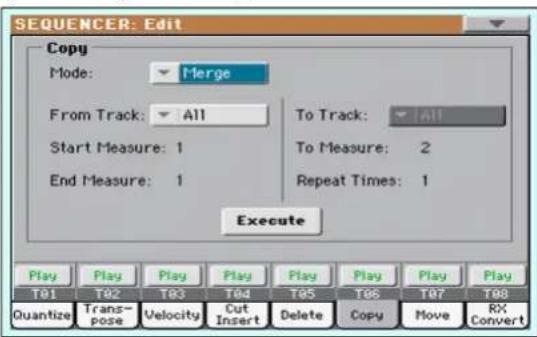
After setting the various parameters, touch Execute to start the operation.
Note: If you copy too many events on the same "tick", many events!" message appears, and the copy operation is aborted.
Mode
Use this parameter to select the Copy mode.
Merge Copied data are merged with the data at the target position.
Overwrite Copied data replace all data at the target position.
Warning: Deleted data cannot be recovered!
From Track... To Track
Use these parameters to select the source and target track to copy.
All All tracks. The target track cannot be selected.
Track 1...16 Selected source and target tracks.
Start Measure... End Measure
These parameters are the starting and ending measure to copy. For example, if From Measure=1 and To Measure=4, the first four measures are copied.
To Measure
This parameter is the first of the target measures.
Repeat Times
Number of times the copy must be executed. Copies will be consecutive.
Song Edit: Move
Here you can shift a track forward or backward by just a few ticks or whole measures.
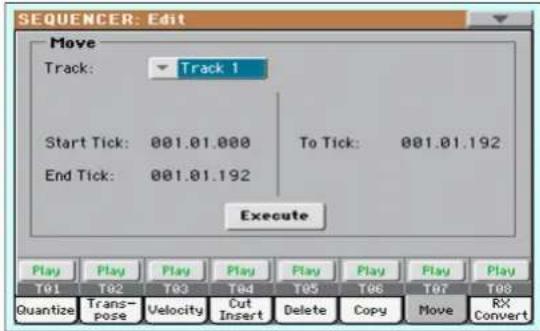
After setting the various parameters, touch Execute to complete the operation.
Track
Use these parameters to select the track you want to move.
Track 1...16 Selected track.
t Start T/End Tick
These parameters set the starting and ending point of the range to move.
To Tick
This parameter allows you to set the target starting point of the moved track.
Song Edit: RX Convert
You can use the RX Convert page to convert notes of the midfile into RX Noises, and vice-versa. This will help programming Songs on an external sequencer.
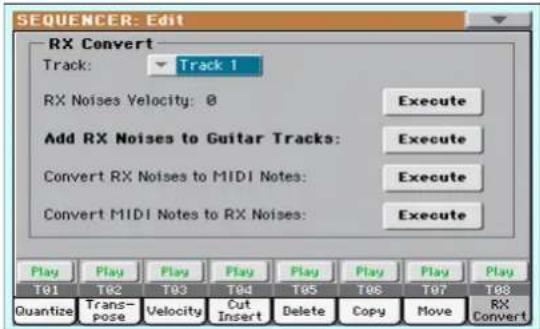
After having chosen a track to convert, touch Execute to complete the operation.
Track
Use these parameters to select the track containing the notes or RX Noises you want to convert.
RX Note Velocity
Use this parameter to adjust the volume level of the RX Noises in the selected track(s).
Add RX Noises to Guitar track
Use this parameter to automatically analyze the Standard MIDI File, and add RX Noises to Guitar tracks. This command scans a single track or the whole Standard MIDI File, looking for guitar strumming played by nylon, steel or electric guitars.
After scanning, a suitable Guitar sound will be automatically assigned to the relevant tracks, and RX Noises automatically added where needed.
Convert RX Noises to MIDI Notes
Use this parameter to convert the RX Noises contained in the selected track to ordinary MIDI Notes.
Convert MIDI Notes to RX Noises
Use this parameter to convert all the relevant MIDI Notes in the selected track to RX Noises.
Page menu
Touch the page menu icon to open the menu. Touch a command to select it. Touch anywhere in the display to close the menu without selecting a command.
| Load Song | Delete Current Track |
| Save Song | Solo Track |
| Undo | Copy FX |
| Overdub Step Recording | Paste FX |
| Overwrite Step Recording | Exit from Record |
| Delete Song |
Load Song
Select this command to open the Song Select window, and load a Song to the sequencer. (See "Song Select window" on page 187).
Save Song
Select this command to save the new or edited Song to a storage device as a Standard MIDI File. The file is automatically added the ".MID" extension. After selecting this command, the Save Song page appears (see "Save Song window" on page 187).
Warning: Turning the instrument off will delete the Song from memory. Save your Song to a storage device to avoid losing it.
Warning: The Song is also lost when switching from Sequencer to Style Play or Song Play mode, without previously saving the Song to a storage device.
Undo
When selecting this command, the latest operation is canceled, and data are reverted to the previous situation.
Overdub Step Recording
Only available in Record mode. Select this command to enter Overdub Step Record mode. This recording mode lets you enter events one at a time, adding events to the existing events. (See "Record mode: Step Record page" on page 170).
Overwrite Step Recording
Only available in Record mode. Select this command to enter Overwrite Step Record mode. This recording mode lets you enter events one at a time, overwriting all existing events. (See "Record mode: Step Record page" on page 170).
Delete Song
Select this command to delete the Song and create a new, blank Song.
Delete Current Track
Select this command to delete the track currently selected in the Track area (see "Track volume/status area" on page 169).
Solo Track
Select the track to be soloed, and check this item. You will hear only the selected track, and the 'Solo' warning will flash on the page header.
Uncheck this item to exit the Solo function.
SHIFT Keep the SHIFT button pressed and touch one of the tracks to solo it. Do the same on a soloed track to deactivate the Solo function.
Copy/Paste FX
Use this command to copy a single effect, or both effects of an FX group (A or B). See "Copy/Paste FX" on page 115 for detailed instructions.
Exit from Record
Only available in Record mode. Select this command to exit the Record mode, and go back to the Main page of the Sequencer Play mode (see "Sequencer Play - Main page" on page 165).
Song Select window
This window appears when you select the "Load Song" command from the page menu, or press the SONG button in the SELECTION section of the control panel. See "Song Select window" on page 91 for details.
Save Song window
The recorded Song is lost when the instrument enters The Song is also lost when you overwrite it in Record mode, or if you confirm the warning message when switching to the Style Play or Song Play mode. You must save to a storage device any Song you wish to preserve.
This window appears when you select the "Save Song" command from the page menu.
Press EXIT to cancel saving and go back to the main page of the Sequencer operating mode.
![Directory PLAYER Save Song Type Name Size Date FID Another MIDI Song 22K 23-09-03 14:59 FID Canyon 25K 21-01-11 22:33 FID LoveSong 22K 23-09-03 14:59 FID My MIDI Song 22K 23-09-03 14:59 FID Pinball 25K 21-01-11 22:32 Song path [KORG DISK]\MYSHOW\MIDI DISK Open Close Locate Save Storage device](/content/2026/05/882139/images/ea527a26df51eb03f08a2f618bb472d1796ce7806287314e8908a1ba813f18d2.jpg)
Song path
This line shows the path of the location where you are saving the Song.
Directory
This is the list of the selected device's content.
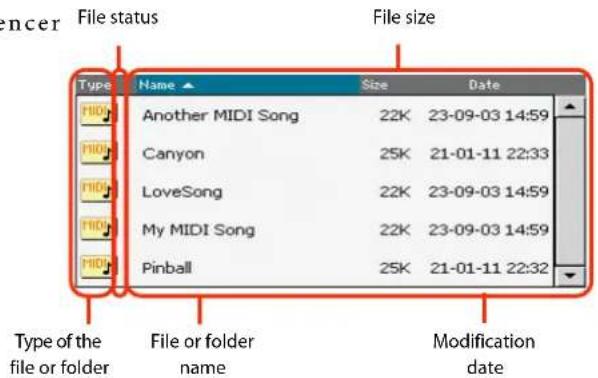
Detailed information about this type of page can be read in "Song Select window" on page 91.
Storage device and by:
Use this menu to select one of the available storage devices.
| Device Type | |
| DISK Internal memory | |
| USB Optional device connected to the USB Host port | |
The actual name (label) of the device appears within square brackets ([]).
Open
Opens the selected folder (item whose icon looks like this: ).
Close
Closes the current folder, returning to the parent ("upper") folder.
Locate
Touch this button to see the Song assigned to This is useful to quickly locate it, after you have browsed through long directories and "dug" into different folders.
Save
Touch this button to open the Save Song dialog box, and save the Song to the current directory.
![Save Song Song Name: T NEWSONG To [KORG DISK]\MYSHOW\MIDI Cancel OK](/content/2026/05/882139/images/bd4a855c690be32cafac358972b0306f75db9fcbb54880e5becd205235cba4a6.jpg)
- If no file has been selected in the display, prior to touching Save, the "NewSong" default name will be automatically assigned to the Song.
Note: If a file is selected, just touch the storage device header to deselect it.
- If a file has been selected in the display, prior to touching Save, the name of the selected file will be automatically assigned to the Song.
In any of the above situations, touch the Text Edit) button to edit the Song name.
Warning: If a file with the same name is already in the current directory, a message will warn you. If you confirm, the existing file will be overwritten. Select a file before saving only if you overwrite it (i.e., in case you are saving changes to an existing file).
Empty measure at the beginning of the Standard MIDI File
When saving a Song as a Standard MIDI File, an empty measure is automatically inserted to the beginning of the Song. This measure contains various Song initialization parameters.
Play/Mute status saved with the Song
When saving a Song, the Play/Mute status is saved with the Song. This status is preserved also when playing back the same Song in Song Play mode.
Master Transpose saved with the Song
Sequence When saving a Song, the Master Transpose value is saved with the Song. Since this value is saved as System Exclusive data, it is preserved also when playing back the Song in Song Play mode.
Hint: Since the Master Transpose is a global parameter, loading a Song with a non-standard transposition may result in unwanted transposing when loading other Songs that do not contain their own transposition data. To transpose a Song it is advisable to use the Transpose function in the Edit section of the Sequencer mode (see "Song Edit: Transpose" on page 183).
You may also lock the Master Transpose, to avoid unwanted transposition. See “General Controls: Lock” on page 236 of the Global chapter.
As a general rule, you should use the Master Transpose (TRANSPOSE buttons on the control panel) when you need to transpose Keyboard tracks together with the Song. You should use the Edit mode Transpose function (see "Song Edit: Transpose" on page 183) when only the Song has to be transposed.
Note: The Master Transpose value is always shown on the page
SEQUENCER
MT:8
Save Song procedure
-
If you are in Record mode, stop the sequencer and exit from the Record mode. Then go back to the main page of the Sequencer Play mode (see "Sequencer Play - Main page" on page 165).
-
Select the Save Song command from the page menu. The t to Save Song page appears.
-
Select the folder where you want to save the Song into. Use the Open and Close commands to browse open or close folders. Use the scrollbar to browse through the files.
-
When you are in the directory where you want to save your Song to, touch the Save button in the display.
- To overwrite an existing file, select it before touch Save. - To create a new file, do not select any file before touching Save. The "NewSong" ("NEWSONG.MID" on a storage device) name will be automatically assigned to the Song.
-
After touching the Save button, the Save Song dialog box will appear.
-
If you like, touch the (Text Edit) button to edit the name.
-
Touch OK to confirm saving, or Cancel to stop the Save operation.
Sound mode
The Sound operating mode is where you can listen to individual Sounds, and edit them. In this mode, the selected Sound can always be played across the full keyboard range.
Details on how to select a Sound are included in the "Selecting elements" chapter (see "Sound Select window" on page 89).
While in a different operating mode, you can easily select the Sound to be edited when switching to the Sound mode. Just select the track the Sound to be edited is assigned to, then keep the SHIFT button pressed while pressing the SOUND button.
Hint: This is also useful to see the Bank Select/Program Change numbers when programming a Song on an external sequencer. Realtime
The MIDI channel
In Sound mode, Pa600 receives and transmits on the same channel of the Upper 1 track. If the Global channel is assigned, notes can also be received on this channel. See "MIDI: MIDI In Channels" on page 247 and "MIDI: MIDI Out Channels" on page 247 for more information.
How to select oscillators
While in an edit page requiring an oscillator to be selected for editing, use the vertical row of buttons on the right (1...24 max) to select one of the available oscillators. The number of available oscillators depends on the "Oscillators Count" parameter (see page 192).
If you cannot see the desired oscillator, touch the scroll arrow, until the hidden oscillator is shown in the display.
When oscillators cannot be select, since the parameter contained in the current page are global and valid for the whole Sound, these buttons are greyed out, and cannot be selected.

Sounds, Drum Kits
Pa600 features two different types of Sounds:
• Ordinary Sounds. These are normal instrument Sounds, like pianos, strings, basses.
- Drum Kits. These are drum and percussion kits, where each note of the keyboard is a different percussive instrument. You can find Drum Kits in the Drum & SFX and User Dk banks.
Before pressing MENU to access the edit pages, you should select a Sound of the type you wish to edit or create.
Note: Notes pointing to special Drum Kit features are marked by
the DRUM icon.
Main page
Here is the main page of the Sound operating mode.
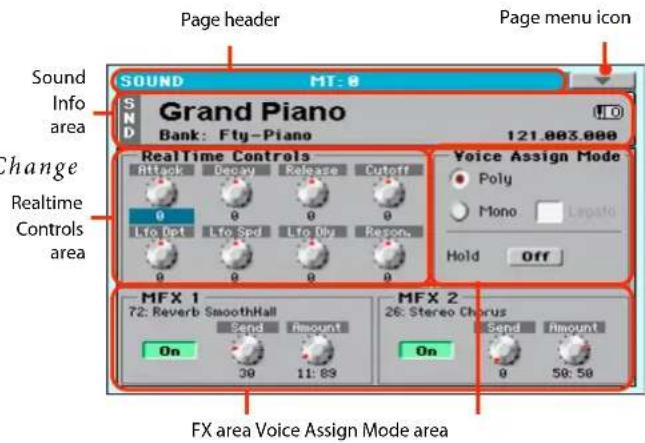
Page header
This line shows the current operating mode and transposition.
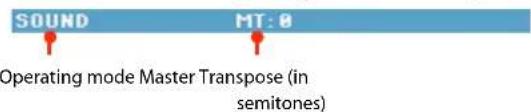
Operating mode name
Name of the current operating mode.
Master transpose
Master transpose value in semitones. This value can be changed using the TRANSPOSE buttons on the control panel.
Page menu icon
Touch the page menu icon to open the menu. See "Page menu" on page 214 for more information.

Sound Info area
This is where basic details for the Sound are shown. Touch anywhere in this area to open the Sound Select window.
Sound name
Name of the Sound assigned to the corresponding Keyboard track.
Bank
Bank the current Sound belongs to.
Bank Select / Program Change sequence
Bank Select MSB / Bank Select LSB / Program Change numbers, in the form "CC00.CC32.PC".
CC00 This section shows the value of the Control Change (CC) 00 message (or Bank Select for the selected Sound.
CC32 This section shows the value of the Control Change (CC) 32 message (a.k.a. Bank Select LSB) for the selected Sound.
PC This section shows the value of the Program Change (PC) message for the selected Sound. Values are in the standard 0-127 MIDI numbering format.
Note: Some manufacturers could use the 1-128 numbering system; when connecting your Pa600 to an instrument of this kind, increment the PC value by 1 unit.
Octave Transpose icon
Octave transpose value. Use the UPPER OCTAVE buttons to change this value.
Realtime Controls area
Controls in this area allow you to edit the main parameters of the Sounds assigned to each track. Touch one of them, and modify its value by using the VALUE DIAL controls (or moving your finger).
Note: All values refer to the original values of the Sound.
Note: When selecting the Write Sound command from the page menu, current parameter values, after editing the Realtime Controls, are saved with the Sound. After saving, Realtime Controls are set back to the default position.
Note: After selecting a different Sound, Realtime Control values are automatically set to zero.
Attack Attack time. This is the time during which the sound goes from zero (at the moment when you strike a key) to it's maximum level.
Decay Decay time. Time to go from the final Attack level to the beginning of the Sustain.
Release Release time. This is the time during which the sound goes from the sustaining phase, to zero. The Release is triggered by releasing a key.
Cutoff Filter cutoff. This sets the sound brightness.
LFO Depth Intensity of the Vibrato (LFO).
LFO Speed Speed of the Vibrato (LFO).
LFO Delay Delay time before the Vibrato (LFO) begins, after the sound starts.
Resonance Use the Filter Resonance to boost the cutoff frequency.
Voice Assign Mode
Poly
The Sound will play polyphonically, allowing you play chords.
Mono
The Sound will play monophonically, producing only one note at a time.
Legato
This parameter is available when the Mono option is selected.
Note: If "Legato" is On, certain multisamples or keyboard locations may produce an incorrect pitch.
On Legato is on. When multiple note-on's occur, the first note-on will retrigger the sound, and the second and subsequent note-on's will not retrigger.
When legato is on, multiple note-on's will not retrigger the voice. If one note is already on and another note is turned on, the first voice will continue sounding. The oscillator sound, envelope, and LFO will not be reset, and only the pitch of the oscillator will be updated. This setting is effective for wind instrument sounds and analog synth-type sounds.
Off Legato is off. Notes will always be retriggered when note-on occurs.
When legato is off, multiple note-on's will retrigger the voice at each note-on. The oscillator sound, envelope, and LFO will be reset (and retriggered) according to the settings of the Sound.
Hold
Use this parameter to keep the notes sustained even after releasing the keys.
Note: Please remember the Hold must be On before playing the note to be held.
FX Area
In Sound mode, two Master effect processors (MFX1 and MFX2) are available.
On/Off
Use this button to turn on or off the corresponding effect.
Selected Effect
Non editable. This shows the effect assigned to the corresponding FX processor. To select a different effect, see “Effects: “B” FX Config” on page 213.
Send
Use this knob to adjust the level of the dry sound sent to the corresponding effect.
Amount
Volume of the effect that is added to the dry (non-effected) signal.
Edit menu
From any page, press the MENU button to open the Sound edit menu. This menu gives access to the various Sound edit sections.
When in the menu, select an edit section, or SOUND to exit the menu and return to the main page. To return to the main page, you can also select the Main Page menu item.
When in an edit page, press EXIT or the SOUND button to return to the main page of the Sound operating mode.
- When an ordinary Sound is selected:
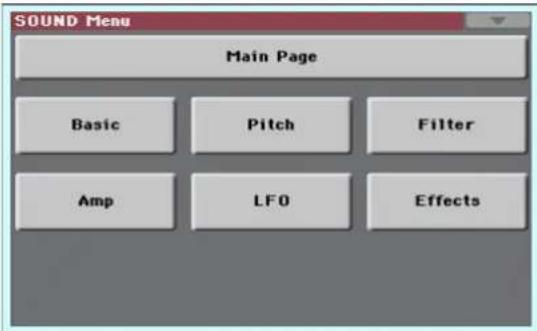
- When a Drum Kit is selected, the "Basic" section is replaced by the "DrumKit" section:
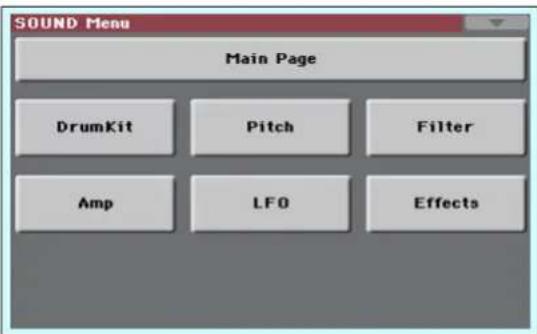
Each item in this menu corresponds to an edit section. Each edit section groups various edit pages, that may be selected by touching the corresponding tab on the lower part of the display.
Edit page structure
All edit pages share some basic elements.
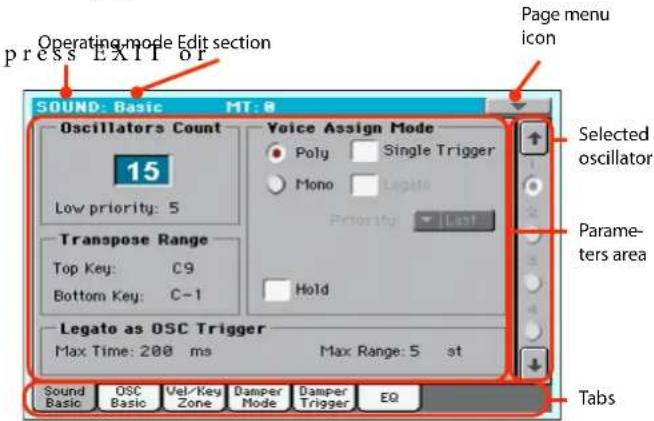
Operating mode
This indicates that the instrument is in Sound mode.
Edit section
This identifies the current edit section, corresponding to one of the items of the edit menu (see "Edit menu" on page 191).
Page menu icon
Touch this icon to open the page menu (see "Page m page 214).
Selected oscillator
Use these buttons to select the oscillator to edit.
Parameters area
Each page contains various parameters. Use the tabs to select one of the available pages. For detailed information on the various types of parameters, see sections starting from page 191.
Tabs
Use tabs to select one of the edit pages of the current edit section.
Basic: Sound Basic
Here you can make basic settings for the Sound, such as oscillator settings, the oscillator count, and the polyphonic mode.
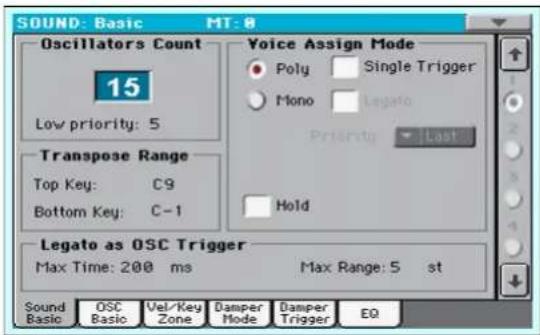
Oscillator Count
Oscillators Count
Use this box to specify the number of oscillators (up to 24) the Sound is based on.
The total amount of polyphony varies depending on the number of oscillators used by the Sound (a maximum of 128 with only 1 oscillator per voice).
Note: When editing the Grand Piano sound, keep in mind Oscillators 10\~15 can only be heard when the Damper pedal is depressed.
Low priority
Use this parameter to decide if the highest-numbered oscillators must be turned off when more polyphony voices are needed. Keep in mind that, with a dense polyphony, missing oscillators might not even be heard.
0 No oscillator will be turned off in any case.
1 The highest-numbered oscillator will be turned off, if needed.
2 The two highest-numbered oscillators can be turned off, one after the other, if needed.
[n]...24 The n-numbered oscillators (up to 24) can be turned off, one after the other, if needed.
Transpose Range
Top/Bottom Key
Use these parameters to set a range for transposition. Inside this range notes are transposed. Outside this range, they are not transposed. This is useful to avoid RX Sounds being transposed when transposing a Sound.
Note: Set these (general) values so that all RX Noises assigned to any Oscillator fall out of the Transpose Range. For example, if you assigned an RX Noise to a G7 on OSC1, and an RX Noise to an A7 on OSC2, set the "Top Key" value no higher than F#7 (just below the lowest RX Noise).
Voice Assign Mode
Poly/Mono
This is the polyphonic mode of the Sound.
Poly The Sound will play polyphonically, allowing you to play chords.
Mono The Sound will play monophonically, producing only one note at a time.
Single Trigger
This parameter is available when the selected mode is Poly.
On When the same note is played repeatedly, the previous note will be silenced before the next note is sounded, so that the notes do not overlap.
Off When the same note is played repeatedly, the previous note will not be silenced before the next note is sounded.
Legato
This parameter is only available when the selected mode is Mono. It is the same found on the main page of the Sound mode.
See "Legato" on page 190 for information on this parameter.
Priority
This parameter is available when the selected mode is Mono. It specifies which note will be given priority to play when two or more notes are played simultaneously.
Low Lowest note will take priority.
High Highest note will take priority.
Last Last note will take priority.
Hold
Use this parameter to keep the notes sustained even after releasing the keys.
Legato as OSC Trigger
The parameters included in this section are to be considered when a note is played 'legato', i.e., with no gap with the previous note. These parameters are valid for the whole Sound (all oscillators).
Max Time
This delay allows notes to be considered Legato, even if there is a small gap before them. This is useful to avoid some notes in a chord are played Legato, and some others Staccato.
1...999 ms Notes played with a small gap are still considered Legato notes. A value of approx. 15 ms is usually considered effective when playing chords.
Max Range
This is the range (in semitones) within the Legato is considered. If you play a wider interval, the note is considered Staccato. This is typical of some acoustic instruments, where legato is only possible within a small interval, but not on wider ones.
As an example, please try the Sound “Nylon Guitar DNC”, where the Max Range is 5 semitones. Play legato with intervals smaller than 5 semitones, and you will hear how smoother legato notes will become. Play legato with wider intervals, and legato smoothing will be lost.
1...127 st Max range in semitones.
Basic: OSC Basic
The multisample(s) on which the Sound will be based can be selected here for each of the sixteen oscillators. Each oscillator can use 1 or 2 multisamples, each one assigned to the High or Low layer.
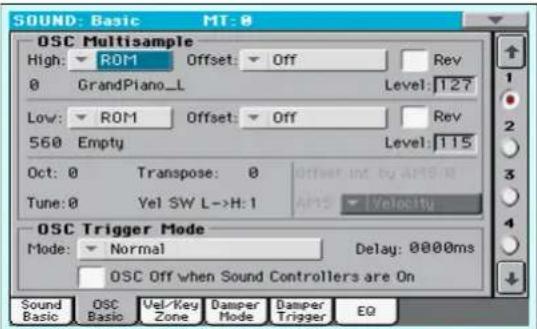
OSC Multisample
High/Low Bank/Num
Use these parameters to select a different multisample for each of the High and Low layers. You can use velocity to switch between the two multisamples. Offset and Level can be adjusted independently for the High and Low multisamples.
The High and Low pop-up menus is where you select the bank (ROM or RAM), while the numeric field under it is for selecting the multisample inside the selected bank. The Sound name appears on its right.
The multisample you select for the High layer will be triggered by velocities higher than the value of the “Velocity Multisample Switch Low-High” parameter (see page 193). If you do not wish to use velocity switching, set the switch to a value of 001, and select only the High multisample.
ROM The Factory bank. The Factory area of the internal memory contains 560 different multisamples (preset multisamples), supplied by KORG as standard.
RAM RAM multisample, read from the RAM. These are user-loaded multisamples.
Note: If you create a new Sound based on a RAM multisample, the RAM samples must be loaded from the internal memory or from a connected USB pen drive.
In case samples are not loaded, no sound will be heard, even if the Sound can be selected and its name appears in the display.
Note: Each multisample has an upper note range limit, and cannot produce sound when played above that limit.
Offset
These parameters specify the point where the multisample(s) will begin to play. For some multisamples this parameter will not be available.
Off The sound will start from the beginning of the multisample waveform.
1st...6th The sound will begin from the offset location predetermined for each sample.
No Attack The initial portion of the multisample is ignored.
AMS Activates the Alternate Modulation Source (see below).
PseudoRandom
(Only works when more than one Offset point is available in the multisample). Randomly selects one of the available Offset points (including Attack and Off).
Level
These parameters specify the level of each multisample.
0...127 Multisample level.
Note: Depending on the multisample, high settings of this parameter may cause the sound to distort when a chord is played. If this occurs, lower the level.
Octave
Use this parameter to adjust the pitch of the selected oscillator in octave units. The normal octave of the multisample is "0".
-2...+1 Octave transposition.
Transpose
Use this parameter to adjust the pitch of the selected oscillator in semitone steps over a range of ±1 octave.
-12...+12 Transposition in semitones.
Tune
Use this parameter to adjust the pitch of the sample in one-cent steps (a semitone is 100 cents) over a range of ±1 octave.
-1200...+1200
Fine-tune value in cents.
Velocity Multisample Switch Low-High
This is the velocity value dividing the High and Low layers for the selected oscillator. Notes struck harder than this value will be played by the High multisample.
AMS / Offset Intensity by AMS
(Only available when the AMS option is selected in the "Offset" parameter.) Alternate Modulation Source for the Offset. See "AMS (Alternate Modulation Source) list" on page 216.
When the "Offset Intensity by AMS" parameter has a positive value, the selected Offset point will depend on the AMS value. For example, if the selected AMS is the Velocity, when playing softly you will select the Off or 1st Offset, when playing loudly you will select the 6th or No Attack Offset.
When the "Offset Intensity by AMS" parameter has a negative value, the selection will happen in reverse (higher-numbered Offsets will be selected before the lowest-numbered ones).
OSC Trigger Mode
OSC Trigger parameters are used to set the condition to trigger the selected Oscillator. For example, a Normal Oscillator will
always play, while a Legato Oscillator will only play when a note is played Legato.
Mode
This is the trigger that allows the selected Oscillator to play.
Normal The Oscillator always plays when a key is pressed (unless the "OSC Off when Sound Controllers are On" parameter is checked).
Legato The Oscillator only plays when the note is played 'legato'. The delay and pitch interval from the previous note are also to be considered, as set in the Sound > Basic page (see "Legato as OSC Trigger" above).
Staccato The Oscillator only plays when the note is NOT played legato (it is the opposite of the al choice).
Sound Controller 1
The Oscillator only plays after a switch or foot-switch programmed as the Sound Controller 1 has been pressed. Press and release it, and the next note will also trigger the selected Oscillator. If you keep it pressed, the Oscillator will continue to be triggered until you release the controller.
Note: In Sequencer and Sound mode, the Assignable Switch 1 is automatically assigned to Sound Controller 1.
Hint: This (like the following Sound Controllers) is especially useful to enable a different nuance to the following note(s).
Sound Controller 2
As the above, but with a switch or footswitch programmed as the Sound Controller 2.
Note: In Sequencer and Sound mode, the Assignable Switch 2 is automatically assigned to Sound Controller 2.
Sound Controller Y+
As the above, but with the Joystick, assigned as the Sound Controller, pushed at least half-way forward (value 64). The controller is when the Joystick is released. This control is equivalent to a CC#01 (Modulation) Control Change message.
Sound Controller Y-
As the above, but with the Joystick, assigned as the Sound Controller, pulled at least half-way back (value 64). The controller is turned off when the Joystick is released. This control is equivalent to a CC#02 (Breath Controller) Control Change message.
Cycle 1 All Oscillators with this same trigger mode assigned will play in cycle. For example, if Oscillators 1, 2 and 4 are assigned the Cycle 1 trigger mode, the following note will trigger Oscillator 1, then 2, then 4, then 1 again.
Hint: This is especially useful to trigger different sound nuances or create vector-like sound sequences.
Cycle 2 As the above, for use with a different (and parallel) group of Oscillators. Having two Cycle Trigger Modes allows for cycling stereo multisamples.
Random As the above, but with a random selection of Oscillators within the assigned group.
After Touch Trigger On
The Oscillator starts playing when an After Touch message with a value of at least 90 is received. The Velocity value is the same as the latest Note On message. The Oscillator will stop playing when the After Touch value falls back to zero.
Note: After Touch messages can be received via MIDI, or contained in a Standard MIDI Files. b o v e
Hint: This (like the following Triggers) is especially useful to trigger harmonics or growls when a note is already playing.
Y+ Trigger On
As the above, but with the Joystick, assigned as the Sound Controller, pushed at least half-way forward (value 64). The controller is turned off when the Joystick is released. This control is equivalent to a CC#01 (Modulation) Control Change message.
Y- Trigger On
As the above, but with the Joystick, assigned as the Sound Controller, pulled at least half-way back (value 64). The controller is turned off when the Joystick is released. This control is equivalent to a CC#02 (Breath Controller) Control Change message.
Legato Up
Like Legato, but is only activated when the second note is out of the “Max Range” value (see page 192) and it is higher than the first one.
Legato Down
Like Legato, but is only activated when the second note is out of the “Max Range” value (see page 192) and it is lower than the first one.
Delay
ned off This parameter sets a delay time from the note-on to the real beginning of the sound. With a setting of KeyOff, the sound will begin when note-off occurs. This is useful to create sounds such as the “click” that is heard when a harpsichord note is released. In this case, set the “Sustain” parameter to 0 (see page 207).
0...5000ms Delay time in milliseconds.
Key Off The sound will begin when the note is released. The note velocity is read from the Key On Velocity.
Key Rel Key Release. The sound will begin when the note is released. The note velocity is read from the Key Off Velocity.
Nat Rel
Natural Release. The sound will begin when the note is released. The note starts from the current volume of the sound. If the sound's volume is already at zero, this oscillator is not retriggered.
OSC Off when Sound Controllers are On
This ‘mirrors’ the way Sound Controllers work. With this parameter checked, the current Oscillator will not play when one of the Sound Controllers (Sound Controller 1, Sound Controller 2, Sound Controller Y+, Sound Controller Y-) is activated. It should be applied to Oscillators with Normal, Legato, Staccato, Cycle 1, Cycle 2, Random, After Touch Trigger On, Y+ Trigger On, Y- Trigger On, Legato Up and Legato Down trigger modes, that can be turned off by using a switch, footswitch, or the Joystick, programmed as a Sound Controller.
Basic: Vel/Key Zone
Here you can set a note and velocity range "window" for the selected oscillator.
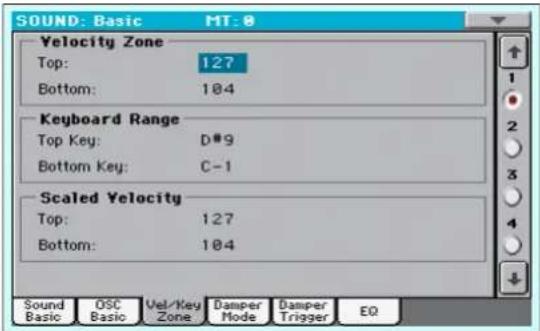
Velocity Zone
Here you can specify the velocity range for the selected oscillator.
Note: You cannot set the Bottom Velocity higher than the Top Velocity, nor the Top Velocity lower than the Bottom Velocity.
0...127 Assigned velocity.
Keyboard Range
Here you can specify the note range for the selected oscillator.
Note: You cannot set the Bottom Key higher than the Top key, nor the Top Key lower than the Bottom key.
C-1...G9 Assigned note.
Scaled Velocity
Use these parameters to scale velocity values received by the oscillator. By using the “Velocity Zone” function (see above), an oscillator may be limited to a restricted range (say, 10 to 20), that may result in weak dynamics when the associated sample is triggered.
By assigning a different value to these parameters, the restricted range will be converted to a wider range (for example, the lowest range value of 10 may be converted to a Scaled Velocity value of 0, and the highest range value of 20 may be converted to a Scaled Velocity value of 127). All values included between the minimum and maximum value are scaled accordingly.
As a consequence, you can create an RX Sound of guitar, by assigning the guitar fret noise to the 10\~20 velocity range. When a dynamics value between 10\~20 is received, the real velocity value is scaled to the Scaled Velocity values, and plays louder.
0...127 Assigned velocity value.
Basic: Damper Mode
Here you can program how the Damper pedal works, the Resonance/Halo effect, and the range within the Note Off message is not sent to the selected Oscillator:
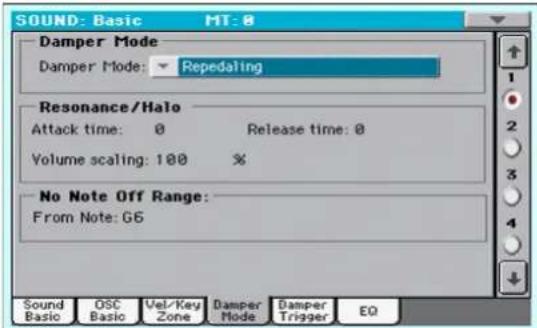
Damper Mode
Here you can program the Damper Mode for each Oscillator.
Damper Mode
This parameter determines how the Damper pedal works.
Normal The Damper pedal works as usual: by keeping it pressed, the note decay is lengthened, to simulate the longer note decay of an acoustic piano.
Damper Off The Damper pedal is deactivated for the selected Oscillator.
Hint: Set the Damper to Damper Off, if you plan to use the selected Oscillator in the Damper Trigger page to trigger sounds. Check the Sound "Harmonica DNC", and see how the Damper Trigger is used.
Resonance/Halo
The Damper pedal enables a multisample, normally used for the Piano Resonance/Halo effect. If the pedal is pressed when the note is already playing, the speed at which the multisample appears and disappears, and the volume it can reach, depend on the "Resonance/Halo" parameters programmed below.
Hint: This Damper mode is much more realistic than the Normal mode, but also 'steals' more notes from the overall polyphony, and is especially suggested for solo piano playing.
Note: Half-pedaling, as well as Damper messages received via MIDI (as Control Change #64), control the level of the Resonance/Halo effect.
Repedaling This mode acts as the Normal mode, but also enables the Damper pedal effect when the pedal is pressed after the note has been released (Note Off). In this case, the Damper effect starts from the current Release level, and decays slowly.
Warning: Do not use Sounds with the "Repedaling" assigned to any Oscillator in a Style, sustained sound could cause unwanted dissonances. The "Grand Piano RX" Sound is an example of this kind of Sounds to be avoided in a Style track.
Resonance/Halo
Here you can program the Resonance/Halo effect that is enabled by the “Resonance/Halo” Damper Mode (see above). These parameters only affect the Resonance/Halo that is enabled when pressing the Damper pedal down when a note is already playing.
Attack Time
Time needed to the Resonance/Halo to reach the maximum level after the Damper pedal has been pressed.
0...99 Attack time as a value relative to the current Amp Env Attack value.
Release Time
Time needed to the Resonance/Halo to extinguish after the Damper pedal has been released.
0...99 Release time as a value relative to the current Amp Env Release value.
Volume Scaling
Volume of the Resonance/Halo effect, relative to the current level of the sound (as determined by the sum of the Multisample Volume, Velocity value and current Amp Env value).
0% No volume at all.
1...100% Volume expressed as a percentage of the current sound level.
No Note Off Range
From Note
Like in an acoustic piano, the dampers can only dampen strings up to a certain pitch. Starting from that pitch, Damper was always pressed down.
Note: This parameter only affects the Normal Damper mode. It has no effect on the Resonance/Halo mode.
C#-1...G9 Note starting from which the Damper is always pressed down. In an acoustic piano, this is usually set to G6.
Basic: Damper Trigger
Here you can set the notes triggered by pressing and releasing the Damper Pedal. The parameters in this page have effect on the Sound as a whole, and not on a single Oscillator.
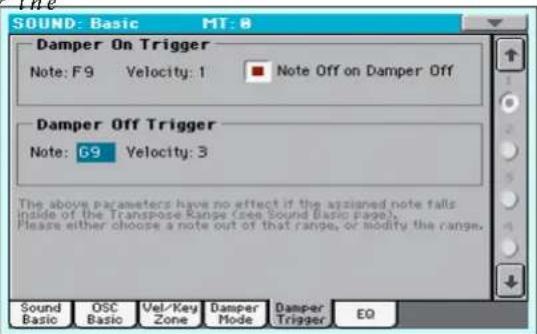
As warned by the message on the lower area of the display, these parameters have no effect if the assigned note falls inside of the Transpose Range programmed in the "Basic: Sound Basic" page (see "Transpose Range" on page 192). Please either choose a note out of that range, or modify the Transpose Range, so that the note is either higher or lower than that range.
Transpose Range
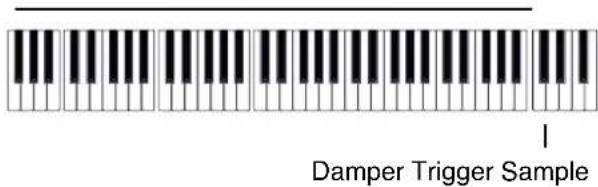
Damper On Trigger
Pressing down the Damper pedal (Damper On) can play a special sample assigned to a particular note (for example down squeaking in the Sound "Grand Piano RX", breathing in the Sound "Harmonica DNC" ...).
Note
Note where the special Damper On sample is located.
Velocity
Fixed velocity of the special Damper On sample. it is as if the
Note Off on Damper Off
If checked, the special Damper On sample stops playing when the Damper pedal is released.
Damper Off Trigger
Releasing the Damper pedal (Damper Off) can play a special sample assigned to a particular note (for example, Damper pedal release noise in the Sound "Grand Piano RX").
Note
Note where the special Damper Off sample is located.
Velocity
Fixed velocity of the special Damper Off sample.
Basic: EQ
In this page, you can set the semi-parametric three-band equalizer for the selected oscillator.
![SOUND: Basic MT: 0 Oscillator Equalizer ■ Enable Low Gain [dB] Mid Gain [dB]/Freq [Hz] Hi Gain [dB] +0.0 dB +0.0 dB 2.50 kHz +0.0 dB Sound Basic OSC Basic Vel/Key Zone Damper Mode Damper Trigger EQ](/content/2026/05/882139/images/b5516b9150827959ce725a85718b4e48dcb36ae91175bb943a2ad4d9a8dc59d2.jpg)
Enable
Check this box to activate the equalizer on the selected oscillator.
TRIM
This knob allows you to limit the level of the signal passing through the equalizer. Extreme equalization values can overload the audio circuits and lead to distortion. This control lets you set equalization as desired, and at the same time avoid overloading.
0...99 Limiting value. The higher, the most effective it is.
Low Gain
Low frequencies equalization. This is a shelving curve filter. Values are shown in decibels (dB).
-18...+18dB Low gain value in decibels.
Mid (Middle) Gain
Middle frequencies equalization. This is a bell curve filter. Values are shown in decibels (dB).
-18...+18dB Middle gain value in decibels.
Mid (Middle) Freq
Centre frequency of the middle frequencies equalization.
-0.100...+10 kHz
Centre frequency in kHz.
Hi (High) Gain
High frequencies equalization. This is a shelving curve filter. Values are shown in decibels (dB).
-18...+18dB High gain value in decibels.
DrumKit: Sample Setup (Drum Kits)
This page appears when you edit a Drum Kit. Her select a different percussive sample for each key and layer.

Drum Kits use only one oscillator.
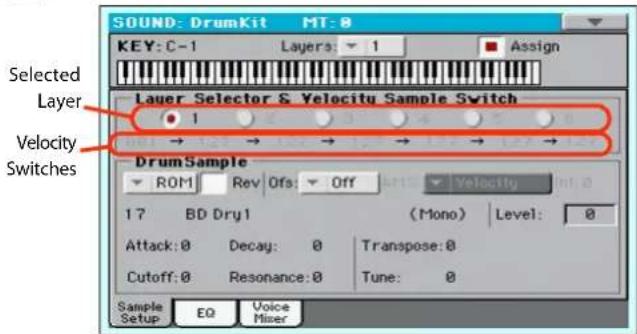
Key
Key
Key in edit. To select a key, you can press a key on the keyboard while this parameter is selected.
Layers
Number of layers assigned to the selected key. Depending on the number of selected layers, you can have a different number of velocity switches.
Assign
Use this parameter to turn the sample on/off.
On The sample is assigned to the selected key.
Off The sample is not assigned. The sample assigned to the next highest assigned key is used instead.
Layer Selector & Velocity Sample Switch
Selected Layer
Use these radio buttons to select the layer to edit. The available layers depends on the "Layers" parameter.
Velocity Switches
Each of these values separates the two adjacent layers for the selected sample/key. Notes stricken harder than a velocity switch will be played by the layer on the right, while notes stricken softer are played by the layer on the left.
The first and last values are not editable, and are always 001 and 127 (respectively).
Drum Sample
Bank/Num/Name
Use these parameters to select a different Drum Sample for each layer. You can use velocity to switch between the available samples. Offset and Level can be adjusted independently for the various drum samples.
The pop-up menu is where you select the bank (ROM or RAM), while the numeric field under it is for selecting the sample inside the selected bank. The sample name appears on its right.
The sample you select for the current layer will be triggered by velocities higher than the value of the “Velocity Switches” parameter (see page 197). If you do not wish to use velocity switching, assign just one layer to the selected key, and assign a sample only to Layer 1.
ROM The Factory bank. The internal Factory area of the Flash-ROM memory contains 1012 different samples (preset samples), supplied by KORG as standard.
RAM RAM sample, read from the RAM. These are user-loaded samples. Level
Note: If you create a new Drum Kit based on RAM samples, the RAM samples must be loaded from the internal memory or from a device connected to the USB Host port.
In case samples are not loaded, no sound will be heard, even if the Drum Kit can be selected and its name appears in the display.
Note: Each sample has an upper note range limit, and may not produce sound when played above that limit.
Rev (Reverse)
The sample will be played in reverse. In the (Flash-ROM) or User (RAM) samples that were originally specified to loop, the sample will be played back in "one-shot" reverse mode. If the sample was originally set to reverse, it will playback without change.
On The sample will playback in reverse.
Off The sample will play back normally.
Ofs (Offset)
These parameters specify the point where the sample will begin to play. For some samples this parameter will not be available.
Off The sound will start from the beginning of the sample.
1st...6th The sound will begin from the offset location pre-determined for each sample.
NoAtk The initial portion of the multisample is ignored.
AMS Activates the Alternate Modulation Source (see below).
PseudoRandom
(Only works when more than one Offset point is available in the multisample). Randomly selects one of the available Offset points (including Attack and Off).
AMS / Int(ensity)
(Only available when the AMS option is selected in the "Offset" parameter.) Alternate Modulation Source for the Offset. See "AMS (Alternate Modulation Source) list" on page 216.
When the "Intensity" parameter has a positive value, the selected Offset point will depend on the AMS value. For example, if the selected AMS is the Velocity, when playing softly you will select the Off or 1st Offset, when playing loudly you will select the 6th or No Attack Offset.
When the “Intensity” parameter has a negative value, the selection will happen in reverse (higher-numbered Offsets will be selected before the lowest-numbered ones).
Level
This parameter specifies the level of the sample. For more information, see “Level” on page 193.
Attack
This parameter is an offset to the selected sample's EG Attack.
Decay
This parameter is an offset to the selected sample's EG Decay.
Cutoff
This parameter sets the cutoff frequency for the filter applied to the selected sample. Use of Factory
Resonance
This parameter sets the resonance for the filter applied to the selected sample.
Transpose
This parameter transposes the selected sample. Use it to change the pitch of the selected key.
0 No transposition applied.
-64...+63 Transpose value in semitones.
Tune
Use this parameter to fine-tune the assigned sample.
0 Original tuning.
-99...+99 Fine-tuning value in cents (1/100 of a semitone).
DrumKit: EQ (Drum Kits)
This page appears when you edit a Drum Kit. In this page, you can set the semi-parametric three-band equalizer for the selected key, layer and Drum sample.
![SOUND: DrumKit MT:0 KEY: C-1 Layers: 1 Assign Layer Selector & Velocity Sample Switch 1 2 3 4 5 6 7 8 DRM Sample Equalizer Enable Low Gain [dB] Mid Gain [dB]/Freq [Hz] Hi Gain [dB] +0.0 dB +0.0 dB 2.50 kHz +0.0 dB Sample Setup EQ Voice Mixer](/content/2026/05/882139/images/e2127dba4c23ca03c2c02add37c752f4be406325e60c5249759dda41ba71df78.jpg)
Key
See "Key" on page 197.
Layer Selector & Velocity Sample Switch
See "Layer Selector & Velocity Sample Switch" on page 197.
Drum Sample Equalizer
Enable
Check this box to activate the equalizer on the selected oscillator.
TRIM
This knob allows you to limit the level of the signal passing through the equalizer. Extreme equalization values can overload the audio circuits and lead to distortion. This control lets you set equalization as desired, and at the same time avoid overloading.
0...99 Limiting value. The higher, the most effective it is.
Low Gain
Low frequencies equalization. This is a shelving curve filter. Values are shown in decibels (dB).
-18...+18dB Low gain value in decibels.
Mid (Middle) Gain
Middle frequencies equalization. This is a bell curve filter. Values are shown in decibels (dB).
-18...+18dB Middle gain value in decibels.
Mid (Middle) Freq
Centre frequency of the middle frequencies equalization.
-0.100...+10 kHz
Centre frequency in kHz.
Hi (High) Gain
High frequencies equalization. This is a shelving curve filter. Values are shown in decibels (dB).
-18...+18dB High gain value in decibels.
DrumKit: Voice Mixer (Drum Kits)
This page appears when you edit a Drum Kit. Here you can set various parameters for the different percussive sample assigned to the selected key and layer.
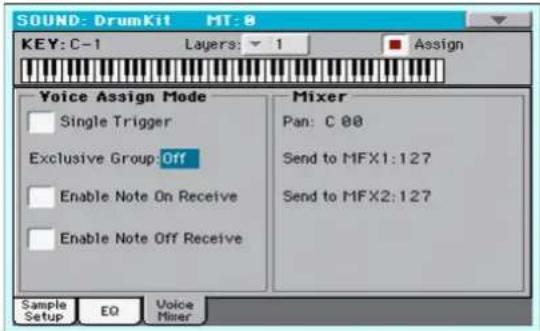
Key
See "Key" on page 197.
Voice Assign Mode
Single Trigger
Use this parameter to set the sample as a single-triggered one.
On When the same key (note) is played repeatedly, the previous note will be stopped before the new note is triggered, so that they will not overlap.
Off When the same key (note) is played repeatedly, the previous note will not be stopped before the new note is triggered.
Exclusive Group
Exclusive Groups are sets of mutually exclusive keys, stopping each other. For example, if the Open Hi-Hat and Closed Hi-Hat are assigned the same Exclusive Group, playing an Open Hi-Hat will stop the Closed Hi-Hat playing.
None No Exclusive Group assigned. The selected key will not be stopped by any other key.
1...127 Exclusive Groups assigned to the selected key. When you play this key, all other keys assigned to the same Exclusive Group will be stopped, and this key will be stopped by other keys assigned to the same Exclusive Group.
Enable Note On Receive
Use this parameter to enable/disable the reception of the Note On (Key On) message.
On The Note On message is normally received.
Off The Note On message is not received. Therefore, the corresponding key is muted.
Enable Note Off Receive
Use this parameter to enable/disable the reception of the Note Off (Key Off) message.
On The sound will stop as soon as you release the key.
Off The sound will continue playing up to the end of the sample. The Note Off message is ignored.
Mixer
Pan
This parameter sets the position in the stereo panorama of the selected key.
Send to MFX1, MFX2
These parameters set the MFX1 or MFX2 send level for the selected key.
Pitch: Pitch Mod
Here you can make pitch settings for each oscillator. These settings specify how keyboard location will affect the pitch of each oscillator, and select the controllers that will affect the oscillator pitch and specify the depth of control. You can also specify the amount of pitch change produced by the Pitch EG and by LFO1 and LFO2, switch portamento on/off and specify how it will apply.
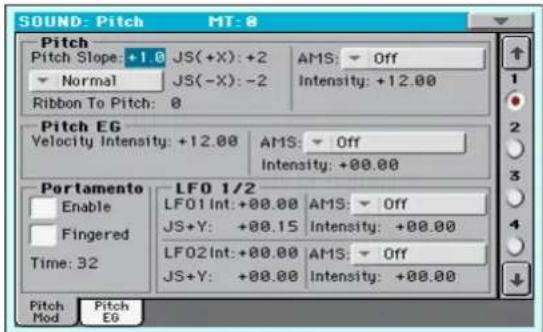
Pitch
Pitch Slope
Normally you will leave this parameter at +1.0. Positive (+) values will cause the pitch to rise as you play higher notes, and negative (−) values will cause the pitch to fall as you play higher notes.
With a value of 0, there will be no change in pitch, and the C4 pitch will sound regardless of the keyboard location you play.
The diagram shows how the Pitch Slope and pitch are related:
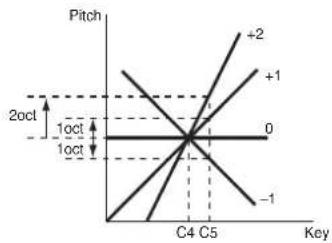
line
| Key | Pitch | | --- | --- | | C4 | -1 | | C5 | +2 | | C5 | +1 | | C5 | -1 | | C5 | 0 |-1.0...+2.0 Pitch slope value.
Pitch Bend Mode
The Pitch Bend can work in different ways, depending on the selected option.
Normal Linear bending.
Fixed Scale When this parameter is turned on an oscillator, Pitch Bend and Sub Scale have no effect on its tuning. The relevant parameters are greyed out and non-selectable. This is useful when assigning to the oscillator a noise (like the breath noise of a reed) with a fixed frequency, that must not change on different notes and different pitches.
Highest Pitch Bend only
On this oscillator, Pitch Bend is only activated on the highest note currently playing on the keyboard.
Lowest Pitch Bend only
On this oscillator, Pitch Bend is only activated on the lowest note currently playing on the keyboard.
Ribbon to Pitch
Pitch Bend range assigned to the Ribbon Controller message (CC#16). The Ribbon Controller message can be received from MIDI or contained in a Standard MIDI File.
-12...0...+12 Maximum bending, when touching the extreme left or right of the Ribbon Controller.
JS (+X)
This parameter specifies how the pitch will change when the joystick is moved all the way to the right. A setting of 12 produces 1 octave of change.
For example if you set this to +12 and move the joystick all the way to the right, the pitch will rise one octave above the original pitch.
-60...+12 Maximum pitch change in semitones.
JS (-X)
This parameter specifies how the pitch will change when the joystick is moved all the way to the left. A setting of 12 produces octave of change.
For example, if you set this to -60 and move the joystick all the way to the left, the pitch will fall five octaves below the original pitch. This can be used to simulate the downward swoops that a guitarist produces using the tremolo arm.
-60...+12 Maximum pitch change in semitones.
AMS (Alternate Modulation Source)
This parameter selects the source that will modulate the pitch of the selected oscillator. See “AMS (Alternate Modulation Source) list” on page 216.
Intensity
This parameter specifies the depth and direction of the effect produced by "AMS". With a setting of 0, no modulation will be applied. With a setting of 12.00, the pitch will change up to one octave.
For example, if you set "AMS" to JS (-Y) and move the joystick downwards, the pitch will rise if this parameter is set to a positive (+) value, or fall if this parameter is set to a new value. The range is a maximum of one octave.
-12.00...+12.00
Parameter value.
Pitch EG
The Pitch EG (Envelope Generator) is unique to all oscillators.
Velocity Intensity
This parameter specifies the depth and direction of the modulation that the pitch EG specified on “Pitch: Pitch EG” will apply to the pitch. With a setting of 12.00, the pitch will change a maximum of ±1 octave.
-12.00...+12.00
Parameter value.
Pitch EG AMS (Alternate Modulation Source)
This parameter selects the source that will modulate the pitch EG of the selected oscillator. See “AMS (Alternate Modulation Source) list” on page 216).
Pitch EG Intensity
This parameter specifies the depth and direction of the effect that “AMS” will have. For example, if you set “AMS” to Velocity and set this value to +12.00, the velocity will control the range of pitch change produced by the pitch EG in a range of ±1 octave. As you play more softly, the pitch change will draw closer to the pitch EG levels.
Pitch change (level)
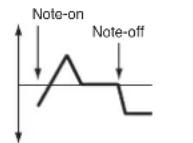
Softly played
(Intensity (Pitch EG) setting)
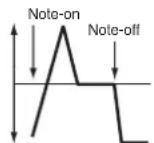
Strongly played with a positive (+) value
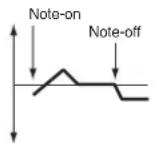
Strongly played with a negative (−) value
Note: "Intensity" (Pitch EG) and AMS will be added to determine the depth and direction of the pitch modulation applied by the pitch EG.
Portamento
Enabled
This parameter turns the portamento effect (smooth change in pitch from one note to the next) on/off, and specifies how it will be applied.
Note: Portamento will also be switched when CC#65 (Portamento SW) is received.
On Portamento will be applied.
Off Portamento will not be applied.
Fingered ill be
This parameter specifies whether the portamento effect restarts or not with each note played.
On Portamento will restart with each note.
Off Portamento will not restart with each note. negative (-)
Time
This parameter sets the portamento time. Increasing the value will produce a slower change in pitch.
000...127 Portamento time in MIDI value.
LFO 1/2
LFO1/2 Int
Intensity of the corresponding LFO.
-12...0...+12 Parameter value. Negative values invert the LFO shape.
JS+Y
Intensity of the corresponding LFO when the joystick is pushed forward.
-12...0...+12 Parameter value. Negative values invert the LFO shape.
AMS / Intensity
Alternate Modulation Source for the LFO. See “AMS (Alternate Modulation Source) list” on page 216. Use the “Intensity” parameter to set the intensity of the modulation.
Pitch: Pitch EG
Here you can make settings for the pitch EG, which creates time-variant changes in the pitch of the oscillators. The depth of pitch change produced by these EG settings on the c adjusted by the "Intensity (AMS1/2 Intensity)" parameter (see page 203).
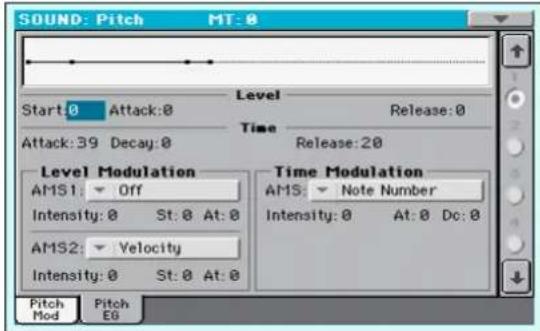
Diagram
The diagram on top of the page shows the Pitch envelope line.
Level
These parameters specify the amount of pitch change. The actual amount of pitch change will depend on the “Intensity (AMS1/2 Intensity)” parameter (see below). For example, with an “Intensity” setting of +12.00, a “Level” setting of +99 would raise the pitch one octave, and a “Level” setting of -99 would lower the pitch one octave.
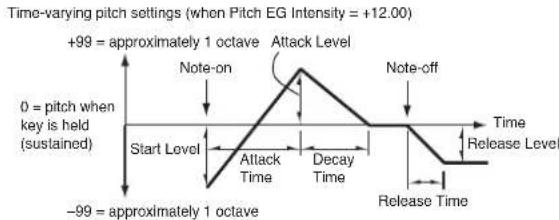
line
Time-varying pitch settings (when Pitch EG Intensity = +12.00) | Time | Value | |---|---| | Start Level | -99 | | Attack Time | -99 | | Decay Time | -99 | | Note-off | -99 | | Note-on | -99 | | Attack Level | 0 | | Release Level | 0 | | Release Time | -99 | The chart displays a single data series representing the time-varying pitch settings. The x-axis represents time in seconds, and the y-axis represents the corresponding intensity value. The annotation '0 = pitch when key is held (sustained)' indicates the condition of pitch setting. The note on the peak at Time=0 corresponds to the 'Attack Level' and the note off at Time=100 corresponds to the 'Release Level'.Start Level
Specifies the amount of pitch change at note-on.
-99...+99 Parameter value.
Attack Level
Specifies the amount of pitch change when the attack time has elapsed.
-99...+99 Parameter value.
Release Level
Specifies the amount of pitch change when the release time has elapsed.
-99...+99 Parameter value.
Time
These parameters specify the time over which the pitch change will occur.
See diagram above.
Attack Time
Specifies the time over which the pitch will change from note-on until it reaches the pitch specified as the attack level.
0...99 Parameter value.
Decay Time
Specifies the time over which the pitch will change after reaching the attack level until it reaches the normal pitch.
0...99 Parameter value.
Release Time
Specifies the time over which the pitch will change from note-off until it reaches the pitch specified as the release level.
0...99 Parameter value.
Level Modulation
Pitch EG change (level) (AMS=JS-Y/Velocity, Intensity=positive (+) value
A note played softly with Start Level Swing set at 0, Attack Level Swing set to +, the Joystick pulled on
A note played strongly with Start Level Swing set to 0, Attack Level Swing set to +, the Joystick pulled on
A note played strongly with Start Level Swing set to 0, Attack Level Swing set to -, the Joystick pulled on
AMS1/2 (Alternate Modulation Source 1/2)
These parameters select the source that will control the pitch EG "Level" parameters ("AMS (Alternate Modulation Source) list" on page 216).
Intensity (AMS1/2 Intensity)
These parameters specify the depth and direction of the effect applied by “AMS1”. With a setting of 0, the levels specified by “Level” will be used.
For example, if “AMS1” is Joystick Y+, moving the Joystick in the upper direction to turn it on will change the “Level” parameters of the Pitch EG. As the absolute value of “Intensity” is increased, the pitch EG levels will change more when the Joystick is released. The direction of the change is specified by “St (Start Level Swing)” and “At (Attack Level Swing)”. When the Joystick is released, the pitch EG levels will return to their own settings.
If “AMS1” is set to Velocity, increasing the ab “Intensity” will produce increasingly wider change in pitch EG levels for strongly-played notes. The direction of the change is specified by “St (Start Level Swing)” and “At (Attack Level Swing)”. As you play more softly, the pitch chan closer to the pitch EG levels.
-99...+99 Parameter value.
St (Start Level Swing)
This parameter specifies the direction of change in “Start Level” caused by “AMS1/2”. If “Intensity” is a positive (+) value, a setting of + will raise the EG level, and a setting of - will decrease it. With a setting of 0 there will be no change.
At (Attack Level Swing)
This parameter specifies the direction of change in “Attack Level” caused by “AMS1/2”. If “Intensity” is a positive (+) value, a setting of + will raise the EG level, and a setting of - will decrease it. With a setting of 0 there will be no change.
Time Modulation
Pitch EG changes (Time) (AMS = Velocity, Intensity = positive (+) value)
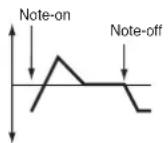
A note played softly with Attack Time Swing set to + and Decay Time Swing set to
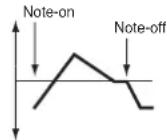
A note played strongly with Attack Time Swing set to + and Decay Time Swing set to +
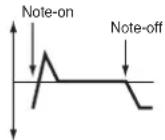
A note played strongly with Attack Time Swing set to – and Decay Time Swing set to –
AMS (Alternate Modulation Source)
This parameter selects the source that will control the "Time" parameters of the pitch EG (see "AMS (Alternate M Source) list" on page 216).
Intensity (AMS Intensity)
This parameter specifies the depth and direction of the effect that “AMS” will have on the “Time” parameters. With a setting of 0, the pitch EG times will be just as specified by the “Time” settings.
The alternate modulation value at the moment that the EG reaches each point will determine the actual value of the EG time that comes next.
For example, the decay time will be determined by the alternate modulation value at the moment that the attack level is reached.
When this parameter is set to values of 16, 33, 49, 66, 82, or 99, the specified EG times will speed up as much as 2, 4, 8, 16, 32, or 64 times respectively (or slowed down to 1/2, 1/4, 1/8, 1/16, 1/32, or 1/64 of the original time).
For example if “AMS” is set to Velocity, increasing the absolute value of “Intensity” will allow strongly-played notes to increase the changes in pitch EG “Time” values. The direction of the change is specified by “At (Attack Time Swing)” and “Dc (Decay Time Swing)”. As you play more softly, the pitch EG times will more closely approach the actual settings of the pitch EG.
-99...+99 Parameter value.
solute value of
At (Attack Time Swing)
This parameter specifies the direction in which “AMS” will affect the “Attack Time” parameter. With positive (+) values of “Intensity” was setting of + will cause the time to be lengthened, and a setting of – will cause the time to be shortened. With a setting of 0 there will be no change.
Dc (Decay Time Swing)
Specify the direction in which “AMS” will affect the “Decay Time”. With positive (+) values of “Intensity”, a setting of + with cause the time to be lengthened, and a setting of – will cause the time to be shortened. With a setting of 0 there will be no change.
Filter: Filter Type
Here you can make settings for the filters that will be used by the oscillators. You can select either a 24 dB/octave low pass filter with resonance, or a series connection of a 12 dB/octave low pass filter and a 12 dB/octave high pass filter.
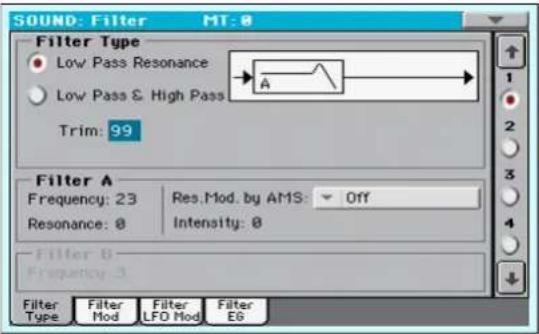
Filter Type
This parameter selects the type of filter (Low Pass Resonant, Low Pass & High Pass) for the selected oscillator.
Low Pass Resonance
When the Low Pass filter type is selected, only filter A will be activated.
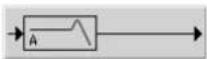
Low Pass & High Pass
When the Low Pass & High Pass filter type is selected, the filter B will be activated.
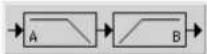
Trim
Use this parameter to adjust the level at which the audio signal output from the selected oscillator is input to filter A.
Note: If this value is raised, the sound may distort if Resonance is set to a high value or when you play a chord.
00...99 Trim level.
Filter A
Frequency (Cutoff Frequency A)
This parameter specifies the cutoff frequency of filter A.
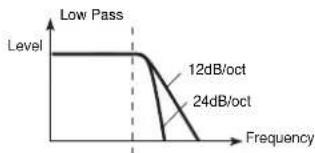
line
| Frequency | Level | | --------- | ----- | | Low Pass | 12dB/oct | | Low Pass | 24dB/oct |This is a later that cuts the high-frequency region above the cutoff frequency.
This is the most common type of "Iter, and is used to cut part of the overtone components, making an originally bright timbre sound more mellow (darker). When the "Filter Type" is Low Pass Resonance, the cutoff will have a steeper slope.
00...99 Cutoff frequency value.
Resonance (Resonance A)
The resonance emphasizes the overtone components that lie in the region of the cutoff frequency specified by “Frequency”, producing a more distinctive sound. Increasing this value will produce a stronger effect.
00...99 Resonance value.
Res. Mod. by AMS (Resonance modulated by AMS)
Selects the source that will control the "Resonance" level. See "AMS (Alternate Modulation Source) list" on page 216.
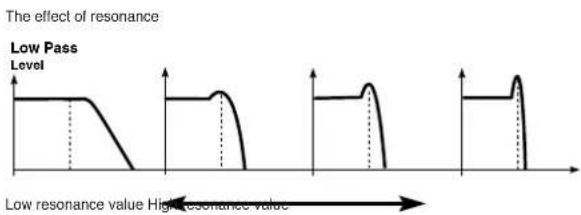
line
| Low Pass Level | Resonance Value | | -------------- | --------------- | | 0 | High | | 1 | High | | 2 | High | | 3 | High | | 4 | High | | 5 | High | | 6 | High | | 7 | High | | 8 | High | | 9 | High | | 10 | High |Intensity (AMS Intensity)
This parameter specifies the depth and direction of the effect that “Res. Mod. by AMS (Resonance modulated by AMS)” will have on the resonance level specified by “Resonance (Resonance A)”.
For example if Velocity has been selected, changes in keyboard velocity will affect the resonance.
With positive (+) values, the resonance will increase as you play more strongly, and as you play more softly the resonance will approach the level specified by the “Resonance” setting.
With negative (−) values, the resonance will decrease as you play more strongly, and as you play more softly the resonance will approach the level specified by the “Resonance” setting.
The resonance level is determined by adding the “Resonance” and “Intensity (AMS Intensity)” values.
-99...+99 Parameter value.
Filter B
Frequency (Cutoff Frequency B)
This parameter specifies the cutoff frequency of filter B. This parameter will be displayed when "Filter Type" is set to Low Pass & High Pass.
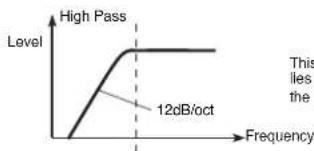
line
| Frequency | High Pass | | --------- | --------- | | 0 | 0 | | 12dB/oct | 12 |This Iter cuts the low-frequency range that lies below the cutoff frequency. By cutting the lower overtones, it lightens the tone.
00...99 Cutoff frequency value.
Filter: Filter Mod
These settings let you apply modulation to the cutoff frequency ("Frequency") of the filter for the selected oscillator to modify the tone.
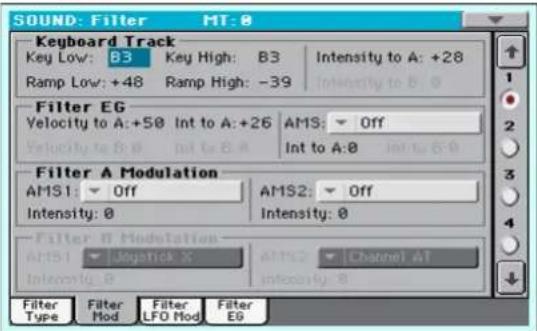
When "Filter Type" is Low Pass Resonance, parameters for filter B will not be editable (greyed out).
Keyboard Tracking
Key Low/High
These settings specify keyboard tracking for the cutoff frequency of the filter for the selected oscillator. The way in which the cutoff frequency is affected by the keyboard location you play can be specified by the "Key Low", "Key High", "Ramp Low" and "Ramp High" parameters.
Keyboard tracking will apply to the range below the specified Low note number, and above the specified High note number.
C-1...G9 Lowest/Highest note in the range.
Ramp Low/High
These parameter specifies the angle of keyboard tracking.
If "Intensity to A" and "Intensity to B" are set to +50, "Ramp Low" is set to -62 and "Ramp High" is set to +62, the angle of the change in cutoff frequency will correspond to the keyboard location (pitch). This means that the oscillation that occurs when you increase the "Resonance (Resonance A)" will correspond to the keyboard location.
If you set "Ramp Low" to +43 and "Ramp High" to -43, the cutoff frequency will not be affected by keyboard location. Use this setting when you do not want the cutoff frequency to change for each note.
-99...+99 Angle value.
Here is how cutoff frequency is affected by keyboard and the Ramp setting ("Intensity to A" and "Intensity to B" = +50):
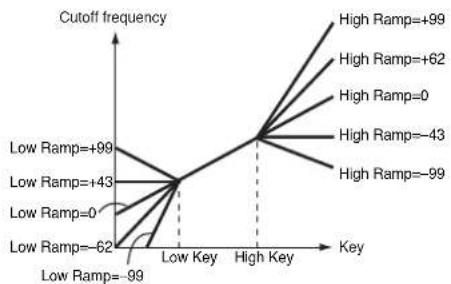
line
| Low Ramp | High Ramp | Cutoff Frequency | | -------- | --------- | ---------------- | | +99 | +99 | 0 | | +43 | +62 | 0 | | 0 | -43 | 0 | | -62 | -99 | 0 | | -99 | -99 | 0 |Tracking to A/B
These parameters specify the note numbers at which keyboard tracking will begin to apply, and set the "Intensity to A" and "Intensity to B" parameters to specify the depth and direction of the change applied to filters A and B.
For the range of notes between "Key Low" and "Key High", the cutoff frequency will change according to the keyboard location (pitch).
-99...+99 Parameter value.
Filter EG
nanges in cutoff frequency
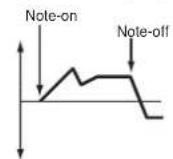
softly played Strongly played
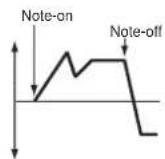
Strongly played Setting to +
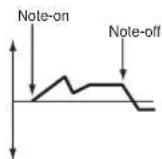
Setting to -
Velocity to A
This parameter specifies the depth and direction of the effect that velocity will have on the time-varying changes created by the filter EG (as set on "Filter: Filter EG") to control the filter A cutoff frequency.
With positive (+) values, playing more strongly will cause the filter EG to produce greater changes in cutoff frequency. With negative (−) values, playing more strongly will also cause the filter EG to produce greater changes in cutoff frequency, but with the polarity of the EG inverted.
99...+99 Value of the Velocity to A parameter.
Velocity to B
This parameter specifies the depth and direction of the effect that velocity will have on the time-varying changes created by the filter EG to control the filter B cutoff frequency (see "Velocity to A").
99...+99 Value of the Velocity to B parameter.
Int to A (Intensity to A)
Specifies the depth and direction of the effect that the time-varying changes created by the filter 1 EG will have on the filter A cutoff frequency.
With positive (+) settings, the sound will become brighter when the EG levels set by Filter EG "Level" and "Time" parameters are in the "−" area, and darker when they are in the “−” area.
With negative (−) settings, the sound will become darker when the EG levels set by Filter EG "Level" and "Time" parameters are in the "+" area, and brighter when they are in the "-" area.
-99...+99 Parameter value.
Int to B (Intensity to B)
Specifies the depth and direction of the effect that the time-varying changes created by the filter EG will have on the filter B cutoff frequency (see "Int to A (Intensity to A)").
-99...+99 Parameter value.
AMS (EG Alternate Modulation Source)
Selects the source that will control the depth and direction of the effect that the time-varying changes produced by the filter EG will have on the cutoff frequency of filters A and B. (Alternate Modulation Source) list" on page 216.
Int to A (Intensity to A)
Specifies the depth and direction of the effect that “AMS” will have on filter A. For details on how this will apply, refer to “Int to A (Intensity to A)”.
Int to B (Intensity to B)
Specifies the depth and direction of the effect that “AMS” will have on filter B. For details on how this will apply, refer to “Int to A (Intensity to A)”.
Note: The sum of the settings for "Velocity to A/B", "Intensity to A/B", and "(AMS) Intensity to A/B" will determine the depth and direction of the effect produced by the filter EG.
Filter A/B Modulation
AMS1 (Alternate Modulation Source 1 for filter A/B)
Selects the source that will control modulation of the filter A cutoff frequency. See “AMS (Alternate Modulation Source) list” on page 216.
Note: The filter B parameters will be displayed when "Filter Type" on page 204 is Low Pass & High Pass.
Intensity (Intensity to AMS1)
Specifies the depth and direction of the effect that "AMS1" will have.
When “AMS1” is JS X, a positive (+) value for this parameter will cause the cutoff frequency to rise when the joystick is moved toward the right, and fall when the joystick is moved toward the left. With a negative (−) value for this parameter, the opposite will occur.
This value is added to the setting of the Filter A "Frequency".
AMS2 (Alternate Modulation Source 2 for filter A/B)
Selects the source that will control modulation of the filter A cutoff frequency (see “AMS (Alternate Modulation Source) list” on page 216).
Intensity (Intensity to AMS2)
Specifies the depth and direction of the effect that the selected source will have (see "Intensity page 206).
Filter: Filter LFO
See "AMS Here you can use the filter LFO to apply cyclic modulation to the cutoff frequency of the filter (for the selected oscillator) to create cyclical changes in tone.
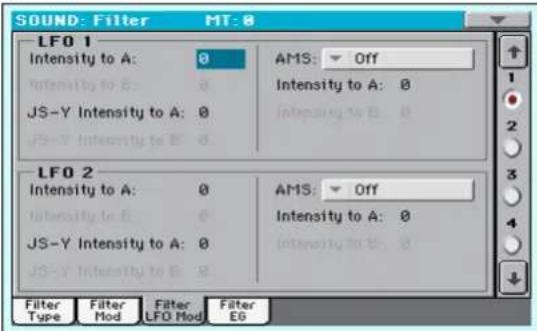
LFO 1
Intensity to A
Specifies the depth and direction of the modulation that LFO1 (set on "LFO: LFO1") will have on the cutoff frequency of filter A. Negative (-) settings will invert the phase.
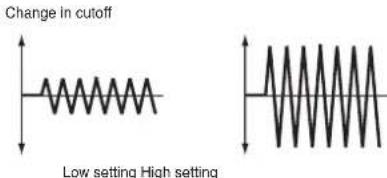
-99...+99 Parameter value.
Intensity to B
Specify the depth and direction of the modulation that LFO1 will have on the cutoff frequency of filter B (see "Intensity to A").
-99...+99 Parameter value.
JS (Joystick) -Y Intensity to A
By moving the joystick in the Y direction (toward yourself), you can control the depth at which LFO1 modulates the cutoff frequency of filter A. This parameter specifies the depth and direction of the control.
Higher settings of this parameter will produce greater increases in the effect of LFO1 on the filter when the joystick is moved
( toward yourself. to AMS1 ) " on
-99...+99 Parameter value.
JS (Joystick) -Y Intensity to B
By moving the joystick in the Y direction (toward yourself), you can control the depth at which LFO1 modulates the cutoff frequency of filter B. This parameter specifies the depth and direction of the control (see "JS (Joystick) -Y Intensity to A").
AMS (Filter LFO1 Alternate Modulation Source)
Select a source that will control the depth and direction of cutoff frequency change for both filters A and B. See “AMS (Alternate Modulation Source) list”.
Intensity to A
Specifies the depth and direction of the effect that "AMS" will have on filter A.
For example if "AMS" is Joystick Y+, higher settings of this parameter will allow greater change to be applied to LFO1 when you move the Joystick up in the Y axis.
-99...+99 Parameter value.
Intensity to B
Specifies the depth and direction of the effect that "AMS" will have on filter B (see "Intensity to A").
LFO 2
Adjusts the depth of the cyclic modulation applied by LFO2 (set on "LFO: LFO2") to the cutoff frequency of filters A and B. For more information on the parameters see "LFO 1" above.
Filter: Filter EG
Here you can make settings for the EG that will produce time-varying changes in the cutoff frequency of filters A and B for the selected oscillator. The depth of the effect that these settings will have on the filter cutoff frequency is determined by the "Velocity" and "Intensity" parameters.
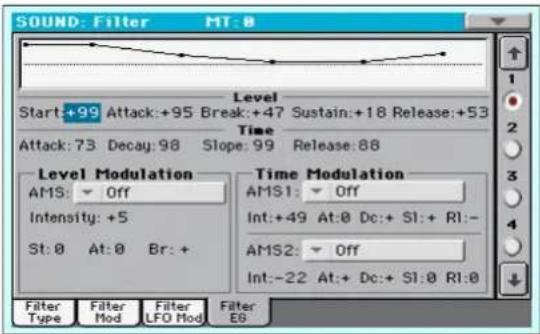
Diagram
The diagram on top of the page shows the Filter envelope line.
Filter envelope
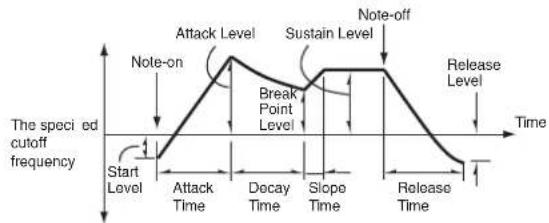
flowchart
graph TD
    A["Start Level"] --> B["Attack Time"]
    B --> C["Decay Time"]
    C --> D["Slope Time"]
    D --> E["Release Time"]
    E --> F["Release Level"]
    F --> G["Break Point Level"]
    G --> H["Sustain Level"]
    H --> I["Note-off"]
    I --> J["Attack Level"]
    J --> K["Note-on"]
    style A fill:#f9f,stroke:#333
    style B fill:#f9f,stroke:#333
    style C fill:#f9f,stroke:#333
    style D fill:#f9f,stroke:#333
    style E fill:#f9f,stroke:#333
    style F fill:#f9f,stroke:#333
    style G fill:#f9f,stroke:#333
    style H fill:#f9f,stroke:#333
    style I fill:#f9f,stroke:#333
    style J fill:#f9f,stroke:#333
    style K fill:#f9f,stroke:#333
Level
These are the envelope segment levels. The result will depend on the filter that was selected in "Filter Type". For example, with the Low Pass Resonance filter, positive (+) values of EG Intensity will cause the tone to be brightened by positive (+) levels, and darkened by negative (−) levels.
Start
This parameter specifies the change in cutoff frequency at the time of note-on.
-99...+99 Level value.
Attack
This parameter specifies the change in cutoff frequency after the attack time has elapsed.
-99...+99 Level value.
Break (Break Point)
This parameter specifies the change in cutoff frequency after the decay time has elapsed.
-99...+99 Level value.
Sustain
This parameter specifies the change in cutoff frequency that will be maintained from after the slope time has elapsed until note-off occurs.
-99...+99 Level value.
Release
This parameter specifies the change in cutoff frequency that will occur when the release time has elapsed.
-99...+99 Level value.
Time
These parameters specify the time over which the filter change will occur.
Attack
This parameter specifies the time over which the level will change from note-on until the attack level is reached.
0...99 Time value.
Decay
This parameter specifies the time over which the level will change from the attack level to the break point level.
0...99 Time value.
Slope
This parameter specifies the time over which the level will change after the decay time has elapsed until the sustain level is reached.
0...99 Time value.
Release
This parameter specifies the time over which the level will change after note-on occurs until the release level is reached.
0...99 Time value.
Level Modulation
Filter 1 EG changes (level) (AMS = Velocity, Intensity = a positive (+) value)
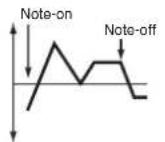
Softly played note with Start Level Swing, Attack Level Swing, and Break Level Swing set to +
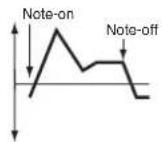
Strongly played note with Start Level Swing, Attack Level Swing, and Break Level Swing set to +
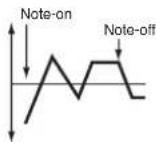
Strongly played note with Start Level Swing, Attack Level Swing, and Break Level Swing set to –
AMS (Alternate Modulation Source)
This parameter selects the source that will control the "Level" parameters of the filter EG ("AMS Source) list" on page 216).
Intensity (AMS Intensity)
This parameter specifies the depth and direction of the effect applied by "AMS". With a setting of 0, the level "Frequency (Cutoff Frequency A)" will be used.
For example, if “AMS” is Velocity, and you set “St (Start Level Swing)”, “At (Attack Level Swing)” and “Br (Break Level Swing)” to + and set “Intensity” to a positive (+) value, the EG levels will rise as you play more strongly. If “Intensity” is set to a negative (-) values, the EG levels will fall as you play more strongly.
-99...+99 Intensity value.
St (Start Level Swing)
This parameter specifies the direction in which “AMS” will affect “Start”. When “Intensity” has a positive (+) value, a setting of + for this parameter will allow “AMS” to raise the EG level, and a setting of - will allow “AMS” to lower the EG level. With a setting of 0 there will be no change.
At (Attack Level Swing)
This parameter specifies the direction in which “AMS” will affect “Attack”. When “Intensity” has a positive (+) value, a setting of + for this parameter will allow “AMS” to raise the EG level, and a setting of – will allow “AMS” to lower the EG level. With a setting of 0 there will be no change.
Br (Break Level Swing)
This parameter specifies the direction in which “AMS” will affect “Break (Break Point)”. When “Intensity” has a positive (+) value, a setting of + for this parameter will allow “AMS” to raise the EG level, and a setting of – will allow “AMS” to lower the EG level. With a setting of 0 there will be no change.
Time Modulation
Filter 1 EG changes (Time) (AMS = Velocity, Intensity = a positive (+) value)
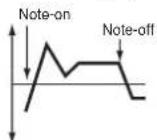
Softly played note with Attack, Decay, Slope and Release Level Swings set to +
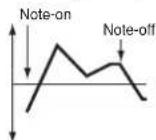
Strongly played note with Attack, Decay, Slope and Release Level Swings set to +
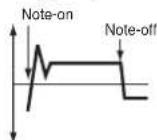
Strongly played note with Attack, Decay, Slope and Release Level Swings set to –
AMS1/2
Use this parameter to select the source that will control the "Tarlet" parameters of Mc filter E.G. see dAMS (Alternate Modulation Source) list" on page 216.
Int (AMS Intensity)
This parameter specifies the depth and direction of the effect that “AM\E/\” will have.
For example, if “AMS1/2” is set to FltKTr +/+, the EG “Time” parameters will be controlled by the Keyboard Tracking settings. With positive (+) values of this parameter, positive (+) values of “Ramp Low/High” will lengthen the EG times, and negative (−) values of “Ramp Low/High” will shorten the EG times. The direction of change is specified by “At (Attack Time Swing)”, “Dc (Decay Time Swing)”, “Sl (Slope Time Swing)”, and “Rl (Release Time Swing)”.
With a setting of 0, the times specified by "Frequency (Cutoff Frequency A)" will be used.
If “AMS1/2” is set to Velocity, positive (+) values of this parameter will cause EG times to lengthen as you play more strongly, and negative (−) values will cause EG times to shorten as you play more strongly.
-99...+99 Intensity value.
At (Attack Time Swing)
This parameter specifies the direction in which “AMS1/2” will affect the attack time. With positive (+) values of “Intensity”, setting this parameter to + will allow AMS to lengthen the time, and setting this parameter to - will allow AMS to shorten the time. With a setting of 0 there will be no change.
Dc (Decay Time Swing)
This parameter specifies the direction in which “AMS1/2” will affect the decay time. With positive (+) values of “Intensity”, setting this parameter to + will allow AMS to lengthen the time, and setting this parameter to - will allow AMS to shorten the time. With a setting of 0 there will be no change.
SI (Slope Time Swing)
This parameter specifies the direction in which “AMS1/2” will affect the slope time. With positive (+) values of “Intensity”, setting this parameter to + will allow AMS to lengthen the time, and setting this parameter to - will allow AMS to shorten the time. With a setting of 0 there will be no change.
RI (Release Time Swing)
This parameter specifies the direction in which “AMS1/2” will affect the release time. With positive (+) values of “Intensity”, setting this parameter to + will allow AMS to lengthen the time,
and setting this parameter to - will allow AMS to shorten the time. With a setting of 0 there will be no change.
Amp: Amp Level/Pan
These parameters control the volume and pan of the selected oscillator.
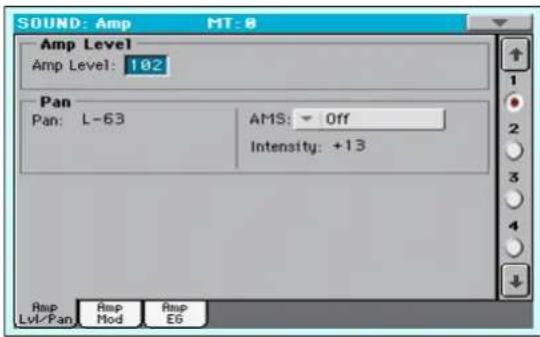
Amp Level
Volume of the selected oscillator.
Note: The volume of a Sound can be controlled by CC#7 (volume) and #11 (expression). The resulting level is determined by multiplying the values of CC#7 and #11. The Global MIDI channel is used for control.
0...127 Volume level.
Pan
Pan (stereo position) of the selected oscillator.

This parameter is not available when editing a Drum Kit. Use the individual Pan control for each key (see "Pan" on page 200).
Random The sound will be heard from a different location at each note-on.
L001 Places the sound at far left.
C064 Places the sound in the center.
R127 Places the sound to far right.
Note: This can be controlled by CC#10 (panpot). A CC#10 value of 0 or 1 will place the sound at the far left, a value of 64 will place the sound at the location specified by the "Pan" setting for each oscillator, and a value of 127 will place the sound at the far right. This is controlled on the global MIDI channel.
Pan modulation
AMS (Alternate Modulation Source)
Selects the source that will modify pan (see "AMS (Alternate Modulation Source) list" on page 216). This change will be relative to the "Pan" setting.
Intensity
Specifies the depth of the effect produced by "AMS". For example, if "Pan" is set to C064 and "AMS" is Note Number, positive (+) values of this parameter will cause the sound to move toward the right as the note numbers increase beyond the C4 note (i.e.,
as you play higher), and toward the left as the note decrease (i.e., as you play lower). Negative (-) values of this parameter will have the opposite effect.
-99...+99 Parameter value.
Amp: Amp Mod
These settings allow you to apply modulation to amp (for each oscillator) to modulate the volume.
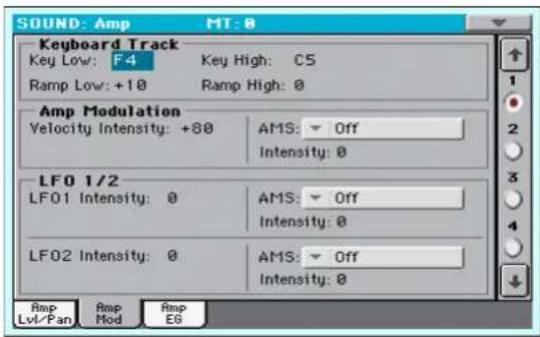
Keyboard Tracking
These parameters let you use keyboard tracking to adjust the volume of the selected oscillator. Use the "Key" and "Ramp" parameters to specify how the volume will be affect keyboard location that you play.
Key Low/High
These settings specify the note number at which keyboard tracking will begin to apply. The volume will not change between "Key Low" and "Key High".
Keyboard tracking will apply to the range below Low note number, and above the specified High note number.
C-1...G9 Lowest/Highest note in the range.
Ramp Low/High
These parameters specify the angle of keyboard tracking.
With positive (+) values of the “Ramp Low” parameter, the volume will increase as you play notes below the “Key Low” note number. With negative (−) values, the volume will decrease.
With positive (+) values of the “Ramp High” parameter, the volume will increase as you play notes above the “Key High” number. With negative (−) values, the volume will decrease.
-99...+99 Angle value.
Here is an example of volume changes produced by k location and "Ramp" settings:
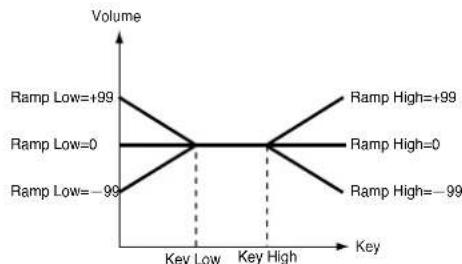
line
| Category | Value | |---|---| | Ramp Low=+99 | 1 | | Ramp Low=0 | 0 | | Ramp Low=-99 | -1 | | Ramp High=+99 | 2 | | Ramp High=0 | 1 | | Ramp High=-99 | 2 | | Key Low | 0 | | Key High | 1 |Amp Modulation
These parameters specify how the volume of the selected oscillator will be affected by velocity.
Velocity Intensity
With positive (+) values, the volume will increase as you play more strongly. With negative (−) values, the volume will decrease as you play more strongly.
Volume change (with positive (+) values of this parameter)
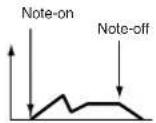
Softly played
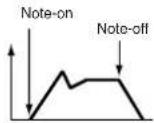
Strongly played
-99...+99 Intensity value.
AMS (Alternate Modulation Source)
Selects the source that will control the volume of the amp for the selected oscillator (See "AMS (Alternate Modulation Source) list" on page 216). "Velocity" cannot be selected.
Intensity
This parameter specifies the depth and direction of the effect that “AMS” will have. The actual volume will be determined multiplying the value of the changes produced by the amp EG with the values of Alternate Modulation etc., and if the levels of the amp EG are low, the modulation applied by Alternate Modulation will also be less.
For example, if “AMS” is set to Joystick Y+, positive (+) values of this parameter will cause the volume to increase when you move the Joystick up in the Y axis. However if the EG settings etc. have already raised the volume to its maximum level, the volume cannot be increased further.
With negative (−) values of this parameter, the volume will decrease when pressure is applied to the keyboard.
-99...+99 Intensity value.
Amp: Amp EG
These parameters let you create time-varying changes in the volume of the selected oscillator.
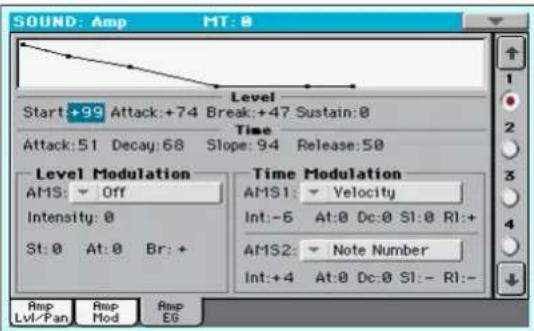
Diagram
The diagram on top of the page shows the Amplitude envelope line.
Level
These parameters are the level of the envelope segment.
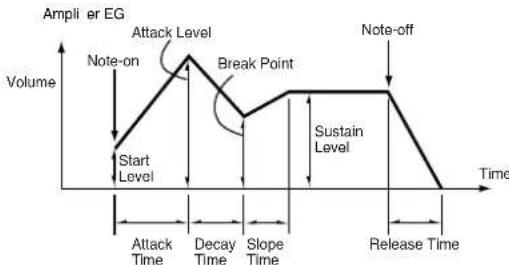
flowchart
graph TD
    A["Start Level"] --> B["Attack Time"]
    B --> C["Decay Time"]
    C --> D["Slope Time"]
    D --> E["Sustain Level"]
    E --> F["Release Time"]
    F --> G["Note-off"]
    G --> H["Break Point"]
    H --> I["Attack Level"]
    I --> J["Note-on"]
    J --> K["Amplifier EG Volume"]
Start
This parameter specifies the volume level at note-on. If you want the note to begin at a loud level, set this to a high value.
0...99 Level value.
Attack
This parameter specifies the volume level that will be reached after the attack time has elapsed.
0...99 Level value.
Break
This parameter specifies the volume level that will be reached after the decay time has elapsed.
0...99 Level value.
Sustain
This parameter specifies the volume level that will be maintained from after the slope time has elapsed until note-off occurs.
0...99 Level value.
Time
These parameters specify the time over which the volume change will occur.
Attack
This parameter specifies the time over which the volume will change after note-on until it reaches the attack level. If the start level is 0, this will be the rise time of the sound.
0...99 Time value.
Decay
This parameter specifies the time over which the volume will change from when it reaches the attack level until it reaches the break point level.
0...99 Time value.
Slope
This parameter specifies the time over which the volume will change from when it reaches the break point level until it reaches the sustain level.
0...99 Time value.
Release
This parameter specifies the time over which the volume will change after note-off until it reaches 0.
0...99 Time value.
Level Modulation
Amp 1 EG changes (Level) (AMS=Velocity, Intensity = a positive (+) value)
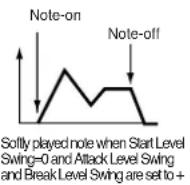
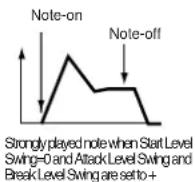
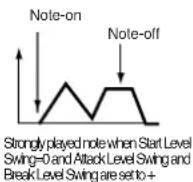
AMS (Alternate Modulation Source)
This parameter specifies the source that will control the “Level” parameters of the amp EG. See “AMS (Alternate Modulation Source) list” on page 216.
Intensity
This parameter specifies the depth and direction of the effect that “AMS” will have. For example, if “AMS” is Velocity, setting “St (Start Level Swing)”, “At (Attack Level Swing)” and “Br (Break Point Level Swing)” to + and setting “Intensity” to a positive (+) value will cause the amp EG volume levels to increase as you play more strongly. Setting “Intensity” to a negative (-) values will cause the amp EG volume levels to decrease as you play more strongly. With a setting of 0, the levels will be as specified on “Amp: Amp EG”.
-99...+99 Intensity value.
St (Start Level Swing)
This parameter specifies the direction in which “AMS” will change “Start”. If “Intensity” is set to a positive (+) value, setting this parameter to + will allow AMS to increase the EG level, and setting this parameter to - will allow AMS to decrease the EG level. With a setting of 0, no change will occur.
At (Attack Level Swing)
This parameter specifies the direction in which “AMS” will change “Attack”. If “Intensity” is set to a positive (+) value, setting this parameter to + will allow AMS to increase the EG level, and setting this parameter to - will allow AMS to decrease the EG level. With a setting of 0, no change will occur.
Br (Break Point Level Swing)
This parameter specifies the direction in which “AMS” will change “Break”. If “Intensity” is set to a positive (+) value, setting this parameter to + will allow AMS to increase the EG level, and setting this parameter to - will allow AMS to decrease the EG level. With a setting of 0, no change will occur.
Time Modulation
These parameters let you use an alternate modulation source to modify the amp EG times that were specified in “Time” on page 210.
Amp 1 EG changes (Time)
(AMS=Amp KTrk +/+, Intensity = a positive (+) value)
(When Amp Keyboard Track "Low Ramp" = a positive (+) value, and
"High Ramp" = a positive (+) value)
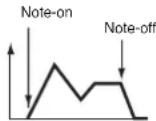
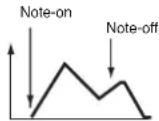
Low-pitched note played with Attack, Decay, Slope, and Release Time Swing at +
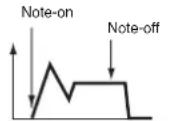
High -pitched note played with Attack, Decay, Slope, and Release Time Swing at –
Amp 1 EG changes (Time) (AMS=Velocity, Intensity= a positive (+) value)
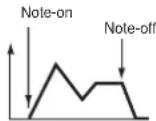
Softly played note with Attack, Decay, Slope and Release Time Swing at +
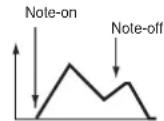
Strongly played note with Attack, Decay, Slope and Release Time Swing at +
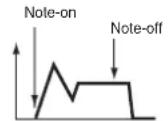
Strongly played note with Attack, Decay, Slope and Release Time Swing at –
AMS1 (Alternate Modulation Source 1 - Time)
This parameter specifies the source that will control the “Time” parameters of the amp EG (see “AMS (Alternate Source) list” on page 216). With a setting of Off, there will be no modulation.
Intensity
This parameter specifies the depth and direction of the effect that “AMS1” will have. For example, if “AMS1(T)” is Amp KTrk +/+, the (Amp) Keyboard Track settings (see “Keyboard Tracking” on page 209) will control the EG “Time” parameters. With positive (+) values of this parameter, positive (+) values of “Ramp (Ramp Setting) will cause EG times to be lengthened, and negative (-) values of “Ramp (Ramp Setting)” will cause EG times to be shortened. The direction of the change is specified by “At (Attack Time Swing)”, “Dc (Decay Time Swing)”, “Sl (Slope Time Swing)”, and “Rl (Release Time)”.
When “AMS1(T)” is Velocity, positive (+) values will cause EG times to lengthen as you play more strongly, and negative (−) values will cause EG times to shorten as you play more strongly. With a setting of 0, the EG times will be as specified by the “Level” parameters (see page 210).
At (Attack Time Swing)
This parameter specifies the direction of the effect that “AMS1” will have on “Attack”. With positive (+) values of “Intensity”, setting this parameter to + will allow AMS1 to lengthen the time, and setting it to - will allow AMS1 to shorten the time. With a setting of 0 there will be no effect.
Dc (Decay Time Swing)
This parameter specifies the direction of the effect that “AMS1” will have on “Decay”. With positive (+) values of “Intensity”, setting this parameter to + will allow AMS1 to lengthen the time, and setting it to - will allow AMS1 to shorten the time. With a setting of 0 there will be no effect.
SI (Slope Time Swing)
This parameter specifies the direction of the effect that "AMS1" will have on "Slope". With positive (+) values of "Intensity", ting this parameter to + will allow AMS1 to lengthen the time, and setting it to - will allow AMS1 to shorten the time. With a setting of 0 there will be no effect.
RI (Release Time)
This parameter specifies the direction of the effect that "AMS1" will have on "Release". With positive (+) values of setting this parameter to + will allow AMS1 to lengthen the time, and setting it to - will allow AMS1 to shorten the time. With a setting of 0 there will be no effect.
AMS2 (Alternate Modulation Source 2)
This is another alternate modulation source for the Amp EG. See above "AMS1" parameters.
LFO: LFO1
In this and the next page you can make settings for the LFO that can be used to cyclically modulate the Pitch, Filter, and Amp of each oscillator. There are two LFO units for each oscillator. By setting the LFO1 or LFO2 Intensity to a negative (−) value for Pitch, Filter, or Amp, you can invert the LFO waveform.
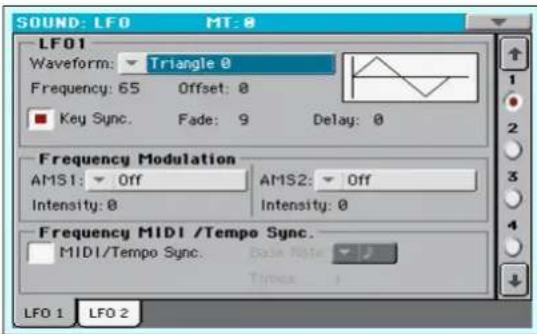
Waveform
This parameter selects the LFO waveform. The numbers that appear at the right of some of the LFO waveforms indicate the phase at which the waveform will begin.
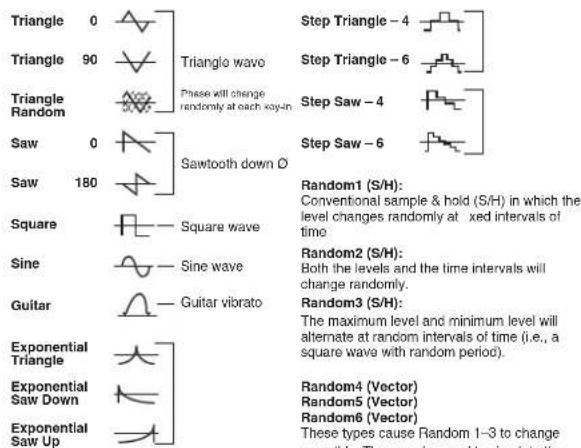
Frequency
Set the LFO frequency. A setting of 99 is the fastest.
00...99 Frequency rate.
Offset
This parameter specifies the central value of the LFO waveform. For example, with a setting of 0 as shown in the following diagram, the vibrato that is applied will be centered on the note-on pitch. With a setting of +99, the vibrato will only raise the pitch above the note-on pitch, in the way in which vibrato is applied on a guitar.
When "Waveform" is set to Guitar, the modulation will occur only in the positive (+) direction even if you set "Offset" to 0.
Here are offset settings and pitch change produced by vibrato:
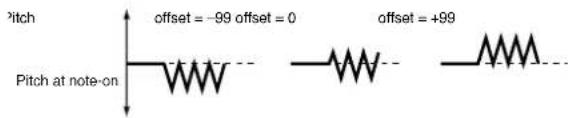
-99...+99 Offset value.
Key Sync
This parameter specifies if the LFO is synchronized to key strokes.
On The LFO will start each time you play a note, and an independent LFO will operate for each note.
Off The LFO effect that was started by the first- played note will continue to be applied to each newly-played note. (In this case, Delay and Fade will be applied only to the LFO when it is first started).
Fade
This parameter specifies the time from when the LFO begins to apply until it reaches the maximum amplitude. When "Key Sync." is Off, the fade will apply only when the LFO started.
Here is how "Fade" affects the LFO (when "Key Sync" is On):
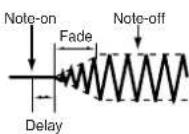
00...99 Fade rate.
Delay
This parameter specifies the time from note-on until the LFO effect begins to apply. When "Key Sync" is Off, the delay v apply only when the LFO is first started.
0...99 Delay time.
Frequency Modulation
You can use two alternate modulation sources to adjust the speed of the LFO1 for the selected oscillator.
AMS1 (Alternate Modulation Source1)
Selects the source that will adjust the frequency of the selected oscillator LFO1 (see “AMS (Alternate Modulation Source) list” on page 216). LFO1 can be modulated by LFO2.
Intensity (AMS1 Intensity)
This parameter specifies the depth and direction of the effect that “AMS1(F)” will have. When this parameter is set to a value of 16, 33, 49, 66, 82, or 99, the LFO frequency being can be increased by a maximum of 2, 4, 8, 16, 32, or 64 times respectively (or decreased by 1/2, 1/4, 1/8, 1/16, 1/32, or 1/64 respectively).
For example, if “AMS1(F)” is Note Number, positive (+) values of this parameter will cause the oscillator LFO to speed up as you play higher notes. Negative (−) values will cause the LFO to slow down as you play higher notes. This change will be centered on the C4 note.
If “AMS1(F)” is set to JS +Y, raising the value of this parameter will cause the oscillator LFO1 speed to increase as the joystick is moved away from yourself. With a setting of +99, moving joystick all the way away from yourself will increase the speed by approximately 64 times.
-99...+99 Intensity value.
AMS2 (Alternate Modulation Source2)
Intensity (AMS2 Intensity)
Make settings for a second alternate modulation so adjust the frequency of the oscillator LFO1 (see above "AMS1 (Alternate Modulation Source1)" and "Intensity (AMS1 Intensity)").
Frequency MIDI/Tempo Sync
MIDI/Tempo Sync
This parameter enables/disables the LFO synchronization with Sequencer 1 Tempo.
On The LFO frequency will synchronize to the tempo (MIDI Clock) of Sequencer 1. In this case, the values you specified for “Frequency” (see page 212) and “Frequency Modulation” (see page 212) will be ignored.
Base Note
When “MIDI/Tempo Sync” is On, these parameters set a note length relative to “q (Tempo)” and the multiple (“Times”) that will be applied to it. These parameters will determine the frequency of the LFO1. For example if “Base Note” is q (quarter note) and “Times” is 04, the LFO will perform one cycle every four beats.
Even if you change the "q (Tempo)" setting of Sequencer 1, the LFO will always perform one cycle every four beats.
DRUM This parameter is not available when editing a Drum Kit.
Note Note value.
Times
DRUM This parameter is not available when editing a Drum Kit.
1...16 Beats before restarting the cycle.
LFO: LFO2
Here you can make settings for the LFO2, which is the second LFO that can be applied to the selected oscillator LFO1" for more information on the parameters value.
However in "Frequency Modulation", the LFO cannot be selected as a modulation source in "AMS1" or "AMS2."
Effects: "B" FX Config
This page allows you to select the effects for the Sound (B oscillator). The effect types and the FX matrix are the same seen for the Style Play mode (see "Effects: A/B FX Configuration" on page 106 of the User's Manual).
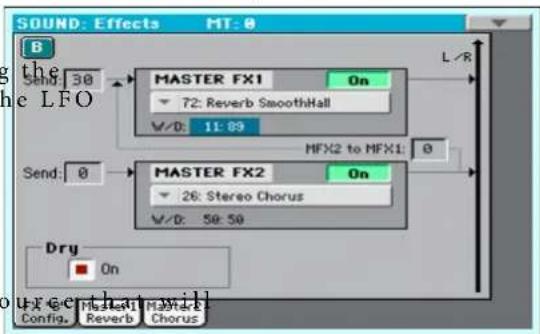
FX Name
Use this pop-up menu to choose one of the available effects. For a list of the available effects, see "Effects" on page 324.
FX parameters
All other parameters in this page are the same seen for the Style Play mode (see "Effects: A/B FX Configuration" on page 106 in the User's Manual).
Send to Master
Use these parameters to set the level of the Sound signal going from the Insert FX to the Master FXs.
0...127 Level of the sent signal.
Dry
Use this checkbox to mix the dry, direct Sound signal to the effects.
Effects: Master 1 / Reverb
In this page you can edit the effect assigned to the Master effect processor (usually Reverb). See "Effects" on page 330 for more information.
Effects: Master 2 / Chorus
In this page you can edit the effect assigned to the Master FX 2 effect processor (usually Chorus). See "Effects" on page 330 for more information.
Page menu
FX Touch the page menu icon to open the menu. Touch a command to select it. Touch anywhere in the display to close the menu without selecting a command.
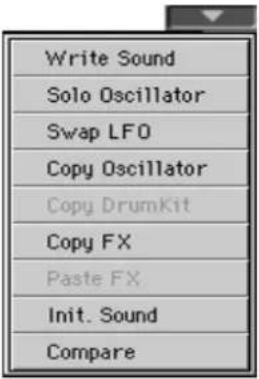
Write Sound
Select this command to open the Write Sound dialog box, and save all editing parameters to a Sound.
See "Write Sound dialog box" on page 215 for more information.
Solo Oscillator
Select this command to solo the selected oscillator, and mute the other oscillators. Select it again to unmute the other oscillators.
When this function is activated, the "Solo OSC [n]" indicator (n = oscillator number) blinks on the page header. While in this situation, you can select a different oscillator to be soloed.
Swap LFO
Select this command to replace LFO1 with LFO2, and vice-versa.
Copy Oscillator
Select this command to copy all settings between oscillators. See "Copy Oscillator dialog box" on page 215 for more information.
Copy/Paste FX
Use this command to copy a single effect, or both effects of an FX group (A or B). See "Copy/Paste FX" on page 115 for detailed instructions.
Copy Drum Kit
Select this command to copy the Drum Kit from a different Drum Kit. See "Copy Drum Kit dialog box" on page 215 for more information.
Init Sound
Select this command to delete all parameters, and set them to a default value.
Compare
When this command is checked, original Sound parameter values are temporarily recalled, to compare them with edited parameters. You cannot edit the Sound while you are in Compare mode.
While this function is on, the Compare indicator blinks on the page header.
Write Sound dialog box
Open this window by selecting the Write Sound item from the page menu. Here, you can save all Sound parameters to a Sound location in memory.
Warning: If you write over an existing Sound, the Sound will be deleted and replaced by the one you are saving ("overwrite"). Please save on a storage device any User Sound you don't want to lose.
Note: Drum Kits cannot be written over standard Sounds, nor vice versa.
Note: To save over a Factory Sound location, uncheck the "Factory Sound Protect" command in the Global > Mode Preferences > Media page (see page 241).
Warning: When replacing a Factory Sound, please be warned that all Performance, STSs, Styles and Songs making use of it will be modified as well. Use this feature with great care!
To restore the original data, please use the "Factory Restore" command in the Utility page of the Media mode (see page 267 for more information).
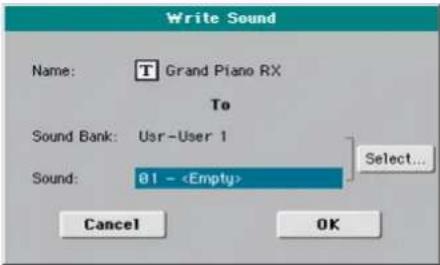
Name
Name of the Sound to be saved. Touch the Text Edit) button next to the name to open the Text Edit window.
Sound Bank
Target bank of Sounds. Use the VALUE controls to select a different bank.
Sound
Target Sound location in the selected bank. Use the VALUE controls to select a different location.
Select...
Touch this button to open the Sound Select window, and select a target location.
Copy Oscillator dialog box
Open this window by selecting the Copy Oscillator item from the page menu. Here, you can copy all settings between oscillators.
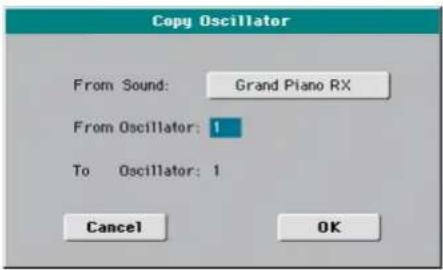
From Sound
Touch this button to open the Sound Select window, and select the source Sound.
From Oscillator
Select the source oscillator to copy from.
To Oscillator
Target oscillator where to copy the source settings to.
Copy Drum Kit dialog box
Open this window by selecting the Copy Drum Kit item from the page menu. Here, you can copy settings from a range of keys of a Drum Kit.
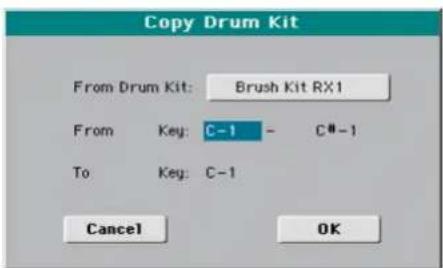
From Drum Kit
Touch this button to open the Sound Select window, and select the source Drum Kit.
From Key
Select the source range of keys to copy from.
To Key
Target key. Settings are copied starting from this key, and upwards.
AMS (Alternate Modulation Source) list
| Off Do not use Alternate Modulation | |
| Pitch EG Pitch EG | |
| Filter EG Filter EG within the same oscillator | |
| Amp EG Amp EG within the same oscillator | |
| LFO1 LFO1 within the same oscillator | |
| LFO2 LFO2 within the same oscillator | |
| Flt KTrk +/+ (Filter Keyboard Track +/+) | Filter keyboard tracking within the same oscillator |
| Flt KTrk +/- (Filter Keyboard Track +/) | Filter keyboard tracking within the same oscillator |
| Flt KTrk 0/+ (Filter Keyboard Track 0/+) | Filter keyboard tracking within the same oscillator |
| Flt KTrk +/0 (Filter Keyboard Track +/0) | Filter keyboard tracking within the same oscillator |
| Amp KTrk +/+ (Amp Keyboard Track +/+) Amp keyboard tracking within the same oscillator | |
| Amp KTrk +/ (Amp Keyboard Track +/) Amp keyboard tracking within the same oscillator | |
| Amp KTrk 0/+ (Amp Keyboard Track 0/+) Amp keyboard tracking within the same oscillator | |
| Amp KTrk +/0 (Amp Keyboard Track +/0) Amp keyboard tracking within the same oscillator | |
| Note Number | Note number |
| Velocity | Velocity |
| Poly AT (Poly After Touch) | Polyphonic After Touch (received/transmitted via MIDI or contained in Standard MIDI Files) |
| Channel AT (Channel After Touch) | After Touch (Channel After Touch) (received/transmitted via MIDI or contained in Standard MIDI Files) |
| Joystick X | Joystick X (horizontal) axis |
| Joystick +Y | Joystick +Y (vertical upward) direction (CC#01) |
| Joystick Y | Joystick Y (vertical downward) direction (CC#02) |
| JS+Y & AT/2 (Joy Stick +Y & After Touch/2) | Joystick +Y (vertical upward) direction and After Touch (received/transmitted via MIDI or contained in Standard MIDI Files) |
| JS-Y & AT/2 (Joy Stick Y & After Touch/2) | Joystick Y (vertical downward) direction and After Touch (received/transmitted via MIDI or contained in Standard MIDI Files) |
| Assign. Pedal | Assignable foot pedal (CC#04) |
| Ribbon Ctl. | Ribbon controller (CC#16) (received/transmitted via MIDI or contained in Standard MIDI Files) |
| CC#18 | CC#18 |
| CC#17 | CC#17 |
| CC#19 | CC#19 |
| CC#20 | CC#20 |
| CC#21 | CC#21 |
| Damper | Damper pedal (CC#64) |
| CC#65 | Portamento switch (CC#65) |
| Sostenuto | Sostenuto pedal (CC#66) |
| CC#80 | CC#80 |
| CC#81 | CC#81 |
| CC#82 | CC#82 |
| CC#83 | CC#83 |
| Tempo | Tempo (tempo data from Sequencer 1 clock or external MIDI clock) |
| Velocity Plus | Key On and Key Off Velocity are used |
| Velocity Exp | Velocity with Exponential curve (higher velocity notes are even louder) |
| Velocity Log | Velocity with Logarithmic curve (higher velocity notes are weaker than with the linear Velocity) |
Flt KTrk +/+ (Filter Keyboard Track +/+)
Flt KTrk +/- (Filter Keyboard Track +/)
Flt KTrk 0/+ (Filter Keyboard Track 0/+)
Flt KTrk +/0 (Filter Keyboard Track +/0)
Amp KTrk +/+ (Amp Keyboard Track +/+)
Amp KTrk +/- (Amp Keyboard Track +/-)
Amp KTrk 0/+ (Amp Keyboard Track 0/+)
Amp KTrk +/0 (Amp Keyboard Track +/0)
+/+ The direction of the effect will be determined by the sign (positive or negative) of the "Ramp Low" or "Ramp High" setting.
+/- The direction of the effect will be determined by the sign of the "Ramp Low" setting, and by the opposite sign of the "Ramp High" setting (50 for a setting of +50, and +50 for a setting of 50).
0/+ "Ramp Low" will have no AMS effect. The sign of the "Ramp High" setting will determine the direction of its effect.
+/0 The sign of the "Ramp Low" setting will determine the direction of its effect. "Ramp High" will have no AMS effect.
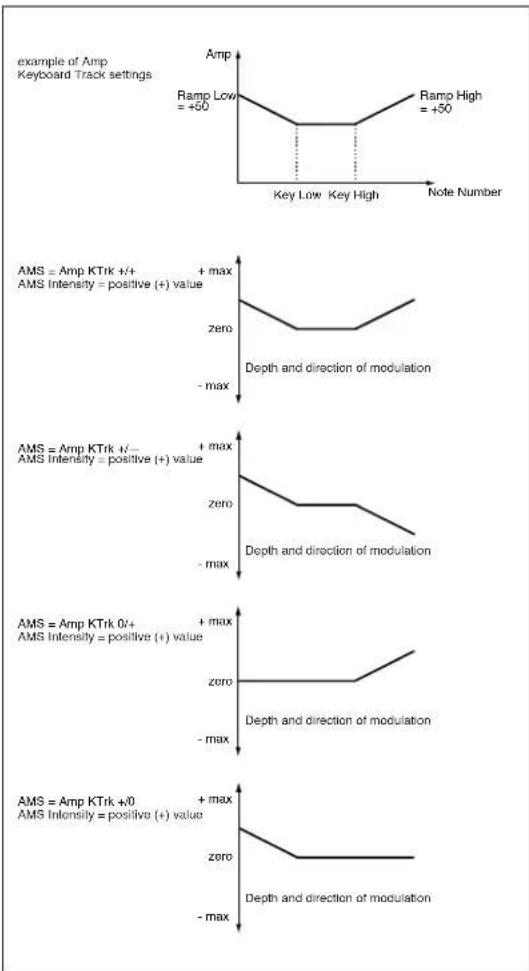
JS +Y & AT/2 (Joy Stick +Y & After Touch/2)
The effect will be controlled by the joystick +Y (vertically upward) and by after touch. In this case, the effect of after touch will be only half of the specified intensity (received/transmitted via MIDI or contained in Standard MIDI Files).
JS Y & AT/2 (Joy Stick -Y & After Touch/2)
The effect will be controlled by the joystick Y (vertically downward) and by after touch. In this case, the effect of after touch will be only half of the specified intensity (received/transmitting via MIDI or contained in Standard MIDI Files).
Sampling mode
The Sampling mode allows you to create new Samples, new Multisamples and new synced Audio Grooves. You can load Samples, Multisamples, Sounds and banks of Sounds from various formats.
Pa600 can read common file formats, like WAV, AIFF and SF2 files, and load data from KORG Trinity and Triton files.
To be used, Samples must be assigned to a Mu Drum Kit. A Multisample allows you to arrange samples into a separate zones of the keyboard. Drum Kits allows you to assign a different sample to each note of the keyboard, with up to six dynamic layers per note.
Multisamples can then be assigned to Sounds. Sounds created with this function can be used as any ord assigned to any track.
Another powerful feature of the Sampling mode is the Time Slice, that lets you add realism to MIDI tracks by creating Audio Grooves.
Warning: When loading a “SET” folder containing User PCM Samples, all existing User PCM Samples are deleted from memory. Save them before loading the folder, by selecting the “PCM” option during a Save All operation (see “Saving the full memory content” on page 261 of the User’s Manual).
To see if a ".SET" folder contains User PCM Samples, open it and look for a "PCM" folder.
Hint: If you want to load new User PCM Samples without deleting the ones already contained in memory, load single Sounds instead of a “SET” folder.
Entering and exiting the Sampling mode
- While in Sound mode, press the RECORD button to enter in Sampling mode.
- While in Sampling mode, press the RECORD button to exit the Sampling mode, and return to the Sound mode.
Creating new Sounds from the Samples
Here is how to create a new Sounds from new Samples and Multisamples.
- Create new Samples with the procedures described in the sample of a following pages.
-
Select the Write command from the page menu to save the Sample in edit. The Write Sample dialog box will appear (see "Write Sample dialog box" on page 230). Assign a name to the new Sample, and confirm saving.
-
After saying, you can load other files to create additional Samples.
-
When you have created and saved all the needed Samples, press the MENU button and go to the "Multisample" section, to assign the Sample(s) to a Multisample. Assign each Sample to a different keyboard zone of the Multisample.
-
When finished editing the Multisample, select the Write command from the page menu. The Write Multisample dialog box will appear (see "Write MultiSample dialog box" on page 230). Assign a name to the new Multisample, and save it to the internal memory.
-
Press RECORD to exit the Sampling mode and return to the Sound mode.
-
Select an ordinary Sound similar to the one you want to create.
-
Press MENU and go to the "Basic: OSC Basic" page (see page 193). Select one of the available layers, then select the RAM bank of Multisamples. Finally, select the new Multisample.
-
Select the Write Sound command from the page menu, and save the Sound to an empty User location.
-
If you want so, assign the new Sound to a track, then select the "Write Performance", "Write Current Style Settings" or "Write STS" command from the page menu, to save the Sound to a Performance, Style Settings or STS.
Creating new Drum Kits from the Samples
Here is how to create a new Drum Kits from new Samples.
- Create new Samples with the procedures described in the following pages.
- Select the Write command from the page menu to save the Sample in edit. The Write Sample dialog box will open for a session (see "Write Sample dialog box" on page 230) and confirm saving.
- After saving, you can load other files to create additional Samples.
- When you have created and saved all the needed Samples, press RECORD to exit the Sampling mode and return the Sound mode.
- Select a Drum Kit similar to the one you want to create.
- Press MENU and go to the "DrumKit: Sample Setup (Drum Kits)" page (see page 197). Select a key and a layer, then select the RAM bank of Samples. Finally, select the new Samples.
- Select the Write Sound command from the page menu, and save the Drum Kit to an empty User DK location.
- If you want so, assign the new Drum Kit to a track, then select the "Write Performance", "Write Current Style Settings" or "Write STS" command from the page save the Drum Kit to a Performance, Style Settings or STS.
Hint: Drum Kits are better suited for the Drum or Percussion track. Assign them to the Style Settings.
Creating new Sounds from an Audio Groove
Creating an Audio Groove
After loading an Audio Groove, you must "slice" it to create a series of separate percussive Samples, a Multisample and a MIDI Groove. (230). Assign a
- Go to the Time Slice page. After creating a series of slices, use the Extend function to refine your groove.
- Select the Write command from the page menu, to save the sliced Samples, a Multisample, a Sound and the MIDI Groove. Choose one of the User Sound locations. The \$8 sound, Multisample, MIDI Groove and sliced Samples are saved to the internal memory.
- Press RECORD to exit the Sampling mode and return to the Sound mode.
Assigning an Audio Grooves to a Sound
You can use the new Multisample and sliced Samples generated from the Audio Groove in a new User Sound.
- To access the new Multisample for use in a Sound, go to the Sound mode.
neulot an ordinary Sound. Press MENU and "Basic: OSC Basic" page (see page 193). Select one of the available layers, then select the RAM bank of Multisamples. Finally, select the new Multisample. - Select the Write Sound command from the page menu, and save the Sound to an empty User location.
Assigning the Audio Groove to Styles or Pads
Sounds based on the Audio Groove can be used in Styles or Pads.
- Assign the new Sound to a Style track (preferably, the Drum or Percussion track) or to a Pad track, then select the "Save Current Style Perf." or "Write Pad" command from the page menu, to save the Style Settings or the Pad.
- Use the "Import: Import Groove" function in the Style/Pad Record mode (see page 145) to import the generated MIDI Groove to the Style track you assigned the new Sound to. By playing this MIDI Groove with the new Sound, you'll be able to play the original audio groove on the keyboard.
Warning: Generated MIDI Grooves will be deleted when turning the instrument off. Import them to a Style track before turning the instrument off.
Edit menu
Sampling: Edit
From any page of the Sampling mode, press the MENU button. This page allows you to cut, trim or normalize a sample, as well to open the Sampling edit menu. This menu gives access to the edit the loop points. The sample can played on the full key- various Sampling edit sections.
When in the menu, select an edit section, or press EXIT to exit the menu and return to the Sample Edit page. To return to this page, you can also select the Sample Edit menu item.
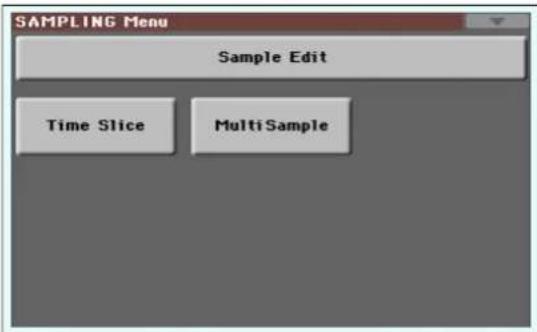
Each item in this menu corresponds to an edit section. Each edit section groups various edit pages, that may be selected by touching the corresponding tab on the lower part of the display.
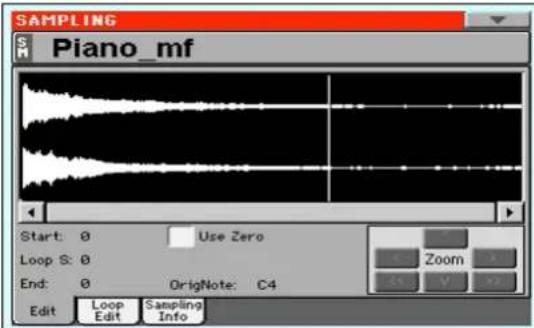
SM (Sample)
Selected sample.
Waveform display
This is the graphical display of the selected sample waveform, i.e., the one you can hear when playing the keyboard. The area included between the Start and End points is highlighted (dark background).
Parameters
Start (Sample Start)
This is the sample start point (in samples). You may edit this point, as well as the End point, to shorten the sample. Changing the Sample Start cuts out the attack portion of the sound.
Note: When moving the "Start" point forward, and reach the "Loop Start" point, this latter is also moved forward.
Warning: When saving the edited sample (Write Sample operation), the segments exceeding the Start and End points are permanently removed.
Loop Start
Note: This parameter has no effect, unless you don't turn the loop on. Use the "Loop On" parameter on the "Sampling: Loop Edit" page to turn the loop on (see page 222).
Use this parameter to adjust the Loop Start point. When you adjust this parameter, an audible click may appear, due to a pitch and/or level mismatch between the starting and ending points of the loop. Move the Loop Start and Loop/Sample End point, so that the click can no longer be heard.
When editing audio grooves, the Loop Start should match the Sample Start point. This parameter usually differs from the Sample Start in ordinary sounds (i.e., a guitar, a piano, a voice...).
Loop End (E)Loop Start (L)
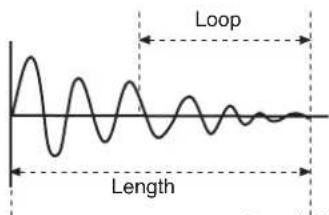
Sample End (E) Sample Start (S)
Changing the sample length and finding good-sounding loop points
To adjust the sample length and loop points, check the "Loop On" parameter, then use the "Start", "Loop Start" and "End" parameters to create a fine sounding cycling loop.
For example, you may have sampled an audio groove of an exceeding length. Use the "End" parameter to cut the exceeding portion at the end of the sample, and adjust the starting point of the loop using the "Start" or "Loop Start" parameters.
Usually, checking the "Use Zero" parameter is a big help, to avoid the loop clicks due to level mismatches.
End (Sample/Loop End)
This is the sample and loop end point (in samples). You may edit this point, to shorten the sample.
Warning: When saving the edited sample (Write Sample operation), the segments exceeding the Start and End points are permanently removed.
Use Zero
If this parameter is turned on, when you move the Start, Start and End points, the selection fall on the nearest zero-crossing point (i.e., points where the waveform crosses the x-axis, and goes from negative to positive, or from positive to negative values). This will make loops more accurate, and will reduce the risk of "clicks".
OrigNote (Original Note)
Original pitch of the sampled note. While this parameter has no effect on sound, it will be useful to identify the original pitch of the sample and when assigning a sample to the multisample.
For example, if you sample a C4, set this parameter. When the sample will be assigned to a keyboard zone of the multisample, it will be transposed (if needed) according to this parameter, to avoid a change of the original pitch.
Zoom
Use these buttons to change the size of the waveform shown in the diagram. When a button is greyed-out, it means the maximum or minimum value has been reached.

Increase the vertical size.

Decrease the vertical size.

Increase the horizontal size.

Decrease the horizontal size.

Full zoom in.

Full zoom out.
Sampling: Loop Edit
The loop is a cycling portion of a sampled sound. It is a technique used to reduce the sampling time, cycling a portion of the sound to create the sustain phase of the sound. After the attack stage, most sounds repeat the same waveform during their sustain stage. You may adjust the Loop Start point with the "Loop Start" parameter, and the Loop End point (always matching the Sample End point) using the "End" parameter.
This page lets you fine tune the loop points, by watching at the Loop End and Loop Start points matching at the center o diagram. A good-sounding loop is shown as a continuous, non-breaking line.
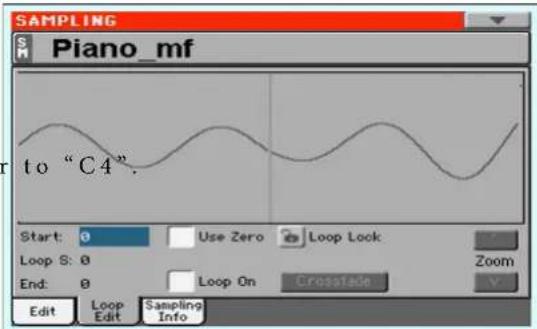
SM (Sample)
Selected sample.
Loop diagram
This diagram shows the "End" (Loop End) point on the left half, and the "Loop Start" point on the right half of the screen. Use the "End" and "Loop Start" parameters to adjust the loop.
Parameters
Start
See "Start (Sample Start)" on page 220.
Loop Start
See "Loop Start" on page 220.
End
See "End (Sample/Loop End)" on page 221.
Use Zero
See "Use Zero" on page 221.
Loop Lock
This fixes the length of the loop being edited.
Off The "Loop S." and "End" parameters can be edited separately.
On When the "Loop S." or "End" parameter is edited, the other one will be automatically adjusted so that the distance between them (i.e., the loop length) does not change. This is convenient when you are creating a rhythm loop to match a specific tempo.
Loop On
Use this parameter to turn the loop on or off.
On The loop is turned on, and the portion of sound included between the Loop Start and Loop End points will cycle until a key is kept pressed. If the "Loop Start" point matches the "Start" point, the whole sample is cycled.
When the loop is turned on, a vertical yellow line, showing the loop point, appears in the waveform display.
Off The loop is turned off. The sound will play from the Sample Start to the Sample End point only once, even if you keep a key pressed on the keyboard.
Crossfade
When looping the pitched sample of a complex sound such as strings or woodwinds to make the sound sustain, it is necessary to create a long loop to preserve the rich character of the sound. Crossfade Loop can be used to minimize the difference in pitch and level between the beginning and ending of the loop region, to create a natural-sounding loop. In order to solve such problems, Crossfade Loop causes the sound to change gradually from the end to the beginning of the loop.
In practice, here is how it works. A specific length (the “Crossfade Length” value) of the waveform immediately before the beginning of the loop is taken and mixed with the end portion. At this time, the waveform level of the portion immediately before the end (the length specified by “Crossfade Length”) will gradually decrease, and the waveform level immediately before the beginning of the loop will gradually increase as the two are mixed.
When the "Loop On" parameter is checked, and the "Start" and "Loop S." parameters have different values, the "Crossfde" button becomes available.
When you touch the Crossfade button, the Crossfade Loop dialog box appears:
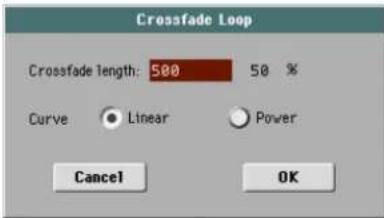
Crossfade Length
In “Crossfade Length,” specify the length of the sample that you wish to crossfade. You can enter it either as the number of samples, or a percentage (%). If you set this as a percentag number of samples will be calculated automatically.
If you set this to 50%, crossfade will be performed on the second half of the region between loop start and loop end.
The “Crossfade Length” cannot be greater than the smaller length between the Sample Start – Loop Start points, or the Loop Start – Sample End points.
Curve
Set "Curve" to specify how the volume will change in the cross-faded region.
Linear The volume will change linearly.
Power The volume will change non-linearly. Sometimes a setting of Linear will produce the impression that the volume has dropped in the middle of the crossfade curve. In such cases, use Power.
Sampling: Sampling Info
Use this page to see detailed info on the sample in edit. General information for the RAM memory is also available.
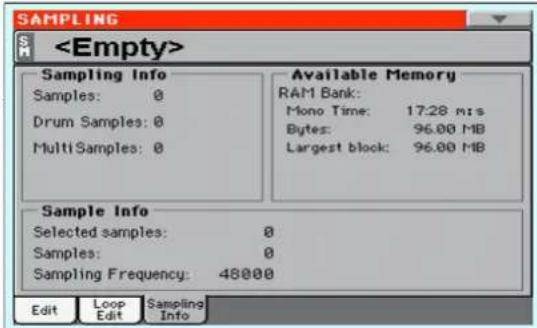
SM (Sample)
Selected sample.
Sampling Info
Samples
Number of samples in memory.
Drum Samples
Number of drum samples in memory.
Multisamples
Number of multisamples in memory.
Available Memory
RAM Bank
Pa600 comes with 96 MB of Sample RAM. This is the maximum amount of Sample data that can be loaded or recorded.
Mono Time
Remaining sample memory (in seconds). This value is given for mono samples. With stereo samples, this time has to be halved.
Bytes
Remaining memory for sampling (in MegaBytes). This value is given for mono samples. With stereo samples, this time has to be halved.
Sample Info
Selected Samples
Size of the selected sample (in samples).
Samples
Total size of the samples in memory (in samples).
Sampling Frequency
Sampling frequency of the selected sample (in Hertz).
Time Slice
The Time Slice function lets you transform a rhythm audio groove in a series of single percussive samples, to be assigned to the Drum or Percussion track of a Style or a Song.
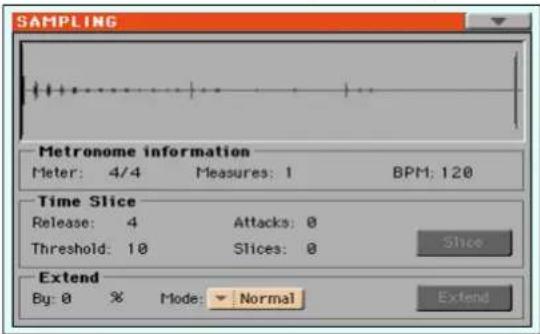
How timeslice works
Analyzing and processing. This function detects the attacks (e.g., kick and snare) inside a rhythm audio groove (a sample that loops a drum pattern), and automatically divides the audio groove into individual percussive samples.
The divided percussive samples will be automatically assigned to different keys in a multisample, and the multisample to a Sound.
Within the generated multisample, a separate sample is assigned to a different note on the keyboard, starting from C#3. By playing an ascending chromatic scale with this multisample, you could recreate the original audio groove.
A MIDI Groove will also be created, containing a sequence of notes triggering the sliced percussive samples in the same order as in the original audio groove (i.e., it plays an ascending chromatic scale starting from C#3).
When you will import this MIDI Groove to the percussive track of a Style (see "Import: Import Groove" on page 145 of the User's Manual), this sequence will let you adjust the groove's tempo without affecting the pitch of the percussive samples.
In addition to changing the groove's tempo without affecting its pitch, this lets you do the following:
- change the order in which notes are played
- change the timing
- edit the pattern notes to freely recreate a new rhythm loop.
Saving. After the slicing, you can select the Write command from the page menu, to save the Sound based on sliced samples, and the MIDI Groove containing the corresponding MIDI sequence.
- The Sound will be saved to the selected location in the User area of the internal memory. You will be able to select it ordinary Sound, and assign it to the Drum or Percussion track of a Style.
- The Multisample will be automatically saved to the next free available location.
- Samples will be permanently saved to the internal memory.
- The MIDI Groove will be temporarily saved to the internal memory, and will be available only when using the Import function of the Style Record mode (see “Import: Import Groove” on page 145 of the User’s Manual).
Warning: All MIDI Grooves will be delete each time the Pa600 is turned off.
Ex.1 - Generating samples and MIDI Groove data:
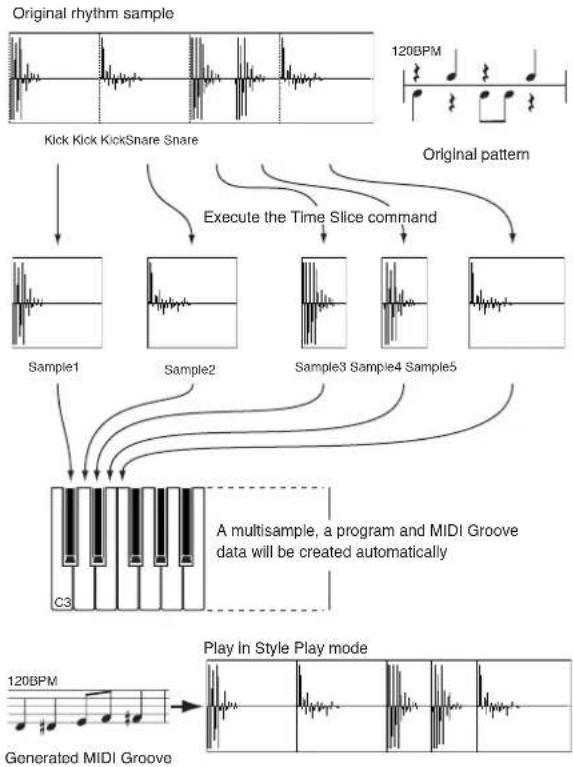
flowchart
graph TD
    A["Original rhythm sample"] --> B["Kick Kick KickSnare Snare"]
    B --> C["Sample1"]
    B --> D["Sample2"]
    B --> E["Sample3"]
    B --> F["Sample4"]
    B --> G["Sample5"]
    C --> H["C3"]
    D --> H
    E --> H
    F --> H
    G --> H
    H --> I["A multisample, a program and MIDI Groove data will be created automatically"]
    I --> J["Generated MIDI Groove"]
    J --> K["Play in Style Play mode"]
    K --> L["120BPM"]
    L --> M["120BPM"]
    M --> N["Original pattern"]
    N --> O["Execute the Time Slice command"]
    O --> P["120BPM"]
Note: Sliced samples and MIDI data are saved with a Write operation.
Ex.2 - Varying the groove's tempo
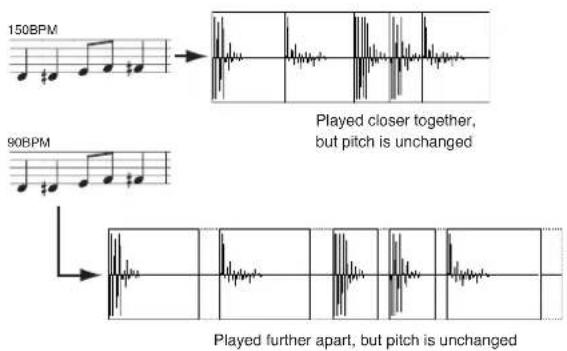
Note: To vary the groove's tempo, you must first import the generated MIDI data into the Percussion track (Import function of the Style and Pad Record mode), and assign the new generated Sound to the Percussion track.
Gaps between sliced samples, when slowing down the tempo, can be automatically filled by the Extend function, smoothing each sample's tail.
Ex.3 - Recombining MIDI notes and samples
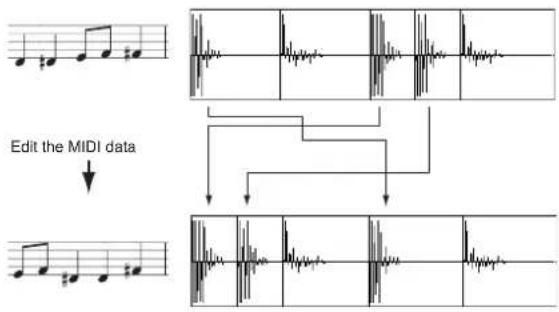
Note: To recombine notes inside the generated MIDI sequence, you must first import the MIDI data in Style or Pad Record mode, by using the "Import" function. Then, use the Event Edit to change the note order.
Sample diagram
This diagram shows the sample waveform and the slices. Here is how the sample diagram appears before the Slice:
natural_image
Abstract waveform pattern with repeating triangular and linear shapes (no text or symbols)... and the same diagram after the Slice:
natural_image
Abstract waveform pattern with repeating triangular shapes on a grid background (no text or symbols)Metronome Information
Meter
Use this parameter to specify the Meter of the original sample.
Measures
Use this parameter to specify the number of measures of the original sample. Usually, you will load a groove 1- or 2-measures long.
BPM
This parameter specifies the tempo (in Beats Per Minute) of the original sample. Pa600 automatically calculates this value based on the Start, End (see page 220), Meter and Measures parameters.
The BPM can be only adjusted to values lower than the one automatically calculated. This can be useful, for example, when the actual sample is shorter than the entered Meter and Measures values.
In the above example, the actual groove lasts only up to the first half of Measure 2. The recognized tempo is 130, while the real tempo is 100. Set the BPM value to 100, and a rest will be added to the end of the groove, to allow it to loop seamlessly.
Time Slice
See "The Time Slice procedure" on page 226 for more information.
Release
Adjust the value of this parameter to change the number of recognized attacks, by varying the speed needed to the Slice engine to start working again. For example, in the following example, if the Release value is too high (i.e., too long), the second attack may be lost:
Note: After changing the Release value, you must select the Slice command again.
Threshold
This parameter varies the threshold over which the attacks are recognized (i.e., the Time Slice sensitivity). If it is too low, weaker attacks may be ignored.
Note: After changing the Threshold value, you are not obliged to select the Slice command again. The Slices value is immediately changed.
Attacks
This (non-editable) parameter shows the number of attacks recognized. More than one attack may be recognized in a single slice. Adjust the Release and Threshold parameters to change the number of recognized attacks.
Slices
This (non-editable) parameter shows the number of generated slices, i.e. generated samples and notes in the midfile. To change this value, edit the Release and Threshold parameters.
Note: You can have a maximum of 100 slices.
Slice
Select this command to execute the Slice after entering the Time Slice page, or changing the Release value. This command is "ghosted" (i.e., non-selectable) if no sample has been recorded of loaded yet.
The Time Slice operation is executed on the sample, from the "Start" to the "End" point set in the Sample Edit / Sample Record section.
Extend
See "The Extend procedure" on page 227 for more information.
When using a sliced groove with a tempo slower than the original, an annoying gap may be heard between a sample and the following one. The Extend function allows you to fix this problem by adding a “tail” to all samples, making their decay smoother and more musical.
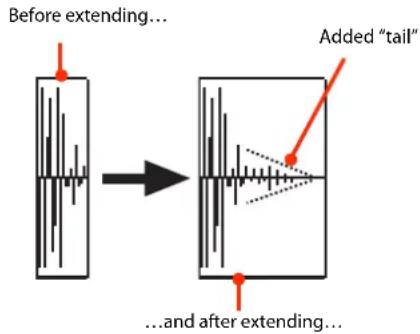
Note: You can use the Extend function only after a Time Slice operation.
Note: The Extend function increases the original sample size.
By
Use this parameter to set the length of the “tail” added to the samples (in percentage). The higher this value, the greater the size of the samples. A setting of 20-30% is usually s most grooves.
Caveat: With higher "By" values, the Extend function may add audible artifacts.
Mode
This parameter specifies if the added "tail" must decay in a linear way, or sustain for a longer time and then fall suddenly.
Normal This option is most suitable for percussive sound with a short (but not immediate) decay. The “tail” envelope is linear, and the level decays fast.
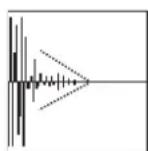
Long This option is most suitable for cymbals, whose sound should be sustained up until the next note. The "tail" envelope is sustained and falls slowly, then falls suddenly next to the end.
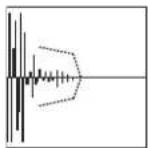
Extend
Touch this button to execute the Extend command. After you select it, it will return "ghosted", meaning that you can't select it again. If you change any of the parameters in this page, it will be available again.
The Time Slice procedure
Before executing a Slice operation, you must record or load a sample. Then, you may edit the sample on "Sampling: Edit", then execute the Slice operation on this sample.
-
After recording or loading a sample, go to the Time Slice page.
-
Pa600 automatically calculates the BPM parameter, based on the given Meter and Measures values. If you know these data, set the Meter, Measures and BPM (Beats Per Minute) parameters. This would make the slicing more accurate.
-
Select the "Slice" command.
The original sample will be sliced, and each generated sample assigned to a different key:
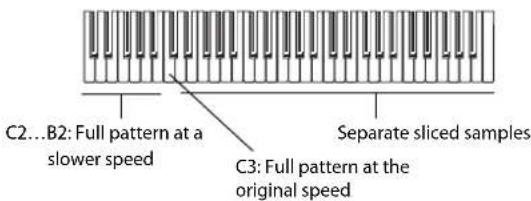
| Key Assigned sample/pattern Speed % | ||
| C2 Full pattern cycling at half the speed 50% | ||
| C#2 | Full pattern cycling at various speeds | 53% |
| D2 56% | ||
| D#2 60% | ||
| E2 63% | ||
| F2 67% | ||
| F#2 | 71% | |
| G2 75% | ||
| G#2 80% | ||
| A2 84% | ||
| A#2 89% | ||
| B2 | 94% | |
| C3 | Full pattern cycling at the original speed | 100% |
| C#3 and above | Separate sliced samples | - |
A MIDI Groove with the original pattern will also be generated. The screen will change, to show slices separated by vertical lines:
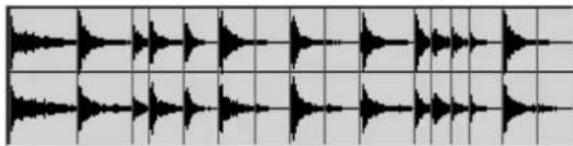
natural_image
Repeating waveform pattern with vertical bars on grid background (no text or symbols)-
Test the generated sliced drum kit on the keyboard.
-
To test the full pattern at different speed, play a note from C2 (half speed) to C3 (original speed). See table above.
- To test the single sliced samples, play notes from C#3 and above. If you play a full chromatic scale, the original pattern will be sounded.
Hint: If too many samples have been generated, and the keyboard can't fit them all, use the OCTAVE buttons to transpose the keyboard, and listen to samples exceeding the upper limit.
-
If the Slice didn't produce satisfactory results, adjust the Release parameter. If this does not produce good results, try adjusting the Threshold parameter, too. After adjusting the Release parameter, you must execute the Time Slice again.
-
Since a tempo value rounding happens when making a Time Slice operation, and the loop may not be accurate, you may need to adjust both the "Start" and "End" parameters of the "Sampling: Edit" page, to make the groove loop flawlessly. After editing these parameters, you must execute the Time Slice again.
Go on experimenting different settings! Editing an audio groove is a pure matter of experimentation.
- When the Slice is completed, you can save the sliced samples and the MIDI Groove, or use the Extend function to improve the quality of the slices.
Select the Write command from the page menu. The Write Slice dialog box will appear (see "Write Slice dialog box" on page 231). Assign a name to the new Sound, and save it to an User Sound location.
A MIDI Groove with the same name will also be saved to the internal memory. Be warned, that this area will be deleted when turning the instrument off. Convert it to an internal Style pattern, by using the Import function of the Style or Pad Record mode, before turning the instrument off.
- To improve the quality of the slices, use the Extend function (see "Extend" below).
-
After saving, you may press RECORD to exit the Sampling mode.
-
After exiting the Sampling mode, you may load the generated MIDI Groove by using the Import function of the Style Record mode (see "Import: Import Groove" on page 145 of the User's Manual for more information).
The Extend procedure
-
Set the By parameter, according to the tempo of the groove you will use. If you will slow down the groove very much, assign higher values to this parameter, otherwise you assign lower values.
-
Select the Extend Mode. "Long" is more suitable for cymbals.
-
Select the Extend command.
-
After the Extend operation is complete, test the full pattern at different speed, by playing notes from C2 (half speed) to C3 (original speed). See table on page 226.
-
If the Extend didn't produce satisfactory results, change the settings. Any previously made change will be deleted.
-
When the Extend is completed, you can save the sliced and extended samples and the resulting MIDI Groove to the internal memory.
Select the Write command from the page menu. The Write Slice dialog box will appear (see "Write Slice dialog box" on page 231). Assign a name to the new Sound, and save in an User Sound location.
A MIDI Groove with the same name will also be saved to a reserved area of the internal memory. Be warned, that this area will be deleted when turning the instrument off. Convert it to an internal Style pattern, by using the Import function of the Style Record mode, before turning the instrument off.
-
After saving, you may press RECORD to exit the Sampling mode.
-
After exiting the Sampling mode, you may load the generated MIDI Groove by using the Import function of the Style or Pad Record mode (see "Import: Import Groove" on page 145 of the User's Manual for more information).
Multisample: Edit MS
The Multisample is a way of organizing several samples on the keyboard. Each sample is assigned to a Keyboard Zone (or index), with a higher and a lower limit.
A Multisample is then assigned to a Sound (see "Basic: OSC Basic" on page 193), where it is enriched with several performance parameters, like Amplitude Envelope, LFO, Filters, etc...
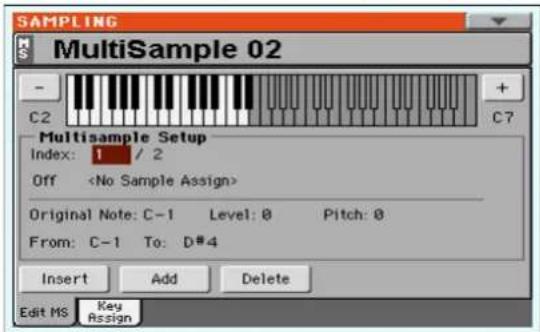
MS (MultiSample)
Touch this area to open the Choose Multisample window select one of the available multisamples in memory.
Keyboard diagram
This diagram shows the selected Index/Zone (highlighted), and its Original Note (in red). Use the big “-” and “+” button on its side to scroll the diagram one octave lower or upper.
Multisample Setup
Index number of the selected Zone of the multisample / total number of Zones in the multisample. A Zone always corresponds to a single sample.
When you play a note on the keyboard, the corresponding index number is automatically selected.
Sample Number / Name
Number / name of the sample assigned to the selected zone of the multisample.
Original Note
Use this parameter to automatically transpose the assigned sample on the keyboard. When you play this note, the sample sounds exactly as it was recorded.
At first, it matches the "OrigNote (Original Note)" value assigned when editing the sample (see page 221). This will speed up the programming.
The note set with this parameter is also shown in red in the virtual keyboard diagram.
Level
Relative level of the selected zone. This value can only be negative.
Pitch
Fine tuning of the selected sample in cents (1 cent = 1/100 of a semitone).
From ... To
Range of the selected Zone (or Index). The minimum size is one key. When reducing the range of a zone, the adjacent one is automatically increased to fill the gap.
Hint: To create a silent zone, create it and assign no sample to it.
Buttons
Insert
Touch this button to split the current zone in half, and create a new zone (Index) on the left of the selected one.
Add
Touch this button to add a new zone (Index) after the last one.
Delete
Touch this button to delete the selected Zone/Index. The zone on the right of the deleted one is automatically extended to fill the gap.
Multisample: Key Assign
Use this page to see and edit the samples assigned to each Keyboard Range/Index in the multisample. This page gives a better display of the assigned samples and their range on the keyboard.
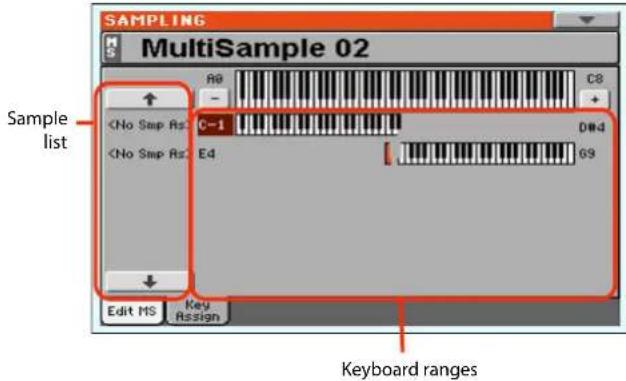
Import
Use the Import command to import Sounds and Multisamples (including the contained Samples) in formats other than the native Pa-Series format.  With this command, you can import the following formats: \- “PCG” is KORG’s native Program format, used by the Triton series of workstations. The file name has the “.PCG” extension. Note that Drum Kits cannot be imported. When importing a PCG file, you can choose between a single Program or a whole bank:  Choose Program to choose a single Program (corresponding to a Pa-Series Sound); touch the Program number and dial in the corresponding number. Choose a target Sound location where to load the imported Program. Choose Bank to import all the Programs from the selected bank. Touch the Sound Bank name to choose a target bank where to load the imported Programs. \- “KMP” is KORG’s native multisample format, used by the Trinity and Triton series of workstations. The file name has the “.KMP” extension. \- "SF2" is a sound bank format by Creative Labs. TI name has the ".SF2" extension. Multisample data are imported. Due to the deep differences with KORG's own fomat, some Instruments from the SF2 file could not be imported (for example, Instruments with overlapping zones). When importing an SF2 file, you can choose between a single Multisample or the whole bank:  Choose MultiSample to choose a single Multisample (i.e., SF2 Instruments); touch the Multisample number and dial in the corresponding number. Choose Complete bank to import all the Multisamples from the selected bank. Check Override Sample Names if you want to assign the Sample names a progressive number. In this case, when importing a Multisample whose name is, for example, "Piano", you will have all Samples renamed as "Piano\_001", "Piano\_002", and so on. Hint: If you get a messages warning there isn't enough memory to load all Samples or resources, return to the main Sampling page and choose the Delete command to clean the Sample memory, then retry. Please note that importing single Multisamples is the safest way to avoid filling the memory with unnecessary data. Imported Sounds and Multisamples are automatically stored in the internal memory, and will not be lost when turning the instrument off. Note: While Pa600 and Triton share most of their internal Multisamples, some of them may differ. While reading a PCG file, Pa600 tries to use exactly the same Multisamples as in Triton. If this is not possible, it looks for a similar Multisample. If this too is not possible, anExport
Depending on whether you are in the "Sample Edit / Sample Record" or "Multisample" section, this command allows you to export a sample in one of two popular computer audio file formats (WAVE and AIFF), or a multisample in a KORG ".KMP" file. See “Export Sample page” on page 232, or “Export Multisample page” on page 232 for more information.Exit from Record
Choose this command to exit from the Sampling mode.Write Sample dialog box
Open this dialog box by selecting the Write command from the page menu, while in the Sample Edit / Sample Record section. In this dialog box you can save the sample to the internal memory, so that it will be preserved when Pa600 is turned off.  To assign a different name to the sample, touch the Text Edit) button to open the Text Edit window. In case you are saving a percussive sample, choose a Drum Sample family to be assigned to. Select an option to choose a memory location where to save the sample: \- Select "Save as a new Sample" to save to a new location. \- Select "Save to" to overwrite an existing location. Warning: The older sample at the same location will be deleted!Write MultiSample dialog box
Open this dialog box by selecting the Write command from the page menu, while in the Multisample section. In this dialog box you can save the multisample to the internal memory. Multisamples are a way to organize samples on the keyboard, and are used by Sounds as their basis.  To assign a different name to the multisample, touch the (Text Edit) button to open the Text Edit window. Select an option to select a memory location where to save the sample: \- Select "Save as a new MultiSample" to save to a new location. \- Select "Save to" to overwrite an existing location. Warning: The older multisample at the same location will be deleted!Write Slice dialog box
Open this dialog box by selecting the Write command from the page menu, while in the Time Slice page. In this dialog box can save the Sound, sliced Samples and Multisample generated by the Time Slice function, together with the generated MIDI Groove. The Sound will be saved to the selected User bank location in the internal memory. The Multisample will be saved to a free location in the same memory. Samples will be saved to the internal memory. Note: The MIDI Groove is automatically saved in a reserved, temporary location, and is automatically deleted when turning the instrument off. So, import it (by using the "Import: Import Groove" function in Style or Pad Record mode, see page 145), before turning the instrument off. Warning: The older Sound at the target location will be deleted! Name
To assign a different name to the Sound, touch the Text Edit) button to open the Text Edit window.Sound Bank
Target bank of Sounds. Each bank corresponds to one of the SOUND buttons. You can use the VALUE dial to select a different bank.Sound
Target Sound location in the selected bank. You can use the VALUE dial to select a different location.Select...
Touch this button to open the Sound Select window, and select a target location.Delete Sample dialog box
Open this dialog box by selecting the Delete command from the page menu, while you are in any page of the Sample Edit/Sample Record section. Selected
Select this command, and select a sample number, to delete just one of the samples from the internal memory.Not assigned to any Multisample/Drumkit
Select this command to delete only samples not yet assigned to a Multisample or Drum Kit. Note: Use this option with care, since you may delete samples you would like to preserve, that have not yet been assigned to a multisample or drumkit. Use it only when you are sure all desired samples have been assigned to a multisample or drumkit.All Samples, Multisamples, Drum Samples
Select this command to delete all samples, multisamples and drum samples from the internal memory. This operation completely resets the RAM, and may be used to "clean-up" any trouble.Delete Multisample dialog box
Open this dialog box by selecting the Delete command from the page menu, while you are in any page of the Multisample section.  \- Select "Selected", then a multisample number, to delete just one of the multisamples from memory. Check the "Delete Unassigned Samples" option, to also delete all samples not assigned to a different multisample. By checking this option, all samples assigned to the multisample you are deleting, and all samples not assigned to a different multisample, will be deleted. Note: Use this option with care, since you may delete samples you would like to preserve, that have not yet been assigned to a multisample or drumkit. Use it only when you are sure all desired samples have been assigned to a multisample or drumkit. - Select "MultiSamples" to delete all multisamples. No samples will be deleted, including those associated deleted multisamples. - Select "All Samples, Multisamples, Drum Samples" to delete all samples, multisamples and drum samples from the internal memory. This operation completely resets the RAM, and may be used to "clean-up" any trouble.Export Sample page
Open this page by selecting the Export command from the page menu, while you are in any page of the Sample Edit/Sample Record section. First of all, select the target location where to export the sample:  Then touch the Save button to see the Export Sample dialog box: Original Name
Name of the sample being exported.File Name
Name of the generated file on the storage device.File Type
Either of the file types you can choose as the file format. WAV Microsoft Wave format, very common on Windows PCs. AIFF Apple's Audio Interchange File Format, standard on the Mac.Export Multisample page
ated with the Open this page by selecting the Export command from the page menu, while you are in any page of the Multisample section. First of all, select the target location where to export the multi-sample:  Then touch the Save button to see the Export MultiSample dialog box:  By using this function, you can export from the internal memory the Multisample in edit in the Multisample section, and all linked samples. The Export operation generates a “.KMP” file (KORG’s proprietary file format for multisamples), and a folder containing a series of “.KSF” files (KORG’s proprietary file format for samples) inside the same directory. Note: When exporting a stereo multisample, be careful to assign a different name to the Left and Right channel files, to avoid over-writing. A “-L” and “-R” suffix is usually added after the name of this kind of files.Merging Samples from various sources
When you load a .SET folder, all User Samples in memory are deleted. To merge samples from several sources, do the following. 1. Load a .SET folder containing samples you want to merge with other samples. 2. Load single Sounds from other .SET folders. 3. Load or import Samples from other sources (Trinity, Triton, Wav, Aiff files). 4. Save the .SET folder, over the same or a new .SET folder.Global mode
The Global mode is where you can set global functions. This mode overlaps the current operating mode (Style Play, Song Play, Sequencer, Sound).Overview on the Global mode
The Global mostly contains a series of global parameters applied to the whole instrument (or to each separate operating mode) as a whole, that are automatically written to memory after editing. Examples of global parameters are the Master Tuning or the Power Management. Global mode also contains parameters that are applied to the instrument as a whole, but can be saved as a “preset”, that can later be loaded to change all parameters at once. Examples of this kind of parameters are the MIDI channel assignment, saved into the MIDI Presets, or the Master EQ settings, saved into the Master EQ Presets. Parameters in the Global mode, either automatically memorized or saved to a preset, are opposed to "local" parameters that you can access in the other operating modes. Examples of local parameters are the Sounds assigned to a track or the function assigned to an Assignable Switch, both saved into a Performance or STS (two types of preset containing musical data relevant to the selected operating mode). Note: Saving or loading a “.SET” folder may also save or load the Global file. Parameter changing may be avoided by turning the Lock on for any single parameter (or groups of parameters in the Lock page of the Global mode, see “General Controls: Lock” on page 236).Main page
There is no main page in the Global edit mode. When pressing EXIT, you exit the Global mode, and the underlying operating mode in the background is recalled.Edit menu
From any page of the Global mode, press the MENU button to open the Global edit menu. This menu gives access to the various Global edit sections. When in the menu, select an edit section, or press EXIT to e the Global mode. When in a page, press EXIT to go back to current mode in the background (Style Play, Song Play, Sequencer, Sound).  Each item in this menu corresponds to an edit section. Each edit section groups various edit pages, that may be selected by touching the corresponding tab on the lower part of the display. Note: The Global mode is not available while in Record mode (Style Record, Pad Record, Song Record, Sampling).Edit page structure
All editing pages share some basic elements. Edit mode
This indicates that the instrument is in Global mode.Edit section
This identifies the current edit section, corresponding to one of the items of the edit menu (see below).Page menu icon
xlt Touch this icon to open the page menu (see below).Parameters area
Each page contains various parameters. Use the tabs to select one of the available pages. For detailed information on the various types of parameters, see sections starting below.Tabs
Use tabs to select one of the edit pages of the current edit section.General Controls: Basic
This page contains various general parameters, setting the status of the keyboard, the fade in/out, and the accelerando/ritardando. Metronome
Mode
Use this parameter to activate the metronome's type of accent. Normal No accent can be heard. Accent The first beat of each measure is accented. Bell A bell sound is heard at the first beat of each measure.Volume
Use this parameter to set the volume of the metronome. 0...127 Volume level.Meter
Use this parameter to choose the meter (time signature) of the Metronome. 1/1...16/16 Selected Meter.Global Reverb
Reverb Offset
This is the master offset for all reverbs. Use it to adjust reverbs to the room where you are playing. Use negative values when you are in a very reverberant room, positive values if the room is too dry. By using this global control, you are not obliged to change the reverb time in each single Performance, STS, Style Settings, or Song. -50 Less reverb. 0 Standard reverb. +50 More reverb.Fade In/Out Time
These parameters allows you to set the speed for the Fade In/Out function.Fade In Time
Time for a full fade in (from zero to maximum volume), after you press the FADE IN/OUT button. 5...20 Fade time (in seconds).Fade Out Time
Time for a full fade out (from maximum volume to zero), after you press the FADE IN/OUT button. 5...20 Fade time (in seconds).Accelerando/Ritardando
These parameters lets you adjust the speed of the Accelerando and Ritardando functions.Step
Speed of the Tempo change (from 1 to 6). With higher values, the step change is greater, and the speed will change faster. With lower values, the step change is smaller, and the speed will change more slowly.Curve
Accelerando/ritardando curves (from 1 to 3). Experiment the various options, to see the one that best fit your taste.Glide
Glide is a function you can assign to a footswitch. When the pedal is pressed, affected notes on Upper tracks are bent down, according to settings for the Pitch Bend on the same tracks. When the pedal is released, notes return to the normal pitch, at the speed defined by the "Time" parameter. To change Pitch Bend values for each Upper track, see the "PB Sensitivity" parameter in the Style Play mode (see page 104)Time
Time needed to notes affected by the Glide to return to the normal pitch.General Controls: Interface
This page contains parameters related to user interface. Language
Use this pop-up menu to select one of the available languages for the on-screen keyboard. Note: Some of the characters can only be used when editing Song-Book Entry names.Change button
To apply the selected language to the onscreen keyboard, touch this button and restart the instrument as described below.How to select a language
1. Since Pa600 must be restarted at the end of this procedure, be sure to first save all unsaved data. 2. While in this page, select a language from menu. 3. The "Change" word will start flashing in red. Touch it. 4. A message will ask you to reboot the Pa600. Touch OK to close the message window. 5. Set Pa600 to standby, then turn it on again.Background Color
Color
Use this parameter to choose a different color scheme for the display.Display Hold
On/Off
When this parameter is checked, if you open a temporary windows (like the Sound Select window), it remains in the display until you press EXIT or an operating mode button. When it is not checked, any temporary window closes after a certain time.Program Change
Show
Check this parameter to show Program Change numbers next to Sound names in the Sound Select window. By default, this parameter is turned on.  Note: Program Change numbers are always shown in the various Track Info areas.Track Activity
Show
Use this parameter to turn on/off the Track Activity display. When it is turned on, you can monitor events coming from the tracks or the MIDI inputs. Incoming events are shown by the color changing on each track's label. Auto Select
Style
When this parameter is checked, the latest selected Style is immediately selected when touching the name of a bank in the Style Select window. n the pop-up Hint: By turning the "Factory Style and Pad Protect" parameter off, you can save your preferred Style into the first location of each bank. This way, by turning on this parameter, you will select your preferred Style at the touch of a single button.Performance
When this parameter is checked, the latest selected Performance selected in a bank is immediately selected with PERFORMANCE button corresponding to the bank. This way, you can assign your preferred Performance to each control panel's button, and select it just with a single press. However, the Performance Select window still appears when you press one of the PERFORMANCE buttons corresponding to the bank, so you can select a different item if desired.Save
Touch this button to save the current Style and Performance assignment. You will find the saved assignment when turning the instrument on again.General Controls: Lock
turning the SPLIT button on (Split keyboard mode) the Upper tracks Octave Transpose will be automatically set to "-1". This page, split in more panes that can be selected by the corresponding side tabs, contains all the available locks. Locks prevent parameter values to be changed when choosing a different Performance, Style or STS.Locks
All the available locks, listed below. Lock them to prevent changes due to selecting different elements. These locks are also found in various other pages, next to the locked parameter. Hint: To save the status of parameters that have unchanged, set them and save the MY SETTING Performance (automatically selected when turning the instrument on). After having saved the startup Performance, go to these pages and lock the parameters that must remain unchanged. AssignTuning pane
Master Transpose
When this lock is closed, Master Transpose is not automatically changed when selecting a different Performance or Style, or a different SongBook Entry. Also, this lock prevents a Standard MIDI File generated with an instrument of the KORG Pa-Series to change the Master Transpose. (See "Master transpose" on page 95).Sub Scale/Quarter Tone
When locked, selecting a Performance or STS, or a SongBook Entry, will not change the Sub-Scale or Quarter Tone value. (See "Sub-Scale panel" on page 100).SubScale/Quarter Tone from STS
When locked, selecting an STS will not change the Sub-Scale or Quarter Tone settings. The STS will change sounds and effects but not the scale. (See "Sub-Scale panel" on page 100). Auto Octave Depending on the status of this lock, the Upper tracks can be automatically transposed when turning the SPLIT on and off. \- If locked, turning the SPLIT on or off will not change the Upper tracks transposition. \- If unlocked, when turning the SPLIT button off (Full keyboard mode) the Upper tracks Octave Transpose will be automatically set to "0". WhenControl pane
Assignable Switches
When locked, selecting a Performance or STS will not change the functions assigned to the Assignable Switches. (See "Pad/Switch: Switch" on page 113). Upper 1 FXs In Sound mode, you can assign a Sound to the FX B Group. When you assign a new Sound to the Upper 1 track, the FX B settings and Master FX send levels saved with that Sound can be automatically selected, overriding Performance/STS settings for this track. Whether Sound or Performance/STS effect parameters will be considered, it depends on the status of this lock. \- If the Upper 1 FX Lock is turned on, when assigning a new Sound to the Upper 1 track, Performance/STS parameters are left untouched; selected effects, and FX Send values, are not changed. \- If the Upper 1 FX Lock is turned off, when assigning a new Sound to the Upper 1 track, Sound parameters are considered; selected effects, and FX Send values, are changed according to the Sound's stored data. Note: If the effects associated to the selected Sound are not compatible with the effects already assigned to the FX B block, the Master FX Send values on the other Keyboard tracks will be automatically set to zero. For example, assume a chorus effect is assigned to the Master 2 FX processor. If the new assigns a distortion effect to the Master 2 FX processor, the Master 2 FX Send value on the Upper 2, Upper 3, and Lower tracks will be set to zero, to avoid these tracks sound in the wrong way. This way, the Upper 1 track (usually the most important one for solo playing) will sound with the needed effect, while the other Keyboard tracks will just sound dry. Pad When locked, selecting a Style or SongBook Entry will not change the Pad assignment. (See "Pad/Switch: Pad" on page 112). Lower When this lock is closed, the Lower track remains unchanged when a different Style, Performance or STS is selected. This is useful if, for example, you prefer to always play with the left hand muted and reserved only to the chords. Hint: If you want the same Lower settings to be used during all your shows, save your preferred Lower settings to the MY SETTING Performance (automatically selected on startup). Keyboard Mode (Split)/Accompaniment When this lock is closed, the status of the SPLIT, button (therefore of the keyboard mode) and the ACCOMP. button remains unchanged when a different Performance or STS is selected. This is useful if, for example, you prefer to always play in Full Keyboard, with chords recognized on the whole keyboard range. Hint: If you want the same Keyboard Mode and Lower Scanning settings to be used during all your shows, save your preferred settings to the MY SETTING Performance (automatically selected on startup), then close this lock. Style pane  Style Tracks Volume When this lock is closed, the Style tracks' volume do not change when a different Style is selected. This is useful when you create your own User Styles, and prefer to dynamically adjust the volume by using the sliders as in a mixer. It is not recommended with Factory Styles, each one already mixed at its best right at the factory. Style Tracks Play/Mute Lock When this lock is closed, selecting a Style does not cause the Play/Mute status of the Style tracks to be changed. This way, you can, for exa turn the bass track off during a whole show, to allow your bassist to play the part live. Also, you could mute all Acc tracks, to only play with the Drum and Bass tracks. Style Element When this lock is closed, the selected Style Element (Variation, Intro...) will not change when choosing a different Style. This lock has no effect on the Styles automatically selected when choosing a SongBook Entry. The Style Element memorized in the SongBook Entry is always selected. Bass Inversion When locked, selecting a Performance or STS will not change the Bass Inversion status. Bass Inversion can also be assigned to one of the Assignable Switches or the Assignable Pedal. (See "Bass Inversion" on page 100). Manual Bass When locked, selecting a Performance or STS will not change the Manual Bass status.General Controls: Clock & Power
Date & Time
Pa600 includes a battery-backed system calendar and clock. This allows for automatically adding a time-stamp to the files when they are created or edited.  Note: When you edit a resource file (Sounds, Styles...), all items in the same bank have their modification date changed. For example, if you edit a single Style in the "Pop" bank, all Styles in that bank will take the new modification date.Month
Use this pop-up menu to choose a month.Day
Use this numeric field to input the day of the month.Year
Use this numeric field to input the year.Time
Use these numeric fields to input the time, in the "hour:minute:second" format.Apply
After having edited all calendar and time fields, touch this button to apply the changes.Auto Power Off
Pa600 can automatically enter standby after two hours of being unused, to save power and help preserving the environment.On
When this parameter is checked, a few minutes before automatic standby a message will warn you that the instrument is going to be put in standby. All unsaved data currently in editing or recording will be lost.  At this message, you can let the instrument enter standby, or you can touch the display, press any button on the display, or play the keyboard to leave it turned on and continue using it.Mode Preferences: Style
In this page you can set various general parameters for the Style Play mode. Split Point
Use this parameter to select the global split point. This point is independent of any Performance or STS. See "Split panel" on page 100 for more information.Chord Recognition
This parameter allows you to choose how chords are recognized by the auto-accompaniment engine. When switching to Full Keyboard mode (SPLIT LED turned off) the Chord Recognition mode is automatically set as in the following table:| Chord Recognition Mode | |
| SPLIT LED On | SPLIT LED Off |
| One Finger | Fingered (3 Notes) |
| Fingered (1 Note) | Fingered (3 Notes) |
| Fingered (3 Notes) | Fingered (3 Notes) |
| Expert | Expert |
Velocity Control
Set this parameter to trigger one of the following functions simply by playing louder with your left hand. When playing with a velocity value higher than the value set by the “Velocity Control Value” parameter (see page 239), the selected function will be activated. This function only works when the SPLIT LED is turned on. Off The function is turned off. Break When playing with a velocity higher than the trigger value on the Lower track, the Break is automatically triggered. Start/Stop You can start or stop the Style by playing harder on the keyboard. Bass Inversion When playing with a velocity higher than the trigger value, the Bass Inversion function will be activated or deactivated. Memory When playing with a velocity higher than the trigger value, the Memory function will be activated or deactivated.Velocity Control Value
Use this parameter to set a velocity threshold over which to automatically trigger the Style Start/Stop or select one of the other functions (see "Velocity Control" above).Scale Mode
This parameter defines which tracks are affected by the selected alternative scale (see "Scales" on page 329). Keyboard Tracks The scale will affect all Keyboard tracks. Upper Tracks The scale will only affect Upper 1-3 Keyboard tracks. The scale will affect all tracks (Keyboard, Style, Pads).Memory Mode
This parameter sets the way the MEMORY button works. Chord When the MEMORY LED is on, recognized chords are kept in memory even when raising your hand from the keyboard. When the LED is off, chords are reset when raising your hand. Chord + Lower When the MEMORY LED is on, recognized chords are kept in memory, and the Lower sound is held until the next note or chord is played. When the LED is off, both the chord (and therefore the accompaniment) and Lower sound are cut when raising the hand from the keyboard. Fixed Arr. + Lower When the MEMORY LED is on, recognized chords are kept in memory, and the Lower sound is held until the next note or chord is played. When the MEMORY LED is off, the Lower sound is cut when raising the hand from the keyboard; on the contrary, the chord is kept in memory (so that the accompaniment can continue to play).Bass & Lower Backing
With this function, you can play a simple accompaniment with your left hand. For this to work, the SPLIT LED must be turned on, and the Style must not be running. By default, this function is turned on. On When the Style is not running, and you play a chord with your left hand, the chord is played by the Lower Sound (even if it is muted), while the chord root is played by the Bass Sound. When you start the Style, the normal behavior is restored. When the Bass & Lower Backing function is active, the Backing icon appears in the Lower track Sound's area. Off No Bass Sound is added when the Style is not running. The Lower track can be heard only if it is not muted.Style Tracks Global Volume
In Style Play mode, the volume of the grouped Style tracks is a global offset of the values memorized in the Style. When you choose a different Style, this offset will not change, and the average volume of the Style tracks remains the same. These controls allows you to globally set the balance between the Drum/Percussion, Bass and Accompaniment tracks. For example, if you prefer Drums and Bass to be prominent to make them have more ‘punch’, you can lower the grouped Accompaniment tracks. Changes are not memorized to a Performance or to the current Style Settings. Instead, they are memorized as a global parameter. 0...127 Volume level.Mode Preferences: Song & Sequencer
In this page, you can set various general parameters for the Song Play and Sequencer modes. SMF Melody Track
This parameter lets you select the Song's Melody track for Standard MIDI Files. This track can then be muted by using the "Song Melody - Mute" function, assignable to an Assignable Switch or Footswitch.Drum & Bass Mode - Drum
This parameter lets you select the Song's Drum track. This track is left set to play (together with the Bass track) when selecting the "Drum&Bass" function, assignable to an Assignable Switch or Footswitch.Drum & Bass Mode - Bass
This parameter selects the Song's Bass track. This track is left set to play (together with the Drum track) when selecting the "Drum&Bass" function, assignable to an Assignable Switch or Footswitch.Fast Play
When checked, this function allows to skip any empty setup beats at the beginning of a Standard MIDI File, and immediately start from the first note. While the beats are skipped, setup data they may contain are read and considered. Please note that, being audio data, any empty space at the beginning of an MP3 file cannot be skipped. Note: When Pa600 is driving an external musical instrument, the fast transfer of MIDI data to the MIDI OUT or USB port may cause a delay to the Song's start. Therefore, we suggest to turn this function off when Pa600 is hooked to other instruments.Save Trk & FX
Touch this button to save the global parameters for the Song Play mode. When touching this button, you are saving the following parameters: \- Play/Mute status of the Song tracks \- Default effect settings • EQ settings for the Song tracks \- Internal/External status of the Song tracksMode Preferences: Media
This page includes various settings for the Media mode. Media Preferences
Media Protect
When on, this parameter protects the internal "KORG [KORG DISK]" disk unit from writing.Global Protect
When on, this parameter protects the global parameters from changes when loading data from disk. Note: Global data from other Pa-Series models are not loaded even without protection.Factory Style and Pad Protect
When On, this parameter protects the Factory Styles and Factory Pads (named "Hit", "Sequence" and "Local" in the Pad Select window) from being overwritten when loading data from a device. Furthermore, you can't access these banks when saving data. Also, when this option is checked, you cannot write any STS (Single Touch Setting) or Style Settings onto the Factory Styles. The "Write Single Touch Setting" and "Write Current Style Settings" command in the page menu are greyed out and cannot be selected. All original settings of the Factory Styles will be left untouched. When Off, you can load or save User Styles or Pads into the Factory Style banks and Factory Pad banks. This way, you can customize your Factory Style and Pad banks. A Save All procedure also saves the Favorite and User Style, and the User Pad banks. Note: This parameter is automatically set to On when the instrument enters standby. Note: Should you accidentally delete some Factory Data, reload the Backup data or use the Factory Restore procedure (Media > Utility).Factory Sound Protect
When On, this parameter prevents writing edited Sounds from the Sound mode into the Factory locations (Factory, Legacy, GM banks). When Off, you can freely save edited Sounds either in the Factory or User Sound area. Warning: Use this feature with great care! Reorganizing the Factory Sounds may make both Styles and Standard MIDI Files play with the wrong Sounds! Note: This parameter is automatically set to On when the instrument enters standby. Note: Should you accidentally delete some Factory Data the Backup data or use the Factory Restore procedure (Media > Utility).Hide Unknown Files
When this option is checked, non-proprietary files are hidden when using Media operations, therefore making browsing directories easier.Show Columns
Size
When checked, the Size column is shown in the File when using Media operations.Date
When checked, the Date column is shown in the File Set when using Media operations.Controllers: Hand Controllers
In this page you can program those controls you can operate with your hands. Keyboard Settings
Velocity Curve
This parameter sets the sensitivity of the keyboard to your touch. Fixed No dynamic control available. Dynamic values are fixed, as in classic organs. When this option is chosen, you can set the fixed velocity value:  Soft1 ... Hard3 Curves, from the lightest one to the hardest one.Balance Control
Balance knob
The BALANCE knob can either be used to mix between the Keyboard and Accompaniment/Song tracks, or to control the Accompaniment/Song Volume without changing the Keyboard tracks. This is always a relative control, whose effective maximum value is determined by the MASTER VOLUME control's position. Note: The BALANCE knob only works in the Style Play and Song Play modes. Acc/Song - Kbd Balance While in Style Play and Song Play mode, the BALANCE knob balances the volume of the Keyboard (Kbd) tracks against the Style (Accompaniment), Song and Pad tracks. Acc/Song Volume While in Style Play and Song Play mode, the BALANCE knob controls the volume of the Style (Accompaniment), Song and Pad tracks.Controllers: Foot Controllers
This page lets you select a function to the Assignable Pedal/Foot-switch, and select the polarity for the Damper and Assignable Pedal/Footswitch.  The following (optional) KORG pedals are compatible with Pa600:| Type Model | |
| Continuous(Volume/Expression) | EXP2, XVP10 |
| Switch PS1, PS3 | |
| Damper DS1H (supporting half-pedalling) | |
Pedal/Footswitch
Function
Function assigned to a continuous (i.e., volume/expression) pedal, or to a footswitch, connected to the ASSIGNABLE PEDAL connector. See page 327 for a list of the assignable functions. The first functions are switch-type functions, while the remaining (starting from Master Volume) are continuous-like functions.Calibration
Use this button to calibrate and choose the polarity of the pedal/footswitch. 1. Connect the pedal or footswitch to the ASSIGNABLE PEDAL connector on the back of the instrument. 2. Go to this page, and touch the "Calibration" button in the display. The following dialog box appears:  3. You are asked to set the pedal to the maximum value. Press the footswitch, or press the pedal to the maximum position (usually front pressed). 4. Touch the "Push" button in the display to confirm the maximum value. The following dialog box appears:  5. You are now asked to set the pedal to the minimum value. Release the footswitch, or press the pedal to the minimum position (usually back pressed). 6. Touch the "Push" button in the display to confirm the minimum value. 7. Check if the pedal or footswitch is working properly, and assign it a function. Note: After loading a new Operating System, an older Global file, a "SET" folder containing a Global file, or a Backup file, you might need to re-calibrate the pedal/footswitch.Curve
With some functions assigned to a volume/expression pedal, you can choose a curve, shaping how the pedal will affect the function. When a curve can't be applied, the curve diagrams will appear dimmed. 1. Be sure to have connected an expression pedal, calibrated it, and selected a function. Curve presets can only be selected with some functions. 2. Touch one of the "Curve" buttons to select a curve preset.| Curve Meaning | |
 | Linear response. |
 | Exponential response. The function value will change faster toward the top of the pedal range. |
 | Logarithmic response. The function value will change slower toward the top of the pedal range. |
 | S-shaped response. The function value will change faster toward the bottom and the top of the pedal range, and will be smoother in the middle. |
 | S-shaped with offset response. As the previous one, but starting from a value higher than zero. |
Damper
Calibration
Use this button to calibrate the action of the Damper pedal, and set its polarity. See above for details about the procedure.Tuning: Basic
This is the general tuning of the instrument. Global Tuning
Master Tuning
This is the master tuning of the instrument (in cents of a semi-tone). Use it to adapt your keyboard tuning to an acoustic instrument, for example an acoustic piano. -100 Lowest pitch (half-semitone down). 0 Standard pitch (A4=440Hz). +100 Highest pitch (half-semitone up).Tuning: Transpose Control
This page is where you can select to which tracks the Master Transpose is applied to, and adjust some related parameter. Transpose Control
Transpose applies to Style and Kbd tracks
Use this parameter to turn the Master Transpose on or off, and define the way it is applied, to Style and Keyboard tracks. Off No Master Transpose is applied to Style and Keyboard tracks. Chords shown in the Lyrics page are, however, transposed. In Sync When you press either the TRANSPOSE [ ] or b [ ] buttons, the new transpose setting will not take effect until the first beat of the next measure is reached. In Realtime When you press either the TRANSPOSE [ ] or [ ] buttons, the new transpose setting will occur when the next note is played for both the Style and Keyboard tracks individually. The next key or chord you press will sound with the new transpose setting applied. (Note that if you play a Keyboard track prior to a new chord, the Keyboard track will play in the new key as the Style will continue to play in the old key until a new chord is entered).Transpose applies to Player
This checkbox lets you turn the Master Transpose on or off for the onboard Player.Transpose applies to Midi In notes
This checkbox lets you turn the Master Transpose on or off Note messages received from MIDI IN.Position
Scale and Transpose position
The Scale and Transpose Position allows you to define the relation between the Scale and the Master Transpose. Post-KB/Pre-Scale When this option is selected, notes will be transposed immediately after they leave the keyboard. The Scale will be applied to the transposed notes. For example, if you altered an E, and then set the Master Transpose to +1, the E key will play F, and the altered key will be E b (that will play an altered E).  Post-KB & Scale When this option is selected, all notes are transposed immediately before they enter the internal tone generator, or are sent to the MIDI OUT, but after the Scale. For example, if you altered an E, and set the Master Transpose to +1, the altered key will still be E (that will play an altered F). Standard MIDI File and chord transpose
When changing the Master Transpose, chord abbreviations contained in a Standard MIDI File are transposed and correctly shown in the display. Master Transpose must be activated on the Player, but not on the Keyboard.  Note: Chords contained in a linked TXT file or shown when loading a CDG file are not transposed.Drum Kits and transpose
Drum Kits are never transposed. If you want that any Sound is not transposed as well, assign them to a track set to the Drum mode in Style Play/Song Play > Track Control > Mode (see "Type" on page 108).Tuning: Scale
This page lets you select the main scale of the instrument. Main Scale
This parameter lets you set the main scale for the whole instrument, apart for those tracks where a different sub-scale has been selected by a Performance or STS (see "Scale" on page 104, Style Play mode). See "Scales" on page 329 for a list of the available scales. Note: You cannot select a User scale in Global mode.Key
This parameter is needed by some scales to set the preferred key.User Quarter Tone SubScale
This section is where you can program the Quarter Tone scale, and save up to four Quarter Tone Scale (SC) Presets. Pa600 Quarter Tone only: This section corresponds to the QUARTER TONE section on the control panel.SC Preset buttons
Touch these buttons to recall the corresponding presets. Each preset contains a custom detuning of each note of the scale (shown in the upper scale diagram). It also memorizes the selected degree(s) of the scale (shown in the lower scale diagram). When no preset is selected, the default scale is automatically recalled. This scale assigns a -50 cent value to all notes, and turns all scale degrees off. You can also select an SC Preset by assigning the relevant function to an Assignable Switch or Assignable Footswitch. To save the current scale programming to a preset, while in this page choose the "Write Quarter Tone SC Preset" command from the page menu, then select one of the preset locations where to save the current settings (see "Write Quarter Tone SC Preset" on page 251). Pa600 Quarter Tone: As an alternative, keep the corresponding SC button pressed for a couple seconds.Upper scale diagram
Use this diagram to set the detuning of each note of the scale. -99...0...+99 Note detuning in cents. Zero is no detuning, ±50 is a full quarter tone up or down, ±99 is one whole semitone up or down.Lower scale diagram
Pa600 Quarter Tone only: This diagram corresponds to the music keyboard in the QUARTER TONE section of the control panel. Use this scale to turn detuning on or off. Applied detuning will depend on the programming set with the Upper scale diagram, or recalled by selecting one of the SC Presets. When a note is detuned, a black dot appears in the corresponding note of the diagram.MIDI: General Controls
This page allows you to select a MIDI Preset and set global parameters for the MIDI communication. MIDI Preset
Preset
MIDI channels can be automatically configured by selecting a MIDI Preset. Each of them lets you automatically assign a value to various MIDI parameters, to allow an easier connection with a particular MIDI controller. For detailed information about the preloaded MIDI Presets, see "MIDI Preset" on page 326. After selecting a MIDI Preset, you can apply any changes to each early channel's settings. To store the changes in memory, select the "Write Midi Preset" command in the page menu to s memory (see "Write Midi Preset dialog box" on page 251). Hint: You can restore the original MIDI Presets by using the "Factory Restore" command and choosing the "Global" option (page "Utility" of the Media mode, see page 267). Please consider this will reset all the Global data.General Controls
Use these parameters to set MIDI Clock and Local Off.Clock Send
Use this parameter to turn the clock information on the MIDI OUT or USB Device port on or off. Note: This parameter is automatically set to On when the instrument enters standby. Off The Pa600 does not send the MIDI Clock signal. You cannot slave another instrument to the Pa600, even when connected to the MIDI OUT or USB Device port. On The Pa600 sends the MIDI Clock signal. You can slave another instrument to the Pa600 Tempo, Start/Stop and Play/Stop commands. Connect the other instrument to the Pa600 MIDI OUT or USB Device port.Clock Source
This parameter selects the MIDI Clock source for the Style Play and Sequencer modes. Note: In Song Play mode, the Internal clock is always used. Note: This parameter is always set to "Internal" when the instrument enters standby. Internal Internal, i.e. the clock generated by the Pa600 Arranger and Player internal metronome. External MIDI External from the MIDI IN port. In Style Play or Sequencer mode, the Pa600 is slaved to an external device connected to its MIDI IN port. The Start/Stop and Play/Stop commands, as well as the metronome tempo, cannot be selected from the control panel of the Pa600. Use the external device to set the tempo and start or stop the sequencer or arranger. External USB As the above, but referred to the USB Device port. See "Installing the KORG USB MIDI Driver" on page 401 for information on how to configure your computer for MIDI Over USB communication.Local Control On
The Local parameter turns the keyboard on or off. Note: This parameter is automatically set to On when the instrument enters standby. On When you play the keyboard, MIDI data is sent to the internal sound generator assigned to a MIDI OUT channel, data sent to the MIDI OUT or USB Device port. Off The keyboard is connected to the MIDI OUT or USB Device port, but cannot play the internal sound generator. This is very useful when working with an external sequencer, to send notes and various MIDI messages from the integrated keyboard and controllers to the external sequencer, and then let the sequencer send them back to the sound generator, without overlapping. See the "MIDI" chapter.Note to RX Noise
RX Noises are special sounds that allow Sounds to be more realistic. They are usually located above C7, depending on the Sound. When this parameter is turned on, notes received from MIDI, or performed by the internal Player, in the RX Noises range, are recognized and converted to RX Noises. When off, notes are not recognized. Note: This parameter is automatically turned on when the instrument is set to standby.MIDI: MIDI In Controls
This page lets you program parameters for the MIDI IN USB Device port, like the Chord Recognition channel. All these parameters can be saved into a MIDI Preset. Midi In Controls
Midi In Octave Transpose
Use this parameter to determine if notes received on the MIDI IN or USB Device ports have to be transposed. On Notes received on the MIDI IN or USB Device port are transposed according to the Octave Transpose setting for each track. Off Data received on the MIDI IN or USB Device r. If tracks are port are not transposed.Track Mute Active
Use this parameter to determine if data received on the MIDI IN or USB Device port can be played by muted tracks. On No data received on the MIDI IN or USB Device port can play on a muted track. Off Data received on the MIDI IN or USB Device port can play on a muted track.Chord 1 Midi Channel
Chord 2 Midi Channel
Notes entering these channels on the MIDI IN or USB Device port, are sent to the Arranger. There are two separate Chord channels. This is very useful when you have to send chords to Pa600 over two different channels (something very common on MIDI accordions). Off Data received on the MIDI IN or USB Device port are not sent to the Arranger. 1...16 Data received on these channels via the MIDI IN or USB Device port are sent to the Arranger.Upper Octave Transp (Transpose)
Octave transposition of data received on the MIDI IN or USB Device port for the Upper tracks. For example, if you select the +1 value, a C4 received via MIDI will play a C5 on the Pa600. This parameter may be useful to many MIDI accordion players, whose MIDI interface may transmit on an unexpected octave. -2...+2 Octave transpose value.Lower Octave Transp (Transpose)
Octave transposition of data received on the MIDI IN or USB Device port for the Lower track. For example, if you select the +1 value, a C4 received via MIDI will play a C5 on the Pa600. This parameter may be useful to many MIDI accordion players, whose MIDI interface may transmit on an unexpected octave. -2...+2 Octave transpose value.Midi In Velocity Value
Use this parameter to set a fixed velocity (dynamics) value for all received MIDI notes. This is useful when playing the Pa600 with an organ or a MIDI Accordion. Normal Received velocity values are left unchanged. 40...127 All received velocity values are converted to the selected value.MIDI: MIDI In Channels
In this page, you can assign Pa600 tracks to any of the MIDI channels received on the MIDI IN and USB Device these parameters can be saved into a MIDI Preset. Channels
You can assign to each channel one of the following tracks: Off No track assigned. Lower Keyboard's Lower track. Upper 1...3 One of the Keyboard's Upper tracks. Pad 1...4 One of the Pad tracks. Drum Style's Drum track. Percussion Style's Percussion track. Bass Style's Bass track. Acc 1...5 One of the Style's Auto-accompaniment tracks. Ply 1/2 Tr 01...16 One of the Player tracks. Global Special channel to simulate the Pa600's integrated controls (keyboard, pedals, joystick) with an external keyboard or controller. MIDI messages coming on this channel are seen as if they were generated by Pa600's integrated controllers. Control On this special channel, the Pa600 receives MIDI messages to remotely select Styles, Performances, STS, Style Elements and SongBook Entries. See tables on page 403 and following for more information on the received dataMIDI: MIDI Out Channels
In this page, you can assign Pa600 tracks to any of the MIDI channels sent to the MIDI OUT and USB Device ports. All these parameters can be saved into a MIDI Preset. Channels
Ports All You can assign to each channel one of the following tracks: Off No track assigned. Lower Keyboard's Lower track. Upper 1...3 One of the Keyboard's Upper tracks. Pad 1...4 One of the Pad tracks. Drum Style's Drum track. Percussion Style's Percussion track. Bass Style's Bass track. Acc 1...5 One of the Style's Auto-accompaniment tracks. Ply Tr 01...16 One of the Player tracks. Chord Use this channel to send notes recognized by the Chord Recognition engine to the MIDI OUT and USB Device port. This is useful, for example, to control an external Harmonizer from the Pa600, using the Lower track to play chords, even if the track is muted. Control On this special channel, the Pa600 sends messages corresponding to the selected SongBook Entry.MIDI: Filters
Use this page to set up to 8 filters for the MIDI data received or sent by the Pa600 on the MIDI and USB Device ports. All these parameters can be saved into a MIDI Preset. Midi In Filters
Selected MIDI IN filters. Filters are applied to all MIDI channels at the same time. Off No filter. Pitch Bend Pitch Bend. MonoTouch Mono (or Channel) After Touch. PolyTouch Poly After Touch. PrgChange Program Change. SysExcl System Exclusive. All CC All Control Change messages. 0...127 Control Change message #0...127. See "MIDI Data" on page 403 for a list of available Control Change messages. Notes Note events.Midi Out Filters
Selected MIDI OUT filters. See above for information on each filter type.Audio & EQ: MP3 / Speakers
This page lets you define various parameters for the MP3 player and the speakers. MP3 Player
Volume
Use this parameter to set the maximum volume for the MP3 Player. This control lets you balance MP3 files against SMF Songs and Styles. 0...100 Max volume in percentage.Speakers
Speakers On/Off
Use this checkbox to turn the integrated speakers on or off.Audio & EQ: Limiter
The Limiter allows for an increased loudness of the MIDI tracks (Styles and Songs), by compressing the signal exceeding a defined threshold. MP3 files are not affected by the Limiter (since they are usually already “produced”, and do not need to pass through the Limiter again). All these parameters can be saved into a Limiter Preset, Limiter Preset
Use this pop-up menu to choose one of the available Lim Presets, and automatically reconfigure the EQ parameters.On/Off
This is the on/off switch for the Limiter section.Ratio
Sets the signal compression ratio. Compression is applied only when the signal level exceeds the Threshold value. 1.0:1 means no compression.Threshold
Sets the level above which compression is applied. 0dB means no signal processed.Attack
Sets the attack time. A higher attack time will cause the compression to be applied more slowly, and not react fast enough for notes with faster transients.Release
Sets the release time. A higher release time will cause the compression to be released more slowly; this may help sustaining longer notes.Gain Adjust
Sets the output gain. Use it to compensate for the gain loss caused by compression.Diagram
Use these indicators to check the level of the audio entering and coming out of the Limiter. - If the input level is too high, decrease the level of the Sounds, Styles and/or Songs that are playing. - If the output level is too high, decrease the level of the "Gain Adjust" control. \- Look at the gain reduction indicator, to understand the amount of limiting going on. Excessive limiting may dramatically change the quality of the musical program.Audio & EQ: Master EQ
In this page you can access the fully parametric Master EQ. This EQ is placed at the end of the audio path, just before the audio outputs. Both MIDI tracks (Styles and Songs) and MP3 files are equalized. This is a full spectrum frequency equalization, positioned at the end of the signal chain, just before the Left & Right audio outputs. It gives you the power to design EQ curves and shape your sound. Master EQ features four fully programmable bands with fully adjustable gain, frequency, and Q parameters. All these parameters can be saved into a Master EQ Preset. EQ Preset
Use this pop-up menu to choose one of the available EQ Presets, and automatically reconfigure the EQ parameters.On/Off
This is the on/off switch for the EQ section.Diagram
Use these indicators to check the EQ curve, and the level of the audio entering and coming out of the Master EQ. - If the input level is too high, decrease the level of the "Input Trim" parameter. - If the output level is too high, decrease the level of the "Gain" controls. - Keep in mind that boosting the Gain is not always the best way of making your sound appear louder; cutting the Gain of some band may make the other bands appear louder.Input Trim
Use this knob to adjust the level of the signal entering the EQ. Excessive amount of signal may cause distortion when boosting the EQ bands.Q
'Quality' of the EQ filter; higher values correspond to narrower, more accurate filters. Use higher values for near-surgical correc- tion on isolated frequencies, lower values for more musical, softer equalization.| Band Value | |
| All Bands 0.5...10 | |
Freq
Center frequency of the corresponding band. Center it on the problematic frequency, or the harmonics you want to emphasize or attenuate.| Band Value | |
| Low 20Hz...1kHz | |
| Mid-Low 50Hz...10kHz | |
| Mid-High 300Hz...10kHz | |
| High 500Hz...20kHz | |
Gain
Gain of the corresponding band. Use it to make the frequencies stronger or weaker.| Band Value | |
| All Bands -18...0...+18dB | |
Touch Panel Calibration
From time to time (for example, after loading a new operating system), calibrating your Color TouchView™ display may be necessary to make pointing more precise. If so, use this page.  1. When in this page, first touch exactly inside the set of arrows in the upper left corner of the display. 2. The arrows will subsequently move to the other corners of the display. Touch exactly inside them. 3. Finally, touch Save to confirm the new calibration.  \- In case you want to exit and cancel the calibration, press EXIT before completing the procedure. Hint: To quickly reach this page from any other page, keep the GLOBAL button pressed until this page appears.Page menu
Touch the page menu icon to open the menu. Touch a command to select it. Touch anywhere in the display to close the menu without selecting a command.  Note: In each Global page, the only available Write Global options from the page menu are the ones relevant to the content of the current page. All other Write Global options are greyed out.Write Quarter Tone SC Preset
Choose this command to open the Write SC Preset dialog box, and save the current scale settings in one of the four available SC Presets. See "Write Quarter Tone SC Preset dialog box" on page 251 for more information.Write Midi Preset
Select this command to open the Write Midi Preset dialog box, and save the current MIDI settings into one of the av MIDI Presets. See "Write Midi Preset dialog box" on page 251 for more information.Write Limiter Preset
Choose this command to save the Limiter settings to one of the available Limiter Presets. See "Write Limiter Preset dialog box" on page 252 for more information.Write Master EQ Preset
Choose this command to save the Master EQ settings to one if the name. the available Master EQ Presets. See "Write Limiter Preset dialog box" on page 252 for more information.Write Quarter Tone SC Preset dialog box
Open this dialog box by selecting the Write Quarter Preset item from the page menu. Here, you can save the current scale settings in one of the four available SC Presets. To
One of the four available SC Preset locations, where to save current scale settings.Write Midi Preset dialog box
Open this dialog box by selecting the Write Midi Preset item from the page menu. Here, you can save all MIDI settings t MIDI Preset. Name
Name of the MIDI Preset to be saved. Touch the Text Edit) button next to the name to open the Text Edit window and mod-Midi Preset
One of the available MIDI Preset locations, where to save current MIDI settings.Write Limiter Preset dialog box
Open this dialog box by selecting the Write Limiter Preset item from the page menu. Here, you can save current settings for the Limiter edit section (see starting from page 249). Name
Name of the Limiter Preset to be saved. Touch the Text Edit) button next to the name to open the Text Edit window and modify the name.Limiter Preset
One of the available locations, where to save current Limiter settings.Write Master EQ Preset dialog box
Open this dialog box by selecting the Write Master EQ Preset item from the page menu. Here, you can save current settings for the Master EQ edit section (see starting from page 249). Name
Name of the Master EQ Preset to be saved. Touch the T(Text Edit) button next to the name to open the Text Edit window and modify the name.Master EQ Preset
One of the available locations, where to save current Master EQ settings.Media mode
The Media mode is where you can manage files. This mode overlaps the current operating mode (Style Play, Song Play, Sequencer, Sound).Storage devices and internal memory
User-accessible storage devices
During a Media operation, files are usually exchanged between a storage device and the internal memory. You can access the following mass storage device types:| Name Media type | |
| DISK [KORG DISK] User | er-accessible area of the internal memory. This is where you can store Songs and other files. |
| USB USB memory device | (for example, a memory stick) connected to the rear USB Host port. |
Supported device
Pa600 supports external devices, like hard disks or USB memory sticks, formatted in FAT16 or FAT32 with long file names. NTSF (Windows NT/2000/XP/Vista/7), HFS (Mac OS 9) and HFS+ (Mac OS X) formats are not supported.Selecting and deselecting files
While a file list is shown in the display, you can select any item by touching it. The selected item is highlighted. You can deselect all items in any of the following ways: \- Touch an empty area in the file list (if available). \- Touch the Device pop-up icon, and select the current device again.Searching files
By using the Search function, you can search files and musical resources in all internal and external devices. For more information, see the relevant chapter.Preferences
You can change some global preferences of the Media mode in the Global > Mode Preferences > Media page (see page 241).File types
The following tables describe all the file and folder types the Pa600 can manage. Here are the files you can read or write with the Pa600.| Extension File/folder type |
| SET All the User data. (This is a folder containing other folders) |
| BKP Backup file, created with the "Full Resource Backup" function of the Media > Utility page |
| GBL Global Setup |
| VOC Voice Processor Presets |
| QTP Quarter Tone Scale Presets |
| MPR MIDI Presets |
| AUD Limiter and Master EQ Presets |
| PRF Performance |
| STY Style |
| PADPad |
| SBD SongBook |
| SBL SongBook's Custom List |
| JBX Jukebox |
| MID Standard MIDI File, SMF |
| MP3 MP3 file |
| TXT Plain text file |
| Extension File type | |
| PKG Operating System and Musical Resource files | |
| KAR Karaoke file | |
| CDG CD+Graphics file | |
| PCG | Sound (KORG Pa-Series) |
| KMP Multisample | |
| PCM Sample | |
Media structure
Each device (and the internal memory) can contain files and folders. Data in the Pa600 is slightly more rigidly structured than in a computer, due to the pre-configured type of data inside the instrument's memory. The diagram below shows the global structure of a Pa600 device. Note: Factory Styles and Pads can be seen in Media mode only when the “Factory Style and Pad Protect” parameter is set to Off (see page 241), and only when loading or saving a single Style bank, or when erasing something. flowchart
graph TD
    A["MYDIR.SET"] --> B["GLOBAL"]
    B --> C["SETUP.GBL"]
    B --> D["LIMITER.AUD"]
    B --> E["MASTEREQ.AUD"]
    B --> F["MIDI.MPR"]
    B --> G["QTPRESET.QTP"]
    A --> H["PERFORM"]
    H --> I["BANK01.PRF"]
    I --> J["1-1 Grand Piano"]
    I --> K["..."]
    I --> L["1-40 Full Strings"]
    A --> M["SONGBOOK"]
    M --> N["SONGDB.SBD"]
    M --> O["LISTDB.SBL"]
    A --> P["SOUND"]
    P --> Q["USER01.PCG"]
    Q --> R["1 Piano 1"]
    Q --> S["..."]
    Q --> T["128 SynBrass22"]
    P --> U["USER02.PCG"]
    U --> V["1 SopranoSax"]
    U --> W["..."]
    U --> X["128 Noise"]
    P --> Y["USERDK.PCG"]
    Y --> Z["1 Standard Kit"]
    Y --> AA["..."]
    Y --> AB["128 Orchestral Kit"]

    C --> AC["STYLE"]
    AC --> AD["BANK01.STY"]
    AD --> AE["1-1 Pop 1"]
    AD --> AF["..."]
    AD --> AG["1-40 Pop 40"]

    C --> AH["BANK...STY"]
    AH --> AI["BANK15.STY"]
    AI --> AJ["15-1 Contemp. 1"]
    AI --> AK["..."]
    AI --> AL["15-40 Contemp. 40"]

    C --> AM["FAVORITE01.STY"]
    AM --> AN["1 Favorite 1"]
    AM --> AO["..."]
    AM --> AP["40 Favorite 40"]

    C --> AQ["FAVORITE...STY"]
    AQ --> AR["FAVORITE10.STY"]
    AR --> AS["1 Favorite 1"]
    AR --> AT["..."]
    AR --> AU["40 Favorite 40"]

    C --> AV["USER01.STY"]
    AV --> AW["U1-1 User 1"]
    AV --> AX["..."]
    AV --> AY["U1-40 User 40"]

    C --> AZ["USER02.STY"]
    AZ --> BA["U2-1 User 1"]
    AZ --> BB["..."]
    AZ --> BC["U2-40 User 40"]

    C --> BD["USER03.STY"]
    BD --> BE["U3-1 User 1"]
    BD --> BF["..."]
    BD --> BG["U3-40 User 40"]

    C --> BH["PAD"]
    BH --> BI["BANK01(...10).PAD (Hit)"]
    BI --> BJ["1 Cowbell 1"]
    BI --> BK["..."]
    BI --> BL["32 Drumkit F"]

    C --> BM["BANK11(...20).PAD (Sequence)"]
    BM --> BN["1 Military 1"]
    BM --> BO["..."]
    BM --> BP["32 Circus 2"]

    C --> BQ["LOCAL01.PAD"]
    BQ --> BR["L1-1 Local 1"]
    BQ --> BS["..."]
    BQ --> BT["L1-32 Local 32"]

    C --> BU["LOCAL...PAD"]
    BU --> BV["LOCAL08.PAD"]
    BV --> BW["L8-1 Local 1"]
    BV --> BX["..."]
    BV --> BY["L8-32 Local 32"]

    C --> BZ["USER01.PAD"]
    BZ --> CA["U1-1 User 1"]
    BZ --> CB["..."]
    BZ --> CC["U1-32 User 32"]

    C --> CD["USER....PAD"]
    CD --> CE["U10-1 User 1"]
    CD --> CF["..."]
    CD --> CG["U10-32 User 32"]
Main page
There is no main page in the Media mode. When pressing EXIT, you exit the Media mode, and the underlying operating mode in the background is recalled.Page structure
All pages share some basic elements. Mode
This indicates that the instrument is in Media mode.Page menu icon
Touch this icon to open the page menu (see "Page menu" on page 269).Path
Full path of the directory currently shown in the display.List of files
This area shows the files and folder contained in the selected device. You can touch one of the heading labels above the list to change the order in which files are shown. For example, by touching the "Name" label, the list is alphabetically re-ordered according to the file names. The selected label appears highlighted, showing the currently selected ordering.  If you touch the highlighted label again, the alphabetic order changes from ascending to descending, or vice-versa. The small arrow next to the label name shows the selected order.Scrollbar
Use the scrollbar to scroll the list. Touching the arrows will scroll one step at a time, while touching the bar will scroll one page at a time. Touching the arrows while SHIFT is kept pressed jumps to the previous or next alphabetical section, or file/folder type (depending on the selected display order).Device pop-up menu
Use this menu to select one of the available storage devices.Commands
Commands may be different depending on the shown page. They are detailed in each relevant section.Tabs
Use tabs to select one of the pages of the current section.Navigation tools
When in a Media page, you can use any of the following commands to browse through the files and folders.Scrollbar
See "Scrollbar" above.VALUE DIAL
Use the VALUE DIAL to scroll the list up or down.Device pop-up menu
See "Device pop-up menu" above.Load/Save/Copy/Delete button
Executes the media operation.Open button
Opens the selected folder or directory (whose name begins with the “” icon).Close button
Closes the current folder or directory, returning to the parent ("upper") level.Load
In this page you can load User data files (Performances, User Sounds, User Styles, the SongBook, the Global) from an internal or external storage device to the internal memory.  Note: While in this page, only data allowed for loading are shown. All other files are hidden.Merging data
When loading all User data, or all data of a specified type, most data loaded from a storage device are merged with data a existing in memory. For example, if there is data in all three USER Style banks in memory (USER01, USER02, USER03), and there is only the USER01 Style bank in the storage device, the USER01 bank will be overwritten, while USER02 and USER03 banks will be left unchanged. As a result, there will be a STYLE folder in memory containing the USER01 bank you just loaded, and the old USER02 and USER03 banks.Loading all the User data
You can load all the User data with a single operation. 1. If loading from an external device, connect the device to the USB Host port. 2. Use the Device pop-up menu to select the source device. When the device is selected, its content will appear in the display. 3. If the folder you are looking for is inside another folder, select this latter and touch the Open button to open it. Touch the Close button to go back to the parent folder. 4. Select the ".SET" folder containing the data you wish to load, and touch Load to confirm the selection. To create a new .SET folder with PCM samples from different sources, see "Merging Samples from various sources" on page 270.Loading all data of a specified type
You can load all data of a specified type with a single operation. 1. If loading from an external device, connect the device to the USB Host port. d7. Use the Device pop-up menu to select the source device. When the device is selected, its content will appear in the display. 3. If the folder you are looking for is inside another folder, select the latter and touch the Open button to open it. Touch the Close button to go back to the parent folder. 18. Select the “.SET” folder containing the data you wish to load, and touch Open to open the “.SET” folder. A list of User data appears (Global, Performance, SongBook, Sounds, Style...).  5. Select the folder containing the type of data you are looking for, and touch Load to confirm your selection.Loading a single bank
You can load a single bank of data (Sounds, Styles, Performances) with a single operation. Each bank corresponds to each of the side tabs in the various Select windows (Style Select, Performance Select...). 1. If loading from an external device, connect the device to the USB Host port. 2. Use the Device pop-up menu to select the source device. When the device is selected, its content will appear in the display. 3. If the folder you are looking for is inside another folder, select this latter and touch the Open button to open it. Touch the Close button to go back to the parent folder. 4. Select the ".SET" folder containing the data you wish to load, and touch Open to open the ".SET" folder. A list of User data appears (Global, Performance, SongBook, Sounds, Style...).  5. Select the folder containing the type of data you are looking for, and touch Open to open the selected folder. A list of Favorite/User banks appears.  6. Select the bank file you are looking for, and touch Load to confirm the selection. A dialog box appears, asking you to select one of the available User (or Favorite/User Style) banks in memory.  In the example above, the previously selected Style bank will be loaded into the bank USER 1 in memory. The Styles already existing in memory will be deleted and overwritten. 7. Select the target bank, and touch OK to load the source bank. Warning: After confirming, all User data contained in memory are deleted. Note: You can save space for loading new data by deleting all unused PCM Samples from memory. When Sounds or Drum Kits based on external PCM Samples are deleted, you no longer need the now unassigned PCM Samples. Use the "Not assigned to any Multisample/Drumkit" Delete option in the Sampling mode to delete all the unassigned Samples (see page 231). Note: If you are loading a bank of Sounds, and one or more Sounds or Drum Kits use external PCM Samples, the Samples are automatically loaded (unless they are already in memory).Loading a single item
You can load a single item with a single operation. 1. If loading from an external device, connect the device to the USB Host port. 2. Use the Device pop-up menu to select the source device. When the device is selected, its content will appear in the display. 3. If the folder you are looking for is inside another folder, select this latter and touch the Open button to open it. Touch the Close button to go back to the parent folder. 4. Select the “.SET” folder containing the data you wish to load, and touch Open to open the “.SET” folder. A list of User data appears (Global, Per Sounds, Style...).  5. Select the folder containing the type of data you are looking for, and touch Open to open the selected folder. A list of banks appears.  6. Select the bank file you are looking for, and touch Open to open it. A list of items appears.  7. Select the item you are looking for, and touch Load to confirm the load. A dialog box appears, asking you one of the available locations in memory.  In the dialog box above, the Style you select from disk will be loaded into location 01 of the bank Usr01 in memory. Any existing Style at the same location will be deleted and overwritten. Empty locations are named “---”. 8. Select the target location, and touch OK to load the source file. Warning: After confirming, the item you are overwriting in memory will be deleted. Note: You can save space for loading new data by deleting all unused PCM Samples from memory. When Sounds or Drum Kits based on external PCM Samples are deleted, you no longer need the now unassigned PCM Samples. Use the "Not assigned to any Multisample/Drumkit" Delete option in the Sampling mode to delete all the unassigned Samples (see page 231). Note: If you are loading a Sound or Drum Kit making use of external PCM Samples, the Samples are automatically loaded (unless they are already in memory).Loading Global data from other Pa-Series instruments
Global data (Global, Limiter, EQ, etc.) cannot be loaded from other Pa-Series instruments.Loading Pa3X data
You can load Pa3X data exactly as if they were Pa600 data, apart for the Global data. Sounds and Effects can be a bit different. Due to the different order in memory, Styles must be reassigned to SongBook Entries by using the SongBook Editor software (freely available on www.korg.com).Loading Pa600 data
You can load Pa600 data exactly as if they were Pa600 data, apart for the Global data. Due to the different order in memory, Styles must be reassigned to SongBook Entries by using the SongBook Editor software (freely available on www.korg.com).Loading Pa2X, Pa800, Pa1X, Pa800, Pa588 data
You can load Pa2X/Pa800 data exactly as if they were Pa600 data, apart for the Global data. Due to the different order in memory, Styles must be reassigned to SongBook Entries by using the SongBook Editor software (freely available on www.korg.com). It is not possible to load Pa600 data into a Pa2X, Pa800, Pa1X, to select Pa500 or Pa588.Loading Pa80/60/50/50SD data
You can load Pa80/60/50/50SD data exactly as if they were Pa600 data, apart for the Global data. The only difference is that the "SOUND" folder of Pa600 is called "PROGRAM" in the Pa80/60/50/50SD. Therefore, to load Sounds from Pa80/60/50/50SD disks, you must accomplish one of the following operations, either: \- Rename the "PROGRAM" folder "SOUND" (by using a personal computer) before loading a ".SET" folder; or \- First load the “.SET” folder, then separately load the “.PCG” file from the “PROGRAM” folder.Loading i-Series data
Pa600 is compatible with the Styles of the older i-Series instruments. You can load them as if they were ordinary Pa600 data. 1. Copy the old i-Series data into an USB device, or transfer them to the internal storage memory of the Pa600. 2. Press MEDIA to go to the Media mode. Select the Load page if needed. 3. While in the Load page, select the device containing the i-Series data from the Device pop-up menu. 4. If you are reading an i30 file, select the “.SET” folder and touch the Open button in the display. 5. Select the ".STY" folder. 6. At this point, you can load the whole ".STY" folder, or open it and select a single Style. \- To load the whole folder, touch the Load button in the display. If it contains more than 40 Styles, loaded into the USER banks sequentially, otherwise you will be prompted to select one of the USER Style banks or the FAVORITE Style banks in memory. Once the target bank is selected, touch Load to load the bank. The “Are you sure?” message will appear. Touch OK to confirm, or Cancel to abort. \- To load a single Style, touch Open in the display to open the ".STY" folder. Since a conversion will be started at this point, please wait some seconds for the operation to be completed. Select the Style to load, then touch Load. You will be prompted to select a target location in memory. Once the target location is selected, touch Load to load the Style. The "Are you sure?" message will appear. Touch OK to confirm, or Cancel to abort. Note: Loading a whole ".SET" folder from an i30 take some time due to format conversion. 7. Go to the Style Play mode, and select (one of) the loaded Style. Adjust the Tempo value, then select the "Write Current Style Settings" to write changes. Touch OK twice to confirm. 8. Due to the difference in Sounds, you will probably want to make some adjustments to the old Styles, once they are loaded in Pa600 (changing the Sound, Volume, Pan, Tempo, Drum Mapping, Wrap Around...). 9. To make the Sound assignment to the Style tracks effective, be sure the "Original Style Sounds" parameter is not checked (see page 98). 10. Save the Style Settings again. Select the "Write Current Style Settings" to write changes. Touch OK to confirm.Save
In this page, you can save User data from the internal memory to a mass storage device (like an hard disk or an USB memory stick). You can save single files, banks, or all the User and Favorite Style files of the internal memory.  Note: While in this page, only data allowed for saving are shown. All other files are hidden. Here are the various types of files contained in the internal memory:| The file/folder type... | ...contains... | ...and will create on the target device... |
| All All the User data in memory A .SET folder | ||
| Style The FAVORITE 01-12 Styles and the USER 01-03 Styles | A STYLE folder inside a .SET folder | |
| Sound The USER Sounds and Drum Kits | A SOUND folder inside a .SET folder | |
| Pad The USER Pads A PAD folder inside the | .SET folder | |
| Perform (Performances) | The Performances | A PERFORM folder inside a .SET folder |
| SongBook | The SongBook database | A SONGBOOK folder inside a .SET folder |
| PCM All the Multisamples contained in the internal storage memory, and the PCM Samples contained in RAM | A PCM folder inside a .SET folder | |
| Global All global parameters. MIDI Presets, SC Presets, Limiter Presets, Master EQ Presets and VP Presets are also saved. | A GLOBAL folder inside a .SET folder. Inside the GLOBAL folder other folders will be created, to contain the MIDI, SC, Limiter, Master EQ Presets and VP Presets. | |
Creating a new ".SET" folder
Pa600 proprietary data must be saved in special folders with the ".SET" extension. These special folders can be saved inside ordinary folders. When saving, you can save onto existing ".SET" folders, or you can create a new folder of this type. Here is how to do it. 1. When the directory of the target device is shown in the display, the "New SET" button appears among the buttons below the file list.  2. Touch the New SET button. A dialog box appears, asking you to enter a name for the new ".SET" folder.  3. Touch the (Text Edit) button to open the Text Edit window. Enter the name, then touch OK to confirm and close the Text Edit window. Note: The ".SET" file name extension is added automatically. 4. Touch OK to create the new folder and exit the dialog box.Saving the full memory content
You can save the full memory content with a single operation. Depending on the status of the "Factory Style and Pad Protect" parameter, you may or may not see the Factory Style and Pad banks (see "Factory Style and Pad Protect" on page 241). 1. If saving to an external device, connect the device to the USB Host port. 2. The full content ("All") of the internal memory is already shown. Select it, and touch Save to confirm the selection. The list of files in the target device is shown.  3. If needed, use the Device pop-up menu to select a different target device. When the target device is selected, its content will appear in the display. 4. At this point, you can: - Touch the New SET button and create a new ".SET" folder (see "Creating a new ".SET" folder" on page 261), or - Select an existing ".SET" folder. 5. Touch Save to confirm. A dialog box appears, asking you to select the type of data to save:  Save All dialog with the Factory Style and Pad Protect option turned on  Save All dialog with the Factory Style and Pad Protect option turned off In the dialog box above, check all data type you wish to save to a storage device. 6. Touch OK to confirm, or Cancel to abort. Warning: After confirming, all data of the selected type in the target folder is deleted.Saving all data of a specified type
In addition to the above, you can save all data of a specified type by selecting the corresponding folder. 1. If saving to an external device, connect the device to the USB Host port. 2. The full content ("All") of the internal memory is already shown. Select it, and touch Open to open it. A list of User data types appear (each type is a separate folder).  3. Select the folder containing the type of data you wish to save, and touch Save To to confirm the selection. The list of files of the target device is shown.  4. If needed, use the Device pop-up menu to select a different target device. When the target device is selected, its content will appear in the display. 5. At this point, you can: \- Touch the New SET button and create a new ".SET" folder (see "Creating a new ".SET" folder" on page 261), or \- Select an existing ".SET" folder, and touch Save to confirm. Warning: After confirming, all data of the selected type in the target folder is deleted.Saving a single bank
You can save a single User bank with a single operation. Each bank corresponds to each of the side tabs in the various Select windows (Style Select, Performance Select...). 1. If saving to an external device, connect the device to the USB Host port. 2. The full content ("All") of the internal memory is already shown. Select it, and touch Open to open it. A list of User data types appear (each type is a separate folder).  3. Select the folder containing the type of data you wish to save, and touch Open to open it. The list of contained bank files is shown.  4. Select the bank file to be saved, and touch Save To to confirm the selection. The list of files of the target device is shown.  5. If needed, use the Device pop-up menu to select a different target device. When the target device is selected, its content will appear in the display. 6. At this point, you can: \- Touch the New SET button and create a new ".SET" folder (see "Creating a new ".SET" folder" on page 261), or \- Select an existing ".SET" folder, and touch Save to confirm. 7. A dialog box appears, asking you to select one of the available User (or Favorite/User Style) locations inside the folder:  In the above dialog box, the previously selected bank of Styles will be saved to bank User 01 inside the selected folder. Three User banks are available. 8. Touch OK to confirm, or Cancel to abort. Warning: After confirming, the same bank in the target folder is deleted.Saving a single item
You can save a single User item with a single operation. 1. If saving to an external device, connect the device to the USB Host port. 2. The full content ("All") of the internal memory is already shown. Select it, and touch Open to open it. A list of User data types appear (each type is a separate folder).  3. Select the folder containing the type of data you wish to save, and touch Open to open it. The list of contained bank files is shown.  4. Select the desired bank file, and touch Open to gain access to the single items.  5. Once you have selected the file that you want to save, touch Save To to confirm the selection. The list of files of the target device is shown.  6. If needed, use the Device pop-up menu to select a different target device. When the target device is selected, its content will appear in the display. 7. At this point, you can: - Touch the New SET button and create a new ".SET" folder (see "Creating a new ".SET" folder" on page 261), or - Select an existing ".SET" folder, and touch Save to confirm. 8. A dialog box appears, asking you to select one of the available User (or Favorite Style) locations inside the selected folder.  In the above dialog box, the previously selected Style will be saved to location 01 inside the bank Usr01 inside the selected folder. 9. Touch OK to confirm, or Cancel to abort. Warning: After confirming, the same item in the target folder is deleted.Copy
In this page you can copy files and folders. Folders can be generic or “.SET” folders. In addition, you can copy the content of the generic folder you are in. You can copy inside the same device, or from a device to a different one (both devices must be connected to the Pa600 during the copy operation). To preserve data structure integrity, during Copy operations you can't open ".SET" folders and copy only one of the files it contains. You can only open and go inside generic folders.  Contrary to the Load and Save pages, in this page you may see all types of files, and not only Pa-Series supported files (assuming the "Hide Unknown Files" option is turned off, see page 241).Copying a folder's content
If nothing is selected while a folder is open in the display, you can copy the folder's content, without copying the folder itself. Note: During the Copy procedure, you can't open a ".SET" folder. You can, however, open any generic folder. 1. If copying from or to an external device, connect the device to the USB Host port. 2. Select the source device, by using the Device pop-up menu. 3. If the folder you are looking for is inside another folder, select this latter and touch the Open button to open it. Touch the Close button to go back to the parent folder. 4. To copy the current folder's content, without copying the folder itself, do not select anything in the display. 5. Touch Copy To to confirm. The target device appears. Note: If the selected device is not available, the "Device not found, or unknown format" message will appear. A different device will be automatically selected. 6. If needed, select the target device, by using the Device pop-up menu. 7. If you want to select a different folder, use the Open and Close buttons to move through the directories. • To copy into an existing generic folder, select that folder. • To copy into the current folder, do not select anything. 8. Once the target is selected, touch Copy. If a file or folder with the same name of the source data already exists at the target location, the "Overwrite" dialog box will appear (see "Overwriting existing files or folders" on page 265). During Copy, a dialog box shows the progress of the operation. Copying a single file or folder
You can copy a single file or folder, from the root or a generic folder to a different one. You can't copy single files or folders from inside a ".SET" folder. 1. If copying from or to an external device, connect the device to the USB Host port. 2. Select the source device, by using the Device pop-up menu. 3. Select the folder containing the file or folder you wish to copy. If it is contained in another folder, touch the Open button to open it. Touch Close to go back to the previous hierarchic level. 4. Touch Open to open the folder containing the file or folder to be copied. 5. Select the file or folder to be copied, then touch Copy To to confirm its selection. The target device appears. Note: If the selected device is not available, the "Device not found, or unknown format" message will appear. A different device will be automatically selected. 6. If needed, select the target device, by using the Device pop-up menu. 7. When the target device content appears in the display, select the target folder. Touch Open to open a folder, or Close to close it. 8. Once the target is selected, touch Copy. If a file or folder with the same name of the source data already exists at the target location, the "Overwrite" dialog box will appear (see "Overwriting existing files or folders" below).Multiple file selection
While in the Copy and Delete pages of the Media mode, you can select several files or folders at the same time before executing the operation. Files or folders can be selected consecutively (i.e., in a row), or discontinuously (i.e., with other files or folders in the middle). To choose either to select files in a consecutive or discontinue way, use the Mode button on the right of the page command buttons, to choose an option for the SHIFT button: (nota“.SET”  Choose this option to select files or folders consecutively (i.e., in a row).  Choose this option to select files or folders discontinuously (i.e., with other files or folders in the middle).To select more files or folders consecutively:
1. Touch the Mode button to choose the option for the SHIFT button. 2. Select the first file or folder to be selected. 3. Press and keep the SHIFT button pressed. 4. Select the last file or folder to be selected. 5. Release the SHIFT button.To select more files or folders discontinuously:
1. Touch the Mode button to choose the option for the SHIFT button. 2. Select the first file or folder to be selected. 3. Press and keep the SHIFT button pressed. 4. Select a second file or folder to be selected. 5. While keeping the SHIFT button pressed, continue selecting the other files or folders to be selected. 6. Release the SHIFT button.To deselect the files or folders:
- To deselect one or more file or folder, without deselecting everything, keep SHIFT pressed and touch the file or folder to be deselected. - To deselect everything, select any other file or folder. All selected files and folders will be deselected.Overwriting existing files or folders
When copying files, a file or folder with the same source element might be found in the target device. In this case, Pa600 asks you if you want to overwrite it. When a duplicate file or folder is met, the following dialog box appears:  Cancel The procedure is interrupted. No The file or folder is not overwritten. The source file or folder is not copied. The procedure will continue with the other files and folders. Yes The file or folder is overwritten. The procedure will continue with the other files and folders. Yes (to) All The file or folder is overwritten. Any following duplicate file or folders will be overwritten as well, without this dialog box appearing again. The procedure will continue with the other files and folders.Delete
The Delete function lets you delete files and folders from the devices.  Contrary to the Load and Save pages, in this page you may see all types of files, and not only Pa-Series supported files (assuming the "Hide Unknown Files" option is turned off, see page 241).Delete procedure
1. If erasing from an external device, connect the device to one of the USB Host ports. 2. If needed, select a different device, by using the Device pop-up menu. 3. If the file or folder you are looking for is inside another folder, select this latter and touch the Open button to open it. Touch the Close button to go back to the parent folder. 4. Select the file or folder to erase. name of a 5. Touch Delete to delete the selected item. During erase, a dialog box shows the progress of the operation.Multiple file selection
See "Multiple file selection" on page 264 for information on how to select more files or folders to be erased at the same time.Format
The Format function lets you initialize a device. Pa600 uses a PC-compliant device format (DOS FAT16 and FAT32):  Warning: When formatting a device, all data it contains is lost forever!Volume Label
Use this parameter to assign a name to an external device to be formatted. Note: You cannot rename the label (name) of the internal volume. When formatting the internal disk, the label cannot be edited. Touch the (Text Edit) button to open the Text Edit window. Enter the name, then touch OK to confirm and close the Text Edit window. Note: When changing the name to a device containing Standard MIDI Files or MP3 files used in the SongBook, the links are broken. We suggest to give the device the same name it had before formatting. In case you changed the name, please use SongBook Editor (freely available on www.korg.com) to edit the links. Warning: It is not possible to change the label (name) of the internal disk when Pa600 is connected to a PC through the USB port. If you try to do it, the original name is restored by Pa600.Execute button
Touch this button, after having assigned a name to the volume, to execute the Format command.Format procedure
Here is how to format a device. 1. If formatting an external device, connect the device to the USB Host port. 2. Choose the device to be formatted by using the Device pop-up menu in the lower-left corner of the display. 3. Touch the Execute button in the display to confirm formatting. 4. The "If you confirm, all data in the media will be lost. Are you sure?" message appears in the display. Touch Yes to confirm, or No to cancel.Utility
This page includes a set of backup and restore utilities. The Backup command should be used for archiving purpose or since you will not be able to load individual data from a backup file. To save data that must remain accessible with the normal Media > Load operations, for example to load User data after updating the Musical Resources, use the Media > Save operations instead. Full Resource Backup
This command allows you to make a full backup of all the internal data on a target device. A “.BKP” file will be created. Hint: This command cannot be used to save single items (like a single Style, a bank of Performances...). To do that, use the Save operations instead. 1. In case you are making the backup on an external US device, connect the device to one of the USB Host ports. Be sure there is enough free space in your target device, or the Backup procedure will not be completed. 2. Select the "Full Resource Backup" command, then touch the Execute button in the display. The target device appears.  3. If needed, select a different device, by using the Device pop-up menu. 4. If you wish to save data inside another folder, select this latter and touch the Open button to open it. Touch the Close button to go back to the parent folder. 5. Select the folder where to save data, and touch Backup to save it. If nothing is selected, data will be saved to the cur- Note: When formatting the hard disk or an external registry directory, device, an additional warning appears, to avoid accidental data loss. After touching Backup, a dialog box will appear, asking you to assign a name to the backup file.  Touch the Text Edit) button to open the Text Edit window. Enter the name, and confirm by touching OK. 6. Touch OK to start the backup. 7. When finished, save the (removable) storage device in a safe place.Resource Restore
This command restores data from a backup of the internal Factory and User data, created with the "Full Resource Backup" command. Hint: This command cannot be used to load single items single Style, a bank of Performances...). You can only load all data, or full data types. Backups are compact archives, that can only be restored as a full package. Note: Loading a backup file created with other Pa-Series and i-Series instruments is not allowed. Warning: Don't play the keyboard while restoring data, and stay in the Media mode. Wait until the "Wait" message disappears. 1. In case you are restoring from an external USB device, connect the device to the USB Host port. 2. Select the Restore Resources command, then touch Execute. The source device appears. 3. If needed, select a different device, by using the Device pop-up menu. 4. Browse through the files to find the backup file. 5. When the backup file (“.BKP” file) is in the display, select it and touch the Restore command. 6. A dialog box will appear, with a list of types of data to be restored. Only check the types of data you want to restore.  Warning: This command will delete from the internal memory all types of data selected in this dialog box (including your custom data). 7. When done, a message appears asking you to restart the instrument ("Data Restored. Please switch off"). Set the instrument to standby mode, then turn it on again.Factory Restore
In case you want to erase all changes to your Factory and User data, and restore your Pa600 to the same condition it was when it was new, you can use the Factory Restore procedure. Warning: This command deletes all data from memory (including your custom data). 1. Select the Factory Restore command, then touch Execute. 2. A dialog box will appear, with a list of types of data to be restored. Only check the types of data you want to restore.  Warning: This command will delete from the internal memory all types of data selected in this dialog box your custom data). (3) when done, a message appears asking you to restart the instrument ("Data Restored. Please switch off"). Set the instrument to standby mode, then turn it on again.OS Version Number
This line shows the installed Operating System version. From time to time, check our web site (www.korg.com), to see if a newer, free version has been released.USB
Use this page to enable or disable the USB Device port for file transfer.  The USB Device port allows you to access the internal storage memory from a personal computer, by just connecting the Pa600 to the computer's USB interface. This way, you can exchange files between the user-accessible area of the internal storage memory of the Pa600 (DISK device) and a personal computer. Note: The drivers supplied in the Accessory Disc are only for MIDI Over USB connection. Note: While USB file transfer is enabled, you cannot access other functions on the Pa600. MIDI Over USB is also disabled. Warning: It is not possible to change the label (name) of the internal disk when Pa600 is connected to a PC through the USB port. If you try to do it, the original name is restored by Pa600.HD Connection
Usually, the USB Device port is not enabled for file transfer on the Pa600 (it is always on, however, for MIDI connection). Touch the Enable button to turn it on, or the Disable button (with all the caveats) to turn it off. 1. Connect Pa600 to a personal computer by using a standard USB cable 2. Touch the "Enable" button to enable file transfer. Pa600 becomes the B USB device (called Device or Slave), while the personal computer becomes the A USB device (called the Host or Master). When finished, the icon of the internal memory of Pa600 will appear among the other storage devices connected to the computer. Caveat: Do not modify the structure of the ".SET" folders, or you will no longer be able to use them on the Pa600. Only use the USB connection for data exchange purpose, or to modify ordinary folders. Note: After starting the USB connection, accessing Pa600 data from the computer may take some time, depending on the size of the hard drive and the data contained in the hard drive. 3. When all data has been transferred, disconnect USB communication from the computer. On a PC, you usually select the dedicated command by clicking on the USB device icon with the right mouse button. On the Mac, select the USB device icon, then select the Eject command or drag it to the eject icon in the Dock. 4. When the Pa600 icon disappears from the computer's desktop, touch the "Disable" button on the display of Pa600. Caveat: Do not disconnect the USB communication before the personal computer has really finished transferring files. Sometimes, the on-screen indicator tells the procedure has been completed BEFORE it has really finished. Disconnecting USB communication (or disconnecting the USB cable) before data transfer has been completed may cause data loss.Page menu
Touch the page menu icon to open the menu. Touch a command to select it. Touch anywhere in the display to close the menu without selecting a command. Create New Folder
This command lets you create a new generic folder. You can't create a ".SET" folder with this command, since this type of folder is reserved to the Save operations (and can be created with the New SET button in any Save page).  By touching the Text Edit) button you can open the Text Edit window. Enter the name, then touch OK to confirm and close the Text Edit window.Rename
Available only when an item is selected in a file list. Use this function to change the name of an existing generic file or folder. To preserve consistency through the data structure, you cannot rename folders and files inside a ".SET" folder. Also, you cannot change the 3-character extension of files and ".SET" folders, since they are used to identify the type of file or folder.  Touch the Text Edit) button to open the Text Edit window. Enter the new name, then touch OK to confirm and close the Text Edit window.Object(s) info
Select this command to see the size of any selected file or folder. Also, the number of files and directories (folders) it contains are shown.  Note: The single file size is always shown to the right of the file name in any file list (assuming the "Size" parameter is turned on, see page 241): Device Info
Select this command to see various info on the selected device. To select a different device, use the Device pop-up menu on the lower left corner of most Media pages.  By touching the Text Edit) button you can open the Text Edit window. Enter the name (label) of the selected device, then touch OK to confirm and close the Text Edit window. Warning: If you change the name of a device connected to the USB Host port, and it contains files used by some SongBook Entries, these entries will no longer be able to find the linked resources contained in the device. In this case, either restore the original device name, or use the SongBook Editor software (freely available on www.korg.com) to edit the links. Note: You cannot change the name of the internal storage memory or the internal microSD card.Protect
Select this command to protect the selected file or folder from writing/erasing. The lock icon will appear next to the file or folder name. Unprotect
Select this command to unprotect the selected file or folder – if protected.Care of mass storage devices
The Pa600 can save most of the data contained in memory to the internal memory, or to external devices (like hard drives or USB memory sticks) connected to the USB Host port. Here are some precautions when handling these devices.Internal memory write protection
You can protect your internal memory from writing, by using the software protection found in Global mode (see “Media Protect” on page 241).Precautions
- Do not remove a device or move the instrument while the device is operating. - In order to avoid losing data in case of damage, make a backup copy of the data contained in a device. You can backup your data to a personal computer, and from there to a backup unit. You can transfer data from the internal memory of Pa600 (DISK unit) to a personal computer by using the USB Device connection. - Do not leave an USB device connected to the USB ports while carrying the instrument, or it may be damaged. - Keep the memory devices or the instrument away from sources of magnetic fields, for example televisions, refrigerators, computers, monitors, speakers, cellular phones and transformers. Magnetic fields can alter the contents of the devices. - Do not keep memory devices in very hot or wet places, do not expose them to direct sunlight and do not store them without use in dusty or dirty places. - Do not place heavy objects on top of the devices. - Regular care is recommended with your devices. Menting and repairing internal devices can be made with any computer utility while the Pa600 is connected via USB.Possible problems
\- Magnetic fields, dirt, humidity and usage can damage data in a device. You can try to recover the data with disk repair utilities for personal computers. It is, however, advisable to always make a backup copy of your data.Merging Samples from various sources
When you load a .SET folder, all User PCM Samples in memory are deleted. So, there is no way to merge different samples by loading complete .SET folders. To merge samples from several sources, you must load single Sounds or Drum Kits based on User PCM Samples.Delete all samples and multisamples
1. If you want to delete all Samples and Multisamples already in memory, press the SOUND button to access the Sound mode, then press the RECORD button to access the Sampling mode. 2. While in Sampling mode, choose the "Delete" command from the page menu. Choose the "All Samples, MultiSample, DrumSamples" option, and touch OK to delete all Samples and Multisamples. Warning: Before deleting, be sure to have a copy of any important data you don't want to lose. 3. To exit from the Sampling mode, choose the "Exit from Record" command from the page menu.Create a new .SET of samples
1. Press the MEDIA button to access the Media mode. Go to the Load page. 2. Open a first .SET folder containing some of the PCM Samples to merge. Open the SOUND folder, then one of the USER banks, and choose the first of the Sounds or Drum Kits based on samples you would like to load. Touch Load, and choose a target User location in memory. The Sound or Drum Kit is loaded, together with the PCM Samples it is based on. Defrag- 3. Do the same with any subsequent Sound or Drum Kit whose Samples you would like to load. 4. When finished loading, save a new .SET folder, being sure the PCM option is checked in the Save All dialog (see "Saving the full memory content" on page 261, or "Saving all data of a specified type" on page 262).SongBook
The SongBook is a musical database that allows you to organize songs and automatically recall the associated “musical resources” (Style, Standard MIDI Files, KAR files, and MP3 files). The SongBook overlaps the Style Play and Song Play operating modes. When you select an entry from the full database or a custom list, the Style Play or Song Play mode is selected, depending on the type of file associated with the entry. In addition to helping you organize your shows, the Son allows you to associate four Pads, and up to four STSs to each Style, Standard MIDI File or MP3 file, to recall a complete set of Keyboard tracks for realtime playing over a Song. You can also link a separate text file containing lyrics to an entry. Note: SongBook Entries do not include actual data; they are just pointers to a Style, a Standard MIDI File an MP3 or a TXT When you copy a SongBook file, referenced files are not copied with it. Hint: Use the SongBook Editor software (freely available from our web site, www.korg.com) to edit your SongBook on a PC. Warning: If you load a SongBook file from a storage device, the existing one in memory (including the custom lists) is deleted. Save your old SongBook file before loading a new one.Book
The Book page contains the full database of song entries. While in this page, you can select an entry, and touch the Select button in the display to load it. Then, press the PLAY or START button to start the Song or Style.  Each entry of this database may include the song's author, name, genre, original key, tempo and meter (time signature). When selecting one of the entries, the associated Style, Standard MIDI File or MP3 file is automatically recalled, together with any TXT lined to the entry. Also, the STSs and Pads may be recalled.List Header
The List Header shows the selected entry's name on the left ("N:"), and the associated Style, Standard MIDI File or MP3 file on the right ("Style:" or "Player"):  Note: If you select a different Style or Standard MIDI File or MP3 file, the entry's name field ("N:") returns blank (---), meaning the entry has been modified.Full list
This is the full list of the SongBook database. Use the scroll (or the VALUE DIAL) to browse through the list. You can touch one of the heading labels above the list to change the order in which entries are shown. For example, by touching the "Name" label, the list is alphabetically re-ordered according to the entry names. The selected label become highlighted, showing the currently selected ordering.  By touching the label again, the order of the files switches between ascending and descending. The small arrow next to the label name shows the selected order.Scrollbar
Use the scrollbar (or the VALUE DIAL) to scroll the entries. You can keep the SHIFT button pressed while touching the scrollbar, to quickly jump to the next/previous section.Commands
Filtered
When this box is checked, only entries matching the selected filter criteria are shown in the full list. The box is automatically checked when you exit from the Filter dialog box by touching OK (see below).Filter...
Touch this button to open the Filter dialog box, and select one or more filter criteria, to show a restricted set of entries in the main list.  Touch the Text Edit) button next to the search criteria you want to edit (Name, Genre, or Artist). You can also Meter, or a range of Tempo values. Touch the Clear button next to the search criterion you want to delete or set to a default value. Touch Clear All to reset all search criteria. Note: You can also find items in the SongBook database by pressing the SEARCH button, and using the Search function. However, the Filter function allow for a more refined search.Add to list
If the "Enable List Edit" command is selected in the page menu, the "Add to list" button becomes available, to let you add entries to the selected Custom List. Select an entry, then touch this button to add the selected entry to the current Custom List (see "Custom List" on page 274).Select
Touch this button to confirm selection of the highlighted entry in the full list. After touching this button, the name of the selected entry appears in the left upper side of the display ("N:"). When you highlight a song in any of the SongBook lists, its name appears in reversed text, over a green-blue background. While in this situation, the song is highlighted, but not yet loaded.  When you touch the Select button in the display, the song will be loaded. The background turns to light green, and the text is turned to boldface, to show the Song has been loaded and ready to play.  To start playback of the Song or Style, press (respectively) either the PLAY or START button.Numeric selection of entries
When in SongBook mode, you can select a SongBook Entry means of an unique number. Numbers associated entry can be programmed in the Book Edit 2 page (see Edit 3" on page 277). To see the numbers while in the Book page, select the "Show Song Numbers (now Key)" command from the page menu:  After you select this command, the "Num" column appears:  To see the "Key" column again, select the "Show Key (now Song Numbers)" command from the page menu. To select a SongBook Entry by entering its number, press the SONGBOOK button again while you are in any page of the SongBook mode. The numeric keypad will appear, allowing you to enter the number corresponding to the desired entry. Hint: You can export a list of SongBook Entries as a TXT file including the assigned selection number. You can print this list on paper as a memo. (See "Export as text file" on page 279).Selecting SongBook Entries via MIDI
SongBook Entries can be selected via MIDI (through the special Control channel), by using the dedicated NRPN Control Change messages #99 (MSB, with value 2) and #98 (LSB, with value 64). See “Selecting SongBook Entries via MIDI” on next page.Setting the special Control MIDI channel
A special MIDI channel used as the "Control" channel is needed to send MIDI messages to select the SongBook Entries. First of all, choose a MIDI Preset to quickly configure the Control channel. Go to the Global > MIDI > General Controls page and choose a MIDI Preset where to save your settings. Then, choose a MIDI channel as the “Control” channel. Go to the Global > MIDI > Midi In Channel page, and assign the Control option to one of the sixteen available MIDI channels (usually one of the higher-numbered ones, for example 16). When done, save this setting to the current MIDI Preset by choosing the "Write Midi Preset" command from the page menu.Selecting SongBook Entries via MIDI
ated with each When you are ready to remotely select SongBook Entries, switch to the Style Play or Song Play mode. At this point, Pa600 must receive on the special Control channel the NRPN Control Change messages #99 (MSB, with value 2) and #98 (LSB, with value 64) in fast succession, as an initialization string. This string must be sent only once, unless another NRPN control is sent on the same MIDI channel before selecting a different SongBook Entry. After the initialization string has been sent, you must send the selection string, made of two Control Change messages: CC#06 (Data Entry MSB) for the thousands and hundreds, and CC#38 (Data Entry LSB) for the tens and units. The range of the Data Entry controls, in this case, is 0\~99 (instead of the typical 0\~127). The following examples show some typical situations. \- Send the following string to select SongBook Entry #77:  \- Send the following string to select SongBook Entry #100:  \- Send the following string to select SongBook Entry #2563: MIDI messages sent when selecting SongBook Entries
When a SongBook Entry is selected, a set of corresponding MIDI messages can be sent through the special "Control" channel.Setting the special Control MIDI OUT channel
A special MIDI channel used as the "Control" channel is needed to send MIDI messages when selecting the SongBook Entries. First of all, choose a MIDI Preset to quickly configure the Control channel. Go to the Global > MIDI > General Controls page and choose a MIDI Preset where to save your settings. Then, choose a MIDI channel as the "Control" channel. Go to the Global > MIDI > Midi Out Channel page, and assign the Control option to one of the sixteen available MIDI channels (usually one of the higher-numbered ones, for example 16). When done, save this setting to the current MIDI Preset by choosing the "Write Midi Preset" command from the page menu.Sending MIDI messages when selecting SongBook Entries
When this special "Control" channel is assigned to one of the MIDI OUT channels, MIDI messages are sent on this channel when choosing a SongBook Entry. The messages sent when selecting a SongBook Entry are the following: \- An initialization strings, made of the NRPN Control Ch messages #99 (MSB, with value 2) and #98 (LSB, with value 64) in fast succession. \- A selection string, made of the two Control Change messages CC#06 (Data Entry MSB) for the thousands and hundreds, and CC#38 (Data Entry LSB) for the tens and units. The range of the Data Entry controls, in this case, is 0\~99 (instead of the typical 0\~127). This type of data can be used by external editors to receive informations from the SongBook.Custom List
Use this page to select and use one of the available Custom Lists. Custom Lists are lists made of entries extracted from the full SongBook list (as seen in the Book page). They allow the use of smaller, customized SongBook lists, suitable for a single gig or your own music tastes.  Hint: You can jump to this page by keeping SHIFT pressed, and pressing the SONGBOOK button.List header
See "List Header" on page 271.Custom list
List of files contained in the selected Custom List. Use the scroll-bar to browse through the list. As an alternative, use the VALUE DIAL.Scrollbar
Use the scrollbar (or the VALUE DIAL) to scroll the entries.Commands
List pop-up menu
Use this pop-up menu to select one of the available lists.Next
Touch this button to select the next entry in the list. Hint: You can assign this command to an Assignable Switch or Assignable Footswitch.Select
Touch this button to confirm selection of the highlighted entry in the list. After touching this button, the name of the selected entry appears on the left upper side of the display ("N:"). Hint: This command is useful to browse through the list, and select an entry different than the one following in the list.List Edit
This page is only available after checking the "Enable List Edit" command in the page menu (see page 279). Use this page to edit the available Custom Lists. A Custom List is a set of SongBook Entries, created by selecting items from the full list in the Book page. To add entries to a Custom List, first create or select the list to be edited in this page. Then, go to the Book page, select the entry to be added, and touch the "Add to list" button. When finished adding entries, return to this page and edit the selected list. List Name
Name of the selected list. To select a Custom List, go to the "Custom List" page and use the List pop-up menu.Custom list
List of songs contained in the selected Custom List. Use the scroll-bar or the VALUE DIAL to browse through the list.Scrollbar
Use the scrollbar (or the VALUE DIAL) to scroll the entries.Commands
Move
Use these buttons to move the selected song entry up or down in the list.Del Song
Touch this button to delete the selected song entry from the list.New List
Touch this button to create a new, empty Custom List. Note: The maximum number of Custom Lists in a SongBook file is 256 lists. Warning: Any unsaved Custom List is lost when creating a new list using this command.Del List
Touch this button to delete the current list.Write
Touch this button to save changes to the selected Custom List.  To assign a different name to the selected list, touch the [T] (Text Edit) button to open the Text Edit window. Select an option to save the edited Custom List: - Select Rename/Overwrite to overwrite an existing list, optionally changing its name. Warning: The older list will be deleted! - Select New List to save a new Custom List in memory. This list will be available in the "Custom List" page.Book Edit 1
The Book Edit 1 page is where you link a "musical r (Style or Song) to the SongBook Entry, and choose to save STSs to the Entry. Hint: Use the Filter in the Book page, to quickly find an entry to be edited. The Book Edit 1 page with a Style-based entry:  The Book Edit 1 page with a Song-based entry: Header
Name
Name of the selected entry. The name is assigned after you touch the Write button to save the entry to the SongBook list.Number (Song Selection Number)
Here you can select a unique number (up to 9,999) to be associated to the current SongBook Entry. By typing this number (b using the Numeric Keypad) after pressing the SONGBOOK button again, you will be able to quickly recall an entry from the Book page (see "Numeric selection of entries" on page 272). Assigning a number is not mandatory, but may help you to organize your entries. For example, you can use the different 100s to create a different way of categorizing your entries by genre or age.Resource
Entry
Style, Standard MIDI File or MP3 file associated with the saved entry. Warning: If you replace this resource with a different one, using the same Style location number or Song file path, the So Entry will no longer point to the right data. Be careful not to delete or move a Style or a file associated with a SongBook Entry from the original location.Write Current
When checked, the currently selected musical resource (whose type and name is shown on the right) is saved to the entry. You can select a different resource by returning to the Style Play or Song Play mode, and selecting a different Style or Song from there. Then, press the SONGBOOK button to return to the Book Edit 1 page. What is saved when touching Write depends on the type of associated resource: \- When you are saving a Style-based entry, a reference to the latest selected Style, whose name is shown on the right of this parameter, is saved. A reference to the selected Pads (whose name you can see by touching the Pad tab in the main page of the Style Play mode) is also saved. Unless changed, Pads are contained into the selected Style. The Style Settings and the Pad Settings for the referenced Style and Pads are saved. If you edited these Settings (by changing Sounds, Effects, Transpose...), the modified data will be saved instead of the original. \- When you are saving a Song-based entry, a reference to the MID, KAR or MP3 file assigned to the Player, whose name is shown on the right of this parameter, is saved. A reference to the selected Pads (whose name you can see by touching the Pad tab in the main page of the Song Play mode) is also saved. The Pad Settings for the referenced Pads are saved. If you edited these Settings, the modified data will be saved instead of the original. When this parameter is left unchecked, no new resource will be saved with the entry. The original resources associated with the entry will be preserved when touching Write. When touching New Song, or keeping the SONGBOOK button pressed for about one second to create a new entry, this parameter is automatically checked and cannot be modified. A reference to the associated resource will be saved with the new entry.STS
Write Current
When saving a SongBook Entry, and this parameter is checked, you can save the STSs of the associated Style into the entry, or the current Keyboard track settings into a new STS. All STS All four STSs are saved to the current SongBook Entry. The source STSs are those contained in the Style currently selected in Style Play mode. If you selected a Performance, its Keyboard track settings will be saved as STS #1. When you touch Write and choose the Rename/Overwrite option, all STSs are overwritten at once. Single STS The current Keyboard track settings are saved to the chosen SongBook STS. When you touch Write and choose the Rename/Overwrite option, only the new STS is overwritten, while the others are left untouched. \- STS Name: Name of the current STS. Touch the T (Text Edit) button to open the Text Edit window, and modify the name. \- To STS Location: One of the four STS available for each entry, where you can save the current Keyboard track settings.Buttons
New Song
Touch this button to create a new entry with the current settings. Settings are copied from the selected Style, Standard MIDI File or MP3 file. Also, the selected Pads, STSs and Split Point will be saved. The current Keyboard track settings will be saved as STS #1. Any TXT file loaded in the Lyrics pages will be saved as a linked file.Del Song
Touch this button to delete the current entry.Write
Touch this button to open the Write Song dialog box, and save the current entry to the main list of the SongBook. Note: The maximum number of entries in a SongBook file is 3,000 entries.  To assign a different name to the entry, touch the Text Edit) button to open the Text Edit window. Select an option to add the new entry to the SongBook: \- Select Rename/Overwrite to overwrite an existing entry, optionally changing its name. Warning: The older entry will be deleted! • Select New Song to save a new entry to the SongBook database.Book Edit 2
The Book Edit 2 page is where you enter information on the Genre, Artist, Key, etc. to the SongBook Entry. The Book Edit 2 page with a Style-based entry:  The Book Edit 2 page with a Song-based entry: Header
This are includes the same Name, Number and Entry Resource fields found in the "Book Edit 1" page (see above).Database
Genre
Music genre associated with the entry.Artist
Name of the artist of the song associated with the entry.Key Info
Original key of the entry. The first field is the key name, the second one is the mode (major or minor).Tempo/BPM
Basic tempo of the Style, or starting tempo of the Standard MIDI File associated with the entry. This may change, if a Tempo Change event is included with the associated resource. You can change this value by using the TEMPO buttons on the control panel. Any change will be shown after saving the Entry. Note: The starting value of a Standard MIDI Files is always considered, and overrides this value. Note: You can edit this value even if an MP3 is associated to the SongBook Entry. However, this is just an indicative value.Meter Info
Basic meter (time signature) of the Style, or starting meter of the Standard MIDI File associated with the entry. This may change, if a Meter Change event is included with the associated resource.M. Transp. (Master Transpose)
Master Transpose. When the entry is selected, the Master Transpose of the whole instrument is automatically changed. The Master Transpose value saved in the SongBook Entry overrides any Master Transpose setting contained in the referenced Song. You can change this value by using the TRANSPOSE buttons on the control panel. Any change will be shown after saving the Entry. Note: If the Master Transpose is locked (Global > General Controls > Lock), the Master Transpose will not change.Book Edit 3
This page is where you select the Synchro and Memory options to be memorized, link a ".TXT" file. The Book Edit 3 page with a Style-based entry:  The Book Edit 3 page with a Song-based entry: Synchro Start / Synchro Stop / Memory
The status of these functions can be memorized in a SongBook Entry. Note: If the SongBook Entry is based on a Song, Synchro Start and Synchro Stop are greyed out and cannot be modified, since they have no effect on a Song. Unchanged When selecting this SongBook Entry, the status of the corresponding function is left unchanged. Off When selecting this SongBook Entry, the status of the corresponding function is turned off. On When selecting this SongBook Entry, the status of the corresponding function is turned on.Linked.TXT
You can select a text (.TXT) file, and link it to the Style or Song associated with the current SongBook Entry. When you select this entry, the text file will be automatically loaded. Text files can be seen on the display. Since there is no automatic synchronization between this kind of lyrics and the associated songs, you must scroll them manually. This can be accomplished in either of two ways: \- When a “.TXT” file is selected, a special vertical scrollbar appears in the “Lyrics” page. Touch it to scroll through the text during the performance. See the “Lyrics, Score, Markers” chapter on page 280. \- Scrolling is also possible by means of the Text Page Down/ Up command, that can be assigned to a Foot Assignable Switch. This section of the Book Edit 3 page contains two buttons: Reset Touch this buttons to unlink the text file from the entry. Browse Touch this button to open a standard File Selector, and select a ".TXT" file to be linked to the current SongBook Entry. After selection, the name of the linked text file appears above the two buttons. Info
Use the Info page to see the name of the selected entry, the associated resource(s), the total number of Songs in the SongBook, the number of filtered entries, the number of available Custom Lists, and the number of Songs in the current list. • In case of an entry based on a Style:  \- In case of an entry based on a Song in Standard MIDI File or MP3 format: Selected entry
This parameter shows the currently selected entry. If it is blank (---), the latest selected entry has been modified, or no entry has been selected.Associated resource
Style, Standard MIDI File or MP3 file associated to the selected entry.Songs
Total number of entries in the SongBook list.Songs after filtering
This parameter shows the number of entries shown in the "Book" page, after applying the selected filter. If no filter is selected, this matches the total number of entries in the Song-Book list (see previous parameter).Custom Lists
This parameter shows the number of available Custom Lists.Songs in the Current List
Number of entries in the selected Custom List.Page menu
Touch the page menu icon to open the menu. Touch a command to select it. Touch anywhere in the display to close the menu without selecting a command. Show Artist/Genre
Select this command to toggle between the Artist and Genre column on the SongBook list, appearing in the "Book" and "Custom List" pages.Show Number/Key
Select this command to toggle between the Number and Key column on the SongBook list, appearing in the "Book" and "Custom List" pages.Enable List Edit
Select this command, and make the checkmark appear, to make the List Edit page available.Export as text file
Only available when the Book or Custom List pages are selected. Select this command to open the Export dialog box, and save the Song-Book or Custom List as a text file. The selected filtering will be applied to the exported list, assuming the Filter button is checked. The dialog box is a little different, depending on the page where you selected this command. \- Selected from the "Book" page:  \- Selected from the "Custom List" page:  Touch the (Text Edit) button to open the Text Edit window and assign a name to the text file to be saved to a storage device. Then, select either the internal storage memory to save the file. \- Touch OK to confirm.Init SongBook
Select this command to erase the SongBook list and start with a new, blank list. Warning: Before initializing the SongBook list, save the older one with one of the Media > Save operations.Lyrics, Score, Markers
By pressing the LYRICS button, you can see lyrics in Style Play mode, lyrics and chord abbreviations in Style Play and Song Play modes. The SCORE button will let you see a traditional score in the Song Play mode. Pressing the MARKER button will give you access to the markers in the Song Play mode.Lyrics page
Open the Lyrics page by pressing the LYRICS button. This page shows the lyrics in Style Play mode, lyrics and chord abbreviations in the Song Play mode.Viewing lyrics and chords with Songs
You can see the following types of lyrics and chords: - Lyrics contained in a Standard MIDI File or Karaoke™ file as Lyrics events, or in an MP3 file with Lyrics (in ID3 format – see www.id3.org). - Lyrics contained in a “.CDG” file, loaded with an MP3 file with the same name. When a “.CDG” file exists in the same directory as an MP3 file, and shares exactly the same name, it will be loaded with the “MP3” file. - Lyrics contained in a “.TXT” file, loaded with a Standard MIDI File, Karaoke or MP3 file with the same name. When a “.TXT” file exists in the same directory as a Standard MIDI File or MP3 file, and shares exactly the same name, it is loaded with the “.MID” or “MP3” file (see “Text files loaded with Standard MIDI Files and MP3 files” on page 281). - Lyrics contained in a ".TXT" file linked to the latest-selected SongBook Entry (see "Linked .TXT" on page 278). - When no lyrics data is contained in the Song, or linked to a SongBook Entry, you can see lyrics contained in a ".TXT" file loaded at any time after selecting a Song (see "On-the-fly TXT loading" below). This is the priority of lyrics data shown in the display: i) CDG file contained in the same folder as the MP3 file, over-riding... ii) TXT file linked to a SongBook Entry, overriding... iii) TXT file contained in the same folder as the Standard MIDI File or MP3 file, recalled by a SongBook Entry, overriding... iv) Lyrics events contained in the Standard MIDI File or MP3 file. Hint: If you do not want to see the TXT file or the CDG file, and prefer to see the Lyrics data, rename or delete the TXT or CDG file, or move it to a different folder.Viewing lyrics with the Styles
Lyrics can be associated to a Style as a ".TXT" file. When in this page, you can see: \- Lyrics contained in a ".TXT" file linked to the latest-selected Style-based SongBook Entry (see "Linked .TXT" on page 278). \- Lyrics contained in a “.TXT” file loaded after selecting a Style (see “On-the-fly TXT loading” below).The Lyrics page in detail
Lyrics will be shown only if they are compatible with a standard format that Pa600 can understand.  While the Song is playing, Lyrics contained in a Standard MIDI File or MP3 file scroll in the display. Chord abbreviations (if any) will appear above the lyrics, in time with the music (depending on the status of the "Chord" button). Lyrics at the current position are highlighted. If the text has been loaded as a ".TXT" file, it will not scroll automatically while the Song is playing back. You must scroll it with the VALUE DIAL or the vertical scrollbar. As an alternative, you can use an assignable switch or footswitch, with the Text Page Up or Text Page Down functions assigned, to scroll (tively) to the previous or next text page. To exit from this page, press either the LYRICS or the EXIT button.Song chords
Chords contained in the Standard MIDI File (if any). This indicator may be easier to read than chords shown within the lyrics. When changing the Master Transpose, chord abbreviations contained in a Standard MIDI File are transposed, and correctly shown in the display. Master Transpose must be activated on the Player, but not on the Keyboard. Master Transpose
Master transpose value in semitones. This value can be changed using the TRANSPOSE buttons on the control panel.Current beat
Standard MIDI Files only. Currently playing beat.Current measure
Standard MIDI Files only. Current measure number.STS
Name of the four selected Single Touch Settings (ST one of them to select it.Chord
If this button is depressed, chords are shown above lyrics in the display – provided the Standard MIDI File contains them.ABC
Size of the fonts. You can choose between a smaller and a bigger font.CGD
Touch this button to show the lyrics contained in the associated On-the-fly TXT loading CDG file.Text in MP3+CGD files
When a “.CDG” file with the same name exists in the same directory as an MP3 file, it will be loaded with the “MP3” file, and can be seen in the Lyrics page. As an example, if the file "MYSONG.CDG" exists in the same directory as the "MYSONG.MP3" file, it is loaded together with the matching ".MP3" file. Text will scroll automatically while the Song is playing back. Note: When a ".CDG" file is loaded with the Song, it overrides any included Lyrics data.Text files loaded with Standard MIDI Files and MP3 files
When a “.TXT” file with the same name exists in the same directory as a Standard MIDI File or MP3 file, it will be loaded with the “.MID” or “MP3” file, and can be seen in the Lyrics page. As an example, if the file "MYSONG.TXT" exists in the same directory as the "MYSONG.MID" or "MYSONG.MP3" file, it is loaded together with the matching ".MID" or ".MP3" file. However, unlike ordinary Lyrics, the text will not scroll automatically while the Song is playing back. You must scroll it with the scrollbar or the VALUE DIAL. As an alternative, you can use an assignable switch or footswitch, with the Text Page Up or Page Down functions assigned, to scroll (respectively) to the previous or next text page. Text files must be formatted with non-proportional fonts (like Courier, Courier New, Monaco, or any other "monospaced" font). Up to 24 characters can fit a single line of text when using the bigger font size, 41 when using the smaller font size (see "ABC" above). Note: When a ".TXT" file is loaded with the Song, it overrides any included Lyrics data.On-the-fly TXT loading
When a Song does not contain any Lyrics metadata or isn't linked to any ".TXT" file, the "No lyrics. Press SHIFT and touch here to load a TXT file" message appears in the display when you press the LYRICS button.  The same happens while in Style Play mode.  When this message appears, and you want to load a ".TXT" file, keep the SHIFT button pressed and touch the center of the display. A standard file selector will appear, and will let you look for a ".TXT" file to be loaded. Hint: You can use the Search function to search a ".TXT" file in the various storage devices. See the relevant chapter.Score page
When you are in Song Play mode, and you are playing a Standard MIDI File, you can open the Score page by pressing the SCORE button.  To exit from this page, press either the SCORE or the EXIT button. Note: Master or Track Transpose do not affect the Score display.Song title
Name of the Song.Tempo
Current Tempo of the Song (in BPM, Beats Per Minute).Staff
The selected track is shown as traditional music notation. Depending on the content of the track, either notes or chords are shown. Pa600 takes care for you of 'cleaning-up' the score, so that it is always easy to read. Several automatic operations are carried on to clean-up the score: Pa600 automatically quantizes to 1/16 notes, detects triplets, avoids note overlaps, correctly notates syncopation, and draws beams according to the time signature. In addition, spacing and measure length are dynamic, and single, double and end measure bars are automatically added. If a KeySign (Key Signature) eve '001.01.000' of the Song's Master track, the correct key signature is also shown.Currently selected staff marker
This red vertical line shows the approximate position of the play-back, by indicating the current staff in play.Current measure indicator
This red triangle shows the current measure in play.Lyrics button
Touch this button to make the lyrics (if available) appear or disappear.Chord button
Touch this button to make the chord symbols (if available) appear or disappear. Chords are shown either according to the English or Italian system, depending on the selected language (see "General Controls: Interface" on page 235).Note button
Touch this button to make the note name appear or disappear next to each note. Note names are shown either according to the English or Italian system, depending on the selected language (see "General Controls: Interface" on page 235).Clef
Touch here to open a pop-up menu, where to choose a clef from. Available clefs are: Treble Standard Treble clef().  Treble+8 Treble clef with transposition one octave upper. Treble-8 Treble clef with transposition one octave lower. Bass Standard Bass clef( ).  Bass-8 Bass clef with transposition one octave lower.Play/Mute
Use this button to let the selected track play, or to mute it. If the track is muted, the score is still shown, so that you can play or sing it. Hint: The "Melody Mute" function, that can be assigned to an assignable switch or footswitch, allows for muting the melody track of a Song (default: Track 4, see "SMF Melody Track" on page 240). If your song has the melody part assigned to the same track, you can mute or unmute it by using this button, or the assigned switch/pedal.Selected track
Touch here to open a pop-up menu where to chose the track to be shown from. t is found at position Hint: The backing vocals are often assigned to Track 5.Markers page
Open the Marker page by pressing the MARKER button. This page shows the Song Markers in the Song Play mode and in the SongBook. Standard Song Markers contained in a Standard MIDI File can be read with the Pa600, to quickly jump to a given position in the Song. Additionally, you can set your own marker points on-the-fly.  To exit from this page, press the EXIT button.How to add a marker:
1. Press the MARKER button to open the Markers page. 2. Start the Song by pressing the PLAY/STOP button (however, markers can be added even while the player is not running). 3. When you reach the position you want to save as a marker, touch the Add button in the display. - If you touch Add within the first beats of the measure, the beginning of the current measure is saved as a marker. - If you touch Add within the last beat of the measure, the beginning of the following measure is saved as a marker. 4. Do the same for any following marker. 5. Stop the Song by pressing the PLAY/STOP button.How to jump to a saved marker:
1. If you like, start the Song again. 2. When you want to jump to a saved marker (while the Song is stopped or playing), touch it in the display. The Song will jump to the saved position at the beginning of the next measure.How to edit a marker:
1. Touch the marker to be edited in the display. 2. Touch the Edit button in the display to set the marker to edit. The Edit Marker window will appear.  3. While in Edit Marker window, you can edit the name and position of the marker being edited. 4. Save the markers (as described below).How to delete a marker:
1. Touch the marker to be deleted in the display. 2. Touch the Delete button in the display to delete the selected marker. 3. Save the markers (as described below).How to save the markers:
Touch the "Save Mk" button in the display to save all markers If you are not in the Lyrics/Score page, choose the "Save Song Marker" command from the page menu. The markers will be saved into the Standard MIDI File.Auto Scroll
Check this parameter if you want the current marker to be always visible in the display during playback, by making the list of markers scroll automatically. Don't check this parameter, if you prefer to prevent the list from scrolling. This is useful if you want a marker to remain in the display, ready to be selected as soon as you want to jump position, with no need to scroll the list to catch it out.STS
Name of the four selected Single Touch Settings (STS one of them to select it.MIDI
What is MIDI?
Here is a brief overview of MIDI, as related to the Pa600. If interested, you may find more information on the general use of MIDI in the various specialized magazines and dedicated books.In general
MIDI stands for Musical Instruments Digital Interface. This interface lets you connect two musical instruments, or a computer and various musical instruments. From a software point of view, MIDI is a protocol that describes messages for playing notes and controlling them. It is sort of a grammar to let different instruments and computers speak the same language, and let the one tell the other what to do. From a physical point of view, MIDI messages can travel across two different types of connectors on the Pa600: \- The MIDI interface, that is composed of two different connectors. The MIDI IN receives data from another device; the MIDI OUT sends data to another device. \- The USB Device port, that replaces both the MIDI IN and OUT connectors with a single port and cable. To use it for MIDI connection, it is advisable to install the KORG USB-MIDI Driver supplied in the Accessory Disc, or downloadable from our web site (www.korg.com). Both these devices are active at the same time. So, you can connect the Pa600 to a computer via the USB port, and connect another instrument's MIDI IN port to the MIDI THRU the Pa600.Channels and messages
Basically, a MIDI or USB cable transmits 16 channels of data. Think to each MIDI channel as a TV channel: the receiver must be set on the same channel of the transmitter. The same happens with MIDI messages: when you send a Note On message on channel 1, it will be received on channel 1 only. This allows for multitimbricity: you can have more than one sound playing on the same MIDI instrument. There are various messages, but here are the most commonly used: Note On - This message instructs an instrument to play a note on a specific channel. Notes have both a name (C4 standing for the center C) and a number (60 being the equivalent for C4). A Note Off message is often used to say the note has been released. In some case, a Note On with value "0" is used instead. Together with the Note On message, a Velocity value is always sent. This value tells the instrument how loud the note must play. Pitch Bend (PB) - You can generate this message acting on the joystick (X direction). The pitch is translated up or down. Program Change (PC) - When you select a Sound, a Program Change message is generated on the channel. Use this message, together with Control Change 00 and 32, to remotely select Pa600 data from a sequencer or a master keyboard. Control Change (CC) - This is a wide array of messages, controlling most of the instrument parameters. Some examples: - CC00, or Bank Select MSB, and CC32, or Bank Select LSB. This message pair is used to select a Sound Bank. Together with the Program Change message, they are used to select a Sound. - CC01, or Modulation. This is the equivalent of pressing up the joystick. A vibrato effect is usually triggered on. - CC07, or Master Volume. Use this controller to set the channel's volume. - CC10, or Pan. This one sets the channel's position on the stereo front. - CC11, or Expression. Use this controller to set the relative volume of tracks, with the maximum value matching the current setting of the CC07 control. - CC64, or Damper Pedal. Use this controller to simulate the Damper pedal.Tempo
Tempo is a global MIDI message, that is not tied to a particular channel. Each Song includes Tempo data.Lyrics
Lyrics are non-standard MIDI events, intended to display text port together with the music. Pa600 can read many of the available Lyrics format on the market.What is MIDI Over USB?
You can let the Pa600 communicate MIDI data with a computer using the USB Device port instead of the MIDI ports. This way, you can connect your Pa600 to a personal computer without the need of a dedicated MIDI interface. Most Pa600 MIDI features can be used on a Windows or Mac computer with no need of special software. However, for full and easy use of all MIDI features, we suggest you to install the "KO-RG USB MIDI Driver", a special software that you can find in the Accessory Disc that comes with your Pa600. Relevant instructions come with the software itself. See "Installing the KORG USB MIDI Driver" on page 401.Standard MIDI Files
Standard MIDI Files (a.k.a. SMF) are a practical way of exchanging songs between different instruments and computers. Pa600 uses the SMF format as its default song format, so reading a song from a computer, or saving a song that a computer software can read, is not a problem at all. The internal Player is compatible with SMFs format 0 (all data in one track; it is the most common format) and 1 (multitrack). Pa600 can read SMFs in Song Play mode and modify/save them in Sequencer mode. It can save a Song in SMF format Sequencer mode. When in Song Play mode, Pa600 can also display SMF lyrics in Solton, M-Live (Midisoft), Tune1000, Edirol, GMX, HitBit, and XF formats, and the chord abbreviations of SMF in Solton, M-Live (Midisoft), GMX, and XF format. Note: The above trademarks are the property of their respective holders. No endorsement is intended by their inclusion in this list. Standard MIDI Files usually have the “.MID” or “.KAR” filename extension.The General MIDI standard
Some years ago, the musical instruments world felt a need for some further standardization. Then, the General MIDI Standard (GM) was born. This extension of the basic MIDI sets new rules for compatibility between instruments: • A minimum of 16 MIDI channels was required. - A basic set of 128 Sounds, correctly ordered, was mandatory. • The Drum Kit had a standard order. • Channel 10 had to be devoted to the Drum Kit. A most recent extension is the GM2, that further expands the Sounds database. Pa600 is sound-compatible with the GM2 standard.The Global channel
Any channels with the Global option assigned (see "MIDI: MIDI In Channels" on page 247) can simulate the Pa600 integrated keyboard. When the Pa600 is connected to a master keyboard, transmission should take place over the Global channel of the Pa600. The MIDI messages received over a Global channel and not over a standard channel are affected by the status of the SPLIT button, as well from the split point. Therefore, if the SPLIT button LED is lit up, notes arriving to Pa600 over this channel will be divided by the split point into the Upper (above the split point) and Lower (below the split point) parts. Notes arriving to a Global channel are used for the chord recognition of the automatic accompaniment. If the SPLIT LED is turned on, only the notes below the split point will be used. These notes will be combined with the ones of the special Chord 1 and Chord 2 channels.The Chord 1 and Chord 2 channels
You can set two special Chord channels (see page 247) to send Pa600 notes for chord recognition. These notes will be combined with the notes that go through the channel set as Global (Global notes are recognized only under the split point, if the SPLIT LED is lit up). The Chord channels are not affected by the split point. All the notes – both above and below the split point – will be sent to the chord recognition. 0 from However, the status of the SPLIT button has a particular effect on the way chords are recognized on the Chord channels: - When the SPLIT LED is turned on (Lower mode), the chord recognition mode will be set by the “Chord Recognition” parameter in the Global > Mode Preferences > Style page (see page 239). You can play a single note to play a Major chord. - When the SPLIT LED is turned off (Full Upper mode), the chord recognition mode will always be Fingered or Expert, depending on the previous situation. You have to play at least three notes in order for the chord to be detected. These two channels are especially useful for accordion players, that wish to assign a different Chord channel to the chords and the bass played with the left hand. This way, chords and bass will both contribute to the formation of chords for the chord recognition of the automatic accompaniment.The Control channel
You can set a MIDI IN channel as the Control channel (see page 247), to select Styles and Performance from an external device. See the Appendix for a list of messages corresponding to Pa600 internal data.MIDI Presets
You can play Pa600 with an external controller, and use it simply as a powerful sound generator. To help you configure the MIDI channels, we have provided a set of MIDI Presets that can be accessed in the Global > MIDI > General Controls page (see "Preset" on page 245). We recommend you to consider each MIDI Preset as a starting point you can freely tweak. Once you have selected the most appropriate MIDI Preset for the connection to be made, you can modify the parameters as needed and save them into a MIDI Preset (see "Write Midi Preset dialog box" on page 251).Connecting Pa600 to a Master keyboard
You can control Pa600 with a master keyboard or any other MIDI keyboard. You only need to connect the MIDI OUT connector of the master keyboard to the MIDI IN Pa600. The master keyboard will become the integrated keyboard of the Pa600 if it transmits over the same channel programmed as Global in Pa600.  If the master keyboard transmits over the Global channel of Pa600, the split point and the status of the SPLIT button in the control panel will affect the notes received from the master keyboard.Connections and settings
To connect the master keyboard to Pa600 follow this procedure: 1. Connect the MIDI OUT connector of the master keyboard to the MIDI IN connector of the Pa600. 2. Program the master keyboard to transmit over the Global channel of Pa600 (see "MIDI: MIDI In Channels" on page 247). For information on programming the master keyboard, please see the master keyboard's own user manual. 3. Select the "Master Keyboard" MIDI Preset. You can do this by going to the "MIDI: General Controls" page of the Global mode. Note that this MIDI Preset will be remain unchanged even when the instrument enters standby. Note: Settings may change when new Global data is loaded from disk. To protect settings from loading, use the Global Protect function (see "Global Protect" on page 241). 4. If needed, press one of the buttons in the MODE section to go to the desired operative mode.Connecting Pa600 to a MIDI accordion
There are various types of MIDI accordions, each one requiring different MIDI settings. Pa600 is provided with a series of c"Anordiction"rMIDI Setups, each one suitable for a different MIDI accordion (see page 245).Connection and settings
To connect the accordion to the Pa600 follow this procedure: 1. Connect the MIDI OUT connector of the accordion to the MIDI IN connector of Pa600. 2. Select one of the available "Accordion" MIDI Preset parameter. You can do this by going to the "MIDI: General Controls" page of the Global mode. Note that this MIDI Preset will be remain unchanged even when the instrument enters standby. Note: Settings may change when new Global data is loaded from disk. To protect settings from loading, use the Global Protect function (see "Global Protect" on page 241). 3. If needed, press one of the buttons in the MODE section to go to the desired operative mode.Connecting Pa600 to an external sequencer
You can program a new song on an external sequence Pa600 as a multi-timbral expander.Connections and settings
In order to connect Pa600 to a computer, you need a computer with either a MIDI interface or a USB port. 1. In case of an USB connection, install the KORG USB MIDI Driver, as explained in "Installing the KORG USB MIDI Driver" on page 401. 2. Connect Pa600 and the computer either via the USB Device port, or via the MIDI ports and a MIDI interface, as shown in the following diagram.  natural_image
Front view of a computer interface with keyboard, mouse, and control panel (no readable text or symbols)The Local Off
When Pa600 is connected to an external sequencer, we recommend you to set the Pa600 in Local Off mode (see "Local Control On" on page 246) to avoid that the notes are simultaneously played by the keyboard and by the MIDI events sent by the External Sequencer. When Pa600 is in Local Off, the keyboard of Pa600 transmits data to the external sequencer, but not to the internal sound generation. The sequencer will receive notes played on the keyboard of Pa600 and will send them to the selected track of the song. The track will then transmit data to the internal sound generation of Pa600. Note: In order to send data to the sound generation of Pa600, the "MIDI Thru" function must be activated in the external sequencer (normally active; the name may be different according to the type of sequencer). For more information refer to the instructions manual of the sequencer.The Sounds
The song that is played back by the sequencer can select Pa600 Sounds through the MIDI messages Bank Select MSB, Bank Select LSB (bank selection, two messages), and Program Change (Sound selection). For a list of Sounds and MIDI values, see "Sounds" on page 295. A suggestion for those who program songs on computer: even though it is not mandatory, for a wider compatibility you should set the bass on channel 2, melody on channel 4, drum kit on channel 10, controls for an harmonizer on channel 5.Playing another instrument with Pa600
You can use Pa600 as the master controller for your MIDI setup. 1. Connect the MIDI OUT connector of Pa600 to the other instrument's MIDI IN. 2. Set the other instrument to the same channels you want to play from Pa600. For example, if you wish to play the Upper 1 and Upper 2 tracks with sounds of the other instrument, enable the other instrument to receive on the same channels Pa600 is transmitting from the Upper 1 and Upper 2 tracks (by default, channels 1 and 2). 3. Set the master volume of the other instrument with its own volume controls. 4. Mute/unmute any track right from the Pa600. Adjust each track's volume by using the Pa600 (sliders on the display). 5. Play the keyboard of Pa600.The Keyboard
The keyboard of Pa600 can drive up to four tracks via the MIDI OUT (Upper 1-3 and Lower). MIDI output channels are set in Global mode (see “MIDI: MIDI Out Channels” on page 247). As per the default situation ("1-Default" MIDI Preset), each of Pa600 Keyboard tracks transmit on the following channels:| Track Out Channel | |
| Upper1 1 | |
| Upper2 2 | |
| Upper3 3 | |
| Lower 4 |
The Player
Any Player's track can drive a channel on an external instrument. To set each track's MIDI output channel, see "MIDI: MIDI Out Channels" on page 247. To only hear the expander's sounds, you can lower the MASTER VOLUME control on the Pa600, or set the Song tracks to the External status (see "Track Controls: Mode" on page 180). Select the "Player" MIDI Preset to set the channels as follows:| Track Out Channel | |
| Song 1...16 1...16 |
The Arranger
One of the most interesting aspect of MIDI, is that you can use your Pa600 to play an external instrument with its onboard arranger. Yes, it's hard to beat the audio quality of Pa600, but you could wish to use that old faithful synth you are still accustomed to... To assign some of the Style tracks of Pa600 to an external instrument, set them to the External status (see “Track Controls: Mode” on page 180). Select the "Default" MIDI Preset to set the channels as follows (this is the default status of Pa600):| Track Out Channel | |
| Bass 9 | |
| Drums 10 | |
| Percussion 11 | |
| Acc1...5 12...16 |
Appendix
Factory data
Styles
Note: You can remotely select Styles on the Pa600, by sending it Bank Select MSB (CC#0), Bank Select LSB (CC#32) and Program Change messages on the Control channel (see "MIDI: MIDI In Channels" on page 247).| # Name CC00 CC32 PC | ||||
| Bank: Pop | ||||
| 1 Guitar Pop 0 0 0 | ||||
| 2 Guitar Beat 0 0 1 | ||||
| 3 | S t a n d a r d | 8 | B e a | |
| 4 Standard 16 Beat | 0 0 3 | |||
| 5 Modern Beat | 0 0 4 | |||
| 6 Pop Ballad | 0 0 5 | |||
| 7 | P o p C h a r t1 | |||
| 8 | P o p C h a r t2 | |||
| 9 | E a s y P o p 1 | |||
| 10 Easy Pop 2 0 0 9 | ||||
| 11 British Pop | 0 0 | 10 | ||
| 12 Slow Latin Pop | 0 0 | 11 | ||
| 13 6/8 Slow Pop | 0 0 | 12 | ||
| 14 12/8 Pop | 0 0 | 13 | ||
| 15 Pop Shuffle 1 | 0 0 | 14 | ||
| 16 Pop Shuffle 2 | 0 0 | 15 | ||
| 17 Easy Beat 1 0 0 16 | ||||
| 18 Easy Beat 2 0 0 17 | ||||
| 19 Real 8 Beat | 0 0 | 18 | ||
| 20 Real 16 Beat | 0 0 | 19 | ||
| 21 Soft 8 Beat | 0 0 | 20 | ||
| 22 Soft 16 Beat | 0 0 | 21 | ||
| 23 Analog Beat 1 | 0 0 | 22 | ||
| 24 Analog Beat 2 | 0 0 | 23 | ||
| 25 8 Beat Analog 1 | 0 0 | 24 | ||
| 26 8 Beat Analog 2 | 0 0 | 25 | ||
| 27 Pop Funk 1 | 0 0 | 26 | ||
| 28 Pop Funk 2 | 0 0 | 27 | ||
| Bank: Ballad | ||||
| 1 Modern Ballad 1 | 0 1 0 | |||
| 2 Modern Ballad 2 | 0 1 1 | |||
| 3 Moonlight Ballad | 0 1 2 | |||
| 4 Soft Ballad 0 1 3 | ||||
| 5 | F u n k y B a l | l | a d | |
| 6 Guitar Ballad | 0 1 5 | |||
| 7 | E a s y B a l l | ad | ||
| 8 Organ Ballad | 0 1 7 | |||
| 9 Folk Ballad | 0 1 8 | |||
| 10 Orchestral Bld | 0 1 9 | |||
| 11 Groove Ballad | 0 1 | 10 | ||
| 12 Blues Ballad | 0 1 | 11 | ||
| # | Name | CC00 | CC32 | PC |
| 13 Analog Ballad 1 | 0 1 | 12 | ||
| 14 Analog Ballad 2 | 0 1 | 13 | ||
| 15 Rock Ballad 1 | 0 | 1 | 4 | |
| 16 Rock Ballad 2 | 0 | 1 | 5 | |
| 17 Waltz Ballad | 0 | 1 | 16 | |
| 18 6/8 Slow | 0 1 | 17 | ||
| 19 6/8 Ballad 1 | 0 1 | 18 | ||
| 20 6/8 Ballad 2 | 0 1 | 19 | ||
| 21 Pop Hit Ballad | 0 1 | 20 | ||
| 22 Oriental Ballad | 0 1 | 21 | ||
| 23 Blue Ballad | 0 | 1 | 22 | |
| Bank: Ballroom | ||||
| 1 Quick Step 7 | 0 2 0 | |||
| 2 Baso Dance 8 | 0 2 1 | |||
| 3 | J i v e 1 | 0 | ||
| 4 | J i v e 2 | 0 | ||
| 5 Argentina Tango | 0 2 4 | |||
| 6 Modern Tango | 0 2 | 5 | ||
| 7 S I o w F o x | ||||
| 8 Organ Foxtrot | 0 2 7 | |||
| 9 Slow Waltz 1 | 0 2 8 | |||
| 10 Slow Waltz 2 | 0 2 9 | |||
| 11 Slow Waltz 3 | 0 2 | 10 | ||
| 12 Organ Waltz | 0 2 | 11 | ||
| 13 Foxtrot 1 | 0 2 | 12 | ||
| 14 Foxtrot 2 | 0 2 | 13 | ||
| 15 Slow Band | 0 2 | 14 | ||
| 16 Big Band Jump | 0 2 | 15 | ||
| 17 Big Band Fox | 0 2 | 16 | ||
| 18 Big Band 40's | 0 2 | 17 | ||
| 19 Fox Shuffle 1 | 0 | 2 | 18 | |
| 20 Fox Shuffle 2 | 0 | 2 | 19 | |
| 21 Italian Tango 1 | 0 2 | 20 | ||
| 22 Italian Tango 2 | 0 2 | 21 | ||
| 23 Twist | 0 2 | 22 | ||
| 24 Hully Gully | 0 2 | 23 | ||
| 25 50's Fox | 0 2 | 24 | ||
| 26 Italian Fox | 0 2 | 25 | ||
| 27 Irish Fox 0 2 26 0 1 4 | ||||
| Bank: Dance | ||||
| 1 70's Disco Remix 6 | 0 3 0 | |||
| 2 70's Disco 1 | 0 3 1 | |||
| 3 70's Disco 2 | 0 3 2 | |||
| 4 80's Dance | 0 3 3 | |||
| 5 90's Dance | 0 3 4 | |||
| 6 Electro Dance | 0 3 5 | |||
| 7 Dance Chart 1 0 3 6 | ||||
| 8 Dance Chart 2 0 3 7 | ||||
| 9 Funky Disco 0 3 8 | ||||
| 1 | 0 T e c h n o | 0 | ||
| 11 Garage 0 3 10 | ||||
| 12 House 0 3 11 | ||||
| 13 Club House 0 3 12 | ||||
| 14 Euro Trance 0 3 13 | ||||
| 15 Fashion Funk | 0 3 14 | |||
| 16 Dance Fever | 0 3 15 | |||
| 17 Barry Dance | 0 3 16 | |||
| 18 Sister & Girl 0 3 17 | ||||
| 19 Philly Disco | 0 3 18 | |||
| 20 Miami Disco | 0 3 19 | |||
| 21 Love Disco | 0 3 20 | |||
| 22 Dance Motown | 0 3 21 | |||
| 23 Dance Mix | 0 3 22 | |||
| 24 Soca Dancing | 0 3 23 | |||
| Bank: Rock | ||||
| 1 | P o p R o c k | |||
| 2 English Rock | 0 4 1 | |||
| 3 | F i re R o c k | |||
| 4 Hard Rock | 0 4 3 | |||
| 5 Open Rock 1 | 0 4 4 | |||
| 6 Open Rock 2 | 0 4 5 | |||
| 7 | Heavy Rock | 0 | 4 | 6 |
| 8 | Fu n k y R o c k | |||
| 9 | R o c k O l d i e | |||
| 10 Rock & Roll | 0 4 9 | |||
| 11 South Shuffle | 0 4 10 | |||
| 12 Slow Latin Rock | 0 4 11 | |||
| 13 Latin Rock 1 | 0 4 12 | |||
| 14 Latin Rock 2 | 0 4 13 | |||
| 15 Surf Rock | 0 4 14 | |||
| 16 60's Rock | 0 4 15 | |||
| 17 Slow Rock 1 0 4 16 | ||||
| 18 Slow Rock 2 0 4 17 | ||||
| 19 60's Slow Rock | 0 4 18 | |||
| 20 6/8 Rock | 0 4 19 | |||
| 21 Steely Rock | 0 4 20 | |||
| 22 Abbey Rock | 0 4 21 | |||
| 23 South Strait Rock | 0 4 22 | |||
| 24 Rock Cha Cha | 0 4 23 | |||
| 25 Blues Shuffle | 0 4 24 | |||
| Bank: Unplugged | ||||
| 1 Unplugged Heaven | 0 5 0 | |||
| 2 Sally Groove | 0 5 1 | |||
| 3 Unplugged Ballad 1 | 0 5 2 | |||
| 4 Unplugged Ballad 2 | 0 5 3 | |||
| 5 Unplugged Ballad 3 | 0 5 4 | |||
| 6 Unplugged Slow | 0 5 5 | |||
| 7 Desert Shuffle 0 5 6 | ||||
| # | Name | CC00 | CC32 | PC |
| 8 Serenade | 0 5 7 | |||
| 9 Unplugged | 0 5 8 | |||
| 10 Meditando | 0 5 9 | |||
| 11 Unplugged 8 Bt | 0 5 10 | |||
| 12 Unplugged 16 Bt | 0 5 11 | |||
| 13 Unplugged Gtr 1 | 0 5 12 | |||
| 14 Unplugged Gtr 2 | 0 5 13 | |||
| 15 Unplugged Gtr 3 | 0 5 14 | |||
| 16 Unplugged Gtr 4 | 0 5 15 | |||
| 17 Slide Blues | 0 5 16 | |||
| 18 Unplugged Rock | 0 5 17 | |||
| 19 Unplugged Latin | 0 5 18 | |||
| 20 Unplugged Swing | 0 5 19 | |||
| 21 3⁄4 Unplugged | 0 5 20 | |||
| 22 3⁄4 Acoustic Bld | 0 5 21 | |||
| Bank: Country | ||||
| 1 | Easy Country | 0 | 6 | 0 |
| 2 Country Blues | 0 6 1 | |||
| 3 Country Strum | 0 6 2 | |||
| 4 Country QuikStep | 0 | 0 6 3 | ||
| 5 Country Beat 1 | 0 6 | 4 | ||
| 6 Country Beat 2 | 2 | 0 | 6 5 | |
| 7 Country Ballad 1 | 0 6 6 | |||
| 8 Country Ballad 2 | 0 6 7 | |||
| 9 Finger Picking 0 6 8 | ||||
| 1 | 0 3⁄4 Co u n | t | ry | |
| 11 Modern Country | 4 7 | 0 | 6 10 | |
| 12 Country Pop | 0 4 8 | 0 | 6 | 11 |
| 13 Bar Country 0 | 6 12 | |||
| 14 Bluegrass | 0 | 6 13 | ||
| 15 Country Boogie | 0 6 14 | |||
| 16 Country Shuffle | 0 6 15 | |||
| 17 Country 8 Beat | 0 | 6 | 16 | |
| 18 Country 16 Beat | 0 | 6 | 17 | |
| Bank: Traditional | ||||
| 1 German Waltz 1 | 0 7 0 | |||
| 2 German Waltz 2 | 0 7 1 | |||
| 3 German Waltz 3 | 0 7 2 | |||
| 4 | Vienna Waltz | 0 | 7 | 3 |
| 5 Italian Waltz | 0 | 7 4 | ||
| 6 Musette Waltz 0 | 7 5 | |||
| 7 | French Waltz | 0 | 7 | 6 |
| 8 Irish Waltz | 0 | 7 7 | ||
| 9 Laendler Waltz | 0 7 8 | |||
| 10 German Polka | 0 | 7 9 | ||
| 11 Italian Polka 1 | 0 | 7 10 | ||
| 12 Italian Polka 2 | 0 | 7 11 | ||
| 13 Italian Polka 3 | 0 | 7 12 | ||
| 14 Italian Mazurka 1 | 0 7 13 | |||
| 15 Italian Mazurka 2 | 0 7 14 | |||
| 16 Italian Mazurka 3 | 0 7 15 | |||
| 17 9/8 | 0 | 7 | 16 | |
| 18 Vahde 0 7 17 | ||||
| 19 2/4 Oyun 0 7 18 | ||||
| 20 Ciftetelli 0 7 19 | ||||
| 21 Halay 0 7 20 | ||||
| 22 5/8 0 7 21 | ||||
| 23 Oryantal 0 7 22 | ||||
| 24 Turkish Pop 0 7 23 | ||||
| Bank: Latin | ||||
| 1 Samba Brazil 0 8 0 | ||||
| 2 B o s s a N o v | a | 0 | 8 | 1 |
| 3 Classic Salsa | 0 8 2 | |||
| 4 Classic Cha Cha | 0 8 3 | |||
| 5 Classic Mambo | 0 8 4 | |||
| 6 Classic Merengue | 0 8 5 | |||
| 7 Classic Bachata | 0 8 6 | |||
| 8 Guajira | 0 8 7 | |||
| 9 6 / 8 A f ro 0 | 8 | 8 | ||
| 10 Cumbia | 0 8 9 | |||
| 11 Rhumba 1 | 0 8 10 | |||
| 12 Rhumba 2 | 0 8 11 | |||
| 13 Salsa 1 | 0 8 12 | |||
| 14 Salsa 2 | 0 8 13 | |||
| 15 Cool Latin Jazz | 0 8 14 | |||
| 16 Latin Big Band | 0 8 15 | |||
| 17 Meditation Bossa | 0 8 16 | |||
| 18 Organ Bossa | 0 8 17 | |||
| 19 Orch. Bossa 1 | 0 8 18 | |||
| 20 Orch. Bossa 2 | 0 8 19 | |||
| 21 Fast Bossa | 0 | 8 20 | ||
| 22 Cool Bossa | 0 8 21 | |||
| 23 Natural Bossa | 0 8 22 | |||
| 24 Pop Cha Cha 0 8 23 | ||||
| 25 Habanera | 0 8 24 | |||
| 26 Latin Vocal | 0 8 25 | |||
| 27 Latin Bolero | 0 8 26 | |||
| 28 Latin Pop | 0 8 27 | |||
| Bank: Latin Dance | ||||
| 1 Reggaeton | 0 9 0 | |||
| 2 Lambada 0 9 1 | ||||
| 3 Meneaito | 0 | 9 | 2 | |
| 4 Macarena | 0 | 9 | 3 | |
| 5 Bomba Dance | 0 9 | 4 | ||
| 6 Tortura Dance | 0 | 9 5 | ||
| 7 Gipsy Dance | 0 9 6 | |||
| 8 Sambalegre | 0 9 7 | |||
| 9 Samba Dance | 0 9 | 8 | ||
| 10 Disco Samba | 0 9 | 9 | ||
| 11 Mambo Party | 0 9 10 | |||
| 12 Modern Bachata | 0 | 9 11 | ||
| 13 Classic Beguine | 0 9 12 | |||
| 14 Bayon | 0 | 9 13 | ||
| 15 Modern Bossa | 0 9 14 | |||
| # | Name | CC00 | CC32 | PC |
| 16 | Disco Cha Cha | 0 9 15 | ||
| 17 | Calypso | 0 | 9 16 | |
| 18 | Reggae 1 0 9 17 | |||
| 19 | Reggae 2 0 9 18 | |||
| 20 | Club Latino | 0 9 19 | ||
| 21 | Andean | 0 | 9 20 | |
| Bank: Jazz | ||||
| 1 | Bigger Band | 0 10 0 | ||
| 2 | Setenade Band | 0 10 | 1 | |
| 3 | Jazz Club | 0 | 10 | 2 |
| 4 | Be Bop | 0 10 3 | ||
| 5 | Medium BigBand1 | 0 10 4 | ||
| 6 | Medium BigBand2 | 0 10 5 | ||
| 7 | Fast Big Band 1 | 0 10 6 | ||
| 8 | Fast Big Band 2 | 0 10 7 | ||
| 9 | Slow Swing Brush | 0 10 8 | ||
| 10 | Swing Ballad 1 | 0 10 9 | ||
| 11 | Swing Ballad 2 | 0 10 | 10 | |
| 12 | Swing Ballad 3 | 0 10 | 11 | |
| 13 | Orchestral Swing | 0 10 | 12 | |
| 14 | Jazz Brush | 0 10 | 13 | |
| 15 | Medium Jazz Waltz | 0 10 | 14 | |
| 16 | Slow Jazz Waltz | 0 10 | 15 | |
| 17 | Jazzy Blues | 0 10 | 16 | |
| 18 | Organ Swing | 0 10 | 17 | |
| 19 | Organ Blues | 0 10 | 18 | |
| 20 | Swing Quintet | 0 10 | 19 | |
| 21 | Medium Swing | 0 10 | 20 | |
| 22 | Vocal Swing | 0 10 | 21 | |
| 23 | Moon Swing | 0 10 | 22 | |
| 24 | Soft Jazz 0 10 23 | |||
| 25 | Django | 0 10 | 24 | |
| 26 | 5/4 Swing | 0 10 | 25 | |
| Bank: Movie & Show | ||||
| 1 | Orchestral Movie | 0 | 11 0 | |
| 2 | Broadway | 0 | 11 | 1 |
| 3 | Show Time | 0 11 2 | ||
| 4 | Ritz Swing | 0 11 3 | ||
| 5 | Hollywood 1 | 0 11 4 | ||
| 6 | Hollywood 2 | 0 11 5 | ||
| 7 | Tap Dance | 0 11 6 | ||
| 8 | Movie Ballad 0 11 7 | |||
| 9 | Movie Swing | 0 | 11 8 | |
| 10 | Safari Swing | 0 11 9 | ||
| 11 | Western Movie | 0 11 | 10 | |
| 12 | Mystery Man | 0 | 11 | 11 |
| 13 | Cartoon Time | 0 11 | 12 | |
| 14 | Horror Movie | 0 11 | 13 | |
| 15 | Love Movie | 0 11 | 14 | |
| 16 | Artie's Theme | 0 | 11 | 15 |
| 17 | Christmas Waltz | 0 11 | 16 | |
| 18 | Christmas Swing | 0 11 | 17 | |
| 19 Theatre Swing 0 11 18 | ||||
| 20 Theatre March 0 11 19 | ||||
| 21 Love Ballad 0 11 20 | ||||
| 22 Army Band 0 11 21 | ||||
| Bank: Funk & Soul | ||||
| 1 | F u n k R & B 0 | 1 | 2 | 0 |
| 2 | K o o l F u | n | k | 0 |
| 3 | A l F u n k | 0 | 1 | 2 |
| 4 | E l e k t r | i k | F | u |
| 5 | Classic Funk | 0 12 | 4 | |
| 6 | U r b a n F | u | n | k |
| 7 | Talkin' Jazz | 0 12 | 6 | |
| 8 | Funky Sisters | 0 12 | 7 | |
| 9 | R h y t h m & B | l | u | e s |
| 10 Blues | 0 12 9 | |||
| 11 Soul | 0 12 10 | |||
| 12 Gospel | 0 12 11 | |||
| 13 Gospel Swing | 0 12 12 | |||
| 14 Gospel Shuffle | 0 12 13 | |||
| 15 Modern Gospel 1 | 0 12 14 | |||
| 16 Modern Gospel 2 | 0 12 15 | |||
| 17 Al Swing | 0 12 16 | |||
| 18 Groove | 0 12 17 | |||
| 19 Groove Funk | 0 12 18 | |||
| 20 Jazz Funk | 0 12 19 | |||
| 21 Motown Shuffle 1 | 0 12 20 | |||
| 22 Motown Shuffle 2 | 0 12 21 | |||
| 23 Cool Vocal | 0 12 22 | |||
| 24 70's Beat Groove | 0 12 23 | |||
| Bank: World | ||||
| 1 | Spanish Dance | 0 13 | 0 | |
| 2 | 4 / 4 F I a | m | e | n |
| 3 | 3⁄4 Flamenco | 0 13 | 2 | |
| 4 | Casatchock | 0 13 | 3 | |
| 5 | Greek Rumba | 0 13 | 4 | |
| 6 | Xasapiko | 0 13 | 5 | |
| 7 | S i r t a k | i | ||
| 8 | Z o u k | 0 | ||
| 9 | Hawaiian | 0 13 | 8 | |
| 10 Mexican Waltz 0 13 9 | ||||
| 11 Norteno | 0 13 10 | |||
| 12 Kebradita | 0 13 11 | |||
| 13 Bolero Ranchero | 0 13 12 | |||
| 14 Mariachi Polka | 0 13 13 | |||
| 15 Mariachi Valz | 0 13 14 | |||
| 16 Mariachi Cumbia | 0 13 15 | |||
| 17 Alpen Schlager | 0 13 16 | |||
| 18 Classic Schlager | 0 13 17 | |||
| 19 Modern Schlager | 0 13 18 | |||
| 20 Vienna Waltz | 0 13 19 | |||
| 21 Tarantella | 0 13 20 | |||
| 22 Rumba Napoletana | 0 13 21 | |||
| # | Name | CC00 | CC32 | PC |
| 23 Raspa | 0 13 22 | |||
| 24 Mad Ska | 0 13 23 | |||
| 25 Celtic Dream | 0 13 24 | |||
| 26 Celtic Waltz | 0 13 25 | |||
| 27 Celtic Ballad | 0 13 26 | |||
| 28 Scottish Reel | 0 13 27 | |||
| 29 Banda | 0 13 28 | |||
| 30 OrchestralBolero | 0 13 29 | |||
| 31 M K | Inuetto 0 1 | 0 13 30 2 | 3 | |
| 32 Baroque | 0 13 31 | |||
| Bank: Contemporary0 1 2 5 | ||||
| 1 | F u n k y R & B | |||
| 2 | A M : P M 0 | 1 | 4 | 1 |
| 3 | ContemporaryBld 1 2 8 | 0 14 | 2 | |
| 4 | I s I a n d | V | i e w | |
| 5 | Fast Smooth Jazz | 0 14 | 4 | |
| 6 | Slow Smooth Jazz | 0 14 | 5 | |
| 7 | S I o w & J | a | z | z |
| 8 | Take Beat | 0 14 | 7 | |
| 9 | S w i n g H | i | p | H |
| 10 Slow Mood | 0 14 9 | |||
| 11 Hip Hindi Hop 0 14 10 | ||||
| 12 Soft HipHop | 0 14 11 | |||
| 13 New Age | 0 14 12 | |||
| 14 Kyoto Lounge | 0 14 13 | |||
| 15 Jazzy Funk | 0 14 14 | |||
| 16 Slow Funk | 0 14 15 | |||
| 17 Elektro Pop | 0 14 16 | |||
| 18 Modern Latin | 0 14 17 | |||
| 19 Folk Beat | 0 14 18 | |||
| 20 Wave Jazz | 0 14 19 | |||
| 21 Little Shuffle 0 1 3 | 0 14 20 1 | |||
| 22 Rap | 0 14 21 | |||
| Bank: Favorite 1...12 | ||||
| (Favorite 1 Styles) | 0 15 | 1-40 | ||
| (Favorite 2 Styles) | 0 16 | 1-40 | ||
| (Favorite 3 Styles) 6 | 0 17 | 1-40 | ||
| 3 | (Favorite 4 Styles) | 0 18 | 1-40 | |
| (Favorite 5 Styles) | 0 19 | 1-40 | ||
| (Favorite 6 Styles) | 0 20 | 1-40 | ||
| (Favorite 7 Styles) | 0 21 | 1-40 | ||
| (Favorite 8 Styles) | 0 22 | 1-40 | ||
| (Favorite 9 Styles) | 0 23 | 1-40 | ||
| (Favorite 10 Styles) | 0 24 | 1-40 | ||
| (Favorite 11 Styles) | 0 25 | 1-40 | ||
| (Favorite 12 Styles) | 0 26 | 1-40 | ||
| Bank: User 1...3 | ||||
| (User 1 Styles) | 0 27 | 1-40 | ||
| (User 2 Styles) | 0 28 | 1-40 | ||
| (User 3 Styles) | 0 29 | 1-40 | ||
Style Elements
Note: You can remotely select the various Style Elements on the Pa600, by sending it Program Change messages on the Control channel (see "MIDI: MIDI In Channels" on page 247).| PC Style Element PC Style Element PC Style Element PC Style Element | ||||||||
| 80 Intro 1 81 Intro 2 82 Intro 3/Count In | 83 Variation 1 84 Variation 2 | |||||||
| 85 Variation 3 86 Variation 4 87 Fill 1 88 Fill 2 89 Fill 3 | ||||||||
| 90 Fill 4 91 Break 92 Ending 1 93 Ending 2 94 Ending 3 | ||||||||
Style and Player controls
Note: You can remotely send various commands to the Style and Player of the Pa600, by sending it Program Change messages on the Control channel (see “MIDI: MIDI In Channels” on page 247).| PC Style Element PC Style Element PC | Style Element PC Style Element | ||||||||
| 95 | Fade In/Out | 96 | STS Mode | 97 | Auto Fill | 98 | Memory | 99 | Bass Inversion |
| 100 | Manual Bass | 101 | Tempo Lock | 102 | Style Change | 103 | Start/Stop (Style) | 104 | Play/Stop (Player) |
Single Touch Settings (STS)
Note: You can remotely select Single Touch Settings (STS) on the Pa600, by sending it Bank Select MSB (CC#0), Bank Select LSB (CC#32) and Program Change messages on the Control channel (see "MIDI: MIDI In Channels" on page 247). If a Style is already selected, just send the Program Change message.| CC#0 | CC#32 | PC | STS | PC | STS | PC | STS | PC | STS |
| The same as the Style to which the STS belongs | 64 | STS 1 | 65 | STS 2 | 66 | STS 3 | 67 | STS 4 | |
Sounds
The following table lists all Pa600 Factory Sounds as they appear in the Sound Select window. Legend: The table also includes MIDI data used to remotely select the Sounds. CC00: Control Change 0, or Bank Select MSB. CC32: Control Change 32, or Bank Select LSB. PC: Program Change. Bank: Sound Select button.| Name CC00 CC32 PC | |||
| Factory: Piano | |||
| Grand Piano RX 121 10 0 | |||
| Bright Piano RX 121 5 1 | |||
| Classic Piano 121 4 0 | |||
| Jazz Piano 121 5 0 | |||
| Rock Piano 121 8 0 | |||
| Piano Layers 121 6 2 | |||
| G.Piano Stack 1 | 121 8 | 2 | |
| G.Piano Stack 2 | 121 9 | 2 | |
| Grand&MovingPad | 121 9 | 0 | |
| Piano & Strings | 121 7 | 0 | |
| Piano & Pad | 121 4 | 1 | |
| Grand & FM Stack | 121 7 | 2 | |
| E. Grand Phaser 121 10 2 | |||
| Clav RX | 121 5 | 7 | |
| Synth Clav RX | 121 6 | 7 | |
| Clav Wah RX 121 2 7 | |||
| Piano & Vibes | 121 6 | 0 | |
| Grand RX DEMO | 121 11 | 0 | |
| Factory: E. Piano | |||
| EP+Damper 1 DNC | 121 25 | 4 | |
| EP+Damper 2 DNC | 121 26 | 4 | |
| Digi E. Piano 121 14 5 | |||
| Classic Tines 121 9 5 | |||
| Tine E.Piano RX | 121 18 | 4 | |
| Club E. Piano | 121 11 | 4 | |
| Suit E.Piano 1 | 121 20 | 4 | |
| Suit E.Piano 2 | 121 21 | 4 | |
| Classic Wurly 1 | 121 17 | 4 | |
| Classic Wurly 2 | 121 12 | 4 | |
| Tremolo Wurly | 121 16 | 4 | |
| R&B E. Piano | 121 8 | 4 | |
| DW8000 EP | 121 11 | 5 | |
| FM Pad EP 121 15 5 | |||
| White Pad EP | 121 13 | 5 | |
| Thin E. Piano 121 9 4 | |||
| Dyno Tine EP 1 | 121 10 | 4 | |
| Dyno Tine EP 2 | 121 22 | 4 | |
| Tine E. Piano | 121 19 | 4 | |
| Studio EP | 121 7 | 4 | |
| Pro Dyno EP | 121 5 | 4 | |
| Pro Stage EP 121 6 4 | |||
| Bell E. Piano 1 | 121 23 | 4 | |
| Name CC00 CC32 PC | |||
| Bell E. Piano 2 | 121 24 | 4 | |
| Factory: Mallet & Bell | |||
| Vibraphone 1 | 121 2 | 11 | |
| Marimba | 121 7 | 12 | |
| Marimba Key Off | 121 2 | 12 | |
| Xylophone 121 1 13 | |||
| Glockenspiel 121 2 9 | |||
| Celesta | 121 | 1 | 8 |
| Music Box | 121 | 2 10 | |
| Balaphon | 121 | 6 12 | |
| Kalimba 1 | 121 | 2 108 | |
| Kalimba 2 | 121 | 1 108 | |
| Sistro | 121 | 1 | 9 |
| Orgel | 121 1 | 10 | |
| Warm Steel | 121 | 1 114 | |
| Vs Bell Boy | 121 | 2 98 | |
| Tubular Bell | 121 4 | 14 | |
| Bells | 121 | 3 | 14 |
| Santur | 121 | 1 15 | |
| Mallet Clock | 121 5 | 12 | |
| Factory: Accordion | |||
| Harmonica DNC | 121 | 5 | 22 |
| Cassotto 16' | 121 12 | 21 | |
| Cassotto | 121 | 9 | 21 |
| Master Accordion | 121 23 | 21 | |
| Sweet Musette | 121 11 | 21 | |
| French Musette | 121 18 | 21 | |
| 2 Voices Musette | 121 16 | 21 | |
| 3 Voices Musette | 121 17 | 21 | |
| Accordion16,8,4' | 121 | 3 | 23 |
| Cassotto Or.Tune | 121 13 | 21 | |
| Acc.Clarinet OT | 121 19 | 21 | |
| Acc. Piccolo OT | 121 21 | 21 | |
| Harmonica 1 | 121 | 3 22 | |
| Harmonica 2 | 121 | 4 22 | |
| Harmonica 3 | 121 | 2 22 | |
| Fisa Master | 121 | 8 | 21 |
| Accordion 16,8' 121 2 23 | |||
| Acc.16,8,4' Plus | 121 8 | 23 | |
| Fisa 16,8' | 121 | 6 21 | |
| Accordion 16,4' 121 7 23 | |||
| Musette 1 | 121 | 3 21 | |
| Musette 2 | 121 | 4 21 | |
| Fisa 16,4' | 121 | 7 21 | |
| Fisa Tango! 121 1 23 | |||
| Tango Accordion | 121 10 | 23 | |
| Accordion 121 24 21 | |||
| Acc.16,8' & Bass | 121 | 4 23 | |
| Acc. & Acc. Bass | 121 9 | 23 | |
| Steirisch.Akk.1 | 121 | 25 21 | |
| Steirisch.Akk.2 | 121 | 26 21 | |
| Steirisch.Akk.3 | 121 | 27 21 | |
| Name | CC00 | CC32 | PC |
| Steirisch.Akk.4 121 28 21 | |||
| Accordion Bass 121 5 23 | |||
| Acc.Voice Change 121 6 23 | |||
| Factory: Organ | |||
| Jimmy Organ 121 13 18 | |||
| Perc. Organ 1 121 10 17 | |||
| Perc. Organ 2V. 121 9 17 | |||
| Perc. Organ 3V. 121 11 17 | |||
| BX3 Rock 1 V. 121 10 16 | |||
| BX3 Rock 2 V. 121 1 18 | |||
| BX3 Rock 3 V. 121 5 18 | |||
| BX3 Rock 4 V. 121 12 18 | |||
| BX3 Full V. 121 6 16 | |||
| BX3 Jazz V. 121 20 16 | |||
| BX3 Jazz Pc. V. 121 9 18 | |||
| BX3 Gospel V. 121 21 16 | |||
| Gospel Organ V. 121 13 16 | |||
| Drawbars Slow V. | 121 19 16 | ||
| Drawbars Fast V. | 121 18 16 | ||
| Drawbars Organ | 121 14 16 | ||
| Jimmy Organ V. | 121 10 18 | ||
| Jazz Organ | 121 8 16 | ||
| Organ Hi V. | 121 17 16 | ||
| Organ LowPc V. | 121 4 17 | ||
| Organ Low 1 V. 121 4 16 | |||
| Organ Low 2 V. 121 15 16 | |||
| Organ Mid V. | 121 16 16 | ||
| Big Theatre Org. | 121 30 16 | ||
| Theatre Organ 1 | 121 22 16 | ||
| Theatre Organ 2 | 121 23 16 | ||
| Church Pipes | 121 4 19 | ||
| Full Pipes | 121 5 19 | ||
| Pipe Tutti 1 | 121 6 | 19 | |
| Pipe Tutti 2 | 121 8 | 19 | |
| Pipe Tutti 3 | 121 9 | 19 | |
| Pipe Tutti 4 | 121 10 19 | ||
| Pipe Flute 1 | 121 4 | 20 | |
| Pipe Flute 2 | 121 5 | 20 | |
| Pipe Mixture | 121 3 | 19 | |
| Flauto Pipes | 121 3 | 20 | |
| Small Pipe | 121 2 | 20 | |
| Positive Organ 121 7 19 | |||
| Factory: Guitar | |||
| RealNylon Gtr ST | 121 16 24 | ||
| Real Nylon Gtr | 121 17 24 | ||
| Crunch Gtr DNC 121 3 29 | |||
| RealSteel Gtr ST | 121 28 25 | ||
| RealFolk Gtr ST1 | 121 29 25 | ||
| RealFolk Gtr ST2 | 121 30 25 | ||
| Steel Gtr RX | 121 35 25 | ||
| Jazz Gtr DNC | 121 7 26 | ||
| Soft Jazz Guitar | 121 5 | 26 | |
| Name | CC00 | CC32 | PC |
| Single Coil Pro 121 14 27 | |||
| Nylon Guitar DNC 121 18 24 | |||
| Natural Nylon | 121 19 24 | ||
| RealFolk Gtr DNC | 121 34 25 | ||
| Real 12 Strings | 121 33 25 | ||
| Nylon Gtr Pro1 | 121 8 | 24 | |
| Nylon Gtr Pro2 | 121 11 24 | ||
| Nylon Slide Pro | 121 14 24 | ||
| Steel Guitar Pro | 121 19 25 | ||
| 12 Strings Pro | 121 17 25 | ||
| Steel 12 Strings | 121 5 | 25 | |
| Real Steel Gtr 121 31 25 | |||
| Real Folk Gtr | 121 32 25 | ||
| Real El. Gtr ST1 | 121 28 27 | ||
| Real El. Gtr ST2 | 121 29 27 | ||
| Real El. Guitar1 121 30 27 | |||
| Real El. Guitar2 121 31 27 | |||
| JazzGtr SlidePro 121 6 26 | |||
| Club Jazz Gtr 1 | 121 2 | 26 | |
| Clean Jazz 1 | 121 22 27 | ||
| Clean Jazz 2 | 121 23 27 | ||
| Pop Steel Gtr 1 | 121 21 25 | ||
| Pop Steel Gtr 2 | 121 22 25 | ||
| 5th Mute Gtr | 121 21 28 | ||
| Stereo Dist.Gtr 121 8 30 | |||
| Solid Guitar | 121 21 27 | ||
| Clean Guitar 1 121 20 27 | |||
| Steel Slide Pro1 | 121 13 25 | ||
| Steel Slide Pro2 | 121 14 25 | ||
| Clean Funk RX1 | 121 10 28 | ||
| Clean Funk RX2 | 121 11 28 | ||
| Dist. Guitar RX1 | 121 9 30 | ||
| Dist. Guitar RX2 | 121 10 30 | ||
| Vintage S. 1 | 121 19 27 | ||
| Vintage S. 2 | 121 4 | 27 | |
| Steel Guitar 1 121 4 25 | |||
| Steel Guitar 2 121 20 25 | |||
| Ac.Guitar KeyOff | 121 5 | 24 | |
| Clean Mute Gtr 121 6 28 | |||
| Clean Gtr Pro 1 121 13 27 | |||
| Clean Gtr Pro 2 121 15 27 | |||
| Dist. Clean Gtr | 121 11 30 | ||
| Chorus Gtr Pro | 121 18 27 | ||
| Pedal Steel | 121 4 | 26 | |
| '54 E. Guitar | 121 24 27 | ||
| Stra. Vel. Pro | 121 16 27 | ||
| New Stra.Guitar | 121 7 27 | ||
| Single Coil | 121 6 | 27 | |
| Soft Overdrive | 121 2 | 29 | |
| Chorus Guitar | 121 3 | 27 | |
| Processed E.Gtr | 121 | 5 | 27 |
| L&R E.Guitar 1 | 121 9 | 27 | |
| R&R Guitar 121 4 28 | |||
| Power Chords 121 4 30 | |||
| Mute Monster 121 5 30 | |||
| Disto Mute 121 9 28 | |||
| Vox Wah Chick RX 121 3 120 | |||
| Funky Wah RX 121 12 27 | |||
| 12 Strings RX 121 18 25 | |||
| Nylon Gtr RX1 121 12 24 | |||
| Nylon Gtr RX2 121 13 24 | |||
| Steel Guitar RX1 121 15 25 | |||
| Steel Guitar RX2 121 16 25 | |||
| Pop SteelGtr RX1 121 24 25 | |||
| Pop SteelGtr RX2 121 25 25 | |||
| Clean Guitar RX1 121 14 28 | |||
| Clean Guitar RX2 121 15 28 | |||
| Clean Guitar RX3 121 16 28 | |||
| Clean Guitar RX4 121 17 28 | |||
| Clean Guitar RX5 121 18 28 | |||
| Clean Guitar RX6 121 20 28 | |||
| Funk Stein RX1 121 12 28 | |||
| Funk Stein RX2 121 13 28 | |||
| Factory: Strings & Vocal | |||
| Movie Str.1 DNC 121 7 49 | |||
| Movie Str.2 DNC 121 8 49 | |||
| Scat Voices DNC 121 20 52 | |||
| Classic Harp 121 2 46 | |||
| Movie Strings 1 | 121 5 | 49 | |
| Movie Strings 2 | 121 6 | 49 | |
| Violin Expr. 1 | 121 2 | 40 | |
| Violin Expr. 2 | 121 4 | 40 | |
| Concert Str.RX | 121 23 | 48 | |
| Strings Ens. RX | 121 22 | 48 | |
| Full Strings 121 2 49 | |||
| Ensemble & Solo 121 11 48 | |||
| Tremolo Strings | 121 1 | 44 | |
| Class.Contrabass 121 1 43 | |||
| Cello | 121 1 | 42 | |
| Viola Expr. | 121 1 | 41 | |
| Violin & Viola 121 2 41 | |||
| Slow Violin 121 3 40 | |||
| Strings Quartet | 121 9 | 48 | |
| Chamber Strings 121 12 48 | |||
| Orchestra Tutti1 121 14 48 | |||
| Orchestra Tutti2 121 19 48 | |||
| Orch. & Oboe 1 | 121 16 | 48 | |
| Orch. & Oboe 2 | 121 17 | 48 | |
| Orchestra&Flute 121 20 48 | |||
| Strings & Horns | 121 15 | 48 | |
| Strings & Glock. | 121 18 | 48 | |
| Octave Strings | 121 8 | 48 | |
| Pizz. Ensemble | 121 1 | 45 | |
| Pizz. Section | 121 2 | 45 | |
| Spiccato Strings | 121 4 | 49 | |
| Symphonic Bows | 121 10 | 48 | |
| Name | CC00 | CC32 | PC |
| Analog Strings 1 | 121 5 | 50 | |
| Synth Strings 1 121 6 50 | |||
| Scat V.& Bass1 | 121 17 | 52 | |
| Scat V.& Bass2 | 121 18 | 52 | |
| Wuuh Choir 121 8 52 | |||
| Oh-Ah Voices | 121 9 | 52 | |
| Femal&Male Scat | 121 14 | 52 | |
| Take Voices 1 121 4 52 | |||
| Ooh Slow Voice | 121 3 | 52 | |
| Scat Voices RX | 121 19 | 52 | |
| Male Scat | 121 16 | 52 | |
| Femal Scat | 121 15 | 52 | |
| Grand Choir | 121 11 | 52 | |
| Ooh Choir | 121 6 | 52 | |
| Ooh Voices | 121 2 | 52 | |
| Choir Light | 121 12 | 52 | |
| Synth Voices | 121 6 | 54 | |
| Full Vox Pad 121 9 91 | |||
| Vocalesque | 121 2 | 54 | |
| Fresh Breath | 121 7 | 91 | |
| Vocalscape | 121 3 | 54 | |
| Heaven | 121 3 | 91 | |
| Airways | 121 3 | 53 | |
| Factory: Trumpet & Trbn. | |||
| Jazz Trumpet DNC | 121 24 | 56 | |
| Jazz Cornet DNC | 121 25 | 56 | |
| Cornet Expr. | 121 21 | 56 | |
| Trombone DNC | 121 | 13 57 | |
| Trumpet Expr.1 | 121 | 15 56 | |
| Trumpet Expr.2 | 121 4 | 56 | |
| Wah Trumpet | 121 2 | 59 | |
| Mute Trumpet | 121 5 | 59 | |
| Sweet FlugelHorn 121 12 56 | |||
| Trumpet Pro 1 | 121 | 10 56 | |
| Trumpet Pro 2 | 121 | 11 56 | |
| Trumpet Pro 3 | 121 | 16 56 | |
| Trombone Expr. 1 | 121 6 | 57 | |
| Trombone Expr. 2 | 121 7 | 57 | |
| Cornet Pro 1 | 121 22 | 56 | |
| Cornet Pro 2 | 121 23 | 56 | |
| Trumpet Overb. | 121 2 | 56 | |
| Trombone Vel. 1 121 8 57 | |||
| Trombone Vel. 2 121 9 57 | |||
| Trombone Vel. 3 121 10 57 | |||
| Flugel Horn Pro | 121 | 13 56 | |
| Concert Trumpet | 121 19 | 56 | |
| Concert Trp. Pro 121 20 56 | |||
| Dual Trumpets | 121 6 | 56 | |
| Hard Trombone | 121 3 | 57 | |
| Trombone Pro Vel 121 11 57 | |||
| Alp Trumpet | 121 17 | 56 | |
| Trumpet | 121 14 | 56 | |
| Trumpet Shake Y+ | 121 18 | 56 | |
| Trumpet Pitch 121 5 56 | |||
| Tuba Gold 121 2 58 | |||
| Oberkr. Tuba 121 1 58 | |||
| Factory: Brass | |||
| Big Band Brass 1 121 32 61 | |||
| Big Band Brass 2 121 4 61 | |||
| Trpts &Trombs 121 34 61 | |||
| Tight Brass Pro 121 28 61 | |||
| Tight Brass 1 121 27 61 | |||
| Tight Brass 2 121 29 61 | |||
| Tight Brass 3 121 2 61 | |||
| Tight Brass 4 121 12 61 | |||
| Trumpet Ens2 Y+ 121 36 61 | |||
| Trumpet Ens. 121 9 61 | |||
| Trombone Ens. 121 10 61 | |||
| Trombones 121 11 61 | |||
| Dyna Brass 1 121 14 61 | |||
| Trpts & Brass 121 7 61 | |||
| Fat Brass | 121 13 61 | ||
| Brass of Power 121 30 61 | |||
| Glenn & Friends | 121 3 61 | ||
| Glenn & Boys | 121 6 61 | ||
| Sax & Brass | 121 5 61 | ||
| Brass & Sax | 121 16 61 | ||
| Mute Ensemble 1 | 121 3 59 | ||
| Mute Ensemble 2 | 121 4 59 | ||
| Sforzato Brass | 121 23 61 | ||
| Movie Brass | 121 20 61 | ||
| Flute Muted | 121 6 73 | ||
| French Section 121 2 60 | |||
| Horns & Ensemble | 121 4 60 | ||
| Classic Horns | 121 3 60 | ||
| Synth Brass 1 | 121 5 62 | ||
| Electrik Brass 121 4 62 | |||
| Brass Section | 121 31 61 | ||
| Brass Fall | 121 26 61 | ||
| Brass Impact 121 4 55 | |||
| Brass Hit | 121 25 61 | ||
| Factory: Sax | |||
| Alto Sax DNC | 121 12 65 | ||
| Tenor Sax DNC 121 12 66 | |||
| Alto Sax RX 121 10 65 | |||
| Jazz Tenor RX | 121 9 66 | ||
| Sweet Soprano 1 | 121 3 64 | ||
| Sweet Soprano 2 | 121 4 64 | ||
| Sweet Soprano 3 | 121 1 64 | ||
| Soprano Pro | 121 2 64 | ||
| Sweet Alto Sax1 | 121 5 65 | ||
| Sweet Alto Sax 2 | 121 6 65 | ||
| Soft Alto Sax 121 7 65 | |||
| Alto Sax Pro | 121 8 65 | ||
| Tenor SaxNoise1 | 121 1 66 | ||
| Name | CC00 | CC32 | PC |
| Tenor Sax Noise2 | 121 6 | 66 | |
| Baritone Sax Pro 121 3 67 | |||
| Baritone Sax | 121 4 | 67 | |
| Tenor Sax Expr.1 121 7 66 | |||
| Tenor Sax Expr.2 121 8 66 | |||
| Jazz Tenor 121 10 66 | |||
| Alto Sax Expr. | 121 9 | 65 | |
| Baritone Growl | 121 1 | 67 | |
| Cool Sax Ens. 121 11 65 | |||
| Sax Ensemble | 121 2 | 65 | |
| Reed of Power | 121 1 | 66 | |
| Factory: Woodwind | |||
| Clarinet DNC 121 13 71 | |||
| Flute DNC | 121 1 | 73 | |
| Whistle DNC | 121 5 | 78 | |
| Blown Bottle 121 1 76 | |||
| Bassoon | 121 1 | 70 | |
| Piccolo | 121 3 | 72 | |
| Ocarina | 121 1 | 79 | |
| Flute Switch | 121 2 | 73 | |
| Jazz Flute RX | 121 10 | 73 | |
| Jazz Flute Expr. | 121 1 | 73 | |
| Flute Dyn. 5th | 121 3 | 73 | |
| Flute Frullato | 121 4 | 73 | |
| Clarinet Pro 1 | 121 8 | 71 | |
| Clarinet Pro 2 | 121 9 | 71 | |
| Jazz Clarinet | 121 1 | 71 | |
| Whistle | 121 1 | 78 | |
| Whistle RX1 | 121 3 | 78 | |
| Whistle RX2 | 121 4 | 78 | |
| Whistle Breathe | 121 2 | 78 | |
| Double Reed 121 1 68 | |||
| Orchestra Flute | 121 5 | 73 | |
| Woodwinds | 121 6 | 71 | |
| Small Orchestra | 121 1 | 72 | |
| Clarinet Ens. | 121 5 | 71 | |
| Section Winds 1 | 121 3 | 71 | |
| Section Winds 2 | 121 4 | 71 | |
| Reeds & Saxes 121 10 71 | |||
| Factory: Synth Pad | |||
| Warm Pad 121 15 89 | |||
| Deep Noise | 121 4 | 127 | |
| The Pad | 121 4 | 89 | |
| Dark Pad | 121 6 | 89 | |
| Analog Pad 1 | 121 8 | 89 | |
| Analog Pad 2 | 121 9 | 89 | |
| Analog Pad 3 | 121 10 | 89 | |
| OB Pad | 121 12 | 89 | |
| Dark Anna | 121 13 | 89 | |
| Symphonic Ens. | 121 14 | 89 | |
| Future Pad | 121 5 | 91 | |
| Air Clouds 121 1 97 | |||
| Tinklin Pad 121 3 97 | |||
| Pods In Pad 121 4 97 | |||
| Vintage Sweep 121 7 95 | |||
| Money Pad 121 5 89 | |||
| Tsunami Wave 121 6 91 | |||
| Ravelian Pad 121 8 91 | |||
| Meditate 121 2 95 | |||
| Cinema Pad 121 5 95 | |||
| Super Sweep 121 4 90 | |||
| Wave Sweep 121 5 90 | |||
| Cross Sweep 121 6 90 | |||
| Digi Ice Pad 121 2 101 | |||
| Virtual Traveler | 121 1 | 88 | |
| Motion Ocean | 121 1 | 96 | |
| Moon Cycles 121 5 102 | |||
| Bell Pad | 121 6 | 98 | |
| Big Panner | 121 4 | 63 | |
| Rave | 121 6 | 97 | |
| Moving Bell | 121 5 | 98 | |
| Big Sweep Stab | 121 | 12 90 | |
| Fresh Air 1 | 121 2 | 91 | |
| Fresh Air 2 | 121 | 11 91 | |
| Pop Synth Pad 1 | 121 4 | 91 | |
| Pop Synth Pad 2 | 121 | 12 91 | |
| 80's Pop Synth | 121 2 | 93 | |
| Wave Cycle 121 3 96 | |||
| Factory: Synth Lead | |||
| Bass Phat Saw | 121 | 12 87 | |
| Old Portamento | 121 3 | 80 | |
| Power Saw 121 5 81 | |||
| Octo Lead | 121 6 | 81 | |
| Electro Lead | 121 2 | 87 | |
| Rich Lead | 121 3 | 87 | |
| Thin Analog Lead | 121 4 | 87 | |
| Dance Lead | 121 4 | 80 | |
| Wave Lead | 121 5 | 80 | |
| Sine Wave | 121 6 | 80 | |
| Express. Lead | 121 5 | 87 | |
| HipHop Lead 121 6 87 | |||
| Analog Lead 121 7 80 | |||
| Phat Saw Lead | 121 8 | 81 | |
| Glide Lead | 121 9 | 81 | |
| Gliding Square | 121 9 | 80 | |
| Power Synth 121 3 89 | |||
| Sine Switch | 121 | 10 80 | |
| Cosmic | 121 1 | 93 | |
| Fire Wave | 121 | 10 81 | |
| Digital PolySix | 121 7 | 90 | |
| A Leadload 121 11 87 | |||
| Noisy Stabb 121 8 90 | |||
| Mega Synth | 121 9 | 90 | |
| Dark Element | 121 3 | 95 | |
| Metallic Rez | 121 4 | 84 | |
| Name | CC00 | CC32 | PC |
| Synth Pianoid | 121 | 12 81 | |
| Arp Angeles | 121 2 | 88 | |
| Big & Raw | 121 8 | 87 | |
| Caribbean | 121 2 | 96 | |
| OB Lead | 121 | 10 87 | |
| Port Whine | 121 | 12 80 | |
| 2VCO Planet Lead | 121 | 13 80 | |
| VCF Modulation | 121 3 | 101 | |
| Factory: Ethnic | |||
| Sitar | 121 8 | 104 | |
| Fiddle | 121 1 | 110 | |
| Mandolin Ens. 1 | 121 | 26 25 | |
| Mandolin Ens. 2 | 121 | 27 25 | |
| Mandolin Trem. | 121 | 11 25 | |
| Banjo Key Off | 121 1 | 105 | |
| Banjo RX | 121 4 | 105 | |
| Sitar Tambou | 121 2 | 104 | |
| Kanoun 1 | 121 5 | 107 | |
| Kanoun 2 | 121 2 | 107 | |
| Kanoun Trem. 1 | 121 6 | 107 | |
| Kanoun Trem. 2 | 121 3 | 107 | |
| Kanoun Mix 121 4 107 | |||
| Bouzouki | 121 5 | 104 | |
| Oud 1 | 121 5 | 105 | |
| Oud 2 | 121 2 | 105 | |
| Nay | 121 2 | 72 | |
| Clarinet G | 121 2 | 71 | |
| Klarnet 1 | 121 | 11 71 | |
| Klarnet 2 | 121 | 12 71 | |
| Kawala | 121 1 | 75 | |
| Hichiriki | 121 2 | 111 | |
| HighlandBagPipes | 121 3 | 109 | |
| Uillean BagPipes | 121 2 | 109 | |
| Old Shakuhachi | 121 1 | 77 | |
| Indian Frets 121 4 104 | |||
| Zurna 1 | 121 3 | 111 | |
| Zurna 2 | 121 1 | 111 | |
| Ac. Baglama 1 | 121 7 | 107 | |
| Ac. Baglama 2 | 121 8 | 107 | |
| Ac. Baglama Grp. | 121 9 | 107 | |
| Gamelan 121 1 112 | |||
| Garbage Mall | 121 3 | 112 | |
| Jaw Harp | 121 3 | 105 | |
| Factory: Bass | |||
| Finger Bass DNC | 121 | 16 33 | |
| Jazz Bass 121 9 32 | |||
| Acous. Bass Pro1 | 121 3 | 32 | |
| Acous. Bass Pro2 | 121 4 | 32 | |
| Finger Bass 1 | 121 6 | 33 | |
| Finger Bass 2 | 121 7 | 33 | |
| Finger Bass 3 | 121 | 10 33 | |
| Finger Bass 4 | 121 | 15 33 | |
| Acoustic Bass 121 8 32 | |||
| Finger Slap 121 12 33 | |||
| The Other Slap 121 5 37 | |||
| Thumb Bass 121 1 37 | |||
| Pick Bass 1 121 7 34 | |||
| Pick Bass 2 121 8 34 | |||
| Super Bass 1 121 1 36 | |||
| Super Bass 2 121 2 36 | |||
| Sweet Fretless 121 3 35 | |||
| Finger E.Bass 1 121 2 33 | |||
| Finger E.Bass 2 121 3 33 | |||
| Finger E.Bass 3 121 4 33 | |||
| Fretless Bass 1 121 1 35 | |||
| Fretless Bass 2 121 2 35 | |||
| Bass & Ride 1 121 6 32 | |||
| Bass & Ride 2 121 2 32 | |||
| Bright Finger B. 121 9 33 | |||
| Picked E.Bass 1 | 121 1 | 34 | |
| Picked E.Bass 2 | 121 2 | 34 | |
| Picked E.Bass 3 | 121 1 | 34 | |
| Chorus Fing.Bass | 121 8 | 33 | |
| Bass Mute | 121 5 | 34 | |
| Synth Bass 1 | 121 18 | 38 | |
| Synth Bass 2 | 121 15 | 39 | |
| Bass&Gtr Double | 121 6 | 34 | |
| FingerB.& Guitar | 121 14 | 33 | |
| Bass & Guitar 121 4 34 | |||
| 30303 Bass | 121 5 | 38 | |
| Digi Bass 1 121 9 38 | |||
| Digi Bass 2 121 10 38 | |||
| Digi Bass 3 121 11 38 | |||
| Jungle Rez 121 5 39 | |||
| Syn Bass Res 121 8 38 | |||
| Jungle Bass | 121 13 | 38 | |
| Hybrid Bass | 121 15 | 38 | |
| Stein Bass | 121 3 | 34 | |
| Organ Pedal 1 | 121 10 | 32 | |
| Organ Pedal 2 | 121 11 | 32 | |
| Acous. Bass RX | 121 7 | 32 | |
| Finger Bass RX | 121 13 | 33 | |
| SlapFing Bass RX | 121 4 | 36 | |
| Picked Bass RX 121 10 34 | |||
| SlapPick Bass RX | 121 5 | 36 | |
| FunkSlap Bass RX | 121 3 | 36 | |
| Factory: Drum & SFX | |||
| Standard Kit RX1 | 120 0 | 5 | |
| Standard Kit RX2 | 120 0 | 1 | |
| Standard Kit RX3 | 120 0 | 2 | |
| Standard Kit RX4 | 120 0 | 6 | |
| Ambient Kit RX | 120 0 | 3 | |
| Pop Std. Kit RX | 120 0 | 4 | |
| Electro Kit RX1 | 120 0 | 75 | |
| Electro Kit RX2 | 120 0 | 76 | |
| Name | CC00 | CC32 | PC |
| Brush Kit RX1 | 120 0 | 42 | |
| Brush Kit RX2 | 120 0 | 43 | |
| Brush Kit RX3 | 120 0 | 44 | |
| HipHop Kit RX 120 0 72 | |||
| Jazz Kit RX1 | 120 0 | 33 | |
| Jazz Kit RX2 | 120 0 | 34 | |
| Jazz Kit RX3 | 120 0 | 35 | |
| Techno Kit RX | 120 0 | 73 | |
| House Kit RX1 | 120 0 | 30 | |
| House Kit RX2 | 120 0 | 31 | |
| Power Kit RX1 | 120 0 | 18 | |
| Power Kit RX2 | 120 0 | 19 | |
| Dance Kit RX | 120 0 | 74 | |
| Analog Kit | 120 0 | 123 | |
| Jungle Kit | 120 0 | 10 | |
| Electro Kit | 120 0 | 122 | |
| Room Kit 1 | 120 0 | 120 | |
| HipHop Kit 1 | 120 0 | 9 | |
| Techno Kit 1 120 0 11 | |||
| Pop Std. Kit 1 | 120 0 | 89 | |
| Pop Std. Kit 2 | 120 0 | 90 | |
| Elektro Kit 1 | 120 0 | 96 | |
| Elektro Kit 2 | 120 0 | 97 | |
| Standard PercKit | 120 0 | 69 | |
| Arabian Kit 1 | 120 0 | 51 | |
| Arabian Kit 2 | 120 0 | 117 | |
| Turkish Kit | 120 0 | 118 | |
| Oriental PercKit | 120 0 | 119 | |
| Percussion Kit | 120 0 | 64 | |
| Latin Perc.Kit 1 120 0 65 | |||
| Latin Perc.Kit 2 120 0 68 | |||
| Trinity Perc.Kit 120 0 66 | |||
| i30 Perc. Kit | 120 0 | 67 | |
| Synth Kit | 120 0 | 58 | |
| SFX Kit 1 | 120 0 | 60 | |
| SFX Kit 2 | 120 0 | 57 | |
| Legacy: Piano | |||
| Grand Piano | 121 3 | 0 | |
| M1 Piano | 121 2 | 2 | |
| Piano Pad 1 | 121 2 | 1 | |
| Piano Pad 2 | 121 3 | 1 | |
| 90's Piano | 121 3 | 2 | |
| 2000's Piano 121 4 2 | |||
| Chorus Piano | 121 5 | 2 | |
| Honky-Tonk | 121 4 | 3 | |
| Harpsi 16' RX 121 5 6 | |||
| Harpsi KORG | 121 4 | 6 | |
| Clav Snap | 121 3 | 7 | |
| Legacy: E. Piano | |||
| Vintage EP 121 4 4 | |||
| Stereo Dig. EP | 121 6 | 5 | |
| FM Stack EP | 121 16 | 5 | |
| Hybrid EP 121 8 5 | |||
| Phantom Tine 121 10 5 | |||
| Soft Wurly 121 13 4 | |||
| Hard Wurly 121 14 4 | |||
| Velo Wurly 121 15 4 | |||
| Sweeping EP 121 12 5 | |||
| Classic Dig. EP 121 7 5 | |||
| Syn Piano X 121 5 5 | |||
| Legacy: Mallet & Bell | |||
| Vibraphone 2 121 3 11 | |||
| Monkey Skuls 121 3 12 | |||
| Digi Bell | 121 4 | 98 | |
| Krystal Bell | 121 3 | 98 | |
| Legacy: Accordion | |||
| Sweet Harmonica | 121 1 | 22 | |
| Akordeon | 121 2 | 21 | |
| Cassotto NorTune | 121 1 | 4 21 | |
| Acc. Clarinet NT | 121 2 | 20 21 | |
| Acc. Piccolo NT | 121 2 | 22 21 | |
| Detune Accordion | 121 1 | 5 21 | |
| Musette Clar. | 121 5 | 21 | |
| Arabic Accordion | 121 1 | 10 21 | |
| Legacy: Organ | |||
| Classic Click | 121 4 | 18 | |
| Perc.Short Decay | 121 8 | 18 | |
| Rock Organ 2 | 121 1 | 11 18 | |
| Dirty B | 121 3 | 18 | |
| Killer B | 121 2 | 18 | |
| BX3 Short Decay | 121 7 | 17 | |
| Super BX Perc. | 121 6 | 18 | |
| Gospel Organ 121 9 16 | |||
| Old Wheels | 121 3 | 17 | |
| Dark Organ 1 | 121 7 | 16 | |
| Dark Organ 2 | 121 5 | 16 | |
| Rotary Organ | 121 8 | 17 | |
| VOX Legend | 121 1 | 11 16 | |
| M1 Organ | 121 5 | 17 | |
| Dirty JazzOrgan | 121 7 | 18 | |
| Arabian Organ | 121 1 | 12 16 | |
| Theatre Organ 3 | 121 2 | 4 16 | |
| Theatre Organ 4 | 121 2 | 5 16 | |
| Tibia | 121 2 | 6 16 | |
| Tibia 16+8+4' 121 27 16 | |||
| Tibia & Vox | 121 2 | 8 16 | |
| Post Horn Trem. | 121 2 | 9 16 | |
| Tibia & Kinura 121 31 16 | |||
| Tibia Vox Glock | 121 3 | 3 2 16 | |
| Techno Org.Bass | 121 6 | 17 | |
| Legacy: Guitar | |||
| Nylon Bossa | 121 4 | 24 | |
| Nylon Vel. Harm. | 121 1 | 10 24 | |
| Spanish Guitar | 121 6 | 24 | |
| Name | CC00 | CC32 | PC |
| Nylon Guitar | 121 15 | 24 | |
| Brazilian Guitar | 121 9 | 24 | |
| Steel Folk Gtr | 121 9 | 25 | |
| Guitar Strings | 121 7 | 24 | |
| Finger Key Off 121 7 25 | |||
| Club Jazz Gtr 2 | 121 3 | 26 | |
| Pop Steel Slide | 121 23 | 25 | |
| Finger Tips | 121 8 | 25 | |
| Country Nu | 121 11 | 27 | |
| Reso Guitar | 121 12 | 25 | |
| Tel. Middle | 121 26 | 27 | |
| Clean Funk | 121 8 | 28 | |
| Wet Dist. Guitar | 121 6 | 30 | |
| Hackbrett | 121 6 | 25 | |
| Tel. Bridge 121 27 27 | |||
| Guitarish | 121 8 | 27 | |
| Stra. Gtr Slide 121 17 27 | |||
| Stra. Chime | 121 5 | 28 | |
| Clean Guitar 2 121 25 27 | |||
| L&R E.Guitar 2 121 10 27 | |||
| Rhythm E.Guitar | 121 7 | 28 | |
| Muted Guitar | 121 19 | 28 | |
| E.Gtr Harmonics | 121 2 | 31 | |
| Solo Dist.Guitar | 121 7 | 30 | |
| Dist. Steel Gtr 121 12 30 | |||
| Joystick Gtr Y- 121 3 30 | |||
| Legacy: Strings & Vocal | |||
| Strings Ens. 1 | 121 21 | 48 | |
| Strings Ens. 2 | 121 3 | 49 | |
| i3 Strings | 121 5 | 48 | |
| Stereo Strings 121 3 48 | |||
| Master Pad | 121 2 | 89 | |
| N Strings | 121 6 | 48 | |
| Arco Strings | 121 7 | 48 | |
| Legato Strings | 121 4 | 48 | |
| Double Strings | 121 3 | 45 | |
| Arabic Strings | 121 13 | 48 | |
| Sweeper Strings | 121 | 1 49 | |
| Analog Strings 2 | 121 2 | 50 | |
| Synth Strings 2 | 121 1 | 51 | |
| Take Voices 2 | 121 5 | 52 | |
| Aah Choir | 121 7 | 52 | |
| Slow Choir 121 10 52 | |||
| Cyber Choir | 121 2 | 85 | |
| Odissey | 121 4 | 50 | |
| Strings Choir 121 13 52 | |||
| Analog Velve | 121 3 | 50 | |
| Ether Voices | 121 1 | 85 | |
| Dream Voice | 121 5 | 54 | |
| Classic Vox | 121 4 | 54 | |
| Doolally | 121 2 | 53 | |
| Legacy: Trumpet & Trbn. | |||
| Mono Trumpet 121 3 56 | |||
| Warm Flugel 121 8 56 | |||
| Pitch Trombone 121 5 57 | |||
| Soft Trombone 121 4 57 | |||
| Trombone 121 12 57 | |||
| BeBop Cornet 121 9 56 | |||
| Flugel Horn 121 7 56 | |||
| Dynabone 121 3 58 | |||
| Ob.Tuba&E.Bass 1 121 4 58 | |||
| Ob.Tuba&E.Bass 2 121 5 58 | |||
| Legacy: Brass | |||
| Attack Brass 121 8 61 | |||
| Big BandShake Y+ 121 33 61 | |||
| Trumpet Ens1 Y+ 121 35 61 | |||
| Dyna Brass 2 121 22 61 | |||
| Double Brass | 121 24 | 61 | |
| Power Brass | 121 21 | 61 | |
| Brass Expr. 121 15 61 | |||
| Film Brass | 121 17 | 61 | |
| Brass Slow 121 18 61 | |||
| Fanfare | 121 19 | 61 | |
| Synth Brass 2 | 121 5 | 63 | |
| Brass Pad | 121 3 | 63 | |
| Netherland Hit | 121 8 | 55 | |
| Legacy: Sax | |||
| Folk Sax | 121 5 | 66 | |
| Breathy Baritone | 121 2 | 67 | |
| Alto Breath | 121 1 | 65 | |
| Tenor Breath | 121 3 | 66 | |
| Breathy Alto Sax | 121 3 | 65 | |
| Alto Sax Growl | 121 4 | 65 | |
| Soft Tenor | 121 2 | 66 | |
| Tenor Growl 121 4 66 | |||
| Legacy: Woodwind | |||
| Folk Clarinet | 121 7 | 71 | |
| Flute | 121 9 | 73 | |
| Wooden Flute | 121 7 | 73 | |
| Bambu Flute | 121 8 | 73 | |
| English Horn | 121 1 | 69 | |
| Recorder 1 | 121 1 | 74 | |
| Recorder 2 | 121 2 | 74 | |
| Legacy: Synth Pad | |||
| Sky Watcher | 121 2 | 90 | |
| Vintage Pad | 121 11 | 89 | |
| You Decide | 121 8 | 95 | |
| KORGmatose | 121 13 | 90 | |
| Reoccurring Astra 121 6 95 | |||
| Astral Dream | 121 1 | 95 | |
| Reso Down | 121 2 | 97 | |
| Crimson 5ths | 121 1 | 86 | |
| Name | CC00 | CC32 | PC |
| Freedom Pad | 121 7 | 89 | |
| Noble Pad 121 5 97 | |||
| Mellow Pad 121 4 95 | |||
| Lonely Spin 121 1 100 | |||
| Synth Ghostly 121 2 100 | |||
| Farluce | 121 1 | 1 90 | |
| Bell Choir | 121 7 | 98 | |
| Dance ReMix | 121 10 | 91 | |
| Elastick Pad | 121 7 | 97 | |
| Legacy: Synth Lead | |||
| Motion Raver | 121 1 | 101 | |
| Synchro City | 121 2 | 84 | |
| Wild Arp | 121 6 | 55 | |
| Seq Lead | 121 7 | 81 | |
| Old & Analog | 121 8 | 80 | |
| Flip Blip | 121 | 7 55 | |
| Reso Sweep | 121 1 | 90 | |
| Synth Sweeper 121 3 90 | |||
| Sync Kron | 121 3 | 84 | |
| Tecno Phonic | 121 10 | 90 | |
| Band Passed 121 3 102 | |||
| Cat Lead | 121 9 | 87 | |
| Pan Reso | 121 4 | 102 | |
| Square Rez | 121 11 | 80 | |
| Rezbo | 121 11 | 81 | |
| Auto Pilot 1 | 121 14 | 38 | |
| Square Bass | 121 7 | 87 | |
| Brian Sync 121 5 84 | |||
| Arp Twins | 121 6 | 84 | |
| LoFi Ethnic | 121 7 | 84 | |
| Legacy: Ethnic | |||
| Shakuhachi | 121 2 | 77 | |
| Mandolin Key Off | 121 10 | 25 | |
| War Pipes | 121 1 | 109 | |
| Sitar Sitar | 121 7 | 104 | |
| Hit in India | 121 5 | 55 | |
| Tambra | 121 6 | 104 | |
| Indian Stars | 121 3 | 104 | |
| Bali Gamelan | 121 2 | 112 | |
| Ukulele Gtr | 121 26 | 24 | |
| Legacy: Bass | |||
| Ac. Bass Buzz | 121 1 | 32 | |
| Slap Bass 1 | 121 6 | 36 | |
| Slap Bass 2 | 121 6 | 37 | |
| Slap Bass 3 | 121 7 | 37 | |
| Dyna Slap Bass 121 3 37 | |||
| Chorus Slap Bass | 121 4 | 37 | |
| DarkWoody A.Bass | 121 5 | 32 | |
| More Mid! Bass | 121 11 | 33 | |
| Woofer Pusher | 121 6 | 35 | |
| Dark R&B Bass1 | 121 4 | 35 | |
| Dyna Bass | 121 | 2 37 | |
| Ticktacing Bass 121 9 34 | |||
| Fretless Bass 3 121 7 35 | |||
| Stick Bass 121 5 33 | |||
| Dark R&B Bass2 121 5 35 | |||
| Auto Pilot 2 121 13 39 | |||
| Bass4 Da Phunk 121 14 39 | |||
| Dr. Octave 121 16 38 | |||
| Monofilter Bass 121 11 39 | |||
| Synth Bass 80ish 121 9 39 | |||
| Reso Bass 121 12 39 | |||
| Autofilter Bass 121 10 39 | |||
| Drive Bass 121 17 38 | |||
| Nasty Bass 121 6 39 | |||
| Euro Bass | 121 4 | 39 | |
| 30303 Square | 121 6 | 38 | |
| Bass Square | 121 7 | 38 | |
| Phat Bass | 121 7 | 39 | |
| Blind As A Bat | 121 12 | 38 | |
| Poinker Bass | 121 8 | 39 | |
| Legacy: Drum & SFX | |||
| Standard Kit | 120 0 | 7 | |
| Bdrum&Sdrum Kit | 120 0 | 50 | |
| Room Kit 2 | 120 0 | 12 | |
| Power Kit 1 | 120 0 | 121 | |
| Power Kit 2 | 120 0 | 17 | |
| HipHop Kit 2 | 120 0 | 13 | |
| Techno Kit 2 | 120 0 | 14 | |
| Techno Kit 3 | 120 0 | 15 | |
| House Kit 1 | 120 0 | 26 | |
| House Kit 2 | 120 0 | 27 | |
| House Kit 3 | 120 0 | 28 | |
| Brush Kit 1 | 120 0 | 125 | |
| Brush Kit 2 | 120 0 | 41 | |
| Orchestra Kit | 120 0 | 49 | |
| Log Drum | 121 4 | 12 | |
| Reverse Tom | 121 2 | 117 | |
| Reverse Snare | 121 3 | 118 | |
| Reverse Cymbal | 121 2 | 119 | |
| Dragon Gong | 121 1 | 119 | |
| Stadium | 121 6 | 126 | |
| Castanets Plus 121 2 115 | |||
| Timpani | 121 1 | 47 | |
| Woodblock | 121 3 | 115 | |
| Footstep Walk 121 7 126 | |||
| GM: Piano | |||
| Acoustic Piano GM | 121 0 | 0 | |
| Ac. Piano Wide | 121 | 1 | 0 |
| Ac. Piano Dark 121 2 0 | |||
| Bright Piano GM | 121 0 | 1 | |
| Bright PianoWide | 121 1 | 1 | |
| E.Grand Piano GM | 121 0 | 2 | |
| E. Grand Wide | 121 1 | 2 | |
| Name | CC00 | CC32 | PC |
| Honky-Tonk GM | 121 0 | 3 | |
| Honky Wide | 121 1 | 3 | |
| E. Piano 1 GM | 121 0 | 4 | |
| Detuned EP 1 | 121 1 | 4 | |
| EP 1 Veloc. Mix | 121 2 | 4 | |
| 60's E. Piano | 121 3 | 4 | |
| E. Piano 2 GM | 121 0 | 5 | |
| Detuned EP 2 | 121 1 | 5 | |
| EP 2 Veloc. Mix | 121 2 | 5 | |
| EP Legend | 121 3 | 5 | |
| EP Phase | 121 4 | 5 | |
| Harpsichord GM | 121 0 | 6 | |
| Harpsi OctaveMix | 121 1 | 6 | |
| Harpsi Wide | 121 2 | 6 | |
| Harpsi Key Off 121 3 6 | |||
| Clav GM | 121 0 | 7 | |
| Pulse Clav | 121 1 | 7 | |
| GM: Chrom. Perc. | |||
| Celesta GM | 121 0 | 8 | |
| Glockenspiel GM | 121 0 | 9 | |
| Music Box GM 121 0 10 | |||
| Vibraphone GM 121 0 11 | |||
| Vibraphone Wide | 121 1 | 11 | |
| Marimba GM | 121 0 | 12 | |
| Marimba Wide | 121 1 | 12 | |
| Xylophone GM | 121 0 | 13 | |
| Tubular Bell GM 121 0 14 | |||
| Church Bell | 121 1 | 14 | |
| Carillon | 121 2 | 14 | |
| Dulcimer GM | 121 0 | 15 | |
| GM: Organ | |||
| Drawbar Org GM | 121 0 | 16 | |
| Det. Drawbar Org | 121 1 | 16 | |
| It. 60's Organ | 121 2 | 16 | |
| Drawbar Org. 2 121 3 16 | |||
| Perc.Organ GM | 121 0 | 17 | |
| Det. Perc. Organ | 121 1 | 17 | |
| Perc. Organ 2 | 121 2 | 17 | |
| Rock Organ GM | 121 0 | 18 | |
| Church Organ GM | 121 0 | 19 | |
| Church Oct. Mix | 121 1 | 19 | |
| Detuned Church | 121 2 | 19 | |
| Reed Organ GM 121 0 20 | |||
| Puff Organ | 121 1 | 20 | |
| Accordion GM 121 0 21 | |||
| Accordion 2 | 121 1 | 21 | |
| Harmonica GM | 121 0 | 22 | |
| Tango Accord.GM | 121 0 | 23 | |
| GM: Guitar | |||
| Nylon Guitar GM | 121 0 | 24 | |
| Ukulele | 121 1 | 24 | |
| Nylon Key Off | 121 2 | 24 | |
| Nylon Guitar 2 121 3 24 | |||
| Steel Guitar GM 121 0 25 | |||
| 12 Strings Gtr 121 1 25 | |||
| Mandoln 121 2 25 | |||
| Steel Gtr & Body 121 3 25 | |||
| Jazz Guitar GM 121 0 26 | |||
| Pedal Steel Gtr 121 1 26 | |||
| Clean Guitar GM 121 0 27 | |||
| Det.Clean El.Gtr 121 1 27 | |||
| Mid Tone Gtr 121 2 27 | |||
| Muted Guitar GM 121 0 28 | |||
| Funky Cut El.Gtr 121 1 28 | |||
| Mute Vel. El.Gtr 121 2 28 | |||
| Jazz Man 121 3 28 | |||
| Overdrive Gtr GM | 121 0 | 29 | |
| Guitar Pinch | 121 1 | 29 | |
| Distortion GtrGM | 121 0 | 30 | |
| Feedback DistGtr | 121 1 | 30 | |
| Dist. Rhythm Gtr | 121 2 | 30 | |
| Gtr Harmonic GM | 121 0 | 31 | |
| Guitar Feedback | 121 1 | 31 | |
| GM: Bass | |||
| Acoustic Bass GM | 121 0 | 32 | |
| Finger Bass GM | 121 0 | 33 | |
| Finger Slap Bass | 121 1 | 33 | |
| Picked E.Bass GM | 121 0 | 34 | |
| Fretless Bass GM | 121 0 | 35 | |
| Slap Bass 1 GM | 121 0 | 36 | |
| Slap Bass 2 GM | 121 0 | 37 | |
| Synth Bass 1 GM | 121 0 | 38 | |
| Synth Bass Warm | 121 1 | 38 | |
| Synth Bass Reso 121 2 38 | |||
| Clavi Bass | 121 3 | 38 | |
| Hammer | 121 4 | 38 | |
| Synth Bass 2 GM | 121 0 | 39 | |
| SynthBass Attack | 121 1 | 39 | |
| SynthBass Rubber | 121 2 | 39 | |
| Attack Pulse | 121 3 | 39 | |
| GM: Strings | |||
| Violin GM | 121 0 | 40 | |
| Slow Att. Violin | 121 1 | 40 | |
| Viola GM 121 0 41 | |||
| Cello GM 121 0 42 | |||
| Contrabass GM | 121 0 | 43 | |
| Tremolo Str. GM 121 0 44 | |||
| Pizzicato Str.GM 121 0 45 | |||
| Harp GM | 121 0 | 46 | |
| Yang Chin | 121 1 | 46 | |
| Timpani GM | 121 0 | 47 | |
| GM: Ensemble | |||
| Strings Ens.1 GM | 121 0 | 48 | |
| Strings & Brass 121 1 48 | |||
| Name | CC00 | CC32 | PC |
| 60's Strings | 121 2 | 48 | |
| Strings Ens.2 GM | 121 0 | 49 | |
| Synth Strings1GM | 121 0 | 50 | |
| Synth Strings 3 | 121 1 | 50 | |
| Synth Strings2GM | 121 0 | 51 | |
| Choir Aahs GM 121 0 52 | |||
| Choir Aahs 2 | 121 1 | 52 | |
| Voice Oohs GM | 121 0 | 53 | |
| Humming | 121 1 | 53 | |
| Synth Voice GM | 121 0 | 54 | |
| Analog Voice | 121 1 | 54 | |
| Orchestra Hit GM | 121 0 | 55 | |
| Bass Hit Plus | 121 1 | 55 | |
| 6th Hit | 121 2 | 55 | |
| Euro Hit | 121 3 | 55 | |
| GM: Brass | |||
| Trumpet GM | 121 0 | 56 | |
| Dark Trumpet | 121 1 | 56 | |
| Trombone GM 121 0 57 | |||
| Trombone 2 | 121 1 | 57 | |
| Bright Trombone | 121 2 | 57 | |
| Tuba GM 121 0 58 | |||
| Muted Trumpet GM | 121 0 | 59 | |
| Muted Trumpet 2 | 121 1 | 59 | |
| French Horn GM | 121 0 | 60 | |
| FrenchHorn Warm | 121 1 | 60 | |
| Brass Section GM | 121 0 | 61 | |
| Brass Section 2 | 121 1 | 61 | |
| Synth Brass 1 GM | 121 0 | 62 | |
| Synth Brass 3 | 121 1 | 62 | |
| Analog Brass 1 121 2 62 | |||
| Jump Brass | 121 3 | 62 | |
| Synth Brass 2 GM | 121 0 | 63 | |
| Synth Brass 4 | 121 1 | 63 | |
| Analog Brass 2 121 2 63 | |||
| GM: Reed | |||
| Soprano Sax GM | 121 0 | 64 | |
| Alto Sax GM | 121 0 | 65 | |
| Tenor Sax GM | 121 0 | 66 | |
| Baritone Sax GM | 121 0 | 67 | |
| Oboe GM | 121 0 | 68 | |
| English Horn GM | 121 0 | 69 | |
| Bassoon GM | 121 0 | 70 | |
| Clarinet GM | 121 0 | 71 | |
| GM: Pipe | |||
| Piccolo GM | 121 0 | 72 | |
| Flute GM 121 0 73 | |||
| Recorder GM | 121 0 | 74 | |
| Pan Flute GM | 121 0 | 75 | |
| Blown Bottle GM | 121 0 | 76 | |
| Shakuhachi GM 121 0 77 | |||
| Whistle GM | 121 0 | 78 | |
| Ocarina GM 121 0 79 | |||
| GM: Syn Lead / Syn Pad | |||
| Lead Square GM 121 0 80 | |||
| Lead Square 2 121 1 80 | |||
| Lead Sine 121 2 80 | |||
| Lead Saw GM 121 0 81 | |||
| Lead Saw 2 121 1 81 | |||
| Lead Saw & Pulse 121 2 81 | |||
| Lead Double Saw 121 3 81 | |||
| Lead Seq. Analog 121 4 81 | |||
| Calliope GM 121 0 82 | |||
| Chiff GM 121 0 83 | |||
| Charang GM 121 0 84 | |||
| Wire Lead 121 1 84 | |||
| Voice Lead GM 121 0 85 | |||
| Fifths Lead GM | 121 0 | 86 | |
| Bass & Lead GM | 121 0 | 87 | |
| Lead Soft Wrl | 121 1 | 87 | |
| New Age Pad GM 121 0 88 | |||
| Warm Pad GM 121 0 89 | |||
| Sine Pad | 121 1 | 89 | |
| Polysynth GM | 121 0 | 90 | |
| Choir Pad GM | 121 0 | 91 | |
| Itopia Pad | 121 1 | 91 | |
| Bowed Glass GM | 121 0 | 92 | |
| Metallic Pad GM | 121 0 | 93 | |
| Halo Pad GM | 121 0 | 94 | |
| Sweep Pad GM | 121 0 | 95 | |
| GM: Synth SFX | |||
| Ice Rain GM 121 0 96 | |||
| Soundtrack GM | 121 0 | 97 | |
| Crystal GM | 121 0 | 98 | |
| Synth Mallet 121 1 98 | |||
| Atmosphere GM 121 0 99 | |||
| Brightness GM | 121 0 | 100 | |
| Goblins GM 121 0 101 | |||
| Echo Drops GM | 121 0 | 102 | |
| Echo Bell | 121 1 | 102 | |
| Echo Pan | 121 2 | 102 | |
| Star Theme GM | 121 0 | 103 | |
| GM: Ethnic | |||
| Sitar GM | 121 0 | 104 | |
| Sitar 2 | 121 1 | 104 | |
| Banjo GM 121 0 105 | |||
| Shamisen GM | 121 0 | 106 | |
| Koto GM 121 0 107 | |||
| Taisho Koto 121 1 107 | |||
| Kalimba GM 121 0 108 | |||
| Bag Pipes GM | 121 0 | 109 | |
| Fiddle GM | 121 0 | 110 | |
| Shanai GM | 121 0 | 111 | |
| Name | CC00 | CC32 | PC |
| GM: Percussive | |||
| Tinkle Bell GM | 121 0 | 112 | |
| Agogo GM | 121 0 | 113 | |
| Steel Drums GM | 121 | 0 114 | |
| Woodblock GM | 121 0 | 115 | |
| Castanets | 121 | 1 | 115 |
| Taiko Drum GM | 121 | 0 | 116 |
| Concert BassDrum | 121 1 | 116 | |
| Melodic Tom GM | 121 | 0 | 117 |
| Melodic Tom 2 121 1 117 | |||
| Synth Drum GM | 121 0 | 118 | |
| Rhythm Box Tom | 121 | 1 | 118 |
| Electric Drum 121 2 118 | |||
| ReverseCymbalGM | 121 | 0 | 119 |
| GM: SFX | |||
| Gtr FretNoise GM 121 0 120 | |||
| Guitar Cut Noise | 121 | 1 | 120 |
| Ac. Bass String | 121 | 2 | 120 |
| Breath Noise GM | 121 | 0 121 | |
| Flute Key Click | 121 | 1 | 121 |
| Seashore GM | 121 | 0 | 122 |
| Rain | 121 | 1 | 122 |
| Thunder | 121 2 | 122 | |
| Wind | 121 | 3 | 122 |
| Stream | 121 4 | 122 | |
| Bubble | 121 5 | 122 | |
| Bird Tweet GM | 121 | 0 | 123 |
| Dog | 121 | 1 | 123 |
| Horse Gallop | 121 | 2 123 | |
| Bird Tweet 2 | 121 | 3 | 123 |
| Telephone GM | 121 0 | 124 | |
| Telephone 2 | 121 1 | 124 | |
| Door Creaking | 121 | 2 124 | |
| Door | 121 | 3 | 124 |
| Scratch | 121 | 4 | 124 |
| Wind Chime | 121 5 | 124 | |
| Helicopter GM | 121 | 0 125 | |
| Car Engine | 121 | 1 | 125 |
| Car Stop | 121 2 | 125 | |
| Car Pass | 121 | 3 | 125 |
| Car Crash | 121 | 4 | 125 |
| Siren | 121 | 5 125 | |
| Train | 121 | 6 | 125 |
| Jetplane | 121 7 | 125 | |
| Starship | 121 8 | 125 | |
| Burst Noise 121 9 125 | |||
| Applause GM 121 0 126 | |||
| Laughing | 121 | 1 126 | |
| Screaming | 121 | 2 | 126 |
| Punch | 121 | 3 | 126 |
| Heart Beat | 121 | 4 | 126 |
| Footsteps 121 5 126 | |||
| Gun Shot GM 121 0 127 | |||
| Machine Gun 121 1 127 | |||
| Laser Gun 121 2 127 | |||
| Explosion 121 3 127 | |||
| GM: Drum | |||
| Standard Kit GM 120 0 0 | |||
| Room Kit GM 120 0 8 | |||
| Power Kit GM 120 0 16 | |||
| Electro Kit GM 120 0 24 | |||
| Analog Kit GM 120 0 25 | |||
| Jazz Kit GM 120 0 32 | |||
| Brush Kit GM 120 0 40 | |||
| Orchestra Kit GM 120 0 48 | |||
| SFX Kit GM 120 0 56 | |||
| Standard Kit1 XG 127 0 0 | |||
| Standard Kit2 XG 127 0 9 | |||
| Room Kit XG | 127 0 | 8 | |
| Rock Kit XG | 127 0 | 16 | |
| Electro Kit XG | 127 0 | 24 | |
| Analog Kit XG | 127 0 | 25 | |
| Jazz Kit 1 XG | 127 0 | 32 | |
| Jazz Kit 2 XG | 127 0 | 48 | |
| Brush Kit XG | 127 0 | 40 | |
| Classic Kit XG | 127 0 | 17 | |
| User: 1 | |||
| User Sounds 0...127 | 121 | 64 | 0...127 |
| User: 1 | |||
| User Sounds 0...127 | 121 | 65 | 0...127 |
| User: DK | |||
| User Drum Kits 0...127 | 120 | 64 | 0...127 |
DNC Sounds
The following table lists all Pa600 Factory DNC Sounds as they appear in the Sound Select window. Note: When a Performance contains Sounds making use of Sound Controllers 1 & 2 (SC1, SC2), these controllers must be assigned to the Assignable Switches or the Assignable Footswitch.| Sound Name(Bank - Page) | Page CC00 CC32 PC | Legato (IR) | Legato (OoR) | SC1 | SC2 | SCY+ | SCY- | Damper | |||
| Factory: Accordion | |||||||||||
| Harmonica DNC 1 121 5 | 22 Bend | Wah Smth | Bright Breath | ||||||||
| Factory: Guitar | |||||||||||
| Crunch Gtr DNC | 2 | 121 | 3 | 29 | < ±5st: Smth | Slide U | Mute | Harm | Feedback | ||
| Jazz Gtr DNC | 3 | 121 | 7 | 26 | < ±4st: Smth | Slide U | Harm | Bend | |||
| Nylon Guitar DNC | 4 | 121 | 18 | 24 | < ±5st: Smth | Slide U | Harm | Body NZ | |||
| RealFolk Gtr DNC | 4 | 121 | 34 | 25 | < ±4st: Smth | Slide U | Harm | Body NZ | |||
| Factory: Bass | |||||||||||
| Finger Bass DNC | 2 | 121 | 16 | 33 | < ±5st: Smth | Slap | Harm | Slide | Stop Noise | ||
| Factory: Strings & Vocal | |||||||||||
| Movie Str.1 DNC | 2 | 121 | 7 | 49 | Solo | Pizzicato | Tremolo | Solo | |||
| Movie Str.2 DNC | 2 | 121 | 8 | 49 | Smth | Pizzicato | Tremolo | Solo | |||
| Scat Voices DNC | 2 | 121 | 20 | 52 | < ±5st: Smth | FD | Smth | Bright | |||
| Factory: Trumpet & Trbn | |||||||||||
| JazzTrumpet DNC | 1 | 121 | 24 | 56 | < ±6st: Smth | Doit | FD | Shake | FD on KR | Breath | |
| JazzCornet DNC | 2 | 121 | 25 | 56 | < ±12st: Smth | Doit | FD | Gliss D | RD on KR | Breath | |
| Trombone DNC | 2 | 121 | 13 | 57 | < ±12st: Smth | Doit | FD | Bend | Bright | Breath | |
| Factory: Sax | |||||||||||
| Tenor Sax DNC | 1 | 121 | 12 | 66 | < ±12st: Smth | Soft | Straight | Gliss D | Bright | Breath | |
| Alto Sax DNC | 2 | 121 | 12 | 65 | < ±12st: Smth | Soft | Growl | Gliss D | Breath | ||
| Factory: Woodwind | |||||||||||
| Clarinet DNC | 1 | 121 | 13 | 71 | < ±5st: Smth | Bend | Bend | Soft | Ensemble | Breath | |
| Flute DNC | 2 | 121 | 11 | 73 | < ±5st: Smth | Voice | Frull | Harm | Voice | Breath | |
| Whistle DNC | 2 | 121 | 5 | 78 | Soft | GD | FD | Breath | Breath | ||
Drum Kits
The following table lists all Pa600 Factory Drum Kits in order of Bank Select-Program Change number. Legend: The table also includes MIDI data used to remotely select the Drum Kits. CC00: Control Change 0, or Bank Select CC32: Control Change 32, or Bank Select LSB. PC: Program Change.| CC00 | CC32 PC | Name | Sound Bank | |
| 120 0 | 0 Standard Kit GM | GM: Drum | ||
| 120 0 | 1 Standard Kit RX | 2 Factory: Drum & SFX | ||
| 120 0 | 2 Standard Kit RX | 3 Factory: Drum & SFX | ||
| 120 0 | 3 Ambient Kit RX | Factory: Drum & SFX | ||
| 120 0 | 4 Pop Std. Kit RX | Factory: Drum & SFX | ||
| 120 0 | 5 Standard Kit RX | 1 Factory: Drum & SFX | ||
| 120 0 | 6 Standard Kit RX | 4 Factory: Drum & SFX | ||
| 120 0 | 7 Standard Kit | Legacy: Drum & SFX | ||
| 120 0 | 8 Room Kit GM | GM: Drum | ||
| 120 0 | 9 HipHop Kit 1 | Factory: Drum & SFX | ||
| 120 | 0 | 10 | Jungle Kit | Factory: Drum & SFX |
| 120 | 0 | 11 | Techno Kit 1 | Factory: Drum & SFX |
| 120 | 0 | 12 | Room Kit 2 | Legacy: Drum & SFX |
| 120 | 0 | 13 | HipHop Kit 2 | Legacy: Drum & SFX |
| 120 | 0 | 14 | Techno Kit 2 | Legacy: Drum & SFX |
| 120 | 0 | 15 | Techno Kit 3 | Legacy: Drum & SFX |
| 120 0 | 16 | Power Kit GM | GM: | Drum |
| 120 | 0 | 17 | Power Kit 2 | Legacy: Drum & SFX |
| 120 | 0 | 18 | Power Kit RX1 | Factory: Drum & SFX |
| 120 | 0 | 19 | Power Kit RX2 | Factory: Drum & SFX |
| 120 0 | 24 | Electro Kit GM | GM: | Drum |
| 120 0 | 25 | Analog Kit GM | GM: | Drum |
| 120 | 0 | 26 | House Kit 1 | Legacy: Drum & SFX |
| 120 | 0 | 27 | House Kit 2 | Legacy: Drum & SFX |
| 120 | 0 | 28 | House Kit 3 | Legacy: Drum & SFX |
| 120 | 0 | 30 | House Kit RX1 | Factory: Drum & SFX |
| 120 | 0 | 31 | House Kit RX2 | Factory: Drum & SFX |
| 120 0 | 32 | Jazz Kit GM | GM: | Drum |
| 120 | 0 | 33 | Jazz Kit RX1 | Factory: Drum & SFX |
| 120 | 0 | 34 | Jazz Kit RX2 | Factory: Drum & SFX |
| 120 | 0 | 35 | Jazz Kit RX3 | Factory: Drum & SFX |
| 120 0 | 40 | Brush Kit GM | GM: | Drum |
| 120 | 0 | 41 | Brush Kit 2 | Legacy: Drum & SFX |
| 120 | 0 | 42 | Brush Kit RX1 | Factory: Drum & SFX |
| 120 | 0 | 43 | Brush Kit RX2 | Factory: Drum & SFX |
| 120 | 0 | 44 | Brush Kit RX3 | Factory: Drum & SFX |
| 120 0 | 48 | Orchestra Kit GM | GM: | Drum |
| 120 | 0 | 49 | Orchestra Kit | Legacy: Drum & SFX |
| 120 | 0 | 50 | Bdrum&Sdrum Kit | Legacy: Drum & SFX |
| 120 | 0 | 51 | Arabian Kit 1 | Factory: Drum & SFX |
| 120 0 | 56 | SFX Kit GM | GM: | Drum |
| 120 | 0 | 57 | SFX Kit 2 | Factory: Drum & SFX |
| 120 | 0 | 58 | Synth Kit | Factory: Drum & SFX |
| CC00 | CC32 | PC | Name | Sound Bank |
| 120 | 0 | 60 | SFX Kit 1 | Factory: Drum & SFX |
| 120M.S.B | 0 | 64 | Percussion Kit | Factory: Drum & SFX |
| 120 | 0 | 65 | Latin Perc.Kit 1 | Factory: Drum & SFX |
| 120 | 0 | 66 | Trinity Perc.Kit | Factory: Drum & SFX |
| 120 | 0 | 67 | i30 Perc. Kit | Factory: Drum & SFX |
| 120 | 0 | 68 | Latin Perc.Kit 2 | Factory: Drum & SFX |
| 120 | 0 | 69 | Standard PercKit | Factory: Drum & SFX |
| 120 | 0 | 72 | HipHop Kit RX | Factory: Drum & SFX |
| 120 | 0 | 73 | Techno Kit RX | Factory: Drum & SFX |
| 120 | 0 | 74 | Dance Kit RX | Factory: Drum & SFX |
| 120 | 0 | 75 | Electro Kit RX1 | Factory: Drum & SFX |
| 120 | 0 | 76 | Electro Kit RX2 | Factory: Drum & SFX |
| 120 | 0 | 89 | Pop Std. Kit 1 | Factory: Drum & SFX |
| 120 | 0 | 90 | Pop Std. Kit 2 | Factory: Drum & SFX |
| 120 | 0 | 96 | Elektro Kit 1 | Factory: Drum & SFX |
| 120 | 0 | 97 | Elektro Kit 2 | Factory: Drum & SFX |
| 120 | 0 | 117 | Arabian Kit 2 | Factory: Drum & SFX |
| 120 | 0 | 118 | Turkish Kit | Factory: Drum & SFX |
| 120 | 0 | 119 | Oriental PercKit | Factory: Drum & SFX |
| 120 | 0 | 120 | Room Kit 1 | Factory: Drum & SFX |
| 120 | 0 | 121 | Power Kit 1 | Legacy: Drum & SFX |
| 120 | 0 | 122 | Electro Kit | Factory: Drum & SFX |
| 120 | 0 | 123 | Analog Kit | Factory: Drum & SFX |
| 120 | 0 | 125 | Brush Kit 1 | Legacy: Drum & SFX |
| 127 0 | 0 Standard Kit1 XG GM: Drum | |||
| 127 0 | 9 Standard Kit2 XG GM: Drum | |||
| 127 0 | 8 Room Kit XG GM: Drum | |||
| 127 0 | 16 Rock Kit XG GM: Drum | |||
| 127 0 | 24 Electro Kit XG GM: Drum | |||
| 127 0 | 25 Analog Kit XG GM: Drum | |||
| 127 0 | 32 Jazz Kit 1 XG GM: Drum | |||
| 127 0 | 48 Jazz Kit 2 XG GM: Drum | |||
| 127 0 | 40 Brush Kit XG GM: Drum | |||
| 127 0 | 17 Classic Kit XG GM: Drum | |||
| 120 64 0-127 ... User DK | ||||
Multisamples
The following is a list of all Pa600 Factory Multisamples. \* OrigTune: Original Tune, i.e., samples use the natural tuning of the original instrument, instead of the equal tuning. Beating may occur at the extreme pitch, when the sound is used in conjunction with other sounds.| 0 GrandPiano_L | 38 Clavi 4 | 76 Organ 2 M1 |
| 1 GrandPiano_R | 39 Clavinet GM | 77 Organ 1 |
| 2 GrandPiano_L OrigTune | 40 Harpsichord | 78 Organ 2 |
| 3 GrandPiano_R OrigTune | 41 Harpsichord Key off | 79 Organ 2LP |
| 4 Resonance_L | 42 Gospel Organ Slow L | 80 Organ 3 Jazz |
| 5 Resonance_R | 43 Gospel Organ Slow R | 81 BX3 & Perc. 3rd |
| 6 Resonance_L OrigTune | 44 Gospel Organ Fast L | 82 E.Organ Vox |
| 7 Resonance_R OrigTune | 45 Gospel Organ Fast R | 83 E.Organ Full |
| 8 Piano FX Pedal On L | 46 16' 8' LF L | 84 E.Organ Dist |
| 9 Piano FX Pedal On R | 47 16' 8' LF R | 85 Rotary Organ 1 |
| 10 Piano FX Pedal Off L | 48 16' 8' LS L | 86 Rotary Organ 2 |
| 11 Piano FX Pedal Off R | 49 16' 8' LS R | 87 Super BX3 |
| 12 Piano FX Key Off L | 50 16' 8' 51/3 LF L | 88 Rotor Noise LF L |
| 13 AcousticPiano L | 51 16' 8' 51/3 LF R | 89 Rotor Noise LF R |
| 14 AcousticPiano R | 52 16' 8' 51/3 LS L | 90 Rotor Noise LS L |
| 15 Piano M1 | 53 16' 8' 51/3 LS R | 91 Rotor Noise LS R |
| 16 E.GrandPiano | 54 4' 22/3' 2' LF L | 92 H Organ Click Kon |
| 17 E.Piano FM 1 | 55 4' 22/3' 2' LF R | 93 H Organ Click Koff |
| 18 E.Piano FM 1LP | 56 4' 22/3' 2' LS L | 94 Pipe Flute L |
| 19 E.Piano FM 2 | 57 4' 22/3' 2' LS R | 95 Pipe Flute R |
| 20 E.Piano Suit Bright mp | 58 11/3' 13/5' 1' LF L | 96 Pipe Positive |
| 21 E.Piano Suit Bright mf | 59 11/3' 13/5' 1' LF R | 97 Pipe Mixture |
| 22 E.Piano Suit Bright f | 60 11/3' 13/5' 1' LS L | 98 Pipe Full 1 L |
| 23 E.Piano Dyno mf | 61 11/3' 13/5' 1' LS R | 99 Pipe Full 1 R |
| 24 E.Piano Dyno f | 62 16' 8' 51/3' Perc LF L | 100 Pipe Full 2 |
| 25 E.Piano Dyno ff | 63 16' 8' 51/3' Perc LF R | 101 Music Box |
| 26 E.Piano Dyno Soft | 64 16' 8' 51/3' Perc LS L | 102 Kalimba |
| 27 E.Piano Dyno SoftLP | 65 16' 8' 51/3' Perc LS R | 103 Kalimba GM |
| 28 E.Piano Stage Hard | 66 Theater Organ 1 | 104 Marimba |
| 29 E.Piano Stage HardLP | 67 Theater Organ 2 | 105 Xylophone |
| 30 E.Piano Wurly Soft | 68 50s E.Organ Bright | 106 Balaphone |
| 31 E.Piano Wurly Hard | 69 50s E.Organ Dark | 107 Vibraphone1 |
| 32 E.Piano Pad 1 | 70 E.Organ CX 3 | 108 Vibraphone2 |
| 33 E.Piano Pad 1LP | 71 E.Organ Perc. 1 | 109 Celesta |
| 34 E.Piano Pad 2 | 72 E.Organ Perc. 2 | 110 Celesta GM |
| 35 Clavi 1 | 73 E.Organ Perc. 3 | 111 Glockenspiel |
| 36 Clavi 2 | 74 E.Organ Perc. 4 | 112 GlockenspielLP |
| 37 Clavi 3 | 75 Organ 1 M1 | 113 Tubular Bell |
| 114 Log Drum | 159 Alto Sax Vibrato2 Drive | 204 Tuba ff |
| 115 Steel Drum Hard | 160 Alto Sax p | 205 Tuba GM |
| 116 Steel Drum GM | 161 Alto Sax mf | 206 Tuba Bariton Attack |
| 117 Gamelan | 162 Alto Sax GM | 207 Trombone 1 Vibrato |
| 118 FM Bell | 163 Alto Sax Growl | 208 Trombone 2 mf |
| 119 Flute | 164 Soprano Sax Vibrato | 209 Trombone 2 f |
| 120 Flute Frull | 165 Soprano Sax Straight | 210 Trombone 3 Soft |
| 121 Flute Voice | 166 Soprano Sax GM | 211 Trombone 3 Bright |
| 122 Flute Jazz | 167 Sax Family Vibrato | 212 Trombone Slur Up |
| 123 Flute Vibrato | 168 Sax key on | 213 Trombone Fall |
| 124 Flute Attack p | 169 Sax key off | 214 Trombone GM |
| 125 Flute Attack f | 170 Musette 1 | 215 2 'Trombones mf L |
| 126 Piccolo | 171 Musette 2 | 216 2 Trombones mf R |
| 127 Pan Flute | 172 Musette 2LP | 217 2 Trombones f L |
| 128 Pan Flute Attack | 173 Accordion 16' | 218 2 Trombones f R |
| 129 Tin Whistle Voice | 174 Accordion 16' OrigTune | 219 Classic Trumpet p |
| 130 Whistle Gliss | 175 Accordion 8' | 220 Classic Trumpet mf |
| 131 Whistle No Vibr | 176 Accordion 8' OrigTune | 221 Pop Trumpet mf |
| 132 Whistle Sfz Vibr | 177 Accordion 4' | 222 Pop Trumpet f |
| 133 Whistle Sfz No Vibr | 178 Accordion 4' OrigTune | 223 Trumpet Expr. |
| 134 Whistle Slow Atk Vibr | 179 Accordion preset 1 | 224 Trumpet Slow mp |
| 135 Whistle Breath | 180 Accordion preset 2 | 225 Trumpet Slow f |
| 136 Shakuhachi | 181 Accordion Bassoon | 226 Trumpet GM |
| 137 Shakuhachi Atk | 182 Accordion Clarinet | 227 Trumpet Tonguing mp |
| 138 Bottle | 183 Accordion Bandoneon | 228 Trumpet Tonguing f |
| 139 Shanai GM | 184 Accordion Volkst. | 229 Trumpet Medium |
| 140 Recorder | 185 Accordion Bass | 230 Trumpet Overblown |
| 141 Ocarina | 186 Accordion Noise KeyOn | 231 Trumpet Muted |
| 142 Clarinet 1 | 187 Accordion Noise KeyOff | 232 Trumpet Muted GM |
| 143 Clarinet 2 | 188 Accordion Change Voice | 233 Trumpet Wah wah |
| 144 DoubleReed M1 | 189 Harmonica Fall | 234 Trumpet Doit |
| 145 Oboe | 190 Harmonica | 235 Trumpet Fall |
| 146 English Horn | 191 Harmonica Wah | 236 2 Trumpets mp L |
| 147 Bassoon | 192 Highland Bag Pipes | 237 2 Trumpets mp R |
| 148 Baritone Sax mf | 193 Highland Drones | 238 2 Trumpets f L |
| 149 Baritone Sax f | 194 Uilleann Pipes | 239 2 Trumpets f R |
| 150 Baritone Sax GM | 195 Bag Pipes | 240 Brass Ensemble Stereo L |
| 151 Tenor Sax Vibrato | 196 Bag Pipes GM | 241 Brass Ensemble Stereo R |
| 152 Tenor Sax Expressive | 197 French Horn T1 | 242 Brass Ensemble 1 |
| 153 Tenor Sax mp | 198 French Horn Ensemble | 243 Brass Ensemble 2 |
| 154 Tenor Sax Straight | 199 French Horns GM | 244 Brass Ensemble GM |
| 155 Tenor Sax M1 | 200 Tenor Horn | 245 Voice Female Wuh |
| 156 Tenor Sax GM | 201 Flugel Horn Vibrato | 246 Voice Female Woh |
| 157 Alto Sax Vibrato1 | 202 Flugel Horn M1 | 247 Voice Female Wah |
| 158 Alto Sax Vibrato2 | 203 Tuba f | 248 Voice Female Dah |
| 249 Voice Male Wuh | 294 Steel Gtr Noise | 339 Jazz Gib mellow mf |
| 250 Voice Male Woh | 295 Guitar Fret Noise Off | 340 Jazz Gib mellow f |
| 251 Voice Male Wah | 296 Guitar Body | 341 Pedal Steel Guitar |
| 252 Voice Male Dah | 297 Nylon Guitar p | 342 Resonator Guitar |
| 253 Voice Choir | 298 Nylon Guitar mf | 343 Vox Wah Guitar |
| 254 Voice Hoo | 299 Nylon Guitar f | 344 Overdrive GM |
| 255 Voice Pop Ooh | 300 Nylon Guitar Atk | 345 Dist. Guitar |
| 256 Voice Pop Ah | 301 Nylon Guitar GM | 346 Dist. Guitar GM |
| 257 Voice Doo | 302 El. Guitar Stra 54 p | 347 Dist. Guitar1 Harmo. |
| 258 Voice DooLP | 303 El. Guitar Stra 54 mf | 348 Gtr Harmonic GM |
| 259 Violin Solo Vibrato | 304 El. Guitar Stra 54 f | 349 Dist. Guitar2 Harmo P1 |
| 260 Violin Straight | 305 El. Guitar Stra 54 Slide | 350 Dist. Guitar2 Harmo P2 |
| 261 Violin GM | 306 El. Guitar Tel Mid p | 351 Dist. Guitar2 Mute1 |
| 262 Fiddle GM | 307 El. Guitar Tel Mid mf | 352 Dist. Guitar2 Mute2 |
| 263 Viola Expressive mf | 308 El. Guitar Tel Mid f | 353 El. Guitar DistMuted p |
| 264 Viola Expressive f | 309 El. Guitar Tel Bridge p | 354 El. Guitar DistMuted mp |
| 265 Viola GM | 310 El. Guitar Tel Bridge mf | 355 El. Guitar PowerChord1 |
| 266 Cello & Contrabass | 311 El. Guitar Tel Bridge f | 356 El. Guitar PowerChord2 |
| 267 Cello GM | 312 El. Guitar Tel Mt 5th p | 357 Acoustic Bass1 |
| 268 Violin & Cello | 313 El. Guitar Tel Mt 5th mf | 358 Acoustic Bass2 mf |
| 269 Strings Quartet Vibrato1 | 314 El. Guitar Tel Mt 5th f | 359 Acoustic Bass2 f |
| 270 Strings Quartet Vibrato2 | 315 El. Guitar Tel Mt 5th ff | 360 Acoustic Bass3 mf VAR |
| 271 Pizzicato | 316 El. Guitar Clean Str p | 361 Acoustic Bass3 f VAR |
| 272 Strings Ensemble St L | 317 El. Guitar Clean Str f | 362 Acoustic Bass GM |
| 273 Strings Ensemble St R | 318 El. Guitar Clean Mute | 363 Acoustic Bass RX Noises |
| 274 Strings Ensemble GM L | 319 El. Guitar Clean Dead | 364 E.Bass1 Finger |
| 275 Strings Ensemble GM R | 320 El. Guitar Clean Slap | 365 E.Bass2 P.B.1 |
| 276 Strings Ensemble Mono | 321 El. Guitar Clean Slide | 366 E.Bass2 P.B.2 |
| 277 Strings Ensemble Tremolo | 322 El. Guitar Clean GM | 367 E.Bass2 LH Stop |
| 278 Pizzicato Ensemble | 323 El. Guitar Fret Noise GM | 368 E.Bass2 RH Stop |
| 279 Harp | 324 El. Guitar Cut Noise GM | 369 E.Bass2 Harmo. |
| 280 Harp Atk | 325 El. Guitar Le Neck | 370 E.Bass3 p |
| 281 Steel Gtr 1 Pick p | 326 El. Guitar Le Bridge | 371 E.Bass3 mf |
| 282 Steel Gtr 1 Pick mf | 327 El. Guitar Le Mute p | 372 E.Bass3 f Slap |
| 283 Steel Gtr 1 Pick f | 328 El. Guitar Le Mute mf | 373 E.Bass4 Pick |
| 284 Steel Gtr 1 Mute | 329 El. Guitar Le Ghost1 | 374 E.Bass4 Harmo. |
| 285 Steel Gtr 1 Slide | 330 El. Guitar Le Ghost2 | 375 E.Bass4 Slap |
| 286 Steel Gtr 2 p | 331 El. Guitar Harmonics | 376 E.Bass4 SlapHar |
| 287 Steel Gtr 2 mf | 332 El. Guitar Gliss Down | 377 E.Bass4 LH Mute |
| 288 Steel Gtr 2 f | 333 El. Guitar Gliss Up | 378 E.Bass4 RH Mute |
| 289 Steel Gtr 2 Slap | 334 El. Guitar Noise | 379 E.Bass5 Finger |
| 290 Steel Gtr 2 Slide | 335 El. Guitar Fret Noise | 380 E.Bass6 Finger |
| 291 Steel Gtr 12 Strings | 336 Jazz Guitar1 | 381 E.Bass7 Finger |
| 292 Steel Gtr Harmonics 1 | 337 Jazz Guitar2 | 382 E.Bass8 Pick |
| 293 Steel Gtr Harmonics 2 | 338 Jazz Gib mellow p | 383 E.Bass9 Pick |
| 384 E.Bass9 PickLP | 429 Syn Bass FM1 | 474 Triangle MG |
| 385 E.Bass10 Thumb | 430 Syn Bass FM2 | 475 Ramp |
| 386 E.Bass11 SlapThumb | 431 Syn Bass FM2LP | 476 Ramp MG |
| 387 E.Bass Gliss | 432 Syn Bass TB | 477 Sine |
| 388 E.Bass Noise1 | 433 R&B Saw Bass | 478 DWGS Syn Sine1 |
| 389 E.Bass Noise2 | 434 R&B Square Bass | 479 DWGS Syn Sine2 |
| 390 E.Bass Harmonics | 435 Chrom Res | 480 DWGS Bell1 |
| 391 E.Bass Fretless | 436 Detuned Super | 481 DWGS Bell2 |
| 392 Finger Bass GM | 437 Detuned PWM | 482 DWGS Bell3 |
| 393 Picked Bass GM | 438 Pop Synth | 483 DWGS Bell4 |
| 394 Slap Bass1 GM | 439 An.Strings1 | 484 DWGS Clav. |
| 395 Slap Bass2 GM | 440 An.Strings2 | 485 DWGS Digi1 |
| 396 Fretless Bass GM | 441 Analog Vintage | 486 DWGS Digi2 |
| 397 Sitar | 442 White Pad | 487 DWGS Wire1 |
| 398 Sitar GM | 443 N1 Air Vox | 488 DWGS Wire2 |
| 399 Sitar & Tambura | 444 SynthBell | 489 DWGS Sync1 |
| 400 Santur | 445 Ether Bell | 490 DWGS Sync2 |
| 401 Tambura | 446 Ether BellLP | 491 Orchestra Hit GM L |
| 402 Bouzouki | 447 Lore | 492 Orchestra Hit GM R |
| 403 BouzoukiLP | 448 Space Lore | 493 Band Hit |
| 404 Mandolin | 449 Wave Sweep1 | 494 Impact Hit |
| 405 Mandolin Tremolo | 450 Wave Sweep2 | 495 Brass Fall |
| 406 Mandolin Ensemble | 451 Syn Ghostly | 496 Stadium |
| 407 Banjo | 452 Ghost | 497 Applause |
| 408 Banjo GM | 453 Syn Air Pad | 498 Birds1 |
| 409 Ukulele | 454 Dream Str | 499 Birds2 |
| 410 Shamisen | 455 Syn AirVortex | 500 Crickets |
| 411 Shamisen GM | 456 Syn Palawan | 501 Church Bell |
| 412 Koto | 457 Syn Clicker | 502 Thunder |
| 413 Koto GM | 458 Noise1 | 503 Stream |
| 414 M.E. Oud | 459 Noise2 | 504 Bubble |
| 415 M.E. Oud Tek | 460 Noise Pad | 505 Dog |
| 416 M.E. Kanoun1 | 461 Swish Terra | 506 Gallop |
| 417 M.E. Kanoun2 | 462 Saw1 | 507 Laughing |
| 418 M.E. Kanoun Tremolo | 463 Saw2 | 508 Telephone Ring |
| 419 M.E. Baglama1 | 464 Saw3 | 509 Scream |
| 420 M.E. Baglama2 | 465 Pulse 02% | 510 Punch |
| 421 M.E. Zurna | 466 Pulse 05% | 511 Heart Beat |
| 422 M.E. Klarnet Tek | 467 Pulse 08% | 512 Footstep |
| 423 M.E. Klarnet | 468 Pulse 16% | 513 Door Creak |
| 424 M.E. Nay | 469 Pulse 33% | 514 Door Slam |
| 425 Mouth Harp1 | 470 Pulse 40% | 515 Car Engine |
| 426 Mouth Harp2 | 471 Square | 516 Car EngineLP |
| 427 Mouth Harp3 | 472 Square MG | 517 Car Stop |
| 428 Syn Bass Reso | 473 Square JP | 518 Car Pass |
| 519 Car Crash | 533 Ride Edge2 | 547 Orchestra BD |
| 520 Train | 534 88 HiHat Open | 548 Timpani |
| 521 Helicopter | 535 88 Cowbell | 549 Taiko |
| 522 Gun Shot | 536 88 Tom | 550 Djembe Mute |
| 523 Machine Gun | 537 88 Crash | 551 FX SD Large Hall1 L |
| 524 Laser Gun | 538 Tom | 552 FX SD Large Hall1 R |
| 525 Explosion | 539 Tom Brush | 553 FX SD Large Hall2 L |
| 526 Wind | 540 Tom Process | 554 FX SD Large Hall2 R |
| 527 Chinese Gong | 541 Electric Tom | 555 FX Rim Large Hall1 L |
| 528 Crash Reverse | 542 Melodic Tom GM | 556 FX Rim Large Hall1 R |
| 529 Crash Reverse GM | 543 Agogo Bell | 557 FX Rim Large Hall2 L |
| 530 Orchestra Crash | 544 Marc Tree | 558 FX Rim Large Hall2 R |
| 531 Ride Jazz | 545 Castanet | 559 Click |
| 532 Ride Edge1 | 546 Temple Blocks | 560 Empty |
Drum Samples
The following table contains all Pa600 Factory Drum Samples.| # Name Family | |||
| 0 BD | 24x14 | BassDr | |
| 1 BD | 24x14 GM | BassDr | |
| 2 BD | 26 inch Open | BassDr | |
| 3 BD | 26 inch Open GM | BassDr | |
| 4 BD | Pop1 | BassDr | |
| 5 BD | Pop2 | BassDr | |
| 6 BD | Acoustic1 p | BassDr | |
| 7 BD | Acoustic1 mf | BassDr | |
| 8 BD | Acoustic1 f | BassDr | |
| 9 BD | Acoustic2 mf | BassDr | |
| 10 BD | Acoustic2 mf GM | BassDr | |
| 11 BD | Acoustic2 f | BassDr | |
| 12 BD | Acoustic2 f GM | BassDr | |
| 13 BD | open p | BassDr | |
| 14 BD | open mf | BassDr | |
| 15 BD | open f | BassDr | |
| 16 BD | Peak | BassDr | |
| 17 BD | Dry1 | BassDr | |
| 18 BD | Dry2 | BassDr | |
| 19 BD | Dry3 | BassDr | |
| 20 BD | Normal | BassDr | |
| 21 BD | SoftRoom | BassDr | |
| 22 BD | Jazz | BassDr | |
| 23 BD | Jazz GM | BassDr | |
| 24 BD | Pillow | BassDr | |
| 25 BD | Woofer | BassDr | |
| 26 BD | MondoKill | BassDr | |
| 27 BD | Terminator | BassDr | |
| 28 BD | Tubby | BassDr | |
| 29 BD | Gated | BassDr | |
| 30 BD | Tight | BassDr | |
| 31 BD | Squash | BassDr | |
| 32 BD | Soul1 | BassDr | |
| 33 BD | Soul2 | BassDr | |
| 34 BD | Soul3 dist | BassDr | |
| 35 BD | Soul4 noise | BassDr | |
| 36 BD | Soul5 Long | BassDr | |
| 37 BD | Soul6 | BassDr | |
| 38 BD | Dance1 | BassDr | |
| 39 BD | Dance2 | BassDr | |
| 40 BD | Dance3 | BassDr | |
| 41 BD | House1 | BassDr | |
| 42 BD | House2 | BassDr | |
| 43 BD | House3 | BassDr | |
| 44 BD | House4 | BassDr | |
| 45 BD | House5 | BassDr | |
| 46 BD | Liquid | BassDr | |
| # | Name | Family |
| 47 BD | Techno1 | BassDr |
| 48 BD | Techno2 | BassDr |
| 49 BD | Hip1 | BassDr |
| 50 BD | Hip2 | BassDr |
| 51 BD | Hip3 | BassDr |
| 52 BD | Hip4 | BassDr |
| 53 BD | Kick1 | BassDr |
| 54 BD | Kick2 | BassDr |
| 55 Electro Kick | BassDr | |
| 56 BD | Ambient | BassDr |
| 57 BD | Ambient Crackle | BassDr |
| 58 BD | Ambient Rocker | BassDr |
| 59 BD | Pop | BassDr |
| 60 BD | Deep | BassDr |
| 61 BD | Deep GM | BassDr |
| 62 BD | Klanger | BassDr |
| 63 BD | Electribe01 | BassDr |
| 64 BD | Electribe02 | BassDr |
| 65 BD | Electribe03 | BassDr |
| 66 BD | Electribe04 | BassDr |
| 67 BD | Electribe05 | BassDr |
| 68 BD | Electribe06 | BassDr |
| 69 BD | Electribe07 | BassDr |
| 70 BD | Electribe08 | BassDr |
| 71 BD | Electribe09 | BassDr |
| 72 BD | Electribe10 | BassDr |
| 73 BD | Electribe11 | BassDr |
| 74 BD | Electribe12 | BassDr |
| 75 BD | Electribe13 | BassDr |
| 76 BD | Electribe14 | BassDr |
| 77 BD | Electribe15 | BassDr |
| 78 BD | Electribe16 | BassDr |
| 79 BD | Electribe17 | BassDr |
| 80 Syn. BD1 | BassDr | |
| 81 Syn. BD2 | BassDr | |
| 82 Syn. BD3 | BassDr | |
| 83 Syn. BD4 | BassDr | |
| 84 Syn. BD Buzz | BassDr | |
| 85 BD | Orchestra | BassDr |
| 86 BD | Orchestra GM | BassDr |
| 87 Timpani | BassDr | |
| 88 SD | LdwVintage S+Rim p | Snare Dr |
| 89 SD | LdwVintage S+Rim mf | Snare Dr |
| 90 SD | LdwVintage S+Rim f | Snare Dr |
| 91 SD | Pop1 p GM | Snare Dr |
| 92 SD | Pop1 mf GM Snare Dr | |
| 93 SD | Pop1 f GM | Snare Dr |
| 94 SD | Pop1 +Rim mf GM | Snare Dr |
| 95 SD | Pop1 +Rim f GM | Snare Dr |
| 96 SD | Black | Snare Dr |
| # | Name | Family | |
| 97 SD | S Gate1 GM | Snare Dr | |
| 98 SD | S Gate2 | Snare Dr | |
| 99 SD | Wood1 p | Snare Dr | |
| 100 | SD Wood1 mf | Snare Dr | |
| 101 | SD Wood1 f | Snare Dr | |
| 102 | SD Wood2 pp | Snare Dr | |
| 103 | SD Wood2 p | Snare Dr | |
| 104 | SD Wood2 mf | Snare Dr | |
| 105 | SD Wood2 f | Snare Dr | |
| 106 | SD Piccolo1 pp | Snare Dr | |
| 107 | SD Piccolo1 p | Snare Dr | |
| 108 | SD Piccolo1 mf | Snare Dr | |
| 109 | SD Piccolo1 f | Snare Dr | |
| 110 | SD Piccolo2 pp | Snare Dr | |
| 111 | SD Piccolo2 p | Snare Dr | |
| 112 | SD Piccolo2 mf | Snare Dr | |
| 113 | SD Piccolo2 f | Snare Dr | |
| 114 | SD Solid1 p | Snare Dr | |
| 115 | SD Solid1 mf | Snare Dr | |
| 116 | SD Solid1 f | Snare Dr | |
| 117 | SD Solid2 p | Snare Dr | |
| 118 | SD Solid2 mf | Snare Dr | |
| 119 | SD Solid2 f | Snare Dr | |
| 120 | SD Maple1 pp | Snare Dr | |
| 121 | SD Maple1 p | Snare Dr | |
| 122 | SD Maple1 mp | Snare Dr | |
| 123 | SD Maple1 mf | Snare Dr | |
| 124 | SD Maple1 f | Snare Dr | |
| 125 | SD Maple1 ff | Snare Dr | |
| 126 | SD Maple2 pp | Snare Dr | |
| 127 | SD Maple2 p | Snare Dr | |
| 128 | SD Maple2 mp | Snare Dr | |
| 129 | SD Maple2 mf | Snare Dr | |
| 130 | SD Maple2 f | Snare Dr | |
| 131 | SD Maple2 ff | Snare Dr | |
| 132 | SD Brass1 p | Snare Dr | |
| 133 | SD Brass1 mf | Snare Dr | |
| 134 | SD Brass1 f | Snare Dr | |
| 135 | SD Brass2 p | Snare Dr | |
| 136 | SD Brass2 mf | Snare Dr | |
| 137 | SD Brass2 f | Snare Dr | |
| 138 | SD Roll | Snare Dr | |
| 139 | SD Ghost Roll | Snare Dr | |
| 140 | SD Ghost p | Snare Dr | |
| 141 | SD Ghost f | Snare Dr | |
| 142 | SD Snr Ghost1 a | Snare Dr | |
| 143 | SD Snr Ghost1 b | Snare Dr | |
| 144 | SD Snr Ghost2 a | Snare Dr | |
| 145 | SD Snr Ghost2 b | Snare Dr | |
| 146 | SD Snr Ghost2 c | Snare Dr | |
| # | Name | Family |
| 147 SD | Snr Signature p Snare Dr | |
| 148 SD | Snr Signature mf Snare Dr | |
| 149 SD | Snr Signature f Snare Dr | |
| 150 SD | Snr Signature Rim mf Snare Dr | Dr |
| 151 SD | Snr Signature Rim f Snare Dr | |
| 152 SD | Snr Signature Rim1 Snare Dr | |
| 153 SD | Snr Signature Rim2 Snare Dr | |
| 154 SD | J Std+Rim p Snare Dr | |
| 155 SD | J Std+Rim mf Snare Dr | |
| 156 SD | J Std+Rim f Snare Dr | |
| 157 SD | Dry1 Snare Dr | |
| 158 SD | Dry2 Snare Dr | |
| 159 SD | Dry3 Snare Dr | |
| 160 SD | Full Room Snare Dr | |
| 161 SD | Off Center Snare Dr | |
| 162 SD | Jazz Ring Snare Dr | |
| 163 SD | Amb.Piccolo Snare Dr | |
| 164 SD | Paper Snare Dr | |
| 165 SD | Big Rock Snare Dr | |
| 166 SD | Yowie Snare Dr | |
| 167 SD | Trinity1 Snare Dr | |
| 168 SD | Trinity2 Snare Dr | |
| 169 SD | Stereo Gate Snare Dr | |
| 170 SD | Stereo Gate GM Snare Dr | |
| 171 SD | Processed Snare Dr | |
| 172 SD | Processed GM Snare Dr | |
| 173 SD | Cracker Room Snare Dr | |
| 174 SD | El. Funk1 Snare Dr | |
| 175 SD | El. Funk2 Snare Dr | |
| 176 SD | El. Funk3 Snare Dr | |
| 177 SD | Dance01 Snare Dr | |
| 178 SD | Dance02 Snare Dr | |
| 179 SD | Dance03 Snare Dr | |
| 180 SD | Dance04 Snare Dr | |
| 181 SD | Dance05 Snare Dr | |
| 182 SD | Dance06 Snare Dr | |
| 183 SD | Dance07 Snare Dr | |
| 184 SD | Dance08 Snare Dr | |
| 185 SD | Dance09 Snare Dr | |
| 186 SD | Dance10 Snare Dr | |
| 187 SD | Dance11 Snare Dr | |
| 188 SD | Dance12 Snare Dr | |
| 189 SD | Dance13 Snare Dr | |
| 190 SD | Dance14 Snare Dr | |
| 191 SD | Dance15 Snare Dr | |
| 192 SD | Dance16 Snare Dr | |
| 193 SD | Dance17 Snare Dr | |
| 194 SD | Dance18 Snare Dr | |
| 195 SD | Dance19 Snare Dr | |
| 196 SD | Dance20 Snare Dr | |
| 197 SD | Dance21 Snare Dr | |
| 198 SD | Dance22 Snare Dr | |
| 199 SD | Dance23 Snare Dr |
| # | Name | Family | |
| 200 SD | Dance23 GM | Snare Dr | |
| 201 SD | Dance24 | Snare Dr | |
| 202 SD | House1 | Snare Dr | |
| 203 SD | House2 | Snare Dr | |
| 204 SD | House3 | Snare Dr | |
| 205 SD | House4 | Snare Dr | |
| 206 SD | BeatBox | Snare Dr | |
| 207 SD | Small | Snare Dr | |
| 208 SD | Rap | Snare Dr | |
| 209 SD | Noise | Snare Dr | |
| 210 SD | Reverse | Snare Dr | |
| 211 SD | Hip1 | Snare Dr | |
| 212 SD | Hip2 | Snare Dr | |
| 213 SD | Hip3 | Snare Dr | |
| 214 SD | Hip4 | Snare Dr | |
| 215 SD | Hip5 | Snare Dr | |
| 216 SD | Hip6 | Snare Dr | |
| 217 SD | Ringy | Snare Dr | |
| 218 SD | Tiny | Snare Dr | |
| 219 SD | Vintage1 | Snare Dr | |
| 220 SD | Vintage2 | Snare Dr | |
| 221 SD | Vintage3 | Snare Dr | |
| 222 SD | Vintage4 | Snare Dr | |
| 223 SD | Vintage5 | Snare Dr | |
| 224 SD | Vintage6 | Snare Dr | |
| 225 SD | AmbiHop | Snare Dr | |
| 226 SD | Brasser | Snare Dr | |
| 227 SD | Chili | Snare Dr | |
| 228 SD | Whopper | Snare Dr | |
| 229 SD | Syn.1 | Snare Dr | |
| 230 SD | Syn.2 | Snare Dr | |
| 231 SD | Syn.3 | Snare Dr | |
| 232 SD | Syn.4 | Snare Dr | |
| 233 SD | Electro | Snare Dr | |
| 234 SD | Orchestra | Snare Dr | |
| 235 SD | Orch. Roll | Snare Dr | |
| 236 SD | JazzBrush1 | Snare Dr | |
| 237 SD | JazzBrush2 | Snare Dr | |
| 238 SD | Brush1 (swirl1) | Snare Dr | |
| 239 SD | Brush1 (swirl2) | Snare Dr | |
| 240 SD | Brush1 (swirl3) | Snare Dr | |
| 241 SD | Brush1 (swirl4) | Snare Dr | |
| 242 SD | Brush1 | Snare Dr | |
| 243 SD | Brush2 (ghost1) | Snare Dr | |
| 244 SD | Brush2 (ghost2) | Snare Dr | |
| 245 SD | Brush2 (ghost3) | Snare Dr | |
| 246 SD | Brush2 | Snare Dr | |
| 247 SD | Brush2 (fill) 4 shots | Snare Dr | |
| 248 SD | Brush2 (fill) 3 shots | Snare Dr | |
| 249 SD | Brush2 (fill) 2 shots | Snare Dr | |
| 250 SD | Brush3 Hit | Snare Dr | |
| 251 SD | Brush3 Tap1 | Snare Dr | |
| 252 SD | Brush3 Tap2 | Snare Dr | |
| # | Name | Family |
| 253 SD | Brush3 Swirl | Snare Dr |
| 254 SD | FX Large Hall1 Snare Dr | |
| 255 SD | FX Large Hall2 Snare Dr | |
| 256 Rim | Signature Hi Snare Dr | |
| 257 Rim | Signature Mid Snare Dr | |
| 258 Rim | Signature Low Snare Dr | |
| 259 Rim | Shot p Snare Dr | |
| 260 Rim | Shot f Snare Dr | |
| 261 Rim | House1 Snare Dr | |
| 262 Rim | House2 Snare Dr | |
| 263 Rim | Synth Snare Dr | |
| 264 Rim | Synth Click Snare Dr | |
| 265 Rim | Synth Tamb Snare Dr | |
| 266 Rim | FX Large Hall1 Snare Dr | |
| 267 Rim | FX Large Hall2 Snare Dr | |
| 268 SideStick mf | Snare Dr | |
| 269 SideStick f | Snare Dr | |
| 270 SideStick Dance | Snare Dr | |
| 271 SideStick Dry Snare Dr | ||
| 272 SideStick Amb Snare Dr | ||
| 273 DrumStick Hit Snare Dr | ||
| 274 DrumStick Hit GM Snare Dr | ||
| 275 Tom R Vintage Hi Tom | ||
| 276 Tom R Vintage Mid Tom | ||
| 277 Tom R Vintage Floor Tom | ||
| 278 Tom Vintage Room Hi Tom | ||
| 279 Tom Vintage Room Mid Tom | ||
| 280 Tom Vintage Room Low Tom | ||
| 281 Tom Jazz Hi center Tom | ||
| 282 Tom Jazz Hi center GM Tom | ||
| 283 Tom Jazz Low center GM Tom | ||
| 284 Tom1 Open Hi p Tom | ||
| 285 Tom1 Open Hi p flam Tom | ||
| 286 Tom1 Open Hi f Tom | ||
| 287 Tom1 Open Hi f flam Tom | ||
| 288 Tom1 Open Mid p Tom | ||
| 289 Tom1 Open Mid p flam Tom | ||
| 290 Tom1 Open Mid f Tom | ||
| 291 Tom1 Open Mid f flam Tom | ||
| 292 Tom1 Open Low p Tom | ||
| 293 Tom1 Open Low p flam Tom | ||
| 294 Tom1 Open Low f Tom | ||
| 295 Tom1 Open Low f flam Tom | ||
| 296 Tom1 Open Floor p Tom | ||
| 297 Tom1 Open Floor p flam Tom | ||
| 298 Tom1 Open Floor f Tom | ||
| 299 Tom1 Open Floor f flam Tom | ||
| 300 Tom2 Hi p Tom | ||
| 301 Tom2 Hi f Tom | ||
| 302 Tom2 Mid p Tom | ||
| 303 Tom2 Mid f Tom | ||
| 304 Tom2 Low p Tom | ||
| 305 Tom2 Low f Tom | ||
| 306 Tom2 Floor p | Tom | |
| 307 Tom2 Floor f | Tom | |
| 308 Tom3 Hi | Tom | |
| 309 Tom3 Floor | Tom | |
| 310 Tom4 Hi | Tom | |
| 311 Tom4 Low | Tom | |
| 312 Tom4 Floor | Tom | |
| 313 Tom5 Hi | Tom | |
| 314 Tom5 Low | Tom | |
| 315 Tom6 Vintage Hi p | Tom | |
| 316 Tom6 Vintage Hi mf | Tom | |
| 317 Tom6 Vintage Hi f | Tom | |
| 318 Tom6 Vintage Mid p | Tom | |
| 319 Tom6 Vintage Mid mf | Tom | |
| 320 Tom6 Vintage Mid f | Tom | |
| 321 Tom6 Vintage Low p | Tom | |
| 322 Tom6 Vintage Low mf | Tom | |
| 323 Tom6 Vintage Low f | Tom | |
| 324 Tom Processed | Tom | |
| 325 Tom Jazz Hi | Tom | |
| 326 Tom Jazz Floor | Tom | |
| 327 Tom Brush1 (sd open) | Tom | |
| 328 Tom Brush1 (sd close) | Tom | |
| 329 Tom Brush2 (sd open) | Tom | |
| 330 Tom Brush2 (sd close) | Tom | |
| 331 Tom Brush3 Hi mf | Tom | |
| 332 Tom Brush3 Hi f | Tom | |
| 333 Tom Brush3 Hi f GM | Tom | |
| 334 Tom Brush3 Mid mf | Tom | |
| 335 Tom Brush3 Mid f | Tom | |
| 336 Tom Brush3 Mid f GM | Tom | |
| 337 Tom Brush3 Low mf | Tom | |
| 338 Tom Brush3 Low f | Tom | |
| 339 Tom Brush3 Low f GM | Tom | |
| 340 Tom Brush4 | Tom | |
| 341 E.Tom FM | Tom | |
| 342 E.Tom Real | Tom | |
| 343 HH1 Closed pp | HiHat | |
| 344 HH1 Closed p | HiHat | |
| 345 HH1 Closed mf | HiHat | |
| 346 HH1 Closed f | HiHat | |
| 347 HH1 Foot mp | HiHat | |
| 348 HH1 Foot mf | HiHat | |
| 349 HH1 Open mp | HiHat | |
| 350 HH1 Open mf | HiHat | |
| 351 HH2 Closed pp | HiHat | |
| 352 HH2 Closed p | HiHat | |
| 353 HH2 Closed mp | HiHat | |
| 354 HH2 Closed mf | HiHat | |
| 355 HH2 Closed f | HiHat | |
| 356 HH2 Closed ff | HiHat | |
| 357 HH2 Foot p | HiHat | |
| 358 HH2 Foot f | HiHat | |
| # | Name | Family | |
| 359 HH2 Open p | HiHat | ||
| 360 HH2 Open f | HiHat | ||
| 361 HH3 Closed1 | HiHat | ||
| 362 HH3 Closed2 | HiHat | ||
| 363 HH3 Foot | HiHat | ||
| 364 HH3 Open1 | HiHat | ||
| 365 HH3 Open2 | HiHat | ||
| 366 HH3 Sizzle | HiHat | ||
| 367 HH4 Closed1 | HiHat | ||
| 368 HH4 Closed2 | HiHat | ||
| 369 HH4 Foot | HiHat | ||
| 370 HH4 Foot Open | HiHat | ||
| 371 HH4 Open | HiHat | ||
| 372 HH Old Close1 | HiHat | ||
| 373 HH Old Open1 | HiHat | ||
| 374 HH Old TiteClose | HiHat | ||
| 375 HH Old Close2 | HiHat | ||
| 376 HH Old Open2 | HiHat | ||
| 377 HH House Open1 | HiHat | ||
| 378 HH House Open2 | HiHat | ||
| 379 HH Hip | HiHat | ||
| 380 HH Alpo Close | HiHat | ||
| 381 HH Dance1 | HiHat | ||
| 382 HH Dance2 | HiHat | ||
| 383 HH Syn. Closed | HiHat | ||
| 384 HH Syn. Open | HiHat | ||
| 385 Ride 20' mp1 | Cymbal | ||
| 386 Ride 20' mp2 | Cymbal | ||
| 387 Ride 20' mf1 | Cymbal | ||
| 388 Ride 20' mf2 | Cymbal | ||
| 389 Ride Edge1 | Cymbal | ||
| 390 Ride Edge2 | Cymbal | ||
| 391 Ride Cup | Cymbal | ||
| 392 Ride Jazz | Cymbal | ||
| 393 Ride Brush1 | Cymbal | ||
| 394 Ride Brush2 | Cymbal | ||
| 395 Ride Brush3 | Cymbal | ||
| 396 Ride Rivet | Cymbal | ||
| 397 Crash 15'edge1 | Cymbal | ||
| 398 Crash 15'edge2 | Cymbal | ||
| 399 Crash 17'edge1 | Cymbal | ||
| 400 Crash 17'edge2 | Cymbal | ||
| 401 Crash 19'open1 | Cymbal | ||
| 402 Crash 19'open2 | Cymbal | ||
| 403 Crash 1 | Cymbal | ||
| 404 Crash 2 | Cymbal | ||
| 405 Crash Reverse | Cymbal | ||
| 406 Crash Dance 99 | Cymbal | ||
| 407 Crash DDD-1 | Cymbal | ||
| 408 Splash 8'edge1 | Cymbal | ||
| 409 Splash 8'edge2 | Cymbal | ||
| 410 Splash | Cymbal | ||
| 411 China | Cymbal | ||
| # | Name | Family |
| 412 | Orchestra Cymbal | Cymbal |
| 413 | Finger Snaps | Low Perc |
| 414 | Claps1 | Low Perc |
| 415 | Claps2 | Low Perc |
| 416 | Claps3 | Low Perc |
| 417 | Claps4 | Low Perc |
| 418 | Dance Claps1 | Low Perc |
| 419 | Dance Claps2 | Low Perc |
| 420 | Dance Claps3 | Low Perc |
| 421 | Dance Claps4 | Low Perc |
| 422 | Dance Claps5 | Low Perc |
| 423 | Dance Claps6 | Low Perc |
| 424 | Dance Conga Lo-Open | Low Perc |
| 425 | Dance Conga Hi-Open | Low Perc |
| 426 | Dance Tambourine | Hi Perc |
| 427 | Syn. Bongo1 | Low Perc |
| 428 | Syn. Bongo2 | Low Perc |
| 429 | Syn. Castanet | Low Perc |
| 430 | Syn. Shaker | Hi Perc |
| 431 | Syn. Noise | SFX |
| 432 | Syn. FX1 | SFX |
| 433 | Syn. FX2 | SFX |
| 434 | Syn. FX3 | SFX |
| 435 | Syn. FX4 | SFX |
| 436 | Syn. FX5 | SFX |
| 437 | Syn. Perc. Ahh | SFX |
| 438 | Boom | SFX |
| 439 | Zap1 | SFX |
| 440 | Zap2 | SFX |
| 441 | Vinyl Hit | SFX |
| 442 | DJ Vinyl Sliced 01 | SFX |
| 443 | DJ Vinyl Sliced 02 | SFX |
| 444 | DJ Vinyl Sliced 03 | SFX |
| 445 | DJ Vinyl Sliced 04 | SFX |
| 446 | DJ Vinyl Sliced 05 | SFX |
| 447 | DJ Vinyl Sliced 06 | SFX |
| 448 | DJ Vinyl Sliced 07 | SFX |
| 449 | DJ Vinyl Sliced 08 | SFX |
| 450 | DJ Vinyl Sliced 09 | SFX |
| 451 | DJ Vinyl Sliced 10 | SFX |
| 452 | DJ Vinyl Sliced 11 | SFX |
| 453 | DJ Vinyl Sliced 12 | SFX |
| 454 | DJ Vinyl Sliced 13 | SFX |
| 455 | DJ Vinyl Sliced 14 | SFX |
| 456 | DJ Vinyl Sliced 15 | SFX |
| 457 | DJ Vinyl Sliced 16 | SFX |
| 458 | DJ Vinyl Sliced 17 | SFX |
| 459 | DJ Vinyl Sliced 18 | SFX |
| 460 | DJ Vinyl Sliced 19 | SFX |
| 461 | DJ Vinyl Sliced 20 | SFX |
| 462 | DJ Vinyl Sliced 21 | SFX |
| 463 | DJ Vinyl Sliced 22 | SFX |
| 464 | DJ Vinyl Sliced 23 | SFX |
| # | Name | Family | |
| 465 DJ | Vinyl Sliced 24 | SFX | |
| 466 DJ | Scratch 01 | SFX | |
| 467 DJ | Scratch 02 | SFX | |
| 468 DJ | Scratch 03 | SFX | |
| 469 DJ | Scratch 04 | SFX | |
| 470 DJ | Scratch 05 | SFX | |
| 471 DJ | Scratch 06 | SFX | |
| 472 DJ | Hit Rub | SFX | |
| 473 DJ | Vocal Rub1 | SFX | |
| 474 DJ | Vocal Rub2 | SFX | |
| 475 DJ | BD Rub | SFX | |
| 476 DJ | SD Rub | SFX | |
| 477 Guiro Long | Low Perc | ||
| 478 Guiro Short | Low Perc | ||
| 479 Vibraslap | Hi Perc | ||
| 480 Samba Whistle | Hi Perc | ||
| 481 Samba Whistle Lp | Hi Perc | ||
| 482 Cuica Hi | Low Perc | ||
| 483 Cuica Lo | Low Perc | ||
| 484 Surdo Open GM | Low Perc | ||
| 485 Surdo Mute GM | Low Perc | ||
| 486 Tumba Open1 mf | Low Perc | ||
| 487 Tumba Open1 f | Low Perc | ||
| 488 Tumba Open2 mf | Low Perc | ||
| 489 Tumba Open2 f | Low Perc | ||
| 490 Tumba Open Flam | Low Perc | ||
| 491 Tumba Glissando | Low Perc | ||
| 492 Tumba Basstone | Low Perc | ||
| 493 Tumba O.Slap Flam mf | Low Perc | ||
| 494 Tumba O.Slap Flam f | Low Perc | ||
| 495 Tumba Muffled | Low Perc | ||
| 496 Conga1 Lo Basstone | Low Perc | ||
| 497 Conga1 Lo Open mf | Low Perc | ||
| 498 Conga1 Lo Open Slap | Low Perc | ||
| 499 Conga1 Lo Glissando | Low Perc | ||
| 500 Conga1 Lo Muffled | Low Perc | ||
| 501 Conga1 Lo Closed | Low Perc | ||
| 502 Conga1 Lo Closed Slap | Low Perc | ||
| 503 Conga1 Lo Heel | Low Perc | ||
| 504 Conga1 Lo Toe | Low Perc | ||
| 505 Conga1 Hi Basstone mf | Low Perc | ||
| 506 Conga1 Hi Basstone f | Low Perc | ||
| 507 Conga1 Hi Open mf | Low Perc | ||
| 508 Conga1 Hi Open Slap | Low Perc | ||
| 509 Conga1 Hi Muffled | Low Perc | ||
| 510 Conga1 Hi Closed | Low Perc | ||
| 511 Conga1 Hi Closed Slap | Low Perc | ||
| 512 Conga1 Hi Heel | Low Perc | ||
| 513 Conga1 Hi Toe | Low Perc | ||
| 514 Conga2 Lo Open | Low Perc | ||
| 515 Conga2 Lo Mt Slap | Low Perc | ||
| 516 Conga2 Lo Slap | Low Perc | ||
| 517 Conga2 Hi Open | Low Perc | ||
| # | Name | Family |
| 518 | Conga2 Hi Mute | Low Perc |
| 519 | Conga2 Hi Mt Slap | Low Perc |
| 520 | Conga2 Hi Slap1 | Low Perc |
| 521 | Conga2 Hi Slap2 | Low Perc |
| 522 | Conga2 Heel | Low Perc |
| 523 | Conga2 Toe | Low Perc |
| 524 | Quinto1 Open | Low Perc |
| 525 | Quinto1 Closed | Low Perc |
| 526 | Quinto1 Closed Slap | Low Perc |
| 527 | Quinto1 Toe | Low Perc |
| 528 | Quinto2 Basstone | Low Perc |
| 529 | Quinto2 Open mp | Low Perc |
| 530 | Quinto2 Open Flam | Low Perc |
| 531 | Quinto2 Open Slap | Low Perc |
| 532 | Quinto2 Muffled | Low Perc |
| 533 | Quinto2 C.Slap Flam p | Low Perc |
| 534 | Quinto2 C.Slap Flam f | Low Perc |
| 535 | Quinto2 Heel | Low Perc |
| 536 | Bongo1 Lo Muffled mp | Low Perc |
| 537 | Bongo1 Lo Muffled f | Low Perc |
| 538 | Bongo1 Lo Closed | Low Perc |
| 539 | Bongo1 Lo Flam | Low Perc |
| 540 | Bongo1 Lo MuffledFlam | Low Perc |
| 541 | Bongo1 Lo Stick | Low Perc |
| 542 | Bongo1 Lo StickEdge mf | Low Perc |
| 543 | Bongo1 Lo StickEdge f | Low Perc |
| 544 | Bongo1 Lo StickBounce | Low Perc |
| 545 | Bongo1 Lo Fingernail | Low Perc |
| 546 | Bongo1 Lo Cuptone | Low Perc |
| 547 | Bongo1 Lo Slap | Low Perc |
| 548 | Bongo1 Hi Open mf | Low Perc |
| 549 | Bongo1 Hi Open f | Low Perc |
| 550 | Bongo1 Hi Pops | Low Perc |
| 551 | Bongo1 Hi Hightone | Low Perc |
| 552 | Bongo1 Hi OpenFlam | Low Perc |
| 553 | Bongo1 Hi Fingernail | Low Perc |
| 554 | Bongo1 Hi Stick | Low Perc |
| 555 | Bongo1 Hi StickEdge mf | Low Perc |
| 556 | Bongo1 Hi StickEdge f | Low Perc |
| 557 | Bongo1 Hi StickBounce | Low Perc |
| 558 | Bongo1 Hi Cuptone | Low Perc |
| 559 | Bongo1 Hi Slap | Low Perc |
| 560 | Bongo2 Lo Open a | Low Perc |
| 561 | Bongo2 Lo Open b | Low Perc |
| 562 | Bongo2 Lo Mute | Low Perc |
| 563 | Bongo2 Hi Open a | Low Perc |
| 564 | Bongo2 Hi Open b | Low Perc |
| 565 | Bongo2 Hi Muffled | Low Perc |
| 566 | Bongo2 Hi Slap | Low Perc |
| 567 | Bongo2 Lo Heel | Low Perc |
| 568 | Bongo2 Lo Muffled | Low Perc |
| 569 | Bongo3 Lo Open | Low Perc |
| 570 | Bongo3 Lo Slap | Low Perc |
| # | Name | Family |
| 571 | Bongo3 Lo Stick | Low Perc |
| 572 | Bongo3 Hi Open | Low Perc |
| 573 | Bongo3 Hi Slap | Low Perc |
| 574 | Bongo3 Hi Stick1 | Low Perc |
| 575 | Bongo3 Hi Stick2 | Low Perc |
| 576 | Okonkolo Boca Op mp | Low Perc |
| 577 | Okonkolo Chacha Open mp | Low Perc |
| 578 | Okonkolo Chacha Open mf | Low Perc |
| 579 | Okonkolo Chacha Open f | Low Perc |
| 580 | Okonkolo Chacha Open ff | Low Perc |
| 581 | Okonkolo Chacha Slap mp | Low Perc |
| 582 | Okonkolo Chacha Slap mf | Low Perc |
| 583 | Okonkolo Chacha Slap f | Low Perc |
| 584 | Baya Open | Low Perc |
| 585 | Baya Ghe | Low Perc |
| 586 | Baya GheUp a | Low Perc |
| 587 | Baya GheUp b | Low Perc |
| 588 | Baya KaPalm | Low Perc |
| 589 | Baya KaToe a | Low Perc |
| 590 | Baya KaToe b | Low Perc |
| 591 | Baya Nail a | Low Perc |
| 592 | Baya Nail b | Low Perc |
| 593 | Baya Nail c | Low Perc |
| 594 | Baya Ge | Low Perc |
| 595 | Baya Up | Low Perc |
| 596 | Baya UpDown a | Low Perc |
| 597 | Baya UpDown b | Low Perc |
| 598 | Baya Mute1 | Low Perc |
| 599 | Baya Mute2 | Low Perc |
| 600 | Baya Mute3 | Low Perc |
| 601 | Tabla1 Na | Low Perc |
| 602 | Tabla1 Open | Low Perc |
| 603 | Tabla1 Tin | Low Perc |
| 604 | Tabla1 Mute1 | Low Perc |
| 605 | Tabla1 Mute2 | Low Perc |
| 606 | Tabla1 Mute3 | Low Perc |
| 607 | Tabla2 Tin a | Low Perc |
| 608 | Tabla2 Tin b | Low Perc |
| 609 | Tabla2 Na a | Low Perc |
| 610 | Tabla2 Na b | Low Perc |
| 611 | Tabla2 Na c | Low Perc |
| 612 | Tabla2 Tun a | Low Perc |
| 613 | Tabla2 Tun b | Low Perc |
| 614 | Tabla2 Tele a | Low Perc |
| 615 | Tabla2 Tele b | Low Perc |
| 616 | Tabla2 Tele c | Low Perc |
| 617 | Tabla2 Ti a | Low Perc |
| 618 | Tabla2 Ti b | Low Perc |
| 619 | Tabla2 Ti c | Low Perc |
| 620 | Tabla2 Tera | Low Perc |
| 621 | Tsuzumi | Low Perc |
| 622 Taiko Open Low Perc | ||
| 623 Taiko Rim Low Perc | ||
| 624 Timbales1 Lo Open mp Low Perc | ||
| 625 Timbales1 Lo Open mf Low Perc | ||
| 626 Timbales1 Lo Open mf GM Low Perc | ||
| 627 Timbales1 Lo Edge mf Low Perc | ||
| 628 Timbales1 Lo Edge f Low Perc | ||
| 629 Timbales1 Lo RimShot Low Perc | ||
| 630 Timbales1 Lo Abanico Low Perc | ||
| 631 Timbales1 Lo Roll Low Perc | ||
| 632 Timbales1 Lo Mute mf Low Perc | ||
| 633 Timbales1 Lo Mute f Low Perc | ||
| 634 Timbales1 Lo Paila mf Hi Perc | ||
| 635 Timbales1 Lo Paila f Hi Perc | ||
| 636 Timbales1 Hi Open Low Perc | ||
| 637 Timbales1 Hi Edge Low Perc | ||
| 638 Timbales1 Hi Edge GM Low Perc | ||
| 639 Timbales1 Hi RimShot mf Low Perc | ||
| 640 Timbales1 Hi RimShot f Low Perc | ||
| 641 Timbales1 Hi RimShot ff Low Perc | ||
| 642 Timbales1 Hi Abanico1 Low Perc | ||
| 643 Timbales1 Hi Abanico2 Low Perc | ||
| 644 Timbales1 Hi Mute Low Perc | ||
| 645 Timbales1 Hi Paila mf Hi Perc | ||
| 646 Timbales1 Hi Paila f Hi Perc | ||
| 647 Timbales2 Lo Open Low Perc | ||
| 648 Timbales2 Lo Mute Low Perc | ||
| 649 Timbales2 Lo Rim Low Perc | ||
| 650 Timbales2 Hi Edge Low Perc | ||
| 651 Timbales2 Hi Rim1 Low Perc | ||
| 652 Timbales2 Hi Rim2 Low Perc | ||
| 653 Timbales2 Paila Hi Perc | ||
| 654 Cowbell1 Hi Perc | ||
| 655 Cowbell2 Hi Perc | ||
| 656 Cowbell3 Hi Perc | ||
| 657 Cowbell4 Open Hi Perc | ||
| 658 Cowbell4 Mute Hi Perc | ||
| 659 Cowbell5 Open a Hi Perc | ||
| 660 Cowbell5 Open b Hi Perc | ||
| 661 Cowbell5 Mute Hi Perc | ||
| 662 Cowbell6 Hi Perc | ||
| 663 Agogo Bell Hi Perc | ||
| 664 Chacha Bell Hi Perc | ||
| 665 Mambo Bell Hi Perc | ||
| 666 Recoreco short1 Hi Perc | ||
| 667 Recoreco short2 Hi Perc | ||
| 668 Recoreco long Hi Perc | ||
| 669 Triangle1 Open Hi Perc | ||
| 670 Triangle1 Mute Hi Perc | ||
| 671 Triangle2 Open Lp Hi Perc | ||
| 672 Triangle2 Closed Hi Perc | ||
| 673 Sleigh Bell Hi Perc | ||
| 674 Rap Sleigh Bell Hi Perc | ||
| # | Name | Family |
| 675 | Jingle Bell | Hi Perc |
| 676 | Bells Open | Hi Perc |
| 677 | Finger Cymbal | Hi Perc |
| 678 | Marc Tree | Hi Perc |
| 679 | Marc Tree GM | Hi Perc |
| 680 | Marc Tree Lp | Hi Perc |
| 681 | Rainstick | SFX |
| 682 | Flexatone | Hi Perc |
| 683 | Chinese Gong | Cymbal |
| 684 | Claves1 Lo a | Low Perc |
| 685 | Claves1 Lo b | Low Perc |
| 686 | Claves1 Hi a | Low Perc |
| 687 | Claves1 Hi b | Low Perc |
| 688 | Claves2 | Low Perc |
| 689 | Wood Block 1 a | Low Perc |
| 690 | Wood Block 1 b | Low Perc |
| 691 | Wood Block 2 a | Low Perc |
| 692 | Wood Block 2 b | Low Perc |
| 693 | Wood Block 3 a | Low Perc |
| 694 | Wood Block 3 b | Low Perc |
| 695 | Wood Block 4 a | Low Perc |
| 696 | Wood Block 4 b | Low Perc |
| 697 | Wood Block 5 a | Low Perc |
| 698 | Wood Block 5 b | Low Perc |
| 699 | Wood Block 6 a | Low Perc |
| 700 | Wood Block 6 b | Low Perc |
| 701 | Wood Block 7 | Low Perc |
| 702 | Wood Block 8 | Low Perc |
| 703 | Castanet 1 a | Low Perc |
| 704 | Castanet 1 b | Low Perc |
| 705 | Castanet 1 c | Low Perc |
| 706 | Castanet 2 | Low Perc |
| 707 | Castanet Single | Low Perc |
| 708 | Castanet Single GM | Low Perc |
| 709 | Castanet Double | Low Perc |
| 710 | Cabasa 1 L a Down | Hi Perc |
| 711 | Cabasa 1 L a Up | Hi Perc |
| 712 | Cabasa 1 L b Down | Hi Perc |
| 713 | Cabasa 1 L b Up | Hi Perc |
| 714 | Cabasa 1 S a Down | Hi Perc |
| 715 | Cabasa 1 S a Up | Hi Perc |
| 716 | Cabasa 1 S b Down | Hi Perc |
| 717 | Cabasa 1 S b Up | Hi Perc |
| 718 | Cabasa 2 L Stack b | Hi Perc |
| 719 | Cabasa 2 L Stack a | Hi Perc |
| 720 | Cabasa 2 L Roll | Hi Perc |
| 721 | Cabasa 2 S Stack a | Hi Perc |
| 722 | Cabasa 2 S Stack b | Hi Perc |
| 723 | Cabasa 2 S Roll | Hi Perc |
| 724 | Cabasa 3 WS | Hi Perc |
| 725 | Cabasa 3 Up | Hi Perc |
| 726 | Cabasa 3 Down | Hi Perc |
| 727 | Cabasa 3 Tap | Hi Perc |
| # | Name | Family |
| 728 | Caxixi1 a | Hi Perc |
| 729 | Caxixi1 b | Hi Perc |
| 730 | Caxixi1 c | Hi Perc |
| 731 | Caxixi2 a | Hi Perc |
| 732 | Caxixi2 b | Hi Perc |
| 733 | Caxixi2 c | Hi Perc |
| 734 | Caxixi3 Hard | Hi Perc |
| 735 | Caxixi3 Soft | Hi Perc |
| 736 | Shaker1 Push a | Hi Perc |
| 737 | Shaker1 Push b | Hi Perc |
| 738 | Shaker1 Pull a | Hi Perc |
| 739 | Shaker1 Pull b | Hi Perc |
| 740 | Shaker1 Accent a | Hi Perc |
| 741 | Shaker1 Accent b | Hi Perc |
| 742 | Shaker1 Slow a | Hi Perc |
| 743 | Shaker1 Slow b | Hi Perc |
| 744 | Shaker1 Slow c | Hi Perc |
| 745 | Shaker1 Roll a | Hi Perc |
| 746 | Shaker1 Roll b | Hi Perc |
| 747 | Shaker1 Roll c | Hi Perc |
| 748 | Shaker2 | Hi Perc |
| 749 | Shaker3 | Hi Perc |
| 750 | Maracas Push | Hi Perc |
| 751 | Maracas Pull | Hi Perc |
| 752 | Dumbek a | Low Perc |
| 753 | Dumbek b | Low Perc |
| 754 | Dumbek c | Low Perc |
| 755 | Dumbek d | Low Perc |
| 756 | Dumbek e | Low Perc |
| 757 | Dumbek f | Low Perc |
| 758 | Dumbek g | Low Perc |
| 759 | Dumbek h | Low Perc |
| 760 | Dumbek i | Low Perc |
| 761 | Dumbek j | Low Perc |
| 762 | Dumbek k | Low Perc |
| 763 | Djembe L Basstone a | Low Perc |
| 764 | Djembe L Basstone b | Low Perc |
| 765 | Djembe L Basstone c | Low Perc |
| 766 | Djembe L Open | Low Perc |
| 767 | Djembe L Open Slap | Low Perc |
| 768 | Djembe L Closed Slap | Low Perc |
| 769 | Djembe S Basstone a | Low Perc |
| 770 | Djembe S Basstone b | Low Perc |
| 771 | Djembe S Basstone c | Low Perc |
| 772 | Djembe Open | Low Perc |
| 773 | Djembe Mute | Low Perc |
| 774 | Djembe Slap | Low Perc |
| 775 | Djembe S Open | Low Perc |
| 776 | Djembe S Open Slap a | Low Perc |
| 777 | Djembe S Open Slap b | Low Perc |
| 778 | Djembe S Closed Slap a | Low Perc |
| 779 | Djembe S Closed Slap b | Low Perc |
| 780 | Djembe S Closed Slap c | Low Perc |
| # | Name | Family | |
| 781 | Djembe Bass | Low Perc | |
| 782 | Udu Open a | Low Perc | |
| 783 | Udu Open b | Low Perc | |
| 784 | Udu Open c | Low Perc | |
| 785 | Udu Open d | Low Perc | |
| 786 | Udu Slide a | Hi Perc | |
| 787 | Udu Slide b | Hi Perc | |
| 788 | Udu Half Open a | Low Perc | |
| 789 | Udu Half Open b | Low Perc | |
| 790 | Udu Half Open c | Low Perc | |
| 791 | Udu Bell a | Low Perc | |
| 792 | Udu Bell b | Low Perc | |
| 793 | WD Brazillia1 | Snare Dr | |
| 794 | WD Brazillia2 | Snare Dr | |
| 795 | WD Ethno SD1 | Snare Dr | |
| 796 | WD Ethno SD2 | Snare Dr | |
| 797 | WD Ethno SD3 | Snare Dr | |
| 798 | WD Ethno SD4 | Snare Dr | |
| 799 | WD Ethno SD5 | Snare Dr | |
| 800 | WD Ethno SD6 | Snare Dr | |
| 801 | WD Kangaroo1 | Snare Dr | |
| 802 | WD Kangaroo2 | SFX | |
| 803 | WD Kangaroo3 | SFX | |
| 804 | WD Kangaroo4 | SFX | |
| 805 | WD Kangaroo5 | SFX | |
| 806 | WD Kangaroo6 | SFX | |
| 807 | WD Kangaroo7 | SFX | |
| 808 | WD Kangaroo8 | SFX | |
| 809 | Tambourine Push | Hi Perc | |
| 810 | Tambourine Pull | Hi Perc | |
| 811 | Tambourine Acc1 a | Hi Perc | |
| 812 | Tambourine Acc1 b | Hi Perc | |
| 813 | Tambourine Acc2 | Hi Perc | |
| 814 | Tambourine Mute1 | Low Perc | |
| 815 | Tambourine Mute2 | Low Perc | |
| 816 | Tambourine Open | Low Perc | |
| 817 | M.E.1 Douf Rim Ak | Low Perc | |
| 818 | M.E.1 Douf Tek Ak1 | Low Perc | |
| 819 | M.E.1 Douf Tek Ak2 | Low Perc | |
| 820 | M.E.1 Pand Open | Low Perc | |
| 821 | M.E.1 Pand Pattern1 | Low Perc | |
| 822 | M.E.1 Pand Pattern2 | Low Perc | |
| 823 | M.E.1 Pand Pattern3 | Low Perc | |
| 824 | M.E.1 Pand Pattern4 | Low Perc | |
| 825 | M.E.1 Rek Dom Ak | Hi Perc | |
| 826 | M.E.1 Rek Jingle | Hi Perc | |
| 827 | M.E.1 Rik1 | Low Perc | |
| 828 | M.E.1 Rik2 | Low Perc | |
| 829 | M.E.1 Rik3 | Low Perc | |
| 830 | M.E.1 Sagat Half Open | Hi Perc | |
| 831 | M.E.1 Sagat Close | Hi Perc | |
| 832 | M.E.1 Surdo L Open | Low Perc | |
| 833 | M.E.1 Surdo L Mute | Low Perc | |
| # | Name | Family |
| 834 M | E.1 Tabla Medium | Low Perc |
| 835 M | E.1 Tabla Dom | Low Perc |
| 836 M | E.1 Tabla Flam | Low Perc |
| 837 M | E.1 Tabla Rim | Low Perc |
| 838 M | E.1 Tabla Tak | Low Perc |
| 839 M | E.1 Timbales | Hi Perc |
| 840 M | E.1 Udu f Open | Low Perc |
| 841 M | E.1 Alkis | Low Perc |
| 842 M | E.1 Bandir Open | Low Perc |
| 843 M | E.1 Bandir Closed | Low Perc |
| 844 M | E.1 Bongo Roll | Low Perc |
| 845 M | E.1 Darbuka1 Tek1 | Low Perc |
| 846 M | E.1 Darbuka1 Tek2 | Low Perc |
| 847 M | E.1 Darbuka1 Open | Low Perc |
| 848 M | E.1 Darbuka1 Closed | Low Perc |
| 849 M | E.1 Darbuka2 | Low Perc |
| 850 M | E.1 Darbuka3 | Low Perc |
| 851 M | E.1 Darbuka4 | Low Perc |
| 852 M | E.1 Darbuka5 D1 | Low Perc |
| 853 M | E.1 Darbuka5 D2 | Low Perc |
| 854 M | E.1 Darbuka5 D3 | Low Perc |
| 855 M | E.1 Darbuka6 Mute | Low Perc |
| 856 M | E.1 Darbuka6 Open | Low Perc |
| 857 M | E.1 Darbuka6 Rim | Low Perc |
| 858 M | E.1 Darbuka6 Dom Ak | Low Perc |
| 859 M | E.1 Davul | Hi Perc |
| 860 M | E.1 Hollo1 | Low Perc |
| 861 M | E.1 Hollo2 | Low Perc |
| 862 M | E.1 Kup1 | Low Perc |
| 863 M | E.1 Kup2 | Low Perc |
| 864 M | E.1 Ramazan Davul1 | Low Perc |
| 865 M | E.1 Ramazan Davul2 | Low Perc |
| 866 M | E.1 Ramazan Davul3 | Low Perc |
| 867 M | E.1 Tef1 | Hi Perc |
| 868 M | E.1 Tef2 | Hi Perc |
| 869 M | E.1 Tef3 | Hi Perc |
| 870 M | E.2 BD Kick | BassDr |
| 871 M | E.2 SD | Snare Dr |
| 872 M | E.2 Asagum | Low Perc |
| 873 M | E.2 Asmatek | Low Perc |
| 874 M | E.2 Bendirgum | Low Perc |
| 875 M | E.2 Bendirtek1 | Low Perc |
| 876 M | E.2 Bendirtek2 | Low Perc |
| 877 M | E.2 Dm1 | Low Perc |
| 878 M | E.2 Findik | Low Perc |
| 879 M | E.2 Gum | Low Perc |
| 880 M | E.2 Hollotokat | Low Perc |
| 881 M | E.2 Islik1 | SFX |
| 882 M | E.2 Islik2 | SFX |
| 883 M | E.2 Kapalit | Low Perc |
| 884 M | E.2 Kasik1 | Low Perc |
| 885 M | E.2 Kasik2 | Low Perc |
| 886 M | E.2 Kasik3 | Low Perc |
| # | Name | Family |
| 887 M.E.2 Kasik4 | Low Perc | |
| 888 M.E.2 Kemik | Low Perc | |
| 889 M.E.2 Kenar | Low Perc | |
| 890 M.E.2 Kenartek | Low Perc | |
| 891 M.E.2 Ramazangum | Low Perc | |
| 892 M.E.2 Ramazantek | Low Perc | |
| 893 M.E.2 Renk | Low Perc | |
| 894 M.E.2 Renkbir | Low Perc | |
| 895 M.E.2 Renkiki | Low Perc | |
| 896 M.E.2 Tefacik | Low Perc | |
| 897 M.E.2 Tefgum | Low Perc | |
| 898 M.E.2 Teftek | Low Perc | |
| 899 M.E.2 Teftokat | Low Perc | |
| 900 M.E.2 Teftrill | Low Perc | |
| 901 M.E.2 Tefzil | Low Perc | |
| 902 M.E.2 Tek1 | Low Perc | |
| 903 M.E.2 Tek2 | Low Perc | |
| 904 M.E.2 Tekbir | Low Perc | |
| 905 M.E.2 Tokat | Low Perc | |
| 906 M.E.2 Toprgum | Low Perc | |
| 907 M.E.2 Toprtek1 | Low Perc | |
| 908 M.E.2 Toprtek2 | Low Perc | |
| 909 M.E.2 Toprtokat | Low Perc | |
| 910 M.E.2 Trill | Low Perc | |
| 911 M.E.2 Zil1 | Hi Perc | |
| 912 M.E.2 Zil2 | Hi Perc | |
| 913 M.E.2 Zil3 | Hi Perc | |
| 914 M.E.2 Zilgit | SFX | |
| 915 Orchestra Hit | SFX | |
| 916 Band Hit | SFX | |
| 917 Impact Hit | SFX | |
| 918 Metal Hit | SFX | |
| 919 Yeah! | SFX | |
| 920 Yeah! Solo | SFX | |
| 921 Uhh | SFX | |
| 922 Hit It | SFX | |
| 923 Uhhhh Solo | SFX | |
| 924 Comp Voice Noise | SFX | |
| 925 Stadium | SFX | |
| 926 Applause | SFX | |
| 927 Scream | SFX | |
| 928 Laughing | SFX | |
| 929 Footsteps1 | SFX | |
| 930 Footsteps2 | SFX | |
| 931 Bird1 | SFX | |
| 932 Bird2 | SFX | |
| 933 Dog | SFX | |
| 934 Gallop | SFX | |
| 935 Crickets | SFX | |
| 936 Cat | SFX | |
| 937 Growl | SFX | |
| 938 Heart Beat | SFX | |
| 939 Heart Beat GM | SFX |
| # | Name | Family | |
| 940 | Punch | SFX | |
| 941 | Tribe | SFX | |
| 942 | Door Creak | SFX | |
| 943 | Door Slam | SFX | |
| 944 | Car Engine | SFX | |
| 945 | Car Stop | SFX | |
| 946 | Car Pass | SFX | |
| 947 | Car Crash | SFX | |
| 948 | Train | SFX | |
| 949 | Helicopter | SFX | |
| 950 | Gun Shot1 | SFX | |
| 951 | Gun Shot2 | SFX | |
| 952 | Machine Gun | SFX | |
| 953 | Laser Gun | SFX | |
| 954 | Explosion | SFX | |
| 955 | Thunder | SFX | |
| 956 | Wind | SFX | |
| 957 | Stream | SFX | |
| 958 | Bubble | SFX | |
| 959 | Bubble GM | SFX | |
| 960 | Church Bell | SFX | |
| 961 | Telephone Ring | SFX | |
| 962 | Xylophone Spectr | SFX | |
| 963 | Cricket Spectrum | SFX | |
| 964 | Air Vortex | SFX | |
| 965 | Noise White | SFX | |
| 966 | Noise FM Mod | SFX | |
| 967 | Tubular | Hi Perc | |
| 968 | Gamelan | Hi Perc | |
| 969 | Tambura | Hi Perc | |
| 970 | Gtr Cut Noise1 | SFX | |
| 971 | Gtr Cut Noise2 | SFX | |
| 972 | Power Chord | SFX | |
| 973 | Fret Noise | SFX | |
| 974 | Dist. Slide1 | SFX | |
| 975 | Dist. Slide2 | SFX | |
| 976 | E.Gtr Pick1 | SFX | |
| 977 | E.Gtr Pick2 | SFX | |
| 978 | Gtr Scratch1 | SFX | |
| 979 | Gtr Scratch2 | SFX | |
| 980 | Ac.Bs-String Slap | SFX | |
| 981 | Amp Noise | SFX | |
| 982 | Space Lore | SFX | |
| 983 | Swish Terra | SFX | |
| 984 | Hand Drill | SFX | |
| 985 | Mouth Harp | SFX | |
| 986 | 66 BD | BassDr | |
| 987 | 88 BD | BassDr | |
| 988 | 88 SD1 GM | Snare Dr | |
| 989 | 88 SD2 | Snare Dr | |
| 990 | 88 SD2 GM | Snare Dr | |
| 991 | 88 Rim Shot GM | Snare Dr | |
| 992 | 88 HH Close1 GM | HiHat | |
| # | Name | Family |
| 993 88 | HH Close2 HiHat | |
| 994 88 | HH Close2 GM HiHat | |
| 995 88 | HH Open1 HiHat | |
| 996 88 | HH Open1 GM HiHat | |
| 997 88 | Tom1 Tom | |
| 998 88 | Tom2 Tom | |
| 999 88 | Crash Cymbal | |
| 1000 | 88 Crash GM | Cymbal |
| 1001 | 88 Congas Low Perc | |
| 1002 | 88 Claps | Low Perc |
| 1003 | 88 Claves Low Perc | |
| 1004 | 88 Cowbell | Hi Perc |
| 1005 | 88 Maracas Hi Perc | |
| 1006 | 99 SD | Snare Dr |
| 1007 | 99 HH Close | HiHat |
| 1008 | 99 HH Open | HiHat |
| 1009 | Click | SFX |
| 1010 | Click GM | SFX |
| 1011 | Seq Click | SFX |
| 1012 | Empty | BassDr |
Pads
You can assign the following Hits or Sequences to the four Pads. Older sounds might be still assigned to the Pads when loading musical resources generated with an older operating system (see the following section).| # HIT - Drum # HIT - Percussion # HIT - World 1 # Hit - World 2 # HIT - Orchestral | ||||||||
| 1 88 Cowbell 1 Agogo 1 1 Baja 1 1 Kup 1 1 Brass Fall | ||||||||
| 2 88 Crash 2 Agogo 2 2 Baja 2 2 Kup 2 2 Orch.Cymbal 1 | ||||||||
| 3 China 3 Castanet 1 3 China Gong 3 Kup 3 3 Orch.Cymbal 2 | ||||||||
| 4 Crash 1 4 Castanet 2 4 Darbuka 1 | 4 Kup 4 4 Orch. Hit | |||||||
| 5 | Crash 2 | 5 | Conga Hi | 5 | Darbuka 2 | 5 | Ramazan 1 | 5 |
| 6 | Rev. Cymbal | 6 | Conga Low | 6 | Darbuka 3 | 6 | Ramazan 2 | 6 |
| 7 | Ride 1 | 7 | Conga Mute | 7 | Darbuka 4 | 7 | Ramazan 3 | 7 |
| 8 | Ride 2 | 8 | Conga Slap | 8 | Darbuka 5 | 8 | Rek Dom Ak | 8 |
| 9 | Ride Bell | 9 | Cowbell | 9 | Darbuka 6 | 9 | Rik 1 | 9 |
| 10 | Splash | 10 | Cuica 1 | 10 | Darbuka 7 | 10 | Rik 2 | 10 |
| 11 | Sticks | 11 | Cuica 2 | 11 | Darbuka 8 | 11 | Rik 3 | 11 |
| 12 | Rim-Shot | 12 | Jingle Bell | 12 | Davul | 12 | Sagat 1 | 12 |
| 13 | Hi Tom Flam | 13 | Long Guiro | 13 | Douf Rim Ak | 13 | Sagat 2 | 13 |
| 14 | Mid Tom Flam | 14 | Short Guiro | 14 | Dragon Gong | 14 | Tef 1 | 14 |
| 15 | Low Tom Flam | 15 | Open Bells | 15 | Hollo 1 | 15 | Tef 2 | 15 |
| 16 | Tom Flam End | 16 | Rain Stick | 16 | Hollo 2 | 16 | Tef 3 | 16 |
| 17 | Drum Single A | 17 | Tamb. Acc. 1 | 17 | 17 | Tef 4 | 17 | |
| 18 | Drum Single B | 18 | Tamb. Acc. 2 | 18 | 18 | Tef 5 | 18 | |
| 19 | Drum Single C | 19 | Tamb. Open | 19 | 19 | Tef 6 | 19 | |
| 20 | Drum Single D | 20 | Tamb. Push | 20 | 20 | 20 | ||
| 21 | Drum Sing.HouseA | 21 | Timbale Hi | 21 | 21 | 21 | ||
| 22 | Drum Sing.HouseB | 22 | Timbale Low | 22 | 22 | 22 | ||
| 23 | Drum Sing.HouseC | 23 | Timbale Rim 1 | 23 | 23 | 23 | ||
| 24 | Drum Sing.HouseD | 24 | Timbale Rim 2 | 24 | 24 | 24 | ||
| 25 | Drum Kit A | 25 | Triangle 1 | 25 | 25 | 25 | ||
| 26 | Drum Kit B | 26 | Triangle 2 | 26 | 26 | 26 | ||
| 27 | Drum Kit C | 27 | Vibra Slap | 27 | 27 | 27 | ||
| 28 | Drum Kit D | 28 | Whistle 1 | 28 | 28 | 28 | ||
| 29 | Drum Kit E | 29 | Whistle 2 | 29 | 29 | 29 | ||
| 30 | Drum Kit F | 30 | Windchimes 1 | 30 | 30 | 30 | ||
| 31 | 31 | Windchimes 2 | 31 | 31 | 31 | |||
| 32 | 32 | Windchimes 3 | 32 | 32 | 32 | |||
| # HIT - Synth&Pad HIT - Voice # HIT - Blocks # HIT - Misc&SFX 1 # HIT - Misc&SFX 2 | |||||||||
| 1 Cosmic 1 Aah ! 1 Blk Funk 1 A Applause 1 Bubble | |||||||||
| 2 VCF Modulation 2 Hit it ! 2 Blk Funk 1 B 2 Bird 1 2 Car Crash | |||||||||
| 3 Planet Lead 3 Laughing | 3 Blk Funk 1 C 3 Bird 2 3 | Car Engine | |||||||
| 4 | Brightness | 4 | Scream | 4 | Blk Funk 1 D | 4 | Cat | 4 | Car Pass |
| 5 | Crystal | 5 | Uuh ! | 5 | Blk Funk 2 A | 5 | Church Bell | 5 | Car Stop |
| 6 | New Age Pad | 6 | Yeah ! 1 | 6 | Blk Funk 2 B | 6 | Crickets | 6 | Explosion |
| 7 | Fifths Lead | 7 | Yeah ! 2 | 7 | Blk Funk 2 C | 7 | Dist. Slide 1 | 7 | Gun Shot |
| 8 | Calliope | 8 | 8 | Blk Funk 2 D | 8 | Dist. Slide 2 | 8 | Helicopter | |
| 9 Caribbean 9 | 9 Blk Organ A 9 Dog | 9 Jet Plane | |||||||
| 10 | Rezbo | 10 | 10 | Blk Organ B | 10 | Door Creak | 10 | Laser Gun | |
| 11 | Digital Polisix | 11 | 11 | Blk Organ C | 11 | Door Slam | 11 | Machine Gun | |
| 12 | Motion Raver | 12 | 12 | Blk Organ D | 12 | Foosteps 1 | 12 | Phone Ring | |
| 13 | Moving Bell | 13 | 13 | Blk Choir A | 13 | Foosteps 2 | 13 | Punch | |
| 14 | Elastick Pad | 14 | 14 | Blk Choir B | 14 | Heart Beat | 14 | River | |
| 15 | Rave | 15 | 15 | Blk Choir C | 15 | Horse Gallop | 15 | Seashore | |
| 16 | Dance Remix | 16 | 16 | Blk Choir D | 16 | Lion | 16 | Siren | |
| 17 | Vintage Sweep | 17 | 17 | 17 | Scratch 1 | 17 | Starship | ||
| 18 | You Decide | 18 | 18 | 18 | Scratch 2 | 18 | Thunder | ||
| 19 | 19 | 19 | 19 | Scratch 3 | 19 | Train | |||
| 20 | 20 | 20 | 20 | Scratch 4 | 20 | Wind | |||
| 21 | 21 | 21 | 21 | Scratch 5 | 21 | ||||
| 22 | 22 | 22 | 22 | Scratch 6 | 22 | ||||
| 23 | 23 | 23 | 23 | Stadium | 23 | ||||
| 24 | 24 | 24 | 24 | 24 | |||||
| 25 | 25 | 25 | 25 | 25 | |||||
| 26 | 26 | 26 | 26 | 26 | |||||
| 27 | 27 | 27 | 27 | 27 | |||||
| 28 | 28 | 28 | 28 | 28 | |||||
| 29 | 29 | 29 | 29 | 29 | |||||
| 30 | 30 | 30 | 30 | 30 | |||||
| 31 | 31 | 31 | 31 | 31 | |||||
| 32 | 32 | 32 | 32 | 32 | |||||
| # | SEQ - Drum | # | SEQ - Percussion | # | SEQ - Groove | # | SEQ - Bass | # | SEQ - Plano |
| 1 | Drum DrumBasSolo | 1 | Perc FingerSnap | 1 | Grv Drum 1 | 1 | Bass Pick Easy | 1 | Piano Accomp 1 |
| 2 | Drum Snare Solo | 2 | Perc Triang.+HH | 2 | Grv Drum 2 | 2 | Bass Pick Med. | 2 | Piano Accomp 2 |
| 3 | Drum 8 Bt Easy | 3 | Perc Latin 1 | 3 | Grv Brush | 3 | Bass Pick Busy | 3 | Piano Accomp 3 |
| 4 | Drum 8 Bt Medium | 4 | Perc Latin 2 | 4 | Grv Jazzy | 4 | Bass Finger Easy | 4 | Piano Accomp 4 |
| 5 | Drum Rock 1 | 5 | Perc Latin 3 | 5 | Grv Latin | 5 | Bass Finger Med. | 5 | Piano Accomp 5 |
| 6 | Drum Rock 2 | 6 | Perc Mix | 6 | Grv HipHop 1 | 6 | Bass Finger Walk | 6 | Piano Accomp 6 |
| 7 | Drum Brush 1 3/4 | 7 | Perc Soft | 7 | Grv HipHop 2 | 7 | Bass Latin | 7 | Piano Accomp 7 |
| 8 | Drum Brush 2 3/4 | 8 | Perc Conga | 8 | Grv HipHop 3 | 8 | Bass Slap | 8 | Piano Accomp 8 |
| 9 | Drum Disco 1 | 9 | Perc Conga+Ride | 9 | Grv HipHop 4 | 9 | Bass Digital | 9 | Piano Accomp 9 |
| 10 | Drum Disco 2 | 10 | Perc Conga+Mix | 10 | Grv HipHop 5 | 10 | Bass Synth | 10 | Piano Arpeg. 1 |
| 11 | Drum Disco 3 | 11 | Perc Conga+Bongo | 11 | Grv HipHop 6 | 11 | Bass DigiFilter1 | 11 | Piano Arpeg. 2 |
| 12 | Drum Disco 4 | 12 | Perc Conga+Tamb. | 12 | Grv Funk 1 | 12 | Bass DigiFilter2 | 12 | Piano Arp 1 3/4 |
| 13 | Drum Funk 1 | 13 | Perc Shaker | 13 | Grv Funk 2 | 13 | Bass DigiFilter3 | 13 | Piano Arp 2 3/4 |
| 14 | Drum Funk 2 | 14 | Perc Shak+Tamb 1 | 14 | Grv Funk 3 | 14 | 14 | Piano Arp Down | |
| 15 | Drum Brush Shuff | 15 | Perc Shak+Tamb 2 | 15 | Grv House 1 | 15 | 15 | Piano Arp Up | |
| 16 | Drum Latin | 16 | Perc Shak+Cong 1 | 16 | Grv House 2 | 16 | 16 | Piano Rhythm 1/8 | |
| 17 | Drum Progressiv1 | 17 | Perc Shak+Cong 2 | 17 | Grv Analog | 17 | 17 | Piano Rhythm1/8T | |
| 18 | Drum Progressiv2 | 18 | Perc Tambourine1 | 18 | Grv Garage 1 | 18 | 18 | Piano Latin Rock | |
| 19 | Drum Fill 1 | 19 | Perc Tambourine2 | 19 | Grv Garage 2 | 19 | 19 | Piano Salsa 1 | |
| 20 | Drum Fill 2 | 20 | Perc Tamb+Conga1 | 20 | Grv Dance 1 | 20 | 20 | Piano Salsa 2 | |
| 21 | Drum Break | 21 | Perc Tamb+Conga2 | 21 | Grv Dance 2 | 21 | 21 | Pno GlissDwnWhit | |
| 22 | Drum End | 22 | Perc Guiro+Bongo | 22 | Grv Techno 1 | 22 | 22 | Pno GlissUpWhite | |
| 23 | 23 | Perc Cowbel+Tamb | 23 | Grv Techno 2 | 23 | 23 | Pno GlissDwnBlak | ||
| 24 | 24 | Perc 3/4 | 24 | 24 | 24 | Pno GlissUpBlack | |||
| 25 | 25 | Perc 6/8 | 25 | 25 | 25 | Honky End | |||
| 26 | 26 | 26 | 26 | 26 | |||||
| 27 | 27 27 27 | ||||||||
| 28 | 28 28 28 | ||||||||
| 29 | 29 29 29 | ||||||||
| 30 | 30 30 30 30 | ||||||||
| 31 | 31 31 31 31 | ||||||||
| 32 | 32 32 32 32 | ||||||||
| # SEQ - Guitar # SEQ - Orchestral # | SEQ - Solo # SEQ - Synth& Pad # | SEQ - Misc&SFX | |||||||
| 1 Gtr Steel Strum1 1 Timpani Roll 1 1 | Solo Marimba 1 Synth Seq 1 1 Military 1 | ||||||||
| 2 Gtr Steel Strum2 2 Timpani Roll 2 2 | Solo Kalimba 1 2 Synth Seq 2 2 Military 2 | ||||||||
| 3 Gtr Steel Strum3 3 Orch. Tutti 1 3 Solo Kalimba 2 3 Synth Seq 3 3 Military 3 | |||||||||
| 4 Gtr Steel Strum4 4 Orch. Tutti 2 4 Solo Steel Drums 4 Synth Seq 4 4 Military 4 | |||||||||
| 5 Gtr Steel Strum5 5 Orch. Tutti 3 5 Solo Vibes 5 Synth Seq 5 5 Horror 1 | |||||||||
| 6 Gtr Steel Strum6 6 Orch. Tutti 4 6 Solo Gtr Dist. 6 Synth Seq 6 6 Horror 2 | |||||||||
| 7 | GtSteelStrum 3/4 | 7 | Orch. Harp 1 | 7 | Solo Slide Steel | 7 | Synth Seq 7 | 7 | Horror 3 |
| 8 | Gtr Steel Arp 1 | 8 | Orch. Harp 2 | 8 | Solo Banjo | 8 | Synth Seq 8 | 8 | Horror 4 |
| 9 | Gtr Steel Arp 2 | 9 | Orch. Harp 3 | 9 | Solo Violin | 9 | Synth Seq 9 | 9 | Lullaby 1 |
| 10 | Gtr Steel Arp 3 | 10 | Orch. Harp 4 | 10 | Solo Harpsi 3/4 | 10 | Synth Seq 10 | 10 | Lullaby 2 |
| 11 | GtrSteel Arp 6/8 | 11 | Orch. Harp 5 | 11 | Solo Harpsi 4/4 | 11 | Synth Seq 11 | 11 | Nature - River |
| 12 | Gtr Steel Mute 1 | 12 | French Horns 1 | 12 | Solo Gtr Funk | 12 | Synth Portam. 1 | 12 | Nature - Storm |
| 13 | Gtr Steel Mute 2 | 13 | French Horns 2 | 13 | Solo Piano 1 | 13 | Synth Portam. 2 | 13 | Metronome 3/4 |
| 14 | Guitar Country | 14 | Strings 1 | 14 | Solo Piano 2 | 14 | Synth Portam. 3 | 14 | PreCount 3/4 |
| 15 | Gtr Nylon Strum1 | 15 | Strings 2 | 15 | Solo Piano 3 | 15 | Synth Portam. 4 | 15 | Metronome 4/4 |
| 16 | Gtr Nylon Strum2 | 16 | Strings 3 | 16 | Solo Piano 4 | 16 | Synth Filter 1 | 16 | PreCount 4/4 |
| 17 | Gtr Nylon Strum3 | 17 | Strings 4 | 17 | Solo Synth 1 | 17 | Synth Filter 2 | 17 | PreCount 4/4 Dbl |
| 18 | Gtr Nylon Strum4 | 18 | Strings 5 | 18 | Solo Synth 2 | 18 | Synth Pad Panned | 18 | Toccata |
| 19 | Gtr Nylon Strum5 | 19 | Strings 6 | 19 | Solo Synth 3 | 19 | Synth Master Pad | 19 | 5th Intro |
| 20 | Gtr Nylon Strum6 | 20 | Strings 7 | 20 | Solo Synth 4 | 20 | Synth Dark Pad | 20 | Primavera |
| 21 | Gtr Nylon Arp 1 | 21 | 21 | Solo Synth 5 | 21 | 21 | Circus 1 | ||
| 22 | Gtr Nylon Arp 2 | 22 | 22 | Solo Synth 6 | 22 | 22 | Circus 2 | ||
| 23 | Gtr Nylon Arp 3 | 23 | 23 | Solo Guitar 1 | 23 | 23 | |||
| 24 | GtrNylon Arp 3/4 | 24 | 24 | Solo Guitar 2 | 24 | 24 | |||
| 25 | 25 25 Solo Guitar 3 | 25 25 | |||||||
| 26 | 26 26 26 26 | ||||||||
| 27 | 27 27 27 27 | ||||||||
| 28 | 28 28 28 28 | ||||||||
| 29 | 29 29 29 29 | ||||||||
| 30 | 30 30 30 30 | ||||||||
| 31 | 31 31 31 31 | ||||||||
| 32 | 32 32 32 32 | ||||||||
Effects
The following list shows all the Factory Effects. Detailed information on each effect's parameter are contained in the "Effects" chapter (see page 330). For FX Master 1/2| 0 | N | o | E | f | f | e | c | t |
| 1 | S | t | e | r | e | o | C | o |
| 2 | S | t | e | r | e | o | L | i |
| 3 | M | u | l | t | i | b | a | n |
| 4 | S | t | . | M | a | s | t | e |
| 5 | S | t | e | r | e | o | G | a |
| 6 St.Parametric4EQ | ||||||||
| 7 | S | t | . | G | r | a | p | h |
| 8 | S | t | . | E | x | c | i | t |
| 9 | S | t | e | r | e | o | I | s |
For FX Master 2 only
110 St.Mltband Limiter 111 PianoBody/Damper 112 OD/HyperGain Wah 113 GuitarAmp + P4EQ 114 BassTubeAmp+Cab. 115 St. Mic + PreAmp 116 Multitap Cho/Delay 117 St. Pitch Shifter 118 St. PitchShift BPM 119 Rotary SpeakerOD 120 L/C/R Long Delay 121 St/Cross Long Dly 122 Hold Delay 123 LCR BPM Long Dly 124 St. BPM Long Dly 125 Early Reflections MIDI Preset| Default Master Kbd Player Acc ordion 1 Acc ordion 2 Acc ordion 3 Extern. Seq Tablet | |||||||||
| MIDI IN Channel | 1 Ply | Tr 1 Global Ply Tr | 1 Global Upper 1 | Upper 1 Ply Tr 1 - | |||||
| 2 Ply | Tr 2 Control Ply | Tr 2 Lower | Lower | Lower Ply Tr 2 - | |||||
| 3 | Ply Tr 3 | - | Ply Tr 3 | Bass | - | Bass | Ply Tr 3 | - | |
| 4 Ply | Tr 4 - Ply Tr 4 - | Upper | 2 Upper 2 Ply Tr 4 - | ||||||
| 5 Ply | Tr 5 - Ply Tr 5 - | Upper | 3 Upper 3 Ply Tr 5 - | ||||||
| 6 Ply | Tr 6 - Ply Tr 6 - | - | - Ply Tr 6 - | ||||||
| 7 Ply | Tr 7 - Ply Tr 7 - | - | - Ply Tr 7 - | ||||||
| 8 Ply | Tr 8 - Ply Tr 8 - | - | - Ply Tr 8 - | ||||||
| 9 Ply | Tr 9 - Ply Tr 9 - | Bass | - Ply Tr 9 - | ||||||
| 10 | Ply Tr 10 | - | Ply Tr 10 | Drum | Drum | Drum | Ply Tr 10 | - | |
| 11 | Ply Tr 11 | - | Ply Tr 11 | Percussion | Percussion | Percussion | Ply Tr 11 | - | |
| 12 | Ply Tr 12 | - | Ply Tr 12 | Acc 1 | Acc 1 | Acc 1 | Ply Tr 12 | - | |
| 13 | Ply Tr 13 | - | Ply Tr 13 | Acc 2 | Acc 2 | Acc 2 | Ply Tr 13 | - | |
| 14 | Ply Tr 14 | - | Ply Tr 14 | Acc 3 | Acc 3 | Acc 3 | Ply Tr 14 | - | |
| 15 | Ply Tr 15 | - | Ply Tr 15 | Acc 4 | Acc 4 | Acc 4 | Ply Tr 15 | - | |
| 16 | Ply Tr 16 | - | Ply Tr 16 | Acc 5 | Acc 5 | Acc 5 | Ply Tr 16 | Control | |
| MIDI OUT Channel | 1 | Upper 1 | Upper 1 | Ply Tr 1 | Upper 1 | Ply Tr 1 | Ply Tr 1 | Upper 1 | - |
| 2 | Upper 2 | Upper 2 | Ply Tr 2 | Upper 2 | Ply Tr 2 | Ply Tr 2 | - | - | |
| 3 | Upper 3 | Upper 3 | Ply Tr 3 | Upper 3 | Ply Tr 3 | Ply Tr 3 | - | - | |
| 4 | Lower | Lower | Ply Tr 4 | Lower | Ply Tr 4 | Ply Tr 4 | - | - | |
| 5 | - | - | Ply Tr 5 | - | Ply Tr 5 | Ply Tr 5 | - | - | |
| 6 | - | - | Ply Tr 6 | - | Ply Tr 6 | Ply Tr 6 | - | - | |
| 7 | - | - | Ply Tr 7 | - | Ply Tr 7 | Ply Tr 7 | - | - | |
| 8 | - | - | Ply Tr 8 | - | Ply Tr 8 | Ply Tr 8 | - | - | |
| 9 | - | - | Ply Tr 9 | - | Ply Tr 9 | Ply Tr 9 | - | - | |
| 10 | - | - | Ply Tr 10 | - | Ply Tr 10 | Ply Tr 10 | - | - | |
| 11 | - | - | Ply Tr 11 | - | Ply Tr 11 | Ply Tr 11 | - | - | |
| 12 | - | - | Ply Tr 12 | - | Ply Tr 12 | Ply Tr 12 | - | - | |
| 13 | - | - | Ply Tr 13 | - | Ply Tr 13 | Ply Tr 13 | - | - | |
| 14 | - | - | Ply Tr 14 | - | Ply Tr 14 | Ply Tr 14 | - | - | |
| 15 | - | - | Ply Tr 15 | - | Ply Tr 15 | Ply Tr 15 | - | - | |
| 16 | - | - | Ply Tr 16 | - | Ply Tr 16 | Ply Tr 16 | - | Control | |
| Chord 1 Chann. | Off | 1 | Off | 2 | 2 | 2 | Off | Off | |
| Chord 2 Chann. | Off | Off | Off | 3 | 3 | Off | Off | Off | |
| MIDI IN Velocity | Normal | Normal | Normal | 110 | 110 | Normal | Normal | Normal | |
| MIDI IN Oct. Trp. | On | On | On | On | On | On | On | Off | |
| MIDI IN Track Mute | - | On | - | - | - | - | On | Off | |
| Upper er Oct. Trp. | 0 | 0 | 0 | 0 | 0 | 0 | 0 | 0 | |
| Lower Oct. Trp. | 0 | 0 | 0 | 0 | 0 | 0 | 0 | 0 | |
Assignable parameters
List of Pedal/Footswitch functions
The following functions can be assigned to an Assignable Foot-switch or Pedal.| Function Meaning | |
| Functions assignable to a Footswitch | |
| Off No function assigned | |
| Style Start/Stop | Same functions of the control panel buttons with the same name |
| Play/Stop Player | |
| Go to Beginning - Player | |
| Chord Seq. Record | |
| Chord Seq. Play | |
| Synchro Start | |
| Synchro Stop | |
| Tap Tempo/Reset | |
| Tempo Lock | |
| Ritardando Progressively increases the Tempo value | |
| Accelerando Progressively decreases the Tempo value | |
| Tempo Up Increases the Tempo value | |
| Tempo Down Decreases the Tempo value | |
| Intro 1 | Same functions of the control panel buttons with the same name |
| Intro 2 | |
| Intro 3/Count In | |
| Ending 1 | |
| Ending 2 | |
| Ending 3 | |
| Fill 1 | |
| Fill 2 | |
| Fill 3 | |
| Fill 4 | |
| Break | |
| Variation 1 | |
| Variation 2 | |
| Variation 3 | |
| Variation 4 | |
| Variation Up Selects the next Variation | |
| Variation Down Selects the previous Variation | |
| Fade In/Out | Same functions of the control panel buttons with the same name |
| Memory | |
| Bass Inversion | |
| Manual Bass | |
| Style Up Selects the next Style | |
| Style Down Selects the previous Style | |
| Single Touch | Same functions of the control panel buttons with the same name |
| STS1 | |
| STS2 | |
| STS3 | |
| STS4 | |
| Function Meaning | |
| STS Up Selects the next STS | |
| STS Down Selects the previous STS | |
| Perform. Up Selects the next | Performance |
| Perform. Down | Selects the previous Performance |
| Style Change | Style number |
| Transpose Down | Same functions of the control panel buttons with the same name |
| Transpose Up | |
| Upper Octave Up | |
| Upper Octave Down | |
| Punch In/Out Turns Punch | Recording on/off |
| Style-Upper1 Mute | |
| Style-Upper2 Mute | |
| Style-Upper3 Mute | |
| Style-Lower Mute | |
| Style-Drum Mute | |
| Style-Percussion Mute | |
| Style-Bass Mute | |
| Style-Acc1 Mute | |
| Style-Acc2 Mute | |
| Style-Acc3 Mute | |
| Style-Acc4 Mute | |
| Style-Acc5 Mute | |
| Style-Acc 1-5 Mute | |
| Song-Melody Mute | Mute of Song track 4 (usually, the Melody track) in Standard MIDI Files |
| Vocal Remover On/Off | Voice removal from MP3 Songs |
| Song-Drum&Bass Mode | Mute of all tracks, apart for track 2 (usually Bass) and 10 (usually Drum) |
| Solo Selected Track | |
| Damper Pedal | |
| Soft Pedal | |
| Sostenuto Pedal | |
| Bass&Lower Backing | Mutes all tracks, except for Bass and Lower |
| Ensemble On/Off | |
| QuarterTone | Turns Quarter Tone on/off |
| Global-Scale | Scale selection |
| SubScale Preset1-SC1 | |
| SubScale Preset2-SC2 | |
| SubScale Preset3-SC3 | |
| SubScale Preset4-SC4 | |
| Chord Latch | Holds the recognized chord until the pedal is released |
| Chord Latch + Damper | Holds the recognized chord until the pedal is released, and sustains the tracks where the Damper has been turned on |
| Glide | When the pedal is pressed, affected notes on Upper tracks are bent down, according to settings for the Pitch Bend on the same tracks. When the pedal is released, notes return to the normal pitch, at the speed defined by the "Time" parameter (see "Glide" on page 234). |
| FX CC12 Switch | Standard FX controllers |
| FX CC13 Switch | |
| Rotary Spkr On/Off | |
| Rotary Spkr Fast/Slow | |
| Text Page Down These options | s let you move to the previous or next page, when reading a text file loaded with a Song (see "Text files loaded with Standard MIDI Files and MP3 files" on page 281) or Song Book entry (see "On-the-fly TXT loading" on page 281). |
| Text Page Up | |
| SongBook Next Moves to the next SongBook entry in the selected Custom List. | |
| Pad 1 | Same functions of the control panel buttons with the same name |
| Pad 2 | |
| Pad 3 | |
| Pad 4 | |
| Pad Stop | |
| Sound Controller 1 | Controls assigned to selected Sounds parameters |
| Sound Controller 2 | |
| Functions assignable to a Pedal | |
| Master Volume | |
| Accompaniment Volume | |
| Keyboard Expression | |
| Pad Volume With this function | assigned, you can control the proportional volume of all four Pads at the same time. Please note that the status of the Pad's volume, after having been modified with a pedal or slider, is made current, and will be saved in a Performance or STS by using the relevant Write procedure. |
| Joystick +X Joystick right | |
| Joystick -X Joystick left | |
| Joystick +Y Joystick forward | |
| Joystick -Y Joystick backward | |
| Upper VDF Cutoff Filter cutoff | (for Sounds assigned to the Upper tracks) |
| Upper VDF Resonance Filter | resonance (for Sounds assigned to the Upper tracks) |
| FX CC12 Ctl | Standard FX controllers |
| FX CC13 Ctl | |
List of Assignable Switches functions
The following functions can be assigned to the Assignable Switches.| Function Meaning | |
| Off No function assigned | |
| Ritardando Progressively increases the Tempo value | |
| Accelerando Progressively decreases the Tempo value | |
| Style Up Selects the next Style | |
| Style Down Selects the previous Style | |
| Perform. Up Selects the next Performance | |
| Perform. Down Selects the previous Performance | |
| Style-Upper1 Mute | |
| Style-Upper2 Mute | |
| Style-Upper3 Mute | |
| Style-Lower Mute | |
| Style-Drum Mute | |
| Style-Percussion Mute | |
| Style-Bass Mute | |
| Style-Acc1 Mute | |
| Style-Acc2 Mute | |
| Style-Acc3 Mute | |
| Style-Acc4 Mute | |
| Style-Acc5 Mute | |
| Style-Acc 1-5 Mute | |
| Song-Melody Mute | Mute of Song track 4 (usually, the Melody track) in Standard MIDI Files |
| Vocal Remover On/Off Voice removal from MP3 Songs | |
| Song-Drum&Bass Mode | Mute of all tracks, apart for track 2 (usually Bass) and 10 (usually Drum) |
| Solo Selected Track | |
| Bass&Lower Backing | Mutes all tracks, except for Bass and Lower |
| QuarterTone Turns Quarter Tone on/off | |
| Global-Scale | Scale selection |
| SubScale Preset1-SC1 | |
| SubScale Preset2-SC2 | |
| SubScale Preset3-SC3 | |
| SubScale Preset4-SC4 | |
| FX CC12 Switch | Standard FX controllers |
| FX CC13 Switch | |
| Rotary Spkr On/Off | |
| Rotary Spkr Fast/Slow | |
| Text Page Down These options | ns let you move to the previous or next page, when reading a text file loaded with a Song (see "Text files loaded with Standard MIDI Files and MP3 files" on page 281) or Song Book entry (see "On-the-fly TXT loading" on page 281). |
| Text Page Up | |
| SongBook Next Moves to the next SongBook entry in the selected Custom List. | |
| Sound Controller 1 | Controls assigned to selected Sounds parameters |
| Sound Controller 2 | |
Scales
The following is a list of scales (or tunings) you can select in various operating modes. Equal Equal tuning, the standard scale for modern Western music. It is made of 12 identical tones. Pure Major Major chords in the selected key are perfectly tuned. Pure Minor Minor chords in the selected key are perfected tuned. Arabic An arabic scale, using quarters of tone. Set the Key parameter as follow: C - for the "rast C/bayati D" scale D - for the "rast D/bayati E" scale F - for the "rast F/bayati G" scale G - for the "rast G/bayati A" scale A# - for the "rast Bb/bayati C" scale Pythagorean Pythagorean scale, based on the music theories of the great Greek philosopher and matematician. It is most suitable for melodies.Werckmeister
Late Baroque/Classic Age scale. Very suitable for XVIII Century music. Kirnberger Harpsichord scale, very common during the XVIII Century. Slendro Scale of the Indonesian Gamelan. The octave is semi- divided in 5 notes (C, D, F, G, A). The remaining notes are tuned as in the Equal tuning. Pelog Scale of the Indonesian Gamelan. The octave is divided in 7 notes (all white keys, when Key is = C). The black keys are tuned as in the Equal tuning. Stretch Simulates the “stretched” tuning of an acoustic piano. Basically an equal tuning, the lowest notes are slightly lower, while the highest notes are slightly higher than the standard. User User scale, i.e. scale programmed by the user for the Style Play, Backing Sequence and Song Play modes. The user scale can be saved to a Performance, Style Settings, STS or Song. You can't select a User scale in Global mode.Effects
Pa600 is equipped with four powerful Effect Processors for the internal MIDI tracks (Upper, Lower, Style, Song, Pads).Dynamic Modulation sources
When the symbol is encountered, a Dynamic Modulation can be applied to the corresponding parameter. Dynamic Modulation allows for realtime control of the effect. The following table shows the available modulation sources. Modulation source Note| Off No modulation |
| Gate1 |
| Gate1+Dmpr |
| Gate2 |
| Gate2+Dmpr |
| Note Nr Note Number |
| Velocity Note Velocity |
| Expo Velocity Exponential Note Velocity |
| AfterTouch After Touch |
| JS X Joystick Left/Right |
| JS+Y: CC#01 Joystick Forward |
| JS-Y: CC#02 Joystick Backward |
| MIDI(CC#04) |
| MIDI(CC#12) |
| MIDI(CC#13) |
| Ribb.(CC#16) Ribbon Controller |
| MIDI(CC#18) |
| MIDI(CC#17) |
| MIDI(CC#19) |
| MIDI(CC#20) |
| MIDI(CC#21) |
| MIDI(CC#17+) |
| MIDI(CC#19+) |
| MIDI(CC#20+) |
| MIDI(CC#21+) |
| Damper: #64 | |
| Prta.SW: #65 Portamento Switch | |
| Sostenu: #66 | Sostenuto Pedal |
| MIDI(CC#67) | |
| MIDI(CC#80) | |
| MIDI(CC#81) | |
| MIDI(CC#82) | |
| MIDI(CC#83) | |
| MIDI(CC#85) | |
| MIDI(CC#86) | |
| MIDI(CC#87) | |
| MIDI(CC#88) | |
| Tempo | |
Gate1, Gate1+Dmpr (Gate1+Damper)
The effect is at maximum during note-on, and will stop when all keys are released. With Gate1 + Dmpr, the effect will remain at maximum even after the keys are released, as long as the damper (sustain) pedal is pressed. Gate2, Gate2+Dmpr (Gate2+Damper)
This is essentially the same as for Gate 1 or Gate 1 + Dmpr. However when Gate 2 or Gate 2 + Dmpr are used as a dynamic modulation source for the EG, a trigger will occur at each note-on. (In the case of Gate 1 and Gate 1 + Dmpr, the trigger occurs only for the first note-on.) Dynamics (Dynamic)
0: No Effect
Select this option when you do not use any effects.1: Stereo Compressor
This effect compresses the input signal to regulate the level and give a "punchy" effect. It is useful for guitar, piano, and drum sounds. This is a stereo compressor. You can link left and right channels, or use each channel separately. flowchart
graph TD
    A["Stereo In - Stereo Out"] --> B["Left"]
    B --> C["EQ Trim"]
    C --> D["LEQ HEQ"]
    D --> E["Compressor"]
    E --> F["Output Level"]
    G["Envelope Select"] --> H["Envelope - Control"]
    I["Envelope - Control"] --> J["Envelope - Control"]
    K["EQ Trim"] --> L["LEQ HEQ"]
    L --> M["Compressor"]
    M --> N["Output Level"]
    O["Right"] --> P["Left"]
    P --> Q["Left"]
    Q --> R["Left"]
    R --> S["Right"]
    S --> T["Left"]
    T --> U["Right"]
    U --> V["Right"]
    V --> W["Left"]
    W --> X["Left"]
    X --> Y["Right"]
    Y --> Z["Right"]
    Z --> AA["Left"]
    AA --> AB["Left"]
    AB --> AC["Right"]
    AC --> AD["Left"]
    AD --> AE["Right"]
    AE --> AF["Right"]
| a | Envelope Select | L/R Mix, L/R Individ- ually | Determines whether the left and right channels are linked or used separately | |
| b | Sensitivity 1...100 | Sets the sensitivity | ||
| c | Attack 1...100 Sets | the attack level | ||
| d | EQ Trim 0...100 Sets | ts the EQ input level | ||
| e | Pre LEQ Fc | Low, Mid-Low | Selects the cutoff frequency (low or mid-low) of the low-range equalizer | |
| Pre HEQ Fc | High, Mid-High | Selects the cutoff frequency (high or mid-high) of the high-range equalizer | ||
| f | Pre LEQ Gain [dB] | -15.0...+15.0 Sets | ts the gain of the Low EQ | |
| Pre HEQ Gain [dB] | -15.0...+15.0 Sets | ts the gain of the High EQ | ||
| g | Output Level 0... | 100 | Sets the output level of the compressor | |
| Src Off...Tempo | Selects the modulation source for the compressor output level | |||
| Amt -100...+100 | Sets the modulation amount for the compressor output level | |||
| h | Wet/Dry | Dry, 1:99...99:1, Wet | Sets the Balance between the wet and dry signal | |
| Src Off...Tempo | Selects a modulation source for Wet/Dry | |||
| Amt -100...+100 | Sets the modulation amount for Wet/Dry | |||
a: Envelope Select
This parameter selects whether the left and right channels are linked to control both signals simultaneously, or whether each channel is controlled independently.b: Sensitivity
g: Output Level
The “Sensitivity” parameter sets the sensitivity of the compressor. If this parameter is set to a higher value, lower level sounds will be boosted. With a higher Sensitivity, the overall volume level is higher. To adjust the final volume level, use the “Output Level” parameter. line
| Time | Wet Level | Dry Level | |------|-----------|-----------| | 0 | Low | Low | | Peak | High | Medium | | Peak | Low | Low | | Peak | High | Medium | | Peak | Low | Low | | Peak | High | Medium | | Peak | Low | Low | | Peak | High | Medium | | Peak | Low | Low | | Peak | High | Medium | | Peak | Low | Low | | Peak | High | Medium | | Peak | Low | Low | | Peak | High | Medium | | Peak | Low | Low | | Peak | High | Medium | | Peak | Low | Low | | Peak | High | Medium | | Peak | Low | Low | | Peak | High | Medium | | Peak | Low | Low | | Peak | High | Medium | | Peak | Low | Low | | Peak | High | Medium | | Peak | Low | Low | | Peak | High | Medium | | Peak | Low | Low | | Peak | High | Medium | | Peak | Low | Low | | Peak | High | Medium | | Peak | Low | Low | | Peak | High | Medium | | Peak | Low | Low | | Peak | High | Medium | | Peak | Low | Low | | Peak | High | Medium | | Peak | Low | Low | | Peak | High | Medium | | Peak | Low | Low | | Peak | High | Medium | | Peak | Low | Low | | Peak | High | Medium | | Peak | Low | Low | | Peak | High | Medium | | Peak | Low | Low | | Peak | High | Medium | | Peak | Low | Low | | Peak | High | Medium | | Peak | Low | Low | | Peak | High | Medium | | Peak | Low | Low | | Peak | High | Medium | | Peak | Low | Low | | Peak | High | Medium | | Peak | Low | Low | | Peak | High | Medium | | Peak | Low | Low | | Peak | High | Medium | | Peak | Low | Low | | Peak | High | Medium | | Peak | Low | Low | | Peak | High | Medium | | Peak | Low | Low | | Peak | High | Medium | | Peak | Low | Low | | Peak | High | Medium | | Peak | Low | Low | | Peak | High | Medium | | Peak | Low | Low | | Peak | High | Medium | | Peak | Low | Low | | Peak | High | Medium | | Peak | Low | Low | | Peak | High | Medium | | Peak | Low | Low | | Peak | High | Medium | | Peak | Low | Low | | Peak | High | Medium | | Peak | Low | Low | | Peak | High | Medium | | Peak | Low | Low | | Peak | High | Medium | | Peak | Low | Low | | Peak | High | Medium | | Peak | Low | Low | | Peak *c: Attack
This parameter controls the attack level. line
| Time | Level (Attack=80) | Level (Attack=20) | |------|-------------------|-------------------| | 0 | 1 | 1 | | Peak | ~0.8 | ~0.7 | | Wet | ~0.5 | ~0.4 | | Dry | ~0.3 | ~0.2 |2: Stereo Limiter
The Limiter regulates the input signal level. It is similar to the Compressor, except that the Limiter compresses only signals that exceed the specified level to lower unnecessary peak signals. The Limiter applies a peaking-type EQ to the trigger signal (which controls the degree of the Limiter effect), allowing you to set any band width to be covered. This effect is a stereo limiter. You can link left and right channels, or use each channel individually. flowchart
graph TD
    A["Stereo In - Stereo Out"] --> B["Left"]
    B --> C["Envelope Select"]
    C --> D["Limiter"]
    D --> E["FX Amt"]
    C --> F["Envelope - Control"]
    F --> G["Trigger Monitor"]
    G --> H["Limiter"]
    H --> I["FX Amt"]
    C --> J["Envelope - Control"]
    J --> K["Limiter"]
    K --> L["FX Amt"]
    C --> M["Envelope - Control"]
    M --> N["Limiter"]
    N --> O["FX Amt"]
    C --> P["Envelope - Control"]
    P --> Q["Limiter"]
    Q --> R["FX Amt"]
    C --> S["Envelope - Control"]
    S --> T["Limiter"]
    T --> U["FX Amt"]
    C --> V["Envelope - Control"]
    V --> W["Limiter"]
    W --> X["FX Amt"]
    C --> Y["Envelope - Control"]
    Y --> Z["Limiter"]
    Z --> AA["FX Amt"]
    C --> AB["Envelope - Control"]
    AB --> AC["Limiter"]
    AC --> AD["FX Amt"]
    C --> AE["Envelope - Control"]
    AE --> AF["Limiter"]
    AF --> AG["FX Amt"]
    C --> AH["Envelope - Control"]
    AH --> AI["Limiter"]
    AI --> AJ["FX Amt"]
    C --> AK["Envelope - Control"]
    AK --> AL["Limiter"]
    AL --> AM["FX Amt"]
    C --> AN["Envelope - Control"]
    AN --> AO["Limiter"]
    AO --> AP["FX Amt"]
| a | Envelope Select | L/R Mix, L Only, R Only, L/R Individ- ually | Selects from linking both channels, controlling only from left channel, only from the right channel, or controlling each channel individ- ually | |
| b | R a t i o | 1.0 : 1...50.0 : 1, Inf : 1 | Sets the signal compression ratio | |
| c T | threshold [dB] -40...0 | Sets the level above which the compressor is applied | ||
| v | Attack | 1...100 Sets the attack time | ||
| Release | 1...100 Sets the release time | |||
| e | Gain Adjust [dB] | -Inf,-38...+24 | Sets the output gain | |
| Src | Off...Tempo | Selects the modulation source for the output gain | ||
| Amt | -63...+63 | Sets the modulation amount of the output gain | ||
| f | Side PEQ Insert | Off, On | Toggles between on/off of the trigger signal's EQ | |
| Trigger Monitor | Off, On | Switches between effect output monitor and trigger signal monitor | ||
| g | Side PEQ Cutoff [Hz] | 20...12.00k | Sets the EQ center frequency for the trigger signal | |
| Q | 0.5...10.0 | Sets the EQ bandwidth for the trigger signal | ||
| Gain [dB] | -18.0...+18.0 | Sets the EQ gain for the trigger signal | ||
| h | Wet/Dry | Dry, 1:99...99:1, Wet | Balance between the wet and dry signal | |
| Src | Off...Tempo | Table , "Dynamic Modulation sources," on page 330 | ||
| Amt | -100...+100 | Amount of modulation source | ||
a: Envelope Select
When L/R Mix is selected for this parameter, the left and right channels are linked to control the Limiter using the mixed signal. If L Only (or R Only) is selected, the left and right channels are linked, and the Limiter is controlled via only the left (or right) channel. With L/R individually, the left and right channels control the Limiter individually.b: Ratio
c: Threshold [dB]
e: Gain Adjust [dB]
This parameter sets the signal compression "Ratio". Compression is applied only when the signal level exceeds the "Threshold" value. Adjust the output level using the "Gain Adjust" parameter, since compression causes the entire level to be reduced. line
| Input Level | Output Level | Limiter - Threshold / Ratio | Dry Level | Ratio | |-------------|--------------|------------------------------|-----------|-------| | Low | Low | 1.0 : 1 | Low | Inf | | Medium | Medium | 2.0 : 1 | Medium | 4.0 | | High | High | 4.0 : 1 | High | 1 |d: Attack
d: Release
These parameters set the attack time and release time. A higher attack time will cause the compression to be applied more slowly. f: Trigger Monitor
Setting this parameter On will cause the trigger signal to be output, instead of the effect sound. Use this parameter to check the trigger signal with EQ applied. Usually, set this to Off.f: Side PEQ Insert
g: Side PEQ Cutoff [Hz]
g: Qg: Gain [dB]
These parameters are used to set the EQ applied to the trigger signal. The Limiter determines whether the compression is applied or not, based on the post-EQ trigger signal. Setting the equalizer allows you to set the Limiter to respond to any frequency band.3: Multiband Limiter
This effect applies the Limiter to the low range, mid range, and high range of the input signal. You can control dynamics for each range to adjust the sound pressure of the low range, mid range, and high range in a different way from the EQ. flowchart
graph TD
    A["FX Amt = 100: Mono In - Mono Out / FX Amt = 0: Stereo In - Stereo Out"] --> B["Left"]
    B --> C["Band-Pass Filters"]
    C --> D["Low"]
    C --> E["Mid Low Offset"]
    C --> F["High Mid Offset"]
    C --> G["High Offset"]
    D --> H["Limiter"]
    E --> I["Limiter"]
    F --> J["Limiter"]
    G --> K["Limiter"]
    H --> L["Gain Adjust"]
    I --> L
    J --> L
    K --> L
    L --> M["FX Amt"]
| a | R a t i o | 1.0 : 1...50.0 : 1, Inf : 1 | Sets the signal compression ratio | |
| b | Threshold [dB] -40...0 | Sets the level above which the compressor is applied | ||
| c | Attack 1...100 Sets the attack time | |||
| d | Release 1...100 Sets the release time | |||
| e | Low Offset [dB] -40...0 Gain of the low-range trigger signal | |||
| f | Mid Offset [dB] -40...0 Gain of the mid-range trigger signal | |||
| g | High Offset [dB] | -40...0 Gain of the high-range trigger signal | ||
| h | Gain Adjust [dB] | -Inf, -38...+24 | Sets the output gain | |
| Src Off...Tempo | Selects the modulation source for the output gain | |||
| Amt | -63...+63 | Sets the modulation amount of the output gain | ||
| i | Wet/Dry | Dry, 1:99...99:1, Wet | Balance between the wet and dry signal | |
| Src Off...Tempo | Table, “Dynamic Modulation sources,” on page 330 | |||
| Amt | -100...+100 | Amount of modulation source | ||
e: Low Offset [dB]
f: Mid Offset [dB]
g: High Offset [dB]
These parameters set the gain of the trigger signal. For example, if you do not want to apply compression to the high range, reduce the "High Offset" value down below the "Threshold" level. In this way, the high range limiter will not respond, and compression will not be applied.4: St.MasteringLimtr
(Stereo Mastering Limiter)
This is a stereo limiter that is optimized for mastering songs. flowchart
graph TD
    A["Left"] --> B["Limiter"]
    B --> C["Out Ceiling"]
    C --> D["FX Amt"]
    E["Right"] --> F["Limiter"]
    F --> G["Out Ceiling"]
    G --> H["FX Amt"]
    I["Envelope - Control"] -.-> B
    I -.-> F
| a | Threshold [dB] -30.0...0.0 | Sets the level above which the compressor is applied | |
| b | Out Ceiling [dB] | -30.0...0.0 Sets the output gain | |
| c | Release [msec] 0.50...1000.0 Sets the release time | ||
| d | Wet/Dry | Dry, 1:99...99:1, Wet | Balance between the wet and dry signal |
| Src Off...Tempo | Table, “Dynamic Modulation sources,” on page 330 | ||
| Amt -100...+100 | Amount of modulation source | ||
5: Stereo Gate
This effect mutes the input signal when it falls below a specified level. You can also invert the on/off status of the gate, or use note-on/off messages to turn the gate on/off directly. flowchart
graph TD
    A["Stereo In - Stereo Out"] --> B["Left"]
    B --> C["Envelope Source"]
    C --> D["Side PEQ"]
    D --> E["Envelope - Control"]
    E --> F["Gain Adjust"]
    F --> G["FX Amt"]
    D --> H["Envelope Select"]
    H --> I["Envelope - Control"]
    I --> J["Gain Adjust"]
    J --> K["FX Amt"]
    L["Right"] --> M["D^med"]
    M --> N["FX Control BUS 1"]
    M --> O["FX Control BUS 2"]
    P["Delay"] --> Q["Gate"]
    Q --> R["Trigger Monitor"]
    S["Delay"] --> T["Gate"]
    T --> U["Gain Adjust"]
| a | Envelope Source | D-mod, Input | Selects the source to control the gate: D-mod control, or use the input signal as a trigger | |
| b | Envelope Select | L/R Mix, L Only, R Only | Selects the control signal: left and right linked, left only, or right only | |
| Src Off...Tempo | Selects the source that will control the gate when Envelope Src = D-mod | |||
| c | Threshold 0...100 | Sets the level at which gating is applied | ||
| Polarity +,- Switches the polarity of gating | ||||
| d | Attack | 1...100 | Sets the attack time | |
| Release 1...100 | Sets the release time | |||
| e | Delay Time [msec] | 0...100 | Sets the delay time for the gate input | |
| f | Side PEQ Insert | Off, On | Switches the trigger signal equalizer on/off | |
| Trigger Monitor | Off, On | Switches between monitoring the effect output and the trigger signal | ||
| g | Side PEQ Cutoff [Hz] | 20...12.00k | Sets the center frequency of the equalizer for the trigger signal | |
| Q | 0.5...10.0 | Sets the bandwidth of the equalizer for the trigger signal | ||
| Gain [dB] | -18.0...+18.0 | Sets the gain of the equalizer for the trigger signal | ||
| h | Wet/Dry | Dry, 1:99...99:1, Wet | Balance between the wet and dry signal | |
| Src Off...Tempo | Table, “Dynamic Modulation sources,” on page 330 | |||
| Amt -100...+100 | Amount of modulation source | |||
c: Polarity
This inverts the polarity of the gate on/off operation. With the “-” setting, the gate will close when the input signal exceeds the specified level. The direction in which the modulation source opens or closes the gate will also be reversed.e: Delay Time [msec]
This sets the delay time for the input to the gate. When using shorter Attack Time settings, you can lengthen the Delay Time so that the sound is input after the gate opens.EQ and Filters (EQ/Filter)
6: St.Parametric4EQ
(Stereo Parametric 4-Band EQ)
This is a stereo 4-band parametric equalizer. You can select peaking type or shelving type for Band 1 and 4. The gain of Band 2 can be controlled by dynamic modulation. flowchart
graph LR
    A["Stereo In - Stereo Out"] --> B["Left"]
    B --> C["Trim"]
    C --> D["LEQ"]
    D --> E["PEQ"]
    E --> F["HEQ"]
    F --> G["PEQ"]
    G --> H["HEQ"]
    H --> I["PEQ"]
    I --> J["HEQ"]
    J --> K["PEQ"]
    K --> L["HEQ"]
    L --> M["PEQ"]
    M --> N["HEQ"]
    N --> O["PEQ"]
    O --> P["HEQ"]
    P --> Q["PEQ"]
    Q --> R["HEQ"]
    R --> S["PEQ"]
    S --> T["HEQ"]
    T --> U["PEQ"]
    U --> V["HEQ"]
    V --> W["PEQ"]
    W --> X["HEQ"]
    X --> Y["PEQ"]
    Y --> Z["HEQ"]
    Z --> AA["PEQ"]
    AA --> AB["HEQ"]
    AB --> AC["PEQ"]
    AC --> AD["HEQ"]
    AD --> AE["PEQ"]
    AE --> AF["HEQ"]
    AF --> AG["PEQ"]
    AG --> AH["HEQ"]
    AH --> AI["PEQ"]
    AI --> AJ["HEQ"]
    AJ --> AK["PEQ"]
    AK --> AL["HEQ"]
    AL --> AM["PEQ"]
    AM --> AN["HEQ"]
    AN --> AO["PEQ"]
    AO --> AP["HEQ"]
    AP --> AQ["PEQ"]
    AQ --> AR["HEQ"]
    AR --> AS["PEQ"]
    AS --> AT["HEQ"]
    AT --> AU["PEQ"]
    AU --> AV["HEQ"]
    AV --> AW["PEQ"]
    AW --> AX["HEQ"]
    AX --> AY["PEQ"]
    AY --> AZ["HEQ"]
    AZ --> BA["PEQ"]
    BA --> BB["HEQ"]
    BB --> BC["PEQ"]
    BC --> BD["HEQ"]
    BD --> BE["PEQ"]
    BE --> BF["HEQ"]
    BF --> BG["PEQ"]
    BG --> BH["HEQ"]
    BH --> BI["PEQ"]
    BI --> BJ["HEQ"]
    BJ --> BK["PEQ"]
    BK --> BL["HEQ"]
    BL --> BM["PEQ"]
    BM --> BN["HEQ"]
    BN --> BO["PEQ"]
    BO --> BP["HEQ"]
    BP --> BQ["PEQ"]
    BQ --> BR["HEQ"]
    BR --> BS["PEQ"]
    BS --> BT["HEQ"]
    BT --> BU["PEQ"]
    BU --> BV["HEQ"]
    BV --> BW["PEQ"]
    BW --> BX["HEQ"]
    BX --> BY["PEQ"]
    BY --> BZ["HEQ"]
| a | Trim 0...100 Sets the input level | |||
| b | Band 1 | Peaking, p.e Shelving-Low | Selects the type of Band 1 | |
| c | Band 4 | Peaking, p.e Shelving-High | Selects the type of Band 4 | |
| d | Band2 Dynamic Gain Src | Off...Tempo | Selects the modulation source of the Band 2 gain | |
| Amt [dB] -18.0... | +18.0 | Sets the modulation amount of Band 2 gain | ||
| e | Band1 Cutoff [Hz] | 20...1.00k Sets the center frequency of Band 1 | ||
| Q 0.5...10.0 Sets the bandwidth of Band 1 | ||||
| Gain [dB] -18.0... | +18.0 Sets the gain of Band 1 | |||
| f | Band2 Cutoff [Hz] | 50...10.00k | Sets the center frequency of Band 2 | |
| Q 0.5...10.0 Sets the bandwidth of Band 2 | ||||
| Gain [dB] -18.0... | +18.0 Sets the gain of Band 2 | |||
| g | Band3 Cutoff [Hz] | 300...10.00k | Sets the center frequency of Band 3 | |
| Q 0.5...10.0 Sets the bandwidth of Band 3 | ||||
| Gain [dB] -18.0... | +18.0 Sets the gain of Band 3 | |||
| h | Band4 Cutoff [Hz] | 500...20.00k | Sets the center frequency of Band 4 | |
| Q 0.5...10.0 Sets the bandwidth of Band 4 | ||||
| Gain [dB] -18.0... | +18.0 Sets the gain of Band 4 | |||
| i | Wet/Dry | Dry, 1:99...99:1, Wet | Balance between the wet and dry signal | |
| Src | Off...Tempo | Table, "Dynamic Modulation sources," on page 330 | ||
| Amt | -100...+100 | Amount of modulation source | ||
line
| Band | Band Type | Gain | |------|-----------|------| | Band1 Cutoff | Band4 Type=Shelving High | 3dB | | Band1 Cutoff | Band1 Type=Shelving Low | 0dB | | Band4 Cutoff | Band4 Type=Peaking | 3dB |7: St. Graphic 7EQ
(Stereo Graphic 7-Band EQ)
This is a stereo 7-band graphic equalizer. The bar graph of the gain setting for each band gives you a clear, visual idea of frequency responses. You can select a center frequency setting for each band from twelve types, according to the sound. flowchart
graph TD
    A["Left"] --> B["Trim"]
    B --> C["Band1 Band2 Band3 Band4 Band5 Band6 Band7"]
    D["Right"] --> E["Trim"]
    E --> F["Band1 Band2 Band3 Band4 Band5 Band6 Band7"]
    G["FX Amt"] --> H["Output"]
| a | Type | 1:Wide 1, 2:Wide 2, 3:Wide 3, 4:Half Wide 1, 5:Half Wide 2, 6:Half Wide 3, 7:Low, 8:Wide Low, 9:Mid, 10:Wide Mid, 11:High, 12:Wide High | Selects a combination of center frequencies for each band | |
| b | Trim | 0...100 | Sets the input level | |
| c | Band1 [dB] | -18.0...+18.0 | Sets the gain of Band 1 | |
| d | Band2 [dB] | -18.0...+18.0 | Sets the gain of Band 2 | |
| e | Band3 [dB] | -18.0...+18.0 | Sets the gain of Band 3 | |
| f | Band4 [dB] | -18.0...+18.0 | Sets the gain of Band 4 | |
| g | Band5 [dB] | -18.0...+18.0 | Sets the gain of Band 5 | |
| h | Band6 [dB] | -18.0...+18.0 | Sets the gain of Band 6 | |
| i | Band7 [dB] | -18.0...+18.0 | Sets the gain of Band 7 | |
| j | Wet/Dry | Dry, 1:99...99:1, Wet | Balance between the wet and dry signal | |
| Src Off...Tempo | Table, “Dynamic Modulation sources,” on page 330 | |||
| Amt -100...+100 | Amount of modulation source | |||
a: Type
This parameter selects a combination of center frequencies for each band. The center frequency of each band is shown in the right of the screen. You can configure a 21-Band Graphic EQ ranging from 80 Hz to 18 kHz if you route three Graphic 7-Band EQ effects in series, with a setting of 7:Low, 9:Mid, and 11:High for each EQ.8: St.Exciter/Enhncr
(Stereo Exciter/Enhancer)
This effect is a combination of the Exciter, which adds a punch to the sound and the Enhancer, which adds spread and presence. flowchart
graph TD
    A["Left"] --> B["EQ Trim"]
    B --> C["LEQ"]
    B --> D["HEQ"]
    C --> E["Exciter"]
    D --> E
    E --> F["Delay"]
    F --> G["Depth"]
    G --> H["FX Amt"]
    I["Right"] --> J["EQ Trim"]
    J --> K["Exciter"]
    K --> L["Delay"]
    L --> M["Depth"]
    M --> N["FX Amt"]
    O["D-meter"] -.-> P["Enhancer"]
| a | Exciter Blend -100...+100 | Sets the intensity (depth) of the Exciter effect | ||
| Src Off...Tempo | Selects the modulation source of the Exciter intensity | |||
| Amt -100...+100 | Sets the modulation amount of the Exciter intensity | |||
| b | Emphasis Freq 0...70 | Sets the frequency to be empha-sized | ||
| Src Off...Tempo | Selects the modulation source of the frequency to be emphasized | |||
| Amt -70...+70 | Sets the amount of modulation of the frequency to be emphasized | |||
| c | Enhancer Delay L [msec] | 0.0...50.0 | Sets the delay time for the Enhancer left channel | |
| d | Enhancer Delay R [msec] | 0.0...50.0 | Sets the delay time for the Enhancer right channel | |
| e | Enhancer Depth | 0...100 | Sets the determines to what degree the Enhancer effect is applied | |
| Src Off...Tempo | Selects the modulation source of the Enhancer width | |||
| Amt -100...+100 | Sets the modulation amount of the Enhancer width | |||
| f EQ Trim 0...100 Sets the 2-band EQ input level | ||||
| g | Pre LEQ Fc | Low, Mid-Low | Selects the cutoff frequency (low or mid-low) of the low-range equalizer | |
| Pre HEQ Fc | High, Mid-High | Selects the cutoff frequency (high or mid-high) of the high-range equalizer | ||
| h | Pre LEQ Gain [dB] | -15.0...+15.0 Ga | n of the Lo EQ | |
| Pre HEQ Gain [dB] | -15.0...+15.0 Ga | n of the High EQ | ||
| i | Wet/Dry | Dry, 1:99...99:1, Wet | Balance between the wet and dry signal | |
| Src Off...Tempo | Table, "Dynamic Modulation sources," on page 330 | |||
| Amt -100...+100 Amount of mod | ulation source | |||
a: Exciter Blend
This parameter sets the depth (intensity) of the Exciter effect. Positive values give a frequency pattern (to be emphasized) different from negative values.b: Emphasis Freq
This parameter sets the frequency to be emphasized. Higher values will emphasize lower frequencies.c: Enhancer Delay L [msec]
d: Enhancer Delay R [msec]
These parameters set the delay time for the Enhancer left and right channel. Specifying a slightly different delay time for the left and right channel will add a stereo image, depth, and width to the sound.9: Stereo Isolator
This is a stereo effect that separates the input signal mid, and high-frequency bands, and controls the volume of each band independently. For example you can separately boost or cut the kick, snare, and hi-hat sounds from a drum signal in real-time. flowchart
graph TD
    A["Left"] --> B["Trim"]
    B --> C["Low"]
    B --> D["Mid"]
    B --> E["High"]
    F["Right"] --> G["Trim"]
    G --> H["Low"]
    G --> I["Mid"]
    G --> J["High"]
    C --> K["FX Amt"]
    D --> K
    E --> K
    H --> L["FX Amt"]
    I --> L
    J --> L
    K --> M["D mod"]
    K --> N["D mod"]
    K --> O["D mod"]
| a | Trim | 0...100 Sets the input level | ||
| b | Low/Mid [Hz] | 100...500 | Sets the frequency at which the low and mid bands are divided | |
| c | Mid/High [Hz] | 2000...6000 | Sets the frequency at which the mid and high bands are divided | |
| d | Low Gain [dB] | -Inf,-59...+12 | Sets the low-frequency gain | |
| Src Off...Tempo | Selects the source that will modulate low-frequency gain | |||
| Amt -72...+72 | Sets the amount by which the low-frequency gain will be modulated | |||
| e | Mid Gain [dB] | -Inf,-59...+12 | Sets the mid-frequency gain | |
| Src Off...Tempo | Selects the modulation source for mid-frequency gain | |||
| Amt -72...+72 | Sets the amount by which the mid-frequency gain will be modulated | |||
| f | High Gain [dB] | -Inf,-59...+12 | Sets the high-frequency gain | |
| Src Off...Tempo | Selects the modulation source for high-frequency gain | |||
| Amt -72...+72 | Sets the amount by which the high-frequency gain will be modulated | |||
| g | Wet/Dry | Dry, 1:99...99:1,Wet | Balance between the wet and dry signal | |
| Src Off...Tempo | Table , "Dynamic Modulation sources," on page 330 | |||
| Amt -100...+100 | Amount of modulation source | |||
10: St. Wah/Auto Wah
(Stereo Wah/Auto Wah)
This stereo wah effect allows you to create sounds from vintage wah pedal simulation to auto-wah simulation, and much broader range settings. flowchart
graph TD
    A["Stereo In - Stereo Out"] --> B["Left"]
    B --> C["Envelope Sens"]
    C --> D["Envelope Shape"]
    D --> E["Response"]
    E --> F["D-mod"]
    F --> G["LFO"]
    G --> H["Wah"]
    H --> I["Sweep Mode"]
    I --> J["Auto"]
    J --> K["LFO"]
    K --> L["Wah"]
    L --> M["FX Amt*"]
    N["Right"] --> O["FX Amt*"]
| a | Frequency Bottom | 0...100 | Sets the lower limit of the wah center frequency | |
| Frequency Top 0...100 | Sets the upper limit of the wah center frequency | |||
| b | Sweep Mode | Auto, D-mod, LFO | Selects the control from auto-wah, modulation source, and LFO | |
| Src Off...Tempo | Selects the modulation source for the wah when Sweep Mode=D-mod | |||
| Respon 0...100 | Sets the response speed when Sweep Mode = Auto or D-mod | |||
| c | Envelope Sens 0...100 Sets the sensitivity of auto-wah | |||
| Envelope Shape | -100...+100 Sets | the sweep curve of auto-wah | ||
| d | LFO Frequency [Hz] | 0.02...20.00 Sets | the speed of the LFO | |
| Src Off...Tempo | Selects a modulation source for LFO speed | |||
| Amt | -20.00... +20.00 | Sets the modulation amount of LFO speed | ||
| e | MIDI Sync Off, On | When this is on, the LFO speed is set by BPM, Base Note, and Times, instead of Frequency | ||
| BPM | MIDI, 40.00... 300.00 | MIDI syncs to the system tempo; 40–300 sets the tempo manually for this individual effect | ||
| Base Note r...w | Selects the type of notes that specify the LFO speed | |||
| Times x1...x32 | Sets the number of notes that specify the LFO speed | |||
| f | Resonance 0...100 Sets the resonance amount | |||
| Low Pass Filter Off, On | Switches the wah low pass filter on and off | |||
| g | Output Level | 0...100 | Sets the output level of the effect sound | |
| Src Off...Tempo | Selects the modulation source that will control the effect output level | |||
| Amt | -100...+100 | Sets the modulation amount of the effect output level | ||
| h | Wet/Dry | Dry, 1:99...99:1, Wet | Balance between the wet and dry signal | |
| Src Off...Tempo | Table, “Dynamic Modulation sources,” on page 330 | |||
| Amt | -100...+100 | Amount of modulation source | ||
a: Frequency Bottom
a: Frequency Top
The sweep width and direction of the wah filter are determined by the "Frequency Top" and "Frequency Bottom" settings. line
| Mode | Frequency | D-mod | Max | |---|---|---|---| | Top=75 | Higher | Zero | Zero | | Top=75 | Higher | Max | Max | | Bottom=25 | Woo | Zero | Zero | | Bottom=25 | Woo | Max | Max | | Wah | — | — | — | | Bottom=60 | — | — | 60 | | Wah | — | — | 30 | | Woo | — | — | Max | Sweep Mode=D-modline
| Time | Woo Frequency | Wah Frequency | |---|---|---| | Top=25 | Higher | Higher | | Bottom=25 | Lower | Higher | | Time | Top=25 | Bottom=25 | | Time | Higher | Wash | | Time | Top=25 | Wash | | Time | Lower | Wash | | Time | Top=25 | Envelope |b: Sweep Mode
This parameter changes the wah control mode. Setting “Sweep Mode” to Auto will select an auto-wah that sweeps according to envelope changes in the input signal level. Auto-wah is frequently used for funk guitar parts and clav sounds. When “Sweep Mode” is set to D-mod, you can control the filter directly via the modulation source in the same way as a wah pedal. When “Sweep Mode” is set to LFO, the effect uses LFO to sweep in cycle.c: Envelope Sens
This parameter sets the sensitivity of auto-wah. Increase the value if the input signal is too low to sweep. Reduce the value if the input signal is so high that the filter is stopped temporarily.c: Envelope Shape
This parameter determines the sweep curve for auto-wah. line
| Time | Value Range | |------|-------------------| | Peak | 0...+100 | | Peak | 0...-100 |d: LFO Frequency [Hz]
e: MIDI Sync
When “MIDI/Tempo Sync”=Off, the LFO speed uses the LFO Frequency parameter setting. When “MIDI/Tempo Sync”=On, the LFO speed follows the “BPM”, “Base Note”, and “Times” settings.e: BPM
e: Base Note
e: Times
One cycle of LFO sweep is obtained by multiplying the length of a note (r...w) (selected for "Base Note", in relation to the tempo specified in "BPM", or the MIDI Clock tempo if "BPM" is set to MIDI) by the number specified in the Times parameter.11: St. Vintage Wah
(Stereo Vintage/Custom Wah)
This effect simulates the tonal character of a vintage wah pedal. You can customize the tone and range settings. flowchart
graph TD
    A["Left"] --> B["Envelope Sens"]
    B --> C{Response}
    C --> D["D-mod"]
    C --> E["LFO"]
    D --> F["Auto"]
    E --> G["LFO"]
    F --> H["Wah"]
    G --> H
    H --> I["Preset Setting"]
    H --> J["Custom Parameters"]
    I --> K["FX Amt"]
    J --> L["FX Amt"]
    M["Stereo In - Stereo Out"] --> N["Left"]
    O["Right"] --> P["Right"]
    Q["Sweep Mode"] --> R["Wah"]
    S["Shape / Invert"] --> H
    T["Mode"] --> H
| a | Mode Preset, Custom | Selects either preset or custom settings | ||
| Shape -100...+100 Sets the curve | of the sweep | |||
| Invert Off, On Inverts the polarity of the sweep | ||||
| b | Frequency Bottom | 0...100 | Sets the lower limit of the wah center frequency when Mode = Custom | |
| Frequency Top | 0...100 | Sets the upper limit of the wah center frequency when Mode = Custom | ||
| c | Resonance Bottom | 0...100 | Sets the lower limit of resonance amount when Mode=Custom | |
| Resonance Top | 0...100 | Sets the upper limit of resonance amount when Mode=Custom | ||
| d | Sweep Mode | Auto, D-mod, LFO | Selects the control from auto-wah, modulation source, and LFO | |
| Src Off...Tempo | Selects the modulation source for the wah when Sweep Mode=D-mod | |||
| Manual 0...100 | Sets the center frequency when Sweep Mode=D-mod and Source=Off | |||
| e | Envelope Sens 0...100 Sets the auto-wah sensitivity | |||
| Response | 0...100 | Sets the speed of response when Sweep Mode=Auto or D-mod | ||
| f | LFO Frequency [Hz] | 0.02...20.00 | Sets the speed of the LFO | |
| Src Off...Tempo | Selects a modulation source for LFO speed | |||
| Amt | -20.00...+20.00 | Sets the modulation amount of LFO speed | ||
| g | MIDI Sync | Off, On | When this is on, the LFO speed is set by BPM, Base Note, and Times, instead of Frequency | |
| BPM | MIDI, 40.00...300.00 | MIDI syncs to the system tempo; 40–300 sets the tempo manually for this individual effect | ||
| Base Note | r...w | Selects the type of notes that specify the LFO speed | ||
| Times x1...x32 | Sets the number of notes that specify the LFO speed | |||
| h | Output Level | 0...100 | Sets the output level of the effect sound | |
| Src Off...Tempo | Selects the modulation source that will control the effect output level | |||
| Amt | -100...+100 | Sets the modulation amount of the effect output level | ||
| i | Wet/Dry | Dry, 1:99...99:1, Wet | Balance between the wet and dry signal | |
| Src Off...Tempo | Table, “Dynamic Modulation sources,” on page 330 | |||
| Amt | -100...+100 Amount of modulation source | |||
a: Shape
This parameter specifies the sweep curve of the wah. It applies to all control via auto-wah, modulation source, and LFO, and lets you adjust subtle nuances of the wah effect. a: Mode b: Frequency Bottom b: Frequency Top c: Resonance Bottom c: Resonance Top If Mode=Preset, this simulates a vintage wah pedal. In this case, internally fixed values are used for Frequency Bottom/Top and Resonance Bottom/Top, and these settings will be ignored. The settings for Frequency Bottom/Top and Resonance Bottom/Top are valid if Mode=Custom.12: St. Random Filter
(Stereo Random Filter)
This stereo band pass filter uses a step-shape waveform and random LFO for modulation. You can create a special effect from filter oscillation. flowchart
graph TD
    A["Left"] --> B["Filter"]
    C["Right"] --> D["Filter"]
    B --> E["FX Amt"]
    D --> F["LFO Phase"]
    G["LFO: Step-Tri/Random"] -.-> D
| a | LFO Waveform | Step-Tri, Random | Selects the LFO Waveform | |
| LFO Phase [degree] | -180...+180 | Sets the LFO phase difference between the left and right | ||
| b | LFO Frequency [Hz] | 0.02...20.00 | Sets the speed of the LFO | |
| Src Off...Tempo | Selects the modulation source used for both LFO speed and step speed | |||
| Amt | -20.00... +20.00 | Sets the modulation amount of LFO speed | ||
| c | LFO Step Freq [Hz] | 0.05...50.00 | Sets the LFO step speed (speed that changes in steps | |
| Amt | -50.00... +50.00 | Sets the modulation amount of LFO step speed | ||
| d | MIDI Sync | Off, On | When this is on, the LFO speed is set by BPM, Base Note, and Times, instead of Frequency | |
| BPM | MIDI, 40.00... 300.00 | MIDI syncs to the system tempo; 40–300 sets the tempo manually for this individual effect | ||
| Base Note | r...w | Selects the type of notes that specify the LFO speed | ||
| Times x1...x32 | Sets the number of notes that specify the LFO speed | |||
| e | Step Base Note | r...w | Selects the type of notes to specify the LFO step speed | |
| Times x1...x32 | Sets the number of notes to specify the LFO step speed | |||
| f | Manual 0...100 S | Sets the filter center frequency | ||
| Src Off...Tempo | Selects the modulation source for the filter center frequency | |||
| Amt | -100...+100 | Sets the modulation amount for the filter center frequency | ||
| g | Depth 0...100 | Sets the modulation depth of filter center frequency | ||
| Src Off...Tempo | Selects the modulation source of filter modulation | |||
| Amt | -100...+100 | Sets the modulation amount of filter modulation | ||
| h | Resonance | 0...100 Sets the resonance amount | ||
| i | Wet/Dry | -Wet, -1:99...Dry...99:1, Wet | Balance between the wet and dry signal | |
| Src Off...Tempo | Table, “Dynamic Modulation sources,” on page 330 | |||
| Amt | -100...+100 Amount of modulation source | |||
a: LFO Phase [degree]
Offsetting the left and right phases alters how modulation is applied to the left and right channels, creating a swelling affect. a: LFO Waveform
b: LFO Frequency [Hz]
c: LFO Step Freq [Hz]
When “LFO Waveform” is set to Step-Tri, LFO is a step-shape, triangle waveform. The “LFO Frequency” parameter sets the original triangle waveform speed. Changing the “LFO Step Freq” parameter enables you to adjust the width of the steps. When "LFO Waveform" is set to Random, the "LFO Step Freq parameter uses a random LFO cycle. line
| Step Type | LFO Frequency | Random Filter LFO | | --------- | ------------- | ----------------- | | Step-Tri | High | Low | | Step-Tri | Medium | Medium | | Step-Tri | Low | High |d: BPM
e: Step Base Note
e: Times
The width of an LFO step, or a cycle of random LFO, is obtained by multiplying the length of a note (r...w) (selected for "Step Base Note", in relation to the tempo specified in "BPM," or the MIDI Clock tempo if "BPM" is set to MIDI) by the specified in the "Times" parameter.i: Wet/Dry
The effect sound's phase will be reversed when you set this parameter in the negative range of values.13: St. MultiModeFilter (Stereo Multi Mode Filter)
This is a multi-mode filter with four types; low pass, high pass, band pass, and band reject. You can use LFO or dynamic modulation to vary the cutoff frequency or resonance. flowchart
graph TD
    A["Stereo In - Stereo Out"] --> B["Trim"]
    B --> C["Multimode Filter"]
    C --> D["Driver"]
    D --> E["FX Amt"]
    C --> F["Filter Type"]
    F --> G["Multimode Filter"]
    G --> H["Driver"]
    H --> I["FX Amt"]
    G --> J["LFO Phase"]
    J --> K["LFO Shape"]
    K --> L["LFO: Tri / Sinc"]
    L --> M["Right"]
    style A fill:#f9f,stroke:#333
    style I fill:#f9f,stroke:#333
| a | Type | LPF, HPF, BPF, BRF | Selects the type of filter | |
| Trim 0...100 Sets | the input level | |||
| b"q" | Cutoff | 0...100 | Sets the cutoff frequency (center frequency) | |
| Src Off...Tempo | Selects the modulation source of the cutoff | |||
| Amt -100...+100 | Sets the modulation amount of the cutoff | |||
| c | Resonance 0...100 Sets the resonance amount | |||
| Src Off...Tempo | Selects the source that will modulate the amount of resonance | |||
| Amt -100...+100 | Sets the amount by which the resonance will be modulated | |||
| d | LFO Waveform | Triangle, Sine Selects the LFO Waveform | ||
| Phase [degree] | -180...+180 | Sets the LFO phase difference between the left and right | ||
| Depth | 0...100 | Sets the depth to which the LFO will modulate the cutoff frequency | ||
| e | LFO Frequency [Hz] | 0.02...20.00 | Sets the speed of the LFO | |
| Src Off...Tempo | Selects a modulation source for LFO speed | |||
| Amt | -20.00...+20.00 | Sets the modulation amount of LFO speed | ||
| e f | MIDI Sync | Off, On | When this is on, the LFO speed is set by BPM, Base Note, and Times, instead of Frequency | |
| n u m b c r BPM | MIDI, 40.00...300.00 | MIDI syncs to the system tempo; 40-300 sets the tempo manually for this individual effect | ||
| Base Note | r...w | Selects the type of notes that specify the LFO speed | ||
| Times | x1...x32 | Sets the number of notes that specify the LFO speed | ||
| g | Drive SW | Off, On | Switches distortion on/off within the filter | |
| Output Level | 0...100 Sets the output level | |||
| h | Drive Gain | 0...100 Sets the distortion amount | ||
| Low Boost | 0...100 Sets the amount of low-range boost | |||
| i | Wet/Dry | Dry, 1:99...99:1, Wet | Balance between the wet and dry signal | |
| Src Off...Tempo | Table, "Dynamic Modulation sources," on page 330 | |||
| Amt -100...+100 | Amount of modulation source | |||
14: St. Sub Oscillator (Stereo Sub Oscillator)
This effect adds very low frequencies to the input very useful when simulating a roaring drum sound or emphasizing powerful low range. This effect is different from the equalizer in that you can add very low range harmonics. You can also adjust the oscillator frequency to match a particular note number, for use as an octaver. flowchart
graph TD
    A["Left"] --> B["Envelope Sens"]
    B --> C["Pre LPF"]
    C --> D["Envelope Shape"]
    D --> E["FX Amt"]
    F["Note Note"] --> G["Fixed Frequency"]
    G --> H["Sine Oscillator"]
    H --> I["Pitch"]
    H --> J["OSC Mode"]
    J --> K["Note (Key Follow)"]
    L["Right"] --> M["Envelope Sens"]
    M --> N["Pre LPF"]
    N --> O["Envelope Shape"]
    O --> P["FX Amt"]
| a | O S C M | Note (Key Follow), Fixed | Determines whether the oscillator frequency follows the note number or whether it is fixed | |
| b | Note Interval -48...0 | Sets the pitch difference from the note number when OSC Mode=Note (Key Follow) | ||
| Note Fine -100..+100 | Fine adjustment of the oscillator frequency | |||
| c | Fixed Frequency [Hz] | 10.0...80.0 | Sets the oscillator frequency when OSC Mode=Fixed | |
| Src Off...Tempo | Selects the modulation source for the oscillator frequency when OSC Mode=Fixed | |||
| Amt -80...+80 | Sets the oscillator frequency modulation amount when OSC Mode=Fixed | |||
| d | Envelope Pre LPF | 1...100 | Sets the upper limit of the frequency range for which very low harmonics are added | |
| e | Envelope Sens 0...100 | Sets the sensitivity with which very low harmonics are added | ||
| Envelope Shape | -100...+100 | Sets the oscillator's volume envelope curve | ||
| f | Wet/Dry | Dry, 1:99...99:1, Wet | Balance between the wet and dry signal | |
| Src Off...Tempo | Table, "Dynamic Modulation sources," on page 330 | |||
| Amt -100...+100 Amount of modulation source | ||||
a: OSC Mode
b: Note Interval
b: Note Fine
The “OSC Mode” parameter selects the oscillator operation mode. When Note (Key Follow) is selected, the oscillator’s frequency is determined based on the note number, allowing you to use it as an octaver. The “Note Interval” parameter sets the pitch offset from the original note number by semitone steps. The “Note Fine” parameter allows you to fine-tune in steps of cents.d: Envelope Pre LPF
This parameter sets the upper limit of the frequency range to which very low harmonics are added. Adjust this parameter if you do not want to add lower harmonics to the higher range.15: Talking Modulator
This effect adds an unusual character, like a human voice, to the input signal. Modulating the tone via dynamic modulation, you can create an interesting effect that sounds as if the guitar or synthesizer is talking. flowchart
graph TD
    A["FX Amt = 100: Mono In - Mono Out / FX Amt = 0: Stereo In - Stereo Out"] --> B["Left"]
    B --> C["Talking Modulator"]
    C --> D["A-I-U-E-O"]
    D --> E["FX Amt"]
    C --> F["Sweep Mode"]
    F --> G["D-mod"]
    F --> H["LFO"]
    G --> I["Voice Top: A"]
    H --> J["Voice Center: U"]
    I --> K["Voice Bottom: U"]
    J --> L["FX Amt"]
| a | S w e e p M o d e | Switches between modulation source control and LFO control O | ||
| b | Manual Voice Control | Bottom, 1...49, Center, 51...99, Top | Voice pattern control | |
| Src Off...Tempo | Selects the modulation source that controls the voice pattern | |||
| c | Voice Top A, I, U, E, O | Selects a vowel sound at the top end of control | ||
| d | Voice Center | A, I, U, E, O | Selects a vowel sound in the center of control | |
| e | Voice Bottom | A, I, U, E, O | Selects a vowel sound at the bottom end of control | |
| f | Formant Shift | -100...+100 | Sets the frequency to which the effect is applied | |
| Resonance | 0...100 | Sets the Level of resonance of the voice pattern | ||
| g | LFO Frequency [Hz] | 0.02...20.00 | Sets the speed of the LFO | |
| Src Off...Tempo | Selects a modulation source for LFO speed | |||
| Amt | -20.00...+20.00 | Sets the modulation amount of LFO speed | ||
| h | MIDI Sync | Off, On | When this is on, the LFO speed is set by BPM, Base Note, and Times, instead of Frequency | |
| BPM | MIDI, 40.00...300.00 | MIDI syncs to the system tempo; 40–300 sets the tempo manually for this individual effect | ||
| Base Note | r...w | Selects the type of notes that specify the LFO speed | ||
| Times | x1...x32 | Sets the number of notes that specify the LFO speed | ||
| i | Wet/Dry | Dry, 1:99...99:1, Wet | Balance between the wet and dry signal | |
| Src Off...Tempo | Table, “Dynamic Modulation sources,” on page 330 | |||
| Amt -100...+100 | Amount of modulation source | |||
E.g.: When "Voice Top" = A, "Voice Center" = I, and "Voice Bottom" = U:
If “Sweep Mode” is set to D-mod and Ribbon is selected as modulation source, moving your finger from the right to left of the ribbon controller will change the sound from “a” to “i,” then “u.” If Sweep Mode is set to LFO, the sound will change cyclically from “a” to “i,” “u,” “i,” then “a.” flowchart
graph TD
    A["A"] --> I["I"]
    I --> O["O"]
    O --> E["E"]
    E --> A
    style A fill:#f9f,stroke:#333
    style U fill:#ccf,stroke:#333
    style I fill:#cfc,stroke:#333
    style O fill:#fcc,stroke:#333
    style E fill:#ffc,stroke:#333
    note right of A: Talking Modulator Control
    note left of D: JS_X1_Ribbon1["JS +Y"] JS -Y1 etc...
f: Formant Shift
This parameter adjusts the frequency level to which the effect is applied. If you wish to apply the effect to a higher-range sound, ^d set this parameter to a higher value; to apply the lower-range sound, set this to a lower value.f: Resonance
This parameter sets the intensity of resonance for the voice pattern. A larger value will add more character to the sound.16: Stereo Decimator
This effect creates a rough sound like a cheap sampler by lowering the sampling frequency and data bit length. You can also simulate noise unique to a sampler (aliasing). flowchart
graph TD
    A[" Stereo In - Stereo Out "] --> B[" Pre LPF "]
    B --> C[" Resolution "]
    C --> D[" Decimator "]
    D --> E[" High Damp "]
    E --> F[" Output Level "]
    F --> G[" FX Amt "]
    H[" the D mod "] --> I[" Sampling Frequency "]
    I --> J[" Pre LPF "]
    J --> K[" Resolution "]
    K --> L[" Decimator "]
    L --> M[" High Damp "]
    M --> N[" Output Level "]
    N --> O[" FX Amt "]
    P[" Right "] --> Q[" Sampling Frequency "]
    Q --> R[" Pre LPF "]
    R --> S[" Resolution "]
    S --> T[" Decimator "]
    T --> U[" High Damp "]
    U --> V[" Output Level "]
    V --> W[" FX Amt "]
| a | Pre LPF Off, On | Selects whether the harmonic noise caused by a decrease in sampling frequency is generated or not | ||
| High Damp [%] | 0...100 | Sets the ratio of cut of the high range | ||
| b | Sampling Freq [Hz] | 1.00k...48.00k | Sets the sampling frequency | |
| Src Off...Tempo | Selects the modulation source of the sampling frequency | |||
| Amt | -48.00k...+48.00k | Sets the modulation amount of the sampling frequency | ||
| c | LFO Frequency [Hz] | 0.02...20.00 Sets | the speed of the LFO | |
| Src Off...Tempo | Selects a modulation source for LFO speed | |||
| Amt | -20.00...+20.00 | Sets the modulation amount of LFO speed | ||
| d, he | MIDI Sync | Off, On | When this is on, the LFO speed is set by BPM, Base Note, and Times, instead of Frequency | |
| BPM | MIDI, 40.00...300.00 | MIDI syncs to the system tempo; 40–300 sets the tempo manually for this individual effect | ||
| e f f e c t o Base Note | a r...w | Selects the type of notes that specify the LFO speed | ||
| Times | x1...x32 | Sets the number of notes that specify the LFO speed | ||
| e | Depth | 0...100 | Sets the depth of the sampling frequency LFO modulation | |
| Src Off...Tempo | Selects the LFO modulation source of the sampling frequency | |||
| Amt | -100...+100 | Sets the LFO modulation amount of the sampling frequency | ||
| f | Resolution 4...24 Sets the data bit length | |||
| g | Output Level | 0...100 | Sets the output level | |
| Src Off...Tempo | Selects the modulation source for the output level | |||
| Amt | -100...+100 | Sets the modulation amount of the output level | ||
| h | Wet/Dry | Dry, 1:99...99:1, Wet | Balance between the wet and dry signal | |
| Src Off...Tempo | Table, "Dynamic Modulation sources," on page 330 | |||
| Amt | -100...+100 | Amount of modulation source | ||
a: Pre LPF
If a sampler with a very low sampling frequency receives very high-pitched sound that could not be heard during playback, it could generate pitch noise that is unrelated to the original sound. Set “Pre LPF” to On to prevent this noise from being generated. If you set the "Sampling Freq" to about 3 kHz and set "Pre LPF" to Off, you can create a sound like a ring modulator.f: Resolution
g: Output Level
If you set a smaller value for the “Resolution” parameter, the sound may be distorted. The volume level may also be changed. Use “Output Level” to adjust the level.17: St. Analog Record (Stereo Analog Record)
This effect simulates the noise caused by scratches and dust on analog records. It also reproduces some of the modulation caused by a warped turntable. flowchart
graph LR
    A["Left"] --> B["EQ Trim"]
    B --> C["Pre EQ"]
    C --> D["Analog Record Simulation"]
    D --> E["FX Amt"]
    F["Right"] --> G["EQ Trim"]
    G --> H["Pre EQ"]
    H --> D
    D --> I["FX Amt"]
| a | Speed [RPM] | 33 1/3, 45, 78 | Sets the r.p.m. of a record | |
| b | Flutter 0...100 | Sets the modulation depth | ||
| c | Noise Density | 0...100 Sets the noise density | ||
| Noise Tone 0...100 Sets the noise tone | ||||
| d | Noise Level 0...100 Sets the noise level | |||
| Src Off...Tempo | Selects the modulation source for the noise level | |||
| Amt -100...+100 | Sets the modulation amount of the noise level | |||
| e | Click Level 0...100 | Sets the click noise level | ||
| Src Off...Tempo | Selects the modulation source for the click noise level | |||
| Amt -100...+100 | Sets the modulation amount of the click noise level | |||
| f EQ Trim 0...100 Sets the EQ input level | ||||
| g | Pre EQ Cutoff [Hz] | 300...10.00k Sets the EQ center frequency | ||
| Q 0.5...10.0 | Sets the EQ band width | |||
| Gain [dB] | -18.0...+18.0 | Sets the EQ gain | ||
| h | Wet/Dry | Dry, 1:99...99:1, Wet | Balance between the wet and dry signal | |
| Src Off...Tempo | Table, “Dynamic Modulation sources,” on page 330 | |||
| Amt -100...+100 | Amount of modulation source | |||
b: Flutter
This parameter enables you to set the depth of the modulation caused by a warped turntable.e: Click Level
This parameter enables you to set the level of the click noise that occurs once every rotation of the turntable. This simulation reproduces record noise, and the noise generated after the music on a vinyl record finishes.Overdrive, Amp models, and Mic models (OD Amp Mic)
18: OD/Hi.Gain Wah (Overdrive/Hi.Gain Wah)
This distortion effect utilizes an Overdrive mode and a Hi-Gain mode. Controlling the wah effect, the 3-band EQ, and the amp simulation will allow you to create versatile distortion sounds. This effect is suitable for guitar and organ sounds. flowchart
graph LR
    A["Pre Low-cut"] --> B["Wah"]
    B --> C["Driver"]
    C --> D["3 Band PEQ"]
    D --> E["Amp Simulation"]
    E --> F["FX Amt"]
    G["Mode: Overdrive / HI-Gain Drive"] --> C
    H["Output Level"] --> C
    I["Direct Mix"] --> C
    J["D^mod"] --> K["Left"]
    L["Right"] --> M["Right"]
| a | Wah Off, On | Switches Wah on/off | ||
| Src | Off...Tempo | Selects the modulation source that switches the Wah on and off | ||
| Sw | Toggle, Moment | Selects the switching mode for the modulation source that switches the Wah on and off | ||
| b | Wah Sweep Range | -10...+10 | Sets the range of Wah | |
| Wah Sweep Src | Off...Tempo | Selects the modulation source that controls the Wah | ||
| c | Drive Mode | Overdrive, Hi-Gain | Switches between overdrive and hi-gain distortion | |
| d | Drive | 1...100 | Sets the degree of distortion | |
| Pre Low-cut | 0...10 | Sets the low range cut amount of the distortion input | ||
| e | Output Level | 0...50 | Sets the output level | |
| Src | Off...Tempo | Selects the modulation source for the output level | ||
| Amt | -50...+50 | Sets the modulation amount of the output level | ||
| f | Low Cutoff [Hz] | 20...1.00k | Sets the center frequency for Low EQ (shelving type) | |
| Gain [dB] | -18...+18 | Sets the gain of Low EQ | ||
| g | Mid1Cutoff [Hz] | 300...10.00k | Sets the center frequency for Mid/ High EQ 1 (peaking type) | |
| Q | 0.5...10.0 | Sets the band width of Mid/High EQ 1 | ||
| Gain [dB] | -18...+18 | Sets the gain of Mid/High EQ 1 | ||
| h | Mid2 Cutoff [Hz] | 500...20.00k | Sets the center frequency for Mid/ High EQ 2 (peaking type) | |
| Q | 0.5...10.0 | Sets the band width of Mid/High EQ 2 | ||
| Gain [dB] | -18...+18 | Sets the gain of Mid/High EQ 2 | ||
| i | Direct Mix | 0...50 | Sets the amount of the dry sound mixed to the distortion | |
| Speaker Simulation | Off, On | Switches the speaker simulation on/ off | ||
| j | Wet/Dry | Dry, 1:99...99:1, Wet | Balance between the wet and dry signal | |
| Src | Off...Tempo | Table , "Dynamic Modulation sources," on page 330 | ||
| Amt | -100...+100 Amount of modulation source | |||
a: Wah
The Wah parameter switches the wah effect on/off.a: Sw
This parameter sets how the wah effect is switched on and off via the modulation source. When “Sw” = Moment, the wah effect is usually turned off. It is turned on only when you press the pedal or operate the joystick. MIDI When a value for the modulation source is less than 64, "off" speed is selected, and when the value is 64 or higher, "on" is selected. When "Sw" = Toggle, the wah effect is switched between on and off each time you press the pedal or operate the joystick. MIDI The switch will be turned on/off each time the value of the modulation source exceeds 64.b: Wah Sweep Range
b: Wah Sweep Src
This parameter sets the sweep range of the wah center frequency. A negative value will reverse the direction of sweep. The wah center frequency can be controlled by the modulation source specified in the “Wah Sweep Src” parameter.d: Pre Low-cut
Cutting the signal in the low range before it is input to the Distortion will create a sharp distortion.d: Drive
e: Output Level
The degree of distortion is determined by the level of input signal and the setting of "Drive". Raising the "Drive" setting will cause the entire volume level to increase. Use the "Output Level" parameter to adjust the volume level. The "Output Level" parameter uses the signal level input to the 3-Band EQ. If clipping occurs at the 3-Band EQ, adjust the "Output Level" parameter.19: St. Guitar Cabinet
(Stereo Guitar Cabinet)
This simulates the acoustical character of a guitar amp's speaker cabinet. flowchart
graph LR
    A["Left"] --> B["Cabinet Simulator"]
    B --> C["FX Amt"]
    D["Right"] --> E["Cabinet Simulator"]
    E --> F["FX Amt"]
    style A fill:#f9f,stroke:#333
    style D fill:#f9f,stroke:#333
    style B fill:#ccf,stroke:#333
    style E fill:#ccf,stroke:#333
| a | Trim 0...100 Sets the input level | |||
| b | Type | TWEED - 1x12 | Selects the type of the cabinetOpen-back cabinet with one 12" speaker, typically used for blues | |
| TWEED - 4x10 | Open-back cabinet with four 10" speakers | |||
| BLACK - 2x10 | Open-back cabinet with two 10" speakers | |||
| BLACK - 2x12 | American open-back cabinet with two12" speakers | |||
| VOX AC15 - 1x12 | Vox AC15 open-back cabinet with one 12" "Blue" speaker | |||
| VOX AC30 - 2x12 | Vox AC30 open-back cabinet with two 12" "Blue" speakers | |||
| VOX AD412 - 4x12 | VOX AD412 closed-back cabinet with four 12" speakers | |||
| UK H30 - 4x12 | Closed-back classic cabinet with four 30W 12" speakers | |||
| UK T75 - 4x12 | Closed-back cabinet with four 75W 12" speakers | |||
| US V30 - 4x12 | Closed-back cabinet with four 30W 12" speakers | |||
| c | Air 0...100 Sets the mic position | |||
| d | Wet/Dry | Dry, 1:99...99:1, Wet | Balance between the wet and dry signal | |
| Src Off...Tempo | Table, "Dynamic Modulation sources," on page 330 | |||
| Amt -100...+100 | Amount of mod | ulation source | ||
20: St. Bass Cabinet (Stereo Bass Cabinet)
This simulates the acoustical character of a bass amp's speaker cabinet. flowchart
graph LR
    A["Left"] --> B["Trim"]
    B --> C["Cabinet Simulator"]
    C --> D["FX Amt"]
    E["Right"] --> F["Trim"]
    F --> G["Cabinet Simulator"]
    G --> H["FX Amt"]
| a Trim 0...100 Sets the input level | ||||
| b | C a b i n | LA - 4x10MODERN - 4x10METAL - 4x10CLASSIC - 8x10UK - 4x12STUDIO - 1x15 e t T y JAZZ - 1x15VOX AC100 - 2x15US - 2x15UK - 4x15LA - 1x18COMBI - 1x12 & 1x18 | Selects the cabinet typeFour 10" speakers / LA sound cabinetFour 10" aluminum-cone speakers / modern cabinetFour 10" aluminum-cone speakers / modern cabinetEight 10" speakers / classic cabinetFour 12" speakers / UK-manufac-tured cabinetOne 15" speaker / studio combo cabinetOne 15" speaker / jazz combo cabinetTwo 15" speakers / cabinet for Vox AC100Two 15" speakers / US-manufac-tured cabinetFour 15" speakers / UK-manufac-tured cabinetOne 18" speaker / LA sound cabinetOne 12" and one 18" speaker combi-nation cabinet | |
| c | Wet/Dry | Dry, 1:99...99:1, Wet | Balance between the wet and dry signal | |
| Src Off...Tempo | Table , "Dynamic Modulation sources," on page 330 | |||
| Amt -100...+100 | Amount of mod-ulation source | |||
21: Bass Amp Model
This simulates a bass amp. flowchart
graph TD
    A["Left"] --> B["Bass Amp Model"]
    B --> C["Volume"]
    C --> D["FX Amt"]
    E["Right"] --> B
    F["D-mod"] -.-> B
    G["FX Amt = 100; Mono In - Mono Out / FX Amt = 0; Stereo In - Stereo Out"] --> H["FX Amt"]
| a | A m p T | LA STUDIOJAZZGOLD PANEL y p eSCOOPED An amp VALVE2 A tube a valVECLASSIC | Selects the amplifier typeAn amp that is typical of the LA sound.A combo amp favored by jazz bassists.An amp distinctive for its eye-catching gold panel and clean sound.typical of 80's sounds.amp suitable for rock.A tube amp with the ULTRA LO switch turned ON.A tube amp whose basic character changes according to the setting of the value dial. | |
| b | Volume | 0...100 | Sets the output level | |
| Src | Off...Tempo | Selects the modulation source for the output level | ||
| Amt | -100...+100 | Sets the modulation amount of the output level | ||
| c B | ass 0...100 | Sets the bass (low range) level | ||
| d | Middle | 0...100 | Sets the middle (mid range) level | |
| Mid Range | 0...4 | Sets the mid-frequency range | ||
| e Treble | 0...100 Sets the treble (high range) level | |||
| f | Presence | 0...100 | Sets the presence (high-frequency tone) | |
| g | Wet/Dry | Dry, 1:99...99:1, Wet | Balance between the wet and dry signal | |
| Src | Off...Tempo | Table , "Dynamic Modulation sources," on page 330 | ||
| Amt | -100...+100 | Amount of modulation source | ||
22: Bass Amp+Cabinet (Bass Amp Model+Cabinet)
This simulates a bass amp and speaker cabinet. flowchart
graph TD
    A["FX Amt = 100: Mono In - Mono Out / FX Amt = 0: Stereo In - Stereo Out"] --> B["Left"]
    B --> C["Bass Amp Model1"]
    C --> D["Cabinet Simulator"]
    D --> E["FX Amt"]
    C --> F["Volume"]
    F --> G["D-mod"]
    G --> H["Right"]
| a | A m p T | LA STUDIO, JAZZ , GOLD PANEL, 3COOPED, VALVE2, VALVE, CLASSIC | Selects the type of the amplifier | |
| b | Volume 0...100 Sets the output level | |||
| Src Off...Tempo | Selects the modulation source for the output level | |||
| Amt -100...+100 | Sets the modulation amount of the output level | |||
| c B | Bass 0...100 Sets the bass (low range) level | |||
| d | Middle 0...100 Sets the middle (mid range) level | |||
| Mid Range 0...4 Sets the mid-frequency range | ||||
| e T | Treble 0...100 Sets the treble (high range) level | |||
| f P | Presence 0...100 | Sets the presence (high-frequency tone) | ||
| g | Cabinet Simulator | Off, On | Switches the cabinet simulator on/off | |
| h | Cabinet Type | LA - 4x10, MODERN - 4x10, METAL - 4x10, CLASSIC - 8x10, UK - 4x12, STUDIO - 1x15, JAZZ - 1x15, VOX AC100 - 2x15, US - 2x15, UK - 4x15, LA - 1x18, COMBI - 1x12 & 1x18 | Selects the cabinet type | |
| l | Wet/Dry | Dry, 1:99...99:1, Wet | Balance between the wet and dry signal | |
| Src Off...Tempo | Table, “Dynamic Modulation sources,” on page 330 | |||
| Amt -100...+100 | Amount of modulation source | |||
| Amp Type | Cabinet Type |
| LA STUDIO | LA - 4x10, LA - 1x18 |
| JAZZ | JAZZ - 1x15 |
| GOLD PANEL | MODERN - 4x10 |
| SCOOPED | METAL - 4x10 |
| VALVE2 | CLASSIC - 8x10 |
| VALVE | CLASSIC - 8x10 |
| CLASSIC | COMBI - 1x12 & 1x18 |
23: Tube PreAmp Model (Tube PreAmp Modeling)
This effect simulates a two-stage vacuum tube preamp. You can make individual settings for two vacuum tubes connected in series. This lets you create the warm sound typical of vacuum tubes. flowchart
graph LR
    A["Left"] --> B["Tube Pre Amp1"]
    B --> C["Invert"]
    C --> D["Tube Pre Amp2"]
    D --> E["Output Level"]
    E --> F["Right"]
    G["FX Amt = 100: Mono In - Mono Out / FX Amt = 0: Stereo In - Stereo Out"] --> H["FX Amt"]
| a | Tube1 Low Cut [Hz] | Thru, 21...8.00k | Sets the cutoff frequency for the low cut filter of stage 1 | |
| High Cut [Hz] | 53...20.00k, Thru | Sets the cutoff frequency for the high cut filter of stage 1 | ||
| b | Tube1 Gain [dB] | -24.0...+24.0 | Sets the input gain for stage 1 | |
| Saturation [%] 0...100 | Sets the input/output response for stage 1 | |||
| c | Tube1 Bias 0...100 Sets the bias voltage for stage 1 | |||
| d | Tube1 Phase | Normal, Wet Invert | Turns phase reversal on/off | |
| e | Tube2 Low Cut [Hz] | Thru, 21...8.00k | Sets the cutoff frequency for the low cut filter of stage 2 | |
| High Cut [Hz] | 53...20.00k, Thru | Sets the cutoff frequency for the high cut filter of stage 2 | ||
| f | Tube2 Gain [dB] | -24.0...+24.0 | Sets the input gain for stage 2 | |
| Saturation [%] 0...100 | Sets the input/output response for stage 2 | |||
| g | Tube2 Bias 0...100 | Sets the bias voltage for stage 2 | ||
| h | Tube2 Output Level [dB] | -48.0...+0.0 | Sets the output level | |
| i | Wet/Dry | Dry, 1:99...99:1, Wet | Balance between the wet and dry signal | |
| Src Off...Tempo | Table, “Dynamic Modulation sources,” on page 330 | |||
| Amt -100...+100 Amount of modulation source | ||||
b, f: Saturation [%]
With higher settings of this value, the waveform will high gain levels, tending to cause distortion. Lower settings of this value will produce linear response. line
| Mic/Pre Amp - Saturation | In | | ------------------------ | ------ | | 0 | 0 | | 50 | ~0.8 | | 100 | ~0.6 |c: Tube1 Bias
This expresses the effect that changes in vacuum tube bias have on the distortion of the waveform. Higher settings of this value will produce distortion even at low gain levels. Since this will also change the overtone structure, you can use it to control the tonal character. line
| Bias | In | Out | |------|--------|--------| | 0 | 0 | 0 | | 50 | 0 | 0 | | 100 | 0 | 0 |d: Tube1 Phase
With the Wet Invert setting, the phase of the signal will be inverted between stage 1 and stage 2. Since "Bias" is applied to the inverted signal in stage 2, this will change the tonal character.24: St. Tube PreAmp
(Stereo Tube PreAmp Modeling)
This is a stereo vacuum tube preamp simulator (See "Tube Pre-Amp Model (Tube PreAmp Modeling)" on page 344.). flowchart
graph TD
    A["Left"] --> B["Tube Pre Amp1"]
    B --> C["+"]
    C --> D["Tube Pre Amp2"]
    D --> E["Output Level"]
    F["Right"] --> G["Tube Pre Amp1"]
    G --> H["+"]
    H --> I["Tube Pre Amp2"]
    I --> J["FX Amt"]
    B --> K["Invert"]
    D --> K
    I --> K
    J --> L["FX Amt"]
25: Mic Model+PreAmp
(Mic Modeling + PreAmp)
This effect simulates a mic and vacuum tube preamp. You can choose from various types of mic and positions to create differing sonic characters. flowchart
graph LR
    A["FX Amt = 100: Mono In - Mono Out / FX Amt = 0: Stereo In - Stereo Out"] --> B["Left"]
    B --> C["Mic Simulation"]
    C --> D["Tube Pre Amp"]
    D --> E["Output Level"]
    E --> F["FX Amt"]
    G["Right"] --> C
    H["Left"] --> I["Right"]
| a | M i c T | Vintage Dynamic, Multi Condenser, Percussion Condenser, Drums Dynamic, Vocal Dynamic, Multi Dynamic, Vocal Condenser, Vocal Tube, Kick Dynamic | Selects the type of mic | |
| b | M i c P | Close, On, Off, Far | Sets the mic placement distance | |
| c | Tube Low Cut [Hz] | Thru, 21...8.00k | Sets the frequency of the low cut filter | |
| High Cut [Hz] | 53...20.00k, Thru | Sets the frequency of the high cut filter | ||
| d | Tube Gain [dB] | -24.0...+24.0 | Sets the input gain to the vacuum tube preamp | |
| Saturation [%] | 0...100 | Sets the input/output response of the preamp | ||
| e T | Tube Bias 0...100 | Sets the bias level | of the preamp | |
| f | Tube Output Level [dB] | -48.0...+0.0 Sets | the output level of the preamp | |
| g | Wet/Dry | Dry, 1:99...99:1, Wet | Balance between the wet and dry signal | |
| Src Off...Tempo | Table, "Dynamic Modulation sources," on page 330 | |||
| Amt | -100...+100 | Amount of modulation source |
b: Mic Position
This expresses the effect that the mic position has on the sound. The Close setting is the closest mic position, and the Far setting is the farthest.Chorus, Flanger, and Phaser (Cho/Fln Phaser)
26: Stereo Chorus
This effect adds thickness and warmth to the sound by modulating the delay time of the input signal. You can add spread to the sound by offsetting the phase of the left and right LFOs from each other. flowchart
graph LR
    A["Stereo In - Stereo Out"] --> B["Left"]
    B --> C["EQ Trim"]
    C --> D["LEQ"]
    D --> E["HEQ"]
    E --> F["Chorus"]
    F --> G["FX Amt"]
    H["Right"] --> I["EQ Trim"]
    I --> J["LEQ"]
    J --> K["HEQ"]
    K --> L["Chorus"]
    L --> M["FX Amt"]
    N["LFO: Tri / Sine"] -.-> L
    L --> O["LFO Phase"]
| a | LFO Waveform | Triangle, Sine Selects the LFO Waveform | |
| LFO Phase [degree] | -180...+180 | Sets the LFO phase difference between the left and right | |
| b | LFO Frequency [Hz] | 0.02...20.00 Sets | the speed of the LFO |
| Src Off...Tempo | Selects a modulation source for LFO speed | ||
| Amt | -20.00...+20.00 | Sets the modulation amount of LFO speed | |
| c | MIDI Sync Off, On | When this is on, the LFO speed is set by BPM, Base Note, and Times, instead of Frequency | |
| BPM | MIDI, 40.00...300.00 | MIDI syncs to the system tempo; 40–300 sets the tempo manually for this individual effect | |
| Base Note r...w | Selects the type of notes that specify the LFO speed | ||
| Times x1...x32 | Sets the number of notes that specify the LFO speed | ||
| d | L Pre Delay [msec] | 0.0...50.0 | Sets the delay time for the left channel |
| R Pre Delay [msec] | 0.0...50.0 | Sets the delay time for the right channel | |
| e | Depth 0...100 Sets the depth of LFO modulation | ||
| Src Off...Tempo | Selects the modulation source for the LFO modulation depth | ||
| Amt -100...+100 | Sets the modulation amount of the LFO modulation depth | ||
| f EQ Trim 0...100 Sets the EQ input level | |||
| g | Pre LEQ Fc | Low, Mid-Low | Selects the cutoff frequency (low or mid-low) of the low-range equalizer |
| Pre HEQ Fc | High, Mid-High | Selects the cutoff frequency (high or mid-high) of the high-range equalizer | |
| h | Pre LEQ Gain [dB] | -15.0...+15.0 Gain of the Low EQ | |
| Pre HEQ Gain [dB] | -15.0...+15.0 Gain of the High EQ | ||
| i | Wet/Dry | -Wet, -1:99...Dry...99:1, Wet | Balance between the wet and dry signal |
| Src Off...Tempo | Table, “Dynamic Modulation sources,” on page 330 | ||
| Amt -100...+100 | Amount of modulation source | ||
27: Black Chorus/Flanger
This models a Danish-made stereo chorus + pitch modulator & flanger. Although this effect was originally intended for guitar, it was also used by numerous keyboard players. Used with electric piano, it produces a distinctive tone. flowchart
graph TD
    A["Input Gain"] --> B["Chorus"]
    C["Wet: Mono In - Stereo Out / Dry: Stereo In - Stereo Out"] --> B
    D["Wet / Dry"] --> B
    B --> E["Mode & Intensity"]
    E --> F["Monoster"]
    F --> G["Output Mode"]
    G --> H["Wet / Dry"]
    I["LFO"] --> J["Feedback to Chorus"]
    J --> B
    K["Left"] --> A
    L["Right"] --> M["Right"]
| Speed [Hz] 0.10 | ...10.0 Sets | the LFO speed | |
| Intensity | 1...100 | Sets the intensity of LFO modulation | |
| Mode | 0, 1, 2 | Select a mode0: Chorus1: Pitch Modulation2: Flanger | |
| Width 0...2 | Sets the LFO modulation depth | ||
| Input Gain | 1...100 | Sets the input gain | |
| Output Mode 0, 1 | Select a output mode0: Mono1: Stereo | ||
| Wet/Dry | Dry, 1:99 ...99:1, Wet | Balance between the wet and dry signal | D### |
| Source | Off...Tempo | Table, “Selects a modulation source for Wet/Dry,” on page 331 | |
| Amount | -100 ... +100 | Table, “Sets the modulation amount for Wet/Dry,” on page 331 | |
Mode
Intensity
Increasing the “Intensity” value will strengthen the modulation effect. This controls the effect, direct, and feedback values. The values that are controlled will depend on the “Mode” setting.28: St.HarmonicChorus (Stereo Harmonic Chorus)
This effect applies chorus only to higher frequencies. This can be used to apply a chorus effect to a bass sound without making the sound thinner. You can also use this chorus block with feedback as a flanger. flowchart
graph TD
    A["Left"] --> B["Chorus/Flanger"]
    B --> C["High Damp"]
    C --> D["FX Amt"]
    E["Right"] --> F["Chorus/Flanger"]
    F --> G["High Damp"]
    G --> H["FX Amt"]
    I["LFO: Tri / Sine"] -.-> J["LFO Phase"]
    K["High/Low Split Point"] --> B
    L["Feedback"] --> F
    M["Low Level"] --> B
| a | LFO Waveform Triangle, Sine Selects the LFO Waveform | |||
| LFO Phase [degree] | -180...+180 | Sets the LFO phase difference between the left and right | ||
| b | LFO Frequency [Hz] | 0.02...20.00 Sets | the speed of the LFO | |
| Src Off...Tempo | Selects a modulation source for LFO speed | |||
| Amt | -20.00... +20.00 | Sets the modulation amount of LFO speed | ||
| c | MIDI Sync Off, On | When this is on, the LFO speed is set by BPM, Base Note, and Times, instead of Frequency | ||
| BPM | MIDI, 40.00... 300.00 | MIDI syncs to the system tempo; 40-300 sets the tempo manually for this individual effect | ||
| Base Note r...w | Selects the type of notes that specify the LFO speed | |||
| Times x1...x32 | Sets the number of notes that specify the LFO speed | |||
| d | Pre Delay [msec] | 0.0...50.0 | Sets the delay time from the original sound | |
| e | Depth 0...100 Sets the depth of LFO modulation | |||
| Src Off...Tempo | Selects the modulation source of the LFO modulation depth | |||
| Amt -100...+100 | Sets the modulation amount of the LFO modulation depth | |||
| f | High/Low Split Point | 1...100 | Sets the frequency split point between the low and high range | |
| g | Feedback -100...+100 | Sets the feed back amount of the chorus block | ||
| High Damp [%] | 0...100 | Sets the high range damping amount of the chorus block | ||
| h | Low Level 0...100 Sets the low range output level | |||
| High Level | 0...100 | Sets the high range (chorus) output level | ||
| i | Wet/Dry | Dry, 1:99...99:1, Wet | Balance between the wet and dry signal | |
| Src Off...Tempo | Table , "Dynamic Modulation sources," on page 330 | |||
| Amt -100...+100 | Amount of modulation source | |||
f: High/Low Split Point
This parameter sets the frequency that splits the high and low range. Only the high range will be sent to the chorus block.g: Feedback
Sets the feedback amount of the chorus block. Increasing the feedback will allow you to use the effect as a flanger.29: St. Biphase Mod. (Stereo Biphase Modulation)
This stereo chorus effect adds two different LFOs together. You can set the Frequency and Depth parameters for each LFO individually. Depending on the setting of these LFOs, very complex waveforms will create an analog-type, unstable modulated sound. flowchart
graph TD
    A["Left+"] --> B["Chorus/Flanger"]
    B --> C["High Damp"]
    C --> D["FX Amt"]
    B --> E["Feedback"]
    E --> F["Chorus/Flanger"]
    F --> G["High Damp"]
    G --> H["FX Amt"]
    I["Right"] --> J["180 [degree"]]
    K["LFO1: Tri / Sine"] --> J
    L["LFO2: Tri / Sine"] --> J
| a | LFO1 Waveform | Triangle, Sine | Selects LFO1 waveform | |
| LFO2 Triangle, | Sine Selects LF | O2 waveform | ||
| Phase Sw | 0 deg, 180 deg | Switches the LFO phase difference between left and right | ||
| b | LFO1 Frequency [Hz] | 0.02...30.00 | Sets the LFO1 speed | |
| Src | Off...Tempo | Selects the modulation source of LFO1&2 speed | ||
| LFO1 Amt | -30.00... +30.00 | Sets the modulation amount of LFO1 speed | ||
| c | LFO2 Frequency [Hz] | 0.02...30.00 | Sets the LFO2 speed | |
| Amt | -30.00... +30.00 | Sets the modulation amount of LFO2 speed | ||
| d | Depth1 | 0...100 | Sets the depth of LFO1 modulation | |
| Src | Off...Tempo | Selects the modulation source of LFO1&2 modulation depth | ||
| Amt | -100...+100 | Sets the modulation amount of LFO1 modulation depth | ||
| e | Depth2 | 0...100 | Sets the depth of LFO2 modulation | |
| Amt | -100...+100 | Sets the modulation amount of LFO2 modulation depth | ||
| f | L Pre Delay [msec] | 0.0...50.0 | Sets the delay time for the left channel | |
| R Pre Delay [msec] | 0.0...50.0 | Sets the delay time for the right channel | ||
| g | Feedback -100...+100 | Sets the feedback amount | ||
| High Damp [%] | 0...100 | Sets the damping amount in the high range | ||
| h | Wet/Dry | -Wet, - 1:99...Dry...99:1 , Wet | Balance between the wet and dry signal | |
| Src | Off...Tempo | Table, "Dynamic Modulation sources," on page 330 | ||
| Amt | -100...+100 | Amount of modulation source | ||
30: Multitap Cho/Delay
(Multitap Chorus/Delay)
This effect has four chorus blocks with a different LFO phase. You can create a complex stereo image by setting each block's delay time, depth, output level, and pan individually. You can also fix some of the chorus blocks to combine the c delay effects. flowchart
graph TD
    A["FX Amt = 100: Mono In - Stereo Out / FX Amt = 0: Stereo In - Stereo Out"] --> B["Left"]
    B --> C["Feedback"]
    C --> D["Tap1 Delay"]
    C --> E["Tap2 Delay"]
    C --> F["Tap3 Delay"]
    C --> G["Tap4 Delay"]
    D --> H["Level"]
    E --> I["Level"]
    F --> J["Level"]
    G --> K["Level"]
    H --> L["Pan"]
    I --> M["Pan"]
    J --> N["Pan"]
    K --> O["Pan"]
    P["LFO: Triangle"] --> Q["0 [degree"]]
    P --> R["180 [degree"]]
    P --> S["90 [degree"]]
    P --> T["270 [degree"]]
    U["FX Amt"] --> V["Right"]
    V --> W["Feedback"]
| a | LFO Frequency [Hz] | 0.02...13.00 Sets | the speed of the LFO | |
| b | Tap1 (000) [msec] | 0...1000 | Sets the Tap1 (LFO phase=0 degrees) delay time | |
| Depth 0...30 Sets | the Tap1 chorus | depth | ||
| Level 0...30 Sets | the Tap1 output | level | ||
| Pan | L6...L1, C, R1...R6 | Sets the Tap1 stereo image | ||
| c | Tap2 (180) [msec] | 0...1000 | Sets the Tap2 (LFO phase=180 degrees) delay time | |
| Depth 0...30 Sets | the Tap2 chorus | depth | ||
| Level 0...30 Sets | the Tap2 output | level | ||
| Pan | L6...L1, C, R1...R6 | Sets the Tap2 stereo image | ||
| d | Tap3 (090) [msec] | 0...1000 | Sets the Tap3 (LFO phase=90 degrees) delay time | |
| Depth 0...30 Sets | the Tap3 chorus | depth | ||
| Level 0...30 Sets | the Tap3 output | level | ||
| Pan | L6...L1, C, R1...R6 | Sets the Tap3 stereo image | ||
| e | Tap4 (270) [msec] | 0...1000 | Sets the Tap4 (LFO phase=270 degrees) delay time | |
| Depth 0...30 Sets | the Tap4 chorus | depth | ||
| Level 0...30 Sets | the Tap4 output | level | ||
| Pan | L6...L1, C, R1...R6 | Sets the Tap4 stereo image | ||
| f | Tap1 Feedback | -100...+100 Sets | the Tap1 feedback amount | |
| Src Off...Tempo | Selects the modulation source of Tap1 feedback amount and effect balance | |||
| Amt -100...+100 | Sets the Tap1 feedback amount and modulation amount | |||
| g | Wet/Dry | Dry, 1:99...99:1, Wet | Balance between the wet and dry signal | |
| Src Off...Tempo | Table, “Dynamic Modulation sources,” on page 330 | |||
| Amt -100...+100 | Amount of modulation source | |||
31: Ensemble
This Ensemble effect has three chorus blocks that use LFO to create subtle shimmering, and gives three dimensional depth and spread to the sound, because the signal is output from the left, right, and center. flowchart
graph TD
    A["Left"] --> B["Ensemble"]
    B --> C["FX Amt"]
    D["Right"] --> E["Shimmer"]
    D --> F["LFO"]
    B --> G["FX Amt"]
    style A fill:#f9f,stroke:#333
    style D fill:#ccf,stroke:#333
    style B fill:#cff,stroke:#333
    style C fill:#ffc,stroke:#333
    style E fill:#cfc,stroke:#333
    style F fill:#fcc,stroke:#333
| a | Speed 1...100 Sets the speed of the LFO | |||
| Src Off...Tempo | Selects a modulation source for LFO speed | |||
| Amt -100...+100 | Sets the modulation amount of LFO speed | |||
| b | Depth 0...100 Sets the depth of LFO modulation | |||
| Src Off...Tempo | Selects the modulation source of the LFO modulation depth | |||
| Amt -100...+100 | Sets the modulation amount of the LFO modulation depth | |||
| c | Shimmer 0...100 | Sets the amount of shimmering of the LFO waveform | ||
| d | Wet/Dry | Dry, 1:99...99:1, Wet | Balance between the wet and dry signal | |
| Src Off...Tempo | Table , “Dynamic Modulation sources,” on page 330 | |||
| Amt -100...+100 | Amount of modulation source | |||
c: Shimmer
This parameter sets the amount of shimmering of the LFO waveform. Increasing this value adds more shimmering, making the chorus effect more complex and richer. line
| Time | Level | |------|-------| | 0 | Low | | Peak | High | | End | Low |32: Polysix Ensemble
This models the ensemble effect built into the classic KORG PolySix programmable polyphonic synthesizer. flowchart
graph LR
    A["Left"] --> B["Polyisix Ensemble"]
    C["Right"] --> B
    B --> D["FX Amt"]
    B --> E["FX Amt = 100: Mono In - Mono Out / FX Amt = 0: Stereo In - Stereo Out"]
| a | Depth 0...100 Sets the depth of the effect | |||
| Src Off...Tempo | Selects the modulation source that will control the effect depth | |||
| Amt -100...+100 | Sets the amount by which the effect depth will be modulated | |||
| b | Wet/Dry | Dry, 1:99...99:1, Wet | Balance between the wet and dry signal | |
| Src Off...Tempo | Table , "Dynamic Modulation sources," on page 330 | |||
| Amt -100...+100 | Amount of modulation source | |||
33: Stereo Flanger
This effect gives a significant swell and movement of pitch to the sound. It is more effective when applied to a sound with a lot of harmonics. This is a stereo flanger. You can add spread to the sound by offsetting the phase of the left and right LFOs from each other. flowchart
graph TD
    A["Left"] --> B["Flanger"]
    B --> C["FFX Amt"]
    D["Right"] --> E["Flanger"]
    E --> F["FFX Amt"]
    G["LFO: Tri / Sine"] --> H["LFO Shape"]
    H --> I["FFX Amt"]
    J["FFX Amt"] --> K["FFX Amt"]
    L["FFX Amt"] --> M["FFX Amt"]
    N["FFX Amt"] --> O["FFX Amt"]
    P["FFX Amt"] --> Q["FFX Amt"]
    R["FFX Amt"] --> S["FFX Amt"]
    T["FFX Amt"] --> U["FFX Amt"]
    V["FFX Amt"] --> W["FFX Amt"]
    X["FFX Amt"] --> Y["FFX Amt"]
    Z["FFX Amt"] --> AA["FFX Amt"]
    AB["FFX Amt"] --> AC["FFX Amt"]
    AD["FFX Amt"] --> AE["FFX Amt"]
    AF["FFX Amt"] --> AG["FFX Amt"]
    AH["FFX Amt"] --> AI["FFX Amt"]
    AJ["FFX Amt"] --> AK["FFX Amt"]
    AL["FFX Amt"] --> AM["FFX Amt"]
    AN["FFX Amt"] --> AO["FFX Amt"]
    AP["FFX Amt"] --> AQ["FFX Amt"]
    AR["FFX Amt"] --> AS["FFX Amt"]
    AT["FFX Amt"] --> AU["FFX Amt"]
    AV["FFX Amt"] --> AW["FFX Amt"]
    AX["FFX Amt"] --> AY["FFX Amt"]
    AZ["FFX Amt"] --> BA["FFX Amt"]
    BB["FFX Amt"] --> BC["FFX Amt"]
    BD["FFX Amt"] --> BE["FFX Amt"]
    BF["FFX Amt"] --> BG["FFX Amt"]
    BH["FFX Amt"] --> BI["FFX Amt"]
    BJ["FFX Amt"] --> BK["FFX Amt"]
    BL["FFX Amt"] --> BM["FFX Amt"]
    BN["FFX Amt"] --> BO["FFX Amt"]
    BP["FFX Amt"] --> BQ["FFX Amt"]
    BR["FFX Amt"] --> BS["FFX Amt"]
    BT["FFX Amt"] --> BU["FFX Amt"]
    BV["FFX Amt"] --> BW["FFX Amt"]
    BX["FFX Amt"] --> BY["FFX Amt"]
    BZ["FFX Amt"] --> CA["FFX Amt"]
    CB["FFX Amt"] --> CC["FFX Amt"]
    CD["FFX Amt"] --> CE["FFX Amt"]
    CF["FFX Amt"] --> CG["FFX Amt"]
    CH["FFX Amt"] --> CI["FFX Amt"]
    CJ["FFX Amt"] --> CK["FFX Amt"]
    CL["FFX Amt"] --> CM["FFX Amt"]
    CN["FFX Amt"] --> CO["FFX Amt"]
    CP["FFX Amt"] --> CQ["FFX Amt"]
    CR["FFX Amt"] --> CS["FFX Amt"]
    CT["FFX Amt"] --> CU["FFX Amt"]
    CV["FFX Amt"] --> CW["FFX Amt"]
    CX["FFX Amt"] --> CY["FFX Amt"]
    CZ["FFX Amt"] --> DA["FFX Amt"]
    DB["FFX Amt"] --> DC["FFX Amt"]
    DD["FFX Amt"] --> DJ["FFX Amt"]
    DK["FFX Amt"] --> DL["FFX Amt"]
    DM["FFX Amt"] --> DE["FFX Amt"]
    DF["FFX Amt"] --> DG["FFX Amt"]
    DH["FFX Amt"] --> DI["FFX Amt"]
    DJ["FFX Amt"] --> DJ
    DK --> DJ
    DL --> DJ
    DV --> DJ
    DW --> DJ
| a | Delay Time [msec] | 0.0...50.0 | Sets the delay time from the original sound | |
| b | LFO Waveform | Triangle, Sine Selects the LFO Waveform | ||
| LFO Shape -100 | ...+100 | Changes the curvature of the LFO Waveform | ||
| c | LFO Phase [degree] | -180...+180 | Sets the LFO phase difference between the left and right | |
| d | LFO Frequency [Hz] | 0.02...20.00 Sets the speed of the LFO | ||
| Src Off...Tempo | Selects a modulation source for LFO speed | |||
| Amt | -20.00... +20.00 | Sets the modulation amount of LFO speed | ||
| e | MIDI Sync Off, On | When this is on, the LFO speed is set by BPM, Base Note, and Times, instead of Frequency | ||
| BPM | MIDI, 40.00... 300.00 | MIDI syncs to the system tempo; 40-300 sets the tempo manually for this individual effect | ||
| Base Note r...w | Selects the type of notes that specify the LFO speed | |||
| Times | x1...x32 | Sets the number of notes that specify the LFO speed | ||
| f | Depth 0...100 | Sets the depth of LFO modulation | ||
| g | Feedback | -100...+100 | Sets the feedback amount | |
| High Damp [%] | 0...100 | Sets the feedback damping amount in the high range | ||
| h | Wet/Dry | -Wet, -1:99...Dry...99:1 , Wet | Balance between the wet and dry signal | |
| Src Off...Tempo | Table, "Dynamic Modulation sources," on page 330 | |||
| Amt -100...+100 Amount of modulation source | ||||
g: Feedback
h: Wet/Dry
The peak shape of the positive and negative “Feedback” value is different. The harmonics will be emphasized when the effect sound is mixed with the dry sound if you set a positive value for both “Feedback” and “Wet/Dry”, and if you set a negative value for both “Feedback” and “Wet/Dry”.g: High Damp [%]
This parameter sets the amount of damping of the feedback the high range. Increasing the value will cut high-range harmonics.34: St. Random Flanger (Stereo Random Flanger)
The stereo effect uses a step-shape waveform and random LFO for modulation, creating a unique flanging effect. flowchart
graph TD
    A["Left"] --> B["Flanger"]
    B --> C["FX Amt"]
    D["Right"] --> E["Flanger"]
    E --> F["FX Amt"]
    G["LFO: Step-Tri/Random"] --> H["LFO Phase"]
    I["Feedback"] --> J["High Damp"]
    K["FF"] --> B
| a | Delay Time [msec] | 0.0...50.0 | Sets the delay time from the original sound | |
| b | LFO Waveform | Step-Tri, Random | Selects the LFO Waveform | |
| LFO Phase [degree] | -180...+180 | Sets the LFO phase difference between the left and right | ||
| c | LFO Frequency [Hz] | 0.02...20.00 Sets | the speed of the LFO | |
| Src Off...Tempo | Selects the modulation source used for both LFO speed and step speed | |||
| Amt | -20.00...+20.00 | Sets the modulation amount of LFO speed | ||
| d | LFO Step Freq [Hz] | 0.05...50.00 | Sets the LFO step speed (speed that changes in steps) | |
| Step Amt | -50.00...+50.00 | Sets the modulation amount of LFO step speed | ||
| e | MIDI Sync Off, On | When this is on, the LFO speed is set by BPM, Base Note, and Times, instead of Frequency | ||
| BPM | MIDI, 40.00...300.00 | MIDI syncs to the system tempo; 40–300 sets the tempo manually for this individual effect | ||
| Base Note r...w | Selects the type of notes that specify the LFO speed | |||
| Times x1...x32 | Sets the number of notes that specify the LFO speed | |||
| f | Step Base Note r...w | Selects the type of notes to specify the LFO step speed | ||
| Times x1...x32 | Sets the number of notes to specify the LFO step speed | |||
| g | Depth 0...100 | Sets the depth of LFO modulation | ||
| h | Feedback -100..+100 | Sets the feedback amount | ||
| High Damp [%] | 0...100 | Sets the feedback damping amount in the high range | ||
| i | Wet/Dry | -Wet, -1:99...Dry...99:1, Wet | Balance between the wet and dry signal | |
| Src Off...Tempo | Table, “Dynamic Modulation sources,” on page 330 | |||
| Amt -100...+100 | Amount of modulation source |
35: St. Env. Flanger (Stereo Envelope Flanger)
This Flanger uses an envelope generator for modulation. You will obtain the same pattern of flanging each time you play. You can also control the Flanger directly using the modulation source. flowchart
graph TD
    A["Left"] --> B["Flanger"]
    B --> C["FFX Amt"]
    C --> D["FFX Amt"]
    D --> E["FFX Amt"]
    E --> F["FFX Amt"]
    F --> G["FFX Amt"]
    G --> H["FFX Amt"]
    H --> I["FFX Amt"]
    I --> J["FFX Amt"]
    J --> K["FFX Amt"]
    K --> L["FFX Amt"]
    L --> M["FFX Amt"]
    M --> N["FFX Amt"]
    N --> O["FFX Amt"]
    O --> P["FFX Amt"]
    P --> Q["FFX Amt"]
    Q --> R["FFX Amt"]
    R --> S["FFX Amt"]
    S --> T["FFX Amt"]
    T --> U["FFX Amt"]
    U --> V["FFX Amt"]
    V --> W["FFX Amt"]
    W --> X["FFX Amt"]
    X --> Y["FFX Amt"]
    Y --> Z["FFX Amt"]
    Z --> AA["FFX Amt"]
    AA --> AB["FFX Amt"]
    AB --> AC["FFX Amt"]
    AC --> AD["FFX Amt"]
    AD --> AE["FFX Amt"]
    AE --> AF["FFX Amt"]
    AF --> AG["FFX Amt"]
    AG --> AH["FFX Amt"]
    AH --> AI["FFX Amt"]
    AI --> AJ["FFX Amt"]
    AJ --> AK["FFX Amt"]
    AK --> AL["FFX Amt"]
    AL --> AM["FFX Amt"]
    AM --> AN["FFX Amt"]
    AN --> AO["FFX Amt"]
    AO --> AP["FFX Amt"]
    AP --> AQ["FFX Amt"]
    AQ --> AR["FFX Amt"]
    AR --> AS["FFX Amt"]
    AS --> AT["FFX Amt"]
    AT --> AU["FFX Amt"]
    AU --> AV["FFX Amt"]
    AV --> AW["FFX Amt"]
    AW --> AX["FFX Amt"]
    AX --> AY["FFX Amt"]
    AY --> AZ["FFX Amt"]
    AZ --> BA["FFX Amt"]
    BA --> BB["FFX Amt"]
    BB --> BC["FFX Amt"]
    BC --> BD["FFX Amt"]
    BD --> BE["FFX Amt"]
    BE --> BF["FFX Amt"]
    BF --> BG["FFX Amt"]
    BG --> BH["FFX Amt"]
    BH --> BI["FFX Amt"]
    BI --> BJ["FFX Amt"]
    BJ --> BK["FFX Amt"]
    BK --> BL["FFX Amt"]
    BL --> BM["FFX Amt"]
    BM --> BN["FFX Amt"]
    BN --> BO["FFX Amt"]
    BO --> BP["FFX Amt"]
    BP --> BQ["FFX Amt"]
    BQ --> BR["FFX Amt"]
    BR --> BS["FFX Amt"]
    BS --> BT["FFX Amt"]
    BT --> BU["FFX Amt"]
    BU --> BV["FFX Amt"]
    BV --> BW["FFX Amt"]
    BW --> BX["FFX Amt"]
    BX --> BY["FFX Amt"]
    BY --> BZ["FFX Amt"]
    BZ --> CA["FFX Amt"]
    CA --> CB["FFX Amt"]
    CB --> CC["FFX Amt"]
    CC --> CD["FFX Amt"]
    CD --> CE["FFX Amt"]
    CE --> CF["FFX Amt"]
    CF --> CG["FFX Amt"]
    CG --> CH["FFX Amt"]
    CH --> CI["FFX Amt"]
    CI --> CJ["FFX Amt"]
    CJ --> CK["FFX Amt"]
    CK --> CL["FFX Amt"]
    CL --> CM["FFX Amt"]
    CM --> CN["FFX Amt"]
    CN --> CO["FFX Amt"]
    CO --> CP["FFX Amt"]
    CP --> CQ["FFX Amt"]
    CQ --> CR["FFX Amt"]
    CR --> CS["FFX Amt"]
    CS --> CT["FFX Amt"]
    CT --> CU["FFX Amt"]
    CU --> CV["FFX Amt"]
    CV --> CW["FFX Amt"]
    CW --> CX["FFX Amt"]
    CX --> CY["FFX Amt"]
    CY --> CZ["FFX Amt"]
    CZ --> DA["FFX Amt"]
    DA --> DB["FFX Amt"]
    DB --> DC["FFX Amt"]
    DC --> DD["FFX Amt"]
    DD --> DE["FFX Amt"]
    DE --> DF["FFX Amt"]
    DF --> DG["FFX Amt"]
    DG --> DH["FFX Amt"]
    DH --> DI["FFX Amt"]
    DI --> DJ["FFX Amt"]
    DJ --> DK["FFX Amt"]
    DK --> DL["FFX Amt"]
| a | L Dly Bottom [msec] | 0.0...50.0 | Sets the lower limit of the left-channel delay time | |
| L Dly Top [msec] | 0.0...50.0 | Sets the upper limit of the left-channel delay time | ||
| b | R Dly Bottom [msec] | 0.0...50.0 | Sets the lower limit of the right-channel delay time | |
| R Dly Top [msec] | 0.0...50.0 | Sets the upper limit of the right-channel delay time | ||
| c | Sweep Mode EG, D-mod | Determines whether the flanger is controlled by the envelope generator or by the modulation source | ||
| Src Off...Tempo | Selects the modulation source that triggers the EG (when Sweep Mode = EG), or the modulation source that causes the flanger to sweep (when Sweep Mode = D-mod) | |||
| d | EG Attack | 1...100 Sets the EG attack speed | ||
| EG Decay | 1...100 Sets the EG decay speed | |||
| e F | Feedback -100...+ | 100 | Sets the feedback amount | |
| f | High Damp [%] | 0...100 | Sets the feedback damping amount in the high range | |
| g | Wet/Dry | -Wet, -1:99...Dry...99:1,Wet | Balance between the wet and dry signal | |
| Src Off...Tempo | Table, “Dynamic Modulation sources,” on page 330 | |||
| Amt -100...+100 | Amount of modulation source | |||
c: Sweep Mode
c: Src
This parameter switches the flanger control mode. With “Sweep Mode” = EG, the flanger will sweep using the envelope generator. This envelope generator is included in the envelope flanger, and not related to the Pitch EG, Filter EG, or Amp EG. The “Src” parameter selects the source that starts the envelope generator. If you select, for example, Gate, the envelope generator will start when the note-on message is received. When “Sweep Mode” = D-mod, the modulation source can control the flanger directly. Select the modulation source using the “Src” parameter. MIDI The effect is off when a value for the modulation source specified for the "Src" parameter is smaller than 64, and the effect is on when the value is 64 or higher. The Envelope Generator is triggered when the value changes from 63 or smaller to 64 or higher.d: EG Attack
d: EG Decay
Attack and Decay speed are the only adjustable parameters on this EG.36: Stereo Phaser
This effect creates a swell by shifting the phase. It is very effective on electric piano sounds. You can add spread to the sound by offsetting the phase of the left and right LFOs from each other. flowchart
graph TD
    A["Stereo In - Stereo Out"] --> B["Left"]
    B --> C["Phaser"]
    C --> D["High Damp"]
    D --> E["FX Amt"]
    F["Right"] --> G["Phaser"]
    G --> H["LFO Phase"]
    H --> I["LFO Shape"]
    I --> J["LFO: Trl / Sine"]
    J --> K["FX Amt"]
    C --> L["Resonance"]
    L --> M["High Damp"]
    M --> N["FX Amt"]
| a | LFO Waveform | Triangle, Sine Selects the LFO Waveform | |
| LFO Shape -100 | ...+100 | Changes the curvature of the LFO Waveform | |
| b | LFO Phase [degree] | -180...+180 | Sets the LFO phase difference between the left and right |
| c | LFO Frequency [Hz] | 0.02...20.00 Sets | the speed of the LFO |
| Src Off...Tempo | Selects a modulation source for LFO speed | ||
| Amt | -20.00...+20.00 | Sets the modulation amount of LFO speed | |
| d | MIDI Sync Off, On | When this is on, the LFO speed is set by BPM, Base Note, and Times, instead of Frequency | |
| BPM | MIDI, 40.00...300.00 | MIDI syncs to the system tempo; 40–300 sets the tempo manually for this individual effect | |
| Base Note r...w | Selects the type of notes that specify the LFO speed | ||
| Times x1...x32 | Sets the number of notes that specify the LFO speed | ||
| e | Manual 0...100 | Sets the frequency to which the effect is applied | |
| Src Off...Tempo | Selects the modulation source for the LFO modulation | ||
| Amt -100...+100 | Sets the modulation amount of the LFO modulation | ||
| f | Depth 0...100 Sets the depth of LFO modulation | ||
| Src Off...Tempo | Selects the modulation source for the LFO modulation depth | ||
| Amt -100...+100 | Sets the modulation amount of the LFO modulation depth | ||
| h | Resonance -100...+100 | Sets the resonance amount | |
| High Damp [%] | 0...100 | Sets the resonance damping amount in the high range | |
| j | Wet/Dry | -Wet, -1:99...Dry...99:1,Wet | Balance between the wet and dry signal |
| Src Off...Tempo | Table, “Dynamic Modulation sources,” on page 330 | ||
| Amt -100...+100 | Amount of modulation source | ||
h: Resonance
i: Wet/Dry
The peak shape of the positive and negative Feedback value is different. The harmonics will be emphasized when the effect sound is mixed with the dry sound, if you set a positive value for both “Resonance” and “Wet/Dry”, and if you set a negative value for both “Resonance” and “Wet/Dry”.h: High Damp [%]
This parameter sets the amount of damping of the resonance in the high range. Increasing the value will cut high-range harmonics.37: St. Random Phaser (Stereo Random Phaser)
This is a stereo phaser. The effect uses a step-shape waveform and random LFO for modulation, creating a unique phasing effect. flowchart
graph TD
    A["Stereo In - Stereo Out"] --> B["Left"]
    B --> C["Phaser"]
    C --> D["FX Amt"]
    C --> E["Resonance"]
    E --> F["High Damp"]
    F --> G["Phaser"]
    G --> H["LFO Phase"]
    H --> I["FX Amt"]
    H --> J["LFO: Step-Tri/Random"]
    J --> K["Right"]
| a | LFO Waveform | Step-Tri, Step-Sin, Random | Selects the LFO Waveform | |
| LFO Phase [degree] | -180...+180 | Sets the LFO phase difference between the left and right | ||
| b | LFO Frequency [Hz] | 0.02...20.00 Sets | the speed of the LFO | |
| Src Off...Tempo | Selects the modulation source commonly used for LFO speed and step speed | |||
| Amt | -20.00...+20.00 | Sets the modulation amount of LFO speed | ||
| c | LFO Step Freq [Hz] | 0.05...50.00 Sets | the LFO step speed | |
| Amt | -50.00...+50.00 | Sets the modulation amount of LFO step speed | ||
| d | MIDI Sync Off, On | When this is on, the LFO speed is set by BPM, Base Note, and Times, instead of Frequency | ||
| BPM | MIDI, 40.00...300.00 | MIDI syncs to the system tempo; 40–300 sets the tempo manually for this individual effect | ||
| Base Note r...w | Selects the type of notes that specify the LFO speed | |||
| Times x1...x32 | Sets the number of notes that specify the LFO speed | |||
| e | Step Base Note | r...w | Selects the type of notes to specify the LFO step speed | |
| Times x1...x32 | Sets the number of notes to specify the LFO step speed | |||
| f | Manual 0...100 | Sets the frequency to which the effect is applied | ||
| Src Off...Tempo | Selects the modulation source for the LFO modulation | |||
| Amt -100...+100 | Sets the modulation amount of the LFO modulation | |||
| g | Depth 0...100 Sets the depth of LFO modulation | |||
| h | Resonance -100...+100 | Sets the resonance amount | ||
| High Damp [%] | 0...100 | Sets the resonance damping amount in the high range | ||
| i | Wet/Dry | -Wet, -1:99...Dry...99:1,Wet | Balance between the wet and dry signal | |
| Src Off...Tempo | Table, “Dynamic Modulation sources,” on page 330 | |||
| Amt -100...+100 Amount of modulation source | ||||
38: St. Env. Phaser
(Stereo Envelope Phaser)
This stereo phaser uses an envelope generator for modulation. You will obtain the same pattern of phasing each time you play. You can also control the Phaser directly using the modulation source. flowchart
graph TD
    A["Left"] --> B["Phaser"]
    B --> C["Resonance"]
    C --> D["High Damp"]
    D --> E["FX Amt"]
    F["Right"] --> G["Phaser"]
    G --> H["FX Amt"]
    I["D-mod"] --> J["EG Attack/Decay"]
    J --> K["Sweep Mode"]
    K --> L["EG"]
    M["Left"] --> N["FX Amt"]
    O["Right"] --> P["FX Amt"]
| a | L Manu Bottom | 0...100 | Sets the lower limit of the frequency range for the effect on the left channel | |
| L Manu Top 0...100 | Sets the upper limit of the frequency range for the effect on the left channel | |||
| b | R Manu Bottom | 0...100 | Sets the lower limit of the frequency range for the effect on the right channel | |
| R Manu Top 0...100 | Sets the upper limit of the frequency range for the effect on the right channel | |||
| c | Sweep Mode EG, D-mod | Determines whether the flanger is controlled by the envelope generator or by the modulation source | ||
| Src Off...Tempo | Selects the modulation source that triggers the EG (when EG is selected for Sweep Mode), or modulation source that causes the flanger to sweep (when D-mod is selected for Sweep Mode) | |||
| d | EG Attack 1...100 | Sets the EG attack speed | ||
| EG Decay 1...100 | Sets the EG decay speed | |||
| e | Resonance -100...+100 | Sets the resonance amount | ||
| f | High Damp [%] 0...100 | Sets the resonance damping amount in the high range | ||
| g | Wet/Dry | -Wet, -1:99...Dry...99:1,Wet | Balance between the wet and dry signal | |
| Src Off...Tempo | Table, “Dynamic Modulation sources,” on page 330 | |||
| Amt -100...+100 | Amount of modulation source | |||
Modulation and Pitch Shift (Mod./P.Shift)
39: Stereo Vibrato
This effect causes the pitch of the input signal to shimmer. Using the AutoFade allows you to increase or decrease the shimmering speed. flowchart
graph TD
    A["Left"] --> B["Vibrato"]
    B --> C["Vibrato"]
    C --> D["FX Amt"]
    E["Right"] --> F["LFO: Tri / Sine"]
    F --> G["LFO Shape"]
    G --> H["Fade-In Delay"]
    H --> I["LFO Frequency"]
    J["AutoField"] -.-> H
    K["FX Amt"] -.-> B
| a A | UTOFADE Src Off...Tempo | Selects the modulation source that starts AutoFade | ||
| b | Fade-In Delay [msec] | 00...2000 | Sets the fade-in delay time | |
| Fade-In Rate | 1...100 | Sets the rate of fade-in | ||
| c | LFO Waveform | Triangle, Sine | Selects the LFO Waveform | |
| LFO Shape | -100...+100 | Changes the curvature of the LFO Waveform | ||
| d | LFO Frequency Mod | D-mod, AUTOFADE | Switches between D-mod and AUTOFADE for the LFO frequency modulation | |
| e | LFO Frequency [Hz] | 0.02...20.00 | Sets the speed of the LFO | |
| Src Off...Tempo | Selects a modulation source for LFO speed | |||
| Amt | -20.00...+20.00 | Sets the modulation amount of LFO speed | ||
| f | MIDI Sync | Off, On | When this is on, the LFO speed is set by BPM, Base Note, and Times, instead of Frequency | |
| BPM | MIDI, 40.00...300.00 | MIDI syncs to the system tempo; 40–300 sets the tempo manually for this individual effect | ||
| Base Note | r...w | Selects the type of notes that specify the LFO speed | ||
| Times | x1...x32 | Sets the number of notes that specify the LFO speed | ||
| g | Depth | 0...100 | Sets the depth of LFO modulation | |
| Src Off...Tempo | Selects the modulation source of the LFO modulation depth | |||
| Amt -100...+100 | Sets the modulation amount of the LFO modulation depth | |||
| h | Wet/Dry | Dry, 1:99...99:1, Wet | Balance between the wet and dry signal | |
| Src Off...Tempo | Table, “Dynamic Modulation sources,” on page 330 | |||
| Amt -100...+100 | Amount of modulation source | |||
flowchart
graph TD
    A["Gate1 Signal"] --> B["Note On"]
    B --> C["All Note Off"]
    C --> D["LFO Frequency: 1.0+3.0=4.0Hz"]
    D --> E["Fade-In Rate"]
    E --> F["Fade-In Dealy"]
    F --> G["LFO Frequency: 1.0Hz"]
    G --> H["Source=Gate1LFO Freq. Mod=AUTOFADE; LFO Frequency[Hz"]=1.0]
    H --> I["Amount=+3.0"]
40: St. Auto Fade Mod.
(Stereo Auto Fade Modulation)
This stereo chorus/flanger effect enables you to control the LFO speed and effect balance using auto fade, and you can spread the sound by offsetting the phase of the left and right LFOs from each other. flowchart
graph TD
    A["Stereo In - Stereo Out"] --> B["Left"]
    B --> C["Delay"]
    C --> D["Feedback"]
    D --> E["High Damp"]
    E --> F["LFO Phase"]
    F --> G["LFO Shape"]
    G --> H["AutoFade"]
    H --> I["LFO Frequency"]
    I --> J["LFO Amt"]
    C --> K["FX Amt"]
    F --> L["FX Amt"]
    style A fill:#f9f,stroke:#333
    style B fill:#ccf,stroke:#333
    style C fill:#cfc,stroke:#333
    style D fill:#fcc,stroke:#333
    style E fill:#cff,stroke:#333
    style F fill:#ffc,stroke:#333
    style G fill:#fcc,stroke:#333
    style H fill:#ffc,stroke:#333
    style I fill:#fcc,stroke:#333
    style J fill:#ffc,stroke:#333
| a | AUTOFADE Src Off...Tempo | Selects the modulation source that starts AutoFade | ||
| Fade-In Delay [msec] | 00...2000 | Sets the fade-in delay time | ||
| Rate 1...100 | Sets the rate of fade-in | |||
| b | LFO Frequency Mod | D-mod, AUTOFADE | Switches between D-mod and AUTOFADE for the LFO frequency modulation | |
| Wet/Dry Mod | D-mod, AUTOFADE | Switches between D-mod and AUTOFADE for the effect balance modulation | ||
| c | LFO Waveform | Triangle, Sine Selects the LFO Waveform | ||
| LFO Shape -100 | ...+100 | Changes the curvature of the LFO Waveform | ||
| d | LFO Phase [degree] | -180...+180 | Sets the LFO phase difference between the left and right | |
| e | LFO Frequency [Hz] | 0.02...20.00 Sets the speed of the LFO | ||
| Src Off...Tempo | Selects a modulation source for LFO speed | |||
| Amt | -20.00... +20.00 | Sets the modulation amount of LFO speed | ||
| f | L Delay Time [msec] | 0.0...500.0 Sets the left channel delay time | ||
| R Delay Time [msec] | 0.0...500.0 Sets the right channel delay time | |||
| g | Depth | 0...200 Sets the depth of LFO modulation | ||
| h | Feedback | -100...+100 | Sets the feedback amount | |
| High Damp [%] | 0...100 | Sets the feedback damping amount in the high range | ||
| i | Wet/Dry | -Wet, -1:99...Dry...99:1 , Wet | Balance between the wet and dry signal | |
| Src Off...Tempo | Table, "Dynamic Modulation sources," on page 330 | |||
| Amt | -100...+100 | Amount of modulation source | ||
41: 2Voice Resonator
This effect resonates the input signal at a specified pitch. You can set the pitch, output level, and pan settings for two resonators individually. You can control the resonance intensity via an LFO. flowchart
graph TD
    A["FX Amt = 100: Mono In - Stereo Out / FX Amt = 0: Stereo In - Stereo Out"] --> B["Left"]
    B --> C["Trim"]
    C --> D["Resonator"]
    D --> E["High Damp"]
    E --> F["Level"]
    F --> G["Pan"]
    G --> H["FX Amt"]
    I["Right"] --> J["Trim"]
    J --> K["Resonator"]
    K --> L["High Damp"]
    L --> M["Level"]
    M --> N["Pan"]
    N --> O["FX Amt"]
    P["Dmod"] --> Q["Invert: On/Off"]
    R["LFO"] --> S["Control Mode"]
    T["Manual"] --> S
    S --> U["Pitch, Fine [cents"]]
| a | Control Mode | Manual, LFO, D-mod | Switches the controls of resonance intensity | |
| LFO/D-mod Invert | Off, On | Reverses the Voice 1 and 2 control when LFO/D-mod is selected | ||
| b | LFO Frequency [Hz] | 0.02...20.00 Sets | the speed of the LFO | |
| D-mod Src Off... | Tempo | Selects the modulation source that controls resonance intensity | ||
| c | MIDI Sync Off, On | When this is on, the LFO speed is set by BPM, Base Note, and Times, instead of Frequency | ||
| BPM | MIDI, 40.00...300.00 | MIDI syncs to the system tempo; 40-300 sets the tempo manually for this individual effect | ||
| Base Note r...w | Selects the type of notes that specify the LFO speed | |||
| Times x1...x32 | Sets the number of notes that specify the LFO speed | |||
| d | Mod. Depth -10 | 0...+100 | Sets the amount of resonance intensity control via LFO/D-mod | |
| Trim 0...100 Sets | the input level at the resonator | |||
| e | Voice1: Pitch C0...B8 Sets the voice1 Pitch for resonance | |||
| Fine [cents] -50...+50 | Fine-adjusts the voice 1 pitch for resonance | |||
| Level 0...100 Sets the Voice1 output level | ||||
| f | Voice1: Resonance | -100...+100 | Sets the intensity of resonance when Control Mode = Manual | |
| High Damp [%] | 0...100 | Sets the damping amount of resonant sound in the high range | ||
| Pan | L6...L1, C, R1...R6 | Sets the Voice1 stereo image | ||
| g | Voice2: Pitch | C0...B8 Sets the voice 2 Pitch for resonance | ||
| Fine [cents] -50...+50 | Fine-adjusts the voice 2 pitch for resonance | |||
| Level 0...100 Sets the Voice2 output level | ||||
| h | Voice2: Resonance | -100...+100 | Sets the intensity of resonance when Control Mode = Manual | |
| High Damp [%] | 0...100 | Sets the damping amount of resonant sound in the high range | ||
| Pan | L6...L1, C, R1...R6 | Sets the Voice2 stereo image | ||
| i | Wet/Dry | Dry, 1:99...99:1, Wet | Balance between the wet and dry signal | |
| Src | Off...Tempo | Table, “Dynamic Modulation sources,” on page 330 | ||
| Amt | -100...+100 | Amount of modulation source | ||
a: LFO/D-mod Invert
When “Control Mode” = LFO or D-mod, the controlled phase of either Voice 1 or 2 will be reversed. When the resonance pitch is set for Voice 1 (Resonance has a positive value), Voice 2 will resonate at a pitch an octave below (Resonance has a negative value). f: Voice 1: Pitch f: Fine [cents] h: Voice 2: Pitch h: Fine [cents] The Pitch parameter specifies the pitch of resonance by note name. The “Fine” parameter allows for fine adjustment in steps of cents. g: High Damp [%] i: High Damp [%] This sets the amount of damping amount for the high frequencies of the resonant sound. Lower values create a metallic sound with a higher range of harmonics.42: Doppler
This effect simulates the “Doppler effect” of with a changing pitch, similar to the siren of an passing ambulance. Mixing the effect sound with the dry sound will create a unique chorus effect. flowchart
graph TD
    A["FX Amt"] --> B["Doppler"]
    B --> C["Pan Depth"]
    C --> D["LFO"]
    D --> E["Trigger"]
    E --> F["LFO Mode = 1-Shot"]
    F --> G["Right"]
    G --> H["Left"]
    H --> I["FX Amt"]
    style A fill:#f9f,stroke:#333
    style B fill:#ccf,stroke:#333
    style C fill:#cfc,stroke:#333
    style D fill:#fcc,stroke:#333
    style E fill:#cff,stroke:#333
    style F fill:#ffc,stroke:#333
    style G fill:#fcc,stroke:#333
    style H fill:#ffc,stroke:#333
| a | LFO Mode Loop, 1-Shot Switches LFO operation mode | |||
| Src Off...Tempo | Selects the modulation source of LFO reset | |||
| b | L F O S y n c O f | Switches between LFO reset on and off when LFO Mode is set to Loop | ||
| c | LFO Frequency [Hz] | 0.02...20.00 Sets | the speed of the LFO | |
| Src Off...Tempo | Selects a modulation source for LFO speed | |||
| Amt | -20.00...+20.00 | Sets the modulation amount of LFO speed | ||
| d | MIDI Sync Off, On | When this is on, the LFO speed is set by BPM, Base Note, and Times, instead of Frequency | ||
| BPM | MIDI, 40.00...300.00 | MIDI syncs to the system tempo; 40–300 sets the tempo manually for this individual effect | ||
| Base Note r...w | Selects the type of notes that specify the LFO speed | |||
| Times x1...x32 | Sets the number of notes that specify the LFO speed | |||
| e | Pitch Depth 0...100 | Sets the pitch variation of the moving sound | ||
| Src Off...Tempo | Selects the modulation source of pitch variation | |||
| Amt -100...+100 | Sets the modulation amount of pitch variation | |||
| f | Pan Depth -100...+100 | Sets the panning of the moving sound | ||
| Src Off...Tempo | Selects the modulation source of panning | |||
| Amt -100...+100 | Sets the modulation amount of panning | |||
| g | Wet/Dry | Dry, 1:99...99:1, Wet | Balance between the wet and dry signal | |
| Src Off...Tempo | Table, “Dynamic Modulation sources,” on page 330 | |||
| Amt -100...+100 | Amount of | modulation source | ||
a: LFO Mode
a: Src
b: LFO Sync
The “LFO Mode” parameter switches LFO operation mode. When Loop is selected, the Doppler effect will be created repeatedly. If “LFO Sync” is set to On, the LFO will be reset when the modulation source specified with the “Src” parameter is turned on. When “LFO Mode” is set to 1-Shot, the Doppler effect is created only once when the modulation source specified in the “Src” field is turned on. At this time if you do not set the “Src” parameter, the Doppler effect will not be created, and no effect sound will be output. MDI The effect is off when a value for the modulation source specified for the "Src" parameter is smaller than 64, and the effect is on when the o v i valge \$s64 or higher. The Doppler effect is triggered when the value changes from 63 or smaller to 64 or higher.e: Pitch Depth
With the Doppler effect, the pitch is raised when the sound approaches, and the pitch is lowered when the sound goes away. This parameter sets this pitch variation.f: Pan Depth
This parameter sets the width of the stereo image of the effect sound. With larger values, the sound seems to come and go from much further away. With positive values, the sound moves from left to right; with negative values, the sound moves from right to left. 43: Scratch
This effect is applied by recording the input signal and moving the modulation source. It simulates the sound of scratches you can make using a turntable. flowchart
graph TD
    A["FX Amt = 100: Mono In - Mono Out / FX Amt = 0: Stereo In - Stereo Out"] --> B["Left"]
    B --> C["Scratch"]
    C --> D["Direct Mix"]
    D --> E["FX Amt"]
    F["Right"] --> G["D-mod Input"]
    G --> H["Envelope Select"]
    H --> I["D-mod"]
    I --> J["Rec Control"]
    J --> C
    K["Scratch"] --> L["FX Amt"]
| a | Scratch Source | Off...Tempo | Selects the modulation source for simulation control | |
| b | Response | 0...100 | Sets the speed of the response to the Scratch Src | |
| c | Envelope Select | D-mod, Input | Selects whether the start and end of recording is controlled via the modulation source or the input signal level | |
| Src Off...Tempo | Selects the modulation source that controls recording when Envelope Select is set to D-mod | |||
| d | Threshold 0...100 | Sets the recording start level when Envelope Select is set to Input | ||
| e | Response | 0...100 | Sets the speed of the response to the end of recording | |
| f | Direct Mix | Always On, Always Off, Cross Fade | Selects how a dry sound is mixed | |
| g | Wet/Dry | Dry, 1:99...99:1, Wet | Balance between the wet and dry signal | |
| Src Off...Tempo | Table , “Dynamic Modulation sources,” on page 330 | |||
| Amt -100...+100 | Amount of | modulation source |
a: Scratch Source
b: Response
The Scratch Source parameter enables you to select the modulation source that controls simulation. The value of the modulation source corresponds to the playback position. The Response parameter enables you to set the speed of the response to the modulation source. c: Envelope Select
c: Src
d: Threshold
When “Envelope Select” is set to D-mod, the input signal will be recorded only when the modulation source value is 64 or higher. When “Envelope Select” is set to Input, the input signal will be recorded only when its level is over the Threshold value. The maximum recording time is 2,730 msec. If this is exceeded, the recorded data will start being erased from the top.e: Response
This parameter enables you to set the speed of the response to the end of recording. Set a smaller value when you are recording a phrase or rhythm pattern, and set a higher value if you are recording only one note.f: Direct Mix
With Always On, a dry sound is usually output. With Always Off, dry sounds are not output. With Cross Fade, a dry sound is usually output, and it is muted only when scratching. Set Wet/Dry to 100 to use this parameter effectively.44: Grain Shifter
This effect cuts extremely short samples (“grains”) from the input signal waveform and plays them repeatedly, giving a mechanical character to the sound. flowchart
graph TD
    A["FX Amt = 100; Mono In - Mono Out / FX Amt = 0; Stereo In - Stereo Out"] --> B["Left"]
    B --> C["Grain Shifter"]
    C --> D["Sample Cycle"]
    D --> E["FX Amt"]
    F["Right"] --> G["LFO"]
    G --> H["Trigger"]
    H --> I["D mod"]
    I --> J["Trigger"]
    J --> K["FX Amt"]
| a | Duration 0...100 | Sets the duration | of the grain | |
| Src Off...Tempo | Selects the source that will modulate the duration of the grain | |||
| Amt -100...+100 | Sets the amount by which the grain duration will be modulated | |||
| b L | LFO Sync Src Off... | Tempo | Selects the modulation source that will reset the LFO | |
| c | LFO Sample Cycle [Hz] | 0.02...20.00 | Sets the frequency at which the grain will be switched | |
| Src Off...Tempo | Selects a modulation source for LFO speed | |||
| Amt | -20.00...+20.00 | Sets the modulation amount of LFO speed | ||
| d | MIDI Sync Off, On | When this is on, the LFO speed is set by BPM, Base Note, and Times, instead of Frequency | ||
| BPM | MIDI, 40.00...300.00 | MIDI syncs to the system tempo; 40–300 sets the tempo manually for this individual effect | ||
| Base Note r...w | Selects the type of notes that specify the LFO speed | |||
| Times x1...x32 | Sets the number of notes that specify the LFO speed | |||
| e | Wet/Dry | Dry, 1:99...99:1, Wet | Balance between the wet and dry signal | |
| Src Off...Tempo | Table , “Dynamic Modulation sources,” on page 330 | |||
| Amt -100...+100 | Amount of mod | ulation source | ||
a: Duration
c: LFO Sample Cycle [Hz]
Duration sets the length of the sampled grain, and the LFO Sample Cycle controls how often a new grain is sampled. In between Sample Cycles, the current grain is repeated continuously. 45: Stereo Tremolo
This effect modulates the volume level of the input signal. The effect is stereo, and offsetting the LFO of the left and right phases from each other produces a tremolo effect between left and right. flowchart
graph TD
    A["Stereo In - Stereo Out"] --> B["Tremolo"]
    C["Left"] --> B
    D["Right"] --> E["Tremolo"]
    F["LFD: Tri/Sin/Vintage/Up/Down"] --> G["LFO Shape"]
    H["LFO Phase"] --> I["Tremolo"]
    J["FX Amt"] --> K["Tremolo"]
    L["FX Amt"] --> M["Tremolo"]
    N["FX Amt"] --> O["Tremolo"]
| a | LFO Waveform | Triangle, Sine, Vintage, Up, Down | Selects the LFO Waveform | |
| LFO Shape -100...+100 | Changes the curvature of the LFO Waveform | |||
| b | LFO Phase [degree] | -180...+180 | Sets the LFO phase difference between the left and right | |
| c | LFO Frequency [Hz] | 0.02...20.00 Sets | the speed of the LFO | |
| Src Off...Tempo | Selects a modulation source for LFO speed | |||
| Amt | -20.00...+20.00 | Sets the modulation amount of LFO speed | ||
| d | MIDI Sync Off, On | When this is on, the LFO speed is set by BPM, Base Note, and Times, instead of Frequency | ||
| BPM | MIDI, 40.00...300.00 | MIDI syncs to the system tempo; 40-300 sets the tempo manually for this individual effect | ||
| Base Note r...w | Selects the type of notes that specify the LFO speed | |||
| Times x1...x32 | Sets the number of notes that specify the LFO speed | |||
| e | Depth 0...100 Sets the depth of LFO modulation | |||
| Src Off...Tempo | Selects the modulation source of the depth of modulation | |||
| Amt -100...+100 | Sets the modulation amount of the depth of modulation | |||
| f | Wet/Dry | Dry, 1:99...99:1, Wet | Balance between the wet and dry signal | |
| Src Off...Tempo | Table, "Dynamic Modulation sources," on page 330 | |||
| Amt -100...+100 | Amount of modulation source | |||
a: LFO Waveform
This parameter sets the basic shape of the LFO. The Vintage waveform models classic guitar-amp tremolo. b: LFO Phase [degree]
This parameter determines the difference between the left and right LFO phases. A higher value will simulate the auto-pan effect in which the sound is panned between left and right.46: St. Env. Tremolo (Stereo Envelope Tremolo)
This effect uses the input signal level to modulate a stereo tremolo (LFO volume modulation). For instance, you can create a tremolo effect that becomes deeper and faster as the input gets more quiet. flowchart
graph TD
    A["Stereo In - Stereo Out"] --> B["Left"]
    B --> C["Tremolo"]
    C --> D["FX Amt"]
    E["Right"] --> F["Tremolo"]
    F --> G["LFO Phase"]
    G --> H["FX Amt"]
    I["Envelope"] --> J["Envelope Sens"]
    J --> K["LFO Shape"]
    K --> L["LFO: Tri/Sin/Vintage"]
    L --> M["End"]
    N["End"] --> O["End"]
| a | Envelope Sens | 0...100 | Sets the envelope's sensitivity to the input signal | |
| Envelope Shape | -100...+100 Sets | the envelope's curvature | ||
| b | LFO Waveform | Triangle, Sine, Vintage | Selects the LFO Waveform | |
| LFO Shape -100 | ...+100 | Changes the curvature of the LFO Waveform | ||
| c | LFO Phase [degree] | -180...+180 | Sets the LFO phase difference between the left and right | |
| d | LFO Frequency [Hz] | 0.02...20.00 | Sets the speed of the LFO | |
| Envelope Amount [Hz] | -20.00... +20.00 | Sets the amount added to or subtracted from the Frequency when the envelope is at maximum | ||
| e | Depth | 0...100 Sets the initial amount of tremolo | ||
| Envelope Amount | -100...+100 | Sets the amount added to or subtracted from the Depth when the envelope is at maximum | ||
| f | Wet/Dry | Dry, 1:99...99:1, Wet | Balance between the wet and dry signal | |
| Src Off...Tempo | Table, "Dynamic Modulation sources," on page 330 | |||
| Amt -100...+100 | Amount of modulation source | |||
d: LFO Frequency [Hz]
d: Envelope Amount [Hz]
e: Depth
e: Envelope Amount
The graphic below shows an example of tremolo modulation with negative modulation of both Depth and Frequency. At the start of the note, the input is at maximum volume. This slows down the LFO Frequency to 1.0Hz, but also modulates the Depth to 0–so the tremolo doesn't have any effect. As the input volume dies down, the Frequency speeds up; the Depth also increases, making the tremolo effect increasingly audible. When the input volume approaches silence, the Depth is at its maximum (100) and Frequency is at 8Hz. line
| Time | Level | |------|-------| | 0 | 8.0 | | 100 | -7.0 | | 200 | -100 |47: Stereo Auto Pan
This is a stereo-in, stereo-out auto-panner. The Phase and Shape parameters lets you create various panning effects, such as making the left and right inputs seem to chase each other around the stereo field. flowchart
graph TD
    A["Left"] --> B["Pan"]
    B --> C["FX Amt"]
    D["Right"] --> E["Pan"]
    E --> F["FX Amt"]
    G["LFO: Tri / Sin"] --> H["LFO Shape"]
    I["LFO Phase"] -.-> E
    J["Depth"] -.-> E
| a | LFO Waveform Triangle, Sine Selects the LFO Waveform | |||
| LFO Shape -100...+100 | Changes the curvature of the LFO Waveform | |||
| b | LFO Phase [degree] | -180...+180 | Sets the LFO phase difference between the left and right | |
| c | LFO Frequency [Hz] | 0.02...20.00 Sets | the speed of the LFO | |
| Src Off...Tempo | Selects a modulation source for LFO speed | |||
| Amt | -20.00... +20.00 | Sets the modulation amount of LFO speed | ||
| d | MIDI Sync Off, On | When this is on, the LFO speed is set by BPM, Base Note, and Times, instead of Frequency | ||
| BPM | MIDI, 40.00... 300.00 | MIDI syncs to the system tempo; 40-300 sets the tempo manually for this individual effect | ||
| Base Note r...w | Selects the type of notes that specify the LFO speed | |||
| Times x1...x32 | Sets the number of notes that specify the LFO speed | |||
| e | Depth 0...100 Sets the depth of LFO modulation | |||
| Src Off...Tempo | Selects the modulation source of the depth of modulation | |||
| Amt -100...+100 | Sets the modulation amount of the depth of modulation | |||
| f | Wet/Dry | Dry, 1:99...99:1, Wet | Balance between the wet and dry signal | |
| Src Off...Tempo | Table, "Dynamic Modulation sources," on page 330 | |||
| Amt -100...+100 Amount of modulation source | ||||
a: LFO Shape
You can change the panning curve by modifying the LFO's Shape.b: LFO Phase [degree]
This determines the phase difference between the left and right LFOs. When you gradually change the value away from 0, the sounds from the left and right channels will seem to chase each other around. If you set the parameter to +180 or -180, the sounds from each channel will cross over each other. You'll only hear the effect of this parameter if the input is true stereo, with different signals in the left and right channels. flowchart
graph TD
    subgraph "LFO Phase = 0 degrees"
        A1["L-In"] --> B1["R-In"]
        B1 --> C1["L-In"]
        C1 --> D1["R-In"]
        D1 --> E1["L-In"]
        E1 --> F1["R-In"]
        F1 --> G1["L-In"]
    end

    subgraph "LFO Phase = 90 degrees"
        A2["L-In"] --> B2["R-In"]
        B2 --> C2["L-In"]
        C2 --> D2["R-In"]
        D2 --> E2["L-In"]
        E2 --> F2["R-In"]
        F2 --> G2["L-In"]
    end

    subgraph "LFO Phase = 180 degrees"
        A3["L-In"] --> B3["L-In"]
        B3 --> C3["R-In"]
        C3 --> D3["L-In"]
        D3 --> E3["L-In"]
        E3 --> F3["R-In"]
        F3 --> G3["L-In"]
    end

    Left --> Center
    Center --> Right
    Right --> Output
    style Left fill:#f9f,stroke:#333
    style Center fill:#f9f,stroke:#333
    style Right fill:#f9f,stroke:#333
48: St. Phaser + Trml (Stereo Phaser + Tremolo)
This effect combines a stereo phaser and tremolo, with linked LFOs. Swelling phaser modulation and tremolo effects synchronize with each other, creating a soothing modulation effect particularly suitable for electric piano. flowchart
graph TD
    A["Stereo In - Stereo Out"] --> B["Left"]
    B --> C["Phaser"]
    C --> D["Tremolo"]
    D --> E["FX Amt"]
    F["Right"] --> G["Phaser"]
    G --> H["Tremolo"]
    H --> I["FX Amt"]
    J["LFO Type"] --> K["LFO"]
    K --> L["LFO Phase"]
    L --> M["LFO Shape"]
    M --> N["LFO Phase"]
    O["Resonance"] --> P["Phaser FX Amt"]
    P --> Q["Tremolo"]
    Q --> R["FX Amt"]
| a | Type | Phs - Trml, ... Phs LR - Trml LR | Selects the type of the tremolo and phaser LFOs Phaser - Tremolo, Phaser - Tremolo Spin, Phaser - Tremolo LR, Phaser LR - Tremolo, Phaser LR - Tremolo Spin, Phaser LR - Tremolo LR | |
| LFO Phase [degree] | -180...+180 | Sets the phase difference between the tremolo and phaser LFOs | ||
| b | LFO Frequency [Hz] | 0.02...20.00 Sets | the speed of the LFO | |
| Src | Off...Tempo | Selects a modulation source for LFO speed | ||
| Amt | -20.00... +20.00 | Sets the LFO speed modulation amount | ||
| c | MIDI Sync | Off, On | When this is on, the LFO speed is set by BPM, Base Note, and Times, instead of Frequency | |
| BPM | MIDI, 40.00... 300.00 | MIDI syncs to the system tempo; 40-300 sets the tempo manually for this individual effect | ||
| Base Note | r...w | Selects the type of notes that specify the LFO speed | ||
| Times | x1...x32 | Sets the number of notes that specify the LFO speed | ||
| d | Phaser Manual 0 | ...100 | Sets the phaser frequency range | |
| Resonance | -100...+100 | Sets the phaser resonance amount | ||
| e | Phaser Depth | 0...100 Sets the | phaser modulation depth | |
| Src | Off...Tempo | Selects the modulation source for the phaser modulation depth | ||
| Amt | -100...+100 | Sets the modulation amount for the phaser modulation depth | ||
| f | Phaser Wet/ Dry | -Wet,-2: 98...Dry...2:98, Wet | Sets the balance between the phaser effect and dry sounds | |
| g | Tremolo Shape | -100...+100 | Sets the degree of the tremolo LFO shaping | |
| h | Tremolo Depth | 0...100 Sets the | tremolo modulation depth | |
| Src | Off...Tempo | Selects the modulation source for the tremolo modulation depth | ||
| Amt | -100...+100 | Sets the modulation amount of the tremolo modulation depth | ||
| i | Wet/Dry | Dry, 1:99...99:1, Wet | Balance between the wet and dry signal | |
| Src Off...Tempo | Table, "Dynamic Modulation sources," on page 330 | |||
| Amt -100...+100 | Amount of modulation source | |||
a: Type
a: LFO Phase [degree]
Select the type of phaser LFO and tremolo LFO for the "Type" parameter. How the effect sound moves or rotates depends on the type of LFO. Selecting "LFO Phase" enables you to offset the timing of the phaser peak and control a subtle movement and rotation of the sound.f: Phaser Wet/Dry
i: Wet/Dry
PHASER Wet/Dry sets the balance between the phaser output and the dry sound. OUTPUT Wet/Dry sets the balance between the final phaser and tremolo output level and the dry sound.49: St. Ring Modulator (Stereo Ring Modulator)
This effect creates a metallic sound by applying the oscillators to the input signal. Use the LFO or Dynamic Modulation to modulate the oscillator to create a radical modulation. Matching the oscillator frequency with a note number will modulation effect in specific key ranges. flowchart
graph TD
    A["Left Stereo In - Stereo Out"] --> B["Pre LPF"]
    B --> C["Ring Modulator"]
    C --> D["FX Amt"]
    E["Right"] --> F["Fixed Frequency"]
    F --> G["Sine Oscillator"]
    G --> H["Pitch"]
    H --> I["FX Amt"]
    J["LFO"] --> K["Note Offset, Fine"]
    K --> L["Note (Key Follow)"]
    L --> M["Osc Mode"]
    M --> N["Fixed"]
    N --> O["Sine Oscillator"]
    O --> P["Pitch"]
    P --> Q["FX Amt"]
| a | OSC Mode | Fixed, Note(Key Follow) | Switching between specifying the oscillator frequency and using a note number | |
| Pre LPF 0...100 | Sets the damping amount of the high range input to the ring modulator | |||
| b | Fixed Frequency [Hz] | 0...12.00k | Sets the oscillator frequency when OSC Mode is set to Fixed | |
| Src Off...Tempo | Selects the modulation source for the oscillator frequency when OSC Mode is set to Fixed | |||
| Amt | -12.00k...+12.00k | Sets the modulation amount of the oscillator frequency when OSC Mode is set to Fixed | ||
| c | Note Offset -48...+48 | Sets the pitch difference from the original note when OSC Mode is set to Note (Key Follow) | ||
| Note Fine -100...+100 Fine-adjusted | the oscillator frequency | |||
| d | LFO Frequency [Hz] | 0.02...20.00 Sets | the speed of the LFO | |
| Src Off...Tempo | Selects a modulation source for LFO speed | |||
| Amt | -20.00...+20.00 | Sets the modulation amount of LFO speed | ||
| e | MIDI Sync Off, On | When this is on, the LFO speed is set by BPM, Base Note, and Times, instead of Frequency | ||
| BPM | MIDI, 40.00...300.00 | MIDI syncs to the system tempo; 40-300 sets the tempo manually for this individual effect | ||
| Base Note r...w | Selects the type of notes that specify the LFO speed | |||
| Times | x1...x32 | Sets the number of notes that specify the LFO speed | ||
| f | LFO Depth | 0...100 | Sets the depth of LFO modulation for the oscillator frequency | |
| Src Off...Tempo | Selects the modulation source of the depth of modulation | |||
| Amt -100...+100 | Sets the modulation amount of the depth of modulation | |||
| g | Wet/Dry | Dry, 1:99...99:1, Wet | Balance between the wet and dry signal | |
| Src Off...Tempo | Table, "Dynamic Modulation sources," on page 330 | |||
| Amt -100...+100 | Amount of modulation source | |||
a: OSC Mode
This parameter determines whether or not the oscillator frequency follows the note number.a: Pre LPF
This parameter enables you to set the damping amount of the high range sound input to the ring modulator. If the input sound contains lots of harmonics, the effect may sound dirty. So produce a ringb: Fixed Frequency [Hz]
This parameter sets the oscillator frequency when "OSC Mode" is set to Fixed.c: Note Offset
c: Note Fine
These parameters for the oscillator are used when “OSC Mode” is set to Note (Key Follow). The “Note Offset” sets the pitch difference from the original note in semitone steps. The “Note Fine” parameter fine-adjusts the pitch in cent steps. Matching the oscillator frequency with the note number produces a ring modulation effect in the correct key.50: Detune
Using this effect, you can obtain a detune effect that offsets the pitch of the effect sound slightly from the pitch of the input signal. Compared to the chorus effect, a more natural sound thickness will be created. flowchart
graph LR
    Left["Left"] -->|Input Level| Detune["Detune"]
    Right["Right"] -->|Input Level| Detune
    Detune --> Delay["Delay"]
    Delay --> HighDamp["High Damp"]
    HighDamp --> Feedback["Feedback"]
    Feedback --> FXAmt["FX Amt"]
    FXAmt -->|FX Amt = 100: Mono In - Mono Out / FX Amt = 0: Stereo In - Stereo Out| FXAmt
| a | Pitch Shift [cents] | -100...+100 | Sets the pitch difference from the input signal | |
| Src Off...Tempo | Selects a modulation source for pitch shift | |||
| Amt -100...+100 | Sets the modulation amount for pitch shift | |||
| b | Delay Time [msec] | 0...1000 Sets the delay time | ||
| c | Feedback -100...+100 Sets the feedback amount | |||
| High Damp [%] | 0...100 | Sets the damping amount in the high range | ||
| d | Input Level Dmod [%] | -100...+100 | Sets the modulation amount of the input level | |
| Src Off...Tempo | Selects the modulation source for the input level | |||
| e | Wet/Dry | Dry, 1:99...99:1, Wet | Balance between the wet and dry signal | |
| Src Off...Tempo | Table, "Dynamic Modulation sources," on page 330 | |||
| Amt -100...+100 Amount of modulation source | ||||
d: Input Level Dmod [%]
d: Src This parameter sets the dynamic modulation of the input level. line
| Input Level | D-mod | Lower Value | |---|---|---| | 0 | 0 | 0 | | 1 | 1 | 1 | | 2 | 2 | 2 | | 3 | 3 | 3 | | 4 | 4 | 4 | | 5 | 5 | 5 | | 6 | 6 | 6 | | 7 | 7 | 7 | | 8 | 8 | 8 | | 9 | 9 | 9 | | 10 | 10 | 10 | The chart displays two line graphs: the left graph shows a linear relationship between Input Level and D-mod, and the right graph shows a linear relationship between Input Level and D-mod. Both charts share the same axes: 'X' (ranging from -1 to 1) and 'Y' (ranging from -1 to 1). The lines are labeled with mathematical notations such as 'x1.0' and 'x0.5'.51: Pitch Shifter
This effect changes the pitch of the input signal. You can select from three types: Fast (quick response), Medium, and Slow (preserves tonal quality). You can also create an effect in which the pitch is gradually raised (or dropped) using the delay with feedback. flowchart
graph TD
    A["FX Amt = 100; Mono In - Mono Out / FX Amt = 0; Stereo In - Stereo Out"] --> B["Input Level"]
    B --> C["Pitch Shifter"]
    C --> D["Delay"]
    D --> E["High Damp"]
    E --> F["FX Amt"]
    G["Input Level"] --> C
    H["Right"] --> I["Feedback Position"]
    I --> D
    J["Pre"] --> C
    K["Post"] --> D
    L["Feedback"] --> D
| a | M o d e | Slow, Medium, Fast | Switches Pitch Shifter mode | |
| b | Pitch Shift [1/2tone] | -24...+24 | Sets the pitch shift amount by steps of a semitone | |
| Src Off...Tempo | Selects the modulation source of pitch shift amount | |||
| Amt -24...+24 | Sets the modulation amount of pitch shift amount | |||
| c | Fine [cents] -100...+100 | Sets the pitch shift amount by steps of a cent | ||
| Amt -100...+100 | Sets the modulation amount of pitch shift amount | |||
| d | Delay Time [msec] | 0...2000 Sets the delay time | ||
| e | Feedback Position | Pre, Post Switches the feedback connection | ||
| f | Feedback -100..+100 | Sets the feedback amount | ||
| High Damp [%] | 0...100 | Sets the damping amount in the high range | ||
| g | Input Level Dmod [%] | -100...+100 | Sets the modulation amount of the input level | |
| Src Off...Tempo | Selects the modulation source for the input level | |||
| h | Wet/Dry | Dry, 1:99...99:1, Wet | Balance between the wet and dry signal | |
| Src Off...Tempo | Table , "Dynamic Modulation sources," on page 330 | |||
| Amt -100...+100 Amount of modulation source | ||||
a: Mode
This parameter switches the pitch shifter operating mode. With Slow, tonal quality will not be changed too much. With Fast, the effect becomes a Pitch Shifter that has a quick response, but may change the tone. Medium is in-between these two. If you do not need to set too much pitch shift amount, set this parameter to Slow. If you wish to change the pitch significantly, use Fast.b: Pitch Shift [1/2tone]
b: Src b:Amt c: Fine [cents] c: Amt The amount of pitch shift will use the value of the Pitch Shift plus the Fine value. The amount of modulation will use the b: Amt value plus the c: Amt. The same Modulation Source is used for both Pitch Shift and Fine.e: Feedback Position
f: Feedback When Feedback Position is set to Pre, the pitch shifter output is again input to the pitch shifter. Therefore, if you specify a higher value for the Feedback parameter, the pitch will be raised (or lowered) more and more each time feedback is repeated. If Feedback Position is set to Post, the feedback signal will not pass through the pitch shifter again. Even if you specify a higher value for the Feedback parameter, the pitch-shifted sound will be repeated at the same pitch.52: Pitch Shifter BPM
This pitch shifter enables you to set the delay time to match the song tempo. flowchart
graph TD
    A["Input Level"] --> B["Pitch Shifter"]
    B --> C["Delay"]
    C --> D["High Damp"]
    D --> E["FX Amt"]
    F["BPM"] --> G["Base Note x Times"]
    H["Pre"] --> I["Feedback Position"]
    J["Post"] --> K["Feedback"]
    L["FX Amt = 100: Mono In - Mono Out / FX Amt = 0: Stereo In - Stereo Out"]
    M["Left"] --> N["Input Level"]
    O["Right"] --> P["Temp"]
    Q["FX Amt"] --> R["FX Amt"]
| a | M o d e | Slow, Medium, Fast | Switches Pitch Shifter mode | |
| b | Pitch Shift [1/2tone] | -24...+24 | Sets the pitch shift amount in steps of a semitone | |
| Src Off...Tempo | Selects the modulation source of pitch shift amount | |||
| Amt -24...+24 | Sets the modulation amount of pitch shift amount | |||
| c | Fine [cents] -100...+100 | Sets the pitch shift amount in steps of one cent | ||
| Amt -100...+100 | Sets the modulation amount of pitch shift amount | |||
| d | BPM | MIDI, 40.00...300.00 | MIDI syncs to the system tempo; 40–300 sets the tempo manually for this individual effect | |
| Time Over? ---, OVER! | Displays an error message when the delay time exceeds the upper limit | |||
| e | Delay Base Note | r...w | Selects the type of notes to specify the delay time | |
| Times x1...x32 | Sets the number of notes to specify the delay time | |||
| f | Feedback Position | Pre, Post | Switches the feedback connection | |
| g | Feedback -100...+100 | Sets the feedback amount | ||
| High Damp [%] | 0...100 | Sets the damping amount in the high range | ||
| h | Input Level Dmod [%] | -100...+100 | Sets the modulation amount of the input level | |
| Src Off...Tempo | Selects the modulation source for the input level | |||
| i | Wet/Dry | Dry, 1:99...99:1, Wet | Balance between the wet and dry signal | |
| Src Off...Tempo | Table , “Dynamic Modulation sources,” on page 330 | |||
| Amt -100...+100 | Amount of mod | ulation source | ||
d: BPM
e: Delay Base Note
e: Times
The delay time is the duration of “Times” number of “Delay Base Note” note values at the “BPM” tempo (or if “BPM” is set to MIDI, the tempo determined by MIDI Clock).d: Time Over?
You can set the delay time up to 5,290msec. If the delay time exceeds this limit, the error message "OVER!" appears on the display. Set the delay time parameters so that this message will not appear. "Time Over?" is only a display parameter.53: Pitch Shift Mod. (Pitch Shift Modulation)
This effect modulates the detuned pitch shift amount using an LFO, adding a clear spread and width to the sound by panning the effect sound and dry sound to the left and right. This is especially effective when the effect sound and dry sound output from stereo speakers are mixed. flowchart
graph TD
    A["Left"] --> B["Pitch Shifter"]
    C["Right"] --> B
    B --> D["FX Amt"]
    B --> E["Pan"]
    B --> F["LFO: Trl / Sqr"]
    style A fill:#f9f,stroke:#333
    style C fill:#f9f,stroke:#333
    style B fill:#ccf,stroke:#333
    style D fill:#cff,stroke:#333
    style E fill:#cff,stroke:#333
    style F fill:#cff,stroke:#333
| a | Pitch Shift [cents] | -100...+100 | Sets the pitch difference from the input signal | |
| b | LFO Waveform | Triangle, Square | Selects the LFO Waveform | |
| c | LFO Frequency [Hz] | 0.02...20.00 | Sets the speed of the LFO | |
| Src Off...Tempo | Selects a modulation source for LFO speed | |||
| Amt | -20.00... +20.00 | Sets the modulation amount of LFO speed | ||
| d | MIDI Sync | Off, On | When this is on, the LFO speed is set by BPM, Base Note, and Times, instead of Frequency | |
| BPM | MIDI, 40.00... 300.00 | MIDI syncs to the system tempo; 40–300 sets the tempo manually for this individual effect | ||
| Base Note | r...w | Selects the type of notes that specify the LFO speed | ||
| Times x1...x32 | Sets the number of notes that specify the LFO speed | |||
| e | Depth | -100...+100 | Sets the LFO modulation depth for pitch shift amount | |
| Src Off...Tempo | Selects the modulation source of the depth of modulation | |||
| Amt -100...+100 | Sets the modulation amount of the depth of modulation | |||
| f | Pan | L, 1 : 99...99 : 1, R | Sets the panning effect sound and dry sound separately | |
| g | Wet/Dry | Dry, 1:99...99:1, Wet | Balance between the wet and dry signal | |
| Src Off...Tempo | Table, “Dynamic Modulation sources,” on page 330 | |||
| Amt -100...+100 | Amount of modulation source | |||
a: Pitch Shift [cents] e: Depth
These parameters set the amount of pitch shift and amount of modulation by means of the LFO. line
Pitch Shift Mod - Pitch Shift / Depth | Pitch | Value | |---|---| | Higher | Peaks at 0° | | Lower | Peaks at 0° | | Original Pitch | Peaks at 0° | | Higher | Peaks at 15° | | Lower | Peaks at 15° | | Original Pitch | Peaks at 25° | | Higher | Peaks at 25° | | Lower | Peaks at 25° | | Original Pitch | Peaks at 35° | | Higher | Peaks at 35° | | Lower | Peaks at 35° | | Original Pitch | Peaks at 45° | | Higher | Peaks at 45° | | Lower | Peaks at 45° | | Original Pitch | Peaks at 55° | | Higher | Peaks at 55° | | Lower | Peaks at 55° | | Original Pitch | Peaks at 65° | | Higher | Peaks at 65° | | Lower | Peaks at 65° | | Original Pitch | Peaks at 75° | | Higher | Peaks at 75° | | Lower | Peaks at 75° | | Original Pitch | Peaks at 85° | | Higher | Peaks at 85° | | Lower | Peaks at 85° | | Original Pitch | Peaks at 95° | | Higher | Peaks at 95° | | Lower | Peaks at 95° | | Original Pitch | Peaks at 105° | | Higher | Peaks at 105° | | Lower | Peaks at 105° | | Original Pitch | Peaks at 115° | | Higher | Peaks at 115° | | Lower | Peaks at 115° | | Original Pitch | Peaks at 125° | | Higher | Peaks at 125° | | Lower | Peaks at 125° | | Original Pitch | Peaks at 135° | | Higher | Peaks at 135° | | Lower | Peaks at 135° | | Original Pitch | Peaks at 145° | | Higher | Peaks at 145° | | Lower | Peaks at 145° | | Original Pitch | Peaks at 155° | | Higher | Peaks at 155° | | Lower | Peaks at 155° | | Original Pitch | Peaks at 165° | | Higher | Peaks at 165° | | Lower | Peaks at 165° | | Original Pitch | Peaks at 175° | | Higher | Peaks at 175° | | Lower | Peaks at 175° | | Original Pitch | Peaks at 185° | | Higher | Peaks at 185° | | Lower | Peaks at 185° | | Original Pitch | Peaks at 195° | | Higher | Peaks at 195° | | Lower | Peaks at 195° | | Original Pitch | Peaks at 205° | | Higher | Peaks at 205° | | Lower | Peaks at 205° | | Original Pitch | Peaks at 215° | | Higher | Peaks at 215° | | Lower | Peaks at 215° | | Original Pitch | Peaks at 225° | | Higher | Peaks at 225° | | Lower | Peaks at 225° | | Original Pitch | Peaks at 235° | | Higher | Peaks at 235° | | Lower | Peaks at 235° | | Original Pitch | Peaks at 245° | | Higher | Peaks at 245° | | Lower | Peaks at 245° | | Original Pitch | Peaks at 255° | | Higher | Peaks at 255° | | Lower | Peaks at 255° | | Original Pitch | Peaks at 265° | | Higher | Peaks at 265° | | Lower | Peaks at 265° | | Original Pitch | Peaks at 275° | | Higher | Peaks at 275° | | Lower | Peaks at 275° | | Original Pitch | Peaks at 285° | | Higher | Peaks at 285° | | Lower | Peaks at 285° | | Original Pitch | Peaks at 295° | | Higher | Peaks at 295° | | Lower | Peaks at 295° | | Original Pitch | Peaks at 305° | | Higher | Peaks at 305° | | Lower | Peaks at 305° | | Original Pitch | Peaks at 315° | | Higher | Peaks at 315° | | Lower | Peaks at 315° | | Original Pitch | Peaks at 325° | | Higher | Peaks at 325° | | Lower | Peaks at 325° | | Original Pitch | Peaks at 335° | | Higher | Peaks at 335° | | Lower | Peaks at 335° | | Original Pitch | Peaks at 345° | | Higher | Peaks at 345° | | Lower | Peaks at 345° | | Original Pitch | Peaks at 355° | | Higher | Peaks at 355° | | Lower | Peaks at 355° | | Original Pitch | Peaks at 365° | | Higher | Peaks at 365° | | Lower | Peaks at 365° | | Original Pitch | Peaks at 375° | | Higher | Peaks at 375° | | Lower | Peaks at 375° | | Original Pitch | Peaks at 385° | | Higher | Peaks at 385° | | Lower | Peaks at 385° | | Original Pitch | Peaks at 395° | | Higher | Peaks at 395° | | Lower | Peak (value) | | Original Pitch (Peak) vs. Prior Peak (Value) vs. Prior Depth (Value) vs. Prior Depth (Value) vs. Prior Depth (Value) vs. Prior Depth (Value) vs. Prior Depth (Value) vs. Prior Depth (Value) vs. Prior Depth (Value) vs. Prior Depth (Value) vs. Prior Depth (Value) vs. Prior Depth (Value) vs. Prior Depth (Value) vs. Prior Depth (Value) vs. Prior Depth (Value) vs. Prior Depth (Value) vs. Prior Depth (Lower) vs. Prior Depth (Lower) vs. Prior Depth (Lower) vs. Prior Depth (Lower) vs. Prior Depth (Lower) vs. Prior Depth (Lower) vs. Prior Depth (Lower) vs. Prior Depth (Lower) vs. Prior Depth (Lower) vs. Prior Depth (Lower) vs. Prior Depth (Lower) vs. Prior Depth (Lower) vs. Prior Depth (Lower) vs. Prior Depth (Lower) vs. Prior Depth (Lower) > Prior Depth (Lower) vs. Prior Depth (Upper) vs. Prior Depth (Upper) vs. Prior Depth (Upper) vs. Prior Depth (Upper) vs. Prior Depth (Upper) vs. Prior Depth (Upper) vs. Prior Depth (Upper) vs. Prior Depth (Upper) vs. Prior Depth (Upper) vs. Prior Depth (Upper) vs. Prior Depth (Upper) vs. Prior Depth (Upper) vs. Prior Depth (Upper) vs. Prior Depth (Upper) vs. Prior Depth (Upper) > Prior Depth (Lower) vs. Prior Depth (Lower) vs. Prior Depth (Lower) vs. Prior Depth (Lower) vs. Prior Depth (Lower) vs. Prior Depth (Lower) vs. Prior Depth (Lower) vs. Prior Depth (Lower) vs. Prior Depth (Lower) vs. Prior Depth (Lower) > Prior Depth (Lower) vs. Prior Depth (Lower) vs. Prior Depth (Lower) vs. Prior Depth (Lower) vs. Prior Depth (Lower) vs. Prior Depth (Lower) > Prior Depth (Lower) vs. Prior Depth (Lower) vs. Prior Depth (Lower) vs. Prior Depth (Lower) vs. Prior Depth (Lower) > Prior Depth (Lower) > Prior Depth (Lower) > Prior Depth (Lower) > Prior Depth (Lower) > Prior Depth (Lower) > Prior Depth (Lower) > Prior Depth (Lower) > Prior Depth (Lower) > Prior Depth (Lower) > Prior Depth (Lower) > Prior Depth (Lower) > Prior Depth (Lower) > Prior Depth (Lower) > Prior Depth (Lower) > Prior Depth (Lower) > Prior Depth (Lower) > Prior Depth (Upper) vs. Prior Depth (Upper), Prior Depth (Upper), and Prior Depth (Upper), Prior Depth (Upper), and Prior Depth (Upper), Prior Depth (Upper), and Prior Depth (Upper), Prior Depth (Upper), and Prior Depth (Upper), Prior Depth (Upper), and Prior Depth (Upper), Prior Depth (Upper), and Prior Depth (Upper), Prior Depth (Upper), and Prior Depth (Upper), Prior Depth (Upper), and Prior Depth (Upper), Prior Depth (Upper), and Prior Depth (Upper), Prior Depth (Upper), and Minor Lengths (> Upper, < Upper, < Upper, < Upper, < Upper, < Upper, < Upper, < Upper, < Upper, < Upper, < Upper, < Upper, < Upper, < Upper, < Upper, < Upper, < Upper, < Upper, < Upper, < Upper, < Upper, < Upper, < Upper, < Upper, < Upper, < Upper, < Upper, < Upper, < Upper, < Upper, < Upper, < Upper, < Upper, < Upper, < Lower than LFO Waveform=Square/Depthg: Pan h: Wet/Dry
The Pan parameter pans the effect sound and dry sound to the left and right. With L, the effect sound is panned left, and the dry sound is panned right. With a Wet/Dry = Wet setting, the effect and dry sound will be output in a proportion of 1:1.54: Organ Vib/Chorus (Organ Vibrato/Chorus)
This effect simulates the chorus and vibrato circuitry of a vintage organ. The modulation speed and depth can be customized. flowchart
graph TD
    A["Left"] --> B["Preset Setting"]
    B --> C["Custom Parameters"]
    C --> D["Mode"]
    D --> E["Vibrato/Chorus"]
    E --> F["FX Amt"]
    G["Right"] --> H["FX Amt"]
    I["FX Amt = 100: Mono In - Mono Out / FX Amt = 0: Stereo In - Stereo Out"] --> J["FX Amt"]
| a Input Trim 0...100 Sets the input level | ||||
| b Control Mode Preset, Custom | Selects either preset or custom settings | |||
| c | Preset Type | V1, C1, V2, C2, V3, C3 | Selects the effect type when Mode=PresetV1/V2/V3 are variations of vibrato, and C1/C2/C3 are variations of chorus | |
| Src | Off...Tempo | Selects the modulation source that will change the effect type | ||
| Amt | -5...+5 | Sets the modulation amount for changing the effect type | ||
| d | Custom Mix | Vibrato, 1:99...99:1, Chorus | Sets the mix level of the direct sound when Mode=Preset | |
| Src | Off...Tempo | Selects the modulation source that will control the mix level of the direct sound | ||
| Amt | -100...+100 | Sets the modulation amount for controlling the mix level of the direct sound | ||
| e | Custom Depth | 0...100 Sets the vibrato depth | ||
| Src | Off...Tempo | Selects the modulation source that will control vibrato depth | ||
| Amt | -100...+100 | Sets the modulation amount for controlling the vibrato depth | ||
| f | Custom Speed [Hz] | 0.02...20.00 | Sets the vibrato speed | |
| Src | Off...Tempo | Selects the modulation source for controlling the vibrato speed | ||
| Amt | -20.00...+20.00 | Sets the modulation amount for controlling the vibrato speed | ||
| g | Wet/Dry | Dry, 1:99...99:1, Wet | Balance between the wet and dry signal | |
| Src | Off...Tempo | Table, “Dynamic Modulation sources,” on page 330 | ||
| Amt | -100...+100 | Amount of modulation source | ||
b: Control Mode
c: Preset Type
d: Custom Mix
e: Custom Depth
f: Custom Speed [Hz]
If Control Mode=Preset, you can use c: Preset Type to select the effect. In this case, the Custom Mix/Depth/Speed settings are ignored. If Control Mode=Custom, the Custom Mix/Depth/Speed settings are valid, and the c: Preset Type setting is ignored.c: Amt
If Preset Type=V1 and Src=JS+Y, you can set this to +5 and move J S + Y to control the V1?C1?V2?C2?V3?C3.55: Rotary Speaker
This effect simulates a rotary speaker, and obtains a more realistic sound by simulating the rotor in the low range and the horn in the high range separately. The effect also simulates the stereo microphone settings. flowchart
graph TD
    A["FX Amt = 100: Mono In - Stereo Out / FX Amt = 0: Stereo In - Stereo Out"] --> B["Left"]
    B --> C["Horn"]
    C --> D["Rotor"]
    D --> E["Rotor Balance"]
    E --> F["Mic Distance Mic Spread"]
    F --> G["FX Amt"]
    G --> H["FX Amt"]
    I["Right"] --> J["Speaker Simulation"]
    K["Mode Switch: Rotate/Stop"] --> J
    L["Speed Switch: Slow/Fast"] --> J
    M["Manual Speed Control"] --> J
    J --> N["Motor"]
| a | Mode Switch | Rotate, Stop | Switches between speaker rotation and stop | |
| Src | Off...Tempo | Selects a modulation source for Rotate/Stop | ||
| Mode | Toggle, Moment | Sets the switch mode for Rotate/Stop modulation | ||
| b | Speed Switch | Slow, Fast | Switches the speaker rotation speed between slow and fast | |
| Src | Off...Tempo | Selects a modulation source for Slow/Fast | ||
| Mode | Toggle, Moment | Sets the switch mode for Slow/Fast modulation | ||
| c | Manual Speed Ctrl | Off...Tempo | Sets a modulation source for direct control of rotation speed | |
| d | Hore Acceleration | 0...100 | How quickly the horn rotation speed in the high range is switched | |
| Hore Ratio | Stop, 0.50...2.00 | Adjusts the (high-range side) horn rotation speed. Standard value is 1.00. Selecting “Stop” will stop the rotation | ||
| e | Rotor Acceleration | 0...100 | Determines how quickly the rotor rotation speed in the low range is switched | |
| Rotor Ratio | Stop, 0.50...2.00 | Adjusts the (low-frequency) rotor speed. Standard value is 1.00. Selecting “Stop” will stop the rotation | ||
| f | Horn/Rotor Balance | Rotor, 1...99, Horn | Sets the level balance between the high-frequency horn and low-frequency rotor | |
| g | Mic Distance | 0...100 | Sets the distance between the microphone and rotary speaker | |
| Mic Spread | 0...100 | Sets the angle of left and right microphones | ||
| h | Wet/Dry | Dry, 1:99...99:1, Wet | Balance between the wet and dry signal | |
| Src | Off...Tempo | Table, “Dynamic Modulation sources,” on page 330 | ||
| Amt | -100...+100 | Amount of modulation source |
a: Mode
This parameter sets how the modulation source switches between rotation and stop. When Mode = Toggle, the speaker rotates or stops alternately each time you press the pedal or move the joystick. Via MIDI, rotation will switch between start and stop each time the modulation amount exceeds 64. effect in the order of When Mode = Moment, the speaker rotates by default, and stops only when you press the pedal or move the joystick. Via MIDI, modulation values above 64 make the speaker rotate, and values below 64 make it stop.b: Speed Switch
This parameter controls how the rotation speed (slow and fast) is switched via the modulation source. When Mode = Toggle, the speed will switch between slow and fast each time you press the pedal or move the joystick. Via MIDI, the speed will switch each time the modulation amount exceeds 64. When Mode = Moment, the speed is usually slow. It becomes fast only when you press the pedal or move the joystick. Via MIDI, modulation values above 64 set the speed to Fast, and values below 64 set it to Slow.c: Manual Speed Ctrl
If you wish to control the rotation speed manually, instead of switching between Slow and Fast, select a modulation source in the Manual Speed Ctrl parameter. If you don't want to use manual control, set this to Off.d: Horn Acceleration
e: Rotor Acceleration
On a real rotary speaker, the rotation speed accelerates or decelerates gradually after you switch the speed. The Horn and Rotor Acceleration parameters set the transition times between fast and slow speeds.g: Mic Distance
g: Mic Spread
This is a simulation of stereo microphone settings. flowchart
graph TD
    A["Microphone"] -->|Mic Distance| B["Rotary Speaker (Top View)"]
    C["Microphone"] -->|Mic Distance| B
    D["Microphone - Mic Placement"] -->|Mic Spread| B
Delay
56: L/C/R Delay
This multitap delay outputs three Tap signals to the left, right, and center respectively. You can also adjust the left and right spread of the delay sound. flowchart
graph TD
    A["Input Level D-mod"] --> B["High Damp"]
    A --> C["Low Damp"]
    B --> D["L Delay"]
    C --> E["C Delay"]
    D --> F["Level"]
    E --> G["Level"]
    F --> H["Spread"]
    G --> H
    H --> I["FX Amt"]
    J["Left"] --> K["Input Level D-mod"]
    J --> L["Input Level D-mod"]
    J --> M["Right"]
    N["FFX Amt = 100: Mono In - Stereo Out / FX Amt = 0: Stereo In - Stereo Out"] --> O["FFX Amt"]
| a | L Delay Time [msec] | 0...2730 Sets the | delay time of TapL | |
| Level 0...50 Sets | the output level | of TapL | ||
| b | C Delay Time [msec] | 0...2730 Sets the | delay time of TapC | |
| Level 0...50 Sets | the output level | of TapC | ||
| c | R Delay Time [msec] | 0...2730 Sets the | delay time of TapR | |
| Level 0...50 Sets | the output level | of TapR | ||
| d | Feedback (C Delay) | -100...+100 Sets | the feedback amount of TapC | |
| Src Off...Tempo | Selects the modulation source of the TapC feedback amount | |||
| Amt -100...+100 | Sets the modulation amount of the TapC feedback amount | |||
| e | High Damp [%] | 0...100 | Sets the damping amount in the high range | |
| Low Damp [%] | 0...100 | Sets the damping amount in the low range | ||
| f | Input Level Dmod [%] | -100...+100 | Sets the modulation amount of the input level | |
| Src Off...Tempo | Selects the modulation source for the input level | |||
| g | Spread 0...50 | Sets the width of the stereo image of the effect sound | ||
| h | Wet/Dry | Dry, 1:99...99:1, Wet | Balance between the wet and dry signal | |
| Src Off...Tempo | Table, "Dynamic Modulation sources," on page 330 | |||
| Amt -100...+100 | Amount of modulation source | |||
e: High Damp [%]
e: Low Damp [%]
These parameters set the damping amount of high range and low range. The tone of the delayed sound becomes darker and lighter as it feeds back.g: Spread
This parameter sets the pan width of the effect sound. The stereo image is widest with a value of 50, and the effect sound of both channels is output from the center with a value of 0.57: Stereo/CrossDelay
This is a stereo delay, and can by used as a cross-feedback delay effect in which the delay sounds cross over between the left and right by changing the feedback routing. flowchart
graph LR
    A["Input Level D-mod"] --> B["Delay"]
    B --> C["High Damp"]
    C --> D["Low Damp"]
    D --> E["Spread"]
    E --> F["FX Amt"]
    G["Input Level D-mod"] --> H["Delay"]
    H --> I["High Damp"]
    I --> J["Low Damp"]
    J --> K["Stereo/Cross"]
    K --> L["FX Amt"]
    M["Left"] --> N["FX Amt"]
    O["Right"] --> P["FX Amt"]
    Q["Stereo/Cross"] --> R["Delay"]
    R --> S["High Damp"]
    S --> T["Low Damp"]
    T --> U["Spread"]
    U --> V["FX Amt"]
| a | Stereo/Cross Stereo, Cross | Switches between stereo delay and cross-feedback delay | ||
| b | L Delay Time [msec] | 0.0...1360.0 | Sets the delay time for the left channel | |
| c | R Delay Time [msec] | 0.0...1360.0 | Sets the delay time for the right channel | |
| d | L Feedback -100...+100 | Sets the feedback amount for the left channel | ||
| Src Off...Tempo | Selects the modulation source of feedback amount | |||
| Amt L -100...+100 | Sets the modulation amount of the left channel feedback | |||
| e | R Feedback -100...+100 | Sets the feedback amount for the right channel | ||
| Amt R -100...+100 | Sets the modulation amount of the right channel feedback | |||
| f | High Damp [%] 0... | 100 | Sets the damping amount in the high range | |
| g | Low Damp [%] 0... | 100 | Sets the damping amount in the low range | |
| h | Input Level Dmod [%] | -100...+100 | Sets the modulation amount of the input level | |
| Src Off...Tempo | Selects the modulation source for the input level | |||
| i | Spread -50...+50 | Sets the width of the stereo image of the effect sound | ||
| j | Wet/Dry | Dry, 1:99...99:1, Wet | Balance between the wet and dry signal | |
| Src Off...Tempo | Table, “Dynamic Modulation sources,” on page 330 | |||
| Amt | -100...+100 | Amount of modulation source | ||
58: St. Multitap Delay (Stereo Multitap Delay)
The left and right Multitap Delays have two taps respectively. Changing the routing of feedback and tap output allows you to create various patterns of complex effect sounds. flowchart
graph TD
    A["Left"] --> B["Input Level D-mod"]
    B --> C["High Damp Low Damp Mode"]
    C --> D["Delay (1)"]
    D --> E["Mode"]
    E --> F["Spread"]
    F --> G["Tap1=(1), Tap2=(2)"]
    G --> H["FX Amt"]
    I["Right"] --> J["Input Level D-mod"]
    J --> K["High Damp Low Damp Mode"]
    K --> L["Delay (1)"]
    L --> M["Mode"]
    M --> N["Spread"]
    N --> O["Tap1=(1), Tap2=(2)"]
    O --> P["FX Amt"]
    Q["Feedback"] --> R["Delay"]
    S["Feedback"] --> T["Delay"]
    U["FX Amt"] --> V["Output"]
| a | Mode | Normal, Cross Feedback,Cross Pan1,Cross Pan2 | Switches the left and right delay routing | |
| b | Tap1 Time [msec] | 0.0...1360.0 | Sets the Tap1 delay time | |
| c | Tap2 Time [msec] | 0.0...1360.0 | Sets the Tap2 delay time | |
| d | Tap1 Level | 0...100 | Sets the Tap1 output level | |
| e | Feedback (Tap2) | -100...+100 | Sets the Tap2 feedback amount | |
| Src Off...Tempo | Selects the modulation source of the Tap2 feedback amount | |||
| Amt | -100...+100 | Sets the modulation amount of the Tap2 feedback amount | ||
| f H | High Damp [%] 0...100 | Sets the damping amount in the high range | ||
| g | Low Damp [%] 0...100 | Sets the damping amount in the low range | ||
| h | Input Level Dmod [%] | -100...+100 | Sets the modulation amount of the input level | |
| Src Off...Tempo | Selects the modulation source for the input level | |||
| i | Spread -100...+100 | Sets the width of the stereo image of the effect sound | ||
| Src Off...Tempo | Selects the modulation source of the effect sound's stereo image width | |||
| Amt | -100...+100 | Sets the modulation amount of the effect sound's stereo image width | ||
| j | Wet/Dry | Dry, 1:99...99:1,Wet | Balance between the wet and dry signal | |
| Src Off...Tempo | Table , "Dynamic Modulation sources," on page 330 | |||
| Amt | -100...+100 | Amount of modulation source | ||
a: Mode
You can change how the left and right delay signals are panned by modifying the routing of the left and right delay as shown in the figure above. You need to input different sounds to each channel in order for this parameter to be effective.d: Tap1 Level
This parameter sets the output level of Tap1. Setting a different level from Tap2 will add a unique touch to a monotonous delay and feedback.59: St. Mod Delay
(Stereo Modulation Delay)
This stereo delay uses an LFO to sweep the delay time. The pitch also varies, creating a delay sound which swells and shimmers. You can also control the delay time using a modulation source. flowchart
graph TD
    A["Left"] --> B["Delay"]
    B --> C["Feedback"]
    C --> D["Delay"]
    D --> E["FX Amr"]
    F["Right"] --> G["FX Amr"]
    H["Dial"] --> I["Response"]
    I --> J["LFO: T1 / Sine"]
    J --> K["LFO Shape"]
    K --> L["LFO Phase"]
    L --> M["Modulation Mode"]
    M --> N["12-mod"]
    N --> O["Feedback"]
    O --> P["Delay"]
    P --> Q["FX Amr"]
| a | Modulation Mode | LFO, D-mod | Switches between LFO modulation control and modulation source control | |
| b | D-mod Modulation | L/R:+/+, L/R:+/- | Reversed L/R control by modulation source | |
| Src Off...Tempo | Selects the modulation source that controls delay time | |||
| Response 0...30 | Sets the rate of response to the modulation source | |||
| c | LFO Waveform | Triangle, Sine Selects the LFO Waveform | ||
| LFO Shape -100...+100 | Changes the curvature of the LFO Waveform | |||
| d | LFO Sync Off, On | Switches LFO reset off/on | ||
| Src Off...Tempo | Selects the modulation source that resets the LFO | |||
| e | LFO Frequency [Hz] | 0.02...20.00 Sets | the speed of the LFO | |
| f | MIDI Sync Off, On | When this is on, the LFO speed is set by BPM, Base Note, and Times, instead of Frequency | ||
| BPM | MIDI, 40.00...300.00 | MIDI syncs to the system tempo; 40-300 sets the tempo manually for this individual effect | ||
| Base Note r...w | Selects the type of notes that specify the LFO speed | |||
| Times x1...x32 | Sets the number of notes that specify the LFO speed | |||
| g | L LFO Phase [deg] | -180...+180 | Sets the phase obtained when the left LFO is reset | |
| L Depth 0...200 | Sets the depth of the left LFO modulation | |||
| h | R LFO Phase [deg] | -180...+180 | Sets the phase obtained when the right LFO is reset | |
| R Depth | 0...200 | Sets the depth of the right LFO modulation | ||
| i | L Delay Time [msec] | 0.0...1000.0 | Sets the delay time for the left channel | |
| L Feedback -100...+100 | Sets the feedback amount of left delay | |||
| j | R Delay Time [msec] | 0.0...1000.0 | Sets the delay time for the right channel | |
| R Feedback | -100...+100 | Sets the feedback amount of right delay | ||
| k | Wet/Dry | -Wet, -1:99...Dry...99:1, Wet | Balance between the wet and dry signal | |
| Src Off...Tempo | Table, “Dynamic Modulation sources,” on page 330 | |||
| Amt | -100...+100 | Amount of modulation source | ||
b: D-mod Modulation
When the modulation source is used for control, this parameter reverses the left and right modulation direction. d: LFO Sync d: Src g: L LFO Phase [deg] h: R LFO Phase [deg] If “LFO Sync” is On, the LFO will be reset by the modulation source that is received. The “Src” parameter sets the modulation source that resets the LFO. For example, you can assign Gate as a modulation source so that the sweep always starts from the specified point. “L LFO Phase” and “R LFO Phase” set the phase obtained when the left and right LFOs are reset. In this way, you can create changes in pitch sweep for the left and right channels individually.  The effect is off when a value of the modulation source specified in the "Src" parameter is 63 or smaller, and the effect is on when the value is 64 or higher. The LFO is triggered and reset to the "L LFO Phase" and "R LFO Phase" settings when the value changes from 63 or smaller to 64 or higher.60: St. Dynamic Delay
(Stereo Dynamic Delay)
This stereo delay controls the level of delay according to the input signal level. You can use this as a ducking delay that applies delay to the sound only when you play keys at a high velocity or only when the volume level is low. flowchart
graph TD
    A["Left"] --> B["Delay"]
    B --> C["High Dump Low Dump"]
    C --> D["Spread"]
    D --> E["FX Amt"]
    F["Right"] --> G["Delay"]
    G --> H["High Dump Low Dump"]
    H --> I["Out"]
    I --> J["FX Amt"]
    K["Envelope"] --> L["Tarefoil"]
    L --> M["Attack Release"]
    M --> N["Control Target"]
    N --> O["FX Amt"]
    P["Feedback"] --> Q["Delay"]
    Q --> R["High Dump Low Dump"]
    R --> S["Spread"]
    S --> T["FX Amt"]
| a | Control Target | None, Out, FB | Selects from no control, output, and feedback | |
| Polarity | +, - | Reverses level control | ||
| b | Threshold 0...100 | Sets the level to which the effect is applied | ||
| Offset | 0...100 | Sets the offset of level control | ||
| c | Attack | 1...100 | Sets the attack time of level control | |
| d | Release | 1...100 | Sets the release time of level control | |
| e | L Delay Time [msec] | 0.0...1360.0 | Sets the delay time for the left channel | |
| f | R Delay Time [msec] | 0.0...1360.0 | Sets the delay time for the right channel | |
| g | Feedback -100...+100 Sets the feedback amount | |||
| h | High Damp [%] | 0...100 | Sets the damping amount in the high range | |
| Low Damp [%] | 0...100 | Sets the damping amount in the low range | ||
| i | Spread | -100...+100 | Sets the width of the stereo image of the effect sound | |
| j | Wet/Dry | Dry, 1:99...99:1, Wet | Balance between the wet and dry signal | |
| Src Off...Tempo | Table , “Dynamic Modulation sources,” on page 330 | |||
| Amt | -100...+100 | Amount of modulation source | ||
a: Control Target
This parameter selects no level control, delay output control (effect balance), or feedback amount control.a: Polarity
b: Threshold
b: Offset
c: Attack
d: Release
The “Offset” parameter specifies the value for the “Control Target” parameter (that is set to None), expressed as the ratio relative to the parameter value (the “Wet/Dry” value with “Control Target”=Output level, or the “Feedback” value with “Control Target”=Feedback). When “Polarity” is positive, the “Control Target” value is obtained by multiplying the parameter value by the “Offset” value (if the input level is below the threshold), or equals the parameter value if the input level exceeds the threshold. When “Polarity” is negative, Control Target value equals the parameter value if the input level is below the threshold, or is obtained by multiplying the parameter value by the “Offset” value if the level exceeds the threshold. The “Attack” and “Release” parameters specify attack time and release time of delay level control. line
| Panel | Description | Value | |-------|--------------------------------------|-------| | Top | Dry | Peak | | Bottom | Envelope | Attack | | Bottom | Time | - | | Bottom | Target Output Level | - | | Bottom | Polarity (−) | - | | Bottom | Target Output Level | - | | Bottom | Polarity (+) | - | | Bottom | Dynamic Delay | - | | Bottom | Threshold | - | | Bottom | Release | - | | Bottom | Delay Time | - | | Bottom | Time | - | | Bottom | (Ducking Delay) | - | | Bottom | Delay Time | - |61: St. AutoPanningDly (Stereo Auto Panning Delay)
This stereo delay effect pans the delay sound left and right using the LFO. flowchart
graph TD
    A["Left"] --> B["Delay"]
    B --> C["High Damp Low Damp"]
    C --> D["Pan"]
    D --> E["FX Amt"]
    F["Right"] --> G["Delay"]
    G --> H["High Damp Low Damp"]
    H --> I["Pan"]
    I --> J["FX Amt"]
    K["LFO: Trl / Sin"] --> L["LFO Shape"]
    M["Feedback"] --> N["Pan"]
    O["Depth"] --> P["Pan"]
    Q["LFO Phase"] --> R["Pan"]
    S["FX Amt"] --> T["FX Amt"]
| a | L Delay Time [msec] | 0.0...1360.0 | Sets the delay time for the left channel | |
| L Feedback -100...+100 | Sets the feedback amount for the left channel | |||
| b | R Delay Time [msec] | 0.0...1360.0 | Sets the delay time for the right channel | |
| R Feedback -100...+100 | Sets the feedback amount for the right channel | |||
| c | High Damp [%] | 0...100 | Sets the damping amount in the high range | |
| Low Damp [%] | 0...100 | Sets the damping amount in the low range | ||
| d | LFO Waveform | Triangle, Sine Selects the LFO Waveform | ||
| LFO Shape -100...+100 | Changes the curvature of the LFO Waveform | |||
| e P | Phase [degree] -1 | 80...+180 | Sets the LFO phase difference between the left and right | |
| f | Panning Freq [Hz] | 0.02...20.00 Sets | the panning speed | |
| g | MIDI Sync Off, On | Switches between using the frequency of the panning speed and using the tempo and notes | ||
| BPM | MIDI, 40.00... 300.00 | MIDI syncs to the system tempo; 40-300 sets the tempo manually for this individual effect | ||
| Base Note r...w | Selects the type of notes to specify the delay time for the panning speed | |||
| Times | x1...x32 | Sets the number of notes to specify the delay time for the panning speed | ||
| h | Panning Depth | 0...100 | Sets the panning width | |
| Src | Off...Tempo | Selects the modulation source for the panning width | ||
| Amt | -100...+100 | Set the modulation amount of the panning width | ||
| i | Wet/Dry | Dry, 1:99...99:1, Wet | Balance between the wet and dry signal | |
| Src | Off...Tempo | Table, "Dynamic Modulation sources," on page 330 | ||
| Amt | -100...+100 | Amount of modulation source | ||
62: Tape Echo
This effect simulates a tape echo unit with three playback heads. The distortion and tonal change typical of magnetic tape are also reproduced. flowchart
graph TD
    A["FX Amt = 100: Mono In - Stereo Out / FX Amt = 0: Stereo In - Stereo Out"] --> B["Left"]
    B --> C["Feedback"]
    C --> D["Feedback"]
    D --> E["Feedback Amt"]
    E --> F["(-3)"]
    F --> G["(-2)"]
    G --> H["(-1)"]
    H --> I["Level Pan"]
    I --> J["Tap2/3 Position"]
    J --> K["FX Amt"]
    K --> L["FX Amt"]
    M["Trim"] --> N["Pre Tone"]
    N --> O["Tape Saturation"]
    O --> P["High / Low Damp"]
    P --> Q["Delay"]
    Q --> R["Wah Flatter"]
    R --> S["Tap2/3 Position"]
    S --> T["FX Amt"]
    U["D-mode"] --> V["Delay Time"]
    V --> W["Right"]
| a | Delay (Tap1) [msec] | 0...2700 | Sets the delay time (tap1) | |
| Src Off...Tempo | Selects the modulation source of the delay time | |||
| Amt | -2700...+2700 | Sets the modulation amount of delay time | ||
| b | Tap2 Position [%] | 0...100 | Sets the position of Tap 2 relative to the Tap 1 delay time the depth of pitch variation | |
| c | Tap3 Position [%] | 0...100 | Sets the position of Tap 3 relative to the Tap 1 delay time the depth of pitch variation | |
| d | Tap1 Level 0...10 | 0 Sets the Tap1 output level | ||
| Pan L, 1...99, R S | sets the stereo image of tap1 | |||
| FB Amt -100...+ | 00 Sets the Tap1 feedback amount | |||
| e | Tap2 Level 0...10 | 0 Sets the Tap2 output level | ||
| Pan L, 1...99, R S | sets the stereo image of tap2 | |||
| FB Amt -100...+ | 00 Sets the Tap2 feedback amount | |||
| f | Tap3 Level 0...10 | 0 Sets the Tap3 output level | ||
| Pan L, 1...99, R S | sets the stereo image of tap3 | |||
| FB Amt -100...+ | 00 Sets the Tap3 feedback amount | |||
| g | Feedback | 0...100 | Sets the amount of feedback for Taps 1, 2, and 3 | |
| Src Off...Tempo | Selects the modulation source of feedback amount | |||
| Amt | -100...+100 | Sets the feedback amount | ||
| h | High Damp [%] | 0...100 | Sets the damping amount in the high range | |
| Low Damp [%] | 0...100 | Sets the damping amount in the low range | ||
| i | Saturation 0...10 | 0 Sets the distortion on amount | ||
| j | Input Trim | 0...100 Sets the input gain | ||
| Pre Tone | 0...100 Sets the tone of the input | |||
| k | Wow Flutter [Hz] | 0.02...1.00 | Sets the frequency at which pitch variation will occur | |
| Wow Flutter depth | 0...100 Sets the depth of pitch variation | |||
| l | Wet/Dry | Dry, 1:99...99:1, Wet | Balance between the wet and dry signal | |
| Src Off...Tempo | Table, “Dynamic Modulation sources,” on page 330 | |||
| Amt | -100...+100 | Amount of modulation source | ||
63: Auto Reverse
This effect records the input signal and automatically plays it in reverse (the effect is similar to a tape reverse sound). flowchart
graph TD
    A["FX Amt = 100: Mono In - Mono Out / FX Amt = 0: Stereo In - Stereo Out"] --> B["Auto Reverse"]
    B --> C["Direct Mix"]
    C --> D["FX Amt"]
    E["Left"] --> B
    F["Right"] --> G["D-mod"]
    G --> H["Input"]
    H --> I["Envelope Select"]
    I --> J["Envelope Control"]
    J --> K["Rec/Reverse Play Control"]
    K --> B
| a | Rec Mode | Single, Multi | Sets the recording mode | |
| b | Reverse Time [msec] | 20...2640 | Sets the maximum duration of the reverse playback | |
| c | Envelope Select | D-mod, Input | Selects whether the start and end of recording is controlled via the modulation source or the input signal level | |
| Src Off...Tempo | Selects the modulation source that controls recording when Envelope Select is set to D-mod | |||
| d | Threshold | 0...100 | Sets the recording start level when Envelope Select is set to Input | |
| e | Response 0...100 | Sets the speed of the response to the end of recording | ||
| f | Direct Mix | Always On, Always Off, Cross Fade | Selects how a dry sound is mixed | |
| g | Wet/Dry | Dry, 1:99...99:1, Wet | Balance between the wet and dry signal | |
| Src Off...Tempo | Table, “Dynamic Modulation sources,” on page 330 | |||
| Amt | -100...+100 | Amount of modulation source |
b: Reverse Time [msec]
When "Rec Mode" is set to Single, you can set up to 2,640ms for "Reverse Time." If recording starts during the reverse playback, the playback will be interrupted. When “Rec Mode” is set to Multi, you can make another recording during the reverse playback. However, the maximum Reverse Time is limited to 1,320 msec. If you wish to record a phrase or rhythm pattern, set "Rec Mode" to Single. If you record only one note, set "Rec Mode" to Multi. The “Reverse Time” parameter specifies the maximum duration of the reverse playback. The part in excess of this limit will not be played in reverse. If you wish to add short reverse playback of single notes, make flowchart
graph TD
    A["Input"] --> B["Mode = Single"]
    B --> C["Mode = Multi"]
    D["Envelope Select = Input"] --> E["Time axis"]
    F["Reverse Reverb"] --> G["Mode = Single"]
    H["Reverse Reverb"] --> I["Mode = Multi"]
    J["Mode = Single"] --> K["Time axis"]
    L["Mode = Multi"] --> M["Time axis"]
c: Envelope Select
c: Src
d: Threshold
These parameters select the source to control the start and end of recording. When “Envelope Select” is set to D-mod, the input signal will be recorded only when the value of the modulation source selected by the Src parameter is 64 or higher. When "Envelope Select" is set to Input, the input signal will be recorded only when its level exceeds the Threshold level. When recording is completed, reverse playback starts immediately.64: Sequence BPM Dly (Sequence BPM Delay)
This four-tap delay enables you to select a tempo and rhythm pattern to set up each tap. flowchart
graph TD
    A["Input Level D-mod"] --> B["Delay"]
    C["High Damp"] --> B
    D["Low Damp"] --> B
    B --> E["Pan"]
    B --> F["Right"]
    G["Rhythm Pattern"] --> H["BPM"]
    H --> I["Temp"]
    I --> J["BPM"]
    J --> K["FX Amt"]
    L["FX Amt = 100: Mono In - Stereo Out / FX Amt = 0: Stereo In - Stereo Out"] --> M["Left"]
    N["FX Amt"] --> O["Right"]
    P["Feedback"] --> Q["Delay"]
    R["Input Level D-mod"] --> S["Delay"]
    T["FX Amt"] --> U["Right"]
| a | BPM | MIDI,40.00...300.00 | MIDI syncs to the system tempo; 40-300 sets the tempo manually for this individual effect | |
| b | Rhythm Pattern | x...eee ^3 | Selects a rhythm pattern | |
| c | Tap1 Pan L, 1...99, R Sets the panning of Tap1 | |||
| Tap2 Pan L, 1...99, R Sets the panning of Tap2 | ||||
| Tap3 Pan L, 1...99, R Sets the panning of Tap3 | ||||
| Tap4 Pan L, 1...99, R Sets the panning of Tap4 | ||||
| d | Feedback -100...+100 Sets the feedback amount | |||
| Src Off...Tempo | Selects the modulation source of feedback amount | |||
| Amt -100...+100 | Sets the feedback amount | |||
| e | High Damp [%] | 0...100 | Sets the damping amount in the high range | |
| Low Damp [%] | 0...100 | Sets the damping amount in the low range | ||
| f | Input Level Dmod [%] | -100...+100 | Sets the modulation amount of the input level | |
| Src Off...Tempo | Selects the modulation source for the input level | |||
| g | Wet/Dry | Dry, 1:99...99:1, Wet | Balance between the wet and dry signal | |
| Src Off...Tempo | Table, “Dynamic Modulation sources,” on page 330 | |||
| Amt -100...+100 | Amount of mod | ulation source | ||
a: BPM
b: Rhythm Pattern
With the tempo specified by the "BPM" parameter (or the MIDI Clock tempo if "BPM" is set to MIDI), the length of one beat equals the feedback delay time, and the interval between taps becomes equal. Selecting a rhythm pattern will automatically turn the tap outputs on and off. When "BPM" is set to MIDI, the lower limit of the "BPM" is 44.65: L/C/R BPM Delay
The L/C/R delay enables you to match the delay time with the song tempo. You can also synchronize the delay time with the arpeggiator or sequencer. If you program the tempo before performance, you can achieve a delay effect that synchronizes with the song in real-time. Delay time is set by notes. flowchart
graph TD
    A["Input Level D-mod"] --> B["High Damp Low Damp"]
    B --> C["L Delay"]
    C --> D["C Delay"]
    D --> E["R Delay"]
    E --> F["Feedback"]
    F --> G["Level"]
    G --> H["Spread"]
    H --> I["FX Amt"]
    J["BPM"] --> K["BPM Base Note x Times"]
    K --> L["Base Note x Times"]
    L --> M["Base Note x Times"]
    M --> N["Output"]
    style A fill:#f9f,stroke:#333
    style J fill:#f9f,stroke:#333
    style K fill:#f9f,stroke:#333
    style L fill:#f9f,stroke:#333
    style M fill:#f9f,stroke:#333
| a | BPM | MIDI, 40.00...300.00 | MIDI syncs to the system tempo; 40-300 sets the tempo manually for this individual effect | |
| Time Over? ---, OVER! | Displays an error message when the delay time exceeds the upper limit | |||
| b | L Delay Base Note | r...w | Selects the type of notes to specify the delay time for TapL | |
| Times x1...x32 | Sets the number of notes to specify the delay time for TapL | |||
| Level 0...50 Sets | the output level | of TapL | ||
| c | C Delay Base Note | r...w | elects the type of notes to specify the delay time for TapC | |
| Times x1...x32 | Sets the number of notes to specify the delay time for TapC | |||
| Level 0...50 Sets | the output level | of TapC | ||
| d | R Delay Base Note | r...w | Selects the type of notes to specify the delay time for TapR | |
| Times x1...x32 | Sets the number of notes to specify the delay time for TapR | |||
| Level 0...50 Sets | the output level | of TapR | ||
| e | Feedback (C Delay) | -100...+100 Sets | the feedback amount of TapC | |
| Src Off...Tempo | Selects the modulation source for the TapC feedback | |||
| Amt -100...+100 | Sets the modulation amount of the TapC feedback | |||
| f | High Damp [%] | 0...100 | Sets the damping amount in the high range | |
| Low Damp [%] | 0...100 | Sets the damping amount in the low range | ||
| g | Input Level Dmod [%] | -100...+100 | Sets the modulation amount of the input level | |
| Src Off...Tempo | Selects the modulation source for the input level | |||
| h | Spread 0...50 | Sets the width of the stereo image of the effect sound | ||
| i | Wet/Dry | Dry, 1:99...99:1, Wet | Balance between the wet and dry signal | |
| Src Off...Tempo | Table, “Dynamic Modulation sources,” on page 330 | |||
| Amt -100...+100 | Amount of modulation source | |||
a: Time Over?
You can set the delay time up to 5,460msec. If the delay time exceeds this limit, the error message "OVER!" appears in the display. Set the delay time parameters so that this message will not appear. "Time Over?" is only a display parameter.66: Stereo BPM Delay
This stereo delay enables you to set the delay time to match the song tempo. flowchart
graph TD
    A["Left"] --> B["Input Level D-mod"]
    B --> C["Delay"]
    C --> D["High Damp Low Damp"]
    D --> E["FX Amt"]
    F["Right"] --> G["Input Level D-mod"]
    G --> H["Delay"]
    H --> I["High Damp Low Damp"]
    I --> J["FX Amt"]
    K["BPM"] --> L["BPM"]
    L --> M["Base Note x Times"]
    M --> N["Adjust (%)"]
    N --> O["Adjust (%)"]
    O --> P["Base Note x Times"]
    P --> Q["Adjust (%)"]
    Q --> R["Base Note x Times"]
    R --> S["Adjust (%)"]
    S --> T["Base Note x Times"]
    T --> U["Adjust (%)"]
    U --> V["Base Note x Times"]
    V --> W["Adjust (%)"]
    W --> X["Base Note x Times"]
    X --> Y["Adjust (%)"]
    Y --> Z["Base Note x Times"]
    Z --> AA["Adjust (%)"]
    AA --> AB["Base Note x Times"]
    AB --> AC["Adjust (%)"]
    AC --> AD["Base Note x Times"]
    AD --> AE["Adjust (%)"]
    AE --> AF["Base Note x Times"]
    AF --> AG["Adjust (%)"]
    AG --> AH["Base Note x Times"]
    AH --> AI["Adjust (%)"]
    AI --> AJ["Base Note x Times"]
    AJ --> AK["Adjust (%)"]
    AK --> AL["Base Note x Times"]
    AL --> AM["Adjust (%)"]
    AM --> AN["Base Note x Times"]
    AN --> AO["Adjust (%)"]
    AO --> AP["Base Note x Times"]
    AP --> AQ["Adjust (%)"]
    AQ --> AR["Base Note x Times"]
    AR --> AS["Adjust (%)"]
    AS --> AT["Base Note x Times"]
    AT --> AU["Adjust (%)"]
    AU --> AV["Base Note x Times"]
    AV --> AW["Adjust (%)"]
    AW --> AX["Base Note x Times"]
    AX --> AY["Adjust (%)"]
    AY --> AZ["Base Note x Times"]
    AZ --> BA["Adjust (%)"]
    BA --> BB["Base Note x Times"]
    BB --> BC["Adjust (%)"]
    BC --> BD["Base Note x Times"]
    BD --> BE["Adjust (%)"]
    BE --> BF["Base Note x Times"]
    BF --> BG["Adjust (%)"]
    BG --> BH["Base Note x Times"]
    BH --> BI["Adjust (%)"]
    BI --> BJ["Base Note x Times"]
    BJ --> BK["Adjust (%)"]
    BK --> BL["Base Note x Times"]
    BL --> BM["Adjust (%)"]
    BM --> BN["Base Note x Times"]
    BN --> BO["Adjust (%)"]
    BO --> BP["BPM"]
    BP --> BQ["BPM"]
    BQ --> BR["BPM"]
    BR --> BS["BPM"]
    BS --> BT["BPM"]
    BT --> BU["BPM"]
    BU --> BV["BPM"]
    BV --> BW["BPM"]
    BW --> BX["BPM"]
    BX --> BY["BPM"]
    BY --> BZ["BPM"]
| a | BPM | MIDI, 40.00...300.00 | MIDI syncs to the system tempo; 40-300 sets the tempo manually for this individual effect | |
| Time Over? L | ---, OVER! | Display the error message if the left channel delay time exceeds the upper limit | ||
| R | ---, OVER! | Display the error message if the right channel delay time exceeds the upper limit | ||
| b | L Delay Base Note | r...w | Selects the type of notes to specify the left channel delay time | |
| Times | x1...x32 | Sets the number of notes to specify the left channel delay time | ||
| Adjust [%] | -2.50...+2.50 | Fine-adjust the left channel delay time | ||
| c | R Delay Base Note | r...w | Selects the type of notes to specify the right channel delay time | |
| Times | x1...x32 | Sets the number of notes to specify the right channel delay time | ||
| Adjust [%] | -2.50...+2.50 | Fine-adjust the right channel delay time | ||
| d | L Feedback | -100...+100 | Sets the feedback amount for the left channel | |
| Src | Off...Tempo | Selects the modulation source of feedback amount | ||
| Amt L | -100...+100 | Sets the modulation amount of the left channel feedback | ||
| e | R Feedback -100...+100 | Sets the feedback amount for the right channel | ||
| Amt R | -100...+100 | Sets the modulation amount of the right channel feedback | ||
| f | High Damp [%] | 0...100 | Sets the damping amount in the high range | |
| g | Low Damp [%] | 0...100 | Sets the damping amount in the low range | |
| h | Input Level Dmod [%] | -100...+100 | Sets the modulation amount of the input level | |
| Src | Off...Tempo | Selects the modulation source for the input level | ||
| i | Wet/Dry | Dry, 1:99...99:1, Wet | Balance between the wet and dry signal | |
| Src | Off...Tempo | Table, "Dynamic Modulation sources," on page 330 | ||
| Amt | -100...+100 | Amount of modulation source | ||
a: Time Over? L, R
You can set the delay time up to 2,730msec. If the delay time exceeds this limit, the error message "OVER!" appears in the display. Set the delay time parameters so that this message will not appear. "Time Over?" is only a display parameter.67: St.BPM Mtap Delay
(Stereo BPM Multi tap Delay)
This four-tap delay enables you to select a tempo and rhythm pattern to set up each tap. flowchart
graph TD
    A["Input Level D-mod"] --> B["High Damp Low Damp"]
    B --> C["Delay"]
    C --> D["FX Amt"]
    E["Input Level D-mod"] --> F["High Damp Low Damp"]
    F --> G["Delay"]
    G --> H["FX Amt"]
    I["BPM"] --> J["BPM"]
    K["Base Note x Times"] --> L["Feedback"]
    M["Base Note x Times"] --> N["Feedback"]
    O["Tap1=(1) Tap2=(2)"] --> P["Mode"]
    Q["Mode"] --> R["Spread"]
    S["Delay"] --> T["Delay"]
    U["Feedback"] --> V["Feedback"]
    W["Input Level D-mod"] --> X["High Damp Low Damp"]
    Y["Input Level D-mod"] --> Z["High Damp Low Damp"]
    AA["Delay"] --> AB["Delay"]
    AC["Delay"] --> AD["Delay"]
    AE["Delay"] --> AF["Delay"]
    AG["Delay"] --> AH["Delay"]
    AI["Delay"] --> AJ["Delay"]
    AK["Delay"] --> AL["Delay"]
    AM["Delay"] --> AN["Delay"]
    AO["Delay"] --> AP["Delay"]
    AQ["Delay"] --> AR["Delay"]
    AS["Delay"] --> AT["Delay"]
    AU["Delay"] --> AV["Delay"]
    AW["Delay"] --> AX["Delay"]
    AY["Left In - Stereo Out"] --> AZ["Feedback"]
    BA["Terms"] --> BB["BPM"]
    BC["Terms"] --> BD["BPM"]
| a | M o d e | Normal, Cross Feedback,Cross Pan1,Cross Pan2 | Switches the left and right delay routing | |
| b | BPM | MIDI,40.00...300.00 | MIDI syncs to the system tempo;40-300 sets the tempo manually for this individual effect | |
| Time Over? 1 --- | OVER! | Displays an error message when the delay time for Tap1 exceeds the upper limit | ||
| 2 ---, OVER! | Displays an error message when the delay time for Tap2 exceeds the upper limit | |||
| c | Tap 1 Base Note | r...w | Selects the type of notes to specify the delay time for Tap1 | |
| Times x1...x32 | Sets the number of notes to specify the delay time for Tap1 | |||
| d | Tap 2 Base Note | r...w | Selects the type of notes to specify the delay time for Tap2 | |
| Times x1...x32 | Sets the number of notes to specify the delay time for Tap2 | |||
| e T | Tap1 Level 0...100 | Sets the Tap1 output level | ||
| f | Feedback (Tap2) | -100...+100 Sets | the Tap2 feedback amount | |
| Src Off...Tempo | Selects the modulation source of the Tap2 feedback amount | |||
| Amt -100...+100 | Sets the modulation amount of the Tap2 feedback amount | |||
| g | High Damp [%] | 0...100 | Sets the damping amount in the high range | |
| Low Damp [%] | 0...100 | Sets the damping amount in the low range | ||
| h | Input Level Dmod [%] | -100...+100 | Sets the modulation amount of the input level | |
| Src Off...Tempo | Selects the modulation source for the input level | |||
| i | Spread -100...+ | 100 | Sets the width of the stereo image of the effect sound | |
| Src Off...Tempo | Selects the modulation source of the effect sound's stereo image width | |||
| Amt -100...+100 | Sets the modulation amount of the effect sound's stereo image width | |||
| j | Wet/Dry | Dry, 1:99...99:1,Wet | Balance between the wet and dry signal | |
| Src Off...Tempo | Table , "Dynamic Modulation sources," on page 330 | |||
| Amt -100...+100 | Amount of modulation source | |||
68: St.BPM Mod. Delay
(Stereo BPM Modulation Delay)
This is a stereo modulation delay that lets you synchronize the delay time to the tempo of the song. flowchart
graph TD
    A["Left"] --> B["Delay"]
    B --> C["Feedback"]
    C --> D["Delay"]
    D --> E["FX Amt"]
    F["Right"] --> G["BPM"]
    G --> H["BPM"]
    H --> I["Base Note x Times"]
    H --> J["Base Note x Times"]
    K["Response"] --> L["LFO: Trl / Sino"]
    L --> M["LFO Shape"]
    M --> N["L/R: +/ +/ +/ -"]
    N --> O["D-mod"]
    O --> P["LFO Phase Modulation Mode"]
    Q["Temad"] --> G
    R["LFO Spd"] --> L
| a | Modulation Mode | LFO, D-mod | Switches between LFO modulation control and modulation source control | |
| b | D-mod Modulation | L/R:1/+, L/R:+/- | Reversed L/R control by modulation source | |
| Src | Off...Tempo | Selects the modulation source that controls delay time | ||
| Response | 0...30 | Sets the rate of response to the modulation source | ||
| c | LFO Waveform | Triangle, Sine | Selects the LFO Waveform | |
| LFO Shape -100...+100 | Changes the curvature of the LFO Waveform | |||
| d | LFO Sync | Off, On | Switches LFO reset off/on | |
| Src | Off...Tempo | Selects the modulation source that resets the LFO | ||
| e | LFO Frequency [Hz] | 0.02...20.00 | Sets the speed of the LFO | |
| f | MIDI Sync | Off, On | When this is on, the LFO speed is set by BPM, Base Note, and Times, instead of Frequency | |
| BPM | MIDI, 40.00... 300.00 | MIDI syncs to the system tempo; 40-300 sets the tempo manually for this individual effect | ||
| Base Note | r...w | Selects the type of notes that specify the LFO speed | ||
| Times x1...x32 | Sets the number of notes that specify the LFO speed | |||
| g | L LFO Phase [deg] | -180...+180 | Sets the phase obtained when the left LFO is reset | |
| Depth | 0...200 | Sets the depth of the left LFO modulation | ||
| h | R LFO Phase [deg] | -180...+180 | Sets the phase obtained when the right LFO is reset | |
| Depth | 0...200 | Sets the depth of the right LFO modulation | ||
| i | BPM(Delay) | MIDI, 40.00... 300.00 | MIDI syncs to the system tempo; 40-300 sets the tempo manually for this individual effect | |
| Time Over? L | ---, OVER! | Display the error message if the left channel delay time exceeds the upper limit | ||
| R | ---, OVER! | Display the error message if the right channel delay time exceeds the upper limit | ||
| j | L Delay Base Note | r...w | Selects the type of notes to specify the left channel delay time | |
| Times x1...x32 | Sets the number of notes to specify the left channel delay time | |||
| Feedback | -100...+100 | Sets the feedback amount of left delay | ||
| k | R Delay Base Note | r...w | Selects the type of notes to specify the right channel delay time | |
| Times x1...x32 | Sets the number of notes to specify the right channel delay time | |||
| Feedback | -100...+100 | Sets the feedback amount of right delay | ||
| 1 | Wet/Dry | -Wet, - 1:99...Dry...99:1 , Wet | Balance between the wet and dry signal | |
| Src Off...Tempo | Table, "Dynamic Modulation sources," on page 330 | |||
| Amt -100...+100 | Amount of modulation source | |||
i: Time Over? L, R
You can set the delay time up to 2,550msec. If the delay time exceeds this limit, the error message "OVER!" appears in the display. Set the delay time parameters so that this message will not appear. "Time Over?" is only a display parameter.69: St.BPMAutoPanDly
(Stereo BPM Auto Panning Delay)
This stereo auto panning delay enables you to set the delay time to match the song tempo. flowchart
graph TD
    A["Left"] --> B["Delay"]
    B --> C["High Damp Low Damp"]
    C --> D["Pan"]
    D --> E["FX AMT"]
    F["Right"] --> G["Delay"]
    G --> H["High Damp Low Damp"]
    H --> I["Pan"]
    I --> J["FX AMT"]
    K["BPM"] --> L["BPM"]
    M["BPM Note x Times"] --> N["Base Note x Times"]
    O["LFO: Trt / Sin"] --> P["LFO Shape"]
    Q["Feedback"] --> G
    R["Depth"] --> I
    S["LFO Phase"] --> I
| a | BPM | MIDI, 40.00... 300.00 | MIDI syncs to the system tempo; 40- 300 sets the tempo manually for this individual effect | |
| Time Over? L --- | OVER! | Display the error message if the left channel delay time exceeds the upper limit | ||
| R ---, OVER! | Display the error message if the right channel delay time exceeds the upper limit | |||
| b | L Delay Base Note | r...w | Selects the type of notes to specify the left channel delay time | |
| Times x1...x32 | Sets the number of notes to specify the left channel delay time | |||
| Feedback -100...+100 | Sets the feedback amount for the left channel | |||
| c | R Delay Base Note | r...w | Selects the type of notes to specify the right channel delay time | |
| Times x1...x32 | Sets the number of notes to specify the right channel delay time | |||
| Feedback -100...+100 | Sets the feedback amount for the right channel | |||
| d | High Damp [%] | 0...100 | Sets the damping amount in the high range | |
| Low Damp [%] | 0...100 | Sets the damping amount in the low range | ||
| e | LFO Waveform | Triangle, Sine Selects the LFO Waveform | ||
| Shape | -100...+100 | Changes the curvature of the LFO Waveform | ||
| LFO Phase | -180...+180 | Sets the LFO phase difference between the left and right | ||
| f | Panning Freq [Hz] | 0.02...20.00 | Sets the panning speed | |
| g | MIDI Sync | Off, On | When this is on, the pan LFO speed is set by BPM, Base Note, and Times, instead of Frequency | |
| BPM | MIDI, 40.00... 300.00 | MIDI syncs to the system tempo; 40- 300 sets the tempo manually for this individual effect | ||
| Base Note | r...w | Selects the type of notes to specify the delay time for the panning speed | ||
| Times x1...x32 | Sets the number of notes to specify the delay time for the panning speed | |||
| h | Panning Depth | 0...100 | Sets the panning width | |
| Src Off...Tempo | Selects the modulation source for the panning width | |||
| Amt -100...+100 | Set the modulation amount of the panning width | |||
| i | Wet/Dry | Dry, 1:99...99:1, Wet | Balance between the wet and dry signal | |
| Src Off...Tempo | Table , "Dynamic Modulation sources," on page 330 | |||
| Amt -100...+100 | Amount of modulation source | |||
70: Tape Echo BPM
This is a tape echo that lets you synchronize the delay time to the tempo of the song. flowchart
graph TD
    A["FX Amt = 100: Mono In - Stereo Out / FX Amt = 0: Stereo In - Stereo Out"] --> B["Left"]
    B --> C["Trim"]
    C --> D["Prc Tone"]
    D --> E["Tape Saturation"]
    E --> F["High / Low Damp"]
    F --> G["Delay"]
    G --> H["Tap2/3 Position"]
    H --> I["FX Amt"]
    I --> J["BPM"]
    J --> K["Base Note x Times"]
    K --> L["Delay Time"]
    L --> M["D"]
    M --> N["Wah Flatter"]
    N --> O["Feedback"]
    O --> P["FFM"]
    P --> Q["FFM"]
    Q --> R["FFM"]
    R --> S["FFM"]
    S --> T["FFM"]
    T --> U["FFM"]
    U --> V["FFM"]
    V --> W["FFM"]
    W --> X["FFM"]
    X --> Y["FFM"]
    Y --> Z["FFM"]
    Z --> AA["FFM"]
    AA --> AB["FFM"]
    AB --> AC["FFM"]
    AC --> AD["FFM"]
    AD --> AE["FFM"]
    AE --> AF["FFM"]
    AF --> AG["FFM"]
    AG --> AH["FFM"]
    AH --> AI["FFM"]
    AI --> AJ["FFM"]
    AJ --> AK["FFM"]
    AK --> AL["FFM"]
    AL --> AM["FFM"]
    AM --> AN["FFM"]
    AN --> AO["FFM"]
    AO --> AP["FFM"]
    AP --> AQ["FFM"]
    AQ --> AR["FFM"]
    AR --> AS["FFM"]
    AS --> AT["FFM"]
    AT --> AU["FFM"]
    AU --> AV["FFM"]
    AV --> AW["FFM"]
    AW --> AX["FFM"]
    AX --> AY["FFM"]
    AY --> AZ["FFM"]
    AZ --> BA["FFM"]
    BA --> BB["FFM"]
    BB --> BC["FFM"]
    BC --> BD["FFM"]
    BD --> BE["FFM"]
    BE --> BF["FFM"]
    BF --> BG["FFM"]
    BG --> BH["FFM"]
    BH --> BI["FFM"]
    BI --> BJ["FFM"]
    BJ --> BK["FFM"]
    BK --> BL["FFM"]
    BL --> BM["FFM"]
    BM --> BN["FFM"]
    BN --> BO["FFM"]
    BO --> BP["FFM"]
    BP --> BQ["FFM"]
    BQ --> BR["FFM"]
    BR --> BS["FFM"]
    BS --> BT["FFM"]
    BT --> BU["FFM"]
    BU --> BV["FFM"]
    BV --> BW["FFM"]
    BW --> BX["FFM"]
    BX --> BY["FFM"]
    BY --> BZ["FFM"]
| a | BPM (Delay) | MIDI, 40.00...300.00 | MIDI syncs to the system tempo; 40–300 sets the tempo manually for this individual effect | |
| Tap1 Dmod Src | Off...Tempo | Selects the modulation source of the delay time | ||
| b | Tap1 Delay Note | r...w | Selects the type of notes to specify the delay time (tap1) | |
| Times x1...x32 | Sets the number of notes to specify the delay time (tap1) | |||
| Time Over? ---, OVER! | Displays an error message when the delay time exceeds the upper limit | |||
| c | Tap1 Dmod Note | r...w | Selects the note value used to specify the delay time when the modulation is at maximum | |
| Times x1...x32 | Specifies the number of notes used to specify the delay time when the modulation is at maximum | |||
| d | Tap2 Position [%] | 0...100 | Sets the position of Tap 2 relative to the Tap 1 delay time the depth of pitch variation | |
| e | Tap3 Position [%] | 0...100 | Sets the position of Tap 3 relative to the Tap 1 delay time the depth of pitch variation | |
| f | Tap1 Level 0...100 Sets the Tap1 output level | |||
| Pan L, 1...99, R Sets the stereo image of tap1 | ||||
| FB Amt -100...+100 Sets the Tap1 feedback amount | ||||
| g | Tap2 Level 0...100 Sets the Tap2 output level | |||
| Pan L, 1...99, R Sets the stereo image of tap2 | ||||
| FB Amt -100...+100 Sets the Tap2 feedback amount | ||||
| h | Tap3 Level 0...100 Sets the Tap3 output level | |||
| Pan L, 1...99, R Sets the stereo image of tap3 | ||||
| FB Amt -100...+100 Sets the Tap3 feedback amount | ||||
| i | Feedback | 0...100 | Sets the amount of feedback for Taps 1, 2, and 3 | |
| Src Off...Tempo | Selects the modulation source of feedback amount | |||
| Amt | -100...+100 | Sets the depth by which feedback amount will be modulated | ||
| j | High Damp [%] | 0...100 | Sets the damping amount in the high range | |
| Low Damp [%] | 0...100 | Sets the damping amount in the low range | ||
| k | Saturation 0...100 Sets the distortion amount | |||
| l | Input Trim | 0...100 Sets the input gain | ||
| Pre Tone | 0...100 | Sets the tone of the input | ||
| m | Wow Flutter [Hz] | 0.02...1.00 | Sets the frequency at which pitch variation will occur | |
| Wow Flutter depth | 0...100 | Sets the depth of pitch variation | ||
| n | Wet/Dry | Dry, 1:99...99:1, Wet | Balance between the wet and dry signal | |
| Src Off...Tempo | Table , “Dynamic Modulation sources,” on page 330 | |||
| Amt | -100...+100 Amount of modulation source | |||
b: Time Over?
You can set the delay time up to 5,400msec. If the delay time exceeds this limit, the error message “OVER!” appears in the display. Set the delay time parameters so that this message will not appear. “Time Over?” is only a display parameter.Reverb and Early Reflections (Reverb ER)
71: Reverb Hall
This hall-type reverb simulates the reverberation of mid-size concert halls or ensemble halls.72: Reverb SmoothHall
This hall-type reverb simulates the reverberation of larger halls and stadiums, and creates a smooth release.73: Reverb Wet Plate
This plate reverb simulates warm (dense) reverberation.74: Reverb Dry Plate
This plate reverb simulates dry (light) reverberation. flowchart
graph LR
    A["Left"] --> B["EQ Trim"]
    B --> C["LEQ HEQ"]
    C --> D["Pre Delay"]
    D --> E["Reverb"]
    E --> F["Pre Delay Thru"]
    F --> G["FX Amt"]
    H["Right"] --> I["EQ Trim"]
    I --> J["Left"]
    K["FX Amt = 100: Mono In - Stereo Out / FX Amt = 0: Stereo In - Stereo Out"] --> L["Left"]
    M["FX Amt"] --> N["Right"]
| a | Reverb Time [sec] | 0.1...10.0 Sets the reverberation time | ||
| High Damp [%] | 0...100 | Sets the damping amount in the high range | ||
| b | Pre Delay [msec] | 0...200 | Sets the delay time from the dry sound | |
| Pre Delay Thru [%] | 0...100 | Sets the mix ratio of non-delay sound | ||
| c EQ Trim 0...100 Sets the EQ input level | ||||
| d | Pre LEQ Fc | Low, Mid-Low | Selects the cutoff frequency (low or mid-low) of the low-range equalizer | |
| Pre HEQ Fc | High, Mid-High | Selects the cutoff frequency (high or mid-high) of the high-range equalizer | ||
| e | Pre LEQ Gain [dB] | -15.0...+15.0 Sets the gain of Low EQ | ||
| Pre HEQ Gain [dB] | -15.0...+15.0 Sets the gain of High EQ | |||
| f | Wet/Dry | Dry, 1:99...99:1, Wet | Balance between the wet and dry signal | |
| Src Off...Tempo | Table , “Dynamic Modulation sources,” on page 330 | |||
| Amt -100...+100 | Amount of modulation source | |||
line
| Time Phase | Level | | ------------------ | ----- | | Dry | High | | Pre Delay Thru | Medium| | Reverb | Low |75: Reverb Room
This room-type reverb emphasizes the early reflections that make the sound tighter. Changing the balance between the early reflections and reverb sound allows you to simulate nuances, such as the type of walls of a room.76: Reverb BrightRoom
This room-type reverb emphasizes the early reflections that make the sound brighter. flowchart
graph LR
    A["Left"] --> B["EQ Trim"]
    B --> C["LEQ"]
    C --> D["HEQ"]
    D --> E["Pre Delay"]
    E --> F["Reverb"]
    F --> G["ERs"]
    G --> H["FX Amt"]
    I["Right"] --> J["EQ Trim"]
    J --> K["HEQ"]
    K --> L["Pre Delay Thru"]
    L --> M["Reverb Level"]
    M --> N["ERs"]
    N --> O["FX Amt"]
    P["Left"] --> Q["EQ Trim"]
    Q --> R["HEQ"]
    R --> S["Pre Delay Thru"]
    S --> T["Reverb Level"]
    T --> U["ERs"]
    U --> V["FX Amt"]
    W["Left"] --> X["EQ Trim"]
    X --> Y["HEQ"]
    Y --> Z["Pre Delay Thru"]
    Z --> AA["Reverb Level"]
    AA --> AB["ERs"]
    AB --> AC["FX Amt"]
| a | Reverb Time [sec] | 0.1...3.0 Sets the | reverberation time | |
| High Damp [%] | 0...100 | Sets the damping amount in the high range | ||
| b | Pre Delay [msec] | 0...200 | Sets the delay time from the dry sound | |
| Pre Delay Thru [%] | 0...100 | Sets the mix ratio of non-delay sound | ||
| c ER Level 0...100 Sets the level of early reflections | ||||
| d Reverb Level 0...100 Sets the REVERBERATION LEVEL | ||||
| e EQ Trim 0...100 Sets the EQ input level | ||||
| f | Pre LEQ Fc | Low, Mid-Low | Selects the cutoff frequency (low or mid-low) of the low-range equalizer | |
| Pre HEQ Fc | High, Mid-High | Selects the cutoff frequency (high or mid-high) of the high-range equalizer | ||
| g | Pre LEQ Gain [dB] | -15.0...+15.0 Sets the gain of Low EQ | ||
| Pre HEQ Gain [dB] | -15.0...+15.0 Sets the gain of High EQ | |||
| h | Wet/Dry | Dry, 1:99...99:1, Wet | Balance between the wet and dry signal | |
| Src Off...Tempo | Table, "Dynamic Modulation sources," on page 330 | |||
| Amt -100...+100 Amount of modulation source | ||||
c: ER Level
d: Reverb Level
These parameters set the early reflection level and reverb level. Changing these parameter values allows you to simulate the type of walls in the room. That is, a larger “ER Level” simulates a hard wall, and a larger “Reverb Level” simulates a soft wall. bar
Reverb - Room Type | Time | Level | |---|---| | Pre Delay Thru | Dry | | Pre Delay | ER (Early Re- ections) | | Reverb | Reverb | | Reverb - Room Type | Level |77: Early Reflections
This effect is only the early reflection part of a reverberation sound, and adds presence to the sound. You can select one of the four decay curves. flowchart
graph LR
    A["Left"] --> B["EQ Trim"]
    B --> C["LEQ HEO"]
    C --> D["Pre Delay"]
    D --> E["Early Re ections"]
    E --> F["FX Amt"]
    G["Right"] --> H["EQ Trim"]
    H --> I["Left"]
    J["Left"] --> K["EQ Trim"]
    K --> L["Left"]
    M["Left"] --> N["Left"]
    O["Left"] --> P["Left"]
    Q["Left"] --> R["Left"]
    S["Left"] --> T["Left"]
    U["Left"] --> V["Left"]
    W["Left"] --> X["Left"]
    Y["Left"] --> Z["Left"]
    AA["Left"] --> AB["Left"]
    AC["Left"] --> AD["Left"]
    AE["Left"] --> AF["Left"]
    AG["Left"] --> AH["Left"]
    AI["Left"] --> AJ["Left"]
    AK["Left"] --> AL["Left"]
    AM["Left"] --> AN["Left"]
    AO["Left"] --> AP["Left"]
    AQ["Left"] --> AR["Left"]
    AS["Left"] --> AT["Left"]
    AU["Left"] --> AV["Left"]
    AW["Left"] --> AX["Left"]
    AY["EQ Trim"] --> AZ["EQ HEO"]
    BA["EQ Trim"] --> BB["EQ HEO"]
    BC["EQ Trim"] --> BD["EQ HEO"]
    BE["EQ Trim"] --> BF["EQ HEO"]
    BG["EQ Trim"] --> BH["EQ HEO"]
    BI["EQ Trim"] --> BJ["EQ HEO"]
    BK["EQ Trim"] --> BL["EQ HEO"]
    BM["EQ Trim"] --> BN["EQ HEO"]
    BO["EQ Trim"] --> BP["EQ HEO"]
    BQ["EQ Trim"] --> BR["EQ HEO"]
    BS["EQ Trim"] --> BT["EQ HEO"]
    BU["EQ Trim"] --> BV["EQ HEO"]
    BW["EQ Trim"] --> BX["EQ HEO"]
    BY["EQ Trim"] --> BZ["EQ HEO"]
    CA["EQ Trim"] --> CB["EQ HEO"]
    CC["EQ Trim"] --> CD["EQ HEO"]
    CE["EQ Trim"] --> CF["EQ HEO"]
    DG["EQ Trim"] --> DH["EQ HEO"]
    DI["EQ Trim"] --> DJ["EQ HEO"]
    DK["EQ Trim"] --> DL["EQ HEO"]
    DV["EQ Trim"] --> DW["EQ HEO"]
    DX["EQ Trim"] --> DXB["EQ HEO"]
    DXB --> DXC["DXA/DXB/DXC/DXC/DXC/DXC/DXC/DXC/DXC/DXC/DXC/DXC/DXC/DXC/DXC/DXC/DXC/DXC/DXC/DXC/DXC/DXC/DXC/DXC/DXC/DXC/DXC/DXC/DXC/DXC/DXC/DXC/DXC/DXC/DXC/DXC/XD/A"]
| a | Type | Sharp, Loose, Modulated, Reverse | Selects the decay curve for the early reflection | |
| b | ER Time [msec] | 10...800 | Sets the time length of early reflection | |
| c | Pre Delay [msec] | 0...200 | Sets the time taken from the original sound to the first early reflection | |
| d | EQ Trim 0...100 | Sets the input level of EQ applied to the effect sound | ||
| e | Pre LEQ Fc | Low, Mid-Low | Selects the cutoff frequency (low or mid-low) of the low-range equalizer | |
| Pre HEQ Fc | High, Mid-High | Selects the cutoff frequency (high or mid-high) of the high-range equalizer | ||
| f | Pre LEQ Gain [dB] | -15.0...+15.0 Gain of the Low EQ | ||
| Pre HEQ Gain [dB] | -15.0...+15.0 Gain of the High EQ | |||
| g | Wet/Dry | Dry, 1:99...99:1, Wet | Balance between the wet and dry signal | |
| Src Off...Tempo | Table , “Dynamic Modulation sources,” on page 330 | |||
| Amt -100...+100 | Amount of modulation source | |||
a: Type
This parameter selects the decay curve for the early reflection. bar
| Early Re ections - Type | Peak Frequency | | ----------------------- | -------------- | | Sharp | High | | Loose | Medium | | Modulated | Low | | Reverse | High |Mono-Mono Serial (Mono-Mono)
78: P4EQ - Exciter
(Parametric 4-Band EQ - Exciter)
This effect combines a mono four-band parametric equalizer and an exciter. flowchart
graph LR
    A["Left"] --> B["Parametric 4Band EQ"]
    B --> C["Exciter"]
    C --> D["FX Amt"]
    E["Right"] --> F["Trim"]
    F --> G["Exciter"]
    G --> H["FX Amt"]
    style A fill:#f9f,stroke:#333
    style E fill:#f9f,stroke:#333
    style B fill:#ccf,stroke:#333
    style C fill:#ccf,stroke:#333
    style D fill:#cfc,stroke:#333
    style F fill:#fcc,stroke:#333
    style G fill:#fcc,stroke:#333
    style H fill:#fcc,stroke:#333
| P4EQ | ||||
| a [E] | Trim 0...100 Sets | the parametric EQ input level | ||
| b | [E]B1 Cutoff [Hz] | 20...1.00k Sets the center frequency of Band 1 | ||
| Q 0.5...10.0 Sets | the bandwidth of Band 1 | |||
| Gain [dB] -18...+ | 18 Sets the gain of Band 1 | |||
| c | [E]B2 Cutoff [Hz] | 50...5.00k Sets the center frequency of Band 2 | ||
| Q 0.5...10.0 Sets | the bandwidth of Band 2 | |||
| Gain [dB] -18...+ | 18 Sets the gain of Band 2 | |||
| d | [E]B3 Cutoff [Hz] | 300...10.00k Sets the center frequency of Band 3 | ||
| Q 0.5...10.0 Sets | the bandwidth of Band 3 | |||
| Gain [dB] -18...+ | 18 Sets the gain of Band 3 | |||
| e | [E]B4 Cutoff [Hz] | 500...20.00k Sets the center frequency of Band 4 | ||
| Q 0.5...10.0 Sets | the bandwidth of Band 4 | |||
| Gain [dB] -18...+ | 18 Sets the gain of Band 4 | |||
| EXCITER | ||||
| f | [X]Exciter Blend | -100...+100 | Sets the intensity (depth) of the Exciter effect | |
| g | [X]Emphasis Freq | 0...70 | Sets the frequency range to be emphasized | |
| h | Wet/Dry | Dry, 1:99...99:1, Wet | Balance between the wet and dry signal | |
| Src Off...Tempo | Table, “Dynamic Modulation sources,” on page 330 | |||
| Amt -100...+100 | Amount of modulation source | |||
79: P4EQ - Wah
(Parametric 4-Band EQ - Wah/Auto
This effect combines a mono four-band parametric equalizer and a wah. You can change the order of the connection. flowchart
graph TD
    A["FX Amt = 100: Mono In - Mono Out / FX Amt = 0: Stereo In - Stereo Out"] --> B["FX Amt"]
    B --> C["FX Amt"]
    D["Parametric 4Band EQ"] --> E["Wah/Auto Wah"]
    F["Trim"] --> G["Wah"]
    H["Right"] --> I["Sweep Mode"]
    J["Envelope"] --> K["Auto"]
    L["D-mod"] --> M["LFO"]
    N["D-mod"] --> O["LFO"]
    P["Fix"] --> Q["FX Amt"]
| P4EQ | ||||
| a | [E]Trim | 0...100 Sets the parametric EQ input level | ||
| Routing | P4EQ ?Wah, Wah ?P4EQ | Changes the order of the parametric equalizer and wah connection | ||
| b | [E]B1 Cutoff [Hz] | 20...1.00k Sets the center frequency of Band 1 | ||
| Q 0.5...10.0 | Sets the band width of Band 1 | |||
| Gain [dB] -18...+ | 18 Sets the gain of Band 1 | |||
| c | [E]B2 Cutoff [Hz] | 50...5.00k Sets the center frequency of Band 2 | ||
| Q 0.5...10.0 | Sets the band width of Band 2 | |||
| Gain [dB] | -18...+18 Sets the gain of Band 2 | |||
| d | [E]B3 Cutoff [Hz] | 300...10.00k Sets the center frequency of Band 3 | ||
| Q 0.5...10.0 | Sets the band width of Band 3 | |||
| Gain [dB] | -18...+18 Sets the gain of Band 3 | |||
| e | [E]B4 Cutoff [Hz] | 500...20.00k Sets the center frequency of Band 4 | ||
| Q 0.5...10.0 | Sets the band width of Band 4 | |||
| Gain [dB] | -18...+18 Sets the gain of Band 4 | |||
| WAH | ||||
| f | [W]Frequency Bottom | 0...100 | Sets the lower limit of the wah center frequency | |
| Frequency Top | 0...100 | Sets the upper limit of the wah center frequency | ||
| g | [W]Sweep Mode | Auto, D-mod, LFO | Selects the control from auto-wah, modulation source, and LFO | |
| Src Off...Tempo | Selects the modulation source for the wah when Sweep Mode=D-mod | |||
| h | [W]LFO Frequency [Hz] | 0.02...20.00 | Sets the speed of the LFO | |
| Resonance | 0...100 Sets the resonance amount | |||
| LPF | Off, On | Switches the wah low pass filter on and off | ||
| i | [W] Wet/Dry | Dry,1 : 99... 99 : 1, Wet | Sets the wah effect balance | |
| Src Off...Tempo | Selects the Wet/Dry modulation source for the wah | |||
| Amt -100...+100 | Sets the Wet/Dry modulation amount for the wah | |||
| j | Wet/Dry | Dry, 1:99...99:1, Wet | Balance between the wet and dry signal | |
| Src Off...Tempo | Table , "Dynamic Modulation sources," on page 330 | |||
| Amt -100...+100 | Amount of modulation source | |||
80: P4EQ - Cho/Flng
(Parametric 4-Band EQ - Chorus/Flanger)
This effect combines a mono four-band parametric equalizer and a chorus/flanger. flowchart
graph LR
    A["FX Amt = 100: Mono In - Stereo Out / FX Amt = 0: Stereo In - Stereo Out"] --> B["FX Amt"]
    B --> C["Parametric 4Band EQ"]
    C --> D["Chorus/Flanger"]
    D --> E["Normal"]
    E --> F["Wet Invert"]
    F --> G["Cho/Flng FX Amt"]
    G --> H["Feedback"]
    H --> I["Trim"]
    I --> J["Left"]
    J --> K["Right"]
    L["LFO: Tri / Sine"] --> G
| P4EQ | ||||
| a [E] | Trim 0...100 Sets | the parametric EQ input level | ||
| b | [E]B1 Cutoff [Hz] | 20...1.00k Sets the center frequency of Band 1 | ||
| Q 0.5...10.0 Sets | the bandwidth of Band 1 | |||
| Gain [dB] -18...+ | 18 Sets the gain of Band 1 | |||
| c | [E]B2 Cutoff [Hz] | 50...5.00k Sets the center frequency of Band 2 | ||
| Q 0.5...10.0 Sets | the bandwidth of Band 2 | |||
| Gain [dB] -18...+ | 18 Sets the gain of Band 2 | |||
| d | [E]B3 Cutoff [Hz] | 300...10.00k Sets the center frequency of Band 3 | ||
| Q 0.5...10.0 Sets | the bandwidth of Band 3 | |||
| Gain [dB] -18...+ | 18 Sets the gain of Band 3 | |||
| e | [E]B4 Cutoff [Hz] | 500...20.00k Sets the center frequency of Band 4 | ||
| Q 0.5...10.0 Sets | the bandwidth of Band 4 | |||
| Gain [dB] -18...+ | 18 Sets the gain of Band 4 | |||
| CHORUS/FLANGER | ||||
| f | [F]LFO Frequency [Hz] | 0.02...20.00 Sets the speed of the LFO | ||
| LFO Waveform | Triangle, Sine | Selects the LFO Waveform | ||
| g | [F]Delay Time [msec] | 0.0...1350.0 Sets the delay time | ||
| Depth | 0...100 Sets the depth of LFO modulation | |||
| Feedback | -100...+100 | Sets the feedback amount | ||
| h | [F]Cho/Flng Wet/Dry | -Wet, -1:99...Dry...99:1,Wet | Sets the effect balance of the chorus/flanger | |
| Src | Off...Tempo | Selects the Wet/Dry modulation source for the chorus/flanger | ||
| Amt | -100...+100 | Sets the Wet/Dry modulation amount for the chorus/flanger | ||
| i | [F]Output Mode | Normal,Wet Invert | Selects the output mode for the chorus/flanger | |
| j | Wet/Dry | Dry, 1:99...99:1,Wet | Balance between the wet and dry signal | |
| Src | Off...Tempo | Table, "Dynamic Modulation sources," on page 330 | ||
| Amt | -100...+100 | Amount of modulation source | ||
i: Output Mode
When Wet Invert is selected, the right channel phase of the chorus/flanger effect sound is inverted. This creates pseudo-stereo effects and adds spread. However, if a mono-input type effect is connected after this effect, the left and right sounds may cancel each other, eliminating the chorus/flanger effects.81: P4EQ - Phaser
(Parametric 4-Band EQ - Phaser)
This effect combines a mono four-band parametric equalizer and a phaser. flowchart
graph LR
    A["FX Amt = 100: Mono In - Stereo Out / FX Amt = 0: Stereo In - Stereo Out"] --> B["Left"]
    B --> C["Parametric 4Band EQ"]
    C --> D["Phaser"]
    D --> E["Normal Output Mode"]
    E --> F["Wet Invent"]
    F --> G["Phaser FX Amt"]
    G --> H["LFO: Tri / Sine"]
    H --> I["Right"]
    I --> J["Trim"]
    J --> K["Phaser"]
    K --> L["Resonance"]
    L --> M["Phaser FX Amt"]
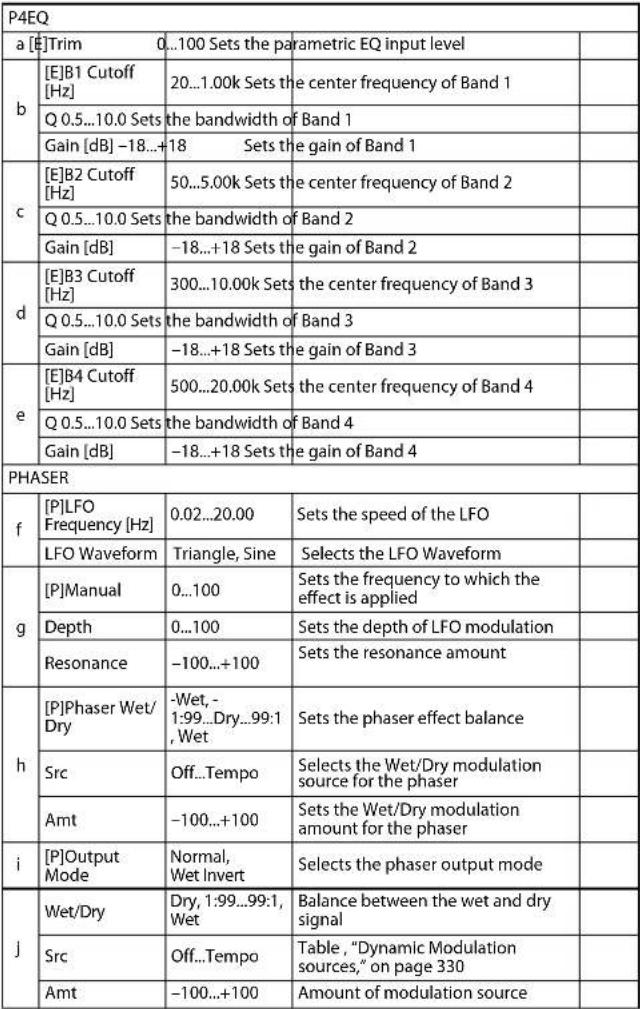 |
82: P4EQ - Mt. Delay
(Parametric 4-Band EQ - Multitap Delay)
This effect combines a mono four-band parametric equalizer and a multitap delay. flowchart
graph LR
    A["Left"] --> B["Trim"]
    B --> C["Parametric 4Band EQ Multitap Delay"]
    C --> D["High Damp (1)"]
    D --> E["MT.Dly FX Amt"]
    E --> F["FX Amt"]
    G["Right"] --> H["FX Amt"]
    I["FX Amt = 100: Mono In - Mono Out / FX Amt = 0: Stereo In - Stereo Out"] --> J["FX Amt"]
    K["Feedback"] --> L["Delay"]
    L --> M["MT.Dly FX Amt"]
| a | [E]Trim 0...100 | Sets the parametric EQ input level | ||
| b | [E]B1 Cutoff [Hz] | 20...1.00k | Sets the center frequency of Band 1 | |
| Q 0.5...10.0 Sets the bandwidth of Band 1 | ||||
| Gain [dB] -18...+18 Sets the gain of Band 1 | ||||
| c | [E]B2 Cutoff [Hz] | 50...5.00k | Sets the center frequency of Band 2 | |
| Q 0.5...10.0 Sets the bandwidth of Band 2 | ||||
| Gain [dB] -18...+18 Sets the gain of Band 2 | ||||
| d | [E]B3 Cutoff [Hz] | 300...10.00k | Sets the center frequency of Band 3 | |
| Q 0.5...10.0 Sets the bandwidth of Band 3 | ||||
| Gain [dB] -18...+18 Sets the gain of Band 3 | ||||
| e | [E]B4 Cutoff [Hz] | 500...20.00k | Sets the center frequency of Band 4 | |
| Q 0.5...10.0 Sets the bandwidth of Band 4 | ||||
| Gain [dB] -18...+18 Sets the gain of Band 4 | ||||
| MULTITAP DELAY | ||||
| f | [D]Tap1 Time [msec] | 0.0...1360.0 Sets the Tap1 delay time | ||
| Tap1 Level 0...100 | Sets the Tap1 output level | |||
| g | [D]Tap2 Time [msec] | 0.0...1360.0 Sets the Tap2 delay time | ||
| Feedback (Tap2) | -100...+100 Sets the Tap2 feedback amount | |||
| h | [D]High Damp [%] | 0...100 | Sets the damping amount in the high range | |
| i | [D]Mt.Delay Wet/Dry | Dry, 1:99...99:1, Wet | Sets the multitap delay effect balance | |
| Src Off...Tempo | Selects the Wet/Dry modulation source for the multitap delay | |||
| Amt -100...+100 | Sets the Wet/Dry modulation amount for the multitap delay | |||
| j | Wet/Dry | Dry, 1:99...99:1, Wet | Balance between the wet and dry signal | |
| Src Off...Tempo | Table , "Dynamic Modulation sources," on page 330 | |||
| Amt -100...+100 Amount of modulation source | ||||
83: Comp - Wah
(Compressor - Wah/Auto Wah)
This effect combines a mono compressor and a wah. You can change the order of the connection. flowchart
graph TD
    A["Left+"] --> B["EQ Trim"]
    B --> C["LEO"]
    C --> D["HEQ"]
    D --> E["Comp"]
    E --> F["Wah"]
    F --> G["FX Amt"]
    G --> H["FX Amt = 100: Mono In - Mono Out / FX Amt = 0: Stereo In - Stereo Out"]
    H --> I["Compressor"]
    I --> J["Routing"]
    J --> K["Wah/Auto Wah"]
    K --> L["FX Amt"]
    L --> M["FX Amt"]
    M --> N["Sweep Mode"]
    N --> O["Envelope - Auto"]
    O --> P["D-mod"]
    P --> Q["LFO"]
    Q --> R["LFO"]
    R --> S["Envelope - Control"]
    S --> T["Output Level"]
    T --> U["Comp"]
    U --> V["EQ Trim"]
| a | [C] Sensitivity | 1...100 | Sets the sensitivity | |
| b | [C]Attack 1...100 | Sets the attack level | ||
| Output Level | 0...100 | Sets the compressor output level | ||
| c [C]EQ Trim 0...100 Sets the EQ input level | ||||
| d | [C]Pre LEQ Gain [dB] | -15...+15 Sets the gain of Low EQ | ||
| Pre HEQ Gain [dB] | -15...+15 Sets the gain of High EQ | |||
| WAH | ||||
| e | [W]Frequency Bottom | 0...100 | Sets the lower limit of the wah center frequency | |
| Frequency Top | 0...100 | Sets the upper limit of the wah center frequency | ||
| f | [w]Sweep Mode | Auto, D-mod, LFO | Selects the control from auto-wah, modulation source, and LFO | |
| Src | Off...Tempo | Selects the modulation source for the wah when Sweep Mode=D-mod | ||
| g | [W]LFO Frequency [Hz] | 0.02...20.00 Sets the speed of the LFO | ||
| Resonance 0...100 | Sets the resonance amount | |||
| LPF | Off, On | Switches the wah low pass filter on and off | ||
| h | [W]Wet/Dry | Dry, 1:99...99:1, Wet | Sets the wah effect balance | |
| Src | Off...Tempo | Selects the Wet/Dry modulation source for the wah | ||
| Amt | -100...+100 | Sets the Wet/Dry modulation amount for the wah | ||
| i | Routing | Comp ?Wah, Wah ?Comp | Switches the order of the compressor and wah | |
| j | Wet/Dry | Dry, 1:99...99:1, Wet | Balance between the wet and dry signal | |
| Src | Off...Tempo | Table, "Dynamic Modulation sources," on page 330 | ||
| Amt | -100...+100 | Amount of modulation source | ||
84: Comp - Amp Sim
(Compressor - Amp Simulation)
This effect combines a mono compressor and an amp simulation. You can change the order of the effects. flowchart
graph TD
    A["FX Amt"] --> B["Compressor"]
    B --> C["LEO"]
    C --> D["HEQ"]
    D --> E["Comp"]
    E --> F["Amp Simulation Filter"]
    F --> G["FX Amt"]
    H["Left"] --> I["EQ Trim"]
    I --> J["LEO"]
    J --> K["HEQ"]
    K --> L["Comp"]
    L --> M["Amp Simulation Filter"]
    M --> N["FX Amt"]
    O["Right"] --> P["Envelope - Control"]
    P --> Q["Output Level"]
    R["Routing"] --> S["Amp Simulation"]
    T["FX Amt = 100: Mono In - Mono Out / FX Amt = 0: Stereo In - Stereo Out"] --> U["FX Amt"]
| COMPRESSOR | ||||
| a | [C] Sensitivity | 1...100 Sets the sensitivity | ||
| b | [C]Attack 1...100 | Sets the attack level | ||
| Output Level 0... | 100 Sets the compressor output level | |||
| c | [C]EQ Trim 0...100 | Sets the EQ input level | ||
| d | [C]Pre LEQ Gain [dB] | -15...+15 Sets the gain of Low EQ | ||
| Pre HEQ Gain [dB] | -15...+15 Sets the gain of High EQ | |||
| AMP SIM | ||||
| e | [A]Amplifier Type | SS, EL84, 6L6 Selects the type of guitar amplifier | ||
| f | R o u t | Comp ? Amp, Amp ? Comp | Switches the order of the compressor and amp simulation | |
| g | Wet/Dry | Dry, 1:99...99:1, Wet | Balance between the wet and dry signal | |
| Src Off...Tempo | Table , "Dynamic Modulation sources," on page 330 | |||
| Amt -100...+100 | Amount of modulation source | |||
85: Comp - OD/HiGain
(Compressor - Overdrive/Hi.Gain)
This effect combines a mono compressor and an overdrive/high-gain distortion. You can change the order of the effects. flowchart
graph TD
    Left["Left"] --> Compressor["Compressor"]
    Compressor --> Comp["Comp"]
    Comp --> Driver["Driver"]
    Driver --> Overdrive["Overdrive / Hi-Gain"]
    Overdrive --> FX_Amt1["FX Amt"]
    Overdrive --> FX_Amt2["FX Amt"]
    FX_Amt1 --> FX_Amt3["FX Amt"]
    FX_Amt2 --> FX_Amt4["FX Amt"]
    FX_Amt3 --> FX_Amt5["FX Amt"]
    FX_Amt4 --> FX_Amt6["FX Amt"]
    FX_Amt5 --> FX_Amt7["FX Amt"]
    FX_Amt6 --> FX_Amt8["FX Amt"]
    FX_Amt7 --> FX_Amt9["FX Amt"]
    FX_Amt8 --> FX_Amt10["FX Amt"]
    FX_Amt9 --> FX_Amt11["FX Amt"]
    FX_Amt10 --> FX_Amt12["FX Amt"]
    FX_Amt11 --> FX_Amt13["FX Amt"]
    FX_Amt12 --> FX_Amt14["FX Amt"]
    FX_Amt13 --> FX_Amt15["FX Amt"]
    FX_Amt14 --> FX_Amt16["FX Amt"]
    FX_Amt15 --> FX_Amt17["FX Amt"]
    FX_Amt16 --> FX_Amt18["FX Amt"]
    FX_Amt17 --> FX_Amt19["FX Amt"]
    FX_Amt18 --> FX_Amt20["FX Amt"]
    FX_Amt19 --> FX_Amt21["FX Amt"]
    FX_Amt20 --> FX_Amt22["FX Amt"]
    FX_Amt21 --> FX_Amt23["FX Amt"]
    FX_Amt22 --> FX_Amt24["FX Amt"]
    FX_Amt23 --> FX_Amt25["FX Amt"]
    FX_Amt24 --> FX_Amt26["FX Amt"]
    FX_Amt25 --> FX_Amt27["FX Amt"]
    FX_Amt26 --> FX_Amt28["FX Amt"]
    FX_Amt27 --> FX_Amt29["FX Amt"]
    FX_Amt28 --> FX_Amt30["FX Amt"]
    FX_Amt29 --> FX_Amt31["FX Amt"]
    FX_Amt30 --> FX_Amt32["FX Amt"]
    FX_Amt31 --> FX_Amt33["FX Amt"]
    FX_Amt32 --> FX_Amt34["FX Amt"]
    FX_Amt33 --> FX_Amt35["FX Amt"]
    FX_Amt34 --> FX_Amt36["FX Amt"]
    FX_Amt35 --> FX_Amt37["FX Amt"]
    FX_Amt36 --> FX_Amt38["FX Amt"]
    FX_Amt37 --> FX_Amt39["FX Amt"]
    FX_Amt38 --> FX_Amt40["FX Amt"]
    FX_Amt39 --> FX_Amt41["FX Amt"]
    FX_Amt40 --> FX_Amt42["FX Amt"]
    FX_Amt41 --> FX_Amt43["FX Amt"]
    FX_Amt42 --> FX_Amt44["FX Amt"]
    FX_Amt43 --> FX_Amt45["FX Amt"]
    FX_Amt44 --> FX_Amt46["FX Amt"]
    FX_Amt45 --> FX_Amt47["FX Amt"]
    FX_Amt46 --> FX_Amt48["FX Amt"]
    FX_Amt47 --> FX_Amt49["FX Amt"]
    FX_Amt48 --> FX_Amt50["FX Amt"]
    FX_Amt49 --> FX_Amt51["FX Amt"]
    FX_Amt50 --> FX_Amt52["FX Amt"]
    FX_Amt51 --> FX_Amt53["FX Amt"]
    FX_Amt52 --> FX_Amt54["FX Amt"]
    FX_Amt53 --> FX_Amt55["FX Amt"]
    FX_Amt54 --> FX_Amt56["FX Amt"]
    FX_Amt55 --> FX_Amt57["FX Amt"]
    FX_Amt56 --> FX_Amt58["FX Amt"]
    FX_Amt57 --> FX_Amt59["FX Amt"]
    FX_Amt58 --> FX_Amt60["FX Amt"]
    FX_Amt59 --> FX_Amt61["FX Amt"]
    FX_Amt60 --> FX_Amt62["FX Amt"]
    FX_Amt61 --> FX_Amt63["FX Amt"]
    FX_Amt62 --> FX_Amt64["FX Amt"]
    FX_Amt63 --> FX_Amt65["FX Amt"]
    FX_Amt64 --> FX_Amt66["FX Amt"]
    FX_Amt65 --> FX_Amt67["FX Amt"]
    FX_Amt66 --> FX_Amt68["FX Amt"]
    FX_Amt67 --> FX_Amt69["FX Amt"]
    FX_Amt68 --> FX_Amt70["FX Amt"]
    FX_Amt69 --> FX_Amt71["FX Amt"]
    FX_Amt70 --> FX_Amt72["FX Amt"]
    FX_Amt71 --> FX_Amt73["FX Amt"]
    FX_Amt72 --> FX_Amt74["FX Amt"]
    FX_Amt73 --> FX_Amt75["FX Amt"]
    FX_Amt74 --> FX_Amt76["FX Amt"]
    FX_Amt75 --> FX_Amt77["FX Amt"]
    FX_Amt76 --> FX_Amt78["FX Amt"]
    FX_Aunt1["FX Aamt = 100: Mono In - Mono Out / FXTAamt = 0: Stereo In - Stereo Out"] --> FXTAamt1
| COMPRESSOR | ||||
| a | [C] Sensitivity | 1...100 Sets the sensitivity | ||
| b | [C]Attack 1...100 | Sets the attack level | ||
| Output Level 0... | 100 Sets the comp | pressor output level | ||
| OD/HI-GAIN | ||||
| c | [O]Drive Mode | Overdrive, Hi-Gain | Switches between overdrive and high-gain distortion | |
| Drive | 1...100 | Sets the degree of distortion | ||
| d | [O]Output Level | 0...50 | Sets the overdrive output level | |
| Src Off...Tempo | Selects the modulation source for the overdrive output level | |||
| Amt -50...+50 | Sets the modulation amount of the overdrive output level | |||
| e | [O]Low Cutoff [Hz] | 20...1.00k | Sets the center frequency for Low EQ (shelving type) | |
| Gain [dB] -18...+ | 18 Sets the gain | of Low EQ | ||
| f | [O]Mid1 Cutoff [Hz] | 300...10.00k | Sets the center frequency for Mid/ High EQ 1 (peaking type) | |
| Q | 0.5...10.0 | Sets the band width of Mid/High EQ 1 | ||
| Gain [dB] -18...+ | 18 Sets the gain | of Mid/High EQ 1 | ||
| g | [O]Mid2 Cutoff [Hz] | 500...20.00k | Sets the center frequency for Mid/ High EQ 2 (peaking type) | |
| Q | 0.5...10.0 | Sets the band width of Mid/High EQ 2 | ||
| Gain [dB] -18...+ | 18 Sets the gain | of Mid/High EQ 2 | ||
| h | [O]Wet/Dry | Dry, 1:99...99:1, Wet | Sets the overdrive effect balance | |
| Src Off...Tempo | Selects the Wet/Dry modulation source for the overdrive | |||
| Amt -100...+100 | Sets the Wet/Dry modulation amount for the overdrive | |||
| i | R o u t | Comp ? OD/ HG, ODyHG ? Comp | Switches the order of the compressor and overdrive | |
| j | Wet/Dry | Dry, 1:99...99:1, Wet | Balance between the wet and dry signal | |
| Src Off...Tempo | Table, "Dynamic Modulation sources," on page 330 | |||
| Amt -100...+100 | Amount of | modulation source | ||
86: Comp - P4EQ
(Compressor - Parametric 4-Band EQ)
This effect combines a mono compressor and a four-band parametric equalizer. You can change the order of the effects. flowchart
graph TD
    A["Compressor"] --> B["FX Amt"]
    B --> C["FX Amt = 100: Mono In - Mono Out / FX Amt = 0: Stereo In - Stereo Out"]
    C --> D["FX Amt"]
    D --> E["FX Amt"]
    E --> F["FX Amt"]
    F --> G["FX Amt"]
    G --> H["FX Amt"]
    H --> I["FX Amt"]
    I --> J["FX Amt"]
    J --> K["FX Amt"]
    K --> L["FX Amt"]
    L --> M["FX Amt"]
    M --> N["FX Amt"]
    N --> O["FX Amt"]
    O --> P["FX Amt"]
    P --> Q["FX Amt"]
    Q --> R["FX Amt"]
    R --> S["FX Amt"]
    S --> T["FX Amt"]
    T --> U["FX Amt"]
    U --> V["FX Amt"]
    V --> W["FX Amt"]
    W --> X["FX Amt"]
    X --> Y["FX Amt"]
    Y --> Z["FX Amt"]
    Z --> AA["FX Amt"]
    AA --> AB["FX Amt"]
    AB --> AC["FX Amt"]
    AC --> AD["FX Amt"]
    AD --> AE["FX Amt"]
    AE --> AF["FX Amt"]
    AF --> AG["FX Amt"]
    AG --> AH["FX Amt"]
    AH --> AI["FX Amt"]
    AI --> AJ["FX Amt"]
    AJ --> AK["FX Amt"]
    AK --> AL["FX Amt"]
    AL --> AM["FX Amt"]
    AM --> AN["FX Amt"]
    AN --> AO["FX Amt"]
    AO --> AP["FX Amt"]
    AP --> AQ["FX Amt"]
    AQ --> AR["FX Amt"]
    AR --> AS["FX Amt"]
    AS --> AT["FX Amt"]
    AT --> AU["FX Amt"]
    AU --> AV["FX Amt"]
    AV --> AW["FX Amt"]
    AW --> AX["FX Amt"]
    AX --> AY["FX Amt"]
    AY --> AZ["FX Amt"]
    AZ --> BA["FX Amt"]
    BA --> BB["FX Amt"]
    BB --> BC["FX Amt"]
    BC --> BD["FX Amt"]
    BD --> BE["FX Amt"]
    BE --> BF["FX Amt"]
    BF --> BG["FX Amt"]
    BG --> BH["FX Amt"]
    BH --> BI["FX Amt"]
    BI --> BJ["FX Amt"]
    BJ --> BK["FX Amt"]
    BK --> BL["FX Amt"]
    BL --> BM["FX Amt"]
    BM --> BN["FX Amt"]
    BN --> BO["FX Amt"]
    BO --> BP["FX Amt"]
    BP --> BQ["FX Amt"]
    BQ --> BR["FX Amt"]
    BR --> BS["FX Amt"]
    BS --> BT["FX Amt"]
    BT --> BU["FX Amt"]
    BU --> BV["FX Amt"]
    BV --> BW["FX Amt"]
    BW --> BX["FX Amt"]
    BX --> BY["FX Amt"]
    BY --> BZ["FX Amt"]
    BZ --> CA["FX Amt"]
    CA --> CB["FX Amt"]
    CB --> CC["FX Amt"]
    CC --> CD["FX Amt"]
    CD --> CE["FX Amt"]
    CE --> CF["FX Amt"]
    CF --> CG["FX Amt"]
    CG --> CH["FX Amt"]
    CH --> CI["FX Amt"]
    CI --> CJ["FX Amt"]
    CJ --> CK["FX Amt"]
| COMPRESSOR | ||||
| a | [C] Sensitivity | 1...100 Sets the sensitivity | ||
| b | [C]Attack 1...100 | Sets the attack level | ||
| Output Level 0... | 100 Sets the compressor output level | |||
| P4EQ | ||||
| c [E] | Trim 0...100 Sets | the parametric EQ input level | ||
| d | [E]B1 Cutoff [Hz] | 20...1.00k Sets the center frequency of Band 1 | ||
| Q 0.5...10.0 Sets | the bandwidth of Band 1 | |||
| Gain [dB] | -18...+18 | Sets the gain of Band 1 | ||
| e | [E]B2 Cutoff [Hz] | 50...5.00k Sets the center frequency of Band 2 | ||
| Q 0.5...10.0 Sets | the bandwidth of Band 2 | |||
| Gain [dB] | -18...+18 | Sets the gain of Band 2 | ||
| f | [E]B3 Cutoff [Hz] | 300...10.00k | Sets the center frequency of Band 3 | |
| Q 0.5...10.0 Sets | the bandwidth of Band 3 | |||
| Gain [dB] | -18...+18 | Sets the gain of Band 3 | ||
| g | [E]B4 Cutoff [Hz] | 500...20.00k | Sets the center frequency of Band 4 | |
| Q 0.5...10.0 Sets | the bandwidth of Band 4 | |||
| Gain [dB] | -18...+18 | Sets the gain of Band 4 | ||
| h | Routing | Comp ?P4EQ, P4EQ ?Comp | Switches the order of the compressor and parametric EQ | |
| i | Wet/Dry | Dry, 1:99...99:1, Wet | Balance between the wet and dry signal | |
| Src | Off...Tempo | Table, "Dynamic Modulation sources," on page 330 | ||
| Amt | -100...+100 | Amount of modulation source | ||
87: Comp - Cho/Flng
(Compressor - Chorus/Flanger)
This effect combines a mono compressor and a chorus/flanger. You can change the order of the effects. flowchart
graph TD
    A["FX Amt = 100: Mono In - Stereo Out / FX Amt = 0: Stereo In - Stereo Out"] --> B["Compressor"]
    B --> C["EQ Trim LEG HEQ Comp"]
    C --> D["Output Level"]
    D --> E["Chorus/Flanger"]
    E --> F["Routing Chorus/Flanger"]
    F --> G["FX Amt"]
    H["FX Amt"] --> I["Wet Invert"]
    I --> J["Cho/Flng FX Amt"]
    J --> K["Feedback"]
    K --> L["Envelope - Control"]
    L --> M["Right"]
    M --> N["LFO: Tri / Sine"]
    N --> O["Output Level"]
    O --> P["Feedback"]
    P --> Q["Chorus/Flanger"]
    Q --> R["Output Level"]
    R --> S["Routing Chorus/Flanger"]
    S --> T["FX Amt"]
| COMPRESSOR | ||||
| a | [C] Sensitivity | 1...100 Sets the sensitivity | ||
| b | [C]Attack | 1...100 | Sets the attack level | |
| Output Level | 0...100 | Sets the compressor output level | ||
| c [C]EQ Trim 0...100 Sets the EQ input level | ||||
| d | [C]Pre LEQ Gain [dB] | -15...+15 | Sets the gain of Low EQ | |
| Pre HEQ Gain [dB] | -15...+15 | Sets the gain of High EQ | ||
| CHORUS/FLANGER | ||||
| e | [F]LFO Frequency [Hz] | 0.02...20.00 | Sets the speed of the LFO | |
| LFO Waveform | Triangle, Sine | Selects the LFO Waveform | ||
| f | [F]Delay Time [msec] | 0.0...1350.0 | Sets the delay time | |
| Depth 0...100 | Sets the depth of LFO modulation | |||
| Feedback | -100...+100 | Sets the feedback amount | ||
| g | [F]Cho/Flng Wet/Dry | -Wet, -1:99...Dry...99:1,Wet | Sets the effect balance of the chorus/flanger, | |
| Src | Off...Tempo | Selects the Wet/Dry modulation source for the chorus/flanger | ||
| Amt | -100...+100 | Sets the Wet/Dry modulation amount for the chorus/flanger | ||
| h | [F]Output Mode | Normal,Wet Invert | Selects the output mode for the chorus/flanger | |
| i | Routing | Comp ?Flanger,Flanger ?Comp | Switches the order of the compressor and chorus/flanger | |
| j | Wet/Dry | Dry, 1:99...99:1,Wet | Balance between the wet and dry signal | |
| Src | Off...Tempo | Table, "Dynamic Modulation sources," on page 330 | ||
| Amt | -100...+100 | Amount of modulation source | ||
h: [F]Output Mode
i: Routing
When Wet Invert is selected, the right channel phase of the chorus/flanger effect sound is inverted. This creates pseudo-stereo effects and adds spread. However, if a mono-input type effect is conne effect, the left and right sounds may cancel each other, eliminating the chorus/flanger effects. When "Routing" is set to FlangerComp, "[F]Output Mode" will be set to Normal.88: Comp - Phaser
(Compressor - Phaser)
This effect combines a mono compressor and a phaser. You can change the order of the effects. flowchart
graph LR
    A["FX Amt = 100: Mono In - Stereo Out / FX Amt = 0: Stereo In - Stereo Out"] --> B["Compressor"]
    B --> C["EQ Trim"]
    C --> D["LEQ"]
    D --> E["HEQ"]
    E --> F["Comp"]
    F --> G["Phaser"]
    G --> H["Phaser FX Amt"]
    H --> I["Wet Invert"]
    I --> J["Normal"]
    J --> K["Output Mode"]
    L["FX Amt"] --> M["FX Amt"]
    N["Right*"] --> O["Envelope - Control"]
    P["Left"] --> Q["Routing"]
    Q --> R["Phaser"]
    S["LFO: Tri / Sine"] --> T["Resonance"]
    T --> G
    U["Output Level"] --> F
| COMPRESSOR | ||||
| a | [C]Sensitivity | 1...100 Sets the sensitivity | ||
| b | [C]Attack 1...100 | Sets the attack level | ||
| Output Level 0... | 100 Sets the compressor output level | |||
| c | [C]EQ Trim 0...100 | Sets the EQ input level | ||
| d | [C]Pre LEQ Gain [dB] | -15...+15 Sets the gain of Low EQ | ||
| Pre HEQ Gain [dB] | -15...+15 Sets the gain of High EQ | |||
| PHASER | ||||
| e | [P]LFO Frequency [Hz] | 0.02...20.00 Sets the speed of the LFO | ||
| LFO Waveform | Triangle, Sine Selects the LFO Waveform | |||
| f | [P]Manual 0...100 | Sets the frequency to which the effect is applied | ||
| Depth 0...100 Sets the depth of LFO modulation | ||||
| Resonance | -100...+100 | Sets the resonance amount | ||
| g | [P]Phaser Wet/Dry | -Wet, -1:99...Dry...99:1,Wet | Sets the phaser effect balance | |
| Src | Off...Tempo | Selects the Wet/Dry modulation source for the phaser | ||
| Amt | -100...+100 | Sets the Wet/Dry modulation amount for the phaser | ||
| h | [F]Output Mode | Normal,Wet Invert | Selects the phaser output mode | |
| i | Routing | Comp ? Phaser, Phaser ? Comp | Switches the order of the compressor and phaser | |
| j | Wet/Dry | Dry, 1:99...99:1,Wet | Balance between the wet and dry signal | |
| Src | Off...Tempo | Table, “Dynamic Modulation sources,” on page 330 | ||
| Amt | -100...+100 | Amount of modulation source | ||
flowchart
graph LR
    A["FX Amt = 100: Mono In - Mono Out / FX Amt = 0: Stereo In - Stereo Out"] --> B["Compressor"]
    B --> C["EQ Trim LEQ HEQ Comp"]
    C --> D["Output Level"]
    D --> E["High Damp (1)"]
    E --> F["Feedback Delay (2)"]
    F --> G["Mit.Dly FX Amt"]
    G --> H["FX Amt"]
    H --> I["Envelope - Control"]
    I --> J["Right"]
    J --> K["Compressor"]
    K --> L["Routing"]
    L --> M["Multitap Delay"]
    M --> N["FX Amt"]
89: Comp - Mt. Delay
(Compressor - Multitap Delay)
This effect combines a mono compressor and a multitap delay. You can change the order of the effects.| COMPRESSOR | ||||
| a | [C]Sensitivity | 1...100 Sets the sensitivity | ||
| b | [C]Attack 1...100 | Sets the attack level | ||
| Output Level 0... | 100 Sets the compressor output level | |||
| c [C]EQ Trim 0...100 | Sets the EQ input level | |||
| d | [C]Pre LEQ Gain [dB] | -15...+15 Sets the gain of Low EQ | ||
| Pre HEQ Gain [dB] | -15...+15 Sets the gain of High EQ | |||
| MULTITAP DELAY | ||||
| e | [D]Tap1 Time [msec] | 0.0...1360.0 | Sets the Tap1 delay time | |
| Tap1 Level | 0...100 | Sets the Tap1 output level | ||
| f | [D]Tap2 Time [msec] | 0.0...1360.0 | Sets the Tap2 delay time | |
| Feedback (Tap2) | -100...+100 | Sets the Tap2 feedback amount | ||
| g | [D]High Damp [%] | 0...100 | Sets the damping amount in the high range | |
| h | [D]Mt.Delay Wet/Dry | Dry, 1:99...99:1, Wet | Sets the multitap delay effect balance | |
| Src | Off...Tempo | Selects the Wet/Dry modulation source for the multitap delay | ||
| Amt | -100...+100 | Sets the Wet/Dry modulation amount for the multitap delay | ||
| i | Routing | Comp ? Mt.Delay, Mt.Delay ? Comp | Switches the order of the compressor and multitap delay | |
| j | Wet/Dry | Dry, 1:99...99:1, Wet | Balance between the wet and dry signal | |
| Src | Off...Tempo | Table , "Dynamic Modulation sources," on page 330 | ||
| Amt | -100...+100 | Amount of modulation source | ||
90: Limiter - P4EQ
(Limiter - Parametric 4-Band EQ)
This effect combines a mono limiter and a four-band parametric equalizer. You can change the order of the effects. flowchart
graph TD
    A["Left"] --> B["Limiter"]
    B --> C["Gain Adjust"]
    C --> D["Trim"]
    D --> E["FX Amt"]
    F["Right"] --> G["Envelope - Control"]
    G --> H["Limiter"]
    H --> I["Routing Parametric 4Band EQ"]
    I --> J["FX Amt = 100: Mono In - Mono Out / FX Amt = 0: Stereo In - Stereo Out"]
| LIMITER | ||||
| a | [L]Ratio | 1.0 : 1...50.0 : 1, Inf : 1 | Sets the signal compression ratio | |
| Threshold [dB] | -40...0 | Sets the level above which the compressor is applied | ||
| b | [L]Attack 1...100 | Sets the attack time | ||
| Release 1...100 S | Sets the release time | |||
| c | [L]Gain Adjust[dB] | -Inf,-38...+24 | Sets the limiter output gain | |
| P4EQ | ||||
| d [E]Trim 0...100 Sets the parametric EQ input level | ||||
| e | [E]B1 Cutoff[Hz] | 20...1.00k Sets the center frequency of Band 1 | ||
| Q 0.5...10.0 Sets | the bandwidth of Band 1 | |||
| Gain [dB] -18...+ | 18 Sets the gain of Band 1 | |||
| f | [E]B2 Cutoff[Hz] | 50...5.00k Sets the center frequency of Band 2 | ||
| Q 0.5...10.0 Sets | the bandwidth of Band 2 | |||
| Gain [dB] -18...+ | 18 Sets the gain of Band 2 | |||
| g | [E]B3 Cutoff[Hz] | 300...10.00k Sets the center frequency of Band 3 | ||
| Q 0.5...10.0 Sets | the bandwidth of Band 3 | |||
| Gain [dB] -18...+ | 18 Sets the gain of Band 3 | |||
| h | [E]B4 Cutoff[Hz] | 500...20.00k Sets the center frequency of Band 4 | ||
| Q 0.5...10.0 Sets | the bandwidth of Band 4 | |||
| Gain [dB] -18...+ | 18 Sets the gain of Band 4 | |||
| i | Routing | Limiter ? P4EQ,P4EQ ? Limiter | Switches the order of the limiter and parametric EQ | |
| j | Wet/Dry | Dry, 1:99...99:1,Wet | Balance between the wet and dry signal | |
| Src | Off...Tempo | Table , "Dynamic Modulation sources," on page 330 | ||
| Amt | -100...+100 | Amount of modulation source | ||
line
| Input Level | Output Level | Ratio | | ----------- | ------------ | --------- | | Low | Low | 1.0 : 1 | | Low | Medium | 2.0 : 1 | | Low | High | 4.0 : 1 | | High | Low | Inf |line
| Time | Ratio=1.0 : 1 | Ratio=2.0 : 1 | Ratio=4.0 : 1 | |------|---------------|---------------|---------------| | Peak | 1 | 1 | 1 | | Threshold | 1 | 1 | 1 |91: Limiter - Cho/Flng
(Limiter - Chorus/Flanger)
This effect combines a mono limiter and a chorus/flanger. You can change the order of the effects. flowchart
graph TD
    A["FX Amt = 100: Mono In - Stereo Out / FX Amt = 0: Stereo In - Stereo Out"] --> B["FX Amt"]
    B --> C["Limiter"]
    C --> D["Chorus/Flanger"]
    D --> E["EQ Trim LEQ HEQ"]
    E --> F["Feedback"]
    F --> G["Wet Invert Cho/Flang FX Amt"]
    G --> H["FX Amt"]
    H --> I["FX Amt"]
    I --> J["LIFO: Tri / Sine"]
    J --> K["Envelope - Control"]
    K --> L["Gain Adjust"]
    L --> M["Limiter"]
    M --> N["Routing"]
    N --> O["Chorus/Flanger"]
    O --> P["Output Mode"]
    P --> Q["FX Amt"]
| LIMITER | ||||
| a | [L]Ratio | 1.0 : 1...50.0 : 1, Inf : 1 | Sets the signal compression ratio | |
| Threshold [dB] | -40...0 | Sets the level above which the compressor is applied | ||
| b | [L]Attack 1...100 | Sets the attack time | ||
| Release 1...100 | Sets the release time | |||
| c | [L]Gain Adjust [dB] | -Inf,-38...+24 | Sets the limiter output gain | |
| CHORUS/FLANGER | ||||
| d | [F]LFO Frequency [Hz] | 0.02...20.00 Sets | the speed of the LFO | |
| LFO Waveform | Triangle, Sine Selects the LFO Waveform | |||
| e | [F]Delay Time [msec] | 0.0...1350.0 Sets | the delay time | |
| Depth 0...100 Sets the depth of LFO modulation | ||||
| Feedback -100...+100 | Sets the feedback amount | |||
| f [F]EQ Trim 0...100 Sets the EQ input level | ||||
| g | [F]Pre LEQ Gain [dB] | -15...+15 Sets the gain of Low EQ | ||
| Pre HEQ Gain [dB] | -15...+15 Sets the gain of High EQ | |||
| h | [F]Cho/Flng Wet/Dry | -Wet, -1:99...Dry...99:1,Wet | Sets the effect balance of the chorus/flanger | |
| Src | Off...Tempo | Selects the Wet/Dry modulation source for the chorus/flanger | ||
| Amt | -100...+100 | Sets the Wet/Dry modulation amount for the chorus/flanger | ||
| i | [F]Output Mode | Normal,Wet Invert | Selects the output mode for the chorus/flanger | |
| Routing | Limiter ?Flanger,Flanger ?Limiter | Switches the order of the limiter and chorus/flanger | ||
| j | Wet/Dry | Dry, 1:99...99:1,Wet | Balance between the wet and dry signal | |
| Src | Off...Tempo | Table, “Dynamic Modulation sources,” on page 330 | ||
| Amt | -100...+100 | Amount of modulation source | ||
flowchart
graph TD
    A["Left"] --> B["Limiter"]
    B --> C["Phaser"]
    C --> D["Normal Output Mode"]
    D --> E["FX Amt"]
    E --> F["FX Amt = 100: Mono In - Stereo Out / FX Amt = 0: Stereo In - Stereo Out"]
    F --> G["Routing"]
    G --> H["Limiter"]
    H --> I["Phaser"]
    I --> J["Envelope - Control"]
    J --> K["LFO: Tri / Sine"]
    K --> L["Right"]
    L --> M["Gain Adjust"]
    M --> N["Phaser FX Amt"]
    N --> O["Wet Invert"]
    O --> P["Phaser FX Amt"]
    P --> Q["Flux Amt"]
| LIMITER | ||||
| a | [L]Ratio | 1.0 : 1...50.0 : 1, Inf : 1 | Sets the signal compression ratio | |
| Threshold [dB] | -40...0 | Sets the level above which the compressor is applied | ||
| b | [L]Attack 1...100 | Sets the attack time | ||
| Release 1...100 S | Sets the release time | |||
| c | [L]Gain Adjust [dB] | -Inf,-38...+24 | Sets the limiter output gain | |
| PHASER | ||||
| d | [P]LFO Frequency [Hz] | 0.02...20.00 Sets | the speed of the LFO | |
| LFO Waveform | Triangle, Sine Selects the LFO Waveform | |||
| e | [P]Manual | 0...100 | Sets the frequency to which the effect is applied | |
| Depth 0...100 Sets | sets the depth of LFO modulation | |||
| Resonance | -100...+100 | Sets the resonance amount | ||
| f | [P]Phaser Wet/Dry | -Wet, -1:99...Dry...99:1,Wet | Sets the phaser effect balance | |
| Src | Off...Tempo | Selects the phaser's Wet/Dry modulation source | ||
| Amt | -100...+100 | Sets the phaser's Wet/Dry modulation amount | ||
| g | [P]Output Mode | Normal,Wet Invert | Selects the phaser output mode | |
| h | Routing | Limiter ? Phaser, Phaser ?Limiter | Switches the order of the limiter and phaser | |
| i | Wet/Dry | Dry, 1:99...99:1,Wet | Balance between the wet and dry signal | |
| Src | Off...Tempo | Table, "Dynamic Modulation sources," on page 330 | ||
| Amt | -100...+100 | Amount of modulation source | ||
93: Limiter - Mt.Delay (Limiter - Multitap Delay)
This effect combines a mono limiter and a multitap delay. You can change the order of the effects. flowchart
graph TD
    A["Left"] --> B["Limiter"]
    B --> C["Gain Adjust"]
    C --> D["High Damp (1)"]
    D --> E["Feedback Delay"]
    E --> F["LT.Dly FX Amt"]
    F --> G["FX Amt"]
    G --> H["FX Amt = 100: Mono In - Mono Out / FX Amt = 0: Stereo In - Stereo Out"]
    H --> I["Routing"]
    I --> J["Multitap Delay"]
    J --> K["Limiter"]
    K --> L["Gain Adjust"]
    L --> M["High Damp (1)"]
    M --> N["Feedback Delay"]
    N --> O["LT.Dly FX Amt"]
    O --> P["FX Amt"]
    P --> Q["FX Amt"]
    Q --> R["Envelope - Control"]
    R --> S["Right"]
| LIMITER | ||||
| a | [L]Ratio | 1.0 : 1...50.0 : 1, Inf : 1 | Sets the signal compression ratio | |
| Threshold [dB] | -40...0 | Sets the level above which the compressor is applied | ||
| b | [L]Attack 1...100 | Sets the attack time | ||
| Release 1...100 S | Sets the release time | |||
| c | [L]Gain Adjust [dB] | -Inf,-38...+24 | Sets the limiter output gain | |
| MULTITAP DELAY | ||||
| d | [D]Tap1 Time [msec] | 0.0...1360.0 Sets | the Tap1 delay time | |
| Tap1 Level 0...100 | Sets the Tap1 output level | |||
| e | [D]Tap2 Time [msec] | 0.0...1360.0 Sets | the Tap2 delay time | |
| Feedback -100...+100 Sets the Tap2 feedback amount | ||||
| f | [D]High Damp [%] | 0...100 | Sets the damping amount in the high range | |
| g | [D]Mt.Delay Wet/Dry | Dry, 1:99...99:1,Wet | Sets the multitap delay effect balance | |
| Src Off...Tempo | Selects the multitap delay's Wet/Dry modulation source | |||
| Amt -100...+100 | Sets the multitap delay's Wet/Dry modulation amount | |||
| h | R o u t i | Limiter ?Mt.Delay,Mt.Delay ?Limiter | Switches the order of the limiter and multitap delay | |
| i | Wet/Dry | Dry, 1:99...99:1,Wet | Balance between the wet and dry signal | |
| Src Off...Tempo | Table , "Dynamic Modulation sources," on page 330 | |||
| Amt -100...+100 | Amount of mod | ulation source | ||
94: Exciter - Comp (Exciter - Compressor)
This effect combines a mono exciter and a compressor. You can change the order of the effects. flowchart
graph LR
    A["Left"] --> B["EQ Trim"]
    B --> C["LEQ"]
    C --> D["HEQ"]
    D --> E["Exciter"]
    E --> F["Comp"]
    F --> G["Output Level"]
    G --> H["FX Amt"]
    I["Right"] --> J["Envelope - Control"]
    J --> F
    K["Exciter"] --> L["Routing Compressor"]
    L --> F
    M["FX Amt = 100: Mono In - Mono Out / FX Amt = 0: Stereo In - Stereo Out"]
| EXCITER | ||||
| a | [X]Exciter Blend | -100...+100 | Sets the intensity (depth) of the Exciter effect | |
| b | [X]Emphasis Frequency | 0...70 | Sets the frequency range to be emphasized | |
| c | [X]EQ Trim 0...100 Sets the EQ input level | |||
| d | [X]Pre LEQ Gain [dB] | -15...+15 | Sets the gain of Low EQ | |
| Pre HEQ Gain [dB] | -15...+15 | Sets the gain of High EQ | ||
| COMPRESSOR | ||||
| e | [C] Sensitivity | 1...100 Sets the sensitivity | ||
| f | [C]Attack | 1...100 Sets the attack level | ||
| Output Level | 0...100 Sets the compressor output level | |||
| g | R o u t i | Exciter ? Comp, Comp ? Exciter | Switches the order of the exciter and compressor | |
| h | Wet/Dry | Dry, 1:99...99:1, Wet | Balance between the wet and dry signal | |
| Src Off...Tempo | Table, “Dynamic Modulation sources,” on page 330 | |||
| Amt -100...+100 | Amount of modulation source | |||
95: Exciter - Limiter
This effect combines a mono exciter and a limiter. You can change the order of the effects. flowchart
graph LR
    A["Left"] --> B["EQ Trim"]
    B --> C["LEQ"]
    C --> D["HEQ"]
    D --> E["Exciter"]
    E --> F["Limiter"]
    F --> G["Gain Adjust"]
    G --> H["FX Amt"]
    I["Right"] --> J["Envelope - Control"]
    J --> K["Exciter"]
    L["Left"] --> M["Exciter"]
    N["Right"] --> O["Excliter"]
    P["Left"] --> Q["Routing"]
    R["Left"] --> S["Limiter"]
    T["Left"] --> U["FX Amt"]
    V["Left"] --> W["FX Amt = 100: Mono In - Mono Out / FX Amt = 0: Stereo In - Stereo Out"]
| EXCITER | ||||
| a | [X]Exciter Blend | -100...+100 | Sets the intensity (depth) of the Exciter effect | |
| b | [X]Emphasis Frequency | 0...70 | Sets the frequency range to be emphasized | |
| c [X]Trim 0...100 Sets the EQ input level | ||||
| d | [X]Pre LEQ Gain [dB] | -15...+15 Sets the gain of Low EQ | ||
| Pre HEQ Gain [dB] | -15...+15 Sets the gain of High EQ | |||
| LIMITER | ||||
| e | [L] R a | 1,0:1...o 50.0:1,Inf:1 | Sets the signal compression ratio | |
| f | [L]Threshold [dB] | -40...0 | Sets the level above which the compressor is applied | |
| g [L]Attack 1...100 Sets the attack time | ||||
| Release 1...100 Sets the release time | ||||
| h | [L]Gain Adjust [dB] | -Inf,-38...+24 | Sets the limiter output gain | |
| i | R o u t | Exciter ? LimitergLimiter ? Exciter | Switches the order of the exciter and limiter | |
| j | Wet/Dry | Dry, 1:99...99:1,Wet | Balance between the wet and dry signal | |
| Src Off...Tempo | Table, “Dynamic Modulation sources,” on page 330 | |||
| Amt -100...+100 Amount of modulation source | ||||
96: Exciter - Cho/Flng
(Exciter - Chorus/Flanger)
This effect combines a mono limiter and a chorus/flanger. flowchart
graph LR
    A["Left"] --> B["EQ Trim LEQ HEQ"]
    B --> C["Exciter"]
    C --> D["Chorus/Flanger"]
    D --> E["Normal Output Mode"]
    E --> F["Wet Invert"]
    F --> G["Cho/Fing FX Amt"]
    G --> H["LFO: Tri / Sine"]
    H --> I["Right"]
    I --> J["Excliter"]
    J --> K["Chorus/Flanger"]
    K --> L["Feedback"]
    L --> M["FX Amt"]
    style A fill:#f9f,stroke:#333
    style J fill:#ccf,stroke:#333
    style D fill:#cfc,stroke:#333
    style E fill:#fcc,stroke:#333
    style F fill:#cff,stroke:#333
    style G fill:#ffc,stroke:#333
    style H fill:#cfc,stroke:#333
    style I fill:#fcc,stroke:#333
| EXCITER | ||||
| a | [X]Exciter Blend | -100...+100 | Sets the intensity (depth) of the Exciter effect | |
| b | [X]Emphasis Frequency | 0...70 | Sets the frequency range to be emphasized | |
| c | [X]Trim 0...100 | Sets the EQ input level | ||
| d | [X]Pre LEQ Gain [dB] | -15...+15 Sets the gain of Low EQ | ||
| Pre HEQ Gain [dB] | -15...+15 Sets the gain of High EQ | |||
| CHORUS/FLANGER | ||||
| e | [F]LFO Frequency [Hz] | 0.02...20.00 | Sets the speed of the LFO | |
| LFO Waveform | Triangle, Sine | Selects the LFO Waveform | ||
| f | [F]Delay Time [msec] | 0.0...1350.0 | Sets the delay time | |
| Depth | 0...100 | Sets the depth of LFO modulation | ||
| Feedback | -100...+100 | Sets the feedback amount | ||
| g | [F]Cho/Flng Wet/Dry | -Wet, -1:99...Dry...99:1, Wet | Sets the effect balance of the chorus/flanger | |
| Src Off...Tempo | Selects the Wet/Dry modulation source for the chorus/flanger | |||
| Amt -100...+100 | Sets the Wet/Dry modulation amount for the chorus/flanger | |||
| h | [F]Output Mode | Normal, Wet Invert | Selects the output mode for the chorus/flanger | |
| i | Wet/Dry | Dry, 1:99...99:1, Wet | Balance between the wet and dry signal | |
| Src Off...Tempo | Table, "Dynamic Modulation sources," on page 330 | |||
| Amt -100...+100 | Amount of | modulation source | ||
97: Exciter - Phaser
This effect combines a mono limiter and a phaser. flowchart
graph LR
    A["Left"] --> B["EQ Trim LEQ HEQ"]
    B --> C["Excliter"]
    C --> D["Phaser"]
    D --> E["Normal Output Mode"]
    E --> F["Wet Invert"]
    F --> G["Phaser FX Amt"]
    G --> H["LFO: Tri / Sinc"]
    H --> I["Right"]
    I --> J["Excliter"]
    J --> K["Phaser"]
    K --> L["Normal Output Mode"]
    L --> M["Wet Invert"]
    M --> N["Phaser FX Amt"]
    N --> O["FX Amt"]
    style A fill:#f9f,stroke:#333
    style O fill:#f9f,stroke:#333
| EXCITER | ||||
| a | [X]Exciter Blend | -100...+100 | Sets the intensity (depth) of the Exciter effect | |
| b | [X]Emphasis Frequency | 0...70 | Sets the frequency range to be emphasized | |
| c | [X]Trim 0...100 Sets the EQ input level | |||
| d | [X]Pre LEQ Gain [dB] | -15...+15 Sets the gain of Low EQ | ||
| Pre HEQ Gain [dB] | -15...+15 Sets the gain of High EQ | |||
| PHASER | ||||
| e | [P]LFO Frequency [Hz] | 0.02...20.00 Sets the speed of the LFO | ||
| LFO Waveform Triangle, Sine Selects the LFO Waveform | ||||
| f | [P]Manual 0...100 | Sets the frequency to which the effect is applied | ||
| Depth 0...100 Sets the depth of LFO modulation | ||||
| Resonance -100...+100 | Sets the resonance amount | |||
| g | [P]Phaser Wet/ Dry | -Wet, -1:99...Dry...99:1, Wet | Sets the phaser effect balance | |
| Src Off...Tempo | Selects the Wet/Dry modulation source for the phaser | |||
| Amt -100...+100 | Sets the Wet/Dry modulation amount for the phaser | |||
| h | [P]Output Mode | Normal, Wet Invert | Selects the phaser output mode | |
| i | Wet/Dry | Dry, 1:99...99:1, Wet | Balance between the wet and dry signal | |
| Src Off...Tempo | Table, “Dynamic Modulation sources,” on page 330 | |||
| Amt -100...+100 | Amount of modulation source | |||
98: Exciter - Mt.Delay (Exciter - Multitap Delay)
This effect combines a mono exciter and a multitap delay. flowchart
graph LR
    A["Left"] --> B["EQ Trim"]
    B --> C["LEQ"]
    C --> D["HEQ"]
    D --> E["Exciter"]
    E --> F["High Damp (1)"]
    F --> G["Feedback"]
    G --> H["Delay"]
    H --> I["(2)"]
    I --> J["Mt.Dly FX Amt"]
    J --> K["FX Amt"]
    L["Right"] --> M["Left"]
    N["Left"] --> O["Left"]
    P["Left"] --> Q["Left"]
    R["Left"] --> S["Left"]
    T["Left"] --> U["Left"]
    V["Left"] --> W["Left"]
    X["Left"] --> Y["Left"]
    Z["Left"] --> AA["Left"]
    AB["Left"] --> AC["Left"]
    AD["Left"] --> AE["Left"]
    AF["Left"] --> AG["Left"]
    AH["Left"] --> AI["Left"]
    AJ["Left"] --> AK["Left"]
    AL["Left"] --> AM["Left"]
    AN["Left"] --> AO["Left"]
    AP["Left"] --> AQ["Left"]
    AR["Left"] --> AS["Left"]
    AT["Left"] --> AU["Left"]
    AV["Left"] --> AW["Left"]
    AX["Left"] --> AY["Left"]
    AZ["Left"] --> BA["Left"]
    BB["Left"] --> BC["Left"]
    BD["Left"] --> BE["Left"]
    BF["Left"] --> BG["Left"]
    BH["Left"] --> BI["Left"]
    BJ["Left"] --> BK["Left"]
    BL["Left"] --> BM["Left"]
    BN["Left"] --> BO["Left"]
    BP["Left"] --> BQ["Left"]
    BR["Left"] --> BS["Left"]
    BT["Left"] --> BU["Left"]
    BV["Left"] --> BW["Left"]
    BX["Left"] --> BY["Left"]
    BZ["Left"] --> CA["Left"]
    CB["Left"] --> CC["Left"]
    DD["Left"] --> DE["Left"]
    FD["Left"] --> ED["Left"]
    EF["Left"] --> GF["Left"]
    DG["Left"] --> DH["Left"]
    DI["Left"] --> DJ["Left"]
    DK["Left"] --> DL["Left"]
    DV["Left"] --> DW["Left"]
    DX["DX"] --> DXA
    DXA --> DXB
    DXB --> DXC
    DXC --> DXD
    DXD --> DXE
    DXE --> DXF
| EXCITER | ||||
| a | [X]Exciter Blend | -100...+100 | Sets the intensity (depth) of the Exciter effect | |
| b | [X]Emphasis Frequency | 0...70 | Sets the frequency range to be emphasized | |
| c [X]Trim 0..100 Sets the EQ Input level | ||||
| d | [X]Pre LEQ Gain [dB] | -15...+15 | Sets the gain of Low EQ | |
| Pre HEQ Gain [dB] | -15...+15 | Sets the gain of High EQ | ||
| MULTITAP DELAY | ||||
| e | [D]Tap1 Time [msec] | 0.0...1360.0 | Sets the Tap1 delay time | |
| Tap1 Level | 0...100 Sets the Tap1 output level | |||
| f | [D]Tap2 Time [msec] | 0.0...1360.0 | Sets the Tap2 delay time | |
| Feedback (Tap2) | -100...+100 | Sets the Tap2 feedback amount | ||
| g | [D]High Damp [%] | 0...100 | Sets the damping amount in the high range | |
| h | [D]Mt.Delay Wet/Dry | Dry, 1:99...99:1, Wet | Sets the multitap delay effect balance | |
| Src | Off...Tempo | Selects the Wet/Dry modulation source for the multitap delay | ||
| Amt | -100...+100 | Sets the Wet/Dry modulation amount for the multitap delay | ||
| i | Wet/Dry | Dry, 1:99...99:1, Wet | Balance between the wet and dry signal | |
| Src | Off...Tempo | Table, “Dynamic Modulation sources,” on page 330 | ||
| Amt | -100...+100 | Amount of modulation source | ||
99: OD/HG - Amp Sim
(Overdrive/Hi.Gain -
Amp Simulation)
This effect combines a mono overdrive/high-gain distortion and an amp simulation. You can change the order of the effects. flowchart
graph TD
    A["FX Amt = 100: Mono In - Mono Out / FX Amt = 0: Stereo In - Stereo Out"] --> B["Driver"]
    B --> C["3 Band PEG"]
    C --> D["Amp Simulation Filter"]
    D --> E["FX Amt"]
    F["Overdrive / Hi-Gain"] --> C
    G["Route"] --> D
    H["Mode: Overdrive / Hi-Gain Drive"] --> B
    I["Right"] --> B
    J["Left"] --> B
| a | [O]Drive Mode | Overdrive, Hi-Gain | Switches between overdrive and high-gain distortion | |
| Drive 1...100 Sets the degree of distortion | ||||
| b | [O]Output Level | 0...50 Sets the overdrive output level | ||
| Src Off...Tempo | Selects the modulation source for the overdrive output level | |||
| Amt -50...+50 | Sets the modulation amount of the overdrive output level | |||
| e | [O]Low Cutoff [Hz] | 20...1.00k | Sets the center frequency for Low EQ (shelving type) | |
| Gain [dB] -18...+ | 18 Sets the gain of Low EQ | |||
| f | [O]Mid1 Cutoff [Hz] | 300...10.00k | Sets the center frequency for Mid/High EQ 1 (peaking type) | |
| Q 0.5...10.0 | Sets the band width of Mid/High EQ 1 | |||
| Gain [dB] -18...+ | 18 Sets the gain of Mid/High EQ 1 | |||
| g | [O]Mid2 Cutoff [Hz] | 500...20.00k | Sets the center frequency for Mid/High EQ 2 (peaking type) | |
| Q 0.5...10.0 | Sets the band width of Mid/High EQ 2 | |||
| Gain [dB] -18...+ | 18 Sets the gain of Mid/High EQ 2 | |||
| AMP SIM | ||||
| h | [A]Amplifier Type | SS, EL84, 6L6 Se | ects the type of guitar amplifie | |
| i | R o u t | OD/HG? Amp, Amp ? OD/HG | Switches the order of the overdrive and amp | |
| j | Wet/Dry | Dry, 1:99...99:1, Wet | Balance between the wet and dry signal | |
| Src Off...Tempo | Table, “Dynamic Modulation sources,” on page 330 | |||
| Amt -100...+100 | Amount of modulation source | |||
100: OD/HG - Cho/Flng
(Overdrive/Hi.Gain - Chorus/Flanger)
This effect combines a mono overdrive/high-gain distortion and a chorus/flanger. You can change the order of the effects. flowchart
graph TD
    A["FX Amt = 100: Mono In - Stereo Out / FX Amt = 0: Stereo In - Stereo Out"] --> B["Driver"]
    B --> C["Chorus/Flanger"]
    C --> D["Output Level"]
    D --> E["Mode: Overdrive / Hi-Gain Drive"]
    E --> F["Overdrive / Hi-Gain"]
    F --> G["Routing"]
    G --> H["Chorus/Flanger"]
    H --> I["Feedback"]
    I --> J["Wet Invert Cho/Fing FX Amt"]
    J --> K["FX Amt"]
    K --> L["LFO: Tri / Sine"]
    L --> M["Right"]
    M --> N["3 Band PEQ"]
    N --> O["FX Amt"]
| a | [O]Drive Mode | Overdrive, Hi-Gain | Switches between overdrive and high-gain distortion | |
| Drive 1...100 | Sets the degree of distortion | |||
| b | [O]Output Level | 0...50 Sets the overdrive output level | ||
| Src Off...Tempo | Selects the modulation source for the overdrive output level | |||
| Amt -50...+50 | Sets the modulation amount of the overdrive output level | |||
| e | [O]Low Cutoff [Hz] | 20...1.00k | Sets the center frequency for Low EQ (shelving type) | |
| Gain [dB] -18...+ | 18 Sets the gain of Low EQ | |||
| f | [O]Mid1 Cutoff [Hz] | 300...10.00k | Sets the center frequency for Mid/ High EQ 1 (peaking type) | |
| Q 0.5...10.0 | Sets the band width of Mid/High EQ 1 | |||
| Gain [dB] -18...+ | 18 Sets the gain of Mid/High EQ 1 | |||
| g | [O]Mid2 Cutoff [Hz] | 500...20.00k | Sets the center frequency for Mid/ High EQ 2 (peaking type) | |
| Q 0.5...10.0 | Sets the band width of Mid/High EQ 2 | |||
| Gain [dB] -18...+ | 18 Sets the gain of Mid/High EQ 2 | |||
| CHORUS/FLANGER | ||||
| h | [F]LFO Frequency [Hz] | 0.02...20.00 Sets | the speed of the LFO | |
| LFO Waveform | Triangle, Sine | Selects the LFO Waveform | ||
| i | [F]Delay Time [msec] | 0.0...1350.0 Sets | the delay time | |
| Depth 0...100 Sets the depth of LFO modulation | ||||
| Feedback | -100...+100 | Sets the feedback amount | ||
| j | [F]Cho/Flng Wet/Dry | -Wet, -1:99...Dry...99:1, Wet | Sets the effect balance of the chorus/flanger | |
| Src Off...Tempo | Selects the Wet/Dry modulation source for the chorus/flanger | |||
| Amt -100...+100 | Sets the Wet/Dry modulation amount for the chorus/flanger | |||
| k | [F]Output Mode | Normal, Wet Invert | Selects the output mode for the chorus/flanger | |
| Routing | OD/HG ? Flanger, Flanger? OD/ HG | Switches the order of the overdrive and chorus / flanger | ||
| l | Wet/Dry | Dry, 1:99...99:1, Wet | Balance between the wet and dry signal | |
| Src Off...Tempo | Table , "Dynamic Modulation sources," on page 330 | |||
| Amt -100...+100 | Amount of modulation source | |||
101: OD/HG - Phaser (Overdrive/Hi.Gain - Phaser)
This effect combines a mono overdrive/high-gain distortion and a phaser. You can change the order of the effects. flowchart
graph TD
    A["FX Amt = 100: Mono In - Stereo Out / FX Amt = 0: Stereo In - Stereo Out"] --> B["Driver"]
    B --> C["3 Band PEQ"]
    C --> D["Phaser"]
    D --> E["Wet Invert"]
    E --> F["Normal Output Mode"]
    F --> G["FX Amt"]
    G --> H["Overdrive / Hi-Gain"]
    H --> I["Routing"]
    I --> J["Phaser FX Amt"]
    J --> K["Resonance"]
    K --> L["Mode: Overdrive / Hi-Gain Drive"]
    L --> M["Output Level"]
    M --> N["Right"]
    N --> O["LFO: Tri / Sine"]
    O --> P["Phaser FX Amt"]
| OD/HI-GAIN | ||||
| a | [O]Drive Mode | Overdrive, Hi-Gain | Switches between overdrive and high-gain distortion | |
| Drive 1...100 | Sets the degree of distortion | |||
| b | [O]Output Level | 0...50 Sets the overdrive output level | ||
| Src Off...Tempo | Selects the modulation source for the overdrive output level | |||
| Amt -50...+50 | Sets the modulation amount of the overdrive output level | |||
| e | [O]Low Cutoff [Hz] | 20...1.00k | Sets the center frequency for Low EQ (shelving type) | |
| Gain [dB] -18...+ | 18 Sets the gain of Low EQ | |||
| f | [O]Mid1 Cutoff [Hz] | 300...10.00k | Sets the center frequency for Mid/High EQ 1 (peaking type) | |
| Q 0.5...10.0 | Sets the band width of Mid/High EQ 1 | |||
| Gain [dB] -18...+ | 18 Sets the gain of Mid/High EQ 1 | |||
| g | [O]Mid2 Cutoff [Hz] | 500...20.00k | Sets the center frequency for Mid/High EQ 2 (peaking type) | |
| Q 0.5...10.0 | Sets the band width of Mid/High EQ 2 | |||
| Gain [dB] -18...+ | 18 Sets the gain of Mid/High EQ 2 | |||
| PHASER | ||||
| h | [P]LFO Frequency [Hz] | 0.02...20.00 Sets the speed of the LFO | ||
| LFO Waveform | Triangle, Sine Selects the LFO Waveform | |||
| i | [P]Manual 0...100 | Sets the frequency to which the effect is applied | ||
| Depth 0...100 Sets the depth of LFO modulation | ||||
| Resonance | -100...+100 | Sets the resonance amount | ||
| j | [P]Phaser Wet/Dry | -Wet, -1:99...Dry...99:1,Wet | Sets the phaser effect balance | |
| Src Off...Tempo | Selects the Wet/Dry modulation source for the phaser | |||
| Amt -100...+100 | Sets the Wet/Dry modulation amount for the phaser | |||
| k | [P]Output Mode | Normal,Wet Invert | Selects the phaser output mode | |
| Routing | OD/HG ? Phaser, Phaser ? OD/HG | Switches the order of the overdrive and phaser | ||
| l | Wet/Dry | Dry, 1:99...99:1,Wet | Balance between the wet and dry signal | |
| Src Off...Tempo | Table, “Dynamic Modulation sources,” on page 330 | |||
| Amt -100...+100 | Amount of modulation source | |||
102: OD/HG - Mt.Delay (Overdrive/Hi.Gain - Multitap Delay)
This effect combines a mono overdrive/high-gain distortion and a multitap delay. flowchart
graph LR
    A["FX Amt = 100: Mono In - Mono Out / FX Amt = 0: Stereo In - Stereo Out"] --> B["Driver"]
    B --> C["3 Band PEQ"]
    C --> D["Output Level"]
    D --> E["Mode: Overdrive / Hi-Gain Drive"]
    E --> F["MultiTap Delay"]
    F --> G["Feedback Delay"]
    G --> H["(2)"]
    H --> I["MT.Dly FX Amt"]
    I --> J["FX Amt"]
    B --> K["FX Amt"]
    style A fill:#f9f,stroke:#333
    style J fill:#f9f,stroke:#333
| OD/HI-GAIN | ||||
| a | [O]Drive Mode | Overdrive, Hi-Gain | Switches between overdrive and high-gain distortion | |
| Drive 1...100 | Sets the degree of distortion | |||
| b | [O]Output Level | 0...50 Sets the overdrive output level | ||
| Src Off...Tempo | Selects the modulation source for the overdrive output level | |||
| Amt -50...+50 | Sets the modulation amount of the overdrive output level | |||
| e | [O]Low Cutoff [Hz] | 20...1.00k | Sets the center frequency for Low EQ (shelving type) | |
| Gain [dB] -18...+ | 18 Sets the gain of Low EQ | |||
| f | [O]Mid1 Cutoff [Hz] | 300...10.00k | Sets the center frequency for Mid/ High EQ 1 (peaking type) | |
| Q 0.5...10.0 | Sets the band width of Mid/High EQ 1 | |||
| Gain [dB] -18...+ | 18 Sets the gain of Mid/High EQ 1 | |||
| g | [O]Mid2 Cutoff [Hz] | 500...20.00k | Sets the center frequency for Mid/ High EQ 2 (peaking type) | |
| Q 0.5...10.0 | Sets the band width of Mid/High EQ 2 | |||
| Gain [dB] -18...+ | 18 Sets the gain of Mid/High EQ 2 | |||
| MULTITAP DELAY | ||||
| h | [D]Tap1 Time [msec] | 0.0...1360.0 Sets | the Tap1 delay time | |
| Tap1 Level | 0...100 | Sets the Tap1 output level | ||
| i | [D]Tap2 Time [msec] | 0.0...1360.0 Sets | the Tap2 delay time | |
| Feedback | -100...+100 | Sets the Tap2 feedback amount | ||
| j | [D]High Damp [%] | 0...100 | Sets the damping amount in the high range | |
| k | [D]Mt.Delay Wet/Dry | Dry, 1:99...99:1, Wet | Sets the multitap delay effect balance | |
| Src Off...Tempo | Selects the Wet/Dry modulation source for the multitap delay | |||
| Amt -100...+100 | Sets the Wet/Dry modulation amount for the multitap delay | |||
| l | Wet/Dry | Dry, 1:99...99:1, Wet | Balance between the wet and dry signal | |
| Src Off...Tempo | Table , "Dynamic Modulation sources," on page 330 | |||
| Amt -100...+100 | Amount of modulation source | |||
103: Wah - Amp Sim
(Wah - Amp Simulation)
This effect combines a mono wah and an amp simulation. You can change the order of the effects. flowchart
graph TD
    A["Left"] --> B["Wah"]
    B --> C["Amp Simulation Filter"]
    C --> D["FX Amt"]
    D --> E["FX Amt = 100; Mono In - Mono Out / FX Amt = 0; Stereo In - Stereo Out"]
    B --> F["Wah/Auto Wah"]
    F --> G["Routing"]
    G --> C
    C --> H["Sweep Mode"]
    H --> I["Envelope Auto"]
    I --> J["D-mod"]
    J --> K["LFO"]
    K --> L["D-mod"]
    L --> M["LFO"]
    M --> N["Right"]
| WAH | ||||
| a | [W]FrequencyBottom | 0...100 | Sets the lower limit of the wah center frequency | |
| Frequency Top 0...100 | Sets the upper limit of the wah center frequency | |||
| b | [W]Sweep Mode | Auto,D-mod,LFO | Selects the control from auto-wah,modulation source, and LFO | |
| Src Off...Tempo | Selects the modulation source for the wah when Sweep Mode=D-mod | |||
| c | [W]LFO Frequency [Hz] | 0.02...20.00 Sets | the speed of the LFO | |
| Resonance 0...100 Sets the resonance amount | ||||
| LPF Off, On | Switches the wah low pass filter on and off | |||
| d | [W]Wet/Dry | Dry, 1:99...99:1,Wet | Sets the wah effect balance | |
| Src Off...Tempo | Selects the Wet/Dry modulation source for the wah | |||
| Amt -100...+100 | Sets the Wet/Dry modulation amount for the wah | |||
| AMP SIM | ||||
| e | [A]Amplifier Type | SS, EL84, 6L6 Se | ects the type of guitar amplifier | |
| f | R o u t | Wah ?Amp,Amp ?Wah | Switches the order of the wah and amp simulation | |
| g | Wet/Dry | Dry, 1:99...99:1,Wet | Balance between the wet and dry signal | |
| Src Off...Tempo | Table , “Dynamic Modulation sources,” on page 330 | |||
| Amt -100...+100 | Amount of mod | ulation source | ||
104: Decimator - Amp
(Decimator - Amp Simulation)
This effect combines a mono decimator and an amp simulation. You can change the order of the effects. flowchart
graph LR
    A["FX Amt = 100: Mono In - Mono Out / FX Amt = 0: Stereo In - Stereo Out"] --> B["Decimator"]
    B --> C["Output Level"]
    C --> D["Amp Simulation Filter"]
    D --> E["FX Amt"]
    F["Pro LPF"] --> G["Decimator"]
    G --> H["Output Level"]
    H --> I["Amp Simulation Filter"]
    I --> J["FX Amt"]
    K["Right"] --> L["Decimator"]
    L --> M["Output Level"]
    M --> N["Amp Simulation Filter"]
    N --> O["FX Amt"]
    P["Left"] --> Q["Decimator"]
    Q --> R["Output Level"]
    R --> S["Amp Simulation Filter"]
    S --> T["FX Amt"]
| DECIMATOR | ||||
| a | [D]Pre LPF Off | On | Turn the harmonic noise caused by lowered sampling on and off | |
| High Damp [%] | 0...100 Sets the ratio of high-range damping | |||
| b | [D]Sampling Freq [Hz] | 1.00k...48.00k | Sets the sampling frequency | |
| Resolution 4...24 Sets the data bit length | ||||
| c | [D]Output Level | 0...100 Sets the decimator output level | ||
| AMP SIM | ||||
| d | [A]Amplifier Type | SS, EL84, 6L6 | Selects the type of guitar amplifier | |
| e | Routing | Decimator ? Amp, Amp ? Decimator | Switches the order of the decimator and amp simulation | |
| f | Wet/Dry | Dry, 1:99...99:1, Wet | Balance between the wet and dry signal | |
| Src | Off...Tempo | Table , “Dynamic Modulation sources,” on page 330 | ||
| Amt | -100...+100 | Amount of modulation source | ||
105: Decimator - Comp (Decimator - Compressor)
This effect combines a mono decimator and a compressor. You can change the order of the effects. flowchart
graph LR
    A["FX Amt = 100: Mono In - Mono Out / FX Amt = 0: Stereo In - Stereo Out"] --> B["Pro LPF"]
    B --> C["Decimator"]
    C --> D["Output Level"]
    D --> E["Comp"]
    E --> F["FX Amt"]
    G["Right"] --> H["Envelope - Control"]
    H --> I["Output Level"]
    I --> J["Compressor"]
    J --> K["Routing"]
    K --> L["Decimator"]
    L --> M["Output Level"]
    M --> N["Compressor"]
    N --> O["FX Amt"]
    P["Left"] --> Q["Decimator"]
    Q --> R["Output Level"]
    R --> S["Compressor"]
    S --> T["FX Amt"]
| DECIMATOR | ||||
| a | [D]Pre LPF Off, On | Turn the harmonic noise caused by lowered sampling on and off | ||
| High Damp [%] | 0...100 | Sets the ratio of high-range damping | ||
| b | [D]Sampling Freq [Hz] | 1.00k...48.00k | Sets the sampling frequency | |
| Resolution 4...24 | Sets the data bit length | |||
| c | [D]Output Level | 0...100 Sets the decimator output level | ||
| COMPRESSOR | ||||
| d | [C] Sensitivity | 1...100 Sets the sensitivity | ||
| e | [C]Attack 1...100 | Sets the attack level | ||
| Output Level 0... | 100 Sets the compressor output level | |||
| f | R o u t i | Decimator ? Comp, Comp, Decimator | Switches the order of the decimator and compressor | |
| g | Wet/Dry | Dry, 1:99...99:1, Wet | Balance between the wet and dry signal | |
| Src Off...Tempo | Table , “Dynamic Modulation sources,” on page 330 | |||
| Amt -100...+100 | Amount of modulation source | |||
106: AmpSim - Tremolo (Amp Simulation- Tremolo)
This effect combines a mono amp simulation and a tremolo. flowchart
graph TD
    A["Left"] --> B["Amp Simulation"]
    B --> C["Tremolo"]
    C --> D["FX Amt"]
    D --> E["LFO: Tri/Sin/Vintage/Up/Down"]
    E --> F["LFO Shape"]
    F --> G["Right"]
    style A fill:#f9f,stroke:#333
    style D fill:#ccf,stroke:#333
    style E fill:#cfc,stroke:#333
| AMP SIM | ||||
| a | [A]Amplifier Type | SS, EL84, 6L6 Se | ects the type of guitar amplifier | |
| TREMOLO | ||||
| b | [T]LFO Waveform | Triangle, Sine, Vintage, Up, Down | Selects the LFO Waveform | |
| LFO Shape | -100...+100 | Changes the curvature of the LFO Waveform | ||
| c | [T]LFO Frequency [Hz] | 0.02...20.00 | Sets the speed of the LFO | |
| d | [T]Depth 0...100 | Sets the depth of | LFO modulation | |
| e | Wet/Dry | Dry, 1:99...99:1, Wet | Balance between the wet and dry signal | |
| Src Off...Tempo | Table, "Dynamic Modulation sources," on page 330 | |||
| Amt -100...+100 | Amount of | modulation source | ||
107: Cho/Flng - Mt.Dly
(Chorus/Flanger - Multitap Delay)
This effect combines a mono chorus/flanger and a multitap delay. flowchart
graph LR
    A["EQ Trim"] --> B["LEQ"]
    B --> C["HEQ"]
    C --> D["Chorus/Flanger"]
    D --> E["Che/Fing FX Amt"]
    E --> F["MT.Dly FX Amt"]
    F --> G["FX Amt"]
    H["LFO: Tri / Sine"] --> D
    I["Left"] --> J["Chorus/Flanger"]
    J --> K["Feedback"]
    K --> D
    L["Multitap Delay"] --> M["Delay 1"]
    M --> N["High Damp"]
    N --> O["Feedback"]
    O --> P["MX"]
    Q["Right"] --> R["Left"]
| CHORUS/FLANGER | ||||
| a | [F]LFO Frequency [Hz] | 0.02...20.00 Sets | the speed of the LFO | |
| LFO Waveform | Triangle, Sine Selects the LFO Waveform | |||
| b | [F]Delay Time [msec] | 0.0...1350.0 Sets | the delay time | |
| Depth 0...100 Sets the depth of LFO modulation | ||||
| Feedback -100...+100 Sets the feedback amount | ||||
| c [F]EQ Trim 0...100 Sets the EQ input level | ||||
| d | [F]PreLEQ Gain [dB] | -15...+15 Sets the gain of Low EQ | ||
| PreHEQ Gain [dB] | -15...+15 Sets the gain of High EQ | |||
| e | [F]Cho/Flng Wet/Dry | -Wet...-1:99, Dry, 1:99...Wet | Sets the effect balance of the chorus/flanger | |
| MULTITAP DELAY | ||||
| a | [D]Tap1 Time [msec] | 0.0...1360.0 Sets | the Tap1 delay time | |
| Tap1 Level 0...100 Sets the Tap1 output level | ||||
| b | [D]Tap2 Time [msec] | 0.0...1360.0 Sets | the Tap2 delay time | |
| Feedback -100...+100 Sets the Tap2 feedback amount | ||||
| c | [D]High Damp [%] | 0...100 | Sets the damping amount in the high range | |
| d | [D]Mt.DelayWe t/Dry | Dry, 1:99...99:1, Wet | Sets the multitap delay effect balance | |
| Src Off...Tempo | Selects the Wet/Dry modulation source for the multitap delay | |||
| Amt | -100...+100 | Sets the Wet/Dry modulation amount for the multitap delay | ||
| e | Wet/Dry | Dry, 1:99...99:1, Wet | Balance between the wet and dry signal | |
| Src Off...Tempo | Table, “Dynamic Modulation sources,” on page 330 | |||
| Amt | -100...+100 Amount of modulation source | |||
108: Phaser - Cho/Flng
(Phaser - Chorus/Flanger)
This effect combines a mono phaser and a chorus/flanger. flowchart
graph LR
    A["Left"] --> B["Phaser"]
    B --> C["Chorus/Flanger"]
    C --> D["Normal"]
    D --> E["Output Mode"]
    B --> F["Resonance"]
    F --> G["LFO: Tri / Sine"]
    G --> H["Phase1: FX Amt"]
    H --> I["EQ Trim"]
    I --> J["LEQREQ"]
    J --> K["Feedback"]
    K --> L["Chorus/Flanger"]
    L --> M["Wet Invert Cho/Fing/ FX Amt"]
    M --> N["FX Amt"]
    style A fill:#f9f,stroke:#333
    style N fill:#f9f,stroke:#333
| PHASER | ||||
| a | [P]LFO Frequency [Hz] | 0.02...20.00 Sets | the speed of the LFO | |
| LFO Waveform | Triangle, Sine | Selects the LFO Waveform | ||
| b | [P]Manual | 0...100 | Sets the frequency to which the effect is applied | |
| Depth 0...100 Sets the depth of LFO modulation | ||||
| Resonance | -100...+100 | Sets the resonance amount | ||
| c | [P]Phaser Wet/Dry | -Wet, -1:99...Dry...99:1,Wet | Sets the phaser effect balance | |
| CHORUS/FLANGER | ||||
| d | [F]LFO Frequency [Hz] | 0.02...20.00 Sets | the speed of the LFO | |
| LFO Waveform | Triangle, Sine | Selects the LFO Waveform | ||
| e | [F]Delay Time [msec] | 0.0...1350.0 Sets | the delay time | |
| Depth 0...100 Sets the depth of LFO modulation | ||||
| Feedback -100..+100 | Sets the feedback amount | |||
| f | [F]EQ Trim 0...100 Sets the EQ input level | |||
| g | [F]PreLEQ Gain [dB] | -15...+15 Sets the gain of Low EQ | ||
| PreHEQ Gain [dB] | -15...+15 Sets the gain of High EQ | |||
| h | [F]Cho/Flng Wet/Dry | -Wet, -1:99...Dry...99:1,Wet | Sets the effect balance of the chorus/flanger | |
| Src Off...Tempo | Selects the Wet/Dry modulation source for the chorus/flanger | |||
| Amt | -100...+100 | Sets the Wet/Dry modulation amount for the chorus/flanger | ||
| i | [F]Output Mode | Normal,Wet Invert | Selects the output mode for the chorus/flanger | |
| j | Wet/Dry | Dry, 1:99...99:1,Wet | Balance between the wet and dry signal | |
| Src Off...Tempo | Table, “Dynamic Modulation sources,” on page 330 | |||
| Amt | -100...+100 | Amount of modulation source | ||
109: Reverb - Gate
This effect combines a mono reverb and a gate. flowchart
graph TD
    A["Left"] --> B["Pre Delay"]
    B --> C["EQ Trim"]
    C --> D["LEOHEQ"]
    D --> E["Reverb"]
    E --> F["Gate"]
    F --> G["Reverb Balance"]
    G --> H["FX Amt"]
    I["Right"] --> J["Input Reverb Mix"]
    J --> K["Input"]
    K --> L["D-mod Envelope Select"]
    L --> M["Envelope - Control"]
    M --> N["Gate"]
    N --> O["FX Amt"]
    style A fill:#f9f,stroke:#333
    style I fill:#f9f,stroke:#333
    style O fill:#f9f,stroke:#333
| REVERB | ||||
| a | [R]Reverb Time [sec] | 0.1...10.0 Sets the | reverberation time | |
| High Damp [%] | 0...100 | Sets the damping amount in the high range | ||
| b | [R]Pre Delay [msec] | 0...200 | Sets the delay time of the reverb sound and gate control signal | |
| c | [R]EQ Trim 0...10 | 0 Sets the EQ input level | ||
| Reverb Balance | 0...100 Sets the reverb effect balance | |||
| d | [R]PreLEQ Fc | Low, Mid-Low | Selects the cutoff frequency (low or mid-low) of the low-range equalizer | |
| Pre HEQ Fc | High, Mid-High | Selects the cutoff frequency (high or mid-high) of the high-range equalizer | ||
| e | [R]PreLEQ Gain [dB] | -15.0...+15.0 Sets the gain of Low EQ | ||
| Pre HEQ Gain [dB] | -15.0...+15.0 Sets the gain of High EQ | |||
| GATE | ||||
| f | [G]Envelope Select | D-mod, Input | Switches between modulation source control and input signal control | |
| Src Off...Tempo | Selects the modulation source that controls the gate when Envelope Select is set to D-mod | |||
| g | [G]Input Reverb Mix | 0...100 | Sets the balance between the dry and reverb sounds of the gate control signal | |
| Threshold 0...100 | Sets the gate threshold level | |||
| h [G]Polarity +,- | Switches between non-invert and invert of the gate on/off state | |||
| i | [G]Attack 1...100 Sets the attack time | |||
| Release 1...100 Sets the release time | ||||
| j | Wet/Dry | Dry, 1:99...99:1, Wet | Balance between the wet and dry signal | |
| Src Off...Tempo | Table , "Dynamic Modulation sources," on page 330 | |||
| Amt | -100...+100 | Amount of modulation source | ||
| f | [G]Envelope Select | D-mod, Input | Switches between modulation source control and input signal control | |
| Src Off...Tempo | Selects the modulation source that controls the gate when Envelope Select is set to D-mod | |||
| g | [G]Input Reverb Mix | 0...100 | Sets the balance between the dry and reverb sounds of the gate control signal | |
| Threshold 0...100 | Sets the gate threshold level | |||
| h [G]Polarity +,- | Switches between non-invert and invert of the gate on/off state | |||
| i | [G]Attack 1...100 | Sets the attack time | ||
| Release 1...100 S | Sets the release time | |||
| j | Wet/Dry | Dry, 1:99...99:1, Wet | Balance between the wet and dry signal | |
| Src Off...Tempo | Table , "Dynamic Modulation sources," on page 330 | |||
| Amt | -100...+100 | Amount of modulation source | ||
Double Size
Double-size effects can only be assigned to the FX2 processors (either in the A or B FX group).110: St. Mltband Limiter (Stereo Mltband Limiter)
This is a stereo multiband limiter. flowchart
graph TD
    A["Left"] --> B["Band-Pass Filters"]
    B --> C1["Low"]
    B --> C2["Mid"]
    B --> C3["High"]
    C1 --> D1["Envelope - Control"]
    C2 --> D2["Envelope - Control"]
    C3 --> D3["Envelope - Control"]
    D1 --> E1["Limiter"]
    D2 --> E2["Limiter"]
    D3 --> E3["Limiter"]
    E1 --> F1["FX Amt"]
    E2 --> F2["FX Amt"]
    E3 --> F3["FX Amt"]
    F1 --> G1["Gain Adjust"]
    F2 --> G2["Gain Adjust"]
    F3 --> G3["Gain Adjust"]
    G1 --> H1["Offset"]
    G2 --> H2["Offset"]
    G3 --> H3["Offset"]
    H1 --> I1["Left"]
    H2 --> I2["Left"]
    H3 --> I3["Left"]
    I1 --> J1["Right"]
    I2 --> J2["Right"]
    I3 --> J3["Right"]
| a | R a t i o | 1.0 : 1...50.0 : 1, Inf : 1 | Sets the signal compression ratio | |
| b | Threshold [dB] -40...0 | Sets the level above which the compressor is applied | ||
| c | Attack 1...100 Sets the attack time | |||
| d | Release 1...100 Sets the release time | |||
| e | Low Offset [dB] -40...0 | Sets the low range gain of trigger signal | ||
| f | Mid Offset [dB] -40...0 | Sets the mid range gain of trigger signal | ||
| g | High Offset [dB] | -40...0 | Sets the high range gain of trigger signal | |
| h | Gain Adjust [dB] | -Inf,-38...+24 | Sets the output gain | |
| Src Off...Tempo | Selects the modulation source for the output gain | |||
| Amt -63...+63 | Sets the modulation amount of the output gain | |||
| i | Wet/Dry | Dry, 1:99...99:1,Wet | Balance between the wet and dry signal | |
| Src Off...Tempo | Table, “Dynamic Modulation sources,” on page 330 | |||
| Amt -100...+100 | Amount of modulation source | |||
111: PianoBody/Damper (PianoBody/Damper Simulation)
This effect simulates the resonance of the piano sound board caused by the string vibration, and also simulates the resonance of other strings that are not being played when you press the damper pedal. It will create a very realistic sound when applied to acoustic piano sounds. flowchart
graph TD
    A["Left"] --> B["Piano Body/Damper Simulation"]
    C["Right"] --> B
    B --> D["FX Amt"]
    B --> E["D mod"]
    E --> F["Damper"]
    F --> G["FX Amt"]
    style B fill:#f9f,stroke:#333
    style D fill:#ccf,stroke:#333
    style E fill:#cfc,stroke:#333
| a | Sound Board Depth | 0...100 | Sets the intensity of resonance of the sound board | |
| b | Damper Depth | 0...100 | Sets the intensity of the string resonance created when the damper pedal is pressed | |
| Src Off...Tempo | Selects the modulation source of damper effect | |||
| c Tone | 1 | ..100 Sets tonal q | quality of effect sound | |
| d Mid Shape | 0 | ..36 Sets the mid range of tonal quality | ||
| e Tune | -50...+50 Fine tuning | |||
| f | Wet/Dry | Dry, 1:99...99:1, Wet | Balance between the wet and dry signal | |
| Src Off...Tempo | Table, “Dynamic Modulation sources,” on page 330 | |||
| Amt -100...+100 Amount of modulation source | ||||
a: Sound Board Depth
This parameter sets the intensity of resonance of the piano sound board.b: Damper Depth
b: Src
This parameter sets the resonance intensity of the other strings created when the damper pedal is pressed. The "Src" parameter selects the modulation source from which the damper effect is applied. Usually, select Damper #64 Pdl (Damper pedal). MIDI The effect is off when a value for the modulation source specified for the "Src" parameter is 63 or smaller, and the effect is on when the value is 64 or higher.c: Tone
d: Mid Shape
These parameters control the tonal quality of the effect sound.e: Tune
Since this effect simulates the resonance of the strings, the sound varies depending on the pitch. If you have changed tuning using the “Master Tuning” (Global > General Controls > Basic), adjust this parameter value.112: OD/HyperGain Wah (Overdrive/Hyper Gain Wah)
This distortion effect has two modes: overdrive and hyper-gain that produces a strong distortion. A higher high-gain setting is required for this effect relative to a normal-size effect. flowchart
graph TD
    A["FX Amt = 100: Mono In - Mono Out / FX Amt = 0: Stereo In - Stereo Out"] --> B["Pre Low-cut"]
    B --> C["Wah"]
    C --> D["Driver"]
    D --> E["3 Band EQ"]
    E --> F["Amp Simulation"]
    F --> G["FX Amt"]
    H["Mode: Overdrive / Hyper-Gain Drive"] --> D
    I["Output Level"] --> E
    J["Direct Mix"] --> D
    K["D"] --> L["Node"]
    L --> M["Right"]
    N["Left"] --> B
| a | Wah Off, On Switches Wah on/off | |||
| Src Off...Tempo | Selects the modulation source that switches the Wah on and off | |||
| Sw | Toggle, Moment | Selects the switching mode for the modulation source that switches the Wah on and off | ||
| b | Wah Sweep Range | -10...+10 Sets the range of Wah | ||
| Wah Sweep Src | Off...Tempo | Selects the modulation source that controls the Wah | ||
| c | Drive | Overdrive Hyper-Gain | Switches between overdrive and hi-gain distortion | |
| d | Drive 1...120 | Sets the degree of distortion | ||
| Pre Low-cut 0...10 | Sets the low range cut amount of the distortion input | |||
| e | Output Level 0...50 Sets the output level | |||
| Src Off...Tempo | Selects the modulation source for the output level | |||
| Amt -50...+50 | Sets the modulation amount of the output level | |||
| f | Low Cutoff [Hz] | 20...1.00k | Sets the center frequency for Low EQ (shelving type) | |
| Gain [dB] -18...+18 Sets the gain of Low EQ | ||||
| g | Mid1 Cutoff [Hz] | 300...10.00k | Sets the center frequency for Mid/High EQ 1 (peaking type) | |
| Q 0.5...10.0 | Sets the band width of Mid/High EQ 1 | |||
| Gain [dB] -18...+18 Sets the gain of Mid/High EQ 1 | ||||
| h | Mid2 Cutoff [Hz] | 500...20.00k | Sets the center frequency for Mid/High EQ 2 (peaking type) | |
| Q 0.5...10.0 | Sets the band width of Mid/High EQ 2 | |||
| Gain [dB] -18...+18 Sets the gain of Mid/High EQ 2 | ||||
| i | Direct Mix 0...50 | Sets the amount of the dry sound mixed to the distortion | ||
| Speaker Simulation | Off, On | Switches the speaker simulation on/off | ||
| j | Wet/Dry | Dry, 1:99...99:1,Wet | Balance between the wet and dry signal | |
| Src Off...Tempo | Table, "Dynamic Modulation sources," on page 330 | |||
| Amt -100...+100 | Amount of modulation source | |||
113: GuitarAmp + P4EQ (Guitar Amp Model + Parametric 4-Band EQ)
This combines a guitar amp simulation (which even faithfully replicates the distortion and tone control circuitry) with a four-band equalizer. By using this in conjunction with "St. Guitar Cabinet (Stereo Guitar Cabinet)" on page 342, you can obtain an even more realistic guitar sound that simulates a guitar amp + speaker cabinet. flowchart
graph LR
    A["Left"] --> B["Guitar Amp Model"]
    B --> C["Volume"]
    C --> D["Parametric 4Band EQ"]
    D --> E["FX Amt"]
    F["Right"] --> G["D^med"]
    G --> H["Output"]
    style A fill:#f9f,stroke:#333
    style F fill:#f9f,stroke:#333
    style B fill:#ccf,stroke:#333
    style C fill:#cfc,stroke:#333
    style D fill:#fcc,stroke:#333
    style E fill:#cff,stroke:#333
    style G fill:#ffc,stroke:#333
| a | Amp Type | VOX AC15, VOX AC15TB, VOX AC30, VOX AC30TB, UK BLUES, UK 70'S, UK 80'S, UK 90'S, UK MODERN, US MODERN, US HIGAIN, BOUTIQUE OD, BOUTIQUE CL, BLACK 2x12, TWEED - 1x12, TWEED - 4x10 | Selects the type of the amplifier | |
| Drive Gain | 0...100 | Sets the input gain | ||
| b | Volume | 0...100 | Sets the output level | |
| Src Off...Tempo | Selects the modulation source for the output level | |||
| Amt -100...+100 | Sets the modulation amount of the output level | |||
| c | Bass | 0...100 | Sets the bass (low range) level | |
| Middle 0...100 | Sets the middle (mid range) level | |||
| d | Treble | 0...100 | Sets the treble (high range) level | |
| Presence | 0...100 | Sets the presence (high-frequency tone) | ||
| e | Post P4EQ | Thru, On | Selects through or on for the equalizer | |
| e | Band1 Cutoff [Hz] | 20...1.00k | Sets the center frequency of Band 1 | |
| Q 0.5...10.0 | Sets Band 1's bandwidth | |||
| Gain [dB] -18...+ | 18 Sets the gain of Band 1 | |||
| f | Band2 Cutoff [Hz] | 50...5.00k | Sets the center frequency of Band 2 | |
| Q 0.5...10.0 | Sets Band 2's bandwidth | |||
| Gain [dB] -18...+ | 18 Sets the gain of Band 2 | |||
| g | Band3 Cutoff [Hz] | 300...10.00k | Sets the center frequency of Band 3 | |
| Q 0.5...10.0 | Sets Band 3's bandwidth | |||
| Gain [dB] -18...+ | 18 Sets the gain of Band 3 | |||
| h | Band4 Cutoff [Hz] | 500...20.00k | Sets the center frequency of Band 4 | |
| Q 0.5...10.0 | Sets Band 4's bandwidth | |||
| Gain [dB] -18...+ | 18 Sets the gain of Band 4 | |||
| i | Wet/Dry | Dry, 1:99...99:1, Wet | Balance between the wet and dry signal | |
| Src Off...Tempo | Table, “Dynamic Modulation sources,” on page 330 | |||
| Amt -100...+100 | Amount of modulation source | |||
a: Amp Type
d: Presence
If the Amp Type is VOX AC15...VOX AC30TB, this sets the attenuation of the high-frequency range. For other types, this sets the boost of the high-frequency range. This corresponds to the Cut knob control of amps made by the VOX Corporation.e: Post P4EQ
By chaining this with 19: St.Guitar Cabinet you can simulate the combination of a guitar amp and speaker cabinet. In this case, we recommend that you set Post P4EQ to “Thru,” but if necessary you can turn it “On” and adjust the tone. Recommended Combinations of Guitar Amp Models and Cabinet Simulators:| Amp Type Cabinet Type | |
| VOX AC15 VOX AC15 - 1x12 | |
| VOX AC15TB VOX AC15 - 1x12 | |
| VOX AC30 VOX AC30 - 2x12 | |
| VOX AC30TB VOX AC30 - 2x12 | |
| UK BLUES UK H30 - 4x12 | |
| UK 70'S UK H30 - 4x12 | |
| UK 80'S UK T75 - 4x12 | |
| UK 90'S UK T75 - 4x12 | |
| UK MODERN UK T75 - 4x12, US V30 - 4x12 | |
| US MODERN US V30 - 4x12 | |
| US HIGAIN US V30 - 4x12, UK T75 - 4x12 | |
| BOUTIQUE OD UK H30 - 4x12 | |
| BOUTIQUE CL UK H30 - 4x12 | |
| BLACK 2x12 BLACK - 2x12 | |
| TWEED - 1x12 TWEED - 1x12 | |
| TWEED - 4x10 TWEED - 4x10 | |
114: BassTubeAmp+Cab.
(Bass Tube Amp Model + Cabinet)
This simulates a bass amp (with gain and drive) and speaker cabinet. flowchart
graph TD
    A["Left"] --> B["Bass Amp Model2"]
    B --> C["Cabinet Simulator"]
    C --> D["FX Amt"]
    D --> E["FX Amt = 100: Mono In - Mono Out / FX Amt = D: Stereo In - Stereo Out"]
    B --> F["Drive"]
    B --> G["Volume"]
    G --> H["Right"]
    H --> I["D-mod"]
    I --> J["Ground"]
| a | Amp Type | STUDIO COMBO VOX AC100 UK MAJOR | Selects the type of the amplifier A tube combo ideal for the Motown sound A 100W tube amp AC100 made by Vox A 200W tube amp made in the UK | |
| b | Drive Gain | 0...100 | Sets the input gain | |
| c | Volume | 0...100 | Sets the output level | |
| Src | Off...Tempo | Selects the modulation source for the output level | ||
| Amt | -100...+100 | Sets the modulation amount of the output level | ||
| d | Bass | 0...100 | Sets the bass (low range) level | |
| e | Middle | 0...100 | Sets the middle (mid range) level | |
| f | Treble | 0...100 | Sets the treble (high range) level | |
| g | Presence | 0...100 | Sets the presence (high-frequency tone) | |
| h | Cabinet Simulator | Off, On | Switches the cabinet simulator on/off | |
| i | Cabinet Type | LA - 4x10, MODERN - 4x10, METAL - 4x10, CLASSIC -8x10, UK - 4x12, STUDIO - 1x15, JAZZ - 1x15, VOX AC100 - 2x15, US - 2x15, UK - 4x15, LA - 1x18, COMBI - 1x12 & 1x18 | Selects the cabinet type | |
| j | Wet/Dry | Dry, 1:99...99:1, Wet | Balance between the wet and dry signal | |
| Src | Off...Tempo | Table , “Dynamic Modulation sources,” on page 330 | ||
| Amt | -100...+100 | Amount of modulation source |
a: Amp Type
i: Cabinet Type
Recommended Combinations of Bass Amp Models and Cabinets:| Amp Type | Cabinet Type |
| STUDIO COMBO STUDIO - 1x15 | |
| AC100 | VOX AC100 - 2x15 |
| UK MAJOR | UK - 4x15, UK - 4x12 |
115: St. Mic + PreAmp (Stereo Mic Modeling + PreAmp)
This is a stereo mic and preamp simulator (See “Mic Model+Pre-Amp (Mic Modeling + PreAmp)” on page 345.). For example you might use this to simulate micing of a stereo source such as a rotary speaker. flowchart
graph LR
    A["Left"] --> B["Tube Pre Amplification Simulation"]
    B --> C["FX Amt"]
    D["Right"] --> E["Tube Pre Amplification Simulation"]
    E --> F["FX Amt"]
116: Multitap Cho/Delay (Multitap Chorus/Delay)
This effect has six chorus blocks with different LFO phases. You can produce a complex stereo image by setting a different delay time and depth for each block. You can control the delay output level via a modulation source. flowchart
graph TD
    A["FX Amt = 100; Mono In - Stereo Out / FX Amt = 0; Stereo In - Stereo Out"] --> B["Feedback"]
    B --> C["Tap1 Delay"]
    B --> D["Tap2 Delay"]
    B --> E["Tap3 Delay"]
    B --> F["Tap4 Delay"]
    B --> G["Tap5 Delay"]
    B --> H["Tap6 Delay"]
    C --> I["Panning Preset"]
    D --> I
    E --> I
    F --> I
    G --> I
    H --> I
    I --> J["FX Amt"]
    K["LFO: Triangle"] --> L["On/Off Control"]
    M["D^ond"] --> L
    N["0 [degree"]] --> O["Tap1 Delay"]
    N --> P["Tap2 Delay"]
    N --> Q["Tap3 Delay"]
    N --> R["Tap4 Delay"]
    N --> S["Tap5 Delay"]
    N --> T["Tap6 Delay"]
    U["Right"] --> V["Feedback"]
| a | LFO Frequency [Hz] | 0.02...13.00 Sets | the speed of the LFO | |
| b | Tap1 (000) [msec] | 0...2000 | Sets the Tap1 (LFO phase=0 degrees) delay time | |
| Depth 0...30 Sets | the Tap1 chorus | depth | ||
| Status | Always On, Always Off, On?Off (Dm), Off?On (Dm) | Selects on, off, or modulation source for the control of Tap1 output | ||
| c | Tap2 (180) [msec] | 0...2000 | Sets the Tap2 (LFO phase=180 degrees) delay time | |
| Depth 0...30 Sets | the Tap2 chorus | depth | ||
| Status | Always On, Always Off, On?Off (Dm), Off?On (Dm) | Selects on, off, or modulation source for the control of Tap2 output | ||
| d | Tap3 (060) [msec] | 0...2000 | Sets the Tap3 (LFO phase=60 degrees) delay time | |
| Depth 0...30 Sets | the Tap3 chorus | depth | ||
| Status | Always On, Always Off, On?Off (Dm), Off?On (Dm) | Selects on, off, or modulation source for the control of Tap3 output | ||
| e | Tap4 (240) [msec] | 0...2000 | Sets the Tap4 (LFO phase=240 degrees) delay time | |
| Depth 0...30 Sets | the Tap4 chorus | depth | ||
| Status | Always On, Always Off, On?Off (Dm), Off?On (Dm) | Selects on, off, or modulation source for the control of Tap4 output | ||
| f | Tap5 (120) [msec] | 0...2000 | Sets the Tap5 (LFO phase=120 degrees) delay time | |
| Depth 0...30 Sets | the Tap5 chorus | depth | ||
| Status | Always On, Always Off, On?Off (Dm), Off?On (Dm) | Selects on, off, or modulation source for the control of Tap5 output |
| g | Tap6 (300) [msec] | 0...2000 | Sets the Tap1 (LFO phase=300 degrees) delay time | |
| Depth 0...30 Sets | the Tap6 chorus | depth | ||
| Status | Always On, Always Off, On?Off (Dm), Off?On (Dm) | Selects on, off, or modulation source for the control of Tap6 output | ||
| h P | Panning Preset | 1:L123456R, 2:L135246R, 3:L135246R, 4:L145632R | Selects the stereo panning pattern for each tap | |
| i | Tap1 Feedback | -100...+100 | Sets the Tap1 feedback amount | |
| Src | Off...Tempo | Selects the modulation source for the Tap output level, feedback amount, and effect balance | ||
| Amt | -100...+100 | Sets the modulation amount of Tap1 feedback amount | ||
| j | Wet/Dry | Dry, 1:99...99:1, Wet | Balance between the wet and dry signal | |
| Src | Off...Tempo | Table, “Dynamic Modulation sources,” on page 330 | ||
| Amt | -100...+100 | Amount of modulation source |
b, c, d, e, f, g: Status
These parameters set the output status of each Tap. Always On: Output is always on. (No modulation) Always Off: Output is always off. (No modulation) On Off (dm): Output level is switched from on to off depending on the modulation source. Off On (dm): Output level is switched from off to on depending on the modulation source. Combining these parameters, you can change from 4-phase chorus to two-tap delay by crossfading them gradually via the modulation source during a performance.h: Panning Preset
This parameter selects combinations of stereo images of the tap outputs.117: St. Pitch Shifter (Stereo Pitch Shifter)
This is a stereo pitch shifter. The pitch shift amount for the left and right channels can be reversed from each other. flowchart
graph TD
    A["Input Level"] --> B["Pitch Shifter"]
    B --> C["Delay"]
    C --> D["High Damp"]
    D --> E["FX Amt"]
    F["Input Level"] --> G["Pitch Shifter"]
    G --> H["Delay"]
    H --> I["High Damp"]
    I --> J["FX Amt"]
    K["Pre"] --> B
    L["Post"] --> C
    M["Feedback Position"] --> G
    N["Pre's Post"] --> G
    O["Feedback"] --> H
    P["Spread"] --> I
    Q["Left"] --> R["FX Amt"]
    S["Right"] --> T["FX Amt"]
| a | Mode | Slow, Medium, Fast | Switches Pitch Shifter mode | |
| L/R Pitch | Normal, Up/Down | Determines whether or not the L/R pitch shift amount is inverted | ||
| b | Pitch Shift [1/2tone] | -24...+24 | Sets the pitch shift amount in steps of a semitone | |
| Src Off...Tempo | Selects the modulation source of pitch shift amount | |||
| Amt -24...+24 | Sets the modulation amount of pitch shift amount | |||
| c | Fine [cents] -100...+100 | Sets the pitch shift amount in steps of one cent | ||
| Amt -100...+100 | Sets the modulation amount of pitch shift amount | |||
| d L | Delay [msec] 0...2000 | Sets the delay time for the left channel | ||
| e R | Delay [msec] 0...2000 | Sets the delay time for the right channel | ||
| f | Feedback -100...+100 | Sets the feedback amount | ||
| High Damp [%] 0...100 | Sets the damping amount in the high range | |||
| g | Feedback Position | Pre, Post Switches the feedback connection | ||
| Spread -100...+100 | Sets the width of the stereo image of the effect sound | |||
| h | Input Level Dmod [%] | -100...+100 | Sets the modulation amount of the input level | |
| Src Off...Tempo | Selects the modulation source for the input level | |||
| i | Wet/Dry | Dry, 1:99...99:1, Wet | Balance between the wet and dry signal | |
| Src Off...Tempo | Table , "Dynamic Modulation sources," on page 330 | |||
| Amt -100...+100 | Amount of modulation source | |||
a: L/R Pitch
When you select Up/Down for this parameter, the pitch shift amount for the right channel will be reversed. If the pitch shift amount is positive, the pitch of the left channel is raised, and the pitch of the right channel is lowered.118: St. PitchShift BPM (Stereo Pitch Shifter BPM)
This stereo pitch shifter enables you to set the delay time to match the song tempo. flowchart
graph TD
    A["Input Level"] --> B["Pitch Shifter"]
    B --> C["Delay"]
    C --> D["High Damp"]
    D --> E["FX Amt"]
    F["Input Level"] --> G["Pitch Shifter"]
    G --> H["Delay"]
    H --> I["High Damp"]
    I --> J["FX Amt"]
    K["BPM"] --> L["BPM Base Note x Times"]
    L --> M["Base Note x Times"]
    N["Temp"] --> O["BPM"]
    O --> P["Feedback Position"]
    P --> Q["Pre Post"]
    Q --> R["Delay"]
    R --> S["High Damp"]
    S --> T["FX Amt"]
    U["Right"] --> V["BPM"]
    V --> W["Base Note x Times"]
    X["Spread"] --> Y["Feedback"]
    Y --> Z["Pre Post"]
    Z --> AA["Delay"]
    AA --> AB["High Damp"]
    AB --> AC["FX Amt"]
| a | Mode | Slow, Medium, Fast | Switches Pitch Shifter mode | |
| L/R Pitch | Normal, Up/Down | Determines whether or not the L/R pitch shift amount is inverted | ||
| b | Pitch Shift [1/2tone] | -24...+24 | Sets the pitch shift amount in steps of a semitone | |
| Src Off...Tempo | Selects the modulation source of pitch shift amount | |||
| Amt -24...+24 | Sets the modulation amount of pitch shift amount | |||
| c | Fine [cents] -100...+100 | Sets the pitch shift amount in steps of one cent | ||
| Amt -100...+100 | Sets the modulation amount of pitch shift amount Sets the modulation amount of pitch shift amount | |||
| d | BPM | MIDI, 40.00...300.00 | MIDI syncs to the system tempo; 40-300 sets the tempo manually for this individual effect | |
| Time Over? L ---, | OVER! | Display the error message if the left channel delay time exceeds the upper limit | ||
| R | - | Display the error message if the right channel delay time exceeds the upper limit | ||
| e | L Delay Base Note | r...w | Selects the type of notes to specify the left channel delay time | |
| Times | x1...x32 | Sets the number of notes to specify the left channel delay time | ||
| f | R Delay Base Note | r...w | Selects the type of notes to specify the right channel delay time | |
| Times | x1...x32 | Sets the number of notes to specify the right channel delay time | ||
| g | Feedback Position | Pre, Post Switches the feedback connection | ||
| Spread | -100...+100 | Sets the width of the stereo image of the effect sound | ||
| h | Feedback | -100...+100 | Sets the feedback amount | |
| High Damp [%] | 0...100 | Sets the damping amount in the high range | ||
| i | Input Level Dmod [%] | -100...+100 | Sets the modulation amount of the input level | |
| Src Off...Tempo | Selects the modulation source for the input level | |||
| j | Wet/Dry | Dry, 1:99...99:1, Wet | Balance between the wet and dry signal | |
| Src Off...Tempo | Table, "Dynamic Modulation sources," on page 330 | |||
| Amt -100...+100 | Amount of | modulation source | ||
119: Rotary SpeakerOD (Rotary Speaker Overdrive)
This is a stereo rotary speaker effect. It has an internal simulator that simulates overdrive (recreating the amp distortion) and characteristics of the rotary speaker, producing a very realistic rotary speaker sound. flowchart
graph TD
    A["FX Amt = 100: Mono In - Stereo Out / FX Amt = 0: Stereo In - Stereo Out"] --> B["Overdrive"]
    B --> C["Rotary Speaker"]
    C --> D["Horn/Rotor Balance"]
    D --> E["Mic Distance Mic Spread"]
    E --> F["FX Amt"]
    C --> G["Rotor"]
    G --> H["Speaker Simulation"]
    H --> I["On/Off"]
    H --> J["Speed Switch: Slow/Fast"]
    H --> K["Manual Speed Control"]
    L["Right"] --> M["mod"]
    L --> N["mod"]
    L --> O["mod"]
    L --> P["mod"]
    M --> Q["Mode Switch: Rotate/Stop"]
    N --> R["Speed Switch: Slow/Fast"]
    O --> S["Manual Speed Control"]
    P --> T["Speed Switch: Slow/Fast"]
| a | Overdrive Off, On | Switches overdrive on/off | |
| Src Off...Tempo | Selects a modulation source to switch overdrive on/off | ||
| Sw | Toggle, Moment | Sets the switch mode for overdrive on/off modulation | |
| b | Overdrive Gain 0...100 Determines the degree of distortion | ||
| Overdrive Level | 0...100 Sets the overdrive output level | ||
| C | Overdrive Tone 0...15 | Sets the tonal quality of the overdrive | |
| Speaker Simulator | Off, On | Switches the speaker simulation on/off | |
| d | Mode Switch Rotate, Stop | Switches between speaker rotation and stop | |
| Src Off...Tempo | Selects a modulation source for Rotate/Stop | ||
| Sw | Toggle, Moment | Sets the switch mode for Rotate/Stop modulation | |
| e | Speed Switch Slow, Fast | Switches the speaker rotation speed between slow and fast | |
| Src Off...Tempo | Selects a modulation source for Slow/Fast | ||
| Sw | Toggle, Moment | Sets the switch mode for Slow/Fast modulation | |
| f | Horn/Rotor Balance | Rotor, 1...99, Horn | Sets the volume balance between the high-range horn and low-range rotor |
| Manual SpeedCtrl | Off...Tempo | Sets a modulation source for direct control of rotation speed | |
| g | Horn Acceleration | 0...100 | Sets how quickly the horn rotation speed changes |
| Horn Ratio | Stop, 0.50...2.00 | Adjusts the (high-frequency) horn rotation speed. Standard value is 1.00. "Stop" stops the rotation | |
| h | Rotor Acceleration | 0...100 | Sets how quickly the rotor speed changes |
| Rotor Ratio | Stop, 0.50...2.00 | Adjusts the (low-frequency) rotor rotation speed. Standard value is 1.0. "Stop" stops the rotation | |
| i | Mic Distance 0...100 | Distance between the microphone and rotary speaker | |
| Mic Spread 0...100 Angle of left and right microphones | |||
| j | Wet/Dry | Dry, 1:99...99:1, Wet | Balance between the wet and dry signal |
| Src Off...Tempo | Table, "Dynamic Modulation sources," on page 330 | ||
| Amt | -100...+100 | Amount of modulation source | |
a: Sw
This parameter determines how to switch on/off the ove via a modulation source. eaker When "Sw" = Toggle, overdrive is turned on/off each tim pedal or joystick is operated. MIDI Overdrive will be switched on/off each time the value of the modulation source exceeds 64. When "Sw" = Moment, overdrive is applied only when you press the pedal or operate the joystick. MIDI Only when the value for the modulation source is 64 or higher, the overdrive effect is applied.120: L/C/R Long Delay
This multitap delay outputs three Tap signals to left, right and center respectively. You can set a maximum of 5,460msec for the delay time. flowchart
graph TD
    A["Input Level D-mod"] --> B["High Damp"]
    B --> C["Low Damp"]
    C --> D["L Delay"]
    D --> E["Level"]
    E --> F["FX Amt"]
    G["Input Level D-mod"] --> H["Low Damp"]
    H --> I["C Delay"]
    I --> J["Level"]
    J --> K["FX Amt"]
    L["Feedback"] --> M["R Delay"]
    M --> N["Level"]
    N --> O["FX Amt"]
    P["Spread"] --> Q["Level"]
    Q --> R["FX Amt"]
    S["Left"] --> T["Input Level D-mod"]
    U["Right"] --> V["Input Level D-mod"]
    W["Left"] --> X["Input Level D-mod"]
    Y["Left"] --> Z["Input Level D-mod"]
    AA["Left"] --> AB["Input Level D-mod"]
    AC["Left"] --> AD["Input Level D-mod"]
    AE["Left"] --> AF["Input Level D-mod"]
    AG["Left"] --> AH["Input Level D-mod"]
    AI["Left"] --> AJ["Input Level D-mod"]
    AK["Left"] --> AL["Input Level D-mod"]
    AM["Left"] --> AN["Input Level D-mod"]
    AO["Left"] --> AP["Input Level D-mod"]
    AQ["Left"] --> AR["Input Level D-mod"]
    AS["Left"] --> AT["Input Level D-mod"]
    AU["Left"] --> AV["Input Level D-mod"]
    AW["Left"] --> AX["Input Level D-mod"]
    AY["Input Level D-mod"] --> AZ["Output"]
    BA["Input Level D-mod"] --> BB["Output"]
| a | L Delay Time [msec] | 0...5460 | Sets the delay time of TapL | |
| Level | 0...50 | Sets the output level of TapL | ||
| b | C Delay Time [msec] | 0...5460 | Sets the delay time of TapC | |
| Level | 0...50 | Sets the output level of TapC | ||
| c | R Delay Time [msec] | 0...5460 | Sets the delay time of TapR | |
| Level | 0...50 | Sets the output level of TapR | ||
| d | Feedback (C Delay) | -100...+100 | Sets the feedback amount of TapC | |
| Src Off...Tempo | Selects the modulation source for the TapC feedback | |||
| Amt | -100...+100 | Sets the modulation amount of the TapC feedback | ||
| e | High Damp [%] | 0...100 | Sets the damping amount in the high range | |
| Low Damp [%] | 0...100 | Sets the damping amount in the low range | ||
| f | Input Level Dmod [%] | -100...+100 | Sets the modulation amount of the input level | |
| Src Off...Tempo | Selects the modulation source for the input level | |||
| g | Spread 0...50 | Sets the width of the stereo image of the effect sound | ||
| h | Wet/Dry | Dry, 1:99...99:1, Wet | Balance between the wet and dry signal | |
| Src Off...Tempo | Table, “Dynamic Modulation sources,” on page 330 | |||
| Amt | -100...+100 | Amount of modulation source |
121: St/Cross Long Delay (Stereo/Cross Long Delay)
122: Hold Delay
This effect records the input signal and plays it back repeatedly. You can control the start of recording and reset via a modulation source. Easy to use for real-time performances. This is a stereo delay, and can by used as a cross-feedback delay effect in which the delay sounds cross over between source Easy to use for real-time performances. right by changing the feedback routing. You can set a maximum of 2,730msec for the delay time. flowchart
graph LR
    A["Input Level D-mod"] --> B["Delay"]
    B --> C["High Damp"]
    C --> D["Low Damp"]
    D --> E["FX Amt"]
    F["Input Level D-mod"] --> G["Delay"]
    G --> H["High Damp"]
    H --> I["Low Damp"]
    I --> J["Spread"]
    J --> K["FX Amt"]
    L["Left"] --> M["Stereo In - Stereo Out"]
    M --> N["Feedback"]
    N --> O["Stereo/Cross"]
    O --> P["FX Amt"]
| a S | Stereo/Cross Stereo | o, Cross | Switches between stereo delay and cross-feedback delay | |
| b | L Delay Time [msec] | 0.0...2730.0 | Sets the delay time for the left channel | |
| c | R Delay Time [msec] | 0.0...2730.0 | Sets the delay time for the right channel | |
| d | L Feedback -100...+100 | Sets the feedback amount for the left channel | ||
| Src Off...Tempo | Selects the modulation source of feedback amount | |||
| Amt -100...+100 | Sets the modulation amount of the left channel feedback | |||
| e | R Feedback | -100...+100 | Sets the feedback amount for the right channel | |
| Amt -100...+100 | Sets the modulation amount of the right channel feedback | |||
| f | High Damp [%] | 0...100 | Sets the damping amount in the high range | |
| g | Low Damp [%] | 0...100 | Sets the damping amount in the low range | |
| h | Input Level Dmod [%] | -100...+100 | Sets the modulation amount of the input level | |
| Src Off...Tempo | Selects the modulation source for the input level | |||
| i | Spread | -50...+50 | Sets the width of the stereo image of the effect sound | |
| j | Wet/Dry | Dry, 1:99...99:1, Wet | Balance between the wet and dry signal | |
| Src Off...Tempo | Table, “Dynamic Modulation sources,” on page 330 | |||
| Amt -100...+100 | Amount of modulation source | |||
flowchart
graph TD
    A["FX Amt = 100; Mono In - Stereo Out / FX Amt = 0; Stereo In - Stereo Out"] --> B["Delay"]
    B --> C["Pan"]
    C --> D["D-RST Control"]
    D --> E["BPM"]
    E --> F["Base Note x Times"]
    F --> G["FX Amt"]
    H["Loop Time: Auto'...5400ms"] --> I["Delay"]
    I --> J["Pan"]
    J --> K["D-RST Control"]
    K --> L["BPM"]
    L --> M["Base Note x Times"]
    M --> N["FX Amt"]
    O["Left"] --> P["+"]
    Q["Right"] --> R["+"]
    S["D-mod"] --> T["REC Control"]
    U["D-mod"] --> V["RST Control"]
    W["Temp"] --> X["BPM"]
    Y["BPM"] --> Z["Base Note x Times"]
| a | Loop Time [msec] | Auto, 1...10800 | Sets Automatic loop time setup mode or specifies loop time | |
| b | Loop BPM Sync | Off, On | Specifies whether delay time is set in milliseconds, or as a note value relative to tempo | |
| c | BPM | MIDI, 40.00...300.00 | MIDI syncs to the system tempo; 40-300 sets the tempo manually for this individual effect | |
| Time Over? | ---, OVER! | An error indication that appears if delay time exceeds the upper limit when MIDI/Tempo Sync=On | ||
| d | Loop Base Note | r...w | Selects the type of notes to specify the delay time | |
| Times | x1...x32 | Sets the number of notes to specify the delay time | ||
| e | REC Control Src | Off...Tempo | Selects control source for recording | |
| f | RST Control Src | Off...Tempo | Selects control source for reset | |
| g | Manual REC Control | REC Off, REC On | Sets the recording switch | |
| h | Manual RST Control | Off, RESET | Sets the reset switch | |
| i | Pan | L100...L1, C, R1...R100 | Sets the stereo image of the effect | |
| Src | Off...Tempo | Selects the modulation source of stereo image of the effect | ||
| Amt | -100...+100 | Sets the modulation amount of stereo image of the effect | ||
| j | Wet/Dry | Dry, 1:99...99:1, Wet | Balance between the wet and dry signal | |
| Src | Off...Tempo | Table, “Dynamic Modulation sources,” on page 330 | ||
| Amt | -100...+100 | Amount of modulation source |
a: Loop Time [msec]
With Auto, the loop time is automatically set. Otherwise, you can specify the loop time. When Auto is selected, the Loop Time is automatically set to the time it takes for a performance recorded while the Modulation Source or "Manual REC Control" is on. However, if the length exceeds 10,800msec, the loop time will be automatically set to 10,800msec.c: Time Over?
You can set the delay time up to 10,800msec. If the delay time exceeds this limit, the error message "OVER!" appears in the display. Set the delay time parameters so that this message will not appear. "Time Over?" is only a display parameter.b: Loop BPM Sync
c: BPMd: Loop Base Note
d: Times If "Loop BPM Sync" is on, the "Times" setting is ignored; the loop time is determined by "BPM," "Loop Base "Times." Even in this case, the delay time cannot exceed 10,800 msec."Hold" procedure (when Loop Time = Auto)
1. "Rec Src"JS +Y: #01 "Reset Src"JS -Y: #02 "Manual REC Control"REC Off "Manual RST Control"RESET "Loop Time [msec]" Auto "MIDI/Tempo Sync"Off It should be noted that all recordings will be deleted while Reset is On. 2. "Manual RST Control"Off Reset is cancelled and the unit enters Rec ready mode. 3. Push the joystick in the +Y direction (forward) and play a phrase you wish to hold. When you pull the joystick to original position, the recording will be finished and the phrase you just played will be held. Loop Time is automatically set only for the first recording after resetting. If the time length exceeds 10,800msec, Loop Time will be automatically set to 10,800msec. (If you have set “Times” to 1–10,800msec, the specified loop time will be used regardless of the time taken from pushing the joystick forward until it is pulled back. However, the recording method remains the same. The phrase being played while the joystick is pushed forward will be held.) 4. If you made a mistake during recording, pull the joystick in the -Y direction (back) to reset. In this way, the recording will be erased. Repeat step 4. again. 5. The recorded phrase will be repeated again and again. You can use this to create an accompaniment. 6. By pushing the joystick in the +Y direction (forward), you can also overdub performances over the phrase that is being held.e: REC Control Src
g: Manual REC Control
"REC Control Src" selects the modulation source that controls recording. If this modulation is on, or if "Manual REC Control" is set to On, you can record the input signal. If a recording has already been carried out, additional signals will be overdubbed.  The effect is off when a value for the modulation source specified for the "REC Control Src" parameter is 63 or smaller, and the effect is on when the value is 64 or higher.f: RST Control Src
h: Manual RST Control
The “RST Control Src” parameter specifies the modulation source that controls the reset operation. When you set this modulation source to On, or "Manual RST Control" to RESET, you can erase what you recorded. If the Loop Time parameter has been set to Auto, the loop time is also reset.  The effect is off when a value for the modulation source specified for the "RST Control Src" parameter is 63 or smaller, and the effect is on when the value is 64 or higher.123: LCR BPM Long Dly
The L/C/R delay enables you to match the delay time with the song tempo. flowchart
graph TD
    A["Input Level D-mod"] --> B["High Damp Low Damp"]
    B --> C["L Delay"]
    C --> D["C Delay"]
    D --> E["R Delay"]
    E --> F["Spread"]
    F --> G["FX Amt"]
    H["BPM"] --> I["Base Note x Times"]
    I --> J["Base Note x Times"]
    J --> K["Base Note x Times"]
    K --> L["Output"]
    M["Input Level D-mod"] --> N["High Damp Low Damp"]
    N --> O["L Delay"]
    O --> P["C Delay"]
    P --> Q["R Delay"]
    Q --> R["Spread"]
    R --> S["FX Amt"]
    T["Right"] --> U["Tency"]
    U --> V["BPM"]
    V --> W["Base Note x Times"]
    W --> X["Base Note x Times"]
    X --> Y["Base Note x Times"]
    Y --> Z["Output"]
| t_sa | BPM | MIDI, 40.00...300.00 | MIDI syncs to the system tempo; 40-300 sets the tempo manually for this individual effect | |
| Time Over? ---, OVER! | Displays an error message when the delay time exceeds the upper limit | |||
| b | L Delay Base Note | r...w | Selects the type of notes to specify the delay time for TapL | |
| Times x1...x32 | Sets the number of notes to specify the delay time for TapL | |||
| Level 0...50 Sets | the output level | of TapL | ||
| c | C Delay Base Note | r...w | elects the type of notes to specify the delay time for TapC | |
| Times x1...x32 | Sets the number of notes to specify the delay time for TapC | |||
| Level 0...50 Sets | the output level | of TapC | ||
| d | R Delay Base Note | r...w | Selects the type of notes to specify the delay time for TapR | |
| Times x1...x32 | Sets the number of notes to specify the delay time for TapR | |||
| Level 0...50 Sets | the output level | of TapR | ||
| e | Feedback (C Delay) | -100...+100 Sets | the feedback amount of TapC | |
| Src Off...Tempo | Selects the modulation source for the TapC feedback | |||
| Amt -100...+100 | Sets the modulation amount of the TapC feedback | |||
| f | High Damp [%] | 0...100 | Sets the damping amount in the high range | |
| Low Damp [%] | 0...100 | Sets the damping amount in the low range | ||
| g | Input Level Dmod [%] | -100...+100 | Sets the modulation amount of the input level | |
| Src Off...Tempo | Selects the modulation source for the input level | |||
| h | Spread | 0...50 | Sets the width of the stereo image of the effect sound | |
| i | Wet/Dry | Dry, 1:99...99:1, Wet | Balance between the wet and dry signal | |
| Src Off...Tempo | Table, “Dynamic Modulation sources,” on page 330 | |||
| Amt -100...+100 | Amount of modulation source | |||
a: Time Over?
You can set the delay time up to 10,920msec. If the delay time exceeds this limit, the error message "OVER!" appears in the display. Set the delay time parameters so that this message will not appear. "Time Over?" is only a display parameter.124: St. BPM Long Dly (Stereo BPM Long Delay)
The stereo delay enables you to match the delay time with the song tempo. flowchart
graph TD
    A["Stereo In - Stereo Out"] --> B["Left *"]
    B --> C["Input Level D-mod"]
    C --> D["Delay"]
    D --> E["High Damp Low Damp"]
    E --> F["FX Amt"]
    G["Input Level D-mod"] --> H["Delay"]
    H --> I["High Damp Low Damp"]
    I --> J["FX Amt"]
    K["Temp"] --> L["BPM"]
    L --> M["Base Note x Times"]
    M --> N["Adjust [%"]]
    L --> O["Base Note x Times"]
    O --> P["Adjust [%"]]
    Q["Feedback"] --> R["Delay"]
    R --> S["High Damp Low Damp"]
    S --> T["FX Amt"]
| a | BPM | MIDI, 40.00...300.00 | MIDI syncs to the system tempo; 40-300 sets the tempo manually for this individual effect | |
| Time Over? L --- | OVER! | Display the error message if the left channel delay time exceeds the upper limit | ||
| R ---, OVER! | Display the error message if the right channel delay time exceeds the upper limit | |||
| b | L Delay Base Note | r...w | Selects the type of notes to specify the left channel delay time | |
| Times x1...x32 | Sets the number of notes to specify the left channel delay time | |||
| Adjust [%] -2.50...+2.50 | Fine-adjust the left channel delay time | |||
| c | R Delay Base Note | r...w | Selects the type of notes to specify the right channel delay time | |
| Times x1...x32 | Sets the number of notes to specify the right channel delay time | |||
| Adjust [%] -2.50...+2.50 | Fine-adjust the right channel delay time | |||
| d | L Feedback -100...+100 | Sets the feedback amount for the left channel | ||
| Src Off...Tempo | Selects the modulation source of feedback amount | |||
| L Amt -100...+100 | Sets the modulation amount of the left channel feedback | |||
| e | R Feedback -100...+100 | Sets the feedback amount for the right channel | ||
| R Amt -100...+100 | Sets the modulation amount of the right channel feedback | |||
| f | High Damp [%] 0...100 | Sets the damping amount in the high range | ||
| g | Low Damp [%] | 0...100 | Sets the damping amount in the low range | |
| h | Input Level Dmod [%] | -100...+100 | Sets the modulation amount of the input level | |
| Src Off...Tempo | Selects the modulation source for the input level | |||
| i | Wet/Dry | Dry, 1:99...99:1, Wet | Balance between the wet and dry signal | |
| Src Off...Tempo | Table, “Dynamic Modulation sources,” on page 330 | |||
| Amt | -100...+100 | Amount of modulation source | ||
a: Time Over? L, R
You can set the delay time up to 5,460msec. If the delay time exceeds this limit, the error message "OVER!" appears in the display. Set the delay time parameters so that this message will not appear. "Time Over?" is only a display parameter.125: Early Reflections
This early reflection effect has more precise early reflections with twice the maximum length of a normal-size effect (See "Early Reflections" on page 374.). You can create a very smooth and dense sound. flowchart
graph LR
    A["Left"] --> B["EQ Trim"]
    B --> C["LEO"]
    C --> D["HEO"]
    D --> E["Pro Delay"]
    E --> F["Early Re ections"]
    F --> G["FX Amt"]
    H["Right"] --> I["EQ Trim"]
    I --> J["Left"]
    K["FX Amt = 100: Mono In - Stereo Out / FX Amt = 0: Stereo In - Stereo Out"] --> L["Left"]
    M["FX Amt"] --> N["Right"]
| a | Type | Sharp, Loose, Modulated, Reverse | Selects the decay curve for the early reflection | |
| b | ER Time [msec] | 10...1600 | Sets the time length of early reflection | |
| c | Pre Delay [msec] | 0...200 | Sets the time taken from the original sound to the first early reflection | |
| d | EQ Trim | 0...100 | Sets the input level of EQ applied to the effect sound | |
| e | Pre LEQ Fc | Low, Mid-Low | Selects the cutoff frequency (low or mid-low) of the low-range equalizer | |
| Pre HEQ Fc | High, Mid-High | Selects the cutoff frequency (high or mid-high) of the high-range equalizer | ||
| f | Pre LEQ Gain [dB] | -15.0...+15.0 | Sets the gain of Low EQ | |
| Pre HEQ Gain [dB] | -15.0...+15.0 | Sets the gain of High EQ | ||
| g | Wet/Dry | Dry, 1:99...99:1, Wet | Balance between the wet and dry signal | |
| Src Off...Tempo | Table, “Dynamic Modulation sources,” on page 330 | |||
| Amt | -100...+100 | Amount of modulation source |
Installing the KORG USB MIDI Driver
The USB Device port can be used to transfer MIDI data between the Pa600 and a personal computer (this is called the MIDI Over USB function). This is useful when your computer is not fitted with a MIDI interface. USB can be used in parallel with the MIDI ports. For example, you can connect your Pa600 to a sequencer running on your computer, and at the same time control another MIDI instrument connected to the MIDI ports of Pa600. Connecting Pa600 this ways makes it, at the same time, a MIDI input device, a controller, and a sound generator.Connecting Pa600 to a personal computer
Please install the KORG USB-MIDI Driver, before connecting Pa600 to a personal computer. Be sure your personal comp meets the requirement shown on "KORG USB-MIDI Driver system requirements" below.KORG USB-MIDI Driver system requirements
Windows
Computer: A computer with an USB port, that satisfies the requirements of Microsoft Windows XP, Vista, 7 or 8. Operating system: Microsoft Windows XP Home Edition / Professional / x64 Edition (a driver for the x64 Edition is in beta release), Vista, 7, 8.Mac
Computer: An Apple Mac with an USB port that satisfies the requirements of Mac OS X. Operating system: Mac OS X version 10.5.8 or later.Please note before use
Copyright to all software included in this product is the property of KORG Inc. The license agreement for this software is provided separately. You must read this license agreement before you install this software. Your installation of this software will be taken to indicate your acceptance of this agreement.Windows: Installing the KORG USB-MIDI ted Driver
Please connect Pa600 to the computer via an USB cable only after having installed the KORG USB-MIDI Driver Tools. 1. Insert the included Accessory DVD into the optical drive of your Windows PC. 2. Open the folder DVD-ROM\USB-MIDI Driver\Win - KORG USB-MIDI Driver v.n.nn\ and double-click on "KORG USB-MIDI Driver Tools Setup v.n.nn.exe" to run the installer ("n.nn" meaning the version number). 3. Follow the instructions appearing on screen. At the end, the tools will be installed. When installation is completed, connect the DEVICE USB port of your Pa600 to one of the USB ports of your Windows PC by using a standard USB cable. The Auto Installer will immediately start. 5. When finished, the USB-MIDI driver will be installed, and Pa600 will be able to communicate with your computer via USB. You can access the tools and manuals from the Start menu. 6. Restart the computer, and turn on Pa600. Connect Pa600 to the computer via an USB cable. 7. Select the following command from the task bar to open the installation instructions: Start > all programs > KORG > KORG USB-MIDI Driver Tools > Installation manual 8. Select the following command from the task bar to open the installation program: Start > all programs > KORG > KORG USB-MIDI Driver Tools > Install KORG USB-MIDI Device 9. Please follow the installation instructions appearing on-screen to install the KORG USB-MIDI Driver.Driver's ports
After installation, the following ports will be shown in you MIDI application (e.g., sequencer) among the other MIDI devices: Pa600 KEYBOARD: This allows for reception of MIDI messages from the Pa600 (keyboard and controller's data) to the MIDI application running on the computer. Pa600 SOUND: This allows for transmission of MIDI messages from the MIDI application running on the computer, to the internal tone generator of Pa600.Mac OS X: Installing the KORG USB-MIDI Driver
1. Insert the included Accessory DVD into the optical drive of your Mac. 2. If the DVD content does not appear on screen, double-click the DVD icon to open a window in the Finder. 3. Open the folder /USB-MIDI Driver/Mac - KORG USB-MIDI Driver v.n.nn/ and double-click on "KORG USB-MIDI Driver v.n.n.n.dmg" to open a virtual drive in the Finder ("n.n.n" meaning the version number). 4. Double-click on "KORG USB-MIDI Driver.pkg" to run the installer. 5. Follow the instructions appearing on screen. 6. When installation is completed, eject the virtual drive, and connect the DEVICE USB port of your Pa600 to one of the USB ports of your Mac by using a standard USB cable.Driver's ports
After installation, the following ports will be shown in you MIDI application (e.g., sequencer) among the other MIDI devices: Pa600 KEYBOARD: This allows for reception of MIDI messages from Pa600 (keyboard and controller's data) to the MIDI application running on the Mac. Pa600 SOUND: This allows for transmission of MIDI messages from the MIDI application running on the Mac, to the internal tone generator of Pa600.MIDI Data
MIDI Controllers
The following is a table including all Control Change messages, and their effect on various Pa600 functions. Note that not all controllers are available in all operative modes.| CC# CC N | Name Pa600 Function | |
| 0 Bank S | Select Sound selection | |
| 1 Mod1 (Y+) Joystick forward | ||
| 2 Mod2 (Y-) Joystick backward | ||
| 3 | U n d | e f . c |
| 4 | F o o | t c t l |
| 5 Port.time | ||
| 6 Data ent. | ||
| 7 | V o l | u m e T |
| 8 | B a l | a n c e |
| 9 | U n d | e f . c |
| 10 Pan Pot Track panning | ||
| 11 Expression Expression | ||
| 12 Fx Ctl 1 CC#12 | ||
| 13 Fx Ctl 2 CC#13 | ||
| 14-15 | Undef. ctlp | |
| 16 Gen.pc.1 | ||
| 17 Gen.pc.2 | ||
| 18 Slider | ||
| 19 Gen.pc.4 | ||
| 20-31 | Undef. ctlpp | |
| Control Change #32-63 are the LSB (Least Significant Bytet) of Control Change #0-31, i.e. the MSB (Most Significant Byte), and are changed according to their MSB counterparts. | ||
| 64 Damper | Damper pedal | |
| 65 Portamento | ||
| 66 Sostenuto | Sostenuto pedal | |
| 67 Soft | Soft pedal | |
| 68 Legato | ||
| 69 Hold 2 | ||
| 70 Sustain level | ||
| 71 F.Res.Hp | Filter resonance | |
| 72 Release Release time | ||
| 73 Attack | Attack time | |
| 74 F.CutOff | Filter cutoff (Brilliance) | |
| 75 Decay T. | Decay time | |
| 76 Lfo1 Sp. | Vibrato speed | |
| 77 Lfo1 Dpt | Vibrato depth | |
| 78 Lfo1 Dly | Vibrato initial delay | |
| 79 FilterEgp | ||
| 80 Gen.pc.5 | Sound Controller 1 | |
| 81 Gen.pc.6 | Sound Controller 2 | |
| 82 Gen.pc.7 | ||
| 83 Gen.pc.8 | ||
| 84 Port.ctl | ||
| 85-90 | Undef. ctl | |
| CC# CC Name Pa600 Function | ||
| 91 Fx 1 depth A/B Master FX 1 (reverb) send level | ||
| 92 Fx 2 ctl | ||
| 93 Fx 3 depth A/B Master FX 2 (modul.) send level | ||
| 94 Fx 4 ctl | ||
| 95 Fx 5 ctl | ||
| 96 Data Inc | ||
| 97 Data Dec | ||
| 98 NRPN Lsb | See table below(*) | |
| 99 NRPN Msb* | See table below(*) | |
| 100 | RPN Lsb | See MIDI Implementation Chart |
| 101 | RPN Msb | See MIDI Implementation Chart |
| 102-119 | Undefined ctl | |
| 120 | AllSOff | |
| 121 | Res Ctl | Reset All Controllers |
| 122 | LocalCt | o l u m |
| 123 | NoteOff | |
| 124 | OmniOff | |
| 125 | Omni On | |
| 126 | Mono On | |
| 127 | Poly On | |
| NRPN | CC#99 (MSB) | CC#98 (LSB) | CC#06 (Data Entry) |
| Vibrato Rate | 1 | 8 | 0...127^(a) |
| Vibrato Depth | 1 | 9 | 0...127^(a) |
| Vibrato Decay | 1 | 10 | 0...127^(a) |
| Filter Cutoff | 1 | 32 | 0...127^(a) |
| Resonance | 1 | 33 | 0...127^(a) |
| EG Attack Time | 1 | 99 | 0...127^(a) |
| EG Decay Time | 1 | 100 | 0...127^(a) |
| EG Release Time | 1 | 102 | 0...127^(a) |
| Drum Filter Cutoff | 20 | dd^(b) | 0...127^(a) |
| Drum Filter Resonance 21 | dd^(b) | 0...127^(a) | |
| Drum EG Attack Time | 22 | dd^(b) | 0...127^(a) |
| Drum EG Decay Time | 23 | dd^(b) | 0...127^(a) |
| Drum Coarse Tune 24 | dd^(b) | 0...127^(a) | |
| Drum Fine Tune | 25 | dd^(b) | 0...127^(a) |
| Drum Volume | 26 | dd^(b) | 0...127 |
| Drum Panpot | 28 | dd^(b) | 0...127^(a) |
| Drum Rev Send (FX 1) 29 | dd^(b) | 0...127^(a) | |
| Drum Mod Send (FX 2) 30 | dd^(b) | 0...127^(a) |
Recognized chords
The following pages show the most important chords recognized by the Pa600, when the selected Chord Recognition mode is Fingered (see "Chord Recognition" on page 239 of the User's Manual). Major 3-note  2-note  Major 6th 4-note  2-note  Major 7th 4-note  3-note  2-note  Sus 4 3-note  2-note  Sus 2 3-note  Dominant 7th 4-note  3-note  2-note  Dominant 7th Sus 4 4-note  3-note  Flat 5th 3-note  Dominant 7th b5 4-note  Major 7th b5 4-note  Major 7th Sus 4 4-note   T= constituent notes of the chord = can be use Minor   Minor 6th  Minor 7th   Minor-Major 7th   Diminished  Diminished 7th  Diminished Major 7th  Minor 7th b5  Augmented  Augmented 7th  Augmented Major 7th  No 3rd  No 3rd, no 5th  ● = constituent notes of the chord = can be used as tensionReplacing the clock backup battery
You can replace the clock backup battery with a standard lithium battery. You can buy the needed battery at a store that sells computer or electronics components. Please replace the clock battery with one identical to the one already installed in the instrument. Do not use replacements other than the one indicated, or you risk to damage the instrument! The battery can be replaced by the user. KORG is not responsible for any data loss, damage or injury caused by incorrect installation of this part.Precautions
- Installation of the battery is done at the user's own risk. KORG will assume no responsibility for any damage or injury resulting from its improper installation or use. - Be sure to disconnect the instrument from the AC plug, before opening it. - To prevent your body's static electricity from damaging the board's components, touch an unpainted metallic component before proceeding with the installation.Installation
For installation, you will need a cross-point and a flatt-head screwdrivers (not supplied). 1. Disconnect the instrument from the AC power. 2. Extract the battery from its package. 3. From the back of the instrument, use the cross-point screwdriver to remove the fixing screw (a).  4. Use the flat-head screwdriver to open the cover (b) to gain access to the inside of the battery slot, and keep the cover apart.  5. With the help of your fingernail, lift the exhausted battery (c) from its lower side, and remove it from the battery slot. natural_image
Line drawing of a finger pressing down on a computer socket (no text or symbols)natural_image
Line drawing of a door handle with an oval component labeled 'd' and an arrow indicating direction (no text or symbols beyond the label)Shortcuts
Shift functions
You can keep the SHIFT button pressed, and press another button on the control panel to directly jump to an edit page or dialog box.| Shift + Functions | |
| Various modes | |
| Dial Tempo Change | |
| Scroll Arrows | When a list is shown: Goes to Next/Previous alphabetical section of the currently selected column |
| Song Play Selects the Global > Mode Preferences > Song & Seq page | |
| Sequencer Selects the Global > Mode Preferences > Song & Seq page | |
| Sound Edit Sends the Sound assigned to the selected track to the Sound mode | |
| Global Selects the Global > MIDI > General Controls page.This is a quick way to jump to MIDI editing pages. | |
| Media Selects the Global > Mode Preferences > Media page | |
| Start/Stop Panic | |
| Style Play Selects the Global > Mode Preferences > Style page | |
| Accomp. | |
| Memory | |
| Fade In/Out Selects the Fade In/Out parameter in the Global >General Controls > Basic page | |
| Synchro Selects the Clock Source parameter in the Global >MIDI > General Controls page | |
| Tempo +/- | With a track selected, proportionally adjusts the volume level of all the tracks of the same type |
| Tempo Lock | Selects the Global > General Controls > Lock page |
| Metro | Selects the Metronome section of the Global >General Controls > Basic page |
| SongBook | Selects the SongBook > Custom List page |
| Transpose (either) | Selects the Global > Tuning > Transpose Controls page |
| Style Play mode | |
| Variation | Selects the corresponding Variation in the StylePlay > Controls > Drum Map page |
| Ensemble | Selects the Ensemble Type parameter in the StylePlay > Keyboard/Ensemble > Ensemble page |
| Pad (any) | Selects the Style Play > Pad/Assignable Switches >Pad page |
| Assignable Switch (any) | Selects the Style Play > Pad/Assignable Switches >Switch page |
| Upper Octave (either) | Selects the Style Play > Mixer/Tuning > Tuningpage |
| Style Record mode | |
| Tempo+/- | When the Sound/Expression page is shown: Proportionally adjusts the Expression level of the Styletracks |
| Song Play mode | |
| Ensemble | Selects the Ensemble Type parameter in the SongPlay > Keyboard/Ensemble > Ensemble page |
| Pad (any) | Selects the Song Play > Pad/Assignable Switches >Pad page |
| Shift + Functions | |
| Assignable Switch (any) | Selects the Song Play >Pad/Assignable Switches >Switch page |
| Upper Octave (either) | Selects the Song Play >Mixer/Tuning >Tuning page |
| JukeBox | |
| >> | Play the next Song in the JukeBox list |
| << | Play the previous Song in the JukeBox list |
| Lyrics | |
| Display | Load a TXT file |
| Sequencer mode | |
| Upper Octave (either) | Selects the Sequencer >Mixer/Tuning >Tuning page |
Long keypress
You can keep a button pressed for about one second to directly jump to an edit page or dialog box.| Long keypress | Functions |
| Various modes | |
| Global Touch Panel Calibration | |
| Split | Opens the Split Point dialog box. Play a note to set the new Split Point. |
| My Setting Opens the "Write My Setting" window | |
| Style Play mode | |
| Style | Opens the "Write Current Style Settings" window |
| Performance | Opens the "Write Performance" window |
| SongBook | Create a new SongBook Entry and open the "Write Song" window (only if pressed outside the Song-Book) |
| STS | Opens the "Write STS" window |
| Song Play mode | |
| Performance | Opens the "Write Performance" window |
| SongBook | Create a new SongBook Entry and open the "Write Song" window (only if pressed outside the Song-Book) |
Special functions
Other available shortcuts are the following ones.| Style Play mode | |
| Tempo +/- (together) | Original Tempo |
| Transpose #/b (together) | Set the Master Transpose to 0 |
| Upper Octave +/- (together) | Set the Upper Octave to the saved setting |
| Problem Solution Page | ||
| General problems | ||
| Power does not turn on | Make sure that (1) the power cable is plugged into the outlet, (2) the cable is plugged into the connector on the back of the instrument, (3) and is not damaged, (4) there are no problems with the mains. | |
| Is the POWER LED turned on? | ||
| If the power still does not turn on, contact your dealer or the nearest KORG Service Center. | ||
| Power does not turn off | Press the POWER button again and keep it pressed for a few seconds. At the end, the button's LED will turn off, and the instrument will be set to standby. | |
| No sound Is the MASTER VOLUME knob | of the Pa600 set to a position other than "0"? | |
| Is the Spearkers parameter turned off? Turn it on. 248 | ||
| Check the connections to your amp or mixer. | ||
| Make sure that all the components of the amplifying system are turned on. | ||
| Is the Local parameter set to off? Turn it on. 246 | ||
| Is the Attack parameter value too high? Set it to a lower value, to let the sound start faster. Is the Volume parameter too low? Set it to a higher value. | 101, 109 | |
| Lowest note are not played | When the SPLIT LED is turned on, the keyboard is divided into a Lower part (lower notes, below the split point) and an Upper part (higher notes, above the split point). Is the Lower track muted? Unmute it. | |
| Wrong sounds Do the USER banks contain | in modified data? Load the appropriate data for the Song or the Style you wish to playback. | 257 |
| Has one of the USER Drum Kits been modified? Load the appropriate Drum Kits. 257 | ||
| Have the Styles or Performances been modified? Load the appropriate data (Styles or Performances). 257 | ||
| Sound does not stop Make sure that the | Damper pedal calibration is correctly set. 243 | |
| The selected Style or Song cannot start | Make sure that the Clock parameter is set to Internal. If you are using the MIDI Clock of another device, you must set the MIDI Clock parameter to MIDI or USB (depending on the port the Pa600 is hooked to the other device through) and make sure that the external device transmits MIDI Clock data. | 246 |
| Does not respond to MIDI messages | Make sure that all MIDI or USB cables are connected correctly. | 284 |
| Make sure that the external device is transmitting through MIDI channels enabled to receive in the Pa600. | 247 | |
| Make sure that the MIDI IN Filters of the Pa600 do not prevent the reception of messages. | 248 | |
| Percussive instruments are not played correctly | Make sure that the Drum track is set to Drum Mode and the external device has not transposition applied. | 107, 180 |
| Some "clicks" can be heard when playing a percussive instrument | This is part of the sound, and not a problem. | |
| A background noise can be heard after selecting a Performance, Style or STS | The selected Performance, Style or STS recalled the effect "17 St. Analog Record", simulating the noise of a old vinyl recording. | |
| Media related problems | ||
| Cannot format a device | Is the USB cable correctly connected? | |
| Is the USB device correctly powered? | ||
| Is the device inserted correctly? | ||
| Is the write protect tab of the disk or card in the protect position? Unprotect it. | ||
| Cannot save data to a device | Is the device formatted? | 266 |
| Is the device inserted correctly? | ||
| Is the write protect tab of the disk or card in the protect position? Unprotect it. | ||
| Cannot load data from a device | Is the device inserted correctly? | |
| Does the device contain data compatible with the Pa600? | 254 | |
| The message "Over Current Condition Detected on USB port: please remove the USB media" appears in the display | The USB device is probably defective, due to a short circuit, and cannot be used. While this will not damage the Pa600, it is advisable to remove the device. | |
| KORG Pa600 Features Pa600 International Pa600 Quarter Tone | ||
| PHYSICAL DATA | ||
| Cabinet Heavy-duty plastic | ||
| Keyboard 61 keys with velocity | ||
| SOUNDS | ||
| Tone Generator | 128 Oscillators, Three band EQ for each track, Filters with resonance, DNC (Defined Nuance Control) | |
| Factory Sounds | More than 950, including Stereo Piano and GM Level 1 & 2 compatible sounds; 64 Drum Kits | |
| User Sounds 256 Sounds, 128 Drum Kits | ||
| Sound Edit On-board full editing for | Sounds and Drum Kits | |
| Sampling Load/Import of Korg, Wave | AIFF and Soundfont; Export of Wave and AIFF; Edit, Time Slice PCM User Memory: 96 MB | |
| Effects | 4 Master Stereo Digital Multi-Effects, 125 Effect types; Mastering Limiter and Final 4-band Parametric EQ | |
| Keyboard Tracks Four Keyboard tracks (Upper 1, 2, 3, Lower) | ||
| Performances / STS | 320 Performance locations, all programmable; Up to 4 STSs x Style, up to 4 x SongBook entry | |
| STYLES | ||
| Factory Styles | More than 360 preloaded Styles, freely reconfigurable | |
| Favorite/User Styles | 10 Favorite banks, plus 3 User banks, for a total of 1,120 Style locations (Factory + Favorite/User) | |
| Arranger Tracks | Eight Style tracks, 4 Single Touch Settings (STS), 4 Pads and one Style Settings per Style, Guitar Track Mode 2, Parallel and Fixed NTT | |
| Style Edit | Style Record with Step Record, Track and Event Edit functions, Import/Export SMF | |
| Patterns/Chord Variations | Up to 46 patterns for each Style, including 3 Intros, 4 Variations, 4 Fills, 1 Break, 3 Endings | |
| Style Controls | 3 Intros, 4 Variations, 4 Fills, Break, 3 Endings, Auto Fill, Synchro Start/Stop, Manual Bass, Memory, Accompaniment On/Off, Single Touch | |
| Chord Sequencer | Realtime Style Chord Sequence Recorder | |
| PLAYER/SEQUENCER | ||
| Player | Player with Song Select, Start/Stop, Home, Rewind, Fast Forward controls; Supported formats: MID, MID+G, KAR, MP3 + lyrics, MP3+G; Lyrics, Score, and Chord data can be displayed on screen; Markers; Jukebox function | |
| 4 STS saved with the Song | In SongBook Mode | |
| Tracks | 16 | |
| Sequencer Edit | Record & Edit functions; SMF native format | |
| Backing Sequence (Quick Record) | Real Time Record - Step Record & Edit | |
| Lyrics/Chords | On-Screen (compatible with most popular formats); +G format supported | |
| Score View On-screen | ||
| Markers | On-screen | |
| SONGBOOK | ||
| SongBook and SongBook List | Fully programmable music database, based on Styles, SMF, Karaoke, MP3 with automatic selection of Style Play and Song Play modes; User-definable custom lists; Filtering and Ordering options | |
| OTHER FEATURES | ||
| MP3 | MP3 Player in Song Play mode; Vocal Remover; Tempo change ±30%, Transpose -5~+6 semitones | |
| Quarter Tone / Arabic Scale | Programmable, with up to 4 SC Presets | Programmable, with up to 4 SC Presets; Dedicated Quarter Tone keypad |
| Pads | 4 + Stop button | |
| Compatibility | i-Series: Styles (some adjustments may be needed); Pa-series: Style, Pad, Performance, Sound, PCM Sample, Song, SongBook | |
| Operating System | RX (Real eXperience), DNC (Defined Nuance Control), Multitasking system, Load while play feature, Upgradable, Internal clock | |
| DATA STORAGE | ||
| Internal Memory | Standard | |
| USB Port for Memory Devices | Yes - 1 Host (2.0 Hi Speed) | |
| USER INTERFACE | ||
| Display | 7" 800 x 480 TFT Graphical Color Touch Screen Display | |
| Controls | Dial, Master Volume, Accompaniment/Player/Keyboard Volume Balance, Transpose, Octave Transpose, Ensemble, Tap Tempo/Reset, Tempo+/-, Tempo Lock, Fade In/Out | |
| KORG Pa600 Features | Pa600 International | Pa600 Quarter Tone |
| Programmable Controls Joystick, 2 Switches, Assignable Pedal/Footswitch | ||
| CONNECTIONS | ||
| MIDI IN, OUT | ||
| USB 1 Host (2.0 Hi Speed) and 1 Device (2.0 Hi Speed); MIDI Over USB | ||
| Outputs 2 Analog (Left/Right) | ||
| Inputs 2 Analog (Left/Right) | ||
| Headphone 1 jack connection | ||
| Pedals 1 Damper, 1 Assignable Pedal/Footswitch | ||
| Power Supply AC - Universal Voltage | ||
| AMPLIFICATION | ||
| Amplification and Speakers | 2 Channel Amplification System; 2x15 Watt; 2 x 100 mm Double-Cone Speakers in Bass Reflex Box | |
| ACCESSORIES | ||
| Supplied Accessories Manual, AC Power Cable, Music Stand, DVD | ||
| OPTIONS | ||
| USB Memory Yes | ||
| Volume/Expression Pedal KORG EXP-2, KORG XVP-10, VOX V860 | ||
| Damper Pedal KORG DS-1H | ||
| Footswitch KORG PS-1, PS-3 | ||
| PHYSICAL DATA | ||
| Consumption 20 Watt | ||
| Dimensions (W x D x H) | 1030 x 378 x 127 mm / 40.55 x 14.88 x 5.00 inch without music stand | |
| Weight | 9.74 kg / 21.47 lbs | 9.8 kg / 21.61 lbs |
MIDI Implementation Chart
KORG Pa600 OS Version 1.1 - April 01, 2013| Function Transmitted Recognized Remarks | ||||
| Basic Channel | Default 1 16 1 16 MemorizedChanged 1 -16 1 16 | |||
| Mode | Default 3Messages X XAltered********** | |||
| NoteNumber: | True Voice*********** | 0-127 0-1270-127 | ||
| Velocity | Note OnNote Off | O 9n, V=1-127O 8n, V=0-127 | O 9n, V=1-127O 8n, V=0-127 | |
| Aftertouch | Poly (Kcy)Mono (Channel) O O | OOPlayer data only | Player data only | *1*1 |
| Pitch Bend | O | O | ||
| Control Change | 0, 321, 2 O O Modalations6387, 1110, 91, 9364, 66, 6765, 571, 72, 7374, 7576, 77, 7880, 8198, 99100, 101120, 121 | OOOOOOOOOOOOOOOOOOOOOOOOOOOOOOOOOOOOOOOOOOOOOOOOOOOOOOOOOOOOOOOOOOOOOOOOOOOOOOOOOOOOOOOOOOOOOOOOOOOOOOOOOOOOOOOOOOOOOOOOOOOOOOOOOOOOOOOOOOOOOOOOOOOOOOOOOOOOOOOOOOOOOOOOOOOOOOOOOOOOOOOOOOOOOOOOOOOOOOOOO | Bank Select (MSB, LSB)*1Data Entry MSB*1Data Entry LSB*1Volume, Expression*1Panpot, A/B Master FX Send *1Damper, Sostenuto, Soft*1Portamento On/Off, Portamento Time*1Harmonic Content, EG time (Release, Attack)*1Brightness, Decay Time*1Vibrato Rate, Depth, Delay*1Sound Controller (1, 2)*1NRPN (LSB, MSB)*1, 2RPN (LSB, MSB)*1, 3OAll sounds off, Reset all controllers*1 | *1*1*1*1*1*1*1*1*1*1*1*1*1*1*1*1*1*1*1*1*1*1*1*1*1*1*1*1*1*1*1*1*1*1*1*1*1*1*1*1*1*1*1*1*1*1*1*1*1*1* |
| ProgramChange | True # | O 0-127************* | O 0-1270-127 | |
| System Exclusive | O | O | *4 | |
| System Common | Song PositionSong SelectTune | XXXXX | XXX | *5*5 |
| System Real Time | ClockCommands | OOOO | O (123-124) | |
| Aux Messages | Local On/OffAll Notes OffActive SenseReset | XXXXOOXX | O (123-124) | |
| Notes | *1: Sent and received when MIDI Filters In and Out are set to Off in Global mode.*2: Sound parameters, Selection of SongBook entries, Drum Kit Family settings.*3: LSB, MSB = 00,00: Pitch Bend range, =01,00: Fine Tune, =02,00: Coarse Tune.*4: Includes Inquiry and Master Volume messages, FX settings, Quarter Tone settings. GM Mode On.*5: Transmitted only when the Clock Send parameter (Global mode) is set to on. | |||
Index
A
AIFF file format 229 Amp EG 211 AMS(Alternate Modulation Source) Amp EG 211 Filter Cutoff 206 Filter EG 206 Filter LFO 206 Pan 209 Pitch 201 Pitch EG 203 Resonance 204 Arabic Scale 100, 104 Attack Level Amp EG 211 Attack Time Filter EG 208 Audio Outputs 19 Auto Style/Perf/Sound Select 235B
Backup 7 Balance (Keyboard/Style or Ply) 9, 19 Bank Select 287 Bass & Lower Backing 240 BPM MIDI/Tempo Sync., LFO 213C
Chord Scanning Lock 237 Contrast 13, 14 Cutoff Frequency 204D
Damper 20, 112 Decay Time Filter EG 208 Delay LFO 212 Display contrast 13, 14 Double Player 12 Drum tracks 108, 113E
Effects Copy 115, 164, 187, 214 Sequencer mode 178, 179 Song Play mode 159, 161 Style Play mode 102, 106, 179 Ending 12 Ensemble 111F
Fade (Sound parameter) LFO 212 Fade In/Out 234 Favorite Styles 117 Filter Cutoff Frequency 204 Filter Type 204 Filter Cutoff 206 Filter EG 206 Filter LFO 206 Footswitch 242 Format 266G
General MIDI 285 Global 233-252 Global channel 285I
Intro 12J
Jukebox 158, 162K
Keyboard Mode (Split) 15 Lock 237 KMP file format 229 KSF file format 229L
Level (Sound parameter) Trim 204 LFO Waveform, LFO waveform 212 Local Off 246, 287 Lower Lock 237M
Markers 283 Master Transpose 16, 243 Master Tune 243 Master Volume 19 Media 253-270 Format 266 Menu 14 MIDI Clock 153, 246 General MIDI 285 Global channel 285 IN channels 247 Interface 287 OUT channels 247 Preset 245, 285 Standard MIDI File 153, 165 MIDI interface 287 MIDI Preset 245, 285 Write 251 Midifile 153, 165, 285 Mode Sampling 218–232 Sequencer 165–188 Song Play 153–155 SongBook 271-279 Sound 189–217 Style Play 94–117 Style Record 118–152 MP3 155, 162, 271, 2800
Octave Transpose 16, 104 Auto Octave 236 Midi In 246 Offset Offset, LFO 212 Operating Modes 10 OS (Operating System) Backup 7 Update 7 Outputs 19P
Pads 11, 112, 113 Pan Pads 112 Sound 200, 209 Style tracks 102 PANIC (SHIFT+START/STOP) 13 PCG file format 229 Pedals 242 Performance 94 Selecting 90 Writing 115 Pitch 201 Pitch Bend 104, 179 Pitch EG 203 Player Transport controls 12 Portamento AMS 216 Program Change 287Q
Quarter Tone 100, 104R
Resonance 204 RX 185S
Sampling 218–232 Sampling mode 218–232 Scale Main scale 244 Sequencer mode 165–188 Shift 14 Single Touch 11, 14 Single Touch Setting (STS) 14 Selecting 14, 91 Writing 116 Song Markers 283 Play from disk 91, 187 Recording 167–177 Selecting 91, 187 Standard MIDI File 285 Song Play mode 153–155 SongBook 271–279 Sound Editing 109, 162, 180 Selecting 89 Writing 215 Sound mode 189–217 Split (Keyboard Mode) 15 Lock 237 Split Point 100, 285 Standard MIDI File 153, 165, 285 STS, See Single Touch Setting Style Ending 12 Intro 12 Recording 118–152 Selecting 12, 88 Style Settings 94 Variation 12 Style Play mode 94–117 Style Record mode 118–152 Style Settings Selecting, see Style Writing 116 Sync. Key Sync., LFO 212 MIDI/Tempo, LFO 213 Synchro Start/Stop 13T
Tap Tempo 13 Tempo/Value section 15 Touch Panel Calibration 250 Track Select 13 Tracks Drum/Percussion 108, 113 Keyboard tracks 94, 154 Octave Transpose 16 Volume 101, 159, 178 Transpose 16, 104 Auto Octave 236 Midi In 246 Trinity 218, 229 Triton 218, 229 Tune Tune (Sound parameter) 193U
Upper Volume Link 101 USB 268V
Variation 12 Velocity AMS 216 Velocity Intensity, Amp Mod. 210 Velocity, Filter EG 205 Velocity Curve 242 Volume Balance 94, 153 Balance (Keyboard/Style or Ply) 9, 19 Individual tracks Sequencer 178 Song Play 159 Style Play 101 Master 19, 94, 153W
WAVE file format 229KORG
Address
KORG ITALY SpA Via Cagiata, 85 60027 Osimo (AN) ItalyWeb
www.korg.com- Pa 600
- QT
- User Manual
- Important safety instructions
- WARNING:
- CAUTION
- AVERTISSEMENT:
- 注意
- NOTICE REGARDING DISPOSAL (EU ONLY)
- IMPORTANT NOTICE TO CONSUMERS
- THE FCC REGULATION WARNING (FOR U.S.A.)
- PERCHLORATE (CALIFORNIA, USA ONLY)
- Further notices
- Automatic Power-Off
- Data Handling
- Cleaning
- Example screens
- Trademarks
- Open Source notice
- Disclaimer
- Liability
- Service and User's Assistance
- Keep your keyboard up-to-date
- Table of Contents
- Introduction
- Quick Guide
- Reference
- Style Play mode .....94
- Style/Pad Record mode 118
- Song Play mode 153
- Sequencer mode 165
- Sound mode 189
- Sampling mode 218
- Global mode ....233
- Media mode .....253
- SongBook 271
- Lyrics, Score, Markers 280
- MIDI 284
- Appendix
- Factory data 290
- Assignable parameters 327
- Effects 330
- Installing the KORG USB MIDI Driver ....401
- MIDI Data 403
- Recognized chords 404
- Replacing the clock backup battery .....406
- Shortcuts 408
- Troubleshooting 409
- Technical specifications ....410
- MIDI Implementation Chart 412
- Index 413
- Welcome!
- Physical Features and User Experience
- Sounds and Effects
- Styles and Songs
- Other Features
- What's in the box
- About this manual
- Contacts
- Making a safety copy of your data
- Making a safety copy
- Restoring a safety copy
- Restoring the original factory data
- Loading the Operating System
- Overview
- Front Panel
- Speakers
- Quarter Tone
- QUARTER TONE / SUB SCALE
- Joystick lever
- JOYSTICK
- Volume controls
- MASTER VOLUME
- BALANCE
- Assignable Switches
- ASSIGNABLE SWITCH
- Mode selection
- SONG PLAY
- SEQUENCER
- SOUND EDIT
- DEMO
- Special Mode Buttons
- GLOBAL
- MEDIA
- r Pads RECORD
- Accompaniment, Memory, Manual Bass, Chord Sequencer
- ACCOMP. (Accompaniment)
- MEMORY
- BASS (Manual Bass)
- CHORD SEQUENCER (PLAY/STOP AND RECORD)
- Pads
- PAD 1-4 STOP
- Selection
- STS MODE
- STYLE
- SOUND
- SONGBOOK
- SONG
- Style Elements
- INTRO 1-3 buttons
- VARIATION 1-4 buttons
- AUTO FILL
- BREAK
- ENDING 1-3 buttons
- Style Controls
- FADE IN/OUT
- TAP TEMPO/RESET
- START/STOP
- SYNCHRO START / STOP button
- Display and Brightness Controls
- COLOR TOUCHVIEW™ GRAPHICAL DISPLAY
- Special Function Controls
- TRACK SELECT
- SEARCH
- SHIFT
- STS Section
- STS 1-4 buttons
- Player Controls
- << and >>
- (HOME)
- ▶/■ (PLAY/STOP)
- Lyrics, Score, Marker
- LYRICS
- SCORE
- MARKER
- Data Entry and Navigation
- VALUE DIAL
- EXIT
- MENU
- Tempo Section
- TEMPO +/- buttons
- TEMPO LOCK
- METRO
- Split
- Ensemble
- Performance Select Section
- MY SETTING
- PERFORMANCE buttons
- STYLE CHANGE
- Transpose Section
- UPPER OCTAVE
- TRANSPOSE
- Power On/Off
- POWER
- Rear Panel
- Music stand
- Music stand holes
- USB Connectors
- HOST(R)
- DEVICE
- Pedals
- ASSIGNABLE
- DAMPER
- MIDI Interface
- OUT
- IN
- AUDIO OUT Section
- LEFT, RIGHT
- PHONES
- AUDIO IN Section
- ACV cable connector
- Start up
- Connecting the AC power cord
- Turning the instrument on (or setting it to standby)
- Controlling the Volume
- Keyboard, Style Accompaniment and Song Volume
- Headphones
- Loudspeakers
- Audio Outputs
- MIDI connections
- Damper pedal
- Assignable pedal
- The music stand
- Glossary of Terms
- Drums
- Percussion
- Bass & Accompaniment
- Variation
- Fill-in & Break
- Song Play or Intro & Ending
- Pad
- Keyboard tracks
- STS (Single Touch Settings)
- Performance
- Player
- The LOGO decoder
- TouchView
- Interface basics
- Color TouchView graphical user interface
- Menus and sections
- Pages
- Overlapping windows
- Dialog boxes
- Page menus
- Pop-up menus
- Checkboxes
- Numeric fields
- Editable names
- Lists and scrollbars
- Virtual sliders
- Virtual knobs
- Icons
- Operative modes
- Selected, highlighted items
- Non-available, grayed-out parameters
- Shortcuts
- Easy Mode
- Turning the Easy Mode on
- Turning the Easy Mode off
- The Style Play page in detail
- Notes:
- The Song Play page in detail
- Turning the instrument on
- Turning the instrument on and viewing the main screen
- Turn Pa600 on (exit from standby) by pressing the POWER button located in the control panel.
- When you want to put Pa600 to standby, keep the POWER button pressed for about one second, and release it when the screen appears dimmed.
- Connecting and calibrating the Damper pedal
- Programming the Damper pedal
- Touch the Foot Contr. tab to select the "Foot Controllers" page.
- Touch the "Calibration" button in the Damper section, to make the "Damper & Pedal/Footswitch Calibration" dialog box appear.
- Fully press the Damper pedal down, and while continuing to press touch the "Push" button to confirm the maximum value.
- When the following dialog box appears, release the pedal.
- Touch the "Push" button in the display to confirm the minimum value.
- Press the EXIT button to return to the previous operative mode.
- Playing the Demo
- Starting and stopping the Demo
- Press the STYLE PLAY and SONG PLAY buttons together.
- In case you want to listen to a specified Demo Song, select one of the available options on the display (Full Songs, Solo Instruments, Styles).
- Playing Sounds
- Selecting a Sound and playing it on the keyboard
- Be sure the Upper 1 track is selected and set to play.
- If you want to play the Sound on the whole keyboard, be sure the keyboard is in Full Upper mode (i.e., the SPLIT LED is turned off). If it is split in two parts, press the SPLIT button to turn its LED off.
- Touch the Upper 1 track's area in the display to open the Sound Select window.
- Select a Sound from the Sound Select window, then press the EXIT button to close the window.
- Play the Sound on the keyboard.
- Playing two or three Sounds at the same time
- Touch the MUTE icon in the Upper 2 status box, to set the Upper 2 track to play.
- Play the keyboard.
- Touch the icon in the Upper 3 status box, to set the Upper 3 track to play.
- Play the keyboard.
- Touch the bank icon in the Upper 3 status box, to mute the Upper 3 track again.
- Play the keyboard.
- Touch the bank icon in the Upper 2 status box, to mute the Upper 2 track again.
- Play the keyboard.
- Playing different Sounds with your left and right hand
- Changing the split point
- Raising or lowering the Upper octave
- Selecting and saving Performances
- Selecting a Performance
- Touch the Performance area in the display, to open the Performance Select window.
- Select one of the Performances in the Performance Select window, then press the EXIT button to close the window.
- Play the keyboard.
- Saving your settings to a Performance
- Keep one of the PERFORMANCE buttons pressed for about one second to open the Write Performance dialog box.
- If you like, you may assign a new name to the Performance.
- Select a bank and Performance location in memory, where you would like to save the Performance.
- When you have edited the name to the Performance, and selected the target location, touch OK to save the Performance to memory (or Cancel to stop the operation).
- Selecting and saving the "My Setting" Performance
- Selecting the startup parameters (the "My Setting" Performance)
- Saving the startup parameters into the "My Setting" Performance
- Selecting and playing Styles
- Selecting and playing a Style
- Touch the Style area in the display. The Style Select window appears.
- Select a Style from the Style Select window.
- Be sure the ACCOMP. LED is turned on.
- Press the SYNCHRO-START/STOP button to turn the START LED on.
- Play the keyboard.
- Press START/STOP to stop the Style.
- Tempo
- Intro, Variation, Fill, Break, Ending
- Single Touch Settings (STS)
- The Pads
- Adjusting the balance between the Style and the keyboard
- Adjusting the volume of the separate tracks
- To separately adjust each Style track, press the TRACK SELECT button to change the track's view.
- To return to the Keyboard Tracks view, press the TRACK SELECT button again.
- Turning the Style tracks on/off
- Be sure the Volume panel is shown, or touch the Volume tab to show it.
- While the Style is playing, touch the Play button to set the track to Mute.
- To set the tracks back to the Play status, touch the Mute icon on the muted track.
- Adding harmony notes to your right-hand melody with the ENSEMBLE function
- Press the SPLIT button to turn its LED on and split the keyboard.
- Press the ENSEMBLE button to turn its LED on.
- Play chords with the left hand and single notes in the right hand.
- To select a different harmonization style, keep the SHIFT button pressed, and press the ENSEMBLE button to open the Ensemble page.
- The Chord Sequencer
- Selecting a Song to play
- Press the SONG PLAY button to switch to the Song Play mode.
- Touch the Player area to open the Song Select window.
- Scroll through the list and select the Song to play.
- When the Song is selected, touch the Select button to confirm your selection; this will automatically close the Song Select window.
- Playing back a Song
- Changing the tracks' volume
- Press the TRACK SELECT button once to see tracks 1-8 (Track 1-8 view).
- Press TRACK SELECT once again to see tracks 9-16 (Track 9-16 view).
- Press TRACK SELECT again, to return to the Normal view (Keyboard tracks).
- Press the (RZ/STOP) button to start the Song.
- While listening to the Song, switch from Normal view to Track 1-8 and Track 9-16 view, to see which tracks are playing.
- Turning the Song tracks on/off
- Soloing a track
- Removing the Melody track from a Standard MIDI File or the Lead Vocal from an MP3 file
- Programming the Assignable Switches
- Using the Assignable Switches with a Song
- Choosing a different Melody track
- The SongBook
- Selecting the desired Entry from the Main List
- Browse through the Entries.
- When the Entry you are looking for becomes visible in the display, select it and touch the Select button in the display.
- Displaying Artist or Genre
- Touch the page menu icon to open the page menu.
- Choose Show Artist (now Genre) to switch from Genre to Artist in the List view. The Artist column will be shown.
- Open the page menu again, and choose the Show Genre (now Artist) item. The Genre column will be shown again.
- Sorting Entries
- You can change the sorting order by touching one of the labels in a list of names.
- Each time you touch the same label again, the order changes between ascending and descending.
- Searching for Entries
- Touch the Filter button in the display, to open the Filter dialog box.
- Touch the T (Text Edit) button next to the search criteria (even more than one) you want to enter.
- Touch OK in the display, and close the Text Edit dialog box. The entered text is now the search criteria.
- Touch OK to close the Filter dialog box and return to the SongBook page.
- To see the whole SongBook database again, touch the Filtered check box again, to make the check mark disappear.
- Adding Entries
- Editing the Entries
- When done with this page, touch the Book Edit 2 tab to see the Book Edit 2 page and edit the SongBook database details.
- Touch the T (Text Edit) button next to the field(s) you want to edit. Set all the other parameters.
- When done with this page, touch the Book Edit 3 tab to go to the Book Edit 3 page, where you can and set the Synchro and Memory parameters, and link a text file to the Entry.
- Creating a Custom List
- Selecting and using a Custom List
- Using the SongBook with external software
- Recording a new Song (Standard MIDI File)
- Preparing the Style and Sounds
- Accessing the Backing Sequence (Quick Record) mode
- Press the RECORD button to open the Song Record Mode Select dialog box.
- Select the Backing Sequence (Quick Record) option and touch OK to enter the Backing Sequence Record mode.
- Setting the Record parameters
- Recording
- Second-take recording (Overdubbing)
- Saving a Song
- Select the Save Song command to open the Save Song window.
- Select a device and folder where you want to save your Song.
- Touch the Save button in the display to open the Save Song dialog box.
- Touch OK in the display to save the Song, or Cancel to stop the Save operation.
- Searching files and musical resources
- How to use the Search function
- Press the SEARCH button to open the Search window.
- If needed, touch the "Type" pop-up menu, and choose the type of item you are looking for.
- In case you are searching for a file in a disk, touch the "Browse" button to open the Media window.
- Type the name of the file to be searched.
- When finished entering the name, touch the "Search" button.
- Notes about searching
- Wildcards
- Selecting elements
- Style Select window
- Style sets
- Side tabs (banks)
- Lower tabs (pages)
- Styles
- Style Select page menu
- Copy and Paste
- Rename
- Delete
- Rename Favorite
- Select All (Bank)
- Sound Select window
- Sound sets
- Previous/Next tabs
- Sounds
- Program Change
- Sound Select page menu
- Performance Select window
- Performances
- Performance Select page menu
- Pad Select window
- Pad sets
- Pad Select page menu
- STS Select
- Song Select window
- Directory
- Page menu icon
- Storage device
- Song path
- Open
- Close
- Locate
- Select
- Play All
- Selecting a Song by its ID number
- Song Select page menu
- Export Song List
- Show Song Number
- Show Song Extension
- Create New Folder
- Style Play mode
- Start-up settings
- How Styles, Variations, Performances and STSs are linked together
- Styles and Pads
- Master Volume and Balance
- Factory, Favorite and User Styles
- Main page
- Page header
- Operating mode name
- Master transpose
- Recognized chord
- Style area
- Style name
- Style bank
- Style Element meter
- Measure length/number
- Current beat
- Current Tempo
- Songs area
- Song name
- Performance/STS area
- Selected Performance or STS
- Keyboard tracks area
- Keyboard track octave transpose
- Bass & Lower Backing icon
- Keyboard track name
- Sound bank's icon
- Keyboard track status
- Panels
- Sound name
- STS Name panel
- Volume panel
- Changing the Play/Mute status
- Saving the track's volume and play/mute status
- Track names
- Normal view
- Grouped Style tracks
- Style Tracks view
- Style tracks Volume
- Original Style Sounds
- Selected Track Info area
- Track name
- Sound bank
- Sounds area
- Style track's octave transpose icon
- Pad panel
- Pad assignment
- Pads lock icon (
- Split panel
- Split Point
- Keyboard diagram
- Bass Inversion
- Sub-Scale panel
- Edit menu
- Edit page structure
- Operating mode
- Edit section
- Parameters area
- Tabs
- Mixer/Tuning: Volume/Pan
- Upper Volume Link
- Dry
- Pan
- Volume
- Play/Mute icon
- Mixer/Tuning: FX Send
- FX Group
- Send level (Master 1, Master 2)
- Mixer/Tuning: EQ Gain
- Hi (High) Gain
- Mid (Middle) Gain
- Low Gain
- Mixer/Tuning: EQ Control
- Reset All Tracks button
- Track Reset buttons
- Bypass
- Input Trim
- Mixer/Tuning: Tuning
- PB Sensitivity
- Oct(ave) Transpose
- Detune
- Mixer/Tuning: Sub Scale
- Scale
- Key
- SC Preset buttons
- Scale lock icon
- How to create a custom scale by fine-tuning each note of the User scale
- How to use the Quarter Tone function with the SC Presets
- How to use the Quarter Tone function with a footswitch or Assignable Switch
- Effects: A/B FX Configuration
- FX Groups (FX A, FX B)
- Master FX 1, 2
- W/D
- MFX2 to MFX1
- M.T. (Modulating Track)
- Effects: Master 1, 2
- Selected effect
- FX parameters
- Wet/Dry
- Src (Source)
- Track Controls: Mode
- Int./Ext. (Internal/External)
- Type
- Track Controls: Drum Edit
- Family Select
- Overview of the current parameter
- Drum Edit parameters
- Reset Family
- Reset Track
- How to edit a single Drum Family
- Track Controls: Easy Edit
- Easy Sound Edit parameters
- Portamento knob and switch
- Reset All Tracks
- How to adjust sound parameters for a single Sound
- Keyboard/Ensemble: Key/Velocity Range
- Top/Bottom Key (Key Range)
- Top/Bottom Vel. (Velocity Range)
- Keyboard/Ensemble: Ensemble
- Trill
- Repeat
- Echo
- AutoSplit1
- AutoSplit2
- Note Velocity
- -10...0
- Feedback
- Ensemble Track Assign
- Off
- Normal
- Mute
- Keyboard/Ensemble: Keyboard Control
- Joystick X
- Joystick Y
- Expression
- Pad/Switch: Pad
- FX Send (Master 1, 2)
- EQ Gain [dB] (Hi, Mid, Low)
- Pad lock icon
- Pad/Switch: Switch
- Style Controls: Drum/Fill
- Switch 1, 2
- Assignable Switch lock icon
- Kick and Snare Designation
- Track status
- Style Controls: Keyboard Range On/Off / Wrap Around
- Keyboard Range On/Off
- Wrap Around
- Page menu
- Write Performance
- Write Single Touch Setting
- Write Current Style Settings
- Solo Track
- Copy/Paste FX
- To copy a single effect:
- To copy all the effects in an FX group:
- Write Performance dialog box
- Name
- Perf Bank
- Select... button
- Write Single Touch Setting dialog box
- Current Style
- STS
- Write Current Style Settings dialog box
- The Favorite banks
- Creating the Favorite banks
- Renaming the Favorite banks
- Style/Pad Record mode
- Recording Styles and Pads
- The Style's structure
- The Pad's structure
- Ordinary, Guitar and Drum tracks
- What to record in a Style
- What to record in a Pad
- Pattern data vs. track data
- Style/Pad Import/Export
- Entering the Style/Pad Record mode
- Exit by saving or deleting changes
- Listening to the Style while in Edit mode
- List of recorded events
- Main page - Record 1
- Page sub-header
- Style in record/edit
- Beat counter
- Measure number
- Recording parameters area
- Element (Style Element)
- Chord Var (Chord Variation)
- Resolution
- Rec Length (Recording Length)
- CV Length (Chord Variation Length)
- Meter
- Key/Chord area
- Key/Chord
- NTT Area
- NTT Type/Table
- Delete Note button
- Tracks volume/status area
- Virtual slider(s)
- Track status icons
- Main page - Record 2/Cue
- Octave transpose icon
- Cue area
- Cue mode for [Style element]
- Main page - Guitar Mode
- Recording overview
- Recording strumming types
- Recording RX Noises
- Recording single strings
- Selecting a Capo
- Recording a regular pattern
- Recording a Chord Shape
- Choosing a Key/Chord for Intro 1 and Ending 1
- Playing back the pattern
- Guitar mode parameters
- Capo - Fret
- Strings - High/Low
- Diagram
- Style/Pad Record procedure
- Preparing to record
- Realtime Record procedure
- Step Record procedure
- Chords and second voices
- Chord
- Selected Style Element
- Event Edit: Event Edit
- Selected track
- SE/CV (Style Element/Chord Variation)
- Event list
- Position
- Type, Value 1, Value 2
- Length
- Scrollbar
- Other elements
- Track pop-up menu
- Go Meas.
- Insert
- Event Edit procedure
- Event Edit: Filter isplay.
- Style/Pad Edit: Quantize
- Track
- E / CV (Style Element/Chord Variation)
- Start / End Tick
- Bottom / Top Note
- Execute
- Track status icon
- Style/Pad Edit: Transpose
- Value
- Style/Pad Edit: Velocity
- Advanced
- Intensity
- Curve
- Start / End Vel. Value
- Style/Pad Edit: Cut
- Start
- Style/Pad Edit: Delete
- Event
- Style/Pad Edit: Delete All
- Style/Pad Edit: Copy from Style
- From Style
- From... To E/CV (Style Element/Chord Variation)
- From... To Track
- Copying to a Chord Variation of a different length
- Style/Pad Edit: Copy from Pad
- From Pad
- From CV (Chord Variation)
- To CV (Chord Variation)
- To Track
- Style Element Track Controls: Sound/Expression
- Expression area
- Expression Monitor
- Expression leveling
- Volume area
- Style Element Track Controls: Keyboard Range
- Top/Bottom
- Style Element Track Controls: Noise/Guitar
- RX Noise
- Humanize GTR
- Pad Track Controls: Sound/Expression
- Sound/Bank
- Pad Type
- Keyboard Range
- Trigger Mode
- Track Type
- Tension
- Style Element/Pad Chord Table: Chord Table
- Style Track Controls: Type/Trigger/Tension
- Import: Import Groove
- From
- To E/CV (Style Element/Chord Variation)
- Import: Import SMF
- From Song
- Initialize
- To E/CV
- Importing an SMF separated by Markers into a Style
- Export SMF
- To Song
- From E/CV
- Exporting a Style as an SMF separated by Markers
- Write Style/Pad
- Undo
- Delete Pad Track
- Copy Key/Ch (Copy Key/Chord) button
- Copy Sound
- Copy Expression
- Copy Keyboard Range
- Copy Chord Table
- Delete Current Track
- Overdub Step Recording
- Exit from Record
- Write Style/Pad dialog box
- Style/Pad Bank
- Copy Key/Chord dialog box
- Copy Sounds dialog box
- From Style Element
- To Style Element
- Copy Expression dialog box
- Copy Key Range dialog box
- Copy Chord Table dialog box
- Overdub Step Recording window
- Track (Selected track)
- SE (Selected Style Element)
- CV (Selected Chord Variation)
- Pos (Position)
- Step Time values
- Free Memory
- Duration
- Velocity
- Rest
- Tie
- Back
- Next M. (Next Measure)
- Done
- Song Play mode
- MIDI Clock
- Master Volume, Balance
- Track parameters
- Standard MIDI Files and Sounds
- Keyboard, Pad and Player tracks
- Main page (Normal view)
- Song area
- Song type icon
- MIDI
- MP3
- TEX
- Total time
- Elapsed time
- Tempo variation
- Changing the tracks' volume and play/mute status
- Saving the tracks' volume and play/mute status
- Jukebox panel
- Song list
- Selected Song
- Select button
- Jukebox file
- Transport controls for the Jukebox
- Parameters
- Pad/Switch: Assignable Switch
- Jukebox Editor
- Move Up/Down
- Add
- Del All
- Save
- Save Song Marker
- Export Jukebox List
- Sequencer mode
- Standard MIDI Files and MP3
- The Songs and the Standard MIDI File format
- Sequencer mode and the MP3
- Sequencer Play - Main page
- Start from
- Tempo (Tempo mode)
- Song track octave transpose
- Track volume/status area
- Volume and virtual sliders
- Entering Record mode
- Record mode: Multitrack Sequencer page
- Free memory %
- Rec mode (Recording mode)
- Multitrack recording procedure
- Record mode: Step Record page
- Step Time area
- Step Time
- Note parameter area
- Event list area
- List of inserted events
- Buttons
- Chords and second voices in Step Record mode
- Record mode: Backing Sequence (Quick Record) page
- Chord/Acc Track, Kbd/Pad Track
- PERF or STS (Performance or STS)
- Backing Sequence tracks area
- Backing Sequence tracks status indicators
- Sliders (track volume)
- Individual track status icons
- Backing Sequence (Quick Record) recording procedure
- Record mode: Step Backing Sequence page
- Side arrow (1)
- Measure
- Style Element
- Del (Delete) button
- "Soft" transport buttons
- Previous or Next Event
- Previous or Next Step
- Previous or Next Measure
- Done button
- Step Backing Sequence page menu
- Insert Measure
- Cut Measure
- Delete All from Selected
- Delete All Styles/Perfs from Selected Delete All Styles Elements from Selected Delete All Chords from Selected Delete All Tempos from Selected
- Step Backing Sequence procedure
- FX Groups
- Track Assign
- Parameter
- Value 1 and 2
- Go/Catch
- Event Edit: Filter
- Song Edit: Quantize
- Song Edit: Transpose
- Song Edit: Velocity
- Song Edit: Cut/Insert Measures
- Song Edit: Delete
- Song Edit: Copy
- Mode
- From Track... To Track
- Start Measure... End Measure
- To Measure
- Repeat Times
- Song Edit: Move
- t Start T/End Tick
- To Tick
- Song Edit: RX Convert
- RX Note Velocity
- Add RX Noises to Guitar track
- Convert RX Noises to MIDI Notes
- Convert MIDI Notes to RX Noises
- Load Song
- Save Song
- Overwrite Step Recording
- Delete Song
- Save Song window
- Storage device and by:
- Empty measure at the beginning of the Standard MIDI File
- Play/Mute status saved with the Song
- Master Transpose saved with the Song
- Save Song procedure
- Sound mode
- The MIDI channel
- How to select oscillators
- Sounds, Drum Kits
- Sound Info area
- Bank
- Bank Select / Program Change sequence
- Realtime Controls area
- Voice Assign Mode
- Poly
- Mono
- Legato
- Hold
- FX Area
- On/Off
- Send
- Amount
- Selected oscillator
- Basic: Sound Basic
- Oscillator Count
- Oscillators Count
- Low priority
- Transpose Range
- Top/Bottom Key
- Poly/Mono
- Single Trigger
- Priority
- Legato as OSC Trigger
- Max Time
- Max Range
- Basic: OSC Basic
- OSC Multisample
- High/Low Bank/Num
- Offset
- Level
- Octave
- Tune
- Velocity Multisample Switch Low-High
- AMS / Offset Intensity by AMS
- OSC Trigger Mode
- Delay
- OSC Off when Sound Controllers are On
- Basic: Vel/Key Zone
- Velocity Zone
- Scaled Velocity
- Basic: Damper Mode
- Damper Mode
- Resonance/Halo
- Attack Time
- Release Time
- Volume Scaling
- No Note Off Range
- From Note
- Basic: Damper Trigger
- Damper On Trigger
- Note
- Note Off on Damper Off
- Damper Off Trigger
- Basic: EQ
- Enable
- TRIM
- Mid (Middle) Freq
- DrumKit: Sample Setup (Drum Kits)
- Layers
- Assign
- Layer Selector & Velocity Sample Switch
- Selected Layer
- Velocity Switches
- Drum Sample
- Bank/Num/Name
- Rev (Reverse)
- Ofs (Offset)
- AMS / Int(ensity)
- Attack
- Decay
- Cutoff
- Resonance
- DrumKit: EQ (Drum Kits)
- Drum Sample Equalizer
- DrumKit: Voice Mixer (Drum Kits)
- Exclusive Group
- Enable Note On Receive
- Enable Note Off Receive
- Mixer
- Send to MFX1, MFX2
- Pitch: Pitch Mod
- Pitch
- Pitch Slope
- Pitch Bend Mode
- Ribbon to Pitch
- JS (+X)
- JS (-X)
- AMS (Alternate Modulation Source)
- Pitch EG
- Velocity Intensity
- Pitch EG AMS (Alternate Modulation Source)
- Pitch EG Intensity
- Portamento
- Enabled
- Fingered ill be
- Time
- LFO 1/2
- LFO1/2 Int
- JS+Y
- AMS / Intensity
- Pitch: Pitch EG
- Start Level
- Attack Level
- Release Level
- Decay Time
- Level Modulation
- AMS1/2 (Alternate Modulation Source 1/2)
- Intensity (AMS1/2 Intensity)
- St (Start Level Swing)
- At (Attack Level Swing)
- Time Modulation
- Intensity (AMS Intensity)
- At (Attack Time Swing)
- Dc (Decay Time Swing)
- Filter: Filter Type
- Filter Type
- Filter A
- Frequency (Cutoff Frequency A)
- Resonance (Resonance A)
- Res. Mod. by AMS (Resonance modulated by AMS)
- Filter B
- Frequency (Cutoff Frequency B)
- Filter: Filter Mod
- Keyboard Tracking
- Key Low/High
- Ramp Low/High
- Tracking to A/B
- Velocity to A
- Velocity to B
- Int to A (Intensity to A)
- Int to B (Intensity to B)
- AMS (EG Alternate Modulation Source)
- Filter A/B Modulation
- AMS1 (Alternate Modulation Source 1 for filter A/B)
- Intensity (Intensity to AMS1)
- AMS2 (Alternate Modulation Source 2 for filter A/B)
- Intensity (Intensity to AMS2)
- Filter: Filter LFO
- LFO 1
- Intensity to A
- Intensity to B
- JS (Joystick) -Y Intensity to A
- JS (Joystick) -Y Intensity to B
- AMS (Filter LFO1 Alternate Modulation Source)
- LFO 2
- Filter: Filter EG
- Filter envelope
- Break (Break Point)
- Sustain
- Release
- Slope
- Br (Break Level Swing)
- AMS1/2
- Int (AMS Intensity)
- SI (Slope Time Swing)
- RI (Release Time Swing)
- Amp: Amp Level/Pan
- Amp Level
- Pan modulation
- Amp: Amp Mod
- Amp Modulation
- Amp: Amp EG
- Br (Break Point Level Swing)
- AMS1 (Alternate Modulation Source 1 - Time)
- RI (Release Time)
- AMS2 (Alternate Modulation Source 2)
- LFO: LFO1
- Waveform
- Frequency
- Key Sync
- Fade
- Frequency Modulation
- AMS1 (Alternate Modulation Source1)
- Intensity (AMS1 Intensity)
- AMS2 (Alternate Modulation Source2)
- Intensity (AMS2 Intensity)
- Frequency MIDI/Tempo Sync
- MIDI/Tempo Sync
- Base Note
- Times
- LFO: LFO2
- Effects: "B" FX Config
- FX Name
- Send to Master
- Effects: Master 1 / Reverb
- Effects: Master 2 / Chorus
- Write Sound
- Solo Oscillator
- Swap LFO
- Copy Oscillator
- Copy Drum Kit
- Init Sound
- Compare
- Write Sound dialog box
- Select...
- Copy Oscillator dialog box
- From Sound
- From Oscillator
- To Oscillator
- Copy Drum Kit dialog box
- From Drum Kit
- From Key
- To Key
- JS +Y & AT/2 (Joy Stick +Y & After Touch/2)
- JS Y & AT/2 (Joy Stick -Y & After Touch/2)
- Sampling mode
- Entering and exiting the Sampling mode
- Creating new Sounds from the Samples
- Creating new Drum Kits from the Samples
- Creating new Sounds from an Audio Groove
- Creating an Audio Groove
- Assigning an Audio Grooves to a Sound
- Assigning the Audio Groove to Styles or Pads
- Sampling: Edit
- SM (Sample)
- Waveform display
- Start (Sample Start)
- Loop Start
- Changing the sample length and finding good-sounding loop points
- End (Sample/Loop End)
- Use Zero
- OrigNote (Original Note)
- Zoom
- Sampling: Loop Edit
- Loop diagram
- End
- Loop Lock
- Loop On
- Crossfade
- Crossfade Length
- Sampling: Sampling Info
- Sampling Info
- Samples
- Drum Samples
- Multisamples
- Available Memory
- RAM Bank
- Mono Time
- Bytes
- Sample Info
- Selected Samples
- Sampling Frequency
- Time Slice
- How timeslice works
- Sample diagram
- Metronome Information
- Measures
- BPM
- Threshold
- Attacks
- Slices
- Slice
- Extend
- By
- The Time Slice procedure
- The Extend procedure
- Multisample: Edit MS
- MS (MultiSample)
- Multisample Setup
- Sample Number / Name
- Original Note
- From ... To
- Multisample: Key Assign
- Sample list
- Keyboard ranges
- Write
- Normalize
- Cut
- Trim/Crop
- Select All
- Init Multisample
- Load Sample
- Import
- Export
- Write Sample dialog box
- Write MultiSample dialog box
- Write Slice dialog box
- Delete Sample dialog box
- Selected
- Not assigned to any Multisample/Drumkit
- All Samples, Multisamples, Drum Samples
- Delete Multisample dialog box
- Export Sample page
- Original Name
- File Name
- File Type
- Export Multisample page
- Merging Samples from various sources
- Global mode
- Overview on the Global mode
- Edit mode
- General Controls: Basic
- Metronome
- Global Reverb
- Reverb Offset
- Fade In/Out Time
- Fade In Time
- Fade Out Time
- Accelerando/Ritardando
- Step
- Glide
- General Controls: Interface
- Language
- Change button
- How to select a language
- Background Color
- Color
- Display Hold
- Show
- Track Activity
- Auto Select
- General Controls: Lock
- Locks
- Tuning pane
- Sub Scale/Quarter Tone
- SubScale/Quarter Tone from STS
- Control pane
- General Controls: Clock & Power
- Date & Time
- Month
- Day
- Year
- Apply
- Auto Power Off
- On
- Mode Preferences: Style
- Chord Recognition
- Velocity Control
- Velocity Control Value
- Scale Mode
- Memory Mode
- Bass & Lower Backing
- Style Tracks Global Volume
- Mode Preferences: Song & Sequencer
- SMF Melody Track
- Drum & Bass Mode - Drum
- Drum & Bass Mode - Bass
- Fast Play
- Save Trk & FX
- Mode Preferences: Media
- Media Preferences
- Media Protect
- Global Protect
- Factory Style and Pad Protect
- Factory Sound Protect
- Hide Unknown Files
- Show Columns
- Size
- Date
- Controllers: Hand Controllers
- Keyboard Settings
- Velocity Curve
- Balance Control
- Balance knob
- Controllers: Foot Controllers
- Pedal/Footswitch
- Function
- Calibration
- Tuning: Basic
- Global Tuning
- Master Tuning
- Tuning: Transpose Control
- Transpose Control
- Transpose applies to Style and Kbd tracks
- Transpose applies to Player
- Transpose applies to Midi In notes
- Scale and Transpose position
- Standard MIDI File and chord transpose
- Drum Kits and transpose
- Tuning: Scale
- Main Scale
- User Quarter Tone SubScale
- Upper scale diagram
- Lower scale diagram
- MIDI: General Controls
- MIDI Preset
- Preset
- General Controls
- Clock Send
- Clock Source
- Local Control On
- Note to RX Noise
- MIDI: MIDI In Controls
- Midi In Controls
- Midi In Octave Transpose
- Track Mute Active
- Chord 1 Midi Channel
- Chord 2 Midi Channel
- Upper Octave Transp (Transpose)
- Lower Octave Transp (Transpose)
- Midi In Velocity Value
- MIDI: MIDI In Channels
- Channels
- MIDI: MIDI Out Channels
- MIDI: Filters
- Midi In Filters
- Midi Out Filters
- Audio & EQ: MP3 / Speakers
- MP3 Player
- Speakers On/Off
- Audio & EQ: Limiter
- Limiter Preset
- Ratio
- Gain Adjust
- Audio & EQ: Master EQ
- EQ Preset
- Q
- Freq
- Gain
- Touch Panel Calibration
- Write Quarter Tone SC Preset
- Write Midi Preset
- Write Limiter Preset
- Write Master EQ Preset
- Write Quarter Tone SC Preset dialog box
- To
- Write Midi Preset dialog box
- Write Limiter Preset dialog box
- Write Master EQ Preset dialog box
- Master EQ Preset
- Media mode
- Storage devices and internal memory
- User-accessible storage devices
- Supported device
- Selecting and deselecting files
- Searching files
- Preferences
- File types
- Media structure
- Page structure
- Path
- List of files
- Device pop-up menu
- Commands
- Navigation tools
- Load/Save/Copy/Delete button
- Open button
- Close button
- Load
- Merging data
- Loading all the User data
- Loading all data of a specified type
- Loading a single bank
- Loading a single item
- Loading Global data from other Pa-Series instruments
- Loading Pa3X data
- Loading Pa600 data
- Loading Pa2X, Pa800, Pa1X, Pa800, Pa588 data
- Loading Pa80/60/50/50SD data
- Loading i-Series data
- Creating a new ".SET" folder
- Saving the full memory content
- Saving all data of a specified type
- Saving a single bank
- Saving a single item
- Copy
- Copying a folder's content
- Copying a single file or folder
- Multiple file selection
- To select more files or folders consecutively:
- To select more files or folders discontinuously:
- To deselect the files or folders:
- Overwriting existing files or folders
- Delete procedure
- Format
- Volume Label
- Execute button
- Format procedure
- Utility
- Full Resource Backup
- Resource Restore
- Factory Restore
- OS Version Number
- USB
- HD Connection
- Object(s) info
- Device Info
- Protect
- Unprotect
- Care of mass storage devices
- Internal memory write protection
- Precautions
- Possible problems
- Delete all samples and multisamples
- Create a new .SET of samples
- Book
- List Header
- Full list
- Filtered
- Filter...
- Add to list
- Numeric selection of entries
- Selecting SongBook Entries via MIDI
- Setting the special Control MIDI channel
- MIDI messages sent when selecting SongBook Entries
- Setting the special Control MIDI OUT channel
- Sending MIDI messages when selecting SongBook Entries
- Custom List
- List pop-up menu
- Next
- List Edit
- List Name
- Move
- Del Song
- New List
- Del List
- Book Edit 1
- Header
- Number (Song Selection Number)
- Resource
- Entry
- Write Current
- New Song
- Book Edit 2
- Database
- Genre
- Artist
- Key Info
- Tempo/BPM
- Meter Info
- Transp. (Master Transpose)
- Book Edit 3
- Synchro Start / Synchro Stop / Memory
- Linked.TXT
- Info
- Selected entry
- Associated resource
- Songs
- Songs after filtering
- Custom Lists
- Songs in the Current List
- Show Artist/Genre
- Show Number/Key
- Enable List Edit
- Export as text file
- Init SongBook
- Lyrics, Score, Markers
- Lyrics page
- Viewing lyrics and chords with Songs
- Viewing lyrics with the Styles
- The Lyrics page in detail
- Song chords
- Current measure
- ABC
- CGD
- Text in MP3+CGD files
- Text files loaded with Standard MIDI Files and MP3 files
- On-the-fly TXT loading
- Score page
- Song title
- Staff
- Currently selected staff marker
- Current measure indicator
- Lyrics button
- Chord button
- Note button
- Clef
- Play/Mute
- Markers page
- How to add a marker:
- How to jump to a saved marker:
- How to edit a marker:
- How to delete a marker:
- How to save the markers:
- Auto Scroll
- What is MIDI?
- In general
- Channels and messages
- What is MIDI Over USB?
- Standard MIDI Files
- The General MIDI standard
- The Global channel
- The Chord 1 and Chord 2 channels
- The Control channel
- MIDI Presets
- Connecting Pa600 to a Master keyboard
- Connections and settings
- Connecting Pa600 to a MIDI accordion
- Connection and settings
- Connecting Pa600 to an external sequencer
- The Local Off
- The Sounds
- Playing another instrument with Pa600
- The Keyboard
- The Player
- The Arranger
- Factory data
- Style and Player controls
- DNC Sounds
- Drum Kits
- Effects
- For FX Master 2 only
- Assignable parameters
- List of Pedal/Footswitch functions
- List of Assignable Switches functions
- Scales
- Werckmeister
- Dynamic Modulation sources
- Gate1, Gate1+Dmpr (Gate1+Damper)
- Gate2, Gate2+Dmpr (Gate2+Damper)
- Dynamics (Dynamic)
- 0: No Effect
- 1: Stereo Compressor
- a: Envelope Select
- b: Sensitivity
- g: Output Level
- c: Attack
- 2: Stereo Limiter
- b: Ratio
- c: Threshold [dB]
- e: Gain Adjust [dB]
- d: Attack
- d: Release
- f: Trigger Monitor
- f: Side PEQ Insert
- g: Side PEQ Cutoff [Hz]
- g: Gain [dB]
- 3: Multiband Limiter
- e: Low Offset [dB]
- f: Mid Offset [dB]
- g: High Offset [dB]
- 4: St.MasteringLimtr
- (Stereo Mastering Limiter)
- 5: Stereo Gate
- c: Polarity
- e: Delay Time [msec]
- EQ and Filters (EQ/Filter)
- 6: St.Parametric4EQ
- (Stereo Parametric 4-Band EQ)
- 7: St. Graphic 7EQ
- (Stereo Graphic 7-Band EQ)
- a: Type
- 8: St.Exciter/Enhncr
- (Stereo Exciter/Enhancer)
- a: Exciter Blend
- b: Emphasis Freq
- c: Enhancer Delay L [msec]
- d: Enhancer Delay R [msec]
- 9: Stereo Isolator
- 10: St. Wah/Auto Wah
- (Stereo Wah/Auto Wah)
- a: Frequency Bottom
- a: Frequency Top
- b: Sweep Mode
- c: Envelope Sens
- c: Envelope Shape
- d: LFO Frequency [Hz]
- e: MIDI Sync
- e: BPM
- e: Base Note
- e: Times
- 11: St. Vintage Wah
- (Stereo Vintage/Custom Wah)
- a: Shape
- 12: St. Random Filter
- (Stereo Random Filter)
- a: LFO Phase [degree]
- a: LFO Waveform
- b: LFO Frequency [Hz]
- c: LFO Step Freq [Hz]
- d: BPM
- e: Step Base Note
- i: Wet/Dry
- 13: St. MultiModeFilter (Stereo Multi Mode Filter)
- 14: St. Sub Oscillator (Stereo Sub Oscillator)
- a: OSC Mode
- b: Note Interval
- b: Note Fine
- d: Envelope Pre LPF
- 15: Talking Modulator
- E.g.: When "Voice Top" = A, "Voice Center" = I, and "Voice Bottom" = U:
- f: Formant Shift
- f: Resonance
- 16: Stereo Decimator
- a: Pre LPF
- f: Resolution
- 17: St. Analog Record (Stereo Analog Record)
- b: Flutter
- e: Click Level
- Overdrive, Amp models, and Mic models (OD Amp Mic)
- 18: OD/Hi.Gain Wah (Overdrive/Hi.Gain Wah)
- a: Wah
- a: Sw
- b: Wah Sweep Range
- b: Wah Sweep Src
- d: Pre Low-cut
- d: Drive
- e: Output Level
- 19: St. Guitar Cabinet
- (Stereo Guitar Cabinet)
- 20: St. Bass Cabinet (Stereo Bass Cabinet)
- 21: Bass Amp Model
- 22: Bass Amp+Cabinet (Bass Amp Model+Cabinet)
- 23: Tube PreAmp Model (Tube PreAmp Modeling)
- b, f: Saturation [%]
- c: Tube1 Bias
- d: Tube1 Phase
- 24: St. Tube PreAmp
- (Stereo Tube PreAmp Modeling)
- 25: Mic Model+PreAmp
- (Mic Modeling + PreAmp)
- b: Mic Position
- Chorus, Flanger, and Phaser (Cho/Fln Phaser)
- 26: Stereo Chorus
- 27: Black Chorus/Flanger
- 28: St.HarmonicChorus (Stereo Harmonic Chorus)
- f: High/Low Split Point
- g: Feedback
- 29: St. Biphase Mod. (Stereo Biphase Modulation)
- 30: Multitap Cho/Delay
- (Multitap Chorus/Delay)
- 31: Ensemble
- c: Shimmer
- 32: Polysix Ensemble
- 33: Stereo Flanger
- h: Wet/Dry
- g: High Damp [%]
- 34: St. Random Flanger (Stereo Random Flanger)
- 35: St. Env. Flanger (Stereo Envelope Flanger)
- c: Sweep Mode
- c: Src
- d: EG Attack
- d: EG Decay
- 36: Stereo Phaser
- h: Resonance
- h: High Damp [%]
- 37: St. Random Phaser (Stereo Random Phaser)
- 38: St. Env. Phaser
- (Stereo Envelope Phaser)
- Modulation and Pitch Shift (Mod./P.Shift)
- 39: Stereo Vibrato
- 40: St. Auto Fade Mod.
- (Stereo Auto Fade Modulation)
- 41: 2Voice Resonator
- a: LFO/D-mod Invert
- 42: Doppler
- a: LFO Mode
- a: Src
- b: LFO Sync
- e: Pitch Depth
- f: Pan Depth
- 43: Scratch
- a: Scratch Source
- b: Response
- c: Envelope Select
- d: Threshold
- e: Response
- f: Direct Mix
- 44: Grain Shifter
- a: Duration
- c: LFO Sample Cycle [Hz]
- 45: Stereo Tremolo
- b: LFO Phase [degree]
- 46: St. Env. Tremolo (Stereo Envelope Tremolo)
- d: Envelope Amount [Hz]
- e: Depth
- e: Envelope Amount
- 47: Stereo Auto Pan
- a: LFO Shape
- 48: St. Phaser + Trml (Stereo Phaser + Tremolo)
- f: Phaser Wet/Dry
- 49: St. Ring Modulator (Stereo Ring Modulator)
- b: Fixed Frequency [Hz]
- c: Note Offset
- c: Note Fine
- 50: Detune
- d: Input Level Dmod [%]
- 51: Pitch Shifter
- a: Mode
- b: Pitch Shift [1/2tone]
- e: Feedback Position
- 52: Pitch Shifter BPM
- e: Delay Base Note
- d: Time Over?
- 53: Pitch Shift Mod. (Pitch Shift Modulation)
- a: Pitch Shift [cents] e: Depth
- g: Pan h: Wet/Dry
- 54: Organ Vib/Chorus (Organ Vibrato/Chorus)
- b: Control Mode
- c: Preset Type
- d: Custom Mix
- e: Custom Depth
- f: Custom Speed [Hz]
- c: Amt
- 55: Rotary Speaker
- b: Speed Switch
- c: Manual Speed Ctrl
- d: Horn Acceleration
- e: Rotor Acceleration
- g: Mic Distance
- g: Mic Spread
- 56: L/C/R Delay
- e: High Damp [%]
- e: Low Damp [%]
- g: Spread
- 57: Stereo/CrossDelay
- 58: St. Multitap Delay (Stereo Multitap Delay)
- d: Tap1 Level
- 59: St. Mod Delay
- (Stereo Modulation Delay)
- b: D-mod Modulation
- 60: St. Dynamic Delay
- (Stereo Dynamic Delay)
- a: Control Target
- a: Polarity
- b: Threshold
- b: Offset
- 61: St. AutoPanningDly (Stereo Auto Panning Delay)
- 62: Tape Echo
- 63: Auto Reverse
- b: Reverse Time [msec]
- 64: Sequence BPM Dly (Sequence BPM Delay)
- a: BPM
- b: Rhythm Pattern
- 65: L/C/R BPM Delay
- a: Time Over?
- 66: Stereo BPM Delay
- a: Time Over? L, R
- 67: St.BPM Mtap Delay
- (Stereo BPM Multi tap Delay)
- 68: St.BPM Mod. Delay
- (Stereo BPM Modulation Delay)
- i: Time Over? L, R
- 69: St.BPMAutoPanDly
- (Stereo BPM Auto Panning Delay)
- 70: Tape Echo BPM
- b: Time Over?
- Reverb and Early Reflections (Reverb ER)
- 71: Reverb Hall
- 72: Reverb SmoothHall
- 73: Reverb Wet Plate
- 74: Reverb Dry Plate
- 75: Reverb Room
- 76: Reverb BrightRoom
- c: ER Level
- d: Reverb Level
- 77: Early Reflections
- Mono-Mono Serial (Mono-Mono)
- 78: P4EQ - Exciter
- (Parametric 4-Band EQ - Exciter)
- 79: P4EQ - Wah
- (Parametric 4-Band EQ - Wah/Auto
- 80: P4EQ - Cho/Flng
- (Parametric 4-Band EQ - Chorus/Flanger)
- i: Output Mode
- 81: P4EQ - Phaser
- (Parametric 4-Band EQ - Phaser)
- 82: P4EQ - Mt. Delay
- (Parametric 4-Band EQ - Multitap Delay)
- 83: Comp - Wah
- (Compressor - Wah/Auto Wah)
- 84: Comp - Amp Sim
- (Compressor - Amp Simulation)
- 85: Comp - OD/HiGain
- (Compressor - Overdrive/Hi.Gain)
- 86: Comp - P4EQ
- (Compressor - Parametric 4-Band EQ)
- 87: Comp - Cho/Flng
- (Compressor - Chorus/Flanger)
- h: [F]Output Mode
- i: Routing
- 88: Comp - Phaser
- (Compressor - Phaser)
- 89: Comp - Mt. Delay
- (Compressor - Multitap Delay)
- 90: Limiter - P4EQ
- (Limiter - Parametric 4-Band EQ)
- 91: Limiter - Cho/Flng
- (Limiter - Chorus/Flanger)
- 93: Limiter - Mt.Delay (Limiter - Multitap Delay)
- 94: Exciter - Comp (Exciter - Compressor)
- 95: Exciter - Limiter
- 96: Exciter - Cho/Flng
- (Exciter - Chorus/Flanger)
- 97: Exciter - Phaser
- 98: Exciter - Mt.Delay (Exciter - Multitap Delay)
- 99: OD/HG - Amp Sim
- (Overdrive/Hi.Gain -
- Amp Simulation)
- 100: OD/HG - Cho/Flng
- (Overdrive/Hi.Gain - Chorus/Flanger)
- 101: OD/HG - Phaser (Overdrive/Hi.Gain - Phaser)
- 102: OD/HG - Mt.Delay (Overdrive/Hi.Gain - Multitap Delay)
- 103: Wah - Amp Sim
- (Wah - Amp Simulation)
- 104: Decimator - Amp
- (Decimator - Amp Simulation)
- 105: Decimator - Comp (Decimator - Compressor)
- 106: AmpSim - Tremolo (Amp Simulation- Tremolo)
- 107: Cho/Flng - Mt.Dly
- (Chorus/Flanger - Multitap Delay)
- 108: Phaser - Cho/Flng
- (Phaser - Chorus/Flanger)
- 109: Reverb - Gate
- Double Size
- 110: St. Mltband Limiter (Stereo Mltband Limiter)
- 111: PianoBody/Damper (PianoBody/Damper Simulation)
- a: Sound Board Depth
- b: Damper Depth
- b: Src
- c: Tone
- d: Mid Shape
- e: Tune
- 112: OD/HyperGain Wah (Overdrive/Hyper Gain Wah)
- 113: GuitarAmp + P4EQ (Guitar Amp Model + Parametric 4-Band EQ)
- a: Amp Type
- d: Presence
- e: Post P4EQ
- 114: BassTubeAmp+Cab.
- (Bass Tube Amp Model + Cabinet)
- i: Cabinet Type
- 115: St. Mic + PreAmp (Stereo Mic Modeling + PreAmp)
- 116: Multitap Cho/Delay (Multitap Chorus/Delay)
- b, c, d, e, f, g: Status
- h: Panning Preset
- 117: St. Pitch Shifter (Stereo Pitch Shifter)
- a: L/R Pitch
- 118: St. PitchShift BPM (Stereo Pitch Shifter BPM)
- 119: Rotary SpeakerOD (Rotary Speaker Overdrive)
- 120: L/C/R Long Delay
- 121: St/Cross Long Delay (Stereo/Cross Long Delay)
- 122: Hold Delay
- a: Loop Time [msec]
- c: Time Over?
- b: Loop BPM Sync
- d: Loop Base Note
- "Hold" procedure (when Loop Time = Auto)
- e: REC Control Src
- g: Manual REC Control
- f: RST Control Src
- h: Manual RST Control
- 123: LCR BPM Long Dly
- 124: St. BPM Long Dly (Stereo BPM Long Delay)
- 125: Early Reflections
- Installing the KORG USB MIDI Driver
- Connecting Pa600 to a personal computer
- KORG USB-MIDI Driver system requirements
- Windows
- Mac
- Please note before use
- Windows: Installing the KORG USB-MIDI ted Driver
- Driver's ports
- Mac OS X: Installing the KORG USB-MIDI Driver
- MIDI Data
- MIDI Controllers
- Recognized chords
- Replacing the clock backup battery
- Installation
- Shift functions
- Long keypress
- Special functions
- MIDI Implementation Chart
- Index
- A
- B
- C
- D
- E
- F
- G
- I
- J
- K
- L
- M
- 0
- P
- R
- S
- T
- U
- V
- W
- KORG
- Address
- Web
Brand : KORG
Model : Pa600
Category : Keyboard