
3 - Smartwatch SUUNTO - Free user manual and instructions
Find the device manual for free 3 SUUNTO in PDF.


| Product Type | Smartwatch |
| Brand | Suunto |
| Model | 3 |
| Dimensions | 43 x 43 x 14.5 mm |
| Weight | 37 g |
| Display | 1.0-inch color LCD, 240x240 pixels |
| Battery Life | Up to 5 days (normal use), up to 10 hours (GPS mode) |
| Charging | Proprietary magnetic USB cable |
| Water Resistance | 30 meters (3 ATM) – not for diving |
| Sensors | Optical heart rate, accelerometer, GPS/GLONASS |
| Connectivity | Bluetooth 4.0 |
| Compatibility | iOS 10+ and Android 5+ |
| Main Functions | Step tracking, sleep tracking, heart rate monitoring, GPS tracking, sports modes (running, cycling, swimming, etc.), notifications |
| Maintenance | Clean with a soft, damp cloth; avoid solvents |
| Safety | Not a medical device; for fitness tracking only |
| Spare Parts and Repairability | Battery not user-replaceable; contact Suunto support for service |
| General Information | Firmware updates via Suunto app; strap width 20 mm (replaceable) |
Frequently Asked Questions - 3 SUUNTO
User questions about 3 SUUNTO
0 question about this device. Answer the ones you know or ask your own.
Ask a new question about this device
Download the instructions for your Smartwatch in PDF format for free! Find your manual 3 - SUUNTO and take your electronic device back in hand. On this page are published all the documents necessary for the use of your device. 3 by SUUNTO.
USER MANUAL 3 SUUNTO
2.6. Adjusting settings....9
- Features....11
3.1. Activity tracking....11
3.2. Adaptive training guidance....12
3.3. Airplane mode....14
3.4. Backlight....14
3.5. Bluetooth connectivity....15
3.6. Button lock and screen dimming....15
3.7. Chest heart rate sensor....15
3.8.Device info....15
3.9. Display theme....15
3.10.Do Not Disturb mode....16
3.11. Feeling....16
3.12. Fitness level.... 17
3.13. Instant HR.... 18
3.13.1. Daily HR....18
3.14. Intensity zones.... 19
3.14.1. Heart rate zones....20
3.14.2. Pace zones....21
3.15. Interval training.... 23
3.16. Language and unit system....24
3.17. Logbook....24
3.18. Notifications....24
3.19. Pairing PODs and sensors.... 25
3.19.1. Calibrating foot POD 26
3.20. Recording an exercise.... 26
3.20.1. Using targets when exercising.... 27
3.20.2. Connected GPS....28
3.20.3. Sport mode power saving options.... 28
3.21. Sleep tracking.... 29
3.22. Speed and distance calibration....30
3.23. Sport modes.... 31
3.24. Swimming....31
3.25. Stress and recovery....31
3.26.Time and date 32
3.26.1. Alarm clock....32
3.27. Timers....33
3.28. Tones and vibration.... 34
3.29. Training insight....34
3.30. Recovery time....35
3.31. Watch faces....35
- Care and support....37
4.1. Handling guidelines....37
4.2. Battery....37
4.3. Disposal....37
- Reference....38
5.1. Technical specifications....38
5.2. Compliance....39
5.2.1. CE....39
5.2.2. FCC compliance.... 39
5.2.3.IC....39
5.2.4. NOM-121-SCT1-2009.... 40
5.2.5. KC....40
5.2.6. Thailand-NBTC....40
5.2.7.NCC....40
5.2.8. EAC....40
5.3. Trademark....40
5.4. Patent notice....40
5.5. International Limited Warranty....41
5.6. Copyright....42
1. SAFETY
Types of safety precautions
⚠ WARNING: - is used in connection with a procedure or situation that may result in serious injury or death.
⚠️ CAUTION: - is used in connection with a procedure or situation that will result in damage to the product.
NOTE: - is used to emphasize important information.
TIP: - is used for extra tips on how to utilize the features and functions of the device.
Safety precautions
⚠ WARNING: Allergic reactions or skin irritations may occur when the product is in contact with skin, even though our products comply with industry standards. In such event, stop use immediately and consult a doctor.
⚠ WARNING: Always consult your doctor before beginning an exercise program. Overexertion may cause serious injury.
⚠ WARNING: Only for recreational use.
WARNING: Do not entirely rely on the connected GPS or battery lifetime of the product. Always use maps and other backup material to ensure your safety.
⚠️ CAUTION: Do not apply solvent of any kind to the product, as it may damage the surface.
⚠️ CAUTION: Do not apply insect repellent on the product, as it may damage the surface.
⚠️ CAUTION: Do not throw the product away, but treat it as electronic waste to preserve the environment.
⚠️ CAUTION: Do not knock or drop the product, as it may get damaged.
NOTE: At Suunto we use advanced sensors and algorithms to generate metrics that can help you in your activities and adventures. We strive to be as accurate as possible. However, none of the data our products and services collect is perfectly reliable, nor are the metrics they generate absolutely precise. Calories, heart rate, location, movement detection, shot recognition, physical stress indicators and other measurements may not match the real world. Suunto products and services are intended for recreational use only and are not meant for medical purposes of any kind.
2. Getting started
Starting your Suunto 3/Suunto 3 Fitness for the first time is quick and simple.
- Wake up your watch by connecting it to a computer with the USB cable from the box.
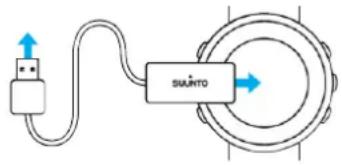
- Press the middle button to begin the setup wizard.

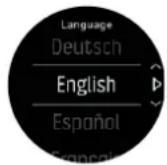
- Select your language by pressing the right top or right bottom button and confirm with the middle button.
- Follow the wizard to complete initial settings. Press the upper right or lower right button to change values and press the middle button to select and go to the next step.
2.1. Suunto app
With the Suunto app, you can further enrich your Suunto 3/Suunto 3 Fitness experience. Pair your watch with the mobile app to get connected GPS, mobile notifications, insights and more.

NOTE: You cannot pair anything if airplane mode is on. Turn off airplane mode before pairing.
To pair your watch with Suunto app:
- Ensure your watch Bluetooth is on. Under the settings menu, go to Connectivity » Discovery and enable it if it is not already.
- Download and install Suunto app on your compatible mobile device from the iTunes App Store, Google Play in addition to several popular app stores in China.
- Start Suunto app and turn on Bluetooth if it is not on already.
- Tap the watch icon in the upper-left of the app screen and then tap "PAIR" to pair your watch.
- Verify the pairing by typing the code that are displayed on your watch in the app.

NOTE: Some features require an internet connection over Wi-Fi or mobile network.
Carrier data connection fees may apply.
2.2. SuuntoLink
Download and install SuuntoLink on your PC or Mac to update your watch software.
We strongly recommend updating your watch when a new software release is available. If an update is available, you are notified via SuuntoLink as well as the Suunto app.
Visit www.suunto.com/SuuntoLink for further information.
To update your watch software:
- Plug your watch into the computer with the supplied USB cable.
- Start SuuntoLink if it is not already running.
- Click the update button in SuuntoLink.
2.3. Buttons
Suunto 3/Suunto 3 Fitness has five buttons you can use to navigate through displays and features.
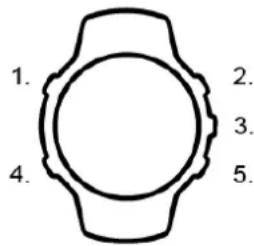
Normal use:
1. Upper left button
• press to activate backlight
• press to view alternative information
2. Upper right button
• press to move up in views and menus
3. Middle button
- press to select an item or to go forward/change displays
- keep pressed to open in-context shortcut menu
4. Lower left button
- press to go back
- keep pressed to go back to watch face
5. Lower right button
• press to move down in views and menus
When you are recording an exercise, the buttons have different functions:
1. Upper left button
• press to view alternative information
2. Upper right button
• press to pause or resume recording
- keep pressed to change activity
3. Middle button
• press to change displays
- keep pressed to open in-context options menu
4. Lower left button
• press to change displays
5. Lower right button
- press to mark a lap
- keep pressed to lock and unlock buttons
2.4. Optical heart rate
Optical heart rate measurement from the wrist is an easy and convenient way to track your heart rate. Best results for heart rate measurement may be affected by the following factors:
- The watch must be worn directly against your skin. No clothing, however thin, can be between the sensor and your skin
- The watch may need to be higher on your arm than where watches are normally worn. The sensor reads blood flow through tissue. The more tissue it can read, the better.
- Arm movements and flexing muscles, such as gripping a tennis racket, can change the accuracy of the sensor readings.
- When your heart rate is low, the sensor may not be able to provide stable readings. A short warm up of a few minutes before you start the recording helps.
- Skin pigmentation and tattoos block light and prevent reliable readings from the optical sensor.
• The optical sensor may not provide accurate heart rate readings for swimming activities. - For higher accuracy and quicker responses to changes in your heart rate, we recommend using a compatible chest heart rate sensor such as Suunto Smart Sensor.
WARNING: The optical heart rate feature may not be accurate for every user during every activity. Optical heart rate may also be affected by an individual's unique anatomy and skin pigmentation. Your actual heart rate may be higher or lower than the optical sensor reading.
⚠ WARNING: Only for recreational use; the optical heart rate feature is not for medical use.
WARNING: Always consult a doctor before beginning a training program. Overexertion may cause serious injury.
WARNING: Allergic reaction or skin irritations may occur when products are in contact with skin, even though our products comply with industry standards. In such event, stop use immediately and consult a doctor.
2.5. Icons
Suunto 3/Suunto 3 Fitness uses the following icons:
| Button lock | |
| Calories | |
| Charging | |
| Distance | |
| Do Not Disturb | |
| Duration | |
| EPOC (Excess Post-Exercise Oxygen Consumption) | |
| Failure | |
| Fitness level | |
| Flat time | |
| Connected GPS acquired | |
| Connected GPS not available | |
| Heart rate | |
| HR signal from watch acquired | |
| HR signal from HR sensor acquired | |
| Incoming call | |
| Logbook | |
| Low battery | |
| Message/notification | |
| Missed call | |
| Pace/speed | |
| Planned move | |
| POD signal acquired | |
| Peak Training Effect | |
| Recovery time | |
| Steps | |
| Stopwatch | |
| Stroke rate (swimming) | |
| Success | |
| Syncing | |
| Settings |
2.6. Adjusting settings
To adjust a setting:
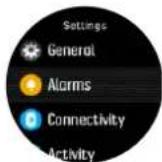
- Press the upper right button until you see the settings icon, then press the middle button to enter the settings menu.
- Scroll through the settings menu by pressing the upper right or lower right buttons.
-
Select a setting by pressing the middle button when the setting is highlighted. Go back in the menu by pressing the lower left button.
-
For settings with a value range, change the value by pressing the upper right or lower right button.
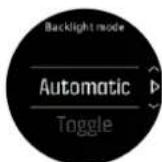
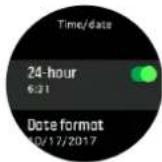
- For settings with just on or off, change the value by pressing the middle button.

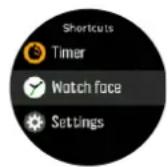
TIP: You can also access general settings from the shortcuts menu by keeping the middle ton pressed.
3. Features
3.1. Activity tracking
Your watch keeps track of your overall activity level throughout the day. This is an important factor whether you just aim to be fit and healthy or you are training for an upcoming competition. It is good to be active, but when training hard, you need to have proper rest days with low activity.
The activity counter automatically resets at midnight every day. At the end of the week, the watch provides a summary of your activity.
From the watch face display, press the lower right button until you see your total steps for the day.
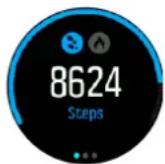
Your watch counts steps using an accelerometer. The total step count accumulates 24/7, also while recording training sessions and other activities. However, with some specific sports, such as swimming and cycling, steps are not counted.
In addition to steps, you can press the upper left button to see estimated calories for the day.
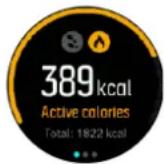
The large number in the center of the display is the estimated amount of active calories you have burned during the day. Below this you see the total calories burned. The total includes both active calories and your Basal Metabolic Rate (see below).
The ring in both displays indicates how close you are to your daily activity goals. These targets can be adjusted to your personal preferences (see below).
You can also check your steps over the last seven days by pressing the middle button once. Press the middle button again to see calories burned over the last seven days.
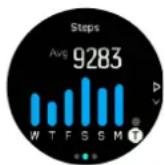
While in steps or calories display, press the lower right button to see the exact numbers for each day.
Activity goals
You can adjust your daily goals for both steps and calories. While in the activity display, keep the middle button pressed to open the activity goal settings.
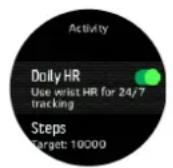
When setting your steps goal, you define the total number of steps for the day.
The total calories you burn per day is based on two factors: your Basal Metabolic Rate (BMR) and your physical activity.
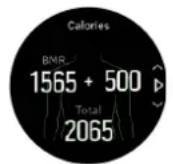
Your BMR is the amount of calories your body burns while at rest. These are the calories your body needs to stay warm and perform basic function like blink your eyes or beat your heart. This number is based on your personal profile, including factors such as age and gender.
When you set a calorie goal, you define how many calories you want to burn in addition to your BMR. These are your so-called active calories. The ring around the activity display advances according to how many active calories you burn during the day compared to your goal.
3.2. Adaptive training guidance
Your Suunto 3/Suunto 3 Fitness automatically generates a 7-day training plan to help you maintain, improve, or boost your aerobic fitness. The weekly training loads and workout intensities are different in the three training programs.
Select your fitness goal:
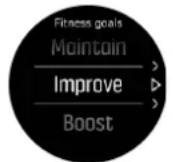
Select the “maintain” option if you are already fairly fit and want to maintain your current fitness level. This option can also be useful for people just getting started with regular exercise. Once you get going, you can always change the program you follow to a more demanding one.
The “improve” option is targeted at improving your aerobic fitness with a moderate progress curve. If you want to improve your fitness more quickly, choose the “boost” program. This will bring you harder workouts and faster results.
The training plan consists of planned exercises with a target duration and intensity. Each exercise is planned with the goal of helping you maintain and improve your fitness gradually without over-stressing your body. If you miss an exercise, or do a little more than planned, Suunto 3/Suunto 3 Fitness automatically adapts your training plan accordingly.
When you start a planned exercise, your watch will guide you with visual and audio indicators to help you stay at the right intensity and keep track of your progress.
The HR zones settings (see 3.14.1. Heart rate zones) affect the adaptive training plan. The upcoming activities in the training plan include intensity. If your HR zones are not set correctly,
the intensity guidance during a planned exercise may not correlate to the real intensity of your exercise.
To see your next planned training sessions:
- From the watch face, press the lower right button to scroll to the training insight view.
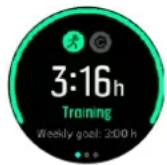
- Press the middle button to view your plan for the current week.
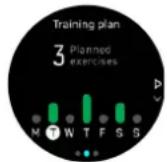
- Press the lower right button to see additional information; training day, duration and intensity level (based on the heart rate zones, see Intensity zones.
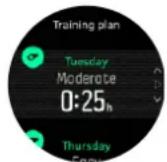
- Press the lower left button to exit the planned exercise views and return to the time display.
NOTE: Today's planned activity is also visible when pressing the middle button in the watch face view.
NOTE: Adaptive training guidance has the goals of maintaining, improving, or boosting your fitness. If you are already very fit and exercise frequently, the 7-day plan may not suite your existing routine.
⚠️ CAUTION: If you have been ill, the training plan may not adjust enough when you start exercising again. Be extra cautious and exercise easy after an illness.
WARNING: The watch cannot tell if you have an injury. Follow the recommendations of your doctor to recover from the injury before following the training plan in your watch.
To disable your personalized training plan:
- Under the settings menu, go to Training.
- Toggle the Guidance to off.
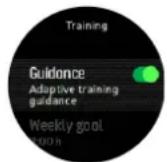
If you don't want the adaptive guidance but would like an exercise goal, you can define a target number of hours as your weekly goal from the settings under Training.
- Disable Guidance.
- Select Weekly goal. by pressing the middle button.
- Select your new Weekly goal by pressing the upper right or lower right buttons.
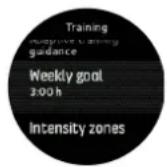
- Confirm by pressing the middle button.
Real-time guidance
If you have a planned exercise scheduled for the current day, that activity appears as the first option in the sport mode list when you enter the exercise view to start an exercise recording. If you want real-time guidance, start the recommended exercise as you would a normal recording, see 3.20. Recording an exercise.
NOTE: Today's planned activity is also visible when pressing the middle button in the watch face view.
When exercising according to a planned exercise, you will see a green progress bar and percentage of your progress. The goal is estimated based on planned intensity and duration. When you exercise within the planned intensity (based on your heart rate), you should reach the goal around the planned duration. Higher exercise intensity will get you to the goal faster. Similarly a lower intensity will take longer.
3.3. Airplane mode
Activate airplane mode when needed to turn off wireless transmissions. You can activate or deactivate airplane mode from the settings under Connectivity.
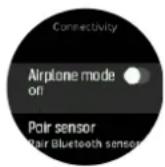
NOTE: To pair anything with your device, you need to first turn off airplane mode if you have it on.
3.4. Backlight
The backlight has two modes: automatic and toggle. In automatic mode, the backlight comes on with any button press. In toggle mode, you turn the backlight on by keeping the upper left button pressed. The backlight stays on until you keep the upper left button pressed again.
By default, the backlight is in automatic mode. You can change the backlight mode from the settings under General » Backlight.
3.5. Bluetooth connectivity
Suunto 3/Suunto 3 Fitness uses Bluetooth technology to send and receive information from your mobile device when you have paired your watch with the Suunto app. Same technology is also used when pairing PODs and sensors.
However, if you do not want your watch to be visible for Bluetooth scanners, you can activate or deactivate the discovery setting from the settings under Connectivity » Discovery.
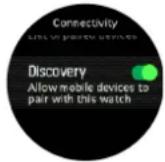
The Bluetooth can also be completely turned off by activating airplane mode, see 3.3. Airplane mode
3.6. Button lock and screen dimming
While recording an exercise you can lock the buttons by keeping the lower right button pressed. Once locked, you cannot change the display views, but you can turn on the backlight with any button press if the backlight is in automatic mode.
To unlock, keep the lower right button pressed again.
When you are not recording an exercise, the screen dims after a short period of inactivity. To activate the screen, press any button.
After a longer period of inactivity, the watch goes into hibernation mode and turns the screen off completely. Any movement reactivates the screen.
3.7. Chest heart rate sensor
You can use a Bluetooth® Smart compatible heart rate sensor, such as the Suunto Smart Sensor, with your Suunto 3/Suunto 3 Fitness to get accurate information about your exercise intensity.
If you use the Suunto Smart Sensor, you also have the added advantage of heart rate memory. The sensor memory function buffers data if the connection to your watch is interrupted, for example, when swimming (no transmission under water).
It also means you can even leave your watch behind after starting a recording. For more information, please refer to the Suunto Smart Sensor User Guide.
See 3.19. Pairing PODs and sensors for instructions on how to pair an HR sensor with your watch.
3.8. Device info
You can check details of your watch software and hardware from the settings under General » About.
3.9. Display theme
To increase the readability of your watch screen while exercising, you can change between light and dark themes.
With the light theme, the display background is light and the numbers dark.
With the dark theme, the contrast is reverse, with the background dark and the numbers light.
The theme is a global setting that you can change in your watch from any of your sport mode options.
To change display theme in sport mode options:
- From the watch face, press the upper right button to scroll to Exercise and press the middle button.
- Go to any sport mode and press the lower right button to open the sport mode options.
- Scroll down to Theme and press the middle button.
- Switch between Light and Dark by pressing the upper right and lower right buttons, and accept with the middle button.
- Scroll back up to exit the sport mode options and start (or exit) the sport mode.
3.10. Do Not Disturb mode
The Do Not Disturb mode is a setting that mutes all sounds and vibrations, making it a very useful option when wearing the watch in, for example, a theater or any environment where you want the watch to operate as usual, but silently.
To turn on/off the Do Not Disturb mode:
-
From the watch face, keep the middle button pressed to open the shortcuts menu.
-
Press the middle button to toggle Do Not Disturb mode on or off.
When Do Not Disturb mode is activated a Do Not Disturb icon is visible in the watch face view.
If you have an alarm set, it sounds as normal and disables Do Not Disturb mode unless you snooze the alarm.
3.11. Feeling
If you are training regularly, following how you feel after each session is an important indicator of your overall physical condition.
There are five degrees of feeling to choose from:
- Poor
- Average
Good - Very good
- Excellent
What these options mean exactly are up to you to decide. The important thing is that you use them consistently.
For each training session, you can record how you felt in the watch directly after stopping the recording by answering the 'How was it?' question.
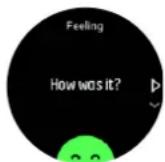
You can skip answering the question by pressing the middle button.
3.12. Fitness level
Good aerobic fitness is important for your overall health, well-being and sports performance.
Your aerobic fitness level is defined as VO2max (maximal oxygen consumption), a widely recognized measure of aerobic endurance capacity. In other words, VO2max shows how well your body can use oxygen. The higher your VO2max, the better you can use oxygen.
The estimation of your fitness level is based on detecting your heart rate response during each recorded running or walking workout. To get your fitness level estimated, record a run or walk with a duration for at least 15 minutes while wearing your Suunto 3/Suunto 3 Fitness with connected GPS or calibrated speed.
If connected GPS is not available, you have to manually calibrate your watch before you can walk/run for 15 minutes and get your fitness level estimated, see 3.22. Speed and distance calibration.
After a successful calibration, your watch is able to provide an estimation of your fitness level for all running and walking workouts.
Your current estimated fitness level is shown in the fitness level display. From the watch face, press the lower right button to scroll to the fitness level display.
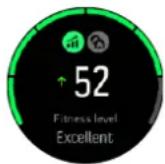
NOTE: If the watch hasn't estimated your fitness level yet, the fitness level display will instruct you further.
Historical data, from recorded running and walking workouts, plays a role in ensuring the accuracy of your VO2max estimate. The more activities you record with your Suunto 3/Suunto 3 Fitness, the more accurate your VO2max estimate becomes.
There are six fitness levels, from low to high: very poor, poor, fair, good, excellent and superior. The value is dependent of your age and gender and the higher value you have, the better your fitness level is.
Press the upper left button to view your estimated fitness age. Fitness age is a metric value that reinterprets your VO2max value in terms of age. Regularly engaging in the right types of physical activity will help you boost your VO2max value and reduce your fitness age.
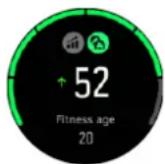
Improvement of VO2max is highly individual and it depends on factors such as age, gender, genetics and training background. If you are already very fit, increasing your fitness level will be slower. If you are just starting to exercise regularly, you may see a quick increase infitness.
3.13. Instant HR
The instant HR display provides a quick snapshot of your heart rate. The display shows your current heart rate.
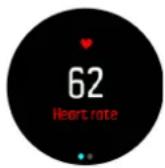
To view instant HR:
- From the watch face view, press the bottom right button to scroll to the instant HR display.
- Press the lower left button to exit the display and return to the watch face view.
3.13.1. Daily HR
The daily HR display provides a 12-hour view of your heart rate. This is a helpful source of information about, for example, your recovery after a hard training session.
The display shows your heart rate over 12 hours as a graph. The graph is plotted using your average heart rate based on 24-minute time slots. In addition, you get your lowest heart rate during the 12-hour period.
Your minimum heart rate from the last 12 hours is a good indicator of your recovery state. If it is higher than normal, you probably are not yet fully recovered from your last exercise.
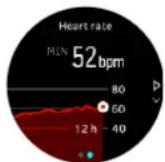
If you record an exercise, the daily HR values reflect the elevated heart rate from your training. But keep in mind that the graph rates are averages. If your heart rate peaks at 200 bpm while exercising, the graph does not show that maximum value, but rather the average from the 24 minutes during which you hit that peak rate.
Before you can see your daily HR graph, you need to activate the daily HR feature. You can toggle the feature on or off from the settings under Activity. If you are in the heart rate display, you can also access the activity settings by keeping the middle button pressed.
With the daily HR feature on, your watch activates the optical heart rate sensor on a regular basis to check your heart rate. This slightly increases battery power consumption.
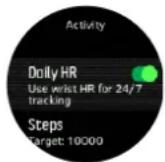
Once activated, your watch needs 24 minutes before it can start displaying daily HR information.
To view daily HR:
- From the watch face view, press the lower right button to scroll to the instant HR display.
- Press the middle button to switch to the daily HR display.
Pressing the the lower right button in the Daily HR display will show how much energy you consume every hour, based on you heart rate.
3.14. Intensity zones
Using intensity zones for exercising helps guide your fitness development. Each intensity zone stresses your body in different ways, leading to different effects on your physical fitness. There are five different zones, numbered 1 (lowest) to 5 (highest), defined as percentage ranges based on your maximum heart rate (max HR) or pace.
It is important to train with intensity in mind and understand how that intensity should feel. And don't forget that, regardless of your planned training, you should always take time to warm up before an exercise.
The five different intensity zones used in Suunto 3/Suunto 3 Fitness are:
Zone 1: Easy
Exercising at zone 1 is relatively easy on your body. When it comes to fitness training, intensity this low is significant mainly in restorative training and improving your basic fitness when you are just beginning to exercise, or after a long break. Everyday exercise – walking, climbing stairs, cycling to work, etc. – is usually performed within this intensity zone.
Zone 2: Moderate
Exercising at zone 2 improves your basic fitness level effectively. Exercising at this intensity feels easy, but workouts with a long duration can have a very high training effect. The majority of cardiovascular conditioning training should be performed within this zone. Improving basic fitness builds a foundation for other exercise and prepares your system for more energetic activity. Long duration workouts at this zone consume a lot of energy, especially from your body's stored fat.
Zone 3: Hard
Exercising at zone 3 begins to be quite energetic and feels like pretty hard going. It will improve your ability to move quickly and economically. In this zone, lactic acid begins to form in your system, but your body is still able to completely flush it out. You should train at this intensity at most a couple of times per week, as it puts your body under a lot of stress.
Zone 4: Very hard
Exercising at zone 4 will prepare your system for competition type events and high speeds. Workouts in this zone can be performed either at a constant speed or as interval training (combinations of shorter training phases with intermittent breaks). High-intensity training develops your fitness level quickly and effectively, but done too often or at too high intensity may lead to overtraining, which may force you to take a long break from your training program.
Zone 5: Maximal
When your heart rate during a workout reaches zone 5, the training will feel extremely hard. Lactic acid will build up in your system much faster than it can be removed, and you will be forced to stop after a few dozen minutes at most. Athletes include these maximum-intensity workouts in their training program in a very controlled manner, fitness enthusiasts do not require them at all.
3.14.1. Heart rate zones
Heart rate zones are defined as percentage ranges based on your maximum heart rate (max HR).
By default, your max HR is calculated using the standard equation: 220 - your age. If you know your exact max HR, you should adjust the default value accordingly.
The 7-day training plan (see 3.2. Adaptive training guidance) is based on the HR zone limits. If the limits or the max HR does not reflect your personal values, the training plan may not optimally guide you to your desired fitness level.
Suunto 3/Suunto 3 Fitness has default and activity-specific HR zones. The default zones can be used for all activities, but for more advanced training, you can use specific HR zones for running and cycling activities.
Set max HR
Set your maximum HR from the settings under Training » Intensity zones » Default zones
- Select the max HR (highest value, bpm) and press the middle button.
- Select your new max HR by pressing the upper right or lower right buttons.
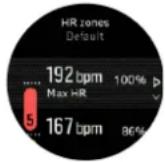
- Press the middle button to select the new max HR.
- Press the lower left button to exit the HR zones view.

NOTE: You can also set your maximum HR from the settings under General » Personal.
Set default HR zones
Set your default HR zones from the settings under Training » Intensity zones » Default zones
- Scroll up/down by pressing the upper right or lower right buttons and press the middle button when the HR zone you want to change is highlighted.
- Select your new HR zone by pressing the upper right or lower right buttons.
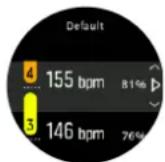
- Press the middle button to select the new HR value.
- Keep the middle button pressed to exit the HR zones view.

NOTE: Selecting Reset in the HR zones view will reset the HR zones to the default value.
Set activity specific HR zones
Set your activity specific HR zones from the settings under Training » Intensity zones » Advanced zones
-
Choose the activity (running or cycling) that you want to edit (by pressing upper right or lower right buttons) and press the middle button when the activity is highlighted.
-
Press the middle button to toggle the HR zones on.
- Scroll up/down by pressing the upper right or lower right buttons and press the middle button when the HR zone you want to change is highlighted.
- Select your new HR zone by pressing the upper right or lower right buttons.
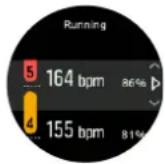
- Press the middle button to select the new HR value.
- Keep the middle button pressed to exit the HR zones view.
3.14.1.1. Using HR zones when exercising
When you record an exercise (see 3.20. Recording an exercise), and have selected heart rate as an intensity target (see 3.20.1. Using targets when exercising), an HR zone gauge, divided into five sections, is shown around the outer edge of the sport mode display (for all sport modes that support HR). The gauge indicates in which HR zone you are currently training by lighting up the corresponding section. The small arrow in the gauge indicates where you are within the zone range.
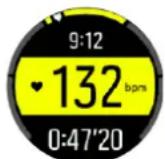
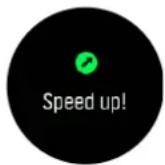
Your watch alerts you when you hit your selected target zone. During your exercise the watch will prompt you to speed up or slow down, if your heart rate is outside the selected target zone.
In addition, there is a dedicated display for HR zones in the sport mode default display. The zone display shows your current HR zone in the middle field and the background color of the gauge also indicates which HR zone you are training in.
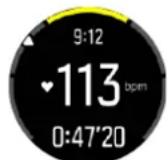
In the exercise summary, you get a breakdown of how much time you have spent in each zone.
3.14.2. Pace zones
Pace zones work just like HR zones but the intensity of your training are based on your pace instead of your heart rate. The pace zones are shown either as metric or imperial value depending on your settings.
Suunto 3/Suunto 3 Fitness has five default pace zones that you can use or you can define your own.
Pace zones are available for running.
Set pace zones
Set your activity specific pace zones from the settings under Training » Intensity zones » Advanced zones
- Choose running and press the middle button.
- Scroll down by pressing the lower right button and press the middle button to toggle the pace zones on.
- Scroll up/down by pressing the upper right or lower right buttons and press the middle button when the pace zone you want to change is highlighted.
- Select your new pace zone by pressing the upper right or lower right buttons.
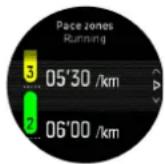
- Press the middle button to select the new pace zone value.
- Keep the middle button pressed to exit the pace zones view.
3.14.2.1. Using pace zones when exercising
When you record an exercise (see 3.20. Recording an exercise), and have selected pace as an intensity target (see 3.20.1. Using targets when exercising) a pace zone gauge, divided into five sections, is viewed. These five section are shown around the outer edge of the sport mode display. The gauge indicates the pace zone you have chosen as an intensity target by lighting up the corresponding section. The small arrow in the gauge indicates where you are within the zone range.
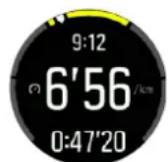
Your watch alerts you when you hit your selected target zone. During your exercise the watch will prompt you to speed up or slow down, if your pace is outside the selected target zone.
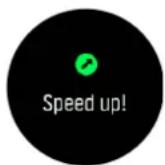
In the exercise summary, you get a breakdown of how much time you have spent in each zone.
3.15. Interval training
Interval workouts are a common form of training consisting of repetitive sets of high and low intensity efforts. With Suunto 3/Suunto 3 Fitness, you can define your own interval training for each sport mode.
When defining your intervals, you have four items to set:
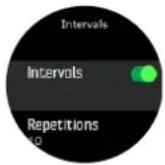
- Intervals: on/off toggle that enables interval training. When you toggle this on, an interval training display is added to your sport mode.
• Repetitions: the number of interval + recovery sets you want to do.
• Interval: the length of your high intensity interval, based on distance or duration.
• Recovery: the length of your rest period between intervals, based on distance or duration.
Keep in mind that if you use distance to define your intervals, you need to be in a sport mode that measures distance. The measurement can be based on mobile assisted GPS, wrist based speed or from a foot or bike POD, for example.
To train with intervals:
- From the launcher, select your sport.
- Before you start an exercise recording, press the lower right button to open the sport mode options.
- Scroll down to Intervals and press the middle button.
- Toggle intervals on and adjust the settings described above.
- Scroll up to Back and confirm with the middle button.
- Press the upper right button until you are back at the start view and start your exercise as normal.
- Press the lower left button to change the view to intervals display and press the upper right button when you are ready to start your interval training.
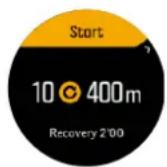
- If you want to stop the interval training before you have completed all your repetitions, keep the middle button pressed to open the sport mode options and toggle off Intervals.
NOTE: While you are in the intervals display, buttons work as normal, for example, pressing the upper right button pauses the exercise recording, not just the interval training.
After you have stopped your exercise recording, interval training is automatically toggled off for that sport mode. The other settings, however, are maintained so you can easily start the same workout the next time you use the sport mode.
3.16. Language and unit system
You can change your watch language and unit system from the settings under General » Language.
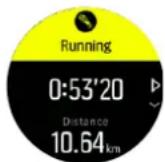
3.17. Logbook
You can access the logbook from the launcher.
Scroll through the log by pressing the upper right or lower right buttons. Press the middle button to open and view the entry of your choice.
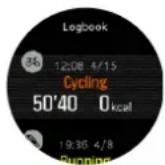
To exit the log, press the lower left button.
3.18. Notifications
If you have paired your watch with the Suunto app, you can recieve notifications such as incoming calls and text messages on your watch.

NOTE: Messages recieved from some apps used for communication might not be
compatible with Suunto 3/Suunto 3 Fitness.
When you pair your watch with the app, notifications are on by default. You can turn them off from the settings under Notifications.
When a notification arrives, a pop-up appears on the watch face.
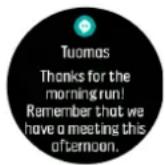
If the message doesn't fit on the screen, press the lower right button to scroll through the full text.
Notification history
If you have unread notifications or missed calls on your mobile device, you can view them on your watch.
From the watch face, press the middle button and then press the lower button to scroll through the notification history.
3.19. Pairing PODs and sensors
Pair your watch with Bluetooth Smart PODs and sensors to collect additional information when recording an exercise.
Suunto 3/Suunto 3 Fitness supports the following types of PODs and sensors:
- Heart rate
- Bike
- Foot

NOTE: You cannot pair anything if airplane mode is on. Turn off airplane mode before pairing. See 3.3. Airplane mode.
To pair a POD or sensor:
- Go to your watch settings and select Connectivity.
- Select Pair sensor to get the list of sensor types.
- Press the lower right button to scroll through the list and select the sensor type with the middle button.
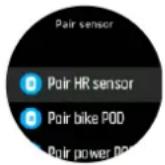
- Follow the instructions in the watch to complete pairing (refer to sensor or POD manual if needed), pressing the middle button to advance to the next step.
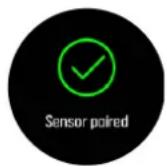
If the POD has required settings, you are prompted to enter a value during the pairing process.
Once the POD or sensor is paired, your watch searches for it as soon as you select a sport mode that uses that sensor type.
You can see the full list of paired devices in your watch from the settings under Connectivity » Paired devices.
From this list, you can remove (unpair) the device if needed. Select the device you want to remove, and tap Forget.
3.19.1. Calibrating foot POD
When you pair a foot POD, your watch automatically calibrates the POD using connect GPS with Suunto app on your mobile phone. We recommend using the automatic calibration, but you can disable it if needed from the POD settings under Connectivity » Paired devices.
For the first calibration with GPS, you should select a sport mode where the foot POD is used, e.g. running. Start the recording and run at a steady pace on a level surface, if possible, for at least 15 minutes.
Run at your normal average pace for the initial calibration, and then stop the exercise recording. The next time you use the foot POD, the calibration is ready.
Your watch automatically re-calibrates the foot POD as needed whenever GPS speed is available.
3.20. Recording an exercise
In addition to daily activity tracking, you can use your watch to record your training sessions or other activities to get detailed feedback and follow your progress.
To record an exercise:
- Put on a heart rate sensor (optional).
- Scroll up to the exercise icon and select with the middle button.
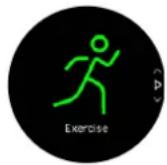
- Press upper right or lower right button to scroll through the sport modes and press the middle button to select the one you want to use.
- Above the start indicator, a set of icons appear, depending on what you are using with the sport mode (such as heart rate and connected GPS). The arrow icon (connected GPS) flash gray while searching and turn green once a signal is found. The heart icon (heart rate) flash gray while searching and when once a signal is found, it turns into a colored heart attached to a belt if you are using a heart rate sensor or a colored heart without the belt if you are using the optical heart rate sensor.
If you are using a heart rate sensor but the icon turns to green only (meaning that the optical heart rate sensor is active), check that the heart rate sensor is paired, see 3.19. Pairing PODs and sensors, and select the sport mode again.
You can wait for each icon to turn green or start the recording as soon as you like by pressing the middle button.
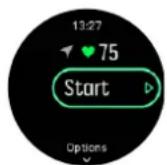
Once the recording is started, the selected heart rate source is locked and cannot be changed during the ongoing training session.
-
While recording, you can switch between displays with the middle button.
-
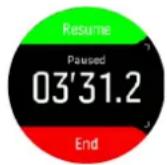
Press the upper right button to pause the recording. Stop and save with the lower right button or resume with the upper right button.
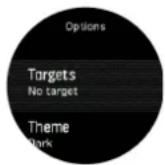
If the sport mode you selected has options, such as setting a duration target, you can adjust them before starting the recording by pressing the lower right button. You can also adjust sport mode options while recording by keeping the middle button pressed.
After you stop the recording, you are asked how you felt. You can answer or skip the question (see 3.11. Feeling). Then you get a summary of the activity that you can browse through with the upper or lower right buttons.
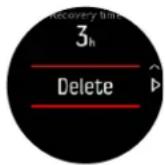
If you made a recording you don't want to keep, you can delete the log entry by scrolling down to Delete and confirm with the middle button. You can also delete logs in the same way from the logbook.
3.20.1. Using targets when exercising
It is possible to set different targets with your Suunto 3/Suunto 3 Fitness when exercising.
If the sport mode you selected has targets as an option, you can adjust them before starting the recording by pressing the lower right button.
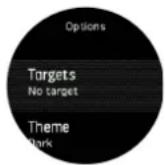
To exercise with general target:
- Before you start an exercise recording, press the lower right button to open the sport mode options.
- Select Targets and press the middle button.
- Toggle General on by pressing the middle button.
- Select Duration or Distance.
- Select your target.
- Press lower left button to go back to the sport mode options.
When you have general targets activated, a progress bar is visible on every data display.
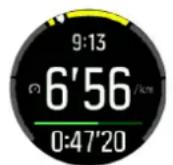
You will also receive a notification when you have reached 50% of your target and when your selected target is fulfilled.
To exercise with intensity target:
- Before you start an exercise recording, press the lower right button to open the sport mode options.
- Select Targets and press the middle button.
- Toggle Intensity on by pressing the middle button.
- Select Heart rate or Pace.
- Select your target zone.
- Press lower left button to go back to the sport mode options
3.20.2. Connected GPS
Suunto 3/Suunto 3 Fitness is able to record speed and distance when running and walking based on your wrist movement, but this must be calibrated to your personal stride length and movement. You can either calibrate manually (see 3.22. Speed and distance calibration), or let the connected GPS do it automatically. The wrist-based speed and distance is automatically calibrated whenever you use connected GPS.
In addition to more accurate speed and distance, with connected GPS you also get a track from your exercise that you can view on a map in the Suunto app.
To use connected GPS:
- Pair your watch with the Suunto app, see 2.1. Suunto app.
- Allow Suunto app to use location services.
- Keep Suunto app active.
- Start a sport mode with GPS.
The GPS icon on your watch blinks grey while searching and turns green when the connection to your phone's GPS is established.
Not all sport modes use GPS. If you don't see the icon, it means the sport mode is for an activity where GPS is not needed, like running on a treadmill or swimming in a pool, or that your Suunto 3/Suunto 3 Fitness is not paired with your phone.
NOTE: Using connected GPS increases battery power consumption on your mobile device. GPS accuracy may vary depending on your mobile device and surrounding conditions. Buildings, for example, can block GPS signals. Please also be aware that GPS data is not available for all mobile operating system versions and that existing support may be withdrawn without notice.
3.20.3. Sport mode power saving options
You can use the following power saving options to extend battery life:
- Display timeout: normally, the display is always on during your exercise. When you turn on the display timeout, the display turns off after 10 seconds to save battery power. Press any button to turn the display back on.
To activate power saving options:
- Before you start an exercise recording, press the lower button to open the sport mode options.
- Scroll down to Power saving and press the middle button.
- Adjust the power saving options as you want and keep the middle button pressed to exit the power saving options.
- Scroll back up to the start view and start your exercise as normal.
NOTE: If the display timeout is on, you can still get mobile notifications as well as sound and vibration alerts.
3.21. Sleep tracking
A good night's sleep is important for a healthy mind and body. You can use your watch to track your sleep and follow how much sleep you are getting and how well you are sleeping.
When you wear your watch to bed, Suunto 3/Suunto 3 Fitness tracks your sleep based on accelerometer data.
To track sleep:
- Go to your watch settings, scroll down to Sleep and press the middle button.
- Toggle on Sleep tracking.
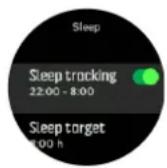
- Set the times for going to bed and waking up according to your normal sleep schedule.
The last step defines your bedtime. Your watch uses that period to determine when you are sleeping (during your bedtime) and reporting all sleep as one session. If you get up for a drink of water during the night, for example, your watch still counts any sleep after that as the same session.
If you fall asleep earlier, or sleep longer, than your set bedtime, your watch will track your sleep as long as a part of your sleep is in within your set bedtime and wake up time.
NOTE: If you go to bed far outside of your bedtime, the watch may not count that to your sleep session.
Once you have enabled sleep tracking, you can also set your sleep target. A typical adult needs between 7 and 9 hours of sleep per day, though your ideal amount of sleep may vary from the norms.
NOTE: All sleep measurements, except for sleep quality and average HR, are based on movement only, so they are estimates that may not reflect your actual sleep habits.
Sleep quality
In addition to duration, your watch can also assess sleep quality by following your heart rate variability during sleep. The variation is an indication of how well your sleep is helping you rest and recover. Sleep quality is shown on scale from 0 to 100 in the sleep summary, with 100 being the best quality.
Measuring heart rate while sleeping
To get sleep quality measured, ensure that Daily HR (see 3.13.1. Daily HR) and sleep tracking are enabled.
Automatic Do Not Disturb mode
You can use the auto Do Not Disturb setting to automatically enable Do Not Disturb mode while you sleep.
Sleep trends
When you wake up, you are greeted with a summary of your sleep. The summary includes the total duration of your sleep, as well as the estimated time you were awake (moving around), when you went to bed, when you woke up and your average HR sleep quality.
You can follow your overall sleep trend with the sleep insight. From the watch face, press the lower right button until you see the Sleep duration display. The first view shows your last sleep compared to your sleep duration target.
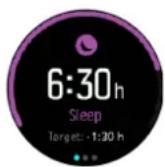
While in the sleep display you can press the middle button once to view your average sleep duration and then your average heart rate while sleeping over the last seven days. The data can be viewed as numbers instead of graphs by pressing the lower right button.

TIP: From the Sleep display, you can keep the middle button pressed to access sleep checking settings and the latest sleep summary.
3.22. Speed and distance calibration
Suunto 3/Suunto 3 Fitness is able to measure running and walking speed and distance using the built-in accelerometer of the watch. The accelerometer needs to be calibrated to your personal stride length and movement. Uncalibrated, the watch cannot correctly measure speed and distanced.
The easiest way to calibrate your watch is to record the first running or walking exercises with connected GPS (See 3.20.2. Connected GPS). When using the GPS of your mobile phone, the speed and distance calibration is done automatically in the background.
To manually calibrate your watch:
- Record a walking and running exercise with a known distance (for example on a track) and for at least 12 minutes, see 3.20. Recording an exercise
- Edit the distance after your exercise in the summary by pressing the middle button when the distance is highlighted.
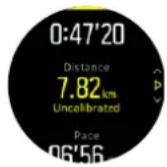
NOTE: To get the most accurate result, manually calibrate your watch separately for both running and walking.
3.23. Sport modes
Your watch comes with a wide range of pre-defined sport modes. The modes are designed for specific activities and purposes, from a casual walk outside to cross country skiing.
When you record an exercise (see 3.20. Recording an exercise), you can scroll up and down to see the short list of sport modes. Select the Other icon at the end of the short list to view the complete list of sport modes.
Each sport mode has a unique set of displays and views.
3.24. Swimming
You can use your Suunto 3/Suunto 3 Fitness for swimming in pools.
When you use a pool swimming sport mode, the watch relies on the pool length to determine distance. You can change the pool length as needed under the sport mode options before you start swimming.
NOTE: The wrist heart rate sensor may not work under water. Use a chest heart rate sensor to get a more reliable HR tracking.
3.25. Stress and recovery
Your resources are a good indication of your body's energy levels and translate into your ability to handle stress and cope with the day's challenges.
Stress and physical activity deplete your resources, while rest and recovery restore them. Good sleep is an essential part of ensuring your body has the resources it needs.
When your resource levels are high, you will likely feel fresh and energetic. Going for a run when your resources are high means you'll probably have a great run, because your body has the energy it needs to adapt and improve as a result.
Being able to track your resources can help you manage and use them wisely. You can also use your resource levels as a guide to identify stress factors, personally effective recovery boosting strategies, and the impact of good nutrition.
Stress and recovery uses optical heart sensor readings and to get those during the day, daily HR must be enabled, see 3.13.1. Daily HR.
Press the lower right button to scroll to the stress and recovery display.
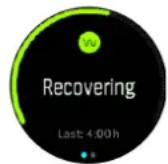
The gauge around this display indicates your overall resource level. If it is green, it means you are recovering. The status and time indicator tell you your current state (active, inactive, recovering or stressed) and for how long you have been in that state. In this screenshot, for example, you have been recovering for the last four hours.
Press the middle button to see a bar chart of your resources over the last 16 hours.
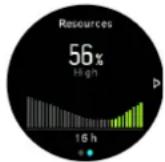
The green bars indicate periods where you have been recovering. The percentage value is an estimate of your current resource level.
3.26. Time and date
You set time and date during the initial startup of your watch.
Adjust time and date from the settings under General » Time/date where you can also change time and date formats.
In addition to the main time, you can use dual time to follow the time at a different location, for example, when you are traveling. Under General » Time/date, tap Dual time to set the time zone by selecting a location.
Once you have paired with Suunto app, your watch gets updated time, date, time zone and daylight-saving time from mobile devices.
Under General » Time/date, tap Auto time update to toggle the feature on and off.
3.26.1. Alarm clock
Your watch has an alarm clock that can sound once or repeat on specific days. Activate the alarm from the settings under Alarms » Alarm clock.
To set an alarm:
-
First select how often you want the alarm to sound. The options are:
-
Once: alarm sounds once in the next 24 hours at the set time
• Weekdays: alarm sounds at the same time Monday thru Friday
• Daily: alarm sounds at the same time every day of the week
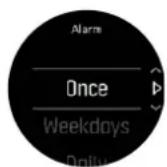
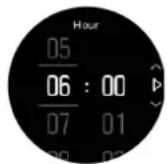
- Set the hour and minutes and then exit the settings.
When the alarm sounds, you can dismiss it to end the alarm, or you can select the snooze option. The snooze time is 10 minutes and can be repeated up to 10 times.
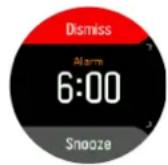
If you let the alarm continue to sound, it will automatically snooze after 30 seconds.
3.27. Timers
Your watch includes a stopwatch and countdown timer for basic time measurement. From the watch face, open the launcher and scroll up until you see the timer icon. Press the middle button to open the timer display.
When you first enter the display, it shows the stopwatch. After that, it remembers whatever you used last, stopwatch or countdown timer.
Press the lower right button to open the Set timer shortcuts menu where you can change the timer settings.
Stopwatch
Start the stopwatch by pressing the middle button.
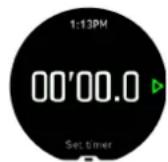
Stop the stopwatch by pressing the middle button. You can resume by pressing the middle button again. Reset by pressing the lower button.
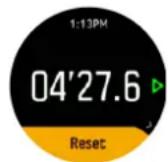
Exit the timer by keeping the middle button pressed.
Countdown timer
In the timer display, press the lower button to open the shortcuts menu. From there you can select a pre-defined countdown time or create custom countdown time.
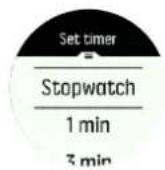
Stop and reset as needed with the middle and lower right buttons.
Exit the timer by keeping the middle button pressed.
3.28. Tones and vibration
Tones and vibration alerts are used for notifications, alarms and other key events and actions. Both can be adjusted from the settings under General » Tones.
Under General » Tones and Vibration, you can select from the following options:
• All on: all events trigger an alert
• All off: no events trigger alerts
- Buttons off: all events other than pushing buttons trigger alerts
Under Alarms, you can select from the following options:
• Vibration: vibration alert
• Tones: sound alert
• Both: both vibration and sound alert
3.29. Training insight
Suunto 3/Suunto 3 Fitness provides an overview of your training activity.
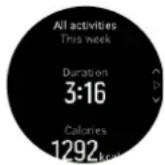
Press the lower right button until you see your training totals for the current week.
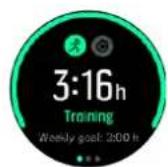
The training goal can not be modified if the adaptive training guidance is on. To turn off the adaptive training guidance and modify your training goal, see 3.2. Adaptive training guidance.
Press the middle button twice to see all performed activities for the current week and your progress for the last 3 weeks.
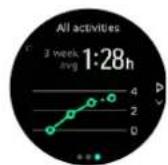
From the totals view you can press the upper left button to toggle between your top three sports.
Press the lower right button to see the summary for the current week. The summary includes total time, distance and calories for the sport chosen in the totals view.
3.30. Recovery time
Recovery time is an estimate in hours of how long your body needs to recuperate after training. The time is based on the duration and intensity of the training session, as well as your overall fatigue.
Recovery time accumulates from all types of exercise. In other words, you accumulate recovery time on long, low intensity training session as well as at high intensity.
The time is cumulative across training sessions, so if you train again before the time has expired, the newly accumulated time is added to the remainder from your previous training session.
To view your recovery time:
- From the watch face, press the lower right button until you see the training and recovery display.
- Press the upper left button to toggle between training and recovery.
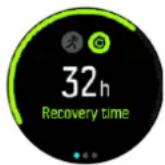
Because recovery time is an estimation only, the accumulated hours count down steadily regardless of your fitness level or other individual factors. If you are very fit, you may recover faster than estimated. On the other hand, if you have the flu, for example, your recovery may be slower than estimated.
3.31. Watch faces
Suunto 3/Suunto 3 Fitness comes with several watch faces to choose from, both digital and analog styles.
To change the watch face:
- Go to the Watch face setting from the launcher or keep the middle button pressed to open the in-context menu. Press the middle button to select Watch face
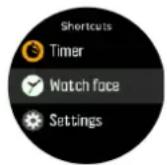
- Use the upper right or lower right buttons to scroll through the watch face previews and select the one you want to use by pressing the middle button.
- Use the upper right or lower right buttons to scroll through the color options and select the one you want to use.
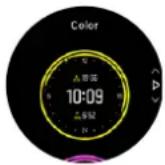
Each watch face has additional information, such as date, total steps or dual time. Press the upper left button to switch between views.
4. Care and support
4.1. Handling guidelines
Handle the unit with care – do not knock or drop it.
Under normal circumstances, the watch does not require servicing. On a regular basis, rinse it with fresh water, mild soap, and carefully clean the housing with a moist, soft cloth or chamois.
Use only original Suunto accessories - damage caused by non-original accessories is not covered by warranty.
4.2. Battery
The duration on a single charge depends on how you use your watch and in what conditions. Low temperatures, for example, reduce the duration of a single charge. In general, the capacity of rechargeable batteries decreases over time.
NOTE: In case of abnormal capacity decrease due to defective battery, Suunto covers battery replacement for one year.
NOTE: This product contains a non-replaceable, rechargeable lithium-ion battery.
When the battery charge level is less than 20% and later 10%, your watch displays a low battery icon. If the charge level gets very low, your watch goes into a low power mode and display a charge icon.
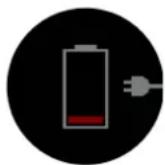
Use the supplied USB cable to charge your watch. Once the battery level is high enough, the watch wakes up from lower power mode.
⚠ WARNING: Only charge you watch using USB adapters that comply with the IEC 60950-1 standard for limited power supply. Using non-compliant adapters may damage your watch or cause a fire.
4.3. Disposal
Please dispose of the device in accordance with local regulations for electronic waste. Do not throw it in the garbage. If you wish, you may return the device to your nearest Suunto dealer.
5. Reference
5.1. Technical specifications
General
- Model: OW175
- Operating temperature: -20^ to +60^ (-5°F to +140°F)
• Storage temperature: -30^ C to +60^ C ( -22^ F to +140^ F)
• Water resistance: 30 m (98 ft)
Battery
• Battery type: rechargeable lithium-ion battery
• Battery life: 10-40 hours, depending on conditions and settings (5 days daily use)
• Battery charging temperature: 0^ C to +35^ C ( +32^ F to +95^ F)

NOTE: This product contains a non-replaceable, rechargeable lithium-ion battery.
Optical sensor
• Optical heart rate by Valencell
Radio transceiver
- Bluetooth Smart compatible
• Frequency band: 2402-2480 MHz
• Maximum output power: <6 dBm
• Range: \~3 m/9.8 ft
Manufacturer
Suunto Oy
The manufacturing date can be determined from your device's serial number. The serial number is always 12 characters long: YYWWXXXXXXXXX.
In the serial number, the first two digits (YY) are the year and the following two digits (WW) are the week within the year when the device was manufactured.
5.2. Compliance
5.2.1. CE
Hereby, Suunto Oy, declares that the radio equipment type OW175 is in compliance with Directive 2014/53/EU. The full text of the EU declaration of conformity is available at the following internet address: www.suunto.com/EUconformity.
5.2.2. FCC compliance
This device complies with Part 15 of the FCC Rules. Operation is subject to the following two conditions:
(1) this device may not cause harmful interference, and
(2) this device must accept any interference received, including interference that may cause undesired operation. This product has been tested to comply with FCC standards and is intended for home or office use.
Changes or modifications not expressly approved by Suunto could void your authority to operate this device under FCC regulations.
NOTE: This equipment has been tested and found to comply with the limits for a Class B digital device, pursuant to part 15 of the FCC Rules. These limits are designed to provide reasonable protection against harmful interference in a residential installation. This equipment generates, uses and can radiate radio frequency energy and, if not installed and used in accordance with the instructions, may cause harmful interference to radio communications. However, there is no guarantee that interference will not occur in a particular installation. If this equipment does cause harmful interference to radio or television reception, which can be determined by turning the equipment off and on, the user is encouraged to try to correct the interference by one or more of the following measures:
• Reorient or relocate the receiving antenna.
- Increase the separation between the equipment and receiver.
- Connect the equipment into an outlet on a circuit different from that to which the receiver is connected.
- Consult the dealer or an experienced radio/TV technician for help.
5.2.3. IC
This device complies with Industry Canada licence-exempt RSS standard(s). Operation is subject to the following two conditions:
(1) this device may not cause interference, and
(2) this device must accept any interference, including interference that may cause undesired operation of the device.
5.2.4. NOM-121-SCT1-2009
The operation of this equipment is subject to the following two conditions: (1) it is possible that this equipment or device may not cause harmful interference, and (2) this equipment or device must accept any interference, including interference that may cause undesired operation of the equipment or device.
5.2.5. KC
Suunto 3/Suunto 3 Fitness, its logos, and other Suunto brand trademarks and made names are registered or unregistered trademarks of Suunto Oy. All rights are reserved.
5.4. Patent notice
This product is protected by patents and pending patent applications and their corresponding national rights. For a list of the current patents, visit:
www.suunto.com/patents
www.valencell.com/patents
Additional patent applications have been filed.
5.5. International Limited Warranty
Suunto warrants that during the Warranty Period Suunto or a Suunto Authorized Service Center (hereinafter Service Center) will, at its sole discretion, remedy defects in materials or workmanship free of charge either by a) repairing, or b) replacing, or c) refunding, subject to the terms and conditions of this International Limited Warranty. This International Limited Warranty is valid and enforceable regardless of the country of purchase. The International Limited Warranty does not affect your legal rights, granted under mandatory national law applicable to the sale of consumer goods.
Warranty Period
The International Limited Warranty Period starts at the date of original retail purchase.
The Warranty Period is two (2) years for Products and Dive wireless transmitters unless otherwise specified.
The Warranty Period is one (1) year for accessories including but not limited to wireless sensors and transmitters, chargers, cables, rechargeable batteries, straps, bracelets and hoses.
For all Suunto Spartan watches purchased in 2016 the Warranty Period has been extended to three (3) years.
The Warranty Period is five (5) years for failures attributable to the depth measurement (pressure) sensor on Suunto Dive Computers.
Exclusions and Limitations
This International Limited Warranty does not cover:
-
a. normal wear and tear such as scratches, abrasions, or alteration of the color and/or material of non-metallic straps, b) defects caused by rough handling, or c) defects or damage resulting from use contrary to intended or recommended use, improper care, negligence, and accidents such as dropping or crushing;
-
printed materials and packaging;
-
defects or alleged defects caused by use with any product, accessory, software and/or service not manufactured or supplied by Suunto;
-
non-rechargeable batteries.
Suunto does not warrant that the operation of the Product or accessory will be uninterrupted or error free, or that the Product or accessory will work with any hardware or software provided by a third party.
This International Limited Warranty is not enforceable if the Product or accessory:
- has been opened beyond intended use;
- has been repaired using unauthorized spare parts; modified or repaired by unauthorized Service Center;
- serial number has been removed, altered or made illegible in any way, as determined at the sole discretion of Suunto; or
- has been exposed to chemicals including but not limited to sunscreen and mosquito repellents.
Access to Suunto warranty service
You must provide proof of purchase to access Suunto warranty service. You must also register your product online at www.suunto.com/register to receive international warranty services globally. For instructions how to obtain warranty service, visit www.suunto.com/warranty, contact your local authorized Suunto retailer, or call Suunto Contact Center.
Limitation of Liability
To the maximum extent permitted by applicable mandatory laws, this International Limited Warranty is your sole and exclusive remedy and is in lieu of all other warranties, expressed or implied. Suunto shall not be liable for special, incidental, punitive or consequential damages, including but not limited to loss of anticipated benefits, loss of data, loss of use, cost of capital, cost of any substitute equipment or facilities, claims of third parties, damage to property resulting from the purchase or use of the item or arising from breach of the warranty, breach of contract, negligence, strict tort, or any legal or equitable theory, even if Suunto knew of the likelihood of such damages. Suunto shall not be liable for delay in rendering warranty service.
5.6. Copyright
© Suunto Oy 01/2018. All rights reserved. Suunto, Suunto product names, their logos and other Suunto brand trademarks and names are registered or unregistered trademarks of Suunto Oy. This document and its contents are proprietary to Suunto Oy and are intended solely for the use of clients to obtain knowledge and information regarding the operation of Suunto products. Its contents shall not be used or distributed for any other purpose and/or otherwise communicated, disclosed or reproduced without the prior written consent of Suunto Oy. While we have taken great care to ensure that information contained in this documentation is both comprehensive and accurate, no warranty of accuracy is expressed or implied. This document content is subject to change at any time without notice. The latest version of this documentation can be downloaded at www.suunto.com.
SUUNTO CUSTOMER SUPPORT
Suunto is a registered trademark of Suunto Oy. All Rights reserved.
- SAFETY
- Types of safety precautions
- Safety precautions
- Getting started
- Suunto app
- SuuntoLink
- Buttons
- Normal use:
- Upper left button
- Upper right button
- Middle button
- Lower left button
- Lower right button
- Optical heart rate
- Icons
- Adjusting settings
- Features
- Activity tracking
- Activity goals
- Adaptive training guidance
- Real-time guidance
- Airplane mode
- Backlight
- Bluetooth connectivity
- Button lock and screen dimming
- Chest heart rate sensor
- Device info
- Display theme
- Do Not Disturb mode
- Feeling
- Fitness level
- Instant HR
- Daily HR
- Intensity zones
- Zone 1: Easy
- Zone 2: Moderate
- Zone 3: Hard
- Zone 4: Very hard
- Zone 5: Maximal
- Heart rate zones
- Set max HR
- Set default HR zones
- Set activity specific HR zones
- Using HR zones when exercising
- Pace zones
- Set pace zones
- Set your activity specific pace zones from the settings under Training » Intensity zones » Advanced zones
- Using pace zones when exercising
- Interval training
- Language and unit system
- Logbook
- Notifications
- Notification history
- Pairing PODs and sensors
- Calibrating foot POD
- Recording an exercise
- Using targets when exercising
- Connected GPS
- Sport mode power saving options
- Sleep tracking
- Sleep quality
- Measuring heart rate while sleeping
- Automatic Do Not Disturb mode
- Sleep trends
- Speed and distance calibration
- Sport modes
- Swimming
- Stress and recovery
- Time and date
- Alarm clock
- Timers
- Stopwatch
- Countdown timer
- Tones and vibration
- Training insight
- Recovery time
- Watch faces
- Care and support
- Handling guidelines
- Battery
- Disposal
- Reference
- Technical specifications
- General
- Battery
- Optical sensor
- Radio transceiver
- Manufacturer
- Compliance
- CE
- FCC compliance
- IC
- NOM-121-SCT1-2009
- KC
- Patent notice
- International Limited Warranty
- Warranty Period
- Exclusions and Limitations
- Access to Suunto warranty service
- Limitation of Liability
- Copyright
- SUUNTO CUSTOMER SUPPORT
Brand : SUUNTO
Model : 3
Category : Smartwatch