
WN3000RPv3 - Wi-Fi repeater NETGEAR - Free user manual and instructions
Find the device manual for free WN3000RPv3 NETGEAR in PDF.


| Product Type | WiFi Range Extender |
| Brand | NETGEAR |
| Model | WN3000RPv3 |
| Dimensions | 67 x 55 x 34 mm (2.64 x 2.17 x 1.34 in) |
| Weight | 102-110 g (3.60-3.88 oz) depending on power plug type |
| Power Supply | 100-240V AC, 0.1A, 50-60 Hz |
| Wireless Standards | IEEE 802.11n/g/b |
| Maximum Data Rate | Up to 300 Mbps |
| Frequency Bands | Dual-band (2.4 GHz and 5 GHz) |
| Security | WPA/WPA2, WPS (Wi-Fi Protected Setup) |
| Interface | 1 x 10/100BASE-T Ethernet port (RJ-45) |
| LEDs | Power, Router Link, Client Link, WPS |
| Buttons | WPS, Power On/Off, Factory Reset |
| Operation Modes | Extender mode, Access Point mode |
| Setup Methods | WPS push button, Web browser (www.mywifiext.net) |
| Management | Web-based interface, firmware update via upload |
| Compliance | FCC Part 15 Class B |
| Operating Temperature | 0 to 40°C (32 to 140°F) |
| Operating Humidity | 90% maximum relative humidity, noncondensing |
| Maintenance | Backup/restore configuration, firmware update, factory reset |
Frequently Asked Questions - WN3000RPv3 NETGEAR
User questions about WN3000RPv3 NETGEAR
0 question about this device. Answer the ones you know or ask your own.
Ask a new question about this device
Download the instructions for your Wi-Fi repeater in PDF format for free! Find your manual WN3000RPv3 - NETGEAR and take your electronic device back in hand. On this page are published all the documents necessary for the use of your device. WN3000RPv3 by NETGEAR.
USER MANUAL WN3000RPv3 NETGEAR
natural_image
White NETGEAR wireless router with two antennas and control buttons (no visible text or symbols on the device body)August 2015
202-11409-02
350 East Plumeria Drive
San Jose, CA 95134
USA

natural_image
Abstract geometric composition with overlapping colored triangles (no text or symbols)Support
Thank you for selecting NETGEAR products.
After installing your device, locate the serial number on the label of your product and use it to register your product at https://my.netgear.com. You must register your product before you can use NETGEAR telephone support. NETGEAR recommends registering your product through the NETGEAR website.
For product updates and web support, visit http://support.netgear.com.
Phone (US & Canada only): 1-888-NETGEAR.
Phone (Other Countries): Check the list of phone numbers at http://support.netgear.com/general/contact/default.aspx.
Compliance
For regulatory compliance information, visit http://www.netgear.com/about/regulatory.
See the regulatory compliance document before connecting the power supply.
Trademarks
© NETGEAR, Inc., NETGEAR and the NETGEAR Logo are trademarks of NETGEAR, Inc. Any non-NETGEAR trademarks are used for reference purposes only.
Table of Contents
Chapter 1 Overview
Meet Your Extender 6
Front Panel....6
Extender Side and Bottom Panels....7
When to Use Your Extender.... 7
How the Extender Works.... 7
Chapter 2 Get Started
Use the Extender in Extender Mode....10
Place the Extender and Apply Power....10
Connect to an Existing WiFi Network 10
Connect an Ethernet-Enabled Device 14
Use the Extender in Access Point Mode....15
Log In to the Extender After Installation 16
Run Smart Setup Installation 17
Chapter 3 Extender Network Settings
View Connected Devices 19
View WiFi Settings....19
Change the WiFi Network Name....20
Turn Off the SSID Broadcast to Create a Hidden Network ..... 21
Disable or Enable the WiFi Radio....22
Change the WiFi Speed....23
Customize the Extender's WiFi Coverage Area. 24
Use WPS to Add a Computer to the Extender's WiFi Network. 25
Use WPS With the Push Button Method 25
Use WPS With the PIN Method. 26
Deny Access to a Computer or WiFi Device 27
Set Up an Access Schedule....28
Set Up the Extender to Use a Static IP Address 29
Use the Extender With MAC Filtering or Access Control....30
Chapter 4 Maintain and Monitor the Extender
Change the Extender User Name and Password....33
Turn Password Protection Off and On 34
Recover a Forgotten User Name or Password....34
Automatically Adjust for Daylight Saving Time. 35
Manually Set the Extender Clock 35
Back Up and Manage the Extender Configuration 36
Back Up the Configuration Settings 36
Restore the Configuration Settings 37
Return the Extender to Its Factory Default Settings 38
Update the Firmware 40
Restart the Extender Remotely.... 41
Chapter 5 FAQs and Troubleshooting
FAQs 43
Cannot Connect to the Extender 43
Cannot Join a WiFi Network and Receive an Error Message 44
Appendix A Supplemental Information
Factory Default Settings 46
Technical Specifications 46
The WiFi Range Extender boosts your existing network range and speed, delivering dual-band WiFi. You can also use the extender in access point mode as a WiFi access point and create a new WiFi hotspot by using a wired Ethernet connection.
This chapter covers the following topics:
- Meet Your Extender
- When to Use Your Extender
• How the Extender Works
Note: For more information about the topics covered in this manual, visit the support website at support.netgear.com.
Note: Firmware updates with new features and bug fixes are made available from time to time on downloadcenter.netgear.com. Some products can regularly check the site and download new firmware, or you can check for and download new firmware manually.
Meet Your Extender
Before you install your extender, familiarize yourself with its LEDs, buttons, and port.
Front Panel
The LEDs are located on the front panel.
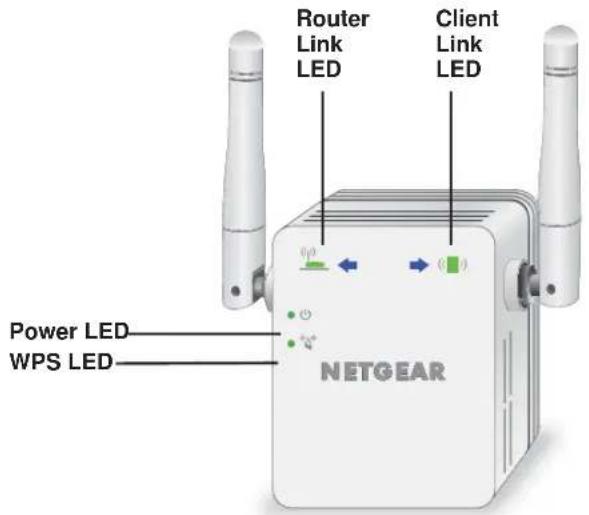
Figure 1. Extender front panel
Table 1. LEDs
| LED Description | |
Router Link LED | The connection between the extender and the router or access point.Solid green. Best connection.Solid amber. Good connection.Solid red. Poor connection.Off. No connection. |
Client Link LED | The connection between the extender and a computer or WiFi device.Solid green. Best connection.Solid amber. Good connection.Solid red. Poor connection.Off. No connection. |
Power LED | Solid amber. The extender is booting.Solid green. The extender is powered on.Off. The extender is powered off. |
WPS LED | Solid green. WiFi security is enabled (WPA or WPA2).Blinking green. A WPS connection is in progress.Off. WiFi security is not enabled. |
Extender Side and Bottom Panels
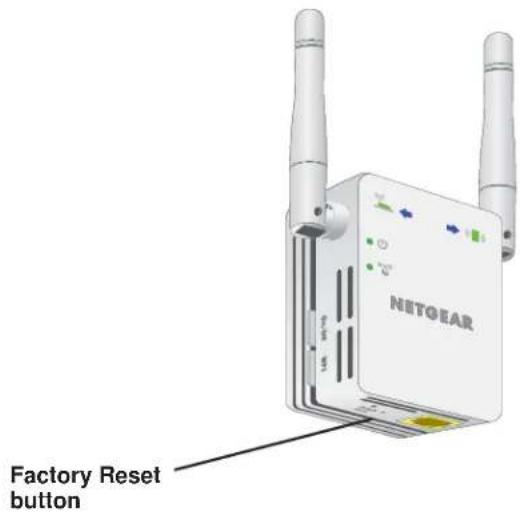
Buttons are located on the side panel. The Factory Reset button and an Ethernet port are located on the bottom panel.
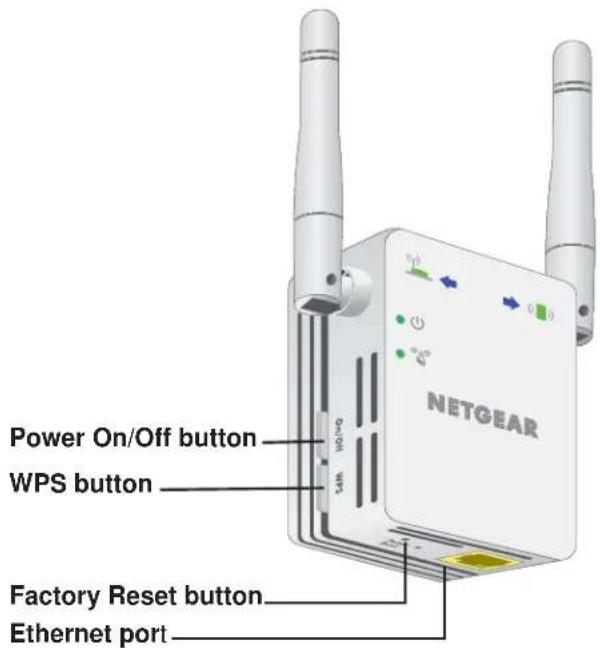
Figure 2. Extender side and bottom panels
When to Use Your Extender
We recommend that you connect through the extender network only when the WiFi device is in a “dead zone” where connection from the existing network is poor or nonexistent. Data traffic routed through the extender is inherently slower than traffic routed directly from the network.
How the Extender Works
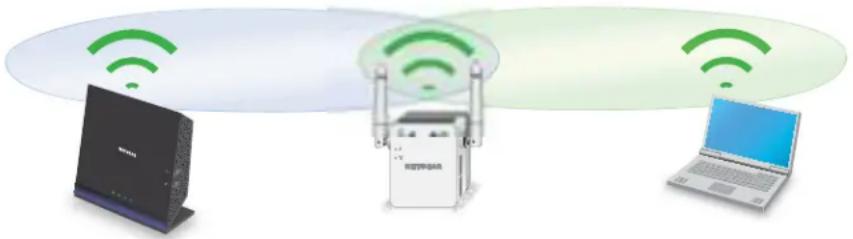
The extender works like a bridge between a WiFi router (or a WiFi access point) and a WiFi device outside the range of the WiFi router. The extender performs two main jobs:
• The extender connects to a working WiFi network.
When the extender connects over WiFi to an existing network, it functions as a network client, similar to how a WiFi device connects to a network.
• The extender acts as an access point for WiFi devices.
The extender broadcasts its own WiFi network that WiFi devices can join. In its role as an access point, the extender performs tasks that WiFi routers do, such as broadcasting its network name (SSID).
The extender must do each of these jobs so that both ends of the bridge are in place.
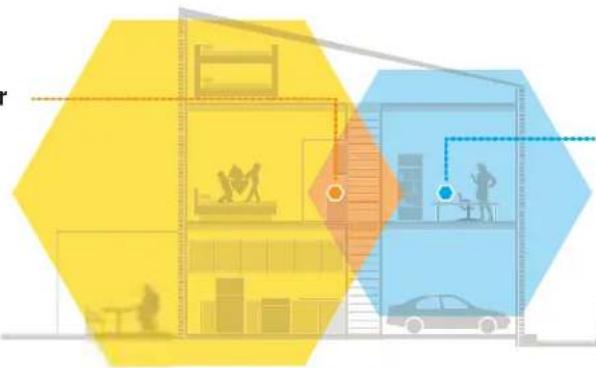
WiFi Range Extender Boosts the range of your existing WiFi and creates a stronger signal in hard-to-reach areas.
natural_image
Illustration of a modern building with silhouettes and architectural elements, no visible text or symbolsExisting WiFi Sometimes your router does not provide the WiFi coverage that you need.
Figure 3. Range extender in a home
Get Started
2
This chapter covers the following topics:
- Use the Extender in Extender Mode
- Use the Extender in Access Point Mode
- Log In to the Extender After Installation
- Run Smart Setup Installation
Use the Extender in Extender Mode
In extender mode, the extender repeats signals from an existing WiFi router or access point. Place the extender, apply power, and connect it to your WiFi network.
Note: You can also use the extender as a WiFi access point and create a new WiFi hotspot by using a wired Ethernet connection. See Use the Extender in Access Point Mode on page 15.
Place the Extender and Apply Power
To place the extender and apply power:
-
Place your extender in the same room as your WiFi router.
Proximity to the WiFi router is required only during the initial setup process. -
Plug the extender into an electrical outlet.
-
Wait for the Power LED ⚙ to light green.
If the Power LED does not light, press the Power On/Off button on the side of the extender.
Connect to an Existing WiFi Network
To extend the range of your WiFi network, you must connect the extender to your existing WiFi network. You can do this in one of two ways:
- Connect with WPS. For more information, see Connect With WPS on page 10.
- Connect with web browser setup. For more information, see Connect With Web Browser Setup on page 12.
Connect With WPS
Wi-Fi Protected Setup (WPS) lets you join a secure WiFi network without typing the network name and password.
Note: WPS does not support WEP network security. If you are using WEP security, follow the instructions in Connect With Web Browser Setup on page 12.
To use WPS to connect the extender to your WiFi router:
- Press the WPS button on the side panel of the extender.
The Power LED blinks.
- Within two minutes, press the WPS button on your router or access point.
When the extender connects to your existing WiFi network, the WPS LED on the extender lights solid green and the Router Link LED lights. If the Router Link LED does not light, try again. If it still does not light, see Connect With Web Browser Setup on page 12.
- Unplug the extender and move it to a new location that is about halfway between your router and the area with a poor router WiFi signal.
natural_image
Illustration of three wireless devices: a router, a Wi-Fi router, and a laptop, all connected with green signal waves (no text or symbols)The location that you choose must be within the range of your existing WiFi router network.
- Plug the extender into an electrical outlet and wait for the Power LED to light green.
If the Power LED does not light, press the Power On/Off button on the side of the extender.
-
Use the Router Link LED 📄 on the front panel to help you choose a spot where the extender-to-router connection is optimal.
-
If the Router Link LED doesn't light amber or green, plug the extender into an outlet closer to the router and try again.
Keep moving the extender to outlets closer to the router until the Router Link LED lights amber or green.
- On your computer or WiFi device, find and connect to the new extended WiFi network.
The extender's new WiFi network name is based on your existing WiFi network name, with _EXT at the end of the name.
For example:
- Existing W iFi network name. MyNetworkName
- New extended network name. MyNetworkName_EXT
Use the same WiFi password that you use for your WiFi router.
- Test the extended WiFi range by moving your computer or WiFi device to the area with a poor router WiFi signal:
a. Leave your computer or WiFi device in the area with a poor router WiFi signal and return to the extender.
b. Check the Client Link LED (☐) on the extender:
- If the Client Link LED is solid green or amber, your extended WiFi network reaches the area with a poor router WiFi signal and your network setup is complete.
- If the Client Link LED is red, your extended WiFi network does not reach the area with a poor router WiFi signal.
You must move the computer or WiFi device closer to the extender until the Client Link LED turns solid green or amber.
Connect With Web Browser Setup
You can use a web browser to log in to the extender and set up its WiFi connection to your existing WiFi router.
To connect with web browser setup:
- Use a WiFi network manager on a computer or WiFi device to find and connect to the extender WiFi network NETGEAR_EXT.
After the connection with the computer or WiFi device is established, the Client Link LED lights. - Launch web browser.
-
Enter www .mywifiext.net in the address field of the browser.
The New Extender Setup page displays. -
Click the NEW EXTENDER SETUP button.
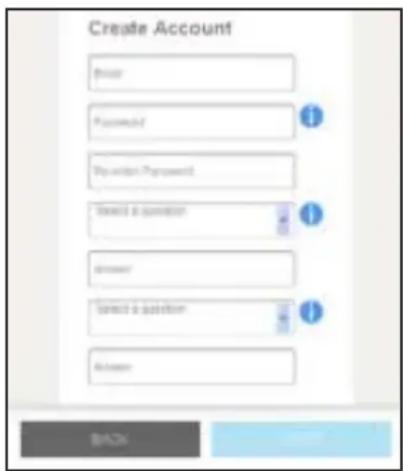
- Complete the fields and click the NEXT button.
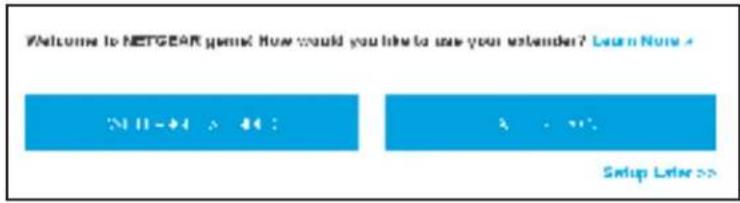
- Click the WIFI RANGE EXTENDER button.
The extender searches for WiFi networks in your area and displays a list.
-
Select a WiFi network to extend and click the NEXT button.
-
In the Password (Network Key) field, type the existing WiFi network password (also called passphrase or security key) and click the NEXT button.
-
Set the network name (SSID) and password for your new extender WiFi network and click the NEXT button.
Wait for the page to display a list of available extended WiFi networks, which might take up to one minute.
- Use a WiFi network manager on the computer or WiFi device to connect to the new extended WiFi network.
You must connect your computer or WiFi device before you click the Continue button.
- Click the Continue button.
A message displays confirming that the extender is connected and ready.
- Click the Next button.
The registration page displays.
- Complete the registration fields and click the Finish button to complete the setup.
If you do not want to register your extender, click the Skip Registration link. Note that you must register your extender before you can use NETGEAR telephone support.
The Status page displays.
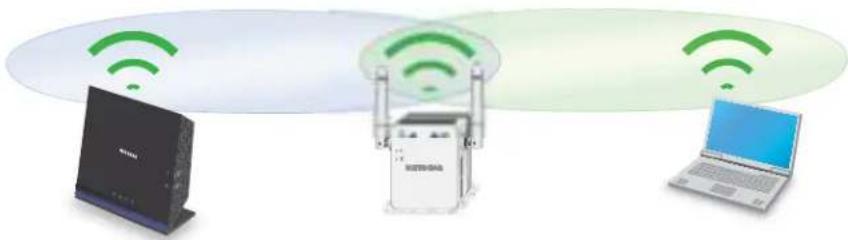
- Unplug the extender and move it to a new location that is about halfway between your router and the area with a poor router WiFi signal.
natural_image
Illustration of wireless network devices including a router, Wi-Fi unit, and laptop with green signal waves (no text or symbols)The location that you choose must be within the range of your existing WiFi router network.
- Plug the extender into an electrical outlet and wait for the Power LED ● ⏻ to light green.
If the Power LED does not light, press the Power On/Off button.
-
Use the Router Link LED 📁 to help you choose a spot where the extender-to-router connection is optimal.
-
If the Router Link LED doesn't light amber or green, plug the extender into an outlet closer to the router and try again.
Keep moving the extender to outlets closer to the router until the Router Link LED lights amber or green.
-
Reconnect your computer or WiFi device to the new extended WiFi network.
-
Test the extended WiFi range by moving your computer or WiFi device to the area with a poor router WiFi signal:
a. Leave your computer or WiFi device in the area with a poor router WiFi signal and return to the extender.
b. Check the Client Link LED (☐) on the extender:
- If the Client Link LED is solid green or amber, your extended WiFi network reaches the area with a poor router WiFi signal and your network setup is complete.
- If the Client Link LED is red, your extended WiFi network does not reach the area with a poor router WiFi signal.
You must move the computer or WiFi device closer to the extender until the Client Link LED turns solid green or amber.
Connect an Ethernet-Enabled Device
After the extender is connected to your existing WiFi network, you can connect a wired device to the extender using an Ethernet cable. The device can then access your existing network through the extender's WiFi connection.
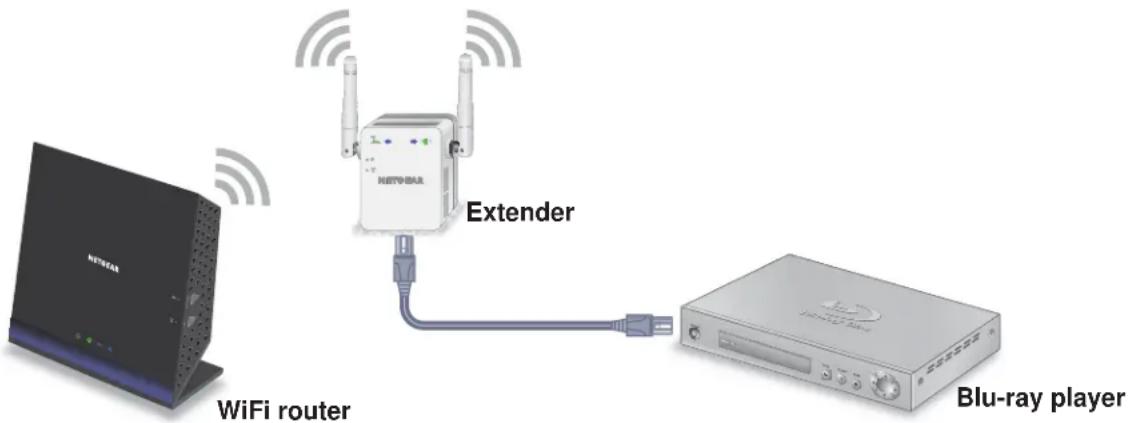
Figure 4. You can connect a device to the extender's Ethernet port
Use the Extender in Access Point Mode
You can use the extender as a WiFi access point, which creates a new WiFi hotspot by using a wired Ethernet connection.
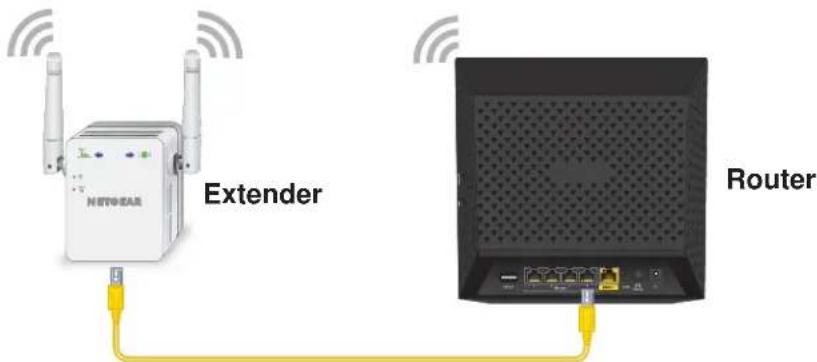
Figure 5. Extender in access point mode
To use the extender in access point mode:
- Use an Ethernet cable to connect the Ethernet port on the extender to a router Ethernet LAN port or a remote Ethernet LAN jack with LAN access.
- Plug the extender into an electrical outlet and wait for the Power LED to light green.
- If the Power LED does not light, press the Power On/Off button on the extender.
- Use a WiFi network manager on a computer or WiFi device to find and connect to the NETGEAR_EXT (SSID) WiFi network.
After the connection with the computer or WiFi device is established, the Client Link LED (☐) lights.
- Launch a web browser and enter www .mywifiext.net in the address field.
The New Extender Setup page displays.
- Click the NEW EXTENDER SETUP button.
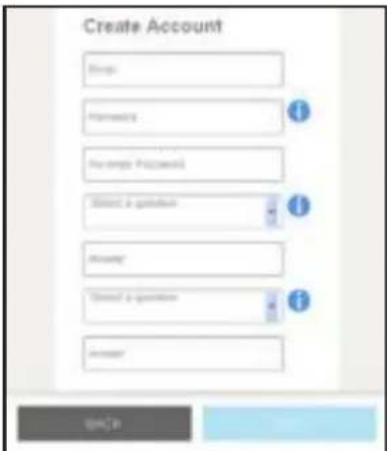
- Complete the fields and click the NEXT button.
Welcome to NETGEAR game! How would you like to use your extender? Learn Note >


Setup Order 22
- Click the ACCESS POINT button.
The extender checks for an Internet connection.
- Set the network name (SSID), security option, and password for the access point network and click the NEXT button.
Your settings are applied and the extender is ready to be used as an access point. - Use a WiFi network manager on the computer or WiFi device to connect to the new access point network.
- Click the Continue button.
A page displays that says you successfully created an access point.
- Click the Next button.
The registration page displays.
- Follow the onscreen instructions to register your extender.
Log In to the Extender After Installation
After installation, you can log in to the extender to view or change the extender's settings.
To log in to the extender:
- Use a WiFi network manager on a computer or WiFi device to find and connect to the new extended WiFi network.
After the connection with the computer or WiFi device is established, the Client Link LED lights.
- Launch a web browser.
- Enter www .mywifiext.net in the address field of the browser.
A login window opens.
- Enter your email address and password and click the LOG IN button.
The Status page displays.
Run Smart Setup Installation
You can use Smart Setup to change the extender settings. This is an easy way to connect the extender to a different router or to change the extender WiFi network name (SSID) or WiFi password.
To run Smart Setup:
- Use a WiFi network manager on a computer or WiFi device to find and connect to the new extended WiFi network. After the connection with the computer or WiFi device is established, the Client Link LED lights solid green.
- Launch a web browser.
- Enter www.mywifiext.net in the address field of the browser.
A login window opens.
- Enter your email address and password and click the LOG IN button.
The Status page displays.
- Click the SMART SETUP button.
The Welcome page displays.
- Click the WIFI RANGE EXTENDER button.
The extender scans for WiFi signals and finds the WiFi networks in your area and displays a list.
- Select your WiFi network and click the NEXT button.
- When prompted, enter the password to connect to your WiFi network and click the NEXT button.
A message displays when the extender connects to your existing router's WiFi network.
- Click the NEXT button.
The extender applies your settings to its WiFi network names and WiFi passwords. During this change, the extender disconnects you from its WiFi network.
- When prompted, connect your WiFi devices to the extender WiFi network and click the CONTINUE button.
The registration page displays.
- Complete the registration fields and click the FINISH button to complete the setup.
If you do not want to register your extender, click the Skip Registration link. Note that you must register your extender before you can use NETGEAR telephone support.
The Status page displays.
Extender Network Settings
3
This chapter covers the following topics:
• View Connected Devices
• View WiFi Settings
- Change the WiFi Network Name
- Turn Off the SSID Broadcast to Create a Hidden Network
- Disable or Enable the WiFi Radio
- Change the WiFi Speed
- Customize the Extender's WiFi Coverage Area
- Use WPS to Add a Computer to the Extender's WiFi Network
- Deny Access to a Computer or WiFi Device
- Set Up an Access Schedule
- Set Up the Extender to Use a Static IP Address
- Use the Extender With MAC Filtering or Access Control
View Connected Devices
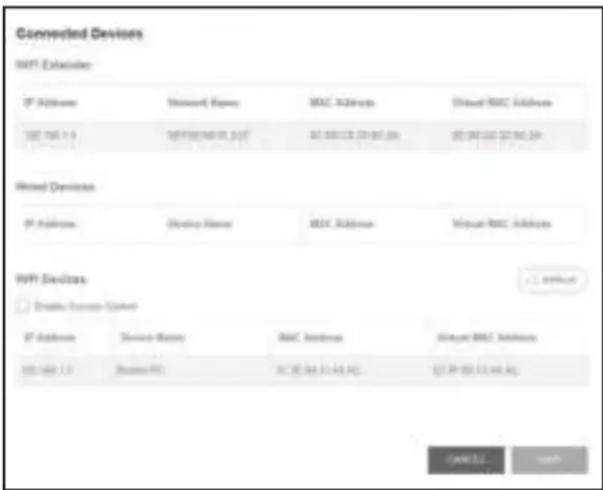
You can view a list of devices that are connected to the extender network.
To view connected devices:
- On a computer or WiFi device that is connected to the extender network, launch a web browser.
- In the address field of your browser, enter www.mywifiext.net.
- When prompted, enter your email address and password.
The Status page displays.
- Click the Menu icon ≡.
The extender menu displays.
- Select Settings > Connected Devices.
View WiFi Settings
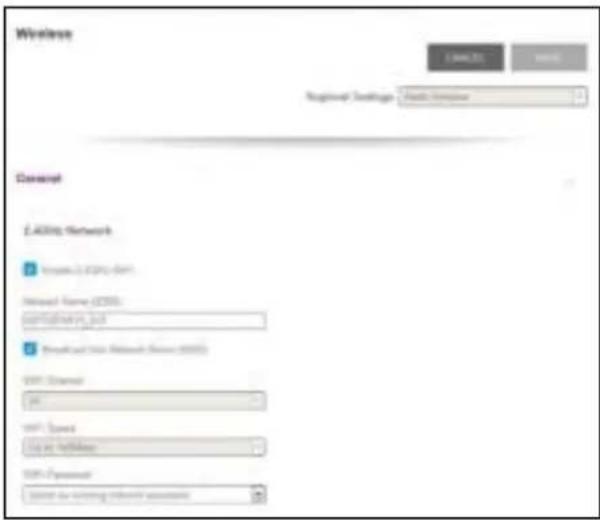
To view the WiFi settings:
- On a computer or WiFi device that is connected to the extender network, launch a web browser.
- In the address field of your browser, enter www.mywifiext.net.
- When prompted, enter your email address and password.
The Status page displays.
- Click the Menu icon ≡.
The extender menu displays.
5. Select Settings > WiFi.
Change the WiFi Network Name
To change the WiFi network name:
- On a computer or WiFi device that is connected to the extender network, launch a web browser.
- In the address field of your browser, enter www.mywifiext.net.
- When prompted, enter your email address and password.
The Status page displays.
- Click the Menu icon

The extender menu displays.
- Select Settings > WiFi.
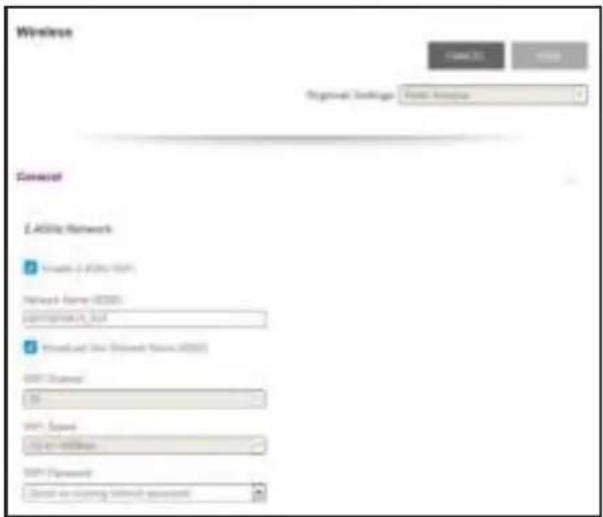
-
In the Network Name (SSID) field, type a network name.
-
Click the SA VE button.
Your settings are saved.
Turn Off the SSID Broadcast to Create a Hidden Network
By default, the extender broadcasts its WiFi signal so that its WiFi network names (SSIDs) are easy for you to find and connect to from your computer, tablet, or smartphone. You can turn off the SSID broadcast to create a hidden WiFi network. To connect to a hidden network you must know its SSID and password and manually enter them.
To turn off the SSID broadcast to create a hidden network:
-
On a computer or WiFi device that is connected to the extender network, launch a web browser.
-
In the address field of your browser, enter www.mywifiext.net.
-
When prompted, enter your email address and password.
The Status page displays.
- Click the Menu icon
The extender menu displays.
- Select Settings > WiFi.
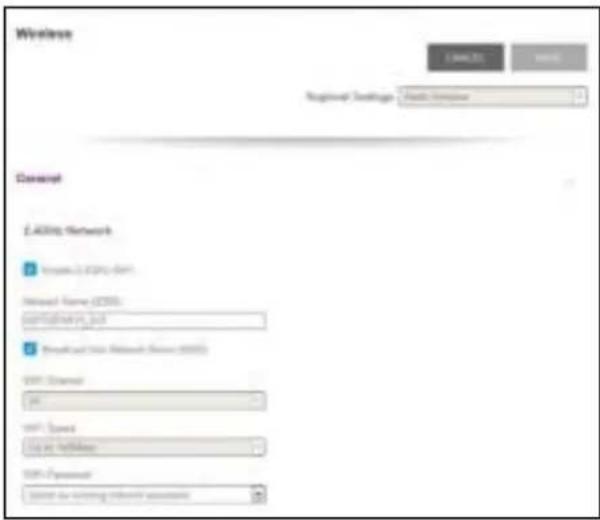
- Clear the Broadcast the Network name (SSID) check box.
- Click the SA VE button.
Your settings are saved.
Disable or Enable the WiFi Radio
By default, the extender's WiFi radio broadcasts signals in the 2.4 GHz band. If you disable the WiFi radio, then no one can connect with WiFi to the extender.
To disable or enable the WiFi radio:
- On a computer or WiFi device that is connected to the extender network, launch a web browser.
- In the address field of your browser, enter www.mywifiext.net.
-
When prompted, enter your email address and password.
The Status page displays. -
Click the Menu icon ≡.
The extender menu displays.
- Select Settings > WiFi.
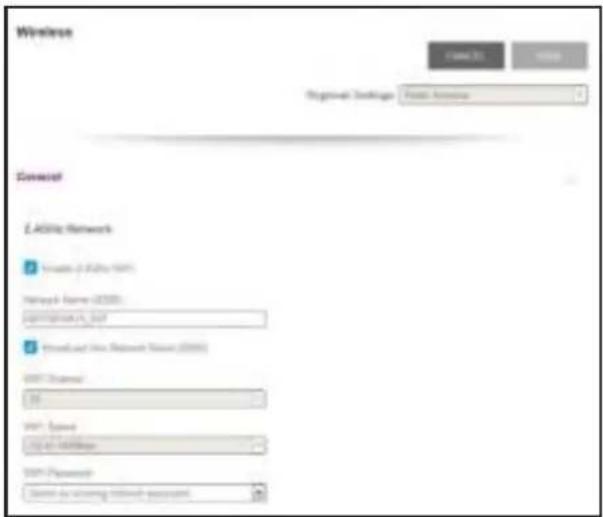
- Select or clear the Enable 2.4 GHz WiFi check box.
- Click the SA VE button.
Your settings are saved.
Change the WiFi Speed
To change the WiFi speed:
- On a computer or WiFi device that is connected to the extender network, launch a web browser.
- In the address field of your browser, enter www.mywifiext.net.
- When prompted, enter your email address and password.
The Status page displays.
- Click the Menu icon

The extender menu displays.
- Select Settings > WiFi.
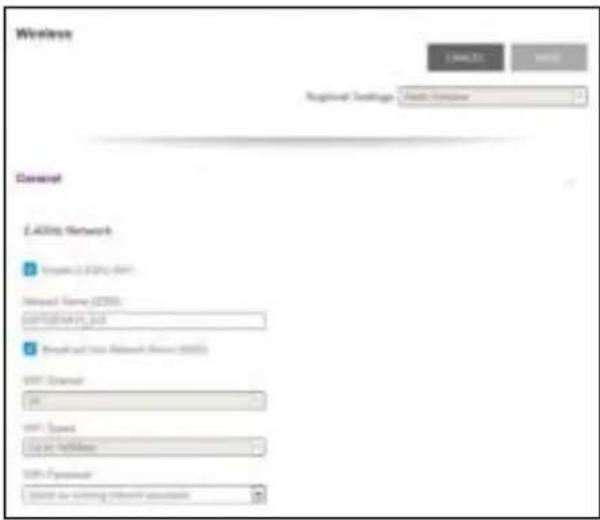
-
In the WiFi Speed menu, select a speed.
-
Click the SA VE button.
Your settings are saved.
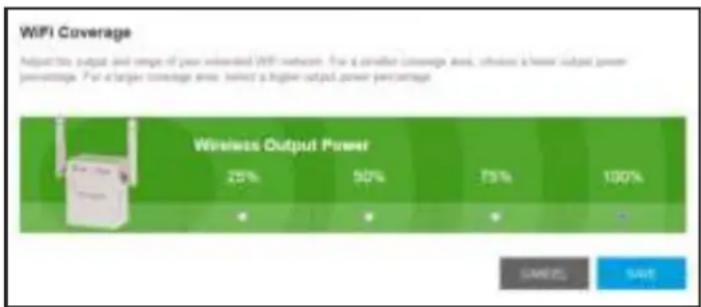
Customize the Extender's WiFi Coverage Area
By default, the extender uses its maximum WiFi coverage area. You can select a smaller coverage area, which uses less electrical power.
To customize the extender's WiFi coverage area:
- On a computer or WiFi device that is connected to the extender network, launch a web browser.
- In the address field of your browser, enter www.mywifiext.net.
-
When prompted, enter your email address and password.
The Status page displays. -
Click the Menu icon ≡.
The extender menu displays.
5. Select Do More > WiFi Coverage.
bar
WiFi Coverage Adjust this output and range of your wireless WIFI network. For a smaller coverage area, wireless & lower output power percentage. For a larger coverage area, select a higher output power percentage. Wireless Output Power | Coverage Area | Percentage (%) | | :--- | :--- | | 25 | 25 | | 50 | 50 | | 75 | 75 | | 100 | 100 | SALES SAVE- Select a radio button for the output power.
- Click the SA VE button.
Your settings are saved.
Use WPS to Add a Computer to the Extender's WiFi Network
WPS (WiFi Protected Setup) lets you connect a computer or WiFi device to the extender's network without entering the WiFi network passphrase or key. Instead, you use a WPS button or enter a PIN to connect.
If you use the button method, the WiFi device that you are trying to connect must include a physical push button or a software button. If you use the PIN method, you must know the PIN of the WiFi device that you are trying to connect.
WPS supports WPA and WPA2 WiFi security. If your extender network is open (no WiFi security is set), connecting with WPS automatically sets WPA + WPA2 WiFi security on the extender network and generates a random passphrase. You can view this passphrase on the WiFi Settings page (for more information, see View WiFi Settings on page 19).
For information about using WPS to connect the extender to a WiFi network during setup, see Use the Extender in Access Point Mode on page 15.
Use WPS With the Push Button Method
For you to use the push button method to connect a WiFi device to the extender's WiFi network, the WiFi device that you are trying to connect must include a physical WPS button or an onscreen WPS button that you can click.
To use WPS to add a computer or WiFi device to the extender's WiFi network:
- On a computer or WiFi device that is connected to the extender network, launch a web browser.
- In the address field of your browser, enter www.mywifiext.net.
- When prompted, enter your email address and password.
The Status page displays.
- Click the Menu icon ≡.
The extender menu displays.
- Select Settings > Do More > Connect Devices (WPS).
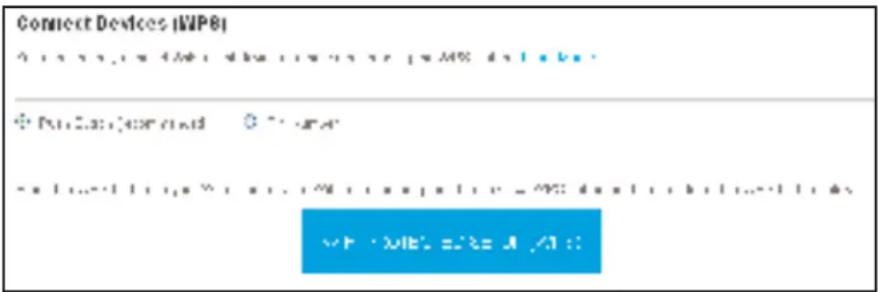
- Leave the Push Button (recommended) radio button selected.
- Click the WIFI PROTECTED SETUP (WPS) button.
For two minutes, the extender attempts to add the computer or WiFi device to its WiFi network.
- Within two minutes, go to the computer or WiFi device and press or click its WPS button.
- To verify that the WiFi device is connected to the extender's WiFi network, select Settings > Connected Devices.
The WiFi device displays onscreen.
Use WPS With the PIN Method
To use the PIN method to connect a WiFi device to the extender's WiFi network, you must know the PIN of the WiFi device that you are trying to connect.
To add a computer or WiFi device to the extender's WiFi network:
- On a computer or WiFi device that is connected to the extender network, launch a web browser.
- In the address field of your browser, enter www.mywifiext.net.
- When prompted, enter your email address and password.
The Status page displays.
- Click the Menu icon ≡.
The extender menu displays.
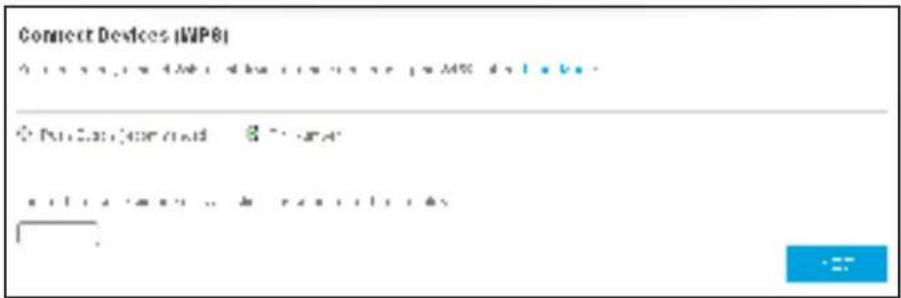
- Select Settings > Do More > Connect Devices (WPS).
The Connect Devices (WPS) page displays.
- Select the PIN Number radio button.
-
Type the PIN of the WiFi device in the field.
-
Click the NEXT button.
For four minutes, the extender attempts to find the computer or WiFi device.
-
Within four minutes, go to the WiFi device and use its WPS software to join the WiFi network.
-
To verify that the WiFi device is connected to the extender's WiFi network, select Settings > Connected Devices.
The WiFi device displays onscreen.
Deny Access to a Computer or WiFi Device
By default, access control is disabled so that it is easy for you to connect to the extender's WiFi networks.
You can deny network access to specific computers and WiFi devices based on their MAC addresses. Each network device is assigned a MAC address, which is a unique 12-character physical address, containing the hexadecimal characters 0–9, a–f, or A–F only, and separated by colons (for example, 00:09:AB:CD:EF:01). Typically, the MAC address is on the label of the WiFi device. If you cannot access the label, you can display the MAC address using the network configuration utilities of the computer. You might also find the MAC addresses on the Connected Devices page (see View Connected Devices on page 19).
To use WiFi access control to deny access:
-
On a computer or WiFi device that is connected to the extender network, launch a web browser.
-
In the address field of your browser, enter www.mywifiext.net.
-
When prompted, enter your email address and password.
The Status page displays.
- Click the Menu icon
The extender menu displays.
- Select Settings > Connected Devices.
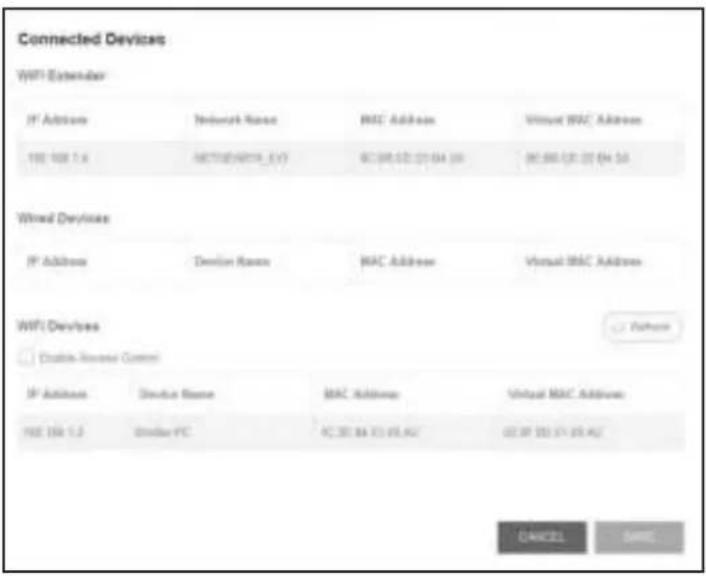
- In the WiFi Devices section, select the Enable Access Control check box.
The WiFi devices table displays the names and MAC addresses of WiFi devices that are connected to the extender.
-
Select the Deny check box for the device.
-
Click the SA VE button.
Your settings are saved and that device cannot connect to the extender's WiFi network.
Set Up an Access Schedule
You can control access to all users during specific periods of the day. You can set up an access schedule that prevents Internet access through the extender network based on the times that you set.
To set up an access schedule:
-
On a computer or WiFi device that is connected to the extender network, launch a web browser.
-
In the address field of your browser, enter www.mywifiext.net.
-
When prompted, enter your email address and password.
The Status page displays.
- Click the Menu icon

The extender menu displays.
5. Select Do More > Access Schedule.
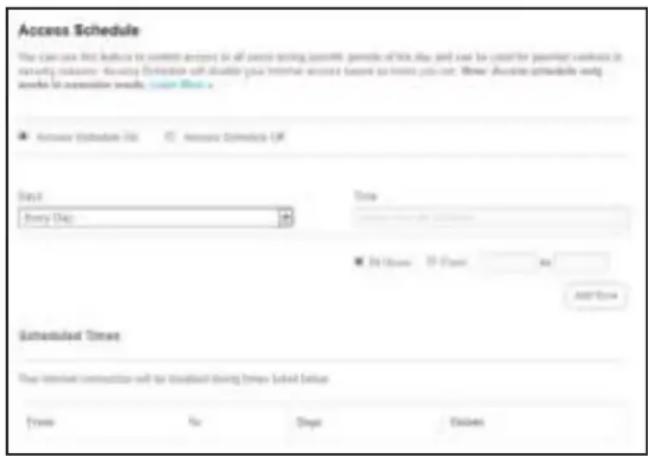
- Select the Access Schedule On radio button.
The page adjusts.
- In the Days menu and the Time menu, select the days and time when you want to disable Internet access.
- Click the Add Time button to add the time that you specified to the Scheduled Times table.
- Click the SA VE button.
Your settings are saved.
Set Up the Extender to Use a Static IP Address
The extender comes set up to use a dynamic IP address, which is the correct setting for most home networks.
To set up the extender to use a static IP address:
- On a computer or WiFi device that is connected to the extender network, launch a web browser.
- In the address field of your browser, enter www.mywifiext.net.
- When prompted, enter your email address and password.
The Status page displays.
- Click the Menu icon ≡.
The extender menu displays.
- Select Settings > WiFi Settings.
The WiFi Settings page displays.
- Scroll down and click the IP Address heading to expand the IP address settings.
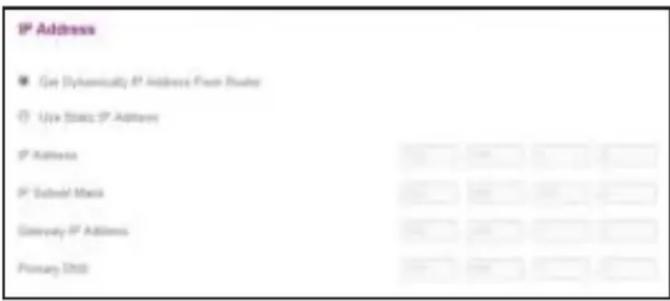
By default, the Get Dynamically IP Address from Router radio button is selected.
- Select the Use Static IP Address radio button.
- Complete the fields to specify the IP network IP addresses.
- Click the SA VE button.
Your settings are saved.
Use the Extender With MAC Filtering or Access Control
When the WiFi device connects through the extender to your router, the MAC address of the WiFi device shown on the router is translated to another MAC address. If your router's MAC filter, WiFi access control, or ACL is enabled, the WiFi device connects to the extender but cannot get an IP address from the extender and cannot access the Internet. To allow the WiFi device to receive an IP address from the extender and access the Internet, you must provide the translated MAC address to the router.
To add a translated MAC address to your router:
- Log in to your router and disable the MAC filter, WiFi access control, or ACL.
For more information about how to disable your router's MAC filter, WiFi access control, or ACL, see your router's documentation.
- Power on the extender and connect all of your WiFi devices to the extender.
- Make sure that the Link Rate LED remains lit.
- Log in to your extender:
a. Launch a web browser.
b. Enter www .mywifiext.net in the address field of the browser.
c. When prompted, enter your email address and password.
The Status page displays.
- Click the Menu icon ≡.
The extender menu displays.
- Select Settings > Connected Devices.
The Connected Devices section displays the MAC addresses and virtual MAC addresses for computer and WiFi devices that are connected to the extender network.
- On the router, add the extender's virtual MAC address and all the virtual MAC addresses connected to the extender network to your router's MAC filter table.
- Enable the router's MAC filter, WiFi access control, or ACL.
Maintain and Monitor the Extender
4
This chapter covers the following topics:
- Change the Extender User Name and Password
- Turn Password Protection Off and On
• Recover a Forgotten User Name or Password
• Automatically Adjust for Daylight Saving Time - Manually Set the Extender Clock
- Back Up and Manage the Extender Configuration
- Back Up the Configuration Settings
- Return the Extender to Its Factory Default Settings
- Update the Firmware
- Restart the Extender Remotely
Change the Extender User Name and Password
You can change the user name and password used to log in to the extender.
To add an extender user:
- On a computer or WiFi device that is connected to the extender network, launch a web browser.
- In the address field of your browser, enter www.mywifiext.net.
- When prompted, enter your email address and password.
The Status page displays.
- Click the Menu icon ≡.
The extender menu displays.
- Select Settings > Password.
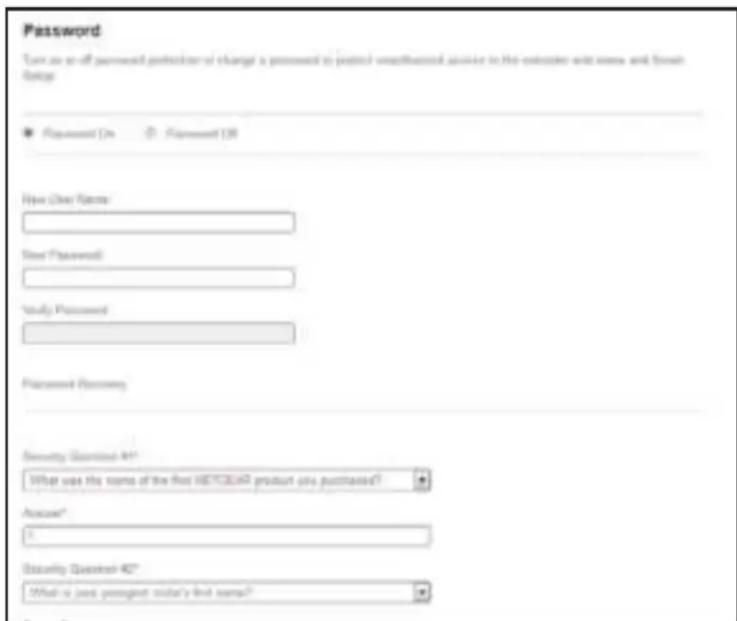
- In the New User Name field, type an email address.
- Type the password in the New Password field and the Verify Password field.
- Select questions and enter the answers.
- Click the SA VE button.
Your settings are saved.
Turn Password Protection Off and On
We recommend that you leave password protection on to help keep your network secure. You can turn password protection off and on.
To turn password protection off or on:
- On a computer or WiFi device that is connected to the extender network, launch a web browser.
- In the address field of your browser, enter www.mywifiext.net.
-
When prompted, enter your email address and password.
The Status page displays. -
Click the Menu icon ≡.
The extender menu displays.
- Select Settings > Password.
The Password Settings page displays.
-
Select the Password Off or Password On radio button.
-
Click the SA VE button.
Your settings are saved.
Recover a Forgotten User Name or Password
If you changed the password to access the extender and set up password recovery, you can recover your password if you lose it.
To recover your password to access the extender:
-
On a computer or WiFi device that is connected to the extender network, launch a web browser.
-
In the address field of your browser, enter www.mywifiext.net.
You are prompted to enter a user name and password.
- Click the Username & Password Help link.
A page displays requesting the answers to your security questions.
If you forgot the answers to your security questions, restore the extender's factory settings and set up your login credentials again. See Return the Extender to Its Factory Default Settings on page 38 and Chapter 2, Get Started.
-
Enter the saved answers to your security questions.
-
Click the NEXT button.
Your email and password are displayed.
- Click the BACK button.
A login window opens.
- Log in to the extender.
Automatically Adjust for Daylight Saving Time
To set up the extender to automatically adjust for daylight saving time:
- On a computer or WiFi device that is connected to the extender network, launch a web browser.
- In the address field of your browser, enter www.mywifiext.net.
-
When prompted, enter your email address and password.
The Status page displays. -
Click the Menu icon ≡.
The extender menu displays.
- Select Do More > Access Schedule.
The Access Schedule page displays.
-
Select the Automatically adjust for daylight savings time check box.
-
Click the SA VE button.
Your settings are saved.
Manually Set the Extender Clock
To manually set the extender clock:
- On a computer or WiFi device that is connected to the extender network, launch a web browser.
- In the address field of your browser, enter www.mywifiext.net.
-
When prompted, enter your email address and password.
The Status page displays. -
Click the Menu icon ≡.
The extender menu displays.
- Select Do More > Access Schedule.
The Access Schedule page displays.
-
In the Extender Clock section, select the Manual radio button.
-
To specify the time, complete the fields or click the Sync Clock button to synchronize the extender time to the time on the computer or WiFi device that you are using.
-
Click the SAVE button.
Your settings are saved.
Back Up and Manage the Extender Configuration
When the extender works correctly after initial setup, we recommend that you back up the extender configuration settings. After you have back up the settings, if you change the extender configuration settings but are not content with the new settings, you can restore the extender configuration to the backed-up settings.
Back Up the Configuration Settings
You can back up the configuration file of the extender.
To back up the extender configuration settings:
- On a computer or WiFi device that is connected to the extender network, launch a web browser.
- In the address field of your browser, enter www.mywifiext.net.
- When prompted, enter your email address and password.
The Status page displays.
- Click the Menu icon ≡.
The extender menu displays.
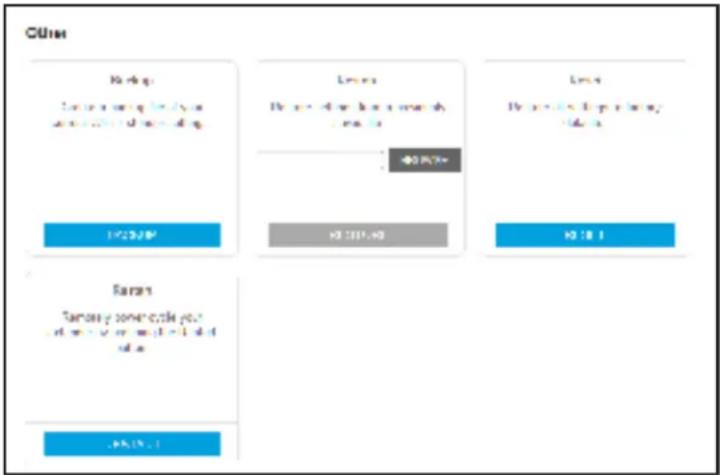
- Select Settings > Other.
flowchart
graph TD
    A["Rating"] --> B{Review}
    B -->|Yes| C["Approval"]
    B -->|No| D["End"]
    C --> E{Approval}
    E -->|Yes| F["Approval"]
    E -->|No| G["End"]
    F --> H["Final Approval"]
- Click the BACKUP button.
Your browser extracts the configuration file from the extender. By default, the name of the backup file is NETGEAR_WN3000RPv3.cfg.
- If your browser is not set up to save downloaded files automatically, locate where you want to save the file.
Restore the Configuration Settings
You can restore the configuration file of the extender to a previously saved configuration file.
To restore the extender configuration settings:
- On a computer or WiFi device that is connected to the extender network, launch a web browser.
- In the address field of your browser, enter www.mywifiext.net.
-
When prompted, enter your email address and password.
The Status page displays. -
Click the Menu icon
The extender menu displays.
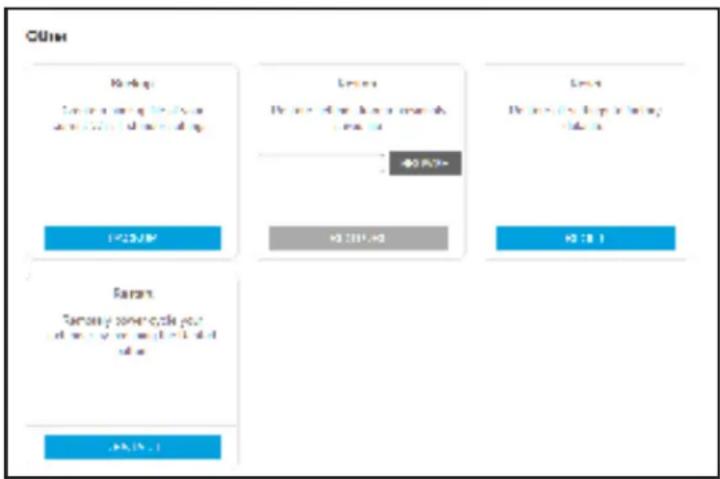
- Select Settings > Other.
flowchart
graph TD
    A["Mark"] --> B{Loss}
    B -->|Yes| C["Loss"]
    B -->|No| D["Loss"]
    C --> E["Loss"]
    D --> F["Loss"]
    E --> G["Outcome 1"]
    F --> H["Outcome 2"]
- Click the BROWSE button.
- Locate and select the previously saved backup file.
By default, the name of the backup file is NETGEAR_WN3000RPv3.cfg.

CAUTION:
After you click the RESTORE button, do not try to go online, turn off the extender, shut down the computer, or do anything else to the extender until it finishes restarting.
- Click the REST ORE button.
A confirmation pop-up window opens.
- Confirm your decision.
The extender configuration is restored and the extender restarts. This process takes about one minute.
Return the Extender to Its Factory Default Settings
Under some circumstances (for example, if you lose track of the changes that you made to the extender settings), you might want to erase the configuration and reset the extender to factory default settings.
To reset the extender to factory default settings, you can either use the Factory Reset button on the rear panel or log in to the extender and reset it.
For a list of factory default settings, see Factory Default Settings on page 46.
To use the Factory Reset button to return the extender to factory default settings:

CAUTION:
This process erases any settings that you configured in the extender.
- Insert a straightened paper clip into the hole of the Factory Reset button and hold it for about seven seconds.
- Release the button.

CAUTION:
Do not try to go online, turn off the extender, shut down the computer, or do anything else to the extender until it finishes restarting.
The extender resets and restarts. This process takes about one minute.
To log in to the extender and reset the extender's to factory settings:

CAUTION:
This process erases any settings that you configured in the extender.
- On a computer or WiFi device that is connected to the extender network, launch a web browser.
- In the address field of your browser, enter www.mywifiext.net.
-
When prompted, enter your email address and password.
The Status page displays. -
Click the Menu icon

The extender menu displays.
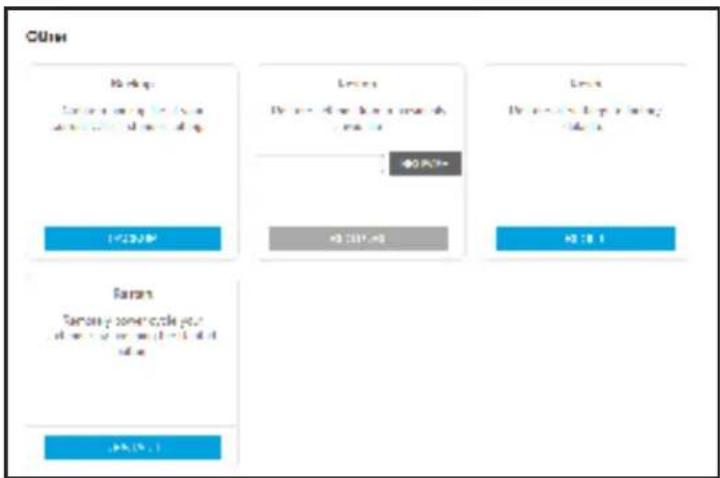
- Select Settings > Other.
flowchart
graph TD
    A["No. 40 q\nLess: 100% less than 50\ndless: 50% less than 25\ndless: 25% less than 10\ndless: 10% less than 50\ndless: 50% less than 25\ndless: 50% less than 10\ndless: 50% less than 25\ndless: 50% less than 10\ndless: 50% less than 25\ndless: 50% less than 10\ndless: 50% less than 10\ndless: 50% less than 25\ndless: 50% less than 10\ndless: 50% less than 10\ndless: 50% less than 25\ndless: 50% less than 10\ndless: 50% less than 10\ndless: 50% more than 25\ndless: 25% more than 10\ndless: 10% more than 25\ndless: 25% more than 10\ndless: 10% more than 10\ndless: 25% more than 25\ndless: 25% more than 10\ndless: 25% more than 10\ndless: 25% more than 25\ndless: 25% more than 10\ndless: 25% more than 10\ndless: 25% more than 25\ndless: 25% more than 10\ndless: 25% more than 10\ndless: 25% more than 25\ndles: <37.797, <37.797, <37.797, <37.797, <37.797, <37.797, <37.797, <37.797, <37.797, <37.797, <37.797, <37.797, <37.797, <37, <37.797, <37.797, <37.797, <37.797, <37.797, <37.797, <37.797, <37.797, <37.797, <37.797, <37.797, <37.796"]
    B["Yes"] --> C["No.40 q\nLess: 100% less than 50\ndless: 50% less than 25\ndless: 25% less than 10\ndless: 10% less than 25\ndless: <37.797, <37.797, <37.797, <37.797, <37.797, <37.797, <37.797, <37.797, <37.797, <37.798, <37.798, <37.798, <37.798, <37.816"]
    C --> D[No.40 q\nLess: >40 q\nLess: >40 q\nLess: >40 q\nLess: >40 q\nLess: >40 q\nLess: >40 q\nLess: >40 q\nLess: >40 q\nLess: >40 q\nLess: >40 q\nLess: >40 q\nLess: >40 q\nLess: >40 q\nLess: >40 q\nLess: >41 q\nLess: >41 q\nLess: >41 q\nLess: >41 q\nLess: >41 q\nLess: >41 q\nLess: >41 q\nLess: >41 q\nLess: >41 q\nLess: >41 q\nLess: >41 q\nLess: >41 q\nLess: >41 q\nLess: >41 q\nLess: >41 q
    D --> E[No.40 q\nLess: >40 q\nLess: >40 q\nLess: >40 q\nLess: >40 q\nLess: >40 q\nLess: >40 q\nLess: >40 q\nLess: >40 q\nLess: >40 q\nLess: >40 q\nLess: >40 q\nLess: >40 q\nLess: >41 q\nLess: >40 q\nLess: >40 q\nLess: >40 q\nLess: >40 q\nLess: >40 q\nLess: >40 q\nLess: >40 q\nLess: >41 q\nLess: >41 q\nLess: >41 q\nLess: >41 q\nLess: >41 q\nLess: >41 q\nLess: >41 q<nl>    E --> F[No.40 q\nLess: >40 q\nLess: >40 q\nLess: >40 q\nLess: >40 q\nLess: >40 q\nLess: >40 q\nLess: >40 q\nLess: >41 q\nLess: >41 q\nLess: >41 q\nLess: >41 q\nLess: >41 q\nLess: >41 q\nLess: >4<fcel>CUIM

CAUTION:
After you click the RESET button, do not try to go online, turn off the extender, shut down the computer, or do anything else to the extender until it finishes restarting.
- Click the RESET button.
A confirmation pop-up window opens.
- Confirm your decision.
The extender returns to its factory settings and restarts. This process takes about one minute.
Update the Firmware
Unless you changed the settings in the Firmware Update page previously, the extender is set up to check for new firmware automatically at login.
To check manually for new firmware and, if available, update the firmware:
- On a computer or WiFi device that is connected to the extender network, launch a web browser.
- In the address field of your browser, enter www.mywifiext.net.
-
When prompted, enter your email address and password.
The Status page displays. -
Click the Menu icon ≡.
The extender menu displays.
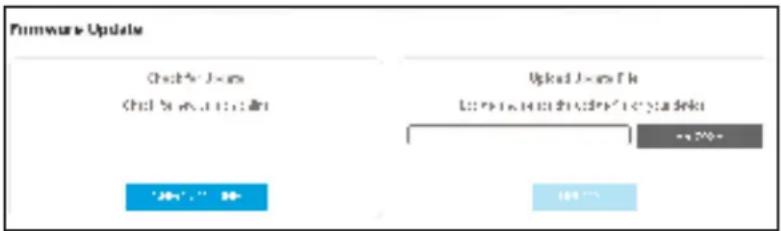
- Select Settings > Firmware Update.
-
Click the CHECK ONLINE button.
-
If new firmware is available, follow the onscreen prompts to download it onto your computer.
Note: You might need to unzip the firmware file.
-
Click the BROWSE button.
-
Locate and select the new firmware file.
The firmware file name ends with a .chk extension.

CAUTION:
After you click the UPLOAD button, do not try to go online, turn off the extender, shut down the computer, or do anything else to the extender until it finishes restarting.
- Click the UPLOAD button.
The firmware update starts and the extender restarts. The firmware update process takes a couple of minutes.
Restart the Extender Remotely
You can log in to the extender and restart it. When the extender restarts, all computers and WiFi devices that are connected to its WiFi network are automatically disconnected.
To restart the extender remotely:
- On a computer or WiFi device that is connected to the extender network, launch a web browser.
- In the address field of your browser, enter www.mywifiext.net.
-
When prompted, enter your email address and password.
The Status page displays. -
Click the Menu icon ≡.
The extender menu displays.
- Select Settings > Other.
The Other Settings page displays.
- Click the REST ART button and click the Yes button to confirm.
The extender restarts, which takes about two minutes.
FAQs and Troubleshooting
5
This chapter covers the following topics:
- FAQs
- Cannot Connect to the Extender
- Cannot Join a WiFi Network and Receive an Error Message
FAQs
This section provides answers for difficulties you might experience with the extender.
The web browser setup keeps asking me for my network password (passphrase) or security key, and I am sure that I entered the correct password. What can I do?
The extender is probably placed at the borderline of the range covered by the router or access point. For more information about where to place the extender, see Connect an Ethernet-Enabled Device on page 14.
If you are using WEP security, make sure that you are typing the network password in the correct field.
Can I set up the extender in extender mode if I connect it to the router or access point with an Ethernet cable?
No. The extender is designed to use WiFi to connect to the router or access point if it is in extender mode. If the extender is in access point mode, you can connect it to the router or access point with an Ethernet connection. For more information about access point mode, see Use the Extender in Access Point Mode on page 15.
I forgot my login email address and password. What can I do?
In the login window, click the Username & Password Help link to answer the security questions that you set up during the initial setup. For more information, see Recover a Forgotten User Name or Password on page 34.
If you forgot your password and the answers to your security questions, you can restore the extender to its factory settings and set it up again.
To restore factory settings:
- Use a sharp object such as a pen or paper clip to press and hold the Factory Reset button on the extender for at least seven seconds until the Power LED lights amber.
- Release the Factory Reset button and wait for the extender to reboot.
The extender resets and returns to the factory default settings.
Cannot Connect to the Extender
If you cannot connect to the extender, determine what prevents you from connecting:
- If you forgot your user name or password, click the Username & Password Help link. For more information, see FAQs on page 43.
- If your browser displays an error page, include http:// in the address field of your browser by typing http://www.mywifiext.net.
- If you already set up the extender but can no longer connect to it over WiFi, check to see if the Client Link LED is off or red.
- If you cannot get a WiFi connection working, you can use an Ethernet cable to connect your computer to the extender.
Cannot Join a WiFi Network and Receive an Error Message
To join a WiFi network, you must know its network name (also called the SSID) so that you can select it. If the network is secure, you must know the passphrase or key. If the extender does not connect to the network that you select, the cause might be one of the following:
- It is possible that you typed the network name, passphrase, or key incorrectly. Use Smart Setup (see Run Smart Setup Installation on page 17) to select a WiFi network and retype the passphrase or key. The passphrase or key is case-sensitive. For example, PASSWORD25 is not the same as Password25 or password25.
- If the extender cannot detect your WiFi network, check to see if your WiFi network is still working. Make sure that the WiFi router is turned on. If possible, move the extender closer to the WiFi router.
- If the extender Client Link LED is red, the WiFi connection between the WiFi router and the extender is poor. You can establish the best connection with a clear line of sight between the extender and the WiFi router. Make sure that no physical obstacles exist between the extender and the WiFi router, and try to move the extender closer to the WiFi router.
If you use Smart Setup, and the extender does not connect to the WiFi router, does not connect to the Internet, or cannot get an IP address from the WiFi router, Smart Setup displays a message to notify you that the extender is not configured.
To run Smart Setup again, click the YES button. To manually configure the extender, click the NO, CONFIGURE MANUALLY button.
Supplemental Information
A
This appendix includes the following sections:
- Factory Default Settings
• Technical Specifications
Factory Default Settings
The following table lists the factory settings for the extender. You can use the Factory Reset button or the Erase feature to return the extender to these settings. (See Return the Extender to Its Factory Settings on page 24.)
Table 2. Factory settings
| Feature Setting | |
| Setup Wizard Enabled | |
| WiFi communication Enabled | |
| WiFi network name (SSID) NETGEAR_EXT | |
| Security Disabled | |
| Transmission speed Auto | 1 |
| Country/region Varies by region | |
| Operating mode 802.11n, 802.11g, 802.11b | |
| Data rate Up to 300 Mbps | |
| DHCP | Client enabled |
- Maximum WiFi signal rate (IEEE Standard 802.11). Actual throughput will vary. Network conditions and environmental factors, including volume of network traffic, building materials and construction, and network overhead, lower actual data throughput rate.
Technical Specifications
The following table includes the product specifications.
Table 3. Technical specifications
| Extender Specifications | |
| Network protocol and standards compatibility | Data and routing protocols: TCP/IP, DHCP server and client, DNS relay |
| Power consumption | 100–240V 0.1 A, 50–60 Hz |
| Physical specifications | Dimensions: 67 x 55 x 34 mm (2.64 x 2.17 x 1.34 in.)Weight: 102–10 g (3.60–3.88 oz) varied by power plug type |
| Environmental | Operating temperature: 32° to 140°F (0° to 40°C)Operating humidity: 90% maximum relative humidity, noncondensingElectromagnetic emissions: Meets requirements of FCC Part 15 Class B. |
| Interface | Local: 10BASE-T, 100BASE-Tx, RJ-45802.11n, 802.11g, 802.11b |
- Support
- Compliance
- Trademarks
- Table of Contents
- Chapter 1 Overview
- Chapter 2 Get Started
- Chapter 3 Extender Network Settings
- Chapter 4 Maintain and Monitor the Extender
- Chapter 5 FAQs and Troubleshooting
- Appendix A Supplemental Information
- Meet Your Extender
- Front Panel
- Extender Side and Bottom Panels
- When to Use Your Extender
- How the Extender Works
- Get Started
- 2
- Use the Extender in Extender Mode
- Place the Extender and Apply Power
- To place the extender and apply power:
- Connect to an Existing WiFi Network
- Connect With WPS
- To use WPS to connect the extender to your WiFi router:
- Connect With Web Browser Setup
- To connect with web browser setup:
- Connect an Ethernet-Enabled Device
- Use the Extender in Access Point Mode
- To use the extender in access point mode:
- Log In to the Extender After Installation
- To log in to the extender:
- Run Smart Setup Installation
- To run Smart Setup:
- Extender Network Settings
- 3
- This chapter covers the following topics:
- View Connected Devices
- To view connected devices:
- View WiFi Settings
- To view the WiFi settings:
- Select Settings > WiFi.
- Change the WiFi Network Name
- To change the WiFi network name:
- Turn Off the SSID Broadcast to Create a Hidden Network
- Disable or Enable the WiFi Radio
- Change the WiFi Speed
- To change the WiFi speed:
- Customize the Extender's WiFi Coverage Area
- To customize the extender's WiFi coverage area:
- Select Do More > WiFi Coverage.
- Use WPS to Add a Computer to the Extender's WiFi Network
- Use WPS With the Push Button Method
- To use WPS to add a computer or WiFi device to the extender's WiFi network:
- Use WPS With the PIN Method
- To add a computer or WiFi device to the extender's WiFi network:
- Deny Access to a Computer or WiFi Device
- To use WiFi access control to deny access:
- Set Up an Access Schedule
- Select Do More > Access Schedule.
- Set Up the Extender to Use a Static IP Address
- To set up the extender to use a static IP address:
- Use the Extender With MAC Filtering or Access Control
- To add a translated MAC address to your router:
- Maintain and Monitor the Extender
- 4
- Change the Extender User Name and Password
- To add an extender user:
- Turn Password Protection Off and On
- To turn password protection off or on:
- Recover a Forgotten User Name or Password
- To recover your password to access the extender:
- Automatically Adjust for Daylight Saving Time
- To set up the extender to automatically adjust for daylight saving time:
- Manually Set the Extender Clock
- To manually set the extender clock:
- Back Up and Manage the Extender Configuration
- Back Up the Configuration Settings
- To back up the extender configuration settings:
- Restore the Configuration Settings
- To restore the extender configuration settings:
- CAUTION:
- Return the Extender to Its Factory Default Settings
- To log in to the extender and reset the extender's to factory settings:
- Update the Firmware
- To check manually for new firmware and, if available, update the firmware:
- Restart the Extender Remotely
- To restart the extender remotely:
- FAQs and Troubleshooting
- 5
- FAQs
- To restore factory settings:
- Cannot Connect to the Extender
- Cannot Join a WiFi Network and Receive an Error Message
- Supplemental Information
- A
- Factory Default Settings
- Technical Specifications
Brand : NETGEAR
Model : WN3000RPv3
Category : Wi-Fi repeater