DHC-60.7 - Receiver Integra - Free user manual and instructions
Find the device manual for free DHC-60.7 Integra in PDF.


| Product Type | AV Controller (AV Receiver) |
| Brand | Integra |
| Model | DHC-60.7 |
| Dimensions (W x H x D) | 435 mm x 199 mm x 416 mm (17-1/8'' x 7-13/16'' x 16-3/8'') |
| Weight | 12 kg (26.5 lbs) |
| Power Consumption (No-sound) | 95 W |
| Standby Power Consumption | 0.15 W (North American models) |
| Power Supply | 120 V AC, 60 Hz (North American) / 220-240 V AC, 50/60 Hz (Others) |
| HDMI Inputs | 7 (6 rear + 1 front AUX INPUT HDMI), all HDCP 2.2 compatible on IN1-IN5 |
| HDMI Outputs | 2 (OUT MAIN and OUT SUB/ZONE2) |
| Supported Audio Formats | Dolby Atmos, Dolby TrueHD, DTS:X, DTS-HD Master Audio, DSD, PCM (up to 8ch), MP3, WMA, FLAC, Apple Lossless, etc. |
| Supported Video Resolutions | 4K 60 Hz (RGB/YCbCr 4:4:4, 24-bit), 1080p, 3D, Deep Color, x.v.Color |
| Network Features | Ethernet (10BASE-T/100BASE-TX), AirPlay, DLNA, Internet Radio, USB playback |
| Room Calibration | AccuEQ with supplied microphone (automatic speaker setup) |
| Multi-zone Capability | Zone 2 and Zone 3 (audio); Zone 2 with HDMI video output |
| Certifications | THX Ultra2 Plus certified |
| Special Features | Bi-Amping, XLR balanced inputs and pre-outs (9.2 ch), toroidal power transformer, Music Optimizer, Phase Matching Bass |
| Speaker Outputs | Up to 7.1 channels (height or back speakers), plus subwoofer (up to 4 subwoofers via RCA and XLR) |
| Tuner | AM/FM with 40 presets |
| Included Accessories | Remote controller, speaker setup microphone, AM loop antenna, FM indoor antenna, power cord |
| Maintenance | Clean with a soft dry cloth. Do not use solvents or abrasive cleaners. |
| Safety Precautions | Do not expose to rain or moisture. Do not place objects filled with liquids on the unit. Use only specified power source. |
| Repairability | Refer all servicing to qualified personnel. No user-serviceable parts inside. |
Frequently Asked Questions - DHC-60.7 Integra
User questions about DHC-60.7 Integra
0 question about this device. Answer the ones you know or ask your own.
Ask a new question about this device
Download the instructions for your Receiver in PDF format for free! Find your manual DHC-60.7 - Integra and take your electronic device back in hand. On this page are published all the documents necessary for the use of your device. DHC-60.7 by Integra.
USER MANUAL DHC-60.7 Integra
The Basic Manual includes information needed when starting up and also instructions for frequently used operations. The Advanced Manual has more detailed information and advanced settings.
CONTENTS
Front Panel 3
Display....4
Rear Panel....5
Step 1: Connections......6
1 Connecting speakers....6
- Speaker layout 6
- Notes for Speaker Connection 7
- Connecting a Subwoofer with Built-in Power
Amplifier 8
- Height speaker types 9
2 Connecting the TV and players....10
• HDMI cable connection....10
- Connecting Components without HDMI 11
3 Other connections....12
Step 2: Initial Setup....13
1 AccuEQ Room Calibration 13
2 Source Connection....14
3 Remote Mode Setup 15
4 Network Connection 15
Step 3: Playing Back....16
1 Basic operations....16
- Remote controller parts name....16
2 Network Functions....17
3 AirPlay ^® 17
4 AM/FM Radio 18
5 Multi-zone....18
• Making Multi-zone Connection....18
• Performing Multi-zone Playback 19
6 Quick Setup menu....20
7 Other useful functions ....21
Troubleshooting 22
Specifications 23
Table of image resolutions....24
Resolutions supported by HDMI 24
Supplied Accessories .... Back Cover


Connections
Initial Setup
Playing Back
Advanced Manual
Front Panel >Rear Panel >Remote Controller
Features
• Supports playback in Dolby Atmos format and has Dolby Surround listening mode
• Supports playback in DTS:X format and has DTS Neural:X listening mode
• THX Ultra2 Plus certified
• Equipped with 4K compatible HDMI IN/OUT jacks
• Equipped with 2 HDMI output jacks
• Supports the HDMI Standby Through function which allows transmission from players to the TV in standby state
• Supports HDCP2.2 (supported by HDMI IN1 to IN5/HDMI OUT MAIN/SUB)
• Supports ARC (Audio Return Channel)
• Supports variety of network functions such as Internet Radio, DLNA, AirPlay, etc.
• Bi-Amping capability
• A/V Sync Function to correct deviation of audio and video
- Multi-zone function (Zone 2 and Zone 3) which allows you to play something in the main room while enjoying a different source in a separate room (Video and audio can also be output to Zone 2 through HDMI)
• Music Optimizer™ for compressed digital music files
• Phase Matching Bass System
• Automatic speaker setup available using supplied calibrated microphone (AccuEQ Room Calibration)
• Supports playback of MP3, WMA, WMA Lossless, FLAC, WAV, Ogg Vorbis, Apple Lossless, DSD, Dolby TrueHD via network and USB storage device (the supported formats will differ depending on the use environment)
• Equipped with a high-class toroidal transformer as an independent power source for the audio circuitry
- XLR balanced jack (9.2 channel output, stereo input) minimizing noises in long distance transmission
En-2

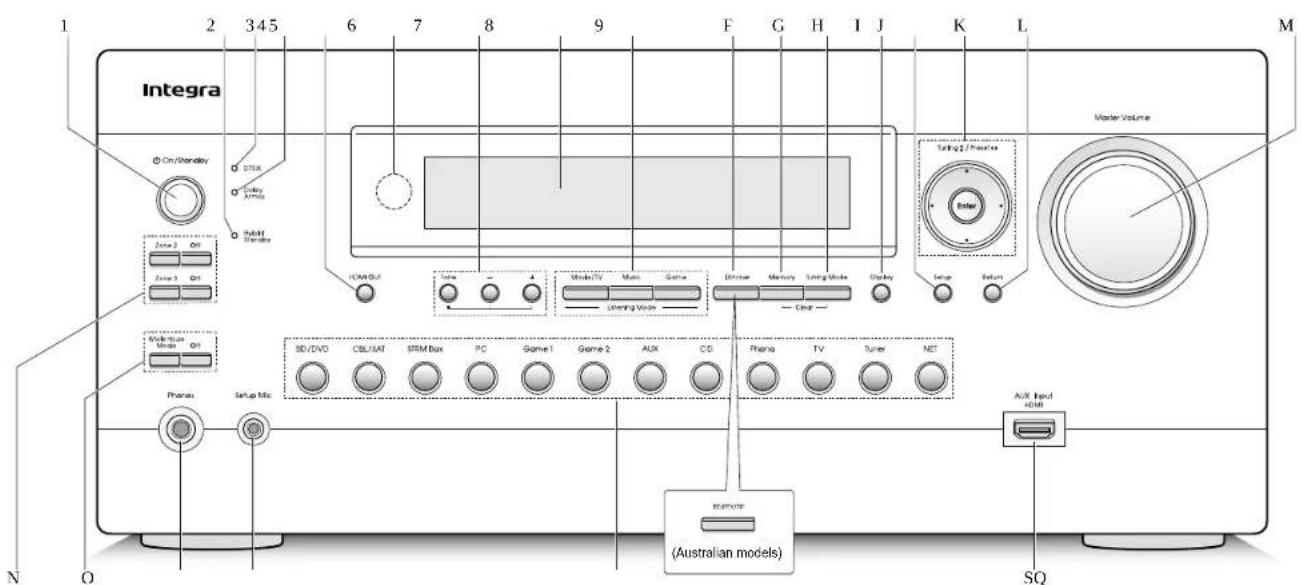
R
Front Panel
① On/Standby button: Turns the unit on or into standby mode.
② Hybrid Standby indicator: Lights if the unit enters standby mode when the HDMI Standby Through, USB Power Out at Standby or Network Standby function is enabled.
③ DTS:X indicator: Lights when playing DTS:X.
④ Dolby Atmos indicator: Lights when playing Dolby Atmos.
⑤ HDMI Out button: Allows you to select the HDMI jack to output video signals.
⑥ Remote control sensor: Receives signals from the remote controller.
⑦ Tone, Tone Level buttons: Adjusts the high tone and low tone. Press the Tone button repeatedly to select the item to adjust from "Bass", "Treble" and "Phase Matching Bass", and press the Tone Level buttons to adjust.
⑧ Display
⑨ Listening Mode button: Allows you to select the listening mode.
⑩ Dimmer button (North American models): Switches the brightness of the display.
RT/PTY/TP button (Australian models): Can be used when receiving the station transmitting text information.
⑪ Memory button: Registers a radio station.
⑫ Tuning Mode button: Switches the tuning mode.
⑬ Display button: Switches the information on the
display.
⑭ Setup button: Used when making settings.
⑮ Cursor buttons, Tuning▲▼ button, Preset◀▶ button and Enter button: Moves the cursor and confirms the selection. When listening to AM/FM broadcasting, tune in to the station with Tuning▲▼ or select the registered station with Preset◀▶.
⑯ Return button: Returns the display to the previous state.
⑰ Master Volume: Allows you to adjust the volume.
⑯ Zone2/Zone3/Off button: Controls the multi-zone function.
⑲ Whole House Mode, Off button: Controls the WHOLE HOUSE MODE function to play the same source in all the multi-zone connected rooms.
En-3

Connections
Initial Setup
Playing Back
Advanced Manual
Front Panel >Rear Panel >Remote Controller
⑳ Phones jack: Stereo headphones with a standard plug are connected.
② Setup Mic jack: The supplied speaker setup microphone is connected.
② Input selector buttons: Switches the input to be played.
② AUX Input HDMI jack: A HD camera or such other device is connected.
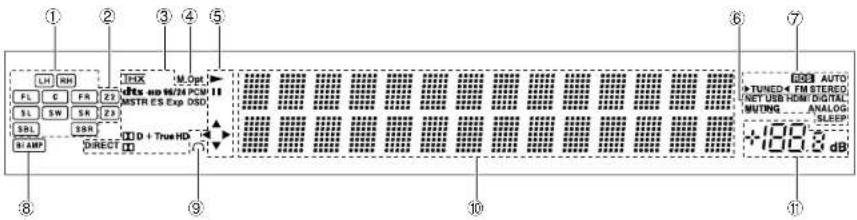
Display
① Speaker/Channel display: Displays the output channel that corresponds to the selected listening mode.
② Z2/Z3: Lights when the output to Zone 2/Zone 3 is set to on.
③ Lights according to the type of input digital audio signals and the listening mode.
④ Stays lit when Music Optimizer is enabled.
⑤ Lights when playing NET or USB.
⑥ "NET": Lights when "NET" input is selected and the unit is connected to the network. It will flash if the connection is not correct.
"USB": Lights when input is "NET" and USB is connected and selected. It will flash if the connection is not correct.
"HDMI": Lights when HDMI signals are input and the HDMI input is selected.
"DIGITAL": Lights when digital signals are input and the digital input is selected.
"MUTING": Flashes when muting is on.
"ANALOG": Lights when analog signals are input and the analog input is selected or when HDMI and digital signal inputs are not assigned.
"SLEEP": Lights when the sleep timer is set.
⑦ Lights in the following conditions.
"RDS" (Australian models): Receiving RDS broadcasting.
"AUTO": Tuning mode is auto.
"▶TUNED◀": Receiving AM/FM radio. ▶◀ flashes
while tuning is automatically performed.
"FM STEREO": Receiving FM stereo.
⑧ "Bi AMP": Using bi-amp.
⑨ Stays lit when headphones are connected.
⑩ Displays various information of the input signals. Pressing Display displays the type of input digital signals and the listening mode.
⑪ Shows the volume level.
En-4

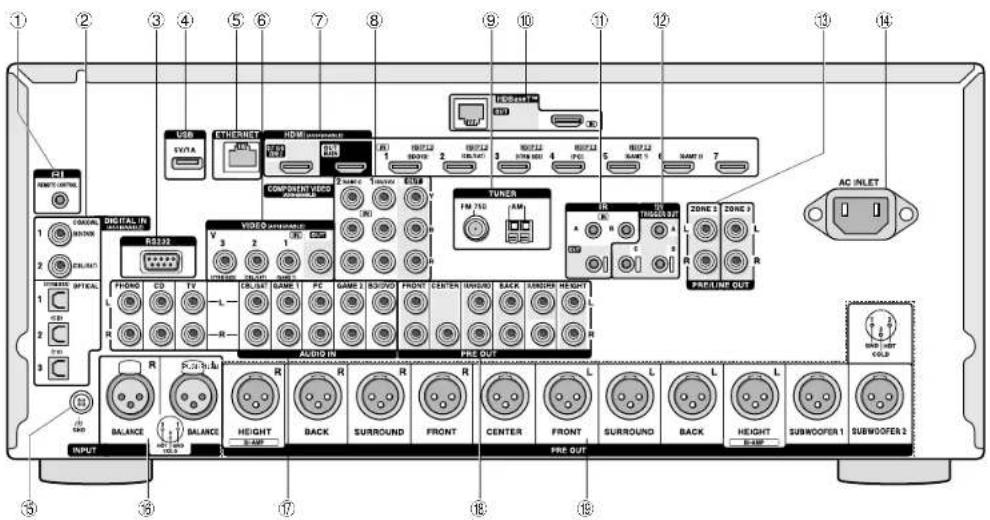
Rear Panel
① RI REMOTE CONTROL jack: An Onkyo product with RI jack can be connected and synchronized with this unit.
② DIGITAL IN COAXIAL/OPTICAL jacks: Digital audio signals are input.
③ RS232 port: Connected to the home control system. (*)
④ USB port: A USB storage device is connected so that music files stored in it can be played. Connect a USB device with a USB cable to supply it with power.
⑤ ETHERNET port: Used for LAN connection
⑥ VIDEO IN/OUT jacks: Composite video signals input/output jacks.
⑦ HDMI IN/OUT jacks: Digital video signals and audio signals are transmitted between the unit and the connected devices.
⑧ COMPONENT VIDEO IN/OUT jacks: Component video signals input/output jacks.
⑨ TUNER AM/FM(75Ω) terminal: The supplied antennas are connected.
HDBaseT™ IN/OUT jack: HDMI input signals are output via the Ethernet cable. As they are covered with a seal when shipped, remove it when you use the ports. Do not use the ports to connect the Ethernet port of network device. (*)
⑪ IR IN A/B, IR OUT jack: Connected to the multiroom remote control kit. (*)
⑫ 12V TRIGGER OUT A/B/C jack: Allows you to connect a device with 12V trigger input jack to enable link operation between the device and the unit. (*)
⑬ PRE/LINE OUT ZONE 2/ZONE 3 jack: Audio output jack connected to the power amplifier and pre-main amplifier for multi-zone playback in a separate room.
⑭ AC INLET: The supplied power cord is connected.
⑤ GND terminal: The ground wire of the turntable is
connected.
⑯ INPUT BALANCE L/R jacks: XLR-type balanced input jacks.
⑰ AUDIO IN jacks: Analog audio signals are input.
⑯ PRE OUT RCA jacks: A power amplifier or subwoofer with built-in amplifier is connected.
⑲ PRE OUT XLR jacks: XLR-type balanced output jacks to connect the multichannel power amplifier or subwoofer with built-in amplifier. FRONT L/R jacks and HEIGHT L/R jack can be used for Bi-amping connection.
* Special devices or cable connections are necessary to use the ③, ④, ⑤ and ⑥ functions. Contact the specialized stores for more information.
Step 1: Connections
1 Connecting speakers
Speaker layout
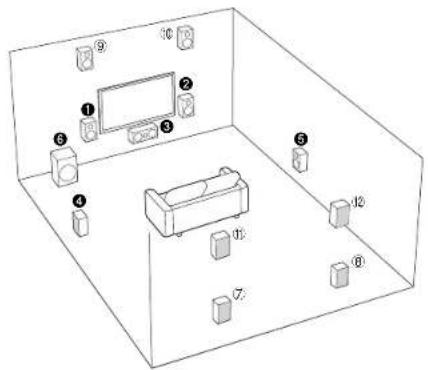
Important: The power cord must be connected only after all other connections are completed.
① ② Front speakers
3 Center speaker
4 5 Surround speakers
6 Subwoofer
⑦⑧ Back speakers
⑨ ① Height speakers (Front High)
10.12 Height speakers (Rear High)
5.1 ①23456
• 7.1 (1)23456+(7)(8), or
123456+⑨:⑩, or
①②③④⑤⑥+⑪⑫
- To enjoy the Dolby Atmos listening mode, height speakers or back speakers need to be installed. There are a variety of height speakers apart from this type. See the next section "Height speaker types" for details.
En-6
Characteristics of speaker types
①② output front stereo sound and ③ outputs center sound such as dialogs and vocals. ④⑤ create back sound field. ⑥ reproduces bass sounds and creates rich sound field.
Connecting ⑦⑧, ⑨⑩, or ⑪⑫ speakers enables playback in 7.1 ch configuration. ⑦⑧ (back) speakers improve sense of envelopment created by back sound field as well as seamlessness of back sounds, providing more natural sound experiences in the sound field. ⑨⑫ and ⑪⑫ (height) speakers produce surround effects on a height plane. Note that this unit can perform optimal sound field processing for the type of height speakers actually installed and registered in Initial Setup.
You can connect both back speakers and height speakers at the same time, but you can only output audio from one of these at a time. When connected at the same time, you can switch speakers to prioritize in the Quick Setup menu that appears when you press the Q button on the remote controller (Speaker Layout function). For details, see "6 Quick Setup menu" of "Step 3: Playing Back".
- The speaker setting is 7.1 channels at the time of purchase. You can change it manually or by using automatic speaker setting.
• To use the multi-zone function, see "5 Multi-zone" in "Step 3: Playing Back".
Notes for Speaker Connection
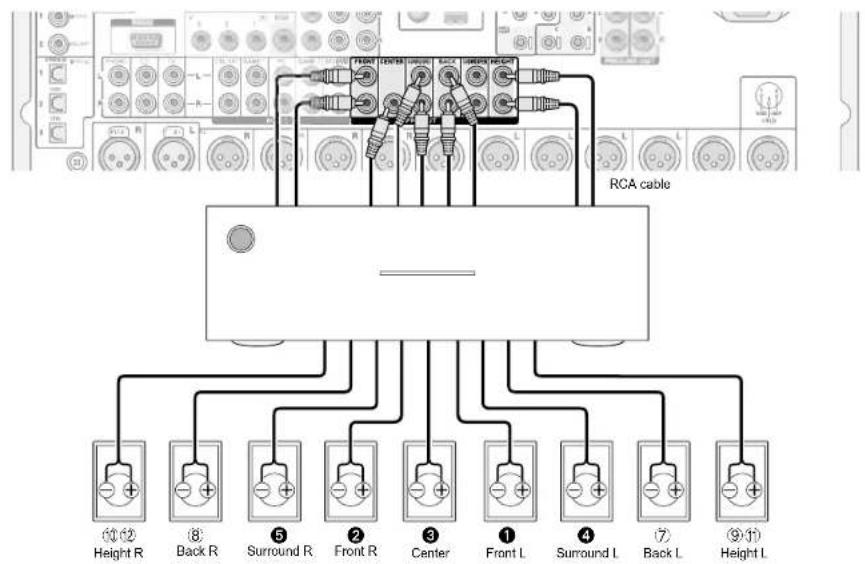
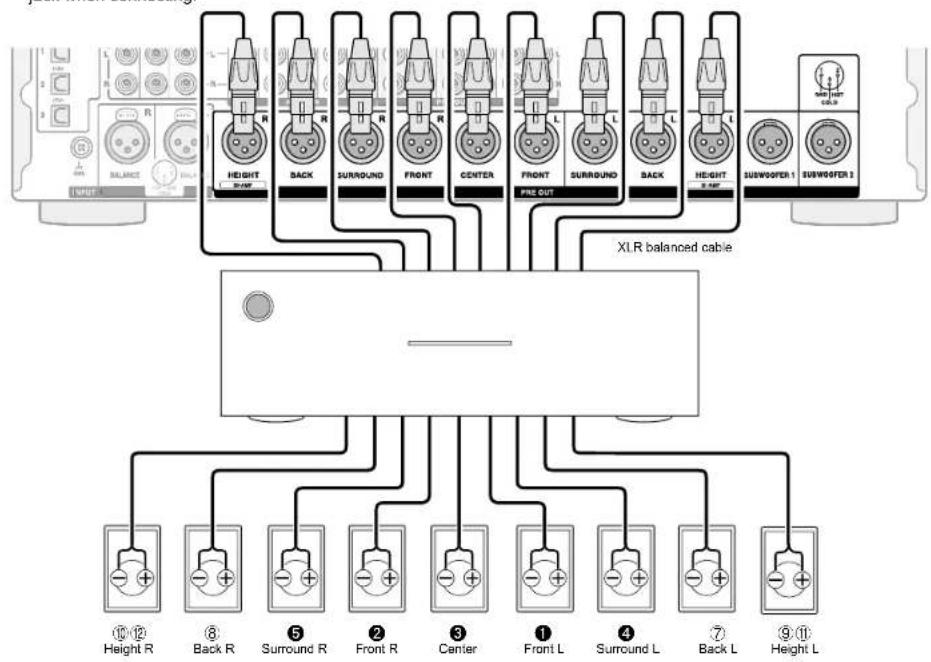
This unit works as an AV controller when connected with a separately sold multichannel power amplifier. Connect a power amplifier to the PRE OUT RCA jack or PRE OUT XLR jack of the unit and then connect the power amplifier with speakers. For how to connect the power amplifier with speakers, refer to the instruction manual of the multichannel power amplifier
- Set the crossover frequency, speaker distance and other settings on this unit.
■ Connecting the multichannel power amplifier to the PRE OUT RCA jack
Connect the multichannel power amplifier to the PRE OUT RCA jack. Refer to the illustration below and connect the unit and power amplifier with an RCA cable.
Step 1: Connections
Connections
Initial Setup
Playing Back
Advanced Manual
Front Panel >Rear Panel >Remote Controller
■ Connecting the multichannel power amplifier to the PRE OUT XLR jack
Connect the multichannel power amplifier to the PRE OUT XLR jack. Refer to the illustration below and connect the unit and power amplifier with an XLR balanced cable.
• Refer to the pin layout to the right of the PRE OUT XLR jack when connecting.
Step 1: Connections
Connecting a Subwoofer with Built-in Power Amplifier
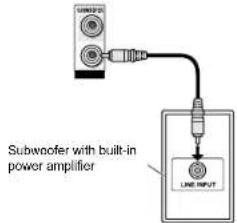
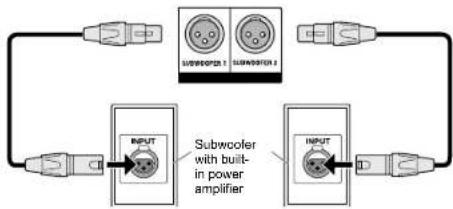
You can connect a maximum four subwoofers with built-in power amplifiers to this unit. Use the SUBWOOFER PRE OUT RCA jack or SUBWOOFER 1/2 PRE OUT XLR jack according to the input jack of your subwoofer. You can also set the level and distance of the connected subwoofer.
- If your subwoofer does not have built-in power amplifier, you can connect a power amplifier between the unit and the subwoofer.
■ Connection to the PRE OUT RCA jack
Connect the RCA input jack of your subwoofer and the SUBWOOFER PRE OUT RCA jack of the unit with an RCA cable.
■ Connection to the PRE OUT XLR jack
Connect the XLR balanced input jack of your subwoofer and the SUBWOOFER 1/2 PRE OUT XLR jack of the unit with an XLR balanced cable.
flowchart
graph TD
    A["Input"] --> B["Subwoofer with built-in power amplifier"]
    B --> C["Output"]
    D["Subwoofer 1"] --> E["Output"]
    F["Subwoofer 2"] --> G["Output"]
En-8

Connections
Initial Setup
Playing Back
Advanced Manual
Front Panel >Rear Panel >Remote Controller
Height speaker types
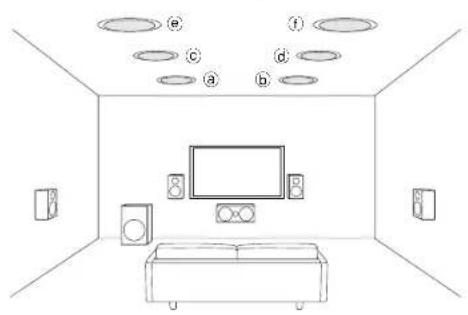
Installing speakers in ceiling
natural_image
Line drawing of a living room interior with TV, speakers, and wall-mounted appliances (no text or symbols)a b Top front
© Top middle
(e) (f) Top Rear
Ceiling speakers, etc. are used for maximizing effects in Dolby Atmos or Dolby Surround listening mode. Install Top Front speakers so that they are positioned at a point between directly above the listening position and directly above the front speakers. Install Top Middle speakers so they are directly above the listening position. Install Top Rear speakers so they are positioned at a point between directly above the listening position and directly above the back speakers. You can select a b, c d, or e f on this unit.
- Dolby Laboratories recommends placing the speakers as described in "Installing speakers in ceiling" to obtain the best Dolby Atmos effect.
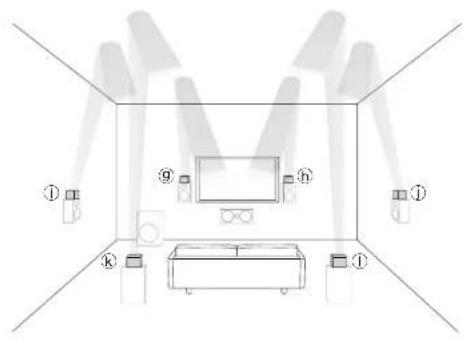
Using Dolby Enabled Speakers
natural_image
Interior layout diagram of a room with furniture and lighting fixtures (no text or symbols)⑨ h Dolby Enabled Speaker (Front)
①① Dolby Enabled Speaker (Surround)
⑧① Dolby Enabled Speaker (Back)
A Dolby Enabled Speaker is specially designed to be used as a Height speaker. There are two types of Dolby Enabled Speakers; types placed on top of other speakers such as front speakers and surround speakers (*), and types that are integrated with the normal speakers. Dolby Enabled Speakers placed with their diaphragms facing toward the ceiling create higher effect in the Dolby Atmos and Dolby Surround listening modes by providing sounds echoing off the ceiling. You can select ⑨, ⑥, ①, ①, or ⑧ on this unit.
* You can put it on top of back speakers, but even if you connect both back speakers and speakers at the same time, you can only output audio from one of these at a time.
Step 1: Connections
When playing Dolby Atmos, the speakers required depend on how you have setup your back speakers or height speakers. The following shows speaker combinations.
| Connection pattern | Back or Height | Front | Center | Surround | |
| 1 Back | ◎ | ○ | ◎ | ||
| 2 Front | High | ◎ | ○ | ○ | |
| 3 Rear | High | ◎ | ○ | ○ | |
| 4 Top | Front | ◎ | ○ | ○ | |
| 5 Top | Middle | ◎ | ○ | ○ | |
| 6 Top | Rear | ◎ | ○ | ○ | |
| 7 Dolby | Enabled Speaker (Front) | ◎ | ○ | ○ | |
| 8 Dolby | Enabled Speaker (Surround) | ◎ | ○ | ◎ | |
| 9 Dolby | Enabled Speaker (Back) | ◎ | ○ | ◎ | |
Required ○ Optional *Connection of a subwoofer is optional.
Step 1: Connections
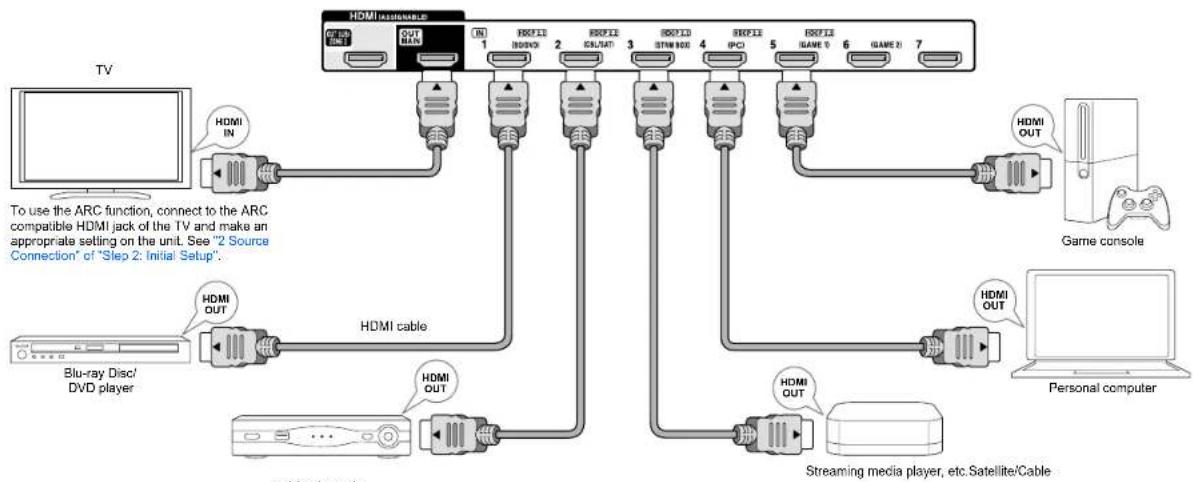
2 Connecting the TV and players
flowchart
graph TD
    TV["TV"] -->|HDMI IN| A1["1"]
    TV -->|HDMI OUT| A2["2"]
    TV -->|HDMI OUT| A3["3"]
    TV -->|HDMI OUT| A4["4"]
    TV -->|HDMI OUT| A5["5"]
    TV -->|HDMI OUT| A6["6"]
    TV -->|HDMI OUT| A7["7"]
    A1 --> B1["HDMI 1"]
    A2 --> B2["HDMI 2"]
    A3 --> B3["HDMI 3"]
    A4 --> B4["HDMI 4"]
    A5 --> B5["HDMI 5"]
    A6 --> B6["HDMI 6"]
    A7 --> B7["HDMI 7"]
    B1 --> C1["Game console"]
    B2 --> C2["Personal computer"]
    B3 --> C3["Streaming media player, etc.Satellite/Cable"]
    B4 --> C4["Game console"]
    B5 --> C5["Game console"]
    B6 --> C6["Game console"]
    B7 --> C7["Game console"]
HDMI cable connection
Refer to the above figure and connect the player to the HDMI jack on the back of this unit. For example, connect a Blu-ray Disc Player to the HDMI IN1 (BD/DVD) jack. To play the player, press the Input Selector button on the remote controller with the same name as the jack to which you connected the player so that the input on the unit is selected.
To connect the TV and the unit, connect the HDMI OUT MAIN jack of the unit and the HDMI IN jack of the TV using an HDMI cable. With this connection, it becomes possible to display the setting screen of the unit on the TV or transmit video/audio signals from the player to the TV. If your TV supports ARC (Audio Return Channel), it is possible to play the TV sound with the AV controller's
speakers with this connection only. If your TV does not support ARC, you need, in addition to the HDMI OUT MAIN jack connection, a digital optical cable connection between the digital audio out optical jack of the TV and the DIGITAL IN OPTICAL jack of the unit or an analog audio cable connection between the audio output jack of the TV and the AUDIO IN TV jack of the unit.
● Audio connection with a TV not supporting ARC
* Select an appropriate connection for your TV.
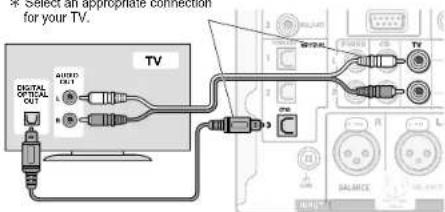
The unit supports the HDMI Standby Through function that allows transmission from players to the TV even if the unit is in standby. You have to modify the settings to enable the input selection link with CEC (Consumer Electronics
En-10

Connections
Initial Setup
Playing Back
Advanced Manual
Front Panel >Rear Panel >Remote Controller
Control) compliant device, connection with ARC compatible TV, and HDMI Standby Through function. See "2 Source Connection" of "Step 2: Initial Setup".
- Another TV can be connected to the HDMI OUT SUB jack. In this case, press the HDMI Out button on the main unit several times to display "SUB" or "MAIN+SUB" and select the output method. You have to modify the settings to enable the CEC functions, such as ARC, for the TV connected to the HDMI OUT SUB jack. Set "Step 3: Playing Back" - "6 Quick Setup menu" - "Control TV" to "SUB".
- To enjoy HDCP2.2 protected video, connect the player to one of the HDMI IN1 to IN5 jacks and connect the HDMI output jack on this unit and to a HDCP2.2 compatible HDMI input jack on the TV. You will be unable to view images protected by HDCP2.2 if your TV does not have a HDCP2.2 compatible input jack. - To play 4K or 1080p video, use a high speed HDMI cable or high speed HDMI with Ethernet cable.
Connecting Components without HDMI
If your AV component does not have HDMI jack, use an available jack of your component for cable connection with this unit.
* It is possible to change assignment of the input jacks and input selector buttons. For how to make settings, see "1. Input/Output Assign" in "Advanced Settings (Setup Menu)" in the Advanced Manual.
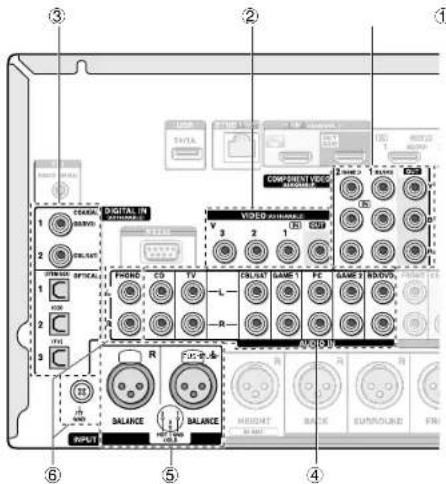
■ Video signal connection
The unit has a video upconversion function. For details, see the next section.
① A TV with component video input jacks or a player with component video output jacks can be connected. * Only images input through the COMPONENT VIDEO IN jacks can be output through the COMPONENT VIDEO OUT jacks.

Component video cable
* Its transmitted video has higher quality than that of composite video cable.
Step 1: Connections
② A TV with composite video input jacks or a player with composite video output jacks can be connected. * Only images input through the VIDEO IN jack (composite) can be output through the VIDEO OUT jack.

Composite video cable
■ Audio signal connection
③ A player with a digital audio out jack can be connected.

Digital optical cable (OPTICAL) * The DIGITAL IN OPTICAL jack of the unit has a cover. Push in the cable against the cover as it is turned inside.

Digital coaxial cable (COAXIAL)
④ A player with analog audio out jacks can be connected. When using jacks ① and ② for video input, connect to the audio input jacks corresponding to the jacks connected at ① and ②. (For example, when video input connection is to the ① BD/DVD jack, the audio input connection should also be to the ④ BD/DVD jacks.)

Analog audio (RCA) cable
⑤ Use an XLR balanced cable to transmit analog audio. An XLR balanced cable, which is less affected by noise when extended over a long distance, is suitable for long-distance transmission.
* Refer to the pin layout below the Balance jack when connecting. * You have to make an appropriate setting to play audio of the device connected to this jack. For details, see "4. Source" - "Audio Select" in "Advanced settings (Setup Menu)" in the Advanced Manual.

XLR balanced cable
⑥ Connect a turntable that uses an MM type cartridge and does not have a built-in audio equalizer. If the connected turntable has a built-in audio equalizer, connect it to the ④ analog audio input jack.
* If it uses an MC type cartridge, install an audio equalizer compatible with MC type cartridge between the unit and the turntable by connecting it to the ④ analog audio input jack. For details, refer to the turntable's instruction manual. * If the turntable has a ground wire, connect it to the GND terminal of this unit. If connecting the ground wire increases noise, disconnect it

Connectors
Initial Setup
Playing Back
Advanced Manual
Front Panel >Rear Panel >Remote Controller
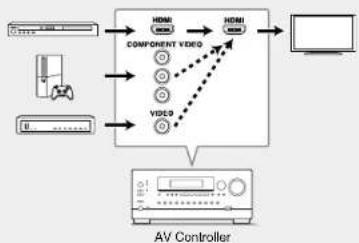
Video upconversion function
Video signals input to the VIDEO IN jack or the COMPONENT VIDEO IN jacks will be upconverted to HDMI signals and then output from the HDMI output jack.
flowchart
graph TD
    A["Computer"] --> B["COMPONENT VIDEO"]
    B --> C["Video"]
    C --> D["AV Controller"]
    D --> E["Computer"]
    B --> F["Hardware"]
    B --> G["Video"]
    F --> H["Computer"]
    G --> I["AV Controller"]
    H --> J["Computer"]
    I --> K["AV Controller"]
* When you upconvert video signals input to the COMPONENT VIDEO IN jacks and output them from the HDMI OUT jack, set the output resolution of the player to 480i or 576i. If the input has 480p/576p or higher resolution, a message prompting you to change the resolution setting will appear. If your player does not support 480i or 576i output, use the VIDEO IN jack.
* If multiple video signal inputs are put into one input system, HDMI signal output is prioritized.
3 Other connections
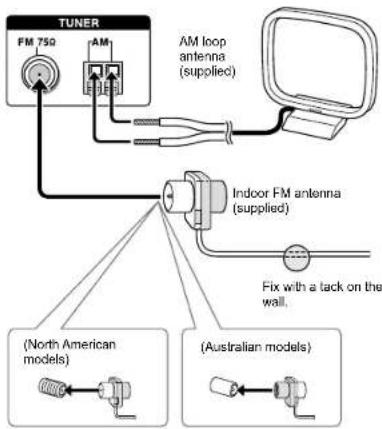
AM/FM antenna connections
Connect the antennas to listen to AM/FM broadcast. When listening to the broadcast for the first time, adjust the antenna position and orientation to get the best reception.
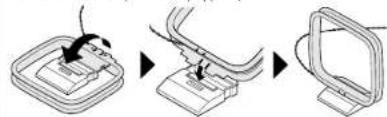
Assemble the AM loop antenna (supplied).
natural_image
Three-step diagram showing a mechanical assembly process: adding a cable, pressing a component, and rotating the screen (no text or symbols present)Step 1: Connections
Network connection
You can enjoy Internet radio, DLNA and AirPlay by connecting the unit to LAN. Connect the Ethernet cable to the Ethernet port of the router.
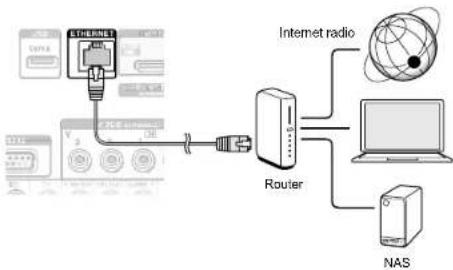
flowchart
graph TD
    A["Internet radio"] --> B["Router"]
    B --> C["Laptop"]
    B --> D["NAS"]
    E["User interface"] --> F["Switch"]
    G["User interface"] --> H["Switch"]
    I["User interface"] --> J["Switch"]
Headphones connection
Connect stereo headphones with a standard plug (1/4 inch or 6.3 mm) to the Phones jack on the front panel. Sound from the speakers will be off while you are using the headphones.
- If you selected any other listening mode than Stereo, Mono and Direct, connecting headphones will switch the listening mode to Stereo.
Power cord
This model includes a removable power cord. Connect the power cord to AC INLET of the unit and then connect to the outlet. Always disconnect the outlet side first when disconnecting the power cord. When the unit is turned on, a large instantaneous current may flow affecting functionality of the computer and other devices, so it is recommended to use a separate outlet.
Step 2: Initial Setup
"Initial Setup" automatically starts on the television when you first turn the unit on.
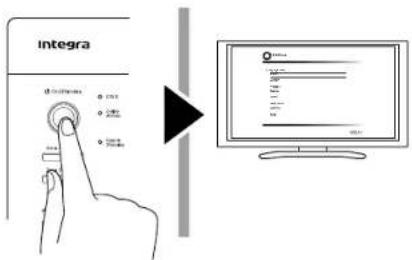
Settings proceed in the following order:
1 AccuEQ Room Calibration
• Automatic calibration for optimum speaker settings
2 Source Connection
- Checking that each input source is connected correctly - HDMI link function settings
3 Remote Mode Setup
- Settings required to operate other AV Components with the Remote Controller
4 Network Connection
- Checking network connections
Firmware update notification: If the unit is connected via LAN and there is firmware update available, the "Firmware Update Available" message will appear. To execute updating, select "Update Now" with the cursor buttons of the remote controller and press Enter. When "Completed!" appears, press () On/Standby on the main unit to turn the unit into standby mode. Then updating will be completed. (The unit automatically turns itself into standby mode after about 3 minutes even if you don't press () On/Standby, and updating will be complete.)
Before Start
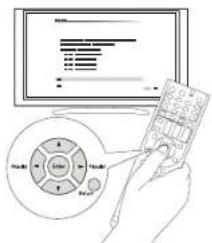
Setup is performed as a series of responses to questions asked by the unit. Select the item with the cursors of the remote controller and press Enter to confirm your selection. To return to the previous screen, press Return.
- Switch the input on the TV to that assigned to the unit.
Select the language first. Next, a summary of the initial settings is displayed. Select "Yes" in this screen and press Enter on the remote controller.
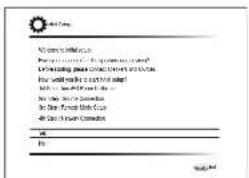
Re-doing initial setup: If you terminate the procedure on the way or change the setting made in the initial setup and want to call up the setup wizard again, press RCV and then Setup on the remote controller, select "8. Miscellaneous" - "Initial Setup", and press Enter.
1 AccuEQ Room Calibration
The test tone coming from each speaker will be measured to enable setting of the number of speakers, volume level, each speaker's optimum crossover frequencies, and distance from the primary listening position, and also enable correction of distortion caused by the room acoustic environment.
- You cannot return to the previous screen during speaker setup, even if you press Return.
1. Place the speaker setup microphone.
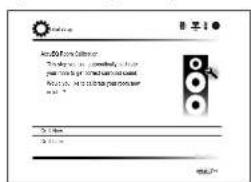
When the above screen is displayed, before starting the procedure, place the supplied speaker setup microphone at the measurement position ★ by referring to the following figure.
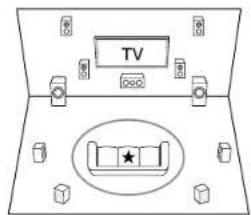

:Listening area

Measurement position with microphone
* Correct measurement will not be possible if the microphone is held by hand. Measurement is not possible if headphones are being used.
* The subwoofer sound may not be detected since it is extremely low frequencies. Set the subwoofer volume to around the half of its maximum volume.
* Measurement may be interrupted if there is ambient noise or radio frequency interference. If this occurs, close the window and turn off the home appliance and fluorescent light.
- After placing the microphone at the measurement position, select "Do it Now" with the cursors and press Enter.
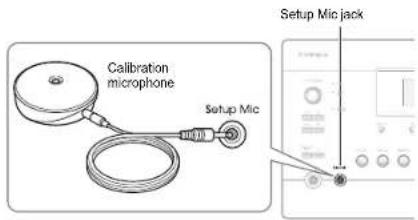
- When "Please plug microphone that came in a box with AV receiver" is displayed, connect the microphone to the Setup Mic jack of the unit.
- Set the speakers you have connected and the type of Height Speakers.
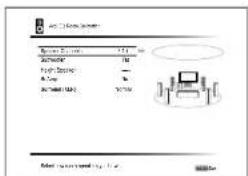
When the screen above is displayed, set the items with the cursors on the remote controller. The image on the screen changes as you choose the number of channels in "Speaker Channels", so refer to it when performing the settings. After completing all the settings, press Enter on the remote controller.
After this, follow the guidance displayed on the TV screen.
- When the cursor is on an item, the content of the item
will be shown in the lower part of the screen.
- The test tones sound from the connected speakers and automatic speaker setting starts.
Measurement will be made three or more times for each speaker. It takes several minutes to be completed. Keep the room as quiet as possible during measurement. If any of the speakers do not produce the test tone, check for disconnection.
- During measurement, each speaker outputs the test tones at a high volume. Be careful of sound leak that may disturb your neighbors, or be careful not to frighten young children.
- When the measurement is completed, the measurement result is displayed.
Press ▶/▶ on the remote controller to check the settings. Press Enter with "Save" selected. To have the settings reflected for all the speakers, select "On (All Channels)" in the next screen and press Enter on the remote controller.
- Select "On (Except Front Left / Right)" to disable just the front speakers.
- If there is an error message, follow the on-screen instruction to remove the error cause. If the subwoofer was not detected, turn the volume of the subwoofer up to maximum and then select "Retry".
About THX playback
THX recommends setting the speakers manually if you use THX-certified speakers or playing back with THX listening modes.
- THX recommends setting the crossover frequency to "80Hz(THX)" manually.
-
Due to the electrical complexities and the interaction with the room, you may notice irregular results when setting the level or distance of each speaker. If this happens, THX recommends setting the speakers and the subwoofer manually.
-
When "Please unplug setup microphone." is displayed, disconnect the microphone.
2 Source Connection
You can check the connections for each of the inputs and configure the HDMI link function.
- When the Source Connection start screen is displayed, select "Yes, Continue" with the cursors and press Enter.
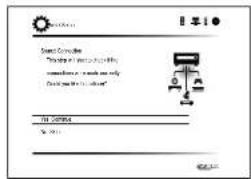
- Select the desired input to check the connection and press Enter.
Start playback of the selected device. If connection is correct, video/audio of the input source selected on the unit will be played.
- After checking the connection, select "Yes" with the cursors and press Enter.
- If you select "No" and press Enter, the error cause will be displayed. Follow the guidance to remove the error cause and check the connection again.
- Select "Yes" with the cursors and press Enter on the remote controller to check the connection of other inputs or select "No, Done Checking" and press Enter to skip.
If you select "Yes", you will return to the screen of step 2.
If you select "No, Done Checking", you will proceed to step 5.
- Settings for the CEC link function.
To enable the HDMI link function with CEC compatible equipment, select "Yes", then select "Yes" again in the next screen.
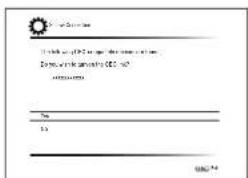
If you select "Yes", the connection with ARC compatible TV and HDMI Standby Through function will be set to "On" and enabled.
3 Remote Mode Setup
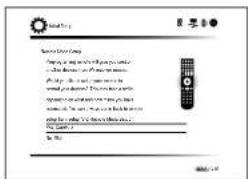
You can enable operation of the other components using the remote controller of the unit. When the Remote Mode Setup start screen is displayed, select "Yes, Continue" with the cursors and press Enter on the remote controller. Follow the guidance to select the desired Remote Mode button and in the keyboard screen, enter the first three characters of the brand name of the device you are going to program and search for the remote control code. The guidance will also explain how to set the remote controller.
4 Network Connection
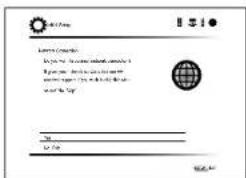
You can check the network connection. When the Network Connection start screen is displayed, select "Yes" with the cursors and press Enter on the remote controller. If you select "Yes" in the next screen, you can view the Ethernet cable connection status.
■If connection is successful
"Successfully Connected" is displayed on the screen.
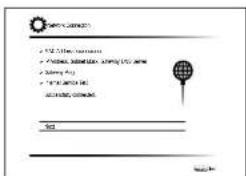
If this is not displayed, try doing the setting again.
\* Privacy policy
A confirmation screen asking you to agree to the privacy policy is displayed during network setting. Select "Yes" and press Enter to indicate agreement.
Step 2: Initial Setup
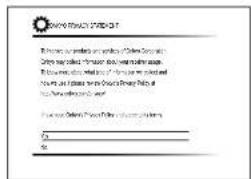
■ Terminating initial setup
After finishing the initial setup, keep "Finished" selected and press Enter on the remote controller. Connection and setting of the unit is now complete.
Audio output of connected players
To enjoy digital surround sound including Dolby Digital and DTS, audio output should be set to "Bitstream output" on the connected Blu-ray Disc Player or other device. Depending on the settings on the Blu-ray Disc Player there may be cases when Dolby TrueHD, Dolby Atmos, and DTS-HD Master Audio audio is not output according to the format of the source. In this case, in the Blu-ray Disc Player settings try setting "BD video supplementary sound" (or secondary sound) to "Off". Change the listening mode after changing the setting to confirm.
Step 3: Playing Back
1 Basic operations
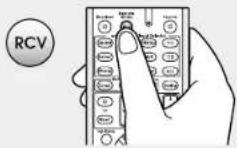
● To control the unit: The remote controller of this unit has the remote mode function for controlling other devices. You cannot control this unit when the remote controller is in the remote mode other than RECEIVER mode (for controlling this unit). Be sure to press the ② RCV button to select the RECEIVER mode before starting operation.
1. Turning the power on.
Press ① Receiver on the remote controller to turn the power on.
- Switch the input on the TV to that assigned to the unit. Use the TV's remote controller.
2. Select the input on the unit.
Press the ③Input Selector button with the same name as the jack used for connection. Press TV to listen the TV's sound. You can also use the input selector buttons on the main unit.
- Input will automatically be selected if the TV or player is CEC compliant and connected to the unit with HDMI cable.
3. Select the desired listening mode.
After pressing ②RCV, press the ⑦ listening mode buttons to switch the mode so that you can enjoy different listening modes.
- Adjust the volume with ⑪ VOL.
Remote controller parts name
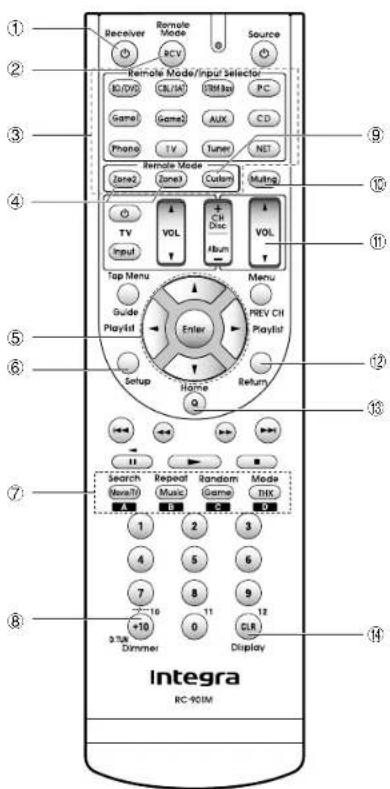
① ◎ Receiver button: Turns the unit on or into standby mode.
② RCV button: Switches the remote controller to the mode for operating this unit.
③ Remote Mode/Input Selector buttons: Switch the input to be played. Furthermore, by registering a particular remote control code to a button, you can switch the remote control mode to operate other equipment by pressing that button.
④ Zone2, Zone3 buttons: For use when the unit is connected with a pre-main amplifier and speakers in a separate room and sound is played there.
⑤ Cursor buttons and Enter button: Moves the cursor and confirms the selection.
⑥ Setup button: Displays the screen for making various settings for this unit.
⑦ Listening mode buttons: Allows you to select the listening mode.
Movie/TV button: You can select a listening mode suitable for movies and TV programs.
Music button: You can select a listening mode suitable for music.
Game button: You can select a listening mode suitable for games.
THX button: You can select a THX listening mode.
- For details on the listening modes, see the Advanced Manual.
⑧ Dimmer button: Switches the brightness of the display.
⑨ Custom button: You can register a preset code to enable operation of other devices. For how to make settings, see the Advanced Manual.
⑩ Muting button: Temporarily mutes audio. Press again to cancel muting.
⑪ Volume buttons: Allows you to adjust the volume. This button also cancels the muting.
⑫ Return button: Returns the display to the previous state.
⑬ Q button: Displays the Quick Setup menu that allows you to quickly access the frequently used setting items including sound quality adjustment.
⑭ Display button: Switches the information on the display.
2 Network Functions
You can enjoy sources such as Internet radio by connecting the unit to a network. For details on the operation, see the Advanced Manual.
- The operations described in this section are not displayed on the TV when the OSD (the feature to show information such as setting menus on the TV) language is set to "Chinese". Operate by confirming the display on the main unit.
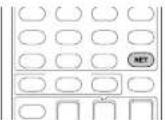
Press NET on the remote controller to display the NET TOP screen on the TV. Select the item with the cursors of the remote controller and press Enter to confirm your selection. To return to the previous screen, press Return.
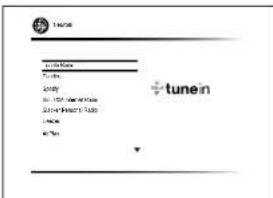
Internet Radio services
The unit comes preset with Internet radio services such as Tuneln Radio. After selecting the desired service, follow the on-screen instructions, using the cursors to select radio stations and programs, then press Enter to play.
• Network services or contents may become unavailable if the service provider terminates its service.
• Available services may vary depending on your area of residence.
dlna DLNA
You can play music files stored in the PC or NAS device connected to the network. Select the server with the cursors, select the desired music file and press Enter to start playback.
- This unit needs to be connected to the same router as a computer or NAS device.
Home media
You can play music files in a shared folder on the PC or NAS device connected to the network. Select the server with the cursors, select the desired music file and press Enter to start playback.
- This unit needs to be connected to the same router as a computer or NAS device.
USB
Play music files on a USB storage device. Connect the USB storage device to the USB jack on the rear of the unit, select the desired folder or music file with the cursors, and press Enter to confirm and start playback.
3 AirPlay®
You can enjoy the audio from iPhone®, iPod touch®, iPad® and PCs with iTunes.
Important: The iOS device or PC needs to be connected to the network through the same router as this unit.
■ Playing music files from an iPhone, iPod touch, or iPad
Update the OS version on your iOS device to the latest version before connecting it to this unit.
-
Press NET on the remote controller.
-
Tap the AirPlay icon on the iPhone, iPod touch, or iPad, select this unit from the list of devices displayed, and click "Done".
Step 3: Playing Back
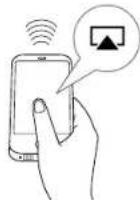
- The AirPlay icon is displayed in the control center under iOS 7 and later. To display the control center, swipe from the bottom of the screen of the iOS device.
-
If the AirPlay icon is not displayed, confirm that this unit and the iOS device are both connected to the router correctly.
-
Playing music files from an iPhone, iPod touch, or iPad.
■ Playing music files from a computer
• AirPlay is compatible with iTunes 10.2 or later.
- Press NET on the remote controller.
- Switch on your computer and start iTunes.
- Click the AirPlay icon in iTunes and select this unit from the list of devices displayed.
- Playing iTunes music files.
- If "6. Hardware"-Power Management"-Network Standby" is set to "On" in the Setup menu, then once AirPlay starts, this unit switches on automatically and the "NET" input source can be selected. Even if this setting is "Off", if the unit is already on then the "NET" input source can be selected.
• Information such as the name of the track is displayed on the unit's display during AirPlay playback.
- Due to the characteristics of AirPlay wireless technology, the sound produced on this unit may slightly be behind the sound played on the AirPlay-enabled device.
- There may be some differences in how operations are performed depending on the iOS or iTunes version.
- OSD are not displayed when the OSD language is set

to "Chinese". Operate by confirming the display on the main unit.
Volume: The volume of this unit and the AirPlay-enabled device are linked. Take care that the volume doesn't become too loud when you adjust the volume on the AirPlay-enabled device. You may damage the unit or the speakers. Stop play on the AirPlay-enabled device immediately if the volume becomes too loud at any point.
4 AM/FM Radio
The Basic Manual explains the method using automatic tuning. For manual tuning, see the Advanced Manual.
- Press the Tuner button on the main unit several times to select either "AM" or "FM".
-
Press Tuning Mode on the unit, so that the "AUTO" indicator on the display lights.
-
Press Tuning▼ on the unit. The automatic tuning to a radio station starts. Searching stops when one is tuned. When tuned into a radio station, the ►TUNED indicator on the display lights. The "FM STEREO" indicator lights if the radio station is an FM radio station.
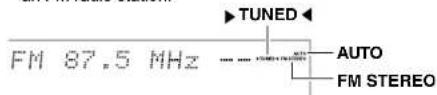
Actual display varies depending on the country or region
Registering a radio station: You can register up to 40 of your favorite AM/FM radio stations.
- Tune into the AM/FM radio station you want to register.
- Press Memory on the unit so that the preset number on the display flashes.
- Repeatedly press Preset◀▶ on the unit to select a
number between 1 and 40 while the preset number is flashing (about 8 seconds).
- Press Memory again on the main unit to register the station. When registered, the preset number stops flashing. To select a preset radio station, press Preset◀▶ on the main unit or CH +/- on the remote controller.
- To delete a registered preset station, press the Preset ◀ button on the main unit, select the preset number you want to delete, then while holding down the Memory button, press the Tuning Mode button. When deleted, the number on the display goes off.
AM/FM frequency step setting
It may be necessary for you to change the frequency step to tune the radio in your area. Change the step with the following procedure. Note that when this setting is changed, all radio presets are deleted.
1 After pressing RCV on the remote controller, press Setup.
2. Select "6. Hardware" with the cursor and press Enter.
3. Select "Tuner" with the cursor and press Enter.
4. Select "AM/FM Frequency Step" (North American models) or "AM Frequency Step" (Australian models) with the cursor and select the frequency step for your area.
1 After pressing RCV on the remote controller, press Setup.
2. Select "6. Hardware" with the cursor and press Enter.
3. Select "Tuner" with the cursor and press Enter.
4. Select "AM/FM Frequency Step" (North American models) or "AM Frequency Step" (Australian models) with the cursor and select the frequency step for your area.
5 Multi-zone
You can listen to audio in a room (called Zone 2 or Zone 3) other than the one where this unit is located (called the main room). You can also output video and audio to a TV in the separate room (Zone 2) via HDMI.
■ Sources you can playback
- External players(1)
- NEF2)
• AM/FM Radio
*1 In Zone 2, you can play equipment connected to any of the HDMI IN1 to IN5 jacks, DIGITAL IN COAXIAL/OPTICAL jacks. AUDIO IN jacks, or INPUT BALANCE L/R jacks. Note that only analog or
Step 3: Playing Back
2-channel PCM audio signals can be played and that some players require audio output setting. Only players connected to the AUDIO IN jacks or INPUT BALANCE L/R jacks by analog connection can be played in Zone 3. *2 DSD and Dolby TrueHD audio cannot be played in Zone 2/Zone 3.
Making Multi-zone Connection
There are the following two methods of connection. Simultaneous playback in all zones is also possible. a. Connecting a TV in a separate room
b. Connecting with an integrated amplifier or power amplifier in a separate room
■ a. Connecting a TV in a separate room
You can play video and audio of the HDMI connected player on the TV in a separate room. With an HDMI cable, connect between the HDMI OUT SUB/ZONE 2 jack of the unit and the HDMI IN jack of the TV in a separate room.
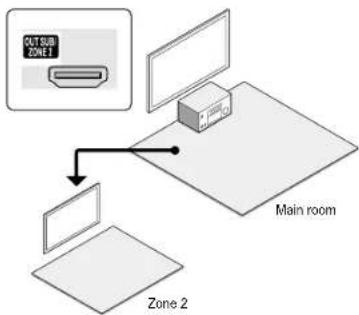
flowchart
graph TD
    A["Main room"] --> B["Zone 2"]
    B --> C["Device with OUT SUB ZONE 1"]
Settings are required: Press RCV and then Setup on the remote controller, select "1. Input/Output Assign" - "TV Out" and set the "Zone 2 HDMI" setting to "Use".
- The information for a connected device can be displayed on the TV screen in a separate room. Press the Zone2 button on the remote controller to select Zone 2 and press Display.
- Adjust the volume on the TV in the separate room.
■ b. Connecting with an integrated amplifier or power amplifier in a separate room
It is possible to play 2 ch source in a separate room while 7.1 ch source is being played in the main room. Connect the PRE/LINE OUT ZONE 2 jacks or PRE/LINE OUT ZONE 3 jacks of the unit and the line-in jacks of the integrated amplifier in a separate room with an RCA cable.
Settings are required to listen to HDMI input audio in Zone 2: Press RCV and then Setup on the remote controller, select "1. Input/Output Assign" - "TV Out" and set the "Zone 2 HDMI" setting to "Use".
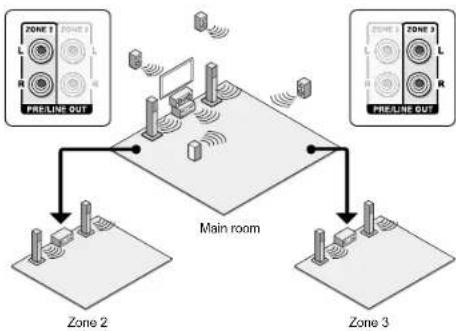
flowchart
graph TD
    subgraph Main Room
        A["Main room"] --> B["Zone 2"]
        A --> C["Zone 3"]
    end
    D["Central screen with monitor and antenna"] --> E["PELINE OUT"]
    F["Radio wave signals"] --> G["Main room"]
    H["Radio wave signals"] --> I["PELINE OUT"]
Settings are required to adjust audio using this unit: Press RCV and then Setup on the remote controller, select "3. Audio Adjust" - "Multi Zone" and set the "Zone 2 Out" or "Zone 3 Out" setting to "Variable". Be sure to make this setting if you connect a power amplifier. If you do not, the volume output may be big enough to cause damage.
Performing Multi-zone Playback
It is possible to perform playback in the main room and a separate room at the same time, for example by playing the Blu-ray Disc player in the main room where the unit is placed while playing Internet radio in a separate room. It is also possible to perform playback only in a separate room.
- With external players, it is possible to play the same source or different sources in the main room and separate room.
- You cannot select separate network services for the main room and another room with the "NET" input.
- When listening to AM/FM broadcasting, you cannot select different stations for the main room and separate room. Therefore broadcasting of the same station will be heard in the both rooms.
- If you have connected the same player by HDMI in the main room and in a separate room, input to this unit (the main room) will be 2-channel PCM.
Playing Back
- Press Zone2 or Zone3 on the remote controller, point the remote controller at the main unit and press ☑Receiver. "Z2" or "Z3" lights on the main unit display and the multi-zone function is enabled. (Zone 2 or Zone 3 is now on.)
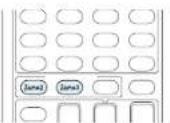
- Press Zone2 or Zone3 again on the remote controller and press Input Selector of the input to be played in a separate room.
- If you turn the unit to standby during multi-zone playback, the Z2/Z3 indicators are dimmed and the playback mode is switched to playback in a separate room only. Performing steps 1 and 2 while the unit is in standby also switches the playback mode to playback in a separate room only. To play the same source in the main room and separate room, hold down Zone2 or Zone3 for approximately 3 seconds.
Step 3: Playing Back
To control on the main unit: press Zone2 or Zone3 and within 8 seconds, press the input selector button of the source to be played in the other room. To play the same source in the main room and separate room, press Zone2 or Zone3 twice.
To adjust the audio in Zone 2 or Zone 3
To adjust the volume, press Zone2 or Zone 3 on the remote controller and then adjust with VOL▲▼. You can also temporarily mute sound by pressing Muting. To control on the main unit, press Zone2 or Zone 3 and within 8 seconds, adjust with the Master Volume control.
To adjust the sound quality, press Zone2 or Zone 3 on the main unit and press Tone several times to display "Bass", "Treble" or "Balance" on the main unit display and adjust it with + or -.
To turn off the function
After pressing Zone2 or Zone3 on the remote controller, press ⓍReceiver. To control on the main unit, press Zone2 or Zone3 and press ⓍOn/Standby.
• Power consumption in standby mode increases when the multi-zone function is being used.
- While using the multi-zone function, the RI linked system function (link between Onkyo components) is disabled.
- Pressing Input Selector on the remote controller while you are using the remote controller for Zone 2 or Zone 3 will switch the controlled target to the main room. To control Zone 2 or Zone 3 again, press the Zone2 or Zone3 button to enter the Zone control mode.
WHOLE HOUSE MODE: If you press Whole House Mode while playback is being performed in the main room, the WHOLE HOUSE MODE is turned on, "Z2" and "Z3" on the display light at the same time and the playback sources of all the rooms are switched to the same source at once.
- The sources that can be played in Zone 2 can be played in all rooms.
- This function cannot be used if headphones are connected or audio is output from the speakers of the TV.

Quick Setup menu
You can perform common settings on the television screen while playing.
- Press Q on the remote controller.
The Quick Setup menu is displayed on the connected TV's screen.
| Quick Setup | BDDVD | |
| Listening Mode | MOVIE/TV | |
| Audio | MUSIC | |
| HDMI | GAME | |
| Information | THK | |
- Select the items with the cursors on the remote controller and then press Enter.
• To return to the previous screen, press Return.
- Select the content with the cursors of the remote controller.
■ Listening Mode: Select the listening mode from the categories of "MOVIE/TV", "MUSIC", "GAME" and "THX". After selecting, press Enter button to confirm.
- It cannot be set when audio is played from the TV's speakers.
■ Audio: You can perform various audio settings including audio quality and speaker level adjustment.
- You cannot select this item when audio is output from the TV's speakers.
Bass, Treble: Adjust volume of the front speaker.
- It cannot be set if the listening mode is Direct or THX.
Phase Matching Bass: Suppress phase shift in the midrange to enhance bass sound. Thus smooth and powerful bass sound can be obtained.
- It cannot be set if the listening mode is Direct or THX.
Center Level, Subwoofer Level: Adjust the speaker level while listening to the sound. The adjustment you made will be reset to the previous status when you turn the unit to standby mode.
• Changes may not be possible depending on the speaker settings.
• This setting is not possible during MUTING or when using headphones.
Speaker Layout: Select the speakers to prioritize when back speakers and height speakers are connected at the same time.
- Changes may not be possible depending on the speaker settings.
A/V Sync: If the video is behind the audio, you can delay the audio to offset the gap. Different settings can be set for each input selector.
- It cannot be set if the listening mode is Direct.
AccuEQ Room Calibration: Enable or disable the settings made by automatic speaker setting. If this is to be enabled, then normally you should select "On (All Ch)", and to disable just the front speakers you should select "On (ex. L/R)". The setting can be separately set to each input selector.
- This setting cannot be selected if the automatic speaker setting has not been performed.
- It cannot be set if headphones are connected or the listening mode is Direct.
Step 3: Playing Back
Equalizer: Select "Preset1" to "Preset3" configured in "2. Speaker" - "Equalizer Settings" in the Setup menu. The same sound field setting is applied all ranges when set to "Off".
- It cannot be set if the listening mode is Direct.
Music Optimizer: Improve the quality of the compressed audio. Playback sound of lossy compressed files such as MP3 will be improved. The setting can be separately set to each input selector.
- The setting is effective in the signals of 48 kHz or less. The setting is not effective in the bitstream signals.
- It cannot be set if the listening mode is Direct.
Late Night: Make small sounds to be easily heard. It is useful when you need to reduce the volume while watching a movie late night. You can enjoy the effect only with Dolby Digital, Dolby Digital Plus, Dolby TrueHD, and DTS sources.
- Turning the unit to standby mode will set the setting to "Off". In case of Dolby TrueHD, the setting will be set to "Auto".
- The setting cannot be used in the following cases. - If "3. Audio Adjust" - "Dolby" - "Loudness Management" in the Setup menu is set to "Off" when playing Dolby Digital Plus or Dolby TrueHD - When the input signal is DTS and "Dialog Control" is other than 0 dB
Re-EQ, Re-EQ(THX): Adjust the soundtrack that was processed to enhance its treble, in order to make it suitable for home theater.
- This function can be used in the following listening modes: Dolby Digital, Dolby Digital Plus, Dolby TrueHD, Multichannel, DTS, DTS-ES, DTS 96/24, DTS-HD High Resolution Audio, DTS-HD Master Audio, and DTS Express.
- In Re-EQ(THX), the following listening modes can be used: THX Cinema, THX Surround EX, and THX Ultra2 Cinema.
Step 3: Playing Back
Center Spread: Adjust the width of the sound field of the front channel when playing in the Dolby Surround listening mode.
To spread the width of the sound field to the left and right, set to "On". To concentrate sound in the center, set to "Off".
- Depending on the speaker settings, this becomes "Off".
Dialog Control: You can increase the dialog portion of the audio in 1 dB steps up to 6 dB so that you can make dialog easier to hear over background noise.
• This cannot be set for content other than DTS:X.
• The effect may not be selectable with some content.
■ HDMI
HDMI OUT: Select the HDMI OUT jack to be used for output.
Control TV: Set whether to enable the CEC link function for TVs connected through one of the HDMI OUT MAIN or SUB jacks.
Information:
Audio: Displays the audio input source, format, number of channels, sampling frequency, listening mode, and number of output channels.
Video: Displays information such as the video input source, resolution, color space, color depth, 3D information, aspect ratio, and output.
Tuner: Displays information such as the band, frequency, and preset number. This is displayed only when "TUNER" is selected as the input source.
7 Other useful functions
To adjust the sound quality
It is possible to enhance or moderate the bass and treble of front speakers. Press Tone on the main unit several times to select the desired setting from "Bass", "Treble" and "Phase Matching Bass", and adjust with +/-
- This cannot be set if the listening mode is Direct, or THX.
"Bass": Allows you to enhance or moderate the bass. "Treble": Allows you to enhance or moderate the treble.
"Phase Matching Bass": Allows you to keep the clear midrange and effectively enhance the bass.
Checking the Input Format
Press Display on the remote controller several times to switch the display of the main unit in order of:
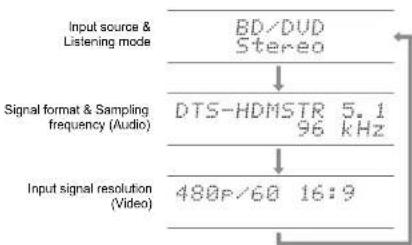
flowchart
graph TD
    A["Input source & Listening mode"] --> B["BD/DVD Stereo"]
    B --> C["Signal format & Sampling frequency (Audio)"]
    C --> D["DTS-HDMSTR 5.1 96 kHz"]
    D --> E["Input signal resolution (Video)"]
    E --> F["480P/60 16:9"]
- If "Dolby D 5.1" is displayed in Signal format, the Dolby Digital 5.1 ch signals are being input. When listening to AM/FM radio, the band, frequency and preset number are displayed.
Playing Audio and Video from Separate Sources
It is possible to play audio and video from different sources. For example, you can play audio from the CD player and video from the BD/DVD player. In this case, press BD/DVD on the remote controller and then CD. Then start playback on the BD/DVD player and CD player. This function is
effective when an input with audio only has been selected (CD, NET, TUNER, and PHONO in the initial setting). (*)
* When NET is selected, press either the NET button then press MODE on the remote controller.
Others
Troubleshooting
Before starting the procedure
Problems may be solved by simply turning the power on/off or disconnecting/connecting the power cord, which is easier than working on the connection, setting and operating procedure. Try the simple measures on both the unit and the connected device. If the problem is that the video or audio is not output or the HDMI linked operation does not work, disconnecting/connecting the HDMI cable may solve it. When reconnecting, be careful not to wind the HDMI cable since if wound the HDMI cable may not fit well. After reconnecting, turn off and on the unit and the connected device.
The AV controller turns off unexpectedly.
•The AV controller will automatically enter standby mode when Auto Standby or Sleep Timer is set and launched.
There's no sound, or it's very quiet.
•A wrong input selector button has been selected. Select a correct input for the player. Also check that muting is not on.
Not all listening modes use all speakers.
Make sure the power amplifier connected to this unit is turned on.
There's no picture.
•A wrong input selector button has been selected.
- To display video from the connected player on the TV screen while the unit is in standby, you need to enable HDMI Standby Through function.
- When the TV image is blurry or unclear, power code or connection cables of the unit may have interfered. In that case, keep distance between TV antenna cable and cables of the unit.
- If you connect a player supporting HDCP2.2, be sure to connect it to one of the HDMI IN1 to IN5 jacks of the unit.
Video and audio are out of synch
- Video may be delayed relative to audio depending on the settings and connections with your television. Adjust in "Step 3: Playing Back", "6 Quick Setup menu", "A/V Sync".
Cannot play digital surround
•To enjoy digital surround sound including Dolby Digital and DTS, audio output should be set to "Bitstream output" on the connected Blu-ray Disc Player or other device.
Cannot output audio such as Dolby Atmos according to the format of the source.
- If you cannot output formats such as Dolby TrueHD, Dolby Atmos, or DTS-HD Master Audio according to the format of the source, in the Blu-ray Disc Player settings try setting "BD video supplementary sound" (or secondary sound) to "Off". Change the listening mode for each source after changing the setting to confirm.
HDMI control does not function correctly.
- Set the CEC link function of the unit to on. It is also necessary to make the HDMI linked system setting on the TV. See the TV's instruction manual for details.
Cannot access to network.
- Try plugging/unplugging the unit or router or check their power-on status. This will work well in many cases.
■ Resetting the unit
Resetting the unit to the status at the time of shipment may solve the problem. If the measures above do not solve the problem, reset the unit with the following procedure. If you reset the unit status, your preferences will be reset to the defaults. Note them down before starting reset.
● How to reset:
- While holding down CBL/SAT on the main unit (note that step 2 must be performed with this button pressed down)
- Press Ⓧ On/Standby on the main unit ("Clear" appears on the display and the unit returns to standby)
Do not unplug the power cord until "Clear" disappears from the display.
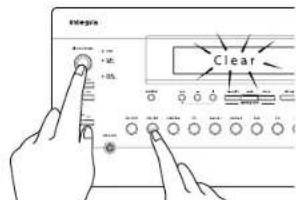
- Press ⏻On/Standby.
- While holding down the CBL/SAT button
● How to reset the remote controller:
- While holding down RCV on the remote controller, press Q until the remote indicator stays lit (about 3 seconds).
- Within 30 seconds, press RCV again.
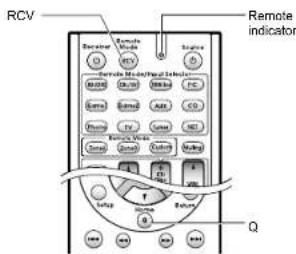
Connections
Initial Setup
Playing Back
Advanced Manual
Front Panel >Rear Panel >Remote Controller
Others
Specifications
Amplifier Section
Input Sensitivity and Impedance
200 mV/47 kΩ (LINE)
3.5 mV/47 kΩ (PHONO MM)
Rated RCA Output Level and Impedance
1 V/470 Ω (PRE OUT)
1 V/470 Ω (SUBWOOFER PRE OUT)
100 RV/2.2 kJ (ZONEZ/ZONE3 LINE OUT)
1 V/2.2 KΩ (ZONE2/ZONE3 PRE OUT)
Rated XLR Output Level
2 V/440 (PRE
Phone Overhead
70 mV (MM 1 kHz 0.5% Direct)
Frequency Response
5 Hz - 100 kHz/+1 dB, -3 dB (Direct mode)
Tone Control Characteristics
±10 dB, 20 Hz (BASS)
±10 dB, 20 kHz (TREBLE)
Signal to Noise Ratio
77 dB (LINE, IHF-A)
51 dB (PHONO MM, IHF-A)
Video Section
Signal Level
1.0 Vp-n/75 O (Component Y)
0.7 Vp-p/75 Ω (Component Pb/Cb, Pr/Cr)
1.0 Vp-p/75 O (Composite)
Component Video Frequency Response
5 Hz - 100 MHz/+0 dB, -3 dB
Corresponding maximum resolution
480i/576i (Component to HDMI)
720p/1080 (Component to Component)
Tuner Section
FM Tuning Frequency Range
87.5 MHz - 107.9 MHz (North American)
87.5 MHz - 108.0 MHz, RDS (Others)
AM Tuning Frequency Range
522/530 kHz - 1611/1710 kHz
Preset Channel
40
Network Section
Ethernet LAN
10BASE-T/100BASE-TX
General
Power Supply
120 V AC. 60 Hz (North American)
220 - 240 V AC, 50/60 Hz (Others)
Power Consumption
0.5 A (North American)
45 W (Others)
0.15 W (Stand-by, North American)
0.2 W (Stand-by, Others)
2.7 W (Network Standby)
95 W (No-sound)
Dimensions (W × H × D)
435 mm × 199 mm × 416 mm
17-1/8" × 7-13/16" × 16-3/8"
Weight
12 kg (26.5 lbs.)
• HDMI
Input
IN1 (BD/DVD, HDCP2.2), IN2 (CBL/SAT, HDCP2.2), IN3 (STRM BOX,
HDCP2.2), IN4 (PC, HDCP2.2), IN5 (GAME1, HDCP2.2), IN6 (GAME2).
IN7. AUX INPUT HDMI (front)
Output
OUT MAIN. OUT SUB/ZONE2
Video Resolution
4K 60 Hz (RGB/YCbCr4:4:4/YCbCr4:2:2, 24bit)
Audio Format
Dolby Atmos. Dolby TrueHD. Dolby Digital Plus. Dolby Digital DTS:X
DTS-HD Master Audio, DTS-HD High Resolution Audio, DTS 96/24, DTS-
ES, DTS, DTS Express, Multichannel PCM (up to 8ch)
Supported
3D Audio Return Channel Deep Color x y Color™, LioSync, CEC 4K
Extended Colorimetry (sYCC601, Adobe RGB, Adobe YCC801), Content
Type, 3D Dual View, 21:9 Aspect Ratio Video Format
- HDBaseT
OUT (×)IN (HDMI)
* 3G bps or less for 4K (use a CAT 5e or better cable, 70 m or less in length)
• Video Inputs
Component
IN1 (BD/DVD), IN2 (GAME2)
Composite
IN1 (GAME1), IN2 (CBL/SAT), IN3 (STRM BOX)
• Video Outputs
Component
OUT
Composite
OUT
- Audio Inputs
Digital
OPTICAL 1 (STRM BOX), 2 (CD), 3 (TV)
COAXIAL 1 (BD/DVD), 2 (CBL/SAT)
Analog
BD/DVD, GAME2, PC, GAME1, CBL/SAT, TV, CD, PHONO
Balance
BALANCE L/R
- Audio Outputs
Analog
PRE/LINE OUT (ZONE2/ZONE3)
Multi language on-screen display
(North American) English, German, French, Spanish, Italian, Dutch.
Swedish, Chinese (+)
(Others) English, German, French, Spanish, Italian, Dutch, Swedish,
Russian, Chinese (*)
* OSD are not displayed when input is "NET". Operate by confirming
the display on the main unit.
Specifications and features are subject to change without notice.
Connections
Initial Setup
Playing Back
Advanced Manual
Front Panel >Rear Panel >Remote Controller
Others
Table of image resolutions
Refer to the following table for information about the image formats and resolutions output by this unit in response to input signals
| Input\Output HDMI | 4K 108p/24 108p 1080i 720p | 480p/576p 480i/576i | |||||
| HDMI | 4K √ | ||||||
| 1080p/24 √ | |||||||
| 1080p √ | |||||||
| 1080i √ | |||||||
| 720p √ | |||||||
| 480p/576p √ | |||||||
| 480i/576i √ | |||||||
| Component | 1080p | ||||||
| 1080i | |||||||
| 720p | |||||||
| 480p/576p | |||||||
| 480i/576i √ | |||||||
| Composite 480i/576i √ | |||||||
Resolutions supported by HDMI
■ HDMI IN1 to IN5 (when using in the main room)
| Copyright protection technology | Display resolution | Frame rate Color | space Color Depth | Remarks |
| HDCP1.4 HDCP2.2 | 720×480i | 60 Hz | RGB/ YCbCr4:4:4/ YCbCr4:2:2 | With YCbCr4:2:2, only 12 bit Color Depth is supported. |
| 720×576i | 50 Hz | |||
| 720×480p | 60 Hz | |||
| 720×576p | 50 Hz | |||
| 1920×1080i 50/60 Hz | ||||
| 1280×720p 24/25/30/50/60 Hz | ||||
| 1680×720p 24/25/30/50/60 Hz | ||||
| 1920×1080p | 24/25/30/50/60 Hz | |||
| 2560×1080p | 24/25/30 Hz | |||
| 50/60 Hz | ||||
| 4K (3840×2160p) | 24/25/30 Hz | RGB/YCbCr4:4:4 | 8/10/12/16 bit | |
| YCbCr4:2:2 | 12 bit | |||
| 50/60 Hz | RGB/YCbCr4:4:4 | 8bit | ||
| YCbCr4:2:2 | 12 bit | |||
| YCbCr4:2:0 | 8/10/12/16 bit | |||
| 4K SMPTE (4096×2160p) | 24/25/30 Hz | RGB/YCbCr4:4:4 | 8/10/12/16 bit | |
| YCbCr4:2:2 | 12 bit | |||
| 50/60 Hz | RGB/YCbCr4:4:4 | 8 bit | ||
| YCbCr4:2:2 | 12 bit | |||
| YCbCr4:2:0 | 8/10/12/16 bit | |||
En-24
■ HDMI IN1 to IN5 (when using in Zone 2)
| Copyright protection technology | Display resolution | Frame rate | Color space Color Depth | Remarks |
| HDCP1.4HDCP2.2 | 720×480i | 60 Hz | RGB/YCbCr4:4:4/YCbCr4:2:2 | With YCbCr4:2:2, only 12 bit Color Depth is supported. |
| 720×576i | 50 Hz | |||
| 720×480p | 60 Hz | |||
| 720×576p | 50 Hz | |||
| 1920×1080i | 50/60 Hz | |||
| 1280×720p | 24/25/30/50/60 Hz | |||
| 1680×720p | 24/25/30/50/60 Hz | |||
| 1920×1080p | 24/25/30/50/60 Hz | |||
| 2560×1080p | 24/25/30 Hz | |||
| 50/60 Hz | RGB/YCbCr4:4:4 8/10/12 bit | |||
| YCbCr4:2:2 | 12 bit | |||
| 4K(3840×2160p) | 24/25/30 Hz | RGB/YCbCr4:4:4 8 bit | ||
| YCbCr4:2:2 | 12 bit | |||
| 50/60 Hz | YCbCr4:2:0 | 8bit | ||
| 4K SMPTE(4096×2160p) | 24/25/30 Hz | RGB/YCbCr4:4:4 8 bit | ||
| YCbCr4:2:2 | 12 bit | |||
| 50/60 Hz | YCbCr4:2:0 | 8 bit |
■ HDMI IN6, IN7, Front
| Copyright protection technology | Display resolution | Frame rate | Color space Color Depth | Remarks |
| HDCP1.4 | 720×480i | 60 Hz | RGB/YCbCr4:4:4/YCbCr4:2:2 | With YCbCr4:2:2, only 12 bit Color Depth is supported. |
| 720×576i | 50 Hz | |||
| 720×480p | 60 Hz | |||
| 720×576p | 50 Hz | |||
| 1920×1080i | 50/60 Hz | |||
| 1280×720p | 24/25/30/50/60 Hz | |||
| 1680×720p | 24/25/30/50/60 Hz | |||
| 1920×1080p | 24/25/30/50/60 Hz | |||
| 2560×1080p | 24/25/30 Hz | |||
| 50/60 Hz | RGB/YCbCr4:4:4 8/10/12 bit | |||
| YCbCr4:2:2 12 bit | ||||
| 4K(3840×2160p) | 24/25/30 Hz | RGB/YCbCr4:4:4 8 bit | ||
| YCbCr4:2:2 12 bit | ||||
| 50/60 Hz | YCbCr4:2:0 8 bit | |||
| 4K SMPTE(4096×2160p) | 24/25/30 Hz | RGB/YCbCr4:4:4 8 bit | ||
| YCbCr4:2:2 12 bit | ||||
| 50/60 Hz | YCbCr4:2:0 8 bit |
Connections
Initial Setup
Playing Back
Advanced Manual
Front Panel >Rear Panel >Remote Controller
Precautions
For U.S. Models
FEDERAL COMMUNICATIONS COMMISSION DECLARATION OF CONFORMITY
This device complies with part 15 of the FCC Rules. Operation is subject to the following two conditions:
(1) this device may not cause interference, and
(2) this device must accept any interference, including interference that may cause undesired operation of the device.
Product Name: AV Controller
Model Number: DHC-60.7
Responsible Party Name: Onkyo U.S.A. Corporation
Address: 18 PARK WAY, UPPER SADDLE RIVER,
NEW JERSEY 07458, USA
Phone: 1-800-229-1687
For European Models
Declaration of Conformity
We declare, under our sole responsibility, that
this product complies with the standards:
- Safety
– Limits and methods of measurement of radio disturbance characteristics
- Limits for harmonic current emissions - Limitation of voltage changes, voltage fluctuations and flicker
- RoHS Directive, 2011/65/EU
- Hereby, Onkyo Corporation, declares that this DHC-60.7 is in compliance with the essential requirements and other relevant provisions of Directive 1999/5/EC.
License and Trademark Information
DOLBY
Manufactured under license from Dolby Laboratories. Dolby, Dolby Atmos, Dolby Surround, Surround EX and the double-D symbol are trademarks of Dolby Laboratories.

For DTS patents, see http://patents.dts.com. Manufactured under license from DTS, Inc. DTS, the Symbol. DTS in combination with the Symbol, the DTS-HD logo, and DTS-HD Master Audio are registered trademarks or trademarks of DTS, Inc. in the United States and/or other countries. © DTS, Inc. All Rights Reserved.

Manufactured under license from THX Ltd. THX and the THX logo are registered in the U.S. and other jurisdictions. All rights reserved. Surround EX is a trademark of Dolby Laboratories. Used with permission. U.S. Pat. nos. 7,254,239 & 7,593,533 & 7,974,425 & 8,452,028 & 8,509,457 Taiwan Pat. I238671 European Pat. 1,360,874
THX Ultra2 Plus
Before any home theater component can be THX Ultra2 Plus certified, it must pass a rigorous series of quality and performance tests. Only then can a product feature the THX Ultra2 Plus logo, which is your guarantee that the Home Theater products you purchase will give you superb performance for many years to come. THX Ultra2 Plus requirements define hundreds of parameters, including power amplifier performance, and pre-amplifier performance and operation for both digital and analog domains. THX Ultra2 Plus receivers also feature proprietary THX technologies (e.g., THX Mode) which accurately translate movie soundtracks for home theater playback.
Re-Equalization and the "Re-EQ" logo are trademarks of THX Ltd.
HDMI
(1) 本说明仅供参考。
The terms HDMI and HDMI High-Definition Multimedia Interface, and the HDMI Logo are trademarks or registered trademarks of HDMI Licensing LLC in the United States and other countries.


AirPlay. iPad, iPhone, and iPod touch are trademarks of Apple Inc., registered in the U.S. and other countries.
iPad Air and iPad mini are trademarks of Apple Inc.
"Made for iPod", "Made for iPhone" and "Made for iPad" mean that an electronic accessory has been designed to connect specifically to iPod. iPhone, or iPad, respectively, and has been certified by the developer to meet Apple performance standards. Apple is not responsible for the operation of this device or its compliance with safety and regulatory standards.
Please note that the use of this accessory with iPod, iPhone or iPad may affect wireless performance.
AirPlay works with iPhone, iPad, and iPod touch with iOS 4.3.3 or later. Mac with OS X Mountain Lion or later, and PC with iTunes 10.2.2 or later.
Apple, Apple TV and Safari are trademarks of Apple Inc., registered in the U.S. and other countries.
CHDBT
HDBaseT™ and the HDBaseT Alliance logo are trademarks of the HDBaseT Alliance.
((SiriusXm))
SIRIUS, XM and all related marks and logos are trademarks of Sirius XM Radio Inc. and its subsidiaries. All rights reserved.
DLNA®, the DLNA Logo and DLNA CERTIFIED® are trademarks, service marks, or certification marks of the Digital Living Network Alliance.
This product is protected by certain intellectual property rights of Microsoft. Use or distribution of such technology outside of this product is prohibited without a license from Microsoft.
Windows and the Windows logo are trademarks of the Microsoft group of companies.
QR Code is a registered trademark of DENSO WAVE INCORPORATED.
"x.v.Color" and "x.v.Color" logo are trademarks of Sony Corporation.
DSD and the Direct Stream Digital logo are trademarks of Sony Corporation. MPEG Layer-3 audio coding technology licensed from Fraunhofer IIS and Thomson.
AccuEQ, Music Optimizer, RIHD and WRAT are trademarks of Onkyo Corporation.
"All other trademarks are the property of their respective owners."
DISCLAIMER
Through this device you are able to link to other services or websites which are not under the control of any company which has designed, manufactured or distributed/have distributed this device, and its affiliates (collectively, "Company"). We have no control over the nature, content and availability of those services. The inclusion of any links does not necessarily imply a recommendation or endorse the views expressed within them.
All information, content and services available through this device belong to third parties and are protected by copyright, patent, trademark and/or other intellectual property laws of applicable countries.
The information, content and services provided through this device are for your personal, noncommercial use only. Any information,
Others
content or services may not be used in any manner other than previously approved by the appropriate content owner or service provider.
You may not modify, copy, republish, translate, exploit, create derivative works, upload, post, transmit, sell or distribute in any manner any information, content or services available through this device, unless expressly permitted by the appropriate copyright, patent, trademark and/or other intellectual property owner, including, without limitation, content owner or service provider.
THE CONTENT AND SERVICES AVAILABLE THROUGH THIS DEVICE ARE PROVIDED "AS IS".
COMPANY DOES NOT WARRANT INFORMATION, CONTENT OR SERVICES SO PROVIDED, EITHER EXPRESSLY OR IMPLIEDLY, FOR ANY PURPOSE.
COMPANY EXPRESSLY DISCLAIMS ANY WARRANTIES, EXPRESS OR IMPLIED, INCLUDING BUT NOT LIMITED
TO, WARRANTIES OF TITLE, NON-INFRINGEMENT, MERCHANTABILITY OR FITNESS FOR A PARTICULAR PURPOSE. Company makes no representation or warranty of any kind, express or implied, about the completeness, accuracy, validity, legality, reliability, suitability or availability with respect to the information, content or services available through this device. Company shall not be liable, whether in contract or tort, including negligence and strict liability, for any direct, indirect, special, incidental or consequential damages or any other damages arising out of, or in connection with, any information contained in, or as a result of the use of any content or service by you or any third party, even if Company has been advised of the possibility of such damages, nor shall Company be liable for any third party claims against users of this device or any third party.
In no event shall Company be responsible nor liable for, without limiting the generality of the foregoing, any interruption or suspension of any information, content or service available through this device. Company is neither responsible nor liable for customer service related to the information, content and services available through this device. Any question or request for service relating to the information, content or services should be made directly to the appropriate content owners and services providers.
En-26

Others
GNUライセンス
Important Notice Regarding Software
The social media package is added in the product, including sales and sales channels. It includes: Cukya Consumer (promoter), retail "Cukya" directly or indirectly by drug specialty development. Prices have been paid to the other revenue and other software.
Notice Regarding GNU GPL/LGPL-applicable Software
This product includes the following software. It is covered by GNU General Fabric License (here further, called "CPL") for by GNU Lower Genera Public License character, called "CPL").
Oncoyn Mechanical you that, sozzering in the attached GPS & GPS, you have right in relation to mostly and net attributes formulas source popular for the labeled formulas.
ソフトウェアに関する重要なお知らせ
Version 2.1, February 1309
Copyright (C) 1991. 1993 Free Software Foundation, Inc. 63 Temple Place, Suite 830, Boston, MA 02111-1307 USA Everyone is permitted to copy and distribute website copies of this license document, but charging the not a word.
[This is the first released version of the Lessor GPL. It also counts as the successor of the GNU Library Public License, version 2, hence the version number 2.1.]
Eramble
The Licenses for most software are designed to save away your freedom to share and change it. By contrast, the GNU General Public Licenses are intended to guarantee your freedom to share and change free software—to make sure the software is free for all its users.
The License, the Letter General Public License, applies to some specialty integrated software packages—specially license—of the Free Software Foundation and other authors who dedicate to use it. You can use it too, but we suggest you first think carefully about whether the license or the ordinary General Public License is the better strategy to use in any particular case, based on the explorations below.
When we expect free software, we are offering to freedom or use price. Our General Public license are designed to make sure that you have the freedom to distribute copies of free software (and change for this service if you want); that you receive source code or can get in if you want; it that you can change the software and use pages of the free software; and then you are informed that you can do these things.
In particular your rights, now need to measure restrictions that hold the distribution to deny you, these rights or to ask you to administer these rights. These restrictions translate to certain responsibilities for you if they distribute codes of the library or if you modify it. For example, if you distal box copies of the library, whether grants or for a fee, you must give the recipient all the rights that we gave you. You must make sure that they, too receive or can get the course code. If you link other codes with the library, you must provide complete object files to the recipients, so that they can rely from with the library after making changes to the library and rescompiling it. And you must show them these terms so they know their rights.
We protect your rights with a two-stop method: (1) we copyright the library, and (2) we offer you this license, which gives you legal permission to copy diploma and/or modify the library. We protect each distributor we want to make it very clear that there is no warranty for the free library. Also, if the library is modified by someone else and passed on, the recipients should know that what they have is not the original version, so that the original author's reputation will not be affected by problems that might be introduced by others.
Finally, software patents pore a constant threat to the evidence of any free program. We wish to make sure that a company cannot effectively reset the users of a free program by obtaining a distinctive license from a potent hole; Therefore, we trust that any patent license exists for a version of the library must be construed with the full freedom of use specified in this license. Most GNU software, including some libraries, is covered by the ordinary GNU General Public License. The licenses, the GNU Lower General Public License, applies to certain designated licenses, and is quite different from the ordinary General Public License. You are this license's only options to access personal information through these licenses into one-free account.
When a program is linked with a library, whether critically or using a shared library, the combination of the two is legally seeking a combined work, a derivative of the original library. The ordinary General Pub is License therefore permits such linking only if the entire combination thus its criteria of freedom. The Lesser General Pub is License permits more but criteria for linking other codes with the library.
We did the license that "there" General Public License because it does I see to protect the Law's freedom from the ordinary General Public License. It also provides other free software developers. Less of an advantage over competing non-free programs. There should be a power in the next year we use the ordinary General Public License for many Ubrates. However, the License License provides advantages in certain special circumstances.
For example, on the following table, this is a special fixed in accordance with the United States for the first French Library, but it becomes a defactor standard. To achieve this non-free programs must be allowed to use the library. A more frequent case is that a free library then the some job actively used into-free literature. In the case, there is little progress by making the free library into free software only, so we are the Lower General Public License.
number courses, permission to use a portion or library in non-free programs enables a greater number of people in use a large body of free software. For example, permission to use the GHI G Library in non-free programs enables many more people to use the
whole GNU operating system, as well as its variant, the GNULinux operating system.
Although the Lesser General Public License is less protected as of the users' freedom, it does ensure that the user of a program that is linked with the I. bears has the freedom and the behavioural in our that program uses a modified version of the bears.
The precise terms and conditions for copying, distribution and modification follows. Pay close attention to the difference between a "work based on the library" and a "work that uses the library". The former contains code derived from the library, whereas the letter must be combined with the library in order to run.
TERMS AND CONDITIONS FOR COPYING, DISTRIBUTION AND MODIFICATION
- This License Agreement applies to any software library or other program which contains a notice placed by the
Copyright from other authorized party buying it may be capitalized under the Public License (also called "this License"). Each licensee is addressed as "you".
A "Library" means a collection of software functions and data prepared so as to be conveniently linked with application programs, which are some of these functions and data from sources.
The "Library", below, refers to any such software library or work which has been distributed under these items. A "work based
on the library. These offer the Locus of any derivative work under copyright, and. Sign to it, say, a work concerning the Locus or a portion of it, either sublim or with modifications and/or translated straightforward links to another language. Here particular.
Translation is included without limitation in the term "modification"
"Source code for a work means the preferred form of the work for making recommendations to it. For a library complete source code, means all the source code for all modules it contains, plus any associated interface definition files, plus the scripts used to control compilation and installation of the library."
Activities other from copying, distribution and modification are not covered by this License; they are outside. Is scope. The act of running a program using the Library is not restricted, and output from such a program is covered only if its contents constitute a work based on the Library independent of the use of the Library in a tool for writing it. Whether that is true depends on what the Library does and what the program that uses the Library does.
- You may copy and distribute verbal copies of the Library's complete source code as you receive it in any form, so provided that you consent or should be appropriately applied as a link copy to appropriate content.
notice and disclaimer of warranty, keep impact all the notice that note is the License and to the absence of any
warranty and distribute a copy of this License along with the Library.
You may charge a fee for the physical out of transforming a copy, and you may at your option offer warranty protection in exchange for a fee.
- You may modify your copy or copies of the Library or any portion of it, thus forming a work based on the Library and access and distribution such as functions or work under the terms of Building, labor, and other
Figure 1. Copy and other common conditions of 40% other items of 'carbon' (25%) should be used in the material of these conditions.
a) The modified work must itself be a software library.
b) You must cause the files modified to carry prominent notices stating that you changed the files and the date of any charge.
at No. 1041.com
(3) If a facility in the modified Library refers to a function or a table of data to be supplied by an application
program that uses the facility, other than as an argument passed when the facility is invoxen, then you must make a very half effect to use in fact in the work as application does not only cause America or tasks.
facility still operates, and performs whatever part of its purpose remains meaningful.
For example, a function in a library to compute square roots as a purpose that is entirely well-defined
Not applicable for the Application. Therefore, Subestic Zn required P at any Application-Equipment Section or 1986. Used by this Section must be approved. The application does not work in the system production requirement.
[1]
Those requirements apply to the modified work as a whole. It identifies two ones of that work are not derived
from the Library, and can be stationary based on the author, and separate words in terms of, then the library, and by means to agree with their own experience, which is from as examples made. Equivalents
there do, this is there to not apply to most sections in the library. The book can be used for the information of the articles in the same section as part of a whole which is a work based on the Library. The breadth of the
where must be on the terms of this License, whose permits on for other licensees extend to the entire whole.
And this is even only easy part of the best of with and in
Thus, it is not the intent of this section to claim rights or contest your rights to work written entirely by your rather, the intent is to preserve the right in purity, the data trust of redemption on refundance being on the Library.
In addition, more appreciation of another work not based on the Library with the Library for with a work based on the Library's on
volume of a storage and air-tuning medium does not bring the other work under the scope of that License
- You may opt to apply the terms of the ordinary GNU General Public License instead of this License to a given
andary (31). General Public License, version 2, improved to this License, if a new version than version 2 of
the ordinary SNH General Public License has appeared, then you can expressly install your own instead if you wish.)
Do not make any other charge in these cases.
Data in the change is made in a green copy, it is invalid for full copy, so the ordinary CNJ General Public License applies to all
This option is useful, when you wish to copy part of the route of the Library and a program that is not a library.
- You may copy and distribute the Library for a portion or perspective of it, under Section 2; in object code or
A. The following text in the image is: "Commanding much possible a source code, which must be clearly left under the label of Section 1 and 2."
If distribution of object code is made by offering access to copy from a designated place, then offering
- A government final carrying patents (sales of any portion of the Lienay, shall be shown in work way, but do
being compared to friend with it is called a "work first issue the I carry" such a work, in addition, is not a
crombie work of the Library and therefore, it's outside. In addition of the Licensee
Feramare, the ring a work Prof. loss the Library with the Library reserve an successful trial to a new value of the Library (theven)
Sedan 6 studies were for distribution of each covariates.
Vitron is "work that cases the Library" unless neither from a reader. The job is part of the Library, that played once for the work may be
The following table provides the results of the first time that the result is a result of the final time.
It such so needed. The new data in the financial reports, then is subject to change and changes, and at end price and at end income
Landforms than lines or lines in length, then the case of the place. The concentration, reference of whether it is legally denominated
Other items. The work is a dedicated to the calling you may be obtained in the compact table of the work under the forms of each of the power of the transportation, but now stop in under Karlo-8 whether or will have any kind of words, he has
- As an exception to the Section above, you may also continue or even a "work that uses the Library" with the
Library in process is work combining pictures of the luxury, and illustrates that work under lemma 4 years
where, provide and the key plan to be a 2013-2015 fiscal year.
You must give yourself make with such one of the work that the Library is used in hand that the Library and its use are
covered by this License. You must supply a copy of this License. If the work during execution displays copyright notices, you must include the copyright notice for the Library among them, and will use an inference directing the user to the copy of this License. Also, you must do one of those things:
a) Accounting the work with the complete corresponding machine reliable source code for the Library
- Using whether changes here uses in the non-influence of a 50000000000000000000000000000000000000000000000000000000000000000000
uses the Library, as obiect code and/or source code, so that the user can modify the Library and then
to produce a modified executable containing the modified Library. It is understood that the user who charges
the content of definition
a) Use a suitable shared library mechanism for linking with the Lizen: A suitable mechanism is one that if
uses at run time a copy of the library already present on the user's computer system, rather than copying
library functions into the executable, and (2) will operate properly with a modified version of the library. If the
[Unreadable]
6) Accompany the work with a written offer, valid for at least three years. To give the same user the materials
specified in Subsection Ta, above. For a charge no more than the cost of performing this distribution.
by a first batch of the 40-12 made by ordering access is copy from a data folder. Note, other details are required to copy the above specified reader from the same place.
c) Verify that the user has already received a copy of these materials or that you have already sent this user a
copy
For an executable, the required form of the "work that uses the Library" must include any data and utility programs needed for maintaining the executable from libraries on a special execution. The material is also used to ensure availability of
is normally distributed (in other source or binary form) with the major components recombinant, kernel, and so on) of the operating system on which the executable runs, unless that component itself accompanies the executable
It may happen that this requirement or lists the license restrictions of other proprietary libraries that do not normally.
sccompany the operating east
- You may place Library for B: but that are a word based on the Library side to side in a circle library together.
with other library facilities not covered by this License, and distribute such a combined library, provided that the
separate distribution of the work based on the Library and of the other library facilities is otherwise permitted,
and provide the story of these are things. As from means the combined library with a core of the same work here, to the library, unprecedented with one
other library facilities. This must be distributed under the terms of the Sections above.
a) Give prominent notice with the combined library of the fact that part of it is a work based on the Library, and
- Ailing, where to find a corresponding choice, it is of the game with.
in license. Any additional otherwise to copy modify sublicense. Link with, or set bare the Library and will
automarkally to minnare your rights under this License. However, parties who have received copies, or right
from you under this License will not have their licenses terminated so long as such parties remain in full
Schn. 2100
e. "You are not required to accept his License, once you have not signed it. However, coming else gives you a complete in many words like the lilyouris is duvantine never. There actions are published by bull's
to per accept In. license. Therefore, by modern or developing the Library for any work based on the
Library, you include your acceptance of this License to do so, and all its terms and conditions for copying
distributing or modifying the library of works based on it
-
Each time you redistribute the Library (or any work based on the Library), the recipient automatically receives
-
Weise from the original sector in Ruby, which is the aim of many the highly subject to these works and
conditions. You may not impose any other resolution on the recipients exercise of you are not responsible by asking some time to find parties with the issue
- If, as a consequence of a court judgment or allocation of patent infringement or for any other reason incl
inferred to patent issue), conditions are imposed on you (whether by oral order, agreement or otherwise) last
contradict the conditions of this License, they do not excuse you from the conditions of this License. If you
The following table is provided in the image:
orgazolo, don't be a consequence you may be. 100% of the company is not a company.
through you, then the only way you could satisfy both it and this License would be to retain entirely from.
distribution of the Library
If any portion of this section is held in-slice coru-erforceable under any particular disturbance, the balance of the section is
added to apply, and the section as a whole is added to apply in other circumstances
If it is not the purpose of this section to decide you to infringe any patents or other property right desire or to correct safety of
my, Iaini, Iaini, Iaini, Iaini, Iaini, Iaini, Iaini, Iaini, Iaini, Iaini, Iaini, Iaini, Iaini, Iaini, Iaini, Iaini, Iaini, Iaini, Iaini, Iaini, Iaini, Iaini, Iaini, Iaini, Iaini, Iain i
Incorporation, the problem is rather than a large number of cases that are possible to be further involved in the case that is not a result.
to die tools software through any other element and a license cannot impose the cause
The section is intended to make thoroughly clear water, a belief in the consequences of the net of the Licensee
12 If the definition and/or use of the Library is restricted in certain countries either by patents or by
Copyright at the office, the original copyright for the who above the Library under the License and shall be
The following table provides the information in a tabular format:
post of the license.
- The First Foundation company publishes second article new version of the Lower Ground Public License
from late to time. Such new versions will be similar in spirit to the present version, but may offer in detail to
The following instructions for
Each version is given a distinguishing series number. If the carry specification a series number of instances which applies to
The First Nature Society, you first the question is linking the items and the best result of that source in my first Nature Society published by the First Nature Foundation. If the history does not specify a known version number, you may choose any version your preferred by the First Nature Foundation.
- If you wish to incorporate parts of the library in order line programs, where delivering conditions are
Treatments with 2005, W/o all the market in box for portfolio, P/E activities are estimated by 16
The following table, with the 19th and 20th lines of interest, are not limited to the interest of the interest in the 19th line.
of overhang by the site to our country of China capital.
NO WARRANTY
IS E CAUSE IT UHARISTO RS CTEL D CHAKI, THIL IS NO WARRANTY FOR THE LIBORY, TO THE
EXTENT PERMITTED BY APPLICABLE LAW. EXCEPT WHEN OTHERWISE STATED IN WRITING THE O
HOLLES AND/OR PAGES POURD. THE FRONT ASIS WHO INFORMATION AND
MILK, ELLT, TES, KISSUED OR ITEMS, WEDDIN, SO NOT EARNED TO THE MISSE HUMANIES OF MULCHUMMULID AND OTHER CHAPERS. THE HOME (ONK ACTUAL) 2016, U.S.
PERFORMANCE OF THE LIBRARY IS WITH YOU SHOULD THE LIBRARY PROVE DEFECTIVE, YOU ASSUME THE
Others
COST OF ALL NECESSARY SERVICING, REPAIR OR CORRECTION
- IN NO EVENT UNLESS REQUIRED BY APPLICABLE LAW OR AGREED TO IN'WRITING WILL ANY COPYRIGHT
HOLDER, OR ANY OTHER PARTY WHO MAY MODIFY AND/OR REDISTRIBUTE THE LIBRARY AS PERMITTED ABOVE. SE, MRLE TO YOU FOR DWAGERS, INCLUDING ANY GENERAL, SPECIAL, INDEPTUAL OF
ABOVE, LE SAUCE TO YOU FOR LARGAGES. INCLUDING ANY GENERAL, SPECIAL NO DENTAL OR CONSEQUENTIAL DAMAGES ARISING OUT OF THE USE OR INABILITY TO USE THE LIBRARY (INCLUDING BUT
NOT LIMITED TO LOSS OF DATA OR DATA BEING RENDERED INACCURATE OR LOSSES BUSTAINED BY YOU
OR THIRD PARTIES OR A FAILURE OF THE LIBRARY TO OPERATE WITH ANY OTHER SOFTWARE; SUCH HOLDER OF OTHER PARTY HAS BEEN ADVISED OF THE POSSIBILITY OF SUCH DAMAGES.
END OF TERMS AND CONDITIONS
How to Apply These Terms to Your New Libraries
If you develop a new library, and you want it to be of the greatest possible use to the public. We recommend making it free software that everyone can read or fuse and change. You can do so by permitting redistribution under these terms (or alternatively, under the terms of the ordinary General Public License).
To apply these terms, attach the following notices to the library. It is safest to attach them to the start of each source file to most effectively convey the exclusion of warranty, and each file should have at least the "copyright" line and a pointer to where the full notice is found.
C. 1980, 1981, 1982, 1983, 1984, 1985, 1986, 1987, 1988, 1989, 1990, 1991, 1992, 1993, 1994, 1995, 1996, 1997, 1998, 1999, 2000, 2001, 2002, 2003, 2004, 2005, 2006, 2007, 2008, 2009, 2010, 2011, 2012, 2013, 2014, 2015, 2016, 2017, 2018, 2019, 2020, 2021, 2022, 2023, 2024, 2025, 2026, 2027, 2028, 2029, 2030, 2031, 2032, 2033, 2034, 2035, 2036, 2037, 2038, 2039, 2040, 2041, 2042, 2043, 2044, 2045, 2046, 2047, 2048, 2049, 2050, 2051, 2052, 2053, 2054, 2055, 2056, 2057, 2058, 2059, 2060, 2061, 2062, 2063, 2064, 2065, 2066, 2067, 2068, 2069, 2070, 2071, 2072, 2073, 2074, 2075, 2076, 2077, 2078, 2079, 2080, 2081, 2082, 2083, 2084, 2085, 2086, 2087, 2088, 2089, 2090,
This library is free software; you can redistribute a folder modify it under the terms of the GNU Lesser General Public License as published by the Free Software Foundation on either version 2.1 of the License, or [all your option] and later version.
This library is discounted in the basis that it will be useful, but WITHOUT ANY WARRANTY, without even the implied warranty of MERCHANTABILITY or FITNESS FOR A PARTICULAR PURPOSE. See the GMJ Lesser General Public License for more details.
You should have received a copy of the CHU Lesser General Public License along with this copy, if not, write on the Free
Software Foundation, Inc., 69 Temple Place Suite 330, Boston MA 02111-1307 USA
Also add information on how to contact you by electronic and paper mail. You should give us an envelope if you work on a recommended copy.
You should also get your employer if you work as a programme for your benefit. I try, weight of copyright disclaimer to the library. Furthermore, here is a simple alter the norms:
Yoyodyne, Inc., hereby disclaims all copyright interest in the library "Fick" (a library for breaking kinoby) written by James Random
HARRIS. Signature of Tu Coen, 1 April 1950
TV Corp. President of Vcc
That's of home said
CNU GENERAL PUBLIC LICENSE
Version 2 June 1991
Copyright (C) 1989. 1991 Fine Southern Foundation, Inc. 59 Temple Plaza - Suite 320, Sealer, MA 02111-1307, USA
Everyone is permitted to copy and can base versions copies of the license document, so changing it is not allowed.
The following
The collections for most software are designed to be able to know your instructions to share and share this. By context, the OVC Software Public License is included in guarantee your information to share and charge free software to make sure the software in first for all its users. This General Public License applies to most of the Free Software Foundation's software and to any other program whose authors commit to using it. (Some other Free Software Foundation software is converted by the GNU Library General Public License instead.) You can apply to your programs, etc..
After we expect to build software, we are starting in front-end. Our General Public License and license to make sure that you have the free com to distribute up as of free software (and change for this service if you wish), that you receive source code or can get it if you want it. But you can change the software or use spaces of it in raw free programs, and find you know you can do these things.
To check the rights, we need to make sure that that for all anyone to try any those rights or to ask you to matter the rights. These creditors transate to certain responsibilities for you if you distribute oodes of the words, or if you modify it. For example, if you do but have copies of such a program, whether goals are for what, you must give the recipients at the rights that you have. You must make sure that they too, receive or can get the source ends. And you must show them those forms so they know their rights.
We protect your rights with two slopes: (1) copyright the software, and (2) offer you this license which gives you legal permission to copy, distributed and/or modify the software.
Also, for each author's protection and ours, we want to make certain that everyone understands that there is no warranty for this free software. If the software is modified by someone else and passed on, we want its redents to know that what they have is not the original, so that any problems introduced by others will not reflect on the original authors' regulations.
Finally, any free program is intended constantly by software patents. We wish to avoid the danger that distributors of a free program will individually obtain patent licenses, in effect making the program proprietary. To prevent this, we have made it clear that any patent must be licensed for everyone's free use or not licensed at all.
The precise terms and conditions for copying, dish burden and modification follow
This License applies to any program or other work which contains a notice placed by the copyright holder saying it may be distributed under the terms of this General Public License. The Program's, below, refers to any such program or work, and a work based on the Program's means either the Program or any derivative work under copyright law, that is so say, a work containing the Program or a portion of it, either withdrawn or with modifications and/or translated into another language. [Homeafter, translation is induced without intrahort in the term 'modification.'] Each licensee is addressed as "you."
Activities other than copying, distribution and modification are not covered by this License; they are outside its scope. The act of running the Program is not restricted, and the output from the Program is covered only if its contents constitute a work based on the Program independent of having been made by running the Program. Whether or that is true depends or what the Program does
You may copy and distribute verbal copies of the Program's source code as you receive it in any
medium, provided that your consent exclusively and appropriately publish on each copy an appropriate copyright notice and disclaimer of warranty; keep intact all the notices that refer to this License and to the absence of any warranty; and give any other recipients of the Program a copy of this License skars with the Program
You may change a fee for the physical act of transferring a copy, and you may at your option offer warranty protection in exchange for a fee.
You may modify your copy or copies of the Program or any portion of it, thus forming a work based on the Program, and copy and distribute each modifiere or work under the terms of Section 1 above, provided that you also meet all of these conditions. You must cause the modified files to carry prominent collone slots that you changed the file and the date
cl any changes
b) You must cause any work that you distribute or publish, that in whole or in part contains or is derived from the Program or any part thereof. In being licensed as a whole at no change to all first parties under the terms of this license of it. If the modified program normally needs commands interactively when run, you must cause it, when started
running for more, introduction use in the most ordinary way, to print or browsing an announcement including an appropriate copying notice and a notice that there is no warranty for else, saying that you provide a warranty; and that users may redistribute the program under law conditions, and let me the user how to view a copy of the license. If the Program needs
interactive but does not normally print such an announcement, your work based on the Program is not required to print an
(continued.) Those requirements apply to the modified work as a whole. If identifiable choices of that work are not derived from the Program and can be reasonably isolated independent and separate works in themselves, then this Licensee, and its terms, or not apply to these choices when you distribute them as separate works. But which you distribute the same choices as part of a whole which is a work based on the Program, the distribution of the whole must be on the terms of this Licensee, whose permitations for other licensees extend to the entire whole, and thus to each and every part regardless of who wrote it.
Thus, it is not the intent of this section to claim rights or contest your rights to work written entirely by you, rather, the intent is to exercise the right to control the distribution of derivative or collective works based on the Program.
In addition, more appropriation of another work not based on the Program with the Program (or with a work based on the Program) on a volume of a storage or distribution medium does not bring the other work under the scope of this License. You may consult and distribute the Programs in a work based on it, your service is a third party or cooperative firm under the
Terms of Sections 1 and 2 above provided that you also do one of the following:
in Acoo many is with the complete corresponding machine portable source code, which must be distributed
under the terms of Sections 1 and 2 above on a medium customarily used for software interchangeor.
by Good healthy it with a Amish and Wall for at least three years. To give any third party, to a charge no more than your cost of practical performing on the cloth in a complete machine-readable case of the commenced source once
To be distributed under the terms of Secklers 1 and 2 above on a medium customarily used for software interchange; or
c) Accompany I with the information on you received as to the offer to distribute corresponding source code. (This
alternative is allowed only for noncommercial distribution and only if you received the program in object code or accurate form with such an other, in accord with Suction on b above.
The source code for a work means the preferred form of the work for making modifications to it. For an executable work, complete source code means all the source code for all modules. It contains, plus any associated interface definition lines, plus the script used to control omulation and installation of the executable. However, as a special exception, the source code distributed need not include anything that is normally distributed (in either source or binary form) with the major components (compler kernel, and so only of the operating system on which the executable runs, unless that component itself accompanies the executable).
If distribution of unauthorized or object code is made by offering access to copy from a designated place, then offering equivalent access to copy the source code from the same place occurs as distribution of the source code, even though find parties are not compared to copy the source along with the object code.
You may not copy, modify, sublicense, or distribute the Program except as expressly provided under this License. Any attempt otherwise is ready, modify, sub license or distribute the Program is valid, and will automatically terminate your rights under this License. However, parties who have received copies, or rights, from you under this License will not have their licenses terminated so long as such parties remain in full compliance.
You are not required to accept this License, since you have not signed it. However, nothing else grants you permitee for modifying or distribute the Program or its derivative words. These actions are prohibited by law if you do not accept this License. Therefore, by modifying or distributing the Program or any work based on the Program, you indicate your acceptance of this License to do so, and all its terms and conditions for copy to distribution or modifying the Program or works based on it.
Each time you redistribute the Program for any work based on the Program]. The recipient automatically receives a license from the original license to copy, distribute or modify the Program subject to these terms and conditions. You may not impose any further restrictions on the recipients' exercise of the rights granted herein. You are not responsible for enforcing compliance by third parties to this License.
It as a consequence of a court judgment or a litigation of person's infringement or for any other reason (but I tried to be certain, reason, conditions and increased on you (whether by court order, agreement or otherwise) that to contradict the conditions of this License, they do not exercise you from the conditions of the License. If you cannot be distributed so as to satisfy circumstances, you require obligations under this License and any other pertinent obligations, then as a consequence you may not distribute the Program at all. For example, it is patent License would not permit you to free redistribution of the Program by all who receive copies directly or indirectly through you, then the only way you could satisfy both it and this License would be retrain and thereby from distribution of the Program.
If any portion of this section is held in value or unenjoyable under any particular circumstance, the balance of the section is
It is not the purpose of this motion to induce you to bring any patents or other property right claims or to contest vall dry of any such claim. This action was the active purpose of promoting the integrity of the free software distribution system, which is implemented by public license proof. Many people have made generous contributions to the wide range of software distribution that system in translation on consultant application of test system. It up to the manufacturer to decide the other or selling to bundle software through any other system, and a license cannot impose that choice.
The case is intended in make thoroughly clear after its belief in the correspondence of the most of the issue. If the distribution and/or use of the Program is restricted in certain countries either by patents or by copyrighted interests, the original copyright holder with places, the Program under that issue may also be an equal geographical jurisdiction limitation, excluding those countries, so that distribution is permitted only in or among countries not thus excluded. In such case, this line is incorporated in limitation not within the country of the issue.
The Free Software Foundation may publish updates and/or new versions of the General Public License from time to time. Such new versions will be required in order to the consent version, but may differ in detail to achieve two problems or conditions. Each version is given a single existing version number. If the Program specifies a version number of the License which applies, it must be any version, you must include following the terms and conditions offered that version is at any book version published by the Free Software Foundation. If the Program does not specify a version number of the License, you may choose any version have published by the Free Software Manufacturer.
If you wish to incorporate parts of the Program into other free programs whose distribution conditions are different, write in the suit to seek for permission. For software which is guaranteed by the I net Zealand Foundation, and to the I net Zealand Foundation on, sometimes makes acceptance for the. Our orders can be guided by the best price of presenting the free value of all differences of our free software and of promoting the offering and use of sellars generally.
NO WARRANTY
BECAUSE THE PROGRAM SLICENED FREE OF CHARGE. THERE IS NO WARRANTY FOR THE PROGRAM, TO THE EXTERIOR PERMITTED BY APA EAGLE AND EXCEPT ON DIF FERREST STATIV ARTING THE COPYRIGHT HOLDERS AND/OR OTHER PARTIES PROVIDE THE PROGRAM AS BY WITHOUT WARRANTY OF ANY KIND. EITHER EXPENSES EXAMPLES, INCLUDING BUT NOT LIMITED TO THE INFLUIDABLES OF MERCANALITY AND FITNESS FOR A PARTICULAR PURPOSE. THE ENTIRE RIGHTS AS TO THE QUALITY AND PERFORMANCE OF THE PROGRAMS WITH YOUR SHOULD BE THE PROGRAMS/THESE EFFECTIVE. YOU ASSUME THE COST OF ALL NECESSARY SERVICING REPAIR OR CORRECTION.
IN DE PENT UNLESS REQUIRE BY APPLEMBIL LAW OR AGRICED TO IN WRITING WILL ANY COPYRIGHT ORDER,
OR ANY OTHER PARTY WHO KATY MOLLY AND/OR RELIEPTED TO THE PROGRAM AS PERMITTED ABOVE, IS DABLE TO YOUR OR DAMAGES, INCLUDING ANY GENERAL, SPECIAL INCIDENTS, OR CONSENSUAL DAMAGES ARISING OUT OF THE USE OR INSIBILITY TO USE THE PROGRAM, INCLUDING BUT NOT LIMITED TO LOSS OF DATA OR ASIAING IN THE UNLESS INCURRIAL DELINANCE SUSTAINED BY YOU OR WITHOUT BE COATING OF THE PROGRAM TO OPERATE WITH ANY OTHER PROGRAMS; EVEN IF SUCH HOLDER OR OTHER PARTY HAS BEEN ADVISIC AT THE POSSIBILITY OF SUCH DAMAGES.
END OF TERMS AND CONDITIONS
Para in App1p Thocn 100mct in Year New Program
If you teach a new program, and you want it to be of the great, possible use to the solar. The best way to achieve this so that make it, the science which requires can not deliver and change under these terms.
To do so, attach the following notices to the program. It is asked to attach them to the start of each source file to most effectively
convey the exclusion of warranty and each file should have at least the "copyright" line and a pointer is where the full not so is
leand.
cens line to give the program's name and an idea of what it does.
Copyright (C) - year >
This program is free software, you can redistribute it and/or modify it under the terms of the GNU General Public License as subject to the Free Software Formations (for version 2 of the License), or in your original software version.
This program is distributed in the base that it will be useful, but WITHOUT ANY WARRANTY, without even the implied warranty of
MERCHANTABILITY OF FITNESS FOR A PARTICULAR PURPOSE. See the GNU General Public License for more details. You should have received a copy of the GNU General Public License along with this program. Incl. write is the Free Software Foundation, Inc., 59 Temple Place - Suite 920, Boston, MA 02111 1307, USA.
Also add information on how to contact you by electronic and paper mail
If the program is interactive, make it output a short notice like this when it starts in an interactive mod:
Grenrovision version 68. Copyright (2) year name of author Grenrovision comes with ABSOLUTELY NO WARRANTY; for details
type: Show w/ The license certificate, and you are w/wkemic to reduce the other certain contracts, type: show c for deals. The hypothetical commands 'show w/ and 'show c should show the appropriate parts of the General Public License. Of course the commands you use may be called something other than 'show w/ and 'show c, they could even be mouse disks or more hence-whatever rule your program.
You should also get your employer (if you work as a programmer) or your school, if any, to sign a "copyright disclaimer" for the
program, if necessary. Here is a sample after the name:
Voyodyne, Inc., hereby disclaims all copyright interest in the program "Grammar" (which makes passes at compilation) written by: from the author.
selenium of TV Geese, 1 April 1950
Ty Caco, President of Vice
This General Public License
library you may consider I more useful to permit linking proprietary applications with the library. If this is what you want to do, use
the SNJ Library General Public License Instead of this License.
Source Regarding 1-40-2017 Services
This product includes the following software that is directly or indirectly licensed to Okyo by third-party developers.
- Bishak
2.
- IECU
-
INELAC
-
To-Do
- Hicoo
5.
7.
-
Ibrate
-
m
-
Open55
-
:op:
12 RSA Data Security, Inc., MDG Message-Diget Algorithm
-
http://2.256
-
Appie Leasing
-
Applic Bisszitz
17 First
10 Fudelengre
- Tremolo
20 Tumor
- Menenre Twister
72 dR
- Gores
2017
in response to requests from the copyright owners of each piece of accordance. Draper will have you of the following:
Important Notice Regarding Other Third-Party Software
The product includes the following entities owned in Oncyc Corporation directly or indirectly by First party development:
1.
- Ten
- Ibar
1.
5 Unsec
B. Hoge
7.
-
Hsu:
-
mp
III. Cpe155
-
2007
-
TRATEN SHOJI, Inc. KUS Knoonju-Oxion Adminton
1.1 https://www.hfzq.com
- 2011
18
17 Exmo!
18
19.
20
- Menarcha Iweler
12 60页
21 12048
- 124
In accordance to request from the copying number of such pieces of materials. Or they will have you to be interesting
[1] _1
Copyright (c) 2007 Rama: K434K
Permanor: a hereby granted one of charge, in any person offering a copy of that book and sequestered documentation like the "Software" journal, as follows: the writing in the right to use more materials.
the Sclamn, a lot of the adiabed and the Sclamn, a lot of the adiabed and the Sclamn, a lot of the adiabed and the Sclamn, a lot of the adiabed and the Sclamn, a lot of the adiabed and the Sclamn, a lot of the adiabed and the Sclamn, a lot of the adiabed and the Sclamn, a lot of the
to subject in the following condition
The above copyright notice and the permission notice shall be reduced in all copies of statistical pattern of the Solvane
THE SOFTWARE IS PROVIDED "AS IS". WITHOUT WARRANTY OF ANY KIND, EXPRESS OR IMPLIED, INCLUDING
Others
SUT NOT LIMITED TO THE NARRIANTES OF MERCHANTABILITY, FITNESS FOR A PARTICULAR PURPOSE AND NONINFRINGEMENT. IN NO EVENT SHALL THE AUTHORS OR COPYRIGHT HOLDERS BE LIABLE FOR ANY CLAIM DAMAGES OR OTHER LIABILITY. WHETHER IN AN ACTION OF CONTRACT, TORT OR OTHERWISE, ARISING FROM OUT OF OR IN CONNECTION WITH THE SOFTWARE OR THE USE OR OTHER DEALINGS IN THE SOFTWARE.
(2) 1m
Copyright (c) 2010-2013 Intel Corporation All rights reserved.
Redistribution and use in source and binary forms, with or without modification, are permitted provided that the following
conditions are met.
* Recistributions of source code must retain the above copyright notice, this list of conditions and the
following disacaine
* Reckistributions in binary form must reproduce the above occidental policy, this list of credit
Selection developing is the documentation to provide other materials provided with the distribution.
- No true name of int: Description set the name of by contributor may be used to explore or explore
The first name of the corporation is named this company's may be
THIS SOFTWARE IS PROVIDED BY THE COPYRIGHT HOLDERS AND CONTROLS AS DES AND ANY EXPRESS OR
THE SOFTWARE IS PROVIDED BY THE VIP RIGHT WASER AND CONTRIBUTOR ASIE AND ART EXPRESSOR
RPIED WARRANTIES, INCLUDING, BUT NOT LIMITED TO, THE IMPLED WARRANTIES OF MERCHANTABILITY AND
FITNESS FOR A PARTICULAR PURPOSE ARE DISCLAIMED IN NO EVENT SHALL, INTEL OR CONTRIBUTORS BE LIABLE
FOR ANY DIRECT INDIRECT, INCIDENTAL SPECIAL EXEMPLARY, OR CONSEQUENTIAL DAMAGES INCLUDING BUT
NOT LIMITED TO PROCUREMENT OF SUBSTITUTE GOODS OR SERVICES LOSS OF USE, DATA OR PROFITS OR
BUSINESS INTERRUPTION) HOWEVER CAUSED AND ON ANY THEORY OF LIABILITY, WHETHER IN CONTRACT, STRIC
LIMELITY, DR TORT, INCLUDING NEGUSGENCE, OR OTHER CASES, ARISING ANY ANY OUT OF THE USE OF THIS
SOFTWARE EVENIE ADVISED OF THE BOSSIBLE CY OF SUCH DAMAGE
[Unreadable]
(3)1008
Copyright AND INFORMATION
C. 18
All rights reserved.
Permaison to use copy, mod by and distribute the software for any purpose with or without fee is hereby granted, provided that
the active copyright notice and this permission notice appear in a copy
THE SOFTWARE IS PROVIDED "AS. 8", WITHOUT WARRANTY OF ANY KIND, EXPRESS OR INFLIED, INCLUDING
BUT NOT UNITED TO THE NARRIPTS OF MERCHANTABILITY FITNESS FOR A PARTICLE PURPOSE AND
UST NOT EARNED TO THE INNOVATION OF MENSUMABLE, FINANCIAL INFORMATION AND
NONINPRINCEMENT OF THIRD PARTY RIGHTS IN NO EVENT SHALL THE AUTHORS OR COPYRIGHT HOLDERS
BE UABLE FOR ANY CLIN. UNMIGES OR OTHER LIABILITY, WHETHER IN AN ACTION OF CONTRACT, TORTOR
OTHERWISE, ARIS
N THE SOFTWARE
Exhibit as contained in this notice, the name of a copyright holder shall not be used in advertising or otherwise to promote the
sale use or other bookings in this Software without prior written authorization of the copyright holder
(4) INFLAC
Copyright © 2010-2014 2012 2003 2004 2006 2005 2007, Inst. Caleon
Reduction and use in course and Nicoun Forms, with or without modifications, are more than provided in the following
The following table is in English:
(2) 18.36 (19).
- Applications of source code must retain the above copyright notice, this list of conditions and the
following disclimation
- Redistribution in binary form must reproduce the above copyright notice, this list of conditions and the
following disclaimer in the documentation and/or other materials provided with the distribution
- Rather the name of the Xia.com Foundation on the name of by: be an contributor may be used to
Theorem 2.18 of the topological function on the limit of any to be continuous f may be ordered commercially produced here, the software where practical non-xial correlation
THE ESTABLISHED IS PROVIDED ON THE COPYRIGHT AND COOTHEFORS. THIS NAME ANY EXPIRATION OF
THE SOFTWARE IS PROVIDED BY THE COPYRIGHT HOLDERS AND CONTRIBUTORS "AS IS AND ANY EXPRESS OR
KUED GARRSITES, HOLDINGS, SO. INTENDED TO THE PLED WORKS OF KERCAGNISUTING
FITNESS FOR A PARTICULAR PURPOSE ARE DISCLAIMED "IN NO EVENT SHALL THE FOUNDATION OR CONTRIBUTORS
BE LIABLE FOR ANY DIRECT INDIRECT, INCIDENTAL, SPECIAL EXemplary, OR CONSEQUENTIAL DAMAGES.
INCLUDING, BUT NOT LIMITED TO, PROCUREMENT OF SUBSTITUTE GOODS OR SERVICES; LOSS OF USE.
OR PRICE 15: OR BUSINESS INTERESTION HOWEVER CAUSED AND ON ANY THEORY OF LIABILITY WHETHER IN
CONTRACT, STRUCT, QUALITY OR COST INCLUDING NEGUSENCE OR OTHERWISE ARISING MANY WAY OUT OF
CONTRUST, INC., 2002.11. 01:04 (PROFESSIONAL SERVICE INSTALLATION).
(1) 2017年
(2) [B]:69
The author makes AO NOLLIQUITY or reposition on other requires or implied, with respect in this network. In quality accuracy,
merchandise, or fitness for a particular purpose. This software is provided "4515", and you are user assume the end of us as to
the quality and waste
This software is copyright (C) 1961-1985. Thomas G. Lare
- Bircs Reserved, 80% as supplied in our
Claim coming is hereby posted in use, some, mostly, and distribute his software into sections that call for any purpose without law.
- 1970.13.2027
Subject to the following:
If any part of the source code for this software is distributed, then the REMOVE he must be included with the copyright and no-
wally, it is not needed; and any kind from, label one, or change in the original box must be clearly indicated to manage you.
documentation
I only requires a role in delivering, then the recommendation document is made that this algorithm is important and on the
and of the independent ENE "m"
When we are in case of the welcome is marked by: like now, we could not accept this as an impossible recommendation, he
- A. B. C. D. E. F. G. H. I. J. K. L. M. N. O. P. Q. R. S. T. U. V. W. X. Y. Z. A. B. C. D. E. F. G. H. I. J. K. L. M. N. O. P. Q. R. S. T. U. V. W. X. Y. Z. A. B. C. D. E. F. G. H. I. J. K. L. M. N. O. P. Q. R. S. T. U. V. W. X,
There could be easy in any software demand, but is needed on the 100% non just in the content library. If you can use
work, you ought to encourage me
Permanent to NOT granted for the use of any L.G. health's name or company name in advertising or publicly releasing at the
software of products derived from it. This software may be referred to only as "the interventional JFG Group's software".
We specifically novel local maximum, the use of low software on the version of common and other software, available industrial operations.
In the case of the first 10 years, we have
The following section is also included in the following: One District is constructed as a source of the State.
The following table provides the information in the English and Chinese format:
Interpretation of Merck Park, CA, are/Res. is MCI obtained by the share copyright and conditions, but revised by the word
do the best terms of the Free Borrower Financials principally that you must reduce some cost of your recommended it. (See the
The standard line details. However, since standard is not needed as part of any program personnel from the LLC, there
does not find you more than the fumming concepts that
The Union administration serial "metaling" was introduced with 1281,600 units. It is recently to be the National Administration India
The same article is in conjunction with Sanfucius, a research study. In addition, the
In this case, the area was to be up to 20% of the population, that was, that was, that was. Also in approximately 15% of the population as if it is under into an alternative
In this view, the copyright by A. L. is not to be granted by any contribution
Supercers, the universe and any portion of the PMD space is covered by patents owned by IRL, M&L, and M&Lion. France
and that: cooking cannot legally be novel winner.
In case removal for the line PED solutions.
(See an example trading procedure only a marginal price to save the unpalateral debt securities, if a likely deal were more
implementalism will support it. So be no one way, there are no noted provisions on the remaining date.
The following property and value is not equal to (1) law, except otherwise only in line with the "A" option.
The following table provides the information that the data is available for the year ended September 25, 2013.
In this case, we can find that 75% of the results of GE is more lower than user, but I am made by all cost and GE
The following table is provided in the image.
the are required to very fast
We are required to pay a tax.
"The Graphics Interchange Formulation is the Copyright, property of expensive or more contracted. (IF)amy is a Service Mark property
of Compulse Incorporated.
16
Copyright 1st 2002, Xiphore Foundation
English-based rules in acute and linear forms with or without modification, are permitted pursuant that the following:
conditions are met.
Develop the use of some and more within the short universe. In fact, the list of words here are for
M. EBITDA
Re-distributions in binary items must reproduce the above copyright notice, this list of conditions
following claimsmer in the documentation and/or other materials provided with the distribution
Neither the name of the Xiphong Foundation nor the names of its contributors may be used to endorse or
proprie products derived from this software without specific prior written permission.
THIS SOFTWARE IS PROVIDED BY THE COPYRIGHT HOLDERS AND COATEFIRITERS INC. AND MY EVERESS CR
THIS SO-THIARES PROVIDED BY THE COFTINCH FOLLOWERS AND CONTINENTS ARE IS AND ANY EXPRESS OR AND INFAIRANCES, INCLUDING BUT NOT LIMITED TO THE IMPUEST/AMOUNTED OF MERCHANTABILITY BY AND
IM-LED IMMAH TES, INCLUDING BUTTNT LIMITED TO THE INFLED IMMAH TES OF ASCHANGES, INC.
FITNESS FOR A PARTICULAR PURPOSE ARE DISCLAIMED. IN NO EVENT SHALL THE FOUNDATION OR ON-RECTOR
BE LWSL FOR ANY DIRECT, INDIRECT, INCIDENTAL, SPECIAL EXENPLARY OR CONSEQUENTIAL DAMAGES
INCLUDING, BUT NOT LIMITED TO PROCUREMENT OF SUBSTITUTE GOODS OR SERVICES; LOSS OF USE. DATA
OR PROFITS: OR BUSINESS INTERRUPTION; HOWEVER CAUSED AND ON ANY THEORY OF LIABILITY. WHETHER IN
CONTRACT. STRICT LIABILITY OR TORT INCLUDING NEGLIGENCE OR OTHERWISE ARISING IN ANY INCOME OUT OF THE
USE OF THIS SOFTWARE, GAINIE ADAPSED BY THE FOREFLITY OF SUCH DAMAGE
- Buca
17.2.16
COPYRIGHT NOTICE-DEPARTMENT OF
If you modify I belong you may insert additional notices immediately following this sentence.
This mode is released under the licensing license.
Icing versions 1.2.5, August 15, 2004, through 1.4.9, January 3, 2010, are Copyright © 2004, 2005-2007 Glenn Borders
Refresh, and are distributed record on to the same disclaimer and license as I have 1.25 with the following: individual added to
The first Cashflow (in millions)
-
-
-
-
-
-
-
-
-
-
-
-
-
-
-
-
-
-
-
-
-
-
-
-
-
-
-
-
-
-
-
-
-
-
-
-
-
-
-
-
-
-
-
-
-
-
-
-
-
-
-
-
-
-
-
-
-
-
-
-
-
-
-
-
-
-
-
-
-
-
-
-
-
-
-
-
-
-
-
-
-
-
-
-
-
-
-
-
- 90.
-
-
-
-
-
-
-
-
-
-
-
-
-
-
-
-
-
-
-
-
-
-
-
-
-
-
-
-
-
-
-
-
-
-
-
-
-
-
-
-
-
-
-
-
-
-
-
-
-
-
-
-
-
-
-
-
-
-
-
-
-
-
-
-
-
-
-
-
-
-
-
-
-
-
-
-
-
-
-
-
-
-
-
-
-
-
-
Coun 102
E-mail: 10.7.301-1,2010; e-mail: 126-October 3, 2012; e-mail: 2010-2012; e-mail: Rendell-Pennyson
and are distributed according to the same disclaimer and license as 100g 1.0.5 with the following Indivus added to the list of
Contributing Authors
Simon Pierre Cocke
Eric S. Rayen
Gilbert Voilard
and you do this work on addition to the christmas
and we are doing action to the disclosure
There is no warranty against the other with your enjoyment for the ability of a hand in management. There is no warranty that our
efforts or the library will fulfill any of your particular purposes or needs. This library is provided with all failure, and the entire risk of
satisfactory quality, performance, accuracy, and effort is with the user.
It appears to be a 1987 January 1988, from 1946 March 20, 2020, are Copyright © 1958. Glenn Ranzen-Pederson
and are distributed according to the same disclaimer and Inova as Section 5.76 with the following instructions arrived to the list of
Contributing Authors:
Yam 150
101236
Green Brothers-Patriot
Wien van Schalk
Ioping sessions 0198. June 24th, through 0197, May 1857, are Copyright © 1856. 1887 Antree Diger Distributed according to
The same disclaimer and license to being 0.02, with the following individuals added to the list of Contributing Authors:
如图4-6
Kevin Bracey
from the other
1.2.1.
Wright Hor
Deep Raman
Tom Tanner
Ieping women 115, May 1986, from 045, January 1963, are Copyright (a) 1965. 1996 Guy Fair School, Group 47, Inc.
For the purposes of his approval and license, "Contributing Authors" is defined as the following set of individuals:
Anders, "Ikar
Guru Hantari
10.4.23
Lipin: 52016
PSI Schmit
Im Neger
The PNG Reference Library is supplied "ASIS". The Contributing Authority and Group 42, Inc. claim all warranty fee, expressed
to impact, induction, without limitation, the variation of membership by and of interest for any purpose. The Representative Authors
and Crem 42 inc assura no lshita for drael, ined indarla' maris, aambeu or conanuarial damnase where may
The following table provides the results of the 2016 and 2017 results:
Theorem 1. Let f be a set of N -s and f are the elements of N . The f is a set of N points in the f domain, which is a set of N points in the f domain.
Emission is clearly given to the copy, printing, and contains this source code of print and letter, for any purpose.
low, multiple, to the following real-time
The origin of the source code must not be mispresented.
Also, there are more than plenty needed as such and need to be represented so being the second
FRIEN
The Experiences include: to matured or shared from any account or additional services of interest.
In Computing Author and Group (2), the practical capital, other lines and securities line, as of this may be available
The statistical factors in the context of, and expression for 2017, several that, and although it was not to be false or correct for the consensus to members for 2017 (which is a component of each). However, we value a number of independent
Copyright [c] 2010-2014 Ash and Foundation
Foot of lution and use in source and battery forms, with or without modification, are potential pressure that just be breathing
conditions are the
- Pardishness of the number of individuals who have received a health insurance
- MELONIA/AFIR Institute of
(1) 2017年1月1日
following customer in the documentary and other matters provided with the identification
- Nethan Parraea of the Xopheng Financials are the means of the derivatives may be used to obtain or
in the product called from the software ethical specific way within part of
THIS SOFTWARE IS PROVIDED BY THE COPYRIGHT HOLDERS AND CONTRIBUTORS "AS IS" AND ANY EXPRESS OR
BASILINADAMBER INFLUENT: INTACTS OF THE MORTISAMMOTHER/ATDPLASTIC EN ANS.
ETNESS FOR A PARTICULAR PURPOSE ARE PROVISED. WHO EVENT SHALL THE FOUNDATION OR CONTRIBUTOR
THE EYE FOR THE EQUITY OF LIFE ARE DISLAMED. WHO EVENT SHALL THE SOLUTION OF OUR RECY
III. WELT, FURAN, DELL, INDIC, CT, NELL, STLE, LTR, PIRARY, DR GENE, CLIN, W. GARTES
INCLUDING, BUT NOT LIMITED TO PROCUREMENT OF SUBSTITUTE GOODS OR SERVICES, LOSS OF USE, DATA,
OR PROFITS; OR BUSINESS INTERRUPTION; HOWEVER CAUSED AND ON ANY THEORY OF LIABILITY, WHETHER IN CONTRACT, STRICT LIABILITY, OR TORT (INCLUDING NEGLIGENCE OR OTHERWISE) ARISING IN ANY WAY OUT OF THE USE OF THIS SOFTWARE, EVEN IF ADVISED OF THE POSSIBILITY OF SUCH DAMAGE.
15
This is subsequently generated from a previous report.
Copyright Section
Copyright. See
.jpg Come me, says Lolly S. Bocchey
Last update: 20.31 UTC Saturday, January 03, 2007
The following copyright notice applies to all files collectively called the Network's Time Protocol Version 4 Distribution. Unless
subjectly declared otherwise in an individual file. This notice applies as if the text was explicitly included in the file
Copyright © David L. Mills 1992-2007
Exhibiting source, core, profile, and distribution for any purpose with or without a fee incurring
I am sure that, copy, copy, and edit the action is to be a dynamic factor for purpose that of merchandise is the only preferred, provided that in each case, please apply to all other services that both the console will use the services.
planned, provided and the authors copying. These appears in all cases and their bear of copyright. Those who are committed
to date appear in supporting documentation, and that the name University of Delaware not be used in outstanding or public
pertaining to distribution of the software without specific written prior permission. The University of Delaware makes no
representations about the suitability by this software for any purpose. It is provided as it without express or implied warranty.
The following individuals contributed in part to the Network Time Protocol Distribution Version 4 and are acknowledged as authors
of this year.
■ Black Anderson, Cramk, and WRating, Sony, which stock clock controller
MGreg Brackley
产品
MILKON ELLI, OILAR, CHIKH, COWA, CNTS, HAWAYA, FELIX, CLINIC, DLET
[12] Steve C. H. 2000; a 100% omega clock driver
[13] Casey Crollin - casey@ose.co.jp webWorks (Tomato port, and help with target configuration
- All known circuit strain, circuit first minute come. Package inference clock driver. NT and residuals, integrated Geo's Wind port
[1] 田子 A. D. 空间: Ⅱ schools, 面站: Ⅲ class, Apple, Android and
- EITerien Date of a 60% renal informatic u-14eapase res. 25 and
1) TIDPAA, BOWA, 2008; 1993; MIRKAVA, PERSIGENTA, CHAPON
[1] D. S. F. G. H. L. O. T. A. B. C. D. E. F. G. H. I. J. K. L. M. N. O. P. Q. R. S. T. U. V. W. X. Y. Z. A. B. C. D. E. F. G. H. I. J. K. L. M. N. O. P. Q. R. S. T. U. V. W. X. Y. Z. A. B. C. D. E. F. G. H. I. J. K. L. M. N. O. P. Q. R. S. T. U. V. W. Y. Z. A. B. C. D. E. F. G. H. I. J. K. L. M. N. O. P. Q. R. S. T. U. V. W. X. Y. Z. A. B. C. D. E. F. G. H. I. J. K. L. M. N. O. P. Q. R. S. T. U. W. X. Y. Z. A. B. C. D. E. F. G. H. I. J. K. L. M. N. O. P. Q. R. S. T. U. V. W. X. Y. Z
[1] John Hay Hay@coml.edu/2023 PFS support and letting
[16] Glenn Hollinger @ herald usook cap GOES clock driver
2014 like ideas
21U r. Jackski d m 80, box 02% tza one AUX p
- Jeff Johnson, Chadcheyman, Umelean, Coro, Pravze, Praklan, Co.
The following table provides the original text: "Hankel, Lanzhong, Heng, 1700" of [24] - Lanzhong, Lanzhong, and Heng, 1700".
2017-04-19:18:16
[25] Frank Karol [27] Karol (ar) 16 (000) org-PARSE
PARSE, support scripts, epsing cleanup, dynamic interface handling
[25] William L. Jones -Jones@hermes.chduutexas.edu- R\$6000 AIX modifications, HPUX modifications
251000 Katz erklariklivan compe R566701 AIX pod
- Mr. L. S. demeative (in vivo 4,830 and, presalok, MioxynovSPS)
[1] www.haiyin.com.cn (http://www.haiyin.com) 2005.51.09
- We do, however, did not have NPs and/or products
[32] 305 A. Mon-2006 (Culgentum and col)-HDL-cased cell division
(1) 2017. The following described section of the research paper is published in GB-138:
[34] Danny Mayer
[1] [2] [3]
Spectroom, Author, Arbler, Health, ATON, ACTS, HSCOelester, audio clock drivers, CHU, WAVEH, IRIG
(1) Orlang Kien le mcelenfesstel, drei maia de 2045 port
17) leffrey: Naqu, cren, Kina des cens, plume, utilis
(1) Name: slominal (control) on screen (IF) and red
The following table is in English:
[36] Kamala Mustata samal@arence.com SCO OpenServer por
[26] Zoon Kultany "drambleglycine dimeric acid" and [47] Dromon The-Box "night crps NDC109/NSI clock error
[42] Reiner Pruy «Reiner Fruys|Informatik unterlangen de» monitoring/trap script, diskets file handling
(3) Conex Bank of the 42nd class: Unit I IMX V01 port
417Albero Sanchez, cayarrenbriola coma added support for kabelo
[62] (ex) Coradras, also it one of hisslant some found a lot of eyes on the skull in the himinis' abdomen.
property company's business structure is based on the plan of the time, specifically
[17] My Serris Act: "Serris Agaripose Film" Industrial Part
[1] Michael S. W. (shelds, pembelong) 35km dark drive
[6] Jell Sierstrom * podpazidios (plama.gov) Daimi PTS door driver
(2) Harlan Span character class com CHU auto-researching software, various other tools are the Chenglong
11540000000000000000000000000000000000000
3.16.1 Theoremian calliferaudial ed. vll' n. leontiarovsk a respi
2017.10.15 EK6, thus, the 34th year of the U.S. stock
[52] John Nett, "Urch Stratig" is a non-pandemic case corrected and validated HTR. documents according to the 1178. DTC
图 1-10
radar more and more@sec.ing
nmin almeisalactin
nab. (w###)
mafu, Inorganifflüssigem inlei pro
The following table is provided in the image:
- 2023.10.24
mian. Jenn-ment, Kandal (Garden's
mala longus.10.14.20
ratin: qen bresde@teled.com
[Unreadable Text]
mation. (Sala-Devikas@el.com, www
m.
The following table is in English:
The following table is:
- 0005(13:28:28)
rudin 580 Delch@minio.CDA
nalu darlaqal,plmaqar
malk: Harts, Landemings,
malk: kardakarmpedotlery
maltx: Jones@hormes.spo.ulexas.edu
maltx.dwtgjvizec.com
maltx leme@ee@1.gov
maltx Indologues uba:
maltic lelegrumde
malk tronings.
mato. mato.
mally, pro-ivitward over cards on
maltv. modikina.doc.com
mally, Imcore@leveldayco10h nor com
maltx.kama@whance.com
maltor derekijkybox demen.co.uk
mbox-4016189
maltz: Raine: Fina@tomak,uri-erangen.de
maltx dir@zks.deo.com
maltar warchen@apple.com
maltx mmaple@quackhu.com
The OpenSSL toolkit stays under a dual license, i.e. both the conditions of the OpenSSL License and the original SSL key license apply to the toolids. See below for the actual license texts. Actually both licenses are BSD-olve Open Source licenses. In case of any license issues related to OpenSSL please control opens-core/licensed.org.
OpenSEL License
[EMPTY]
Reported by: 2015, 2016 for Public Edition, Number
Copyright © 1856-07 The Optical Paper, 2004
Reduzication and use in source and binary forms, with or medical modifications, are permitted provided that the following conditions are met:
End striburians of course on the ground return for above occasional prices. This list of conditions and the
The following table is in Chinese:
Redistributions in binary form must reproduce the above copyright notice, this list of conditions and the following disclaimer in the documentation similar other materials provided with the distribution.
All advertising materials mentioning features or use of this software must display the following acknowledgment:
"The product and other authorities described by the Open521 Project for use in the Open521 Limited (https://www.sprove.org)"
The name: "OpenSSL Toolkit" and "OpenSSL Project" must not be used to endorse or promote products derived from Iris.
whisone when part within permsack. For a##len permace on plas#### and ###-###-###
Products derived from this software may not be called "OpenSQL" nor may "OpenSSL" appear in their names without prior written permission of the OpenSSL. Expired.
Redistrictations of any form whatever must retain the following acknowledgment:
* The product and other products developed by the Open2021 Property for sale in the Open2021.
http://www.openet.org/
THIS SOFTWARE IS PROVIDED BY THE OPRESS PROJECT "AS IS" AND ANY EXPRESSED DRIMPLES WITHOUT THE
INCLUDING, BUT NOT LIMITED TO THE IMPLED WARRANTIES OF MERCHANTABILITY AND FITNESS FOR A
WHOLE COUNCUM PURPOSE, AND DECLARATION. IN INVESTMENT SHEET THE CHINESE PRODUCT OF THE CONSULTORS IN LARGE FOR ANY DIRECT, DIRECT, INCIDENTAL, SPECIAL EXPERYLATION OR CONSENSIENTAL DAMAGES INCLUDING BUT NOT LIMITED TO PROCUREMENT OF SUBSTRUMENTS, DISCUSITORS, LOSS OF USE, DATA, DETAILS, OR BUSINESS INFORMATION, HOWEVER CAUSED AND ON ANY THEORY OF LIABILITY, NEITHER IN CONTRACT, STREET LIMITS, OR OTHER INCLUDING NOUSICE OR OTHER NON-USING IN ANY WAY OUT OF THE USE OF THIS
SOFTWARE, EVEN IF ADMISED OF THE POSSIBILITY OF SUCH DAMAGE
(1) 2015-2016 (2017) was the first time in the last year (2018) for the last day of the following: 2016-2017 (2017) was the second day of the last year (2018) for the last day of the second year.
This product includes cryptographic functions written by Eric Young (any@copyptel.com). This product includes software entries.
Corporoti (CI 1586-1596) Inc: You can leave/your own all noble holders.
This package is at 38. implementation only by Etc Young (2024) and
The implementation was written as to confirm with heterogeneity 529
This library is free for commercial and non-commercial use as long as the following conditions are obtained in: The following conditions apply in code format in the distribution by the ISO, USA, Brazil, India, etc., however just the SSI code. The SSI document includes a valid with this distribution as covered by the same copyright terms except that, the failure to Miss Hudson (the) crystal port).
Copyright renkins Eric Young, and see authoring Copyright notices in the office are not to be married.
The package is made in a product. I'm Young should be given additional use of the solar in the parts of the battery used. This can be in the letters of a hundred messages at program sections or in documents on for some or instead, provided with the broadband. (Technical and law on sources and binary terms, which are without documentation, we permitted provided that the following
conditions are not
The following table provides the information in the copyright notice, that the content and the contents of this document are obtained from
En-30
Redistribution in binary form must reproduce this above copyright notice, this list of conditions and the following disclaimer in the documentation and/or other materials provided with the classification. All advertising materials monitoring features or use of this software must display the following acknowledgements: "Erio Young Time Securities Corp."
The end of the following can be used to find the results from the Earying being and not effectively obtained: (1) From books are, a Windows specific choice for a generic user through the first session tape, taking code you must include an open book. (2) The book is designed to use a standard format for the content of the book. (3) This SOFTWARE IS PROVIDED BY ERIO YOUNG 'AIS' AND ANY EXPRESS OR IMPLIED WARRANTIES, INCLUDING, BUT NOT LIMITED, THE INFLUED WARRANTIES OF MERCHANTABILITY AND FITNESS FOR A PARTICULAR ORDER OR ANY OTHER COMPRIMATE OR ANY OTHER COMPRIMATE WITHOUT THE USE OF THIS SOFTWARE, INSCRIBITED, INSCRIBITED, INSCRIBITED, INSCRIBITED, INSCRIBITED, INSCRIBITED, INSCRIBITED, INSCRIBITED, INSCRIBITED, INSCRIBITED, INSCRIBITED, INSCRIBITED, INSCRIBITED, INSCRIBITED, INSCRIBITED, INSCRIBITED, INSCRIBITED, INSCRIBITED, INSCRIBITED, INSCRIBITED, INSCRIBATED
11pc-l
Copyright: 1900 Red Hat Software
Formation is merely granted, free charge to any person obtaining a copy of this software and associated documentation files (Software), so do not in the Software without restrictions, including without limitation the rights to use, copy, modify, modify, copy, trimble, trimble, and other costs of the Software, and to permit persons who in the Software is furnished to do so, subject to the following conditions. The Software is not only allowed for any person to receive entire or its related items or other categories of the Software. THE SOFTWARE IS PROVIDED AS BY WITHOUT WARRANTY OF ANY KIND. EXPRESS OR IMPLIED. INCLUDING BUT NOT LIMITED TO THE WARRANTIES OF MERCHANTABILITY FITNESS FOR A PARTICULAR PURPOSE AND MORNINGMENT. IN NO EVENT SHALL THE X CONSORTUM BE LIABLE FOR ANY CLAY, DAMAGE OR DURATION, LIABILITY AND OTHER IN AN ACTION OF COMPLIANCE, YOUR INFORMATION, FROM OUR ORDER IN CONNECTION WITH THE SOFTWARE OR THE USE OF OTHER DESUGNS IN THE SOFTWARE. A PART OF THIS SOFTWARE AND/OR INFORMATION, ALL OF THE SOFTWARE AND/OR INFORMATION, OR otherwise to promote the use of user or other deals in the Software without a protection authorization from the X Consortium.
(12) RSA Data Security, Inc. MDS Message Digest Algorithm
Copyright © 1991-2, RSA Data Security, Inc. Created 1991. All rights reserved. License to occupy and use this software is granted provided that it is identified as the "RSA Data Security, Inc. NDS Message Digital Software" in all mineral products for processing the software as the American
License is also granted to make and use derivative works provided that such works are identified as "derived from the RSA Data Security, Inc. M36 Message-Digaset Algorithm" in all material mentioning or referencing the derived work
RSA Data Security, Inc. makes no representations concerning either the merchantability of this software or the suitability of this software for any particular purpose. It is provided "as it" without express or implied warranty of any kind.
Those notices must be retained in any copies of any part of this documentation and/or software.
13) Elpe 2.25
Copyright: © 2.00 by Jor Postwater (original) section. All rights reserved
Used to check and use in source and share forms, with or without modification on. She permitted provided that the following work has been
ReDistribution of source code must remain the above copyright notice, this list of conditions and the
folding oksla mer.
Redell burkors in binary form must reproduce the above copyright notice, this list of conditions and the following disclaimer in the documentation and other materials provided with the distribution
THIS SOFTWARE IS PROVIDED BY THE AUTHOR AND CONTRIBUTORS AS IS AND ANY EXPRESS OR IMPLIED WARRANTIES, INCLUDING, BUT NOT LIMITED TO THE IMPLIED WARRANTIES OF MERCHANTABILITY AND FITNESS FOR PATENTARY EXPENSES. ARE DECLARED IN MOVEMENT SHALL THE AUTHOR OR CONTRIBUTORS BE LIABLE FOR ANY DIRECT, INDIRECT, INCIDENTAL, SPECIAL, EXEMPLARY, OR CONSEQUENTIAL DAMAGES (INCLUDING, BUT NOT LIMITED TO PROCUREMENT OF SUBSTUFF, GOODS OR SERVICE'S, LOSS OF USE, DATA, DESCRIPTION, OR BUSINESS INTERRUPTION) HOWEVER CALURED AND ON ANY THEORY OF LIABILITY WHETHER IN CONTRACT, STRICT VALID BY, OR RIGHT UNLESSING MEASURE OR OTHERWISE ARISING IN ANY WAYOUT OF THE USE OF THIS SOFTWARE. EVEN ADVISED OF THE POSSIBILITY OF SUCH DAMAGE.
1142
zil:1 - interface of the 'zil' general purpose compression library version 3.1.4, March 11th, 2002
Copyright (C) 1983-2013. Jasn-eap Gsily and Mark Arlas
This software is provided "no-45", without any express or implied warranty. In no event will the authors be held liable for any
throughs strong from the use of Itox software
Permission is granted to anyone to use the software for any purpose, including commercial applications, and in other than
The step of the delivery must be manganese
The design of the product is not to be made, because, you make no or what you wish the product itself. You can use the products in a product, an advocate-guest in the product documentation shall be appreciated but not required.
Altered source variance was, the plant marked as such, and must not be represented so being the root of all areas.
This notice may not be removed or altered from any source distribution.
John-tan-Cindy Mark Affer
Jup@gep.org make@yirm.ca/tech.edu
The data formal need by the 24th century is classified by II-10. Request for Commenio 1910 to 1917 in the file
[pr. Mio. Iclama: no] 1952, al (Ate. Iermal), ndc'25" In] nblebde (Imera) and rd.1953, bl [gap. Iermal].
[15] Apple Laceras
Apoedra Lao100
Yunnan 20 January 2014
https://www.essence.org/camera/
TERMS AND CONDITIONS FOR USE, REPRODUCTION, AND DISTRIBUTION
Dafrijaro
"Liceron" also has been declared and sanctioned for use, reproduction, and collaboration as defined by Section 1 through To The document.
"License" shall mention the copyright owner of Arilly, Inc. (the copyright owner, but is part of the License
"Lapal Lally" and mean the cause of being only and of other indirect control, are controlled by one or more common control with dual only. For the purpose of the control, control means (i) be power direct or induced, to cause the deviation in management of each only, whether by control or otherwise, or (ii) ownership is fully certain (SNS) or means of the outstanding shares, or (iii) beneficial ownership of such entity.
"You" for "Your" shall mean an individual or Legal Entity executing permission granted by this License.
"Sources" form shall mean the preferred form for making modifications, including but not limited to software sources code, documental on source, and configured on files.
"Object" form shall mean any form resulting from mechanical transformation or translation of a Source form, including but not limited to compiled object code, penetrated documentation, and conversions to other media types.
"Work" shall mean the work of authorship, whether in Source or Object form, made available under the License, as indicated by a copyright notice that is included in or attached to the work (an example is provided in the Appendix 2.
"Derivative Works" shall mean any work, whether in Source or Object form, that is based on for derivates from the Work and for which the editorial relations, and all one elaborators, or other modifications represent as a whole, an original work of authorship. For the purposes of this License, Derivative Works shall not include works that remain separable from, or merely this (or bind by name) to the interfaces of the Work and Derivative Works thereof.
"Contribution" and means any work of authorship, including the original version of the Work and any fixed disasters or accidents to those of Derivative Works thereof, that is potentially submitted to License for inducer in the Works by the copyright owner or by an individual or Legal Entity authorized to submit on behalf of the copyright owner. For the purposes of this definition, "limited" means any form of electronic, verbal, or informal communication sent to the License or its representatives, including but not limited to communication on an electronic mailing list, source code control systems, and lease mailing systems that are managed by, or on behalf of, the License for the purpose of discussing and improving the Works, but evolving communication that is consciously marked or otherwise designed in writing by the copyright owner as "that a Contribution."
"Contributor" shall mean Licensee and any individual or Legal Entity on behalf of whom a Contribution has been received by Licensee and subsequently incorporated within the Office.
Grant of Copyright License.
Subject to the terms and conditions of this License, each Contributor hereby grants to Your a perpetual worldwide, non exclusive, no charge royalty-free, irrevocable copyright license to reproduce, prepare Derivative Works cf. publicly display, publicly perform, public service, and claims the Work and such Derivative Works In Source or Order form.
Grant of Patent License.
Subject to the terms and conditions of this License, each October be filed grants to Your perfect worksfield, not exclusive non-charge royalty-free immovable receipt as stated in this sectional patent license to make "new made, use, offer to sell, sell, import", and otherwise transfer the Work, where such license applies only to those patent claim and hereby by such Contributor that are necessarily infringed by their Construction, alone or by contribution of the Commission(s) with the Work to which such Construction is not successful. If the Institute public litigation begins not only entity (including a cross claim or certificate claim in a lawsuit), alleging that the Author or a Contributor incorporated with a Work's consequences direct or contributory patent infringement, from any patent licenses granted to You understand this License for that Work shall terminate as of the date such litigation is filed.
Red attribution.
You may reproduce and distribute copies of the Work or Derivative Works thereof in any medium, with or without modifications, and in Source or Object form, provided that You meet the following conditions:
You must give any other recipient of the Work or Derivative Works a copy of the Order, and
You must cause any modified life to carry prominent not less eating that you changed the tree and
We must never, in the course form many Derivative Works that you describe, although your patient mark and with instructions from the Source form of the Work, excluding those follows do not certain to any part of the Derivative Works and if the Author includes a NOICEE, he is not part in a contribution, that may Denver with us that the author must include a remarkable note of the attribution notices contained within each NOICEE. It is working these notices that do not certain to any part of the Derivative Works and if the Author includes a NOICEE, but it is not part in a contribution, which may Denver with us that the author must include a remarkable note of the attribution notices contained within each NOICEE. It is working these notices that do not certain to any part of the Derivative Works and if the Author includes a NOICEE, but it is not part in a contribution, which may Denver with us that the author must include a remarkable note of the attribution notices contained within each NOICEE or outside documentation, it is provided along with the Derivative Works or within a display required by the Derivative Works, it is without any company name or company name, however, the contents of the NOICEE. It is under the informational purposes only and does modify its license. But you said, you can inform their notices within a Derivative with us that the author must be called with the NOICEE and from the source, provided both an additional information copy and has been corrected as modifying this license.
You may add Your own copyright statement in Your modifications are, may provide additional and reward license terms and content lists for any, reconstruction, or attribution of Your modifications, or for any such Derivative Works on a whole, presented Your use, reproduction, and distribution of the Works otherwise complete with the condition stated in this License
Submission of Contributions
Unless you explicitly know otherwise, any Contribution intermediately submitted for inclusion in the Work by You to the License should be under the terms and conditions of the License, which only accepted some or conditions. After increasing the action, nothing here is bold experience or modify the terms of any responsible lawrence agreement you may have assessed with License regarding such Contributions.
Tracematis
The Lacerate does not grant permanent income from the Lacerate, franchisee, service sector or product, revenue of the Lacerate, and go to report for renewable and regulatory loss in descending the origin of the Work and restructuring the current of the NOTICE No.
Director of Almerly
Unless required by applicable law or equivalent to in writing License, pursuant to the Work [used each Commission for the Commission] or an "ASIS" BASE, WITHOUT WARRANTIES OR CONDITIONS OF ANY S.N.I. rather exercise or method, including without limitations, any termination or other issue of TITLE, NON INFRINGEMENT, MERCHANTABILITY, or FITNESS FOR A WITHOUT PURPOSE. You can also require for further impact the appropriate use of using or communicating the Work and assume any other prescribed with Your source as of publication under this License.
Limitation of Lability.

Others
In case and under no legal hierarchy, in terms of (including legal persons), contract, or otherwise, unless required by applicable law (such as deliberate and costly legal permits) or agreed to in writing, shall any Contributor to be able to view for damages including any client, individual, several, principal, or consent, additional damages of any character arising as a result of the License or out of the size or inability to use the Wors (including but not limited to damages for loss of goodwill, were stopping, computer failure or malfunction, or any and all other commercial damages or asset even if such Contributor has been advised of the possibility of such damages.
Accepting Warranty or Additional Liability.
While introducing the Work or Derivative Works I refer. You may choose to offer, and charge a free for, acceptance of support, warranty, income, or other liability obligations and/or rights contract with this License. However, in accepting such obligations, you may act only on your own behalf and on your own responsibility, not on behalf of any other Contributor and only if you agree to indemnify, dislead, and hold each Contributor harmless for any liability incurred by, or claims assessed against each Contributor by reason of your accepting any such warranty or additional liability.
END OF TERMS AND CONDITIONS
APPENDIX: How to apply the Apache License to your work.
To apply the Apache License to your work, attach the following certificate notice, with the file being enclosed by brackets 1" replaced with your own identifying information. (Don't notice the bracket). The list should be enclosed in the appropriate comment system for the file format. We also recommend that a file or class name and description of purpose be included on the same "closed page" as the copyright notice for marker identification within third-party archives.
Copyright © 2011 Apple Inc. All rights reserved.
Licensed under the Apache License. Version 2.0 (the "License"); you may not use this file except in compliance with the License. You may obtain a copy of the License at
http://www.apache.org/licensesLICENSE-2.0
Unless required by applicable law or agreed to in writing, software distributed under the License is distributed on an "AS IS" BASIS, WITHOUT WARRANTIES OR CONDITIONS OF ANY KIND. Other express or mailed. See the License for the specific language governing permitations and, hereby under
the License
(16) Bocet
http://www.002139
Software License - Version 13-08-2014. 2015 Permission is hereby granted, free of charge, to any person for organization obtaining a copy of the software and accompanying documentation covered by the license (the "Software") to use, reproduce, shipping, distribution, exercise, and transmit the Software, and to prepare derivative works of the Software, and to permit third point or to whom the Software is furnished to do so all subject to the information.
The copyright notices in the Software and this entire statement, including the above license grant, this restriction and the following described, must be included in all cases of the Software, in whole or in part, and all derivative cases of the Software, unless such copies or derivative works are solely in the form of much no-executable object codes generated by a source language processor.
THE SOFTWARE IS PROVIDED AS ST. WITHOUT WARRANTY OF ANY KIND, EXPRESS OR INFLUED, INCLUDING BUT NOT LIMITED TO THE WARRANTIES OF MERCHANTABILITY FITNESS FOR A PARTICULAR PURPOSE, TITLE AND NON-FRINEMENT. IN NO EVENT SHALL THE COPYRIGHT POLDERS OR ANYONE DISTRIBUTING THE SOFTWARE BE USED FOR ANY DAMAGES OR OTHER LIABILITY, AND THEIR IN CONTRACT TORT OR OTHER RASH, ARISING FROM OUT OF ORIC CONNECTION WITH THE SOFTWARE OR THE USE OR OTHER DEALINGS IN THE SOFTWARE. (1) FROM
http://www.jlark.com/inspur.html
Digital License Copyright (r): 1948, 1969, 2001 The Open Software License Unit Perim action is hereby granted, free of charge, to any person obtaining a copy of this software and associated documentation files (the Software), to use in the Software without permission, including other limited on the rights to one copy, monthly merge, public, distribution, subscription, and/or copy of the Software, and to permit persons to whom the Software is humshed to do so, printed in the following publication:
The above copy of the notice and the permission notice shall be included in all copies or subtropical portions of the Software. The SOFTWARE IS PROCESSED AS ST. AUTHICIT VAMMANY OF ANY KING, EXPRESS OR PUBLIC, INCLUDING BUT NOT LIMITED TO THE WARRANTIES OF MERCHANTABILITY, FITNESS FOR A PARTICULAR PURPOSE AND NORM INCLUSION IN THIS EVENT SHALL BE AUTHICERS ON COPYRIGHTED SHEET SHALL BE ANY CLAIM DAMAGES OR OTHER ISSUITY, WHETHER IN ACTION OF CONTRACT TORT OR OTHERWISE, ARISING FROM OUT OF OTHER CONNECTION WITH THE SOFTWARE OR THE USE OF OTHER RIGHTS IN THE SOFTWARE.
in the case of the
THE WORK AS DEFINED BEFORE IS PROVIDED UNDER THE TERMS OF THIS CODE PROJECT OPEN LICENSE (LICENSE). THE WORK IS PROTECTED BY COPYRIGHT AND/OR OTHER APPLICABLE LAW ANY USE OF THE WORK. OTHER THAN AS AUTHICATED UNDER THIS LICENSE OR COPYRIGHT LAW IS PROHIBITED.
BY EXTERIORING ANY RIGHTS TO THE WORK PROCESSED HEREIN, YOU ACCEPT AND AGREED TO BE DELINED BY THE TERMS OF THIS LICENSE. THE AUTHOR GRANS YOU THE RIGHT'S CONTAINED OTHER FINANCIAL CONSIDERATION OF YOUR ACCEPTANCE OF SUCH TERMS AND CONDITIONS. IF YOU DO NOT AGREE TO ACCEPT AND BE BOUND BY THE TERMS OF THIS LICENSE, YOU CANNOT APPE ANY USE OF THE WORK
Сайтис
A. "Oriental" means, relatively, all areas written by failure after describing how the Korean Code are
Comparable Price, of the Grade may be used by a year.
b. "Alike" means the induction of why that above the West under the terms of the source c. "Customize 'Alike' means a work based upon the West or upon the West and other processal events. d. "A conceptual I do" note for the experimental history, carryingism and any required data that reduced
a. "Pubisher" measures the potential of the cells, response, C3-RDA (25D) or other molecular ion or by
which the Work is obtained by You
Source Code' refers to the collection of source code and ranking information files used to create the listable files.
q. "Standard Vascular nerve to each Zisk: Thus not been normal or not been modified in a multivariate
with the account of the Author, such consent being in the full discussion of the Author
In: "Work" refers to the collection of the distributed by the Authorie, including the Source Goal. Exercisable Files, Instruments, data Tech, documentary, manuscripts and the Articles
"You're you in an individual or entity wishing to use the Work and exercise your rights under the License. Fair Use/Fair Use Rights. Nothing in this License is intended to reduce, limit or refusal any right arising from law, legal, accounting, first sale or other imbalances on the exclusive rights of the copyright owner under the license or other applicable laws. License, subject to the terms and conditions of this License. The Author Note grant you a worldwide royalty from non-exclusive, perpetual for the duration of the applicable copyright license to exercise the rights in the Work as stated above. You must be the standard version of the Working Center Executive Rule. Your new law
- You may open a bug fixes, potentially flows and other modifications obtained from the Public Domain or from
the Authee A'Now modified in such a way she I still be considered the standard version and will be subjected to this License. You may otherwise modify Your copy of this Week (including the Articles) in any way to create a Derivative.
Work provided that You insert a prominent notice in each changed file stating how, when and where You changed that it.
d. You may distribute the standard version of the Exocurable Files and Source Code or Derivative Work in
aggregate with other (possibly commercial) programs as part of a larger (possibly commercial) software distrib
e. The Articles discussing this Work published in any form by the author may not be distributed or republished without the Author's consent. The author retains copyright to any such Articles. You may use the Exocurable Files and Source Code pursuant to this License but you may not repell or republish or otherwise distribute or make available the Articles, without the prior written consent of the Author.
Any outcome or module supplied by You and Insert into the Source Code or Executable Files. This Work shall not be considered part of this Work and will not be subject to the terms of this License.
Patent License. Subject to the terms and conditions of the License, each further hereby grants to you a perpetual worldwide, non-excluded, no charge, royalty free, irrevocable (except as stated in this section) patent license to make, have made, use, import, and otherwise transfer the book.
Restricted. The license granted in Section 3 above is expressly made subject to and limited by the following restrictions:
- You spoke for to remove a 3-y of the original copyright, patent, 14, mark, and associated disclosure that you appear in the Figure Code or Executive Officer.
You are not to advise or a way you improve that like I work is a product of You can
- The name of the author may not be used to endorse or promote purchase demand from the Bank officer.
the prior written consent of the author.
d. You agree not to sell, lease, or mark any part of the Works. This does not restrict you from including the Works
or any part of the Work inside a larger software distribution that itself is using sold. The Work by itself, though, cannot be sold, paper corrected.
c. You may distribute the Exceivable Files and Source Code only under the terms of this License, and You must include a copy of or the Uniform Resource Identifier for this License with every copy of the Exceivable Files or Source Code. You distribute and ensure that anyone receiving such Exceivable Files and Source Code agrees that the terms of this License apply to such Exceivable Files and Source Code. You may not often interrupt any terms on the Work that other corresponds the terms of this License or the Responsible Exercise of the Rights granted her holder. You may not subscribe to the Work. You must keep intact all notices that refer to the License and to the distalment of warranties. You may not distribute the Exceivable Files or Source Code with any technical measures that control access cross of the Work in a manner unless then with the terms of this License.
- You agree not to use the Work for illegal, immoral or improper purposes, or on pages containing illegal
minimal or improper material. The Work is subject to applicable export laws. You agree to comply with all such laws and useful use that may apply to the Work after Your receipt of the Work.
References: Warranties and Exchange THIS WORK IS PROCIFIED AS IS "WHERE IS AND "AS AVAILABLE".
WITHOUT ANY EXPRESS OR IMPLED WARRANTIES OR CONDITIONS OR GUARANTIES, YOU THE USER, ASSUME ALL RISK IN ITS USE, INCLUDING COPYRIGHT INFRINGEMENT, PATENT INFRINGEMENT, SUITABILITY, ETC. AUTHOR EXPRESSLY DISCLAIMS ALL EXPRESS, INFLUED OR STATUTORY WARRANTIES OR CONDITIONS, INCLUDING WITHOUT LIMITATION, WARRANTIES OR CONDITIONS OF MERCHANTABILITY, MERCHANTABILITY, QUALITY OR FITNESS FOR A PARTICULAR PURPOSE, OR ANY WARRANTY OF TITLE OR NON INFRINGEMENT, OR THAT THE WORK OR ANY INFORMATION IS CORRECT, USEFUL, BUGREE OR FREE OR VIIRUSES, YOU MUST PASS THIS DISCLAIMER ON WHEVERY YOU DISTRIBUTE THE WORK OR DERIVATIVE WORKS.
Intermity: You agree to defend, immurity and hold harmless the author and the Publisher from and against any claims, etc., losses, damages, liabilities, costs, and expenses (including reasonable legal or attorneys' fees) resulting from or relating to any use of the Work by You.
Limitation on Facility. EXCEPT TO THE EXTENT REQUIRED BY APPLICABLE LAW. IN NO EVENT WILL THE AUTHOR OR
THE FILL SHER BE UATE TO YOL DN AND LEGAL THE CRY FOR ANY SPECIAL ACCIDENTIAL
PUNTIVE OR EXEMPLARY DAMAGES ARISING OUT OF THIS LICENSE OR THE USE OF THE WORK OR OTHER
A. The License and law rights granted herein under will them made electronically open any search by You of any form of the License. Individual or entities who have received Derivative Works from You under the License, however, will not know their license terms directed such institutional or well as remain in full compliance with these licenses. Section 1, 2, 8, 7, 8, 9, 10 and 11 will pursue any verification of this license.
- If You bring a campbell,建筑面积, point is any other interest from said appeal and/or further use
ntringments. You claim are made by the Work, your License from such contributor to the Work ends automatically.
- Subject in the action terms and conditions, In a exercise a parallel (for the duration of the application
copyright in the Work). Notwithstanding the share, the author reserves the right to relaxes the Work under different license terms
or in step addressing the Work at any time provided, however, but any such worker will not serve to attribute the same job
any other license that has been, or is required to be granted under the terms of Ina. Licensee), and Ina. Licensee will
Publisher. The parties hereby confirm that the Publisher shall not, under any circumstances, be responsible for and shall not
"we are jointly in respect of the suspected matter in the context. The Public matter is necessary absolutely as confirmed with the Work and should not be able to be, or any party on any legal theory for any damages whatsoever, including without interference any general cause, increased or accumulated charges arising in connection at this issue. The Public matter is exempted in case that the Work available to you at any time without notice."
Nacelbem
a. The License shall be granted by the State of the Interior of the Head Office of the Author or the Author is
an relabeld the term of a series of the principal class of nonlistions of the Active.
- If any price is on or in line, it is traded or under purchase in order to purchase a buy, it shall not add the
visibly or understanding of the numerical factors of the Lasso, and animal further subject by the person in the Lasso.
such provisions shall be referred to the minimum event necessary to make such provisions valid and identifiable.
- NO OTTIEF (MIZABETH) E-50 LESCING AFTER THE CONSTRUCTION AND OTHERS IN THIS STATEMENT TO RESOLATE
2020-11 February 2021 was in Xiam, Am Raj-Boy, The party of the United States as a result of:
- In a case of consideration and the opportunity, the author is a special author's proposal to the Park Zealand. Name: These are an independent company or manufacturer with respect to the Work and research names. The Author
and not be heard as any sufficient appropriate just more money in any metropolitan area. Yes, This location may be
notices within the material and arrangement of the Author and You.
(10) Tectu
-1) (Note 21.4) and (Note 30.5)
Copyright (C) 2000-2009 Xaltong Foundation Charges Copyright (C) 2009-2010 Rosin Wata for Pihousw Productions Ltd
Technical and use in source and library terms, with or without classification, and permitted desired for the following
or disagree with
Red oil burdens of sources also must retain the above copyright notice, this list of conditions and the
following disclarin
Red slur burdens in binary form must reproduce the above copyright notice, this list of conditions and the
Following disclaimer in the documentation and other materials provided with the distribution
- Neither the name of the Xichang Foundation nor the names of its contributors may
PROVIDENCE DETAILS: From the software-based scope we can participate in. THIS SOFTWARE IS PROVIDED BY THE COPYRIGHT HOLDERS AND CONTRIBUTORS AS IS APID AND ANY EXPRESS AND/OR INFORMATION TO THE INFORMATION OF MERCHANTABILITY AND RESPONSIBILITY OF MERCHANTABILITY AND FITNESS FOR A PARTICULAR PURPOSE ARE DISCLAIMED IN NO EVENT SHALL THE FOUNDATION OR CONTRIBUTORS BE LIABLE FOR ANY DIRECT, INDIRECT, INCIDENTAL, SPECIAL, EXEMPLARY, OR CONSULTENT, DAWARDS INCLUDING, BUT NOT LIMITED TO PROCUREMENT OF SUBSTITUTE GOODS OR SERVICES LOSS OF EFFECTS, USE, DATA, OR PROFITS, OR BUSINESS INTERRUPTION HOWEVER CAUSED AND ON ANY THEORY OF LIABILITY, WHIPHER INFORMATION STRICTLY, OR TWENT INCLUDING NEG公开发行 OR OTHERWISE ARISING IN ANY WHIPHER INFORMATION WITHOUT THE USE OF THIS SOFTWARE, EVEN IF ADVISED OF THE POSSIBILITY OF SUCH DAMAGE (2010)
http://wlmdxch.org/index.php/Tremor
Copyright © 2002 Xiphong Foundry
Redish burden and use in source and binary forms, with or without modification, are permitted provided that the following
conditions are met
Red oil burdons of source ooce must retain the above copyright notice, this list of conditions and the
following disclaimer
- Recistributions in binary form must reproduce the above copyright notice, this list of conditions and the
following disclaimer in the documentation and other materials provided with the distribution.
- Neither the name of the Xiphog Foundation nor the names of its contributors may be used to endorse or
· promote products serve to this complete and/or specific, the written permission. THIS SOFTWARE IS PROCESSED BY THE COPYRIGHT OF FERS AND CONTRIBUTORS IN ICE AND ANY EXCEEDS.
THIS SOFTWARES PROVIDED BY THE OPFINISH FOLLOWERS AND CONTINUERS AS IS INDICATE EXPRESS OF NEUTRALWATERIES INCLUDING THE NOT LIMITED TO THE UNITED STATES OF AMERICA'S CITY.
FOR THE INFORMATION AND INFORMATION, IT IS LIMITED TO THE RESOLVENTION OF AFFECTIVE ASSISTANCE. THIS INFORMATION AND INFORMATION FOR THE INFORMATION AND INFORMATION FOR THE INFORMATION AND INFORMATION FOR THE INFORMATION AND INFORMATION FOR THE INFORMATION AND INFORMATION FOR THE INFORMATION AND INFORMATION FOR THE INFORMATION AND INFORMATION FOR THE INFORMATION AND INFORMATION FOR THE INFORMATION AND INFORMATION FOR THE INFORMATION AND INFORMATION FOR THE INFORMATION AND INFORMATION FOR THE INFORMATION AND INFORMATION FOR THE INFORMATION AND INFORMATION FOR THE INFORMATION AND INFORMATION FOR THE INFORMATION AND INFORMATION FOR THE INFORMATION AND INFORMATION FOR THE INFORMATION AND INFORMATION FOR THE INFORMATION AND INFORMATION FOR THE INFORMATION AND INFORMATION FOR THE INFORMATION AND INFORMATION FOR THE INFORMATION AND INFORMATION FOR The INFORMATION AND INFORMATION FOR THE INFORMATION AND INFORMATION FOR THE INFORMATION AND INFORMATION FOR THE INFORMATION AND INFORMATION FOR THE INFORMATION AND INFORMATION FOR THE INFORMATION AND INFORMATION FOR THE INFORMATION AND INFORMATION FOR THE INFORMATION AND INFORMATION FOR THE INFORMATION AND INFORMATION FOR THE INFORMATION AND INFORMATION FOR THE INFORMATION AND INFORMATION FOR THE INFORMATION AND INFORMATION FOR THE INFORMATION AND INFORMATION FOR THE INFORMATION AND INFORMATION FOR THE INFORMATION AND INFORMATION FOR THE INFORMATION AND INFORMATION FOR THE INFORMATION AND INFORMATION FOR THE INFORMATION AND INFORMATION FOR THE INFORMATION AND INFORMATION FOR THE INFORMATION AND INFORMATION FOR TURSDIN AT 1998.
(2) Konsen 16 Wider
http://www.math.sc.hiroshima-u.ac.jp-mi-mltMTN2003CODESmt1958740
Copyright © 1997-2032.4835-4850, Inc. 3/4 1500 Nenmin,
and this reported
Redish burden and use in source and ordinary forms, with or without modification, are permitted provided that the following
conditions are met
Redish buttons of source code must retain the above copyright notice, this list of conditions and the following disclaimer. Redish buttons in binary form must reproduce the above copyright notice, this list of conditions and the following disclaimer in the documentation and other materials provided with the distribution
The names of its contributors may not be used to endorse or promote products derived from this software without specific prior
written permission
THIS SOFTWARE IS PROVIDED BY THE COPYRIGHT HOLDERS AND CONTRIBUTORS AS IS BY ANY EXPRESS OR IMPLIED WARRANTIES INCLUDING, BUT NOT LIMITED TO THE IMPLIED WARRANTIES OF MERCHANTABILITY AND FITNESS FOR A PARTICULAR PURPOSE ARE DISCLAIMED. IN AN OFF BEAL SHALL THE COPYRIGHT OWNER OR CONTRIBUTORS IS PRISE FOR ANY DIRECT INTEREST, INCIDENTAL, SPECIAL, EXEMPLARY, OR CONSEQUENTIAL DAMAGES INCLUDING, BUT NOT LITED TO: PROCUREMENT OF SUBSITE GOODS OR SERVICES LOSS OF USE, DATA OR PROFITS OR BUSINESS INFORMATION HOWEVER CAUSED ON ANY THEORY OF LIABILITY, WHETHER IN CONTRACT, STRICT LIABILITY, OR TORT, INCLUDING NEGENCE OR OTHERWISE ARISING IN ANY WAY OUT OF THE USE OF THIS SOFTWARE, EVEN AN ADVISITION OF THE POSSIBILITY OF SUCH DAMAGE.
121481
Hilvianl hawce re
COPYRIGHT AND PERMISSION NOTICE
Copyright © 1986-2011, Davis S. Hartberg, www.chinastock.com, Memphis Research
Femission to use, copy, modify, and distribute this software for any purpose with or without fee is necessary granted, provided that
THE SOFTWARE IS PROVIDED AS IT, WITHOUT WARRANTY TO ANY HAND, EXPRESS OR BYED, INCLUDING
THE SOFTWARE & PROVIDED BASIS, WITHOUT COOKING OF ANY FUND EXPRESSION INCLUDING BILKON (PENGUO) 1987 0283451.5 DE MACHIN (MILLY - 1981 551 DTA PABLOE & AR PLANSSE &RC
NOMINERGEMENT DE THIRD PARTY RIGHTS UN NO EVENT SHALL THE AUTHORS OR COPYRIGHT HOLDERS
III. WILL I DO ANY OAM DAMAGES OR OTHER EQUITY WILL BE IN AN ACTION OF CONTRACT OR IT OR OTHERWISE, ARISING FROM OUT OF OR IN CONNECTION WITH THE SOFTWARE OR THE USE OR OTHER DEALINGS IN THE SIX PAPAY.
Except as contained in this notice, the name of a copyright holder shall not be used in advertising or otherwise to promote the
role, use or other desktops in the Solitans which prior written understand at the copyright holder
1240-000
Ита-анытис
Copyright 1985 by the Massachusetts Institute of Technology.
From people to use, rights, money and debt into the software and its documentation for any purpose and without law or money.
granted, presented that the shows copyright notice appear in all copies and hold held that copyright notice and the permission
the same moment in estimating document, and the first version of M.C. will be covered in accounting for behalf of funding to
Identification of the software without explicit, written prior permission. (2011) makes no representation should be mutually in the software have been used to use this version as part of the
BANK OF ANY SUPECE, IT IS POULADO. 3017. WE-EN, SPONSITIE INQUES WMALY.
(1)
Cerp. (1): 2:1-2:4, Tilt Cenr A Right National
10.3.2015, 10.3.2016, 10.3.2017, 10.3.2018, 10.3.2019, 10.3.2020, 10.3.2021, 10.3.2022, 10.3.2023, 10.3.2024, 10.3.2025, 10.3.2026, 10.3.2027, 10.3.2028, 10.3.2029, 10.3.2030, 10.3.2031, 10.3.2032, 10.3.2033, 10.3.2034, 10.3.2035, 10.3.2036, 10.3.2037, 10.3.2038, 10.3.2039, 10.3.2040, 10.3.2041, 10.3.2042, 10.3.2043, 10.3.2044, 10.3.2045, 10.3.2046, 10.3.2047, 10.3.2048, 10.3.2049, 10.3.2050, 10.3.2051, 10.3.2052, 10.3.2053, 10.3.2054, 10.3.2055, 10.3.2056, 10.3.2057, 10.3.2058, 10.3.2059, 10.3.2060, 10.3.2061, 10.3.2062, 10.3.2063, 10.3.2064, 10.3.2065, 10.3.2066, 10.3.2067, 10.3.2068, 10.3.2069, 10.3.2070, 10.3.2071, 10.3.2072, 10.3.2073, 10.3.2074, 10.3.2075, 10.3.2076, 10.3.2077, 10.3.2078, 10.3.2079, 10.3.2080, 10.3.2081, 10.3.2082, 10.3.2083, 10.3.2084, 10.3.2085, 10.3.2086, 10.3.2087, 10.3.2088, 10.3.2089, 10.3.2090, 10.3.2091, 10.3.2092, 10.3.2093, 10.3.2094, 10.3.2095, 10.3.2096, 10.3.2097, 10.3.2098, 10.3.2099, 10.3.21
• Utilization of
* For example, a group is assumed to be the company's name. It is of problems and the following reasons:
In the myocardial anorectal malapnia marker with the angina
THIS SOFTWARE IS PROVIDED BY THE COPYRIGHT HOLDERS AND CONTRIBUTORS "AS IS AND ANY EXPRESS OR INTENDED ANYABLES INCLUDING, BUT NOT LIMITED TO, THE PATENT WARRANTY OF RICH KINARITY AND FITNESS FOR A PARTICULAR PURPOSE ARE DISCLAIMED IN NO EVENT SHALL THE COPYRIGHT HOLDER OR CONTRIBUTIONS WILL BE FOR ANY OTHER, IN particular, SPECIAL, UNIVARY, DISCREP COUNCING DAMAGES INCLUDING, BUT NOT LIMITED TO PROCUREMENT OF SUBSTITUTE GOODS OR SERVICES.
TUSS OF ONE, LIMA DRYFRENTS, OF BUSINESS INTERMO-TEKNITRAVEER CABBAGE AND ON
ANY THEORY OF LIABILITY, WHETHER IN CONTRACT, STRICT LIABILITY, OR TORTING INCLUDING RESIDENCE OR OTHERWISE ARISING IN ANY ANY OUT OF THE USE OF THIS SOFTWARE, EVENT ADVISED OF THE POSSIBILITY OF SUCH DAMAGE.
Connections
Initial Setup
Playing Back
Advanced Manual
Front Panel >Rear Panel >Remote Controller
Supplied Accessories

Indoor FM antenna --- (1)

AM loop antenna — (1)

Remote controller (RC-901M) -- (1)
Batteries (AA/R6) --- (2)

Power cord — (1)

Speaker setup microphone -- (1)
* The number in parenthesis indicates the quantity. On packaging, the letter at the end of the product name indicates the color.
How to use the remote controller
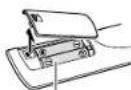
Batteries (AA/R6)
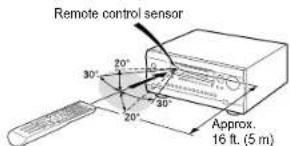
* If you do not use the remote controller for a long time, remove the batteries to prevent leakage.
* Note that keeping consumed batteries inside may cause corrosion resulting in damage of the remote controller.
Integra.
Integra Division of
Onkyo U.S.A. Corporation
18 park Way, Upper Saddle River, N.J. 07458, U.S.A.
Tel: 800-225-1946, 201-818-9200 Fax: 201-785-2650
http://www.integrahometheater.com
Integra Division of
Onkyo Europe Electronics GmbH
Liegnitzerstrasse 6. 82194 Groebenzell, GERMANY
Tel: +49-8142-4401-0 Fax: +49-8142-4208-213
http://www.integra.eu
Integra Division of
Onkyo China PRC
302, Building 1, 20 North Chaling Rd., Xuhui District, Shanghai,
China 200032, Tel: 86-21-52131366 Fax: 86-21-52130396
http://www.integra.com.cn
Integra Division of
Onkyo Corporation
Kitahama Chuo Bldg, 2-2-22 Kitahama, Chuo-ku, OSAKA 541-0041, JAPAN
Tel: 072-831-8023 Fax: 072-831-8163
http://www.integraworldwide.com
SN 29402054
(C) Copyright 2015 Onkyo Corporation Japan. All rights reserved. Onkyo has the Privacy Policy. You can review it at [http://www.onkyo.com/privacy/].
F1506-0

AV Controller
DHC-60.7
Advanced Manual
Integra
The Basic Manual includes information needed when starting up and also instructions for frequently used operations. The Advanced Manual has more detailed information and advanced settings.
CONTENTS
Details on AM/FM reception 2
Tuning into a Radio Station 2
Presetting an AM/FM Radio Station 3
Using RDS (Australian models) 3
Playing Music Files on a USB Storage Device 5
Listening to Internet Radio 6
About Internet Radio 6
Tuneln Radio 6
Pandora®—Getting Started (U.S., Australia and
New Zealand only) 7
Spotify
SiriusXM Internet Radio (North American only) 8
Slacker Personal Radio (North American only) 9
Registering Other Internet Radios 10
Playing Music with DLNA 12
About DLNA 12
Configuring the Windows Media® Player 12
DLNA Playback
Controlling Remote Playback from a PC
Playing Music Files in a Shared Folder
About Shared Folder
Setting PC
Playing from a Shared Folder
8
Operating Music Files with the Remote Controller
About the Remote Controller
Remote Controller Buttons
Icons Displayed during Playback
Using the Listening Modes
Selecting Listening Mode 17
Listening Mode Types
Selectable Listening Modes
Checking the Input Format
Advanced Settings (Setup Menu)
How to Set
-
Input/Output Assign
-
Speaker
-
Audio Adjust
-
Source
-
Listening Mode Preset
-
Hardware
-
Remote Controller
-
Miscellaneous
Operating Other Components with the Remote
Controller
Functions of Remote Mode Buttons
Programming Remote Control Codes
TV operation
16 Blu-ray Disc player/DVD player/DVD recorder
operation
VCR/PVR operation
Satellite receiver / Cable receiver operation
CD player operation
Cassette tape deck operation
To operate CEC-compatible components
Advanced Connections 68
Connecting Bi-amp Speakers
Connecting Dipole Speakers
Connecting and Operating Onkyo RI Components 69
About RI Function
RI Connection and Setting
iPod®/iPhone® Operation
Control Function between the Unit and External
Component 71
Firmware Update 72
About Firmware Update
Updating the Firmware via Network
Updating the Firmware via USB
Troubleshooting 75
Reference Information 80


Details on AM/FM reception
Tuning into a Radio Station
■ Tuning automatically
- Press Tuner on the main unit several times to select either "AM" or "FM".
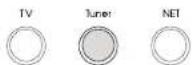
- Press Tuning Mode so that the "AUTO" indicator on the display lights.
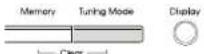
- Press Tuning to start automatic tuning.
- Searching automatically stops when a station is found. When tuned into a radio station, the "▶ TUNED indicator on the display lights. When tuned into an FM radio station, the "FM STEREO" indicator lights.
- No sound is output while the "TUNER" indicator is off.
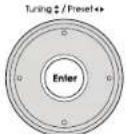
When the signal from an FM radio station is weak: Radio wave may be weak depending on the building structure and environmental conditions. In that case, perform the manual tuning procedure as explained in the next section, "Tuning manually", to manually select the desired station.
En-2
■ Tuning manually
- Press Tuner on the main unit several times to select either "AM" or "FM".
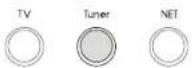
- Press Tuning Mode so that the "AUTO" indicator on the display goes off.
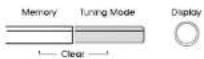
- Press Tuning▲▼ select the desired radio station.
- The frequency changes by 1 step each time you press the button. The frequency changes continuously if the button is held down and stops when the button is released. Tune by looking at the display.
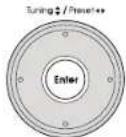
To return to automatic tuning: Press Tuning Mode on the main unit again. The unit automatically tunes into a radio station. Normally "AUTO" should be displayed.
■ Tuning to the frequency directly
It allows you to directly enter the frequency of the radio station you want to listen to.
- Press Tuner on the remote controller several times to select either "AM" or "FM".
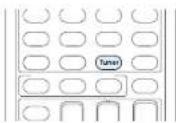
Details on AM/FM reception
- Press D.TUN.
- Using the number buttons, enter the frequency of the radio station within 8 seconds.
- To enter 87.5 (FM), for example, press 8, 7, 5, or 8, 7, 5, 0. If you entered the wrong number, press D.TUN and enter the correct one.

Presetting an AM/FM Radio Station
It allows you to register up to 40 of your favorite AM/FM radio stations. Registering radio stations in advance allows you to tune into your radio station of choice directly.
■ Registration Procedure
- Tune into the AM/FM radio station you want to register.
- Press Memory on the unit so that the preset number on the display flashes.
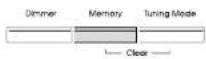
- Press Preset several times to select a number between 1 and 40 while the preset number is flashing (about 8 seconds).
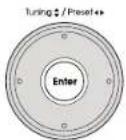
-
Press Memory again to register the station.
-
When the station is registered, the preset number stops flashing.
- Repeat this procedure for all of your favorite AM/FM radio stations.
■ Selecting a Preset Radio Station
- Press CH +/- on the remote controller to select a preset number.
- Alternatively you can press Preset on the main unit. You can also select by directly entering the preset number with the number buttons on the remote controller.
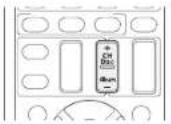
■ Deleting a Preset Radio Station
- Press CH +/- on the remote controller to select the preset number to delete.
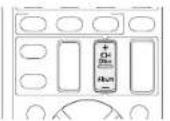
- Press and hold Memory on the main unit and press Tuning Mode to delete the preset number.
- When deleted, the number on the display goes off.
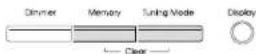
Using RDS (Australian models)
RDS stands for Radio Data System and is a method of transmitting data in FM radio signals.
- RDS works only in areas where RDS broadcasts are available.
- In some cases, the text information appeared on the display is not identical to the content transmitted by the RDS station. Furthermore, unexpected characters may be displayed when the unit receives unsupported characters. However, this is not a malfunction.
- If the signal from an RDS station is weak, the RDS data may be displayed continuously or not at all.
PS (Program Service): Tuning into a radio station distributing Program Service information displays the radio station name. Pressing Display displays the frequency for 3 seconds.
RT (Radio Text): Tuning into a radio station transmitting Radio Text information displays text on the display of the unit.
PTY (Program Type): Allows you to search for RDS stations by program type.
TP (Traffic Program): Allows you to search for radio stations transmitting traffic information.
■ Displaying Radio Text (RT)
- Press RT/PTY/TP on the main unit once.
- The Radio Text (RT) is displayed scrolling across the display. "No Text Data" is displayed when no text information is available.
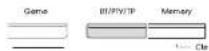
■ Searching by Type (PTY)
- Press RT/PTY/TP on the main unit twice.
- The current program type appears on the display.
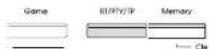
Connections
Initial Setup
Playing Back
Advanced Manual
Front Panel >Rear Panel >Remote Controller
- Press Preset▶select the type of program to search for.
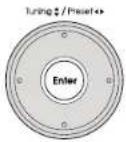
• The following RDS station types are displayed:
None News (News reports)
Affairs (Current affairs)
Info (Information)
Sport
Educate (Education)
Drama
Culture
Science (Science and technology)
Varied
Pop M (Pop music)
Rock M (Rock music)
Easy M (Middle of the road music)
Light M (Light classics)
Classics (Serious classics)
Other M (Other music)
Weather
Finance
Children (Children's programmes)
Social (Social affairs)
Religion
Phone In
Travel
Leisure
Jazz (Jazz music)
Country (Country music)
Nation M (National music)
Oldies (Oldies music)
Folk M (Folk music)
Document (Documentary)
- Press Enter to search the radio stations of the selected type.
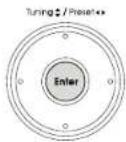
- When such a radio station is found, the indication on the display flashes. Then, press Enter again. • If no stations are found, the message "Not Found" is displayed.
■ Listening to Traffic Information (TP)
- Press RT/PTY/TP on the main unit three times.
- "[TP]" will be displayed if traffic information is transmitted by the radio station you are tuned in. "TP" only is displayed if no traffic information is available.
- Press Enter to search a radio station distributing traffic information.
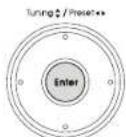
- When a radio station is found, searching stops and traffic information is received.
- "Not Found" is displayed if no radio station distributing traffic information is found.
Details on AM/FM reception
En-4

Playing Music Files on a USB Storage Device
- Operation: You can set up by viewing the guidance displayed on the TV screen (OSD). Select the item with the cursor buttons of the remote controller and press Enter to confirm your selection. To return to the previous screen, press Return.
- If the OSD language is set to Chinese, the operations in this section are not displayed on the TV. Operate by looking at the display on the main unit. Note that the display on the main unit does not support the display of Chinese characters. Characters that cannot be displayed are replaced with asterisks (*
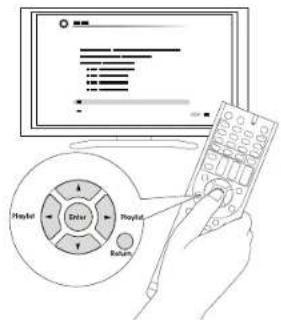
Playing Back
- Plug your USB storage device with the music files into the USB port on the rear of the unit.
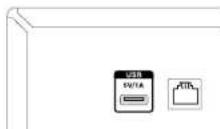
- Press NET on the remote controller to display the NET TOP screen.
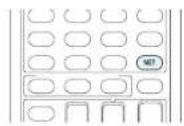
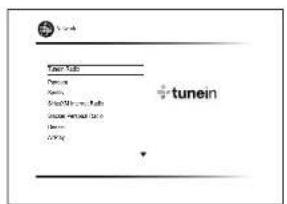
-
Select "USB" with the cursors and press Enter.
-
If the "USB" indicator on the display flashes, check whether the USB storage device is plugged in properly.
-
Do not unplug the USB storage device while "Connecting..." is on the display. This may cause data corruption or malfunction.
-
Press Enter again in the next screen. The list of folders and music files on the USB storage device are displayed. Select the folder with the cursors and press Enter to confirm your selection.
Playing Music Files on a USB Storage Device
- With the cursors, select the music file to play, and then press Enter or ▶ to start playback.
- The USB port of this unit conforms with the USB 1.1 standard. The transfer speed may be insufficient for some content you play, which may cause some interruption in sound.
Listening to Internet Radio
About Internet Radio
The unit comes preset with Internet radio stations such as Tuneln Radio for you to enjoy these services, just by connecting the unit to the Internet.
- Network services or contents may become unavailable if the service provider terminates its service.
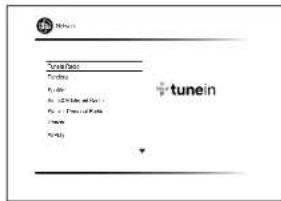
Tuneln Radio
With more than 70,000 radio stations and 2 million on-demand programs registered, Tuneln Radio is a service where you can enjoy music, sports and news from all over the world.
- Operation: You can set up by viewing the guidance displayed on the TV screen (OSD). Select the item with the cursor buttons of the remote controller and press Enter to confirm your selection. To return to the previous screen, press Return.
- If the OSD language is set to Chinese, the operations in this section are not displayed on the TV. Operate by looking at the display on the main unit. Note that the display on the main unit does not support the display of Chinese characters. Characters that cannot be displayed are replaced with asterisks (*).
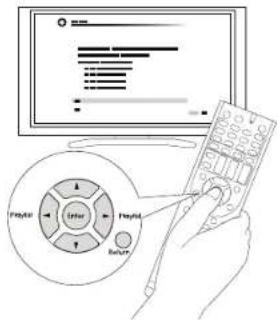
Playing Back
- Press NET on the remote controller to display the NET TOP screen.
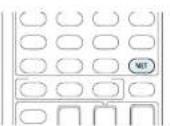
Listening to Internet Radio
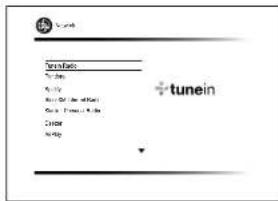
-
Select "Tuneln Radio" with the cursors and press Enter to display the Tuneln Radio top screen.
-
With the cursors, select a radio station or program and press Enter to start playing.
■ Regarding the Tuneln Radio Menu
To display the Tuneln menu, press Menu or Enter while playing a radio station. Selecting the corresponding menu item with the cursors and pressing Enter allows you to perform the following operations:
Add to My Presets: Registers the radio station or program being broadcast in "My Presets". Once registered, "My Presets" is displayed in the level under TuneIn Radio. To play, select the program from "My Presets".
Remove from My Presets: Deletes a radio station or program from your "My Presets" within Tuneln Radio.
Report a problem: Reports a problem or interactively solves a problem related to TuneIn Radio.
View Schedule: Displays the radio station or program schedule.
Clear recents: Clears all radio stations and programs from the "Recents" within Tuneln Radio. (This menu is displayed only when a radio station or program inside the "Recents" is being played.)
Add to My Favorites: Registers the radio station or program being broadcast in "My Favorites", "My Favorites" are displayed in the level under the one displayed when you press NET. To play, select the program from "My Favorites".
Connections
Initial Setup
Playing Back
Advanced Manual
Front Panel >Rear Panel >Remote Controller
■ Regarding the Tuneln Radio Account
Creating an account on the TuneIn Radio website (tunein.com) and logging in it from the unit allows you to automatically add radio stations and programs to your "My Presets" on the unit as you follow them on the website. "My Presets" are displayed in the level under TuneIn Radio. To display a radio station registered in "My Presets", you must log into TuneIn Radio from the unit. To log in, select "Login" - "I have a TuneIn account" in the "TuneIn Radio" top list on the unit, and then enter your user name and password.
- If you associate the device on My Page within the Tuneln Radio website using the registration code obtained by selecting "Login" - "Login with a registration code" on the unit, you can log in without entering the user name and password.
Pandora®—Getting Started (U.S., Australia and New Zealand only)
Pandora is a free, personalized Internet radio service that plays the music you know and helps you discover music you'll love.
- Operation: You can set up by viewing the guidance displayed on the TV screen (OSD). Select the item with the cursor buttons of the remote controller and press Enter to confirm your selection. To return to the previous screen, press Return.
- If the OSD language is set to Chinese, the operations in this section are not displayed on the TV. Operate by looking at the display on the main unit. Note that the display on the main unit does not support the display of Chinese characters. Characters that cannot be displayed are replaced with asterisks (*).
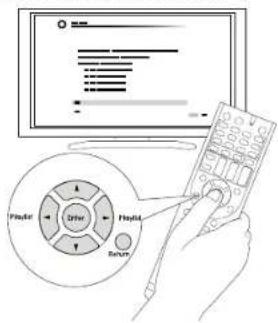
Playing Back
- Press NET on the remote controller to display NET TOP screen.
Listening to Internet Radio
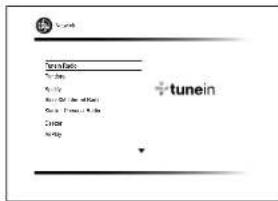
-
With the cursors on the remote controller, select "Pandora", and then press Enter.
-
Use ▲No select "I have a Pandora Account" or "I'm new to Pandora" and then press Enter. If you are new to Pandora select "I'm new to Pandora". You will see an activation code on your TV screen. Please write down this code. Go to an Internet connected computer and point your browser to www.pandora.com/integra. Enter your activation code and then follow the instructions to create your Pandora account and your personalized Pandora stations. You can create your stations by entering your favorite tracks and artists when prompted. After you have created your account and stations you can return to your Integra receiver and press Enter to begin listening to your personalized Pandora.
If you have an existing Pandora account, you can add your Pandora account to your Integra receiver by selecting "I have a Pandora Account" and logging in with your email and password.
- If you want to use multiple user accounts, see "Using Multiple Accounts". Login can be made from the "Users" screen.
- To play a station, use ▲ to select the station from your station list, and then press Enter. Playback starts and the playback screen appears.
■ Create a New Station
Enter the name of a track, artist, or genre and Pandora will create a unique radio station for you based on the musical qualities of that track, artist, or genre.
I like this track: Give a track "thumbs-up" and Pandora will play more music like it.
I don't like this track: Give a track "thumbs-down" and Pandora will ban that track from the current station.
En-7

Listening to Internet Radio
Why is this track playing?: Discover some of the musical attributes that Pandora uses to create your personal radio stations.
I'm tired of this track: If you are tired of a track, you can put the track to sleep and Pandora will not play it for one month.
Create station from this artist: Creates a radio station from this artist.
Create station from this track: Creates a radio station from this track.
Delete this station: This will permanently delete a station from your Pandora account. All of your thumbs feedback will be lost should you choose to re-create the station with the same track or artist.
Rename this station: Lets you rename the current radio station.
Bookmark this artist: Pandora will bookmark your favorite artist for your profile on www.pandora.com.
Bookmark this track: Pandora will bookmark the current track and allow you to buy them all from Amazon or iTunes in one step!
Add to My Favorites: Adds a station to My Favorites list.
PANDORA
PANDORA, the PANDORA logo, and the Pandora trade dress are trademarks or registered trademarks of Pandora Media, Inc. Used with permission.
Spotify
This unit is compatible with Spotify Connect. To enable Spotify Connect, install the Spotify application on your smartphone or tablet and create a Spotify premium account.
- The unit and smartphone or tablet must be connected to the same router.
- Refer to the following for the procedures for configuring Spotify:
www.spotify.com/connect/
- The Spotify software is subject to third party licenses found here:
www.spotify.com/connect/third-party-licenses
Playing Back
Just by clicking the Connect icon in the playback screen of the Spotify application and selecting this unit, you can automatically turn this unit on (auto power on function), switch input to the NET position, and start playback of high-quality streaming from Spotify. To enable the auto power on function, make sure the "Network Standby" setting item in this unit's Setup is "On".
■ Notes for using the multi-zone function
- To enjoy Spotify music in a separate room, select Zone 2/Zone 3, and manually select "NET" as the input of the separate room. Also select this unit in the Spotify application.
- You can only adjust the volume in the Spotify app when outputting to Zone 2 when "Zone 2 Out" is set to "Variable" and you have connected a pre-main amplifier. In other cases, adjust the volume on the audio equipment placed in a separate room.
- To enjoy Spotify music in the main room after playing it in a separate room, select "NET" as the input of the main room.

Spotify®

SiriusXM Internet Radio (North American only)
If you want to listen to the service, you must subscribe. To subscribe go to www.siriusxm.com/internetradio with your computer. When you subscribe, you will be provided with a username and password which has to be entered into this unit. To use SiriusXM Internet Radio, you must have this unit connected to the Internet. Using the remote control, follow these steps:
- Operation: You can set up by viewing the guidance displayed on the TV screen (OSD). Select the item with the cursor buttons of the remote controller and press Enter to confirm your selection. To return to the previous screen, press Return.
- If the OSD language is set to Chinese, the operations in this section are not displayed on the TV. Operate by looking at the display on the main unit. Note that the display on the main unit does not support the display of Chinese characters. Characters that cannot be displayed are replaced with asterisks (*).
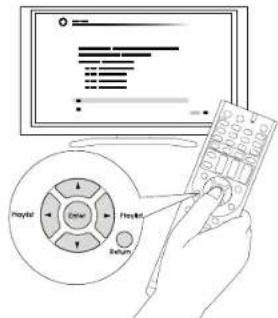
En-8

Listening to Internet Radio
■ Playing Back
- Press NET on the remote controller to display NET TOP screen.
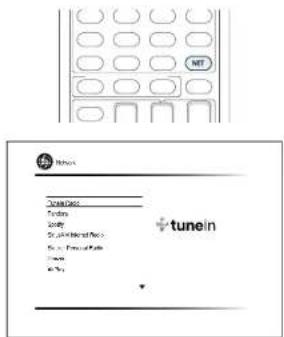
- With the cursors on the remote controller, select "SiriusXM Internet Radio", and then press Enter.
- Select "Sign In", and then press Enter. If you have an existing SIRIUS account, you can sign in by selecting "Sign In". Enter your user name and password in the next keyboard screen, or in Web Setup. If you do not know your username or password, call Sirius XM at (888) 539-7474 for assistance.
- If you want to use multiple user accounts, see "Using Multiple Accounts". Login can be made from the "Users" screen.
Using the keyboard screen
① Use ▲▼ and Enter to enter your user name and password.
② Select "OK".
③ Press Enter. The "Confirm your entries" screen appears.
④ Press Enter. "Please wait..." appears and then "SiriusXM Internet Radio" screen appears which displays the category available for selection.
- Use ▼ to select the category and then press Enter. The channel list screen for the selected category appears.
- Use ▲/▼ to select the desired channel and then press Enter.
The playback screen for the selected channel appears and you can listen to SiriusXM Internet Radio. You can control the tracks with the buttons on the remote control.
Add to My Favorites: Adds a channel to My Favorites list.
Add to Presets: Adds the currently playing station to presets list.
Delete from Presets: Deletes the currently playing station from presets list.
((SiriusXM))
SiriusXM Internet Radio subscriptions are sold separately and are governed by the Sirius Terms and Conditions (see www.sirius.com). Be sure to read this agreement before you purchase your subscription.
Sirius, XM and all related marks and logos are trademarks of Sirius XM Radio Inc. and its subsidiaries. All rights reserved.
Slacker Personal Radio (North American only)
- Operation: You can set up by viewing the guidance displayed on the TV screen (OSD). Select the item with the cursor buttons of the remote controller and press Enter to confirm your selection. To return to the previous screen, press Return.
- If the OSD language is set to Chinese, the operations in this section are not displayed on the TV. Operate by looking at the display on the main unit. Note that the display on the main unit does not support the display of Chinese characters. Characters that cannot be displayed are replaced with asterisks (*)
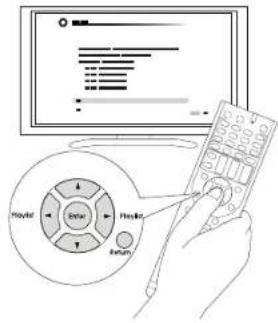
■ Playing Back
- Press NET on the remote controller to display NET TOP screen.
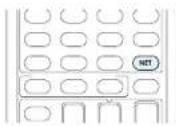
Listening to Internet Radio
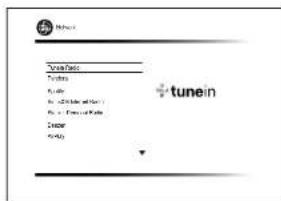
- With the cursors on the remote controller, select "Slacker Personal Radio", and then press Enter.
- If you do not have an account, create one on the Slacker website (www.slacker.com) with your computer. If you already have a Slacker account, select "Sign in to your account" and then press Enter. The keyboard screen appears. You can enter information from the remote control or the keys on the main unit.
- If there are no mistakes in the information you have entered, use ▲/▼/▲●select "OK" then press Enter. An account information confirmation screen appears
- If you do not have an account, select "Access without Sign In" and press Enter to use a restricted version of the service. Note that use will be restricted.
- If you want to use multiple user accounts, see "Using Multiple Accounts". Login can be made from the "Users" screen.
- Use ▲/▼ to select a menu item and then press Enter. To sign out, use ▲/▼ to select "Sign out" from this screen and then press Enter.
- Use ▲/▼ to select a station and then press Enter or ▶ to start playback from the station. The playback screen appears.
- You can control the tracks with the buttons on the remote control.
Rate Song as Favorite: Stores information to server, making it more likely that the song will be played again.
Ban Song: Stores information to server, making it less likely that the song will be played again.
Ban Artist: Stores information to server, making it less likely that the songs from this artist will be played again.
Mark Favorite: Adds the currently playing station to your favorites.
Unmark Favorite: Deletes the currently playing station from your favorites.
Add song to Library: Adds the currently playing track to your library.
Delete song from Library: Deletes the currently playing track from your library.
Add to My Favorites: Adds a station or song to My Favorites list.
Using Multiple Accounts: This unit supports multiple user accounts, which means you can freely switch between several logins. After registering user accounts, login is performed from the "Users" screen.
Press Menu while the Users screen is displayed. "Add new user", "Remove this user" menu appear. You can either store a new user account, or delete an existing one.
- Some of the services do not allow the use of multiple user accounts.
- You can store up to 10 user accounts.
- To switch between accounts you must first log out from the current account, and log in again on the "Users" screen.
Registering Other Internet Radios
To listen to other Internet radio program, register the program in the "My Favorites" list as described in the next section. "My Favorites" are displayed in the level under the one displayed when you press NET.
- You can register up to 40 Internet radio stations.
- The unit supports Internet radio stations stored in the following formats: PLS (URL ending in .pls), M3U (URL ending in .m3u) and RSS (URL ending in rss/rdf/xml).
Depending on the data type and playback format, there may be some you cannot play.
● Available services may vary depending on your area of residence.
- Operation: You can set up by viewing the guidance displayed on the TV screen (OSD). Select the item with the cursor buttons of the remote controller and press Enter to confirm your selection. To return to the previous screen, press Return.
- If the OSD language is set to Chinese, the operations in this section are not displayed on the TV. Operate by looking at the display on the main unit. Note that the display on the main unit does not support the display of Chinese characters. Characters that cannot be displayed are replaced with asterisks (*).
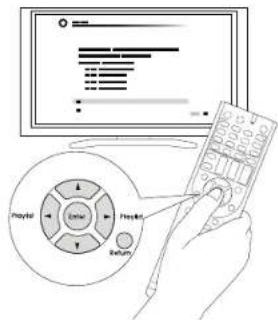
■ Registration Procedure
Before Performing any Operation: The name and URL of the radio station that you want to add are required for registration. Check the specifications before use.
En-10

Listening to Internet Radio
- Press NET on the remote controller to display the NET TOP screen.
-
Select "My Favorites" with the cursors and press Enter to display the "My Favorites" list screen.
-
With the cursors, select a blank area of "My Favorites" and press Menu to display the menu screen.
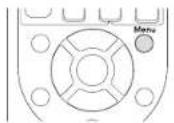
-
Select "Create new station" with the cursors and press Enter to display the keyboard screen.
-
Enter the name and URL of the radio station to add.
- Select "A/a" and press Enter to toggle between upper and lower case. Select "-" or "-" and press Enter to move the cursor to the selected direction. Select "☒" and press Enter to delete one character to the left of the cursor position.
■ Registering a Station with PC
Before Performing any Operation: The name and URL of the radio station that you want to add are required for registration. Check the specifications before use. Also, make sure this unit and a computer are connected to the same router.
- Press RCV on the remote controller.
- Always press RCV first to change the remote controller to RECEIVER mode (the mode to operate this unit) since its mode may be changed to operate another component.
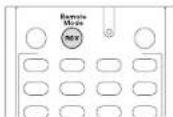
- Press Setup to display the Setup menu.
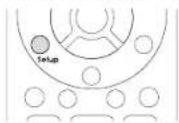
- With the cursors, select "6. Hardware" - "Network" - "IP Address" to display the IP address.
• Take note of the IP address since you will need it later.
-
Open the Internet browser on your PC or smartphone and enter the IP address of the unit in the URL field.
-
When using Internet Explorer, you can alternatively select "Open" in the "File" menu to enter the IP address.
-
Information of the unit is displayed on the browser. ("WEB Setup")
-
Click "★" tab, then enter the name and URL of the Internet radio station.
- Click "Save" to register the entered Internet radio station in "My Favorites".
To rename the registered radio station: Select the radio station in the "My Favorites" list and press Menu to display the menu screen. Select "Rename this station" with the cursors and press Enter to display the keyboard screen. Rename the station as desired.
- Radio stations can be renamed also from "WEB Setup".
■ Playing a Registered Radio Station
- Press NET on the remote controller to display the NET TOP screen.
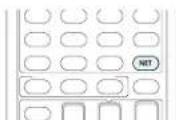
- Select "My Favorites" with the cursors and press Enter to display the registered Internet radio stations.
- With the cursors, select a radio station and press Enter to start playing.
■ Deleting a Registered Radio Station
- Press NET on the remote controller to display the NET TOP screen.
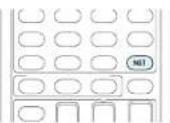
- Select "My Favorites" with the cursors and press Enter to display the registered Internet radio stations.
- With the cursors, select the radio station to delete and press Menu to display the menu screen.
- With the cursors, select "Delete from My Favorites", and then press Enter. A confirmation screen will appear.
- With the cursors, select "OK", and then press Enter to delete the radio station.
- Select "Back" to return to the previous screen.
- Radio stations can be deleted also from "WEB Setup".
Playing Music with DLNA
About DLNA
Digital Living Network Alliance (DLNA) can be referred to as a technology standard or the industry group to develop the technology standard to interconnect and use AV components, computers and other devices in a home network. This unit allows you to use DLNA to play music files stored on a computer or a hard disk connected to your home network (NAS device). Make sure this unit and a computer or NAS device are connected to the same router.
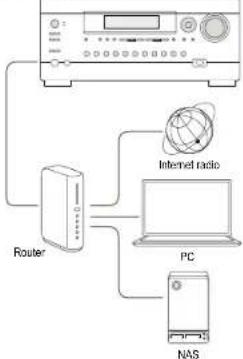
flowchart
graph TD
    A["Device"] --> B["Router"]
    B --> C["Internet radio"]
    C --> D["PC"]
    D --> E["NAS"]
- To stream a music file, you need a NAS device with DLNA server functions or a PC where a player (e.g., Windows Media ^48 Player 11 or Windows Media ^49 Player 12) with DLNA server functions is installed. To enable streaming with Windows Media ^50 Player 11 or Windows Media ^51 Player 12, you must first configure the settings.
Configuring the Windows Media ^® Player
■ Windows Medlayer 11
-
Turn on your PC and start Windows Media® Player 11.
-
In the "Library" menu, select "Media Sharing" to display a dialog box.
-
Select the "Share my media" check box, and then click "OK" to display the compatible devices.
-
Select this unit, and then click "Allow".
-
When it is clicked, the corresponding icon is checked.
-
Click "OK" to close the dialog.
- Depending on the version of Windows Media Player, the names of the items you need to select may differ from the explanation here.
■ Windows McPlayer 12
-
Turn on your PC and start Windows Media ^® Player 12.
-
In the "Stream" menu, select "Turn on media streaming" to display a dialog box.
- If media streaming is already turned on, select "More streaming options..." in the "Stream" menu to list players in the network, and then go to step 4.
-
Click "Turn on media streaming" to list players in the network.
-
Select this unit in "Media streaming options" and check that it is set to "Allow".
-
Click "OK" to close the dialog.
- Depending on the version of Windows Media Player, the names of the items you need to select may differ from the explanation here.
Playing Music with DLNA
DLNA Playback
- Operation: You can set up by viewing the guidance displayed on the TV screen (OSD). Select the item with the cursor buttons of the remote controller and press Enter to confirm your selection. To return to the previous screen, press Return.
- If the OSD language is set to Chinese, the operations in this section are not displayed on the TV. Operate by looking at the display on the main unit. Note that the display on the main unit does not support the display of Chinese characters. Characters that cannot be displayed are replaced with asterisks (*
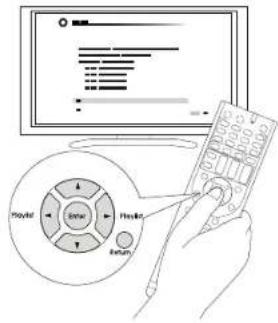
■ Playing Back
-
Start the server (Windows Media® Player 11, Windows Media® Player 12, or NAS device) containing the music files to play.
-
Press NET on the remote controller to display the NET TOP screen.
- If the "NET" indicator on the display flashes, the unit is not properly connected to the network. Check the connection.
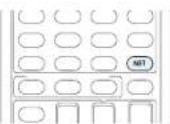
En-12

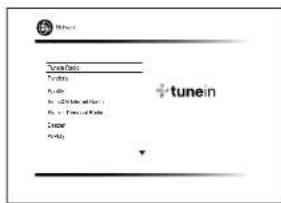
- Select "DLNA" with the cursors and press Enter.
-
Select the target server with the cursors and press Enter to display the items list screen.
-
Searching does not work in servers that do not support search functions.
- The unit cannot access pictures and videos stored on servers.
-
Contents stored on the server may not be displayed depending on the server sharing settings.
-
With the cursors, select the music file to play, and then press Enter or ▶ to start playback.
- If "No Item." is displayed, check whether the network is properly connected.
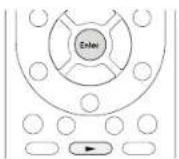
Controlling Remote Playback from a PC
You can use this unit to play music files stored on your PC by operating the PC inside your home network. The unit supports remote playback with Windows Media ^® Player 12. To use the remote playback function with Windows Media ^® Player 12, Windows Media ^® Player 12 must be configured in advance.
- Using a DLNA-compatible controller (such as an Android application), you can select a music file stored on Windows Media® Player 12 and stream to this unit by operating the controller. For information on how to remotely play using the controller, refer to the controller's instruction manual.
Setting PC
- Turn on your PC and start Windows Media ^® Player 12.
- In the "Stream" menu, select "Turn on media streaming" to display a dialog box.
- If media streaming is already turned on, select "More streaming options..." in the "Stream" menu to list players in the network, and then go to step 4.
-
Click "Turn on media streaming" to list players in the network.
-
Select this unit in "Media streaming options" and check that it is set to "Allow".
- Click "OK" to close the dialog box.
- Open the "Stream" menu and check that "Allow remote control of my Player..." is checked.
- Depending on the version of Windows MediaPlayer, the names of the items you need to select may differ from the explanation here.
■ Remote playback
- Turn on the power of the unit.
- Turn on your PC and start Windows Media® Player 12.
- Select and right-click the music file to play with Windows Media® Player 12.
- To remotely play a music file on another server, open the target server from "Other Libraries" and select the music file to play.
- Select this unit in "Play to" to open the "Play to" window of Windows Media ^3 Player 12 and start playback on the unit.
Playing Music with DLNA
- Operations during remote playback are possible from the "Play to" window on the PC. The playback screen is displayed on the TV connected to the HDMI output of the unit. If your PC is running on Windows® 8, click "Play to", and then select this unit.
-
Adjust the volume using the volume bar on the "Play to" window.
-
Sometimes, the volume displayed on the remote playback window may differ from that appeared on the display of the unit.
- When the volume is adjusted from the unit, the value is not reflected in the "Play to" window.
- This unit cannot play music files remotely in the following conditions.
- It is using a network service.
- It is playing a music file on a USB storage device.
- Depending on the version of Windows MediaPlayer, the names of the items you need to select may differ from the explanation here.
Playing Music Files in a Shared Folder
About Shared Folder
A shared folder is configured in a network device such as a PC or NAS (hard disk connected to your home network) for access from other users.
You can play music files in a shared folder on your PC or NAS connected to the same home network as that of the unit. To play music files in a shared folder, you must first configure Windows ^8 8 or Windows ^6 7. Make sure the unit and PC or NAS device are connected to the same router.
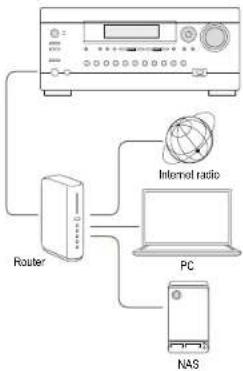
flowchart
graph TD
    A["Router"] --> B["Internet radio"]
    B --> C["PC"]
    C --> D["NAS"]
- The sharing options must be configured and a shared folder created on the PC in advance.
- For information on how to configure the NAS device and create a shared folder, refer to the NAS device's instruction manual.
En-14
Setting PC
■ Configuring the Sharing Options
- Select "Choose home group and sharing options" on the "Control Panel".
- If the menu is not displayed, check whether "View by" is set to "Category".
-
Select "Change advanced sharing settings".
-
Check whether the following radio buttons are selected in "Home or Work":
"Enable network discovery"
"Turn on file and printer sharing"
"Turn on sharing so anyone with network access can read and write files in the Public folders."
"Turn off password protected sharing"
- Select "Save Changes" and click "OK" on the dialog box.
■ Creating a Shared Folder
- Select and right-click the folder to share.
- Select "Properties".
- Select "Advanced Sharing" on the "Sharing" tab.
- Select the "Share this folder" check box and click "OK".
- Select "Share" for "Network File and Folder Sharing".
- Select "Everyone" from the pull-down menu. Click "Add", and then "Share".
- To set user name and password to a shared folder, set "Permissions" in "Advanced Sharing" on the "Sharing" tab.
- Check whether a workgroup is set.
Playing Music Files in a Shared Folder
Playing from a Shared Folder
- Operation: You can set up by viewing the guidance displayed on the TV screen (OSD). Select the item with the cursor buttons of the remote controller and press Enter to confirm your selection. To return to the previous screen, press Return.
- If the OSD language is set to Chinese, the operations in this section are not displayed on the TV. Operate by looking at the display on the main unit. Note that the display on the main unit does not support the display of Chinese characters. Characters that cannot be displayed are replaced with asterisks (*
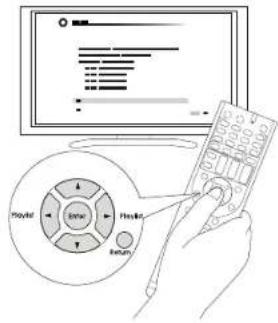
■ Playing Back
- Press NET on the remote controller to display the NET TOP screen.
- If the "NET" indicator on the display flashes, the unit is not properly connected to the network. Check the connection.
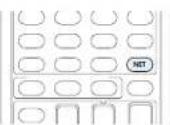

Connections
Initial Setup
Playing Back
Advanced Manual
Front Panel >Rear Panel >Remote Controller
Playing Music Files in a Shared Folder
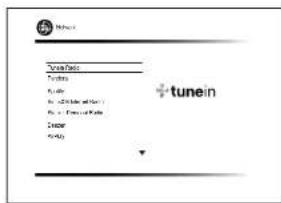
- With the cursors, select "Home Media", and then press Enter.
- With the cursors, select the target server, and then press Enter.
- You can check the server name of your PC from the PC properties.
- With the cursors, select the target shared folder, and then press Enter.
- If a username and password is required, enter the necessary login information.
- The login information is the account information set at the time of creating the shared folder.
- Once entered, the login information will be remembered from the next time onward.
- With the cursors, select the music file to play, and then press Enter or ▶ to start playback.
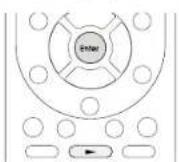
En-15

Operating Music Files with the Remote Controller
About the Remote Controller
The remote controller of this unit allows you to play music files stored on USB storage devices, Internet radio, PCs and NAS devices on your home network. It also allows you to view information of the music file being played and perform various other operations.
• Available buttons may vary depending on the service and device to play.
Remote Controller Buttons
- Press NET on the remote controller.
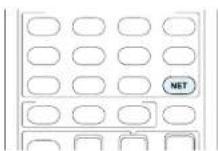
- Operate the remote controller by referring to the name and function of each of the buttons.
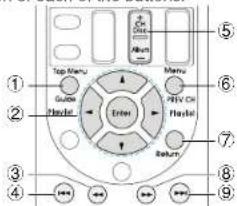
① Top Menu: This button displays the top menu for each media or server.
② Enter: These buttons navigate through items
En-16
and activate the selected item.
◀. These buttons allow you to navigate to other pages when the list continues on other pages.
③ This button fast-reverses the current track. This button is not operable from 10 seconds before the playback ends.
④ This button plays the current track from the beginning. Pressing this button twice plays the previous track.
⑤ +/-: Moves the cursor up or down on the Internet radio stations list in "My Favorites".
⑥ Menu: This button displays the menu of each Internet radio service.
⑦ Return: This button returns to the previous screen.
⑧ This button fast-forwards the current track. This button is not operable from 10 seconds before the playback ends.
⑨ ▶This button plays the next track.
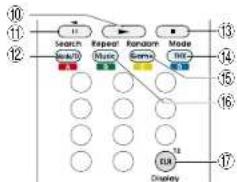
flowchart
graph TD
    A["Search"] --> B["Repeal"]
    B --> C["Random"]
    C --> D["Mode"]
    D --> E["UI"]
    E --> F["Display"]
    style A fill:#f9f,stroke:#333
    style B fill:#ccf,stroke:#333
    style C fill:#cfc,stroke:#333
    style D fill:#fcc,stroke:#333
    style E fill:#cff,stroke:#333
    style F fill:#ffc,stroke:#333
⑩ ▶This button starts the playback.
⑪ This button pauses the playback.
⑫ Search: This button toggles between the playback screen and list screen during playback.
⑬ This button stops the playback.
④ Mode: This button displays the video from the input selected in "Video Select". Each press of the button displays or turns off the video. You can change the display position of the OSD by pressing Enter while the video is displayed on the screen.
- These buttons are disabled when the OSD language is set to Chinese.
⑤ Random: This button performs random playback.
⑥ Repeat: This button replays the track(or tracks). Pressing this button repeatedly cycles through the repeat modes.
⑰ Display: This button changes the displayed track information during playback. Pressing this button
Operating Music Files with the Remote Controller
when the list screen is displayed toggles the screen to playback.
Icons Displayed during Playback
Icons are displayed on the display during music file playback. The meaning of each icon is as follows:
D: Folder
Track
: Play
II: Pause
Fast-forward
: Fast-reverse
: Artist
Album
10: Repeat one track
□ Q: Repeat within a folder
Ω: Repeat
Shuffle
Using the Listening Modes
Selecting Listening Mode
The listening modes allow you to select the best sound effect for your input source.
- After pressing RCV on the remote controller, press one of the following four buttons.
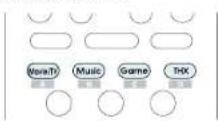
- Press the selected button repeatedly to switch the modes displayed on the display of the unit.
- Set the listening mode of your choice by listening to the actual sound.
Dolby D
For details on the listening modes see "Listening Mode Types". For listening modes selectable with each button, refer to "Selectable Listening Modes".
Listening Mode Types
The unit allows you to enjoy audio in a variety of listening modes. This section lists the types of listening modes available on the unit and describes their functions.
■ Future listening mode update
A future firmware update is planned to enable the unit to support playback in DTS:X audio format. For this reason, the available listening modes will vary depending on the firmware version.
Versions before the release of an update with support for the DTS:X audio format
- Neo:6 Cinema and Neo:6 Music are available.
Versions that support the DTS:X audio format
- DTS:X and DTS Neural:X are available. (Neo:6 Cinema and Neo:6 Music become unavailable after the update.)
In alphabetical order
AllCh Stereo
Ideal for background music, this mode fills the entire listening area with stereo sound.
Direct
In this mode, audio from the input source is output as-is. For example, if a 2 ch source from a music CD is input, the output will be stereo, or if Dolby Digital signal is input, the sound field will be controlled in accordance with the number of channels present.
■ Dolby Atmos
Introduced first in the cinema, Dolby Atmos brings a revolutionary sense of dimension and immersion to the Home Theater experience. Dolby Atmos is an adaptable and scalable object based format that reproduces audio as independent sounds (or objects) that can be accurately positioned and move dynamically throughout the 3 dimensional listening space during playback. A key ingredient of Dolby Atmos is the introduction of a height plane of sound above the listener.
Using the Listening Modes
■ Dolby D (Dolby Digital)
Mode suitable for playing sources recorded in Dolby Digital. - This listening mode can be selected only if your Blu-ray Disc/DVD player is digitally connected to the unit or the player's output setting is bitstream.
■ Dolby D+ (Dolby Digital Plus)
Mode suitable for playing sources recorded in Dolby Digital Plus.
- This listening mode can be selected only if your Blu-ray Disc/DVD player is digitally connected to the unit or the player's output setting is bitstream.
■ Dolby Surround
Dolby surround is a next generation surround technology that intelligently up mixes stereo; 5.1 and 7.1 content for playback through your surround speaker system. Dolby surround is compatible with traditional speaker layouts, as well as Dolby Atmos enabled playback systems that employ inceiling speakers or products with Dolby speaker technology.
Dolby TrueHD
Mode suitable for playing sources recorded in Dolby TrueHD.
- This listening mode can be selected only if your Blu-ray Disc/DVD player is digitally connected to the unit or the player's output setting is bitstream.
DSD
Mode suitable for playing sources recorded in DSD.
- This unit supports DSD signals input through HDMI IN. However, depending on the connected player, better sound is possible when output from the PCM output of the player.
- This listening mode can be selected only if your Blu-ray Disc/DVD player's output setting is DSD.
■ DTS
Mode suitable for playing sources recorded in DTS.
- This listening mode can be selected only if your Blu-ray Disc/DVD player is digitally connected to the unit or the player's output setting is bitstream.
Using the Listening Modes
■ DTS 96/24
Mode suitable for playing sources recorded in DTS 96/24. With 96 kHz sampling rate and 24-bit resolution, it provides superior fidelity.
- Depending on the settings, this listening mode becomes DTS.
- This listening mode can be selected only if your Blu-ray Disc/DVD player is digitally connected to the unit or the player's output setting is bitstream.
■ DTS Express
Mode suitable for playing sources recorded in DTS Express.
- This listening mode can be selected only if your Blu-ray Disc/DVD player is digitally connected to the unit or the player's output setting is bitstream.
■ DTS-HD HR (DTS-HD High Resolution Audio)
Mode suitable for playing sources recorded in DTS-HD High Resolution Audio.
- This listening mode can be selected only if your Blu-ray Disc/DVD player is digitally connected to the unit or the player's output setting is bitstream.
■ DTS-HD MSTR (DTS-HD Master Audio)
Mode suitable for playing sources recorded in DTS-HD Master Audio.
- This listening mode can be selected only if your Blu-ray Disc/DVD player is digitally connected to the unit or the player's output setting is bitstream.
■ DTS Neo:6
This mode expands any 2 ch source for 5.1 ch multichannel surround playback. It offers full-bandwidth on all channels, with great independence between the channels. There are two variants for this mode: one ideal for movies and another ideal for music.
- Neo:6 Cinema: Use this mode with any 2 ch movie.
- Neo:6 Music: Use this mode with any 2 ch music source.
■ DTS Neural:X
Neural:X enables upmixing of legacy content such as mono, stereo; 5.1 or 7.1ch to many higher speaker count including the layout using elevated channels set for DTS:X playback.
DTS:X
This mode is for use with DTS sources. DTS:X is DTS's next-generation object-based surround sound technology that includes height to deliver a fully-immersive listening experience to your living room.
■ ES Discrete (DTS-ES Discrete)
This mode is for use with DTS-ES Discrete sources and enables 6.1 ch or 7.1 ch playback using back channel. Completely discrete seven channels will improve spatial imaging and enable 360-degree sound localization producing a sound crossing between the surround channels.
- This listening mode can be selected only if your Blu-ray Disc/DVD player is digitally connected to the unit or the player's output setting is bitstream.
- Use on the DVD with DTS ES logo, particularly on the software containing DTS-ES Matrix soundtrack.
■ ES Matrix (DTS-ES Matrix)
This mode is for use with DTS-ES Matrix soundtrack and enables 6.1 ch or 7.1 ch playback using matrix-encoded back channel.
- This listening mode can be selected only if your Blu-ray Disc/DVD player is digitally connected to the unit or the player's output setting is bitstream.
- Use on the CD, DVD or LD with DTS ES logo, particularly on the software containing DTS-ES Matrix soundtrack.
Full Mono
In this mode, all speakers output the same sound in mono, so the sound you hear is the same regardless of where you are within the listening room.
■ Game-Action
In this mode, sound localization is distinct with emphasis on bass.
Game-Rock
In this mode, sound pressure is emphasized to heighten live feel.
Game-RPG
In this mode, the sound has a dramatic feel with a similar atmosphere to Orchestra mode.
■ Game-Sports
Suitable for audio source with much reverberation.
Mono
Use this mode when watching an old movie with a mono soundtrack, or use it to separately reproduce soundtracks in two different languages recorded in the left and right channels of some movies. It is also suitable for DVDs or other sources containing multiplexed audio.
■ Multich (Multichannel)
Mode suitable for playing sources recorded in PCM multichannel.
Orchestra
Suitable for classical or operatic music. This mode emphasizes the surround channels in order to widen the stereo image, and simulates the natural reverberation of a large hall.
Stereo
In this mode, sound is output from the front left and right speakers and subwoofer.
■ Studio-Mix
Suitable for rock or pop music, Listening to music in this mode creates a lively sound field with a powerful acoustic image, like being at a club or rock concert.
■ T-D (Theater-Dimensional)
In this mode, you can enjoy a virtual playback of multichannel surround sound even with only two or three speakers. This works by controlling how sounds reach the listener's left and right ears.
Using the Listening Modes
THX
Founded by George Lucas, THX develops stringent standards that ensure movies are reproduced in movie theaters and home theaters just as the director intended. THX Modes carefully optimize the tonal and spatial characteristics of the soundtrack for reproduction in the home-theater environment. They can be used with 2-channel matrixed and multichannel sources. Back speaker output depends on the source material and the selected listening mode.
- The THX mode can finely adjust the acoustic and spatial characteristics of the soundtrack for the best reproduction of home theater sound. It will work on 2 ch source and multichannel source. Back speaker sound will differ depending on the source and selected listening mode.
- THX Cinema: THX Cinema mode corrects theatrical soundtracks for playback in a home theater environment. In this mode, THX Loudness Plus is configured for cinema levels and Re-EQ, Timbre Matching, and Adaptive Decorrelation are active.
- THX Games: THX Games mode is meant for spatially accurate playback of game audio, which is often mixed similarly to movies but in a smaller environment. THX Loudness Plus is configured for game audio levels, with Timbre Matching active.
- THX Music: THX Music mode is tailored for listening to music, which is typically mastered at significantly higher levels than movies. In this mode, THX Loudness Plus is configured for music playback and only Timbre Matching is active.
- THX U2 Cinema (THX Ultra2 Cinema): THX Ultra2 Cinema mode plays 5.1 movie using 7.1 ch giving you the best possible movie watching experience. In this mode, THX ASA processing blends the side surround speakers and back surround speakers providing the optimal mix of ambient and directional surround sounds.
-
THX U2 Games (THX Ultra2 Games): For the replay of multichannel game audio, the THX Ultra2 Games mode should be selected. In this mode, THX ASA processing is applied to the surround channels of all 5.1 encoded game sources such as PCM, DTS, and Dolby Digital. This accurately places all game audio surround information creating a full 360 degree playback environment. THX Ultra2 Games is unique as it gives you a smooth transition of audio in all points of the surround field.
-
THX U2 Music (THX Ultra2 Music): For the replay of multichannel music, the THX Ultra2 Music should be selected. In this mode, THX ASA processing is applied to the surround channels of all 5.1 encoded music sources such as DTS, Dolby Digital, DVD-Audio, etc. to provide a wide and stable rear soundstage.
- THX Surr EX (THX Surround EX) : This mode expands 5.1-channel sources for 7.1-channel playback. It's especially suited to Dolby Digital EX sources. THX Surround EX, also known as Dolby Digital Surround EX, is a joint development between Dolby Laboratories and THX Ltd.
TV Logic
Suitable for TV shows produced in a TV studio. This mode enhances the surround effects to the entire sound to give clarity to voices and create a realistic acoustic image.
■ Unplugged
Suitable for acoustic instruments, vocals and jazz. This mode emphasizes the front stereo image, giving the impression of being right in front of the stage.
■ Reference
Dialogue Normalization
Dialogue Normalization (DialogNorm) is a feature of Dolby Digital, which is used to keep the programs at the same average listening level so the user does not have to change the volume control between Dolby Digital, Dolby Digital Plus and Dolby TrueHD programs. When playing back software which has been encoded in Dolby Digital, Dolby Digital Plus and Dolby TrueHD, sometimes you may see a brief message in the front panel display which will read "DialogNorm: X dB" (X being a numeric value). The display is showing how the program level relates with THX calibration level. If you want to play the program at calibrated theatrical levels, you may wish to adjust the volume. For example, if you see the following message: "DialogNorm: +4 dB" in the front panel display, to keep the overall output level at THX calibrated loudness, just turn down the volume control by 4dB. However, unlike a movie theater where the playback loudness is preset, you can choose your preferred volume setting for best enjoyment.
THX Cinema Processing
THX is an exclusive set of standards and technologies established by the world-renowned film production company Lucasfilm Ltd. THX grew from George Lucas' personal desire to make your experience of the film soundtrack in both movie theaters and in your home theater as faithful as possible to what the director intended. Movie soundtracks are mixed in special environments called dubbing stages and are designed to be played back in movie theaters with similar equipment and conditions. Most of those soundtracks are remixed using flat response loudspeakers similar to those used in the small home theater environment before being transferred onto Blu-ray Discs, DVD, etc. THX engineers developed patented technologies to accurately translate the sound from the movie theater environment into the home, correcting the tonal and spatial errors that occur. On this product, when the THX indicator is on, THX features are automatically added in Cinema modes (e.g. THX Cinema, THX Surround EX).
Timbre Matching
The human ear changes our perception of a sound depending on the direction from which the sound is coming. In a movie theater, there is an array of surround speakers so that the surround information is all around you. In a home theater, you may only have two speakers located to the side of your head. In this case, the Timbre
Using the Listening Modes
Matching feature filters the information going to the surround speakers so that they more closely match the tonal characteristics of the sound coming from the front speakers. This ensures seamless panning between the front and surround speakers.
Adaptive Decorrelation
In a movie theater, a large number of surround speakers help create an enveloping surround sound experience. If a home theater only has two sidewall surround speakers, the surround speakers may sound similar to headphones lacking spaciousness and envelopment. Surround sounds will also collapse toward the closet speaker as you move away from the middle seating position. Adaptive Decorrelation slightly changes one surround channel's time and phase relationship with respect to the other surround experience as in a movie theater using only two speakers.
ASA (Advanced Speaker Array)
ASA is a proprietary THX technology which processes the audio on the two side and two back surround speakers for the optional surround sound experience. When you set up your home theater system using eight speaker outputs (Left, Center, Right, Surround Right, Back Right, Back Left, Surround Left, and Subwoofer), be sure to go to the THX Audio Setup screen and choose the setting that closely corresponds to the back speaker spacing. This will reoptimize the surround sound field. ASA is used in three modes: THX Ultra2 Cinema, THX Ultra2 Music and THX Ultra2 Games.
Selectable Listening Modes
Listening modes that can be selected with the listening mode buttons will differ depending on the input signal format and actual speaker configuration. Also note that depending on the player settings and content, some listening modes may not be available for selecting.
- Listening modes available when headphones are connected are: Mono, Direct, and Stereo.
■ Future listening mode update
A future firmware update is planned to enable the unit to support playback in DTS:X audio format. For this reason, the available listening modes will vary depending on the firmware version.
Versions before the release of an update with support for the DTS:X audio format
• Neo:6 Cinema and Neo:6 Music are available.
Versions that support the DTS:X audio format
- DTS:X and DTS Neural:X are available. (Neo:6 Cinema and Neo:6 Music become unavailable after the update.)
■ Movie/TV button
You can select a mode suitable for movies and TV programs.
| Input Format Listening Mode | |
| Analog Direct | |
| Mono | |
| Dolby Surround | |
| Neo:6 Cinema ^+1 | |
| DTS Neural:X | |
| THX Cinema ^+2 | |
| TV Logic ^+3 | |
| AllCh Stereo ^+4 | |
| Full Mono ^+2 | |
| T-D | |
^21 Center speaker or surround speakers need to be installed.
» Surround speakers need to be installed.
^50 Surround speakers or height speakers need to be installed.
*1 Center speaker, surround speakers or height speakers need to be installed.
| Input Format Listening Mode | |
| PCM Direct | |
| Mono | |
| Dolby Surround | |
| Neo:6 Cinema*1 | |
| DTS Neural:X | |
| THX Cinema*2 | |
| TV Logic*3 | |
| AllCh Stereo*4 | |
| Full Mono*2 | |
| T-D | |
*1 Center speaker or surround speakers need to be installed.
** Surround speakers need to be installed.
^31 Surround speakers or height speakers need to be installed.
*4 Center speaker, surround speakers or height speakers need to be installed.
Connections
Initial Setup
Playing Back
Advanced Manual
Front Panel >Rear Panel >Remote Controller
Using the Listening Modes
| Input Format Listening Mode | |
| Multich PCM Direct | |
| Mono | |
| Multich*1 | |
| Dolby Surround | |
| DTS Neural.X | |
| THX Cinema*2 | |
| THX U2 Cinema*3 | |
| THX Surr EX*3 | |
| TV Logic*4 | |
| AllCh Stereo*5 | |
| Full Mono*5 | |
| T-D | |
*1 Center speaker or surround speakers need to be installed.
*2 Surround speakers need to be installed.
* Back speakers need to be installed. Can be selected when the input format is 5.1 ch.
^14 Surround speakers or height speakers need to be installed.
^10 Center speaker, surround speakers or height speakers need to be installed.
| Input Format Listening Mode | |
| DSD Direct | |
| Mono | |
| DSD^*1.42 | |
| Dolby Surround | |
| Neo:6 Cinema*3 | |
| DTS Neural:X | |
| THX Cinema*4 | |
| THX U2 Cinema*5 | |
| THX Surr EX*5 | |
| TV Logic*8 | |
| AllCh Stereo *7 | |
| Full Mono*7 | |
| T-D | |
*1 Cannot be selected when the input format is monaural or 2 ch.
^*2 Center speaker or surround speakers need to be installed.
*3 Can only be selected when the input format is 2 ch and a center speaker or surround speakers are installed.
^14 Surround speakers need to be installed.
^19 Back speakers need to be installed. Can be selected when the input format is 5.1 ch.
^** Surround speakers or height speakers need to be installed.
^17 Center speaker, surround speakers or height speakers need to be installed.
| Input Format Listening Mode | |
| Dolby AtmosThe listening mode of Dolby Digital Plus or Dolby TrueHD can be selected if back speakers or height speakers are not connected. | Direct |
| Mono | |
| Dolby Atmos | |
| TV Logic | |
| AllCh Stereo | |
| Full Mono | |
| T-D | |
| Input Format Listening Mode | |
| Dolby D Direct | |
| Mono | |
| Dolby D^+1+2 | |
| Dolby Surround | |
| Neo:6 Cinema ^+3 | |
| DTS Neural:X | |
| THX Cinema ^+4 | |
| THX U2 Cinema ^+5 | |
| THX Surr EX ^+5 | |
| TV Logic ^+6 | |
| AllCh Stereo ^+7 | |
| Full Mono ^+7 | |
| T-D | |
^*1 Cannot be selected when the input format is monaural or 2 ch.
^*2 Center speaker or surround speakers need to be installed.
* Can only be selected when the input format is 2 ch and a center speaker or surround speakers are installed.
4 Surround speakers need to be installed.
** Back speakers need to be installed. Can be selected when the input format is 5.1 ch.
- Surround speakers or height speakers need to be installed.
- Center speaker, surround speakers or height speakers need to be installed.
Using the Listening Modes
| Input Format Listening Mode | |
| Dolby D+ Direct | |
| Mono | |
| Dolby D+*1 *2 | |
| Dolby Surround | |
| Neo:6 Cinema*3 | |
| DTS Neural:X | |
| THX Cinema*4 | |
| THX U2 Cinema*5 | |
| THX Surr EX*5 | |
| TV Logic*5 | |
| AllCh Stereo*7 | |
| Full Mono*7 | |
| T-D | |
*1 Cannot be selected when the input format is monaural or 2 ch.
^+2 Center speaker or surround speakers need to be installed.
*3 Can only be selected when the input format is 2 ch and a center speaker
or surround speakers are installed.
- Surround speakers need to be installed.
10 Back speakers need to be installed. Can be selected when the input
format is 5.1 ch.
** Surround speakers or height speakers need to be installed.
^77 Center speaker, surround speakers or height speakers need to be installed.
Input Format Listening Mode
| Dolby TrueHD Direct | |
| Mono | |
| Dolby TrueHD*1+2 | |
| Dolby Surround | |
| Neo:6 Cinema*3 | |
| DTS Neural:X | |
| THX Cinema-4 | |
| THX U2 Cinema*5 | |
| THX Surr EX*5 | |
| TV Logic*8 | |
| AllCh Stereo-7 | |
| Full Mono*7 | |
| T-D |
*1 Cannot be selected when the input format is monaural or 2 ch.
^*2 Center speaker or surround speakers need to be installed.
*3 Can only be selected when the input format is 2 ch and a center speaker
or surround speakers are installed.
14 Surround speakers need to be installed.
19 Back speakers need to be installed. Can be selected when the input
format is 5.1 ch.
*6 Surround speakers or height speakers need to be installed.
^17 Center speaker, surround speakers or height speakers need to be installed.
Input Format Listening Mode
| DTS Direct | |
| Mono | |
| DTS^+1+2 | |
| Dolby Surround | |
| Neo:6 Cinema*3 | |
| DTS Neural:X | |
| THX Cinema*4 | |
| THX U2 Cinema*5 | |
| THX Surr EX*5 | |
| TV Logic*6 | |
| AllCh Stereo*7 | |
| Full Mono*7 | |
| T-D |
^*1 Cannot be selected when the input format is monaural or 2 ch.
^* Center speaker or surround speakers need to be installed.
- Can only be selected when the input format is 2 ch and a center speaker
or surround speakers are installed.
^34 Surround speakers need to be installed.
Back speakers need to be installed. Can be selected when the input
format is 5.1 ch.
- Surround speakers or height speakers need to be installed.
- Center speaker, surround speakers or height speakers need to be installed.
Connections
Initial Setup
Playing Back
Advanced Manual
Front Panel >Rear Panel >Remote Controller
Using the Listening Modes
| Input Format Listening Mode | |
| DTS 96/24 Direct | |
| Mono | |
| DTS 96/24 ^*1 * ^2 | |
| Dolby Surround | |
| Neo:6 Cinema ^*3 | |
| DTS Neural:X | |
| THX Cinema ^*4 | |
| THX U2 Cinema ^*5 | |
| THX Surr EX ^*5 | |
| TV Logic ^*6 | |
| AllCh Stereo ^*7 | |
| Full Mono ^*7 | |
| T-D | |
*1 Cannot be selected when the input format is monaural or 2 ch.
^+2 Center speaker or surround speakers need to be installed.
*3 Can only be selected when the input format is 2 ch and a center speaker
or surround speakers are installed.
- Surround speakers need to be installed.
10 Back speakers need to be installed. Can be selected when the input
format is 5.1 ch.
** Surround speakers or height speakers need to be installed.
^77 Center speaker, surround speakers or height speakers need to be installed.
Input Format Listening Mode
| DTS Express Direct | |
| Mono | |
| DTS Express ^*1+2 | |
| Dolby Surround | |
| Neo:6 Cinema ^*3 | |
| DTS Neural:X | |
| THX Cinema ^*4 | |
| THX U2 Cinema ^*5 | |
| THX Surr EX ^*5 | |
| TV Logic ^*8 | |
| AllCh Stereo ^*7 | |
| Full Mono ^+7 | |
| T-D |
*1 Cannot be selected when the input format is monaural or 2 ch.
^*2 Center speaker or surround speakers need to be installed.
*3 Can only be selected when the input format is 2 ch and a center speaker
or surround speakers are installed.
14 Surround speakers need to be installed.
19 Back speakers need to be installed. Can be selected when the input
format is 5.1 ch.
*6 Surround speakers or height speakers need to be installed.
^17 Center speaker, surround speakers or height speakers need to be installed.
Input Format Listening Mode
| DTS-HD HR Direct | |
| Mono | |
| DTS-HD HR^+1 × 2 | |
| Dolby Surround | |
| Neo:6 Cinema ^+3 | |
| DTS Neural:X | |
| THX Cinema ^+4 | |
| THX U2 Cinema ^+5 | |
| THX Surr EX ^+5 | |
| TV Logic ^+6 | |
| AllCh Stereo ^+7 | |
| Full Mono ^+7 | |
| T-D |
^*1 Cannot be selected when the input format is monaural or 2 ch.
^* Center speaker or surround speakers need to be installed.
- Can only be selected when the input format is 2 ch and a center speaker
or surround speakers are installed.
^24 Surround speakers need to be installed.
Back speakers need to be installed. Can be selected when the input
format is 5.1 ch.
- Surround speakers or height speakers need to be installed.
- Center speaker, surround speakers or height speakers need to be installed.
Using the Listening Modes
Input Format Listening Mode
| DTS-HD MSTR Direct | |
| Mono | |
| DTS-HD MSTR^*1 × 2 | |
| Dolby Surround | |
| Neo:6 Cinema ^+3 | |
| DTS Neural:X | |
| THX Cinema ^*4 | |
| THX U2 Cinema ^*5 | |
| THX Surr EX ^*5 | |
| TV Logic ^*5 | |
| AllCh Stereo ^*7 | |
| Full Mono ^*7 | |
| T-D |
*1 Cannot be selected when the input format is monaural or 2 ch.
^*2 Center speaker or surround speakers need to be installed.
*3 Can only be selected when the input format is 2 ch and a center speaker
or surround speakers are installed.
- Surround speakers need to be installed.
10 Back speakers need to be installed. Can be selected when the input
formal is 5.1 ch.
**. Surmond speakers or height speakers need to be installed
*7 Center speaker, surround speakers or height speakers need to be
installed.
Input Format Listening Mode
| DTS-ES Direct | |
| Mono | |
| DTS^*1 | |
| ES Matrix ^-2 | |
| ES Discrete ^*2 | |
| Dolby Surround ^*3 | |
| DTS Neural:X | |
| THX Cinema ^*4 | |
| TV Logic ^*5 | |
| AllCh Stereo ^*6 | |
| Full Mono ^*8 | |
| T-D |
11 Can only be selected when the back speakers are not installed.
^12 Back speakers need to be installed.
^45 Height speakers need to be installed
* Surround speakers need to be installed.
^5 Surround speakers or height speakers need to be installed.
^* Center speaker, surround speakers or height speakers need to be
installed
Input Format Listening Mode
| DTS:X Direct | |
| Mono | |
| DTS:X | |
| TV Logic ^*1 | |
| AllCh Stereo ^*2 | |
| Full Mono ^-2 | |
| T-D |
*1 Surround speakers or height speakers need to be installed.
^* Center speaker, surround speakers or height speakers need to be
installed.
■ Music button
You can select a mode suitable for music.
| Input Format Listening Mode | |
| Analog Direct | |
| Stereo | |
| Dolby Surround | |
| Neo:6 Music ^*1 | |
| DTS Neural:X | |
| THX Music ^*2 | |
| Orchestra ^*3 | |
| Unplugged ^*3 | |
| Studio-Mix ^*3 | |
| AllCh Stereo ^*4 | |
| Full Mono ^*4 | |
^27 Center speaker or surround speakers need to be installed.
: Surround speakers need to be installed.
*1. Surround speakers or height speakers need to be installed.
*1. Center speakers, surround speakers or height speakers need to be
Center's installed
| Input Format Listening Mode | |
| PCM Direct | |
| Stereo | |
| Dolby Surround | |
| Neo:6 Music ^+1 | |
| DTS Neural:X | |
| THX Music ^+2 | |
| Orchestra ^+3 | |
| Unplugged ^+3 | |
| Studio-Mix ^+3 | |
| AllCh Stereo ^+4 | |
| Full Mono ^+4 | |
^31 Center speaker or surround speakers need to be installed.
^2 Surround speakers need to be installed.
^* Surround speakers or height speakers need to be installed.
^24 Center speaker, surround speakers or height speakers need to be
installed.
Connections
Initial Setup
Playing Back
Advanced Manual
Front Panel >Rear Panel >Remote Controller
Using the Listening Modes
| Input Format Listening Mode | |
| Multich PCM Direct | |
| Stereo | |
| Multich*1 | |
| Dolby Surround | |
| DTS Neural.X | |
| THX Music*2 | |
| THX U2 Music*3 | |
| Orchestra*4 | |
| Unplugged*4 | |
| Studio-Mix*1 | |
| AllCh Stereo*5 | |
| Full Mono*5 | |
*1 Center speaker or surround speakers need to be installed.
*2 Surround speakers need to be installed.
* Back speakers need to be installed. Can be selected when the input format is 5.1 ch.
^14 Surround speakers or height speakers need to be installed.
^10 Center speaker, surround speakers or height speakers need to be installed.
| Input Format Listening Mode | |
| DSD Direct | |
| Stereo | |
| DSD^*1+2 | |
| Dolby Surround | |
| Neo:6 Music ^-3 | |
| DTS Neural:X | |
| THX Music ^*4 | |
| THX U2 Music ^*5 | |
| Orchestra ^*6 | |
| Unplugged ^*5 | |
| Studio-Mix ^*6 | |
| AllCh Stereo ^*7 | |
| Full Mono ^*7 | |
*1 Cannot be selected when the input format is monaural or 2 ch.
^*2 Center speaker or surround speakers need to be installed.
^*3 Can only be selected when the input format is 2 ch and a center speaker or surround speakers are installed.
14 Surround speakers need to be installed.
^19 Back speakers need to be installed. Can be selected when the input format is 5.1 ch.
^** Surround speakers or height speakers need to be installed.
^17 Center speaker, surround speakers or height speakers need to be installed.
| Input Format Listening Mode | |
| Dolby AtmosThe listening mode of Dolby Digital Plus or Dolby TrueHD can be selected if back speakers or height speakers are not connected. | Direct |
| Stereo | |
| Dolby Atmos | |
| Orchestra | |
| Unplugged | |
| Studio-Mix | |
| AllCh Stereo | |
| Full Mono | |
| Input Format Listening Mode | |
| Dolby D Direct | |
| Stereo | |
| Dolby D^+1+2 | |
| Dolby Surround | |
| Neo:6 Music ^+3 | |
| DTS Neural:X | |
| THX Music ^+4 | |
| THX U2 Music ^+5 | |
| Orchestra ^+5 | |
| Unplugged ^+6 | |
| Studio-Mix ^+5 | |
| AllCh Stereo ^+7 | |
| Full Mono ^+7 | |
^*1 Cannot be selected when the input format is monaural or 2 ch.
^*2 Center speaker or surround speakers need to be installed.
* Can only be selected when the input format is 2 ch and a center speaker or surround speakers are installed.
4 Surround speakers need to be installed.
Back speakers need to be installed. Can be selected when the input format is 5.1 ch.
- Surround speakers or height speakers need to be installed.
* Center speaker, surround speakers or height speakers need to be installed.
| Input Format Listening Mode | |
| Dolby D+ Direct | |
| Stereo | |
| Dolby D+*1*2 | |
| Dolby Surround | |
| Neo:6 Music*3 | |
| DTS Neural:X | |
| THX Music*4 | |
| THX U2 Music*5 | |
| Orchestra*8 | |
| Unplugged*6 | |
| Studio-Mix*6 | |
| AllCh Stereo*7 | |
| Full Mono*7 | |
Connections
Initial Setup
Playing Back
Advanced Manual
Front Panel >Rear Panel >Remote Controller
Using the Listening Modes
Input Format Listening Mode
^+ Cannot be selected when the input format is monaural or 2 ch.
^12 Center speaker or surround speakers need to be installed.
^13 Can only be selected when the input format is 2 ch and a center speaker or surround speakers are installed.
* Surround speakers need to be installed.
* Back speakers need to be installed. Can be selected when the input format is 5.1 ch.
10 Surround speakers or height speakers need to be installed.
^17 Center speaker, surround speakers or height speakers need to be installed.
Input Format Listening Mode
| Dolby TrueHD Direct | |
| Stereo | |
| Dolby TrueHD ^*1 ^2 | |
| Dolby Surround | |
| Neo:6 Music ^+3 | |
| DTS Neural:X | |
| THX Music ^+4 | |
| THX U2 Music ^+5 | |
| Orchestra ^+8 | |
| Unplugged ^+6 | |
| Studio-Mix ^+6 | |
| AllCh Stereo ^+7 | |
| Full Mono ^+7 |
^+1 Cannot be selected when the input format is monaural or 2 ch.
^+2 Center speaker or surround speakers need to be installed.
^* Can only be selected when the input format is 2 ch and a center speaker or surround speakers are installed.
^+ : Surround speakers need to be installed.
^+2 Back speakers need to be installed. Can be selected when the input format is 5.1 ch.
** Surround speakers or height speakers need to be installed.
*7 Center speaker, surround speakers or height speakers need to be installed.
Input Format Listening Mode
| DTS Direct | |
| Stereo | |
| DTS^+1^*2 | |
| Dolby Surround | |
| Neo:6 Music ^-3 | |
| DTS Neural:X | |
| THX Music ^~2 | |
| THX U2 Music ^*5 | |
| Orchestra ^+6 | |
| Unplugged ^+9 | |
| Studio-Mix ^+6 | |
| AllCh Stereo ^~7 | |
| Full Mono ^+7 |
*1 Cannot be selected when the input format is monaural or 2 ch.
^*2 Center speaker or surround speakers need to be installed.
*3 Can only be selected when the input format is 2 ch and a center speaker.
or surround speakers are installed
- Surround speakers need to be installed
- According to the need to be installed,
19 Back speakers need to be installed. Can be selected when the input
format is 5.1 ch.
*6 Surround speakers or height speakers need to be installed.
^17 Center speaker, surround speakers or height speakers need to be installed.
Input Format Listening Mode
| DTS 96/24 Direct | |
| Stereo | |
| DTS 96/24 ^*1 * ^2 | |
| Dolby Surround | |
| Neo:6 Music ^*3 | |
| DTS Neural:X | |
| THX Music ^*4 | |
| THX U2 Music ^*5 | |
| Orchestra ^+6 | |
| Unplugged ^+6 | |
| Studio-Mix ^+6 | |
| AllCh Stereo ^-7 | |
| Full Mono ^+7 |
Input Format Listening Mode
^1 Cannot be selected when the input format is monaural or 2 ch.
** Center speaker or surround speakers need to be installed.
* Can only be selected when the input format is 2 ch and a center speaker or surround speakers are installed.
^1 Surround speakers need to be installed.
* Back speakers need to be installed. Can be selected when the input format is 5.1 ch.
^* Surround speakers or height speakers need to be installed.
* Center speaker, surround speakers or height speakers need to be installed.
Input Format Listening Mode
| DTS Express Direct | |
| Stereo | |
| DTS Express ^+1 × 2 | |
| Dolby Surround | |
| Neo:6 Music ^+3 | |
| DTS Neural:X | |
| THX Music ^+4 | |
| THX U2 Music ^+5 | |
| Orchestra ^+8 | |
| Unplugged ^+6 | |
| Studio-Mix ^+6 | |
| AllCh Stereo ^+7 | |
| Full Mono ^+7 |
^*1 Cannot be selected when the input format is monaural or 2 ch.
^*2 Center speaker or surround speakers need to be installed.
* Can only be selected when the input format is 2 ch and a center speaker or surround speakers are installed.
^24 Surround speakers need to be installed.
- Back speakers need to be installed. Can be selected when the input format is 5.1 ch.
- Surround speakers or height speakers need to be installed.
* Center speaker, surround speakers or height speakers need to be installed.
Using the Listening Modes
| Input Format Listening Mode | |
| DTS-HD HR Direct | |
| Stereo | |
| DTS-HD HR^+1+2 | |
| Dolby Surround | |
| Neo:6 Music ^+3 | |
| DTS Neural:X | |
| THX Music ^+4 | |
| THX U2 Music ^*5 | |
| Orchestra ^*6 | |
| Unplugged ^*6 | |
| Studio-Mix ^*6 | |
| AllCh Stereo ^*7 | |
| Full Mono ^*7 | |
*1 Cannot be selected when the input format is monaural or 2 ch.
^*2 Center speaker or surround speakers need to be installed.
*3 Can only be selected when the input format is 2 ch and a center speaker
or surround speakers are installed.
- Surround speakers need to be installed.
10 Back speakers need to be installed. Can be selected when the input
formal is 5.1 ch.
**. Surmond speakers or height speakers need to be installed
*7 Center speaker, surround speakers or height speakers need to be
installed
Input Format Listening Mode
| DTS-HD MSTR Direct | |
| Stereo | |
| DTS-HD MSTR*1 ~2 | |
| Dolby Surround | |
| Neo:6 Music*3 | |
| DTS Neural:X | |
| THX Music*4 | |
| THX U2 Music*5 | |
| Orchestra*8 | |
| Unplugged*6 | |
| Studio-Mix*6 | |
| AllCh Stereo*7 | |
| Full Mono*7 |
Input Format Listening Mode
^+1 Cannot be selected when the input format is monaural or 2 ch.
^12 Center speaker or surround speakers need to be installed.
^13 Can only be selected when the input format is 2 ch and a center speaker.
or surround speakers are installed.
^* : Surround speakers need to be installed.
*5 Back speakers need to be installed. Can be selected when the input
BUSH SPEAKERS
format is 5.1 ch
III. Surround sneakers or height sneakers need to be installed
- Sumbond speakers of height speakers need to be installed.
17. Center speaker, surround speakers or height speaker need to be
• Center speaker, surround speakers of height speakers need to be installed.
Input Format Listening Mode
| DTS-ES Direct | |
| Stereo | |
| DTS^+1 | |
| ES Matrix*2 | |
| ES Discrete*2 | |
| Dolby Surround*3 | |
| DTS Neural:X | |
| THX Music*4 | |
| Orchestra*5 | |
| Unplugged*5 | |
| Studio-Mix*5 | |
| AllCh Stereo*6 | |
| Full Mono*6 |
^*1 Can only be selected when the back speakers are not installed.
** Back speakers need to be installed.
^2 Height speakers need to be installed
*1. Surround speakers need to be installed
^82 Surround speakers or height speakers need to be installed.
* Center speakers, surround speakers or height sneakers need to be
- Center speaker, surround speakers of height speakers need to be installed.
Input Format Listening Mode
| DTS:X Direct | |
| Stereo | |
| DTS:X | |
| Orchestra*1 | |
| Unplugged*1 | |
| Studio-Mix*1 | |
| AllCh Stereo*2 | |
| Full Mono*2 |
- Surround speakers or height speakers need to be installed.
** Center speaker, surround speakers or height speakers need to be
installed
Connections
Initial Setup
Playing Back
Advanced Manual
Front Panel >Rear Panel >Remote Controller
■ Game button
You can select a mode suitable for games.
| Input Format Listening Mode | |
| Analog Direct | |
| Dolby Surround | |
| DTS Neural:X | |
| THX Games*1 | |
| Game-RPG*2 | |
| Game-Action*2 | |
| Game-Rock*2 | |
| Game-Sports*2 | |
| AllCh Stereo*3 | |
| Full Mono*3 | |
| T-D | |
^++ Surround speakers need to be installed.
^+2 Surround speakers or height speakers need to be installed.
^*3 Center speaker, surround speakers or height speakers need to be installed.
Input Format Listening Mode
| PCM Direct | |
| Dolby Surround | |
| DTS Neural:X | |
| THX Games*1 | |
| Game-RPG*2 | |
| Game-Action*2 | |
| Game-Rock*2 | |
| Game-Sports*2 | |
| AllCh Stereo*3 | |
| Full Mono*3 | |
| T-D |
* Surround speakers need to be installed.
^12 Surround speakers or height speakers need to be installed.
^45 Center speaker, surround speakers or height speakers need to be installed.
Input Format Listening Mode
| Multich PCM Direct | |
| Multich ^+1 | |
| Dolby Surround | |
| DTS Neural:X | |
| THX Games ^-2 | |
| THX U2 Games ^+3 | |
| Game-RPG ^+4 | |
| Game-Action ^+4 | |
| Game-Rock ^+4 | |
| Game-Sports ^-4 | |
| AllCh Stereo ^-5 | |
| Full Mono ^+5 | |
| T-D |
^+1 Center speaker or surround speakers need to be installed.
^42 Surround speakers need to be installed.
^*3 Back speakers need to be installed. Can be selected when the input format is 5.1 ch.
^14 Surround speakers or height speakers need to be installed.
^19 Center speaker, surround speakers or height speakers need to be installed.
Using the Listening Modes
| Input Format Listening Mode | |
| DSD Direct | |
| DSD^*1*2 | |
| Dolby Surround | |
| DTS Neural:X | |
| THX Games^43 | |
| THX U2 Games^44 | |
| Game-RPG*5 | |
| Game-Action*5 | |
| Game-Rock*5 | |
| Game-Sports*5 | |
| AllCh Stereo*6 | |
| Full Mono*8 | |
| T-D | |
^*1 Cannot be selected when the input format is monaural or 2 ch.
^*2 Center speaker or surround speakers need to be installed.
^*2 Surround speakers need to be installed.
- Back speakers need to be installed. Can be selected when the input format is 5.1 ch.
Surround speakers or height speakers need to be installed. Center speaker, surround speakers or height speakers need to be
Input Format Listening Mode
| Dolby AtmosThe listening mode of Dolby Digital Plus or Dolby TrueHD can be selected if back speakers or height speakers are not connected. | Direct |
| Dolby Atmos | |
| Game-RPG | |
| Game-Action | |
| Game-Rock | |
| Game-Sports | |
| AllCh Stereo | |
| Full Mono | |
| T-D |
Connections
Initial Setup
Playing Back
Advanced Manual
Front Panel >Rear Panel >Remote Controller
Using the Listening Modes
| Input Format Listening Mode | |
| Dolby D Direct | |
| Dolby D^+1 × 2 | |
| Dolby Surround | |
| DTS Neural:X | |
| THX Games ^+3 | |
| THX U2 Games ^+4 | |
| Game-RPG ^+5 | |
| Game-Action ^+5 | |
| Game-Rock ^+5 | |
| Game-Sports ^+5 | |
| AllCh Stereo ^+6 | |
| Full Mono ^+8 | |
| T-D | |
*1 Cannot be selected when the input format is monaural or 2 ch.
^*2 Center speaker or surround speakers need to be installed.
*3 Surround speakers need to be installed.
* Back speakers need to be installed. Can be selected when the input format is 5.1 ch.
^10 Surround speakers or height speakers need to be installed.
^18 Center speaker, surround speakers or height speakers need to be installed.
Input Format Listening Mode
| Dolby D+ Direct |
| Dolby D+ ^+1 +2 |
| Dolby Surround |
| DTS Neural:X |
| THX Games ^-3 |
| THX U2 Games ^*4 |
| Game-RPG ^+5 |
| Game-Action ^*5 |
| Game-Rock ^+5 |
| Game-Sports ^*5 |
| AllCh Stereo ^-9 |
| Full Mono ^+6 |
| T-D |
*1 Cannot be selected when the input format is monaural or 2 ch.
^*2 Center speaker or surround speakers need to be installed.
*3 Surround speakers need to be installed
* Back speakers need to be installed. Can be selected when the input format is 5.1 ch.
^19 Surround speakers or height speakers need to be installed.
^18 Center speaker, surround speakers or height speakers need to be installed.
Input Format Listening Mode
| Dolby TrueHD Direct |
| Dolby TrueHD^*1+2 |
| Dolby Surround |
| DTS Neural:X |
| THX Games^*3 |
| THX U2 Games^*4 |
| Game-RPG*5 |
| Game-Action*5 |
| Game-Rock*5 |
| Game-Sports*5 |
| AllCh Stereo*6 |
| Full Mono*8 |
| T-D |
^1 Cannot be selected when the input format is monaural or 2 ch.
^2 Center speaker or surround speakers need to be installed.
^2 Surround speakers need to be installed.
^1 Back speakers need to be installed. Can be selected when the input format is 5.1 ch.
Surround speakers or height speakers need to be installed.
^** Center speaker, surround speakers or height speakers need to be installed.
Connections
Initial Setup
Playing Back
Advanced Manual
Front Panel >Rear Panel >Remote Controller
Using the Listening Modes
| Input Format Listening Mode | |
| DTS Direct | |
| DTS^+1+2 | |
| Dolby Surround | |
| DTS Neural:X | |
| THX Games^+3 | |
| THX U2 Games^+4 | |
| Game-RPG ^+5 | |
| Game-Action ^+5 | |
| Game-Rock ^+5 | |
| Game-Sports ^+5 | |
| AllCh Stereo ^+6 | |
| Full Mono ^+8 | |
| T-D | |
*1 Cannot be selected when the input format is monaural or 2 ch.
^*2 Center speaker or surround speakers need to be installed.
*3 Surround speakers need to be installed.
* Back speakers need to be installed. Can be selected when the input format is 5.1 ch.
^10 Surround speakers or height speakers need to be installed.
^18 Center speaker, surround speakers or height speakers need to be installed.
Input Format Listening Mode
| DTS 96/24 Direct |
| DTS 96/24 ^*1 ^×2 |
| Dolby Surround |
| DTS Neural:X |
| THX Games ^-3 |
| THX U2 Games ^*4 |
| Game-RPG ^*5 |
| Game-Action ^*5 |
| Game-Rock ^*5 |
| Game-Sports ^*5 |
| AllCh Stereo ^-5 |
| Full Mono ^*6 |
| T-D |
*1 Cannot be selected when the input format is monaural or 2 ch.
^*2 Center speaker or surround speakers need to be installed.
*3 Surround speakers need to be installed
* Back speakers need to be installed. Can be selected when the input format is 5.1 ch.
^19 Surround speakers or height speakers need to be installed.
^18 Center speaker, surround speakers or height speakers need to be installed.
Input Format Listening Mode
| DTS Express Direct | |
| DTS Express ^*1 × 2 | |
| Dolby Surround | |
| DTS Neural:X | |
| THX Games ^43 | |
| THX U2 Games ^44 | |
| Game-RPG ^*5 | |
| Game-Action ^*5 | |
| Game-Rock ^*5 | |
| Game-Sports ^*5 | |
| AllCh Stereo ^46 | |
| Full Mono ^*6 | |
| T-D |
^1 Cannot be selected when the input format is monaural or 2 ch.
^2 Center speaker or surround speakers need to be installed.
^2 Surround speakers need to be installed.
^1 Back speakers need to be installed. Can be selected when the input format is 5.1 ch.
Surround speakers or height speakers need to be installed.
^** Center speaker, surround speakers or height speakers need to be installed.
Connections
Initial Setup
Playing Back
Advanced Manual
Front Panel >Rear Panel >Remote Controller
Using the Listening Modes
| Input Format Listening Mode | |
| DTS-HD HR Direct | |
| DTS-HD HR^*1+2 | |
| Dolby Surround | |
| DTS Neural:X | |
| THX Games ^+3 | |
| THX U2 Games ^+4 | |
| Game-RPG ^+5 | |
| Game-Action ^+5 | |
| Game-Rock ^+5 | |
| Game-Sports ^+5 | |
| AllCh Stereo ^+6 | |
| Full Mono ^*\8} | |
| T-D | |
| ^{*1}Cannot be selected when the input format is monaural or 2 ch.^{**2}Center speaker or surround speakers need to be installed.^{**3}Surround speakers need to be installed.^{**4}Back speakers need to be installed. Can be selected when the input format is 5.1 ch.^{**5}Surround speakers or height speakers need to be installed.^{**6}$ Center speaker, surround speakers or height speakers need to be installed. | |
| Input Format Listening Mode | |
| DTS-HD MSTR Direct | |
| DTS-HD MSTR^+1+2 | |
| Dolby Surround | |
| DTS Neural:X | |
| THX Games^-3 | |
| THX U2 Games^-4 | |
| Game-RPG^+5 | |
| Game-Action^+5 | |
| Game-Rock^+5 | |
| Game-Sports^+5 | |
| AllCh Stereo^-8 | |
| Full Mono^+6 | |
| T-D | |
*1 Cannot be selected when the input format is monaural or 2 ch.
^42 Center speaker or surround speakers need to be installed.
*3 Surround speakers need to be installed
* Back speakers need to be installed. Can be selected when the input
format is 5.1 ch.
^16 Surround speakers or height speakers need to be installed.
^18 Center speaker, surround speakers or height speakers need to be installed.
| Input Format Listening Mode | |
| DTS-ES Direct | |
| DTS^+1 | |
| ES Matrix^*2 | |
| ES Discrete^*2 | |
| Dolby Surround^*3 | |
| DTS Neural:X | |
| THX Games^*4 | |
| Game-RPG^*5 | |
| Game-Action^*5 | |
| Game-Rock^*5 | |
| Game-Sports^*5 | |
| AllCh Stereo^*6 | |
| Full Mono^*8 | |
| T-D | |
^21 Can only be selected when the back speakers are not installed.
Back speakers need to be installed
^v1 Height speakers need to be installed.
^24 Surround speakers need to be installed.
** Surround speakers need to be installed.
*2 Center speaker, surround speakers or height speakers need to be installed.
Connections
Initial Setup
Playing Back
Advanced Manual
Front Panel >Rear Panel >Remote Controller
Using the Listening Modes
Input Format Listening Mode
| DTS:X Direct | |
| DTS:X | |
| Game-RPG ^1 | |
| Game-Action ^1 | |
| Game-Rock ^1 | |
| Game-Sports ^1 | |
| AllCh Stereo ^1,2 | |
| Full Mono ^4 | |
| T-D |
^1 Surround speakers or height speakers need to be installed. ^*2 Center speaker, surround speakers or height speakers need to be installed.
THX button
You can select a THX listening mode.
| Input Format Listening Mode | |
| All formats other than Dolby Atmos and DTS:X | THX Cinema ^*1 |
| THX Music ^*1 | |
| THX Games ^*1 | |
| THX U2 Cinema ^*2 | |
| THX U2 Music ^*2 | |
| THX U2 Games ^*2 | |
| THX Surr EX ^*2 | |
^11 Surround speakers need to be installed. ^12 Back speakers need to be installed. Can be selected when the input format is 5.1 ch.
Checking the Input Format
While audio from the player is being input, press Display on the remote controller several times to switch the information shown on the main unit display. For example, if "Dolby D 5.1" is displayed, the Dolby Digital 5.1 ch signals are being input.
- The number of channels is not displayed when the input signal is "Dolby Atmos" format.
Dolby D 5.1
En-32

Advanced Settings (Setup Menu)
How to Set
The unit allows you to configure advanced settings in order to provide even better experience.
- Operation: You can set up by viewing the guidance displayed on the TV screen (OSD). Select the item with the cursor buttons of the remote controller and press Enter to confirm your selection. To return to the previous screen, press Return.
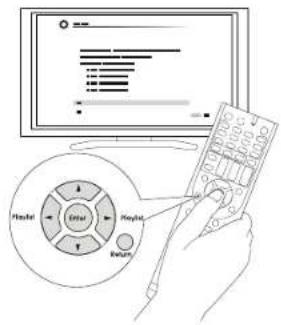
Operation
- Press RCV on the remote controller.
- Always press RCV first to change the remote controller to RECEIVER mode (the mode to operate this unit) since its mode may be changed to operate another component.
- Press Setup to display the Setup menu.
- Press ▲▼ to select the desired menu, and then press Enter.
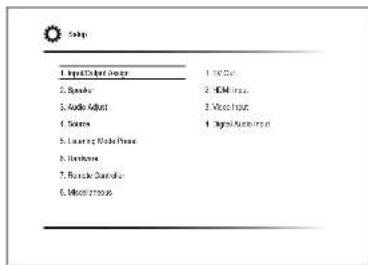
- Press ▼▼ to select the item, and then press Enter.
Using the Listening Modes
- With the V / V / - cursors, select the item to configure the settings.
![HDMI Out Zone 2 HCD1 HDBaseT [TM] OSO Language Name OSO Strait Level VAIN Not Use Not Use English On 3 Windows](/content/2026/05/877119/images/fa689fbb6b02675c7aa9e29626ddf87596163b467b16260eed0285879d6b5ec9.jpg)
To exit the setup menu, press Setup.
Overview of the Setup menu:
- Input/Output Assign
Make settings to assign the various jacks and for the on-screen display function on the TV when you use the setting menu, for example.
- Speaker
Make advanced settings for the speakers.
- Audio Adjust
Make a variety of settings related to sound.
- Source
Make settings for input sources, such as volume difference adjustments for each input selector for the connected equipment.
- Listening Mode Preset
You can preset your favorite listening mode.
- Hardware
Make a variety of settings such as for linked operation with connected HDMI equipment, the standby mode and network connection for this unit.
- Remote Controller
Make settings related to the remote controller.
- Miscellaneous
Update the firmware and perform initial settings, etc.
1. Input/Output Assign
TV Out
Select the HDMI jack to be connected with the TV. Make settings for the on-screen display function on the TV when you use the setting menu, for example.
Setting Item Default Value Setting Details
| HDMI Out MAIN Select the HDMI jack to be connected with the TV."MAIN": When connecting the TV to the HDMI OUT MAIN jack"SUB": When connecting the TV to the HDMI OUT SUB jack"MAIN+SUB": When connecting to both the MAIN and SUB jacks |
| Zone 2 HDMI Not Use Make the setting when you output to the Zone2 TV connected to the HDMI OUT SUB/ZONE 2 jack."Use": Enable this function"Not Use": Disable this function |
| HDBaseT(TM) Not Use Set when outputting the input HDMI signals from the HDBaseT port via an Ethernet cable."MAIN": When connecting the HDMI OUT MAIN jack and the HDBaseT IN port"SUB/ZONE 2": When connecting the HDMI OUT SUB/ZONE 2 jack and the HDBaseT IN port |
| OSD Language English Select the on-screen display language.Select from English, German, French, Spanish, Italian, Dutch, Swedish, Russian (Australian models), or Chinese. |
| Impose OSD On Set whether or not to display the information on the TV when the volume is adjusted or input is changed, for example."On": OSD will be displayed on the TV."Off": OSD will not be displayed on the TV.The OSD may not be displayed depending on the input signal even if "On" is selected. If the operation screen is not displayed, change the resolution of the connected device. |
| Screen Saver 3 minutes Set the time to start the screen saver. Select a value from "3 minutes", "5 minutes", "10 minutes" and "Off". |
En-34
Advanced Settings (Setup Menu)
HDMI Input
You can change input assignment between the input selectors and HDMI IN jacks.
| Setting Item Default | Value | Setting | Details |
| BD/DVD | HDMI 1 (HDCP 2.2) | "HDMI 1 (HDCP 2.2)" to "HDMI 7": Assign a desired HDMI IN jack to the BD/DVD button. If you do not assign a jack, select "----". To select an HDMI IN jack already assigned to another input selector, change its setting to "----" first. | |
| CBL/SAT | HDMI 2 (HDCP 2.2) | "HDMI 1 (HDCP 2.2)" to "HDMI 7": Assign a desired HDMI IN jack to the CBL/SAT button. If you do not assign a jack, select "----". To select an HDMI IN jack already assigned to another input selector, change its setting to "----" first. | |
| STRM BOX | HDMI 3 (HDCP 2.2) | "HDMI 1 (HDCP 2.2)" to "HDMI 7": Assign a desired HDMI IN jack to the STRM Box button. If you do not assign a jack, select "----". To select an HDMI IN jack already assigned to another input selector, change its setting to "----" first. | |
| PC | HDMI 4 (HDCP 2.2) | "HDMI 1 (HDCP 2.2)" to "HDMI 7": Assign a desired HDMI IN jack to the PC button. If you do not assign a jack, select "----". To select an HDMI IN jack already assigned to another input selector, change its setting to "----" first. | |
| GAME 1 | HDMI 5 (HDCP 2.2) | "HDMI 1 (HDCP 2.2)" to "HDMI 7": Assign a desired HDMI IN jack to the Game 1 button. If you do not assign a jack, select "----". To select an HDMI IN jack already assigned to another input selector, change its setting to "----" first. | |
| GAME 2 | HDMI 6 | "HDMI 1 (HDCP 2.2)" to "HDMI 7": Assign a desired HDMI IN jack to the Game 2 button. If you do not assign a jack, select "----". To select an HDMI IN jack already assigned to another input selector, change its setting to "----" first. | |
| AUX | (Front) | The setting cannot be changed. | |
| CD | ---- | "HDMI 1 (HDCP 2.2)" to "HDMI 7": Assign a desired HDMI IN jack to the CD button. If you do not assign a jack, select "----". To select an HDMI IN jack already assigned to another input selector, change its setting to "----" first. | |
Connections
Initial Setup
Playing Back
Advanced Manual
Front Panel >Rear Panel >Remote Controller
Advanced Settings (Setup Menu)
Setting Item Default Value Setting Details
| PHONO ---- "HDMI 1 (HDCP 2.2)" to "HDMI 7": Assign a desired HDMI IN jack to the Phono button. If you do not assign a jack, select "----". To select an HDMI IN jack already assigned to another input selector, change its setting to "----" first. |
| TV ---- "HDMI 1 (HDCP 2.2)" to "HDMI 7": Assign a desired HDMI IN jack to the TV button. If you do not assign a jack, select "----". To select an HDMI IN jack already assigned to another input selector, change its setting to "----" first. |
Video Input
You can change assignment of the COMPONENT VIDEO IN 1 and 2 jacks and the VIDEO IN 1 to 3 jacks between the input selectors. If you do not assign a jack, select "----".
| Setting Item Default Value Setting Details | ||
| BD/DVD COMPONENT | 1 | "COMPONENT 1", "COMPONENT 2": Assign the COMPONENT VIDEO IN jacks to the BD/DVD button."VIDEO 1" to "VIDEO 3": Assign a desired VIDEO IN jack to the BD/DVD button. |
| CBL/SAT VIDEO 2 "COMPONENT 1", "COMPONENT 2": Assign the COMPONENT VIDEO IN jacks to the CBL/SAT button."VIDEO 1" to "VIDEO 3": Assign a desired VIDEO IN jack to the CBL/SAT button. | ||
| STRM BOX VIDEO 3 "COMPONENT 1", "COMPONENT 2": Assign the COMPONENT VIDEO IN jacks to the STRM Box button."VIDEO 1" to "VIDEO 3": Assign a desired VIDEO IN jack to the STRM Box button. | ||
| PC ---- "COMPONENT 1", "COMPONENT 2": Assign the COMPONENT VIDEO IN jacks to the PC button."VIDEO 1" to "VIDEO 3": Assign a desired VIDEO IN jack to the PC button. | ||
| GAME 1 VIDEO 1 "COMPONENT 1", "COMPONENT 2": Assign the COMPONENT VIDEO IN jacks to the Game 1 button."VIDEO 1" to "VIDEO 3": Assign a desired VIDEO IN jack to the Game 1 button. | ||
| GAME 2 COMPONENT | 2 | "COMPONENT 1", "COMPONENT 2": Assign the COMPONENT VIDEO IN jacks to the Game 2 button."VIDEO 1" to "VIDEO 3": Assign a desired VIDEO IN jack to the Game 2 button. |
| AUX ---- The setting cannot be changed. | ||
| CD ---- "COMPONENT 1", "COMPONENT 2": Assign the COMPONENT VIDEO IN jacks to the CD button."VIDEO 1" to "VIDEO 3": Assign a desired VIDEO IN jack to the CD button. | ||
En-35

Connections
Initial Setup
Playing Back
Advanced Manual
Front Panel >Rear Panel >Remote Controller
Advanced Settings (Setup Menu)
Setting Item Default Value Setting Details
| PHONO ---- "COMPONENT 1", "COMPONENT 2": Assign the COMPONENT VIDEO IN jacks to the Phono button."VIDEO 1" to "VIDEO 3": Assign a desired VIDEO IN jack to the Phono button. |
| TV ---- "COMPONENT 1", "COMPONENT 2": Assign the COMPONENT VIDEO IN jacks to the TV button."VIDEO 1" to "VIDEO 3": Assign a desired VIDEO IN jack to the TV button. |
- When you convert video signals input to the COMPONENT VIDEO IN jacks and output them from the HDMI OUT jack, set the output resolution of the player to 480i or 576i. If the input has 480p/576p or higher resolution, an error message will appear.
Digital Audio Input
You can change input assignment between the input selectors and DIGITAL IN COAXIAL 1 to 2/OPTICAL 1 to 3 jacks. If you do not assign a jack, select "----".
| Setting Item Default Value Setting Details | |
| BD/DVD COAXIAL 1 "COAXIAL 1", "COAXIAL 2", "OPTICAL 1", "OPTICAL 2", "OPTICAL 3": Assign a desired DIGITAL IN jack to the BD/DVD button. | |
| CBL/SAT COAXIAL 2 "COAXIAL 1", "COAXIAL 2", "OPTICAL 1", "OPTICAL 2", "OPTICAL 3": Assign a desired DIGITAL IN jack to the CBL/SAT button. | |
| STRM BOX OPTICAL 1 "COAXIAL 1", "COAXIAL 2", "OPTICAL 1", "OPTICAL 2", "OPTICAL 3": Assign a desired DIGITAL IN jack to the STRM Box button. | |
| PC ---- "COAXIAL 1", "COAXIAL 2", "OPTICAL 1", "OPTICAL 2", "OPTICAL 3": Assign a desired DIGITAL IN jack to the PC button. | |
| GAME 1 ---- "COAXIAL 1", "COAXIAL 2", "OPTICAL 1", "OPTICAL 2", "OPTICAL 3": Assign a desired DIGITAL IN jack to the Game 1 button. | |
| GAME 2 ---- "COAXIAL 1", "COAXIAL 2", "OPTICAL 1", "OPTICAL 2", "OPTICAL 3": Assign a desired DIGITAL IN jack to the Game 2 button. | |
| AUX ---- The setting cannot be changed. | |
| CD OPTICAL 2 "COAXIAL 1", "COAXIAL 2", "OPTICAL 1", "OPTICAL 2", "OPTICAL 3": Assign a desired DIGITAL IN jack to the CD button. | |
| PHONO ---- "COAXIAL 1", "COAXIAL 2", "OPTICAL 1", "OPTICAL 2", "OPTICAL 3": Assign a desired DIGITAL IN jack to the Phono button. | |
| TV OPTICAL 3 "COAXIAL 1", "COAXIAL 2", "OPTICAL 1", "OPTICAL 2", "OPTICAL 3": Assign a desired DIGITAL IN jack to the TV button. |
- Sampling rates for PCM signals (stereo, mono) from a digital input are 32 kHz, 44.1 kHz, 48 kHz, 88.2 kHz, 96 kHz/16 bit, 20 bit, and 24 bit.
Connections
Initial Setup
Playing Back
Advanced Manual
Front Panel >Rear Panel >Remote Controller
2. Speaker
Allows you to change the speaker configuration such as presence or not of subwoofer, crossover frequency, and so on. Settings are automatically configured if you use the Automatic Speaker Setup.
This setting cannot be selected if headphones are connected or audio is output from the speakers of the TV.
Configuration
You can change the number of speaker channels connected, the type of front speaker connection, the height speaker type, and other speaker settings.
| Setting Item Default Value Setting | Details | |
| Speaker Channels | 7.1 ch | Select "2.1 ch", "3.1 ch", "4.1 ch", "5.1 ch", "6.1 ch", "7.1 ch", "2.1.2 ch", "3.1.2 ch", "4.1.2 ch", "5.1.2 ch", "6.1.2 ch", or "7.1.2 ch" to suit the number of speaker channels connected. |
| Subwoofer Yes Set | whether a subwoofer is connected or not."Yes": When subwoofer is connected"No": When subwoofer is not connected | |
| Height Speaker Front High Set the speaker type if height speakers are connected.Select "Front High", "Top Front", "Top Middle", "Top Rear", "Rear High", "Dolby Speaker (Front)", "Dolby Speaker (Surr)", or "Dolby Speaker (Back)" according to the connected speaker type and location.If an item cannot be selected even though connection is correct, check that the settings in "Speaker Channels" matches the number of connected channels. | ||
| Bi-Amp No Set whether your front speaker connection is bi-amp."No": When front speakers are connected in a normal manner"Yes": When front speakers are bi-amp connectedIf an item cannot be selected even though connection is correct, check that the settings in "Speaker Channels" matches the number of connected channels. | ||
Advanced Settings (Setup Menu)
| Setting Item Default Value Setting | Details | |
| Surround (XLR) Normal | Set | the output for surround sound signals."Normal": Set to output surround sound signals through surround jacks"Dual": Set to output surround sound signals through surround jacks and back jacksThis can only be selected when "Speaker Channels" is set to "4.1 ch", "5.1 ch", "4.1.2 ch", or "5.1.2 ch". |
En-37

Connections
Initial Setup
Playing Back
Advanced Manual
Front Panel >Rear Panel >Remote Controller
Crossover
Allows you to change speaker configurations, such as crossover frequency. Settings are automatically configured if you use the Automatic Speaker Setup. Audio will not be output while you are making this setting.
- If you are using THX-certified speakers, we recommend the following settings:
- Set a value "80Hz(THX)" in Crossover frequency.
- Set a value "80Hz" in "LPF of LFE".
- Set a value "Off" in "Double Bass".
Setting Item Default Value Setting Details
| Front 80 Hz(THX) Select the crossover frequency from "40Hz" to "200Hz" to start outputting frequencies for each channel."Full Band": Full band will be output.If "Configuration" - "Subwoofer" is set to "No", "Front" will be fixed to "Full Band" and the low pitched range of the other channels will be output from the front speakers. Refer to the instruction manual of your speakers to make the setting. | |
| Center 80 Hz(THX) Select the crossover frequency from "40Hz" to "200Hz" to start outputting frequencies for each channel."Full Band": Full band will be output."Full Band" can be selected only when "Front" is set to "Full Band".If an item cannot be selected even though connection is correct, check that the settings in "Configuration" - "Speaker Channels" matches the number of connected channels. | |
| Height 80 Hz(THX) Select the crossover frequency from "40Hz" to "200Hz" to start outputting frequencies for each channel."Full Band": Full band will be output.This cannot be selected when the setting for "Configuration" - "Bi-Amp" is "Yes"."Full Band" can be selected only when "Front" is set to "Full Band".If an item cannot be selected even though connection is correct, check that the settings in "Configuration" - "Speaker Channels" matches the number of connected channels. |
Advanced Settings (Setup Menu)
Setting Item Default Value Setting Details
| Surround 80 Hz(THX) | Select the crossover frequency from "40Hz" to "200Hz" to start outputting frequencies for each channel."Full Band": Full band will be output."Full Band" can be selected only when "Front" is set to "Full Band".If an item cannot be selected even though connection is correct, check that the settings in "Configuration" - "Speaker Channels" matches the number of connected channels. | |
| Back 80 Hz(THX) | Select the crossover frequency from "40Hz" to "200Hz" to start outputting frequencies for each channel."Full Band": Full band will be output.This cannot be selected when the setting for "Configuration" - "Bi-Amp" is "Yes"."Full Band" can be selected only when "Surround" is set to "Full Band".If an item cannot be selected even though connection is correct, check that the settings in "Configuration" - "Speaker Channels" matches the number of connected channels. | |
| LPF of LFE 120Hz | Set the | ow-pass filter for LFE (low-frequency effect) signals in order to pass lower frequency signals than the set value and thus cancel unwanted noises. The low-pass filter will be effective only on sources with LFE channel.The value from "80Hz" to "120Hz" can be set."Off": Do not use this function |
| Subwoofer Phase | 0^ | Bass sound of the subwoofers may be insufficient depending on the type of sound and the listening position. In that case, change the phase of subwoofers. Set the phase value while listening to the sound so that you can obtain your preferred bass sound." 0^ : The subwoofer is in normal phase." 180^ : The subwoofer is in reverse phase.The setting cannot be changed if "Configuration" - "Subwoofer" is set to "No". |
En-38

Connections
Initial Setup
Playing Back
Advanced Manual
Front Panel >Rear Panel >Remote Controller
Advanced Settings (Setup Menu)
Setting Item Default Value Setting Details
| Double Bass On This can only be selected when "Configuration" - "Subwoofer" is set to "Yes" and "Front" is set to "Full Band".Boost bass output by feeding bass sounds from the front left and right, and center speakers to the subwoofer."On": Bass output will be boosted."Off": Bass output will not be boosted.The setting will not automatically be configured even if you performed the automatic speaker setup. |
Distance
Set the distance from each speaker to the listening position. Settings are automatically configured if you use the automatic speaker setup.
Setting Item Default Value Setting Details
| Unit feet/meters Specify the unit of distance for configuring settings."feet": When setting in feet (0.1 ft to 30.0 ft, in increments of 0.1 ft)"meters": When setting in meters (0.03 m to 9.00 m, in increments of 0.03 m) | |
| Front Left 12.0ft/3.60m Specify the distance between each speaker and the listening position. | |
| Center 12.0ft/3.60m Specify the distance between each speaker and the listening position. | |
| Front Right 12.0ft/3.60m Specify the distance between each speaker and the listening position. | |
| Height Left 9.0ft/2.70m Specify the distance between each speaker and the listening position. | |
| Height Right 9.0ft/2.70m Specify the distance between each speaker and the listening position. | |
| Surround Right 7.0ft/2 10m Specify the distance between each speaker and the listening position. | |
| Back Right 7.0ft/2.10m Specify the distance between each speaker and the listening position. | |
| Back Left 7.0ft/2.10m Specify the distance between each speaker and the listening position. | |
| Surround Left 7.0ft/2.10m Specify the distance between each speaker and the listening position. | |
| Subwoofer 12.0ft/3.60m Specify the distance between each speaker and the listening position. |
- Default values vary depending on the regions.
- The speaker "Distance" may be unable to be changed depending on the settings in "Configuration" - "Speaker Channels" / "Subwoofer".
En-39

Connections
Initial Setup
Playing Back
Advanced Manual
Front Panel >Rear Panel >Remote Controller
Level Calibration
Adjust the level of each speaker with the built-in test tone. Settings are automatically configured if you use the Automatic Speaker Setup.
Setting Item Default Value Setting Details
| Front Left 0.0dB Select a value between "-12.0 dB" and "+12.0 dB" (in 0.5 dB increments). A test tone will be output each time you change the value. Select the desired level. | |
| Center 0.0dB Select a value between "-12.0 dB" and "+12.0 dB" (in 0.5 dB increments). A test tone will be output each time you change the value. Select the desired level. | |
| Front Right 0.0dB Select a value between "-12.0 dB" and "+12.0 dB" (in 0.5 dB increments). A test tone will be output each time you change the value. Select the desired level. | |
| Height Left 0.0dB Select a value between "-12.0 dB" and "+12.0 dB" (in 0.5 dB increments). A test tone will be output each time you change the value. Select the desired level.This cannot be selected if "Configuration" - "Bi-Amp" is set to "Yes". | |
| Height Right 0.0dB Select a value between "-12.0 dB" and "+12.0 dB" (in 0.5 dB increments). A test tone will be output each time you change the value. Select the desired level.This cannot be selected if "Configuration" - "Bi-Amp" is set to "Yes". | |
| Surround Right 0.0dB Select a value between "-12.0 dB" and "+12.0 dB" (in 0.5 dB increments). A test tone will be output each time you change the value. Select the desired level. | |
| Back Right 0.0dB Select a value between "-12.0 dB" and "+12.0 dB" (in 0.5 dB increments). A test tone will be output each time you change the value. Select the desired level.This cannot be selected if "Configuration" - "Bi-Amp" is set to "Yes". |
Advanced Settings (Setup Menu)
| Setting Item Default Value Setting Details | |
| Back Left 0.0dB Select a value between "-12.0 dB" and "+12.0 dB" (in 0.5 dB increments). A test tone will be output each time you change the value. Select the desired level.This cannot be selected if "Configuration" - "Bi-Amp" is set to "Yes". | |
| Surround Left 0.0dB Select a value between "-12.0 dB" and "+12.0 dB" (in 0.5 dB increments). A test tone will be output each time you change the value. Select the desired level. | |
| Subwoofer 0.0dB Select a value between "-15.0 dB" and "+12.0 dB" (in 0.5 dB increments). A test tone will be output each time you change the value. Select the desired level. |
- The speaker "Level Calibration" may be unable to be changed depending on the settings in
"Configuration" - "Speaker Channels" / "Subwoofer". - "Level Calibration" cannot be changed while muting is on.
Connections
Initial Setup
Playing Back
Advanced Manual
Front Panel >Rear Panel >Remote Controller
Equalizer Settings
Adjust the output volume of each range of each connected speaker. You can adjust the volume of each range of each speaker. You can set three types of equalizer settings in the Presets 1, 2, and 3.
- You can adjust the bass in the low range frequencies (63 Hz, etc.), and the treble in the high range frequencies (16 kHz, etc.).
- You can select up to seven frequency bands for each speaker.
Setting Item Default Value Setting Details
| Front 0 dB First select the frequency of the speaker from"25 Hz" to "16 kHz" with the◀/▶cursors, then use ▲To adjust the volume of the frequency between "-6dB" to "+6dB". | |
| Center 0 dB First select the frequency of the speaker from"25 Hz" to "16 kHz" with the◀/▶cursors, then use ▲To adjust the volume of the frequency between "-6dB" to "+6dB". | |
| Height 0 dB First select the frequency of the speaker from"25 Hz" to "16 kHz" with the◀/▶cursors, then use ▲To adjust the volume of the frequency between "-6dB" to "+6dB".● This cannot be selected if "Configuration" - "Bi-Amp" is set to "Yes". | |
| Surround 0 dB First select the frequency of the speaker from"25 Hz" to "16 kHz" with the◀/▶cursors, then use ▲To adjust the volume of the frequency between "-6dB" to "+6dB". | |
| Back 0 dB First select the frequency of the speaker from"25 Hz" to "16 kHz" with the◀/▶cursors, then use ▲To adjust the volume of the frequency between "-6dB" to "+6dB".● This cannot be selected if "Configuration" - "Bi-Amp" is set to "Yes". | |
| Subwoofer 0 dB First select the frequency of the speaker from"25 Hz" to "160Hz" with the◀/▶cursors, then use ▲To adjust the volume of the frequency between "-6dB" to "+6dB".● This cannot be selected if "Configuration" - "Subwoofer" is set to "No". |
- The Speaker "Equalizer Settings" may be unable to be changed depending on the settings in
"Configuration" - "Speaker Channels" / "Subwoofer". - Adjust the volume of each speaker in "Level Calibration".
- Adjust the volume in 1 dB steps.
- This is not effective if the listening mode is Direct.
- The result may not be as expected depending on the input source and listening mode setting.
THX Audio
| Setting item Default | Value | Setting Details |
| Back Speaker Spacing | >4.0 ft / >1.2 m | Select the distance between the back speakers from the following values.When "Distance" - "Unit" is set to "feet".: Select a value from "<1.0 ft", "1.0-4.0 ft", and ">4.0 ft".When "Distance" - "Unit" is set to "meters".:Select a value from "<0.3 m", "0.3-1.2 m", and ">1.2 m".This cannot be selected if "Configuration" - "Bi-Amp" is set to "Yes".If an item cannot be selected even though connection is correct, check that the settings in "Configuration" - "Speaker Channels" matches the number of connected channels. |
| THX Ultra2/Select2 Subwoofer | No | Set "Yes" or "No" of the connection of the THX certified subwoofer."Yes": When a THX-certified subwoofer is connected"No": When a THX-certified subwoofer is not connectedThe setting cannot be changed if "Configuration" - "Subwoofer" is set to "No". |
| BGC | Off | If your listening room layout (for practical or aesthetic reasons) locates most of the listeners close to the rear wall, the resulting bass level can be sufficiently reinforced by the boundary that the overall sound becomes "boomy". THX Ultra2 Plus receivers contain a Boundary Gain Compensation (BGC) feature to improve bass balance."On": Use this function"Off": Do not use this functionIn the following cases, the setting cannot be changed:- "Configuration" - "Subwoofer" is set to "No"- "THX Ultra2/Select2 Subwoofer" is set to "No". |
Connections
Initial Setup
Playing Back
Advanced Manual
Front Panel >Rear Panel >Remote Controller
Advanced Settings (Setup Menu)
Setting item Default Value Setting Details
| Loudness Plus On When the setting is set to "On", it is possible to enjoy even subtle nuances of audio expression at low volume. This is only available when the THX listening mode is selected.THX Loudness PlusTHX Loudness Plus is a new volume control technology featured in THX Ultra2 PlusTM and THX Select2 PlusTM Certified receivers.With THX Loudness Plus, home theater audiences can now experience the rich details in a surround mix at any volume level.A consequence of turning the volume below Reference Level is that certain sound elements can be lost or perceived differently by the listener. THX Loudness Plus compensates for the tonal and spatial shifts that occur when the volume is reduced by intelligently adjusting ambient surround channel levels and frequency response. This enables users experience the true impact of soundtracks regardless of the volume setting. THX Loudness Plus is automatically applied when listening in any THX listening mode. The new THX Cinema, THX Music, and THX Games modes are tailored to apply the proper THX Loudness Plus settings for each type of content. |
3. Audio Adjust
Configure various settings related to sound, such as settings for listening to multiplex audio or multilingual TV broadcasts and sound field settings for listening modes.
Multiplex/Mono
| Setting Item Default Value Setting Details | ||
| Multiplex Input Channel | Main Set the audio channel or language to be output when playing multiplex audio or multilingual TV broadcasts etc."Main": Main channel only"Sub": Sub channel only"Main/Sub": Main and sub channels will be output at the same time.If multiplex audio is being played, "1+1" will be displayed when Display is pressed. | |
| Mono Input Channel | Left+Right Set the input channel to use for playing any 2 ch digital source such as Dolby Digital, or 2-ch analog/PCM source in the Mono listening mode."Left": Left channel only"Right": Right channel only"Left + Right": Left and right channels | |
| Mono Output Speaker | Center Select the speaker to output monaural audio in the Mono listening mode."Center": Audio is output from the center speaker."Left/Right": Audio is output from the front L/R speakers.If an item cannot be selected even though connection is correct, check that the settings in "Configuration" - "Speaker Channels" matches the number of connected channels. | |
Connections
Initial Setup
Playing Back
Advanced Manual
Front Panel >Rear Panel >Remote Controller
Dolby
Make the settings for Dolby listening mode.
Setting Item Default Value Setting Details
| Loudness Management | On Enable the Late Night function that allows you to enjoy surround sound of Dolby TrueHD playback even in low volume. "On": Use this function "Off": Do not use this function |
Theater-Dimensional
Make the settings for Theater-Dimensional listening mode.
Setting Item Default Value Setting Details
| Listening Angle Wide To enhance the effect of Theater-Dimensional,select the actual angle of the left and rightfront speakers as it appears from the listeningposition."Narrow": Less than 30°"Wide": Greater than 30° |
- Position the front speakers 20° to the listening position if you have selected "Narrow" in "Listening Angle" and 40° if you have selected "Wide".
LFE Level
Set the low-frequency effect (LFE) level of the Dolby Digital, DTS, Multichannel PCM and DSD signals.
Setting item Default Value Setting Details
| Dolby D/Dolby D+/TrueHD | 0dB Select the low-frequency effect (LFE) level of each type of signal from "0dB" to "-∞dB". If the low-frequency effect sound is too strong, select "-20dB" or "-∞dB". |
| DTS/DTS-ES/DTS-HD | 0dB Select the low-frequency effect (LFE) level of each type of signal from "0dB" to "-∞dB". If the low-frequency effect sound is too strong, select "-20dB" or "-∞dB".This setting works on LFE channel volume of DTS, DTS-ES, DTS-HD High Resolution and DTS-HD Master Audio sources. |
Advanced Settings (Setup Menu)
Setting item Default Value Setting Details
| Other Multich Source 0dB Select the low-frequency effect (LFE) level of each type of signal from "0dB" to "-∞dB". If the low-frequency effect sound is too strong, select "-20dB" or "-∞dB".This setting works on LFE channel volume of Multichannel PCM and DSD sources. |
Volume
Make the detailed volume setting of the unit.
Setting Item Default Value Setting Details
| Volume Display Absolute | Switch the volume display between the absolute value and relative value. The absolute value 82.0 is equivalent to the relative value 0.0dB."Absolute": Absolute value such as "0.5" to "99.5" "Relative": Relative value such as "-81.5dB" and "+18.0dB"If the absolute value is set to "82.0", "82.0Ref" will appear on the display. | |
| Muting Level | -∞dB | Set the volume lowered from the listening volume when muting is on.Select a value from "-∞dB", "-40dB" to "-20dB". |
| Maximum Volume | Off | Set the maximum value to avoid too high volume. Select a value from "Off", "50" to "99". (When "Volume Display" is set to "Absolute") |
| Power On Volume Last | Set the volume level of when the power is turned on. Select a value from "Last" (Volume level before entering standby mode), "Min", "1" to "99" and "Max". (When "Volume Display" is set to "Absolute")You cannot set a higher value than that of "Maximum Volume". | |
| Headphone Level | 0 dB | Adjust the output level of the headphones. Select a value between "-12 dB" and "+12 dB". |
En-43

Multi Zone
Setting Item Default Value Setting Details
| Zone 2 Out Fixed Select which of the integrated amplifier in a separate room or this unit should be used to adjust the volume when Zone 2 is active. "Fixed": Adjust on the Integrated amplifier in a separate room "Variable": Adjust on the unit | |
| Zone 2 Maximum Volume | Off Set the maximum value for Zone 2 to avoid too high volume. Select a value from "Off", "50" to "99". (When "Volume Display" is set to "Absolute") |
| Zone 2 Power On Volume | Last Set the Zone 2 volume level of when the unit is turned on. Select a value from "Last" (Volume level when the unit was turned off), "Min", "1" to "99" and "Max". (When "Volume Display" is set to "Absolute")● You cannot set a higher value than that of "Zone 2 Maximum Volume". |
| Zone 3 Out Fixed Select which of the integrated amplifier in a separate room or this unit should be used to adjust the volume when Zone 3 is active. "Fixed": Adjust on the Integrated amplifier in a separate room "Variable": Adjust on the unit | |
| Zone 3 Maximum Volume | Off Set the maximum value for Zone 3 to avoid too high volume. Select a value from "Off", "50" to "99". (When "Volume Display" is set to "Absolute") |
| Zone 3 Power On Volume | Last Set the Zone 3 volume level of when the unit is turned on. Select a value from "Last" (Volume level when the unit was turned off), "Min", "1" to "99" and "Max". (When "Volume Display" is set to "Absolute")● You cannot set a higher value than that of "Zone 3 Maximum Volume". |
Advanced Settings (Setup Menu)
4. Source
Make settings for input sources, such as volume difference adjustments for each input selector for the connected equipment. Select the input selector to configure.
IntelliVolume
| Setting Item Default Value Setting Details | |
| IntelliVolume 0 dB Adjust the volume level difference between the devices connected to the unit. Select a value between "-12 dB" and "+12 dB". Set a negative value if the volume of the target device is larger than the others and a positive value if smaller. When you select a desired input to check the audio, start playback of the connected device.This function is not effective in Zone 2/Zone 3. |
Name Edit
Set an easy name to each input. The set name will be shown on the main unit display. Select the input selector to configure.
Setting Item Default Value Setting Details
| Name Input name 1. Select a character or symbol with the cursors and press Enter.Repeat it to input 10 or less characters."A/a": Switches between upper and lower cases. (Pressing +10 on the remote controller also toggles between upper and lower cases.) "-" "→": Moves the cursor to the arrow direction."×": Removes a character on the left of the cursor."Space": Puts a space.Pressing CLR on the remote controller will remove all the input characters.2. After inputting, select "OK" with the cursors and press Enter.The input name will be saved. |
- To name a preset radio station, press Tuner on the remote controller, select AM/FM and select the preset number.
- It cannot be set if the "NET" input is selected.
Connections
Initial Setup
Playing Back
Advanced Manual
Front Panel >Rear Panel >Remote Controller
Audio Select
Make the audio input setting. The setting can be separately set to each input selector button. Select the input selector to configure.
Setting Item Default Value Setting Details
| Audio Select BD/DVD: | Select the priority for input selection when multiple audio sources are connected to one input selector, such as connections to both the "BD/DVD" of HDMI jack and "BD/DVD" of AUDIO jack. You cannot select a jack that is not associated with the currently selected input."ARC": When giving priority to input signal from ARC compatible TV.The setting can be selected only when "HDMI - "Audio Return Channel" is set to "Auto" and also the "TV" input is selected."HDMI": When giving priority to input signal from HDMI jacksThe setting can be selected only when the input is assigned to the HDMI IN jack in the "HDMI Input" setting."COAXIAL": When giving priority to input signal from COAXIAL jacks.The setting can be selected only when the input is assigned to the COAXIAL jack in the "Digital Audio Input" setting."OPTICAL": When giving priority to input signal from OPTICAL jacks.The setting can be selected only when the input is assigned to the OPTICAL jack in the "Digital Audio Input" setting."Analog": To always output analog audio independently of the input signal"Balance": When giving a higher priority to an input from the balanced jack"----": This is displayed when none of "HDMI", "COAXIAL", "OPTICAL", or "Analog" are allocated for this item. |
| HDMICBL/SAT:HDMISTRM BOX:HDMIPC:HDMIGAME 1:HDMIGAME 2:HDMIAUX:HDMICD:OPTICALTV:OPTICALPHONO:Analog |
Advanced Settings (Setup Menu)
Setting Item Default Value Setting Details
| PCM Fixed Mode Off Select whether to fix input signals to PCM(except multi-channel PCM) when you have selected "HDMI", "COAXIAL", or "OPTICAL" in the "Audio Select" setting. Set this item to "On" if noise is produced or truncation occurs at the beginning of a track when playing PCM sources. Select "Off" normally.Changing "Audio Select" changes the setting to "Off". |
- The setting cannot be changed when "TUNER" or "NET" input is selected.
Video Select
Setting Item Default Value Setting Details
| Video Select Last Select the video input played along with audiooutput when either "TUNER" or "NET" is selected.This setting is effective only for an input selector which is assigned in "HDMI Input" or "Video Input"."Last": Select the video input played immediately prior."BD/DVD", "CBL/SAT", "STRM BOX", "PC", "GAME 1", "GAME 2", "AUX", "CD", "PHONO", "TV": Play the video from the selected input. |
- The setting cannot be changed when input other than "TUNER" or "NET" is selected.
- When input is "NET", switch between displaying and not displaying video by pressing Mode on the remote controller.
En-45

Connections
Initial Setup
Playing Back
Advanced Manual
Front Panel >Rear Panel >Remote Controller
5. Listening Mode Preset
You can preset your favorite listening mode to each input. (For example, you can always apply straight decode to the Dolby TrueHD source of Blu-ray Disc to play it in unchanged sound field.)
When the list of input sources is displayed, set the signal type and listening mode. Although it is possible to select the listening mode during playback, the selected mode will be reset when the unit enters standby mode.
Setting Item Default Value Setting Details
| Analog/PCM AllCh Stereo Set the listening mode for playing PCM signals of CD and analog signals of record and cassette tape. | |
| Mono/Multiplex Full Mono Set the listening mode for playing Dolby Digital and other digital signals recorded in monaural or multiplex audio. | |
| 2 ch Source Dolby Surround Set the listening mode for playing Dolby Digital and other digital signals recorded in 2 channels. | |
| Dolby D/Dolby D+/ TrueHD | Dolby Surround Set the listening mode for playing multi-channel Dolby Digital, Dolby Digital Plus and Dolby TrueHD signals.Input signals are played as they are input if you select "Straight Decode". |
| DTS/DTS-ES/ DTS-HD | DTS Neural:X (before updating to a version that supports DTS:X audio: Straight Decode)Set the listening mode for playing multi-channel digital audio signals in DTS and DTS-HD High Resolution formats. Select the listening mode specified for Blu-ray or such other DTS-HD Master Audio source.Input signals are played as they are input if you select "Straight Decode". |
| Other Multich Source Dolby Surround Set the listening mode for playing multi-channel audio such as DVD-audio and DSD signals.Input signals are played as they are input if you select "Straight Decode". | |
■ Available listening modes vary depending on speaker configuration and the input signal.
- Setting "Last Valid" will always select the last selected mode.
- Only "Analog" can be set to the "TUNER" input.
■ "Digital" and "TrueHD" can be set to the "NET" input.
En-46
Advanced Settings (Setup Menu)
6. Hardware
Tuner
| Setting Item Default | Value | Setting Details |
| AM/FM Frequency Step (North American models) | 10kHz/0.2MHz | Select a frequency step depending on your area of residence.Select "10kHz/0.2MHz" or "9kHz/0.05MHz".When this setting is changed, all radio presets are deleted. |
| AM Frequency Step (Australian models) | 9kHz | Select a frequency step depending on your area of residence.Select "10kHz" or "9kHz".When this setting is changed, all radio presets are deleted. |
En-46

Connections
Initial Setup
Playing Back
Advanced Manual
Front Panel >Rear Panel >Remote Controller
Advanced Settings (Setup Menu)
HDMI
| Setting Item Default Value Setting Details | ||
| HDMI CEC (RIHD) Off | Setting to "On" enables the input selection link and other link functions with HDMI connected CEC compliant device. "On": Use this function "Off": Do not use this function When changing this setting, turn off and then on again the power of all connected components. Depending on the TV set, a link may need to be configured on the TV. When this setting is "On", the names of the CEC-compatible components and "CEC On" are displayed after this operation screen is closed. Setting to "On" increases the power consumption even when the unit is on standby. However, the increase in power consumption is kept to a minimum by automatically entering the HYBRID STANDBY mode, where only the essential circuit is operating. If you operate the Master Volume control on this unit when this setting is "On" and audio is output from the TV speakers, audio will be output also to the amplifier connected to the unit. If you want to output from only either of them, change the unit or TV settings, or reduce the volume of the unit. If abnormal operation occurs when you set the setting to "On", set it to "Off". When connecting a non-CEC compatible component, or when you are not sure whether it is compatible, set the setting to "Off". | |
| Control TV MAIN Set | whether to enable the CEC link function for TVs connected through one of the HDMI OUT MAIN or SUB jacks. To change this setting, set "HDMI CEC (RIHD)" to "On" in advance. When you have set "TV Out" - "HDMI Out" to "SUB" you cannot select "MAIN". | |
Setting Item Default Value Setting Details
| HDMI Standby Through | Off When this is set to anything other than "Off", you can play the video and audio of an HDMI connected player on the TV even if the unit is in standby mode. Only "Auto" and "Auto(Eco)" can be selected if "HDMI CEC (RIHD)" is set to "On". If you select anything else, set "HDMI CEC (RIHD)" to "Off".Power consumption in standby mode increases if set to anything other than "Off". "BD/DVD", "CBL/SAT", "STRM BOX", "PC", "GAME 1", "GAME 2", "AUX", "CD", "PHONO", "TV": For example, if you select "BD/DVD", you can play the equipment connected to the "BD/ DVD" terminal on the TV even if the unit is in standby mode. Select this setting if you have decided which player to use with this function."Last": You can play the video and audio of the input selected immediately prior to the unit being switched to standby on the TV."Auto", "Auto (Eco)": Select one of these settings when you have connected equipment that conforms to the CEC standard. You can play the video and audio of the input selected on the TV, irrespective of what input was selected immediately prior to the unit being switched to standby, using the CEC link function.To play players on the TV that do not conform to the CEC standard, you will need to turn the unit on and switch to the relevant input.When using a TV that conforms to the CEC standard, you can reduce the power consumption in standby mode by selecting "Auto (Eco)". |
En-47

Connections
Initial Setup
Playing Back
Advanced Manual
Front Panel >Rear Panel >Remote Controller
Advanced Settings (Setup Menu)
Setting Item Default Value Setting Details
| Audio TV Out (MAIN) Off You can enjoy audio through the speakers of the HDMI connected TV while this unit is on. "On": Use this function "Off": Do not use this functionTo select "On", set "HDMI CEC (RIHD)" to "Off".The setting is fixed to "Auto" if "HDMI CEC (RIHD)" is set to "On" and "Control TV" is set to "MAIN".Listening mode cannot be changed while "Audio TV Out (MAIN)" is set to "On" and audio is being output through the speakers of the TV.Depending on your TV set or input signal of the component, audio may not output through the speakers of the TV even if this setting is set to "On". In this case, output the audio signal to the amplifier connected to the unit.If you operate the Master Volume control on this unit when audio is output from the TV speakers, audio is output to the amplifier connected to the unit. If you do not want to output audio from the unit, change the unit or TV settings, or reduce the volume of the unit.This setting is fixed to "Off" if "TV Out" - "HDMI Out" is set to "SUB". |
Setting Item Default Value Setting Details
| Audio TV Out (SUB) Off You can enjoy audio through the speakers of the HDMI connected TV while this unit is on. "On": Use this function "Off": Do not use this function The setting is fixed to "Auto" if "HDMI CEC (RIHD)" is set to "On" and "Control TV" is set to "SUB". Listening mode cannot be changed while "Audio TV Out (SUB)" is set to "On" and audio is being output through the speakers of the TV. Depending on your TV set or input signal of the component, audio may not output through the speakers of the TV even if this setting is set to "On". In such case, audio is output from the speakers of the unit. If you operate the Master Volume control on this unit when audio is output from the TV speakers, audio is output to the amplifier connected to the unit. If you do not want to output audio from the unit, change the unit or TV settings, or reduce the volume of the unit. This setting is fixed to "Off" if "TV Out" - "HDMI Out" is set to "MAIN". | |
| Audio Return Channel | Auto (*) You can enjoy sound of the HDMI connected ARC compatible TV through the amplifier connected to the unit. * To use this function, set "HDMI CEC (RIHD)" to "On" in advance. "Auto": When outputting the TV's audio signals to an amplifier connected to the unit "Off": When not using the ARC function |
| Auto LipSync On This setting automatically corrects any desynchronization between the video and audio signals based on data from the HDMI LipSync compatible TV. "On": Automatic correction will be enabled. "Off": Automatic correction will be disabled. | |
Connections
Initial Setup
Playing Back
Advanced Manual
Front Panel >Rear Panel >Remote Controller
Advanced Settings (Setup Menu)
Power Management
| Setting Item Default Value Setting Details | ||
| Sleep Timer Off Select to turn the unit into standby mode automatically when the specified time elapses. Select a value between "10 minutes" to "90 minutes". "Off": Select if you do not want the unit to automatically switch to standby. | ||
| Auto Standby On/Off This setting places the unit on standby automatically after 20 minutes of inactivity without any video or audio input. (When "USB Power Out at Standby" or "Network Standby" is on, the unit enters the HYBRID STANDBY mode, which minimizes the increase in power consumption.) "On": The unit will automatically enter standby mode. "Off": The unit will not automatically enter standby mode. "Auto Standby" is appeared on the display and TV screen 30 seconds before the Auto Standby comes on. "Auto Standby" does not work when Zone 2 is on. Default values vary depending on the regions. | ||
| Auto Standby in HDMI Standby Through | Off Enable or disable "Auto Standby" while "HDMI Standby Through" is on. "On": The setting will be enabled. "Off": The setting will be disabled. This setting cannot be set to "On" if "Auto Standby" is set to "Off". | |
| USB Power Out at Standby | Off When this function is "On", you can still have equipment connected to the USB port supplied with power even when this unit is in standby. When this function is being used, the power consumption increases even when the unit is on standby. However, the increase in power consumption is kept to a minimum by automatically entering the HYBRID STANDBY mode, where only the essential circuit is operating. | |
Setting Item Default Value Setting Details
| Network Standby Off When this function is "On", you can turn on the power of the unit via network using an application such as Integra Remote. ·When "Network Standby" is used, the power consumption increases even when the unit is on standby. However, the increase in power consumption is kept to a minimum by automatically entering the HYBRID STANDBY mode, where only the essential circuit is operating. |
- Wait for a while if "Network Standby" cannot be selected. It will appear when the network function is started up.
Connections
Initial Setup
Playing Back
Advanced Manual
Front Panel >Rear Panel >Remote Controller
Network
Make the network setting.
- When LAN is configured with a DHCP, set "DHCP" to "Enable" to configure the setting automatically. ("Enable" is set by default) To assign fixed IP addresses to each components, you must set "DHCP" to "Disable" and assign an address to this unit in "IP Address" as well as set information related to your LAN, such as Subnet Mask and Gateway.
Setting Item Default Value Setting Details
| MAC Address – This is the MAC address of this unit. | |
| This value is specific to the component and cannot be changed. | |
| DHCP Enable "Enable": Auto configuration by DHCP | |
| "Disable": Manual configuration without DHCPIf selecting "Disable", you must set "IP Address", "Subnet Mask", "Gateway", and "DNS Server" manually. | |
| IP Address – Displays/Sets the IP address. | |
| Subnet Mask – Displays/Sets the subnet mask. | |
| Gateway – Displays/Sets the gateway. | |
| DNS Server – Displays/Sets the primary DNS server. | |
| Proxy URL – Displays/Sets the proxy server URL. | |
| Proxy Port – Displays/Sets the proxy server port number whenyou enter "Proxy URL". | |
Advanced Settings (Setup Menu)
| Setting Item Default Value Setting Details | ||
| Friendly Name | DHC-60.7 | Change the name for this unit to a simple one for display on the equipment connected by network.1. Press Enter to display the Edit screen.2. Select a character or symbol with the cursors and press Enter.Repeat it to input 31 or less characters."A/a": Switches between upper and lower cases. (Pressing +10 on the remote controller also toggles between upper and lower cases.)"←" "→": Moves the cursor to the arrow direction.""": Removes a character on the left of the cursor."Space": Puts a space.Pressing CLR on the remote controller will remove all the input characters.3. After inputting, select "OK" with the cursors and press Enter.The input name will be saved. |
| AirPlay Password | ---- | You can enter a password (maximum of 31 places) so that only the entered user can use AirPlay®.1. Press Enter to display the Edit screen.2. Select a character or symbol with the cursors and press Enter.Repeat it to input 31 or less characters. "A/a": Switches between upper and lower cases. (Pressing +10 on the remote controller also toggles between upper and lower cases.)"←" "→": Moves the cursor to the arrow direction.""": Removes a character on the left of the cursor."Space": Puts a space.Pressing D on the remote controller will switch whether to mask the password with "*" or display in the plain text.Pressing CLR on the remote controller will remove all the input characters.3. After inputting, select "OK" with the cursors and press Enter.The input password will be saved. |
En-50

Connections
Initial Setup
Playing Back
Advanced Manual
Front Panel >Rear Panel >Remote Controller
Setting Item Default Value Setting Details
| Usage Data No As a means of improving the quality of our products and services. Onkyo may collect information about your usage over the network. Select "Yes" if you agree to our collecting this information. Select "No" if you do not want us to collect this information.You can set this after confirming the Privacy Policy. When you select "Usage Data" and press Enter, the Privacy Policy is displayed. (The same screen is displayed once also when setting up the network connection.) If you agree to the collection of the information, this setting also becomes "Yes". Note that if you agree to the Privacy Policy but select "No" for this setting, the information will not be collected. | |
| Network Check – You can check the network connection. Press Enter when "Start" is displayed. |
- Wait for a while if "Network" cannot be selected. It will appear when the network function is started up.
Advanced Settings (Setup Menu)
12V Trigger A
Set when outputting the control signal (maximum 12 V/100 mA) through the 12V TRIGGER OUT A jack. Different settings can be set for each input selector. You can enable power link operation when you connect the unit and the external devices equipped with 12V trigger input jack.
Setting Item Default Value Setting Details
| Delay 0 sec Set after how many seconds the 12V trigger output will occur in response to the unit's operation. As some devices cause a large current when they turn on, delay the output if such devices are connected. Select a value between "0 sec" to "3 sec". | |
| BD/DVD Main | Set the 12V trigger output setting to each input."Off": No output"Main": Output when "BD/DVD" is selected as input for main room."Zone2": Output when "BD/DVD" is selected as input for ZONE2."Main/Zone2": Output when "BD/DVD" is selected as input for main room or ZONE2."Zone3": Output when "BD/DVD" is selected as input for ZONE3."Main/Zone3": Output when "BD/DVD" is selected as input for main room or ZONE3."Zone2/Zone3": Output when "BD/DVD" is selected as input for ZONE2 or ZONE3."Main/Zone2/Zone3": Output when "BD/DVD" is selected as input for main room, ZONE2 or ZONE3. |
En-51

Advanced Settings (Setup Menu)
| Setting Item Default Value Setting Details | ||
| CBL/SAT Main Set the | 12V trigger output setting to each input."Off": No output"Main": Output when "CBL/SAT" is selected as input for main room."Zone2": Output when "CBL/SAT" is selected as input for ZONE2."Main/Zone2": Output when "CBL/SAT" is selected as input for main room or ZONE2."Zone3": Output when "CBL/SAT" is selected as input for ZONE3."Main/Zone3": Output when "CBL/SAT" is selected as input for main room or ZONE3."Zone2/Zone3": Output when "CBL/SAT" is selected as input for ZONE2 or ZONE3."Main/Zone2/Zone3": Output when "CBL/SAT" is selected as input for main room, ZONE2 or ZONE3. | |
| STRM BOX Main Set the 12V trigger output setting to each input."Off": No output"Main": Output when "STRM BOX" is selected as input for main room."Zone2": Output when "STRM BOX" is selected as input for ZONE2."Main/Zone2": Output when "STRM BOX" is selected as input for main room or ZONE2."Zone3": Output when "STRM BOX" is selected as input for ZONE3."Main/Zone3": Output when "STRM BOX" is selected as input for main room or ZONE3."Zone2/Zone3": Output when "STRM BOX" is selected as input for ZONE2 or ZONE3."Main/Zone2/Zone3": Output when "STRM BOX" is selected as input for main room, ZONE2 or ZONE3. | ||
| Setting Item Default Value Setting Details | |
| PC Main Set the 12V trigger output setting to each input."Off": No output"Main": Output when "PC" is selected as input for main room."Zone2": Output when "PC" is selected as input for ZONE2."Main/Zone2": Output when "PC" is selected as input for main room or ZONE2."Zone3": Output when "PC" is selected as input for ZONE3."Main/Zone3": Output when "PC" is selected as input for main room or ZONE3."Zone2/Zone3": Output when "PC" is selected as input for ZONE2 or ZONE3."Main/Zone2/Zone3": Output when "PC" is selected as input for main room, ZONE2 or ZONE3. | |
| GAME 1 Main Set the 12V trigger output setting to each input."Off": No output"Main": Output when "GAME 1" is selected as input for main room."Zone2": Output when "GAME 1" is selected as input for ZONE2."Main/Zone2": Output when "GAME 1" is selected as input for main room or ZONE2."Zone3": Output when "GAME 1" is selected as input for ZONE3."Main/Zone3": Output when "GAME 1" is selected as input for main room or ZONE3."Zone2/Zone3": Output when "GAME 1" is selected as input for ZONE2 or ZONE3."Main/Zone2/Zone3": Output when "GAME 1" is selected as input for main room, ZONE2 or ZONE3. |
En-52
Connections
Initial Setup
Playing Back
Advanced Manual
Front Panel >Rear Panel >Remote Controller
Advanced Settings (Setup Menu)
| Setting Item Default | Value Setting Details | |
| GAME 2 Main Set the | 12V trigger output setting to each input."Off": No output"Main": Output when "GAME 2" is selected as input for main room."Zone2": Output when "GAME 2" is selected as input for ZONE2."Main/Zone2": Output when "GAME 2" is selected as input for main room or ZONE2."Zone3": Output when "GAME 2" is selected as input for ZONE3."Main/Zone3": Output when "GAME 2" is selected as input for main room or ZONE3."Zone2/Zone3": Output when "GAME 2" is selected as input for ZONE2 or ZONE3."Main/Zone2/Zone3": Output when "GAME 2" is selected as input for main room, ZONE2 or ZONE3. | |
| AUX Main Set the 12V | trigger output setting to each input."Off": No output"Main": Output when "AUX" is selected as input for main room."Zone2": Output when "AUX" is selected as input for ZONE2."Main/Zone2": Output when "AUX" is selected as input for main room or ZONE2."Zone3": Output when "AUX" is selected as input for ZONE3."Main/Zone3": Output when "AUX" is selected as input for main room or ZONE3."Zone2/Zone3": Output when "AUX" is selected as input for ZONE2 or ZONE3."Main/Zone2/Zone3": Output when "AUX" is selected as input for main room, ZONE2 or ZONE3. |
| Setting Item Default Value Setting Details | |
| CD Main Set the 12V trigger output setting to each input."Off": No output"Main": Output when "CD" is selected as input for main room."Zone2": Output when "CD" is selected as input for ZONE2."Main/Zone2": Output when "CD" is selected as input for main room or ZONE2."Zone3": Output when "CD" is selected as input for ZONE3."Main/Zone3": Output when "CD" is selected as input for main room or ZONE3."Zone2/Zone3": Output when "CD" is selected as input for ZONE2 or ZONE3."Main/Zone2/Zone3": Output when "CD" is selected as input for main room, ZONE2 or ZONE3. | |
| PHONO Main Set the 12V trigger output setting to each input."Off": No output"Main": Output when "PHONO" is selected as input for main room."Zone2": Output when "PHONO" is selected as input for ZONE2."Main/Zone2": Output when "PHONO" is selected as input for main room or ZONE2."Zone3": Output when "PHONO" is selected as input for ZONE3."Main/Zone3": Output when "PHONO" is selected as input for main room or ZONE3."Zone2/Zone3": Output when "PHONO" is selected as input for ZONE2 or ZONE3."Main/Zone2/Zone3": Output when "PHONO" is selected as input for main room, ZONE2 or ZONE3. |
En-53

Advanced Settings (Setup Menu)
Setting Item Default Value Setting Details
| TV Main Set the 12V trigger output setting to each input."Off": No output"Main": Output when "TV" is selected as input for main room."Zone2": Output when "TV" is selected as input for ZONE2."Main/Zone2": Output when "TV" is selected as input for main room or ZONE2."Zone3": Output when "TV" is selected as input for ZONE3."Main/Zone3": Output when "TV" is selected as input for main room or ZONE3."Zone2/Zone3": Output when "TV" is selected as input for ZONE2 or ZONE3."Main/Zone2/Zone3": Output when "TV" is selected as input for main room, ZONE2 or ZONE3. |
| TUNER Main Set the 12V trigger output setting to each input."Off": No output"Main": Output when "TUNER" is selected as input for main room."Zone2": Output when "TUNER" is selected as input for ZONE2."Main/Zone2": Output when "TUNER" is selected as input for main room or ZONE2."Zone3": Output when "TUNER" is selected as input for ZONE3."Main/Zone3": Output when "TUNER" is selected as input for main room or ZONE3."Zone2/Zone3": Output when "TUNER" is selected as input for ZONE2 or ZONE3."Main/Zone2/Zone3": Output when "TUNER" is selected as input for main room, ZONE2 or ZONE3. |
Setting Item Default Value Setting Details
| NET Main Set the 12V trigger output setting to each input."Off": No output"Main": Output when "NET" is selected as input for main room."Zone2": Output when "NET" is selected as input for ZONE2."Main/Zone2": Output when "NET" is selected as input for main room or ZONE2."Zone3": Output when "NET" is selected as input for ZONE3."Main/Zone3": Output when "NET" is selected as input for main room or ZONE3."Zone2/Zone3": Output when "NET" is selected as input for ZONE2 or ZONE3."Main/Zone2/Zone3": Output when "NET" is selected as input for main room, ZONE2 or ZONE3. |
12V Trigger B
Set when outputting the control signal (maximum 12 V/25 mA) through the 12V TRIGGER OUT B jack. Different settings can be set for each input selector. You can enable power link operation when you connect the unit and the external devices equipped with 12V trigger input jack.
Setting Item Default Value Setting Details
| Delay 1 sec Set after how many seconds the 12V trigger | |
| output will occur in response to the unit's operation. As some devices cause a large current when they turn on, delay the output if such devices are connected. Select a value between "0 sec" to "3 sec". | |
En-54
Operating Other Components with the Remote Controller
| Setting Item Default Value Setting Details | |
| BD/DVD Zone2 Set the 12V trigger output setting to each input."Off": No output"Main": Output when "BD/DVD" is selected as input for main room."Zone2": Output when "BD/DVD" is selected as input for ZONE2."Main/Zone2": Output when "BD/DVD" is selected as input for main room or ZONE2."Zone3": Output when "BD/DVD" is selected as input for ZONE3."Main/Zone3": Output when "BD/DVD" is selected as input for main room or ZONE3."Zone2/Zone3": Output when "BD/DVD" is selected as input for ZONE2 or ZONE3."Main/Zone2/Zone3": Output when "BD/DVD" is selected as input for main room, ZONE2 or ZONE3. | |
| CBL/SAT Zone2 Set the 12V trigger output setting to each input."Off": No output"Main": Output when "CBL/SAT" is selected as input for main room."Zone2": Output when "CBL/SAT" is selected as input for ZONE2."Main/Zone2": Output when "CBL/SAT" is selected as input for main room or ZONE2."Zone3": Output when "CBL/SAT" is selected as input for ZONE3."Main/Zone3": Output when "CBL/SAT" is selected as input for main room or ZONE3."Zone2/Zone3": Output when "CBL/SAT" is selected as input for ZONE2 or ZONE3."Main/Zone2/Zone3": Output when "CBL/SAT" is selected as input for main room, ZONE2 or ZONE3. |
| Setting Item Default Value Setting Details | |
| STRM BOX Zone2 Set the 12V trigger output setting to each input."Off": No output"Main": Output when "STRM BOX" is selected as input for main room."Zone2": Output when "STRM BOX" is selected as input for ZONE2."Main/Zone2": Output when "STRM BOX" is selected as input for main room or ZONE2."Zone3": Output when "STRM BOX" is selected as input for ZONE3."Main/Zone3": Output when "STRM BOX" is selected as input for main room or ZONE3."Zone2/Zone3": Output when "STRM BOX" is selected as input for ZONE2 or ZONE3."Main/Zone2/Zone3": Output when "STRM BOX" is selected as input for main room, ZONE2 or ZONE3. | |
| PC Zone2 Set the 12V trigger output setting to each input."Off": No output"Main": Output when "PC" is selected as input for main room."Zone2": Output when "PC" is selected as input for ZONE2."Main/Zone2": Output when "PC" is selected as input for main room or ZONE2."Zone3": Output when "PC" is selected as input for ZONE3."Main/Zone3": Output when "PC" is selected as input for main room or ZONE3."Zone2/Zone3": Output when "PC" is selected as input for ZONE2 or ZONE3."Main/Zone2/Zone3": Output when "PC" is selected as input for main room, ZONE2 or ZONE3. |
Operating Other Components with the Remote Controller
| Setting Item Default Value Setting Details | |
| GAME 1 Zone2 Set the 12V trigger output setting to each input."Off": No output"Main": Output when "GAME 1" is selected as input for main room."Zone2": Output when "GAME 1" is selected as input for ZONE2."Main/Zone2": Output when "GAME 1" is selected as input for main room or ZONE2."Zone3": Output when "GAME 1" is selected as input for ZONE3."Main/Zone3": Output when "GAME 1" is selected as input for main room or ZONE3."Zone2/Zone3": Output when "GAME 1" is selected as input for ZONE2 or ZONE3."Main/Zone2/Zone3": Output when "GAME 1" is selected as input for main room, ZONE2 or ZONE3. | |
| GAME 2 Zone2 Set the 12V trigger output setting to each input."Off": No output"Main": Output when "GAME 2" is selected as input for main room."Zone2": Output when "GAME 2" is selected as input for ZONE2."Main/Zone2": Output when "GAME 2" is selected as input for main room or ZONE2."Zone3": Output when "GAME 2" is selected as input for ZONE3."Main/Zone3": Output when "GAME 2" is selected as input for main room or ZONE3."Zone2/Zone3": Output when "GAME 2" is selected as input for ZONE2 or ZONE3."Main/Zone2/Zone3": Output when "GAME 2" is selected as input for main room, ZONE2 or ZONE3. |
| Setting Item Default Value Setting Details | |
| AUX Zone2 Set the 12V trigger output setting to each input."Off": No output"Main": Output when "AUX" is selected as input for main room."Zone2": Output when "AUX" is selected as input for ZONE2."Main/Zone2": Output when "AUX" is selected as input for main room or ZONE2."Zone3": Output when "AUX" is selected as input for ZONE3."Main/Zone3": Output when "AUX" is selected as input for main room or ZONE3."Zone2/Zone3": Output when "AUX" is selected as input for ZONE2 or ZONE3."Main/Zone2/Zone3": Output when "AUX" is selected as input for main room, ZONE2 or ZONE3. | |
| CD Zone2 Set the 12V trigger output setting to each input."Off": No output"Main": Output when "CD" is selected as input for main room."Zone2": Output when "CD" is selected as input for ZONE2."Main/Zone2": Output when "CD" is selected as input for main room or ZONE2."Zone3": Output when "CD" is selected as input for ZONE3."Main/Zone3": Output when "CD" is selected as input for main room or ZONE3."Zone2/Zone3": Output when "CD" is selected as input for ZONE2 or ZONE3."Main/Zone2/Zone3": Output when "CD" is selected as input for main room, ZONE2 or ZONE3. |
Connections
Initial Setup
Playing Back
Advanced Manual
Front Panel >Rear Panel >Remote Controller
Operating Other Components with the Remote Controller
| Setting Item Default Value Setting Details | |
| PHONO Zone2 Set the 12V trigger output setting to each input."Off": No output"Main": Output when "PHONO" is selected as input for main room."Zone2": Output when "PHONO" is selected as input for ZONE2."Main/Zone2": Output when "PHONO" is selected as input for main room or ZONE2."Zone3": Output when "PHONO" is selected as input for ZONE3."Main/Zone3": Output when "PHONO" is selected as input for main room or ZONE3."Zone2/Zone3": Output when "PHONO" is selected as input for ZONE2 or ZONE3."Main/Zone2/Zone3": Output when "PHONO" is selected as input for main room, ZONE2 or ZONE3. | |
| TV Zone2 Set the 12V trigger output setting to each input."Off": No output"Main": Output when "TV" is selected as input for main room."Zone2": Output when "TV" is selected as input for ZONE2."Main/Zone2": Output when "TV" is selected as input for main room or ZONE2."Zone3": Output when "TV" is selected as input for ZONE3."Main/Zone3": Output when "TV" is selected as input for main room or ZONE3."Zone2/Zone3": Output when "TV" is selected as input for ZONE2 or ZONE3."Main/Zone2/Zone3": Output when "TV" is selected as input for main room, ZONE2 or ZONE3. |
| Setting Item Default Value Setting Details | |
| TUNER Zone2 Set the | 12V trigger output setting to each input."Off": No output"Main": Output when "TUNER" is selected as input for main room."Zone2": Output when "TUNER" is selected as input for ZONE2."Main/Zone2": Output when "TUNER" is selected as input for main room or ZONE2."Zone3": Output when "TUNER" is selected as input for ZONE3."Main/Zone3": Output when "TUNER" is selected as input for main room or ZONE3."Zone2/Zone3": Output when "TUNER" is selected as input for ZONE2 or ZONE3."Main/Zone2/Zone3": Output when "TUNER" is selected as input for main room, ZONE2 or ZONE3. |
| NET Zone2 Set the 12V trigger output setting to each input."Off": No output"Main": Output when "NET" is selected as input for main room."Zone2": Output when "NET" is selected as input for ZONE2."Main/Zone2": Output when "NET" is selected as input for main room or ZONE2."Zone3": Output when "NET" is selected as input for ZONE3."Main/Zone3": Output when "NET" is selected as input for main room or ZONE3."Zone2/Zone3": Output when "NET" is selected as input for ZONE2 or ZONE3."Main/Zone2/Zone3": Output when "NET" is selected as input for main room, ZONE2 or ZONE3. | |
En-57

Connections
Initial Setup
Playing Back
Advanced Manual
Front Panel >Rear Panel >Remote Controller
12V Trigger C
Set when outputting the control signal (maximum 12 V/25 mA) through the 12V TRIGGER OUT C jack. Different settings can be set for each input selector. You can enable power link operation when you connect the unit and the external devices equipped with 12V trigger input jack.
Setting Item Default Value Setting Details
| Delay 2 sec Set after how many seconds the 12V trigger output will occur in response to the unit's operation. As some devices cause a large current when they turn on, delay the output if such devices are connected. Select a value between "0 sec" to "3 sec". | |
| BD/DVD Main/Zone2/Zone3 Set the 12V trigger output setting to each input."Off": No output"Main": Output when "BD/DVD" is selected as input for main room."Zone2": Output when "BD/DVD" is selected as input for ZONE2."Main/Zone2": Output when "BD/DVD" is selected as input for main room or ZONE2."Zone3": Output when "BD/DVD" is selected as input for ZONE3."Main/Zone3": Output when "BD/DVD" is selected as input for main room or ZONE3."Zone2/Zone3": Output when "BD/DVD" is selected as input for ZONE2 or ZONE3."Main/Zone2/Zone3": Output when "BD/DVD" is selected as input for main room, ZONE2 or ZONE3. |
Operating Other Components with the Remote Controller
| Setting Item Default Value Setting Details | ||
| CBL/SAT Main/Zone2/Zone3 Set the 12V tr | gger output setting to each input."Off": No output"Main": Output when "CBL/SAT" is selected as input for main room."Zone2": Output when "CBL/SAT" is selected as input for ZONE2."Main/Zone2": Output when "CBL/SAT" is selected as input for main room or ZONE2."Zone3": Output when "CBL/SAT" is selected as input for ZONE3."Main/Zone3": Output when "CBL/SAT" is selected as input for main room or ZONE3."Zone2/Zone3": Output when "CBL/SAT" is selected as input for ZONE2 or ZONE3."Main/Zone2/Zone3": Output when "CBL/SAT" is selected as input for main room, ZONE2 or ZONE3. | |
| STRM BOX Main/Zone2/Zone3 Set the 12V | trigger output setting to each input."Off": No output"Main": Output when "STRM BOX" is selected as input for main room."Zone2": Output when "STRM BOX" is selected as input for ZONE2."Main/Zone2": Output when "STRM BOX" is selected as input for main room or ZONE2."Zone3": Output when "STRM BOX" is selected as input for ZONE3."Main/Zone3": Output when "STRM BOX" is selected as input for main room or ZONE3."Zone2/Zone3": Output when "STRM BOX" is selected as input for ZONE2 or ZONE3."Main/Zone2/Zone3": Output when "STRM BOX" is selected as input for main room, ZONE2 or ZONE3. | |
En-58

Connections
Initial Setup
Playing Back
Advanced Manual
Front Panel >Rear Panel >Remote Controller
Operating Other Components with the Remote Controller
| Setting Item Default Value Setting Details | |
| PC Main/Zone2/Zone3 | Set the 12V trigger output setting to each input."Off": No output"Main": Output when "PC" is selected as input for main room."Zone2": Output when "PC" is selected as input for ZONE2."Main/Zone2": Output when "PC" is selected as input for main room or ZONE2."Zone3": Output when "PC" is selected as input for ZONE3."Main/Zone3": Output when "PC" is selected as input for main room or ZONE3."Zone2/Zone3": Output when "PC" is selected as input for ZONE2 or ZONE3."Main/Zone2/Zone3": Output when "PC" is selected as input for main room, ZONE2 or ZONE3. |
| GAME 1 Main/Zone2/Zone3 Set the 12V trigger output setting to each input."Off": No output"Main": Output when "GAME 1" is selected as input for main room."Zone2": Output when "GAME 1" is selected as input for ZONE2."Main/Zone2": Output when "GAME 1" is selected as input for main room or ZONE2."Zone3": Output when "GAME 1" is selected as input for ZONE3."Main/Zone3": Output when "GAME 1" is selected as input for main room or ZONE3."Zone2/Zone3": Output when "GAME 1" is selected as input for ZONE2 or ZONE3."Main/Zone2/Zone3": Output when "GAME 1" is selected as input for main room, ZONE2 or ZONE3. | |
| Setting Item Default Value Setting Details | |
| GAME 2 Main/Zone2/Zone3 Set the 12V trigger output setting to each input."Off": No output"Main": Output when "GAME 2" is selected as input for main room."Zone2": Output when "GAME 2" is selected as input for ZONE2."Main/Zone2": Output when "GAME 2" is selected as input for main room or ZONE2."Zone3": Output when "GAME 2" is selected as input for ZONE3."Main/Zone3": Output when "GAME 2" is selected as input for main room or ZONE3."Zone2/Zone3": Output when "GAME 2" is selected as input for ZONE2 or ZONE3."Main/Zone2/Zone3": Output when "GAME 2" is selected as input for main room, ZONE2 or ZONE3. | |
| AUX Main/Zone2/Zone3 Set the 12V trigger output setting to each input."Off": No output"Main": Output when "AUX" is selected as input for main room."Zone2": Output when "AUX" is selected as input for ZONE2."Main/Zone2": Output when "AUX" is selected as input for main room or ZONE2."Zone3": Output when "AUX" is selected as input for ZONE3."Main/Zone3": Output when "AUX" is selected as input for main room or ZONE3."Zone2/Zone3": Output when "AUX" is selected as input for ZONE2 or ZONE3."Main/Zone2/Zone3": Output when "AUX" is selected as input for main room, ZONE2 or ZONE3. |
En-59

Advanced Connections
Setting Item Default Value Setting Details
| CD Main/Zone2/Zone3 | Set the 12V trigger output setting to each input."Off": No output"Main": Output when "CD" is selected as input for main room."Zone2": Output when "CD" is selected as input for ZONE2."Main/Zone2": Output when "CD" is selected as input for main room or ZONE2."Zone3": Output when "CD" is selected as input for ZONE3."Main/Zone3": Output when "CD" is selected as input for main room or ZONE3."Zone2/Zone3": Output when "CD" is selected as input for ZONE2 or ZONE3."Main/Zone2/Zone3": Output when "CD" is selected as input for main room, ZONE2 or ZONE3. |
| PHONO Main/Zone2/Zone3 | Set the 12V trigger output setting to each input."Off": No output"Main": Output when "PHONO" is selected as input for main room."Zone2": Output when "PHONO" is selected as input for ZONE2."Main/Zone2": Output when "PHONO" is selected as input for main room or ZONE2."Zone3": Output when "PHONO" is selected as input for ZONE3."Main/Zone3": Output when "PHONO" is selected as input for main room or ZONE3."Zone2/Zone3": Output when "PHONO" is selected as input for ZONE2 or ZONE3."Main/Zone2/Zone3": Output when "PHONO" is selected as input for main room, ZONE2 or ZONE3. |
Setting Item Default Value Setting Details
| TV Main/Zone2/Zone3 | Set the 12V trigger output setting to each input."Off": No output"Main": Output when "TV" is selected as input for main room."Zone2": Output when "TV" is selected as input for ZONE2."Main/Zone2": Output when "TV" is selected as input for main room or ZONE2."Zone3": Output when "TV" is selected as input for ZONE3."Main/Zone3": Output when "TV" is selected as input for main room or ZONE3."Zone2/Zone3": Output when "TV" is selected as input for ZONE2 or ZONE3."Main/Zone2/Zone3": Output when "TV" is selected as input for main room, ZONE2 or ZONE3. |
| TUNER Main/Zone2/Zone3 | Set the 12V trigger output setting to each input."Off": No output"Main": Output when "TUNER" is selected as input for main room."Zone2": Output when "TUNER" is selected as input for ZONE2."Main/Zone2": Output when "TUNER" is selected as input for main room or ZONE2."Zone3": Output when "TUNER" is selected as input for ZONE3."Main/Zone3": Output when "TUNER" is selected as input for main room or ZONE3."Zone2/Zone3": Output when "TUNER" is selected as input for ZONE2 or ZONE3."Main/Zone2/Zone3": Output when "TUNER" is selected as input for main room, ZONE2 or ZONE3. |
Connections
Initial Setup
Playing Back
Advanced Manual
Front Panel >Rear Panel >Remote Controller
Connecting and Operating Onkyo RI Components
Setting Item Default Value Setting Details
| NET Main/Zone2/Zone3 Set the 12V trigger | output setting to each input."Off": No output"Main": Output when "NET" is selected as input for main room."Zone2": Output when "NET" is selected as input for ZONE2."Main/Zone2": Output when "NET" is selected as input for main room or ZONE2."Zone3": Output when "NET" is selected as input for ZONE3."Main/Zone3": Output when "NET" is selected as input for main room or ZONE3."Zone2/Zone3": Output when "NET" is selected as input for ZONE2 or ZONE3."Main/Zone2/Zone3": Output when "NET" is selected as input for main room, ZONE2 or ZONE3. |
- Remote Controller
| Setting Item Default Value Setting Details | |
| Remote ID 1 Select an ID for the unit's remote controller from"1", "2", and "3" to prevent interference between the unit and other Integra/Onkyo components that are installed in the same room. After changing the ID on the main unit, change the ID on the remote controller accordingly with the following procedure.1. While holding down RCV, press and hold Setup for about 3 seconds until the remote indicator lights.2. With the number buttons, press one of 1, 2, and 3. The remote indicator flashes twice. | |
| Remote Mode – Input and register the remote controller code of other devices.For registration of the remote control code, refer to the next section, "Operating Other Components with the Remote Controller". |
En-61

Connections
Initial Setup
Playing Back
Advanced Manual
Front Panel >Rear Panel >Remote Controller
8. Miscellaneous
Firmware Update
| Setting Item Default Value Setting Details | ||
| Update Notice Enable | Availability of a firmware update will be notified via network."Enable": Notify updates"Disable": Do not notify updates | |
| Version – The current firmware version will be displayed. | ||
| Update via NET – Press Enter to select when you want to update the firmware via network.You will not be able to select this setting if you do not have Internet access or there is nothing to update. | ||
| Update via USB – Press Enter to select when you want to update the firmware via USB.You will not be able to select this setting if a USB storage device is not connected or there is nothing to update in the USB storage device. | ||
- Wait for a while if "Firmware Update" cannot be selected. It will appear when the network function is started up.
- Refer to the "Firmware Update" section for details about how to update the firmware.
Initial Setup
You can make the initial setup from the setup menu.
- Wait for a while if "Initial Setup" cannot be selected. It will appear when the network function is started up.
Lock
| Setting Item Default | Value Setting Details |
| Setup Parameter Unlocked Lock the Setup | menu to protect the settings."Locked": The menu is locked."Unlocked": The menu is unlocked. |
En-62
Connecting and Operating Onkyo RI Components

Operating Other Components with the Remote Controller
Functions of Remote Mode Buttons
You can control any other device than this unit by programming a specified remote control code to a Remote Mode button of the remote controller. Register a remote control code to a desired Remote Mode button and press it to enter the remote mode that allows you to operate the corresponding device.
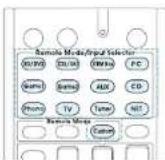
* The RCV and Zone2/Zone3 buttons cannot be programmed.
Control Function between the Unit and External Component
Programming Remote Control Codes
■ Searching in the Setup Menu
You can search a remote control code and register it to a desired Remote Mode button in the unit's Setup menu.
- After pressing RCV on the remote controller, press Setup.
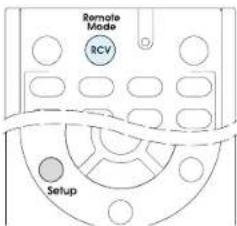
- With the cursors, select "7. Remote Controller" - "Remote Mode" and press Enter.
- With the cursors, select the Remote Mode button for which you want to register a remote control code and press Enter to display the subcategory selection screen.
- With the cursors, select the target subcategory, and then press Enter to display the brand name input screen.
- Select a character with the cursors and press Enter. Repeat it to enter the first three characters of the brand name.
- Select "OK" with the cursors and press Enter.
- After a search is done, the list of possible brand names is displayed. If the brand name list is not displayed, select "Not Listed" with the cursors and press Enter to return to the brand name input screen in step 5.
- With the cursors, select the target brand name, and then press Enter.
- When the brand name is specified, the remote control code of the brand and how to register it will be displayed on the TV screen.
- Follow the guidance displayed on the TV screen.
- If the component can successfully be operated with its registered remote control code, select "OK" with the cursors and press Enter.
- Only TV remote control codes can be entered for TV.
- Program a remote control code in accordance with the input since each button also works as the input selector. (For example, when the CD player is connected to the CD jack, program the remote control code for the CD player to CD)
- If the component cannot be operated, select "Try Next Code" with the cursors and press Enter to display another code.
■ Consulting the Remote Control Code List
Find the remote control code in the remote control code list.
-
Look up the Remote Control Codes at the back of the manual for the corresponding remote control code.
-
The codes in the Remote Control Code List are those known as of the date of publication and may be changed.
- The following Remote Mode buttons are preprogrammed with remote control codes. BD/DVD: Integra/Onkyo Blu-ray Disc/DVD player CD: Integra/Onkyo CD player STRM Box: Apple TV
- Only TV remote control codes can be entered for TV.
-
Program a remote control code in accordance with the input since each button also works as the input selector. (For example, when the CD player is connected to the CD jack, program the remote control code for the CD player to CD)
-
Press and hold Display for 3 or more seconds while holding down the Remote Mode button to which you want to program the remote control code.
• The remote indicator lights in the input mode.
- With the number buttons, enter the 5-digit remote control code within 30 seconds.
- Programming is complete when the remote indicator flashes twice. The remote indicator flashes once slowly when programming the remote control code fails. Try programming again.

■ Remapping the Colored Buttons
The colored button assignment on this unit's remote controller can be remapped to match that on the remote controller of the component whose remote control code you programmed to Remote Mode. However, you will not be able to remap the colored buttons if Zone 2/Zone 3 is selected.
- Hold down the Remote Mode button to map and A (Red) simultaneously until the remote indicator lights (about 3 seconds).
- Remapping is possible only for codes included in the categories of the Remote Control Code List (DVD player, TV, etc.)
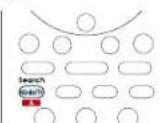
- Within 30 seconds, press the colored buttons from left to right, in the order you want to remap.
- For example, if the colored buttons on the remote controller of the other component are yellow, green, blue, and red from left to right, press the buttons on this unit's remote controller in that order.
- Programming is complete when the remote indicator flashes twice. The remote indicator flashes once slowly when programming the remote control code fails. Try programming again.
- Pressing any other button than a colored button cancels the remap operation.
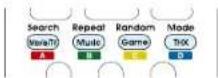
■ Resetting the Remote Mode Buttons
You can reset the remote control code registered in the Remote Mode button to its default status. This operation can be executed on a single Remote Mode button.
- Press and hold Q for 3 or more seconds while holding down the Remote Mode button you want to reset.
- The remote indicator will light.
- Within 30 seconds, press the Remote Mode button again.
- Resetting is complete when the remote indicator flashes twice.
To reset all the remote controller settings: While holding down RCV, press and hold Q for 3 or more seconds until the remote indicator stays lit. Within 30 seconds, press RCV again. Resetting is complete when the remote indicator flashes twice.
Firmware Update
TV operation
Press the Remote Mode button programmed with the remote control code for the relevant AV component to switch the remote controller mode to that for the AV component. Then, operate by using the corresponding buttons. Available buttons vary depending on the product category of the component. Operation may be incorrect or impossible depending on the product.
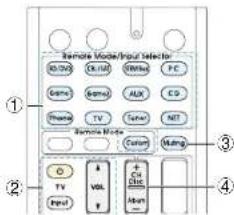
① Remote Mode
② Input, VOL / ▲▼
③ Muting
④ CH +/−
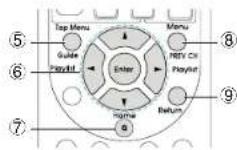
⑤ Guide
⑥ ▲/▼, Enter
⑦ Home
⑧ PREV CH
⑨ Return
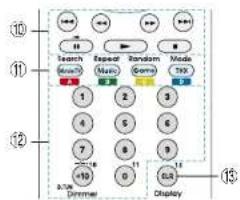
⑩ ▶ 11 ■. ◀◀)▶▶◀◀▶▶
⑪ A (Red), B (Green), C (Yellow), D (Blue)
⑫ Number 1 to 9, 0, +10
⑬ CLR, Display
* Not CEC-compatible.
Blu-ray Disc player/DVD player/DVD recorder operation
Press the Remote Mode button programmed with the remote control code for the relevant AV component to switch the remote controller mode to that for the AV component. Then, operate by using the corresponding buttons. Available buttons vary depending on the product category of the component. Operation may be incorrect or impossible depending on the product.
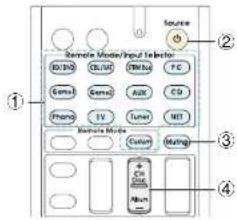
① Remote Mode
② Source
③ Mutina
④ CH +/-, Disc +/-
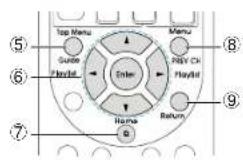
⑤ Top Menu
⑥ A/T Enter
⑦ Home
⑧ Menu
⑨ Return
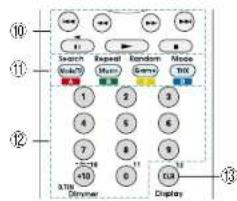
⑩ ▶ ∥ ■ ◀◀ ▶◀ ▶◀
⑪ A (Red), B (Green), C (Yellow), D (Blue)
⑫ Number 1 to 9, 0, +10 (*)
⑬ CLR, Display
* Not CEC-compatible.
Firmware Update
VCR/PVR operation
Press the Remote Mode button programmed with the remote control code for the relevant AV component to switch the remote controller mode to that for the AV component. Then, operate by using the corresponding buttons. Available buttons vary depending on the product category of the component. Operation may be incorrect or impossible depending on the product.
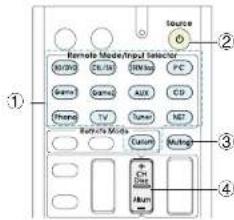
① Remote Mode
② Source
③ Muting
④ CH +/−
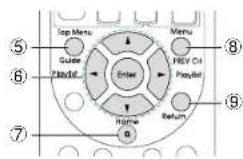
⑤ Guide
⑥ A/V, Enter
⑦ Home
⑧ PREV CH
⑨ Return
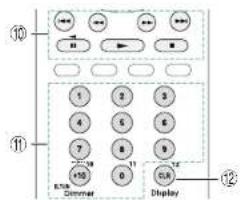
⑩ ▶ □ □, ◀◀ ▶◀ |◀◀ ▶◀
⑪ Number 1 to 9, 0, +10
⑫ CLR, Display
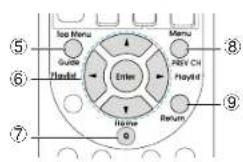
⑤ Guide
⑥ ▲/▼ ▶ter
⑦ Home
⑧ PREV CH
⑨ Return
Satellite receiver / Cable receiver operation
Press the Remote Mode button programmed with the remote control code for the relevant AV component to switch the remote controller mode to that for the AV component. Then, operate by using the corresponding buttons. Available buttons vary depending on the product category of the component. Operation may be incorrect or impossible depending on the product.
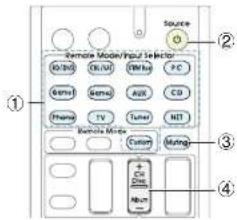
① Remote Mode
② Source
③ Muting
④ CH +/−
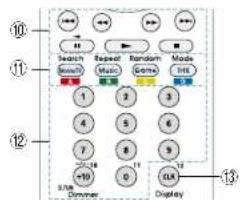
⑩ ▶ ∥ ■ ◀ ▶ ◀ ▶
⑪ A (Red), B (Green), C (Yellow), D (Blue)
⑫ Number 1 to 9, 0, +10
⑬ CLR, Display
Firmware Update
CD player operation
Press the Remote Mode button programmed with the remote control code for the relevant AV component to switch the remote controller mode to that for the AV component. Then, operate by using the corresponding buttons. Available buttons vary depending on the product category of the component. Operation may be incorrect or impossible depending on the product.
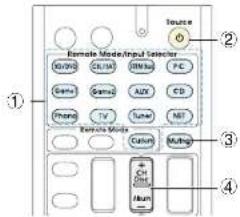
① Remote Mode
② Source
③ Muting
④ Disc +/-
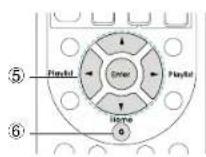
⑤ ▲/▼, Enter
⑥ Home
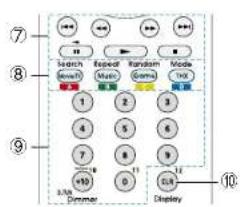
⑦ ▶ ▶ ■, ◀◀ ▶▶ |◀◀ ▶▶
⑧ Search, Repeat, Random, Mode
⑨ Number 1 to 9, 0, +10
⑩ CLR, Display
Cassette tape deck operation
Press the Remote Mode button programmed with the remote control code for the relevant AV component to switch the remote controller mode to that for the AV component. Then, operate by using the corresponding buttons. Available buttons vary depending on the product category of the component. Operation may be incorrect or impossible depending on the product.
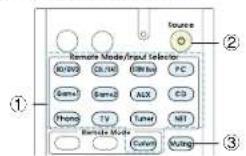
① Remote Mode
② Source
③ Muting
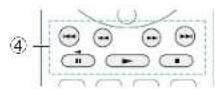
To operate CEC-compatible components
If this unit is connected via HDMI to a TV or BD/DVD player, you may be able to control the devices using the remote controller of this unit with CEC (Consumer Electronics Control) linked operation.
TV: The TV button on the remote controller is preprogrammed with remote control codes for linked operation of some CEC(Consumer Electronics Control)-compatible TV sets.
- If you cannot operate your CEC-compatible TV, program one of the following remote control codes (11807/13100/13500) to the TV button.
BD/DVD player: By registering a remote control code (32910/33101/33501/31612) in the BD/DVD button, your remote controller will be able to take advantage of linked operation with CEC-compatible BD/DVD players.
Advanced Connections
Connecting Bi-amp Speakers
It is possible to connect speakers supporting bi-amping to improve quality of the bass and treble. Up to 5.1 ch will be played in bi-amping.
■ Bi-amping with PRE OUT RCA jacks
- Connect as below using the FRONT terminals and HEIGHT terminals.
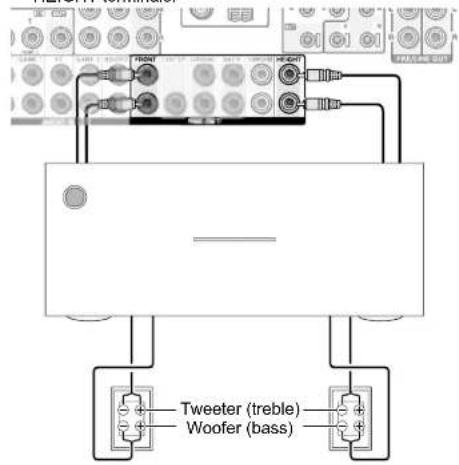
- Turn the unit on and make the bi-amping setting.
① After pressing RCV on the remote controller, press Setup.
② With the cursors, select "2. Speaker" - "Configuration" - "Bi-Amp".
③ Select "Yes" with the cursors.
- Before bi-amping, be sure to remove the short-circuit connector that connects the tweeter (treble)
En-68
jack and the subwoofer (bass) jack.
- Use speakers supporting bi-amping only. For details, refer to the speakers' instruction manual.
■ Bi-amping with PRE OUT XLR jacks
- Connect as below using the FRONT terminals and HEIGHT(Bi-AMP) terminals.
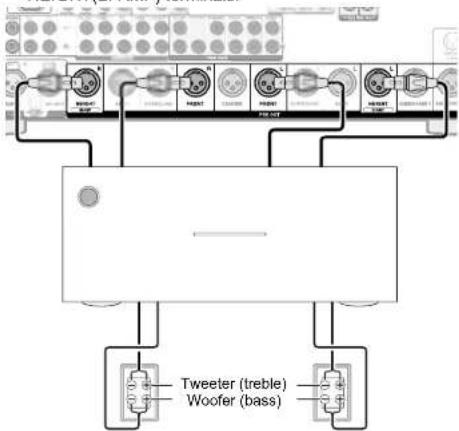
- Turn the unit on and make the bi-amping setting.
① After pressing RCV on the remote controller, press Setup.
② With the cursors, select "2. Speaker" - "Configuration" - "Bi-Amp".
③ Select "Yes" with the cursors.
- Before bi-amping, be sure to remove the short-circuit connector that connects the tweeter (treble) jack and the subwoofer (bass) jack.
- Use speakers supporting bi-amping only. For details, refer to the speakers' instruction manual.
Connecting Dipole Speakers
A dipole speaker is bidirectional speaker outputting the same sound in two directions, for example forward and backward.
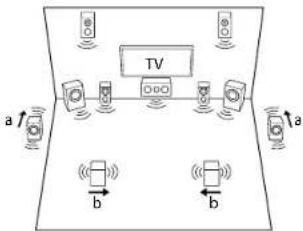
■ Connections
An arrow for matching the phases (*) is marked on a dipole speaker. Place the surround speakers (a) so that their arrows (↑) point to the TV and the back speakers (b) so that their arrows (→) point to each other.
* If the phases do not match due to mistake in speaker distance, installation angle or positive/negative of wiring. sound image and sound field may be unclear or hard of listening.
Connecting and Operating Onkyo RI Components
About RI Function
Connecting an Onkyo component with RI jack such as the separately sold RI Dock to the unit by using an RI cable and an analog audio cable enables the following RI functions:
System On / Auto Power On: Starting playback on a component connected via RI when the unit is on standby mode, automatically turns on the unit to select the relevant component as its input source.
Direct Change: When playback is started on a component connected via RI, the unit selects that component as the input source.
Remote Controller Operation: Allows you to operate RI-compatible Onkyo components using this unit's remote controller. Point the remote controller at remote control sensor of the unit. This operation is possible only when the RI remote control code is programmed.
• Some components may not support all RI functions.
• These functions do not work when Zone 2/Zone 3 is turned on.
- For information on the RI functions, also refer to each component's instruction manual.
RI Connection and Setting
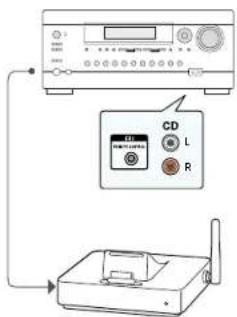
Connect an Onkyo component with RI jack to this unit using an RI cable and an analog audio cable. For details, refer to the instruction manual of the component with RI jack. The RI cable can be connected in any order. When there are two RI jacks, both jacks work in the same way and are interchangeable.
To connect the RI Dock or cassette tape deck via RI, the following settings are required.
■ Rename the input selector
To make the RI functions work, you must rename the input selectors on the unit. Press CD or Game 1 on the main unit to display "CD" or "GAME1" on the main unit display. Then press and hold CD or Game 1 on the main unit 3 seconds or more to switch the display to "DOCK" or "TAPE".
■ To program the RI remote control code
Program the remote control code to any Remote Mode button on the remote controller. This will allow you to operate the component by pointing the remote controller at the unit instead of the component.
- Press and hold Display for 3 or more seconds while holding down the Remote Mode button to which you want to program the remote control code.
• The remote indicator will light.
- The RCV, Zone2 and Zone3 buttons cannot be programmed.
Troubleshooting
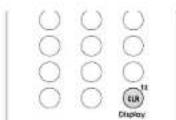
- With the number buttons, enter the following 5-digit remote control code within 30 seconds. RI Dock: 81993
Cassette tape deck with RI jack: 42157
- Programming is complete when the remote indicator flashes twice. The remote indicator flashes once slowly when programming the remote control code fails. Try programming again.
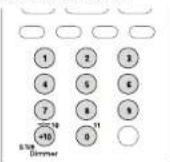
Input selector on the RI Dock: Switch to "DOCK" or "TAPE". For details, refer to the RI Dock's instruction manual.
To operate Onkyo components directly or Onkyo components that are not connected via RI, use the following remote control codes:
Onkyo DVD player: 30627
Onkyo CD player: 71817
RI Dock: 82990
- With some models, operation may be not possible in part or not possible at all.
Connections
Initial Setup
Playing Back
Advanced Manual
Front Panel >Rear Panel >Remote Controller
iPod®/iPhone® Operation
The RI Dock allows you to use this unit's remote controller to operate and play music on your iPod/iPhone. Moreover, it also allows you to view videos on your iPod/iPhone on the screen of your TV, as well as perform RI operations if connected via RI. This operation is possible only when the RI remote control code is programmed.
Before performing any operation: Make sure the OS for your iPod/iPhone is updated to the latest version. Certain buttons may not work for some iPod/iPhone models and generations, or RI Dock. For details on the operation, refer to the RI Dock's instruction manual.
Switch the remote controller mode by pressing the Remote Mode button programmed with the remote control code for the iPod/iPhone, and operate by using the corresponding buttons. Point the remote controller at the unit.
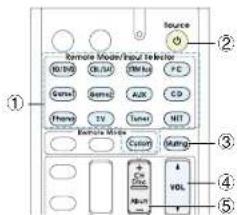
① Remote Mode
② Source
③ Muting
④ VOL▼
⑤ Album +/-
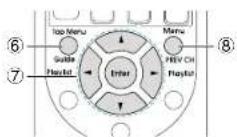
⑥ Top Menu
⑦ ▲, Enter, Playlist /
⑧ Menu
En-70
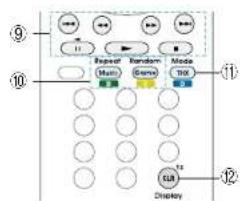
⑨
⑩ Repeat, Random
⑪ Mode
⑫ Display
- Pressing Display turns on the backlight for a few seconds.
- Mode allows you to use the Resume function.
Troubleshooting

Connections
Initial Setup
Playing Back
Advanced Manual
Front Panel >Rear Panel >Remote Controller
Troubleshooting
Control Function between the Unit and External Component
You can enable the control functions between the unit and external devices using the terminals below. Special devices or cable connections are necessary to enable the functions. For more information about preparation, contact the specialized stores.
RS232 port
Use the port for connection with a commercially available integrated control system that can enable home automation. Some integrated control systems provide a centralized operation with a single touch panel controller in order to control audio and video home appliances and security devices together. For more information about adopting an integrated control system, contact the specialized stores.
■ IR jack
If you use a multiroom remote control kit with this jack, you can operate the unit with the remote controller even when you are in a separate room, or operate the unit with the remote controller even if its remote control sensor is difficult to see. You can also connect a device with the unit and operate it with the remote controller. For more information about adopting a multiroom remote control kit, contact the specialized stores.
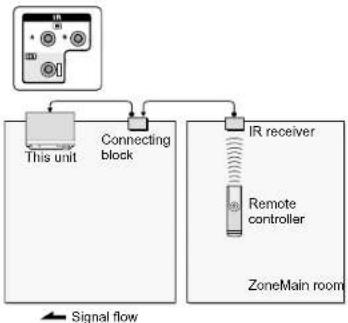
flowchart
graph TD
    A["Device Unit"] --> B["This unit"]
    B --> C["Connecting block"]
    C --> D["IR receiver"]
    D --> E["Remote controller"]
    E --> F["ZoneMain room"]
    style A fill:#f9f,stroke:#333
    style D fill:#ccf,stroke:#333
    style E fill:#cfc,stroke:#333
    linkStyle 0 stroke:#000,stroke-width:2px
    linkStyle 1 stroke:#000,stroke-width:2px
    linkStyle 2 stroke:#000,stroke-width:2px
    linkStyle 3 stroke:#000,stroke-width:2px
    linkStyle 4 stroke:#000,stroke-width:2px
    linkStyle 5 stroke:#000,stroke-width:2px
    linkStyle 6 stroke:#000,stroke-width:2px
    linkStyle 7 stroke:#000,stroke-width:2px
    linkStyle 8 stroke:#000,stroke-width:2px
    linkStyle 9 stroke:#000,stroke-width:2px
    linkStyle 10 stroke:#000,stroke-width:2px
    linkStyle 11 stroke:#000,stroke-width:2px
    linkStyle 12 stroke:#000,stroke-width:2px
    linkStyle 13 stroke:#000,stroke-width:2px
    linkStyle 14 stroke:#000,stroke-width:2px
    linkStyle 15 stroke:#000,stroke-width:2px
    linkStyle 16 stroke:#000,stroke-width:2px
    linkStyle 17 stroke:#000,stroke-width:2px
    linkStyle 18 stroke:#000,stroke-width:2px
    linkStyle 19 stroke:#000,stroke-width:2px
    linkStyle 20 stroke:#000,stroke-width:2px
■ 12V trigger output jack
You can enable power link operation when you connect the unit and an external device such as power amplifier equipped with 12V input jack. When the desired input is selected on the unit, power link operation will be activated with a control signal of maximum 12 V/100 mA from the 12V TRIGGER OUT A jack or maximum 12 V/25 mA when using the 12V TRIGGER OUT B or C jack. You can select the zone to output the control signal by setting each of the inputs. For connection, use a monaural mini plug cable.
En-71

Firmware Update
About Firmware Update
There are two methods for updating the firmware; via network and via USB.
Use the one that best suits your environment.
- For the latest information on updates, visit the Onkyo website.
- Before updating, make sure that the speaker setup microphone is not connected.
• During an update, do not
- Disconnect and reconnect any cable, USB storage device, speaker setup microphone or headphones, or perform any operation on the component such as turn off its power
- Access to this unit from a PC or smartphone using application
- The update may take about 30 minutes to complete for either method: via network or via USB.
Furthermore, existing settings are guaranteed regardless of the method used for update.
Disclaimer: The program and accompanying online documentation are furnished to you for use at your own risk.
Onkyo will not be liable and you will have no remedy for damages for any claim of any kind whatsoever concerning your use of the program or the accompanying online documentation, regardless of legal theory, and whether arising in tort or contract.
In no event will Onkyo be liable to you or any third party for any special, indirect, incidental, or consequential damages of any kind, including, but not limited to, compensation, reimbursement or damages on account of the loss of present or prospective profits, loss of data, or for any other reason whatsoever.
En-72
Updating the Firmware via Network
Before Starting:
- Check that the unit is turned on, and the connection to the Internet is secured.
- Turn off the controller component (PC etc.) connected to the network.
- Stop any playing Internet radio, USB storage device, or server content.
- If the multi-zone function is active, turn it off.
If "HDMI CEC (RIHD)" is set to "On", set it to "Off" (default value). - After pressing RCV on the remote controller, press Setup. Then, after selecting "6. Hardware" - "HDMI" and pressing Enter, select "HDMI CEC (RIHD)" to select "Off".
* The description may differ from the on-screen display but that will not change the way to operate or the function.
Update
- After pressing RCV on the remote controller, press Setup.
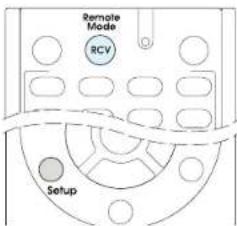
Troubleshooting
The Setup menu is displayed on the TV screen.
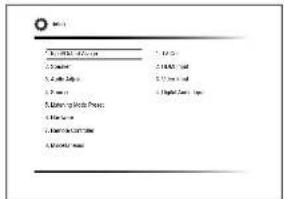
- With the cursors, select "8. Miscellaneous" - "Firmware Update" - "Update via NET", and then press Enter.
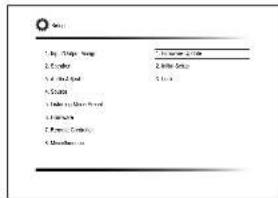
- If "Firmware Update" is grayed out and cannot be selected, wait for a while until it starts up.
-
You will not be able to select "Update via NET" if there is nothing to update.
-
Press Enter with "Update" selected to start update.
-
During the update, the TV screen may go black depending on the updated program. In that case, check the progress on the display of the unit. The TV screen will remain black until the update is complete and the power is turned on again.
-
"Completed!" is displayed when the update is complete.
-
Press ⏻On/Standby on the main unit to turn the unit into standby mode. The process is completed and your firmware is updated to the latest version.
- Do not use Receiver on the remote controller.

■ If an Error Message is Displayed
When an error occurs, "*-** Error!" is displayed on the unit. ("*" represents an alphanumeric character.) Check the following:
Error Code
• *-01, *-10:
Ethernet cable not found. Connect the Ethernet cable properly.
- *-02, *-03, *-04, *-05, *-06, *-11, *-13, *-14, *-16, *-17, *-18, *-20, *-21:
Internet connection error. Check the following: - Whether the router is turned on
- Whether this unit and router are connected to the network
Try to disconnect and then connect again the power to the unit and router. This may solve the problem. If you are still unable to connect to the Internet, the DNS server or proxy server may be temporarily down. Check the service status with your ISP provider.
- Others:
First disconnect then reconnect the AC power cord, and then retry from the beginning.
Updating the Firmware via USB
Before Starting:
- Prepare a 64MB or larger USB storage device. This unit supports FAT16 and FAT32 file system formats for USB storage devices.
– Media inserted in a USB card reader may not be used for this function. - USB storage devices with security function are not supported.
- USB hubs and USB devices with hub function are not supported. Do not connect these devices to the unit.
- Delete any data stored on the USB storage device
- Turn off the controller component (PC etc.) connected to the network.
- Stop any playing Internet radio, USB storage device, or server content.
- If the multi-zone function is active, turn it off.
- If "HDMI CEC (RIHD)" is set to "On", set it to "Off" (default value).
- After pressing RCV on the remote controller, press Setup. Then, after selecting "6. Hardware" - "HDMI" and pressing Enter, select "HDMI CEC (RIHD)" to select "Off".
* Some USB storage devices may take long to load, may not be loaded correctly, or may not be correctly fed depending on the device or their content.
* Onkyo will not be liable whatsoever for any loss or damage of data, or storage failure arising from the use of the USB storage device with this unit. Thank you for your understanding.
* The description may differ from the on-screen display but that will not change the way to operate or the function.
Update
- Connect the USB storage device to your PC.
- Download the firmware file from the Onkyo website to your PC and unzip.
Firmware files are named in the following way: ONKAVR**************.zip
Unzip the file on your PC. The number of unzipped files and folders varies depending on the model.
- Copy all unzipped files and folders to the root folder of the USB storage device.
• Make sure to copy the unzipped files. - Connect the USB storage device to the USB port of the unit.
- If you connect a USB hard disk drive to the USB port of the unit, we recommend that you use its AC
adapter to power it.
- If the USB storage device has been partitioned, each section will be treated as an independent device.
- After pressing RCV on the remote controller, press Setup.
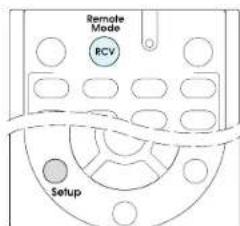
The Setup menu is displayed on the TV screen.
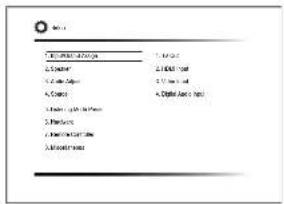
- With the cursors, select "8. Miscellaneous" - "Firmware Update" - "Update via USB", and then press Enter.
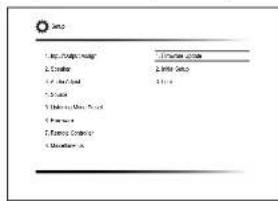
- If "Firmware Update" is grayed out and cannot be selected, wait for a while until it starts up.
- You will not be able to select "Update via USB" if there is nothing to update.
Connections
Initial Setup
Playing Back
Advanced Manual
Front Panel >Rear Panel >Remote Controller
Reference Information
-
Press Enter with "Update" selected to start update.
-
During the update, the TV screen may go black depending on the updated program. In that case, check the progress on the display of the unit. The TV screen will remain black until the update is complete and the power is turned on again.
- During the update, do not turn off, or disconnect and reconnect the USB storage device.
-
"Completed!" is displayed when the update is complete.
-
Disconnect the USB storage device from the unit.
-
Press ⏻On/Standby on the main unit to turn the unit into standby mode. The process is completed and your firmware is updated to the latest version.
- Do not use Receiver on the remote controller.
■ If an Error Message is Displayed
When an error occurs, "+-** Error!" is displayed on the unit. ("*" represents an alphanumeric character.) Check the following:
Error Code
• *-01, *-10:
USB storage device not found. Check whether the USB storage device or USB cable is correctly inserted to the USB port of the unit.
Connect the USB storage device to an external power source if it has its own power supply.
• *-05, *-13, *-20, *-21:
The firmware file is not present in the root folder of the USB storage device, or the firmware file is for another model. Retry from the download of the firmware file.
- Others:
First disconnect then reconnect the AC power cord, and then retry from the beginning.
En-74

Reference Information
Troubleshooting
Before starting the procedure
Problems may be solved by simply turning the power on/off or disconnecting/connecting the power cord, which is easier than working on the connection, setting and operating procedure. Try the simple measures on both the unit and the connected device. If the problem is that the video or audio is not output or the HDMI linked operation does not work, disconnecting/connecting the HDMI cable may solve it. When reconnecting, be careful not to wind the HDMI cable since if wound the HDMI cable may not fit well. After reconnecting, turn off and on the unit and the connected device.
- This unit contains a microPC for signal processing and control functions. In very rare situations, severe interference, noise from an external source, or static electricity may cause it to lock up. In the unlikely event that this happens, unplug the power cord from the wall outlet, wait at least 5 seconds, and then plug it back in.
- Onkyo is not responsible for damages (such as CD rental fees) due to unsuccessful recordings caused by the unit's malfunction. Before you record important data, make sure that the material will be recorded correctly.
Resetting the unit
Resetting the unit to the status at the time of shipment may solve the problem. If the measures mentioned in the troubleshooting do not solve the problem, reset the unit with the following procedure. If you reset the unit status, your preferences will be reset to the defaults. Note them down before starting reset.
■ How to reset
-
While holding down CBL on the main unit (note that step 2 must be performed with this button pressed down)
-
Press ⏻On/Standby on the main unit. "Clear" is appeared on the display and the unit will enter standby mode.
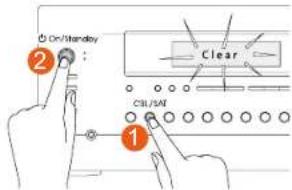
■ How to reset the remote controller
-
While holding down ① RCV on the remote controller (note that step 2 must be performed with this button pressed down)
-
Press and hold ② Q for 3 or more seconds until the ③ remote indicator stays lit. Within 30 seconds, press ① RCV again.
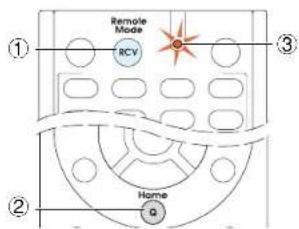
Power
■ Cannot turn on the unit
- Make sure that the power cord is properly plugged into the wall outlet.
- Unplug the power cord from the wall outlet, wait 5 seconds or more, then plug it in again.
■ The unit turns off unexpectedly
- This unit will automatically enter standby mode when Auto Standby or Sleep Timer is set and launched.
WARNING: If smoke, smell or abnormal noise is produced by the unit, unplug the power cord from the wall outlet immediately and contact the dealer or your Support.
Audio
- Make sure that the speaker setup microphone is not still connected.
- Check that the output jack of the connected equipment and the input jack of this unit are connected correctly.
- Make sure that none of the connecting cables are bent, twisted, or damaged.
- If the MUTING indicator on the display flashes, press Muting on the remote controller to unmute the unit.
- While headphones are connected to the Phones jack, no sound is output from the speakers.
- If "Audio Select" - "PCM Fixed Mode" is set to "On", set it to "Off".
- Make sure the power amplifier connected to this unit is turned on.
If the above does not solve the problem, check the following.
■ There is no sound from the television
- The input selector of this unit needs to be in the position that corresponds to the jack where the television is connected.
- If your TV does not support ARC, you need, in addition to the HDMI OUT jack connection, a digital optical cable connection between the digital audio out optical jack of the TV and the DIGITAL IN OPTICAL jack of the unit or an analog audio cable connection between the audio output jack of the TV and the AUDIO IN TV jack of the unit.
■ There is no sound from the connected player
- The input selector of this unit needs to be in the position that corresponds to the jack where the player is connected.
- Check the digital audio output setting on the connected component. On some game consoles, such as those that support DVD, the default setting is off.
- With some DVD-Video discs, you need to select an audio output format from a menu.
■ One of the speakers produces no sound
• Make sure the speakers are configured correctly.
■ Only the front speakers produce sound
- When the Stereo or Mono listening mode is selected, only the front speakers and subwoofer produce sound.
■ Only the center speaker produces sound
- If you use the Dolby Surround listening mode with a mono source, such as an AM radio station or mono
TV program, the sound is concentrated in the center speaker.
■ The surround speakers produce no sound
- When the T-D (Theater-Dimensional), Stereo or Mono listening mode is selected, the surround speakers produce no sound.
- Depending on the source and current listening mode, not much sound may be produced by the surround speakers. Try selecting another listening mode.
■ The center speaker produces no sound
- When the Stereo or Mono listening mode is selected, the center speaker produces no sound.
■ No sound from the back speakers and height
speakers
- Depending on the source and current listening mode, not much sound may be produced by the speakers. Try selecting another listening mode.
■ The subwoofer produces no sound
- When the input signal does not include a subwoofer audio element (LFE), the subwoofer may not produce sound.
Volume is low
- Check the volume. The volume level is adjustable between Min, 0.5 to 99.5, Max (100). A level of around 60 is normal in a domestic environment.
■ There is no sound from a connected turntable
- If your turntable uses an MC cartridge, you must connect an audio equalizer and either an MC head amp or an MC transformer.
■ Noise can be heard
- Using cable ties to bundle audio cables with power cords, speaker cables, etc. may degrade the audio performance, so refrain from doing it.
- An audio cable may be picking up interference. Try repositioning your cables.
■ The sound changes when I connect my headphones
- When a listening mode other than Direct or Mono is selected, connecting a headphone automatically selects Stereo.
Reference Information
■ About DTS signals
- When DTS program material ends and the DTS bitstream stops, the unit remains in DTS listening mode and the dts indicator remains on. This is to prevent noise when you use the pause, fast forward, or fast reverse function on your player. If you switch your player from DTS to PCM, you may not hear any sound because the unit does not switch formats immediately. In such case, you should stop your player for about 3 or more seconds and then resume playback.
- With some CD and LD players, you will not be able to playback DTS material properly even though your player is connected to a digital input on the unit. This is usually because the DTS bitstream has been processed (e.g., output level, sampling rate, or frequency response changed) and the unit does not recognize it as a genuine DTS signal. In such cases, you may hear noise.
- When playing DTS program material, using the pause, fast forward, or fast reverse function on your player may produce a short audible noise. This is not a malfunction.
■ The beginning of audio received by an HDMI IN cannot be heard
- Since it takes longer to identify the format of an HDMI signal than it does for other digital audio signals, audio output may not start immediately.
■ The volume has suddenly dropped
- If this unit is used for a long time even after the internal temperature of this unit exceeds a certain threshold, the volume may be lowered automatically to protect the circuitry.
■ Cannot increase volume when playing AirPlay, Spotify, or DLNA
- You can set the upper limit for the volume in "WEB Setup". After pressing the RCV button on the remote controller, press the Setup button, select "6. Hardware" - "Network" - "IP Address" to display the IP address.
After connecting the unit and your PC or smartphone to the same router, open the browser, enter the IP address of the unit in the URL field to display the "WEB Setup" screen. Change the value for "Max Volume" in "WEB Setup" and click "Save".
Reference Information
Listening Mode
- When listening to Dolby Digital and/or DTS sound, digital connection is necessary.
- Check the digital audio output setting on the connected component. On some game consoles, such as those that support DVD, the default setting is off.
- After pressing RCV on the remote controller, repeatedly press Display to switch the display on the main unit. You can see the input format.
If the above does not solve the problem, check the following.
■ Cannot select a desired listening mode
- Depending on the connecting status of the speaker, some listening modes may not be selected. Check the details in "Selectable Listening Modes" section.
■ There is no sound with Dolby Atmos - You need to have either back speakers or height speakers connected. After connecting each of the speakers, make sure the connection settings in "Configuration" - "Speaker Channels" are correct.
- Dolby Atmos play is only possible when the input signal is Dolby Atmos.
Video
- Check that the output jack of the connected equipment and the input jack of this unit are connected correctly.
- Make sure that none of the connecting cables are bent, twisted, or damaged.
- Make sure the switching of input screens is proper at the monitor side such as a TV.
If the above does not solve the problem, check the following.
■ There is no picture from a source connected to an HDMI IN
- The input selector of this unit needs to be in the position that corresponds to the jack where the player is connected.
- Check if "Resolution Error" is displayed on the main unit display when video input via HDMI IN jack is not displayed. In this case, the TV does not support the resolution of the video input from the player. Change the setting on the player.
- Reliable operation with an HDMI-to-DVI adapter is not guaranteed. In addition, video signals from a PC are not supported.
- Try switching off the Deep Color function. To turn off the Deep Color function, while holding down STM on the main unit, press On/Standby repeatedly until "Deep Color:Off" appears on the display. To reactivate the Deep Color function, repeat the above described step until "Deep Color:On" is appeared on the display.
■ There is no picture from a source connected to the composite video/component video input jack
- If multiple videos are input into one input system, HDMI signal output is prioritized. In this case, to output composite video/component video, set "HDMI Input" to "____".
■ Images flicker
- It is possible that the resolution of the player is not compatible with the TV's resolution. If you have connected the player to this unit with an HDMI cable, try changing the output resolution on the player. There also may be an improvement if you change the screen mode on the TV.
Linked operation
■ There is no HDMI linked operation with CEC-compliant equipment such as a television
- Set the HDMI CEC (RIHD) setting of the unit to On. Press RCV and then Setup on the remote controller, select "6. Hardware" - "HDMI" - "HDMI CEC (RIHD)" and set to On.
- It is also necessary to make the HDMI linked system settings on the CEC-compliant equipment. Check the operating instructions.
■ The RI functions do not work
- To use RI, you must make an RI connection and an analog audio connection (RCA) between the component and this unit.
- While Zone 2/Zone 3 is selected, the RI functions do not work.
Tuner
■ Reception is noisy, FM stereo reception is noisy, or the "FM STEREO" indicator does not stay lit
• Re-check the antenna connection.
- Relocate your antenna.
- Move the unit away from your TV or PC.
• Passing cars and airplanes can cause interference.
• Concrete walls weaken radio signals.
- Listen to the station in mono.
- When listening to an AM station, operating the remote controller may cause noise.
Reference Information
Network function
- Network services become selectable after the network starts up even if they cannot be selected first. It may take about a minute to start up.
- When NET is blinking, this unit is not properly connected to the home network.
- Try unplugging the power supply of this unit and the router, and then plugging in again. Try rebooting the router.
If the above does not solve the problem, check the following.
■ Cannot access the Internet radio
- Certain network service or contents available through the unit may not be accessible in case the service provider terminates its service.
• Make sure that your modem and router are properly connected, and make sure they are both turned on. - Make sure that the router LAN side port is properly connected to this unit.
- Make sure that connecting to Internet from other components is possible. If connecting is not possible, turn off all components connected to the network, wait for a while, and then turn on the components again.
- If a specific radio station is unavailable for listening, make sure the registered URL is correct, or whether the format distributed from the radio station is supported by this unit.
- Depending on ISP, setting the proxy server is necessary.
- Make sure that the used router and/or modem is supported by your ISP.
■ Cannot access the network server
- This unit needs to be connected to the same router as the network server.
• Make sure your network server has been started up. - Make sure your network server is properly connected to the home network.
• Make sure your network server is correctly set. - Make sure that the router LAN side port is properly connected to this unit.
■ Playback stops while listening to music files on the
network server
- Make sure the network server is compatible with this unit.
- When the PC is serving as the network server, try quitting any application software other than the server software (Windows Media ^ Player 12 etc.).
En-78
- If the PC is downloading or copying large files, the playback may be interrupted.
USB storage device
■ USB storage device is not displayed
- Check whether the USB storage device or USB cable is correctly inserted to the USB port of the unit.
- Remove the USB storage device from this unit once, and then try re-connecting.
- Performance of the hard disk that receive power from the USB port of the unit is not guaranteed.
- Depending on the type of format, the playback may not be performed normally. Check the type of the file formats that is supported.
- This unit supports FAT16 and FAT32 file system formats for USB storage devices.
- USB storage devices with security functions may not be played.
Multi-zone Function
■ There is no zone output from the connected player
- When outputting audio from an external player, in Zone 2, you can play equipment connected to any of the HDMI IN1 to IN5 jacks, DIGITAL IN COAXIAL/OPTICAL jacks, AUDIO IN jacks, or INPUT BALANCE L/R jacks. Note that only analog or 2-channel PCM audio signals can be played and that some players require audio output setting. Only players connected to the AUDIO IN jacks or INPUT BALANCE L/R jacks by analog connection can be played in Zone 3.
- When the NET input source is selected, DSD and Dolby TrueHD audio signals cannot be output to Zone 2/Zone 3.
Remote Controller
- Make sure that the batteries are installed with the correct polarity.
• Install new batteries. Do not mix different types of batteries, or old and new batteries. - Make sure that the remote controller is not too far away from the unit, and that there is no obstruction between the remote controller and the remote control sensor of the unit.
- Make sure that the unit is not subjected to direct sunshine or inverter-type fluorescent lights. Relocate if necessary.
- If the unit is installed in a rack or cabinet with colored-glass doors or if the doors are closed, the remote controller may not work reliably.
If the above does not solve the problem, check the following.
■ The remote controller does not work
- Before operating this unit with the remote controller, be sure to press RCV.
■ Operating other Onkyo component by using a RI mote control code is not available
- Make sure that the Onkyo component is properly connected with RI cable. When RI cable is used for connection, make sure to connect analog audio cable as well. (Connecting only an RI cable will not be enough.)
- Make sure you have selected the correct remote controller mode.
- When the RI remote control code is input, point the
remote controller at remote control sensor of the unit.
• Make sure that the input display is correctly set.
- Input the RI remote control code again.
■ Cannot operate Integra/Onkyo components (ones without RI connection) and components of other makers
- Operate the remote controller by setting toward the light receiving section of each component.
- When using the remote controller to control other manufacturers' AV components, some buttons may not work as expected. Also, some components may not operate at all.
- Make sure you have selected the correct remote controller mode.
- Make sure you have entered the correct remote control code.
- Make sure to set the same ID on both the unit and remote controller.
- Input a correct remote control code again. If there are several codes, try each code.
Display and OSD
■ The display does not light
- Make sure that Dimmer function is not working. Press Dimmer button and change the brightness level of the display.
■ The on-screen menus do not appear
- On your TV, make sure that the video input to which this unit is connected is selected.
- Set "TV Out" - "Impose OSD" to "On".
- The guidance displayed on the TV screen (OSD) are not displayed when the OSD language is set to Chinese if the input selector is "NET". Operate by confirming the display on the main unit. Note that the display on the main unit does not support the display of Chinese characters. Characters that cannot be displayed are replaced with asterisks (*)
RI Dock
- Make sure the unit is turned on, the correct input source is selected, and the volume is turned up.
• Make sure cord and cable plugs are properly plugged in.
- Make sure your iPod/iPhone is properly inserted in the Dock. If your iPod/iPhone is in a case, it may not connect properly to the Dock. Always remove your iPod/iPhone from the case before inserting it into the Dock. Try reconnecting your iPod/iPhone.
• Make sure your iPod/iPhone is actually playing.
If the above does not solve the problem, check the following.
■ There is no sound
• Try resetting your iPod/iPhone.
■ There is no video
- Make sure the correct input is selected on your TV or the unit.
- Make sure that your iPod/iPhone model's TV OUT setting is set to On.
• Some versions of the iPod/iPhone do not output video.
■ This unit's remote controller does not control your iPod/iPhone
- The iPod/iPhone cannot be operated while it is displaying the Apple logo.
- Make sure you have selected the correct remote controller mode.
- When you use this unit's remote controller, point it toward this unit.
- Before operating with the remote controller, you may need to play on your iPod/iPhone to make the input selector be recognized.
- Depending on your iPod/iPhone model and generation, some buttons may not work as expected.
• Try resetting your iPod/iPhone.
■ The unit unexpectedly selects your iPod/iPhone as the input source
- Always pause iPod/iPhone playback before selecting a different input source. If playback is not paused, the Direct Change function may select your iPod/iPhone as the input source by mistake during the transition between tracks.
Others
■ Strange noises can be heard from the unit
- If you have connected another unit to the same wall outlet as this unit, this noise may be an effect from the other unit. If the symptoms improve by unplugging the power cord of the other unit, use different wall outlets for this unit and the other unit.
■ When performing Automatic Speaker Setup, the measurement fails and the message "Ambient noise is too high." is displayed
- This can be caused by a malfunction in your speaker unit. Check if the unit produces normal sounds.
■ The Late Night function does not work
- Make sure the source material is Dolby Digital, Dolby Digital Plus, Dolby TrueHD, or DTS.
■ Re-EQ, Re-EQ(THX) function does not work
- This function can be used in the following listening modes: Dolby Digital, Dolby Digital Plus, Dolby TrueHD, Multichannel, DTS, DTS-ES, DTS 96/24, DTS-HD High Resolution Audio, DTS-HD Master Audio, DTS Express, DSD.
- In Re-EQ(THX), the following listening modes can be used: THX Cinema, THX Surround EX, and THX Ultra2 Cinema.
■ How do I change the language of a multiplex source
- Select "Main" or "Sub" for "3. Audio Adjust" - "Multiplex/Mono" - "Multiplex Input Channel".
■ Cannot connect to this unit from a Web browser
- Make sure that the IP address of this unit is correctly input to the Internet browser.
- When DHCP is used for allocating the IP address, the IP address of this unit may have been changed.
- Make sure that both this unit and PC are properly connected to the network.
■ Power consumption in standby mode
- In the following cases, the power consumption in standby mode may reach up to a maximum of 16.2 W:
- When "USB Power Out at Standby" or "Network Standby" is set to "On".
- When "HDMI CEC (RIHD)" is set to "On". (Depending on the TV status, this unit will enter normal standby mode)
- The "HDMI Standby Through" setting is set to other than "Off".
Reference Information
Linked Operation with CEC-compatible Components
Link operation with a product conforming to the CEC of the HDMI standard.
Note that linked operation is not always guaranteed with all CEC devices.
Operation has been confirmed on the following devices (as of February 2015).
TV (Random order):
- Toshiba TV sets
- Sharp TV sets
Players/Recorders (Random order):
- Onkyo and Integra RIHD-compatible players
■ Toshiba players and recorders - Sharp players and recorders (only when used together with
Sharp TV sets)
Caution: For linking functions to work properly, do not connect more RIHD-compatible components than the quantities specified below, to the HDMI jacks. Linking functions are not guaranteed when more RIHD-compatible components than the below mentioned quantities are connected. Furthermore, do not connect this unit to another AV controller/AV amplifier via HDMI.
- Blu-ray Disc/DVD players: up to 3.
• Blu-ray Disc/DVD recorders: up to 3. - Cable TV tuner, terrestrial digital tuner, and satellite broadcasting tuner: up to 4 units.
En-80
Checking whether the HDMI Linked Operation Settings Are Enabled
- Turn on the power of all connected components.
- Turn off the power of the TV, and confirm that the power of the connected components is turned off automatically with the link operation.
- Turn on the power of the Blu-ray Disc/DVD player/recorder.
-
Start playback on the Blu-ray Disc/DVD player/recorder, and verify the following:
-
This unit automatically turns on, and selects the input to which the Blu-ray Disc/DVD player/recorder is connected.
-
The TV automatically turns on, and selects the input to which this unit is connected.
-
Following the operating instructions of the TV, select "Use the TV speakers" from the menu screen of the TV, and confirm that the audio is output from the speakers of the TV, and not from the speakers connected to the amplifier receiver.
-
Select "Use the speakers connected to this unit" from the menu screen of the TV, and confirm that the audio is output from the speakers connected to the amplifier, and not from the TV speakers.
Caution:
- Even if you set to output audio from the TV speakers, audio will be output from the speakers connected to the amplifier when you adjust the volume or switch the input on this unit. To output audio from the TV speakers, redo the corresponding operations on the TV.
- In case of an RIHD connection with RI audio control compatible components, do not connect the RI cable at the same time.
- On the TV, when you select anything other than the HDMI jack to which this unit is connected, the input on this unit will be switched to "TV".
- This unit will automatically power on in conjunction when it determines it to be necessary. Even if this unit is connected to an RIHD compatible TV or player/recorder, it will not power on if it is not necessary. It may not power on in conjunction when the TV is set to output audio from the TV.
- Linked system functions with this unit may not work depending on the component model connected. In such cases, operate this unit directly.
- When the player/recorder cannot be operated with the remote
Reference Information
controller of this unit, the corresponding component may not be programmed to support the remote controller operation of CEC. Program the remote control code of the component maker to the remote controller for using.
About HDMI
HDMI (High-Definition Multimedia Interface) is a digital interface standard for connecting TVs, projectors, Blu-ray Disc/DVD players, set-top boxes, and other video components. Until now, several separate video and audio cables have been required to connect AV components. With HDMI, a single cable can carry control signals, digital video and digital audio (2-channel PCM, multichannel digital audio, and multichannel PCM).
The HDMI video stream (i.e., video signal) is compatible with DVI (Digital Visual Interface) (*1), so TVs and displays with a DVI input can be connected by using an HDMI-to-DVI adapter cable. (This may not work with some TVs and displays, resulting in no picture.)
This unit supports HDCP (High-bandwidth Digital Content Protection) (*2), so it can display picture only on HDCP-compatible components.
HDMI of the unit supports the following functions. Audio Return Channel, 3D, x.v.Color, Deep Color, LipSync, 4K (Passthrough)
Audio Formats Supported by The Unit:
- 2-channel linear PCM (32 - 192 kHz, 16/20/24 bit)
- Multichannel linear PCM (up to 7.1 ch, 32 - 192 kHz, 16/20/24 bit)
- Bitstream (Dolby Atmos, Dolby Digital, Dolby Digital Plus, Dolby TrueHD, DTS, DTS-HD High Resolution Audio, DTS-HD Master Audio)
• DSD
Your Blu-ray Disc/DVD player must also support HDMI output of the above audio formats.
About Copyright Protection:
The unit supports Revision 1.4 and Revision 2.2 (HDMI OUT MAIN/SUB and HDMI IN1 to 5 only) of the HDCP (High-bandwidth Digital Content Protection) (*2), a copy-protection system for digital video signals. Other devices connected to the unit must also support HDCP.
*1 DVI (Digital Visual Interface): The digital display interface standard set by the DDWG (*3) in 1999.
Connections
Initial Setup
Playing Back
Advanced Manual
Front Panel >Rear Panel >Remote Controller
Reference Information
*2 HDCP (High-bandwidth Digital Content Protection): The video encryption technology developed by Intel for HDMI/DVI. It is designed to protect video content and requires a HDCP-compatible HDMI/DVI receiver to display the encrypted video.
^3 DDWG (Digital Display Working Group): Lead by Intel, Compaq, Fujitsu, Hewlett Packard, IBM, NEC, and Silicon Image. This open industry group's objective is to address the industry's requirements for a digital connectivity specification for high-performance PC and digital displays.
Caution:
- There are some content that can be played only with HDCP Rev. 2.2 compatible devices. To play such content, connect an HDCP Rev.2.2 compatible TV or player to the HDMI OUT MAIN/SUB jack or HDMI IN1 to 5 jacks of the unit. - The HDMI video stream (i.e., video signal) is compatible with DVI (Digital Visual Interface), so TVs and displays with a DVI input can be connected by using an HDMI-to-DVI adapter cable. (Note that DVI connections only carry video, so you will need to make a separate connection for audio.) However, reliable operation with such an adapter is not guaranteed. In addition, video signals from a PC are not supported.
- The HDMI audio signal (sampling rate, bit length, etc.) may be restricted by the connected source component. If the picture is poor or there is no sound from a component connected via HDMI, check its setup. Refer to the connected component's instruction manual for details.
Home network (LAN)
The connection of several components via cables enabling the mutual communication is called a network. At households, many families create (generally, the term "build" is used) a network to connect PC and gaming machines to the Internet and to exchange data between PC.
The network established in a relatively narrow area such as one household is called a LAN (Local Area Network). In this manual, a term "home network" (network for a family) is used instead of "LAN", so this LAN becomes more familiar.
By connecting this unit with the network server such as a PC, playing music files in the network server (in the PC) is possible. Moreover, by connecting to the Internet, listening to the Internet radio is also possible. This unit, PC, and Internet are not directly connected. When connecting with a PC and/or Internet, several components (network components) are necessary.
Components necessary for establishing a home network (LAN):
Components necessary for the home network (LAN) for using the NET function of this unit are as follows.
Router
A router is a device that controls information (data) flow between the unit, PC, and the Internet. As a network term, the flow of information (data) is called "traffic". The router has a role to control the information flow as the traffic control, between connected components.
- A router with a built-in 100Base-TX switch is recommended.
- In addition, if your router has the DHCP function, facilitating the network setting becomes possible.
- Some routers have a built-in modem, and some Internet Service Providers (ISP) require you to use specific routers.
Please consult your ISP or PC dealer if you are unsure.
CAT5 Ethernet cable
The Ethernet cable is a cable that actually connects components that comprise the network. There are straight type and cross type Ethernet cables.
- Use a shielded CAT5 Ethernet cable (straight-type) to connect the unit to your home network.
Consult your cable store for details of Ethernet cable.
■ Network server (When PC etc./network server is d)
Component that stores music files and provides the unit with those files at the time of playback.
- Requirements for use with this unit depend on the component that is used as a network server.
- Conditions for pleasant playback of music files on the unit depend on the using network server (PC performance). See instruction manuals of using components.
■ Modem (when Internet radio is used)
Device that connects home network (LAN) and Internet. There are many kinds of modems depending on the forms of Internet connection. In addition, when connecting to the Internet, it is required to conclude an agreement with a company that provides Internet connection service, called ISP (Internet Service Provider).
Use a modem that is recommended by your ISP company for the Internet connection.
There are some devices that have both router and modem functions.
Within above network components, prepare a router, Ethernet cable, and network server when the NET function "network server" is used.
For enjoying the NET function "Internet radio", it is necessary to use the router, Ethernet cable, and modem (and agreement with ISP).
Reference Information
Server Requirements
■ Server playback
This unit can play digital music files stored on a PC or media server and supports the following technologies:
- Windows MediBlayer 11
• Windows MediPlayer 12
• DLNA-certified media server
The network server must be connected to the same network as this unit.
Each folder can contain up to 20,000 tracks, and folders can be nested up to 16 levels deep.
Caution: Depending on the media server, the unit may not recognize it, or may not be able to play its music files.
■ Remote playback
Remote playback is the function that enables this unit to play music files saved in different components by operating the DLNA-compliant controller component and PC in the home network.
- Windows MediPlayer 12
• DLNA-certified (within DLNA Interoperability Guidelines
version 1.5) media server or controller component.
* The setting varies depending on the media server or controller
components. Refer to your components' instruction manual for details. If the operating system of your personal PC is Windows® 8/Windows® 7, Windows Media® Player 12 is already installed. For more information, see the Microsoft web site.
USB Storage Device Requirements
- USB Mass Storage device class (but not always guaranteed).
• FAT16 or FAT32 file system format. - If the USB storage device has been partitioned, each section will be treated as an independent device.
- Each folder can contain up to 20,000 tracks, and folders can be nested up to 16 levels deep.
- USB hubs and USB storage devices with hub functions are not supported. Do not connect these devices to the unit.
Caution:
- If the media you connect is not supported, the message "No Storage" will be displayed.
- Sound files that are protected by copyright cannot be played.
- When the USB audio player and this unit are connected, the audio player screen and the screen of the unit may be different. In addition, control functions of the audio player (classifying and sorting music files and adding information, etc.) are not available on this unit.
- Do not connect a PC to the USB port of the unit. Inputting sound to the USB port of the unit from a PC is not possible.
• Media inserted to the USB card reader may not be available in this function. - Some USB storage devices and its contents may require some time to be read.
- Depending on the USB storage device, proper reading of the contents and proper supply of the power supply may not be possible.
- Onkyo accepts no responsibility whatsoever for the loss or damage to data stored on a USB storage device when that device is used with this unit. We recommend that you back up your important music files beforehand.
- Performance of the hard disk that receive power from the USB port of the unit is not guaranteed.
- If you connect a USB hard disk drive to the USB port of the unit, we recommend that you use its AC adapter to power it.
- When an audio player that are operated with batteries is used, make sure that the batteries have enough remaining power.
- This unit does not support USB storage devices with security functions.
Supported Audio Formats
- For server playback and playback from a USB storage device, this unit supports the following music file formats.
- Music files of the following formats that can be played depend on the network server. For example, when using Windows Media® Player 12, not all music files in the PC can be played. The music files that can be played are the ones registered to the Windows Media® Player 12 library.
- Variable bit-rate (VBR) files are supported. However, playback times may not be displayed correctly.
- This unit supports the gapless playback of the USB storage device in the following conditions. When WAV, FLAC and Apple Lossless files are continuously played back with the same format, sampling frequency, channels and quantization bit rate
- Remote playback does not support the gapless playback.
Caution:
- With remote playback on this unit the following formats are not supported:
- FLAC, Ogg Vorbis, DSD and Dolby TrueHD.
■ MP3 (.mp3/.MP3)
- Supported formats: MPEG-1/MPEG-2 Audio Layer 3
- Supported sampling rates: 8 kHz, 11.025 kHz, 12 kHz, 16 kHz, 22.05 kHz, 24 kHz, 32 kHz, 44.1 kHz, 48 kHz
- Supported bitrates: Between 8 kbps and 320 kbps. Incompatible files cannot be played.
■ WMA (.wma/.WMA)
WMA stands for Windows Media Audio and is an audio compression technology developed by Microsoft Corporation. Audio can be encoded in WMA format by using Windows Media ^17 Player.
• Supported sampling rates: 8 kHz, 11.025 kHz, 16 kHz, 22.05 kHz, 32 kHz, 44.1 kHz, 48 kHz
- Supported bitrates: Between 5 kbps and 320 kbps. Incompatible files cannot be played.
• WMA Pro/Voice formats are not supported.
Connections
Initial Setup
Playing Back
Advanced Manual
Front Panel >Rear Panel >Remote Controller
Reference Information
■ WMA Lossless (.wma/.WMA)
• Supported sampling rates: 44.1 kHz, 48 kHz, 88.2 kHz,
96 kHz
• Quantization bit: 16 bit, 24 bit
WAV (.wav/.WAV)
WAV files contain uncompressed PCM digital audio.
• Supported sampling rates: 8 kHz, 11.025 kHz, 12 kHz,
16 kHz, 22.05 kHz, 24 kHz, 32 kHz, 44.1 kHz, 48 kHz.
64 kHz, 88.2 kHz, 96 kHz, 176.4 kHz, 192 kHz
• Quantization bit: 8 bit, 16 bit, 24 bit
* For playback from a USB storage device, sampling rates of 176.4 kHz
and 192 kHz are not supported.
* For playback from a USB storage device, 5.1 ch is not supported
AAC
(.aac/.m4a/.mp4/.3gp/.3g2/.AAC/.M4A/.MP4/.3GP/.3G2)
• Supported formats: MPEG-2/MPEG-4 Audio
• Supported sampling rates: 8 kHz, 11.025 kHz, 12 kHz,
16 kHz, 22.05 kHz, 24 kHz, 32 kHz, 44.1 kHz, 48 kHz,
64 kHz, 88.2 kHz, 96 kHz
• Supported bitrates: Between 8 kbps and 320 kbps.
Incompatible files cannot be played
FLAC (.flac/.FLAC)
FLAC is a file format for lossless audio data
compression.
• Supported sampling rates: 8 kHz, 11.025 kHz, 12 kHz,
16 kHz, 22.05 kHz, 24 kHz, 32 kHz, 44.1 kHz, 48 kHz,
64 kHz, 88.2 kHz, 96 kHz, 176.4 kHz, 192 kHz
• Quantization bit: 8 bit, 16 bit, 24 bit
* For playback from a USB storage device, sampling rates of 176.4 kHz
and 192 kHz are not supported.
For playback from a USB storage device, 5.1 ch is not supported.
■ Ogg Vorbis (.ogg/.OGG)
• Supported sampling rates: 8 kHz, 11.025 kHz, 16 kHz,
22.05 kHz, 32 kHz, 44.1 kHz, 48 kHz
• Supported bitrates: Between 32 kbps and 500 kbps.
• Incompatible files cannot be played
LPCM (Linear PCM)
• Supported sampling rates: 44.1 kHz, 48 kHz
• Quantization bit: 16 bit
* Only for playback via DLNA.
■ Apple Lossless (.m4a/.mp4/.M4A/.MP4)
• Supported sampling rates: 8 kHz, 11.025 kHz, 12 kHz,
16 kHz, 22.05 kHz, 24 kHz, 32 kHz, 44.1 kHz, 48 kHz,
64 kHz, 88.2 kHz, 96 kHz
• Quantization bit: 16 bit, 24 bit
DSD (.dsf/.DSF)
• Supported sampling rates: 2.8224 MHz, 5.6448 MHz
* For playback from a USB storage device, 5.6448 MHz is not supported.
Dolby TrueHD (.vr/.mlp/.VR/.MLP)
• Supported sampling rates: 48 kHz, 64 kHz, 88.2 kHz,
96 kHz, 176.4 kHz, 192 kHz
* Only sampling rates of 48 kHz is supported for playback from USB.
* Playback via DLNA is not supported.
* For playback from a USB storage device, 7.1 ch is not supported.
Reference Information
Remote Control Codes
| ■ Television (A to E) | |
| A.R. Systems 10037, 10556 | |
| ACCENT 10037 | |
| Acoustic Solutions 11667, 11585, 11523, 11037 | |
| Action 10650 | |
| Adcom 10625 | |
| Addison 10653, 11150 | |
| Admiral 10093 | |
| AEG 12197, 11037, 12239 | |
| Affinity 13717, 13870, 13577 | |
| Aftron 13478 | |
| Aiko 10037 | |
| Aim 10037 | |
| Akai 12676, 10812, 10037, 10672, 10208, 10714, 11523, 13067, 12414, 13183, 10178, 10556, 12197 | |
| Akiba | 10037 |
| Akito | 10037 |
| Akura | 12289, 10037, 11667, 10714, 10668, 11585, 10171, 11037, 11498, 11687, 11983, 12239 |
| Alba | 12676, 11037, 10037, 10668, 10714, 11585, 13005, 13067, 13790, 11667, 12104, 12561 |
| Alfide | 10672 |
| Alien | 11037 |
| Allstar 10037 | |
| Amstrad | 10037, 10171, 11037 |
| Anam | 10037, 10650 |
| Andersson | 12676, 11585 |
| Anitech | 10037 |
| Ansonic | 10668, 10037 |
| AOC | 11589, 12769, 11365, 13720, 12014, 12087, 13790, 10093, 10178, 10625, 11150 |
| Apex Digital | 12397 |
| Apollo 12239 | |
| Ardem | 10714, 10037 |
| Arena 10037 | |
| Ario | 12397 |
| Aristona | 10556, 10037 |
| ART 11037 | |
| Art Mito | 11585, 11667 |
| AS | 11667, 11585, 11523, 11037 |
| Asberg | 10037 |
| Astra | 10037 |
| ATD | 10698 |
| Atlantic | 10037 |
| Atvio | 13636 |
| Audiosonic | 10714, 12104, 10037, 13067, 11983 |
| Audio-Technica | 10000, 10093, 10150, 11150 |
| Audiovox 11769 | |
| Audioworld | 10698 |
| Auria | 12087, 12014 |
| Autovox 12676 | |
| Aventura | 10171 |
| Axxon 10714 | |
| Azuki | 12239 |
| B & O 10620 | |
| Baier | 12239 |
| Baird | 10208 |
| Bang & Olufsen | 10620 |
| Barco | 10556 |
| Base | 10698 |
| Basic Line | 10037, 10668, 11037, 10556 |
| Bauer 12197 | |
| Baur 10037, 10512, | 10195 |
| BBK | 12098, 11523 |
| Beaumark | 10178 |
| Beijing 10208, 10812 | |
| Beko | 10714, 12125, 10037, 12239 |
| Bell & Howell | 10017 |
| Belson | 10698, 11667 |
| Belstar 11037 | |
| BenQ | 12563, 11562, 11523 |
| Beon | 10037 |
| Berthen | 10556, 10668 |
| Bestar | 10037 |
| Bexa | 12493 |
| BGH | 14070, 14029, 10898, 12414, 12098 |
| Black Diamond | 11037 |
| Blaupunkt | 10195, 12426 |
| Blue Sky | 10714, 10037, 11037, 10668, 10556, 10625 |
| BlueDiamond | 12426 |
| Bluetech | 12561 |
| bogo | 12561 |
| BPL | 10208, 10037 |
| Brandt | 10625, 11585, 10714 |
| Brinkmann | 10037, 10668 |
| Brionvega | 10037 |
| Britania 12414 | |
| BuBuGao | 12098, 11523 |
| Bush | 11037, 10037, 12676, 10668, 10714, 13790, 13005, 11667, 11687, 11983, 10556, 12125, 10208, 11585, 12104, 10698, 11589, 12673, 12964 |
| Byd:sign | 12209 |
| Cameron 11523 | |
| Camper | 10037 |
| Carad | 11037, 10668 |
| Carena | 10037 |
| Carrefour | 10037 |
| Cascade | 10037 |
| Casio | 10037 |
| Cathay | 10037 |
| CCE 13782, 14091, | 10037 |
| Celcus | 12676, 11585 |
| Celebrity | 10000 |
| cello | 12673 |
| Centrum | 11037 |
| Centurion | 10037 |
| Changhong | 13434, 12769, 11498, 10508, 10208 |
| Chiawin | 10810 |
| Chimei 12769 | |
| CHL | 13067 |
| Chung Hsin | 11150 |
| Chunyun | 10000, 11150, 11687 |
| Cinema | 10672 |
| Clarivox 10037 | |
| Clatronic | 10037, 10714 |
| Clayton 11037 | |
| CME | 10037, 10512 |
| CMX | 13332, 13067 |
Reference Information
| Coby 13478, 12315, | 13627 |
| Commercial Solutions 1 | 1447 |
| Condor 10037 | |
| Conia 11498, 11523, | 11687 |
| Conrowa 10698 | |
| Contec 10037 | |
| Cosmel 10037 | |
| CPTEC 10625 | |
| Crosley 10000 | |
| Crown 10037, 10714, | 10208, 10672,11037, 10668 |
| Crown Mustang 10672, | 10898 |
| Crypton 11667 | |
| Currys Essentials 12486 | |
| Curtis 12855, 13577, | 12466, 12352,13895, 12397,13636, 13382,14035 |
| Curtis Mathes 10093 | |
| Cyberpix 11667 | |
| Daenyx 10672 | |
| Daewoo 10634, 10037, | 10672, 10556,12098, 10178,11150, 12125 |
| Dansai 10037, 10208 | |
| Dantax 11037, 12676, | 10714, 11667 |
| Datsura 10208 | |
| DAWA 10037 | |
| Daytek 10672 | |
| Daytron 10037 | |
| De Graaf | 10208 |
| Decca | 10037 |
| Dell | 11863 |
| Denver | 12197, 13067,10037, 12239 |
| Desmet | 10037 |
| Devant 12098 | |
| DGM 12239 | |
| Diamant 10037 | |
| Diamond | 10698, 10672 |
| Dick Smith Electronics | 10698 |
| Digatron 10037 | |
| Digihome | 12676, 11667 |
| Digiline 10037, 10668 | |
| Digimate | 12239 |
| Digisonic | 11826 |
| Digitor | 10698, 10037 |
| Digitrex | 13067 |
| Dikom | 12561 |
| diVision | 12197, 12239 |
| Dixi | 10037 |
| DNS | 13434 |
| Domeos 10668 | |
| Donghai 10037, 10668, 11037 | |
| Drean 10037 | |
| DSE | 10698 |
| Dual | 12197, 11037, 12676, 11667, 10037, 11585, 10714 |
| Dumont | 10017 |
| Durabrand | 10171, 10178, 10714, 11037 |
| Dux | 10037 |
| D-Vision 12197, 10037, 10556 | |
| DX Antenna | 13817 |
| Dynatron | 10037 |
| Dynex | 12049 |
| E.S.C. | 10037 |
| Easy Living | 12104 |
| ECE | 10037 |
| ECG | 12197, 12125 |
| Eiki | 10735 |
| Elbe | 10037, 10556 |
| Electroband | 10000 |
| Electrograph | 11755 |
| Electrohome | 11670 |
| Electrolux | 11585 |
| Electron | 12466, 12855 |
| Elektra 10017 | |
| Element | 13559, 11687, 12183, 12964, 13907, 11886, 12256 |
| Elfunk | 11037 |
| ELG | 10037 |
| Elin | 10037 |
| Elite | 13867, 10037 |
| Emerson | 11864, 11394, 10171, 11886, 10178, 10037, 13623, 12183, 10668, 10714, 13559 |
| e-motion | 12426 |
| Enox. | 12673 |
| Envision 11589, 11365, | 12087, 12014, 11506 |
| Epson | 11379 |
| EQD | 12014, 12087 |
| EQD Auria | 12014, 12087 |
| Erisson | 13183 |
| Erres | 10037 |
| ESA | 10812, 10171 |
| Essentials | 12486 |
| Euroman | 10037 |
| Europa | 10037 |
| Europhon | 10037 |
| Evesham Technology | 11667 |
| Evotel | 12561 |
| Excello | 11037 |
| Exquisit | 10037 |
■ Television (F to J)
| F&U | 12676 |
| FairTec 11585 | |
| Favi | 13382 |
| Fedders Lloyd | 13639 |
| Ferguson | 10625, 11037, 13005, 10037, 12426, 10195, 11585, 12676 |
| Fidelity 10037, 10512, | 10171 |
| Finlandia | 10208 |
| Finlux | 11667, 12676, 10714, 10037, 10556 |
| Firstline | 10714, 10037, 10668, 11037, 10208, 10556 |
| Fisher | 11585, 10208 |
| Flint | 10037 |
| Fluid | 12964, 13907 |
| Formenti | 10037 |
| Fortress | 10093 |
| Fraba | 10037 |
| Friac 10037 | |
| Frigidaire | 11826 |
| Fujimaro | 11498, 11687 |
| Fujimaru | 11687 |
| Fujitsu 10809 | |
| Fujitsu Siemens | 10809 |
| Funai | 13817, 10171, 11394, 10000, 11037, 10714, 10668, 11864 |
| Funai United | 12676 |
| Furrion 13332 | |
| Gaba 11037 | |
| Galaxi | 10037 |
| Galaxis | 10037 |
| Gateway | 11755 |
Reference Information
| GE 11447, 10178, | 10735, 10625,10093, 11454 |
| GEC 10037 | |
| General Electric 11447, 10178,10735, 10625,10093, 11454 | |
| Genesis 10037 | |
| Genexxa 10037 | |
| GFM 10171, 11864, | 11886 |
| Gibraltar 10017 | |
| Gibson 11826 | |
| Gintai 11150 | |
| Godrej 11585 | |
| GoGen 12676, 11585 | |
| Goldfunk 10668 | |
| GoldStar 10178, 10037, | 10714, 13183,11150 |
| Goodmans 10037, 11037, | 10634, 11667,10668, 11523,11585, 11687,11983, 10714,10556, 10625,12426, 12676 |
| Gorenje 11585, 12676 | |
| Gradiente | 10037 |
| Graetz 10714 | |
| Gran Prix | 12197 |
| Granada | 10037, 10208 |
| Grandin 10037, 10714. | 10668, 11037,10556, 12125 |
| Grundig 10195, 11223 | |
| 12125, 12239,10556, 10037,11523, 11667,13067, 10672,12561, 12676 | |
| Grunkel | 11523 |
| GVA | 12098, 13067 |
| Haier | 12876, 11749, 12309, 13382, 11753, 13620, 13613, 13429, 10698, 11983, 12293, 13790, 13987, 10037, 10508 |
| Hallmark 10178 | |
| Handic | 12676 |
| Hankook 10178 | |
| Hannspree 11826 | |
| Hanseatic | 10037, 10634, 10714, 10625, 10556 |
| Hantarex | 12197, 10037 |
| Hantor 10037 | |
| Harwood 10037 | |
| Hauppauge | 10037 |
| Havermy 10093 | |
| HB | 10714 |
| HB Ingelen | 10714 |
| H-Buster 13620, 13419 | |
| HCM | 10037 |
| Heran | 11826 |
| Herosonic | 11826 |
| Highline | 10037 |
| Hikona | 11983 |
| Hinari 10037, 10208 | |
| HiPlus | 11826 |
| Hisawa | 10714 |
| Hisense | 12846, 12098, 13519, 12183, 10556, 13123, 10508, 14029, 10208, 13382 |
| Hitachi | 11643, 12676, 11576, 11585, 11037, 11691, 13317, 11667, 10634, 13639, 10037, 10679, 12170, 12846, 10150, 10178, 10508, 11150 |
| Hitachi Fujian | 10150 |
| Hitec | 10698 |
| Hiteker 13118 | |
| Hoher | 10714, 13434 |
| Hongmei 10093 | |
| Hornyphon 10037 | |
| Hua Tun | 11150 |
| Hypson | 10037, 10714, 10556, 10668, 11037 |
| Hyundai 10698, 12414, 12676, 11037, 11523 | |
| Iberia | 10037 |
| ICE | 10037 |
| iLo | 11394 |
| Imperial 10037 | |
| Indiana | 10037 |
| Ingelen | 10714 |
| Ingo Devices | 12239 |
| Inno Hit | 11585, 11037 |
| Innova 10037 | |
| Insignia | 12049, 11423, 10171 |
| Integra | 11807, 13100, 13500 |
| Inteq 10017 | |
| Interbuy | 10037 |
| Interfunk | 10037, 10512 |
| Internal | 10556 |
| Intervision | 10037 |
| Irradio | 10037 |
| IRT | 10698 |
| Isis | 12676 |
| Isukai 10037 | |
| iSymphony | 13429, 13382, 13118 |
| ITS | 10037 |
| ITT | 12675, 12125, 12676, 10208, 11523 |
| ITT Nokia | 10208 |
| ITV | 10037 |
| James | 13183 |
| Jay-tech | 13067 |
| JC Penney 10178 | |
| JCB | 10000 |
| JCM | 12256 |
| Jinfeng 10208 | |
| Jinxing | 10556, 10037, 10698 |
| JMB | 12676, 10634, 10556, 12426 |
| JTC | 13067 |
| Jubilee 10556 | |
| JVC | 11774, 11653, 11601, 11818, 10653, 12321, 12271, 11428, 13650, 11670, 12676, 14070, 10650, 10093, 10508 |
■ Television (K to N)
| Kaisui | 10037 |
| Karcher | 12125, 10714 |
| Kathrein | 10556 |
| KDS | 11498, 11687 |
| Kendo | 11037, 11585, 12676, 10037 |
| Kennex | 11037 |
Reference Information
| Kioto 10556 | |
| Kiton 10037, 10668 | |
| KLL 10037 | |
| Kneissel 10037, 10556 | |
| Kolin 11610, 10150, | 11755, 10037, 11150 |
| Kolster 10037 | |
| Konig 10037, 10512 | |
| Konka 12881, 13419, | 10037, 10714 |
| Korpel 10037 | |
| Kosmos 10037 | |
| Kunlun 10208 | |
| Kuppersbusch 12676 | |
| L&S Electronic 10714 | |
| Lavis 11037 | |
| Leader 12876 | |
| Lecson 10037 | |
| Legend 12397, 12309 | |
| Lenco | 12676, 11983, 10037, 11037 |
| Leyco | 10037 |
| LG | 11840, 11860, 11423, 12731, 12182, 12358, 10178, 12362, 13941, 12424, 10037, 10714, 10017, 10556, 10698, 11753 |
| Liberton 13183 | |
| Liesenkotter | 10037 |
| Lifetec | 10668, 10037, 11037, 10714 |
| Linetech 12676 | |
| Linsar | 12676, 11667, 11585 |
| Lloyd | 13639 |
| Lodos | 11037 |
| Loewe | 10512, 10633, 10037 |
| Logic | 11585 |
| Logik | 13432, 13005, 12486, 11037, 10698, 11585, 11687 |
| Logix | 10668 |
| Luma | 10037, 11037 |
| Lumatron | 10037, 10668 |
| Lumenio | 10037 |
| Lux May 10037 | |
| Luxor | 12676, 11037, 10208 |
| LXI | 10178, 10017 |
| Madison 10037 | |
| MAG 11687, 11498 | |
| Magnavox | 13623, 11866, 12372, 11454, 11506, 10171, 11365, 11755, 11867 |
| Magnum | 10714, 10037 |
| Manesth | 10037 |
| Manhattan | 10037, 11037, 10668 |
| Marantz 10037, 10556 | 11454 |
| Mark 10037, 10714 | |
| Marks & Spencer | 12673 |
| Mascom 12197, 12125 | |
| Masters | 10037 |
| Mastro | 10698 |
| Masuda | 10037 |
| Matsui | 10037, 10195, 10208, 12486, 11037, 10714, 11667, 12676, 10556, 12561 |
| Matsushita | 10650 |
| Maxent | 11755 |
| Maxess | 12493 |
| Meck | 10698 |
| Mediator | 10037, 10556 |
| Medion | 12676, 10714, 10037, 10668, 11037, 11585, 11667, 10512, 12239, 13067, 10556, 10698, 12563 |
| Megatron | 10178 |
| MEI 11037 | |
| Melectronic | 10037, 10195, 10634, 10512, 10714 |
| Memorex | 11687, 11037, 11670, 10178, 10150 |
| Memory 11983 | |
| Mercury 10037 | |
| Mermaid | 10037 |
| Metronic | 10625 |
| Metz | 11037, 10668, 10195 |
| MGA 10150, 10178 | |
| Micromaxx | 10037, 10668, 10714, 11037 |
| Microsonic | 13419 |
| Midland | 10017 |
| Mikomi | 11585, 11667 |
| Minato | 10037 |
| Minerva | 10195 |
| Ministry Of Sound | 11667 |
| Minoka 10037 | |
| Miray | 12414, 13183, 10898 |
| Misakai | 10171 |
| Mitsubishi Electric | 11250, 12313, 10150, 10178, 10512, 11797, 10093, 10556, 10037, 11150, 11037, 11171 |
| Mivar | 10609 |
| Moree 10037 | |
| Morgan's | 10037 |
| Moserbaer | 11585 |
| Motorola | 10093 |
| MTC | 10512 |
| MTlogic | 10714, 12104 |
| Mudan | 10208 |
| Multitec | 11037, 10037, 10668 |
| Multitech | 10037 |
| Murphy 12673 | |
| Mx Onda | 11983, 11498, 11687 |
| Myryad | 10556 |
| Mystery | 13047 |
| NAD | 10037, 10178 |
| Naiko 10037 | |
| Nakimura | 10037 |
| National | 10208, 10508 |
| Naxa 12104, 13382 | |
| NEC | 11797, 13257, 12293, 12461, 11585, 10037, 10178, 10508, 10653, 11150 |
| Neckermann | 10037, 10556 |
| NEI | 10037, 11037 |
| Neoka 11826 | |
| Neon | 12673 |
| Netsat 10037 | |
| NetTV 11755 | |
| Neufunk | 10037, 10556, 10714 |
| Nevir 12676 |
Reference Information
| New Acoustic Dimension | 10037, 10178 |
| New Sonic 11826 | |
| New Tech 10037, 10556 | |
| Newave 10093, 10178 | 11150 |
| NEX 13861 | |
| Nexus Electronics 12183 | |
| Nikkai 10037 | |
| Nikkei 12197, 10714 | |
| Nikko 10178, 10017 | |
| Nimbro 12104 | |
| Noblex 14029 | |
| Nokia 10208 | |
| Norcent 11365, 11589 | |
| Nordmende 13419, 13861, 10037, 10195, 11585, 13835, 10714, 11667 | |
| Normerel 10037 | |
| Nortek | 10668 |
| Novatronic 10037 | |
| Novex | 11523 |
| Novita | 11585 |
| NPG | 13434 |
| ■ Television (O to S) | |
| O.K.Line | 11037 |
| Oceanic | 10208 |
| OK Line 11037 | |
| OK. | 13434, 12676, 13047 |
| Okano | 10037 |
| OKI | 11667, 12676, 12125, 13434, 11585 |
| Olevia | 11610 |
| Omni | 10698 |
| Onei | 11667 |
| Onida | 10653, 12414 |
| Onimax | 10714 |
| Onix 10698 | |
| Onkyo | 11807, 13100, 13500 |
| Onn | 12125, 11667 |
| Opera | 10037, 10714 |
| Optimus | 10650, 10679 |
| Optoma | 12796 |
| Optonica | 10093 |
| Orava 11037 | |
| Orbit | 10037 |
| Orion | 12108, 10037, 12676, 10556, 10714, 11037, 11667, 13540, 13650 |
| Online | 10037 |
| Ormond 10668, 11037 | |
| Osaki 10037, 10556 | |
| Osio 10037 | |
| Osume 10037 | |
| Otic | 11983, 11498, 11687 |
| Otto Versand | 10037, 10512, 10093, 10556, 10195 |
| Pacific | 10714, 11037, 10556 |
| Palladium 10037, 10714, 10556 | |
| Palsonic | 12461, 10698, 13067, 10037 |
| Panama | 10037 |
| Panasonic | 11636, 11480, 11291, 10650, 11650, 13825, 12170, 10037, 10093, 10150, 10178, 10208, 10508 |
| Panavideo | 13825 |
| Panavision | 10037 |
| Panavox | 13835 |
| Panda | 10698, 10208, 10508 |
| PARK | 12104 |
| Penney | 10178 |
| Peony | 10208 |
| Perdio | 10037 |
| Perfekt | 10037 |
| Philco 10171, 13426, | 12414, 11394, 10037, 10178, 13639 |
| Philips | 11887, 11867, 10037, 12372, 12800, 10556, 13614, 11506, 11744, 12768, 12680, 11454, 10639, 11866, 10017, 10512, 13623, 10171, 12769, 11365, 11394, 10000, 10178, 11589 |
| Phocus | 10714 |
| Phoenix 10037 | |
| PHOENIX Apollo | 12239 |
| Phonola | 10037, 10556 |
| Pioneer | 10679, 11457, 10037, 10698, 11636, 10512, 12171 |
| PJ | 11506 |
| Planar | 10679, 14247, 11589 |
| Plantron | 10037 |
| Playsonic | 10714, 10037 |
| Polaroid | 11523, 11769, 11498, 11687, 11767, 12676, 14035, 12125, 11826 |
| Powerpoint | 10037, 10698 |
| Premier 13419, 13183, | 13793 |
| Prestiz | 13419 |
| Prima | 11753, 10037, 11749, 12461, 10698 |
| Prinston | 11037 |
| Pro Vision | 10037, 10556, 10714, 12197 |
| Profitronic | 10037 |
| ProLine | 10625, 10634, 10037, 11037, 12676 |
| Proscan | 11447, 12183, 12256, 13577, 13382, 13332, 13717, 13895, 12746, 13636, 14035 |
| Prosonic | 10714, 12676, 12125, 10668, 12197, 10037, 11523, 11585, 11667 |
| Protech | 10037, 10668, 11037 |
| Proton | 10178 |
| Proview | 11687, 11498 |
| Proxima | 10735 |
| Pulsar | 10017 |
| Pye | 10037, 10556 |
| Q.Bell 12561 | |
| Quadro | 11667 |
| QuantumFX | 12337 |
| Quasar | 11291, 13899, 10650 |
En-88
Reference Information
| Quelle 10037, 10512, | 11037, 10195, 10668 |
| Radiola 10037, 10556 | |
| Radiomarelli 10037 | |
| Radionette 10714 | |
| RadioShack 10178, 10037 | |
| Radiotone 10037, 10668, | 11037 |
| RCA 12746, 12434, | 12932, 11447, 12247, 13577, 11781, 10625, 12187, 13382, 10679, 13332, 13717, 10093, 13793, 12183, 12855, 13419, 10000, 10178, 10618, 11454, 13426, 13636 |
| Realistic 10178 | |
| Recco 10898, 13183 | |
| Reconnect 13183 | |
| Recor 10037 | |
| Rectiligne 10037 | |
| Red Star 10037 | |
| Reflex 10037, 10668, | 11037 |
| RefleXion 12239 | |
| Relisys 11585 | |
| Relon | 11826 |
| Remotec | 10037, 10093, 10171, 11150 |
| Reoc | 10714, 12197 |
| Revox 10037 | |
| RFT | 10037 |
| R-Line | 10037 |
| Roadstar | 11037, 10037, 10714, 10668 |
| Rolsen | 12098, 13067, 13434 |
| Rowa | 10898, 13047, 10698, 11038, 13001, 10037 |
| RTF | 10037 |
| Runco 10017 | |
| Saba | 10625, 12676, 10714 |
| Saga | 12197 |
| Sagem | 10618 |
| Saivod | 10668, 11037, 10037, 11667 |
| Salora 12197, 12676, | 12239, 12125, 13067, 10208 |
| Sampo | 11755, 10898, 13419, 10093, 10171, 10178, 10650 |
| Samsung | 12051, 10812, 11632, 10618, 11458, 11630, 12953, 10037, 10556, 10650, 10178, 10208, 11150 |
| Sandstrom 12197, 13047 | |
| Sansui | 13540, 11670, 13564, 10037, 10898, 10171, 10714, 13559 |
| Sanyo 11142, 10208, | 11585, 12676, 12461, 12994, 10735, 11974, 12881, 12769, 13488, 11498, 11365, 10508, 11037, 11150, 11667, 13861 |
| Sanyuan 10093 | |
| Save | 10037 |
| SBR | 10037, 10556 |
| Sceptre | 13899, 12528, 12337 |
| Schaub Lorenz | 10714, 12676, 12125, 12197, 11667, 12289 |
| Schneider | 10037, 10714, 10556, 11037, 10668, 11585, 12676 |
| Schontech | 11037 |
| Scotch | 10178 |
| Scott | 10178, 11983 |
| Sears | 10171, 10178 |
| Seaway | 10634 |
| Seelver 10556, 11037 | |
| SEG 12673, 11037, | 10037, 10668, 12125, 11523, 10634, 13434 |
| SEI | 10037 |
| Seiki | 13953, 12964, 13559, 10178 |
| Seiko Epson | 11379 |
| Sel-Sinudyne | 10037 |
| Semp | 11743, 13793 |
| Semp Toshiba | 11743, 13793 |
| Sencor | 13067, 12197, 10714 |
| Senzu 12493 | |
| Serie Dorada | 10178 |
| Serino 10093 | |
| Shanghai | 10208 |
| Sharp 12360, 11659, | 10818, 10093, 12951, 11393, 12676, 13867, 10650, 11165, 11423 |
| Sheng Chia | 10093, 11150 |
| Shinelco | 12104 |
| Shintoshi | 10037 |
| Shivaki 12197, 10178, | 10037 |
| Siam | 10037 |
| Siemens | 10195, 10037 |
| Siera | 10556, 10037 |
| Silva | 10037 |
| Silva Schneider | 12197, 10037, 12125 |
| SilverCrest | 12676, 11037 |
| Sinudyne | 10037 |
| SKY | 10037 |
| Sky Brasil | 10037 |
| Skyworth | 12899, 12963, 12889, 12769, 10037, 10698 |
| SLX | 10668 |
| Sogo | 13067 |
| Solavox | 10037 |
| Soniko | 10037 |
| Soniq | 12493, 13005 |
| Sonitron | 10208 |
| Sonneclair | 10037 |
| Sonoko 10037 | |
| Sonolor | 10208 |
| Sontec | 10037 |
| Sontech | 11983 |
| Sony | 12778, 10810, 11825, 10000, 11651, 11551, 11625, 11505, 11317, 10150, 11150, 10093, 11167 |
| Sounddesign | 10178 |
| Soundwave | 10037, 11037, 12673 |
| SOVOS | 12239 |
| Sowa | 10178, 11150 |
| Soyea 10698, 11743 |
Reference Information
| Soyo 11826 | |
| Spectroniq 11498, 11687 | |
| Squareview 10171 | |
| SR Standard 10037, 11037 | |
| Starion 11037 | |
| Starlite 10037 | |
| STI 13793 | |
| Strato 10037 | |
| SunBriteTV 12337, 12528, 11610 | |
| Sunic Line 10037 | |
| Sunkai 10037, 11523 | |
| Sunny 10037 | |
| Sunstar 10037 | |
| Sunstech 12676 | |
| Sunwood 10037 | |
| Superior 11585 | |
| Superscan 10093, 10171 | |
| Supersonic | 10208, 11753, 12104 |
| SuperTech 10037, 10556 | |
| Supra 10178 | |
| Supreme | 10000 |
| SVA | 11498 |
| Svasa | 10208 |
| Swisstec | 12106, 12104 |
| Sylvania 10171, 11864, 11886, 11394 | |
| Symphonic | 10171, 11394 |
| Synco | 11755, 11826, 10000, 10093, 10178 |
| Syntax 11610 | |
| Sysline | 10037 |
| ■ Television (T to Z) | |
| Tacico 10178, 11150 | |
| Tai Yi | 11150 |
| Talent 10178 | |
| Tandy 10093 | |
| Tashiko | 10650, 11150 |
| Tatung | 10037, 11150, 11687 |
| Tauras | 12197 |
| TCL | 13047, 13183, 12434, 13001, 10898, 11038, 12414, 13426, 12675, 10698 |
| TCM | 10714 |
| Teac | 10037, 11037, 10698, 10714, 11755, 10898, 10178, 10668, 10171, 10512, 11983, 13005 |
| Tec | 10037 |
| Tech Line | 10037, 10668, 11585 |
| Technica | 11037, 12106, 12426 |
| Technical 12676, 11667 | |
| Technics | 10017, 10556, 10650 |
| Technika | 12426, 12106, 12197, 11667, 11983, 12676, 13005, 12125, 13067 |
| TechniSat | 10556 |
| Technisson | 10714 |
| Techno | 11585 |
| Technosonic | 10556, 10625 |
| Techwood | 12676, 11667, 11037 |
| Tecnimagen | 10556 |
| Teco | 10093, 10178, 10653, 11523, 11687 |
| Tedelex 10208 | |
| Teknika | 10150 |
| TELE System | 11585, 12125 |
| Telecor | 10037 |
| Telefunken | 10625, 12676, 12414, 10698, 12239, 11585, 11667, 10037, 10714 |
| Telefusion | 10037 |
| Telegazi | 10037 |
| Telemagic | 10735 |
| Telemeister 10037 | |
| Telesonic 10037 | |
| Telestar | 10037, 10556 |
| Teletech | 10037, 10668, 11037 |
| Teleview | 10037 |
| Tennessee | 10037 |
| Tensai | 10037, 11037 |
| Terris | 11667 |
| Tesco | 12426 |
| Tesla | 11037, 10037, 10556, 10714 |
| Tevion | 10714, 12426, 10668, 11037, 12125, 10037, 10556, 11498, 11585, 11667, 11687, 12197, 12289 |
| ThemeScene | 12796 |
| Thomas | 10625 |
| Thomas America | 10625 |
| Thomson 10625, 13047, 12675, 11447, 10037 | |
| Thorn | 10037, 10512 |
| Tiane | 10093 |
| TMK | 10178 |
| TNCi 10017 | |
| Tokai | 10037, 10668, 11037 |
| Tokaido 11037 | |
| Tophouse | 10672, 10698 |
| Topline 10668, 11037 | |
| Toshiba 11508, 11524, | 11656, 13323,12676, 12598,10508, 12724,13570, 11743,10650, 10618,12108, 11037,10093, 10195,11150, 11169 |
| Tosonic | 11508 |
| TRANS-continents | 10037, 10556,10668, 11037 |
| Transonic | 10037, 10698,10512 |
| Triad | 10556 |
| Trio | 11498, 11687 |
| Triumph | 10037, 10556 |
| Tucson | 12676 |
| TVE | 12239 |
| TVTEXT 95 10556 | |
| Uher | 10037 |
| Ultravox | 10037 |
| UMC 12106, 12426 | |
| Unic Line 10037 | |
| Uniden 12122, 12676, | 11667 |
| United | 10714, 11037,10037, 10556,11523, 11983,12125, 13434 |
| Universal 10037, 10714 | |
| Universum 10037, 11037, | 10512, 10668,10618, 10195 |
| Univox 10037 | |
| V7 Videoseven | 11755 |
| Vanguard | 10037 |
| VD-Tech | 13067, 13332 |
Reference Information
| Venturer 13005 | |
| Vestel 11037, 11585, | 10037, 12676, 10668, 11667 |
| Vexa 10037 | |
| Victor 11428, 10000, | 10093, 10150, 11150, 10650, 10653 |
| Videocon 10508, 10037 | |
| Videoseven 11755 | |
| VideoSystem 10037 | |
| Vidikron 10735 | |
| Vidtech 10178 | |
| Viewsonic 12014, 12745, | 12087, 13706, 11755, 11627, 12049, 11365 |
| Viore 12352, 13382, | 13118, 13429, 12104 |
| Visa 10037 | |
| Vision 11826, 10037 | |
| VisionPlus 12426, 12106 | |
| Visual Innovations 12106 | |
| VIZIO | 11758, 13758, 12707, 12757, 13415, 12512, 13174, 12209 |
| Vortec | 10037 |
| Voxson | 12197, 10178, 10037, 11667 |
| VU | 12098, 11365 |
| Walker | 12676, 11667, 11585 |
| Waltham | 10037, 11037, 10668 |
| Wansa | 12098 |
| Wards | 10178, 10017, 10000 |
| Watson 11037, 10037, | 10668, 10714 |
| WeCube | 11860 |
| Wega | 10037 |
| Welltech | 10714 |
| Weltstar | 11037 |
| Westinghouse | 11712, 13579, 13382, 13949, 11826, 12293, 11755, 12397 |
| Westwood 11585 | |
| Wharfedale | 11983, 11667, 10037, 10556 |
| White Westinghouse | 10037 |
| Wilson | 10556 |
| Windsor | 11037, 10668 |
| Windy Sam | 10556 |
| Wintel | 10714 |
| Wyse | 11365 |
| Xenius | 11667, 10634, 11585, 12676 |
| Xiahua | 11753, 10037, 11749, 12461, 10698 |
| Xiron 11983, 11037 | |
| XLogic | 10698 |
| Xoceco 11753, 10037, | 11749, 12461, 10698 |
| Xogego | 11753, 10037, 11749, 12461, 10698 |
| Xoro | 13067 |
| Xpeer | 12051 |
| XRYPTON | 10037 |
| Yamaha 11576, 10650 | |
| Yamishi | 10037 |
| Yokan 10037 | |
| Yoko | 10037 |
| YU-MA-TU | 10037 |
| Zenith | 10017, 10178, 11423, 10000, 12731, 11365, 12358, 12362 |
| Zepto 11585 | |
| Ziggo | 11818 |
| Zonda | 10698 |
■ TV DVD Combination
| Akai | 32966 |
| Alba | 32966 |
| Black Diamond | 30713 |
| Blue Sky | 30713 |
| Bush | 30713, 32966 |
| Celcus | 32966 |
| Centrum 30713 | |
| Crown 30713 | |
| Dantax | 32966 |
| Digihome | 32966 |
| Dual 32966, 30713 | |
| Elfunk | 30713 |
| Emerson 30675 | |
| Ferguson | 30713, 32966 |
| Finlux | 32966 |
| Funai 30675 | |
| Goodmans | 30713, 32966 |
| Grandin 30713 | |
| Grundig 30539, 32966 | |
| Hitachi | 32966, 30713 |
| Hyundai | 32966 |
| Insignia | 32095 |
| JMB | 32966 |
| JVC | 32966 |
| Kuppersbusch | 32966 |
| Linetech | 32966 |
| Linsar 32966 | |
| Logik 30713 | |
| Luxor 32966, 30713 | |
| Matsui | 30713, 32966 |
| Medion | 32966 |
| Mitsubishi Electric | 34004 |
| OK. | 32966 |
| OKI | 32966 |
| Orava 30713 | |
| Orion | 30713 |
| Panasonic | 32859 |
| Philips | 30539 |
| Polaroid | 32966 |
| ProLine | 32966 |
| Prosonic | 32966 |
| Saba 32966 | |
| Salora 32966 | |
| Sanyo | 32966 |
| SEG | 30713 |
| Sharp | 32966, 30630 |
| Sony | 30864 |
| Soundwave | 30713 |
| Sylvania | 30675, 30630 |
| Symphonic 30675 | |
| Technica | 30713 |
| Technical | 32966 |
| Techwood | 32966 |
| Telefunken | 32966 |
| Teletech | 30713 |
| Thomson | 30551 |
| Toshiba | 32966 |
| United | 30713 |
| Universum | 30713 |
| Walker | 32966 |
| Waltham | 30713 |
| Weltstar | 30713 |
| Xiron 30713 |
DVD
| 3D LAB | 30539 |
| Accurian | 30675 |
| Acoustic Solutions | 30730, 30713 |
| AEG | 30675, 31643, 30770, 31233 |
| Aitro 32095 |
Reference Information
| Aiwa 30533 | |
| Akai 32966, 30770, | 31233, 30675 |
| Akura 31233 | |
| Alba 32966, 30713, | 30539, 30730 |
| Amitech 30770 | |
| Amphion MediaWorks 30872 | |
| Amstrad 30713, 30770, | 32139 |
| AMW 30872 | |
| Ansonic 30831 | |
| Anthem 32820 | |
| Anthem Statement 32820 | |
| Aristona 30539, 30646 | |
| Arrgo 31023 | |
| AS 30730, 30713 | |
| ASDA 32213 | |
| Audio Authority 32555 | |
| Audix 30713 | |
| Autovox 30713 | |
| Awa | 30730, 30872 |
| Axion 30730 | |
| Basic Line | 30713 |
| Beko | 30831 |
| Bel Canto Design | 31571 |
| Belson | 32139 |
| Berthen | 31643 |
| Best Buy | 32139 |
| Black Diamond 30713 | |
| Blu:sens | 31233 |
| Blue Parade | 30571 |
| Blue Sky | 30713 |
| Brainwave | 30770 |
| Brandt | 30551, 30503 |
| Bush | 30713, 30730, 30831, 32966 |
| Byd:sign | 30872 |
| California Audio Labs | 30490 |
| Cambridge Audio | 32808 |
| CCE | 30730 |
| Celcus | 32966 |
| Centrum | 30713, 30675 |
| Changhong | 30627 |
| Cinea 30831 | |
| Cineral | 30730 |
| Cinetec | 30713, 30872 |
| CJ Digital | 31643 |
| Classic | 30730 |
| Clatronic | 30675, 31233 |
| Clayton | 30713 |
| CMX | 31643 |
| Coby | 32494, 30730 |
| Codex | 31233 |
| Continental Edison | 30831, 30872 |
| Craig | 30831 |
| Crown | 30713, 30770 |
| Cybercom | 30831 |
| CyberHome | 31023 |
| Daenyx | 30872 |
| Daewoo 30770, 30872, 30490 | |
| Dansai | 30770 |
| Dantax | 30713, 30539, 32966 |
| Datsun | 31233 |
| Daytek | 30872 |
| Dayton Audio | 30872 |
| DCE | 30831 |
| Decca | 30770 |
| Denon | 31634, 32258, 30490, 32748, 33851 |
| Denver | 31643 |
| Dewo | 31634 |
| Dick Smith Electronics | 32095, 30675 |
| Digihome | 32966, 30713 |
| DigiLogic | 30713 |
| DiK | 30831 |
| Dikom | 32494 |
| Disney | 30675, 30831 |
| DK Digital | 30831, 32095, 31643 |
| Donghai 31233 | |
| Dragon | 30831 |
| DSE | 32095, 30675 |
| Dual | 30831, 30730, 30713, 32966, 31023 |
| Durabrand | 30713, 30675, 31023, 30831 |
| Dynex | 32596 |
| E:max | 30770, 31233, 31643 |
| ECC | 30730 |
| Electrocompaniet | 32545 |
| Elfunk | 30713 |
| Elin | 30770 |
| Elite 32854 | |
| Elta | 30770, 31643, 31233 |
| Eltax | 31233 |
| Emerson | 30675, 30591, 32213 |
| Enterprise | 30591 |
| Epworth 30533 | |
| EuroLine | 30675, 31233, 31643 |
| Ferguson | 30713, 32966 |
| Finlux | 32966, 30770, 30591, 30741 |
| Firstline | 30713 |
| Funai 30675 | |
| GE | 30522 |
| General Electric | 30522 |
| GFM | 30675 |
| G-Hanz 32213 | |
| G-HanzS | 32213 |
| Go Video | 31044, 30741 |
| GoGen | 32139 |
| GoldStar | 30741, 30591 |
| Goodmans | 30713, 30730, 32966 |
| GoWell | 31643 |
| GPX | 30741 |
| Gran Prix | 30831 |
| Grandin 30713, 31233 | |
| Grundig 30539, 30551, | 30713, 31643, 32966 |
| Grunkel | 30770, 30831 |
| GVG | 30770 |
| H & B 30713, 31233 | |
| Hanseatic | 30741 |
| Harman/Kardon | 30582, 33228, 32927 |
| HE | 30730 |
| Hello Kitty | 30831 |
| Hen° | 30713 |
| Hitachi | 30573, 32966, 30713, 31664 |
| Hoher 30713, 30831, | 31643 |
| Home Electronics | 30770, 30730 |
| Home Tech Industries | 31643 |
| Humax | 30646 |
| HYD | 31233 |
| Hyundai 32966 | |
| Ingersoll | 31023 |
| Inno Hit 30713 | |
| Insignia 32095, 32596, | 32428, 30675, 30741 |
| Integra | 30627, 32147, 31769, 31634, 30571, 30503, 31612 |
| Irradio | 31233, 30646 |
| ITT | 31233 |
| Jamo 32358 | |
| JDB | 30730 |
| JMB 32966 | |
| JVC | 30623, 31602, 32365, 32612, 32855, 32966 |
En-92
Reference Information
| Kansas Technologies 31233 | |
| Kendo 30713, 30831 | |
| Kennex 30713, 30770 | |
| Kenwood 30534, 30490 | |
| KeyPlug 31643 | |
| Kiiro 30770 | |
| KingVision 31643 | |
| Kuppersbusch 32966 | |
| Leiker 30872 | |
| Lenco 30713, 30770 | |
| Lenoxx 32213 | |
| Lexicon 32545 | |
| LG 30741, 32811, | 31602, 30591, 31233 |
| Lifetec 30831 | |
| Linetech 32966 | |
| Linsar 32966 | |
| LM | 31643 |
| Lodos 30713 | |
| Loewe 30741, 30539 | |
| Logik | 30713 |
| Lumatron | 30713, 30741 |
| Lunatron | 30741 |
| Luxman | 30573 |
| Luxor | 32966, 30713 |
| Magnavox | 30675, 31354, 30503, 30539, 30646, 31506, 33488, 30713 |
| Manhattan 30713 | |
| Marantz | 30539, 32481, 32414, 33444 |
| Mark | 30713 |
| Marquant | 30770 |
| Matsui 30713, 32966 | |
| Maxim 30713, 30872 | |
| MBO | 30730 |
| McIntosh | 31273 |
| MDS | 30713 |
| Mecotek 30770 | |
| Medion | 30831, 32966, 30741, 30630 |
| Memorex 30831, 32213, 33153 | |
| Metz | 30713, 30571 |
| Micromedia | 30503, 30539 |
| Micromega | 30539 |
| Microsoft | 31708, 32083, 32202, 30522 |
| Microstar | 30831 |
| Minax | 30713 |
| Minoka 30770 | |
| Mitsubishi Electric | 31521, 34004, 30713 |
| Mizuda 30770 | |
| Mustek 30730 | |
| Muvid | 31643 |
| Mystral 30831 | |
| NAD | 30741 |
| Naiko | 30770 |
| NEC | 30741, 31602 |
| Neom | 31643 |
| Nevir | 30831, 30770 |
| New Acoustic Dimension | 30741 |
| Nisato | 31233 |
| Noblex | 31233 |
| Norcent | 30872 |
| Nordmende | 30831 |
| Nortek 31643 | |
| OK. | 32966 |
| OKI | 32966 |
| Omni | 32139 |
| One For All | 32555 |
| Onkyo 30627, 32147, 30503, 31769, 31612, 30571, 31634 | |
| Oppo | 32545, 30575 |
| Optimus 30571 | |
| Orava 30713 | |
| Orbit | 31643, 30872 |
| Orion | 30713, 31233 |
| Ormond | 30713 |
| Pacific 30831, 30713 | |
| Packard Bell | 30831 |
| Palladium | 30713 |
| Panasonic | 31641, 30490, 33641, 31579, 33580, 33862, 32710, 32859, 32523, 30503 |
| Philco 30675 | |
| Philips 32056, 30539, | 31354, 32789, 30646, 32434, 31506, 32334, 31340, 30503, 33488, 30675, 32084, 30713 |
| Pioneer 31571, 30571, | 30631, 31531, 32442, 32847, 30142, 32854 |
| Play It | 31643 |
| Polaroid | 32966 |
| Polk Audio 30539 | |
| Portland 30770 | |
| Powerpoint | 30872 |
| Presidian 30675 | |
| Prinz | 30831 |
| Prism | 30831 |
| Pro Vision | 30730 |
| ProLine 31643, 32966 | |
| Proscan | 30522 |
| Proson | 30713 |
| Prosonic | 32966 |
| Pye | 30539, 30646, 30675 |
| Radionette | 30741 |
| Radiotone | 30713 |
| RCA | 30522, 32213, 30571, 31769, 32532 |
| RE-BL 32555 | |
| REC | 30490 |
| Red | 32213 |
| Red Star | 30770 |
| Richmond | 31233 |
| Roadstar | 30713, 30730 |
| Ronin | 30872 |
| Rotel | 30623 |
| Rowa | 30872 |
| Saba | 30551, 31643, 32966 |
| Saivod | 30831 |
| Salora 32966, 30741 | |
| Samsung | 30199, 30573, 33195, 32069, 31635, 32942, 32369, 32329, 32489, 31044, 30490, 32107 |
| Sanyo | 32966, 30713, 31233 |
| ScanMagic | 30730 |
| Schaub Lorenz | 30770, 31643 |
| Schneider | 30539, 30646, 30831, 30713 |
| Schontech 30713 | |
| Scott | 31233 |
| Seeltech | 31643 |
| SEG | 30713, 30872 |
| Semp | 30503 |
| Semp Toshiba | 30503 |
| Sharp | 32250, 30630, 32966, 30675, 33313, 30713 |
| Sherwood | 30741, 30770, 32820, 33837 |
| Shinsonic | 30533 |
| Signatek 32139 | |
| Silva Schneider | 30831, 30741 |
| SilverCrest | 31643 |
| Skantic | 30713, 30539 |
| Skymaster 30730 |
Reference Information
| SM Electronic 30730 | |
| Smart 30713 | |
| Sonashi 30831 | |
| Soniq 30831 | |
| Sony 31516, 31633, | 30533, 31033,30864, 31070,31548, 32861,31536, 32839,32180, 30772 |
| Sound Color 31233 | |
| Soundwave 30713 | |
| Spectra 30872 | |
| SR Standard 30831 | |
| Sunkai 30770 | |
| Sunstech 30831, 32139 | 32966 |
| Superior 31643 | |
| Supratech 32139 | |
| SV2000 30675 | |
| Sylvania 30675, 30630 | |
| Symphonic 30675 | |
| Sytech 30831 | |
| Tandberg 30713 | |
| Targa | 30741 |
| Tascam 31818 | |
| Tatung | 30770 |
| TBoston | 32139 |
| Tchibo | 30741 |
| TCM | 30741 |
| Teac 30571, 30675, | 30741, 31818,32139, 34004 |
| Technica 30713 | |
| Technical | 32966 |
| Technics 30490 | |
| Technika 30770, 30831 | |
| Technosonic | 30730 |
| TechnoStar | 31643 |
| Techwood | 30713, 32966 |
| Telefunken | 30551, 32966 |
| Teletech | 30713 |
| Tensai 30770 | |
| Theta Digital | 30571 |
| Thomson | 30551, 30522, 30831 |
| Thule Audio | 30551 |
| Tokai | 31233 |
| Tosaki | 32006 |
| Toshiba | 30503, 33157, 33857, 32006, 32277, 32705, 31769, 32966, 32551 |
| TRANS-continents | 30831, 30872, 31233 |
| Transonic | 30730 |
| Trent | 31643 |
| Trevi | 30831 |
| TruTech 30675 | |
| TVE | 30713 |
| United 30713, 30675, | 30730, 31233, 31643 |
| Universum | 30713, 30741, 30591 |
| Urban Concepts | 30503 |
| Venturer | 31769 |
| Vestel | 30713 |
| Vitek | 30831 |
| VIZIO | 32563 |
| Voxson | 30730, 30831 |
| Waitec | 30730, 31233 |
| Walker | 32966 |
| Waltham 30713 | |
| WB Electronics | 32555 |
| Welkin | 30831 |
| Wellington 30713 | |
| Wellstar | 30713 |
| Wharfedale | 30713 |
| Wilson | 31233, 30831 |
| Windsor | 30713 |
| Windy Sam | 30573 |
| Waxter | 32139 |
| Xbox | 32083, 31708, 32202, 30522 |
| Xiron | 30713 |
| XMS | 30770 |
| X-View | 31233 |
| Yamada | 30872, 32139 |
| Yamaha | 30497, 32298, 30539, 30817, 30490, 31354, 33871, 30646, 33837 |
| Yamakawa | 30872 |
| YBA | 30872 |
| Yukai 30730 | |
| Zenith | 30741, 30591, 30503 |
■ Blu-ray Disc
| Anthem 32820 | |
| Anthem Statement | 32820 |
| Cambridge Audio | 32808 |
| Denon | 32258, 32748, 33851 |
| Electrocompaniet | 32545 |
| Elite | 32854 |
| Funai | 30675 |
| Harman/Kardon | 33228, 32927 |
| Insignia 32596, 32428, | 30675 |
| Integra | 32147, 32900, 32910, 33100, 33101, 33500, 33501 |
| JVC | 32365, 32612, 32855 |
| Lexicon 32545 | |
| LG | 31602, 32811, 30741 |
| Magnavox | 30675 |
| Marantz 32414, 33444 | |
| Mitsubishi Electric | 34004 |
| Onkyo | 32147, 32900, 33101, 33501, 32910, 33100, 33500 |
| Oppo | 32545 |
| Panasonic | 31641, 33862, 33580, 33641, 32859, 32523, 32710 |
| Philips | 32789, 32434, 32084 |
| Pioneer 32442, 32847, | 32854, 30142 |
| RCA | 32532 |
| Samsung | 30199, 33195 |
| Sharp 32250, 33313 | |
| Sherwood | 32820, 33837 |
| Sony 31516, 32180, | 30772 |
| Sylvania 30675 | |
| Tascam 34004 | |
| Toshiba 32705, 33157, | 33857, 32551 |
| VIZIO | 32563 |
| Yamaha | 32298, 33871, 33837 |
DVD-R
| Accurian | 30675 |
| AEG | 30675 |
| Akai | 30675 |
| Aristona | 30646 |
| CyberHome | 31023 |
| Denon | 30490 |
| Dick Smith Electronics | 30675 |
| DSE | 30675 |
| Emerson | 30675 |
| Funai | 30675 |
Connections
Initial Setup
Playing Back
Advanced Manual
Front Panel
Rear Panel
Remote Controller
Reference Information
| Go Video 30741 | |
| GPX 30741 | |
| Hitachi 31664 | |
| Humax 30646 | |
| Insignia 32095 | |
| Irradio 30646 | |
| JVC 30623, 32612 | |
| LG 30741 | |
| Loewe 30741 | |
| Magnavox 30675, 30646, 31506 | |
| Medion 30741 | |
| NEC 30741 | |
| Panasonic 30490, 31579, 33580, 32710, 32859, 32523 | |
| Philips 30646, 31340, 31506, 32334, 30539, 32056 | |
| Pioneer 30631 | |
| Pye 30646, 30675 | |
| RCA 30522 | |
| Samsung 31635, 32942 | 33195, 32107, 30490, 32069, 32489 |
| Schneider 30646 | |
| Sharp 33313, 30630, 30675, 30713 | |
| Silva Schneider | 30741 |
| Sony | 31070, 31033, 32861, 31516, 31536, 32839, 32180, 31633 |
| Sylvania | 30675 |
| Targa | 30741 |
| Tchibo | 30741 |
| TCM | 30741 |
| Thomson 30551 | |
| Toshiba 32277, 32551, 30503 | |
| Universum | 30741 |
| Yamaha | 30646 |
| Zenith | 30741 |
VCR
| DirecTV | 20739 |
| Humax | 20739 |
| Loewe | 21062 |
| Metz | 21062 |
| Optimus | 21062 |
| Panasonic | 21062, 20616 |
| Philips | 20739 |
| Quasar | 21062 |
| RCN | 20739 |
| ReplayTV 20616 | |
| Sonic Blue | 20616 |
| Sony | 20636 |
| TiVo | 20739, 20636 |
■ Cable Set Top Box (A to E)
| ABN | 03322, 02897, 02979, 03340, 03407, 03849 |
| Access Communications | 01376, 00476 |
| ACT | 02950 |
| Adams Cable TV | 01376 |
| ADB | 02586, 01920, 01585, 01927, 01481, 01998, 02254, 02302, 02437, 03028 |
| Akado 02043 | |
| Aland | 02030, 02437 |
| Alands Datakommunikation | 02030, 02437 |
| Alcom | 02030, 02437 |
| Alice | 01585 |
| Allegiance Communications | 00476, 01376 |
| Allen TV Cable | 00476 |
| Altibox | 02437, 02030 |
| Amino 01615, 01898, | 01481, 02482,01998, 02302,03028 |
| Anguang Network | 03936 |
| Anhui Network | 03936 |
| Arcadyan 02952 | |
| Arion | 03336 |
| Armstrong 01376, 00476 | |
| Arris | 02187, 01982,01998, 02378 |
| Arvig Communication Systems | 01376, 01982,01998, 02345 |
| Astound Broadband | 01376, 01877,00476, 02479,04079 |
| AT&T | 00858 |
| AT&T U-verse | 00858 |
| Atlantic Broadband | 01877, 01376 |
| ATMC | 01376, 01982,03028 |
| Austar | 00276 |
| B tv 02681, 03442 | |
| Baja Broadband | 00476, 01376 |
| BBTV | 02980 |
| Beijing | 04010 |
| Belgacom TV | 02047, 02132 |
| Bell | 01998 |
| Bell Aliant | 01998 |
| Bell ExpressVu | 01998 |
| Bell Fibe TV | 01998 |
| Bend Broadband | 01376, 00476,02187 |
| BesTV | 04196 |
| Bevcomm | 01898, 00476 |
| BGCTV 03278, 00476 | |
| BIG.BOX | 03465 |
| Blue Ridge Communications | 01877 |
| Bluewin | 02271 |
| Bouygues Telecom | 03007 |
| Boxer | 03607 |
| Bright ClouDigital | 03961 |
| Bright House | 01877, 01376, 00476 |
| British Telecom | 02294 |
| Broadstripe | 00476, 01376 |
| BSI | 02979 |
| BT | 02294 |
| BT Vision 02294 | |
| Buckeye Cable System | 01376, 00476, 01877, 02187 |
| C&M | 03407, 03319, 02962, 02979 |
| Cable America | 01376, 01877 |
| Cable Axion Digital | 01376, 00476 |
| Cable HK | 01374 |
| Cable One | 01376, 00476, 01877 |
| Cablecom 01582 | |
| Cablecom Mexico | 00476, 01376 |
| Cablemas 01376, 01877 | |
| Cablevision | 01877, 01376, 03336, 00476 |
| Cabovisao | 02436, 02493 |
| Caiway 02015, 03607, | 02762, 00660, 02447 |
| Caiyun Digital | 03961 |
| CalTel Connections | 02254, 02586 |
| Canal Digital | 02030 |
| Canby Telcom | 01481, 02302 |
| Cass Cable | 00476, 01376 |
| CC9 | 02703, 02752, 03474 |
| CCAP | 01877 |
| CCS 03322 | |
| Celrun 03442, 02682 | |
| CenturyLink | 01998 |
| Channel Master | 03118 |
| Charter | 01877, 01376, 00476, 02187, 03560 |
| Chengde Guanglong | 03936 |
| Chengdu Cable | 03953 |
| Chengdu Telecom | 04196 |
Reference Information
| China Telecom 04196, 03937 | 2913, |
| 03937 | |
| China Unicom 04366, 04196 | |
| Chongqing Cable 03954 | |
| Chongqing Cable Networks | 03954 |
| CHT 03647, 01917 | |
| Chunghwa 03647, 01917 | |
| Cincinnati Bell 01877, 01376 | |
| Cisco 01877, 00858, | 03028, 01982, |
| 02132, 02345, | |
| 02589, 01883, | |
| 01998, 01582, | |
| 02047, 02378, | |
| 02563, 02401, | |
| 02742, 03265, | |
| 02271, 02947, | |
| 03452 | |
| Citycable 03451, 03477 | |
| CJ 03322, 02897, | 02979, 03340, |
| 03407, 03849 | |
| CJ Digital 02979, 02897, | 03322, 03340, |
| 03407, 03849 | |
| CJ HelloVision 03322, 02897, | 02979, 03340, |
| 03407, 03849 | |
| Claro 01376, 00476 | |
| ClubInternet 02132 | |
| CMA Communications 01376 | |
| CMB | 03389, 02979, |
| 03498 | |
| CMBTV | 03498 |
| CNS | 02980, 02350 |
| Cogeco | 01376, 01982, |
| 00476 | |
| Com Hem | 00660, 02447, |
| 02832, 02015 | |
| Comcast | 01982, 01376, |
| 00476, 01877, | |
| 03560, 02187 |
| Comporium | 01877, 03560, 02187 |
| Consolidated Communications | 01877, 01376, 01998, 02302, 03048 |
| Coship | 01991, 02950, 03278, 04162, 04408, 04196 |
| Cosmic | 02897 |
| Cox | 01877, 01376, 00476 |
| CTS | 02703, 03474 |
| Daeryung | 01877 |
| Darty Box | 02436 |
| DASAN | 02683 |
| Delta | 03607, 02015, 00660, 02447, 02762 |
| DEN | 02726 |
| Deutsche Telekom | 02132 |
| Digeo | 02187 |
| Digi | 02762, 03479 |
| Digicable 03382, 02479 | |
| DigitAlb | 02493 |
| Director | 00476 |
| Dmg | 03835 |
| DNA | 02832, 00660, 02030 |
| Dom.ru TV | 02493 |
| Dream Satellite TV | 02493 |
| DSD | 03340 |
| DST | 03389 |
| Du | 02401 |
| DV | 02979 |
| Eagle Communications | 01376, 02187 |
| EastLink | 01376, 00476 |
| Echostar | 02955, 03452 |
| Elion | 03916 |
| Entertain | 02132 |
| Entone | 02302, 03048 |
| ER Telecom | 02493 |
| eTb | 04281 |
| Evolution 02479, 02746, | 04079 |
| Extra TV | 02132 |
| ■ Cable Set Top Box (F to J) | |
| Fastway | 03382 |
| FCTV | 01782, 02703 |
| Fidelity Communications | 01376 |
| Finnet | 02030, 02832 |
| First Media | 03783 |
| Freebox | 01976 |
| Frontier Communications | 02378 |
| Fujian Broadcast & TV Network Group | 04195 |
| Fujian Broadcast and TV | 04195 |
| Gangwon Broadcasting Network | 03407 |
| Gansu Cable | 04236 |
| GCI | 01376 |
| GCS | 03322 |
| GDCATV 02980, 03131, | 03132 |
| Gehua | 03278, 00476 |
| General Communications | 01376 |
| General Instrument | 00276, 00476 |
| 03666 | |
| Gospell | 04205 |
| Grande Communications | 01877, 03560, 01376 |
| Great Plains Communications | 01376 |
| Guangdong Cable | 02980, 03131, 03132 |
| Guangxi Broadcasting | 02897, 03407, 03961 |
| Guangxi Broadcasting Network | 02897, 03407, 03961 |
| Guangzhou Cable | 02945 |
| Guizhou Broadcasting Network | 03946 |
| Hana TV | 02681, 03442 |
| Hathw@y | 02043, 02726 |
| Hawaiian Telcom | 03028 |
| HBC | 01376, 01877,01982, 02979,03322, 03340,03849 |
| HCN | 02979, 03340 |
| HD+ 03607 | |
| HDT 03465 | |
| Hebei Broadcasting | 04026, 03967 |
| Hebei Broadcasting Network | 04026, 03967 |
| Hebei Digital TV | 04205 |
| Hello TV | 03322 |
| HelloD | 02979 |
| Henan Cable | 04034 |
| HickoryTech 01898, 02302 | |
| Hikari TV 03237 | |
| Himawari TV | 01760 |
| Homecast | 02977, 02979,03389 |
| Hong Kong Cable | 01374 |
| Hrvatski Telekom | 02132 |
| HSHONG | 03965, 03937,04026 |
| Huashu | 04034 |
| Huawei | 02994, 03278,03937, 01991,02913, 04281,01982 |
| Humax | 03607, 02762,02043, 02447,00660, 01981,01983, 02620,02832, 03560,02165, 02683,02701, 02889,02715, 02962,03051, 03053,03075, 03319,03849 |
| Hunan Cable Net | 04205 |
| HYA | 02989 |
| Hyroad | 02979 |
Reference Information
| HyTV 02979, 03340 | |
| Hyundai Digital Technology | 03465 |
| HZRTV 02960 | |
| I-Cable 01374 | |
| i-CAN 01585, 02437 | |
| I-Digital 03319, 02979 | |
| IMBTVN 04106 | |
| INESA 03865 | |
| Innovative Systems 01898 | |
| Inotel 02437 | |
| Inter Mountain Cable 01877, 02479, 04079 | |
| Invitel 02437 | |
| InviTV 02437 | |
| iTSCOM 02703 | |
| ITV 02979, 03389, | 04196, 03498 |
| J:COM 01760, 02703, | 03925, 01782, 02701, 02700, 02715, 02752, 03051, 03053 |
| Jambox | 02030 |
| JBC | 02979, 03322, 03340, 03849 |
| JCN North | 02703, 01760, 03474 |
| Jerrold | 00276, 00476 |
| Jiangsu Cable Network | 04022 |
| Jilin Broadcasting | 04009 |
| Jilin Cable | 04009 |
| Jinan Radio and Television Network | 04206 |
| Jishi Media | 04009 |
| Jiuzhou | 01991 |
| JP PTT 01615 | |
| JXCN 03948 |
| Cable Set Top Box (K to N) | |
| Kabel Deutschland | 03514, 01981,01983, 02165,03607, 02620 |
| KabelBW | 02889, 01981, 01983 |
| KabelNoord | 02015 |
| Kaon | 02493, 02889, 02746, 03407, 04409, 02682, 02979, 03389 |
| kbro | 02350, 03139 |
| KCN-TV | 02703 |
| KCT | 01760, 02703, 02752, 03474 |
| KCTV 02979, 03340, | 03389, 03849, 03322 |
| KCTV JEJU | 02979, 03340, 03389, 03849 |
| KCTV-KJ | 02979, 03340, 03389, 03849 |
| KDMC | 03319, 02979 |
| Kiryung 03498 | |
| Kiss | 02132, 02271 |
| KoolConnect | 01481 |
| KPN | 02952, 02437 |
| Kreatel | 02030 |
| KT | 02683, 03478 |
| Lattelecom | 02030 |
| LG | 03340, 02682, 03407, 02979, 03389, 03319 |
| LG U+ | 02682 |
| Linksys 02271 | |
| Lishui Huashu | 04034 |
| Longyan Broadcasting Cable & Tv | 04195 |
| Lumos Networks | 01998, 03028 |
| Magio Sat | 02132 |
| Magnet 01615 | |
| Maige TV | 03937 |
| Massillon Cable | 00476, 01376 |
| Matanuska Telephone Association | 01481, 02254, 02482, 02586 |
| Mediacom | 01376, 00476, 01982, 01877 |
| Mediastream | 01376, 00476 |
| Mega 02683 | |
| Mega TV | 02683 |
| Megacable | 01376, 00476 |
| Meo | 02401 |
| MetroCast Cablevision | 01376, 01982, 00476 |
| Mi-Connection | 01877 |
| Midcontinent | 01376, 00476, 01982 |
| Communications | |
| Mid-Hudson Cable | 00476, 01376 |
| Minerva Networks | 03118 |
| MIO | 02275, 02802 |
| mio TV | 02275, 02802 |
| Mitsubishi Electric | 03274 |
| MOD | 03647, 01917 |
| Motorola | 01376, 00476, 02378, 02437, 01998, 02030, 00858, 01982, 02952, 00276, 01562, 02275, 03916, 01585, 04034, 02401 |
| Movistar 01585, 03288 | |
| Moxi | 02187 |
| Moyo 03611 | |
| MTS | 01998, 03611, 01615, 01481, 01898 |
| MyLGTV | 02682 |
| NET | 01883 |
| NewWave | 00476, 01376, 02187 |
| Communications | |
| NIB | 03322 |
| Ningde Cable TV | 04195 |
| Noos | 02436 |
| Northland Communications | 01376 |
| Novus 01376, 00476 | |
| Now TV | 02009, 02014 |
| NTL | 01060, 00276 |
| NTT | 03237, 03274 |
| NTV Plus | 02762 |
| NU Telecom | 01998, 03028 |
| Numericable | 02436 |
| Cable Set Top Box (O to S) | |
| O2 | 02586 |
| OCN | 03865 |
| Oi TV | 03452, 03454, 04165 |
| Olleh TV | 02683, 03478 |
| Olleh-Skylife | 02683, 03478 |
| Ono | 01562 |
| Open IPTV | 01615 |
| Optimum | 01877 |
| Optimus Clix | 02437 |
| Optus 00276, 01060 | |
| Orange 02407 | |
| Oriental Cable Networks | 03865 |
| Pace | 01376, 01060, 02620, 01982, 01877, 01998, 00858, 01582, 01883, 03454, 02294, 02401 |
| Panasonic | 02703, 02752, 03474, 01760, 01782, 01982 |
| Parasat | 03479 |
| Paul Bunyan Communications | 02254, 02586 |
| PCCW | 02009, 02057 |
| Philips | 01582, 02378, 03560, 02294 |
| Pioneer | 01782, 01877, 03925, 02700 |
| Pioneer Telephone | 02254, 02302 |
| Portugal Telecom | 02401 |
| Premiere | 02620 |
| Primacom | 02889 |
| Primestar | 02030 |
| PrimeTel | 03611, 02030, 02437 |
| PrimeTV | 02030 |
| PT | 02401 |
Reference Information
| PTCI 01376 | |
| PX 03348 | |
| QooK TV 02683, 03478 | |
| Qook-Skylife 02683, 03478 | |
| Qrix 03465, 02979 | |
| QuickLine 02493 | |
| Qwerty 01898, 01481, | 01615 |
| Qwerty.TV 01898 | |
| RCN 01376, 00476, | 03560 |
| Reach Broadband 01376, 01877, | 01982 |
| Reliance 02556 | |
| RIO Media 02030 | |
| Rogers 01877, 01376 | |
| Rostelecom 03611 | |
| Sagem 02407, 02436, | 03288 |
| Sagemcom 03514, 02407, | 02436, 03007, |
| 03288 | |
| Samsung | 03322, 02979, |
| 03319, 01877, | |
| 02407, 02015, | |
| 03340, 03407, | |
| 03451, 03442, | |
| 03477, 02610, | |
| 02955, 01060, | |
| 02683, 03514, | |
| 03783, 02589, | |
| 02889, 02962, | |
| 03265, 03849, | |
| 03928, 01982, | |
| 01987 | |
| SaskTel | 01998 |
| SBN | 03965 |
| Scientific Atlanta | 01877, 00858, |
| 01982, 02401, | |
| 02345, 01987, | |
| 02047, 02436, | |
| 03028, 02378 | |
| SCTV | 02493 |
| SCV | 02950 |
| Seokyung 03340 | |
| Service Electric | 01376, 00476, 01982 |
| SetaBox | 01917 |
| Shaanxi Broadcasting | 03965 |
| Shanghai | 03865 |
| Shanghai OCN | 03865 |
| Shanxi Broadcasting Network | 03965 |
| Shaw | 01376, 01877, 00476, 02187, 01982 |
| Shenzhen Broadcasting | 01991, 04162 |
| Shenzhen Digital TV | 01991, 04162 |
| Shijiazhuang Broadcasting | 04026 |
| Shimanto CATV | 02752 |
| Sichuan Broadcasting | 03953 |
| SingTel | 02275, 01998, 02802 |
| Siti Digital 03664 | |
| SK Broadband | 03442, 02681 |
| SK Btv | 02681, 03442 |
| Sky Austria | 02620, 02447, 02832 |
| Sky Deutschland | 02620, 02447, 02832 |
| SkyCable | 02950, 03521, 03527, 04177 |
| SkyLife | 02683, 03478 |
| Skyworth 03298, 02960, | 03278, 01991, 03521, 04177, 03946, 04162 |
| Smartlabs | 03611 |
| Smile Content | 02437 |
| SMT | 03527 |
| SMtronics 03319 | |
| Sogetel | 01998, 02482 |
| Sonaecom 02437 | |
| Sonera 00660 | |
| Source Cable | 01376, 00476 |
| Starcat 02703, 01782 |
| StarHub | 01927, 00276 |
| Stipte | 01898 |
| Stofa | 02015 |
| Suddenlink | 01877, 01376, 01982, 03560, 00476 |
| Supercable 00276 | |
| Supercanal 01376, 00476 | |
| Suwon Cable | 03319 |
| Suzhou Cable Network | 04022 |
| SVA 03865 | |
| Swisscom | 02271 |
| SXBCTV | 03965 |
| Cable Set Top Box (T to Z) | |
| TalkTalk | 02994 |
| Tbaytel | 03028 |
| Tbroad 03319 | |
| TCC | 04409, 04408 |
| TCN | 03340, 02703 |
| T-Com | 02132 |
| TDC | 02271 |
| TDS Telecom | 03028 |
| Technicolor 01982, 02994, 03288 | |
| TechniSat | 03316 |
| Tele2 | 00660, 02447 |
| Telecentro | 00476, 01376 |
| TeleColumbus | 02889 |
| Telefonica 01585, 03028, 03288, 02586 | |
| Telekom Deutschland | 02132 |
| Telenet | 01920, 03451, 03477 |
| Telewest | 01987 |
| Telia 02030 | |
| Telmex | 01376 |
| TELUS | 03028 |
| TFN | 03127, 03139 |
| T-Home | 02132 |
| Thomson 01582, 01981,01982, 01983,03007, 02407 | |
| T-Hrvatski Telekom | 02132 |
| Tianjin Broadcast & TV Network | 04010 |
| Tianjin Broadcasting | 04010 |
| Time Warner | 01877, 01376,00476, 02187 |
| TiVo | 03560, 03265 |
| ToongTV | 03322 |
| Top | 03766 |
| TopTV | 01991 |
| TP 02407 | |
| Trans PX | 00276 |
| True Visions | 03075, 02762 |
| TVB | 01615 |
| TVS Cable | 01376, 01877,01982 |
| U+ | 02682 |
| U+ tvG | 02682 |
| UCATV | 02703, 01760 |
| Unitymedia | 02955, 02610,03451, 03477 |
| UPC | 01582, 03451,03477, 00660,01060 |
| UPC Cablecom | 01582, 03451,03477 |
| US Electronics | 00276 |
| U-verse | 00858 |
| Vector | 02030 |
| VeeTV 03231 | |
| Verizon | 02378 |
| Viasat | 02030 |
| Videotron | 01877, 02947 |
| Viken Fibernett | 02030, 02437 |
| Virgin Media | 01987, 02563,01060, 03265,00276 |
| Visionetics 01374 | |
| Vivo | 03288 |
En-98
Reference Information
| Vodafone 02401 | |
| Volia 02493 | |
| Volia Cable 02493 | |
| Voo 02742 | |
| VTR 01376 | |
| wasu 04034 | |
| Wave Broadband 01376, 00476,02479, 04079 | |
| Wavevision 01376, 01877,01982 | |
| Wbox 02832 | |
| WEHCO Video 01376 | |
| Welho 02832 | |
| WellAV 03479 | |
| WestmanCommunications | 01376, 00476,02187 |
| WideOpenWest 01376 | 01877,02187 |
| Windjammer Cable 00476, 01376,01877 | |
| WNC | 03118 |
| WOW! | 01877, 01376,00476, 02187,02479 |
| Xfinity | 01376, 01982,00476, 01877,03560, 02187 |
| Xuyi Radio & TV | 02897 |
| YBN | 03322 |
| YCV | 02703, 01760 |
| Youview | 02994 |
| Yunnan Broadcasting | 03961 |
| Yuxing | 02014 |
| Zhong Hua Dian Xin | 01917 |
| Ziggo | 02589, 03607,02015, 02762,00660, 02401,02447 |
| Zinwell | 03139 |
| Zito Media | 01376, 01982 |
| ZTE | 04196 |
■ Satellite Set top Box
| @sat | 01300 |
| @Sky | 01334 |
| 1.Sky 03538 | |
| Acoustic Solutions 01284 | |
| ADB | 02553, 00887, 01887 |
| AEG 02738, 02813 | |
| Agora | 01284 |
| Airis | 02813, 03012 |
| Airtel 02248 | |
| Akai | 02938 |
| Akira 02738 | |
| Akta | 01986 |
| Akura | 01626 |
| Alba | 01284, 02034, 02568 |
| Allvision | 01334 |
| Altech UEC | 02059, 02097, 03517 |
| Amiko | 04197 |
| Amstrad | 00847, 01662, 01175, 01693, 02467 |
| AMTC | 02738, 02813 |
| Ansonic | 02418 |
| Aonvision | 02279 |
| Apro 01672 | |
| Argos | 02568 |
| Arion | 03374, 04348 |
| Arnion | 01300 |
| Arris | 00869 |
| AS | 01284 |
| ASA | 00740 |
| ASCI | 01334 |
| ASDA 01284 | |
| AssCom | 00853 |
| Astrell | 01986, 02418 |
| Astro | 00173, 01838, 02627, 00658, 03838, 01099, 01100, 02026 |
| Atevio | 02928 |
| Atlanta | 02418, 03320 |
| Atom | 02289 |
| Audiola | 03012, 02418 |
| Audioline | 01672 |
| Aurora 00879 | |
| Austar | 00879 |
| Austriasat | 01195, 01197, 02957, 03374, 01561, 01631, 02631 |
| Auvisio | 02932, 02738, 02813 |
| Avanit | 00299, 01631 |
| Awa | 02418 |
| Axil | 02418, 01413, 01777, 02738, 03424 |
| Axitronic | 01626 |
| AZ America | 01631 |
| AZBox 02719 | |
| B.net | 01672 |
| B@ytronic | 00740 |
| Beijing 03299 | |
| Bell | 00775 |
| Bell ExpressVu | 00775 |
| Bell Fibe TV | 00775 |
| Bell Satellite TV | 00775 |
| Belson | 02418 |
| BENsat 02957, 02938 | |
| Best Buy | 02728, 02842 |
| BIG TV | 04312 |
| BIOSTEK | 02738 |
| BiS Television | 01986 |
| Black Diamond | 01284 |
| Blaupunkt | 00173 |
| Blu:sens | 02938 |
| Boca 02026, 02458, | 02797, 02308, 02813 |
| Boshmann | 01413, 01631 |
| Botech | 02738, 03749 |
| Boxer | 02443, 01692, 01957, 04024 |
| Brainwave | 00658, 01672 |
| BSkyB 01175, 01662, | 00847 |
| Bulltech | 02738 |
| Bush 01935, 02376, | 01284, 02813, 01672, 03346, 03439, 02034, 03652, 01291, 01626, 02418, 02568 |
| Cablecom 01195, 01197 | |
| Caiway | 02443, 00253 |
| Canal Digitaal | 02631, 00853, 02466, 02957 |
| Canal Digital | 02553, 01780, 00853, 01334 |
| Canal+ | 00853, 02657, 01195, 01197, 01986 |
| CanalSat | 00853, 02657 |
| Century | 03110, 00856 |
| CGV | 02034, 01413, 01986 |
| Chess | 02026, 01334, 01626 |
| Cignal | 02289, 02835, 02836 |
| CityCom | 00299, 00658, 02957 |
| Clarke-Tech 03320 | |
| Claro | 03787, 03790 |
| Classic | 01291, 01284, 01672 |
| Clatronic | 01413, 02738 |
| Clayton 01626 | |
| CME | 00173 |
| CMX | 02205, 02932 |
| Cobra 02728, 03012 | |
| Com Hem 01176, 01915 |
Reference Information
| Comag 02797, 02026, | 02458, 02813,02308, 01413 |
| Comsat 01413 | |
| Comwell 01956 | |
| Continent 01986 | |
| Coship 03787, 03790, | 01672, 02525,03574 |
| Cosmos TV 01545 | |
| Croner 02813 | |
| Crown 01284 | |
| Crypto 03012 | |
| Crystal 03012, 01416 | |
| Cyfra+ 00853, 01409 | |
| Cyfrowy Polsat 02262, 02527,00253, 00853 | |
| Dantax 01626 | |
| Danystar 02938 | |
| DASAN 03321 | |
| D-box 01114 | |
| DCR 03517 | |
| Delta 02443 | |
| Denver 02418, 02738 | |
| Deutsche Telekabel | 01195, 01197 |
| Dgtec | 01631, 02418 |
| Dick Smith Electronics | 02418, 02813 |
| Dicra 02738, 02842, | 03012 |
| Digenius | 00299, 00740 |
| Digi | 01416, 01195,01197, 02026 |
| Digi Raum Electronics | 02622 |
| Digi Romania | 01416 |
| Digitality | 01334, 02813 |
| Digihome | 02034, 01284,01935 |
| DigiLogic | 01284, 02034 |
| DigiQuest | 02278, 02738,01300, 01631 |
| Digital | 02308 |
| DigitAlb 01195, 01197 |
| DigitalBox | 02540, 01631, 02289, 01100, 03240 |
| DigitSat-e | 02842 |
| Digiturk | 03517, 02097 |
| Digiwave | 01631 |
| Dikom | 02938, 02842 |
| Dilog | 01957, 01780 |
| DiPro | 02278 |
| DirecTV | 01377, 01442, 00099 |
| Dish Mexico | 00775 |
| Dish Network | 00775 |
| DishHD 04090 | |
| Dishpro 00775 | |
| DishTV | 01300, 02604, 01780 |
| Di-Way 02289 | |
| DMT 03321 | |
| DMTech | 02738 |
| DNA | 01780, 01957, 01176, 02144 |
| Donghai | 02938 |
| Doro 01672 | |
| DragonSat | 02928 |
| DRE | 02622 |
| Dream | 01237 |
| Dream Multimedia | 01237, 01652, 01923 |
| Dream Satellite TV | 01416, 03374 |
| DSE | 02418, 02813 |
| D-Smart | 02231 |
| DSTV 00879, 02059, | 02060 |
| DTI Electronics | 02938 |
| DTK Deutsche Telekabel | 01195, 01197 |
| DTV | 03572 |
| Dual | 02034 |
| Durabrand | 01284, 02034 |
| Dyon 02738, 02813 | |
| Easy-One | 03240 |
| Echostar | 00775, 02262, 02527, 00853, 01409 |
| Eco-Star | 01413 |
| Edision | 01631 |
| Ekotech | 03422 |
| Elap | 01413 |
| Elbe | 02418 |
| Electron | 01956 |
| Elisa 01322, 02455 | |
| Elless 00740 | |
| Elta | 02738 |
| Embratel 02796, 03787 | |
| Energy Sistem | 02418, 01631, 02289, 02813 |
| Engel | 03749, 01611, 01672 |
| Etisalat | 02443 |
| Europhon | 00299, 01334 |
| Europsat 01611, 01413 | |
| Eurosky | 00740, 00299 |
| Eutra | 00740 |
| Evesham Technology | 02034 |
| Eycos | 03374 |
| F&U | 03012 |
| Fagor | 01611 |
| FaVal | 03422 |
| Ferguson | 02638, 01291, 01803, 01935, 02034 |
| Finepass | 01780 |
| Finlux 01626, 02034 | |
| Finnet | 01780, 01957 |
| FinnSat 00740, 01195, 01197, 01351 | |
| FMD 01413 | |
| Fortec Star | 01631 |
| Foxtel | 01356, 00879, 01176 |
| Freesat | 01692, 02928, 03266, 01986, 02376 |
| Freesat+ 02443, 03266 | |
| freeview | 02982 |
| Fte Maximal | 02289 |
| Fuba | 02750, 00173, 00299, 03726 |
| Fuji Onkyo | 02728, 01631 |
| Funai United | 03012 |
| Galaxis | 00853, 00879 |
| Galaxy 01956 | |
| Galaxy Innovations | 02799, 04197 |
| General Instrument | 00869 |
| General Satellite | 03064, 02622 |
| Gi | 02799, 04197 |
| GigaBlue | 03663 |
| GigaTV | 02738 |
| Globo 02026, 01334, | 00740, 01429, 02957, 01626 |
| GMMZ 03538 | |
| Go | 01780 |
| GoGen 02738 | |
| GOI | 00775 |
| Gold Box | 00853 |
| Gold Vision | 01631 |
| Golden Media | 04197 |
| GoldMaster | 01334, 02928 |
| Goodmans | 01284, 02376, 02034, 03652, 02568, 03346, 03439 |
| Gradiente | 00887, 03110, 00856 |
| Gran Prix | 00740 |
| Grandin | 01626 |
| Grocos 01409 |
En-100
Reference Information
| Grundig 00173, 00847, | 02376, 01291,02034, 00853,02813, 01284,01780, 02738,03424, 00879,01672, 02568,03346 |
| GVT 03789 | |
| Haier 02418 | |
| Hailo 02289 | |
| Hallo 01626 | |
| Handan 01780, 01957 | |
| Hanseatic 01099, 01100 | |
| Hauppauge 01672 | |
| HD Box 02928 | |
| HD+ 02797, 02443, | 01429, 02569,03095 |
| HDT 01416, 01255, | 03321 |
| Hirschmann 00173, 00299, | 02026, 00740 |
| Hitachi 02034, 01284 | |
| Homecast 02525 | |
| Hornet 01300 | |
| HTS 00775 | |
| Huawei 03787 | |
| Huaxian Radio andTelevision Network | 04041 |
| Hubei Chutian | 04041 |
| Hubei Radio &Television Network | 04041 |
| Hughes NetworkSystems | 01442, 01377 |
| Humax | 01176, 02443, 01427, 01808, 02736, 01882, 01915, 03140, 02231, 02408, 02144, 02616, 02754, 01377, 03517, 01989, 02289, 03321, 01255 |
| Hyundai | 01416 |
| Hyundai Digital Technology | 01416, 01255, 03321 |
| ibox | 01652 |
| IceCrypt | 04197, 02838, 02928 |
| ID Digital | 01176 |
| ID Sat | 02289, 01334, 01631 |
| i-Joy | 02938 |
| Illusion | 01631 |
| Imagin 01195, 01197 | |
| Imperial 01195, 01197, | 01334, 01429, 01672 |
| InDigital | 01416 |
| Indovision 01989, 00856, | 01887, 02108, 00887, 01255 |
| iNETBOX | 01652, 01237 |
| Inno Hit 01626, 02728 | |
| Innova 00099 | |
| Intv | 04348 |
| Inverto 03095 | |
| inVion | 02418 |
| iotronic | 01413 |
| IP Vision | 02455 |
| IPM | 03567 |
| IQ | 02813 |
| IQ Prism | 02813 |
| ISkyB | 00887 |
| ITT | 02418 |
| Jaeger 02797, 01334 | |
| Jameson | 02813 |
| Jerrold 00869 | |
| Jiuzhou 03140 | |
| JVC | 00775, 01284 |
| Kabel Deutschland | 01195, 01197, 01672, 01882, 01915 |
| KabelBW | 01882, 01915, 01195, 01197, 01429 |
| KabelNoord | 00253, 02443 |
| Kamosonic | 02738 |
| Kaon | 01300, 02231 |
| Kathrein | 01561, 02569, 00658, 00173, 03658, 01416, 02263 |
| Kenwood | 00853 |
| Konig | 02289, 01631, 00173 |
| Koscom | 01956 |
| KPN 01986 | |
| Kreiling 00658, 01626 | |
| Kreiselmeyer | 00173 |
| KT | 03321 |
| L&S Electronic | 01334 |
| Labgear | 03424 |
| LaSAT 00740, 00299 | |
| Lava | 01631 |
| Lazer | 02738 |
| Leiker | 02728 |
| Leiko 01626 | |
| Lemon 01334 | |
| Lenoxx | 01611 |
| LG | 03321 |
| Lifesat | 00299 |
| LinkBox 02957 | |
| Linsar | 01284, 02842 |
| Listo | 01626, 02813 |
| Lodos | 01284 |
| Logik 02034, 01284, | 01906, 02842,01803, 03652 |
| LogiSat | 02797, 02026,02813, 02458 |
| Lorenzen | 00299 |
| Lowry | 02938 |
| Luxor | 01935, 02034 |
| M vision | 03562 |
| M7 | 02631 |
| Macab 00853 | |
| Magic TV | 02982 |
| Majestic | 03012, 02738,02842 |
| Manhattan | 01300 |
| Maplin | 02034 |
| Marusys | 02799, 03543 |
| Mascom | 02738 |
| Maspro 00173, 03099 | |
| Matsui | 01284, 00173,01626 |
| Maximum | 01334, 02813,01672, 01986 |
| Mediabox | 00853 |
| MediaSat 00853 | |
| Mediascape | 02289, 02835,02836 |
| Mediaset | 02750, 02278,01427, 02736,02739 |
| Medion 00299, 00740, | 01626, 01334,02026, 02797 |
| Mega TV | 03321 |
| MegaSat | 01631, 02034,02813, 02289,00740, 02738 |
| Melita | 01416 |
| Meo 02466 | |
| Mercury | 03422 |
Reference Information
| Metronic 01986, 02418 | 02738, 01334,01631, 01413,01672, 01935,02278 |
| Metz 00173 | |
| Micro 02797, 02813 | |
| Micro electronic 02308 | 02813 |
| Micromaxx 00299 | |
| Microstar 00299 | |
| Miraclebox 02928 | |
| Mitsai 02738 | |
| Morgan's 02026 | |
| Motorola 00869, 03110 | 00856, 03469 |
| Movistar 02527, 02262 | 02263 |
| MTEX 03539 | |
| Multichoice 00879, 02059,02060 | |
| Murphy 02034 | |
| Mx Onda 02938 | |
| myfreeviewHD 02982 | |
| Mysat 02738 | |
| MySky Italia | 02467 |
| MySky New Zealand | 01356, 02211 |
| Nagra | 02262 |
| NanoXX | 01631 |
| NC+ | 00853, 01409 |
| NEOTION | 01334 |
| NET | 02262 |
| Netgem | 01322, 02455 |
| Netsat | 00099, 00887 |
| Neuf TV | 01322 |
| Neuling | 02458, 02026 |
| Nevir | 02938, 02728 |
| Next | 02231 |
| Next Level | 00869 |
| Nextvision | 01956 |
| NextWave | 01956 |
| Nilox | 02278 |
| Nokia | 00853 |
| Nordmende | 01611 |
| Noru 02938 | |
| Nova | 02475, 00879 |
| NPG 02289, 01413, | 01631 |
| NTV Plus | 01307, 01692, 02443 |
| Octagon 02928 | |
| Olleh TV 03321 | |
| Olleh-Skylife | 03321 |
| Onn | 02034, 01284 |
| Openbox 01956, 02928 | |
| Opensat 02957, 01956, | 02719 |
| Opentech | 02525 |
| Opentel | 02525 |
| Optex 01626, 01413, | 01611, 03012 |
| Opticum | 02957, 02797, 02932 |
| Optus 01356, 00879 | |
| Orbis | 01334 |
| Orbitech 01195, 01100, | 01197, 01099, 01351 |
| Orchid | 02289 |
| Orion Express | 01986 |
| Orlon | 02957 |
| P&T Luxembourg | 01322, 02455 |
| Pace | 00847, 00887, 01356, 02754, 01682, 01175, 01693, 02475, 00853, 02231, 02467, 02631, 02657, 03469, 03790, 01377, 01662, 02097, 02211, 02059, 02060, 02466, 02796, 02160 |
| Pacific | 01284 |
| Palcom 01611, 00299, | 01409 |
| Palsonic 02813 | |
| Panasat | 00879 |
| Panasonic | 03494, 00847, 03099 |
| Panda | 00173 |
| peeKTon | 02418 |
| Philips | 00099, 00853, 02561, 01499, 01442, 02466, 01114, 01672, 02619, 02211, 03110, 03469, 00173, 00856, 00887, 02631 |
| Phoenix | 01956, 02418 |
| Phonotrend | 01780 |
| Pino | 01334 |
| Pioneer | 00853 |
| Pixel Magic | 02982 |
| PLDT | 02835, 02836, 02289 |
| PMB 01611 | |
| Polsat 02262, 02527, | 00253, 00853 |
| Portugal Telecom | 02466 |
| Premiere 01429, 01114, | 01195, 01197 |
| PremiumX | 03374 |
| Primacom | 01176, 01195, 01197 |
| Pro Basic | 00853 |
| ProLine | 01284 |
| PSI | 03539 |
| PT | 02466 |
| QooK TV 03321 | |
| Qook-Skylife | 03321 |
| Quelle | 00299 |
| Qwest | 01377 |
| RadioShack | 00869 |
| Radix | 01255 |
| Raduga TV | 01986, 02957 |
| RCA | 01291, 01442, 02108 |
| RCS | 01416 |
| Rebox | 02928 |
| RiksTV | 01692 |
| Rimax | 02938 |
| RIO Media | 01780 |
| Roadstar 00853 | |
| Rollmaster | 01413 |
| Ross | 02540 |
| SAB | 01956, 01631, 04197, 01300 |
| Saba | 00740, 02205 |
| Sagem | 01692, 01690, 01114, 02553, 01307 |
| Sagemcom | 01692, 04024, 03789 |
| Saivod | 02418 |
| Samart DTH | 03576, 03574 |
Reference Information
| Samsung 03063, 00253, | 01442, 01377,02467, 01682,01989, 03266,00853, 01662,02525, 03321,03784, 03834,03838, 01255,01693 |
| Sansui 01545 | |
| Sanyo 01626 | |
| Sat Control 01300 | |
| Sat Industrie 01611 | |
| SAT+ 01409 | |
| SatCatcher 01956 | |
| Satforce 03374 | |
| Satplus 01100 | |
| SatyCon 01631 | |
| Schaub Lorenz 02034, | 02418 |
| Schneider 02842 | |
| Schwaiger 01672, 01429, | 02308, 02458,01631, 02797,02813, 00740,01334, 02957 |
| Schwaiger CS 01631 | |
| Scott 02738 | |
| SCS 00299, 00740 | |
| Sedea | 01626 |
| Sedea Electronique | 01626 |
| SEG | 01626, 01284,02034 |
| Sencor | 02813 |
| Servimat | 01611 |
| Set-One 03240, 02728 | |
| Shark | 01631 |
| Sharp | 01935, 02034 |
| Shaw Direct | 00869 |
| Sherwood 01409 | |
| Shinelco 02738, 02278, | 02938 |
| SHOI 02938 | |
| Siemens | 00173, 01657,01429, 02418,01626, 01334,01672 |
| Sigmatek | 02418, 02813,02738 |
| SignalMAX | 01956 |
| Silva | 00299 |
| Silva Schneider | 00740 |
| SilverCrest | 02026, 02308,02458, 02932 |
| SKY | 01662 |
| Sky Austria 02754, 02443,01429, 01114,01915, 01195,01197 | |
| Sky Brasil | 01377, 03110,00887, 00856,00099, 01499,02619 |
| Sky Deutschland | 02754, 02443,01429, 01114,01915, 01195,01197 |
| Sky Ireland 01175, 01662,00847 | |
| Sky Italia | 01693, 02467,00853 |
| Sky Mexico | 00856, 02619,00887, 01377,03469 |
| Sky New Zealand | 02211, 00887,00856, 01356 |
| SKY PerfecTV! 03099,02616,03049 | |
| Sky UK 01175, 01662,00847 | |
| SkyCable | 01631, 01957 |
| SkyLife | 03321, 01255 |
| Skylink | 02957, 01545, 02443, 02928, 01195, 01197, 01986 |
| Skymaster | 01409, 02205, 01611, 02728, 02932, 01545, 01334 |
| Skymax | 01413 |
| Skypex | 00740 |
| Skyplus | 01334, 02026, 00740, 01175 |
| SkySat | 01100 |
| Skytec | 02928 |
| Skyvision 02797, 01334 | |
| SkyWay | 02928 |
| Skyworth | 01631, 02835, 02836 |
| SL | 00740, 02026, 00299, 01672 |
| SM Electronic | 01409 |
| Smart | 01631, 01413, 03095, 02289, 00740, 00299 |
| Sogo | 02842 |
| Sonera | 01780, 01957 |
| Sony 01558, 00847, | 00853, 03049 |
| Spiderbox 03562 | |
| Star | 00887 |
| Star Choice | 00869 |
| Starmax 02638 | |
| Steinner 02738 | |
| Stream System | 01300 |
| Strong | 01409, 02235, 01626, 02278, 02418, 02813, 00879, 03424, 00853, 01300, 03374, 01284, 01682 |
| Sun Box | 03571 |
| Sun Direct 02525 | |
| Sunny 01300 | |
| Sunstech | 02738 |
| Supernova | 00887 |
| Supratech | 01413 |
| Systec | 01334 |
| Sytech 02418, 02842, | 03012 |
| S-ZWO 03374 | |
| TATA Sky | 03575 |
| TBoston 02418 | |
| TDS Telecom | 00775 |
| Teac | 01957, 01322, 02813 |
| Technical | 01626 |
| Technicolor | 03469, 03790 |
| Technika | 01284, 01672, 02034 |
| TechniSat | 01197, 01195, 01100, 01099, 01351, 03440, 02813, 01322 |
| Technoit 02278 | |
| Technosonic | 01672 |
| Technotrend | 01429, 01672, 02263 |
| Techwood 01284, 02034, | 01626, 01935 |
| Tecsat | 01986 |
| TEKCOMM | 02738 |
| Telasat | 02466 |
| TELE System | 02750, 01611, 01409, 02739, 03726, 02813 |
| Tele2 | 01195, 01197 |
| Telefonica 01692, 02262, | 02527, 02263 |
| TeleSAT 02631, 02466 |
Reference Information
| Telestar 01100, 01099 | 01334, 01197,02540, 01195,01351, 01626,01672 |
| Televes 01300, 01334 | |
| Televisa 00887 | |
| TelkomVision 04310 | |
| Telsey 02738 | |
| TelSKY 02540 | |
| Telstra 01356 | |
| TELUS 00775 | |
| Tesla 01626 | |
| Tevion 02205, 01409, | 01672, 02026,02813 |
| Thai 03573, 03539 | |
| Thomson 01291, 01935, | 01662, 00847,00853, 01175,02278, 01307,02160, 02619,03110, 03469 |
| Tiny 01672 | |
| Titan | 02205 |
| Tividi | 01429 |
| TiVo | 01377, 01442 |
| TivuSat | 02750 |
| T-Mobile | 02631, 02443,01545 |
| TNT SAT | 01692, 01195,01197, 01986 |
| Tokai 02938 | |
| Tonna | 01611, 02458 |
| Topfield | 01545, 01986,01208, 02838 |
| Toshiba | 01803, 01284,01429 |
| TPS 01307 | |
| Transparent Video Systems | 01780, 01957 |
| TrekStor | 02738 |
| Triax | 01291, 01626, 00853, 01099, 01611, 01631 |
| Tricolor TV | 02622, 03064 |
| True Visions | 03140, 01208, 02408, 03784 |
| TT-micro | 01429 |
| TV Cabo | 02160 |
| TV Star 03012 | |
| TV Vlaanderen | 02631, 00853, 02466 |
| TVA Digital | 02895, 01692, 02262 |
| TVB 01989 | |
| TVonics | 01906, 01803 |
| Twinner 01611 | |
| UEC | 00879, 01356 |
| UfaNet | 01986 |
| UNE | 01692 |
| United 02842, 02278, | 03012, 01626, 02418 |
| Unitymedia | 01429, 01882, 01915 |
| Universum | 00173, 00299, 00740, 01099 |
| Unixbox 01652 | |
| UPC | 01780, 02443 |
| UPC Cablecom | 01195, 01197 |
| UPC Direct | 02443 |
| Vantage | 02797 |
| Variosat 00173 | |
| VEA | 02418 |
| Vectra 01195, 01197 | |
| Vestel | 01626, 01284, 02231, 02034, 03517 |
| VH Sat | 00299 |
| Via Embratel | 03787, 02796 |
| Viasat | 01682, 01197, 01195, 02235, 00253 |
| Videocon 03077 | |
| Vietnam Television Corporation | 03834 |
| Viola Digital | 01672 |
| Vision | 01626 |
| VisionNet | 01631 |
| Visiosat 01413 | |
| Vistron | 00740 |
| Vitecom 01413 | |
| Viva 00856 | |
| Vivax | 02418 |
| Vivo 02262, 02895, | 01692, 02527 |
| Volcasat | 02418 |
| Voom | 00869 |
| VTC | 03834 |
| Vu+ | 03458, 02799, 03543 |
| Walker | 02034 |
| Wavelength | 01413 |
| Wharfedale | 01935, 02034, 01284, 01906 |
| Winix | 02278 |
| Wintel | 00299 |
| Wisl | 00740, 00173, 00299, 02957, 01986 |
| Woxter | 02418, 02813 |
| Xoro | 02813, 02738, 03012, 03422 |
| Xtreme 01300 | |
| Xtrend 03320 | |
| Yakumo 01413 | |
| Yes | 00887, 01887 |
| Youview | 03140 |
| ZapMaster | 00740 |
| Zehnder | 01777, 03422,01334, 01413,02289, 03424,02034, 00740,01631 |
| Zenega 02604 | |
| Zenith | 00856, 03110,03469 |
| Ziggo | 02443, 01499,01657, 00253 |
| Zircon | 02957 |
| Zodiac | 03726 |
| Zon | 02160 |
| Zon Optimus | 02160 |
■ Video - Accessory
| A.C.Ryan | 02709, 03350 |
| ABS | 01272 |
| Acer | 01272 |
| Alienware | 01272 |
| Apple | 02615 |
| ASRock 01272 | |
| Boxee 03693 | |
| Ceton | 01272 |
| Claritas 01272 | |
| CyberPower | 01272 |
| Daily Media | 01272 |
| Dell | 01272 |
| Digitech 02260 | |
| D-Link 03671, 03693, | 02186 |
| Elonex | 01272 |
| Eminent | 03215, 02260 |
| Emtec 02709 | |
| Fantec | 03350, 02709 |
| Fujitsu Siemens | 01272 |
| Funai | 03339 |
| Gateway | 01272 |
| G-Box Midnight | 04440 |
| Hewlett Packard | 01272 |
Reference Information
| hFX 01272 | |
| Howard Computers 01272 | |
| HP 01272 | |
| Hush 01272 | |
| iBUYPOWER 01272 | |
| iconBIT 03350, 02709 | |
| ICY Box 03350 | |
| iNext 03350 | |
| Iomega 02558 | |
| ISTAR 02260 | |
| JadooTV 02260 | |
| Keedox 04442 | |
| LG 03373 | |
| Linksys 01272 | |
| Magnavox 03339 | |
| Mede8er 02709 | |
| Media Center PC 01272 | |
| Micca | 03669 |
| Microsoft | 01272, 01805, 04000 |
| Mind | 01272 |
| Netgear | 03324, 04401, 03292 |
| NiveusMedia | 01272 |
| Northgate | 01272 |
| Omniverse | 04421 |
| Packard Bell | 01272 |
| Panasonic | 03760 |
| Philips | 01272 |
| Pivos | 04339 |
| PopBox | 02260 |
| Popcorn Hour | 02260 |
| RCA | 03335 |
| Ricavision | 01272 |
| Roku 03061, 02371 | |
| Seagate | 02698 |
| Sony 02713, 01272 | |
| Stack 9 01272 | |
| Sumvision 04339 | |
| Systemax | 01272 |
| Tagar Systems | 01272 |
| Toshiba | 01272 |
| Touch | 01272 |
| TrekStor | 02723 |
| Trust | 01272 |
| VIA Technologies | 01272 |
| Viewsonic | 01272 |
| VIZIO | 03670 |
| Voodoo 01272 | |
| Western Digital | 02558 |
| Waxter | 02709 |
| Xbox 01805, 04000, | 01272 |
| Xtreamer | 02723 |
| ZT Group | 01272 |
CD
| A.V.International | 70157 |
| ADVANTAGE | 70032 |
| AH! | 70157 |
| Aiwa | 70157 |
| Arcam 70157 | |
| Atoll | 70157 |
| Atoll Electronique | 70157 |
| Audio Research | 70157 |
| Audiolab | 70157 |
| Audiomeca | 70157 |
| Audioton 70157 | |
| AVI | 70157 |
| Balanced Audio Technology | 70157 |
| BAT | 70157 |
| Cairn | 70157 |
| California Audio Labs | 70029, 70303 |
| Cambridge | 70157 |
| Cambridge Audio 70157 | |
| Carver | 70157 |
| CCE | 70157 |
| Curtis Mathes | 70029 |
| Cyrus | 70157 |
| Denon | 70766 |
| DKK | 70000 |
| DMX Electronics | 70157 |
| Dynaco 70157 | |
| Epworth 70157 | |
| Genexxa 70032, 70000 | |
| Goldmund 70157 | |
| Grundig | 70157 |
| Harman/Kardon | 70157, 73044 |
| HIFIAkademie | 70157 |
| Hitachi | 70032 |
| JVC | 70072 |
| Integra | 71817 |
| Kenwood | 70036, 70157 |
| Krell | 70157 |
| Linn | 70157 |
| Loewe | 70157 |
| Magnavox 70157 | |
| Marantz | 70157, 70029 |
| Matsui | 70157 |
| MCS | 70029 |
| Memorex | 70032 |
| Meridian | 70157 |
| Micromega | 70157 |
| Miro | 70000 |
| Mission 70157 | |
| Myryad | 70157 |
| NAD | 70721, 70000 |
| Naim 70157 | |
| New Acoustic Dimension | 70721, 70000 |
| NSM | 70157 |
| Onkyo 71817 | |
| Optimus | 70032, 70000 |
| Panasonic | 70303, 70029 |
| Philips | 70157 |
| Pioneer | 70032 |
| Polk Audio | 70157 |
| Primare | 70157 |
| Proton | 70157 |
| QED | 70157 |
| Quad | 70157 |
| Quasar | 70029 |
| Radiola 70157 | |
| RCA | 70032 |
| Restek | 70157 |
| Revox | 70157 |
| Rotel 70157 | |
| SAE | 70157 |
| Sansui | 70157 |
| SAST | 70157 |
| Siemens | 70157 |
| Silsonic | 70036 |
| Simaudio | 70157 |
| Sonic Frontiers | 70157 |
| Sony 70000, 70490 | |
| Sylvania | 70157 |
| TAG McLaren | 70157 |
| TAG McLaren Audio | 70157 |
| Tandy | 70032 |
| Tascam | 73095, 73511, 73533 |
| Teac | 73095, 73531, 73532, 73551 |
| Technics | 70303, 70029, 70207 |
| Thorens 70157 | |
| Thule Audio | 70157 |
| Universum | 70157 |
| Victor | 70072 |
| Wards 70032, 70000, | 70157 |
| Yamaha 70036, 70032, | 70490 |
| Zonda | 70157 |
■ Cassette Deck
| Aiwa | 40029 |
Reference Information
| Arcam 40076 | |
| Audiolab 40029, 40229 | |
| Carver 40029 | |
| Denon 40076 | |
| Epworth 40029 | |
| Grundig 40029 | |
| Harman/Kardon 40029 | |
| Inkel 40070 | |
| JVC 40244 | |
| Kenwood 40070 | |
| Magnavox 40029 | |
| Marantz 40029 | |
| Myryad 40029 | |
| Onkyo 42157 | |
| Optimus 40027 | |
| Panasonic 40229 | |
| Philips 40029, 40229 | |
| Pioneer 40027 | |
| Polk Audio | 40029 |
| Radiola | 40029 |
| RCA 40027 | |
| Revox | 40029 |
| Sansui | 40029 |
| Sony | 40243, 40170 |
| Tascam 73095 | |
| Technics 40229 | |
| Thorens 40029 | |
| Universum | 40029 |
| Victor | 40244 |
| Wards | 40027, 40029 |
| Yamaha 40097 |
■ Receiver
| Integra 52503 | |
| Onkyo 52503 |
■ Audio - Accessory
| Apple | 81115 |
| Jamo | 82228 |
En-106
| Onkyo 81993, 82990, | 82351, 82352,82353 |
| Polk Audio | 82228 |
IPTV
| ADB | 02586, 01585,01481, 01998,02254, 02302,02437, 03028 |
| Aland | 02030, 02437 |
| AlandsDatakommunikation | 02030, 02437 |
| Alcom | 02030, 02437 |
| Altibox 02437, 02030 | |
| Amino | 01615, 01898,01481, 02482,01998, 02302,03028 |
| Arcadyan | 02952 |
| Arkwest 02482, 01481, | 01998, 02302 |
| Arris | 01998, 02378 |
| Arvig Communication Systems | 01998, 02345 |
| AT&T | 00858 |
| AT&T U-verse | 00858 |
| ATMC | 03028 |
| B tv | 02681, 03442 |
| BBTV | 02980 |
| BEK Communications | 02254, 02302 |
| Belgacom TV | 02047, 02132 |
| Bell | 01998 |
| Bell Aliant | 01998 |
| Bell ExpressVu | 01998 |
| Bell Fibe TV | 01998 |
| BesTV 04196 | |
| Bluewin | 02271 |
| Bouygues Telecom | 03007 |
| British Telecom | 02294 |
| BT | 02294 |
| BT Vision | 02294 |
| Cabovisao | 02436 |
| CalTel Connections | 02586 |
| Canal Digital | 02030 |
| Canby Telcom | 01481, 02302 |
| Celrun 03442 | |
| CenturyLink | 01998 |
| Channel Master 03118 | |
| China Telecom | 04196, 02913, 03937 |
| China Unicom | 04366, 04196 |
| CHT | 03647, 01917 |
| Chunghwa | 03647, 01917 |
| Cisco | 00858, 03028, 02132, 02345, 02047, 02378, 01998, 02271, 03452 |
| ClubInternet | 02132 |
| CNS 02980 | |
| Consolidated Communications | 01998, 02302, 03048 |
| Coship | 04196 |
| Deutsche Telekom | 02132 |
| DNA 02030 | |
| Du | 02401 |
| Echostar | 03452 |
| Elion | 03916 |
| Entertain | 02132 |
| Entone | 02302, 03048 |
| eTb | 04281 |
| Evertek | 02302 |
| Finnet | 02030 |
| Freebox 01976 | |
| Frontier Communications | 02378 |
| GDCATV | 02980 |
| 03666 | |
| Guangdong Cable | 02980 |
| Guangxi Broadcasting | 02897 |
| Guangxi Broadcasting Network | 02897 |
| Hana TV | 02681 |
| Hathw@y | 02043 |
| Hikari TV | 03237 |
| HSHONG | 03937 |
| Huawei | 02994, 03937, 02913, 04281 |
| i-CAN | 02437 |
| Innovative Systems | 01898 |
| Inotel | 02437 |
| Invitel | 02437 |
| InviTV | 02437 |
| ITV | 04196 |
| Jambox | 02030 |
| JP PTT | 01615 |
| Kaon | 04409, 02682 |
| kbro | 03139 |
| Kiss 02132, 02271 | |
| KoolConnect | 01481 |
| KPN | 02952, 02437 |
| Kreatel | 02030 |
| KT | 02683 |
| LG | 02682 |
| LG U+ 02682 | |
| Linksys | 02271 |
| Lumos Networks | 01998, 03028 |
| Magio Sat | 02132 |
| Magnet | 01615 |
| Maige TV | 03937 |
| Matanuska Telephone Association | 01481, 02254, 02482, 02586 |
| Mega TV | 02683 |
| Meo | 02401 |
Reference Information
| MHTC 01481, 01998, | 02254, 02302,02482 |
| Minerva Networks 031 | 18 |
| MIO 02275, 02802 | |
| mio TV 02275, 02802 | |
| Mitsubishi Electric 032 | 74 |
| MM&G Enterprises 014 | 81, 01998,02302, 02482 |
| MOD 03647, 01917 | |
| Motorola 02378, 02437, | 01998, 02030,00858, 02952,02275, 03916,01585, 02401 |
| Movistar 01585, 03288 | |
| Moyo 03611 | |
| MTS 01998, 03611, | 01615, 01481,01898 |
| MyLGTV 02682 | |
| Now TV 02009, 02014 | |
| NTT 03237, 03274 | |
| NU Telecom 01998, 03 | 028 |
| Numericable | 02436 |
| Oi TV | 03452, 03454,04165 |
| Open IPTV | 01615 |
| Optimus Clix | 02437 |
| Orange | 02407 |
| Pace | 01998, 00858,03454, 02294,02401 |
| PCCW | 02009, 02057 |
| Philips | 02378 |
| Pioneer Telephone | 02254, 02302 |
| Portugal Telecom | 02401 |
| Primestar | 02030 |
| PrimeTel 02030, 02437, | 03611 |
| PrimeTV 02030 |
| PT | 02401 |
| Qwerty 01898, 01481, | 01615 |
| Qwerty.TV | 01898 |
| Reliance 02556 | |
| RIO Media | 02030 |
| Rostelecom | 03611 |
| Sagem 02407, 03288 | |
| Sagemcom | 02436, 02407, 03007 |
| Samsung | 02407 |
| SaskTel | 01998 |
| Scientific Atlanta | 00858, 02345, 02047, 02401, 03028, 02378 |
| SetaBox 01917 | |
| SingTel | 02275, 01998, 02802 |
| SK Broadband | 03442, 02681 |
| SK Btv | 02681, 03442 |
| Sky Austria | 02620 |
| Sky Deutschland | 02620 |
| Smartlabs | 03611 |
| Smile Content | 02437 |
| Sogetel | 01998 |
| Sonaecom | 02437 |
| SureWest | 01998, 01481, 02254, 02482, 02586 |
| Swisscom | 02271 |
| TalkTalk 02994 | |
| TCC | 04409 |
| TDC | 02271 |
| Technicolor | 02994 |
| Telefonica | 01585, 03028, 03288 |
| Telekom Deutschland | 02132 |
| Telia | 02030 |
| TELUS | 03028 |
| TeNeT | 01898 |
| T-Home 02132 | |
| Thomson | 03007, 02407 |
| TVB 01615 | |
| U+ tvG 02682 | |
| U-verse | 00858 |
| Verizon | 02378 |
| Viasat | 02030 |
| Viken Fibernett | 02030, 02437 |
| Vivo 03288 | |
| Vodafone | 02401 |
| WNC | 03118 |
| Youview | 02994 |
| Yuxing | 02014 |
| Zinwell | 03139 |
| ZTE 04196 |
■ IPTV PVR Combination
| ADB 01585, 02254, | 02437 |
| Altibox | 02437 |
| Amino | 01615, 01898 |
| Arcadyan | 02952 |
| Arris | 01998, 02378 |
| AT&T | 00858 |
| AT&T U-verse | 00858 |
| ATMC | 03028 |
| BBTV | 02980 |
| Belgacom TV | 02047, 02132 |
| Bell | 01998 |
| Bell Aliant | 01998 |
| Bell ExpressVu | 01998 |
| Bell Fibe TV 01998 | |
| Bluewin | 02271 |
| Bouygues Telecom 03007 | |
| British Telecom | 02294 |
| BT | 02294 |
| BT Vision | 02294 |
| Cabovisao | 02436 |
| Canal Digital | 02030 |
| CenturyLink | 01998 |
| CHT | 03647 |
| Chunghwa | 03647 |
| Cisco | 03028, 02132, 00858, 02047, 02345, 02271, 02378, 03452 |
| ClubInternet 02132 | |
| CNS 02980 | |
| Consolidated Communications | 01998 |
| Deutsche Telekom | 02132 |
| Du | 02401 |
| Echostar 03452 | |
| Elion | 03916 |
| Entertain | 02132 |
| Entone 03048 | |
| Freebox | 01976 |
| Frontier Communications | 02378 |
| GDCATV | 02980 |
| Glashart Media | 01615, 01898 |
| 03666 | |
| Guangdong Cable | 02980 |
| Hikari TV | 03237 |
| Huawei | 02994 |
| i-CAN | 02437 |
| Innovative Systems | 01898 |
| Invitel | 02437 |
| InviTV | 02437 |
| Kaon 04409 | |
| kbro 03139 | |
| Kiss 02132, 02271 | |
| KPN | 02952, 02437 |
| Linksys | 02271 |
| Lumos Networks | 01998 |
| Magio Sat | 02132 |
| Magnet | 01615 |
| Meo 02401 | |
| MetroNet | 01998 |
Reference Information
| Minerva Networks 031 | 18 |
| Mitsubishi Electric 032 | 74 |
| MOD 03647 | |
| Motorola 01998, 02437 | 02378, 02952,00858, 03916,01585, 02030,02401 |
| Movistar 01585 | |
| MTS 01998, 01615, | 01481, 01898 |
| NTT 03237, 03274 | |
| Numericable 02436 | |
| Oi TV 03452, 03454, | 04165 |
| Orange 02407 | |
| Pace 00858, 01998, | 03454, 02294,02401 |
| Philips 02378 | |
| Portugal Telecom 02401 | |
| PrimeTel 02437 | |
| PT 02401 | |
| Qwerty 01898 | |
| Sagem 02407, 03288 | |
| Sagemcom | 02436, 03007,02407 |
| Samsung | 02407 |
| SaskTel | 01998 |
| Scientific Atlanta | 00858, 02047,02401, 02345,03028, 02378 |
| Sky Austria | 02620 |
| Sky Deutschland | 02620 |
| SureWest | 01998 |
| Swisscom | 02271 |
| TalkTalk | 02994 |
| TCC | 04409 |
| TDC | 02271 |
| Telefonica | 01585, 03028,03288 |
| Telekom Deutschland | 02132 |
| TELUS | 03028 |
| T-Home | 02132 |
| Thomson | 03007 |
| U-verse | 00858 |
| Verizon 02378 | |
| Vodafone | 02401 |
| WNC | 03118 |
| Youview | 02994 |
| Zinwell | 03139 |
| SAT_PVR Combination | |
| @sat | 01300 |
| ADB 02553 | |
| AEG | 02738, 02813 |
| Airtel | 02248 |
| Altech UEC | 02097, 03517 |
| Amiko | 04197 |
| Amstrad | 01662, 01175, 02467, 01693 |
| Arion | 04348 |
| Astro | 03838 |
| Atevio | 02928 |
| Atlanta | 03320 |
| Austriasat | 01195, 01197, 02957, 02631 |
| Auvisio | 02932, 02738, 02813 |
| Avanit | 00299 |
| Axil | 03424 |
| AZ America | 01631 |
| AZBox | 02719 |
| B@ytronic | 00740 |
| Bell | 00775 |
| Bell ExpressVu | 00775 |
| Bell Fibe TV | 00775 |
| Bell Satellite TV | 00775 |
| BENsat | 02957 |
| Boca 02797, 02308, | 02813 |
| Botech | 02738, 03749 |
| Boxer | 01957 |
| BSkyB | 01175, 01662 |
| Bush 02034 | |
| Canal Digitaal | 02631, 02466, 02957 |
| Canal Digital | 02553 |
| Canal+ | 02657 |
| CanalSat | 02657 |
| CityCom | 02957 |
| Clarke-Tech | 03320 |
| Claro | 03790 |
| CMX | 02932 |
| Comag | 02797, 02813, 02308 |
| Coship | 03790 |
| Cyfrowy Polsat | 02527 |
| DCR | 03517 |
| Deutsche Telekabel | 01195, 01197 |
| Digenius 00740 | |
| Digi | 01195, 01197 |
| Digihome | 02034 |
| DigiQuest | 01300 |
| Digital | 02308 |
| DigitAlb | 01195, 01197 |
| DigitalBox | 02540, 03240 |
| Digiturk | 03517, 02097 |
| Dilog 01957 | |
| DirecTV | 01377, 01442, 00099 |
| Dish Mexico | 00775 |
| Dish Network | 00775 |
| DishHD | 04090 |
| Dishpro | 00775 |
| DNA 01957 | |
| DragonSat | 02928 |
| Dream Multimedia | 01237, 01923 |
| D-Smart | 02231 |
| DSTV | 02059, 02060 |
| DTK Deutsche Telekabel | 01195, 01197 |
| Dyon 02738, 02813 | |
| Easy-One | 03240 |
| Echostar | 00775, 02527 |
| Edision | 01631 |
| Elta | 02738 |
| Engel 03749 | |
| Etisalat | 02443 |
| Eurosky | 00740 |
| FaVal 03422 | |
| Ferguson | 02638 |
| Finnet | 01957 |
| Foxtel | 01356 |
| Freesat | 01692, 02928, 03266 |
| Freesat+ | 02443, 03266 |
| Fuji Onkyo | 01631 |
| Galaxy Innovations | 02799, 04197 |
| General Satellite | 03064 |
| Gi | 02799, 04197 |
| GigaBlue | 03663 |
| Globo | 02957 |
| Golden Media | 04197 |
| GoldMaster | 02928 |
| Goodmans | 02034 |
| Grundig | 02738, 03424 |
| GVT | 03789 |
| Handan | 01957 |
| HD Box | 02928 |
| HD+ | 02797, 03095 |
| Hirschmann | 00740 |
| Hitachi | 02034 |
| Hughes Network Systems | 01442 |
| Humax 02443, 01176, | 01377, 03517, 01427, 01808, 02231, 02408, 02754 |
Reference Information
| IceCrypt 04197, 02928 | |
| ID Sat 01334 | |
| Indovision 01989 | |
| iNETBOX 01237 | |
| Intv 04348 | |
| Inverto 03095 | |
| Jaeger 02797 | |
| JVC 00775 | |
| Kamosonic 02738 | |
| Kaon 01300 | |
| Kathrein 02569, 01561, 03658, 00658 | |
| Labgear 03424 | |
| LaSAT 00740 | |
| LinkBox 02957 | |
| LogiSat 02797, 02813 | |
| Luxor 01935 | |
| M vision 03562 | |
| M7 02631 | |
| Marusys | 02799, 03543 |
| Maspro | 03099 |
| Maximum 01334, 02813 | |
| Medion | 02797, 00740 |
| MegaSat | 01631, 02813, 02034, 02738 |
| Meo | 02466 |
| Mercury | 03422 |
| Micro | 02797, 02813 |
| Micro electronic | 02308 |
| Miraclebox | 02928 |
| Motorola | 00869 |
| Movistar | 02527 |
| Multichoice | 02059, 02060 |
| Mysat | 02738 |
| MySky Italia | 02467 |
| MySky New Zealand | 01356, 02211 |
| NEOTION | 01334 |
| Nova 02475 | |
| NTV Plus | 01307, 01692, 02443 |
| Octagon | 02928 |
| Openbox | 02928 |
| Opensat | 02957, 02719 |
| Opticum 02957, 02797, 02932 | |
| Orbitech | 01195, 01197 |
| Orton 02957 | |
| Pace | 01682, 01175, 02754, 02475, 02231, 01356, 02467, 02631, 02657, 03790, 01662, 02097, 02211, 02059, 02060, 02466, 02895 |
| Panasonic | 03099 |
| Philips | 01442, 02466, 00099, 02631 |
| Polsat 02527 | |
| Portugal Telecom | 02466 |
| PT | 02466 |
| Qwest | 01377 |
| Raduga TV | 02957 |
| RCA | 01442 |
| Rebox | 02928 |
| Ross | 02540 |
| SAB | 04197 |
| Sagem | 01692, 02553, 01307 |
| Sagemcom | 03789, 01692 |
| Samsung | 03063, 01442, 01682, 01989, 02467, 01377, 03266, 01662, 03784, 03838, 01693 |
| Sansui 01545 | |
| Sat Control | 01300 |
| Schwaiger | 02308, 00740, 02957 |
| SEG | 02034 |
| Set-One 03240 | |
| Sharp | 02034, 01935 |
| Shaw Direct | 00869 |
| Siemens | 01657 |
| SilverCrest | 02308, 02932 |
| Sky Austria | 02754, 02443 |
| Sky Brasil | 01377 |
| Sky Deutschland | 02754, 02443 |
| Sky Ireland | 01175, 01662 |
| Sky Italia | 02467, 01693 |
| Sky New Zealand | 02211, 01356 |
| SKY PerfecTV! | 03099 |
| Sky UK | 01175, 01662 |
| SkyCable | 01631, 01957 |
| Skylink | 02957, 01545, 02443, 02928, 01195, 01197 |
| Skymaster | 02932, 01545 |
| Skypex | 00740 |
| Skyplus | 00740, 01175, 01334 |
| Skytec 02928 | |
| Skyvision | 02797 |
| SkyWay | 02928 |
| Skyworth | 01631 |
| SL | 00740 |
| Smart | 03095, 01631 |
| Spiderbox 03562 | |
| Star Choice | 00869 |
| Starmax 02638 | |
| Stream System | 01300 |
| Strong | 03424, 01300, 02813, 01682, 02278 |
| Sunny | 01300 |
| TDS Telecom | 00775 |
| Teac | 01957 |
| Technicolor | 03790 |
| TechniSat | 01197, 01195, 03440 |
| Technotrend | 01429 |
| Techwood 02034 | |
| Telasal | 02466 |
| Telefonica 01692, 02527 | |
| TeleSAT 02631, 02466 | |
| Telestar | 02540, 01195, 01197 |
| TelkomVision | 04310 |
| TelSKY | 02540 |
| Telstra | 01356 |
| TELUS | 00775 |
| Thomson | 01662, 01175, 01935, 01307, 02160 |
| TiVo 01377, 01442 | |
| T-Mobile | 02631, 02443, 01545 |
| TNT SAT | 01692 |
| Topfield | 01545, 02838 |
| TPS | 01307 |
| Tricolor TV | 03064 |
| True Visions | 03784 |
| TV Cabo | 02160 |
| TV Vlaanderen | 02631, 02466 |
| TVA Digital | 02895 |
| TVonics 01906 | |
| UPC | 02443 |
| UPC Direct | 02443 |
| Vantage 02797 | |
| Vestel | 02231, 03517 |
| Via Embratel | 02796 |
| Viasat 01682, 01197, | 01195 |
| Vivo | 02895, 01692, 02527 |
| Vu+ | 03458, 02799, 03543 |
| Wisi 00740, 02957 |
En-109
Reference Information
| Xoro 02738, 02813, | 03422 |
| Xtreme 01300 | |
| Xtrend 03320 | |
| Zehnder 03422, 03424 | 01777, 02034, 00740 |
| Ziggo 02443 | |
| Zircon 02957 |
TV_DVD Combination
| AEG 12197, 12239 | |
| Affinity 13870, 13717 | |
| Akai 12676, 13067, | 12197 |
| Akura 12289, 11983, | 12239 |
| Alba 12676, 13005, | 13067, 12104 |
| Apollo 12239 | |
| Audiosonic 12104, 11983 | |
| Audiovox 11769 | |
| Azuki 12239 | |
| Baier | 12239 |
| Bauer | 12197 |
| Beko | 12239 |
| Black Diamond | 11037 |
| Blaupunkt | 12426 |
| Blue Sky | 11037 |
| BlueDiamond | 12426 |
| Bush | 13005, 12676, 11983, 12104, 10698, 11037 |
| Celcus | 12676 |
| cello | 12673 |
| Centrum | 11037 |
| Coby | 13627, 12315 |
| Crown | 11037 |
| Currys Essentials | 12486 |
| Curtis 12855, 12466, | 13895, 13636, 14035 |
| Dantax | 12676 |
| Denver 12197, 13067, | 12239 |
| DGM | 12239 |
| Digihome | 12676 |
| Digimate | 12239 |
| Digitrex | 13067 |
| diVision | 12197, 12239 |
| Dual | 12197, 12676, 11037 |
| Durabrand | 10171 |
| D-Vision | 12197 |
| Dynex | 12049 |
| Easy Living | 12104 |
| ECG | 12197, 12125 |
| Electrohome | 11670 |
| Element | 12964 |
| Elfunk 11037 | |
| Emerson | 11886, 11864, 11394, 10171 |
| e-motion | 12426 |
| Enox. | 12673 |
| Essentials | 12486 |
| Favi | 13382 |
| Ferguson | 13005, 12426, 11037, 12676 |
| Finlux | 12676 |
| Funai 11394 | |
| Goodmans 11983, 11037, | 11687, 12676, 12426 |
| Gran Prix | 12197 |
| Grundig | 12239, 12125, 12676 |
| Haier | 11753, 12309, 13429, 11749, 11983 |
| Hantarex | 12197 |
| Hikona | 11983 |
| Hisense | 13519 |
| Hitachi | 12676, 11037, 11667 |
| Hyundai | 12676 |
| Ingo Devices | 12239 |
| Insignia | 12049 |
| iSymphony | 13429 |
| Jay-tech | 13067 |
| JMB 12676 | |
| JTC | 13067 |
| JVC | 12271, 11670, 11774, 12676, 11601 |
| Kuppersbusch | 12676 |
| Lenco | 12676, 11983 |
| LG | 11860, 11423 |
| Linetech | 12676 |
| Linsar | 12676 |
| Logik | 13432, 13005, 12486, 11037, 11687 |
| Luxor 12676, 11037 | |
| Magnavox | 12372, 11866, 11454 |
| Marks & Spencer | 12673 |
| Mascom | 12197 |
| Matsui 12486, 12676, | 11037 |
| Medion | 12676, 12239, 13067 |
| Memorex | 11670 |
| Memory | 11983 |
| MTlogic | 12104 |
| Murphy | 12673 |
| Mx Onda | 11983 |
| Naxa | 12104, 13382 |
| Neon | 12673 |
| Nikkei | 12197 |
| Nimbro 12104 |
| Nordmende | 13835 |
| OK. | 13434, 12676 |
| OKI | 12676 |
| Orava | 11037 |
| Orion 11037, 12676 | |
| Otic | 11983 |
| Palsonic | 13067 |
| Panasonic | 11291, 12170, 11636, 11480 |
| Panavox | 13835 |
| Philips 13614, 12800, | 10556, 11454, 11394, 12372 |
| PHOENIX Apollo | 12239 |
| Polaroid | 11769, 11523, 12676 |
| Powerpoint | 10698 |
| Prima 11753 | |
| Pro Vision | 12197 |
| ProLine | 12676 |
| Proscan | 12256, 13895, 13636 |
| Prosonic | 12676, 12197 |
| QuantumFX | 12337 |
| RCA 12187, 12746, | 12932, 11447, 12247, 13382 |
| RefleXion | 12239 |
| Reoc | 12197 |
| Saba | 12676 |
| Saga | 12197 |
| Salora | 12197, 12676, 12239 |
| Sandstrom | 12197 |
| Sansui | 11670, 13564 |
| Sanyo | 12676, 13488 |
| Sceptre | 12528, 12337 |
| Schaub Lorenz | 12197, 12289 |
| Scott | 11983 |
| SEG 12673, 11037 |
Reference Information
| Sencor 12197 | |
| Sharp 10818, 12676, | 12360 |
| Shinelco 12104 | |
| Shivaki 12197 | |
| Skyworth 12963 | |
| Soniq 12493, 13005 | |
| Sontech 11983 | |
| Sony 12778, 10000 | |
| Soundwave 11037, 12673 | |
| SOVOS 12239 | |
| Supersonic 11753, 12104 | |
| Swisstec 12106, 12104 | |
| Sylvania 11886, 11864, | 11394, 10171 |
| Tauras 12197 | |
| Teac | 10698, 11983, 13005 |
| Technica 11037, 12426 | |
| Technical | 12676 |
| Technika 12426, 12197, | 12106, 11983, 13005 |
| Techwood | 12676 |
| Telefunken | 12239, 10698, 12676 |
| Teletech | 11037 |
| Tesco | 12426 |
| Tevion | 12426 |
| Thomson | 12675, 10625, 13047 |
| Toshiba | 13323, 12676, 11524, 11656 |
| TVE | 12239 |
| UMC 12426, 12106 | |
| United | 11037, 11983 |
| VD-Tech 13067 | |
| Venturer 13005 | |
| Vestel | 11037 |
| Viewsonic | 12049 |
| Viore | 13429, 12352, 12104, 13382, 13118 |
| VisionPlus | 12426 |
| Walker | 12676 |
| Waltham | 11037 |
| Weltstar 11037 | |
| Westinghouse | 11712 |
| Wharfedale | 11983 |
| Xiahua | 11753 |
| Xiron | 11983, 11037 |
| Xoceco | 11753 |
| Xogego | 11753 |
| Xoro | 13067 |
| Zenith | 10000, 10178 |
| Xogego | 11753 |
| Xoro | 13067 |
| Zenith | 10000, 10178 |
En-111

Integra®
Integra Division of
Onkyo U.S.A. Corporation
18 park Way, Upper Saddle River, N.J. 07458, U.S.A.
Tel: 800-225-1946, 201-818-9200 Fax: 201-785-2650
http://www.integrahometheater.com
Integra Division of
Onkyo Europe Electronics GmbH
Liegnitzerstrasse 6, 82194 Groebenzell, GERMANY
Tel: +49-8142-4401-0 Fax: +49-8142-4208-213
http://www.integra.eu
Integra Division of
Onkyo China PRC
302, Building 1, 20 North Chaling Rd., Xuhui District, Shanghai,
China 200032, Tel: 86-21-52131366 Fax: 86-21-52130396
http://www.integra.com.cn
Integra Division of
Onkyo Corporation
Kitahama Chuo Bldg, 2-2-22 Kitahama, Chuo-ku, OSAKA 541-0041, JAPAN
Tel: 072-831-8023 Fax: 072-831-8163
http://www.integraworldwide.com
SN 29402058PDF_EN
(C) Copyright 2015 Onkyo Corporation Japan. All rights reserved. Onkyo has the Privacy Policy. You can review it at [http://www.onkyo.com/privacy/].

- CONTENTS
- Features
- Front Panel
- Display
- Rear Panel
- Step 1: Connections
- Connecting speakers
- En-6
- Characteristics of speaker types
- Notes for Speaker Connection
- ■ Connecting the multichannel power amplifier to the PRE OUT RCA jack
- ■ Connecting the multichannel power amplifier to the PRE OUT XLR jack
- Connecting a Subwoofer with Built-in Power Amplifier
- ■ Connection to the PRE OUT RCA jack
- ■ Connection to the PRE OUT XLR jack
- Height speaker types
- Connecting the TV and players
- HDMI cable connection
- En-10
- Connecting Components without HDMI
- ■ Video signal connection
- Component video cable
- ■ Audio signal connection
- Video upconversion function
- Other connections
- AM/FM antenna connections
- Network connection
- Headphones connection
- Power cord
- Step 2: Initial Setup
- AccuEQ Room Calibration
- Source Connection
- Remote Mode Setup
- Network Connection
- Before Start
- Place the speaker setup microphone.
- About THX playback
- ■If connection is successful
- \* Privacy policy
- ■ Terminating initial setup
- Audio output of connected players
- Step 3: Playing Back
- Basic operations
- Turning the power on.
- Select the input on the unit.
- Select the desired listening mode.
- Network Functions
- Internet Radio services
- dlna DLNA
- Home media
- USB
- AirPlay®
- ■ Playing music files from an iPhone, iPod touch, or iPad
- ■ Playing music files from a computer
- AM/FM Radio
- AM/FM frequency step setting
- Multi-zone
- ■ Sources you can playback
- Making Multi-zone Connection
- ■ a. Connecting a TV in a separate room
- ■ b. Connecting with an integrated amplifier or power amplifier in a separate room
- Performing Multi-zone Playback
- Playing Back
- To adjust the audio in Zone 2 or Zone 3
- To turn off the function
- Quick Setup menu
- ■ HDMI
- Information:
- Other useful functions
- To adjust the sound quality
- Checking the Input Format
- Playing Audio and Video from Separate Sources
- Others
- Troubleshooting
- Before starting the procedure
- The AV controller turns off unexpectedly.
- There's no sound, or it's very quiet.
- There's no picture.
- Video and audio are out of synch
- Cannot play digital surround
- Cannot output audio such as Dolby Atmos according to the format of the source.
- HDMI control does not function correctly.
- Cannot access to network.
- ■ Resetting the unit
- ● How to reset:
- ● How to reset the remote controller:
- Specifications
- Amplifier Section
- Video Section
- Tuner Section
- Network Section
- General
- • HDMI
- - HDBaseT
- • Video Inputs
- • Video Outputs
- - Audio Inputs
- - Audio Outputs
- Precautions
- For U.S. Models
- FEDERAL COMMUNICATIONS COMMISSION DECLARATION OF CONFORMITY
- For European Models
- Declaration of Conformity
- License and Trademark Information
- DOLBY
- THX Ultra2 Plus
- HDMI
- CHDBT
- ((SiriusXm))
- DISCLAIMER
- En-26
- GNUライセンス
- Important Notice Regarding Software
- Notice Regarding GNU GPL/LGPL-applicable Software
- ソフトウェアに関する重要なお知らせ
- Version 2.1, February 1309
- Eramble
- END OF TERMS AND CONDITIONS
- En-30
- Dafrijaro
- Accepting Warranty or Additional Liability.
- Copyright © 2011 Apple Inc. All rights reserved.
- http://www.apache.org/licensesLICENSE-2.0
- the License
- Bocet
- http://www.jlark.com/inspur.html
- in the case of the
- Сайтис
- Comparable Price, of the Grade may be used by a year.
- which the Work is obtained by You
- with the account of the Author, such consent being in the full discussion of the Author
- Nacelbem
- Tectu
- following disclarin
- conditions are met
- following disclaimer
- Konsen 16 Wider
- and this reported
- written permission
- 121481
- Hilvianl hawce re
- 1240-000
- Ита-анытис
- (1)
- • Utilization of
- Supplied Accessories
- How to use the remote controller
- Integra.
- AV Controller
- DHC-60.7
- Advanced Manual
- Integra
- Details on AM/FM reception
- Tuning into a Radio Station
- ■ Tuning automatically
- En-2
- ■ Tuning manually
- ■ Tuning to the frequency directly
- Presetting an AM/FM Radio Station
- ■ Registration Procedure
- ■ Selecting a Preset Radio Station
- ■ Deleting a Preset Radio Station
- Using RDS (Australian models)
- ■ Displaying Radio Text (RT)
- ■ Searching by Type (PTY)
- ■ Listening to Traffic Information (TP)
- Playing Music Files on a USB Storage Device
- Listening to Internet Radio
- About Internet Radio
- Tuneln Radio
- ■ Regarding the Tuneln Radio Menu
- ■ Regarding the Tuneln Radio Account
- Pandora®—Getting Started (U.S., Australia and New Zealand only)
- ■ Create a New Station
- PANDORA
- Spotify
- ■ Notes for using the multi-zone function
- SiriusXM Internet Radio (North American only)
- ■ Playing Back
- Using the keyboard screen
- Slacker Personal Radio (North American only)
- Registering Other Internet Radios
- ■ Registering a Station with PC
- ■ Playing a Registered Radio Station
- ■ Deleting a Registered Radio Station
- Playing Music with DLNA
- About DLNA
- Configuring the Windows Media ® Player
- ■ Windows Medlayer 11
- ■ Windows McPlayer 12
- DLNA Playback
- Controlling Remote Playback from a PC
- Setting PC
- ■ Remote playback
- Playing Music Files in a Shared Folder
- About Shared Folder
- ■ Configuring the Sharing Options
- ■ Creating a Shared Folder
- Playing from a Shared Folder
- Operating Music Files with the Remote Controller
- About the Remote Controller
- Remote Controller Buttons
- En-16
- Icons Displayed during Playback
- Using the Listening Modes
- Selecting Listening Mode
- Dolby D
- Listening Mode Types
- ■ Future listening mode update
- In alphabetical order
- AllCh Stereo
- Direct
- ■ Dolby Atmos
- ■ Dolby D (Dolby Digital)
- ■ Dolby D+ (Dolby Digital Plus)
- ■ Dolby Surround
- Dolby TrueHD
- DSD
- ■ DTS
- ■ DTS 96/24
- ■ DTS Express
- ■ DTS-HD HR (DTS-HD High Resolution Audio)
- ■ DTS-HD MSTR (DTS-HD Master Audio)
- ■ DTS Neo:6
- ■ DTS Neural:X
- DTS:X
- ■ ES Discrete (DTS-ES Discrete)
- ■ ES Matrix (DTS-ES Matrix)
- Full Mono
- ■ Game-Action
- Game-Rock
- Game-RPG
- ■ Game-Sports
- Mono
- ■ Multich (Multichannel)
- Orchestra
- Stereo
- ■ Studio-Mix
- ■ T-D (Theater-Dimensional)
- THX
- TV Logic
- ■ Unplugged
- ■ Reference
- Dialogue Normalization
- THX Cinema Processing
- Timbre Matching
- Adaptive Decorrelation
- ASA (Advanced Speaker Array)
- Selectable Listening Modes
- ■ Movie/TV button
- ■ Music button
- Input Format Listening Mode
- ■ Game button
- THX button
- Advanced Settings (Setup Menu)
- How to Set
- Operation
- Overview of the Setup menu:
- Input/Output Assign
- TV Out
- En-34
- HDMI Input
- Video Input
- Digital Audio Input
- Speaker
- Configuration
- Crossover
- Distance
- Level Calibration
- Equalizer Settings
- Audio Adjust
- Theater-Dimensional
- LFE Level
- Volume
- Source
- Name Edit
- Audio Select
- Video Select
- Listening Mode Preset
- Hardware
- Network
- 12V Trigger A
- 12V Trigger B
- 12V Trigger C
- Miscellaneous
- Initial Setup
- Operating Other Components with the Remote Controller
- Functions of Remote Mode Buttons
- Control Function between the Unit and External Component
- Programming Remote Control Codes
- ■ Searching in the Setup Menu
- ■ Consulting the Remote Control Code List
- ■ Remapping the Colored Buttons
- ■ Resetting the Remote Mode Buttons
- TV operation
- Blu-ray Disc player/DVD player/DVD recorder operation
- VCR/PVR operation
- Satellite receiver / Cable receiver operation
- CD player operation
- Cassette tape deck operation
- To operate CEC-compatible components
- Advanced Connections
- Connecting Bi-amp Speakers
- ■ Bi-amping with PRE OUT RCA jacks
- En-68
- ■ Bi-amping with PRE OUT XLR jacks
- Connecting Dipole Speakers
- ■ Connections
- Connecting and Operating Onkyo RI Components
- About RI Function
- ■ Rename the input selector
- ■ To program the RI remote control code
- iPod®/iPhone® Operation
- RS232 port
- ■ IR jack
- ■ 12V trigger output jack
- Firmware Update
- About Firmware Update
- En-72
- Updating the Firmware via Network
- Before Starting:
- Update
- ■ If an Error Message is Displayed
- Error Code
- Updating the Firmware via USB
- Resetting the unit
- ■ How to reset
- ■ How to reset the remote controller
- Power
- ■ Cannot turn on the unit
- ■ The unit turns off unexpectedly
- Audio
- ■ There is no sound from the television
- ■ There is no sound from the connected player
- ■ One of the speakers produces no sound
- ■ Only the front speakers produce sound
- ■ Only the center speaker produces sound
- ■ The surround speakers produce no sound
- ■ The center speaker produces no sound
- ■ No sound from the back speakers and height
- speakers
- ■ The subwoofer produces no sound
- Volume is low
- ■ There is no sound from a connected turntable
- ■ Noise can be heard
- ■ The sound changes when I connect my headphones
- Reference Information
- ■ About DTS signals
- ■ The beginning of audio received by an HDMI IN cannot be heard
- ■ The volume has suddenly dropped
- ■ Cannot increase volume when playing AirPlay, Spotify, or DLNA
- Listening Mode
- Video
- ■ There is no picture from a source connected to an HDMI IN
- ■ There is no picture from a source connected to the composite video/component video input jack
- ■ Images flicker
- Linked operation
- ■ There is no HDMI linked operation with CEC-compliant equipment such as a television
- ■ The RI functions do not work
- Tuner
- ■ Reception is noisy, FM stereo reception is noisy, or the "FM STEREO" indicator does not stay lit
- Network function
- ■ Cannot access the Internet radio
- ■ Cannot access the network server
- ■ Playback stops while listening to music files on the
- network server
- En-78
- USB storage device
- ■ USB storage device is not displayed
- Multi-zone Function
- ■ There is no zone output from the connected player
- Remote Controller
- ■ The remote controller does not work
- ■ Operating other Onkyo component by using a RI mote control code is not available
- ■ Cannot operate Integra/Onkyo components (ones without RI connection) and components of other makers
- Display and OSD
- ■ The display does not light
- ■ The on-screen menus do not appear
- RI Dock
- ■ There is no sound
- ■ There is no video
- ■ This unit's remote controller does not control your iPod/iPhone
- ■ The unit unexpectedly selects your iPod/iPhone as the input source
- ■ Strange noises can be heard from the unit
- ■ When performing Automatic Speaker Setup, the measurement fails and the message "Ambient noise is too high." is displayed
- ■ The Late Night function does not work
- ■ Re-EQ, Re-EQ(THX) function does not work
- ■ How do I change the language of a multiplex source
- ■ Cannot connect to this unit from a Web browser
- ■ Power consumption in standby mode
- Linked Operation with CEC-compatible Components
- Operation has been confirmed on the following devices (as of February 2015).
- Checking whether the HDMI Linked Operation Settings Are Enabled
- Caution:
- About HDMI
- Audio Formats Supported by The Unit:
- About Copyright Protection:
- Home network (LAN)
- Components necessary for establishing a home network (LAN):
- Router
- CAT5 Ethernet cable
- ■ Network server (When PC etc./network server is d)
- ■ Modem (when Internet radio is used)
- Server Requirements
- ■ Server playback
- USB Storage Device Requirements
- Supported Audio Formats
- ■ MP3 (.mp3/.MP3)
- ■ WMA (.wma/.WMA)
- ■ WMA Lossless (.wma/.WMA)
- WAV (.wav/.WAV)
- AAC
- (.aac/.m4a/.mp4/.3gp/.3g2/.AAC/.M4A/.MP4/.3GP/.3G2)
- FLAC (.flac/.FLAC)
- FLAC is a file format for lossless audio data
- ■ Ogg Vorbis (.ogg/.OGG)
- LPCM (Linear PCM)
- ■ Apple Lossless (.m4a/.mp4/.M4A/.MP4)
- DSD (.dsf/.DSF)
- Dolby TrueHD (.vr/.mlp/.VR/.MLP)
- Integra®
Brand : Integra
Model : DHC-60.7
Category : Receiver