CD12LE - Dehumidifier ElectriQ - Free user manual and instructions
Find the device manual for free CD12LE ElectriQ in PDF.


| Product Type | Compressor Dehumidifier with Air Purification |
| Model | CD12LE (also CD12LEB) |
| Dehumidifying Capacity | 12 L/day (at 30°C / 80% RH) |
| Power Consumption | 180 W |
| Running Current | 0.8 Amps |
| Power Supply | 220-240 V ~ 50 Hz |
| Refrigerant | R290, 50 g (GWP = 3) |
| Tank Capacity | 6 litres |
| Humidity Setting Range | 35% - 80% RH (in 5% increments) |
| Fan Speeds | 2 (High and Low) |
| Airflow | 125 m³/h |
| Dimensions (W x D x H) | 377 x 262 x 623 mm |
| Weight | 11.8 kg |
| Modes | Smart, Dehumidify, Laundry, Air Purifier (Fan only) |
| Additional Features | UV-C light, Ioniser, Humidity Indicator, 24-hour Timer, Child Lock, Auto Defrost, Auto Restart, Swing Louvres |
| Filtration | Washable mesh filter; optional HEPA and Carbon filters (sold separately) |
| Water Drainage | Removable 6 L tank or continuous drainage via hose (8.9 mm ID) |
| Operating Temperature Range | 1°C to 32°C (optimal 15°C to 32°C) |
| Humidity Operating Range | 30% to 80% RH (indoor) |
| Safety Features | Tank full alarm & auto-stop, auto defrost, child lock, thermal cut-out |
| Maintenance | Clean mesh filter every 3 weeks; replace HEPA/Carbon filters every 3-6 months |
| Warranty | Contact retailer; warranty void if filters not used |
| Accessories Included | Water tank, castors, power cord, continuous drainage adapter (pipe not included) |
| Intended Use | Indoor domestic or small office |
Frequently Asked Questions - CD12LE ElectriQ
User questions about CD12LE ElectriQ
0 question about this device. Answer the ones you know or ask your own.
Ask a new question about this device
Download the instructions for your Dehumidifier in PDF format for free! Find your manual CD12LE - ElectriQ and take your electronic device back in hand. On this page are published all the documents necessary for the use of your device. CD12LE by ElectriQ.
USER MANUAL CD12LE ElectriQ
natural_image
Line drawing of a portable air purifier with control panel and wheels (no text or symbols)PREMIUM LOW ENERGY DEHUMIFIDIER WITH AIR PURIFICATION
CD12LE
CD12LEB
12 Litres per day
CD20LE
CD20LEB
20 Litres per day
Thank you for choosing electriQ.
Please read this user manual before using this innovative dehumidifier and keep it safe for future reference
Visit our page www.electriQ.co.uk for our entire range of Intelligent Electricals
SETTLING IN OK?
We hope this has been helpful to you.
We would love to see how you're getting on with your new purchase, so please share any snaps you have on the platform of your choice below.
Our community awaits your uploads - Snap, tag and hashtag away!

@electriQUK
electriQUK
WE'RE HERE TO HELP
Should you have any problems or questions with your purchase, please contact a member of our customer service team.
0330 390 3061
support@electriQ.co.uk
Mon-Fri | 9am to 5pm
Unit 2A, Trident Business Park, Neptune Way, Leeds Road, Huddersfield, HD2 1UA
CONTENTS
SAFETY INSTRUCTIONS 4
VISUAL SAFETY GUIDE 5
INFORMATION ON INDOOR POLLUTANTS 6
APPLIANCE DIAGRAM 7
FEATURES 8
INSTALLATION 8
FITTING THE OPTIONAL FILTERS 8
CONTROL PANEL 9
OTHER FEATURES AND INDICATORS 11
QUICK REFERENCE GUIDE 12
POSITIONING THE DEHUMIDIFIER 13
WATER DRAINAGE 14
CARE AND MAINTENANCE 15
TROUBLESHOOTING 16
TECHNICAL DATA 17
SUPPORT 18
SAFETY INSTRUCTIONS
IMPORTANT
- Carefully read the instructions before operating the unit.
- This appliance is only intended for use in an indoor domestic environment. The manufacturer does not recommend any other use and may cause fire, electrical shock or other injuries to a person or damage to property.
- Rating: This unit must only be connected to an AC 220-240V / 50 Hz earthed outlet. Installation must be in accordance with the regulations of the country where the unit is used.
- If you are in any doubt about the suitability of your electrical supply, have it checked and, if necessary, modified by a qualified electrician.
- This dehumidifier has been tested and is safe to use. However, as with any electrical appliance – care must be taken during use.
- CAUTION: In order to avoid a hazard due to inadvertent resetting of the thermal cut-out, this appliance must not be supplied through an external switching device, such as a timer, or connected to a circuit that is regularly switched on and off by the utility.
- Disconnect the power from the appliance before dismantling, assembling or cleaning.
- Avoid touching any moving parts of the appliance.
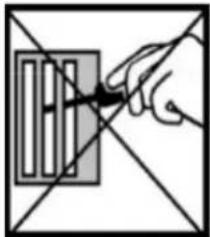
- Never insert fingers, pencils or any other objects through the guard.
- This appliance is not intended for use by persons (including children) with reduced physical, sensory or mental capabilities. It is also not intended for use by those with a lack of experience and knowledge unless they have been given supervision or instruction concerning the use of the appliance by a person responsible for their safety.
- Children should be supervised to ensure they do not play with the appliance.
- Do not clean the unit by spraying it or immersing it in water.
- Never connect the unit to an electrical outlet using an extension cord. If a power outlet is not available, one should be installed by a qualified electrician.
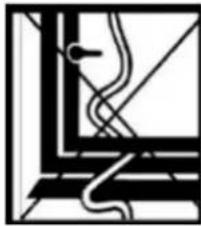
- Never operate this appliance if the unit is damaged. Call the retailer first. Ensure the power cord is not stretched or exposed to sharp objects or edges.
- If the supply cord is damaged, it must be replaced by the manufacturer, its service agent or similarly qualified persons in order to avoid a hazard.
- R290 refrigerant gas complies with European environmental directives.
- R290 has a low GWP (Global Warming Potential) of 3.
- An authorised service representative should perform any service other than regular cleaning or filter replacement. Failure to comply could result in a voided warranty.
- The unit must be disconnected from the power prior to any cleaning, maintenance or servicing.
- This unit contains a UVC light source, which is inaccessible.
- The unit must only be opened by a suitably competent engineer when the power is disconnected and after reading the service manual.
- Unintended use or damage to the casing may result in the escape of dangerous UV-C radiation. UV-C radiation may, even in small doses, cause harm to the eyes and skin.
- Do not use the appliance for any purpose other than its intended use.
- Do not tilt the unit while in use. The unit is designed to work only in a vertical position. This dehumidifier must always be stored upright; otherwise, irreparable damage may be caused.
- This unit will still operate for approximately 3-4 minutes after pressing the power button to turn off.
- Never use the mains plug as a switch to start or turn off the dehumidifier. Instead, use the power button provided on the control panel.
- Always place the unit on a dry and stable surface.
- The appliance should not be installed in a laundry or wet room where the humidity is higher than 85% RH. This unit should be operated at an ambient temperature between 1°C and 32°C.
- Do not dry laundry directly above the unit. To prevent water from entering the dehumidifier, laundry should be placed at least 40 cm away from your dehumidifier.
- Do not place the unit next to heat sources (e.g. electrical fires, fireplaces, etc.)
- Do not store or use gasoline, petrol, paint, solvents or other flammable vapours and liquids in the vicinity of this dehumidifier or any other appliance. Do not use dehumidifiers where flammable gases or VOC can be released or accumulate.
- Do not use or store the unit in a room smaller than 4m^2 .
ENERGY SAVING AND UNIT SAFETY PROTECTION TIPS
Do not cover or restrict the airflow from the outlet or inlet grills.
For maximum performance, the unit should be operated at least 20 cm away from walls and 50 cm from other objects within the room. Whilst storing the unit when not in use, ensure the same ventilation clearances as in operation. Do not store anything on top or leaning against the unit.
Always store the unit in a dry room away from direct sunlight.
Keep the appliance's filters and grills clean. Under normal conditions, filters and grills should only need cleaning once every three weeks (approximately). Do not use the unit without the mesh air filter, as this will allow dirt to gather inside the dehumidifier, which could invalidate the warranty.
A dirty filter restricts the airflow into the machine, increasing the resistance of the fan. This can damage the unit and invalidate your warranty.
Since the filters remove airborne particles, more frequent cleaning may be necessary depending on the air quality. Vacuum and wash the mesh filters with hot, soapy water and dry them before placing them back in the unit.
QUICK VISUAL SAFETY GUIDE ON WHERE OR WHEN NOT TO USE YOUR DEHUMIDIFIER
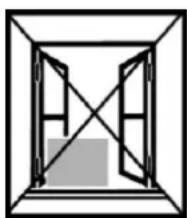
natural_image
Simple line drawing of a double-framed window with diagonal x-bracing and a gray rectangle at the bottom (no text or symbols)Exposed to the weather outdoors
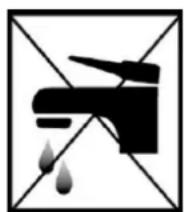
Near water

natural_image
Abstract black-and-white geometric pattern with diagonal lines and a central emblem (no text or symbols)If the power cable wires are frayed or cut.
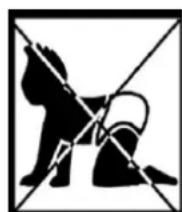
Where small children may be left unattended
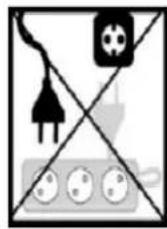
If an extension lead may become overloaded
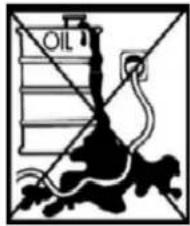
Where it may be damaged by chemicals
natural_image
Abstract black-and-white geometric line drawing with no text or symbolsWhere the power cable may be damaged
natural_image
Hand holding a tool interacting with a grid-like object, enclosed in a square frame (no text or symbols visible)Where there is a risk of interference by foreign objects
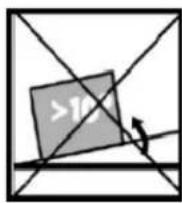
On a slope or uneven surface

This product is not for DIY repair

Where there is a risk of fire, or close to a naked flame
natural_image
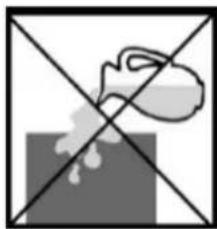
Simple line drawing of a spray bottle over a cube, crossed by diagonal lines (no text or symbols)Where there is a risk of water falling on the unit
WARNING SYMBOLS
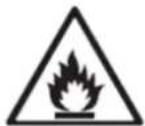
Flammable Refrigerant

Read the operating instructions.

Read the operator's manual.

UV Radiation
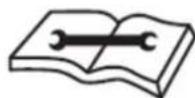
Read the service/technical manual.
INFORMATION ON INDOOR POLLUTANTS
VOC (Volatile Organic Compound): VOCs come from motor vehicle exhausts, gasoline vapour, pollutants such as formaldehyde, ammonia and many other common and chemical solvents such as paints and glues, or can be a by-product of mould growth. VOCs cause irritation to the eyes and or nose as well as causing headaches, nausea and even potential damage to the central nervous system. Pressed wood furniture, newly decorated rooms, paint and cleaning solvents are common sources of VOCs.
Mould / Fungus: These can affect our respiratory system and cause allergic reactions, like a runny nose, eye and throat irritation, headaches, fatigue and aggravation of asthma. Other indoor pollutants include bacteria, viruses, dust mites and pollen.
Emissions from electronic office equipment: Many studies, including those from EPA and the University of California Berkley, have reported that emissions from office equipment such as computers and printers, include VOCs, ultra-fine particles and ozone. These emissions have been proven to have a negative effect on the health of many people which can be reduced by using an air purifier.
Using HEPA and Carbon filters: An effective HEPA filter is absolutely necessary to remove particles, even at a microscopic level; it ensures that the particles are not spread. Ionisers will sterilise the air and reduce bacterial growth.
The carbon filter will absorb unpleasant odours and reduce the VOC content in the air, while the Ioniser will sterilise the air and reduce bacterial growth. The UV light uses short-wave ultraviolet light to inactivate airborne pathogens and microorganisms such as mould, bacteria and viruses.
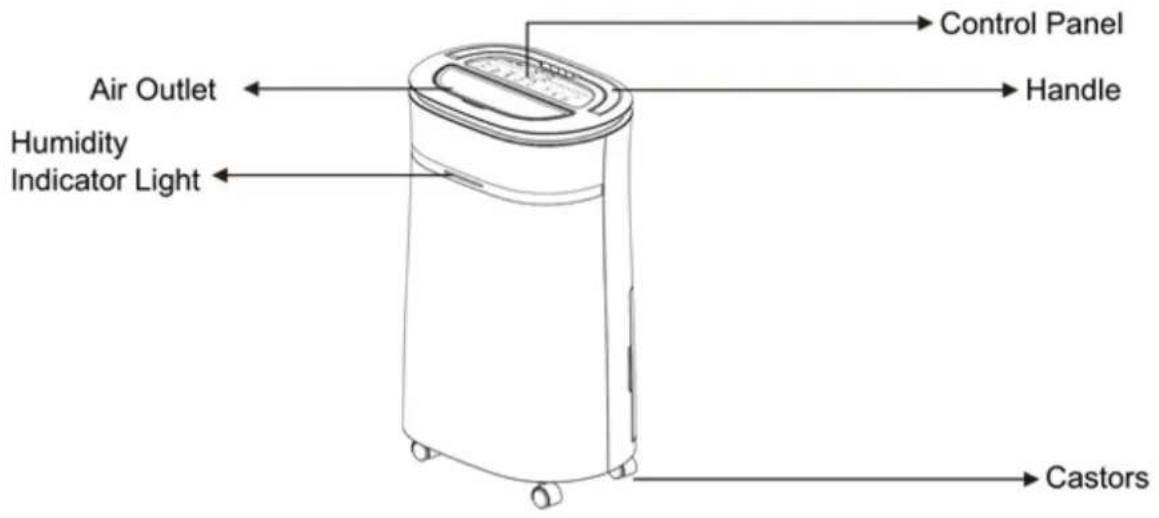
APPLIANCE DIAGRAM
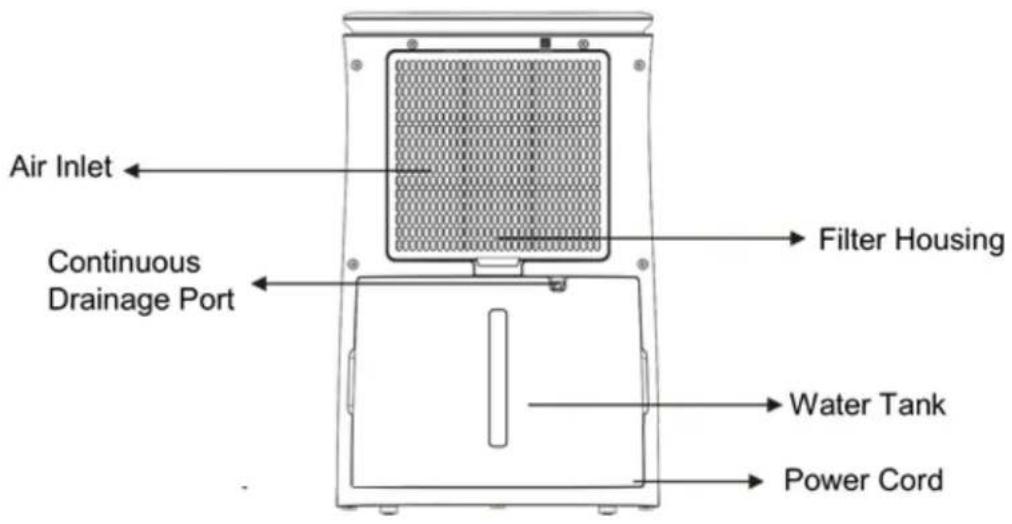
OPTIONAL FILTERS
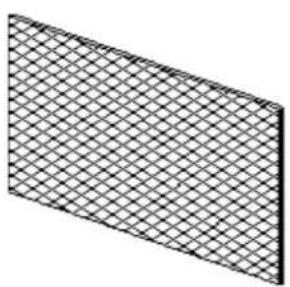
natural_image
Isometric view of a rectangular grid pattern with no text or symbolsCARBON FILTER
Replacement filters are available from the retailer under code: ACFIL-CDLEX
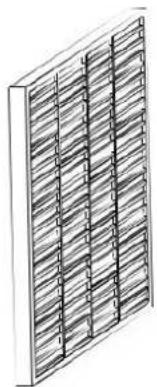
natural_image
Isometric line drawing of a grid-patterned panel or panel (no text or symbols)HEPA FILTER
Filters are available from the retailer under code: HEPA-CDLEX
Note: Diagrams are for illustrative purposes only. The design of the parts may vary from what is shown.
FEATURES
Your dehumidifier belongs to the electriQ dehumidifier range featuring power saving logic.
- Easy to use controls
- Cost effective way to combat mould, condensation and damp
- Optional HEPA and Carbon filters for air purification
- UV light and loniser to remove mould and pathogens from the air.
- Dries laundry more efficiently than a tumble dryer
- Designed to complement any modern space
- Castors for improved mobility
- Intelligent CPU controlled digital humidistat with 35-80% RH and room humidity display
- 24 hours start / stop timer
- Tank operation or permanent drainage option with splash proof tank
- Tank full alarm & auto-stop function
These dehumidifiers use compressor technology to extract water from the environment. Compressor dehumidifiers are ideal for normal domestic or office environments which are heated during the winter months and maintain a temperature above 12-15°C.
This dehumidifier is easy to move around on castors and is designed to extract unwanted humidity while saving money due to it's power saving logic. It features an intelligent humidistat where the desired relative humidity can be adjusted in increments of 5% between 35 and 80% ensuring the air in your room is not too dry and that power is not wasted.
INSTALLATION
Remove any water from within the water tank before starting the unit. In order to save energy do not open windows or doors while the unit is running. Place the unit on a hard / flat surface. On first use run the unit continuously for 24 hrs.
TO REDUCE NOISE LEVELS: Place a piece of carpet or a rubber mat under the unit to reduce any vibrations while the unit is running.
FITTING THE OPTIONAL FILTERS
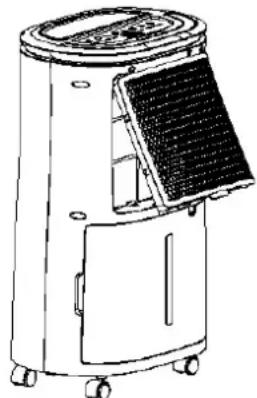
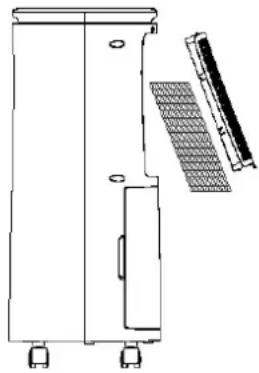
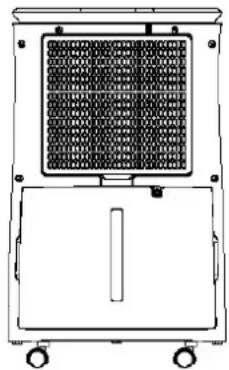
The optional filters can be placed in the appliance before use. The optional HEPA filter is fitted into the rear of the filter housing. The optional Carbon filter is placed between the unit and the filter housing.
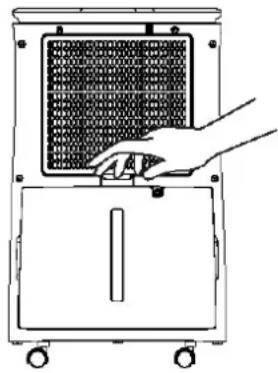
natural_image
Line drawing of a hand inserting a grid into a device with wheels (no text or symbols)Unclip the filter housing.
natural_image
Line drawing of a portable air purifier with solar panel and door (no text or symbols)Remove the filter housing and fit the HEPA filter. (If required)
natural_image
Technical line drawing of a mechanical device with mounting holes and a grid-patterned component (no text or symbols)Refit the filter housing and place the Carbon filter in position. (If required)
natural_image
Technical line drawing of a mechanical device with a grid-patterned panel and wheels (no text or symbols)Ensure the filter housing is securely fastened into position.
CONTROL PANEL
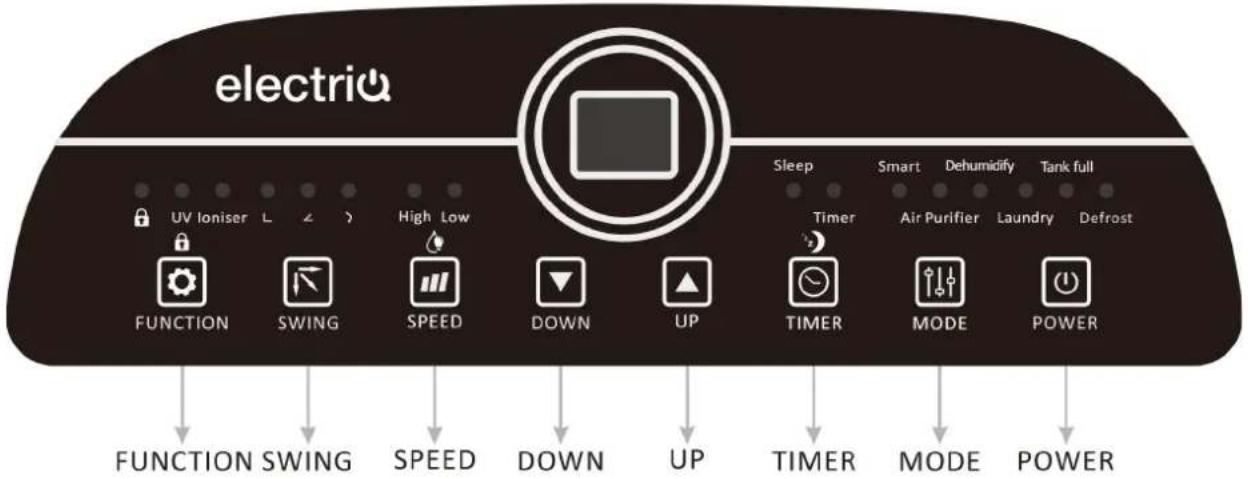
 POWER POWER | POWER ButtonTurn the appliance on/off |
 MODE MODE | MODE ButtonSelect the function of the unit between: SMART and FAN modes. The LED's next to the button will show which mode is selected.SMART MODE: The unit will default to SMART mode the first time it is switched on and remains in this mode until another program is chosen. In smart mode it will default to aim for a relative humidity of 55%.AIR PURIFIER: Only the fan will run and water is not extracted. To be used in conjunction with the optional filters. It can also be run without the filters to work as a fan.DEHUMIDIFY: The unit will remove moisture from the air. The desired humidity level can be set using the up and down buttons.LAUNDRY: The dehumidifier will run continuously at high fan speed, to remove the most moisture possible. This is ideal for drying clothes. |
 UP / DOWN UP / DOWN | HUMIDITY SETTINGPress the UP and DOWN buttons to select the desired relative humidity level, the default relative humidity is 55%. When a relative humidity of 35% is selected, the compressor will not stop until the water tank is full. |
HUMIDITY INDICATOR INDICATOR    | HUMIDITY INDICATOR ButtonWhen the appliance is started, the indicator light will turn on automatically. The indicator light colour will change according to the humidity conditionRED: High humidity, RH≥70%ORANGE: Above ideal humidity, 70%> RH ≥60%GREEN: Ideal humidity, RH<60%The “Humidity Indicator” can be turned on and off by holidng the SPEED button for 3 seconds.Note: It can take around 2 minutes after the humidity has changed into a different colour bracket for the indicator will change the colour e.g. if humidity drops to 55% may take 2 minutes before the indicator changes to green.TIMER ButtonPress the TIMER button to program the timer. When the timer is activated the "TIMER" light will be illuminated. Before programming the timer, ensure the timer function has not been activated (the light must be off). The following timer programs are available.DELAYED POWER-ON FUNCTION: With the appliance in stand-by, press the TIMER button, then use the UP and DOWN buttons to set in how many hours time you require the unit to start (1~24 hours).DELAYED POWER-OFF FUNCTION: While the appliance is running with the desired settings, press the TIMER button, then use the UP and DOWN buttons to set in how many hours time you require the unit to stop (1~24 hours).SLEEP: Press and hold the TIMER button for 3 seconds to enter sleep model. The Sleep indicator will illuminate, and all other lights will turn off. The unit will run at low fan speed. To exit Sleep mode, press and hold the TIMER button for 3 seconds. |
 | SPEED ButtonPress the SPEED button to change the fan speed between HIGH and LOW. The LED's above the button will illuminate to indicate the currently selected fan speed. |
 f f | FUNCTION ButtonPress the FUNCTION button to activate the UV and loniser purification options to improve indoor air quality. The relevant LEDs above the button will illuminate to show which function is currently activated.LOCK: Press and hold the FUNCTION button for 3 seconds to activate the child lock. While activated the lock LED will illuminate, and the buttons on the control panel are deactivated. To turn off the lock, press and hold the FUNCTION button for 3 seconds. |
 | SWING ButtonPress to select the position of the louvre on the top of the unit. This can either be set at a 45 or 90 degree angle. Alternatively the swing function can be activated which changes the position of the louvre toalter the direction of the airflow. |
 | INTELLIGENT DEFROSTThe appliance will defrost automatically when the coil sensor detects that the internal temperature is too low. During defrosting the indicator will light up. Once the defrost cycle has finished, the appliance will return to the mode that was previously operating. |
 | TANK-FULLWhen the water tank is full, the TANK FULL indicator light will flash, and the unit will stop operating. Once emptied and replaced, the appliance will resume operation. |
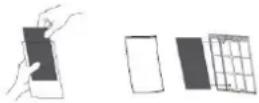 | OPTIONAL CARBON AND HEPA FILTERS (Air purification function)Insert the filters into the filter housing. It is suggested to hoover the filters every 2-3 weeks and change them every 3-6 months as this will help to ensure the room is kept fresh and odour free. |
The led indicator performs the following functions:
- When the unit is plugged in, it will indicate the humidity level of the room.
- When the UP and DOWN buttons are pressed, it will indicate the desired humidity currently set.
- When the timer is programmed will show the duration.
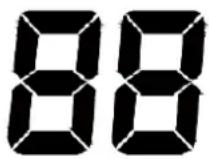
Notes: When humidity level is outside the normal operational parameters will show LO/HI. If ambient humidity is lower than 20%, it will show "LO" If ambient humidity is higher than 90%, it will show "HI".
OTHER FEATURES AND INDICATORS
TANK FULL LIGHT
When the water tank is full, removed or incorrectly inserted the unit will stop dehumidifying, the red tank full light will illuminate and the unit will beep. Empty the tank and reinsert it correctly to resume operation.
AUTO DEFROST
When frost builds up on the evaporator coils, the compressor will cycle off and the unit will go in to defrost mode. Following completion of the defrost mode, the unit will return to the previously operating settings.
- When the unit is running in a room with a temperature between 5^ C and 12^ C, it will enter defrost mode roughly every 30 minutes.
- When the unit is running in a room with a temperature between 12^ C and 20^ C, it will enter the defrost mode roughly every 45 minutes.
HUMIDISTAT CONTROL AND FAN/COMPRESSOR OPERATION
- When the humidity of the room is 2% lower than the desired humidity the compressor will turn off automatically but the fan will continue to operate to ensure that the air within the room is not stale. The unit will use only a minimal amount of energy in fan mode.
- When the humidity of the room is equal to or higher than the desired humidity the compressor will restart after a 3 minutes delay to protect the compressor.
AUTO-RESTART
If the unit stops unexpectedly due to the power cut, it will restart with the previous function selected automatically when the power resumes, and the 3 minute compressor protection has elapsed.
POWER
After the unit has stopped, to protect the compressor it is not recommended to resume operation for at least 10 minutes. Operation can resume after this period lapses. When the unit is restarted there is a 3 minute delay before compressor will start.
LIGHTWEIGHT PORTABLE DESIGN ON CASTORS
The dehumidifier is built to be compact and lightweight. The castors on the bottom of the unit make it easy to move from room to room.
Your dehumidifier contains an advanced micro-CPU controlled device which is capable of self-diagnostics.
The LCD display may also show the error and protections codes.
QUICK REFERENCE GUIDE
Power Button: Press to turn the dehumidifier on and off.
Timer: Press the timer button, then use the the timer (1-24 hrs, start/ stop timer).

buttons to adjust the duration of
If set while the unit is running: The number will represent the number of hours the unit will operate before turning off. This will not be affected if the unit enters defrost mode or the tank is emptied and reinserted.
If set while the unit is in standby: the set number represents the period in hours after which the unit will start. To cancel start / stop mode press the timer key again.

natural_image
Two hand-drawn buttons with triangular and inverted symbols, no text or labels presentUp and Down Buttons: During the High or Low modes when the unit is displaying the current relative humidity, these buttons can be used to adjust the desired humidity level. The desired relative humidity can be set between 35 and 80% in 5% increments.
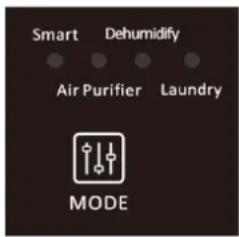
SMART Mode: This is designed for maximum convenience and defaults to the ideal domestic environment humidity level of 50-55% while saving electricity. This is the default mode and is recommended for most users.
During operation the compressor will operate until the desired humidity is reached and then will stop. The fan moves the air around the room ensuring the entire air in the room is processed and humidity correctly measured.
DEHUMIDIFY MODE: This is the standard operating mode, for which the desired humidity can be set using the up and down buttons.
LAUNDRY MODE: When drying clothes it is advised for the dehumidifier to operate continuously with maximum water extraction until the water tank is full. Do not place clothes directly over any of the vents on the dehumidifier. Make sure that there is nothing blocking the hot air exhaust air flow and for best results place the laundry within 1.5 meters of the dehumidifier.
NOTES:
- If a permanent drainage pipe is fitted the unit will not stop operating. Setting the desired humidity to around 35% is good for laundry mode, a quick drying boost, or in emergencies. It is not recommended for long normal operation in a domestic or office environment.
- To allow more moisture in the air, press the up button and set to a higher desired humidity (e.g. 60-70%).
- We recommend setting the Humidity to 50-55%. This is great for domestic operation and dry storage.
- Setting the humidity to 60% is great for personal comfort and applications where 50% RH is considered too dry.
- Setting the humidity to 70% is ideal for unoccupied properties or where an economical run is needed without the need to reduce the humidity further.
POSITIONING THE DEHUMIDIFIER
A badly positioned dehumidifier will have little effect. In positioning the dehumidifier please ensure circulation of air in not restricted around the unit.
Allow at least 20 cm space around the unit. This dehumidifier is designed only for indoor residential or small office applications and any commercial or industrial use will invalidate the warranty.
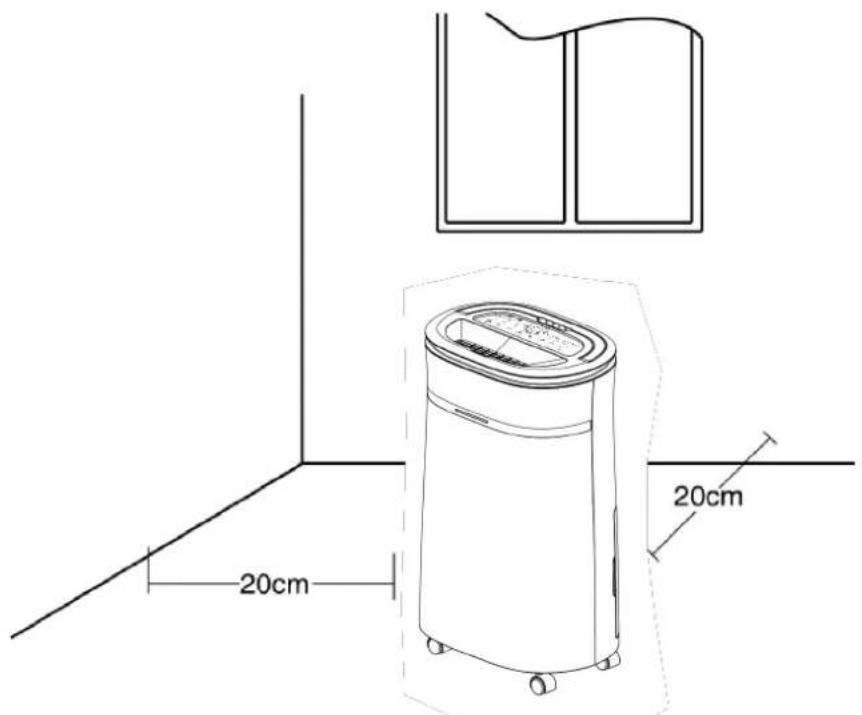
Use in an enclosed area for maximum efficiency. Close all doors, windows to create an effective operating environment. Do not use outdoors.
Your electriQ dehumidifier will begin to protect your space from the harmful effects of excessive moisture as soon as it is turned on. Excess moisture is dispersed throughout your home. For this reason, the dehumidifier should be positioned in a central and clear location so that it can draw this moist air towards it from all over the home. A warm hallway or landing is an excellent position for your dehumidifier. If possible, leave interior doors ajar to allow air circulation.
Alternatively, if you have a serious problem in one area you can begin by positioning the dehumidifier there and moving it to a more central location at a later date. For the most effective use, run your dehumidifier with external doors and windows kept closed. Please note the unit should not be placed directly against a radiator or other heat source.
Before moving the appliance the water tank should be emptied. The handle on the appliance is designed to aid in its movement and should not be used to support the full weight of the dehumidifier. When carrying the unit, it should be kept upright and sufficiently supported from its base. The handle should not be used if there is any signs of damage to its fixings.
When positioning your electriQ dehumidifier, ensure that it is placed clear of any obstacle that may limit the air movement. Place the dehumidifier on a flat dry surface.
Note: Do not force castors to move over carpet or uneven surfaces, nor move the unit with water in the tank as it may tip over and spill water.
WATER DRAINAGE
When the water tank is full, the unit will stop automatically. When this happens the TANK FULL light will illuminate on the control panel.
NOTE: Only empty the water tank when it is full or before moving or storing the unit.
There are two ways to dispense collected water.
1. USE THE TANK
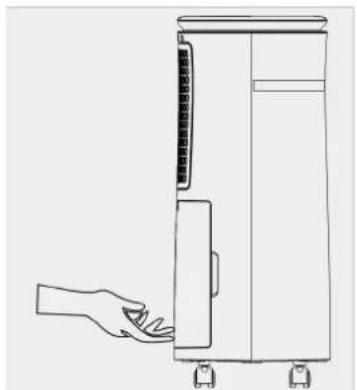
When the tank is full, the unit will automatically stop running, and the Tank Full indicator will flash. Slowly pull out the tank. Grip the tank by its handle securely, and carefully pull it out. Empty the water tank and reinsert it into the dehumidifier. The tank must be in place and securely seated for the dehumidifier to operate again. The dehumidifier will re-start when the tank is restored to its correct position.
natural_image
Line drawing of a hand pressing down on a portable air conditioner unit (no text or symbols)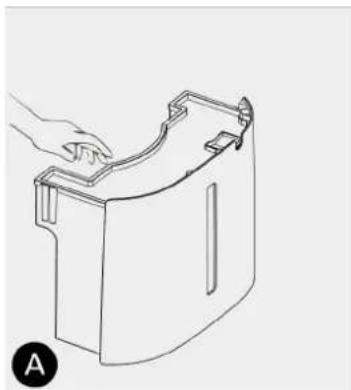
natural_image
Line drawing of a hand holding a curved mechanical component, labeled 'A' in the corner (no text or symbols on the diagram itself)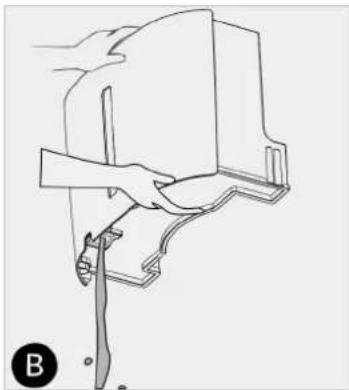
natural_image
Line drawing of a hand holding a tool next to a mechanical component (no text or symbols)NOTES:
When you remove the water tank, do not touch sensors or any parts which are situated behind tank. Doing so may damage the product. Be sure to push the tank gently all the way into the unit. Banging the bucket against anything or failing to push it in securely into place may cause the unit not to operate.
Do not remove any parts from the water tank or tank enclosure. The water full sensor will no longer be able to detect the water level correctly and water may leak from the water tank.
2. CONTINUOUS DRAINAGE
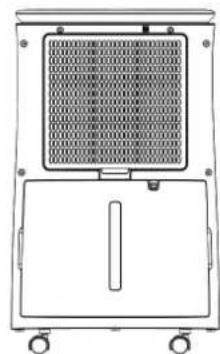
Water can be automatically plumbed in or drained into a sink, a larger container or through the wall into an outside drain by attaching a pipe to the unit (8.9 mm internal diameter). Insert the pipe into the drain outlet at the back of the unit as shown here.
natural_image
Line drawing of a portable air conditioner unit with ventilation grilles and wheels (no text or symbols)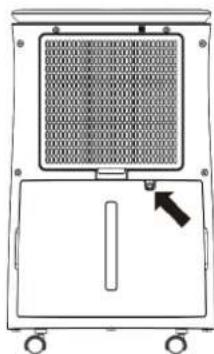
natural_image
Diagram of a portable air conditioner unit with ventilation grille and control panel (no text or symbols)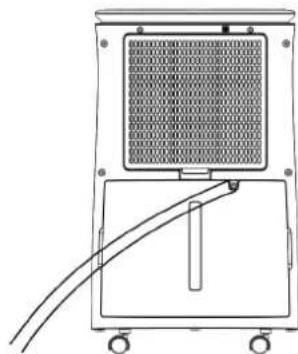
natural_image
Technical line drawing of a portable industrial machine with cooling unit and wiring (no text or symbols)Make sure the connection between pipe and the drain outlet is tight and does not leak. Then direct the pipe to a suitable drainage point. This unit uses gravity to dispose of water hence the drain should be lower than the water outlet on the unit. Put the tank back. Be sure to run the water pipe downward and to let the water flow out smoothly. Do not kink or bend the pipe.
The permanent drain can be used in conjunction with a water pump (e.g. when draining from a cellar) to lift the water upwards.
CARE AND MAINTENANCE
Always shut off the unit and unplug from the mains before cleaning or performing any maintenance. When it is not in use for long periods it is advisable to remove the plug from the power socket. Do not use chemical solvents (such as benzene, alcohol or gasoline) as they may cause irreversible damage to the unit.
natural_image
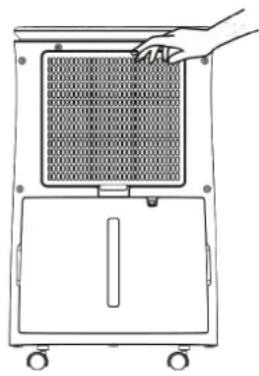
Line drawing of a hand placing a grid-patterned panel into a control panel (no text or symbols)1. CLEAN THE GRILLE AND CASE
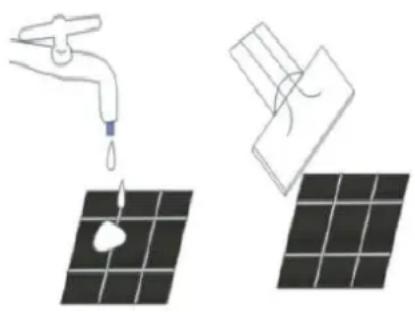
Use water and a mild detergent to clean the washable mesh filter. Do not use bleach or abrasives. Do not splash water directly onto the main unit. Doing so may cause an electrical shock and can lead to the insulation to deteriorate, or cause the unit to rust. The air intake and outlet grilles get soiled easily, so use a vacuum attachment or soft brush to clean. Wipe the dehumidifier body with a soft damp cloth or kitchen towel.
natural_image
Illustration showing a faucet pouring liquid into a solar panel, and a hand holding a tool above it (no text or symbols)Remove the filter housing. If the optional filters are fitted, remove them from the frame and hoover gently approximately every 2-3 weeks.
If the mesh filter is dirty hoover it, if it is heavily soiled wash it with warm soapy water and dry thoroughly before reinserting it in the unit. When filter cleaning is finished and filters are dry placed them back into the unit. The optional filters should be replaced every 3 – 6 months.
NOTE: While the HEPA and Carbon filters are optional, never run the unit without the mesh filter housing correctly inserted.
2. CLEAN THE WATER TANK
Every few weeks, clean the tank to prevent growth of mould, mildew and bacteria. Partially fill the tank with clean water and add a little mild detergent. Swish it around and than empty the tank and rinse.
NOTE: Do not use a dishwasher to clean the tank. After cleaning and drying, the tank must be reinserted securely into dehumidifier in order to restart operation.
END OF SEASON MAINTENANCE
- Empty and clean the water tank.
- Clean the unit and the filters as per cleaning procedure above.
- Coil the power cord on the special cord storage rest at the back of the unit.
- Cover the unit and keep it in a dry place.
TROUBLESHOOTING
| Issue | Cause | Solution |
| Hot or cold air being produced | Normal Operation | When the unit is in dehumidifying mode it absorbs humid air from room and freezes it to reduce the humidity. During the cold cycle there should be cold air coming out of the unit During the defrost cycle hot dry air should be coming out of the outlet grill. |
| Unit does not operate | Is the plug properly inserted in the socket? | Insert the plug into the socket and ensure the socket is switched on. |
| Does the tank full indicator is red? | Tank full, float displaced or tank not properly inserted. Empty tank, check float and make sure tank is properly inserted in unit. | |
| Front louvres do not open | Louvre motor is blocked | Check if anything is blocking the louvre Try to move the louvres gently up and down while the unit is off. If the above fails return the unit to service centre |
| Dehumidifier does not extract water | Is the unit set to a humidity level lower than the humidity of the room? | Set the humidity level on the humidistat below the current humidity reading. |
| Is the temperature too low for water extraction to be efficient? | Increase temperature in the room or reposition the unit. | |
| Is any intake grill or outlet blocked? Is the unit too close to walls. | Remove obstructions and restart the unit. Ensure a distance of at least 20 cm between the unit & walls | |
| Airflow seems weak | Are the filters dirty or clogged? | Please service the filters regularly as per the user manual. |
| Unit is noisy during operation | Is the unit on an uneven surface? | Please place on flat horizontal surface. Where possible this should be soft such as rubber or carpet to prevent vibrations. |
| Is filter clogged? | Please service the filters regularly as per user manual. | |
| E3 or E4 | Humidity sensor error | Use the unit within the prescribed humidity range. Unplug the unit, rest and plug it back in. If error repeats, call the service centre. |
| E1 or E2 | Temperature sensor error | Use the unit within the prescribed temperature range. Unplug the unit, rest and plug it back in. If error repeats, call the service centre. |
| E5 or E6 | Abnormal Coil sensor temperature or current | Use the unit within the prescribed humidity and temperature range. Unplug the unit, rest and plug it back in. If error repeats, call the service centre. |
| Defrost light on and unit stops regularly | Unit is defrosting | Allow the unit to automatically defrost. The protection will clear after the unit self defrosts. Increase the temperature in the room if this repeats too often |
| Tank full red light | Water tank full notification | Tank is full or is not in the right position-- Empty the tank and replace in the right position. |
| Any other malfunctions will need to be reported to electriQ service centre. Do not attempt unauthorised repairs as these may invalidate the warranty. | ||
FREQUENTLY ASKED QUESTIONS
Why doesn't the dehumidifier seem to extract much water if the temperature is low?
This is a compressor dehumidifier which works best in temperatures above 15^ C. If the temperature is low and the air is dryer than the setting on the humidistat the unit will not extract water. If you want to use a dehumidifier for outside buildings, unheated properties, boats or garages please check our desiccant range.
Why doesn't the unit work /or stops suddenly?
The water tank may be full or displaced. To rectify: empty the tank and carefully place the tank back in the unit. Also the unit may be running in dehumidifying mode with a low room temperature. Please check if the room temperature is lower than 5^ C. If so, the unit will stop working while in dehumidifying mode. (unit may be defrosting).
The ambient operating range is between 5^ C and 35^ C with a relative humidity ranging from 30% to 80%. For maximum efficiency use the unit between 15^ C and 32^ C.
Sometimes cold and/or hot air comes out from the air outlet grill, why?
When the unit is in dehumidifying mode it absorbs humid air from room and freezes it to reduce the humidity.
During the cold cycle there should be cold air coming out of the unit.
During the hot cycle hot dry air should be coming out of the outlet grill.
TECHNICAL DATA
| Model | CD12LE-V3 | CD12LEB-V2 | CD20LE-V4 | CD20LEB-V2 |
| Voltage | 220-240V~50Hz | |||
| Dehumidifying capacity | 12 L / day(at 30°C / 80%RH) | 20 L / day(at 30°C / 80%RH) | ||
| Fan Speeds | 2 | |||
| Power Consumption | 180W | 280W | ||
| Running Amps | 0.8 Amps | 1.21 Amps | ||
| Tank Capacity | 6 litres | |||
| Desired Humidity Range | 35 – 80% | |||
| IP Rating | IPX1 | |||
| Refrigerant | R290, 50 grams | R290, 80 grams | ||
| Airflow m3/h | 125 | 180 | ||
| High / Low Pressure | 3.2/0.7MPa | |||
| Filters | Carbon (Optional)HEPA (Optional) | |||
| Dimensions mm (WxDxH) | 377 x 262 x 623 | |||
| Weight Kgs | 11.8 | 14 | ||
| GWP | 3 | |||
electriQ UK SUPPORT
www.electriQ.co.uk/support
Please, for your own convenience, make these simple checks before calling the service line.
- Has the unit been standing upright for at least 2 hours?
- Is the unit plugged into the mains?
- Is the fuse OK?
- Switch the unit off and wait three minutes to see if the issue is resolved. Restart the unit.
- Check if the water tank is full.
- Was the troubleshooting guide followed?
If the unit still fails to operate call: 0330 390 3061 or complete the online form
Office hours: 9AM - 5PM Monday to Friday
Unit 2A, Trident Business Park, Neptune Way, Leeds Road, Huddersfield, HD2 1UA
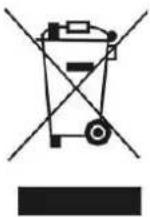
Recycling facilities are now available for all customers at which you can deposit your old electrical products. Customers will be able to take any old electrical equipment to participating sites run by their local councils. Please remember that this equipment will be further handled during the recycling process, so please be considerate when depositing your equipment. Please contact the local council for details of your local household waste recycling centres.
- PREMIUM LOW ENERGY DEHUMIFIDIER WITH AIR PURIFICATION
- SETTLING IN OK?
- electriQUK
- WE'RE HERE TO HELP
- CONTENTS
- SAFETY INSTRUCTIONS
- IMPORTANT
- ENERGY SAVING AND UNIT SAFETY PROTECTION TIPS
- WARNING SYMBOLS
- INFORMATION ON INDOOR POLLUTANTS
- FEATURES
- INSTALLATION
- FITTING THE OPTIONAL FILTERS
- OTHER FEATURES AND INDICATORS
- TANK FULL LIGHT
- AUTO DEFROST
- HUMIDISTAT CONTROL AND FAN/COMPRESSOR OPERATION
- AUTO-RESTART
- POWER
- LIGHTWEIGHT PORTABLE DESIGN ON CASTORS
- QUICK REFERENCE GUIDE
- NOTES:
- POSITIONING THE DEHUMIDIFIER
- WATER DRAINAGE
- USE THE TANK
- CONTINUOUS DRAINAGE
- CARE AND MAINTENANCE
- CLEAN THE GRILLE AND CASE
- CLEAN THE WATER TANK
- END OF SEASON MAINTENANCE
- FREQUENTLY ASKED QUESTIONS
- Why doesn't the unit work /or stops suddenly?
- Sometimes cold and/or hot air comes out from the air outlet grill, why?
- electriQ UK SUPPORT
- Please, for your own convenience, make these simple checks before calling the service line.
Brand : ElectriQ
Model : CD12LE
Category : Dehumidifier