
WIFICI20CGY - Surveillance Camera NEDIS - Free user manual and instructions
Find the device manual for free WIFICI20CGY NEDIS in PDF.


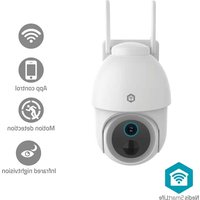
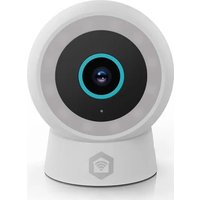
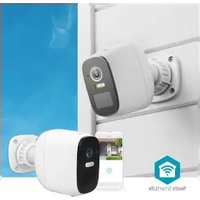
| Product Type | Surveillance Camera |
| Brand | Nedis |
| Model | WIFICI20CGY |
| Resolution | 1080p Full HD (1920x1080) |
| Field of View | 130 degrees |
| Night Vision | Infrared up to 10 meters |
| Connectivity | Wi-Fi 802.11 b/g/n 2.4 GHz |
| Power Supply | 5V DC via micro USB adapter (included) |
| Dimensions (H x W x D) | 11 cm x 6 cm x 6 cm |
| Weight | 140 g |
| Audio | Two-way audio with built-in microphone and speaker |
| Motion Detection | Yes, with push notifications |
| Storage | MicroSD card up to 128 GB (not included) or cloud storage |
| Weather Resistance | IP65 (outdoor use) |
| Compatibility | Android and iOS app |
| Mounting | Wall mount bracket included |
| Maintenance | Clean lens with a soft, dry cloth |
| Safety | Do not expose to rain; use only in dry locations |
| Spare Parts | Mounting bracket and screws available from Nedis |
| Repairability | Consumer repairable parts: none; for service contact Nedis support |
| Warranty | 1 year limited warranty |
Frequently Asked Questions - WIFICI20CGY NEDIS
User questions about WIFICI20CGY NEDIS
0 question about this device. Answer the ones you know or ask your own.
Ask a new question about this device
Download the instructions for your Surveillance Camera in PDF format for free! Find your manual WIFICI20CGY - NEDIS and take your electronic device back in hand. On this page are published all the documents necessary for the use of your device. WIFICI20CGY by NEDIS.
USER MANUAL WIFICI20CGY NEDIS
Full manual Nedis SmartLife™
Download the app: Nedis SmartLife from Apple App store or Google Play Store.
Create account
Select country code and enter full national phone number or email address and then request verification code.
Enter received verification code and pick your own password.

natural_image
Blue hexagonal icon with a white house and Wi-Fi symbol (no text or numbers)SmartLife
Add device
- Tap "+" on the top right corner. A list of potential products appears.
- Select the device type you want to add from the list
- Activate the device to be added by plugging it in or connecting the battery.
- Make sure the indication LED (or the lighting device) flashes quickly (as shown in example in the application) and tap the button to confirm.
If the light is not flashing quickly hold the reset button (or switch the bulb off and on for 3 times) until it flashes. - Confirm your phone is connected to the Wi-Fi network to which the device will be added, enter the Wi-Fi password and confirm.
- Now the device will be searched, make sure your phone and the device are close to the router to optimize reception.
- After the product is found and added, rename it so you can easily recognize it.
If above method fails (this can be due to unstable network or specific network protection) add the device using AP mode by following the steps below.
Add device (AP mode)
- Tap “+” on the top right corner. A list of potential products appears.
- Select the device type you want to add from the list
- Hold the reset button (or switch the bulb off and on for 3 times) until the indication LED (or lighting device) flashes SLOWLY (as shown in example)
If the light is flashing quickly, reset again by holding the reset button for about 5 seconds or switching the light off and on 3 times. - Confirm the Wi-Fi network to which the device will be added, enter the Wi-Fi password and confirm.
- Connect your phone to the device's Wi-Fi hotspot (SmartLife_xxxx)
- If asked: confirm to stay connected to Wi-Fi network without internet access
- Go back to the Nedis SmartLife application to continue installation.
- Now the device is sent the instructions to connect to your existing Wi-Fi network, make sure your phone and the device are close to the router to optimize reception.
- After the product is found and added, rename it so you can easily recognize it.
Connecting to Amazon Alexa
(only required for first time use of Nedis SmartLife in combination with Amazon Alexa)
- An official Alexa device and Amazon Alexa account are required
- Open Amazon Alexa App on your smartphone and login
- Open the menu by tapping on the upper left corner
- Go to Skills
- Search for "Smart Life" and tap Enable
- You will be redirected to a login page to confirm the country/region and enter your Nedis SmartLife account and password. Then confirm you are using the app SmartLife
- Authorize Amazon to use your profile and connect with your products
- After successful link is confirmed, close the window and go back to homescreen of Amazon Alexa app to add your smart product(s).
Add product(s) to Amazon Alexa
- After you have installed new products in the SmartLife application, ask "Alexa, discover devices" or open the Amazon Alexa app – menu – Smart Home and tap "+ Add Device"
- In about 20 seconds, the products will automatically be added to the Alexa product list and can then be controlled using Amazon Alexa.
Connecting to Google Home / Google Assistant
(only required for first time use of Nedis SmartLife in combination with Google Home
- Hold the home button to start Google Assistant
- Tap on the compass in the upper right corner to explore Assistant's functionality
- Now open the menu on the upper right corner and go to Settings
- Open "Home Control"
- Tap "+" to add products
- Search for "Smart Life" to add this skill
- Confirm your country code and enter your Nedis SmartLife account name and password
- Then confirm you are using the app SmartLife
- Authorize Google to use your profile and connect with your products
- Any installed products as well as created scenes or automations are automatically being linked, you can assign a room to each product.
Add product(s) to Google Home / Google Assistant
- After you have installed new products or created new scenes or automations in the SmartLife application, ask Google Assistant to "Sync devices" so they can be controlled or activated using Google Home.
App interface:
My Family (main screen)

1. My Home
Tap this to select or manage your different locations (e.g. my home, parents' place, office, etc.)
Here you can change
○ Name
- Rooms
○ Location
○ Device sharing
- Add family members
2. “+”
Tap this to add new products, see instructions.
3. Weather information
Estimated weather information is shown, based on your set Home location.
4. Scenes
When creating a scene, it can be selected whether or not to shown on first page. If they are said to be shown, this is where they will be shown.
5. Rooms
Select a room to only show the products that have been assigned to this room. This to quickly find the products relevant
6. Room management
Tap the cog on the right to add or edit rooms
Choose a predefined room or enter any custom name and confirm
Tap the newly created room to assign or unassign products to this room. When unassigning, the products are not being removed, but are still available under All devices.
7. All installed products or product groups are shown here
Tap the product tile to access the product page, the main interface for the specific product.
8. Main navigation between different displays
a. My family = products
b. Smart = Scenes and Automations
c. Profile = Personal profile and general app settings
Smart
This is where scenes and automations are shown and can be created.

- Tap 'Edit' to move or remove current scenes or automations: changing the order is simply done by sliding vertically, deleting is done by sliding a specific scene or automation to the left and tap "Delete"
- Tap "+" on the upper right corner to add a new scene or automation, the options for each are described below.
- All created scenes are shown here and can be activated by simply tapping them.
A scene is a shortcut to do multiple preset things at once, you can set:
- Name (used on main screen as well as by voice assistants)
- Image (choose any of the preset images)
- Unlimited number of actions (including enabling or disabling an automation)
- Whether or not to show on first page
On the bottom right of each tile is a small button to edit this specific scene
- All created automations are shown here
Automation is one or more actions triggered by one or more events Here you can set the following:
- Name (used on main screen as well as by voice assistants)
- Image (choose any of the preset images)
- Type of conditions (only applicable when combining multiple conditions as trigger)
- When ALL set conditions are met
- When ANY of the set conditions are met
- The actual condition which can be:
- Any notification from a sensor, detector or camera
- Any state of a product which is set manually or automatically
○ A specific time of day (which can be repeated on selected days) - The sunrise or sunset
- Weather conditions (these are approximates based on your set location)
- Each condition can simple be removed by sliding it to the left and tapping "Delete"
- Actions to be executed can be:
○ Activating a scene
○ A different automation (to enable or disable an existing automation)
○ Switching a set product on/off
Setting a lighting product to a certain mode, brightness or temperature
Common product interface (these will show on some products, not on all)
Schedule
- Add timing to add any recurring behaviour.
- Set the time when this specific product should switch on/off
- Indicate on which days of the week to repeat this
- Set whether to switch the device on or off
- Tap Save on the top right corner
Timer
- Add a timer that will count down after which the product will be switched on / off (the timer is set in hours and minutes)
- The timer can easily be overruled by manually switching the product
Statistics
- Actual usage (Current, Power, Voltage)
- Monthly usage
- Daily usage is shown after a month is selected
Product menu
Tap the button on the upper right corner on the product page.
Through this menu you can do the following (depends on the type of product)
a. Change the products name (also used by Amazon Alexa and Google Home)
b. Set device sharing to give other people access to this product, for this family members need to be added
c. Create a group to control multiple similar products at once.
Cameras only:
d. Basic feature setting where you can switch status indicator, watermark, audio mode or flip the image for ceiling mounted camera.
e. Sound detection can be switched on/off and the sensitivity can be set
f. Motion detection can be switched on/off and the sensitivity can be set
g. Storage can be monitored or formatted
Profile
Here the basis information of your profile can be checked and set
- Home management (Add or edit set locations)
- Message center (showing all notifications of cameras with a corresponding picture, sensors or detectors)
- Scan QR code (only required in case of emergency)
-
Feedback (please send us your feedback, both positive and negative)
-
Settings
a. Enable/disable sound of notifications while in the app
b. Enable/disable App message notifications
c. Integration (here you can find instructions on how to connect your products to either Amazon Alexa or Google Home
d. About (here you can give us your rating, find version information and manually check for updates)
e. Empty cache memory to free up disk space (this will however result in a temporary slower interaction as interfaces need to be reloaded)
FAQ
Required router settings:
- 2.4 GHz needs to be enabled
- Encryption mode: WPA2-PSK
- Authorization type: AES
- Wireless MAC filtering: enabled


- Full manual Nedis SmartLife™
- Create account
- Add device
- Add device (AP mode)
- Connecting to Amazon Alexa
- Add product(s) to Amazon Alexa
- Connecting to Google Home / Google Assistant
- Add product(s) to Google Home / Google Assistant
- My Home
- “+”
- Weather information
- Scenes
- Rooms
- Room management
- All installed products or product groups are shown here
- Main navigation between different displays
- Smart
- Common product interface (these will show on some products, not on all)
- Schedule
- Timer
- Statistics
- Product menu
- Cameras only:
- Profile
- FAQ
Brand : NEDIS
Model : WIFICI20CGY
Category : Surveillance Camera