
Specialty Brew Drip PC8100 - Coffee maker SUNBEAM - Free user manual and instructions
Find the device manual for free Specialty Brew Drip PC8100 SUNBEAM in PDF.


| Product Type | Drip Coffee Maker |
| Brand | Sunbeam |
| Model | Specialty Brew Drip PC8100 |
| Water Capacity | 12 cups (1800 ml) |
| Dimensions (Approx.) | 12.6 x 9.1 x 14.2 inches (32 x 23 x 36 cm) |
| Weight (Approx.) | 5.5 lbs (2.5 kg) |
| Power Requirements | 120 V, 60 Hz, 1100 W |
| Control Panel | Digital display with Brew Now, Brew Later, Hour, Minute, Clean buttons |
| Brewing Functions | Brew Now, Brew Later (programmable timer), Grab-a-Cup Auto Pause |
| Warming Plate | Automatic 4-hour keep warm with illuminated freshness indicator |
| Water Filtration | Advanced 2-step water filtration system (removes chlorine and calcium) |
| Filter Types | Reusable filter (included); compatible with paper filters (not included) |
| Carafe | Color-coded glass carafe, dishwasher safe (except base) |
| Accessories Included | Reusable coffee filter, Advanced Water Filtration holder and cartridge, Sunbeam scoop |
| Descaling | Descaling cycle using vinegar; recommended every 30 days |
| Safety Features | Auto shut-off after 4 hours, non-drip valve, cool-touch handles |
| Cleaning & Maintenance | Removable filter basket and carafe lid are dishwasher safe; base and cord are not immersible |
| Warranty | 12 months replacement or repair warranty (Australia/New Zealand) |
| Spare Parts Availability | Advanced Water Filtration cartridges and reusable filters available from Sunbeam |
| Intended Use | Household and similar applications (e.g., office kitchens, farm houses) |
Frequently Asked Questions - Specialty Brew Drip PC8100 SUNBEAM
User questions about Specialty Brew Drip PC8100 SUNBEAM
0 question about this device. Answer the ones you know or ask your own.
Ask a new question about this device
Download the instructions for your Coffee maker in PDF format for free! Find your manual Specialty Brew Drip PC8100 - SUNBEAM and take your electronic device back in hand. On this page are published all the documents necessary for the use of your device. Specialty Brew Drip PC8100 by SUNBEAM.
USER MANUAL Specialty Brew Drip PC8100 SUNBEAM
natural_image
Modern Sunbeam coffee maker with digital display and glass lid, no visible text or symbols on the device itself.Contents
Sunbeam's Safety Precautions 3
Product Notices 4
Get To Know Your Coffee Maker 5
Understand Your Control Panel 6
Extra Accessories Included 6
Getting Started 7
Setting The Clock 8
Advanced Water Filtration 8
How To Make Your First Coffee 9-10
Grab-a-cup auto pause 11
Descaling Cycle 12
Tips On How To Brew The Perfect Cup 12
Carafe Use And Care 12
Warranty 13
Important Instructions - Retain For Future Use
Sunbeam's Safety Precautions
When using electrical appliances, basic safety precautions should always be followed to reduce the risk of fire, electric shock, and/or injury to persons including the following:
- Read all instructions.
- Do not touch hot surfaces. Use handles or knobs.
- To protect against electric shock, do not place or immerse cord, plugs, or appliance in water or other liquid.
- This appliance is not intended for use by persons (including children) with reduced physical, sensory or mental capabilities, or lack of experience and knowledge, unless they have been given supervision or instruction concerning use of the appliance by a person responsible for their safety.
- Close supervision is necessary when any appliance is used near children. Children should not play with the appliance.
- Children should not perform cleaning and user maintenance without supervision.
- Unplug from outlet when not in use and before cleaning. Allow to cool before putting on or taking off parts, and before cleaning the appliance.
- The temperature of accessible surfaces may be high when the appliance is operating. Even after use, the heating element surface is subject to residual heat.
- Do not operate any appliance with a damaged cord or plug or after the appliance malfunctions, or has been damaged in any manner. Return appliance to an Authorized Service Center for examination, repair or adjustment. Do not attempt to replace or splice a damaged cord.
- The use of an accessory not recommended by the appliance manufacturer for use with this appliance may result in fire, electric shock or injury to persons.
- Do not use outdoors.
- Do not let cord hang over edge of table or counter, or touch hot surfaces.
- Do not place on or near a hot gas or electric burner, or in a heated oven.
- Do not place in a cabinet when in use.
- Always attach plug to appliance first, then plug cord into the wall outlet (for appliances with detachable cords). To disconnect, turn any control to the off position, then remove plug from wall outlet.
- Do not use an appliance for any purpose other than its intended use. Injury could occur from misuse.
- All lids should be closed during use.
- Scalding may occur if the lid is removed during or immediately after the brewing cycles. Contents may be hot. Allow to cool before opening the lid.
- This appliance is intended to be used in household and similar applications such as; staff kitchen areas in shops, office and other working environments; farm houses; by clients in hotels, motels and other residential type environments; bed and breakfast type environments.
For appliances with glass carafe:
- The carafe is designed for use with this appliance. It must never be used on a range top.
- Do not set a hot carafe on a wet or cold surface.
- Avoid sudden temperature changes, such as rinsing, washing, filling, or immersing a hot carafe with cold liquids.
- Do not use a cracked or chipped carafe or a carafe having a loose or weakened handle.
- Do not clean carafe with cleansers, steel wool pads, or other abrasive material.
Product Notices
- Place the appliance on a hard, flat, level surface to avoid interruption of airflow underneath the coffeemaker.
- Discard the carafe immediately if it is ever boiled dry.
- Protect the carafe from sharp blows, scratches or rough handling.
- Keep the area above the appliance clear during use, as hot steam will escape the appliance.
- To reduce the risk of fire, do not store anything directly on top of the appliance surface when the appliance is in operation.

DO NOT PLACE BASE IN DISHWASHER.
DO NOT IMMERSE BASE IN WATER OR ANY OTHER LIQUID.
DO NOT BREW COFFEE WITHOUT PARTS FULLY ASSEMBLED.
Get To Know Your Coffee Maker
- Brew Basket Lid
- Water Reservoir
- Color Coded Water Window
- Illuminated 4-Hour Freshness Indicator
- Color Coded Measuring Scoop
- Advanced Water Filtration Holder
-
Advanced Water Filtration Cambridge
-
Warming Plate
- Color Coded Carafe (dishwasher safe)
- Grab-A-Cup Auto Pause
- Removable Filter Basket (dishwasher safe)
- Advanced Shower Head
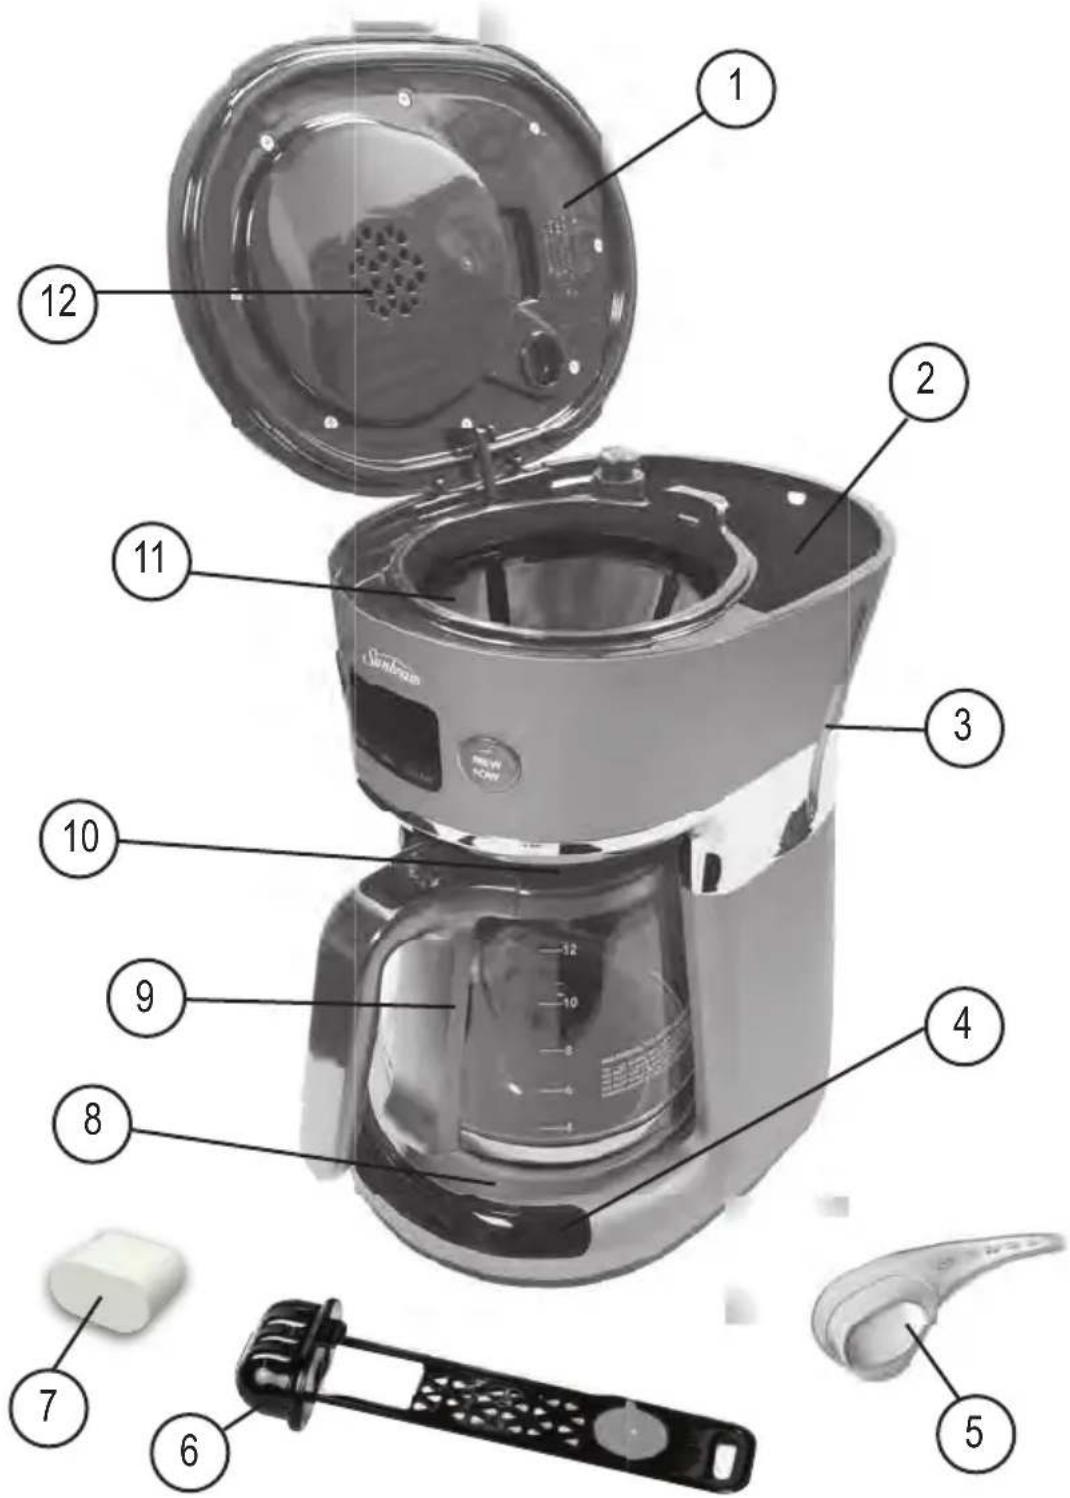
Understand Your Control Panel
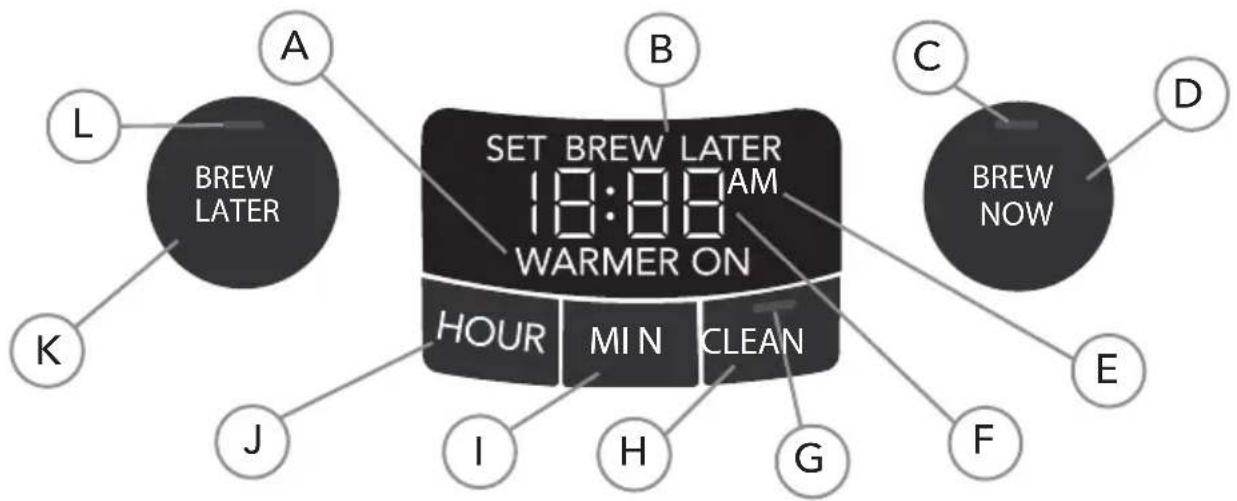
A. Warming Plate ON Indicator
B. Set Brew Later Indicator
C. Brew Now Indicator
D. Brew Now Button
E. AM/PM Indicator
F. Clock Display
G. Clean Coffeemaker Indicator
H. Clean Button
1. Minute Button
J. Hour Button
K. Brew Later Button
L. Brew Later Indicator
Extra Accessories Included
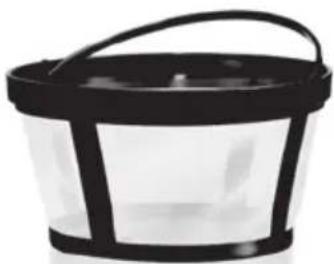
natural_image
Black plastic bucket with handle, no visible text or symbolsReusable Coffee Filter
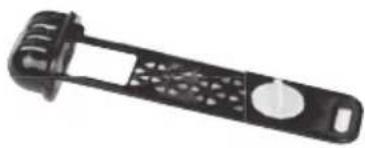
natural_image
Black plastic kitchen grater with a circular button and textured handle (no text or symbols visible)Advanced Water Filtration Holder
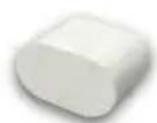
Advanced Water Filtration Cartridge
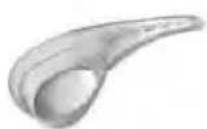
Sunbeam Scoop
Getting Started
Unpack your Coffeemaker
- Unpack your coffeemaker and remove plastic bags, cartons and any tape on the unit. IMPORTANT: KEEP PLASTIC BAGS AWAY FROM CHILDREN.
Clean Coffeemaker Before Use
Just follow these simple steps:
- Wash the carafe lid and the filter basket in a mixture of mild detergent and water. Rinse each thoroughly.
- Replace all the parts and close the lid. Then, run a brew cycle by adding only water to the coffee maker. After adding water, press Brew Now.
- When brewing is complete, turn your coffee maker off. Turn your coffee maker off by pressing the Brew Now button again.
- Discard the water in the carafe and rinse the carafe, carafe lid, and removable filter basket.
CAUTION: The electrical base, power cord, and plug are not dishwasher safe and should not be immersed in water or other liquids.
NOTE: Advanced Water Filtration holder is dishwasher safe. Advanced Water Filtration Cartidges are not, do not place them in the dishwasher.
Setting The Clock
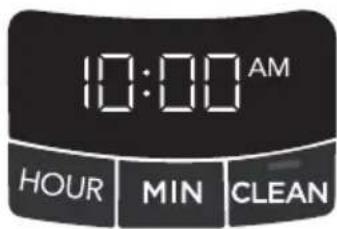
Plug in the coffeemaker and set the current time using the hour and minute buttons. 5 seconds of inactivity will set clock at time selected.
Advanced Water Filtration
The improved 2-step advanced water filtration system reduces impurities like chlorine and calcium to make coffee taste better.
- Soak the advanced water filtration cartridge in cold water for 5 minutes.
- Rinse the soaked cartridge for about 1 minute.
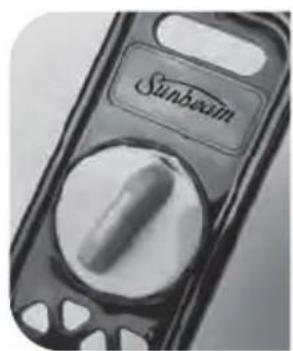
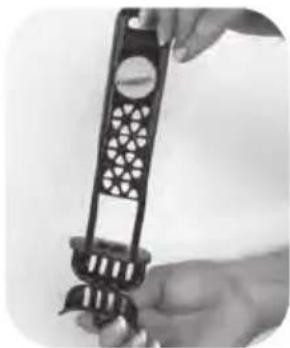
- Open bottom hatch where the cartridge goes and insert a new Advanced Water Filtration cartridge. (Figure 1)
- Close the hatch and place system in designated slot in water reservoir.(Figure 2)
NOTE: When cleaning the coffeemaker, be sure to remove the Advanced Water Filtration holder and cartridge.
NOTE: Replace filter cartridge frequently to ensure great tasting coffee. Contact Sunbeam for replacement cartridges.
natural_image
Close-up of a Sunbeam mobile phone control panel (no visible text or symbols on the device body)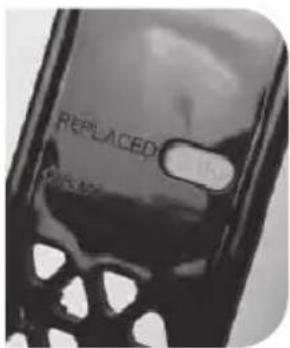
natural_image
Close-up of hands holding a black plastic mechanical component with circular cutouts (no visible text or symbols)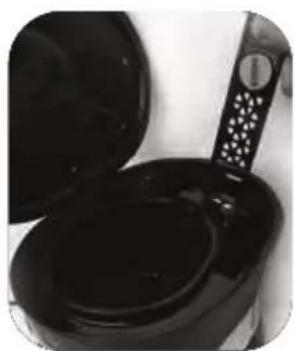
natural_image
Close-up of a black electric oven with a metal handle and lid, no visible text or symbols(Figure 1) (Figure 2)
ILLUMINATED 4-HOUR FRESHNESS INDICATOR
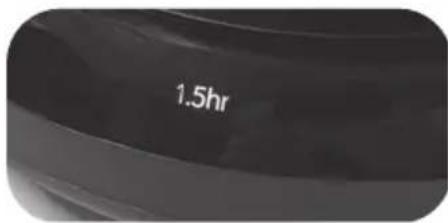
The Illuminated 4-Hour Freshness Indicator feature automatically lets you know how long your coffee has been waiting for you. At the end of the brew cycle, the feature will automatically be activated.
The indicator changes to show the time since brewing began in 30 minute intervals, up to four minutes.
After 4 hours, the light will remain on for 10 minutes,
before the coffee maker automatically turns off.
To continue after 4 hours, press Brew Now and the timer will reset after it attempts to brew coffee.
How To Make Your First Coffee
Suggested Coffee Measurement Chart:
For best results, brew 4 or more cups of coffee.
| Water To Brew | Ground Coffee |
| 12 cups = 1800ml | 3 Sunbeam Scoops |
| 10 cups = 1500ml | 2.5 Sunbeam Scoops |
| 8 cups = 1200ml | 2 Sunbeam Scoops |
| 6 cups = 900ml | 1.5 Sunbeam Scoops |
| 4 cups = 600ml | 1 Sunbeam Scoops |
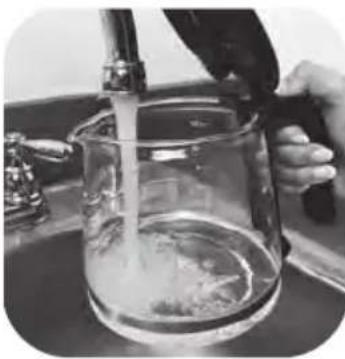
- Fill the carafe with fresh cold water to the desired level. 1 Sunbeam "cup" is equivalent to 150 ml. Pour into Water Reservoir.
natural_image
Person pouring liquid into a glass beaker on a kitchen sink (no visible text or symbols)- Insert and line the Removable Filter Basket with a reusable coffee filter.
- Referencing the chart to the left, use Sunbeam Scoop to measure out the equivalent amount of coffee grounds into the filter.
- You are ready to Brew Now!
NOTE: Some water will be absorbed into the coffee grounds and water filter during the brewing process.
-
After brew cycle is complete, the coffeemaker will keep coffee warm for 4 hours before automatically shutting off.
-
Enjoy great tasting coffee every time!
How To Make Your First Coffee (Con.)
BREW NOW BREW LATER
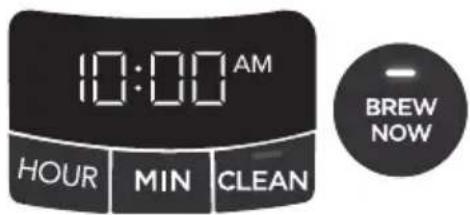
- After filling the coffeemaker with water and grounds, press the Brew Now button to brew instantly.
- Brew Now indicator will illuminate.
- "Warmer On" will illuminate on the display to indicate warming plate is on. The warming plate will stay on for up to 4 hours. The coffeemaker will beep to signal the end of the brew cycle.
NOTE: Push Brew Now button prior to 4 hours to turn the coffee maker off early.
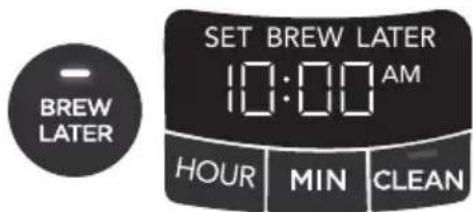
IMPORTANT: YOU MUST SET THE CLOCK BEFORE USING THIS FEATURE.
- Press Brew Later. The display flashes "12:00 AM". To set desired brew time, press the HOUR and MIN buttons. 5 Seconds of inactivity will set clock at time selected.
- The Brew Later indicator will light up, showing that the coffee maker is pre-set to brew at a later time.
If you change your mind and wish to turn off the Brew Later feature, simply press the Brew Later button again and it will turn off. Once the Brew Later time is set, the coffeemaker will automatically remember it until you change it or unplug the machine.
NOTE: As a reminder, if you want to continue to use the Brew Later feature, you will have to press Brew Later each time. Your coffee maker will not automatically start again the next day.
Grab-a-cup auto pause
Non-drip valve allows you to interrupt the coffee cycle when you want to grab a cup.
NOTE: The non-drip valve is a convenient way to pour a cup of coffee mid cycle, however it is ideal to wait until the end of the brewing cycle to ensure the optimum flavor from your coffee.
While this temporarily stops the coffee from dripping into the carafe, it does not stop the brewing process. After pouring a cup of coffee, the carafe should immediately be returned to the hot plate for completion of the brewing cycle and to prevent the filter basket from overflowing.

TO AVOID THE FILTER BASKET OVERFLOWING, THE CARAFE MUST FIT SECURELY INTO THE COFFEE MAKER HOT PLATE, WITH THE LID ON AT ALL TIMES. IF NOT PROPERLY POSITIONED ON THE HOT PLATE, HOT WATER OR HOT COFFEE MAY OVERFLOW.
DO NOT OPEN THE WATER TANK LID DURING THE BREWING CYCLE AS HOT STEAM COULD CAUSE INJURY. IF WATER/COFFEE IS NOT DRIPPING FROM THE COFFEE MAKER, IMMEDIATELY PRESS THE ON/OFF BUTTON, SWITCH OFF AT THE POWER OUTLET, UNPLUG AND WAIT 10 MINUTES BEFORE OPENING THE WATER TANK LID AND CHECKING THE FILTER BASKET.
THE COFFEE MAKER BECOMES HOT DURING THE BREWING CYCLE. PLEASE HANDLE WITH EXTREME CARE.
Descaling Cycle
Descaling your Sunbeam Specialty Brew Drip Filter coffee machine
Minerals (calcium/limestone) found in water will leave deposits in your coffeemaker and affect its performance. It's recommended that you regularly remove these deposits using vinegar.
- IMPORTANT: Remove the advanced water filtration system from the coffeemaker.
- Prepare 4 cups or 600ml of undiluted, white household vinegar. Pour the vinegar into the water reservoir.
- Place the empty reusable filter into the filter basket and close the coffeemaker's lid.
- Place the empty carafe back in the unit, centered on the warming plate.
- Press the Clean button.
- The coffeemaker will run a slow clean cycle and shut off.
- Discard the cleaning solution and rinse the carafe thoroughly with clean water.
- Fill the water reservoir with 12 cups of clean, fresh water.
- Place the empty carafe back on the coffeemaker, centered on the warming plate.
- Remove the reusable filter used during the cleaning cycle and rinse it thoroughly before replacing it in the filter basket.
- Press Brew Now and allow the full brew cycle to complete, rinsing the coffeemaker with hot water.
- Discard the water and rinse the carafe thoroughly with clean water.
- Repeat steps 8 through 12 one more time, to ensure it is fully rinsed.
Your coffeemaker is now clean and ready to brew the delicious, hot coffee!
NOTE: It is recommended that you descale your coffeemaker every 30 days.
Tips On How To Brew The Perfect Cup
PAPER FILTERS: To achieve a smoother, less bitter cup of coffee, use a paper filter. It will be most effective in trapping bitter sediments.
REUSABLE FILTERS: For a more robust and full taste, use a reusable filter. It will allow the coffee's full flavor to fill your cup. Reusable filters have tiny holes that allow rich coffee oils to brew through.
Water
While it may not seem like an important ingredient, coffee is 98 percent water. The type of water that you brew with greatly affects the final taste. Always use clean, fresh water that is filtered and free of impurities – avoid soft water or well water. Please refer to the “Advanced Water Filtration” section to learn more about how your coffeemaker reduces impurities in water.
Carafe Use And Care
Follow the instructions below to reduce or eliminate the chance of breaking the glass carafe:
- Discard the carafe immediately if it is ever cracked.
- Protect the carafe from sharp blows, scratches or rough handling. Do not use harsh abrasive cleaners that may scratch the carafe. Scratches may cause the carafe to break.

This Sunbeam product is covered by a 12 month replacement or repair warranty, which is in addition to your rights under the Australian Consumer Law (if your product was purchased in Australia) or New Zealand Consumer Guarantees Act (if your product was purchased in New Zealand).
Upon receipt of your claim, Sunbeam will seek to resolve your difficulties or, if the product is defective, advise you on how to obtain a replacement or refund.
To assist us in managing warranty claims, we recommend you register your product as soon as practicable after purchase by creating a MySunbeam account on our website and uploading a copy of your original receipt.
In order to make a claim under our warranty, you must have the original proof of purchase documentation for the product and present it when requested (if not already uploaded to our website).
Should your product develop any defect within 12 months of purchase because of faulty materials or workmanship, we will replace or repair it, at our discretion, free of charge. A product presented for repair may be replaced by a refurbished product of the same type rather than being repaired. Refurbished parts may be used to repair the product.
Our replacement or repair warranty only applies where a defect arises as a result of faulty material or workmanship during the warranty period. Your warranty does not cover misuse or negligent handling (including damage caused by failing to use the product in accordance with this instruction booklet), accidental damage, or normal wear and tear.
- servicing or modification of the product other than by Sunbeam or an authorised Sunbeam service centre;
- use of the product with other accessories, attachments, product supplies, parts or devices that do not conform to Sunbeam specifications; or
- exposure of the product to abnormally corrosive conditions; or
- extend beyond 3 months if the product is used in commercial, industrial, educational or rental applications.
The benefits given to you by our warranty are in addition to other rights and remedies under law in relation to the product.
In Australia our goods come with guarantees that cannot be excluded under the Australian Consumer Law. You are entitled to a replacement or refund for a major failure and for compensation for any other foreseeable loss or damage. You are also entitled to have the goods repaired or replaced if the goods fail to be of acceptable quality and the failure does not amount to a major failure.
Our goods also come with guarantees that cannot be excluded under the New Zealand Consumer Guarantees Act.
If your warranty claim is not accepted, we will inform you and if requested to do so by you, repair the product provided you pay the usual charges for such repair. You will also be responsible for all freight and other costs.
Should your product require repair or service after the warranty period, contact your nearest Sunbeam service centre. For a complete list of Sunbeam's service centres, visit our website or call our customer care line for advice on: 1300 881 861 in Australia, or 0800 786 232 in New Zealand.
Should you experience any difficulties with your product during the warranty period, please contact Sunbeam Customer Care:
Australia
www.sunbeam.com.au 1300 881 861 Units 5 & 6, 13 Lord Street, Botany NSW 2019 Australia
New Zealand
www.sunbeam.co.nz
0800 786 232
Level 6, Building 5,
Central Park,
660-670 Great South Road
Greenlane, Auckland
New Zealand
Your warranty does not:
• cover freight or any other costs incurred in making a claim, consumable items, accessories that by their nature and limited lifespan require periodic renewal (such as filters and seals) or any consequential loss or damage; or
• cover damage caused by:
- power surges, power dips, voltage supply problems, or use of the product on incorrect voltage;
Sunbeam
Need help with your appliance?
Contact our Customer Care Team or visit our website for information and tips on getting the most from your appliance.
AUSTRALIA
Visit: www.sunbeam.com.au
Phone: 1300 881 861
Mail: Units 5 & 6, 13 Lord Street,
Botany NSW 2019
NEW ZEALAND
Visit: www.sunbeam.co.nz
Phone: 0800 786 232
Mail: Level 6, Building 5, Central Park,
660-670 Great South Road,
Greenlane, Auckland

Sunbeam Corporation PTY LTD | ACN 000 006 771
Sunbeam is a division of Newell Brands
Due to continued product improvements, product illustrations and photographs in this User Guide may differ slightly from the actual product.
- Contents
- Important Instructions - Retain For Future Use
- Sunbeam's Safety Precautions
- When using electrical appliances, basic safety precautions should always be followed to reduce the risk of fire, electric shock, and/or injury to persons including the following:
- For appliances with glass carafe:
- Product Notices
- Get To Know Your Coffee Maker
- Understand Your Control Panel
- Extra Accessories Included
- Getting Started
- Unpack your Coffeemaker
- Clean Coffeemaker Before Use
- Setting The Clock
- Advanced Water Filtration
- ILLUMINATED 4-HOUR FRESHNESS INDICATOR
- How To Make Your First Coffee
- Suggested Coffee Measurement Chart:
- How To Make Your First Coffee (Con.)
- BREW NOW BREW LATER
- IMPORTANT: YOU MUST SET THE CLOCK BEFORE USING THIS FEATURE.
- Grab-a-cup auto pause
- Descaling Cycle
- Descaling your Sunbeam Specialty Brew Drip Filter coffee machine
- Tips On How To Brew The Perfect Cup
- Water
- Carafe Use And Care
- Australia
- New Zealand
- Your warranty does not:
- • cover damage caused by:
- Sunbeam
- Need help with your appliance?
Brand : SUNBEAM
Model : Specialty Brew Drip PC8100
Category : Coffee maker