
32DIG470B - TV VOX - Free user manual and instructions
Find the device manual for free 32DIG470B VOX in PDF.


| Product Type | TV |
| Brand | VOX |
| Model | 32DIG470B |
| Screen Size (Diagonal) | 32" |
| Display Resolution | 1366 x 768 (HD Ready) |
| Dimensions (with stand) | 200 x 735 x 494 mm (D x L x H) |
| Dimensions (without stand) | 78/90 x 735 x 438 mm (D x L x H) |
| Power Consumption (max) | 65 W |
| Operating Voltage | 220-240V AC, 50Hz |
| Audio Output Power | 2 x 6 W |
| Digital TV Standard | DVB-T/T2/C |
| Number of Preset Channels | 1000 |
| Connectivity | HDMI (x2), SCART, USB, VGA/PC, YPbPr, CI slot, Headphone, SPDIF Optical Out |
| USB Recording | Yes (FAT32, timeshift, instant recording) |
| Energy Saving Modes | Off, Minimum, Medium, Maximum, Auto, Screen Off |
| Parental Control | Yes (PIN protected, child lock, maturity lock) |
| Sleep Timer | Yes |
| Teletext | Yes (analog and digital) |
| Accessories Included | Remote control, 2xAAA batteries, instruction book |
| Wall Mount Compatibility | Yes (VESA standard, screws not included) |
Frequently Asked Questions - 32DIG470B VOX
User questions about 32DIG470B VOX
0 question about this device. Answer the ones you know or ask your own.
Ask a new question about this device
Download the instructions for your TV in PDF format for free! Find your manual 32DIG470B - VOX and take your electronic device back in hand. On this page are published all the documents necessary for the use of your device. 32DIG470B by VOX.
USER MANUAL 32DIG470B VOX
natural_image
Abstract circular graphic with diagonal white stripes on a glossy gray background (no text or symbols)VOX
ELECTRONICS
ENG
CPП
BOS
GR
OPERATING INSTRUCTIONS FOR TV
- Do not place any heat sources such as electric heaters, radiators, etc. near the TV set. - Do not place the TV on the floor and inclined surfaces. - To avoid danger of suffocation, keep plastic bags out of the reach of the babies, children and domestic animals.
- Carefully attach the stand to the TV. If the stand is provided with screws, tighten the screws firmly prevent the TV from tilting. Do not over-tighten the screws and mount the stand rubbers properly. - Do not dispose of the batteries in fire or with hazardous or flammable materials.
Warning: Batteries must not be exposed to excessive heat such as sunshine, fire or the like.
| Caution | Serious injury or death risk |
| Risk of electric shock | Dangerous voltage risk |
| Maintenance | Important maintenance component |
Markings on the Product
The following symbols are used on the product as a marker for restrictions and precautions and safety instructions. Each explanation shall be considered where the product bears related marking only. Note such information for security reasons.
Class II Equipment: This appliance is designed in such a way that it does not require a safety connection to electrical earth. Class II Equipment With Functional Earthing: This appliance is designed in such
a way that it does not require a safety connection to electrical earth, the earth connection is used for functional purposes. Protective Earth Connection: The marked terminal is intended for connection of the
Hazardous Live Terminal: The marked terminal(s) is/are hazardous live under normal operating conditions.
Caution, See Operating Instructions: The marked area(s) contain(s) user replaceable coin or button cell batteries.
CLASS 1 Laser Product Class 1 Laser Product: This product contains Class 1 laser source that is safe under reasonably foreseeable conditions of operation.
Safety Information

CAUTION: TO REDUCE THE RISK OF ELECTRIC SHOCK DO NOT REMOVE COVER (OR BACK). NO USER-SERVICEABLE PARTS INSIDE. REFER SERVICING TO QUALIFIED SERVICE PERSONNEL.
In extreme weather (storms, lightning) and long inactivity periods (going on holiday) disconnect the TV set from the mains. The mains plug is used to disconnect TV set from the mains and therefore it must remain readily operable. If the TV set is not disconnected electrically from the mains, the device will still draw power for all situations even if the TV is in standby mode or switched off. Note: Follow the on screen instructions for operating the related features.
IMPORTANT - Please read these instructions fully before installing or operating
WARNING: Never let people (including children) with reduced physical, sensory or mental capabilities or lack of experience and / or knowledge use electrical devices unsupervised. • Use this TV set at an altitude of less than 2000 meter
above the sea level, in dry locations and in regions with moderate or tropical climates. The TV set is intended for household and similar general use but may also be used in public places. For ventilation purposes, leave at least 5cm of free space around the TV.
- The ventilation should not be impeded by covering or blocking the ventilation openings with items, such as newspapers, table-cloths, curtains, etc. - The power cord plug should be easily accessible. Do not place the TV, furniture, etc. on the power cord. A damaged power cord/plug can cause fire or give you an electric shock. Handle the power cord by the plug, do not unplug the TV by pulling the power cord. Never touch the power cord/plug with wet hands as this could cause a short circuit or electric shock.
Never make a knot in the power cord or tie it with other cords. When damaged it must be replaced, this should only be done by qualified personnel. - Do not expose the TV to dripping or splashing of liquids and do not place objects filled with liquids, such as vases, cups, etc. on or over the TV (e.g., on shelves above the unit). - Do not expose the TV to direct sunlight or do not place open flames such as lit candles on the top of or near the TV.
Contents
Safety Information 2
Markings on the Product 2
Environmental Information 3
Features 4
Accessories Included....4 Standby Notifications....4 TV Control Switch & Operation....4 Inserting the Batteries into the Remote ....5
Connect Power ....5 Antenna Connection ....5 License Notification ....5 Specification ....5
Remote Control ....6 Connections....7 Switching On/Off ....8 First Time Installation....8
Media Playback via USB Input ....8 Recording a Programme ....9 Timeshift Recording ....9
Instant Recording ....9
Watching Recorded Programmes ....9
Recording Configuration....9
Media Browser Menu....10 CEC and CEC RC Passthrough....10 TV Menu Contents....11
General TV Operation ....15 Using the Channel List ....15 Configuring Parental Settings....15 Electronic Programme Guide (EPG) ....15
Teletext Services ....16 Software Upgrade....16
Troubleshooting & Tips ....16 PC Input Typical Display Modes ....17 AV and HDMI Signal Compatibility ....17
Supported File Formats for USB Mode ....18 Supported DVI Resolutions ....19
TV Control Switch & Operation
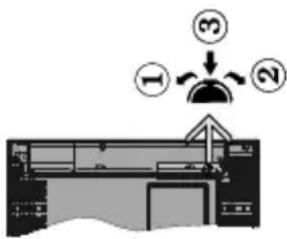
- Up direction
-
Down direction
-
Volume / Info / Sources List selection and Standby-On switch
The Control button allows you to control the Volume/Programme/Source and Standby-On functions of the TV. To change volume: Increase the volume by pushing the button up. Decrease the volume by pushing the button down.
To change channel: Press the middle of the button in, the information banner will appear on the screen. Scroll through the stored channels by pushing the button up or down.
To change source: Press the middle of the button in twice(for the second time in total), the source list will appear on the screen. Scroll through the available sources by pushing the button up or down.
To turn the TV off: Press the middle of the button in and hold it down for a few seconds, the TV will turn into standby mode.
To turn on the TV: Press the middle of the button in, the TV will turn on.
Notes: If you turn the TV off, this circle starts again beginning with the volume setting. Main menu OSD cannot be displayed via control buttons.
Operation with the Remote Control
Press Menu button on your remote control to display main menu screen. Use the directional buttons to select a menu tab and press OK to enter. Use the directional buttons again to select or set an item. Press Return/Back button or Menu button to quit a menu screen.
Input Selection
Once you have connected external systems to your TV, you can switch to different input sources. Press Source button on your remote control consecutively to select the different sources.
Features
• Remote controlled colour TV
- Fully integrated digital terrestrial/cable TV (DVB T-T2/C) - HDMI inputs to connect other devices with HDM sockets
- USB input
- OSD menu system
- Scart socket for external devices (such as DVD Players, PVR, video games, etc.) - Stereo sound system
- Teletext - Headpho
- Automatic programming system - Manual tuning
• Automatic power
- Sleep timer - Child lock
- Automatic sound mute when no transmission. - NTSC playback
- AVL (Automatic Volume Limiting) - PLL (Frequency Search) - PC input
• Game Mode (Optional)
- Picture off function
• Programme recording
• Programme timeshifting
Accessories Included
- Remote Control
- Batteries: 2 x AAA
- Instruction Book
Standby Notifications
If the TV does not receive any input signal (e.g. from an aerial or HDMI source) for 3 minutes, it will go into standby. When you next switch-on, the following
message will be displayed: "TV switched to stand-by mode automatically because there was no signal for a long time." Press OK to continue.
If the TV is on and it isn't being operated for a while it will go into standby. When you next switch-on, the following message will be displayed. "TV switched to stand-by mode automatically because no operation was made for a long time." Press OK to continue.
WALL MOUNTING WARNINGS
- Read the instructions before mounting your TV
- The wall mount kit is optional. You can obtain from your local dealer, if not supplied with your TV.
- Do not install the TV on a ceiling or on an inclined wall.
- Use the specified wall mounting screws and other accessories.
- Tighten the wall mounting screws firmly to prevent the TV from fall. Do not over-tighten the screws.
WARNING
Apparatus connected to the protective earthing of the building installation through the MAINS connection or through other apparatus with a
connection to protective earthing – and to a television distribution system using coaxial cable, may in some circumstances create a fire hazard
Connection to a television distribution system has therefore to be provided through a device providing electrical isolation below a certain frequency range (galvanic isolator, see EN 60728-11)
Environmental Information
This television is designed to be environment friendly. To reduce energy consumption, you can follow these
steps:
If you set the Energy Saving to Minimum, Medium,
Maximum or Auto the TV will reduce the energy consumption accordingly. If you like to set the
Backlight to a fixed value set as Custom and adjust
the Backlight (located under the Energy Saving
setting) manually using Left of Right buttons on the remote. Set as Off to turn this setting off.
Note: Available Energy Saving options may differ depending
on the selected Mode in the System>Picture menu.
The Energy Saving settings can be found in the System Picture may Note that some picture
System>Picture menu. Note that some picture settings will be unavailable to be changed.
If pressed Right button while Auto option is selected
or Left button while Custom option is selected, "Screen will be off in 15 seconds." message will be
displayed on the screen. Select Proceed and press
OK to turn the screen off immediately. If you don't
press any button, the screen will be off in 15 seconds. Press any button on the remote or on the TV to turn
The screen on again.
Note: Screen Off option is not available if the Mode is set
to Game.
when the TV is not in use, please switch off or disconnect the TV from the mains plug. This will also
reduce energy consumption.
WARNING
Do not ingest the battery, Chemical Burn Hazard This product or the accessories supplied with the
product may contain a coin/button cell battery. If the coin/button cell battery is swallowed, it can cause
severe internal burns in just 2 hours and can lead
to death. Keep new and used batteries away from children.
If the battery compartment does not close securely, stop using the product and keep it away from
If you think batteries might have been swallowed or
placed inside any medical attention.
WARNING
Never place a television set in unstable or inclined
locations. A television set may fall, causing serious personal injury or death. Many injuries, particularly to children, can be avoided by taking simple
precautions such as;
- Using cabinets or stands recommended by the manufacturer of the television set.
• Only using furniture that can safely support the television set.
• Ensuring the television set is not overhanging the
edge of the supporting furniture.
• Not placing the television set on tall furniture (for example, cupboards or bookcases) without
anchoring both the furniture and the television set to a suitable support.
• Not standing the television set on cloth or other
materials placed between the television and supporting furniture.
• Educating children about the dangers of climbing
on furniture to reach the television set or its controls. If your existing television set is being
controls. If your existing television set is being retained and relocated, the same considerations
as above should be applied.
Remote Control
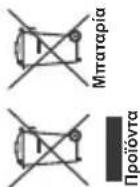
You should look for appropriate recycling facilities and systems for the disposal of these products. Notice: The sign Pb below the symbol for batteries indicates that this battery contains lead.
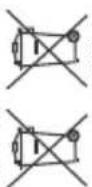
Products
Specification
| TV Broadcasting PAL B/G | D/K K I/I' |
| Receiving Channels | VHF (BAND I/III) - UHF (BAND U) - HYPERBAND |
| Digital Reception | Fully integrated digital terrestrial-cable TV (DVB-T-C) (DVB-T2 compliant) |
| Number of Preset Channels | 1 000 |
| Channel Indicator On Screen Display | |
| RF Aerial Input 75 Ohm (unbalanced) | |
| Operating Voltage 220-240V AC, 50Hz. | |
| Audio German+Nicam Stereo | |
| Audio Output Power (WRMS.) (10% THD) | 2 x 6 |
| Power Consumption (W) | 65 W |
| TV Dimensions DxLxH (with foot) (mm) | 200 x 735 x 494 |
| TV Dimensions DxLxH (without foot) (mm) | 78/90 x 735 x 438 |
| Display | 32" |
| Operation temperature and operation humidity | 0°C up to 40°C, 85% humidity max |
Changing Channels and Volume
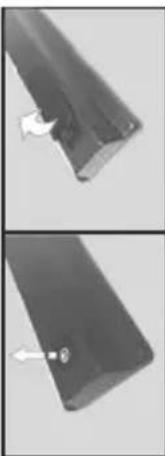
You can change the channel and adjust the volume by using the Volume +/- and Programme +/- buttons on the remote. Inserting the Batteries into the Remote Remove the output that secure the battery compartment
Remove the screw that secure the battery compartment cover on the back side of the remote control first. Lift the cover gently. Insert two size AAA batteries. Make sure the (+) and (-) signs match (observe correct polarity). Do not mix old and new batteries. Replace only with same or equivalent type. Place the cover back on. Then screw the cover back on again.
natural_image
Two views of a mechanical component with a bolt and arrow indicator (no text or symbols)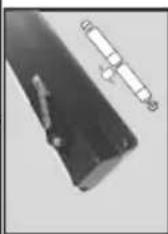
Connect Power
IMPORTANT: The TV set is designed to operate on 220-240V AC, 50 Hz socket. After unpacking, allow the TV set to reach the ambient room temperature before you connect the set to the mains. Plug the power cable to the mains socket outlet.
Antenna Connection Connect the aerial or cable TV plug to the AERIAL INPUT (ANT) socket located on the back of the TV.

License Notification
The terms HDMI and HDMI High-Definition Multimedia Interface, and the HDMI Logo are trademarks or registered trademarks of HDMI Licensing Administrator, Inc. in the United States and other countries.

Manufactured under license from Dolby Laboratories. Dolby, Dolby Audio and the double-D symbol are trademarks of Dolby Laboratories. Information for Users on Disposal of Old Equipment and Batteries [European Union only]
| Switching On/OffTo Switch the TV OnConnect the power cord to a power source such as a wall socket (220-240V AC, 50 Hz).To switch on the TV from standby mode either:Press the Standby button, Programme +/- or a numeric button on the remote control.Press the side function switch on the TV until the TV comes on from standby.To Switch the TV OffPress the Standby button on the remote control or press the side function switch on the TV until the TV switches into standby mode.To power down the TV completely, unplug the power cord from the mains socket.Note: When the TV is switched into standby mode, the standby LED can blink to indicate that features such as Standby Search, Over Air Download or Timer is active. The LED can also blink when you switch on the TV from standby mode.First Time InstallationWhen turned on for the first time, the language selection screen is displayed. Select the desired language and press OK.On the next screen, set your preferences using the directional buttons.Note: Depending on the Country selection you may be asked to set and confirm a PIN at this point. The selected PIN cannot be 0000. You have to enter it if you are asked to enter a PIN for any menu operation later.About Selecting Broadcast TypeDigital Aerial: If Digital Aerial broadcast search option is turned on, the TV will search for digital terrestrial broadcasts after other initial settings are completed.Digital Cable: If Digital Cable broadcast search option is turned on, the TV will search for digital cable broadcasts after other initial settings are completed. According to your other preferences a confirmation message may be displayed before starting to search. Select YES and press OK to proceed. To cancel operation, select NO and press OK. You can select Network or set values such as Frequency, Network ID and Search Step. When finished, press OK button.Note: Searching duration will change depending on the selected Search Step.Analogue: If Analogue broadcast search option is turned on, the TV will search for analogue broadcasts after other initial settings are completed.Additionally you can set a broadcast type as your favourite one. Priority will be given to the selected broadcast type during the search process and the | channels of it will be listed on the top of the Channel List. When finished, press OK to continue.You can activate Store Mode option at this point. This option will configure your TV's settings for store environment and depending on the TV model being used, the supported features of it may be displayed on the top of the screen as an info banner. This option is intended only for store use. It is recommended to select Home Mode for home use. This option will be available in System>Settings>More menu and can be turned off/on later.Press OK button on the remote control to continue. After the initial settings are completed TV will start to search for available broadcasts of the selected broadcast types.After all the available stations are stored, scan results will be displayed. Press OK to continue. The Edit Channel List menu will be displayed next. You can edit the channel list according to your preferences or press the Menu button to quit and watch TV.While the search continues a message may appear, asking whether you want to sort channels according to the LCN(*) . Select Yes and press OK to confirm. (*) LCN is the Logical Channel Number system that organizes available broadcasts in accordance with a recognizable channel number sequence (if available).Note: Do not turn off the TV while initializing first time installation. Note that, some options may not be available depending on the country selection.Media Playback via USB InputYou can connect 2.5" and 3.5" inch (hdd with external power supply) external hard disk drives or USB memory stick to your TV by using the USB inputs of the TV.IMPORTANT! Back up the files on your storage devices before connecting them to the TV. Manufacturer will not be responsible for any file damage or data loss. Certain types of USB devices (e.g. MP3 Players) or USB hard disk drives/memory sticks may not be compatible with this TV. The TV supports FAT32 and NTFS disk formatting but recording will not be available with NTFS formatted disks.While formatting USB hard drives which have more than 1TB (Tera Byte) storage space you may experience some problems in the formatting process.Wait a little while before each plugging and unplugging as the player may still be reading files . Failure to do so may cause physical damage to the USB player and the USB device itself. Do not pull out your drive while playing a file.You can use USB hubs with your TV's USB inputs. External power supplied USB hubs are recommended in such a case.It is recommended to use the TV's USB input(s) directly, if you are going to connect a USB hard disk. |
| Connector Type Cables Device | |||
 | Scart Connection (back) | 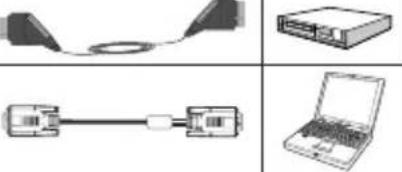 | |
 | VGA Connection (back) | ||
SIDE AV   | PC/YPbPr Audio Connection (side) | YPbPr/PC Audio Cable | 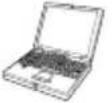 |
 | HDMI Connection (back) | W745 | |
SPDIF  | SPDIF (Optical Out) Connection (back) | ||
SIDE AV   | Side AV (Audio/Video) Connection (side) | AV Cable |  |
HEADPHONE  | Headphone Connection (side) | 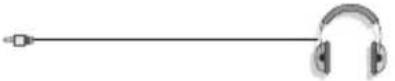 | |
P  | YPbPr Video Connection (back) | 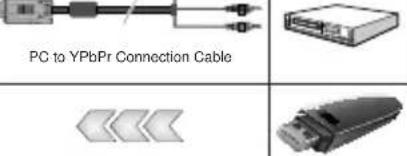 | |
| [WHST] | USB Connection (side) | ||
 | CI Connection (side) | 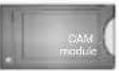 | |
If you want to connect a device to the TV, make sure that both the TV and the device are turned off before making any connection. After the connection is done, you can turn on the units and use them.
that device from the source list. In that case volume control keys are directed to connected audio device. Note: ARC is supported only via the HDMI1 input.
System Audio Control
Allows an Audio Amplifier/Receiver to be used the TV. The volume can be controlled using the
remote control of the TV. To activate this feature set the Speakers option in the System>Settings>More menu as Amplifier. The TV speakers will be muted and the sound of the watched source will be provided from the connected sound system.
Note: The audio device should support System Audio Control feature and CEC option should be set as Enabled.
not meet the speed requirements. Try connecting another USB disk.
Media Browser Menu
You can play photo, music, and movie files stored on a USB disk by connecting it to your TV. Connect a USB
disk to one of the USB inputs located on the side of the TV. Pressing the Menu button while in the Media Browser mode will access the Picture, Sound and Settings menu options. Pressing the Menu button
again will exit from this screen. You can set your Media Browser preferences by using the Settings Menu.
| Loop/Shuffle Mode Operation | |
| Start playback with the Play button and activate | All files in the list will be continuously played in original order |
| Start playback with the OK button and activate | The same file will be played continuously (repeat) |
| Start playback with the Play button and activate | All files in the list will be played once in random order |
| Start playback with the Play button and activate | All files in the list will be continuously played in the same random order. |
This function allows to control the CEC-enabled devices, that are connected through HDMI ports by using the remote control of the TV.
The CEC option in the System>Settings>More menu should be set as Enabled at first. Press the Source button and select the HDMI input of the connected CEC device from the Sources List menu. When
CEC device from the Sources List menu. When new CEC source device is connected, it will be listed in source menu with its own name instead of the connected HDMI ports name(such as DVD Player, Recorder 1 etc.).
The TV remote is automatically able to perform the main functions after the connected HDMI source has been selected.
To terminate this operation and control the TV via the remote again, press Quick Menu button on the remote, highlight the CEC RC Passthrough and set as Off by pressing Left or Right button. This feature can also be enabled or disabled under the System>Settings>More menu.
The TV supports also ARC(Audio Return Channel) feature. This feature is an audio link meant to replace other cables between the TV and the audio system (A/V receiver or speaker system).
When ARC is active, TV does not mute its other audio outputs automatically. So you need to decrease TV volume to zero manually, if you want to hear audio from connected audio device only (same as other optical or co-axial digital audio outputs). If you want to change connected device's volume level, you should select
Note: When viewing image files the Media Browser menu | button to stop timeshift recording and return to the can only display 1000 image files stored on the connected file broadcast.
Timeshift cannot be used while in radio mode. You cannot use the timeshift fast reverse feature before advancing the playback with the fast forward option.
Instant Recording Press Record button to start recording an event instantly while watching a programme. You can press Record button to start recording an event instantly while watching a programme.
Record button on the remote control again to record the next event after selecting the next programme from within the EPG. Press Stop button to cancel instant recording.
You can not switch broadcasts or view the Media Browser during the recording mode. While recording a programme or during the timeshifting, a warning message appears on the screen if your USB device speed is not
sufficient. Watching Recorded Programmes Select the Recordings from the Media Browser menu. Select a recorded item from the list (if previously recorded). Press the OK button to view the Play Options. Select an option then press OK button. Press the Stop button to stop a playback and return to the Recordings.
Slow Forward If you press Pause button while watching recorded programmes, the slow forward feature will be available. You can use Rapid advance button to slow forward. Pressing Rapid advance button consecutively will change slow forwarding speed.
Note: Viewing main menu and menu items will not be available during the playback. Please also note that previously set recording timer/s will not function while using the Recordings menu.
Recording Configuration Select the Recording Settings item in the Media Browser>Settings menu to configure the recording
settings. Format Disk: You can use the Format Disk feature for formatting the connected USB disk. Your PIN is required to use the Format Disk feature. Note: Default PIN can be set to 0000 or 1234. If you have defined the PIN(is requested depending on the
selection) during the First Time Installation use the PIN that you have defined.
IMPORTANT: Formatting your USB drive will erase ALL the data on it and it's file system will be converted to FAT32. In most cases operation errors will be fixed
If "USB disk writing speed too slow to record" message is displayed on the screen while starting a recording, try restarting the recording. If you still get the same error, it is possible that your USB disk does
Note: When viewing image files the Media Browser menu can only display 1000 image files stored on the conn
USB device. Recording a Programme IMPORTANT: When using a new USB hard disk
drive, it is recommended that you first format the disk using your TV's "Format Disk" option in the Media Browser>Settings>Recording Settings menu. To record a programme, you should first connect a USB
disk to your TV while the TV is switched off. You should then switch on the TV to enable the recording feature. To use recording your USB drive should have 2 GB free
space and be USB 2.0 compatible. If the USB drive is not compatible an error message will be displayed. To record long duration programmes such as movies, it is recommended to use USB Hard disk drives (HDD's).
Recorded programmes are saved into the connected USB disk. If desired, you can store/copy recordings onto a computer; however, these files will not be available to be played on a computer. You can play the recordings only via your TV.
Lip Sync delay may occur during the timeshifting. Radio record is supported. The TV can record programmes up to ten hours. Recorded programmes are split into 4GB partitions.
If the writing speed of the connected USB disk is not sufficient, the recording may fail and the timeshifting feature may not be available. It is recommended to use USB hard disk drives for recording HD programmes.
Do not pull out the USB/HDD during a recording. This may harm the connected USB/HDD.
Multipartition support is available. A maximum of two different partitions are supported. The first partition of
the USB disk is used for PVR ready features. It also must be formatted as the primary partition to be used for the PVR ready features.
Some stream packets may not be recorded because of signal problems, as a result sometimes videos may freeze during playback. Record, Play, Pause, Display (for PlayListDialog) keys can not be used when teletext is on. If a recording starts from timer when teletext is on, teletext is automatically
turned off. Also teletext usage is disabled when there is an ongoing recording or playback. Timeshift Recording Press Pause button while watching a broadcast to
activate timeshifting mode. In timeshifting mode, the programme is paused and simultaneously recorded to the connected USB disk.
Press Play button again to resume the paused programme from where you stopped. Press the Stop
| System - Sound Menu Contents | |
| Volume Adjusts the volume level. | |
| Equalizer | Selects the equalizer mode. Custom settings can be made only when in User mode. |
| Balance Adjusts whether the sound comes from the left or right speaker. | |
| Headphone | Sets headphone volume.Please ensure before using headphones that the headphone volume is set to a low level, to prevent damage to your hearing. |
| Sound Mode | You can select a sound mode (If the viewed channel supports). |
| AVL (Automatic Volume Limiting) | Sets the sound to obtain fixed output level between programmes. |
| Headphone/Lineout | When you connect an external amplifier to your TV using the headphone jack, you can select this option as Lineout. If you have connected headphones to the TV, set this option as Headphone.Please ensure before using headphones that this menu item is set to Headphone. If it is set to Lineout, the output from the headphone socket will be set to maximum which could damage your hearing. |
| Dynamic Bass | Enables or disables the Dynamic Bass. |
| Surround sound | Surround sound mode can be changed as On or Off. |
| Digital Out | Sets digital out audio type. |
TV Menu Contents
| System - Picture Menu Contents | |
| Mode | You can change the picture mode to suit your preference or requirements. Picture mode can be set to one of these options: Cinema, Game(optional), Sports, Dynamic and Natural. |
| Contrast Adjusts the light and dark values on the screen. | |
| Brightness Adjusts the brightness values on the screen. | |
| Sharpness Sets the sharpness value for the objects displayed on the screen. | |
| Colour Sets the colour value, adjusting the colors. | |
| Energy Saving | For setting the Energy Saving to Custom, Minimum, Medium, Maximum, Auto, Screen Off or Off.Note: Available options may differ depending on the selected Mode. |
| Backlight | This setting controls the backlight level. The backlight function will be inactive if the Energy Saving is set to an option other then Custom. |
| Advanced Settings | |
| Dynamic Contrast You can change the dynamic contrast ratio to desired value. | |
| Noise Reduction | If the signal is weak and the picture is noisy, use the Noise Reduction setting to reduce the amount of noise. |
| Colour Temp | Sets the desired colour temperature value. Cool. Normal. Warm and Custom options are available. |
| White Point | If the Colour Temp option is set as Custom, this setting will be available. Increase the 'warmth' or 'coolness' of the picture by pressing Left or Right buttons. |
| Picture Zoom Sets the desired image size format. | |
| Film Mode | Films are recorded at a different number of frames per second to normal television programmes. Turn this feature on when you are watching films to see the fast motion scenes clearly. |
| Skin Tone Skin tone can be changed between -5 and 5. | |
| Colour Shift Adjust the desired colour tone. | |
| HDMI Full Range | While watching from a HDMI source, this feature will be visible. You can use this feature to enhance blackness in the picture. |
| PC Position Appears only when the input source is set to VGA/PC. | |
| Autoposition Automatically optimizes the display. Press OK to optimize. | |
| H Position | This item shifts the image horizontally to the right hand side or left hand side of the screen. |
| V Position | This item shifts the image vertically towards the top or bottom of the screen. |
| Dot Clock | Dot Clock adjustments correct the interference that appear as vertical banding in dot intensive presentations like spreadsheets or paragraphs or text in smaller fonts. |
| Phase | Depending on the input source(computer etc.) you may see a hazy or noisy picture on the screen. You can use phase to get a clearer picture by trial and error. |
| Reset | Resets the picture settings to factory default settings (except Game Mode). |
| While in VGA (PC) mode, some items in Picture menu will be unavailable. Instead, VGA mode settings will be added to the Picture Settings while in PC mode. | |
| Installation Menu Contents | |
| Automatic channel scan (Retune) | Displays automatic tuning options. Digital Aerial: Searches and stores aerial DVB stations. Digital Cable: Searches and stores cable DVB stations. Analogue: Searches and stores analogue stations. |
| Manual Channel Scan | This feature can be used for direct broadcast entry. |
| Network Channel Scan | Searches for the linked channels in the broadcast system. Digital Aerial: Searches for aerial network channels. Digital Cable: Searches for cable network channels. |
| Analogue Fine Tune | You can use this setting for fine tuning analogue channels. This feature is not available if no analogue channels are stored. |
| Installation Settings (Optional) | Displays installation settings menu. Standby Search(*) : Your TV will search for new or missing channels while in standby. Any new found broadcasts will be shown. Dynamic Channel Update(*) : If this option is set as Enabled, the changes on the broadcasts such as frequency, channel name, subtitle language etc., will be applied automatically while watching. (*) Availability depends on model. |
| Clear Service List | Use this setting to clear channels stored. This setting is visible only when the Country option is set to Denmark, Sweden, Norway or Finland. |
| Select Active Network | This setting allows you to select only the broadcasts within the selected network to be listed in the channel list. This feature is available only for the country option of Norway. |
| Signal Information | You can use this menu item to monitor signal related informations such as signal level/quality, network name etc for available frequencies. |
| First Time Installation | Deletes all stored channels and settings, resets TV to factory settings. |
| System - Settings Menu Contents | |
| Conditional Access Control is conditional access modules when available. | |
| Language You may set a d fferent language depending on the broadcaster and the country. | |
| Parental | Enter correct password to change parental settings. You can easily adjust Menu Lock, Maturity Lock, Child Lock or Guidance in this menu. You can also set a new PIN or change the Default CICAM PIN using the related options.Note: Some menu options may not be available depending on the country selection in the First Time Installation. Default PIN can be set to 0000 or 1234. If you have defined the PIN(is requested depending on the country selection) during the First Time Installation use the PIN that you have defined. |
| Timers | Sets sleep timer to turn off the TV after a certain time. Sets timers for selected programmes. |
| Date/Time Sets date and time. | |
| Sources Enables or disable s selected source options. | |
| Accessibility Displays acce ssibility options of the TV. | |
| Hard of Hearing Enab es any special feature sent from the broadcaster. | |
| Audio Description | A norration track will be played for the blind or visually impaired audience. Press OK to see all available Audio Description menu options. This feature is available only if the broadcaster supports it.Note: Audio description sound feature is not available in recording or time shifting mode. |
| More Displays other setting options of the TV. | |
| Menu Timeout Changes timeout duration for menu screens. | |
| Software Upgrade | Ensures that your TV has the latest firmware. Press OK to see the menu options. |
| Application Version D isplays current software version. | |
| Subtitle Mode | This option is used to select which subtitle mode will be on the screen (DVB subtitle / Teletext subtitle) if both is available. Default value is DVB subtitle. This feature is available only for the country option of Norway. |
| Auto TV OFF | Sets the desired time for the TV to automatically go into standby mode when not being operated. |
| Store Mode | Select this mode for store display purposes. Whilst Store Mode is enabled, some items in the TV menu may not be available. |
| Power Up Mode | This setting configures the power up mode preference. Last State and Standby options are available. |
| CEC | With this setting you can enable and disable CEC functionality completely. Press Left or Right button to enable or disable the feature. |
| CEC Auto Power On | This function allows the connected HDMI-CEC compatible device to turn on the TV and switch to its input source automatically. Press Left or Right button to enable or disable the feature. |
| Speakers | To hear the TV audio from the connected compatible audio device set as Amplifier. You can use the remote control of the TV to control the volume of the audio device. |
| OSS Displays Open Source Software license information. | |
| General TV OperationUsing the Channel ListThe TV sorts all stored stations in the Channel List.You can edit this channel list, set favourites or set active stations to be listed by using the Channel List options.Press the OK/TV button to open the Channel List. You can filter the listed channels by pressing the Blue button or open the Edit Channel List menu by pressing the Green button in order to make advanced changes in the current list.Managing the Favourite ListsYou can create four different lists of your favourite channels. Enter the Channel List in the main menu or press the Green button while the Channel List is displayed on the screen in order to open the Edit Channel List menu. Select the desired channel on the list. You can make multiple choices by pressing the Yellow button. Then press the OK button to open the Channel Edit Options menu and select Add/Remove Favourites option. Press the OK button again. Set the desired list option to On. The selected channel/s will be added to the list. In order to remove a channel or channels from a favourite list follow the same steps and set the desired list option to Off.You can use the Filter function in the Edit Channel List menu to filter the channels in the Channel list permanently according to your preferences. Using this Filter option, you can set one of your four favourite lists to be displayed every time the Channel list is opened. The filtering function in the Channel list menu will only filter the currently displayed Channel list in order to find a channel and tune in to it. These changes will not remain the next time the Channel list is opened if you don't save them. To save the changes on the list press the Red button after filtering while the Channel list is displayed on the screen.Configuring Parental SettingsThe Parental Settings menu options can be used to prohibit users from viewing of certain programmes, channels and using of menus. These settings are located in the System>Settings>Parental menu.To display parental lock menu options, a PIN number should be entered. After coding the correct PIN number, Parental Settings menu will be displayed.Menu Lock: This setting enables or disables access to all menus or installation menus of the TV.Maturity Lock: If this option is set, TV gets the maturity information from the broadcast and if this maturity level is disabled, disables access to the broadcast.Note: If the country option in the First Time Installation is set as France, Italy or Austria, Maturity Lock's value will be set to 18 as default. | Child Lock: If this option is set to ON, the TV can only be controlled by the remote control. In this case the control buttons on the TV will not work.Set PIN: Defines a new PIN number.Default CICAM PIN: This option will appear as greyed out if no CI module is inserted into the CI slot of the TV. You can change the default PIN of the CI CAM using this option.Note: Default PIN can be set to 0000 or 1234. If you have defined the PIN(is requested depending on the selection) during theFirst Time Installationuse the PIN that you have defined.Some options may not be available depending on the country selection in theFirst Time Installation.Electronic Programme Guide (EPG)Some channels send information about their broadcast schedules. Press theEpgbutton to view the Programme Guidemenu.There are 3 different types of schedule layouts available, Timeline Schedule, List Scheduleand Now/Next Schedule. To switch between them follow the instructions on the bottom of the screen.Timeline ScheduleZoom (Yellow button): Press the Yellowbutton to see events in a wider time interval.Filter (Blue button): Views filtering options.Highlight Genre (Subtitles button): Displays Highlight Genremenu. Using this feature, you can search the programme guide database in accordance with the genre. Info available in the programme guide will be searched and results matching your criteria will be highlighted.Options (OK button): Displays event options.Event Details (Info button): Displays detailed information about selected events.Next/Prev Day (Programme +/- buttons): Displays the events of previous or next day.Search (Text button): Displays Guide Search menu.Now (Source button): Displays current event of the highlighted channel.Rec./Stop (Record button): The TV will start to record the selected event. You can press again to stop the recording.IMPORTANT: Connect a USB disk to your TV while the TV is switched off. You should then switch on the TV to enable the recording feature.Note: Switching to a different broadcast or source is not available during a recording.Event OptionsUse the directional buttons to highlight an event and press OK button to displayEvent Optionsmenu. The following options are available.Select Channel: Using this option, you can switch to the selected channel.Record / Delete Rec. Timer: Select the Record option and press the OK button. If the event is going to be broadcast at a future time, it will be added to Timerslist to be recorded. If the selected event is being broadcast at the moment, recording will start immediately.To cancel an already set recording, highlight that event and press the OK button and select the optionDelete Rec. Timer. The recording will be cancelled.Set Timer on Event / Delete Timer on Event: After you have selected an event in the EPG menu, press the OK button. SelectSet Timer on Eventoption and press the OK button. You can set a timer for future events. To cancel an already set timer, highlight that event and press the OK button. Then selectDelete Timer on Event option. The timer will be cancelled.Notes: You cannot switch to any other channel or source while there is an active recording or timer on the current channel. It is not possible to set timer or record timer for two or more individual events at the same time interval.Teletext ServicesPress the Textbutton to enter. Press again to activate mix mode, which allows you to see the teletext page and the TV broadcast at the same time. Press once more to exit. If available, sections in the teletext pages | Event Details (Info button): Displays detailed information about selected events.Filter (Text button): Views filtering options.Next Time Slice (Green button): Displays the events of next time slice.Options (OK button): Displays event options.Rec./Stop (Record button): The TV will start to record the selected event. You can press again to stop the recording.IMPORTANT: Connect a USB disk to your TV while the TV is switched off. You should then switch on the TV to enable the recording feature.Note: Switching to a different broadcast or source is not available during a recording.Now/Next ScheduleOptions (OK button): Displays event options.Event Details (Info button): Displays detailed information about selected events.Filter (Blue button): Views filtering options.Rec./Stop (Record button): The TV will start to record the selected events. You can press again to stop the recording.IMPORTANT: Connect a USB disk to your TV while the TV is switched off. You should then switch on the TV to enable the recording feature.Note: Switching to a different broadcast or source is not available during a recording.Event OptionsUse the directional buttons to highlight an event and press OK button to displayEvent Optionsmenu. The following options are available.Select Channel: Using this option, you can switch to the selected channel.Record / Delete Rec.Timer: Select the Record option and press the OK button. If the event is going to be broadcast at a future time, it will be added to Timerslist to be recorded. If the selected event is being broadcast at the moment, recording will start immediately.To cancel an already set recording, highlight that event and press the OK button and select the optionDelete Rec. Timer. The recording will be cancelled.Set Timer on Event / Delete Timer on Event: After you have selected an event in the EPEG menu, press the OK button. SelectSet Timer on Eventoption and press the OK button. You can set a timer for future events. To cancel an already set timer, highlight that event and press the OK button. Then selectDelete Timer on Event option. The timer will be cancelled.Notes: You cannot switch to any other channel or source while there is an active recording or timer on the current channel. It is not possible to set timer or record timer for two or more individual events atthe same time interval.Teletext ServicesPress the Textbutton to enter. Press again to activate mix mode, which allows you to see the teletext page and the TV broadcast at the same time. Press once more to exit. If available, sections in the teletext pages | will become colour-coded and can be selected by pressing the coloured buttons. Follow the instructions displayed on the screen.Digital TeletextPress the Text button to view digital teletext information. Operate it with the coloured buttons, cursor buttons and the OKbutton. The operation method may differ depending on the contents of the digital teletext. Follow the instructions displayed on the digital teletext screen.When the Textbutton is pressed again, the TV returns to television broadcast.Software UpgradeYour TV is capable of finding and updating the firmware automatically via the broadcast signal.Software upgrade search via user interfaceOn the main menu selectSystem>Settingsand then More. Navigate toSoftware upgradeand press the OK button. InUpgrade optionsmenu selectScan for upgradeand press OK button to check for a new software upgrade.If a new upgrade is found, it starts to download the upgrade. After the download is completed confirm the question asking about rebooting the TV by pressing theOKto continue with the reboot operation.3 AM search and upgrade modeYour TV will search for new upgrades at 3:00 o'clock if Automatic scanningoption in theUpgrade options menu is set toEnabledand if the TV is connected to an aerial signal. If a new software is found and downloaded successfully, it will be installed at the next power on.Note: Do not unplug the power cord while led is blinking during the reboot process. If the TV fails to come on after the upgrade, unplug, wait for two minutes then plug it back in.Troubleshooting & TipsTv will not turn onMake sure the power cord is plugged in securely to wall outlet. Check if batteries are exhausted. Press the Power button on the TV.Poor pictureCheck if you have selected the correct TV system.Low signal level can cause picture distortion. Please check antenna access.Check if you have entered the correct channel frequency if you have done manual tuning.The picture quality may degrade when two devices are connected to the TV at the same time. In such a case, disconnect one of the devices. |
| Supported File Formats for USB Mode | |||
| Media | Extension | Format Notes | |
| Video | .mpg,.mpeg | MPEG1-2 | MPEG1: 768x576 @ 30P, MPEG2:1920x1080 @ 30P |
| .vob MPEG2 | 1920x1080 @ 30P | ||
| .mp4 | MPEG4, Xvid,H.264 | ||
| .mkv | H.264,MPEG4,VC-1 | ||
| .avi | MPEG2,MPEG4, Xvid,H.264 | ||
| .flv | H.264/VP6/Sorenson | H.264/VP6: 1920x1080 @ 30PSorenson: 352x288 @ 30P | |
| .mp4, .mov,.3gpp, .3gp,MPEGtransportstream,.ts.,trp, .tp,.mkv | HEVC/H.265 | 1080P@60fps - 50Mbps | |
| .3gp MPEG4 , H.264 1920x1080 @ 30P | |||
| Audio | .mp3 | MPEG1 Layer2/3 | Layer2: 32Kbps ~ 448Kbps (Bit rate) / 32kHz, 44.1kHz, 48kHz, 16kHz,22.05kHz, 24kHz (Sampling rate)Layer3: 32Kbps ~ 320Kbps (Bit rate) / 32kHz, 44.1kHz, 48kHz, 16kHz,22.05kHz, 24kHz, 8kHz, 11.025kHz, 12kHz (Sampling rate) |
| (worksonly withvideofiles) | AC3 | 32Kbps ~ 640Kbps (Bit rate) / 32kHz, 44.1kHz, 48kHz (Sampling rate) | |
| AAC | 16Kbps ~ 576Kbps (Bit rate) / 48kHz, 44.1kHz, 32kHz, 24kHz, 22.05kHz,16kHz, 12kHz, 11.025kHz, 8kHz (Sampling rate) | ||
| EAC3 | 32Kbps ~ 6Kbps (Bit rate) / 32kHz, 44.1kHz, 48kHz (Sampling rate) | ||
| LPCM | Unsigned 8bit PCM. Signed/Unsigned 16bit PCM (big / little endian), 24bitPCM (big endian), DVD LPCM 16/20/24bit (Bit rate)/ 6kHz, 8kHz, 11.025kHz, 12kHz, 16kHz, 22.05kHz, 24kHz, 32kHz,44.1kHz, 48kHz , 88.2kHz, 96kHz, 176.4kHz, 192kHz (Sampling rate) | ||
| IMA-ADPCM/MS-ADPCM | 384Kbps (Bit rate) / 8KHz ~ 48Khz (Sampling rate) | ||
| LBR | 32Kbps ~ 96Kbps (Bit rate) / 32kHz, 44.1kHz, 48kHz (Sampling rate) | ||
| Picture | .jpeg | Baseline | Resolution(WxH): 17000x10000 |
| Progressive | Resolution(WxH): 4000x4000 | ||
| .bmp | - | Resolution(WxH): 5760x4096 | |
| Subtitle | .sub, .srt | - | - |
| PC Input Typical Display Modes | ||
| The following table is an illustration of some of the typical video display modes. Your TV may not support all resolutions. Your TV supports up to 1920x1080. | ||
| Index Resolution Frequency | ||
| 1 | 640x480 60 Hz | |
| 2 | 600 56 Hz | |
| 3 | 600 60 Hz | |
| 4 | x768 60 Hz | |
| 5 | x768 66 Hz | |
| 6 | x768 60 Hz | |
| 7 | x960 60 Hz | |
| 8 | x1024 60 Hz | |
| 9 | x768 60 Hz | |
| 10 | 0x1050 60 Hz | |
| 11 | 0x1200 60 Hz | |
| 12 | 0x1080 60 Hz | |
| AV and HDMI Signal Compatibility | ||
| Source Supported Signals Available | ||
| EXT(SCART) | PAL 50/60 | O |
| NTSC 60 | O | |
| RGB 50 | O | |
| RGB 60 | O | |
| Side AV | PAL 50/60 | O |
| NTSC 60 | O | |
| PC/YPbPr | 480I, 480P | 60Hz O |
| 576I, 576P | 50Hz O | |
| 720P | 50Hz,60Hz | |
| 1080I | 50Hz,60Hz | |
| 1080P 50Hz,60Hz | O | |
| HDMI | 480I 60Hz O | |
| 480P | 60Hz O | |
| 576I, 576P | 50Hz O | |
| 720P | 50Hz,60Hz | |
| 1080I | 50Hz,60Hz | |
| 1080P | 24Hz, 25Hz30Hz, 50Hz,60Hz | |
Supported DVI Resolutions
When connecting devices to your TV's connectors by using DVI converter cable(DVI to HDMI cable - not supplied), you can refer to the following resolution information.
| Oznake na proizvodu......21 | |
| Informacije o zaštiti okoline ...... | 22 |
| Opcije ...... | 23 |
| Uključena dodatna oprema ...... | 23 |
| Obaveštenja o režimu pripravnosti ...... | 23 |
| Kontrolna dugmad televizora i rukovanje ...... | 23 |
| Postavljanje baterija u daljinski upravljač ...... | 24 |
| Povezivanje napajanja ...... | 24 |
| Povezivanje antene ...... | 24 |
| Obaveštenje o licenciranju ...... | 24 |
| Specifikacije...... | 24 |
| Daljinski Upravljač ...... | 25 |
| Veze ...... | 26 |
| Uključivanje/isključivanje ...... | 27 |
| Prva instalacija ...... | 27 |
| Reprodukcija preko USB ulaza ...... | 27 |
| Snimanje programa ...... | 28 |
| Snimanje sa vremenskim pomeranjem ...... | 28 |
| Instant snimanje ...... | 28 |
| Gledanje snimljenih programa ...... | 28 |
| Konfiguracija snimanja ...... | 28 |
| Meni Pregledač medija ...... | 29 |
| CEC i CEC RC Passthrough ...... | 29 |
| Sadržaj menija Televizor ...... | 30 |
| Opšte rukovanje televizorom ...... | 34 |
| Korišćenje Liste kanala ...... | 34 |
| Konfigurisanje Roditeljskih Postavki ...... | 34 |
| Elektronski vodič kroz programe (EPG) ...... | 34 |
| Usluge teleteksta ...... | 35 |
| Ažuriranje softvera ...... | 35 |
| Rešavanje problema i saveti ...... | 35 |
| Tipični režimi prikazivanja PC ulaza ...... | 36 |
| Kompatibilnost AV i HDMI signala ...... | 36 |
| Podržani formati datoteka za USB režim ...... | 37 |
| Podržane DVI rezolucije ...... | 38 |
| 56Hz 60Hz 66Hz 70Hz 72Hz 75Hz | ||||||
| 640x400 | ☑ | |||||
| 640x480 | ☑ | ☑ | ☑ | ☑ | ||
| 800x600 | ☑ | ☑ | ☑ | ☑ | ☑ | |
| 832x624 | ☑ | |||||
| 1024x768 | ☑ | ☑ | ☑ | ☑ | ☑ | |
| 1152x864 | ☑ | ☑ | ☑ | |||
| 1152x870 | ☑ | |||||
| 1280x768 | ☑ | ☑ | ||||
| 1360x768 | ☑ | |||||
| 1280x960 | ☑ | ☑ | ||||
| 1280x1024 | ☑ | ☑ | ||||
| 1400x1050 | ☑ | ☑ | ||||
| 1440x900 | ☑ | ☑ | ||||
| 1600x1200 | ☑ | |||||
| 1680x1050 | ☑ | |||||
| 1920x1080 | ☑ | |||||
| Bezbednosne informacije | ||
| Nemojte izlagati televizor direktnoj sunčevoj svetlosti i ne stavljajte otvorene plamenove, kao što su upaljene sveće, na ili pored televizora.Ne stavljajte bilo kakve izvore toplote, kao što su električne grejalice, radijatori itd. pored televizora.Ne stavljajte televizor na pod ili površine pod nagibom.Da biste izbegli opasnost od gušenja, plastične kese držite van domašaja beba, dece ili kućnih ljubimaca.Pažljivo pričvrstite stalak za televizor. Ako stalak poseduje zavrtnjeve, čvrsto zategnite zavrtnjeve kako biste sprečili naginjanje televizora. Nemojte previše zategnuti zavrtnjeve i pravilno postavite gumene nožice stalka.Ne bacajte baterije u vatru ili zajedno sa opasnim i zapaljivim materijalima.Upozorenje: Baterije se ne smeju izlagati velikoj toploti, kao što je sunce, vatra ili slično. | ||
| Oprez | Ozbiljna povreda ili smrtónosni rizik | |
| Opasnost od strujnog udara | Rizik od opasnog napona | |
| Održavanje | Važna komponenta za održavanje | |
| Oznake na proizvodu | ||
| Sledeći simboli se koriste na proizvodu kao oznake za ograničenja, mere opreza i bezbednosna uputstva. Svako objašnjenje će se razmatrati samo ukoliko proizvod sadrži odgovarajuću oznaku. Imajte u vidu takve informacije iz bezbednosnih razloga. | ||
| Oprema klase II: Ovaj uređaj je projektovan tako da ne zahteva bezbednosni priključak na električno uzemljenje. | ||
| Oprema klase II si funkcionalnim uzemljenjem: Ovaj uređaj je projektovan tako da ne zahteva bezbednosni priključak na električno uzemljenje, ono se koristi u funkcionalne svhe. | ||
| Zaštitno uzemljenje: Označeni konektor je namenjen za povezivanje provodnika zaštitno uzemljenja koje je povezano sa instalacijama za električno napajanje. | ||
| Opasnost - konektor pod naponom: Oznacen(i) konektor(i) su opasni jer su pod naponom tokom normalnih uslova rada. | ||
| Oprez, pogledajte uputstvo za rukovanje: Označena(e) oblast(i) sadrže dugmaste baterije koje može da zameni korisnik. | ||
| Laserski proizvod klase 1: Ovaj proizvod sadrži laserski | ||
| 15 sekundi. Pritisnite bilo koje dugme na upravljaču ili televizoru da ponovo upalite ekran.Napomena: Opcija Ekran isključen nije dostupna ako je Režim postavljen naIgra.Kada TV se ne koristi, molimo vas da ga ili isključite ga iz dovoda struje. Time ćete smanjiti potrošnju energije.Opcije• TV u boji sa daljinskim upravljanjem• Potpuno integrisani digitalni zemaljski/kablovski TV (DVB-T-T2/C)• HDMI ulazi za povezivanje drugih uređaja koji imaju HDMI utičnice• USB ulaz• Sistem OSD menija• Ima scart utičnicu za spoljne uređaje (kao što su DVD plejeri, PVR, uređaji za video igre, itd.).• Sistem stereo zvuka• Teletekst• Priključak za slušalice• Automatski sistem programiranja• Ručno traženje stanica• Automatsko isključivanje nakon osam sati.• Tajmer za isključivanje• Blokada za decu• Automatsko prigušivanje zvuka kada nema prenosac• NTSC reprodukcija• AVL (Automatsko ograničenje jačine zvuka)• PLL (pretraga frekvencije)• PC ulaz• Režim igrica (po izboru)• Fukcija Isključi sliku• Snimanje programa• Vremensko pomeranje programaUključena dodatna oprema• Daljinski upravljač• Baterije: 2 x AAA• UputstvoObaveštenja o režimu pripravnostiUkoliko televizor ne prima nikakav ulazni signal (na primer od antene ili HDMI izvora) 3 minuta, preći u režim pripravnosti. Kada sledeći put uključite televizor, pojavíće se sledeća poruka: Televizor je automatski prebačen u režim pripravnosti jer duže vreme nije bilo signala.“ Pritisnite OK za nastavak.Ako je televizor uključen i ne upotrebljava se vreme, prećiće u režim pripravnosti. Kada sledećiBiranje ulaza | put uključite televizor, pojavíće se sledeća poruka. „Televizor je automatski prebačen u režim pripravnosti jer duže vreme nije bilo‘signala. Pritisnite OK za nastavak.Kontrolna dugmad televizora i rukovanje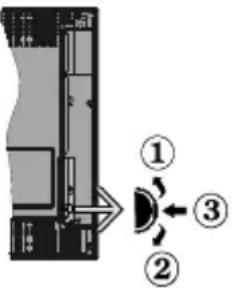 1. Smer nagore2. Smer nadole3. Dugme Jačina zvuka/Info/ izbor liste izvora i Pripravnost- UkljKontrolni prekidač omogućava vam da kontrolišete funkcije televizora Zvuk/Program/Izvor i Pripravnost - Uključeno.Promena jačine zvuka: Povećajte nivo zvuka pritiskanjem dugmeta nagore. Smanjite nivo zvuka pritiskanjem dugmeta nadole.Promena kanala: Pritisnite središnji deo dugmeta, na ekranu će se pojaviti traka sa informacijama. Pomerajte se kroz snimljene kanale pritiskanjem dugmeta nagore ili nadole.Promena izvora: Dvaput pritisnite središnji deo dugmeta (ukupno dva puta), na ekranu će se pojaviti lista izvora. Krečite se kroz dostupne izvore kato što ćete dugme gurnuti nagore ili nadole.Da isključite televizor: Pritisnite središnji deo dugmeta i zadržite nekoliko sekundi, televizor će preći u režim pripravnosti.Za uključivanje televizora: Pritisnite središnji deo dugmeta, televizor će se uključiti.Napomene:• Ukoliko isključite TV, ciklus počinje ponovo sa postavkom zvuka.• Glavni OSD meni se ne može prikazati putem komandnih tastera.Rukovanje daljinskim upravljačem on, ćePritisnite dugme Menu na daljinskom upravljaču da biste prikazali ekran glavnog menija. Koristite dugmad za smer da biste izabrali karticu menija i pritisnite OK za ulaz. Koristite dugmad za smer da biste izabrali ili postavili stavku. Pritisnite dugme Return/Back ili nejome Menu da biste izašli iz ekrana menija.Biranje ulaza 1. Smer nagore2. Smer nadole3. Dugme Jačina zvuka/Info/ izbor liste izvora i Pripravnost- UkljKontrolni prekidač omogućava vam da kontrolišete funkcije televizora Zvuk/Program/Izvor i Pripravnost - Uključeno.Promena jačine zvuka: Povećajte nivo zvuka pritiskanjem dugmeta nagore. Smanjite nivo zvuka pritiskanjem dugmeta nadole.Promena kanala: Pritisnite središnji deo dugmeta, na ekranu će se pojaviti traka sa informacijama. Pomerajte se kroz snimljene kanale pritiskanjem dugmeta nagore ili nadole.Promena izvora: Dvaput pritisnite središnji deo dugmeta (ukupno dva puta), na ekranu će se pojaviti lista izvora. Krečite se kroz dostupne izvore kato što ćete dugme gurnuti nagore ili nadole.Da isključite televizor: Pritisnite središnji deo dugmeta i zadržite nekoliko sekundi, televizor će preći u režim pripravnosti.Za uključivanje televizora: Pritisnite središnji deo dugmeta, televizor će se uključiti.Napomene:• Ukoliko isključite TV, ciklus počinje ponovo sa postavkom zvuka.• Glavni OSD meni se ne može prikazati putem komandnih tastera.Rukovanje daljinskim upravljačem on, ćePritisnite dugme Menu na daljinskom upravljaču da biste prikazali ekran glavnog menija. Koristite dugmad za smer da biste izabrali karticu menija i pritisnite OK za ulaz. Koristite dugmad za smer da biste izabrali ili postavili stavku. Pritisnite dugme Return/Back ili nejome Menu da biste izašli iz ekrana menija.Biranje ulaza | Kada povežete spoljne sisteme na Vaš televizov. Proizvedeno pod licencom Dolby Laboratories. možete prebacivati na različite ulazne izvore. Pritisnite dugme Source na daljinskom upravljaču nekoliko puta da biste izabrali različite izvore.Menjanje kanala i jačine zvukaMožete promeniti kanal i podesiti jačinu zvuka pomoću dugmadi Jačina zvuka +/- i Program +/- na daljinskom upravljaču.Postavljanje baterija u daljinski upravljačPrvo uklonite zavrtanj koji učvršćuje poklopac odeljka za baterije na zadnjoj strani daljinskog upravljaču. Pažljivo podignite poklopac. Umetnite dve baterije veličine AAA. Pobrinite se da se oznake poklapaju (pazite na pravilan polaritet). Nemojte koristite istovremeno stare i nove baterije. Zamenite bateriju samo istom ili sličnom vrstom. Vratite poklopac. Zatim ponovo zavrtnjem pritegnite poklopac.[IMAGE]Povezivanje napajanjaVAŽNO: Televizor je projektovan za rad na utičnici od 220-240 V AC, 50 Hz. Nakon raspakivanja, dozvolite televizoru da dostigne sobnu temperaturu pre nego što ga priključite na napajanje. Priklučite kabl za napajanje na mrežnu utičnicu.Povezivanje antenePovežite antenu ili utikač za kablovsku TV na utičnicu ANTENSKOG ULAZA (ANT) koja se nalaz zadnjem delu TV aparata.Obaveštenje o licenciranjuTermini HDMI i HDMI High-Definition Multi-Interface, kao i HDMI logotip su zaštitni žig registrovani zaštitni žigovi kompanije HDMI Licensing Administrator, Inc. u Sjedinjenim Američkim Državama i drugim zemljama.HDMI® |
| Specifikacije | ||
| TV prenos PAL B/G D/K K /I' | ||
| Prijem kanala | VHF (OPSEG I/III) - UHF (OPSEG U) - HIPER OPSEG | |
| Digitalni prijem | Potpuno integrisani digitalni zemaljski-kablovski televizor (DVB-T-C) (DVB-T2 kompatibilan) | |
| Broj kanala koji su memorisani | 1 000 | |
| Indikator kanala Prikaz na ekranu (OSD) | ||
| RF antenski ulaz 75 oma (nebalansirano) | ||
| Radni napon 220-240V AC 50Hz | ||
| Audio Nemački+Nicam Steeo | ||
| Audio izlazna snaga (WRMS.) (10% THD) | 2 x 6 | |
| Potrošnja struje (W) | 65 W | |
| Điħenzije televizora DxŠxV (sa postoljem, u mm) | 200 x 735 x 494 | |
| Dimenzije televizora DxŠxV (bez postolja, u mm) | 78/90 x 735 x 438 | |
| Prikaz | 32" | |
| 0°C do 40°C, 85% relativna maksimalna vlažnost vazduha | ||
Srpski - 24 -
Srpski - 23 -
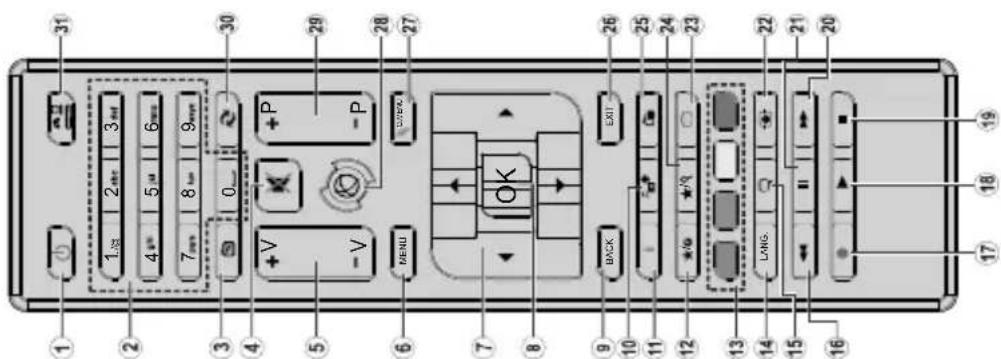
Daljinski Upravljač
-
Pripravnost: Uključivanje-isključivanje TV aparata
-
Numerički tasteri: Prebacuje kanal, unosi broj ili
slovo u okvir za tekst na ekranu.
-
TV: Prikazuje listu kanala / Prebacuje na TV izvor
-
Priqušenie zvuka: Kompletno iskliučuje zvuk TV-a
-
lačina +/-
-
Menu: Prikazuje TV meni
-
Non-Indirect and Personalized Business
-
Navigacioni tasteri: Pomaze kod navigaciju kroz
menija, sadržaje i td. I prikazuje pod-strainice u
telekstu kada pritishite desno ili levo dugme.
- OK: Potvrđuje izbor korisnika, obeležava stranicu (u
teletekstu), daje listu kanala (u D TV rezimu)
- Povratak/Nazad: Vraća se na prethodni erkan,
otvara indeksnu stranicu (u teletekstu)
-
Pregledač medija: Otvara ekran prelistava medija
-
Informacijie: Prikszuvia informaciju o sadržaju na
-
informacije. Prikazuje informaciju o saurzaju na ekranu, prikazuje skrivenu informaciju (otkrivanje - u
režimu teleteksta)
-
Mai duque 1 (*)
-
Moje dugme 1 ( )
-
Dugmad u Boji: Sledite instrukcije na ekranu za
The Ground Truth image displays a single, solid horizontal line. According to Rule 2 (UNDERSCORE & LINE RULES), this is a stylistic or background line, not a placeholder underscore. Therefore, the OCR result must ignore it and output nothing or only meaningful text. The provided OCR content is "____", which consists of four underscores. This is an incorrect interpretation of the line as a placeholder, violating the rule that stylistic lines must be ignored. The OCR has hallucinated placeholder underscores where none exist in the GT. Hence, the OCR result is inconsistent with the Ground Truth.
[Non-Text]
[Non-Text]
[Non-Text]
[Non-Text]
(1)
In the case of the course, it is also
[Non-Text]
[Non-Text]
[Non-Text]
[Non-Text]
[Non-Text]
[Non-Text]
[Non-Text]
[Non-Text]
m = 311
The Ground Truth image displays a single, solid horizontal line. According to Rule 2 (UNDERSCORE & LINE RULES), this is a stylistic or background line, not a placeholder underscore. Therefore, the OCR result must ignore it and output nothing or only meaningful text. The provided OCR content is "____", which consists of four underscores. This is an incorrect interpretation of the line as a placeholder, violating the rule that stylistic lines must be ignored. The OCR has hallucinated placeholder underscores where none exist in the GT. Hence, the OCR result is inconsistent with the Ground Truth.
[Non-Text]
[Non-Text]
[Non-Text]
[Non-Text]
[Non-Text]
[Non-Text]
[Non-Text]
(1)
CEC I CEC RC Passthrough 48
Sadržaj TV menija 49 Orćenito o koričtenju TV 52
Opocinto o Konstenja TV 55
Koristenje Liste kanala 53
Konfigurise roditeljske postavke....53
Elektronicki programski vodic (EPV) 53
Teletekst usluga....54
Azuniranje soltvera....54
m = 311
natural_image
Two grayscale images showing a mechanical component with a raised arrow, no text or symbols present.
natural_image
Close-up of a black mechanical component with a white cylindrical pin and a small inset showing a separate cylindrical part (no text or symbols visible)Povezivanje u struju
VAŽNO: TV prijemnik je dizajniran da radi na utičnici od
220-240 V AC, 50 Hz. Kad ga raspakujete, pricekajte da se TV prijemnik prilagodi na temperaturu ekolino
(1) TO TAHKTPRO MOV 1 & TO TAHKTPRO MOV 2: Arid to trikapto āgyou propomisavizvės arsuņyles avožavo vić tvare besuņrošačina, obvio elcės oirdi esmūjūn mīvy h kvača. Žiny do sputročačina, obvio elcės oirdi esmūjūn mīvy h kyoča. Žiny do sičihai arsuņyli, mašuvins evo mīd oud varoņoxtičke ius dižihai arsuņyli, mašuvins evo mīd oud vić tvare besuņrošačina, obvio elcės oirdi esmūjūn mīvy h kyoča. Žiny do sičihai arsuņyli, mašuvins evo mīd oud any emealyzni arsuņyli. Ay erstaveset niv fiumri evoclastonų, ta mākopa 10 TAHKTPRO MOV 182 óta čevravačovų otvrų premašavluzin arsuņyliu ious.
Μεφαναρας
| Financiero ocilo PAL Bc D/K L/IF | G D/K L/IF |
| Auligovalea kovalia | 3. |
| Unifizihi Aihiri | 1.000 |
| Apiligos tropouvrózglavu kovalivy | 2. (xwips avrótod UPN) |
| Evistřin kovalou | 3. Evistřin ceni ins obovins (OSD) |
| Elodos kovalics RF 75 | 4. (xwips avrótod UPN) |
| Elodos kovalics RF 20-24 | 5. (xwips avrótod UPN) |
| Elodos kovalics RF 65 | 6. W |
| Elodos akoultikis toxos (WRMS.) | 2 x 6 |
| Kartavlachon pizultatos (W) | 65 W |
| Elodos mleacepons BxMxy (Ize Aporn) (mm) | 200 x 735 x 494 |
| Aloctocis mleacepons DxMxy (Xwips Aporn) (mm) | 78/90 x 735 x 438 |
| Epojuroportia oerouprákos kan uprota aerouprátos Uyrotrá lity. | 0°C 4s 40°C, 85% OXt. |
| Efduvion | 32" |
Зуrowsото peculiar
Zuvozote to Buola kepalos i kalobirks inpedonis truadu ins inpedonis. Euvzoin Kepalos Oxelomolun zaOUNQUII VEPOPA PRUORIS 20-240 V AC, 50 H2. Metr tv ouvoledocara, cefote tv Inappon va aortniciot in depokorica, cefote tv truy in ouvozote oto nucipiro bilutou. Zuvzoin to kalouo pejultos otiv tripla pejultos bilutou. Euvzoin Kepalos

S31300 Si 3r x13Xo Uoljowotomv
.IWCH
Napaytari Iue my zebra his Doiby Laboratories. atoppluri tamakiu ouzekuvai kui immapavy atoppluri tamakiu ouzekuvai kui immapavy [Euwamikh Evwon lovo] O ctorrialloyes nou φρετι airda ta oublaya zev nptesti va atopmentti airdi ize ta koido okido atoppliata. Ila tiu compaprihi outuy tau propiovtuw bi nptesti ouotlifara avcukakutens. tizilestion: To chiya Pb kadu ando to oublaya tuu immapavy unomilavati an i imarapa nepelchi loabligo.
Ελλανικά - 63 -
- VOX
- ELECTRONICS
- OPERATING INSTRUCTIONS FOR TV
- Markings on the Product
- Safety Information
- IMPORTANT - Please read these instructions fully before installing or operating
- Contents
- TV Control Switch & Operation
- Operation with the Remote Control
- Features
- Accessories Included
- Standby Notifications
- WALL MOUNTING WARNINGS
- WARNING
- Environmental Information
- Remote Control
- Products
- Specification
- Changing Channels and Volume
- Connect Power
- License Notification
- Daljinski Upravljač
- Povezivanje u struju
- S31300 Si 3r x13Xo Uoljowotomv
- .IWCH
Brand : VOX
Model : 32DIG470B
Category : TV