S1iPBTDB12E - Bluetooth speaker Sandstrøm - Free user manual and instructions
Find the device manual for free S1iPBTDB12E Sandstrøm in PDF.


| Product Type | Bluetooth Speaker |
| Brand | Sandstrøm |
| Model | S1iPBTDB12E |
| Dimensions (W x H x D) | 180 mm x 70 mm x 70 mm |
| Weight | 0.5 kg |
| Color Options | Black |
| Power Input | 5V DC via Micro USB |
| Battery Capacity | 2000 mAh |
| Playback Time | Up to 10 hours |
| Charging Time | Approx. 3 hours |
| Wireless Technology | Bluetooth 5.0 |
| Wireless Range | Up to 10 meters |
| Audio Input | 3.5 mm AUX |
| Speaker Output | 10W RMS |
| Controls | Power, Volume +/-, Play/Pause, Track Forward/Back |
| Built-in Microphone | Yes (for hands-free calls) |
| Water Resistance | IPX5 (splash-proof) |
| Operating Temperature | 0°C to 45°C |
| Cleaning Instructions | Wipe with a soft, dry cloth. Do not use liquids. |
| Safety Warnings | Keep away from fire and extreme heat. Do not disassemble. |
| Box Contents | Speaker, Micro USB cable, 3.5mm AUX cable, User manual |
Frequently Asked Questions - S1iPBTDB12E Sandstrøm
User questions about S1iPBTDB12E Sandstrøm
0 question about this device. Answer the ones you know or ask your own.
Ask a new question about this device
Download the instructions for your Bluetooth speaker in PDF format for free! Find your manual S1iPBTDB12E - Sandstrøm and take your electronic device back in hand. On this page are published all the documents necessary for the use of your device. S1iPBTDB12E by Sandstrøm.
USER MANUAL S1iPBTDB12E Sandstrøm
Speaker with Docking for iPhone/iPod/iPad and Bluetooth® Technology
GB
Instruksjonsmanual
natural_image
Black electronic device with a smartphone on top, labeled 'Touchbox' at the base (no other text or symbols visible)
Bluetooth®
iPhone, iPod and iPad not included
Safety Warnings....7
Unpacking....11
Product Overview....12
Main Unit....12
-Front View....12
-Rear View 12
-Top View....13
Remote Control 14
Removing the Plastic Strip from the Remote Control....16
Battery Replacement for the Remote Control....16
-Handling the Battery 16
-Handling the Remote Control....17
Remote Control Operation Range....17
Connecting the Aerial 18
Power Source 18
Mains Power....18
General Operation....19
Switching ON / OFF....19
Selecting Modes....19
Auto Setting the Clock....19
Manually Setting the Clock 20
Sleep Function 20
Adjusting the volume....20
Adjusting the Sound Effect 20
Dimming the display 20
DAB Operation....21
DAB Auto Scan....21
Secondary Services 21
Manual Tuning....21
Programming radio stations....21
DAB Display Modes 22
Selecting a stored radio station....22
Listening to the Radio 24
FM Station Scanning Setup....24
Audio Mode 24
Programming radio stations....24
Selecting a stored radio station....24
FM Display Modes....25
Docking an iPod / iPhone/ iPad 26
iPod / iPhone / iPad Operation 27
Inserting the iPod / iPhone / iPad 27
To Play / Pause music....27
Skipping and searching tracks....28
Random Playback....28
Repeat Playback....28
Charging your iPod / iPhone / iPad 28
Video Out Function....28
Bluetooth® Audio....29
AUX IN Operation 30
Maintenance 30
Cleaning the Unit....30
Hints and Tips....31
Specifications....31
iPod/iPhone/iPad-betjening....48
Sette inn iPod/iPhone/iPad 48
Lade iPod/iPhone/iPad 49
Ladda iPod/iPhone/iPad....70
AUX IN hantering....72
Underhåll....72
Rengöra enheten 72
Tips och råd....73
Specifikationer....73
Turvavaroitukset 8
- Read all the instructions carefully before using the unit and keep them for future reference.
- Retain the manual. If you pass the unit onto a third party make sure to include this manual.
- Check that the voltage marked on the rating label matches your mains voltage.
Damage
• Please inspect the unit for damage after unpacking.
- Do not continue to operate the unit if you are in any doubt about it working normally, or if it is damaged in any way - switch off, withdraw the mains adapter and consult your dealer.
Location of Unit
• The unit must be placed on a flat stable surface and not subjected to vibrations.
- Do not place the unit on sloped or unstable surfaces as the unit may fall off or tip over.
- The mains socket must be located near the unit and should be easily accessible.
- This unit is designed for indoor use only.
Temperature
- Avoid extreme degrees of temperature, either hot or cold. Place the unit well away from heat sources such as radiators or gas / electric fires.
- Avoid exposure to direct sunlight and other sources of heat.
Naked Flames
• Never place any type of candle or naked flame on the top of or near the unit.
Moisture
• To reduce the risk of fire, electric shock or product damage, do not expose this unit to rain, moisture, dripping or splashing. No objects filled with liquids, such as vases, should be placed on the unit.
• If you spill any liquid into the unit, it can cause serious damage. Switch it off at the mains immediately. Withdraw the mains plug and consult your dealer.
Ventilation
- To prevent the risk of electric shock or fire hazard due to overheating, ensure that curtains and other materials do not obstruct the ventilation vents.
• A minimum distance of 5cm around the unit should be maintained to allow for sufficient ventilation. - Do not install or place this unit in a bookcase, built-in cabinet or in another confined space. Ensure the unit is well ventilated.
Safety
• Always disconnect the unit from the mains supply before connecting / disconnecting other devices or moving the unit.
• Unplug the unit from the mains socket during a lightning storm.
- In the interests of safety and to avoid unnecessary energy consumption, never leave the unit switched on while unattended for long periods of time, e.g. overnight, while on holiday or while out of the house. Switch it off and disconnect the mains plug from the mains socket.
Mains Adapter Cable
• Make sure the unit or unit stand is not resting on top of the mains adapter cable, as the weight of the unit may damage the cable and create a safety hazard.
Mains Adapter
- The mains adapter will continue to draw electricity from the mains supply when plugged in the mains socket. In the interests of safety and to avoid unnecessary energy consumption, never leave the adaptor plugged in the mains socket while unattended for long periods of time. Disconnect the adapter from the power supply.
Interference
- Do not place the unit on or near appliances which may cause electromagnetic interference. If you do, it may adversely affect the working of the unit, and cause a distorted sound.
Batteries
- Batteries used in the unit are easily swallowed by young children and this is dangerous.
- Keep loose batteries away from young children and make sure that the battery holder tray is secure in the unit. Seek medical advice if you believe a cell has been swallowed.
- Please dispose of batteries correctly by following the guidance in this manual.
- Do not expose the battery to direct sunlight or sources of excessive heat.
Supervision
• Children should be supervised to ensure that they do not play with the unit.
- Never let anyone especially children push anything into the holes, slots or any other openings in the case - this could result in a fatal electric shock.

The lightning flash with arrowhead symbol, within an equilateral triangle, is intended to alert the user to the presence of uninsulated “dangerous voltage” within the unit’s enclosure that may be of sufficient magnitude to constitute a risk of electric shock.

The exclamation point within an equilateral triangle is intended to alert the user to the presence of important operating and maintenance (servicing) instructions in the manual accompanying the unit.
Service
• To reduce the risk of electric shock, do not remove screws. The unit does not contain any user-serviceable parts. Please leave all maintenance work to qualified personnel.
- Do not open any fixed covers as this may expose dangerous voltages.
Maintenance
- The mains adapter will continue to draw electricity from the mains supply when plugged in the mains socket. In the interests of safety and to avoid unnecessary energy consumption, never leave the adaptor plugged in the mains socket while unattended for long periods of time. Disconnect the adaptor from the power supply.
Rušenie
Thank you for purchasing your new Sandstrøm Wireless speaker with docking for iPhone / iPod / iPad.
We recommend that you spend some time reading this instruction manual in order that you fully understand all the operational features offered. You will also find some hints and tips to help you resolve any issues.
Read all the safety instructions carefully before use and keep this instruction manual for future reference.
GB
Unpacking
Remove all items from the packaging. Retain the packaging. If you dispose of it please do so according to local regulations.
The following items are included:

natural_image
Simple illustration of a gray rectangular device with a small screen and top handle (no text or symbols)Mains Unit

Remote Control
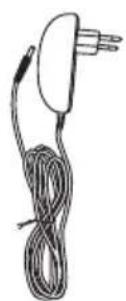


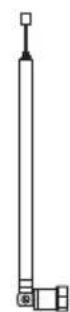
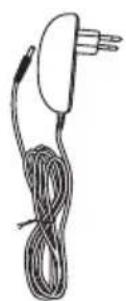
Instruction ManualMains Adapter FM/DAB Aer
Product Overview
Main Unit
GB
Front View
- iPod / iPhone / iPad dock
- Remote control sensor
- Display
- Speakers

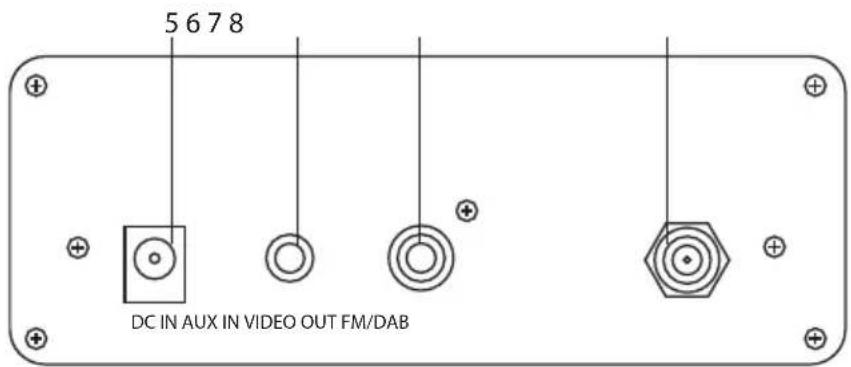
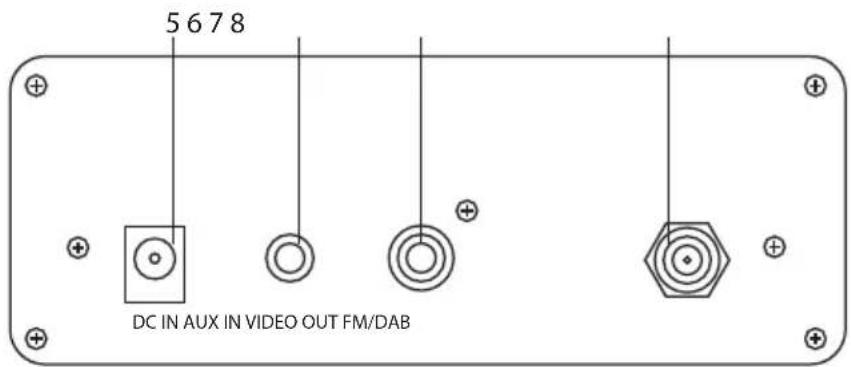
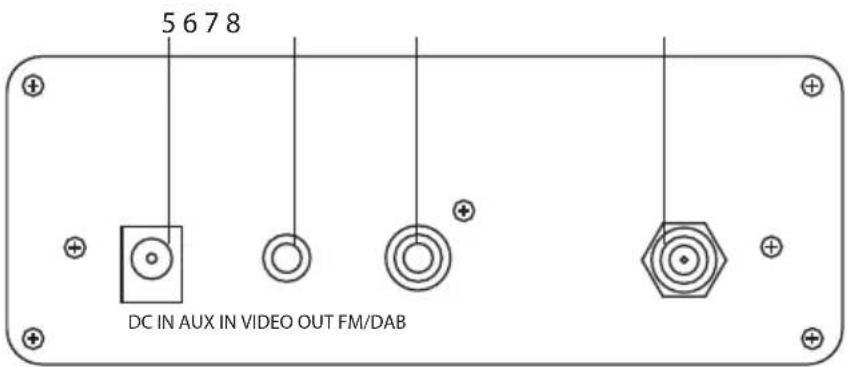
Rear View

- DC IN socket
-
AUX IN socket
-
VIDEO OUT Socket
- FM/DAB aerial socket
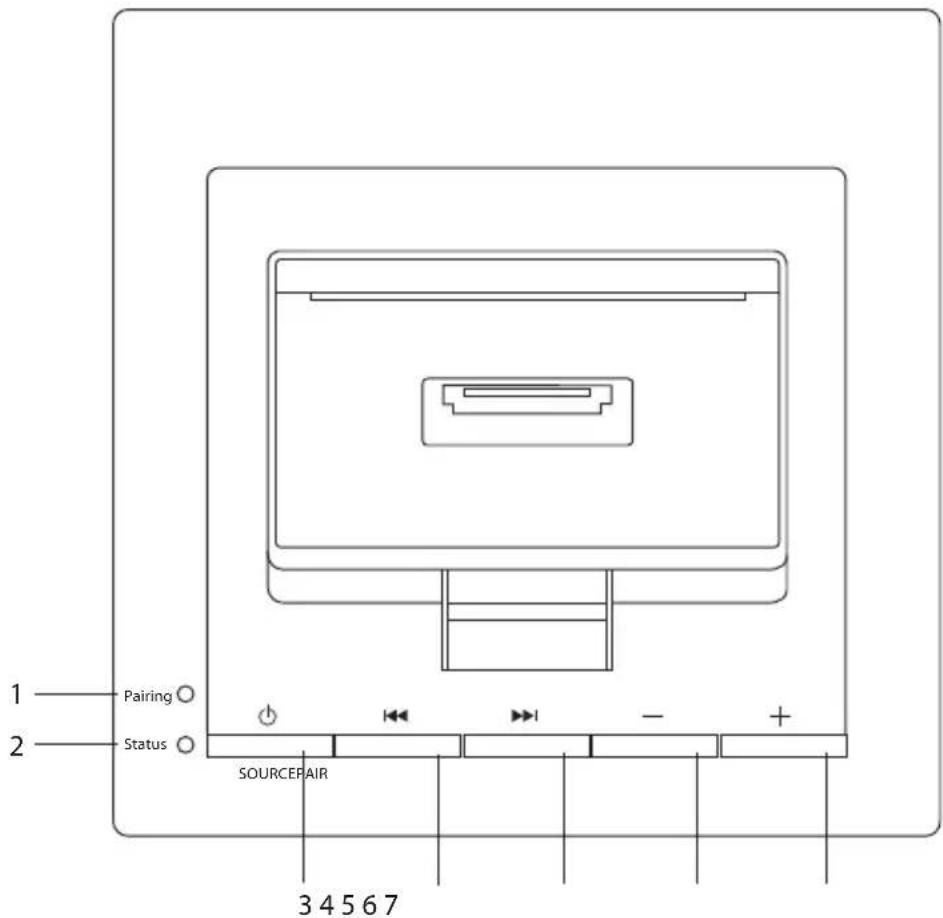
Top View
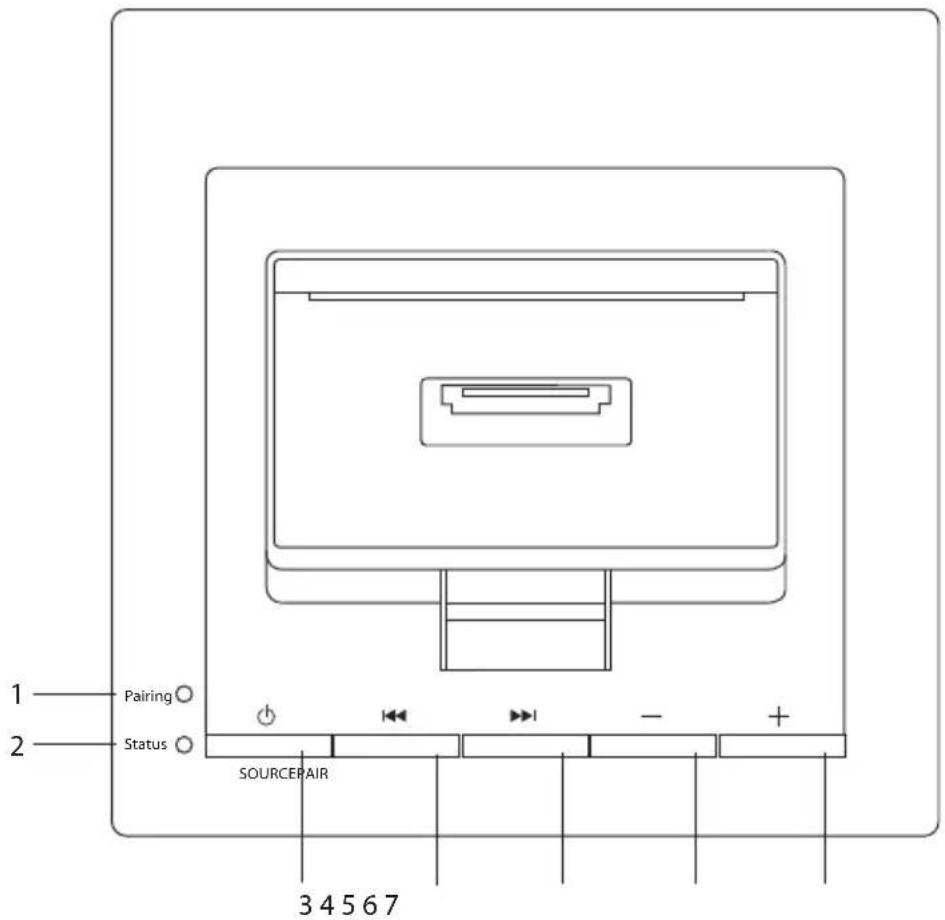
1. Pairing indicator
Flashes to indicate Bluetooth pairing status.
2. Status indicator
- Lights up GREEN when the unit is in iPOD mode.
• Lights up AMBER when the unit is in AUX mode.
• Lights up RED when the unit is in DAB mode. - Unlit when the unit is in FM or STANDBY Mode.
• Flashes to indicate the unit is in MUTE mode.
3. SOURCE Button
Switches between modes: iPod / Bluetooth - AUX - DAB - FM - STANDBY.
4. PAIR Button / BACKWARDS SKIP button
- Access Bluetooth function to pair with Bluetooth device.
- Press to skip back to the beginning of the track or to the previous track.
- Press and hold to fast reverse the current track.
- Press to search for a radio station going backward through accessible radio frequencies.
5. FORWARD SKIP Button
• Press to skip to the next track.
- Press and hold to fast forward the current track.
- Press to search for a radio station going forwards through accessible radio frequencies.
6. VOLUME - Button
Press to decrease the volume.
7. VOLUME + Button
Press to increase the volume.
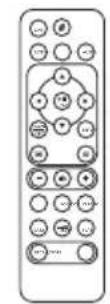
Remote Control
1. STANDBY Button
Switches the unit between ON and STANDBY modes.
2. FM Button
Switches to FM mode.
3. AUX Button
Switches to AUX mode.
4. Button
Press to scroll up menus or programmed radio stations.
5. ||► / PAIR Button
Press to play or pause a track in iPod mode. Press and hold to pair to a Bluetooth device.
6. > Button
• Press to skip to the next track.
- Press and hold to fast forward the current track.
- Press to search for a radio station going forwards through accessible radio frequencies.
7. ∨ Button
Press to scroll down menus or programmed radio stations.
8. ENTER Buttons
Confirms the selection on a menu screen.
9. REPEAT ⇌ Button
Press once to repeat the track that is playing. Press again to repeat all the tracks. Press again to switch repeat off.
10. MUTE Button
Press to mute the volume.
11. VOLUME + Button
Press to increase the volume.
12. POP Button
Press to listen to music in a preset POP sound effect.
13. CLASSIC Button
Press to listen to music in a preset CLASSIC sound effect.

14. DIM / SLEEP Button
• Press to adjust brightness level.
- Press to enable / disable sleep timer.
15. FLAT Button
Press to listen to music in a preset FLAT sound effect.
16. STORE Button
• Press to store radio stations.
• Press and hold to setup the clock.
17. DAB Button
Switches to DAB mode
18. DOCK Button
Press to select IPOD or Bluetooth mode
19. < Button
- Press to skip back to the beginning of the track or to the previous track.
- Press and hold to fast reverse the current track.
- Press to search for a radio station going backward through accessible radio frequencies.
20. MENU/INFO Button
• Press to scroll back through menus.
- Press to display information in DAB or FM mode.
21. SHUFFLE ✗ Button
Press to listen to tracks in a random order.
22. VOLUME - Button
Press to decrease the volume.
23. ROCK Button
Press to listen to music in a preset ROCK sound effect.
24. JAZZ Button
Press to listen to music in a preset JAZZ sound effect.
25. RECALL Button
Press to select preset radio stations.

Removing the Plastic Strip from the Remote Control
Remove the protective plastic strip from the battery if the battery is being used for the first time. It is located at the bottom side of the remote control.

natural_image
Line drawing of a finger pressing down on a curved object with an arrow indicating force (no text or symbols)Battery Replacement for the Remote Control
The remote control requires a CR2025, 3V Lithium battery.
-
Slide and hold the battery release tab in the direction of the arrow. (If you are having difficulty with the tab, use a paper clip to squeeze the tab.)
-
Pull out the battery holder and remove the old battery.
-
Replace with a new battery. (Ensure the + polarity faces up.)
-
Insert the battery holder back into the remote control. It will close with a click.

flowchart
graph TD
    A["Rectangular Component"] --> B["Internal Components"]
    B --> C["Battery-like Component with Internal Label"]
    C --> D["Internal Component with Internal Label and Battery"]
Handling the Battery
- Improper or incorrect use of batteries may cause corrosion or battery leakage, which could cause re, personal injury or damage property.
- Install the battery correctly in the battery compartment. Normally the battery's positive polarity (+) will face up.
- When the battery is exhausted, the remote control will not function.
• Only use the battery type indicated in this manual. - Do not dispose of the used battery as domestic waste. Dispose of it in accordance with local regulations.
- Small button cell batteries such as the one used in the remote control are easily swallowed by young children and this is dangerous. Keep loose button cells away from young children and make sure that the battery is secure in the remote control. Seek medical advice if you believe a battery cell has been swallowed.
Handling the Remote Control
- If you are having difficulty removing the battery cover, use a paper clip to squeeze the battery tab before pulling out the battery cover. Remove the battery.
• Do not drop the remote control. - Do not allow anything to impact the remote control.
- Do not spill water or liquid on the remote control.
- Do not place the remote control on a wet object.
- Do not place the remote control under direct sunlight or near sources of excessive heat.
- Remove the battery from the remote control when not in use for a long period of time, as corrosion or battery leakage may occur and result in physical injury, and/or property damage, and/or fire.
Remote Control Operation Range
- The remote control sensor on the front unit is sensitive to the remote control's commands up to a maximum of 5 metres away and within a maximum of a 60^ arc.
- Please note that the operating distance may vary depending on the brightness of the room.

Connecting the Aerial
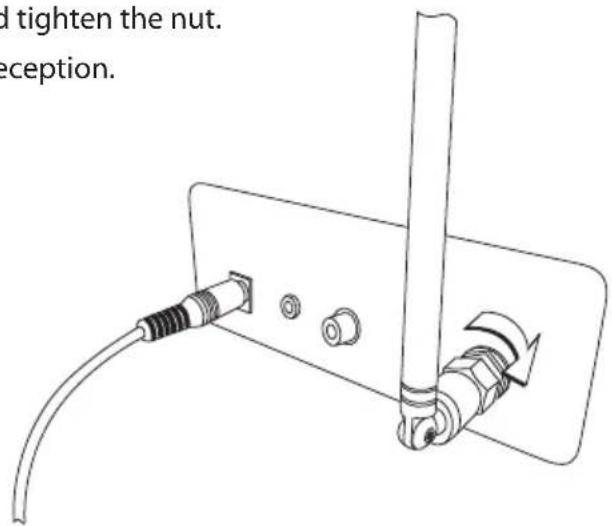
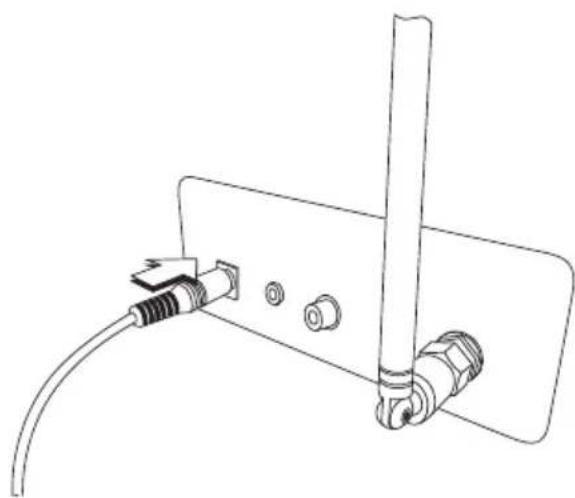
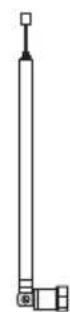
Insert the aerial into the FM/DAB socket and tighten the nut.
Extent and angle the aerial to get the best reception.
GB

Please use only the FM/DAB aerial supplied with this unit.
Power Source
Mains Power
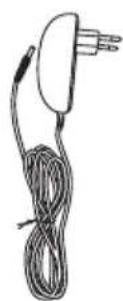
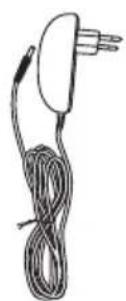
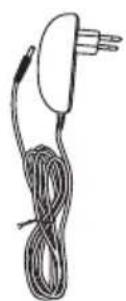
• This unit operates with a DC 18V/1.5A mains adapter (included).
- Connecting the unit to any other power source may damage the unit. Unwind the mains adapter to its full length. Connect the mains adapter to the DC socket on the rear of the unit and a mains socket. Make sure the mains adapter is fully inserted into the mains socket. The unit is now connected and ready to use.
• To switch the unit off completely, unplug the mains adapter from the mains socket.
natural_image
Line drawing of a mounted electronic device with connectors and a vertical rod (no text or symbols)General Operation
Switching ON / OFF
- When you first connect the unit to the mains socket, the unit will be in STANDBY mode. '00:00' will flash on the display.
- Press the SOURCE button on the unit or press the STANDBY button on the remote control to turn the unit on.
- To switch the unit back into standby, press the SOURCE button on the remote control or press and hold the STANDBY button on the unit.
- Disconnect the mains adapter from the mains socket if you want to switch the unit off completely.

If the unit volume is close to mute or idle for 20 minutes, it will automatically switch to standby mode, the LED indicators will flash for 5 minute before it switches to standby. Press any buttons to extend the time.
Selecting Modes
- Press the SOURCE button repeatedly on the unit to switch to iPod/Bluetooth, AUX, DAB, or FM mode. The status indicator will light up green, orange, red or remain unlit depending on mode selected.
- Press the DOCK button on the remote control to select iPod/Bluetooth mode. (Status indicator will light up green (iPod mode) or flash blue (Bluetooth mode).)
- Press the DAB button on the remote control to select DAB mode. (Status indicator will light up orange.)
- Press the FM button on the remote control to select FM mode. (No status indicator.)
- Press the AUX button on the remote control to select AUX mode. (Status indicator will light up red.)
Auto Setting the Clock
The clock can be update automatically if you can receive DAB signal in your location. In order to synchronise to the current local time you must leave it on the DAB station for a short period of time.
Manually Setting the Clock
In STANDBY mode:
- Press and hold STORE.
-
Press <> to adjust the time.
-
Press ENTER to confirm.
-
Repeat steps (2) and (3) until you have finished setting the clock.

• In STANDBY mode, press STORE to switch between 12-hour and 24-hour format.
- If you have selected 12-hour time mode, the unit will display "AM/PM" at the appropriate hour.
Sleep Function
You can switch the unit to standby after a set time.
- Press the DIM/SLEEP button to scroll through the sleep times when the unit is switched on.
The times are as follows:

- When the sleep timer is set if you press DIM/SLEEP the remaining time will be displayed.
- To cancel the SLEEP function, press and hold DIM/SLEEP until the display shows "SLEEP OFF".
Adjusting the volume
- Press the VOLUME + or - buttons to increase or decrease the volume level.
- Press the MUTE button to turn the sound off. The status indicator and display will flash. Press the MUTE button again to resume audio listening.
Adjusting the Sound Effect
Press the POP, JAZZ, ROCK, CLASSIC or FLAT buttons on the remote control to select a desired music mode.
Dimming the display
When the unit is in standby press the DIM/SLEEP button. The unit has 3 display light setting, repeatedly press the DIM/SLEEP button to scroll through the settings.
DAB Auto Scan
The auto scan will search for all DAB Band III channels. After the scan has finished, the first alphanumerically found station will be automatically selected.

Full auto scan will not replace the DAB stations in the memory. If you want to remove all the previously scanned stations, a system reset is required.
- To activate auto scan, first press and hold the MENU/INFO button to enter the DAB Menu. Then press the <buttons to select the "FULL SCAN", and then press the ENTER button to confirm. This may take a few minutes, depending on the number of stations found.
- All the stations that have been found will be stored automatically. To explore the found stations, press the <>buttons to select.
Secondary Services
- Press the button to access the station's secondary services if available.
- Press the button again to skip to the next the station's secondary services if available.
Manual Tuning
As well as the auto tune function, you can manually tune the receiver. This can help you when aligning your aerial or when adding stations that were missed while auto tuning.
- Press and hold the MENU/INFO button and then press the <>buttons to select Manual tune, the display will now show Manual. Press the ENTER button to confirm the selection.
- Press the <>buttons to cycle through the DAB channels, which are numbered from 5A to 13B.
- After your desired channel number is selected, press the ENTER button to confirm.
- Press and hold the MENU/INFO button to exit.
Programming radio stations
You can store up to 10 DAB radio stations in your units memory.
- When you have found a radio station that you would like to store press the STORE button.
- Press the ∧ or ∨ buttons to select a programme position number 1-10.
- Press the ENTER button to store the radio station.
Selecting a stored radio station
Press the RECALL button or the A buttons to scroll through the stored stations.

The stored stations will be saved into the memory and power off will not erase it. Storing a new station in a preset location will erase the previously stored station in that location.
DAB Display Modes
Every time you press the MENU/INFO button, the display will cycle through the following display modes: Service Name, DLS, Signal Strength, Programme Type, Ensemble Name, Frequency, Signal Error, Birate, Mode, Time, Date.

flowchart
graph TD
    A["Service Name"] --> B["DLS"]
    B --> C["Signal Strength"]
    C --> D["Programme Type"]
    D --> E["Ensemble Name"]
    E --> F["Frequency"]
    F --> G["Signal Error"]
    H["Date"] --> I["Time"]
    I --> J["Mode"]
    J --> K["Birate"]
Service Name
Describes the type of service the station provides, e.g. news.
DLS (Dynamic Label Segment)
Dynamic label segment is a scrolling message that the broadcaster may include with their transmissions. The message usually includes information, such as programme details etc.

DAB – unlike normal radio, groups together several radio stations and transmits them on one frequency.
Signal Strength
The display will show a slide bar to indicate the signal strength, the stronger the signal, the longer the bar will be from left to right.
Programme Type
This describes the "Style" or "genre" of music that is being broadcast e.g. "Rock" or "Classical".
Ensemble Name
A Ensemble/multiplex is a collection of radio stations that are bundled and transmitted on one frequency. There are national and local multiplexes. Local ones contain stations that are specific to that area.
Frequency
The frequency of the present station will be displayed.
Signal Error
A number showing the error rate. If the number is 0, it means the signal received is error free and the signal strength is strong. If the error rate is high, it is recommended to reorient the radio aerial or reposition the unit.
Birate
The display will show the digital audio bit rate being received.
Mode
The display will show the radio mode.
Time and Date
The broadcaster (Radio station) provides clock and date information automatically so there's no need to manually set this information. If the information is not available, the display will show the incorrect time or date.
Listening to the Radio
Extend the FM aerial to receive the best FM reception.
- Press the FM button on the remote control to select FM mode.
- Press and hold the < or > button to automatically search for the next available radio station.
- To fine tune a station press the
button. Each press will adjust the frequency by 0.05MHz.
FM Station Scanning Setup
- Press and hold MENU/INFO on the remote control, then to select "SCAN". Press ENTER to confirm.
- Press <> to select "STRONG" and "WEAK", then press ENTER to confirm.
- Press and hold the MENU/INFO to exit.
Audio Mode
- Press and hold MENU/INFO on the remote control, then to select "AUDIO". Press ENTER to confirm.
- Press <> to select "STEREO" and "MONO", then press ENTER to confirm.
- Press and hold the MENU/INFO to exit.

Alternatively, press the MO./ST. button to toggle between the Auto or Mono selection.
- The unit will automatically switch between stereo and mono in auto mode, but you can override this and switch this function manually. This is helpful when receiving poor signal reception.
Programming radio stations
You can store up to 10 FM radio stations in your units memory.
- When you have found a radio station that you would like to store press the STORE button.
- Press the ∧ or ∨ buttons to select a programme position number 1-10.
- Press the ENTER button to store the radio station.
Selecting a stored radio station
Press the RECALL button or the AV buttons to scroll through the stored stations.

The stored stations will be saved into the memory and power off will not erase it. Storing a new station in a preset location will erase the previously stored station in that location.
FM Display Modes
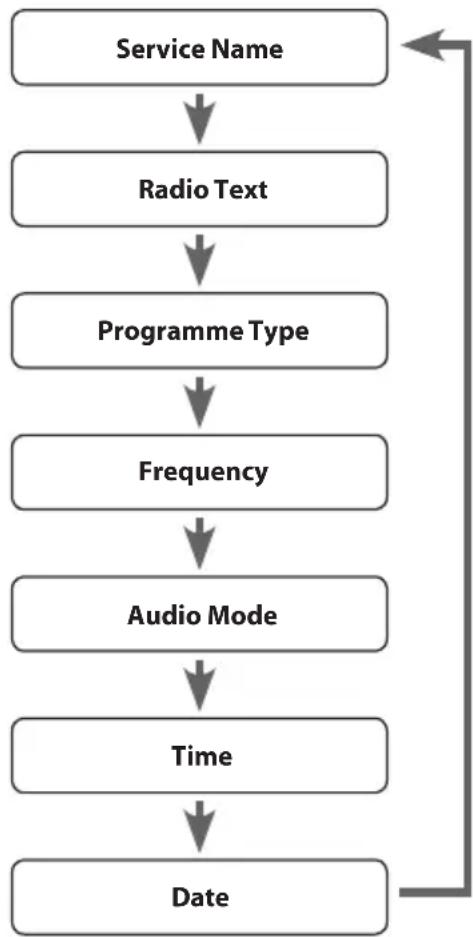
Every time you press the MENU/INFO button, the display will cycle through the following display modes: Service Name, Radio Text, Programme Type, Frequency, Audio Mode, Time/Date.
Service Name
Describes the type of service the station provides, e.g. news.
Radio Text
As with DAB, the broadcaster can include a scrolling text that displays information about the current program.
Programme Type
This describes the "Style" or "Genre" of music that is being broadcast e.g. "Rock" or "Classical".
Frequency
This shows the frequency of the current station. e.g. 89.80 MHz.
Audio Mode
The display will show if the station being received is in mono or stereo.
Time/Date
Date and Time will show on the display.
flowchart
graph TD
    A["Service Name"] --> B["Radio Text"]
    B --> C["Programme Type"]
    C --> D["Frequency"]
    D --> E["Audio Mode"]
    E --> F["Time"]
    F --> G["Date"]
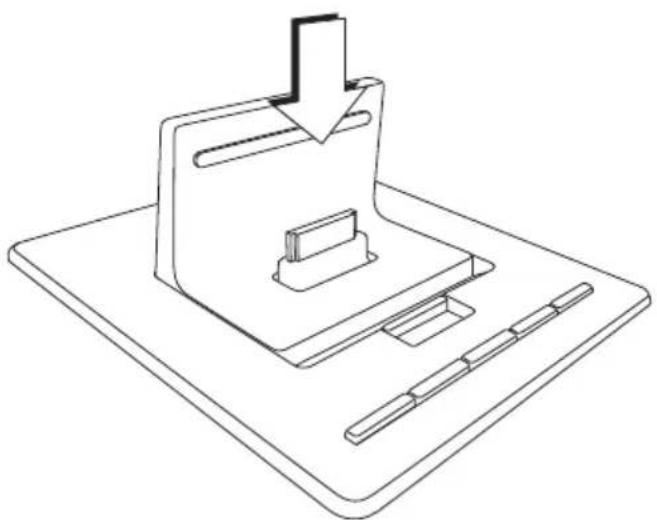
Docking an iPod / iPhone/ iPad
GB
1

natural_image
Line drawing of a flatboard with a laptop and pen, no text or symbols present2

natural_image
Line drawing of a mechanical device with a slide, tray, and handle (no text or symbols)
natural_image
Line drawing of a smartphone with blank screen and buttons (no text or symbols)3

natural_image
Line drawing of a mechanical device with a downward arrow and base plate (no text or symbols)iPod / iPhone / iPad Operation
Using the iPod/iPhone/iPad dock you can use the unit to play music files stored on your iPod/iPhone/iPad.
This unit can support the following iPod/iPhone/iPad models.
| Type Support Model | |
| iPhone • iPhone | • iPhone 3G/3GS• iPhone 4/4S |
| iPod(with 30-pin dock connectors) | • iPod touch 1^t/2^nd/3^rd/4^th Generation• iPod nano 1^t/2^nd/3^rd/4^th/5^th/6^th Generation |
| iPad* • iPad | • iPad 2• iPad 3 |
Inserting the iPod / iPhone / iPad
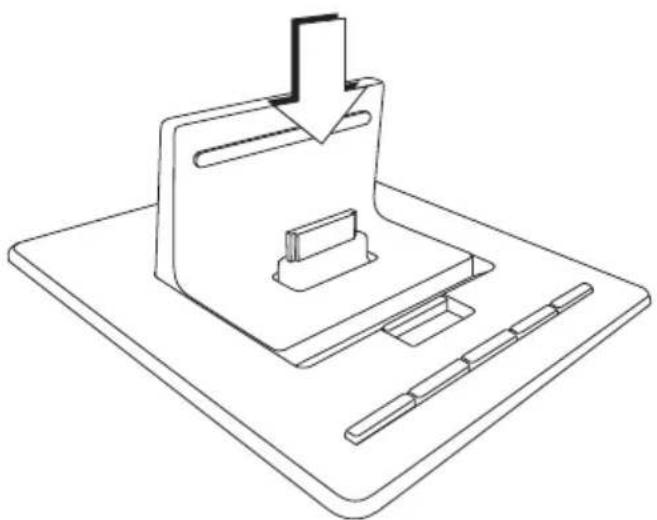
- The iPod / iPhone / iPad battery will automatically charge when docked with the unit until the battery is fully charged.
- Press the DOCK button your iPod/iPhone/iPad with start to play automatically.
- Press the MENU button to go back through the menus.
- Press the ∧ or √ buttons to move up and down the menus.
- Press the ENTER button to select a menu option.

- The unit does not show any music information from your iPod / iPhone / iPad. Please view the music information on your iPod / iPhone / iPad display.
- To avoid damaging your iPod / iPhone / iPad or the unit, please take care when inserting and removing your iPod / iPhone / iPad from the dock.

- To use the remote control to operate the menus of the iPod touch series, iPhone series and iPod nano 6^th generation, you need to enter the music menus on your iPod / iPhone / iPad first.
- This manual provides the basic instructions of menu navigation on iPod / iPhone / iPad. For advance operations, please refer to the instructions that accompanied your iPod / iPhone / iPad.
To Play / Pause music
- Press the ▶ / PAIR button on the remote control pause playback.
• To resume playback, press the ▶ / PAIR button on the remote control again. - Press and hold the ▶ / PAIR button to send the iPod /iPhone / iPad into sleep mode.
Skipping and searching tracks
- Press the > buttons on the remote control to skip forwards to the next track.
- Press the < buttons on the remote control to skip back to the beginning of the track or to the previous track.
- Press and hold the < or > during playback to search forwards and backwards.
Random Playback
All the tracks on the disc can be played in a random order.
- During playback, press the ✗ button on the remote control.
• After all the tracks have been played once, the playback will stop automatically. - To cancel the random playback, press the ✗ button on the remote control during RANDOM playback. Normal playback will resume.
Repeat Playback
- Press the ≡ button once on the remote control. The unit will play the current track repeatedly.
- Press the button twice. The unit will play all tracks repeatedly.
- Press the button once more to cancel the repeat function.
Charging your iPod / iPhone / iPad
- Your iPod / iPhone / iPad has an internal non-removable battery, the battery may need to be charged if it has not been used for a while.
- You can automatically charge the iPod / iPhone / iPad through the unit when it is docked.

- If you charge the iPod / iPhone / iPad while playing music, it may take longer than normal to fully charge the battery.
- At any time, you can control the iPod / iPhone / iPad player itself directly.
• 1 ^st , 2 ^nd & 3 ^rd generation iPods cannot be charged.
• The charging function will only work with the mains adapter connected.
• The iPod / iPhone / iPad can be charged with this unit in either ON or Standby mode.
Video Out Function
When any iPod / iPhone / iPad model with video playback function is plugged into the unit, videos / photos can be viewed on another display screen.
- Connect a TV or display screen using the Video Out socket via the video connection cable (not included).
- Set your TV to the correct input.
- Choose the video / photo file you would like to play / display and the iPod / iPhone / iPad will automatically play / display the file on the desired video display.
Bluetooth® Audio
The unit has a Bluetooth function that can receive a signal within 10 metres.
To pair the unit with a Bluetooth device to listen to music:
- Press the SOURCE ⏻ button repeatedly on the unit or press the DOCK button on the remote control to select iPOD/Bluetooth mode.

Make sure the dock is empty.
-
Press and hold the ||► / PAIR button until you hear 2 "beeps". The pairing indicator will flash blue. The system has entered pairing mode and can be found.
-
Activate your Bluetooth device and select the search mode.
-
"S1IPBTDX12E" will appear on your Bluetooth device list.
-
Select "S1IPBTDX12E" and enter "0000" for the password if necessary.
-
When pairing is successful, the Bluetooth indicator will light up blue and stop flashing.
-
When switched on, the unit will automatically reconnect with the latest connected Bluetooth device.
-
If the unit's Bluetooth connection is lost, press II▶ / PAIR to reconnect with the latest connected Bluetooth device.
-
If the power is cut off from a device that your speaker is connected to, it may not automatically reconnect when the power resumes. You may have to pair the speaker again.

- If the signal strength is weak, your Bluetooth receiver may disconnect, but it will re-enter pairing mode automatically.
• The unit supports pairing for up to 8 Bluetooth devices. - While in Pairing Mode (the LED will flash blue) press the ▶ / PAIR button 2 times (1 second apart each time) to clear all pairing settings. If successful, you will hear 2 beeps.
AUX IN Operation
- Before connecting to the mains socket, use a 3.5mm AUX IN cable (not included) to connect your audio device through the AUX IN socket at the rear of the unit.
- Connect the mains adapter to the unit and then the mains socket.
- Press the AUX button on the remote control to switch to AUX mode. The status indicator will light up orange.
- Press the VOL +/- buttons to adjust the volume to your desired level.
- In AUX mode, operate your audio device directly for playback features.
Maintenance
Cleaning the Unit

Ensure the unit is fully unplugged from the mains socket before cleaning.
• To clean the unit, wipe the case with a slightly moist, lint-free cloth.
- Do not use any cleaning fluids containing alcohol, ammonia or abrasives.
- Do not spray an aerosol at or near the unit.
Hints and Tips
If a problem does occur, it may often be due to something very minor. The following table contains various tips.
| Problem Cause / Solution | |
| PowerSystem does not turn on or does not respond to the remote control. | Make sure mains adapter is connected to the mains socket and the unit properly and that the mains socket is turned on.Check that the remote control has a battery. The battery may need to be replaced. |
| Radio | |
| Desired station not found | Weak signal. Use the Manual Tune function. |
| iPod/iPhone/iPadThe unit doesn’t play iPod / iPhone / iPad files or doesn’t function as expected. | Make sure the iPod / iPhone / iPad is connected properly.Check if the unit is off or in AUX or FM mode. Press the SOURCE button repeatedly on the unit or press the DOCK button on the remote control switch to iPod mode.Make sure the iPod / iPhone / iPad is switched on.Vibrations may have caused the iPod / iPhone / iPad to come loose from the docking station. |
| BluetoothI cannot find “S1IPBTDX12E” on my Bluetooth device. | Ensure the Bluetooth function is activated on your Bluetooth device. |
| Remote ControlNo functions or short range. | Insert a new battery.Aim remote control directly at the unit’s remote sensor. |
Specifications
| Model S1IPBTDB12E / S1IPBTDW12E |
| AC Power AC 100 -240V ~50/60Hz |
| Unit Output Power 2 x 15 Watts |
| Power Consumption 27W (Standby < 1.0W) |
| DC Output Voltage 18V 1.5A |
Features and specifications are subject to change without prior notice.
natural_image
Simple illustration of a gray rectangular device with a small screen and top handle (no text or symbols)Hovedenhet
Fjernkontroll


NO
Sett bakfra

- DC-IN-kontakt
-
AUX IN-kontakt
-
VIDEO UT-kontakt
- FM/DAB-antennekontakt
Sett ovenfra
NO

1. Indikator for paring
Blinker for å indikere status for Bluetooth-paring.
2. Statusindikator
- Lyser GRøNT når enheten er i iPODmodus.
- Lyser GULT när enheten er i AUX-modus.
- Lyser RøDT når enheten er i DABmodus.
• Lyser ikke när enheten er FM-modus. - Blinker for å indikere at enheten er i DEMP-modus.
3. KILDE-knapp
Bytter mellom moduser: iPod / Bluetooth - AUX - DAB - FM - STANDBY.
4. PAR-knapp / HOPPER BAKOVER-knapp
5. HOPP FREMOVER-knapp
natural_image
Diagram of a finger pressing down on a curved object with an arrow indicating force (no text or symbols)NO
Skifte batteriet i fjernkontrollen
Fjernkontrollen krever et 3 V litiumbatteri av typen CR2025.
flowchart
graph TD
    A["Rectangular Case"] --> B["Internal Component"]
    B --> C["Mechanical Component with Ring and nut"]
    C --> D["Final Assembly"]
Behandle batteriet
natural_image
Technical line drawing of a mounted electronic device with connectors and a vertical rod (no text or symbols)Generell bruk
Slå PÅ/AV
DLS-tekst (DLS = Dynamic Label Segment)
natural_image
Line drawing of a flatboard with a tray, drawer, and handle (no text or symbols)NO

natural_image
Line drawing of a mechanical device with a base plate, drawer, and handle (no text or symbols)
natural_image
Line drawing of a smartphone with blank screen and buttons (no text or symbols)3

natural_image
Line drawing of a mechanical device with a downward arrow and base plate (no text or symbols)iPod/iPhone/iPad-betjening
Sette inn iPod/iPhone/iPad
Lade iPod/iPhone/iPad
natural_image
Simple illustration of a gray rectangular device with a lid and a small screen (no text or symbols)Huvudenhet

Fjärrkontroll

InstruktionsbokNätadapter FM/DAB-antenn
Produktöversikt
Huvudenhet
Vy framifrån
SE
- iPod/iPhone/iPad dockning
- Fjärrkontrollsensor
- Display
- Högtalare

Baksida
- DC IN-uttag
-
AUX IN-uttag
-
VIDEO UT uttag
- FM/DAB-antennuttag
Vy ovanifrån
1. Kopplingsindikator
3. SOURCE (KÄLL)-knapp
4. PAIR (Parnings) knapp/
BACKWARDS SKIP (hoppa bakåt) knapp
natural_image
Line drawing of a finger pressing down on a curved object with an arrow indicating force (no text or symbols)SE
Batteribyte i fjärrkontrollen
flowchart
graph TD
    A["Rectangular case with battery icon"] --> B["Internal component with battery symbol"]
    B --> C["Device with battery symbol and arrow indicating assembly"]
    C --> D["Internal component with battery symbol and arrow indicating assembly"]
    D --> E["Device with battery symbol and arrow indicating assembly"]
Hantera batteriet
Ansluta antennen
natural_image
Technical line drawing of a mechanical or electrical component with a vertical rod and threaded connectors (no text or symbols)Allmän hantering
Slå PÅ/ stänga AV
DLS (Dynamic Lable Segment)
natural_image
Line drawing of a mechanical device with a tray, handle, and bracket (no text or symbols)2

natural_image
Line drawing of a mechanical device with a slide, tray, and handle (no text or symbols)
natural_image
Line drawing of a smartphone with blank screen and buttons (no text or symbols)3

natural_image
Line drawing of a mechanical device with a bracket and base plate (no text or symbols)iPod/iPhone/iPad hantering
Ladda iPod/iPhone/iPad
natural_image
Simple illustration of a gray rectangular device with a small screen and top handle (no text or symbols)Päälaite

Kaukosäädin

FI
Näkymä takaa
5. ▶ / PARIUTA-painike
13. KLASSINEN-painike
natural_image
Diagram showing a hand pressing down on a curved object with an arrow indicating force or movement (no text or symbols present)natural_image
Technical line drawing of a mounted electronic device with connectors and a vertical rod (no text or symbols)Yleinen käyttö
Kytkeminen PÄÄLLE/POIS
DLS (Dynamic Label Segment)
natural_image
Line drawing of a flatboard with a tray, drawer, and handle (no text or symbols)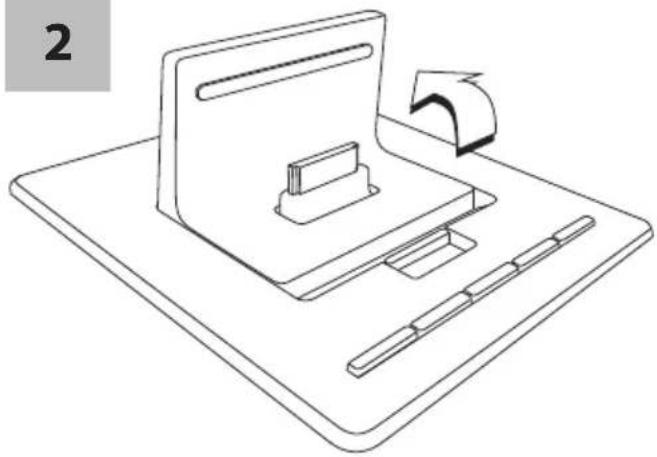
natural_image
Line drawing of a mechanical device with a base plate, drawer, and handle (no text or symbols)FI

natural_image
Line drawing of a smartphone with blank screen and buttons (no text or symbols)3

natural_image
Line drawing of a mechanical device with a downward arrow and base plate (no text or symbols)- The unit does not show any music information from your iPod / iPhone / iPad. Please view the music information on your iPod / iPhone / iPad display.
- To avoid damaging your iPod / iPhone / iPad or the unit, please take care when inserting and removing your iPod / iPhone / iPad from the dock.

- To use the remote control to operate the menus of the iPod touch series, iPhone series and iPod nano 6^th generation, you need to enter the music menus on your iPod / iPhone / iPad first.
- This manual provides the basic instructions of menu navigation on iPod / iPhone / iPad. For advance operations, please refer to the instructions that accompanied your iPod / iPhone / iPad.
natural_image
Simple illustration of a gray rectangular device with a small screen and top handle (no text or symbols)Hovedenhed

Fjernbetjening
DK


DK
Set bagfra
- DC IN stik
-
AUX IN-stik
-
VIDEO UDGANGSSTIK
- FM/DAB antennestik
Set oppefra

1. Lys for parring
Blinker for at angive status for Bluetooth-parring.
2. Statuslys
natural_image
Line drawing of a finger pressing a button with an arrow indicating force (no text or symbols)flowchart
graph TD
    A["Rectangular case with battery icon"] --> B["Internal component with battery symbol"]
    B --> C["Device with battery symbol"]
    C --> D["Internal component with battery symbol"]
    D --> E["Device with battery symbol"]
natural_image
Technical line drawing of a mechanical assembly with a vertical rod, threaded connectors, and a cable (no text or symbols)Generel betjening
Tænd og sluk
DLS (Dynamic Label Segment)
natural_image
Line drawing of a flatboard with a laptop and pen, no text or symbols present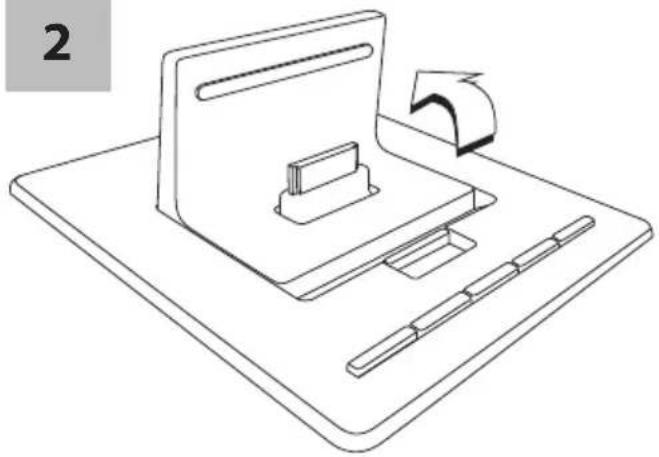
natural_image
Line drawing of a mechanical device with a clip and base plate (no text or symbols)DK

natural_image
Line drawing of a smartphone with blank screen and buttons (no text or symbols)3
natural_image
Line drawing of a mechanical device with a downward arrow and base plate (no text or symbols)Betjening af iPod/iPhone/iPad
natural_image
Simple illustration of a gray rectangular device with a small rectangular slot on top (no text or symbols)Hlavní jednotka

Dálkový ovladač


natural_image
Diagram of a hand holding a small object with an arrow indicating direction (no text or symbols)natural_image
Technical line drawing of a mechanical or electrical component with connectors and a vertical rod (no text or symbols)Obecné používání
Zapnutí a vypnutí
DLS (Dynamic Label Segment)
Frequency (Frekvence)
Frequency (Frekvence)
natural_image
Line drawing of a mechanical device with a tray, handle, and bracket (no text or symbols)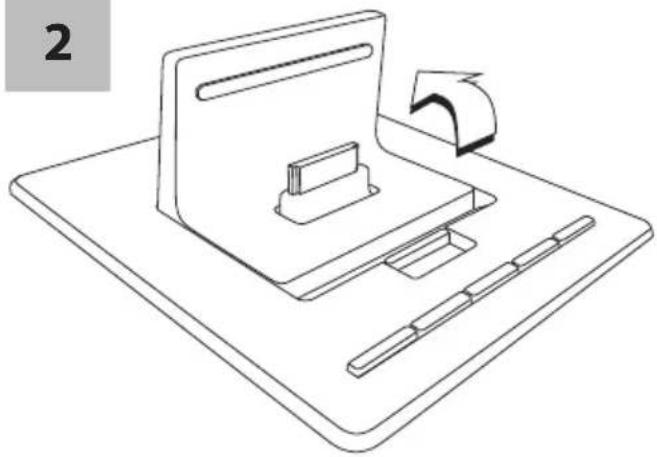
natural_image
Line drawing of a mechanical device with a base plate, drawer, and handle (no text or symbols)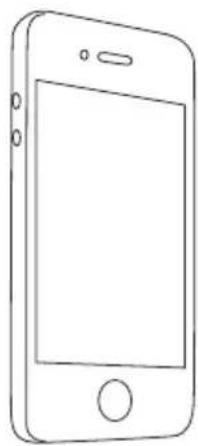
natural_image
Line drawing of a smartphone with blank screen and buttons (no text or symbols)3

natural_image
Line drawing of a mechanical device with a downward arrow and base plate (no text or symbols)CZ
natural_image
Simple illustration of a gray rectangular device with a lid and a small screen (no text or symbols)Hlavná jednotka

Dialkový ovládač
SK

![Sandetrem SANDETREM [美] 布里克·B·德雷尔 著 王伟 译 2008 100 1999 1998 1997 1996 1995 1994 1993 1992 1991 1990 1989 1988 1987 1986 1985 1984 1983 1982 1981 1980 1979 1978 1977 1976 1975 1974 1973 1972 1971 1970 1969 1968 1967 1966 1965 1964 1963 1962 1961 1960 1959 1958 1957 1956 1955 1954 1953 1952 1951 1950 1949 1948 1947 1946 1945 1944 1943 1942 1941 1940 1939 1938 1937 1936 1935 1934 1933 1932 1931 1930 1929 1928 1927 1926 1925 1924 1923 1922 1921 1920 1919 1918 1917 1916 1915 1914 1913 1912 1911 1910 1909 1908 1907 1906 1905 1904 1903 1902 1901 1900](/content/2026/05/870552/images/30eafda8200680531008d1f243240cc019f37e009e62b39bc046d0818fa52003.jpg)
1. Indikátor párovania
Ked'bliká, ukazuje stav párovania Bluetooth.
2. Indikátor stavu
- Ked'je zariadenie v režime iPOD, svieti ZELENÝ indikátor.
- Ked'je zariadenie v režime AUX, svieti ŽLTÝ indikátor.
- Ked'je zariadenie v režime DAB, svieti ČERVENÝ indikátor.
- Až, kým zariadenie nebude v režime FM.
- Ked' bliká, ukazuje, že zariadenie je v režime STLMIČ ZVUK.
3. Tlačidlo SOURCE (Zdroj)
Slúži na prepínanie režimov: iPod / Bluetooth – AUX - DAB - FM - STANDBY.
4. Tlačidlo PAIR (Párovanie) / Tlačidlo na PRESKOČENIE NASPÄT
natural_image
Line drawing of a finger pressing down on a curved object with an arrow indicating force (no text or symbols)flowchart
graph TD
    A["Rectangular case with battery icon"] --> B["Internal component with battery symbol"]
    B --> C["Device with battery symbol"]
    C --> D["Internal component with battery symbol"]
    D --> E["Device with battery symbol"]
SK
natural_image
Line drawing of a mechanical or electrical component with a vertical rod, connectors, and a cable (no text or symbols)Zapnutie/vypnutie
- Jednotka sa pri prvom zapojení do sietovej zásuvky uvedie do POHOTOVOSTNÉHO režimu. Na displeji bude blikat „00:00“.
- Na jednotke stlačte tlačidlo POHOTOVOSTNÉHO REŽIMU alebo stlačte tlačidlo POHOTOVOSTNÉHO REŽIMU na dialkovom ovládači, čím jednotku zapnete.
- Na prepnutie jednotky do pohotovostného režimu stlačte tlačidlo POHOTOVOSTNÉHO REŽIMU ☐ na dialkovom ovládači alebo stlačte a podržte tlačidlo POHOTOVOSTNÉHO REŽIMU ☐ na jednotke.
- Na úplné vypnutie zariadenia vytiahnite zástrčku napájacieho kábla z elektrickej zásuvky.

Describes the type of service the station provides, e.g. news.
Funkcia Rádiotext
natural_image
Line drawing of a flatboard with a laptop, tablet, and pen (no text or symbols)
natural_image
Line drawing of a mechanical device with a base plate and handle, no text or symbols presentSK

natural_image
Line drawing of a smartphone with blank screen and buttons (no text or symbols)3
natural_image
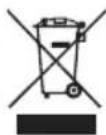
Line drawing of a mechanical device with a downward arrow and base plate (no text or symbols)This symbol on the product or in the instructions means that your electrical and electronic equipment should be disposed at the end of its life separately from your household waste. There are separate collection systems for recycling in the EU.
For more information, please contact the local authority or your retailer where you purchased the product.
Notes for battery disposal
The batteries used with this product contain chemicals that are harmful to the environment.
To preserve our environment, dispose of used batteries according to your local laws or regulations. Do not dispose of batteries with normal household waste.
For more information, please contact the local authority or your retailer where you purchased the product.
The Bluetooth ^® word mark and logos are registered trademarks owned by Bluetooth ^® SIG, Inc. and any use of such marks by DSG Retail Limited is as an Affiliate under the License held by DSG International Sourcing Ltd. Other trademarks and trade names are those of their respective owners and all rights are acknowledged.
All trademarks are the property of their respective owners and all rights are acknowledged.
SE
"Made for iPod", "Made for iPhone" and "Made for iPad" mean that an electronic accessory has been designed to connect specifically to iPod, iPhone and iPod, respectively, and has been certified by the developer to meet Apple performance standards.
Apple is not responsible for the operation of this device or its compliance with safety and regulatory standards.
Please note that the use of this accessory with iPod, iPhone or iPad may affect wireless performance.
iPhone, iPad, iPod, iPod classic, iPod nano, and iPod touch are trademarks of Apple Inc., registered in the U.S. and other countries.
All other trademarks appearing herein are the property of their respective owners.
- Damage
- Location of Unit
- Temperature
- Naked Flames
- Moisture
- Ventilation
- Safety
- Mains Adapter Cable
- Mains Adapter
- Interference
- Batteries
- Supervision
- Service
- Maintenance
- Rušenie
- Unpacking
- Product Overview
- Main Unit
- Front View
- Rear View
- Top View
- Pairing indicator
- Status indicator
- SOURCE Button
- PAIR Button / BACKWARDS SKIP button
- FORWARD SKIP Button
- VOLUME - Button
- VOLUME + Button
- Remote Control
- STANDBY Button
- FM Button
- AUX Button
- Button
- ||► / PAIR Button
- > Button
- ∨ Button
- ENTER Buttons
- REPEAT ⇌ Button
- MUTE Button
- VOLUME + Button
- POP Button
- CLASSIC Button
- DIM / SLEEP Button
- FLAT Button
- STORE Button
- DAB Button
- DOCK Button
- < Button
- MENU/INFO Button
- SHUFFLE ✗ Button
- VOLUME - Button
- ROCK Button
- JAZZ Button
- RECALL Button
- Removing the Plastic Strip from the Remote Control
- Battery Replacement for the Remote Control
- Handling the Battery
- Handling the Remote Control
- Remote Control Operation Range
- Connecting the Aerial
- Power Source
- Mains Power
- General Operation
- Switching ON / OFF
- Selecting Modes
- Auto Setting the Clock
- Manually Setting the Clock
- Sleep Function
- Adjusting the volume
- Adjusting the Sound Effect
- Dimming the display
- DAB Auto Scan
- Secondary Services
- Manual Tuning
- Programming radio stations
- Selecting a stored radio station
- DAB Display Modes
- Service Name
- DLS (Dynamic Label Segment)
- Signal Strength
- Programme Type
- Ensemble Name
- Frequency
- Signal Error
- Birate
- Mode
- Time and Date
- Listening to the Radio
- FM Station Scanning Setup
- Audio Mode
- FM Display Modes
- Radio Text
- Time/Date
- Docking an iPod / iPhone/ iPad
- iPod / iPhone / iPad Operation
- Inserting the iPod / iPhone / iPad
- To Play / Pause music
- Skipping and searching tracks
- Random Playback
- Repeat Playback
- Charging your iPod / iPhone / iPad
- Video Out Function
- Bluetooth® Audio
- AUX IN Operation
- Cleaning the Unit
- Hints and Tips
- Specifications
- Sett bakfra
- Sett ovenfra
- Indikator for paring
- Statusindikator
- KILDE-knapp
- PAR-knapp / HOPPER BAKOVER-knapp
- HOPP FREMOVER-knapp
- Skifte batteriet i fjernkontrollen
- Behandle batteriet
- Generell bruk
- Slå PÅ/AV
- DLS-tekst (DLS = Dynamic Label Segment)
- iPod/iPhone/iPad-betjening
- Sette inn iPod/iPhone/iPad
- Lade iPod/iPhone/iPad
- Produktöversikt
- Huvudenhet
- SE
- Vy ovanifrån
- Kopplingsindikator
- SOURCE (KÄLL)-knapp
- PAIR (Parnings) knapp/
- BACKWARDS SKIP (hoppa bakåt) knapp
- Batteribyte i fjärrkontrollen
- Hantera batteriet
- Ansluta antennen
- Allmän hantering
- Slå PÅ/ stänga AV
- DLS (Dynamic Lable Segment)
- iPod/iPhone/iPad hantering
- Ladda iPod/iPhone/iPad
- ▶ / PARIUTA-painike
- KLASSINEN-painike
- Yleinen käyttö
- Kytkeminen PÄÄLLE/POIS
- Set bagfra
- Set oppefra
- Lys for parring
- Statuslys
- Generel betjening
- Tænd og sluk
- Betjening af iPod/iPhone/iPad
- Obecné používání
- Zapnutí a vypnutí
- Frequency (Frekvence)
- Indikátor párovania
- Indikátor stavu
- Tlačidlo SOURCE (Zdroj)
- Tlačidlo PAIR (Párovanie) / Tlačidlo na PRESKOČENIE NASPÄT
- SK
- Zapnutie/vypnutie
- Funkcia Rádiotext
- Notes for battery disposal
Brand : Sandstrøm
Model : S1iPBTDB12E
Category : Bluetooth speaker