
MicroTalk CXT390 - Walkie-talkie COBRA - Free user manual and instructions
Find the device manual for free MicroTalk CXT390 COBRA in PDF.


| Product Type | Two-Way Radio / Walkie-Talkie |
| Brand | Cobra |
| Model | MicroTalk CXT390 |
| Dimensions (Approx.) | 5.5 x 2.5 x 1.0 inches (140 x 64 x 25 mm) |
| Weight (with batteries) | ~10 oz (283 g) |
| Power Source | 4 x AA alkaline or rechargeable batteries (not included) |
| Frequency Band | FRS/GMRS (UHF 462-467 MHz) |
| Maximum Range (Line of Sight) | Up to 5 miles (8 km) under optimal conditions |
| Channels | 22 FRS/GMRS channels |
| Privacy Codes | 121 sub-audible squelch codes (CTCSS/DCS) |
| Weather Alert | NOAA Weather Radio with 10 weather channels and alert |
| VibraCall | Vibrating alert for incoming calls |
| Keypad Lock | Yes, to prevent accidental changes |
| Scan Function | Scans for active channels |
| Hands-Free Operation | VOX (Voice Activation) with adjustable sensitivity |
| Display | Backlit LCD with channel/battery indicator |
| Battery Life (Approx.) | Up to 20 hours typical use (alkaline) |
| Belt Clip | Removable, included |
| Warranty | Limited 1-year warranty (check manual for details) |
| Cleaning | Wipe with a dry, soft cloth; avoid solvents |
| Spare Parts Availability | Belt clips and batteries available via Cobra support |
Frequently Asked Questions - MicroTalk CXT390 COBRA
User questions about MicroTalk CXT390 COBRA
0 question about this device. Answer the ones you know or ask your own.
Ask a new question about this device
Download the instructions for your Walkie-talkie in PDF format for free! Find your manual MicroTalk CXT390 - COBRA and take your electronic device back in hand. On this page are published all the documents necessary for the use of your device. MicroTalk CXT390 by COBRA.
USER MANUAL MicroTalk CXT390 COBRA

Introduction

Product Features

- Antenna
- External Speaker!
Micronbone/Charge Jack - Mode/Power Button
- Weather, Power, Butte
- Weather/LOCK BUTTON
- Channel Up/Down
Buttons -
Backlit LCD Display
-
Speaker/Microphone
B. Volume Up/Down Buttons - Light/Max Range Button
- Talk Button
- Call Buller
- Call Button
- Whist Strap Connection
- Ben Clip
- Battery Compartment
- Battery Door Latch
Introduction

Product Features
Features
- Shawals
22 Channels
Seven shared
with FRS/GMRS,
seven FRS only,
eight GMRS only
• 10 Channel NOAA All
Hazardo Radio
2017年1月1日
- Weather Alert
• 121 Privanny Codas
(20 STOPS series)
(36) CROSS LOUIS
85 DOS CODES
- Hands-Free Operation
(VOY)
- 2017年1月1日
- Scan
Channels.
privacy codes
The following table is:
- Backlit LCD Display
Call Alert
Five calectobia
tenes
tonica
- Button Lock
(1) 2017年1月1日
- Speaker?
Microphone?
Charge Jack
• Roger Been
Selectable Co/Off
2、本次股东大会的召集和召开程序
• Battery/Power Saver
• Kuvizraks Tener
(2)证券代码:002359
- Battery Level
Indicator
• Auto Squirrel
(1) 本说明仅供参考。
- Maximum
Range Extender
cklit LCD Display
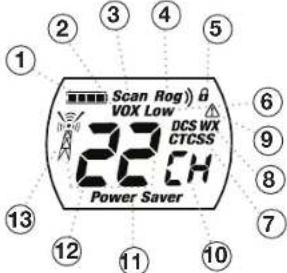
- Battery Level Indicator
2 VOX icon - Scan loop
- Page Page Book
- Roger Beep Icon
- Lock icon
- Low Power Icon
- DCS/CTCSS Icons
- Weather Icon
- Weather Alert Icon
- DCS/CTCSS Privacy Code Numbers
- Power Sever loop
- Changed Numbers
- Channel Numbers
- Receiver/ transmit icon

Important FCC Licensing Information
This radio operates on General Mobile Radio
Service (GMRS) frequencies which require a
Federal Communications Commission (EOCI)
license. See page 15 for licensing and other
related information.

Maximum range may vary and is based on
unobstructed line-of-sight communication
under ideal conditions.


Warranty and Trademark Acknowledgement
Warranty
Limited One-Year Warranty on Radio(s)
For Products Purchased in the U.S.A.
Cobra Electronics Corporation warrants that its Cobra microTALK ^® radios and the component parts thereof, will be free of defects in workmanship and materials for a period of one year from the date of first consumer purchase. This warranty may be enforced by the first consumer purchaser, provided that the product is utilized within the U.S.A.
Cobra will, without charge, repair or replace, at its option, defective microTALK ^® radios, products or component parts upon delivery to the Cobra Factory Service department, accompanied by proof of the date of first consumer purchase, such as a duplicated copy of a sales receipt.
You must pay any initial shipping charges required to ship the product for warranty service, but the return charges will be at Cobra's expense.
if the product is repaired or replaced under warranty. This warranty gives you specific legal rights, and you may also have other rights which may vary from state to state.
Exclusions: This limited warranty does not apply: 1) To any product damaged by accident; 2) In the event of misuse or abuse of the product or as a result of unauthorized alterations or repairs; 3) If the serial number has been altered, defaced, or removed; 4) If the owner of the product resides outside the U.S.A.
All implied warranties, including warranties of merchantability and fitness for a particular purpose are limited in duration to the length of this warranty. Cobra shall not be liable for any incidental, consequential or other damages; including, without limitation, damages resulting from loss of use or cost of installation. Some states do not allow limitations on how long an implied warranty lasts and/or do not allow the exclusion or limitation of incidental or consequential damages, so the above limitations may not apply to you.
For Products Purchased Outside the U.S.A.
Please contact your local dealer for warranty information.
90-Day Warranty on Rechargeable Batteries
For products purchased in the U.S.A. and Canada.
Trademark Acknowledgement
Cobra ^® , microTALK ^® , Nothing Comes Close to a Cobra ^® , VibrAlert ^™ and the snake design are registered trademarks of Cobra Electronics Corporation, USA. Cobra Electronics Corporation ^™ is a trademark of Cobra Electronics Corporation, USA.
Nothing Comes Close to a Cobra ^®

Caring for Your microTALK® Radio
Your microTALK ^® radio will give you years of trouble-free service if cared for properly. Handle the radio gently. Keep the radio away from dust. Never put the radio in water or in a damp place. Avoid exposure to extreme temperatures.
Installing Batteries
To install or replace batteries:
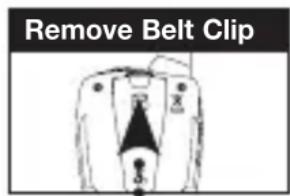
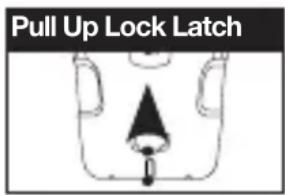

- Remove belt clip by releasing belt clip latch and sliding clip up.
- Pull up on the battery door latch to remove the battery compartment cover.
- Insert the supplied three AA rechargeable batteries or non-rechargeable alkaline batteries. Position batteries according to polarity markings.
- Replace battery compartment cover and belt clip.
- Do not attempt to charge alkaline batteries.
- Do not mix old and new batteries.
- Do not mix alkaline, standard (carbon-zinc), or rechargeable (Ni-Cd, Ni-MH, etc.) batteries.
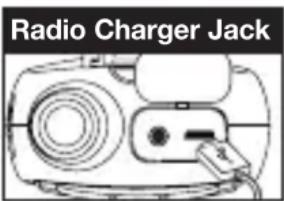
To charge batteries in radio:
- Check to see that the batteries have been inserted properly.
- Insert the cable into the charge jack located at the top of the radio.
- Plug the cable into USB-compatible power port.
Use only the supplied rechargeable batteries and charger for recharging your Cobra microTALK radio.
Cobra recommends your radio is turned off while being charged.
Non-rechargeable alkaline batteries can also be used in your radio.

Operation
Using Your Radio

For charging microTALK radio(s) in desktop charger:
- Insert radio(s) into desktop charger as shown.
- Insert the micro-USB cable into jack on back of charger.
- Plug the cable into USB-compatible power port.
If charging light is not on, check position of radio. Radio should be upright. The charge indicator light will stay on as long as the radio is in the charging well, even after the batteries are fully charged.
Note: To charge a single radio, you can bypass the desktop charger and simply insert the micro-USB's connector directly into the charge jack located on the top of the radio.
The radio will display flashing battery icon while charging.
Cobra recommends your radio be turned off while being charged. Non-rechargeable alkaline batteries can also be used in your radio.

Quick Start
- Press and hold the Mode/Power button to turn on your radio.
- Press the Channel Up or Channel Down button to select a channel.

Both radios must be tuned to the same channel/privacy code to communicate.
-
Press and hold the Talk button while speaking into the microphone.
-
When finished talking, release the Talk button and listen for a response.
Turning on Your microTALK® Radio

Press and hold the Mode/Power button until you hear a series of audible tones indicating the radio is on. Your microTALK® radio is now in Standby mode, ready to receive transmissions. The radio is always in Standby mode except when the Talk, Call or Mode/Power buttons are pressed.
2

Operation
Customer Assistance Warranty Introduction
Battery Status Indicator
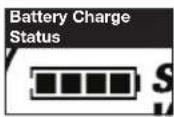
The battery charge status is shown on the display. Four bars indicates fully charged.
Battery Low

When battery power is low, the final bar in the Battery Low icon will blink and an audible tone will sound twice before the radio shuts off. Your batteries should be replaced or recharged, if using rechargeable batteries. The radio will display flashing battery icon while charging.
Auto Power Save

If there are no transmissions within 10 seconds, the radio will automatically switch to Power Save mode and the Power Saver icon will flash in the display. This will not affect the radio's ability to receive incoming transmissions.
Communicating with Another Person
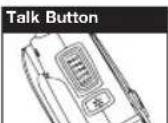
- Press and hold the Talk button.
- With the microphone about two inches (5 cm) from your mouth, speak in a normal voice.
- Release the Talk button when you are finished talking and listen for a response.
You cannot receive incoming calls while pressing the Talk button.
Note: both radios must be tuned to the same channel to communicate.

To Select a Channel
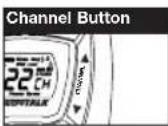
With the radio on, select any of the 22 channels by pressing the Channel Up or Channel Down button. Note: both radios must be tuned to the same channel to communicate.

Channels 1 through 7 are shared with FRS/ GMRS. Channels 8 through 14 are FRS only. Channels 15 through 22 are GMRS only. See page 14 for FRS/GMRS frequency allocations and compatibility charts.
Nothing Comes Close to a Cobra*
3

Operation
Using Your Radio
Listening for a Response

Release the Talk button to receive incoming transmissions. Your microTALK ^® radio is always in Standby mode while the Talk or Call buttons are not pressed.
To Adjust Volume

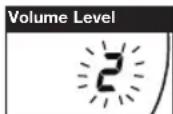
Press the Volume Up or Volume Down button.
A double beep sound is used to indicate the minimum and maximum volume levels (1 through 8).
Call Button

Press and release the Call button.
The other person will hear a two second call tone. This tone is used only to establish voice communications.

See page 13 on how to select between five call tone settings.
To Illuminate Display
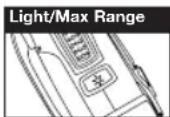
Press and release the Light/Max Range button to illuminate the display.
Auto Squelch/Maximum Range
Your microTALK ^® radio will automatically shut off weak transmissions and unwanted noise due to terrain, conditions or if you've reached your Maximum Range limit.
You can temporarily turn off auto squelch or turn on maximum range extender, allowing all signals to be received and extending the maximum range of your radio.


Operation
Customer Assistance Warranty Introduction

To temporarily turn off auto squelch:
Press the Light/Max Range button for less than five seconds.
To turn maximum range extender on:
- Press and hold the Light/Max Range button for at least five seconds until you hear two beeps which indicates the maximum range extender is on.
To turn maximum range extender off:
- Press and release the Light/Max Range button or change channels.
Lock Function

The Lock function locks the Channel Up, Channel Down and Mode/Power buttons to prevent accidental operation.
To turn the lock on or off:
- Press and hold the Lock button for two seconds.
A double beep sound is used to confirm your lock on or off request. When in Lock mode, the Lock icon will be displayed.

microTALK® Range
Your range will vary depending on terrain and conditions.

In flat, open country your radio will operate at maximum range.
Buildings and foliage in the path of the signal can reduce the range of the radio.
Dense foliage and hilly terrain will further reduce the range of the radio.
On FRS Channels 8 through 14, your radio automatically switches to low power, which will limit the range the radio can communicate.
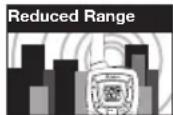

Remember, you can achieve maximum range by using maximum range extender. See page 4 for details.
Nothing Comes Close to a Cobra ^®


Operation
Using Your Radio
Scrolling Through the Mode Function
By scrolling through the Mode function, you will be able to select or turn on preferred features of your microTALK® radio. When scrolling through the Mode function, your radio features will be displayed in the same predetermined order:


Set CTCSS Privacy Codes
Set DCS Privacy Codes
Set Vox On/Off
Set Vox Sensitivity
Set Channel Scan
Set CTCSS Privacy Code Scan
Set DCS Privacy Code Scan
Set Call Tones
Set Roger Beep On/Off
Privacy Codes
Your microTALK radio incorporates two advanced coded squelch systems that can help to reduce interference from other users on any given channel. CTCSS (Continuous Tone Coded Squelch System) provides 38 privacy codes and DCS (Digitally Coded Squelch) provides 83 privacy codes. This provides a total of 121 Privacy Codes. Either system can be used on all channels, but both systems cannot be used on the same channel at the same time.

To successfully communicate using a privacy code, both the sending and receiving radios must be tuned to the same channel and to the same privacy code system (CTCSS or DCS) and privacy code number. Each channel will remember the last privacy code system and number you select.

The privacy code 00 is not a privacy code, but allows all signals to be heard on a channel that is set to 00 on both the CTCSS and DCS systems.

Operation
Customer Assistance Warranty Introduction
Set CTCSS Privacy Codes
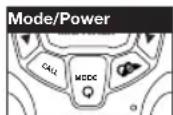
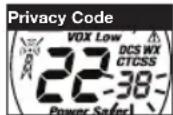

To select a CTCSS privacy code:
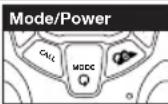
- After selecting a channel, press the Mode/Power button until the CTCSS icon appears and the small numbers next to the channel number flash on the display.

If DCS is turned on at the channel selected, the display will flash the CTCSS icon and "OFF." To switch from DCS to CTCSS, press the Channel Up or Channel Down button while the display is flashing "OFF." The display will then show the small numbers flashing and you will then be able to proceed to step 2.
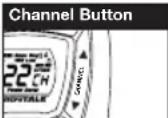
- Press using the Channel Up or Channel Down button to select a privacy code. You can hold the Up or Down button for fast advance.
- When your desired CTCSS privacy code is displayed, choose one of the following:
a. Press the Mode/Power button to enter the new setting and proceed to other functions.
b. Press the Lock button to enter the new setting and return to Standby mode.
c. Do not press any buttons for 15 seconds to enter the new setting and return to Standby mode.

Mode Functions

OperationOperation
Customer Assistance Warranty Introduction
Set DCS Privacy Codes

To select a DCS privacy code:
- After selecting a channel, press the Mode/Power button until the DCS icon appears and the small numbers flash on the display (01 through 83).

If CTCSS is turned on at the channel selected, the display will flash the DCS icon and "OFF." To switch from CTCSS to DCS, press the Channel Up or Channel Down button while the display is flashing "OFF." The display will then show the small numbers flashing and you will then be able to proceed to step 2.
- Press using the Channel Up or Channel Down button to select a DCS privacy code. You can hold the Up or Down button for fast advance.
- When DCS privacy code is displayed, choose one of the following:
a. Press the Mode/Power button to enter the new setting and proceed to other functions.
b. Press the Lock button to enter the new setting and return to Standby mode.
c. Do not press any buttons for 15 seconds to enter the new setting and return to Standby mode.
Voice Activated Transmit (VOX)
In VOX mode, your microTALK ^® radio can be used “hands-free,” automatically transmitting when you speak. You can set the VOX sensitivity level to fit the volume of your voice and avoid transmissions triggered by background noise.

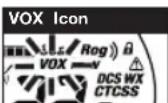


To turn VOX mode on or off:
- Press the Mode/Power button until the VOX icon flashes on the display. The current On or Off setting is displayed.
- Press the Channel Up or Channel Down button to turn VOX On or Off.
- Choose one of the following:
a. Press the Mode/Power button to enter the selected On or Off setting and proceed to other functions.
b. Press the Lock button to enter the selected On or Off setting and return to Standby mode.

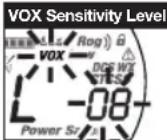
To set VOX sensitivity:
- Press the Mode/Power button until the VOX icon flashes and the current sensitivity level is displayed.

The current VOX sensitivity level is displayed with letters "LE" and a Number 1 through 5, with Number 5 being the most sensitive level and Number 1 being the least sensitive level.
- Press the Channel Up or Channel Down button to change the setting.
- Choose one of the following:
a. Press the Mode/Power button to enter the selected setting and proceed to other functions.
b. Press the Lock button to enter the selected setting and return to Standby mode.

Operation
Mode Functions

Operation
Customer Assistance Warranty Introduction
Channel Scan
Your microTALK ^® radio can automatically scan channels.


To scan channels:
- Press the Mode/Power button until the Scan icon and the channel numbers appear on the display.
- Press the Channel Up or Channel Down button to begin scanning channels.

The radio ignores specific privacy codes while scanning channels.
The Scan icon will continue to be displayed when scan is on. Your radio will continue to scan all channels and stop if an incoming transmission is detected. Your radio will remain on that channel for 10 seconds.
During scanning (while receiving an incoming transmission), you can choose from the following:
a. Press and hold the Talk button to communicate on that channel. Your radio will remain on that channel and return to Standby mode.
b. Press the Channel Up or Channel Down button to resume scanning channels.
c. Press the Lock button to return to Standby.
During scanning (while receiving an incoming transmission), you can choose from the following:
a. Press and hold the Talk button to communicate on that channel/privacy code. Your radio will remain on that channel/privacy code and return to Standby mode.
b. Press the Channel Up or Channel Down button to resume scanning privacy codes. If you do not press any button within 10 seconds, your radio will automatically resume scanning privacy codes.
c. Press the Lock button to return to Standby.
Privacy Code Scan
Your microTALK radio can automatically scan the Privacy Codes (either CTCSS 01 through 38 or DCS 01 through 83) within one channel. Only one set of privacy codes (CTCSS or DCS) can be scanned at a time.


To scan privacy codes:
- While in Standby mode, press the Channel Up or Channel Down button to choose the channel on which you wish to scan privacy codes.
- Press the Mode/Power button until either the CTCSS or the DCS icon appears on the display and the Scan icon and the privacy code numbers flash on the display.
- Press the Channel Up or Channel Down button to begin scanning privacy codes within the channel you selected.
During scanning (while receiving an incoming transmission), you can choose from the following:
a. Press and hold the Talk button to communicate on that channel/privacy code. Your radio will remain on that channel/privacy code and return to Standby mode.
b. Press the Channel Up or Channel Down button to resume scanning privacy codes. If you do not press any button within 10 seconds, your radio will automatically resume scanning privacy codes.
c. Press the Lock button to return to Standby.

Mode Functions

Operation
Customer Assistance Warranty Introduction
Five Call Tone Settings
You can choose between five different Call Tone Settings to transmit a call alert.

To change a call tone setting:
- Press the Mode/Power button until the letter "C" and the current call tone number (01 through 05) is displayed. The current call tone will sound for one second.
- Press the Channel Up or Channel Down button to hear the other call tone settings.
- Choose one of the following:
a. Press the Mode/Power button to enter the new setting and proceed to other functions.
b. Press the Lock button to enter the new setting and return to Standby mode.

Roger Beep Confirmation Tone
Your listener will hear an audible tone when you release the Talk button. This alerts the other party that you are finished talking and it is OK for them to speak.

To turn roger beep on or off:
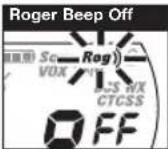
- Press the Mode/Power button until the Roger Beep icon flashes. The current on or off setting is displayed.
- Press the Channel Up or Channel Down button to select roger beep on or off.
- Choose one of the following:
a. Press the Mode/Power button to enter the new setting and return to Standby mode.
b. Press the Lock button to enter the new setting and return to Standby mode.

NOAA\* All Hazards Radio Channels
You can use your microTALK radio to listen to NOAA All Hazards Radio channels transmitting in your area.


To listen to All Hazards Radio channels:
- Press the Weather button until the All Hazards Radio icon and the currently selected All Hazards Radio channel are displayed.
- Use the Channel Up or Channel Down button to change All Hazards Radio channels.
- The All Hazards Radio icon will continue to be displayed when All Hazards Radio is on.
- To exit All Hazards Radio, press and hold the Weather button until On or Off is displayed.
*National Oceanographic and Atmospheric Administration
Weather (WX) Alert Mode
Turning On the Weather Alert function will allow your radio to automatically receive NOAA Hazard Alert radio signals and warnings from designated NOAA broadcast stations. If the radio is turned ON, it will alert to Weather and other emergency alerts broadcast by NOAA.

This feature is set to OFF by default.

Make sure the strongest Weather channel is selected for your area using the NOAA All Hazards Radio Channels selection in the previous menu.

To turn Weather Alert On or Off:
- Press the Weather/Lock button until the Weather Alert icon flashes on the display. The current On or Off setting is displayed.
- Press the Channel Up and Channel Down button to turn Weather Alert On or Off.
- Press and hold the Weather/Lock button again to save the new setting and exit the Weather Alert Mode and return to Standby mode.

This radio is rain resistant to JIS3 standards.
General Specifications
FRS/GMRS Frequency Allocation and Compatibility
Important: Please note that Cobra GMRS models with 15 Channels may designate different channel numbers for the same frequency. For example, a Cobra 15 Channel GMRS model would need to be tuned to Channel 11 in order to communicate with a 22 Channel GMRS tuned to Channel 15. Please refer to the chart below for channel/ frequency number compatibility.
A = Channel No. for 22 Channel FRS/GMRS Models
B = Channel No. for 15 Channel GMRS Models
C = Type of Radio Service
D = Frequency in MHz
E = Power Output
ABCDE
| 1 | 1 | FRS/GMRS | 462.5625 | High | ||
| 2 | 2 | FRS/GMRS | 462.5875 | High | ||
| 3 | 3 | FRS/GMRS | 462.6125 | High | ||
| 4 | 4 | FRS/GMRS | 462.6375 | High | ||
| 5 | 5 | FRS/GMRS | 462.6625 | High | ||
| 6 | 6 | FRS/GMRS | 462.6875 | High | ||
| 7 | 7 | FRS/GMRS | 462.7125 | High | ||
| 8 | FRS | 467.5625 | Low | |||
| 9 | FRS | 467.5875 | Low | |||
| 10 | FRS | 467.6125 | Low | |||
| 11 | FRS | 467.6375 | Low | |||
| 12 | FRS | 467.6625 | Low | |||
| 13 | FRS | 467.6875 | Low | |||
| 14 | FRS | 467.7125 | Low | |||
| 15 | 11 | GMRS | 462.5500 | High | ||
| 16 | 8 | GMRS | 462.5750 | High | ||
| 17 | 12 | GMRS | 462.6000 | High | ||
| 18 | 9 | GMRS | 462.6250 | High | ||
| 19 | 13 | GMRS | 462.6500 | High | ||
| 20 | 10 | GMRS | 462.6750 | High | ||
| 21 | 14 | GMRS | 462.7000 | High | ||
| 22 | 15 | GMRS | 462.7250 | High |
Introduction
Operation
IMPORTANT NOTICE: FCC LICENSE REQUIRED
This two-way radio operates on GMRS (General Mobile Radio Service) frequencies which require an FCC (Federal Communications Commission) license. A user must be licensed prior to operating on Channels 1 through 7 on high power or 15 through 22, which comprise the GMRS channels of this radio. Serious penalties could result for unlicensed use of GMRS channels, in violation of FCC rules. Operation of this radio is subject to additional rules specified in 47 C.F.R. Part 95.
Licensed users will be issued a call sign by the FCC, which should be used for station identification when operating this radio. GMRS users should also cooperate by engaging in permissible transmissions only, avoiding channel interference with other GMRS users, and being prudent with the length of their transmission time.
For licensing information and application forms, please call the FCC Hotline at 800-418-FORM. Request form #159 and form #605. Questions regarding the license application should be directed to the FCC at 888-CALL-FCC. Additional information is available on the FCC's website at www.fcc.gov. Channel 1 through 7 on low power and channels 8 through 14 comprise the FRS (Family Radio Service). No license is required to operate on the FRS.
Safety Information for microTALK Radios
Your wireless handheld portable transceiver contains a low power transmitter. When the talk button is pushed, it sends out radio frequency (RF) signals.
The device is authorized to operate at a duty factor not to exceed 50%. In August 1996, the Federal Communications Commissions (FCC) adopted RF exposure guidelines with safety levels for handheld wireless devices.
Important
FCC RF Exposure Requirements: For body-worn operation, this radio has been tested and meets the FCC RF exposure guidelines when used with Cobra accessories supplied or designated for this product. Use of other accessories may not ensure compliance with FCC RF exposure guidelines. Use only the supplied antenna. Unauthorized antennas, modifications or attachments could damage the transmitter and may violate FCC regulations.
Normal Position
Hold the transmitter approximately 2 inches from your face and speak in a normal voice, with the antenna pointed up and away.

This device complies with part 15 of the FCC Rules. Operation is subject to the following two conditions: 1) This device may not cause harmful interference, and 2) this device must accept any interference received, including interference that may cause undesired operation.
FCC Warnings: Replacement or substitution of transistors, regular diodes or other parts of a unique nature, with parts other than those recommended by Cobra may cause a violation of the technical regulations of part 95 of the FCC rules, or violation of type acceptance requirements of part 2 of the rules.
Product Service Questions
For any questions about operating or installing this new Cobra product, or if parts are missing...PLEASE CALL COBRA FIRST...do not return this product to the store. See customer assistance on page A1.
For Products Purchased in the U.S.A.
If your product should require factory service, please call Cobra first before sending your radio. This will ensure the fastest turn-around time on your repair. You may be asked to send your radio to the Cobra factory. It will be necessary to furnish the following to have the product serviced and returned.
1) For warranty repair include a copy of the original sales receipt. If you send the original receipt, it cannot be returned.
2) Send the entire product.
3) Enclose a detailed description of the problem along with the name and address of where the product is to be returned.
4) Pack radio securely to prevent damage in transit. If possible, use the original packing material.
5) Ship prepaid and insured by way of a traceable carrier such as United Parcel Service (UPS) or Priority Mail to avoid loss in transit to Cobra Factory Service:
Cobra Electronics Corporation 6500 West Cortland Street Chicago, Illinois 60707 U.S.A.
6) If the radio is under warranty, it will be repaired or exchanged depending on the model.
Please allow approximately three to four weeks before contacting Cobra for status. If the radio is out of warranty, a letter will automatically be sent informing you of the repair charge or replacement charge. If you have any questions, please call 773-889-3087 for assistance.
For Products Purchased Outside the U.S.A.
Please contact your local dealer for product service information.


- Product Features
- Features
- cklit LCD Display
- Warranty and Trademark Acknowledgement
- Limited One-Year Warranty on Radio(s)
- For Products Purchased in the U.S.A.
- For Products Purchased Outside the U.S.A.
- 90-Day Warranty on Rechargeable Batteries
- Trademark Acknowledgement
- Caring for Your microTALK® Radio
- Installing Batteries
- To install or replace batteries:
- To charge batteries in radio:
- Using Your Radio
- For charging microTALK radio(s) in desktop charger:
- Quick Start
- Turning on Your microTALK® Radio
- Battery Status Indicator
- Battery Low
- Auto Power Save
- Communicating with Another Person
- To Select a Channel
- Listening for a Response
- To Adjust Volume
- Call Button
- To Illuminate Display
- Auto Squelch/Maximum Range
- To temporarily turn off auto squelch:
- To turn maximum range extender on:
- To turn maximum range extender off:
- Lock Function
- To turn the lock on or off:
- microTALK® Range
- Scrolling Through the Mode Function
- Privacy Codes
- Set CTCSS Privacy Codes
- To select a CTCSS privacy code:
- Mode Functions
- Set DCS Privacy Codes
- To select a DCS privacy code:
- Voice Activated Transmit (VOX)
- To turn VOX mode on or off:
- To set VOX sensitivity:
- Channel Scan
- To scan channels:
- Privacy Code Scan
- To scan privacy codes:
- Five Call Tone Settings
- To change a call tone setting:
- Roger Beep Confirmation Tone
- To turn roger beep on or off:
- NOAA\* All Hazards Radio Channels
- To listen to All Hazards Radio channels:
- Weather (WX) Alert Mode
- To turn Weather Alert On or Off:
- General Specifications
- FRS/GMRS Frequency Allocation and Compatibility
- IMPORTANT NOTICE: FCC LICENSE REQUIRED
- Safety Information for microTALK Radios
- Important
- Normal Position
- Product Service Questions
Brand : COBRA
Model : MicroTalk CXT390
Category : Walkie-talkie