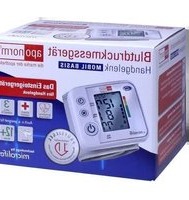
Basis Plus - Sphygmomanometer Aponorm - Free user manual and instructions
Find the device manual for free Basis Plus Aponorm in PDF.


| Product Type | Blood Pressure Monitor |
| Model | Basis Plus |
| Brand | Aponorm |
| Measurement Method | Oscillometric |
| Arm Circumference Range | 22–32 cm (standard cuff) |
| Display | LCD Digital Display |
| Memory | 2 x 60 readings (for two users) |
| Blood Pressure Classification Indicator | Yes (WHO classification) |
| Irregular Heartbeat Detection | Yes |
| Automatic Inflation | Yes |
| Automatic Deflation | Yes |
| Power Supply | 4 x AA batteries (included) or AC adapter (optional) |
| Battery Life | Approx. 300 measurements |
| Dimensions (approx.) | 150 x 100 x 80 mm |
| Weight (without batteries) | Approx. 300 g |
| Cuff Type | Standard arm cuff (22–32 cm) |
| Clinical Validation | Clinically tested according to ESH, AAMI, and BHS protocols |
| Safety Standards | CE marking, RoHS compliant |
| Auto Power Off | Yes (after 1 minute of inactivity) |
| Date/Time Display | Yes |
| Low Battery Indicator | Yes |
| Cleaning | Clean with a soft dry cloth; do not immerse in water |
| Storage Conditions | Temperature: -20°C to 55°C; Humidity: ≤85% RH |
| Warranty | 2 years (refer to manual for details) |
Frequently Asked Questions - Basis Plus Aponorm
User questions about Basis Plus Aponorm
0 question about this device. Answer the ones you know or ask your own.
Ask a new question about this device
Download the instructions for your Sphygmomanometer in PDF format for free! Find your manual Basis Plus - Aponorm and take your electronic device back in hand. On this page are published all the documents necessary for the use of your device. Basis Plus by Aponorm.
USER MANUAL Basis Plus Aponorm
Read the instructions carefully before using this device.

Type BF applied part
Dear Customer,
Your new aponorm® by microlife blood pressure monitor is a reliable medical device for taking measurements on the upper arm. It is simple to use, accurate and comes highly recommended for blood pressure monitoring in your home. This device was developed in collaboration with physicians and clinical tests carried out proving its measurement accuracy to be of a very high standard.*
Please read through these instructions carefully so that you understand all functions and safety information. We want you to be happy with your aponorm® by microlife product. If you have any questions, problems or want to order spare parts please contact aponorm® by microlife-Customer Service. Your dealer or pharmacy will be able to give you the address of the aponorm® by microlife dealer in your country. Alternatively, visit the internet at www.aponorm.de where you will find a wealth of invaluable information on our products.
Stay healthy – aponorm® by microlife!
* This device uses the same measuring technology as the award winning «BP 3BTO-A» model tested according to the British Hypertension Society (BHS) protocol.
Table of Contents
1. Important Facts about Blood Pressure and Self-Measurement
• How do I evaluate my blood pressure?
2. Using the Device for the First Time
- Inserting the batteries
- Setting the date and time
- Selecting the correct cuff
3. Taking a Blood Pressure Measurement using this Device
• How not to store a reading
4. Appearance of the Pulse Arrhythmia Indicator for early Detection
5. Traffic Light Indicator in the Display
6. Data Memory
- Viewing the stored values
- Memory full
- Clearing all values
7. Battery Indicator and Battery change
- Low battery
- Flat battery – replacement
- Which batteries and which procedure?
• Using rechargeable batteries
8. Using a Mains Adapter
9. Error Messages
10. Safety, Care, Accuracy Test and Disposal
- Safety and protection
- Device care
- Cleaning the cuff
- Accuracy test
- Disposal
11. Guarantee
12. Technical Specifications
Guarantee Card
1. Important Facts about Blood Pressure and Self-Measurement
- Blood pressure s the pressure of the blood flowing in the arteries generated by the pumping of the heart. Two values, the systolic (upper) value and the diastolic (lower) value, are always measured.
- The device indicates the pulse rate (the number of times the heart beats in a minute).
• Permanently high blood pressure values can damage your health and must be treated by your doctor! - Always discuss your values with your doctor and tell him/her if you have noticed anything unusual or feel unsure. Never rely on single blood pressure readings.
- There are several causes of excessively high blood pressure values. Your doctor will explain them in more detail and offer treatment where appropriate. Besides medication, weight loss and exercise can also lower your blood pressure.
- Under no circumstances should you alter the dosages of any drugs prescribed by your doctor!
- Depending on physical exertion and condition, blood pressure is subject to wide fluctuations as the day progresses. You should therefore take your measurements in the same quiet conditions and when you feel relaxed! Take at least two readings every time (in the morning and in the evening) and average the measurements.
- It is quite normal for two measurements taken in quick succession to produce significantly different results.
- Deviations between measurements taken by your doctor or in the pharmacy and those taken at home are quite normal, as these situations are completely different.
- Several measurements provide much more reliable information about your blood pressure than just one single measurement.
-
Leave a small break of at least 15 seconds between two measurements.
-
If you suffer from an irregular heartbeat (arrhythmia, see «Section 4.»), measurements taken with this device should be evaluated with your doctor.
- The pulse display is not suitable for checking the frequency of heart pacemakers!
- If you are pregnant, you should monitor your blood pressure very closely as it can change drastically during this time!
This monitor is specially tested for use in pregnancy and preeclampsia. When you detect unusual high readings in pregnancy, you should measure again after 4 hours. If the reading is still too high, consult your doctor or gynaecologist.
How do I evaluate my blood pressure?
Table for classifying home blood pressure values in adults in accordance with the international Guidelines (ESH, AHA, JSH). Data in mmHg.
| Range | Systolic | Diastolic | Recommendation | |
| blood pressure too low | 100 | 60 | Consult your doctor | |
| 1. | blood pressure optimum | 100 - 130 | 60 - 80 | Self-check |
| 2. | blood pressure elevated | 130 - 135 | 80 - 85 | Self-check |
| 3. | blood pressure too high | 135 - 160 | 85 - 100 | Seek medical advice |
| 4. | blood pressure dangerously high | 160 | 100 | Urgently seek medical advice! |
The higher value is the one that determines the evaluation. Example: a blood pressure value of 140/80 mmHg or a value of 130/90 mmHg indicates «blood pressure too high».
2. Using the Device for the First Time
Inserting the batteries
After you have unpacked your device, first insert the batteries. The battery compartment ⑤ is on the bottom of the device. Insert the batteries (4 x size AAA 1,5 V), thereby observing the indicated polarity. Switch the Lock Switch ⑭ to «unlock» position.
Setting the date and time
Your aponorm® Basis Plus upper arm blood pressure monitor is equipped with a radio clock, which is controlled by the DCF77 signal. This time and date are set automatically. If no DCF77 signal (this is the term for the time signal transmitter) is available, the time is not adjusted automatically.
The display comes to receiving mode and device sets the time automatically, after insert batteries.
If you do not wish to set the time or you want to take a measurement immediately, exit the time setting mode by pressing the Start/Stop button ①.
Once the time signal is received, the radio clock icon ② flashes on the display every second until the reception of the DCF77 signal is complete.
While receiving the DCF77 signal, the radio clock icon ② flashes first with 1, then 2 and then 3 bars above it. When the icon appears with 3 bars, the time has been set. First the date and then the time are displayed at the top right of the display. Then the time is displayed permanently together with the radio clock icon ④.
The automatic setting of date and time takes about 2-4 minutes. If no signal is received within 10 minutes, “-” appears on the display.
Now you need to improve the reception by choosing another location or set the clock manually (for more information see „manual setting“). After a change of location, batteries have to be re-inserted or to reset radio clock to „ON“ to restart the auto setting again.
Manual setting
(if automatic setting does not work or is not desired):
The device must be in ON mode. If you do not press any buttons for 1 minute during the time setting, the time setting mode switches off and „-:- -” appears in the clock display.
- Press down Time button several seconds until „bl OFF“ appears on the display.
- Press Time button again, the radio clock indicator and "ON" appears in the display.
- Press the M button to switch on („ON“) or switch off the radio clock („OFF“).
- Press ON/OFF button to confirm and return to standby mode, or if the radio clock is switched off, you can press Time button to confirm.
- The year number flashes in the display. You can set the year by pressing either the «+» ⑪ or the «-» ⑩ button. To confirm and then set the month, press the time button ⑧.
- Press the «+» ⑪ or the «-» ⑩ button to set the month. Press the time button ⑧ to confirm and then set the day.
- Follow the instructions above to set the day, hour and minutes.
- Once you have set the minutes and pressed the time button, the date and time are set and the time is displayed.
- If you want to change the date and time, press and hold the time button down for approx. 3 seconds until the year number starts to flash. Now you can enter the new values as described above.
Selecting the correct cuff
aponorm® by microlife offers different cuff sizes. Select the cuff size to match the circumference of your upper arms (measured by close fitting in the centre of the upper arm).
| Cuff size for circumference of upper arm | |
| S 17 - 22 cm | |
| M 22 - 32 cm | |
| M - L 22 - 42 cm | |
| L - XL 32 - 52 cm | |
Only use aponorm ® by microlife cuffs.
Connect the cuff to the device by inserting the cuff connector ⑦ into the cuff socket ③ as far as it will go.
3. Taking a Blood Pressure Measurement using this Device
Checklist for taking a reliable measurement
- Avoid activity, eating or smoking immediately before the measurement.
- Sit down for at least 5 minutes before the measurement and relax.
- Always measure on the same arm (normally left).
It is recommended that doctors perform double arm measurements on a patients first visit in order to determine which arm to measure in the future. The arm with the higher blood pressure should be measured. -
Remove close-fitting garments from the upper arm. To avoid constriction, shirt sleeves should not be rolled up – they do not interfere with the cuff if they are laid flat.
-
Always ensure that the correct cuff size is used (marking on the cuff).
• Fit the cuff closely, but not too tight.
- Make sure that the cuff is positioned 2 cm above the elbow.
- The artery mark located on the cuff (ca. 3 cm long bar) must lie over the artery which runs down the inner side of the arm.
• Support your arm so it is relaxed.
- Ensure that the cuff is at the same height as your heart.
-
Slide the lock switch ⑫ down to the «unlock» position. Press the START/STOP button ① to start measuring.
-
The cuff will now pump up automatically. Relax, do not move and do not tense your arm muscles until the measurement result is displayed. Breathe normally and do not talk.
-
When the correct pressure is reached, the pumping stops and the pressure falls gradually. If the required pressure was not reached, the device will automatically pump some more air into the cuff.
-
During the measurement, the pulse indicator ⑳ flashes in the display.
-
The result, comprising the systolic 14 and the diastolic 15 blood pressure and the pulse rate 16 is displayed. Note also the explanations on further display symbols in this booklet.
-
When the device has finished measuring, remove the cuff.
-
Switch off the device. (The monitor does switch off automatically after approx. 1 min.).
How not to store a reading
Press the START/STOP button ① while the reading is being displayed. Keep the button pressed until «M» ⑲ is flashing and then release it. Confirm by pressing the M-button ⑨ again.
You can stop the measurement at any time by pressing the START/STOP button (e.g. if you feel uneasy or an unpleasant pressure sensation).
4. Appearance of the Pulse Arrhythmia Indicator for early Detection
This symbol ② indicates that certain pulse irregularities were detected during the measurement. In this case, the result may deviate from your normal blood pressure – repeat the measurement.
In most cases, this is no cause for concern. However, if the symbol appears on a regular basis (e.g. several times a week with measurements taken daily) we advise you to tell your doctor.
Please show your doctor the following explanation:
Information for the doctor on frequent appearance of the Arrhythmia indicator
This device is an oscillometric blood pressure monitor that also analyses pulse irregularity during measurement. The device is clinically tested.
The arrhythmia symbol is displayed after the measurement, if pulse irregularities occur during measurement. If the symbol appears more frequently (e.g. several times per week on measurements performed daily) we recommend the patient to seek medical advice.
This device does not replace a cardiac examination, but serves to detect pulse irregularities at an early stage.
5. Traffic Light Indicator in the Display
The bars on the left-hand edge of the traffic light display 18 show you the range within which the indicated blood pressure value lies. Depending on the height of the bar, the readout value is either within the optimum (green), elevated (yellow), too high (orange) or dangerously high (red) range. The classification corresponds to the 4 ranges in the table as defined by the international guidelines (ESH, AHA, JSH), as described in «Section 1.».
6. Data Memory
This device automatically stores up to 99 measurement values.
Viewing the stored values
Press the M-button ⑨ briefly, when the device is switched on. The display first shows «M» ⑲ and then an average value. The device then switches to the last stored value.
Press the M-button again to exit the memory mode. Pressing the «+» ⑪ or the «-» ⑩ button repeatedly enables you to move from one stored value to another.
Memory full

Pay attention that the maximum memory capacity of 99 memories is not exceeded. When the 99 memory is full, the oldest value is automatically overwritten with the 100th value. Values should be evaluated by a doctor before the memory capacity is reached – otherwise data will be lost.
Clearing all values
If you are sure that you want to permanently remove all stored values, hold down the M-button ③ until «CL» appears and then release the button.
Press the M-button while «CL» is flashing to permanently clear all values.
Cancel deletion: press START/STOP button ① while «CL» is flashing.
Individual values cannot be cleared.
7. Battery Indicator and Battery change
Low battery
When the batteries are approximately 3/4 empty the battery symbol ⑰ will flash as soon as the device is switched on (partly filled battery displayed). Although the device will continue to measure reliably, you should obtain replacement batteries.
Flat battery – replacement
When the batteries are flat, the battery symbol ⑰ will flash as soon as the device is switched on (flat battery displayed). You cannot take any further measurements and must replace the batteries.
- Open the battery compartment ⑤ on the bottom of the device.
- Replace the batteries – ensure correct polarity as shown by the symbols in the compartment.
- To set date and time, follow the procedure described in «Section 2».
The memory retains all values although date and time must be reset – the year number therefore flashes automatically after the batteries are replaced.
Which batteries and which procedure?
Use 4 new, long-life 1.5 V, size AAA batteries.
Do not use batteries beyond their date of expiry.
Remove batteries if the device is not going to be used for a prolonged period.
Using rechargeable batteries
You can also operate this device using rechargeable batteries.
Only use «NiMH» type reusable batteries.
Batteries must be removed and recharged when the flat battery symbol appears. They should not remain inside the device as they may become damaged (total discharge as a result of low use of the device, even when switched off).
Always remove the rechargeable batteries if you do not intend to use the device for a week or more.
Batteries cannot be charged in the blood pressure monitor. Recharge batteries in an external charger and observe the information regarding charging, care and durability.
8. Using a Mains Adapter
You can operate this device using the aponorm® by microlife mains adapter (DC 6 V, 600 mA).
Only use the aponorm ® by microlife mains adapter available as an original accessory appropriate for your supply voltage.
Ensure that neither the mains adapter or the cable are damaged.
- Plug the adapter cable into the mains adapter socket ④ in the blood pressure monitor.
- Plug the adapter plug into the wall socket.
When the mains adapter is connected, no battery current is consumed.
9. Error Messages
If an error occurs during the measurement, the measurement is interrupted and an error message, e.g. «ERR 3», is displayed.
| Error | Description | Potential cause and remedy |
| «ERR 1» | Signal too weak | The pulse signals on the cuff are too weak. Re-position the cuff and repeat the measurement.* |
| «ERR 2»18 | Error signal | During the measurement, error signals were detected by the cuff, caused for instance by movement or muscle tension.Repeat the measurement, keeping your arm still. |
| «ERR 3»17 | No pressure in the cuff | An adequate pressure cannot be generated in the cuff. A leak may have occurred. Check that the cuff is correctly connected and is not too loose. Replace the batteries if necessary. Repeat the measurement. |
| «ERR 5» | Abnormal result | The measuring signals are inaccurate and no result can therefore be displayed. Read through the checklist for performing reliable measurements and then repeat the measurement.* |
| «HI» | Pulse or cuff pressure too high | The pressure in the cuff is too high (over 300 mmHg) OR the pulse is too high (over 200 beats per minute). Relax for 5 minutes and repeat the measurement.* |
| «LO» | Pulse too low | The pulse is too low (less than 40 beats per minute). Repeat the measurement.* |
* Please consult your doctor, if this or any other problem occurs repeatedly.
If you think the results are unusual, please read through the information in «Section 1.» carefully.
10. Safety, Care, Accuracy Test and Disposal

ety and protection
- This device may only be used for the purposes described in this instruction. The manufacturer cannot be held liable for damage caused by incorrect application.
- This device comprises sensitive components and must be treated with caution. Observe the storage and operating conditions described in the «Technical Specifications» section.
- Protect it from:
▶ water and moisture
▶ extreme temperatures
▶ impact and dropping
▶ contamination and dust
direct sunlight
▶ heat and cold
• The cuffs are sensitive and must be handled with care.
• Only pump up the cuff once fitted.
- Do not use this device close to strong electromagnetic fields such as mobile telephones or radio installations.
- Do not use this device if you think it is damaged or notice anything unusual.
- Never open this device.
- If the device is not going to be used for a prolonged period the batteries should be removed.
- Read the additional safety information in the individual sections of this instructions.

Ensure that children do not use this device unsupervised; some parts are small enough to be swallowed.
Device care
Clean the device only with a soft, dry cloth.
Cleaning the cuff
Carefully remove spots on the cuff with a damp cloth and soapsuds.

WARNING: Do not wash the cuff in a washing machine or dishwasher!
Accuracy test
We recommend this device is tested for accuracy every 2 years or after mechanical impact (e.g. being dropped). Please contact aponorm® by microlife-Service to arrange the test (see foreword).
Disposal

Batteries and electronic devices must be disposed of in accordance with the locally applicable regulations, not with domestic waste.
11. Guarantee
This device is covered by a 5 year guarantee from the date of purchase. The guarantee is valid only on presentation of the guarantee card completed by the dealer (see back) confirming date of purchase or the receipt.
• Batteries and wearing parts are not included.
- Opening or altering the device invalidates the guarantee.
- The guarantee does not cover damage caused by improper handling, discharged batteries, accidents or non-compliance with the operating instructions.
- The cuff is included for the functional guarantee only (tightness) for 2 years.
Please contact aponorm® by microlife-Service (see foreword).
12. Technical Specifications
Operating temperature: 10 - 40 °C / 50 - 104 °F 15 - 95 % relative maximum humidity
Storage temperature: -20 - +55 °C / -4 - +131 °F 15 - 95 % relative maximum humidity
Weight: 354 g (including batteries)
Dimensions: 160 x 80 x 32 mm
Measuring procedure: oscillometric, corresponding to Korotkoff method: Phase I systolic, Phase V diastolic
Measurement range: 20 - 280 mmHg – blood pressure 40 - 200 beats per minute – pulse
Cuff pressure display 0 - 299 mmHg range:
Resolution: 1 mmHg
Static accuracy: pressure within ± 3 mmHg
Pulse accuracy: ± 5 % of the readout value
Voltage source: 4 x 1.5 V Batteries; size AAA Mains adapter DC 6 V, 600 mA (optional)
Reference to standards: EN 1060-1 /-3 /-4; IEC 60601-1; IEC 60601-1-2 (EMC)
This device complies with the requirements of the Medical Device Directive 93/42/EEC.
Technical alterations reserved.
aponorm® Basis Plus – Garantiekarte
Name of Purchaser / Nom de l'acheteur / Nombre del comprador / Nome do comprador / Name des Käufers / Naam koper / Ф.И.О. покупателя / Imię i nazwisko nabywcy / Vásárló neve / Име на купувача / Numele cumpărătorului / Jméno kupujícího / Meno zákazníka / Alicinín Adı / Овоматетпώνυμο αγοραστή
Serial Number / Numéro de série / Número de serie / Número de série / Serien-Nr. / Seriennummer / Серийный номер / Numer seryjny / Sorozatszám / Сериен номер Număr de serie / Výrobné číslo / Seri Numarası / Аріθμός σειράς
Date of Purchase / Date d'achat / Fecha de compra / Data da compra / Kaufdatum / Datum van aankoop / Дата покупки / Data zakupu / Vásárlás dátuma / Дата на закупуване / Data cumpărării / Datum nákupu / Dátum kúpy / Satın Alma Tarihi / Нμερομηνία αγοράς
Specialist Dealer / Revendeur / Vendedor especializado / Revendedor autorizado / Apotheker / Specialist Dealer / Специализированный дилер / Przedstawiciel / Forgalmazó / Специалист дистрибутор / Distributor de specialitate / Specializovaný dealer / Špecializovaný predajca / Uzman Saticí / Εξειδικευμένος αντιπρόσωπος
Garantiekarte


- TABLE OF CONTENTS
- IMPORTANT FACTS ABOUT BLOOD PRESSURE AND SELF-MEASUREMENT
- USING THE DEVICE FOR THE FIRST TIME
- TAKING A BLOOD PRESSURE MEASUREMENT USING THIS DEVICE
- APPEARANCE OF THE PULSE ARRHYTHMIA INDICATOR FOR EARLY DETECTION
- TRAFFIC LIGHT INDICATOR IN THE DISPLAY
- DATA MEMORY
- BATTERY INDICATOR AND BATTERY CHANGE
- USING A MAINS ADAPTER
- ERROR MESSAGES
- SAFETY, CARE, ACCURACY TEST AND DISPOSAL
- GUARANTEE
- TECHNICAL SPECIFICATIONS
- GUARANTEE CARD
- HOW DO I EVALUATE MY BLOOD PRESSURE
- INSERTING THE BATTERIES
- SETTING THE DATE AND TIME
- MANUAL SETTING
- (IF AUTOMATIC SETTING DOES NOT WORK OR IS NOT DESIRED)
- SELECTING THE CORRECT CUFF
- CHECKLIST FOR TAKING A RELIABLE MEASUREMENT
- HOW NOT TO STORE A READING
- INFORMATION FOR THE DOCTOR ON FREQUENT APPEARANCE OF THE ARRHYTHMIA INDICATOR
- VIEWING THE STORED VALUES
- MEMORY FULL
- CLEARING ALL VALUES
- LOW BATTERY
- FLAT BATTERY – REPLACEMENT
- WHICH BATTERIES AND WHICH PROCEDURE
- USING RECHARGEABLE BATTERIES
- ETY AND PROTECTION
- DEVICE CARE
- CLEANING THE CUFF
- ACCURACY TEST
- DISPOSAL
- APONORM® BASIS PLUS – GARANTIEKARTE
- GARANTIEKARTE
Brand : Aponorm
Model : Basis Plus
Category : Sphygmomanometer