
CDX-1 - CD Player ROLAND - Free user manual and instructions
Find the device manual for free CDX-1 ROLAND in PDF.


| Product Type | Digital Audio Workstation / CD Player |
| Brand | Roland |
| Model | CDX-1 |
| Category | CD Player / Multitrack Recorder |
| Power Supply | AC Adaptor PSB-2U (12V/2.8A) |
| Display | Liquid Crystal Display with time, marker, track info |
| Recording Media | CD-R, CD-RW discs |
| Audio Formats | Audio CD (CD-DA), WAV file loading |
| Number of Audio Tracks | 8 audio tracks (plus stereo master) |
| Effects | Insert effects (COSM amp sim, multi-effects) and Loop effects (chorus, delay, reverb) |
| Sampling | 8 pads, 64 banks; up to 128 MB RAM (expandable via DIMM) |
| Sequencer | Pattern sequencer with realtime and step recording |
| Inputs | MIC1 (XLR/phone), MIC2/GUITAR/BASS (high-Z), LINE (RCA), Digital (coaxial/optical) |
| Outputs | MASTER (RCA), PHONES (stereo), Digital (coaxial/optical) |
| MIDI | IN, OUT/THRU connectors |
| Dimensions (approx.) | 482 mm (W) x 300 mm (D) x 100 mm (H) |
| Weight (approx.) | 5.0 kg |
| Safety | Class 1 laser product; observe warnings in manual |
| Cleaning | Wipe with soft dry cloth; do not use solvents |
| Repairability | Refer to Roland Service Center; do not disassemble |
Frequently Asked Questions - CDX-1 ROLAND
User questions about CDX-1 ROLAND
0 question about this device. Answer the ones you know or ask your own.
Ask a new question about this device
Download the instructions for your CD Player in PDF format for free! Find your manual CDX-1 - ROLAND and take your electronic device back in hand. On this page are published all the documents necessary for the use of your device. CDX-1 by ROLAND.
USER MANUAL CDX-1 ROLAND
natural_image
Exterior view of a CDL380 audio workstation (no visible text or symbols on the device body)Before using this unit, carefully read the sections entitled: "USING THE UNIT SAFELY" and "IMPORTANT NOTES" (Owner's manual p. 2, 3, 9, 10). These sections provide important information concerning the proper operation of the unit. Additionally, in order to feel assured that you have gained a good grasp of every feature provided by your new unit, Owner's manual should be read in its entirety. The manual should be saved and kept on hand as a convenient reference.
USING THE UNIT SAFELY
INSTRUCTIONS FOR THE PREVENTION OF FIRE, ELECTRIC SHOCK, OR INJURY TO PERSONS
About ⚠ WARNING and ⚠ CAUTION Notices
 | Used for instructions intended to alert the user to the risk of death or severe injury should the unit be used improperly. |
 | Used for instructions intended to alert the user to the risk of injury or material damage should the unit be used improperly.* Material damage refers to damage or other adverse effects caused with respect to the home and all its furnishings, as well to domestic animals or pets. |
About the Symbols
| [XYA] | The △symbol alerts the user to important instructions or warnings. The specific meaning of the symbol is determined by the design contained within the triangle. In the case of the symbol at left, it is used for general cautions, warnings, or alerts to danger. |
| [327C] | The ⊗ symbol alerts the user to items that must never be carried out (are forbidden). The specific thing that must not be done is indicated by the design contained within the circle. In the case of the symbol at left, it means that the unit must never be disassembled. |
 | The ● symbol alerts the user to things that must be carried out. The specific thing that must be done is indicated by the design contained within the circle. In the case of the symbol at left, it means that the power-cord plug must be unplugged from the outlet. |
ALWAYS OBSERVE THE FOLLOWING
WARNING
- Before using this unit, make sure to read the instructions below, and the Owner's Manual.

- Do not open or perform any internal modifications on the unit or its AC adaptor. (The only exception would be where this manual provides specific instructions which should be followed in order to put in place user-installable options; see p. 15.)

- Do not attempt to repair the unit, or replace parts within it (except when this manual provides specific instructions directing you to do so). Refer all servicing to your retailer, the nearest Roland Service Center, or an authorized Roland distributor, as listed on the "Information" page.

- Never use or store the unit in places that are:
- Subject to temperature extremes (e.g., direct sunlight in an enclosed vehicle, near a heating duct, on top of heat-generating equipment); or are
- Damp (e.g., baths, washrooms, on wet floors); or are
- Humid; or are
- Exposed to rain; or are
- Dusty; or are
- Subject to high levels of vibration.
• Make sure you always have the unit placed so it is level and sure to remain stable. Never place it on stands that could wobble, or on inclined surfaces.

WARNING

- If this adaptor is used while it is emitting smoke, generating a strange odor or making an abnormal noise, it could cause fire or electric shock. Turn off the main switch immediately, then be sure to pull the power plug from the outlet. After making sure that smoke is no longer emitted, take it to your retailer, the nearest Roland Service Center, or an authorized Roland distributor, as listed on the "Information" page.
- During a thunder storm, do not touch the electric plug. Doing so could cause electric chock.

- Be sure to use only the AC adaptor supplied with the unit. Also, make sure the line voltage at the installation matches the input voltage specified on the AC adaptor's body. Other AC adaptors may use a different polarity, or be designed for a different voltage, so their use could result in damage, malfunction, or electric shock.

- Do not excessively twist or bend the power cord, nor place heavy objects on it. Doing so can damage the cord, producing severed elements and short circuits. Damaged cords are fire and shock hazards!

- This unit, either alone or in combination with an amplifier and headphones or speakers, may be capable of producing sound levels that could cause permanent hearing loss. Do not operate for a long period of time at a high volume level, or at a level that is uncomfortable. If you experience any hearing loss or ringing in the ears, you should immediately stop using the unit, and consult an audiologist.

WARNING
- Do not allow any objects (e.g., flammable material, coins, pins); or liquids of any kind (water, soft drinks, etc.) to penetrate the unit.


- Immediately turn the power off, remove the AC adaptor from the outlet, and request servicing by your retailer, the nearest Roland Service Center, or an authorized Roland distributor, as listed on the "Information" page when:

- The AC adaptor, the power-supply cord, or the plug has been damaged; or
- Objects have fallen into, or liquid has been spilled onto the unit; or
- The unit has been exposed to rain (or otherwise has become wet); or
- The unit does not appear to operate normally or exhibits a marked change in performance.
- In households with small children, an adult should provide supervision until the child is capable of following all the rules essential for the safe operation of the unit.

- Protect the unit from strong impact. (Do not drop it!)

- Do not force the unit's power-supply cord to share an outlet with an unreasonable number of other devices. Be especially careful when using extension cords—the total power used by all devices you have connected to the extension cord's outlet must never exceed the power rating (watts/amperes) for the extension cord. Excessive loads can cause the insulation on the cord to heat up and eventually melt through.

- Before using the unit in a foreign country, consult with your retailer, the nearest Roland Service Center, or an authorized Roland distributor, as listed on the "Information" page.

- Always turn the unit off and unplug the AC adaptor before attempting installation of the memory DIMM board (p. 14).

- DO NOT play a CD-ROM disc on a conventional audio CD player. The resulting sound may be of a level that could cause permanent hearing loss. Damage to speakers or other system components may result.

CAUTION
- The unit and the AC adaptor should be located so their location or position does not interfere with their proper ventilation.

- Always grasp only the plug on the AC adaptor cord when plugging into, or unplugging from, an outlet or this unit.

- Whenever the unit is to remain unused for an extended period of time, disconnect the AC adaptor.

- Try to prevent cords and cables from becoming entangled. Also, all cords and cables should be placed so they are out of the reach of children.

- Never climb on top of, nor place heavy objects on the unit.

- Never handle the AC adaptor or its plugs with wet hands when plugging into, or unplugging from, an outlet or this unit.

- Before moving the unit, disconnect the AC adaptor and all cords coming from external devices.

- Before cleaning the unit, turn off the power and unplug the AC adaptor from the outlet (p. 34).

- If the power plug is damaged, or if the plug is loose when plugged into the outlet, do not use the AC power adapter. Doing so could cause electric shock, short circuit, or fire.

- Whenever you suspect the possibility of lightning in your area, disconnect the AC adaptor from the outlet.

- Install only the specified memory DIMM board. Remove only the specified screws (p. 14).

- Should you remove ground screws and screws fastening the expanding memory cover, make sure to put them in a safe place out of children's reach, so there is no chance of them being swallowed accidentally.

IMPORTANT NOTES ......9
Introduction.... 11
Before you begin....12
Check the contents of the package....12
Main features of the CDX-1....12
Expanding the memory ....14
Precautions for expanding memory....14
How to expand the memory 15
Removing the memory....16
Verifying that the memory is recognized by the CDX-1 16
Verify that the memory module has been installed in the socket correctly .....16
Memory read/write test—DIMM diagnostics....17
Learning about CD-R/RW discs....18
What is a CD-R/RW disc? 18
What is a CD-R disc? 18
What is a CD-RW disc? 18
Writing to a CD-R disc 18
Discs for use on the CDX-1....19
List of usable discs for each operation....19
Recommended CD-R/CD-RW discs....19
CD-R/RW disc handling and cleaning 20
Disc handling....20
Disc cleaning....20
Panel Descriptions....21
Top Panel 21
Front Panel....30
Rear Panel 30
Basic operation of the CDX-1 32
Connecting peripheral equipment....32
Turning the Power On and Off 33
Turning On the Power....33
Turning Off the Power 34
Inserting/removing a disc 35
Inserting a disc....35
Removing a disc 36
Switching among the Basic screens 37
The Basic screens....37
If you are confused about operations or screens—Going back to the Basic screen....38
Adjusting the brightness of the screen display—Contrast 38
Switching the Big Time display 38
Viewing information on the CD-RW disc—Song Information screen....39
Naming a song (CD-RW disc)....39
Returning the CDX-1 to the factory settings—Initialize 40
What you need to do to create your own CD 42
Steps taken in producing an original CD 42
Listening to the demo disc....45
Playing the demo disc 45
How to play an audio CD—the CD Player....48
About the Display 48
CD Player screen 48
Switching the time display 48
Playing and stopping a song....49
Playing/stopping an audio CD....49
Changing the playback location....50
Moving to the previous/next track 50
To go back to the beginning of an audio CD 50
Rewind/fast-forward 50
Repeatedly playing a specified region—the Repeat function....51
Registering the repeat region 51
Canceling the repeat region....51
Changing the way in which audio CD volume is adjusted ....52
Collecting audio material.... 53
Recording a sound to a pad—Sampling....54
What is sampling? 54
Pads and banks 54
Eight pads and 64 pad banks....54
Switching pad banks....54
Naming a pad bank 55
Sampling to a pad....56
Sampling an external sound 56
Sampling from a CD audio clip collection inserted in the CDX-1....57
Loading a Windows WAVE file....58
Using free audio sources from the Internet....59
Making settings in the Sampling screen 60
Selecting the audio quality and sampling time appropriate for the material—Data Type....60
Specifying stereo or mono—Type 61
Automatically start sampling when sound is input—Start with....61
Making sure to capture the beginning of the sound—Pre Trigger.... 62
Sampling from a pad to another pad—Resampling....63
If the display indicates "Memory Full." 64
Increasing the Remaining Memory—Optimize Sample....64
Deleting a sample—Delete Sample 65
Deleting samples individually 65
Deleting all samples of a pad bank—Bank Erase....65
Preventing accidental erasure of pads—Bank Protect....66
Protecting/unprotecting a pad bank 66
Saving Pad/Sequence on a CD-RW disc 67
More about saving Pad/Sequence 67
Saving Pad/Sequence....67
Loading Pad/Sequence from a CD-RW disc....68
Playing the pad samples....69
Basic ways to play samples....69
Playing a sample 69
Adjusting the Overall Sample Volume 69
Playing samples simultaneously....69
Playing pads while audio tracks play back....69
Playing pads while you play back an audio CD 69
Changing how a pad starts and stops sounding—Pad Play....70
Crossfading the pad samples you play—Pad Crossfade....71
Making the sound continue even after you release the pad—Hold....72
Using Hold....72
Using Hold for multiple samples 72
Playing repeatedly—Loop mode....73
Preventing specific samples from sounding simultaneously—Mute Groups....74
Playing a sample from a connected foot switch 75
Specifying the Function of the Foot Switch....75
Specifying the pad sample that will be played by the foot switch ....75
Editing the sample of a pad 76
Adjusting the volume of a sample—Sample Level 76
Displaying the correct tempo of a sample 77
Adjusting the start/end points of the sound—Trim Sample ....78
What are the Start/Loop points and Length? 78
Setting each point....78
Automatically removing Empty Portion at the Beginnings and Ends of Samples .....79
Expanding and Compressing a sample to modify the length or tempo.... 80
Matching the tempo to another sample—Tempo Match 80
Expanding/compressing by a specified percentage or tempo—Time Stretch ....81
Copying a sample to another pad—Clipboard 82
Splitting a sample among several pads—Divide Sample.... 83
Specifying a division point and dividing a sample in two 83
Automatically dividing a sample at silent portions....84
Dividing a sample at the timing that you press a button.... 85
Creating a "reverse tape" style sample—Create Reversal....86
Boosting the sample level as high as possible—Normalize 87
Arranging audio samples to create a song—Sequence....88
What is a sequence? 88
About the sequence tracks....88
About the tempo of the sequence 88
Recording pad operations as you play pads—Realtime Recording....90
Realtime recording....90
Recording while you listen to the playback of another sequence track....91
Recording while you listen to the playback of the audio tracks....91
Correcting timing inaccuracies while you record—Quantize.... 92
Recording pad operations at the specified interval—Step Recording....93
Button functions during step recording 93
Step recording....94
Adding dynamics while you step-record....95
Playing a sequence track....96
Playing sequence tracks and audio tracks simultaneously....97
Editing a sequence track 98
Moving a phrase—Move....98
Pasting a phrase at a different location—Paste....99
Cutting a phrase—Cut....100
Erasing Phrases—Erase....101
Inserting a phrase in another location—Insert 102
Dividing the phrase at the current location—Split 103
Finely Adjusting the Timing of Each Phrase—Adjust Timing....104
Adjusting the volume setting for each phrase....105
Edit on Sequence Play List screen—Quick Edit 106
Deleting a sequence track....107
Recording the sequence playback sound on audio track.... 108
Creating an audio CD 109
Prepare for recording—Multitrack recording....110
What is multitrack recording?......110
Preparing a CD-RW disc for use —Format....110
Preparing a new CD-RW disc for use 110
Erasing the entire contents of a CD-RW disc 112
Monitoring the sound of a connected instrument 113
Selecting the input source....113
Adjusting the input sensitivity....113
Monitoring the sound....113
Setting the left/right position (pan) of the input sound 113
Tuning an instrument—Tuner....114
Adjusting the Tuning....114
Setting the reference pitch of the tuner....115
Using the rhythm guide 116
Playing/stopping the rhythm guide....116
Adjusting the Volume of the Rhythm Guide....116
Changing the time signature....116
Changing the rhythm pattern....117
Changing the tempo 117
Setting the tempo and rhythm pattern of the song—Tempo Map ....117
Deleting a tempo map 118
Playing the rhythm guide according to the tempo map 118
Recording/playing back a performance....119
Recording a Performance....119
Select the audio track for recording....119
Record 120
Re-recording only a mistake—Punch-in/out....121
Using the Record button to punch-in/out 121
Using a foot switch to punch-in/out....122
Automatically punching-in/out at a specified location—Auto Punch-in/out....122
Recording an additional performance while listening to an existing performance—Overdubbing.....124
Select the audio track to record 124
Recording while you listen to the playback.... 124
Combining the performances of multiple audio tracks—Bounce Recording....125
Bounce recording procedure 125
Playing back and stopping a recorded performance....126
Playing back/stopping....126
Adjusting the volume of each track.... 126
Silencing a specific audio track—Mute....126
Saving Song settings on a CD-RW disc 126
Saving Song settings 126
Increasing the free space on a CD-RW disc—Optimize Disc.... 127
Repeatedly playing a specified region—the Repeat function....128
Registering the repeat region 128
Canceling the registration....128
Assigning markers within a song—Marker....129
Assigning a marker....129
Moving to the location of a marker 129
Deleting a marker....129
Changing the location of a marker 130
Naming a marker 130
Stopping the song automatically—Marker Stop....131
Editing a recorded performance to create an audio CD....132
Preparing to write a CD-R disc—Mixdown 132
Setting the left/right position (pan) of each audio track....132
Adjusting the tone of each audio track—Equalizer.... 132
Adjusting the overall volume balance—Master Balance 132
Mixing down....133
Listen to the result of Mixing down 133
Adjusting the mastering tools 134
Completing your original CD—CD Burning....135
Writing to a CD-R disc 135
Finishing the CD Burning 135
Finalizing a CD-R disc....136
More functions for the CDX-1 ....138
Undoing a recording/editing operation 138
Undoing a recording or editing operation—Undo 138
Canceling the Undo—Redo 138
Cueing to a precise location—Preview....139
Adjusting the current location while listening to the preceding and/or following sound .....139
Using Scrub to make fine adjustments in the cue location—Scrub Preview....140
Using the insert effects....141
What is an insert effect? 141
What is a patch?....141
How the patches are organized 141
Using an insert effect....142
Editing the insert effect settings....142
Saving insert effect settings 143
Copying a patch to create a new patch....143
Changing the insert effect connections....144
Using the loop effects....145
What is a loop effect? 145
Editing the loop effect settings....145
Creating a backup CD-RW disc....147
Backing up song data on a CD-RW disc....147
Connecting with a digital audio device 148
In Order to Make a Digital recording with CD player 148
To Prevent Digital recording with CD players....149
Prohibiting digital copying—Digital Copy Prohibit....150
Using the CDX-1 with other MIDI devices....151
MIDI Fundamentals....151
Switching MIDI OUT/THRU....152
Using MIDI to control the CDX-1 from another device....153
Play samples 153
Switch the pad bank 153
Synchronized playback with the CDX-1 as the master....154
Using MTC (master) 154
Using MMC 156
Using the CDX-1 as the MMC master.... 156
Using the CDX-1 as an MMC slave 157
Using an external MIDI sound module to play the rhythm guide....158
How the rhythm guide sounds correspond to note numbers....158
CD direct recording.... 159
Recording to a CD-R disc—CD Recorder....160
Recording an external audio source to a CD-R disc 161
Recording samples played using Pad Crossfade on a CD-R disc....162
Recording the sequence playback on a CD-R disc 163
Appendices 165
Troubleshooting....166
Major Message List 170
Rhythm Pattern List....172
Mixer effect parameter functions....174
Insert effect algorithm list 175
Glossary....204
Parameter List....208
MIDI Implementation 212
Mixer Block Diagram....217
Specifications 218
Index....220
In addition to the items listed under "USING THE UNIT SAFELY" on p. 2–3, please read and observe the following:
Power Supply
- Do not use this unit on the same power circuit with any device that will generate line noise (such as an electric motor or variable lighting system).
- The AC adaptor will begin to generate heat after long hours of consecutive use. This is normal, and is not a cause for concern.
- Before connecting this unit to other devices, turn off the power to all units. This will help prevent malfunctions and/or damage to speakers or other devices.
Placement
- Using the unit near power amplifiers (or other equipment containing large power transformers) may induce hum. To alleviate the problem, change the orientation of this unit; or move it farther away from the source of interference.
- This device may interfere with radio and television reception. Do not use this device in the vicinity of such receivers.
- Observe the following when using the unit's CD-RW drive. For further details, refer to "Before Using Compact Discs" (p. 10).
○ Do not place the unit near devices that produce a strong magnetic field (e.g., loudspeakers).
○ Install the unit on a solid, level surface.
○ Do not move the unit or subject it to vibration while the drive is operating.
- Do not expose the unit to direct sunlight, place it near devices that radiate heat, leave it inside an enclosed vehicle, or otherwise subject it to temperature extremes. Excessive heat can deform or discolor the unit.
- To avoid possible breakdown, do not use the unit in a wet area, such as an area exposed to rain or other moisture.
Maintenance
- For everyday cleaning wipe the unit with a soft, dry cloth or one that has been slightly dampened with water. To remove stubborn dirt, use a cloth impregnated with a mild, non-abrasive detergent. Afterwards, be sure to wipe the unit thoroughly with a soft, dry cloth.
- Never use benzine, thinners, alcohol or solvents of any kind, to avoid the possibility of discoloration and/or deformation.
Additional Precautions
- Unfortunately, it may be impossible to restore the contents of data that was stored on a CD-R/RW disc once it has been lost. Roland Corporation assumes no liability concerning such loss of data.
- Use a reasonable amount of care when using the unit's buttons, sliders, or other controls; and when using its jacks and connectors. Rough handling can lead to malfunctions.
- Never strike or apply strong pressure to the display.
- If you put stickers or adhesive tape on the panel surface, peel slowly. Or the prints may be removed together.
- When connecting / disconnecting all cables, grasp the connector itself—never pull on the cable. This way you will avoid causing shorts, or damage to the cable's internal elements.
- To avoid disturbing your neighbors, try to keep the unit's volume at reasonable levels. You may prefer to use headphones, so you do not need to be concerned about those around you (especially when it is late at night).
- When you need to transport the unit, package it in the box (including padding) that it came in, if possible. Otherwise, you will need to use equivalent packaging materials.
- Use a cable from Roland to make the connection. If using some other make of connection cable, please note the following precautions.
Some connection cables contain resistors. Do not use cables that incorporate resistors for connecting to this unit. The use of such cables can cause the sound level to be extremely low, or impossible to hear. For information on cable specifications, contact the manufacturer of the cable.
Electric wave obstacle
- CD-RW drive is authorized to conform to the chapter 15, and the regulation for the division B digital devices of the FCC regulation, which is for the prevention of electric wave obstacle by the installation in the residence. CD-RW drive generates, uses or radiates radio frequency energy, and may cause obstacle to the radio communication if you use it in irregular manners. If the wave jamming may happen on the radio and TV, please try the following. But we cannot guarantee that the obstacle is completely eliminated.
○ Turn off the power of CDX-1.
○ Change the location and direction of the antennae of the radio and TV.
○ Keep CDX-1 and the receiver away.
○ Supply the power to CDX-1 and the receiver from the different power outlet.
○ Consult your nearest Roland Service Center or authorized Roland distributor in your country.
Laser beam
- If you operate the operating section, controlling section and drive section of this device in irregular manners, harmful ray may be radiated. Laser beam radiated from the optical pickup is harmful to your eyes and body. Please observe the following.
○ Do not attempt to open the optical pickup unit.
When you need repair service, call your nearest Roland Service Center or authorized Roland distributor in your country.
Before Using Compact Discs
Handling the CD-RW Drive
- Install the unit on a solid, level surface in an area free from vibration.
- Avoid using the unit immediately after it has been moved to a location with a level of humidity that is greatly different than its former location. Rapid changes in the environment can cause condensation to form inside the drive, which will adversely affect the operation of the drive and/or damage discs. When the unit has been moved, allow it to become accustomed to the new environment (allow a few hours) before operating it.
- Remove any disc from the drive before powering up or down.
- To avoid the risk of malfunction and/or damage, insert only discs with into the CD-RW drive. Never insert any other type of disc. Avoid getting paper clips, coins, or any other foreign objects inside the drive.
- When you carry CDX-1, remove the disc from the loading tray. Do not carry the device with the loading tray downward.
- Avoid vibration and shock during operating. Do not carry with the power on.
- The pickup is designed to be dust-proof. Do not use pickup cleaners, since they may cause malfunction.
Handling Compact Discs (CD-R/ RW/ ROM)
- Upon handling the discs, please observe the following.
○ Do not touch the recorded surface of the disc.
○ Do not use at the places with dust.
○ Do not leave the disc in the direct sunlight or enclosed vehicle (proper temperature: 10-50 degree centigrade).
- Avoid touching or scratching the shiny underside (encoded surface) of the disc. Damaged or dirty discs may not be read/write properly. Keep your discs clean using a commercially available CD cleaner.
- Keep the disc in the case.
- Do not keep the disc in the CD-RW drive for a long time.
- Do not put a sticker on the label of the disc.
- Wipe the disc with a soft and dry cloth radially from inside to outside. Do not wipe along circumference.
- Do not use benzine, record cleaner spray or solvents of any kind.
- Do not bend the disc.
Copyright
- Unauthorized recording, distribution, sale, lending, public performance, broadcasting, or the like, in whole or in part, of a work (musical composition, video, broadcast, public performance, or the like) whose copyright is held by a third party is prohibited by law.
- When exchanging audio signals through a digital connection with an external instrument, this unit can perform recording without being subject to the restrictions of the Serial Copy Management System (SCMS). This is because the unit is intended solely for musical production, and is designed not to be subject to restrictions as long as it is used to record works (such as your own compositions) that do not infringe on the copyrights of others. (SCMS is a feature that prohibits second-generation and later copying through a digital connection. It is built into MD recorders and other consumer digital-audio equipment as a copyright-protection feature.)
- Do not use this unit for purposes that could infringe on a copyright held by a third party. Roland assumes no responsibility whatsoever with regard to any infringements of third-party copyrights arising through your use of this unit.
About the License Agreement
- The CDX-1 and its CD-R capability are designed to allow you to reproduce material to which you have copyright, or material which the copyright owner has granted you permission to copy. Accordingly, reproduction of Music CD or other copyrighted material without permission of the copyright owner avoiding technical prohibiting features of second-generation and later copying like SCMS or others constitutes copyright infringement and may incur penalties even in case such reproduction is for your own personal use and enjoyment (private use). Consult a copyright specialist or special publications for more detailed information on obtaining such permission from copyright holders.
Introduction
Before you begin
Check the contents of the package
The CDX-1 is packaged with the following items. Please make sure that you have all of them.
□ CDX-1 (one unit)
□ CD-RW blank disc (one)
□ Demo disc (Songs, Samples) (one)
□ CDX-1 Owner's Manual (this document)
□ Effect Patch List
□ AC Adopter: USB-2U
About the included disc
• Demo disc (multitrack recording)
This is a demo disc containing a multitrack recording. When you play it back, the state of the multitrack recording will be reproduced. ( “Listening to the demo disc”; p. 45)
Main features of the CDX-1
Easy operation from recording/editing to audio CD production
- The CDX-1 is designed to be operated as easily as a cassette tape recorder, even by beginners. From recording and editing to producing an audio CD, you can experience the power of digital recording from the day you first take it out of the box.
- The liquid crystal display shows icons to indicate various types of information.
Sampling functionality
- The CDX-1's Sampling function lets you record your favorite audio material to a pad (p. 53). You can freely edit the sampled materials. Since edited samples can be added to the instrumental performances that you record, this function gives you a wide range of possibilities for song creation.
- WAVE files can be loaded from a mixed-mode CD (AUDIO+WAVE) and assigned to pads. Simply select from the WAVE files that appear in the display, and press [YES/ENTER].
→ "Loading a Windows WAVE file" (p. 58)
Versatile CD play functions
- Without using any other equipment, you can play back a CD on the CDX-1 while you press the pads to play samples, or input a mic or guitar.
Rhythm Guide function
- The Rhythm Guide function makes it easy to capture phrases or musical ideas that come to mind. Simply select an appropriate rhythm pattern, and set the tempo.
→ "Using the rhythm guide" (p. 116)

DO NOT play the demo disc on a conventional audio CD player. The resulting sound may be of a level that could cause permanent hearing loss. Damage to speakers or other system components may result.

WAVE file (p. 207)
A diverse array of connectors
- The CDX-1 provides four type of input jacks. Since a high impedance phone jack (GUITAR/BASS) is also provided, a guitar or bass can be connected directly.
- RCA phone type MASTER jacks (stereo) are provided.
- Both coaxial type and optical type digital I/O connectors are provided, allowing digital connections to audio devices (e.g., CD players, DAT recorders, MD recorders).
- MIDI connectors (IN, OUT/THRU) are provided. You can synchronize the performance with an external MIDI sequencer, or play the rhythm guide (p. 116) on an external MIDI sound module.
→ "Using the CDX-1 with other MIDI devices" (p. 151)
Digital audio workstation
All processes are fully digital
In addition to a digital mixer and digital disc recorder, the CDX-1 contains two digital effects processors.
Bounce-recording (p. 125), effect processing, mixdown (p. 133), and completing your original CD since a CD-R/RW drive is built in, all processes of the music production process including editing, are performed in full-digital form, preventing any loss of audio signal quality.
Two versatile digital effects processors
The CDX-1 contains two types of effect unit. One type is for recording (insert effect; p. 141) and the other type is independent send/return effects (loop effect; p. 145). These two types can be used simultaneously. This means that the CDX-1 is all you need to produce a sophisticated song without using external effect devices.
A variety of simulations and effects are provided as insert effects, including amp simulations generated using COSM technology. In addition to effects for guitar, numerous multi-effects for vocals or keyboard are also provided.
As loop effects, you can use a broad range of spatial-type effects in stereo, including chorus, delay, and reverb effects that are indispensable for mixdown (p. 133).
By using insert effects and loop effects simultaneously, you can perform all effect processing at once—from creative sound-making to placement in the sound field.
Undo/Redo function
The Undo/Redo function lets you cancel the results of an editing and a recording mistake.
→ "Undoing a recording/editing operation" (p. 138)
Quick movement to a point
You can assign a marker to a desired location (point). If you assign markers to locations such as the end of the opening or the beginning of a solo, you will be able to move instantly to the point where you wish to begin listening.
→ "Assigning markers within a song—Marker" (p. 129)
Expanding the memory
The CDX-1 comes with 32 MB of memory into which audio samples can be loaded. However, in some cases, 32 MB of memory will be insufficient for loading large amounts of data. In such a case, you will have to add separately sold memory (DIMM). Memory can be expanded up to 128 MB.
Before expanding the memory, consult with your retailer, the nearest Roland Service Center, or an authorized Roland distributor.
Precautions for expanding memory
- Always turn the unit off and unplug the AC adaptor before attempting installation of the memory DIMM board.
- Install only the specified memory DIMM board. Remove only the specified screws.
- To avoid the risk of damage to internal components that can be caused by static electricity, please carefully observe the following whenever you handle the board.
Before you touch the board, always first grasp a metal object (such as a water pipe), so you are sure that any static electricity you might have been carrying has been discharged.
○ When handling the board, grasp it only by its edges. Avoid touching any of the electronic components or connectors.
○ Save the bag in which the board was originally shipped, and put the board back into it whenever you need to store or transport it.
- Do not touch any of the printed circuit pathways or connection terminals.
- Never use excessive force when installing a circuit board. If it doesn't fit properly on the first attempt, remove the board and try again.
- When circuit board installation is complete, double-check your work.
- When turning the unit upside-down, get a bunch of newspapers or magazines, and place them under the four corners or at both ends to prevent damage to the buttons and controls. Also, you should try to orient the unit so no buttons or controls get damaged.
- When turning the unit upside-down, handle with care to avoid dropping it, or allowing it to fall or tip over.
- Use a Philips screwdriver of the appropriate size to avoid damaging the screw heads (a number of 2 screwdriver). If an unsuitable screwdriver is used, the head of the screw may be stripped.
-
Turn the screwdriver counter-clockwise to loosen the screws-turn it clockwise to tighten them.
-
Be careful not to cut your hand on the edge of the cover or the opening edge while removing the cover.
- Be careful not to let the screws drop inside the CDX-1's body.
- Do not touch the circuitry or the connectors.
- Do not force a memory board into its slot. If it can't be inserted smoothly, take it out, check its orientation and try again.

tightenloosen
MEMO
If you add 128 MB of separately sold memory, the standard 32 MB of memory will no longer be used.
NOTE
In case of expanding memory other than 128 MB of memory, turn on the power, a message "Wrong DIMM Type! Turn off the power, and replace w/correct one" appears, and. At this time, the CDX-1 will not operate normally.
How to expand the memory
- Turn off the power to the CDX-1 and any connected equipment, and then disconnect all cables attached to the CDX-1.
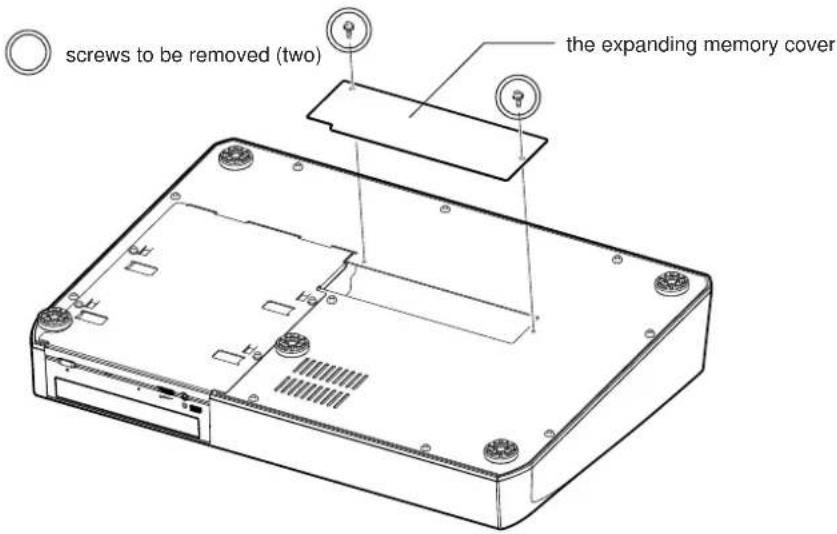
- Turn the CDX-1 upside-down, and remove the expanding memory cover.
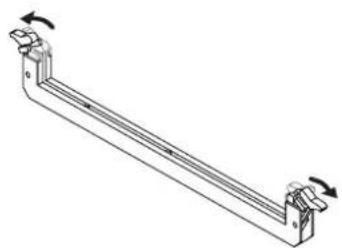
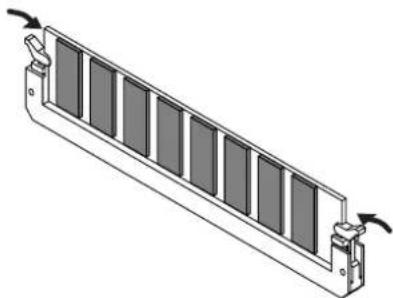
- Press outward the white clips at either end of the socket should be in the downward position.
natural_image
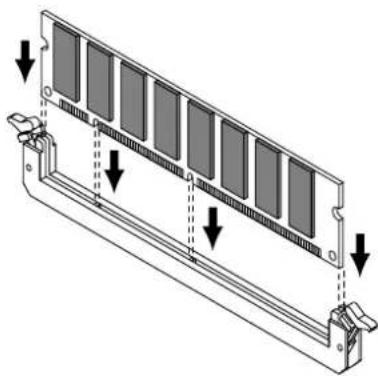
Technical line drawing of a mechanical lever or support structure with rotational arrows indicating motion (no text or symbols)- Paying attention to the location of the notch on the memory module and the orientation, insert it vertically within the guides at either side of the socket.
natural_image
Technical diagram of a rectangular electronic component with multiple slots and mounting brackets, showing alignment arrows (no text or symbols)- Move the white clips upward, and press them until the memory module is locked in place.
natural_image
Technical line drawing of a mechanical component with multiple slots and mounting brackets (no text or symbols)- Return the CDX-1's top cover to its original position.

When turning the unit upside-down, get a bunch of newspapers or magazines, and place them under the four corners or at both ends to prevent damage to the buttons and controls. Also, you should try to orient the unit so no buttons or controls get damaged.

If you have difficulty inserting the memory module, try tilting it a bit and inserting one end at a time.
Expanding the memory
Removing the memory
To remove the memory module, reverse the installation procedure.
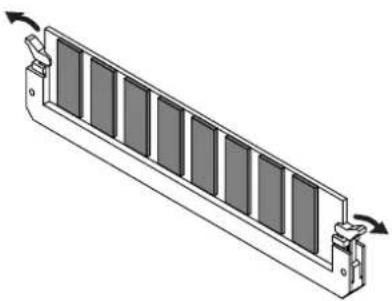
- Simultaneously press outward the white clips located at either end of the socket.
natural_image
Isometric diagram of a rectangular device with internal vertical slots and mounting feet, showing rotational arrows (no text or symbols)- Remove the memory module from the socket.
Verifying that the memory is recognized by the CDX-1
Before re-connecting the CDX-1 to any peripheral devices, check to verify that the added memory is being correctly recognized.
Verify that the memory module has been installed in the socket correctly
- Turn on the power, as described in "Turning On the Power" (p. 33).
After several seconds when the CDX-1 starts up normally, the post-fader screen appears.
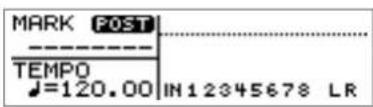
- Press [UTILITY].
The Menu are displayed as icon.
- Press CURSOR [] to select the DIMM Diagnosis icon.
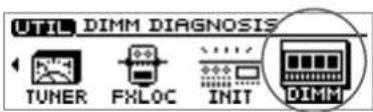
- Press [YES/ENTER].
The DIMM Diagnosis screen appears. "DIMM" will indicate status the expanding internal memory. If the memory has been detected correctly, this will indicate "INSTALLED."
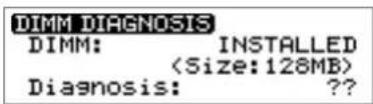
* If "DIMM" shows "NOT INSTALLED" even though you installed expanding memory, the added memory has not been detected correctly. As described in "Turning off the power" (p. 34), turn off the power. Please re-install the memory correctly, as described in "How to expand the memory" (p. 15).
- Press [DISPLAY] to return to the Basic screen.
NOTE
In case of expanding memory other than 128 MB of memory, turn on the power, a message "Wrong DIMM Type! Turn off the power, and replace w/correct one" appears, and. At this time, the CDX-1 will not operate normally.
Memory read/write test—DIMM diagnostics
You can perform a read/write test to see whether the additional wave memory you installed can be used by the CDX-1. Perform this test after installing memory, or if an error message relating to memory is displayed.
- Press [UTILITY].
The Menu are displayed as icon.
-
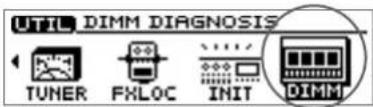
Press CURSOR [] to select the DIMM Diagnosis icon.
-
Press [YES/ENTER].
The DIMM Diagnosis screen appears.
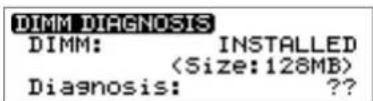
- Press [YES/ENTER] to execute the check.
When the test is complete, a screen appears showing its results.
Memory boards that have successfully passed the write/read test are marked "OK" at the "Diagnosis."
Memory boards that have not passed the write/read test are marked "NG" at the "Diagnosis."
* Memory for which "NG" is displayed cannot be used with the CDX-1. In this case, turn off the power as described in "Turning off the power" (p. 34). Then remove the memory as described in "Removing the memory" (p. 16).
* If any pad/sequence is held in internal memory of CDX-1 when you carry out DIMM diagnosis, the massage "You'll lose PAD/SEQ by diagnosis. Sure?" appears.
If you are ready to execute the check, press [YES/ENTER]. Press [NO/EXIT], DIMM diagnosis will be canceled.
- Press [DISPLAY] to return to the Basic screen.
MEMO
"Diagnosis: ??" means that the DIMM has not been
diagnosed. Even if the memory has been diagnosed, the result of diagnosis will be lost when the power is off, and
"Diagnosis: ??" appears when you turn the power on next time.

If the internal memory of the CDX-1 already contains pad/sequence, it will be lost when this procedure is performed. If you wish to keep the pad/sequence, you must save it on a CD-RW disc.
→ "Saving Pad/Sequence" (p. 67)
Learning about CD-R/ RW discs
What is a CD-R/ RW disc?
The CDX-1 lets you record your performances on a CD-RW disc, and finally use a CD-R disc to create an original audio CD. First, here's some basic information on CD-R discs and CD-RW discs.
What is a CD-R disc?
CD-R (Compact Disc Recordable) is a CD to which data can be written. Data can be written only once to a CD-R disc. It is not possible to erase or move the data that has been written. However, you make up to 99 additions to a CD-R disc, as long as free capacity remains.
What is a CD-RW disc?
CD-RW (Compact Disc ReWritable) is a CD that can be written and erased. Data that has been written can be erased, and new data written. A CD-RW disc can be written and erased approximately 1000 times.
Writing to a CD-R disc
There are several ways to write to a CD-R disc. The CDX-1 uses track at once when it creates an original audio CD.
- Track at once:
This method allows writing to be added on a single CD-R disc. As long as capacity remains on the CD-R disc, up to 99 additional writes can be performed as long as you do not finalize the disc. However, if you are writing audio data, it cannot be played on a conventional CD player until you finalize the disc. Also, once a CD-R disc has been finalized, no further additions can be made.

Finalize (p. 204)
Discs for use on the CDX-1
The CDX-1 contains various functions, and the discs it uses will differ depending on the function.
List of usable discs for each operation
| Operation\Disc | CD-R discs | high-speed compatible CD-RW discs |
| Playing a audio (CD-DA) | OK | |
| Multitrack recording | OK | |
| Creating a original audio CD | OK | |
| Backing up song data | OK | |
| Saving pad/sequence data | OK | |
| CD direct recording | OK |
Recommended CD-R/CD-RW discs
- CD-R Disc


You can use CD-R discs that carry these logos.
- CD-RW Disc

You must use high-speed compatible CD-RW discs that carry this logo. The CDX-1 cannot use CD-RW discs that are not high-speed compatible.
Also, we recommend that you use CD-RW discs made by the following manufacturers, whose products Roland has successfully tested for writing.
Ricoh Corporation, Mitsubishi Chemical Corporation
CD-R/ RW disc handling and cleaning
Disc handling
- Do not place a disc in direct sunlight for an extended period of time.
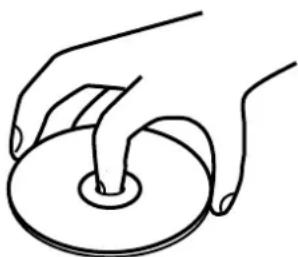
- Hold a disc by inserting a finger in the center hole and pressing your thumb against the outer edge. Be careful not to get fingerprints on, or scratch the recording surface of the disc (the green surface).
natural_image
Line drawing of two hands holding a circular object with a handle (no text or symbols)- Do not drop or stack discs.
- Do not place heavy objects on a disc, or subject it to strong physical shock.
- Do not affix stickers to the label surface of the disc. If a disc is used with a sticker affixed, read/write errors can occur, or the disc may be scratched.
- When writing a title on the label surface of the disc, use a soft-tipped writing implement such as a felt pen.
- To protect the disc, keep it in its original case.
Disc cleaning
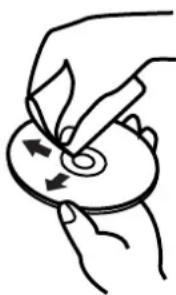
- If dust or dirt adheres to a disc, gently wipe it off with a soft dry cloth. Always wipe from the center of the disc outward toward the outer edge. Never wipe the disc in the direction of rotation.
natural_image
Illustration of a hand holding a small object with arrows indicating motion or force (no text or symbols)Panel Descriptions
Top Panel
INPUT section
flowchart
graph TD
    A["① PEAK indicators"] --> B["INPUT SENS knobs"]
    B --> C["MIN MIC1"]
    B --> D["MIN MIC2/ Gtr/Bs"]
    B --> E["MIN LINE /R DIGITAL"]
    C --> F["L R"]
    D --> F
    E --> F
    F --> G["INPUT SELECT"]
    G --> H["SIMUL"]
    H --> I["③ INPUT SELECT button"]
    I --> J["INPUT REC LEVEL"]
    J --> K["MIN MAX"]
    J --> L["④ INPUT REC LEVEL knob"]
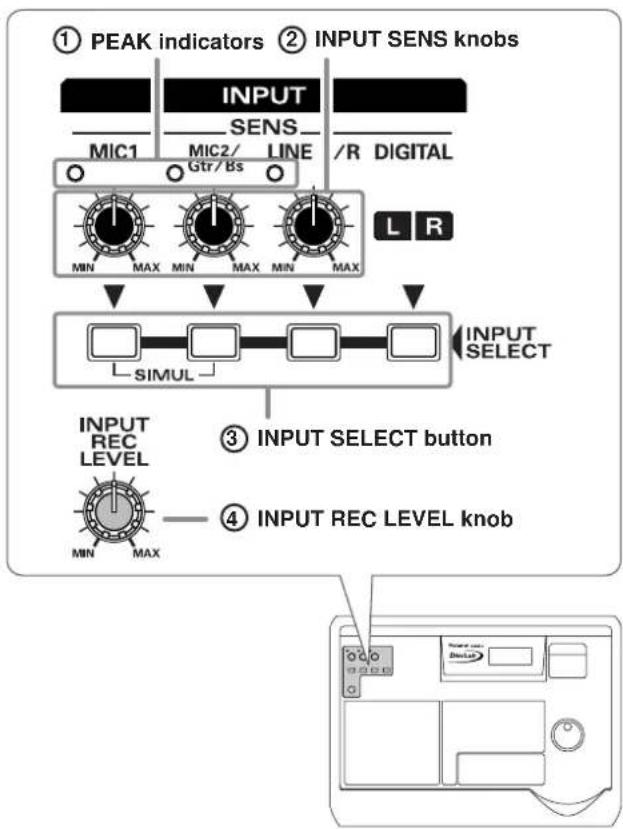
① PEAK indicators
These indicate whether distortion is occurring in the sound that is being input to the respective input jacks (MIC1, MIC2, GUITAR/BASS, LINE).

The PEAK indicator will light at a level below clipping level. Adjust the INPUT SENS knob as high as possible without causing the PEAK indicator to light when the sound is input.
② INPUT SENS knobs
These adjust the input sensitivity of the input jacks (MIC1, MIC2, GUITAR/BASS, LINE).
③ INPUT SELECT buttons
Use these buttons to select the input source (input jack) that you wish to record. The selected button will light. When you press an INPUT SELECT button that is lit, it will go dark, and the input sound will be muted (silenced).
- [MIC1]:
Select this when you wish to record the sound of a mic connected to the MIC1 jack (phone or XLR).
* Do not use identically numbered phone-type and XLR-type MIC jacks simultaneously.
• [ MIC2/Gtr/Bs]:
Select this when you wish to record the sound of a mic connected to the MIC2 jack or the sound of an instrument connected to the GUITAR/BASS jack.
* Do not use identically numbered phone-type and XLR-type MIC jacks simultaneously.
• [LINE]:
Select this when you wish to record the sound of an instrument or CD player connected to the LINE jacks.
• SIMUL [MIC1]+[MIC2]:
When you wish to record vocal and guitar simultaneously, or when you wish to record two mics, press [MIC1] and [MIC2] simultaneously. Both buttons will light, and can be recorded simultaneously.
* If an instrument and mic are connected to both the GUITAR/BASS jack and the MIC2 jack, respectively, the input from the GUITAR/BASS jack will take priority. The input from the mic connected to the MIC2 jack (phone-type/XLR-type) cannot be recorded.
• [DIGITAL]:
Select this when you wish to record the sound of a CD player or MD player connected to the COAXIAL IN connector or OPTICAL IN connector.
When you press [DIGITAL], the connected connector (COAXIAL IN or OPTICAL IN) will be selected automatically.
* If digital audio devices are connected only to coaxial connectors, you can repeatedly press [DIGITAL] to cycle through lit (COAXIAL IN is selected) → blink → OFF (mute).
* If digital audio devices are connected to both the optical and coaxial connectors, the input from the COAXIAL IN will take priority. In this case, you can repeatedly press |DIGITAL| to cycle through COAXIAL IN → OPTICAL IN → OFF (mute).
* Digital audio signals cannot be recorded simply by connecting a digital audio device to the OPTICAL or COAXIAL connector. If you wish to recorded digital audio signals, you must change the settings as described in "In order to make a Digital recording with CD player" (p. 148).
④ INPUT REC LEVEL knob
This adjusts the volume of the input source or the recording level of the input source that you are recording.
* If you use the INPUT REC LEVEL knob to turn down the volume of the input source during recording, the sound will be recorded in the audio track or pad at a low volume, so that noise will be more apparent when you raise the volume of the audio track or pad for playback. If you wish to lower the volume of the input source you are hearing, use the MASTER fader or the phone knob to lower the volume.
Panel Descriptions
INSERT EFFECTS section
Here you can make settings for the insert effect.
→ "Using the insert effects" (p. 141), "Insert effect algorithm list" (p. 175)
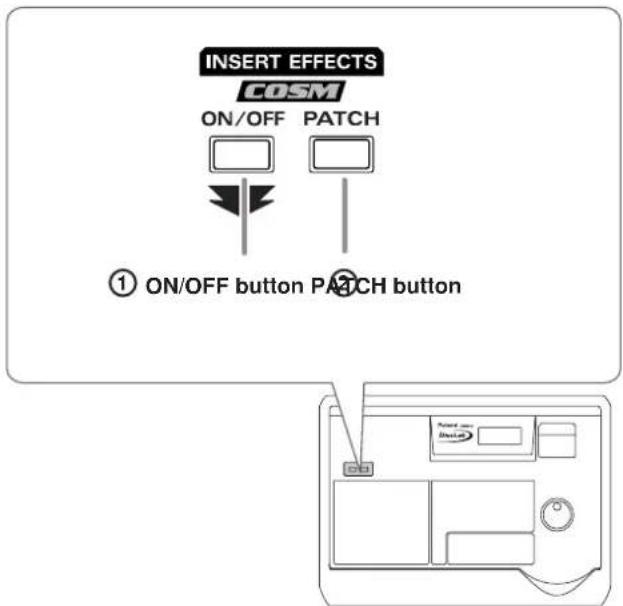
① ON/OFF button
This button switches Insert Effect on and off.
② PATCH button
Here you can switch the parameters displayed in the edit section, and change the type of curve.
PHONES Section
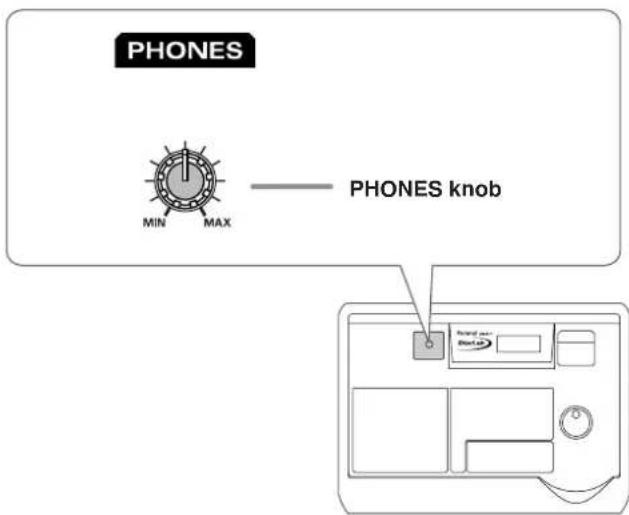
PHONES knob
This knob adjusts the volume of the headphones.
LOOP EFFECTS section
Here you can make settings for the loop effects.
→ "Using the loop effects" (p. 145), "Mixer effect parameter functions" (p. 174)
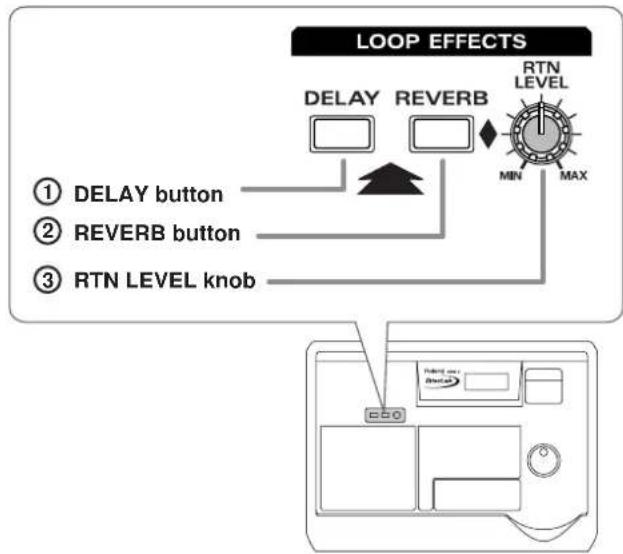
flowchart
graph TD
    A["LOOP EFFECTS"] --> B["① DELAY button"]
    A --> C["② REVERB button"]
    A --> D["③ RTN LEVEL knob"]
    B --> E["DELAY"]
    C --> F["REVERB"]
    D --> G["RTN LEVEL"]
    H["MIN MAX"] --> I["Device 1"]
    I --> J["Control panel with 'Control' icon"]
    style A fill:#f9f,stroke:#333
    style H fill:#ccf,stroke:#333
① DELAY button
This button accesses a screen where you can set the volume (send level) that is sent from each audio track to the chorus/delay/doubling loop effect, and a screen where you can edit the chorus/delay/doubling settings.
* Chorus/delay/doubling cannot be used simultaneously. You can select and use only one at a time.
② REVERB button
This button accesses a screen where you can set the volume (send level) that is sent from each audio track to the loop effect, and a screen where you can edit the reverb settings.
③ RTN LEVEL (return level) knob
This knob adjusts the volume that is returned from the reverb (the return level).
AUDIO TRACK section
① STATUS buttons
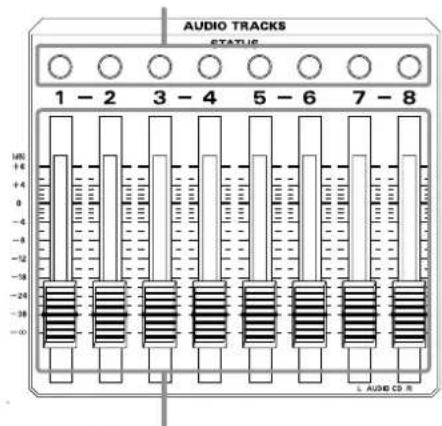
② AUDIO TRACK faders
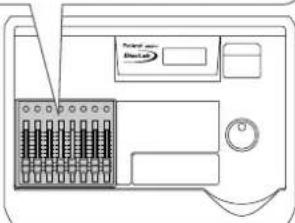
① STATUS buttons 1–8
These switch the status of each audio track. The current status is shown by the color of the button.
- Extinguished: Sound will not be output (i.e., muted).
- Lit in green: The track is ready for playback.
- Blinking in red: The track is selected as a recording destination.
- Lit in red: The track is now being recorded.
② AUDIO TRACK faders
These adjust the volume of each audio track.
TRACK EDIT section
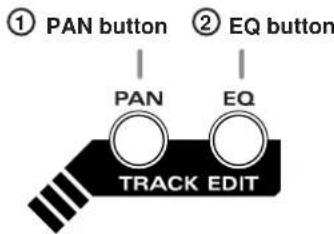
natural_image
Line drawing of a device with buttons and a scroll (no text or symbols)① PAN Button
This displays a screen where you can set pan (left/right positioning of the sound) for each audio track.
→ "Setting the left/right position (pan) of an input sound" (p. 113), "Setting the left/right position of each audio track" (p. 132)
② EQ (Equalizer) Button
This accesses a screen where you can make equalizer settings to modify the tone of each audio track.
→ "Adjusting the tone of each audio track—Equalizer" (p. 132)
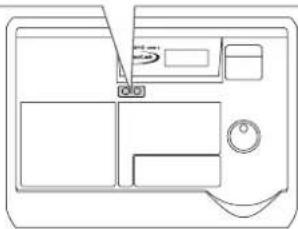
RHYTHM GUIDE section
Here you can make settings for the Rhythm Guide function. → "Using the rhythm guide" (p. 116)
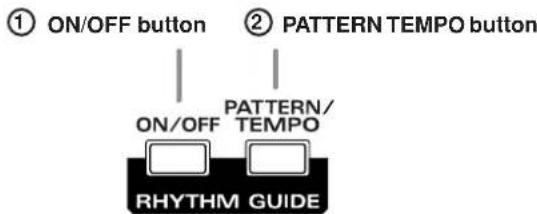
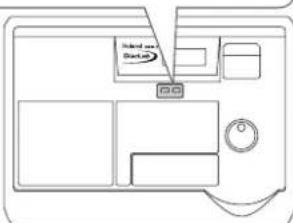
① ON/OFF button
Pressed to cycle the Rhythm Guide function through the available selections: Auto → On → Off.
② PATTERN/TEMPO button
This accesses a screen where you can set the rhythm pattern and tempo.
Panel Descriptions
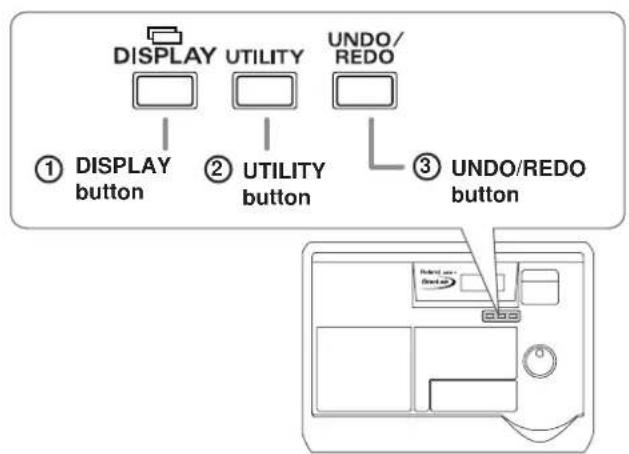
DISPLAY, UTILITY and UNDO/REDO Button
flowchart
graph TD
    A["① DISPLAY button"] --> B["② UTILITY button"]
    B --> C["③ UNDO/REDO button"]
    D["DISPLAY"] --> E["①"]
    F["UTILITY"] --> G["②"]
    H["UNDO/REDO"] --> I["③"]
SAMPLE PADS/SEQUENCING Section
① DISPLAY Button
Use these to move between screen pages in the display.
→ "Switching among the Basic screen" (p. 37)
② UTILITY Button
Displays a screen where you can access a variety of functions, including formatting a CD-RW disc, backing up samples, and initializing the system.
③ UNDO/REDO Button
Cancel the last-performed recording, sampling, or editing operation, and return to the previous state. By pressing [UNDO/REDO] once again, you can bring back the canceled recording or re-execute the editing operation.
→ "Undoing a recording/editing operation" (p. 138)
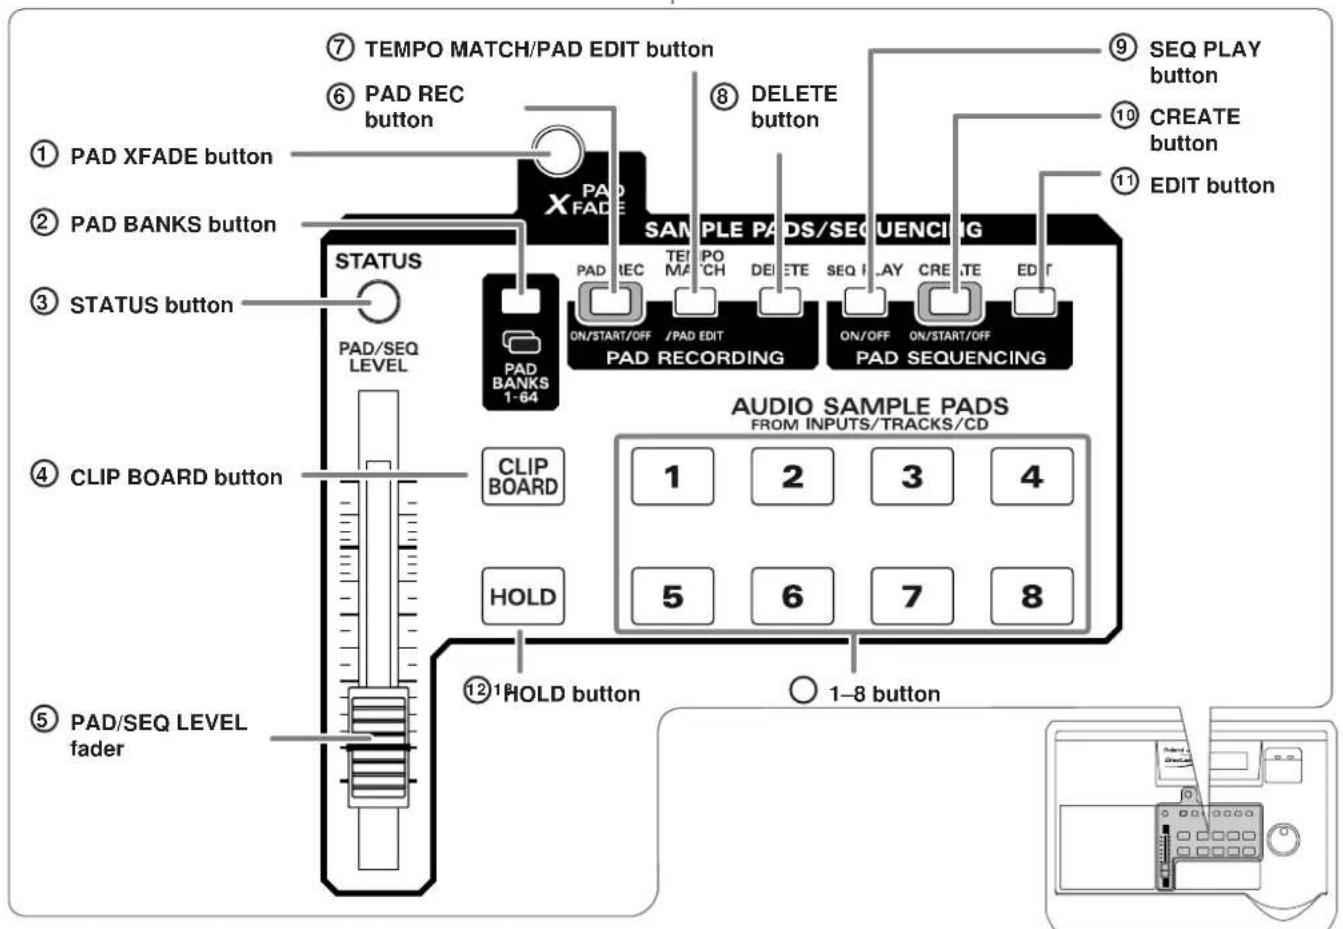
① PAD X FADE (pad crossfade) button
Use this button to play pad samples while crossfading.
If you press another pad while a sample is already sounding, the currently sounding sample will be faded-out, and the sample of the pad you pressed subsequently will fade-in and begin sounding.
→ "Crossfading the pads you play—Pad Crossfade" (p. 71)
② PAD BANKS Button
This displays a list of the 64 pad banks.
→ "Switching pad banks" (p. 54)
③ STATUS Button
The color of the button will indicate the current status.
Lit in green: Play back samples and the sequence track.
Lit in red: Record to the pads or sequence track.
* In order to play back a sequence track, turn PAD SEQUENCING [SEQ PLAY] on (lit).
④ CLIPBOARD Button
Use this when you want to copy a sample from one pad to another.
→ "Copying a sample to another pad—Clipboard" (p. 82)
⑤ PAD/SEQ LEVEL fader
This adjusts the volume of the pad samples and sequence.
⑥ PAD REC (pad recording) button
This button starts/ends sampling.
→ "Sampling to a pad" (p. 56)
⑦ TEMPO MATCH/PAD EDIT button
Pressed to toggle between the Tempo Match setting screen and the Sample Edit screen.
⑧ DELETE button
This button deletes the sample of a pad.
→ "Deleting samples individually" (p. 65)
⑨ SEQ PLAY (sequence play) button
Turns the Sequencing function on/off.
Turn this on (lit) when you wish to edit or play a sequence track.
⑩ CREATE Button
Use this when you wish to create a sequence (i.e., to record a sequence of pads).
→ Recording pad operations as you play pads—Realtime Recording" (p. 90), "Recording pad operations at the specified interval—Step Recording" (p. 93)
⑪ EDIT Button
The Sequence Track Edit screen appears.
→ "Editing a sequence track" (p. 98)
⑫ HOLD Button
The sound will continue playing even after you release your hand from the pad.
→ "Making the sound continue even after you release the pad—Hold" (p. 72)
⑬ 1–8 Buttons
Up to eight samples can be assigned to these pads. Pads to which a sample is assigned will light. The way in which the sample plays and stops can be specified independently for each pad.
→ "Changing how a pad start and stops sounding—Pad Play" (p. 70)
AUDIO CD Section
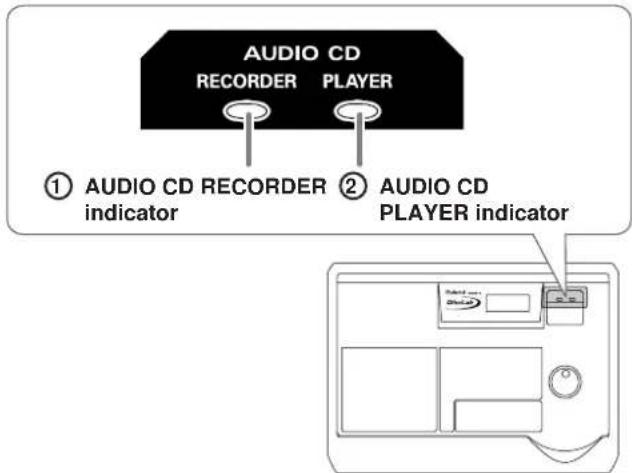
* If you insert a not finalized CD-R disc, both the RECORDER and PLAYER indicators will light.
① AUDIO CD RECORDER indicator
This will light when a new CD-R disc is inserted.
This indicates that the audio input from an external source, the sound of samples being played using pad crossfade, or the playback sound from a sequence track can be recorded directly to a CD-R disc.
→ "CD direct recording" (p. 159)
② AUDIO CD PLAYER indicator
This will light when an audio CD is inserted.
This indicator will also light if you insert a CD-R disc written audio data.
This will light when a CD-RW disc for use by the CDX-1 (formatting; p. 110) is inserted.
② BOUNCE Button
This button switches to Bounce recording. Use this when you wish to combine multiple audio tracks (1–6 tracks) into two audio tracks.
→ "Combining the performances of multiple audio tracks—BOunce Recording" (p. 125)
③ MIX DOWN Button
This button switches to Mixdown mode. Use this when you wish to combine audio tracks into a master track in order to create an original CD.
→ "Mixing down" (p. 133)
④ CD BURNING Button
This will light when CD Burning mode.
→ "Completing your original CD—CD Burning" (p. 135)
Power Switch
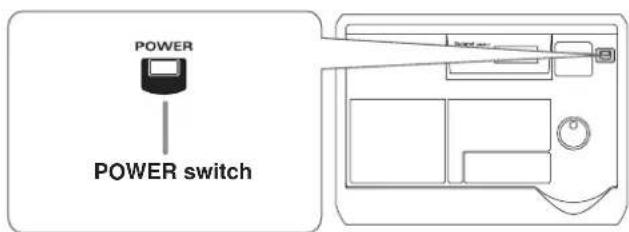
POWER Switch
This is the power switch. It turns the power of the CDX-1 on/off.
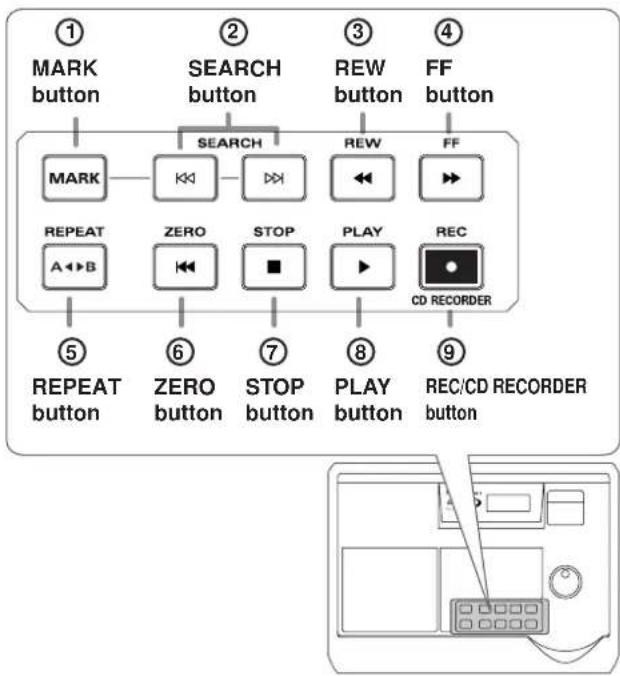
Transport section
flowchart
graph TD
    A["① MARK button"] --> B["② SEARCH button"]
    B --> C["③ REW button"]
    C --> D["④ FF button"]
    B --> E["SEARCH"]
    E --> F["REPEAT"]
    F --> G["REPEAT"]
    G --> H["REPEAT"]
    H --> I["REPEAT"]
    I --> J["REPEAT"]
    J --> K["REPEAT"]
    K --> L["REPEAT"]
    L --> M["REPEAT"]
    M --> N["REPEAT"]
    N --> O["REPEAT"]
    O --> P["REPEAT"]
    P --> Q["REPEAT"]
    Q --> R["REPEAT"]
    R --> S["REPEAT"]
    S --> T["REPEAT"]
    T --> U["REPEAT"]
    U --> V["REPEAT"]
    V --> W["REPEAT"]
    W --> X["REPEAT"]
    X --> Y["REPEAT"]
    Y --> Z["REPEAT"]
    Z --> AA["REPEAT"]
    AA --> AB["REPEAT"]
    AB --> AC["REPEAT"]
    AC --> AD["REPEAT"]
    AD --> AE["REPEAT"]
    AE --> AF["REPEAT"]
    AF --> AG["REPEAT"]
    AG --> AH["REPEAT"]
    AH --> AI["REPEAT"]
    AI --> AJ["REPEAT"]
    AJ --> AK["REPEAT"]
    AK --> AL["REPEAT"]
    AL --> AM["REPEAT"]
    AM --> AN["REPEAT"]
    AN --> AO["REPEAT"]
    AO --> AP["REPEAT"]
    AP --> AQ["REPEAT"]
    AQ --> AR["REPEAT"]
    AR --> AS["REPEAT"]
    AS --> AT["REPEAT"]
    AT --> AU["REPEAT"]
    AU --> AV["REPEAT"]
    AV --> AW["REPEAT"]
    AW --> AX["REPEAT"]
    AX --> AY["REPEAT"]
    AY --> AZ["REPEAT"]
    AZ --> BA["REPEAT"]
    BA --> BB["REPEAT"]
    BB --> BC["REPEAT"]
    BC --> BD["REPEAT"]
    BD --> BE["REPEAT"]
    BE --> BF["REPEAT"]
    BF --> BG["REPEAT"]
    BG --> BH["REPEAT"]
    BH --> BI["REPEAT"]
    BI --> BJ["REPEAT"]
    BJ --> BK["REPEAT"]
    BK --> BL["REPEAT"]
    BL --> BM["REPEAT"]
    BM --> BN["REPEAT"]
    BN --> BO["REPEAT"]
    BO --> BP["REPEAT"]
    BP --> BQ["REPEAT"]
    BQ --> BR["REPEAT"]
    BR --> BS["REPEAT"]
    BS --> BT["REPEAT"]
    BT --> BU["REPEAT"]
    BU --> BV["REPEAT"]
    BV --> BW["REPEAT"]
    BW --> BX["REPEAT"]
    BX --> BY["REPEAT"]
    BY --> BZ["REPEAT"]
    BZ --> CA["REPEAT"]
    CA --> CB["REPEAT"]
    CB --> CC["REPEAT"]
    CC --> CD["REPEAT"]
    CD --> CE["REPEAT"]
    CE --> CF["REPEAT"]
    CF --> CG["REPEAT"]
    CG --> CH["REPEAT"]
    CH --> CI["REPEAT"]
    CI --> CJ["REPEAT"]
    CJ --> CK["REPEAT"]
    CK --> CR["REPEAT"]
    CR --> CS["REPEAT"]
    CS --> CT["REPEAT"]
    CT --> CU["REPEAT"]
    CU --> CV["REPEAT"]
    CV --> CW["REPEAT"]
    CW --> CX["REPEAT"]
    CX --> CY["REPEAT"]
    CY --> CZ["REPEAT"]
    CZ --> DA["REPEAT"]
    DA --> DB["REPEAT"]
    DB --> DC["REPEAT"]
    DC --> DD["REPEAT"]
    DD --> DE["REPEAT"]
    DE --> DF["REPEAT"]
    DF --> DG["REPEAT"]
    DG --> DH["REPEAT"]
    DH --> DI["REPEAT"]
    DI --> DJ["REPEAT"]
    DJ --> DK["REPEAT"]
    DK --> DL["REPEAT"]
① MARK button
This button assigns a marker at the desired location of the song. When you press [MARK], a marker will be assigned to the current location of the song. If you have registered a marker, you will be able to jump instantly to the desired point in the song.
→ "Assigning Markers within a song—Markers" (p. 129)
② SEARCH buttons
- SEARCH []
If the song is stopped, this button takes you back to the previous song. If the song is playing, it returns you to the beginning of the currently playing song.
→ "Moving to the previous/next track" (p. 50)
This button takes you to the location of the previous marker.
→ "Moving to the location of a marker" (p. 129)
- SEARCH []
Jump to the next song.
This button moves you to the location of the next marker.
③ REW (rewind) button
The song will rewind while you hold down the button.
④ FF (fast-forward) button
The song will fast-forward while you hold down the button.
⑤ REPEAT button
You can specify a region that you wish to hear, and play it back repeatedly.
→ "Specify a region and play it back repeatedly—the Repeat function" (CD Player; p. 51), "Repeatedly play back a specified region—the Repeat function" (Multitrack recording; p. 128)
⑥ ZERO button
Returns to the beginning of the song.
⑦ STOP button
Stops recording or playback of the song.
⑧ PLAY button
Plays back songs.
When REC [ ] blinking, pressing PLAY [ ] will start recording.
⑨ REC/CD RECORDER (recording/CD recorder) button
This is the Record button. In addition to the Recording operation, it is also used for manual punch-in/out.
→ "Using the Record button to punch-in/out" (p. 121)
Blinking: indicates recording-standby status.
Lit: indicates that recording in progress.
AUTO PUNCH section
Here you can make settings for the punch-in/out function.
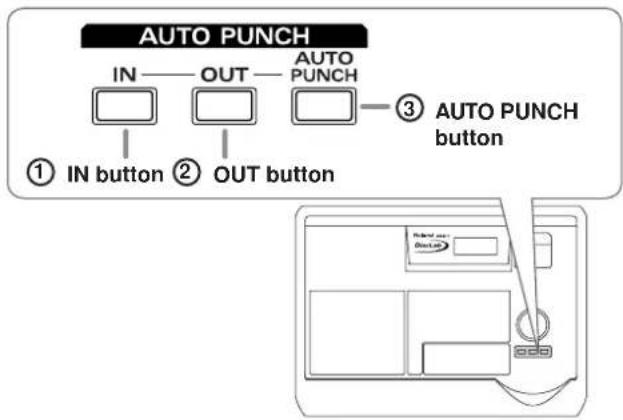
flowchart
graph TD
    A["IN"] --> B["① IN button"]
    C["OUT"] --> D["② OUT button"]
    E["AUTO PUNCH"] --> F["③ AUTO PUNCH button"]
    style A fill:#fff,stroke:#000
    style C fill:#fff,stroke:#000
    style E fill:#fff,stroke:#000
① IN button
This button specifies the punch-in location. When you press [IN], the current location will be memorized as the punch-in location. After you have specified the punch-in location, you can press [IN] to move to the punch-in location.
② OUT button
This button specifies the punch-out location. When you press [OUT], the current location will be memorized as the punch-out location. After you have specified the punch-out location, you can press [OUT] to move to the punch-out location.
③ AUTO PUNCH button
This turns the auto punch-in/out function on/off. When this is on, the button will light. By using the auto punch-in/out function, you can automatically punch-in/out at the previously specified locations.
→ "Automatically punching-in/out at the specified locations—Auto punch-in/out" (p. 122)
PREVIEW section
Here you can make settings for the Preview function.
By using the Preview function, you can precisely adjust the current location while listening to the sound.
→ "Cueing to a precise location—Preview" (p. 139)
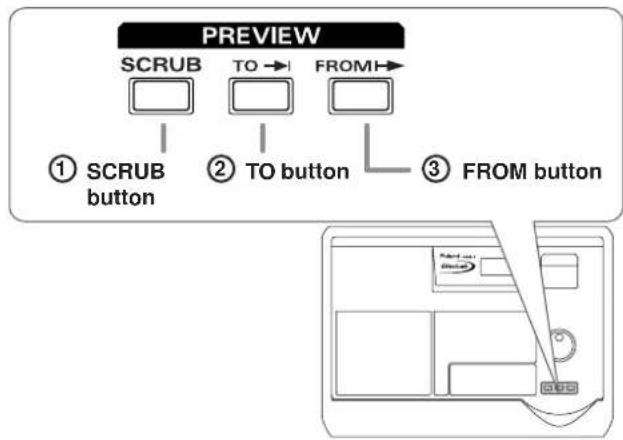
flowchart
graph TD
    A["PREVIEW"] --> B["SCRUB"]
    B --> C{① SCRUB button}
    B --> D{② TO button}
    B --> E{③ FROM button}
    C --> F["User interface with buttons"]
    D --> G["User interface with buttons"]
    E --> H["User interface with buttons"]
① SCRUB button
This button causes an extremely short region of sound that ends or begins at the current location to be played repeatedly (p. 140).
② TO button
This button plays the sound from a point one second earlier than the current location to the current location (once only). If you are in Scrub mode, pressing [TO] will select the region ending at the current location as the scrub region.
③ FROM button
This button plays the sound from the current location to a point one second later (once only).
If you are in Scrub mode, pressing [FROM] will select the region beginning at the current location as the scrub region.
Control section
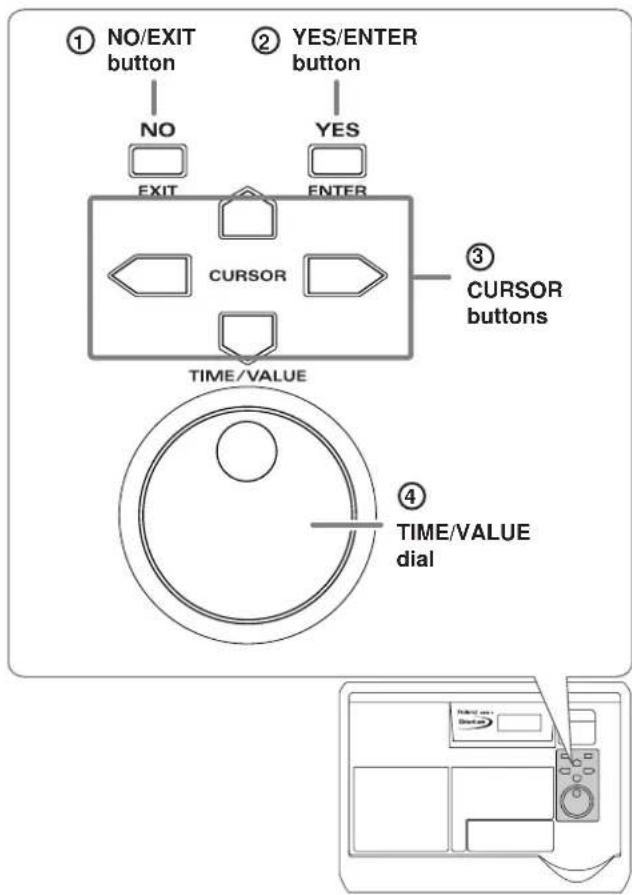
① NO/EXIT Button
Press this when you wish to return to the previous screen (i.e., the next higher screen in the hierarchy). You can also press this to respond "no" to a message displayed in the screen.
② YES/ ENTER Button
Press this to execute a menu selection. You can also press this to respond "yes" to a message displayed in the screen.
③ CURSOR Button
When making various settings, use these buttons to move the cursor to the item you wish to set. In screens that consist of multiple pages, these buttons are also used to move between pages.
④ TIME/VALUE Dial
In screens where there are no items to set, such as the Pre/post-fader screen (p. 37) and Sequence Play List screen (p. 37), use these buttons to move the current location of the song.
When making settings for various functions, these modify the value of the item selected by the cursor.

If you turn the TIME/VALUE dial clockwise, the value will increase continuously. If you turn the dial counterclockwise, the value will decrease continuously.
CD-RW/CD-R/AUDIO CD indicator section
An indicator will light to show the type of CD that is inserted.
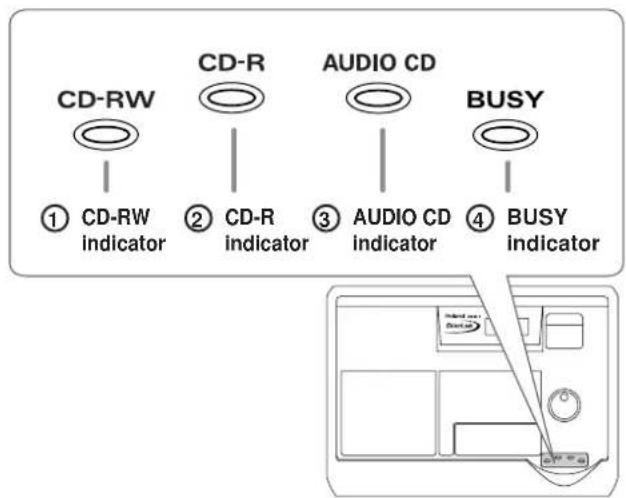
① CD-RW indicator
Indicates that a CD-RW disc is inserted.
② CD-R indicator
Indicates that a CD-R disc is inserted.
③ AUDIO CD indicator
Indicates that an audio CD type disc is inserted.
④ BUSY indicator
This indicator will light in red when the inserted CD is being read or written.
Eject button
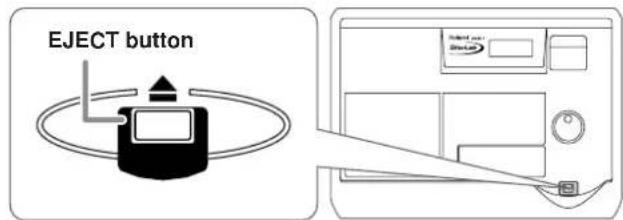
Eject button
This button opens or closes the CD disc tray.

If you need to remove the CD after the power has been turned off, you must turn on the power once again and press [EJECT] to remove the CD. If you attempt to remove the CD by force, you may damage the disc tray.
MASTER Section
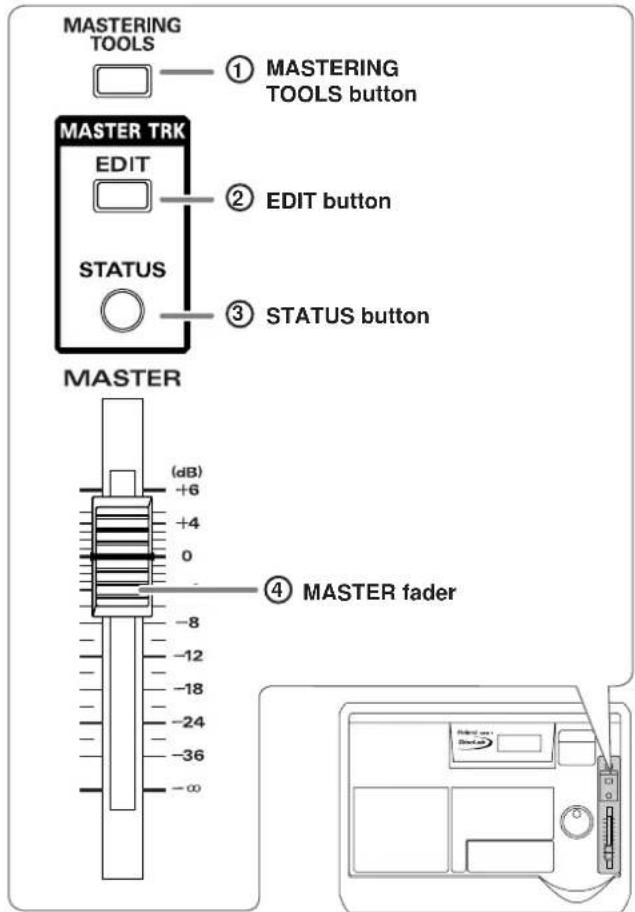
① MASTERING TOOLS Button
This button switches "mastering tools kit" (p. 134) effect on and off. If CD BURNING mode is selected, this will be turned on automatically.
② EDIT Button
Access a screen where you can set the master balance.
→ "Adjusting the overall volume balance—Master balance" (p. 132)
③ STATUS Button
Shows the status of the Master track. The current state is shown by the color of the button.
→ Mixdown (p. 133), CD Burning (p. 135)
- Blinking in red: Indicates currently in recording-standby mode.
• Lit in red: Indicates currently recording
- Lit in green: Recorded Master track data is being played back.
④ MASTER fader
You can adjust the overall volume level
Display Section
Various information regarding operation will be displayed here.
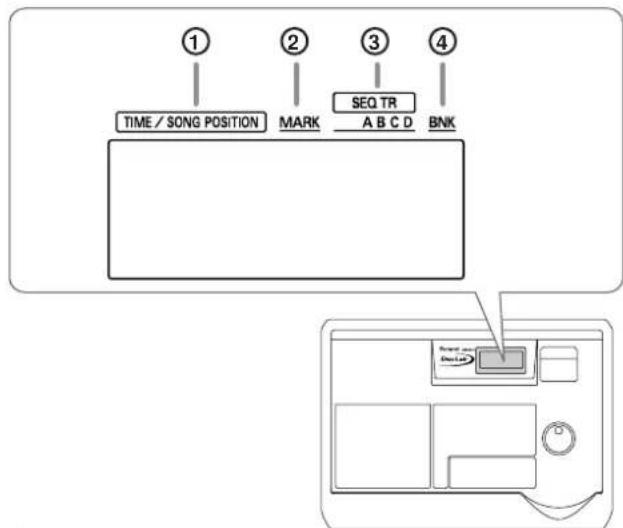
flowchart
graph TD
    A["1 TIME / SONG POSITION"] --> B["2 MARK"]
    B --> C["3 SEQ TR"]
    C --> D["4 BNK"]
    E["Device 1 Display"] --> F["Control Panel"]
① TIME/SONG POSITION
Indicates the current time location of the song in "Current track number/Minute/Second."
Indicates the current time location of the song in "Hour/Minute/Second/Frame."
- Frame display
The number displayed after the current time indicates the number of frames for the current location in the song.
At the factory settings, one second is set to 30 frames (non-drop). This is one type of a specification known as MTC (MIDI Time Code), and when you use the CDX-1 to play in synchronization with another MIDI device, you will need to set both devices to the same MTC type.
→ "Using MTC (Master)" (p. 154)
Indicates the current time location of the song in "Measure/Beat/Tick."
② MARK
This shows the number of the marker at the current location. If no marker is registered at the current location, the number of the marker immediately before the current location will be displayed.
If the current location is earlier than marker number "001," or if no marker has been registered, the display will indicate "--".
→ "Assigning markers within a song—Marker" (p. 129)
③ SEQ TR (Sequence Track)
This indicates symbol the sequence track that is selected as the playback destination.
→ "Playing a sequence track" (p. 96)
④ BNK (Pad Bank)
This indicates the number of the currently selected pad bank. → "Switching pad banks" (p. 54)
Front Panel
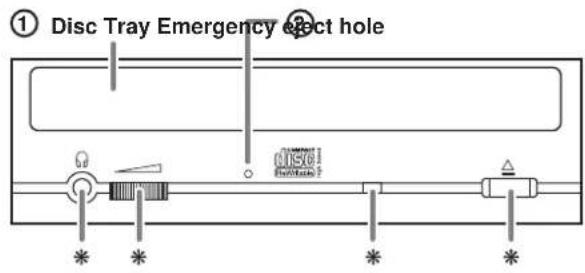
① Disc Tray
Place the CD to be loaded on this tray.
② Emergency eject hole
This hole allows the disc tray to be opened in case of emergency.
→ "If the disc tray does not open" (p. 36)

The jack and button marked by the *symbol cannot be used.
Rear Panel
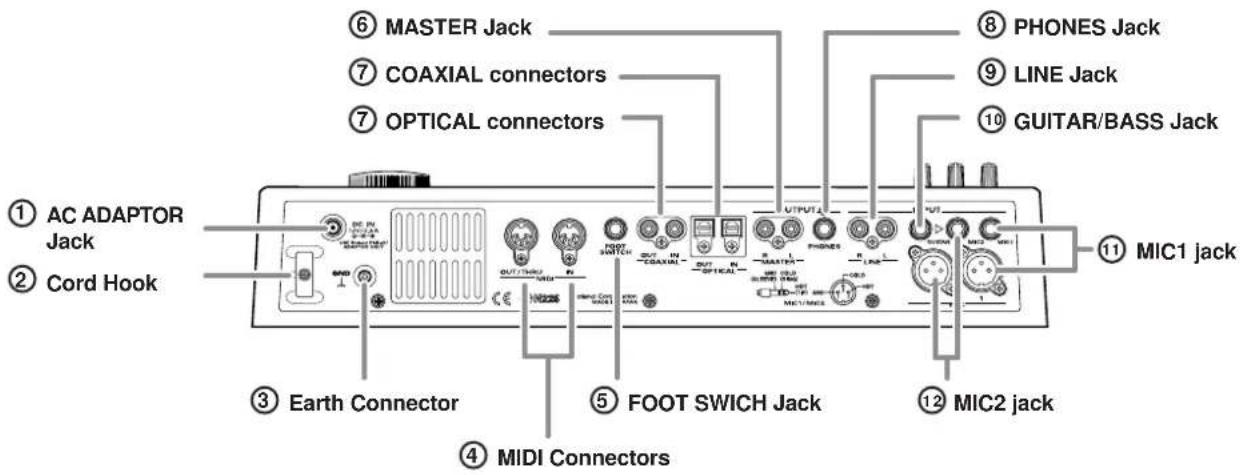
① AC ADAPTOR Jack
Connect the supplied AC adaptor to this jack.

You must use only the included PSB-2U AC adaptor. Use of any other adaptor may cause overheating or malfunctions.
② Cord Hook
Wrap the cable around this hook so that the AC adaptor cable is not pulled out accidentally.
* If the AC adaptor is disconnected during operation, your important recorded data may be lost.
③ Earth Connector
Connect the ground cable here.

In some cases, a Electric Guitar etc. is connected, the metallic part of the panel may sometimes feel rough and grainy. This is due to an infinitesimal electrical charge, which is absolutely harmless.
However, if you are concerned about this, connect the ground terminal (see figure) with an external ground. When the unit is grounded, a slight hum may occur, depending on the particulars of your installation. If you are unsure of the connection method, contact the nearest Roland Service Center, or an authorized Roland distributor, as listed on the "Information" page.
Unsuitable places for connection
• Water pipes (may result in shock or electrocution)
• Gas pipes (may result in fire or explosion)
- Telephone-line ground or lightning rod (may be dangerous in the event of lightning)
④ MIDI Connectors (IN, OUT/THRU)
Connect an external MIDI device (e.g., MIDI controller or MIDI sequencer) here.
• IN
Receives MIDI messages from another MIDI device. Connect this to the MIDI OUT connector of your external MIDI device.
• OUT/THRU
This connector transmits MIDI messages. Connect it to the MIDI IN connector of your external MIDI device.
MEMO
On the CDX-1, a single connector doubles in use for MIDI OUT and MIDI THRU. At the factory settings, this functions as a MIDI OUT connector. You may change the setting as needed.
⑤ FOOT SWITCH Jack
This is an input jack for connecting a separately sold foot switch (DP-2, FS-5U). You can use a foot switch to play or stop the song remotely, or to punch-in/out.
→ "Playing a sample from a connected foot switch" (p. 75), "Using a foot switch to punch-in/out" (p. 122)
⑥ MASTER Jack
These are output jacks for the analog audio signal. The MASTER fader adjusts the volume.
⑦ OPTICAL, COAXIAL connectors (IN, OUT)
NOTE
Digital audio signals cannot be recorded simply by connecting a digital audio device to the OPTICAL or COAXIAL connector. If you wish to recorded digital audio signals, you must change the settings as described in "In order to make a Digital recording with CD player" (p. 148).
• IN
These connectors are for connecting digital audio devices such as a CD player or MD recorder. There are two types of connector: optical and coaxial.
* If digital audio devices are connected to both optical and coaxial connectors, the input from COAXIAL IN will take priority. By pressing INPUT SELECT [DIGITAL] you can switch the inputs.
• OUT
These connectors output a digital audio signal (stereo). There are two types of connectors: optical and coaxial. Optical and coaxial connectors can be used simultaneously.
* The sound that is output will be the same as master out.
⑧ PHONES Jack
Stereo Headphones (sold separately) are connected here.
⑨ LINE Jack
These are input jacks for analog audio signals. Connect them to an audio device such as a CD player or to a keyboard or rhythm machine.
⑩ GUITAR/BASS Jack
An electric guitar or bass can be connected to this jack. Since this is a high-impedance input, a guitar or bass can be connected directly.

Impedance (p. 205)
⑪ MIC1 jack/phone type, XLR type
These jacks allow you to connect a mic. If you are recording a vocal alone, use the MIC1 jack. Phone-type and XLR-type jacks are provided.
* Do not use identically numbered phone-type and XLR-type MIC jacks simultaneously.
* The phone-type jack is TRS, and supports both balanced and unbalanced connections.
⑫ MIC2 jack/phone-type, XLR-type
These jacks allow a mic to be connected. Use them if you are recording acoustic guitar with a mic, or if you are recording a chorus together with MIC1. Both phone-type and XLR-type jacks are provided.
* Do not use identically numbered phone-type and XLR-type MIC jacks simultaneously.
* The phone-type jack is TRS, and supports both balanced and unbalanced connections.
* If an instrument is connected to the GUITAR/BASS jack, the input from the GUITAR/BASS jack will take priority. The input from the mic connected to MIC2 (phone-type/XLR-type) cannot be recorded.
Basic operation of the CDX-1
Connecting peripheral equipment
Make connections as shown in the diagram below. Before you begin making connections, be sure that the power of all equipment is turned off.
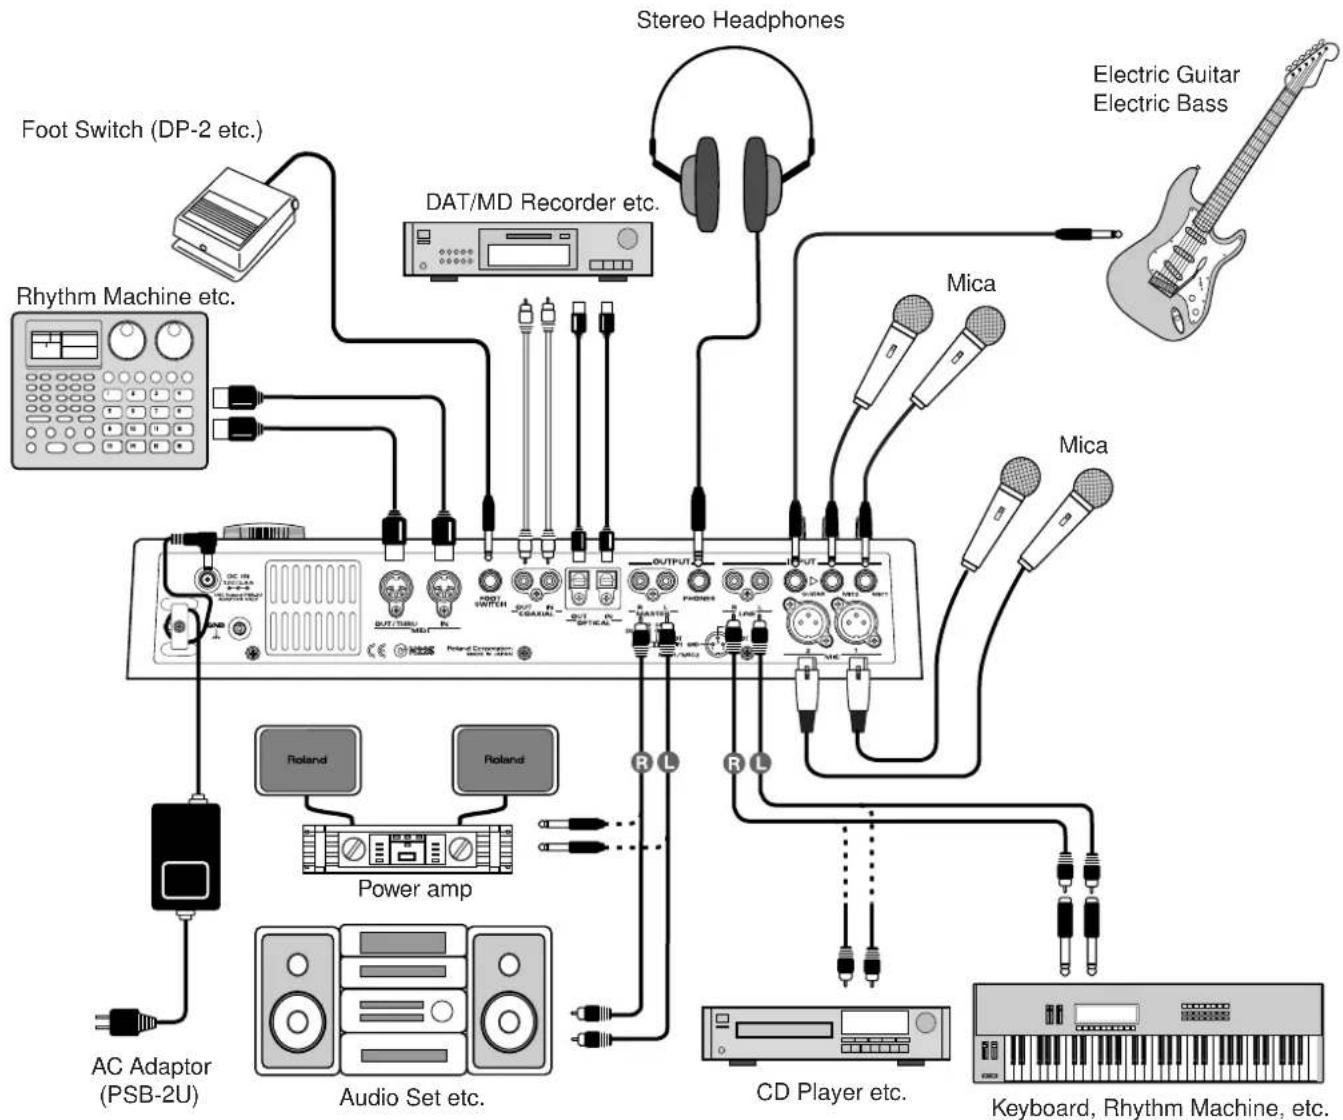
flowchart
graph TD
    A["AC Adaptor (PSB-2U)"] --> B["Power amp"]
    B --> C["Audio Set etc."]
    C --> D["AC Adaptor (PSB-2U)"]
    D --> E["Rhythm Machine etc."]
    E --> F["Foot Switch (DP-2 etc.)"]
    F --> G["DAT/MD Recorder etc."]
    G --> H["Stereo Headphones"]
    H --> I["Mica"]
    I --> J["Electric Guitar Electric Bass"]
    H --> K["Mica"]
    K --> L["CD Player etc."]
    L --> M["Keyboard, Rhythm Machine, etc."]
    style A fill:#f9f,stroke:#333
    style B fill:#ccf,stroke:#333
    style C fill:#cfc,stroke:#333
    style D fill:#fcc,stroke:#333
    style E fill:#cff,stroke:#333
    style F fill:#ffc,stroke:#333
    style G fill:#cfc,stroke:#333
    style H fill:#fcc,stroke:#333
    style I fill:#ffc,stroke:#333
    style J fill:#fcc,stroke:#333
    style K fill:#ffc,stroke:#333
    style L fill:#cfc,stroke:#333
    style M fill:#fcc,stroke:#333

- To prevent malfunction and/or damage to speakers or other devices, always turn down the volume, and turn off the power on all devices before making any connections.
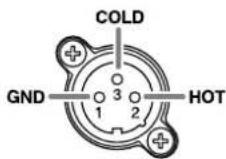
- The pin assignment for the XLR type connectors is as shown below. Before making any connections, make sure that this pin assignment is compatible with that of all your other devices.
-
Howling could be produced depending on the location of microphones relative to speakers. This can be remedied by:
-
Changing the orientation of the microphone(s).
- Relocating microphone(s) at a greater distance from speakers.
- Lowering volume levels.
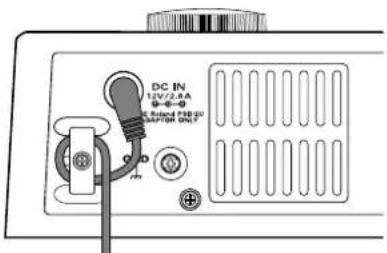
- To prevent the inadvertent disruption of power to your unit (should the plug be pulled out accidentally), and to avoid applying undue stress to the AC adaptor jack, anchor the power cord using the cord hook, as shown in the illustration.
- Do not use identically numbered phone-type and XLR-type MIC jacks simultaneously.
- Please connect or disconnect the foot switch after you turn off the power.
Turning the Power On and Off
* Once the connections have been completed (p. 32), turn on power to your various devices in the order specified. By turning on devices in the wrong order, you risk causing malfunction and/or damage to speakers and other devices.
Turning On the Power
- Turn the volume of the connected equipment down to the minimum level.
- Lower the MASTER fader to the lowest position.
- Turn on the power of the equipment connected to the INPUT jacks.
- Press the POWER switch to turn on the power of the CDX-1.
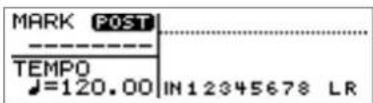
After several seconds, the CDX-1 will start up normally and the post-fader screen appears.
-
Turn on the power of the equipment connected to the OUTPUT jack.
-
Raise the volume of the connected equipment to appropriate levels.
NOTE
- This unit is equipped with a protection circuit. a brief interval (a few seconds) after power up is required before the unit will operate normally.
- Be careful that the AC adaptor does not become disconnected during use. If the AC adaptor is disconnected, the recorded data may be destroyed.
• The explanations in this manual include illustrations that depict what should typically be shown by the display. Note, however, that your unit may incorporate a newer, enhanced version of the system (e.g., includes newer sounds), so what you actually see in the display may not always match what appears in the manual. - POWER switch may not work right after you connect the AC adaptor to CDX-1. In this case, try again to turn the power on after a few seconds.
Turning Off the Power

- To turn off the power of the CDX-1, you must use the POWER switch rather than unplugging the AC adaptor from the outlet or disconnecting the AC ADAPTOR jack.
○ If you turn off the power without using the POWER switch while the internal CD-RW drive is operating, the CD-RW drive may malfunction.
○ If the power supply is interrupted due to an unexpected power failure or other cause, avoid moving the CDX-1, and turn the power on once again when the power resumes.
☐ CDX-1 saves some parameters like system setting when power turned off. For this reason if you simply unplug the AC adaptor without using the POWER switch, the mixer settings, effect patch data, and unsaved sample data will all be lost. Please use caution.
- Turn off the power of the connected equipment in the opposite order from which they were turned on (p. 33).
- Press the Power Switch.
The message "Shutdown?" appears in the display.
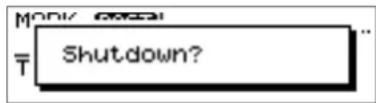
- If you are ready to turn off the power, press [YES/ENTER].
The power will turn off.
Press [NO/EXIT], shutdown will be canceled.
- If the display asks "You'll lose PAD/SEQ data during shutdown. Sure?"
If any pad/sequence is held in internal memory of CDX-1 when you carry out shutdown, the massage "You'll lose PAD/SEQ data during shutdown. Sure?" appears.
- If you are ready to turn off the power, press [YES/ENTER].
The power will turn off.
* If a CD-RW disc is inserted in CDX-1, a message "Save SONG before shutdown?" appears. In this case, see following process of "If the display asks Save SONG before shutdown?"
Press [NO/EXIT], shutdown will be canceled.
- If the display asks "Save SONG before shutdown?"
When the CD-RW disc is inserted in CDX-1, the massage "Save SONG before shutdown?" appears in the display.
- If you wish to save the song data, press [YES/ENTER].
A message “Processing...” appears and CDX-1 saves setting of SONG (Parameter of Mixer, effects etc.) in CD-RW disc. When saving is completed, the power will turn off.
If you press [NO/EXIT], power will be turned off without saving of data. All the settings (Mixer, effects etc.) after inserting CD-RW disc will be lost.
MEMO
Once you carry out turning off the power, pad/sequence held in internal memory of CDX-1 will be lost. If you wish to keep the pad/sequence, you must save it on a CD-RW disc before shutdown.→ "Saving Pad/Sequence" (p. 67).

For details of saved Song settings, refer to "Saving Song settings on a CD-RW disc" (p. 126).

This message appears even in case you have not changed setting of Song.
Inserting/ removing a disc
Inserting a disc
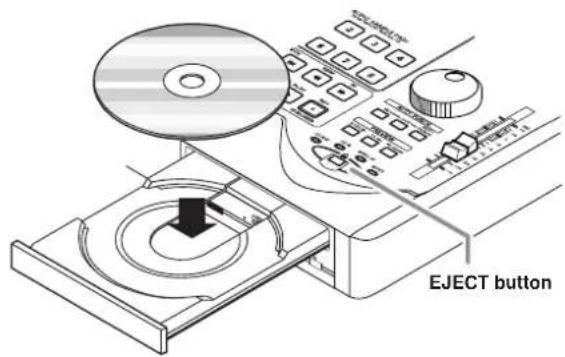
- Press the EJECT button.
The disc tray will open.
- Place the disc on the disc tray.
- Press the EJECT button once more.
The disc tray will close.
The disc tray will also close if you press lightly on the front of the tray.
Time to mount disc
CDX-1 carries out the followings when mounting the discs.
- Inspecting CD-RW disc to improve preciseness of writing
- Optimize CD-RW drive
- Load various data like audio files
Thus, it takes some time to complete mounting od discs. The time length to mount disc is varied depending on amount of Pad/Sequence data. Mounting of discs including no Pad/Sequence data completes in approximately 3 minutes.
Mounting takes approximately 8 minutes at most.

If you transport the CDX-1 with a CD left in the disc tray, the CD or drive may be damaged. Before transporting or moving the CDX-1, you must remove the CD from the disc tray.
Basic operation of the CDX-1
Removing a disc
1. Press the EJECT button.
The disc tray will open.
* If a CD-RW disc is inserted in CDX-1, a message "Save SONG before eject?" appears. In this case, see following process of "If the display asks Save SONG before eject?"
2. Remove the disc from the disc tray.
3. Press the EJECT button once more.
The disc tray will close.
The disc tray will also close if you press lightly on the front of the tray.
- If the display asks Save SONG before eject?
When the CD-RW disc is inserted in CDX-1, the massage "Save SONG before eject?" appears in the display.
1. If you wish to save the song data, press [YES/ENTER].
A message "Processing..." appears and CDX-1 saves setting of SONG (Parameter of Mixer, effects etc.) in CD-RW disc. When saving is completed, the disc tray will open.
If you press [NO/EXIT], a message "Eject disc? (not saved)" appears.
Press [YES/ENTER]:
The disc tray will open without saving of data. All the settings (Mixer, effects etc.) after inserting CD-RW disc will be lost.
Press [NO/EXIT]:
Removing disc will be canceled.
If the disc tray does not open
If the power is turned off with the disc still in the drive (such as due to a power failure), the disc tray cannot be opened by pressing the eject button. In this case, you can insert a piece of wire to force the tray open.
1. Turn off the power of the CDX-1.
2. Insert a thin object such as a wire into the emergency eject hole.
The disc tray will open.
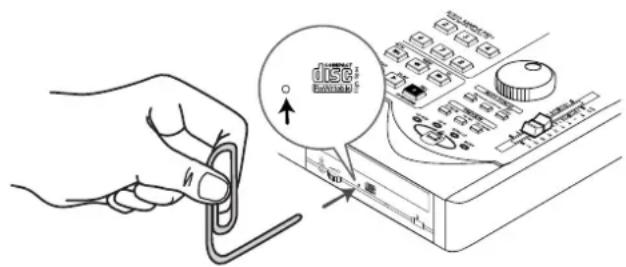

For details of saved Song settings, refer to "Saving Song settings on a CD-RW disc" (p. 126).
Switching among the Basic screens
The basic display screens of the CDX-1 are accessed by pressing [DISPLAY], located below the screen. As described below, there are five Basic screens, which you can cycle through by pressing [DISPLAY].
* The AUDIO CD PLAYER indicator and/or the AUDIO CD RECORDER indicator is lit, pressing [DISPLAY] will cycle you through the CD Player screen and Sequence Play List screen displays.
However, CD RECORDER [ ]inks (recording-standby mode), only the CD Recorder screens will be displayed.
The Basic screens
Post-fader (level meter) screen
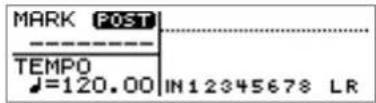
This screen shows the levels after the signals have passed through the audio track faders (post-fader). During multitrack recording (p. 113), the meters indicate the recording levels of those tracks.
Pre-fader (level meter) screen
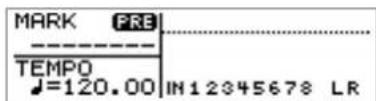
This screen shows the levels before the signals have passed through the audio track faders (pre-fader). Use the Pre-fader screen when you wish to check the input levels.
Big Time screen
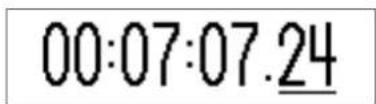
The current location of the song will be displayed in large characters using the full size of the display. The units indicated can be switched "Measure/Beat /Tick" or "Hour/Minute/Second/Frame."
→ Refer to "Switching the Big Time display."(p. 38)
Sequence Play List screen
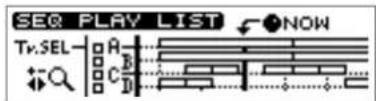
This screen shows the status of the sequence (p. 88). The location and length of the boxes (rectangles) indicates how phrases are arranged in the sequence track.
Song Information screen (at the time of using CD-RW disc)
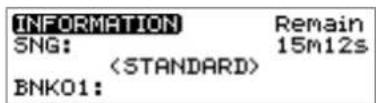
This screen shows information about the song (CD-RW disc).
→ Refer to "Viewing information on the song (CD-RW disc)-Song Information screen."(p. 39)

CD Player screen (p. 48)
Basic operation of the CDX-1
If you are confused about operations or screens —Going back to the Basic screen
While you are still unfamiliar with operation, you may come upon a screen you do not recognize. If this occurs, you can press [DISPLAY] to return to one of the Basic screens (the most-recently selected one). (Refer to "The Basic screens," above.)
Adjusting the brightness of the screen display—Contrast
The contrast of the display will change depending on the viewing angle and the temperature. If you have difficulty reading the display, use the following procedure to adjust the contrast.
- Press [UTILITY].
The Menu are displayed as icon. - Make sure that the cursor is located at the LCD Contrast icon.
- Press [YES/ENTER].
The LCD Contrast Setting screen appears.
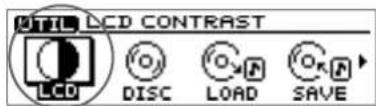
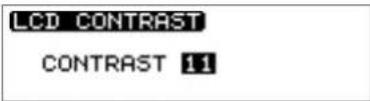
- Turn the TIME/VALUE dial to adjust the contrast.
- Press [DISPLAY] to return to the Basic screen.
Switching the Big Time display
The units indicated can be switched "Measure/Beat /Tick" or "Hour/Minute/Second/Frame."
- Press [UTILITY].
The Menu are displayed as icon.
- Press CURSOR [] to select the System icon.
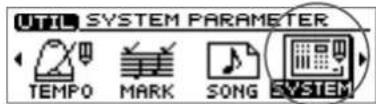
- Press [YES/ENTER].
The System settings screen appears.
- Press CURSOR [][] to move the cursor to "Time Disp."
- Turn the TIME/VALUE dial to select "TIME CODE" or "MEASURE."
- Time Disp:
TIME CODE: Display "Hour/Minute/Second/Frame."
00:07:07.24
MEASURE: Display "Measure/Beat /Tick."
0214-04-058
- Press [DISPLAY] to return to the Basic screen.
MEMO
Hold down [UTILITY] and turn the TIME/VALUE dial, the contrast of display will be changed.
Viewing information on the CD-RW disc —Song Information screen
You can view information about the CD-RW disc (song) inserted in the CDX-1.
- Press [DISPLAY] to switch among the Basic screen.
The Information screen appears.
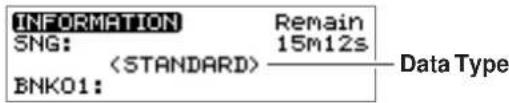
Remain: This displays remaining capacity (time) for editing in min./sec. When mixdown mode (p. 133) is selected, this displays remaining capacity (time) for recording on mastering track (internal).
SNG: This displays the name of the CD-RW disc. → "Naming a song (CD-RW disc)" (below section).
Data Type: This will indicate the data type that was selected when the CD-RW disc was formatted. → "Preparing a CD-RW disc for use—Format" (p. 110)
BNK: This shows the pad bank number and name. → "Naming a pad bank" (p. 55)
Naming a song (CD-RW disc)
- Press [UTILITY].
The Menu are displayed as icon.
-
Press CURSOR [] to select the Song Parameter icon.
-
Press [YES/ENTER].
The Song Parameter screen appears.
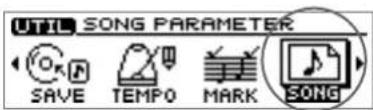
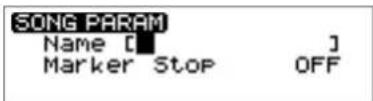
-
Make sure that the cursor is located at the "Name" line.
-
Use CURSOR to move to the desired character location, and turn the TIME/VALUE dial to input characters.
-
Press [DISPLAY] to return to the Basic screen.

Remaining capacity for editing different from remaining capacity for recording. Even in case the displayed time in "Remain" shows some capacity is remaining, CDX-1 stops recording when remaining capacity for recording run out. The capacity differs recording to data type (p. 111).

CDX-1 automatically stops recording when remaining capacity for recording is 00m00s. If you optimize the disc, remaining capacity for recording may increase. → "Increasing the free space on a CD-RW disc–Optimize Disc" (p. 127)
Returning the CDX-1 to the factory settings—Initialize
The current settings of the CDX-1 can be returned (initialized) to the factory settings. The following parameters can be initialized.
- Global Parameter
- Tuner parameters
- System parameters
- MIDI parameters
- Marker parameters
- Tempo map parameters
- Effect patch data
All user patches: U001-U100
- Mixer parameters
PAN, EQ, DELAY, REVERB, Effects location, Master balance
Here we will describe the procedure for initializing the Global parameters.
1. Press [UTILITY].
The Menu are displayed as icon.
2. Press CURSOR [] to select an Initialize icon
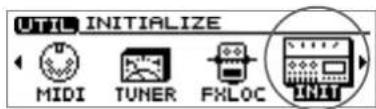
3. Press [YES/ENTER].
The Initialize Menu are displayed as icon appears.
4. Make sure that the cursor is located at the Initialize Global Parameters icon
5. Press [YES/ENTER].
The display will ask "Initialize Global Param. Are you sure?"
6. When you wish to initialize, press the [YES/ENTER].
To cancel the operation, press [NO/EXIT].
When initialization is complete, you're returned to the Basic screen.
![ROLAND CDX-1 - When you wish to initialize, press the [YES/ENTER]. - 1](/content/2026/05/862949/images/378902d3376d85adea157610b64a742d517c5d4791650b6aafd75394be8f58a6.jpg)
For details on each parameter and its default value, refer to "Parameter list" (p. 208).
![ROLAND CDX-1 - When you wish to initialize, press the [YES/ENTER]. - 2](/content/2026/05/862949/images/2af5f29eb59402bccab1c964573a01cffe9e82c6dda90eb643c1e3516bcc5bce.jpg)
To initialize other parameters, select the icon for the parameters you wish to initialize in step 3. For the meaning of the Initialize icons, refer to the separate column "The meaning of each Initialize icon" (p. 41).
The meaning of each Initialize icon
- Initialize Global Parameters icon
When you select this icon, Global parameters (p. 40) will return to the factory settings.
- Initialize Effect Patch icon
When you select this icon, effect patches U001–U100 will be initialized to the factory settings.
- Initialize Mixer Parameters icon
When you select this icon, the mixer parameters will be initialized to the factory settings.
- Initialize All Parameters icon
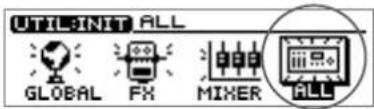
When you select this icon, the global parameters, effect patches, and mixer parameters will all be initialized.
The display screen contrast will also be initialized to the factory setting.

"What is a patch?" (p. 141)

"Mixer parameters" refer to the parameters that can be set in the screens accessed by pressing [PAN], [EQ], [DELAY], and [REVERB].
What you need to do to create your own CD
Steps taken in producing an original CD
The following introduces you to a number of paths that you could choose to follow in carrying out the steps needed to create your own original CD, using a CD-R disc.
Path 1
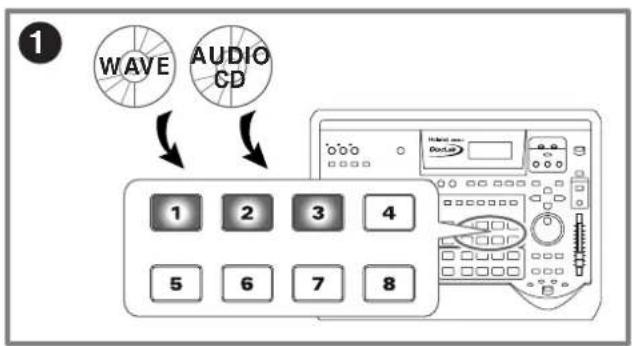
flowchart
graph TD
    A["WAVE"] --> B["AUDIO CD"]
    B --> C["1"]
    B --> D["2"]
    B --> E["3"]
    B --> F["4"]
    C --> G["5"]
    C --> H["6"]
    C --> I["7"]
    C --> J["8"]
Sample audio materials from a sampling CD ("clip audio" collection) or load Windows WAVE files, and assign the sounds to pads.
→ "Sampling to a pad" (p. 56)
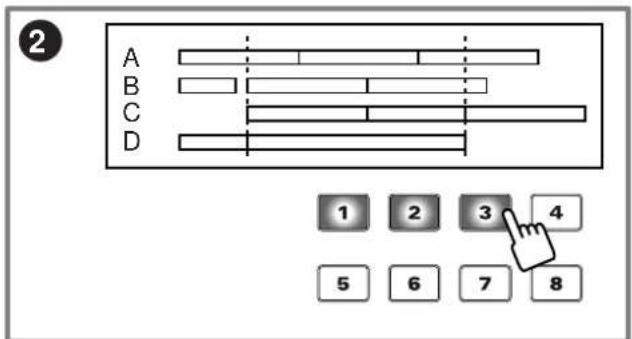
Freely combine pad sounds to create your song. Record the pad operations on the sequence track.
→ "Arranging audio samples to create a song—Sequence" (p. 88)
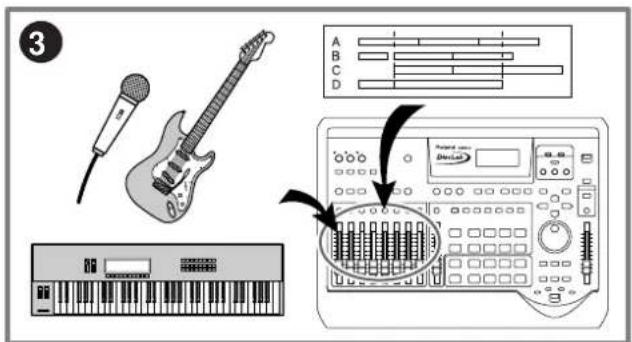
On the audio tracks, record sounds from connected instruments, or what is played back by the sequence track.
→ "Recording your performance" (p. 119) "Recording the sequence playback sound on an audio track" (p. 108)
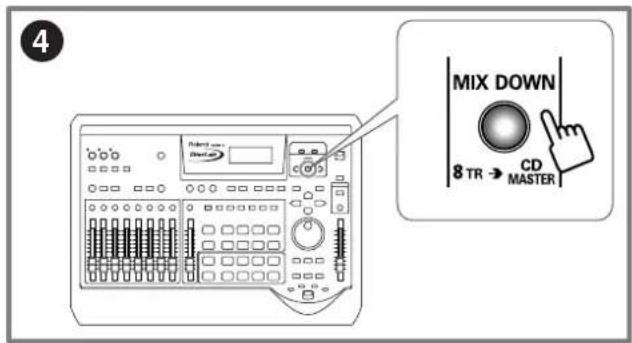
Combine the performances recorded on multiple audio tracks to two-channel stereo (mixdown).
→ "Preparing to write a CD-R disc—Mixdown" (p. 132)
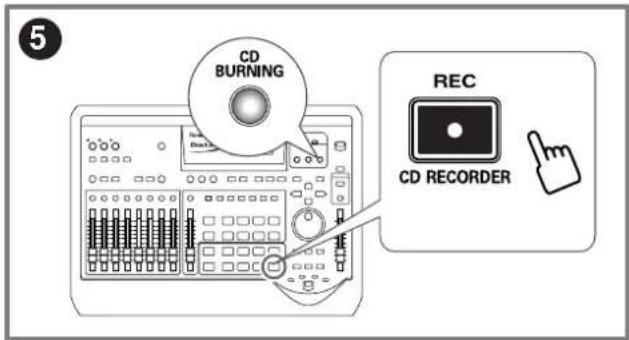
Insert a CD-R disc, and write the song data.
→ "Completing your original CD—CD burning"
This completes your original audio CD.
Path 2
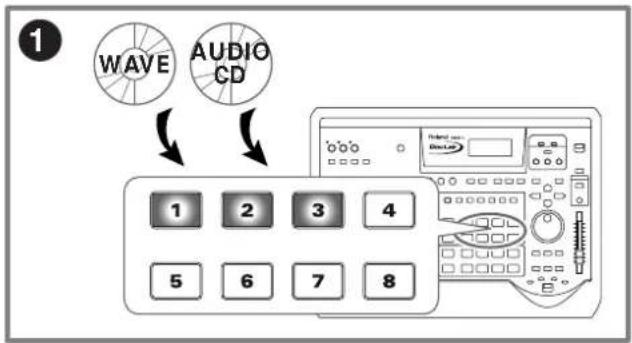
flowchart
graph TD
    A["WAVE"] --> B["1"]
    C["AUDIO CD"] --> D["2"]
    C --> E["3"]
    C --> F["4"]
    G["5"] --> H["6"]
    G --> I["7"]
    G --> J["8"]
Sample sounds from a sampling CD ("clip audio" collection) or load Windows WAVE files, and assign the sounds to pads.
→ "Sampling to a pad" (p. 56)
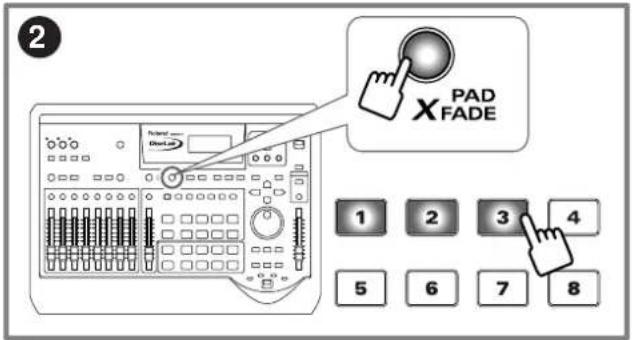
Use pad crossfade to make the samples crossfade as they play.
→ "Crossfading the pad sample you play" (p. 71)
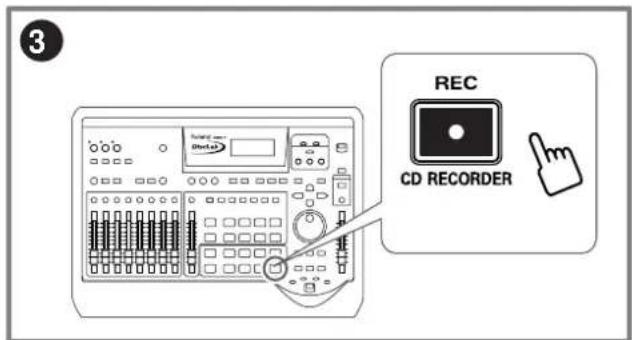
While pressing the pads to play samples, record the sample playback sounds directly on the CD-R disc.
→ "Recording samples played using Pad Crossfade on a CD-R disc" (p. 162)
This completes your original audio CD.
Path 3
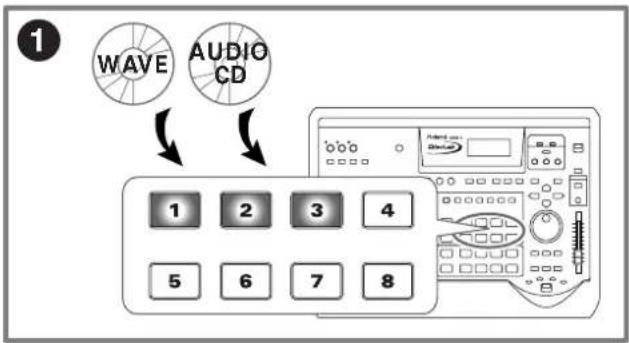
flowchart
graph TD
    A["WAVE"] --> B["1"]
    C["AUDIO CD"] --> D["2"]
    C --> E["3"]
    C --> F["4"]
    G["5"] --> H["6"]
    G --> I["7"]
    G --> J["8"]
Sample sounds from a sampling CD ("clip audio" collection) or load Windows WAVE files, and assign the sounds to pads.
→ "Sampling to a pad" (p. 56)
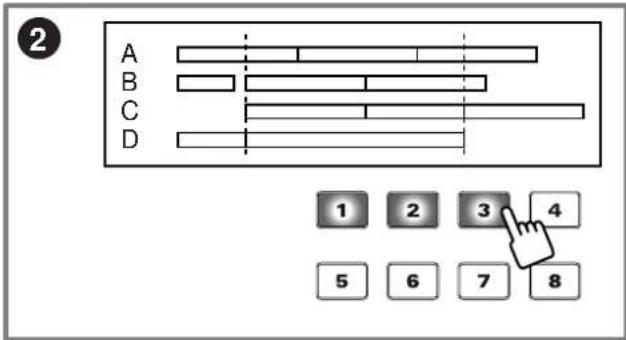
Freely combine the sounds of pads to create your song. Record the pad operations on the sequence track.
→ "Arranging audio samples to create a song—Sequence" (p. 88)
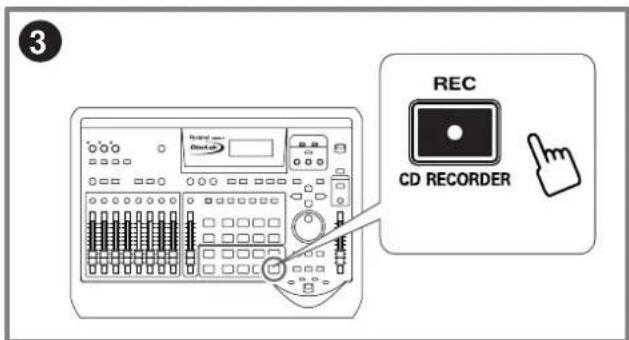
Record the playback sound of the sequence track directly onto a CD-R disc.
→ "Recording the sequence playback on a CD-R disc" (p. 163)
This completes your original audio CD.
What you need to do to create your own CD
Path 4
flowchart
graph TD
    A["Audio CD"] --> B["Keyboard"]
    C["Music Instrument"] --> B
    D["CD Recorder"] --> E["Rec"]
    E --> F["CD Recorder Icon"]
Record external audio sources directly to a CD-R disc, without using the audio tracks.
→ "Recording an external audio source to a CD-R disc"
(p. 161)
This completes your original audio CD.
Listening to the demo disc
Here's how to play back the demo disc and listen to the demo song.
Playing the demo disc
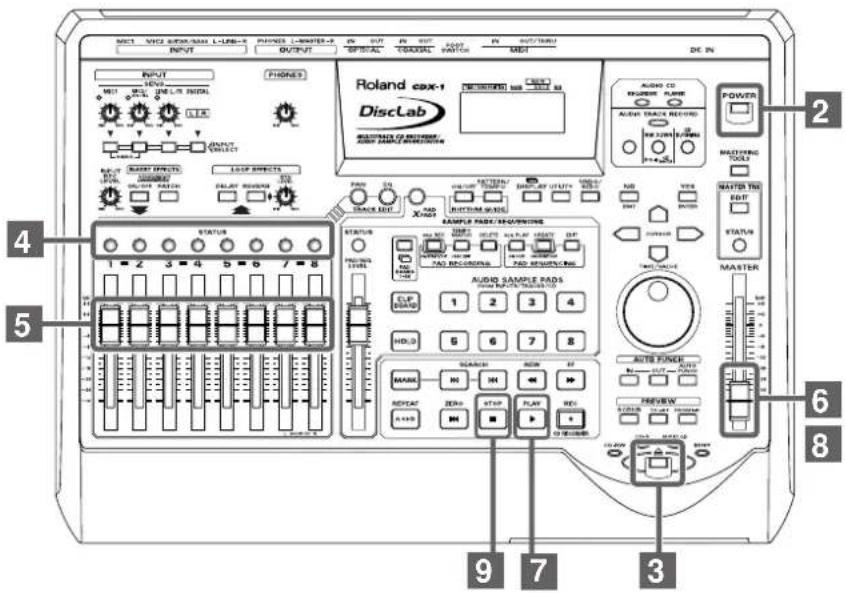
- Make sure that your sound reproduction system (i.e., amp or headphones) is correctly connected.
- As described in "Turning On the Power" (p. 33), turn on the power of the CDX-1.
- Insert the demo disc as described in "Inserting a disc" (p. 35).
- Press the [STATUS] of the audio tracks enough times to get them to light in green.
- Set the AUDIO TRACK faders (1–8) to the 0 dB position.
-
Lower the MASTER fader.
-
Press PLAY [ ].
The song will play back.
-
Raise the MASTER fader to adjust the volume.
-
Press STOP [].
Playback will stop. Press ZERO [ ] had then press PLAY [ ] once again, and playback will start from the beginning of the song.
Adjusting the overall volume—MASTER fader
Use the MASTER fader to adjust the overall volume.
The stereo (left/right) balance can be adjusted with the master balance.
Adjusting the headphone volume
The volume of the headphones connected to the phones jack is adjusted with the phones knob.
* If the MASTER fader is lowered, you will hear no sound even when you turn up the volume with the phones knob.
NOTE
- Use of the Demo Disc supplied with this product for any purpose other than private, personal enjoyment without the permission of the copyright holder is prohibited by law. Additionally, this data must not be copied, nor used in a secondary copyrighted work without the permission of the copyright holder.
• DO NOT play the demo disc on a conventional audio CD player. The resulting sound may be of a level that could cause permanent hearing loss. Damage to speakers or other system components may result.
HINT
You can play rhythm guide according to demo song. If you switch the "PATTERN" of tempo map, you can play various rhythm patterns that matches the song. → "Using the rhythm guide" (p. 116)
MEMO
Using marker stop function (p. 131), the play back from demo CD stops at the end of first song. Press PLAY [▶] to do play back of next-song.
[Non-Text]
"Adjusting the overall volume balance—Master Balance" (p. 132)
What you need to do to create your own CD
Adjusting the volume of each audio track—AUDIO TRACK faders
The volume of audio tracks 1–8 is adjusted with the AUDIO TRACK faders (1–8).
* If the [STATUS] of an audio track is extinguished, no sound will be heard, regardless of the position of the AUDIO TRACK fader. To play back the track, press [STATUS] enough times to get it to light in green.
Press pads to play back audio samples
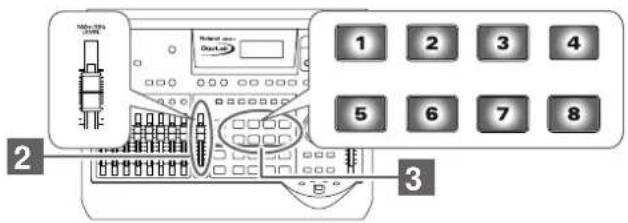
- Press STOP [] ■ stop demo song playback.
The eight pads will light. Pads that are lit contain audio samples (sounds).
- Press a pad that is lit.
The audio samples of that pad will sound. You can press up to four pads simultaneously to layer their sounds. Go ahead and press pads to hear their sounds.
MEMO
If the [STATUS] of all audio tracks is lit in green, all pads will be dark while the audio tracks are playing back, and pressing the pads will not produce sound. If you extinguish [STATUS] for a pair of audio tracks 1-2, 3-4, 5-6, or 7-8, you will be able to play pad sounds. (→ "Playing pads while audio tracks play back" p. 69)
Playing back the sequence track
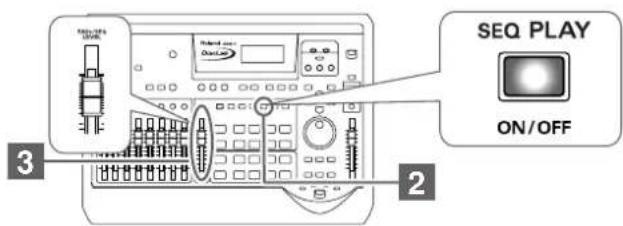
-
Press STOP [] ■stop demo song playback.
-
Press PAD SEQUENCING [SEQ PLAY].
[SEQ PLAY] will light, and the Sequence Play List screen appears.
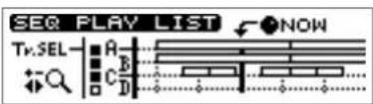
-
Press ZERO [] return the SONG POSITION to "0001-01-000" (beginning of the song).
-
Press PLAY [ ].
The sequence track will play back.
- Press STOP [ ].
Playback will stop. Press ZERO [ ] and then press PLAY [ ] once again, and playback will start from the beginning.

If you switch pad banks, the pads will contain other samples. → "Switching pad banks" (p. 54)
MEMO
At this time, the [STATUS] of all audio tracks will go dark (silent). The sequence track will play back.
Playing an audio CD
How to play an audio CD—the CD Player
About the Display
CD Player screen
When you insert an audio CD, the CD Player screen appears.
![current track number total number of tracks on the disc total time of tracks on the disc CD PLAYER TOTAL 15TRK [65:38] TRK 02 TIME 03:59 Time: TOTAL Time display selection Time Level meter (L/R)](/content/2026/05/862949/images/a526004bff0e9619242145eabe10d2b19b6f22a47b0cb76db0a875d9e438505c.jpg)
Switching the time display
You can select one of four types of time display. Turn the TIME/VALUE dial to switch the time display.
• Time:
TOTAL: Display the total time from the beginning of the audio CD to the current time location.
TRACK: Display the total time from the beginning of the track to the current time location.
TOTAL REMAIN: Display the remaining time from the current time location to the end of the audio CD.
TRACK REMAIN: Display the remaining time from the current time location to the end of the track.
Playing and stopping a song
Here's how to play an audio CD on the CDX-1.
Playing/stopping an audio CD
- Insert an audio CD as described in "Inserting a disc" (p. 35).
The CD Player screen appears.
![CD PLAYER TOTAL 15TRK [65:38] TRK 01 TIME 00:00 Time: TOTAL](/content/2026/05/862949/images/8c08f05fea6a14d43835e03291d02ac7eee77fd0e31375b420df4c6da995cdb7.jpg)
- Move the AUDIO CD fader (AUDIO TRACK 7-8 fader) to approximately 0 dB.
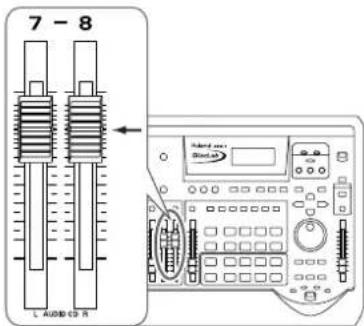
* You can make settings so that the volume of an audio CD will be adjusted only by the MASTER fader, without using the AUDIO CD fader (AUDIO TRACK 7-8 fader). In this case, the AUDIO CD fader (AUDIO TRACK 7-8 fader) will have no effect, so step 2 will not be necessary. For details refer to "Changing the way in which audio CD volume is adjusted" (p. 52).
-
Lower the MASTER fader of the CDX-1.
-
Press PLAY [ ▶] .
The song is played back.
-
Raise the MASTER fader to adjust the master.
-
Press STOP [].
The song stops.
MEMO
You can play back an audio CD on the CDX-1 and sample favorite phrases from the CD. For details on operation, refer to "Sampling from a CD audio clip collection inserted in the CDX-1" (p. 57).
NOTE
If [SEQ PLAY] lights, the song will not be played back.
Changing the playback location
Moving to the previous/next track
■ When the song is stopped
Press SEARCH [ ] to move to the previous track.
Press SEARCH [] to move to the next track.
■ When a song is playing
Press SEARCH [K] move to the beginning of the currently playing track.
Press SEARCH [ ]to move to the previous track.
To go back to the beginning of an audio CD
Press ZERO[ ◀◀ ] to move to the beginning (Track 1) of an audio CD.
Rewind/fast-forward
■ Rewind
While you hold down REW [ ] the song will rewind.
■ Fast-forward
While you hold down FF [▶he song will fast-forward.
* These operations can be used regardless of whether the song is playing or stopped.
Repeatedly playing a specified region —the Repeat function
You can specify a region that you wish to hear, and hear it repeatedly.
Registering the repeat region
- Use REW [] RF [] to move to the location where you wish to begin repeating.
- Press REPEAT [ ].A ◀▶B
REPEAT [ ]A will Bink, indicating that the current location has been registered as the repeat start point (A).

If you wish to re-do the registration, you can cancel the registered location by pressing REPEAT [ ]AwhBthe current location is the same as the repeat start point (A). If the current location is beyond the repeat start point (A), press REPEAT [ ]AwiBo cancel the registration.
- Use REW [ ]FF [ ] to move to the location where you wish to stop repeating.
- Press REPEAT [].A◀▶B
REPEAT [ ] will light, indicating that the current location has been registered as the repeat end point (B).
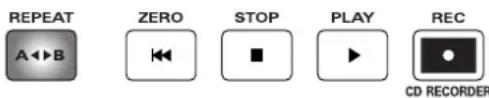
If you wish to re-do the registration, press REPEAT [ ] and Rel the registered location. Then re-register from the repeat start point (A).
- When you press PLAY [] the region between the (A) and (B) points you registered will be played back repeatedly.

Specifying the repeat region while the song plays
You can specify the repeat region while the song is playing. To do so, use the following procedure to.
- Press PLAY [] to play the song.
- When you come to the point where you wish to begin repeating, press REPEAT [ ]A ◀▶B REPEAT [ ]A will bek, indicating that the repeat start point (A) has been registered.
- When you come to the point where you wish to stop repeating, press REPEAT [A◄►B REPEAT [ ] will light, indicating that the repeat end point (B) has been registered. When the end point (B) has been registered, the region between the (A) and (B) points will be played back repeatedly.
Canceling the repeat region
- When REPEAT [] is hot press REPEAT [].

REPEAT [ ] Avilb8 out. The Repeat function will be defeated, and the repeat start (A) and end (B) points you registered will also be cleared.

There must be at least one second between repeat start point (A) and repeat end point (B). It is not possible to set the end point less than one second away from the start point.
Changing the way in which audio CD volume is adjusted
At the factory settings, the audio CD volume is set to be adjusted by the AUDIO CD fader (AUDIO TRACK 7-8 fader) and the MASTER fader. If you wish to adjust the volume of audio CDs by using only the MASTER fader (without using the AUDIO CD fader), use the following procedure to change the setting.
- Press [UTILITY].
The Menu are displayed as icon.
- Press CURSOR [] to select the System icon.
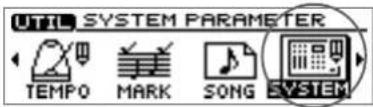
- Press [YES/ENTER].
The System settings screen appears.
- Press CURSOR [] to move the cursor to "Audio CD Fader."
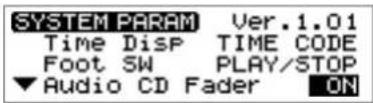
- Turn the TIME/VALUE dial to select "OFF."
• Audio CD Fader:
This turns the audio CD fader on/off for when an audio CD is played.
ON: The audio CD fader (AUDIO TRACK 7-8 fader) and Master fader will be used.
OFF: The volume will be adjusted only by the MASTER fader.
- Press [DISPLAY] to return to the Basic screen.
MEMO
If you wish to play the pads while listening to an audio CD (p. 69), it is convenient to make settings so that the AUDIO CD fader (AUDIO TRACK 7-8 fader) adjusts the volume, since this will allow you to adjust the pad volume and audio CD volume separately.
Collecting audio material
Recording a sound to a pad—Sampling
What is sampling?
Sampling refers to the process by which audio sources such as instruments or vocals can be digitally recorded. Audio sources that you've sampled by actually playing an instrument or by cutting part of an existing performance are referred to by the CDX-1 as audio samples (subsequently called "samples").
Today, the method of creating music by repeatedly playing back sampled materials (samples) and by using a sequencer to freely combine samples has become one of the most commonly used methods. Since the CDX-1 provides a Sequencer function (p. 88), you can freely arrange samples to create a song.
For example, you might start by sampling a favorite drum pattern or bass pattern. Then you might modify the tempo of these samples, and use effects to change the character of the sound while you create a new accompaniment. Finally, you can layer vocal or instrumental performances to create a new song.
This method of music production via sampling originated in hip-hop and house music, but today has become widely used in all popular music.
Pads and banks
Eight pads and 64 pad banks
The panel buttons with numbers from 1 to 8 are pads. Samples can be assigned to these pads and played.
A set of eight samples assigned to the panel is called a pad bank. By switching pad banks you can use up to 512 samples (64 pad banks x 8).
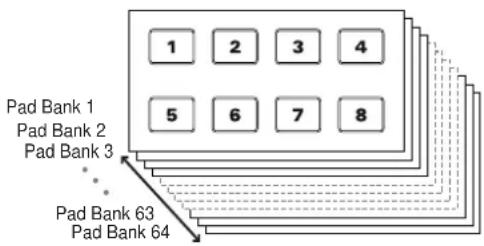
flowchart
graph TD
    A["1"] --> B["2"]
    B --> C["3"]
    C --> D["4"]
    E["5"] --> F["6"]
    F --> G["7"]
    G --> H["8"]
    I["Pad Bank 1\nPad Bank 2\nPad Bank 3"] --> J["Pad Bank 63\nPad Bank 64"]
Switching pad banks
- Press the [PAD BANKS].
The Pad Bank List screen appears.
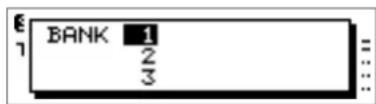
- Select the pad bank (1–64) by turning the TIME/VALUE dial.
At this time, a pad in which a sample has been recorded lights. While turning the TIME/VALUE dial, allowing you to check whether or not there is a sample.
- Press [YES/ENTER].
The pad bank will change.

In step 2, you can press a pad [1]–[8] to select pad banks 1–8.
Naming a pad bank
Each of the 64 pad banks can be given a name of up to ten characters. If you have assigned names to the pad banks, it will be easier to select the desired bank. For clarity, you may wish to use pad bank names like the examples given below.
- Types of samples
Examples: "DrumLoop1," "Male Voice," "SFX" -
Dates on which you sampled
Examples: "Jan.1, 01" "5/12 pm9:30" -
Select the pad bank to which you wish to assign a name (refer to the preceding section).
-
Press PAD RECORDING [TEMPO MATCH] twice.
Alternatively, you can press [TEMPO MATCH] and then press CURSOR [ ].
The Pad Edit menu are displayed as icons.
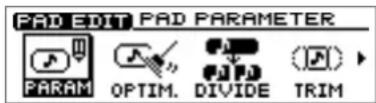
- Press CURSOR [] to select the Bank Parameter icon.
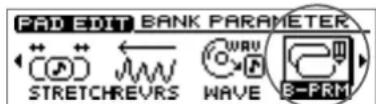
- Press [YES/ENTER].
The Bank Parameter screen appears.
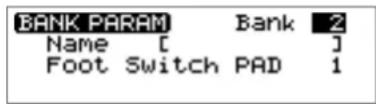
-
Press CURSOR [] to move the cursor to "Name" line.
-
Use CURSOR [] [] to move to the desired character location, and turn the TIME/VALUE dial to input the desired character.
-
Press [DISPLAY] to return to the Basic screen.
Sampling to a pad
Sampling an external sound
As an example, we will explain how to connect a synthesizer and sample it.
- Connect your synthesizer to the CDX-1 as described in "Connecting peripheral equipment" (p. 32), and then press INPUT SELECT [LINE L/R].
INPUT SELECT [LINE L/R] will light.
- Turn the INPUT SENS knob to adjust the input sensitivity.
Adjust the INPUT SENS knob as high as possible without causing the peak indicator to light when you play your synthesizer strongly.
- Press PAD RECORDING [PAD REC].
[PAD REC] indicator begins flashing, and the Sampling screen appears.
The lowest-numbered unused pad will automatically be selected as the sampling destination, and will blink.
- Turn the INPUT REC LEVEL knob to adjust the level so that level meter moves as far as possible without exceeding the dotted line in the upper portion.
* If you use the INPUT REC LEVEL knob to turn down the volume of the input source, the sound will be sampled to the pad at a low volume. This means that when you raise the volume of the pad for playback, noise may be more obtrusive.
The meter moves high level as possible without exceeding the limit shown as dotted line.
- If necessary, press a pad to change the sampling destination.
* If the specified pad already contains a sample, you will be asked "Overwrite?" If it is OK to delete the existing sample, press [YES/ENTER]. If you wish to keep that sample, specify a different pad that is unused. If necessary, press [PAD BANKS] to change the pad bank. (→ "Switching pad banks"; p. 54)
- At the appropriate moment of the performance, press [PAD REC].
The display will indicate "Now recording..." and sampling will begin.
- When sampling is completed, press [PAD REC].
When sampling is completed, the Basic screen reappears.
MEMO
- For details on the jack to use for connections and on the INPUT SELECT buttons, refer to "Panel Descriptions: Rear Panel" (p. 30), and "panel descriptions: INPUT section" (p. 21).
- At the factory settings, the CDX-1 cannot record the output of a digital audio device via the OPTICAL IN or COAXIAL IN connectors. You must change the settings as described in "In order to make a Digital recording with CD player" (p. 148).
- Use the MASTER fader to adjust the monitoring volume of the synthesizer. If you are monitoring through headphones, use the MASTER fader and the PHONES knob to adjust the volume to a comfortable level.

For details on settings in the Sampling screen, refer to "Making Settings in the sampling screen" (p. 60).

With the CDX-1's internal effects, you can perform sampling while adding any of the internal effects to the input source. "Using the insert effects"(p. 141), "Using the loop effects"(p. 145).
MEMO
If you wish to do it over again, press [UNDO/REDO] (p. 138) after step 6.
Sampling from a CD audio clip collection inserted in the CDX-1
Here's how you can sample audio materials from a CD audio clip collection (copyright-free) inserted in the CDX-1.
-
Insert the audio clip CD into the CDX-1.
-
Press PAD RECORDING [PAD REC].
[PAD REC] indicator begins flashing, and the Sampling screen appears.
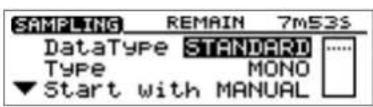
The lowest-numbered vacant pad will be automatically selected as the sampling destination, and will blink.
- If necessary, press a pad to change the sampling destination.
* If the specified pad already contains a sample, you will be asked "Overwrite?" If it is OK to delete the existing sample, press [YES/ENTER]. If you wish to keep that sample, specify a different pad that is unused. If necessary, press [PAD BANKS] to change the pad bank. (→ "Switching pad banks"; p. 54)
- Press PLAY [ ] play back the audio CD, use the AUDIO CD fader (AUDIO TRACK 7-8 fader) to adjust the recording level so that level meter moves as far as possible without exceeding the dotted line in the upper portion.
* If you use the AUDIO CD fader (AUDIO TRACK 7-8 fader) to turn down the volume of the CD player, the sound will be sampled to the pad at a low volume. This means that when you raise the volume of the pad for playback, noise may be more obtrusive.
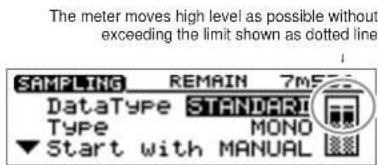
-
When you adjust the volume, press STOP [].
-
Press PLAY [] to play back the audio CD, and at the appropriate timing press [PAD REC].
The display will indicate "Now recording...," and sampling will begin.
- When sampling is completed, press [PAD REC].
When sampling is completed, the CD Player screen appears.
- Press [ ] ■ stop playback of the audio CD.

For details on settings in the Sampling screen, refer to "Making Settings in the Sampling screen" (p. 60).

If you make settings so that the volume of an audio CD will be adjusted using the AUDIO CD fader (AUDIO TRACK 7-8 fader) (p. 52).
Recording level is fixed 0 dB when "Audio CD fader" is "OFF" (p. 52).

If you set "Start with" in the sampling screen to "[ ]", sampling will begin when you press PLAY [▶(p. 61)

If you wish to do it over again, press [UNDO/REDO] (p. 138) after step 7.
Recording a sound to a pad—Sampling
Loading a Windows WAVE file
Some commercially available sampling CD audio clip collections (copyright-free) designed for use in music production are mixed-mode CDs that saving both audio and WAVE files. The CDX-1 lets you load these WAVE files and assign them to the pads.
-
Insert a mixed-mode CD (AUDIO+WAVE) as described in "Inserting a disc" (p. 35).
-
Press PAD RECORDING [TEMPO MATCH] twice.
Alternatively, you can press [TEMPO MATCH] and then press CURSOR []. The Pad Edit menu are displayed as icons.
- Press CURSOR [] to select the Load WAVE file icon.
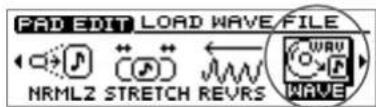
- Press [YES/ENTER].
The Load WAVE file screen appears.
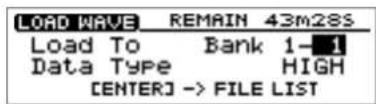
- Make sure that the cursor is located at the "Load To" line, press CURSOR [] [ ] to select the pad bank number and pad number, and specifying the pad to which the newly loading sample is assigned.
Turn the TIME/VALUE dial to set the pad bank number. To set the pad number, either press a pad or turn the TIME/VALUE dial.
-
Press CURSOR [] to move the cursor to "Data Type" line, and turn the TIME/VALUE dial to select the data type.
-
Press [YES/ENTER].
The File List screen appears.
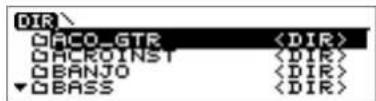
* If the specified pad already contains a sample, you will be asked "Overwrite OK?" If it is OK to delete the existing sample, press [YES/ENTER]. If you wish to keep that sample, press [NO/EXIT] to return to the Load WAVE screen, and then specify a different pad that is unused. If necessary, press [PAD BANKS] to change the pad bank. (→ "Switching pad banks"; p. 54)
- Press CURSOR [ ] [] to select the file that you wish to load.
If you wish to see contents of a folder, select folder and press [YES/ENTER].
If you press PLAY [ ] play back of the selected WAVE file starts. When the play back is finished, a massage "Convert are you sure?" is displayed, asking you wish to load the file. If you wish load, see step 9.
Press [NO/EXIT], the File List screen reappears.
- Press [YES/ENTER].
The display will show a message of "Completed.", the WAVE file will be assigned to the pad.
- Press [DISPLAY] to return to the Basic screen.

In case the name of folders or files are not readable. CDX-1 displays those "____."

To close the folder, select "PARENT DIRECTORY" and press [YES/ENTER].
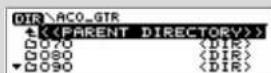

In step 8, if you wish to switch preview length of WAVE files, refer to the column "Switching of preview length of Windows WAVE files" (p. 59).
Switching of preview length of Windows WAVE files.
Preview length of WAVE files imported on "Loading a Windows WAVE file" (p. 58) can be switched.
- Press [UTILITY].
The Menu are displayed as icon.
- Press CURSOR [] to select the System icon.
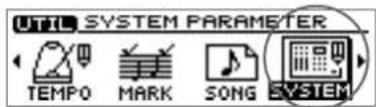
- Press [YES/ENTER].
The System setting screen appears.
- Press CURSOR [] to move the cursor to "Wave Preview" line.
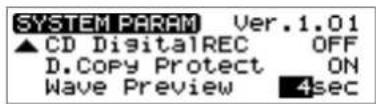
- Turn the TIME/VALUE dial to select the preview time:
"1sec"-"10sec" (units: second).
- Press [DISPLAY] to return to the Basic screen.
Using free audio sources from the Internet
If you have a computer that can connect to the Internet and a CD-R drive, you can load free audio sources (Windows WAVE files) from the Internet.
- Connect to the Internet and download the desired free Windows WAVE files.
- Using a CD-R drive connected to (or installed in) your computer, write the downloaded Windows WAVE file(s) to a CD-R disc.
- Insert the above CD-R disc into the CDX-1.
- Follow the procedure described in steps 2–10 of "Loading a Windows WAVE file."

CDX-1 is not able to be recorded to a CD-R disc, connect directly to the personal computer.
Making settings in the Sampling screen
The Sampling screen appears in step 3 of "Sampling an external sound" (p. 56) or step 2 of "Sampling from a CD audio clip collection inserted in the CDX-1" (p. 57). As necessary, make settings for the various items in the Sampling screen to modify the sampling settings.
Selecting the audio quality and sampling time appropriate for the material—Data Type
You can set the data type each time you sample. This allows you to select the audio quality and recording time appropriate for the audio material you are sampling.
- Make sure that the cursor is located at the "Data Type" line.
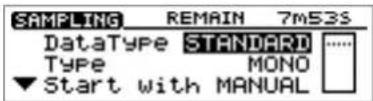
- Turn the TIME/VALUE dial to select the data type.
- Data Type
HIGH: Of the four types, this allows the highest-quality recording.
STANDRD: This type maintains high quality, while allowing longer recording time than "HIGH." Normally you should select this type.
LONG1: This type allows longer recording than "STANDARD." It is suitable for recording live performances.
LONG2: This allows the longest recording time of the four types.
Data type and sampling time
If you limit your selection to one data type, the available sampling time will be as follows.
| Data Type | Sampling Time | |
| Using standard memory | Using expansion memory | |
| HIGH | 5 minutes | 43 minutes |
| STANDARD | 7 minutes | 58 minutes |
| LONG1 | 9 minutes | 69 minutes |
| LONG2 | 11minutes | 87 minutes |
* The above sampling times are approximations for when only one data type is used. The data type can be set separately when recording each sample, and the sampling time will be different if different data types coexist.
MEMO
For multitrack recording, you will select the data type when you format the CD-RW disc (p. 110).
Specifying stereo or mono—Type
You can specify whether the sound will be sampled in mono or in stereo.
- Press CURSOR [] to move the cursor to "Type" line.
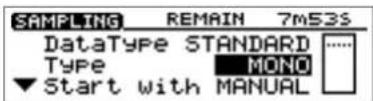
- Turn the TIME/VALUE dial to select "STEREO" or "MONO."
Automatically start sampling when sound is input —Start with
At the factory settings, sampling will begin manually (when you press [PAD REC]). You can change this setting so that sampling will begin automatically when audio input is detected.
- Press CURSOR [] to move the cursor to "Start with" line.
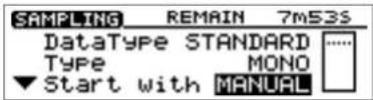
- Turn the TIME/VALUE dial to select a value in the range of "LEV.1"-"LEV.8." The value 1-8 specifies the volume at which sampling is to begin (1 is the minimum). The level specified is indicated by a small symbol ( )it both side of the level meter (sampling screen).
It is best to set this while actually playing sounds and watching the movement of the level meter.
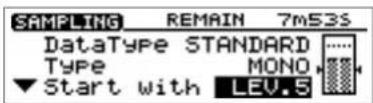
-
Prepare the audio source for sampling so that it can be played immediately.
-
Press [PAD REC].
The display will indicate "Waiting trigger...", and the CDX-1 will be in sampling-ready mode.
To abort the procedure from this state, press [PAD REC].
- Play the audio source that you wish to sample.
When audio input is detected, the display will indicate "Now recording...," and sampling will begin.
- When sampling is completed, press [PAD REC].
When sampling is completed, the Basic screen reappears.
What the "Start with" setting does
This determines how sampling will begin.
MANUAL: Sampling can be started manually.
LEV.1-LEV.8: Sampling will be triggered by audio input.
PAD: Sampling will begin when you press any pad.
→ "Sampling from a pad to another pad-Resampling" (p. 63)
[▶] : Sampling will begin when you press PLAY [ ].
→ "Sampling from a CD audio clip collection inserted in the CDX-1" (p. 57)
MEMO
Mono sampling requires only half the memory of stereo sampling. However, this has no effect on the number of samples that can be played simultaneously. ("Playing samples simultaneously"; p. 69)
Recording a sound to a pad—Sampling
Making sure to capture the beginning of the sound —Pre Trigger
Depending on the sampling conditions, the beginning of the sampled sound may not be captured. By setting the pre-trigger time appropriately, you can avoid this problem by causing sampling to begin slightly ahead of the time when you initiated sampling or when the audio input was detected.
- Press CURSOR [] to move the cursor to "Pre Trigger" line.
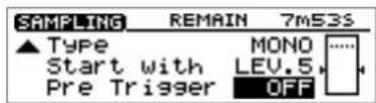
- Turn the TIME/VALUE dial to select the pre-trigger time: "OFF," "20ms," "40msms," "80ms," "160ms," or "320ms" (units: milliseconds).

In order to set Pre-Trigger, the "Start with" setting must be "Lev.1"- "Lev.8."
Sampling from a pad to another pad —Resampling
You can press one or more pads to play their samples and "re-sample" the result. This is called resampling.
- Press PAD RECORDING [PAD REC].
[PAD REC] indicator begins flashing, and the Sampling screen appears.
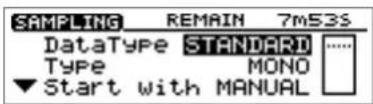
* If all pads already contain samples, a message of "Overwrite?" appears. In this case, press [YES/ENTER], a message disappears.
- Press CURSOR [] to move the cursor to the "Start with" line.
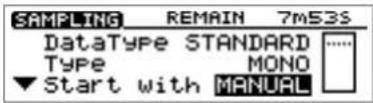
-
Turn the TIME/VALUE dial to select "PAD."
-
Press the source pad(s) and watch the meter at the right edge of the screen while you use the PAD/SEQ LEVEL fader to adjust the level.
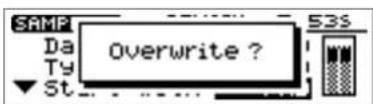
- Press the pad to designate the sampling destination.
* If the specified pad already contains a sample, you will be asked "Overwrite?" If it is OK to delete the existing sample, press [YES/ENTER]. If you wish to keep that sample, specify a different pad that is unused. If necessary, press [PAD BANKS] to change the pad bank. (→ "Switching pad banks"; p. 54)
- Press [PAD REC].
The display will indicate "Waiting for PAD to start.", and the CDX-1 will be in sampling-ready mode.
To abort the procedure from this state, press [PAD REC].
-
When you press the source pad(s), sampling will begin automatically.
-
When sampling is completed, press [PAD REC].
The display returns to the Basic screen.

When resampling, you can play a maximum of three samples simultaneously.

For details on settings in the Sampling screen, refer to "Making settings in the sampling screen" (p. 60).

If you wish to apply an insert effect while you resample, change the insert effect connection to "MASTER".
For details on changing the insert effect connection, refer to "Changing the insert effect connections" (p. 144).
If the display indicates "Memory Full."
If the remaining memory is completely used up during sampling, the display indicates "Memory Full." (no remaining memory), and sampling stops.
This indication disappears when you press any button such as [DISPLAY] or [NO/EXIT] (the sounds recorded up to that point is kept on in the internal memory).
If such instances, execute the Optimize Sample function. This deletes wasted space being consumed on the memory and may secure new memory.
For details on Optimize Sample, read "Increasing the Remaining Memory—Optimize Sample" on this page.
Increasing the Remaining Memory —Optimize Sample
By executing Optimize Sample you can erase the unwanted data from the internal memory, may increase the amount of available space in the internal memory. Optimize Sample will delete data as follows.
- As much as possible, data including partial waveforms used in samples and on tracks, except for those portions actually sounded (used), is deleted.
-
Waveform data in each phrase on the tracks from the beginning of the waveforms to where they start playing, as well as data after points specified by "Wave End Point" (p. 105) are erased.
-
Press PAD RECORDING [TEMPO MATCH] twice.
Alternatively, you can press [TEMPO MATCH] and then press CURSOR [ ]. The Pad Edit menu are displayed as icons.
- Press CURSOR [] to select the Optimize Sample icon.
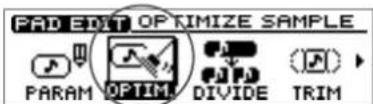
- Press [YES/ENTER].
A message of "You can't UNDO this function." appears.
- Press [YES/ENTER].
A message of "Are you sure?" appears.
- If you press [YES/ENTER], Optimize will be executed.
The display will show a message of "Completed." and the Basic screen will reappear. If you press [NO/EXIT], the display of step 3 reappears without executing Optimize.
If there is no increase in the remaining memory even after Optimize Sample is executed...
If there is no increase in the remaining memory even after Optimize Sample is executed, first delete unneeded data then try Optimize Sample again.
→ "Deleting a sample—Delete Sample" (p. 65)

• After you execute Optimize Sample, it is not possible to press [UNDO/REDO] (p. 138) to revert to the state before executing Optimize.
• After you execute Optimize Sample, editing to be the start points earlier and the end points later (p. 78) becomes impossible.
- While the processing bar appears, do not turn off the power with unplugging the AC adaptor.

A rough figure of the time remaining is indicated as "Remain **m**s" in the Sampling screen. Check this display as sampling progresses, and if the remaining memory is running out perform the Optimize Sample procedure.
Deleting a sample—Delete Sample
Here's how you can delete an unwanted sample to free up that pad.
Deleting samples individually
- Hold down PAD RECORDING [DELETE] and Press a pad to specify the sample that you wish to delete.
The sample is deleted.
You wish to cancel to delete a sample, press [UNDO/REDO] (p. 138).
Deleting all samples of a pad bank—Bank Erase
- Press PAD RECORDING [TEMPO MATCH] twice.
Alternatively, press [TEMPO MATCH] and then press CURSOR [ ]
The Pad Edit menu are displayed as icons.
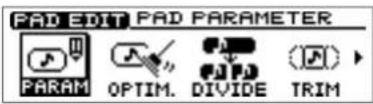
- Press CURSOR [] to select the Bank Erase icon.
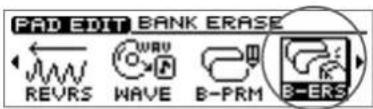
- Press [YES/ENTER].
The Erase Bank screen appears.
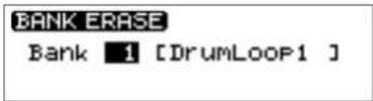
-
Turn the TIME/VALUE dial to specify the pad bank to be deleted.
-
Press [YES/ENTER].
A message of "Are you sure?" appears.
- Press [YES/ENTER] once again.
All samples of the specified pad bank will be erased.
-
If you wish to erase other pad banks, repeat steps 4 and 6.
-
Press [DISPLAY] to return to the Basic screen.

If you carry on bank erase, a pad bank name (p. 55) will be remained without a erasing.
Preventing accidental erasure of pads —Bank Protect
The samples assigned to the pads can be protected against accidental erasure so that they are not lost by unintended operations or by inadvertently overwriting them. A protected pad bank and its samples are handled as follows.
- If you attempt to sample, a warning of "Bank is Protected." appears, and sampling will not be possible.
- If you attempt to change setting of Pad Parameter and Pad Bank Parameter, a warning of "Bank is Protected."
- Editing operations that would affect the contents of the pad bank, such as deleting the entire pad bank or an individual sample, will produce a warning message, and will not be executed.
- Editing operations that require you to specify a writing destination (such as rearranging samples or Time Stretch) cannot be executed if the writing destination is protected.
Protecting/unprotecting a pad bank
- Press PAD RECORDING [TEMPO MATCH] twice.
Alternatively, press [TEMPO MATCH] and then press CURSOR [ ].
The Pad Edit menu are displayed as icons.
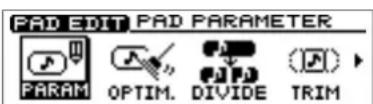
- Press CURSOR [] to select the Bank Protection icon.
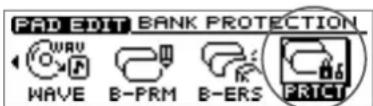
- Press [YES/ENTER].
The Bank Protection setting screen appears.
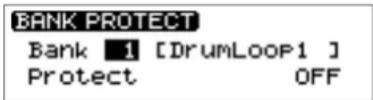
- Make sure that the cursor is located at the "Bank" line.
- Turn the TIME/VALUE dial to select the pad bank that you wish to protect.
- Press CURSOR [] to move the cursor to the "Protect" line.
- Turn the TIME/VALUE dial to change to protect "ON" or "OFF."
- Press [DISPLAY] to return to the Basic screen.
Saving Pad/ Sequence on a CD-RW disc
Pad and Sequence (p. 88) can be saved on a CD-RW disc.
More about saving Pad/Sequence
When you sample and create a sequence (p. 88), the Pad/Sequence is temporarily stored in the internal memory of the CDX-1. This means that you can sample and create a sequence (p. 88) even if a CD-RW disc is not inserted.
Pad/Sequence stored in internal memory will be lost when the power is turned off (p. 34) or when you mixdown (p. 133). If you wish to keep the pad/sequence, you must save it on a CD-RW disc, follow the procedure in "Saving Pad/Sequence," below.
Saving Pad/Sequence
* On the CDX-1, this operation does not save the following sequence-related parameters.
In order to save the following parameters, you must perform the operation "Saving Song settings on a CD-RW disc" (p. 126).
• The sequence track (A–D) status
• The state of the PAD SEQUENCING [SEQ PLAY]
- Tempo map
- "Beat" and "Tempo" settings of the Rhythm Guide
- Press [UTILITY].
The Menu are displayed as icon.
- Press CURSOR [] to select the Save PAD/SEQ icon.
- Press [YES/ENTER].
A message of "Save PAD/SEQ data?" appears.
- Press [YES/ENTER].
The display will indicate "Saving PAD/SEQ...," and the data will be saved. When saving is completed, the display will show a message of "Completed."
- Press [DISPLAY] to return to the Basic screen.

When you save Pad/Sequence, all previously saved samples on a CD-RW disc will be overwritten and lost.
Loading Pad/ Sequence from a CD-RW disc
To load Pad/Sequence saved in CD-RW disc, carry out the following process.
- Press [UTILITY].
The Menu are displayed as icon.
- Press CURSOR [] to select the Load PAD/SEQ icon.
- Press [YES/ENTER].
A message of "Load PAD/SEQ data?" appears.
- Press [YES/ENTER].
The display will indicate "Loading PAD/SEQ...," and the data will be loaded. When loading is completed, the display will show a message of "Completed." and the Basic screen will reappear.
If the display asks "Load PAD/SEQ data?"
If you insert a CD-RW disc containing Pad/Sequence when internal memory contains Pad/Sequence, a message of "Load PAD/SEQ data?" will be displayed. In this case, use the following procedure.
■ Use the Pad/Sequence that are stored in internal memory
In response to the "Load PAD/SEQ data?" message, press [NO/EXIT].
The Pad/Sequence stored in internal memory will continue to be available.
■ Use the Pad/Sequence from the CD-RW disc
In response to the "Load PAD/SEQ data?" message, press [YES/ENTER].
The Pad/Sequence from the CD-RW disc will be assigned to the pads.
* At this time, the Pad/Sequence stored in internal memory will be replaced. This means that the sample that was previously in internal memory will be lost. If necessary, save the Pad/Sequence on a CD-RW disc. For details refer to "Saving Pad/Sequence" (p. 67).

In case any Pad/Sequence is held in internal memory of CDX-1, it will be overwritten by those loaded from CD-RW disc. It is recommended to save Pad/Sequence in internal memory to another CD-RW disc before loading. "Saving Pad/Sequence" (p. 67)
Playing the pad samples
Basic ways to play samples
Playing a sample
Press a pad in which a sample has been recorded (lit), and it will play.
There are 3 kinds of how a pad starts/stops sounding. For details refer to “Changing how a pad starts and stops sounding—Pad Play” (p. 70).
Adjusting the Overall Sample Volume
The overall monitoring volume of the samples you play from the pads can be adjusted by the PAD/SEQ LEVEL fader and the MASTER fader.
To adjust the volume of an individual pad sample, refer to "Adjusting the volume of a sample–Sample Level" (p. 76).
Playing samples simultaneously
Up to four samples can be played simultaneously. If you press more than four pads, the sample of the pad you pressed last will be given priority, and the sample of the pad that was pressed first will stop sounding.
Playing pads while audio tracks play back
The number of sounds that can be played simultaneously is four stereo notes total for the audio tracks, pads, and sequence track. Audio track playback takes priority over pad playback. This means that if seven or more audio tracks are playing, pressing a pad will not sound its sample (the pads will be extinguished).
If you wish to play back audio tracks and add samples played from the pads, the [STATUS] of at least two audio tracks must be extinguished (muted). In this case, you must turn off the audio track [STATUS] in a combination of 1-2, 3-4, 5-6, or 7-8.
Playing pads while you play back an audio CD
Sample data assigned to pads will remain in the internal memory of the CDX-1 unless mixdown (p. 133) is performed or the power is turned off (p. 34). Here's how you can use the Pad/Sequence in internal memory to play the pads while an audio CD plays back.
- With samples assigned to the pads (pads lit), insert an audio CD.
- Press PLAY [ ].
The audio CD plays.
- When you press a pad, its sample will play.
At this time you can play up to three pads simultaneously.
Can I layer samples from another pad bank?
When you switch pad banks, the samples of the previous pad bank will stop. However, samples to which Hold (p. 72) is applied will continue to sound until Hold is defeated. You can press other pads to layer samples from another sample bank. Even in this case, it is not possible to exceed the limit of four stereo notes.
NOTE
Depending on the status of the audio tracks, even pads that contain samples may be extinguished, and will not be playable. For details refer to "Playing pads while audio tracks play back" on this page.
NOTE
The number of samples that can be played simultaneously will not increase even if you sample in mono. However, mono sampling uses only half the memory of stereo sampling.
MEMO
When [SEQ PLAY] lights, an audio CD is inserted, and the Sequence function will automatically be turned off. Also, when you press [SEQ PLAY] turn on, an audio CD will not be played back even if an audio CD is inserted.
Changing how a pad starts and stops sounding—Pad Play
- Press PAD RECORDING [TEMPO MATCH] twice.
Alternatively, you can press [TEMPO MATCH] and then press CURSOR [ ].
The Pad Edit menu are displayed as icons.
- Make sure that the cursor is located at the pad parameter icon.
- Press [YES/ENTER].
The pad parameter screen appears.
- Press the pad for the sample for which you'll be making settings.
The selected pad blinks.
- Make sure that the cursor is located at the "Pad Play" line.
- Turn the TIME/VALUE dial to specify how the pad will sound.
- Pad Play
GATE: Press the pad → the sound begins
Release the pad → the sound stops
TRIGGER: Press the pad → the sound begins
The sound will continue even after you release the pad
Press the pad once again → the sound stops
DRUM: Press the pad → the sound will begin sounding, and will automatically stop at the sample end point (p. 78; the location specified for the sound to end)
* If you select "DRUM", the Loop Mode (p. 73) setting will be ignored, and the sound will play only once. Also if "DRUM" is selected, it will not be possible to stop the sample once it has been played. Use this setting with caution in the case of extremely long samples.
-
If you wish to make settings for other samples, press the desired pad and repeat steps 5 and 6.
-
Press [DISPLAY] to return to the Basic screen.
MEMO
If you wish to make settings for the samples of other pad banks, you must first switch the pad bank (p. 54).
Crossfading the pad samples you play —Pad Crossfade
By using Pad Crossfade, you can play pad samples without creating gaps between the sounds of each pad. Each time you press a pad, its sample will be automatically crossfaded (faded in and faded out).
Pad samples can be recorded directly to a CD-R disc only when Pad Crossfade is turned on. (→ "Recording samples played using Pad Crossfade on a CD-R disc"; p. 162)
- Press [PAD X FADE].
[PAD X FADE] will light, and Pad Crossfade will be turned on.
- Press a pad to play its sample.
- When you press another pad while the first sample is playing, the first-played sample will be faded-out, and the sample of the subsequently played pad will be faded-in as it starts playing.
- To cancel Pad Crossfade, press [Pad X FADE].
[PAD X FADE] will go out, and Pad Crossfade will be turned off.
MEMO
All pads will sound in Trigger mode, regardless of their actual mode setting.
- Trigger mode:
The sound will begin playing when you press the pad, and will continue playing even when you release the pad. The sound will stop when you press the pad once again.
Making the sound continue even after you release the pad—Hold
In some cases, you may want a sample whose Pad Play setting (p. 70) is set to "GATE" (start sounding when you press the pad, and stop sounding when you release it) to continue sounding even after you take your hand away from the pad. In such cases, you can use the Hold function.
Using Hold
- Hold down a pad that is set to "GATE," and press [HOLD].
[HOLD] will light, indicating that Hold has been enabled. The sample will continue playing even after you release [HOLD] or the pad.
- Press [HOLD] once again.
[HOLD] will go out, Hold will be cancelled, and the sample will stop sounding.
Using Hold for multiple samples
After you have enabled Hold in step 1 of the preceding procedure,
- Hold down another pad and press [HOLD].
Both samples will be held, and will continue playing even after you release [HOLD] or the pad.
- Press [HOLD] once again.
[HOLD] will go out, Hold will be cancelled, and both samples will stop sounding.

Hold will not function if the Pad Play setting (p. 70) is "DRUM."

You can obtain a result similar to Hold by setting the Hold Play setting (p. 70) to "TRIGGER."
Playing repeatedly—Loop mode
Loop refers to a state in which a sample is played repeatedly from its start point (the beginning of the sound) to its end point (the end of the sound) (or a specified region). This function is convenient when you wish to repeatedly play a sample to create the basic rhythm.
- Press PAD RECORDING [TEMPO MATCH] twice.
Alternatively, press [TEMPO MATCH] and then press CURSOR [ ].
The Pad Edit menu are displayed as icons.
- Make sure that the cursor is located at the pad parameter icon.
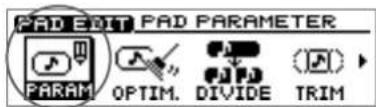
- Press [YES/ENTER].
The pad parameter screen appears.
- Press the pad for the sample for which you'll be making settings.
The selected pad blinks.
- Press CURSOR [] to move the cursor to "Loop Mode" line.
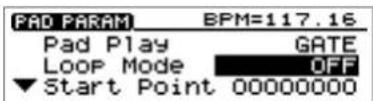
- Turn the TIME/VALUE dial to select Loop mode.
- Loop Mode:
OFF: No looping
START-END:
Looping (from start point to end point)
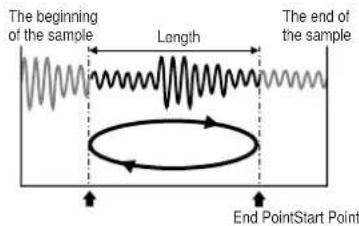
LOOP-END:
Looping (from loop point to end point)
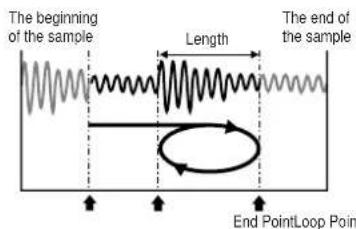
-
If you wish to make settings for other samples, press the appropriate pad and repeat steps 4 and 5.
-
Press [DISPLAY] to return to the Basic screen.

For the significance of each point and details on how to change the setting, refer to "Adjusting the start/end points of the sound" (p. 78).

If you wish to make settings for a sample of another pad bank, you must first switch to that pad bank (p. 54).
Preventing specific samples from sounding simultaneously—Mute Groups
Samples that do not need to sound simultaneously (or that you do not want to be heard simultaneously) can be assigned to the same mute group. The CDX-1 has seven mute groups, and samples that are assigned to the same mute group will not sound together with each other.
Playing samples that are set to the same Mute group (Example)
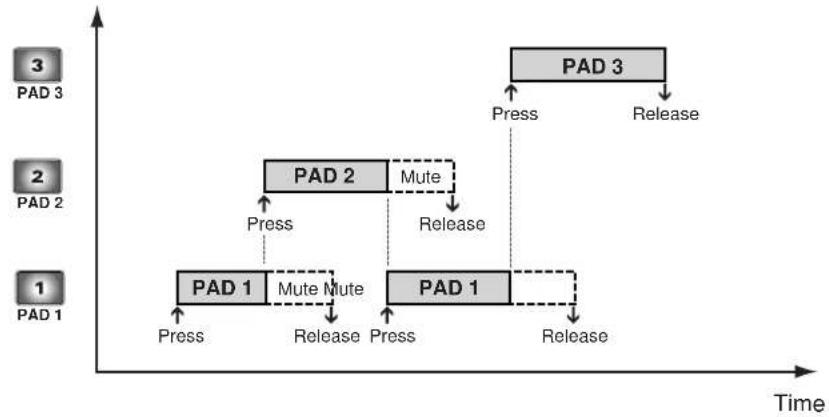
flowchart
graph TD
    A["PAD 1"] -->|Press| B["PAD 2"]
    B -->|Press| C["PAD 3"]
    C -->|Press| D["PAD 3"]
    D -->|Release| E["PAD 3"]
    E -->|Release| F["PAD 3"]
    F -->|Press| G["PAD 1"]
    G -->|Press| H["PAD 1"]
    H -->|Release| I["PAD 1"]
    I -->|Press| J["PAD 1"]
    J -->|Release| K["PAD 1"]
    K -->|Press| L["PAD 1"]
    L -->|Release| M["PAD 1"]
    M -->|Press| N["PAD 1"]
    N -->|Release| O["PAD 1"]
    O -->|Press| P["PAD 1"]
    P -->|Release| Q["PAD 1"]
    Q -->|Press| R["PAD 1"]
    R -->|Release| S["PAD 1"]
    S -->|Press| T["PAD 1"]
    T -->|Release| U["PAD 1"]
    U -->|Press| V["PAD 1"]
    V -->|Release| W["PAD 1"]
    W -->|Press| X["PAD 1"]
    X -->|Release| Y["PAD 1"]
    Y -->|Press| Z["PAD 1"]
    Z -->|Release| AA["PAD 1"]
    AA -->|Press| AB["PAD 1"]
    AB -->|Release| AC["PAD 1"]
    AC -->|Press| AD["PAD 1"]
    AD -->|Release| AE["PAD 1"]
    AE -->|Press| AF["PAD 1"]
    AF -->|Release| AG["PAD 1"]
    AG -->|Press| AH["PAD 1"]
    AH -->|Release| AI["PAD 1"]
    AI -->|Press| AJ["PAD 1"]
    AJ -->|Release| AK["PAD 1"]
    AK -->|Press| AL["PAD 1"]
    AL -->|Release| AM["PAD 1"]
    AM -->|Press| AN["PAD 1"]
    AN -->|Release| AO["PAD 1"]
    AO -->|Press| AP["PAD 1"]
    AP -->|Release| AQ["PAD 1"]
    AQ -->|Press| AR["PAD 1"]
    AR -->|Release| AS["PAD 1"]
    AS -->|Press| AT["PAD 1"]
    AT -->|Release| AU["PAD 1"]
    AU -->|Press| AV["PAD 1"]
    AV -->|Release| AW["PAD 1"]
    AW -->|Press| AX["PAD 1"]
    AX -->|Release| AY["PAD 1"]
    AY -->|Press| AZ["PAD 1"]
    AZ -->|Release| BA["PAD 1"]
    BA -->|Press| BB["PAD 1"]
    BB -->|Release| BC["PAD 1"]
    BC -->|Press| BD["PAD 1"]
    BD -->|Release| BE["PAD 1"]
    BE -->|Press| BF["PAD 1"]
    BF -->|Release| BG["PAD 1"]
    BG -->|Press| BH["PAD 1"]
    BH -->|Release| BI["PAD 1"]
    BI -->|Press| BJ["PAD 1"]
    BJ -->|Release| BK["PAD 1"]
    BK -->|Press| BL["PAD 1"]
    BL -->|Release| BM["PAD 1"]
    BM -->|Press| BN["PAD 1"]
    BN -->|Release| BO["PAD 1"]
    BO -->|Press| BP["PAD 1"]
    BP -->|Release| BQ["PAD 1"]
    BQ -->|Press| BR["PAD 1"]
    BR -->|Release| BS["PAD 1"]
    BS -->|Press| BT["PAD 1"]
    BT -->|Release| BU["PAD 1"]
    BU -->|Press| BV["PAD 1"]
    BV -->|Release| BW["PAD 1"]
- Press PAD RECORDING [TEMPO MATCH] twice.
Alternatively, press [TEMPO MATCH] and then press CURSOR [ ].
The Pad Edit menu are displayed as icons.
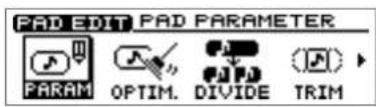
- Make sure that the cursor is located at the pad parameter icon.
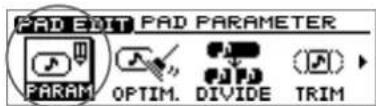
- Press [YES/ENTER].
The pad parameter screen appears.
- Press the pad whose sample you wish to set.
The specified pad blinks.
- Press CURSOR [] to move the cursor to "Mute Group" line.
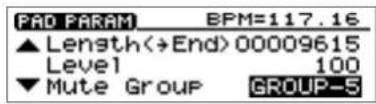
-
Turn the TIME/VALUE dial to select "OFF" or "GROUP-1"- "GROUP-7."
-
If you wish to make settings for another sample, press the appropriate pad and repeat steps 4 and 5.
-
Press [DISPLAY] to return to the Basic screen.
MEMO
If you press two or more pads that are assigned to the same mute group, the sample that was pressed first will be muted (silenced).
MEMO
If you wish to make settings for a sample of another pad bank, you must first switch the pad bank (p. 54).
Playing a sample from a connected foot switch
If a separately sold foot switch (e.g., DP-2 or BOSS FS-5U) is connected, you can play the sample of a specified pad by pressing the foot switch.
Specifying the Function of the Foot Switch
- Connect an optional foot switch (DP-2, BOSS FS-5U, etc.) to the FOOT SWITCH jack.
- Press [UTILITY].
The Menu are displayed as icon.
- Press CURSOR [] to select the System icon.
- Press [YES/ENTER].
The System settings screen appears.
- Press CURSOR [] to move the cursor to "Foot SW" line.
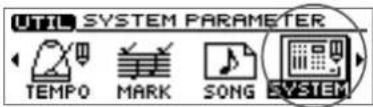
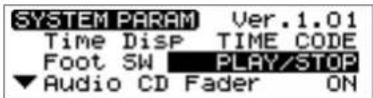
- Turn the TIME/VALUE dial to select "SAMPLER TRIG."
- Press [DISPLAY] to return to the Basic screen.
When you press the foot switch, the sample of the specified pad will sound.
Specifying the pad sample that will be played by the foot switch
- Press PAD RECORDING [TEMPO MATCH] twice.
Alternatively, press [TEMPO MATCH] and then press CURSOR [ ].
The Pad Edit menu are displayed as icons.
- Press CURSOR [] to select the Bank Parameter icon.
- Press [YES/ENTER].
The pad bank parameter screen appears.
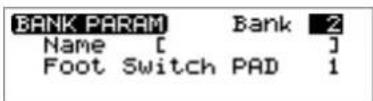
- Make sure that the cursor is located at the "Bank" line, and use TIME/VALUE dial to witch to the pad bank for which you wish to make settings
- Press CURSOR [] to move the cursor to "Foot Switch PAD" line.
- Turn the TIME/VALUE dial to select a pad number (1-8).
- Press [DISPLAY] to return to the Basic screen.
MEMO
This parameter has only a single setting which will apply regardless of the song or the CD-RW disc.

For details on "Foot SW" parameter, refer to step 6 of "Using a foot switch to punch-in/out" (p. 122).
Editing the sample of a pad
The 512 samples (8 pads x 64) stored in the CDX-1 can be edited in a variety of ways, such as by adjusting their volume or length. Samples can be edited either by creating a new sample for another pad, or by simply modifying the settings of the same pad.
Adjusting the volume of a sample—Sample Level
The volume at which a pad plays when you press it can be adjusted separately for each pad. This conveniently allows you to achieve the appropriate relative volume levels among your pads.
- Press PAD RECORDING [TEMPO MATCH] twice.
Alternatively, press [TEMPO MATCH] and then press CURSOR [ ].
The Pad Edit menu are displayed as icons.
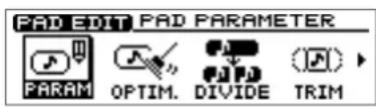
- Make sure that the cursor is located at the Pad Parameter icon.
- Press [YES/ENTER].
The Pad Parameter screen appears.
- Press the pad for which you wish to make settings.
The corresponding pad blinks.
- Press CURSOR [] to move the cursor to "Level" line.
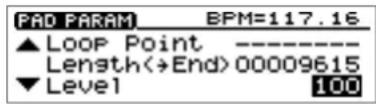
- Turn the TIME/VALUE dial to set the volume.
* The volume can be adjusted in a range of 0–100. This setting is also used as the volume level when you arrange samples to create a song (p. 90–93).
-
If you wish to make settings for another sample, press the appropriate pad and repeat steps 4–6
-
Press [DISPLAY] to return to the Basic screen.
MEMO
If you wish to make settings for a sample of another bank, you must first switch to the desired pad bank.
→ "Switching pad banks" (p. 54)
Displaying the correct tempo of a sample
The upper right of the Pad Parameter screen displays the tempo of the sample in units of BPM (Beats Per Minute: the number of beats in one minute).
However, for this to be displayed accurately, you must tell the CDX-1 the number of beats in that sample and the note value of each beat.
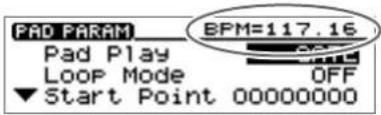
* The tempo (BPM) display is always calculated as 1 beat = quarter note. For example, an eighth note is calculated and displayed as half a beat, and a half note as double the length of one beat.
* In the case of a long sample such as a narration, for which it is difficult to determine a tempo (BPM), you should set the number of beats in "x_" as 0. This produces the best results for the Time Stretch function (p. 81).
- Press PAD RECORDING [TEMPO MATCH] twice.
Alternatively, press [TEMPO MATCH] and then press CURSOR [ ]
The Pad Edit menu are displayed as icons.
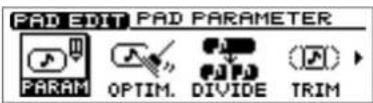
- Make sure that the cursor is located at the Pad Parameter icon.
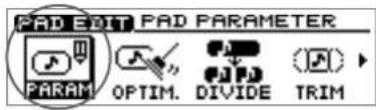
- Press [YES/ENTER].
The Pad Parameter screen appears.
- Press the pad for which you wish to make settings.
The corresponding pad blinks.
- Press CURSOR [] to move the cursor to "BPM Base Note."
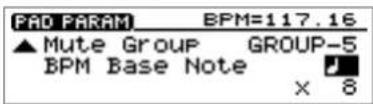
- Turn the TIME/VALUE dial to select a note.
- Press CURSOR [] to move the cursor to "X__."
- Turn the TIME/VALUE dial to set the length of the sample as a multiple of the note value you selected in step 5.
- Press [DISPLAY] to return to the Basic screen.
MEMO
Initially this is set to 8 (quarter note x 8 notes).
MEMO
If the sample is a simple rhythm, you can just play back the sample and count, and specify that value in step 6. This is accurate and easy.
Adjusting the start/end points of the sound—Trim Sample
You can specify the portion of the sample that are played when you press the pad.
What are the Start/Loop points and Length?
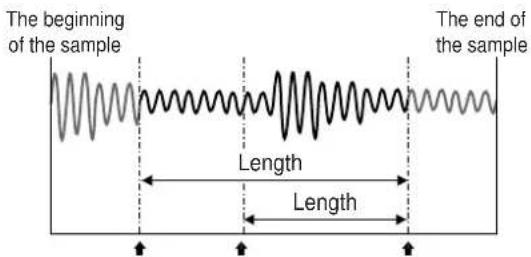
End PointLoop PointStart Point
Start Point: This is the point where the sound begins. By adjusting this, you can skip a portion of unintended silence at the beginning of a sample so that the sample starts playing at the right moment.
Loop point: When the sample is played repeatedly, this is the point where the repetition (the second and subsequent times) begins. Set this when you want to loop from a location other than the Start point.
Length: This is the length from the Start (or Loop) point to the End point (where the sound stops). By adjusting this you can skip an unintended silent portion at the end of a sample. This also determines the length of the looped area when the sample is played back repeatedly (p. 73).
Setting each point
- Press PAD RECORDING [TEMPO MATCH] twice.
Alternatively, press [TEMPO MATCH] and then press CURSOR [ ]
The Pad Edit menu are displayed as icons.
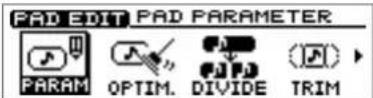
- Make sure that the cursor is located at the Pad Parameter icon.
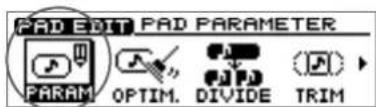
- Press [YES/ENTER].
The Pad Parameter screen appears.
- Press CURSOR [] to select the screen with the three items "StartPoint," "LoopPoint," and "Length (→ End)."
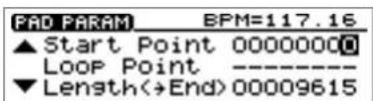
-
Use CURSOR [][] to move the cursor to the item you wish to set.
-
Press the pad to play the sample you are editing, and turn the TIME/VALUE dial to adjust the setting.
-
Press [DISPLAY] to return to the Basic screen.
MEMO
- The location of the End point (where the sound stops) is determined indirectly by the Length (the length from the Start point to the End point). - Set the Loop mode ("Playing repeatedly"; p. 73) to specify whether the sample are looped (played repeatedly).
MEMO
While changing the end point or loop point, in order to effectively edit even extremely long samples, the beginning of the sound can be automatically switched to play not from the start point, but from just before the end point.

In step 6, if you press [YES/ENTER] while the value of "StartPoint" is selected, the sample to be changed sounds from the beginning.
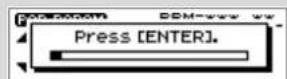
While listening this sound press [YES/ENTER] again, that time location is set as a start point automatically. When the "Length(→End)" or "LoopPoint" is selected, you can set the end or loop point with the same procedure as above.
Automatically removing Empty Portion at the Beginnings and Ends of Samples
This automatically removes any bank portions that may come before the sample starts ti play or after the sample is finished.
- Press PAD RECORDING [TEMPO MATCH] twice.
Alternatively, press [TEMPO MATCH] and then press CURSOR [ ].
The Pad Edit menu are displayed as icons.
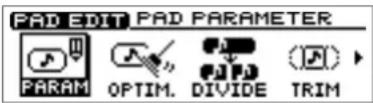
- Press CURSOR [] to select the Trim icon.
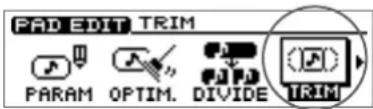
- Press [YES/ENTER].
The Trim Sample screen appears.
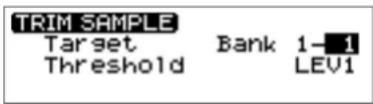
- Make sure that the cursor is located at the "Target" line, use CURSOR []
[ ] to select the pad bank number and pad number for each item, specifying the sample containing the empty sections at the start and end of sound.
Select the pad bank number by turning the TIME/VALUE dial. Select the pad number either by pressing a pad or by turning the TIME/VALUE dial.
-
Press CURSOR [] to move the cursor to "Threshold" line.
-
Turn the TIME/VALUE dial to select the volume level (LEV1-LEV8) necessary for detection of the empty sections.
The higher the numeral. the greater the volume these sections can have while still being regarded as containing no sound.
- When you have finished making the settings, press [YES/ENTER].
When remove of the empty sections is finished, "Completed." appears in the display.
- Press [DISPLAY] to return to the Basic screen.
Expanding and Compressing a sample to modify the length or tempo
If you want the tempo or length of samples to match, you can stretch or shorten the time that the sample is played.
Matching the tempo to another sample—Tempo Match
It is easier to edit your song if the materials you collected are of a consistent tempo. The CDX-1 makes it easy to match the tempo of different samples.
Since this function needs to accurately calculate the tempo in order to perform a high-quality compression or expansion, you must first perform the procedure of "Displaying the correct tempo of a sample" (p. 77) to specify the number of beats in the original sample.
In the case of samples for which it is difficult to calculate a tempo, such as a narration, vocal part, or a long sustained sound, set the number of beats to 0.
1. Press PAD RECORDING [TEMPO MATCH].
The Tempo Match Setting screen appears.
![ROLAND CDX-1 - Press PAD RECORDING [TEMPO MATCH]. - 1](/content/2026/05/862949/images/1791be498f600c67f0f4c9ea1b2e0d2e2159338fbdca27e0021ac1eada936e10.jpg)
2. Use CURSOR [ ][ ][ ] to select the pad bank number and pad number for each item, specifying the desired number for each.
Turn the TIME/VALUE dial to set the pad bank number. To set the pad number, either press a pad or turn the TIME/VALUE dial.
BasePad: Specify the sample that is the standard for tempo.
Source: Specify the sample you wish to expand/compress sample.
To: Specify the pad to which the newly created sample is assigned. (*)
* If the destination pad already contains a sample, a message of "Overwrite?" appears. If it is OK to overwrite the existing sample, press [YES/ENTER].
3. When you have finished making the settings, press [YES/ENTER].
After a while, the newly created sample is assigned to the destination pad.
- Press [DISPLAY] to return to the Basic screen.
![ROLAND CDX-1 - When you have finished making the settings, press [YES/ENTER]. - 1](/content/2026/05/862949/images/4e5c7555756a3538d5758d1eaca1cd54d822336e78de67c6220a81b0f1906d52.jpg)
- Compression/expansion (Stretch) requires more processing time than other sample editing operations. Also, the audio quality of the stretched sample may be inferior to that of the original sample.
• In case the expanding/expanding level is in excess of 130% or less than 70%, the sample will not be made correct tempo.
Expanding/compressing by a specified percentage or tempo—Time Stretch
Since this function needs to accurately calculate the tempo in order to perform a high-quality compression or expansion, you must first perform the procedure of "Displaying the correct tempo of a sample" (p. 77) to specify the number of beats in the original sample.
In the case of samples for which it is difficult to calculate a tempo, such as a narration, vocal part, or a long sustained sound, set the number of beats to 0.
- Press PAD RECORDING [TEMPO MATCH] twice.
Alternatively, press [TEMPO MATCH] and then press CURSOR [].
The Pad Edit menu are displayed as icons.
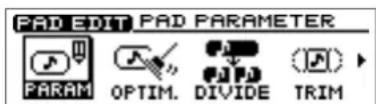
- Press CURSOR [] to select the Time Stretch icon.
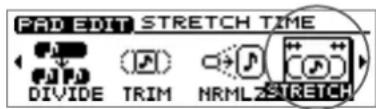
- Press [YES/ENTER].
The Time Stretch screen appears.
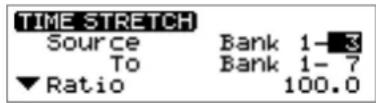
- Use CURSOR [ ] [ ][ ] [ ] to select the pad bank number and pad number for each item, and specify the desired number for each.
To set the pad bank number, turn the TIME/VALUE dial. To set the pad number, either press a pad or turn the TIME/VALUE dial.
Source: Specify the sample you wish to expand/compress sample.
To: Specify the pad to which the expanded/compressed sample is assigned. (*)
* If the destination pad already has a sample, a message of "Overwrite?" appears. If it is OK to overwrite the existing sample, press [YES/ENTER].
- Press CURSOR [] [] to move the cursor to "Ratio."
Turn the TIME/VALUE dial to specify the expansion/compression in a range of 50.0–150.0%.
A setting of 100.0% is the same as the original length.
* By selecting and setting "New BPM" (new tempo) in the line below, you can specify the expansion/compression in terms of the new tempo. The Ratio and New BPM values always changes simultaneously.
- When you have finished making the settings, press [YES/ENTER].
After a time, the expanded/compressed sample is assigned to the destination pad.
- Press [DISPLAY] to return to the Basic screen.

Compression/expansion (Stretch) requires more processing time than other sample editing operations. Also, the audio quality of the stretched sample may be inferior to that of the original sample.
Copying a sample to another pad—Clipboard
By temporarily pasting a sample into the clipboard, you can easily copy a sample from one pad to another.
- Hold down the pad of the sample you wish to move (the pad lights), and press [CLIP BOARD].
[CLIP BOARD] is illuminated.
* If [CLIP BOARD] already contains a sample, that is overwritten the existing sample.
-
Press [CLIP BOARD] to verify that the sample sounds.
-
Hold down [CLIP BOARD] and press the destination pad.
[CLIP BOARD] goes out, and the destination pad lights.
* If the destination pad already contains a sample, you cannot copy a sample.
- Press the destination pad to verify that the sample sounds.
Deleting a sample of [CLIP BOARD]
If you wish to delete a sample of [CLIP BOARD], hold [DELETE] and press [CLIP BOARD].
![ROLAND CDX-1 - Deleting a sample of [CLIP BOARD] - 1](/content/2026/05/862949/images/caa7d98f8d03d772d1d356e60f4653eed1f2460377cf4c9ca83a6cee2255718c.jpg)
The sample of the PAD are unable to be played back simultaneously while playing the sample of [CLIP BOARD].
Splitting a sample among several pads—Divide Sample
Sometimes after sampling an extended performance, you may wish to divide the sample into two parts, and assign them to separate pads as new samples. The Divide Sample function lets you do this. This is convenient when you wish to record a sample without pausing, and then later divide it into shorter samples and assign them to pads.
Specifying a division point and dividing a sample in two
- Set the end point of the original sample at the location where you wish to divide the sample.
→ "Setting the points" (p. 78)
- Press PAD RECORDING [TEMPO MATCH] twice.
Alternatively, you can press [TEMPO MATCH] and then press CURSOR [ ].
The Pad Edit menu are displayed as icons.
- Press CURSOR [] to select the Divide icon.
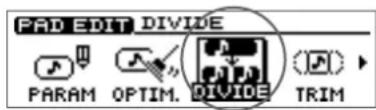
- Press [YES/ENTER].
The Divide Sample screen appears.
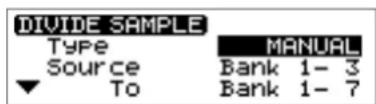
-
Make sure that the cursor is located at the "Type" line, and turn the TIME/VALUE dial to set "END POINT."
-
Use CURSOR [ ][ ][ ][ ] to select the pad bank number and pad number for "Source" (original sample) and "To" (destination), specifying the sample for each.
Select the pad bank number by turning the TIME/VALUE dial. Select the pad number either by pressing a pad or by turning the TIME/VALUE dial.
- Press [YES/ENTER].
The sample are divided.
* If the destination pad already contains a sample, the "Overwrite?" message appears. If it is OK to overwrite the existing sample, press [YES/ENTER]. If you do not wish to overwrite the existing sample, press [NO/EXIT].
- Press [DISPLAY] to return to the Basic screen.
Editing the sample of a pad
Automatically dividing a sample at silent portions
- Press PAD RECORDING [TEMPO MATCH] twice.
Alternatively, press [TEMPO MATCH] and then press CURSOR [ ].
The Pad Edit menu are displayed as icons.
- Press CURSOR [[ ] to select the Divide icon.
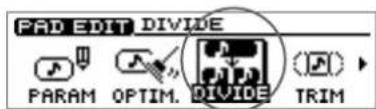
- Press [YES/ENTER].
The Divide Sample screen appears.
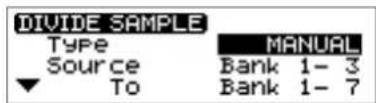
- Make sure that the cursor is located at the "Type" row, and turn the TIME/VALUE dial to set "AUTO."
Values of "AUTO 0.5," "AUTO 1.0," "AUTO 1.5," and "AUTO 2.0" specify the length (in seconds) of the silent portion that are the standard for dividing the sample. For example, if you set this to "AUTO 1.0," silent portions longer than one second are the boundaries of the divided samples.
- Use CURSOR [ ][ ][ ][ ] to select the "Source" (original sample) and "To" (destination) pad bank number and pad number, and specify the sample for each.
Specify the pad bank number by turning the TIME/VALUE dial. Specify the pad number by pressing a pad or by turning the TIME/VALUE dial.
- Press [YES/ENTER].
The sample are divided.
* If the destination pad already contains a sample, the "Overwrite?" message appears. If it is OK to overwrite the existing sample, press [YES/ENTER]. If you do not wish to overwrite the existing sample, press [NO/EXIT].
- Press [DISPLAY] to return to the Basic screen.
Dividing destinations when "AUTO" is used
- The divided samples are assigned successively, starting with the pad you specified for "TO." Pads that already contain a sample are skipped.
- If there are not enough vacant pads for all of the divided samples, a message of "PADs are Full. Use Next Bank?" appears. If you press [YES/ENTER], the process of division continues with the next pad bank. If you press [NO/EXIT], all of the remaining samples are written to the last pad as a single sample.

If you turn "Trim" on, the beginning of the next sample are set to the point at which the volume first rises from silence to exceed the "Threshold." By setting "Threshold" to the desired level, you can cause the sample to be divided automatically, according to the level you specify.

If you want only the results of the division to be neatly arranged in the pad bank, select pad [1] of the pad bank as the destination.
Dividing a sample at the timing that you press a button
- Press PAD RECORDING [TEMPO MATCH] twice.
Alternatively, press [TEMPO MATCH] and then press CURSOR [ ].
The Pad Edit menu are displayed as icons.
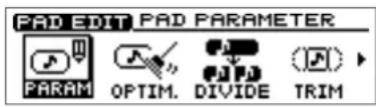
- Press CURSOR [] to select the Divide icon.
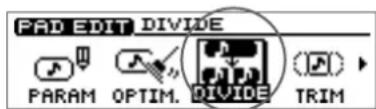
- Press [YES/ENTER].
The Divide Sample screen appears.
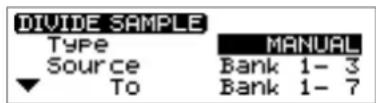
- Make sure that the cursor is located at the "Type" line, and turn the TIME/VALUE dial to set it to "MANUAL."
- Use CURSOR [ ][ ][ ] to select the "Source" (original sample) and "To" (destination) pad bank number and pad number, and specify the sample for each.
Specify the pad bank number by turning the TIME/VALUE dial. Specify the pad number by pressing a pad or by turning the TIME/VALUE dial.
- Press [YES/ENTER], and the original sample begins playing.
- At the point where you wish to divide the sample, press [YES/ENTER] once again.
The sample are divided at that point.
* If the destination pad already contains a sample, the "Overwrite?" message appears. If it is OK to overwrite the existing sample, press [YES/ENTER]. If you do not wish to overwrite the existing sample, press [NO/EXIT].
8. Press [DISPLAY] to return to the Basic screen.
Creating a “reverse tape” style sample—Create Reversal
By using this function you can create a sample that sounds as though a tape recorder were being played backward.
- Press PAD RECORDING [TEMPO MATCH] twice.
Alternatively, you can press [TEMPO MATCH] and then press CURSOR [ ].
The Pad Edit menu are displayed as icons.
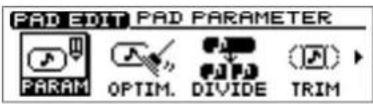
- Press CURSOR [] to select the Create Reversal icon.
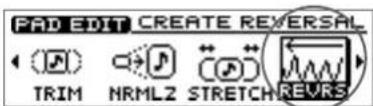
- Press [YES/ENTER].
The Create Reversal Settings screen appears.
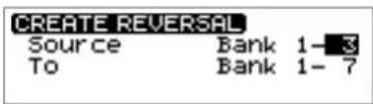
- Use CURSOR [ ] [ ] [ ] to select the "Source" (source sample) and "To" (destination) pad bank number and pad number, and specify the sample for each.
Specify the pad bank number by turning the TIME/VALUE dial. Specify the pad number by pressing a pad or by turning the TIME/VALUE dial.
- Press [YES/ENTER].
The Create Reversal operation is executed.
* If the destination pad already contains a sample, the "Overwrite?" message appears. If it is OK to overwrite the existing sample, press [YES/ENTER]. If you do not wish to overwrite the existing sample, press [NO/EXIT].
- Press [DISPLAY] to return to the Basic screen.

The Pad Play and Loop settings will be the same as the original sample. However, the Loop point setting is ignored.
Boosting the sample level as high as possible—Normalize
Normalize is a function that raises the level of the entire sample as high as possible without exceeding the maximum level.
- Press PAD RECORDING [TEMPO MATCH] twice.
Alternatively, press [TEMPO MATCH] and then press CURSOR [ ].
The Pad Edit menu are displayed as icons.
- Press CURSOR [] to select the Normalize icon.
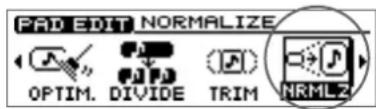
- Press [YES/ENTER].
The Normalize Settings screen appears.
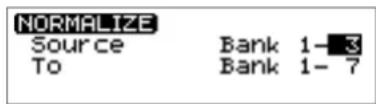
- Use CURSOR [ ] [ ] [ ] to select the "Source" (source sample) and "To" (destination) pad bank number and pad number, and specify the sample for each.
Specify the pad bank number by turning the TIME/VALUE dial. Specify the pad number by pressing a pad or by turning the TIME/VALUE dial.
- Press [YES/ENTER].
The Normalize operation is executed.
* If the destination pad already contains a sample, the "Overwrite?" message appears. If it is OK to overwrite the existing sample, press [YES/ENTER]. If you do not wish to overwrite the existing sample, press [NO/EXIT].
- Press [DISPLAY] to return to the Basic screen.
Arranging audio samples to create a song—Sequence
What is a sequence?
You can create a song by consecutively playing pad samples. The CDX-1 is able to record pad operations; i.e., "which pad was pressed," "in what order," and "how long." Data for pad operations that have been recorded in this way is called a sequence.
The CDX-1 provides two ways of recording a sequence: Realtime recording and step recording.

When creating a sequence by arranging samples that are recorded to the pads, the sounds comprising the sequence and the original samples do not effect each other directly. For example, if the sounds on the pad samples used as source material for a sequence are deleted, those sounds, once saved as a sequence, are not lost.
About the sequence tracks
The CDX-1 has four tracks (A–D) for recording sequences. When you access the Sequence Play List screen, the arrangement of samples in a sequence track will be shown by the location and length of the boxes (rectangles). The vertical dotted lines in the screen indicate measure divisions.
The Sequence Play List screen will be displayed when you press [DISPLAY] to switch screens. It will also be displayed when you press PAD SEQUENCING [SEQ PLAY] to turn the sequence on.
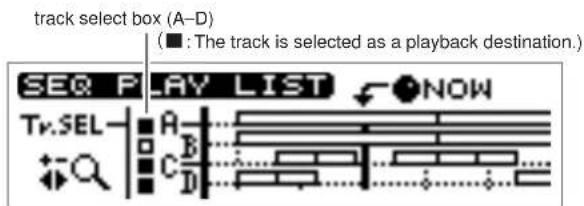
When the graphic of “” appears in the display, the area indicated on the screen can be widened by pressing CURSOR [ ◇ ] and narrowed by pressing CURSOR [ □ ] .
About the tempo of the sequence
Setting the tempo of the sequence
The CDX-1 uses the measure (MEAS), beat (BEAT), and tick (TICK) * as the units of its basic system for measuring the current location in a sequence.
Thus, sequences on the CDX-1 are based on the concept of tempo, and in changing the tempos of sequences containing multiple phrases, the intervals between the beginning of one phrase and the beginning of the next are lengthened and shortened.
The overall tempo a sequence is changed in the Rhythm Guide setting screen. If you want the tempo to change midway through the sequence, set the tempo map to specify the tempo.
For details on setting the tempo, refer to "Changing the tempo" (p. 117).
For details on setting the tempo map, refer to "Setting the tempo and rhythm pattern of the song—Tempo Map" (p. 117).
* the tick, 1/96 of a beat, is the smallest unit in a sequence on the CDX-1.
MEMO
During sequence recording/Playing, indicates the current time location of the song in "Measure/Beat/Tick." In the Big Time Screen, the units indicated can be switched "Measure/Beat/Tick" or "Hour /Minute/Second."
→ Column "Switching the Big Time display" (p. 38)
The Relationship Between Sequences and Phrases
The sequence tempo can be changed in the Rhythm Guide setting screen or Tempo Map screen. When the tempo is slowed down, the interval during which the phrase sounds is lengthened. Conversely, increasing the tempo makes the interval shorter. However, in either case, you cannot change the performance tempo of the phrases (the tempo when the phrase is audio-recorded) themselves.
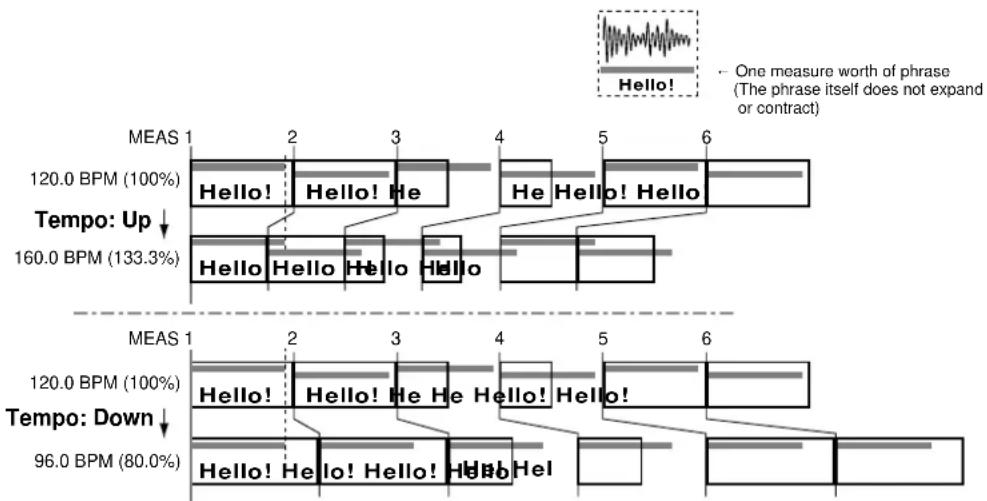
other
| Time Period | Phase | Value | |-------------|---------|-----------| | Up | Hello! | 120.0 BPM (100%) | | Up | Hello! | 160.0 BPM (133.3%) | | Down | Hello! | 120.0 BPM (100%) | | Down | Hello! | 96.0 BPM (80.0%) | | Tempo Up | Hello! | 120.0 BPM (100%) | | Tempo Up | Hello! | 160.0 BPM (133.3%) | | Tempo Down | Hello! | 120.0 BPM (100%) | | Tempo Down | Hello! | 96.0 BPM (80.0%) | One measure worth of phrase (The phrase itself does not expand or contract)
In order to use the tempo map to specify the tempo, you must change the way in which the rhythm guide is sounded.
→ “Playing the rhythm guide according to the tempo map” (p. 118)
How recording works
Phrases on Sequence are recorded as described below.
Play the sample selected for recording:
- From which measure, beat, and tick where the change to begin;
- Start from the position **** units from the beginning of the sample; and....
- For beats and ticks then mute the sample.
The data in 1-3 sets the phrase represented by the outlined rectangle displayed in the Play List screen.
Depending on the precess at the recording, the data of item 1 and 3 are set.
In the case of recording the phrases on the song by pressing the pad, the sample's start point (p. 78) is reflected to the data number which skip play the sample songs from the beginning in 2. This value can be changed with the Adjust Timing function (p. 104).

Depending on the actual sampling time or other factors, the length of time of a sample on the PAD is determined. In case the loop mode (p. 73) of sample is turned off the stops upon recording the edit point, before the end point determined in 3 even if the apparent play length of 3 above is expanded with tempo down. Thus, the sound may stop even when the apparent phrase (the outlined rectangle) is indicated in the Sequence Play List screen.
Recording pad operations as you play pads—Realtime Recording
Realtime recording of pad operations is when the timing at which pads are pressed and released is recorded in the sequence track. Since the actual sounds that you are hearing are not being recorded anew in the sequence track, this does not reduce the remaining time available for recording. Nor is it necessary to set the recording level. However, it is not possible to apply effects while you record pad operations, or to layer the sounds of multiple pads in the same sequence track. If you play two or more pads simultaneously, only the last-played pad operation will be recorded.
Realtime recording
- Press PAD SEQUENCING [CREATE].
[CREATE] blinks, and a screen appears in which you can select the recording method and the recording-destination sequence track.
- Press CURSOR [] to select "Realtime" (realtime recording).
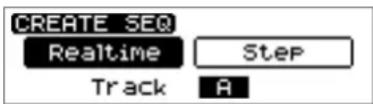
- Use the TIME/VALUE dial to select the sequence track A-D that you wish to record.
* If you re-record over a previously recorded sequence track, the pad operation data will be overwritten and the previous data will be lost.
- After you have specified the recording method and the sequence track to be recorded, press [YES/ENTER].
The realtime recording setting screen appears.
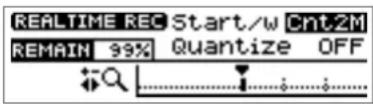
- Press ZERO [] make sure that the SONG POSITION in the screen indicates "0001-01-000" (beginning).
Alternatively, you can move to a desired location so that recording will start from that point.
- Make sure that the cursor is locates at the "Start/w" line. Turn the TIME/VALUE dial to specify how recording will begin.
- Start/w (Start with):
Norm: Recording will start at the moment you press [CREATE].
Cnt1M: Recording will start after a one-measure count is heard.
Cnt2M: Recording will start after a two-measure count is heard.
[PAD]: Recording will start at the moment you press a pad.
-
Press CURSOR [] to move the cursor to "Quantize." Turn the TIME/VALUE dial to select "OFF."
-
Press PAD SEQUENCING [CREATE].
[CREATE] will light, and recording will begin as you specified in step 6. Press pads to record them.
- When you are finish recording, press PAD SEQUENCING [CREATE].
[CREATE] goes out (extinguished), and the display returns to the Basic screen.
- Return to the location at which you began recording, and press PLAY [to play back your performance and listen to the result.

It is convenient to use the built-in rhythm guide when recording. If you record along with the rhythm guide, you will be able to edit the track in units of measures, and will also be able to synchronize the performance with an external device. For details on the rhythm guide, refer to "Using the rhythm guide" (p. 116).
MEMO
If [SEQ PLAY] is off, press [CREATE], and it will be turned on (lit) automatically. Also, the [STATUS] of all audio tracks will go dark.

For details on the "Quantize" setting, refer to "Correcting timing inaccuracies while you record" (p. 92).
MEMO
• In step 9, if you press
STOP [■CREATE] will blink (recording-standby mode). Then press [CREATE] once again, recording will begin.
• After recording, you can press [UNDO/REDO] (p. 138) to return to the previous conditions.
Recording while you listen to the playback of another sequence track
You can select a sequence track for playback, and then perform realtime recording while you listen to the playback of the selected sequence track.
- As described in steps 1–3 of "Playing a sequence track" (p. 96), select the sequence track that you wish to play.
- Follow the procedure described of "Realtime recording," above. Recording will begin, and at the same time the sequence track you selected in step 1 will play back. Press pads to record them.
Recording while you listen to the playback of the audio tracks
When sequence is turned on ([SEQ PLAY] is turned on), all the lighting [STATUS] of audio tracks will go dark (muted). At this time, you can select a audio track for playback, and then perform realtime recording while you listen to the playback of the selected audio track.
- Follow steps 1–7 of "Realtime recording," above.
- For the audio track(s) that you wish to play, press [STATUS] to get it to light in green.
* It is not possible for the sequence track selected as the recording destination to play simultaneously with the corresponding audio track. And an audio track cannot be played back simultaneously with the corresponding sequence track selected as the playing back destination. For details refer to "Playing sequence tracks and audio tracks simultaneously" (p. 97).
- Press [CREATE].
Recording will begin, and at the same time the audio track(s) you selected in step 2 will play. Press pads to record them.
- When you are finished recording, press PAD SEQUENCING [CREATE].
[CREATE] goes out (extinguished), and the display returns to the Basic screen.
- Return to the location where you begin recording, and press PLAY [] to play back your performance and listen to the result.
MEMO
In step 4, if you press
STOP [■[CREATE] will
blink (recording-standby
mode). Then press [CREATE]
once again, recording will begin.
MEMO
After recording, you can press [UNDO/REDO] (p. 138) to return to the previous conditions.
Correcting timing inaccuracies while you record —Quantize
Pad operations are recorded on the track with a timing precision of 1/96th of a beat. This means that it is rather difficult to record pad operations exactly at precise measure beginnings, quarter notes, or eighth notes when you are using realtime recording. This is why the CDX-1 provides a Quantize function that can correct the timing of your pad operations while you record.
1. In step 7 of "Realtime recording" (p. 90), change the "Quantize" setting.
Sets the timing resolution in terms of notes. The timing at which the sound begins will be adjusted to the beginning of measures or beats.
"MEAS": Beginning of the measure
| “ ♩ ” | : | 192 tick intervals |
| “ ♩ ” | : | 96 tick intervals |
| “ ♩3 ” | : | 64 tick intervals |
| “ ♩ ” | : | 48 tick intervals |
| “ ♩3 ” | : | 32 tick intervals |
| “ ♩ ” | : | 24 tick intervals |
| “ ♩3 ” | : | 16 tick intervals |
"OFF": The timing at which you press a pad will not be adjusted.
* When you use the Quantize function, pad operations on the same sequence track may overlap. If this occurs, only the last pad operation will be valid, and only that phrase will be recorded.
About remaining recordable events of Sequence
Remaining recordable events * of sequence is displayed as "REMAIN XX%" on REALTIME REC screen and STEP REC screen. XX% shows remaining number of events in percent.
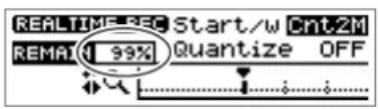
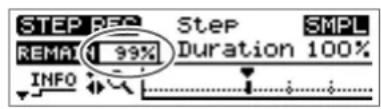

Quantize is not applied to the timing at which you release a pad.
* An event is an operation of pressing/releasing a pad.
Recording pad operations at the specified interval—Step Recording
The CDX-1 allows you to record pad operations on a sequence track while the playback remains stopped. This is analogous to pasting the pad samples at previously specified intervals (steps). This is called step recording.
Button functions during step recording
During step recording, the buttons have the following functions.
Pads [1]–[8]: Record the sample of that pad, and advance the current location by one step.
PLAY [▶ Extend (tie) the phrase of the preceding step by an additional step.
FF [▶▶ Record a rest for a length of one step, and advance the current location by one step.
REW [ ] Return to the previous step.
If You Become confused About Button Function During Recording
In the following the Step Recording screen, press CURSOR [ ] once or twice so that the display switches to "STEP REC USAGE INFORMATION."
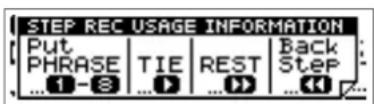
Recording continues even when you switch to this screen. Press CURSOR [] to return the previous screen.
Arranging audio samples to create a song—Sequence
Step recording
In the explanation that follows, we will assume that pads [1] and [2] contain samples, and that you wish to record on the sequence track as shown in the diagram.
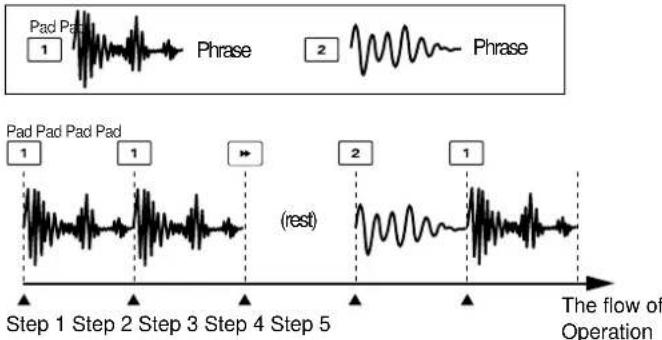
-
Use the REW [ ] or TIME/VALUE dial to move to the location at which you wish to begin recording, such as the beginning of the desired measure.
-
Press PAD SEQUENCING [CREATE]. [CREATE] blinks, and a screen appears in which you select the recording method and recording-destination sequence track.
-
Press CURSOR [] to select "Step" (step recording).
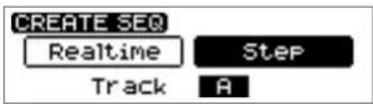
-
Turn the TIME/VALUE dial to select the sequence track A-D that you wish to record.
-
When you have specified the recording method and the sequence track to be recorded, press [YES/ENTER].
The step recording setting screen appears. [CREATE] will light.
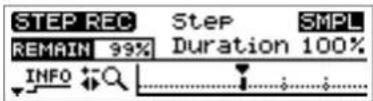
-
Make sure that the cursor is locates at the "Step" line. Turn the TIME/VALUE dial to specify the step (input interval) in terms of a note value.
-
Make sure that "Duration" is set to "100%."
-
When you press pad [1] recording begins simultaneously, and [1] of STEP 1 in the figure is recorded. When [1] is pressed again, it is also recorded STEP 2.
-
Press [ ], and a rest (silence) is recorded in step 3.
-
Press pad [2], and the sound of pad [2] is recorded in step 4.
-
Press pad [1], and the sound of pad [1] is recorded in step 5. Then press PLAY [▶] and the phrase of step 5 is extended (tied) by one step, doubling the recorded length.
-
When you finish recording, press PAD SEQUENCING [CREATE]. [CREATE] is turned off, and the Sequence Play List screen appears.
-
Return to the location where you began recording, and press PLAY [▶to play back the performance and hear the results.
MEMO
If [SEQ PLAY] is off, press [CREATE], and it will be turned on (lit) automatically. Also, the [STATUS] of all audio tracks will go dark.
[Non-Text]
For details on the "Step" and the "Duration" parameter, refer to the column "Parameter settings for step recording" (p. 95).
NOTE
Even if you repeatedly press
[▶] (Tie) to record what appears to be a long phrase in the track, the playback will not exceed the length of the sample itself. However, in the case of a pad for which Loop playback (p. 73) is specified, the result of step recording will also be looped, and a single long phrase will be recorded on the track.
MEMO
If you want to over record this, press [UNDO/REDO] (p. 138). Return to the previous conditions.
Parameter settings for step recording
- Step:
“SMPL” (sample): Advance by a number of ticks (of the current tempo) corresponding to the length of the pad sample.
"MEAS" (measure): Advance to the beginning of the next measure.
“ ♩ ” : Advance 192 ticks.
“ ”: Advance 96 ticks.
"3 Advance 64 ticks.
“ ” Advance 48 ticks.
"3 Advance 32 ticks.
" ” Advance 24 ticks.
"3 Advance 16 ticks.
" " Advance 12 ticks.
* If "MEAS (Measure)" is selected, the input location where recording will first begin is usually the beginning of the next measure. However, recording will begin from the current location if it is the beginning of a measure.
* If you select "SMPL" (Sample), the length of a step will depend on the pad you press. This is convenient when you wish to pack the pad samples exactly together without being concerned with the performance tempo or the bar lines.
In this case, even if the length of the sample is numerically the same as the measure length for playback, a difference may accumulate gradually due to inaccuracies in calculation. Also, pressing [ ] (first) will produce a rest of the same length of the preceding sample. (If you press [ ] before pressing the first pad, it will be ignored.)
- Duration
Duration determines the length that the phrase will be held relative to the step (input interval). Use the TIME/VALUE dial to set the value in the range of 1%–100%. Normally you will set this to 100%.
For example, suppose that you set Step to "MEAS" (1 measure), and step-record by repeatedly pressing a pad that contains a one-measure phrase. In this case if you set Duration to "50%," the phrase will be recorded from the beginning of each measure, but will play back only for the first half of each measure.
< An example of step-recording by repeatedly pressing the same pad >
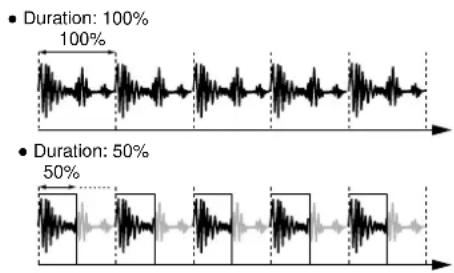
Adding dynamics while you step-record
The volume level of step-recorded phrases will be the same as the volume level of the samples you use (p. 76).
On the CDX-1, samples will sound at a fixed volume regardless of the strength with which you press the pad. If you wish to add dynamics to each step during step-recording, it is best to prepare several pads containing the same sample but different volume levels, and use these pads appropriately.
To assign the same sample to multiple pads, you can use clipboard.
→ "Copying a sample to another pad—clipboard" (p. 82)
The sample volume setting can be set independently for each pad.
→ "Adjusting the volume of a sample—Sample level" (p. 76)
Playing a sequence track
The number of sounds that can be played simultaneously is a total of four stereo sounds for audio track playback, pad playback, and sequence track playback.
When the sequence is on, the playback priority will be in the order of sequence tracks → audio tracks → pads.
- Press PAD SEQUENCING [SEQ PLAY].
[SEQ PLAY] lights, and the Sequence Play List screen appears.
At this time, the [STATUS] of all audio tracks will go dark (muted).
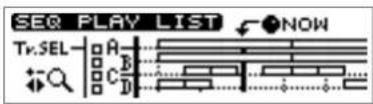
- Press CURSOR [].
A cursor appears on box A of "Tr.SEL" (track select).
CURSOR
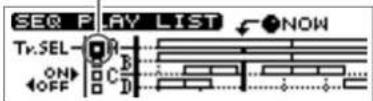
-
Press CURSOR [ ] to move the cursor to the "Tr.SEL" (track select) box for the sequence track (A-D) that you wish to play back.
-
Press CURSOR [].
The "Tr.SEL" (track select) box will be highlighted in black, indicating that it will play back.
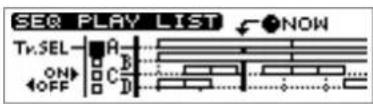
To cancel your selection, press CURSOR []
-
If there are other sequence tracks that you wish to play back, repeat steps 3–4.
-
Press ZERO [] return to the beginning of the performance.
-
Press PLAY [ ].
The sequence track(s) will play back.
- When you are finished playing back the sequence track(s), press PAD SEQUENCING [SEQ PLAY].
[SEQ PLAY] goes out, and sequence is turned off.
Playing sequence tracks and audio tracks simultaneously
When sequence is turned on, the [STATUS] of all audio tracks will go dark. If you wish to play back audio tracks at the same time, press [STATUS] of an audio track enough times to get it to light in green.
However, an audio track cannot be played back simultaneously with the corresponding sequence track selected as the playing back destination.
Sequence tracks and audio tracks correspond as follows.
- Sequence tracks • Audio tracks
track A → track 1-2
track B → track 3-4
track C → track 5-6
track D → track 7-8
For example, if sequence track A has been selected as a playback track, it will not be possible to select audio tracks 1-2 as playback tracks. Audio tracks 3-4, 5-6, or 7-8 can be played back simultaneously.
Editing a sequence track
The samples arranged in a sequence track can be edited by moving the location at which they will play, by pasting them in a different location, or by deleting them. This makes it easy to make corrections to entire phrases without re-recording.
Moving a phrase—Move
This function moves the specified phrase to another location. The place from which the phrase was moved will be blank (silent), and if there was already a phrase at the move destination, it will be overwritten by the moved phrase.
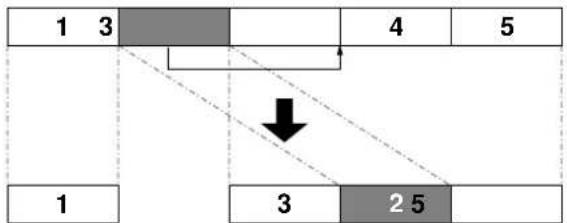
flowchart
graph TD
    A["1"] --> B["3"]
    B --> C["4"]
    C --> D["5"]
    E["1"] --> F["3"]
    F --> G["25"]
    G --> H[" "]
    style A fill:#f9f,stroke:#333
    style B fill:#ccc,stroke:#333
    style C fill:#fff,stroke:#333
    style D fill:#fff,stroke:#333
    style E fill:#fff,stroke:#333
    style F fill:#fff,stroke:#333
    style G fill:#ccc,stroke:#333
    style H fill:#fff,stroke:#333
- Press PAD SEQUENCING [EDIT].
[EDIT] will light, and the Sequence Edit menu will be displayed as icons.
- Press CURSOR [] to select the Move icon.
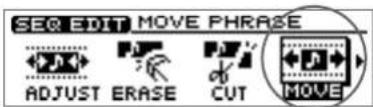
- Press [YES/ENTER].
The Move Phrase screen appears.
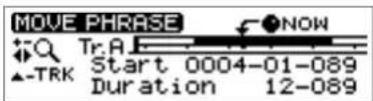
- Press CURSOR [].
A sequence track select mini-menu appears.
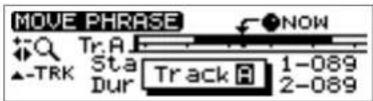
- Turn the TIME/VALUE dial to select the sequence track (A-D) that you wish to edit, and press [YES/ENTER].
A mini-menu disappears.
- Use the REW [ ] or the TIME/VALUE dial to select the phrase that you wish to move.
The currently selected phrase will be highlighted in black.
- After you have specified the move phrase, press [YES/ENTER].
It displays where to move. You can adjust the destination.
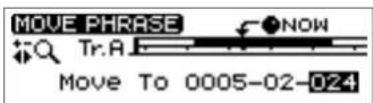
-
Use the REW [] [ ] or the TIME/VALUE dial to set the move destination to "NOW."
-
After you have specified the move destination, press [YES/ENTER].
The specified phrase is moved.
- When you are finished editing the sequence track, press [DISPLAY]. [EDIT] goes out (extinguished), and the display returns to the Basic screen.
MEMO
If [SEQ PLAY] is off, press [EDIT], and it will be turned on (lit) automatically. Also, the [STATUS] of all audio tracks will go dark.
MEMO
In step 5, also press [NO/EXIT], a mini-menu disappears.
MEMO
To cancel the move, press [UNDO/REDO] (p. 138) after step 9.
Pasting a phrase at a different location—Paste
If something has already been recorded at the paste destination, it will be overwritten by the pasted phrase.
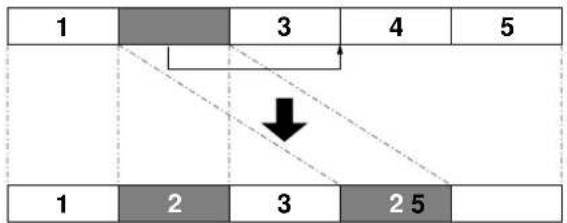
flowchart
graph TD
    A["1"] --> B["3"]
    B --> C["4"]
    C --> D["5"]
    E["1"] --> F["2"]
    F --> G["3"]
    G --> H["2 5"]
    style A fill:#ccc,stroke:#333
    style B fill:#ccc,stroke:#333
    style C fill:#ccc,stroke:#333
    style D fill:#ccc,stroke:#333
    style E fill:#ccc,stroke:#333
    style F fill:#ccc,stroke:#333
    style G fill:#ccc,stroke:#333
    style H fill:#ccc,stroke:#333
- Press PAD SEQUENCING [EDIT].
[EDIT] lights, and the Sequence Edit menu are displayed as icons.
- Press CURSOR [] to select the Paste icon.
- Press [YES/ENTER].
The Paste Phrase screen appears.
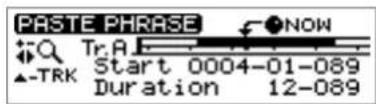
- Press CURSOR [].
A sequence track select mini-menu appears.
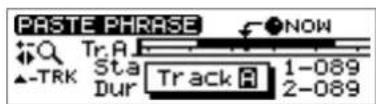
- Turn the TIME/VALUE dial to select the sequence track (A-D) that you wish to edit, and press [YES/ENTER].
A mini-menu disappears.
- Use the REW [ ] or the TIME/VALUE dial to select the phrase that you wish to paste.
The currently selected phrase will be highlighted in black.
- After you have specified the paste phrase, and press [YES/ENTER].
It displays where to paste. You can adjust the destination.
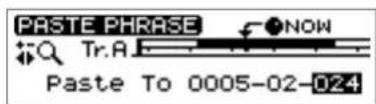
-
Use the REW [ ] or the TIME/VALUE dial to set the move destination to "NOW."
-
After you have specified the paste destination, press [YES/ENTER] The specified phrase is pasted.
-
When you are finished editing the sequence track, press [DISPLAY]. [EDIT] goes out (extinguished), and the display returns to the Basic screen.
MEMO
If [SEQ PLAY] is off, press [EDIT], and it will be turned on (lit) automatically. Also, the [STATUS] of all audio tracks will go dark.
MEMO
In step 5, also press [NO/EXIT], a mini-menu disappears.
MEMO
To cancel the paste, press [UNDO/REDO] (p. 138) after step 9.
Arranging audio samples to create a song—Sequence
Cutting a phrase—Cut
When you cut a phrase, subsequent phrases will be moved forward.
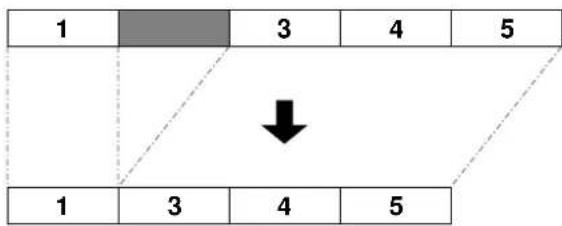
flowchart
graph TD
    A["1"] --> B["3"]
    B --> C["4"]
    C --> D["5"]
    E["1"] --> F["3"]
    F --> G["4"]
    G --> H["5"]
    style A fill:#f9f,stroke:#333
    style B fill:#ccf,stroke:#333
    style C fill:#cfc,stroke:#333
    style D fill:#fcc,stroke:#333
    style E fill:#ffc,stroke:#333
    style F fill:#cfc,stroke:#333
    style G fill:#fcc,stroke:#333
    style H fill:#cfc,stroke:#333
- Press PAD SEQUENCING [EDIT].
[EDIT] lights, and the Sequence Edit menu are displayed as icons.
- Press CURSOR [] to select the Cut icon.
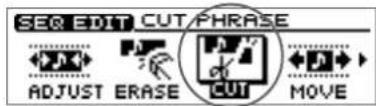
- Press [YES/ENTER].
The Cut Phrase screen appears.
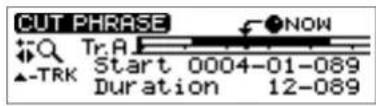
- Press CURSOR [].
A sequence track select mini-menu appears.
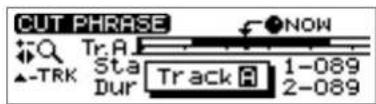
- Turn the TIME/VALUE dial to select the sequence track (A-D) that you wish to edit, and press [YES/ENTER].
A mini-menu disappears.
- Use the REW[]/R[] or the TIME/VALUE dial to select the phrase that you wish to cut.
The currently selected phrase will be highlighted in black.
- After you have specified the cut phrase, and press [YES/ENTER].
The specified phrase is cut.
- When you are finished editing the sequence track, press [DISPLAY].
[EDIT] goes out (extinguished), and the display returns to the Basic screen.
MEMO
If [SEQ PLAY] is off, press [EDIT], and it will be turned on (lit) automatically. Also, the [STATUS] of all audio tracks will go dark.
MEMO
In step 5, also press [NO/EXIT], a mini-menu disappears.
MEMO
To cancel the cut, press [UNDO/REDO] (p. 138) after step 7.
Arranging audio samples to create a song—Sequence
Erasing Phrases—Erase
The phrase that you cut will be silent. Even if there are phrases following it, they will not be moved forward.
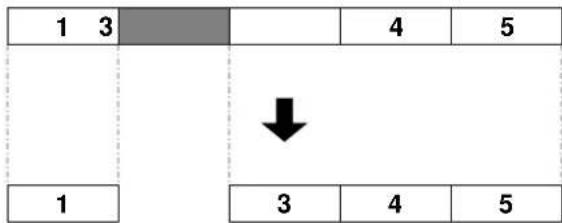
- Press PAD SEQUENCING [EDIT].
[EDIT] lights, and the Sequence Edit menu are displayed as icons.
- Press CURSOR [] to select the Erase icon.
- Press [YES/ENTER].
The Erase Phrase screen appears.
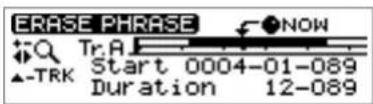
- Press CURSOR [].
A sequence track select mini-menu appears.
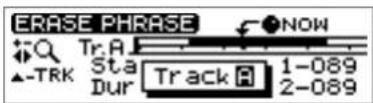
- Turn the TIME/VALUE dial to select the sequence track (A-D) that you wish to edit, and press [YES/ENTER].
A mini-menu disappears.
- Use the REW [] / [ ] or the TIME/VALUE dial to select the phrase that you wish to erase.
The currently selected phrase will be highlighted in black.
- After you have specified the erase phrase, press [YES/ENTER].
The specified phrase is erased.
- When you are finished editing the sequence track, press [DISPLAY].
[EDIT] goes out (extinguished), and the display returns to the Basic screen.
MEMO
If [SEQ PLAY] is off, press [EDIT], and it will be turned on (lit) automatically. Also, the [STATUS] of all audio tracks will go dark.
MEMO
In step 5, also press [NO/EXIT], a mini-menu disappears.
MEMO
To cancel the erase, press [UNDO/REDO] (p. 138) after step 7.
Arranging audio samples to create a song—Sequence
Inserting a phrase in another location—Insert
If something has already been recorded at the insert destination, subsequent phrases will be moved backward by the length of the phrase that is pasted.
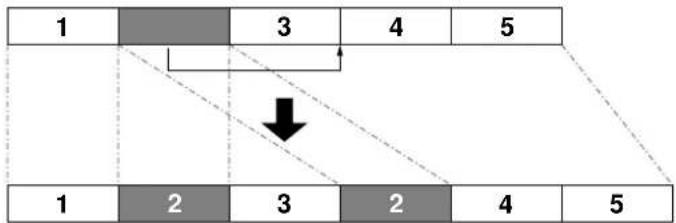
flowchart
graph TD
    A["1"] --> B["3"]
    B --> C["4"]
    C --> D["5"]
    E["1"] --> F["2"]
    F --> G["3"]
    G --> H["2"]
    H --> I["4"]
    I --> J["5"]
    style A fill:#999
    style B fill:#ccc
    style C fill:#ccc
    style D fill:#ccc
    style E fill:#999
    style F fill:#999
    style G fill:#999
    style H fill:#999
    style I fill:#999
    style J fill:#999
- Press PAD SEQUENCING [EDIT].
[EDIT] will light, and the Sequence Edit menu will be displayed as icons.
- Press CURSOR [] to select the Insert icon.
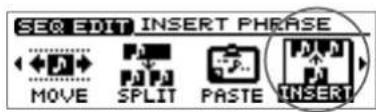
- Press [YES/ENTER].
The Insert Phrase screen appears.
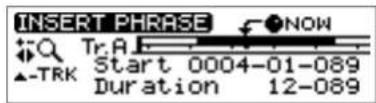
- Press CURSOR [].
A sequence track select mini-menu appears.
- Turn the TIME/VALUE dial to select the sequence track (A-D) that you wish to edit, and press [YES/ENTER].
A mini-menu disappears.
- Use the REW[] or the TIME/VALUE dial to select the phrase that you wish to insert.
The currently selected phrase will be highlighted in black.
- After you have specified the insert phrase, press [YES/ENTER].
It displays where to move. You can adjust the destination.
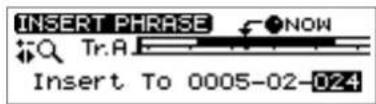
-
Use the REW [ ] or th>FIME/VALUE dial to set the insert destination to "NOW."
-
After you have specified the insert destination, press [YES/ENTER] The specified phrase is inserted.
-
When you are finished editing the sequence track, press [DISPLAY]. [EDIT] goes out (extinguished), and the display returns to the Basic screen.
MEMO
If [SEQ PLAY] is off, press [EDIT], and it will be turned on (lit) automatically. Also, the [STATUS] of all audio tracks will go dark.
MEMO
In step 5, also press [NO/EXIT], a mini-menu disappears.
MEMO
To cancel the insert, press [UNDO/REDO] (p. 138) after step 9.
Dividing the phrase at the current location—Split
This function splits the phrase at "NOW" (the current location). By dividing a phrase, you can delete a portion of the phrase or paste it into another location.
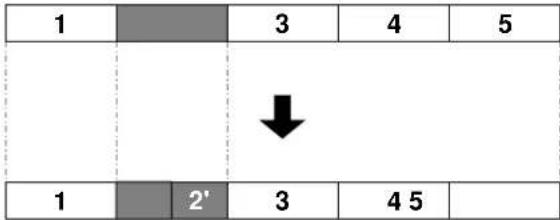
- Press PAD SEQUENCING [EDIT].
[EDIT] lights, and the Sequence Edit menu are displayed as icons.
- Press CURSOR [] to select the Split icon.
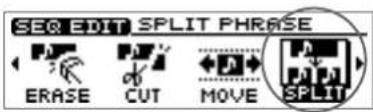
- Press [YES/ENTER].
The Split Phrase screen appears.
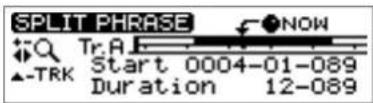
- Press CURSOR [].
A sequence track select mini-menu appears.
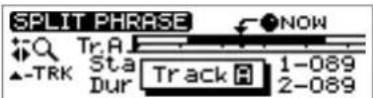
- Turn the TIME/VALUE dial to select the sequence track (A-D) that you wish to edit, and press [YES/ENTER].
A mini-menu disappears.
- Use the REW [ ] or the TIME/VALUE dial to set the split destination to "NOW."
The currently selected phrase will be highlighted in black.
- After you have specified the split phrase, press [YES/ENTER].
The specified phrase is spitted at "NOW."
- When you are finished editing the sequence track, press [DISPLAY].
[EDIT] goes out (extinguished), and the display returns to the Basic screen.
MEMO
If [SEQ PLAY] is off, press [EDIT], and it will be turned on (lit) automatically. Also, the [STATUS] of all audio tracks will go dark.

If you wish to make precise adjustments to the location at which the phrase will be divided, it is convenient to use Preview. Refer to "Cueing to a precise location---Preview" (p. 139).
MEMO
In step 5, also press [NO/EXIT], a mini-menu disappears.
MEMO
To cancel the split, press [UNDO/REDO] (p. 138) after step 7.
Arranging audio samples to create a song—Sequence
Finely Adjusting the Timing of Each Phrase—Adjust Timing
The positioning of phrases on the sequence tracks is determined with the following formats.
• From which measure, beat, and tick number (Start)
• The length of expression in beats and ticks (Duration)
The Adjust Timing function is for changing these values.
Adjust Timing comprises three screens. The first screen is for selecting phrases, and the second and third screen is changing settings.
- Press PAD SEQUENCING [EDIT].
[EDIT] lights, and the Sequence Edit menu are displayed as icons.
- Make sure that the cursor is located at the Adjust Timing icon.
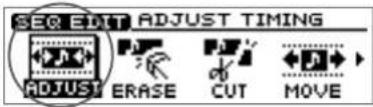
- Press [YES/ENTER].
The Adjust Timing screen appears.
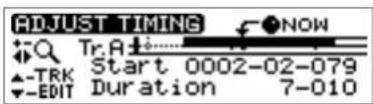
- Press CURSOR [].
A sequence track select mini-menu appears.
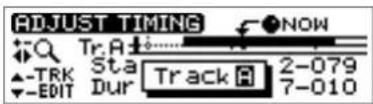
- Turn the TIME/VALUE dial to select the sequence track (A-D) that you wish to edit, and press [YES/ENTER].
A mini-menu disappears.
- Use the REW [ ] or the TIME/VALUE dial to select the phrase that you wish to adjust.
The currently selected phrase will be highlighted in black.
- When the phrase to be adjust is highlighted, press [YES/ENTER].
That phrase is selected, and the Edit screen appears.
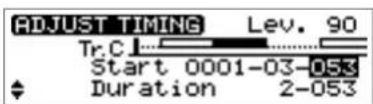
- Press CURSOR [ ] [] to select "Start" or "Duration", and press CURSOR
[ ] [ ] and turn TIME/VALUE dial to change the setting.
- Start: Setting the point where the beginning of the phrase on the sequence track.
Start 0001-03-053 ← measure-beat-tick
• Duration: Setting the phrase length.
Duration 2-053 number of beats and ticks
- If required, press CURSOR [] repeatedly until the third screen is displayed, and turn the TIME/VALUE dial to change the value "WaveOffset" or "WaveEnd."
For details refer to "Offset and End Point"(p. 105), below.
- When you are finished editing the sequence track, press [DISPLAY].
[EDIT] goes out (extinguished), and the display returns to the Basic screen.
MEMO
If [SEQ PLAY] is off, press [EDIT], and it will be turned on (lit) automatically. Also, the [STATUS] of all audio tracks will go dark.
MEMO
In step 5, also press [NO/EXIT], a mini-menu disappears.
NOTE
The extend to which the "Start" and "Duration" of a phrase can be changed is limited by the phrase before and after it; that is, phrases on the same track cannot be overlapped. In addition, one beat, as indicated here, always means a quarter note (96 ticks). This is not affected by the rhythm in each measure.
Offset and End Point
"WaveOffset" and "WaveEnd," the parameters selected in Step 9, determine which part of the waveform data is used for to a phrase.
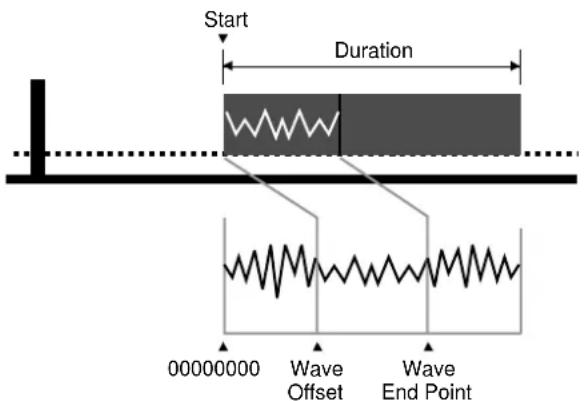
In both Offset and End point are indicated by 8-digits values likewise the sample reading start points (p. 78). (The amount of time indicated by "00000001" is 1/3000 of a second). This does not change with tempo and measure length.
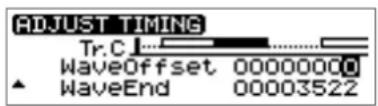
WaveOffset:
This specifies and changes the starting point for reading the waveform data of sample. The specified point is placed at the position determined in Adjust Timing "Start" (in the second screen).
WaveEnd:
This specifies and changes the end point for reading the waveform data of sample. If this point is before the end of the segment resulting from the "Duration" setting in Adjust Timing (in the second screen), then even though still within the phrase, the sound stops.
If a pad contains a looped sound recorded in Realtime/Step Recording, then the end point of the loop on the track is designated.
Adjusting the volume setting for each phrase
The upper right of the Sequence Track Edit screen shows the volume of each phrase. By highlighting this value and turning the TIME/VALUE dial to change it, you can adjust the volume of the selected phrase (0–100).
The value prior to the change will reflect the volume that was specified for the pad you pressed when recording (p. 90–93). A setting of "100" is the volume at which the sound was sampled.
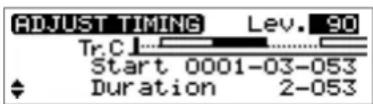

If "LOOP-END" was the sampling mode used during Event Recording, you cannot select a value smaller than that fixed value.
Arranging audio samples to create a song—Sequence
Edit on Sequence Play List screen—Quick Edit
It is convenient to select a phrase to edit seeing whole part of Play List.
- Press PAD SEQUENCING [SEQ PLAY].
[SEQ PLAY] lights, and the Sequence Play List screen appears.
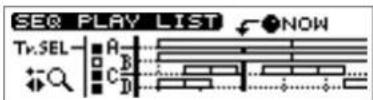
- Press CURSOR [].
A cursor appears on box A of "Tr.SEL" (track select).
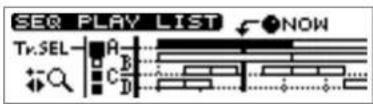
-
Press CURSOR [] to move the cursor to the "Tr.SEL" (track select) box of the sequence track (A-D) that you wish to edit.
-
Use the REW [ ] or the TIME/VALUE dial to select the phrase that you wish to edit.
The currently selected phrase will be highlighted in black.
- Press [YES/ENTER].
A mini-menu appears.
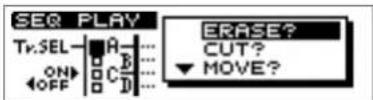
- Press CURSOR [ ] to select the menu, and press [YES/ENTER].
At this time, press [NO/EXIT], a mini-menu disappears.
Menu displayed on screen and operation of those are as follows.
"MOVE?" "Moving a phrase—Move" (p. 98) step 8–9.
"PASTE?" "Pasting a phrase at a different location—Paste" (p. 99) step 8–9.
"CUT?" The specified phrase is cut.
"ERASE?" The specified phrase is erased.
"INSERT?" "Inserting a phrase in another location—Insert" (p. 102) step 8–9.
"SPRIT?" "Dividing the phrase at the current location—Split" (p. 103) step 6–7.
"ADJUST? "Finely Adjusting the Timing of Each Phrase" (p. 104) step 7–8.
- When you are finished editing the sequence track, press [DISPLAY].
[EDIT] goes out (extinguished), and the display returns to the Basic screen.
MEMO
At this time, the [STATUS] of all audio tracks will go dark.
Deleting a sequence track
An unwanted sequence track can be deleted as follows.
- Press PAD SEQUENCING [EDIT].
[EDIT] lights, and the Sequence Edit menu are displayed as icons.
- Press CURSOR [] to select the Erase Track icon.
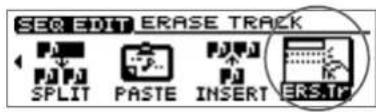
- Press [YES/ENTER].
The erase track setting screen appears.
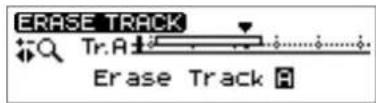
-
Turn the TIME/VALUE dial to specify the track number you wish to delete.
-
Press [YES/ENTER].
The sequence track will be deleted.
- When you are finished editing the sequence track, press [DISPLAY].
[EDIT] goes out (extinguished), and the display returns to the Basic screen.
MEMO
If [SEQ PLAY] is off, press [EDIT], and it will be turned on (lit) automatically. Also, the [STATUS] of all audio tracks will go dark.
MEMO
To cancel the erase sequence track, press [UNDO/REDO] (p. 138) after step 5.
Recording the sequence playback sound on audio track
When you have created a sequence that you like, you can record the playback sound of the sequence on an audio track. You can even play back all three sequence tracks and combine them into two audio track (stereo).
- Press PAD SEQUENCING [SEQ PLAY].
[SEQ PLAY] lights, and the Sequence Play List screen appears.
At this time, the [STATUS] of all audio tracks will go dark.
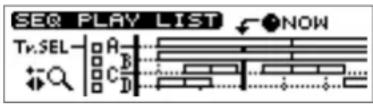
- Select sequence tracks you wish to play back.
It is possible to select three sequence tracks.
→ "Playing sequence tracks and audio tracks simultaneously" (p. 96).
- Press PLAY [] to play back, and use the PAD/SEQ LEVEL faders to adjust the volume balance of a sequence track.
- Use the MASTER fader to adjust the recording level.
At this time, raise the volume as high as possible without allowing the sound to distort. - When you adjust the volume, press STOP [].
- Press [BOUNCE] to get it to light.
- Press audio track [STATUS] that you wish to use as the recording destination.
The [STATUS] of audio tracks will blink in red, and now the selected audio track is ready for recording.
* It is not possible designated the audio track corresponding to playing sequence track recording destination. For sequence tracks and audio tracks correspond refer to “Playing sequence tracks and audio tracks simultaneously” (p. 97).
- Press ZERO [] | return the SONG POSITION to "0001-01-000" (beginning of the song).
Alternatively, you can move to a desired location so that recording will start from that point.
- Press REC [].
REC [ ]ink (recording-standby mode).
-
Press PLAY [▶] and recording will begin.
-
Press STOP [■o stop recording.
A message of "Keep take? (NO/YES)" (Do you want wish to save the take on CD-RW disc?) appears.
- If you wish to save the take, press [YES/ENTER].
When CDX-1 complete to save, [BOUNCE] will go to dark, and the [STATUS] of the selected recording destination tracks will go light in green.
If you press [NO/EXIT], saving to CD-RW discs will be cancelled.
- Listen to the result of bounce recording.
Press PAD SEQUENCING [SEQ PLAY] to go dark. Press PLAY [▶] to play back audio tracks you selected recording destination.

You can record simultaneously audio tracks and input source.
Creating an audio CD
Prepare for recording—Multitrack recording
What is multitrack recording?
The CDX-1 provides eight "audio tracks" that are used to independently record and manage the parts that make up a song. You can record separate parts on each audio track, for example recording the vocal on audio track 1 and the guitar on audio track 2. The process of recording parts on separate audio tracks is called multitrack recording.
Preparing a CD-RW disc for use —Format

You must use high-speed compatible CD-RW discs!

When performing multitrack recording, you must use high-speed compatible CD-RW discs that bear this logo.
It is not possible to perform multitrack recording using a CD-R disc or CD-RW disc not compatible with high-speed write. It is not possible to format either.
If you wish to use a new CD-RW disc, you must prepare that CD-RW disc for use by the CDX-1. This process is called formatting.
Preparing a new CD-RW disc for use
- Insert a new CD-RW disc as described in "Inserting a disc" (p. 35).
A message of "This is blank disc. Do you wont to format?" appears in the screen.
- If you wish to format the disc, press [YES/ENTER].
The CD-RW Format screen appears.
If you press [NO/EXIT], format will be canceled.

-
Make sure that the cursor is locates at the "Format Type" line."
-
Turn the TIME/VALUE dial to select the format type.
- Format Type:
FULL: The entire data area of the disc will be physically erased to make it completely blank. This will increase the reliability of a disc that has been previously used by another device. Normally you should select this. Approximately 20 minutes will be required.
STANDARD: The data on the disc will merely be invalidated logically. Normally you should select this. Approximately 10 minutes will be required.
-
Press CURSOR [] to move the cursor to "Data Type" line.
-
Turn the TIME/VALUE dial to select the data type.
For details on data types, refer to the column "What is the data type?" on this page.

"Recommended CD-R/
CD-RW discs" (p. 19)

The CDX-1 uses a sample rate of 44.1 kHz. It is not possible to change the sample rate.
MEMO
CDX-1 carries out the followings when formatting discs.
- Insert CD-RW disc to improve preciseness of writing.
- Reserve area for recording
- Reserve area to save data of pad/sequence.
Thus, it take sometime to complete formatting.
Prepare for recording—Multitrack recording
7. Press [YES/ENTER].
A message of "Format OK?" appears in the screen.
![ROLAND CDX-1 - Press [YES/ENTER]. - 1](/content/2026/05/862949/images/ec12af0be9c987e9d3b64c914b3078a11f0d91012ffebdca7e4a35a4723aab8e.jpg)
8. Press CURSOR [] to select "OK", and press [YES/ENTER].
The format is executed. When formatting is completed, the display will show a message of "Completed."
If you press [YES/ENTER] to select "CANCEL", the CD-RW Format screen will reappear.
9. Press [YES/ENTER] to return to the Basic screen.
What is the data type
The CDX-1 allows you to specify the data type when a CD-RW disc is formatted. This enables you to select the combination of audio quality and recording time that is most suitable for the material you are recording.
The following data types can be selected.
• STANDARD:
Of the three types, this provides the highest audio quality. Normally you should select this type.
- LONG1:
This type allows longer recording than "STANDARD." It is suitable for recording live performances.
•LONG2:
This allows the longest recording time of the three types.
The times that can be recorded on one CD-RW disc for each data type are listed below.
| Data Type Recording time | |
| STANDARD | 15 minutes |
| LONG1 | 19 minutes |
| LONG2 | 23 minutes |
* The recording times shown above are approximate. Depending on how you edit the song, they will be somewhat shorter.
* On the CDX-1, the approximate recording times shown above will apply regardless of the number of tracks used for recording. For example, even if you use only one track for recording, the amount of time available for recording will be the same as when using all eight tracks.
NOTE
- It is not possible to change the data type while you are working on the song.
• After you execute format, it is not possible to press [UNDO/REDO] (p. 138) to revert to the state before executing format.
- While formatting, do not turn off the power with unplugging the AC adaptor.
Prepare for recording—Multitrack recording
Erasing the entire contents of a CD-RW disc
Sometimes you may no longer need to keep the data that was saved on a CD-RW disc, and would like to use the same CD-RW disc for a different performance. You would also like to use the a CD-RW disc that was previously used by a computer. In such cases, execute the Disc Format operation.
- Press [UTILITY].
The Menu are displayed as icon.
- Press CURSOR [] to select the CD-R/RW Disc icon, and press [YES/ENTER].
The CD-R/RW Disc Menu are displayed as icon.
- Press CURSOR [] to select the CD-RW Disc Format icon.
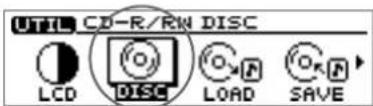
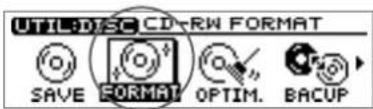
- Press [YES/ENTER].
The CD-RW Format screen appears.
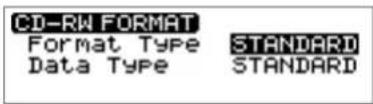
-
Make sure that the cursor is located at "Format Type" line.
-
Turn the TIME/VALUE dial to select the format type.
- Format Type
FULL: The entire data area of the disc will be physically erased to make it completely blank. This will increase the reliability of a disc that has been previously used by another device. Approximately 20 minutes will be required.
STANDARD: The data on the disc will merely be invalidated logically. Normally you should select this. Approximately 10 minutes will be required.
- Press CURSOR [] to move the cursor to "Data Type" line.
- Turn the TIME/VALUE dial to select the data type.
For details on the data type, refer to the column "What is the data type?" (p. 111).
* It is not possible to change the data type while you are working on the song.
- Press [YES/ENTER].
A message of "Format OK?" appears in the screen.
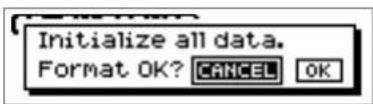
- Press CURSOR [ ] to select "OK", and press [YES/ENTER].
The format is executed. When formatting is completed, the display will show a message of "Completed." and the Basic screen will reappear.
If you press [YES/ENTER] to select "CANCEL", the CD-RW Format screen will reappear.
- Press [YES/ENTER] to return to the Basic screen.
MEMO
• An unused CD-RW disc will be formatted in approximately ten minutes, regardless of the format type setting. The contents of the CD-RW disc that are erased by the format operation cannot be recovered.
• After you execute format, it is not possible to press [UNDO/REDO] (p. 138) to revert to the state before executing format.
- While formatting, do not turn off the power with unplugging the AC adaptor.
MEMO
CDX-1 carries out the followings when formatting discs.
- Insert CD-RW disc to improve preciseness of writing.
• Reserve area for recording - Reserve area to save data of pad/sequence.
Thus, it take sometime to complete formatting.
Monitoring the sound of a connected instrument
Selecting the input source
Press the INPUT SELECT button(s) for the instrument you will record. The indicator of the selected button(s) will light.
Adjusting the input sensitivity
- Turn the INPUT SENS knob to adjust the input sensitivity.
Adjust the INPUT SENS knob as high as possible without causing the peak indicator to light when the sound is input.
- Press [DISPLAY] a number of times to access the Post-fader screen. Turn the INPUT REC LEVEL knob to adjust the level so that "IN" level meter moves as far as possible without exceeding the dotted line in the upper portion.
* If you use the INPUT REC LEVEL knob to turn down the volume of the input source, the sound will be recorded in the audio track at a low volume, so that noise will be more apparent when you raise the volume of the audio track for playback.
The meter moves high level as possible without exceeding the limit shown as dotted line.
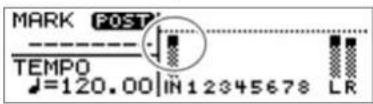
* If INPUT REC LEVEL knob is set at in case of Digital In, input level will be "0 dB."

Monitoring the sound
Use the MASTER fader to adjust the volume of the instrument or mic that you are monitoring.
If you are monitoring through headphones, adjust the MASTER fader and the PHONES knob to set a comfortable volume.
Setting the left/right position (pan) of the input sound
If you adjust the pan (left/right position) of the instrument you are playing to a location where it can be heard easily, the sound of your instrument will not be lost in the other sounds during overdubbing (p. 124), and you will find it easier to work.
- Press TRACK EDIT [PAN].
The Pan settings screen appears.
- Press CURSOR [] to select the INPUT knob display.
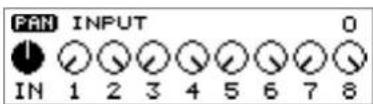
-
Turn the TIME/VALUE dial to set the pan.
-
Press [DISPLAY] to return to the Basic screen.

For details on the jack to use for connections and on the INPUT SELECT button, refer to "Panel Descriptions: Rear panel" (p. 30) and "Panel Descriptions: INPUT section" (p. 21).

For details on adjusting the volume of the device connected to the OUTPUT jack, refer to the operating manual for that device.

The pan you set here is automatically reflected in the pan of the recording-destination audio track. When you play back, you will hear the same pan setting as when you recorded. After recording, you are free to adjust the pan setting of each audio track. ("Setting the left/right position (pan) of each audio track"; p. 132)

When recording in stereo using SIMUL, set the input pan to "L100" (the far left) before you record. If you set the input pan except for "L100," the two input sources will be mixed and recorded.
Prepare for recording—Multitrack recording
Tuning an instrument—Tuner
The CDX-1 has a built-in chromatic tuner function that allows you to tune your instrument quickly. The built-in tuner supports both guitar and bass guitar.
As an example here, we will explain how to use the tuner to tune your guitar.
Adjusting the Tuning
Check the following points before you begin.
- Your guitar is connected to the GUITAR/BASS jack.
-
[MIC2] is lit. If [MIC2] is extinguished, press [MIC2] to make the button light.
-
Press [UTILITY].
The Menu are displayed as icon.
- Press CURSOR [] to select the Tuner icon.
- Press [YES/ENTER].
The Tuner screen appears.
For details on the screen, refer to the column "About the tuner display" (p. 115).
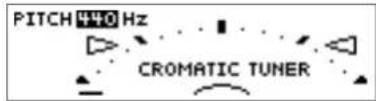
- Play a single open (unfretted) note on the string that you wish to tune.
The screen will indicate the note name that is closest to the pitch of the string you played. Tune the string so that the desired note name appears in the screen (refer to the table below).
◆ Standard tuning ◆
| 6th string | 5th string | 4th string | 3rd string | 2nd string | 1st string | |
| Guitar | E | A | D | G | B | E |
| Bass | E | A | D | G |
- While you watch the tuning guide, make fine adjustments to the pitch so that the left and right guides are both highlighted in black.
If the pitch of the string is within + / - 50 cents of the correct pitch, the tuning guide will indicate the discrepancy between the actual and the correct pitches.
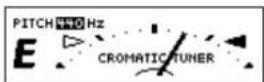
If the guide at the right is highlighted in black, the string is higher (sharper) than the displayed note.
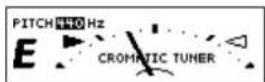
If the guide at the left is highlighted in black, the string is lower (flatter) than the displayed note.
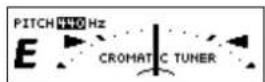
When the left and right guides are both highlighted in black, the string and the displayed pitch are the same.
-
Repeat steps 3–4 to tune each of the strings.
-
When you are finished using the tuner, press [DISPLAY] to return to the Basic screen.

For details on connecting a musical instrument, refer to "Connecting peripheral equipment" (p. 32). For details on selecting the input source, refer to "Selecting the input source" (p. 113).

It is not possible to play back or record while using the tuner.

Cleanly play a single note only on the string you wish to tune.

If you are tuning a guitar that has a vibrato arm, tuning one string may cause other strings to drift. In this case, you should first tune the strings approximately so that the correct note name is displayed, and then re-tune each string.
About the tuner display
- Screen display
The built-in tuner of the CDX-1 displays the reference pitch, note name, and a tuning guide (see the illustration).
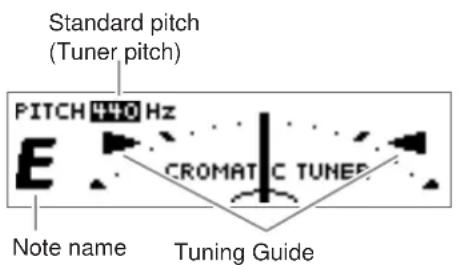
- Tuning guide display
If the difference between the input pitch and the correct pitch is less than +/-50 cents, the tuning guide will indicate the discrepancy between the actual and the correct pitches (refer to step 5 of previous page). While you watch the tuning guide, tune your instrument so that the left and right guides are both highlighted in black.
Setting the reference pitch of the tuner
The frequency of the A4 note on the instrument used as the reference for tuning is called the reference pitch. (For example, the middle A note on a piano.) On the CDX-1, the reference pitch can be set in the range of 435–445 Hz.
At the factory settings, this is set to 440 Hz.
- Press [UTILITY].
The Menu are displayed as icon.
-
Press CURSOR [] to select the Tuner icon.
-
Press [YES/ENTER].
The Tuner Menu screen appears.
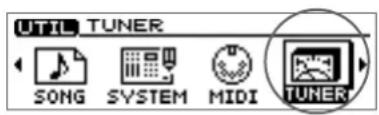
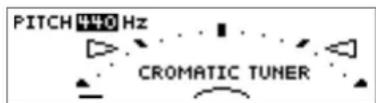
- Turn the TIME/VALUE dial to set the standard pitch.
- When you are finished using the tuner, press [DISPLAY] to return to the Basic screen.
Using the rhythm guide
When you record, it is convenient to use the built-in rhythm guide. If you record along with the rhythm guide, you will be able to use various convenient functions such as track editing in units of measures, or synchronizing the performance with external devices.
When the rhythm guide is used in conjunction with the tempo map, you can change the tempo or rhythm pattern during the song. The rhythm guide can also be used as a metronome when you are not recording.
Playing/stopping the rhythm guide
Each time you press [RHYTHM GUIDE [ON/OFF], the setting will cycle in the order of auto (blinking) → on (lit) → off (extinguished).
Blinking: The rhythm will sound according to whether the song is playing or stopped.
Lit: The rhythm will sound regardless of whether the song is playing.
Dark: The rhythm will be stopped.
Adjusting the Volume of the Rhythm Guide
- Press RHYTHM GUIDE [PATTERN/TEMPO].
The Rhythm Guide Setting screen appears.
- Make sure that the cursor is located at the "Level" line.
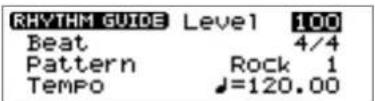
-
Turn the TIME/VALUE dial to adjust the volume.
-
Press [DISPLAY] to return to the Basic screen.
Changing the time signature
- Press RHYTHM GUIDE [PATTERN/TEMPO].
The Rhythm Guide Setting screen appears.
- Press CURSOR [] to move the cursor to "Beat" line.
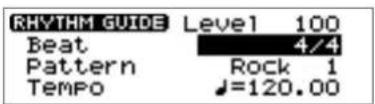
-
Turn the TIME/VALUE dial to select the desired time signature.
-
Press [DISPLAY] to return to the Basic screen.

"Setting the tempo and rhythm pattern of the song – Tempo Map" (p. 117)

The rhythm guide can also be used when you record pad operations on a sequence track. Refer to "Recording pad operations while you play the pads—Realtime Recording" (p. 90)

Effects can be applied to the sound of the rhythm guide. This is convenient when you are applying a loop effect to the audio tracks, since it lets you apply the same character to the sound of the rhythm guide. Refer to "Using the loop effects" (p. 93)
Prepare for recording—Multitrack recording
Changing the rhythm pattern
-
Press RHYTHM GUIDE [PATTERN/TEMPO]. The Rhythm Guide Setting screen appears.
-
Press CURSOR [] to move the cursor to "Pattern" line.
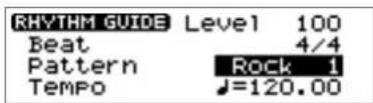
- Turn the TIME/VALUE dial to select the desired rhythm pattern.
- Press [DISPLAY] to return to the Basic screen.
Changing the tempo
-
Press RHYTHM GUIDE [PATTERN/TEMPO]. The Rhythm Guide Setting screen appears.
-
Press CURSOR [] to move the cursor to "Tempo" line.
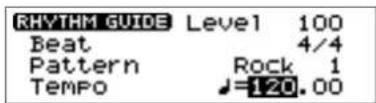
- Turn the TIME/VALUE dial to select the desired tempo.
- Press [DISPLAY] to return to the Basic screen.
Setting the tempo and rhythm pattern of the song —Tempo Map
The tempo map specifies tempo changes in units of a measure. It contains data indicating the time signature and tempo that are to be applied at a specified measure. The tempo map can be used to switch not only the tempo of the rhythm guide, but also the rhythm pattern.
-
Press [UTILITY]. The Menu are displayed as icon.
-
Press CURSOR [] to select the Tempo Map icon.
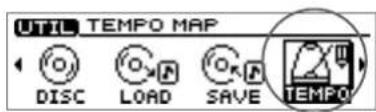
- Press [YES/ENTER]. The Tempo Map Setting screen appears. The display shown below indicates that the tempo map begins at measure 1, and a tempo of quarter note =120, specifies a 4/4 time signature, and rhythm pattern number 01 (Rock1).
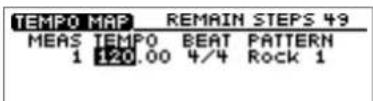
The rhythm guide contains a wide variety of rhythm patterns, including a metronome. For details refer to "Rhythm Pattern List" (p. 172).
NOTE
The tempo you specify here is the tempo for the entire system. The sequence and MIDI OUT will use this same tempo.
NOTE
In order to use the tempo map, you must create a tempo map and also change the way in which the rhythm guide is sounded. For details refer to the section below, "Playing the rhythm guide according to the tempo map."
NOTE
If you specify that a tempo map is to be used, the tempo of the entire system will also follow the tempo map. The sequence and MIDI OUT will also use the tempo of the tempo map
Prepare for recording—Multitrack recording
- Use CURSOR [ ] [ ] to move the cursor to the item you wish to edit, and turn the TIME/VALUE dial to edit the value.
MEAS (measure): Specify the starting measure (1–9999) of the tempo map. The measures and beats shown in the display, the rhythm guide sound, and the MIDI clock data transmitted from the CDX-1 will follow the settings of this measure.
TEMPO: Specify the tempo (20.00–250.00) of the tempo map. The measures and beats shown in the display, the tempo of the rhythm guide, the temp of the sequence and the MIDI clock data transmitted from the CDX-1 will follow this tempo setting.
BEAT: Specify the time signature of the tempo map (1/1–8/1, 1/2–8/2, 1/4–8/4, 1/8–8/8). The measures and beats shown in the display, the rhythm guide sound, and the MIDI clock data transmitted from the CDX-1 will follow this time signature setting.
PATTERN: Specify the rhythm pattern of the rhythm guide.
- If you wish to change the tempo from a measure in the middle of the song, press [YES/ENTER].
A mini-menu appears.
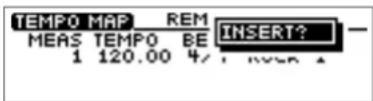
- Press [YES/ENTER].
The settings of the preceding tempo map will be applied.
-
Repeat steps 4–5 as necessary.
-
Press [DISPLAY] to return to the Basic screen.
Deleting a tempo map
- Access the Tempo Map setting screen as described in steps 1–2 of the preceding section.
- Move the cursor to the line of the tempo map that you wish to delete, and press [YES/ENTER].
A mini-menu appears.
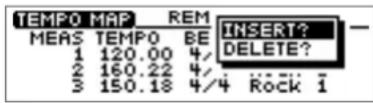
- Press CURSOR [] to select "DELETE?."
- Press [YES/ENTER].
The tempo map of the selected line will be deleted.
- Press [DISPLAY] to return to the Basic screen.
Playing the rhythm guide according to the tempo map
- Press RHYTHM GUIDE [PATTERN/TEMPO]. The Rhythm Guide Setting screen appears.
- Press CURSOR [] to move the cursor to "Beat."
- Turn the TIME/VALUE dial to select "TEMPO MAP." The rhythm guide will play according to the tempo map.
- Press [DISPLAY] to return to the Basic screen.

It is not possible to change the "MEAS" value "1" of the tempo map 1.

Rhythm Pattern List (p. 172)

Up to fifty tempo maps can be created.

Tempo map 1 cannot be deleted.
Recording/ playing back a performance
Recording a Performance
Here's how a performance on a connected instrument can be recorded on an audio track. The input source selected by the INPUT SELECT button can be recorded in mono or stereo.
Select the audio track for recording
- Press [STATUS] for the audio track on which you wish to record, so that it blinks in red.
Now the selected audio track is ready for recording.
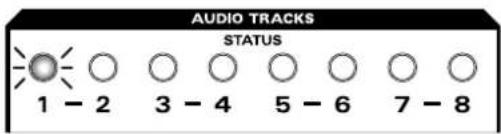
The state of each audio track is shown by the color of its [STATUS] button.
• Dark: An audio track that has been muted (silenced)
- Lit in green: An audio track is ready for playback.
- Lit in red: An audio track being recorded.
- Blinking in red: An audio track selected as the recording destination.
- Record in mono
When the input is mono, you will normally use one audio track to record the sound in mono. Press a [STATUS] to select one of the audio tracks 1–8.

- Record in stereo
When the input is stereo, you will normally use two audio tracks to record the sound in stereo. Press two [STATUS] in a combination of 1-2, 3-4, 5-6, or 7-8.
A sound that is input in mono will become stereo if an insert effect is applied to it. If you wish to record in stereo while applying an insert effect, select two audio tracks with same procedure as above.


For details on the jack to use for connections and on the INPUT SELECT button, refer to "Panel Description: Rear panel" (p. 30) and "Panel Description: INPUT section" (p. 21).

If the eight audio tracks are insufficient for you to record all of the necessary performances, you can combine the performances of multiple audio tracks into a single track, freeing up additional audio tracks for more recording.→ "Combining the performances of multiple audio tracks—Bounce Recording" (p. 125)

For details on insert effects, refer to "Using the insert effects" (p. 141).

When recording in stereo using SIMUL, set the input pan to "L100" (the far left) before you record. If you set the input pan except for "L100," the two input sources will be mixed and recorded.
Recording/ playing back a performance

Doubling technique
One technique for spreading the backing guitar between left and right is to record the same backing performance twice (on separate audio tracks), and then pan the two tracks to left and right. This is known as doubling.
The CDX-1 provides a "DOUBL'N (doubling)" (p. 202) insert effect that lets you produce a doubling effect without having to record the same performance twice. Select two audio tracks and choose stereo recording, and use the "DOUBL'N (doubling)" effect as you play the backing. This will produce a spacious doubling effect.
"DOUBL'N (doubling)" is also provided as a loop effect. By using the "DOUBL'N" (p. 174) loop effect, you can produce a doubling effect even from a single-track (mono) recording, allowing you to make more efficient use of the audio tracks.
Record
- Press REC [].
REC [ ]ink (recording-standby mode).
- Press PLAY [ ].
REC [ ] and the [STATUS] of the audio track selected as the recording destination will change from a blinking red light to a steady red light, and recording will begin.
- Press STOP [] ■ stop recording.
A message of "Keep take? (NO/YES)" (Do you wish to save the take on CD-RW disc?) appears.
If you wish to save the take, press [YES/ENTER].
If you press [NO/EXIT], saving to CD-RW discs will be cancelled.

"Using the insert effects" (p. 141)

"Using the loop effects" (p. 145)
Re-recording only a mistake
—Punch-in/ out
You may occasionally make a mistake while recording, or the performance may not turn out as you expect. In such cases, it is convenient to re-record only the portion where the mistake occurred. The action of switching to record mode while an audio track plays is called Punch-in. Switching from recording mode back to playback while the track plays is called Punch-out.
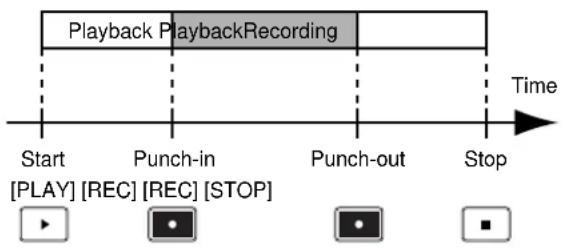
flowchart
graph LR
    A["Start"] --> B["Punch-in"]
    B --> C["Punch-out"]
    C --> D["Stop"]
    style A fill:#f9f,stroke:#333
    style B fill:#ccf,stroke:#333
    style C fill:#cfc,stroke:#333
    style D fill:#fcc,stroke:#333
Using the Record button to punch-in/out
Here's how to use the REC [] to punch-in/out.
- For the audio track that you wish to re-record, press [STATUS] to get it to blink in red.
The selected audio track will be in recording-standby mode. - Set the fader of the selected audio track to the 0 dB position.
- Listen to compare the input source volume with the volume of the audio track that you wish to re-record, and adjust the INPUT REC LEVEL knob to adjust the input sensitivity so that there is no difference in volume between the two.
- After you have adjusted the input sensitivity, turn the TIME/VALUE dial to move to a location immediately before the area you wish to re-record.
- Press PLAY [] ▶ play back the audio track.
- At the moment you wish to begin recording, press REC [ ].
Punch-in will occur, and recording will begin.
During recording, you can press REC [ ] alternately punch-in and punch-out. If there are other locations that you wish to re-record, repeat this procedure.
- When you are finished recording, press STOP [] ▪stop the playback.
A message of "Keep take? (NO/YES)" (Do you wish to save the take on CD-RW disc?) appears.
If you wish to save the take, press [YES/ENTER].
If you press [NO/EXIT], saving to CD-RW discs will be cancelled.
- Listen to the re-recorded results.
Return to a location immediately before the re-recorded area, and play back.
MEMO
The data prior to punch-in/out will remain on the CD-RW disc without being erased. If you no longer need this data, you can erase it from the CD-RW disc to make better use of the storage space on the CD-RW disc. "Increasing the free space on a CD-RW disc—Optimize Disc" (p. 126)
[Non-Text]
For details on adjusting the input sensitivity of an input source, refer to "Adjusting the input sensitivity" (p. 113).
MEMO
You can use the Undo function (p. 138) to revert to the condition before re-recording.
Recording/ playing back a performance
Using a foot switch to punch-in/out
If you are playing an instrument at the same time that you operate the controls of the recorder, it will be difficult for you to perform punch-in/out operations using the REC [ button. In such cases, it is more convenient to press a separately sold foot switch (such as the DP-2 or BOSS FS-5U) instead of pressing the REC [ • ] button.
- Connect an optional foot switch (DP-2, BOSS FS-5U, etc.) to the FOOT SWITCH jack.
- Press [UTILITY].
The Menu are displayed as icon.
- Press CURSOR [] to select the System icon.
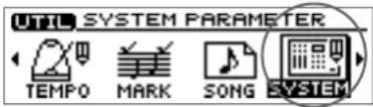
- Press [YES/ENTER].
The System settings screen appears.
- Press CURSOR [] to move the cursor to "Foot SW."
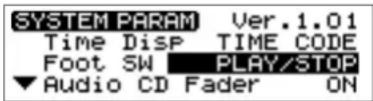
- Turn the VALUE dial to select "PUNCH I/O."
- FSW Func (Foot Switch):
PLAY/STOP:
Each time you press the foot switch, the song will alternately play back (I) and stop(I)
PUNCH I/O:
It will perform the same function as REC [■se this to switch between punch-in recording and playback.
SAMPLER TRIG:
The samples specified for each pad bank will play. (→ "Playing a sample from a connected foot switch" p. 75)
- Press [DISPLAY] to return to the Basic screen.
This changes the settings so that the foot switch will perform punch-in/out operations. Perform punch-in/out as described in "Using the Record button to punch-in/out" (p. 121). At this time, press the foot switch instead of pressing REC

Automatically punching-in/out at a specified location —Auto Punch-in/out
Auto punch-in/out is a function that automatically performs punch-in/out at the time locations that you specify beforehand. This is convenient when you wish to punch-in/out at precise times.
Specifying the area for recording
Before you begin recording, you must register the locations at which punch-in and punch-out will occur automatically.
- Move to the desired punch-in location.
Recording/ playing back a performance
- Press AUTO PUNCH [IN].
The current location will be registered as the punch-in location, and the button will light.
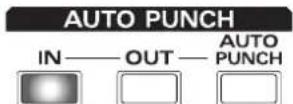
If you wish to re-do the setting, move to the punch-in location you registered, and press AUTO PUNCH [IN]. The registration will be cancelled, and AUTO PUNCH [IN] will go out.
-
Move to the desired punch-out location.
-
Press AUTO PUNCH [OUT].
The current location will be registered as the punch-out location, and the button will light.
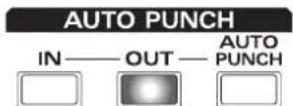
If you wish to re-do the setting, move to the punch-out location you registered, and press AUTO PUNCH [OUT]. The registration will be cancelled, and AUTO PUNCH [OUT] will go out.
How to Record
-
For the audio track that you wish to re-record, press [STATUS] to get it to blink in red. The selected audio track will be ready to record.
-
Move the fader of the selected audio track to the 0 dB position.
-
Listen to compare the input source volume with the volume of the audio track that you wish to re-record, and adjust the INPUT REC LEVEL knob to adjust the input sensitivity so that there is no difference in volume between the two.
-
After you have adjusted the input sensitivity, move to a location immediately before the area you wish to re-record.
-
Press [AUTO PUNCH].
The button will light, and auto punch-in/out will be on.
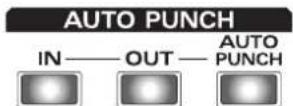
-
Press REC [] to enter record-ready mode.
-
Press PLAY [] ▶ play it back.
At the point you specified for re-recording, punch-in will occur automatically. Play your instrument to re-record the performance.
At the point you specified for punch-out, the track will automatically change back to play mode.
- Press STOP [] ■stop playback.
A message of "Keep take? (NO/YES)" (Do you wish to save the take on CD-RW disc?) appears.
If you wish to save the take, press [YES/ENTER].
If you press [NO/EXIT], saving to CD-RW discs will be cancelled.
- Listen to the result of the re-recording.
Return the song to a point earlier than you re-recorded, and play it back.
- Press [AUTO PUNCH].
[AUTO PUNCH] will go out, and auto punch-in/out will be turned off.

There must be at least one second between the punch-in and punch-out points. It is not possible to set the punch-out point less than one second after the punch-in point.

If you wish to punch-in/out at the location of a marker, move to the marker location in steps 1 and 3 before you register the punch-in/out locations.
→ "Moving to the location of a marker" (p. 129)

Once you have registered the punch-out location, you can press AUTO PUNCH [IN]/[OUT] to move to the registration locations.

For details on adjusting the input sensitivity of an input source, refer to "Adjusting the input sensitivity" (p. 113).

Even after auto punch-in/out has been turned off, you can press AUTO PUNCH [IN] or [OUT] to move instantly to those specified locations.
Recording an additional performance while listening to an existing performance—Overdubbing
The process of listening to a previously recorded performance while you record additional material on another audio track is called overdubbing. If you record drums, bass guitar, keyboard, guitar, and vocal parts on separate audio tracks, you can then adjust the volume balance between instruments and set the left/right position (pan).
Select the audio track to record
- For the audio track that you wish to record, press [STATUS] to get it to blink in red.
With these settings, you are ready to record while listening to the performances of the audio tracks you selected for playback.
Recording while you listen to the playback
Record using the same procedure as in "Recording a performance" (p. 119).
If you wish to adjust the volume of the audio tracks that are playing, adjust the appropriate AUDIO TRACK fader.
At this time, the audio track selected as the recording destination will record only the sounds you are playing, and will not record the sound of the audio tracks that are playing back.

Overdubbing tip
When you record new material while listening to a recorded performance, your playing may tend to be buried in the existing performances, making it difficult for you to play. In such cases, you can slightly lower the faders of the audio tracks that are playing, or pan the playback tracks to the left (or right) and your own new performance to the right (or left), to make it easier to distinguish your own playing.

If at this time you select an audio track that has already been recorded, the new performance will be overwritten onto the previously recorded performance, replacing it.2. For the audio tracks that you wish to play back, press [STATUS] to get them to light in green.

"Setting the left/right position (pan) of each audio track" (p. 132), "Setting the left/right position (pan) of the input sound" (p. 113)
Combining the performances of multiple audio tracks—Bounce Recording
Depending on the number of instruments that you wish to record, eight audio tracks may not be sufficient. In such cases, you can combine performances that were recorded on multiple audio tracks, and re-record them onto another track. This process is called bounce recording. By combining multiple performances in this way, you can free up other audio tracks in order to record additional performances.
Playback/recording audio tracks for bounce recording
Each track can either play back or record. For example if you are bouncing to two tracks in stereo, you will be able to play back the tracks that are not recording destinations; i.e., you will be able to play back six tracks simultaneous during bounce recording.
Bounce recording procedure
Here we will explain an example of how mono performances recorded on audio tracks 1 and 2 can be mixed with the stereo performance recorded on audio tracks 3-4, and bounce-recorded on audio tracks 7-8.
-
For audio tracks 1, 2, 3, and 4 that you wish to combine, press [STATUS] to get it to light in green.
-
Adjust the pan (left/right position) of the audio tracks for playback.
-
Press PLAY [] ▶ play back, and use the AUDIO TRACK faders to adjust the volume balance.
-
Use the MASTER fader to adjust the overall volume (recording level). At this time, raise the volume as high as possible without allowing the sound to distort. For the audio tracks that you do not want to mix (tracks 5-6), make their [STATUS] go dark to mute them.
-
When you adjust the volume, press STOP [].
-
Press [BOUNCE] to get it to light.
-
Press the audio track 7 or 8 [STATUS]. The [STATUS] of audio tracks 7-8 will blink in red (recording-standby mode).
-
Press ZERO [ ] return the SONG POSITION to "00:00:00-00".
-
Press REC [].
REC [ ]ink (recording-standby mode).
-
Press PLAY [▶] and recording will begin.
-
Press STOP [■]o stop recording. A message of "Keep take? (NO/YES)" appears.
-
If you wish to save the take, press [YES/ENTER]. When CDX-1 complete to save, [BOUNCE] will go to dark, and the [STATUS] of the selected recording destination tracks will go light in green. If you press [NO/EXIT], saving to CD-RW discs will be cancelled.
-
Listen to the result of bounce recording. Press audio tracks 1–4 [STATUS] to go dark (mute). Return to the location at which you began recording, and press PLAY [▶] to play back audio tracks 7-8.
NOTE
Once performances have been bounce-recorded to an audio track, it will no longer be possible to adjust the volume, pan, or equalization of a specific instrument or vocal. If you need to keep the option of individually adjusting pan, equalization, etc., of an audio track, you should not combine it with other tracks by bounce-recording.
[Non-Text]
"Adjusting the left/right position (pan) of each audio track" (p. 132)
MEMO
In step 4, the INPUT SELECT button will automatically go dark. If you wish to mix an input source as part of the bounce recording, press an INPUT SELECT button to select the desired input source.
Playing back and stopping a recorded performance
Playing back/stopping
- For the audio tracks that you wish to play, press [STATUS] to get the button to light in green.
- Press ZERO [ ] to return the SONG POSITION to "00:00:00-00" (beginning of the song).
- Press PLAY [] ▶ start playback.
- Press STOP [].
The song stops.
Adjusting the volume of each track
Use the AUDIO TRACK faders to adjust the playback volume of each audio track.
Silencing a specific audio track—Mute
- Press [STATUS] to extinguish the light.
The sound of that track will be silenced (muted).
To hear the sound once again, press [STATUS] to get it to light in green.
Saving Song settings on a CD-RW disc
The following parameters can be saved on a CD-RW disc.
- Mixer parameter • Maker parameter
- Rhythm Guide parameter • Tempo Map parameter
- Sequence parameter • Effects Location parameter
- Song parameter • Master parameter
Saving Song settings
- Press [UTILITY].
The Menu are displayed as icon.
- Press CURSOR [] to select the CD-R/RW Disc icon.
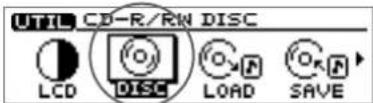
- Press [YES/ENTER].
The CD-R/RW Disc Menu are displayed as icon.
- Make sure that the cursor is located at the Save Song icon.
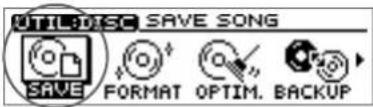
- Press [YES/ENTER].
The display will indicate "Processing...," and the data will be saved. When saving is completed, the display will show a message of "Completed."
- Press [DISPLAYAY] to return to the Basic screen.

When BUSY indicator is lit, CDX-1 is preparing for playback. Thus, the playback do not immediately start when it is lit. In this case,
PLAY[▶] blinks.

It is not possible to change the [STATUS] during the song is playing.

For details on each parameter, refer to "Parameter List" (p. 208).

This operation does not save the Pad/Sequence to CD-RW. In order to save the Pad/Sequence, you must perform the operation "Saving Pad/Sequence" (p. 67).

Song settings can be saved on a CD-RW disc, when the power is turned off (p. 34), when a CD-RW disc is removed (p. 36), or when you mixdown (p. 133).
Increasing the free space on a CD-RW disc —Optimize Disc
When you perform overdubbing (p. 124) or punch-in/out (p. 121), the data that you rewrite (replace) actually remains on the CD-RW disc. In some cases, this unwanted data may occupy a significant amount of space on the CD-RW disc. This will cause the time available for recording to be less than it should be.
By executing Optimize you can erase the unwanted data from the CD-RW disc, increasing the amount of available space on the CD-RW disc.
- Press [UTILITY].
The Menu are displayed as icon.
- Press CURSOR [] to select the CD-R/RW Disc icon.
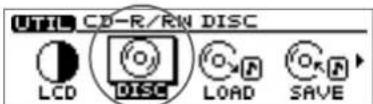
- Press [YES/ENTER].
The CD-R/RW Disc Menu are displayed as icon.
- Press CURSOR [] to select the Optimize Disc icon.
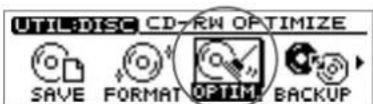
- Press [YES/ENTER].
A message of "You can't UNDO this function." appears.
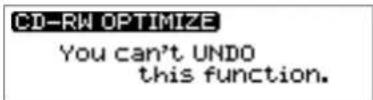
- If you press [YES/ENTER], Optimize will be executed.
The display will show a message of "Completed." and the Basic screen will reappear. If you press [NO/EXIT], the display of step 3 reappears without executing Optimize.

After you execute Optimize, it is not possible to press [UNDO/REDO] (p. 138) to revert to the state before executing Optimize.

Depending on the situation, an appreciable length of time may be required for Optimize to be completed. This is not a malfunction. While the processing bar appears, do not turn off the power with unplugging the AC adaptor.
If you turn off the power during the Optimize operation, the CD-RW disc may become unusable, or the drive may be damaged.
Repeatedly playing a specified region —the Repeat function
By using the Repeat function you can repeatedly play back a specified region. This is convenient when you wish to check the mix balance over and over.
Registering the repeat region
- Turn the TIME/VALUE dial or press REW [ ] to move to the location where you wish to begin repeating.
- Press REPEAT [].A◀▶B
REPEAT [A]ink, indicating that the current location has been registered as the repeat start point (A).

If you wish to re-do the registration, press REPEAT [ ] If the Current location is the same as the repeat start point (A), and the registration will be cancelled. If the current location is past the repeat start point (A), press REPEAT [ ] A will Bo cancel the registration.
- Turn the TIME/VALUE dial or press REW [ ] to m▶ to the location where you wish to stop repeating.
- Press REPEAT [ ].A ◀▶B
REPEAT [ ]A→B→C→D, indicating that the current location has been registered as the repeat end point (B).

If you wish to re-do the registration, press REPEAT [ ] and beel the registration, and then re-register, starting with the repeat start point (A).
- When you press PLAY [ ], the region between the (A) and (B) points you registered will play repeatedly.
Canceling the registration
- When REPEAT [] is Hit press REPEAT [] once again.
REPEAT [A will go out. The Repeat function will be cancelled, and the repeat start point (A) and end point (B) registrations will also be erased.

The Repeat function and Punch-in/out recording cannot be used together.

If you want to repeat at the location of a marker, move to the location of that marker in steps 1 and 3 before you register the repeat start/end points. → "Moving to a location of a marker" (p. 129)

There must be at least one second between the repeat start (A) and end (B) points. Is not possible to set the end point less than one second away from the start point.
Assigning markers within a song—Marker
The Marker function lets you assign a marker at desired locations in the song. When this function is used, you can move instantly to the location of a marker that you registered, simply by specifying the appropriate marker number. This is also a great convenience for editing.
Markers are assigned a number in the range of 001–100, starting at the beginning of the song, and you can assign up to 100 markers. This means that if you register a new marker between existing markers, subsequent markers will be renumbered upward by one.
For example, if you add the following marker after marker number 2, the numbers will change as shown below.
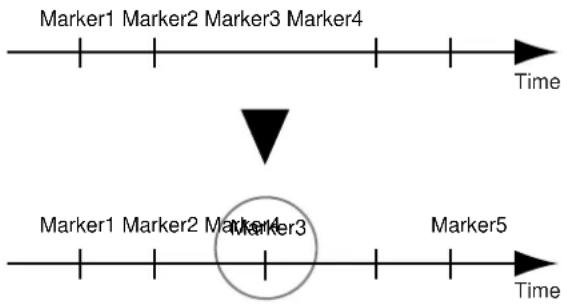
flowchart
graph TD
    A["Marker1 Marker2 Marker3 Marker4"] --> B["Time"]
    C["Marker1 Marker2 Marker3 Marker3"] --> D["Time"]
    E["Marker5"] --> F["Time"]
Assigning a marker
Press [MARK]. A marker is assigned at the location where you pressed the button. Markers can be registered regardless of whether you are recording, playing, or stopped.
Moving to the location of a marker
To move to a marker earlier than the playback location, press SEARCH [ ]. Each time you press SEARCH [ ]. You will move to the previous marker.
To move to a marker later than the playback location, press SEARCH [ ]
Deleting a marker
Markers will make searching more convenient, but an excessive number of markers can actually make searching more difficult. It is a good idea to delete markers as they become no longer needed.
- Press SEARCH [][] to move to the marker that you wish to delete.
- Press [MARK], and the marker will be deleted.
If markers exist after the deleted marker, they will be renumbered downward by one.

There must be at least one second between markers. It is not possible to assign a marker within 1 seconds of an existing marker.
Recording/ playing back a performance
Changing the location of a marker
- Press [UTILITY].
The Menu are displayed as icon.
- Press CURSOR [] to select the Marker Edit icon.
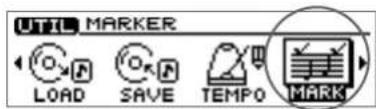
- Press [YES/ENTER].
The Marker Edit screen appears.
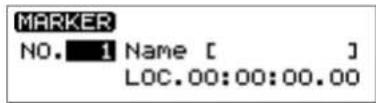
-
Make sure that the cursor is located at the "NO."
-
Turn the TIME/VALUE dial to specify the number of the marker that you wish to edit.
-
Press CURSOR [] to move the cursor to "LOC."
-
Turn the TIME/VALUE dial to specify the desired location for the marker.
-
Press [DISPLAY] to return to the Basic screen.
Naming a marker
- Press [UTILITY].
The Menu are displayed as icon.
- Press CURSOR [] to select the Marker Edit icon.
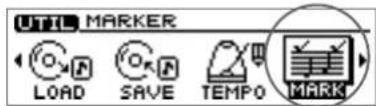
- Press [YES/ENTER].
The Marker Edit screen appears.
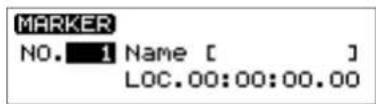
-
Make sure that the cursor is located at the "NO." line.
-
Turn the TIME/VALUE dial to specify the number of the marker that you wish to edit.
-
Press CURSOR [] to move the cursor to "NAME."
-
Use CURSOR [] [ ] to move the character location, and turn the TIME/VALUE dial to input the desired character.
-
When you have finished determining the name, press [DISPLAY]. The display returns to the Basic screen.

A marker can be assigned a name of up to 8 characters.
Stopping the song automatically—Marker Stop
You can make playback stop at marker locations (Marker Stop).
When you play back after stopping, the song will play back to the next marker, and will then automatically stop again.
- Press [UTILITY].
The Menu are displayed as icon.
-
Press CURSOR [] to select the Song Parameter icon.
-
Press [YES/ENTER].
The Song Parameter screen appears.
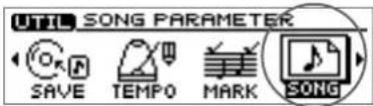
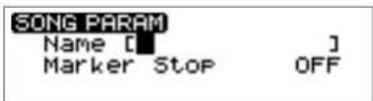
-
Press CURSOR [] to move the cursor to "Marker Stop."
-
Turn the TIME/VALUE dial to select "ON."
- Marker Stop:
If this is turned "ON," playback will stop automatically at locations where a marker has been assigned.
- Press [DISPLAY] to return to the Basic screen.

For details on assigning a marker, refer to "Assigning a marker" (p. 129).
Editing a recorded performance to create an audio CD
Preparing to write a CD-R disc—Mix down
The process of combining the performances recorded on multiple audio tracks into two-channel stereo is called mixdown. Before you mixdown, you will complete the song by adjusting the tone (equalizer), left/right position (pan), loop effects, and volume balance settings of each track.
Setting the left/right position (pan) of each audio track
- Press TRACK EDIT [PAN].
The pan setting screen for the audio tracks appears.
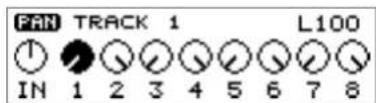
- Press CURSOR [ ] [ ] to select the audio track that you wish to adjust.
- Turn the TIME/VALUE dial to set the pan.
- Press [DISPLAY] to return to the Basic screen.
Adjusting the tone of each audio track—Equalizer
The mixer section of the CDX-1 provides a two-band equalizer (EQ) for each audio track, allowing you to independently adjust the tone of the low-frequency and high-frequency ranges.
- Press TRACK EDIT [EQ].
The equalizer setting screen appears.
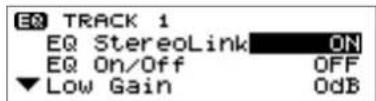
- Press CURSOR [ ] [ ] to select the audio track that you wish to adjust.
- Use CURSOR [ ] to move the cursor to the line of the parameter you wish to set.
- Turn the TIME/VALUE dial to change the value.
→ For details on the parameters, refer to "Mixer effect parameter functions" (p. 174).
- Press [DISPLAY] to return to the Basic screen.
Adjusting the overall volume balance—Master Balance
Here's how to adjust the overall volume balance.
- Press MASTER TRK [EDIT].
The Master Balance Setting screen appears.
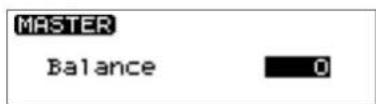
- Turn the TIME/VALUE dial to adjust the overall balance.
- Press [DISPLAY] to return to the Basic screen.

For details on the loop effect, refer to "Using the loop effects" (p. 145).

Pan settings can also be changed while the song is being recorded. If you change the pan setting during recording, the changes will be recorded just as you make them.
Mixing down
After listening to repeated playbacks and adjusting the pan, equalizer, loop effects, and volume balance settings of each audio track to the desired settings, you are ready to mixdown.
[MIX DOWN] will light, and you will be in mixdown-ready mode.
* If the pad/sequence contained in the CDX-1's internal memory, a message of "Save PAD/SEQ Data?" appears, [MIX DOWN] will blink.
If you wish to save the pad/sequence on a CD-RW disc, press [YES/ENTER]. [MIX DOWN] will light.
If you press [NO/EXIT], a message of "You'll lose PAD/SEQ data. Go to MIXDOWN MODE?" appears. If you wish to go mixdown mode, press [YES/ENTER]. If you wish to cancel, press [NO/EXIT].
2. For audio tracks that you wish to include in the mixdown, press [STATUS] to make the button light in green.
* Make sure that master track [STATUS] light in red.
3. Press ZERO [] to return the SONG POSITION to "00:00:00-00" (beginning of the song).
Alternatively, you can move to a desired location so that recording will start from that point.
4. Press PLAY [ ].
Mixdown will begin.
5. When mixdown is finished, press STOP [].
The screen will ask "Do you want to burn a CD?"
If you wish to create an audio CD, press [YES/ENTER] and continue with the procedure "Writing to a CD-R disc" (p. 135).
If you wish to make sure that the result of mixdown, press [NO/EXIT]. For detail refer to "Listen to the result of Mixing down", below.
Listen to the result of Mixing down
-
When the "BURNING CD?" message appears in step 5 of the above procedure, press [NO/EXIT].
-
Press master track [STATUS] to make the button light in green.
The mastering track screen appears.
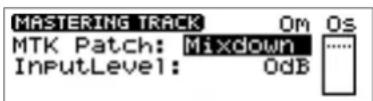
3. Press PLAY []▶ the beginning of the mastering track.
The song will play back. Adjust the settings of the mastering tools as necessary.
(→ "Adjusting the mastering tools"; p. 134)
4. When you are finished with test-listening, press STOP [].
- If you wish to write to the CD-R disc, press [CD BURNING] and continue with the procedure "Writing to a CD-R disc" (p. 135).
![ROLAND CDX-1 - When you are finished with test-listening, press STOP []. - 1](/content/2026/05/862949/images/43072836d69a743ec9fb7a1dbbb3bb0e231597d822c52e501fea24ff565421be.jpg)
Once you carry out mixdown, pad/sequence held in internal memory of CDX-1 will be lost.
MEMO
If you wish to cancel MIXDOWN MODE ([MIX DONW] is lit), press [MIX DONW] once again.

You cannot listen the song in CD burning mode.

If you press PLAY [ ] to play back the master track form top each time.

If you wish to redo mixing down, press master track [STATUS] to make the button blink in red. Return to step 2 of "Mixing down," above.
Adjusting the mastering tools
The mastering tools are a convenient set of tools that divide the sound into high-frequency, mid-frequency, and low-frequency ranges, and make the volume consistent so that the audio CD can be created with the optimal levels. There are 19 mastering tool patches, so you can select the patch that is most appropriate for your situation.
If [MASTERING TOOLS] will turn on, the data being written to the CD-R disc will use the mastering tools.
- In step 2 of "Listen to the result of Mixing down," above, the Mastering track screen appears.
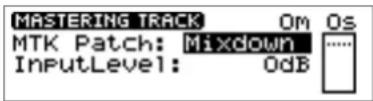
- Use CURSOR [] to move the cursor to the line of the parameter that you wish to adjust. Turn the TIME/VALUE dial to adjust the value.
- MTK Patch (mastering tools patch)
Mixdown: Tools for audio CD production
PreMastr: Tools for video pre-mastering
LiveMix: Tools for final mix of a live recording
PopMix: Tools for pop music
DanceMix: Tools for dance music
JinglMix: Tools for FM broadcast jingles
HardComp: Heavy compressor
SoftComp: Light compressor
ClnComp: Cut background noise to clean up the overall sound
DnceComp: Compressor for dance music
OrchComp: Compressor for orchestra
VocalCmp: Compressor for vocals
Acoustic: Tools for acoustic guitar
RockBand: Tools for rock band.
Orchestr: Tools for orchestra.
LoBoost: Tools to emphasize the low frequency
Brighten: Tools to emphasize the high frequency
DJsVoice: Tools for a DJ voice
PhoneVox: Tools to model a telephone voice
Cassette: Suitable for cassette Tapes.
Phono: Suitable for analog record disks.
- Input Level
Adjust the volume level (-24–12 dB) that is sent to the mastering tools. The default setting is "0 dB."
MEMO
If you are in CD BURNING mode, [MASTERING TOOLS] will be turned on (lit) automatically.
MEMO
You can select the mastering tools patch and adjust the input level in CD burning screen. However, you can not test-listening.
Completing your original CD—CD Burning
Here's how to write the mixed-down song to a CD-R disc to complete your own original CD.
When you create an original CD on the CDX-1, you will use the "mastering tools" to adjust the overall volume to the optimal level.
* The CDX-1 uses Track At Once to write song data to a CD-R disc. A CD-R disc that was written using Track At Once allows additional song data to be written as long as you have not yet finalized the disc. However, the disc cannot be played in a conventional CD player until it has been finalized. Once a CD-R disc has been finalized, no further data can be written to it.
Writing to a CD-R disc
- When the "Do you want to burn a CD?" message appears in step 5 of "Mixing down" (p. 133) or step 5 "Listen to the result of Mixing down" (p. 133), press [YES/ENTER].
A message of "Save SONG before eject?" appears.
If you wish to save, press [YES/ENTER].
A message of "Processing..." appears and CDX-1 saves setting of SONG (Parameter of Mixer, effects etc.) in CD-RW disc. When saving is completed, the disc tray will open, the screen indicates "Insert CD-R disc."
If you press [NO/EXIT], CDX-1 will not save setting of SONG (Parameter of Mixer, effects etc.) in CD-RW disc. The disc tray will open, the screen indicates "Insert CD-R disc."
- Remove the CD-RW disc and insert a CD-R disc.
The CD burning screen appears.
CD RECORDER [ ] will blink (writing-ready mode).
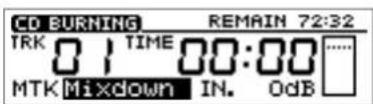
* You can select the mastering tools patch and adjust the input level in CD burning screen before writing to the CD-R disc. However, you can not test-listening.
- Press PLAY [ ].
Writing to the CD-R disc will begin.
When writing is completed correctly, the screen will ask "Do you want to finalize a CD?"
- If you wish to finalize the disc, press [YES/ENTER].
The screen will indicate "Now Processing...," and the disc will be finalized. When finalization is completed, the disc tray will open.
If you wish to add another song, press [NO/EXIT]. Finalize will not be executed, and the disc tray will open.
Finishing the CD Burning
- Press [CD BURNING] or [NO/EXIT].
A message of "You'll lose MASTER TR. Are you sure?" appears.
- Press [YES/ENTER], CD burning mode will finish.
[CD BURNING] will go dark.
Press [NO/EXIT], stay on CD burning mode.

For details on the mastering tools, refer to "Adjusting the mastering tools" (p. 134)

Track At Once (p. 18), Finalize (p. 204)

For details of saved Song settings, refer to "Saving Song settings on a CD-RW disc" (p. 126).

Data is written to the CD-R disc at 1x speed.

If you wish to add other songs to the CD-R disc and execute Finalize later, refer to "Finalizing a CD-R disc" (p. 136).

Finalization will require approximately 1 minutes.
Editing a recorded performance to create an audio CD
Finalizing a CD-R disc
Here's how to finalize an original CD that you created, so that it can be played on a conventional CD player.
- Insert the CD-R disc that you wish to finalize.
- Press [UTILITY].
The Menu are displayed as icon.
- Press CURSOR [] to select the CD-R/RW Disc icon.
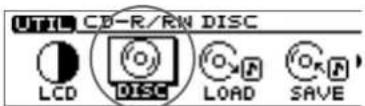
- Press [YES/ENTER].
The CD-R/RW Disc Menu are displayed as icon.
- Press CURSOR [] to select the CD-R Finalize icon.
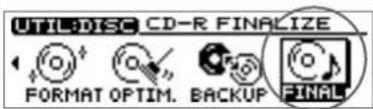
- Press [YES/ENTER].
The display will ask "CD-R finalize OK?"
- Press [YES/ENTER] once again.
The display will indicate "Now Processing...," and finalization will be executed. When finalization is completed, the CD Player screen appears.
If you press [NO/EXIT], finalization will not be executed, and you're returned to step 5.

Once a CD-R disc has been finalized, no further data can be recorded to it.

Finalize (p. 204)

Finalization will require approximately 1 minutes.
Taking full advantage of the CDX-1
More functions for the CDX-1
Undoing a recording/ editing operation
When you record or sample a performance, the recorded (or sampled) results may not always be as you expect. Or, you may make a mistake in editing. In such cases, you can use the Undo function to cancel the result of the preceding operation and return the data to its original state. Conversely, you can use the Redo function to cancel the last-performed Undo operation and go back to the recorded or edited data.
Undoing a recording or editing operation—Undo
When Undo is available, [UNDO/REDO] will light.
- Press [UNDO/REDO].
[UNDO/REDO] will go out, and the previous recording or editing operation will be undone.
Canceling the Undo—Redo
- Press [UNDO/REDO].
[UNDO/REDO] will light, and the previous undo operation will be undone.
Cueing to a precise location—Preview
When you are editing the performance of an audio track or sequence track, there are times when you need to determine a precise editing location, such as the beginning of a specific sound or the point where a break begins. By using the Preview function you can search for the desired point while listening to the sound, and adjust the location with great precision.
Adjusting the current location while listening to the preceding and/or following sound
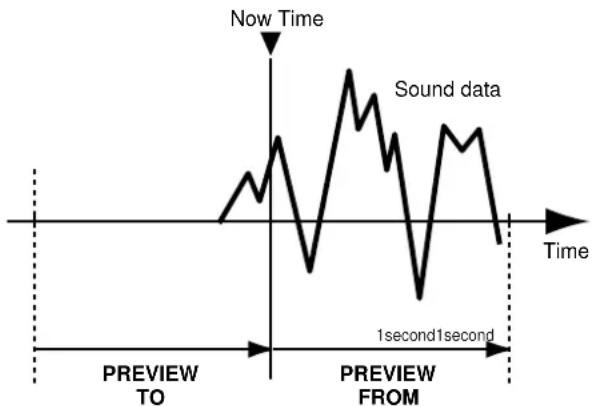
line
| Time Segment | Value | | ------------------ | --------- | | Before Preview | 0 | | Before Preview | 1 | | After Preview | 0 | | After Preview | 2 | | After Preview | 3 | | After Preview | 4 | | After Preview | 5 | | After Preview | 6 | | After Preview | 7 | | After Preview | 8 | | After Preview | 9 | | After Preview | 10 | | After Preview | 11 | | After Preview | 12 | | After Preview | 13 | | After Preview | 14 | | After Preview | 15 | | After Preview | 16 | | After Preview | 17 | | After Preview | 18 | | After Preview | 19 | | After Preview | 20 | | After Preview | 21 | | After Preview | 22 | | After Preview | 23 | | After Preview | 24 | | After Preview | 25 | | After Preview | 26 | | After Preview | 27 | | After Preview | 28 | | After Preview | 29 | | After Preview | 30 | | After Preview | 31 | | After Preview | 32 | | After Preview | 33 | | After Preview | 34 | | After Preview | 35 | | After Preview | 36 | | After Preview | 37 | | After Preview | 38 | | After Preview | 39 | | After Preview | 40 | | After Preview | 41 | | After Preview | 42 | | After Preview | 43 | | After Preview | 44 | | After Preview | 45 | | After Preview | 46 | | After Preview | 47 | | After Preview | 48 | | After Preview | 49 | | After Preview | 50 | | After Preview | 51 | | After Preview | 52 | | After Preview | 53 | | After Preview | 54 | | After Preview | 55 | | After Preview | 56 | | After Preview | 57 | | After Preview | 58 | | After Preview | 59 | | After Preview | 60 | | After Preview | 61 | | After Preview | 62 | | After Preview | 63 | | After Preview | 64 | | After Preview | 65 | | After Preview | 66 | | After Preview | 67 | | After Preview | 68 | | After Preview | 69 | | After Preview | 70 | | After Preview | 71 | | After Preview | 72 | | After Preview | 73 | | After Preview | 74 | | After Preview | 75 | | After Preview | 76 | | After Preview | 77 | | After Preview | 78 | | After Preview | 79 | | After Preview | 80 | | After Preview | 81 | | After Preview | 82 | | After Preview | 83 | | After Preview | 84 | | After Preview | 85 | | After Preview | 86 | | After Preview | 87 | | After Preview | 88 | | After Preview | 89 | | After Preview | 90 | | After Preview | 91 | | After Preview | 92 | | After Preview | 93 | | After Preview | 94 | | After Preview | 95 | | After Preview | 96 | | After Preview | 97 | | After Preview | 98 | | After Preview | 99 | | After Preview | 100 |- For the audio track whose sound you wish to check, press [STATUS] to make it light in green.
To play back a sequence track, turn [SEQ PLAY] on. Then in the Sequence Play List screen, select the sequence track (A–D) that you wish to play. (→ "Playing a sequence track"; p. 96)
- With playback stopped, press PREVIEW [TO] or [FROM] to play back the sound as described below.
Press [TO]:
Playback once from one second before the current location to the current location.
Press [FROM]:
Playback once from the current location to one second after the current location.
- While listening to the sound, turn the TIME/VALUE dial to make fine adjustments to the current location.
MEMO
[TO] is convenient when you wish to set the current location to the beginning of a sound, and [FROM] is convenient when you wish to set the current location to the end of a sound.
MEMO
For an audio track, you can press [MARK] to mark the current location so that it can be easily found later. →
"Assigning a marker" (p. 129)
Using Scrub to make fine adjustments in the cue location—Scrub Preview
An extremely short region (45 milliseconds) either before or after the current location will play back repeatedly. This is called the Scrub function.
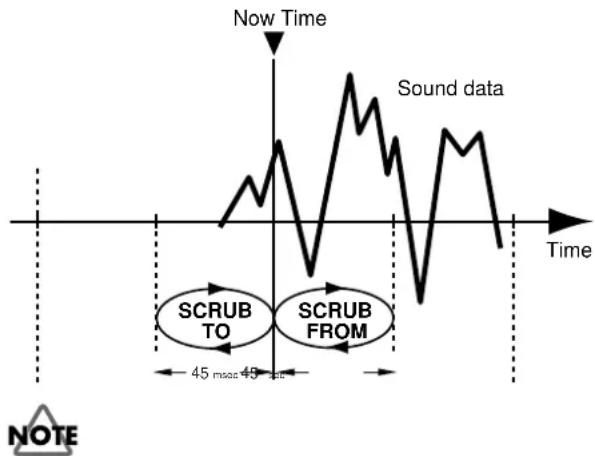
line
| Time Segment | Event | | ------------------ | ------------ | | Start | SCRUB TO | | End | SCRUB FROM |The Scrub Preview function will play back only audio tracks.
- For the audio track that you wish to play, press the [STATUS] to make it light in green.
- Press [SCRUB].
Scrub playback will begin.
- While you listen to the sound and current time, turn the TIME/VALUE dial to move the current location in small steps, and find the moment at which the sound begins.
- As necessary, press [TO] or [FROM] to switch the region that will be played back repeatedly.
[TO] is convenient when you wish to set the current location to the beginning of a sound, and [FROM] is convenient when you wish to set the current location to the end of a sound.
[TO]: Repeatedly play from a point 45 milliseconds before the current location, up to the current location.
[FROM]: Repeatedly play from the current location, up to a point 45 milliseconds after the current location.
- When you have found the precise location at which the sound begins, press [SCRUB] once again.
[SCRUB] will go out, and Scrub Preview will be turned off.
MEMO
For an audio track, you can press [MARK] to assign a marker at the current location so that it will be easy to find again. → "Assigning a marker" (p. 129)
Using the insert effects
The CDX-1 comes with two onboard effects processors: an insert effect and loop effects. These two types can be used simultaneously, and you can make settings for each effect as desired.
What is an insert effect?
An insert effect is an effect that is applied directly to a specific signal line (in the case of the CDX-1, an input instrument or an audio track being played back). (The effect pedals that a guitarist connects between his guitar and amp are a type of insert effect.) For example, by applying an insert effect to an electric guitar connected to the CDX-1, you can distort the sound or transform the sound into the tone of an acoustic guitar. You can also modify the settings of an insert effect to create your own original sounds.
What is a patch?
The CDX-1 provides numerous effects for vocals, guitar, etc., and two or more of these effects can be used simultaneously. Such a combination of effects (i.e., the types of the effects used and the order in which they are connected) is called an algorithm. In addition, each effect has a variety of settings (parameters) that can be adjusted in order to change the sound. By editing the values of these parameters you can create a wide range of tonal characteristics. The settings for the overall state of the effects including the effect parameter values are stored as a unit called a patch. The effects used for the insertion effect together with the parameters of each effect can be changed by recalling a patch.
How the patches are organized
The CDX-1 provides a variety of patches suitable for vocals or various instruments (preset patches). The preset patches are organized into four groups. In addition to the preset patches, there are 100 user patches and 100 song patches in which you can store your own patches that you create.
- Preset patches (A001–A100, B001–B100)
The preset patches already contain patch data. The settings can be modified, but cannot be rewritten.
• LINE (line group): A001–A050
• SIMUL (simul group): A051–A100
• GUITAR/BASS (guitar/bass group): B001–B050
• MIC (mic group): B051–B100
- User patches (U001–U100)
User patches can be rewritten, and are stored in internal memory. If you have created a patch that you would like to use for other songs as well, it is convenient to store it as a user patch.
- Song patches (S001–S100)
Song patches can be rewritten, but are stored on the CD-RW disc together with the song data. This is convenient when you have created a patch for a specific recorded performance, and would like to store that patch together with the song.

"Using the loop effects"
(p. 145)

"What is a loop effect?"
(p. 145)

"Insert effect algorithm list"
(p. 175)

Song patches (S001–S100)
cannot be selected unless a
CD-RW disc is inserted.
More functions for the CDX-1
Using an insert effect
- Press INSERT EFFECTS [ON/OFF].
[ON/OFF] will light, and the sound processed by the effect will be output.
- Press INSERT EFFECTS [PATCH].
The patch select screen appears.
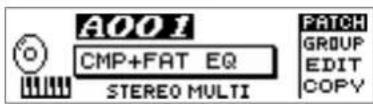
- Turn the TIME/VALUE dial to select a patch.
When you switch patches, the effect sound will also change. While you listen to the effect sound, select the desired effect patch.
- If you do not wish to use an insert effect, press INSERT EFFECTS [ON/OFF] once again.
[ON/OFF] will go out, and the insert effect will be off.
Editing the insert effect settings
If you wish to create a new effect sound, you should first select an existing patch that is closest to the sound you want, and then edit its settings. If you wish to save the effect settings that you edited, save them as a user patch or song patch.
- Press INSERT EFFECTS [PATCH].
The patch select screen appears.
-
Turn the TIME/VALUE dial to select a patch that is close to what you intend to create.
-
Press CURSOR [] to select "EDIT."
-
Press [YES/ENTER].
The effect block diagram is displayed graphically.
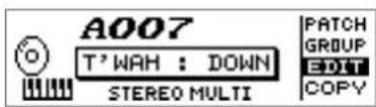
- Use CURSOR [ ][ ][ ][ ] to
select an effect, and turn the TIME/VALUE dial to turn the effect on/off.
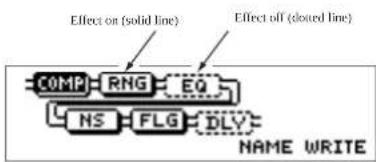
- Use CURSOR [ ] [ ] [ ] to select the effect whose parameters you wish to edit, and press [YES/ENTER].
The parameter setting screen for the selected effect will appear.
-
Use CURSOR [][] to select a parameter, and turn the TIME/VALUE dial to edit the value.
-
If you would like to edit another effect, press [NO/EXIT] to return to the previous screen, and repeat steps 5–6.
* Edited effect settings are temporary. If you go back one screen without saving the edited patch, the patch number will be displayed as "TMP." While "TMP" is displayed, newly selecting a different patch will cause the edited patch to revert to its previous state, and your edits will be lost.

Insert effects can be used on a specific audio track during playback, or during mixdown (p. 133). → Refer to "Changing the insert effect connections" (p. 144).

If you use CURSOR [] to select "GROUP," then turn the TIME/VALUE dial, patches can be changed by groups.

For further descriptions of each algorithm's function, please refer to p. 175–203.

If you wish to save the current effect settings, perform the procedure described in "Saving insert effect settings," below.
Saving insert effect settings
You can assign a name (patch name) to the edited effect settings, and save them. Continue with this procedure after the preceding section, "Editing insert effect settings."
- In the screen that displays the effect block diagram, press CURSOR [ ] a number of times to select "NAME."
- Press [YES/ENTER]. The Patch Name input screen will appear.
- Use the TIME/VALUE dial and CURSOR [ ] [ ] to input the desired patch name.
- When you are finished inputting the patch name and editing the settings of each effect, press [NO/EXIT] to return to the effect block diagram screen.
- Press CURSOR [] to select "WRITE," and press [YES/ENTER].
- Turn the TIME/VALUE dial to select the patch-save destination.
- After you have specified the patch-save destination, press [YES/ENTER]. When the data has been saved, you're returned to the patch select screen.
- Press [DISPLAY] to return to the Basic screen.
Copying a patch to create a new patch
If you wish to create two or more patches with similar effect settings, it is convenient to copy the patch.
- Press INSERT EFFECTS [PATCH]. The patch select screen appears.
- Turn the TIME/VALUE dial to select the copy-source patch.
- Press CURSOR [] to select "COPY."
- Press [YES/ENTER]. The Copy Effect setting screen will appear.
- Turn the TIME/VALUE dial to select the patch-copy destination.
- When you have specified the patch-copy destination, press [YES/ENTER]. When the copy is completed, you're returned to the patch select screen.
- Press [DISPLAY] to return to the Basic screen.
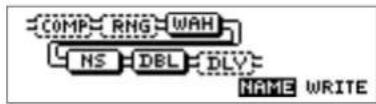
flowchart
graph TD
    A["COMP"] --> B["RNG"]
    B --> C["WAH"]
    C --> D["NS"]
    D --> E["DBL"]
    E --> F["DLY"]
    F --> G["NAME WRITE"]
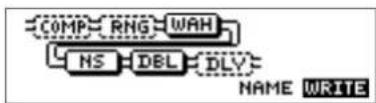
flowchart
graph TD
    A["COMP"] --> B["RNG"]
    B --> C["WAH"]
    C --> D["NS"]
    D --> E["DBL"]
    E --> F["DLY"]
    F --> G["NAME WRITE"]
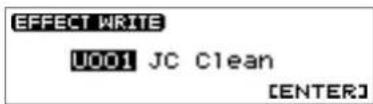
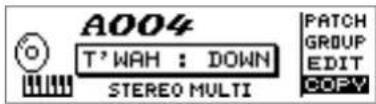
![EFFECT COPY From:A001 JC Clean To:U001 JC Clean [ENTER]](/content/2026/05/862949/images/fd6970755e03d71c9b4423ddbeda6a23bca2108705e4d654bb51222b61d76164.jpg)
NOTE
Song patch data is not saved immediately when you write it; rather, it is saved to CD-RW disc when you save the song or when you automatically turn off the power. For this reason, the song patch data will be lost if you turn off the power by disconnecting the AC adaptor instead of using the power switch. Please use caution.

Press CURSOR | to move the cursor to "From" line, you can change the copy-source patch.
More functions for the CDX-1
Changing the insert effect connections
By changing the connections of the insert effect, you can meet the needs of a wide variety of situations. For example, you can apply effects to the playback of specific audio tracks or audio sample pads, or adjust the sound during mixdown (p. 133)
- Press [UTILITY].
The Menu are displayed as icon.
- Press CURSOR [] to select the Effects location icon.
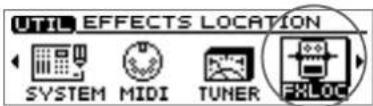
- Press [YES/ENTER].
The Insert Mode setting screen appears.
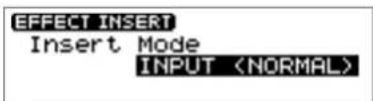
- Turn the TIME/VALUE dial to switch the "Insert Mode."
- INPUT (NORMAL):
You will hear the sound that passes through the insert effect. The sound that passes through the insert effect (the same sound that you hear) will also be recorded/sampled. Normally you will use this setting.
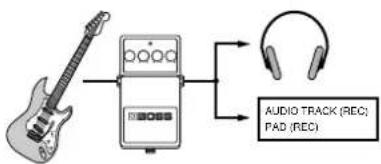
flowchart
graph LR
    A["Music Player"] --> B["Audio Track (REC) PAD (REC)"]
    B --> C["Headphones"]
- INPUT (REC DRY):
You will hear the sound that passes through the insert effect. The sound prior to passing through the insert effect (i.e., the original sound) will be recorded/sampled. Use this setting when you wish to try various effects after recording the sound.
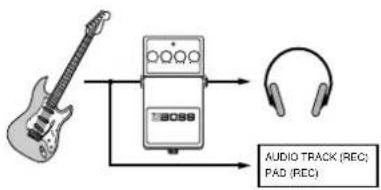
flowchart
graph LR
    A["Music Player"] --> B["DOSS Sensor"]
    B --> C["Audio Track (REC), PAD (REC)"]
    B --> D["Headphones"]
- TRACK1-8, 1&2, 3&4, 5&6, 7&8:
The insert effect will be applied to the audio tracks. Use this setting when you wish to try various effects after recording the direct sound (i.e., the sound not processed by the effect), or when you wish to apply an effect to a specific audio track.
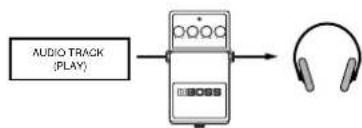
flowchart
graph LR
    A["AUDIO TRACK (PLAY)"] --> B["Playd"]
    B --> C["Headphones"]
- MASTER:
Use this setting when you wish to adjust the tone during mixdown, or when you wish to apply an effect to the entire sound, such as during resampling (p. 63).
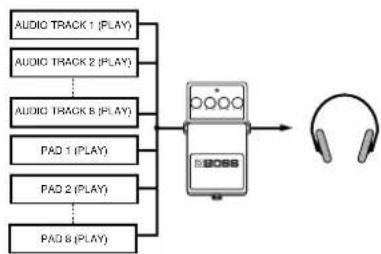
flowchart
graph TD
    A["AUDIO TRACK 1 (PLAY)"] --> D["BOSS"]
    B["AUDIO TRACK 2 (PLAY)"] --> D["BOSS"]
    C["AUDIO TRACK 8 (PLAY)"] --> D["BOSS"]
    E["PAD 1 (PLAY)"] --> D["BOSS"]
    F["PAD 2 (PLAY)"] --> D["BOSS"]
    G["PAD 8 (PLAY)"] --> D["BOSS"]
    D --> H["Output"]
- Press [DISPLAY] to return to the Basic screen.
MEMO
By default, the insert effect is inserted immediately after the input source ("INPUT (NORMAL)").

Input level is always same regardless to the position of REC LEVEL knob in case of "INPUT (REC DRY)" is selected.

It is not possible to apply the insert effect to the sound played by the pads.
Using the loop effects
What is a loop effect?
The method of sending a signal from a mixer to an effect (the "send"), and then returning the output of the effect back to the mixer (the "return") is called "loop effect." When a loop effect is used, its output is generally mixed with the original sound.
The mixer section of the CDX-1 provides chorus/delay/doubling and reverb as loop effects. By using these you can add spaciousness to the sound.
Since the send level is independent for each audio track, you can vary the effect depth for each track. For example, you might apply deep reverb to the vocal and light reverb to the drums.
Editing the loop effect settings
Chorus/delay/doubling
- Press LOOP EFFECTS [DELAY].
A screen will appear in which you can adjust the volume (send level) that is sent from the pad and each audio track to chorus/delay/doubling.
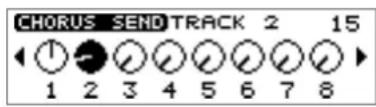
- Press CURSOR [ ] [ ] to select the audio track for which you wish to make settings.
When you wish to use the loop effect to the PAD, use CURSOR [] to move the "PAD."

You can continue pressing CURSOR [ ] and adjust the send level of the input source.
When the input source is recorded/sampled adding of the loop effects, the sound with the added effects is recorded/sampled.
You can also continue pressing CURSOR [ ] and adjust the send level of the rhythm guide.
-
Turn the TIME/VALUE dial to adjust the send level.
-
Press LOOP EFFECTS [DELAY] once again.
The chorus/delay/doubling setting screen appears.
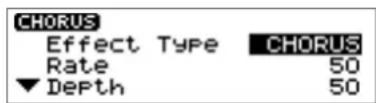
-
Make sure that the cursor is located at the "Effect Type" line.
-
Turn the TIME/VALUE dial to select the effect.
For details on other parameters, refer to "Mixer effect parameter functions" (p. 174).
- Press [DISPLAY] to return to the Basic screen.

Chorus/delay/doubling cannot be used simultaneously. You must select one of them.
Using the loop effect to create doubling
One technique for spreading the backing guitar between left and right is to record the same backing performance twice (on separate audio tracks), and then pan the two tracks to left and right. This is known as doubling.
The CDX-1 provides a "DOUBL'N (doubling)" (p. 174) loop effect that lets you produce a doubling effect without having to record the same performance twice.
By using the "DOUBL'N (doubling)" effect, doubling can be applied to the mono recording of a channel after it has already been recorded.
Before you edit the parameters of the "DOUBL'N" (doubling) loop effect, set the pan settings of the audio track to far left or right.
Reverb
Reverb consists of overlapping sounds reflected from the walls and floor. For example, if you clap your hands in a large room such as a church, the "wash" of sound that lingers is the reverb. The character of the reverb is affected by the size of the space (room, hall, etc.), its shape, and the materials of the wall or other reflecting surface.
1. Press LOOP EFFECTS [REVERB].
A screen will appear in which you can adjust the volume (send level) that is sent from the pad and each audio track to the reverb.
![ROLAND CDX-1 - Press LOOP EFFECTS [REVERB]. - 1](/content/2026/05/862949/images/62a805a285712dea4f62a6ac9dbb21d51b0f51fd003e4842558ea44f51fc5353.jpg)
2. Press CURSOR [ ] [ ] to select the audio track for which you wish to make settings.
When you wish to use the loop effect to the PAD, use CURSOR [][] to move the "PAD."
![ROLAND CDX-1 - Press CURSOR [ ] [ ] to select the audio track for which you wish to make settings. - 1](/content/2026/05/862949/images/2c6d7690577656a3fb06c5873317d05875ebe353099e98da67885f6b59d8ee42.jpg)
![ROLAND CDX-1 - Press CURSOR [ ] [ ] to select the audio track for which you wish to make settings. - 2](/content/2026/05/862949/images/90e7f813318ffc039fe454b2aa364658d9bc92e944d571e9650ede6b255176ba.jpg)
You can continue pressing CURSOR [ ][ ] and adjust the send level of the input source.
When the input source is recorded/sampled adding of the loop effects, the sound with the added effects is recorded/sampled.
You can also continue pressing CURSOR [] and adjust the send level of the rhythm guide.
- Turn the TIME/VALUE dial to adjust the send level.
- Turn the RTN LEVEL knob to adjust the return level.
- Press LOOP EFFECTS [REVERB] once again.
A Reverb Setting Screen appears.
For details on the parameters, refer to "Mixer effect parameter functions" (p. 174).
![ROLAND CDX-1 - Press CURSOR [ ] [ ] to select the audio track for which you wish to make settings. - 3](/content/2026/05/862949/images/29357e89ef4cf996ac7452ac3a25cbbf69b3d98b14ddfa0a0dcc63fe8fbcd767.jpg)
- Press [DISPLAY] to return to the Basic screen.
![ROLAND CDX-1 - Press CURSOR [ ] [ ] to select the audio track for which you wish to make settings. - 4](/content/2026/05/862949/images/abe13773be1167676ee9d9525d7e08b933d30410d762aab5dc68508871964b86.jpg)
For details on pan settings for an audio track, refer to
"Setting the left/right position (pan) of an audio track."
Creating a backup CD-RW disc
If you have a CD-RW disc that contains important performance data, it is a good idea to copy it onto a another CD-RW disc to create a backup before the data is lost or damaged.
Backing up song data on a CD-RW disc
Before you begin the backup, you must obtain a CD-RW disc that has been formatted on the CDX-1.
→ "Preparing a CD-RW disc for use" (p. 110)
- Press [UTILITY].
The Menu are displayed as icon.
- Press CURSOR [] to select the CD-R/RW Disc icon.
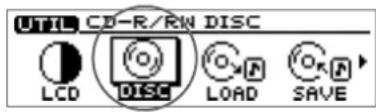
- Press [YES/ENTER].
CD-R/RW Disc Menu are displayed as icon.
- Press CURSOR [] to select the CD-RW Backup icon.
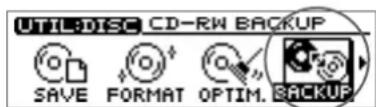
- Press [YES/ENTER].
A message of "Prepare a formatted destination disc." appears.
- Press [YES/ENTER].
A message of "Please insert the source disc." appears, and the disc tray opens.
* If the pad/sequence contained in the CDX-1's internal memory, a message of "You'll lose PAD/SEQ data. Are you sure?" appears.
If you press [YES/ENTER], all Pad/Sequence will be lost, and you will go to step 7.
Press [NO/EXIT] to return to the display of step 5. If you wish to save Pad/Sequence, follow the procedure described of "Saving Pad/Sequence." (p. 67).
- Insert the backup-source CD-RW disc.
The display will indicate "Reading..." and the CDX-1 will begin reading the CD-RW disc.
A message "Please insert the Destination disc." appears, and the disc tray opens.
- Insert the backup-destination CD-RW disc.
The display will indicate "Writing..." and the CDX-1 will begin writing the CD-RW disc.
The display of step 6 ("Please insert the source disc.") reappears, and the disc tray opens.
- As directed by the instructions that appear in the screen, alternately insert the CD-RW disc.
When the backup has been completed, the display will show a message of "Completed." Press [YES/ENTER] return to the display of step 5.
- Press [DISPLAY] return to the Basic screen.
MEMO
Backing up a CD-RW disc requires a considerable amount of time. It can take as long as twenty minutes. The number of times that discs must be exchanged will depend on the amount of performance data saved on the CD-RW disc and on the amount of internal memory.
NOTE
When you backup song data, all data previously on that CD-RW disc will be erased. Be careful not to insert a CD-RW disc that contains data you wish to keep.
Connecting with a digital audio device
The output of a digital audio device such as a CD player, DAT recorder, or MD recorder can be directly recorded in digital form on the CDX-1.
In Order to Make a Digital recording with CD player
At the factory settings, the CDX-1 cannot record the output of a digital audio device via the OPTICAL IN or COAXIAL IN connectors. If you wish to make connections with a digital audio device, you must perform the following procedure.
- Press [UTILITY].
The Menu are displayed as icon.
-
Press CURSOR [] to select the System icon.
-
Press [YES/ENTER].
The System settings screen appears.
-
Press CURSOR [] to move the cursor to "CD DigitalREC."
-
Turn the TIME/VALUE dial clockwise.
"Obey Copyright? See Owner's Manual" appears in the display.
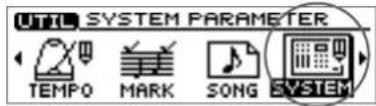
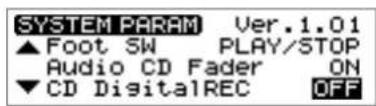
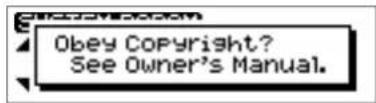
- Carefully read the condition for permission that are listed on the back cover of this manual, and if you agree to the condition, press [YES/ENTER].
Parameter of "CD DigitalREC" changes to "ON."
Subsequently you will be able to use digital connections from a digital audio device such as a CD player.
If you do not agree with the terms, press [NO/EXIT]. The setting will remain "OFF," and the System settings screen reappears.
- Press [DISPLAY] to return to the Basic screen.
To Prevent Digital recording with CD players
- Press [UTILITY].
The Menu are displayed as icon.
- Press CURSOR [] to select the System icon.
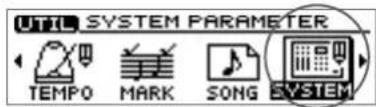
- Press [YES/ENTER].
The System settings screen appears.
- Press CURSOR [] to move the cursor to "CD Digital REC."
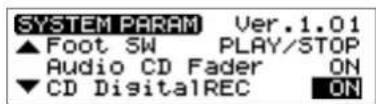
- Turn the TIME/VALUE dial to select "OFF."
Subsequently it will not be possible to use digital connections from a digital audio device such as a CD player.
- Press [DISPLAY] to return to the Basic screen.
Prohibiting digital copying—Digital Copy Prohibit
When digitally recording from the CDX-1 to an MD recorder or similar device, you can prohibit subsequent digital copying from the recorded MD to another MD recorder.
If digital copying is prohibited, it will be impossible for the MD that was digitally copied from the CDX-1 to be subsequently copied in digital form to another MD.
- Press [UTILITY].
The Menu are displayed as icon.
- Press CURSOR [] to select the System icon.
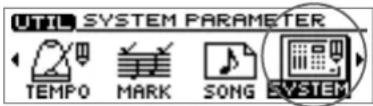
- Press [YES/ENTER].
The System settings screen appears.
- Press CURSOR [] to move the cursor to "D.Copy Protect."
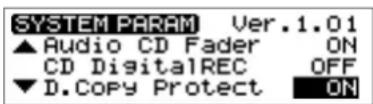
- Turn the TIME/VALUE dial to select "ON."
Subsequently, it will not be possible for a MD digitally recorded from the CDX-1 to be again copied in digital form to another MD recorder.
• D.Copy Protect (digital copy protect):
Specify whether digital copying of a digitally copied tape will be prohibited.
ON: Digital copying will be prohibited.
THRU: A "Copy Protect Signal" is output with digital signals that are input from DIGITAL IN (COAXIAL IN or OPTICAL IN) with "Copy Protect Signal." When using the CD player functionality (p. 49) of the CDX-1, a "Copy Protect Signal" is output with digital signals that are playing back track with "Copy Protect Signal."
- Press [DISPLAY] to return to the Basic screen.
* Some DAT recorders do not support SCMS, or do not allow digital connections to a CD player. If you are using this type of DAT recorder, it will not be possible to record the digital output of the CDX-1 on a DAT recorder if "D.Copy Protect" is turned "ON." In such cases, you will need to turn this setting "THRU."

What is SCMS?
"SCMS" stands for "Serial Copy Management System." This is a function of consumer digital audio devices such as DAT recorders or MD recorders that protects the copyright of the producer by prohibiting second-generation and subsequent copies from being made digitally. If digital connections are made to a digital recorder that has this function, SCMS flags will be recorded along with the digital audio signals. Digital audio data that contains these flags cannot be recorded again via a digital connection.
Using the CDX-1 with other MIDI devices
MIDI Fundamentals
What is MIDI?
MIDI stands for “Musical Instrument Digital Interface.” This is a worldwide standard that was developed in order to allow music data and sound data to be exchanged among electronic musical instruments and computers. Devices that are MIDI-compatible can exchange music data according to their capabilities, even if they are different types of device or were made by different manufacturers.
MIDI channels
MIDI allows data to be transmitted independently to multiple MIDI devices over a single MIDI cable. This is made possible by the concept of "MIDI channels."
You can think of MIDI channels as being similar to television channels. Although many broadcast channels are in the air at any one time (many channels of MIDI data are moving through a single cable), a television set receives only the channel to which it is set (the MIDI device receives only the channel to which it is set).
The same is true in the case of MIDI. If a transmitting device is set to MIDI channel "1," the MIDI messages will be received by receiving devices that are also set MIDI channel "1."
MIDI Implementation Chart
MIDI allows a wide variety of electronic musical instruments to communicate with each other. However, it is not necessarily the case that every device is able to transmit and receive every type of MIDI message. Only MIDI messages that are supported by both devices can be conveyed.
The operating manual of every MIDI device includes a “MIDI implementation chart.” This chart makes it easy to see the types of MIDI message that can be transmitted and received. When you wish to connect two MIDI devices, you should compare their charts to see which types of MIDI message can be conveyed between them.

For details on the MIDI functionality of the CDX-1, refer to "MIDI Implementation chart" (p. 216).
Switching MIDI OUT/ THRU
MIDI messages (the data handled by MIDI) is transferred using the following three types of connector.
MIDI IN: This connector receives MIDI messages from another MIDI device.
MIDI OUT: This connector sends MIDI messages from the CDX-1.
MIDI THRU: MIDI messages received at the MIDI IN connector are re-transmitted without change from this connector.
The CDX-1 provides a single connector that can be used either as MIDI OUT or MIDI THRU. At the factory settings, it functions as MIDI OUT. You can change this setting as necessary.
- Press [UTILITY].
The Menu are displayed as icon.
- Use CURSOR [] to select the MIDI icon.
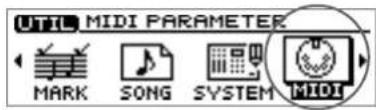
- Press [YES/ENTER].
The MIDI settings screen appears.
- Press CURSOR [] to move the cursor to "Out/Thru" line.
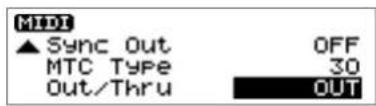
-
Turn the TIME/VALUE dial to select either "OUT" or "THRU."
-
Press [DISPLAY] to return to the Basic screen.
Using MIDI to control the CDX-1 from another device
The CDX-1 can be controlled in the following ways by MIDI messages from another MIDI device.
Play samples
By sending MIDI note messages from a keyboard or drum pad to the CDX-1, you can play the eight samples of the selected pad bank.
To play the samples of the CDX-1, you can choose one MIDI channel from channels 1–16.
- Press [UTILITY].
The Menu are displayed as icon.
-
Press CURSOR [] to select the MIDI icon.
-
Press [YES/ENTER].
The MIDI settings screen appears.
- Make sure that the cursor is located at the "Pads Rx Ch." line.
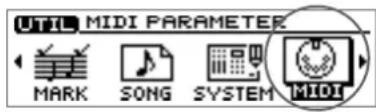
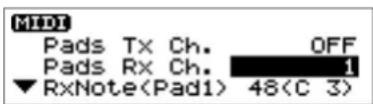
- Turn the TIME/VALUE dial to select a channel in the range of "1"-16."
If you select "OFF," samples cannot be played by any MIDI channel.
- Press [DISPLAY] to return to the Basic screen.
At the factory settings, the pads correspond to MIDI note numbers (numbers that indicate keyboard locations) as follows.
| 1 | 2 | 3 | 4 | 5 | 6 | 7 | 8 | |
| MIDI | C3 | C#3 | D3 | D#3 | E3 | F3 | F#3 | G3 |
| Note | 48 | 49 | 50 | 51 | 52 | 53 | 54 | 55 |
P a d
Changing the correspondence between pads and note numbers
- Press [UTILITY].
- Press CURSOR [] to select the MIDI icon, and press [YES/ENTER].
The MIDI settings screen appears.
- Press CURSOR [] to move the cursor to "Rx Note (Pad1)."
- Turn the TIME/VALUE dial to specify the note number.
- Press [DISPLAY] to return to the Basic screen.
Switch the pad bank
The eight samples of the selected pad bank are the only the samples that can be played by MIDI note messages. To switch the pad bank, use program change messages.
Of the program numbers sent to the CDX-1, only 1–64 are valid. These select pad banks 1 through 64 respectively. Program numbers 65–128 will be ignored.

The "Pads Tx Ch." parameter specifies the MIDI channel that will be used to control another MIDI device when you press the pads of the CDX-1.

Eight consecutive MIDI note numbers are used, according to the pad numbers. You are free to specify which note number will be the first (i.e., pad [1]) (see the following section).
Synchronized playback with the CDX-1 as the master
The CDX-1 can operate in synchronization with a MIDI sequencer. Synchronization can be accomplished using MTC (MIDI Time Code).
Master and slave
When the CDX-1 plays in synchronization with a MIDI sequencer, the device that transmits the time data is called the master. The device that receives the time data transmitted by the reference device (master) and follows this data is called the slave.
When playing in synchronization with a MIDI sequencer, the CDX-1 can be used as the master (transmitting) device, but not as the slave (receiving) device. Also, the MIDI sequencer must be set as the slave (receiving) device.
Using MTC (master)
- Use a MIDI cable to connect the CDX-1 and your MIDI sequencer as shown in the diagram.
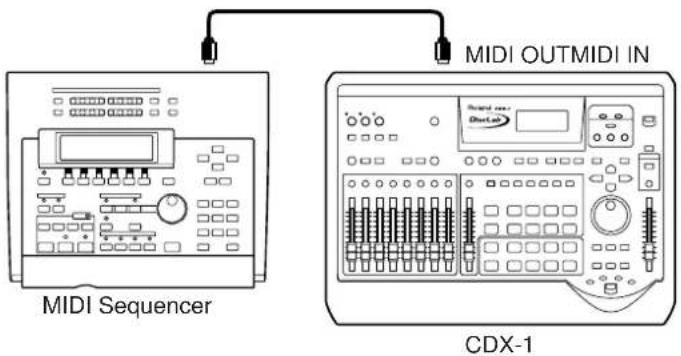
- Press [UTILITY].
The Menu are displayed as icon.
-
Press CURSOR [] to select the MIDI Parameter icon.
-
Press [YES/ENTER].
The MIDI settings screen appears.
- Press CURSOR [] to move the cursor to "Sync Out" line.
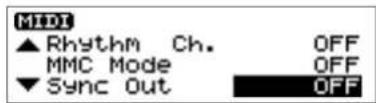

MTC (p. 205)

For details on operation of your MIDI sequencer, refer to the operating manual for your device.
- Turn the TIME/VALUE dial to select "MTC."
- Sync Out:
Select whether or not the synchronization signals that will be transmitted from the MIDI OUT/THRU connector.
Off: Synchronization signals will not be output.
MTC: MIDI Time Code will be transmitted.
- Press CURSOR [] to move the cursor to "MTC Type" line.
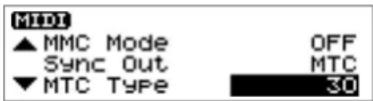
- Turn the TIME/VALUE dial to select the MTC type (30, 29N, 29D, 25, or 24).
- Sync MTC Type (MTC Type):
Check the specifications of the MIDI sequencer you are using, and match the MTC setting of the CDX-1 and your MIDI sequencer.
30: 30 frames per second, non-drop. This format is used for audio devices such as tape recorders, and for NTSC-format black and white video.
29N: 29.97 frames per second, non-drop. This format is used for NTSC-format color video.
29D: 29.97 frames per seconds, drop-frame. This format is used for NTSC-format broadcast color video.
25: 25 frames per second. This format is used for SECAM/PAL-format video and audio devices, and film.
24: 24 frames per second. This format is used in the United States for video and audio devices for and film.
-
Press [DISPLAY] to return to the Basic screen.
-
Make settings on your MIDI sequencer so that it can receive MTC from an external device, and prepare it to play back MIDI song data.
When the CDX-1 begins playing, the MIDI sequencer will also begin playing in sync with it.

Frames (p. 205), NTSC-format (p. 206), SECAM/PAL-format (p. 206)
Using MMC
This section explains how to make settings for synchronizing the playback with a computer-based MIDI sequence program that supports MMC and MTC.
Using the CDX-1 as the MMC master
- Make connections as follows.
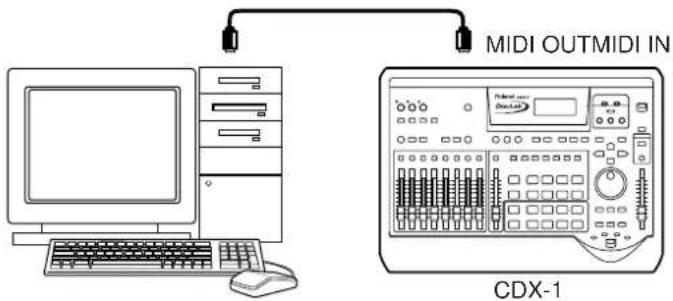
The CDX-1 will be the master for MMC and MTC.
- Press [UTILITY].
The Menu are displayed as icon.
- Press CURSOR [] to select the MIDI icon.
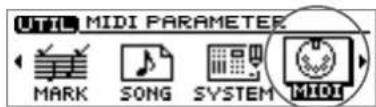
- Press [YES/ENTER].
The MIDI settings screen appears.
- Press CURSOR [] to move the cursor to "MMC Mode" line.
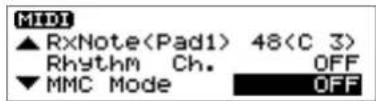
- Turn the TIME/VALUE dial to select "MASTER."
- MMC Mode: Specify how the CDX-1 will use MMC.
Off: MMC will not be transmitted.
MASTER: MMC will be transmitted. The CDX-1 will be the master for external MIDI devices.
SLAVE: MMC will be received. The CDX-1 operates as the slave of an external MIDI device.
- Make settings to allow MTC synchronization.
Use the procedure of step 5 and following in "Using MTC (master)" (p. 154).
- Make settings on your sequence software.
Make the following settings on your sequencer software. For details on making these settings, refer to the manual for your sequencer software.
- MTC: receive
- MTC type: same setting as the MTC Type selected on the CDX-1
-
MMC: receive
-
Press [DISPLAY] to return to the Basic screen.

MMC (p. 205)

Some MIDI devices do not support the CDX-1's MMC functionality. If so, it will not be possible to operate them from the CDX-1 using the methods described here. For details on the MMC functionality supported by the CDX-1, read "MIDI Implementation" (p. 212).

For details on the supported MMC functions, refer to "MIDI Implementation" (p. 212).
Using the CDX-1 as an MMC slave
1. Make the following connections.
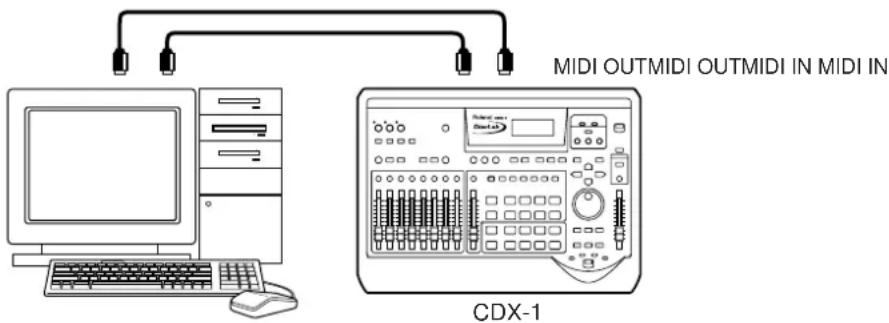
The CDX-1 will be the MMC slave, but the MTC master.
2. Press [UTILITY].
The Menu are displayed as icon.
3. Press CURSOR [] to select the MIDI icon.
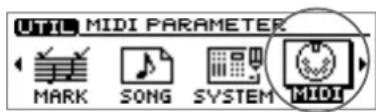
4. Press [YES/ENTER].
The MIDI settings screen appears.
5. Press CURSOR [] to move the cursor to "MMC Mode" line.
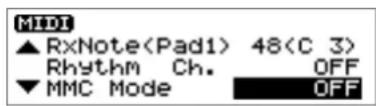
6. Turn the TIME/VALUE dial to select "SLAVE."
For details on the MMC Mode, refer to step 6 of "Using the CDX-1 as the MMC master," above.
7. Make settings to allow MTC synchronization.
Perform steps 5 and following of "Using MTC (master)" (p. 154).
8. Make settings on your sequence software.
Make the following settings on your sequencer software. For details on making these settings, refer to the manual for your sequencer software.
- MTC: receive
- MTC type: same setting as the MTC Type selected on the CDX-1
- MMC: transmit
9. Press [DISPLAY] to return to the Basic screen.
![ROLAND CDX-1 - Press [DISPLAY] to return to the Basic screen. - 1](/content/2026/05/862949/images/d88745ba46baf7eb57e2d07b3302914ab35b4b99964d7dc9c34c09a3de551d04.jpg)
For details on the MMC functionality that is supported, refer to "MIDI Implementation" (p. 212).
Using an external MIDI sound module to play the rhythm guide
The rhythm guide can be played using your favorite sounds on another MIDI device.
- Use a MIDI cable to connect the CDX-1 and your MIDI sound module as shown in the diagram.
fig.5-32e
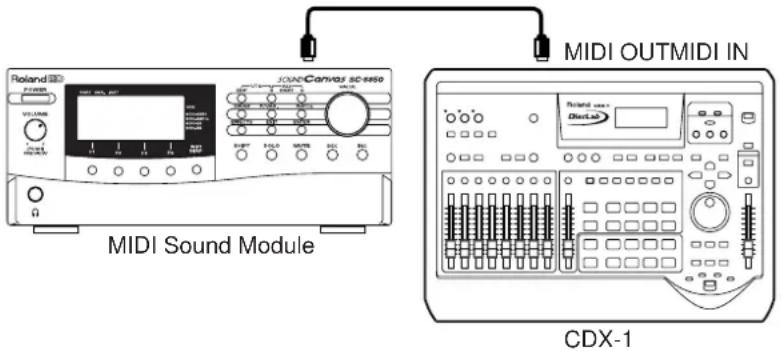
- Press [UTILITY].
The Menu are displayed as icon.
-
Press CURSOR [] to select the MIDI icon.
-
Press [YES/ENTER].
The MIDI settings screen appears.
- Press CURSOR [] to move the cursor to "Rhythm ch" line.
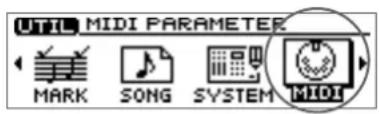
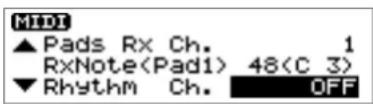
- Turn the TIME/VALUE dial to set the MIDI channel (1–16).
If you select "OFF," note messages of the rhythm guide will not be transmitted.
- Press [DISPLAY] to return to the Basic screen.
How the rhythm guide sounds correspond to note numbers
| Rhythm guide sound Note number | |
| Metronome (click: low tone) A | 1 (33) |
| Metronome (click: high tone) A#1 (34) | |
| Kick C 2 (36) | |
| Stick C#2 (37) | |
| Snare D 2 (38) | |
| Hand Clap D#2 (39) | |
| Closed hi-hat F#2 (42) | |
| Half open hi-hat G#2 (44) | |
| Open hi-hat A#2 (46) | |
If your external MIDI sound module is GS- or GM-compatible, you can use it without further settings. If it is not compatible with either of these, you will need to make settings on your external MIDI sound module to change the sounds that correspond to each note number. For details on making these settings, refer to the manual of your MIDI sound module.

"Using the rhythm guide" (p. 116)

If you are using an external MIDI sound module to play the rhythm guide, use the controls of the external MIDI sound module to adjust the volume level.
CD direct recording
Recording to a CD-R disc—CD Recorder
The CDX-1 can record an external audio source directly to a CD-R without using the audio tracks.

- You must use CDK graphics that carry these logos.


- The CDX-1 writes song data to a CD-R using Track At Once. As long as the disc has not yet been finalized, additional song data can be added to a music CD-R that has been written using Track At Once. However, the disc cannot be played in a conventional CD player until it has been finalized. (→ "Finalizing a CD-R disc"; p. 136)
No further data can be added to a CD-R that has been finalized.
- Do not use this unit for purposes that could infringe on a copyright held by a third party. Roland assumes no responsibility whatsoever with regard to any infringements of third-party copyrights arising through your use of this unit.
- The CDX-1 and its CD-R capability are designed to allow you to reproduce material to which you have copyright, or material which the copyright owner has granted you permission to copy. Accordingly, reproduction of Music CD or other copyrighted material without permission of the copyright owner avoiding technical prohibiting features of second-generation and later copying like SCMS or others constitutes copyright infringement and may incur penalties even in case such reproduction is for your own personal use and enjoyment (private use).
Consult a copyright specialist or special publications for more detailed information on obtaining such permission from copyright holders.

Using the mastering tools
You can use the mastering tools while recording an external input source. For details refer to "Adjusting the mastering tools" (p. 134).
If you wish to use the mastering tools, press [MASTERING TOOLS] to turn it on (lit). In this case, Pad/Sequence is held in internal memory will not be playable. (Pad may be extinguished and/or [SEQ PLAY] turn off.)
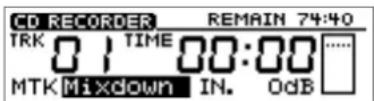
It is possible to set mastering tools for each in CD recorder screen. Press CURSOR
[ ] [ ] to select "MTK" (mastering tool patch) and "IN" (input level), turn the TIME/VALUE dial to adjust value. For details on the mastering tools, refer to "Adjusting the mastering tools" (p. 134).

Track at once (p. 18), Finalize (p. 204)
Recording an external audio source to a CD-R disc
Here we will explain an example using digital connections with an external MD recorder.
The CDX-1 has two types of DIGITAL IN connector: coaxial and optical. This allows the output of a external digital audio device such as a CD player, DAT recorder, or MD recorder to be recorded onto a CD-R in digital form.
* In order to record a digital audio signal into the CDX-1, it is not enough to simply connect the digital audio device to the OPTICAL IN or COAXIAL IN connectors. To allow digital audio signals to be recorded, you must make the setting described in “Connecting with a digital audio device” (p. 148).
- Connect the digital in jack of the CDX-1 to the digital out jack of your external MD recorder. Make sure that the type of jack is correct.
e.g., Optical Convection
MD Recorder
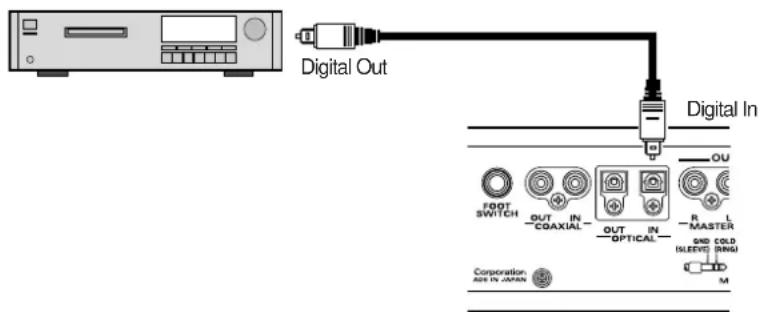
- Insert an unused CD-R disc or a CD-R disc that has been written by the CDX-1.
* When insert an CD-R disc written audio data, CD player screen appears.
* When insert an unused CD-R disc, CD recording screen (step 3) appears.
* You cannot record on a CD-R disc that has been finalized.
- Press CD RECORDER [ ].
CD recording screen appears.
CD RECORDER [ ] will blink (recording-standby mode).
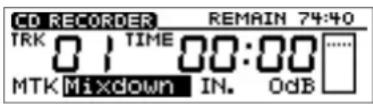
- Press INPUT SELECT [DIGITAL].
- Turn the INPUT REC LEVEL knob to adjust the level so that level meter moves as far as possible without exceeding the dotted line in the upper portion.
If INPUT REC LEVEL knob is set at in case of Digital In, input level will be
"0 dB."

- Ready a MD (mini-disk) into your external MD recorder for immediate play.
- Press PLAY [] to begin recording, and then start playback on your external MD recorder.
- To stop recording, press STOP [].
If you wish to finalize the CD-R that you recorded, use the procedure described in "Finalizing a CD-R disc" (p. 136).

It is not possible to use COAXIAL IN and OPTICAL IN inputs simultaneously. For details refer to "Panel Descriptions: INPUT section: [DIGITAL]" (p. 21).

Except for input digital, adjustment of the input is necessary. For details refer to "Adjust the input sensitivity" step1 (p. 113).

You can use the mastering tools while recording an external input source. For details refer to the column "Using the mastering tools" (p. 160).
Recording samples played using Pad Crossfade on a CD-R disc
The sound of samples played using Pad Crossfade can be recorded directly on a CD-R.
- Insert the CD-RW disc that contains the sample data you wish to record.
→ "Sampling to a pad" (p. 56)
→ "Loading Pad/Sequenece from a CD-RW disc" (p. 68)
- Insert an unused CD-R disc or a CD-R disc that has been written by the CDX-1.
* When insert an CD-R disc written audio data, CD player screen appears.
* When insert an unused CD-R disc, CD recording screen (step 3) appears.
* You cannot record on a CD-R that has been finalized.
- Press CD RECORDER [ ].
CD recording screen appears.
CD RECORDER [ ] will blink (recording-standby mode).
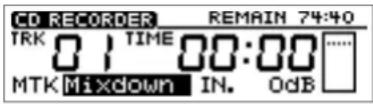
-
Press a pad, and Use the PAD/SEQ LEVEL fader to adjust the recording level so that level meter moves as far as possible without exceeding the dotted line in the upper portion.
-
Press [PAD X FADE]. [PAD X FADE] will light, and pad crossfade will be turned on.
-
Press PLAY []▶ begin recording, and press a pad to play its sample.
-
If you press another pad while the first sample is sounding, the first-played sample will fade-out, and the sample of the subsequently played pad will fade-in as it begins sounding.
-
Continue pressing pads as desired.
-
To stop recording, press STOP [].
-
If you wish to finalize the CD-R disc, follow the procedure described in "Finalizing an CD-R disc" (p. 136).

"Crossfading the pad sample you play–Pad Crossfade" (p. 71)

The mastering tools (p. 134) cannot be used.

You can connect an instrument and add your instrumental performance to the playback sound of the sequence.
Recording the sequence playback on a CD-R disc
Here's how you can record the playback sound of a sequence directly on a CD-R.
- Press PAD SEQUENCING [SEQ PLAY].
[SEQ PLAY] lights, and the Sequence Play List screen appears.
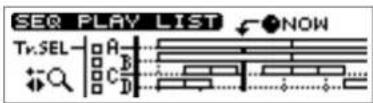
- Press CURSOR [].
A cursor appears on box A of "Tr.SEL" (track select).
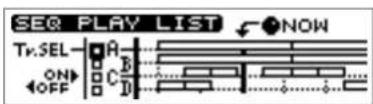
-
Press CURSOR [][] to move the cursor to the "Tr.SEL" (track select) box of the sequence track (A-D) that you wish to play.
-
Press CURSOR [].
The "Tr.SEL" (track select) box will be highlighted in black, indicating that it will play back.
To cancel your selection, press CURSOR
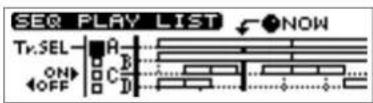
[ ◁ ]
-
If you wish to record other sequence tracks as well, repeat steps 3–4.
-
Press PLAY [] ▶ play back sequence track.
-
Use the PAD/SEQ LEVEL fader to adjust the recording level.
At this time, raise the volume as high as possible without allowing the sound to distort.
-
When you adjust the volume, press STOP [].
-
Press ZERO [] ◀et SONG POSITION to "0001-01-000" (the beginning).
Alternatively, you can move to a desired location so that recording will start from that point.
- Insert an unused CD-R disc or a CD-R disc that has been written by the CDX-1.
* When insert a CD-R disc written audio data, CD player screen appears.
* When insert an unused CD-R disc, CD recording screen (step 11) appears.
* You cannot record on a CD-R that has been finalized.
- Press CD RECORDER [ ]
CD recording screen appears.
CD RECORDER [ ] will blink (recording-standby mode).
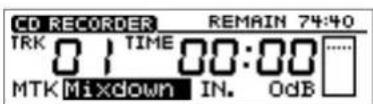
- Press PLAY [▶]
The sequence will play back, and will begin being written to the CD-R disc.
-
To stop recording, press STOP [■]
-
If you wish to finalize the CD-R disc, follow the procedure in "Finalizing a CD-R disc" (p. 136).

The mastering tools (p. 134) cannot be used.

You can connect an instrument and add your instrumental performance to the playback sound of the sequence.

In step 7, set master fader at position of "0 dB" to make the recording level moderate.
Memo...
Memo...
Appendices
Troubleshooting
If you encounter problems with the operation of the CDX-1, first check the following points. If after these steps the problem is still unresolved, consult your nearest Roland service center or authorized Roland distributor.
Problems with the sound
There is no sound whatsoever
- Is the power of the CDX-1 or any connected device turned on?
- Are all of the connections correct? (p. 32)
- Is any of the connection cables broken?
- Is the amp or mixer volume turned up?
- Is the Master fader up?
The volume level of the instrument connected to the INPUT jacks (MIC1, MIC2, GUITAR/ BASS, LINE) is too low.
- Could you be using a connection cable that contains a resistor?
Use a connection cable that does not contain a resistor.
The input source cannot be heard
• Did you adjust the SENS knob?
- Has INPUT SELECT been muted? (The INPUT SELECT indicator will be dark.)
- Has the INPUT REC LEVEL knob been set to "MIN"?
There is no sound from the audio tracks
- Are any audio track [STATUS] illuminated green?
- Are the audio track faders up?
- Are the audio tracks empty or recorded with no signal?
There is no pad (sample) sound
- Is the sample on an assigned pad (one that is illuminated)?
- Was the sound sampled with no signal?
- Are the PAD/SEQ LEVEL faders up?
- Is the volume setting (Volume) for the individual samples turned up?
Adjust the volume of a sample as described in "Adjusting the volume of a sample–Sample Level" (p. 76) - Including audio tracks and sequence tracks, are there four stereo sounds being played?
- Are samples assigned to the same mute group?
Samples in the same mute group are prevented from being played simultaneously (p. 74).
There is no sound through the headphones
- Is the headphones knob (PHONES) turned up?
- Are the MASTER fader up?
There is no sound from the sequence tracks
- Has the [SEQ PLAY] been turned on? When playing a sequence track, press PAD SEQUENCING [SEQ PLAY] and [SEQ PLAY] will be turned on. (p. 96)
- Are the PAD/SEQ LEVEL fader up?
- Are the audio tracks empty or recorded with no signal?
- Are the boxes "Tr.SEL" (track select) highlighted in black? (p. 96)
There is no sound from the audio CD
- Has the [SEQ PLAY] been turn off? When playing a audio CD, the PAD SEQUENCING [SEQ PLAY] turn off. (The [SEQ PLAY] indicator will be dark.) - Are the AUDIO CD fader (AUDIO TRACK 7-8 fader) up? (p. 52)
Unintended effects are added to the sound
- Are the internal effects turned on? Press INSERT EFFECTS [ON/OFF] to turn the effects off. (p. 142)
The sound from the pad does not stop
- Is the sample "Pad Play" setting set to "DRUM?" Because the sound is played up until the end point, it may seem that with long samples the sound indeed does not stop (p. 70).
The rhythm guide dose not sound
- Is the rhythm guide off? Press RHYTHM GUIDE [ON/OFF] to turn the rhythm guide on. (p. 116) - Is the rhythm guide level set to 0? Press RHYTHM GUIDE[PATTERN/TEMPO] to access the Rhythm Guide screen, and raise the "Level" setting (p. 116)
There is no sound only when the effects are in use
- Is the output level of the inserted effects patch raised?
Raise the output level of the patch as described in "Editing insert effect settings" (p. 142).
Sampling does not begin, even when [PAD REC] is pressed
- Is the appropriate "Start with" setting selected? (p. 61)
The effects sounds can not be recorded or sampled
- Is the effect connection set to "INPUT (NORMAL)"?
When recording or sampling, you must set the effect connection to "INPUT (NORMAL)" in order to record the sound that is processed by the effect. (p. 144)
Cannot record
- Is a high-speed compatible CD-RW disc insert?
- Is the CD-R/RW disc inserted with the correct side facing up?
Insert the CD-R/RW disc with its label facing upward.
- Did you insert a CD-R disc that has already been finalized?
Once a disc has been finalized, no further data can be recorded on it. Please use a new CD-R disc.
- Dose the CD-RW disc have insufficient remaining capacity?
Please check the remaining available recording time. (p. 39)
- Is INPUT SELECT button lit for the input source that you wish to record?
- Has the Scrub Playback function (p. 140) been turned on?
The recorded or sampled sound is very distorted or noisy
- Is the input sensitivity set appropriatery?
If the input sensitivity is too high, the recorded sound will be distorted. If it is too low, the input sound will be buried in noise. Adjust the INPUT SENS knob as high as possible without causing the peak indicator to light.
- Are the equalizer settings appropriate?
Some equalizer settings can cause the sound to distort even though the peak indicator dose not light. Readjust the equalizer (p. 132).
- Is the distortion a result of mixing multiple audio tracks?
When bouncing tracks, distortion can result from excessive levels caused by the addition of the sounds from multiple audio tracks during mixing. Lower the audio track faders.
- Is a distortion effect being applied to the sound?
- Is any INPUT SENS knob not currently in use turned up?
To avoid additional noise, completely turn down any INPUT SENS knob not in use.
The recording comes out in mono sound
- Is the sampling "Type" setting set to "MONO" (p. 61)?
- Have you selected the [STATUS] of only one audio track for recording?
In order to record in stereo, you must select two audio tracks for recording. (p. 119)
When sampling, the very beginning of the sound is missing
- Is the "Start with" setting (p. 61) value "LEV.1–8" set too high?
The insert effects can not be applied
- Is INSERT EFFECTS [ON/OFF] turned on (illuminated)? (p. 142)
- Is the "Insert Mode" setting (determining the insert effect connections) set appropriately? (p. 144)

It is not possible to apply the insert effect to the sound played by the pads.
The loop effects can not be applied
- Is the effects send level for the pad and each audio track set to 0?
Raise the effect send level as described in "Editing the loop effect settings" (p. 145)
Cannot digitally record
- Have you made settings to allow digital recording from your CD player?
At the factory settings, the CDX-1 cannot record the output of a digital audio device via the OPTICAL IN or COAXIAL IN connectors. You must change the settings as described in "In order to make a Digital recording with CD player" (p. 148).
- Dose the sampling rate of the CDX-1 match that of the digital audio device.
Set the digital audio device to a sampling rate of 44.1kHz.
- Dose the digital signal format match.
YOur digital audio device may use a non-standard digital signal format. Connect the CDX-1 to a digital audio device that supports S/P DIF.
Problems with the CD-RW disc drive
The disc tray dose not open
- Is the power turned on?
If the power is not turned on, pressing the EJECT button will not open the disc tray.
In cases when pressing the EJECT button does not open the disc tray (such as during a power failure), remove the disc as described in "If the disc tray does not open" (p. 36).
Synchronization problems
When using MTC to synchronize the CDX-1 with a MIDI sequencer, the CDX-1 must be the master device.
- Is the MIDI cable connected correctly?
• is the MIDI cable broken? - If you are synchronizing with MTC, has the other device been set to the same MTC type? (p. 154)
- Is the "Out/Thru" setting (p. 152) correct?
- Has the MIDI sequencer been set correctly?
- Is the MIDI sequencer ready to play back?
- Dose the other device support the MMC commands of the CDX-1?
Other problems
The foot switch is connected, but it is not working as intended
- Have you made the appropriate system "Foot SW" setting?
Set the "Foot SW" parameter in the System Settings screen. (p. 75, 122) - Did you connect or disconnect the foot switch while the power was turned on?
Turn the power off before connecting or disconnecting the foot switch.
Can't make Pre-Trigger settings
- Is the "Start with" (p. 62) setting appropriate?
In order to set Pre-Trigger, the "Start with" setting must be "Lev.1"- "Lev.8."
DIMM checking does not end
DIMM checking takes approximately ten minutes to be completed. You can abort DIMM checking by pressing [NO/EXIT].
Display screen is difficult to read
Adjust the contrast as described in "Adjusting the brightness of the screen display" (p. 38).
The two input sources are mixed and recorded when you record in stereo using SIMUL.
When recording in stereo using SIMUL, set the input pan to "L100" (the far left) before you record.
→ "Setting the left/right position (pan) of the input sound" (p. 113)
Pad/ Sequence was not saved to disc
Did you save the pad/sequence to disc before turning off the power?
→ "Saving pads/sequences" (p. 67)
Unable to make Audio CD
- Are you using CD-R disc?
It is impossible to make Audio CDs on CD-RW disc or on unwritable CD-ROM, Audio CD.
- Are you using CD-R disc that has been finalized?
The data on the CD-RW disc is corrupted or damaged
Damaged data may be caused by the following:
- Was the power turned off while the CD-RW disc drive was operating?
- Was a strong physical shock applied to the CD-RW drive?
Damaged or corrupted data cannot be restored.

In some cases, by selecting "FULL" for the format type (p. 112), such disks may be used as blank disks. However, since these disks may be damaged or broken, do not store important data on them.
Major Message List
• Bank is protected.
The operation cannot be executed since the pad bank is protected.
- Canceled.
The operation was canceled.
- Can't execute.
Cannot execute this operation.
- Can't insert to this point.
Cannot insert to this point.
- Can't UNDO.
Undo is not possible.
- Can't use PAD/SEQ now.
Pad/Sequence cannot be used.
- CD-ROM is not ready.
The CD-ROM from which to load the WAVE file is not ready.
- Checking disc...
- Checking...
Now checking the disc. Please wait.
- Coaxial input locked.
Locked to digital input (coaxial).
- Coaxial input unlocked.
Could not lock to digital input (coaxial).
- Completed.
The operation has been completed.
- Convert data. Are you sure?
Do you want to convert the WAVE file?
- DIMM error.
An error occurred while checking the DIMM.
- Disc is not for audio.
This disc is not made for audio.
- Disc full.
The disc is full.
- Do you want to burn a CD?
Do you want to burn the CD?
- Do you want to finalize a CD?
Do you want to finalize the CD-R?
- Do you want to initialize the disc?
The data will be initialized when you execute the format operation. Do you want to execute?
- Eject disc? (not saved)
Do you want to eject the disc without saving the song?
- Finalize failed.
Failed to finalized the disc.
- Format failed.
Failed to format the disc.
- Initialize All param. Are you sure?
OK to initialize all parameters?
- Initialize Effects param. Are you sure?
OK to initialize effect parameters?
- Initialize Global param. Are you sure?
OK to initialize global parameters?
- Initialize Mixer param. Are you sure?
OK to initialize mixer parameters?
- Insert a Destination disc.
This disc is the backup source disc.
Please insert the backup destination disc.
- Insert CD-R disc.
Insert a CD-R disc.
- Insert CD-RW disc.
Insert a CD-RW disc.
- Keep take?
Do you wish to save the data on CD-RW disc?
- Load error.
An error occurred while loading data.
Do you want load pad and sequence data?
- Marker does not exist.
There are no markers.
- Master track does not exist.
There is no master track.
- Memory full.
There is not enough memory to execute the operation.
- Memory low, cannot UNDO. Continue?
There is not enough memory to undo this operation. Execute anyway?
- MTR disc not ready.
The MTR disc is not inserted in the drive.
- No PAD/ SEQ data to save. Save anyway?
No pad/sequence data was found.
- Not CD-RW disc.
This disc is not a CD-RW disc.
- Not HIGH-SPEED CD-RW.
This is not a high-speed compatible CD-RW disc.
- Not supported.
The specified file is not in a format that can be converted.
- Not WAVE file.
The specified file is not a WAVE file.
- Now playing SCRUB.
Now scrubbing.
- Now Processing...
Now processing. Please wait.
- Now recording...
Now recording pads.
- Obey copyrights? See Manual for details.
Do you agree to obey copyright law? Please refer to the owner's manual for details.
• Optical input locked.
Locked to digital input (optical).
• Optical input unlocked.
Unable to lock to digital input (optical).
- Optimize failed.
Failed to optimize.
- Overwrite?
- Overwrite OK?
The specified pad already contains a sample, which will be lost if overwritten. Do you want to overwrite anyway?
- PAD/ SEQ does not exist.
There is no pad/sequence data.
- PADs are Full. Use next bank?
The pads of the bank are full. Do you want to use the next bank?
- Patch write failed.
Was not able to write the effect patch.
- Please insert the Destination disc.
Insert the backup destination disc.
- Please insert the Source disc.
Insert the backup source disc.
- Press [ENTER].
Press [YES/ENTER] at the timing you wish to set.
- Read error.
An error occurred while reading.
- Read only disc.
This disc is a read-only disc.
- Reading...
Now reading. Please wait.
- Reading Disc Information.
Now reading disc information. Please wait.
- Recordable CD-R not ready
A recordable CD-R is not ready.
- Save error.
An error occurred while saving.
- Save PAD/ SEQ data?
Do you want to save the pad/sequence data?
- Save SONG before eject?
Do you want to save the song before ejecting?
- Save SONG before shutdown?
Do you want to save the song before shutdown?
- Saving PAD/ SEQ.
Now saving the pad/sequence data.
- Shutdown?
Do you want to shutdown?
- Song end.
The end of the song has been reached.
- Stop recorder.
Please stop the recorder.
- This is a blank disc. Do you want to format?
This is a new disc. Do you wish to format it?
- This is not a MTR disc. Insert a Destination disc.
This disc is not for MTR.
Please insert the correct backup destination disc.
- This is not a MTR disc. Insert a Source disc.
This disc is not an MTR disc.
Please insert the correct backup source disc.
- This PAD contains data. Cannot overwrite.
This pad already exists.
- There is no data on the PADS in this Bank.
There is no pad in this bank.
- Unknown disc
This is an unknown type of disc.
- Waiting trigger...
Waiting for input level to trigger recording.
- Waiting for PAD to start.
Waiting for pad input to trigger recording.
- Waiting play...
Waiting for sequence start to trigger recording.
- Waiting eject...
Waiting for the disc to be ejected.
- Waiting for PAD...
Waiting for pad input.
- Write error.
An error occurred while writing.
- Writing...
Now writing. Please wait.
- You'll lose MASTER TR. Are you sure?
The master track data will be lost if you execute. OK to execute?
- You'll lose PAD/SEQ data. Go to MIXDOWN Mode?
Pad/Sequence data will be lost if you move to Mixdown mode. Is this OK?
- You'll lose PAD/SEQ data during Shutdown. Sure?
Pad/Sequence data will be lost if you shutdown. OK to shutdown?
- You'll lose PAD/ SEQ data during Diagnosis. Sure?
Pad/Sequence data will be lost if you execute DIMM checking. OK to execute?
- You'll lose PAD/ SEQ data. Are you sure?
Pad/Sequence data will be lost. OK?
Rhythm Pattern List
Beat No. Name Measure
| 1/1 01 Metronom 1 |
| 2/1 01 Metronom 1 |
| 3/1 01 Metronom 1 |
| 4/1 01 Metronom 1 |
| 5/1 01 Metronom 1 |
| 6/1 01 Metronom 1 |
| 7/1 01 Metronom 1 |
| 8/1 01 Metronom 1 |
Beat No. Name Measure
| 1/2 01 Metronom 1 |
| 2/2 01 Rockbly 2 |
| 2/2 02 Metronom 1 |
| 3/2 01 Metronom 1 |
| 4/2 01 Metronom 1 |
| 5/2 01 Metronom 1 |
| 6/2 01 Metronom 1 |
| 7/2 01 Metronom 1 |
| 8/2 01 Metronom 1 |
Beat No. Name Measure
| 1/4 01 Metronom 1 |
| 2/4 01 Bossa 1 4 |
| 2/4 02 Bossa 2 2 |
| 2/4 03 Bossa 3 4 |
| 2/4 04 Metronom 1 |
| 3/4 01 Rock 1 2 |
| 3/4 02 Rock 2 2 |
| 3/4 03 Rock 3 4 |
| 3/4 04 Jazz 2 |
| 3/4 05 Ballad 2 |
| 3/4 06 Gospel 2 |
| 3/4 07 Metronom 1 |
Beat No. Name Measure
| 4/4 01 Rock 1 2 | |
| 4/4 02 Rock 2 2 | |
| 4/4 03 Rock 3 2 | |
| 4/4 04 Rock 4 2 | |
| 4/4 05 Rock 5 2 | |
| 4/4 06 Rock 6 2 | |
| 4/4 07 Rock 7 2 | |
| 4/4 08 Rock 8 2 | |
| 4/4 09 Rock 9 4 | |
| 4/4 10 Rock 10 2 | |
| 4/4 11 Rock 11 2 | |
| 4/4 12 Rock 12 1 | |
| 4/4 13 Rock 13 2 | |
| 4/4 14 Rock 14 2 | |
| 4/4 15 Rock 15 2 | |
| 4/4 16 Heavy 1 2 | |
| 4/4 17 Heavy 2 2 | |
| 4/4 18 Heavy 3 1 | |
| 4/4 19 Ballad 1 1 | |
| 4/4 20 Ballad 2 2 | |
| 4/4 21 Blues 1 2 | |
| 4/4 22 Blues 2 2 | |
| 4/4 23 Blues 3 2 | |
| 4/4 24 Shuffle 1 | |
| 4/4 25 LtnRock 1 1 | |
| 4/4 26 LtnRock 2 1 | |
| 4/4 27 Bluegras | 1 |
| 4/4 28 Country | 2 |
| 4/4 29 Fusion | 2 |
| 4/4 30 Jazz 1 | 2 |
| 4/4 31 Jazz 2 | 2 |
| 4/4 32 Gospel 2 | |
| 4/4 33 Soul 1 | 1 |
| 4/4 34 Soul 2 | 1 |
| 4/4 35 Soul 3 | 2 |
| 4/4 36 Soul 4 | 2 |
| 4/4 37 Soul 5 | 2 |
| 4/4 38 Soul 6 | 1 |
| 4/4 39 Soul 7 | 1 |
| 4/4 40 Soul 8 | 1 |
Beat No. Name Measure
| 4/4 41 Funk 1 2 |
| 4/4 42 Funk 2 2 |
| 4/4 43 Funk 3 2 |
| 4/4 44 Funk 4 2 |
| 4/4 45 Funk 5 2 |
| 4/4 46 Funk 6 2 |
| 4/4 47 Funk 7 2 |
| 4/4 48 Funk 8 1 |
| 4/4 49 Funk 9 2 |
| 4/4 50 Funk 10 2 |
| 4/4 51 Reggae 2 |
| 4/4 52 Samba 1 2 |
| 4/4 53 Samba 2 4 |
| 4/4 54 EleRock 1 2 |
| 4/4 55 EleRock 2 2 |
| 4/4 56 Techno 1 2 |
| 4/4 57 Techno 2 2 |
| 4/4 58 Techno 3 1 |
| 4/4 59 House 1 1 |
| 4/4 60 House 2 2 |
| 4/4 61 House 3 2 |
| 4/4 62 Eurobt 1 1 |
| 4/4 63 Eurobt 2 1 |
| 4/4 64 Eurobt 3 2 |
| 4/4 65 Eurobt 4 2 |
| 4/4 66 Metronom 1 |
5/4 01 Rock 2
5/4 02 Jazz 1
5/4 03 Metronom 1
6/4 01 Rock 1
6/4 02 Metronom 1
7/4 01 Rock 1 2
7/4 02 Rock 2 1
7/4 03 Metronom 1
8/4 01 Metronom 1
Beat No. Name Measure
| 1/8 01 Metronom 1 | |
| 2/8 01 Metronom 1 | |
| 3/8 01 Metronom 1 | |
| 4/8 01 Metronom 1 | |
| 5/8 01 Rock 4 | |
| 5/8 02 Metronom 1 | |
| 6/8 01 Rock 1 2 | |
| 6/8 02 Rock 2 2 | |
| 6/8 03 Blues | 4 |
| 6/8 04 Metronom 1 | |
| 7/8 01 Rock 1 4 | |
| 7/8 02 Rock 2 2 | |
| 7/8 03 Metronom 1 | |
| 8/8 01 Metronom 1 | |
Mixer effect parameter functions
EQ (Equalizer): This is a two-band equalizer that is independent for each track.
Parameter (full name) Setting Function
| EQ StereoLink (EQ Stereo Link) OFF, ON When EQ Stereo Link is ON, you can have the setting for a pair of audio tracks, linked so that they adjust in the same way. |
| EQ On/Off (EQ On/Off) OFF, ON This parameter turns the equalizer effect on/off. |
| Low Gain (Low Gain) -12–+12 dB This sets the gain (-12 to +12 dB) for the low-range equalizer (shelving type). |
| Low Freq (Low Frequency) 40 Hz–1.5 kHz This sets the center frequency (40Hz to 1.5 kHz) for the low-range equalizer (shelving type). |
| High Gain (High Gain) -12–+12 dB This sets the gain (-12 to +12 dB) for the high-range equalizer (shelving type). |
| High Freq (High Frequency) 500–18 kHz This sets the center frequency (500 Hz to 18 kHz) for the high-range equalizer (shelving type). |
Loop Effect
CHORUS/DELAY/DOUBL'N (Chorus / Delay / Doubling)
Parameter (full name) Setting Function
| Effect Type CHORUS A sound with a subtly shifted pitch is added to the direct sound, making the final output sound thicker and broader. | ||
| DELAY This creates a thicker sound by applying a delayed sound to the direct sound. | ||
| DOUBL'N By adding a slightly time-delayed sound to the direct sound, this produces the impression that multiple sources are sounding together (a “doubling” effect). The delayed sound will be output from the side opposite to which the playback track has been panned. | ||
| ■ When “CHORUS” is selected | ||
| Rate | 0–100 Adjusts the rate of the Chorus effect. | |
| Depth | 0–100 Adjusts the depth of the Chorus effect. | |
| Pre Delay | 0.5–50 mS | Adjusts the time needed for the effect sound to be output after the direct sound has been output. |
| Effect Level | 0–100 Adjusts the volume of the effect sound. | |
| ■ When “DELAY” is selected | ||
| Delay Time 10–1000 mS This parameter adjusts the delay time (i.e., the interval for which sound is delayed). | ||
| Feedback | 0–100 This parameter adjusts the amount of feedback. Changing the amount of feedback causes the number of time the delayed sound is repeated to change as well. | |
| Effect Level | 0–100 This adjusts the volume of the delay sound. | |
| Reverb Send | 0–100 Adjust the volume of the reverb that is applied to the delayed sound. For details on reverb, refer to “Reverb” (p. 146). | |
| ■ When “DOUBL'N” is selected | ||
| Delay Time | 0.5–50 mS | This parameter adjusts the delay time (i.e., the interval for which sound is delayed). |
| Effect Level | 0–100 This adjusts the volume of the delay sound. | |
REVERB (Reberb): This feature adds reverberation to the sound to model the size of space such as a hall and a room.
Parameter (full name) Setting Function
| Reverb Type | ROOM | Models the reverberation in a small room. |
| HALL | Models the reverberation in a concert hall. | |
| Reverb Time | 0.1–10 | This parameter adjusts the duration (time) of the reverb. |
| Reverb Tone | -12–+12 | Adjusts the tone. |
Insert effect algorithm list
Here we will explain the effects used by each algorithm and the order in which they are connected. The effect groups and the algorithms in each group are shown below.
To select the desired algorithm, refer to the separate "Effect patch list" and switch to a patch that uses the desired algorithm.
For details on how to switch patches, refer to "Using the insert effects" (p. 141).
Effect group Algorithm
| LINE | 1. STEREO MULTI .....(p. 176)2. LO-FI BOX .....(p. 178) |
| SIMUL | 3. VO+GT.AMP (Vocal+Guitar Amp) .....(p. 180)4. VO+AC.MDL (Vocal+Acoustic Modeling) .....(p. 182)5. VO+ACOUSTIC (Vocal+Acoustic) .....(p. 184) |
| GUITAR/BASS | 6. COSM GUITAR AMP .....(p. 185)7. ACOUSTIC MDL (Acoustic Guitar Modeling) .....(p. 188)8. BASS MDL (Bass Guitar Modeling) .....(p. 190)9. ACOUSTIC GUITAR .....(p. 192)10. BASS MULTI (Bass Guitar Multi) .....(p. 194)11. COSM BASS AMP (COSM Bass Guitar Amp) .....(p. 196) |
| MIC | 12. VOCAL MULTI .....(p. 199)13. VOICE TRANCEFORMER .....(p. 201) |
1. STEREO MULTI
This algorithm connects seven types of effect, all in full stereo.
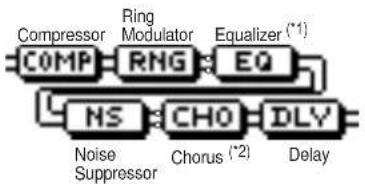
flowchart
graph LR
    A["Compressor"] --> B["RNG"]
    B --> C["EQ"]
    C --> D["NS"]
    D --> E["Chorus (*2)"]
    E --> F["DLY"]
    G["Noise Suppressor"] --> D
    H["Ring Modulator"] --> B
    I["Equalizer (*1)"] --> C
    J["Delay"] --> F
*1 Equaliser can be replaced with Wad.
*2 Chorus can be replaced one of the following effects.

Parameter (full name) Setting Function
• COMP (Compressor): Compressor the entire output signals when the input volume exceeds a specified value.
Effect On/Off (Effect On/Off) OFF, ON This parameter turns the compressor effects on/off.
Sustain (Sustain) 0–100 Adjusts the range (time) over which low-level signals are boosted. Larger values will result in longer sustain.
Attack (Attack) 0–100 Adjusts the strength of the attack. Larger values will result in a sharper attack, creating a more clearly defined sound.
Level (Output Level) 0–100 Adjusts the volume.
- RNG (Ring Modulator): This creates a bell-like sound. The sound will be unmusical and lack distinctive pitches.
Effect On/Off (Effect On/Off) OFF, ON This parameter turns the ring modulator effect on/off.
Frequency (Frequency) 0–100 This adjusts the frequency of the internal oscillator.
Effect Level (Effect Level) 0–100 This adjusts the volume of the effect sound.
Direct Level (Direct Level) 0–100 This adjusts the volume of the direct sound.
• EQ (Equalizer): A 4-band equalizer.
Effect On/Off (Effect On/Off) OFF, ON This parameter turns the equalizer effect on/off.
Low Gain (Low Gain) -20—+20 dB This parameter sets the gain (amount of boost or cut) for the bass equalizer.
Low-Mid Gain (Low-Mid Gain) -20→+20 dB This parameter sets the gain (amount of boost or cut) for the low-midrange equalizer.
| Low-Mid Freq (Low-Mid Freq) | 100–10.0 kHz | This parameter sets the central frequency for the low-midrange equalizer. |
| Low-Mid Q (Low-Mid Q) | 0.5–16 | This parameter sets the range of change in gain for the frequency set by “Low-Mid Freq.” A larger value results in a narrower range of change. |
| High-Mid Gain (High-Mid Gain) | -20→+20 dB | This parameter sets the gain (amount of boost or cut) for the high-midrange equalizer. |
| High-Mid Freq (High-Mid Freq) | 100–10.0 kHz | This parameter sets the central frequency for the high-midrange equalizer. |
| High-Mid Q (High-Mid Q) | 0.5–16 | This parameter sets the range of change in gain for the frequency set by “High-Mid Freq.” A larger value results in a narrower range of change. |
High Gain (High Gain) -20–+20 dB This parameter sets the gain (amount of boost or cut) for the treble equalizer.
Level (Output Level) -20—+20 dB This parameter adjusts the volume after the equalizer stage.
- WAH (Wah): The wah effect creates a unique tone by changing the frequency response characteristics of a filter.
Effect On/Off (Effect On/Off) OFF, ON This parameter turns the wah effect on/off.
| Polarity (Polarity) UP The frequency of the filter will rise.DOWN The frequency of the filter will fall. | |
| Sensitivity (Sens) 0–100 This adjusts the sensitivity at which the filter will change in the directiondetermined by the polarity setting. Higher values will result in a stronger response. With a setting of “0,” the strength of picking will have no effect. | |
| Frequency (Frequency) 0–100 This adjusts the center frequency of the Wah effect. | |
| Peak (Peak) 0–100 Adjusts the way in which the wah effect applies to the area around thecenter frequency. Lower values will produce a wah effect over a wide area around the center frequency. Higher values will produce a wah effect in anarrow area around the center frequency.With a value of “50” a standard wah sound will be produced. | |
| Level (Level) 0–100 Adjusts the volume. |
- NS (Noise Suppressor): This effect reduces the noise and hum.
Effect On/Off (Effect On/Off) OFF, ON This parameter turns the noise suppressor effect on/off.
| Threshold (Threshold) * 0–100 Adjust this parameter as appropriate for the volume of the noise. If thenoise level is high, a higher setting is appropriate. If the noise level is low,a lower setting is appropriate. Adjust this value until the decay of the soundis as natural as possible. |
| Release (Release) 0–100 Adjusts the time from when the noisesuppressor begins to function untilvolume reaches “0.” |

High settings for the Threshold parameter may result in there being no sound when you play with your instruments volume turned down.
- Modulation effect type
The Modulation effect type can be selected from the following effects. For details on each effect, refer to “Available types of modulation and their effect” (p. 202).
○ FLANGER (Flanger) : The flanger effect gives a twisting, jet-airplane-like character to the sound.
○ CHORUS (Chorus) : A sound with a subtly shifted pitch is added to the direct sound, making the final output sound thicker and broader.
○ PHASER (Phaser) : By adding varied-phase portions, the phaser effect gives a whooshing, swirling character to the sound.
○ P.SHIFT (Pitch Shifter) : This effect changes the pitch of the original sound (up or down) within a range of two octaves.
○ DOUBL'N (Doubling) : An effect of multiple sounds heard together (a doubling effect) is produced.
○ TRM/PAN (Tremolo/Pan) : Tremolo is an effect that creates a cyclic change in volume.
Pan cyclically moves the stereo position between left and right (when stereo output is used).
- DLY (Delay): This creates a thicker sound by applying a delayed sound to the direct sound.
Effect On/Off (Effect On/Off) OFF, ON This parameter turns the delay effect on/off.
| Effect Type (Type) | SINGLE TAP | This is a simple delay. The delayed sound is panned across the left and right channels. This will be effective when stereo output is used. |
| Delay Time (Delay Time) | SINGLE: 1–1400 mS TAP: 1–700 mS | This parameter adjusts the delay time (i.e., the interval for which sound is delayed). |
| Feedback (Feedback) | 0–100 | This parameter adjusts the amount of feedback. Changing the amount of feedback causes the number of time the delayed sound is repeated to change as well. |
| Effect Level (Effect Level) | 0–120 This adjusts the volume of the delay sound. | |
2. LO-FI BOX
This allows you to model sounds that appear to be playing on an AM radio, the sounds of old records played on an old-fashioned gramophone, and even extreme deformations of the sound produced by a Lo-Fi Digital.
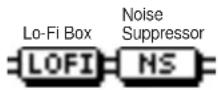
Parameter (full name) Setting Function
- LOFI (Lo-Fi Box): Produces a lo-fi sound.
Effect On/Off (Effect On/Off) OFF, ON This parameter turns the lo-fi box effect on/off.
| Type (Type) RADIO The sound will appear to be heard from an AM radio. By adjusting “Tuning,” you can model the sounds that occur when you adjust the tuning frequency of the radio.PLAYER The sound will appear to be heard from a gramophone. The noise caused by scratches and dust on the record are is modeled.DIGITAL This allows you to create a “lo-fi” sound by lowering the sample rate and/or decreasing the number of bits. Realtime modify filters connected in series allow you to reshape the sound freely. |
■ When "RADIO" or "PLAYER" is selected
Tuning (Tuning) 0–100 This is a parameter for "RADIO." It models the sounds that occur when you adjust the tuning frequency of an AM radio.
| Wow Flutter (Wow Flutter) 0–100 This is a parameter for “PLAYER.” It models the wow and flutter which occur when the speed of the turntable is not constant. |
Noise (Noise) 0–100 This models noise.
Filter (Filter) 0–100 Adjusts the filter.
| D:E Balance (Effect Balance) | 100:0–0:100 | This adjusts the volume balance of the direct and effect sounds. |
| ■ When “DIGITAL” is selected | ||
| Pre Filter (Pre Filter) | OFF, ON | This filter decreases digital distortion. By turning this off, you can create an extremely lo-fi sound that includes aliasing. |
| Sample Rate (Sample Rate) | OFF, 1/2–1/32 | Modify the sample rate. If this is turned off, the sample rate will be the same as the sample rate of the currently selected song. |
| Bit (Bit) * | OFF, 15–1 | Modify the number of data bits. If this is turned off, the number of data bits will be unchanged. |
| Post Filter (Post Filter) | OFF, ON | This filter decreases the digital distortion produced by lo-fi. By turning this off, you can create an extremely lo-fi sound. |
| Effect Level (Effect Level) | 0–100 Adjust the volume of the lo-fi sound. | |
| Direct Level (Direct Level) | 0–100 Adjust the volume of the direct sound. | |
| Modify Filter (Modify Filter) | The sound is passed through a filter to remove unwanted sound according to the frequency specified by Cutoff Freq (cutoff frequency). | |
| OFF | The Modify Filter will not be used. | |
| LPF | A Low Pass Filter will be applied to pass the sound that is below the specified frequency. | |
| BPF | A Band Pass Filter will be applied to pass the sound that is in the region of the specified frequency. | |
| HPF | A High Pass Filter will be applied to pass the sound that is above the specified frequency. | |
| Cutoff Freq (Cutoff Freq) | 0–100 Adjust the cutoff frequency. | |
| Resonance (Resonance) | 0–100 Adjust the resonance. | |
| Gain (Gain) | 0–24 dB | Adjust the volume level of the sound that has passed through the modify filter. |

If an extremely low number of bits is selected, loud noise may appear even when there is no sound, depending on the input source. In such cases, raise the threshold of the noise suppressor.
- NS (Noise Suppressor): This effect reduces the noise and hum.
Effect On/Off (Effect On/Off) OFF, ON This parameter turns the noise suppressor effect on/off.
| Threshold (Threshold) * 0–100 Adjust this parameter as appropriate for the volume of the noise. If thenoise level is high, a higher setting is appropriate. If the noise level is low,a lower setting is appropriate. Adjust this value until the decay of the soundis as natural as possible. |
| Release (Release) 0–100 Adjusts the time from when the noise suppressor begins to function untilvolume reaches “0.” |

* High settings for the Threshold parameter may result in there being no sound when you play with your instruments volume turned down.
■ Creating lo-fi sounds
Follow the steps below to create lo-fi sounds essential to dance music including hip-hop and DJ music.
Lo-Fi Box
- Turn Pre Filter and Post Filter off.
- Set Sample Rate and Bit to relatively low values. Note, however, an excessively low value for Bit may cause big noise even in the silent mode. In that case, increase Threshold (Thresh) of Noise Suppressor.
3. VO+GT.AMP (Vocal+Guitar Amp)
This algorithm is for use when simultaneously recording a vocal and electric guitar. For the guitar, you can produce an amp sound using a preamp and speaker modeling.
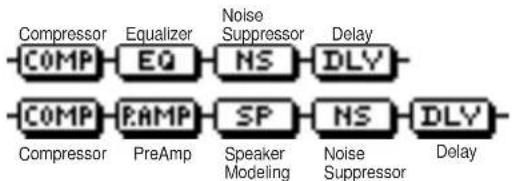
flowchart
graph LR
    A["Compressor"] --> B["Equalizer"]
    B --> C["Noise Suppressor"]
    C --> D["Delay"]
    E["COMP"] --> F["EQ"]
    F --> G["NS"]
    G --> H["DFY"]
    I["COMP"] --> J["FAMP"]
    J --> K["SP"]
    K --> L["NS"]
    L --> M["DFY"]
    N["Compressor"] --> O["PreAmp"]
    O --> P["Speaker Modeling"]
    P --> Q["Noise Suppressor"]
    Q --> R["Delay"]
■ MIC
Parameter (full name) Setting Function
• COMP (Compressor): Compressor the entire output signals when the input volume exceeds a specified value.
Effect On/Off (Effect On/Off) OFF, ON This parameter turns the compressor effects on/off.
Sustain (Sustain) 0–100 Adjusts the range (time) over which low-level signals are boosted. Larger values will result in longer sustain.
Attack (Attack) 0–100 Adjusts the strength of the attack. Larger values will result in a sharper attack, creating a more clearly defined sound.
Level (Output Level) 0–100 Adjusts the volume.
• EQ (Equalizer): A 4-band equalizer.
Effect On/Off (Effect On/Off) OFF, ON This parameter turns the equalizer effect on/off.
Low Gain (Low Gain) -20–+20 dB This parameter sets the gain (amount of boost or cut) for the bass equalizer.
Low-Mid Gain (Low-Mid Gain) -20—+20 dB This parameter sets the gain (amount of boost or cut) for the low-midrange equalizer.
Low-Mid Freq (Low-Mid Freq) 100–10.0 kHz This parameter sets the central frequency for the low-midrange equalizer.
| Low-Mid Q (Low-Mid Q) | 0.5–16 | This parameter sets the range of change in gain for the frequency set by “Low-Mid Freq.” A larger value results in a narrower range of change. |
| High-Mid Gain (High-Mid Gain) | -20→+20 dB | This parameter sets the gain (amount of boost or cut) for the high-midrange equalizer. |
| High-Mid Freq (High-Mid Freq) | 100–10.0 kHz | This parameter sets the central frequency for the high-midrange equalizer. |
| High-Mid Q (High-Mid Q) | 0.5–16 | This parameter sets the range of change in gain for the frequency set by “High-Mid Freq.” A larger value results in a narrower range of change. |
| High Gain (High Gain) -20→+20 dB This parameter sets the gain (amount of boost or cut) for the treble equalizer. | ||
Level (Output Level) -20—+20 dB This parameter adjusts the volume after the equalizer stage.
- NS (Noise Suppressor): This effect reduces the noise and hum.
Effect On/Off (Effect On/Off) OFF, ON This parameter turns the noise suppressor effect on/off.
| Threshold (Threshold) * | 0–100 | Adjust this parameter as appropriate for the volume of the noise. If the noise level is high, a higher setting is appropriate. If the noise level is low, a lower setting is appropriate. Adjust this value until the decay of the sound is as natural as possible. |
| Release (Release) | 0–100 | Adjusts the time from when the noise suppressor begins to function until volume reaches “0.” |

* High settings for the Threshold parameter may result in there being no sound when you play with your instruments volume turned down.
- DLY (Delay): This creates a thicker sound by applying a delayed sound to the direct sound.
Effect On/Off (Effect On/Off) OFF, ON This parameter turns the delay effect on/off.
Delay Time (Delay Time) SINGLE: 1–1400 mS This parameter adjusts the delay time (i.e., the interval for which sound is delayed).
TAP: 1–700 mS
Feedback (Feedback) 0–100 This parameter adjusts the amount of feedback. Changing the amount of feedback causes the number of time the delayed sound is repeated to change as well.
Effect Level (Effect Level) 0–120 This adjusts the volume of the delay sound.
■ GUITAR
Parameter (full name) Setting Function
- COMP (Compressor): Compressor the entire output signals when the input volume exceeds a specified value.
For details on the parameters, refer to "COMP" on the preceding page.
- P.AMP (Preamp): Adjust the distortion and tone of the guitar sound.
Effect On/Off (Effect On/Off) OFF, ON This parameter turns the preamp effect on/off.
Amp Type (Amp Type) *1 Refer to the column on page 187. Selects the type of the guitar amplifier that will be modeled.
Volume (Volume) 0–100 Adjusts the volume and distortion of the amp.
Bass (Bass) 0–100 Adjusts the tone for the low frequency range.
Middle (Middle) *2 0–100 Adjusts the tone for the middle frequency range.
Treble (Treble) 0–100 Adjusts the tone for the high frequency range.
Presence (Presence) *3 0–100 Adjusts the tone for the ultra high frequency range.
Master (Master) 0–100 Adjusts the volume of the entire preamp.
Bright (Bright) *4 OFF, ON Turns the bright setting on/off. Bright is switched on to create a lighter and crisper tone.
Gain (Gain) *5 LOW, MIDDLE, HIGH Adjusts the distortion of the amp. Distortion will successively increase for settings of "LOW," "MIDDLE" and "HIGH."

*1 When all Bass, Middle and Treble are set to "0," no sound may be produced depending on the "Amp Type" setting.
*2 If you have selected "MATCH" as the type, the middle control will have no effect.
*3 If you have selected "MATCH" or "VO DRV" as the type, raising presence will cut the high range (the value will change from "0" to "-100").
*4 Depending on the "Amp Type" setting, this may not be displayed.
*5 successively increase for settings of "LOW", "MIDDLE" and set to "MIDDLE." So, normally set it to "MIDDLE."
- SP (Speaker modeling): This models the characteristics of various types of speakers.
Effect On/Off (Effect On/Off) OFF, ON This parameter turns the speaker modeling effect on/off.
| Speaker Type (Speaker Type) | Refer to the column on page 187. Selects the type of speaker that will be modeled. | |
| Mic Setting (Mic Setting) | CENTER, 1–10 cm | This models the microphone position. “CENTER” models the condition that the microphone is set in the middle of the speaker cone. “1–10 cm” means that the microphone is moved away from the center of the speaker cone. |
| Mic Level (Mic Level) | 0–100 Adjusts the volume of the microphone. | |
| Direct Level (Direct Level) | 0–100 Adjusts the volume of the direct sound. | |
- NS (Noise Suppressor): This effect reduces the noise and hum.
For details on the parameters, refer to "NS" on the preceding page.
- DLY (Delay): This creates a thicker sound by applying a delayed sound to the direct sound.
For details on the parameters, refer to "DLY," above.
4. VO+AC.MDL (Vocal+Acoustic Guitar Modeling)
This algorithm is for use when simultaneously recording a vocal and electric guitar. For the guitar, you can make the electric guitar sound like an acoustic guitar.
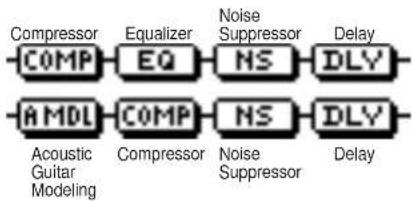
flowchart
graph LR
    A["Compressor"] --> B["COMP"]
    C["Equalizer"] --> D["EQ"]
    E["Noise Suppressor"] --> F["NS"]
    G["Delay"] --> H["DLY"]
    I["ACoustic Guitar Modeling"] --> J["COMP"]
    K["Compressor"] --> L["NS"]
    M["Noise Suppressor"] --> N["DLY"]
    O["Delay"] --> P["Delay"]
■ MIC
Parameter (full name) Setting Function
- COMP (Compressor): Compressor the entire output signals when the input volume exceeds a specified value.
Effect On/Off (Effect On/Off) OFF, ON This parameter turns the compressor effects on/off.
Sustain (Sustain) 0–100 Adjusts the range (time) over which low-level signals are boosted. Larger values will result in longer sustain.
Attack (Attack) 0–100 Adjusts the strength of the attack. Larger values will result in a sharper attack, creating a more clearly defined sound.
Level (Output Level) 0–100 Adjusts the volume.
• EQ (Equalizer): A 4-band equalizer.
Effect On/Off (Effect On/Off) OFF, ON This parameter turns the equalizer effect on/off.
Low Gain (Low Gain) -20—+20 dB This parameter sets the gain (amount of boost or cut) for the bass equalizer.
Low-Mid Gain (Low-Mid Gain) -20—+20 dB This parameter sets the gain (amount of boost or cut) for the low-midrange equalizer.
Low-Mid Freq (Low-Mid Freq) 100–10.0 kHz This parameter sets the central frequency for the low-midrange equalizer.
| Low-Mid Q (Low-Mid Q) | 0.5–16 | This parameter sets the range of change in gain for the frequency set by “Low-Mid Freq.” A larger value results in a narrower range of change. |
| High-Mid Gain (High-Mid Gain) | -20—+20 dB | This parameter sets the gain (amount of boost or cut) for the high-midrange equalizer. |
| High-Mid Freq (High-Mid Freq) | 100–10.0 kHz | This parameter sets the central frequency for the high-midrange equalizer. |
| High-Mid Q (High-Mid Q) | 0.5–16 | This parameter sets the range of change in gain for the frequency set by “High-Mid Freq.” A larger value results in a narrower range of change. |
High Gain (High Gain) -20→+20 dB This parameter sets the gain (amount of boost or cut) for the treble equalizer.
Level (Output Level) -20—+20 dB This parameter adjusts the volume after the equalizer stage.
- NS (Noise Suppressor): This effect reduces the noise and hum.
Effect On/Off (Effect On/Off) OFF, ON This parameter turns the noise suppressor effect on/off.
| Threshold (Threshold) * | 0–100 | Adjust this parameter as appropriate for the volume of the noise. If the noise level is high, a higher setting is appropriate. If the noise level is low, a lower setting is appropriate. Adjust this value until the decay of the sound is as natural as possible. |
| Release (Release) | 0–100 | Adjusts the time from when the noise suppressor begins to function until volume reaches “0.” |

High settings for the Threshold parameter may result in there being no sound when you play with your instruments volume turned down.
- DLY (Delay): This creates a thicker sound by applying a delayed sound to the direct sound.
Effect On/Off (Effect On/Off) OFF, ON This parameter turns the delay effect on/off.
Delay Time (Delay Time) SINGLE: 1–1400 mS This parameter adjusts the delay time (i.e., the interval for which sound is delayed).
TAP: 1–700 mS
Feedback (Feedback) 0–100 This parameter adjusts the amount of feedback. Changing the amount of feedback causes the number of time the delayed sound is repeated to change as well.
Effect Level (Effect Level) 0–120 This adjusts the volume of the delay sound.
■ GUITAR
Parameter (full name) Setting Function
- A.MDL (Acoustic Guitar Modeling): This models the sound of an acoustic guitar.
Effect On/Off (Effect On/Off) OFF, ON This parameter turns the acoustic guitar modeling effect on/off.
Pick Up Type (Pick Up Type) SINGLE, HUMBUCK Set this to the type of pickup on the connected guitar.
Character (Character) STD This is a normal acoustic guitar.
| JUMBO This is an acoustic guitar with a body that is bigger than STANDARD. The bass sound is powerful. | ||
| ENHANCE This is an acoustic guitar that with a more responsive attack, so the guitar will retain more of its prominence in almost any situation. | ||
| PIEZO | This models the sound you would get from a pickup installed on an electric-acoustic guitar.During the attack, a certain amount of compression will be applied. | |
| Top-Hi (Top-Hi) | -100→+100 * | Adjust the level of the direct sound from the strings. That is, it adjusts the harmonic contents. |
| Top-Mid (Top-Mid) | -100→+100 * | This adjusts the interference to the strings made by the top plate. That is, it adjusts the attack sense. |
| Body (Body) | -100→+100 * | This adjusts the resonance of the sound caused by the body. That is, it adjusts the softness and fatness of the sound which is the typical characteristics of acoustic guitars. |
| Level (Level) | 0–100 This adjusts the volume of the acoustic guitar modeling. | |

If Top-Hi, Top-Mid, and Body are all set to “-100”, there will be no sound.

If you set the pickup selector of your guitar to the front position, the desired effect will be easier to achieve.
- COMP (Compressor): Compressor the entire output signals when the input volume exceeds a specified value. For details on the parameters, refer to "COMP" on the preceding page.
- NS (Noise Suppressor): This effect reduces the noise and hum. For details on the parameters, refer to "NS" on the preceding page.
- DLY (Delay): This creates a thicker sound by applying a delayed sound to the direct sound. For details on the parameters, refer to "DLY," above.
5. VO+ACOUSTIC (Vocal+Acousitc Guitar)
This algorithm is for use when simultaneously recording a vocal and acoustic guitar. For the guitar, you can produce a warm sound as though a mic were being used, even when an electric-acoustic is connected by a direct line.
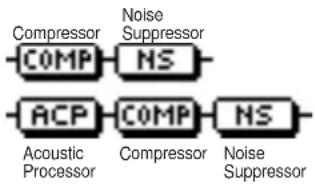
flowchart
graph LR
    A["Compressor"] --> B["COMP"]
    B --> C["NS"]
    D["ACP"] --> E["COMP"]
    E --> F["NS"]
    G["Acoustic Processor"] --> H["Compressor"]
    I["Noise Suppressor"] --> J["Compressor"]
    K["Noise Suppressor"] --> L["NS"]
■ MIC
Parameter (full name) Setting Function
- COMP (Compressor): Compressor the entire output signals when the input volume exceeds a specified value.
Effect On/Off (Effect On/Off) OFF, ON This parameter turns the compressor effects on/off.
Sustain (Sustain) 0–100 Adjusts the range (time) over which low-level signals are boosted. Larger values will result in longer sustain.
Attack (Attack) 0–100 Adjusts the strength of the attack. Larger values will result in a sharper attack, creating a more clearly defined sound.
Level (Output Level) 0–100 Adjusts the volume.
- NS (Noise Suppressor): This effect reduces the noise and hum.
Effect On/Off (Effect On/Off) OFF, ON This parameter turns the noise suppressor effect on/off.
Threshold (Threshold) * 0–100 Adjust this parameter as appropriate for the volume of the noise. If the noise level is high, a higher setting is appropriate. If the noise level is low, a lower setting is appropriate. Adjust this value until the decay of the sound is as natural as possible.
Release (Release) 0–100 Adjusts the time from when the noise suppressor begins to function until volume reaches "0."

* High settings for the Threshold parameter may result in there being no sound when you play with your instruments volume turned down.
■ GUITAR
Parameter (full name) Setting Function
- ACP (Acoustic Processor): With this feature, you can change the sound from a pickup on an electric-acoustic guitar into a richer sound.
Effect On/Off (Effect On/Off) OFF, ON This parameter turns the acoustic processor effect on/off.
| Body (Body) -100-+100 This adjusts the resonance of the sound caused by the body. That is, it adjusts the softness and fatness of the sound which is the typical characteristics of acoustic guitars. | ||
| Mic Distance (Mic Distance) | -100-+100 | This models the distance between the microphone capturing the sound of an acoustic guitar and the guitar itself. |
| Level (Level) | -100-+100 This adjusts the volume of the acoustic processor. | |

Best results will be achieved when stereo output is used.
- COMP (Compressor): Compressor the entire output signals when the input volume exceeds a specified value.
For details on the parameters, refer to "COMP," above.
- NS (Noise Suppressor): This effect reduces the noise and hum.
For details on the parameters, refer to "NS," above.
6. COSM GUITAR AMP
This is a multi-effect designed for electric guitar. This provides an amp sound using a preamp and speaker modeling.
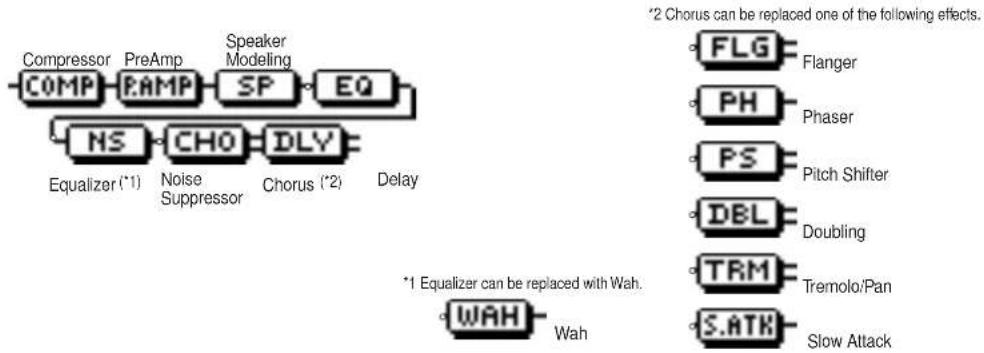
flowchart
graph LR
    A["Compressor"] --> B["PreAmp"]
    B --> C["Speaker Modeling"]
    C --> D["EQ"]
    D --> E["NS"]
    E --> F["CHO"]
    F --> G["DLY"]
    G --> H["Equalizer (*1)"]
    H --> I["Noise Suppressor"]
    I --> J["Chorus (*2)"]
    J --> K["Delay"]

    L["*1 Equalizer can be replaced with Wah."] --> M["WAH"]
    M --> N["Wah"]

    O["*2 Chorus can be replaced one of the following effects."] --> P["FLG"]
    P --> Q["Flanger"]
    R["PH"] --> S["Phaser"]
    T["PS"] --> U["Pitch Shifter"]
    V["DBL"] --> W["Doubling"]
    X["TRM"] --> Y["Tremolo/Pan"]
    Z["S.ATK"] --> AA["Slow Attack"]
Parameter (full name) Setting Function
- COMP (Compressor): Compressor the entire output signals when the input volume exceeds a specified value.
Effect On/Off (Effect On/Off) OFF, ON This parameter turns the compressor effects on/off.
Sustain (Sustain) 0–100 Adjusts the range (time) over which low-level signals are boosted. Larger values will result in longer sustain.
Attack (Attack) 0–100 Adjusts the strength of the attack. Larger values will result in a sharper attack, creating a more clearly defined sound.
Level (Output Level) 0–100 Adjusts the volume.
- P.AMP (Preamp): Adjust the distortion and tone of the guitar sound.
Effect On/Off (Effect On/Off) OFF, ON Turns the preamp effect on/off.
Amp Type (Amp Type) *1 Refer to the column on page 187. Selects the type of the guitar amplifier that will be modeled.
Volume (Volume) 0–100 Adjusts the volume and distortion of the amp.
Bass (Bass) 0–100 Adjusts the tone for the low frequency range.
Middle (Middle) *2 0–100 Adjusts the tone for the middle frequency range.
Treble (Treble) 0–100 Adjusts the tone for the high frequency range.
Presence (Presence) *3 0–100 Adjusts the tone for the ultra high frequency range.
| Master (Master) | 0–100 Adjusts the volume of the entire preamp. | |
| Bright (Bright) *4 | OFF, ON | Turns the bright setting on/off. Bright is switched on to create a lighter and crisper tone. |
| Gain (Gain) *5 | LOW, MIDDLE, HIGH | Adjusts the distortion of the amp. Distortion will successively increase for settings of “LOW,” “MIDDLE” and “HIGH.” |

*1 When all Bass, Middle and Treble are set to "0," no sound may be produced depending on the "Amp Type" setting.
*2 If you have selected "MATCH" as the type, the middle control will have no effect.
*3 If you have selected "MATCH" or "VO DRV" as the type, raising presence will cut the high range (the value will change from "0" to "-100").
*4 Depending on the "Amp Type" setting, this may not be displayed.
*5 successively increase for settings of "LOW", "MIDDLE" and set to "MIDDLE." So, normally set it to "MIDDLE."
- SP (Speaker Modeling): This models the characteristics of various types of speakers.
Effect On/Off (Effect On/Off) OFF, ON This parameter turns the speaker modeling effect on/off.
| Speaker Type (Speaker Type) | Refer to the column on page 187. Selects the type of speaker that will be modeled. | |
| Mic Setting (Mic Setting) | CENTER, 1–10 cm | This models the microphone position. “CENTER” models the condition that the microphone is set in the middle of the speaker cone. “1–10 cm” means that the microphone is moved away from the center of the speaker cone. |
| Mic Level (Mic Level) | 0–100 Adjusts the volume of the microphone. | |
| Direct Level (Direct Level) | 0–100 Adjusts the volume of the direct sound. | |
• EQ (Equalizer): A 4-band equalizer.
Effect On/Off (Effect On/Off) OFF, ON This parameter turns the equalizer effect on/off.
| Low Gain (Low Gain) -20→+20 dB This parameter sets the gain (amount of boost or cut) for the bass equalizer. | |
| Low-Mid Gain (Low-Mid Gain) -20→+20 dB This parameter sets the gain (amount of boost or cut) for the low-midrange equalizer. | |
| Low-Mid Freq (Low-Mid Freq) 100–10.0 kHz This parameter sets the central frequency for the low-midrange equalizer. | |
| Low-Mid Q (Low-Mid Q) 0.5–16 This parameter sets the range of change in gain for the frequency set by “Low-Mid Freq.” A larger value results in a narrower range of change. | |
| High-Mid Gain (High-Mid Gain) -20→+20 dB This parameter sets the gain (amount of boost or cut) for the high-midrange equalizer. | |
| High-Mid Freq (High-Mid Freq) 100–10.0 kHz This parameter sets the central frequency for the high-midrange equalizer. | |
| High-Mid Q (High-Mid Q) 0.5–16 This parameter sets the range of change in gain for the frequency set by “High-Mid Freq.” A larger value results in a narrower range of change. | |
| High Gain (High Gain) -20→+20 dB This parameter sets the gain (amount of boost or cut) for the treble equalizer. | |
| Level (Output Level) | -20→+20 dB This parameter adjusts the volume after the equalizer stage. |
- WAH (Wah): The wah effect creates a unique tone by changing the frequency response characteristics of a filter.
Effect On/Off (Effect On/Off) OFF, ON This parameter turns the wah effect on/off.
| Polarity (Polarity) | UP | The frequency of the filter will rise. |
| DOWN | The frequency of the filter will fall. | |
| Sensitivity (Sens) | 0–100 | This adjusts the sensitivity at which the filter will change in the direction determined by the polarity setting. Higher values will result in a stronger response. With a setting of “0,” the strength of picking will have no effect. |
| Frequency (Frequency) | 0–100 This adjusts the center frequency of the Wah effect. | |
| Peak (Peak) | 0–100 Adjusts the way in which the wah effect applies to the area around the center frequency. Lower values will produce a wah effect over a wide area around the center frequency. Higher values will produce a wah effect in a narrow area around the center frequency. With a value of “50” a standard wah sound will be produced. | |
| Level (Level) | 0–100 Adjusts the volume. | |
- NS (Noise Suppressor): This effect reduces the noise and hum.
Effect On/Off (Effect On/Off) OFF, ON This parameter turns the noise suppressor effect on/off.
| Threshold (Threshold) * | 0–100 | Adjust this parameter as appropriate for the volume of the noise. If the noise level is high, a higher setting is appropriate. If the noise level is low, a lower setting is appropriate. Adjust this value until the decay of the sound is as natural as possible. |
| Release (Release) | 0–100 | Adjusts the time from when the noise suppressor begins to function until volume reaches “0.” |

High settings for the Threshold parameter may result in there being no sound when you play with your instruments volume turned down.
- Modulation effect type
The Modulation effect type can be selected from the following effects. For details on each effect, refer to “Available types of modulation and their effect” (p. 202).
○ FLANGER (Flanger) : The flanger effect gives a twisting, jet-airplane-like character to the sound.
○ CHORUS (Chorus) : A sound with a subtly shifted pitch is added to the direct sound, making the final output sound thicker and broader.
○ PHASER (Phaser) * : By adding varied-phase portions, the phaser effect gives a whooshing, swirling character to the sound.
○ P.SHIFT (Pitch Shifter) : This effect changes the pitch of the original sound (up or down) within a range of two octaves.
○ DOUBL'N (Doubling) : An effect of multiple sounds heard together (a doubling effect) is produced.
○ TRM/PAN (Tremolo/Pan) : Tremolo is an effect that creates a cyclic change in volume.
Pan cyclically moves the stereo position between left and right (when stereo output is used).
○ SLO ATK (Slow Attack) * : This produces a volume-swell effect ("violin-like" sound).
* In case of "Phase" and "Slow Attack", output will become monaural.
- DLY (Delay): This creates a thicker sound by applying a delayed sound to the direct sound.
Effect On/Off (Effect On/Off) OFF, ON This parameter turns the delay effect on/off.
| Effect Type (Type) SINGLE This is a simple delay.TAP The delayed sound is panned across the left and right channels. This will be effective when stereo output is used. |
| Delay Time (Delay Time) SINGLE: 1–1400 mS This parameter adjusts the delay time (i.e., the interval for which sound is delayed).TAP: 1–700 mS |
| Feedback (Feedback) 0–100 This parameter adjusts the amount of feedback. Changing the amount offeedback causes the number of time the delayed sound is repeated to change as well. |
Effect Level (Effect Level) 0–120 This adjusts the volume of the delay sound.
■ Preamp
Models the preamp section of a guitar amp. Set the desired type for Amp Type.
JC-120 : The sound of the Roland "JC-120" (Jazz Chorus 120), a favorite of pro musicians around the world.
CLEAN : The sound of a conventional built-in tube amp.
CRUNCH : Allows you to obtain a crunch effect that creates a natural distortion.
MATCH : A modeling of the latest tube amp widely used in styles from blues and rock.
VO DRV : Allows you to obtain the Liverpool sound of the 60's.
BLUES : A lead sound with a rich middle ideal for Blues.
BG LEAD : The sound of a tube amp typical of the late '70s to '80s, characterized by a distinctive mid-range.
MS(1, 2, 1+2): The sound of a large tube amp stack that was indispensable to the British hard rock of the 70's, and is used to this day by many hard rock guitarists.
MS(1) : A trebly sound created by using input I of the guitar amp.
MS(2) : A mild sound created by using input II of the guitar amp.
MS(1+2) : The sound of connecting inputs I and II of the guitar amp in parallel, creating a sound with a stronger low end than I.
SLDN : A tube amp sound with versatile distortion, usable in a wide range of styles.
METAL : The sound of a large tube amp, suitable for heavy metal.
METAL D : A high gain and powerful metal sound.
■ Speaker modeling
The characters of the following types of speakers can be modeled. Set the desired type for Speaker Type.
| Speaker Type | Cabinet | Speaker Unit | Microphone Setting ^-1 | Well-matched preamp type |
| SMALL | Small open-back enclosure | 10 inch | On Mic | |
| MIDDLE | Open-back enclosure | 12 inch | On Mic | Clean, Crunch, Blues |
| JC-120 ^2 | Open-back enclosure | 12 inch (two units) | On Mic | JC-120 |
| TWIN | Open-back enclosure | 12 inch (two units) | On Mic | Clean, Crunch |
| twin | Open-back enclosure | 12 inch (two units) | Off Mic | Clean, Crunch |
| MATCH | Open-back enclosure | 12 inch (two units) | On Mic | Match, Blues |
| match | Open-back enclosure | 12 inch (two units) | Off Mic | Match, Blues, BG Lead |
| VO DRV | Open-back enclosure | 12 inch (two units) | On Mic | Vo drv |
| vo drv | Open-back enclosure | 12 inch (two units) | Off Mic | Vo drv |
| BG STK | Large Sealed enclosure | 12 inch (two units) | On Mic | BG Lead |
| bg stk | Large Sealed enclosure | 12 inch (two units) | Off Mic | BG Lead |
| MS STK | Large Sealed enclosure | 12 inch (four units) | On Mic | MS(1), MS(2), MS(1+2), Sldn, Metal, Meal D |
| ms stk | Large Sealed enclosure | 12 inch (four units) | Off Mic | MS(1), MS(2), MS(1+2), Sldn, Metal, Meal D |
| METAL | Large dual stack | 12 inch (four units) | Off Mic | MS(1), MS(2), MS(1+2), Sldn, Metal, Meal D |
*1 "On Mic" models sound when a dynamic microphone is used.
"Off Mic" models sound when a condenser microphone is used.
*2 Roland JC-120 Modeling
7. ACOUSTIC MDL (Acoustic Guitar Modeling)
This is a multi-effect designed for electric guitar. It allows you to use an electric guitar to produce sounds similar to those of an acoustic guitar.
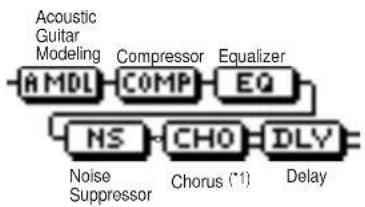
flowchart
graph LR
    A["Acoustic Guitar Modeling"] --> B["MDL"]
    B --> C["COMP"]
    C --> D["EQ"]
    D --> E["NS"]
    E --> F["CHO"]
    F --> G["DLY"]
    G --> H["Delay"]
    I["Noise Suppressor"] --> E
    J["Chorus (*1)"] --> F
'2 Chorus can be replaced one of the following effects.
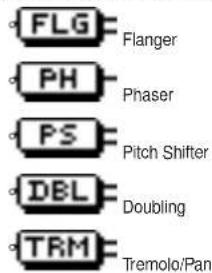
Parameter (full name) Setting Function
• A.MDL (Acoustic Guitar Modeling): This models the sound of an acoustic guitar.
Effect On/Off (Effect On/Off) OFF, ON This parameter turns the acoustic guitar modeling effect on/off.
Pick Up Type (Pick Up Type) SINGLE, HUMBUCK Set this to the type of pickup on the connected guitar.
Character (Character) STD This is a normal acoustic guitar.
JUMBO This is an acoustic guitar with a body that is bigger than STANDARD. The bass sound is powerful.
ENHANCE This is an acoustic guitar that with a more responsive attack, so the guitar will retain more of its prominence in almost any situation.
PIEZO This models the sound you would get from a pickup installed on an electric-acoustic guitar. During the attack, a certain amount of compression will be applied.
Top-Hi (Top-Hi) -100-+100 * Adjust the level of the direct sound from the strings. That is, it adjusts the harmonic contents.
Top-Mid (Top-Mid) -100-+100 * This adjusts the interference to the strings made by the top plate. That is, it adjusts the attack sense.
Body (Body) -100→+100 * This adjusts the resonance of the sound caused by the body. That is, it adjusts the softness and fatness of the sound which is the typical characteristics of acoustic guitars.
Level (Level) 0–100 This adjusts the volume of the acoustic guitar modeling.

If Top-Hi, Top-Mid, and Body are all set to "-100", there will be no sound.

If you set the pickup selector of your guitar to the front position, the desired effect will be easier to achieve.
- COMP (Compressor): Compressor the entire output signals when the input volume exceeds a specified value.
Effect On/Off (Effect On/Off) OFF, ON This parameter turns the compressor effects on/off.
| Sustain (Sustain) | 0–100 | Adjusts the range (time) over which low-level signals are boosted. Larger values will result in longer sustain. |
| Attack (Attack) | 0–100 | Adjusts the strength of the attack. Larger values will result in a sharper attack, creating a more clearly defined sound. |
| Level (Output Level) | 0–100 | Adjusts the volume. |
• EQ (Equalizer): A 4-band equalizer.
Effect On/Off (Effect On/Off) OFF, ON This parameter turns the equalizer effect on/off.
| Low Gain (Low Gain) -20—+20 dB This parameter sets the gain (amount of boost or cut) for the bass equalizer. | |
| Low-Mid Gain (Low-Mid Gain) -20—+20 dB This parameter sets the gain (amount of boost or cut) for the low-midrange equalizer. | |
| Low-Mid Freq (Low-Mid Freq) 100–10.0 kHz This parameter sets the central frequency for the low-midrange equalizer. | |
| Low-Mid Q (Low-Mid Q) 0.5–16 This parameter sets the range of change in gain for the frequency set by “Low-Mid Freq.” A larger value results in a narrower range of change. | |
| High-Mid Gain (High-Mid Gain) -20—+20 dB This parameter sets the gain (amount of boost or cut) for the high-midrange equalizer. | |
| High-Mid Freq (High-Mid Freq) 100–10.0 kHz This parameter sets the central frequency for the high-midrange equalizer. | |
| High-Mid Q (High-Mid Q) 0.5–16 This parameter sets the range of change in gain for the frequency set by “High-Mid Freq.” A larger value results in a narrower range of change. | |
| High Gain (High Gain) -20—+20 dB This parameter sets the gain (amount of boost or cut) for the treble equalizer. | |
| Level (Output Level) | -20—+20 dB This parameter adjusts the volume after the equalizer stage. |
- NS (Noise Suppressor): This effect reduces the noise and hum.
Effect On/Off (Effect On/Off) OFF, ON This parameter turns the noise suppressor effect on/off.
| Threshold (Threshold) * | 0–100 | Adjust this parameter as appropriate for the volume of the noise. If the noise level is high, a higher setting is appropriate. If the noise level is low, a lower setting is appropriate. Adjust this value until the decay of the sound is as natural as possible. |
| Release (Release) | 0–100 | Adjusts the time from when the noise suppressor begins to function until volume reaches “0.” |

* High settings for the Threshold parameter may result in there being no sound when you play with your instruments volume turned down.
- Modulation effect type
The Modulation effect type can be selected from the following effects. For details on each effect, refer to “Available types of modulation and their effect” (p. 202).
○ FLANGER (Flanger) : The flanger effect gives a twisting, jet-airplane-like character to the sound.
○ CHORUS (Chorus) : A sound with a subtly shifted pitch is added to the direct sound, making the final output sound thicker and broader.
○ PHASER (Phaser) * : By adding varied-phase portions, the phaser effect gives a whooshing, swirling character to the sound.
○ P.SHIFT (Pitch Shifter) : This effect changes the pitch of the original sound (up or down) within a range of two octaves.
☐ DOUBL'N (Doubling) : An effect of multiple sounds heard together (a doubling effect) is produced.
○ TRM/PAN (Tremolo/Pan) : Tremolo is an effect that creates a cyclic change in volume.
Pan cyclically moves the stereo position between left and right (when stereo output is used).
* In case of "Phase", output will become monaural.
- DLY (Delay): This creates a thicker sound by applying a delayed sound to the direct sound.
Effect On/Off (Effect On/Off) OFF, ON This parameter turns the delay effect on/off.
| Effect Type (Type) | SINGLE TAP | This is a simple delay. The delayed sound is panned across the left and right channels. This will be effective when stereo output is used. |
| Delay Time (Delay Time) | SINGLE: 1–1400 mS TAP: 1–700 mS | This parameter adjusts the delay time (i.e., the interval for which sound is delayed). |
| Feedback (Feedback) | 0–100 | This parameter adjusts the amount of feedback. Changing the amount of feedback causes the number of time the delayed sound is repeated to change as well. |
| Effect Level (Effect Level) | 0–120 This adjusts the volume of the delay sound. | |
8. BASS MDL (Bass Guitar Modeling)
Models the sound of a bass guitar. Obtain the sound of a bass guitar while playing an electric guitar.
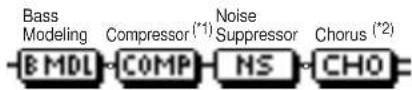
*1 Compressor can be replaced with Defretter.
Defretter
*2 Chorus can be replaced one of the following effects.

Flanger

Phaser

Pitch Shifter

Doubling
Tremolo/Pan
Parameter (full name) Setting Function
• B.MDL (Bass Modeling): Models the sound of a bass guitar.
Effect On/Off (Effect On/Off) OFF, ON This parameter turns the bass modeling effect on/off.
Character (Character) LOOSE, TIGHT Bass tone characteristic is set. When "LOOSE" is selected, as if the string gauge was getting thicker.
Level (Level) 0–100 This adjusts the volume of the bass modeling.
MEMO
You should avoid playing chords when using the Bass modeling.
- COMP (Compressor): Compressor the entire output signals when the input volume exceeds a specified value.
Effect On/Off (Effect On/Off) OFF, ON This parameter turns the compressor effects on/off.
Sustain (Sustain) 0–100 Adjusts the range (time) over which low-level signals are boosted. Larger values will result in longer sustain.
Attack (Attack) 0–100 Adjusts the strength of the attack. Larger values will result in a sharper attack, creating a more clearly defined sound.
Level (Output Level) 0–100 Adjusts the volume.
- DEFRET (Defretter): This models a fretless bass.
Effect On/Off (Effect On/Off) OFF, ON This parameter turns the defretter effect on/off.
Sensitivity (Sens) 0–100 This controls the input sensitivity of the Defretter. It should be adjusted for the bass guitar you have until you get the harmonic changes to sound natural.
Attack (Attack) 0–100 This controls the attack of the Defretter. Increasing the value will cause the harmonics to change more slowly, thus producing a relatively attack-less sound, similar to a fretless bass.
Depth (Depth) 0–100 This controls the rate of the harmonics. Increasing the value will increase the harmonic content and therefore will create a more unusual sound.
Level (Level) 0–100 Adjusts the volume of the defretter sound.
- NS (Noise Suppressor): This effect reduces the noise and hum.
Effect On/Off (Effect On/Off) OFF, ON This parameter turns the noise suppressor effect on/off.
| Threshold (Threshold) * 0–100 Adjust this parameter as appropriate for the volume of the noise. If thenoise level is high, a higher setting is appropriate. If the noise level is low,a lower setting is appropriate. Adjust this value until the decay of the soundis as natural as possible. |
| Release (Release) 0–100 Adjusts the time from when the noise suppressor begins to function untilvolume reaches “0.” |

* High settings for the Threshold parameter may result in there being no sound when you play with your instruments volume turned down.
- Modulation effect type
The Modulation effect type can be selected from the following effects. For details on each effect, refer to “Available types of modulation and their effect” (p. 202).
○ FLANGER (Flanger): The flanger effect gives a twisting, jet-airplane-like character to the sound.
○ CHORUS (Chorus) : A sound with a subtly shifted pitch is added to the direct sound, making the final output sound thicker and broader.
○ PHASER (Phaser) * : By adding varied-phase portions, the phaser effect gives a whooshing, swirling character to the sound.
○ P.SHIFT (Pitch Shifter) : This effect changes the pitch of the original sound (up or down) within a range of two octaves.
○ DOUBL'N (Doubling) : An effect of multiple sounds heard together (a doubling effect) is produced.
○ TRM/PAN (Tremolo/Pan) : Tremolo is an effect that creates a cyclic change in volume.
Pan cyclically moves the stereo position between left and right (when stereo output is used).
9. ACOUSTIC GUITAR
This is a multi-effect designed for acoustic guitar. Even when an electric-acoustic is connected at line level, this provides a warm sound similar to what is obtained through a microphone.

flowchart
graph LR
    A["ACP"] --> B["COMP"]
    B --> C["EQ"]
    C --> D["NS"]
    D --> E["Delay"]
    F["Acoustic Processor"] --> G["Compressor"]
    G --> H["Equalizer"]
    H --> I["Noise Suppressor"]
    I --> J["Delay"]
Parameter (full name) Setting Function
- ACP (Acoustic Processor): With this feature, you can change the sound from a pickup on an electric-acoustic guitar into a richer sound.
Effect On/Off (Effect On/Off) OFF, ON This parameter turns the acoustic processor effect on/off.
Body (Body) -100—+100 This adjusts the resonance of the sound caused by the body. That is, it adjusts the softness and fatness of the sound which is the typical characteristics of acoustic guitars.
Mic Distance (Mic Distance) -100→+100 This models the distance between the microphone capturing the sound of an acoustic guitar and the guitar itself.
Level (Level) -100—+100 This adjusts the volume of the acoustic processor.

Best results will be achieved when stereo output is used.
- COMP (Compressor): Compressor the entire output signals when the input volume exceeds a specified value.
Effect On/Off (Effect On/Off) OFF, ON This parameter turns the compressor effects on/off.
Sustain (Sustain) 0–100 Adjusts the range (time) over which low-level signals are boosted. Larger values will result in longer sustain.
Attack (Attack) 0–100 Adjusts the strength of the attack. Larger values will result in a sharper attack, creating a more clearly defined sound.
Level (Output Level) 0–100 Adjusts the volume.
• EQ (Equalizer): A 4-band equalizer.
Effect On/Off (Effect On/Off) OFF, ON This parameter turns the equalizer effect on/off.
| Low Gain (Low Gain) -20-+20 dB This parameter sets the gain (amount of boost or cut) for the bass equalizer. | ||
| Low-Mid Gain (Low-Mid Gain) | -20-+20 dB | This parameter sets the gain (amount of boost or cut) for the low-midrange equalizer. |
| Low-Mid Freq (Low-Mid Freq) | 100-10.0 kHz | This parameter sets the central frequency for the low-midrange equalizer. |
| Low-Mid Q (Low-Mid Q) | 0.5-16 | This parameter sets the range of change in gain for the frequency set by “Low-Mid Freq.” A larger value results in a narrower range of change. |
| High-Mid Gain (High-Mid Gain) | -20-+20 dB | This parameter sets the gain (amount of boost or cut) for the high-midrange equalizer. |
| High-Mid Freq (High-Mid Freq) | 100-10.0 kHz | This parameter sets the central frequency for the high-midrange equalizer. |
| High-Mid Q (High-Mid Q) | 0.5-16 | This parameter sets the range of change in gain for the frequency set by “High-Mid Freq.” A larger value results in a narrower range of change. |
| High Gain (High Gain) -20-+20 dB This parameter sets the gain (amount of boost or cut) for the treble equalizer. | ||
| Level (Output Level) -20-+20 dB This parameter adjusts the volume after the equalizer stage. | ||
- NS (Noise Suppressor): This effect reduces the noise and hum.
Effect On/Off (Effect On/Off) OFF, ON This parameter turns the noise suppressor effect on/off.
| Threshold (Threshold) * 0–100 Adjust this parameter as appropriate for the volume of the noise. If thenoise level is high, a higher setting is appropriate. If the noise level is low,a lower setting is appropriate. Adjust this value until the decay of the soundis as natural as possible. |
| Release (Release) 0–100 Adjusts the time from when the noise suppressor begins to function untilvolume reaches “0.” |

* High settings for the Threshold parameter may result in there being no sound when you play with your instruments volume turned down.
- DLY (Delay): This creates a thicker sound by applying a delayed sound to the direct sound.
Effect On/Off (Effect On/Off) OFF, ON This parameter turns the delay effect on/off.
| Effect Type (Type) SINGLE This is a simple delay.TAP The delayed sound is panned across the left and right channels. This will be effective when stereo output is used. |
| Delay Time (Delay Time) SINGLE: 1–1400 mS This parameter adjusts the delay time (i.e., the interval for which sound is delayed).TAP: 1–700 mS |
| Feedback (Feedback) 0–100 This parameter adjusts the amount of feedback. Changing the amount offeedback causes the number of time the delayed sound is repeated to change as well. |
| Effect Level (Effect Level) 0–120 This adjusts the volume of the delay sound. |
10. BASS MULTI (Bass Guitar Multi)
This is a multi-effect designed for bass guitar. Appropriate for creating standard bass sound.
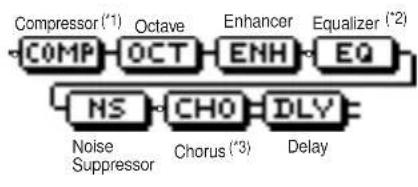
flowchart
graph LR
    A["Compressor (1)"] --> B["COMP"]
    B --> C["OCT"]
    C --> D["Enhancer"]
    D --> E["ENH"]
    E --> F["Equalizer (2)"]
    F --> G["EQ"]
    G --> H["NS"]
    H --> I["Chorus (3)"]
    I --> J["DLY"]
    J --> K["Delay"]
    L["Noise Suppressor"] --> M["Chorus (3)"]
    M --> N["DLY"]
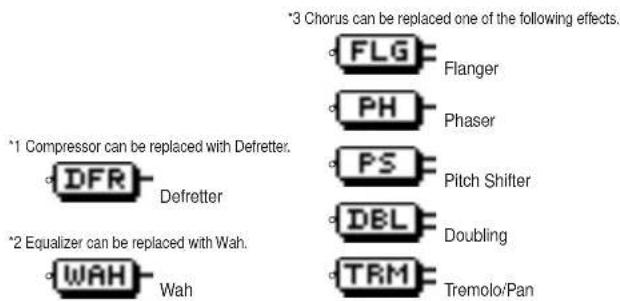
Parameter (full name) Setting Function
- COMP (Compressor): Compressor the entire output signals when the input volume exceeds a specified value.
Effect On/Off (Effect On/Off) OFF, ON This parameter turns the compressor effects on/off.
Sustain (Sustain) 0–100 Adjusts the range (time) over which low-level signals are boosted. Larger values will result in longer sustain.
Attack (Attack) 0–100 Adjusts the strength of the attack. Larger values will result in a sharper attack, creating a more clearly defined sound.
Level (Output Level) 0–100 Adjusts the volume.
• DEFRET (Defretter): This models a fretless bass.
Effect On/Off (Effect On/Off) OFF, ON This parameter turns the defretter effect on/off.
Sensitivity (Sens) 0–100 This controls the input sensitivity of the Defretter. It should be adjusted for the bass guitar you have until you get the harmonic changes to sound natural.
Attack (Attack) 0–100 This controls the attack of the Defretter. Increasing the value will cause the harmonics to change more slowly, thus producing a relatively attack-less sound, similar to a fretless bass.
Depth (Depth) 0–100 This controls the rate of the harmonics. Increasing the value will increase the harmonic content and therefore will create a more unusual sound.
Level (Level) 0–100 Adjusts the volume of the defretter sound.
- OCT (Octave): This adds a note one octave lower, creating a richer sound.
Effect On/Off (Effect On/Off) OFF, ON This parameter turns the octave effect on/off.
Octave Level (Octave Level) 0–100 This adjust the volume of the sound one octave below.
Direct Level (Direct Level) 0–100 This adjust the volume of the direct sound.
- ENH (Enhancer): This effect enhances the definition of the sound, and pushes it to the forefront.
Effect On/Off (Effect On/Off) OFF, ON This parameter turns the enhancer effect on/off.
| Sensitivity (Sens) | 0–100 | Adjusts the manner in which the enhancer will be applied relative to the input signals. |
| Frequency (Frequency) | 1.0 –10.0 kHz | Adjusts the frequency at which the enhancer effect will begin to be applied. The effect will be made apparent in the frequencies above the frequency set here. |
| Mix Level (Mix Level) | 0–100 | Adjusts the amount of phase-shifted sound of the range set by “Frequency” that is to be mixed with the input. |
| Low Mix Level (Low Mix Level) | 0–100 | Adjusts the amount of phase-shifted sound of the lower range that is to be mixed with the input. |
Level (Level) 0–100 Adjusts the volume of the enhanced sound.
• EQ (Equalizer): A 4-band equalizer.
Effect On/Off (Effect On/Off) OFF, ON This parameter turns the equalizer effect on/off.
| Low Gain (Low Gain) | -20→+20 dB | This parameter sets the gain (amount of boost or cut) for the bass equalizer. |
| Low-Mid Gain (Low-Mid Gain) | -20→+20 dB | This parameter sets the gain (amount of boost or cut) for the low-midrange equalizer. |
| Low-Mid Freq (Low-Mid Freq) | 100–10.0 kHz | This parameter sets the central frequency for the low-midrange equalizer. |
| Low-Mid Q (Low-Mid Q) | 0.5–16 | This parameter sets the range of change in gain for the frequency set by “Low-Mid Freq.” A larger value results in a narrower range of change. |
High-Mid Gain (High-Mid Gain) -20—+20 dB This parameter sets the gain (amount of boost or cut) for the high-midrange equalizer.
High-Mid Freq (High-Mid Freq) 100–10.0 kHz This parameter sets the central frequency for the high-midrange equalizer.
High-Mid Q (High-Mid Q) 0.5–16 This parameter sets the range of change in gain for the frequency set by "High-Mid Freq." A larger value results in a narrower range of change.
High Gain (High Gain) -20–+20 dB This parameter sets the gain (amount of boost or cut) for the treble equalizer.
Level (Output Level) -20—+20 dB This parameter adjusts the volume after the equalizer stage.
- WAH (Wah): The wah effect creates a unique tone by changing the frequency response characteristics of a filter. Effect On/Off (Effect On/Off) OFF, ON This parameter turns the wah effect on/off.
Polarity (Polarity) UP The frequency of the filter will rise.
DOWN The frequency of the filter will fall.
Sensitivity (Sens) 0–100 This adjusts the sensitivity at which the filter will change in the direction
determined by the polarity setting. Higher values will result in a stronger response. With a setting of "0," the strength of picking will have no effect.
Frequency (Frequency) 0–100 This adjusts the center frequency of the Wah effect.
Peak (Peak) 0–100 Adjusts the way in which the wah effect applies to the area around the
center frequency. Lower values will produce a wah effect over a wide area around the center frequency. Higher values will produce a wah effect in a narrow area around the center frequency. With a value of "50" a standard wah sound will be produced.
Level (Level) 0–100 Adjusts the volume.
- NS (Noise Suppressor): This effect reduces the noise and hum.
Effect On/Off (Effect On/Off) OFF, ON This parameter turns the noise suppressor effect on/off.
| Threshold (Threshold) * | 0–100 | Adjust this parameter as appropriate for the volume of the noise. If the noise level is high, a higher setting is appropriate. If the noise level is low, a lower setting is appropriate. Adjust this value until the decay of the sound is as natural as possible. |
| Release (Release) | 0–100 | Adjusts the time from when the noise suppressor begins to function until volume reaches “0.” |

High settings for the Threshold parameter may result in there being no sound when you play with your instruments volume turned down.
- Modulation effect type
The Modulation effect type can be selected from the following effects. For details on each effect, refer to “Available types of modulation and their effect” (p. 202).
○ FLANGER (Flanger) : The flanger effect gives a twisting, jet-airplane-like character to the sound.
○ CHORUS (Chorus) : A sound with a subtly shifted pitch is added to the direct sound, making the final output sound thicker and broader.
○ PHASER (Phaser) * : By adding varied-phase portions, the phaser effect gives a whooshing, swirling character to the sound.
○ P.SHIFT (Pitch Shifter) : This effect changes the pitch of the original sound (up or down) within a range of two octaves.
○ DOUBL'N (Doubling) : An effect of multiple sounds heard together (a doubling effect) is produced.
○ TRM/PAN (Tremolo/Pan) : Tremolo is an effect that creates a cyclic change in volume. Pan cyclically moves the stereo position between left and right (when stereo output is used).
* In case of "Phase", output will become monaural.
- DLY (Delay): This creates a thicker sound by applying a delayed sound to the direct sound.
Effect On/Off (Effect On/Off) OFF, ON This parameter turns the delay effect on/off.
| Effect Type (Type) | SINGLE | This is a simple delay. |
| TAP The delayed sound is panned across the left and right channels. This will be effective when stereo output is used. | ||
| Delay Time (Delay Time) | SINGLE: 1–1400 mS | This parameter adjusts the delay time (i.e., the interval for which sound is delayed). |
| TAP: 1–700 mS | ||
| Feedback (Feedback) | 0–100 | This parameter adjusts the amount of feedback. Changing the amount of feedback causes the number of time the delayed sound is repeated to change as well. |
| Effect Level (Effect Level) | 0–120 This adjusts the volume of the delay sound. | |
11. COSM BASS AMP (COSM Bass Guitar Amp)
This is a multi-effect designed for bass guitar. This features an amp sound that uses a preamp and speaker modeling.
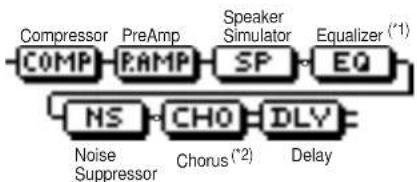
flowchart
graph LR
    A["Compressor"] --> B["COMP"]
    C["PreAmp"] --> D["PAMP"]
    E["Speaker Simulator"] --> F["SP"]
    G["Equalizer (*1)"] --> H["EQ"]
    I["NS"] --> J["CHO"]
    K["Noise Suppressor"] --> L["Chorus (*2)"]
    M["DLY"] --> N["Delay"]
*1 Equalizer can be replaced with Wah.
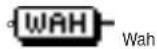
*2 Chorus can be replaced one of the following effects.
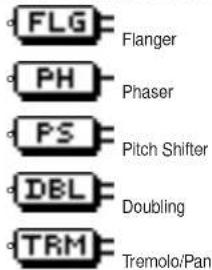
Parameter (full name) Setting Function
- COMP (Compressor): Compressor the entire output signals when the input volume exceeds a specified value.
Effect On/Off (Effect On/Off) OFF, ON This parameter turns the compressor effects on/off.
Sustain (Sustain) 0–100 Adjusts the range (time) over which low-level signals are boosted. Larger values will result in longer sustain.
Attack (Attack) 0–100 Adjusts the strength of the attack. Larger values will result in a sharper attack, creating a more clearly defined sound.
Level (Output Level) 0–100 Adjusts the volume.
- P.AMP (Preamp): Adjust the distortion and tone of the guitar sound.
Effect On/Off (Effect On/Off) OFF, ON Turns the preamp effect on/off.
Amp Type (Amp Type) *1 AC It produces the vintage sound of an early transistor amp.
AMG It produces the sound of a large double-stack vacuum tube amp with ultra-lows and a crisp edge.
Volume (Volume) 0–100 Adjusts the volume and distortion of the amp.
Bass (Bass) -100—+100 Adjusts the tone for the low frequency range.
Middle (Middle) -100—+100 Adjusts the tone for the middle frequency range.
Treble (Treble) -100-+100 Adjusts the tone for the high frequency range.
Master (Master) 0–100 Adjusts the volume of the entire preamp.
Bright (Bright) *2 OFF, ON Turns the bright setting on/off. Bright is switched on to create a lighter and crisper tone.
Gain (Gain) *3 LOW, MIDDLE, HIGH Adjusts the distortion of the amp. Distortion will successively increase for settings of "LOW," "MIDDLE" and "HIGH."

*1 When all Bass, Middle and Treble are set to "0," no sound may be produced depending on the "Amp Type" setting.
*2 Depending on the "Amp Type" setting, this may not be displayed.
*3 successively increase for settings of "LOW," "MIDDLE" and set to "MIDDLE." So, normally set it to "MIDDLE."
■ Speaker modeling
The characters of the following types of speakers can be modeled. Set the desired type for Speaker Type.
| Speaker Type | Cabinet | Speaker Unit | Microphone Setting' | Well-matched preamp type |
| AC | Large Sealed enclosure | 15 inch (two units) | On Mic | AC |
| ac | Open-back enclosure | 15 inch (two units) | Off Mic | AC |
| AMG | Open-back enclosure | 10 inch (eight units) | On Mic | AMG |
| amg | Open-back enclosure | 10 inch (eight units) | Off Mic | AMG |
* "On Mic" models sound when a dynamic microphone is used. "Off Mic" models sound when a condenser microphone is used
- SP (Speaker Modeling): This models the characteristics of various types of speakers.
Effect On/Off (Effect On/Off) OFF, ON This parameter turns the speaker modeling effect on/off.
| Speaker Type (Speaker Type) See the columnon this page. Selects the type of speaker that will be modeled. |
| Mic Setting (Mic Setting) CENTER, 1–10 cm This models the microphone position. “CENTER” models the condition thatthe microphone is set in the middle of the speaker cone. “1–10 cm” meansthat the microphone is moved away from the center of the speaker cone. |
| Mic Level (Mic Level) 0–100 Adjusts the volume of the microphone. |
| Direct Level (Direct Level) 0–100 Adjusts the volume of the direct sound. |
• EQ (Equalizer): A 4-band equalizer.
Effect On/Off (Effect On/Off) OFF, ON This parameter turns the equalizer effect on/off.
| Low Gain (Low Gain) -20→+20 dB This parameter sets the gain (amount of boost or cut) for the bass equalizer. | ||
| Low-Mid Gain (Low-Mid Gain) -20→+20 dB This parameter sets the gain (amount of boost or cut) for the low-midrange equalizer. | ||
| Low-Mid Freq (Low-Mid Freq) 100–10.0 kHz This parameter sets the central frequency for the low-midrange equalizer. | ||
| Low-Mid Q (Low-Mid Q) 0.5–16 This parameter sets the range of change in gain for the frequency set by “Low-Mid Freq.” A larger value results in a narrower range of change. | ||
| High-Mid Gain (High-Mid Gain) | -20→+20 dB | This parameter sets the gain (amount of boost or cut) for the high-midrange equalizer. |
| High-Mid Freq (High-Mid Freq) | 100–10.0 kHz | This parameter sets the central frequency for the high-midrange equalizer. |
| High-Mid Q (High-Mid Q) | 0.5–16 | This parameter sets the range of change in gain for the frequency set by “High-Mid Freq.” A larger value results in a narrower range of change. |
| High Gain (High Gain) -20→+20 dB This parameter sets the gain (amount of boost or cut) for the treble equalizer. | ||
| Level (Output Level) | -20→+20 dB This parameter adjusts the volume after the equalizer stage. | |
- WAH (Wah): The wah effect creates a unique tone by changing the frequency response characteristics of a filter.
Effect On/Off (Effect On/Off) OFF, ON This parameter turns the wah effect on/off.
| Polarity (Polarity) | UP | The frequency of the filter will rise. |
| DOWN | The frequency of the filter will fall. | |
| Sensitivity (Sens) | 0–100 | This adjusts the sensitivity at which the filter will change in the direction determined by the polarity setting. Higher values will result in a stronger response. With a setting of “0,” the strength of picking will have no effect. |
| Frequency (Frequency) | 0–100 This adjusts the center frequency of the Wah effect. | |
| Peak (Peak) | 0–100 Adjusts the way in which the wah effect applies to the area around the center frequency. Lower values will produce a wah effect over a wide area around the center frequency. Higher values will produce a wah effect in a narrow area around the center frequency. With a value of “50” a standard wah sound will be produced. | |
| Level (Level) | 0–100 Adjusts the volume. | |
- NS (Noise Suppressor): This effect reduces the noise and hum.
Effect On/Off (Effect On/Off) OFF, ON This parameter turns the noise suppressor effect on/off.
| Threshold (Threshold) * 0–100 Adjust this parameter as appropriate for the volume of the noise. If thenoise level is high, a higher setting is appropriate. If the noise level is low,a lower setting is appropriate. Adjust this value until the decay of the soundis as natural as possible. |
| Release (Release) 0–100 Adjusts the time from when the noise suppressor begins to function untilvolume reaches “0.” |

* High settings for the Threshold parameter may result in there being no sound when you play with your instruments volume turned down.
- Modulation effect type
The Modulation effect type can be selected from the following effects. For details on each effect, refer to “Available types of modulation and their effect” (p. 202).
○ FLANGER (Flanger): The flanger effect gives a twisting, jet-airplane-like character to the sound.
○ CHORUS (Chorus) : A sound with a subtly shifted pitch is added to the direct sound, making the final output sound thicker and broader.
○ PHASER (Phaser) * : By adding varied-phase portions, the phaser effect gives a whooshing, swirling character to the sound.
○ P.SHIFT (Pitch Shifter) : This effect changes the pitch of the original sound (up or down) within a range of two octaves.
☐ DOUBL'N (Doubling) : An effect of multiple sounds heard together (a doubling effect) is produced.
○ TRM/PAN (Tremolo/Pan) : Tremolo is an effect that creates a cyclic change in volume.
Pan cyclically moves the stereo position between left and right (when stereo output is used).
* In case of "Phase", output will become monaural.
- DLY (Delay): This creates a thicker sound by applying a delayed sound to the direct sound.
Effect On/Off (Effect On/Off) OFF, ON This parameter turns the delay effect on/off.
| Effect Type (Type) SINGLE | This is a simple delay. | |
| TAP | The delayed sound is panned across the left and right channels. This will be effective when stereo output is used. | |
| Delay Time (Delay Time) | SINGLE: 1–1400 mS | This parameter adjusts the delay time (i.e., the interval for which sound is delayed). |
| TAP: 1–700 mS | ||
| Feedback (Feedback) | 0–100 | This parameter adjusts the amount of feedback. Changing the amount of feedback causes the number of time the delayed sound is repeated to change as well. |
| Effect Level (Effect Level) | 0–120 This adjusts the volume of the delay sound. | |
12. VOCAL MULTI
This is a multi-effect designed for vocals. It provides the basic effects needed for vocals.
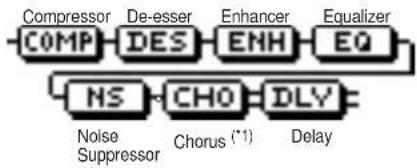
flowchart
graph LR
    A["Compressor"] --> B["DE"]
    B --> C["Enhancer"]
    C --> D["Equalizer"]
    D --> E["ES"]
    E --> F["ENH"]
    F --> G["EQ"]
    G --> H["NS"]
    H --> I["CHO"]
    I --> J["DLY"]
    J --> K["Delay"]
    L["Noise Suppressor"] --> M["Chorus (*1)"]
    M --> N["Delay"]
*1 Chorus can be replaced one of the following effects.
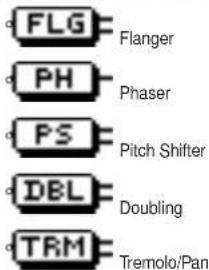
Parameter (full name) Setting Function
- COMP (Compressor): Compressor the entire output signals when the input volume exceeds a specified value.
Effect On/Off (Effect On/Off) OFF, ON This parameter turns the compressor effects on/off.
Sustain (Sustain) 0–100 Adjusts the range (time) over which low-level signals are boosted. Larger values will result in longer sustain.
Attack (Attack) 0–100 Adjusts the strength of the attack. Larger values will result in a sharper attack, creating a more clearly defined sound.
Level (Output Level) 0–100 Adjusts the volume.
- DES (De-esser): Useful for reducing 'sibilant' or 'S' sounds produced by a vocalist.
Effect On/Off (Effect On/Off) OFF, ON This parameter turns the de-esser effect on/off.
Sibilant Level (Sibilant Level) 0–100 Adjusts the sensitivity relative to the input volume, which controls how the effect is applied.
Level (Level) 0–100 Adjusts the volume.
- ENH (Enhancer): This effect enhances the definition of the sound, and pushes it to the forefront.
Effect On/Off (Effect On/Off) OFF, ON This parameter turns the enhancer effect on/off.
Sensitivity (Sens) 0–100 Adjusts the manner in which the enhancer will be applied relative to the input signals.
Frequency (Frequency) 1.0 – 10.0 kHz Adjusts the frequency at which the enhancer effect will begin to be applied. The effect will be made apparent in the frequencies above the frequency set here.
| Mix Level (Mix Level) | 0–100 | Adjusts the amount of phase-shifted sound of the range set by “Frequency” that is to be mixed with the input. |
| Low Mix Level (Low Mix Level) | 0–100 | Adjusts the amount of phase-shifted sound of the lower range that is to be mixed with the input. |
Level (Level) 0–100 Adjusts the volume of the enhanced sound.
• EQ (Equalizer): A 4-band equalizer.
Effect On/Off (Effect On/Off) OFF, ON This parameter turns the equalizer effect on/off.
| Low Gain (Low Gain) | -20–+20 dB | This parameter sets the gain (amount of boost or cut) for the bass equalizer. |
| Low-Mid Gain (Low-Mid Gain) | -20–+20 dB | This parameter sets the gain (amount of boost or cut) for the low-midrange equalizer. |
| Low-Mid Freq (Low-Mid Freq) | 100–10.0 kHz | This parameter sets the central frequency for the low-midrange equalizer. |
| Low-Mid Q (Low-Mid Q) | 0.5–16 | This parameter sets the range of change in gain for the frequency set by “Low-Mid Freq.” A larger value results in a narrower range of change. |
| High-Mid Gain (High-Mid Gain) | -20–+20 dB | This parameter sets the gain (amount of boost or cut) for the high-midrange equalizer. |
| High-Mid Freq (High-Mid Freq) | 100–10.0 kHz | This parameter sets the central frequency for the high-midrange equalizer. |
| High-Mid Q (High-Mid Q) | 0.5–16 | This parameter sets the range of change in gain for the frequency set by “High-Mid Freq.” A larger value results in a narrower range of change. |
| High Gain (High Gain) | -20–+20 dB | This parameter sets the gain (amount of boost or cut) for the treble equalizer. |
| Level (Output Level) -20–+20 dB | This parameter adjusts the volume after the equalizer stage. | |
- NS (Noise Suppressor): This effect reduces the noise and hum.
Effect On/Off (Effect On/Off) OFF, ON This parameter turns the noise suppressor effect on/off.
| Threshold (Threshold) * 0–100 Adjust this parameter as appropriate for the volume of the noise. If thenoise level is high, a higher setting is appropriate. If the noise level is low,a lower setting is appropriate. Adjust this value until the decay of the soundis as natural as possible. |
| Release (Release) 0–100 Adjusts the time from when the noise suppressor begins to function untilvolume reaches “0.” |

* High settings for the Threshold parameter may result in there being no sound when you play with your instruments volume turned down.
- Modulation effect type
The Modulation effect type can be selected from the following effects. For details on each effect, refer to “Available types of modulation and their effect” (p. 202).
○ FLANGER (Flanger): The flanger effect gives a twisting, jet-airplane-like character to the sound.
○ CHORUS (Chorus) : A sound with a subtly shifted pitch is added to the direct sound, making the final output sound thicker and broader.
○ PHASER (Phaser) * : By adding varied-phase portions, the phaser effect gives a whooshing, swirling character to the sound.
○ P.SHIFT (Pitch Shifter) : This effect changes the pitch of the original sound (up or down) within a range of two octaves.
○ DOUBL'N (Doubling) : An effect of multiple sounds heard together (a doubling effect) is produced.
○ TRM/PAN (Tremolo/Pan) : Tremolo is an effect that creates a cyclic change in volume.
Pan cyclically moves the stereo position between left and right (when stereo output is used).
* In case of "Phase", output will become monaural.
- DLY (Delay): This creates a thicker sound by applying a delayed sound to the direct sound.
Effect On/Off (Effect On/Off) OFF, ON This parameter turns the delay effect on/off.
| Effect Type (Type) SINGLE | This is a simple delay. | |
| TAP | The delayed sound is panned across the left and right channels. This will be effective when stereo output is used. | |
| Delay Time (Delay Time) | SINGLE: 1–1400 mS | This parameter adjusts the delay time (i.e., the interval for which sound is delayed). |
| TAP: 1–700 mS | ||
| Feedback (Feedback) | 0–100 | This parameter adjusts the amount of feedback. Changing the amount of feedback causes the number of time the delayed sound is repeated to change as well. |
| Effect Level (Effect Level) | 0–120 This adjusts the volume of the delay sound. | |
13. VOICE TRANSFORMER
This is a multi-effect designed for vocals. Special effects can also be created using the Voice Transformer.
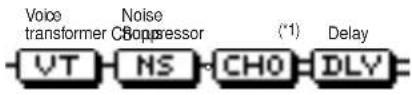
*1 Chorus can be replaced one of the following effects.
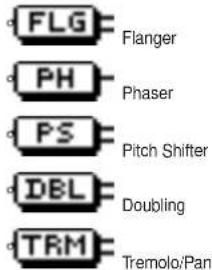
Parameter (full name) Setting Function
- VT (Voice Transformer): This controls the formants, allowing a variety of voice characters to be created.
Effect On/Off (Effect On/Off) OFF, ON This parameter turns the voice transformer effect on/off.
Formant 1 (Formant 1) -100—+100 Adjust the formant of the voice character 1.
Formant 2 (Formant 2) -100-+100 Adjust the formant of the voice character 2.
Effect Level 1 (Effect Level 1) 0–100 Adjust the volume of the voice character 1.
Effect Level 2 (Effect Level 2) 0–100 Adjust the volume of the voice character 2.
Direct Level (Direct Level) 0–100 Adjust the volume of the direct sound.
Formant (p. 204)
- NS (Noise Suppressor): This effect reduces the noise and hum.
Effect On/Off (Effect On/Off) OFF, ON This parameter turns the noise suppressor effect on/off.
Threshold (Threshold) * 0–100 Adjust this parameter as appropriate for the volume of the noise. If the noise level is high, a higher setting is appropriate. If the noise level is low, a lower setting is appropriate. Adjust this value until the decay of the sound is as natural as possible.
Release (Release) 0–100 Adjusts the time from when the noise suppressor begins to function until volume reaches "0."

* High settings for the Threshold parameter may result in there being no sound when you play with your instruments volume turned down.
- Modulation effect type
The Modulation effect type can be selected from the following effects. For details on each effect, refer to "Available types of modulation and their effect" (p. 202).
○ FLANGER (Flanger): The flanger effect gives a twisting, jet-airplane-like character to the sound.
○ CHORUS (Chorus) : A sound with a subtly shifted pitch is added to the direct sound, making the final output sound thicker and broader.
○ PHASER (Phaser) * : By adding varied-phase portions, the phaser effect gives a whooshing, swirling character to the sound.
○ P.SHIFT (Pitch Shifter) : This effect changes the pitch of the original sound (up or down) within a range of two octaves.
☐ DOUBL'N (Doubling) : An effect of multiple sounds heard together (a doubling effect) is produced.
○ TRM/PAN (Tremolo/Pan) : Tremolo is an effect that creates a cyclic change in volume. Pan cyclically moves the stereo position between left and right (when stereo output is used).
* In case of "Phase", output will become monaural.
- DLY (Delay): This creates a thicker sound by applying a delayed sound to the direct sound.
Effect On/Off (Effect On/Off) OFF, ON This parameter turns the delay effect on/off.
| Effect Type (Type) | SINGLE TAP | This is a simple delay. The delayed sound is panned across the left and right channels. This will be effective when stereo output is used. |
| Delay Time (Delay Time) | SINGLE: 1–1400 mS TAP: 1–700 mS | This parameter adjusts the delay time (i.e., the interval for which sound is delayed). |
| Feedback (Feedback) | 0–100 | This parameter adjusts the amount of feedback. Changing the amount of feedback causes the number of time the delayed sound is repeated to change as well. |
| Effect Level (Effect Level) | 0–120 This adjusts the volume of the delay sound. | |
Available types of modulation and their effect
Parameter (full name) Setting Function
- [FLG] FLANGER (Flanger): The flanger effect gives a twisting, jet-airplane-like character to the sound.
Effect On/Off (Effect On/Off) OFF, ON This parameter turns the flanger effect on/off.
Rate (Rate) 0–100 Determines the rate of the flanging effect.
Depth (Depth) 0–100 Determines the depth of the flanging effect.
Manual (Manual) 0–100 Adjusts the center frequency at which to apply the effect.
Resonance (Resonance) 0–100 Determines the amount of resonance (feedback). Increasing the value will emphasize the effect, creating a more unusual sound.
Separation (Separation) 0–100 Adjusts the diffusion. The diffusion increases as the value increases.
Effective when stereo output is used.
- [CHO] CHORUS (Chorus): A sound with a subtly shifted pitch is added to the direct sound, making the final output sound thicker and broader.
Effect On/Off (Effect On/Off) OFF, ON This parameter turns the chorus effect on/off.
Rate (Rate) 0–100 Adjusts the rate of the Chorus effect.
Depth (Depth) 0–100 Adjusts the depth of the Chorus effect.
Pre Delay (Pre Delay) 0.5–50 mS Adjusts the time needed for the effect sound to be output after the direct sound has been output.
Effect Level 0–100 Adjusts the volume of the effect sound.
![ROLAND CDX-1 - - [CHO] CHORUS (Chorus): A sound with a subtly shifted pitch is added to the direct sound, making the final output sound thicker and broader. - 1](/content/2026/05/862949/images/77d2e2c54c2be0d7ec035686f11d4fc95ebbf1f32e7de9954297b82c705a4ccb.jpg)
Best results will be achieved when stereo output is used.
- [PH] PHASER (Phaser): By adding varied-phase portions, the phaser effect gives a whooshing, swirling character to the sound.
Effect On/Off (Effect On/Off) OFF, ON This parameter turns the phaser effect on/off.
Rate (Rate) 0–100 This sets the rate of the Phaser effect.
Depth (Depth) 0–100 Determines the depth of the Phaser effect.
Manual (Manual) 0–100 Adjusts the center frequency of the phaser effect.
Resonance (Resonance) 0–100 Determines the amount of resonance (feedback). Increasing the value will emphasize the effect, creating a more unusual sound. Setting it to a minus value will create resonance having a reversed phase.
- [PS] P.SHIFT (Pitch Shifter): This effect changes the pitch of the original sound (up or down) within a range of two octaves.
Effect On/Off (Effect On/Off) OFF, ON This parameter turns the pitch shifter effect on/off.
| Pitch (Pitch) * | -24–DETUNE→+24 | Adjusts the amount of pitch shift (the amount of pitch change) in semitone steps. By selecting “DETUNE,” you can add a slightly pitch-shifted sound to the input sound, producing a detune effect. |
| D:E Balance (Effect Balance) | 100:0–0:100 | This adjusts the volume balance of the direct and effect sounds. |
| Separation (Separation) | -100→+100 | Adjusts the diffusion. The panning of the direct sound and effect sound can be spread to left and right. Effective when stereo output is used. |
- [DBL] DOUBL'N (Doubling): An effect of multiple sounds heard together (a doubling effect) is produced.
Effect On/Off (Effect On/Off) OFF, ON This parameter turns the doubling effect on/off.
| Delay Time (Delay Time) 0.5–50 mS This parameter adjusts the delay time (i.e., the interval for which sound is delayed). | ||
| Separation (Separation) | -100–+100 | Adjusts the diffusion. The panning of the direct sound and effect sound can be spread to left and right. Effective when stereo output is used. |
| Effect Level (Effect Level) | 0–120 | This adjusts the volume of the delay sound. |
![ROLAND CDX-1 - - [DBL] DOUBL'N (Doubling): An effect of multiple sounds heard together (a doubling effect) is produced. - 1](/content/2026/05/862949/images/179781e2b647fe7092bb8634a739f98a8899ef2971dcc972bbcfda8f71c77ccf.jpg)
The best effect is achieved when stereo output is used.
- [TRM] TRM/PAN (Tremolo/Pan): Tremolo is an effect that creates a cyclic change in volume.
Pan cyclically moves the stereo position between left and right (when stereo output is used).
Effect On/Off (Effect On/Off) OFF, ON This parameter turns the tremolo/pan effect on/off.
Mode (Mode) Selection for tremolo or pan. And selection for the effect will use.
TRM-TRI The volume will change cyclically. Smooth change will be produced.
TRM-SQR The volume will change cyclically. Abrupt change will be produced.
PAN-TRI The sound will be moved cyclically between left and right. Smooth change will be produced.
PAN-SQR The sound will be moved cyclically between left and right. Abrupt change will be produced.
Rate (Rate) 0–100 Adjust the rate at which the effect will operate.
Depth (Depth) 0–100 Adjusts the depth of the effect.
- [S.ATK] SLO ATK (Slow Attack): This produces a volume-swell effect ("violin-like" sound).
Effect On/Off (Effect On/Off) OFF, ON This parameter turns the slow attack effect on/off.
Rise Time (Rise Time) 10–2000 mS This adjusts the time needed for the volume to reach its maximum from the moment you begin picking.
Level (Level) 0–100 Adjust the volume of the slow attack sound.
Glossary
Balanced connection
A method of transmitting signals using three electrical conductors. This cancels any noise that may have entered the line during transmission, allowing noise-free transmission of low-level signals over long distances. This method is usual on professional and broadcast equipment.
The number of beats in one minute (usually quarter note).
Coaxial
A digital audio connector to which a coaxial cable can be connected. In contrast, a type of digital audio connector to which an optical cable can be connected are referred to as "optical." The CDX-1's digital audio connector conforms to S/P DIF.
→ S/P DIF
→ Optical
Condenser microphone
A type of microphone that applies the principle of a condenser. It has excellent high-frequency response, and allows more subtle nuances of sound to be captured.
Contrast
A setting that adjusts the difference between the light and dark areas of a display. This controls the apparent brightness of the display.
COSM
An abbreviation for Composite Object Sound Modeling. Proprietary Roland technology for combining sound models of various types to produce sound. Some of the effect algorithms of the CDX-1 are implemented using this technology.
DAT
Short for Digital Audio Tape. This refers both to the system of recording digitized sound to magnetic tape, as well as to the tapes themselves. Besides digital audio signals, all song information is recorded on the tape, including starts and track data, information to allow or prevent copying, etc.
Dynamic microphone
A type of microphone that uses the same principle as an electrical generator. It operates without a power source. The most common types are quite durable, and are widely used as vocal and instrument mics.
Effects
Special processes that modify or enhance the sound in some way, such as causing it to distort, adding reverberation, or delaying it, etc. Also used to refer to the device or processor that produces the effect.
Effect patch
A state or settings that specifies an effect, stored under a number or name. By recalling an effect patch you can reproduce the state of the effect at any time.
Effect processor
A device that adds an acoustical effect such as reverberation, distortion, or modulation. The CDX-1 contains a built-in effect processor. This manual may refer to the “effect processor” simply as “effect.”
Error message
A message that appears in the display when an incorrect operation has been performed, or when data could not be processed correctly.
Fade-in
Fade-out
Fade-in means to gradually raise the volume (for example, at the beginning of a song). Fade-out means to gradually lower the volume until silence is reached.
Fader
Faders are the sliders that are arranged on the panel of the console, and used mainly to adjust the volume.
Formant
A fixed frequency region of emphasis that is determined by the size of the vocal cords, and which determines the character of a human voice. When a recorded voice is simply lowered in pitch, the location of the formants is also changed. For example when the pitch is raised, the resulting “duck voice” sounds as though the singer has smaller vocal cords. Lowering the pitch produces a “giant voice” that sounds as though the singer has larger vocal cords.
Format
When used as a verb, "format" refers to the act of re-writing the data storage divisions on a magnetic disk or memory card etc. so that it conforms to the storage methods used by a particular device. On the CDX-1, a newly purchased CD-RW disc or one that has been used by a different device must be formatted by this system before it can be used. When a storage medium is formatted, any data previously existing on that medium will normally be lost.
Finalize
This is the operation that writes the TOC to a prepared audio disc. Whereas additions and changes can be made to discs that have not yet been finalized, such discs are not playable on regular CD players.
Foot switch
A switch that is operated by stepping on it. Various operations can be performed by pressing a pedal instead of operating a button. This permits operation even while both hands are occupied, such as when you are playing an instrument.
Frame
This refers to the individual still images that make up a moving picture on a video recorder etc. In the context of SMPTE time code or MTC, a "frame" is a unit of time. The frame rate selection determines whether a frame corresponds to 1/30th or 1/24th of a second.
→ Frame rate
→ SMPTE time code
→ MIDI time code
Frame rate
The number of frames per second in SMPTE time code etc. Also refers to the type of time code indicated thereby. The frame rate can be 30, 39.97N (non-drop), 29.97D (drop), 25, or 24 per second.
→ SMPTE time code
→ Frame
Initialize
To restore the parameters of a device to their basic state.
Insert effect
An effect that is used by inserting it directly into the signal path. Examples of insertion effects include distortion, equalizer, compressor, and wah. Normally these are used without mixing in the original dry (direct) sound.
→ Loop effect
Impedance
The total resistance of an electrical circuit to an alternating voltage such as audio, expressed in units of an Ohm ( ). When transmitting a signal, the output impedance of the transmitting device must match the input impedance of the receiving device. If not, problems such as distortion, noise, and lowered signal level can occur.
On the CDX-1, a high-impedance input jack are used for directly connecting guitar and bass.
Loop effect
The path by which signals are sent from a mixer to internal or external effects, and the sound produced by an external device is returned to the mixer, is collectively referred to as "Loop Effect." When using a loop type effect, the effect sound will be combined with the original sound.
→ Insert effect
Master
- A parameter, knob, or fader that affects all channels in common.
- When two or more devices (sequencers, drum machines, recorders, video devices etc.) are operated in synchronization, the device that transmits tempo or time data is called the "master." (The devices that receive this data and follow it are called "slaves.")
MIDI
An abbreviation for Musical Instrument Digital Interface, a unified standard for exchanging performance data, time data, and various settings etc. between electronic musical instruments, computers, and audio devices etc. The CDX-1 is MIDI-compatible, and has two MIDI connectors; MIDI IN and MIDI OUT (also providing MIDI THRU functionality). When these connectors are connected to other MIDI devices, a variety of applications are possible.
MIDI implementation chart
A table that makes it easy to confirm the types of MIDI messages that can be transmitted and received by a device. Check the MIDI implementation charts of both devices that you intend to connect, and use MIDI messages that are supported by both devices. In this manual, the MIDI implementation chart is on p. 216.
MIDI time code, MTC
A type of MIDI message that is used to accurately synchronize a MIDI device with professional tape recorders, sequencers, or video devices. The master device transmits data indicating the current absolute time (hours/minutes/seconds/frames from the beginning), and the slave device will advance its own time accordingly. In order to use MTC, the other device must also support MTC synchronization, or you can use an MTC to SMPTE converter. Because MTC does not contain tempo information, the displayed measures and beats may not necessarily match.
MTC also allows various frame rates. In order to use MTC for synchronization, the frame rates of both devices must be set to match.
→ Master
→ Slave
→ Frame rate
Mix down
In music production using a multitrack recorder, this is the process of adjusting the mix balance of multiple tracks and combining them into two-channel stereo.
MMC
An Abbreviation for MIDI machine Control. This is a set of MIDI system exclusive messages used to operate multiple devices form a single device. The CDX-1 supports MMC. By using MMC, a MIDI device connect to the CDX-1 can be controlled by the CDX-1 to perform operations such as start, and fast-forward. Since MMC is intended to synchronize operations such as playback, recording, and fast-forward, you must also use MIDI Clock or MTC to achieve time-based synchronization.
→ MIDI Clock
→ MTC
Glossary
Monitor
The action of auditioning or listening to an audio signal. What a recording engineer does when listening to the sound that is being recorded, or what a performer does when listening to other parts.
Multitrack
Having multiple tracks, such as 4, 8, 16, or 24 etc.
"Multitrack recorder."
→ Track
Multitrack recording
The process of using a multitrack recorder to record each part or instrument on a separate track.
Mute
To silence something. On the CDX-1, you can mute individual audio tracks by pressing the relevant [STATUS] button, extinguishing its light.
Note number
A number included in a MIDI note message to specify the note location on a keyboard. A number of 0-127 is assigned to each semitone of the keyboard, with middle C (C4) as number 60.
NTSC format
The color television format used in the United States and Japan. Tapes recorded in NTSC format cannot be played on a SECAM format or PAL format video deck.
→ SECAM format, PAL format
Optical
A type of digital audio connector to which an optical cable can be connected. In contrast, a type of digital audio connector to which a coaxial cable can be connected are referred to as "coaxial." The CDX-1's digital audio connector conforms to S/P DIF.
→ S/P DIF
→ Coaxial
Pad
A surface that is struck, or a button used to play sound on an electronic drum, drum machine, or sampler. The CDX-1 has eight pads.
PAL format
→ SECAM format
Pan
The direction from which a sound is heard when played back in stereo. Also refers to the knob that adjust this.
Parameter
A setting that can be adjusted to modify the sound or operation of an electronic device or electronic musical instrument. An example of use would be; "This effect has three parameters: level, drive, and tone." The setting or level of a parameter is called its "value."
Punch-in, Punch-out
Punch-in/out recording is a procedure by which a specific portion of a track (between two specified times) can be re-recorded. Punch-in means to begin recording (i.e., to instantaneously switch from song playback to recording), and punch-out means to stop recording (by instantly switching from recording back to playback). A button or foot switch can be used to punch in and out (manual), or punch-in/out can occur automatically at previously specified locations (auto).
Sample rate
A number that indicates how many times per second the analog signal is digitized when converting from analog audio (or other analog signal) into digital audio. In the case of audio processing, the sample rate is given in units of "kHz."
In general, a higher sample rate will allow better frequency response and will provide a more faithful reproduction of the original sound. On the other hand, a lower sample rate will allow longer recording/playback with the same memory capacity (tape length, disk size).
SECAM format, PAL format
Color television formats used in Europe etc. Tapes recorded in SECAM format or PAL format cannot be played on a NTSC format video deck.
→ NTSC format
Send/Return type effect
→ Loop effect
Slave
When two or more devices are operated in synchronization, one device (the master) transmits tempo or time data, and the other devices (the slaves) receive this data and follow it.
Sync, Synchronization
These terms refer to linking the time progression of two or more recorders, sequencers, video devices, or rhythm machines. One of the devices must be set to be the master, and will transmit synchronization data. The remaining devices (slaves) will receive this data, and will align their own time accordingly.
→ MIDI time code
→ MIDI clock
SMPTE time code
A signal format defined by the Society of Motion Picture and Television Engineers (United States) for the purpose of synchronizing multiple video/audio devices. The time location is expressed as "hours:minutes:seconds:frames," and is widely used on professional equipment to manage absolute time.
S/P DIF
S/P DIF stands for Sony/Philips Digital Interface Format. This is a specifications for transmitting and receiving stereo digital audio signals between digital audio devices. The CDX-1 provides coaxial and optical connectors which supports S/P DIF.
TOC
Short for Table of Contents. This is the region on the CD-R disc that handles information such as song times, end times, sequence, and so on. Although the songs on a disc and their playing time can be displayed when an audio CD is placed in a CD player, this is because they can be read automatically from the TOC. The TOC is recorded differently than music data, with its main characteristic being disc access, such as the ability to go to the start of any song instantly.
Track
Multitrack recorders, disk recorders, and sequencers etc. have multiple "tracks" on which the parts that make up a song can be independently recorded and managed. Each track can record and play back audio (or performance data in the case of a MIDI sequencer) along a time axis. The CDX-1 provides multitrack recorder tracks (1–8) and sequence tracks (A–D).
TRS type (Tip-Ring-Sleeve plug)
A special type of quarter-inch phone plug and jack that has three contacts. Widely known from its use as a headphone plug.
→ Balanced connection
Value
The setting of a parameter.
→ Parameter
Redo
After using Undo to cancel a setting or operation, you can use Redo to go back to the settings that were in effect before you used Undo.
Unbalanced connection
A method of transmitting a signal using two electrical conductors. Broadly used on electric instruments and consumer audio devices.
→ Balanced connection
Undo
A function that allows an operation performed in error to be cancelled, returning to the state before that operation was performed. Redo is a function that “cancels the Undo operation.”
WAVE file
The WAVE file is the standard form file of the audio data that be able to use it with Microsoft Windows.
The file name has ".WAV".
* Microsoft and Windows are registered trademarks of Microsoft Corporation.
XLR Jack
The collective name for the “XLR” series jacks developed by Cannon Electric Corporation (USA) and compatible jacks manufactured by other companies. Also called “Cannon.” On the CDX-1, 3-pin XLR jacks are used for the mic inputs (1, 2).
Parameter List

- The setting of the Tuner parameter, LCD Contrast parameter, System parameter and MIDI parameter are stored in internal memory.
- When you operate saving the setting of Song, the settings of parameters with symbol are stored on a CD-RW disc.
■ Mixer Parameter (★)
Parameter name Display Initial Value Value
| Input Level - current panel setting 0–127 | |||
| Audio Track Fader Level - current panel setting 0–127 | |||
| Pad/Sequence Fader Level - current panel setting 0–127 | |||
| Master Fader Level - current panel setting 0–127 | |||
| Input Select - LINE L/R MIC1, MIC2/GUITAR/BASS, | LINE L/R, SIMUL, MUTE | ||
| Pan PAN 0 L100–0–R100 | |||
| Equalizer Stereo Link | EQ StereoLink OFF OFF, ON | ||
| Equalizer On/Off EQ On/Off | OFF OFF, ON | ||
| Equalizer Low Gain | Low Gain | 0 dB | -12–+12 dB |
| Equalizer Low Frequency | Low Freq | 300 Hz | 40 Hz–1.5 kHz |
| Equalizer High Gain | High Gain | 0 dB | -12–+12 dB |
| Equalizer High Frequency | High Freq | 4.0 kHz | 500 Hz–18.0 kHz |
| Chorus/Delay/Doubling Send Level | CHORUS/DELAY/DOUBL'N: SEND | 0 0–100 | |
| Reverb Send Level | REVERB: SEND | IN/TR1-8/PAD: 20, RHYTHM: 10 | 0–100 |
| Reverb Return Level | - current panel setting 0–100 | ||
Chorus/ Delay/ Doubling
Parameter name Display Initial Value Value
| Effect Type | Effect Type | DELAY | CHORUS, DELAY, DOUBL'N |
| Chorus | |||
| Rate | Rate | 10 0–100 | |
| Depth | Depth | 10 0–100 | |
| Pre Delay | Pre Delay | 10.0 mS | 0.5–50.0 mS |
| Effect Level | Effect Level | 100 | 0–100 |
| Delay | |||
| Delay Time Delay Time | 370 | 10–1000 mS | |
| Feedback | Feedback | 30 0–100 | |
| Effect Level | Effect Level | 30 0–100 | |
| Reverb Send Level | Reverb Send | 50 0–100 | |
| Doubling | |||
| Delay Time Delay Time | 20.0 mS | 05–50.0 mS | |
| Effect Level | Effect Level | 100 | 0–100 |
Reverb
Parameter name Display Initial Value Value
| Reverb Type | Reverb Type | HALL | ROOM, HALL |
| Reverb Time | Reverb Time | 2.0 | 0.1–10.0 |
| Tone | Tone 0 -12-0-+12 |
■ Rhythm Guide Parameter (★)
Parameter name Display Initial Value Value
| Rhythm Guide Auto/On/Off Beat | - OFF OFF, AUTO, ON Beat | 4/4 | 1/1–8/1, 1/2–8/2, 1/4–8/4, 1/8–8/8, TEMPO MAP |
| Tempo | Tempo | 120.00 | 20.00–250.00 |
| Pattern | Pattern | 01 | 01–** (*) |
| Rhythm Guide Level | Level | 60 | 0–100 |
* The settable range for Pattern will change depending on the Beat.
■ Pad Recording Parameter
Parameter name Display Initial Value Value
| Data Type Data Type STANDARD HIGH, STANDARD, LONG1, LONG2 |
| Sampling Type Type STEREO STEREO, MONO |
| Start With Start with MANUAL MANUAL, LEV.1-LEV.8, PAD, [ ] |
| Pre Trigger Pre Trigger OFF OFF, 20ms, 40ms, 80ms, 160ms, 320ms |
■ Edit Pad Parameter
Tempo Match
Parameter name Display Initial Value Value
| Base Sample | Base Pad | Bank**-** | Bank No.1-64, Pad No.1-8 |
| Source Sample | Source | Bank**-** | Bank No.1-64, Pad No.1-8 |
| To | To | Bank 1-1 | Bank No.1-64, Pad No.1-8 |
Divide Sample
Parameter name Display Initial Value Value
| Divide Type | Type END POINT | END POINT, AUTO 0.5, AUTO 1.0,AUTO 1.5, AUTO 2.0, MANUAL | |
| Source Sample | Source | Bank**-** | Bank No.1-64, Pad No.1-8 |
| Destination Pad Number | To | Bank 1-1 | Bank No.1-64, Pad No.1-8 |
| Threshold Threshold | **** LEV1-LEV8 (*1) | ||
| Trim | Trim | *** | OFF, ON (*2) |
*1 Valid when "Threshold" is "ON."
*2 Valid when "Type" is "AUTO 0.5," "AUTO 1.0," "AUTO 1.5," or "AUTO 2.0."
Trim Sample
Parameter name Display Initial Value Value
| Target Sample | Target | Bank**-** | Bank No.1-64, Pad No.1-8 |
| Threshold Threshold | LEV1 LEV1-LEV8 |
Normalize
Parameter name Display Initial Value Value
| Source Sample | Source | Bank**-** | Bank No.1-64, Pad No.1-8 |
| Destination Pad Number | To | Bank 1-1 | Bank No.1-64, Pad No.1-8 |
Time Stretch
Parameter name Display Initial Value Value
| Source Sample | Source | Bank**-** | Bank No.1-64, Pad No.1-8 |
| Destination Pad Number | To | Bank 1-1 | Bank No.1-64, Pad No.1-8 |
| Ratio | Ratio | 100.0 | 50.0-150.0 |
| New BPM | New BPM | ***.** | 20.00-500.00 |
Create Reversal
Parameter name Display Initial Value Value
| Source Sample | Source | Bank**-** | Bank No.1-64, Pad No.1-8 |
| Destination Pad Number | To | Bank 1-1 | Bank No.1-64, Pad No.1-8 |
■ Pad Parameter
Parameter name Display Initial Value Value
| Pad Play | Pad Play | GATE | GATE, TRIGGER, DRUM |
| Loop Mode | Loop Mode | OFF OFF, START-END, LOOP-END | |
| Start Point | Start Point | 00000000 | 00000000-99999999 |
| Loop Point | Loop Point | 00000000 | 00000000-99999999 |
| Length | Length(→END) | 00000000 | 00000000-99999999 |
| Sample Level | Level | 100 | 0-100 |
| Mute Group | Mute Group | OFF OFF, GROUP-1-GROUP-7 | |
| BPM Base Note | BPM Base Note | ♩ | ♩, ♪, ♫, ♬ |
| X | 8 | 1-255 | |
Parameter List
■ Pad Bank Parameter
Parameter name Display Initial Value Value
| Bank Number Bank 1 1-64 |
| Bank Name Name - 10 characters |
| Foot Switch PAD Foot Switch PAD 1 1-8 |
■ Pad Bank Erase Parameter
Parameter name Display Initial Value Value
| Erase Bank Bank 1 1–64 |
■ Pad Bank Protect Parameter
Parameter name Display Initial Value Value
| Bank Number Bank 1 1-64 |
| Pad Bank Protection Protect OFF OFF, ON |
■ Sequence Parameter (★)
Parameter name Display Initial Value Value
| Sequence play ON/OFF - OFF OFF, ON |
| Sequence track status - OFF OFF, ON |
■ Pad Sequencing Parameter
Parameter name Display Initial Value Value
| Recording Mode Select | RecMode SEL | REAL TIME | REAL TIME, STEP |
| Sequence Track Select | Tr.SEL | A A-D |
Real Time Recording
Parameter name Display Initial Value Value
| QuantizeStart With | QuantizeStart/W | OFFCont1M | MEAS, ♩, ♩, ♩3, ♩, ♩3, ♩, ♩3, OFFNorm, Cont1M, Cont2M, PAD |
Step Recording
Parameter name Display Initial Value Value
| Step | Step | SMPL | SMPL, MEAS, |
| Duration | Duration | 100 1-100 |
■ Song Parameter (★)
Parameter name Display Initial Value Value
| Song Name | Name - 10 characters | |
| Marker Stop | Marker Stop | OFF OFF, ON |
■ Tuner Parameter
Parameter name Display Initial Value Value
| Pitch | PITCH 440 435-445 |
■ LCD Contrast Parameter
Parameter name Display Initial Value Value
| LCD Contrast | LCD Contrast | 8 0–15 |
■ System Parameter
Parameter name Display Initial Value Value
| Big Time Display Time DispFoot Switch | TIME CODEFoot SW | TIME CODE, MEASUREPLAY/STOP | PLAY/STOP, PUNCH I/O,SAMPLER TRIG |
| Audio CD FaderCD Digital REC | Audio CD FaderCD DigitalREC | ONOFF OFF, ON | OFF, ON |
| Digital Copy ProtectWAVE file preview length | D.CopyprotectWave Preview | ON4sec | THRU, ON1sec-10sec |
■ MIDI Parameter
Parameter name Display Initial Value Value
| Rhythm MIDI Channel Rhythm Ch. OFF OFF, 1–16 | |||
| Pads Rx Channel Pads Rx Ch. 1 OFF, 1–16 | |||
| Pads Note Number RxNote(Pad1) 48(C3) 0(C-)-120(C9) | |||
| Pads Tx Channel Pads Tx Ch. OFF OFF, 1–16 | |||
| MMC Mode MMC Mode OFF OFF, MASTER, SLAVE | |||
| Sync Out Sync Out | OFF OFF, MTC | ||
| MTC Type | MTC Type 30 30, 29N, 29D, 25, 24 | ||
| Out/Thru Select | Out/Thru | OUT | OUT, THRU |
■ CD-RW Disc Format Parameter
Parameter name Display Initial Value Value
| Data Type | Data Type | STANDARD | STANDARD, LONG1, LONG2 |
| Format Type | Format Type | STANDARD | STANDARD, FULL |
■ Marker Parameter (★)
Parameter name Display Initial Value Value
| Marker Number | No. | 1 1–100 | |
| Marker Name | Name | - | 8 characters |
| Marker Location | Loc.- | 00:00:00-00–23:59:59-** (*) |
* The settable range for Mark Location will change slightly on the MTC Type (MIDI parameter).
■ Temp Map Parameter (★)
Parameter name Display Initial Value Value
| Measure | MEAS | 1 1–9999 | |
| Tempo | TEMPO | 120.00 | 20.00–250.00 |
| Bcat | BEAT 4/4 | 1/1–8/1, 1/2–8/2, 1/4–8/4, 1/8–8/8 | |
| Pattern | PATTERN | Rock 1 | Rock 1-** (*), OFF |
* The settable range for Pattern will change depending on the Beat.
■ Effects Location Parameter (★)
Parameter name Display Initial Value Value
| Insert Mode | Insert Mode INPUT (NORMAL) | INPUT (NORMAL), |
| INPUT (REC DRY), | ||
| TRACK1-8, | ||
| TRACK1&2-7&8, MASTER |
■ Mastering Tools Parameter
Parameter name Display Initial Value Value
| Mastering Toll Patch | MTK Patch | Mixdown Mixdown, Premastr, LiveMix,PopMix, DanceMix, KingMix,HardComp, SoftComp, ClnComp,DnceComp, OrchComp, VacalComp,Accoustic, RockBand, Orchr,LoBoost, Brighten, DJsVoice,PhoneVox, Cassette, Phono |
| Input Level | Input Level | 0 dB-24–12 dB |
■ Master Parameter (★)
Parameter name Display Initial Value Value
| Master Balance | Balance | 0 L100–0–R100 |
MIDI Implementation
Model CDX-1 Version 1.01, Apl. 16 2001
1. RECOGNIZED RECEIVE DATA
■ Channel Voice Message
- Note On/Off
Receive the note number which is designated with "RxNote", in the MIDI channel number which is designated with "Pads Rx Ch." in the UTILITY "MIDI."
Status
Second Third
—
9nH mmH III
n = MIDI Channel No.: 00H-0FH (ch.1-ch.16)
mm = Note No.: 0011-7F11 (0-127)
II = Velocity: 01H-7FH (1-127) / 00H = NOTE OFF
- Program Change
Works as bank switch when MIDI channel number is set for playing the sample.
Status Second
—
CnHppH
n = MIDI Channel No.: 0011-0FII (ch.1-ch.16)
pp = Program No.: 00H-3FH (0-63)
■ Channel Mode Message
• All Sound Off (Controller Number 120)
Mutes all sounding notes, in the MIDI channel number which is designated with "Pads Rx Ch." in the UTILITY "MIDI."
Status Second Third
—
BnH 78H 00H
n = MIDI Channel No.: 00H-0FH (ch.1-ch.16)
• All Note Off (Controller Number 123)
Mutes all sounding notes, in the MIDI channel number which is designated with "Pads Rx Ch." in the UTILITY "MIDI."
Status Second Third
—
BnH 7BH 00H
n = MIDI Channel No.: 00I I-0FII (ch.1-ch.16)
- System Exclusive Message
Status Data Bytes Status
—
F0H iiH,ddH,...,eeH F7H
Byte Description
FOII Status of System Exclusive Message
iiH
Manufacturer ID
41H RolandsManufacturerID'
F711 EOX (End of System Exclusive Message)
• Universal System Exclusive Message
○INQUIRY MESSAGE
◇ Identity Request
Status Data Bytes Status
—
F0117E11, Dev, 0611, 0111 F711
Byte Description
FOH Status of System Exclusive Message
7EII Universal System Exclusive Message Non Realtime Header
Dev Device ID (10H or 7FH)
06H General Information
(sub-ID #1)
F7H EOX (End of System Exclusive Message)
The message is used to request the particular of the CDX-1.
If CDX-1 received the message and the device ID of the message is same as 10H or 7FH, the
CDX-1 transmits the prescribed Identity Replay message.
○ MIDI Machine Control Commands
Status Data Bytes
Status
F0117F11, Dev, 0611, aall,..., bb
F711
Byte Description
(No text)
FOH Status of System Exclusive Message
7FH Universal System Exclusive Message Realtime Header
Dev Device ID (10H or 7FII)
06H MMC Command Message
aaH Command
|
bbH Command
F71 EOX (End of System Exclusive Message)
* See "2. MIDI Machine Control" section.
2. MIDI Machine Control
■ MIDI Machine Control Details
- STOP (MCS)
Status Data Bytes Status
-
F0H 7FH, Dev, 06H, 01H F7H
Byte Description
—
FOH Status of System Exclusive Message
7FH Universal System Exclusive Message Realtime Header
Dev Device ID (10H or 7FH)
06H MMC Command Message
01H STOP (MCS)
F7H EOX (End of System Exclusive Message)
If the device ID on the message was as same as that of the receiving 10H or 7FH, the CDX-1 stops immediately.
- PLAY (MCS)
Status Data Bytes Status
The Ground Truth image displays a single, solid horizontal line. According to Rule 2 (UNDERSCORE & LINE RULES), if the GT contains lines used for stylistic emphasis or as background (like ruled paper), the OCR result must ignore them. The provided OCR content is "____", which consists of four underscores. This is an incorrect interpretation of the line as a placeholder symbol, violating the rule that stylistic/background lines must be ignored. Therefore, the OCR output is inconsistent with the Ground Truth.
F0H 7FH, Dev, 06H, 02H F7H
Byte Description
—
F0H Status of System Exclusive Message
7F11 Universal System Exclusive Message Realtime Header
Dev Device ID (10H or 7FH)
06H MMC Command Message
02H PLAY (MCS)
F711 EOX (End of System Exclusive Message)
If the device ID on the message was as same as that of the receiving 10H or 7FH, the CDX-1 goes into the playback condition.
• DEFERRED PLAY (MCS)
Status Data Bytes Status
—
F0H 7FH, Dev, 06H, 03H F7H
Byte Description
—
F0H Status of System Exclusive Message
7F11 Universal System Exclusive Message Realtime Header
Dev Device ID (10H or 7FH)
06H MMC Command Message
03H DEFERRED PLAY (MCS)
F711 EOX (End of System Exclusive Message)
If the device ID on the message was as same as that of the receiving 10H or 7FH, the CDX-1 goes into the playback condition after the locate operation.
F7H EOX (End of System Exclusive Message)
If the device ID on the message was as same as that of the receiving 10H or 7FH, the CDX-1 goes into the fast forward condition.
- REWIND (MCS)
Status Data Bytes Status
F0H 7FH, Dev, 06H, 05H F7H
Byte Description
FUH Status of System Exclusive Message
7FH Universal System Exclusive Message Realtime Header
Dev Device ID (1011 or 7F11)
06H MMC Command Message
05H REWIND (MCS)
F7H FOX (End of System Exclusive Message)
If the device ID on the message was as same as that of the receiving 10H or 7FH, the CDX-1 goes into the rewind condition.
- RECORD STROBE
Status Data Bytes Status
F0H 7FH, Dev, 06H, 06H F7H
Byte Description
FOII Status of System Exclusive Message
7FH Universal System Exclusive Message Realtime Header
Dev Device ID (10H or 7FH)
06H MMC Command Message
0611 RECORD STROBE
F7H EOX (End of System Exclusive Message)
If the device ID on the message was as same as that of the receiving 10H or 7FH, the CDX-1 goes into the following condition.
- The CDX-1 is in the playback condition.
Start Recording the tracks that status are the record standby mode.
- The CDX-1 is in the stop condition.
Start Playing back, and Start Recording the track that status are record standby mode.
- RECORD EXIT
Status Data Bytes Status
F0H 7FH, Dev, 06H, 07H F7H
Byte Description
FOH Status of System Exclusive Message
7FH Universal System Exclusive Message Realtime Header
Dev Device ID (10H or 7FH)
06H MMC Command Message
0711 RECORD EXIT
F7H EOX (End of System Exclusive Message)
If the device ID on the message was as same as that of the receiving 10H or 7FH, the CDX-1 exits from the record condition.
- LOCATE (MCP)
○ Format 2-LOCATE [TARGET]
Status Data Bytes Status
F0H 7FH, Dev, 06H, 44H, 06H, 01H, hrH, mnH, scH, frH, ffH F7H
Byte Description
FUH Status of System Exclusive Message
7FH Universal System Exclusive Message Realtime Header
Dev Device ID (10H or 7FH)
06H MMC Command Message
44H LOCATE (MCP)
06H Number of Bytes
01H "TARGET" sub command
hr11, mn11, scl1, fr11, ffl1 Standard Time with Sub Frame
F7H EOX (End of System Exclusive Message)
If the device ID on the message was as same as that of the receiving 10H or 7FH, the CDX-1 locates the specified time location received from the command.
3. TRANSMITTED DATA
■ Channel Voice Message
- Note On/Off
Transmit the number/velocity which is designated, in the MIDI channel number "1" - "16" which is designated with "Rhythm Ch." in the UTILITY "MIDI."
The MIDI Channel number specified in "Pads Tx Ch." in the UTILITY "MIDI" and the Note number specified in "RxNote(Pad1)" are output.
In this case, Velocity is fixed at 100.
Status Second Third
9nH mmH 11H
n = MIDI Channel No.: 00H-0FH (ch.1-ch.16)
mm = Note No.: 00H-7FH (0-127)
II = Velocity: 01H-7FH (1-127) / 00H = NOTE OFF
- Program Change
Works as bank switch, in the MIDI channel number which is designated with "Pads Rx Ch." in the UTILITY "MIDI."
Status Second
CnH
ppH
n = MIDI Channel No.: 00H-0FH (ch.1-ch.16)
pp = Program No.: 0011-3F11 (0-63)
■ System Common Messages
• MIDI Time Code Quarter Frame Messages
MIDI Time Code Quarter Frame Messages can be transmitted while the CDX-1 is running (Playing or Recording) if the SONG parameter "Sync Out" is "MTC."
Status Second
F1H mmH (= 0nnndddd)
nnn = Message type:
0 = Frame count LS nibble
1 = Frame count MS nibble
2 = Seconds count 1.5 nibble
3 = Seconds count MS nibble
4 = Minutes count LS nibble
5 = Minutes count MS nibble
6 = Hours count LS nibble
7 = Hours count MS nibble
dddd = 4 bit nibble data: 0H-FH (0-15)
If the upper and lower 4 bits of the count are combined, these bit fields are assigned as follows.
Frame Count
xxxxyyyy
xxx Reserved (000)
yyyy Frame No. (0-29)
Seconds Count
xxyyyyy
xx Reserved (00)
yyyyy Seconds Count (0–59)
Minutes Count
xxyyyyyy
xx Reserved (00)
yyyyy Minutes Count (0–59)
Hours Count
xyy72777.
x Reserved (0)
yy Time Code type
0 = 24 Frames/Sec
1 = 25 Frames/Sec
2 = 30 Frames/Sec (Drop Frame)
3 = 30 Frames/Sec (Non Drop Frame
1 Hours Count (0–23)
MIDI Implementation
■ System Exclusive Message
Status Data Bytes Status
(No text)
FOII iil1, ddl1, ..., eel1 F7II
Byte Description
FOH Status of System Exclusive Message
iiH Manufacturer ID
41H RolandsManufacturerID'
41H Manufacturer ID (Roland)
3B11, 01H Device Family Code (CDX-1)
00H, 00H Device Family No.
ssH, ssH, ssH, ssH Software Revision Level
F7H EOX (End of System Exclusive Message)
The CDX-1 transmits as the device ID 10H.
○ MIDI Time Code
Status Data Bytes Status
F0H 7FH, Dev, 01H, 01H, hr, mn, sc, fr F7H
Byte Description
FOH Status of System Exclusive Message
7FH Universal System Exclusive Message Realtime Header
Dev Device ID
01H MIDI Time Code (sub-ID #1)
2 = 30 frame/sec (Drop frame)
3 = 30 frame/sec (Non-drop frame)
77772 Hours (0-23)
mn Minutes (0-59)
sc Seconds (0-59)
fr Frames (0-29)
F7H EOX (End of Exclusive)
If the time locate is operated effectively, the CDX-1 transmits as the device ID 7FH.
○ MIDI Machine Control Commands
Status Data Bytes Status
F0H 7FH, Dev, 06H, aaH, ..., bb F7H
Byte Description
FOH Status of System Exclusive Message
7FH Universal System Exclusive Message Realtime Header
Dev Device ID
0611 MMC Command Message
aaH Command
| |
bbH Command
F7H EOX (End of System Exclusive Message)
* See "4. MIDI Machine Control" section.
4. MIDI Machine Control
■ MIDI Machine Control Details
- STOP (MCS)
Status Data Bytes Status ____ ____
F0H 7FH, Dev, 06H, 01H F7H
Byte Description
F0H Status of System Exclusive Message
7FH Universal System Exclusive Message Realtime Header
Dev Device ID
06H MMC Command Message
01H STOP (MCS)
F7H EOX (End of System Exclusive Message)
If the transport switch [STOP] was pressed, the CDX-1 transmits as the device ID 7FH.
• DEFERRED PLAY (MCS)
Status Data Bytes ____ Status ____
F0H 7FH, Dev, 06H, 03H F7H
Byte
Description
FOI Status of System Exclusive Message
7FH Universal System Exclusive Message Realtime Header
Dev Device ID
06H MMC Command Message
03H DEFERRED PLAY (MCS)
F7H EOX (End of System Exclusive Message)
If the transport switch [PLAY] was pressed, the CDX-1 transmits as the device ID 7FH.
• RECORD STROBE
Status Data Bytes Status ____
F0H 7FH, Dev, 06H, 06H F7H
Byte Description
FOH Status of System Exclusive Message
7FH Universal System Exclusive Message Realtime Header
Dev Device ID
06H MMC Command Message
06H RECORD STROBE
F7H EOX (End of System Exclusive Message)
If the transport switch [REC] was pressed out of the recording condition, the CDX-1 transmits as the device ID 7FH.
- RECORD EXIT
Status Data Bytes Status
F0H 7FH, Dev, 06H, 07H F7H
Byte Description
FOH Status of System Exclusive Message
7FH Universal System Exclusive Message Realtime Header
Dev Device ID
06H MMC Command Message
07H RECORD EXIT
F7H EOX (End of System Exclusive Message)
If the transport switch [REC] was pressed while recording, the CDX-1 transmits as the device ID 7FH.
- LOCATE (MCP)
○ Format 2-LOCATE [TARGET]
| Status | Data Bytes | Status |
| F0H | 7FH, Dev, 06H, 44H, 06H, 01H, hrH, mnH, scH, frH, ffH | F7H |
| Byte | Description |
| F011 | Status of System Exclusive Message |
| 7FH | Universal System Exclusive Message Realtime Header |
| Dev | Device ID |
| 06H | MMC Command Message |
| 44H | LOCATE (MCP) |
| 06H | Number of Bytes |
| 01H | "TARGET" sub command |
| hrH, mnH, scH, frH, ffH | Standard Time with Sub Frame |
| F711 | EOX (End of System Exclusive Message) |
If the time locate is operated effectively, the CDX-1 transmits as the device ID 7FH.
5. Appendices
- Decimal and Hexadecimal table
(Hexadecimal number is shown with H.)
In MIDI documentation, data values and addresses/sizes of system exclusive messages etc. are expressed as hexadecimal values for each 7 bits.
The following table shows how these correspond to decimal numbers.
| dec | hex | dec | hex | dec | hex | dec | hex |
| 0 | 00H | 32 | 20H | 64 | 40H | 96 | 60H |
| 1 | 01H | 33 | 21H | 65 | 41H | 97 | 61H |
| 2 | 02H | 34 | 22H | 66 | 42H | 98 | 62H |
| 3 | 03H | 35 | 23H | 67 | 43H | 99 | 63H |
| 4 | 04H | 36 | 24H | 68 | 44H | 100 | 64H |
| 5 | 05H | 37 | 25H | 69 | 45H | 101 | 65H |
| 6 | 06H | 38 | 26H | 70 | 46H | 102 | 66H |
| 7 | 07H | 39 | 27H | 71 | 47H | 103 | 67H |
| 8 | 08H | 40 | 28H | 72 | 48H | 104 | 68H |
| 9 | 09H | 41 | 29H | 73 | 49H | 105 | 69H |
| 10 | 0AH | 42 | 2AH | 74 | 4AH | 106 | 6AH |
| 11 | 0BH | 43 | 2BH | 75 | 4BH | 107 | 6BH |
| 12 | 0CH | 44 | 2CH | 76 | 4CH | 108 | 6CH |
| 13 | 0DH | 45 | 2DH | 77 | 4DH | 109 | 6DH |
| 14 | 0EH | 46 | 2EH | 78 | 4EH | 110 | 6EH |
| 15 | 0FH | 47 | 2FH | 79 | 4FH | 111 | 6FH |
| 16 | 10H | 48 | 30H | 80 | 50H | 112 | 70H |
| 17 | 11H | 49 | 31H | 81 | 51H | 113 | 71H |
| 18 | 12H | 50 | 32H | 82 | 52H | 114 | 72H |
| 19 | 13H | 51 | 33H | 83 | 53H | 115 | 73H |
| 20 | 14H | 52 | 34H | 84 | 54H | 116 | 74H |
| 21 | 15H | 53 | 35H | 85 | 55H | 117 | 75H |
| 22 | 16H | 54 | 36H | 86 | 56H | 118 | 76H |
| 23 | 17H | 55 | 37H | 87 | 57H | 119 | 77H |
| 24 | 18H | 56 | 38H | 88 | 58H | 120 | 78H |
| 25 | 19H | 57 | 39H | 89 | 59H | 121 | 79H |
| 26 | 1AH | 58 | 3AH | 90 | 5AH | 122 | 7AH |
| 27 | 1BH | 59 | 3BH | 91 | 5BH | 123 | 7BH |
| 28 | 1CH | 60 | 3CH | 92 | 5CH | 124 | 7CH |
| 29 | 1DH | 61 | 3DH | 93 | 5DH | 125 | 7DH |
| 30 | 1EH | 62 | 3EH | 94 | 5EH | 126 | 7EH |
| 31 | 1FH | 63 | 3FH | 95 | 5FH | 127 | 7FH |
* Decimal values such as MIDI channel, bank select, and program change are listed as one (1) greater than the values given in the above table.
A 7-bit byte can express data in the range of 128 steps. For data where greater precision is required, we must use two or more bytes. For example, two hexadecimal numbers aa bbH expressing two 7-bit bytes would indicate a value of aa x 128 + bb.
^6 In the case of values which have a ± sign, 00H = -64, 40H = ±0, and 7FH = +63, so that the decimal expression would be 64 less than the value given in the above chart. In the case of two types, 00 00II = -8192, 40 00II = ±0, and 7F 7FII = +8191.
* Data marked "nibbled" is expressed in hexadecimal in 4-bit units. A value expressed as a 2-byte nibble 0a 0bH has the value of a x 16 + b.
5AH = 90 according to the above table.
12H = 18, 34H = 52 according to the above table. So 18 x 128 + 52 = 2356.
0AH = 10, 03H = 3, 09H = 9, 0DH = 13 according to the table.
So ((10× 16 + 3)× 16 + 9)× 16 + 13 = 41885.
16)1258
16) 78 ... 10
16) 4 ... 14
() ... 4
0 = 00H, 4 = 04H, 14 = 0EH, 10 = 0AH According to the table.
So it is 00 04 0E 0AH.
MIDI Machine Control (MMC) Command
- Commands Recognized
Command Action
01H STOP STOP
02H PLAY PLAY
03H DEFERRED PLAY PLAY
04H FAST FORWARD FF
05H REWIND REW
06H RECORD STROBE REC/PUNCH IN
07H RECORD EXIT PUNCH OUT
- Commands Transmitted
Command Action
01H STOP STOP
03H DEFERRED PLAY PLAY
06H RECORD STROBE REC/PUNCH IN
07H RECORD EXIT PUNCH OUT
| Function... | Transmitted Recognized Remarks | |||
| Basic Channel | Default Changed | 1-16 1-16 | 1-16 1-16 | |
| Mode | Default Messages Altered | Mode 3 X********** | Mode 3 X X | |
| Note Number: | True Voice | O 0-127********** | O 0-127 0-127 | |
| Velocity | Note On Note Off | O 1-127 X9n, v = 0 | X X | |
| After Touch | Key's Channel's | X X | X X | |
| Pitch Bend | X | X | ||
| Control Change | X | X | ||
| Program Change :True Number | O********** | O 0-63 | Pad Bank1-64 | |
| System Exclusive | O | O | ||
| : Quarter Frame System : Song Position Common : Song Select : Tune Request | O *1 X X X | X X X X | ||
| System : Clock Real Time : Commands | X X | X X | ||
| Aux Messages : All Sound Off Reset All Controllers Local On/Off Active Sensing System Reset | X X X X X | O X X O X X | ||
| Notes | * 1 SyncOut=MTC Only | |||
| Mode 1 : OMNI ON, POLY Mode 2 : OMNI ON, MONO O : Yes Mode 3 : OMNI OFF, POLY Mode 4 : OMNI OFF, MONO X : No | ||||
Mixer Block Diagram
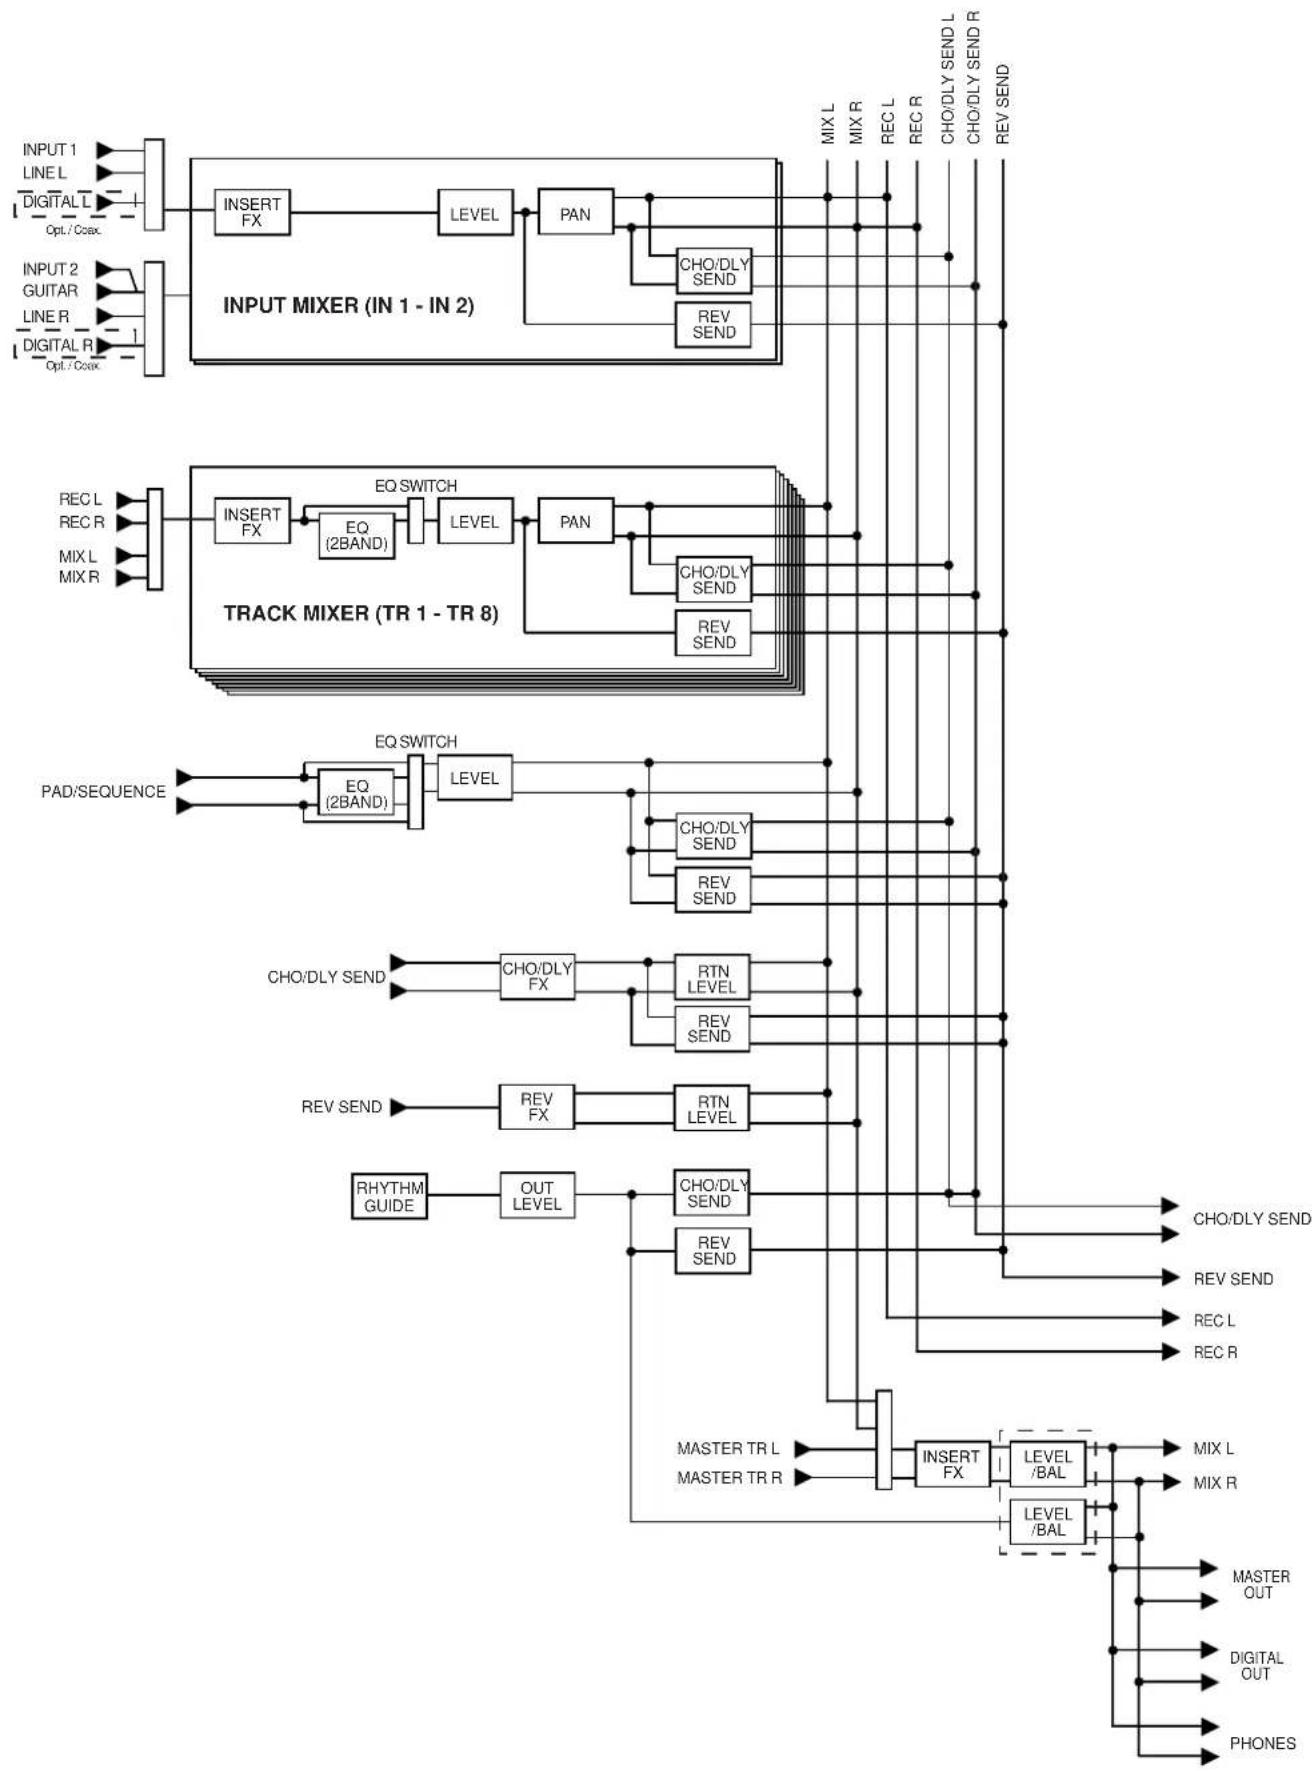
flowchart
graph TD
    A["PHONES"] --> B["MASTER TRL"]
    C["DIGITAL OUT"] --> D["LEVEL /BAL"]
    E["MASTER OUT"] --> F["MIX L"]
    B --> G["INSERT FX /BAL"]
    D --> H["LEVEL /BAL"]
    F --> I["MIX R"]
    G --> J["REV SEND"]
    H --> K["REV SEND"]
    I --> L["CHODLY SEND"]
    J --> M["RHYTHM OUT LEVEL"]
    K --> N["CHODLY SEND"]
    L --> O["REV SEND"]
    M --> P["REV SEND"]
    N --> Q["RECYTM"]
    O --> R["RECYTM"]
    P --> S["RECYTM"]
    Q --> T["RECYTM"]
    R --> U["RECYTM"]
    S --> V["RECYTM"]
    T --> W["RECYTM"]
    U --> X["RECYTM"]
    V --> Y["RECYTM"]
    W --> Z["RECYTM"]
    X --> AA["RECYTM"]
    Y --> AB["RECYTM"]
    Z --> AC["RECYTM"]
    AA --> AD["RECYTM"]
    AB --> AE["RECYTM"]
    AC --> AF["RECYTM"]
    AD --> AG["RECYTM"]
    AE --> AH["RECYTM"]
    AF --> AI["RECYTM"]
    AG --> AJ["RECYTM"]
    AH --> AK["RECYTM"]
    AI --> AL["RECYTM"]
    AJ --> AM["RECYTM"]
    AK --> AN["RECYTM"]
    AL --> AO["RECYTM"]
    AM --> AP["RECYTM"]
    AN --> AQ["RECYTM"]
    AO --> AR["RECYTM"]
    AP --> AS["RECYTM"]
    AQ --> AT["RECYTM"]
    AR --> AU["RECYTM"]
    AS --> AV["RECYTM"]
    AT --> AW["RECYTM"]
    AU --> AX["RECYTM"]
    AV --> AY["RECYTM"]
    AW --> AZ["RECYTM"]
    AX --> BA["RECYTM"]
Specifications
CDX-1:
MULTITRACK CD RECORDER / AUDIO SAMPLE WORKSTATION
- Audio Data Format
CDX-1 Original Format (R-DAC)
• Maximum Polyphony
Monaural x 8 (Stereo x 4) (Total)
- Audio Tracks
Number of Tracks: 8
Maximum Simultaneously Playback
Tracks: 8
Maximum Simultaneously Recording
Tracks: 2
Data Type: STANDARD
LONG 1
LONG 2
Recording Time: Data Type Time
STANDARD About 15 minutes
LONG 1 About 19 minutes
LONG 2 About 23 minutes
- Audio Sample PAD
Sample PAD: 512 Phrases (8 PAD x 64 Bank)
Maximum Polyphony: 4 (Stereo/Mono)
Memory Capacity: 15 MB (*)
* When expanding the Memory (DIMM: 128 MB): 111 MB
Data Type: HIGH
STANDARD
LONG 1
LONG 2
Sampling Time: Data Type Time
HIGH About 5 minutes
STANDARD About 7 minutes
LONG 1 About 9 minutes
LONG 2 About 11 minutes
* When expanding the Memory (DIMM: 128MB):
Data Type Time
HIGH About 43 minutes
STANDARD About 58 minutes
LONG 1 About 69 minutes
LONG 2 About 87 minutes
- Maximum number of phrases (events) to be memorized
2000 phrases
- Signal Processing
AD Conversion: 24 bits, 64 times oversampling
DA Conversion: 24 bits, 128 times oversampling
- Sample rate
44.1 kHz
• Frequency Response
20 Hz - 20 kHz (+0/-3 dB)
• Nominal Output Level (variable)
Guitar/Bass (Hi-Z): -26 dBu (SENS: MAX)
MIC 1, 2: -56 dBu (SENS: MAX)
LINE: 0 dBu (SENS: MAX)
- Input Impedance
Guitar/Bass (Hi-Z): 1M ohms
MIC 1, 2: 100k ohms
LINE: 30k ohms
- Nominal Output Level
Master Out: 0 dBu
• Output Impedance
Master Out: 1k ohms
Phones: 22 ohms
- Recommended Load Impedance
Master Out: 10 k ohms or greater
Phones: 8–600 ohms
- Residual Noise Level
Master Out: -77 dBu or less
(INPUT:LINE, ASENS: MAX, AIHF-A, typ.)
- Interface
Digital I/O: Coaxial, Optical (conforms to S/P DIF)
- Display
69.0 x 25.0 mm (backlit LCD)
- Connectors
MIC In Jack 1, 2 (1/4 inch TRS phone type)
MIC In Jack 1, 2 (XLR type)
Guitar/Bass (Hi-Z) Jack (1/4 inch phone type)
Line In Jack L/R (RCA phono type)
Digital In Connectors (Coaxial type, Optical type)
Master Out Jack L/R (RCA phono type)
Digital Out Connectors (Coaxial type, Optical type)
Phones Jack (Stereo 1/4 inch phone type)
Foot Switch Jack (1/4 inch phone type)
MIDI Connectors (In, Out/Thru)
- CD-RW Drive
x12 (Write), x10 (Rewrite), x32 (Read),
- Power Supply
DC 12 V: Supplied AC Adaptor (PSB-2U)
- Current Draw
2.8 A
- Dimensions
456.0 (W) x 330.0 (D) x 94.0 (H) mm
18 (W) x 13 (D) x 3-3/4 (H) inches
- Weight
5.0 kg/11 lbs (excluding AC adaptor)
- Accessories
AC Adaptor: PSB-2U
Owner's Manual
Effect Patch List
Demo Disc (Songs, Samples)
CD-RW blank disc
- Option
Foot Switch: FS-5U (BOSS)
Pedal Switch: DP-2
$$ (0 \mathrm{dBu} = 0. 7 7 5 \mathrm{Vrms}) $$
* In the interest of product improvement, the specifications and/or appearance of this unit are subject to change without prior notice.
Index
A
AC ADAPTOR Jack 30
ACOUSTIC GUITAR 192
ACOUSTIC MDL 188
Adjust Timing 104
Adjust Timing icon 104
AUDIO CD indicator 28
AUDIO CD PLAYER indicator 25
AUDIO CD RECORDER indicator 25
audio sample 54
AUDIO TRACK faders 23
AUDIO TRACK RECORD indicator 26
AUTO PUNCH button 27
B
Balanced connection 204
Bank
Erase 65
Protect 66
Bank Erase icon 65
Bank Parameter icon 55
Bank Protection icon 66
banks 54
BasePad 80
Basic screen
Big Time screen 37
Post-fader screen 37
Pre-fader screen 37
Sequence Play List screen 37
Song Information screen 37
BASS MDL 190
BASS MULTI 194
BNK 29
BOUNCE Button 26
BPM 77
BPM, beats per minute 204
BUSY indicator 28
C
CD 18
CD Burning 135
CD BURNING Button 26
CD burning screen 135
CD Digital REC. 148
CD direct recording 159
CD Player screen 48
CD Recorder function 160
CD recording screen 161-163
CD-R disc 18
CD-R Finalize icon 136
CD-R indicator 28
CD-RW Backup icon 147
CD-RW disc 18
CD-RW Disc Format icon 112
CD-RW indicator 28
CHORUS 174
Chorus 145
Clipboard 82
CLIPBOARD Button 25
Coaxial 204
COAXIAL connectors 31
Condenser microphone 204
Contrast 38,204
Cord Hook 30
COSM BASS AMP 196
COSM GUITAR AMP 185
CREATE Button 25
Create Reversal 86
Create Reversal icon 86
CURSOR Button 28
Cut 100
Cut icon 100
D
DAT 204
Data type multitrack recording .... 111 sampling .... 60
DELAY 174
delay 145
DELAY button 22
DELETE button 25
Delete Sample 65
demo disc 45
DIGITAL button 21
Digital Copy Prohibit 150
DIMM Diagnosis icon 16-17
DIMM diagnostics 17
disc inserting .... 35 removing .... 36
Disc Tray 30
DISPLAY Button 24
Divide icon 83-85
Divide Sample 83
DOUBL'N 174
doubling 145
DRUM 70
Dynamic microphone 204
E
Earth Connector 30
EDIT Button 25,29
Effects location icon 144
Eject button 28
Emergency eject hole 30
End Point 105
EQ 174
EQ Button 23
Equalizer 132
Erase 101
Erase icon 101
Erase Track icon 107
expanding memory cover 15
F
faded-in 71
faded-out 71
FF button 27
Finalize 136,204
foot switch 75
FOOT SWITCH Jack 31
Formant 204
Format 110
Format Type 110
FROM button 27
G
GATE 70
GUITAR/BASS Jack 31
H
HIGH 60
high-impedance 31
Hold 72
HOLD Button 25
|
IN button 27
Initialize 40
Initialize All Parameters icon 41
Initialize Effect Patch icon 41
Initialize Global Parameters icon 41
Initialize Mixer Parameters icon 41
Input Level 134
INPUT REC LEVEL knob 21
INPUT SELECT buttons 21
INPUT SENS knobs 21
insert effects 141
Insert icon 102
L
Length 78
Licensing 10
LINE button 21
LINE Jack 31
Load PAD/SEQ icon 68
Load WAVE file icon 58
LO-FI BOX 178
LONG1 60,111
LONG2 60,111
Loop Effect 174
loop effects 145
Loop mode 73
Loop point 78
LOOP-END 73
M
MARK 29
MARK button 26
Master Balance 132
MASTER fader 29
MASTER Jack 31
master track 133
mastering tools 134
MASTERING TOOLS Button 29
mastering track screen 133
memory 14
Memory Full. 64
MIC1 button 21
MIC1 jack 31
MIC2 jack 31
MIC2/Gtr/Bs button 21
MIDI Connectors 31
MIDI icon 152-153, 156
MIDI Implementation Chart 151
MIDI IN 152
MIDI OUT 152
MIDI THRU 152
MIDI Time Code 154
MIX DOWN Button 26
Mixdown 132
MMC 156
Move 98
Move icon 98
MTC 154
MTK Patch 134
Mute Groups 74
N
NO/EXIT Button 28
Normalize 87
Normalize icon 87
0
Offset 105
OPTICAL connectors 31
Optimize
Disc 127
Sample 64
OUT button 27
P
PAD BANKS 54
pad banks 54
PAD BANKS Button 24
Pad Crossfade 71
Pad Play 70
PAD REC button 25
PAD X FADE button 24
PAD/SEQ LEVEL fader 25
Pads 54
Pan 132
PAN Button 23
Paste 99
Paste icon 99
patch 141
PATCH button 22
PATTERN/TEMPO button 23
PEAK indicators 21
phone type 31
PHONES Jack 31
PHONES knob 22
phrase
Cutting 100
Dividing 103
Erasing 101
Inserting 102
Moving 98
Pasting 99
PLAY button 27
Power
off 34
on 33
POWER Switch 26
Pre Trigger 62
Preset patches 141
Preview 139
Q
Quantize 92
R
Realtime Recording 90
Realtime Recording 90
Step Recording 93
tempo 88
tracks 88
sequence track edit
Adjust Timing 104
Cut 100
Deleting 107
Erase 101
Insert 102
Move 98
Paste 99
Split 103
Shutdown? 34
SIMUL 21
Song patches 141
Split 103
Split icon 103
STANDARD 111
STANDRD 60
Start Point 78
Start with 61
START-END 73
STATUS Button 25, 29
STATUS button 23
Step Recording 93
STEREO MULTI 176
STOP button 27
T
Tempo Map 117
Tempo Match 80
TEMPO MATCH/PAD EDIT button 25
Time Stretch 81
Time Stretch icon 81
TIME/SONG POSITION 29
TIME/VALUE Dial 28
TO button 27
track at once 18
TRIGGER 70
Trim Sample 78
Tuner screen 114
Tuning guide 115
Type 61
U
Undo 138
UNDO/REDO Button 24
User patches 141
UTILITY Button 24
V
VO+AC.MDL 182
VO+ACOUSTIC 184
VO+GT.AMP 180
VOCAL MULTI 199
VOICE TRANSFORMER 201
W
Windows WAVE file 58
X
XLR type 31
Y
YES/ ENTER Button 28
Z
ZERO button 27
Memo...
Memo...
Memo...
Information
When you need repair service, call your nearest Roland Service Center or authorized Roland distributor in your country as shown below.
AFRICA
EGYPT
Al Fanny Trading Office
P.O. Box 2904,
El Horrieh Heliopolos, Cairo,
EGYPT
TEL: (02) 4185531
REUNION
That Other Music Shop
(PTY) Ltd.
11 Melle St., Braamfontein,
Johannesbourg
Republic of SOUTH AFRICA
P.O.Box 32918, Braamfontein 2017
Republic of SOUTH AFRICA
TEL: (011) 403 4105
Paul Bothner (PTY) Ltd.
17 Werdemuller Centre Claremont
7700
Republic of SOUTH AFRICA
P.O. Box 23032
Claremont, Cape Town
SOUTH AFRICA, 7735
TEL: (021) 674 4030
ASIA
CHINA
Beijing Xinghai Musical
Instruments Co., Ltd.
6 Huangmuchang Chao Yang
District, Beijing, CHINA
TEL: (010) 6774 7491
Shanghai Xingtong Acoustics
Equipment CO., Ltd.
Rm.1108, No.2240 Pudong South
Road Shanghai, CHINA
TEL: (021) 6873 4123
HONG KONG
Tom Lee Music Co., Ltd.
Service Division
22-32 Pun Shan Street, Tsuen
Wan, New Territories,
HONG KONG
TEL: 2415 0911
INDIA
Rivera Digitec (India) Pvt. Ltd.
409, Nirman Kendra Mahalaxmi
Flats Compound Off. Dr. Edw
Moses Road, Mumbai-400011,
INDIA
TEL: (022) 498 3079
INDONESIA
PT Citra IntiRama
J1. Cideng Timur No. 15J-150
Jakarta Pusat
INDONESIA
TEL: (021) 6324170
KOREA
Cosmos Corporation
1461-9, Scocho-Dong,
Seocho Ku, Seoul, KOREA
TEL: (02) 3486-8855
MALAYSIA
G.A. Yupangco & Co. Inc.
339 Gil J. Puyat Avenue
Makati, Metro Manila 1200,
PHILIPPINES
TEL: (02) 899 9801
SINGAPORE
Swee Lee Company
150 Sims Drive
SINGAPORE 387381
TEL: 846-3676
CRISTOFORI MUSIC PTE
LTD
Blk 3014, Bedok Industrial Park E,
02-2148, SINGAPORE 489980
TEL: 243 9555
TAIWAN
ROLAND TAIWAN
ENTERPRISE CO., LTD.
Room 5, 9fl. No. 112 Chung Shan
N.Road Sec.2, Taipei, TAIWAN,
R.O.C
TEL: (02) 2561 3339
THAILAND
Theera Music Co., Ltd.
330 Verng NakornKasem, Soi 2,
Bangkok 10100, THAILAND
TEL: (02) 2248821
VIETN AM
Saigon Music
138 Tran Quang Khai St.,
District 1
Ho Chi Minh City
VIETNAM
TEL: (08) 844-4068
AUSTRALIA/
NEW ZEALAND
AUSTRALIA
Roland Corporation
Australia Pty., Ltd.
38 Campbell Avenue
Dee Why West. NSW 2099
AUSTRALIA
TEL: (02) 9982 8266
NEW ZEALAND
Roland Corporation Ltd.
32 Shaddock Street, Mount Eden,
Auckland, NEW ZEALAND
TEL: (09) 3098 715
CENTRAL/ LATIN
AMERICA
ARGENTINA
Instrumentos Musicales S.A.
Florida 656 2nd Floor
Office Number 206A
Buenos Aires
ARGENTINA, CP1005
TEL:(54-11)4-393-6057
BRAZIL
Roland Brasil Ltda
Rua San Jose, 780 Sala B
Parque Industrial San Jose
Cotia - Sao Paulo - SP, BRAZIL
TEL: (011) 4615 5666
COSTA RICA
JUAN Bansbach
Instrumentos Musicales
Ave.1. Calle 11, Apartado 10237,
San Jose, COSTA RICA
TEL: (506)258-0211
CHILE
Comercial Fancy II S.A.
Avenida Rancagua #0330
Boulevard Andrews, Albrook,
Panama City,
REP. DE PANAMA
TEL: (507) 315-0101
PARAGUAY
Distribuidora De
Instrumentos Musicales
J.E. Olear y ESQ. Manduvira
155, New National Road
26422 Patras, GREECE
TEL: 061-435400
HUNGARY
Intermusica Ltd.
Warehouse Area 'DEPO' Pf.83
H-2046 Torokbalint, HUNGARY
TEL:(23)511011
IRELAND
Roland Ireland
Audio House, Belmont Court,
Donnybrook, Dublin 4.
Republic of IRELAND
TEL: (01) 2603501
ITALY
Roland Italy S. p. A.
Danvik Center 28, 2 tr.
S-131 30 Nacka SWEDEN
TEL: (08) 702 0020
SWITZERLAND
Roland (Switzerland) AG
Musitronic AG
Atlantic Close, Swansea
Enterprise Park, SWANSEA
SA7 9FJ,
-For the USA
FEDERAL COMMUNICATIONS COMMISSION RADIO FREQUENCY INTERFERENCE STATEMENT
This equipment has been tested and found to comply with the limits for a Class B digital device, pursuant to Part 15 of the FCC Rules. These limits are designed to provide reasonable protection against harmful interference in a residential installation. This equipment generates, uses, and can radiate radio frequency energy and, if not installed and used in accordance with the instructions, may cause harmful interference to radio communications. However, there is no guarantee that interference will not occur in a particular installation. If this equipment does cause harmful interference to radio or television reception, which can be determined by turning the equipment off and on, the user is encouraged to try to correct the interference by one or more of the following measures:
- Reorient or relocate the receiving antenna.
– Increase the separation between the equipment and receiver. - Connect the equipment into an outlet on a circuit different from that to which the receiver is connected.
- Consult the dealer or an experienced radio/TV technician for help.
This device complies with Part 15 of the FCC Rules. Operation is subject to the following two conditions:
(1) This device may not cause harmful interference, and
(2) This device must accept any interference received, including interference that may cause undesired operation.
Tested To Comply With FCC Standards
FOR HOME OR OFFICE USE
Unauthorized changes or modification to this system can void the users authority to operate this equipment. This equipment requires shielded interface cables in order to meet FCC class B Limit.
For Canada
NOTICE
This Class B digital apparatus meets all requirements of the Canadian Interference-Causing Equipment Regulations.
AVIS
IMPORTANT: THE WIRES IN THIS MAINS LEAD ARE COLOURED IN ACCORDANCE WITH THE FOLLOWING CODE.
BLUE: NEUTRAL
BROWN: LIVE
As the colours of the wires in the mains lead of this apparatus may not correspond with the coloured markings identifying the terminals in your plug, proceed as follows: The wire which is coloured BLUE must be connected to the terminal which is marked with the letter N or coloured BLACK. The wire which is coloured BROWN must be connected to the terminal which is marked with the letter L or coloured RED. Under no circumstances must either of the above wires be connected to the earth terminal of a three pin plug.
Copyright
- Unauthorized recording, distribution, sale, lending, public performance, broadcasting, or the like, in whole or in part, of a work (musical composition, video, broadcast, public performance, or the like) whose copyright is held by a third party is prohibited by law.
- When exchanging audio signals through a digital connection with an external instrument, this unit can perform recording without being subject to the restrictions of the Serial Copy Management System (SCMS). This is because the unit is intended solely for musical production, and is designed not to be subject to restrictions as long as it is used to record works (such as your own compositions) that do not infringe on the copyrights of others. (SCMS is a feature that prohibits second-generation and later copying through a digital connection. It is built into MD recorders and other consumer digital-audio equipment as a copyright-protection feature.)
- Do not use this unit for purposes that could infringe on a copyright held by a third party. Roland assumes no responsibility whatsoever with regard to any infringements of third-party copyrights arising through your use of this unit.
About the License Agreement
- The CDX-1 and its CD-R capability are designed to allow you to reproduce material to which you have copyright, or material which the copyright owner has granted you permission to copy. Accordingly, reproduction of Music CD or other copyrighted material without permission of the copyright owner avoiding technical prohibiting features of second-generation and later copying like SCMS or others constitutes copyright infringement and may incur penalties even in case such reproduction is for your own personal use and enjoyment (private use). Consult a copyright specialist or special publications for more detailed information on obtaining such permission from copyright holders.
DiscLab
Newly Added Functions Ver.1.5
As the result of recent upgrades, the descriptions in the Owner's Manual may not accurately represent the performance of some of the features of the CDX-1. To make sure you are fully aware of the newly added functionality, please read this booklet in conjunction with the Owner's Manual while you use the CDX-1.
CONTENTS
Sample Pad
Compressing/expanding a sample according to the tempo at which playback was stopped....2
Modifying the pitch of a sample to create a new sample—Pitch Change 3
Making fine adjustments to the location at which a sample starts/ends.... 4
Adjusting the crossfade time 6
Sequence Track
Exchanging the contents of sequence tracks—Exchange Track 7
Copying the contents of a sequence track—Copy Track 8
Editing a specified region of a sequence track—Region In/Out....9
Multitrack Recorder
Muting (silencing) a specific audio track.... 13
Using [STATUS] to select the track whose parameters you want to adjust 14
Preventing tempo data from being read from a CD-RW disc 15
Using the tempo of a sample to modify the tempo map 16
Using Pads/Sequences while you mix down.... 17
Effect
Editing the Mastering Tool settings 18
Saving the mastering tool settings 19
Mastering Tools parameter list 20
Others
Remembering the icon that was last selected in a menu screen 23
Synchronization with a Sequence or Drum Machine.... 24
Compressing/ expanding a sample according to the tempo at which playback was stopped
While playback is stopped, you can adjust the length of the sample according to the tempo of the location at which playback was stopped.
This function makes it easy to adjust the sample length to match the tempo of a sequence track. This provides an easy way by which the length of a sample recorded in a sequence track can be made to match the length of a measure in that sequence track.
The tempo at the point that playback is stopped will be one of the following.
- The tempo displayed in "Tempo" of the Rhythm Guide screen.
- If the "Beat" parameter in the Rhythm Guide screen is set to "TEMPO MAP," the tempo of the Tempo Map.
Since this function needs to accurately calculate the tempo in order to perform a high-quality compression or expansion, you must first perform the procedure of "Displaying the correct tempo of a sample" (Owner's Manual; p. 77) to specify the number of beats in the original sample.
In the case of samples for which it is difficult to calculate a tempo, such as a narration, vocal part, or a long sustained sound, set the number of beats to 0.
- Press PAD RECORDING [TEMPO MATCH] twice.
Alternatively, press [TEMPO MATCH] and then press CURSOR [ ].
The Pad Edit menu are displayed as icons.
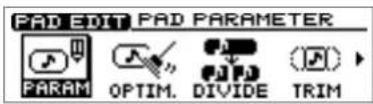
- Press CURSOR [][] to select the Tempo Match Now icon.
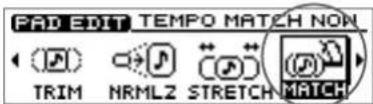
- Press [YES/ENTER].
The Tempo Match Now screen appears.
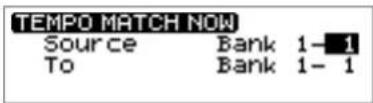
- Press CURSOR [ ] [ ] [ ] to select the pad bank number and pad number for each item, and specify the desired number for each.
To set the pad bank number, turn the TIME/VALUE dial. To set the pad number, either press a pad or turn the TIME/VALUE dial.
Source: Specify the sample whose length you want to adjust.
To: Specify the pad to which the length-adjusted sample will be assigned.
- Press [YES/ENTER].
After a while, the expand/compress sample is assigned to the destination pad.
* If the destination pad already contains a sample, the "Overwrite?" message appears. If it is OK to overwrite the existing sample, press [YES/ENTER]. If you do not want to overwrite the existing sample, press [NO/EXIT].
- Press [DISPLAY] to return to the Basic screen.

Compression/expansion requires more processing time than other sample editing operations. Also, the audio quality of the stretched sample may be inferior to that of the original sample.

In case the expanding/ expanding level is in excess of 134% or less than 67%, the sample will not be made correct tempo.
Modifying the pitch of a sample to create a new sample—Pitch Change
You can modify the pitch of a sample to create a new sample.
- Press PAD RECORDING [TEMPO MATCH] twice.
Alternatively, press [TEMPO MATCH] and then press CURSOR [ ].
The Pad Edit menu are displayed as icons.
- Press CURSOR [] [] to select the Pitch Change icon.
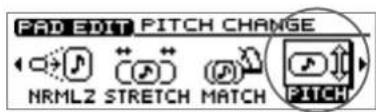
- Press [YES/ENTER].
The Pitch Change screen appears.
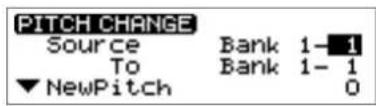
- Press CURSOR [ ] [ ][ ] to select the pad bank number and pad number for each item, and specify the desired number for each.
To set the pad bank number, turn the TIME/VALUE dial. To set the pad number, either press a pad or turn the TIME/VALUE dial.
Source: Specify the sample whose pitch you want to adjust.
To: Specify the pad to which the pitch-adjusted sample will be assigned.
-
Press CURSOR [] to move the cursor to "NewPitch" line. Turn to TIME/VALUE dial to set the interval of the pitch changing by semitone unit.
-
Press CURSOR [] to move the cursor to "P.Fine" line. Turn the TIME/VALUE dial to make fine adjustments in one-cent units (1/100th of a semitone) to the amount of change from the original pitch.
-
Press CURSOR [] move the cursor to "Grade" line. Turn to TIME/VALUE dial to select the quality of the sound after the pitch changing process, adjustable in three levels.
"Grade" can be set in three levels (1–3) to specify the quality of the resulting sound. Higher settings will require more processing time.
- Press [YES/ENTER].
After a while, the changing pitch sample is assigned to the destination pad.
* If the destination pad already contains a sample, the "Overwrite?" message appears. If it is OK to overwrite the existing sample, press [YES/ENTER]. If you do not want to overwrite the existing sample, press [NO/EXIT].
- Press [DISPLAY] to return to the Basic screen.

Pitch Change requires more processing time than other sample editing operations. Also, the audio quality of the stretched sample may be inferior to that of the original sample.

1 semitone = 100 cents

"Grade"

For sound with a sharp attack.
For sound with a dull attack.
Making fine adjustments to the location at which a sample starts/ ends
When you arrange samples in a sequence track to create a song, you will sometimes need to make fine adjustments to the sample's start/loop points, or to its length. By using the {Preview function} or {Scrub function}, you can make precise and detailed adjustments while listening to the sound.
Specifying a point while you listen to the sound before and after it—Preview
The preview button [TO] means "To Now" (to the point). Each time you press [TO], a brief region of sound (one second) ending at that point will be played. By turning the TIME/VALUE dial to move the point back and forth while listening to this sound, you can easily make accurate adjustments to the point.
When you press the preview button [FROM], the preview function will play "From Now" (from the point), allowing you to hear a brief region of sound (one second) beginning at that point.
- Press PAD RECORDING [TEMPO MATCH] twice.
Alternatively, press [TEMPO MATCH] and then press CURSOR [ ].
The Pad Edit menu are displayed as icons.
- Press CURSOR [] [] to select the Pad Parameter icon.
-
Press [YES/ENTER]. The Pad Parameter screen appears.
-
Press CURSOR [ ] [] to move the cursor to the point "Start Point," "Loop Point," or "Length(→End)" you want to adjust.
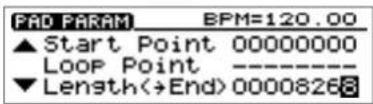
- Press PREVIEW [TO] or [FROM] to play back the sound as described below.
[TO]: Playback once from one second before the current point to the current point.
[FROM]: Playback once from the current location to one second after the current location.
-
While listening to the sound, turn the TIME/VALUE dial to make fine adjustments to the current point.
-
Press [DISPLAY] to return to the Basic screen.

For details on the Start/Loop point and Length, refer to "What are the Start/Loop point and Length" (Owner's Manual; p. 78).

The sample waveform will not be displayed for PREVIEW [TO] [FROM] operations.
Using scrub to set a point—Scrub Preview
Scrub Preview repeatedly plays an extremely brief region (45 milliseconds) either before or after the point. At the same time, the sample waveform will be displayed in the screen. While monitoring the displayed waveform and the sound, you can turn the TIME/VALUE dial to easily make precise adjustments to the point.
- Press PAD RECORDING [TEMPO MATCH] twice.
Alternatively, press [TEMPO MATCH] and then press CURSOR [ ].
The Pad Edit menu are displayed as icons.
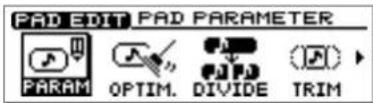
- Press CURSOR [] [] to select the Pad Parameter icon.
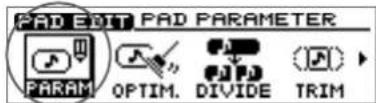
- Press [YES/ENTER].
The Pad Parameter screen appears.
- Press CURSOR [][] to move the cursor to the point "Start Point," "Loop Point," or "Length(→End)" you want to adjust.
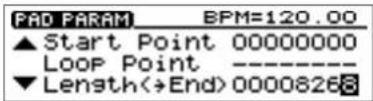
- Press [SCRUB].
[SCRUB] lights, the Wave View screen appears.
The sound either before or after the point will play repeatedly.
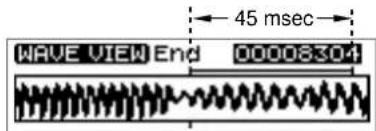
- While monitoring the sound and the screen, turn the TIME/VALUE dial to make fine adjustments to the point.
As necessary, you can switch the region that is repeated, or switch the screen display.
[TO]: Repeatedly play from a point 45 milliseconds before the current point, up to the current point.
[FROM]: Playback once from the current point to one second after the current point.
CURSOR [ ]: Expand the waveform vertically (amplitude axis).
CURSOR [ ]: Shrink the waveform vertically (amplitude axis).
CURSOR [ ]: Expand the waveform horizontally (time axis).
CURSOR [ ]: Shrink the waveform horizontally (time axis).
- Press [SCRUB].
[SCRUB] go out, the Pad Parameter screen reappears.
- Press [DISPLAY] to return to the Basic screen.
Adjusting the crossfade time
You can adjust the time over which two pads will be exchanged by the Pad Crossfade function (Owner's Manual; p. 71).
- Press [UTILITY].
The Menu are displayed as icon.
- Press CURSOR [] [] to select the System icon.
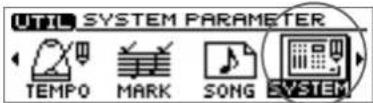
- Press [YES/ENTER].
The System Parameter screen appears.
- Press CURSOR [] to move the cursor to "X-Fade Time" line.
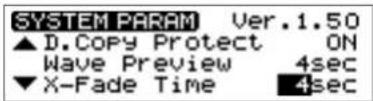
-
Turn the TIME/VALUE dial to select the crossfade time: "1sec"-"10sec" (units: second).
-
Press [DISPLAY] to return to the Basic screen.
Exchanging the contents of sequence tracks—Exchange Track
A sequence track and its corresponding audio track cannot be played back at the same time. For example, sequence track A and audio tracks 1-2 cannot be played back simultaneously. In such cases, you can exchange the contents of the sequencer track with another track, so that the sequence track and audio tracks can be played simultaneously.
- Press PAD SEQUENCING [EDIT].
[EDIT] lights, and the Sequence Edit menu are displayed as icons.
- Press CURSOR [] [] to select the Exchange Track icon.
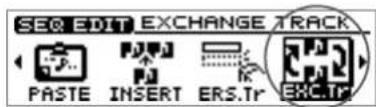
- Press [YES/ENTER].
The Exchange Track screen appears.
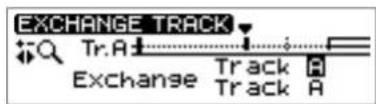
-
Press CURSOR [] to move the cursor, and turn the TIME/VALUE dial to specify the two sequence tracks that are exchanged.
-
Press [YES/ENTER].
The two sequence tracks are exchanged.
- Press [DISPLAY] return to the Basic screen.

For details, refer to "Playing sequence tracks and audio tracks simultaneously" (Owner's Manual; p. 97).

When you carry out the Exchange Track procedure, the entire contents of the sequence tracks will be exchanged. It is not possible to specify a region of time that will be exchanged.

The status data of the sequence tracks will also be exchanged.
Copying the contents of a sequence track —Copy Track
The contents of a sequence track can be copied to another sequence track.
- Press PAD SEQUENCING [EDIT].
[EDIT] lights, and the Sequence Edit menu are displayed as icons.
- Press CURSOR [] [ ] to select the Copy Track icon.
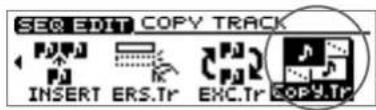
- Press [YES/ENTER].
The Copy Track screen appears.
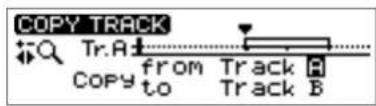
- Press CURSOR [] to move the cursor to "Copy from Track."
- Turn to TIME/VALUE dial to select the copy-source track.
- Press CURSOR [] to move the cursor to "Copy from Track."
- Turn to TIME/VALUE dial to select the track-copy destination.
- Press [YES/ENTER].
The contents of the copy-source sequence track is copied to the copy-destination track.
- Press [DISPLAY] return to the Basic screen.

When you execute the Copy Track operation, the entire contents of the sequence track will be copied. It is not possible to copy only a specified time region.

f the copy-destination sequence track has already been recorded, the entire contents will be lost.
Editing a specified region of a sequence track —Region In/ Out
In the Sequence Play List screen, you can specify a region, then edit only that region. You can also edit multiple tracks at once.
Specifying the editing region
- Press PAD SEQUENCING [SEQ PLAY].
[SEQ PLAY] lights, and the Sequence Play List screen appears.
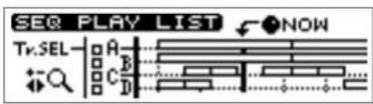
- Select the sequence tracks for playback as described in "Playing back sequence tracks" (Owner's Manual; p. 96).
Get the "Tr.SEL" (track select) box to be highlighted in black for the track(s) in which you want to specify a region. You may select more than one track.
- Use the REW[] or the
TIME/VALUE dial to move the "NOW" (current location) to the starting point of the segment.
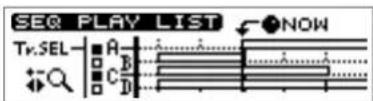
- Press [YES/ENTER].
A mini-menu "SET REGION IN" appears.
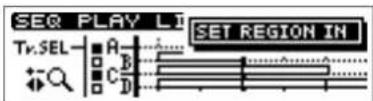
-
Press [YES/ENTER] to specify the beginning (in point) of the segment.
-
Use the REW [] or the
TIME/VALUE dial to move the "NOW" (current location) to the end point of the segment.
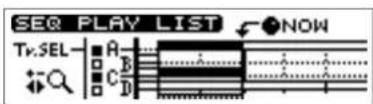
- Press [YES/ENTER].
A mini-menu appears.
- Press CURSOR [] to select the "SET REGION OUT."
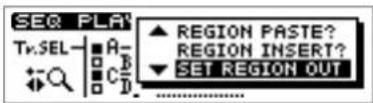
- Press [YES/ENTER] to specify the end (out point) of the segment.

In case edit region is specified, you cannot execute editing phrase by phrase basis (Quick Edit). If you want to do such editing, please cancel the editing region as described in "Canceling an editing region" (p. 10).
For details of Quick Edit, refer to "Edit on Sequence Play List screen—Quick Edit" (Owner's Manual; p. 106).

If a region has already been specified in step 4, press CURSOR[] to select "SET REGION IN."
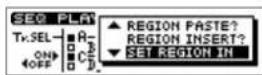
Press [YES/ENTER] in step 5, the specified region will be cancelled, and the In point will be newly set.
Canceling an editing region
To cancel an editing region that you've specified, perform the following.
- Press PAD SEQUENCING [SEQ PLAY].
[SEQ PLAY] lights, and the Sequence Play List screen appears.
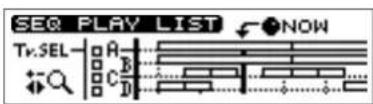
- Press [YES/ENTER].
A mini-menu appears.
- Press CURSOR [] to select the "CLEAR REGION."
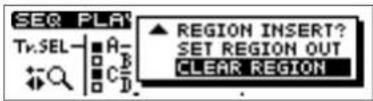
- Press [YES/ENTER].
The specified region are canceled.
Editing the specified region
Erasing Segments—Erase
This operation erases the phrases of the specified region, creating silence. If phrases exist following the region, they will not move forward.
- Specify the region that you want to erase, as described in "Specifying the editing region" (p. 9) of this booklet.
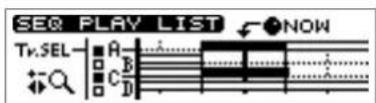
- Press [YES/ENTER].
A mini-menu appears.
- Press CURSOR [] to select the "REGION ERASE?"
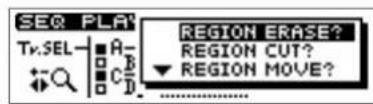
- Press [YES/ENTER].
The specified region are erased.
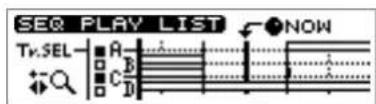
Cutting Segments—Cut
This operation cuts the phrases of the specified region. Any phrases that followed the region will be moved forward.
- Specify the region that you want to cut, as described in "Specifying the editing region" (p. 9) of this booklet.
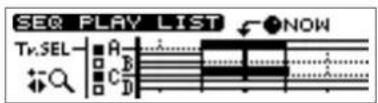
- Press [YES/ENTER].
A mini-menu appears.
- Press CURSOR [] to select the "REGION CUT?"
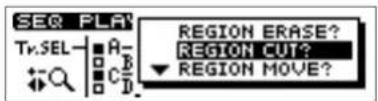
- Press [YES/ENTER].
The specified region are cut.
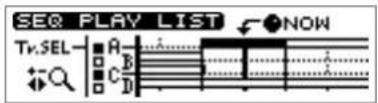
Moving to a Another Location—Move
This operation moves the phrases of the specified region to another location. The phrases in the specified region will be erased; i.e., they will change to silence. If there were any phrases in the move-destination, they will be overwritten by the phrases from the specified region.
- Specify the region that you want to move, as described in "Specifying the editing region" (p. 9) of this booklet.
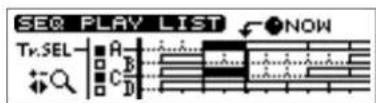
- Use the REW[] or th▶ TIME/VALUE dial to set the move- destination "NOW" (current location).
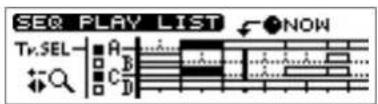
-
Press [YES/ENTER]. A mini-menu appears.
-
Press CURSOR [] to select the "REGION MOVE?"
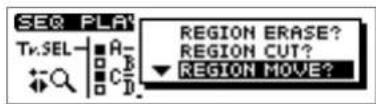
- Press [YES/ENTER]. The specified region are moved.
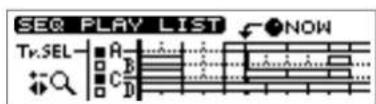
Editing a specified region of a sequence track
Pasting to a Another Location—Paste
This operation pastes the phrases of the specified region to another location. If there were any phrases in the paste-destination, they will be overwritten by the phrases from the specified region.
- Specify the region that you want to paste, as described in "Specifying the editing region" (p. 9) of this booklet.
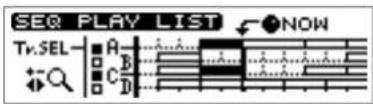
- Use the REW[ ] [ ] or the TIME/VALUE dial to set the paste- destination "NOW" (current location).
-
Press [YES/ENTER]. A mini-menu appears.
-
Press CURSOR [] to select the "REGION PASTE?"
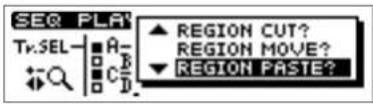
- Press [YES/ENTER]. The specified region are pasted.
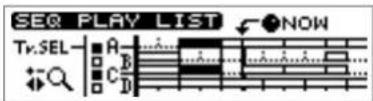
Inserting to a Another Location—Insert
This operation inserts the phrases of the specified region to another location. If there ware any phrases in the inserting location of backward, they will be moved back for duration of specified region.
- Specify the region that you want to insert, as described in "Specifying the editing region" (p. 9) of this booklet.
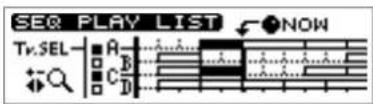
- Use the REW[]/■[] or the TIME/VALUE dial to set the insert- destination "NOW" (current location).
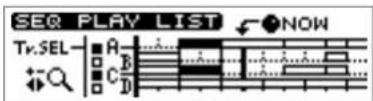
-
Press [YES/ENTER]. A mini-menu appears.
-
Press CURSOR [] to select the "REGION INSERT?"
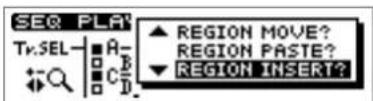
- Press [YES/ENTER]. The specified region are inserted.
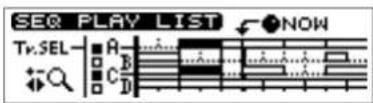
Muting (silencing) a specific audio track
During playback, you can switch audio tracks between muted (silent) and playing statuses.
- During playback, press [STATUS] for the audio track that you want to mute (silence).
[STATUS] will change from green to blinking, and the sound of that audio track will be muted (silenced).
- Once again, press the [STATUS] key that you caused to blink in step 1.
[STATUS] will change from blinking to lighting solidly in green, and that audio track will resume playing.

An audio track whose [STATUS] was dark when playback began cannot be switched to Play status by pressing [STATUS] during playback. ([STATUS] will not light in green.)
Using [STATUS] to select the track whose parameters you want to adjust
When you want to adjust an audio track's mixer settings (pan, equalizer), or loop effect settings, you can also press [STATUS] for that audio track to select it directly.
Setting the left/right position (pan) of each audio track
- Hold down TRACK EDIT [PAN] and press AUDIO TRACK [STATUS] that you want to adjust.
The pan setting screen appears.
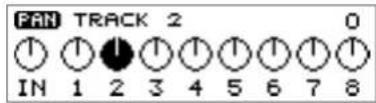
-
Turn the TIME/VALUE dial to set the pan.
-
Press [DISPLAY] to return to the Basic screen.
Adjusting the tone of each audio track
- Hold down TRACK EDIT [EQ] and press AUDIO TRACK [STATUS] that you want to adjust.
The equalizer setting screen appears.
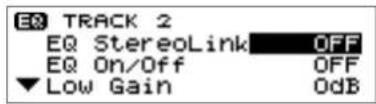
-
Press CURSOR [] to move the cursor to the line of the parameter you want to adjust.
-
Turn the TIME/VALUE dial to change the value.
→ For details on the parameters, refer to "Mixer effect parameter functions" (Owner's Manual; p. 174).
- Press [DISPLAY] to return to the Basic screen.
Editing the loop effect settings
Chorus/ delay/ doubling
- Hold down LOOP EFFECT [DELAY], and press AUDIO TRACK [STATUS] that you want to adjust.
The equalizer setting screen appears.
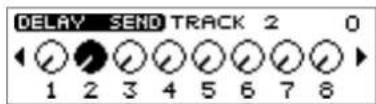
-
Turn the TIME/VALUE dial to adjust the send level.
-
Press [DISPLAY] to return to the Basic screen.
Reverb
- Hold down LOOP EFFECT [REVERB], and press AUDIO TRACK [STATUS] that you want to adjust.
The equalizer setting screen appears.
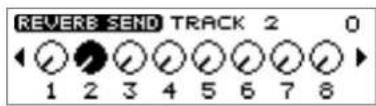
-
Turn the TIME/VALUE dial to adjust the send level.
-
Press [DISPLAY] to return to the Basic screen.

In step 1, you can hold down [DELAY] and press PAD [STATUS] to select "PAD."

For details on setting the effect parameters, refer to "Editing the loop effect settings" (Owner's Manual; p. 145–146).

In step 1, you can hold down [REVERB] and press PAD [STATUS] to select "PAD."
Preventing tempo data from being read from a CD-RW disc
When pads or sequences are stored in internal memory, you can specify that the tempo data of a song saved on a CD-RW disc not be loaded when you insert a CD-RW disc on which pads or sequences have been saved.
- Press [UTILITY].
The Menu are displayed as icon.
- Press CURSOR [] [] to select the System icon.
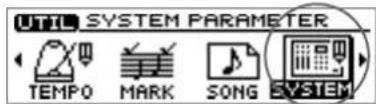
- Press [YES/ENTER].
The System Parameter screen appears.
- Press CURSOR [] to move the cursor to "T.Map LoadCinfirm" line.
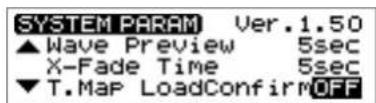
- Turn the TIME/VALUE dial to select "ON."
• T.Map LoadConfirm (Tempo Map Load Confirm):
ON: You will be able to select whether the tempo data saved on the CD-RW disc will be loaded.
OFF: The tempo data saved on the CD-RW disc will be loaded.
- Press [DISPLAY] to return to the Basic screen.
If "T.Map LoadConfirm" is "ON"
Insert a CD-RW disc on which pads/sequences have been saved.
If internal memory contains pads/sequences, a message of "Load PAD/SEQ data?" will be displayed.
If you press [NO/EXIT] at this time, a message of "Use song's tempo map?" (use the tempo data of the song saved on the CD-RW disc?) will be displayed. Press either [NO/EXIT] or [YES/ENTER] to select whether to load the tempo data from the song on the CD-RW disc.
[NO/EXIT]: The tempo data in internal memory will be preserved. The tempo data of the song saved on the CD-RW disc will not be loaded.
[YES/ENTER]: The tempo data of the song saved on the CD-RW disc will be loaded. The tempo data in internal memory will be overwritten.
Using the tempo of a sample to modify the tempo map
Here's how you can easily modify the tempo map to match a drum loop sample on which your song is based.
- Press [UTILITY].
The Menu are displayed as icon.
- Press CURSOR [] [] to select the Tempo Map icon.
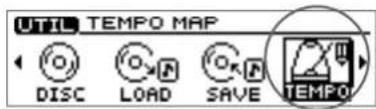
- Press [YES/ENTER].
The Tempo Map Setting screen appears.
- Press CURSOR [] [] to move the
cursor to tempo whose tempo you want to change.
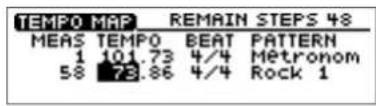
- Press the pad that contains the desired tempo data.
For example, if the sample tempo is "65.57", a message of "Tempo → 65.57 Are you sure? (OK to change the tempo to 65.57?) will be displayed.
- Press [YES/ENTER].
The tempo map will be changed to the tempo of the sample.
If you press [NO/EXIT], the tempo map will not be changed.
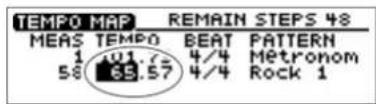
- Press [DISPLAY] to return to the Basic screen.
MEMO
The tempo of a sample is displayed in the upper right of the pad parameter screen. For details, refer to "Displaying the correct tempo of a sample" (Owner's Manual; p. 77).

For the procedure used to create a tempo map, refer to "Setting the tempo and rhythm pattern of the song—Tempo Map" (Owner's Manual; p. 117).
Using Pads/ Sequences while you mix down
You can play sequence tracks and pads while mixing down. This can be done in any combination: for example, you can mix down sequence tracks and pads together with audio tracks, or mix down only pads and/or sequences.
Even if a CD-RW disc is not inserted, you can mix down just pads/sequences if internal memory contains pads/sequences.
* When you mix down using pads/sequences, the time available for the mixdown will be the remaining amount of sampling memory. For this reason, if you need to perform lengthy mixdowns, we recommend that you expand the memory. The time available for mixdown can be checked in the Song Information screen (Owner's Manual; p. 39).
If the pads/sequences contained in the CDX-1's internal memory, a message of "Also use PAD/SEQ for Mixdown?" appears, [MIX DOWN] blinks.
If you press [YES/ENTER], you will be able to use pads/sequences, and [MIX DOWN] will light.
If you do not want to use pads/sequences, press [NO/EXIT]. For the subsequent steps, refer to step 1 of "Mixing down" (Owner's Manual; p. 133).
2. If you want to use sequence tracks, press [SEQ PLAY] to make it light.
For sequence tracks that you want to include in the mixdown. For details, refer to "Playing sequence tracks and audio tracks simultaneously" (Owner's Manual; p. 96).
3. For audio tracks that you want to include in the mixdown, press [STATUS] to make the button light in green.
4. Make sure that master track [STATUS] light in red.
5. Press ZERO [] to return the SONG POSITION to "00:00:00-00" (beginning of the song).
Alternatively, you can move to a desired location so that recording will start from that point.
6. Press PLAY [ ].
Mixdown begins.
If you play samples pressing pads during mix down is processing, the sample sounds in pads will be mixed down together. However, please be careful that sample sound dose not come out in case four stereo (incl. audio track and sequence track) are outputted. In such case, the pads goes out.
7. When mixdown is finished, press STOP [].
The screen will ask "Do you want to burn a CD?"
If you want to create an audio CD, press [YES/ENTER] and continue with the procedure "Writing to a CD-R disc" (Owner's Manual; p. 135).
If you want to make sure that the result of mixdown, press [NO/EXIT]. For details, refer to "Listen to the result of Mixing down" (Owner's Manual; p. 135).
![ROLAND CDX-1 - When mixdown is finished, press STOP []. - 1](/content/2026/05/862949/images/db0ff277a1fd3bde15e2fa6b053232125746c889b3e89e80c47295d9cab3163b.jpg)
When CD recorder screen or CD player screen is appearing, you cannot switch to mix down eyes pressing [MIX DOWN].
![ROLAND CDX-1 - When mixdown is finished, press STOP []. - 2](/content/2026/05/862949/images/2c4124aa1e4251ee123faf1455fd572a7c35552343f9ac19f28510eaab326bca.jpg)
If you mix down without a CD-RW disc, the "Data Type" will be "Standard."
![ROLAND CDX-1 - When mixdown is finished, press STOP []. - 3](/content/2026/05/862949/images/7d84cdfc5f0d90a5de8fc2c90cd2cd0f6f07b2217bad61588088ef34e3951385.jpg)
If you mix down without a CD-RW disc in step 1, a message of "Also use PAD/SEQ for Mixdown?" will not appears.
![ROLAND CDX-1 - When mixdown is finished, press STOP []. - 4](/content/2026/05/862949/images/e16ed397e8056df68c96e98d2552e55c3eeadfdd8d3563873347e922094d340e.jpg)
If you mix down without a CD-RW disc, step 3 will not be necessary.
![ROLAND CDX-1 - When mixdown is finished, press STOP []. - 5](/content/2026/05/862949/images/10cc5935b32d8b8f02e58afddd31617c830653b726b711887b0c921e8393d474.jpg)
A sequence track and its corresponding audio track cannot be played back simultaneously. If you are unable in step 3 to select an audio track that you want to mix down, you must first exchange sequence tracks so that the desired tracks can be played back simultaneously. For details, refer to
"Exchanging the content of sequence tracks—Exchange Track" (p. 7) in this booklet.
Editing the Mastering Tool settings
You can edit the mastering tool settings while you listen to the mixdown. Select one of the preset patches (P01–P21) that is closest to what you have in mind, and edit the patch settings

Mastering Tools
The mastering tools are a convenient set of tools that divide the sound into high-frequency, mid-frequency, and low-frequency ranges, and make the volume consistent so that the audio CD can be created with the optimal levels.
- In step 1 of "Listen to the result of Mixing down" (Owner's Manual; p. 133), the Mastering track screen appears.
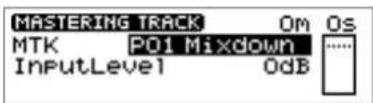
- Make sure that [MASTERING TOOLS] lights in red.
If [MASTERING TOOLS] is dark, press [MASTERING TOOLS], and it will go light in red.
-
Press CURSOR [] to move the cursor to "MTK" line.
-
Turn the TIME/VALUE dial to select the mastering tool patch that you want to edit.
-
Press [YES/ENTER].
The mastering tools effect block screen appears.
- Press CURSOR [ ][ ][ ][ ]

to select an effect, and turn the TIME/VALUE dial to turn the effect on/off.
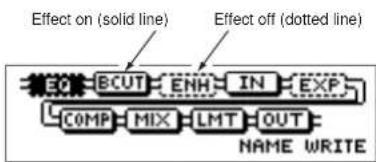
flowchart
graph LR
    A["BCUT"] --> B["ENH"]
    B --> C["IN"]
    C --> D["EXP"]
    D --> E["COMP"]
    E --> F["MIX"]
    F --> G["LMT"]
    G --> H["OUT"]
    H --> I["NAME WRITE"]
    style A fill:#f9f,stroke:#333
    style I fill:#f9f,stroke:#333
- Press CURSOR [ ] [ ] [ ] to select the effect whose parameters you want to edit, and press [YES/ENTER].
The parameter setting screen for the selected effect appears.
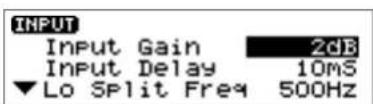
- Press CURSOR [][] to select a parameter, and turn the TIME/VALUE dial to edit the value.
For details on each parameter, refer to "Mastering Tools parameter list" (p. 20–22) in this booklet.
- If you would like to edit another effect, press [NO/EXIT] to return to the previous screen, and repeat steps 6-8.
If you want to save the current effect settings, perform the procedure described in "Saving mastering tools settings," below.
* Edited effect settings are temporary. If you return to the previous screen without saving the edited patch, "TMP" will be displayed in front of the patch name. While "TMP" is displayed, newly selecting a different patch will cause the edited patch to revert to its previous state, and your edits will be lost.
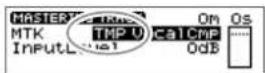
MEMO
You can also edit the mastering tool settings in the CD Burning screen or CD Recorder screen. However, it will not be possible to audition the results of the mastering tool before writing to the CD-R disc.

"IN" (input), "MIX" (mixer), and "OUT" (output) of the effect block are always on. These cannot be turned off.
Saving the mastering tool settings
You can assign a name (patch name) to the mastering tool settings you've edited, and save your settings. This procedure is a continuation of "Editing the mastering tool settings," above.
Your edited patch can be saved at one of twenty-one patch numbers U01–U21, and recalled at any time, just like a preset patch.
- In the mastering tools effect block screen, press CURSOR [ ] to select "NAME."
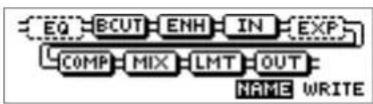
- Press [YES/ENTER].
The Patch Name input screen appears.
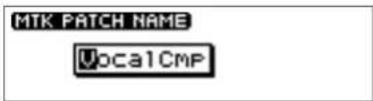
-
Press CURSOR [ ] [ ] to move to the desired character location, and turn the TIME/VALUE dial to input patch name.
-
When you are finished inputting the patch name and editing the settings of each effect, press [NO/EXIT] to return to the effect block screen.
-
Press CURSOR [] to select "WRITE."
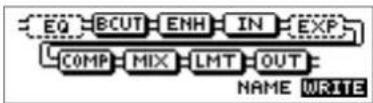
- Press [YES/ENTER].
The Patch-save screen appears.
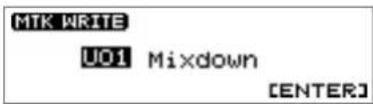
-
Turn the TIME/VALUE dial to select the patch-save destination (U01-U21).
-
After you have specified the patch-save destination, press [YES/ENTER]. When the data has been saved, you're returned to the Mastering track screen.
MEMO
You can input a patch name of up to eight characters.
MEMO
Patches are stored in internal memory.
Mastering Tools parameter list
The Mastering Tools is compressor that splits sounds into different frequency band to unify their volumes.
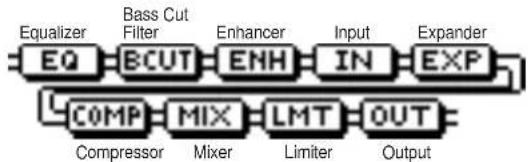
flowchart
graph LR
    EQ --> BOUT
    BOUT --> ENH
    ENH --> IN
    IN --> EXP
    EXP --> OUT
    COMP --> MIX
    MIX --> LMT
    LMT --> OUT
    Compressor --> Mixer
    Mixer --> Limiter
    Limiter --> Output
    Bass Cut --> Filter
    Filter --> Equalizer
    Enhancer --> Input
    Input --> Expander
* Below shows the signal form "INPUT" to "MIXER."
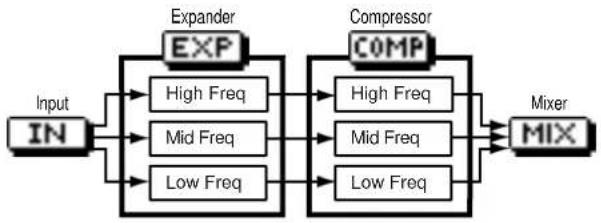
flowchart
graph LR
    IN["Input IN"] --> EXP["Expander EXP"]
    EXP --> HighFreq1["High Freq"]
    EXP --> MidFreq1["Mid Freq"]
    EXP --> LowFreq1["Low Freq"]
    COMP["Compressor COMP"] --> HighFreq2["High Freq"]
    COMP --> MidFreq2["Mid Freq"]
    COMP --> LowFreq2["Low Freq"]
    MIX["Mixer MIX"] --> HighFreq3["High Freq"]
    MIX --> MidFreq3["Mid Freq"]
    MIX --> LowFreq3["Low Freq"]
    EXP --> EXP2["Expander EXP"]
    COMP --> COMP2["Compressor COMP"]
Parameter (full name) Setting Function
• EQ (Equalizer): A 4-band equalizer.
Effect On/Off (Effect On/Off) OFF, ON This parameter turns the equalizer effect on/off.
| Input Gain (Input Gain) -24-+12 dB | This parameter sets the overall volume before passing through the equalizer. | |
| Low Type (Low Type) SHELV, PEAKING This parameter sets the type of the low frequency band equalizer (Shelving type or peaking type). | ||
| Low Gain (Low Gain) -12-+12 dB This parameter sets the gain (amount of boost or cut) for the bass equalizer. | ||
| Low Freq (Low Frequency) 20 Hz-2.00 kHz This parameter sets the central frequency for the low equalizer. | ||
| Low Q (Low Q) *1 0.3-16.0 This parameter sets the range of change in gain for the frequency set by “Low Freq.” A larger value results in a narrower range of change. | ||
| Low-Mid Gain (Low Middle Gain) -12-+12 dB This parameter sets the gain (amount of boost or cut) for the low-midrange equalizer. | ||
| Low-Mid Freq (Low Middle Frequency) 20 Hz-8.00 kHz | This parameter sets the central frequency for the low-midrange equalizer. | |
| Low-Mid Q (Low Middle Q) | 0.3-16.0 | This parameter sets the range of change in gain for the frequency set by “Low-Mid Freq.” A larger value results in a narrower range of change. |
| High-Mid Gain (High Middle Gain) | -12-+12 dB | This parameter sets the gain (amount of boost or cut) for the high-midrange equalizer. |
| High-Mid Freq (High Middle Frequency) | 20 Hz-8.00 kHz This parameter sets the central frequency for the high-midrange equalizer. | |
| High-Mid Q (High Middle Q) | 0.3-16.0 | This parameter sets the range of change in gain for the frequency set by “High-Mid Freq.” A larger value results in a narrower range of change. |
| High Type (High Type) | SHELV, PEAKING | This parameter sets the type of the High frequency band equalizer (Shelving type or peaking type). |
| High Gain (High Gain) | -12-+12 dB | This parameter sets the gain (amount of boost or cut) for the treble equalizer. |
| High Freq (High Frequency) | 1.40-2.00 kHz | This parameter sets the central frequency for the high equalizer. |
| High Q (High Q) *1 | 0.3-16.0 | This parameter sets the range of change in gain for the frequency set by “High Freq.” A larger value results in a narrower range of change. |
Output Level (Output Level) -24—+12 dB This parameter adjusts the volume after the equalizer stage.
Effect On/Off (Effect On/Off) OFF, ON This parameter turns the bass cut filter effect on/off.
Bass Cut Freq (Bass Cut Frequency) THRU, 20 Hz–2.00 kHz This parameter sets the frequency for cutting off undesired low frequency band sounds such as pop noise.
- ENH (Enhancer): This effect enhances the definition of the sound, and pushes it to the forefront.
Effect On/Off (Effect On/Off) OFF, ON This parameter turns the enhancer effect on/off.
| Sensitivity (Sensitivity) | 0–100 | Adjusts the manner in which the enhancer will be applied relative to the input signals. |
| Enhancer Freq (Enhancer Frequency) | 1.00 –10.0 kHz | Adjusts the frequency at which the enhancer effect will begin to be applied.The effect will be made apparent in the frequencies above the frequency set here. |
| Mix Level (Mix Level) | -24–+12 dB | Adjusts the amount of phase-shifted sound of the range set by “Frequency” that is to be mixed with the input. |
- IN (Input): Specify the frequency points at which the original sound will be divided, so that the expander/compressor can be applied independently to the low, mid, and high frequency ranges.
Input Gain (Input Gain) -24—+12dB
This parameter sets the overall volume before entering expander/compressor.
Input Delay (Input Delay) 0–10 ms This parameter sets the length of delay to add to the direct sound input.
Lo Split Freq (Low Split Frequency) 20–800 Hz This parameter sets the frequency at which the direct sound is split into three bands (on the low frequency band side).
Hi Split Freq (High Split Frequency) 1.60–16.0 kHz This parameter sets the frequency at which the direct sound is split into three bands (on the High frequency band side).
Effect of "Input Delay" under Input
With ordinary compressors, a moment of delay occurs to suppress a level over instance after it has been detected. With Mastering Tool, this problem is bypassed by using the input sound only for level detection and adding a specified length of delay to the sound for processing and output. "Input Delay" under Input is the setting of the delay time for this purpose. Note that supplying Delay Time causes time difference between input and output of audio signals.
Splitting into frequency bands
To split into High, middle and low frequency bands, "Low Split Freq" (Low Split Frequency) and "High Split Freq" (High Split Frequency) under Input are used to specify frequencies.
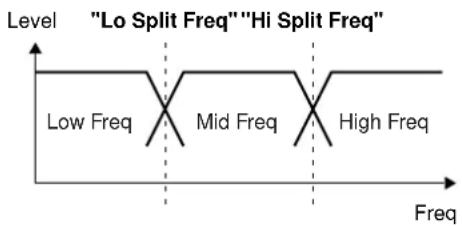
- EXP (Expander): Expands the dynamic range (the proportion between the loudest and softest sounds) at a certain ratio.
Effect On/Off (Effect On/Off) OFF, ON This parameter turns the expander effects on/off.
Low Threshold (Low Threshold) -80–0 dB This parameter sets the volume at which the expander for the low frequency band starts working.
Mid Threshold (Middle Threshold) -80–0 dB This parameter sets the volume at which the expander for the middle frequency band starts working.
Hi Threshold (High Threshold) -80–0 dB This parameter sets the volume at which the expander for the high frequency band starts working.
| Low Ratio (Low Ratio) | 1:1.0–1:16.0, 1:INF | This parameter sets the ratio at which the output in the low frequency band is increased when the input level has dropped below the low threshold level. |
| Mid Ratio (Middle Ratio) | 1:1.0–1:16.0, 1:INF | This parameter sets the ratio at which the output in the middle frequency band is increased when the input level has dropped below the middle threshold level. |
| High Ratio (High Ratio) | 1:1.0–1:16.0, 1:INF | This parameter sets the ratio at which the output in the middle frequency band is increased when the input level has dropped below the High threshold level. |
| Low Attack (Low Attack) | 0–100 ms | This parameter sets the time until when the low frequency band expander starts working after the input level has exceeded the low threshold level. |
| Mid Attack (Middle Attack) | 0–100 ms | This parameter sets the time until when the middle frequency band expander starts working after the input level has exceeded the middle threshold level. |
| High Attack (High Attack) | 0–100 ms | This parameter sets the time until when the High frequency band expander starts working after the input level has exceeded the High threshold level. |
| Low Release (Low Release) 50–5000 ms | This parameter sets the time until when the low frequency band expander stops working after the input level has dropped below the low threshold level. | |
| Mid Release (Middle Release) 50–5000 ms | This parameter sets the time until when the middle frequency band expander stops working after the input level has dropped below the middle threshold level. | |
| High Release (High Release) | 50–5000 ms | This parameter sets the time until when the High frequency band expander stops working after the input level has dropped below the High threshold level. |
- COMP (Compressor) *2: Compressor the entire output signals when the input volume exceeds a specified value.
| Effect On/Off (Effect On/Off) OFF, ON This parameter turns the compressor effects on/off. | |
| Low Threshold (Low Threshold) -24–0 dB This parameter sets the volume at which the compressor for the low frequency band starts working. | |
| Mid Threshold (Middle Threshold) -24–0 dB This parameter sets the volume at which the compressor for the middle frequency band starts working. | |
| Hi Threshold (High Threshold) -24–0 dB This parameter sets the volume at which the compressor for the high frequency band starts working. | |
| Low Ratio (Low Ratio) 1:1.0–1:16.0, 1:INF This parameter sets the ratio at which the output in the low frequency band is suppressed when the input level has exceeded the low threshold level. | |
| Mid Ratio (Middle Ratio) 1:1.0–1:16.0, 1:INF | This parameter sets the ratio at which the output in the middle frequency band is suppressed when the input level has exceeded the middle threshold level. |
| High Ratio (High Ratio) 1:1.0–1:16.0, 1:INF | This parameter sets the ratio at which the output in the High frequency band is suppressed when the input level has exceeded the High threshold level. |
| Low Attack (Low Attack) 0–100 ms | This parameter sets the time until when the low frequency band compressor starts working after the input level has exceeded the low threshold level. |
| Mid Attack (Middle Attack) 0–100 ms | This parameter sets the time until when the middle frequency band compressor starts working after the input level has exceeded the middle threshold level. |
| High Attack (High Attack) 0–100 ms | This parameter sets the time until when the High frequency band compressor starts working after the input level has exceeded the High threshold level. |
| Low Release (Low Release) 50–5000 ms | This parameter sets the time until when the low frequency band compressor stops working after the input level has dropped below the low threshold level. |
| Mid Release (Middle Release) 50–5000 ms | This parameter sets the time until when the middle frequency band compressor stops working after the input level has dropped below the middle threshold level. |
| High Release (High Release) 50–5000 ms | This parameter sets the time until when the High frequency band compressor stops working after the input level has dropped below the High threshold level. |
- MIX (Mixer): Adjust the volume of the low, mid, and high frequency ranges, and mix them.
| Low Level (Low Level) -80–+6 dB This parameter sets the volume in the low frequency band after passing through the expander and compressor. | ||
| Mid Level (Middle Level) | -80–+6 dB | This parameter sets the middle frequency band volume after passing through the expander and compressor. |
| High Level (High Level) | -80–+6 dB | This parameter sets the volume in the High frequency band after passing through the expander and compressor. |
- LMT (Limiter): Prevents distortion by suppressing signals at High levels.
| Effect On/Off (Effect On/Off) OFF, ON This parameter turns the limiter effects on/off. | ||
| Threshold (Threshold) -24–0 dB This parameter sets the volume at which the limiter starts working. | ||
| Attack (Attack) | 0–100 ms | This parameter sets the time until when the limiter starts working after the input level has exceeded threshold level. |
| Release (Release) | 50–5000 ms | This parameter sets the time until when the limiter stops working after the input level drops below the threshold level. |
- OUT (Output): Provides settings concerning overall output.
| Level (Level) | -80–+6 dB | This parameter sets the overall volume after passing through the limiter. |
| Soft Clip (Soft Clip) | OFF, ON | By turning this ON, suppresses conspicuous distortion that may occur when the effect of compressor/limiter has been applied excessively. |
| Dither (Dither) | OFF, 8–24 bit | This parameter smooths the transition where the sound disappears. |

*1 If "Low Type" or "High Type" is set to "SHELV" (Shelving Type), the setting for "Lo Q" or "High Q" is invalid.
*2 With Compressor (COMP), the level is automatically adjusted to the optimal with the settings for "Threshold" and "Ratio". Setting "Attack" to a relatively long time may cause distortion. For this reason, a margin of -6 dB is provided. Adjust the Mixer (MIX) level as required.
Remembering the icon that was last selected in a menu screen
You can cause the icon that was last selected in the following menu screens to be remembered. This is convenient when you are repeatedly using the same menu item to edit, since you will not have to re-select the desired icon each time.
| Button Screen | |
| [UTILITY] Utility Menu Screen | |
| PAD SEQUENCING [TEMPO MAP] Pad Edit Menu Screen | |
| PAD SEQENCING [EDIT] Sequence Edit Menu Screen | |
- Press [UTILITY].
The Menu are displayed as icon.
-
Press CURSOR [] [] to select the System icon.
-
Press [YES/ENTER].
The System Parameter screen appears.
- Press CURSOR [] to move the cursor to "Keep Last Menu" line.
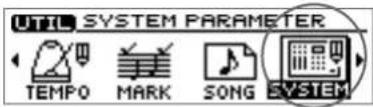
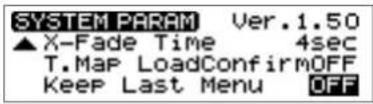
- Turn the TIME/VALUE dial to select "ON."
- Keep Last Menu:
ON: The last-selected icon will be remembered when you access a menu screen.
OFF: The first icon of the menu will be selected when you access a menu screen.
- Press [DISPLAY] to return to the Basic screen.

The data identifying the last-selected icon in each screen will be discarded when the power is turned off. The next time the power is turned on, the icon at the beginning of the menu will always be selected when you open a menu screen.
Synchronization with a Sequence or Drum Machine
You can cause a MIDI sequencer or rhythm machine to operate in synchronization with the button operations of the CDX-1.
- Use a MIDI cable to connect the CDX-1 and your MIDI sequencer as shown in the diagram.
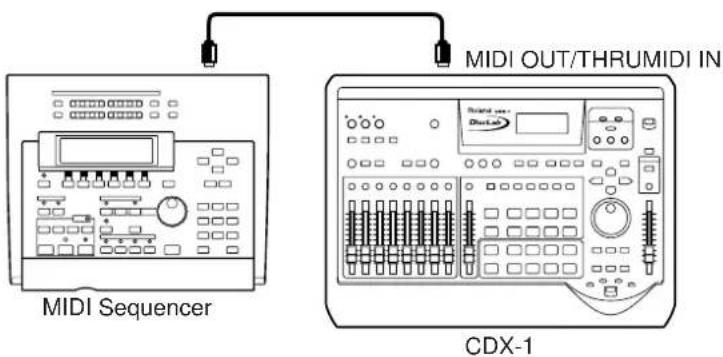
- Press [UTILITY].
The Menu are displayed as icon.
- Press [YES/ENTER].
The MIDI settings screen appears.
- Press CURSOR [] [ ] to select the MIDI icon.
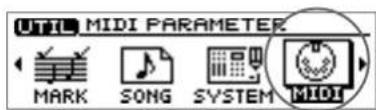
- Press CURSOR [] to move the cursor to "Sync Out" line.
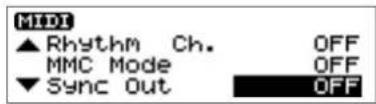
- Turn the TIME/VALUE dial to select "MIDI CLK."
- Sync Out:
Select weather or not the synchronization signals that will sent from the MIDI OUT/THRU connector.
OFF: Synchronization signals are not sent.
MTC: MIDI Time Code is sent.
MIDI CLK: MIDI Clock is sent.
- Press CURSOR [] to move the cursor to "Out/Thru" line.
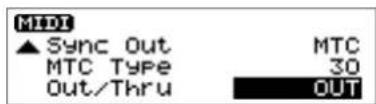
-
Turn the TIME/VALUE dial to select "OUT."
-
Press [DISPLAY] to return to the Basic screen.
-
Make settings on your MIDI sequencer so that it can receive MTC from an external device, and prepare it to play back MIDI song data.
For details on using, refer to the Owner's Manual for your MIDI sequencer.
- When the CDX-1 begins playing, the MIDI sequencer will also begin playing in sync with it.
- USING THE UNIT SAFELY
- INSTRUCTIONS FOR THE PREVENTION OF FIRE, ELECTRIC SHOCK, OR INJURY TO PERSONS
- ALWAYS OBSERVE THE FOLLOWING
- WARNING
- CAUTION
- IMPORTANT NOTES ......9
- Introduction.... 11
- Before you begin....12
- Expanding the memory ....14
- Learning about CD-R/RW discs....18
- Panel Descriptions....21
- Basic operation of the CDX-1 32
- What you need to do to create your own CD 42
- How to play an audio CD—the CD Player....48
- Collecting audio material.... 53
- Recording a sound to a pad—Sampling....54
- Playing the pad samples....69
- Editing the sample of a pad 76
- Arranging audio samples to create a song—Sequence....88
- Creating an audio CD 109
- Prepare for recording—Multitrack recording....110
- Recording/playing back a performance....119
- Editing a recorded performance to create an audio CD....132
- More functions for the CDX-1 ....138
- Using the CDX-1 with other MIDI devices....151
- CD direct recording.... 159
- Recording to a CD-R disc—CD Recorder....160
- Appendices 165
- Power Supply
- Placement
- Maintenance
- Additional Precautions
- Electric wave obstacle
- Laser beam
- Before Using Compact Discs
- Handling the CD-RW Drive
- Handling Compact Discs (CD-R/ RW/ ROM)
- Copyright
- About the License Agreement
- Introduction
- Before you begin
- Check the contents of the package
- About the included disc
- Main features of the CDX-1
- Easy operation from recording/editing to audio CD production
- Sampling functionality
- Versatile CD play functions
- Rhythm Guide function
- A diverse array of connectors
- Digital audio workstation
- Expanding the memory
- Precautions for expanding memory
- MEMO
- NOTE
- How to expand the memory
- Removing the memory
- Verifying that the memory is recognized by the CDX-1
- Verify that the memory module has been installed in the socket correctly
- Memory read/write test—DIMM diagnostics
- Learning about CD-R/ RW discs
- What is a CD-R/ RW disc?
- What is a CD-R disc?
- What is a CD-RW disc?
- Writing to a CD-R disc
- - Track at once:
- Discs for use on the CDX-1
- List of usable discs for each operation
- Recommended CD-R/CD-RW discs
- CD-R/ RW disc handling and cleaning
- Disc handling
- Disc cleaning
- Panel Descriptions
- Top Panel
- INPUT section
- ① PEAK indicators
- ② INPUT SENS knobs
- ③ INPUT SELECT buttons
- - [MIC1]:
- • [ MIC2/Gtr/Bs]:
- • [LINE]:
- • SIMUL [MIC1]+[MIC2]:
- • [DIGITAL]:
- ④ INPUT REC LEVEL knob
- INSERT EFFECTS section
- LOOP EFFECTS section
- AUDIO TRACK section
- ① STATUS buttons 1–8
- ② AUDIO TRACK faders
- TRACK EDIT section
- ① PAN Button
- ② EQ (Equalizer) Button
- RHYTHM GUIDE section
- ① ON/OFF button
- ② PATTERN/TEMPO button
- ① DISPLAY Button
- ② UTILITY Button
- ③ UNDO/REDO Button
- ① PAD X FADE (pad crossfade) button
- ② PAD BANKS Button
- ③ STATUS Button
- ④ CLIPBOARD Button
- ⑤ PAD/SEQ LEVEL fader
- ⑥ PAD REC (pad recording) button
- ⑦ TEMPO MATCH/PAD EDIT button
- ⑧ DELETE button
- ⑨ SEQ PLAY (sequence play) button
- ⑩ CREATE Button
- ⑪ EDIT Button
- ⑫ HOLD Button
- ⑬ 1–8 Buttons
- ① AUDIO CD RECORDER indicator
- ② AUDIO CD PLAYER indicator
- ④ FF (fast-forward) button
- ⑤ REPEAT button
- ⑥ ZERO button
- ⑦ STOP button
- ⑧ PLAY button
- ⑨ REC/CD RECORDER (recording/CD recorder) button
- AUTO PUNCH section
- ① IN button
- ② OUT button
- ③ AUTO PUNCH button
- PREVIEW section
- ① SCRUB button
- ② TO button
- ③ FROM button
- ① NO/EXIT Button
- ② YES/ ENTER Button
- ③ CURSOR Button
- ④ TIME/VALUE Dial
- CD-RW/CD-R/AUDIO CD indicator section
- ① CD-RW indicator
- ② CD-R indicator
- ③ AUDIO CD indicator
- ④ BUSY indicator
- Eject button
- MASTER Section
- ① MASTERING TOOLS Button
- ② EDIT Button
- ④ MASTER fader
- Display Section
- ① TIME/SONG POSITION
- ② MARK
- ③ SEQ TR (Sequence Track)
- ④ BNK (Pad Bank)
- Front Panel
- ① Disc Tray
- ② Emergency eject hole
- Rear Panel
- ① AC ADAPTOR Jack
- ② Cord Hook
- ③ Earth Connector
- Unsuitable places for connection
- ④ MIDI Connectors (IN, OUT/THRU)
- • IN
- • OUT/THRU
- ⑤ FOOT SWITCH Jack
- ⑥ MASTER Jack
- ⑦ OPTICAL, COAXIAL connectors (IN, OUT)
- • OUT
- ⑧ PHONES Jack
- ⑨ LINE Jack
- ⑩ GUITAR/BASS Jack
- ⑪ MIC1 jack/phone type, XLR type
- ⑫ MIC2 jack/phone-type, XLR-type
- Basic operation of the CDX-1
- Connecting peripheral equipment
- Turning the Power On and Off
- Turning On the Power
- Turning Off the Power
- Inserting/ removing a disc
- Inserting a disc
- Time to mount disc
- Removing a disc
- Press the EJECT button.
- Remove the disc from the disc tray.
- Press the EJECT button once more.
- - If the display asks Save SONG before eject?
- If you wish to save the song data, press [YES/ENTER].
- If the disc tray does not open
- Turn off the power of the CDX-1.
- Insert a thin object such as a wire into the emergency eject hole.
- Switching among the Basic screens
- The Basic screens
- If you are confused about operations or screens —Going back to the Basic screen
- Adjusting the brightness of the screen display—Contrast
- Switching the Big Time display
- Viewing information on the CD-RW disc —Song Information screen
- Naming a song (CD-RW disc)
- Returning the CDX-1 to the factory settings—Initialize
- - Global Parameter
- - Effect patch data
- - Mixer parameters
- Press [UTILITY].
- Press CURSOR [] to select an Initialize icon
- Press [YES/ENTER].
- Make sure that the cursor is located at the Initialize Global Parameters icon
- Press [YES/ENTER].
- When you wish to initialize, press the [YES/ENTER].
- The meaning of each Initialize icon
- What you need to do to create your own CD
- Steps taken in producing an original CD
- Path 2
- Path 3
- Listening to the demo disc
- Playing the demo disc
- Adjusting the overall volume—MASTER fader
- Adjusting the headphone volume
- HINT
- [Non-Text]
- Adjusting the volume of each audio track—AUDIO TRACK faders
- Press pads to play back audio samples
- Playing back the sequence track
- Playing an audio CD
- How to play an audio CD—the CD Player
- About the Display
- CD Player screen
- Switching the time display
- Playing and stopping a song
- Playing/stopping an audio CD
- Changing the playback location
- Moving to the previous/next track
- To go back to the beginning of an audio CD
- Rewind/fast-forward
- Repeatedly playing a specified region —the Repeat function
- Registering the repeat region
- Specifying the repeat region while the song plays
- Canceling the repeat region
- Changing the way in which audio CD volume is adjusted
- Collecting audio material
- Recording a sound to a pad—Sampling
- What is sampling?
- Pads and banks
- Eight pads and 64 pad banks
- Switching pad banks
- Naming a pad bank
- Sampling to a pad
- Sampling an external sound
- Sampling from a CD audio clip collection inserted in the CDX-1
- Loading a Windows WAVE file
- Switching of preview length of Windows WAVE files.
- Using free audio sources from the Internet
- Making settings in the Sampling screen
- Selecting the audio quality and sampling time appropriate for the material—Data Type
- Data type and sampling time
- Specifying stereo or mono—Type
- Automatically start sampling when sound is input —Start with
- What the "Start with" setting does
- Making sure to capture the beginning of the sound —Pre Trigger
- Sampling from a pad to another pad —Resampling
- If the display indicates "Memory Full."
- Increasing the Remaining Memory —Optimize Sample
- If there is no increase in the remaining memory even after Optimize Sample is executed...
- Deleting a sample—Delete Sample
- Deleting samples individually
- Deleting all samples of a pad bank—Bank Erase
- Preventing accidental erasure of pads —Bank Protect
- Protecting/unprotecting a pad bank
- Saving Pad/ Sequence on a CD-RW disc
- More about saving Pad/Sequence
- Saving Pad/Sequence
- Loading Pad/ Sequence from a CD-RW disc
- If the display asks "Load PAD/SEQ data?"
- Playing the pad samples
- Basic ways to play samples
- Playing a sample
- Adjusting the Overall Sample Volume
- Playing samples simultaneously
- Playing pads while audio tracks play back
- Playing pads while you play back an audio CD
- Can I layer samples from another pad bank?
- Changing how a pad starts and stops sounding—Pad Play
- Crossfading the pad samples you play —Pad Crossfade
- Making the sound continue even after you release the pad—Hold
- Using Hold
- Using Hold for multiple samples
- Playing repeatedly—Loop mode
- Preventing specific samples from sounding simultaneously—Mute Groups
- Playing a sample from a connected foot switch
- Specifying the Function of the Foot Switch
- Specifying the pad sample that will be played by the foot switch
- Editing the sample of a pad
- Adjusting the volume of a sample—Sample Level
- Displaying the correct tempo of a sample
- Adjusting the start/end points of the sound—Trim Sample
- What are the Start/Loop points and Length?
- Setting each point
- Automatically removing Empty Portion at the Beginnings and Ends of Samples
- Expanding and Compressing a sample to modify the length or tempo
- Matching the tempo to another sample—Tempo Match
- Press PAD RECORDING [TEMPO MATCH].
- Use CURSOR [ ][ ][ ] to select the pad bank number and pad number for each item, specifying the desired number for each.
- When you have finished making the settings, press [YES/ENTER].
- Expanding/compressing by a specified percentage or tempo—Time Stretch
- Copying a sample to another pad—Clipboard
- Deleting a sample of [CLIP BOARD]
- Splitting a sample among several pads—Divide Sample
- Specifying a division point and dividing a sample in two
- Automatically dividing a sample at silent portions
- Dividing destinations when "AUTO" is used
- Dividing a sample at the timing that you press a button
- Creating a “reverse tape” style sample—Create Reversal
- Boosting the sample level as high as possible—Normalize
- Arranging audio samples to create a song—Sequence
- What is a sequence?
- About the sequence tracks
- About the tempo of the sequence
- Setting the tempo of the sequence
- The Relationship Between Sequences and Phrases
- How recording works
- Recording pad operations as you play pads—Realtime Recording
- Realtime recording
- Recording while you listen to the playback of another sequence track
- Recording while you listen to the playback of the audio tracks
- Correcting timing inaccuracies while you record —Quantize
- In step 7 of "Realtime recording" (p. 90), change the "Quantize" setting.
- About remaining recordable events of Sequence
- Recording pad operations at the specified interval—Step Recording
- Button functions during step recording
- If You Become confused About Button Function During Recording
- Step recording
- Parameter settings for step recording
- - Step:
- - Duration
- < An example of step-recording by repeatedly pressing the same pad >
- Adding dynamics while you step-record
- Playing a sequence track
- Playing sequence tracks and audio tracks simultaneously
- Editing a sequence track
- Moving a phrase—Move
- Pasting a phrase at a different location—Paste
- Cutting a phrase—Cut
- Erasing Phrases—Erase
- Inserting a phrase in another location—Insert
- Dividing the phrase at the current location—Split
- Finely Adjusting the Timing of Each Phrase—Adjust Timing
- Offset and End Point
- WaveOffset:
- WaveEnd:
- Adjusting the volume setting for each phrase
- Edit on Sequence Play List screen—Quick Edit
- Deleting a sequence track
- Recording the sequence playback sound on audio track
- Creating an audio CD
- Prepare for recording—Multitrack recording
- What is multitrack recording?
- Preparing a CD-RW disc for use —Format
- You must use high-speed compatible CD-RW discs!
- Preparing a new CD-RW disc for use
- Press [YES/ENTER].
- Press CURSOR [] to select "OK", and press [YES/ENTER].
- Press [YES/ENTER] to return to the Basic screen.
- What is the data type
- • STANDARD:
- - LONG1:
- •LONG2:
- Erasing the entire contents of a CD-RW disc
- Monitoring the sound of a connected instrument
- Selecting the input source
- Adjusting the input sensitivity
- Monitoring the sound
- Setting the left/right position (pan) of the input sound
- Tuning an instrument—Tuner
- Adjusting the Tuning
- ◆ Standard tuning ◆
- About the tuner display
- - Screen display
- - Tuning guide display
- Setting the reference pitch of the tuner
- Using the rhythm guide
- Playing/stopping the rhythm guide
- Adjusting the Volume of the Rhythm Guide
- Changing the time signature
- Changing the rhythm pattern
- Changing the tempo
- Setting the tempo and rhythm pattern of the song —Tempo Map
- Deleting a tempo map
- Playing the rhythm guide according to the tempo map
- Recording/ playing back a performance
- Recording a Performance
- Select the audio track for recording
- Doubling technique
- Record
- Re-recording only a mistake
- —Punch-in/ out
- Using the Record button to punch-in/out
- Using a foot switch to punch-in/out
- Automatically punching-in/out at a specified location —Auto Punch-in/out
- Specifying the area for recording
- How to Record
- Recording an additional performance while listening to an existing performance—Overdubbing
- Select the audio track to record
- Recording while you listen to the playback
- Overdubbing tip
- Combining the performances of multiple audio tracks—Bounce Recording
- Playback/recording audio tracks for bounce recording
- Bounce recording procedure
- Playing back and stopping a recorded performance
- Playing back/stopping
- Adjusting the volume of each track
- Silencing a specific audio track—Mute
- Saving Song settings on a CD-RW disc
- Saving Song settings
- Increasing the free space on a CD-RW disc —Optimize Disc
- Canceling the registration
- Assigning markers within a song—Marker
- Assigning a marker
- Moving to the location of a marker
- Deleting a marker
- Changing the location of a marker
- Naming a marker
- Stopping the song automatically—Marker Stop
- Editing a recorded performance to create an audio CD
- Preparing to write a CD-R disc—Mix down
- Setting the left/right position (pan) of each audio track
- Adjusting the tone of each audio track—Equalizer
- Adjusting the overall volume balance—Master Balance
- Mixing down
- For audio tracks that you wish to include in the mixdown, press [STATUS] to make the button light in green.
- Press ZERO [] to return the SONG POSITION to "00:00:00-00" (beginning of the song).
- Press PLAY [ ].
- When mixdown is finished, press STOP [].
- Listen to the result of Mixing down
- Press PLAY []▶ the beginning of the mastering track.
- When you are finished with test-listening, press STOP [].
- Adjusting the mastering tools
- Completing your original CD—CD Burning
- Finishing the CD Burning
- Finalizing a CD-R disc
- Taking full advantage of the CDX-1
- More functions for the CDX-1
- Undoing a recording/ editing operation
- Undoing a recording or editing operation—Undo
- Canceling the Undo—Redo
- Cueing to a precise location—Preview
- Adjusting the current location while listening to the preceding and/or following sound
- Using Scrub to make fine adjustments in the cue location—Scrub Preview
- Using the insert effects
- What is an insert effect?
- What is a patch?
- How the patches are organized
- - Preset patches (A001–A100, B001–B100)
- - User patches (U001–U100)
- - Song patches (S001–S100)
- Using an insert effect
- Editing the insert effect settings
- Saving insert effect settings
- Copying a patch to create a new patch
- Changing the insert effect connections
- Using the loop effects
- What is a loop effect?
- Editing the loop effect settings
- Chorus/delay/doubling
- Using the loop effect to create doubling
- Reverb
- Press LOOP EFFECTS [REVERB].
- Press CURSOR [ ] [ ] to select the audio track for which you wish to make settings.
- Creating a backup CD-RW disc
- Backing up song data on a CD-RW disc
- Connecting with a digital audio device
- In Order to Make a Digital recording with CD player
- To Prevent Digital recording with CD players
- Prohibiting digital copying—Digital Copy Prohibit
- What is SCMS?
- Using the CDX-1 with other MIDI devices
- MIDI Fundamentals
- What is MIDI?
- MIDI channels
- MIDI Implementation Chart
- Switching MIDI OUT/ THRU
- Using MIDI to control the CDX-1 from another device
- Play samples
- Changing the correspondence between pads and note numbers
- Switch the pad bank
- Synchronized playback with the CDX-1 as the master
- Master and slave
- Using MTC (master)
- Using MMC
- Using the CDX-1 as the MMC master
- Using the CDX-1 as an MMC slave
- Make the following connections.
- Press [UTILITY].
- Press CURSOR [] to select the MIDI icon.
- Press [YES/ENTER].
- Press CURSOR [] to move the cursor to "MMC Mode" line.
- Turn the TIME/VALUE dial to select "SLAVE."
- Make settings to allow MTC synchronization.
- Make settings on your sequence software.
- Press [DISPLAY] to return to the Basic screen.
- Using an external MIDI sound module to play the rhythm guide
- How the rhythm guide sounds correspond to note numbers
- CD direct recording
- Recording to a CD-R disc—CD Recorder
- Using the mastering tools
- Recording an external audio source to a CD-R disc
- Recording samples played using Pad Crossfade on a CD-R disc
- Recording the sequence playback on a CD-R disc
- Memo...
- Appendices
- Troubleshooting
- Problems with the sound
- There is no sound whatsoever
- The volume level of the instrument connected to the INPUT jacks (MIC1, MIC2, GUITAR/ BASS, LINE) is too low.
- The input source cannot be heard
- There is no sound from the audio tracks
- There is no pad (sample) sound
- There is no sound through the headphones
- There is no sound from the sequence tracks
- There is no sound from the audio CD
- Unintended effects are added to the sound
- The sound from the pad does not stop
- The rhythm guide dose not sound
- There is no sound only when the effects are in use
- Sampling does not begin, even when [PAD REC] is pressed
- The effects sounds can not be recorded or sampled
- Cannot record
- The recorded or sampled sound is very distorted or noisy
- The recording comes out in mono sound
- When sampling, the very beginning of the sound is missing
- The insert effects can not be applied
- The loop effects can not be applied
- Cannot digitally record
- Problems with the CD-RW disc drive
- The disc tray dose not open
- Synchronization problems
- Other problems
- The foot switch is connected, but it is not working as intended
- Can't make Pre-Trigger settings
- DIMM checking does not end
- Display screen is difficult to read
- The two input sources are mixed and recorded when you record in stereo using SIMUL.
- Pad/ Sequence was not saved to disc
- Unable to make Audio CD
- The data on the CD-RW disc is corrupted or damaged
- Major Message List
- Rhythm Pattern List
- Mixer effect parameter functions
- Loop Effect
- CHORUS/DELAY/DOUBL'N (Chorus / Delay / Doubling)
- Insert effect algorithm list
- STEREO MULTI
- Parameter (full name) Setting Function
- - Modulation effect type
- LO-FI BOX
- - LOFI (Lo-Fi Box): Produces a lo-fi sound.
- ■ Creating lo-fi sounds
- Lo-Fi Box
- VO+GT.AMP (Vocal+Guitar Amp)
- ■ MIC
- • COMP (Compressor): Compressor the entire output signals when the input volume exceeds a specified value.
- • EQ (Equalizer): A 4-band equalizer.
- - NS (Noise Suppressor): This effect reduces the noise and hum.
- ■ GUITAR
- VO+AC.MDL (Vocal+Acoustic Guitar Modeling)
- - COMP (Compressor): Compressor the entire output signals when the input volume exceeds a specified value.
- VO+ACOUSTIC (Vocal+Acousitc Guitar)
- COSM GUITAR AMP
- - P.AMP (Preamp): Adjust the distortion and tone of the guitar sound.
- - SP (Speaker Modeling): This models the characteristics of various types of speakers.
- ■ Preamp
- ■ Speaker modeling
- ACOUSTIC MDL (Acoustic Guitar Modeling)
- • A.MDL (Acoustic Guitar Modeling): This models the sound of an acoustic guitar.
- BASS MDL (Bass Guitar Modeling)
- • B.MDL (Bass Modeling): Models the sound of a bass guitar.
- - DEFRET (Defretter): This models a fretless bass.
- ACOUSTIC GUITAR
- BASS MULTI (Bass Guitar Multi)
- • DEFRET (Defretter): This models a fretless bass.
- - OCT (Octave): This adds a note one octave lower, creating a richer sound.
- - ENH (Enhancer): This effect enhances the definition of the sound, and pushes it to the forefront.
- COSM BASS AMP (COSM Bass Guitar Amp)
- - WAH (Wah): The wah effect creates a unique tone by changing the frequency response characteristics of a filter.
- - DLY (Delay): This creates a thicker sound by applying a delayed sound to the direct sound.
- VOCAL MULTI
- - DES (De-esser): Useful for reducing 'sibilant' or 'S' sounds produced by a vocalist.
- VOICE TRANSFORMER
- Available types of modulation and their effect
- - [FLG] FLANGER (Flanger): The flanger effect gives a twisting, jet-airplane-like character to the sound.
- - [CHO] CHORUS (Chorus): A sound with a subtly shifted pitch is added to the direct sound, making the final output sound thicker and broader.
- - [PH] PHASER (Phaser): By adding varied-phase portions, the phaser effect gives a whooshing, swirling character to the sound.
- - [PS] P.SHIFT (Pitch Shifter): This effect changes the pitch of the original sound (up or down) within a range of two octaves.
- - [DBL] DOUBL'N (Doubling): An effect of multiple sounds heard together (a doubling effect) is produced.
- Glossary
- Balanced connection
- Coaxial
- Condenser microphone
- Contrast
- COSM
- DAT
- Dynamic microphone
- Effects
- Effect patch
- Effect processor
- Error message
- Fade-in
- Fade-out
- Fader
- Formant
- Format
- Finalize
- Foot switch
- Frame
- Frame rate
- Initialize
- Insert effect
- Impedance
- Master
- MIDI
- MIDI time code, MTC
- Mix down
- MMC
- Monitor
- Multitrack
- Multitrack recording
- Mute
- Note number
- NTSC format
- Optical
- Pad
- PAL format
- Pan
- Parameter
- Punch-in, Punch-out
- Sample rate
- SECAM format, PAL format
- Send/Return type effect
- Slave
- Sync, Synchronization
- SMPTE time code
- S/P DIF
- TOC
- Track
- TRS type (Tip-Ring-Sleeve plug)
- Value
- Redo
- Unbalanced connection
- Undo
- WAVE file
- XLR Jack
- Parameter List
- ■ Mixer Parameter (★)
- ■ Rhythm Guide Parameter (★)
- ■ Pad Recording Parameter
- ■ Edit Pad Parameter
- ■ Pad Bank Parameter
- ■ Pad Bank Erase Parameter
- ■ Pad Bank Protect Parameter
- ■ Sequence Parameter (★)
- ■ Pad Sequencing Parameter
- Real Time Recording
- ■ Song Parameter (★)
- ■ Tuner Parameter
- ■ LCD Contrast Parameter
- ■ System Parameter
- ■ MIDI Parameter
- ■ CD-RW Disc Format Parameter
- ■ Marker Parameter (★)
- ■ Temp Map Parameter (★)
- ■ Effects Location Parameter (★)
- ■ Mastering Tools Parameter
- ■ Master Parameter (★)
- MIDI Implementation
- RECOGNIZED RECEIVE DATA
- ■ Channel Voice Message
- - Note On/Off
- - Program Change
- ■ Channel Mode Message
- • All Sound Off (Controller Number 120)
- • All Note Off (Controller Number 123)
- - System Exclusive Message
- • Universal System Exclusive Message
- ○INQUIRY MESSAGE
- ◇ Identity Request
- ○ MIDI Machine Control Commands
- MIDI Machine Control
- ■ MIDI Machine Control Details
- - STOP (MCS)
- - PLAY (MCS)
- • DEFERRED PLAY (MCS)
- - REWIND (MCS)
- Byte Description
- - RECORD STROBE
- - RECORD EXIT
- - LOCATE (MCP)
- ○ Format 2-LOCATE [TARGET]
- TRANSMITTED DATA
- ■ System Common Messages
- • MIDI Time Code Quarter Frame Messages
- ■ System Exclusive Message
- ○ MIDI Time Code
- MIDI Machine Control
- • RECORD STROBE
- Appendices
- - Decimal and Hexadecimal table
- MIDI Machine Control (MMC) Command
- - Commands Recognized
- - Commands Transmitted
- Mixer Block Diagram
- Specifications
- CDX-1:
- MULTITRACK CD RECORDER / AUDIO SAMPLE WORKSTATION
- - Audio Data Format
- • Maximum Polyphony
- - Audio Tracks
- - Audio Sample PAD
- - Maximum number of phrases (events) to be memorized
- - Signal Processing
- - Sample rate
- • Frequency Response
- • Nominal Output Level (variable)
- - Input Impedance
- - Nominal Output Level
- • Output Impedance
- - Recommended Load Impedance
- - Residual Noise Level
- - Interface
- - Display
- - Connectors
- Index
- A
- B
- C
- D
- E
- F
- G
- H
- |
- L
- M
- N
- 0
- P
- Q
- R
- T
- U
- V
- W
- X
- Y
- Z
- Information
- AFRICA
- EGYPT
- REUNION
- ASIA
- CHINA
- HONG KONG
- INDIA
- INDONESIA
- KOREA
- MALAYSIA
- SINGAPORE
- CRISTOFORI MUSIC PTE
- 02-2148, SINGAPORE 489980
- TAIWAN
- THAILAND
- VIETN AM
- AUSTRALIA/
- NEW ZEALAND
- AUSTRALIA
- CENTRAL/ LATIN
- AMERICA
- ARGENTINA
- BRAZIL
- COSTA RICA
- CHILE
- PARAGUAY
- HUNGARY
- IRELAND
- ITALY
- SWITZERLAND
- FEDERAL COMMUNICATIONS COMMISSION RADIO FREQUENCY INTERFERENCE STATEMENT
- FOR HOME OR OFFICE USE
- NOTICE
- AVIS
- DiscLab
- Newly Added Functions Ver.1.5
- CONTENTS
- Sample Pad
- Sequence Track
- Multitrack Recorder
- Effect
- Others
- Compressing/ expanding a sample according to the tempo at which playback was stopped
- Modifying the pitch of a sample to create a new sample—Pitch Change
- Making fine adjustments to the location at which a sample starts/ ends
- Specifying a point while you listen to the sound before and after it—Preview
- Using scrub to set a point—Scrub Preview
- Adjusting the crossfade time
- Exchanging the contents of sequence tracks—Exchange Track
- Copying the contents of a sequence track —Copy Track
- Editing a specified region of a sequence track —Region In/ Out
- Specifying the editing region
- Canceling an editing region
- Editing the specified region
- Erasing Segments—Erase
- Cutting Segments—Cut
- Moving to a Another Location—Move
- Editing a specified region of a sequence track
- Pasting to a Another Location—Paste
- Inserting to a Another Location—Insert
- Muting (silencing) a specific audio track
- Using [STATUS] to select the track whose parameters you want to adjust
- Adjusting the tone of each audio track
- Chorus/ delay/ doubling
- Preventing tempo data from being read from a CD-RW disc
- If "T.Map LoadConfirm" is "ON"
- Using the tempo of a sample to modify the tempo map
- Using Pads/ Sequences while you mix down
- If you want to use sequence tracks, press [SEQ PLAY] to make it light.
- For audio tracks that you want to include in the mixdown, press [STATUS] to make the button light in green.
- Make sure that master track [STATUS] light in red.
- Press ZERO [] to return the SONG POSITION to "00:00:00-00" (beginning of the song).
- Press PLAY [ ].
- When mixdown is finished, press STOP [].
- Editing the Mastering Tool settings
- Mastering Tools
- Saving the mastering tool settings
- Mastering Tools parameter list
- Effect of "Input Delay" under Input
- Splitting into frequency bands
- Remembering the icon that was last selected in a menu screen
- Synchronization with a Sequence or Drum Machine
Brand : ROLAND
Model : CDX-1
Category : CD Player